Trilogy Quick Start Guide - Akamaihd.net
25
Trilogy Quick Start Guide
-
Upload
khangminh22 -
Category
Documents
-
view
0 -
download
0
Transcript of Trilogy Quick Start Guide - Akamaihd.net
Trilogy Quick Start Guide

2
3
CharaCters
The World of Tyria
The kingdoms of Tyria, the Empire of Cantha, the provinces of Elo-na, the Battle Isles—together, they form the world of Guild Wars®. Millions of adventurers have explored this world, and more arrive every day. They compete in gladiatorial arenas, save the world, ex-plore the landscape, make great fortunes, and travel to different dimensions. Whether you want to experience the game’s story or rush straight into arena combat, every game starts the same way: you begin by creating a character.
Creating Your Character
Guild Wars is a versatile, expandable, and customizable game. It consists of three campaigns (the “original” Guild Wars, Fac-tions®, and Nightfall®) and the Eye of the North expansion (avail-able separately).
No matter where you start, your character is at the heart of the game’s story, working with other characters, Heroes, and hench-men you recruit along the way. Choosing your primary profession is the first step. The first Guild Wars campaign introduces six core professions: the Warrior, Ranger, Monk, Mesmer, Elementalist, and Necromancer. Factions adds the Assassin and Ritualist. Nightfall includes the Dervish and Paragon. Characters from different cam-paigns can work together, taking advantage of the strengths of each profession.
Two Professions, Many Skills
Each time you create a character, you select a primary profes-sion. Later in the game, you’ll choose a secondary profession. The
CharaCters
TM
TM
®
Please visit the Official Guild Wars Wiki for comprehensive gameplay information:
wiki.guildwars.com
Download the extended manual at: www.guildwars.com/gameplay/manuals.php

4
5
professions you choose determine your character’s attributes, ar-mor, and fighting style, influencing the way you play the game. Your primary profession determines the armor you can wear, and that armor affects your Health and Energy.
Your primary and secondary professions also define which skills are available as you advance in the story. Guild Wars includes over a thousand skills. After selecting a primary and secondary profes-sion, your character will be able to unlock hundreds of skills fit for your particular profession combination. Each time you’re ready to leave a town or outpost, you can change your character’s attri-butes and equip up to eight skills for use when you’re exploring the world. You have plenty of choices, so you should feel free to experi-ment with different combinations of professions, skills, and attri-butes until you create a character that suits your play style best.
RP Characters and PvP Characters Each time you create a character, you must decide on a style of play, choosing between an “RP” (roleplaying) character or a “PvP-only” (player-versus-player only) character.
An RP character starts off in the cooperative, roleplaying section of the game. ÙThese characters begin at 1st level (the game’s lowest level) and must work their way up to 20th level. All roleplaying characters can also compete in PvP (although their competition will usually be 20th level characters). A PvP-only character can only participate in the competitive PvP section of the Ùgame. These characters start out at 20th level, the game’s highest character level. You’ll find more details on PvP in the final chapter of this manual.
Attributes
Attributes make your skills more powerful, affecting damage as well as other skill mechanics (such as duration). Your character begins play with four or five attributes, as determined by your pri-mary profession. One of them is a primary attribute that is unique
to your primary profession. When you choose a second profession, your character gains an additional three or four attributes. You can find a list and description of each profession’s attributes on the Of-ficial Guild Wars wiki at wiki.guildwars.com.
Primary Attributes
Each profession has a primary attribute that is only available when you choose that profession as your primary one. You’ll want to keep your primary attribute in mind when choosing your first profes-sion. If you choose Mesmer as your primary profession, for exam-ple, you can put points into the Mesmer’s primary attribute, Fast Casting, which decreases the activation time of all of your spells. If you choose Mesmer as a secondary profession, however, you won’t have access to that primary attribute or its effects. (You can use skills related to that attribute, but since you won’t be able to in-crease that attribute, you won’t be able to improve those skills.)
Leveling Up
Unless you start the game with a 20th-level PvP character, you’ll need to “level up.” As your roleplaying character defeats enemies, completes missions, and finishes quests, your character earns ex-perience points (XP) and gains levels. Each time you gain a level, your character’s maximum Health increases (making you harder to kill). The roleplaying part of a campaign advances your charac-ter up to 20th level, the highest level you can attain. You can check how much experience you need to reach the next level in the Hero panel (press H).
Gaining Attribute Points
Each time your roleplaying character gains a level, that character gains attribute points. The number of points you receive when your character gains a level varies as you progress through the game. By opening the Skills and Attributes panel (press K), you can see the total number of attribute points your character has.
CharaCtersCharaCters

6
7
Attribute points are used to raise attributes; you can spend them at any time. Raising an attribute increases the effectiveness of skills and weapons related to that attribute. Whenever your character is in a town or outpost, you can change your allocation of attribute points, raising or lowering each attribute. Doing so doesn’t cost your character money or experience—that’s part of the customiz-able nature of Guild Wars.
Gaining Skill Points Each time you level up, your character receives a skill point. You can also gain skill points by completing missions and resolving quests. Each time your character purchases a new skill, you’ll need to spend one of that character’s skill points. Some of these skills are bought from Skill Trainers found in towns and outposts. Before you leave a town or outpost, you can change the skills your character uses, so a large collection of skills can be useful.
After your roleplaying character reaches 20th level, that character still gets a reward each time you gain enough XP to level up. You won’t gain additional Health or attribute points, but you will con-tinue to earn a skill point each time you gain a level.
Expanding the World
You can create up to eight characters once you activate the Guild Wars Trilogy using the included activation code. If you need more characters, you can buy additional character slots from the Guild Wars In-Game Store, but you aren’t required to do so. At any time, you can delete or create new characters.
As you add games, the world expands. A roleplaying character from one campaign can travel to the setting of another campaign after reaching a “port city.” Characters from the original campaign can do this after reaching Lion’s Arch. Factions characters must reach Kaineng Center; Nightfall characters use Kamadan. A character must reach one of the game’s port cities (and attain 10th level) before playing Eye of the North, the first Guild Wars expansion (sold separately).
After you’ve activated the Guild Wars Trilogy, each port city you enter will have a quick message explaining which quest can transi-tion your character between games. The message appears when you enter the port city, and it recurs each time you enter until you start that quest.
Each campaign is set in a different part of the world.
The original ÙÙ Guild Wars campaign is set on a continent called Tyria. The name of this continent is also the name of the world. Characters from this campaign come from the Kingdom of Ascalon, and they’re called Ascalonians.
The second campaign, ÙÙ Factions, takes place on the continent of Cantha. Characters from this campaign are called Canthans.
The third campaign,ÙÙ Nightfall, begins on the continent of Elona. Characters from this campaign are called Elonians. Since they start the game in the province of Istan, they’re also known as Istani.
the ten Professions You have up to ten professions to choose from in Guild Wars. Each one has a set of attributes that affects your character’s skills. The choice you make will give you a unique set of abilities for dealing damage, protecting and healing allies, and altering the enemies and environment around you. You are what you build, so consider your choices carefully.
Primary Profession
Your primary profession determines the type of armor your character wears, as well as your character's basic appearance. The profession includes four to five attributes that improve skills over time, including a primary attribute.
Secondary Profession
Your secondary profession provides your character with three to four more attributes and additional skills. However, your secondary profession does not include the primary attribute for that profession. Note that roleplaying characters have the option to change their secondary profession later in the game; the Official Guild Wars Wiki provides information on how to do so.
the ten ProfessionsCharaCters
8
9
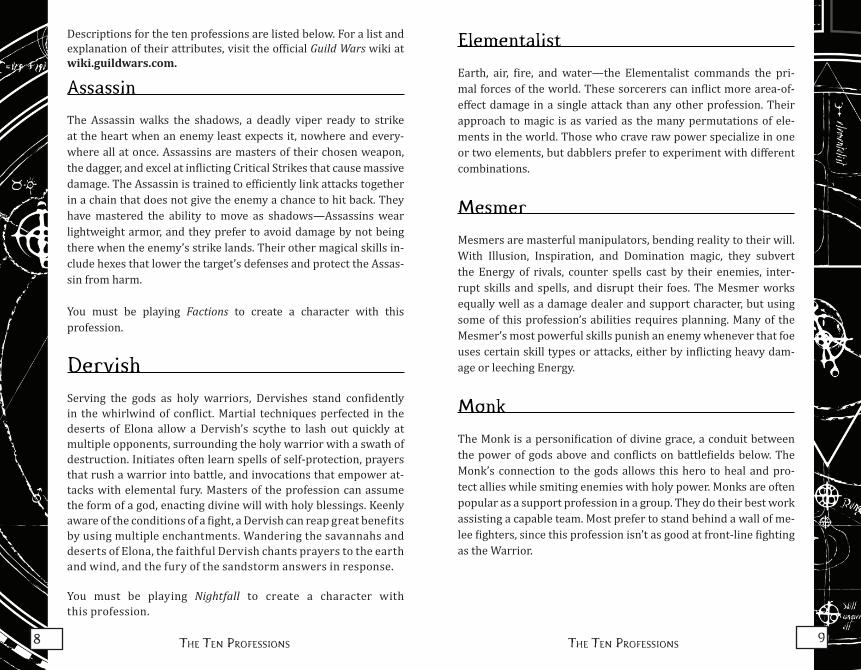
Descriptions for the ten professions are listed below. For a list and explanation of their attributes, visit the official Guild Wars wiki at wiki.guildwars.com.
Assassin
The Assassin walks the shadows, a deadly viper ready to strike at the heart when an enemy least expects it, nowhere and every-where all at once. Assassins are masters of their chosen weapon, the dagger, and excel at inflicting Critical Strikes that cause massive damage. The Assassin is trained to efficiently link attacks together in a chain that does not give the enemy a chance to hit back. They have mastered the ability to move as shadows—Assassins wear lightweight armor, and they prefer to avoid damage by not being there when the enemy’s strike lands. Their other magical skills in-clude hexes that lower the target’s defenses and protect the Assas-sin from harm.
You must be playing Factions to create a character with this profession.
DervishServing the gods as holy warriors, Dervishes stand confidently in the whirlwind of conflict. Martial techniques perfected in the deserts of Elona allow a Dervish’s scythe to lash out quickly at multiple opponents, surrounding the holy warrior with a swath of destruction. Initiates often learn spells of self-protection, prayers that rush a warrior into battle, and invocations that empower at-tacks with elemental fury. Masters of the profession can assume the form of a god, enacting divine will with holy blessings. Keenly aware of the conditions of a fight, a Dervish can reap great benefits by using multiple enchantments. Wandering the savannahs and deserts of Elona, the faithful Dervish chants prayers to the earth and wind, and the fury of the sandstorm answers in response.
You must be playing Nightfall to create a character with this profession.
Elementalist
Earth, air, fire, and water—the Elementalist commands the pri-mal forces of the world. These sorcerers can inflict more area-of-effect damage in a single attack than any other profession. Their approach to magic is as varied as the many permutations of ele-ments in the world. Those who crave raw power specialize in one or two elements, but dabblers prefer to experiment with different combinations.
Mesmer
Mesmers are masterful manipulators, bending reality to their will. With Illusion, Inspiration, and Domination magic, they subvert the Energy of rivals, counter spells cast by their enemies, inter-rupt skills and spells, and disrupt their foes. The Mesmer works equally well as a damage dealer and support character, but using some of this profession’s abilities requires planning. Many of the Mesmer’s most powerful skills punish an enemy whenever that foe uses certain skill types or attacks, either by inflicting heavy dam-age or leeching Energy.
Monk
The Monk is a personification of divine grace, a conduit between the power of gods above and conflicts on battlefields below. The Monk’s connection to the gods allows this hero to heal and pro-tect allies while smiting enemies with holy power. Monks are often popular as a support profession in a group. They do their best work assisting a capable team. Most prefer to stand behind a wall of me-lee fighters, since this profession isn’t as good at front-line fighting as the Warrior.
the ten Professionsthe ten Professions

10
11
Necromancer
The Necromancer holds power over death and the undead. Soul Reaping, Curses, Death Magic, and Blood Magic—each of the dark arts requires occasional sacrifices of blood (and Health). That’s often a small price to pay for the resulting havoc. Necromancy re-quires patience and discipline to master, but effective exploitation of the living and the dead can have devastating results. Necroman-cers fight alongside some of the greatest heroes in the world . . . but “anti-hero” might be a better term for this profession. Necroman-cers gain their power and strength from the suffering and untimely demise of others.
Paragon
Paragons are the guardian angels of Elona, humanity’s champi-ons against malefic threats. They rally the valiant with shouts and chants, aiding Heroes, henchmen, and other adventurers through inspiration and motivation. A Paragon’s best weapons rely on an insightful mind, a courageous spirit, and a charismatic voice. Many Paragons also arm themselves with a spear and shield, striking from a distance as they shout their battle cries. Through insight, they help others resist hexes and conditions, echoing their com-mands across the field of battle (in fact, some “echo” abilities re-new themselves each time a chant or shout ends). When all hell breaks loose, a commanding Paragon shines as a beacon of light, driving back the forces of darkness.
You must be playing Nightfall to create a character with this profession.
Ranger
Rangers are unique in their ability to succeed with the help of (or even in spite of) their environment. Nature rituals allow them to manipulate the environment to hinder their enemies, or borrow
the very power of creation to heal and aid their allies. They favor long-range combat, the bow being their weapon of choice, and can be especially effective from elevated locations such as bridges and cliffs. They are the only profession with the ability to charm ani-mals, which then accompany them on their travels and assist them in battle, gaining experience and levels over time. Rangers are also blessed with survival skills that help keep them alive.
Ritualist
Ritualists channel otherworldly energies that summon allies from the void and employ mystic binding rituals that bend those allies to the Ritualist’s will. They hood their eyes to better commune with spirits that grant great power and protection to both Ritualists and their comrades. The Energy they channel drives Ritualist skills that enhance the deadliness of an ally’s weapon and wreak havoc on an enemy’s Health. The Ritualist can also use the remains of the dead to defend the living—not by reanimating corpses as a Necroman-cer would, but through the ritual use of urns and ashes. Where the Ranger lives as one with the spirit world, the Ritualist can and will be its master.
You must be playing Factions to create a character with this profession.
Warrior
The Warrior rushes to the front lines of a fight, dealing damage that’s up close and personal. Wearing heavy armor, these soldiers can endure massive amounts of punishment. Armed with brutal melee weapons, hack-and-slash heroes dish it out as well as they can take it. (For this reason, many MMORPG players refer to this type of character as “the tank.”) Energy fuels some Warrior skills, but other skills depend on adrenaline, which slowly builds as the Warrior deals or takes damage.
the ten Professionsthe ten Professions
12
13
skills Once you understand your character’s attributes, it’s easier to se-lect your character’s skills. To see a complete list of the skills your character knows, press K for the Skills and Attributes panel (or go to the main menu and select Skills). Your character’s Skill Bar, located at the bottom of your screen, can hold up to eight skills at a time. When your character is in a town or outpost, you can equip skills or move them around on your Skill Bar. After you leave a town or outpost, you can change the order of the skills on your Skill Bar, but you can’t replace them (unless you learn new skills as part of a quest or mission).
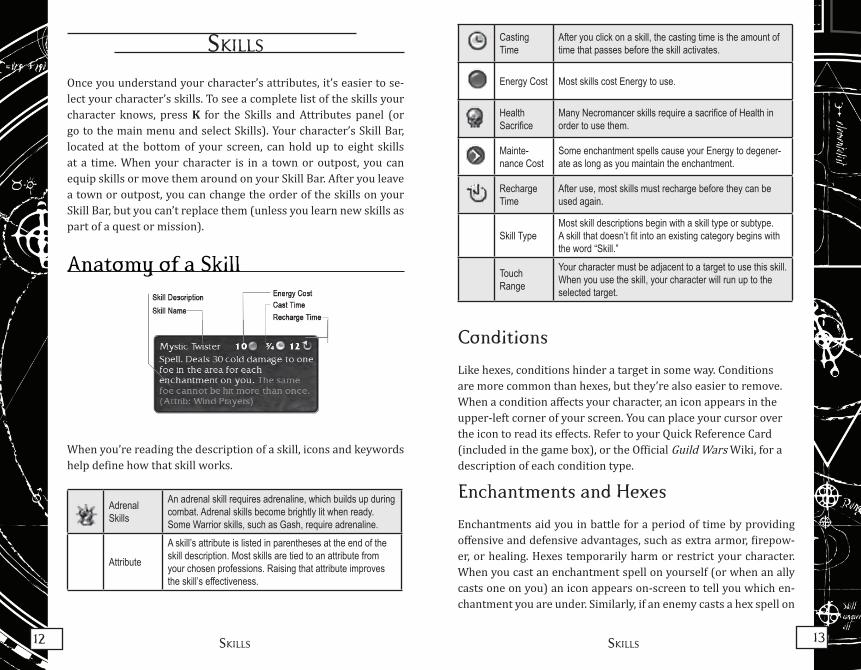
Anatomy of a Skill
When you’re reading the description of a skill, icons and keywords help define how that skill works.
Adrenal Skills
An adrenal skill requires adrenaline, which builds up during combat. Adrenal skills become brightly lit when ready. Some Warrior skills, such as Gash, require adrenaline.
Attribute
A skill’s attribute is listed in parentheses at the end of the skill description. Most skills are tied to an attribute from your chosen professions. Raising that attribute improves the skill’s effectiveness.
Casting Time
After you click on a skill, the casting time is the amount of time that passes before the skill activates.
Energy Cost Most skills cost Energy to use.
Health Sacrifice
Many Necromancer skills require a sacrifice of Health in order to use them.
Mainte-nance Cost
Some enchantment spells cause your Energy to degener-ate as long as you maintain the enchantment.
Recharge Time
After use, most skills must recharge before they can be used again.
Skill TypeMost skill descriptions begin with a skill type or subtype. A skill that doesn’t fit into an existing category begins with the word “Skill.”
Touch Range
Your character must be adjacent to a target to use this skill. When you use the skill, your character will run up to the selected target.
Conditions
Like hexes, conditions hinder a target in some way. Conditions are more common than hexes, but they’re also easier to remove. When a condition affects your character, an icon appears in the upper-left corner of your screen. You can place your cursor over the icon to read its effects. Refer to your Quick Reference Card (included in the game box), or the Official Guild Wars Wiki, for a description of each condition type.
Enchantments and Hexes
Enchantments aid you in battle for a period of time by providing offensive and defensive advantages, such as extra armor, firepow-er, or healing. Hexes temporarily harm or restrict your character. When you cast an enchantment spell on yourself (or when an ally casts one on you) an icon appears on-screen to tell you which en-chantment you are under. Similarly, if an enemy casts a hex spell on
skillsskills

14
15
you, an icon appears. You can mouse over these icons for informa-tion about the enchantment or hex affecting you.
Builds
You’ll hear the term “build” a great deal when players talk about characters in Guild Wars, especially when they talk about player-versus-player games. The word refers to the eight skills your char-acter has in the Skill Bar when leaving a town or outpost (or at the start of a PvP battle), along with the points you’ve allocated in at-tributes. Some players tend to settle into a preferred build that fits their favorite style of play, while others adjust skills to prepare for a particular enemy, mission, or explorable area. The Official Guild Wars Wiki offers tips and suggested builds to help you overcome particularly difficult storyline missions or monsters.
Skill Types
Guild Wars has many basic skill types and subtypes. You don’t need to learn them all to play the game, but understanding the defini-tions can be helpful. Most skill descriptions begin with a skill type, which tells you how a skill will behave. Some skills don’t have a skill type and don’t fit into any of the categories listed below, but each one is still defined as a “Skill” in its skill description.
Attack
Attack skills help you inflict additional damage (and other effects) with your profession’s weapons. Most attack skills require a char-acter to have a specific type of weapon equipped. When you look at a weapon’s description in your inventory, you’ll see a listing of its weapon type. When a skill requires a profession, you’ll need it as either your primary or secondary profession.
Axe Attack, Hammer Attack, Sword AttackÙÙ . Your character must have the right weapon equipped—axe, hammer, or sword—to use one of these skills. Only War-riors can use these skills.
Bow AttackÙÙ . Your character must have a bow equipped to use one of these skills. Only Rangers can use these skills.
Lead Attack, Off-Hand Attack, Dual AttackÙÙ . Each of these attacks requires a pair of daggers to use, and you can chain these attacks together. Some skills (such as Palm Strike) allow you to skip the normal attack order. Only an Assassin can use these skills.
You must successfully strike with aÙÙ Lead Attack before using any skill that says “Must follow a Lead Attack” in its description.
You must successfully strike with an ÙÙ Off-Hand Attack before using any skill that says “Must follow an Off-Hand Attack” in its description.
All ÙÙ Dual Attacks cause you to attack twice in rapid succession. Both of these attacks will cause whatever effect the skill’s description describes if they hit. You must successfully strike with at least one part of a Dual Attack before us-ing any skill that says “Must follow a Dual Attack” in the description.
Scythe Attack.ÙÙ Your character must be a Dervish equipped with a scythe to use one of these skills.
Spear Attack.ÙÙ Your character must be a Paragon equipped with a spear to use one of these skills.
Chant
A chant bestows a one-time benefit (or “buff”) to another charac-ter, Hero, or henchman within earshot who meets its requirements. (Earshot is the longest range in the game.) Chants cannot be re-moved by enemies. Paragons use chants.
Echo
An echo is placed on a single character, bestowing a benefit when that character is affected by a shout or chant. Paragons use echoes.
skillsskills
16
17
Form
A form skill alters the appearance of your character as it bestows benefits to your character. The five “god forms” of the Dervish (such as Avatar of Dwayna) are examples of form skills.
Glyph
An Elementalist can use a glyph to enhance the next spell that char-acter casts. Only one glyph can be active at a time. After a glyph affects a set number of spells, the glyph ends.
Pet Attack
A Ranger can capture and train a wild animal using Beast Mastery skills, recruiting a dedicated “pet.” A pet attack is a type of skill that allows a Ranger’s pet to perform a focused, specialized attack. This skill can be activated instantaneously (like a shout skill), but it won’t take effect until the next time the pet attacks an enemy. The pet cannot carry out more than one pet attack at the same time. If you try to use a second pet attack before the first one has resolved, only the second skill will be used.
Preparation
Rangers use preparation skills to modify their normal weapon at-tacks. A preparation skill can only affect the character who uses it. You can only be under the effects of one preparation skill at a time. Apply Poison is an example of a preparation skill.
Ritual
A ritual skill creates a spirit, a ghostly incarnation that has a magi-cal effect on nearby allies or enemies. Each spirit has a Health trait. Spirits can be attacked and destroyed, but they cannot be hexed or
enchanted. Only Ritualists have skills that can heal spirits. If a char-acter creates a spirit within range of an identical spirit, and both were summoned by characters on the same team, the first spirit will be destroyed.
Rangers use ÙÙ nature rituals. In general, spirits created with this type of skill affect all creature types, including both allied creatures and enemy creatures. The term “creature” includes characters, Heroes, henchmen, and allies—nature rituals af-fect all of them.
Ritualists use ÙÙ binding rituals. In general, spirits created with binding rituals harm foes or help allies.
Shout
This type of skill can be used instantaneously, even when the char-acter using it has been knocked down or is busy using another skill. Shouts often affect more than one target. The name of a shout skill appears in quotation marks and almost always ends in an exclama-tion point. When a character uses a shout skill, the name of the skill appears in a speech balloon over the character’s head. “I Will Avenge You!” is an example of a shout skill.
Signet
Signets are skills with no Energy cost. All other skills either cost Energy or require another resource, such as adrenaline. Some skills are designed to affect only signets (such as Ignorance and Rust). The Resurrection Signet can be used by characters from any profession.
Spell
A spell is a skill based on a character’s magical abilities. A spell’s subtype is listed at the beginning of its description.
Enchantment Spell.ÙÙ These are usually cast on allies, bestowing a positive effect on the target.
skillsskills
18
19
know what to look for, you can quickly find the allies and resources you’ll need for exploring the world of Tyria.
Getting Around
Move your character around using the keyboard, the mouse, or both. Your movement is only limited by the surrounding terrain. Explora-tion is more than a simple matter of choosing the right direction; sometimes it helps to find a path as well. Some stretches of land-scape are impassable, including steep ledges and towering cliffs.
Mouse Movement
To move using the mouse, aim the mouse pointer at a patch of ground and click the left mouse button. Your character then walks to that location. This is often a great way to maneuver around ob-stacles and rough terrain when the path may not be entirely clear.
To exercise direct mouse control, hold down both mouse buttons at once. Steer by moving the mouse left or right.
Keyboard Movement
Eight keys on the keyboard control your character’s movement. (If you’ve played other games of this type, you might know them as the “WASD” keys.) Refer to the Quick Reference Card for a diagram of the standard keyboard layout.
Camera Control
Your point of view is up to you. Change the distance between your point of view and the character with the mouse wheel. By holding the right mouse button and moving your mouse, you can change the game’s camera angle. If you want to invert your camera con-trols (a common choice for players of first-person shooters), go to
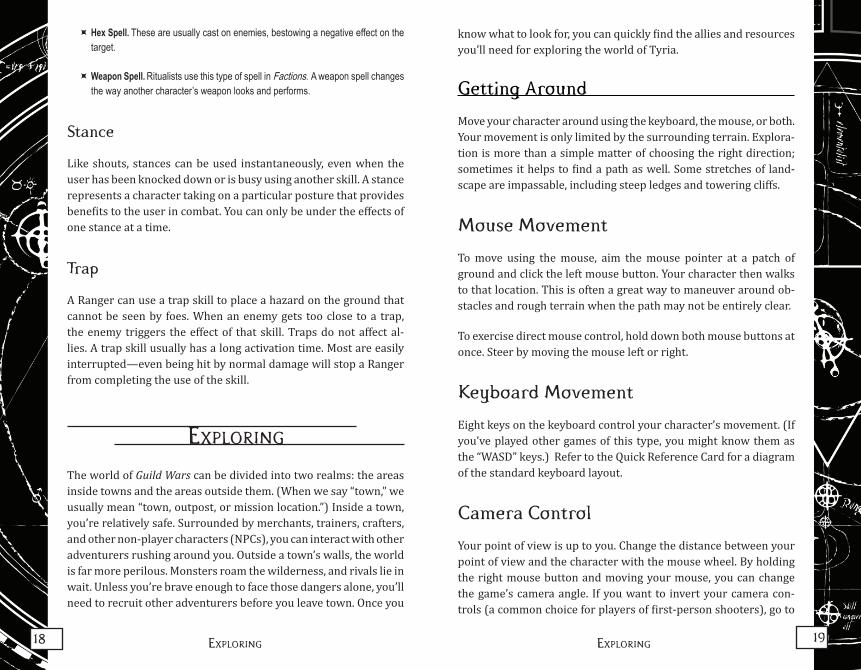
Hex Spell.ÙÙ These are usually cast on enemies, bestowing a negative effect on the target.
Weapon Spell.ÙÙ Ritualists use this type of spell in Factions. A weapon spell changes the way another character’s weapon looks and performs.
Stance
Like shouts, stances can be used instantaneously, even when the user has been knocked down or is busy using another skill. A stance represents a character taking on a particular posture that provides benefits to the user in combat. You can only be under the effects of one stance at a time.
Trap
A Ranger can use a trap skill to place a hazard on the ground that cannot be seen by foes. When an enemy gets too close to a trap, the enemy triggers the effect of that skill. Traps do not affect al-lies. A trap skill usually has a long activation time. Most are easily interrupted—even being hit by normal damage will stop a Ranger from completing the use of the skill.
exPloring The world of Guild Wars can be divided into two realms: the areas inside towns and the areas outside them. (When we say “town,” we usually mean “town, outpost, or mission location.”) Inside a town, you’re relatively safe. Surrounded by merchants, trainers, crafters, and other non-player characters (NPCs), you can interact with other adventurers rushing around you. Outside a town’s walls, the world is far more perilous. Monsters roam the wilderness, and rivals lie in wait. Unless you’re brave enough to face those dangers alone, you’ll need to recruit other adventurers before you leave town. Once you
exPloringexPloring

20
21
Menu in the lower left corner of your screen and select Options.
Zoom Scroll the mouse wheel forward and backward to zoom in and out on your character and the environment.
Rotate Camera
Hold down the right mouse button and move the mouse to change the camera angle (also known as “mouselook”).
Districts
Whenever you’re in a town or outpost, you’ll see a District menu in the upper left corner of your screen. Anytime a large number of people enter the same location, additional districts may appear to keep that location from getting overcrowded. When meeting friends, make sure you specify which district you’re in so they can find you easily.
Your Guild Wars account is specific to the region you live in, but you can meet players from other countries by traveling to another region or one of the International Districts. For example, if you normally play in the American region, but you want to play with a friend in Europe, the two of you could meet in one of the European regions. Use the District List drop-down menu in the upper left cor-ner of the screen to get there.
Using Maps
Each character carries three maps while traveling. The Compass (or “Compass mini-map”) is a circle located by default in the upper right-hand corner of the screen. The Mission Map is an adjustable, movable rectangle you can call up by pressing U. Pressing M reveals or hides a World Map that stretches across the screen. Some play-ers have their own nicknames for various maps, but this manual consistently uses these terms.
Compass
Your circular Compass contains a “mini-map” that shows an overview of your current location. You can use it to track the relative positions of allies, enemies, NPCs, and other players.
When you’re in a group, you can communicate strategy to other players by drawing on the Compass. Click on the Compass mini-map to “ping” a specific area. A quick ping can show your allies where you want to run or attack. Left-click and drag the mouse to draw lines on that map. This last technique is useful when you want to show someone a suggested path to take, especially when you’re leading a team that doesn’t know the surrounding terrain as well as you do.
Player Characters
Blue dots represent other online player characters inside the confines of a town. When they are on your team, player characters become dark blue dots.
Allies Green circles represent your allies, including any Heroes and henchmen in your party.
Foes Red dots indicate the locations of foes.
NPCs Green triangles represent non-player characters (such as villagers, traders, and henchmen) not hostile to your party.
Danger Zone
A circle that represents the radius beyond which monsters cannot detect you. Monsters inside this “aggro area” may become aggressive and attack you.
Ping Click to “ping” the Compass mini-map and point out a location for party members.
Mission Pings
During missions, pings often indicate high-priority targets or the location of important items.
Map Drawing
Click and drag to draw on the Compass mini-map to diagram strategy for your allies. Opponents in PvP cannot see your team’s map drawings.
exPloringexPloring

22
23
Mission Map
While you’re exploring the world, you can press the U key to open (or close) a map of the surrounding area. In some Guild Wars games, this map often shows the location of objectives critical to a mission, so we refer to it as the Mission Map. (Since it opens by pressing U, some players call this the “U map.”) By clicking and dragging a corner of this rectangular Mission Map, you can resize it for a larger or smaller area. You can also zoom this map in and out by highlighting the map and using the mouse wheel. When you’re trying to find a path through particularly treacherous landscape, glancing at the Mission Map may be easier than opening and clos-ing the World Map.
Outside towns and outposts, a red dotted line on the Mission Map shows the path you’ve taken. You can see nearby waypoints (green starbursts) related to a current quest. The details of each Mission Map are revealed as you encounter that area; until then, you’ll see a fogged-out view.
World Map
Outside each town, the world awaits you. Press M to open (or close) the World Map. When the map is open, your cursor appears as a magnifying glass. When it has a minus sign, you can zoom out to overview mode by clicking the left mouse button; when it’s a plus sign, you can zoom in to a smaller area with the left mouse button. In overview mode, the display shows the entire continent. Click on a portion of the map to see a closer view, as well as the towns and outposts you’ve visited there. Hold down the left or right mouse button while clicking on the map to scroll and view different areas of the world.
When you’re in overview mode, locations on the map appear as pins. After you zoom in, they’ll show up as more distinct markers. You can find a detailed map key describing the different marker types on the Official Guild Wars Wiki.
Traveling
Once you’ve revealed towns or outposts on your World Map, you can travel freely between those locations by “map traveling.” Open the World Map (press M) and click on the location. Your character will automatically travel from your current location to that town, outpost, or mission. You can even rush back to town in the mid-dle of combat—a choice to consider when you and your allies are overwhelmed.
The leader of a party (the character who assembled it) can move the entire party from one town or outpost to another; a timer counts down before travel begins. If a party member hasn’t been to that destination before, that character will drop from the party. If another character attempts to map travel, that character will drop from the party.
Trading
During your travels, your character can collect loot from fallen foes. Often this will be gold, but sometimes your loot is an item: a weapon, shield, or possibly even a salvageable part of your enemy’s armor or hide. Many towns have bustling marketplaces with mer-chants, weaponsmiths, crafters, and other traders. They can help you exchange this wealth for what you really want—whether that’s better items or even more gold.
Left-click on a vendor to start a transaction. In most trades, you can select the type of item you want to buy or sell using the appro-priate tabs at the top of the commerce window. Sometimes you’ll need to ask for a price quote beforehand, since the market for some commodities may change. To find NPC vendors faster in town, hold down the left Alt key.
To trade with another character, target that character and hit the Trade button at the top of the screen. Then either submit an offer in gold or put an item up for trade. Both players must accept the offer
exPloringexPloring
24
25
to seal the deal. Players who thrive on trading can use their chat interface to check the Trade channel in town. Some players post trade announcements in the Party Search panel (see page 26).
Who’s Who in Town
Most types of NPCs you’ll need can be found in towns and outposts. Smaller outposts are usually inhabited by a less diverse variety of citizens: a merchant, a Xunlai Storage Agent, and maybe one or two quest givers. The larger hub towns (marked accordingly on the map) usually have a larger population of NPCs. Holding down the left Alt key (and moving the camera with the right mouse button, if necessary) shows the names of merchants and other NPCs in front of you.
Armorers (Armor Crafters)
Armorers can create new armor out of raw materials you’ve found, salvaged, or bought, such as chitin fragments, ingots, or slabs of rock.
CollectorsCollectors conduct their trade both inside and outside towns. They offer rewards, such as powerful weapons and armor, in exchange for large quantities of a particular trophy item.
Consumable Crafter
A crafter that creates "consumable" items—those that can be used only a certain number of times. Many consumable items are specific to a particular event in the Guild Wars world, such as spiked eggnog during the Wintersday festival, candy corn during Halloween, and crème brûlée at the Dragon Festival.
Guild Registrar and Emblemer
A registrar can create a guild for you for 100 gold. An emblemer can create a cape design for your guild for 2,000 gold.
Henchmen
Henchman are computer-controlled "adventurers" for hire. They don’t gain experience (their level depends on the place where you recruit them) but they do take their share of any gold and items you find on your adventures.
Heroes
Similar to henchmen, Heroes can be added to a player's party in place of player characters. Unlike henchmen, they do gain XP, and their weapons, armor, and skills can be customized. You must "unlock" each Hero by playing through game content (mostly in the Nightfall storyline). Visit the Guild Wars website and the Official Guild Wars Wiki for detailed information on acquiring Heroes and using them in combat.
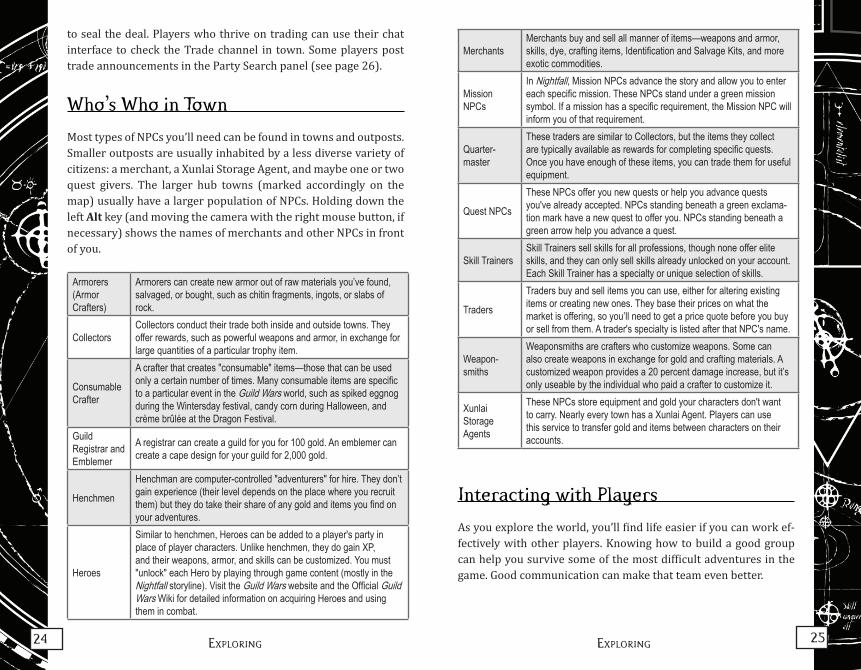
MerchantsMerchants buy and sell all manner of items—weapons and armor, skills, dye, crafting items, Identification and Salvage Kits, and more exotic commodities.
Mission NPCs
In Nightfall, Mission NPCs advance the story and allow you to enter each specific mission. These NPCs stand under a green mission symbol. If a mission has a specific requirement, the Mission NPC will inform you of that requirement.
Quarter-master
These traders are similar to Collectors, but the items they collect are typically available as rewards for completing specific quests. Once you have enough of these items, you can trade them for useful equipment.
Quest NPCs
These NPCs offer you new quests or help you advance quests you've already accepted. NPCs standing beneath a green exclama-tion mark have a new quest to offer you. NPCs standing beneath a green arrow help you advance a quest.
Skill TrainersSkill Trainers sell skills for all professions, though none offer elite skills, and they can only sell skills already unlocked on your account. Each Skill Trainer has a specialty or unique selection of skills.
Traders
Traders buy and sell items you can use, either for altering existing items or creating new ones. They base their prices on what the market is offering, so you’ll need to get a price quote before you buy or sell from them. A trader's specialty is listed after that NPC's name.
Weapon-smiths
Weaponsmiths are crafters who customize weapons. Some can also create weapons in exchange for gold and crafting materials. A customized weapon provides a 20 percent damage increase, but it’s only useable by the individual who paid a crafter to customize it.
Xunlai Storage Agents
These NPCs store equipment and gold your characters don't want to carry. Nearly every town has a Xunlai Agent. Players can use this service to transfer gold and items between characters on their accounts.
Interacting with Players
As you explore the world, you’ll find life easier if you can work ef-fectively with other players. Knowing how to build a good group can help you survive some of the most difficult adventures in the game. Good communication can make that team even better.
exPloringexPloring
26
27
Chat
Access the Chat panel by pressing Enter on your keyboard. After you type a message, press Enter again to send the message. The chat channel you choose determines where the message goes. You can buy and sell rare items on Trade Chat (often for a better price than a Merchant offers), “whisper” a private message to another player in Whisper Chat, confer with teammates in Group Chat, or check in with guildmates in Guild Chat by pressing the @ key .
Emotes
Typing is just one method of communication. With emotes, you can use different actions and animations to communicate with (and en-tertain) your fellow players. To perform an emote, press Enter to bring up the Chat panel, then type / followed by the emote name. For instance, you can type /laugh to see your character erupt with laughter or /dance to kick off a dance party. The Guild Wars web-site, the Official Guild Wars Wiki, and the Quick Reference Card in-cluded with your game box provide lists of available emotes.
The Party Search PanelIn all of the Guild Wars games, you can look for players in a town or outpost by pressing P to toggle the Party Search panel. Whenever you’re in a town or outpost, you’ll also see a Party Formation panel on your screen with a Search button inside it. When you use Party Search, you’ll see potential party members organized in different categories, depending on the type of party they want.
Players typically announce in chat when they’re “looking for group,” usually with the letters “lfg.” A player who uses these letters in local chat automatically adds the name of the party leader to the Party Search panel. The panel can also be used to merge existing parties. A player can use the panel to search through all characters at the same location (within the same region). You can also use the Party Search panel for recruiting guild members, trading items, adding Heroes to your party, and recruiting henchmen without walking across a town or outpost.
Grouping with Other Players
If you’re putting a team together, use Left Ctrl or Alt to check out the levels and professions of characters around you. After you find someone you want to recruit, left click on that character with your mouse cursor, and then press the + symbol next to the character’s name in the Party Formation panel. If the other player is available for a team, and you’ve got room on yours, that player can decide whether or not to join you. Some players have numbers after their names; this not only shows that they’re on a team, but also shows how many are in that character’s party. If you have enough room on your team, you can actually merge the two groups into one.
When you aren’t in a group, you can approach a party leader and attempt to join that group (or “self-invite”). Party leaders are desig-nated by a blue head-shaped icon floating overhead with a number that denotes the size of the current group. When you do this, the party leader sees your name at the bottom of the list, along with a choice to accept you or turn you down.
adventuring Conflict is a way of life. Anyone who ventures outside town should be ready for the dangers that lie ahead. Once an adventure starts, a little knowledge can mean the difference between life and death.
Choose Your Skills
Before you leave a town or outpost, you can equip up to eight skills on your Skill Bar. You’ll gradually gather a collection of skills as you advance through the game. Press K to call up a complete list of skills your character knows (along with the related attributes that char-acter has). To organize that list, use the drop-down menu in the
adventuringexPloring
28
29
corner of the Skills and Attributes panel. When you’re in town, you can click and drag skills from the skill list to the Skill Bar.
Skills and Attributes Panel
The Skills and Attributes panel gathers all of the basic statistics for your character in one place. Your attributes are listed at the top, and your skill list is at the bottom. With this panel, you can also ad-just the skills, attributes, and secondary profession for any Heroes you control.
In addition, you can use this panel to load, save, or manage “tem-plates.” Look for the blue computer disk icon in the upper left. A template summarizes a build of skills and attributes with a short name (and a short line of code). By saving templates, you can quick-ly switch builds as your character (and Heroes) prepare for differ-ent missions and explorable areas. For more information on using the Skills and Attributes panel, including ways to use templates, check the Guild Wars website and the Official Guild Wars wiki.
Your Inventory
Press I to open (or close) your inventory. Through that screen, you can equip weapons, armor, and off-hand items (such as shields and focus items). As you advance in the game, your character can ac-quire a belt pouch and additional bags for increased carrying ca-pacity. A Rune of Holding can increase the carrying capacity of each bag, but not belt pouches or your backpack (or special bags like Zehtuka’s Pack). To open a pouch or bag, click on its picture in the inventory screen. The F5 through F8 function keys open specific bags. F9 opens all of them at once. You can also use the Inventory menu to change the equipment your Heroes are carrying.
adventuring adventuring
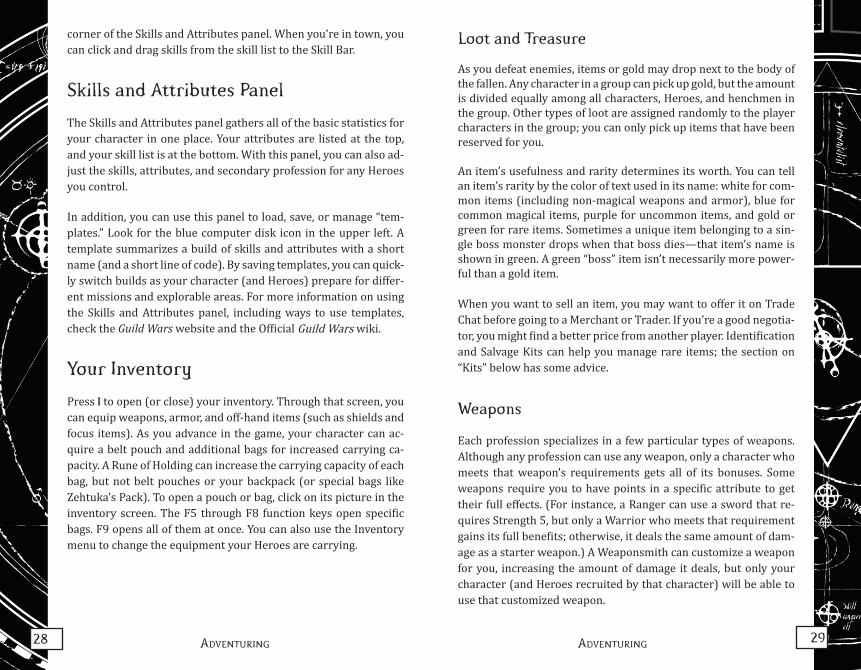
Loot and Treasure
As you defeat enemies, items or gold may drop next to the body of the fallen. Any character in a group can pick up gold, but the amount is divided equally among all characters, Heroes, and henchmen in the group. Other types of loot are assigned randomly to the player characters in the group; you can only pick up items that have been reserved for you.
An item’s usefulness and rarity determines its worth. You can tell an item’s rarity by the color of text used in its name: white for com-mon items (including non-magical weapons and armor), blue for common magical items, purple for uncommon items, and gold or green for rare items. Sometimes a unique item belonging to a sin-gle boss monster drops when that boss dies—that item’s name is shown in green. A green “boss” item isn’t necessarily more power-ful than a gold item.
When you want to sell an item, you may want to offer it on Trade Chat before going to a Merchant or Trader. If you’re a good negotia-tor, you might find a better price from another player. Identification and Salvage Kits can help you manage rare items; the section on “Kits” below has some advice.
Weapons
Each profession specializes in a few particular types of weapons. Although any profession can use any weapon, only a character who meets that weapon’s requirements gets all of its bonuses. Some weapons require you to have points in a specific attribute to get their full effects. (For instance, a Ranger can use a sword that re-quires Strength 5, but only a Warrior who meets that requirement gains its full benefits; otherwise, it deals the same amount of dam-age as a starter weapon.) A Weaponsmith can customize a weapon for you, increasing the amount of damage it deals, but only your character (and Heroes recruited by that character) will be able to use that customized weapon.

30
31
Armor
Your primary profession determines what type of armor you wear. Unlike weapons, pieces of armor are customized for you when you buy them. You can purchase armor from an Armor Crafter NPC if
you acquire enough gold and the proper materials (often available for sale from a Materials Trader). Sometimes you can get armor from a Collector (an NPC who offers items in exchange for trophies you collect from fallen enemies), including armor that’s different than what’s normally available for sale. Enemies occasionally drop armor as well, but it’s customized for them and cannot be worn by other characters. Instead, you can salvage materials from enemy armor with a Salvage Kit (see below).
Kits
Kits are used to alter items in your inventory. They all work the same way: you double-click on the kit and then click once on the item. Some items in your inventory are listed with the word “Sal-vage Item” or “Unidentified” beneath them. Salvage Kits extract re-sources from items, including salvage items extracted from enemy armor. An Identification Kit reveals what an unidentified magic item does.
When you see the word “Unidentified” beneath the name of a magic item, you can reveal its identity and function with an Identification Kit. This type of kit has two varieties: Normal and Superior. The only difference is the number of times you can use the kit. Selling an identified item typically yields more money than selling an un-identified one.
There are four types of Salvage Kits: Normal, Expert, Superior, and Perfect. Normal Salvage Kits can break down almost anything in your inventory into common crafting materials, such as wood and cloth. Expert Salvage Kits retrieve rare crafting materials, runes, in-signia, inscriptions, and weapon components from some valuable items, including magic, uncommon, or rare items. You’ll also find them useful for salvaging rare materials from most common items. Superior Salvage Kits work like Expert Kits, but have more charges. A Perfect Salvage Kit has few charges, but will always leave the item intact after removing any runes, insignia, inscriptions, or weapon components.
Salvage Item
Crafting Material
Salvage Kit
Dye
Identification Kit
Currency
Guild Cape
PrimaryWeapon
Off-Hand
Bags
Key
Trophy
Feet Slot
Legs Slot
Hand Slot
Chest Slot
Head Slot
Rune
adventuring adventuring
32
33
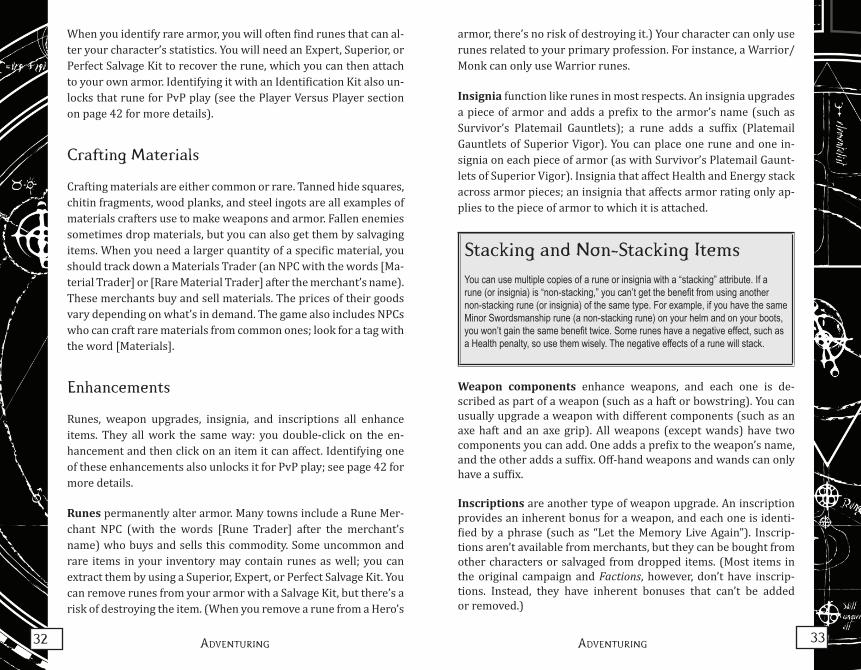
When you identify rare armor, you will often find runes that can al-ter your character’s statistics. You will need an Expert, Superior, or Perfect Salvage Kit to recover the rune, which you can then attach to your own armor. Identifying it with an Identification Kit also un-locks that rune for PvP play (see the Player Versus Player section on page 42 for more details).
Crafting Materials
Crafting materials are either common or rare. Tanned hide squares, chitin fragments, wood planks, and steel ingots are all examples of materials crafters use to make weapons and armor. Fallen enemies sometimes drop materials, but you can also get them by salvaging items. When you need a larger quantity of a specific material, you should track down a Materials Trader (an NPC with the words [Ma-terial Trader] or [Rare Material Trader] after the merchant’s name). These merchants buy and sell materials. The prices of their goods vary depending on what’s in demand. The game also includes NPCs who can craft rare materials from common ones; look for a tag with the word [Materials].
Enhancements
Runes, weapon upgrades, insignia, and inscriptions all enhance items. They all work the same way: you double-click on the en-hancement and then click on an item it can affect. Identifying one of these enhancements also unlocks it for PvP play; see page 42 for more details.
Runes permanently alter armor. Many towns include a Rune Mer-chant NPC (with the words [Rune Trader] after the merchant’s name) who buys and sells this commodity. Some uncommon and rare items in your inventory may contain runes as well; you can extract them by using a Superior, Expert, or Perfect Salvage Kit. You can remove runes from your armor with a Salvage Kit, but there’s a risk of destroying the item. (When you remove a rune from a Hero’s
armor, there’s no risk of destroying it.) Your character can only use runes related to your primary profession. For instance, a Warrior/Monk can only use Warrior runes.
Insignia function like runes in most respects. An insignia upgrades a piece of armor and adds a prefix to the armor’s name (such as Survivor’s Platemail Gauntlets); a rune adds a suffix (Platemail Gauntlets of Superior Vigor). You can place one rune and one in-signia on each piece of armor (as with Survivor’s Platemail Gaunt-lets of Superior Vigor). Insignia that affect Health and Energy stack across armor pieces; an insignia that affects armor rating only ap-plies to the piece of armor to which it is attached.
Stacking and Non-Stacking ItemsYou can use multiple copies of a rune or insignia with a “stacking” attribute. If a rune (or insignia) is “non-stacking,” you can’t get the benefit from using another non-stacking rune (or insignia) of the same type. For example, if you have the same Minor Swordsmanship rune (a non-stacking rune) on your helm and on your boots, you won’t gain the same benefit twice. Some runes have a negative effect, such as a Health penalty, so use them wisely. The negative effects of a rune will stack.
Weapon components enhance weapons, and each one is de-scribed as part of a weapon (such as a haft or bowstring). You can usually upgrade a weapon with different components (such as an axe haft and an axe grip). All weapons (except wands) have two components you can add. One adds a prefix to the weapon’s name, and the other adds a suffix. Off-hand weapons and wands can only have a suffix.
Inscriptions are another type of weapon upgrade. An inscription provides an inherent bonus for a weapon, and each one is identi-fied by a phrase (such as “Let the Memory Live Again”). Inscrip-tions aren’t available from merchants, but they can be bought from other characters or salvaged from dropped items. (Most items in the original campaign and Factions, however, don’t have inscrip-tions. Instead, they have inherent bonuses that can’t be added or removed.)
adventuring adventuring
34
35
You can remove a rune, insignia, upgrade component, or inscrip-tion from your equipment with an Expert, Superior, or Perfect Salvage Kit. Unless you use a Perfect Salvage Kit, there’s a risk of destroying the item.
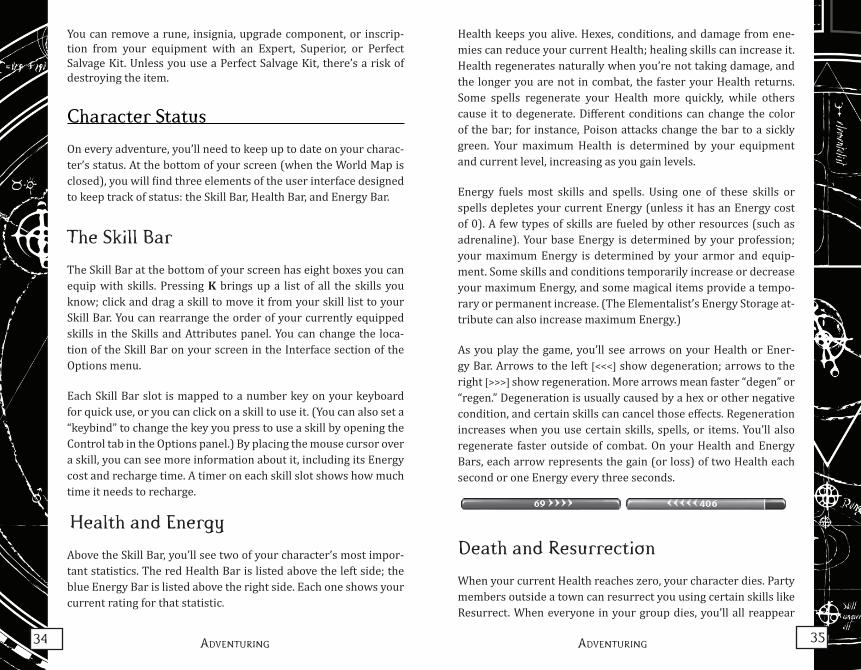
Character Status
On every adventure, you’ll need to keep up to date on your charac-ter’s status. At the bottom of your screen (when the World Map is closed), you will find three elements of the user interface designed to keep track of status: the Skill Bar, Health Bar, and Energy Bar.
The Skill Bar
The Skill Bar at the bottom of your screen has eight boxes you can equip with skills. Pressing K brings up a list of all the skills you know; click and drag a skill to move it from your skill list to your Skill Bar. You can rearrange the order of your currently equipped skills in the Skills and Attributes panel. You can change the loca-tion of the Skill Bar on your screen in the Interface section of the Options menu.
Each Skill Bar slot is mapped to a number key on your keyboard for quick use, or you can click on a skill to use it. (You can also set a “keybind” to change the key you press to use a skill by opening the Control tab in the Options panel.) By placing the mouse cursor over a skill, you can see more information about it, including its Energy cost and recharge time. A timer on each skill slot shows how much time it needs to recharge.
Health and Energy
Above the Skill Bar, you’ll see two of your character’s most impor-tant statistics. The red Health Bar is listed above the left side; the blue Energy Bar is listed above the right side. Each one shows your current rating for that statistic.
Health keeps you alive. Hexes, conditions, and damage from ene-mies can reduce your current Health; healing skills can increase it. Health regenerates naturally when you’re not taking damage, and the longer you are not in combat, the faster your Health returns. Some spells regenerate your Health more quickly, while others cause it to degenerate. Different conditions can change the color of the bar; for instance, Poison attacks change the bar to a sickly green. Your maximum Health is determined by your equipment and current level, increasing as you gain levels.
Energy fuels most skills and spells. Using one of these skills or spells depletes your current Energy (unless it has an Energy cost of 0). A few types of skills are fueled by other resources (such as adrenaline). Your base Energy is determined by your profession; your maximum Energy is determined by your armor and equip-ment. Some skills and conditions temporarily increase or decrease your maximum Energy, and some magical items provide a tempo-rary or permanent increase. (The Elementalist’s Energy Storage at-tribute can also increase maximum Energy.)
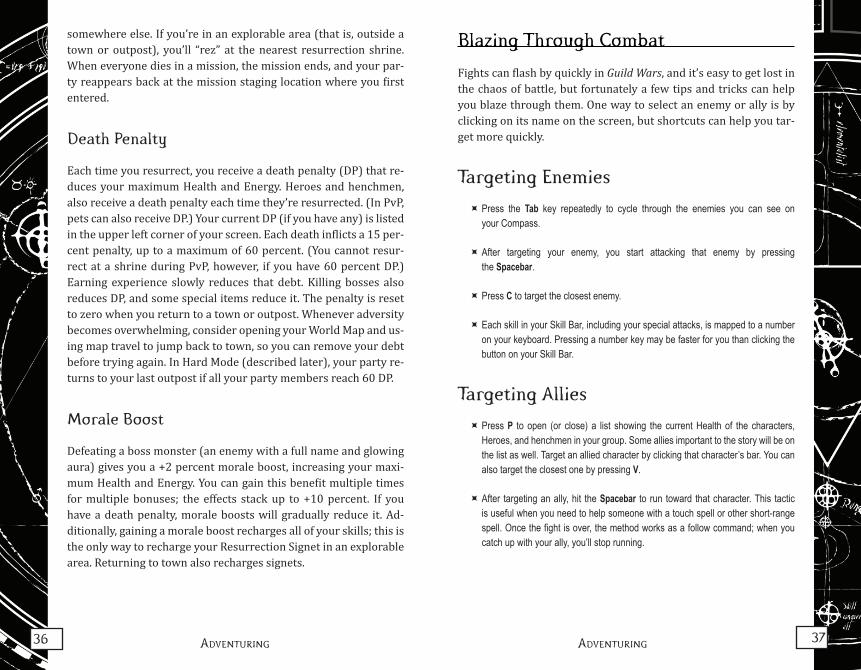
As you play the game, you’ll see arrows on your Health or Ener-gy Bar. Arrows to the left [<<<] show degeneration; arrows to the right [>>>] show regeneration. More arrows mean faster “degen” or “regen.” Degeneration is usually caused by a hex or other negative condition, and certain skills can cancel those effects. Regeneration increases when you use certain skills, spells, or items. You’ll also regenerate faster outside of combat. On your Health and Energy Bars, each arrow represents the gain (or loss) of two Health each second or one Energy every three seconds.
Death and Resurrection
When your current Health reaches zero, your character dies. Party members outside a town can resurrect you using certain skills like Resurrect. When everyone in your group dies, you’ll all reappear
adventuring adventuring
36
37
somewhere else. If you’re in an explorable area (that is, outside a town or outpost), you’ll “rez” at the nearest resurrection shrine. When everyone dies in a mission, the mission ends, and your par-ty reappears back at the mission staging location where you first entered.
Death Penalty
Each time you resurrect, you receive a death penalty (DP) that re-duces your maximum Health and Energy. Heroes and henchmen, also receive a death penalty each time they’re resurrected. (In PvP, pets can also receive DP.) Your current DP (if you have any) is listed in the upper left corner of your screen. Each death inflicts a 15 per-cent penalty, up to a maximum of 60 percent. (You cannot resur-rect at a shrine during PvP, however, if you have 60 percent DP.) Earning experience slowly reduces that debt. Killing bosses also reduces DP, and some special items reduce it. The penalty is reset to zero when you return to a town or outpost. Whenever adversity becomes overwhelming, consider opening your World Map and us-ing map travel to jump back to town, so you can remove your debt before trying again. In Hard Mode (described later), your party re-turns to your last outpost if all your party members reach 60 DP.
Morale Boost
Defeating a boss monster (an enemy with a full name and glowing aura) gives you a +2 percent morale boost, increasing your maxi-mum Health and Energy. You can gain this benefit multiple times for multiple bonuses; the effects stack up to +10 percent. If you have a death penalty, morale boosts will gradually reduce it. Ad-ditionally, gaining a morale boost recharges all of your skills; this is the only way to recharge your Resurrection Signet in an explorable area. Returning to town also recharges signets.
Blazing Through Combat
Fights can flash by quickly in Guild Wars, and it’s easy to get lost in the chaos of battle, but fortunately a few tips and tricks can help you blaze through them. One way to select an enemy or ally is by clicking on its name on the screen, but shortcuts can help you tar-get more quickly.
Targeting Enemies
Press the ÙÙ Tab key repeatedly to cycle through the enemies you can see on your Compass.
After targeting your enemy, you start attacking that enemy by pressing ÙÙthe Spacebar.
Press ÙÙ C to target the closest enemy.
Each skill in your Skill Bar, including your special attacks, is mapped to a number ÙÙon your keyboard. Pressing a number key may be faster for you than clicking the button on your Skill Bar.
Targeting Allies
Press ÙÙ P to open (or close) a list showing the current Health of the characters, Heroes, and henchmen in your group. Some allies important to the story will be on the list as well. Target an allied character by clicking that character’s bar. You can also target the closest one by pressing V.
After targeting an ally, hit the ÙÙ Spacebar to run toward that character. This tactic is useful when you need to help someone with a touch spell or other short-range spell. Once the fight is over, the method works as a follow command; when you catch up with your ally, you’ll stop running.
adventuring adventuring
38
39
Calling Your Target
Some organized teams fight more effectively by calling out targets. To declare your intentions in a fight, target your enemy (by left-clicking on the name, using the Tab key, or pressing C), then hold down the Ctrl key while you start your attack (either by clicking on the enemy or pressing the Spacebar.) As soon as you attack while holding Ctrl, your character sends a message to the team: “I’m at-tacking [enemy’s name]!”
You will then see a small crosshair next to your name on the Party panel. Any character who left-clicks that crosshair or presses T tar-gets the same foe to “assist” on the attack. Some henchmen who have applicable attacks will also leap into the fray, assisting against the target you’ve called out (unless you’ve given them commands not to attack; see below).
Hero and Henchmen Waypoints
Your Compass includes one or more flags underneath its mini-map. You can use these flags in explorable areas or missions when you have henchmen or Heroes in your party. (Other types of allies don’t respond to waypoints.) If you do not have Heroes in your party, only one button (showing multiple flags) is available on your Compass. Click on that button to assign a waypoint for your henchmen. When you place that flag on your Compass mini-map or on the ground in front of you, your henchmen will go to that waypoint.
Your character can also control up to three Heroes. (After you’ve unlocked a Hero, you can use it in all three campaigns. Most He-roes are unlocked in Nightfall.) When you use the waypoint show-ing multiple flags, all of your Heroes and henchmen will go to that common waypoint. You’ll also see three single flags on the Com-pass. Each individual flag directs a single Hero to a specific destina-tion. A player may bring up to three Heroes to a party.
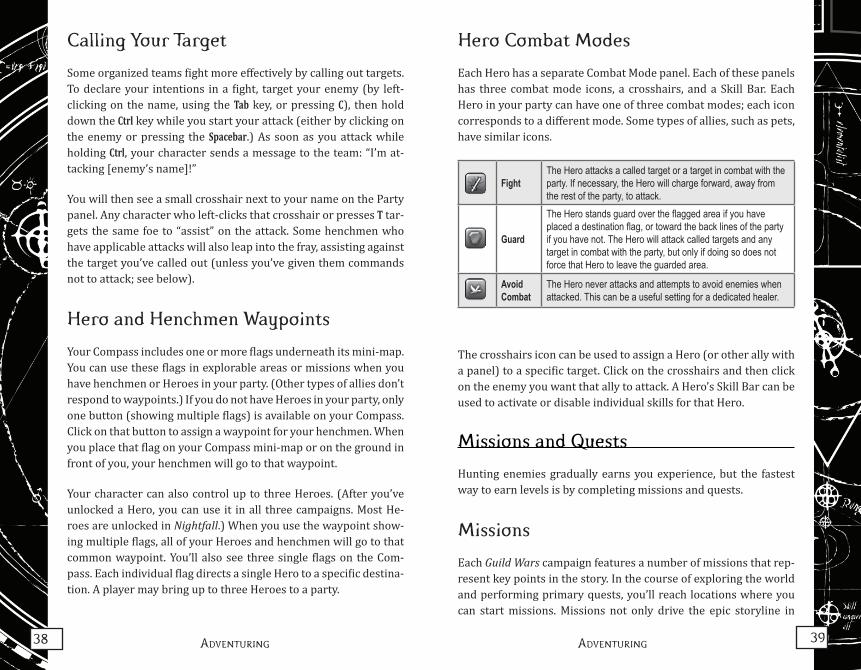
Hero Combat Modes
Each Hero has a separate Combat Mode panel. Each of these panels has three combat mode icons, a crosshairs, and a Skill Bar. Each Hero in your party can have one of three combat modes; each icon corresponds to a different mode. Some types of allies, such as pets, have similar icons.
FightThe Hero attacks a called target or a target in combat with the party. If necessary, the Hero will charge forward, away from the rest of the party, to attack.
Guard
The Hero stands guard over the flagged area if you have placed a destination flag, or toward the back lines of the party if you have not. The Hero will attack called targets and any target in combat with the party, but only if doing so does not force that Hero to leave the guarded area.
Avoid Combat
The Hero never attacks and attempts to avoid enemies when attacked. This can be a useful setting for a dedicated healer.
The crosshairs icon can be used to assign a Hero (or other ally with a panel) to a specific target. Click on the crosshairs and then click on the enemy you want that ally to attack. A Hero’s Skill Bar can be used to activate or disable individual skills for that Hero.
Missions and Quests
Hunting enemies gradually earns you experience, but the fastest way to earn levels is by completing missions and quests.
Missions
Each Guild Wars campaign features a number of missions that rep-resent key points in the story. In the course of exploring the world and performing primary quests, you’ll reach locations where you can start missions. Missions not only drive the epic storyline in
adventuring adventuring
40
41
each campaign, but also provide a significant amount of experi-ence, along with cinematics that reveal more of the story.
The Help Menu and the WikiThe F10 button opens a Help menu for Guild Wars, which is linked to the Official Guild Wars Wiki. This wiki is continually developed and expanded by the game’s extensive community of gamers. When you’re stuck on a mission or quest, the Help menu can help you figure out a strategy, since it includes documentation and advice copied and compiled by other players. The wiki also has information on nearly every aspect of the game.
Quests
Completing quests is another effective way to gain experience and levels. By opening the Quest Log (press L), you’ll see a list of your current quests. Each quest has a list of objectives that get crossed off as you complete them. You can change your current quest at any time. On most quests, an arrow appears on your Compass showing the direction to the next objective. A green swirl on your World Map either shows the location of that objective or a gate you can pass through to move closer to the objective. (Note that the sequence of gates may not be the shortest possible route.) A few quests don’t have these waypoints, usually because they involve searching or exploration. If you have trouble finding your way back to the current quest giver, you’ll find the NPC’s zone listed in your Quest Log.
The StorylineEach Guild Wars game has a story running through it via a chain of primary quests and missions. To advance the game’s story, look for the next primary quest in your Quest Log (opened with the L key) or the next mission on your World Map. Some-times completing one mission will automatically take you to the location of the next mission or primary quest. You may need to locate the next Quest NPC or Mission NPC, but those characters will have a green icon over their heads to make them easier to find. Also, if you highlight a quest in your Quest Log, the World Map will show the name of the location where you need to go next for that quest in green text.
Hard Mode
After you finish a game’s storyline for the first time, you unlock another mode of play on your account for that game: Hard Mode. Before you leave a town or outpost to enter a mission or explorable area (EA), you can choose this mode of play in your Party Forma-tion panel. This increases the level and other statistics of all en-emies. A party leader can choose Hard Mode for a mission or EA as long as everyone in the party qualifies for it. (After you’ve unlocked Hard Mode on your account, each character in the party must be 20th level.) Characters earn 50 percent more experience in Hard Mode.
While you’re in Hard Mode, a red helmet icon appears over most explorable areas and missions on your World Map. When you suc-cessfully kill all of the enemies in an EA in hard mode, you’ve “van-quished” that EA. When you finish a mission on Hard Mode, you’ve “vanquished” that mission. Areas you haven’t vanquished have a small red icon; areas you have vanquished have a large gold icon. Each campaign has two title tracks for vanquishing: one for explor-able areas, and one for missions.
Guilds
Guilds form for a variety of reasons. Some recruit characters who want to level quickly through cooperative environments. Others seek out competitive players who live for the thrill of guild-versus-guild competitions. For some players, building social contacts and allies among other players is as important (or more important) than collecting skills and equipment.
As you’d probably expect, guilds are the heart and soul of Guild Wars. You don’t have to join a guild, but if you do, all of the charac-ters on your account will belong to that same guild. When you are invited to join a guild, you can accept or decline. Press G to open the guild window, then click on the accept or decline button.
adventuring adventuring
42
43
From the moment you join, you can press G for more informa-tion on your guild, including the names of guild members cur-rently online. You can also chat with others in your guild by pressing Enter (to open chat) and then selecting the Guild tab.
Player versus Player The first section of this manual describes how to create a role-playing character: a character who advances through the game’s storyline using a cooperative “player-versus-environment” (PvE) style of play. There’s more to the game than PvE, however, and life does not end at 20th level. Some players prefer different challeng-es, facing off against their most dangerous rivals in the game: other players. This style of play is called “player-versus-player,” or PvP.
Characters in PvP
As you build up a character to 20th level in the PvE areas of Guild Wars, you’ll advance a storyline, unlocking skills along the way. As you unlock these skills for your roleplaying character, they become available for all of your PvP characters. Drawing from your collec-tion of skills, you can build and customize characters for a variety of high-level challenges.
Two types of characters participate in PvP: PvP-only characters and RP characters.
PvP-Only Characters: Each time you create a character, you can decide to build that character exclusively for PvP play. A PvP-only character begins play at 20th level. In addition to the skills and items available after character creation, you can use skills and items you’ve unlocked in the game’s story. You can also use skills you’ve bought with faction (described below). Another option is unlocking skills with a PvP unlock pack, available at the Guild Wars In-Game Store (accessible after you log in).
RP Characters in PvP: You can instead choose to play PvP with one of your existing roleplaying (RP) characters. Keep in mind that the “build” of skills you use for cooperative RP play may not be effec-tive in competitive PvP play.
Each campaign includes arenas available to RP characters below 20th level, but some battles are only available to 20th level charac-ters. Most PvP takes place in a region called the Battle Isles. Any RP character can travel from a port city to the Battle Isles, but most of the battles there require a character to be 20th level.
The Battle Isles
One region of the world exists solely for the purpose of testing the mettle of heroes: the aptly named Battle Isles. Each day, experi-enced adventurers from Tyria, Cantha, and Elona sail to the Battle Isles to test their worth. The Zaishen Order welcomes competitors from around the world. Since they consider combat a sacred right, they ensure that all fights are fair fights within their holy arenas.
If you create a PvP-only character, that character begins play in the combat tutorial area of the Battle Isles. Roleplaying characters can travel to the Battle Isles by ship from a port city (Lion’s Arch, Kaineng Center, or Kamadan).
The Combat Tutorial
You can learn all about PvP gameplay—and Guild Wars combat in general—on the Isle of the Nameless, a location in the center of the Battle Isles. The Isles include an academy offering a full course of techniques and training. Although the focus is on player-versus-player combat, you should check out this area even if you never intend to set foot in a PvP arena. For a start, you’ll find out about various conditions you might find yourself suffering (such as Bleeding or becoming Dazed) and learn which skills and profes-sions are effective against such conditions. The Isle of the Nameless
Player versus Player Player versus Player
44
45
also features training arenas and targeting aids that can teach you about ranged combat and spellcasting, including the relative dis-tance of terms like “adjacent” or “nearby.”
Unlocking Skills and RunesThe more you play through the roleplaying content in the game, the more choices you’ll have in competitive player-versus-player arenas. Not only can your PvE characters unlock new skills for PvP by adventuring through the cooperative section of the game, they can also unlock item upgrades, such as runes.
While you’re playing the PvE section of the game, you’ll want to keep an eye out for weapon components. Some magic weapons have specialized components that grant bonuses to your character. When you identify a weapon component in the cooperative game (using an Identification Kit), you unlock those same components for use in the competitive game.
In addition, after you loot armor from foes you’ve defeated in the cooperative game, you can identify that item to see if it has a rune (using an Identification Kit). Runes you’ve identified in this way are also unlocked for the competitive game. The same principle applies to insignia and inscriptions.
Balthazar’s Faction
You can improve your PvP characters by winning matches in are-nas. When you’re on a team that eliminates opponents and wins competitions, each character on that team earns faction (some-times called Balthazar’s Faction; press H for a current tally.) Priests of Balthazar on the Battle Isles can unlock skills and items for you in exchange for faction. When you unlock a skill or rune in this way, all PvP characters you create from that point on can use that skill or item.
Roleplaying characters who come to the Battle Isles from the PvE area of the game can also buy skills and runes from these same merchants. Buying skills and runes with faction unlocks them for all your PvP-only characters and Heroes, but not your PvE charac-ters. Players can also trade faction for Zaishen Keys. These keys un-lock a Zaishen Chest on the Isles of the Nameless, which provides equipment useable in both PvE and PvP.
PvP Equipment Panel
The items you unlock in the PvE game (or via faction purchases) that you wish to use on your PvP characters, including runes, in-signia, inscriptions, and weapon upgrades, can be found in the PvP Equipment Panel (opened with the J key). Whenever your charac-ter is in an outpost in the Battle Isles, you can change weapons and armor using this interface. As an alternative, you can move non-PvP items between your Xunlai Storage account and your character.
PvP Combat
PvP battles consist of two or more teams (usually groups of four or eight) battling for supremacy. Depending on the type of conflict, you may be able to work with allies from your guild, form a pick-up group of other online players, or recruit henchmen and Heroes. You can participate in many different types of conflicts, including Are-nas, Guild Battles, Tournaments, and the Heroes’ Ascent. Visit the Official Guild Wars Wiki for descriptions of the different types of PvP play offered in Guild Wars, as well as helpful tips and builds.
Player versus Player Player versus Player
46
47
Limited Warranty
The following warranty and support information applies only to customers in the United States and Canada, and only to original consumer purchasers of products covered by this warranty.
NC Interactive, Inc. and ArenaNet Inc. warrant to the original purchaser of the enclosed product (the “Product”) that the media containing the Product will be free from defects in material and workmanship for a period of ninety (90) days from the date of purchase (the “Warranty Period”). NC Interactive’s entire liability and your exclusive remedy under this limited warranty shall be, at NC Interactive’s option, repair or replacement, without charge, of all or the affected portion of any Product that proves to be defective in material or workmanship during the Warranty Period.
EXCLUSIONS FROM WARRANTY
This warranty applies only to defects in factory materials and factory workmanship. Any condition caused by abuse, unreasonable use, mistreatment, neglect, accident, improper operation, destruction, or alteration is not a defect cov-ered by this warranty. Parts and materials subject to wear and tear in normal usage are not covered by this warranty.
LIMITATIONS
This warranty is in lieu of all other warranties and no other representations or claims of any nature shall be binding on, or obligate NC Interactive. Other than the warranties set forth above (which are limited to the ninety (90) day period described above), NC Interactive products are provided “as is” without express or implied warranties of any kind, including, without limitation, warranties of merchantability and fitness for a particular purpose. NC Interactive does not warrant that the products will be error free or will operate without interruption. In no event will NC Inter-active be liable for any special, incidental, or consequential damages resulting from possession, use, or malfunction of NC Interactive products. Some states do not allow limitations as to how long an implied warranty lasts and/or exclusions or limitations of incidental or consequential damages. So the above limitations and/or exclusions of liability may not apply to you. This warranty gives you specific rights, and you may also have other rights that vary from state to state. Neither NC Interactive nor your retail dealer has any responsibility for any incidental or consequential damages relating to your use of the product, including, without limitation, any damages for loss of data or loss of profit, or for any incidental expenses, loss of time, or inconvenience. As some states do not allow the exclusion or limitation of incidental or consequential damage, the foregoing limitation or exclusion may not apply to you.
HOW TO OBTAIN WARRANTY SERVICE
To obtain warranty service, please send the defective Product, together with a copy of your original sales receipt, your return address, name, telephone number (should contact be necessary), and a brief note describing the defect to NC Interactive at the following address: 6801 N. Capital of Texas Hwy, Bldg. 1, Ste. 102, Austin, TX 78731-1780. The defective product must be post marked within ninety (90) days from the date of purchase. Proof of purchase in the form of a dated receipt must be inluded to obtain warranty service. The shipping costs for sending the defective product to NC Interactive is the sole responsibility of the Customer. NC Interactive will not be liable for any damage that occurs during shipping.
If you have warranty questions, you can also contact our Customer Support department via email at: [email protected].
CUSTOMER SUPPORT
For customer support, account support, and technical support questions, please visit the support section of the Guild Wars website at http://support.guildwars.com.
At this site you will find a searchable knowledge base containing useful answers to frequently asked questions, solu-tions to common issues, and detailed information regarding additional contact methods if your answer or solution is nowhere to be found.
Photosensitive Seizures
SEIZURE WARNING — Please Read Prior to Playing
A very small percentage of individuals may experience seizures when exposed to certain light patterns, flashing lights, or flashing images. Children and teenagers are more susceptible to seizure than adults, but even those with no history of seizure or epilepsy could experience them while playing or watching video games.
Symptoms of seizures include: lightheadedness, altered vision, jerking or shaking of the extremities, loss of awareness, confusion, twitching, or full convulsions. Convulsions can lead to other injuries by causing an individual to fall off of a chair and/or strike objects nearby.
If you or anyone in your family has an epileptic condition or history of seizures, consult your physician prior to playing this game—you could have an undiagnosed condition. If you experience any of the aforementioned symptoms of a seizure while playing, STOP PLAYING AND CONSULT YOUR DOCTOR IMMEDIATELY. Parents should ensure their children are not experiencing symptoms.
In order to reduce the risk of photosensitive epileptic seizures, you should play NC Interactive games in a well-lit room while you are alert and awake. Avoid poorly lit rooms and playing when fatigued.
48
www.guildwars.com© 2005–2008 ArenaNet, Inc. and NC Interactive, Inc. All rights reserved. NCsoft, the interlocking NC logo, ArenaNet, Guild Wars, Guild Wars Factions, Factions, Guild Wars Nightfall, Nightfall Guild Wars Eye of the North, Guild Wars: Eye of the North, Eye of the North and all associated logos and designs are trademarks or registered trademarks of NCsoft Corporation. All other trademarks are the property of their respective owners.
No part of this book may be reproduced or transmitted in any form, or by any means, electronic or mechanical, including without limitation photocopying and recording, or by any information storage or retrieval system, without written permission from ArenaNet, Inc. and NC Interactive, Inc.
TM