ExpressionEngine 2 A Quick-Start Guide.pdf
202
Download at WoweBook.com
-
Upload
khangminh22 -
Category
Documents
-
view
0 -
download
0
Transcript of ExpressionEngine 2 A Quick-Start Guide.pdf

Download at WoweBook.com

What Readers Are Saying About
ExpressionEngine 2: A Quick-Start Guide
Ryan helps make the entire process of working with ExpressionEngine
extremely clear. ExpressionEngine 2: A Quick-Start Guide is a great
start for newbies but also a great reference for us pros, with some
oft-neglected features and techniques.
Lea Alcantara
Creative Principal/Chief Hired Gun, Lealea Design
ExpressionEngine 2: A Quick-Start Guide is a must-have asset for all
developers new to ExpressionEngine. How I wish this book had been
written when I first started using ExpressionEngine.
Sean Smith
Head Developer, Create Sean Web Design
Since the goal of the book is to finish a complete website, it’s hard to
put the book down until the end. Ryan’s writing style turns what ini-
tially seems like a daunting challenge into a fun, easy, and rewarding
learning experience.
Joey Pfeifer
Designer
An excellent introduction to ExpressionEngine 2.
Greg Salt
Purple Dogfish
Download at WoweBook.com

ExpressionEngine 2A Quick-Start Guide
Ryan Irelan
The Pragmatic BookshelfRaleigh, North Carolina Dallas, Texas
Download at WoweBook.com

Many of the designations used by manufacturers and sellers to distinguish their prod-
ucts are claimed as trademarks. Where those designations appear in this book, and The
Pragmatic Programmers, LLC was aware of a trademark claim, the designations have
been printed in initial capital letters or in all capitals. The Pragmatic Starter Kit, The
Pragmatic Programmer, Pragmatic Programming, Pragmatic Bookshelf and the linking g
device are trademarks of The Pragmatic Programmers, LLC.
Every precaution was taken in the preparation of this book. However, the publisher
assumes no responsibility for errors or omissions, or for damages that may result from
the use of information (including program listings) contained herein.
Our Pragmatic courses, workshops, and other products can help you and your team
create better software and have more fun. For more information, as well as the latest
Pragmatic titles, please visit us at
http://www.pragprog.com
Copyright © 2010 Ryan Irelan.
All rights reserved.
No part of this publication may be reproduced, stored in a retrieval system, or transmit-
ted, in any form, or by any means, electronic, mechanical, photocopying, recording, or
otherwise, without the prior consent of the publisher.
Printed in the United States of America.
ISBN-10: 1-934356-52-2
ISBN-13: 978-1-934356-52-4
Printed on acid-free paper.
P1.0 printing, March 2010
Version: 2010-3-12
Download at WoweBook.com

ContentsAcknowledgments 8
Foreword 9
Introduction 11
What’s New in ExpressionEngine 2 . . . . . . . . . . . . . . . . 11
Who Should Read This Book . . . . . . . . . . . . . . . . . . . 12
What’s in This Book? . . . . . . . . . . . . . . . . . . . . . . . . 12
How to Read This Book . . . . . . . . . . . . . . . . . . . . . . 13
Online Resources . . . . . . . . . . . . . . . . . . . . . . . . . . 14
I Getting Started with ExpressionEngine 15
1 Installing ExpressionEngine 16
1.1 Evaluating Hosting . . . . . . . . . . . . . . . . . . . . . 16
1.2 Getting the Software . . . . . . . . . . . . . . . . . . . . 18
1.3 Installing ExpressionEngine . . . . . . . . . . . . . . . . 19
1.4 Exploring the ExpressionEngine Directories and Files . 22
1.5 Touring the Control Panel . . . . . . . . . . . . . . . . . 24
1.6 What We Learned . . . . . . . . . . . . . . . . . . . . . . 29
2 Hands-on Templating 31
2.1 Building Our First Template . . . . . . . . . . . . . . . . 31
2.2 Dissecting ExpressionEngine URLs . . . . . . . . . . . 36
2.3 Displaying Dynamic Content . . . . . . . . . . . . . . . 37
2.4 Working with ExpressionEngine Variables . . . . . . . . 38
2.5 Bringing Life to Templates with ExpressionEngine Tags 40
2.6 What We Learned . . . . . . . . . . . . . . . . . . . . . . 46
Download at WoweBook.com

CONTENTS 6
II Building Our First ExpressionEngine Site 47
3 What We’re Building 48
3.1 Engine City Times Home Page . . . . . . . . . . . . . . . 49
3.2 Engine City Times Article Page . . . . . . . . . . . . . . 51
3.3 Engine City Times Category Page . . . . . . . . . . . . . 51
3.4 Moving Forward . . . . . . . . . . . . . . . . . . . . . . . 51
4 Creating and Configuring the Site 53
4.1 Setting the Preferences . . . . . . . . . . . . . . . . . . . 53
4.2 Cleaning Up the Default Site . . . . . . . . . . . . . . . 54
4.3 Representing the Content . . . . . . . . . . . . . . . . . 55
4.4 Controlling Content with Custom Statuses . . . . . . . 64
4.5 Working with Categories . . . . . . . . . . . . . . . . . . 67
4.6 Creating Authors and Members . . . . . . . . . . . . . . 70
4.7 What We Learned . . . . . . . . . . . . . . . . . . . . . . 74
5 Making the Pages 76
5.1 Building Out the Home Page . . . . . . . . . . . . . . . 76
5.2 Displaying the Categories . . . . . . . . . . . . . . . . . 87
5.3 Embedding Reusable Code . . . . . . . . . . . . . . . . 89
5.4 Building Out the Article Template . . . . . . . . . . . . 92
5.5 Lighting Up the Category Template . . . . . . . . . . . . 99
5.6 What We Learned . . . . . . . . . . . . . . . . . . . . . . 102
6 Adding the Final Touches 103
6.1 Adding a Static Page . . . . . . . . . . . . . . . . . . . . 103
6.2 Lighting Up the Navigation . . . . . . . . . . . . . . . . 106
6.3 Cleaning Up Using Conditionals . . . . . . . . . . . . . 109
6.4 Creating an RSS Feed . . . . . . . . . . . . . . . . . . . 112
6.5 Adding Search Functionality . . . . . . . . . . . . . . . 114
6.6 On Your Own . . . . . . . . . . . . . . . . . . . . . . . . 117
6.7 What We Learned . . . . . . . . . . . . . . . . . . . . . . 117
III Digging In 119
7 Creating Relationships Between Entries 120
7.1 Building Entry Relationships . . . . . . . . . . . . . . . 121
7.2 Setting Up Related Entries . . . . . . . . . . . . . . . . . 123
7.3 Writing Related Entries Template Code . . . . . . . . . 125
7.4 What We Learned . . . . . . . . . . . . . . . . . . . . . . 127
Report erratum
this copy is (P1.0 printing, March 2010)Download at WoweBook.com

CONTENTS 7
8 Managing Files and Images 129
8.1 Exploring the File Manager . . . . . . . . . . . . . . . . 129
8.2 Creating and Managing Upload Destinations . . . . . . 131
8.3 Editing Image Files . . . . . . . . . . . . . . . . . . . . . 135
8.4 Embedding Images in Entries . . . . . . . . . . . . . . . 137
8.5 Adding Files to Entries . . . . . . . . . . . . . . . . . . . 138
8.6 What We Learned . . . . . . . . . . . . . . . . . . . . . . 141
9 Advanced Templating 142
9.1 A More Powerful Channel Entries Tag . . . . . . . . . . 142
9.2 Writing Custom MySQL Queries . . . . . . . . . . . . . 147
9.3 Adding Content Outside of the Control Panel . . . . . . 150
9.4 Sharing Data Between Templates . . . . . . . . . . . . . 156
9.5 Edit Templates Anywhere . . . . . . . . . . . . . . . . . 158
9.6 What We Learned . . . . . . . . . . . . . . . . . . . . . . 160
10 Optimizing Our ExpressionEngine Site 161
10.1 Setting Permissions and Establishing a Baseline . . . . 161
10.2 Optimizing with Four Types of Caching . . . . . . . . . 162
10.3 Disabling Unneeded Queries . . . . . . . . . . . . . . . 168
10.4 Optimizing for High Traffic . . . . . . . . . . . . . . . . 169
10.5 What We Learned . . . . . . . . . . . . . . . . . . . . . . 171
11 Extending ExpressionEngine with Add-Ons 173
11.1 Exploring the Different Types of Add-Ons . . . . . . . . 173
11.2 The Add-on Developer Community . . . . . . . . . . . . 184
Index 187
Report erratum
this copy is (P1.0 printing, March 2010)Download at WoweBook.com

AcknowledgmentsThis book wasn’t created by just one person. I’m thankful to have had
so many different people help me out both directly and indirectly.
To Mike Clark, who connected me with the wonderful people at The
Pragmatic Programmers, for his continued support.
To Susannah Davidson Pfalzer for her work as my editor and motivator.
To Greg Storey for his mentorship, friendship, and support. I hold him
personally responsible for any success I may have.
To the fine folks at EllisLab: Rick Ellis, Leslie Camacho, Derek Jones,
Derek Allard, Lisa Wess, Robin Sowell, and their entire support staff.
To Lea Alcantara, Greg Salt, Sean Smith, Kaan Karaca, Dan Wohlbruck,
Drew Warkentin, and Joey Pfeifer for their valuable feedback.
To my friends and colleagues for their support: Ethan Marcotte,
Stephen Caver, Helenita Johnston, Matt Clark, Dan Benjamin, Dan
Cederholm, Jeffrey Zeldman, Mark Huot, Brian Warren, Jenn Lukas,
Jason Santa Maria, Manton Reece, James Duncan Davidson, Damon
Clinkscales, Phi Sanders, Jason Moore, David Tull, Brian Carter, Doug
Payne, Greg Cangialosi, Jamie Pittock, Simon Collison, Robert Eerhart,
Ryan Masuga, Luke Dorny, Nevin Lyne, Ryan Sims, Noah Stokes, Bran-
don Kelly, Leevi Graham, Kenny Meyers, Erik Reagan, Mitchell Kim-
brough, Paul Burdick, Veerle Pieters, Gert Leyseele, and all of the read-
ers and contributors to EE Insider.
To Mom and Dad for their encouragement and support.
And, finally, to my wife Alexandra for supporting my endeavors and for
her love and partnership.
Download at WoweBook.com

ForewordIt’s been nearly ten years since I wrote my first web publishing applica-
tion, a blog tool called pMachine, which would become the predecessor
to ExpressionEngine. Ten years ago there were only some 3 million
websites in total, few of which served content dynamically. Although
blogging had just been invented and there were a few software venders
offering expensive content management systems (CMSs), the Web was
a patchwork of mostly static brochure sites. This was about to change.
Rapidly.
Today, more than 25 percent of the world is online, and the number of
sites serving dynamic content well exceeds 100 million. Blogs have gone
totally mainstream, and CMSs are ubiquitous and cheap. A revolution
in personal and corporate communication happened in the blink of an
eye. For those of us who have been in the field since the beginning,
it’s been a very exciting and satisfying ride. For those interested in web
publishing, the opportunities and choices have never been greater or
more powerful.
Henry Mencken, long before the Web was invented, quipped, “Free-
dom of press is limited to those who own one.” He had no idea that
soon anyone with little more than an Internet connection and a web
browser could “own” such a press. The book you hold teaches how you
too can join this revolution and reach a potential audience of well over
1 billion people.
As I write this, ExpressionEngine just turned 2, and I can think of no
one more qualified to teach it than Ryan Irelan. When people ask me
what the best feature of ExpressionEngine is, I usually say “our com-
munity,” and Ryan is a shining example of just such a “feature.” Ryan
has distinguished himself as an educator and advocate of Expression-
Engine and as a member of our Professionals Network. He has touched
Download at WoweBook.com

FOREWORD 10
thousands of people in our discussion forums, through his own Expres-
sionEngine online resources, and with his web clientele.
Happy publishing!
Rick Ellis (CEO of EllisLab and creator of ExpressionEngine)
March 2010
Report erratum
this copy is (P1.0 printing, March 2010)Download at WoweBook.com

IntroductionWhat started out as a simple publishing tool for recording artist Nancy
Sinatra has been cultivated by EllisLab and the community into a
robust content management and web publishing system. Over the past
six years, ExpressionEngine has seen phenomenal growth, not only in
terms of features, flexibility, and extensibility but also in the size of the
community of web designers, developers, and marketers who build web-
sites with it. Whether you’re building a small site or a large corporate
undertaking, ExpressionEngine is becoming the tool of choice. With the
release of ExpressionEngine 2, this is a great time to learn Expression-
Engine and become part of this passionate and thriving community.
This book gives you the information and tools you need to begin devel-
oping websites with ExpressionEngine. You’ll get up and running on
ExpressionEngine quickly while learning best practices. You’ll learn
everything you need to build a basic ExpressionEngine-powered web-
site, and this book lays the foundation you can build on to become
an ExpressionEngine expert. We’ll get hands-on immediately: through-
out the book, I’ll show how to build an entire website using Expres-
sionEngine, and you’ll learn the main site-building techniques along
the way.
What’s New in ExpressionEngine 2
ExpressionEngine 2 is a large step forward in terms of functionality and
platform. The entire application was rewritten using the CodeIgniter
PHP framework, making add-on development easier. ExpressionEngine
2 has about fifty new features that help make building websites on
ExpressionEngine better than before. Here are a few of the most notable
new features:
• Redesigned and more customizable Control Panel interface
• File Manager for easy upload and retrieval of site images and files
Download at WoweBook.com

WHO SHOULD READ THIS BOOK 12
• Accessories add-ons that allow you to strategically display content
or data in specific parts of the Control Panel
• More easily customizable member theme templates
Chapter 8, Managing Files and Images, on page 129 is dedicated to
the new File Manager and explores its features and functionality. In
the final chapter, Chapter 11, Extending ExpressionEngine with Add-
Ons, on page 173, you’ll learn about all of the different add-on types,
including the new accessories.
Those are just the highlights. This book covers everything you need to
get started with ExpressionEngine 2. ExpressionEngine continues to
evolve. See the Online Resources section for ways to keep up to date
with the latest ExpressionEngine changes and versions.
Who Should Read This Book
This book is written for web designers, web developers, and managers
of web or interactive teams. To get the most from this book, you should
have experience building websites and using content management
systems.
To successfully follow along in this book, you should know how to use
HTML, how to use CSS (you’ll be able to download sample code tem-
plates for the example site we’ll build), and how to upload files to a
web server and set permissions. If you’ve installed and configured other
content management systems or blogging applications, then you should
have no problem getting started with this book.
What’s in This Book?
This book is broken up into three parts:
• Getting Started with ExpressionEngine: You’ll first learn how to
install the software and then learn how to make content appear in
templates. This part is the appetizer and will teach you the basics
of ExpressionEngine upon which you’ll build throughout the book.
• Building Your First ExpressionEngine Site: This is the main course.
Here you’ll build, step-by-step, a basic newspaper website in Ex-
pressionEngine. By the time you’re finished with this part, you’ll
Report erratum
this copy is (P1.0 printing, March 2010)Download at WoweBook.com

HOW TO READ THIS BOOK 13
have learned all of the necessary skills and techniques needed to
successfully build websites in ExpressionEngine.
• Digging In: The third and final part is the icing on the cake. You’ll
learn some advanced site-building techniques and use one of the
biggest new features in ExpressionEngine 2: the File Manager.
You’ll also learn some advanced techniques you can use to make
your ExpressionEngine templates smarter and more flexible. You’ll
also learn how to optimize your ExpressionEngine website for
maximum performance and how to extend the functionality of
ExpressionEngine with add-ons (accessories, plug-ins, modules,
and extensions).
How to Read This Book
Depending on your level of experience, the approach you take with the
book may differ. Here are some ways to get the most of the material.
If you’re new to ExpressionEngine and have never used it before, start
with Chapter 1, Installing ExpressionEngine, on page 16. You can then
comfortably proceed to Chapter 2, Hands-on Templating, on page 31 to
prepare for the rest of the book. I encourage you to progress through
the book in order so you get the most from the information provided.
If you have some prior experience with ExpressionEngine, you can skip
the first two chapters and jump right into building an ExpressionEn-
gine website. This process begins in Chapter 3, What We’re Building,
on page 48 and continues throughout the rest of the book. Even if you
have built a website with ExpressionEngine before, the techniques and
best practices covered may be new or beneficial to you. I encourage you
to follow along through the entire site-building process.
For the best experience, the second part of the book should be read
straight through from beginning to end. However, you can read the
third part in any order that makes the most sense to you.
All of the code, images, and other files needed to build the website in
Part II are provided in the downloadable code files. You can find infor-
mation on how to download the site templates in the following section.
Report erratum
this copy is (P1.0 printing, March 2010)Download at WoweBook.com

ONLINE RESOURCES 14
Online Resources
This book has its own web page, http://pragprog.com/titles/riexen, where
you can find more information about the book and interact in the fol-
lowing ways:
• You can download all of the static and fully coded templates for
the sample site.
• You can participate in a discussion forum with other readers,
ExpressionEngine enthusiasts, and me.
• You can help improve the book by reporting errata, including con-
tent suggestions and typos.
Also, if you own the ebook, you can click the gray boxes before each
code listing to download the code excerpts while building the sample
site.
The ExpressionEngine software is just one part of the picture. It’s the
community of passionate users and helpful developers who make it a
reliable platform on which to build a website. Here are some community
resources to explore:
• ExpressionEngine Forums: http://expressionengine.com/forums
• EE Insider: http://eeinsider.com
• Devot:ee: http://devot-ee.com
• ExpressionEngine Wiki: http://expressionengine.com/wiki
My goal with this book is to teach you the basics and inspire you to
explore, learn, and build powerful, flexible, and amazing websites with
ExpressionEngine. Whether you’re new to ExpressionEngine or have
some experience, we’ll take the journey together, and I’ll guide you each
step of the way.
Ryan Irelan
March 2010
Report erratum
this copy is (P1.0 printing, March 2010)Download at WoweBook.com

Part I
Getting Started with
ExpressionEngine
Download at WoweBook.com

Chapter 1
Installing ExpressionEngineOur first order of business is to get ExpressionEngine installed and
running. After that we’ll create a template, tour the Control Panel, and
learn about development environments.
First you need to follow a few steps to prepare to install ExpressionEn-
gine on your server.
1.1 Evaluating Hosting
Once you download the Server Wizard, unzip it and use your FTP client
to upload the ee_wizard directory to the web root of your server. In your
browser, go to the wizard 1, and you should see a page similar to Fig-
ure 1.1, on the next page.
Step 1 checks your database server. You should have your database
server information at hand for this test. The database check attempts to
connect to your database using the login information you provided and
checks that MySQL is configured so ExpressionEngine can function
properly.
Fill out the form, entering your MySQL server address, your MySQL
username and password, and the MySQL database name. If for some
reason the wizard cannot connect to your database server, it will report
an error message at the bottom of the next page.
1. http://yourdomain.com/ee_wizard
Download at WoweBook.com

EVALUATING HOSTING 17
Figure 1.1: Checking the database connection with the ExpressionEn-
gine Server Wizard.
If you receive an error, double-check your login information, database
name, and server location. If you continue to have issues, contact your
web host support or your server administrator. In my experience, most
issues with connecting to the database are related to login information
and the server location information.
If the wizard is able to successfully connect to your database server and
database, you should be forwarded to the next page of the wizard.
Step 2 checks your server for all the requirements and suggested li-
braries. Those marked with a red “No” are not supported on your server
or hosting account, while those marked with a green “Yes” are sup-
ported. If you have a red “No” next to a required item, you should con-
tact your web host support or server administrator and ask about it.
Going forward with the ExpressionEngine installation in spite of the
missing requirements will cause the software to not function properly
and will create problems.
Report erratum
this copy is (P1.0 printing, March 2010)Download at WoweBook.com

GETTING THE SOFTWARE 18
Figure 1.2: Checking for requirements with the ExpressionEngine
Server Wizard.
If the wizard shows that all requirements have been met (including the
database test from earlier), you should see a congratulatory message at
the bottom of the page.
With your server ready to run ExpressionEngine, let’s move forward
and download the software.
1.2 Getting the Software
ExpressionEngine is not open source software and cannot be freely dis-
tributed across the Internet.
ExpressionEngine is a commercial product, and there are licensing fees
involved. The only way to get the software is from the ExpressionEngine
website.2
2. http://expressionengine.com
Report erratum
this copy is (P1.0 printing, March 2010)Download at WoweBook.com

INSTALLING EXPRESSIONENGINE 19
Can I Use the Trial Version?
You can download a limited, 30-day trial of ExpressionEngine.Because the source code is encrypted, it requires some specialsoftware, the Zend Optimizer, to run. Additionally, you are notable to change the name of the system directory.
To get the most from this book, you should use a full version ofExpressionEngine.
Here are the available licenses:
• Freelancer: $99.95 and restricted to web professionals who want
to use ExpressionEngine to build their own company website.
• Noncommercial: $149.95 and can be used only on nonprofit and
personal websites.
• Commercial: $299.95 and has no restrictions in how it is used.
This version is for commercial sites run by for-profit or commercial
companies.
To get a full list of the features available for each type of license, I
encourage you to visit the ExpressionEngine website for a side-by-side
comparison of the licensing options.3
Once you choose the license that is right for your situation, purchase
and then download the software from the ExpressionEngine site so you
can install it.
1.3 Installing ExpressionEngine
Once the download is complete, you should have a .zip file. Unzip this
file on your desktop.
Uploading the Files
You are now ready to move the files from the local computer and onto
the server. To upload the ExpressionEngine software to your server,
follow these steps:
1. Connect to your server using your FTP client software.
3. http://expressionengine.com/overview/pricing/
Report erratum
this copy is (P1.0 printing, March 2010)Download at WoweBook.com
INSTALLING EXPRESSIONENGINE 20
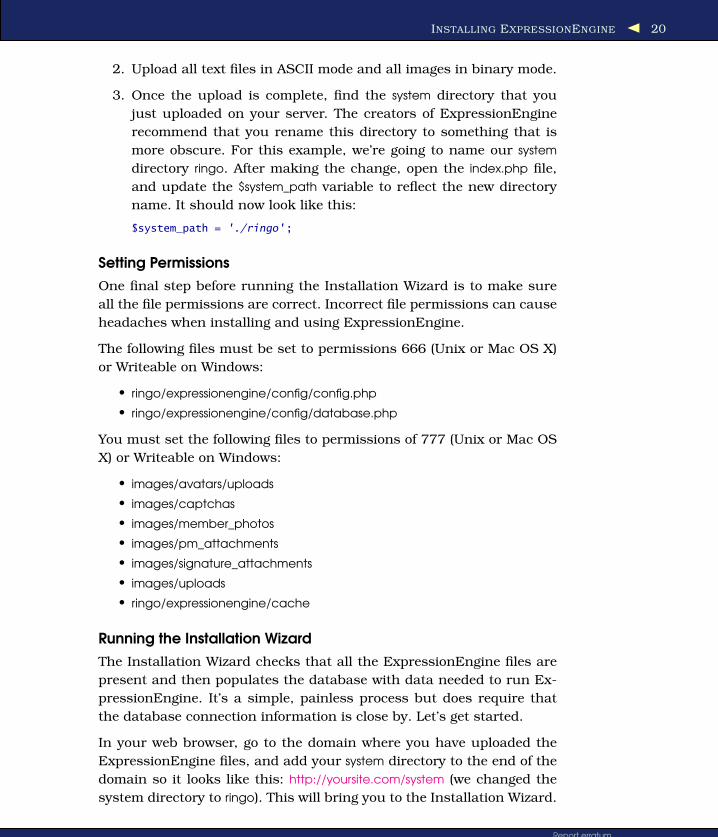
2. Upload all text files in ASCII mode and all images in binary mode.
3. Once the upload is complete, find the system directory that you
just uploaded on your server. The creators of ExpressionEngine
recommend that you rename this directory to something that is
more obscure. For this example, we’re going to name our system
directory ringo. After making the change, open the index.php file,
and update the $system_path variable to reflect the new directory
name. It should now look like this:
$system_path = './ringo';
Setting Permissions
One final step before running the Installation Wizard is to make sure
all the file permissions are correct. Incorrect file permissions can cause
headaches when installing and using ExpressionEngine.
The following files must be set to permissions 666 (Unix or Mac OS X)
or Writeable on Windows:
• ringo/expressionengine/config/config.php
• ringo/expressionengine/config/database.php
You must set the following files to permissions of 777 (Unix or Mac OS
X) or Writeable on Windows:
• images/avatars/uploads
• images/captchas
• images/member_photos
• images/pm_attachments
• images/signature_attachments
• images/uploads
• ringo/expressionengine/cache
Running the Installation Wizard
The Installation Wizard checks that all the ExpressionEngine files are
present and then populates the database with data needed to run Ex-
pressionEngine. It’s a simple, painless process but does require that
the database connection information is close by. Let’s get started.
In your web browser, go to the domain where you have uploaded the
ExpressionEngine files, and add your system directory to the end of the
domain so it looks like this: http://yoursite.com/system (we changed the
system directory to ringo). This will bring you to the Installation Wizard.
Report erratum
this copy is (P1.0 printing, March 2010)Download at WoweBook.com

INSTALLING EXPRESSIONENGINE 21
Figure 1.3: Filling out the server settings during installation
Click the button to begin, and then choose a new install by clicking
the text “Click here to install a brand new copy of ExpressionEngine.”
Agree to the software license, and then click Submit.
The next step is to input your server settings and database connection
details and create an administrator account. You should see a screen
that looks similar to Figure 1.3.
Follow the instructions that are listed with each area on the settings
page of the wizard. You can also check or uncheck ExpressionEngine
modules that you would like to have installed. These modules can be
installed at any time, so it’s safe to leave the default settings.
For the “Choose your default template design” option, select Agile
Records. Although you won’t need this for the site we’ll build later in
the book, the sample site will help you become familiar with Expres-
sionEngine.
Report erratum
this copy is (P1.0 printing, March 2010)Download at WoweBook.com

EXPLORING THE EXPRESSIONENGINE DIRECTORIES AND FILES 22
Once completed, click Install ExpressionEngine! If the installation was
successful, you should see the success screen.
You should now delete the installer directory from your server. It’s located
in the expressionengine directory in your system directory. This is an
important security precaution. If you leave the directory on your server,
someone could potentially run the Installation Wizard in their browser
and reinstall the software, wiping out your database and your website.
ExpressionEngine has a safeguard against this by “locking” your instal-
lation, but it’s still a good idea to remove the directory to eliminate the
chance of unauthorized access to your site.
1.4 Exploring the ExpressionEngine Directories and Files
If you’re not already connected, open your FTP client software, and
connect to your server where you installed ExpressionEngine. Navigate
to the web root where the ExpressionEngine files are located. Let’s take
a quick look at the directories and files that will be most important
while learning to use ExpressionEngine:
images/
Stored in this directory are the images that ExpressionEngine will
use in your site. These images are for member avatars, photos,
smileys, and user uploads via the Control Panel.
index.php
This is the main file that processes all requests to the Expression-
Engine site. As we progress in the book, you’ll notice that this file
appears in the URL of your site. Leave this file as is, and don’t edit
it any further.
expressionengine/installer/
Ha, tricked you! This directory shouldn’t be on your server if you
were following directions. If you still have this file on your server,
please delete it now.
system/ (renamed by me to ringo)
This directory contains all the files that make ExpressionEngine
run. It’s also the directory you’ll use in the web browser to access
the site’s Control Panel.
system/expressionengine/third_party
This directory is where you will put any third-party add-ons you
want to use with ExpressionEngine. This is different from previous
Report erratum
this copy is (P1.0 printing, March 2010)Download at WoweBook.com
EXPLORING THE EXPRESSIONENGINE DIRECTORIES AND FILES 23
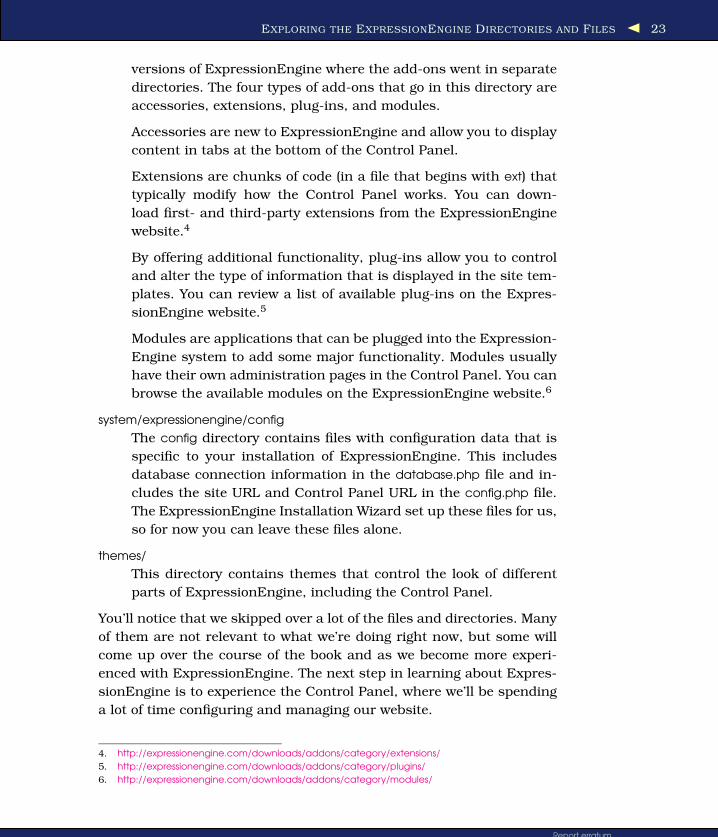
versions of ExpressionEngine where the add-ons went in separate
directories. The four types of add-ons that go in this directory are
accessories, extensions, plug-ins, and modules.
Accessories are new to ExpressionEngine and allow you to display
content in tabs at the bottom of the Control Panel.
Extensions are chunks of code (in a file that begins with ext) that
typically modify how the Control Panel works. You can down-
load first- and third-party extensions from the ExpressionEngine
website.4
By offering additional functionality, plug-ins allow you to control
and alter the type of information that is displayed in the site tem-
plates. You can review a list of available plug-ins on the Expres-
sionEngine website.5
Modules are applications that can be plugged into the Expression-
Engine system to add some major functionality. Modules usually
have their own administration pages in the Control Panel. You can
browse the available modules on the ExpressionEngine website.6
system/expressionengine/config
The config directory contains files with configuration data that is
specific to your installation of ExpressionEngine. This includes
database connection information in the database.php file and in-
cludes the site URL and Control Panel URL in the config.php file.
The ExpressionEngine Installation Wizard set up these files for us,
so for now you can leave these files alone.
themes/
This directory contains themes that control the look of different
parts of ExpressionEngine, including the Control Panel.
You’ll notice that we skipped over a lot of the files and directories. Many
of them are not relevant to what we’re doing right now, but some will
come up over the course of the book and as we become more experi-
enced with ExpressionEngine. The next step in learning about Expres-
sionEngine is to experience the Control Panel, where we’ll be spending
a lot of time configuring and managing our website.
4. http://expressionengine.com/downloads/addons/category/extensions/
5. http://expressionengine.com/downloads/addons/category/plugins/
6. http://expressionengine.com/downloads/addons/category/modules/
Report erratum
this copy is (P1.0 printing, March 2010)Download at WoweBook.com

TOURING THE CONTROL PANEL 24
1.5 Touring the Control Panel
The ExpressionEngine Control Panel is the nerve center for your site.
Here you manage and publish content, create and edit templates, and
configure any of the many settings and preferences for your Expression-
Engine-powered website.
To gain access to the Control Panel, you have to enter the username
and password you created during installation. In your web browser,
navigate to your system directory.7 Once there you should see a login
screen. Log in, and you’re brought to the Control Panel home page.
We’re going to tour just a few of the main features of the Control Panel;
you’ll find out about many more features later as we build the sample
site in the second part of the book.
Control Panel Home
The Control Panel home page (see Figure 1.4, on the next page) pro-
vides you with easy access to the three main ways to manage your
ExpressionEngine site: create, modify, and view. From the home page,
you can easily create or modify content, manage comments, access the
ExpressionEngine User Guide, or manage your website templates.
You can also search the Control Panel (for example, searching for tem-
plate will return all the areas in the Control Panel where you can man-
age a template) or access the Quick Links to easily access bookmarked
Control Panel pages.
Publishing Content
Click the Content button and then Publish at the top left of the Control
Panel to add new content to the site. ExpressionEngine prompts you to
choose which channel you’d like to use. A channel is a bucket for your
content. As we build the website in the second part of this book, we’ll
be creating multiple channels for our content.
Select News from the two channels listed. This is the screen where you
add content to your site.
7. Such as http://mysite.com/system. Yours should have a customized name (I used ringo,
remember?).
Report erratum
this copy is (P1.0 printing, March 2010)Download at WoweBook.com

TOURING THE CONTROL PANEL 25
Figure 1.4: Exploring the Control Panel home page
Editing Content
The Edit screen (see Figure 1.5, on the following page) provides an
overview of all content on your site, whether it’s in draft form or pub-
lished. When you click the Content button and then Edit, you see sev-
eral channel entries listed. As we build out our ExpressionEngine site,
this will be an even longer list of channel entries.
Also notice the search functionality at the top of the page. It will let you
search and sort content by channel, category, status (Open or Closed),
and date range. Additionally, you can limit the search to just specific
pieces of content, such as titles or comments. Once your site is popu-
lated with hundreds of content items, it becomes an indispensable tool
for managing your content in ExpressionEngine.
The list of content is comprised of several columns, each providing an
overview of the content pieces. Click the title of the sample content, and
you will see the Edit page for that item. Here you can edit the content
and save your changes.
Report erratum
this copy is (P1.0 printing, March 2010)Download at WoweBook.com

TOURING THE CONTROL PANEL 26
Figure 1.5: Viewing the Edit screen in the Control Panel
From the main Edit page, you also have the ability to delete content—
either individually or in bulk. You do this by checking the box (on the
far right) next to each item and then using the drop-down menu at
the bottom to select which action you’d like to take. Deleting content
cannot be undone, so be careful!
Managing Templates
The Template Manager (see Figure 1.6, on the next page) is where you
manage all the templates (HTML markup and ExpressionEngine tags)
that make your site come to life in the web browser. To access the
Template Manager, click the Design button at the top of the Control
Panel and then click Template Manager under the Templates menu
item.
Templates are organized by groups, which are listed on the far left
of the Template Manager page. You should see four groups: about,
global_embeds, * news, and search. The asterisk next to the third group
denotes that its index template is the home page of the site.
Report erratum
this copy is (P1.0 printing, March 2010)Download at WoweBook.com

TOURING THE CONTROL PANEL 27
Figure 1.6: Managing your ExpressionEngine templates
The middle of the page is where you can access each individual template
of the selected group. Clicking the name will let you edit the template.
Additionally, at the top of the list of templates there are three buttons
that allow you to edit the selected template groups, as well as add a
new template or delete a group.
Administering the Site
Let’s continue our tour of the Control Panel by exploring the site admin-
istration options.
The Admin area is where you configure and tweak your Expression-
Engine installation and consists of several sections to give you control
over how your site is set up. To access the Admin area, click the Admin
button at the top of the Control Panel, and then choose Overview (at
the bottom of the list).
Report erratum
this copy is (P1.0 printing, March 2010)Download at WoweBook.com

TOURING THE CONTROL PANEL 28
Channel Administration
The Channel Administration section is at the top of page when you
access the Admin area of the Control Panel. Please explore each area of
Channel Administration on your own, but here are some of the areas
that will be most important to you as you begin building your first
website with ExpressionEngine:
• Channels: Here you create, delete, and edit the content channels
on your ExpressionEngine website. This is where you can define
the different types of the content that will appear on the site.
• Categories: In this subsection of Channel Administration, you can
add new category groups and categories, as well as manage all of
your existing categories. The default site we installed comes with
two category groups.
• Custom fields: ExpressionEngine allows you to create custom
fields that fit the type of content in your website. Here you can
manage those custom fields and custom field groups.
System Administration
Further down the page, System Administration gives you access to
some of the finer controls of the ExpressionEngine software. Although
most of the settings here won’t be necessary to get started with Expres-
sionEngine (the defaults will work just fine), I do want to point out a
couple of areas that you should be familiar with:
• Config Editor: In this area you can alter settings in your config.php
file.
• Output and Debugging: Although you may not use this immedi-
ately, it is good to know where the debugging settings are located.
These settings allow you to enable special debugging output when
you need some extra information to help solve a problem while
building your ExpressionEngine-powered website.
Tools for Managing Your ExpressionEngine Site
The Tools section of the Control Panel offers you some additional op-
tions to manage your ExpressionEngine site. Of these tools, the most
useful to you will most likely be the Data tools. Access the Tools area
by clicking the Tools button at the top of the page, and select Data.
Consisting of four different tools for advanced management of your
data, the one tool you’ll use most often is Clear Cached Data so you
Report erratum
this copy is (P1.0 printing, March 2010)Download at WoweBook.com

WHAT WE LEARNED 29
can make sure the site is always serving up the latest content. The
SQL Manager tool allows you view and query the ExpressionEngine
database tables and may be useful when you’re more experienced with
ExpressionEngine.
Explore the other tools in the section. The various logs available will
help make troubleshooting easier, and you can use the Communicate
section to send email to members.
Managing Your User Account
The My Account area gives you access to manage all of your personal
account details, including email address, profile, username and pass-
word, and Control Panel customizations. To access this area, click Con-
trol Panel (under the My Account heading) in the sidebar of the Control
Panel. If the sidebar is hidden, click “reveal sidebar” near the top right
of the Control Panel to make it appear.
Quick Links
At the right-bottom side of the Control Panel is a small menu that is
very useful while working within ExpressionEngine (see Figure 1.7, on
the following page). By default there is just one item in the list: Quick
Links Manager.
Use the Quick Links Manager to customize the links that appear in the
Quick Links list. Some useful examples are a link to a dictionary web-
site for easy reference, links to related sites, and links to site-specific
documentation.
A dictionary quick link will be useful as we’re adding content to our
site, so let’s create a link that will lead us to Dictionary.com. Click
Quick Links Manager in the list.
Give the link the title of “Dictionary” and a URL of http://dictionary.com.
Click Submit, and the new dictionary link appears in the Quick Links
menu. Be sure to click the Dictionary link to test it!
1.6 What We Learned
In this chapter we installed ExpressionEngine and took a brief tour
of the Control Panel. What we’ve learned will prepare us for the next
chapter where we dig in and learn how to create and view templates.
Report erratum
this copy is (P1.0 printing, March 2010)Download at WoweBook.com

WHAT WE LEARNED 30
Figure 1.7: Adding Quick Links to the Control Panel
Before going on, however, take a few minutes to poke around the Con-
trol Panel and become even more familiar with how it works. Although
I’ll cover specific functionality throughout the book, it will make the
learning process easier if you become as familiar as possible with Con-
trol Panel interface in this early stage.
Report erratum
this copy is (P1.0 printing, March 2010)Download at WoweBook.com

Chapter 2
Hands-on TemplatingNow that we’ve successfully installed and configured ExpressionEn-
gine, let’s jump right in and create our first web page. As we progress,
we’ll learn not only about templates but about ExpressionEngine vari-
ables and tags. By the end of the chapter, we’ll have created a simple
web page that displays our contact information and includes some blog
entries. The work in this chapter will prepare us for the task of building
our first website with ExpressionEngine.
2.1 Building Our First Template
Let’s head back to the Control Panel (log in again, if necessary) so we
can build our first template.
As you noticed in the previous chapter when we explored the Control
Panel, ExpressionEngine has automatically created a series of template
groups and templates during installation. But let’s not worry about
them right now. It’s quicker and easier, and—most importantly—we
will learn more if we just start from scratch. So, we will create our own
template group and template for our new web page.
To create a new template group, click Template Group in the Create
box on the home page of the Control Panel. We are now presented with
the form for creating a new template group. Template group names
must be a single word or multiple words connected by either under-
scores or hyphens. Spaces between words are not allowed (for example
my_template is valid, while my template is not).
Since we’re creating a single page with our contact information to which
we can point business associates and friends, name the template group
Download at WoweBook.com

BUILDING OUR FIRST TEMPLATE 32
Figure 2.1: Creating a new template group
“contact.” Some other options are available when creating a new tem-
plate group (see Figure 2.1), but we can leave them as is for now.
Click Submit to create the new template group. ExpressionEngine pops
you back to the Template Management view. To get into the template
group, select it from the list on the far left. You’ll notice that there is
already a template there called index with a small icon of a house next
to it. What is this template? Well, ExpressionEngine creates an index
template automatically when we create a new template group.
For right now, we’ll ignore the index template and create our own. At the
top right of the template list, click the red New Template button. Let’s
call this new template my_info. We want the template type to be “web
page,” and we want ExpressionEngine to create an empty template.1
Click Create to create the template.
1. You do have the option of creating a new template by cloning an existing template,
but in this instance we want to create an empty template.
Report erratum
this copy is (P1.0 printing, March 2010)Download at WoweBook.com

BUILDING OUR FIRST TEMPLATE 33
The Different Types of Templates
In ExpressionEngine you can create six types of templates:
• Web Page: Use this type to create templates to display inthe web browser. This is the template type that you will usemost often.
• RSS Page: If you need to create an RSS feed for your site,you should use this template type.
• CSS: If you are using ExpressionEngine to store your CSS,you will want to select this template type. ExpressionEn-gine tags are not parsed in CSS templates.
• JavaScript : This template type should be used for storingand outputting JavaScript in ExpressionEngine.
• Static: This is a simple template that is not parsed byExpressionEngine.
• XML: Use this type if you want to create and serve an XMLdocument in ExpressionEngine.
Adding Our Contact Information
After creating the template, ExpressionEngine returns us to the Tem-
plate Management page. In the list of templates to the right, find my_info,
and click the name. You’ll notice the document icon to the left of the
template name; this indicates that this is a web page template.
At the template edit page, you should now see a blank template. Click
into the large edit area, and let’s do something simple to start. Type
your name and then save the template by clicking Update. To view it in
a web browser, click the red View Rendered Template button (at the top
right). You should see something like the screenshot in Figure 2.2, on
the following page.
Adding HTML to Our Template
Of course, ExpressionEngine templates can do more than just display
simple, plain text. You can put in any valid HTML markup you want,
and it will render properly in the browser. Let’s go ahead and give our
plain my_info template a little something extra.
But before we add any HTML to our template, let’s first put in the proper
document header and DOCTYPE. Put the following code in the my_info
template, replacing the text we had in there. Notice that your name now
lives between the body tags.Report erratum
this copy is (P1.0 printing, March 2010)Download at WoweBook.com

BUILDING OUR FIRST TEMPLATE 34
Figure 2.2: Rendering your name in the browser
Download BasicsofTemplating/header.html
<!DOCTYPE HTML PUBLIC "-//W3C//DTD HTML 4.01 Transitional//EN"
"http://www.w3.org/TR/html4/loose.dtd">
<html>
<head>
<title>Contact Information for Ryan Irelan</title>
</head>
<body>
Ryan Irelan
</body>
</html>
Now we can begin adding very simple markup to our template. Let’s
wrap our name in an h1 tag. We’ll also create an h2 tag and place the
text “Contact Information” inside it. We also don’t want to forget that
we need to add our contact information. Something like this:
Download BasicsofTemplating/hello_world_simple.html
<h1>Ryan Irelan</h1>
<h2>Contact Information</h2>
<p>Please use this information to get in touch with me.</p>
<address>
123 Expression Street<br />
Engine City, USA<br />
01234<br />
<a href="mailto:[email protected]">
[email protected]</a><br />
111-555-1212
</address>
Report erratum
this copy is (P1.0 printing, March 2010)Download at WoweBook.com

BUILDING OUR FIRST TEMPLATE 35
Figure 2.3: Viewing our contact information
This should all sit between the body tags in the template. After you’ve
added the previous code, save the template, and view it in your browser.
You should see something like that in Figure 2.3.
The complete markup should now look like this:
Download BasicsofTemplating/hello_world_simple_complete.html
<!DOCTYPE HTML PUBLIC "-//W3C//DTD HTML 4.01 Transitional//EN"
"http://www.w3.org/TR/html4/loose.dtd">
<html>
<head>
<title>Contact Information for Ryan Irelan</title>
</head>
<body>
<h1>Ryan Irelan</h1>
<h2>Contact Information</h2>
<p>Please use this information to get in touch
with me.</p>
<address>
123 Expression Street<br />
Engine City, USA<br />
01234<br />
<a href="mailto:[email protected]">
[email protected]</a><br />
111-555-1212
</address>
</body>
</html>
Report erratum
this copy is (P1.0 printing, March 2010)Download at WoweBook.com
DISSECTING EXPRESSIONENGINE URLS 36
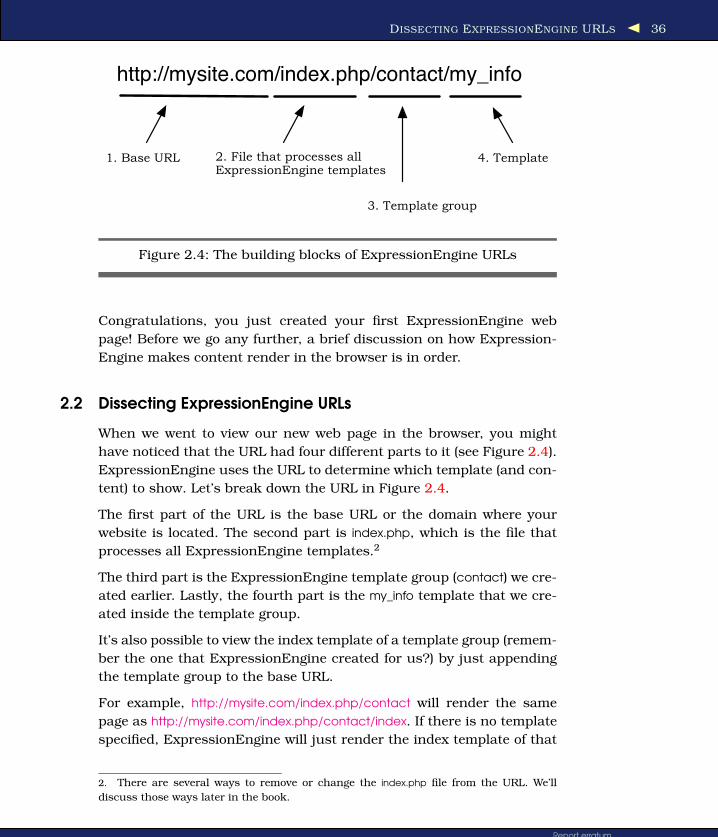
http://mysite.com/index.php/contact/my_info
1. Base URL 2. File that processes all ExpressionEngine templates
3. Template group
4. Template
Figure 2.4: The building blocks of ExpressionEngine URLs
Congratulations, you just created your first ExpressionEngine web
page! Before we go any further, a brief discussion on how Expression-
Engine makes content render in the browser is in order.
2.2 Dissecting ExpressionEngine URLs
When we went to view our new web page in the browser, you might
have noticed that the URL had four different parts to it (see Figure 2.4).
ExpressionEngine uses the URL to determine which template (and con-
tent) to show. Let’s break down the URL in Figure 2.4.
The first part of the URL is the base URL or the domain where your
website is located. The second part is index.php, which is the file that
processes all ExpressionEngine templates.2
The third part is the ExpressionEngine template group (contact) we cre-
ated earlier. Lastly, the fourth part is the my_info template that we cre-
ated inside the template group.
It’s also possible to view the index template of a template group (remem-
ber the one that ExpressionEngine created for us?) by just appending
the template group to the base URL.
For example, http://mysite.com/index.php/contact will render the same
page as http://mysite.com/index.php/contact/index. If there is no template
specified, ExpressionEngine will just render the index template of that
2. There are several ways to remove or change the index.php file from the URL. We’ll
discuss those ways later in the book.
Report erratum
this copy is (P1.0 printing, March 2010)Download at WoweBook.com
DISPLAYING DYNAMIC CONTENT 37
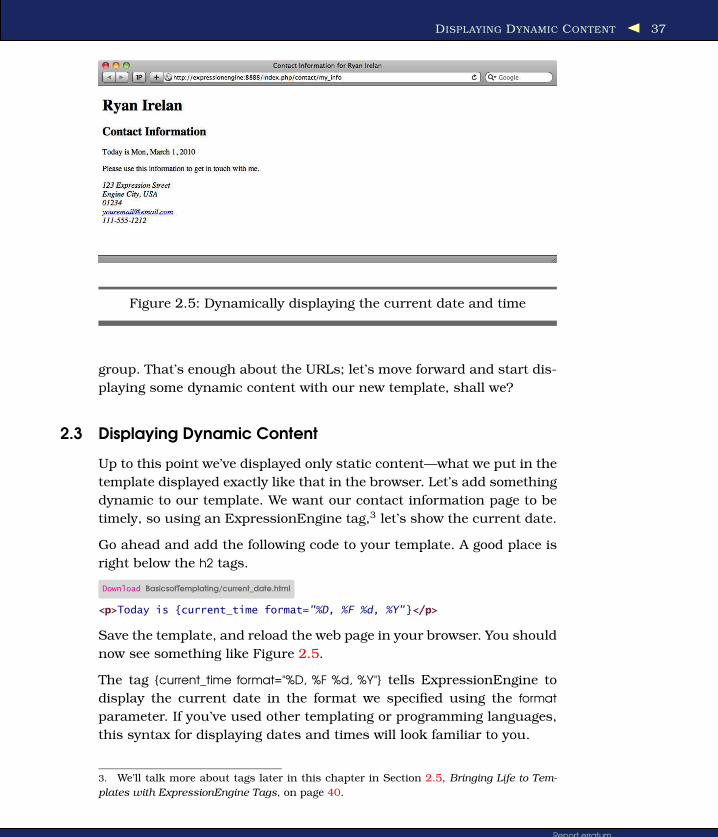
Figure 2.5: Dynamically displaying the current date and time
group. That’s enough about the URLs; let’s move forward and start dis-
playing some dynamic content with our new template, shall we?
2.3 Displaying Dynamic Content
Up to this point we’ve displayed only static content—what we put in the
template displayed exactly like that in the browser. Let’s add something
dynamic to our template. We want our contact information page to be
timely, so using an ExpressionEngine tag,3 let’s show the current date.
Go ahead and add the following code to your template. A good place is
right below the h2 tags.
Download BasicsofTemplating/current_date.html
<p>Today is {current_time format="%D, %F %d, %Y"}</p>
Save the template, and reload the web page in your browser. You should
now see something like Figure 2.5.
The tag {current_time format="%D, %F %d, %Y"} tells ExpressionEngine to
display the current date in the format we specified using the format
parameter. If you’ve used other templating or programming languages,
this syntax for displaying dates and times will look familiar to you.
3. We’ll talk more about tags later in this chapter in Section 2.5, Bringing Life to Tem-
plates with ExpressionEngine Tags, on page 40.
Report erratum
this copy is (P1.0 printing, March 2010)Download at WoweBook.com

WORKING WITH EXPRESSIONENGINE VARIABLES 38
{preload_replace:my_blog="http://ryanirelan.com"}
1. Indicates that thisis a tag that assignsa variable
2. Variable name
3. Variable contents
Figure 2.6: Assigning a preload replacement variable
2.4 Working with ExpressionEngine Variables
Let’s continue building on our my_info template by adding some more
of our own content, but this time we’ll use ExpressionEngine variables
to make it display. First we’ll see how the variables work, and then
we will learn what they do and how we can use them in our website
development with ExpressionEngine.
Our First Variable
We want to be sure that the friends and business associates who visit
the page also know where to go to read my weblog. Because it’s impor-
tant that the reader not miss this link, we want to include it twice—once
at the top of the page and once at the bottom.
However, we don’t want to repeat the same markup twice because down
the road if we ever want to edit it and change the URL, we’ll have to
change the markup in two different places. This is where the variables
in ExpressionEngine come in handy.
ExpressionEngine provides a way for us to assign variables right inside
the template. We’re going to create the variable using the preload_
replace tag. This tag has three parts (see Figure 2.6). The first part
defines what type of tag it is and indicates to ExpressionEngine that
this tag will create a new instance of preload replacement. The second
part is the variable name, and the third part is the value we’re going to
assign to the variable.
Download BasicsofTemplating/ee_variable_assign.php
{preload_replace:my_blog="<a href='http://ryanirelan.com'>
Visit my blog</a>"}
Report erratum
this copy is (P1.0 printing, March 2010)Download at WoweBook.com

WORKING WITH EXPRESSIONENGINE VARIABLES 39
The variable name is my_blog, and the value of that variable is some
HTML to create the link to my blog. Place the preload replacement tag
at the very top of the my_info template. It’s a good idea to keep your
preload replacement tags altogether in one place. Most people prefer
the top of the template; it helps keep the template more organized.
Save the template, and then reload the web page.
Oops! What happened? Where are the links to the blog? They’re not
there because we haven’t yet placed the variable itself in the template.
We only assigned the blog link to the variable but didn’t tell Expres-
sionEngine to display it.
We add variables to the template by surrounding the variable name
from the preload_replace tag with curly braces. This is what our variable
will look like: {my_blog}.
Place this new variable at the top of the page, just above the h1, and
then again at the bottom of the page below the last p tag. To make our
link display nicely, wrap the variable in paragraph tags.
Download BasicsofTemplating/hello_world_with_variables.php
{preload_replace:my_blog="<a href="http://ryanirelan.com">
Visit my blog</a>"}
<!DOCTYPE HTML PUBLIC "-//W3C//DTD HTML 4.01 Transitional//EN"
"http://www.w3.org/TR/html4/loose.dtd">
<html>
<head>
<title>Contact Information for Ryan Irelan</title>
</head>
<body>
<p>{my_blog}</p>
<h1>Ryan Irelan</h1>
<h2>Contact Information</h2>
<p>Today is {current_time format="%D, %F %d,
%Y"}</p>
<p>Please use this information to get in
touch with me.</p>
<address>
123 Expression Street<br />
Engine City, USA<br />
01234<br />
<a href="mailto:[email protected]">
[email protected]</a><br />
111-555-1212
</address>
<p>{my_blog}</p>
</body>
</html>
Report erratum
this copy is (P1.0 printing, March 2010)Download at WoweBook.com

BRINGING LIFE TO TEMPLATES WITH EXPRESSIONENGINE TAGS 40
Figure 2.7: Linking my blog using preload replacement variables
After you make these changes, save the template. Reload the page in
your browser, and you should see the links to the blog at both the top
and bottom of the page, similar to Figure 2.7.
If you ever want to edit these links to my blog to point to a new URL,
it’s just a matter of editing in one place: at the top of the template page
where we assigned the preload replacement variable. Go ahead and give
it a try. Change the variable to one of your favorite websites, save the
template, and reload the page.
Up to this point we’ve created our contact page template, dynamically
displayed the date using the current_time variable, and learned how to
use preload replacement variables. We’re now ready to move forward
and implement ExpressionEngine tags.
2.5 Bringing Life to Templates with ExpressionEngine Tags
In ExpressionEngine, the tags are what make your templates come
to life. Using tags, we can dynamically pull content stored through
ExpressionEngine to generate a list of categories, a comments thread,
images, or blog entries. Almost anything we can input into Expression-
Engine, we can also output using a tag.
Report erratum
this copy is (P1.0 printing, March 2010)Download at WoweBook.com

BRINGING LIFE TO TEMPLATES WITH EXPRESSIONENGINE TAGS 41
How Preload Replacement Variables Work
Preload replacement variables are not much different fromthe variables you’ll encounter in most programming languages.They are very simple to learn and a powerful way to managecontent—both dynamic and static—in your template.
If you notice that your variable renders in the browser like{my_variable_name}, this probably means ExpressionEngine didnot recognize it, and you have not assigned it correctly. Checkyour syntax and tag structure for any errors.
Finally, preload replacement variables can contain more thanjust static content. As you learn more about ExpressionEngine,you’ll see that you can assign the variable different dynamiccontent depending on the page that is rendered. It’s verypowerful!
Building Blocks of a Tag
The first obvious sign of an ExpressionEngine tag is that it begins and
ends with curly braces. All ExpressionEngine tags will follow this stan-
dard. The second thing you’ll notice (Figure 2.8, on the following page)
is that there are three parts to the tag, separated by colons.4
The first part, exp, indicates to ExpressionEngine that this is an Expres-
sionEngine tag. When ExpressionEngine comes across this tag in a
template, it will parse it and return the data that the tag calls for.
The second part of the tag is the module name. In our example, the
module is channel. ExpressionEngine is built from a collection of mod-
ules that when combined make up the powerful content management
system you installed in the previous chapter.
The third part of the tag is the function inside the module preceding it.
The function is some PHP code that performs a certain task and returns
some type of data. In this example, the function is channel_name, which
would return the name of the current channel.
4. There are exceptions to this, but for now this simplified explanation will be enough.
Report erratum
this copy is (P1.0 printing, March 2010)Download at WoweBook.com

BRINGING LIFE TO TEMPLATES WITH EXPRESSIONENGINE TAGS 42
{exp:channel:channel_name}
1. Indicates that this isan ExpressionEnginetag and should beparsed.
2. Module name
3. Function name
Figure 2.8: Building blocks of a tag
Tag Pairs
The tag we looked at in Figure 2.8 is a single tag. The following example
is a tag pair:
Download BasicsofTemplating/tag_pair_example.php
{exp:channel:entries}
Your channel entry content
{/exp:channel:entries}
We see the same three-part structure, but this time there is a closing
tag that has a forward slash after the opening curly brace. If you neglect
to close a tag pair, you’ll be greeted with an error, or ExpressionEngine
will just fail silently and not return anything at all.
A tag pair typically returns several different pieces of information.
In this example, we are returning the entries of a channel. It tells
ExpressionEngine to go fetch all the entries for the channel and then
place them between the two tags.
So, how does ExpressionEngine know from which channel to pull the
content? Unless we tell it exactly where to pull from, ExpressionEngine
will pull content from every channel. We’ll tell it using parameters.
Report erratum
this copy is (P1.0 printing, March 2010)Download at WoweBook.com

BRINGING LIFE TO TEMPLATES WITH EXPRESSIONENGINE TAGS 43
Complete List of Tags
A lot of tags are available with the default ExpressionEnginemodules. For a list of those tags, check out the official wiki:http://expressionengine.com/wiki/Complete_Tag_List.
Meet the Parameters
Parameters determine what type and how much content Expression-
Engine should return. We’ll use a couple of parameters to tell Expres-
sionEngine which channel to pull from and how many entries we’d like
to show.
The parameter takes the form of parameter_name="value". This is univer-
sal across all ExpressionEngine tags, no matter whether the modules
are the ones that ship with the software, those you download online
from a third-party, or modules you create yourself.
{exp:channel:entries channel="my_weblog"}
Channel entries here
{/exp:channel:entries}
Another typical parameter for the Channel Entries tag pair is the limit
parameter. This, just like it says, limits the number of entries that
ExpressionEngine displays in the browser. Let’s limit our display to
just two entries:
{exp:channel:entries channel="my_weblog" limit="2"}
2 channel entries here
{/exp:channel:entries}
That’s a good start. We’ve told ExpressionEngine that we want to dis-
play entries from a channel, and we’ve indicated which channel and
how many entries to show. Now we have to tell it which content to
display from those entries and where.
Report erratum
this copy is (P1.0 printing, March 2010)Download at WoweBook.com

BRINGING LIFE TO TEMPLATES WITH EXPRESSIONENGINE TAGS 44
Tag Variables
Tag variables are the single tags that live inside the tag pairs and
instruct ExpressionEngine on which content should be displayed and
where.
For example, a channel entry usually consists of several different parts.
A basic channel entry has a title, a body, a date published, an author
name, and possibly a category. Using the tag variables, we can instruct
ExpressionEngine on what to display for every channel entry it returns.
Let’s go back to our hello_world template we created earlier and set it up
to display channel entries.
We’re going to use the following tag variables inside the Channel Entries
tag pair:
{title} {news_body} {entry_date} {author}
It’s fairly self-explanatory what each tag variable will return, so go
ahead and add the following to our my_info template. Place it just above
the bottom {my_blog} variable.
Download BasicsofTemplating/weblog_entries.php
<h3>Latest Entries from My Blog</h3>
{exp:channel:entries channel="news" limit="2"}
<h4>{title}</h4>
{news_body}
<small>Published on {entry_date format="%M %d, %Y"} by
{author}</small>
{/exp:channel:entries}
I added some simple HTML to better organize the blog entry. Your com-
plete template should now look like this (the new code is indicated by
the arrows):
Download BasicsofTemplating/complete_template.php
{preload_replace:my_blog="<a href="http://ryanirelan.com">
Visit my blog</a>"}
<!DOCTYPE HTML PUBLIC "-//W3C//DTD HTML 4.01 Transitional//EN"
"http://www.w3.org/TR/html4/loose.dtd">
<html>
<head>
<title>Contact Information for Ryan Irelan</title>
</head>
<body>
<p>{my_blog}</p>
Report erratum
this copy is (P1.0 printing, March 2010)Download at WoweBook.com

BRINGING LIFE TO TEMPLATES WITH EXPRESSIONENGINE TAGS 45
<h1>Ryan Irelan</h1>
<h2>Contact Information</h2>
<p>Today is {current_time format="%D, %F
%d, %Y"}</p>
<p>Please use this information to get in
touch with me.</p>
<address>
123 Expression Street<br />
Engine City, USA<br />
01234<br />
<a href="mailto:[email protected]">
[email protected]</a><br />
111-555-1212
</address>
<h3>Latest Entries from My Blog</h3>
{exp:channel:entries channel="news" limit="2"}
<h4>{title}</h4>
{news_body}
<small>Published on {entry_date
format="%M %d,%Y"} by {author}</small>
{/exp:channel:entries}
<p>{my_blog}</p>
</body>
</html>
Save the updated template, and reload the web page in your browser
(see Figure 2.9, on the following page). Wow! Where did that content
come from?
When we installed ExpressionEngine, we chose the Agile Record sample
site, which populated ExpressionEngine with some sample channels
and entries. Using the channel="news" parameter, we’re pulling the latest
entry from that channel. This default content is a convenient way to test
our code against content without having to create any.
We now have a simple yet informative page that includes some contact
information, a link to our blog, and some recent blog entries.
Using the {exp:channel:entries} tag pair, we were able to pull existing con-
tent into our page and display it using tag variables. Now that we have
the basics, we’re able to attack some more advanced features of cre-
ating templates in ExpressionEngine. We’ll have this opportunity when
we’re building an entire site in the next section.
Report erratum
this copy is (P1.0 printing, March 2010)Download at WoweBook.com

WHAT WE LEARNED 46
Figure 2.9: Our complete contact page
2.6 What We Learned
In this chapter, we learned how to create a new template group and
template and the basics of managing templates in ExpressionEngine.
By creating our contact information web page, we learned how to render
a simple template in the browser and display dynamic content using
single tags, tag pairs, and tag variables.
While the web page we created is simple, the basic knowledge we’ve
acquired has prepared us for the task of building an entire site in the
next section of the book.
Report erratum
this copy is (P1.0 printing, March 2010)Download at WoweBook.com

Part II
Building Our First
ExpressionEngine Site
Download at WoweBook.com

Chapter 3
What We’re BuildingThe only way to really learn anything is to do it. Over the next few
chapters we’ll jump in and build our first ExpressionEngine site.
We’ve been contracted by the Engine City Times, a small paper in the
medium-sized city in the Midwest, Engine City, to build an online ver-
sion of their newspaper. Engine City is a fine town and boasts a vibrant
and active citizenry, who demand only the best from their local paper.
It’s up to us build a simple and usable website so the population can
get their news online.
The site we’ll create is a small newspaper website that will cover news,
sports, politics, and obituaries and that will feature a political cartoon
from a national cartoonist. We’d like to offer some newer web technolo-
gies, too, so the website will have an RSS feed with the latest news. As
a way to make it easier to find older news, the site will also feature a
simple keyword search tool.
We’ll create a basic site with some content, but we’ll leave it to the folks
at the Engine City Times to fully populate the site with new stories.
So we can focus on the ExpressionEngine part of building a site, I’ve
already done some of the legwork and created a design and the XHTML/
CSS templates. The templates I’ve created are filled with sample content
that will be replaced and powered by ExpressionEngine.
Before we go any further, go ahead and download the templates from
the book website.1
1. http://pragprog.com/titles/riexen
Download at WoweBook.com
Engine City Times HOME PAGE 49
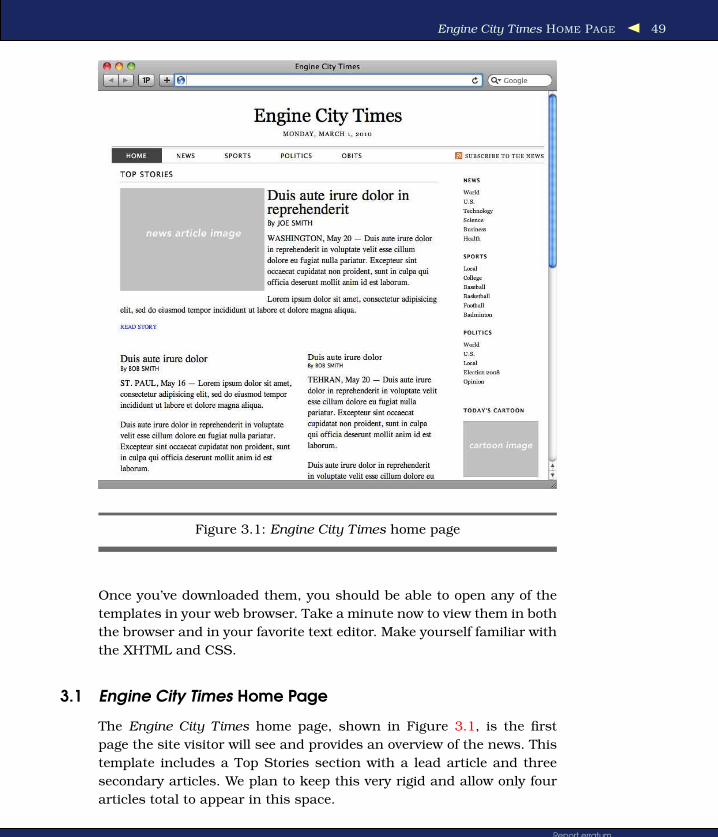
Figure 3.1: Engine City Times home page
Once you’ve downloaded them, you should be able to open any of the
templates in your web browser. Take a minute now to view them in both
the browser and in your favorite text editor. Make yourself familiar with
the XHTML and CSS.
3.1 Engine City Times Home Page
The Engine City Times home page, shown in Figure 3.1, is the first
page the site visitor will see and provides an overview of the news. This
template includes a Top Stories section with a lead article and three
secondary articles. We plan to keep this very rigid and allow only four
articles total to appear in this space.
Report erratum
this copy is (P1.0 printing, March 2010)Download at WoweBook.com

Engine City Times ARTICLE PAGE 50
Figure 3.2: Engine City Times article page
Below the top stories is a Letters to the Editor section, where comments,
letters, and emails from readers are shared. This section is limited to
the most three recent letters.
The other elements on the page are global—they appear on every page
on the website. This includes the masthead, the main navigation, and
the topics navigation on the far right.
Report erratum
this copy is (P1.0 printing, March 2010)Download at WoweBook.com
Engine City Times ARTICLE PAGE 51
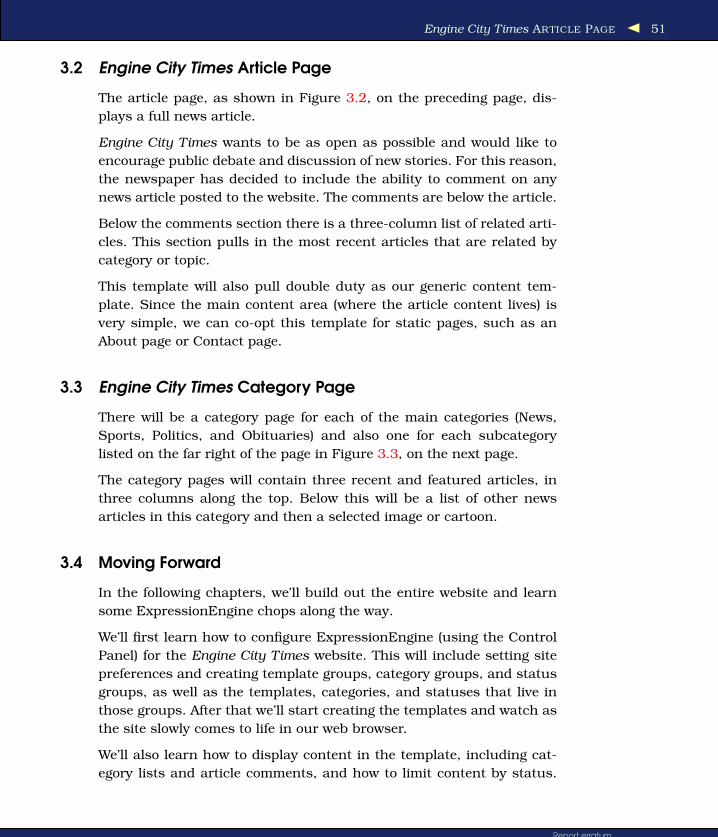
3.2 Engine City Times Article Page
The article page, as shown in Figure 3.2, on the preceding page, dis-
plays a full news article.
Engine City Times wants to be as open as possible and would like to
encourage public debate and discussion of new stories. For this reason,
the newspaper has decided to include the ability to comment on any
news article posted to the website. The comments are below the article.
Below the comments section there is a three-column list of related arti-
cles. This section pulls in the most recent articles that are related by
category or topic.
This template will also pull double duty as our generic content tem-
plate. Since the main content area (where the article content lives) is
very simple, we can co-opt this template for static pages, such as an
About page or Contact page.
3.3 Engine City Times Category Page
There will be a category page for each of the main categories (News,
Sports, Politics, and Obituaries) and also one for each subcategory
listed on the far right of the page in Figure 3.3, on the next page.
The category pages will contain three recent and featured articles, in
three columns along the top. Below this will be a list of other news
articles in this category and then a selected image or cartoon.
3.4 Moving Forward
In the following chapters, we’ll build out the entire website and learn
some ExpressionEngine chops along the way.
We’ll first learn how to configure ExpressionEngine (using the Control
Panel) for the Engine City Times website. This will include setting site
preferences and creating template groups, category groups, and status
groups, as well as the templates, categories, and statuses that live in
those groups. After that we’ll start creating the templates and watch as
the site slowly comes to life in our web browser.
We’ll also learn how to display content in the template, including cat-
egory lists and article comments, and how to limit content by status.
Report erratum
this copy is (P1.0 printing, March 2010)Download at WoweBook.com

MOVING FORWARD 52
Figure 3.3: Engine City Times category page
Additionally, we’ll add a couple of static pages and learn more about
the Pages module in ExpressionEngine.
Finally, we’ll tidy up our templates and make the site ready for some
more advanced topics that we will cover in Part III of the book.
Report erratum
this copy is (P1.0 printing, March 2010)Download at WoweBook.com

Chapter 4
Creating and Configuring the SiteWith the numerous client meetings and conference calls out of the way,
let’s get started building the site for the Engine City Times.
Over the course of this chapter, we’ll do the following:
• Set the site preferences
• Identify and create the different channels of the website
• Create custom channel fields for each channel
• Set up custom statuses to control the article creation workflow
and give the newspaper editors the power to control which articles
are published and which are not
• Add a category group and parent and child categories
• Create member groups and restrict access to certain aspects of
the Control Panel
Let’s get started.
4.1 Setting the Preferences
First, we’ll learn how to edit the system preferences in ExpressionEn-
gine. Although we’ll alter only one of the many preferences, this is an
important point of control in ExpressionEngine, because it allows us to
affect every part of the front and back ends of our site.
Log back into the Control Panel, and navigate to the System Adminis-
tration area by using the Admin button at the top, and then click Gen-
eral Configuration, which allows us to edit the settings for the entire
site. What we’re after is the setting called “Name of your site.”
Download at WoweBook.com

CLEANING UP THE DEFAULT SITE 54
The name of our site is Engine City Times, so we’ll want to replace the
text in the field. When we start building our templates, we’ll be able to
call this preference as a variable. Instead of hard-coding the title of the
site in the template, we’ll just call the {site_name} variable, and it will
output whatever we just put in the site name field.
Click Submit at the bottom to save the change to the site name.
4.2 Cleaning Up the Default Site
Let’s clear our plate and give ourselves a fresh start. When we installed
ExpressionEngine, we chose to also install the Agile Records default
site. That was useful for poking around the software and learning how
it works. Now we want to remove all the content and categories and
then edit the channel that the installer created.
Removing the Default Templates
Head over to the Template Management section by clicking the Design
button; select Templates and then Template Manager. Remove all the
templates from the “news” group, except the index template (which
ExpressionEngine won’t let you delete anyway). We delete templates by
clicking Delete in the far-right column of each template. ExpressionEn-
gine will warn us that deleted templates cannot be undone. Click Delete
to confirm.
Open the index template, clear the contents of it, and then save it; we
end up with a blank template. As a last step, we’ll rename the “news”
template group to “site.” Do this by selecting the template group and
then clicking the Edit Group button. Change “news” to “site ” and then
click Update.
While we’re in a destructive mood, let’s completely delete both of the
remaining template groups. Select a group from the far-left list, and
then click the red Delete Group button at the top of the list of templates.
Deleting Content and Categories
Some other leftovers from installing the Agile Records site are a few
entries and categories. When creating any new website, none of these
will be of any use to us, so let’s purge them all from the system.
Navigate to the Edit Channel Entries page by using the Content button
and then clicking Edit. We see several content items listed here. To
Report erratum
this copy is (P1.0 printing, March 2010)Download at WoweBook.com
REPRESENTING THE CONTENT 55
delete these, check the box to the far right of each item, and then choose
Delete Selected from the selection list right below it. Click Submit and
then Delete on the warning screen, and it’s gone!
To access the categories, click the Admin button; then choose Channel
Administration and then Categories. We see two category groups that
contain two categories each. Click Delete Group next to each to delete
the category group and all the categories inside.
Finally, let’s delete the channels that ExpressionEngine created during
the installation. Click Administration in the breadcrumb, which is the
row of text links under the main button navigation that shows the cur-
rent location, and a list of options should appear. From that list choose
Channels under the Channel Administration section. To the far right,
click Delete to remove the channels Information Pages and News.
Ah, now it’s all nice and clean. We have a fresh start with Expression-
Engine, with none of the cruft created during installation. With that
done, let’s move on to planning how we’ll handle the website content in
the Control Panel.
4.3 Representing the Content
In this section, we’ll learn how to create and customize site channels
using the Channel Management screen in the Administration section.
Our main focus will be creating custom channel fields, which allow us
to make the publish forms fit the amount and types of content on the
Engine City Times website. After going through it together, I’ll have you
do some work on your own.
Let’s get started with the site channels.
Engine City Times has four types of content on the site:
• News articles
• Letters to the editor
• Obituaries
• Static pages (About, Contact)
These are very large and distinct sections of the website, so it should
be obvious that they all deserve their own channel within Expression-
Engine. By giving each type of content its own channel, we create a
separation between the content, which allows us to easily grant only
Report erratum
this copy is (P1.0 printing, March 2010)Download at WoweBook.com

REPRESENTING THE CONTENT 56
Figure 4.1: Creating a new site channel called News Articles
certain people access to different types of content (for example, only let
the obit team add and edit the Obituaries channel, while only allowing
news reporters access to the News Articles channel).
Another benefit of separating the content is that it becomes easier to
enter content. If a reporter wants to add a news article, they simply
add a new entry to the News Article channel. Each channel has its own
publish form, and we will tailor each form to that specific content type.
We’ll create those in a few minutes.
Creating Site Channels
But first we need to create the channels in ExpressionEngine that
will hold the content. Head back into the Control Panel, and click the
Admin button; then select Channel Administration and then Channels
(if you’ve been following along, this is where we left off). You should see
no channels listed. If you do, you probably didn’t remove the default
channel (see Section 4.2, Deleting Content and Categories, on page 54).
Report erratum
this copy is (P1.0 printing, March 2010)Download at WoweBook.com

REPRESENTING THE CONTENT 57
Click the gray Create a New Channel button at the top right. To create
this new channel, we need to give ExpressionEngine a few pieces infor-
mation, including the full channel name and the short channel name.
The full name is a plain-English name that accurately describes what
the content is. The channel name is a single-word name with no spaces
(hyphens and underscores are permitted). Keep your naming conven-
tions very simple and descriptive. Although obscure or coded names
may make sense to you now, they may not to the person who comes
after you to work on the site.
The first channel we’ll create is News Articles. We’ll use the full name
“News Articles” and the short name “news_articles,” as you see in Fig-
ure 4.1, on the previous page. We don’t want to duplicate any existing
channel preferences (there are none), and we want Edit Group Pref-
erences set to No. We will edit the full set of preferences after we’ve
created the channel.
We also have the option of creating new a template for this channel.
This will save us some time, so we’ll take ExpressionEngine up on the
offer.
Select “Duplicate an existing template group,” and the group “site”
should be selected by default since it’s the only one available. This
group has only the index template that we cleared earlier. Every tem-
plate group has to have an index template, so this will make a great
starting point.
Below that option there is an empty text field. Here we want to input the
name of the template group we want ExpressionEngine to create. For
the sake of consistency, I like to name my channels and correspond-
ing template groups the same thing. So, input “news_articles” into the
empty text field.
Review the form to make sure everything is correct, and then click Sub-
mit to create the News Articles channel.
Setting Channel Preferences
Now that we have our News Articles channel created, it’s time to edit
the channel preferences and do some fine-tuning. Click the Edit Pref-
erences link.
Each channel has eight sets of preferences. Finely tuned control over
channels in ExpressionEngine is fairly elaborate. We won’t set all of the
Report erratum
this copy is (P1.0 printing, March 2010)Download at WoweBook.com
REPRESENTING THE CONTENT 58
preferences right now, but instead we’ll come back later to adjust some,
as needed. We do, however, want to set up some basic preferences for
the News Articles channel by doing the following:
• Enabling versioning
• Disabling some publish page features
Enabling Versioning
Choose Versioning Preferences from the list of preferences by clicking it.
The preferences should slide down and appear as shown in Figure 4.2,
on the following page. We want to enable versioning for this channel, so
toggle the radio button to Yes.
When you enable versioning, ExpressionEngine tracks, by default, up
to ten changes at once for every piece of content you create. You can
track as many versions as you’d like, but in this situation, ten versions
is enough. We think this is a great service to our client and the writers
at Engine City Times, so we’ll enable it. If, for some reason, a writer acci-
dentally deletes a portion of their article copy, they can simply go back
to the previous revision in ExpressionEngine, and it will be restored.
Revisions to even hundreds of articles do not take up copious amount
of space in the database, so it’s a worthwhile feature to turn on.
Customizing the Publish Page
Now we want to customize the publish page by disabling a few of the
features. Click Publish Page Customization, and set the following items
to No:
• Display URL Title Field: In the publish form, this allows you to
edit what the URL for the article will be. This is helpful in some
situations—for search engine optimization, as an example—but
in the case of the newspaper, we’ll just use the default URL that
ExpressionEngine creates from the article title.
• Display Ping Buttons: These buttons will let you manage what
online services get notified that you just updated your site. We’re
not interested in using this feature for the Engine City Times
website.
Once you have those preferences set, click Update and Finished.
Up to this point we’ve created our channels and set up the channel
preferences. Let’s move forward and create the fields we need to enter
our content.
Report erratum
this copy is (P1.0 printing, March 2010)Download at WoweBook.com

REPRESENTING THE CONTENT 59
Figure 4.2: Enabling entry versioning in the News Articles
channel
Creating Custom Channel Fields
We are now entering into a very powerful part of ExpressionEngine—the
ability to create custom publish forms for any channel on our site. Not
only are we creating a front-end form that appears in the user interface,
but we’re also customizing the type and amount of data we can store in
the database.
After saving the preferences in the previous section, we ended up at the
Channel Management screen. Click Administration in the breadcrumb
trail at the top, and then choose the Custom Fields option under Chan-
nel Administration.
There are two field groups that we neglected to delete during our clean-
up. Quickly delete both field groups by clicking the Delete Field Group
text.
We want to create a new field group and customize it for our News Arti-
cles channel on the website. But before we do that, we need to decide
what content we want to capture (and then later display on the website).
Report erratum
this copy is (P1.0 printing, March 2010)Download at WoweBook.com

REPRESENTING THE CONTENT 60
Figure 4.3: Creating a new custom field for the News Articles channel
Flip back to the previous chapter, and take a look at the designs of the
Engine City Times website. From looking at the design of the front page
of the site and the article view page, we can see that we need space for
the following:
• Article title
• Article excerpt or teaser
• Article body
ExpressionEngine requires a title for every entry, so that field is already
created for us. The other two we’ll create by clicking the gray Create a
New Channel Field Group button. You should now see a page similar to
that in Figure 4.3.
Report erratum
this copy is (P1.0 printing, March 2010)Download at WoweBook.com

REPRESENTING THE CONTENT 61
The first step is to give the field group a name. As with previous steps,
we want to choose a name that is simple, clear, and easily identifiable
with the News Article channel of the website. Let’s call it “News Articles.”
Enter that in the empty text field, and then click Submit.
To use the new field group, it has to be assigned to a channel. We will
do that after we populate our new group with some fields.
Next to the name of our new group, click Add/Edit Custom Fields, and
then click the gray Create a New Custom Field button. Since Expres-
sionEngine already provides us with the title field, we only need to cre-
ate two custom fields: Article Excerpt and Article Body.
Let’s first create the Article Excerpt field. The type of field we want is
a textarea because we’re entering a paragraph of text and a text input
field will not be enough room. Choose Textarea from the list.
We want to call it “Article Excerpt,” so we’ll input that into the first
field, Field Label. The second field has to be a single word with no
spaces, so let’s use “article_excerpt.” We can optionally give the user
some instructions for this field. These will appear just above the field
itself. Let’s add something simple: “Enter a short, descriptive teaser for
this article. This will appear on the front page of the website.”
Set this field as required and searchable. By requiring the field, it will
have to be filled in order to publish the article. Opening this field up
to search will allow visitors to the newspaper site to search on its text
using the search functionality we’ll build later.
We want this field to be shown by default, and finally we will set it to be
first in the display order.
Let’s shorten up the textarea rows to 3 as a visual reminder to the user
that this is an excerpt and should be short.
The Default Text Formatting setting for this field should remain as
XHTML. This means that ExpressionEngine will create XHTML for the
entry, so the writer doesn’t have to create p tags around paragraphs.
We also want to disallow overriding the formatting on the publish form
so that the writers are unable to alter the formatting type, which could
affect how the content displays on the website. Finally, we can leave
the text direction as is.
Click Submit to create the new field.
Report erratum
this copy is (P1.0 printing, March 2010)Download at WoweBook.com

REPRESENTING THE CONTENT 62
Figure 4.4: Assigning the field group to the News Articles
channel
Go ahead and create the second custom field: Article Body. We want
to name it “article_body,” give it short instructions, give it a Field Type
value of Textarea, and then give it all of the other settings we used in
the previous field. Set Field Display Order to 2 so this field displays
after the Article Excerpt field we created a moment ago.
Assigning the Field Group
One last detail before we finish up with this section of the site: remem-
ber earlier when I mentioned that we would not be able to use this
custom field group until we assign it a channel? Well, let’s do that now.
Navigate to the Channel Management screen (click Administration in
the breadcrumb trail, and then choose Channels from the list under
Channel Administration). We can see the News Articles channel (Fig-
ure 4.4). To the right, click the Edit Group Assignments link. Here we
assign our newly created field group to the News Articles channel.
Choose News Articles from the drop-down menu, and click Update. Now
we’re all set!
Up to this point you should have created a News Articles site channel,
adjusted the site preferences, and created the custom fields needed to
add the news article content to ExpressionEngine.
Report erratum
this copy is (P1.0 printing, March 2010)Download at WoweBook.com

REPRESENTING THE CONTENT 63
On Your Own
We just walked through how to create site channels and custom chan-
nel fields for the News Articles channel. We still have two more chan-
nels in this website: Letters to Editor and Obituaries. Rather than walk
through creating those, this is a good time for me to hand it off to you
to practice what you’ve learned so far.
Here’s some information on the remaining two channels that you’ll find
helpful.
Letters to Editor
You might consider using the following names for the site channel and
template group:
• Short name: letters_to_editor
• Template group name: letters_to_editor
To save yourself some time in setting up the preferences, try using
the “Duplicate existing channel’s preferences” option when creating the
channel. Here’s what it will look like:
What fields do you think we need to create? Take a look at the designs
in the previous chapter. The Letters to Editor channel appears on the
bottom of the front page.
Here are my suggestions (full name/short name/formatting):
• Author Name/author_name/no formatting
• Letter Copy/letter_copy/XHTML formatting
Obituaries
For the channel name, you might consider the following:
• Short name: obits
• Template group name: obits
Again, use an existing channel’s preferences to save yourself some time.
Obituaries appear in their own channel on the site. They contain two
pieces of information: a title (the name of the deceased) and the text
Report erratum
this copy is (P1.0 printing, March 2010)Download at WoweBook.com

CONTROLLING CONTENT WITH CUSTOM STATUSES 64
Figure 4.5: Creating custom statuses for the News Articles channel
of the obituary. Remember that ExpressionEngine automatically gen-
erates a title field for every channel because it is required. Therefore,
you have to create only one field for this channel. I recommend the
following:
• Obit Copy/obit_copy/XHTML formatting
After you create the channel fields, don’t forget to assign them to the
proper channel!
Now that we have set up ExpressionEngine to handle our website con-
tent using custom fields, let’s move forward and configure Expression-
Engine to handle different pieces of content in different ways using
custom statuses.
4.4 Controlling Content with Custom Statuses
Custom statuses are a powerful way to control how and where content
appears on a website. In this section, we’ll explore ExpressionEngine’s
support for custom statuses, create our own, and discuss how they will
help define the content publishing workflow.
The News Articles channel of Engine City Times will have many different
articles, but we need a way to mark certain articles as featured. If you
look back at the design, you’ll notice the front page has one featured
top story, followed by three other top stories that are less prominent.
We could let ExpressionEngine set the latest story as the featured top
Report erratum
this copy is (P1.0 printing, March 2010)Download at WoweBook.com

CONTROLLING CONTENT WITH CUSTOM STATUSES 65
story, but that would remove a lot of editorial control from the news-
paper editors. We need to tell ExpressionEngine which news articles to
feature, and then later we’ll call those featured articles in our template.
The way we give the Engine City Times editors control over featured top
stories is through statuses. By default every piece of content we create
in ExpressionEngine has a status of either “open” or “closed.” Open
means that the article is appearing on the front end of the website.
Closed means it is not. You can alter this in your templates, but that’s
how it works by default.
ExpressionEngine also gives us the ability to specify our own statuses,
called custom entry statuses. We can create as many statuses as we’d
like, and then in the templates we are able to control which content is
displayed based on the status.
Creating Statuses
For the Engine City Times website, we need to create two statuses
in addition to the Open and Closed statuses that ExpressionEngine
requires.
The first status we will call Top Story, and this will allow an article with
this status to appear in the Top Stories section of the front page of the
website. The second status we need is Featured Top Story, which will
determine which news article displays at the very top of the Top Stories
section (the largest article). Let’s create those statuses now.
From the Admin button, select Channel Administration, and then click
Custom Status Groups. You should see a group called Statuses (Fig-
ure 4.5, on the previous page). We’ll use this status group for our other
channels in the site, because they don’t need the special statuses that
we’re giving the news articles.
Click the gray Create New Status Group button at the top right, and
then name the status group “News Articles.” Click Submit, and we’re
brought back to the Status Groups page.
You’ll notice that our new group already shows two statuses, but we
didn’t add any! This is because ExpressionEngine requires that the sta-
tuses “open” and “closed” be in every status group and automatically
adds them for us.
Click the Add/Edit Statuses link. Use the gray Create a New Status
button to create a status called “Top Story.” We’ll give it a Status Order
Report erratum
this copy is (P1.0 printing, March 2010)Download at WoweBook.com

CONTROLLING CONTENT WITH CUSTOM STATUSES 66
Figure 4.6: Changing the order of the statuses
value of 1 and leave the Highlight Color field blank. Click Submit to add
the status. Let’s do the same for the status Featured Top Story.
Even though we told ExpressionEngine to display Top Story first and
Featured Top Story second, the statuses are now in this order: open,
Top Story, closed, Featured Top Story.
The statuses “open” and “closed” already had the order 1 and 2, so
when we created our custom statuses with those same order numbers,
ExpressionEngine ordered statuses with the same order number alpha-
betically. This isn’t a problem because we’ll just renumber the statuses
so they appear in our desired order of Top Story, Featured Top Story,
open, closed. Click Update to save the changes. To do this, click into
each status, and adjust the order number (Figure 4.6).
You should now have a News Articles status group that contains four
statuses: Featured Top Story, Top Story, open, and closed.
Assigning Status Groups
Before we forget, let’s assign this new status group to our News Articles
channel. On the Edit Group Assignments screen for the News Articles
channel, we choose the News Articles status group.
Report erratum
this copy is (P1.0 printing, March 2010)Download at WoweBook.com

WORKING WITH CATEGORIES 67
Now when the editors at Engine City Times want to decide which stories
are top stories and which one is featured, they simply adjust the status
of any article in the system.
Using custom statuses, we created the first part of a very powerful
workflow system for publishing content to the newspaper website. With
that out of the way, we can now focus on categories and then finally
wrap up with creating the members and member groups to round out
the site configuration in ExpressionEngine.
4.5 Working with Categories
In ExpressionEngine you can assign every piece of content a category.
You use categories to organize content in some sort of taxonomy or as
a way to control where and how content is displayed on a website. In
this section, we’ll learn how to create categories and category groups.
For the Engine City Times website, we’re going to use categories in their
simplest form—as a way to organize content. The only part in the site
that will use categories is the News Articles channel. Take a look at
the site design again, and you’ll see a list of categories on the far right.
News, Sports, and Politics are the top-level categories, and those under-
neath are subcategories.
Just like statuses, categories are organized into groups. This makes it
easy to assign an entire set of categories to one channel of the website.
We’re going to have three parent categories, and each parent will have
multiple child categories. We’ll set all of this up through the Expres-
sionEngine Control Panel.
Creating Categories
The first step is to create a new group for our News Article categories.
Click the Admin button, and then select Categories under Channel
Administration. There aren’t any categories or category groups, so click
the gray Create a New Category Group button to create a new group.
Let’s name the group “News Articles.” You’ll notice that there is some
information there about who can edit and delete categories. We can
safely ignore this for now, because we’ll be dealing with members and
permission in the next section of this chapter.
Report erratum
this copy is (P1.0 printing, March 2010)Download at WoweBook.com

WORKING WITH CATEGORIES 68
Figure 4.7: Creating categories for the News Articles channel
Click Submit to create the new group. We’re now ready to begin adding
the categories to the group. We’ll do a few together, and then you’ll do
the rest on your own.
Click the Add/Edit Categories and then the gray Create a New Category
button. You will see an entry form like that shown in Figure 4.7. We’re
going to first create the parent categories and then their children.
Let’s start with the News category. The Category Name value will be
“News.” We’ll let ExpressionEngine create the Category URL Title value.
We will leave the Category Description value and leave the Category
Image URL value blank. Since this is a parent category, the Category
Parent drop-down should be None. Click Submit to add the category.
Creating a child category is the same as done earlier, but we’ll assign it
to the parent category News. Here are the child categories of News:
• World
• U.S.
• Technology
Report erratum
this copy is (P1.0 printing, March 2010)Download at WoweBook.com

WORKING WITH CATEGORIES 69
Figure 4.8: Parent and child categories listed alphabetically
• Science
• Business
• Health
After adding these categories and assigning them the parent News, they
should appear under News on the Category Management screen.
If you have a keen eye, you’ll notice that the categories are not in the
same order in which we entered them (see Figure 4.8). By default,
ExpressionEngine orders the categories alphabetically unless we tell
it otherwise.
The editors at Engine City Times have a specific order to their news-
paper sections in the print version of their paper and would like to
replicate that on the website. To do a custom sort order, use the up and
down arrows to organize the categories just like they were listed earlier.
When you have completed reordering the categories, click Update to
save them. Your list should now be in the order that it appears in the
site design.
Report erratum
this copy is (P1.0 printing, March 2010)Download at WoweBook.com

CREATING AUTHORS AND MEMBERS 70
On Your Own
We still have two more parent categories and their children to enter
into ExpressionEngine. We did the first set of categories together, so
go ahead and do the rest on your own. Start with the parent category,
and then create and assign its children. You can find a complete list
of the categories in the static templates you downloaded from the book
website.
When you’re finished, your list of categories for the News Articles group
should all be in the same order as in the design in the previous chapter.
One thing to note while you’re creating the other categories is that
ExpressionEngine requires that the category URL be unique across all
categories. This is so if you go to that URL, you get to the correct cat-
egory (for example, World News instead of World Politics). If you get a
warning that the category URL already exists, simply append _politics
(as an example) to the category name (resulting in world_politics), and
you should be all set.
Now that we have the categories entered and organized, we need to
assign this category group to the News Articles channel. Navigate to
the Channel Management page, and Choose Edit Group Assignments
for News Articles. Select the category group News Articles, and then
click Update.
With the categories created, we are almost finished with setting up the
site inside the Control Panel. The final step is to create authors and
members so the writers and editors can access the site.
4.6 Creating Authors and Members
In this section, we will learn the basics of member and group manage-
ment using ExpressionEngine’s Member module. The Member module
provides us with everything from member account creation to manage-
ment to restricting a member’s access to site content and Control Panel
functionality through permissions.
The newspaper editors wanted all of their writers and editors to have
access to ExpressionEngine. However, not everyone should have the
same type of access. For example, one writer should not be able to
edit the work of another, and editors should have access to everyone’s
writing. We could get fairly granular with the permissions, but for this
site we want to keep it manageable and simple to build.
Report erratum
this copy is (P1.0 printing, March 2010)Download at WoweBook.com

CREATING AUTHORS AND MEMBERS 71
Figure 4.9: Creating a member group for the news writers
In ExpressionEngine we are able to restrict members to only a single
channel and then restrict what they can do in that channel (for exam-
ple, add new articles but not edit others). We will set up the workflow
so that all articles submitted by the writers will be set to the status of
“closed,” and then an editor at the newspaper will come behind them
and either have the writer make changes or approve the articles to be
published to the website by setting the status to “open.”
Creating Member Groups
By creating member groups, we can easily assign permissions to many
people at once by assigning a specific set of permissions to the group.
To create a new member group, click the Members button at the top of
the Control Panel, and choose Member Groups from the list.
We see that ExpressionEngine has already created some of the groups
for us, but unfortunately we don’t currently have any use for them.
Since most of them are default groups that cannot be deleted, we’ll just
ignore them all for now.
Report erratum
this copy is (P1.0 printing, March 2010)Download at WoweBook.com

CREATING AUTHORS AND MEMBERS 72
Click the gray Create a New Member Group button.
Don’t get scared off by the long list of member preferences on the page.
ExpressionEngine offers a powerful set of tools to fine-tune member
permissions, but we’re not going to set them all, and we’ll walk through
the process together.
The first step is to name the group. We want to first create a group for
the team of writers who work in the News section of the newspaper.
We’ll call this group “News Writers” and give it a brief description: “This
is the group for reporters” (see Figure 4.9, on the previous page).
For security reasons, ExpressionEngine gives every new group the most
restrictive permissions. This keeps someone from creating a new group
and forgetting to revoke permissions. Everything is locked down by
default, and you have to explicitly grant access. Because of this, we
won’t go through every preference listed. Those that don’t apply to the
News Writers group are turned off, so there are no worries about them
having access they shouldn’t.
We want to change the following preferences for this group:
• Control Panel Access: Switch this to Yes. We want the writers to
be able to log in and write their news articles. Additionally, grant
access to the Content section, Publish page, and Edit page (listed
as “CONTENT section”, “CONTENT: Publish”, and “CONTENT:
Edit”). Everything else should be set to No. We want the writers
to be able to access the content section, create new articles, and
edit their own articles.
• Channel Assignment: Grant the group access to post and edit
entries in the News Articles channel.
After we have those permissions set, click Submit, which returns us
to the Member Groups page. Our new group appears in the list in red
lettering. This denotes that the group has Control Panel access.
Restricting Article Status
One of the requirements from the newspaper is that the writers—no
matter which section they write for—are only able to submit articles
to ExpressionEngine that have a status of “closed.” Only editors are
allowed to set articles to “open” and have them published to the site.
The first step in setting up this workflow for the News Writers group is
to go to the Channel Management screen and click Edit Preferences for
Report erratum
this copy is (P1.0 printing, March 2010)Download at WoweBook.com

CREATING AUTHORS AND MEMBERS 73
the News Articles channel. Click Administrative Preferences, set Default
Status to “closed,” and click Update and Finished to save the changes.
Now every new article that is created by the writers will have a status
of “closed.” We have one more step remaining to really lock this down.
Right now the writers still have ability to change the status of an article.
We want to revoke that privilege.
Navigate to the Administration screen, and choose Custom Status
Groups. Click Add/Edit Statuses next to the News Articles status
group. Click the Edit text next to the “open” status. At the bottom you’ll
see an extra preference that wasn’t there before. We had to first assign
this group permissions to access the Publish and Edit areas of the Con-
trol Panel before this ability to restrict status to News Writers group
would appear.
Change the Can Access Status option for News Writers to No, and click
Update. We’ll need to do the same thing for the Top Story and Featured
Top Story statuses. Now when a news writer creates a new article, it
will automatically have the status of “closed,” and the writer will not be
able to change that status.
Creating the Editors Group
Before I give you some work to do on your own, let’s first create the
Editors group and assign it the appropriate permissions. In the pre-
vious section, we limited the writers in the News Articles group to a
status of “closed” for every article they created in ExpressionEngine.
The members of the Editors group (the newspaper editors) are the peo-
ple in charge of setting a article from “closed” to “open” or Top Story or
Featured Top Story. The editors are the final clearance point on what
gets published to the Engine City Times website and what doesn’t—just
like in the print newspaper.
Like we did with the previous group, navigate to the Member Groups
page, and click the gray Create a New Member Group button to create
a new member group.
We’re going to name this group “Editors” and give it a short description
that reads “Editors at Engine City Times.” Remember that Expression-
Engine creates a very restrictive set of permissions by default, so we’ll
need to loosen them up slightly to give our editors their editorial power.
We want to change the following preferences for this group:
Report erratum
this copy is (P1.0 printing, March 2010)Download at WoweBook.com

WHAT WE LEARNED 74
• Control Panel Access: Switch this to Yes. We want the editors to be
able to log in and edit or approve the articles their team of writers
submitted. Additionally, grant access to the Content section, Pub-
lish page, and Edit page. Everything else should be set to No. We
want the editors to be able to access the content section, create
new articles or edit their own articles, as well as articles from the
team of writers.
• Channel Posting Privileges: This is where the editors get some of
their power. The writers are not allowed to view or edit entries
by other writers, but we want the editors to have that ability. Set
everything to Yes except the last two items, which are in red.
• Channel Assignment: We want to grant the editors permission to
post and edit entries in all three channels.
Click Submit to save the new Editors group.
Up to this point you should have created two member groups: News
Writers and Editors.
On Your Own
Together we created the News Writers and Editors member groups. We
still need to create groups for the teams that work on obituaries and let-
ters to the editor. On your own, using the previous steps as an example,
create these two groups in ExpressionEngine. They should both have
the same permissions as the News Writers group.
When you’ve completed creating the groups, add a member to each
group. Using a fake name and personal information will be fine for now.
After you create the group members, log in with the different members,
and see how the permissions affect what ExpressionEngine displays to
the user in the Control Panel.
4.7 What We Learned
So far in our Engine City Times project, we set up ExpressionEngine
to handle the website content using template groups, custom chan-
nel fields, and categories. We also created two custom statuses and set
some strict user permissions, creating a workflow that allows the news-
paper editors to tightly control what does and does not get published to
the website.
Report erratum
this copy is (P1.0 printing, March 2010)Download at WoweBook.com

WHAT WE LEARNED 75
Now that we have the Control Panel set up, we can begin creating some
of the front-end templates, which we’ll build in the next chapter.
Report erratum
this copy is (P1.0 printing, March 2010)Download at WoweBook.com

Chapter 5
Making the PagesIn the previous chapter, we set up ExpressionEngine to handle all of
the content of our Engine City Times website. In this chapter, we’ll reap
the benefits of the work we’ve done and begin to see the Engine City
Times website come together. We’ll focus on creating the templates and
on using ExpressionEngine to display content, list categories, and add
commenting functionality to articles.
We’ve made a lot of progress so far, but there is still work to do to bring
the website to life.
5.1 Building Out the Home Page
Let’s first change things up a bit and start off with a little DIY work
for you. Before we can jump in and create our templates, it would
make sense to have some content to display. We could certainly cre-
ate the templates without content, but it would be a challenge knowing
whether the code we’re writing is actually working correctly.
Creating Placeholder Content
For the front page, we need to create four news articles. We need one
article to be a Featured Top Story and the rest to be Top Story articles.
Click the Content button, click Publish, and then choose News Articles.
This will bring you to the news articles publish form, as shown in Fig-
ure 5.1, on the following page. Give the article a title, excerpt, and body.
You can see that I’m using a fake title and some fake Latin text for the
news copy. Since this is just to help us out while coding the templates,
it’s not important that this content makes sense or is even real. The
Download at WoweBook.com

BUILDING OUT THE HOME PAGE 77
Figure 5.1: Adding sample content to the News Article section
people at Engine City Times will do all of the data entry, so we just have
to put enough in to help us build the site.
After you entered the content, click over to the Categories tab, and
choose World, which is nested under News. We want to assign all the
sample content to the same category so that later in the chapter we can
easily build the category template. (Since all of the category pages use
the same template, once we build one, we’ve built them all.)
Click over to the Options tab. Here we need to set the status of the
article. You’ll remember from the previous chapter that we created two
custom statuses for new articles: Top Story and Featured Top Story.
Let’s make this article the one that appears at the very top of the site
(there can be only one) by assigning it the Featured Top Story status.
Click Submit to add the article and publish it on the site.
Report erratum
this copy is (P1.0 printing, March 2010)Download at WoweBook.com

BUILDING OUT THE HOME PAGE 78
On your own, create three Top Story articles using the news articles
publish form. Don’t forget to use the proper status!
When you’ve completed creating the placeholder content, you should
have four articles listed when viewing the Edit screen. Three articles
should have a status of Top Story and one Featured Top Story.
The last set of placeholder content we have to create is for the Letters to
the Editor section. This section appears at the bottom of the home page
and contains three very short letter from readers, displayed in their
entirety. Navigate to the letters publish form using the Content button.
Give each letter a title, author name, and letter copy. Letters don’t have
any categories or custom statuses, so we can fill out the form and just
click Submit to save the letter and publish it to the website.
With those three letters created, we should now have seven pieces of
content—four news articles and three letters to the editor—listed on
the Edit screen.
Starting Static
Open the directory of Engine City Times templates you downloaded in
Chapter 3, What We’re Building, on page 48. Find the img directory,
and upload it to the root of your website on the server. This directory
contains a few images we need for the site.
With that uploaded, open the template template-home.html in your favor-
ite text editor. Using the Design button, go to the Template Manager.
Copy the static template—in its entirety—and paste it into the index
template under the site group in ExpressionEngine. Click Update to
save the changes to the template.
Open the site in your browser (or click the gray View Rendered Template
button). You’ll notice that the template changes are there, but there is
no styling. Why? Because we haven’t added the CSS that makes page
look nice. Let’s do that now.
There are two ways to manage CSS files for ExpressionEngine-powered
websites. There is the traditional way of having the CSS file live some-
where on the server and just referenced in the head element of the
HTML document. With ExpressionEngine you can also put your CSS in
a template, which keeps it together with the rest of your template code.
We didn’t create a CSS template in the previous chapter, so let’s do that
now. Navigate to the site template group in the Template Manager, and
Report erratum
this copy is (P1.0 printing, March 2010)Download at WoweBook.com

BUILDING OUT THE HOME PAGE 79
create a new empty template named site_css. Choose a Template Type
value of CSS. Click Create to add the new template.
In the downloaded directory of site template files, open core.css, which
is located in the css directory. Copy the entire contents of the file into
the newly created site_css template, and save it.
There’s one more step left before the styles will be applied to the index
template. We need to link the stylesheet template in the index template.
Open the index template, and find this line near the top:
Download EngineCityTimes/template-home.html
<link rel="stylesheet" href="css/screen/main.css"
type="text/css" media="screen" />
Replace the value of the href parameter with this ExpressionEngine-
specific code:
{stylesheet=site/site_css}
The new CSS link should look like this:
Download MakingthePages/template-home-ee.html
<link rel="stylesheet" href="{stylesheet=site/site_css}"
type="text/css" media="screen" />
Reload the home page of the site in your web browser, and you should
now see the page fully rendered and looking just like Figure 5.2, on the
following page.
Lighting Up the Page
Now that we have the entire template in ExpressionEngine (static con-
tent and all), we can begin lighting up—turning the content from static
to dynamic—the template using content from the ExpressionEngine
database. We’ll do this one small section at a time, starting with the
Featured Top Story.
Bringing the Featured Top Story to Life
The Featured Top Story consists of four parts: title, author, content,
and link to the full article. We’ll pull all of this information out of
ExpressionEngine using one tag pair:
{exp:channel:entries} {/exp:channel:entries}
Report erratum
this copy is (P1.0 printing, March 2010)Download at WoweBook.com

BUILDING OUT THE HOME PAGE 80
Figure 5.2: Viewing the site home page with CSS included
Report erratum
this copy is (P1.0 printing, March 2010)Download at WoweBook.com

BUILDING OUT THE HOME PAGE 81
Find this chunk of code in the index template that controls the display
of the Featured Top Story:
Download EngineCityTimes/template-home.html
<div id="lead-article">
<img src="img/news-article-image.png"
alt="Image Alt Here" />
<h4>Duis aute irure dolor in reprehenderit</h4>
<h5><span class="by">By</span> Joe Smith</h5>
<p>WASHINGTON, May 20 — Duis aute irure dolor
in reprehenderit in voluptate velit esse
cillum dolore eu fugiat nulla pariatur. Excepteur
sint occaecat cupidatat non proident,
sunt in culpa qui officia deserunt mollit
anim id est laborum.</p>
<p>Lorem ipsum dolor sit amet, consectetur adipisicing elit,
sed do eiusmod tempor incididunt ut labore
et dolore magna aliqua.</p>
<p><a href="#" class="read_story"
>Read Story</a></p>
</div><!-- END #lead-article -->
We’ll start by wrapping all of the content in the lead-article div with a
basic ExpressionEngine Channel Entries tag pair:
{exp:channel:entries channel=""}
{/exp:channel:entries}
We want to enhance it slightly using some parameters. To the tag add
the limit parameter with a value of 1 because we want only one Top
Featured Story to appear at a time. Also add the disable parameter, and
give it a value of pagination. This tells ExpressionEngine to not make
the queries necessary to create pagination since we’re not using it on
this page. It’s a simple way to optimize your template and make it load
faster.1
You’ll remember from the previous chapter that we set up Expression-
Engine to allow the newspaper editors to use statuses to determine
which news articles are tagged as Top Stories and which is the Fea-
tured Top Story. To make sure we’re pulling the proper content, we
also have to add the status parameter to the tag pair. We want the latest
entry with the status of Featured Top Story, so make that the value
of the status parameter. Finally, we need to give the channel parameter
1. See Chapter 9, Advanced Templating, on page 142 for more on template optimization.
Report erratum
this copy is (P1.0 printing, March 2010)Download at WoweBook.com

BUILDING OUT THE HOME PAGE 82
the value of news_articles, which is the ExpressionEngine section from
which we’re pulling the content.
Your tag pair should now look like this:
{exp:channel:entries channel="news_articles"
limit="1" disable="pagination"
status="Featured Top Story"}
...
{/exp:channel:entries}
With the Channel Entries tag pair all set, let’s replace the static content
with ExpressionEngine variables that will pull in the content from the
database. The tags we use are just the short names of the fields we
created in the previous chapter. For this chunk of content, we will use
{title} and {article_excerpt}. We’ll populate the author byline using the
{author} variable that ExpressionEngine makes available for every entry.
Place these variables in their proper places, replacing the static content
in the template. That part of your template should look like this:
Download MakingthePages/template-home-ee.html
<div id="lead-article">
{exp:channel:entries channel="news_articles"
limit="1" disable="pagination"
status="Featured Top Story"}
<img src="img/news-article-image.png" alt="" />
<h4>{title}</h4>
<h5><span class="by">By </span> {author}</h5>
{article_excerpt}
<p>
<a href="{title_permalink="news_articles/view"}"
class="read_story">Read Story</a></p>
{/exp:channel:entries}
</div><!-- END #lead-article -->
Besides the article image, which we’ll ignore for now and come back to
later, the only thing left to light up is the Read Story link that leads you
to the full article. There are several different types of links you could
create, but for our purposes we want the link to have the article title in
the URL.
We’ll use the {title_permalink} single variable and specify what template
group and template the link should point to. We want to use a template
that will show the entire article (more on that in Section 5.4, Building
Out the Article Template, on page 92). Let’s assume the template will
Report erratum
this copy is (P1.0 printing, March 2010)Download at WoweBook.com

BUILDING OUT THE HOME PAGE 83
be named “view.” We’ll want to create the permalink, the unique URL
where this article will live, like so:
Download MakingthePages/template-home-ee.html
<p>
<a href="{title_permalink="news_articles/view"}"
class="read_story">Read Story</a></p>
This variable will render a link that contains the article title at the end,
preceded by the news_articles template group and view template.2 We’ll
make that URL work shortly.
That’s it for the Featured Top Story. Now we need to light up the rest of
the top stories.
Let’s review where we are. Up to this point you should have pasted in
the static home page template and created a CSS template with the site
CSS. Finally, you should have coded the Featured Top Story at the top
of the home page of the Engine City Times website.
Secondary Top Stories
The secondary top stories appear in two columns below the Featured
Top Story. The left column contains two stories, and the right column
contains just one. This presents a slight challenge because we have
to be smart about how we pull this content in from ExpressionEngine
without breaking the page layout. We’ll do each side separately and add
a special parameter that will ensure we have unique content on both
sides.
The left column contains two featured news articles, so we want to wrap
it in an Channel Entries tag pair just like we did previously. The only
difference this time is we set a different value for the status parame-
ter and for the limit parameter. The status parameter value should be
Top Story so we pull in the latest stories set as top stories. Set the limit
parameter to 2 so we display only two stories on the left.
Use the same variables as we did on the Featured Top Story to light up
the content. Since ExpressionEngine will loop through all entries based
on the parameters, you need only one of the blocks of markup.
2. Your exact URL will look different, but here’s an example:
http://example.com/index.php/news_articles/view/sample_news_article/.
Report erratum
this copy is (P1.0 printing, March 2010)Download at WoweBook.com
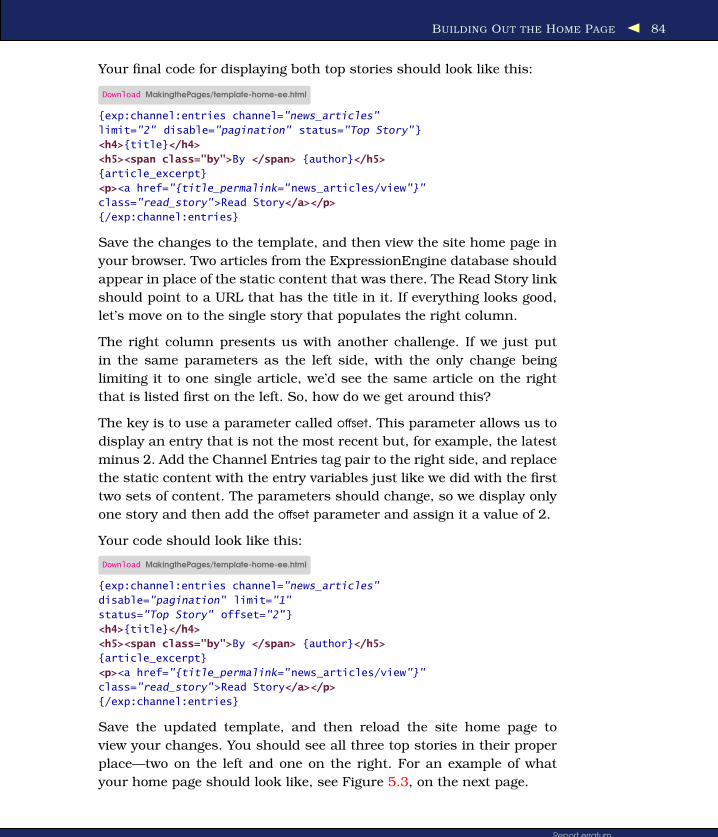
BUILDING OUT THE HOME PAGE 84
Your final code for displaying both top stories should look like this:
Download MakingthePages/template-home-ee.html
{exp:channel:entries channel="news_articles"
limit="2" disable="pagination" status="Top Story"}
<h4>{title}</h4>
<h5><span class="by">By </span> {author}</h5>
{article_excerpt}
<p><a href="{title_permalink="news_articles/view"}"
class="read_story">Read Story</a></p>
{/exp:channel:entries}
Save the changes to the template, and then view the site home page in
your browser. Two articles from the ExpressionEngine database should
appear in place of the static content that was there. The Read Story link
should point to a URL that has the title in it. If everything looks good,
let’s move on to the single story that populates the right column.
The right column presents us with another challenge. If we just put
in the same parameters as the left side, with the only change being
limiting it to one single article, we’d see the same article on the right
that is listed first on the left. So, how do we get around this?
The key is to use a parameter called offset. This parameter allows us to
display an entry that is not the most recent but, for example, the latest
minus 2. Add the Channel Entries tag pair to the right side, and replace
the static content with the entry variables just like we did with the first
two sets of content. The parameters should change, so we display only
one story and then add the offset parameter and assign it a value of 2.
Your code should look like this:
Download MakingthePages/template-home-ee.html
{exp:channel:entries channel="news_articles"
disable="pagination" limit="1"
status="Top Story" offset="2"}
<h4>{title}</h4>
<h5><span class="by">By </span> {author}</h5>
{article_excerpt}
<p><a href="{title_permalink="news_articles/view"}"
class="read_story">Read Story</a></p>
{/exp:channel:entries}
Save the updated template, and then reload the site home page to
view your changes. You should see all three top stories in their proper
place—two on the left and one on the right. For an example of what
your home page should look like, see Figure 5.3, on the next page.
Report erratum
this copy is (P1.0 printing, March 2010)Download at WoweBook.com

BUILDING OUT THE HOME PAGE 85
Figure 5.3: Viewing the Top Stories on the home page
Letters to the Editor
The last part of the home page content that we need to build out is the
Letters to the Editor section at the very bottom of the page. This section
contains three short letters from the newspaper readers. It includes a
title, an author, and the letter copy. The entire letter is published on
the front page, so there’s no link to read more.
To display the letters content, we’ll use the same Channel Entries tag
pair as before but give the channel parameter the value of letters_to_editor
so that we’re pulling content from the Letters to Editor channel in
ExpressionEngine. Since there are three letters displayed at one time,
we want to use a value of 3 for the limit parameter. This will display the
three most recently added letters. The Channel Entries tag pair should
now look like this:
{exp:channel:entries
channel="letters_to_editor" limit="3"}
...
{/exp:channel:entries}
Report erratum
this copy is (P1.0 printing, March 2010)Download at WoweBook.com

BUILDING OUT THE HOME PAGE 86
Looking at the HTML in the template, we notice that each letter is con-
tained in its own div with a unique id. These ids reference CSS, which
controls how the letters are presented on the page—in three columns,
one letter per column. This presents a small challenge when dynami-
cally pulling in content from ExpressionEngine because it wants to just
pull it all in without regard for layout. Our goal is to use one entry tag
pair to pull in all three letters. To accomplish this, we need to use an
ExpressionEngine variable called switch. This variable rotates through
different values as ExpressionEngine displays each entry on the page.
We want to place the switch variable in the id parameter of the div that
contains the letter and give it the values of the ids, separated by a pipe
(|) character.
For this example, the switch variable will look like this:
{switch="lcol|mcol|rcol"}
This tells ExpressionEngine to rotate through each of the values—in
order—for each entry that it displays. Since we’re displaying only three
entries, it’ll use each value once. If we were displaying six entries, it
would use each value twice (allowing us to create two rows of three
columns).
The final code in your template for the Letters to Editor channel should
look like this:
Download MakingthePages/template-home-ee.html
{exp:channel:entries channel="letters_to_editor"
limit="3"}
<div id="{switch="lcol|mcol|rcol"}">
<h4>{title}</h4>
<h5><span class="by">From</span> {author_name}</h5>
{letter_copy}
</div>
{/exp:channel:entries}
We only need one of the markup blocks because ExpressionEngine will
loop through and create all three for us. Save the template, and reload
the home page to see your changes. It should look similar to the screen-
shot in Figure 5.4, on the following page.
With the major content pieces now being pulled from the database
using ExpressionEngine, let’s switch to the category list on the far-
right column of the page and learn how to make a list of categories to
display.
Report erratum
this copy is (P1.0 printing, March 2010)Download at WoweBook.com

DISPLAYING THE CATEGORIES 87
Figure 5.4: Dynamically displaying the letters to the editor using
ExpressionEngine
5.2 Displaying the Categories
On the side of every page on the Engine City Times website there is a
vertical list containing the parent and child categories for all news arti-
cles. All of the categories link to a category template (which we’ll build
at the end of this chapter) and are organized by parent categories. Look
at the HTML, and you’ll see that this is just a nested unordered list. The
markup is straightforward, and the CSS does most of the heavy lifting to
make the list appear styled and not like a default nested unordered list.
ExpressionEngine offers a convenient way to display nested categories
—where the parent category is followed by its children—like those we
have for the news articles. It’s a tag pair for displaying categories, and
it looks like this:
{exp:channel:categories channel="news_articles"}
...
{/exp:channel:categories}
Report erratum
this copy is (P1.0 printing, March 2010)Download at WoweBook.com

DISPLAYING THE CATEGORIES 88
This tag pair will output a nested unordered list with an id and class
of nav_categories. Since our template is also coded using a nested un-
ordered list, displaying the categories is going to be very simple. We just
want to add two parameters to the Channel Categories tag pair and then
link up each category so it points to the category view template.
The style parameter sets whether the categories are displayed in a
nested unordered list or in a linear fashion (no markup at all). The
values you can pass this parameter are nested and linear. (If you use the
Channel Categories tag pair and do not specify a style, ExpressionEn-
gine defaults to a nested display. Technically, we could just leave this
parameter out for this example, but I find it good form to include it so
the behavior of the ExpressionEngine tag is clear.)
We also want to include the id parameter, which will assign the un-
ordered list a custom id. We need to use the id of category-nav, which
will reference styles in our CSS. By doing this, we override the default id
of nav_categories. Now our Channel Categories tag pair looks like this:
{exp:channel:categories channel="news_articles"
style="nested" id="category-nav"}
...
{/exp:channel:categories}
The only thing left is to place the proper variables between the tag so the
category names appear and they link up to category pages. The variable
we want to use is {category_name}, and we’ll wrap it in an anchor link
and use the path variable to set the URL to point to the news_articles
template group and the page; template, which we’ll create later. Your
code for displaying the newspaper categories should now look like this:
Download MakingthePages/template-home-ee.html
{exp:channel:categories channel="news_articles"
style="nested" id="category-nav"}
<a href="{path=news_articles/page}">{category_name}</a>
{/exp:channel:categories}
Before the category link will work properly, we need to tweak one set-
ting in the global preferences, which you can access under the Chan-
nel Administration section of the Administration page (click Admin and
choose Overview). The first preference listed asks, “Use Category URL
Titles in Links?” Select Yes, and then save the change by clicking
Submit.
What we did was tell ExpressionEngine to use a underscored version
of the category titles in the category page URLs instead of the default
Report erratum
this copy is (P1.0 printing, March 2010)Download at WoweBook.com
EMBEDDING REUSABLE CODE 89
category ID. This method produces readable URLs that are not only
easier to remember but much friendlier for search engine optimization
efforts.
Reload the site home page, and you should now see a perfectly styled
list of all the categories in the Engine City Times website.
5.3 Embedding Reusable Code
Before we go further and build out the rest of the site templates, let’s
first do some legwork that will make building and maintaining the tem-
plates easier. Some of the items on the front page of the site—the cate-
gories list, main navigation, document header, and so on—are also used
elsewhere. We’re going to break the template up into chunks and create
several smaller templates that we can just include in any template in
the site. The goal here is to never duplicate code in different templates.
In ExpressionEngine-speak, this method of reusing code is called tem-
plate embedding, and the global variable {embed} is used to include one
template into another. To use the variable, we tell it which template
group and template to embed. The variable is placed in the template
that will be receiving the embedded template. Here’s an example of the
variable:
{embed="your_template_group/your_template"}
In the Engine City Times site, we’re going to break out and embed the
following parts of the template:
• Document header
• Masthead and navigation
• Category list
• Footer
• Search box and today’s cartoon
We want to store all of our embedded templates in their own template
group called includes. In the Template Manager, create a new template
group, name it “includes,” and save it. Now we can get started breaking
up and embedding templates.
We’ll start with the document header, which includes the DOCTYPE
and everything between the header tags.
Report erratum
this copy is (P1.0 printing, March 2010)Download at WoweBook.com

EMBEDDING REUSABLE CODE 90
We want to take this chunk of code:
Download MakingthePages/template-home-ee.html
<!DOCTYPE html PUBLIC "-//W3C//DTD XHTML 1.0 Transitional//EN"
"http://www.w3.org/TR/xhtml1/DTD/xhtml1-transitional.dtd">
<html xmlns="http://www.w3.org/1999/xhtml"
xml:lang="en" lang="en">
<head>
<meta http-equiv="Content-Type"
content="text/html; charset=utf-8"/>
<title>Engine City Times</title>
<link rel="stylesheet" href="{stylesheet=site/site_css}"
type="text/css" media="screen" />
</head>
and remove it from the index template and then replace it with an
embed variable.
First, create a new template in the includes template group called “doc-
ument_header.” Remove the code from the index template, and place it
in the newly created template.
Of course, now we have a gaping hole in the index template where the
code was. In that space, place the embed variable, and point it at the
includes template group and the document_header template. The variable
should be placed at the very top of the template (in place of the content
you removed) and should look like this:
{embed="includes/document_header"}
Save the index template, and reload the page. The home page should
render just as it did before. You can use your browser’s View Source
command to check that the HTML is being embedded properly.
On Your Own
Now that you know how to do it, go ahead and create new templates
for each template part listed earlier, and then embed those templates
in the website index template. Do one at a time, and check after each
one that the page renders properly.
Report erratum
this copy is (P1.0 printing, March 2010)Download at WoweBook.com

EMBEDDING REUSABLE CODE 91
After you’re done, the top portion of the index template (with the top
stories) should look like this:
Download MakingthePages/template-home-embeds-one.html
{embed="includes/document_header"}
<body class="home">
<div id="layoutWrapper">
{embed="includes/masthead"}
<div id="content">
<div id="top-stories">
<h3>Top Stories</h3>
<div id="lead-article">
{exp:channel:entries channel="news_articles"
limit="1" disable="pagination" status="Featured Top Story"}
<img src="img/news-article-image.png" alt="" />
<h4>{title}</h4>
<h5><span class="by">By </span> {author}</h5>
{article_excerpt}
<p>
<a href="{title_permalink="news_articles/view"}"
class="read_story">Read Story</a>
{/exp:channel:entries}
</div><!-- END #lead-article -->
<div id="sec-story-left">
{exp:channel:entries channel="news_articles"
disable="pagination" limit="2" status="Top Story"}
<h4>{title}</h4>
<h5><span class="by">By </span> {author}</h5>
{article_excerpt}
<p><a href="{title_permalink="news_articles/view"}"
class="read_story">Read Story</a></p>
{/exp:channel:entries}
</div><!-- END #sec-story-left -->
<div id="sec-story-right">
{exp:channel:entries channel="news_articles"
disable="pagination" limit="1" status="Top Story" offset="2"}
<h4>{title}</h4>
<h5><span class="by">By </span> {author}</h5>
{article_excerpt}
<p><a href="{title_permalink="news_articles/view"}"
class="read_story">Read Story</a></p>
{/exp:channel:entries}
</div> <!-- END sec-story-right -->
<div style="clear:both"></div>
</div><!-- END #top-stories -->
The bottom portion of the template, which includes the sidebar, should
be coded similar to the code at the top of the next page.
Report erratum
this copy is (P1.0 printing, March 2010)Download at WoweBook.com

BUILDING OUT THE ARTICLE TEMPLATE 92
Download MakingthePages/template-home-embeds-two.html
<div id="to-editor">
<h3>To the Editor</h3>
<p class="subhead">Every day we publish some of
your emails, letters and comments.</p>
{exp:channel:entries channel="letters_to_editor" limit="3"}
<div id="{switch="lcol|mcol|rcol"}">
<h4>{title}</h4>
<h5><span class="by">From</span> {author_name}</h5>
{letter_copy}
</div>
{/exp:channel:entries}
<p class="subhead">To submit your letter or comment,
you can use our <a href="#">comment form</a> or
email <a href="#">[email protected]</a>.
Letters may be edited for content, clarity and space
constraints.</p>
</div>
<div style="clear:both;"></div><!-- END clear -->
</div><!-- END #content -->
<div id="topic-nav">
{embed="includes/category_list"}
{embed="includes/search_and_cartoon"}
</div><!-- END #topic-nav -->
<div style="clear:left;"><br /></div><!-- END clear -->
{embed="includes/footer"}
5.4 Building Out the Article Template
On the home page, we linked every news article excerpt to a complete
version using an anchor link that looked like this:
<a href="{title_permalink="news_articles/view"}"
class="read_story">Read Story</a>
Up to this point, the link that the ExpressionEngine code builds isn’t
functional because the “view” template we call doesn’t exist yet. Let’s
create it now.
In the Template Manager, create a new blank template named “view”
in the news_articles template group. In the directory of templates you
downloaded, find the file template-article.html. Copy its entire contents
into the new view template, and save it by clicking Update.
Report erratum
this copy is (P1.0 printing, March 2010)Download at WoweBook.com

BUILDING OUT THE ARTICLE TEMPLATE 93
Adding the Embedded Templates
Before we get started lighting up the content areas of the view template,
we want to first add the embedded templates we created in the previous
section. Start with the document header, and embed the templates (we
don’t create any new ones because we can just reuse what’s there!) one
by one.
Once we’ve completed that, we click one of the Read Story links on
the front page of the site, and it will lead to the view template we just
created. Since we have not yet added ExpressionEngine tags to display
content, we’ll just see the static content from the template.
Lighting Up the Article Page
For this template, we’ll use a similar process that we used to light up
the home page except that we have different content. The article view
page has the entire article copy, including the title and author. The
article page also has reader discussion, which includes all recent reader
comments, plus a form that readers can use to submit new comments.
Finally, at the bottom of the page there is a section that contains three
related articles. Let’s start with the article content.
Article Content
To light up the article content, we’ll use the same Channel Entries tag
pair that we used for the home page, except this time we’ll pull in the
entire article copy instead of the excerpt using the {article_body} entry
variable, which pulls the content from the custom field we created.
We want to use slightly different parameter settings for this template.
The channel parameter will remain the same, but the status and limit
parameters will need to be adjusted. Let’s see how the final chunk of
code should look, and then we’ll discuss why it needs to be this way.
Download MakingthePages/template-article-ee.html
{exp:channel:entries channel="news_articles"
status="open|Featured Top Story|Top Story"
limit="1"}
<img src="/img/news-article-image.png"
alt="News Article Image" />
<h4>{title}</h4>
<h5><span class="by">By</span> {author}</h5>
{article_body}
{/exp:channel:entries}
The status parameter has the value of all possible statuses that would
allow an article to appear on the site. Since this article view template is
Report erratum
this copy is (P1.0 printing, March 2010)Download at WoweBook.com

BUILDING OUT THE ARTICLE TEMPLATE 94
used by ExpressionEngine to display every article, we have to ensure it
can do just that! By including every possible status, we can be sure
every article will display properly, whether it’s a top story, featured
top story, or just a regular news article. Of course, we don’t include
the “closed” status because articles with that status have not received
editorial approval to be published on the site. To include more than
one value in a parameter, you separate it using what’s called a pipe (|)
character.
The limit parameter is also included but with a value of 1. Since the
article view will only ever be used to display a single article, you would
think we don’t need to specify a limit. The template would function
without it, but by setting the limit to 1, we eliminate the possibility of
someone seeing every single article in the database listed if they visit the
site using an incorrect article URL. Try it for yourself. Change the last
segment of the URL of an article page, and watch as ExpressionEngine
loads in every article in the database. Right now it’s only a few, so it’s
nothing more than a ugly page. But down the road when the Engine City
Times site has thousands of articles, ExpressionEngine will attempt to
load them all, and that could possibly negatively affect the performance
of the web server. So, to be safe, always set a limit of 1 on individual
article pages.
If you haven’t already, add or adjust the article code in the view template
so it looks the snippet listed earlier. Save the template, and reload the
page to see the individual article.
Article Comments
With the article content displayed, we can now turn our attention to
the reader comments and comment submission form that accompa-
nies every news article on the site. The ability to comment on every
news article was enabled when we created the news_articles channel and
set its preferences in Chapter 4, Creating and Configuring the Site, on
page 53.
Let’s first focus on the comment submission form. We’ll get it up and
running first, add a few comments, and then add the code to display
those comments. We don’t need to make many changes to the comment
form to get it working with ExpressionEngine. The first thing we want
to do is replace the opening and closing form tags with these special
ExpressionEngine Comment Form tags:
{exp:comment:form}
...
{/exp:comment:form}
Report erratum
this copy is (P1.0 printing, March 2010)Download at WoweBook.com

BUILDING OUT THE ARTICLE TEMPLATE 95
We can keep the form elements for name, email, and comment text, but
we just need to add some variables to the value parameters, so our final
form looks like this:
Download MakingthePages/template-article-ee.html
{exp:comment:form}
<p><label for="name">Name</label><br />
<input type="text" name="name"
value="{name}" id="name" size="37" /></p>
<p><label for="email">Email Address</label><br />
<input type="text" name="email" value="{email}"
id="email" size="37" /></p>
<p><label for="comment">Comment</label><br />
<textarea name="comment" rows="8" cols="35"
id="comment">{comment}</textarea></p>
<p><input type="submit" name="submit"
value="Submit" /></p>
{/exp:comment:form}
Make the changes so your template looks like the previous code, and
then save the template. Reload the article view in the browser, and
the form should look the same. Go ahead and fill it out with a test
comment, and click Submit. ExpressionEngine will save the comment
and then return you to the article page. Add at least three comments to
the news article.3 Once you’ve done that, we’ll need to make our newly
added comment display under the article.
Above the comment form are the three sample comments. If we look at
the template, we’ll see that each comment is marked up as a definition
list, which is contained in a div. There are three parts to every com-
ment: comment author name, comment date, and comment body. Also
notice that every other comment has a gray background. We’ll need to
account for that when adding the ExpressionEngine code to light up
the comments.
For the comment submission form, we used the {exp:comment:form} tag
pair. For displaying the entries, we’ll use a corresponding tag pair:
{exp:comment:entries}
...
{/exp:comment:entries}
We want to wrap this tag pair around the “comment-content” div and
then replace the comment author’s name with the {name} variable, the
3. Unless you log out from the Control Panel, ExpressionEngine will create every com-
ment with you as the user, no matter what you enter into the Name and Email fields.
Report erratum
this copy is (P1.0 printing, March 2010)Download at WoweBook.com

BUILDING OUT THE ARTICLE TEMPLATE 96
comment date with {comment_date format="%F %d, %Y"}, and the comment
text with the {comment} variable.
To make the background color of the comment alternate, we need to
use the {switch} variable again. The classes of odd and even get applied
to the div that surrounds each comment. We just need to replace the
second class (leave the class comment-content in place) with the {switch}
variable so it alternates between “even” and “odd.”
The final chunk of code for displaying comments should look like this:
Download MakingthePages/template-article-ee.html
{exp:comment:entries channel="news_articles"}
<div class="comment-content {switch="odd|even"}">
<dl>
<dt><span class="posted-by">
Posted by</span> {name}
<span class="comment-date">
{comment_date format="%F %d, %Y"}
</span></dt>
<dd>{comment}</dd>
</dl>
</div>
{/exp:comment:entries}
Save these changes to your article view template, and then reload the
page to see your comments listed. If you have at least two comments,
the alternating background color should look like Figure 5.5, on the
following page.
Displaying Related Articles
The final part of the article view template that needs to be integrated
into ExpressionEngine is the Related Articles section at the bottom of
the page. You should recognize the layout of this section, because it’s
exactly the same as the To the Editor section on the front page of the
site. Look at the HTML for this section, and it should definitely look
familiar. There are three columns, each with their own id: lcol, mcol,
and rcol.
Before we add the ExpressionEngine code to make the related articles
display, let’s briefly discuss how we’re going to tell ExpressionEngine
to show articles that are somehow related to the one being viewed.
There are complex ways to do this—based on tags and relationships
between entries—but we’ll keep it simple for this site and define related
articles as those that belong to the same category as the article being
Report erratum
this copy is (P1.0 printing, March 2010)Download at WoweBook.com

BUILDING OUT THE ARTICLE TEMPLATE 97
Figure 5.5: Displaying comments with alternating backgrounds using
the switch parameter
shown. Luckily for us, ExpressionEngine has a parameter we can set
in a Channel Entries tag pair to make this happen almost automati-
cally: related_categories_mode="yes". Placed in the Channel Entries tag
pair, it would look like this: Before we add the ExpressionEngine code
to make the related articles display, let’s briefly discuss how we’re going
to tell ExpressionEngine to show articles that are somehow related to
the one being viewed. There are complex ways to do this—based on
tags and relationships between entries—but we’ll keep it simple for this
site and define related articles as those that belong to the same cate-
gory as the article being shown. Luckily for us, ExpressionEngine has
a parameter we can set in a Channel Entries tag pair to make this hap-
pen almost automatically: related_categories_mode="yes". Placed in the
Channel Entries tag pair, it would look like this:
{exp:channel:entries channel="news_articles"
related_categories_mode="yes" custom_fields="yes"}
...
{/exp:channel:entries}
Whenever we use related categories, we have to explicitly enable cus-
tom fields, which in most other situations are on by default. If we
don’t turn that on, the custom fields we created in the previous chap-
Report erratum
this copy is (P1.0 printing, March 2010)Download at WoweBook.com

BUILDING OUT THE ARTICLE TEMPLATE 98
ter won’t show when we view the page in the browser. The folks who
make ExpressionEngine turned off custom fields when using related
categories as a way to reduce the load on the database.
The other parameters we need to include in the Channel Entries tag
pair are limit="3" and status="Open|Top Story|Featured Top Story". Let’s add
these parameters to the previous code, and wrap the Channel Entries
tag pair around the div that displays the related articles.
To make sure we get the nice three-column layout, we have to once
again use the {switch} variable to rotate between ids for the divs that
create the columns.
Finally, we need to plug in the entry variables so the content displays.
We’ll use {title}, {author}, and {article_excerpt} for the article content and
{title_permalink="news_articles/view"} to link up the “Read Story” text to the
individual article view page. The final chunk of code should look like
this:
Download MakingthePages/template-article-ee.html
<h3>Related Articles</h3>
{exp:channel:entries channel="news_articles"
related_categories_mode="yes" disable="pagination"
limit="3" status="open|Top Story|Featured Top Story"
custom_fields="yes" dynamic="no"}
<div id="{switch="lcol|mcol|rcol"}">
<h4>{title}</h4>
<h5><span class="by">By</span> {author}</h5>
{article_excerpt}
<p><a href="{title_permalink="news_articles/view"}"
class="read_story">Read Story</a></p>
</div>
{/exp:channel:entries}
Make these changes in your template, save it, and then load the article
view in a browser. At the bottom you should see three articles, similar
to Figure 5.6, on the next page. Clicking the Read Story link should
bring you to the article page for another news story where there also
will be related articles at the bottom of the page.
With two of the three templates that power the Engine City Times web-
site complete, the site is slowly coming to life with dynamic content. We
have only one template left to light up: the category template.
Report erratum
this copy is (P1.0 printing, March 2010)Download at WoweBook.com
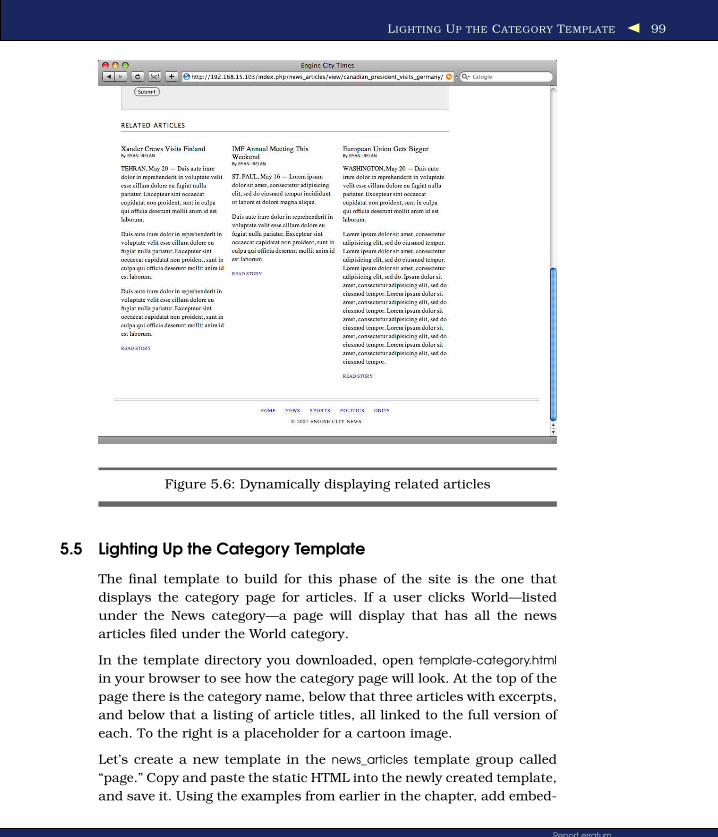
LIGHTING UP THE CATEGORY TEMPLATE 99
Figure 5.6: Dynamically displaying related articles
5.5 Lighting Up the Category Template
The final template to build for this phase of the site is the one that
displays the category page for articles. If a user clicks World—listed
under the News category—a page will display that has all the news
articles filed under the World category.
In the template directory you downloaded, open template-category.html
in your browser to see how the category page will look. At the top of the
page there is the category name, below that three articles with excerpts,
and below that a listing of article titles, all linked to the full version of
each. To the right is a placeholder for a cartoon image.
Let’s create a new template in the news_articles template group called
“page.” Copy and paste the static HTML into the newly created template,
and save it. Using the examples from earlier in the chapter, add embed-
Report erratum
this copy is (P1.0 printing, March 2010)Download at WoweBook.com

LIGHTING UP THE CATEGORY TEMPLATE 100
ded templates where needed so we’re reusing markup and Expression-
Engine code that is shared among the site templates.
Displaying the Category Name
At the top of the page is the name of the category that is being viewed.
Since this template is being used for every category on the site, we can’t
hard-code it with a category name. We have to set it up so it dynamically
displays the category name. To do this, we’ll use the ExpressionEngine
tag pair {exp:channel:category_heading}. The sole purpose of this tag pair
is to do exactly what we’re using it for: display the name of the currently
viewed category.
We just have to add the channel parameter, giving it a value of news_
articles, and wrap the tag pair around the h3 that displays the category
name. The code in your template should look like this:
Download MakingthePages/template-category-ee.html
{exp:channel:category_heading channel="news_articles"}
<h3>{category_name}</h3>
{/exp:channel:category_heading}
After making these changes, save the template, and click one of the
category names from the list on the far right to test the template. You
should see the static category template, but the category name at the
top of the page should change according to the category you clicked.
With that set, we can get started displaying the category content.
Displaying the Category Content
We have two content areas to display in this template: the three latest
articles and a simple list of titles of any other articles filed under this
category. Since we’ve done this together a couple of times already, I’m
going to hand this part off to you to do on your own. Everything that is
required we’ve already done together, but here are some hints:
• Latest Three Articles: Use the {switch} parameter for the column ids,
and don’t forget to link up the “Read Story” text.
• List of Article Titles: This is a simple unordered list of titles and
links. Let’s limit this to the latest twenty articles (although only
one will show because our site is not yet populated with content).
Just like with the other page elements, you need only one li ele-
ment, and ExpressionEngine will loop through and create one for
each article it finds.
Good luck!
Report erratum
this copy is (P1.0 printing, March 2010)Download at WoweBook.com
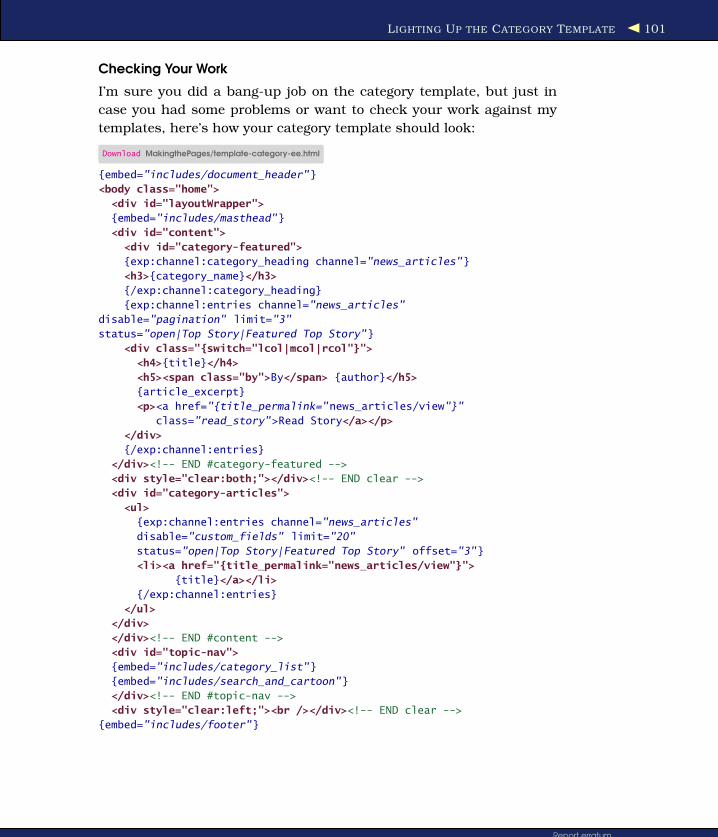
LIGHTING UP THE CATEGORY TEMPLATE 101
Checking Your Work
I’m sure you did a bang-up job on the category template, but just in
case you had some problems or want to check your work against my
templates, here’s how your category template should look:
Download MakingthePages/template-category-ee.html
{embed="includes/document_header"}
<body class="home">
<div id="layoutWrapper">
{embed="includes/masthead"}
<div id="content">
<div id="category-featured">
{exp:channel:category_heading channel="news_articles"}
<h3>{category_name}</h3>
{/exp:channel:category_heading}
{exp:channel:entries channel="news_articles"
disable="pagination" limit="3"
status="open|Top Story|Featured Top Story"}
<div class="{switch="lcol|mcol|rcol"}">
<h4>{title}</h4>
<h5><span class="by">By</span> {author}</h5>
{article_excerpt}
<p><a href="{title_permalink="news_articles/view"}"
class="read_story">Read Story</a></p>
</div>
{/exp:channel:entries}
</div><!-- END #category-featured -->
<div style="clear:both;"></div><!-- END clear -->
<div id="category-articles">
<ul>
{exp:channel:entries channel="news_articles"
disable="custom_fields" limit="20"
status="open|Top Story|Featured Top Story" offset="3"}
<li><a href="{title_permalink="news_articles/view"}">
{title}</a></li>
{/exp:channel:entries}
</ul>
</div>
</div><!-- END #content -->
<div id="topic-nav">
{embed="includes/category_list"}
{embed="includes/search_and_cartoon"}
</div><!-- END #topic-nav -->
<div style="clear:left;"><br /></div><!-- END clear -->
{embed="includes/footer"}
Report erratum
this copy is (P1.0 printing, March 2010)Download at WoweBook.com

WHAT WE LEARNED 102
5.6 What We Learned
In this chapter, we built out almost every template for the website and
added ExpressionEngine code to display content dynamically. Along the
way, we learned about parameters that control how ExpressionEngine
displays content, generated a complete list of all article categories, and
broke up the template code into “embeddable” templates, which allow
us to reuse code throughout the site’s templates.
In the next chapter, we’ll add some spit and polish to the Engine City
Times website by adding an RSS feed, search functionality, and navi-
gation. The site is quickly coming together!
Report erratum
this copy is (P1.0 printing, March 2010)Download at WoweBook.com

Chapter 6
Adding the Final TouchesThe Engine City Times website is almost complete. Left on our list of
to-dos is to add an RSS feed, light up the search box, create a search
results page, add a static About page, and light up the navigation. After
all of that, you’ll be ready to finalize the site by adding the Obituaries
section on your own.
Now that the site is almost completely built, we’ll get into the finer
details, and we’ll continue adding new ExpressionEngine site-building
skills to our tool belt.
6.1 Adding a Static Page
Up to this point the only type of content we have dealt with was col-
lections—a set of news articles and letters to the editor. But we can
also create single pages in ExpressionEngine. Pages are static content—
assigned to a URI—that we can create and edit through the Control
Panel. This functionality is available through the Pages module, which
ships with all versions of ExpressionEngine. To use the module, we
have to first install and configure it.
Installing the Pages Module
To install the module, click the Add-Ons button, and then select Mod-
ules. Find Pages in the list of modules. To the far right of the Pages line,
click Install. If the install worked, you should now see the word “Pages”
hyperlinked. But before we access the Pages module, we first need to
create a site channel to store the page’s content, custom fields to enter
the page content, and a template to display the page on the website.
Download at WoweBook.com

ADDING A STATIC PAGE 104
Why do we have to create a site channel for the Pages module? Expres-
sionEngine stores the pages as entries in a channel but displays them
as individual pages where you can explicitly set the URI. Because of
this, we need to create a site channel to hold our pages. Up to this
point, the Engine City Times site has three channels: Letters to the
Editor, News Articles, and Obituaries. Let’s create a new channel and
name it “Static Content.” We want to configure it similarly to Letters to
the Editor—with pagination disabled.
Next, we need to create a field group for the page’s content. Create a
new one with a field for the page copy (call it page_copy and make it
a textarea). Assign that field group to the “Static Content” section that
we created.
We also need to create a new template that we’ll use to display the
pages. We can use the same template for every static page we create.
We’ll call the template static and create it in the site template group.
Paste in the code from the template-static.html file that you downloaded
from the book website, and save the template. Be sure to replace the
code we extracted into embedded templates. Use an existing template
as a guide, and refer to Chapter 5, Making the Pages, on page 76 if you
need a refresher on how we set up the templates for the Engine City
Times website.
Now we need to light up the static template using a Channel Entries tag
pair that calls the static_content channel. Wrap the content in a Channel
Entries tag pair, and replace the sample content with the necessary tag
variables. Your template should look like this:
Download AddingtheFinalTouches/staticTemplate.html
{embed="includes/document_header"}
<body class="home">
<div id="layoutWrapper">
{embed="includes/masthead"}
<div id="content">
<div id="article">
{exp:channel:entries channel="static_content"
disable="pagination" limit="1"}
<h4>{title}</h4>
{page_copy}
{/exp:channel:entries}
</div>
</div><!-- END #content -->
<div id="topic-nav">
{embed="includes/category_list"}
{embed="includes/search_and_cartoon"}
</div><!-- END #topic-nav -->
Report erratum
this copy is (P1.0 printing, March 2010)Download at WoweBook.com

ADDING A STATIC PAGE 105
Making It Easier to Access the Pages Module
By default, the Pages module is buried in the list of modules inthe Modules section of the Control Panel. We want to makePages accessible via a button at the top of the Control Panel.To do this, navigate to the Pages module, and then click thered “+ Add” text to the right of the row of buttons. This will auto-matically create a Pages button for you. Now, it’s much easierfor us and the Engine City Times editors to manage and createnew pages.
<div style="clear:both;"></div><!-- END clear -->
{embed="includes/footer"}
</div><!-- END #layoutWrapper -->
</body>
</html>
Navigate to the Pages module, and you should see a blank page with
the text “No Pages Currently Exist.” Before we can get started creating
static pages, we need to first configure the module using the Module
Configuration button at the top right. Here we need to set the three
configuration options for the module.
For a nicer look, we’d like to have the display of URIs on the module
home page be nested, so set that option using the drop-down menu.
All of our static pages will be saved into the newly created Static Con-
tent channel in ExpressionEngine, so we want to make that the default
channel. Finally, we’ll set the default template for the Static Content
channel to site/static. We can leave the others alone for now, because we
won’t be setting up those sections to publish static pages. Click Update
to save the changes. This will bring you back to the main Pages screen,
and now we can create our first page!
Creating the About Page
We’re going to create an About page for the newspaper. It will be a
simple page with a title and a couple of paragraphs of content that will
describe the newspaper and its history. The client will fill in the final
content, so we’ll just add some dummy content in the interim.
Click the gray Create New Page button to get to the entry form. To see
the Pages-specific fields, click the small Pages tab at the top of the form.
Report erratum
this copy is (P1.0 printing, March 2010)Download at WoweBook.com

LIGHTING UP THE NAVIGATION 106
The Pages module allows you to set exactly what you want the URI of
the page to be. For the About page, we want to set the URI to /about/.
The template can stay how it is because it just uses the default we set
earlier when we configured the Pages module.
Give the page a title of “About” and then add some sample content to
the Page Copy field. When you’re done, save the page using the Submit
button. You should now be able to view the page in the browser by going
to the site URL for the page, which should be something like this: http://
yourdomain.com/index.php/about/.
Now that the Pages module is set up, we can create as many pages as
we want. In fact, I think you should do just that.
On Your Own
As a bit of homework, create a new page in the Engine City Times web-
site that will hold contact information. There won’t be a contact form,
but just an address and phone number.
After you’re done making the page, add both it and the About page we
created earlier to the navigation in the footer. You can edit it using the
footer template, located in the includes template group.
While you’re creating pages, try nesting them like this: /about/me or
/about/you/. Then see how ExpressionEngine displays them nested on
the Pages module overview page. Make as many pages as you need to
get comfortable with how they work and how ExpressionEngine handles
the URIs you create.
6.2 Lighting Up the Navigation
We haven’t touched the main navigation at all since creating the
templates for the Engine City Times website. You may have wondered
whether we’d ever get those working. Well, now is the time.
Linking the Navigation Items
The first step in lighting up the navigation is to link the navigation
items to the proper URIs. To do this, open the masthead template in the
includes template group.
Report erratum
this copy is (P1.0 printing, March 2010)Download at WoweBook.com

LIGHTING UP THE NAVIGATION 107
Edit the template so the navigation links look like this:
Download AddingtheFinalTouches/masthead_one.html
<ul>
<li><a href="/">Home</a></li>
<li><a href="/index.php/news_articles/page/
category/news">News</a></li>
<li><a href="/index.php/news_articles/page/
category/sports">Sports</a></li>
<li><a href="/index.php/news_articles/page/
category/politics">Politics</a></li>
<li><a href="">Obits</a></li>
</ul>
Notice that we’re leaving the Obituaries item unlinked. Later in the
chapter you’ll have some homework and can take care of that then.
Save the template, load the website in your browser, and test the navi-
gation links.
The problem we have now is that we want to change how each item in
the navigation displays when its page or section is displayed. For exam-
ple, when the News page is displayed, the News navigation item should
be highlighted with the dark gray background color that is currently
being used for Home. How do we solve this? It’s all very easy with the
power of ExpressionEngine conditionals.
Creating a Dynamic Navigation with ExpressionEngine
Conditionals
In ExpressionEngine, conditionals allow you to control what informa-
tion is displayed based on different decisions. There are two types
of conditionals in ExpressionEngine—conditional global variables and
channel entries conditional variables. The latter are only used inside
the Channel Entries tag pair and are specific to content. The other con-
ditionals you can use almost anywhere.
If you’re familiar with any programming languages, you’ll quickly catch
on to the syntax of ExpressionEngine conditionals. Here’s a simple
example:
{if logged_in}
You are logged in.
{/if}
This simple conditional checks whether the visitor is logged in to Ex-
pressionEngine. If they are, the “You are logged in” message appears. If
not, the message does not show.
Report erratum
this copy is (P1.0 printing, March 2010)Download at WoweBook.com
LIGHTING UP THE NAVIGATION 108
There is also the option to do something if the condition is not met.
Here’s an example:
{if logged_in}
You are logged in.
{if:else}
Please log in.
{/if}
The {if:else} variable gives you finer control by telling ExpressionEngine
what to do in the event that the first conditional is not met. In this
example, ExpressionEngine will display the “You are logged in” text if
the user is logged in. If not, the “Please log in” text will display.
Taking it a step further, let’s use something called the URL segment
to check which page of the site we’re on and then display code in the
template based on whether that condition is met.
URL Segments
ExpressionEngine breaks every URL it generates into segments, start-
ing after the index.php. The first segment is segment_1, the second is
segment_2, the third is segment_3, and so on. Segments are commonly
used to control what information is presented on a page depending on
which page you’re on. Here’s an example of that:
{if segment_1 == "news_articles"}
You are reading news articles.
{/if}
This conditional checks the first segment of the URL, and if it is equiv-
alent to “news_articles,” the text will show. You can probably see where
we’re going with this. Using conditionals, we can make our navigation
dynamic so it always knows the page we’re on.
Making Smart Navigation
Our goal is to make the navigation highlight the item that is currently
displayed. If we’re on the Politics page, the Politics navigation item
should be highlighted. We can make this happen with a combination
of URL segments and conditionals that we just learned about.
To make it happen, we want to check for the current page, and if it
matches the one that belongs to the navigation item, we’ll add a class
to the anchor link so the CSS alters the display. To see how it will
look, view the site and look at the Home item in the navigation. In the
template, that item is marked up like this:
<li><a class="current" href="/">Home</a></li>
Report erratum
this copy is (P1.0 printing, March 2010)Download at WoweBook.com

CLEANING UP USING CONDITIONALS 109
To highlight the navigation item, we just add a class="current". What we
need to do now is use a conditional to check whether we’re on a certain
URL segment. Let’s jump into the code that’ll make it work:
Download AddingtheFinalTouches/masthead.html
<li><a {if segment_1 == ""}class="current"
{/if} href="/">Home</a></li>
This uses a simple conditional that checks whether segment_1 is empty
(which means we’re on the home page of the site), and if it is, we display
class="current". We will do the same for the other links but with a slight
adjustment. Instead of checking for the first segment, we need to check
for the fourth, where the category name is listed. Additionally, instead
of using empty quotes, we’ll check that the category name in the fourth
segment matches the name of the navigation items. Here’s the final
code for our main navigation:
Download AddingtheFinalTouches/masthead.html
<ul>
<li><a {if segment_1 == ""}class="current"
{/if} href="/">Home</a></li>
<li><a {if segment_4 == "news"}class="current"
{/if}href="/index.php/news_articles
/page/category/news">News</a></li>
<li><a {if segment_4 == "sports"}class="current"
{/if}href="/index.php/news_articles
/page/category/sports">Sports</a></li>
<li><a {if segment_4 == "politics"}class="current"
{/if}href="/index.php/news_articles
/page/category/politics">Politics</a></li>
<li><a href="">Obits</a></li>
</ul>
Add this code to your masthead template, and save the changes. Load
the front page of the Engine City Times in your website, and test the
navigation. As you click each one, the proper page should display, and
the navigation item is highlighted. The only one that won’t work is Obits
because we haven’t yet created that section of the site. That will be your
homework at the end of this chapter.
6.3 Cleaning Up Using Conditionals
We just learned the basics about ExpressionEngine conditionals and
used them to alter how our navigation displays. Let’s also use them to
clean up how some of our content displays on the site.
Report erratum
this copy is (P1.0 printing, March 2010)Download at WoweBook.com

CLEANING UP USING CONDITIONALS 110
There are two scenarios on the Engine City Times website where con-
tent can be cleaned up using conditionals. The first is when there are
no comments on an article. If you navigate to an article on the site
that doesn’t have comments, you’ll see that the header “Reader Dis-
cussion” is immediately followed by “Comment on this News Article.”
This looks awkward. If there aren’t any comments, we want to display
a short message that encourages the reader to comment; it should be
something like “Be the first to comment, using the form below!”
In the previous section, I briefly mentioned the channel entries condi-
tional variables. This is a special set of conditional variables that you
can use only inside a Channel Entries tag pair. There are also some
special variables in the Comment Entries tag pair, and we’ll use one to
display our message if an article has no comments.
The conditional variable we’ll use is called if no_results, and if it evaluates
to true, it displays whatever is between the tag pair. Here’s how it would
work for our implementation:
{if no_results}
<p>
Be the first to comment, using the form below!
</p>
{/if}
We place this in between the Comment Entries tag pair like so:
Download AddingtheFinalTouches/comments-conditional.html
{exp:comment:entries channel="news_articles"}
{if no_results}
<p>Be the first to comment, using the form below!</p>
{/if}
<div class="comment-content {switch="odd|even"}">
<dl>
<dt><span class="posted-by">Posted by</span> {name}
<span class="comment-date">
{comment_date format="%F %d, %Y"}
</span></dt>
<dd>{comment}</dd>
</dl>
</div>
{/exp:comment:entries}
Add the conditional code to the view template in the news_articles
template group. Save the template, and load an article that has no
Report erratum
this copy is (P1.0 printing, March 2010)Download at WoweBook.com

CLEANING UP USING CONDITIONALS 111
comments. The message to the reader should now appear. If we add a
comment, the message will go away.
The second scenario is when an article has no related articles. Once
the newspaper populates the site with content, this may be a fringe
case, but it could still happen, and we should account for it. Rather
than show a “Related Articles” header with nothing below it, let’s show
a short message stating that there are no related entries for this article.
To achieve this, we’ll use the channel entries version of if no_results. Sim-
ilar to comments, this conditional is used to display content if for some
reason the Channel Entries tag pair returns no entries.
{if no_results}
<p>There are no related articles.</p>
{/if}
Add this code into the view template, specifically in the Channel Entries
tag pair for the Related Articles section. Your code should look like this:
Download AddingtheFinalTouches/related-articles.html
<h3>Related Articles</h3>
{exp:channel:entries channel="news_articles"
related_categories_mode="yes"
disable="pagination" limit="3"
status="Open|Top Story|Featured Top Story"
custom_fields="yes"}
{if no_results}
<p>There are no related articles.</p>
{/if}
<div id="{switch="lcol|mcol|rcol"}">
<h4>{title}</h4>
<h5><span class="by">By</span> {author}</h5>
{article_excerpt}
<p><a href="{title_permalink="news_articles/view"}"
class="read_story">Read Story</a></p>
</div>
{/exp:channel:entries}
Save the template, and then create a new entry using a category to
which you have not yet published an article. I’d suggest something
under Sports. After creating the article, load it in the browser, and at
the bottom you should see “the no related articles” message.
There are almost limitless uses of ExpressionEngine conditionals, but
these two examples are some of the simplest and most common imple-
mentations. You’ll find that ExpressionEngine conditionals come in
handy for making websites more dynamic and responsive to where the
Report erratum
this copy is (P1.0 printing, March 2010)Download at WoweBook.com

CREATING AN RSS FEED 112
user is on the website. By learning the basics of ExpressionEngine con-
ditionals, you are now prepared to face many of the challenges pre-
sented while building websites with ExpressionEngine.
6.4 Creating an RSS Feed
The Engine City Times editors want to offer an alternative method for
readers to get news articles, so they’ve opted to publish an RSS feed. It
will be accessible at the top of every page on the site, just to the right
of the main navigation.
Creating the feed is a three-step process: we create the RSS feed tem-
plate in ExpressionEngine, edit the template to work with our site, and
then validate the feed using a “feed validator” so we’re sure it will work
in most every RSS reader.
ExpressionEngine provides you with almost everything you need to get
an RSS feed up and running. The first thing we want to do is create
a template called feed in the site template group. We want to give it
the template type of RSS Page and create an empty template. After you
create it, you’ll notice it shows up in the template list with a small feed
icon next to it. If it doesn’t, you may not have set the proper template
type.
We won’t have to create the code for the RSS template from scratch
because EllisLab, the makers of ExpressionEngine, offer RSS templates
on its site.1 Copy the RSS 2.0 template, and paste the entire thing into
the newly created feed template. At time of publication of this book, the
feed template is still coded for a previous version of ExpressionEngine.
You will need to convert all instances of “weblog” to “channel” to get this
feed working properly. I’ve done this for you in the template included in
the downloadable code available on the book website. Click Update to
save the template.
Now that we have the default ExpressionEngine template, we need to
customize it so it will work with our Engine City Times website. We
will start at the top by setting the preload replace variable master_
channel_name.
Download AddingtheFinalTouches/rss.html
{preload_replace:master_channel_name="news_articles"}
1. http://expressionengine.com/templates/source/category/feeds/
Report erratum
this copy is (P1.0 printing, March 2010)Download at WoweBook.com

CREATING AN RSS FEED 113
This variable is referenced throughout the template, so we only need to
declare once that we want to create a feed of all news articles. Because
we’re pulling only from the news_articles channel, we need to edit the title
tag so it has the name of the site.
<title>{exp:xml_encode}{channel_name}{/exp:xml_encode}</title>
If we leave it as is, the feed will show that the site name is “News Arti-
cles,” which is the name of the channel we’re displaying. We’ll use the
site_name variable, so the line looks like this:
Download AddingtheFinalTouches/rss.html
<title>{exp:xml_encode}{site_name}{/exp:xml_encode}</title>
Now when an RSS reader displays the feed, it will have the site’s name.
The next line we need to change is the URL that ExpressionEngine uses
to point to each article so the reader can click through and read the full
article on the Engine City Times website. The link in the RSS feed is
created in this line of template code:
<link>{title_permalink=site/index}</link>
The title permalink isn’t set to how we have our news article template
group and template named, so we need to adjust it like this:
Download AddingtheFinalTouches/rss.html
<link>{title_permalink="news_articles/view"}</link>
Now the link to each news article in the RSS feed will point the correct
URL of the article.
The final change needed is to the variables used to display the con-
tent, which is located one line below the previous change. The default
RSS template uses channel entry variables from the default field group.
Since we customized ExpressionEngine, we need to tell it which content
to show. The newspaper wants to show only the excerpt of the article,
so the readers will have to click and visit the site to read the entire
article.
We want to replace the two variables in the template with the arti-
cle_excerpt variable, so the line looks like this:
Download AddingtheFinalTouches/rss.html
<description>{exp:xml_encode}
{article_excerpt}{/exp:xml_encode}</description>
Report erratum
this copy is (P1.0 printing, March 2010)Download at WoweBook.com

ADDING SEARCH FUNCTIONALITY 114
Now the RSS feed will show the excerpt only. Save these changes to the
template.
Now we want to validate the feed to check that it is valid and will display
in most every RSS reader. To do this, we take the feed URL and submit
it to the feed validator website.2 Your feed URL will be your domain plus
index.php/feed.3 Submit your feed to the feed validator site to check that
it is valid. If it is, your feed is all set.
Before we move on, let’s go back into the masthead template and add
the feed URL to the subscribe link. That part of your template should
look similar to this:
Download AddingtheFinalTouches/rssLink.html
<a href="http://yourdomain.com/index.php/feed"> <p id="subscribe">
<img src="/img/feed-icon.png"
alt="feed icon" />Subscribe to the News</a></p>
Save the template, load the website front page, and test the subscribe
link.
Let’s review what we’ve done so far. Up to this point you should have
a working RSS feed and dynamic navigation using ExpressionEngine
conditionals. Now let’s move forward and add some search functionality
to our website.
6.5 Adding Search Functionality
On every page of the Engine City Times there is a small search box in
the side column below the categories list. Currently, it does nothing, so
we want to light it up so the readers of Engine City News website can
search all of the news articles on the site.
When we set up the News Articles section, we set the option “Make
available to search” to Yes. This tells ExpressionEngine that these fields
should be used to return search results.
ExpressionEngine uses the Search module, which is provided with Ex-
pressionEngine, to create the search functionality. It provides us with
an easy way to create simple and advanced search forms and search
results pages. The module comes preinstalled, so we don’t have to do
anything to get started.
2. http://feedvalidator.org
3. http://yourdomain.com/index.php/feed
Report erratum
this copy is (P1.0 printing, March 2010)Download at WoweBook.com

ADDING SEARCH FUNCTIONALITY 115
Making a Simple Search Form
Creating a simple search form in ExpressionEngine is really as simple
as the name implies. We use the Simple Search Form tag pair, which
we wrap around a text input field and input button. Here’s the search
from the HTML code on our site:
Download AddingtheFinalTouches/search-static.html
<dt id="search-box">Search</dt>
<dd>
<form action="template-article_submit"
method="post" accept-charset="utf-8">
<input type="text" name="search"
value="" id="search"
size="17" />
<p><input type="submit" value="Go"></p>
</form>
</dd>
To get this form working, we just need to replace the form tags with the
ExpressionEngine Simple Search Form tags:
Download AddingtheFinalTouches/search-ee.html
<dt id="search-box">Search</dt>
<dd>
{exp:search:simple_form channel="news_articles"}
<input type="text" name="keywords" value=""
id="search" size="17" />
<input type="submit" value="Go">
{/exp:search:simple_form}
</dd>
The Simple Search Form tag pair takes several parameters, including
the channel parameter and the search_in parameter. Since we want to
allow readers to search only news articles, I made news_articles the value
of the channel parameter. It also takes a search_in parameter to tell
ExpressionEngine where to search in the entries. By default Expres-
sionEngine searches only the titles. We set the values of the search_in
parameter to “everywhere” to tell ExpressionEngine to search inside all
available fields (unless we explicitly marked the field as not searchable
when we configured our custom fields).
The search will work, but ExpressionEngine won’t know which template
to use to display the results. We need to add the parameter result_page
that will tell ExpressionEngine which template to render to display the
results.
Report erratum
this copy is (P1.0 printing, March 2010)Download at WoweBook.com

ADDING SEARCH FUNCTIONALITY 116
Download AddingtheFinalTouches/search-ee-2.html
<dt id="search-box">Search</dt>
<dd>
{exp:search:simple_form channel="news_articles"
search_in="everywhere" result_page="site/search"}
<input type="text" name="keywords" value=""
id="search" size="17" />
<input type="submit" value="Go">
{/exp:search:simple_form}
</dd>
We are now telling ExpressionEngine to display the search template,
which will be located in the site template group. We’ll create the template
in the next section.
Add this updated form code to the cartoon_and_search template we cre-
ated in the previous chapter, and save it.
Creating the Search Results Template
Create an empty template named “search” in the site template group,
and paste in the code from template-search-results.html from the directory
of templates you downloaded from the book website. Be sure to edit
the template so it uses the same embedded templates (from the includes
template group) that the rest of the templates use (if you’ve forgotten
how to do this, refer to Chapter 5, Making the Pages, on page 76). After
you’ve done that, save the template.
Load the template in the browser to get an idea of what it will look like.
Using a definition list, the template lists the title and article excerpt for
each search result. Each title is linked to the article view page.
Back in the Control Panel, edit the template, and light it up using the
Search Results tag pair that ExpressionEngine provides.
{exp:search:search_results}
...
{/exp:search:search_results}
We will start by wrapping our search results with the tag pair. The
next step is to add the variables to display the content. We use the
same variables we used for displaying the new articles in other parts of
the site.
Download AddingtheFinalTouches/search-ee-results.html
<h4>Search Results</h4>
<dl id="search_results">
{exp:search:search_results}
Report erratum
this copy is (P1.0 printing, March 2010)Download at WoweBook.com
ON YOUR OWN 117
<dt><a href="{title_permalink="news_articles/view"}">
{title}</a></dt>
<dd>{article_excerpt}</dd>
{/exp:search:search_results}
</dl>
I removed all the static content from the results listing and replaced
it with the entry variables. We’re going to display the article title and
excerpt and, using the title_permalink variable, link the title to the article
view page. Make these changes to your template, and save it. Using a
keyword from one of your articles, test the search to see how the results
look. The search results will be limited until the Engine City Times staff
begins populating the site with content.
6.6 On Your Own
Most of the major functionality of the site is now complete. Although
there are some leftover items that we’ll address throughout the remain-
der of the book, there is one gaping hole left: the Obituaries section. I
need your help with this, and it will give you the opportunity to use all
of the information and skills acquired over the previous three chapters
to complete this task.
We’ve already created the Obituaries section and template group. You
need to create the necessary templates and light them up with Expres-
sionEngine tags. There aren’t premade templates for you to use. My
suggestion would be to use the news category template but remove the
large cartoon image.
Good luck!
6.7 What We Learned
With the Engine City Times website now complete in basic functional-
ity, we’ve successfully built our first ExpressionEngine site from instal-
lation to implementation. Throughout this part of the book we learned
all of the basic skills needed to begin building any website on Expres-
sionEngine. It’s true that every site will require a different setup and
present different challenges. However, since we’ve already seen a site
through from inception to end, we can meet the challenge of building a
website with ExpressionEngine.
Report erratum
this copy is (P1.0 printing, March 2010)Download at WoweBook.com

WHAT WE LEARNED 118
Moving forward, we will build on the techniques presented up to this
point, further refining them and adding complexity that will prepare us
for even the most challenging of websites. In the next section of the
book, we get more advanced. The tasks are set up so we can build on
the Engine City Times website and the skills learned up to this point.
We’ll learn about sharing data between templates with embed variables,
working with templates as files instead of inside the Control Panel and
allowing site visitors to submit their own content right into the Expres-
sionEngine database.
Because we’re so well-prepared with the basic ExpressionEngine skills,
from here on out we’ll quickly increase our ExpressionEngine knowl-
edge and begin to anticipate problems and quickly devise their solu-
tions. This is where the real joy of building websites with Expression-
Engine is born.
Report erratum
this copy is (P1.0 printing, March 2010)Download at WoweBook.com

Part III
Digging In
Download at WoweBook.com

Chapter 7
Creating RelationshipsBetween Entries
Creating relationships between entries is essential in keeping your web-
site content as simple and organized as possible. It prevents you from
having to store the same data in multiple places.
Let’s say you’re building an About page for a business website that
lists employees and their respective departments. You could store the
department name in a field in a channel entry for each employee. But
what happens if that department name changes? You would have to go
through each and every employee entry and change the name.
You can prevent this scenario by creating another channel called “de-
partments,” creating an entry for each department, and then relating
an employee to a department. Now, if the department name changes,
you only have to edit in one place: the entry for that department. All of
the employees in that department will then display the new name.
Relating entries lets you take many different channel entries and orga-
nize them under a common umbrella. That is exactly what we’ll be doing
for our sample website.
With the basic Engine City Times website done, the editors at the news-
paper have asked for some additional functionality. They want to be
able to organize some articles on their website by the print edition of
the newspaper in which they appeared.
Here’s what we need to accomplish:
• Give editors the ability to create new print editions for each day
Download at WoweBook.com

BUILDING ENTRY RELATIONSHIPS 121
Figure 7.1: In these entry relationships, the print editions are the par-
ents, and the news aArticles are the children.
• Display a page for each print edition and its articles
• Show a list of recent print editions on the sidebar of the Engine
City Times website
Using the related entries functionality in ExpressionEngine, we will
implement this request from the newspaper. But first let’s cover the
basics about related entries and how they work.
7.1 Building Entry Relationships
Related entries allow us to create a relationship between one entry and
one or more others. In our case, we’ll create a relationship between
an entry in the Print Edition channel (we need to create this channel)
and some News Articles channel entries. In our templates, we will use
special related entry tags to retrieve and display the related entries.
In Figure 7.1, we can see how we’ll use related entries.
The print editions are the parents, and the news articles are the chil-
dren. One or more news articles can be related to a print edition. In
Figure 7.1, both Article 1 and Article 4 are related to the March 1,
Report erratum
this copy is (P1.0 printing, March 2010)Download at WoweBook.com

BUILDING ENTRY RELATIONSHIPS 122
2010, print edition. Similarly, both Article 3 and Article 6 are related to
the March 3, 2010, print edition.
There are two ways to display related entries in ExpressionEngine:
straight related entries and reverse related entries. Let’s look at them
both.
Related Entries
Straight related entries are used to display information about the parent
when viewing one of its children. So, if we were viewing a news article,
we could display the print edition to which that news article belongs.
To do this, we use the Related Entries tag pair:
{related_entries id="print_edition"}
<p><em>Published in print on {title}</em>.</p>
{/related_entries}
The Related Entries tag pair has a required parameter of id whose value
should be the custom field that contains the relationship (we’ll create
this field later in Section 7.2, Setting Up Related Entries, on the following
page). Because this code must live in the Channel Entries tag pair, we
can use any custom fields available in the parent channel. In the code
example, we’re just displaying the related entry’s title.
Reverse Related Entries
To display a print edition and all of its children, we need to use the
Reverse Related Entries tag pair. Why reverse? Because unlike in the
previous code sample, we are displaying the parent plus the children.
To get a list of news articles that are related to the print edition, we’ll
need to get the reverse relationship. We’ll go over the code in more detail
in Section 7.3, Writing Related Entries Template Code, on page 125, but
here is the tag pair for reverse related entries:
{reverse_related_entries sort="desc"}
...
{/reverse_related_entries}
Just like the Related Entries tag pair, the Reverse Related Entries tag
pair has to live in the Channel Entries tag pair. This will output all of
the child entries of the parent entry.
Let’s get started building the print editions for the Engine City Times.
Report erratum
this copy is (P1.0 printing, March 2010)Download at WoweBook.com

SETTING UP RELATED ENTRIES 123
7.2 Setting Up Related Entries
To create relationships between entries, we need to have two separate
channels in place and some entries available in each. It is required
to have all of the content channels set up first before creating any
relationships.
Since the Engine City Times would like to be able to view a page for
each print edition, we need to first set up the new channel to hold the
print edition entries.
Navigate to the Channel Management section of the Control Panel. Cre-
ate a new channel with a full channel name of “Print Editions” and a
channel name of “print_editions.” Save this new channel by clicking
Submit.
Each print edition only needs a title and nothing else, so we will create
a new custom field group called “Print Editions” but not add any other
fields. ExpressionEngine will, by default, display only the Title and URL
Title fields. In the future, however, we can expand the print edition
entry with more data about the edition (a PDF of the front page, for
example) by adding other fields.
With the new channel created, let’s add a couple of print editions to
ExpressionEngine. Click the Content button in the main navigation,
choose Publish, and then choose Print Editions. For the title, we’ll use
a full date, like March 1, 2010. After entering the title, save the entry.
Create one more for March 2, 2010.
The next step is to create a way relate each news article with a print
edition. We’ll do this by creating a new custom field in the News Articles
custom field group.
Navigate to the Custom Channel Fields page using the Admin button
in the main navigation. The custom field group we want to edit is News
Articles. Click the red “Add/Edit Custom Fields” text next to New Arti-
cles to edit the custom channel fields.
We need to create one field for relating a news article entry to a print
edition entry. Click Create a New Custom Field at the top left. For the
label, input “Print Edition,” and for the Field Name use “print_edition.”
You can also give some brief instructions such as “Choose the print
edition in which article appeared.”
Report erratum
this copy is (P1.0 printing, March 2010)Download at WoweBook.com

SETTING UP RELATED ENTRIES 124
Figure 7.2: Creating the custom field for the relationship between
entries and news articles
Report erratum
this copy is (P1.0 printing, March 2010)Download at WoweBook.com
WRITING RELATED ENTRIES TEMPLATE CODE 125
As shown in Figure 7.2, on the preceding page, the field type we need to
choose is Relationship. After selecting that field type from the top of the
form, some new options will appear under the Custom Field Options
area. First, we need to choose with which channel we’d like to create
the relationship. We want to relate to the print editions, so choose that
channel. The defaults for sorting are fine, but we do want to adjust the
limit to the last twenty-five. This will help keep the menu from becoming
too long and unwieldy. Click Submit to save the new field.
With the relationship field created, let’s view it in the publish form.
Go to the Edit Channel Entries page using the Content button in the
main navigation. Choose a recent news article, and scroll down to the
new Print Edition field. Choose a date, and save the entry. Do this for
one more news article entry so we have some entries to play with while
adding the necessary template code.
7.3 Writing Related Entries Template Code
With the content channels set up and the necessary custom fields cre-
ated, we have the ability to create relationships between entries. How-
ever, we still have some work to do. We now need to use some special
tags to make those relationships appear on the website.
The Engine City Times requested that readers be able to browse articles
by print edition. We will add a list of the recent print editions to the
sidebar (under the search box) and then create a template that displays
all the news articles related to that print edition.
The first step is to create the print editions template group. Using the
Design navigation button, go to the Template Manager. Create a new
template group called “print_editions.” ExpressionEngine will automat-
ically create the index template. We need only one template, so we will
use the “index” to display our print editions.
Open the template-print-editions.html file from the code bundle you down-
loaded from this book’s web page. You may notice that it is very similar
to the category template we used earlier in the book in Section 5.5,
Lighting Up the Category Template, on page 99.
Paste the template code into the index template in the print_editions tem-
plate group. Go ahead and use the existing embed templates to make
the template work like templates we created earlier.
Report erratum
this copy is (P1.0 printing, March 2010)Download at WoweBook.com

WRITING RELATED ENTRIES TEMPLATE CODE 126
Think of this template as the individual entry template we created for
the news articles; its job is to display the content of a single entry. In
this case, it will be the content of an entry in the print_editions channel.
We’ll start just below the div with the id of print-edition-articles. Since the
primary content is from the print_editions channel, we need to add a
Channel Entries tag pair around everything inside the div. We’ll remove
the hard-coded date and replace it with the title variable. By leaving the
“Print Edition” text there, the following code will display the title as, for
example, “March 1, 2010 Print Edition”:
Download RelatedEntries/print-edition-1.html
<div id="print-edition-articles">
{exp:channel:entries channel="print_editions"
disable="pagination" limit="1"}
<h3>{title} Print Edition</h3>
...
{/exp:channel:entries}
</div><!-- END #print-edition-articles -->
Just like we did with the markup in the categories template in Sec-
tion 5.5, Lighting Up the Category Template, on page 99, we’ll remove
all but one instance of the divs with the lcol, mcol, and rcol ids.
Around the div, we place our Reverse Related Entries tag pair. Here’s
what the tag pair looks like:
{reverse_related_entries sort="desc"
status="Open|Top Story|Featured Top Story"}
...
{/reverse_related_entries}
This tag pair has to live in the Channel Entries tag pair in order to work.
We’re using two parameters: sort and status. The sort parameter has the
value of desc, so ExpressionEngine will display the entries by date in
descending order. Since we’re using custom statuses, we also have to
tell ExpressionEngine which status the entries should have.
Along with the switch tag to make the columns appear properly, we’ll
add the Reverse Related Entries tag pair into our template. That part of
the template should now look like this:
Download RelatedEntries/print-edition-2.html
<div id="print-edition-articles">
{exp:channel:entries channel="print_editions"
disable="pagination" limit="1"}
Report erratum
this copy is (P1.0 printing, March 2010)Download at WoweBook.com

WHAT WE LEARNED 127
<h3>{title} Print Edition</h3>
{reverse_related_entries sort="desc"
status="Open|Top Story|Featured Top Story"}
<div id="{switch="lcol|mcol|rcol"}">
<h4>{title}</h4>
<h5><span class="by">By</span> {author}</h5>
{article_excerpt}
<p><a href="{title_permalink="news_articles/view"}"
class="read_story">Read Story</a></p>
</div>
{/reverse_related_entries}
{/exp:channel:entries}
</div><!-- END #print-edition-articles -->
The Reverse Related Entries tag pair uses standard Channel Entries
tag pair variables, including custom field variables. So, displaying the
article title, author, excerpt, and permalink should be very familiar.
To finish this template, let’s make the document title also reflect
the print edition being viewed. We will add the title parameter to the
document_header embed template and then use a Channel Entries tag
pair to pull in the title. The code looks like this:
Download RelatedEntries/print-edition-header.html
{embed="includes/document_header"
title="{exp:channel:entries channel="print_editions"
disable="pagination" limit="1"} {title} Print
Edition{/exp:channel:entries}"}
The completed template should look similar to the page in Figure 7.3,
on the next page.
The only thing left to implement is a simple listing of the five most
recent print editions in the sidebar of the Engine City Times website.
By now you should be well prepared to take on this simple task, so how
about some homework?
Using the code available in the download bundle from this book’s web-
page, add the list to the sidebar template, and light it up with the Chan-
nel Entries tag pair.
7.4 What We Learned
Creating print editions for the Engine City Times website is only one
example of what you can do with entry relationships in ExpressionEn-
Report erratum
this copy is (P1.0 printing, March 2010)Download at WoweBook.com

WHAT WE LEARNED 128
Figure 7.3: Viewing the print edition page
gine. As you build more and more ExpressionEngine-powered websites,
you’ll find related entries to be an essential tool. Entry relationships
allow you to better organize and display more complex data and con-
tent in a way that is easy to manage.
Moving forward, we’re going to learn even more skills to help you master
ExpressionEngine: file management skills, advanced templating tech-
niques, and more. Onward!
Report erratum
this copy is (P1.0 printing, March 2010)Download at WoweBook.com

Chapter 8
Managing Files and ImagesContent management systems like ExpressionEngine allow you to man-
age both content and assets (such as images and PDFs) all within an
easy-to-use interface in your web browser. But it wasn’t always so easy.
Back before the widespread availability and use of free and affordable
content management systems, it was much more manual. If you wanted
to include an image on a page, you would upload it via FTP and then
add the markup to the HTML file to make the image appear. This wasn’t
a difficult process, but it did make it harder for nontechnical people to
easily update the site content.
In this chapter, you’ll learn to use the File Manager, a new feature in
ExpressionEngine 2, and set it up as a powerful and easy way to man-
age files and assets. You will also learn how to upload different types of
content using file upload destinations, which are collections of prefer-
ences that tell ExpressionEngine where to save the file, what type of file
is allowed, and more. Once you have your files uploaded, you’ll embed
them in entries and make them available in the Engine City Times arti-
cle template.
8.1 Exploring the File Manager
Before we start setting up our file uploads, let’s first get an overview of
the File Manager. In the Control Panel, click the Content button, and
then select File Manager. The File Manager should look sparse because
we haven’t uploaded any files or set up additional upload destinations.
On the left side is the file list that is grouped by upload directory.
The default destination, Main Upload Directory, is already there. When
we upload files, they will appear in the table, which is divided into
Download at WoweBook.com
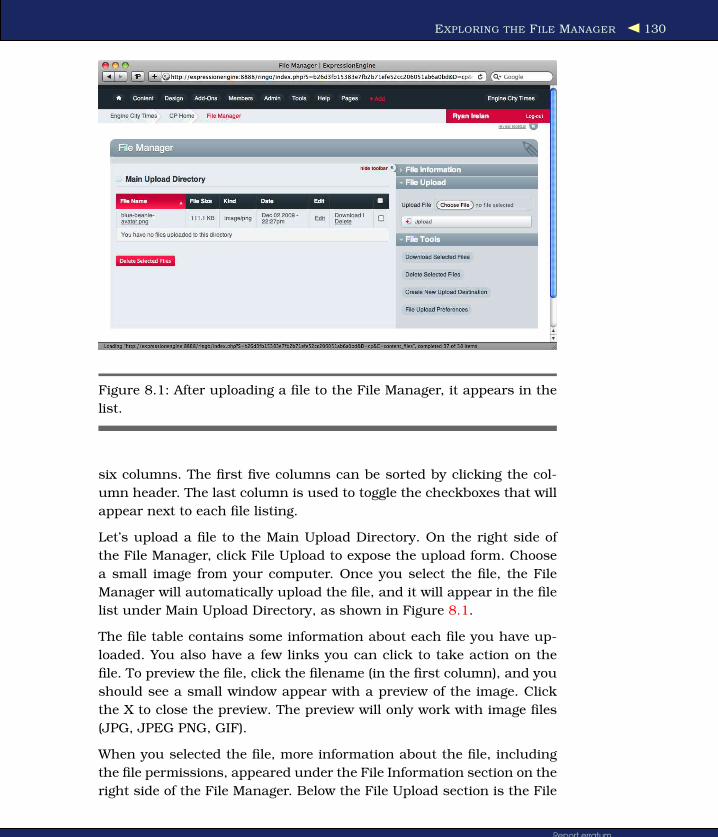
EXPLORING THE FILE MANAGER 130
Figure 8.1: After uploading a file to the File Manager, it appears in the
list.
six columns. The first five columns can be sorted by clicking the col-
umn header. The last column is used to toggle the checkboxes that will
appear next to each file listing.
Let’s upload a file to the Main Upload Directory. On the right side of
the File Manager, click File Upload to expose the upload form. Choose
a small image from your computer. Once you select the file, the File
Manager will automatically upload the file, and it will appear in the file
list under Main Upload Directory, as shown in Figure 8.1.
The file table contains some information about each file you have up-
loaded. You also have a few links you can click to take action on the
file. To preview the file, click the filename (in the first column), and you
should see a small window appear with a preview of the image. Click
the X to close the preview. The preview will only work with image files
(JPG, JPEG PNG, GIF).
When you selected the file, more information about the file, including
the file permissions, appeared under the File Information section on the
right side of the File Manager. Below the File Upload section is the File
Report erratum
this copy is (P1.0 printing, March 2010)Download at WoweBook.com
CREATING AND MANAGING UPLOAD DESTINATIONS 131
Tools section, where you can delete or download multiple files. When
multiple files are downloaded, the File Manager places them in a direc-
tory called image and compress it into a ZIP file before downloading.
Below the download and delete options, there are two links to assist in
creating new upload destinations and managing the file upload prefer-
ences, where you can manage existing upload destinations.
Now that we have a quick overview of what the File Manager looks like,
let’s move forward and create a new file upload destination. After that,
we will start uploading files and displaying or making them available
on the Engine City Times website.
8.2 Creating and Managing Upload Destinations
The first step to managing files with the File Manager is to set up the
upload destinations. The upload destinations allow you define where
ExpressionEngine should save the file, the type of file allowed, the file
size limit, and more. You can also restrict an upload destination to a
one or more member groups.
You can set up as many upload destinations as necessary. For the
Engine City Times website, we’ll create one for news article images and
one for downloadable PDF files of the article. The first thing we need to
do is decide where to save the files.
Creating the Upload Directories
Each upload destination requires that we set a physical location on our
server where ExpressionEngine should upload and save the files. This
can be anywhere on your server that ExpressionEngine can access. For
files that you want to display or make available for download (like the
images we’ll use in the Engine City Times), the physical file location
has to be in the public directory (the one where the ExpressionEngine
application files live).
ExpressionEngine comes with a default upload destination called Main
Upload Directory. Under File Tools, click File Upload Preferences to see
a listing of the upload destinations. Click the Edit link for Main Upload
Directory to see the preferences.
The second preference listed is Server Path to Upload Directory, and
you can see that it is set to save the files in the uploads directory, which
lives in the images directory in the root of the site. ExpressionEngine
Report erratum
this copy is (P1.0 printing, March 2010)Download at WoweBook.com

CREATING AND MANAGING UPLOAD DESTINATIONS 132
has this directory set up for us by default, but that doesn’t mean we
have to use it. For our Engine City Times file uploads, we want to save
the files in the site root in a directory. However, ExpressionEngine will
not automatically create those directories. We have to do that.
On the server, in the root of the website, use an FTP client to create
two directories: article_images and article_pdfs. One directory is for the
article images, and one is to store the PDFs. Using your FTP program,
check that the permissions of the directories we just created are set to
777 on Mac OS X and Unix or to Writeable on Windows. By doing this,
we ensure that the directories have the proper permissions to allow
ExpressionEngine to save the files.
You should now have two directories in the root of your site: article_
images and article_pdfs. Remember those two directory names because
we’ll need them in the next step when we create the new file upload
destinations.
Creating the File Upload Destinations
With the new directories created, we are now ready to create the file
upload destinations that ExpressionEngine will use to manage our files.
Navigate to the File Manager in the Control Panel by clicking the Con-
tent button and selecting File Manager. Under File Tools, click the Cre-
ate New Upload Destination link. We have two destinations to create,
but let’s do the one for the article images first.
We’re presented with a form (see Figure 8.2, on the next page) to create
the new destination. First we want to name the destination; let’s keep it
simple and name ours “Article Images.” The name can be anything, but
it’s important to keep it descriptive so the people uploading the files
know which destination to use. Next, we need to set the path to the
upload directory we created earlier in Section 8.2, Creating the Upload
Directories, on the preceding page. ExpressionEngine prefills the server
path to the ExpressionEngine installation, so we just need to append
our article_images directory after the last forward slash. The file path
(which will be different on every server) should look something like this:
/path/to/ee/article_images.
The next step is to define the URL where the files will be accessible.
ExpressionEngine will use this URL to display the image in the tem-
plate. Since we placed our article_images directory in the site root, cre-
ating the URL of the upload directory is as simple as appending arti-
Report erratum
this copy is (P1.0 printing, March 2010)Download at WoweBook.com

CREATING AND MANAGING UPLOAD DESTINATIONS 133
Figure 8.2: Adding a new file upload destination
cle_images to the end of the site URL that ExpressionEngine prefills
for us. So, your upload directory URL should look something like this:
http://mysite.com/article_images.
There are several more preferences we can set. Here’s a rundown of
what’s available:
• Allowed File Types: There are two options: Images Only and All File
Types. We want to use Images Only for this destination because
we’ll only be uploading images for the news articles. While All File
Types includes everything, Images Only will allow certain image
files to be upload. They must be of the type PNG, GIF, JPG, or
JPEG. Any other image types will be refused.
• Maximum File Size: Entered in bytes, the value of this field will let
you restrict the upload file size. For a 1MB file limit, you would
enter 1048576 (bytes). Let’s set that for this upload destination.
This should be more than enough for the news article images.
• Maximum Image Height and Maximum Image Width: The next two
fields allow you to restrict the height and width in pixels of the
Report erratum
this copy is (P1.0 printing, March 2010)Download at WoweBook.com
CREATING AND MANAGING UPLOAD DESTINATIONS 134
upload image. News article images for the Engine City Times will
be of varying size, so we will leave these two preferences blank.
• Image Properties: Here you can set any properties in the img tag,
like style and alt. By default ExpressionEngine includes a style to
remove borders around images and alt text. You can also use this
to give the img element a class or id so the image is easier to style
using CSS.
• Image Pre Formatting and Image Post Formatting: If you need to
add markup before or after the image (like wrapping it in a con-
taining div), these two preferences will be very handy. We can leave
both fields blank for the news article images.
• File Properties: Just like the Image Properties preference, this al-
lows you to set properties to the anchor link that appears for non-
image files. Since we’re using only images in this destination, we
will leave this blank.
• File Pre Formatting and File Post Formatting: This allows you to
wrap file download links in any markup you want. It functions
the same as the Image Pre Formatting and Image Post Formatting
preference. This destination is only for images, so we can leave
this field blank.
• Restrict file uploading to select member groups: The final setting
before we create the new upload destination allows us to deter-
mine who is and is not allowed to upload files to this destination.
As a Super Admin, you are always allowed to upload files. We
don’t, however, want Members to be able to upload files, so toggle
that to No.
With all of the preferences set, click Create New Upload Destination to
add the news articles destination to ExpressionEngine.
Navigate back to the File Manager. You should now see the Article
Images upload destination listed above the Main Upload Directory des-
tination. There aren’t files listed because we haven’t uploaded any!
Using the File Upload tool on the right side of the File Manager, upload
a few test files to make sure everything is working OK.
On Your Own
The editors of the Engine City Times would also like to offer download-
able PDF versions of some of the new articles on the website. Now that
Report erratum
this copy is (P1.0 printing, March 2010)Download at WoweBook.com

EDITING IMAGE FILES 135
you know how to create a file upload destination in ExpressionEngine,
create another one for the PDFs of news articles. Since the destination
will contain nonimage files, you want to make sure you allow that. Give
the destination a short descriptive name like “Article PDFs.”
After you create the new file upload destination for the PDFs, test that
everything is working properly by uploading some PDFs in the File Man-
ager. When you’re done, you should have three upload destinations:
Main Upload Directory, Articles Images, and the one you just created
called Article PDFs.
Now that we have our file upload destinations created and some sample
files uploaded, let’s make some use of the image files by editing them
in ExpressionEngine and then including them in a news article.
8.3 Editing Image Files
The File Manager also allows you to edit images directly in the Control
Panel. The tools are simple but useful; you can do quick image crop-
ping, resizing, and rotating. It could be especially useful to people who
don’t have dedicated image-editing software on their computer. For our
Engine City Times website, the editing functionality gives reporters and
editors the ability to quickly edit photos for the news articles. Let’s take
a look at the different features of the image editor.
To access the editing screen, choose an image from your list of files, and
click the Edit link in the fifth column of the table. If the Edit link does
not appear for a file, that means it is not a file type that ExpressionEn-
gine can edit. Only the acceptable image formats (PNG, GIF, JPG, and
JPEG) will be available to edit in the File Manager.
After clicking Edit for an image, you are brought to the Edit screen of
the File Manager. On the left is the image that you’ll be editing. On
the right are the three different edit modes available: crop, resize, and
rotate.
Cropping an Image
Click the Crop Mode button to begin cropping an image. You should see
a small animated outline box, like in Figure 8.3, on the next page. Use
your mouse to resize, and move the box to set your crop. On the right
side, the crop values will change as you move and resize the outlined
box. You can also set those crop values manually if you already know
exactly the crop you need.
Report erratum
this copy is (P1.0 printing, March 2010)Download at WoweBook.com

EDITING IMAGE FILES 136
Figure 8.3: Cropping an image in the File Manager
Once you have the crop you like, click Save Image to save the changes.
The image editor should reload and display the updated, cropped im-
age. There is no undo for cropping, so make sure you are satisfied
before saving the edit!
Resizing an Image
If an image is cropped as you like, you may still want to resize it so it fits
properly within the design of the website. Choose an image to edit, and
then click the Resize Mode button. Two input boxes will appear con-
taining the current dimensions of the image. Adjust either the width
or height, and the other value will also change to keep the image con-
strained to its original proportions. But be careful; sizing the image up
(increasing the width and height) may cause loss of quality.
To save the resized image, click Save Image.
Rotating an Image
The last edit option is Rotate Mode, which allows you to change the
orientation of the image. Click the Rotate Mode button, and a box with
four rotate options should appear. The first option lets you rotate the
Report erratum
this copy is (P1.0 printing, March 2010)Download at WoweBook.com

EMBEDDING IMAGES IN ENTRIES 137
image to the right, and the second rotates the images to the left. The
last two options allow you to flip the image top to bottom (turning it
upside down) and right to left (reversing the image).
Take a few minutes to play around with the four different rotating but-
tons, and when you have your image as you like it, click Save Image to
save the image.
If you work with a lot of images accompanying content, you will quickly
find great value in having a simple image editor right inside the Expres-
sionEngine Control Panel. The ability to resize, crop, and rotate images
will save you from having to launch bulky image-editing software for
simple tasks. Even better, you don’t have to leave the Control Panel.
Now that we have our images edited and ready for the site, let’s learn
how to embed images directly in our entries.
8.4 Embedding Images in Entries
ExpressionEngine makes it simple to embed an image you uploaded
through the File Manager and have it appear in the content of an entry.
If you didn’t upload images earlier in the chapter, you should add some
now before going further. If you have image uploaded in the File Man-
ager, then let’s get started embedding.
Embedding images in entries is the most common usage. For the Engine
City Times website, we will create a new news article and embed an
image in it.
Click the Content button at the top of the Control Panel, select Publish,
and then select News Articles. Create a sample entry (give it any title
you please), adding a short excerpt and some content in the article
body.
Above the Article Body textarea is a formatting toolbar (see Figure 8.4,
on the following page). The second-to-last icon, which looks like an
image of a tree, is what we want to use to embed an image in the article
body.
Place your cursor in the middle of the content, just to the left of the
first letter of a sentence, and then click the image icon in the formatting
toolbar. An overlay should appear that displays a form to upload a new
image or to choose an image from one of your file upload destination.
Choose Main Upload Directory, and then select the image you want to
Report erratum
this copy is (P1.0 printing, March 2010)Download at WoweBook.com

ADDING FILES TO ENTRIES 138
Figure 8.4: Using the toolbar to embed an image in the field
content
embed by clicking it. ExpressionEngine should add the img element at
the beginning of the content in the article body.
Save the entry, and then view the article on the Engine City Times web-
site. It should look something like Figure 8.5, on the next page. The
image appears in the flow of the content of the article, and the text
wraps nicely around it.
If you want to apply any styles to the image, you can use the file upload
destination preferences we set back in Section 8.2, Creating the File
Upload Destinations, on page 132 to add properties to the img element.
Use the properties to include inline styles or to add a CSS class or id.
This would be useful if you wanted to add a border around the image,
increase padding or margins, or set the image on a colored background.
Embedding images is a great way to break up large chunks of text in
an entry and give the reader something to look at. However, there is
another way to include files with an entry—but not right in the content
field—and it’s done using a custom file upload field.
8.5 Adding Files to Entries
While viewing the Engine City Times article you just created in the pre-
vious section, you probably saw that the article still had the gray place-
holder image with the text “news article image.”
Report erratum
this copy is (P1.0 printing, March 2010)Download at WoweBook.com

ADDING FILES TO ENTRIES 139
Figure 8.5: Viewing the embedded image on the website
We weren’t able to address this image using embedded images because
it lives outside the entry content. Let’s take a quick look at a snippet of
the markup for the news articles:
Download FileManagement/article-view.html
<div id="content">
<div id="article">
<img src="/img/news-article-image.png"
alt="News Article Image" />
<h4>EE Screencasts Releases New Series</h4>
<h5><span class="by">By</span> Ryan Irelan</h5>
<p>Lorem ipsum ...</p>
The main image for the article lives outside the content area in a
dedicated img element. To change this image, we have to somehow place
an article-specific image in that img element. We could use a simple
input field in our publish form and type the URL to the image (after we
manually upload it to the server). Or we could allow the user to upload
an image right in the form and have it attached to the entry. This is the
better choice.
Report erratum
this copy is (P1.0 printing, March 2010)Download at WoweBook.com

ADDING FILES TO ENTRIES 140
New to ExpressionEngine 2 is a native file upload field that you can
place in the publish form for entries. It makes uploading and attaching
files to entries very simple. We only need to add a new custom field and
tell ExpressionEngine where to upload the file.
Adding the Upload Field
In the Control Panel, click the Admin button, then Channel Administra-
tion, and finally Custom Fields. Click Add/Edit Custom Fields for the
News Articles field group. Create a new field, giving it the label “Article
Image” and the short name “article_image.” From the Field Type list,
choose Upload, and then choose Image from the File Type select list.
Click Submit to save the new field.
Bring up the edit form for the article we created earlier in Section 8.4,
Embedding Images in Entries, on page 137, and you should see the
new Article Image upload field. Click Choose File, and select an image
to attach to the entry. You can also choose which upload destination
should be used; the Article Images destination should be selected by
default. Click Submit to save the changes and upload the file.
The image won’t yet appear with the article because we haven’t updated
our template with the new field. Let’s do that now.
Adjusting the Article View Template
When we attached and uploaded a new article image to the new article
entry, ExpressionEngine did not actually save the image in the entry.
ExpressionEngine uploaded the file to our Article Image upload desti-
nation and then saved the URL to that image in the entry Upload field.
This makes it easy for us for drop the field variable in the src prop-
erty of the img element in the view template (located in the news_articles
template group). Let’s look at that bit of template code:
Download FileManagement/article-view.html
<div id="content">
<div id="article">
{exp:channel:entries channel="news_articles" limit="1"
status="Open|Top Story|Featured Top Story"}
<img src="/img/news-article-image.png"
alt="News Article Image" />
<h4>{title}</h4>
We just need to drop in the field variable for the image, article_image,
replacing the /img/news-article-image.png path with the variable.
Report erratum
this copy is (P1.0 printing, March 2010)Download at WoweBook.com

WHAT WE LEARNED 141
The template code should now look like this:
Download FileManagement/article-view.html
<div id="content">
<div id="article">
{exp:channel:entries channel="news_articles" limit="1"
status="Open|Top Story|Featured Top Story"}
<img src="{article_image}" alt="News Article Image" />
<h4>{title}</h4>
Save the template, and then view the article again on the Engine City
Times website. If your code is set up correctly, you should now see the
image you uploaded with the news article.
We now have given the editors and reporters at the Engine City Times
the ability to attach an article image that will appear to the left of the
headline.
On Your Own
Back in Section 8.2, Creating the Upload Directories, on page 131, we
created an upload destination for PDF files to be included with the arti-
cles. The Engine City Times staff will be creating downloadable versions
of the articles and making them available as PDF files.
On your own, enable this functionality for the Engine City Times website
by setting up a new Upload custom field and then placing a link at the
bottom of the article where the reader can download the file. Not every
article will have a PDF file, so you’ll want to use a simple conditional
to check whether there is one available before displaying the HTML to
create the download link. Good luck!
8.6 What We Learned
In this chapter, we learned how to manage images and files using
the ExpressionEngine File Manager. We were able to embed an image
directly in the content of a news article on the Engine City Times web-
site. For files that we didn’t embed in the content, we used the Upload
custom field type to attach files directly to the entry. This allowed us to
make the images appear wherever we wanted.
We’ve been spending a lot of time working in the Control Panel, so
let’s change over to working in the templates. In the next chapter, we’ll
learn some advanced templating techniques that will help us make our
ExpressionEngine templates more powerful and useful.
Report erratum
this copy is (P1.0 printing, March 2010)Download at WoweBook.com

Chapter 9
Advanced TemplatingIn the previous part, we built the Engine City Times website from begin-
ning to end. Throughout the process, we learned all the basic skills
needed to build websites with ExpressionEngine. Now we’ll add to that
knowledge and get closer to becoming ExpressionEngine experts who
can tackle almost any ExpressionEngine website project.
In this chapter, we’ll learn some advanced templating techniques that
give us finer control over how we present content to the user. We’ll
learn how the user can submit content to the site using a stand-alone
entry form. We’ll see how to create a more powerful Channel Entries tag
using two new parameters: dynamic_parameters and search. Finally, we’ll
explore how to display any data we want with custom MySQL queries,
right in an ExpressionEngine template.
9.1 A More Powerful Channel Entries Tag
By now we’re familiar with the Channel Entries tag and how to use it
in a template to display content. Well, it can do even more. Let’s take
a step forward and improve our templating skills and what we can do
with the Channel Entries tag. We’ll learn how to search inside custom
fields and dynamically set the Channel Entries tag parameters.
Searching Inside Custom Fields
The first power tip for the Channel Entries tag is to use the search:
parameter, which allows us to display content that matches some con-
tent in our custom fields.
Download at WoweBook.com

A MORE POWERFUL CHANNEL ENTRIES TAG 143
We use it like this:
Download AdvancedTemplating/search-custom-fields.html
{exp:channel:entries channel="site" search:body="pig"}
{title}
{/exp:channel:entries}
In the example, we’re using the search: parameter to tell Expression-
Engine to search in the body field of all entries in the site channel and
display the titles of those entries where “pig” is in the body field. This
is useful in the Engine City Times website to show all news articles
that mention, for example, “Obama” in the body of an article. In that
example, we use the search: parameter like this:
Download AdvancedTemplating/search-custom-fields.html
{exp:channel:entries channel="news_articles"
search:article_body="Obama"}
{title}
{/exp:channel:entries}
This code will return all articles that have the word “Obama” in the
article_body custom field. The search: parameter also accepts multiple
terms. You just need to separate them with the pipe character.
Download AdvancedTemplating/search-custom-fields.html
{exp:channel:entries channel="news_articles"
search:article_body="Obama|Clinton"}
{title}
{/exp:channel:entries}
The previous code will display all news articles where the article_body
field contains either “Obama” or “Clinton.” There is no limit to how
many search terms you can use.
To return all news articles that contain both terms, separate the terms
with a double ampersand instead of with a pipe:
Download AdvancedTemplating/search-custom-fields.html
{exp:channel:entries channel="news_articles"
search:article_body="Obama&&Clinton"}
{title}
{/exp:channel:entries}
To match entries that do not contain a certain term, use the not term
in the parameter value. So, instead of search:article_body="Obama" as
the parameter value, the value to return all entries that do not contain
Report erratum
this copy is (P1.0 printing, March 2010)Download at WoweBook.com

A MORE POWERFUL CHANNEL ENTRIES TAG 144
the word “Obama” in the article body would be search:article_body="not
Obama".
We can further refine our searches using two more special parameter
values: an = sign for exact searches and IS_EMPTY to check whether the
custom field is empty.
To do exact matching of a term, we prepend the search term with the =
sign:
Download AdvancedTemplating/search-custom-fields.html
{exp:channel:entries channel="site"
search:body="=pig"}
{title}
{/exp:channel:entries}
This only displays entries where “pig” is the only word in the body field.
This isn’t useful for large content fields (like the news_body field in the
Engine City Times) but could come in handy if we wanted to match
entries from a job database that contained a job title in the field, like
“News Editor.”
Download AdvancedTemplating/search-custom-fields.html
{exp:channel:entries channel="jobs"
search:job_title="=News Editor"}
{title}
{/exp:channel:entries}
The code returns all entries in the jobs channel where the job_title field
contains exactly “News Editor” and nothing else.
If we didn’t use the exact matching and we had an entry with the job
title “Editor in Chief,” that job would also be returned in the results. To
get the correct results, we have to prepend = to the search term.
We can also check whether fields contain no content. To display job
listings where no salary has been specified (by leaving the salary field
blank), we use the special search constant IS_EMPTY.
Download AdvancedTemplating/search-custom-fields.html
{exp:channel:entries channel="jobs"
search:job_salary="IS_EMPTY"}
{title}
{/exp:channel:entries}
In this code we search the jobs channel for all entries where the job_
salary field is empty. ExpressionEngine returns all of the entries where
the job_salary field has no content.
Report erratum
this copy is (P1.0 printing, March 2010)Download at WoweBook.com

A MORE POWERFUL CHANNEL ENTRIES TAG 145
Dynamically Set Channel Entries
As we built the Engine City Times website, we worked extensively with
the Channel Entries tag and its parameters. Up until this point, we’ve
set the parameters right in the template; if we wanted to pull from
the site channel, we assigned the channel parameter the value of site.
ExpressionEngine displays entries from that channel until we change
it in the template. That’s how it normally works. However, using an
advanced feature of the Channel Entries tag, we can allow the website
visitor to change the values of the parameters. This feature in Expres-
sionEngine is called dynamic parameters, and it is yet another way
we can make our ExpressionEngine templates even more powerful and
customizable.
Dynamic parameters are a documented, yet rarely used, feature of
ExpressionEngine that allow us to dynamically set any of the avail-
able Channel Entries tag pair parameters (there are more than forty
to choose from). It gives users the flexibility to choose how they want
the content to be presented. Let’s use dynamic parameters to add some
new functionality to the Engine City Times website.
We want to give readers the ability to control how many articles appear
on the News page. Our goal is to present the reader with a simple drop-
down menu, from which they choose a number from 1 to 10 and then
click the Submit to alter the number of entries being displayed.
With dynamic parameters, we set the parameters using the POST data
from a form. We will post the data using a simple form, like this:
Download AdvancedTemplating/dynamic-parameters.html
<form action="{path='news_articles/page/category/news'}"
method="post">
<select name="limit" id="limit">
<option value="1">1</option>
<option value="2">2</option>
<option value="3">3</option>
<option value="4">4</option>
<option value="5">5</option>
<option value="6">6</option>
<option value="7">7</option>
<option value="8">8</option>
<option value="9">9</option>
<option value="10">10</option>
</select>
<p><input type="submit" value="Submit"></p>
</form>
Report erratum
this copy is (P1.0 printing, March 2010)Download at WoweBook.com

A MORE POWERFUL CHANNEL ENTRIES TAG 146
Figure 9.1: Dynamic parameters form to change number of articles on
category page
This is a simple select option list with options from 1 to 10 and a Submit
button to send the form data. Note two important things about the
form:
• The name of the select element has to be the name of the param-
eter you want to dynamically set.
• The values of the options have to be the values you want to set to
the parameter.
We want the form to submit to the same page the user is viewing (to
keep this example simple, we’re using the News category page), so we
set the action of the form using the {path} variable.
Let’s add the form to the top of the category template, just under the
category name, so it looks like Figure 9.1.
Select a number from the drop-down, and click Submit. The page re-
loads, but the number of articles displayed doesn’t change. Why? We
still need to add a parameter to the Channel Entries tag pair that
makes the three columns of articles appear. Add the dynamic_parameters
parameter to the Channel Entries tag pair, like this:
Download AdvancedTemplating/dynamic-parameters.html
{exp:channel:entries channel="news_articles"
limit="3" status="Open|Top Story|Featured Top Story"
dynamic_parameters="limit"}
...
{/exp:channel:entries}
Report erratum
this copy is (P1.0 printing, March 2010)Download at WoweBook.com
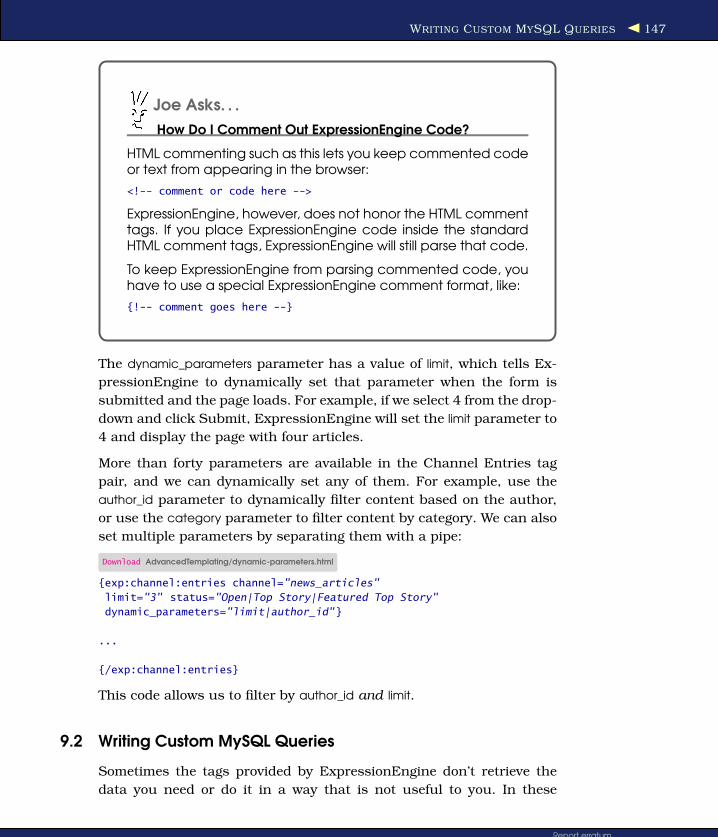
WRITING CUSTOM MYSQL QUERIES 147
Joe Asks. . .
How Do I Comment Out ExpressionEngine Code?
HTML commenting such as this lets you keep commented codeor text from appearing in the browser:
<!-- comment or code here -->
ExpressionEngine, however, does not honor the HTML commenttags. If you place ExpressionEngine code inside the standardHTML comment tags, ExpressionEngine will still parse that code.
To keep ExpressionEngine from parsing commented code, youhave to use a special ExpressionEngine comment format, like:
{!-- comment goes here --}
The dynamic_parameters parameter has a value of limit, which tells Ex-
pressionEngine to dynamically set that parameter when the form is
submitted and the page loads. For example, if we select 4 from the drop-
down and click Submit, ExpressionEngine will set the limit parameter to
4 and display the page with four articles.
More than forty parameters are available in the Channel Entries tag
pair, and we can dynamically set any of them. For example, use the
author_id parameter to dynamically filter content based on the author,
or use the category parameter to filter content by category. We can also
set multiple parameters by separating them with a pipe:
Download AdvancedTemplating/dynamic-parameters.html
{exp:channel:entries channel="news_articles"
limit="3" status="Open|Top Story|Featured Top Story"
dynamic_parameters="limit|author_id"}
...
{/exp:channel:entries}
This code allows us to filter by author_id and limit.
9.2 Writing Custom MySQL Queries
Sometimes the tags provided by ExpressionEngine don’t retrieve the
data you need or do it in a way that is not useful to you. In these
Report erratum
this copy is (P1.0 printing, March 2010)Download at WoweBook.com
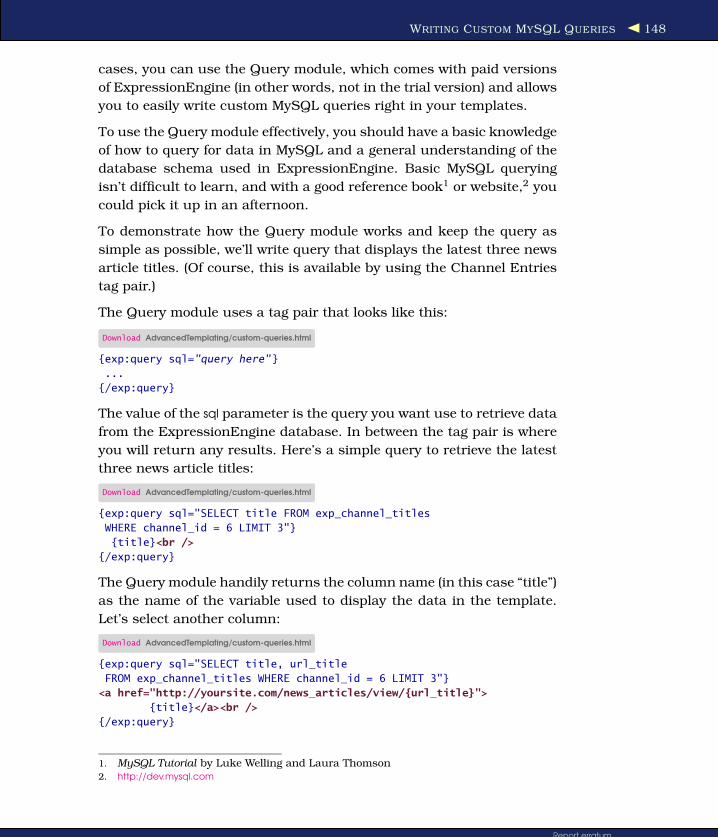
WRITING CUSTOM MYSQL QUERIES 148
cases, you can use the Query module, which comes with paid versions
of ExpressionEngine (in other words, not in the trial version) and allows
you to easily write custom MySQL queries right in your templates.
To use the Query module effectively, you should have a basic knowledge
of how to query for data in MySQL and a general understanding of the
database schema used in ExpressionEngine. Basic MySQL querying
isn’t difficult to learn, and with a good reference book1 or website,2 you
could pick it up in an afternoon.
To demonstrate how the Query module works and keep the query as
simple as possible, we’ll write query that displays the latest three news
article titles. (Of course, this is available by using the Channel Entries
tag pair.)
The Query module uses a tag pair that looks like this:
Download AdvancedTemplating/custom-queries.html
{exp:query sql="query here"}
...
{/exp:query}
The value of the sql parameter is the query you want use to retrieve data
from the ExpressionEngine database. In between the tag pair is where
you will return any results. Here’s a simple query to retrieve the latest
three news article titles:
Download AdvancedTemplating/custom-queries.html
{exp:query sql="SELECT title FROM exp_channel_titles
WHERE channel_id = 6 LIMIT 3"}
{title}<br />
{/exp:query}
The Query module handily returns the column name (in this case “title”)
as the name of the variable used to display the data in the template.
Let’s select another column:
Download AdvancedTemplating/custom-queries.html
{exp:query sql="SELECT title, url_title
FROM exp_channel_titles WHERE channel_id = 6 LIMIT 3"}
<a href="http://yoursite.com/news_articles/view/{url_title}">
{title}</a><br />
{/exp:query}
1. MySQL Tutorial by Luke Welling and Laura Thomson2. http://dev.mysql.com
Report erratum
this copy is (P1.0 printing, March 2010)Download at WoweBook.com
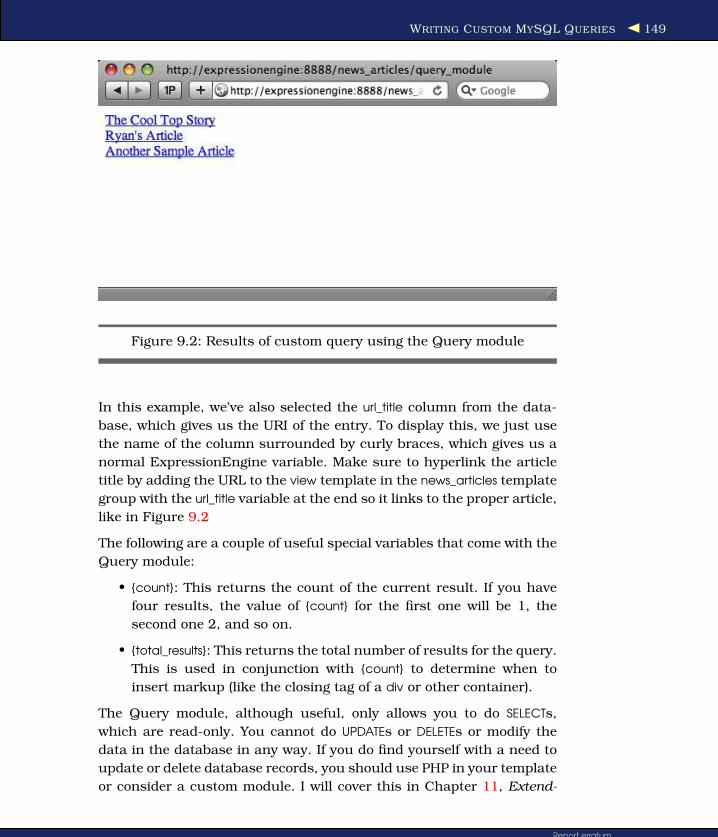
WRITING CUSTOM MYSQL QUERIES 149
Figure 9.2: Results of custom query using the Query module
In this example, we’ve also selected the url_title column from the data-
base, which gives us the URI of the entry. To display this, we just use
the name of the column surrounded by curly braces, which gives us a
normal ExpressionEngine variable. Make sure to hyperlink the article
title by adding the URL to the view template in the news_articles template
group with the url_title variable at the end so it links to the proper article,
like in Figure 9.2
The following are a couple of useful special variables that come with the
Query module:
• {count}: This returns the count of the current result. If you have
four results, the value of {count} for the first one will be 1, the
second one 2, and so on.
• {total_results}: This returns the total number of results for the query.
This is used in conjunction with {count} to determine when to
insert markup (like the closing tag of a div or other container).
The Query module, although useful, only allows you to do SELECTs,
which are read-only. You cannot do UPDATEs or DELETEs or modify the
data in the database in any way. If you do find yourself with a need to
update or delete database records, you should use PHP in your template
or consider a custom module. I will cover this in Chapter 11, Extend-
Report erratum
this copy is (P1.0 printing, March 2010)Download at WoweBook.com

ADDING CONTENT OUTSIDE OF THE CONTROL PANEL 150
ing ExpressionEngine with Add-Ons, on page 173. Adding data to the
database from a template, however, is possible with the stand-alone
entry form.
9.3 Adding Content Outside of the Control Panel
Throughout this chapter we’ve learned how to make our templates more
dynamic and powerful when presenting content to visitors. Now we’re
going to move away from presenting content and learn how to allow
visitors to add content, outside of the Control Panel, to the Engine City
Times website.
You can do this using the stand-alone entry form (SAEF). This is a
special form in ExpressionEngine that lets you display custom fields to
a logged-in user to be filled out and submitted to the ExpressionEngine
database as entries. For example, you could allow visitors to add a
job posting to a job board website or add a classified ad to a website.
To see a real-world implementation of an SAEF, visit the EE Insider
Tips section of the EE Insider website.3 It allows the ExpressionEngine
community to easily submit and share their favorite ExpressionEngine
tips and tricks.
You’ll recall that back in Chapter 5, Making the Pages, on page 76 we
added the Letters to the Editor section on the front page of the Engine
City Times website. We entered the letters into ExpressionEngine using
the Control Panel interface.
To demonstrate how to build an SAEF, we’re going to implement a way
for registered users to send letters to the editor and have those submit-
ted letters added to ExpressionEngine with a status of “closed.” We’re
using that status so a letter doesn’t appear on the website until an
editor has reviewed and approved it.
As you can see in Figure 9.3, on the next page, the Submit a Letter to
the Editor form consists of only two fields: Subject and Your Thoughts.
The Subject field is actually the entry title, and the Your Thoughts field
is just a custom field to hold the letter body.
Before we get into the template code used, we need to create the tem-
plate itself. Under the site template group, create a template called “let-
ter_form,” and save it.
3. http://eeinsider.com/tips
Report erratum
this copy is (P1.0 printing, March 2010)Download at WoweBook.com

ADDING CONTENT OUTSIDE OF THE CONTROL PANEL 151
Figure 9.3: Letter to editor submission form
In the downloaded directory of site template files, open letter_form.html,
copy the entire contents of the file into the newly created letter_form
template, and save it. Add the appropriate embed templates to make
the template the same as others in the site.
We’re going to focus on the form itself. Right now it’s just typical form
code; there’s an input field, a textarea, and a submit button.
Download AdvancedTemplating/saef.html
<form action="saef-form-form" method="post" accept-charset="utf-8">
<p><label for="Subject">Subject:</label><br /><input
type="text" name="" value="" id="" size="50"/></p>
<p><label for="letter-content">Your Thoughts:</label>
<br /><textarea name="Name" rows="10" cols="50"></textarea></p>
<p><input type="submit" value="Submit"></p>
</form>
Report erratum
this copy is (P1.0 printing, March 2010)Download at WoweBook.com

ADDING CONTENT OUTSIDE OF THE CONTROL PANEL 152
As you can see, the action doesn’t go anywhere, so we need to light up
this form so it submits content to the letter_to_editor section in Expres-
sionEngine. We’ll do this using the SAEF tags that ExpressionEngine
provides.
Adding SAEF Tags to the Form
The first step to creating an SAEF is to replace the form tags with the
special SAEF tags that ExpressionEngine gives us.
First, locate the opening tag of the form:
Download AdvancedTemplating/saef.html
<form action="saef-form-form" method="post"
accept-charset="utf-8">
and completely replace it with the SAEF tag:
Download AdvancedTemplating/saef.html
{exp:channel:entry_form channel="letters_to_editor"
return="site/thank_you" status="Closed"}
The tag pair takes a few parameters we need to set. The first is channel,
which, like the Channel Entries tag pair, tells ExpressionEngine which
section to use. In this case, we’re telling ExpressionEngine which sec-
tion to add to the submitted form data. The second parameter is return,
which tells ExpressionEngine where to direct the user after the form is
successfully submitted. The third parameter is status, which allows you
to set the status of the new entry. The editors of the Engine City Times
would like to edit and approve all letters to the editor that appear on
the site, so we’ll give the status of “closed” to any letter submitted with
the form.
Let’s continue bringing the form to life. Find the closing form tag:
</form>
and replace it with the closing SAEF tag:
{/exp:channel:entry_form}
Now we make some changes to the form elements (the input field and
textarea) so they work with our SAEF. Let’s start with the Subject field:
<input type="text" name="" value="" id="" size="50"/>
Since we’re using the title field for the Subject, we need to give the name
parameter the value of name and the value parameter the value of {title},
which is a variable ExpressionEngine will use to repopulate the field
Report erratum
this copy is (P1.0 printing, March 2010)Download at WoweBook.com

ADDING CONTENT OUTSIDE OF THE CONTROL PANEL 153
upon an incorrect form submission. With that done, the input field
code should look like this:
Download AdvancedTemplating/saef.html
<input type="text" name="title" value="{title}"
id="title" size="50"/>
To tackle the textarea, we employ a new tag pair, {custom_fields}, that is
special to the SAEF. This tag pair will loop through every custom field of
the field group assigned to the section and display them in the template.
This makes it simple to use a small amount of code to generate several
form fields. Since we have only one field, it will be even simpler.
Inside the {custom_fields} tag pair, we need to put in an if statement to
check to see whether there are any textarea fields to display.
Download AdvancedTemplating/saef.html
{custom_fields}
{if textarea}
...
{/if}
{/custom_fields}
If there is a textarea (which there is for this form), we want to display the
textarea markup. We also give the parameters values using special vari-
ables. ExpressionEngine will automatically assign the correct value for
each parameter based on which textarea it is showing. This includes the
{field_data} variable, which will repopulate the field with the submitted
data if there was an error while submitting the form.
Download AdvancedTemplating/saef.html
{custom_fields}
{if textarea}
<p><label for="letter-content">Your Thoughts:</label>
<br />
<textarea id="{field_name}" name="{field_name}"
rows="{rows}" cols="50">{field_data}
</textarea></p>
{/if}
{/custom_fields}
The complete form should look like this:
Download AdvancedTemplating/saef.html
{exp:channel:entry_form channel="letters_to_editor"
return="site/thank_you" status="Closed"}
<p><label for="Subject">Subject:</label>
<br />
Report erratum
this copy is (P1.0 printing, March 2010)Download at WoweBook.com

ADDING CONTENT OUTSIDE OF THE CONTROL PANEL 154
<input type="text" name="title" value="{title}"
id="title" size="50"/></p>
{custom_fields}
{if textarea}
<p><label for="letter-content">Your Thoughts:</label>
<br />
<textarea id="{field_name}" name="{field_name}"
rows="{rows}" cols="50">{field_data}</textarea></p>
{/if}
{/custom_fields}
<p><input type="submit" value="Submit"></p>
{/exp:channel:entry_form}
With the form in place, we have a small amount of cleanup work to do. If
you were not logged in while working on this template, the SAEF did not
appear. Next up, we’ll handle this situation with a simple conditional.
Checking for a Logged-in User
Submitting the SAEF requires that the user is logged in to Expression-
Engine. This could be as a normal user with no access to the Control
Panel or as an administrator. If you are not logged in, the form will
not appear. This is a security measure built in to ExpressionEngine to
prevent unauthorized users from adding data to your ExpressionEn-
gine database. We want to display some text for those users who try to
access the SAEF when they’re not logged in.
Right below the introductory text (“To submit your letter use...”), we’ll
add a conditional to check whether the user is logged out, and if so,
we’ll display some text.
Download AdvancedTemplating/saef.html
{if logged_out}
<p>To submit a letter you must have a member account.
Please <a href="{path=member/login}">log in</a>
or <a href="{path=member/register}">sign up for
a free account</a>.
</p>
{/if}
After placing this in the template, sign out of the Control Panel, and
then reload the page. You will see the text we just added (see Figure 9.4,
on the following page).
Log back in to the Control Panel, and then reload the page to make
the form appear again. Fill out the form with some sample data, and
then submit it. It should submit properly and then redirect you to the
Report erratum
this copy is (P1.0 printing, March 2010)Download at WoweBook.com

ADDING CONTENT OUTSIDE OF THE CONTROL PANEL 155
Figure 9.4: Letter to editor submission page when logged out
thank_you template. We haven’t created that template, but it’s just a
simple template thanking the user for submitting the letter.
Log in to the Control Panel, and check that the entry was added to the
proper channel and has a status of “closed.” If so, your SAEF is set up
and working properly.
We’ve now created our first SAEF and enabled the Engine City Times
visitors to submit letters directly to the website. This is just one example
of how to use an SAEF. Think for a moment about other uses. What
ideas do you have? Do you see how it can help you build websites that
are more useful to your users?
Report erratum
this copy is (P1.0 printing, March 2010)Download at WoweBook.com

SHARING DATA BETWEEN TEMPLATES 156
9.4 Sharing Data Between Templates
In Chapter 5, Making the Pages, on page 76, we learned about shar-
ing code across templates using embed templates. This keeps us from
repeating the same code in multiple templates and makes managing
and updating templates a lot easier (and faster). Used creatively, you
can pare down the number of templates required to run a website.
But there’s more to embed templates than just the templates them-
selves. The handiest part of embed templates is the embed variable
functionality. Embed variables allow you to pass data from one tem-
plate to another using special variables declared in your embed tag.
Why is this so useful? While building out the Engine City Times website
in Chapter 5, Making the Pages, on page 76, we put the header code for
the entire site in one file and embedded it in every template. We did this
because updating one header file is easier than updating twenty. Our
embed tag looks like this:
Download AdvancedTemplating/embed-variables.html
{embed="includes/document_header"}
To use an embed variable and share data from the main template to
the embed template, you add a parameter with the name of the variable
you’d like to pass to the document_header template. Give the variable
any name you want, as long as it doesn’t conflict with another variable
in the embed template.
For the Engine City Times document_header template, we want to pass
the page title, so we’ll call the variable page_title.
Download AdvancedTemplating/embed-variables.html
{embed="includes/document_header" page_title=""}
Now we need to assign some data to the page_title variable. We need to
find the page title (the title of the entry that is being viewed), so we’ll use
the standard Channel Entries tag pair. We can just place the entire tag
pair plus its variable (in this case we’re using the {title} variable) inside
the double quotes of the {page_title} variable.
Download AdvancedTemplating/embed-variables.html
{embed="includes/document_header"
page_title="{exp:channel:entries
channel="news_articles" limit="1"}
{title}{/exp:channel:entries}"}
Report erratum
this copy is (P1.0 printing, March 2010)Download at WoweBook.com

SHARING DATA BETWEEN TEMPLATES 157
This code works because ExpressionEngine parses the Channel Entries
tag pair before the embed tag. When it comes time to parse the embed
tag, the value of the page_title is already set with the title of the current
entry.4
With the variable properly created and set, ExpressionEngine will em-
bed the document_header template and pass along the current entry’s
title. In that template, we have all of the code for the header of our page.
Here’s a snippet of the template:
Download AdvancedTemplating/embed-variables.html
<head>
<meta http-equiv="Content-Type" content="text/html;
charset=utf-8"/>
<title>The Engine City Times</title>
We want to customize the title tag so it also displays the title of whatever
page or article that is currently being displayed. The title comes from
the value of the embed variable that is being passed to the template.
Right now the document_head template only displays “The Engine City
Times” for every page. We want to keep that as part of the title tag but
also prepend the page title. To do this, we’ll simply add the embed
variable.
Download AdvancedTemplating/embed-variables.html
<head>
<meta http-equiv="Content-Type" content="text/html;
charset=utf-8"/>
<title>{embed:page_title} — The Engine City Times</title>
The format of the embed variable is just like a normal variable, except
we prepend embed: to the variable name. This differentiates it from
normal template variables.
With that set, now when we view a news article on the Engine City Times
website, the title tag will be populated with both the name of the website
(hard-coded into the template) and the title of the article we’re viewing
(using the embed variable), as shown in Figure 9.5, on the next page.
Here’s what the title tag looks like if we viewed the source of the page:
<head>
<meta http-equiv="Content-Type" content="text/html;
charset=utf-8"/>
<title>Sample News Article — The Engine City Times</title>
4. ExpressionEngine parses template tags in a certain order, and this can impact how
your ExpressionEngine tags return data. To learn about more about the parsing order of
tags, refer to the ExpressionEngine Wiki page: http://expressionengine.com/wiki/Parse_Order/.
Report erratum
this copy is (P1.0 printing, March 2010)Download at WoweBook.com

EDIT TEMPLATES ANYWHERE 158
Figure 9.5: Displaying the article title using an embed variable
This is only one example of how you can use the embed variable to
share data between templates. Explore using embed variables in other
ways, and you’ll learn how flexible and powerful your templates can be.
9.5 Edit Templates Anywhere
Up until this point we’ve been editing the ExpressionEngine templates
in the browser via the built-in template editor. Although this is a sim-
ple way to get started, editing in the browser limits you. Like me, you
probably have a favorite text editor that you like to use to write and edit
HTML code. By working with ExpressionEngine templates as files, you
can easily format your code in the text editor of your choice. You also
benefit from an easy to way to back up your templates (just download
them from the server). Finally, incorporating version control (like Sub-
version5) into your workflow is simple when your templates are saved
as files.
For these reasons, work with your templates as files. The flexibility is
more than worth the little effort it takes to set it up.
5. For a introduction and overview of Subversion, read
http://www.alistapart.com/articles/collaboratewithsubversion/.
Report erratum
this copy is (P1.0 printing, March 2010)Download at WoweBook.com

EDIT TEMPLATES ANYWHERE 159
Enabling Templates as Files
Saving templates as files is not enabled by default in ExpressionEn-
gine, so we’ll need to do a small amount of setup first. We will turn the
option on, tell ExpressionEngine where to save the templates as files,
and, finally, go through each template and save it so ExpressionEngine
creates the file.
On the Control Panel home page, click the Design button, and then
click Template Manager under Templates. Click the gray Global Tem-
plate Preferences button at the top of the page.
Here we alter two settings to enable the ability to save templates as
files. First, toggle the preference Allow Templates to be Saved as Files?
to Yes. Next, we tell ExpressionEngine where to save the templates.
We can save the templates to wherever we fancy, in any location on
our server that ExpressionEngine can access. ExpressionEngine comes
with a templates directory inside the system/expressionengine directory,
which is a convenient place to put the templates. I use this directory to
save templates for all of my projects, so let’s use that directory for the
Engine City Times template files, too.
Now that we know where we want to save our templates as files, we
need to let ExpressionEngine know.
The last field on the Global Template Preferences page is Basepath to
Template File Directory. Enter the full, absolute path to the location of
the template directory. The absolute path will differ across web servers,
so if you have trouble finding yours, you may want to ask your system
administrator or contact your web host.
With the path to the template directory set, click Update to save the
changes. Now ExpressionEngine knows where to save the templates,
so we just have to go through and save them all as files.
Saving the Templates as Files
Even though we’ve enabled saving templates as files, ExpressionEngine
doesn’t automatically save all of your templates as files. You have to do
this manually for each template in the system.
Head back into the Control Panel, and go to the site template group.
Select the index template. At the bottom of the page you should now
see a Save Template as File checkbox. Select the box, and then click
Update. ExpressionEngine saves your template to a file, and from now
Report erratum
this copy is (P1.0 printing, March 2010)Download at WoweBook.com

WHAT WE LEARNED 160
When ExpressionEngine Can’t Find the Template File
A common error when moving a website to a new server orhost is that the template path is incorrect. When this happens,ExpressionEngine will fall back to the last version of the tem-plates saved to the database. Because you have been editingyour templates as files, the templates in the database are mostlikely out-of-date. If you move a site and see that the pagesdon’t have your most recent changes, the culprit is most likelyan incorrect path to the templates directory.
on it will read from the template file instead of from the database when
using the template to display content on the website.
You can now log in to your server via FTP (or look in your file system,
if you’re developing locally) and see the template inside the templates
and site directories. ExpressionEngine will automatically create directo-
ries for each of your template groups when the first template from that
group is saved as a file.
Since ExpressionEngine is pulling your template code from the file (as
opposed to from the database), any changes you make to the file will
be rendered in the browser. If you decide you want to edit a template
from within the ExpressionEngine Control Panel, you can still do that;
ExpressionEngine will pull in the template from the static file and dis-
play it for editing. Any changes you make and save will be saved back
to the template file only, not into the database.
With ExpressionEngine templates now saved as files, we are free to edit
them in any text editor we choose. The increased flexibility will make
creating websites with ExpressionEngine easier.
9.6 What We Learned
This chapter demonstrated how to use the more advanced Expression-
Engine templating features. With just a handful of tools, we now have
the ability to share data between templates, empower users to choose
how they want to see the content, and, finally, submit our own content
directly to the site. Up next we’ll learn how to keep our site running
smoothly using optimization.
Report erratum
this copy is (P1.0 printing, March 2010)Download at WoweBook.com

Chapter 10
Optimizing OurExpressionEngine Site
With our Engine City Times site complete, we now turn our attention to
making sure it is responsive and reliable when the throngs of visitors
come to read the news.
The performance bottleneck for most database-driven websites is the
database. Querying and reading a data set from a database takes longer
than if the web server just had to serve up static files (like .html files).
Because of this, we need to make sure we take some steps to optimize
our ExpressionEngine website so the database doesn’t have the chance
to become too much of a bottleneck under heavy or even moderate
traffic.
The most basic way to optimize an ExpressionEngine website is by
using best practices when coding the templates. If you’ve been follow-
ing along up to this point in the book, then you know what those best
practices are because you’ve been using them. But sometimes just fol-
lowing good coding practices isn’t enough to guarantee that your site
will perform when under medium to heavy traffic.
10.1 Setting Permissions and Establishing a Baseline
Before we get started, we need to make sure ExpressionEngine is able
to create and save the cache files. All cache files created by Expres-
sionEngine live in the cache directory, which is located in your system
directory. This is something we did earlier in the book, but it’s worth
Download at WoweBook.com

OPTIMIZING WITH FOUR TYPES OF CACHING 162
checking again to make sure the cache directory is Writeable on Win-
dows and set to Read & Write or 777 on Unix or Mac OS X. If you’re
not seeing the cache files created after implementing one of the caching
methods that follow, you should double-check that your cache direc-
tory has the proper permissions.
We also want to measure how effective these optimizations are for the
Engine City Times website. To do this, we’ll enable some debugging out-
put, so we can see how many queries it takes to render the home page
without any caching enabled at all. After implementing each caching
method in this chapter, we’ll once again look at the number of queries
and compare them to the baseline query count.
To enable the debugging output, we use the Admin button in the Con-
trol Panel and choose System Administration and then Output and
Debugging Preferences. Toggle the Display Output Profiler option to
Yes. Click Submit to save the changes. If you’re logged in as Super
Admin, ExpressionEngine will now show all of the queries used to ren-
der the website pages as well as some benchmarks and other applica-
tion information as shown in Figure 10.1, on the following page.
Reload the Engine City Times home page, and scroll down to the bottom.
One of the gray boxes you see contains every query needed to render
the page. Right at the top of the box is the total query count. My count
is showing 58 queries to render the Engine City Times home page. We’ll
put this number aside and use it compare against the query count after
implementing each of our caching methods.
10.2 Optimizing with Four Types of Caching
Optimizing your ExpressionEngine website using caching will improve
site performance and decrease the load on your server so that your
site will load quickly for your visitors. We’ve all visited sites that are
painfully slow, but with some caching and optimization we can avoid
that.
There are four ways to optimize your ExpressionEngine website using
caching. We’ll go over each caching method in detail, but here is a brief
overview:
• SQL query caching: Most of your database query results are saved
in a text file and used the next time the server needs to retrieve
the same data.
Report erratum
this copy is (P1.0 printing, March 2010)Download at WoweBook.com

OPTIMIZING WITH FOUR TYPES OF CACHING 163
Figure 10.1: Viewing the debugging output
• Dynamic channel query caching: This picks up where query
caching leaves off, by caching queries that change on every page
load.
• Template caching: This allows you to cache individual templates
by saving an almost-static version of that template.
• Tag caching: This gives you finer control over what in your tem-
plate gets cached and what doesn’t. This type of caching is not
compatible with template caching.
Enabling SQL Query Caching
In a nutshell, SQL query caching takes all of the output from the
queries that ExpressionEngine makes to the database and saves them
Report erratum
this copy is (P1.0 printing, March 2010)Download at WoweBook.com
OPTIMIZING WITH FOUR TYPES OF CACHING 164
in a plain-text cache file. Instead of querying the database again, Ex-
pressionEngine can read those cache files when needing the same data.
This is a good thing because it is typically faster for the server to read
the data from a file than it is to query the database.
SQL query caching is a sitewide setting that will offer you a minimal
blanket of optimization. According to the ExpressionEngine documen-
tation, it will reduce by 30 to 90 percent the number of queries needed
to run the site.1
To enable query caching, log in to the Control Panel, and choose the
Admin button at the top. Then choose System Administration, and click
Database Settings.
Enable SQL Query Caching should be the third preference. Toggle the
radio button to Yes, and save it by clicking Submit. Now all possible
queries will be cached, and you should see a reduction in the number
of queries needed to render the page.
Let’s make sure that the SQL query caching is working as expected.
Load the home page of the Engine City Times in your browser, and then
check the cache directory to see whether ExpressionEngine created a
db_cache directory in it. Inside the db_cache directory there should be
some more directories and files. If you see this, then SQL query caching
is properly enabled and working.
Now let’s compare the number of queries it takes to render the home
page with the baseline we established at the beginning of the chapter.
Scroll down to see the total count of queries. Did the number go down?
If it didn’t but you see the new cache files in your cache directory, then
it is possible that the Engine City Times home page doesn’t gain any
optimization from SQL query caching.
Enabling Dynamic Channel Query Caching
Sometimes the normal SQL query caching cannot cache the more dy-
namic queries that are produced by the Channel Entries tag pair. This
is because the parameters for the Channel Entries tag pair change on
every page load (for example when ExpressionEngine uses the current
date and time to determine whether to display entries). This extra layer
of caching, however, will not work if you use future entries, expiring
entries, or random entries. Enabling dynamic channel query caching
1. http://expressionengine.com/docs/general/caching.html#query_caching
Report erratum
this copy is (P1.0 printing, March 2010)Download at WoweBook.com

OPTIMIZING WITH FOUR TYPES OF CACHING 165
using any of those three types of entries will give unpredictable and
incorrect results.
We’re not using any of the three types of entries for The Engine City
Times, so we’re going to go ahead and enable dynamic channel query
caching.
In the Control Panel, select the Admin button, and then under Content
Administration select Global Preferences. Look for the Cache Dynamic
Channel Queries preference and toggle it to Yes. Click Submit to save
your changes.
Let’s go back to our browser and reload the Engine City Times home
page. ExpressionEngine should have created a sql_cache directory and
inside it should be some cache files.
Now check the query count at the bottom of the page; it should be less
than the baseline we established earlier. You should have saved around
seven queries by enabling dynamic channel query caching.
Dynamic channel query caching and SQL query caching are both sys-
temwide settings. The next group of optimization settings give your finer
control of how and where you optimize your ExpressionEngine website.
Template Caching
Template caching allows you to have ExpressionEngine cache individ-
ual templates; you specify which templates you want to cache and
which you don’t (by default no templates are cached). When Expres-
sionEngine caches a template, it saves an almost-static version of that
rendered template to a file and uses it to display the page to site visi-
tors until the cache expires and is reset. The reset of template caches
are time-based and triggered by certain actions, such as adding a new
entry or comment.
Template caching is enabled on a per-template basis, so we need to
specifically tell ExpressionEngine to cache the templates. To do this,
we go into the Control Panel and choose the Design button, click Tem-
plates, and then click Template Manager. We will enable caching on the
home page template, so select the site template group and then click
Edit Preferences to the right of the index template (see Figure 10.2, on
the next page). Find the preference called Enable Caching, and toggle
it to Yes. In the next column, set the Refresh Interval value to 60. This
tells ExpressionEngine to delete the old cache file and create a new one
every 60 minutes.
Report erratum
this copy is (P1.0 printing, March 2010)Download at WoweBook.com

OPTIMIZING WITH FOUR TYPES OF CACHING 166
Figure 10.2: Turning on template caching
The preference will be automatically updated, and now ExpressionEn-
gine knows to cache the site home page template.
Caching Embedded Templates
When we built out the Engine City Times templates, we created embed-
ded templates of commonly used template parts (see above, Section 5.3,
Embedding Reusable Code, on page 89) so we didn’t repeat the same
code in different templates. These embedded templates are not auto-
matically cached by their parent templates (the template in which they
are embedded), but instead caching must be enabled just like with any
other template.
For the Engine City Times website, the embedded templates are in the
includes template group. Just like we did with the site index template,
we select the includes template group. For the templates we want to
cache, we choose Edit Preferences and toggle Enable Caching Yes. Go
ahead and enable caching for all of the templates in the includes tem-
plate group.
Checking for Results
Load the Engine City Times home page in your web browser, and then
navigate to the cache directory (inside your system directory); you
should see a directory called page_cache. Inside that directory will be
the cache directories and files for any templates you set to be cached.
Now when you load the Engine City Times home page, ExpressionEn-
gine will use the cache file to display the page instead of completely
building it dynamically.
Report erratum
this copy is (P1.0 printing, March 2010)Download at WoweBook.com

OPTIMIZING WITH FOUR TYPES OF CACHING 167
Template Caching Trumps Tag Caching
In the game of caching, template caching will always over-ride any tag caching set in the same template. So, if you setExpressionEngine to cache your index template and enabletag caching on one or more tags, the entire template willbe cached, and the individual tag cache parameters will beignored.
With our templates cached, check the number of database queries
needed to display the page.
Tag Caching
Tag caching gives us the finest control of all the caching methods
described in this chapter. Unlike template caching, which caches the
entire template, tag caching allows us to selectively cache certain tags
inside a template. This can be useful if you have one tag pair in a
template that outputs data that rarely changes while the rest of the
template is more dynamic.
Just like with disabling unneeded queries, there is no systemwide pref-
erence to enable tag caching. We just place the cache parameter in the
tag we want to cache, and ExpressionEngine does the right thing.
In the Engine City Times website, a good candidate for tag caching is
the category list that lives in the sidebar. The list rarely changes, so
there’s no reason to query the database for every page load, but other
parts of the template may need to be cached less aggressively. That’s
the real value tag caching; we can cache different parts of a template
based on actual need instead of applying one blanket caching setting
to the entire template.
As you recall from Chapter 5, Making the Pages, on page 76, the cat-
egory list lives inside an embed template called sidebar in the includes
template group. Let’s open that template and implement tag caching on
the list of categories.
Report erratum
this copy is (P1.0 printing, March 2010)Download at WoweBook.com

DISABLING UNNEEDED QUERIES 168
Joe Asks. . .
Can I Use Tag Caching on Any Tag?
Yes. Tag caching will work on any ExpressionEngine tag in yourtemplate. It doesn’t matter if this tag is for a third-party add-onor one that is native to ExpressionEngine; the output of the tagwill be cached.
Go to the tag pair that populates the list of categories. It should look
like this:
Download OptimizingYourSitesPerformance/tag_caching.php
{exp:channel:categories channel="news_articles" style="nested"
id="category-nav"}
<a href="{path="news_articles/page"}">{category_name}</a>
{/exp:channel:categories}
To tell ExpressionEngine to cache the output of this tag, we add two
more parameters to the categories tag: cache and refresh. The cache
parameter with a value of yes tells ExpressionEngine to cache the out-
put of the tag, and the refresh parameter tells ExpressionEngine how
often (in minutes) to recache the output. Since the categories will rarely
change, we’re going to give the refresh parameter a value of 720, which
means this cache will reset every twelve hours.
With the category list cached, reload the Engine City Times home page.
The list should be cached by ExpressionEngine, and a new tag_cache
directory should appear in your cache directory. If it does, you know
that tag caching is now properly implement for the category list. Don’t
forget to check the number of queries required to render the page.
10.3 Disabling Unneeded Queries
You’ll recognize this method of optimization because we learned about
it in Chapter 5, Making the Pages, on page 76. As we were building
the Engine City Times website, we used the disable parameter in the
Channel Entries tag pair. You might not have been aware of it then, but
you were already optimizing ExpressionEngine!
Report erratum
this copy is (P1.0 printing, March 2010)Download at WoweBook.com

OPTIMIZING FOR HIGH TRAFFIC 169
Download OptimizingYourSitesPerformance/disabling_queries.php
{exp:channel:entries channel="site" disable="pagination"
limit="5"}
The disable parameter tells ExpressionEngine to not bother querying the
database for specified data. In the previous code example, we’re telling
ExpressionEngine to perform the queries needed to set up pagination of
the entries it retrieves. We’re not going to use pagination, so there’s no
need to query for the data. Multiple data types should be separated by
a pipe (|). This is a very precise optimization method and one that you
should get into the habit of implementing as you build your website.
You can disable five different types of data from within the Channel
Entries tag:
• categories
• category_fields
• custom_fields (disables all custom field data)
• member_data (disables all member data, like entry author name)
• pagination
If we wanted to disable all six, the tag would look like this:
Download OptimizingYourSitesPerformance/disabling_queries.php
{exp:channel:entries channel="site"
disable="categories|category_fields|custom_fields|
member_data|pagination" limit="5"}
There is no global preference to enable or disable this optimization
feature. Simply add the parameter to any Channel Entries tags, and
ExpressionEngine will not fetch the unneeded data from the database.
10.4 Optimizing for High Traffic
Many high-traffic websites are built on ExpressionEngine. One of the
most popular was the Change.gov site put up in 2008 by the Obama
Administration transition team. This site received such massive
amounts of traffic that they worked closely with EllisLab, the developers
of ExpressionEngine, to add some functionality to ExpressionEngine for
high-traffic situations.
Tracking Preferences
The functionality added for the Change.gov website is called tracking
preferences. These settings allow you to control how and if Expression-
Report erratum
this copy is (P1.0 printing, March 2010)Download at WoweBook.com

OPTIMIZING FOR HIGH TRAFFIC 170
Figure 10.3: Disabling tracking preferences for improved site perfor-
mance
Engine tracks template hits, online users, referrer logging, and more.
Some of these tracking features (for example Online Users) require an
update to the database on every page load, and under high traffic this
can cause a significant load on the database because it tries to lock the
database table for each update (a requirement of UPDATEs when using
the MyISAM storage engine).
For a lot of websites, this tracking isn’t required and can be reduced
or turned off completely by using the tracking preferences. These are a
handful of user-defined options that can reduce the amount of track-
ing ExpressionEngine does on every page load, thereby reducing the
number of database UPDATEs required.
To access the tracking preferences, go the Control Panel, and click the
Admin button at the top of the page. Click Security and Privacy and
then Tracking Preferences. You should a form like in Figure 10.3.
• Enable Online User Tracking: Turns on and off ExpressionEngine’s
tracking of online users. This is needed if you want to display
statistics such as “716 Users Online” but is not required for the
Report erratum
this copy is (P1.0 printing, March 2010)Download at WoweBook.com

WHAT WE LEARNED 171
majority of ExpressionEngine’s functionality. I disable this for al-
most every single website I build with ExpressionEngine.
• Enable Template Hit Tracking: Toggles the hit counting for indi-
vidual templates. Enable this if you’re interested in knowing how
many hits a certain template is getting. My suggestion is to turn
it off and use a website statistics package (such as the free Google
Analytics) for hit tracking. Packages like Google Analytics are more
robust and will cause less trouble for your site under heavy traffic.
• Enable Channel Entry View Tracking: Enables the hit counting for
each channel entry. If you’re using ExpressionEngine to measure
traffic to your website, then you will want to leave this on. As
with Template Hit Tracking, my suggestion is to disable this option
and use a full-fledged website statistics package such as Google
Analytics.2
• Enable Referrer Tracking: Allows you to enable the tracking of sites
that refer visitors to your website. This can be a useful feature if
you have no other statistics package.
Sometimes you don’t realize you need to disable these settings until
you’re already being hammered by a lot of visitors. This could prevent
you from logging into your ExpressionEngine Control Panel and updat-
ing the settings in the previous list. For situations like these, you can
also set these preferences in your config.php file:
• Enable Online User Tracking: $config[’enable_online_user_tracking’] =
’[yes|no]’;
• Enable Template Hit Tracking: $config[’enable_hit_tracking’] =
’[yes|no]’;
• Enable Channel Entry View Tracking: $config[’enable_entry_view_
tracking’] = ’[yes|no]’;
• Enable Referrer Tracking: $config[’log_referrers’] = ’[yes|no]’;
10.5 What We Learned
In this chapter, we learned the techniques available to tune our Expres-
sionEngine website for optimal performance. Depending on your web-
site traffic, you may need to implement everything covered or only some
2. http://google.com/analytics
Report erratum
this copy is (P1.0 printing, March 2010)Download at WoweBook.com

WHAT WE LEARNED 172
Appropriate Hosting and Hardware
Although hosting configuration and hosting hardware arebeyond the scope of this book, I want to recommend thatyou find the appropriate hosting and server hardware for yourwebsite. For small, low-traffic sites, this could be an inexpensiveshared hosting account. For medium-sized sites, this might bea dedicated server with enough RAM and tuning to handlea significant amount of traffic. For high-traffic websites, this willmost likely be a load-balanced setup with multiple servers andexpert configuration.
If you use the optimization techniques described in this chapterplus host on the appropriate hardware and configuration, youshould have an easier time of keeping your ExpressionEnginesite running smoothly.
of the options. As a baseline, I recommend that you at least cache your
templates, tags, and queries whenever possible. Even on low-traffic
websites this caching will improve the performance and speed of the
website for your visitors.
I’ve included more resources on optimizing your ExpressionEngine
website for further reading, and I encourage you to go through all of
them and put together your own ExpressionEngine optimization plan
of attack.
Resources for Optimizing Your ExpressionEngine Website. . .. . . http://eeinsider.com/articles/resources-for-optimizing-your-ee-website/
This is a list of resources where you can read more about optimizing your
ExpressionEngine website.
10 Largest Websites Running ExpressionEngine. . .. . . http://www.hopstudios.com/blog/the_10_largest_expressionengine_sites/
Hop Studios has published a short report on ten of the largest known Expres-
sionEngine websites.
Handling Extreme Traffic with ExpressionEngine. . .. . . http://expressionengine.com/docs/general/handling_extreme_traffic.html
This is the official documentation page on the preferences available in Expres-
sionEngine for managing high-traffic websites.
Report erratum
this copy is (P1.0 printing, March 2010)Download at WoweBook.com

Chapter 11
Extending ExpressionEnginewith Add-Ons
It’s a common scenario. You’re building a website with ExpressionEn-
gine, and your clients want a certain piece of functionality. But Expres-
sionEngine doesn’t have what you want. What do you do? Abandon
ExpressionEngine and move to a different CMS? Of course not. This is
where add-ons come into play. They extend and enhance Expression-
Engine with functionality that didn’t previously exist.
One of the great things about ExpressionEngine is that it doesn’t try to
do everything. For the most part, it’s a lean CMS that relies heavily on
outside developers to add functionality based on need.
This chapter will cover the different types of add-ons available in Ex-
pressionEngine and how they fit into the add-on ecosystem. It will also
show the best places to find add-ons when you’re in need.
At the time of publication of this book, the availability of Expression-
Engine 2–compatible add-ons was very limited. As developers continue
to convert their add-ons to ExpressionEngine 2, the pool of available
add-ons will increase.1
11.1 Exploring the Different Types of Add-Ons
Not every add-on is made equally. ExpressionEngine 2 has four differ-
ent types of add-ons: plug-ins, extensions, modules, and accessories.
1. To keep up-to-date on ExpressionEngine 2 add-ons, visit the EE 2.0 Ready Add-Ons
page at http://devot-ee.com/add-ons/ee2.
Download at WoweBook.com

EXPLORING THE DIFFERENT TYPES OF ADD-ONS 174
Each of these add-ons gives us a different amount of control over how
and where we extend ExpressionEngine.
Plug-ins, for example, only affect the templates by displaying or altering
content. Plug-ins don’t have any effect on the Control Panel functional-
ity; that’s the domain of extensions. Modules, on the other hand, allow
you to create a full-scale application that plugs into ExpressionEngine
with template tags and a Control Panel interface.
To get an idea of what each does, let’s walk through them, learn about
how they work, see how to install them, and view some examples.
Plug-Ins
Plug-ins are the simplest of add-ons. They can be used only in tem-
plates and typically affect the output when the template is loaded and
parsed by ExpressionEngine. Plug-ins are also the easiest and most
accessible add-ons for new developers; a simple plug-in does not take
long to create.
Installing Plug-Ins
Before you can use a plug-in, it has to be installed. But don’t worry,
because it’s simple! Only a few steps are involved.
The first step is to find and download the plug-in you want to use.
A plug-in typically comes in a .zip file, which contains a folder named
after the plug-in. Inside the folder is the plug-in file. All plug-in files
will have the same naming convention: pi followed by the name of the
plug-in followed by the .php extension.
To install the plug-in, move the entire folder to the third_party directory,
which is located in system/expressionengine. You’ll notice that there is
also a plugins folder inside expressionengine. This is reserved for plug-
ins that ship with ExpressionEngine. Any plug-ins you download and
install should be placed in the third_party folder. This makes it much
easier to back up and manage all of your add-ons since they’re all in
one folder.
With the plug-in in place, navigate to the Plugins page in the Control
Panel (see Figure 11.1, on the following page). Click the Add-Ons button
in the main navigation, and then select Plugins. You should see the
newly installed plug-in listed in the table of plug-ins. A couple of plug-
ins come preinstalled with ExpressionEngine (XML Encode and Magpie
RSS Parser), and those should also appear in the list.
Report erratum
this copy is (P1.0 printing, March 2010)Download at WoweBook.com

EXPLORING THE DIFFERENT TYPES OF ADD-ONS 175
Figure 11.1: Viewing installed plug-ins in the Control Panel
There are no further steps to install plug-ins. Take a few minutes, and
find one or two useful plug-ins that interest you. Download, install, and
experiment!
Plug-ins You Should Know
The following is a list of plug-ins that are very useful and popular in
the ExpressionEngine community. These plug-ins will work on Expres-
sionEngine 2. Although the list is small now,2 the number of plug-ins
available for ExpressionEngine 2 will grow over time.
• Allow EE Code: Put ExpressionEngine template code right in your
entry, and ExpressionEngine will parse it. This is very handy for
those times when you need dynamic content in an entry field.
• Low Replace: Easily find and replace text in your template.
• EE Gravatar: A simple way to include gravatars (“globally recog-
nizable avatars”) on a site. I use this in the comments section of
my website.
• ClassEE Body: Dynamically assign a class to the body of your
template.
2. For a longer list of popular plug-ins and their ExpressionEngine 2 status, visit
http://devot-ee.com/add-ons/ee2/faves-plugin/.
Report erratum
this copy is (P1.0 printing, March 2010)Download at WoweBook.com

EXPLORING THE DIFFERENT TYPES OF ADD-ONS 176
Joe Asks. . .
Can I Use ExpressionEngine 1.6 Add-ons in Expression-Engine 2?
The release of ExpressionEngine 2 required that all existing add-ons be converted to work on the new and improved Expres-sionEngine 2 platform. Therefore, only ExpressionEngine add-ons that have been converted (or created new) will work with2. The transition from ExpressionEngine 1.6 to 2 will take time, sonot every add-on will be immediately available with Expression-Engine 2 compatibility.
When researching add-ons for your ExpressionEngine 2–powered website, be sure to check whether they have beenconverted. If not, contact the developer and kindly askwhether there are any plans to convert the add-ons to Expres-sionEngine 2.
• YearList: Generate a list of years in which there are entries. This
is a great way to start building a yearly archive of content.
• Word Limiter: Limit text to a specified number of words. This is
great for automatically creating excerpts from a long content entry.
Extensions
Extensions allow you to hook into the ExpressionEngine system and
add functionality. Unlike plug-ins, extensions do not have any tem-
plate tags. Developers create extensions by using “hooks” that are made
available by ExpressionEngine where they can insert their code to cre-
ate new functionality.
One example use of an extension would be to do something extra when
a user logs in. For example, you may want to make sure that every
user sees a list of rules and regulations the first time they log in. An
extension could be used to “hook” into the login process and display
the rules and regulations to the user, after which they’ll proceed to the
normal logged-in page.
Installing Extensions
Like installing plug-ins, installing extensions is easy but does require
one extra step.
Report erratum
this copy is (P1.0 printing, March 2010)Download at WoweBook.com

EXPLORING THE DIFFERENT TYPES OF ADD-ONS 177
First we need to find and download the extension that we want to use.
For this we’ll use the First Timer extension I created. This extension
allows us to redirect users, upon their first login, to any page on our
site (see the earlier example of displaying rules and regulations).
You can download the extension from my website.3 Unzip the down-
loaded file, and you should have a folder called first_timer. Inside the
folder is the extension file, named ext.first_timer.php, and a language
folder. Just like we did with the plug-in, move the entire folder to the
system/expressionengine/third_party directory.
You’ll recall that with plug-ins we had a one-step installation. Exten-
sions, however, require that we enable them from the Control Panel.
Navigate to the Extensions page in the Control Panel (see Figure 11.2,
on the next page) using the Add-Ons button and selecting Extensions
from the menu. To the right, you’ll see a gray Enable Extensions but-
ton. In ExpressionEngine, the ability to use extensions is not enabled
by default. So, we need to first tell ExpressionEngine to let us use exten-
sions. Click Enable Extensions? to do this. When prompted, click Sub-
mit to confirm that you want to take this action. Now extensions are
enabled for our site. You only have to enable extensions once to be able
to use them. You do, however, have to enable each and every extension
you install.
You should see the First Timer extension listed in the table on the page.
If it is not, double-check that you moved the first_timer directory to the
third_party folder.
The final step in installing an extension is to enable it. We do this by
clicking the red “Enable?” text in the far right column of the extensions
table (labeled “Status”). By enabling the extension, we tell Expression-
Engine to start allowing it to insert its functionality.
You will also notice two other options listed in the extensions table:
Settings and Documentation. The Documentation link will take you to
another website (specified by the developer of the extension) that con-
tains information about how to use the extension. The Settings link
isn’t available for every extension. If it is, you can use it to access the
settings for the extension. For the First Timer extension, this includes
two settings: the URL to redirect to on first login and the URL to redirect
to on subsequent logins.
And now the extension is installed and enabled!
3. http://eequickstartguide.com/downloads/first_timer.zip
Report erratum
this copy is (P1.0 printing, March 2010)Download at WoweBook.com

EXPLORING THE DIFFERENT TYPES OF ADD-ONS 178
Figure 11.2: Viewing extensions in the Control Panel
On Your Own
With the First Timer extension successfully installed and enabled, take
a moment to adjust the settings and try it. Fill in the fields for the URL
that should be used for the first login and the URL that should be used
for subsequent logins.
Create a new user, and log in to test the functionality of the extension.
You may want to also disable the extension to see ExpressionEngine
return to its normal login process.
Extensions You Should Know
Here are a few must-have extensions:
• Low Seg2Cat: This extension loops through the segments of a URL
and matches them to categories. This allows you to create hierar-
chical category URLs rather than the standard ExpressionEngine
category URLs.
• First Timer: You can redirect members to a different page the first
time they log into your website.
Report erratum
this copy is (P1.0 printing, March 2010)Download at WoweBook.com

EXPLORING THE DIFFERENT TYPES OF ADD-ONS 179
Modules
The next type of add-ons are modules. Modules are more complex than
plug-ins and can generally contain more functionality than extensions.
The best way to think about modules are as entire applications that can
easily plug into your ExpressionEngine-powered website. Modules can
have their own Control Panel interface (accessible through the Modules
section) and typically have their own template tags (just like plug-ins).
Most of ExpressionEngine’s core functionality consists of a series of
modules. Let’s take a look.
Navigate to the Modules page of the Control Panel using the Add-Ons
button. You should see a long list of modules. All of these put together
are what makes up ExpressionEngine. Here are a few examples of mod-
ules that are critical to ExpressionEngine:
• Channel module: This is what allows you to create and store con-
tent in channels. Without this module, you couldn’t manage con-
tent with ExpressionEngine.
• Comment module: This enables the functionality of commenting
on channel entries.
• Member module: The Member module gives you the ability to have
users create and manage member accounts on your website.
All of the modules needed to make ExpressionEngine run are included
with the software, but you can also install third-party modules to ex-
tend the functionality of ExpressionEngine.
Installing Modules
Similar to installing extensions, modules require that you enable them
in the Control Panel before they are available for you to use. I’ve cre-
ated a very simple sample module for us to install. The module doesn’t
do anything per se, but it will allow you to become familiar with how
modules are installed.
Download the module,4 and unzip the file. Just like before with exten-
sions and plug-ins, copy the entire module folder to the third_party folder
inside the system folder. Now, we need to install the module from the
Control Panel.
4. http://eequickstartguide.com/downloads/sample_module.zip
Report erratum
this copy is (P1.0 printing, March 2010)Download at WoweBook.com

EXPLORING THE DIFFERENT TYPES OF ADD-ONS 180
Figure 11.3: Viewing modules in the Control Panel
Navigate to the Modules page of the Control Panel (see Figure 11.3)
using the Add-On button in the top navigation. In the table of modules
(ordered alphabetically), find Sample Module. Listed should be the mod-
ule name, description, version number, and status. Our sample module
should have a status of Not Installed. To install it, click the Install link.
You should receive a confirmation message that it has been installed,
and the module name should now be red and a link. This link is what
gives you access to the module’s Control Panel interface. From here
you can configure and use the module. Clicking the module name will
bring you to the module’s Control Panel interface. For our module, this
is just a simple single page.
Report erratum
this copy is (P1.0 printing, March 2010)Download at WoweBook.com

EXPLORING THE DIFFERENT TYPES OF ADD-ONS 181
Figure 11.4: Viewing the News and Stats accessory in the
Control Panel
Click the module name to access our sample module. Since this is just
for demonstration purposes, there isn’t much there; a typical module
would have one or more screens of configuration and administration
options.
Accessories
Accessories are the newest type of add-on for ExpressionEngine. They
were introduced in ExpressionEngine 2 as a way to make information
and functionality easily available in the Control Panel. Accessories live
in tabs at the bottom of the Control Panel and are easily accessible no
matter where you may be.
Accessories can serve many purposes. An accessory could be as simple
as a container for instructions on how to manage the website or a list of
links to documentation. It could also be more complex with functional-
ity that allows you to interact with data in the database. The only limit
is what developers can do with PHP and MySQL.
An accessory that comes with ExpressionEngine is News and Stats, as
shown in Figure 11.4. This accessory gives you real-time information
about your ExpressionEngine website and a stream of the latest news
from the official ExpressionEngine blog.
Accessories are new, so at first there may not that many available.
However, over time, as developers find more uses for them, you should
see them pop up regularly.
Report erratum
this copy is (P1.0 printing, March 2010)Download at WoweBook.com

EXPLORING THE DIFFERENT TYPES OF ADD-ONS 182
Figure 11.5: Viewing a list of installed accessories
Installing Accessories
Installing accessories is almost the same as installing the other types
of add-ons. Download the accessory you want to install, copy the folder
to the third_party folder in your ExpressionEngine install, and then nav-
igate to the Accessories page in the Control Panel, which you can see
in Figure 11.5.
There you should see a list of accessories available and their statuses.
We want to install the News and Stats accessory. To do so, click the
Install link in the far right column. Once the News and Stats accessory
is successfully installed, ExpressionEngine will display a success mes-
sage, and the accessory name will turn red and into a link. Additionally,
the status will change to Uninstall. The accessory should now appear
as a tab at the bottom of the Control Panel. To view the content of the
accessory, click the tab.
Configuring Accessory Preferences
Accessories also give you the ability to determine who can see them
(controlled by the member group) and where they appear in the Control
Panel. To access the preferences for the News and Stats accessory we
Report erratum
this copy is (P1.0 printing, March 2010)Download at WoweBook.com

EXPLORING THE DIFFERENT TYPES OF ADD-ONS 183
Figure 11.6: Editing the preferences for the News and Stats accessory
just installed, click the accessory name in the table. You should see the
Edit Accessory Preferences page, like in Figure 11.6.
There are two types of preferences we can set for accessories:
• Assigned Pages: Here we can select or deselect which pages we
want the accessory to appear on. This is very handy if your acces-
sory addresses only a certain part of the Control Panel (like the
Publish screen).
• Assigned Member Groups: Restrict access to one or more mem-
ber groups by selecting the box next to the ones you’d like to see
the accessory. You may want to show an accessory to the Writers
member group, for example, of the Engine City Times site, but not
to the Super Admins. Using this preference, you can control that.
Once you have your preferences set, click Update to save your changes.
ExpressionEngine will return you to the Accessories page in the Control
Panel. There you’ll see the changes you made reflected in the Specific
Page? column.
Report erratum
this copy is (P1.0 printing, March 2010)Download at WoweBook.com

THE ADD-ON DEVELOPER COMMUNITY 184
Joe Asks. . .
How Do I Build My Own Add-Ons?
If you have knowledge of PHP and MySQL, you can learn howto build your own add-ons using the official documentation onthe ExpressionEngine website: http://expressionengine.com/docs/
development/. It walks you through how each type of add-onis built, including some code samples. ExpressionEngine 2 isbuilt on the CodeIgniter PHP framework. Becoming familiar withCodeIgniter will be of great benefit.
Another way to learn how to create add-ons is to downloadseveral of them, open them, and look at the code. There is nobetter way to learn than from someone else’s code!
On Your Own
If you’d like to try to install an additional accessory, download5 the
EE Insider accessory, which brings the latest news about Expression-
Engine right into the Control Panel. Follow the instructions in Sec-
tion 11.1, Installing Accessories, on page 182 to install the accessory.
Good luck!
Now that we’ve explored the four different types of add-ons, it’s impor-
tant to talk about where they come from and who creates them. Al-
though there are a lot of “first party” add-ons (created by EllisLab), there
are even more “third-party” add-ons, created by developers around the
world. These developers make up the real power behind Expression-
Engine.
11.2 The Add-on Developer Community
One of the lesser known features of ExpressionEngine is the vibrant
add-on developer community. There is a large developer base actively
creating hundreds of add-ons for ExpressionEngine. Add-ons for almost
everything you can imagine have been created, but new ones are still
released every single day.
5. http://eequickstartguide.com/downloads/eeinsider.zip
Report erratum
this copy is (P1.0 printing, March 2010)Download at WoweBook.com

THE ADD-ON DEVELOPER COMMUNITY 185
Free vs. Paid Add-Ons
As you begin searching for add-ons to use for your Expression-Engine projects, you will undoubtedly notice that some arereleased for free while others require a paid license (typicallyper domain).
Many developers release their add-ons for free as a way to giveback to the community and help out others who may face asimilar problem that their add-on solves. As the user of the add-ons, you should be aware that a free add-on may be morethan just free in terms of cost. It may also be free of support, bugfixes, and updates. Typically, paid add-ons have reliable sup-port (through support forums or email), regular updates, andbug fixes.
Both free and paid add-ons, however, are an important part ofthe add-on developer community.
If a certain piece of functionality is missing from ExpressionEngine,
you can be sure that a developer has created an add-on to fill that void.
So, where do you find the ExpressionEngine add-ons you need? Well,
luckily, there are several resources for you to use.
Add-on Repositories
Because of the nature of how add-ons are distributed (in the forums,
on developer websites, and so on), it’s not easy to find a comprehensive
listing of every add-on that has been created. There are, however, a few
places you can use to find almost anything you need when it comes to
ExpressionEngine add-ons.
Devot:ee
Devot:ee6 is an add-on repository created by Ryan Masuga of Masuga
Design and curated by both Ryan and the community. Devot:ee has
indexed more than 500 ExpressionEngine add-ons and relies on the
community to submit new add-ons as they are released. You can easily
search for add-ons by type (plug-in, extension, module, or accessory)
or by name.
6. http://devot-ee.com
Report erratum
this copy is (P1.0 printing, March 2010)Download at WoweBook.com

THE ADD-ON DEVELOPER COMMUNITY 186
In addition to indexing add-ons, Devot:ee also lets users rate, review,
and save add-ons as favorites. Devot:ee users can also submit addi-
tional information about an add-on to be included in the database.
Devot:ee doesn’t store or make available the actual add-on files; you
still have to visit the developer websites to download the add-ons you’re
looking for. Devot:ee just makes it a lot easier to find those add-ons.
When looking for a new add-on, Devot:ee is the first place I go.
Official ExpressionEngine Add-on Library
The Add-on Library7 at the ExpressionEngine website is much smaller
than Devot:ee and not as regularly updated. Add-ons in this reposi-
tory have to meet certain development guidelines and be approved by
EllisLab in order to be included. Despite its small size, it can still be a
helpful resource when searching for add-ons for your project.
ExpressionEngine Forums
Although not at all organized like the Official ExpressionEngine Add-on
Library or Devot:ee, another place to find add-ons is the official Expres-
sionEngine Forums.8 Because of the low barrier of entry, developers will
routinely announce new add-ons in the forums and include the add-on
file for download. Oftentimes that forum thread becomes the one and
only location for information, download, and support of the add-on.
With, most likely, hundreds of add-ons in the forums, you can imagine
that it becomes difficult to find and keep track of them all.
The ExpressionEngine Forums is typically the last place I look for add-
ons because of the low signal-to-noise ratio.
With the help of add-ons, ExpressionEngine becomes even more pow-
erful. Empowered with the knowledge of the different types of add-ons
available, how they work, and how to install them, you are now ready
to tackle almost any challenging website.
7. http://expressionengine.com/downloads/addons
8. http://expressionengine.com/forums
Report erratum
this copy is (P1.0 printing, March 2010)Download at WoweBook.com

IndexAAbout page, 105
Access, 70
Accessories, 181f, 182f, 183f, 181–184
Add-ons, 173–186
building your own, 184
developer community for, 184–186
Devot:ee and, 185
free vs. paid, 185
library for, 186
resources for, 173n
types of, 174–184
accessories, 181f, 182f, 183f,
181–184
extensions, 178f, 176–178
modules, 180f, 179–181
plug-ins, 175f, 174–176
versions and, 176
Allow EE Code, 175
Allowed File Types, 133
alt property, 134
Ampersand, 143
Article content, 93
Article Excerpt field, 61
Article Template, 92–98
article_body variable, 93, 143
article_excerpt variable, 82, 113
article_images directory, 132
article_pdfs directory, 132
Assigned Member Groups, 183
Assigned Pages, 183
Assigning status groups, 66
{author} variable, 82
author_id parameter, 147
Authors and members, 71f, 70–74
Bbody tags, 33
Breadcrumb, 55
Ccache directory, 161, 164
cache parameter, 167
Caching, 166f, 162–168
cartoon_and_search template, 116
Categories, 28, 68f, 69f, 67–70, 87–89
category parameter, 147
Category template, 99–101
{category_name} variable, 88
channel parameter, 82, 100
Channel Administration, 28
Channel entries
conditional variables, 110
deleting, 55
parts of, 44
Channel Entries tag pair, 81, 146f,
142–147
caching, 164
disabling data types from, 169
dynamic entries, 145
searching custom fields, 143
Channel Management, 59
Channel module, 179
channel_name function, 41
Channels, 24, 28
custom fields for, 60f
editing preferences of, 57
naming, 57
class parameter, 88, 134, 138
ClassEE Body, 175
Code
commenting out, 147
reusing, 89–91
Comment form tags, 94
Comment module, 179
Comment syntax, 95
Commenting out code, 147
Comments form, 110
Conditionals, 107, 109–112
Download at WoweBook.com

CONFIG DIRECTORY ENGINE CITY TIMES
config directory, 23
Config Editor, 28
Contact information, 33, 35f, 46f
Content channels, 28
Control Panel
adding content outside of, 151f,
150–155
Admin area, 27
Admin button, 56
Edit screen, 25
extensions and, 178f
home page, 24
modules and, 105, 179, 180f
overview of, 25f, 26f, 27f, 24–29, 30f
plug-ins, 175f
Quick Links for, 29
template group, 31
Tools, 28
Conventions
channel entry structure, 44
comment syntax, 95
conditionals syntax, 107
entry titles, 60
image formats, acceptable, 135
nested categories, 87
parameter form, 43
parsing template tags, 157n
plug-in filenames, 174
statuses and, 65
tag structure, 41, 42f, 42
URL segments, 108
variable placement for reusable
content, 90
see also Naming conventions
core.css, 79
count variable, 149
Cropping, 136f
CSS
on home page, 80f
in templates, 78
css directory, 79
CSS template, 33
Curly braces, 39, 41, 42
current_time variable, 40
{current_time format="%D, %F %d, %Y"}
tag, 37
Custom fields, 28
Custom statuses, 64f, 66f, 64–67
DDate, displaying, 37f, 37
db_cache directory, 164
Debugging, 28
Debugging output, 163f
Default site, 54–55
Delete Field Group, 59
Deleting content and categories, 54
Devot:ee, 185
Dictionary, as quick link, 29
disable parameter, 81, 169
Disabling data from Channel Entries
tag, 169
Disabling queries, 168
Display Ping Buttons, 58
Display URL Title Field, 58
div tags, 86, 95, 126
Document icon, 33
document_header template, 127, 156,
157
Domain, of website in URL, 36
Downloads
accessories, 184
EE Insider accessory, 184
of First Timer extension, 177
RSS feed template, 112
sample module, 179
for this book, 13
see also Resources
Dynamic channel query caching, 163,
164
Dynamic content, 37f, 37, 79
see also Navigation
Dynamic parameters, 145, 146f
dynamic_parameters, 142, 146, 147
EEdit screen, 25, 26f
Editing links, 40
EE Gravatar, 175
{embed} variable, 89
embed: (prepend to variable name), 157
Embed variable, 158f, 156–158
Embedded template caching, 166
Embedded templates, 93
Enable Referrer Tracking, 171
Engine City Times
About page, 105
access, 70
article template, building, 92–98
authors as members, 71f, 70–74
categories, 68f, 69f, 67–70, 87–89
category template, 99–101
188Download at WoweBook.com
ENTRY RELATIONSHIPS HYPHENS
cleaning up content, conditionals,
109–112
comments background display, 97f
content types, 55–64
creating an RSS feed, 112–114
creating content for, 77f, 80f, 85f,
76–86
custom statuses, 64f, 66f, 64–67
default site, cleaning up, 54–55
embedding reusable code, 89–91
Letters to Editor, 63
Navigation, 106–109
News Articles, creating, 56f
Obituaries, 63
overview of, 48–52
article page, 50f, 51
category page, 51, 52f
home page, 49f, 49
search functionality, 114–117
setting the preferences, 53–54
static content, 103–106
see also Add-ons; Control Panel;
Conventions; Images; Letters to
Editor; Optimization; Placeholder
content; Templates
Entry relationships, 120–128
overview of, 121f, 121–122
setup of, 124f, 123–125
writing template code, 125–127, 128f
Equals sign, 144
Error, incorrect template path, 160
Excerpt, of articles, 113
exp, 41
{exp:channel:entries} tag, 45
{exp:comment:form} tag pair, 95
ExpressionEngine
background for, 12
community resources for, 14
control panel overview, 25f, 26f, 27f,
24–29, 30f
directories and files, exploring,
22–23
fees, 18
history of, 11
installation, 19–22
minimum requirements for, 17f, 18f,
16–18
resources for, 14
server settings, 21f
Server Wizard for, 17, 18f
template types, 33
Tools for, 28
trial version, 19
versions, 11, 176
see also Add-ons; Control Panel;
Conventions; Downloads; Engine
City Times; Images; Installation:
Naming conventions;
Optimization; Resources;
Templates; Variables
expressionengine, 174
ExpressionEngine Forums, 186
Extensions, 178f, 176–178
FFeatured Top Story, 79
feed template, 112
Feed validator, 112
Fees, 18
Field group, 61, 62f
Fields, adding, 140
File Information, 130
File Manager, 129–131
adding files to entries, 139–141
file table, 130
image editing, 136f, 135–137
image embedding, 137–138, 139f
upload destinations, 133f, 131–135
upload list in, 130f
File Properties, 134
Files
cache, 161
enabling templates as, 159
overview of, 22–23
permissions, 20
saving templates as, 159
see also Images
First Timer extension, 177, 178
form tags, 115
GGlobal Template Preferences, 159
Hh1 tags, 34
h2 tags, 34
head, 78
Hooks, for extensions, 176
Hosting, 172
href parameter, 79
HTML, adding to templates, 33
Hyphens, 31, 57
189Download at WoweBook.com

ID PARAMETER NEWS_ARTICLES TEMPLATE
Iid parameter, 86, 88, 96, 134, 138
if no_results variable, 110, 111
{if:else} variable, 108
Image Properties, 134
Images, 130
adding files to entries, 139–141
cropping, 136f
editing, 135–137
embedding in entries, 137–138, 139f
formats for, 135
preferences, 133
resizing, 136
rotating, 136
images directory, 22, 131
img directory, 78
img property, 134, 140
index.php file, 22, 36
index template, 32, 37, 57, 79, 81, 125,
159, 167
Insider accessory, 184
Installation
of accessories, 182
of extensions, 176
minimum requirements for, 17f, 18f,
16–18
of modules, 179
Pages module, 103
of plug-ins, 174, 175f
Installation Wizard, 20
installer directory, 22
IS EMPTY search constant, 144
JJavaScript template, 33
job_salary field, 144
job_title field, 144
LLetters to Editor, 63, 78, 85, 86, 87f,
151f
li element, 100
Licensing fees, 18
limit parameter, 43, 81, 83, 85, 93, 147
Links, 82, 88
Login message, 107
Low Replace, 175
Low Seg2Cat extension, 178
Mmasthead template, 106, 109, 114
Masuga, Ryan, 185
Maximum File Size, 133
Maximum Image Height, 133
Maximum Image Width, 133
Member module, 71f, 70–74, 179
Minimum requirements,
ExpressionEngine, 17f, 18f, 16–18
Modules, 180f, 179–181
My Account, 29
{my_blog} variable, 39, 44
MySQL queries, 149f, 148–150
NNaming conventions
channel names, 57
field groups, 61
file upload destination, 132
plug-in files, 174
tags, 38
template group names, 31
see also Conventions
Navigation, 106–109
display with conditionals, 107
highlighting current page, 108
linking to URIs, 106
Nesting, 87
see also Categories
News and Stats accessory, 181f, 182,
183f
News Articles
categories, 68f, 69f, 67–70
comments on, 94, 110
creating, 56f, 57
custom channel fields, 60f
Custom statuses, 64f
custom statuses, 66f, 64–67
enabling versioning, 59f
excerpts of, 113
related articles, 99f, 111
Related Entry custom field, 124f
restricting access to, 72
RSS feed for, 112
status of, 77
see also Add-ons; Dynamic content;
Navigation; Optimization;
Placeholder content
News Editors, 73
News Writers
Member group for, 71f
preferences, 72
news_articles template, 83
190Download at WoweBook.com

NEWS_ARTICLES VALUE SEARCH_IN PARAMETER
news_articles value, 82
news_body field, 144
Not term, 143
OObituaries, 63
offset parameter, 84
Optimization, 81, 89, 161–172
caching, 166f, 162–168
debugging output, 163f
disabling queries, 168–169
establishing a baseline, 161
high traffic, 170f, 169–172
resources for, 172
Pp tags, 39, 61
page_title variable, 156
Pages module
accessing, 105
installing, 103
pagination value, 81
parameter_name="value", 43
Parameters, 43, 93, 97f, 143
Parsing template tags, 157n
path variable, 88, 146
Performance, 161–172
caching, 166f, 162–168
disabling queries, 168–169
high traffic, 170f, 169–172
resources for, 172
setting permissions, 161
Permalinks, 83
Permissions, 20
Permissions, debugging output, 163f
Pipe character, 86, 94, 143, 147
Placeholder content, 77f, 80f, 76–86
Letters to Editor, 85, 87f
making dynamic, 79
top stories, 83, 85f
Plug-ins, 175f, 174–176
plugins folder, 174
POST form data, 145
Preferences, 53–54
for accessories, 182, 183f
of channels, 57
for Editors group, 73
enabling versioning, 58, 59f
file upload destinations, 133
member, 72
Preload replacement variables, 38f, 40f,
41
preload_replace tag, 39
Print Edition page, 128f
print_editions template group, 125
Publish Page Customization, 58
QQueries, disabling, 168
Query module, 149f, 148–150
Quick Links, 29, 30f
RRead Story link, 82
Related Articles, 96, 99f
Related entries, 120–128
overview of, 121f, 121–122
setup of, 124f, 123–125
writing template code, 125–127, 128f
Repositories, for add-ons, 185
Resources
for add-ons, 173n
community, 14
developer community for add-ons,
184–186
Devot:ee, 185
ExpressionEngine Forums, 186
for optimization, 172
for plug-ins, 175
for this book, 14
see also Downloads; Optimization
Reusing code, 89–91
Reverse Related Entries, 126
Revisions, 58, 59f
ringo directory, 22
RSS feed, creating, 112–114
RSS Page template, 33, 112
Ssalary field, 144
Sample content, see Placeholder
content
Saving templates as files, 159
search parameter, 142, 143
search template, 116
Search box, 114
Search functionality, 114–117
Search module, 114
Search Results tag pair, 116
search_in parameter, 115
191Download at WoweBook.com

SEARCHING CUSTOM FIELDS TOTAL_RESULTS VARIABLE
Searching custom fields, 143
Segments, 94, 108, 109
Server hardware, 172
Server settings, 21f
Server Wizard, 17, 18f
Setting permissions, 20
Setting preferences, 53–54
Sharing data, 158f, 156–158
Simple Search Form tag pair, 115
Sinatra, Nancy, 11
site templates, 78
Site channels, creating and
customizing, 56f, 55–64
site_css template, 79
site_name variable, 54, 113
sort parameter, 126
Spaces, 31, 57
SQL query caching, 162, 164
sql_cache directory, 165
src property, 140
Static content, 103–106
Static template, 33, 78
status parameter, 81, 83, 93, 126
Statuses
assigning groups to, 66
creating, 65
custom, 64f
ordering, 66f
style parameter, 88, 134
Subversion, 158
switch variable, 86, 96, 97f, 126
Syntax, see Conventions; Naming
conventions
system directory, 22, 161, 179
System Administration, 28
System preferences, 53–54
system/expressionengine, 174
TTag caching, 163, 167, 168
Tags, 40–45
complete list of, 43
pairs of, 42
structure of, 41, 42f
as variables, 44
Template caching, 163, 166f, 167
Template group, URLs and, 36
Template Management view, 32
Template Manager, 26, 27f
template-article.html file, 92
template-category.html, 99
template-home.html template, 78
template-print-editions.html file, 125
template-search-results.html, 116
Templates, 31–46
adding content outside Control
Panel, 151f, 150–155
adding HTML to, 33
adding variables to, 39
article, building out, 92–98
building and creating, 32f, 34f,
31–36
category, 99–101
Channel Entries tag, 146f, 142–147
contact page, 46f
CSS in, 78
custom MySQL queries, 149f,
148–150
dynamic content, 37f, 37
editing, 40
editing anywhere, 158–160
embedded, 93
embedding reusable code in, 89, 90
enabling as files, 159
incorrect path error, 160
limits and, 94
naming, 31
optimization for, 81
parameters for, 43
for RSS feeds, 112
saving, 33, 40
saving as files, 159
search results, 116
sharing data between, 158f, 156–158
static, 78
tags and, 42f, 40–45
types of, 33
URLs and, 36f, 36–37
variables and, 38f, 40f, 38–41
viewing in browser, 35f
writing related entries code, 125
themes directory, 23
third_party directory, 174, 177, 179
Time, displaying, 37f, 37
{title_permalink} variable, 82
{title}, 82
title variable, 113, 126, 127
title_permalink variable, 117
Titles, for entries, 60
Tools, 28
Top Stories, 85f
total_results variable, 149
192Download at WoweBook.com

TRACKING PREFERENCES YEARLIST
Tracking preferences, 169, 170f
Traffic, handling, 169, 172
Trial version, 19
UUnderscores, 31, 57
Upload destinations, 133f, 131–135
Upload field, 140
uploads directory, 131
URL segments, 94, 108, 109
URLs
article title in, 82
of articles, 113
defining, 132
hierarchical categories for, 178
overview of, 36f, 36–37
use category URL titles in links, 88
User account, 29
VVariables, 38–41
adding to template, 39
channel entries conditional, 110
conditional, 110
declaring, 113
dynamic content and, 82
embedded, 158f
placement of, 90
placing in a template, 39
preload replacement, 38f, 40f, 41
for Query module, 149
tag variables, 44
Version control, 158
Versioning Preferences, 58, 59f
Versions, 176
view template, 83, 110, 140
View Rendered Template button, 33,
34f
WWeb Page template, 33
Word Limiter, 176
XXML template, 33
YYearList, 176
193Download at WoweBook.com

The Pragmatic BookshelfAvailable in paperback and DRM-free eBooks, our titles are here to help you stay on top of
your game. The following are in print as of March 2010; be sure to check our website at
pragprog.com for newer titles.
Title Year ISBN Pages
Advanced Rails Recipes: 84 New Ways to Build
Stunning Rails Apps
2008 9780978739225 464
Agile Coaching 2009 9781934356432 248
Agile Retrospectives: Making Good Teams Great 2006 9780977616640 200
Agile Web Development with Rails, Third Edition 2009 9781934356166 784
Beginning Mac Programming: Develop with
Objective-C and Cocoa
2010 9781934356517 300
Behind Closed Doors: Secrets of Great
Management
2005 9780976694021 192
Best of Ruby Quiz 2006 9780976694076 304
Core Animation for Mac OS X and the iPhone:
Creating Compelling Dynamic User Interfaces
2008 9781934356104 200
Core Data: Apple’s API for Persisting Data on
Mac OS X
2009 9781934356326 256
Data Crunching: Solve Everyday Problems
using Java, Python, and More
2005 9780974514079 208
Debug It! Find, Repair, and Prevent Bugs in Your
Code
2009 9781934356289 232
Deploying Rails Applications: A Step-by-Step
Guide
2008 9780978739201 280
Design Accessible Web Sites: 36 Keys to
Creating Content for All Audiences and
Platforms
2007 9781934356029 336
Desktop GIS: Mapping the Planet with Open
Source Tools
2008 9781934356067 368
Developing Facebook Platform Applications with
Rails
2008 9781934356128 200
Domain-Driven Design Using Naked Objects 2009 9781934356449 375
Enterprise Integration with Ruby 2006 9780976694069 360
Enterprise Recipes with Ruby and Rails 2008 9781934356234 416
Everyday Scripting with Ruby: for Teams,
Testers, and You
2007 9780977616619 320
FXRuby: Create Lean and Mean GUIs with Ruby 2008 9781934356074 240
From Java To Ruby: Things Every Manager
Should Know
2006 9780976694090 160
GIS for Web Developers: Adding Where to Your
Web Applications
2007 9780974514093 275
Continued on next page
Download at WoweBook.com

Title Year ISBN Pages
Google Maps API, V2: Adding Where to Your
Applications
2006 PDF-Only 83
Grails: A Quick-Start Guide 2009 9781934356463 200
Groovy Recipes: Greasing the Wheels of Java 2008 9780978739294 264
Interface Oriented Design 2006 9780976694052 240
Land the Tech Job You Love 2009 9781934356265 280
Language Implementation Patterns: Create Your
Own Domain-Specific and General Programming
Languages
2009 9781934356456 350
Learn to Program, 2nd Edition 2009 9781934356364 230
Manage It! Your Guide to Modern Pragmatic
Project Management
2007 9780978739249 360
Manage Your Project Portfolio: Increase Your
Capacity and Finish More Projects
2009 9781934356296 200
Mastering Dojo: JavaScript and Ajax Tools for
Great Web Experiences
2008 9781934356111 568
Metaprogramming Ruby: Program Like the Ruby
Pros
2010 9781934356470 240
Modular Java: Creating Flexible Applications
with OSGi and Spring
2009 9781934356401 260
No Fluff Just Stuff 2006 Anthology 2006 9780977616664 240
No Fluff Just Stuff 2007 Anthology 2007 9780978739287 320
Pomodoro Technique Illustrated: The Easy Way
to Do More in Less Time
2009 9781934356500 144
Practical Programming: An Introduction to
Computer Science Using Python
2009 9781934356272 350
Practices of an Agile Developer 2006 9780974514086 208
Pragmatic Project Automation: How to Build,
Deploy, and Monitor Java Applications
2004 9780974514031 176
Pragmatic Thinking and Learning: Refactor Your
Wetware
2008 9781934356050 288
Pragmatic Unit Testing in C# with NUnit 2007 9780977616671 176
Pragmatic Unit Testing in Java with JUnit 2003 9780974514017 160
Pragmatic Version Control Using Git 2008 9781934356159 200
Pragmatic Version Control using CVS 2003 9780974514000 176
Pragmatic Version Control using Subversion 2006 9780977616657 248
Programming Clojure 2009 9781934356333 304
Programming Cocoa with Ruby: Create
Compelling Mac Apps Using RubyCocoa
2009 9781934356197 300
Programming Erlang: Software for a Concurrent
World
2007 9781934356005 536
Programming Groovy: Dynamic Productivity for
the Java Developer
2008 9781934356098 320
Continued on next page
Download at WoweBook.com

Title Year ISBN Pages
Programming Ruby: The Pragmatic
Programmers’ Guide, Second Edition
2004 9780974514055 864
Programming Ruby 1.9: The Pragmatic
Programmers’ Guide
2009 9781934356081 960
Programming Scala: Tackle Multi-Core
Complexity on the Java Virtual Machine
2009 9781934356319 250
Prototype and script.aculo.us: You Never Knew
JavaScript Could Do This!
2007 9781934356012 448
Rails Recipes 2006 9780977616602 350
Rails for .NET Developers 2008 9781934356203 300
Rails for Java Developers 2007 9780977616695 336
Rails for PHP Developers 2008 9781934356043 432
Rapid GUI Development with QtRuby 2005 PDF-Only 83
Release It! Design and Deploy Production-Ready
Software
2007 9780978739218 368
Scripted GUI Testing with Ruby 2008 9781934356180 192
Ship It! A Practical Guide to Successful Software
Projects
2005 9780974514048 224
Stripes ...and Java Web Development Is Fun
Again
2008 9781934356210 375
TextMate: Power Editing for the Mac 2007 9780978739232 208
The Definitive ANTLR Reference: Building
Domain-Specific Languages
2007 9780978739256 384
The Passionate Programmer: Creating a
Remarkable Career in Software Development
2009 9781934356340 200
ThoughtWorks Anthology 2008 9781934356142 240
Ubuntu Kung Fu: Tips, Tricks, Hints, and Hacks 2008 9781934356227 400
Web Design for Developers: A Programmer’s
Guide to Design Tools and Techniques
2009 9781934356135 300
iPhone SDK Development 2009 9781934356258 576
Download at WoweBook.com

Better Practices
SQL AntipatternsIf you’re programming applications that store data,
then chances are you’re using SQL, either directly
or through a mapping layer. But most of the SQL
that gets used is inefficient, hard to maintain, and
sometimes just plain wrong. This book shows you
all the common mistakes, and then leads you
through the best fixes. What’s more, it shows you
what’s behind these fixes, so you’ll learn a lot about
relational databases along the way.
SQL Antipatterns: Avoiding the Pitfalls of
Database Programming
Bill Karwin
(300 pages) ISBN: 978-19343565-5-5. $34.95
http://pragprog.com/titles/bksqla
Debug It!Debug It! will equip you with the tools, techniques,
and approaches to help you tackle any bug with
confidence. These secrets of professional debugging
illuminate every stage of the bug life cycle, from
constructing software that makes debugging easy;
through bug detection, reproduction, and
diagnosis; to rolling out your eventual fix. Learn
better debugging whether you’re writing Java or
assembly language, targeting servers or embedded
micro-controllers, or using agile or traditional
approaches.
Debug It! Find, Repair, and Prevent Bugs in Your
Code
Paul Butcher
(232 pages) ISBN: 978-1-9343562-8-9. $34.95
http://pragprog.com/titles/pbdp
Download at WoweBook.com

Better Systems
Release It!Whether it’s in Java, .NET, or Ruby on Rails,
getting your application ready to ship is only half
the battle. Did you design your system to survive a
sudden rush of visitors from Digg or Slashdot? Or
an influx of real-world customers from 100
different countries? Are you ready for a world filled
with flaky networks, tangled databases, and
impatient users?
If you’re a developer and don’t want to be on call at
3 a.m. for the rest of your life, this book will help.
Release It! Design and Deploy Production-Ready
Software
Michael T. Nygard
(368 pages) ISBN: 0-9787392-1-3. $34.95
http://pragprog.com/titles/mnee
Ubuntu Kung FuAward-winning Linux author Keir Thomas gets
down and dirty with Ubuntu to provide over 300
concise tips that enhance productivity, avoid
annoyances, and simply get the most from Ubuntu.
You’ll find many unique tips here that can’t be
found anywhere else.
You’ll also get a crash course in Ubuntu’s flavor of
system administration. Whether you’re new to
Linux or an old hand, you’ll find tips to make your
day easier.
This is the Linux book for the rest of us.
Ubuntu Kung Fu: Tips, Tricks, Hints, and Hacks
Keir Thomas
(400 pages) ISBN: 978-1-9343562-2-7. $34.95
http://pragprog.com/titles/ktuk
Download at WoweBook.com

Better Methods
Practices of an Agile DeveloperAgility is all about using feedback to respond to
change. Learn how to • apply the principles of
agility throughout the software development
process • establish and maintain an agile working
environment • deliver what users really want
• use personal agile techniques for better coding
and debugging • use effective collaborative
techniques for better teamwork • move to an agile
approach
Practices of an Agile Developer:
Working in the Real World
Venkat Subramaniam and Andy Hunt
(189 pages) ISBN: 0-9745140-8-X. $29.95
http://pragprog.com/titles/pad
Ship It!Page after page of solid advice, all tried and tested
in the real world. This book offers a collection of
tips that show you what tools a successful team
has to use, and how to use them well. You’ll get
quick, easy-to-follow advice on modern techniques
and when they should be applied. You need this
book if: • you’re frustrated at lack of progress on
your project. • you want to make yourself and your
team more valuable. • you’ve looked at
methodologies such as Extreme Programming (XP)
and felt they were too, well, extreme. • you’ve
looked at the Rational Unified Process (RUP) or
CMM/I methods and cringed at the learning curve
and costs. • you need to get software out the
door without excuses.
Ship It! A Practical Guide to Successful Software
Projects
Jared Richardson and Will Gwaltney
(200 pages) ISBN: 0-9745140-4-7. $29.95
http://pragprog.com/titles/prj
Download at WoweBook.com

Expand Your Horizons
Web Design for DevelopersWeb Design for Developers will show you how to
make your web-based application look
professionally designed. We’ll help you learn how to
pick the right colors and fonts, avoid costly
interface and accessibility mistakes—your
application will really come alive.
We’ll also walk you through some common
Photoshop and CSS techniques and work through
a web site redesign, taking a new design from
concept all the way to implementation.
Web Design for Developers: A Programmer’s
Guide to Design Tools and Techniques
Brian P. Hogan
(300 pages) ISBN: 978-19343561-3-5. $42.95
http://pragprog.com/titles/bhgwad
Manage Your Project PortfolioToo many projects? Want to organize them and
evaluate them without getting buried under a
mountain of statistics? You’ll see how to determine
the really important projects (which might not be
what you think) as well as the projects you should
never do. You’ll learn how to tie your work to your
organization’s mission and show your board, your
managers, and your staff what you can accomplish
and when. You’ll get a better view of the work you
have, and learn how to make those difficult
decisions, ensuring that all your strength is
focused where it needs to be.
Manage Your Project Portfolio: Increase Your
Capacity and Finish More Projects
Johanna Rothman
(200 pages) ISBN: 978-19343562-9-6. $32.95
http://pragprog.com/titles/jrport
Download at WoweBook.com
Tune up Your Brain
Pomodoro Technique IllustratedDo you ever look at the clock and wonder where the
day went? You spent all this time at work and
didn’t come close to getting everything done.
Tomorrow, try something new. In Pomodoro
Technique Illustrated, Staffan Nöteberg shows you
how to organize your work to accomplish more in
less time. There’s no need for expensive software or
fancy planners. You can get started with nothing
more than a piece of paper, a pencil, and a kitchen
timer.
Pomodoro Technique Illustrated: The Easy Way
to Do More in Less Time
Staffan Nöteberg
(144 pages) ISBN: 9781934356500. $24.95
http://pragprog.com/titles/snfocus
Pragmatic Thinking and LearningSoftware development happens in your head. Not in
an editor, IDE, or design tool. In this book by
Pragmatic Programmer Andy Hunt, you’ll learn how
our brains are wired, and how to take advantage of
your brain’s architecture. You’ll master new tricks
and tips to learn more, faster, and retain more of
what you learn.
• Use the Dreyfus Model of Skill Acquisition to
become more expert • Leverage the architecture of
the brain to strengthen different thinking modes
• Avoid common “known bugs” in your mind
• Learn more deliberately and more effectively
• Manage knowledge more efficiently
Pragmatic Thinking and Learning:
Refactor your Wetware
Andy Hunt
(288 pages) ISBN: 978-1-9343560-5-0. $34.95
http://pragprog.com/titles/ahptl
Download at WoweBook.com

The Pragmatic BookshelfThe Pragmatic Bookshelf features books written by developers for developers. The titles
continue the well-known Pragmatic Programmer style and continue to garner awards and
rave reviews. As development gets more and more difficult, the Pragmatic Programmers
will be there with more titles and products to help you stay on top of your game.
Visit Us OnlineExpressionEngine 2’s Home Page
http://pragprog.com/titles/riexen
Source code from this book, errata, and other resources. Come give us feedback, too!
Register for Updates
http://pragprog.com/updates
Be notified when updates and new books become available.
Join the Community
http://pragprog.com/community
Read our weblogs, join our online discussions, participate in our mailing list, interact
with our wiki, and benefit from the experience of other Pragmatic Programmers.
New and Noteworthy
http://pragprog.com/news
Check out the latest pragmatic developments, new titles and other offerings.
Buy the BookIf you liked this eBook, perhaps you’d like to have a paper copy of the book. It’s available
for purchase at our store: pragprog.com/titles/riexen.
Contact UsOnline Orders: www.pragprog.com/catalog
Customer Service: [email protected]
Non-English Versions: [email protected]
Pragmatic Teaching: [email protected]
Author Proposals: [email protected]
Contact us: 1-800-699-PROG (+1 919 847 3884)
Download at WoweBook.com