SAP HANA Developer Quick Start Guide
242
PUBLIC SAP HANA Platform 2.0 SPS 05 Document Version: 1.1 – 2021-07-09 SAP HANA Developer Quick Start Guide For SAP HANA XS Classic and Advanced Model © 2021 SAP SE or an SAP affiliate company. All rights reserved. THE BEST RUN
-
Upload
khangminh22 -
Category
Documents
-
view
7 -
download
0
Transcript of SAP HANA Developer Quick Start Guide

PUBLICSAP HANA Platform 2.0 SPS 05Document Version: 1.1 – 2021-07-09
SAP HANA Developer Quick Start GuideFor SAP HANA XS Classic and Advanced Model
© 2
021 S
AP S
E or
an
SAP affi
liate
com
pany
. All r
ight
s re
serv
ed.
THE BEST RUN

Content
1 SAP HANA Developer Quick Start Guide. . . . . . . . . . . . . . . . . . . . . . . . . . . . . . . . . . . . . . . . . . .3
2 Getting Started with Application Development in XS Classic. . . . . . . . . . . . . . . . . . . . . . . . . . . 42.1 Developing Applications for XS Classic with SAP HANA Studio. . . . . . . . . . . . . . . . . . . . . . . . . . . . . 4
Getting Started. . . . . . . . . . . . . . . . . . . . . . . . . . . . . . . . . . . . . . . . . . . . . . . . . . . . . . . . . . . . 5
Setting Up Your Application. . . . . . . . . . . . . . . . . . . . . . . . . . . . . . . . . . . . . . . . . . . . . . . . . . 28
2.2 Developing Applications for XS Classic with SAP HANA Web-Based Workbench. . . . . . . . . . . . . . . . 52
Getting Started with Application Development. . . . . . . . . . . . . . . . . . . . . . . . . . . . . . . . . . . . . 52
3 Getting Started with Application Development in XS Advanced. . . . . . . . . . . . . . . . . . . . . . . 1243.1 Working with the SAP Web IDE for SAP HANA. . . . . . . . . . . . . . . . . . . . . . . . . . . . . . . . . . . . . . . 125
Create a Simple "Tiny-World" Application. . . . . . . . . . . . . . . . . . . . . . . . . . . . . . . . . . . . . . . . 126
Extend the "Tiny World" Application to Use an OData Service and a Client UI. . . . . . . . . . . . . . . 132
Add Business Logic to the "Tiny World" Application. . . . . . . . . . . . . . . . . . . . . . . . . . . . . . . . . 140
Deploy the "Tiny World" Application. . . . . . . . . . . . . . . . . . . . . . . . . . . . . . . . . . . . . . . . . . . . 149
Upgrade and Redeploy the "Tiny World" Application. . . . . . . . . . . . . . . . . . . . . . . . . . . . . . . . 153
Add User Authentication to the "Tiny World" Application. . . . . . . . . . . . . . . . . . . . . . . . . . . . . .161
Add Authorization Checks to the "Tiny World" Application. . . . . . . . . . . . . . . . . . . . . . . . . . . . 165
Create and Assign User Roles for the "Tiny World" Application. . . . . . . . . . . . . . . . . . . . . . . . . 169
Working with the SAP HANA Database Explorer. . . . . . . . . . . . . . . . . . . . . . . . . . . . . . . . . . . . 171
3.2 Working with the XS Advanced Command-Line Client. . . . . . . . . . . . . . . . . . . . . . . . . . . . . . . . . . 177
Get Started with the XS CLI Client. . . . . . . . . . . . . . . . . . . . . . . . . . . . . . . . . . . . . . . . . . . . . 178
Deploy a Node.js Hello-World Application using the XS CLI. . . . . . . . . . . . . . . . . . . . . . . . . . . . 183
Deploy a Node.js Application that Uses Database Artifacts and OData Services. . . . . . . . . . . . . 188
3.3 Working with Gerrit Version Control in XS Advanced. . . . . . . . . . . . . . . . . . . . . . . . . . . . . . . . . . . 197
Set up Gerrit for XS Advanced Application Development. . . . . . . . . . . . . . . . . . . . . . . . . . . . . 198
3.4 Set up an XS Advanced Application Project. . . . . . . . . . . . . . . . . . . . . . . . . . . . . . . . . . . . . . . . . 202
XS Advanced Application Resource Files. . . . . . . . . . . . . . . . . . . . . . . . . . . . . . . . . . . . . . . . 208
4 Working with the SAP Cloud Application Programming Model. . . . . . . . . . . . . . . . . . . . . . . . .2114.1 Create a Basic HTML5 Module for your SAP Cloud Platform Business Application. . . . . . . . . . . . . . 213
4.2 Create the Core Data Services for your SAP Cloud Platform Business Application. . . . . . . . . . . . . . 217
4.3 Create the Node.js Back-end Services for your SAP Cloud Platform Business Application. . . . . . . . .221
4.4 Create the SAPUI5 Web UI for your SAP Cloud Platform Business Application. . . . . . . . . . . . . . . . . 231
5 Important Disclaimer for Features in SAP HANA. . . . . . . . . . . . . . . . . . . . . . . . . . . . . . . . . . 239
2 PUBLICSAP HANA Developer Quick Start Guide
Content

1 SAP HANA Developer Quick Start Guide
This guide contains a selection of tutorials which show you how to build applications using SAP HANA extended application services: both XS advanced and XS classic models.
In this quick-start guide, you will get to know the tools provided to enable you to build application logic in SAP HANA Extended Application Services (SAP HANA XS). The information in the SAP HANA Developer Quick Start Guide is organized as follows:
● Getting started with SAP HANA XS, classic model:○ Application development with SAP HANA studio
Use this collection of tutorials to learn how to use SAP HANA studio to build and deploy a simple SAP HANA-based application for the SAP HANA XS, classic model, run time environment quickly and easily
○ Application development with SAP HANA Web-based WorkbenchUse this collection of tutorials to learn how to use SAP HANA Web-based Development Workbench to build and deploy a simple SAP HANA-based application for the SAP HANA XS, classic model, run-time environment quickly and easily
● Getting started with SAP HANA XS, advanced model (XS advanced)Use this collection of tutorials to learn how to use SAP Web IDE for SAP HANA to build and deploy a simple SAP HANA-based application for the SAP HANA XS, advanced model, run-time environment quickly and easily
● Working with SAP's Cloud Application Programming ModelThis tutorial is designed to show you how to use the Node.js and the Odata V4 framework as well as some exit handlers to develop and deploy an Cloud application using the Cloud Application Programming Model (CAP) for SAP Cloud Platform and the tools provided in the SAP Web IDE for SAP HANA.
Related Information
Getting Started with Application Development in XS Advanced [page 124]Developing Applications for XS Classic with SAP HANA Studio [page 4]Developing Applications for XS Classic with SAP HANA Web-Based Workbench [page 52]Working with the SAP Cloud Application Programming Model [page 211]
SAP HANA Developer Quick Start GuideSAP HANA Developer Quick Start Guide PUBLIC 3

2 Getting Started with Application Development in XS Classic
This section contains a selection of tutorials which show you how to get started with the process of building applications using SAP HANA extended application services, classic model (XS classic).
The information in this section of the SAP HANA Developer Quick Start Guide is organized as follows:
● Getting started with SAP HANA studioA collection of tutorials which are designed to demonstrate how use the tools provided with SAP HANA studio to build and deploy a simple SAP HANA-based application on SAP HANA XS classic model
● Getting started with SAP HANA Web-Based Development WorkbenchA collection of tutorials which are designed to demonstrate how use SAP HANA Web-Based Workbench tools to build and deploy a simple SAP HANA-based application on SAP HANA XS classic model
Related Information
Developing Applications for XS Classic with SAP HANA Studio [page 4]Developing Applications for XS Classic with SAP HANA Web-Based Workbench [page 52]
2.1 Developing Applications for XS Classic with SAP HANA Studio
This guide contains a selection of tutorials which show you how to get started with the process of building applications using SAP HANA extended application services, classic model (XS classic) and the SAP HANA studio tools.
The information in this section of the SAP HANA Developer Quick Start Guide is organized as follows:
● Getting startedA collection of tutorials which are designed to demonstrate how use SAP HANA studio to build and deploy a simple SAP HANA-based application on SAP HANA XS classic model quickly and easily
● The development processStep-by-step information that shows in detail the tasks you need to perform to develop the various elements that make up an XS classic application. The information provided uses tasks and tutorials to explain how to develop the SAP HANA development objects.
4 PUBLICSAP HANA Developer Quick Start Guide
Getting Started with Application Development in XS Classic

Related Information
Getting Started [page 5]Setting Up Your Application [page 28]
2.1.1 Getting Started
To understand which tools SAP HANA Extended Application Services (SAP HANA XS) provides to enable you to start developing native applications, you need to run through the process of building a small application, for example, in the form of a “Hello World” application.
As part of the getting-started process, you go through the following steps:
● PrerequisitesA short list of the tools and permissions required to start working with the SAP HANA application-development tools.
● Workspaces and projects SAP HANA projectsIf you are using the SAP HANA studio, you must create a shared project, which you use to group all your application-related artifacts and synchronize any changes with the repository workspace.
NoteIf you are using the SAP HANA Web-based Development Workbench, you do not need to create a project of a repository workspace.
● Creating application descriptorsEach native SAP HANA application requires descriptor files. The application descriptors are the core files that you use to describe an application's framework within SAP HANA XS, for example: to mark the root point from which content can be served, which content is to be exposed, or who has access to the content.
● TutorialsA selection of “Hello World” tutorials are used to demonstrate the application-development process in SAP HANA XS and show you how to produce a simple application quickly and easily. Some of the tutorials in this guide refer to models that are included in the demonstration content provided with the SAP HANA Interactive Education (SHINE) delivery unit (DU). The SHINE DU is available for download in the SAP Software Download Center.
NoteAccess to the SAP Software Download Center is only available to SAP customers and requires logon credentials.
Related Information
Prerequisites [page 6]
SAP HANA Developer Quick Start GuideGetting Started with Application Development in XS Classic PUBLIC 5

2.1.1.1 Prerequisites
To start working with the tools provided to enable application development on SAP HANA Extended Application Services (SAP HANA XS), it is necessary to ensure that the developers have the required software and access permissions.
Before you start developing applications using the features and tools provided by the SAP HANA XS, bear in mind the following prerequisites. Developers who want to build applications to run on SAP HANA XS need the following tools, accounts, and privileges:
NoteThe following can only be provided by someone who has the required authorizations in SAP HANA, for example, an SAP HANA administrator.
● Access to a running SAP HANA development system (with SAP HANA XS)● A valid user account in the SAP HANA database on that system● Access to SAP HANA developer tools, for example: SAP HANA studio or the SAP HANA Web-based
Development Workbench.
NoteTo provide access to the SAP HANA repository from the SAP HANA studio, the EXECUTE privilege is required for SYS.REPOSITORY_REST, the database procedure through which the REST API is tunneled.
● Access to the SAP HANA repository● Access to selected run-time catalog objects● Some of the tutorials in this guide refer to models that are included in the demonstration content provided
with the SAP HANA Interactive Education (SHINE) delivery unit (DU). The SHINE DU is available for download in the SAP Software Download Center.
NoteAccess to the SAP Software Download Center is only available to SAP customers and requires logon credentials.
2.1.1.2 Tutorials
Tutorials are a good way to understand quickly what is required to write a simple native application for SAP HANA XS.
In this section you can use the following tutorials to help you understand the basic steps you need to perform when developing native SAP HANA XS applications:
● Hello ODataA simple application that enables you to test the SAP HANA OData interface by exposing an OData collection for analysis and display in a client application.
● Hello World in server-side JavaScript (XSJS)A simple application written in server-side JavaScript which displays the words “Hello World” in a Web browser along with a string extracted from a table in the SAP HANA database.
6 PUBLICSAP HANA Developer Quick Start Guide
Getting Started with Application Development in XS Classic

NoteThe namespace sap in the SAP HANA repository is restricted. Place the new packages and application artifacts that you create during the tutorials in your own namespace, for example, com.acme, or use the system.local area for testing.
Related Information
Tutorial: Use the SAP HANA OData Interface [page 24]Tutorial: My First SAP HANA Application [page 7]
2.1.1.2.1 Tutorial: My First SAP HANA Application
This topic describes the steps required to develop a simple application that runs natively in SAP HANA.
Context
This tutorial shows you how to use the SAP HANA studio to develop a functional SAP HANA application. Although it is simple, the tutorial demonstrates the development process that you can apply to all types of application-development scenarios.
The tutorial shows how to create a simple SAP HANA application. The application uses server-side JavaScript code to retrieve data from SAP HANA by executing SQL statements in the SAP HANA database. The retrieved data is displayed in a Web browser. During the tutorial, you use tools provided in the SAP HANA studio to perform the following tasks:
● Connect to an SAP HANA systemAdd (and connect to) an SAP HANA system, which hosts the repository where development objects are stored
● Create a repository workspaceCreate a development workspace which enables you to synchronize the development artifacts in your local file system with the repository hosted on the SAP HANA system you connect to.
● Create and share a projectAdd a project which you can use to hold the application-development artifacts in a convenient central location.Sharing the project makes the contents of the new project available to other members of the application-development team by linking the local project to the SAP HANA repository. In this way, you can manage object versions and synchronize changes to development objects.
● Write server-side JavaScript codeUse JavaScript code to extract data from the SAP HANA database in response to a client request; the code will include SQLScript to perform the data extraction.
● Display dataDisplay data extracted from the SAP HANA database in a Web browser.
SAP HANA Developer Quick Start GuideGetting Started with Application Development in XS Classic PUBLIC 7

Related Information
Tutorial: Add an SAP HANA System [page 8]Tutorial: Add a Repository Workspace [page 12]Tutorial: Add an Application Project [page 14]Tutorial: Write Server-Side JavaScript [page 19]Tutorial: Retrieve Data from SAP HANA [page 23]
2.1.1.2.1.1 Tutorial: Add an SAP HANA System
Application-development artifacts are stored and managed in the SAP HANA repository. To connect to an SAP HANA repository, you must add the system to SAP HANA studio.
Prerequisites
● Access to a running SAP HANA development system (with SAP HANA XS)● A valid user account in the SAP HANA database on that system● Access to SAP HANA studio
NoteTo provide access to the SAP HANA repository from the SAP HANA studio, the EXECUTE privilege is required for SYS.REPOSITORY_REST, the database procedure through which the REST API is tunneled.
● Access to the SAP HANA Repository
Context
You must add a connection to the SAP HANA system hosting the repository that stores the application-development artifacts you will be working with.
Procedure
1. Open SAP HANA studio.2. Open the SAP HANA Development perspective.3. In the Systems view, click [+] Add System... and choose Add System....
8 PUBLICSAP HANA Developer Quick Start Guide
Getting Started with Application Development in XS Classic

4. Type the details of the SAP HANA system in the following fields:
○ Host Name:The name of the server hosting the SAP HANA database instance, for example, dev.host.acme.comIf you are adding a tenant database in a multi-database system, you can specify either the fully qualified domain name (FQDN) of the system hosting the tenant database or the virtual host name for the tenant database. Every tenant database requires a virtual host name so that the system's internal SAP Web Dispatcher can forward HTTP requests to the XS server of the correct database.
TipIf you do not enter the virtual host name for the tenant database here, you must specify it explicitly as the XS server host in the system properties. You can do this after you have finished adding the system. In the Systems view by right-clicking the system whose properties you want to modify and choosing Properties XS Properties .
○ Instance NumberSAP HANA instance number on that server, for example, 00
○ DescriptionA display name for the system you are adding. When you start working with a lot of systems, you will need to label and recognize the systems in the SAP HANA studio. Enter Development System.
SAP HANA Developer Quick Start GuideGetting Started with Application Development in XS Classic PUBLIC 9

5. Select Next.6. Enter a user name and password for the connection, and select Finish.
10 PUBLICSAP HANA Developer Quick Start Guide
Getting Started with Application Development in XS Classic

Results
After adding the system, you will see the system in the Systems view.
SAP HANA Developer Quick Start GuideGetting Started with Application Development in XS Classic PUBLIC 11

2.1.1.2.1.2 Tutorial: Add a Repository Workspace
The place where you work on development objects is called a repository workspace. The workspace is the link between the SAP HANA repository and your local file system.
Prerequisites
● Access to a running SAP HANA development system (with SAP HANA XS)● A valid user account in the SAP HANA database on that system● Access to SAP HANA studio● Access to the SAP HANA Repository
Context
After you add the SAP HANA system hosting the repository that stores your application-development files, you must specify a repository workspace, which is the location in your file system where you save and work on the development files.
To create a repository workspace, perform the following steps:
Procedure
1. Open SAP HANA studio.2. In the SAP HANA Development perspective, open the Repositories view.
3. In the Repositories view, choose File New Repository Workspace .4. You must provide the following information:
○ SAP HANA systemThe name of the SAP HANA system hosting the repository that you want to synchronize your workspace with; choose the same system you just added for this tutorial.
○ Workspace NameIf a default repository workspace exists, uncheck the Default workspaceoption and enter a workspace name; the workspace name can be anything you like, for example, DevWS.A folder with the name you type is created below the Workspace Root.
○ Workspace rootThe Workspace Root is a folder that contains the workspace you create in this step. The Workspace Root can be anywhere on your local file system. For this tutorial, create a folder at C:\users\<PATH>\workspaces and make this the Workspace Root.
12 PUBLICSAP HANA Developer Quick Start Guide
Getting Started with Application Development in XS Classic

5. Click Finish.
In the Repositories view, you see your workspace, which enables you to browse the repository of the system tied to this workspace. The repository packages are displayed as folders.
At the same time, a folder will be added to your file system to hold all your development files.
6. Remove a repository workspace.
SAP HANA Developer Quick Start GuideGetting Started with Application Development in XS Classic PUBLIC 13

If it is necessary to remove a workspace, you can choose between multiple deletion options; the option you choose determines what is removed, from where (local file system or remote repository), and what, if anything, is retained.a. Open the SAP HANA Development perspective.b. Choose the Repositories view and expand the repository node containing the workspace you want to
remove.c. Right-click the workspace you want to remove.d. Choose the workspace-deletion mode.
The following modes apply when you delete a workspace in SAP HANA studio:
Workspace Deletion Modes
Workspace Deletion Mode Description
Delete Remove workspace; delete all workspace-related local files; delete related changes to remote (repository) data.
Remove from client (keep remote changes) Remove workspace from local client system; delete all local workspace-related files; retain changes to remote (repository) data.
Disconnect local from remote (keep changes) Keep the workspace but remove the workspace label from the list of workspaces displayed in the Repositories view. The connection to the disconnected workspace can be reestablished at any time with the option Import Local Repository Workspaces.
2.1.1.2.1.3 Tutorial: Add an Application Project
You use the project to collect all the development artifacts relating to a particular part of an application in one convenient place.
Prerequisites
● Access to a running SAP HANA development system (with SAP HANA XS)● A valid user account in the SAP HANA database on that system● Access to SAP HANA studio● Access to an SAP HANA Repository workspace
Context
After you set up a development environment for the chosen SAP HANA system, you can add a project to contain all the development objects you want to create as part of the application-development process.
14 PUBLICSAP HANA Developer Quick Start Guide
Getting Started with Application Development in XS Classic

There are a variety of project types for different types of development objects. Generally, a project type ensures that only the necessary libraries are imported to enable you to work with development objects that are specific to a project type. In this tutorial, you create an XS Project.
Procedure
1. Open SAP HANA studio.
2. From the File menu in SAP HANA studio, choose New Project .
3. In the New Project dialog, under SAP HANA Application Development , select XS Project, and choose Next.
4. Enter the following details for the new project:
○ Project nameEnter: mycompany.com.testingSince a project name must be unique within the same Eclipse workspace, a good convention is to use the fully qualified package name as the project name.
○ Project locationYou can keep this as the default SAP HANA studio (Repository) workspace. To save the project in an alternative location from the recommended default, you must first disable the option Share project in SAP repository. You can share the new project manually later. Sharing a project enables continuous synchronization with the SAP HANA repository.
○ Working sets (optional)A working set is a concept similar to favorites in a Web browser, which contain the objects you work on most frequently.
SAP HANA Developer Quick Start GuideGetting Started with Application Development in XS Classic PUBLIC 15

5. Choose Finish.
Results
The Project Explorer view in the SAP HANA Development perspective displays the new project. The system information in brackets [X4D (D007)...] to the right of the project node name in the Project Explorer view indicates that the project has been shared; shared projects are regularly synchronized with the Repository hosted on the SAP HANA system you are connected to.
16 PUBLICSAP HANA Developer Quick Start Guide
Getting Started with Application Development in XS Classic

NoteIf you disabled the option Share project in SAP repository when you created the project, you must share the new project manually.
Related Information
Tutorial: Share an Application Project [page 17]
2.1.1.2.1.4 Tutorial: Share an Application Project
Sharing a project establishes a link between project-specific files in your development workspace and the repository hosted by the SAP HANA system you are connected to.
Prerequisites
● Access to a running SAP HANA development system (with SAP HANA XS)● A valid user account in the SAP HANA database on that system● Access to SAP HANA studio● Access to an SAP HANA Repository workspace● An existing SAP HANA project
Context
Sharing a project associates the project with your repository workspace and synchronizes the project with the repository hosted on the SAP HANA system you are connected to. By default, a project is automatically shared at the same time as it is created; the option to disable the auto-share operation is available in the project-creation wizard.
NoteManually sharing a project is necessary only if you disabled the option Share project in SAP repository when you created the project or chose to explicitlyunshare the project after you created it.
SAP HANA Developer Quick Start GuideGetting Started with Application Development in XS Classic PUBLIC 17

If you need to manually share a project, perform the following steps:
Procedure
1. Start SAP HANA studio and open the SAP HANA Development perspective.
2. In the Project Explorer view, right-click the project you want to share, and choose Team Share Projectin the context-sensitive popup menu to display the Share Project dialog.
Since you only have one workspace, the wizard selects it for you automatically. If you have more than one workspace, you must choose the workspace to host the shared project.
The dialog also shows the Current project location (the current location of your project, in the repository workspace), and the New project location (where your project will be copied so it can be associated with the repository workspace).
Also, since Add project folder as subpackage is checked, subpackages will be created based on the name of your project.
3. Choose Finish.
The shared project is displayed in the Project Explorer view associated with your workspace.
18 PUBLICSAP HANA Developer Quick Start Guide
Getting Started with Application Development in XS Classic

The .project file is shown with an asterisk , which indicates that the file has changed but has yet to be committed to the repository.
4. Right-click the .project file, and select Team Commit from the context-sensitive popup menu to add your project and its files to the repository. The .project file is now displayed with a diamond icon,
, indicating that the latest version of the file on your workstation has been committed to the SAP HANA repository.
In addition, the Repositories view shows that a new hierarchy of packages has been created based on the name of your project, mycompany.myorg.testing.
2.1.1.2.1.5 Tutorial: Write Server-Side JavaScript
SAP HANA Extended Application Services (SAP HANA XS) supports server-side application programming in JavaScript. In this step we add some simple JavaScript code that generates a page which displays the words Hello, world!.
Prerequisites
● Access to a running SAP HANA development system (with SAP HANA XS)● A valid user account in the SAP HANA database on that system● Access to SAP HANA studio● Access to a shared project in the SAP HANA Repository where you can create the artifacts required for this
tutorial.
SAP HANA Developer Quick Start GuideGetting Started with Application Development in XS Classic PUBLIC 19

Context
As part of this server-side JavaScript tutorial, you create the following files:
● MyFirstSourceFile.xsjsThis contains your server-side JavaScript code.
● .xsappThis marks the root point in the application's package hierarchy from which content can be exposed via HTTP. You still need to explicitly expose the content and assign access controls.
● .xsaccessExpose your content, meaning it can be accessed via HTTP, and assign access controls, for example, to manage who can access content and how.
TipIf you are using SAP HANA studio to create artifacts in the SAP HANA Repository, the file-creation wizard adds the required file extension automatically and enables direct editing of the file in the appropriate editor.
Procedure
1. Open SAP HANA studio.2. Open the SAP HANA Development perspective.
3. In the Project Explorer view, right-click your XS project, and choose New Other in the context-sensitive popup menu.
4. In the Select a Wizard dialog, choose SAP HANA Application Development XS JavaScript File .5. In the New XS JavaScript File dialog, enter MyFirstSourceFile.xsjs in File name text box.
TipIf you are using SAP HANA studio to create artifacts in the SAP HANA Repository, the file creation wizard adds the required file extension automatically and enables direct editing of the file in the appropriate editor. You can also select a template to use. Templates contain sample source code to help you.
6. Choose Finish.7. In the MyFirstSourceFile.xsjs file, enter the following code and save the file:
NoteBy default, saving the file automatically commits the saved version of the file to the repository.
$.response.contentType = "text/html"; $.response.setBody( "Hello, World !");
The example code shows how to use the SAP HANA XS JavaScript API's response object to write HTML. By typing $. you have access to the API's objects.
8. Check that the application descriptor files are present in the root package of your new XS JavaScript application.
20 PUBLICSAP HANA Developer Quick Start Guide
Getting Started with Application Development in XS Classic

The application descriptors (.xsapp and .xsaccess) are mandatory and describe the framework in which an SAP HANA XS application runs. The .xsapp file indicates the root point in the package hierarchy where content is to be served to client requests; the .xsaccess file defines who has access to the exposed content and how.
NoteBy default, the project-creation Wizard creates the application descriptors automatically. If they are not present, you will see a 404 error message in the Web Browser when you call the XS JavaScript service.
If you need to create the application descriptors manually, perform the following steps:
a. Add a blank file called .xsapp (no name, just a file extension) to the root package of your XS JavaScript application.
To add an .xsapp file, right-click the project to which you want to add the new file, select NewOther SAP HANA Application Development XS Application Descriptor File from the context-sensitive popup menu, and choose Next.
TipIf you are using SAP HANA studio to create artifacts in the SAP HANA Repository, the file-creation wizard adds the required file extension automatically.
b. Add a file called .xsaccess (no name, just a file extension) to the root package of your XS JavaScript application, and copy the following code into the new .xsaccess file:
To add a .xsaccess manually, right-click the project to which you want to add the file, select NewOther SAP HANA Application Development XS Application Access File from the context-sensitive popup menu, and choose Next.
TipIf you are using SAP HANA studio to create artifacts in the SAP HANA Repository, the file-creation wizard adds the required file extension automatically, provides a working template, and, if appropriate, enables direct editing of the file.
{ "exposed" : true, "authentication" : [ { "method" : "Form" } ], "prevent_xsrf" : true }
This code exposes the application content via HTTP, specifies form-based logon as the default authentication method for the corresponding SAP HANA application, and helps protect your application from cross-site request-forgery (XSRF) attacks.
TipYou define the user-authentication method for a SAP HANA application in the application's runtime configuration, for example, using the SAP HANA XS Administration Tool. For the purposes of this tutorial, you do not need to change the runtime configuration.
SAP HANA Developer Quick Start GuideGetting Started with Application Development in XS Classic PUBLIC 21

9. Activate the new files in the SAP HANA repository.Activating a file makes the file available to other project members. Right-click the new files (or the folder/package containing the files) and select Team Activate from the context-sensitive popup menu.The activate operation publishes your work and creates the corresponding catalog objects; you can now test it.
Results
To access your JavaScript application, open a Web browser and enter the following URL, replacing <myServer> with the name of the server hosting your SAP HANA instance, and where appropriate the path to the server-side JavaScript source file:
http://<myServer>:8000/mycompany/myorg/testing/MyFirstSourceFile.xsjs
NoteFor standard HTTP access, the port number is 80<SAPHANA_ID>, where <SAPHANA_ID> is two digits representing your SAP HANA instance number. For example, if your SAP HANA instance is 00, then the port number to use is 8000.
If everything works as expected, you should see the following result:
22 PUBLICSAP HANA Developer Quick Start Guide
Getting Started with Application Development in XS Classic

After logging in with your SAP HANA user name and password, the following page should be displayed:
2.1.1.2.1.6 Tutorial: Retrieve Data from SAP HANA
The final step of the data display tutorial is to extract data from the database and display it in a Web Browser.
Prerequisites
● Access to a running SAP HANA development system (with SAP HANA XS)● A valid user account in the SAP HANA database on that system● Access to SAP HANA studio● Access to the shared project in the SAP HANA Repository which contains the artifacts used in this tutorial.
Context
To extract data from the database we use our JavaScript code to open a connection to the database and then prepare and run an SQL statement. The results are added to the response which is displayed in the Web browser. You use the following SQL statement to extract data from the database:
select * from DUMMY
The SQL statement returns one row with one field called DUMMY, whose value is X.
Procedure
1. Open SAP HANA studio.2. Open the SAP HANA Development perspective.3. In the Project Explorer view, located the server-side JavaScript file MyFirstSourceFile.xsjs and open
it in the embedded JavaScript editor.4. In MyFirstSourceFile.xsjs, replace your existing code with the code in the following example.
$.response.contentType = "text/html"; var output = "Hello, World !"; var conn = $.db.getConnection();
SAP HANA Developer Quick Start GuideGetting Started with Application Development in XS Classic PUBLIC 23

var pstmt = conn.prepareStatement( "select * from DUMMY" );var rs = pstmt.executeQuery();if (!rs.next()) { $.response.setBody( "Failed to retrieve data" ); $.response.status = $.net.http.INTERNAL_SERVER_ERROR;} else { output = output + "This is the response from my SQL: " + rs.getString(1);}rs.close();pstmt.close();conn.close(); $.response.setBody(output);
5. Save the file MyFirstSourceFile.xsjs.
NoteSaving a file in a shared project automatically commits the saved version of the file to the Repository, To explicitly commit a file to the Repository, right-click the file (or the project containing the file) and choose Team Commit from the context-sensitive popup menu.
6. Activate the file MyFirstSourceFile.xsjs by right-clicking the file and choosing Team Activate .
Results
In your browser, refresh the page. If everything works as expected, you should see the following page:
2.1.1.2.2 Tutorial: Use the SAP HANA OData Interface
The package you put together to test the SAP HANA OData interface includes all the artifacts you need to use SAP HANA Extended Application Services (SAP HANA XS) to expose an OData collection for analysis and display by client applications.
Prerequisites
Since the artifacts required to get a simple OData application up and running are stored in the repository, it is assumed that you have already performed the following tasks:
● Create a development workspace in the SAP HANA repository● Create a project in the workspace
24 PUBLICSAP HANA Developer Quick Start Guide
Getting Started with Application Development in XS Classic

● Share the new project
Context
To create a simple OData application, perform the following steps:
TipFile extensions are important. If you are using SAP HANA studio to create artifacts in the SAP HANA Repository, the file-creation wizard adds the required file extension automatically and, if appropriate, enables direct editing of the file in the appropriate editor.
Procedure
1. Create a root package for your OData application, for example, helloodata and save and activate it in the repository.
a. Click the Content directory with the alternate mouse button and choose New Package .b. Enter the required information for the package in the dialog box and choose OK.
NoteThe namespace sap is restricted. Place the new package in your own namespace, which you can create alongside the sap namespace.
2. Create a schema, for example, HELLO_ODATA.hdbschema.
The schema is required for the table that contains the data to be exposed by your OData service-definition. The schema is defined in a flat file with the file extension .hdbschema that you save in the repository and which you must activate.
TipFile extensions are important. If you are using SAP HANA studio to create artifacts in the SAP HANA Repository, the file-creation wizard adds the required file extension automatically and, if appropriate, enables direct editing of the file in the appropriate editor.
Enter the following code in the HELLO_ODATA.hdbschema file:
schema_name="HELLO_ODATA";
3. Create the database table that contains the data to be exposed by your OData service definition, for example, otable.hdbtable.
In the Project Explorer view, right-click the folder where you want to create the new OData service definition file and choose New Other SAP HANA Database Development Database Table in the context-sensitive popup menu.
SAP HANA Developer Quick Start GuideGetting Started with Application Development in XS Classic PUBLIC 25

TipFile extensions are important. If you are using SAP HANA studio to create artifacts in the SAP HANA Repository, the file-creation wizard adds the required file extension automatically and, if appropriate, enables direct editing of the file in the appropriate editor.
Enter the following code in the otable.hdbtable file:
NoteIf the editor underlines the keywords nullable and Defaultvalue in red, you can safely ignore this.
table.schemaName = "HELLO_ODATA"; table.tableType = COLUMNSTORE; table.columns = [ {name = "Col1"; sqlType = VARCHAR; nullable = false; length = 20; comment = "dummy comment";}, {name = "Col2"; sqlType = INTEGER; nullable = false;}, {name = "Col3"; sqlType = NVARCHAR; nullable = true; length = 20; defaultValue = "Defaultvalue";}, {name = "Col4"; sqlType = DECIMAL; nullable = false; precision = 12; scale = 3;}];table.primaryKey.pkcolumns = ["Col1", "Col2"];
4. Grant SELECT privileges to the owner of the new schema.After activation in the repository, the schema object is only visible in the catalog to the _SYS_REPO user. To enable other users, for example the schema owner, to view the newly created schema in the SAP HANA studio's Modeler perspective, you must grant the user the required SELECT privilege.a. In the SAP HANA studio Systems view, right-click the SAP HANA system hosting the repository where
the schema was activated and choose SQL Console in the context-sensitive popup menu.b. In the SQL Console, execute the statement illustrated in the following example, where <SCHEMANAME>
is the name of the newly activated schema, and <username> is the database user ID of the schema owner:
call _SYS_REPO.GRANT_SCHEMA_PRIVILEGE_ON_ACTIVATED_CONTENT('select','<SCHEMANAME>','<username>');
5. Create an application descriptor for your new OData application in your root OData package helloodata.
The application descriptor (.xsapp) is the core file that you use to define an application's availability within SAP HANA application. The .xsapp file sets the point in the application-package structure from which content will be served to the requesting clients.
NoteThe application-descriptor file has no content and no name; it only has the extension .xsapp. File extensions are important. If you are using SAP HANA studio to create artifacts in the SAP HANA Repository, the file-creation wizard adds the required file extension automatically and, if appropriate, enables direct editing of the file in the appropriate editor.
a. In the Project Explorer view, right-click the folder where you want to create the new application descriptor and choose New Other SAP HANA Application Development XS Application Descriptor File in the context-sensitive popup menu.
26 PUBLICSAP HANA Developer Quick Start Guide
Getting Started with Application Development in XS Classic

b. Save and activate the application-descriptor file in the repository.
NoteSaving a file in a shared project automatically commits the saved version of the file to the repository, To explicitly commit a file to the repository, right-click the file (or the project containing the file) and choose Team Commit from the context-sensitive popup menu.
6. Create an application-access file for your new OData application and place it in your root OData package helloodata.
The application-access file enables you to specify who or what is authorized to access the content exposed by the application.
NoteThe application-access file has no name; it only has the extension .xsaccess. File extensions are important. If you are using SAP HANA studio to create artifacts in the SAP HANA Repository, the file-creation wizard adds the required file extension automatically and, if appropriate, enables direct editing of the file in the appropriate editor.
a. In the Project Explorer view, right-click the folder where you want to create the new application descriptor and choose New Other SAP HANA Application Development XS Application Access File in the context-sensitive popup menu.
b. Enter the following content in the .xsaccess file for your new OData application:
{ "exposed" : true, "prevent_xsrf" : true }
NoteIt is highly recommended to always use the prevent_xsrf keyword to help protect your application against attacks that use cross-site request forgery.
c. Save and activate the application-access file in the repository.7. Create an OData service-definition file and place it in your root OData package helloodata.
The Odata service-definition file has the file extension .xsodata, for example, hello.xsodata and for the purposes of this tutorial should be located in the root package of the OData application:
TipFile extensions are important. If you are using SAP HANA studio to create artifacts in the SAP HANA Repository, the file-creation wizard adds the required file extension automatically and, if appropriate, enables direct editing of the file in the appropriate editor.
a. In the Project Explorer view, right-click the folder where you want to create the new application descriptor and choose New Other SAP HANA Application Development XS OData File in the context-sensitive popup menu.
b. Enter the following content in the hello.xsodata OData service-definition file:
service { "helloodata::otable";
SAP HANA Developer Quick Start GuideGetting Started with Application Development in XS Classic PUBLIC 27

}
c. Save and activate the OData service-definition file in the repository.8. Test the new OData service.
Open a browser and enter the following URL.
NoteIf you are using Internet Explorer, press F12 and set compatibility mode = IE10 and document mode = Standards.
http://<hana.server.name>:80<HANA_instance_number>/helloodata/hello.xsodata/otable
TipYou can also run the service directly from the Project Explorer view where you activated it; right-click the object in the Project Explorer view and chose Run As... in the context-sensitive popup menu.
2.1.2 Setting Up Your Application
In SAP HANA Extended Application Services (SAP HANA XS), the design-time artifacts that make up your application are stored in the repository like files in a file system. You first choose a root folder for your application-development activities, and within this folder you create additional subfolders to organize the applications and the application content according to your own requirements.
NoteFor the latest information about the availability of features for SAP HANA Extended Application Services (SAP HANA XS) and related development tools, see 1779803 .
As part of the application-development process, you typically need to perform the tasks described in the following list. Each of the tasks in more detail is described in its own section:
Application Setup Steps
Step Action Notes
1 Check roles and permissions
Before you start developing applications using the features and tools provided by the SAP HANA XS, developers who want to build applications to run on SAP HANA XS need to be granted access to development tools, SAP HANA systems, database accounts, and so on.
2 Set up delivery units To create and manage delivery units, for example, using the SAP HANA Application Lifecycle Management, you must set the identity of the vendor with whom the delivery units are associated. To avoid conflicts with applications from SAP or other providers, we recommend that you use the DNS name of your company as the name of your root application-development folder, for example, com.acme.
28 PUBLICSAP HANA Developer Quick Start Guide
Getting Started with Application Development in XS Classic

Step Action Notes
3 Set up an SAP HANA project
In SAP HANA, projects enable you to group together all the artifacts you need for a specific part of the application-development environment. To create a project, you must first create a repository workspace, a directory structure to store files on your PC.
4 Maintain repository packages
To perform the high-level tasks that typically occur during the process of maintaining repository packages, you need to be familiar with the concepts of packages and package hierarchies, which you use to manage the artifacts in your applications.
5 Maintain application descriptors
The framework defined by the application descriptors includes the root point in the package hierarchy where content is to be served to client requests; it also defines if the application is permitted to expose data to client requests and what kind of access to the data is allowed.
6 Maintain application security
As part of the application-development process, you must decide how to grant access to the applications you develop. For example, you must specify which (if any) authentication method is used to grant access to content exposed by an application, and what content is visible.
Related Information
Roles and Permissions for XS Development [page 29]Maintaining Delivery UnitsUsing SAP HANA Projects [page 32]Maintaining Repository PackagesCreating the Application Descriptors [page 39]Set up Application Security [page 47]
2.1.2.1 Roles and Permissions for XS Development
An overview of the authorizations required to develop database artifacts for SAP HANA using the CDS syntax.
To enable application-developers to start building native applications that take advantage of the SAP HANA Extended Application Services (SAP HANA XS), the SAP HANA administrator must ensure that developers have access to the tools and objects that they need to perform the tasks required during the application- and database-development process.
Before you start developing applications using the features and tools provided by the SAP HANA XS, bear in mind the following prerequisites. Developers who want to build applications to run on SAP HANA XS need the following tools, accounts, and privileges:
● SAP HANA XS Classic Model [page 30]● SAP HANA XS Advanced Model [page 31]
SAP HANA Developer Quick Start GuideGetting Started with Application Development in XS Classic PUBLIC 29

NoteThe required privileges can only be granted by someone who has the necessary authorizations in SAP HANA, for example, an SAP HANA administrator.
SAP HANA XS Classic Model
To develop database artifacts for use by applications running in the SAP HANA XS classic environment, bear in mind the following prerequisites:
● Access to a running SAP HANA development system (with SAP HANA XS classic)● A valid user account in the SAP HANA database on that system● Access to development tools, for example, provided in:
○ SAP HANA studio○ SAP HANA Web-based Development Workbench
● Access to the SAP HANA repository● Access to selected run-time catalog objects
NoteTo provide access to the repository for application developers, you can use a predefined role or create your own custom role to which you assign the privileges that the application developers need to perform the everyday tasks associated with the application-development process.
To provide access to the repository from the SAP HANA studio, the EXECUTE privilege is required for SYS.REPOSITORY_REST, the database procedure through with the REST API is tunneled. To enable the activation and data preview of information views, the technical user _SYS_REPO also requires SELECT privilege on all schemas where source tables reside.
In SAP HANA, you can use roles to assign one or more privileges to a user according to the area in which the user works; the role defines the privileges the user is granted. For example, a role enables you to assign SQL privileges, analytic privileges, system privileges, package privileges, and so on. To create and maintain artifacts in the SAP HANA repository, you can assign application-development users the following roles:
● One of the following:○ MODELING
The predefined MODELING role assigns wide-ranging SQL privileges, for example, on _SYS_BI and _SYS_BIC. It also assigns the analytic privilege _SYS_BI_CP_ALL, and some system privileges. If these permissions are more than your development team requires, you can create your own role with a set of privileges designed to meet the needs of the application-development team.
○ Custom DEVELOPMENT roleA user with the appropriate authorization can create a custom DEVELOPMENT role specially for application developers. The new role would specify only those privileges an application-developer needs to perform the everyday tasks associated with application development, for example: maintaining packages in the repository, executing SQL statements, displaying data previews for views, and so on.
● PUBLICThis is a role that is assigned to all users by default.
30 PUBLICSAP HANA Developer Quick Start Guide
Getting Started with Application Development in XS Classic

Before you start using the SAP HANA Web-based Development Workbench, the SAP HANA administrator must set up a user account for you in the database and assign the required developer roles to the new user account.
TipThe role sap.hana.xs.ide.roles::Developer grants the privileges required to use all the tools included in the SAP HANA Web-based Development Workbench. However, to enable a developer to use the debugging features of the browser-based IDE, your administrator must also assign the role sap.hana.xs.debugger::Debugger. In addition, the section debugger with the parameter enabled and the value true must be added to the file xsengine.inifile, for example, in the SAP HANA studio Administration perspective.
SAP HANA XS Advanced Model
To develop database artifacts for use by applications running in the SAP HANA XS advanced environment, bear in mind the following prerequisites:
● Access to a running SAP HANA development system (with SAP HANA XS advanced)● A valid user account in the SAP HANA database on that system● Access to development tools, for example, provided in:
○ SAP Web IDE for SAP HANA○ SAP HANA Run-time Tools (included in the SAP Web IDE for SAP HANA)
NoteTo provide access to tools and for application developers in XS advanced, you define a custom role to which you add the privileges required to perform the everyday tasks associated with the application- and database-development process. The role is then assigned to a role collection which is, in turn, assigned to the developer.
● Access to the SAP HANA XS advanced design-time workspace and repository● Access to selected run-time catalog objects● Access to the XS command-line interface (CLI); the XS CLI client needs to be downloaded and installed
Related Information
Create a Design-Time RoleAssign Repository Package PrivilegesSAP HANA Web-Based Development Workbench
SAP HANA Developer Quick Start GuideGetting Started with Application Development in XS Classic PUBLIC 31

2.1.2.2 Using SAP HANA Projects
Projects group together all the artifacts you need for a specific part of the application-development environment.
Context
Before you can start the application-development workflow, you must create a project, which you use to group together all your application-related artifacts. However, a project requires a repository workspace, which enables you to synchronize changes in local files with changes in the repository. You can create the workspace before or during the project-creation step. As part of the project-creation process, you perform the following tasks:
Procedure
1. Create a development workspace.The workspace is the link between the SAP HANA repository and your local filesystem, where you work on project-related objects.
2. Create a project.Create a new project for a particular application or package; you can use the project to collect in a convenient place all your application-related artifacts.
3. Share a project.Sharing a project enables you to ensure that changes you make to project-related files are visible to other team members and applications. Shared projects are available for import by other members of the application-development team.
NoteFiles checked out of the repository are not locked; conflicts resulting from concurrent changes to the same file must be resolved manually, using the Merge tools provided in the context-sensitive Team menu.
4. Import a project.Import a project (and its associated artifacts) that has been shared by another member of the application-development team.
Related Information
Maintain a Repository Workspace [page 33]Create a Project for SAP HANA XS [page 34]Share an SAP HANA XS Project [page 36]
32 PUBLICSAP HANA Developer Quick Start Guide
Getting Started with Application Development in XS Classic

Import an SAP HANA XS Project [page 37]
2.1.2.2.1 Maintain a Repository Workspace
A workspace is a local directory that you map to all (or part) of a package hierarchy in the SAP HANA repository. When you check out a package from the repository, SAP HANA copies the contents of the package hierarchy to your workspace, where you can work on the files.
Context
Before you can start work on the development of the application, you need to set up a workspace, where you store checked-out copies of your application’s source-code files. To ensure that only the owner of data can access the data stored in a workspace, a workspace must be created in the owner's home directory. In addition, it is recommended that users encrypt the data on their hard drives using an encryption tool.
To create a new workspace in the SAP HANA studio, perform the following steps:
Procedure
1. Open the SAP HANA studio.2. Open the SAP HANA Development perspective.3. Choose the Repositories view.4. Choose Create Workspace…
The Create Workspace… button is located in the top right-hand corner of the Repositories view.5. Specify the workspace details. In the Create New Repository Workspace dialog, enter the following
information and choose Finish:a. Specify the SAP HANA system, for which you want to create a new workspace.b. Enter a workspace name, for example the name of the SAP HANA system where the repository is
located. To avoid the potential for confusion, it is recommended to associate one workspace with one repository.
c. Specify where the workspace root directory should be located on your local file system, for example: C:\users\username\workspaces
The new workspace is displayed in the Repositories view.
NoteAlthough the packages and objects in the chosen repository are visible in the Repositories view, you cannot open or work on the objects here. To work on objects, you must create a project and use the Project Explorer view.
SAP HANA Developer Quick Start GuideGetting Started with Application Development in XS Classic PUBLIC 33

The Repositories view displays the status of a workspace as follows:
UI Icon Explanation
Yellow database icon An inactive workspace exists in the SAP HANA repository
Yellow database icon with a blue check mark
An inactive workspace has been imported to your local file system (and the contents checked out from the SAP HANA repository)
6. Remove a repository workspace.If it is necessary to remove a workspace, you can choose between multiple deletion options; the option you choose determines what is removed, from where (local file system or remote repository), and what, if anything, is retained.a. Open the SAP HANA Development perspective.b. Choose the Repositories view and expand the repository node containing the workspace you want to
remove.c. Right-click the workspace you want to remove.d. Choose the workspace-deletion mode.
The following modes apply when you delete a workspace in SAP HANA studio:
Workspace Deletion Modes
Workspace Deletion Mode Description
Delete Remove workspace; delete all workspace-related local files; delete related changes to remote (repository) data.
Remove from client (keep remote changes) Remove workspace from local client system; delete all local workspace-related files; retain changes to remote (repository) data.
Disconnect local from remote (keep changes) Keep the workspace but remove the workspace label from the list of workspaces displayed in the Repositories view. The connection to the disconnected workspace can be reestablished at any time with the option Import Local Repository Workspaces.
2.1.2.2.2 Create a Project for SAP HANA XS
Before you can start the application-development workflow, you must create a project, which you use to group all your application-related artifacts.
Context
Projects group together all the artifacts you need for a specific part of your application-development environment. A basic project contains folders and files. More advanced projects are used for builds, version management, sharing, and the organization and maintenance of resources.
34 PUBLICSAP HANA Developer Quick Start Guide
Getting Started with Application Development in XS Classic

To create a new project in the SAP HANA studio, perform the following steps:
Procedure
1. Open the SAP HANA studio.2. Open the SAP HANA Development perspective.3. Choose the Project Explorer view.
4. Choose File New Project... or right-click the white space in the Project Explorer view and choose New > Project… in the popup menu.The type of project you create determines the details you have to provide in the New Project wizard that appears. Choose SAP HANA Application Development XS Project .a. Enter the following details for the new XS project:
○ Shared projectThis is the default setting. Sharing a project enables continuous synchronization between your local-file system workspace and the SAP HANA repository. If you choose not to share the project at this point, you can share the new project manually later.
○ Project nameEnter a project name that describes what the project is about, for example: XS_JavaScript or XS_SAPUI5. Since a project name must be unique within the same Eclipse workspace, it is recommended to use the fully qualified package name as the project name.
○ Project locationYou can save the project in the default location, which is the SAP HANA studio (Repository) workspace. To save the project in an alternative location from the recommended default, first disable the option Share project in SAP repository.You can share the new project manually later. Sharing a project enables continuous synchronization with the SAP HANA repository.
○ Working setsA working set is a concept similar to favorites in a Web browser, which contain the objects you work on most frequently.
○ Repository workspace and packageFor a shared project, you can set the project location by selecting a repository workspace and package.
○ Common objectsFor a shared project, you can include some commonly used objects in your project. Some of these will provide you with a basic template to begin with.
○ Access objectsFor a shared project, the access objects are checked by default. However, if either an .xsaccess file or an .xsapp file already exists in the folder you have chosen to create the new project, the corresponding option is automatically unchecked and greyed out.
b. Click Finish to create the new project.All the objects included are activated automatically when the project is created. The new project is displayed in the Project Explorer view.
SAP HANA Developer Quick Start GuideGetting Started with Application Development in XS Classic PUBLIC 35

Note○ If there is an error during activation of one of the project objects, none of the objects will be
automatically activated. You can manually correct the error and then manually activate the objects.○ The contents of the project depend on the type of project you create. For example, a general
project is empty immediately after creation; a JavaScript project contains all the resource files associated with a JavaScript project, such as libraries and build-environment artifacts.
2.1.2.2.3 Share an SAP HANA XS Project
Before you can start working on files associated with a new project, you must share the project; sharing a project enables you to track and synchronize local changes with the repository.
Context
When you share a project, you set up a connection to the SAP HANA repository associated with a particular SAP HANA instance. Sharing the project enables you to ensure that changes you make to project-related files are visible to other team members and applications. Other developers can import a shared project and work on the same files.
NoteUse the Project Explorer view in the SAP HANA studio to check if a project is shared. In addition to the project name, a shared project displays the SAP HANA system ID of the repository where the shared artifacts are located, an SAP HANA user name, and the path to the repository package to which the shared project is assigned, for example. "XSJS_myproject [SID (dbusername, 'sap.hana.xs.app1')].
To share a project in the SAP HANA studio, perform the following steps:
Procedure
1. Open the SAP HANA studio2. Open the SAP HANA Development perspective.3. Open the Project Explorer view.4. Share the project.
Right-click the project you want to share and choose Team Share Project… in the pop-up menu.5. Select the repository type.
The Share Project dialog displays a list of all available repository types; choose SAP HANA Repository and choose Next.
6. Select the repository workspace where the project should be located.
36 PUBLICSAP HANA Developer Quick Start Guide
Getting Started with Application Development in XS Classic

7. Specify the package that you want to associate the shared project with.The Share Project dialog displays the suggested location for the shared project in the New Project location screen area. The default location is the name of the workspace with the name of the project you want to share. Choose Browse... to locate the package you want to associate the shared project with. The selected package is displayed in the Path to package text box.
NoteThe Keep project folder option appends the name of the project you are sharing to the name of the workspace in which you are sharing the project and creates a new package with the name of the shared project under the workspace location displayed. Use this option only if you want to create multiple projects for a selected package, for example, if you are creating a root project in your root application package.
8. Click Finish to complete the project-sharing procedure.9. Add new files as required
At this point you can start adding project-specific files to the shared project. These artifacts can then be committed to the repository, where they reside as inactive objects until they are activated, for example, using the Team Activate option in the context-sensitive menus available in the Project Explorer view.
NoteThe Project Explorer view decorates the file icons to indicate the current state of the repository files, for example: local (not yet committed), committed (inactive), and active (available for use by others).
10. Make the project available for import, for example, so that others can join it and make changes to project content.The project-sharing procedure creates some artifacts (for example, the .project file) that must be committed to the repository and activated so that other team members can import the project more easily into their workspace. The .project file is used in several dialogs to populate the list of available projects.
NoteUse the Repositories view to import projects (and checkout project content).
Related Information
Import an SAP HANA XS Project [page 37]
2.1.2.2.4 Import an SAP HANA XS Project
Before you can start the application-development workflow, you must either create a new project and share it (with the repository), or import a shared project from the repository into your workspace. Importing a project
SAP HANA Developer Quick Start GuideGetting Started with Application Development in XS Classic PUBLIC 37

enables you to track and synchronize local changes with the colleagues working on the objects in the imported project.
Context
To import an existing project from the repository into your workspace, perform the following steps.
Procedure
1. Open the SAP HANA studio2. Open the SAP HANA Development perspective.3. Choose the Repositories view.4. Right-click the package where the project you want to import is located and choose Checkout and Import
Projects... in the popup menu.Projects can be assigned to a package at any level of the package hierarchy. If you know where the project is located, browse to the package first before choosing the Checkout and Import Projects... option. This reduces the amount of files to checkout and download to your local file system.
NoteThe existence of a .project file in a package identifies the package as being associated with a project.
The SAP HANA studio checks out the content of the selected package and displays any projects it finds in the Projects screen area.
5. Select the projects to import.If multiple projects are available for import, select the projects you want to import.
6. Choose Finish to import the selected projects.You can add the imported project to your Working Sets.
NoteA working set is a concept similar to favorites in a Web browser, which contain the objects you work on most frequently.
38 PUBLICSAP HANA Developer Quick Start Guide
Getting Started with Application Development in XS Classic

2.1.2.3 Creating the Application Descriptors
The application descriptors describe the framework in which an SAP HANA XS application runs. The framework defined by the application descriptors includes the root point in the package hierarchy where content is to be served to client requests, and who has access to the content.
Prerequisites
● You must be familiar with the concept of the application descriptor file (.xsapp), the application-access file (.xsaccess), and if required, the application-privileges file (.xsprivileges).
Context
When you develop and deploy applications in the context of SAP HANA Extended Application Services (SAP HANA XS), you must define the application descriptors. Maintaining the application descriptors involves the following tasks:
Procedure
1. Create an application-descriptor file.The package that contains the application descriptor file becomes the root path of the resources exposed to client requests by the application you develop.
2. Create an application-access file.The application-access file enables you to specify who or what is authorized to access the content exposed by a SAP HANA XS application package and what content they are allowed to see. You can use keywords in the application-access file to set authentication rules, define package-privilege levels (for example, EXECUTE or ADMIN, specify the connection security level (for example, SSL/HTTPS), and allow (or prevent) the creation of entity tags (Etags). You can also define rewrite rules for URLs exposed by an application, for example, to hide internal details of URL paths from external users, clients, and search engines.
3. Create an application-privileges file. (Optional)The application-privileges file enables you to define the authorization privileges required for access to an SAP HANA XS application, for example, to start the application (EXECUTE) or to perform administrative actions on an application (ADMIN). The privileges defined here are activated for a particular application in the application-access file. These privileges can be checked by an application at runtime. Privileges defined apply to the package where the privileges file is located as well as any packages further down the package hierarchy unless an additional privileges file is present, for example, in a subpackage.
SAP HANA Developer Quick Start GuideGetting Started with Application Development in XS Classic PUBLIC 39

Related Information
Create an application descriptor [page 40]Create an application-access file [page 41]Create an application-privileges file [page 44]
2.1.2.3.1 Create an Application Descriptor File
Each application that you want to develop and deploy on SAP HANA Extended Application Services (SAP HANA XS) must have an application-descriptor file. The application descriptor is the core file that you use to describe an application's framework within SAP HANA XS.
Prerequisites
● A repository workspace with a shared project● A root package for your application, for example, MyAppPackage
NoteThe namespace sap is restricted. Place the new package in your own namespace, for example, com.acme, which you can create alongside the sap namespace.
Context
The application descriptor is the core file that you use to indicate an application's availability within SAP HANA XS. The application descriptor marks the point in the package hierarchy at which an application's content is available to clients. The application-descriptor file has no contents and no name; it only has the file extension .xsapp. The package that contains the application-descriptor file becomes the root path of the resources exposed by the application you develop.
NoteFor backward compatibility, content is allowed in the.xsapp file but ignored.
To create an application descriptor for your new application, perform the following steps.
Procedure
1. In the SAP HANA studio, open the SAP HANA Development perspective.
40 PUBLICSAP HANA Developer Quick Start Guide
Getting Started with Application Development in XS Classic

2. In the Project Explorer view, right-click the folder where you want to create the new (.xsapp) file.
3. In the context-sensitive popup menu, choose New Other... .
4. In the Select a Wizard dialog, choose SAP HANA Application Development XS Application Descriptor File
5. Enter or select the parent folder. Note that the default file name for the XS application descriptor is .xsapp and cannot be changed.
6. Select a template to use. Templates contain sample source code to help you get started.7. Choose Finish.
If you are using the SAP HANA Studio to create artifacts in the SAP HANA Repository, the file creation wizard adds the required file extension .xsapp automatically.
TipFiles with names that begin with the period (.), for example, .xsapp, are sometimes not visible in the Project Explorer. To enable the display of all files in the Project Explorer view, use the Customize View
Available Customization option and clear all check boxes.
8. Save and activate your changes and additions.a. In the SAP HANA Development perspective, open the Project Explorer view and right-click the new
(.xsapp) package.
b. In the context-sensitive popup menu, choose Team Activate .
2.1.2.3.2 Enable Access to SAP HANA XS Application Packages
The application-access file enables you to specify who or what is authorized to access the content exposed by the application package and what content they are allowed to see.
Prerequisites
● A repository workspace with a shared project● A root package for your application, for example, MyAppPackage
NoteThe namespace sap is restricted. Place the new package in your own namespace, for example, com.acme, which you can create alongside the sap namespace.
● An application descriptor file (.xsapp) for the selected application
SAP HANA Developer Quick Start GuideGetting Started with Application Development in XS Classic PUBLIC 41

Context
The application-access file is a JSON-compliant file with the file suffix .xsaccess. You can use a set of keywords in the application-access file .xsaccess to specify if authentication is required to enable access to package content, which data is exposed, and if rewrite rules are in place to hide target and source URLs, for example, from users and search engines. You can also specify what, if any, level of authorization is required for the package and whether SSL is mandatory for client connections.
NoteThe application-access file does not have a name before the dot (.); it only has the suffix .xsaccess.
To create the application access file, perform the following steps:
Procedure
1. Create a file called .xsaccess and place it in the root package of the application to which you want to enable access.A basic .xsaccess file must, at the very least, contain a set of curly brackets, for example, {}. Note that the .xsaccess file uses keyword-value pairs to set access rules; if a mandatory keyword-value pair is not set, then the default value is assumed.a. In the SAP HANA studio, open the SAP HANA Development perspective.b. In the Project Explorer view, right-click the folder where you want to create the new (.xsaccess) file.
c. In the context-sensitive popup menu, choose New Other... .
d. In the Select a Wizard dialog, choose SAP HANA Application Development XS Application Access File
e. TipIf you are using the SAP HANA Studio to create artifacts in the SAP HANA Repository, the file creation wizard adds the required file extension .xsaccess automatically and enables direct editing of the file.
Enter or select the parent folder where the .xsaccess file is to be located.
NoteThe default name for the core application-access file is .xsaccess and cannot be changed.
f. Select a template to use. Templates contain sample source code to help you.g. Choose Finish.
2. Enable application access to data.You use the expose keyword to enable or disable access to content at a package or subpackage level.
{ "exposed" : true, "prevent_xsrf" : true }
42 PUBLICSAP HANA Developer Quick Start Guide
Getting Started with Application Development in XS Classic

NoteIt is highly recommended to always use the prevent_xsrf keyword to help protect your application against attacks that use cross-site request forgery vector.
3. Define the application authentication method.To ensure that form-based logon works when you enable it using the SAP HANA XS Administration Tool, the authentication keyword is required in the .xsaccess file, too, and must be set to the value "form", as illustrated in the following example.
{ "authentication" : { "method" : "Form"} }
NoteUse the SAP HANA XS Administration Tool to configure applications to use additional authentication methods, for example, basic, logon tickets, or Single Sign On (SSO) providers such as SAML2 and X509. You must also enable the Form-based authentication checkbox, if you want your application (or applications) to use form-based logon as the authentication method. Any other keywords in the authentication section of the .xsaccess file are ignored.
4. Specify the application privileges if required. (Optional)Use the authorization keyword in the .xsaccess file to specify which authorization level is required by a user for access to a particular application package. The authorization keyword requires a corresponding entry in the .xsprivileges file, for example, execute for basic privileges or admin for administrative privileges on the specified package.
{ "authorization": ["sap.xse.test::Execute", "sap.xse.test::Admin" ] }
5. Save the .xsaccess file in the package with which you want to associate the rules you have defined.
NoteSaving a file in a shared project automatically commits the saved version of the file to the repository, To explicitly commit a file to the repository, right-click the file (or the project containing the file) and choose Team Commit from the context-sensitive popup menu.
6. Activate the .xsaccess file to the repository.
In the Project Explorer view, right click the object you want to activate and choose Team > Activate in the context-sensitive popup menu.
Related Information
Create an Application Descriptor File [page 40]Application-Access File Keyword Options [page 71]
SAP HANA Developer Quick Start GuideGetting Started with Application Development in XS Classic PUBLIC 43

The Application-Privileges File [page 85]
2.1.2.3.3 Create an SAP HANA XS Application Privileges File
The application-privileges (.xsprivileges) file enables you to define the authorization levels required for access to an application, for example, to start the application or perform administrative actions on an application. You can assign the application privileges to the individual users who require them.
Prerequisites
● A repository workspace with a shared project● A root package for your application, for example, MyAppPackage
NoteThe namespace sap is restricted. Place the new package in your own namespace, for example, com.acme, which you can create alongside the sap namespace.
● An application descriptor file (.xsapp) for the selected application● An application access file (.xsaccess) for the selected application
Context
The .xsprivileges file must reside in the same application package that you want to define the access privileges for.
NoteIf you use the .xsprivileges file to define application-specific privileges, you must also add a corresponding entry to the same application's .xsaccess file, for example, using the authorization keyword.
Procedure
1. Create the application-privileges (.xsprivileges) file and place it in the application package whose access privileges you want to define.
The application-privileges file does not have a name; it only has the file extension .xsprivileges. The contents of the .xsprivileges file must be formatted according to JavaScript Object Notation (JSON) rules.
44 PUBLICSAP HANA Developer Quick Start Guide
Getting Started with Application Development in XS Classic

NoteMultiple .xsprivileges files are allowed, but only at different levels in the package hierarchy; you cannot place two .xsprivileges files in the same application package. The privileges defined in a .xsprivileges file are bound to the package to which the file belongs and can only be applied to this package and its subpackages.
a. In the SAP HANA studio and open the SAP HANA Development perspective.b. In the Project Explorer view, right-click the folder where you want to create the new (.xsprivileges)
file.
c. In the context-sensitive popup menu, choose New Other... .
d. In the Select a Wizard dialog, choose SAP HANA Application Development XS Application Privileges File
e. Enter or select the parent folder, where the application-privileges file is to be located.f. Enter a name for the application-privileges file.
TipIf you are using the SAP HANA Studio to create artifacts in the SAP HANA Repository, the file creation wizard adds the required file extension .xsprivileges automatically and enables direct editing of the file.
g. Select a template to use. Templates contain sample source code to help you.h. Choose Finish.i. Activate the new (.xsprivileges) file.
2. Define the required application privileges.
In the .xsprivileges file, you define a privilege for an application package by specifying an entry name with an optional description. This entry name is then automatically prefixed with the package name in which the .xsprivileges file is located to form a unique privilege name. For example, com.acme.myapp::Execute would enable execute privileges on the package com.acme.myapp. The privilege name is unique to the package to which it belongs and, as a result, can be used in multiple .xsprivileges files in different packages.
NoteThe .xsprivileges file lists the authorization levels defined for an application package. A corresponding entry is required in the same application's access file .xsaccess file to define which authorization level is assigned to which application package.
{ "privileges" : [ { "name" : "Execute", "description" : "Basic execution privilege" }, { "name" : "Admin", "description" : "Administration privilege" } ]}
3. Specify which privileges are required for access to the application or application package.
SAP HANA Developer Quick Start GuideGetting Started with Application Development in XS Classic PUBLIC 45

If you use the .xsprivileges file to define application-specific privileges, you must also add a corresponding entry to the same application's .xsaccess file, for example, using the authorization keyword.
NoteThe .xsprivileges file lists the authorization levels that are available for access to an application package; the .xsaccess file defines which authorization level is assigned to which application package.
a. Locate and open the XS application access file (.xsaccess) for the application for which you want to define application privileges.
b. Specify the privileges required for access to the application or application package.Use the authorization keyword in the .xsaccess file to specify which authorization level is required by a user for access to a particular application package.
NoteIf you enable the authorization keyword in the .xsaccess file, you must add a corresponding entry to the .xsprivileges file, too.
{ "exposed" : true, "authentication" : [ { "method" : "Form" } ], "authorization": [ "com.acme.myApp::Execute", "com.acme.myApp::Admin" ] }
4. Save and activate your changes and additions.The activation of the application privileges creates the corresponding objects, which you can use to assign the specified privileges to an author.
5. Assign the application privilege to the users who require it.After activation of the .xsprivileges object, the only user who by default has the application privileges specified in the .xsprivileges file is the _SYS_REPO user. To grant the specified privilege to (or revoke them from) other users, use the GRANT_APPLICATION_PRIVILEGE or REVOKE_APPLICATION_PRIVILEGE procedure in the _SYS_REPO schema.
To grant the execute application privilege to a user, run the following command in the SAP HANA studio's SQL Console:
call "_SYS_REPO"."GRANT_APPLICATION_PRIVILEGE"('"com.acme.myApp::Execute"','<UserName>')
To revoke the execute application privilege to a user, run the following command in the SAP HANA studio's SQL Console:
call "_SYS_REPO"."REVOKE_APPLICATION_PRIVILEGE"('"com.acme.myApp::Execute"','<UserName>')
46 PUBLICSAP HANA Developer Quick Start Guide
Getting Started with Application Development in XS Classic

Related Information
Create an Application Descriptor File [page 40]Enable Access to SAP HANA XS Application Packages [page 41]
2.1.2.4 Maintaining Application Security
As part of the application-development process, you must decide how to provide access to the applications you develop. Application access includes security-related matters such as authentication methods and communication protocols
In addition to the features and functions you can enable with keywords in the .xsaccess file, SAP HANA Extended Application Services (SAP HANA XS) provides a dedicated SAP HANA XS administration tool that is designed to help you configure and maintain the authentication mechanism used to control access to the applications you develop. The SAP HANA XS Administration Tool enables you to configure the following runtime elements for an application:
● SecurityChoose the security level you want to set to provide access to the application. For example, you can expose the application with/without requiring authentication (public/private) and force the application to accept only requests that use SSL/HTTPS.
● AuthenticationSelect an authentication type to use when checking user credentials before authorizing access to an application, for example: form-based authentication (with user name and password), SAML (SSO with Security Assertion Markup Language), SAP logon tickets...
Related Information
Set up Application Security [page 47]Application SecurityApplication Authentication
2.1.2.4.1 Set up Application Security
To restrict access to the applications you develop, you must configure the application to work with particular authentication methods and communication protocols.
Prerequisites
To perform the steps in this task, you must ensure the following prerequisites are met:
SAP HANA Developer Quick Start GuideGetting Started with Application Development in XS Classic PUBLIC 47

● You have access to an SAP HANA system● You have the privileges granted in the following SAP HANA XS user roles:
○ sap.hana.xs.admin.roles::RuntimeConfAdministrator
Context
You must specify whether or not to expose application content, which authentication method is used to grant access to the exposed content, and what content is visible.
Procedure
1. Start the SAP HANA XS Administration Tool.The tool is available on the SAP HANA XS Web server at the following URL: http://<WebServerHost>:80<SAPHANAinstance>/sap/hana/xs/admin/.
NoteIn the default configuration, the URL redirects the request to a logon screen, which requires the credentials of an authenticated SAP HANA database user to complete the logon process. To ensure access to all necessary features, the user who logs on should have the SAP HANA XS role sap.hana.xs.admin.roles::RuntimeConfAdministrator.
2. Select the security options your applications use.You can setup the following application-related security options:
NoteSecurity settings are automatically inherited by applications further down the application hierarchy. However, you can override the inherited security settings at any application level by modifying the settings for a particular application. Applications below the application with the modified security settings inherit the new, modified settings.
a. Use the Public (no authentication required) option to specify if applications require user authentication to start.○ Disabled
This is the default setting. In disabled mode, Form-based authentication and Basic authentication options are enabled automatically in the Authentication screen area.
○ EnabledIf you enable the Public option , no authentication is required to start an application; the Authentication screen area is hidden, and you cannot select any authentication-method options.
b. Use the Force SSL option to specify if client requests must use secure HTTP (HTTPS).○ Disabled
This is the default setting. With Force SSL disabled, the application returns a response to all requests (both HTTP and HTTPS).
○ Enabled
48 PUBLICSAP HANA Developer Quick Start Guide
Getting Started with Application Development in XS Classic

If you enable the Force SSL option , requests from browsers using standard HTTP are refused.
NoteEnabling the Force SSL option only ensures that the selected application refuses any request that does not use HTTPS; it does not set up the Secure Sockets Layer (SSL) protocol for you. The SAP HANA administrator must configure the SAP Web Dispatcher to accept (and forward) HTTPS requests in addition.
Related Information
SAP HANA XS Application SecuritySet up Application Authentication [page 49]SAP HANA XS Application AuthenticationThe Application-Access File [page 70]
2.1.2.4.2 Set up Application Authentication
To restrict access to the applications you develop, you must configure the application to work with particular authentication methods and communication protocols.
Prerequisites
To perform the steps in this task, you must ensure the following prerequisites are met:
● You have access to an SAP HANA system● You have the privileges granted in the following SAP HANA XS user roles:
○ sap.hana.xs.admin.roles::RuntimeConfAdministrator
Context
Before you define which authentication methods an application uses to grant access to the application content, you must use the application security tools to define whether or not to expose application content and, if so, which content to expose. SAP HANA XS enables you to define multiple authentication methods to verify the credentials of users who request access to the exposed content; multiple authentication methods are considered according to a specific order of priority. For example, if the first authentication method fails, SAP
SAP HANA Developer Quick Start GuideGetting Started with Application Development in XS Classic PUBLIC 49

HANA tries to authenticate the user with the next authentication method specified. To configure the authentication method an application uses to verify user credentials, perform the following steps:
Procedure
1. Start the SAP HANA XS Administration Tool.The tool is available on the SAP HANA XS Web server at the following URL: http://<WebServerHost>:80<SAPHANAinstance>/sap/hana/xs/admin/.
NoteIn the default configuration, the URL redirects the request to a logon screen, which requires the credentials of an authenticated SAP HANA database user to complete the logon process. To ensure access to all necessary features, the user who logs on should have the SAP HANA XS role sap.hana.xs.admin.roles::RuntimeConfAdministrator.
2. Select the security options your applications use.If you have already set the application security level, you can safely skip this step. You can setup the following application-related security options:
NoteSecurity settings are automatically inherited by applications further down the application hierarchy. However, you can override the inherited security settings at any application level by modifying the settings for a particular application. Applications below the application with the modified security settings inherit the new, modified settings.
a. Use the Public (no authentication required) option to specify if applications require user authentication to start.○ Disabled
This is the default setting. In disabled mode, Form-based authentication and Basic authentication options are enabled automatically in the Authentication screen area.
○ EnabledIf you enable the Public option , no authentication is required to start an application; the Authentication screen area is hidden, and you cannot select any authentication-method options.
b. Use the Force SSL option to specify if client requests must use secure HTTP (HTTPS).○ Disabled
This is the default setting. With Force SSL disabled, the application returns a response to all requests (both HTTP and HTTPS).
○ EnabledIf you enable the Force SSL option , requests from browsers using standard HTTP are refused.
NoteEnabling the Force SSL option only ensures that the selected application refuses any request that does not use HTTPS; it does not set up the Secure Sockets Layer (SSL) protocol for you. The SAP HANA administrator must configure the SAP Web Dispatcher to accept (and forward) HTTPS requests in addition.
50 PUBLICSAP HANA Developer Quick Start Guide
Getting Started with Application Development in XS Classic

3. Select the authentication method your applications must use.Authentication settings are automatically inherited by applications further down the application hierarchy. However, you can override the inherited authentication settings at any application level by modifying the settings for a particular application. Applications below the application with the modified authentication settings inherit the new, modified settings.
NoteEnabling an application-security option (for example, SAML2 or X509) only ensures that the selected application uses the enabled authentication method when required; it does not perform any setup operation for the authentication method itself. The SAP HANA administrator must maintain the selected authentication infrastructure (SAML2, X509, or SAP logon tickets) in an additional step.
You can choose any selection of the following application-related authentication methods; if you enable multiple authentication methods for your application, a priority applies depending on whether the application logon is interactive or non-interactive:
a. Enable the SAML2 option.The SAP HANA administrator must already have configured the authentication infrastructure, for example, to enable the creation of SAML2 assertions to permit SSO in Web browsers.
b. Enable the X509 Authentication optionThe SAP HANA administrator must already have configured the appropriate authentication infrastructure, for example, to enable users to be authenticated by client certificates signed by a trusted Certification Authority (CA).
c. Enable the SAP logon ticket optionThe SAP HANA administrator must already have configured the appropriate authentication infrastructure, for example, to enable users to be be authenticated by a logon ticket that is issued when the same user logs on to an SAP system that is configured to create logon tickets (for example, the SAP Web Application Server or Portal).
d. Enable the Form-based authentication optionIf the Public security option is disabled, the Form-based authentication option is enabled by default.
e. Enable the Basic authentication optionIf the Public security option is disabled, the Basic authentication option is enabled by default.
Related Information
Set up Application Authentication [page 47]SAP HANA XS Application SecuritySAP HANA XS Application AuthenticationThe Application-Access File [page 70]
SAP HANA Developer Quick Start GuideGetting Started with Application Development in XS Classic PUBLIC 51

2.2 Developing Applications for XS Classic with SAP HANA Web-Based Workbench
This guide contains a selection of tutorials which show you how to get started with the process of building applications using SAP HANA extended application services, classic model (XS classic) and the SAP HANA Web-Based Workbench tools.
The information in this section of the SAP HANA Developer Quick Start Guide is organized as follows:
● Getting startedA collection of tutorials which are designed to demonstrate how use SAP HANA Web-Based Workbench to build and deploy a simple SAP HANA-based application on SAP HANA XS classic model quickly and easily
● The development processStep-by-step information that shows in detail the tasks you need to perform to develop the various elements that make up an XS classic application. The information provided uses tasks and tutorials to explain how to develop the SAP HANA development objects.
Related Information
Getting Started with Application Development [page 52]SAP HANA Developer Quick Start Guide [page 3]
2.2.1 Getting Started with Application Development
To develop applications using SAP HANA Extended Application Services (SAP HANA XS), you use a hierarchical package structure to organize the design-time artifacts that make up your applications. Within this structure you apply application descriptors to define which application content is to be exposed and to control access to it.
1. To set up a package hierarchy, you create a root package for your application-development activities, and within this package you create additional subpackages to organize the applications and the application content. All artifacts are stored in the SAP HANA repository.To avoid conflicts with applications from SAP or other providers, we recommend that you use your company’s dedicated name space (DNS) as the name of your root application development folder, for example, com.acme.
2. To expose and control access to application content, you create application descriptors. These are files that define the following:○ The root point in the package hierarchy from which content can be served to client requests○ Whether the application is permitted to expose data to client requests and what kind of access to the
data is allowed3. To secure the application, you decide how to grant access to the applications you develop. For example,
you specify which authentication method, if any, is to be used to grant access to content exposed by an application, and what content is visible.
52 PUBLICSAP HANA Developer Quick Start Guide
Getting Started with Application Development in XS Classic

Related Information
Maintaining Repository Packages [page 56]Creating the Application Descriptors [page 39]Maintaining Application Security [page 47]
2.2.1.1 Tutorial: Create a Simple SAPUI5 ApplicationIn this tutorial, you use the SAP HANA Web-based Development Workbench Editor to develop an SAPUI5 application that displays a button in a browser window which fades out when clicked.
Prerequisites
You have the privileges granted by the role sap.hana.ide.roles::EditorDeveloper; this role is included in the parent role sap.hana.ide.roles::Developer.
Context
You use the SAPUI5 Hello World template to create an application that consists of the following files:
● index.html: contains the application code.● Application descriptors .xsaccess and .xsapp: mandatory for all applications deployed on SAP HANA
extended application services (SAP HANA XS).
Procedure
1. Open the SAP HANA Web-based Development Workbench Editor tool.The Editor tool is available on the SAP HANA XS Web server at the following URL: http://<WebServerHost>:80<SAPHANAinstance>/sap/hana/ide/editor
2. From the context menu of the Content folder, choose Create Application.3. Choose the SAP UI5 Hello World template.4. Enter a package name, for example, demo.hello, and choose Create.
SAP HANA Developer Quick Start GuideGetting Started with Application Development in XS Classic PUBLIC 53
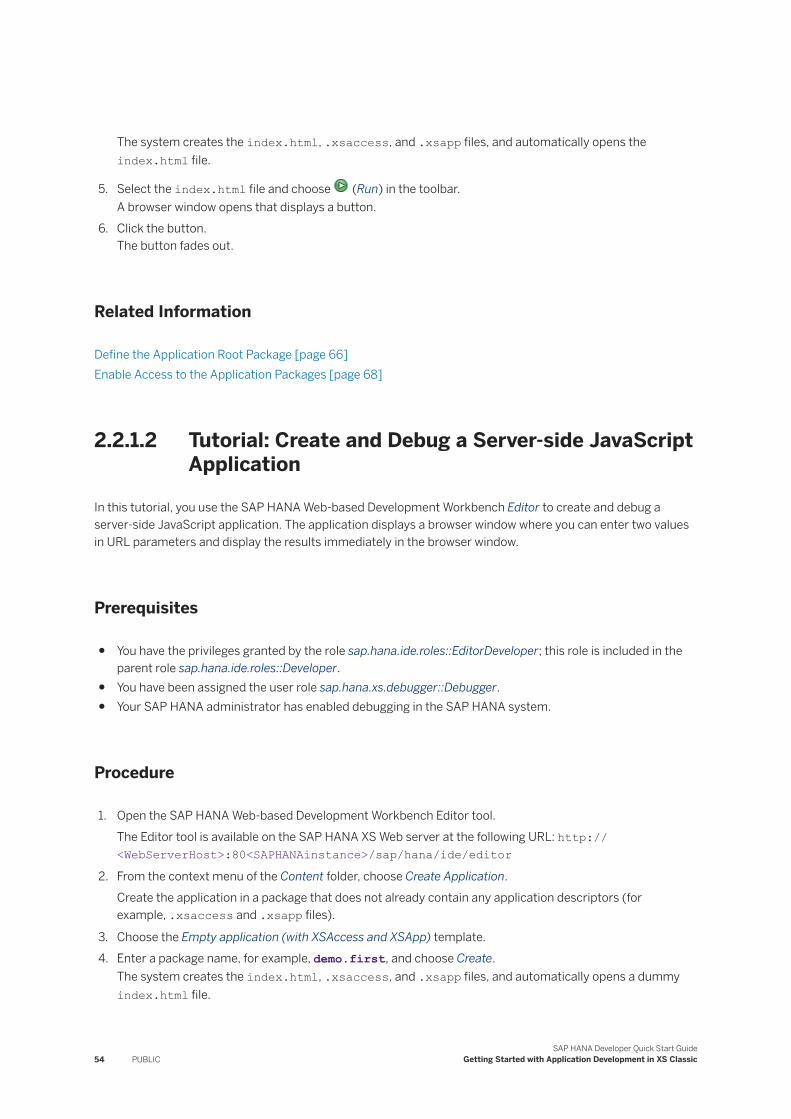
The system creates the index.html, .xsaccess, and .xsapp files, and automatically opens the index.html file.
5. Select the index.html file and choose (Run) in the toolbar.A browser window opens that displays a button.
6. Click the button.The button fades out.
Related Information
Define the Application Root Package [page 66]Enable Access to the Application Packages [page 68]
2.2.1.2 Tutorial: Create and Debug a Server-side JavaScript Application
In this tutorial, you use the SAP HANA Web-based Development Workbench Editor to create and debug a server-side JavaScript application. The application displays a browser window where you can enter two values in URL parameters and display the results immediately in the browser window.
Prerequisites
● You have the privileges granted by the role sap.hana.ide.roles::EditorDeveloper; this role is included in the parent role sap.hana.ide.roles::Developer.
● You have been assigned the user role sap.hana.xs.debugger::Debugger.● Your SAP HANA administrator has enabled debugging in the SAP HANA system.
Procedure
1. Open the SAP HANA Web-based Development Workbench Editor tool.The Editor tool is available on the SAP HANA XS Web server at the following URL: http://<WebServerHost>:80<SAPHANAinstance>/sap/hana/ide/editor
2. From the context menu of the Content folder, choose Create Application.Create the application in a package that does not already contain any application descriptors (for example, .xsaccess and .xsapp files).
3. Choose the Empty application (with XSAccess and XSApp) template.4. Enter a package name, for example, demo.first, and choose Create.
The system creates the index.html, .xsaccess, and .xsapp files, and automatically opens a dummy index.html file.
54 PUBLICSAP HANA Developer Quick Start Guide
Getting Started with Application Development in XS Classic

5. To create a server-side JavaScript demo, do the following:a. Delete the automatically created index.html file.
b. From the context menu of the demo.first folder, choose New File .c. Enter a file name with the .xsjs extension, for example, debug.xsjs, and choose Create.d. Enter the following server-side JavaScript code into the file and save it:
function doMultiply(var1, var2) { return var1 + " X " + var2 + " = " + var1 * var2; }function doAdd(var1, var2) { return var1 + " + " + var2 + " = " + (parseInt(var1, 10) + parseInt(var2, 10));}$.response.contentType = "application/json";$.response.status = 200;$.response.contentType = "text/plain";try { var variable1 = parseInt($.request.parameters.get("var1"),10); var variable2 = parseInt($.request.parameters.get("var2"), 10); switch ($.request.parameters.get("mode")) { case "multiply": $.response.setBody((doMultiply(variable1, variable2))); break; case "add": $.response.setBody((doAdd(variable1, variable2))); break; default: $.response.setBody(("Service not supported: " + $.request.parameters.get("mode"))); break; }} catch (err) { $.response.setBody("Failed to execute action: " + err.toString());}
6. Choose (Run) in the toolbar.A browser window opens.
7. Edit the URL parameters as follows and press Enter :
a. For multiply, enter <your_file_name>.xsjs?mode=multiply&var1=10&var2=200.b. For addition, enter <your_file_name>.xsjs?mode=add&var1=10&var2=200.
The system computes the result and displays it in the browser window.8. Set a breakpoint in front of the code line in the doAdd function by simply clicking the line number and then
repeat step 7b using, for example: <your_file_name>.xsjs?mode=add&var1=10&var2=200During program execution, the Debugger panel opens in the editor as soon as a breakpoint is encountered. You can see that the XSJS debugger has stopped at the breakpoint you defined and that the values of <var1> and <var2> are shown in the Watch Area pane.
9. Evaluate an expression.
a. Choose (Evaluate expression) on the Debugger toolbar.b. In the Evaluate expression dialog box, enter the expression parseInt(var1)+parseInt(var2) and
choose Evaluate.c. Check that the result is displayed correctly on the right.
10. Change the value assigned to a variable.
SAP HANA Developer Quick Start GuideGetting Started with Application Development in XS Classic PUBLIC 55

a. In the same Evaluate expression dialog box, change the value assigned to the variable <var1>, for example, to var1=100, and choose Evaluate.
b. Close the dialog box and choose (Resume (F10)) to finish the debugger session.c. Switch to the application window to confirm that the change you made is reflected in the displayed
result.
Related Information
XSJS Debugger
2.2.1.3 Maintaining Repository Packages
All content delivered as part of the application you develop for SAP HANA is stored in packages in the SAP HANA repository. The packages are arranged in a hierarchy that you define to help make the process of maintaining the packages transparent and logical.
Context
To perform the high-level tasks that typically occur during the process of maintaining repository packages, you need to be familiar with the concepts of packages and package hierarchies. Packages enable you to group together the artifacts you create and maintain for your applications. You must also be aware of the privileges the application developers require to access (and perform operations on) the packages.
Procedure
1. Define the package hierarchyThe package hierarchy is essential for ease of maintenance as well as the configuration of access to packages and the privileges that are required to perform actions on the packages.
2. Define package privilegesYou can set package authorizations for a specific user or for a role. Authorizations that are assigned to a repository package are implicitly assigned to all sub-packages, too.
3. Create a packagePackages are necessary to group logically distinct artifacts together in one object location that is easy to transport.
56 PUBLICSAP HANA Developer Quick Start Guide
Getting Started with Application Development in XS Classic

Related Information
Repository Package Hierarchy [page 57]Define Repository Package Privileges [page 58]Create Repository Packages [page 61]
2.2.1.3.1 Repository Package Hierarchy
A package hierarchy can include sub-packages, for example, to isolate the data model from the business logic.
You can create a package hierarchy, for example, by establishing a parent-child type relationship between packages. The assignment of packages to delivery units is independent of the package hierarchy; packages in a parent-child relationship can belong to different delivery units. SAP recommends that you assign to one specific delivery unit all packages that are part of a particular project or project area.
The package hierarchy for a new project typically includes sub-packages, for example, to isolate the data model from the business logic. Although there are no package interfaces to enforce visibility of objects across packages, this separation of logical layers of development is still a recommended best practice.
The following simple example shows a package structure containing tutorials for the use of a new application:
sap \ hana \ app1 \ code demos docs \ tutorials manuals help
All content delivered by SAP should be in a sub-package of "sap". Partners and customers should choose their own root package to reflect their own name (for example, the domain name associated with the company) and must not create packages or objects under the "sap" root structural package. This rule ensures that customer- or partner-created content will not be overwritten by an SAP update or patch.
NoteSAP reserves the right to deliver without notification changes in packages and models below the "sap" root structural package.
There are no system mechanisms for enforcing the package hierarchy. The "sap" root structural package is not automatically protected. However, by default you cannot change the content of packages that did not originate in the system. In addition, an authorization concept exists, which enables you to control who can change what inside packages.
SAP HANA Developer Quick Start GuideGetting Started with Application Development in XS Classic PUBLIC 57

2.2.1.3.2 Define Repository Package Privileges
In the SAP HANA repository, you can set package authorizations for a specific user or for a role.
Context
Authorizations that are assigned to a repository package are implicitly assigned to all sub-packages, too. You can also specify if the assigned user authorizations can be passed on to other users.
Procedure
1. Open the SAP HANA Web-based Development Workbench Security tool.The Security tool is available on the SAP HANA XS Web server at the following URL: http://<WebServerHost>:80<SAPHANAinstance>/sap/hana/ide/security
2. Expand the Security Users node.3. Select the user to whom you want to assign authorizations.4. Choose the Package Privileges tab.
5. Choose the (Add) button and enter all or part of the package name to locate the repository package.6. Select the relevant package from the list of matching items and choose OK.
The selected package is added to the table.7. In the table, select the package you just added and in the privileges list select the required privileges, for
example:a. REPO.READ
Read access to the selected package and design-time objects (both native and imported)b. REPO.EDIT_NATIVE_OBJECTS
Authorization to modify design-time objects in packages originating in the system the user is working in
c. REPO.ACTIVATE_NATIVE_OBJECTSAuthorization to activate/reactivate design-time objects in packages originating in the system the user is working in
d. REPO.MAINTAIN_NATIVE_PACKAGESAuthorization to update or delete native packages, or create sub-packages of packages originating in the system in which the user is working
8. Save your changes.
58 PUBLICSAP HANA Developer Quick Start Guide
Getting Started with Application Development in XS Classic

2.2.1.3.2.1 Package PrivilegesPackage privileges authorize actions on individual packages in the SAP HANA repository.
Privileges granted on a repository package are implicitly assigned to the design-time objects in the package, as well as to all sub-packages. Users are only allowed to maintain objects in a repository package if they have the necessary privileges for the package in which they want to perform an operation, for example to read or write to an object in that package. To be able perform operations in all packages, a user must have privileges on the root package .REPO_PACKAGE_ROOT.
If the user authorization check establishes that a user does not have the necessary privileges to perform the requested operation in a specific package, the authorization check is repeated on the parent package and recursively up the package hierarchy to the root level of the repository. If the user does not have the necessary privileges for any of the packages in the hierarchy chain, the authorization check fails and the user is not permitted to perform the requested operation.
In the context of repository package authorizations, there is a distinction between native packages and imported packages.
● Native packageA package that is created in the current system and expected to be edited in the current system. Changes to packages or to objects the packages contain must be performed in the original development system where they were created and transported into subsequent systems. The content of native packages are regularly edited by developers.
● Imported packageA package that is created in a remote system and imported into the current system. Imported packages should not usually be modified, except when replaced by new imports during an update. Otherwise, imported packages or their contents should only be modified in exceptional cases, for example, to carry out emergency repairs.
NoteThe SAP HANA administrator can grant the following package privileges to an SAP HANA user: edit, activate, and maintain.
Related Information
Package Privilege Options [page 59]
2.2.1.3.2.2 Package Privilege OptionsPackage privileges authorize actions on individual packages in the SAP HANA repository. In the context of repository package authorizations, there is a distinction between native packages and imported packages.
NoteTo be able perform operations in all packages in the SAP HANA repository, a user must have privileges on the root package .REPO_PACKAGE_ROOT.
SAP HANA Developer Quick Start GuideGetting Started with Application Development in XS Classic PUBLIC 59

Privileges for Native Repository Packages
A native repository package is created in the current SAP HANA system and expected to be edited in the current system. To perform application-development tasks on native packages in the SAP HANA repository, developers typically need the privileges listed in the following table:
Package Privilege Description
REPO.READ Read access to the selected package and design-time objects (both native and imported)
REPO.EDIT_NATIVE_OBJECTS Authorization to modify design-time objects in packages originating in the system the user is working in
REPO.ACTIVATE_NATIVE_OBJECTS Authorization to activate/reactivate design-time objects in packages originating in the system the user is working in
REPO.MAINTAIN_NATIVE_PACKAGES Authorization to update or delete native packages, or create sub-packages of packages originating in the system in which the user is working
Privileges for Imported Repository Packages
An imported repository package is created in a remote SAP HANA system and imported into the current system. To perform application-development tasks on imported packages in the SAP HANA repository, developers need the privileges listed in the following table:
NoteIt is not recommended to work on imported packages. Imported packages should only be modified in exceptional cases, for example, to carry out emergency repairs.
Package Privilege Description
REPO.READ Read access to the selected package and design-time objects (both native and imported)
REPO.EDIT_IMPORTED_OBJECTS Authorization to modify design-time objects in packages originating in a system other than the one in which the user is currently working
REPO.ACTIVATE_IMPORTED_OBJECTS Authorization to activate (or reactivate) design-time objects in packages originating in a system other than the one in which the user is currently working
60 PUBLICSAP HANA Developer Quick Start Guide
Getting Started with Application Development in XS Classic

Package Privilege Description
REPO.MAINTAIN_IMPORTED_PACKAGES Authorization to update or delete packages, or create sub-packages of packages, which originated in a system other than the one in which the user is currently working
Related Information
Package Privileges
2.2.1.3.3 Create Repository Packages
In SAP HANA, a package contains a selection of repository objects. You assemble a collection of packages into a delivery unit, which you can use to transport the repository objects between SAP HANA systems.
Context
You can use repository packages to manage the various elements of your application development project in the SAP HANA repository.
Procedure
1. Open the SAP HANA Web-based Development Workbench Editor tool.The Editor tool is available on the SAP HANA XS Web server at the following URL: http://<WebServerHost>:80<SAPHANAinstance>/sap/hana/ide/editor
2. Expand the Content node to display the namespace hierarchy for package content.
3. From the context menu of the Content folder (or a folder of your choice), choose New Package .The Create Package dialog box appears.
4. Maintain the package details.a. Enter a name for the new package.
The package name is mandatory. Note that guidelines and conventions apply to package names.b. Fill in the other optional information as required:
○ Enter a package description.○ Assign responsibility of the package to a specific user.
NoteIf omitted, the user responsible for a new package is, by default, the user who created it.
SAP HANA Developer Quick Start GuideGetting Started with Application Development in XS Classic PUBLIC 61

○ Specify a language for the package content.5. Choose Create.
The new package appears in the package hierarchy. The fully qualified package name and package properties are shown above the multi-file drop zone in the panel on the right.
Next Steps
To specify the delivery unit that a package is to be assigned to, select the package and from the context menu choose Delivery Unit Assign . Then enter the name of the delivery unit and choose Assign.
Related Information
Define Repository Package Privileges [page 58]Maintaining Delivery Units
2.2.1.3.3.1 SAP HANA Repository Packages and Namespaces
In SAP HANA, a package typically consists of a collection of repository objects, which can be transported between systems. Multiple packages can be combined in a delivery unit (DU).
An SAP HANA package specifies a namespace in which the repository objects exist. Every repository object is assigned to a package, and each package must be assigned to a specific delivery unit. In the repository, each object is uniquely identified by a combination of the following information:
● Package name● Object name● Object type
NoteMultiple objects of the same type can have the same object name if they belong to different packages.
Before you start the package development process, consider the following important points:
● Package hierarchyEach vendor uses a dedicated namespace, and the package hierarchy you create enables you to store the various elements of an application in a logical order that is easy to navigate.
● Package typePackages can be structural or non-structural; some packages contain content; other packages contain only other (sub)packages.
● Package naming conventionsThere are recommendations and restrictions regarding package names, for example, the name's maximum length and which characters must not be used.
62 PUBLICSAP HANA Developer Quick Start Guide
Getting Started with Application Development in XS Classic

Package Naming Conventions
The following rules apply to package names:
● Permitted charactersLower/upper case letters (aA-zZ), digits (0-9), hyphens (-), underscores (_), and dots (.) are permitted in package names. Dots in a package name define a logical hierarchy. For example, "a.b.c" specifies a package "a" that contains sub-package "b", which in turn contains sub-package "c".
● Forbidden charactersA package name must not start with either a dot (.) or a hyphen (-) and cannot contain two or more consecutive dots (..).
● Package name lengthThe name of the complete package namespace hierarchy (for example, “aa.bb.cc.zz” including dots) must not be more than 190 characters long. In addition, on object activation, the maximum permitted length of a generated catalog name (which includes the package path, the separating dots, and the object base name) is restricted to 127 characters.○ hdbtable hdbview, hdbsequence, hdbstructure, hdbprocedure objects
sap.test.hana.db::myObject
○ CDS objects
sap.test.hana.db::myContext.myEntity
2.2.1.3.3.2 Repository Package Types
SAP HANA enables the use of various types of package, which are intended for use in particular scenarios.
SAP HANA Application Services provide or allow the following package types:
● StructuralPackage only contains sub-packages; it cannot contain repository objects.
● Non-StructuralPackage contains both repository objects and subpackages.
The following packages are delivered by default with the repository:
● sapTransportable package reserved for content delivered by SAP. Partners and customers must not use the sap package; they must create and use their own root package to avoid conflicts with software delivered by SAP, for example when SAP updates or overwrites the sap package structure during an update or patch process.
● system-localNon-transportable, structural packages (and subpackages). Content in this package (and any subpackages) is considered system local and cannot be transported. This is similar to the concept of the $tmp development class in SAP NetWeaver ABAP.
● system-local.generatedNon-transportable, structural packages for generated content, that is; content not created by manual user interaction
SAP HANA Developer Quick Start GuideGetting Started with Application Development in XS Classic PUBLIC 63

● system-local.privateNon-transportable, structural package reserved for objects that belong to individual users, for example, system-local.private.<user_name> . To avoid compatibility issues with future functionality, do not use the system-local.private package or any of its sub-packages.
2.2.1.3.4 Delete Repository Packages
In SAP HANA development, repository packages are used to manage various elements of your application development project. Sometimes you need to delete a package that contains repository objects from other developers.
Prerequisites
You are assigned the REPO.WORK_IN_FOREIGN_WORKSPACE system privilege.
Procedure
1. Open the SAP HANA Web-based Development Workbench Editor tool.The Editor tool is available on the SAP HANA XS Web server at the following URL: http://<WebServerHost>:80<SAPHANAinstance>/sap/hana/ide/editor
2. In the Content tree, locate the package that you want to delete.3. Delete the package.
1. In the context menu of the package that you want to delete, choose Delete.2. When prompted, choose OK.
Related Information
System Privileges (Reference)
64 PUBLICSAP HANA Developer Quick Start Guide
Getting Started with Application Development in XS Classic

2.2.1.4 Creating the Application Descriptors
The application descriptors describe the framework in which an SAP HANA XS application runs. The framework defined by the application descriptors includes the root point in the package hierarchy where content is to be served to client requests, and who has access to the content.
Prerequisites
● You must be familiar with the concept of the application descriptor file (.xsapp), the application-access file (.xsaccess), and if required, the application-privileges file (.xsprivileges).
Context
When you develop and deploy applications in the context of SAP HANA Extended Application Services (SAP HANA XS), you must define the application descriptors. Maintaining the application descriptors involves the following tasks:
Procedure
1. Create an application-descriptor file.The package that contains the application descriptor file becomes the root path of the resources exposed to client requests by the application you develop.
2. Create an application-access file.The application-access file enables you to specify who or what is authorized to access the content exposed by a SAP HANA XS application package and what content they are allowed to see. You can use keywords in the application-access file to set authentication rules, define package-privilege levels (for example, EXECUTE or ADMIN, specify the connection security level (for example, SSL/HTTPS), and allow (or prevent) the creation of entity tags (Etags). You can also define rewrite rules for URLs exposed by an application, for example, to hide internal details of URL paths from external users, clients, and search engines.
3. Create an application-privileges file. (Optional)The application-privileges file enables you to define the authorization privileges required for access to an SAP HANA XS application, for example, to start the application (EXECUTE) or to perform administrative actions on an application (ADMIN). The privileges defined here are activated for a particular application in the application-access file. These privileges can be checked by an application at runtime. Privileges defined apply to the package where the privileges file is located as well as any packages further down the package hierarchy unless an additional privileges file is present, for example, in a subpackage.
SAP HANA Developer Quick Start GuideGetting Started with Application Development in XS Classic PUBLIC 65

Related Information
Create an application descriptor [page 40]Create an application-access file [page 41]Create an application-privileges file [page 44]
2.2.1.4.1 Define the Application Root Package
Each application that you want to develop and deploy on SAP HANA Extended Application Services (SAP HANA XS) must have an application-descriptor (.xsapp) file.
Prerequisites
You have created an application root package.
Context
This file is the core file that you use to indicate an application's availability within SAP HANA XS. It marks the point in the package hierarchy at which an application's content is available, that is, the package that contains this file becomes the root path of the resources exposed by the application you develop.
Note that the .xsapp file has no content except the set of curly brackets {} and no name; it only has the file extension .xsapp.
TipWhen creating applications, remember that it is not necessary to manually create the application descriptors. Choose an appropriate application template or the empty application template and these files will be created automatically.
Procedure
1. Open the SAP HANA Web-based Development Workbench Editor tool.The Editor tool is available on the SAP HANA XS Web server at the following URL: http://<WebServerHost>:80<SAPHANAinstance>/sap/hana/ide/editor
2. Select the package where you want to create the new file and from the context menu choose NewFile .
3. Enter the file name .xsapp and choose Create.
66 PUBLICSAP HANA Developer Quick Start Guide
Getting Started with Application Development in XS Classic

4. Save the file.
Related Information
The SAP HANA XS Application Descriptor [page 67]
2.2.1.4.1.1 The SAP HANA XS Application Descriptor
Each application that you want to develop and deploy on SAP HANA Extended Application Services (SAP HANA XS) must have an application descriptor file. The application descriptor is the core file that you use to describe an application's framework within SAP HANA XS.
The package that contains the application descriptor file becomes the root path of the resources exposed to client requests by the application you develop.
NoteThe application-descriptor file has no name and no content; it only has the file extension “xsapp”, for example, .xsapp. For backward compatibility, content is allowed in the .xsapp file but ignored.
The application root is determined by the package containing the .xsapp file. For example, if the package sap.test contains the file .xsapp, the application will be available under the URL http://<host>:<port>/sap.test/. Application content is available to requests from users.
CautionMake sure that the folder containing the .xsapp application descriptor file also contains an .xsaccess file, which controls access to the application.
The contents of the package where the .xsapp file resides (and any subfolders) are exposed to user requests and, as a result, potentially reachable by attackers. You can protect this content with the appropriate authentication settings in the corresponding application-access (.xsaccess) file, which resides in the same package. Bear in mind that by exposing Web content, you run the risk of leaking information; the leaked information can be used in the following ways:
● DirectlyData files such as .csv files used for the initial database load can contain confidential information.
● IndirectlyFile descriptors can give details about the internal coding of the application, and files that contain the names of developers are useful; they can be used by an attacker in combination with social-engineering techniques.
To help protect your application from security-related issues, place the application descriptor (.xsapp) as deep as possible in the package hierarchy. In addition, include only the index page in this package; all other application data should be placed in sub-folders that are protected with individual application-access files.
SAP HANA Developer Quick Start GuideGetting Started with Application Development in XS Classic PUBLIC 67

TipKeep the application package hierarchy clean. Do not place in the same package as the .xsapp file (or sub-package) any unnecessary content, for example, files which are not required for the application to work.
Related Information
The Application-Access File [page 70]
2.2.1.4.2 Enable Access to the Application Packages
The application-access (.xsaccess) file enables you to specify who or what is authorized to access the content exposed by the application package and what content they are allowed to see.
Prerequisites
● An application root package● An application descriptor file (.xsapp) for the selected application
Context
You can use a set of keywords in the application-access file to specify if authentication is required to enable access to package content, which data is exposed, and if rewrite rules are in place to hide target and source URLs, for example, from users and search engines. You can also specify what, if any, level of authorization is required for the package and whether SSL is mandatory for client connections.
The application-access file does not have a name before the dot (.); it only has the file extension .xsaccess. The contents of the .xsaccess file must be formatted according to JavaScript Object Notation (JSON) rules.
Procedure
1. Open the SAP HANA Web-based Development Workbench Editor tool.The Editor tool is available on the SAP HANA XS Web server at the following URL: http://<WebServerHost>:80<SAPHANAinstance>/sap/hana/ide/editor
2. Select the root package of the application to which you want to enable access and from the context menu choose New File .
68 PUBLICSAP HANA Developer Quick Start Guide
Getting Started with Application Development in XS Classic

3. Enter the file name .xsaccess and choose Create.
A basic .xsaccess file must, at the very least, contain a set of curly brackets, for example, {}. Note that the .xsaccess file uses keyword-value pairs to set access rules; if a mandatory keyword-value pair is not set, then the default value is assumed.
4. Enable application access to data.To enable or disable access to content at a package or subpackage level, you use the exposed keyword:
{ "exposed" : true }
5. Define the application authentication method.To ensure that basic or form-based logon works when it is enabled using the SAP HANA XS Administration Tool, the authentication keyword is required in the .xsaccess file, too, and must be set to the respective value, as shown in the following example:
{ "authentication" : { "method" : "Form"} }
NoteProvided the Public security option is disabled (default setting) in the SAP HANA XS Administration Tool, both the form-based authentication and basic authentication options are automatically enabled.
You can use the SAP HANA XS Administration Tool to configure applications to use additional authentication methods, for example, logon tickets, or Single Sign On (SSO) providers such as SAML2 and X509.
6. Optionally specify the application privileges if required.Use the authorization keyword in the .xsaccess file to specify which authorization level is required by a user to access a particular application package. The authorization keyword requires a corresponding entry in the .xsprivileges file, for example, execute for basic privileges or admin for administrative privileges on the specified package:
{ "authorization": ["<package.path>::Execute", "<package.path>::Admin" ] }
7. Save the file in the package with which you want to associate the rules you have defined.
Related Information
The Application-Access File [page 70]Application-Access File Keyword Options [page 71]Application-Access URL Rewrite Rules [page 81]
SAP HANA Developer Quick Start GuideGetting Started with Application Development in XS Classic PUBLIC 69

2.2.1.4.2.1 The Application-Access File
SAP HANA XS enables you to define access to each individual application package that you want to develop and deploy.
The application-access file enables you to specify who or what is authorized to access the content exposed by a SAP HANA XS application package and what content they are allowed to see. For example, you use the application-access file to specify if authentication is to be used to check access to package content and if rewrite rules are in place that hide or expose target and source URLs.
The application-access file does not have a name; it only has the file extension .xsaccess. The content of the .xsaccess file is formatted according to JSON rules, and the settings specified in an .xsaccess file apply not only to the package the .xsaccess file belongs to but also any subpackages lower in the package hierarchy. Multiple .xsaccess files are allowed, but only at different levels in the package hierarchy. You cannot place two .xsaccess files in the same package.
NoteThe settings specified in an .xsaccess file in a subpackage take precedence over any settings specified in a .xsaccess file higher up the package hierarchy; the subpackage settings are also inherited by any packages further down the package hierarchy. Any settings not modified by the .xsaccess in the subpackage remain unchanged, that is: as defined in the parent package or, where applicable, the default settings.
Using multiple .xsaccess files enables you to specify different application-access rules for individual subpackages in the package hierarchy. Following the inheritance rule, any applications below the application package containing the modified access settings inherit the new, modified settings.
The following example shows the composition and structure of the SAP HANA XS application access (.xsaccess) file, which comprises a list of key-value pairs that specify how the application service responds to client requests. For example, in this file, "exposed" : true indicates that data is available to client requests; "force_ssl" : true specifies that standard HTTP requests are not allowed by the Web browser.
NoteSome elements can also be specified in the application's runtime configuration, for example, using the SAP HANA XS Administration Tool. For example, you can configure applications to refuse insecure HTTP connections, allow the use of e-tags, or enable additional authentication methods such as Single Sign On (SSO) providers SAML2 and X509.
Example: The Application-Access (.xsaccess) File
{ "exposed" : true, // Expose data via http "authentication" : { "method": "Form" }, "authorization": // Privileges for application access [
70 PUBLICSAP HANA Developer Quick Start Guide
Getting Started with Application Development in XS Classic

"sap.xse.test::Execute", "sap.xse.test::Admin" ], "rewrite_rules" : // URL rewriting rules [ { "source": "/entries/(\\d+)/(\\d+)/(\\d+)/", "target": "/logic/entries.xsjs?year=$1&month=$2&day=$3" } ], "mime_mapping" : // Map file-suffix to MIME type [ { "extension":"jpg", "mimetype":"image/jpeg" } ], "force_ssl" : true, // Accept only HTTPS requests "enable_etags" : true, // Allow generation of etags "prevent_xsrf" : true, // Prevent cross-site request forgery "anonymous_connection" : "sap.hana.sqlcon::AnonConn", //.xssqlcc object "default_connection" : "sap.hana.sqlcon::sqlcc", //.xssqlcc object "cors" : // Permit cross-origin browser requests { "enabled" : false }, "default_file" : "homepage.html", // Override default access setting "cache_control" : "no-cache, no-store", // Manage static Web-content cache "headers": // Enable X-Frame-Options HTTP header field { "enabled": true, "customHeaders": [ { "name":"X-Frame-Options","value":"SAMEORIGIN" } ] } }
Related Information
Application-Access File Keyword Options [page 71]Set up Application Security [page 47]
2.2.1.4.2.2 Application-Access File Keyword Options
The application-access (.xsaccess) file enables you to specify whether or not to expose package content, which authentication method is used to grant access, and what content is visible.
Example: The Application Access (.xsaccess) File
NoteThis example of the .xsaccess file is not a working model; it is used to illustrate the syntax for all possible options.
{
SAP HANA Developer Quick Start GuideGetting Started with Application Development in XS Classic PUBLIC 71

"exposed" : false, "authentication" : { "method": "Form" }, "authorization": [ "sap.xse.test::Execute", "sap.xse.test::Admin" ], "anonymous_connection" : "sap.hana.sqlcon::AnonConn", "default_connection" : "sap.hana.sqlcon::sqlcc", "cache_control" : "no-store", "cors" : { "enabled" : false }, "default_file" : "index_1.html", "enable_etags" : false, "force_ssl" : true, "mime_mapping" : [ { "extension":"jpg", "mimetype":"image/jpeg" } ], "prevent_xsrf" : true, "rewrite_rules" : [{ "source" : "...", "target" : "..." }] "headers": { "enabled": true, "customHeaders": [ {"name":"X-Frame-Options","value":"<VALUE>"} ] }}
exposed
{ "exposed" : false, }
The exposed keyword enables you define if content in a package (and its subpackages) is to be made available by HTTP to client requests. Values are Boolean true or false. If no value is set for exposed, the default setting (false) applies.
TipOnly expose content that is absolutely necessary to enable the application to run.
Consider whether it is necessary to expose data via HTTP/S. Not exposing data via HTTP enables you to keep your files accessible to other programs but prevent direct access to the data via URL. Since the application's index.html page must normally remain reachable, consider storing the index.html file separately with a
72 PUBLICSAP HANA Developer Quick Start Guide
Getting Started with Application Development in XS Classic

dedicated .xsaccess file that enables access (“exposed”: true). You can keep all other content hidden, for example, in separate package to which access is denied (“exposed”: false).
Packages without a dedicated .xsaccess file inherit the application-access settings defined in the parent folder. If an .xsaccess file exists but the exposed keyword is not defined, the default setting false applies.
anonymous_connection
{ "anonymous_connection" : "sap.hana.sqlcon::AnonConn", }
The anonymous_connection keyword enables you to define the name of the .xssqlcc file that will be used for SQL access when no user credentials are provided. SAP HANA XS enables you to define the configuration for individual SQL connections. Each connection configuration has a unique name, for example, Registration, AnonConn, or AdminConn, which is generated from the name of the corresponding connection-configuration file (Registration.xssqlcc, AnonConn.xssqlcc, or AdminConn.xssqlcc) on activation in the repository. If no value is set, the default setting is “null”.
TipIt is not recommended to enable anonymous access.
If it is necessary to provide anonymous access to an application, design your application in such a way that all files requiring anonymous access are placed together in the same package, which you can then protect with the permissions defined in a dedicated .xsaccess file. Remember that the behavior of the anonymous connection depends on the details specified in the corresponding SQL configuration file (.xssqlcc).
default_connection
{ "default_connection" : "sap.hana.sqlcon::sqlcc", }
If the default_connection is set in the .xsaccess file, the specified SQL connection configuration (for example, defined in sqlcc) is used for all SQL executions in this package, whether or not the requesting user is authenticated in SAP HANA or not. The difference between the default_connection and the anonymous_connection is that the anonymous SQL connection configuration is only used if the requesting user is not authenticated. Like any other property of the xsaccess file, the default_connection is inherited down the package hierarchy, for example, from package to subpackage. The default_connection can also be overwritten, for example, by locating an xsaccess file with a different default_connection in one or more subpackages.
TipIf the requesting user is authenticated, the user name will be available in the connection as the APPLICATIONUSER session variable.
SAP HANA Developer Quick Start GuideGetting Started with Application Development in XS Classic PUBLIC 73

The credentials to use for an SQL execution are determined according to the following order of priority:
1. The SQL connection configuration (SQLCC) specified in $.db.getConnection(sqlcc); this applies only in XS JavaScript (not OData, for example)
2. The value specified in default_connection (if set)3. An authenticated user4. The valued specified in anonymous_connection (if set)
The default_connection is intended for use with anonymous parts of the application that require the same privileges for all users. If the anonymous part of an application is designed to behave according to the privileges granted to authenticated users, the anonymous_connection should be used. This is particularly important if analytic privileges are involved, for example, to restrict the amount of returned rows (not overall access to the table). In most cases, the default_connection should be used.
authentication
{ "authentication" : { "method": "Form" },}
The authentication keyword is required in the .xsaccess file and must be set to the value "form", for example "method" : "Form", to ensure that form-based logon works when you enable it using the SAP HANA XS Administration Tool.
NoteUse the SAP HANA XS Administration Tool to configure applications to use additional authentication methods, for example, basic, logon tickets, or Single Sign On (SSO) providers such as SAML2 and X509. You must also enable the Form-based authentication checkbox, if you want your application (or applications) to use form-based logon as the authentication method. Any other keywords in the authentication section of the .xsaccess file are ignored.
● Form-based authenticationRedirect the logon request to a form to fill in, for example, a Web page.To ensure that, during the authentication process, the password is transmitted in encrypted form, it is strongly recommended to enable SSL/HTTPS for all application connections to the XS engine, for example, using the force_ssl keyword. If you set the force_ssl option, you must ensure that the SAP Web Dispatcher is configured to accept and manage HTTPS requests.Form-based authentication requires the libxsauthenticator library, which must not only be available but also be specified in the list of trusted applications in the xsengine application container. The application list is displayed in the SAP HANA studio's Administration Console perspective in the following location:
Administration Configuration tab xsengine.ini application_container application_list . If it is not displayed, ask the SAP HANA administrator to add it.
74 PUBLICSAP HANA Developer Quick Start Guide
Getting Started with Application Development in XS Classic

NoteIf you need to troubleshoot problems with form-based logon, you can configure the generation of useful trace information in the XSENGINE section of the database trace component using the following entry: xsa:sap.hana.xs.formlogin.
authorization
{ "authorization": [ "sap.xse.test::Execute", "sap.xse.test::Admin" ], }
The authorization keyword in the .xsaccess file enables you to specify which authorization level is required for access to a particular application package, for example, execute or admin on the package sap.xse.text.
NoteThe authorization levels you can choose from are defined in the .xsprivileges file for the package, for example, "execute" for basic privileges, or "admin" for administrative privileges on the specified package. If you do not define any authorization requirements, any user can launch the application.
If you use the authorization keyword in the .xsaccess file, for example, to require “execute” privileges for a specific application package, you must create a .xsprivileges file for the same application package (or a parent package higher up the hierarchy, in which you define the “execute” privilege level declared in the .xsaccess file.
Authorization settings are inherited down the package hierarchy from a package to a subpackage. However, you can specify different authorization levels for different subpackages; this new setting is then inherited by any subpackages further down the hierarchy. To disable authorization for a subpackage (for example, to prevent inheritance of authorizations from the parent package), you can create a (sub)package-specific .xsaccess file with the authorization keyword explicitly set to null, as illustrated in the following example.
{ "authorization": null }
Bear in mind that the “authorization”:null setting applies not only to the package in which the .xsaccess with the null setting is located but also to any subpackages further down the package hierarchy. You can re-enable authorization in subpackage levels by creating new a .xsaccess file.
SAP HANA Developer Quick Start GuideGetting Started with Application Development in XS Classic PUBLIC 75

cache_control
{ "cache_control":"no-store", }
The cache_control keyword enables you to override the cache-control header for Web content served by the SAP HANA XS Web server. So-called cache-control directives (for example, public, private, no-store) enable you to control the behavior of the Web browser and proxy caches, for example, whether or not to store a page, how to store it, or where. For more information about the values you can use to set cache_control, see the HTTP standard for cache-control directives. If no value for code_controlis set in the .xsaccess file, the default setting is “null”.
TipFor security reason, it is recommended to set the cache_control keyword to “no-cache, no-store”. However, if nothing is cached or stored, there is an obvious impact on application performance.
If application performance allows, the no-cache, no-store setting is advisable for the following reasons:
● From a client perspective:If an application is handling sensitive data, it is bad practice to cache the data in the local browser since this could lead to unintended disclosure of information.
● From a server perspective:Allowing an application to cache data can open up the application to attack. For example, if attackers build a malicious page and host it on a proxy server between your server and the requesting client, it would be possible to steal data from the client or prevent access to the application altogether. Since the risk of such an attack is small, you might want to consider allowing caching, as long as it does not adversely affect performance.
cors
{ "cors" : { "enabled" : false }, }
The cors keyword enables you to provide support for cross-origin requests, for example, by allowing the modification of the request header. Cross-origin resource sharing (CORS) permits Web pages from other domains to make HTTP requests to your application domain, where normally such requests would automatically be refused by the Web browser's security policy.
If CORS support is disabled ("enabled" : false), the following settings apply on the Web server:
● The server does not respond to any CORS preflight requests● The server does not add CORS response headers to any CORS requests● The server refuses to execute the resource specified in the request
76 PUBLICSAP HANA Developer Quick Start Guide
Getting Started with Application Development in XS Classic

To enable support for CORS, set the cors keyword to {“enabled”:true}, which results in the following default corsconfiguration:
{"cors":{"enabled":true,"allowMethods": [“GET”,”POST”,”HEAD”,”OPTIONS”],"allowOrigin": [“*”], “maxAge”:”3600”}}
The following table describes the options that are supported with the cors keyword:
{"cors":{"enabled":true, "allowMethods":<ALLOWED_METHODS>, "allowOrigin":<ALLOWED_ORIGIN>, “maxAge”:<MAX_AGE>, “allowHeaders”:<ALLOWED_HEADERS>, “exposeHeaders”:<EXPOSED_HEADERS>}}
Default Settings for CORS Options
CORS Option Description
ALLOWED_METHODS A single permitted method or a comma-separated list of methods that are allowed by the server, for example, “GET”, “POST”. If allowMethods is defined but no method is specified, the default “GET”, “POST”, “HEAD”, “OPTIONS” (all) applies. Note that matching is case-sensitive.
ALLOWED_ORIGIN A single host name or a comma-separated list of host names that are allowed by the server, for example: www.sap.com or *.sap.com. If allowOrigin is defined but no host is specified, the default “*” (all) applies. Note that matching is case-sensitive.
ALLOW_HEADERS A single header or a comma-separated list of request headers that are allowed by the server. If allowHeaders is defined but no header is specified as allowed, no default value is supplied.
MAX_AGE A single value specifying how long a preflight request should be cached for. If maxAge is defined but no value is specified, the default time of “3600” (seconds) applies.
EXPOSE_HEADERS A single header or a comma-separated list of response headers that are allowed to be exposed. If exposeHeaders is defined but no response header is specified for exposure, no default value is supplied.
Alternatively, you can isolate the part of the application where CORS must be allowed, for example, in a specific subpackage. By adding a dedicated .xsaccess file to this CORS-related subpackage, you can set the cors option in the dedicated .xsaccess file to true.
default_file
{ "default_file" : "new_index.html", }
The default_file keyword enables you to override the default setting for application access (index.html) when the package is accessed without providing a file in the URI. If you use the default_file but do not specify a value, the default setting “index.html” is assumed.
TipIt is good practice to specify a default file name manually. Changing the default from index.html to something else can help make your application less vulnerable to automated hacker tools.
SAP HANA Developer Quick Start GuideGetting Started with Application Development in XS Classic PUBLIC 77

rewrite_rules
{ "rewrite_rules" : [{ "source": "...", "target": "..." }],}
The rewrite_rules keyword enables you hide the details of internal URL paths from external users, clients, and search engines. Any rules specified affect the local application where the .xsaccess file resides (and any subpackage, assuming the subpackages do not have their own .xsaccess files); it is not possible to define global rewrite rules. URL rewrite rules are specified as a source-target pair where the source is written in the JavaScript regex syntax and the target is a simple string where references to found groups can be inserted using $groupnumber.
TipIt is not recommended to rely on rewrite rules to make an application secure.
In the following example, the rule illustrated hides the filename parameter and, as a result, makes it harder to guess that the parameter provided after /go/ will be used as a filename value. Note that it is still necessary to validate the received input
{ "rewrite_rules" : [{ "source": "/go/(\\d+)/", "target": "/logic/users.xsjs?filename=$1" }],}
mime_mapping
{ "mime_mapping" : [ { "extension":"jpg", "mimetype":"image/jpeg" } ], }
The mime_mapping keyword enables you to define how to map certain file suffixes to required MIME types. For example, you can map files with the .jpg file extension to the MIME type image/jpeg.
This list you define with the mime_mapping keyword supersedes any default mapping defined by the server; the Web browser uses the information to decide how to process the related file types.
78 PUBLICSAP HANA Developer Quick Start Guide
Getting Started with Application Development in XS Classic

CautionMake sure you do not instruct the browser to execute files that are not meant to be executed, for example, by mapping .jpg image files with the MIME type application/javascript.
The default MIME mappings remain valid for any values you do not define with the mime_mapping keyword. Consider restricting any explicit mappings to file types where the default behavior does not work as expected or where no default value exists, for example, for file types specific to your application.
force_ssl
{ "force_ssl" : false, }
The force_ssl keyword enables you to refuse Web browser requests that do not use secure HTTP (SSL/HTTPS) for client connections. If no value is set for force_ssl, the default setting (false) applies and non-secured connections (HTTP) are allowed.
TipTo ensure that, during the authentication process, passwords are transmitted in encrypted form, it is strongly recommended to enable SSL/HTTPS for all application connections to the XS engine. If you set the force_ssl option, you must ensure that the SAP Web Dispatcher is configured to accept and manage HTTPS requests. For more information, see the SAP HANA XS section of the SAP HANA Administration Guide.
Enabling theforce_ssl option ensures that your application is reachable only by means of an HTTPS connection. If your application must support standard HTTP (without SSL), make sure that no sensitive data is being sent either to or from the application. Disabling the force_ssl option allows attackers to read whatever is sent over the network. Although it is possible to use message-based encryption for sensitive data while allowing HTTP, it is much better to work with HTTPS.
CautionIf a runtime configuration exists for your application, the force_ssl setting in the runtime configuration supersedes the force_ssl in the .xsaccess.
enable_etags
{ "enable_etags" : true, }
You can allow or prevent the generation of entity tags (etags) for static Web content using the enable_etags keyword. If no value is set, the default setting (true) applies, in which case etags are generated. Etags are used
SAP HANA Developer Quick Start GuideGetting Started with Application Development in XS Classic PUBLIC 79

to improve caching performance, for example, so that the same data is not resent from the server if no change has occurred since the last time a request for the same data was made.
If etags are enabled, the browser sends with each HTTP request the etag retrieved from its cached page. If the etag from the cached page matches the etag from the server, the server answers with the status code 304 (not modified) and does send the full requested page. Although enabling etags has the positive side-effect of helping to prevent cache poisoning attacks, there is no direct security risk associated with disabling etags from the developer's perspective.
prevent_xsrf
{ "prevent_xsrf" : true, }
You can use the prevent_xsrf keyword in the .xsaccess file to protect applications from cross-site request-forgery (XSRF) attacks. XSRF attacks attempt to trick a user into clicking a specific hyperlink, which shows a (usually well-known) Web site and performs some actions on the user’s behalf, for example, in a hidden iframe. If the targeted end user is logged in and browsing using an administrator account, the XSRF attack can compromise the entire Web application. There is no good reason why you would explicitly set this keyword to false.
NoteIt is recommended to enable the prevent_xsrf feature for all applications that are not read-only.
The prevent_xsrf keyword prevents the XSRF attacks by ensuring that checks are performed to establish that a valid security token is available for a given Browser session. The existence of a valid security token determines if an application responds to the client's request to display content; if no valid security token is available, a 403 Forbidden message is displayed. A security token is considered to be valid if it matches the token that SAP HANA XS generates in the back end for the corresponding session.
NoteThe default setting is false, which means there is no automatic prevention of XSRF attacks. If no value is assigned to the prevent_xsrf keyword, the default setting (false) applies.
Setting the prevent_xsrf keyword to true ensures XSRF protection only on the server side. On the client side, to include the XSRF token in the HTTP headers, you must first fetch the token as part of a GET request, as illustrated in the following example:
xmlHttp.setRequestHeader("X-CSRF-Token", "Fetch");
You can use the fetched XSRF token in subsequent POST requests, as illustrated in the following code example:
xmlHttp.setRequestHeader("X-CSRF-Token", xsrf_token);
80 PUBLICSAP HANA Developer Quick Start Guide
Getting Started with Application Development in XS Classic

headers
{ "headers": { "enabled": true, "customHeaders": [ {"name":"X-Frame-Options","value":"<VALUE>"} ] }}
Enable support for the X-Frame-Options HTTP header field, which allows the server to instruct the client browser whether or not to display transmitted content in frames that are part of other Web pages. You can also enable this setting in the application's corresponding runtime configuration file, for example, using the XS Administration Tool.
CautionRuntime settings override any settings specified in the design-time configuration.
<VALUE> can be one of the following:
● DENY● SAMEORIGIN● ALLOW-FROM <URL>
You can only specify one URL with the ALLOW-FROM option, for example: "value":"ALLOW-FROM http://www.site.com".
NoteTo allow an application to use custom headers, you must enable the headers section.
Related Information
Server-Side JavaScript Security ConsiderationsThe SQL Connection Configuration File
2.2.1.4.2.3 Application-Access URL Rewrite Rules
Rewriting URLs enables you to hide internal URL path details from external users, clients, and search engines. You define URL rewrite rules in the application-access file (.xsaccess) for each application or for an application hierarchy (an application package and its subpackages).
The rewrite rules you define in the .xsaccess file apply only to the local application to which the .xsaccess file belongs; it is not possible to define global rules to rewrite URLs. Rules are specified as a source-target pair where the source is written in the JavaScript regex syntax, and the target is a simple string where references to found groups can be inserted using $groupnumber.
SAP HANA Developer Quick Start GuideGetting Started with Application Development in XS Classic PUBLIC 81

The following examples show how to use a simple set of rewrite rules to hide internal URLs from requesting clients and users.
The first example illustrates the package structure that exists in the repository for a given application; the structure includes the base package apptest, the subpackages subpackage1 and subpackage2, and several other subpackages:
sap---apptest |---logic | |---users.xsjs | |---posts.xsjs |---posts | |---2011... |---subpackage1 | |---image.jpg |---subpackage2 | |---subsubpackage | | |---secret.txt | |---script.xsjs |---subpackage3 | |---internal.file |---users | |---123... |---.xsapp |---.xsaccess |---index.html
The application-access file for the package apptest (and its subpackages) includes the following rules for rewriting URLs used in client requests:
{ "rewrite_rules": [ { "source": "/users/(\\d+)/", "target": "/logic/users.xsjs?id=$1" }, { "source": "/posts/(\\d+)/(\\d+)/(\\d+)/", "target": "/logic/posts.xsjs?year=$1&month=$2&day=$3" } ]}
Assuming we have the package structure and URL rewrite rules illustrated in the previous examples, the following valid URLs would be exposed; bold URLs require authentication:
/sap/apptest/ /sap/apptest/index.html/sap/apptest/logic/users.xsjs/sap/apptest/logic/posts.xsjs
The rewriting of the following URLs would be allowed:
/sap/apptest/users/123/ ==> /sap/appTest/logic/users.xsjs?id=123 /sap/apptest/posts/2011/10/12/ ==> /sap/appTest/logic/posts.xsjs?year=2011&month=10&day=12
82 PUBLICSAP HANA Developer Quick Start Guide
Getting Started with Application Development in XS Classic

2.2.1.4.3 Define Application Access Privileges
The application-privileges (.xsprivileges) file allows you to define the authorization levels required to access an application, for example, to start the application or perform administrative actions on an application. You can assign the application privileges to the individual users who require them.
Prerequisites
● An application descriptor file (.xsapp) for the selected application● An application access file (.xsaccess) for the selected application
Context
The .xsprivileges file must reside in the same application package that you want to define the access privileges for.
NoteIf you use the .xsprivileges file to define application-specific privileges, you must also add a corresponding entry to the same application's .xsaccess file, for example, using the authorization keyword.
The application-privileges file does not have a name; it only has the file extension .xsprivileges. The contents of the .xsprivileges file must be formatted according to JavaScript Object Notation (JSON) rules.
Procedure
1. Open the SAP HANA Web-based Development Workbench Editor tool.The Editor tool is available on the SAP HANA XS Web server at the following URL: http://<WebServerHost>:80<SAPHANAinstance>/sap/hana/ide/editor
2. Select the application package whose access privileges you want to define and from the context menu choose New File .
NoteMultiple .xsprivileges files are allowed, but only at different levels in the package hierarchy; you cannot place two .xsprivileges files in the same application package. The privileges defined in a .xsprivileges file are bound to the package to which the file belongs and can only be applied to this package and its subpackages.
3. Enter the file name .xsprivileges and choose Create.
SAP HANA Developer Quick Start GuideGetting Started with Application Development in XS Classic PUBLIC 83

4. Define the required application privileges.In the .xsprivileges file, you define a privilege for an application package by specifying an entry name with an optional description. This entry name is then automatically prefixed with the package name in which the .xsprivileges file is located to form a unique privilege name. For example, com.acme.myapp::Execute would enable execute privileges on the package com.acme.myapp. The privilege name is unique to the package to which it belongs and, as a result, can be used in multiple .xsprivileges files in different packages.
{ "privileges" : [ { "name" : "Execute", "description" : "Basic execution privilege" }, { "name" : "Admin", "description" : "Administration privilege" } ]}
5. Specify which privileges are required to access the application or application package.If you use the .xsprivileges file to define application-specific privileges, you must also add a corresponding entry to the same application's .xsaccess file, for example, using the authorization keyword.
NoteThe .xsprivileges file lists the authorization levels that are available for access to an application package; the .xsaccess file defines which authorization level is assigned to which application package.
a. Locate and open the application access file (.xsaccess) for the application for which you want to define application privileges.
b. Specify the privileges required to access the application or application package.Use the authorization keyword in the .xsaccess file to specify which authorization level is required by a user to access a particular application package.
{ "exposed" : true, "authentication" : [ { "method" : "Form" } ], "authorization": [ "<package.path>::Execute", "<package.path>::Admin" ] }
6. Save your changes and additions.The activation of the application privileges creates the corresponding objects, which you can use to assign the specified privileges to a user.
7. Assign the application privilege to the users who require it.After activation of the .xsprivileges object, the only user who by default has the application privileges specified in the .xsprivileges file is the _SYS_REPO user. To grant the specified privilege to (or revoke it from) other users, use the GRANT_APPLICATION_PRIVILEGE or REVOKE_APPLICATION_PRIVILEGE procedure in the _SYS_REPO schema.
84 PUBLICSAP HANA Developer Quick Start Guide
Getting Started with Application Development in XS Classic

To grant the execute application privilege to a user, open the catalog and run the following command in the SQL editor:
call "_SYS_REPO"."GRANT_APPLICATION_PRIVILEGE"('"<package.path>::Execute"','<UserName>')
To revoke the execute application privilege to a user, run the following command in the SQL editor:
call "_SYS_REPO"."REVOKE_APPLICATION_PRIVILEGE"('"<package.path>::Execute"','<UserName>')
Related Information
The Application-Privileges File [page 85]
2.2.1.4.3.1 The Application-Privileges File
In SAP HANA Extended Application Services (SAP HANA XS), the application-privileges (.xsprivileges) file can be used to create or define the authorization privileges required for access to an SAP HANA XS application, for example, to start the application or to perform administrative actions on an application. These privileges can be checked by an application at runtime.
The application-privileges file has only the file extension .xsprivileges; it does not have a name and is formatted according to JSON rules. Multiple .xsprivileges files are allowed, but only at different levels in the package hierarchy; you cannot place two .xsprivileges files in the same application package. The package privileges defined in a .xsprivileges file are bound to the package to which the .xsprivileges file belongs and can only be used in this package and its subpackages.
Inside the .xsprivileges file, a privilege is defined by specifying an entry name with an optional description. This entry name is then automatically prefixed with the package name to form the unique privilege name, for example, sap.hana::Execute.
As an application privilege is created during activation of an .xsprivileges file, the only user who has the privilege by default is the _SYS_REPO user. To grant or revoke the privilege to (or from) other users you can use the GRANT_APPLICATION_PRIVILEGE or REVOKE_APPLICATION_PRIVILEGE procedure in the _SYS_REPO schema.
NoteThe .xsprivileges file lists the authorization levels that are available for access to an application package; the .xsaccess file defines which authorization level is assigned to which application package.
In the following above, if the application-privileges file is located in the application package sap.hana.xse, then the following privileges are created:
● sap.hana.xse::Execute
SAP HANA Developer Quick Start GuideGetting Started with Application Development in XS Classic PUBLIC 85

● sap.hana.xse::Admin
The privileges defined apply to the package where the .xsprivileges file is located as well as any packages further down the package hierarchy unless an additional .xsprivileges file is present, for example, in a subpackage. The privileges do not apply to packages that are not in the specified package path, for example, sap.hana.app1.
Example: The SAP HANA XS Application-Privileges File
The following example shows the composition and structure of a basic SAP HANA XS application-privileges file.
{ "privileges" : [ { "name" : "Execute", "description" : "Basic execution privilege" }, { "name" : "Admin", "description" : "Administration privilege" } ]}
If the .xsprivileges file shown in the example above is located in the package sap.hana.xse, you can assign the Execute privilege for the package to a particular user by calling the GRANT_APPLICATION_PRIVILEGE procedure, as illustrated in the following code:
call "_SYS_REPO"."GRANT_APPLICATION_PRIVILEGE"('"sap.hana.xse::Execute"', '<user>')
2.2.1.5 Maintaining Application Artifacts
The design-time building blocks of an SAP HANA applications are called development objects (or artifacts), and many have a mandatory file extension, for example, .hdbtable (design-time table definition), .hdbview (design-time SQL-view definition), or .hdbrole (design-time role definition).
Some of the development objects you encounter when creating an application, such as projects and packages, are designed to help you structure your application. Other objects such as schemas, table definitions, or analytical and attribute views, help you organize your data. Design-time definitions of procedures and server-side JavaScript code are the core objects of an SAP HANA application; these, too, have mandatory file extensions, for example, .hdbprocedure or .xsjs. Other types of development objects help you control the access to runtime objects.
When you activate an application artifact, the file extension (for example, .hdbdd, .xsjs, or hdbprocedure, ...) is used to determine which runtime plug-in to call during the activation process. The plug-in reads the repository artifact selected for activation (for example, a table definition, a complete CDS document, or server-side JavaScript code), interprets the object description in the file, and creates the appropriate runtime object in the designated catalog schema.
The file extensions associated with application artifacts are used in other contexts, too. For example, in SAP HANA studio, a context-sensitive menu is displayed when you click an artifact with the alternate mouse button; the options displayed in the menu is determined, amongst other things, according to the file extension.
86 PUBLICSAP HANA Developer Quick Start Guide
Getting Started with Application Development in XS Classic

Related Information
Design-Time Application Artifacts [page 87]Studio-Based SAP HANA Development Tools
2.2.1.5.1 Design-Time Application Artifacts
The design-time building blocks of your SAP HANA applications have a mandatory file extension, for example, .hdbtable (design-time table definition) or .hdbview (design-time SQL-view definition).
In SAP HANA, application artifacts have a mandatory file extension, which is used to determine the Repository tools required to parse the contents of the design-time artifact on activation. The following tables list the most commonly used building blocks of an SAP HANA application; the information provided shows any mandatory file extension and, if appropriate, indicates where to find more information concerning the context in which the object can be used.
Design-time Application Building Blocks
File Extension Object Description
.aflpmml Procedure A file used by the application function modeler to store details of a procedure defined using application functions in the Predictive Analysis Library * (PAL) or Business Function Library * (BFL). Using the AFM also generates a .diagram and a .aflmodel file.
.analyticview Analytic view A file containing a design-time definition of an analytic view; the view can be referenced in an OData service definition.
.attributeview Attribute view A file containing a design-time definition of an attribute view; the view can be referenced in an OData service definition.
.calculationview Calculation view A file containing a design-time definition of an calculation view; the view can be referenced in an OData service definition.
.hdbdd CDS document A file containing a design-time definition of a CDS-compliant data-persistence object (for example, an entity or a data type) using the Data Definition Language (DDL).
.hdbprocedure Procedure Replaces .procedure. A design-time definition of a database function for performing complex and data-intensive business logic that cannot be performed with standard SQL.
.hdbrole Role A file containing a design-time definition of an SAP HANA user role.
.hdbscalarfunction Scalar user-defined function
A file containing a design-time definition of a a scalar user-defined function (UDF), which is a custom function that can be called in the SELECT and WHERE clauses of an SQL statement.
.hdbschema Schema A design-time definition of a database schema, which organizes database objects into groups.
.hdbsequence Sequence A design-time definition of a database sequence, which is set of unique numbers, for example, for use as primary keys for a specific table.
SAP HANA Developer Quick Start GuideGetting Started with Application Development in XS Classic PUBLIC 87

File Extension Object Description
.hdbstructure Table type A design-time definition of a database table type using the .hdbtable syntax. Used for defining reusable table types, for example, for parameters in procedures.
.hdbsynonym Database synonym A design-time definition of a database synonym using the .hdbsynonym syntax.
.hdbtable Table A design-time definition of a database table using the .hdbtable syntax.
.hdbtablefunction Table user-defined function
A file containing a design-time definition of a table user-defined function (UDF), which is a custom function that can be called in the FROM–clause of an SQL statement.
.hdbtextbundle Resource Bundle A file for defining translatable UI texts for an application. Used in SAP UI5 applications.
.hdbti Table Import definition A table-import configuration that specifies which .csv file is imported into which table in the SAP HANA system.
.hdbview SQL View A design-time definition of a database view, which is a virtual table based on an SQL query.
.procedure Procedure A design-time definition of a database function for performing complex and data-intensive business logic that cannot be performed with standard SQL.
.proceduretemplate Procedure template A design-time artifact containing a base script with predefined placeholders for objects such as tables, views and columns.
.project Project An Eclipse project for developing your application or part of an application. The .project file is a design-time artifact that is stored in the SAP HANA repository.
.searchruleset Search Rule Set * A file that defines a set of rules for use with fuzzy searches. The rules help decide what is a valid match in a search.
.xsaccess Application Access File An application-specific configuration file that defines permissions for a native SAP HANA application, for example, to manage access to the application and running objects in the package.
.xsapp Application Descriptor An application-specific file in a repository package that defines the root folder of a native SAP HANA application. All files in that package (and any subpackages) are available to be called via URL.
.xsappsite Application Site A file that defines an application site
.xshttpdest HTTP destination config-uration
A file that defines details for connections to a remote destination by HTTP (or HTTPS)
.xsjob Scheduled XS job A JSON-compliant file used to define recurring tasks that run in the background (independent of any HTTP request/response process); a scheduled job can either execute a JavaScript function or call a SQLScript procedure.
.xsjs Server-Side JavaScript Code
A file containing JavaScript code that can run in SAP HANA Extended Application Services and be accessed via URL
88 PUBLICSAP HANA Developer Quick Start Guide
Getting Started with Application Development in XS Classic

File Extension Object Description
.xsjslib Server-Side JavaScript Library
A file containing JavaScript code that can run in SAP HANA Extended Application Services but cannot be accessed via URL. The code can be imported into an .xsjs code file.
.xsoauthappconfig OAuth application configuration file
A file describing high-level details of an application that enables logon to a service running on a remote HTTP destination using OAuth
.xsoauthclientconfig
OAuth client configura-tion file
A file containing detailed information about a client application that uses OAuth as the authentication mechanism for logon to a remote HTTP destination
.xsoauthclientflavor
OAuth client flavor file The corresponding OAuth flavors file for the OAuth client configu-ration
.xsodata OData Descriptor A design-time object that defines an OData service that exposes SAP HANA data from a specified end point.
.xsprivileges Application Privilege A file that defines a privilege that can be assigned to an SAP HANA Extended Application Services application, for example, the right to start or administer the application.
.xssecurestore Application secure store The design-time file that creates an application-specific secure store; the store is used by the application to store data safely and securely in name-value form.
.xssqlcc SQL Connection Config-uration
A file that enables execution of SQL statements from inside server-side JavaScript code with credentials that are different to those of the requesting user
.xswidget Widget A file that defines a standalone SAP HANA application for the purpose of integration into an application site
.xsxmla XMLA Descriptor A design time object that defines an XMLA service that exposes SAP HANA data
Caution(*) For information about the capabilities available for your license and installation scenario, refer to the Feature Scope Description for SAP HANA.
Additional Application Building Blocks
Object Description File Extension
Package A container in the repository for development objects. Packages are represented by folders.
Attribute, Analytic and Calculation View
A view created with modeling tools and designed to model a business use case.
Created with the Systems view.
Decision Table A table used to model business rules, for example, to manage data validation and quality.
Analytic Privilege A set of rules that allows users to seeing a subset of data in a table or view.
SAP HANA Developer Quick Start GuideGetting Started with Application Development in XS Classic PUBLIC 89

2.2.1.5.2 File Versions
The version history lets you view a list of file versions, compare one version of a file with another one, and revert a file to a previous version.
You can open the version history by choosing Versions from the context menu of a file. The version history is shown in the Versions panel on the right.
Compare File Versions
To compare one version of a file with another one, select the radio button of one of the file versions (referred to as the base version) and from the context menu of the other file version choose Compare with selected.
The differences in the two file versions are highlighted in a side-by-side display on the compare tab. You can switch to a unified view by choosing Toggle diff view in the Versions panel.
The difference blocks are indicated by a light blue marker on the right of the compare tab, where dark blue shows your current cursor position. You can navigate between the blocks by clicking the markers, the highlighted code lines, or using the arrows (Next diff block, Previous diff block). Additions to the code are shown in green, while deletions are shown in red.
In the side-by-side view, a line between the two panes shows the location of a change in the two files.
Revert File Version
From the context menu of the relevant file version, choose Revert to version. You can restore a previous version or a locally cached version.
Version Information
The version history provides the following information about each version:
● Version number: Available for active and inactive versions, but not for locally cached versions and GitHub versions.
● Version marker:○ Inactive version: [l]○ Locally cached version: [L]○ Deleted version: [D]○ GitHub version: [G]
● Date and time when the version was changed.● The name of the user who made the change. Depending on the version type, this is either the user’s GitHub
user name or their SAP HANA database user name.
Example
90 PUBLICSAP HANA Developer Quick Start Guide
Getting Started with Application Development in XS Classic

The example below shows the version history for a file that has active versions, an inactive version, a locally cached version, and a GitHub version. Note that the locally cached version is listed above its GitHub version, inactive version, and active versions:
Related Information
Editor SettingsStoring Source Code on GitHub [page 91]
2.2.1.6 Storing Source Code on GitHub
You can use GitHub to store and share your source code.
Prerequisites
● You have a GitHub user account.● You have created a GitHub repository.
SAP HANA Developer Quick Start GuideGetting Started with Application Development in XS Classic PUBLIC 91

Context
The SAP HANA Web-based Development Workbench allows you to push and pull changes made to your code between your SAP HANA repository and your repositories on GitHub. GitHub requires your user credentials whenever you commit changes to your GitHub repositories.
Procedure
1. Open the SAP HANA Web-based Development Workbench Editor tool.The Editor tool is available on the SAP HANA XS Web server at the following URL: http://<WebServerHost>:80<SAPHANAinstance>/sap/hana/ide/editor
2. Connect a package with a GitHub repository.a. In the Content tree, select the package that you want to connect with GitHub and from the context
menu choose Synchronize with GitHub.The Git Pane opens on the right.
b. Before you can select a GitHub repository, you need to provide your GitHub credentials:
1. In the Git Pane, choose (Edit GitHub repository connection details).2. Enter your GitHub user name, GitHub password, and GitHub email and choose OK.
NoteYou can save this information as defaults in your Editor settings. You will then be connected automatically with the specified credentials. You will still be able to choose (Edit GitHub repository connection details) to overwrite these values.
You are now connected to GitHub and can choose a repository.c. Choose a repository and branch.
1. Select a GitHub repository.2. Select a branch.3. Choose Connect to connect the selected package with the specified GitHub repository.
Your SAP HANA package is now connected to the selected repository, allowing you to fetch and commit code changes from and to the selected branch.
3. Clone the GitHub repository branch to the SAP HANA package.Under Synchronization, choose Fetch.All files contained in the repository are pulled to your SAP HANA package. In the message console you can see exactly which files have been pulled.
4. Push changes to the GitHub repository.a. Make a change to a file contained in the SAP HANA package.b. Under Synchronization, choose Commit.c. In the Commit dialog box, enter a commit description and choose Commit.
In the message console, you can see which files have been pushed to GitHub.5. Check which version of a file is currently contained in the GitHub repository.
92 PUBLICSAP HANA Developer Quick Start Guide
Getting Started with Application Development in XS Classic

To open the version history, select a file and choose Versions from the context menu.For files contained in packages for which a connection has been established to GitHub (see step 2), the top entry in the version list is marked with [G] and shows the current version of the file on GitHub, that is, when the last push to GitHub occurred.
Related Information
File Versions [page 90]Create a GitHub Repository
2.2.1.7 Maintaining Application Security
As part of the application-development process, you must decide how to provide access to the applications you develop. Application access includes security-related matters such as authentication methods and communication protocols
In addition to the features and functions you can enable with keywords in the .xsaccess file, SAP HANA Extended Application Services (SAP HANA XS) provides a dedicated SAP HANA XS administration tool that is designed to help you configure and maintain the authentication mechanism used to control access to the applications you develop. The SAP HANA XS Administration Tool enables you to configure the following runtime elements for an application:
● SecurityChoose the security level you want to set to provide access to the application. For example, you can expose the application with/without requiring authentication (public/private) and force the application to accept only requests that use SSL/HTTPS.
● AuthenticationSelect an authentication type to use when checking user credentials before authorizing access to an application, for example: form-based authentication (with user name and password), SAML (SSO with Security Assertion Markup Language), SAP logon tickets...
Related Information
Set up Application Security [page 47]Application SecurityApplication Authentication
SAP HANA Developer Quick Start GuideGetting Started with Application Development in XS Classic PUBLIC 93

2.2.1.7.1 Set up Application Security
To restrict access to the applications you develop, you must configure the application to work with particular authentication methods and communication protocols.
Prerequisites
To perform the steps in this task, you must ensure the following prerequisites are met:
● You have access to an SAP HANA system● You have the privileges granted in the following SAP HANA XS user roles:
○ sap.hana.xs.admin.roles::RuntimeConfAdministrator
Context
You must specify whether or not to expose application content, which authentication method is used to grant access to the exposed content, and what content is visible.
Procedure
1. Start the SAP HANA XS Administration Tool.The tool is available on the SAP HANA XS Web server at the following URL: http://<WebServerHost>:80<SAPHANAinstance>/sap/hana/xs/admin/.
NoteIn the default configuration, the URL redirects the request to a logon screen, which requires the credentials of an authenticated SAP HANA database user to complete the logon process. To ensure access to all necessary features, the user who logs on should have the SAP HANA XS role sap.hana.xs.admin.roles::RuntimeConfAdministrator.
2. Select the security options your applications use.You can setup the following application-related security options:
NoteSecurity settings are automatically inherited by applications further down the application hierarchy. However, you can override the inherited security settings at any application level by modifying the settings for a particular application. Applications below the application with the modified security settings inherit the new, modified settings.
a. Use the Public (no authentication required) option to specify if applications require user authentication to start.
94 PUBLICSAP HANA Developer Quick Start Guide
Getting Started with Application Development in XS Classic

○ DisabledThis is the default setting. In disabled mode, Form-based authentication and Basic authentication options are enabled automatically in the Authentication screen area.
○ EnabledIf you enable the Public option , no authentication is required to start an application; the Authentication screen area is hidden, and you cannot select any authentication-method options.
b. Use the Force SSL option to specify if client requests must use secure HTTP (HTTPS).○ Disabled
This is the default setting. With Force SSL disabled, the application returns a response to all requests (both HTTP and HTTPS).
○ EnabledIf you enable the Force SSL option , requests from browsers using standard HTTP are refused.
NoteEnabling the Force SSL option only ensures that the selected application refuses any request that does not use HTTPS; it does not set up the Secure Sockets Layer (SSL) protocol for you. The SAP HANA administrator must configure the SAP Web Dispatcher to accept (and forward) HTTPS requests in addition.
Related Information
SAP HANA XS Application SecuritySet up Application Authentication [page 49]SAP HANA XS Application AuthenticationThe Application-Access File [page 70]
2.2.1.7.2 Set up Application Authentication
To restrict access to the applications you develop, you must configure the application to work with particular authentication methods and communication protocols.
Prerequisites
To perform the steps in this task, you must ensure the following prerequisites are met:
● You have access to an SAP HANA system● You have the privileges granted in the following SAP HANA XS user roles:
○ sap.hana.xs.admin.roles::RuntimeConfAdministrator
SAP HANA Developer Quick Start GuideGetting Started with Application Development in XS Classic PUBLIC 95

Context
Before you define which authentication methods an application uses to grant access to the application content, you must use the application security tools to define whether or not to expose application content and, if so, which content to expose. SAP HANA XS enables you to define multiple authentication methods to verify the credentials of users who request access to the exposed content; multiple authentication methods are considered according to a specific order of priority. For example, if the first authentication method fails, SAP HANA tries to authenticate the user with the next authentication method specified. To configure the authentication method an application uses to verify user credentials, perform the following steps:
Procedure
1. Start the SAP HANA XS Administration Tool.The tool is available on the SAP HANA XS Web server at the following URL: http://<WebServerHost>:80<SAPHANAinstance>/sap/hana/xs/admin/.
NoteIn the default configuration, the URL redirects the request to a logon screen, which requires the credentials of an authenticated SAP HANA database user to complete the logon process. To ensure access to all necessary features, the user who logs on should have the SAP HANA XS role sap.hana.xs.admin.roles::RuntimeConfAdministrator.
2. Select the security options your applications use.If you have already set the application security level, you can safely skip this step. You can setup the following application-related security options:
NoteSecurity settings are automatically inherited by applications further down the application hierarchy. However, you can override the inherited security settings at any application level by modifying the settings for a particular application. Applications below the application with the modified security settings inherit the new, modified settings.
a. Use the Public (no authentication required) option to specify if applications require user authentication to start.○ Disabled
This is the default setting. In disabled mode, Form-based authentication and Basic authentication options are enabled automatically in the Authentication screen area.
○ EnabledIf you enable the Public option , no authentication is required to start an application; the Authentication screen area is hidden, and you cannot select any authentication-method options.
b. Use the Force SSL option to specify if client requests must use secure HTTP (HTTPS).○ Disabled
This is the default setting. With Force SSL disabled, the application returns a response to all requests (both HTTP and HTTPS).
○ Enabled
96 PUBLICSAP HANA Developer Quick Start Guide
Getting Started with Application Development in XS Classic

If you enable the Force SSL option , requests from browsers using standard HTTP are refused.
NoteEnabling the Force SSL option only ensures that the selected application refuses any request that does not use HTTPS; it does not set up the Secure Sockets Layer (SSL) protocol for you. The SAP HANA administrator must configure the SAP Web Dispatcher to accept (and forward) HTTPS requests in addition.
3. Select the authentication method your applications must use.Authentication settings are automatically inherited by applications further down the application hierarchy. However, you can override the inherited authentication settings at any application level by modifying the settings for a particular application. Applications below the application with the modified authentication settings inherit the new, modified settings.
NoteEnabling an application-security option (for example, SAML2 or X509) only ensures that the selected application uses the enabled authentication method when required; it does not perform any setup operation for the authentication method itself. The SAP HANA administrator must maintain the selected authentication infrastructure (SAML2, X509, or SAP logon tickets) in an additional step.
You can choose any selection of the following application-related authentication methods; if you enable multiple authentication methods for your application, a priority applies depending on whether the application logon is interactive or non-interactive:
a. Enable the SAML2 option.The SAP HANA administrator must already have configured the authentication infrastructure, for example, to enable the creation of SAML2 assertions to permit SSO in Web browsers.
b. Enable the X509 Authentication optionThe SAP HANA administrator must already have configured the appropriate authentication infrastructure, for example, to enable users to be authenticated by client certificates signed by a trusted Certification Authority (CA).
c. Enable the SAP logon ticket optionThe SAP HANA administrator must already have configured the appropriate authentication infrastructure, for example, to enable users to be be authenticated by a logon ticket that is issued when the same user logs on to an SAP system that is configured to create logon tickets (for example, the SAP Web Application Server or Portal).
d. Enable the Form-based authentication optionIf the Public security option is disabled, the Form-based authentication option is enabled by default.
e. Enable the Basic authentication optionIf the Public security option is disabled, the Basic authentication option is enabled by default.
Related Information
Set up Application Authentication [page 47]SAP HANA XS Application SecuritySAP HANA XS Application Authentication
SAP HANA Developer Quick Start GuideGetting Started with Application Development in XS Classic PUBLIC 97

The Application-Access File [page 70]
2.2.1.8 Maintaining HTTP Destinations
An HTTP destination defines connection details for services running on specific hosts whose details you want to define and distribute. The definition can be referenced by an application.
Context
If you want to configure an SAP HANA XS application to access data on a specific server that offers a specific service, for example, a service that is only available outside your network, it is recommended to configure the HTTP connection parameters in an HTTP destination file that you store locally as a design-time artifact. You can use an HTTP destination to call an external resource directly from a server-side JavaScript application. You can also use an HTTP destination when configuring a transport route, for example, to automate the process of exporting a delivery unit from one system and importing it into another. To create an HTTP destination configuration for an SAP HANA XS application, you must perform the following high-level steps.
Procedure
1. Create a package for the SAP HANA XS application that will use the HTTP destination you define.2. Define the details of the HTTP destination.
You define the details of an HTTP destination in a configuration file and using a specific syntax. The configuration file containing the details of the HTTP destination must have the file extension .xshttpdest and be located in the same package as the application that uses it or one of the application's subpackages.
3. Define any extensions to the HTTP destination configuration.You can extend a configured HTTP destination, for example, by providing additional details concerning proxy servers and logon details. The details concerning the extensions to the HTTP destination must be specified in a separate configuration file. Like the original HTTP destination that the extension modifies, the configuration-file extension must have the file extension .xshttpdest and be located in the same package as the HTTP destination configuration file it extends and the application that uses it.
4. Check the HTTP destination configuration using the SAP HANA XS Administration Tool.The SAP HANA XS Administration Tool is available on the SAP HANA XS Web server at the following URL: http://<WebServerHost>:80<SAPHANAinstance>/sap/hana/admin/cockpit.
NoteAccess to details of HTTP destinations in the SAP HANA XS Administration Tool requires the credentials of an authenticated database user and one of the following SAP HANA roles:○ HTTPDestViewer○ HTTPDestAdministrator
98 PUBLICSAP HANA Developer Quick Start Guide
Getting Started with Application Development in XS Classic

Related Information
Create an HTTP Destination ConfigurationExtend an HTTP Destination ConfigurationHTTP Destination Configuration Syntax [page 101]
2.2.1.8.1 Tutorial: Create an HTTP Destination
Create an HTTP destination defining connection details for services running on specific hosts. The definition can be referenced by an application.
Prerequisites
● You have the privileges granted by the role sap.hana.ide.roles::EditorDeveloper; this role is included in the parent role sap.hana.ide.roles::Developer.
● You have been assigned the HTTPDestViewer or HTTPDestAdministrator user role.
Context
An HTTP destination defines connection details for services running on specific hosts whose details you want to define and distribute. HTTP destination configurations are defined in a text file and can be referenced by an application. You can also provide more (or modified) connection details in additional files called “extensions”; values specified in extensions overwrite values specified in the original HTTP destination configuration.
Procedure
1. Open the SAP HANA Web-based Development Workbench Editor tool.The Editor tool is available on the SAP HANA XS Web server at the following URL: http://<WebServerHost>:80<SAPHANAinstance>/sap/hana/ide/editor
2. Create the application package structure:a. From the context menu of the Content folder, choose Create Application.b. Choose the Empty application (with XSAccess and XSApp) template.c. Enter a package name, for example, testApp, and choose Create.
The system creates the index.html, .xsaccess, and .xsapp files.d. Delete the index.html file.
3. Define the details of the HTTP destination.
SAP HANA Developer Quick Start GuideGetting Started with Application Development in XS Classic PUBLIC 99

You define the details of an HTTP destination in a configuration file that requires a specific syntax. The configuration file containing the details of the HTTP destination must have the file extension .xshttpdest.
CautionYou must place the HTTP destination configuration and the XSJS application that uses it in the same application package. An application cannot reference an HTTP destination configuration that is located in another application package.
a. From the context menu of the testApp folder, choose New File .b. Enter a file name, for example, yahoo.xshttpdest, and choose Create.c. Enter the following code in the new file yahoo.xshttpdest.
host = "download.finance.yahoo.com"; port = 80; description = "my stock-price checker";useSSL = false;pathPrefix = "/d/quotes.csv?f=a";authType = none;proxyType = none;proxyHost = "";proxyPort = 0; timeout = 0;
d. If necessary, set proxyType to http and enter your proxy host and port number.e. Save the file.
4. View the activated HTTP destination.You can use the SAP HANA XS Administration Tool to check the contents of an HTTP destination configuration.
NoteTo make changes to the HTTP Destination configuration, you must use a text editor, save the changes and reactivate the file.
To start the SAP HANA XS Administration Tool, select the yahoo.xshttpdest file and choose (Maintain Credentials) in the toolbar. The details of the HTTP destination are displayed.If you are using the Web-based XS Administration Tool, you can only make limited changes to the displayed HTTP destination configuration, as follows:○ Save
Commit to the repository any modifications made to the HTTP destination configuration in the current session.
○ EditDisplay details of the corresponding extension to the selected HTTP destination configuration. If no extension exists, the Edit option is not available.
○ ExtendEnables you to create an extension to the selected XS HTTP destination and associate the extension with another (new or existing) package.
100 PUBLICSAP HANA Developer Quick Start Guide
Getting Started with Application Development in XS Classic

NoteThis option is only available if the selected HTTP destination is provided as part of a delivery unit, for example, as a destination template.
Related Information
HTTP Destination Configuration Syntax [page 101]The HTTP Destination Extension [page 109]
2.2.1.8.2 HTTP Destination Configuration Syntax
An HTTP destination defines connection details for services running on specific hosts whose details you want to define and distribute. Syntax rules apply to the contents of the HTTP destination configuration are checked when you activate the configuration in the repository.
Example: The .xshttpdest Configuration File
The following example shows all possible keyword combinations in the SAP HANA XS application-access (.xshttpdest) file.
NoteIn the form shown below, the .xshttpdest file is not a working model; it is used to illustrate the syntax for all possible options.
host = "download.finance.yahoo.com"; port = 80; //All of the following keywords are optional description = ""; useSSL = false; sslAuth = client; sslHostCheck = true; pathPrefix = "/d/quotes.csv?f=a"; authType = none; samlProvider = ""; samlACS = "header"; samlAttributes = ""; samlNameId = ["email"]; proxyType = none; proxyHost = ""; //in-line comments are allowed proxyPort = 0; timeout = 0; remoteSID = "Q7E"; remoteClient = "007"; oAuthAppConfigPackage = "sap.hana.test"; oAuthAppConfig = "abapTest";
SAP HANA Developer Quick Start GuideGetting Started with Application Development in XS Classic PUBLIC 101

When you are defining the HTTP destination, bear in mind the following important syntax rules:
● A semi-colon (;) is required at the end of each line in the HTTP destination configuration, including the last line in the file.
● String values must be wrapped in quotes (""), for example:host = "download.finance.yahoo.com";
NoteThe host and port keywords are mandatory; all other keywords are optional.
host
host = "download.finance.yahoo.com";
The host keyword is mandatory: it enables you to specify the hostname of the HTTP destination providing the service or data you want your SAP HANA XS application to access.
port
port = 80;
The port keyword is mandatory; it enables you to specify the port number to use for connections to the HTTP destination hosting the service or data you want your SAP HANA XS application to access.
description
description = "my short description of the HTTP connection";
The optional keyword description enables you to provide a short description of the HTTP destination you want to configure. If you do not want to provide a description, include the description but leave the entry between the quotes empty, for example, “”.
useSSL
useSSL = [true | false];
The optional keyword useSSL is of type Boolean and enables you to specify if the outbound connections between SAP HANA XS and the HTTP destination is secured with the Secure Sockets Layer (SSL) protocol (HTTPS).
102 PUBLICSAP HANA Developer Quick Start Guide
Getting Started with Application Development in XS Classic

NoteSetting this option does not configure SSL; if you want to use SSL to secure connections to the configured destination, you must ensure that SAP HANA is already set up to enable secure outbound connections using SSL.
If useSSL = true, you can set the authentication type with the keyword sslAuth. You can also use the sslHostCheck to enable a check which ensures that the certificate used for authentication is valid (matches the host).
sslAuth
sslAuth = [client | anonymous];
If useSSL = true, you can use the keyword sslAuth to set the authentication type. The following values are permitted:
● client(Default setting). You must create a TRUST store entry in the SAP HANA XS Admin Tool's Trust manager (or use an existing one that is known to the HTTP destination configuration) and maintain the trust relationship with the SSL server, for example, by adding a certificate to the trust store that is used for the authentication process.
● anonymousA built-in key is used for SSL encryption; no TRUST store is needed.. No authentication via SSL is possible.
sslHostCheck
sslHostCheck = [true | false];
If useSSL = true, you can use the keyword sslHostCheck to enable a check which ensures that the certificate used for authentication is valid (matches the host). The following values are permitted:
● true(Default setting). The SSL certificate subject must match the host name. For example, if SSL server certificate CN=server1.acme.com, then the host parameter must be server1.acme.com. If there is no match, SSL terminates.
● falseNo host check is performed. Note that if the SSL server certificate is CN=server1.acme.com, and you use “localhost” as a connection parameter (because this certificate is installed on its own server), then this works with sslHostCheck deactivated (sslHostCheck=false).
SAP HANA Developer Quick Start GuideGetting Started with Application Development in XS Classic PUBLIC 103

pathPrefix
pathPrefix = "";
The optional keyword pathPrefix enables you to specify a text element to add to the start of the URL used for connections to the service specified in the HTTP destination configuration. For example, pathPrefix = "/d/quotes.csv?f=a" inserts the specified path into the URL called by the connection.
authType
authType = [none | basic | AssertionTicket | SamlAssertion | SamlAssertionPropagation];
The optional keyword authType enables you to specify the authentication method that must be used for connection requests for the service located at the HTTP destination specified in the configuration, for example, “basic”, which requires users to provide a user name and password as authentication credentials. Permitted values for the authType are “none”, “basic”, and “AssertionTicket”. If no authentication type is specified, the default setting “none” applies.
The AssertionTicket option is for use with XSJS applications that want to enable access to HTTP services running on remote SAP servers using single sign-on (SSO) with SAP assertion tickets. If the AssertionTicket option is enabled, a user with administration privileges in SAP HANA must use the parameter saplogontickettruststore to specify the location of the trust store containing the assertion tickets.
Tip
The saplogontickettruststore parameter can be set in [indexserver | xsengine].ini authenticationsaplogontickettruststore .
If authType = AssertionTicket is set you also need to set values for the keywords remoteSID and remoteclient.
For authType = SamlAssertion;, you must also set the subproperties samlProvider, samlACS, samlAttributes, and samlNameId.
samlProvider
samlProvider = "";
If you set authType = SamlAssertion, you must also set the subproperty samlProvider, which enables you to specify the entityID of the remote SAML party.
104 PUBLICSAP HANA Developer Quick Start Guide
Getting Started with Application Development in XS Classic

samlACS
samlACS = "header";
If you set authType = SamlAssertion, you must also set the subproperty samlACS, which enables you to specify the way in which SAML assertions or responses are sent. The following values are supported:
● "" (empty string)A SAML response (including the SAML assertion) is sent to the HTTP destination end point as a POST parameter.
● /saml/acs/ssoIf you provide a URL path, the SAML response (including the SAML Assertion) is sent to the specified endpoint in an additional Web connection to establish the authentication context (session).When the outbound communication is being established, there are two connections: first to the specified end point (for example, /saml/asc/sso) and then to the destination service end point.
● headerThe SAML response (including the SAML assertion) is sent in the HTTP header authorization with the following syntax: Authorization: SAML2.0 <base-64-saml-response>.
● parameter:assertionThe SAML Assertion is sent as a POST parameter. This flavor is needed for JAM integrations.
samlAttributes
samlAttributes = "name1=<property>&name2=<property>";
If you set authType = SamlAssertion, you must also set the subproperty samlAttributes, which enables you to specify additional attributes for the SAML Assertion.
samlNameId
samlNameId = ["email", "unspecified"];
If you set authType = SamlAssertion, you must also set the subproperty samlNameId, which enables you to define a list of name-ID mappings. The following values are supported:
● email● unspecified
For example, if you have an e-mail maintained in SAP HANA User Self Services (USS), the SAML assertion contains your e-mail address; if you do not have a e-mail address maintained in SAP HANA USS, the mapping is “unspecified”.
SAP HANA Developer Quick Start GuideGetting Started with Application Development in XS Classic PUBLIC 105

proxyType
proxytype = none;
The optional keyword proxyType enables you to specify if a proxy server must be used to resolve the host name specified in the HTTP destination configuration file, and if so, which type of proxy. The following values are allowed:
● none● http● socks
CautionproxyType replaces and extends the functionality previously provided with the keyword useProxy. For backward compatibility, the useProxy is still allowed but should not be used any more.
To define the proxy host and the port to connect on, use the keywords proxyHost and proxyPort respectively.
If you want to include the proxy-related information in a separate configuration (a so-called extension to the original HTTP destination configuration), you must set proxyType = none in the original HTTP destination configuration. In the HTTP destination extension that references and modifies the original HTTP destination, you can change the proxy setting to proxyType = http. You must then provide the corresponding host name of the proxy server and a port number to use for connections.
proxyHost
proxyHost = "";
If you use the keyword useProxy = true to specify that a proxy server must be used to resolve the target host name specified in the HTTP destination configuration, you must use the proxyHost and proxyPort keywords to specify the fully qualified name of the host providing the proxy service (and the port number to use for connections). The name of the proxy host must be wrapped in quotes, as illustrated in the following example,
proxyHost = "myproxy.hostname.com"
proxyPort
proxyPort = 8080;
If you use the keyword useProxy = true to indicate that a proxy server must be used to resolve the host name specified in the HTTP destination configuration, you must also use the proxyPort keyword (in combination with proxyHost =) to specify the port on which the proxy server accepts connections.
106 PUBLICSAP HANA Developer Quick Start Guide
Getting Started with Application Development in XS Classic

timeout
timeout = -1;
The optional keyword timeout enables you to specify for how long (in milliseconds) an application tries to connect to the remote host specified in the HTTP destination configuration, for example, timeout = 5000; (5 seconds). By default, the timeout interval is set to -1, which means that there is no limit to the time required to connect to the server specified in the HTTP destination configuration. In the default setting, the application keeps trying to connect to the destination server either until the server responds, however long this takes, or the underlying request-session timeout (300 seconds) is reached. The default setting (-1) is intended to help in situations where the destination server is slow to respond, for example, due to high load.
remoteSID
remoteSID = "Q7E";
The optional keyword remoteSID enables you to specify the SID of a remote ABAP system. You use this keyword in combination with the remoteClient keyword, for example, to enable an application to log on to an ABAP system that is configured to provide SAP assertion tickets. If the XSJS application service requires access to remote services, you can create an HTTP destination that defines the logon details required by the remote ABAP system and specifies SSO with SAP assertion tickets as the logon authentication method.
NoteIn the XS Administration Tool, the value specified in an HTTP destination configuration file with the remoteSID keyword is displayed in the SAP SID field in the AUTHENTICATION section of the application's runtime configuration. The SAP SID option is only available if you select SAP Assertion Ticket as the authentication type in the application's runtime configuration.
remoteClient
remoteClient = "007";
The optional keyword remoteClient enables you to specify the client number to use when logging on to a remote ABAP system. You use this keyword in combination with the remoteSID keyword, for example, to enable an application to logon to an ABAP system that is configured to provide SAP assertion tickets. If the XSJS application service requires access to remote services, you can create an HTTP destination that defines the logon details required by the remote ABAP system and specifies SSO with SAP assertion tickets as the logon authentication method.
NoteIn the XS Administration Tool, the value specified in an HTTP destination configuration file with the remoteClient keyword is displayed in the SAP Client field in the AUTHENTICATION section of the
SAP HANA Developer Quick Start GuideGetting Started with Application Development in XS Classic PUBLIC 107

application's runtime configuration. The SAP Client option is only available if you select SAP Assertion Ticket as the authentication type in the application's runtime configuration.
oAuthAppConfigPackage
oAuthAppConfigPackage = "sap.hana.test";
Use the optional keyword oAuthAppConfigPackage enables you to specify the location of the package that contains the oAuth application configuration to be used by an HTTP destination configuration.
oAuthAppConfig
oAuthAppConfig = "abapTest";
Use the optional keyword oAuthAppConfig enables you to specify the name of the oAuth application configuration to be used by an HTTP destination configuration. The OAuth application configuration is a file describing the application-specific OAuth parameters that are used to enable access to a resource running on a remote HTTP destination. The OAuth application configuration is defined in a design-time artifact with the mandatory file suffix .xsoauthappconfig; the configuration file must be specified using the JSON format.
modifies
modifies pkg.path.testApp:yahoo.xshttpdest;
The keyword modifies can only be used in an HTTP extension file and enables you to reference an existing HTTP destination (or extension) whose settings you want to further extend or modify. The settings in an HTTP destination extension overwrite any identical settings in the original HTTP destination configuration. The HTTP destination configuration referenced by the modifies keyword must already exist.
NoteThe HTTP destination extension does not have to be tied to a particular XSJS application; it can be located in any application package or subpackage. For this reason, you must include the full package path to the HTTP destination extension when using the modifies keyword.
Related Information
The HTTP Destination ConfigurationThe HTTP Destination Extension [page 109]
108 PUBLICSAP HANA Developer Quick Start Guide
Getting Started with Application Development in XS Classic

2.2.1.8.3 The HTTP Destination Extension
An HTTP destination defines connection details for services running on specific hosts whose details you want to define and distribute. An extension to an HTTP destination provides additional information or modifies values set in the original configuration.
You can use one or more extension to an HTTP destination configuration; the extensions include additions to the original settings or modifications to the values set in the original configuration. For example, you could include basic configuration settings in an HTTP destination and provide details of any required proxy settings in a separate, so-called “extension”.
You define an extension to an HTTP destination configuration in a text file that contains the details of the modifications you want to apply to the connection details for the original HTTP destination. The HTTP destination extension uses a mandatory syntax comprising a list of keyword=value pairs, for example, host = "download.finance.myhoo.com";. The same syntax rules apply for the basic HTTP destination configuration and any extensions. Both files must also have the file suffix .xshttpdest, for example, myHTTPdestination.xshttpdest or myHTTPextension.xshttpdest.After creating and saving the HTTP destination extension, you must activate it in the SAP HANA repository.
NoteThe HTTP destination extension does not have to be tied to a particular XSJS application; it can be located in any application package or subpackage. For this reason, you must include the full package path to the HTTP destination extension.
The following configuration file for the HTTP destination yahooProxy.xshttpdest illustrates how to modify the proxy settings specified in the HTTP destination yahoo.xshttpdest, located in the application package pkg.path.testApp.
modifies pkg.path.testApp:yahoo.xshttpdest; proxyType = http;proxyHost = "proxy.host.name.com"; proxyPort = 8080;
NoteFor backward compatibility, the keyword userProxy still works; however, it has been replaced with the keyword proxyType, which takes the values: [none | http | socks].
After activation, you can view the details of the new HTTP destination extension using the SAP HANA XS Administration tool.
NoteAccess to details of HTTP destinations in the SAP HANA XS Administration Tool requires the credentials of an authenticated database user and one of the following SAP HANA roles:
● HTTPDestViewer● HTTPDestAdministrator
SAP HANA Developer Quick Start GuideGetting Started with Application Development in XS Classic PUBLIC 109

2.2.1.8.4 Tutorial: Create an OAuth Configuration Package
Create the files required to enable a service that uses OAuth to authorize access to a resource running on a remote HTTP destination.
Prerequisites
● An HTTP destination configuration (.xshttpdest)● Your SAP HANA database user has the permissions granted by the following roles:
○ RuntimeConfAdministrator○ HTTPDestAdministrator○ oAuthAdmin
Context
An OAuth configuration package is a collection of configuration files that define the details of how an application uses OAuth to enable logon to a resource running on a remote HTTP destination.
An HTTP destination defines connection details for services running on specific hosts whose details you want to define and distribute. Additional syntax rules that apply to the contents of the HTTP destination configuration are checked when you activate the configuration in the repository.
An OAuth configuration requires the following dependent configuration files:
● OAuth application configuration (<filename>.xsoauthappconfig)Describes the configuration of the OAuth application parameters, including the name and package location of the associated client configuration and any mandatory or optional scopes.
● OAuth client configuration (<filename>.xsoauthclientconfig)Describes the configuration of the OAuth client, including the client ID, the client authentication type, and the name and package location of the associated client flavor.
● OAuth client flavor configuration (<filename>.xsoauthclientflavor)Describes the OAuth client flavor setup used by the XS OAuth client configuration, including the protocol steps and the parameters to be set. Note that normally you do not need to change the OAuth client flavor configuration.
TipYou connect the OAuth configuration to the HTTP destination configuration in the HTTP destination's runtime configuration. Access to the runtime configuration tools requires the permissions included in an administrator role.
110 PUBLICSAP HANA Developer Quick Start Guide
Getting Started with Application Development in XS Classic

Procedure
1. Open the SAP HANA Web-based Development Workbench Editor tool.The Editor tool is available on the SAP HANA XS Web server at the following URL: http://<WebServerHost>:80<SAPHANAinstance>/sap/hana/ide/editor
2. Create an OAuth application configuration.
You need to create the base configuration for your OAuth application in a design-time file with the mandatory file-extension .xsoauthappconfig. The application configuration is stored in the SAP HANA repository and must be activated to create the corresponding catalog objects.
a. Create the design-time file that contains your OAuth application configuration, for example, oauthDriveApp.xsoauthappconfig.
b. Define the details of the new OAuth application configuration, as follows:
{ "clientConfig" : "sap.hana.xs.oAuth.lib.providerconfig.providermodel:abap_ac", "mandatoryScopes" : ["OAUTH2_TEST_SCOPE1", "OAUTH2_TEST_SCOPE2"], "description" : "ABAP Testapplication for OAuth" }
NoteIn this example, the OAuth client configuration is located in the package sap.hana.xs.oAuth.lib.providerconfig.providermodel; you can change the path to suit your own requirements.
3. Create an OAuth client configuration (optional).
You create the client configuration for your OAuth application in a design-time file with the mandatory file-extension .xsoauthclientconfig. You can either use an existing client configuration from the package sap.hana.xs.oAuth.lib.providerconfig.providermodel or create your own client configuration. The application configuration is stored in the SAP HANA repository and must be activated to create the corresponding catalog objects.
a. Create the design-time file that contains your OAuth client configuration, for example, ABAPv1.xsoauthclientconfig.
b. Define the details of the new OAuth client configuration, as follows:
{ "clientFlavor" : "sap.hana.xs.oAuth.lib.providerconfig.providermodel:abap_ac", "clientID" : "<OAuth ClientId registered at ABAP>", "clientAuthType" : "basic", "authorizationEndpointURL" : "/sap/bc/sec/oauth2/authorize", "tokenEndpointURL" : "/sap/bc/sec/oauth2/token", "revocationEndpointURL" : "/sap/bc/sec/oauth2/revoke", "redirectURL" : "<External_XS_HOST>:<PORT>/sap/hana/xs/oAuth/lib/runtime/tokenRequest.xsjs", "flow" : "authCode", "scopeReq" : "maxScopes", "description" : "OAuth Client for SAP Application Server ABAP - Authorization Code Flow" }
4. Create the OAuth client flavor (optional).
SAP HANA Developer Quick Start GuideGetting Started with Application Development in XS Classic PUBLIC 111

The OAuth client flavor file is a design-time artifact that provides details of the OAuth protocol for a client application which uses the services provided by a corresponding OAuth application. The OAuth client flavor steps are defined in a design-time artifact with the mandatory file suffix .xsoauthclientflavor; the configuration file must be specified using the JSON format.
TipYou do not have to create the OAuth client flavor from scratch; SAP HANA provides some example OAuth client flavors which you can use. The example OAuth client flavors are located in the following package: sap.hana.xs.oAuth.lib.providerconfig.providermodel.
The following example shows the required format and syntax for the contents of the .xsoauthclientflavor artifact:
{ "parameters":[ { "flavorStep":"1Aut", "paramLocation":"uri", "paramName":"client_id", "paramValue":"client_id", "valueType":"eval", "paramMandatory":"true" },{ "flavorStep":"2Gra", "paramLocation":"head", "paramName":"Authorization", "paramValue":"Basic Authentication", "valueType":"sec", "paramMandatory":"true" },{ "flavorStep":"3Prc", "paramLocation":"head", "paramName":"Bearer", "paramValue":"access_token", "valueType":"sec", "paramMandatory":"true" },{ "flavorStep":"4Ref", "paramLocation":"head", "paramName":"Authorization", "paramValue":"Basic Authentication", "valueType":"sec", "paramMandatory":"true" },{ "flavorStep":"5Rev", "paramLocation":"para", "paramName":"token", "paramValue":"access_token", "valueType":"sec", "paramMandatory":"true" }, ] }
NoteThe example above is not complete; it is intended for illustration purposes only.
5. Activate all the XS OAuth configuration files.Activating the configuration files creates the corresponding catalog objects.
6. Add the OAuth configuration to the runtime configuration of the HTTP destination configuration that requires it.
To start the SAP HANA XS Administration Tool, select the xshttpdest file and choose (Maintain Credentials) in the toolbar. The details of the HTTP destination are displayed.a. Choose the OAuth Details tab.
b. Choose Edit Browse OAuth App Configs .c. Select an OAuth application configuration from the list displayed.
The name of the application configuration you choose and the absolute path to the package where it is located are displayed in the appropriate fields, for example:○ OAuth App Config Package: sap.hana.test○ OAuth App Config Name: abapTest
NoteThe values displayed here must also be present in the HTTP destination configuration to which the OAuth configuration applies.
112 PUBLICSAP HANA Developer Quick Start Guide
Getting Started with Application Development in XS Classic

For example, the HTTP destination corresponding to the OAuth configuration you are setting up in this task must also contain entries that describe the name and package location of the OAuth application configuration to use:
oAuthAppConfigPackage = "sap.hana.test"; oAuthAppConfig = "abapTest"; d. Navigate to the OAuth client configuration and set the client secret.e. Choose Save to update the runtime confguration for the HTTP destination.
Related Information
OAuth Application Configuration Syntax [page 113]OAuth Client Configuration Syntax [page 115]OAuth Client Flavor Syntax [page 120]
2.2.1.8.4.1 OAuth Application Configuration Syntax
The format and syntax required in a design-time artifact describing an OAuth application configuration.
The OAuth application configuration is a file describing the application-specific OAuth parameters that are used to enable access to a resource running on a remote HTTP destination. The OAuth application configuration is defined in a design-time artifact with the mandatory file suffix .xsoauthappconfig; the configuration file must be specified using the JSON format.
NoteThe following code example is not a working example; it is provided for illustration purposes, only.
{ "clientConfig":"sap.hana.xs.oAuth.lib.providerconfig.providermodel:abap_ac", "description":"ABAP test application for OAuth", "mandatoryScopes":["OAUTH2_TEST_SCOPE1", "OAUTH2_TEST_SCOPE2"], "optionalScopes":["OAUTH2_TEST_SCOPE3", "OAUTH2_TEST_SCOPE4"], "modifies":"sap.hana.test:abapTest" }
An OAuth configuration requires the following dependent configuration files:
● OAuth application configuration (.xsoauthappconfig)● OAuth client configuration (.xsoauthclientconfig)● OAuth client flavor configuration (.xsoauthclientflavor)
SAP HANA Developer Quick Start GuideGetting Started with Application Development in XS Classic PUBLIC 113

clientConfig
Use the clientConfig keyword to specify the fully qualified name of the associated xsoauthclientconfig artifact, using the format <path.to.package>:<XSOauthClientConfigObjectName>.
"clientConfig":"sap.hana.xs.oAuth.lib.providerconfig.providermodel:abap_ac",
NoteIt is mandatory to specify the name and location of the package containing the associated OAuth client configuration.
description
Use the description keyword to provide an optional short description of the contents of the OAuth application configuration.
"description":"ABAP test application for OAuth",
mandatoryScopes
Use the mandatoryScopes keyword to specify one or more (in an array) of strings describing the mandatory permissions requested by the client.
"mandatoryScopes":["OAUTH2_TEST_SCOPE1", "OAUTH2_TEST_SCOPE2"],
optionalScopes
Use the optionalScopes keyword to specify one or more (in an array) of strings describing the optional permissions to be used by the client.
"optionalScopes":["OAUTH2_TEST_SCOPE3", "OAUTH2_TEST_SCOPE4"],
modifies
Use the modifies keyword to indicate that the current XS OAuth application configuration (for example, abapTest2.xsoauthappconfig is based on (and extends) another SAP HANA XS OAuth application configuration (for example, abapTest.xsoauthappconfig). You must specify the fully qualified name of the
114 PUBLICSAP HANA Developer Quick Start Guide
Getting Started with Application Development in XS Classic

associated SAP HANA XS OAuth application configuration artifact (xsoauthappconfig), using the format <path.to.package>:<ObjectName>.
"modifies":"sap.hana.test:abapTest.xsoauthappconfig",
Related Information
OAuth Client Configuration Syntax [page 115]OAuth Client Flavor Syntax [page 120]Tutorial: Create an OAuth Configuration Package
2.2.1.8.4.2 OAuth Client Configuration Syntax
The format and syntax required in a design-time artifact describing the OAuth client configuration.
The OAuth client configuration is a file describing details of the client parameters for an application which uses the services provided by a corresponding OAuth application that enables access to a resource running on a remote HTTP destination. The OAuth client configuration is defined in a design-time artifact with the mandatory file suffix .xsoauthclientconfig; the configuration file must be specified using the JSON format. The following code example shows the contents of a typical OAuth client configuration.
NoteThe following code example is not a working example; it is provided for illustration purposes, only.
{ "clientFlavor":"sap.hana.xs.oAuth.lib.providerconfig.providermodel:abap_ac", "clientID":"<The OAuth ClientId you registered at ABAP>", "clientAuthType":"basic", "authorizationEndpointURL":"/sap/bc/sec/oauth2/authorize", "tokenEndpointURL":"/sap/bc/sec/oauth2/token", "revocationEndpointURL":"/sap/bc/sec/oauth2/revoke", "flow":"authCode", "description":"OAuth Client for ABAP server", "samlIssuer":"" , "redirectURL":"<HOST>:<PORT>/sap/hana/xs/oAuth/lib/runtime/tokenRequest.xsjs", "scopeReq":"maxScopes", "shared":"true", "modifies":"sap.hana.xs.oAuth.lib.providerconfig.providermodel:abap_ac" }
In this example, the OAuth client configuration is located in the package com.acme.oAuth.lib; change the path specified in clientFlavor to suit your own requirements. You will also have to change the value specified for clientID and redirectURL.
TipSAP HANA provides some example OAuth client configurations which you can use; you can find them in the following package: sap.hana.xs.oAuth.lib.providerconfig.providermodel
SAP HANA Developer Quick Start GuideGetting Started with Application Development in XS Classic PUBLIC 115

clientFlavor
Use the clientFlavor keyword to specify the fully qualified name of the associated XS OAuth client flavor configuration artifact, for example, ABAPv1.xsoauthclientfavor; you must use the format <path.to.package>:<ObjectName> (no file extension is required).
"clientFlavor":"sap.hana.xs.oAuth.lib.providerconfig.providermodel:abap_ac",
NoteIt is mandatory to specify the name and location of the package containing the associated OAuth client flavor configuration.
clientID
Use the clientID keyword to define a string that specifies the customer's ID, which is used to identify the client with the server. The clientID must be changed to suit your requirements. Typically, the client ID is obtained by registering with a specific service provider.
"clientID" : "<The OAuth ClientId you registered at ABAP>",
NoteIt is mandatory to define the clientID.
clientAuthType
Use the clientAuthType keyword to define a number that specifies the client authentication type, for example, “cert” or “basic”.
"clientAuthType" : "basic",
NoteIt is mandatory to define the clientAuthType.
The following values are permitted:
● basic (user and password)● cert (authentication by client certificate)
116 PUBLICSAP HANA Developer Quick Start Guide
Getting Started with Application Development in XS Classic

authorizationEndpointURL
Use the authorizationEndpointURL keyword to specify a string that defines the authorization endpoint. The authorization endpoint is the endpoint on the authorization server where the resource owner logs on and grants authorization to the client application.
"authorizationEndpointURL" : "/sap/bc/sec/oauth2/authorize",
NoteIt is mandatory to define the authorizationEndpointURL.
tokenEndpointURL
Use the tokenEndpointURL keyword to to specify a string that defines the token endpoint. The token endpoint is the endpoint on the authorization server where the client application exchanges the authorization code, the client ID, and the client secret for an access token.
"tokenEndpointURL" : "/sap/bc/sec/oauth2/token",
NoteIt is mandatory to define the tokenEndpointURL.
revocationEndpointURL
Use the revocationEndpointURL keyword to to specify a string that defines the token endpoint. The token endpoint is the endpoint on the authorization server where the client application exchanges the authorization code, the client ID, and the client secret for an access token.
"revocationEndpointURL" : "/sap/bc/sec/oauth2/revoke",
NoteIt is mandatory to define a value for the revocationEndpointURL.
flow
Use the flow keyword to specify a number that defines the authorization flow used during the authentication exchange, for example, saml2Bearer or authCode.
"flow" :"saml2Bearer",
SAP HANA Developer Quick Start GuideGetting Started with Application Development in XS Classic PUBLIC 117

NoteIt is mandatory to define a value for flow.
The following values are permitted:
● saml2Bearer● authCode
description
Use the optional description keyword to provide a short description of the OAuth client configuration.
"description": "OAuth Client for SAP App Server ABAP - Authorization Code Flow"
samlIssuer
Use the optional samlIssuer keyword to specify a string that defines the SAML issuer ID. The SAML issuer ID describes the issuer of the SAML token. The SAML bearer extension enables the validation of SAML tokens as part of granting the OAuth access token.
NoteYou set this parameter only if the parameter flow is set to saml2Bearer, for example, "flow" :"saml2Bearer".
"samlIssuer" : "" ,
redirectURL
Use the redirectURL keyword to specify a string that defines the redirection endpoint. The redirection endpoint is the endpoint in the client application where the resource owner is redirected to, after having granted authorization at the authorization endpoint. The redirectURL must be changed to suit your requirements.
"redirectURL" : "<HOST>:<PORT>/sap/hana/xs/oAuth/lib/runtime/tokenRequest.xsjs",
NoteIf "flow" : "authCode", it is mandatory to define a value for the redirectURL.
118 PUBLICSAP HANA Developer Quick Start Guide
Getting Started with Application Development in XS Classic

scopeReq
Use the scopeReq keyword to specify whether the maximum available scope from all applications using this client configuration is always requested or the scope set is specified iteratively.
"scopeReq" : "maxScopes",
The following values are permitted:
● maxScopes● iterativeScopes
NoteCurrently only maxScopes is implemented.
shared
Use the shared keyword to specify a number that defines whether the if the XS OAuth client configuration can be shared between applications.
"shared" : "false",
The following values are permitted:
● true (shared)● false (not shared)
NoteCurrently only true is implemented.
modifies
Use the modifies keyword to indicate that the current XS OAuth client configuration, for example, abap_ac1.xsoauthclientconfig, is based on (and extends) another SAP HANA XS OAuth client configuration (for example, abap_ac.xsoauthclientconfig). You must specify the fully qualified name of the associated OAuth client configuration artifact (<fileName>.xsoauthclientconfig), using the format <path.to.package>:<ArtifactName>.xsoauthclientconfig.
"modifies":"sap.hana.xs.oAuth.lib.providerconfig.providermodel:abap_ac.xsoauthclientconfig",
SAP HANA Developer Quick Start GuideGetting Started with Application Development in XS Classic PUBLIC 119

Related Information
OAuth Client Flavor Syntax [page 120]OAuth Application Configuration Syntax [page 113]Tutorial: Create an OAuth Configuration Package
2.2.1.8.4.3 OAuth Client Flavor Syntax
The format and syntax required in a design-time artifact that describes the OAuth client flavors.
The OAuth client flavor file provides details of the OAuth protocol for a client application that uses the services provided by a corresponding OAuth application. The OAuth client flavor steps are defined in a design-time artifact with the mandatory file suffix .xsoauthclientflavor; the configuration file must be specified using the JSON format.
NoteThe following example of an OAuth client flavor configuration is incomplete; it is intended for illustration purposes only.
{ "parameters":[ { "flavorStep":"1Aut", "paramLocation":"uri", "paramName":"client_id", "paramValue":"client_id", "valueType":"eval", "paramMandatory":"true" }, { "flavorStep":"1Aut", "paramLocation":"uri", "paramName":"redirect_uri", "paramValue":"redirect_uri", "valueType":"eval", "paramMandatory":"true" },{ "flavorStep":"1Aut", "paramLocation":"uri", "paramName":"scope", "paramValue":"scope", "valueType":"eval", "paramMandatory":"true" },{ "flavorStep":"1Aut", "paramLocation":"uri", "paramName":"response_type", "paramValue":"code", "valueType":"litr", "paramMandatory":"true" },{ "flavorStep":"1Aut", "paramLocation":"uri", "paramName":"state", "paramValue":"state", "valueType":"eval", "paramMandatory":"true" },{ "flavorStep":"2Gra", "paramLocation":"head", "paramName":"Authorization", "paramValue":"Basic Authentication", "valueType":"sec", "paramMandatory":"true" },{ "flavorStep":"2Gra", "paramLocation":"head", "paramName":"Content-Type", "paramValue":"application/x-www-form-urlencoded", "valueType":"litr", "paramMandatory":"true" },{ "flavorStep":"2Gra", "paramLocation":"para", "paramName":"code", "paramValue":"code", "valueType":"eval", "paramMandatory":"true" },{ "flavorStep":"2Gra", "paramLocation":"para", "paramName":"grant_type", "paramValue":"authorization_code", "valueType":"litr", "paramMandatory":"true" },{ "flavorStep":"2Gra", "paramLocation":"para", "paramName":"client_id", "paramValue":"client_id", "valueType":"eval", "paramMandatory":"true" },{ "flavorStep":"2Gra", "paramLocation":"para", "paramName":"redirect_uri", "paramValue":"redirect_uri", "valueType":"eval", "paramMandatory":"true" },{ "flavorStep":"3Prc", "paramLocation":"head", "paramName":"Bearer ", "paramValue":"access_token", "valueType":"sec", "paramMandatory":"true" },
120 PUBLICSAP HANA Developer Quick Start Guide
Getting Started with Application Development in XS Classic

{ "flavorStep":"4Ref", "paramLocation":"head", "paramName":"Authorization", "paramValue":"Basic Authentication", "valueType":"sec", "paramMandatory":"true" },{ "flavorStep":"4Ref", "paramLocation":"head", "paramName":"Content-Type", "paramValue":"application/x-www-form-urlencoded", "valueType":"litr", "paramMandatory":"true" },{ "flavorStep":"4Ref", "paramLocation":"para", "paramName":"grant_type", "paramValue":"refresh_token", "valueType":"litr", "paramMandatory":"true" },{ "flavorStep":"4Ref", "paramLocation":"para", "paramName":"refresh_token", "paramValue":"refresh_token", "valueType":"sec", "paramMandatory":"true" },{ "flavorStep":"5Rev", "paramLocation":"para", "paramName":"token", "paramValue":"access_token", "valueType":"sec", "paramMandatory":"true" }, ] }
It is not necessary to create your own OAuth client flavor from scratch; SAP HANA provides some OAuth client flavors for a selection of OAuth server scenarios, which you can use without modification.
TipThe example OAuth client flavors are located in the package sap.hana.xs.oAuth.lib.providerconfig.providermodel.
However, you do need to modify the OAuth client flavor artifact for the following scenarios:
● Modifications are required (or have already been made) to the API of an available OAuth server.● A connection is required to a new OAuth server not covered by the scenarios included in the SAP HANA
configuration templates.
parameters
Use the parameters keyword to define a list of parameter-values pairs, for example, "paramLocation":"uri" that support the specification defined in the OAuth client configuration file <filename>.oxauthclientconfig.
flavorStep
Use the flavorStep keyword to specify a step in the procedure used by the client flavor, as illustrated in the following example
"flavorStep":"saml",
The following values are permitted:
● IAut● 2Gra● 3Prc● 4Ref
SAP HANA Developer Quick Start GuideGetting Started with Application Development in XS Classic PUBLIC 121

● 5Rev● saml
paramLocation
Use the paramLocation keyword to specify the location of the parameter defined, as shown in the following example:
"paramLocation":"uri",
The following values are permitted:
● uriUniversal resource indicator
● headIn the request header
● paraIn the request body
paramName
Use the paramName keyword to specify the name of the parameter defined in “paramLocation”, as shown in the following example:
"paramName":"token",
The parameter name depends on the local setup of your client configuration.
paramValue
Use the paramValue keyword to specify a value for the parameter name specified in “paramName”.
"paramValue":"access_token",
The parameter name depends on the local setup of your client configuration.
valueType
Use the valueType keyword to specify the type of value expected by the parameter defined in “paramValue”.
"valueType":"sec",
122 PUBLICSAP HANA Developer Quick Start Guide
Getting Started with Application Development in XS Classic

The following values are permitted:
● litrLiteral value
● evalThe value is evaluated by the OAuth client runtime
● secThe value is evaluated by the OAuth client runtime in a secure way
paramMandatory
Use the paramMandatory keyword to specify if a parameter is required or not.
"paramMandatory":"true",
The following values are permitted:
● trueRequired
● falseNot Required
Related Information
OAuth Client Configuration Syntax [page 115]OAuth Application Configuration Syntax [page 113]Tutorial: Create an OAuth Configuration Package
SAP HANA Developer Quick Start GuideGetting Started with Application Development in XS Classic PUBLIC 123

3 Getting Started with Application Development in XS Advanced
SAP HANA applications for SAP HANA XS advanced must include a number of mandatory files that are used for configuration and deployment.
To set up your SAP HANA application as a multi-target application, you need to create the necessary source files and place them in the appropriate folders. On deployment, the SAP HANA deployment service reads the information contained in the various configuration files and uses it to deploy the various application components to the corresponding targets.
The following high-level rules need to be followed when setting up your SAP HANA application:
● Separate all database content (design-time representations of tables, views, procedures, etc.)● Isolate all static content (html, images, other UI related files) in its own folder.● Place language-specific application source files in their own folder.
NoteSince xsodata files must be deployed to a JavaScript or Java run-time, place OData service definitions in the application source folders, for example, javascript/odata/ or java/odata/.
● db/Contains only database artifact, for example: tables, views stored procedures, etc.
● web/Static HTML resources
● java/Java source code and any Odata service definitions
● javascript/, js/, or xsjs/JavaScript source code and any Odata service definitions; this can include either JavaScript or node.js (or both) in sub-folders
The following example include modules for the following areas: database, Web, JavaScript application code, Odata (optional) services, and security (OAuth2 client configuration).
Example
Sample Code
<myAppName> |- db/ # Database deployment artifacts| \- src/ # Database artifacts: tables, views, etc.|- web/ # Application router/descriptors| \- resources/ # Static Web resources|- js/ # JavaScript artifacts| \- src/ # JavaScript source code| \- odata/ # OData resources (optional)
124 PUBLICSAP HANA Developer Quick Start Guide
Getting Started with Application Development in XS Advanced

| \- srv/ # OData services\- security/ # Security deployment artifacts/scopes/auths
Related Information
Set up an XS Advanced Application Project [page 202]XS Advanced Application Resource Files [page 208]Working with the XS Advanced Command-Line Client [page 177]Working with the SAP Web IDE for SAP HANA [page 125]
3.1 Working with the SAP Web IDE for SAP HANA
SAP Web IDE for SAP HANA is a browser-based integrated development environment (IDE) that can be used for the development of complex SAP HANA applications.
SAP Web IDE for SAP HANA provides a comprehensive suite of tools which enable the development of complex multi-target applications (MTA) comprising a Web-based or mobile user interface (UI), business logic, and extensive SAP HANA data models. Designed to support developers who use SAP HANA and XS Advanced, SAP Web IDE for SAP HANA provides a variety of tools, for example: syntax-aware editors for the creation of application code and many other SAP HANA artifacts, graphical editors for the design and development of CDS data models and calculation views, as well as a suite of additional tools for inspection, testing and debugging. SAP Web IDE for SAP HANA includes the SAP HANA database explorer, and is tightly integrated with the SAP HANA run-time tools, the SAP HANA deployment infrastructure (HDI) for XS advanced, the tools used for application life-cycle management (ALM), and the XS advanced run-time platform
To facilitate the process of developing multi-target applications for XS advanced, SAP Web IDE for SAP HANA provides the following features and tools:
● An integrated workspace● A comprehensive suite of the most up-to-date development tools● Wizards and code templates to help you get started more quickly and easily● The automatic update in real time of dependencies between the development and build artifacts● Build, run, and deployment tools
The SAP Web IDE for SAP HANA is designed to guide you through the development process required to deploy multi-target applications; the process includes the following high-level steps:
1. Set up access to the XS advanced development tools, for example, SAP Web IDE for SAP HANA.
TipAccess to the SAP Web IDE for SAP HANA is restricted to those users who have the required privileges; the privileges are defined in a “role” which is included in a “role collection” that is assigned to users.
SAP HANA Developer Quick Start GuideGetting Started with Application Development in XS Advanced PUBLIC 125

To enable access to the development and administration tools included in SAP Web IDE for SAP HANA, some administration setup tasks are necessary after installation of SAP Web IDE for SAP HANA. For more information, see Related Information below.
2. Set up an application project.3. Develop your application modules.
For example, for your data model, your application business logic, and your client user interface.4. Build your application modules.5. Run and debug your application modules.6. Package the modules into a multi-target application.7. Deploy the application to SAP HANA XS advanced.
Related Information
Create a Simple "Tiny-World" Application [page 126]Extend the "Tiny World" Application to Use an OData Service and a Client UI [page 132]Working with the SAP HANA Database Explorer [page 171]SAP Web IDE for SAP HANA Reference
3.1.1 Create a Simple "Tiny-World" Application
The "tiny-world" application demonstrates a quick way to get an application running in the XS advanced run time.
Prerequisites
● Access to a running SAP HANA system where the XS advanced run time is installed and configured● Access to the developer tools included in the SAP Web IDE for SAP HANA
If the SAP Web IDE for SAP HANA is not available at the default URL https://host.acme.com:53075, log in to the XS advanced run time with the XS command-line interface (CLI) and use the command xs app webide --urls to display the URL required to access the tool.
CautionThe code examples included in this document for XS advanced are often syntactically incomplete; they are intended for illustration purposes only.
Context
For the XS advanced run time, you develop multi-target applications (MTA), which contain modules, for example: a database module, a module for your business logic (Node.js), and a UI module for your client
126 PUBLICSAP HANA Developer Quick Start Guide
Getting Started with Application Development in XS Advanced

interface (HTML5). The modules enable you to group together in logical subpackages the artifacts that you need for the various elements of your multi-target application. You can deploy the whole package or the individual subpackages.
Procedure
1. Start the SAP Web IDE for SAP HANA.2. Create a project to develop your tiny-world application.
An application is created within a context of a project. There are a number of ways to create a project, for example, by importing it or cloning it. For this tutorial, we will create a new project from scratch using a project template.
a. In the SAP Web IDE for SAP HANA, choose File New Project from Template .b. Choose the project template type.
Choose the project template type Multi-Target Application Project and choose Next.c. Type the name tinyworld for the new MTA project and choose Next to confirm.d. Specify details of the new MTA project and choose Next to confirm.e. Create the new MTA project; choose Finish.
A project is created with the name “tinyworld”; the root folder of the new project contains one essential file, the application's development descriptor mta.yaml. The MTA development descriptor defines the prerequisites and dependencies for the deployment of a multi-target application. At this point in time, the file contains only the name and version of the project and an optional short description.
TipAs you add modules and code to your MTA, the SAP Web IDE adds the corresponding information to the relevant part of the mta.yaml file.
Sample CodeMTA Development Descriptor (mta.yaml)
_schema-version: 2.0.0 ID: tinyworlddescription: Tinyworld project for GFN version: 0.0.1
3. Add a module for your new MTA's database components.
The SAP Web IDE for SAP HANA provides Wizards to simplify the process of creating modules for your MTA.
a. Create a database module.
Right-click the root folder of your new MTA project and, in the context menu, choose New SAP HANA Database Module .
b. Provide a name for the new database module; type tinydbc. Customize the details of the new database module, if required. In this case, you can accept the default
settings and choose Next to confirm your settings.
SAP HANA Developer Quick Start GuideGetting Started with Application Development in XS Advanced PUBLIC 127

d. Confirm the details of the new module; choose Finish.
The Wizard creates the new database module with the specified name: tinydb. The new module contains the folder src for your database artifacts and, in addition, two configuration files: .hdiconfig and .hdinamespace. The .hdiconfig file is mandatory and defines the plug-ins that SAP HANA uses to create a catalog object from a design-time resource; the .hdinamespace is optional and defines the rules to use for run-time name spaces.
NoteBy default, the .hdiconfig and .hdinamespace configuration files are hidden. To display hidden files in the SAP Web IDE for SAP HANA, choose View Show Hidden Files .
In addition, the SAP Web IDE adds details of the new module to the application's central deployment descriptor mta.yaml, as illustrated in the following example:
Sample CodeApplication Deployment Descriptor mta.yaml
_schema-version: 2.0.0 ID: tinyworlddescription: Tiny world tutorial projectversion: 0.0.1modules:- name: tinydb type: hdb path: tinydb requires: - name: hdi_tinydbresources:- name: hdi_tinydb properties: hdi-container-name: '${service-name}' type: com.sap.xs.hdi-container
4. Define the data model for your new MTA; define some simple database content in the new database module.
In this step we use Core Data Services (CDS) to define a simple database table. CDS is SAP HANA's enhancement to SQL for defining and consuming semantically rich data models.
a. Navigate to the src/ folder in your database module tinydb/.
b. Right-click the folder tinydb/src/ and choose New HDB CDS Artifact in the context menu.c. Name the new CDS artifact tinyf.
The setup Wizard adds the mandatory suffix for CDS artifacts (.hdbcds) to the new file name automatically. This suffix is important; it determines how the file is interpreted in the SAP HANA database. In SAP HANA, a file suffix is linked to a specific plug-in, which is used to generate the corresponding catalog object from a design-time artifact.
TipBy default, the new CDS artifact is displayed in the CDS Graphical Editor; to open the new artifact in the text-based code editor, right-click the artifact and choose Open with Code Editor in the context-sensitive menu.
128 PUBLICSAP HANA Developer Quick Start Guide
Getting Started with Application Development in XS Advanced

d. Enter the CDS code for a simple table (called an “entity” in CDS).
Sample Code
namespace tinyworld.tinydb; context tinyf { entity world { key continent: String(100); }; };
In this step, we defined a simple data-model with a single entity named “world”, with a single field named “continent”.
5. Build the HDB module tinydb.
Building a database module activates the data model and creates corresponding object in the database catalog for each artifact defined in the CDS document. In this case, the build creates one database table called “world”.
a. In the SAP Web IDE for SAP HANA, select the tinydb module and choose Build Build .
If the builder displays the message (Builder) Build of /tinyworld/tinydb completed in the SAP Web IDE console, the data-model was successfully activated in a HANA database container, and can now be used to store and retrieve data.
6. Create a new application module to contain the code for your “tiny world” Node.js application.
The Node.js application module contains the business logic for your “tiny-world” application.
a. Create a new MTA module for your Node.js code.
Right-click the tinyworld/ project folder and choose New Node.js Module in the context menu.
b. Name the new Node.js module tinyjs and choose Finish to complete the setup and close the Wizard.
RememberCheck the Enable xsjs support check box.
The setup Wizard creates the new Node.js module tinyjs which contains a number of default folders and files, for example, the file lib/index.xsjs.
c. In the Node.js module tinyjs, open the file lib/index.xsjs and check that it contains the following code:
Sample Code
$.response.contentType = "text/html"; $.response.setBody("It's a tiny JS World!");
d. Save your changes.
The SAP Web IDE adds details of the new Node.js module (tinyjs) to the application's central deployment descriptor mta.yaml, as illustrated in the following example:
SAP HANA Developer Quick Start GuideGetting Started with Application Development in XS Advanced PUBLIC 129

Sample CodeApplication Deployment Descriptor mta.yaml
_schema-version: 2.0.0 ID: tinyworlddescription: Tiny world tutorial projectversion: 0.0.1modules:- name: tinydb type: hdb path: tinydb requires: - name: hdi_tinydb - name: tinyjs type: nodejs path: tinyjs requires: - name: tinydb provides: - name: tinyjs_api properties: url: '${default-url}' resources:- name: hdi_tinydb type: com.sap.xs.hdi-container
7. Build the new Node.js application module.
Right-click the module folder tinyjs/ and, in the context menu, choose Run Run as Node.js Application .
The Run as Node.js Application command automatically builds the application, too. You can view the build-run progress in the run console at the bottom of the SAP Web IDE screen; it should look like the following system output:
Application: https://host.acme.com:51013 Status: Running [] Stop
In addition, if a Web browser does not open automatically and display the page It's a tiny JS world!, paste the URL indicated in the system output into your Web browser, for example: https://host.acme.com:51013.
8. Create an HTML5 module for the client user interface.
The HTML5 module contains the files for the client UI for your “tiny-world” application.
a. Create a new MTA module for your HTML5 client code.
Right-click the tinyworld/ project folder and choose New Basic HTML5 Module in the context menu.
b. Name the new HTML5 module tinyui and choose Finish to complete the setup and close the Wizard.
The setup Wizard creates the new HTML5 module tinyui which contains a number of default folders and files, for example, the file resources/index.html.
c. In the HTML5 module, open the file resources/index.html and check that it contains the following code:
Sample Code <!DOCTYPE HTML>
130 PUBLICSAP HANA Developer Quick Start Guide
Getting Started with Application Development in XS Advanced

<html><head><meta http-equiv="X-UA-Compatible" content="IE=edge"> <meta http-equiv='Content-Type' content='text/html;charset=UTF-8' /> <title>Tiny UI</title> <!-- 1.) Load SAPUI5 (from a remote server), select theme and control library --> <script src="https://sapui5.hana.ondemand.com/resources/sap-ui-core.js" id="sap-ui-bootstrap" data-sap-ui-libs="sap.ui.commons, sap.ui.table, sap.m" data-sap-ui-theme="sap_bluecrystal"> </script> <!-- 2.) Create a UI5 button and place it onto the page --> <script> // create the button instance var myButton = new sap.m.Button("btn"); // set properties, e.g. the text myButton.setText("Hello Tiny HTML World!"); // attach an action to the button's "press" event (use jQuery to fade out the button) myButton.attachPress(function(){$("#btn").fadeOut()}); // place the button into the HTML element defined below myButton.placeAt("uiArea"); </script> </head> <body class="sapUiBody"> <!-- This is where you place the UI5 button --> <div id="uiArea"></div> </body> </html>
The SAP Web IDE adds details of the new HTML 5 module (tinyui) to the application's central deployment descriptor mta.yaml, as illustrated in the following example:
Sample CodeApplication Deployment Descriptor mta.yaml
_schema-version: 2.0.0 ID: tinyworlddescription: Tiny world tutorial projectversion: 0.0.1modules:- name: tinydb type: hdb path: tinydb requires: - name: hdi_tinydb- name: tinyjs type: nodejs path: tinyjs provides: - name: tinyjs_api properties: url: ${default-url} - name: tinyui type: html5 path: tinyui resources:- name: hdi_tinydb properties: hdi-container-name: '${service-name}' type: com.sap.xs.hdi-container
SAP HANA Developer Quick Start GuideGetting Started with Application Development in XS Advanced PUBLIC 131

9. Run the new HTML5 application module.
Right-click the module folder tinyui/ and, in the context menu, choose Run Run as Web Application .
A Web browser displays the text Tiny HTML world. You can view the build-run progress in the run console at the bottom of the SAP Web IDE screen; it should look like the following system output:
Application: https://host.acme.com:51013 Status: Running [] Stop
In addition, if a Web browser does not open automatically and display the page Tiny HTML world!, paste the URL indicated in the console output into your Web browser, for example: https://host.acme.com:51013.
Results
In this tutorial, we learned how to use the SAP Web IDE for SAP HANA to develop a small (but not very useful) application, consisting of three separate modules: database (tinydb/), Node.js (tinyjs/), and HTML5 (tinyui/). It is important to note that, in this example, each module is a stand-alone component: the business logic does not access the data model, and the UI application does not access the business logic. You can learn how to get MTA modules to interact with each other in other tutorials.
Related Information
Working with the XS Advanced Command-Line Client [page 177]Extend the "Tiny World" Application to Use an OData Service and a Client UI [page 132]
3.1.2 Extend the "Tiny World" Application to Use an OData Service and a Client UI
Extend the simple “Tiny-World” application to enable it to access the SAP HANA database.
Prerequisites
● You have access to a running SAP HANA system where the XS advanced run time is installed and configured
● You have access to the developer tools included in the SAP Web IDE for SAP HANAIf the SAP Web IDE for SAP HANA is not available at the default URL , for example,https://host.acme.com:53075, log in to the XS advanced run time with the XS command-line client (CLI) and use the command xs app webide --urls to display the URL required to access the tool.
132 PUBLICSAP HANA Developer Quick Start Guide
Getting Started with Application Development in XS Advanced

● You have successfully completed the instructions described in the tutorial Create a Simple “Tiny-World” Application in XS Advanced.
CautionThe code examples included in this document for XS advanced are sometimes syntactically incomplete; as a general rule, code examples are intended for illustration purposes only.
Context
In this tutorial, we learn how to use the SAP Web IDE for SAP HANA to build a real SAP-HANA-based business application, with a UI module that accesses the database by means of an Odata service.
Procedure
1. Start the SAP Web IDE for SAP HANA.2. Open the MTA project “tinyworld” that you created in the tutorial Create a Simple “Tiny-World” Application.3. Open the application module tinyworld/tinydb and display the contents of the CDS database artifact
tinyworld/tinydb/src/tinyf.
Sample Code
namespace tinyworld.tinydb; context tinyf { entity world { key continent: String(100); }; };
4. Add an entity (table) to the CDS artifact tinydb/tinyf.
Add the entity definition country to the CDS context tinyf, as illustrated in bold text in the following example:
Sample Code
namespace tinyworld.tinydb; context tinyf { entity world { key continent: String(100); }; entity country { name: String(100); }; };
5. Add an association between the entities defined in the CDS artifact tinyf.
SAP HANA Developer Quick Start GuideGetting Started with Application Development in XS Advanced PUBLIC 133

Add the association partof between entity definitions world and country, as illustrated in bold text in the following example:
Sample Code
namespace tinyworld.tinydb; context tinyf { entity world { key continent: String(100); }; entity country { name: String(100); partof: Association[0..1] to world; }; };
6. Build the HDB module tinydb.
Building a database module activates the data model and creates corresponding object in the database catalog for each artifact defined in the CDS document. In this case, the build creates two database tables called “world” and “country”.
a. In the SAP Web IDE for SAP HANA, right-click tinydb and choose Build.
If the builder displays the message (Builder) Build of /tinyworld/tinydb completed in the SAP Web IDE console, the data-model was successfully activated in a HANA database container, and can now be used to store and retrieve data.
7. Add the HDI container to the database explorer so that you can view the newly created run-time tables.
a. Open the database explore, by choosing Tools Database Explorer .b. If prompted, choose to add a database to the database explorer. Otherwise, at the top of the database
browser, click Add database to the Database Explorer.c. In the Add Database window, choose HDI Container for the Database Type.d. In the list of HDI containers, choose the HDI container in which the tables were created.
The name of the database container with the database artifacts from the tinyworld MTA's database module will be something like the following: your-user-name...tinyworld-hdi-container.
Your HDI container is added to the database browser.e. View the two tables (tinyf.country and tinyf.world), by expanding the HDI container in the tree and
clicking Tables.f. Open the SQL console by right-clicking the Tables folder in your HDI container tree and choosing Open
SQL Console.g. Add the following statements to the SQL console and then choose Run from the global tool bar to
execute them.
INSERT INTO "tinyworld.tinydb::tinyf.world" VALUES ('Africa'); INSERT INTO "tinyworld.tinydb::tinyf.world" VALUES ('Asia'); INSERT INTO "tinyworld.tinydb::tinyf.world" VALUES ('Europe'); INSERT INTO "tinyworld.tinydb::tinyf.country" VALUES ('Ghana', 'Africa');INSERT INTO "tinyworld.tinydb::tinyf.country" VALUES ('Nigeria', 'Africa'); INSERT INTO "tinyworld.tinydb::tinyf.country" VALUES ('China', 'Asia'); INSERT INTO "tinyworld.tinydb::tinyf.country" VALUES ('Japan', 'Asia'); INSERT INTO "tinyworld.tinydb::tinyf.country" VALUES ('Denmark', 'Europe'); INSERT INTO "tinyworld.tinydb::tinyf.country" VALUES ('Spain', 'Europe');
134 PUBLICSAP HANA Developer Quick Start Guide
Getting Started with Application Development in XS Advanced

h. Verify that the data was written into the new tables, by executing the following SQL statement.
SELECT * FROM "tinyworld.tinydb::tinyf.country" WHERE "partof.continent" = 'Africa'
or...
SELECT * FROM "tinyworld.tinydb::tinyf.country" WHERE "partof.continent" = 'Europe'
8. Return to the development workspace, by clicking Development from the left side bar, and then add a calculation view to the data model.
Use SAP HANA's graphical modeling tools to add a calculation view; the view should display only European countries.
a. Navigate to the folder named src in the MTA database module tinydb.b. Create the new calculation view.
Right-click the database module folder tinydb/src and choose New Calculation View in the context menu. Name the new calculation view “myview” and choose the Data Category “DEFAULT” (or leave this selection empty).
9. Set up the details of the calculation view.
The graphical calculation view should have the following nodes: Semantics Aggregation Projection
TipIn the calculation-view graphical editor, you can change the type of node, for example, from Projection to Aggregation by right-clicking the node and choosing the corresponding option from the context-sensitive menu. For example, right-click a projection node and select Switch to Aggregation.
a. Create a projection using the Create Projection tool in the graphical editor for calculation views.
Drag the new projection (Projection_1) down into the calculation view palette and drop it below the Aggregation node.
b. Connect the Projection_1 node to the Aggregation node.
Select the (->) icon next to the Projection_1 node, then drag it (and drop it on) to the Aggregation node.c. Configure the projection.
Select the Projection_1 node. In the Mapping tab, choose [+] to display a search wizard. Type “tiny” to search for the tables that we created, select tinyworld.tinydb::tinyf.country in the search results, and click Finish.
The selected table tinyf.country is displayed in the list of Data sources.d. Connect data sources to output columns.
In the Mapping tab, select the table tinyf.country and, in the tab tool bar, choose Add to Output.
The selected data sources (name and partof_continent) are displayed in the list of Output Columns.e. Define a filter expression for your view.
The filter expresses the rule that defines what the view displays.
SAP HANA Developer Quick Start GuideGetting Started with Application Development in XS Advanced PUBLIC 135

Choose the FILTER EXPRESSION" tab, expand the Columns element, and double-click the element partof_continent. In the Operators screen, select the equals icon (=). The expression appears at the top of the dialog screen; complete it by typing the text 'Europe'.
The complete filter expression should look like the following example:
Sample Code
"partof_continent"='Europe'
f. Set up the Aggregation node.
Select the Aggregation node and, in the MAPPING tab, chose name in the list of Data Sources and drag it (and drop it on) to the Output Columns list.
TipIf no aggregation node exists, the calculation-view graphical editor allows you to change the type of node, for example, from Projection to Aggregation by right-clicking the node and choosing the corresponding option from the context-sensitive menu. Right-click a projection node and select Switch to Aggregation.
g. Change the privileges for the view to enable anonymous access.
Select the Semantics node at the top of the view graph, display the VIEW PROPERTIES tab, and change the value shown in the Apply Privileges field from SQL Analytical Privileges to empty.
h. Save the changes you made to the calculation view.i. Rebuild the MTA database module tinyworld.tinydb.
In the SAP Web IDE for SAP HANA, right-click the MTA moduletinyworld/tinydb/ and choose Buildin the context menu.
This creates a view that displays only the names of European countries.10. Create an OData service to display exposed parts of your data model.
The OData service is defined in one file (with the file extension .xsodata) that we will save in the Node.js module (tinyjs/), for example, euro.xsodata).
a. Create the new OData service.
You define an XS OData service in a design-time file with the file extension “xsodata”, for example, service.xsodata.
In the navigation pane of the SAP Web IDE for SAP HANA, locate the tinyworld MTA project and, in the tinyjs module, right-click the folder tinyjs/lib/, and choose New File ". Name the new OData service file “euro.xsodata”.
Enter the following code into the euro.xsodata file and save the file:
Source Code
service { "tinyworld.tinydb::myview" as "euro" keys generate local "ID"; }
136 PUBLICSAP HANA Developer Quick Start Guide
Getting Started with Application Development in XS Advanced

The OData service euro.xsodata defines an entity “euro” that is based on the calculation view “myview”. The “euro” entity uses an auto-generated key named “ID”.
b. Create a dependency between the Node.js module tinyjs/ that exposes the OData service euro.xsodata and the underlying database module tinydb/ on which the OData service depends.
Open the MTA descriptor mta.yaml and add the following code (in bold text in the following example) to the tinyjs module:
Sample Code
- name: tinyjs type: nodejs path: tinyjs/ requires: - name: tinydb - name: hdi_container provides: - name: tinyjs_api properties: url: ${default-url}
c. Enable the application to create a connection to the SAP HANA database.
Open the file tinyjs/server.js, and uncomment the line that establishes the connection to the SAP HANA database, as illustrated in the following code example:
Sample Code
// configure HANA try { options = Object.assign(options, xsenv.getServices({ hana: {tag: "hana"} }));} catch (err) { console.log("[WARN]", err.message); }
Hide (comment out) the section that configures the User Account and Authentication (UAA) service, which is not required yet for this tutorial, as follows:
Sample Code
// configure UAA //try { // options = Object.assign(options, xsenv.getServices({ uaa: {tag: "xsuaa"} })); //} catch (err) { // console.log("[WARN]", err.message); //}
d. Save all files and run the Node.js module again.
Right-click the module tinyjs/ and choose Run Run as Node.js Application in the context menu.
The Run as Node.js Application command automatically builds the application, too. You can view the build-run progress in the run console at the bottom of the SAP Web IDE screen; it should look like the following system output:
Application: https://host.acme.com:51013 Status: Running [] Stop
SAP HANA Developer Quick Start GuideGetting Started with Application Development in XS Advanced PUBLIC 137

In addition, if a Web browser does not open automatically and display the page It's a tiny JS world!, paste the URL indicated in the system output into your Web browser, for example: https://host.acme.com:51013.
11. Test the OData service is available.
Since we did not change the code in the file application start-up file index.xsjs, the Web browser still displays the text “It's a tiny JS World!”. However, we can use a modified URL to test if the OData service is now running.
In your Web browser, replace the URL element “/index.xsjs” with the string “/euro.xsodata/euro?$format=json”; the resulting URL should look like the following example;
https://host.acme.com:51013/euro.xsodata/euro?$format=json
The OData output formatted as JSON should look like the following example:
Output Code
{ "d": { "results": [ { "__metadata": { "uri": "https:/host.acme.com:51013/euro.xsodata/euro('14518283563411')", "type": "default.euroType" }, "ID": "14518283563411", "name": "Spain" }, { "__metadata": { "uri": "https:/host.acme.com:51013/euro.xsodata/euro('14518283563422')", "type": "default.euroType" }, "ID": "14518283563422", "name": "Denmark" } ] } }
12. Create a simple SAPUI5 application that uses the OData service.
The simple SAPUI5 application you create here uses the OData service euro.xsodata to extract data from the database and display it in the client interface.
a. Open the file UI resource file tinyui/resources/index.html and replace its contents with the following UI5 code.
NoteCheck that the data-sap-ui-libs= list includes the SAPUI5 libraries sap.ui.commons, sap.ui.table and, if not, add them.
Sample Code
<!DOCTYPE HTML> <head><meta http-equiv="X-UA-Compatible" content="IE=Edge" />
138 PUBLICSAP HANA Developer Quick Start Guide
Getting Started with Application Development in XS Advanced

<title>DevXdemo</title> <script src="https://sapui5.hana.ondemand.com/resources/sap-ui-core.js" id="sap-ui-bootstrap" data-sap-ui-libs="sap.ui.commons, sap.ui.table, sap.m" data-sap-ui-theme="sap_bluecrystal"> </script> <script> var oModel = new sap.ui.model.odata.ODataModel("/euro.xsodata", true); var oTable = new sap.ui.table.Table({ title: "European Countries" }); oTable.addColumn(new sap.ui.table.Column({ label: "Country Name", template: "name" })); oTable.setModel(oModel); oTable.bindRows("/euro"); oTable.placeAt("content"); </script> </head> <body class='sapUiBody'> <!-- This is where you place the UI5 button <div id="uiArea"></div>--> <!-- This is where you place the UI5 content --> <div id='content'></div> </body> </html>
The code snippet is designed to do the following actions:
○ Define a model (oModel)○ Bind the model oModel to the OData service /euro.xsodata○ Create a table with a single column, bound to the “name” field of the entity “/euro”○ Initialize the table and display it in an HTML context.
13. Configure the application router to handle cross-module URL requests.
To run the UI5 application in the XS advanced run time, we must set up a destination for the XS advanced application router (“approuter”), which handles cross-references to other URLs. In this case, we define a dependency between the tinyui and tinyjs application modules and specify a destination route to the OData service euro.xsodata defined in the Node.js module “tinyjs”.
a. Open the mta.yaml file and add the following URL destination to the tinyui module.
Sample Code
# -- requires tinyjs service URL requires: - name: tinyjs_api group: destinations properties: name: tinyjs_be url: ~{url}
b. Add the URL destination for the tinyjs_api to the application-router configuration file.
Open the application-router configuration file tinyui/xs-app.json and add the following entry to the "routes" array (inside the square brackets):
Sample Code
{ "welcomeFile": "index.html", "authenticationMethod": "none", "routes": [{ "source": "^/euro.xsodata/.*$",
SAP HANA Developer Quick Start GuideGetting Started with Application Development in XS Advanced PUBLIC 139
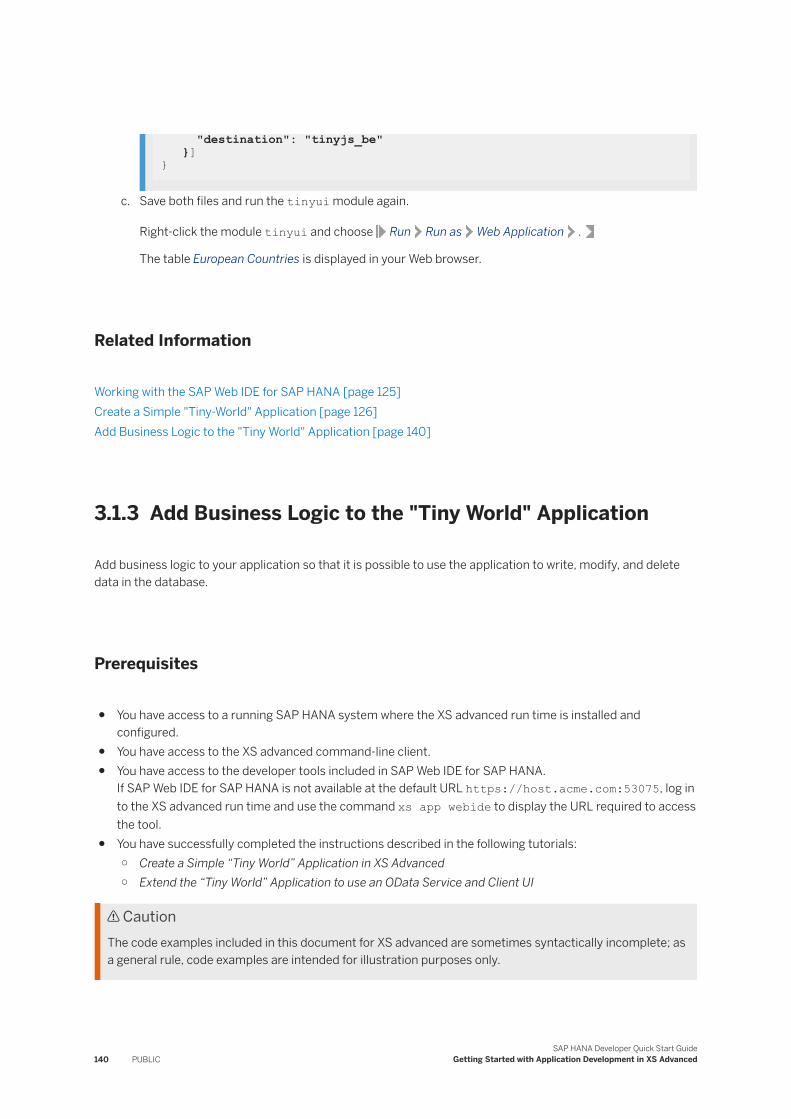
"destination": "tinyjs_be" }] }
c. Save both files and run the tinyui module again.
Right-click the module tinyui and choose Run Run as Web Application .
The table European Countries is displayed in your Web browser.
Related Information
Working with the SAP Web IDE for SAP HANA [page 125]Create a Simple "Tiny-World" Application [page 126]Add Business Logic to the "Tiny World" Application [page 140]
3.1.3 Add Business Logic to the "Tiny World" Application
Add business logic to your application so that it is possible to use the application to write, modify, and delete data in the database.
Prerequisites
● You have access to a running SAP HANA system where the XS advanced run time is installed and configured.
● You have access to the XS advanced command-line client.● You have access to the developer tools included in SAP Web IDE for SAP HANA.
If SAP Web IDE for SAP HANA is not available at the default URL https://host.acme.com:53075, log in to the XS advanced run time and use the command xs app webide to display the URL required to access the tool.
● You have successfully completed the instructions described in the following tutorials:○ Create a Simple “Tiny World” Application in XS Advanced○ Extend the “Tiny World” Application to use an OData Service and Client UI
CautionThe code examples included in this document for XS advanced are sometimes syntactically incomplete; as a general rule, code examples are intended for illustration purposes only.
140 PUBLICSAP HANA Developer Quick Start Guide
Getting Started with Application Development in XS Advanced

Context
In real-life, productive applications, you can use application logic to complement and extend the built-in database features such as calculation views and SQL procedures. This tutorial shows you how to use stored procedure to add data to the database and, in addition, Node.js and its XS JavaScript compatibility layer to build SAP-HANA-based business logic that extracts and validates data from the database.
Procedure
1. From the SAP Web IDE for SAP HANA, open the MTA project “tinyworld” that you created in the tutorial Create a Simple “Tiny-World” Application.
2. Create a stored procedure to enable you to add content to a database table.
The procedure you create in this step will be used to insert a new country into the database table tinyworld.tinydb::tinyf.country, but only if the country does not already exist in the database, and the continent is valid. Otherwise, an error message is displayed.
a. Create a new .hdbprocedure file for your stored procedure.
Right-click the database-module folder tinydb/src, choose New Procedure from the context menu, and name the new stored procedure createCountry.
An SQL editor opens for the new stored procedure.b. Add the following SQLScript code to the procedure file createCountry.hdbprocedure and save the
file.
Sample Code
PROCEDURE "tinyworld.tinydb::createCountry" ( IN im_country NVARCHAR(100), im_continent NVARCHAR(100), OUT ex_error NVARCHAR(100)) LANGUAGE SQLSCRIPT SQL SECURITY INVOKER AS --READS SQL DATA AS BEGIN declare noc integer; select count(*) into noc from "tinyworld.tinydb::tinyf.world" where "continent" = im_continent; if :noc = 0 then ex_error := 'ERROR: Continent ' || :im_continent || ' does not exist!';else select count(*) into noc from "tinyworld.tinydb::tinyf.country" where "name" = im_country; if :noc > 0 then ex_error := 'ERROR: Country ' || :im_country || ' already exists!'; else insert into "tinyworld.tinydb::tinyf.country" values (im_country, im_continent); end if; end if; END;
SAP HANA Developer Quick Start GuideGetting Started with Application Development in XS Advanced PUBLIC 141

c. Build the application database module tinydb again.
Right-click the application module tinyworld/tinydb, choose Build Build in the context menu, and follow the build progress in the output displayed in the console pane.
Output Code
2:10:51 PM (Builder) Build of /tinyworld/tinydb completed successfully.
3. Switch to the database explorer to test the stored procedure createCountry by attempting to add some data to your database table tinyworld.tinydb::tinyf.country..
a. Choose Tools Database Explorer .
By default, the HDI container that was created when you built the database module tinydb appears in the database browser. The HDI container is named <UserName>-<ID>-tinyworld-hdi-container. If the HDI container is not present, choose Add Database to the Database Explorer from the database browser toolbar to open it.
b. Use the database browser to find the procedure tinyworld.tinydb::createCountry in the HDI container.
c. Select the tinyworld.tinydb::createCountry procedure in the catalog list, then right-click the procedure and choose Generate Call Statement with UI in the context-sensitive menu.
d. Add a country that already exists in the database.
Specify Spain in the IM_COUNTRY field and Europe in the IM_CONTINENT field, and then choose Run from the global tool bar (or press F8 ).
As expected, an error is returned: ERROR: Country Spain already exists!e. Repeat the step to call the procedure and prompt for values, but this time add a country that does not
exist in the database.
Specify Ireland in the IM_COUNTRY field, and Europe in the IM_CONTINENT box, and then choose Run from the global tool bar (or press F8 ).
f. Verify that the new country, Ireland, was added to the table tinyworld.tinydb::tinyf.country.
In the database browser, find the table, right-click it, and then choose Open Data to view the data in the table.
There is a now a row in the table for Ireland.4. Return to the development perspective in SAP Web IDE and create a new JavaScript file called
“country.xsjs”. Place it in the JavaScript application folder tinyworld/tinyjs/lib/country..
a. Switch to the development perspective by choosing Tools Development .b. Open the application module tinyworld/tinyjs and display the lib folder.c. In the folder tinyworld/tinyjs/lib, create a new subfolder named country.
Right-click the folder tinyworld/tinyjs/lib, choose New Folder in the context menu, and name the new folder “country”.
d. In the folder tinyworld/tinyjs/lib/country, create a new JavaScript file called country.xsjs.
Right-click the folder tinyworld/tinyjs/lib/country/, choose New File in the context menu, and name the new JavaScript country.xsjs.
142 PUBLICSAP HANA Developer Quick Start Guide
Getting Started with Application Development in XS Advanced

5. In the development perspective, add the business logic to your application.
Open the new JavaScript file country.xsjs and add the following code to it.
The following code snippet reads the values of two “GET” parameters, “<name>” and “<continent>” respectively, passes them to a function that calls the SQLScript procedure createCountry, which is used to write these values to the “country” table, and displays a confirmation message
NoteTo keep things simple, this tutorial uses the HTTP GET method to access the service used to create database entries; productive applications should always use update methods (for example, POST, PUT, or DELETE) to make changes or modifications to the database.
Sample Codecountry.xsjs
function saveCountry(country) { var conn = $.hdb.getConnection(); var output = JSON.stringify(country); var fnCreateCountry = conn.loadProcedure("tinyworld.tinydb::createCountry"); var result = fnCreateCountry({IM_COUNTRY: country.name, IM_CONTINENT: country.partof}); conn.commit(); conn.close(); if (result && result.EX_ERROR != null) { return result.EX_ERROR;} else { return output; }}var country = { name: $.request.parameters.get("name"), partof: $.request.parameters.get("continent")};// validate the inputs here!var output = saveCountry(country);$.response.contentType = "application/json";$.response.setBody(output);
6. In the development perspective, save all files and run the Node.js module again.
Right-click the module tinyjs/ and choose Run Run as Node.js Application in the context menu.
The Run as Node.js Application command automatically builds the application, too. You can view the build-run progress in the run console at the bottom of the SAP Web IDE screen; it should look like the following system output:
Application: https://host.acme.com:51012 Status: Running [] Stop
If a Web browser does not open automatically and display the page It's a tiny JS world!, paste the URL indicated in the system output into your Web browser, for example: https://host.acme.com:51012.
7. Use your browser to test that the new XS JavaScript service is available.
Since we did not change the code in the file application start-up file index.xsjs, the Web browser still displays the text “It's a tiny JS World!”. However, we can us a modified URL to test if the new XS JavaScript service is up, running, and ready to use.
SAP HANA Developer Quick Start GuideGetting Started with Application Development in XS Advanced PUBLIC 143

In your Web browser, replace the URL element “/index.xsjs” with the string “/country/country.xsjs?name=Zambia&continent=Africa”; the resulting URL should look like the following example;
https://host.acme.com:51012/country/country.xsjs?name=Zambia&continent=Africa
The output should look like the following example:
Output Code
{ "name": "Zambia" "partof": "Africa" }
TipYou can add additional countries to other continents by replacing the appropriate values, for example: /country/country.xsjs?name=Vietnam&continent=Asia or /country/country.xsjs?name=Finland&continent=Europe
8. Check that the tables have been successfully updated in the catalog and contain the countries you added.
To view the contents of the HDI container that is bound to your development project, right-click the database module where the design-time tables are stored, and in the context menu choose Open HDI Container.
TipThe new tables are listed in the catalog's Tables node. Right-click the table tinyf.country and choose Open Data in the context menu. The countries you added (Zambia, Vietnam, and Finland) should appear in the name column alongside their respective continent (Africa, Asia, and Europe) in the adjacent partof.continent column.
Related Information
Deploy the "Tiny World" Application [page 149]
144 PUBLICSAP HANA Developer Quick Start Guide
Getting Started with Application Development in XS Advanced

3.1.3.1 Debug the JavaScript Code in the "Tiny World" Application
Use the built-in debugging tools to find and fix bugs in the JavaScript code.
Prerequisites
● You have access to a running SAP HANA system where the XS advanced run time is installed and configured
● You have installed the XS command-line client on your development machine.The XS CLI client tools are installed by default on the SAP HANA server. However, you must download and install the client tools locally, if you want to connect to SAP HANA from your local machine. The XS CLI client tools (xs.onpremise.runtime.client_<platform>-<version>.zip) can be downloaded from the SAP HANA server, from the installation DVD, or from the SAP support portal. For more information about the SAP support portal, see the link to SAP note 2242468 in the related links below.
● SAP Node.js packagesThe archive (xs_javascript-<version>-bundle.tar.gz) is available on the SAP HANA media and the SAP Marketplace (SMP); it includes a selection of Node.js packages developed by SAP for use with the Node.js applications running in the XS advanced run time.
TipAlternatively, you can configure NPM to resolve SAP-related NPM dependencies using the public NPM Registry (at https://registry.npmjs.org).
● You have access to the developer tools included in the SAP Web IDE for SAP HANAIf the SAP Web IDE for SAP HANA is not available at the default URL https://host.acme.com:53075, in a command shell, log in to the XS advanced run time and use the command xs app webide to display the URL required to access the tool.
● You have successfully completed the instructions described in the following tutorials:○ Create a Simple “Tiny World” Application in XS Advanced○ Extend the “Tiny World” Application to use an OData Service and Client UI○ Add Business Logic to the “Tiny World” Application
CautionThe code examples included in this document for XS advanced are sometimes syntactically incomplete; as a general rule, code examples are intended for illustration purposes only.
Context
The built-in debugging tools enable you to perform standard debugging tasks, such as adding breakpoints to the code and starting, stepping through, and resuming code execution. You can also inspect variables and check the validity of expressions.
SAP HANA Developer Quick Start GuideGetting Started with Application Development in XS Advanced PUBLIC 145

Procedure
1. Choose Run Run as Node.js Application in the tool bar for the Node.js module tinyjs in the “Tiny World” application.
2. Choose View Debugger in the tool bar, to display the built-in JavaScript debugging tools.
3. Choose (attach) in the (debugger) pane and select your running Node.js application in the dialog.4. Set a break point to test the debug mode.
Open the JavaScript file tinyjs/lib/country/country.xsjs and set a break point at line 21 by clicking to the left of the line number displayed in the built-in JavaScript editor.
5. Test the JavaScript code.
Open a new Web browser (or tab) and append the string “/country/country.xsjs?name=Andorra&continent=Europe” to the “tinyui” application entry point URL, as illustrated in the following example:
https://host.acme.com:51013/country/country.xsjs?name=Andorra&continent=Europe
NoteThe debugger displays a notification indicating that the “tinyui” application is suspended at the break point you just set.
6. Debug the JavaScript code.
In the SAP Web IDE for SAP HANA's debug tool you can examine the call stack and see the value assigned to any variable in the function “saveCountry”. If you want to modify variables in the context of the current breakpoint, you can use the Debug Console to type in any valid JavaScript statement, including variable assignments.
7. Resume the debugging process.
Choose Resume to complete execution of the JavaScript file.
NoteIf the debugging process takes too long, the Web browser might time out; the Debugger tool displays a message indicating that the Websocket for the attached debug session has been closed. However, the operation should have completed.
Related Information
The SAP HANA XS Advanced JavaScript Run TimeRun Unit Tests on the "Tiny World" Application's JavaScript Code [page 147]Add Business Logic to the "Tiny World" Application [page 140]
146 PUBLICSAP HANA Developer Quick Start Guide
Getting Started with Application Development in XS Advanced

3.1.3.2 Run Unit Tests on the "Tiny World" Application's JavaScript Code
Use the built-in Jasmine-based unit-test tools to check the JavaScript code.
Prerequisites
● You have access to a running SAP HANA system where the XS advanced run time is installed and configured
● You have installed the XS command-line client on your development machine.The XS CLI client tools are installed by default on the SAP HANA server. However, you must download and install the client tools locally, if you want to connect to SAP HANA from your local machine. The XS CLI client tools (xs.onpremise.runtime.client_<platform>-<version>.zip) can be downloaded from the SAP HANA server, from the installation DVD, or from the SAP support portal. For more information about the SAP support portal, see the link to SAP note 2242468 in the related links below.
● SAP Node.js packagesConfigure NPM to resolve dependencies to Node.js packages developed by SAP by using the public NPM Registry (at https://registry.npmjs.org). In the NPM registry configuration file .npmrc, add the following line:
@sap:registry=https://registry.npmjs.org
● You have access to the developer tools included in the SAP Web IDE for SAP HANAIf the SAP Web IDE for SAP HANA is not available at the default URL https://host.acme.com:53075, in a command shell, log in to the XS advanced run time and use the command xs app webide to display the URL required to access the tool.
● You have successfully completed the instructions described in the following tutorials:○ Create a Simple “Tiny World” Application in XS Advanced○ Extend the “Tiny World” Application to use an OData Service and Client UI○ Add Business Logic to the “Tiny World” Application
CautionThe code examples included in this document for XS advanced are sometimes syntactically incomplete; as a general rule, code examples are intended for illustration purposes only.
Context
SAP HANA XS classic supports a Jasmine-like unit-test pattern called “XSUnit”, which can also be used in XS advanced to develop unit tests for a Node.js application. When you create a Node.js module for your multi-target application (MTA), the SAP Web IDE for SAP HANA creates a new folder named “test/”, which includes a sample test library named “sampleTest.xsjslib”. You can use this sample test library to run some simple tests on the Node.js files in the “Tiny World” application.
SAP HANA Developer Quick Start GuideGetting Started with Application Development in XS Advanced PUBLIC 147

Procedure
1. Create a new test run-configuration for your Node.js application module tinyjs.
a. Create a new test run-configuration.
Choose Run Run Configurations in the tool bar.b. In the Run Configurations dialog, choose [+], select Node.js Test in the drop-down list.c. Type the name test and choose Save and Run.
XSUnit runs your Node.js module tinyjs in XS JavaScript test mode. The test finds the sampleTest.xsjslib file because it matches the test file pattern “*test” defined in the run configuration you created. The Node.js Test Execution pane displays the results of the test.
2. Add a more meaningful function to the unit test.
Since the original test is not doing anything particularly interesting (expect(0).toBe(1);), replace the function it("not ok"...) in the test file sampleText.xsjslib with something more meaningful, for example, a calculation of a simple sum, as illustrated in bold text in the following example:
Sample Code
describe("sample test suite", function() { beforeEach(function() { }); it("add simple", function() { $.import("calc", "calculator"); var calc = $.calc.calculator; var sum = calc.add(1, 1); expect(sum).toBe(2); }); });
At this point the test cannot run since neither the test library calculator.xsjslib nor the function add exists.
3. Add the calculator test code.
Create a new JavaScript library named calculator.xsjslib in the folder tinyjs/lib/calc; the completed test library should look like the following example:
Sample Codetinyjs/lib/calc
function add(a, b) { return a+b;}
4. Add more tests as required.
You can add new tests (for example, as additional it functions) or test suites (for example,using the describe function) either in the same test file (sampleTest.xsjslib) or other test libraries in the predefined test/ folder.
148 PUBLICSAP HANA Developer Quick Start Guide
Getting Started with Application Development in XS Advanced

NoteThe name of any new test file must contain the string “Test”, for example, myTest.xsjslilb or myotherTest.xsjslib. This ensures that the file name matches the required *Test defined in the Test File Pattern box in the run configuration.
3.1.4 Deploy the "Tiny World" Application
Deploy the “Tiny World” application to the SAP HANA XS advanced run time.
Prerequisites
● You have access to a running SAP HANA system where the XS advanced run time is installed and configured
● You have installed the XS command-line client on your development machine.The XS CLI client tools are installed by default on the SAP HANA server. However, you must download and install the client tools locally, if you want to connect to SAP HANA from your local machine. The XS CLI client tools (xs.onpremise.runtime.client_<platform>-<version>.zip) can be downloaded from the SAP HANA server, from the installation DVD, or from the SAP support portal. For more information about the SAP support portal, see the link to SAP note 2242468 in the related links below.
● SAP Node.js packagesThe archive (xs_javascript-<version>-bundle.tar.gz) is available on the SAP HANA media; it includes a selection of Node.js packages developed by SAP for use with the Node.js applications running in the XS advanced run time.
TipAlternatively, you can configure NPM to resolve SAP-related NPM dependencies using the latest packages available on the public NPM Registry (at https://registry.npmjs.org). For more information, see Related Information below.
● You have access to the developer tools included in SAP Web IDE for SAP HANAIf SAP Web IDE for SAP HANA is not available at the default URL https://host.acme.com:53075, in a command shell, log in to the XS advanced run time and use the command xs app webide to display the URL required to access the tool.
● You have successfully completed the instructions described in the following tutorials:○ Create a Simple “Tiny World” Application in XS Advanced○ Extend the “Tiny World” Application to use an OData Service and Client UI○ Add Business Logic to the “Tiny World” Application
CautionThe code examples included in this document for XS advanced are sometimes syntactically incomplete; as a general rule, code examples are intended for illustration purposes only.
SAP HANA Developer Quick Start GuideGetting Started with Application Development in XS Advanced PUBLIC 149

Context
Application life cycle management is the processes followed by an administrator to transport, install, deploy, maintain and upgrade applications for productive systems. A multi-target applications (MTA) is transported in the form of a (compressed and digitally signed) archive called an MTA archive (MTAR). Deploying an MTA to the XS advanced run time involves deploying each module to its corresponding target run time container, as described in this tutorial..
Procedure
1. Create the MTA archive.a. Build the individual application modules in the following order:
○ tinydbIn the project navigation pane, right-click the module tinydb and choose Build in the context menu.12:44:25 PM (Builder) Build of /tinyworld/tinydb completed successfully.
○ tinyjsIn the project navigation pane, right-click the module tinyjs and choose Build in the context menu.12:44:37 PM (Builder) Build of /tinyworld/tinyjs started. 12:44:39 PM (DIBuild) Build of /tinyworld/tinyjs in progress 12:45:25 PM (Builder) Build of /tinyworld/tinyjs completed successfully
○ tinyuiIn the project navigation pane, right-click the module tinyui and choose Build in the context menu.12:45:57 PM (Builder) Build of /tinyworld/tinyui completed successfully.
b. Specify the application version.
The ID and version properties in the application descriptor file mta.yaml define the application version in the production environment.
For the first version of our application, update the value of the version property in the mta.yaml file to “1.0.0”, as illustrated below:
Sample Code
ID: tinyworld description: Tiny world tutorialversion: 1.0.0 [...]
c. Build the complete “tinyworld” application project.
Right-click the project folder tinyworld/ and choose Build in the context menu. You can follow the progress of the build in the console at the bottom of the details pane in the SAP Web IDE for SAP HANA.
150 PUBLICSAP HANA Developer Quick Start Guide
Getting Started with Application Development in XS Advanced

Output Code
12:46:03 PM (Builder) Build of /tinyworld started. 12:46:20 PM (DIBuild) ********** Printing /tinyworld Build Log **********[INFO] Reading mta.yaml[INFO] Processing mta.yaml[INFO] Creating MTA archive[INFO] Saving MTA archive tinyworld_1.0.0.mtar********** End of /tinyworld Build Log **********12:46:20 PM (DIBuild) Build results link: https://host.acme.com:53075/che/builder/... 12:46:20 PM (Builder) Build of /tinyworld completed successfully.
If the build process completes successfully, an MTA archive named tinyworld_1.0.0.mtar is created in the root folder of the application project (mta_archives/tinyworld/).
d. Download the MTA archive to your local file system.
In the project navigation pane, right-click the MTA archive tinyworld_1.0.0.mtar and choose Exportin the context menu.
2. Deploy the tinyworld MTA to your SAP HANA XS advanced run time.
In this tutorial, we use command-line tools to deploy the application to SAP HANA.
As an administrator, use the xs command-line tool to log in into XS advanced run time on the target system, organization and space. In this tutorial we will use “Rita” as our administrator, “myorg” as our organization and “PROD” as our space.
a. Log on as an administrator to the XS advanced run time on the target SAP HANA system.
xs login -a https://host.acme.com:30030 -u RITA --skip-ssl-validation
NoteYou will need to provide a password for RITA and,when prompted, choose the organization and space from the lists, for example, by typing the corresponding number: “0” for “PROD”.
In this example, the administrator user “RITA” has logged on to the XS advanced run-time space “PROD” in the default organization “myorg”.
Output Code
xs login -u RITA Existing spaces: 0. PROD 1. SAP SPACE> 0 API endpoint: https://host.acme.com:30030 User: RITA Org: myorg Space: PROD
b. Check that the user RITA has the required user permissions in the space “PROD”.
xs space-users myorg PROD
Listing users in space "PROD" of org "myorg" by role ... role users
SAP HANA Developer Quick Start GuideGetting Started with Application Development in XS Advanced PUBLIC 151

--------------------------SpaceManager RITASpaceDeveloper RITA SpaceAuditor
TipIf necessary, grant RITA the required permissions:
xs set-space-role RITA myorg PROD SpaceDeveloper
c. Check that you are in the correct space for the application deployment.
xs target
API endpoint: https://host.acme.com:30030 (API version: 1) User: RITAOrg: myorg Space: PROD
TipIf necessary, switch to the target space for deployment (“PROD”):
xs target -o myorg –s PROD
d. Deploy the MTA archive to the target space.
In the command shell, change directory to the location where you saved the MTA archive you want to deploy, then run the following command:
xs deploy tinyworld_1.0.0.mtar --use-namespaces
Follow the deployment progress in the output displayed in the command shell. On successful completion, the following message is displayed in the console:
Output Code
... 1 of 1 instances running (1 running) Application "tinyworld.tinyui" started and available at "https://host.acme.com:51016" Publishing public provided dependencies... Registering service URLs... Creating service brokers... Process finished
TipAs indicated in the system output, the services required by the deployed application are started automatically, for example: hdi-container and tiny_uaa.
3. Test the deployed application in a Web browser.a. Paste the URL assigned the deployed application into a Web browser; the URL can be copied from the
system output in the console.
https://host.acme.com:51016
152 PUBLICSAP HANA Developer Quick Start Guide
Getting Started with Application Development in XS Advanced

The application starts in the Web browser; you can log on using any valid database user, for example, “RITA”.
b. Display details of the deployed “tinyui” application running in the current space.
In the command shell, run the following command:
xs app tinyworld.tinyui
Showing status and information about "tinyworld.tinyui" name: tinyworld.tinyui requested state: STARTED instances: 1 memory: <not specified> disk: <not specified> buildpack: <default> urls: https://host.acme.com:51016Instances of droplet 1 created at Mar 11, 2016 1:41:09 PMindex created state host internal port------------------------------------------------------------------------------------0 Mar 11, 2016 1:41:18 PM RUNNING host.acme.com 50012
c. Paste the URL displayed into your Web browser.
https://host.acme.com:51016
The Web browser displays the database table “European Countries” table.
NoteThe table is empty because we have just deployed this application to a new HDI container, which might not have all the content we added manually in other tutorials.
Related Information
Download and Consume SAP Node.js PackagesAdd Business Logic to the "Tiny World" Application [page 140]Upgrade and Redeploy the "Tiny World" Application [page 153]The XS Command-Line Interface Reference
3.1.5 Upgrade and Redeploy the "Tiny World" Application
Prerequisites
● You have access to a running SAP HANA system where the XS advanced run time is installed and configured
● You have installed the XS command-line client on your development machine.
SAP HANA Developer Quick Start GuideGetting Started with Application Development in XS Advanced PUBLIC 153

The XS CLI client tools are installed by default on the SAP HANA server. However, you must download and install the client tools locally, if you want to connect to SAP HANA from your local machine. The XS CLI client tools (xs.onpremise.runtime.client_<platform>-<version>.zip) can be downloaded from the SAP HANA server, from the installation DVD, or from the SAP support portal. For more information about the SAP support portal, see the link to SAP note 2242468 in the related links below.
● SAP Node.js packagesThe archive (xs_javascript-<version>-bundle.tar.gz) is available on the SAP HANA media; it includes a selection of Node.js packages developed by SAP for use with the Node.js applications running in the XS advanced run time.
TipAlternatively, you can configure NPM to resolve SAP-related NPM dependencies using the latest packages available on the public NPM Registry (at https://registry.npmjs.org). For more information, see Related Information below.
● You have access to the developer tools included in SAP Web IDE for SAP HANAIf SAP Web IDE for SAP HANA is not available at the default URL https://host.acme.com:53075, in a command shell, log in to the XS advanced run time and use the command xs app webide to display the URL required to access the tool.
● You have successfully completed the instructions described in the following tutorials:○ Create a Simple “Tiny World” Application in XS Advanced○ Extend the “Tiny World” Application to use an OData Service and Client UI○ Add Business Logic to the “Tiny World” Application○ Deploy the “Tiny World” Application
CautionThe code examples included in this document for XS advanced are sometimes syntactically incomplete; as a general rule, code examples are intended for illustration purposes only.
Context
After you have successfully deployed the initial version of the tinyworld application, you can add a new feature to the application and then upgrade the version of the application running in the production environment by re-deploying the modified application. In this example, the upgrade involves the following modifications:
● A new button in the user interface; the button enables you to add a country to the database table “European Countries” (tinyworld/tinydb/tinyf.country).
● A new form for collecting country information in the UI module (tinyui); this information will be passed to the tinyjs module by means of a “POST” HTTP request.
● A change to Node.js module (tinyjs) to process this new API
154 PUBLICSAP HANA Developer Quick Start Guide
Getting Started with Application Development in XS Advanced

Procedure
1. Update the content of the file resources/index.html in the tinyui application module.
Add the content highlighted in bold text in the following example to the file tinyworld/tinyui/resources/index.html:
Sample Code
<!DOCTYPE HTML><head><meta http-equiv="X-UA-Compatible" content="IE=Edge" /> <title>DevXdemo</title><script src="https://sapui5.hana.ondemand.com/resources/sap-ui-core.js" id="sap-ui-bootstrap" data-sap-ui-libs="sap.ui.commons, sap.ui.table" data-sap-ui-theme="sap_bluecrystal"></script> <script src="./Util.js" > </script> <script> var oModel = new sap.ui.model.odata.ODataModel("/euro.xsodata", true); var oTable = new sap.ui.table.Table({ title: "European Countries", visibleRowCount: 5, id: "tinytab", toolbar: new sap.ui.commons.Toolbar({items: [ new sap.ui.commons.Button({text: "Add Country", press:openFirstDialog}) ]})}); oTable.addColumn(new sap.ui.table.Column({ label: "Country Name", template: "name" }));oTable.setModel(oModel); oTable.bindRows("/euro"); oTable.placeAt("content"); </script> </head><body class='sapUiBody'> <div id='content'></div> </body> </html>
NoteYou create the JavaScript file Util.js in the next step.
2. Create a new JavaScript resource named Util.js in the folder tinyui/resources/ folder of the “tinyworld” application project.
a. Right-click the folder tinyui/resources/ and choose New File from the context menu.b. Type the name Util.js.c. Paste the following code into the new JavaScript Util.js.
TipThis code creates a small form with two fields and 'OK' button where users can enter a new country name and continent. When the user clicks the 'OK' button we construct and send the POST request to the server.
Sample Code
var oFirstDialog; function openFirstDialog() { if (oFirstDialog) { oFirstDialog.open();
SAP HANA Developer Quick Start GuideGetting Started with Application Development in XS Advanced PUBLIC 155

} else { oFirstDialog = new sap.ui.commons.Dialog({ width: "400px", // sap.ui.core.CSSSize height: "550px", // sap.ui.core.CSSSize title: "Country Details", // string applyContentPadding: true, // boolean modal: true, // boolean content: [new sap.ui.commons.form.SimpleForm({ content: [ new sap.ui.core.Title({ text: "Country Name" }), new sap.ui.commons.Label({ text: "name"}), new sap.ui.commons.TextField({ value: "", id: "name" }), new sap.ui.commons.Label({ text: "partof" }), new sap.ui.commons.TextField({ value: "", id: "partof" }) ] })] // sap.ui.core.Control }); oFirstDialog.addButton(new sap.ui.commons.Button({ text: "OK", press: function() { var name = sap.ui.getCore().byId("name").getValue(); var partof = sap.ui.getCore().byId("partof").getValue(); var payload = {}; payload.name = name; payload.partof = partof; var insertdata = JSON.stringify(payload); $.ajax({ type: "POST", url: "country/country.xsjs", contentType: "application/json", data: insertdata, dataType: "json", crossDomain: true, success: function(data) { oFirstDialog.close(); sap.ui.getCore().byId("tinytab").getModel().refresh(true); alert("Data inserted successfully"); }, error: function(data) { var message = JSON.stringify(data); alert(message); } }); } })); oFirstDialog.open(); }}
3. Add a new route to the application descriptor: the configuration file for the application router.
Open the file tinyui/xs-app.json and add the code highlighted in bold text in the following example.
Sample Code
{ welcomeFile": "index.html", "authenticationMethod": "none", "routes": [{ "source": "^/euro.xsodata/.*$", "destination": "tinyjs_be" }, { "source": ".*\\.xsjs",
156 PUBLICSAP HANA Developer Quick Start Guide
Getting Started with Application Development in XS Advanced

"destination": "tinyjs_be" }] }
4. Make a small modification to the JavaScript tinyjs/lib/country/country.xsjs.
The modification (highlighted in bold text in the following example) fetches country data from the request body instead of URL parameters (as expected by the HTTP POST method) and return the status “success” or “failure”:
Open the file country.xsjs and add the code highlighted in bold text in the following example.
Sample Code
function saveCountry(country) { var conn = $.hdb.getConnection(); var output = JSON.stringify(country); var fnCreateCountry = conn.loadProcedure("tinyworld.tinydb::createCountry"); var result = fnCreateCountry({IM_COUNTRY: country.name, IM_CONTINENT: country.partof}); conn.commit(); conn.close(); if (result && result.EX_ERROR !== null) { return {body : result, status: $.net.http.BAD_REQUEST};
} else { return {body : output, status: $.net.http.CREATED}; }}var body = $.request.body.asString();var country = JSON.parse(body);// validate the inputs here!var output = saveCountry(country);$.response.contentType = "application/json"; $.response.setBody(output.body);$.response.status = output.status;
5. Rebuild the application modules.a. Build the database application module tinydb/.
Right-click the module tinydb/ and choose Build in the context menu.b. Run the Node.js application module tinyjs/.
Right-click the module tinyjs/ and choose Run Run as Node.js Application in the context menu.c. Run the UI5 application module tinyui/.
Right-click the module tinyui and choose Run Run as Web Application .
6. Start the application in your Web browser.
Paste the application URL specified at the end of the tinyui build run in into the Web browser, for example:
Run tinyworld/tinyui Application: https://host.acme.com:51013
SAP HANA Developer Quick Start GuideGetting Started with Application Development in XS Advanced PUBLIC 157

A new button Add Country is displayed in the application user interface: it is positioned beneath the table title European Countries.
7. Test the new Add Country feature.
Choose Add Country and, in the Country Details dialog, type the name of a country (Ireland) and continent (Europe), and choose OK.
The country “Ireland” appears in the database table European Countries.8. Update the application version to reflect the changes you have made.
The ID and version properties in the application descriptor file mta.yaml define the application version in the production environment.
For the updated version of the “Tiny World” application, update the value of the version property in the mta.yaml file to “2.0.0”, as illustrated below:
Sample Code
ID: tinyworld description: Tiny world tutorialversion: 2.0.0 [...]
9. Create the MTA archive.a. Build the individual application modules in the following order:
○ tinydbIn the project navigation pane, right-click the module tinydb and choose Build in the context menu.
○ tinyjsIn the project navigation pane, right-click the module tinyjs and choose Build in the context menu.
○ tinyuiIn the project navigation pane, right-click the module tinyui and choose Build in the context menu.
b. Build the complete “tinyworld” application project.
Right-click the project folder tinyworld/ and choose Build in the context menu. You can follow the progress of the build in the console at the bottom of the details pane in the SAP Web IDE for SAP HANA.
Output Code
12:46:03 PM (Builder) Build of /tinyworld started. 12:46:20 PM (DIBuild) ********** Printing /tinyworld Build Log **********[INFO] Reading mta.yaml[INFO] Processing mta.yaml[INFO] Creating MTA archive[INFO] Saving MTA archive tinyworld_2.0.0.mtar********** End of /tinyworld Build Log **********12:46:20 PM (DIBuild) Build results link: https://host.acme.com:53075/che/builder/... 12:46:20 PM (Builder) Build of /tinyworld completed successfully.
158 PUBLICSAP HANA Developer Quick Start Guide
Getting Started with Application Development in XS Advanced

If the build process completes successfully, an MTA archive named tinyworld_2.0.0.mtar is created in the root folder of the application project (mta_archives/tinyworld/).
c. Download the MTA archive to your local file system.
In the project navigation pane, right-click the MTA archive tinyworld_2.0.0.mtar and choose Exportin the context menu.
10. Deploy the tinyworld MTA to your SAP HANA XS advanced run time.
In this tutorial, we use command-line tools to deploy the application to SAP HANA.
As an administrator, use the xs command-line tool to log in into XS advanced run time on the target system, organization and space. In this tutorial we will use “RITA” as our administrator, “myorg” as our organization and “PROD” as our space.
a. Log on as an administrator to the XS advanced run time on the target SAP HANA system.
xs login -a https://host.acme.com:30030 -u RITA -o myorg -s PROD --skip-ssl-validation
In this example, the administrator user “RITA” has logged on to the XS advanced run-time space “PROD” in the default organization “myorg”.
TipTo display details of the space you are logged into, use the xs target command.
b. Deploy the MTA archive to the target space.
In the command shell, change directory to the location where you saved the MTA archive you want to deploy, then run the following command:
xs deploy tinyworld_2.0.0.mtar --use-namespaces
Follow the deployment progress in the output displayed in the command shell. On successful completion, the following message is displayed in the console:
Output Code
... 1 of 1 instances running (1 running) Application "tinyworld.tinyui" started and available at "https://host.acme.com:51016" Publishing public provided dependencies... Registering service URLs... Creating service brokers... Process finished
TipAs indicated in the system output, the services required by the deployed application are started automatically, for example: hdi-container and tiny_uaa.
11. Test the deployed application in a Web browser.a. Display a list of the applications running in the current space.
SAP HANA Developer Quick Start GuideGetting Started with Application Development in XS Advanced PUBLIC 159

In the command shell, run the following command:
xs apps
Getting apps in org "orgname" / space "PROD" as RITA... Found apps:name requested state instances memory-----------------------------------------------------------------------------deploy-service STARTED 1/1 288 MBproduct-installer STARTED 1/1 512 MBhrtt-service STARTED 1/1 512 MBhrtt-core STARTED 1/1 512 MBdi-core-db STOPPED 0/1 256 MBdi-local-npm-registry STARTED 1/1 <not spe..di-core STARTED 1/1 512 MBdi-builder STARTED 1/1 640 MBdi-runner STARTED 1/1 512 MBwebide STARTED 1/1 1.00 GBRITA-j5d0r0x3h-tinyworld-tinyjs STARTED 1/1 1.00 MB RITA-j5d0r0x3h-tinyworld-tinyui STARTED 1/1 1.00 GB
b. Display details of the “tinyui” application running in the current space.
In the command shell, run the following command:
xs app RITA-j5d0r0x3ukcz1y6h-tinyworld-tinyui --urls
https://host.acme.com:51013 c. Paste the URL displayed into a Web browser.
https://host.acme.com:51013
The Web browser displays the database table “European Countries” table and the new UI elements provided with the upgrade.
Related Information
Download and Consume SAP Node.js PackagesDeploy the "Tiny World" Application [page 149]Add User Authentication to the "Tiny World" Application [page 161]The XS Command-Line Interface Reference
160 PUBLICSAP HANA Developer Quick Start Guide
Getting Started with Application Development in XS Advanced

3.1.6 Add User Authentication to the "Tiny World" Application
Configure an application to require user authentication before responding to user requests.
Prerequisites
● You have access to a running SAP HANA system where the XS advanced run time is installed and configured
● You have access to the developer tools included in SAP Web IDE for SAP HANAIf SAP Web IDE for SAP HANA is not available at the default URL https://host.acme.com:53075, in a command shell, log in to the XS advanced run time and use the command xs app webide to display the URL required to access the tool.
● You have successfully completed the instructions described in the following tutorials:○ Create a Simple “Tiny World” Application in XS Advanced○ Extend the “Tiny World” Application to use an OData Service and Client UI○ Add Business Logic to the “Tiny World” Application○ Deploy and Upgrade the “Tiny World” Application
CautionThe code examples included in this document for XS advanced are sometimes syntactically incomplete; as a general rule, code examples are intended for illustration purposes only.
Context
Authentication forces the users of an application to identify themselves, and only those users with the required authorization will be allowed access. Authentication and authorization are managed using the XS advanced User Account and Authentication (UAA) service. XS UAA is an OAuth authorization service that provides support for SAP HANA and SAML2 authentication. The configuration steps performed in this tutorial require changes to the following design-time artifacts:
● tinyjs/server.jsThe startup file for the “Tiny World” JavaScript application.
● tinyui/xs-app.jsonThe application descriptor for the “Tiny World” JavaScript application; the “application descriptor” is required to configure an MTA's Node.js application router package.
● mta.yamlThe “Tiny World” JavaScript application's deployment descriptor, which specifies the dependencies required to ensure successful deployment to the XS advanced JavaScript run time.
SAP HANA Developer Quick Start GuideGetting Started with Application Development in XS Advanced PUBLIC 161
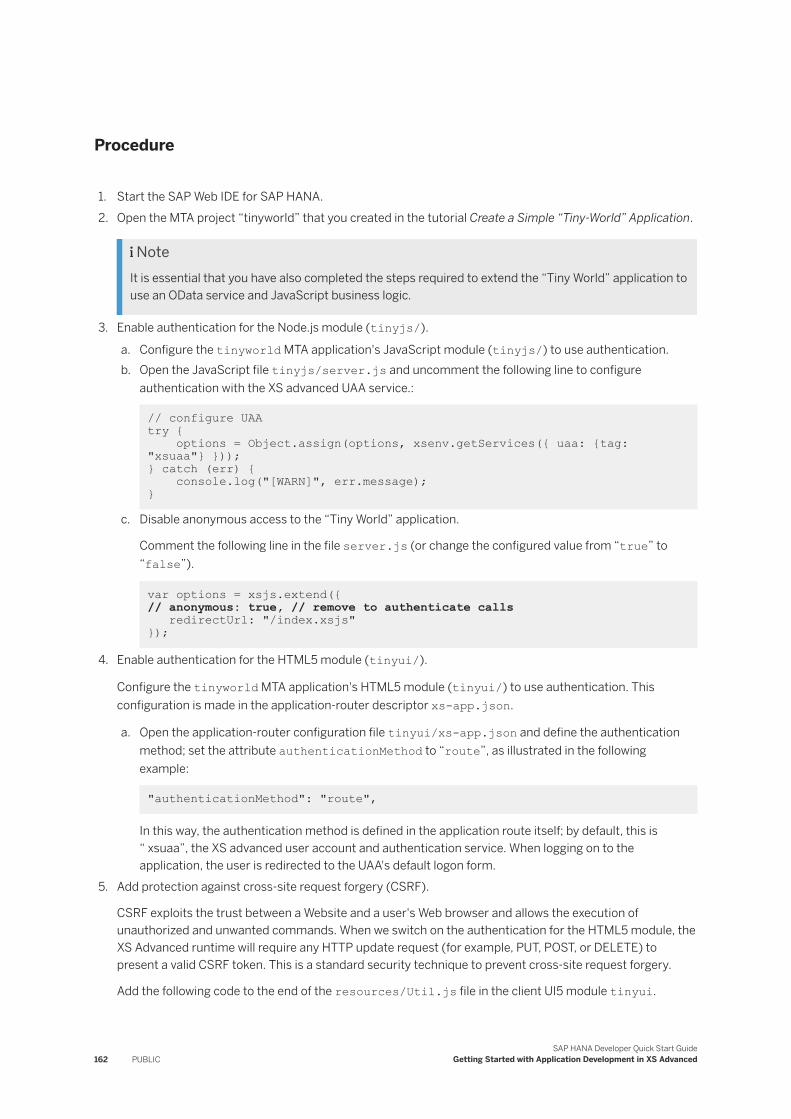
Procedure
1. Start the SAP Web IDE for SAP HANA.2. Open the MTA project “tinyworld” that you created in the tutorial Create a Simple “Tiny-World” Application.
NoteIt is essential that you have also completed the steps required to extend the “Tiny World” application to use an OData service and JavaScript business logic.
3. Enable authentication for the Node.js module (tinyjs/).
a. Configure the tinyworld MTA application's JavaScript module (tinyjs/) to use authentication.b. Open the JavaScript file tinyjs/server.js and uncomment the following line to configure
authentication with the XS advanced UAA service.:
// configure UAA try { options = Object.assign(options, xsenv.getServices({ uaa: {tag: "xsuaa"} })); } catch (err) { console.log("[WARN]", err.message); }
c. Disable anonymous access to the “Tiny World” application.
Comment the following line in the file server.js (or change the configured value from “true” to “false”).
var options = xsjs.extend({ // anonymous: true, // remove to authenticate calls redirectUrl: "/index.xsjs" });
4. Enable authentication for the HTML5 module (tinyui/).
Configure the tinyworld MTA application's HTML5 module (tinyui/) to use authentication. This configuration is made in the application-router descriptor xs-app.json.
a. Open the application-router configuration file tinyui/xs-app.json and define the authentication method; set the attribute authenticationMethod to “route”, as illustrated in the following example:
"authenticationMethod": "route",
In this way, the authentication method is defined in the application route itself; by default, this is “ xsuaa”, the XS advanced user account and authentication service. When logging on to the application, the user is redirected to the UAA's default logon form.
5. Add protection against cross-site request forgery (CSRF).
CSRF exploits the trust between a Website and a user's Web browser and allows the execution of unauthorized and unwanted commands. When we switch on the authentication for the HTML5 module, the XS Advanced runtime will require any HTTP update request (for example, PUT, POST, or DELETE) to present a valid CSRF token. This is a standard security technique to prevent cross-site request forgery.
Add the following code to the end of the resources/Util.js file in the client UI5 module tinyui.
162 PUBLICSAP HANA Developer Quick Start Guide
Getting Started with Application Development in XS Advanced

Sample Code
$(function() { // one time fetch of CSRF token $.ajax({ type: "GET", url: "/", headers: {"X-Csrf-Token": "Fetch"}, success: function(res, status, xhr) { var sHeaderCsrfToken = "X-Csrf-Token"; var sCsrfToken = xhr.getResponseHeader(sHeaderCsrfToken); // for POST, PUT, and DELETE requests, add the CSRF token to the header $(document).ajaxSend(function(event, jqxhr, settings) { if (settings.type==="POST" || settings.type==="PUT" || settings.type==="DELETE") { jqxhr.setRequestHeader(sHeaderCsrfToken, sCsrfToken); } }); } });});
6. Create an instance of the XS advanced UAA service, which can be used by the HTML5 and Node.js modules.
In order to bind the “Tiny World” application modules to the UAA service at run time, we first need to define a new UAA service. The configuration is performed in the application's central deployment descriptor mta.yaml, as illustrated in the following steps:
a. Add a new service instance to the “resources” section of the mta.yaml application descriptor file, as illustrated in bold text in the following example.
Sample Code
resources: - name: hdi_tinydb properties: hdi-container-name: '${service-name}' type: com.sap.xs.hdi-container - name: tiny_uaa type: com.sap.xs.uaa
b. Add a new service instance to the “requires” section of the mta.yaml application descriptor file, as illustrated in bold text in the following example.
NoteThe name of the new UAA service (tiny_uaa) must be added to the requires section of both the tinyjs and tinyui modules in the mta.yaml file, as illustrated in bold text in the following example:
Sample Code
- name: tinyjs type: nodejs path: tinyjs/ requires: - name: tiny_uaa - name: tinydb
SAP HANA Developer Quick Start GuideGetting Started with Application Development in XS Advanced PUBLIC 163

- name: hdi_tinydb provides: - name: tinyjs_api properties: url: ${default-url} - name: tinyui type: html5 path: tinyui/ requires: - name: tiny_uaa - name: tinyjs_api group: destinations properties: name: tinyjs_be url: ~{url}
c. Ensure that the authentication token acquired at run time by the tinyui/ module is automatically forwarded to the tinyjs/ module.
Add the attribute forwardAuthToken: true to the destinations property of the tinyui/ module in the mta.yaml application descriptor file, as illustrated in bold text in the following example.
Sample Code
- name: tinyui type: html5 path: tinyui/ requires: - name: tiny_uaa - name: tinyjs_api group: destinations properties: name: tinyjs_url url: ~{service_url} forwardAuthToken: true
7. Rebuild the application modules tinyjs/ and tinyui/.
a. Rebuild the application module tinyjs/.
Right-click the module tinyjs/ and choose Run Run as Node.js Application in the context menu.b. Rebuild the application module tinyui/.
Right-click the module tinyui and choose Run Run as Web Application .
Related Information
Add Authorization Checks to the "Tiny World" Application [page 165]
164 PUBLICSAP HANA Developer Quick Start Guide
Getting Started with Application Development in XS Advanced

3.1.7 Add Authorization Checks to the "Tiny World" Application
Configure an application to check authorizations before responding to user requests.
Prerequisites
● You have access to a running SAP HANA system where the XS advanced run time is installed and configured
● You have access to the developer tools included in SAP Web IDE for SAP HANAIf SAP Web IDE for SAP HANA is not available at the default URL https://host.acme.com:53075, in a command shell, log in to the XS advanced run time and use the command xs app webide to display the URL required to access the tool.
● You have successfully completed the instructions described in the following tutorials:○ Create a Simple “Tiny World” Application in XS Advanced○ Extend the “Tiny World” Application to use an OData Service and Client UI○ Add Business Logic to the “Tiny World” Application○ Deploy and Upgrade the “Tiny World” Application○ Add User Authentication to the “Tiny World” Application
CautionThe code examples included in this document for XS advanced are sometimes syntactically incomplete; as a general rule, code examples are intended for illustration purposes only.
Context
To enable authorization in an applications (such as tinyui), it is necessary to specify the scope a user must be assigned to be allowed to access the resources available at a specific route. The assignment of scopes to routes is configured in the application descriptor (xs-app.json) file, which is located under the tinyui/ MTA application folder. To impose an authorization check on any request to the Tiny World application, add an additional general route, and assign the appropriate scope to it, as follows:
Procedure
1. Start the SAP Web IDE for SAP HANA.2. Open the MTA project “tinyworld” that you created in the tutorial Create a Simple “Tiny-World” Application.
3. Define authorization scopes and role-templates.
SAP HANA Developer Quick Start GuideGetting Started with Application Development in XS Advanced PUBLIC 165

In XS advanced, the security descriptor xs-security.json is a configuration file that defines the authorization scopes used by the application and the role-templates that are used to build functional user roles.
For the purposes of our “Tiny World” application, the following security descriptor defines one scope to only view data ($XSAPPNAME.view, and another scope to create data ($XSAPPNAME.create) as well as the corresponding role-templates: tinyworldView and tinyworldCreate.
a. Create a security descriptor for your “Tiny World” application.
The security descriptor must be named xs-security.json and must be placed in the root folder of your XS advanced application project.
Right-click the root folder of your application project, choose New File in the context menu, and name the new file xs-security.json.
b. Define details of the authorization scopes and role templates to use for the “Tiny World” application.
Paste the following code into your new xs-security.json file.
Sample Code
{ "xsappname": "tinyworld", "scopes": [ { "name": "$XSAPPNAME.view", "description": "View data" }, { "name": "$XSAPPNAME.create", "description": "Create data"} ], "role-templates": [ { "name": "tinyworldView", "description": "Role for viewing data", "scope-references": [ "$XSAPPNAME.view" ] }, { "name": "tinyworldCreate", "description": "Role for creating data", "scope-references": [ "$XSAPPNAME.create", "$XSAPPNAME.view" ] } ] }
NoteYou use the widely available JSON validation tools to ensure that the contents of the file meet the JSON guidelines and rules.
c. Configure the User Account and Authentication (UAA) service to use the new security configuration defined in the xs-security.json file.
Open the application deployment descriptor (mta.yaml) and a parameter to the UAA service (tiny_uaa) in the resources section; the parameter defines the path to the security descriptor xs-security.json, as illustrated in the following example:
Sample Codemta.yaml Resources Section
resources: - name: hdi_tinydb properties:
166 PUBLICSAP HANA Developer Quick Start Guide
Getting Started with Application Development in XS Advanced

hdi-container-name: '${service-name}' type: com.sap.xs.hdi-container- name: tiny_uaa type: com.sap.xs.uaa parameters: path: ./xs-security.json
4. Provision the UAA service with the new security configuration.
Next we need to update our tiny_uaa service with the new authorization configuration defined in the xs-security.json file.
NoteThis manual step is only required if the SAP Web IDE for SAP HANA does not automatically recognize the change to the security configuration.
a. Open a command shell and log on to the XS Controller for your XS advanced run time.b. Delete the exisiting UAA service used by the “Tiny World” application.
xs delete-service tiny_uaac. Create a new UAA service for the “Tiny World” application.
xs create-service xsuaa devuser tiny_uaa -c ./xs-security.json
NoteThe security configuration uses the authorization scopes and role templates defined in the previous steps. The service plan “devuser” is designed for use at development time; it enables multiple developers to create UAA service instances with the same application name in their xs-security.json file. In XS advanced, application names must be unique; in the event of a name clash, the UAA service broker adds a suffix to the application name to make every application unique per user, for example, “tinyworld!u1” .
5. Add authorization checks to the application.
To enable user authorization in applications using an application router (for example, “tinyui”), it is necessary to specify the authorization scope a user must be assigned to access the resources provided by a specific route. The assignment of scopes to routes is configured in the so-called “application descriptor” (xs-app.json), which is located in the tinyui/ folder.
a. Open the application descriptor for the “Tiny World” application.b. Add (or modify) the application routes.
We extend the routes for the OData service (/euro.xsodata), the business logic change request feature (.*\\.xsjs), and the general application route ("^/(.*)$"), as illustrated in bold text in the following example:
Sample Codexs-app.json Application Routes
{ "welcomeFile": "index.html", "authenticationMethod": "route", "routes": [{ "source": "^/euro.xsodata/.*$", "destination": "tinyjs_be",
SAP HANA Developer Quick Start GuideGetting Started with Application Development in XS Advanced PUBLIC 167
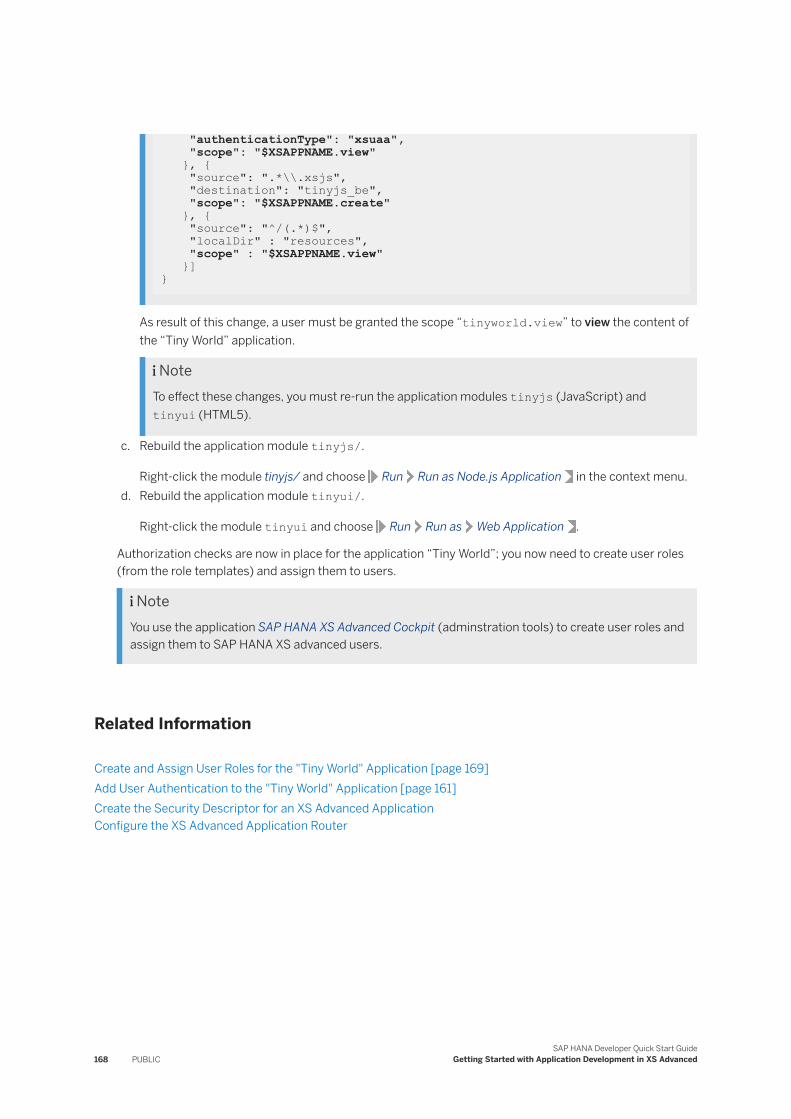
"authenticationType": "xsuaa", "scope": "$XSAPPNAME.view" }, { "source": ".*\\.xsjs", "destination": "tinyjs_be", "scope": "$XSAPPNAME.create" }, { "source": "^/(.*)$", "localDir" : "resources", "scope" : "$XSAPPNAME.view" }] }
As result of this change, a user must be granted the scope “tinyworld.view” to view the content of the “Tiny World” application.
NoteTo effect these changes, you must re-run the application modules tinyjs (JavaScript) and tinyui (HTML5).
c. Rebuild the application module tinyjs/.
Right-click the module tinyjs/ and choose Run Run as Node.js Application in the context menu.d. Rebuild the application module tinyui/.
Right-click the module tinyui and choose Run Run as Web Application .
Authorization checks are now in place for the application “Tiny World”; you now need to create user roles (from the role templates) and assign them to users.
NoteYou use the application SAP HANA XS Advanced Cockpit (adminstration tools) to create user roles and assign them to SAP HANA XS advanced users.
Related Information
Create and Assign User Roles for the "Tiny World" Application [page 169]Add User Authentication to the "Tiny World" Application [page 161]Create the Security Descriptor for an XS Advanced ApplicationConfigure the XS Advanced Application Router
168 PUBLICSAP HANA Developer Quick Start Guide
Getting Started with Application Development in XS Advanced

3.1.8 Create and Assign User Roles for the "Tiny World" Application
Create user roles from role-templates using the Application Role Builder.
Prerequisites
● You have access to a running SAP HANA system where the XS advanced run time is installed and configured
● You have access to the SAP HANA XS Advanced Administration and Monitoring ToolsXS advanced administration tools are available at the following default URL https://host.acme.com:51017
RestrictionAccess to the SAP HANA run-time tools requires the administrator permissions defined in the user parameters XS_RC_XS_AUTHORIZATION_ADMIN (XS_AUTHORIZATION_ADMIN) and XS_RC_XS_CONTROLLER_ADMIN (XS_CONTROLLER_ADMIN).
● You have access to the User Administration Tools in the Web-based Development Workbench for SAP HANA XS classic modelXS classic user-administration tools are available at the following default URL:https://host.acme.com:43<HANA_instance>/sap/hana/ide/security
RestrictionAccess to the user-administration tools for SAP HANA XS classic model requires the administrator permissions defined in the user role sap.hana.ide.roles::SecurityAdmin.
● The application has already been configured to use authorization scopes● You have successfully completed the instructions described in the following tutorials:
○ Create a Simple “Tiny World” Application in XS Advanced○ Extend the “Tiny World” Application to use an OData Service and Client UI○ Add Business Logic to the “Tiny World” Application○ Deploy and Upgrade the “Tiny World” Application○ Add User Authentication to the “Tiny World” Application○ Add Authorization Checks to the “Tiny World” Application
CautionThe code examples included in this document for XS advanced are sometimes syntactically incomplete; as a general rule, code examples are intended for illustration purposes only.
Context
To enable authorization checks in app-router based applications (such as the Tiny World “tinyui” application), you need to specify the authorization “scope” that a user must be assigned to in order to access
SAP HANA Developer Quick Start GuideGetting Started with Application Development in XS Advanced PUBLIC 169

resources available under a specific route. You also need to create roles based on the role-templates defined in your security configuration. Both the authorization scopes and the role-templates are defined in the security descriptor xs-security.json.
Procedure
1. Create roles and assign them to a role collection.
In XS advanced, you create a user role from the role-template defined in the application's security descriptor (xs-security.json) using the Application Role Builder included with the XS Advanced Administration and Monitoring Tools.
a. Start the XS Advanced Administration and Monitoring Tools.
TipTo display the URL required to start the tool, log on to the XS advanced run time in a command shell and run the following command:
xs app xsa-admin --urls
b. Start the Application Role Builder tool.c. Display details of the application for which you want to create roles.
In the Applications list locate and choose tinyworld!u1; the default roles tinyworldView and tinyworldCreate are already displayed in the details pane. We can use these default roles in this tutorial.
2. Create role collections for the “Tiny World” application users.
In XS advanced, you cannot assign a role to a user; you must assign one or more role collections. Role collections are aggregations of the roles needed by a user to access an application and perform a specific task, for example: view content or create content. In order to separate the View authorizations from the Create authorizations, you must create two different role collections: TinyViewRC and TinyCreateRC, as follows:
a. Start the Role Collection tool.b. Create a new role collection for viewing content.
In the list of role collections, choose [+], type the name TinyViewRC, and choose [+] Add Application Role.
In the dialog that pops up, use the drop-down menus to enter the required details of the application for which you want to create the role collection:
○ Application Name: tinyworld○ Template Name: tinyworldView○ Application Role: tinyworldView
c. Create a new role collection for creating content.
In the list of role collections, choose [+], type the name TinyCreateRC, and choose [+] Add Application Role.
In the dialog that pops up, use the drop-down menus to enter the required details of the application for which you want to create the role collection:
170 PUBLICSAP HANA Developer Quick Start Guide
Getting Started with Application Development in XS Advanced

○ Application Name: tinyworld○ Template Name: tinyworldCreate○ Application Role: tinyworldCreate
3. Assign the role collections to the application users.
In this step, you assign the role collections to the application users who want to use the tinyworld application. You assign role collections with the Security tool included with the SAP HANA Web-based Development Workbench.
a. Start the Security tool.
XS classic user-administration tools are available at the following default URL:
https://host.acme.com:43<HANA_instance>/sap/hana/ide/security
RestrictionAccess to the user-administration tools for SAP HANA XS classic model requires the administrator permissions defined in the user role sap.hana.ide.roles::SecurityAdmin.
b. Locate the user to whom you want to assign the role collection.
Expand the Users node, and double-click the appropriate user.c. Assign the role collection to the selected user.
Display the Application Role Collections tab, choose [+], select the newly added role collection, and in the drop-down list, choose TinyViewRC.. Repeat the operation to add the role collection TinyCreateRC. Save the changes and close the tool.
The authorization checks are now in place. To test your recent changes you must log on again to your “Tiny World” application; this action creates a new security token containing the new authorization scopes assigned to your user. Since there is no log-out option in our simple application, restart the Web browser, or open a new incognito session.
Related Information
Add Authorization Checks to the "Tiny World" Application [page 165]Create the Security Descriptor for an XS Advanced Application
3.1.9 Working with the SAP HANA Database Explorer
The SAP HANA database explorer provides a set of run-time tools that enable access to objects in HDI containers.
Use the database explorer to view and interact with HDI created content. After you've built your HDI containers, open the database explorer to verify that your objects were built correctly, debug your procedures, and query the database.
SAP HANA Developer Quick Start GuideGetting Started with Application Development in XS Advanced PUBLIC 171

The database explorer includes the following tools:
A catalog browser Browse, view, run, and visualize the content of all types of catalog objects, for example: tables, views, stored procedures, functions, and synonyms.
An SQL console Create SQLScript, run SQL statements and visualize objects in text form (such as, procedures and functions).
An SQL analyzer View query plans and analyze the performance of SQL queries.
An SQL debugger View the call stack, set break points, view and evaluate expressions and variables.
From the SAP Web IDE , start the SAP HANA database explorer by clicking Tools Database Explorer .
Related Information
Add HDI Containers and Databases to the SAP HANA Database Explorer [page 172]Managing SAP HDI Containers and ArtifactsSAP Web IDE for SAP HANA ReferenceSAP Note 2373065
3.1.9.1 Add HDI Containers and Databases to the SAP HANA Database Explorer
Add a built HDI container to the SAP HANA database explorer in the SAP Web IDE , so that you can browse its catalog objects and test its procedures and functions.
Prerequisites
You must be a space developer of the space that the HDI container is deployed in.
Context
Once an HDI container or database is added to the database explorer, it is listed in the catalog browser pane on the left.
You cannot add a database to the database explorer that uses LDAP authentication.
172 PUBLICSAP HANA Developer Quick Start Guide
Getting Started with Application Development in XS Advanced

Procedure
1. Open the database explorer from the SAP Web IDE by choosing Tools Database Explorer .
2. Add a database by clicking the Add a database to the Database Explorer icon ( ) from the catalog browser toolbar.
3. From the Database Type dropdown list, choose the type of database to add:
Database Type Action
An HDI container 1. Choose HDI container.2.
HDI containers contained in instance managers
1. Choose Application Managed Service Instances.2. Specify the instance manager that contains the HDI container you want to add.3.
4. (Optional) Specify advanced connection properties as required.
In the Advanced Options field, specify the advanced options as a semi-colon-separated, option-name=value pair. For example: locale=en-US, isolationLevel=READ COMMITTED.
Option Description
isolationLevel The isolation level for the connection. The supported values are: READ COMMITTED, REPEATABLE READ, and SERIALIZABLE. The default is to specify no isolation level.
locale The locale to use for the connection. If you do not set this option, then the database explorer looks for a locale setting in your user parameter, and then in your browser. If no locale setting is found, then the locale is set to en-US.
schema The name of the schema that you want to use
CLIENT Sets the session client for the connection. The value is a three character string. For example, CLIENT=100.
5. Click OK.
Results
By default, you are connected to the HDI container as the technical user.
Related Information
Open Catalog Objects
SAP HANA Developer Quick Start GuideGetting Started with Application Development in XS Advanced PUBLIC 173

3.1.9.2 View Database Procedures in the SAP HANA Database Explorer
Use the SAP HANA database explorer to view and test a database procedure.
Prerequisites
● You have access to a running SAP HANA system that includes a database procedure.
Procedure
Find your procedure in your catalog browser, and then choose one of the following options:
Option Action
View information about the procedure's parameters Click the procedure to open.
View the CREATE statement associated with the procedure
Open the procedure, and then click the CREATE Statement tab.
Generate a CALL statement for the procedure Open the procedure, and then click Generate CALL Statement.
Open the procedure to debug it (SAP Web IDE only) Right-click the procedure, and then choose Open for debugging.
Related Information
Working with the SAP HANA Database Explorer [page 171]Create a Simple "Tiny-World" Application [page 126]Create a Simple "Tiny-World" Application
3.1.9.3 Debug Procedures in the SAP HANA Database Explorer
Debug your stored procedures by using the SQL debugger in the SAP HANA database explorer.
Prerequisites
You must have the DEBUG object privilege granted to the schema or the procedures, that you want to debug.
174 PUBLICSAP HANA Developer Quick Start Guide
Getting Started with Application Development in XS Advanced

To allow a user to debug a procedure in another user's session, the secondary user must be granted the ATTACH DEBUGGER privilege. For example, user A can grant the ATTACH DEBUGGER privilege (using the GRANT statement) to user B to allow user B to debug a procedure in user A’s session. User B also needs the DEBUG privilege on the procedure.
Context
In the SAP Web IDE, use the development perspective to create stored procedures in .hdbprocedure modules and build them into HDI containers. Switch to the database explorer to test and debug the built procedures. To make corrections to the stored procedures, return to the development perspective.
Using the SQL debugger with user-provided services or application-managed service instances is not supported.
NoteIf you are debugging a procedure and subsequently make changes to the procedure, then you must restart the debugging session by detaching and re-attaching the debugger. Each debug session works with a snapshot of the procedure(s) and any subsequent changes to procedures are not visible in active debug sessions.
Procedure
1. Choose one of the following options to open the procedure for debugging:
Option Action
From the development perspective: 1. Open the stored procedure (the .hdbprocedure file.)
2. Right-click in the editor and choose Open Runtime Object.The database explorer opens, the HDI container appears in the catalog browser, and the metadata viewer for the procedure opens.
3. Right-click the procedure in the catalog browser item list and click Open for debugging.
From the database explorer: 1. Connect to the database.2. Locate the stored procedure in the database browser,
and then right-click and click Open for debugging.
The procedure opens in a code editor, the debugger opens on the right sidebar and connects to the database, and a debugger session starts.
2. Set breakpoints in the code of your stored procedure by clicking a line number.3. Call the procedure by right-clicking the procedure in the catalog browser item list and clicking Generate
CALL statement.
SAP HANA Developer Quick Start GuideGetting Started with Application Development in XS Advanced PUBLIC 175

a. In the code, enter values for any input parameters.b. Choose Run ( ) from the global toolbar.
The SQL console opens and it contains the CALL statement for your procedure.
The debugger stops at the first breakpoint and the session is suspended until you resume the debugging.
4. Choose (Resume module execution (F8)) or (Step over next function call (F10)) to step through the code execution.
Next Steps
Once you are finished debugging, click Detach debugger from running application ( ) to stop the debugging session.
3.1.9.4 Execute MDX Queries in the SAP HANA Database Explorer
Execute MDX queries on your database by using the MDX console included with the SAP HANA database explorer.
Prerequisites
You must have the required privileges in the SAP HANA database to execute your MDX statements.
Procedure
1. From the catalog browser choose the database that you want to run your MDX query against. You must be connected to the database.
2. From the global toolbar, click the MDX console icon ( ).3. Specify an MDX query.
4. Choose Run ( ) from the global toolbar to execute the query.
Option Action
Execute the query. Choose Run ( ) from the global toolbar.
Verify that your MDX statements are syntactically and semantically correct before you try to run them.
From the Run ( ) dropdown list in the global toolbar, choose Verify.
176 PUBLICSAP HANA Developer Quick Start Guide
Getting Started with Application Development in XS Advanced

Results
You have successfully executed an MDX query.
Related Information
Multidimensional Expressions (MDX)
3.2 Working with the XS Advanced Command-Line Client
SAP HANA XS advanced provides a set of command-line tools that enable access to (and control of) the SAP HANA XS advanced run-time environment.
The XS CLI client tools are installed by default on the SAP HANA server; they can be used if you have also installed the XS advanced run-time in your SAP HANA instance. However, you must download the client tools and install them locally, if you want to connect to SAP HANA from your local development machine. The package containing the XS CLI client tools (xs.onpremise.runtime.client_<platform>-<version>.zip) can be downloaded from the SAP HANA server, from the installation DVD, or from the SAP support portal. For more information about the SAP support portal, see the link to SAP Note 2242468 in Related Infomration below.
The XS command-line tools enable you to perform all the steps in the development process which are required to deploy multi-target applications to SAP HANA XS advanced run time; the process includes the following high-level steps:
1. Set up an application project environment (for example: users, organizations and spaces).2. Develop your application modules.
For example, for the underlying data model, the application business logic, and even the client user interface.
3. Build and run the individual application modules.4. Deploy the complete multi-target application to SAP HANA XS advanced.
Related Information
SAP Note 2242468The XS Command-Line Interface ReferenceGet Started with the XS CLI Client [page 178]Deploy a Node.js Hello-World Application using the XS CLI [page 183]Deploy a Node.js Application that Uses Database Artifacts and OData Services [page 188]
SAP HANA Developer Quick Start GuideGetting Started with Application Development in XS Advanced PUBLIC 177

3.2.1 Get Started with the XS CLI Client
Get started with the XS command-line tools that enable access to the SAP HANA XS advanced run-time environment.
Prerequisites
● You have installed the XS command-line client on your development machine.The XS CLI client tools are installed by default on the SAP HANA server. However, you must download and install the client tools locally, if you want to connect to SAP HANA from your local machine. The XS CLI client tools (xs.onpremise.runtime.client_<platform>-<version>.zip) can be downloaded from the SAP HANA server, from the installation DVD, or from the SAP support portal. For more information about the SAP support portal, see SAP Note 2242468 .
● SAP Node.js packagesYou configure NPM to resolve SAP-related NPM dependencies, for example, to Node.js packages developed by SAP for use with the Node.js applications running in the XS advanced run time.
● You have a Git client installed on your development machine.● You have access to the Internet from your development machine.● Logon access to the SAP HANA database with the privileges to create SAP HANA users (for example,
SYSTEM)
Context
You can use the XS command-line client to perform a wide-variety of developer- and administrator-related tasks. For example, in the role of a developer, you can use the XS CLI to connect to the XS advanced run time installed on the SAP HANA server, log on as a specific user, deploy and manage your applications. If you have the correct role assigned, you can also maintain selected aspects of the run-time space you are assigned to. As an administrator, and with the apropriate roles assigned, you can use the XS CLI to create and manage new users, maintain organizations and spaces, and assign authorizations to the new users in organizations and spaces.
In the following tutorial, you learn how to use the XS CLI to connect to SAP HANA, set up organizations and spaces for use by your development teams, assign roles to users in the organizations and spaces, create services, and bind services to the corresponding applications:
Procedure
1. Check that the XS advanced run time is installed and available on the SAP HANA server.
Enter the following URL in your Web browser:
https://<hana_hostname>:3<instance>30
178 PUBLICSAP HANA Developer Quick Start Guide
Getting Started with Application Development in XS Advanced

For example, for the SAP HANA instance “00” on the host “xsa.acme.com”:
https://xsa.acme.com:30030
This displays a Web page indicating that the XS advanced Web server is available.
TipAdding /v2/info to the URL above displays a JSON string in the Web browser, which includes details of a successful connection to the XS advanced controller.
2. Check that the XS client for XS advanced is installed and available.
The XS client tools are required to connect to the XS advanced run time on SAP HANA and deploy your XS advanced applications. If the XS advanced XS client tools are not installed on your developer machine, you can download the XS client package from the SAP HANA server, the installation DVD, or the SAP Service Portal.
On your client machine, run the following command in a command shell:
$ xs help $ xs -v
3. Connect to the XS advanced controller on the SAP HANA server.a. Specify the URL of the API end point on the SAP HANA server you want to connect to:
$ xs api https://hostname:3<instanceNr>30
If this command fails due to a missing SSL certificate, you can download the missing certificate from the SAP HANA server; the certificate default.root.crt.pem is typically installed in the following default location:
<installation_path>/<SID>/xs/controller_data/controller/ssl-pub/router/default.root.crt.pem
For example, where <installation_path>=/hana/shared/ and <SID>=HDB:
/hana/shared/HDB/xs/controller_data/controller/ssl-pub/router/default.root.crt.pem
TipFor temporary testing purposes you can also use the option --skip-ssl-validation, but this is not recommended in a production environment.
b. Install the security certificate on the machine where you are running the XS CLI client.
Place the copy of the root certificate in a safe location in your client file system, for example, /<path>/default.root.crt.pem
c. Set the API end point for client connections to the SAP HANA server using the newly installed certificate for authentication.
$ xs api https://<hostname>:3<instanceNr>30 -cacert /<path>/default.root.crt.pem
4. Log on to the XS advanced run time.
SAP HANA Developer Quick Start GuideGetting Started with Application Development in XS Advanced PUBLIC 179

You log on to the SAP HANA instance specified in the API end point set in a previous step. SAP HANA provides a default user XSA_ADMIN with administrator permissions; you can use this user ID to test the logon. However, it is recommended to create a new user with more limited permissions, which you can use to log on for developer tasks.
$ xs login -u XSA_ADMIN -p <PassWord>
NoteThe password is assigned to the XSA_ADMIN user during installation.
In the following example, the default administrator user XSA_ADMIN has logged on to the XS advanced run-time space “PROD” in the default organization “initial”.
Output Code
$ xs login -u XSA_ADMIN Existing spaces: 0. PROD 1. SAP SPACE> 0 API endpoint: https://host.acme.com:30030 User: XSA_ADMIN Org: initial Space: PROD
5. Create a new SAP HANA user called “DEVUSER” with the appropriate developer permissions.
Make a note of the initial password.
You can use standard tools such as the SAP HANA studio or the Web-based Workbench to create the new SAP HANA user. To enable access to the XS advanced run time, the new user must be assigned at least the following role collections (listed in the Role Collections tab):
○ XS_CONTROLLER_USERModify access within the assigned organization or space
○ XS_AUTHORIZATION_DISPLAYRead-only access to tools
6. Create a new space (for example, called “DEV”) for the development team.
TipIn the XS advanced run time, a space is an area that assigned developers can use to develop applications. You must be logged on as administrator (for example, XSA_ADMIN) to create the new run-time space.
$ xs create-space DEV
7. Create a new organization (for example, called “devteam1”) for the development team. The space “DEV” will be assigned to the organization “devteam1”.
180 PUBLICSAP HANA Developer Quick Start Guide
Getting Started with Application Development in XS Advanced

TipIn the XS advanced run time, an organization is like a team. You must be logged on as administrator (for example, XSA_ADMIN) to create a new run-time organization.
$ xs create-org devteam1
8. Assign roles to the DEVUSER user for the run-time organization (“devteam1”) and space (“DEV”).
In this step, you assign the following user roles:○ Organization role: “OrgManager”
Create and manage users, and enable features for a specified organization○ Space role: “SpaceDeveloper”
Create and manage applications and services, and view logs and reports in the specified space
$ xs set-org-role DEVUSER devteam1 OrgManager $ xs set-space-role DEVUSER devteam1 DEV SpaceDeveloper
9. Log on to the SAP HANA XS advanced run time as user “DEVUSER”.
$ xs login -u DEVUSER
TipIf it is necessary to change the password on first logon, start the SAP HANA Web-based Workbench at hostname.acme.com:80<instanceNr>/sap/hana/xs/formLogin/login.html, enter the initial and new password and choose Change Password.
10. Change the default target space for automatic logon (for example, from “PROD” to “DEV”).
All subsequent logons will automatically be routed to the specified organization and space.
$ xs target -o devteam1 -s DEV
$ xs login -u DEVUSER API endpoint: https://host.acme.com:30030 User: DEVUSER Org: devteam1 Space: DEV
11. Log on to SAP HANA XS advanced as the new user “DEVUSER” and test access to the XS CLI.
$ xs login -u DEVUSER $ xs -v
12. List all running default services in the organization “devteam1” and space “DEV”.
$ xs marketplace
The following information should be displayed:
Output Code
$ xs marketplace Getting services from marketplace in org “devteam1” / space “DEV” as DEVUSER... OKservice plans description
SAP HANA Developer Quick Start GuideGetting Started with Application Development in XS Advanced PUBLIC 181

--------------------------------------------------------------------------fs-storage free Environment variable denotes the root of client app's file systemhana hdi-shared, sbss, schema HDI container on shared HANA db securestorexsuaa default, devuser, space XS UAA Service Broker for user authentication & authorization...jobscheduler default Job Scheduler on the XS advanced Platform
13. List all manually defined service instances.
$ xs services
On a freshly installed system, no services have yet been defined, so the following information should be displayed:
Output Code
$ xs marketplace Getting services from marketplace in org “devteam1” / space “DEV” as DEVUSER... Found services: No services found
14. Create an instance of the XS advanced User Account and Authentication (UAA) service.
The following information should be displayed:
Output Code
$ xs create-service xsuaa default my-uaa Creating service “my-uaa”... OK
15. Create an instance of the SAP HANA HDI (Deployment Infrastructure) service.
The following information should be displayed:
Output Code
$ xs create-service hana hdi-shared my-hdi-container Creating service “my-hdi-container”... OK
16. List the newly created services in organization “devteam1” and space “DEV”.
The following information should be displayed:
Output Code
$ xs services Getting services in org "devteam1" / space "DEV" as DEVUSER Found services: name service plan Bound apps ------------------------------------------------------ my-uaa xsuaa default my-hdi-container hana hdi-shared
182 PUBLICSAP HANA Developer Quick Start Guide
Getting Started with Application Development in XS Advanced

Related Information
The XS Command-Line Interface ReferenceSAP Note SAP Note 2242468: Setting up the XS Advanced CLIStandard Node.js Packages for XS AdvancedDeploy a Node.js Hello-World Application using the XS CLI [page 183]Deploy a Node.js Application that Uses Database Artifacts and OData Services [page 188]
3.2.2 Deploy a Node.js Hello-World Application using the XS CLI
Use command-line tools to deploy a simple Node.js application to the SAP HANA XS advanced run-time environment.
Prerequisites
● The XS advanced run time is installed and available on the SAP HANA server● You have installed the XS command-line client on your development machine.
The XS CLI client tools are installed by default on the SAP HANA server. However, you must download and install the client tools locally, if you want to connect to SAP HANA from your local machine. The XS CLI client tools (xs.onpremise.runtime.client_<platform>-<version>.zip) can be downloaded from the SAP HANA server, from the installation DVD, or from the SAP support portal. For more information about the SAP support portal, see the link to SAP note 2242468 in the related links below.
● SAP Node.js packagesYou configure NPM to resolve SAP-related NPM dependencies, for example, to Node.js packages developed by SAP for use with the Node.js applications running in the XS advanced run time.
● You have a GIT client installed on your development machine.● Your development machine has access to the Internet● The XS advanced services specified in the application manifest files are available, for example:
○ my-uaa (user account and authentication)○ my-hdi-container (access to database artifacts in an HDI container).
SAP HANA Developer Quick Start GuideGetting Started with Application Development in XS Advanced PUBLIC 183

Context
In the following tutorial, you learn how to use the XS CLI to deploy a simple Node.js application (“myxsaapp1”) to the XS advanced-model JavaScript run time; the deployed application displays a “Hello World” page and allows you to run a simple JavaScript service:
Procedure
1. Clone the XS advanced GIT repository "XSA" containing some getting-started Node.js/JavaScript code examples.
The XS advanced GIT repository "XSA" contains code samples and artifacts for two simple XS advanced JavaScript applications, which you can use to learn how to set up the module structure of the XS advanced application and deploy the application to the XS advanced run time:
○ “myxsaapp1”Simple “Hello-World” JavaScript application
○ “myxsaapp2”JavaScript “Hello-World” application that uses database artifacts and an XS OData service
Output Code
$ git clone https://github.com/saphanaacademy/XSA.git cloning into 'XSA' ... remote: Counting objects: 33, done. remote: Compressing objects: 100% (27/27), done. remote: Total 33 (delta 2), reused 33 (delta 2), pack-reused 0 unpacking objects: 100% (33/33), done Checking connectivity... done.
In the cloned repository on your local machine, you should see the following high-level structure; in this tutorial, we focus on the first of the cloned applications, “myxsaapp1”:
NoteThe contents of the XSA Git repository might include additional objects that are not required to complete this tutorial.
<gitrepo> |- myxsaapp1/| |- web/ | |- xsjs/| \- manifest.yml|- myxsaapp2/| |- db/ | |- web/ | |- xsjs/| \- manifest.yml.gitattributes README.md
2. Check the contents of the cloned myxsaapp1 folder.
184 PUBLICSAP HANA Developer Quick Start Guide
Getting Started with Application Development in XS Advanced

The cloned myxsaapp1 folder should look like the following example:
|- myxsaapp1/ |- web/ | \- resources/ | |- .npmrc | |- package.json | \- xs-app.json |- xsjs/ | |- .npmrc | |- package.json | |- server.js | \- lib/ | \-index.xsjs \- manifest.yml
3. Adapt the application's deployment dependencies defined in the manifest.yml file to suit your SAP HANA XS advanced environment.a. Check the myxsaapp1 module names, for example: “web” and “xsjs”.b. Choose a port for the web/ and xsjs/ modules.
You can allow SAP HANA XS advanced to allocate ports automatically, or choose a free port manually, for example, 51510, for xsjs/.
NoteNot assigning a port for the web application forces XS advanced to assign a port automatically during deployment. After successful deployment, use the command xs apps web --urls to display a list of assigned ports.
c. Check the module paths, for example: “web” and “xsjs”. The path must point to the location where module-specific files are stored.
d. Adapt the application's destination in the web/ module to point to the application's entry point server.js with the appropriate host and port.
Sample Code
[ {"name":"xsjs-backend", "url":"https://host.acme.com:51510"} ]
The manifest.yml file for the application “myxsaapp1” should look like the following example:
Sample Code
ID: myxsaapp1 _schema-version: '2.0' version: 0.0.1 applications: - name: xsjs type: nodejs path: xsjs memory: 128M port: 51510 - name: web type: html5 path: web memory: 128M
SAP HANA Developer Quick Start GuideGetting Started with Application Development in XS Advanced PUBLIC 185

env: destinations: > [ {"name":"xsjs-backend", "url":"https://host.acme.com:51510"} ]
4. Configure command-line tools to use the NPM Registry to resolve package dependencies.
The applications myxsaapp1 and myxsaapp2 have dependencies to the following packages included in the NPM Registry.
○ @sap/hdi-deploy○ @sap/approuter○ @sap/xsenv○ @sap/xsjs
If you are using command-line tools to build your Node.js applications for XS advanced, you can configure the tools to use a particular NPM registry to resolve the dependencies between resources specified in the deployment descriptors. To specify the NPM Registry, add the "@sap:registry=" property to the .npmrc resource-configuration file, as illustrated in the following example:
Sample CodeNPM Registry Configuration in the .npmrc File
@sap:registry=https://registry.npmjs.org strict-ssl=false
NoteThe strict-ssl=false option is only required if XS advanced is behind a firewall.
5. Check the package dependencies for the application's web module; the dependencies are defined in the file myxsaapp1/web/package.json.
Sample CodeApplication Router's Package Dependencies (myxsaapp1/web/package.json)
{ "name": "web-approuter", "engines": { "node": ">=4.0.0 <7.0.0" }, "dependencies": { "@sap/approuter": "latest" }, "scripts": { "start": "node node_modules/@sap/approuter/approuter.js" } }
6. Check the specifications of the application's router configuration; the details are specified in the file myxsaapp1/web/xs-app.json.
Application routes are defined in one or more “destinations”, which specify where files are expected to be found for the relevant application modules, for example, xsjs.
186 PUBLICSAP HANA Developer Quick Start Guide
Getting Started with Application Development in XS Advanced

Sample CodeApplication Router Configuration (myxsaapp1/web/xs-app.json)
{ "welcomeFile": "index.html", "authenticationMethod": "none", "routes": [ { "source": "^(.*)(.xs(js|odata))(.*)$", "destination": "xsjs-backend" } ] }
7. Deploy the JavaScript application “myxsaapp1” to the XS advanced run time.a. Change directory to the application's root folder, which contains the deployment manifest file
manifest.yml.b. Deploy the application.
Output Code
$ xs push Using manifest file “manifest.yml” Creating app “myxsaapp1-web” in org “devteam1” / space “DEV” as DEVUSER Creating route “myxsaapp1-web.acme.com:51511” in org “devteam1” / space “DEV” as DEVUSER Binding route “myxsaapp1-web.acme.com:51511” to app “myxsaapp1-web” ... staging app "myxsaapp1-xsjs" starting app "myxsaapp1-xsjs"Showing status and information about app "myxsaapp1-xsjs" name: myxsaapp1-xsjs requested state: STARTED instances: 1 memory: 128 MB disk: <unlimited> buildpack: <default> urls: https://acme.com:51510 Instances:index created state--------------------------------------------- 0 Dec 25, 2015 10:22:37 AM RUNNING
8. Check which applications are currently running in the XS advanced run time.
Output Code
$ xs apps Getting apps in org "devteam1" / space "DEV" as DEVUSER...Found apps: name requested state instances memory urls--------------------------------------------------------------------------------------------myxsaapp1-web STARTED 1/1 128 MB https://acme.com:51511 myxsaapp1-xsjs STARTED 1/1 128 MB https://acme.com:51510
SAP HANA Developer Quick Start GuideGetting Started with Application Development in XS Advanced PUBLIC 187

9. Check the application in a Web browser.
Specify the entry point for the application router: https://acme.com:51511
A logon screen is displayed; log on as DEVUSER.
You should see the web/resources/index.html page displaying the text Static HTML - Hello World!.
Click the “Welcome” link to test the JavaScript service “index.xsjs”.
Related Information
Working with the XS Advanced Command-Line Client [page 177]
3.2.3 Deploy a Node.js Application that Uses Database Artifacts and OData Services
Use command-line tools to deploy a more advanced Node.js application to the SAP HANA XS advanced run-time environment.
Prerequisites
● The XS advanced run time is installed and available on the SAP HANA server● You have installed the XS command-line client on your development machine.
The XS CLI client tools are installed by default on the SAP HANA server. However, you must download and install the client tools locally, if you want to connect to SAP HANA from your local machine. The XS CLI client tools (xs.onpremise.runtime.client_<platform>-<version>.zip) can be downloaded from the SAP HANA server, from the installation DVD, or from the SAP support portal. For more information about the SAP support portal, see the link to SAP note 2242468 in the related links below.
● SAP Node.js packagesYou configure NPM to resolve SAP-related NPM dependencies, for example, to Node.js packages developed by SAP for use with the Node.js applications running in the XS advanced run time.
● You have a GIT client installed on your development machine.● Your development machine has access to the Internet● The XS advanced services specified in the application manifest files are available, for example:
○ my-uaa (access to the XS advanced User Account and Authentication service)○ my-hdi-container (access to database artifacts in the HDI container).
188 PUBLICSAP HANA Developer Quick Start Guide
Getting Started with Application Development in XS Advanced

Context
In the following tutorial, you learn how to use the XS CLI to deploy a more advanced Node.js application (“myxsaapp2”) to the XS advanced-model JavaScript run time; the deployed application uses an HDI container with simple database artifacts, implements some simple business logic to insert and extract data from a table, and calls a simple OData service, too:
Procedure
1. Clone the XSA GIT repository containing the Node.js/JavaScript code examples used in this tutorial.
The GIT repository contains code samples and artifacts for the following simple JavaScript applications, which you can use to learn how to set up the module structure of the XS advanced application:
○ “myxsaapp1”Simple JavaScript application
○ “myxsaapp2”JavaScript application with database artifacts and an XS OData service
Output Code
$ git clone https://github.com/saphanaacademy/XSA.git cloning into 'XSA' ... remote: Counting objects: 33, done. remote: Compressing objects: 100% (27/27), done. remote: Total 33 (delta 2), reused 33 (delta 2), pack-reused 0 unpacking objects: 100% (33/33), done Checking connectivity... done.
In the cloned repository on your local machine, you should see the following high-level structure; in this tutorial, we focus on the cloned application “myxsaapp2”:
NoteThe contents of the XSA Git repository might include additional objects that are not required to complete this tutorial.
Output Code
<gitrepo> |- myxsaapp1/| |- web/ | |- xsjs/| \- manifest.yml |- myxsaapp2/| |- db/ | |- web/ | |- xsjs/| \- manifest.yml .gitattributes README.md
SAP HANA Developer Quick Start GuideGetting Started with Application Development in XS Advanced PUBLIC 189

2. Check the contents of the cloned myxsaapp2 folder.
The cloned myxsaapp2 folder should look like the following example:
Output Code
|- myxsaapp2/ |- db/ # Database artifact | |- .npmrc # NPM Registry configuration | |- package.json # Node.js package dependencies | \- src/ | |- .hdiconfig | |- .hdinamespace | \- MyContext.hdbcds |- web/ # Static Web resources | |- .npmrc # NPM Registry configuration | |- package.json # Node.js package dependencies | |- xs-app.json # Route configuration | \- resources/ | \- index.html |- xsjs/ # Application code | |- .npmrc # NPM Registry configuration | |- package.json # Node.js package dependencies | |- server.js # Application entry point | \- lib/ | |- insert.xsjs | |- index.xsjs | \- service.xsodata | \- manifest.yml # Application overview
3. Adapt the application's deployment dependencies defined in the manifest.yml file to suit your SAP HANA XS advanced environment.a. Check the module names, for example: “myxsaapp2-web”, “myxsaapp2-hdb-db”, and “myxsaapp2-
xsjs”.b. Choose a port for the web/ and xsjs/ modules.
You can allow SAP HANA XS advanced to allocate ports automatically, or choose a free port manually, for example, “64021” and “64022”, for web/ and xsjs/ respectively.
TipIf no port is specified manually, a port is assigned automatically during application deployment. A port allocation is not required for the database module db.
c. Check the module paths, for example: “db”, “web” and “xsjs”. The path must point to the location where module-specific files are stored.
d. Check that the database module myxsaapp2-db includes the entry “no-route: true”. This entry is mandatory and signifies that no direct access to the HDI container is necessary from the UI; access is ensured by other means, for example, JavaScript code or an OData service.
e. Check that the service names match the service instances you created, for example, “my-hdi-container” for the HDI container for the deployed database artifacts“ and my-uaa” for user authentication and authorization in XS advanced.
f. Adapt the application's destination in the web/ module to point to the application's entry point server.js with the appropriate host and port.
190 PUBLICSAP HANA Developer Quick Start Guide
Getting Started with Application Development in XS Advanced

Sample Code
[ {"name":"xsjs-backend", "url":"https://acme.com:64022", "forwardAuthToken": true} ]
When complete, the manifest.yml file for the application “myxsaapp2” should look like the following example:
Sample Code
ID: myxsaapp2 _schema-version: '2.0'version: 0.0.1applications: - name: hdi-db path: db memory: 256M no-route: true services: - my-hdi-container - name: xsjs type: nodejs path: xsjs memory: 128M port: 51510 services: - my-uaa - my-hdi-container - name: web type: html5 path: web memory: 128M services: - my-uaa env: destinations: > [ {"name":"xsjs-backend", "url":"https://acme.com:64021", "forwardAuthToken":true} ]
4. Configure the use of the NPM Registry to resolve package dependencies.
The applications myxsaapp1 and myxsaapp2 have dependencies to the following packages included in the NPM Registry.
○ @sap/hdi-deploy○ @sap/approuter○ @sap/xsenv○ @sap/xsjs
If you are using command-line tools to build your Node.js applications for XS advanced, you can configure the tools to use a particular NPM registry to resolve the dependencies between resources specified in the
SAP HANA Developer Quick Start GuideGetting Started with Application Development in XS Advanced PUBLIC 191

deployment descriptors. To specify the NPM Registry, add the "@sap:registry=" property to the .npmrc resource-configuration file, as illustrated in the following example:
Sample Code
@sap:registry=https://registry.npmjs.org strict-ssl=false
NoteThe strict-ssl=false option is only required if XS advanced is behind a firewall.
5. Check the package dependencies for the new database module “myxsaapp2-db”; the dependencies are defined in the file myxsaapp2/db/package.json.
Sample CodeDatabase Container Dependencies (myxsaapp2/db/package.json)
{ "name": "deploy", "dependencies": { "@sap/hdi-deploy": "latest" }, "scripts": { "start": "node node_modules/@sap/hdi-deploy/deploy.js" } }
6. Check the contents of the database module's db/src folder; it contains some configuration files and any database artifacts.
Output Code
|- myxsaapp2/ |- db/ |- .npmrc |- package.json \- src/ |- .hdiconfig |- .hdinamespace \- MyContext.hdbcds
The database artifact .hdiconfig specifies the plug-ins (and the version) to use when deploying a particular type of database artifact to an HDI container; the artifact type is defined in the file suffix, for example, .hdbcds or .hdbsynonym. The plug-in definition ensures that the appropriate run-time object is created from the specified design-time artifact, as specified in the following example:
Sample CodeHDI Configuration (.hdiconfig)
{ "file_suffixes": { "hdbcds": { "plugin_name": "com.sap.hana.di.cds", "plugin_version": "2.0.0.0" },
192 PUBLICSAP HANA Developer Quick Start Guide
Getting Started with Application Development in XS Advanced

"file_suffixes": { "hdbsynonym": { "plugin_name": "com.sap.hana.di.synonym", "plugin_version": "2.0.0.0" }, "file_suffixes": { "hdbsynonymconfig": { "plugin_name": "com.sap.hana.di.synonym.config", "plugin_version": "2.0.0.0" }, }
The database artifact .hdinamespace specifies a design-time namespace to use in run-time object name, for example, "<name>.<space>::RunTimeObject".
Sample CodeHDI Namespace Configuration (.hdinamespace)
{ "name" : "myxsaapp2" "subfolder": "append" }
Note"append" signifies that design-time folder paths (for example under “db/”) should be added as a prefix to the run-time object names, for example, "<name>.<space>.<subfolder(s)>::RunTimeObject".
The database artifact MyContext.hdbcds is a simple document that defines database objects (in this example, a table specifying an ID and a corresponding value) using the Core Data Services (CDS) syntax.
Sample CodeDatabase Artifact (MyContext.hdbcds)
namespace myxsaapp2; context MyContext { Entity MyTable { key id : Integer generated always as identity; created : UTCTimestamp; }; };
7. Check the contents of the myxsaapp2 application's JavaScript xsjs module; the lib/ subfolder contains the code for the business logic used by the application.
Sample Code
|- myxsaapp2/ |- xsjs/ | |- .npmrc | |- package.json | |- server.js | \- lib/ | |- insert.xsjs # Insert data into a table | |- index.xsjs # Query data in a table | \- service.xsodata # XS OData service to extract data
SAP HANA Developer Quick Start GuideGetting Started with Application Development in XS Advanced PUBLIC 193

\- manifest.yml
The service.xsodata defines an OData service used by the application myxsaapp2 to extract data from the table “MyTable” (in the context “MyContext” and the name space “myxsaapp2):”
Sample Code
service: { "myxsaapp2"::MyContext.MyTable" as "MyEntity"; create forbidden update forbidden delete forbidden }
8. Check the package dependencies for the application's web module “myxsaapp2-web”; the dependencies are defined in the file myxsaapp2/web/package.json.
Sample CodeApplication Router's Package Dependencies (myxsaapp2/web/package.json)
{ "name": "web-approuter", "engines": { "node": ">=4.0.0 <7.0.0" }, "dependencies": { "@sap/approuter": "latest" }, "scripts": { "start": "node node_modules/@sap/approuter/approuter.js" } }
9. Check the specifications of the application's router configuration; the details are specified in the file myxsaapp2/web/xs-app.json.
Application routes are defined in one or more “destinations”, which specify where files are expected to be found for the relevant application modules, for example, xsjs.
Sample CodeApplication Router Configuration (myxsaapp2/web/xs-app.json)
{ "welcomeFile": "index.html", "authenticationMethod": "route", "routes": [{ "source": "^(.*)(.xs(js|odata))(.*)$", "destination": "xsjs-backend" }] }
10. Check the routing configuration for the application's Web module.11. Deploy the JavaScript application “myxsaapp2” to the XS advanced run time.
a. Change directory to the folder that contains the myxsaapp2 application's deployment manifest file “manifest.yml”.
194 PUBLICSAP HANA Developer Quick Start Guide
Getting Started with Application Development in XS Advanced

b. Deploy the application
Output Code
$ xs push Using manifest file “manifest.yml” Creating app “myxsaapp2-web” in org “devteam1” / space “DEV” as DEVUSER Creating route “myxsaapp2-web.acme.com:64021” in org “devteam1” / space “DEV” as DEVUSER Binding route “myxsaapp2-web.acme.com:64021” to app “myxsaapp1-web” Uploading “myxsaapp2-web"”... ... staging app "myxsaapp2-xsjs" ... starting app "myxsaapp2-xsjs" ...Showing status and information about app "myxsaapp2-xsjs" name: myxsaapp2-xsjs requested state: STARTED instances: 1 memory: 128 MB disk: <unlimited> buildpack: <default> urls: https://acme.com:64022 Instances:index created state--------------------------------------------- 0 Dec 25, 2015 10:22:37 AM RUNNING
12. Check which applications are currently running in the XS advanced run time.
Output Code
$ xs apps Getting apps in org "devteam1" / space "DEV" as DEVUSER... Found apps: name requested state instances memory urls -------------------------------------------------------------------------------- myxsaapp2-web STARTED 1/1 100 MB https://acme.com:64021 myxsaapp2-db STARTED 1/1 100 MB <none> myxsaapp2-xsjs STARTED 1/1 128 MB https://acme.com:64022
NoteThe database application has no URL assigned because it not accessed directly from the UI (no-route:true); it is accessed from the HDI container by means of the JavaScript and OData business logic.
13. Check the running services.
The following information should be displayed:
Output Code
$ xs services Getting services in org "devteam1" / space "DEV" as DEVUSERFound services:
SAP HANA Developer Quick Start GuideGetting Started with Application Development in XS Advanced PUBLIC 195

name service plan Bound apps-------------------------------------------------------------------my-uaa xsuaa default myxsaapp2-web, myxsaapp2-xsjsmy-hdi-container hana hdi-shared myxsaapp2-db
14. Check the application myxsaapp2 in a Web browser.
Specify the entry point for the application router: https://acme.com:64021
The following Web page is displayed
1. Test the “Welcome” link.Click Welcome; a Web page is displayed with the message: XSJS - Hello DEVUSER
2. Insert some data into your table by using the “Insert” button.Enter an id (for example, “1”) and a value (for example, “Kofi”) and choose Insert. If the operation is successful, a Web page is displayed with the message XSJS Insert.
3. Run a query on the table data by using the “Query” link.Choose Query. If the operation is successful, a Web page is displayed with the content: [{"id":1,"value":"Kofi"}]. At this point, this is in the only data in the table.
4. Test the OData service that you defined.In the Web browser, enter the following URL: https://acme.com:64021/service.xsodata
Output Code
<service xmlns:atom="http:/www.w3.org/2005/Atom" xmlns:app="http://www.w3.org/2007/app" xmlns:app="http://www.w3.org/2007/app" xml:base="https://host:64021/service.xsodata/"> <workspace> <atom:title>Default</atom:title> <collection href="MyEntity"> <atom:title>MyEntity</atom:title> </collection> </workspace> </service>
Related Information
Getting Started with Application Development in XS Advanced [page 124]Set up an XS Advanced Application Project [page 202]Get Started with the XS CLI Client [page 178]
196 PUBLICSAP HANA Developer Quick Start Guide
Getting Started with Application Development in XS Advanced

Standard Node.js Packages for XS AdvancedThe NPM Registry
3.3 Working with Gerrit Version Control in XS Advanced
An overview of the version-control tools available for the management of design-time artifacts in SAP HANA XS advanced model.
Gerrit is an open-source Git server that provides access control for the hosted Git repositories as well as a Web-based client for doing code review. Code review is a core (but optional) of Gerrit; individual development teams can decide whether to work with or without code review.
Gerrit is an optional component of the XS advanced platform which can be used to store and manage versions of the source code for XS advanced applications, for example, JavaScript or Java applications and SAPUI5 in Git repositories.
NoteSAP Gerrit for XS advanced is deprecated as indicated in SAP Note 1589311 . However, SAP Note 2889508 describes how you can migrate an existing installation of Gerrit for XS advanced to the open-source version of Gerrit while retaining all repositories and review data, and continuing to use XS advanced user-account-and-authentication service (XSUAA) to manage SAP HANA XS advanced user accounts. For information about how to perform a fresh installation of the open-source version 3.1 Gerrit server for use with XS advanced, see SAP Note 2890964 .
Git is a widely used open-source system for revision management of source code that facilitates distributed and concurrent large-scale development work flows. It supports a large variety of commands for working with repositories.
NoteTo work with Gerrit you must understand the basic concepts of Git and be familiar with the basic Git commands and work flows used when developing an application. In addition, to perform Git operations, you must also have access to a suitable Git client, for example, the SAP Web IDE for SAP HANA. You can find the documentation for Gerrit for XS advanced at the following URL on the system where you installed Gerrit for XS advanced: https://<GerritServer>.acme.com:8080/Documentation/index.html
Related Information
Set up Gerrit for XS Advanced Application Development [page 198]Using Source Control (Git)
SAP HANA Developer Quick Start GuideGetting Started with Application Development in XS Advanced PUBLIC 197

3.3.1 Set up Gerrit for XS Advanced Application Development
A description of the basic steps developers need to perform to get started with Gerrit and Git version-management tools.
Prerequisites
To start working with Gerrit version control, the following prerequisites apply:
● A Gerrit server is available in your development environment● The Gerrit server is configured to work with XS advanced
NoteSAP Gerrit for XS advanced is deprecated as indicated in SAP Note 1589311 . However, SAP Note 2889508 describes how you can migrate an existing installation of Gerrit for XS advanced to the open-source version of Gerrit while retaining all repositories and review data, and continuing to use XS advanced user-account-and-authentication service (XSUAA) to manage SAP HANA XS advanced user accounts. For information about how to perform a fresh installation of the open-source version 3.1 Gerrit server for use with XS advanced, see SAP Note 2890964 .
● You have access to a Git client, for example, the client included with SAP Web IDE for SAP HANA
Context
To get started with Gerrit in XS advanced, you need to perform the following steps:
TipThe documentation for Gerrit for XS advanced is available on the system where the Gerrit for XS advanced server is running at the following URL:
https://<GerritServer>.acme.com:8080/Documentation/index.html
Procedure
1. Sign in to Gerrit.
Before you can start uploading files and changes to Gerrit, you must create and activate your Gerrit account.
a. Open the Gerrit Web UI's start page in a Web browser.
NoteThe URL of the Gerrit server is defined during the installation process.
198 PUBLICSAP HANA Developer Quick Start Guide
Getting Started with Application Development in XS Advanced

Check the information displayed for git-service in the system output under the section Registered Service ULRs, as illustrated in the following example:
NoteYou will need to change the port number to the one published on your system, for example:
https://host.acme.com:29<HANA_Instance_Nr>9
Output Code
xs version Client version: xs v0.1614-consServer version information: name = XS Controller support = http://service.acme.com/message build = v0.1614-cons version = 1 user = <not set> description = SAP XS Runtime on premise controllerEndpoint = https://host.acme.com:30030 authorizationEndpoint = https://host.acme.com:30032/uaa-security loggingEndpoint = <not set> allowDebug = true ... Registered service URLs: deploy-service = https://host.acme.com:51002 component-registry = https://host.acme.com:51003 product-installer = https://host.acme.com:51005 git-service = https://host.acme.com:29419
b. Choose Sign In in the top right-hand corner of the screen.
Gerrit is attached to the user management system (XSUAA) of the XS Advanced platform. As a result, the sign-in process redirects you to the standard log-in screen of the SAP HANA database.
NoteIf you do not have an SAP HANA identity in the XS UAA server, contact your SAP HANA system administration team and ask them to create a user account for you.
c. Enter your SAP HANA user credentials to sign in to Gerrit.
Gerrit displays your personal My Reviews dashboard.2. Have a look at your Reviews Dashboard.
You can manage the projects you are assigned to in Watched Projects, which you can find in SettingsWatched Projects .
NoteWhen you sign in to Gerrit for the first time, your personal dashboard will typically be empty, because you have not yet been assigned to any Gerrit project.
3. Select a Gerrit development project to join.
To display a list of all available projects, choose Projects List .
SAP HANA Developer Quick Start GuideGetting Started with Application Development in XS Advanced PUBLIC 199

This list shows all projects to which you have at least “read” access rights together with a short description and a link to the repository browser. The repository browser allows you to examine the content and history of the Git repository associated with the Gerrit project.
4. Display details of a Gerrit development project.
To display details of a Gerrit project, choose the name of the project in the project list. The Gerrit project contains the reference to the Git repository used to manage the project's application code.
TipTo clone the project to your workplace, you need the project's URL, which is displayed immediately below the project title. To clone the Gerrit project, you can use any standard Git client, for example, a Git command-line client or the Git tools provided with SAP Web IDE for SAP HANA.
5. Create a new project.
If you are not assigned to a Gerrit project, and cannot find a project in the list of existing projects, you might have to create a new project. Gerrit provides the following methods for creating a new project:
NoteIn a production environment, the permissions required to create a new Gerrit project are granted to a selected group of “admin” users. As a new Gerrit user, you will need to ask the Gerrit administration group to create the new project for you.
○ In the Gerrit Web UI under Projects Create Project
TipIf you intend to bind the new repository to an XS advanced application, you must create it with the XS advanced service broker. Git repositories not created with the XS advanced service broker are not visible for the XS Advanced run time.
6. Access the Git repository.
The Git repository stores the authoritative copy of the application source code being developed in the project. Project team members fetch code from (and push code to) this repository. Build servers and other packaging tools use the Git repository to obtain the source-code, too.
By default, Gerrit requires authentication and authorization for all Git operations. For example, to upload changes to a Git repository, you must either be a project owner or have been granted the appropriate access rights for the target repository. If you need write access to a Gerrit project, contact the project owner or the Gerrit administrator.
NoteDefault access rules allow all authenticated users to push changes for review to any Gerrit project. However, only project owners are allowed to submit changes to the underlying repository. This facilitates the implementation of the simple contributor-committer work flow followed by many open-source projects.
It is possible to enable anonymous read access to a repository by adding a “Read” permission for the reference refs/* and assigning that permission to the predefined group “Anonymous Users”. To grant anonymous read access for all repositories, you must adapt the configuration of the project All-Projects, from which all other projects inherit their permissions.
200 PUBLICSAP HANA Developer Quick Start Guide
Getting Started with Application Development in XS Advanced

7. Set up your Gerrit profile.
Before you start working with Gerrit you should check and, if necessary, amend your contact information, and customize Gerrit to your personal needs and preferences. You might also want to enable SSH communication for your account.
○ Contact informationGit identifies the author and committer of a change by their e-mail addresses, and you cannot upload any changes to Gerrit if the configured e-mail address is wrong or invalid. Gerrit stores these attributes in your contact information, which you can access under Settings Contact Information .
NoteWhen you sign in to Gerrit for the first time, an account is created using the full name and e-mail address received from the XS advanced user-management system (XSUAA). In some cases, this information might not be accurate, especially if you sign in using the credentials of an SAP HANA database user. Furthermore, in a productive environment it might be necessary to use your corporate e-mail address and real name, regardless of your identity in the SAP HANA system.
○ PreferencesYou can customize Gerrit by configuring your preferences in your profile, for example, under Settings
Preferences .○ Secure Shell (SSH) settings
Gerrit supports the SSH protocol for Git operations. If you want to use SSH for communication with Gerrit, you first must generate a suitable SSH key pair and upload the public key to your profile, for example, under Settings SSH Public Key .
8. Clone an existing repository. (optional)
If you already have a Git repository that you want to clone, you can use the tools provided by SAP Web IDE for SAP HANA to perform the clone operation.
a. Obtain the URL of the Gerrit server where the Git repository that you want to clone is located.
NoteThe URL of the Gerrit server is defined during the installation process.
Check the information displayed for git-service in the system output under the section Registered Service ULRs, as illustrated in the following example:
Output Code
xs version Client version: xs v0.1614-consServer version information: name = XS Controller support = http://service.acme.com/message build = v0.1614-cons version = 1 user = <not set> description = SAP XS Runtime on premise controllerEndpoint = https://host.acme.com:30030 authorizationEndpoint = https://host.acme.com:30032/uaa-security ...Registered service URLs: deploy-service = https://host.acme.com:51002 component-registry = https://host.acme.com:51003
SAP HANA Developer Quick Start GuideGetting Started with Application Development in XS Advanced PUBLIC 201

product-installer = https://host.acme.com:51005 git-service = https://host.acme.com:29419
b. Start SAP Web IDE for SAP HANA.
If SAP Web IDE for SAP HANA is not available at the default URL https://host.acme.com:53075, you can use the xs CLI to display the URL allocated to the application. In a command shell, log in to the XS advanced run time and use the command xs app webide --urls to display the URL required to access SAP Web IDE for SAP HANA in a Web browser.
c. Clone the Git repository.
In SAP Web IDE for SAP HANA, choose File Git Clone Repository .
You will need to provide the following details:
○ URLThe URL to the Gerrit server where the project's Git repository is located, for example, https://host.acme.com:29419
○ Repository PathThe path to (and name of) the Git repository you want to clone, for example, /<RepositoryName>.git
○ Connection ProtocolThe protocol to use for the connection to the Gerrit server, for example, HTTPS.
○ AuthenticationThe log-on credentials for a SAP HANA user with access permissions for the cloned Git repository.
Related Information
Working with Gerrit Version Control in XS Advanced [page 197]Using Source Control (Git)
3.4 Set up an XS Advanced Application Project
An overview of the steps required to set up and deploy an application project for SAP HANA XS advanced.
Prerequisites
● Development toolsYou can choose between graphical and command-line tools:○ SAP Web IDE for SAP HANA
If the SAP Web IDE for SAP HANA is not available at the default URL https://host.acme.com:53075, log in to the XS advanced run time with the XS command-line interface (CLI) and use the command xs app webide --urls to display the URL required to access the tool.
202 PUBLICSAP HANA Developer Quick Start Guide
Getting Started with Application Development in XS Advanced

○ You have installed the XS command-line client on your development machine.The XS CLI client tools are installed by default on the SAP HANA server. However, you must download and install the client tools locally, if you want to connect to SAP HANA from your local machine. The XS CLI client tools (xs.onpremise.runtime.client_<platform>-<version>.zip) can be downloaded from the SAP HANA server, from the installation DVD, or from the SAP support portal. For more information about the SAP support portal, see the link to SAP note 2242468 in the related links below.
○ SAP Node.js packagesThe archive (xs_javascript-<version>-bundle.tar.gz) is available on the SAP HANA media and the SAP Marketplace (SMP); it includes a selection of Node.js packages developed by SAP for use with the Node.js applications running in the XS advanced run time.
TipAlternatively, you can configure NPM to resolve SAP-related NPM dependencies using the public NPM Registry (at https://registry.npmjs.org).
● Version control, for example, GIT/GerritGerrit for SAP HANA XS advanced is an optional component of the XS advanced platform which can be used to store and manage versions of the source code for XS advanced applications (for example, JavaScript or Java applications and SAPUI5) in Git repositories.
TipThe SAP Web IDE for SAP HANA includes an integrated Git client.
● Access to a running SAP HANA system where the XS advanced run time is installed and configured
CautionThe code examples included in this document for XS advanced are often syntactically incomplete; they are intended for illustration purposes only.
Context
The end-to-end process of developing an application that you want to deploy on SAP HANA is straight forward, as illustrated in the steps described in this high-level overview.
XS Advanced Application Development Overview
Step Description
1 Create the design-time folder infrastructure for your application source files
2 Create the deployment descriptor files for your application
3 Add database artifacts and content
4 Add application business logic to work with the database artifacts
SAP HANA Developer Quick Start GuideGetting Started with Application Development in XS Advanced PUBLIC 203

Step Description
5 Create any required OData service definitions
6 Create the user interface in which to display the database content
7 Add security to protect what you have built
8 Define application routes (and destinations)
9 Create any service instances needed by your application
10 Add scheduled jobs if required (optional)
11 Deploy your project
12 Test your project in the user interface
NoteSome configuration artifacts are subject to restrictions regarding their location; SAP HANA XS advanced deployment tools expect to find particular artifacts in a particular location.
Procedure
1. Create the design-time folder infrastructure for your application source files.
To make the maintenance of source files easier and facilitate the task of deploying the application, it is also essential to create a clear and consistent structure for the design-time artifacts that you develop for your application. The folders typically include modules for the following areas: database, Web, application code, OData (optional). The security description (OAuth2 client configuration) can be placed either in its own root-level module or in the application code structure, for example, js/security/ or java/security/.
TipSAP Web IDE for SAP HANA provides Wizards and templates to assist with the creation of application modules and the related resources for your MTA. If you are using the XS command-line tools to develop an MTA for SAP HANA XS advanced, you must create all modules and resources yourself.
Sample Code
<myAppName> |- db/ # Database module| |- package.json # Database details/dependencies| \- src/ # Database artifacts: tables, views,| |- .hdiconfig # HDI plug-in configuration| |- .hdinamespace # HDI plug-in namespace configuration (optional)| \- myModel.hdbcds # Database design-time definition|- js/ # JavaScript app module | |- start.js # JavaScript app entry point| |- package.json # JavaScript app details/dependencies
204 PUBLICSAP HANA Developer Quick Start Guide
Getting Started with Application Development in XS Advanced

| \- src/ # JavaScript source code| \- odata/ # OData module| |- resources/ # OData service resources| \- services/ # OData service definitions| | - srv1.xsodata # OData service definition| \ - srvN.xsodata # OData service definition|- ui/ # Application UI module| |- xs-app.json # Application routes configuration| |- package.json # Application details/dependencies| \- resources/ # Static UI resources| \- index.html # Client UI start page|- xs-security.json # Application security description|- manifest.yml # Manifest description incl. destinations |- mta.yaml # Central development manifest (SAP Web IDE only) \- mtad.yaml # Central deployment manifest
2. Create the development and deployment descriptor files for your application.
The development and deployment descriptors specify what application components to build (and how), the dependencies between the application components, and where (and how) to deploy the components. The development and deployment manifest files for the multi-target application must be located in the application's root folder.
○ mta.yamlDevelopment manifest for a multi-target application (MTA)
TipThe mta.yaml is only required if you are working with SAP Web IDE for SAP HANA, which creates (and maintains) the file automatically when you create a new application project and maintain the project's components.
○ mtad.yamlDeployment manifest for a multi-target application (MTA)
TipIf you are working with the XS advanced command-line client, you must create (and maintain) the mtad.yaml file manually. If you are using SAP Web IDE for SAP HANA, no action is required; SAP Web IDE for SAP HANA creates the deployment manifest mtad.yaml transparently at deployment time using the information specified in the corresponding development descriptor (mta.yaml).
3. Add database artifacts and content.
Create database artifacts such as tables and views, for example using Core Data Services (CDS). You can also create procedures and sequences, for example, using SQLScript.
NoteThe database content must include a package.json file containing details of dependencies and, in addition, the container configuration (.hdiconfig) and run-time name space configuration (.hdinamespace) files.
4. Add application business logic to work with the database artifacts.
The business logic is used to help retrieve data from the database, for example, using OData services. The data is requested from and displayed in the client user interface.
SAP HANA Developer Quick Start GuideGetting Started with Application Development in XS Advanced PUBLIC 205

For applications written in JavaScript (Node.js or XS JavaScript), you need to perform the following high-level steps:
a. Add a package description file (package.json) to your JavaScript resource-files folder with details of your application's contents and dependencies.
b. Add a startup file for your JavaScript application, for example, main.js.c. Create any additional JavaScript (.js or .xsjs) files and libraries.
For applications written in Java, you need to perform the following high-level steps:
a. Write Java application's code.b. Look up the required data source.c. Build the WAR file based on the project object model file (pom.xml), for example, with Maven.d. Use the Java Persistence API (JPA) to work with CDS entities (if required).
5. Create any required OData service definitions.
An OData service definition is described in an xsodata artifact, for example, myOdataService.xsodata; the service definition should be placed in the resources/ folder of your OData project structure.
6. Create the user interface (GUI) to display the database content (HTML pages).7. Add security to protect what you have built (xs-security.json).
The tasks required to set up authorization artifacts in SAP HANA XS advanced are performed by two distinct user roles:
○ Application developerCreates the security descriptor (xs-security.json) for the XS advanced application; maintains role templates and authorization scopes (in the xs-security.json) to define who has access to the application; binds the application to an XS advanced service instance; deploys the application to the XS advanced run-time environment.
○ SAP HANA XS administrator.After deployment of the authorization artifacts as role templates, the XS advanced run-time administrator uses the role templates provided by the developers to build roles, group the roles into role collections, and assign the role collections to business users, for example, using the SAP HANA XS Administration Tools.
8. Define application routes (and destinations).
The application router is used to serve static content, propagate user information, and act as a proxy to forward requests to other micro services. Application routes are defined in the application-router descriptor xs-app.json, a JSON-formatted file that should be located in the application's Web resources module.
Destinations are defined in an environment variable for the @sap/approuter application. The destinations are typically specified in the application manifest (manifest.yml) file. The router information is added to the env: destinations section of the manifest.yml, as illustrated in the following example.
9. Create any service instances needed by your application.
NoteSAP Web IDE for SAP HANA creates any required services based on the information in the “resources” section of the application's development/deployment descriptor (mta.yaml) and binds the application to the service instance created.
206 PUBLICSAP HANA Developer Quick Start Guide
Getting Started with Application Development in XS Advanced

If you are using the XS advanced CLI, you must create any services and manually bind the application to the service instance, for example, using the xs create-service and xs bind-service commands.
xs create-service <SERVICE> <PLAN> <SERVICE_INSTANCE>○ HDI container service instance
xs create-service hana hdi-shared my-hdi-container ○ User Account and Authentication (UAA) service
Using information specified in the application’s security descriptor (xs-security.json)xs create-service xsuaa default -c </path/to/>xs-security.json
10. Add scheduled jobs if required (optional).
Jobs can be scheduled using an instance of the Job Scheduler service.
NoteFor more information, see Scheduling Jobs in XS advanced in the SAP HANA Administration Guide (Related Links below).
11. Deploy your application project.a. Deploy an application to the XS advanced run-time environment.
○ XS CLI client○ Push an individual application component/module:
xs push <myAppName>○ Deploy a complete MTA archive:
xs deploy <myMTAName>.[mtar | zip]○ Install a Software Component Version (SCV):
xs install <myAppArchive>.zip12. Test your application project in the user interface.
On build or deployment, an XS advanced application is assigned a URL with a specific port. You can paste the assigned URL into a Web Browser to test it. This information is displayed differently depending on the tools you are using:
○ SAP Web IDE for SAP HANAIn the UI, select the application's UI module and, in the context menu, choose Run Run as Web Application . When the application is up and running, SAP Web IDE displays the URL required to access the application as well as the application's current status at the bottom of the run console in the details pane:
TipIf the application is already running, you do not need to restart it; selecting an application module in the SAP Web IDE project pane displays the URL and status of the application in the run console:
Output Code
Run tinyworld/tinyui Updating applicationApplication is startingApplication is running
SAP HANA Developer Quick Start GuideGetting Started with Application Development in XS Advanced PUBLIC 207

Application: https://acme.com:51031 Status: Running
○ XS advanced CLIDisplays the ports allocated to applications running in a given run-time space, for example, using the xs apps command, as illustrated in the following example:
Output Code
$>xs apps Getting apps in org "myorg" / space "PROD" as XSA_ADMIN...Found apps:name state instances urls---------------------------------------------------------------------------------hrtt-service STARTED 1/1 https://acme.com:51021hrtt-core STARTED 1/1 https://acme.com:51020hrtt-db STOPPED 0/1 <none>di-core-db STOPPED 0/1 <none>di-local-npm-registry STARTED 1/1 https://acme.com:51025di-core STARTED 1/1 https://acme.com:53030di-runner STARTED 1/1 https://acme.com:51027webide STARTED 1/1 https://acme.com:53075di-builder STARTED 1/1 https://acme.com:51029[...]-tinyjs STARTED 1/1 https://acme.com:51030 [...]-tinyui STARTED 1/1 https://acme.com:51031
Related Information
XS Advanced Application Resource Files [page 208]Maintaining Application Services in XS AdvancedManaging SAP HDI Containers and ArtifactsMaintaining Application Security in XS AdvancedThe XS Command-Line Interface ReferenceSAP Web IDE for SAP HANA Reference
3.4.1 XS Advanced Application Resource Files
SAP HANA XS advanced applications require some mandatory configuration artifacts.
In SAP HANA XS advanced, applications require a number of mandatory configuration and deployment files. Which files are required depends on the language you are using to develop the application, for example, JavaScript (including node.js) or Java, and the deployment options you need. The following table provides an overview of the artifacts required by each application. There are rules and requirements concerning where to store these artifacts in the application folder hierarchy.
208 PUBLICSAP HANA Developer Quick Start Guide
Getting Started with Application Development in XS Advanced

XS Advanced Application Artifacts Overview
File Name Description DatabaseApp Router Node/JS Java Python
mta.yaml MTA development descriptor ✔ ✔ ✔ ✔ ✔
mtad.yaml MTA deployment descriptor ✔ ✔ ✔ ✔ ✔
package.json Description and dependencies of node modules
✔ ✔ ✔
xs-app.json Application router description ✔
*.hdi* Configuration artifacts for the SAP HANA deployment infrastructure (HDI), for example, .hdiconfig and .hdinamespace
✔
*.java Java application source files ✔
*.xsjs SAP HANA XS JavaScript source files
✔
*.js JavaScript (node.js) source files ✔
*.py Python source files ✔ ✔
xs-security.json
Shared description of OAuth2 client
NoteIf you use SAP Web IDE for SAP HANA to develop an MTA, both the mta.yaml (development descriptor) and the mtad.yaml (deployment descriptor) are created automatically. The mta.yaml is generated when you create the application project in SAP Web IDE for SAP HANA, and the mtad.yaml file is created when you build the project.
The mta.yaml is not required if you are using command-line tools to build an MTA for XS advanced; you must specify all build and deployment dependencies in the deployment descriptor (mtad.yaml).
Related Information
Maintaining the XS Advanced Application Development & Deployment DescriptorsThe XS Advanced Application DescriptorThe XS Advanced Application Package DescriptorThe SAP HDI Container Configuration FileThe HDI Name-Space Configuration File
SAP HANA Developer Quick Start GuideGetting Started with Application Development in XS Advanced PUBLIC 209

The Application Security Descriptor
210 PUBLICSAP HANA Developer Quick Start Guide
Getting Started with Application Development in XS Advanced

4 Working with the SAP Cloud Application Programming Model
An overview of the steps required to create a simple Node.js application using SAP's Cloud application programming model.
This tutorial aims to show you how to use the Node.js and the Odata V4 framework as well as some exit handlers to construct an application using the SAP Cloud Application Programming Model (CAP) with the tools provided in the SAP Web IDE for SAP HANA. The use of so-called "exit handlers" enables real-time interaction with data in the database, for example, by means of a Fiori or SAPUI5 Web User Interface (UI). The tutorial comprises the following high-level steps:
● Create a basic HTML5 application module● Define the core data model and core services in CAP's Core Data and Services (CAP CD+S)
NoteCD+S, or Core Data and (Core) Services, is intended for use in SAP CAP scenarios and is not the same as the Core Data Services (CDS) component used in XS classic or XS advanced applications, which focuses solely on the design-time representation of a data-persistence model. For more information about CD+S, see Developing SAP Cloud Platform Business Applications in Related Information below.
● Define the back-end, business-logic services in Node.js● Create the Web user interface using SAPUI5
In this tutorial, the simple Web-based user interface you build as the Node.js application's front-end includes features that enable you to create users in the SAP HANA database (Create Record), update a user's details
SAP HANA Developer Quick Start GuideWorking with the SAP Cloud Application Programming Model PUBLIC 211

(Update Changes), and view a list of all existing database users (User List), as illustrated in the following example:
TipCode snippets and examples used in these tutorials are taken from the source versions stored in the GitHub repository "openSAP7-xsa-node-2". For more details, see Related Information below.
Related Information
Create a Basic HTML5 Module for your SAP Cloud Platform Business Application [page 213]OpenSAP XS advanced tutorial content on GitHubWelcome to SAP Cloud Application Programming Model (CAP)
212 PUBLICSAP HANA Developer Quick Start Guide
Working with the SAP Cloud Application Programming Model

4.1 Create a Basic HTML5 Module for your SAP Cloud Platform Business Application
Set up the basic components of your SAP Cloud Platform business application.
Prerequisites
To complete this tutorial successfully, note the following prerequisites:
● You must have access to an SAP HANA system where the XS advanced model run-time platform is installed and running and the SAP HANA Deployment Infrastructure (HDI) is enabled.
● For the purposes of this tutorial, you must have access to the SAP Web IDE for SAP HANA. Generally speaking though, you can use any text editor to create a design-time artifact.
TipThe SAP Web IDE provides access to the SAP HANA Database Explorer tools that enable you to view the contents of the catalog. You can also open the XS advanced Administration Cockpit to add and maintain platform services.
○ The SAP Web IDE must be able to connect to the Internet○ The SAP Web IDE must be configured to use the following registries for the Node.js Package Manager
(NPM):○ Public NPM Registry (http://registry.npmjs.org)
For more information, see Related Information below.● Code snippets and examples used in this tutorial are taken from the source versions stored in the GitHub
repository "openSAP7-xsa-node-2". For more details, see Related Information below.
Context
In the first part of this tutorial to develop a simple SAP Cloud Platform business application for deployment to XS advanced, you create the basic HTML5 module that is used to host and serve the application's front-end content, as described in the following steps:
Procedure
1. Start SAP HANA Web IDE for SAP HANA.
The SAP Web IDE for SAP HANA is typically available at the following URL:
https://<HANA_HOST>:53075/
SAP HANA Developer Quick Start GuideWorking with the SAP Cloud Application Programming Model PUBLIC 213

TipTo display the URL for the SAP Web IDE for SAP HANA, open a command shell, log on to the XS advanced run time using the xs login command, and run the following command:
xs app webide --urls
2. Create a new project for your SAP Cloud business-application.
The project provides a convenient way to store and organize all the design-time artifacts that belong to your new application.
a. Create the new project from an existing template.
File New Project from Templateb. Select the template you want to use as a model for your SAP Cloud business-application project.
SAP Cloud Platform Business Application Nextc. Specify the new application project's name.
In the setup Wizard's Basic Information tab, type users as the Project Name and choose Next.d. Specify the details of the new project.
In the setup Wizard's Project Details tab, use the drop-down lists to provide the following information:
○ Service Module (srv): Node.js○ Database Module (db): SAP HANA Database○ Space: <mySpace>
TipAdjust to suit the name of the development space in your XS advanced organization.
Choose Next and Finish to generate the new project and close the project-creation Wizard.3. Adjust the names of the project's modules.
The project-creation Wizard adds two modules to a new project: a database module and a service module. By default, the project name (“users” here) is appended to the start of the names of the hdb and nodejs modules, for example, users-db and users-srv. For the purposes of this tutorial, we need to change the names.
a. Open the project’s development descriptor (mta.yaml) file.b. Switch to the Code Editor view and rename the modules users-db and users-srv to db and srv
respectively, as illustrated in the following example:
Sample Code
ID: users _schema-version: '2.1'version: 0.0.1modules: - name: db type: hdb path: db parameters: memory: 256M disk-quota: 256M requires:
214 PUBLICSAP HANA Developer Quick Start Guide
Working with the SAP Cloud Application Programming Model

- name: users-hdi-container - name: srv type: nodejs path: srv parameters: memory: 512M disk-quota: 256M
c. Save your changes and switch back to the MTA Editor view.4. Add a resource to handle user authentication when logging on to the new application later in the tutorial.
At this point it is necessary to add the user-account-and-authentication service resource users-uaa to the mta.yaml file. This is because we plan to require user authentication to access our application.
a. Name the new resource.
In the MTA Editor, open the Resources tab and choose [+] to add a new resource to the application's development descriptor. This displays a new input field into which you can type the name of the resource: users-uaa.
b. Define the resource Type as com.sap.xs.uaa-space.c. Save the changes and navigate back to the srv (nodejs) module in the MTA Editor.
Ensure that the properties and dependencies match the following names and values:
○ Properties○ Key: UAA_SERVICE_NAME○ Value: users-uaa
○ Requires○ Name: users-hdi-container (resource)○ Name: users-uaa (resource)○ Name: db (module)
5. Add and configure an HTML5 module to host and serve the application's front-end content.
a. Right-click the root module (users) of your application project and choose New Basic HTML5 Module .
b. Name the new module web and choose Next.c. Define the module's requirements.
In the Modules tab, select your new web module, click [+] in the Requires section, and choose the newly created UAA resource users-uaa (resource) from the drop-down list. This creates the connection between the web module and the selected UAA resource (users-uaa).
d. Map the application's routes and destinations in the application descriptor (xs-app.json).
The web folder in our project contains the resources that will be served by the HTML5 module. The Add Module Wizard adds a simple index.html file to the resources folder, which displays the message “Hello World”. The HTML5 module is configured in the application descriptor file xs-app.json. This is the file we use to map application routes to the destinations defined in the development descriptor mta.yaml. We can also set up the authentication type and other options, too. For the moment, just change the authenticationMethod from none to route, as illustrated in the following example:
Sample Codexs-app.json {
SAP HANA Developer Quick Start GuideWorking with the SAP Cloud Application Programming Model PUBLIC 215
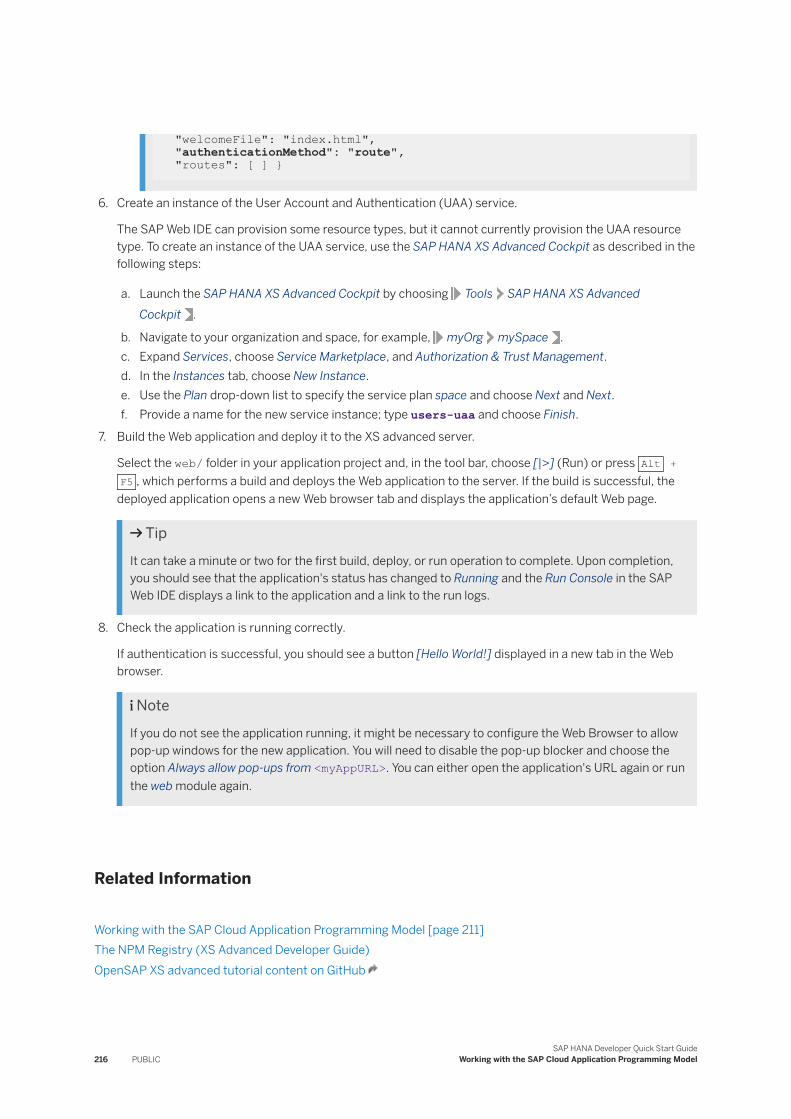
"welcomeFile": "index.html", "authenticationMethod": "route", "routes": [ ] }
6. Create an instance of the User Account and Authentication (UAA) service.
The SAP Web IDE can provision some resource types, but it cannot currently provision the UAA resource type. To create an instance of the UAA service, use the SAP HANA XS Advanced Cockpit as described in the following steps:
a. Launch the SAP HANA XS Advanced Cockpit by choosing Tools SAP HANA XS Advanced Cockpit .
b. Navigate to your organization and space, for example, myOrg mySpace .c. Expand Services, choose Service Marketplace, and Authorization & Trust Management.d. In the Instances tab, choose New Instance.e. Use the Plan drop-down list to specify the service plan space and choose Next and Next.f. Provide a name for the new service instance; type users-uaa and choose Finish.
7. Build the Web application and deploy it to the XS advanced server.
Select the web/ folder in your application project and, in the tool bar, choose [|>] (Run) or press Alt + F5 , which performs a build and deploys the Web application to the server. If the build is successful, the
deployed application opens a new Web browser tab and displays the application’s default Web page.
TipIt can take a minute or two for the first build, deploy, or run operation to complete. Upon completion, you should see that the application's status has changed to Running and the Run Console in the SAP Web IDE displays a link to the application and a link to the run logs.
8. Check the application is running correctly.
If authentication is successful, you should see a button [Hello World!] displayed in a new tab in the Web browser.
NoteIf you do not see the application running, it might be necessary to configure the Web Browser to allow pop-up windows for the new application. You will need to disable the pop-up blocker and choose the option Always allow pop-ups from <myAppURL>. You can either open the application's URL again or run the web module again.
Related Information
Working with the SAP Cloud Application Programming Model [page 211]The NPM Registry (XS Advanced Developer Guide)OpenSAP XS advanced tutorial content on GitHub
216 PUBLICSAP HANA Developer Quick Start Guide
Working with the SAP Cloud Application Programming Model

4.2 Create the Core Data Services for your SAP Cloud Platform Business Application
Use CD and S to create the basic data model for your SAP Cloud Platform Business Application.
Prerequisites
To complete this tutorial successfully, note the following prerequisites:
● You must have access to an SAP HANA system where the XS advanced model run-time platform is installed and running and the SAP HANA Deployment Infrastructure (HDI) is enabled.
● For the purposes of this tutorial, you must have access to the SAP Web IDE for SAP HANA. Generally speaking though, you can use any text editor to create a design-time artifact.
TipThe SAP Web IDE provides access to the SAP HANA Database Explorer tools that enable you to view the contents of the catalog. You can also open the XS advanced Administration Cockpit to add and maintain platform services.
○ The SAP Web IDE must be able to connect to the Internet○ The SAP Web IDE must be configured to use the following registries for the Node.js Package Manager
(NPM):○ Public NPM Registry (http://registry.npmjs.org)
For more information, see Related Information below.● You must have completed the following tutorials already: they contain artifacts that this tutorial depends
on:○ Create a Basic HTML5 Module for your SAP Cloud Platform Business Application
● Code snippets and examples used in this tutorial are taken from the source versions stored in the GitHub repository "openSAP7-xsa-node-2". For more details, see Related Information below.
Context
SAP HDI enables you to manage database catalog objects using design-time artifacts but in a way that allows multiple copies (and versions) of the same core objects to be used on the same SAP HANA database at the same time. HDI also introduces the concept of the container as an abstraction of the database schema; the container dynamically generates the schema along with a container-specific database user who owns all objects in the container, and a password for the database user. With this infrastructure in place, XS-advanced-based services then only need access to the container; they do not need to know the actual schema, the technical user, or user password since this information is all stored in the container definition.
SAP HANA Developer Quick Start GuideWorking with the SAP Cloud Application Programming Model PUBLIC 217

In the second part of this tutorial to develop a simple SAP Cloud Platform business application for deployment to XS advanced, you create the basic code data services used by the application's business logic, as described in the following steps:
Procedure
1. Check the version of the plug-in library used by SAP HDI to build and deploy database artifacts.
The project-creation Wizard adds an entry to the SAP HDI container's configuration file (.hdiconfig) which defines the version of the build plug-in to use when generating database objects; this version must be at least 2.0.30.0 (HANA 2.0 SPS 03). The .hdiconfig file is not visible by default.
a. Show all hidden files in your application project.
In the SAP Web IDE's tool bar, choose View Show Hidden Files and open the .hdiconfig file, which is located in the folder users/db/src. The entry for the SAP HDI plug-in version should look like the following example:
Sample Code
{ "plugin_version": "2.0.30.0", "file_suffixes": { "hdbsynonym": { "plugin_name": "com.sap.hana.di.synonym" },[...] }
2. Define the application's data-model.
For the purposes of this tutorial, we need to change some of the sample content added to the default files by the project-creation Wizards. In the application's database module (db), open the file db/data-model.cds and replace the default template content with the following CDS code, which defines a simple table (entity).
Sample Code
Entity USER_DETAILS { EMAIL: String(255) @title: 'Email Address'; FIRSTNAME: String(40) @title: 'Given Name'; LASTNAME: String(40) @title: 'Family Name'; key USERID: Integer @title: 'User Id'; }
TipThis CDS data-model file is available on the openSAP GitHub Web site at https://github.com/matteogp/openSAP7-xsa-node-2/blob/master/ex1/ex1_2.
3. Define a service that uses your application's CDS data-model definition.
For the purposes of this tutorial, we need to change some of the sample content added to the default files by the project-creation Wizards. In the application's service module (srv), open the file srv/
218 PUBLICSAP HANA Developer Quick Start Guide
Working with the SAP Cloud Application Programming Model

myservice.cds and replace the default template content with the following code, which defines a simple table (entity).
Sample Code
using USER_DETAILS as UserDetails from '../db/data-model'; service CatalogService { entity User @( title: '{i18n>userService}', Capabilities: { InsertRestrictions: {Insertable: true}, UpdateRestrictions: {Updatable: true}, DeleteRestrictions: {Deletable: true} } ) as projection on UserDetails; }
NoteThis CDS service-definition file is available on the openSAP GitHub Web site at https://github.com/matteogp/openSAP7-xsa-node-2/blob/master/ex1/ex1_3.
4. Build the CDS database-specific files.
Save all the .cds files in the db module, right-click the users project, and choose Build Build CDS .
TipThe Build CDS operation does not create anything in the database; it simply “compiles“ the CDS files into SAP-HANA-specific, HDI-compliant .hdbcds files and stores the generated files in the project folder db/src/gen: in this case a file called USER_DETAILS.hdbcds.
5. Build the database.
Use the CDS artifacts generated in the previous step to build the database itself. Right-click the db folder in the users application project and choose Build Build .
NoteCheck the Run Console at the bottom of the SAP Web IDE to view the build's progress:
08:31:57 AM (DIBuild) ********** End of /users/db Build Log ********** 08:31:57 AM (DIBuild) Build results link: https://webide.hana.acme.com:30573/[...] 08:31:57 AM (Builder) Build of /users/db completed successfully.
6. Set up the database-container view.
You can use the Database Explorer to view the catalog objects generated in the application's SAP HDI container.
a. Open the Database Explorer.
Choose Tools Database Explorer or click the Database Explorer icon in the tools bar on the left-hand side of SAP Web IDE for SAP HANA.
b. Add a database connection if necessary.
SAP HANA Developer Quick Start GuideWorking with the SAP Cloud Application Programming Model PUBLIC 219

If the Database Explorer is empty and has no connections to a database, a connection dialog is displayed: Choose Yes to add a new connection. Otherwise choose [+] (the Add button).
Choose HDI Container from the Database Type drop-down list, enter the following details and choose OK:
○ In HDI Containers: Type users○ In Name to Show in Display: Type users_db
The Database Explorer should now display the database container "users_db" to which your application's database artifacts are deployed.
7. View the CDS entity (table) that you created in a previous step.
In the Database Explorer, expand the HDI container users_db and choose Tables; the table USER_DETAILS you created in a previous step is displayed at the bottom of the pane. Double-click USER_DETAILS to display the table definition, which contains the following four columns: EMAIL, FIRSTNAME, LASTNAME, and USERID.
NoteThis table is the same table that we interact with later on in this tutorial, when we define our Node.js back end. The Open Data button enables you to view the data stored in the table, although at this point the table is still empty.
8. Create a database sequence to increment the User ID for each new user added to the table.
Navigate to the Development perspective in SAP Web IDE, open up the users project, and perform the following steps:
a. In the srv module, create a new folder called sequences/.b. Add the file userSeqId.hdbsequence to the new sequences/ folder.c. Add the following code to the new userSeqId.hdbsequence file.
The following sequence file enables you to uniquely increment each user ID as it is created in our database:
Sample CodeContents of userSeqId.hdbsequence
SEQUENCE "userSeqId" START WITH 1 MAXVALUE 1999999999 RESET BY SELECT IFNULL(MAX(USERID), 1) + 1 FROM USER_DETAILS
NoteThis sequence definition file is available on the openSAP GitHub Web site at https://github.com/matteogp/openSAP7-xsa-node-2/blob/master/ex1/ex1_6.
9. Save all files and build the database (db) module.
Related Information
Create the Node.js Back-end Services for your SAP Cloud Platform Business Application [page 221]
220 PUBLICSAP HANA Developer Quick Start Guide
Working with the SAP Cloud Application Programming Model

Working with the SAP Cloud Application Programming Model [page 211]The NPM Registry (XS Advanced Developer Guide)OpenSAP XS advanced tutorial content on GitHub
4.3 Create the Node.js Back-end Services for your SAP Cloud Platform Business Application
Use Node.js to define the back-end services for your SAP Cloud Platform Business Application.
Prerequisites
To complete this tutorial successfully, note the following prerequisites:
● You must have access to an SAP HANA system where the XS advanced model run-time platform is installed and running and the SAP HANA Deployment Infrastructure (HDI) is enabled.
● For the purposes of this tutorial, you must have access to the SAP Web IDE for SAP HANA. Generally speaking though, you can use any text editor to create a design-time artifact.
TipThe SAP Web IDE provides access to the SAP HANA Database Explorer tools that enable you to view the contents of the catalog. You can also open the XS advanced Administration Cockpit to add and maintain platform services.
○ The SAP Web IDE must be able to connect to the Internet○ The SAP Web IDE must be configured to use the following registries for the Node.js Package Manager
(NPM):○ Public NPM Registry (https://registry.npmjs.org)
For more information, see Related Information below.● You must have completed the following tutorials: they contain artifacts that this tutorial depends on:
○ Create a Basic HTML5 Module for your SAP Cloud Platform Business Application○ Create the Core Data Services for your SAP Cloud Platform Business Application
● Code snippets and examples used in this tutorial are taken from the source versions stored in the GitHub repository "openSAP7-xsa-node-2". For more details, see Related Information below.
SAP HANA Developer Quick Start GuideWorking with the SAP Cloud Application Programming Model PUBLIC 221

Context
In the third part of this tutorial to develop a simple SAP Cloud Platform business application for deployment to XS advanced, you use Node.js to define the back-end, business-logic services for the SAP Cloud Platform business application, as described in the following steps:
Procedure
1. Add a new service provider to the application's development descriptor (mta.yaml).
a. Open the application project’s mta.yaml file, and in the MTA Editor select the web module.b. In the Requires tab, choose [+] and add srv_api as a new provider as part of the group destinations.c. Define the following properties (keys and values) for the new srv_api service.
Name Group Key Value
srv_api (provider) destinations name srv_api
url ~{url}
forwardAuthToken true
2. Create a central Node.js file to hold the reusable functions required by other services and files.a. In the srv module of the users project, create a new folder called utils.
Right click the src module and choose New Folder in the context menu.b. In the new utils folder, create a new file called util.js.
Right click the utils folder and choose New File in the context menu.c. Add the following code to the new util.js file.
Sample Code
/*eslint no-console: 0, no-undef: 0, no-unused-vars: 0, no-shadow: 0, quotes: 0, no-use-before-define: 0, new-cap:0 */'use strict';var xsenv = require('@sap/xsenv');module.exports = { getLocale: function (req) { let langparser = require("accept-language-parser"); let lang = req.headers["accept-language"]; if (!lang) { return null; } var arr = langparser.parse(lang); if (!arr || arr.length < 1) { return null; } var locale = arr[0].code; if (arr[0].region) { locale += "_" + arr[0].region; } return locale; }, callback: function (error, res, message) {
222 PUBLICSAP HANA Developer Quick Start Guide
Working with the SAP Cloud Application Programming Model

if (error) { res.writeHead(500, { 'Content-Type': 'application/json' }); res.end(JSON.stringify({ message: message })); } else { res.writeHead(200, { 'Content-Type': 'application/json' }); res.end(JSON.stringify({ message: message })); } }, appconfig: function () { var services = xsenv.getServices({ jobscheduler: { tag: 'jobscheduler' } }).jobscheduler; return { timeout: 15000, user: services.user, password: services.password, baseURL: services.url }; }, isAlphaNumeric: function (str) { var code, i, len; for (i = 0, len = str.length; i < len; i++) { code = str.charCodeAt(i); if (!(code > 47 && code < 58) && // numeric (0-9) !(code > 64 && code < 91) && // upper alpha (A-Z) !(code > 96 && code < 123)) { // lower alpha (a-z) return false; } } return true; }, isAlphaNumericAndSpace: function (str) { var res = str.match(/^[a-z\d\-_\s]+$/i); if (res) { return true; } else { return false; } }, isValidDate: function (date) { console.log("date" + date); var timestamp = Date.parse(date); console.log("timsestamp" + timestamp); if (isNaN(timestamp) === true) { return false; } return true; } };
TipThe Node.js file util.js is also available on the openSAP GitHub Web site at https://github.com/matteogp/openSAP7-xsa-node-2/blob/master/ex1/ex1_7.
SAP HANA Developer Quick Start GuideWorking with the SAP Cloud Application Programming Model PUBLIC 223

d. Save the file.3. Enable the Node.js server to connect to (and interact with) the database.
In this step we create a Node.js file called dbPromises.js that will contain the functions required to connect to the SAP HANA database.
a. In the database module's utils folder, create a new file called dbPromises.js.
Right click the utils folder and choose New File in the context menu.b. Add the following code to the new dbPromises.js file.
Sample Code /*eslint no-console: 0, no-unused-vars: 0, no-shadow: 0, new-cap: 0, dot-notation:0, no-use-before-define:0 *//*eslint-env node, es6 */"use strict";module.exports = class { static createConnection() { return new Promise((resolve, reject) => { const xsenv = require("@sap/xsenv"); let options = xsenv.getServices({ hana: { tag: "hana" } }); var hdbext = require("@sap/hdbext"); hdbext.createConnection(options.hana, (error, client) => { if (error) { reject(error); } else { resolve(client); } }); }); } constructor(client) { this.client = client; this.util = require("util"); this.client.promisePrepare = this.util.promisify(this.client.prepare); } preparePromisified(query) { return this.client.promisePrepare(query); } statementExecPromisified(statement, parameters) { statement.promiseExec = this.util.promisify(statement.exec); return statement.promiseExec(parameters); } loadProcedurePromisified(hdbext, schema, procedure) { hdbext.promiseLoadProcedure = this.util.promisify(hdbext.loadProcedure); return hdbext.promiseLoadProcedure(this.client, schema, procedure); } callProcedurePromisified(storedProc, inputParams) { return new Promise((resolve, reject) => { storedProc(inputParams, (error, outputScalar, results) => { if (error) { reject(error); } else { resolve({ outputScalar: outputScalar, results: results
224 PUBLICSAP HANA Developer Quick Start Guide
Working with the SAP Cloud Application Programming Model

}); } }); }); } };
TipThe Node.js file dbPromises.js is also available on the openSAP GitHub Web site at https://github.com/matteogp/openSAP7-xsa-node-2/blob/master/ex1/ex1_8.
c. Save the file.4. Define the handlers used to create users in the SAP HANA database and update the corresponding user
records.
The code used to add users to the database should be stored in the folder users/srv/lib/handlers, which you must first create, as follows:
a. In the srv module of the users project, create a new folder called lib.
Right click the src module and choose New Folder in the context menu.b. In the new lib folder, create a new folder called handlers.
Right click the lib folder and choose New Folder in the context menu.c. In the new handlers folder, create a new file called index.js.
Right click the handlers folder and choose New File in the context menu.d. Add the following code to the new index.js file.
Sample Code
/*eslint no-console: 0, no-unused-vars: 0, no-undef:0, no-process-exit:0, new-cap:0*/ /*eslint-env node, es6 */"use strict";const uuid = require("uuid/v4");const cds = require("@sap/cds");/** * Register handlers to events. * @param {Object} entities.User */module.exports = function (entities) { const { catalog } = entities; function validateEmail(email) { var re = /^(([^<>()[\]\\.,;:\s@\"]+(\.[^<>()[\]\\.,;:\s@\"]+)*)|(\".+\"))@((\[[0-9]{1,3}\.[0-9]{1,3}\.[0-9]{1,3}\.[0-9]{1,3}\])|(([a-zA-Z\-0-9]+\.)+[a-zA-Z]{2,}))$/; return re.test(email); } this.on("CREATE", entities.User, async(User) => { console.log("Before User Create"); const { data } = User; if (data.length < 1) { return null; }
SAP HANA Developer Quick Start GuideWorking with the SAP Cloud Application Programming Model PUBLIC 225

if (!validateEmail(data.EMAIL)) { throw new Error(`Invalid email for ${data.FIRSTNAME}. No Way! E-Mail must be valid and ${data.EMAIL} has problems`); } const dbClass = require(global.__base + "utils/dbPromises"); var client = await dbClass.createConnection(); let db = new dbClass(client); const insStatement = await db.preparePromisified( `INSERT INTO USER_DETAILS (FIRSTNAME, LASTNAME, EMAIL, USERID) VALUES (?,?,?, "userSeqId".NEXTVAL)` ); const updResults = await db.statementExecPromisified(insStatement, [data.FIRSTNAME, data.LASTNAME, data.EMAIL]); console.log('After User Create'); const statement = await db.preparePromisified( `SELECT MAX(USERID) FROM USER_DETAILS`); const userResults = await db.statementExecPromisified(statement, []); data.USERID = userResults[0]["MAX(USERID)"]; console.log(JSON.stringify(data)); return data; }); this.on("UPDATE", entities.User, async(User) => { console.log("Before User Update"); const { data } = User; if (data.length < 1) { return null; } const dbClass = require(global.__base + "utils/dbPromises"); var client = await dbClass.createConnection(); let db = new dbClass(client); const statement = await db.preparePromisified( `SELECT * FROM USER_DETAILS WHERE USERID = ?`); const userResults = await db.statementExecPromisified(statement, [data.USERID]); Object.keys(data).forEach(function (key) { userResults[0][key] = data[key]; }); const updStatement = await db.preparePromisified( `UPDATE USER_DETAILS SET "FIRSTNAME" = ?, "LASTNAME" = ?, "EMAIL" = ? WHERE "USERID" = ?` ); const updResults = await db.statementExecPromisified(updStatement, [userResults[0].FIRSTNAME, userResults[0].LASTNAME, userResults[0].EMAIL, userResults[0].USERID ]); return userResults[0]; }); };
TipThe Node.js file index.js is also available on the openSAP GitHub Web site at https://github.com/matteogp/openSAP7-xsa-node-2/blob/master/ex1/ex1_9.
e. Save the file.
226 PUBLICSAP HANA Developer Quick Start Guide
Working with the SAP Cloud Application Programming Model

5. Create a new file called server.js that defines the primary business logic for our Node.js server back end.
The file users/srv/server.js contains the primary logic that the Node.js server uses to handle any calls to our oData service and assign the appropriate routes. This concerns, in particular, those services that are required to interact with the exit handlers.
a. In the module srv/, create a new file called server.js.
Right click the srv/ folder and choose New File in the context menu.b. Add the following code to the new server.js file.
Sample Code
/*eslint no-console: 0, no-unused-vars: 0, no-undef:0, no-process-exit:0*/ /*eslint-env node, es6 */"use strict";const https = require("https");const port = process.env.PORT || 3000;const server = require("http").createServer();const cds = require("@sap/cds");//Initialize Express App for XSA UAA and HDBEXT Middlewareconst xsenv = require("@sap/xsenv");const passport = require("passport");const xssec = require("@sap/xssec");const xsHDBConn = require("@sap/hdbext");const express = require("express");https.globalAgent.options.ca = xsenv.loadCertificates();global.__base = __dirname + "/";global.__uaa = process.env.UAA_SERVICE_NAME;//loggingvar logging = require("@sap/logging");var appContext = logging.createAppContext();//Initialize Express App for XS UAA and HDBEXT Middlewarevar app = express();passport.use("JWT", new xssec.JWTStrategy(xsenv.getServices({ uaa: { tag: "xsuaa" }}).uaa));app.use(logging.middleware({ appContext: appContext, logNetwork: true}));app.use(passport.initialize());var hanaOptions = xsenv.getServices({ hana: { tag: "hana" }});//hanaOptions.hana.rowsWithMetadata = true;app.use( passport.authenticate("JWT", { session: false }), xsHDBConn.middleware(hanaOptions.hana));//CDS OData V4 Handlervar options = { driver: "hana"};Object.assign(options, hanaOptions.hana, { driver: options.driver});
SAP HANA Developer Quick Start GuideWorking with the SAP Cloud Application Programming Model PUBLIC 227

cds.connect(options);var odataURL = "/odata/v4/opensap.hana.CatalogService/";// Main appcds.serve("gen/csn.json", { crashOnError: false }) .at(odataURL) .with(require("./lib/handlers")) .in(app) .catch((err) => { console.log(err); process.exit(1); });// Redirect any to service rootapp.get("/", (req, res) => { res.redirect(odataURL);});//Start the Server server.on("request", app);server.listen(port, function () { console.info(`HTTP Server: ${server.address().port}`); });
TipThe Node.js file server.js is also available on the openSAP GitHub Web site at https://github.com/matteogp/openSAP7-xsa-node-2/blob/master/ex1/ex1_10.
c. Save the file.6. Update the srv/package.json file to reflect the latest changes and additions to the project's srv module.
Update the file srv/package.json to look like the following example:
Sample Code
{ "name": "serve", "dependencies": { "@sap/cds": ">=2.8", "express": "^4.16.2", "@sap/xssec": "^2.1.12", "@sap/xsenv": "^1.2.9", "hdb": "^0.16.0", "@sap/hdbext": "4.7.5", "@sap/hana-client": "~2.3", "@sap/logging": "~4.0", "@sap/audit-logging": "2.2.4", "passport": "~0.4.0", "async": "latest" }, "scripts": { "postinstall": "cds build/all --project .. --clean", "start": "node server.js" }, "engines": { "node": "8.x", "npm": "6.x" }, "cds": { "data": { "driver": "hana" } }
228 PUBLICSAP HANA Developer Quick Start Guide
Working with the SAP Cloud Application Programming Model

}
TipThe JSON file srv/package.json is also available on the openSAP GitHub Web site at https://github.com/matteogp/openSAP7-xsa-node-2/blob/master/ex1/ex1_11.
7. Run the applications srv module.
Right-click the srv module and choose Run Run as Node.js Application .
TipThe first time you start a build (run or deploy) operation, it can take a few minutes to complete. However, you can follow the build progress in the Run Console, and on completion, a message is displayed showing the operation status.
12/3/18 10:48:18.582 AM [APP/2-0] OUT [cds] - serving CatalogService at /odata/v4/opensap.hana.CatalogService/ - impl: <inline>Application is running
Before testing the running service, we need to make some changes to the application (router) configuration, as described in the following steps.
8. Define the routes and authentication methods required to access the application and its oData services.
Update the application-router's configuration file web/xs-app.json to include the new routes "/odata/v4/(.*)" and "/node(.*)" as illustrated in the following example:
Sample Code
{ "welcomeFile": "index.html", "authenticationMethod": "route", "routes": [{ "source": "/odata/v4/(.*)", "destination": "srv_api", "authenticationType": "xsuaa" }, { "source": "/node(.*)", "destination": "srv_api", "authenticationType": "xsuaa" }] }
TipThis xs-app.json file is also available on the openSAP GitHub Web site at https://github.com/matteogp/openSAP7-xsa-node-2/blob/master/ex1/ex1_12.
9. Save all files and re-run the web module.
Right-click the web module and choose Run Run as Web Application .
SAP HANA Developer Quick Start GuideWorking with the SAP Cloud Application Programming Model PUBLIC 229

TipYou can follow the start-up progress in the Run Console. On completion, a message is displayed showing the application status (running), and the running application Hello World! is displayed in a new Web-browser tab.
Restarting ModuleApplication is startingApplication is running
10. Test that the OData V4 service is running and available.
In the Web-browser tab where the web application is running, replace the index.html part of the URL with the path to the OData service (odata/v4/opensap.hana.CatalogService/$metadata).
https://myapp-users-web.acme.com:30133/index.html
The modified URL should look like the following:
https://myapp-users-web.acme.com:30133/odata/v4/opensap.hana.CatalogService/$metadata
The OData metadata contains details of the service and underlying table, as illustrated in the following incomplete ([…]) excerpt:
<edmx:Edmx xmlns:edmx="http://docs.oasis-open.org/odata/ns/edmx" Version="4.0"> [...] <edmx:DataServices> <Schema xmlns="http://docs.oasis-open.org/odata/ns/edm" Namespace="CatalogService"> <EntityContainer Name="EntityContainer"> <EntitySet Name="User" EntityType="CatalogService.User"/> </EntityContainer> <EntityType Name="User"> <Key> <PropertyRef Name="USERID"/> </Key> <Property Name="EMAIL" Type="Edm.String" MaxLength="255"/> <Property Name="FIRSTNAME" Type="Edm.String" MaxLength="40"/> <Property Name="LASTNAME" Type="Edm.String" MaxLength="40"/> <Property Name="USERID" Type="Edm.Int32" Nullable="false"/> </EntityType> <Annotations Target="CatalogService.User"> <Annotation Term="Common.Label" String="{i18n>userService}"/> </Annotations> [...] </Schema> </edmx:DataServices> </edmx:Edmx>
Related Information
Working with the SAP Cloud Application Programming Model [page 211]The NPM Registry (XS Advanced Developer Guide)OpenSAP XS advanced tutorial content on GitHub
230 PUBLICSAP HANA Developer Quick Start Guide
Working with the SAP Cloud Application Programming Model

4.4 Create the SAPUI5 Web UI for your SAP Cloud Platform Business Application
Use SAPUI5 to create the Web user interface for your SAP Cloud Platform Business Application.
Prerequisites
To complete this tutorial successfully, note the following prerequisites:
● You must have access to an SAP HANA system where the XS advanced model run-time platform is installed and running and the SAP HANA Deployment Infrastructure (HDI) is enabled.
● For the purposes of this tutorial, you must have access to the SAP Web IDE for SAP HANA. Generally speaking though, you can use any text editor to create a design-time artifact.
TipThe SAP Web IDE provides access to the SAP HANA Database Explorer tools that enable you to view the contents of the catalog. You can also open the XS advanced Administration Cockpit to add and maintain platform services.
○ The SAP Web IDE must be able to connect to the Internet○ The SAP Web IDE must be configured to use the following registries for the Node.js Package Manager
(NPM):○ Public NPM Registry (https://registry.npmjs.org)
For more information, see Related Information below.● You must have completed the following tutorials already: they contain artifacts that this tutorial depends
on:○ Create a Basic HTML5 Module for your SAP Cloud Platform Business Application○ Create the Core Data Services for your SAP Cloud Platform Business Application○ Create the Node.js Back-end Services for your SAP Cloud Platform Business Application
● Code snippets and examples used in this tutorial are taken from the source versions stored in the GitHub repository "openSAP7-xsa-node-2". For more details, see Related Information below. For this tutorial we also need the following archives, which contain data required by the application:○ common.zip○ odataCRUDV4.zip
NoteThe archives are available for download on openSAP's GitHub repository in the following location: https://github.com/matteogp/openSAP7-xsa-node-2/blob/master/ex1/
SAP HANA Developer Quick Start GuideWorking with the SAP Cloud Application Programming Model PUBLIC 231

Context
In the fourth and final part of this tutorial to develop a simple SAP Cloud Platform business application for deployment to XS advanced, you use SAPUI5 to create a Web application that provides the user interface required to add a new user to the SAP HANA database, update the user's details in the database, and check if the user's e-mail address is valid, as described in the following steps:
Procedure
1. Import two file archives into the users application project.
The archives common.zip and odataCRUDV4.zip contain data that the steps in this tutorial rely on.
a. In the SAP Web IDE tool bar, choose File Import File or Projectb. Import the files to the following locations in the users project structure and choose OK:
NoteMake sure you check the option Extract Archive to ensure that the archive's contents are available in the expected folder locations.
○ common.zip/users/web/resources/common
○ odataCRUDV4.zip/users/web/resources/odataCRUDV4
2. Add a new resource called users-ui5 to the application's MTA development descriptor (mta.yaml).
a. Open the application project’s mta.yaml file, and navigate to the Resource tab.b. In the Resources tab, choose [+] and add a new resource called users_ui5.c. Define the details of the new users_ui5 resource.
Choose the resource type org.cloudfoundry.managed-service from the drop-down list and define the following parameter keys and values:
Parameter Key Parameter Value
service sapui5_sb
service-plan sapui5-1.52
NoteSwitch to the MTA's Code Editor view and back to the MTA Editor to refresh the screen and ensure the newly defined resource is available for selection in the list of resources.
3. Add the new users_ui5 resource as a dependency for the project's web module.a. In the MTA Editor display the Modules tab and choose the web html5 module.b. In the Requires list, choose users-ui5 (resource).
232 PUBLICSAP HANA Developer Quick Start Guide
Working with the SAP Cloud Application Programming Model

c. Save the changes.
In the MTA Code Editor, the development descriptor (mta.yaml) should now look like the following example:
TipYou can find a complete version of this MTA development descriptor on the openSAP GitHub Web site at https://github.com/matteogp/openSAP7-xsa-node-2/blob/master/ex1/ex1_13.
Sample Codemta.yaml
ID: users _schema-version: '2.1'version: 0.0.1modules: - name: db type: hdb path: db parameters: memory: 256M disk-quota: 256M requires: - name: users-hdi-container - name: srv type: nodejs path: srv parameters: memory: 512M disk-quota: 256M provides: - name: srv_api properties: url: '${default-url}' requires: - name: users-hdi-container - name: users-uaa - name: db properties: UAA_SERVICE_NAME: users-uaa - name: web type: html5 path: web requires: - name: users-uaa - name: srv_api group: destinations properties: name: srv_api url: '~{url}' forwardAuthToken: true - name: users-ui5resources: - name: users-hdi-container properties: hdi-container-name: '${service-name}' type: com.sap.xs.hdi-container - name: users-uaa type: com.sap.xs.uaa-space - name: users-ui5 type: org.cloudfoundry.managed-service parameters: service: sapui5_sb
SAP HANA Developer Quick Start GuideWorking with the SAP Cloud Application Programming Model PUBLIC 233

service-plan: sapui5-1.52
4. Update the application router configuration to take into account the SAPUI5 Web user interface.
In the SAP Web IDE's Development perspective, open the application-router configuration file xs-app.json in the web module and add the following new route for localdir, which is highlighted in bold type in the following example:
TipYou can find a complete version of this application-router configuration file (xs-app.json) on the openSAP GitHub Web site at https://github.com/matteogp/openSAP7-xsa-node-2/blob/master/ex1/ex1_14.
Sample Codexs-app.json
{ "welcomeFile": "index.html", "authenticationMethod": "route", "routes": [{ "source": "/odata/v4/(.*)", "destination": "srv_api", "authenticationType": "xsuaa" }, { "source": "/node(.*)", "destination": "srv_api", "authenticationType": "xsuaa" },{ "source": "/(.*)", "localDir": "resources", "authenticationType": "xsuaa", "replace": { "pathSuffixes": [ "index.html" ], "services": { "sapui5_sb": { "tag": "ui5" } } } }] }
5. Create the SAPUI5 backing service.
Since it is not possible to create this SAPUI5 service using the SAP Web IDE; use the SAP HANA XS Advanced Cockpit, as described in the following steps:
a. Start the SAP HANA XS Advanced Cockpit under Tools SAP HANA XS Advanced Cockpit .b. Navigate to the organization and space where you are developing this users application.
In the navigation pane, expand Services, choose Service Marketplace, and in the services pane, choose sapui5_sb.
c. In the navigation pane, choose Instances and in the Instances pane choose New Instanced. In the Create Instance tab, choose sapui5-1.52 from the Plan drop-down list and press Next. Press Next
again to skip the definition of any optional parameters.
234 PUBLICSAP HANA Developer Quick Start Guide
Working with the SAP Cloud Application Programming Model

e. In the Confirm tab of the Create Instance Wizard, type the name users-ui5 in the Instance Name box and press Finish.
6. Test the Create Record feature in the odataCRUDV4 user interface by adding a new user to the database.
In this step, you start the SAPUI5 user interface of our Web application and use the new user interface to make changes in the database, for example, by defining details of a new user.
a. Open the Development perspective of the SAP Web IDE and (re)start the users Web application.
Right-click the web module in the users project and choose Run Run as Web Application .
When the Web application is running, the [Hello World!] button is visible in a new tab in the Web browser.
b. Start the OData V4 CRUD user interface.
In the Web browser tab where the users Web application is now running, replace “index.html” in the URL with the text “odataCRUDV4/”, which is the path to the OData V4 user interface and refresh the browser ( Shift + F5 ). The new URL should look like the following example:
https://myapp-users-web.acme.com:30133/odataCRUDV4/
The new Web user interface using SAPUI5 should be visible, which enables you to define details of a user, whom you want to add to the database, or modify a user's existing details.
c. Add details of a new user to your SAP HANA database.
Type the following user details into the appropriate fields in the user interface and choose Create Record:
Parameter Parameter Value
First Name Kweku
Last Name Ampomah
Email [email protected]
An Alert dialog is displayed indicating that a new user has been created; the new user has a unique ID, for example, 2. Choose OK.
The new user is displayed immediately in the User List of the ODATA V4 CRUD Web application.
In the SAP Web IDE's Run Console, you should see messages similar to the following extract from a run log:
Application is running[...]12/4/18 9:44:37.665 AM [APP/4.0] OUT [cds] - service CatalogService at /odata/V4/...12/4/18 9:44:58.838 AM [APP/4.0] OUT Before User Create12/4/18 9:44:58.862 AM [APP/4.0] OUT After User Create12/4/18 9:44:58.873 AM [APP/4.0] OUT {"USERID":2,"FIRSTNAME":"Kweku","LASTNAME":"Ampomah","EMAIL":"[email protected]"}
7. Confirm that the new user has been added to the records stored in the USER_DETAILS database table.
SAP HANA Developer Quick Start GuideWorking with the SAP Cloud Application Programming Model PUBLIC 235
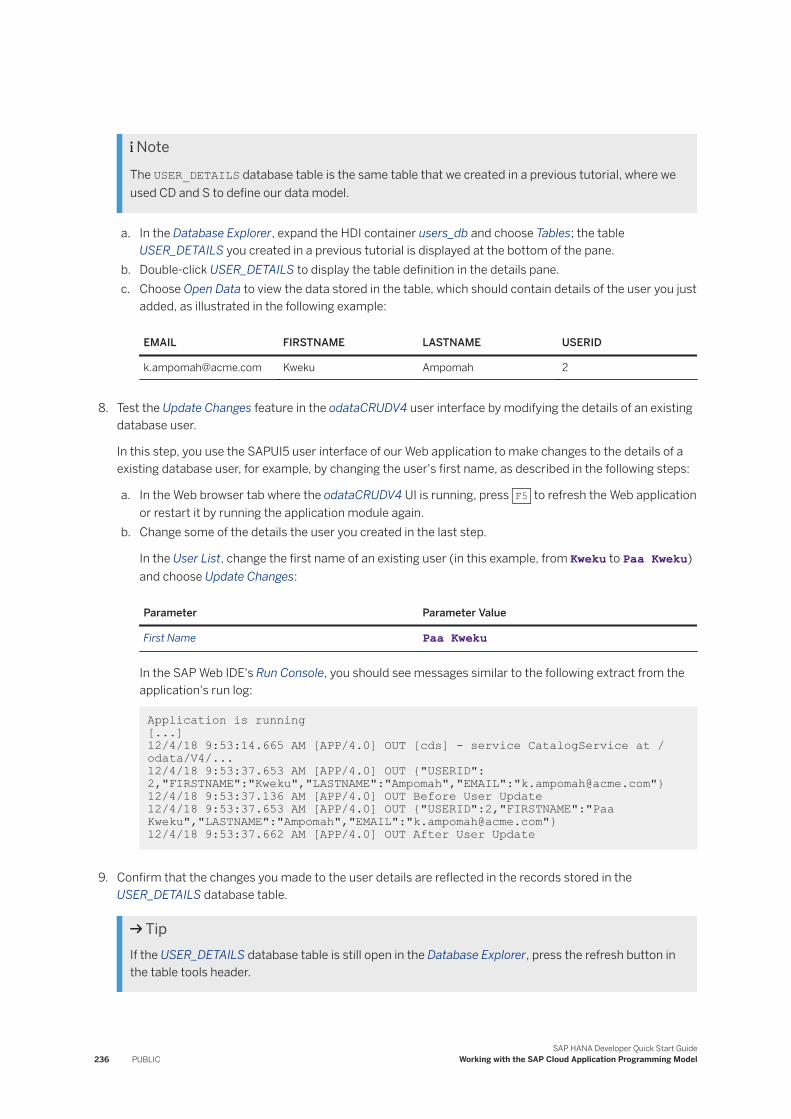
NoteThe USER_DETAILS database table is the same table that we created in a previous tutorial, where we used CD and S to define our data model.
a. In the Database Explorer, expand the HDI container users_db and choose Tables; the table USER_DETAILS you created in a previous tutorial is displayed at the bottom of the pane.
b. Double-click USER_DETAILS to display the table definition in the details pane.c. Choose Open Data to view the data stored in the table, which should contain details of the user you just
added, as illustrated in the following example:
EMAIL FIRSTNAME LASTNAME USERID
[email protected] Kweku Ampomah 2
8. Test the Update Changes feature in the odataCRUDV4 user interface by modifying the details of an existing database user.
In this step, you use the SAPUI5 user interface of our Web application to make changes to the details of a existing database user, for example, by changing the user's first name, as described in the following steps:
a. In the Web browser tab where the odataCRUDV4 UI is running, press F5 to refresh the Web application or restart it by running the application module again.
b. Change some of the details the user you created in the last step.
In the User List, change the first name of an existing user (in this example, from Kweku to Paa Kweku) and choose Update Changes:
Parameter Parameter Value
First Name Paa Kweku
In the SAP Web IDE's Run Console, you should see messages similar to the following extract from the application's run log:
Application is running[...]12/4/18 9:53:14.665 AM [APP/4.0] OUT [cds] - service CatalogService at /odata/V4/...12/4/18 9:53:37.653 AM [APP/4.0] OUT {"USERID":2,"FIRSTNAME":"Kweku","LASTNAME":"Ampomah","EMAIL":"[email protected]"}12/4/18 9:53:37.136 AM [APP/4.0] OUT Before User Update12/4/18 9:53:37.653 AM [APP/4.0] OUT {"USERID":2,"FIRSTNAME":"Paa Kweku","LASTNAME":"Ampomah","EMAIL":"[email protected]"}12/4/18 9:53:37.662 AM [APP/4.0] OUT After User Update
9. Confirm that the changes you made to the user details are reflected in the records stored in the USER_DETAILS database table.
TipIf the USER_DETAILS database table is still open in the Database Explorer, press the refresh button in the table tools header.
236 PUBLICSAP HANA Developer Quick Start Guide
Working with the SAP Cloud Application Programming Model

If not, open the Database Explorer, locate and double-click the table USER_DETAILS, and choose Open Data.
TipYou might need to press the refresh button in the table header.
EMAIL FIRSTNAME LASTNAME USERID
[email protected] Paa Kweku Ampomah 2
10. Confirm that the Web application tests the validity of a new user's e-mail address.
In this step, you test the functionality that checks the validity of a new user's e-mail address when adding the new user to the database, for example, by specifying an invalid e-mail address.
a. In the Web browser tab where the odataCRUDV4 UI is running, press F5 to refresh the Web application or restart it by running the application module again.
b. Add details of a new user to your SAP HANA database.
Type the following user details into the indicated fields in the user interface and choose Create Record:
Parameter Parameter Value
First Name Bad
Last Name Data
Email not@email
This time, the Web application does not display any alert dialog confirming that a new user was successfully created, but the new user Bad Data does appear in the Web application's user list, albeit with the User ID “0”.
In the SAP Web IDE's Run Console, you should see messages indicating what happened; the OData exit handler noticed the invalid e-mail address and, as a result, did not create the new user:
Application is running[...]12/4/18 9:49:17.665 AM [APP/4.0] OUT [cds] - service CatalogService at /odata/V4/...12/4/18 9:49:38.838 AM [APP/4.0] OUT Before User Create[...]12/4/18 9:49:38.862 AM [APP/4.0] ERR Stacktrace: Error: Invalid email for Bad...
In the Database Explorer, refresh the data in the USER_DETAILS table to check that no user with the name "Bad Data" is listed, which confirms the user was not added to the database.
TipIf you refresh the Web page of the OData V4 DRUD application you used to add the new user, you will notice that the new user Bad Data no longer appears in the User List. This is because the list of users is fetched from the database each time the Web page is loaded.
SAP HANA Developer Quick Start GuideWorking with the SAP Cloud Application Programming Model PUBLIC 237

Related Information
Working with the SAP Cloud Application Programming Model [page 211]OpenSAP XS advanced tutorial content on GitHubThe NPM Registry
238 PUBLICSAP HANA Developer Quick Start Guide
Working with the SAP Cloud Application Programming Model

5 Important Disclaimer for Features in SAP HANA
For information about the capabilities available for your license and installation scenario, refer to the Feature Scope Description for SAP HANA.
SAP HANA Developer Quick Start GuideImportant Disclaimer for Features in SAP HANA PUBLIC 239

Important Disclaimers and Legal Information
HyperlinksSome links are classified by an icon and/or a mouseover text. These links provide additional information.About the icons:
● Links with the icon : You are entering a Web site that is not hosted by SAP. By using such links, you agree (unless expressly stated otherwise in your agreements with SAP) to this:
● The content of the linked-to site is not SAP documentation. You may not infer any product claims against SAP based on this information.● SAP does not agree or disagree with the content on the linked-to site, nor does SAP warrant the availability and correctness. SAP shall not be liable for any
damages caused by the use of such content unless damages have been caused by SAP's gross negligence or willful misconduct.
● Links with the icon : You are leaving the documentation for that particular SAP product or service and are entering a SAP-hosted Web site. By using such links, you agree that (unless expressly stated otherwise in your agreements with SAP) you may not infer any product claims against SAP based on this information.
Videos Hosted on External PlatformsSome videos may point to third-party video hosting platforms. SAP cannot guarantee the future availability of videos stored on these platforms. Furthermore, any advertisements or other content hosted on these platforms (for example, suggested videos or by navigating to other videos hosted on the same site), are not within the control or responsibility of SAP.
Beta and Other Experimental FeaturesExperimental features are not part of the officially delivered scope that SAP guarantees for future releases. This means that experimental features may be changed by SAP at any time for any reason without notice. Experimental features are not for productive use. You may not demonstrate, test, examine, evaluate or otherwise use the experimental features in a live operating environment or with data that has not been sufficiently backed up.The purpose of experimental features is to get feedback early on, allowing customers and partners to influence the future product accordingly. By providing your feedback (e.g. in the SAP Community), you accept that intellectual property rights of the contributions or derivative works shall remain the exclusive property of SAP.
Example CodeAny software coding and/or code snippets are examples. They are not for productive use. The example code is only intended to better explain and visualize the syntax and phrasing rules. SAP does not warrant the correctness and completeness of the example code. SAP shall not be liable for errors or damages caused by the use of example code unless damages have been caused by SAP's gross negligence or willful misconduct.
Gender-Related LanguageWe try not to use gender-specific word forms and formulations. As appropriate for context and readability, SAP may use masculine word forms to refer to all genders.
240 PUBLICSAP HANA Developer Quick Start Guide
Important Disclaimers and Legal Information

SAP HANA Developer Quick Start GuideImportant Disclaimers and Legal Information PUBLIC 241

www.sap.com/contactsap
© 2021 SAP SE or an SAP affiliate company. All rights reserved.
No part of this publication may be reproduced or transmitted in any form or for any purpose without the express permission of SAP SE or an SAP affiliate company. The information contained herein may be changed without prior notice.
Some software products marketed by SAP SE and its distributors contain proprietary software components of other software vendors. National product specifications may vary.
These materials are provided by SAP SE or an SAP affiliate company for informational purposes only, without representation or warranty of any kind, and SAP or its affiliated companies shall not be liable for errors or omissions with respect to the materials. The only warranties for SAP or SAP affiliate company products and services are those that are set forth in the express warranty statements accompanying such products and services, if any. Nothing herein should be construed as constituting an additional warranty.
SAP and other SAP products and services mentioned herein as well as their respective logos are trademarks or registered trademarks of SAP SE (or an SAP affiliate company) in Germany and other countries. All other product and service names mentioned are the trademarks of their respective companies.
Please see https://www.sap.com/about/legal/trademark.html for additional trademark information and notices.
THE BEST RUN