Power PDF Advanced Quick Start Guide
29
Quick Start Guide Document Imaging Solutions Nuance Power PDF Advanced Power PDF Advanced Quick Start Guide
-
Upload
khangminh22 -
Category
Documents
-
view
1 -
download
0
Transcript of Power PDF Advanced Quick Start Guide
Quick Start GuideDocument Imaging SolutionsNuance Power PDF Advanced
Power PDF Advanced Quick Start Guide

2 Quick Start Guide
Table of contents
Executive summary 4
1. Creating PDF 5 – Create PDF files inside Power PDF 5 – Create a PDF file in Power PDF from multiple source files 5 – Create a PDF from Windows Explorer or desktop by drag-and-drop 5 – Create a PDF by combining all open documents 5 – Create a PDF from Windows Explorer by menu 5 – Create PDF from multiple files in Windows Explorer by menu 6 – Create PDF by printing from the source file’s application 6 – Create PDF directly from the source file’s application 6 – Create a PDF file from Create Assistant 7 – Create a PDF using a website URL 7 – Customize the user interface 7
2. Converting PDF 8 – Convert whole PDF or XPS files inside Power PDF with Save As 8 – Convert PDF or XPS files inside Power PDF with page ranges 8 – Convert a selected page area in a PDF to an editable format 9 – Convert PDF or XPS files from the desktop 9 – Convert from PDF/XPS using Convert Assistant 9
3. Modifying documents 10 – Touch up text in the PDF 10 – Touch up images in the PDF 10 – Add text using the Typewriter tool 11 – Modify documents with Advanced Edit 11 – Comment a PDF 12
4. Forms 12 – Activate and submit static PDF forms 12 – Create new form fields 12 – Touch up existing PDF forms with form controls 13 – Create a new form from a blank PDF 13 – Export data from multiple forms 13
Document Imaging SolutionsNuance Power PDF Advanced
3 Quick Start Guide
5. Security with passwords 14 – Apply a password to a document printed to PDF 14 – Set an open password for a document in Power PDF 15 – Remove passwords 15 – Set permissions and permission password for a document 15 – Create a Password-based Security Scheme 16 – Redact a document 16
6. Digital signatures 17 – Create your own Digital ID and send to Windows Certificate Store 18 – Export a Certificate and send to recipient 19 – Sign a document 19 – Sign or send a PDF with DocuSign® 21 – Save a Certificate to Trusted Identities 21 – Validate a signature and document integrity 22
7. Document assembly 22 – Open and use Page Assembly view with a single document 22 – Use Page Assembly view with a multiple document 22 – Preview pages to be added; renumber pages 23 – Add watermarks to specific pages 23 – More page editing operations 23
8. Collaboration 24 – Add comment text to a PDF page 24 – Add marking to text 24 – Insert items or markup text 25 – Open and use the comments panel 25 – Summarize comments from a document 25 – Migrate comments 25 – Real-time Collaboration 26
9. Batch Processing 27 – Set up a sequence for batch processing 27 – Run a sequence 27 – Create a watched folder job 28 – Use of a watched folder 29 – Batch conversions TIFF and PDF 29
Document Imaging SolutionsNuance Power PDF Advanced
4
Executive summary
This Quick Start Guide is an additional resource to help you get started with Power PDF Advanced. It will demonstrate how to accomplish the most used features of Power PDF Advanced with the fewest possible steps.
Power PDF Advanced makes it easy for businesses to gain control over PDF workflows in every department and for every use with the ability to create, convert and assemble industry-standard PDF files with superior accuracy. It features the richest set of capabilities for collaborating and securely sharing PDF files with colleagues or customers. Power PDF is easy to install and customize for your business needs. It supports touch-enabled Windows® 10 devices so you can be productive on the go or in the office. It delivers performance and value as never before, freeing you from the compromises of other PDF applications.
Quick Start GuideDocument Imaging SolutionsNuance Power PDF Advanced
5
1. Creating PDF
Create PDF files inside Power PDFUse File > Open > Browse, set All Files as file type and choose one or more non-PDF files whose types are supported by the program. Each file is converted to a separate PDF file.
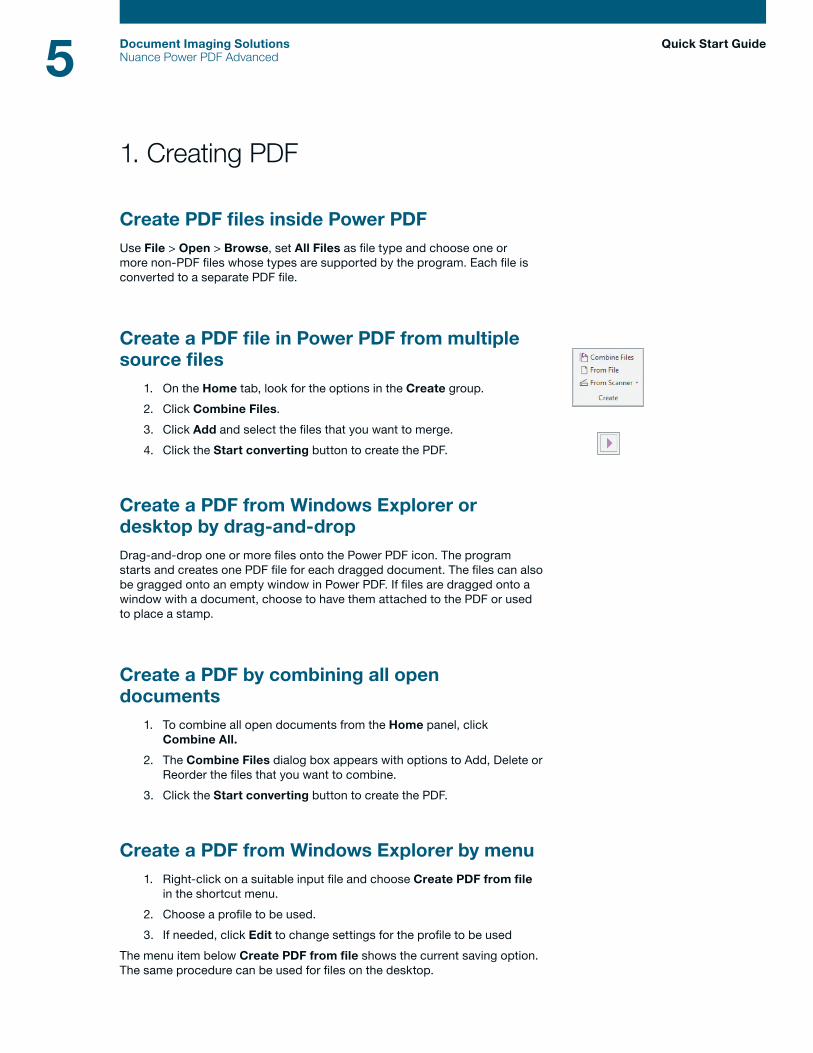
Create a PDF file in Power PDF from multiple source files
1. On the Home tab, look for the options in the Create group.
2. Click Combine Files.
3. Click Add and select the files that you want to merge.
4. Click the Start converting button to create the PDF.
Create a PDF from Windows Explorer or desktop by drag-and-dropDrag-and-drop one or more files onto the Power PDF icon. The program starts and creates one PDF file for each dragged document. The files can also be gragged onto an empty window in Power PDF. If files are dragged onto a window with a document, choose to have them attached to the PDF or used to place a stamp.
Create a PDF by combining all open documents
1. To combine all open documents from the Home panel, click Combine All.
2. The Combine Files dialog box appears with options to Add, Delete or Reorder the files that you want to combine.
3. Click the Start converting button to create the PDF.
Create a PDF from Windows Explorer by menu1. Right-click on a suitable input file and choose Create PDF from file
in the shortcut menu.
2. Choose a profile to be used.
3. If needed, click Edit to change settings for the profile to be used
The menu item below Create PDF from file shows the current saving option. The same procedure can be used for files on the desktop.
Quick Start GuideDocument Imaging SolutionsNuance Power PDF Advanced
6
Create PDF from multiple files in Windows Explorer by menuSelect the files to be converted. Right-click the selection and view the Create PDF commands in the context menu.
– Choose Create PDF from file to have one PDF per input file. – Choose Combine files as one PDF to generate just one PDF. – Choose Package files as one PDF to place all generated PDFs into a package.
– Choose Overlay files as one PDF to have files combined into one set of PDF pages.
Choose a profile to be used from the sub-menu of the selected command. If needed, click Edit to change settings for the profile to be used. Combining, packaging and overlaying files are done via the Create Assistant.
Create PDF by printing from the source file’s application
1. Open the source file in Microsoft Word, Excel, PowerPoint or similar.
2. Choose File > Print and choose the printer Nuance PDF.
3. Click Preferences (or similar option) to check or change PDF creation choices.
4. Click Print.
5. Name the generated PDF file in the save dialog box that appears.
To transfer bookmarks, comments, tag structure, document description, links etc, prefer the following procedure.
Create PDF directly from the source file’s applicationOpen the source file in Microsoft Word, Excel, PowerPoint or similar. Open the Nuance PDF tab and in its ribbon change settings and/or start creation:
Click this to define additional items to transfer. The following list relates to Microsoft Word:
1. Bookmarks: Click the checkbox in front off all bookmarks to be transferred.
2. Links: Define the appearance for links in the generated PDF.
3. Comments: Click the checkbox in front off all comments to be transferred.
4. Tags: Enable or disable transfer of tags to the PDF, including PDF/A accessibility.
5. Advanced Settings: Enable transfer of metadata and access further settings.
Click OK to confirm the settings.
Quick Start GuideDocument Imaging SolutionsNuance Power PDF Advanced
7 Quick Start Guide
The range of settings available for Excel and PowerPoint differ from the above.
Click this to create and save the PDF and additionally attach it to a new mail message.
Click this to create and save the PDF to a defined name and location.
These procedures function only if PDF Create remains integrated with the application.
Create a PDF file from Create Assistant1. In Power PDF, select File > New, then click From File.
2. Choose Create PDFs from multiple files.
3. Use the Add button to compile a file list of source files.
4. Use the Up or Down buttons to modify the file order.
5. In the Assembly method drop-down list, choose to save files separately, or to combine, overlay or package them.
6. Choose a profile and if needed, click Profiles to view and modify its settings.
7. Choose a PDF version, font embedding, compression, security, watermark and more.
8. Click the relevant Advanced button to change settings for each item.
9. Click OK to confirm the settings.
10. View current destinations settings, click Saving to modify them.
Click the Start converting button.
Create a PDF using a website URL1. In Power PDF, select File > New, then click From Web Page.
2. Type or Copy and Paste the URL of the web page into the URL field.
3. Enter the number of levels you want Power PDF to traverse and add to the PDF, or choose to get all levels.
4. Specify whether or not you want Power PDF to stay on the same server.
5. Check the current Settings and change the page size, margins and scaling if needed.
Customize the user interfaceChange color skin
1. To change the color scheme, select the View tab on the top ribbon and then select the Change Skin dropdown to display choices.
Document Imaging SolutionsNuance Power PDF Advanced
8 Quick Start Guide
2. Save your work and then close and re-open Power PDF for the changes to take effect.
View documents in separate tabs or windows
1. To have documents open in their own separate Power PDF window versus a separate tab, first click File, then Options.
2. Select General, and then uncheck the “Open documents as new tabs within the same window” option.
3. Save your work and then close and re-open Power PDF for the changes to take effect.
2. Converting PDFPDF and XPS files can be converted to a wide range of editable formats in the following ways.
Convert whole PDF or XPS files inside Power PDF with Save As
1. Use File > Save As > Browse and choose the desired file type.
2. Accept or modify the file name and browse to the desired folder.
3. Optionally click Settings to view or modify conversion settings.
4. Click Save.
This conversion method converts all pages of the PDF document. To convert a page range or selected pages, use the following procedure. If image-only pages or areas containing text are found, Optical Character Recognition (OCR) is used to generate editable text.
Convert PDF or XPS files inside Power PDF with page ranges
1. On the Home tab, locate the Convert options and click Other.
2. Choose a target application or file type from the context menu.
3. Choose whole document, current page, set a range or define selected pages.
4. Choose whether to store the exported file in a Document Management System or not.
5. Click Settings to access further settings for the export.
6. Click OK then define an output location and file name.
The range of available settings depends on the chosen output target.
Document Imaging SolutionsNuance Power PDF Advanced

9 Quick Start Guide
Convert a selected page area in a PDF to an editable format
1. Click on Advanced Processing > Export > Export Area.
2. Use the cursor shape to draw a rectangle on the page.
3. Define a file type, an output location and filename.
This is useful to save just one article from a magazine page or just one table to Excel or the contents for just one slide in PowerPoint.
Convert PDF or XPS files from the desktop1. Right-click on a single PDF or XPS file on the desktop.
2. Click Convert PDF/XPS in the shortcut menu.
3. Choose a target file type or choose Using Convert Assistant (see below)
4. When a file type in chosen, conversion starts immediately.
5. The converted document appears in the target application.
6. Save it using Save As. Do not use Save, and do not close it without using Save As.
Convert from PDF/XPS using Convert Assistant1. Click the Convert Assistant tool under Advanced Processing >
Batch with the PDF or XPS file already open in Power PDF.
2. Choose to convert the whole document, the current page only, a page range or selected pages and click OK.
3. The Convert Assistant opens in Full view.
4. Click the Open tool or use the File menu to add more documents.
5. Files are added in the list on the right.
6. Click the Show Preview tool to see a preview of the first page of a single selected document.
7. Use items in the File menu or the tools above the file list to remove or rearrange files.
8. Use the controls at the base of the Preview window to view further pages in the currently selected document and if desired define page ranges for added documents.
9. Click the Mode tool to choose a conversion mode for the currently selected document.
10. Click the Output tool to define the target application for the currently selected document.
Click the Convert Selected tool to convert just the selected document(s).
Click the Convert All tool to convert all documents in the list, one after the other.
Document Imaging SolutionsNuance Power PDF Advanced
10 Quick Start Guide
Different documents can have different conversion types and targets and page range settings. The Mode choices are Standard, Spreadsheet, Form and Legal. The tool’s appearance shows which mode is currently set. Similarly, the appearance of the Output tool shows the current target applica-tion (Word, WordPerfect, Excel, PowerPoint, Rich Text Format (RTF).
Remember to use Save As to save documents displayed in their target applications.
3. Modifying documents
Touch up text in the PDFThis editing method is designed for making relatively small text modifications. For more major changes, use the source file if you have it and generate a new PDF, or use Advanced Edit (see below).
1. Click Edit > Modify > Edit Text.
2. Click in the text to be modified.
3. A frame appears defining the text boundaries – this may be a line or a paragraph.
4. Relevant text editing settings will appear in the top ribbon.
5. Click at the change location for an editing cursor and make the required changes.
6. Optionally, use Edit > Select All, to select all text in the frame.
7. Click the Hand tool at the top of the Panel bar to finish editing.
Text in image-only pages or areas cannot be modified until they have been made searchable. Do this at Home > Convert > Make PDF Searchable. Sometimes Power PDF must substitute a similar font if it does not have access to the font used in the document or it may be unable to find a suitable font at all.
PDF files with password protection specifying No Modification cannot be edited in this way.
Touch up images in the PDFThese images can be inserted pictures, watermarks or Clip Art.
1. Use Edit > Modify > Edit Object.
2. Click in the image to be modified.
3. A frame appears defining the image boundaries.
4. Resize this frame if necessary.
5. Use the tools in the Object > Tools tab to make further changes to the selected image.
This tool can also be used to import images. Choose Place Image in the toolbar.
PDF files with password protection specifying No modification cannot be edited in this way.
Document Imaging SolutionsNuance Power PDF Advanced
11 Quick Start Guide
Add text using the Typewriter tool1. Use Edit > Modify > Typewriter.
2. Click at the location you want to add text.
3. Type or paste the desired text – its properties (color, font, size) are the values currently set.
4. Text is automatically spell checked if this is enabled under File > Options > Spell Check.
5. To modify the text later click the Typewriter tool and double-click in the frame for an editing cursor.
6. To change text properties for selected text, right-click and choose Properties.
7. Make choices and use the control top right to close the toolbar to have the changes applied without changing the default values.
8. To change the default properties for the Typewriter tool, click Set and confirm your choice.
The newly added text remains editable with the Typewriter tool or the Edit Text tool.
Modify documents with Advanced EditThis process involves transforming the file using the Convert component of the program to generate fully editable text. After editing is finished the modified document is reconverted to PDF.
PDF files with password protection specifying No Modification cannot be edited in this way.
We recommend you save the PDF before using Advanced Edit and work with a copy, since the conversion process may not be able to fully handle pages with complex layouts. This applies mainly to Image-only and Searchable PDF, since the conversion must use Optical Character Recognition (OCR). The conversion also removes tags and layers.
1. Open the document in Power PDF, if it has image-only parts or pages, first make them searchable under Home > Convert > Make PDF Searchable.
2. Click Edit > Convert > Convert to Editable.
3. Confirm your desire to make the document editable and specify conversion type: as a document or as a form.
4. The document remains in Power PDF, but it can now be edited freely.
5. Before starting, check that the layout and text content are acceptable.
6. Use the Home ribbon in Advanced Edit to modify text, paragraphs, alignment and page layout.
7. Use the Insert ribbon to place page, section and column breaks, insert pictures, create links, add symbols, tables, headers and footers.
8. Use the View ribbon to set page display options, set split views and more.
Document Imaging SolutionsNuance Power PDF Advanced

12 Quick Start Guide
9. Use the Track ribbon to set revision marking, accept or reject changes and set marking options.
10. When the document is ready, choose Home > Close Advanced Editor > Finalize. The document returns to Review mode with all changes confirmed.
Comment a PDFAdding comments to a PDF file does not change the basic content of the PDF file. Commenting and document markup are covered in Quick Start Guide section 8.
4. Forms
Activate and submit static PDF formsYou may receive PDF forms that are image-only; these cannot be immediately filled out electronically. The following procedure details activating a form for filling out as well as sharing.
1. Scan or open the form, converting to PDF if required.
2. Click the Form Typer tool under Forms > Fillable Forms to have form controls detected, activated and labeled.
3. Post-edit the form if necessary, moving, adding or deleting fields. Auto detection finds only text boxes and checkboxes. Manually add other form control types (see below).
4. Click the Hand tool, then fill the form.
5. To resend the completed form, do one of the following:
• Send the filled form as a PDF.
• Print the form and its contents, and send the printed form.
• Print only your responses onto the blank physical form and resend that.
As an alternative, you can convert a static PDF form to an active Word form using form mode in PDF Convert – post-edit and fill the form in Microsoft Word and send that, electronically or physically.
Do not use Form Typer with forms already containing XFA form controls.
Create new form fields1. Open the Forms tab and choose the desired tool from the Form
Elements group.
2. Drag the cursor to create a form field of the required size.
3. The relevant form field properties dialog box appears.
4. Select desired properties and click Close.
The properties available depend on the form field type.
Document Imaging SolutionsNuance Power PDF Advanced
13 Quick Start Guide
Touch up existing PDF forms with form controlsSelect the one or more form fields you want to resize.
– To resize the fields by dragging, select the form tool that was used to create the form field, and then drag any border handle on the field. Press Shift to keep the current field’s aspect ratio.
– To resize the fields by one pixel, press the Ctrl+Arrow key; to resize the fields by 10 pixels, press Ctrl+Shift+Arrow.
– To resize a group of form fields to have the same width, height, or area of a particular form field, select the fields to be changed; then right-click over the field that has the dimension you want and choose Height, Width, or Both under Size in the shortcut menu.
– To delete a form field right-click in it and choose Edit > Delete from the context menu, or select a field and press Delete.
Create a new form from a blank PDF1. Choose File > New > Blank PDF, or press CTRL+N.
2. Draw form elements on the page with the form tools under Forms > Form Elements.
3. Add static texts using text boxes.
4. When the form is ready, save the PDF file.
5. Choose the Hand tool if you want to fill the form you have created.
The newly added text remains editable with the Typewriter tool or the Edit Text tool.
Export data from multiple formsFor efficient export, all forms should have the same set of field names. Multi-page forms can be processed. One PDF file per form is recommended, but a single PDF containing a set of assembled forms is also acceptable, providing the form field sets are identical. If there are field differences between forms, all non-identical field names generate columns in the output table. All fields in the resulting table have a generic cell type that accepts any input – use your spreadsheet program to set other cell types (e.g. date, currency, numbers only).
1. Choose Forms > Data > Import/Export Data > Export Data From Multiple Forms.
2. Click Add and select the desired files from a folder.
3. Select the checkmark Include most recent list of files to export from to have all the forms from the last exporting session added to the list.
4. Click Export, specify the output folder, file name and type (CSV or XML) and click Save.
5. Use Save As and choose a suitable file type (e.g. Excel Worksheet). If you do not do this, the file remains in the CSV or XML format.
Document Imaging SolutionsNuance Power PDF Advanced
14 Quick Start Guide
5. Security with passwordsA PDF file can be secured in a number of ways. This guide details the use of passwords and digital signatures. Passwords have two types: Open Passwords and Permissions Passwords.
Apply a password to a document printed to PDFAn editable document in a range of applications can become password- protected when it is printed to PDF. There are three possible password choices:
Open Password onlySet this to ensure that only people with this password can open the document. Once opened, the PDF can be modified, printed or copied freely.
Permissions Password onlySet this to ensure that only people with this password can change its security settings. Anyone can open the document, but the permitted and prohibited actions are set when the permissions password is created.
Open and Permissions PasswordsSet this to ensure that only people with either password can open the document, and only those with the permissions password can change its security settings.
Here is how to apply one or both passwords when printing a document to PDF:
1. Prepare a document in Word, Excel, PowerPoint or a similar application.
2. Choose File > Print and select the printer “Nuance PDF”.
3. Click the link Printer Properties.
4. Make settings under the tab General as desired.
5. Open the tab PDF Settings, make settings as desired.
6. Go to the list box Security and choose a security control from the list on the left.
7. Enter an Open Password and/or a Permissions Password together with its choices.
8. Click OK to set the security and passwords for the current document.
To create a new security control make the desired settings and passwords and click New. Name the control. This will appear in future among the options. The settings for any security control can be modified, but if they differ from the control name description the changed control should be saved to a suitable name using New.
Printing to PDF allows encryption at 40-bit or 128-bit levels. For 256-bit please set PDF version 1.7 before choosing the encryption level
When you use Create Assistant to make a PDF you can apply passwords and define the range of permitted and prohibited actions. The Create Assistant can be accessed via the Windows Start menu, or from buttons in the Nuance ribbon in a range of applications. This can also be done in Power PDF, as described in the following topics.
Document Imaging SolutionsNuance Power PDF Advanced

15
Set an open password for a document in Power PDF
1. Open the Security tab with the document already open.
2. Click Manage Security > Modify.
3. Click the Security Method drop down menu and select Password Security.
4. Check Allow document opening only by password.
5. Enter the desired password.
6. Click OK to confirm the password.
7. From now on anyone trying to open this PDF document must supply the password, including the person who set the password.
Remove passwordsIf you have the Open Password and have opened a document with no Permissions Password set, you can remove the Open Password. Go to Security > Manage Security > Modify, set the Security Method drop-down list to No Security and then save and close the document.
Similarly, if you have the Permissions Password and have opened a document with no Open Password set, you can remove the Permissions Password in the same way.
If a document is protected by both an Open and a Permissions Password, you must supply either password to open the document and the Permissions Password to choose No Security.
Note: If prohibitions were set using Certificate security (that is via digital signatures), they cannot be removed by removing a password.
Set permissions and permission password for a documentThis procedure produces a document that cannot be modified, copied or accessed by screen readers or similar.
1. Open the Security tab with the document already open.
2. Click Manage Security > Modify.
3. In Security Method drop-down list, select Password Security.
4. Under Permissions, check the box Set a permissions password to restrict editing of secuirty settings.
5. Select the desired permission security settings from the drop down menus.
6. Enter the desired password.
7. Confirm the desired password.
8. From now on anyone opening this PDF document without the Permissions Password can no longer change or copy it.
Quick Start GuideDocument Imaging SolutionsNuance Power PDF Advanced
16 Quick Start Guide
Create a Password-based Security SchemePower PDF allows you to create and store Security Schemes – some for Password Security, others for Certificate Security. Schemes are created and managed in the Security panel (called from the Panel bar by the Security tool).
If you do not see this tool, right-click in an empty area of the Panel bar and select it.
The Security panel shows all security schemes currently available in your system. The predefined schemes are accessed by clicking the headings Interactive, Privacy and No Modification. Custom-created schemes are grouped under different categories.
Managing Security SchemesClick the Security Scheme Option button to choose an active item from the drop-down menu.
1. Apply Security Scheme: Apply a selected scheme to the current PDF document, or double-click a scheme, or drag it into the PDF document. If you choose this with no scheme saved, you are invited to create a scheme.
2. Create Security Scheme: Create a Password or Certificate Security Scheme of your own, or click the Create Security Scheme button at the top of the panel. Until you create a security scheme, this is the only option. See the Help topic Security Properties.
3. Delete Security Scheme: Select a custom-created security scheme, or click the Delete Security Scheme button at the top of the panel or right-click a custom-created scheme and choose this action, or select it and press Delete. Confirm deletion by clicking OK. Predefined security schemes cannot be deleted.
4. Copy Security Scheme: Select a custom-created password security schemes. Do this to create a new security scheme based on an existing one. Certificate type security schemes cannot be copied.
5. Edit Security Scheme: Select a custom-created security scheme, and use this to change its properties. Predefined security schemes cannot be edited.
Redact a documentThis is done to make sensitive data unreadable in PDF documents that are to be published. It is available only in Power PDF Advanced.
The Mark Redaction tool in the Security ribbon marks content for redaction that are to be published, so planned deletions can be reviewed.
The Apply Redaction tool is used when reviewing is completed, to permanently and unrecoverably render the data unreadable.
Areas to be redacted are marked by red rectangles; already redacted areas appear as colored blocks; by default these are black.
Document Imaging SolutionsNuance Power PDF Advanced
17 Quick Start Guide
Visible contents including text, graphics and images can be redacted. The appearance of redacted items can be specified before redaction. They commonly appear as colored boxes filled in with solid color, but you can also set them to display overlaid privacy codes, custom text, or just a blank area.
To mark and then permanently redact content from your document
1. Click Redaction Properties at Security > Redaction and set redaction mark appearance.
2. Select the Mark Redaction tool shown above.
3. To mark text content to be removed, move the cursor onto it; it becomes , select the text.
4. To mark a picture for redaction, move the cursor to it; the cursor changes to , draw a rectangle to cover the desired selection area.
5. Hold the pointer over a marked area to preview the redaction marking appearance.
6. If your proposed marking needs review, save and close the document.
7. After review, reopen the document and right-click in a marked area and select Apply from the shortcut menu to apply redaction perma-nently to that area. If you want to make all marked redactions in the current PDF permanent, select Apply All.
8. Confirm redaction by clicking Apply in the dialog box that warns redaction cannot be undone.
Notes: Redaction cannot be undone once applied. To avoid mistakes, we strongly advise you to make a copy of the original PDF before you perform redaction; or save the redacted PDF as a new file with a different name and/or location.
Conversely, if you mark and/or apply redaction to a document, but then close it without saving, all the redaction work is lost.
Redaction can be combined with document flattening or removing document elements.
6. Digital signaturesUse of digital IDs provides a higher level of protection than passwords, since you must send the password(s) to trusted recipients, and such messages can be intercepted.
A Digital ID is a file pair on your computer that identifies you to other users; typically it is used for online financial transactions, sending secure emails and protecting PDF files.
Digital IDs are managed by an industry standard -- the public key infrastruc-ture. This is a set of people, policies, procedures, hardware and software used in creating, distributing, managing, revoking and using the digital IDs. The file pair in a digital ID are a public key and a private key. Digital IDs are stored inside certificate files of which there are two types:
Document Imaging SolutionsNuance Power PDF Advanced
18 Quick Start Guide
The private Digital ID file contains both your private and your public keys. It must be stored securely and not shared. Typically it is password protected. Its extension is often pfx; others are possible. Such files must be imported into Power PDF under Security > IDs and Certificates > Manage Digital Identities.
The public ID file contains only your public key plus associated data. Common extensions are .p7b, p7c or .cer. This file typically contains:
– Your public key – Your name and e-mail address – Expiration date of the key pair – Serial number of the Digital ID
If the Digital ID was obtained from a Certification Authority (CA), the public ID contains information about that CA.
Digital IDs are used in the following cases:
Signed documentsA signature using a Digital ID lets the recipient know the e-mail or PDF file is from you and lets them check that no changes have been made since the signature was applied. If there are changes, the recipient can see what changed.
Signed and Certified DocumentsA certified document works the same way, but restrictions on use can be set. With signed and certified documents only the signature is encrypted, not the PDF contents. See the Help topics: Sign/Certify panel and Signing and Certifying Documents.
Create your own Digital ID and send to Windows Certificate StoreDigital ID’s can be created by Power PDF when you create a self-signed certificate, or they can be issued by Certificate Authorities (CA). See the Help topic: Certificates Overview.
To create a self-signed Digital ID
1. Select Security > IDs and Certificates > Manage Digital Identities.
2. Click Add ID in the Seurity Settings dialog box.
3. In the Add Digital ID dialog box, select the Create a Self-Signed Digital ID option and click Next.
4. Select New Digital ID File and click Next.
5. Choose the storage location, either you local computer or the Windows Certificate Store. Click Next.
6. In the Create a Self-Signed Digital ID dialog box, type in at least your name and select a country under User Attributes.
7. Type in a password (at least 6 characters), confirm it, and then click OK.
8. If you chose local storage, specify a location and a name for your Digital ID file in the Save As dialog box and click Save.
Document Imaging SolutionsNuance Power PDF Advanced
19 Quick Start Guide
The newly created self-signed certificate will be added to the Digital ID Files list that appears in the Security Settings dialog box (called from Security > ID’s and Certificates > Manage Digital IDs). Files purchased from a CA or self-created in a different application must be imported by clicking Add ID.
Export a Certificate and send to recipientOnce you have created a digital ID in Power PDF or imported one, you can use it to generate a public key to send to people you trust or need to trust. For the latter (e.g. people in your organization that you do not know personally) using a Certification Authority is preferable – the CA acts as a neutral third-party. For people you trust and know, a self-signed certificate is usually enough.
To generate a public key from an ID file.
1. Go to Security > IDs and Certificates > Manage Digital Identities and choose the private ID file you want to use and click Export Certificate.
2. Choose whether to save this public key to your local computer or use it to e-mail the file to one or more recipients.
3. If you chose to save the file to your local machine, specify a name and location. You can later retrieve the file and send it to trusted contacts.
4. If you chose to email the file to one or more contacts, enter an e-mail address. In the case of multiple addresses, use the syntax required by your default e-mail client. Click E-Mail.
5. The file is attached to an e-mail in your default browser with a message generated by Power PDF that explains how to save and use the file.
6. Modify this text and/or add other messages as desired, then send the e-mail.
You can send this public ID file to anyone you trust or need to trust and want to be able to verify your signatures and also send you protected PDF files. Sending this ID file is safe because it cannot be used or misused without the corresponding private key.
Sign a documentApplying a digital signature to a document allows a recipient to verify that you were the person who signed the document, and if any changes were made after the signature is applied, the recipient can request a display of those changes. Later in this document, you will learn how to sign a document using the DocuSign® eSignature service. To sign using the built-in tools, see below.
To sign an open document with an invisible signature
1. Click the Sign tool at Security > Sign and Certify > Sign.
2. Click the arrow for a drop-down list and choose Sign Document.
3. Click with the pen cursor and click in the page at a location for the signature.
4. A dialog box appears. Click Continue to create an invisible signature.
Document Imaging SolutionsNuance Power PDF Advanced

20 Quick Start Guide
5. In the Sign Document dialog box, select a Digital ID from the list or click Add to create a new one or browse for an existing one.
6. Confirm the password if the signature scheme includes password protection.
7. When a recipient opens the file, a bubble message informs the document is signed, but the signature will not be visible. The public key will be needed to verify the signature
To sign an open document with a visible signature (using the Sign tool cursor)
1. Click the Sign tool at Security > Sign and Certify.
2. Click the arrow for a drop-down list and choose Sign Document.
3. Click on the page and draw a box big enough to accept a signature.
4. If the box is not big enough for the signature to appear legibly, a dialog box appears. Click Start Over and draw a box big enough to accept your visible signature.
5. In the Sign Document dialog box, select a Digital ID or create or browse for one.
6. Confirm the password if the signature scheme includes password protection.
7. When a recipient opens the file, a bubble message informs that the document is signed and the signature will be visible.
To sign and certify an open document
1. Click the Certify tool at Security > Sign and Certify.
2. Click the arrow for a drop-down list and choose Certify Document or Certify Document Invisibly.
3. For a visible signature click, with the pen cursor and click in the page at a location for the signature.
4. The Certify Document dialog box appears and offers your default signature. Click Add to specify a different one. Confirm your pass-word if required.
5. Define the permitted range of actions for the file. Optionally add a timestamp. Click Next.
6. The next panel displays the appearance of the chosen signature. If you have custom appearances saved, you can select a preferred one.
7. Click Edit to modify the signature appearance or New to create a new one.
8. When ready, click Save or Save As to save the signature appearance and place the signature in the document
If you choose “Certify Document Invisibly,” skip step 3 and move directly to the Certify Document dialog box.
Document Imaging SolutionsNuance Power PDF Advanced
21 Quick Start Guide
Sign or send a PDF with DocuSign®
Users of the DocuSign eSignature service will be able to sign and send documents from within Power PDF. A user must have first created an account with DocuSign at www.docusign.com, and can then enter their user creden-tials in Power PDF. These credentials can be remembered so that they do not need to be re-entered every time you want to sign or send a document for signatures.
Sign a document using DocuSign
1. Click the DocuSign tool at Security > Sign and Certify.
2. Select Sign from the drop down list.
3. If you have not logged in yet, enter the login credentials you created at www.docusign.com.
4. If you’d like for Power PDF to remember your login, check the Remember user checkbox.
5. A new Power PDF window is opened that contains the Sign workflow of the DocuSign application, with your PDF loaded and ready to sign.
Send a document for signatures with DocuSign
1. Click the DocuSign tool at Security > Sign and Certify.
2. Select Send from the drop down list.
3. If you have not logged in yet, enter the login credentials you created at www.docusign.com.
4. If you’d like for Power PDF to remember your login, check the Remember user checkbox.
5. A new Power PDF window is opened that contains the Send for Signatures workflow of the DocuSign application, with your PDF loaded and ready to send.
Save a Certificate to Trusted IdentitiesYou will do this if an individual or Certificate Authority (CA) sends you a certificate file containing a public key. A recipient of such a file from you must also do this.
To save a certificate so the sender becomes trusted
1. Save the certificate file containing a public key to a useful location.
2. Open Power PDF, choose Trusted Identities in the IDs and Certificates group in the Security ribbon.
3. Browse for the file and select it. View its properties, sender and expiry date. Click Details for more information.
4. If you want to always trust certificates from the same source, select the file and click Set as Trusted Root. If you do this the column Trust confirms this.
5. If you have many trusted identities, the Search button helps you navigate in them.
See the Help topic: Manage Trusted Identities.
Document Imaging SolutionsNuance Power PDF Advanced
22 Quick Start Guide
Validate a signature and document integrityTo verify a signature
1. Open a PDF document containing a digital signature.
2. Right-click a signature on the page and then select Verify Signature from the shortcut menu. The Validation Status information box shows the results. If all is in order, it states that the document content has not been changed since signing, the signer’s identity is valid and the signer’s certificate has not been revoked.
3. Click Properties for more information about the signature. If the Validity Status is Unknown, you will have to verify the signature by contacting the signer.
4. Click Verify Identity to see if the user has entered contact infor-mation. If so, you can confirm the signature’s origin by matching certificate numbers. If there is no contact information for a known signer, use alternate means to verify the signature.
7. Document assemblyThis view displays multiple pages at reduced size, to assist page operations within or between documents. Here pages are just reduced in size, not ren-dered as static thumbnails, so many page editing functions remain available.
Open and use Page Assembly view with a single document
1. Choose Home > Assemble > Document Assembly to see the set of pages in the current document each with a page number bar below it.
2. Use the Zoom tools in the View tab to resize the displays.
3. To move a single page, select it, click its number and drag it to the drop point until the red insertion bar indicates the desired location.
4. To move a set of pages, select them and click the number bar of any selected page. Use drag-and-drop as described above.
5. To copy one or more pages, proceed as above with the Ctrl key held down.
6. Click the Document Assembly tool again to leave Assembly view.
Use Page Assembly view with multiple documents
1. Choose Home > Assemble > Document Assembly to see the set of pages for all currently opened documents; each page has a number bar below it.
2. All documents subsequently opened while Document Assembly is set are displayed similarly in their own program window.
Document Imaging SolutionsNuance Power PDF Advanced
23 Quick Start Guide
3. Resize document windows to make cross-document actions easier to perform.
4. Right-click on a page for a shortcut menu of operations: Use it to insert pages from other files, replace, extract or delete pages, split the document, add headers and footers, renumber the pages and more.
5. Copying or moving pages between documents can be done using the number bars and using drag-and-drop between document windows.
6. Click the Document Assembly tool again to leave Assembly view; all opened documents are restored to normal view.
Preview pages to be added; renumber pagesWhen Document Assembly is set, two further tools appear:
Page Assembly: Select a set of source files for document assembly— these do not need to be PDF files. Each opened document is presented in a separate tab. Page thumbnails let you view each document to decide which pages are needed. Select, drag and drop pages into the target PDF. Conversion to PDF is done when necessary and may take some time.
Renumber Pages: this updates auto-generated header and footer page numbering to the new page order built up in Document Assembly view. This tool becomes active only for documents with auto-numbering.
Add watermarks to specific pagesPDF Create and the Nuance PDF printer both allow you to add watermarks as PDF files are created; the Watermarks panel in Power PDF allows a water-mark to be added to the current or selected pages. Document Assembly view provides more flexibility. Enter Document Assembly mode and open the required documents.
Click the Watermarks panel to open the watermarks panel. (Right click the panel bar to reveal the watermark panel).
This lets you see your set of watermarks along with views of document pages. Use drag-and-drop to place watermarks on the desired pages.
More page editing operationsSome page editing operations can be done in Document Assembly view that cannot be done with the Pages panel. These include:
– Use the Select tool to copy a selection to Clipboard for pasting to editable documents outside the program, or into notes, text boxes or callouts in other pages or documents.
Document Imaging SolutionsNuance Power PDF Advanced
24 Quick Start Guide
– Use the Select tool to copy a text selection for pasting onto a Typewriter tool cursor. This allows you to copy and paste real PDF text from one PDF page to another, even in other documents. On saving the target PDF, pasted text becomes part of the document.
– Use the Edit Text tool to modify page content.
– Use the Comments tools to add notes, text boxes, drawing elements or mark up texts.
– Use tools from the Edit > Insert to add text, sounds, movies or 3D objects to the PDF.
An alternative to Document Assembly is to use Create Assistant to combine files of different types – editable text documents and image files—into a single PDF.
8. CollaborationThe Comment ribbon provides an array of tools for collaborative reviewing and commenting of documents. These annotations do not become an integral part of the PDF, but can be replied to, commented and managed. Later in this section you’ll learn how to edit and comment on PDF documents in real time with another user on your LAN (local area network).
Add comment text to a PDF pageAdd a note, add a text box, add a callout.
Note: Click the tool, click a location on a page, and enter text. It appears as simple text without attributes (bold, italic, coloring etc.). Finalized and closed notes are shrunk to an icon (the default is shown); click it to open the note. Right-click and choose Properties to change the color or the icon appear-ance and more.
Text Box: Click the tool, then drag a rectangle, and enter text. The box expands vertically to accept longer texts. Default properties are set under File > Options > Comment. Text attributes can be accepted. Text box contents remain visible; text boxes are not shrunk.
Callout: Functions as a text box, but the box has an arrow that can be directed to a precise location in the PDF text.
Add marking to textHighlight a text or an area, cross-out or underline selected text.
Highlight: Select to highlight text or an area. Then select text or drag to define an area. Right click on the highlight and choose Properties to change the highlight color and its opacity.
Cross-out and Underline: Click the desired button then make a text selec-tion. Right-click and choose Properties to change the color or appearance.
Document Imaging SolutionsNuance Power PDF Advanced
25 Quick Start Guide
Insert items or markup textYou can use drawing and active markup tools, and insert stamps.
Draw Tools: click the tool, select a drawing object from the drop-down list and drag to define the location for the object. A note is attached to the object. Double click the object to reopen the note. With closed shapes (rectangles, ovals, polygons, clouds) any text within the shape is copied into the note – edit this as desired.
Active Markup: Click this to have all text changes marked: inserted or deleted text, changes to text attributes etc.
Stamp: Opens the Stamp panel so a supplied or customized stamp can be added to the page. It functions as a comment so it can take a note and be managed in the Comments panel (see below).
Open and use the comments panelClick the Comments panel to open this panel along the side of the document window. By default it lists all comments, which can be filtered, reordered by various criteria, searched and replied to. A review or migration status can be set for each comment using the comment options at the top of the panel.
Summarize comments from a document1. Click the Options tool on the right of the Comments panel toolbar.
2. Choose Create Comment Summary from the dropdown menu.
3. Choose a presentation type (comments only, comments plus docu-ment with three display options).
4. Set a page size, font size, comment type (default is All Comments), a sorting order and linking line color.
5. Click OK to see and optionally save the summary or Print Comment Summary to receive it on paper.
Migrate commentsThis serves to migrate a set of comments from an earlier state of a document into the latest version.
1. Open the latest version of the file and also the source file; make the latest version the current document.
2. Open the Comments panel, click the Options tool and choose Migrate Comments.
3. Define the source file whose comments should be migrated to the current document. All currently open documents are listed. Choose the appropriate one.
Document Imaging SolutionsNuance Power PDF Advanced
26 Quick Start Guide
4. Choose whether to display all migrated comments or only unconfirmed ones. The comment list is automatically filtered to show only migrated comments: any comments that existed in the target document become hidden.
5. Review the list of migrated comments and choose which to accept and which to reject.
6. To confirm a migrated comment, right-click it and choose Set Status > Migration > Confirmed. That comment disappears from the list and the document. If all migrated comments are confirmed, the comment list will be empty.
7. Click the Filter comments tool in the Comments panel toolbar and select Show by Status > All Status to make all comments in the target document visible and listed.
Real-time CollaborationUse this to collaboratively edit and comment on a document in real-time with one or more other users on the same local area network. PDF portfolio, XFA and PPDF (Microsoft RMS Protected PDF) files are not supported with this feature.
To start a collaboration session
1. Select the Collaboration icon from the left side ribbon. You may need to right-click on the left ribbon and select this menu item if it is not visible.
2. If you haven’t set a nickname yet, enter one into the Name field and click OK.
3. Check the Visible to others in the same LAN checkbox.
4. If desired, you can set an access code that other users must enter to begin the session. To do this, click the Security Setup button, check the Access Code checkbox and enter an alphanumeric code.
5. Click the Start Collaboration button.
6. In the Collaboration dialog, click the Browse button and find the PDF file that you would like to edit. Click Next.
7. In the LAN Collaboration dialog, select one or more collaboration partners by checking the box next to their username. Click Start to begin the session.
8. Your partner(s) will then receive a notification inside Power PDF indicating that they have been invited to collaborate with you. When they click OK to accept, the PDF that you selected will be opened in their Power PDF interface.
To end a collaboration session
1. From the left side Collaboration menu, either click the Exit icon, or right-click on any name in the list of users and select Exit.
2. You will be prompted to save the document to your computer.
Document Imaging SolutionsNuance Power PDF Advanced

27 Quick Start Guide
9. Batch Processing
Set up a sequence for batch processingDefine a set of commands for use with files you receive that all need similar treatment – for instance conversion to PDF files that are searchable with the addition of a watermark.
1. Choose Advanced Processing > Batch > Sequencer.
2. Select New Sequence in the dialog box that appears.
3. Name the sequence, then in the Edit Workflow dialog box click item 1: Select Commands.
4. Choose commands for the sequence in the Edit Sequence dialog box. Click Add, Remove, Move Up or Move Down to finalize the list.
5. Select each command in turn and click Edit to make a selection, e.g. to choose a watermark or stamp or to select pages to be inserted. Only two commands take no further choices.
6. Choose under item 2 how you will specify the files to be processed when the sequence is run. This can be pre-selected files or folders – browse to make the selection. Choose Ask When Sequence is Run to specify the input whenever the sequence is activated.
7. Choose All Open Files to apply the processing to all files currently open in the program. These files remain in place as PDF files, waiting to be saved with their batch processing modifications.
8. Select an output location under item 3, along with options for file naming, file type and whether saved PDF files should be optimized for fast web viewing or not. Click OK to close the dialog box.
9. Recheck all settings, then click OK in the Edit Workflow dialog box so the sequence is saved.
Sequence commands or settings can be modified later. Open the Sequences dialog box, choose a sequence and click Edit Sequence.
Run a sequence1. Choose Advanced Processing > Batch > Sequencer. The
Sequences dialog box shows all available sequences.
2. Choose one and click Run Sequence. The Confirm Running Sequence dialog box lets you review and approve the sequence input and output settings and the commands. With predefined output, be sure to note where results will be stored. Click OK to continue.
3. Specify input files if you requested run-time prompting. If the settings for any commands were undefined or any command could not be performed, you are warned.
4. Specify output information if you requested run-time prompting.
5. If the sequence was run successfully the result is delivered without any further interaction.
Do not apply batch processing to packages or portfolios, the processing would only be applied to the cover sheet. Please unpack files before batch processing them.
Document Imaging SolutionsNuance Power PDF Advanced
28 Quick Start Guide
Create a watched folder jobHave a folder regularly monitored for incoming files that can be automatically processed. This feature is available only in Power PDF Advanced. Input files can be of different types; these are converted to PDF or TIFF. The watched folder is typically at a network location accessible from your computer. The destination folder is typically on your local computer. Avoid using the same folder for watching and for results.
1. Click Watched Folder at Advanced Processing > Batch.
2. Select the checkmark Enable Watched Folder at the top of the dialog box.
3. Click Source and locate the folder to be monitored, with or without subfolders.
4. Choose the file type from the drop-down list. Choose all supported file types or only one.
5. Click Destination and locate the target folder for the converted files.
6. Choose a File Type for the output files: TIFF (single or multi-page) or PDF (Normal or Searchable - including different PDF/A levels)
7. Optionally, click Settings and modify default parameters, for instance on how to handle image-only pages using OCR for PDF output.
8. Optionally, select the checkmark Use Workflow and browse for a workflow file. See below.
9. Specify how to handle finished source files after conversion:
• Keep: Preserve source files in the watched folder.
• Delete: Delete source files from the watched folder.
• Move to folder: Move sources files to a folder your browser can locate.
• Auto Clear Results: automatically clear the file list from the Watch and Convert dialog box task view.
10. Choose CPU Options, set the Count to 1 for sequential processing, to a higher number for parallel task processing.
11. Confirm Watched Folder setup by clicking OK.
Using a workflow means applying a defined set of actions to all incoming files. The checkbox becomes active only when at least one workflow has been created. The selection list offers all existing workflows. Watched folder processing is automated, so any steps in the workflow requiring interaction are not performed.
Document Imaging SolutionsNuance Power PDF Advanced

29 Quick Start Guide
Use of a watched folderWhenever a valid file enters the watched folder, the program waits a few seconds to see if further files are arriving. When files stop arriving it begins conversion and displays progress in the Watch and Convert dialog box. You can:
– Track conversion progress in the list – Pause, Resume or Delete a task – Clear finished tasks from the task view – Retry running a failed task – View a conversion log – Hide this dialog box. Once hidden, click the Watch and Convert icon in the notification area of the Windows taskbar to restore it.
Batch conversions TIFF and PDFPower PDF advanced also offers batch conversion TIFF to PDF, PDF to TIFF, between single page and multipage TIFF and PDF to PDF (different flavors) without using a Watched folder. For this, select Advanced Processing > Batch > Batch Converter.
Document Imaging SolutionsNuance Power PDF Advanced
Copyright © 2018 Nuance Communications, Inc. All rights reserved. Nuance and the Nuance logo are trademarks and/or registered trademarks of Nuance Communications, Inc., or its affiliates in the United States and/or other countries. All other brand and product names are trademarks or registered trademarks of their respective companies.
NDI_328 MAY 2018
About Nuance Communications, Inc.Nuance Communications, Inc., is a leading provider of voice and language solutions for businesses and consumers around the world. Its technologies, applications and services make the user experience more compelling by transforming the way people interact with devices and systems. Every day, millions of users and thousands of businesses experience Nuance’s proven applications. For more information, please visit www.nuance.com.