ESRI® ArcGIS® 3D Analyst™: Animation Customization
55
ESRI 380 New York St., Redlands, CA 92373-8100, USA • TEL 909-793-2853 • FAX 909-793-5953 • E-MAIL [email protected] • WEB www.esri.com ESRI ® ArcGIS ® 3D Analyst ™ : Animation Customization An ESRI Technical Paper • November 2004
-
Upload
khangminh22 -
Category
Documents
-
view
2 -
download
0
Transcript of ESRI® ArcGIS® 3D Analyst™: Animation Customization

ESRI 380 New York St., Redlands, CA 92373-8100, USA • TEL 909-793-2853 • FAX 909-793-5953 • E-MAIL [email protected] • WEB www.esri.com
ESRI® ArcGIS® 3D Analyst™: Animation Customization
An ESRI Technical Paper • November 2004

Copyright © 2004 ESRI All rights reserved. Printed in the United States of America. The information contained in this document is the exclusive property of ESRI. This work is protected under United States copyright law and other international copyright treaties and conventions. No part of this work may be reproduced or transmitted in any form or by any means, electronic or mechanical, including photocopying and recording, or by any information storage or retrieval system, except as expressly permitted in writing by ESRI. All requests should be sent to Attention: Contracts and Legal Services Manager, ESRI, 380 New York Street, Redlands, CA 92373-8100, USA. The information contained in this document is subject to change without notice.
U.S. GOVERNMENT RESTRICTED/LIMITED RIGHTS Any software, documentation, and/or data delivered hereunder is subject to the terms of the License Agreement. In no event shall the U.S. Government acquire greater than RESTRICTED/LIMITED RIGHTS. At a minimum, use, duplication, or disclosure by the U.S. Government is subject to restrictions as set forth in FAR §52.227-14 Alternates I, II, and III (JUN 1987); FAR §52.227-19 (JUN 1987) and/or FAR §12.211/12.212 (Commercial Technical Data/Computer Software); and DFARS §252.227-7015 (NOV 1995) (Technical Data) and/or DFARS §227.7202 (Computer Software), as applicable. Contractor/Manufacturer is ESRI, 380 New York Street, Redlands, CA 92373-8100, USA. ESRI, the ESRI globe logo, ArcGIS, 3D Analyst, ArcObjects, ArcScene, ArcGlobe, www.esri.com, and @esri.com are trademarks, registered trademarks, or service marks of ESRI in the United States, the European Community, or certain other jurisdictions. Other companies and products mentioned herein are trademarks or registered trademarks of their respective trademark owners.

J-9343
ESRI Technical Paper i
ESRI ArcGIS 3D Analyst: Animation Customization
An ESRI Technical Paper Contents Page Document Overview ............................................................................. 1 Basic Animation Concepts.................................................................... 1
Customizing Animations in ArcScene............................................ 2 Customizing Animations in ArcGlobe............................................ 3
Keyframes ............................................................................................. 3
Time Scale Properties of an Animation .......................................... 5 Keyframe Time Stamps .................................................................. 6 Using Unbound Keyframes to Control Objects .............................. 6 Angle Interpolation in Layer Keyframes in ArcScene ................... 7
Animation Tracks.................................................................................. 8
Using the Scene or Globe as Container of the Animation Tracks .. 10 The Animation Environment ................................................................ 12
Reading the Animation Environment ............................................. 12 Setting the Animation Environment ............................................... 13 Synchronizing Other Tasks With Animations ................................ 14
Saving and Sharing 3D Animations...................................................... 14
Exporting Animations to Video Files ............................................. 15 Defining Custom Animation Types ...................................................... 17
Animation Type Implementation.................................................... 18 Keyframe Implementation .............................................................. 21 Registration..................................................................................... 26

ESRI ArcGIS 3D Analyst: Animation Customization
J-9343
November 2004 ii
Contents Page Appendixes Appendix A: Properties of Out-of-the-Box Animation Types ............ 28 Appendix B: Code Samples Illustrating the Use of Animation
Objects in ArcScene and ArcGlobe ................................................ 30

J-9343
ESRI Technical Paper
ESRI ArcGIS 3D Analyst: Animation Customization
Document Overview Animations are an effective way to illustrate complex ideas and concepts. The purpose of this document is to explain how to create simple and complex animations using ESRI® ArcObjects™ in ArcScene™ and ArcGlobe™. It discusses the basic functionality and architecture of the animation objects, the different types of animations supported, and the creation of custom animation types. Also, the document discusses how to control animations and export them to the supported file formats.
Basic Animation Concepts
ArcScene and ArcGlobe have the same underlying architecture for animation. Both these applications allow you to create, save, and share animations in a similar fashion. An animation is a description of the changes of a set of objects in time. In ArcScene, the object may be the Scene, Camera, or Layer, whereas in ArcGlobe, the objects can be the Globe Camera or Globe Layer. To describe how an object changes, the animation framework uses keyframes, which are snapshots of the object's state at a certain time. From these keyframes, the state of the object at any given time can be calculated and interpolated between the keyframes. A collection of one or more keyframes of the same type constitutes an animation track. Each track is bound to one or more objects and describes their behavior over time. The animation is composed of one or more of these animation tracks executed simultaneously.

ESRI ArcGIS 3D Analyst: Animation Customization
J-9343
November 2004 2
Customizing Animations in
ArcScene
The animation functionality in ArcScene is implemented by a set of objects listed in Figure 1.
Figure 1 Animation Object Model for ArcScene
Each kind of object has different properties that can be animated. The AnimationType classes describe these properties for each specific type. The ArcGIS® 3D Analyst™ installation includes three out-of-the-box animation types in ArcScene: Scene, Camera, and Layer. Each animation type is associated to a different kind of keyframe, so there are three predefined keyframe classes that store configurations of each kind of animated object. All these keyframe classes (SceneKeyframe, LayerKeyframe, and Bookmark3D) implement a common interface (IKeyframe) used to access and apply the stored properties. Notice that the Bookmark3D coclass can be used for managing bookmarks as well as creating camera keyframes. Three-dimensional bookmarks are saved camera perspectives. Bookmark3D provides the facility to convert a 3D bookmark to a camera keyframe using the IBookmarkToKeyframe::ConvertToKeyframe method. Individual keyframes can be used to animate an object, but in most cases, you will prefer to create an AnimationTrack, which is a group of keyframes meant to control the same object. To take advantage of the ArcScene animation tools for working with multiple animation tracks, the tracks must be added to the Scene by using the IAnimationTracks interface.

ESRI ArcGIS 3D Analyst: Animation Customization
J-9343
ESRI Technical Paper 3
Customizing Animations in
ArcGlobe
As mentioned earlier, the animation functionality in ArcGlobe has a similar architecture to ArcScene and is described by the set of objects listed in Figure 2.
Figure 2
Animation Object Model for ArcGlobe
With ArcGIS 9, the 3D Analyst installation includes two out-of-the-box animation types in ArcGlobe: GlobeCamera and GlobeLayer. Each animation type is associated to a different kind of keyframe. In ArcGlobe, there are two predefined keyframe classes that store configurations of each kind of animated object. These keyframe classes (GlobeCameraKeyframe and GlobeLayerKeyframe) implement a common interface (IKeyframe) used to access and apply the stored properties. Similar to ArcScene, individual keyframes can then be used to animate an object, which can be grouped to create an AnimationTrack. Animation tracks of the same or different type can then be added to the Globe (by using the IAnimationTracks interface) and run in parallel to create an animation. Unlike ArcScene, there is no interface in ArcGlobe, which can be used to convert a bookmark to a camera keyframe. However, the developer sample—Convert 3D bookmarks to GlobeCamera keyframes—illustrates how to do the same. This developer sample can be found under the ArcGIS 3D Analyst developer samples available with the ESRI ArcGIS Developer Toolkit or on the Web at ArcGIS Developer Online.
Keyframes Keyframes are snapshots of an object's properties at any given moment. The IKeyframe interface contains methods to set the values of the properties stored in the keyframe and applies them directly to the object. To set a property in the keyframe, you need to know the property index and type. The sorted list of property names for each animation type can be seen by selecting the Keyframes or Tracks tab of the Animation Manager dialog box and clicking the Properties button. For example, in a layer keyframe, the Rotation property has a property index equal to 4, and the property type is Point.

ESRI ArcGIS 3D Analyst: Animation Customization
J-9343
November 2004 4
The names and types of each property can also be obtained programmatically; see the code below, using the IAnimationType interface corresponding to the AnimationType object. Dim pAnimType As IAnimationType Set pAnimType = New AnimationTypeGlobeCamera Debug.Print "Count " & "Name" Dim counter As Integer For counter = 0 To pAnimType.PropertyCount - 1 Debug.Print counter & " " & pAnimType.PropertyName(counter) Next For convenience, all property names and types used in ArcScene and ArcGlobe are listed in Appendix A of this document. The code in Sample 1a, listed in Appendix B, creates a single layer keyframe and sets the value of the z rotation angle. This angle is part of the Rotation property supported in ArcScene, a Point-type property with index 4. The Point type contains three floating-point numbers, in this case corresponding to the rotation angles around the x,y, and z axes. The following code is used to set the z rotation value in a LayerKeyframe in ArcScene: Dim pAngles As IPoint Set pAngles = New Point pAngles.X = 0 pAngles.Y = 0 pAngles.Z = angle pKeyframe.PropertyValuePoint(4) = pAngles Similarly, the code in Sample 1b creates a single GlobeCamera keyframe, which moves the observer around the globe by setting the value of the observer latitude, longitude, and altitude. As shown in the code below, to create this effect, the latitude and altitude are kept constant, whereas the longitude value is in increments ranging from 0 to 360 degrees. pKeyframe.PropertyValueDouble(4) = 0 ' set latitude pKeyframe.PropertyValueDouble(5) = plongitude ' set longitude pKeyframe.PropertyValueDouble(6) = 20000 ' set altitude When a keyframe is created, all its properties are active by default. If you do not use some of them in the animation and you want to allow the user to change them interactively, you must explicitly list the active properties. In the code Sample 1a, only the Rotation property will be active in the keyframe. Dim pProperties As ILongArray Set pProperties = New LongArray

ESRI ArcGIS 3D Analyst: Animation Customization
J-9343
ESRI Technical Paper 5
pProperties.Add (4) pKeyframe.ActiveProperties = pProperties In the code Sample 1b, the properties describing the location of the observer—latitude, longitude, and altitude—will be active in the keyframe. Dim pProperties As ILongArray Set pProperties = New LongArray pProperties.Add (4) pProperties.Add (5) pProperties.Add (6) pKeyframe.ActiveProperties = pProperties For the Camera keyframe (the Bookmark3D object) in ArcScene, there is an internal limitation on the properties that can be active. When the projection mode is Orthographic, all the properties but the ortho extent and the projection mode itself will be inactive. In the Perspective projection mode, the orthographic extent property will be inactive. For this reason, it is important to remember that the projection mode must be set before you assign the list of active properties for Camera keyframe in ArcScene. In ArcGlobe, the GlobeCameraKeyframe has two modes of navigation, the global navigation mode and the surface navigation mode. Both these navigation modes have the same Globe Camera properties. For the surface navigation mode, the target, where the observer is looking toward, is on the surface of the globe, whereas in global navigation mode, the target is at the center of the earth.
Time Scale Properties of an
Animation
As you can see in the Animation Manager, the time scale of the animation is normalized to a 0–1 range (see Figure 3), in which 0 means the beginning of the animation and 1 the end of the animation. Individual animation tracks have begin and end times inside this range. For example, the animation described in Figure 3 has a Globe Camera track that spans 0.25 to 0.85. Also, this animation has a Globe Layer track, which spans the entire animation from 0 to 1. This means that the Globe Layer track will start at the beginning of the animation and end at the end of the animation, whereas the Globe Camera track will begin when 25 percent of the animation is completed and end when 85 percent of the animation is done. So if the actual duration of the animation is 100 seconds, the Globe Layer track will run the entire time, but the Globe Camera track will start after 25 seconds and end after 60 seconds, when 85 seconds of the animation have elapsed. On the other hand, bound keyframes have time stamps relative to the respective tracks to which they belong. The keyframe time stamps can have a value between 0 (meaning the beginning of the track) and 1 (the end of the track). In the animation described in Figure 3, the Globe Camera track has six Globe Camera keyframes with time stamps between 0 and 1.

ESRI ArcGIS 3D Analyst: Animation Customization
J-9343
November 2004 6
Figure 3 Time Scale Properties of an Animation
Keyframe Time Stamps
As mentioned earlier, keyframes represent the state of an object at a given moment in an animation. Keyframes can be used to interpolate the state of the object along time, even if they are not bound to an animation track. In this case, keyframe time stamps define the interval at which it is correct to call the IKeyframe::Interpolate method. For example, in the code Sample 2a and Sample 2b, two keyframes are utilized to create an interpolated rotation using LayerKeyframe and CameraKeyframe in ArcScene and the GlobeCameraKeyframe in ArcGlobe, respectively. If the first keyframe has a time stamp 0.0 and the second has 1.0, you can call the Interpolate method on the first keyframe and pass the second keyframe as an argument of the Interpolate method with a time value between 0.0 and 1.0. When you add the keyframes to an animation track, their time stamps must be between the 0.0 and 1.0 values that represent, respectively, the beginning and the end of the track. Notice that the keyframe time stamps do not refer to the total span of the animation but to the interval occupied by the track. The keyframe time stamps do not change when the begin/end times of the track are modified. Note: In this second case, the time stamps must be assigned after adding the keyframes to the track. If the time value is set before, it will be overwritten by the automatic time stamp assignation performed by the track object (see below).
Using Unbound Keyframes to Control
Objects
You can use a single keyframe to set the state of an object with the IKeyframe::Apply method. Usually this does not make much sense, since you can set the state of the object directly by using its own interfaces. However, this technique is useful when creating ArcScene animations that include the positional transformation of layers. For details about how layer transformation works, see the technical paper Advanced Animation in ArcScene. Note: The transformation properties for layers (translation, rotation, etc.) are currently accessible only through the LayerKeyframe object in ArcScene. An easy way to move a

ESRI ArcGIS 3D Analyst: Animation Customization
J-9343
ESRI Technical Paper 7
layer around is to create a LayerKeyframe, set the transformation properties, and apply the keyframe to the layer. This functionality is currently unavailable in ArcGlobe. The code in Sample 1a uses this technique to make a layer rotate 360 degrees in ArcScene. The animation is created by a simple loop that changes the value of the rotation angle, calls the apply method to transform the layer, and refreshes the viewers. Dim angle As Integer For angle = 0 To 360 Dim pAngles As IPoint Set pAngles = New Point pAngles.X = 0 pAngles.Y = 0 pAngles.Z = angle pKeyframe.PropertyValuePoint(4) = pAngles ' set rotation pKeyframe.Apply pScene, pLayer ' apply it pSceneGraph.RefreshViewers Next angle
Angle Interpolation in Layer Keyframes
in ArcScene
The precise behavior of the interpolation might be different for each animation type, since it is implemented internally in each keyframe. In the case of layer keyframes, when moving from one rotation angle to another, the interpolation will always follow the shortest path. This is very convenient for creating smooth movements. Unfortunately, it means that you cannot make a full, 360-degree turn by adding one keyframe with angle 0 and another with angle 360 because the shortest path between them is followed by staying at angle 0. In this case, you would need at least four keyframes, for example, at 0, 120, 240, and 360 degrees. Figure 4 describes the interpolation with four keyframes and a simpler case with two keyframes. A similar problem occurs with 180-degree turns. When angles are separated 180 degrees, there are two possible ways to rotate (clockwise and counterclockwise), and both are equal in length. If you want to make sure that the object rotates in the direction you want, you should add a third intermediate keyframe.

ESRI ArcGIS 3D Analyst: Animation Customization
J-9343
November 2004 8
Figure 4 General Case of Interpolation With Four Keyframes and Simple Case With Only
Two Keyframes
Animation Tracks Animation tracks are containers for one or more similar keyframes. The previous examples used two keyframes that were not inserted in an animation track. In a typical animation, you may need many keyframes and properties. The script code to create the corresponding interpolations could become very complex. It is a good practice to add keyframes (with their proper values and time stamps) to an animation track and use the

ESRI ArcGIS 3D Analyst: Animation Customization
J-9343
ESRI Technical Paper 9
IAnimationTrack interface to perform the interpolation for creating dynamic visual effects. The code in Sample 3a in Appendix B shows a simple use of this technique to create a 360-degree rotation of a layer in ArcScene. First, an animation track with the proper animation type is created, then a number of keyframes are added with their rotation values and time stamps. Dim pKeyframe As IKeyframe Dim nKeyframes As Integer nKeyframes = 4 Dim iKeyframe As Integer For iKeyframe = 0 To nKeyframes - 1 Set pKeyframe = New LayerKeyframe pAnimTrack.InsertKeyframe pKeyframe, -1 ' insert last pKeyframe.TimeStamp = 1# * (iKeyframe / (nKeyframes - 1)) ' set rotation values Dim pAngles As IPoint Set pAngles = New Point pAngles.X = 0 pAngles.Y = 0 pAngles.Z = 360# * (iKeyframe / (nKeyframes - 1)) pKeyframe.PropertyValuePoint(4) = pAngles Next iKeyframe The active properties for the track can be set optionally, but it is very important that the track be attached to the object or objects that are being animated. For example, in Sample 3a, the layer animation track is attached to the layer object, which is being animated. pAnimationTrack.AttachObject pLayer For creating the animation, the animation loop below uses the IAnimationType:: ResetObject to reset the state of the attached layer object. The IAnimationTrack:: InterpolateObjectProperties is then used to interpolate the state of the attached layer. Dim time As Double Dim iteration As Integer For iteration = 0 To 100 time = iteration / 100# ' reset pAnimationType.ResetObject pScene, pLayer ' interpolate by using track pAnimationTrack.InterpolateObjectProperties pScene, time pSceneGraph.RefreshViewers Next iteration

ESRI ArcGIS 3D Analyst: Animation Customization
J-9343
November 2004 10
The key of this loop is the call to the InterpolateObjectProperties method of the track. This method finds the appropriate keyframes and active properties to interpolate for all the objects attached to the track. Notice that the call to ResetObject is still necessary, but the call to RefreshObject is internally performed by the track. The default time stamp assigned to a keyframe when it is inserted in an animation track depends on the value of the IAnimationTrack::EvenTimeStamps Boolean property. When this flag is true, the time stamps of the keyframes are automatically redistributed in equally spaced intervals between 0.0 and 1.0. When the flag is false, the default time stamp is 1.0. You can have full control of the time stamps assigned to the keyframes by disabling the EvenTimeStamps flags and setting the time value after the keyframe is added to the track. If this option is chosen, make sure that the order of the keyframes corresponds to increasing time values. Otherwise, the interpolation results will not be well defined.
Using the Scene or Globe as Container
of the Animation Tracks
The previous samples used animation tracks that are not connected to the scene. As a consequence, these tracks are not visible in the Animation Manager dialog box and cannot be played, exported to video, or persisted in the document. To add the animation tracks to the Animation Manager, the animation track has to be added to the scene or globe. The following code can be used for this purpose: ' add the track to the scene Dim pSceneTracks As IAnimationTracks Set pSceneTracks = pScene pSceneTracks.AddTrack pAnimationTrack ' send event to inform Dim pActiveView As IActiveView Set pActiveView = pScene pActiveView.ContentsChanged
ESRI ArcGIS 3D Analyst: Animation Customization
J-9343
ESRI Technical Paper 11
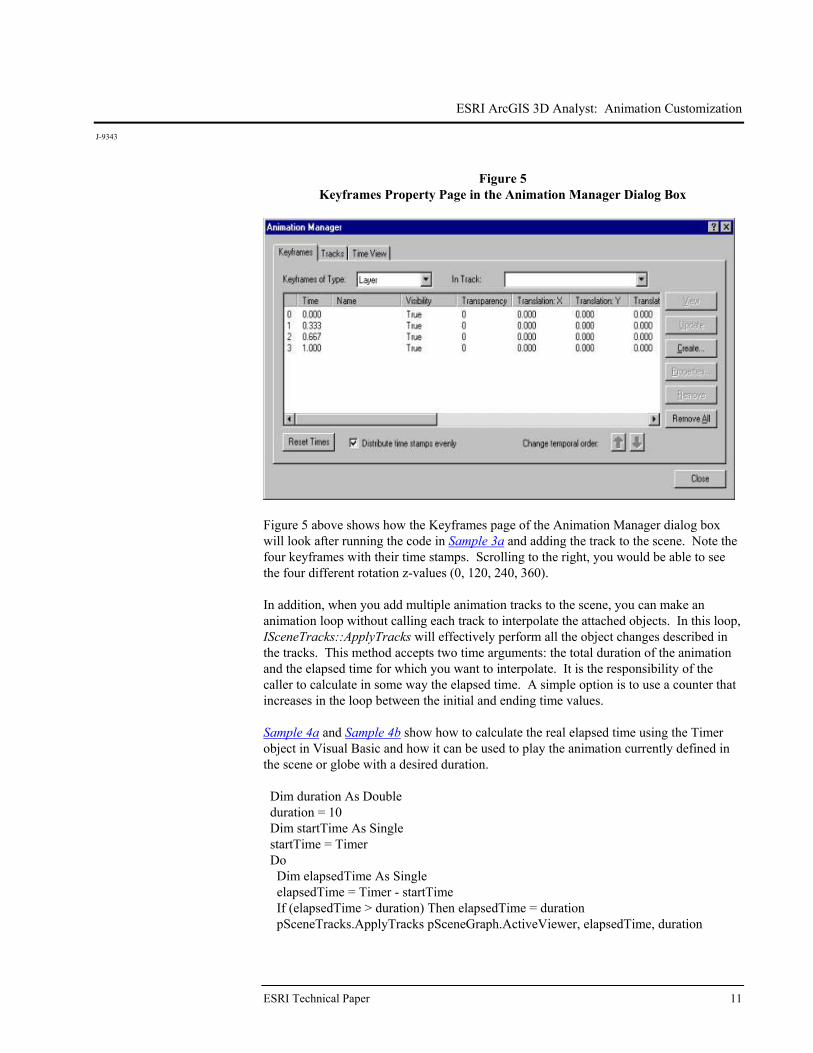
Figure 5 Keyframes Property Page in the Animation Manager Dialog Box
Figure 5 above shows how the Keyframes page of the Animation Manager dialog box will look after running the code in Sample 3a and adding the track to the scene. Note the four keyframes with their time stamps. Scrolling to the right, you would be able to see the four different rotation z-values (0, 120, 240, 360). In addition, when you add multiple animation tracks to the scene, you can make an animation loop without calling each track to interpolate the attached objects. In this loop, ISceneTracks::ApplyTracks will effectively perform all the object changes described in the tracks. This method accepts two time arguments: the total duration of the animation and the elapsed time for which you want to interpolate. It is the responsibility of the caller to calculate in some way the elapsed time. A simple option is to use a counter that increases in the loop between the initial and ending time values. Sample 4a and Sample 4b show how to calculate the real elapsed time using the Timer object in Visual Basic and how it can be used to play the animation currently defined in the scene or globe with a desired duration. Dim duration As Double duration = 10 Dim startTime As Single startTime = Timer Do Dim elapsedTime As Single elapsedTime = Timer - startTime If (elapsedTime > duration) Then elapsedTime = duration pSceneTracks.ApplyTracks pSceneGraph.ActiveViewer, elapsedTime, duration

ESRI ArcGIS 3D Analyst: Animation Customization
J-9343
November 2004 12
pSceneGraph.ActiveViewer.Redraw True Loop While elapsedTime < duration This can be used to create custom play controls and custom video export tools. It is important to notice the role of the first argument (a reference to a scene viewer) in the call to ApplyTracks. If you pass a specific viewer to ApplyTracks and redraw it, as shown in the example, only that viewer will be animated. But if you want to animate multiple viewers simultaneously (you must first set up the appropriate track bindings), pass Nothing (a null pointer) as the first argument in ApplyTracks, and refresh all the viewers involved. For a discussion about binding tracks to multiple objects, see the Advanced Animation in ArcScene technical paper available on the ArcGIS Desktop Technical Papers page at the ESRI Online Support Center Web site.
The Animation Environment
The SxAnimationEnvironment is a global object that stores the animation state and playing options such as playing intervals, animation duration, and so forth. These animation properties are set by the 3D Analyst animation controls and are persisted with the document or the 3D animation files (*.asa and *.aga). When a 3D document or animation file is loaded, the SxAnimationEnvironment properties are set from the persisted values. This object also stores the animation type, current selection of tracks, and keyframes, which are set through the Animation Manager. In ArcGIS 9, the SxAnimationEnvironment coclass resides in the ESRI 3DAnalyst library and is available in ArcGIS Desktop and ArcGIS Engine. This coclass inherits from ISxAnimationEnvironment2, which has properties such as PlayInAllViewers and PlayMode PlayTime. This facilitates the availability of these properties and methods in both the 3D desktop applications (ArcScene and ArcGlobe) and the ArcGIS Engine controls (SceneControl and GlobeControl).
Reading the Animation
Environment
The SxAnimationEnvironment can be used to read the animation properties, which are reflected in the Animation Controls and Animation Manager dialog boxes. The code in Sample 5a and Sample 5b illustrates how to load an existing 3D animation file, which is discussed later in detail in the Saving and Sharing 3D Animations section. The sample code illustrates how simple animation properties stored in the 3D animation file can be read from the animation environment using the SxAnimationEnvironment object. In this code, the ISxAnimationEnvironment2::AnimationDuration is used to obtain the duration of the animation. Dim pSxAnimEnviron As ISxAnimationEnvironment2 Set pSxAnimEnviron = New SxAnimationEnvironment Dim duration as Double duration = pSxAnimEnviron.AnimationDuration Animations can be played within a specified interval. This time interval can be obtained using the GetPlayInterval method, which returns begin and end times of the animation. This information can be useful in creating your own animation loop, which runs the animation within a specified time interval (see code below from Sample 5a and Sample 5b).

ESRI ArcGIS 3D Analyst: Animation Customization
J-9343
ESRI Technical Paper 13
' Get the beginTime and endTime of the play interval Dim pBeginTime As Double Dim pEndTime As Double pSxAnimEnviron.GetPlayInterval sBeginTime, sEndTime ' Animation loop based on the Play Interval Dim startTime As Single startTime = Timer Dim duration As Double duration = pSxAnimEnviron.AnimationDuration Do Dim elapsedTime As Single elapsedTime = Timer - startTime + pBeginTime If (elapsedTime > duration) Then elapsedTime = duration End If If elapsedTime >= pBeginTime And elapsedTime <= pEndTime Then pAnimTracks.ApplyTracks pGlobeDisplay.ActiveViewer, elapsedTime, duration pSxAnimEnviron.State = esriAnimationPlaying pGlobeDisplay.RefreshViewers ElseIf elapsedTime > pEndTime Then Exit Do End If Loop While elapsedTime < duration
Setting the Animation
Environment
The SxAnimationEnvironment allows you to control animation properties such as the animation duration, play interval, playing mode and so forth, which are reflected in the Animation Controls dialog box. As described earlier, these properties are persisted with the document or the exported animation file. The animation play interval can be set using the ISxAnimationenvironment2:: PutPlayInterval (see code in Sample 6a and Sample 6b). To play the animation within a defined play interval, it is important to set the Boolean property ISxAnimationenvironment2::IsIntervalPlay to True. ' Specify the time interval for which the animation will be played pSxAnimEnviron.PutPlayInterval 3, 8 ' Check the state of the "Play between intervals" option. ' If IsIntervalPlay = False, set it to True so that the ' animation can be played between the set time interval. Dim boolPlayBetweenIntervals As Boolean boolPlayBetweenIntervals = pSxAnimEnviron.IsIntervalPlay If boolPlayBetweenIntervals = False Then pSxAnimEnviron.IsIntervalPlay = True End If

ESRI ArcGIS 3D Analyst: Animation Customization
J-9343
November 2004 14
Animations can be played simultaneously in all viewers. However, sometimes it may be useful to display the data in one viewer and run the animation in another. To do so, the ISxAnimationEnvironment2::PlayInAllViewers property should be set to False. pSxAnimEnviron.PlayInAllViewers = False Also, the animation can be set to be played once or loop forward or reverse, depending on which PlayMode is set. pSxAnimEnviron.PlayMode = esriAnimationPlayLoopForward These properties in SxAnimationEnvironment are useful when creating your own custom animation controls and video export tools.
Synchronizing Other Tasks With Animations
The SxAnimationEnvironment object can also be used to perform other events or tasks parallel to an animation. For example, moving custom 3D objects can be drawn independently while an animation is still being played. The ISceneGraphEvents::Before Draw and ISceneGraphEvents::AfterDraw methods can be used to draw these custom objects, depending on the animation state (obtained from ISxAnimationEnvironment2:: State) and current animation playtime (obtained from ISxAnimationEnvironment2:: PlayTime). The PlayTime value changes as the animation is being played. The online developer sample—Group Animation Value Tracker—shows how to display dynamic information based on the animation state and playtime while an animation is being played. This developer sample can be found under the 3D Analyst developer samples available with ESRI's ArcGIS Developer Toolkit or on the Web at ArcGIS Developer Online.
Saving and Sharing 3D Animations
Animations created in ArcScene or ArcGlobe are stored in the document when it is saved. The animation tracks and animation environment can also be saved into an ArcScene animation (*.asa) or an ArcGlobe animation (*.aga) file using IBasicScene::Save Animation. These animation files can be reused or loaded within the same 3D document or another 3D document using IBasicScene::LoadAnimation. Note: Prior to ArcGIS 9, the SaveAnimation and LoadAnimation methods resided in the ISxDocument interface. In ArcGIS 9, these have been moved to a new interface named IBasicScene to facilitate their use with both ArcGIS Desktop and ArcGIS Engine. The code in Sample 6a and Sample 6b describes how to export the animation to an ArcScene or ArcGlobe animation file. Dim pBasicScene As IBasicScene Set pBasicScene = pScene ' Get the current scene ' For exporting an *.aga file (ArcGlobe Animation file), use pBasicScene.SaveAnimation "c:\tempAGAanim.aga"

ESRI ArcGIS 3D Analyst: Animation Customization
J-9343
ESRI Technical Paper 15
This animation can be loaded into the same or different ArcGlobe or ArcScene document (see note below) using IBasicScene::LoadAnimation and can be played using either the Animation Controls dialog box or programmatically as described in Sample 5a and Sample 5b. pBasicScene.LoadAnimation "c:\animFile.asa" Also, the developer sample GlobeControl Animation illustrates how a previously saved ArcGlobe animation file can be loaded into the GlobeViewer control. This developer sample can be found under the ArcGIS 3D Analyst developer samples available with ESRI's ArcGIS Developer Toolkit or on the Web at ArcGIS Developer Online. Note: When loading a 3D animation file in another 3D session, the animation track tries to bind itself to the object to which it was bound when the 3D animation file was saved, specified by an index (e.g., Layer 0, 1). If this object is not found, the track will not play correctly. For example, if the animation file contains a track that is bound to a certain layer in a document, that layer must be present and should be in the correct location in the table of contents (TOC). Because a layer track refers to a layer by its rank or index in the TOC, the track may animate an incorrect layer or may not be enabled to play. Also, if a track is bound to a viewer that is not open in the new document, that track will not play. It must also be noted that geographic coordinates of a moving camera define camera animations. If you have created a camera track in a document's extent and want to play it in a new document, the camera track will still play along the original coordinates. Therefore, you may not see anything if the document has data with a different extent.
Exporting Animations to Video
Files
Animations in ArcScene and ArcGlobe can also be saved as Audio Video Interleave (*.avi) or QuickTime™ (*.mov) files. Note that to be able to export QuickTime videos, QuickTime should be installed on your computer. Figure 6 below describes the objects involved in exporting animations to video files.

ESRI ArcGIS 3D Analyst: Animation Customization
J-9343
November 2004 16
Figure 6 Animation Exporting Objects
The AVIExporter and QuickTimeExporter objects are used to export animation to AVI and QuickTime files, respectively. As described in Sample 7a and Sample 7b, the SceneExporter3D object creates a new instance of a QuickTime movie export. Dim pSceneExporter3D As ISceneExporter3d Set pSceneExporter3D = New QuickTimeExporter The SceneVideoExporter must be assigned the active viewer where the animation tracks will be played. Dim pExporter As ISceneVideoExporter Set pExporter = pSceneExporter3D Set pExporter.Viewer = pGlobe.GlobeDisplay.ActiveViewer Other video properties for AVI and QuickTime movie file exports, such as the codec type, the data frame rate, and so forth, can be changed using the members of IVideoExporterProperties as described in code Sample 7a and Sample 7b. Dim pVideoExporterProps As IVideoExporterProperties Set pVideoExporterProps = pSceneExporter3D pVideoExporterProps.Quality = 90 If not set explicitly in the code, the default codec is used when exporting AVI or QuickTime animation files. For more information on codecs, see the help provided for IVideoExporterProperties interface.
ESRI ArcGIS 3D Analyst: Animation Customization
J-9343
ESRI Technical Paper 17
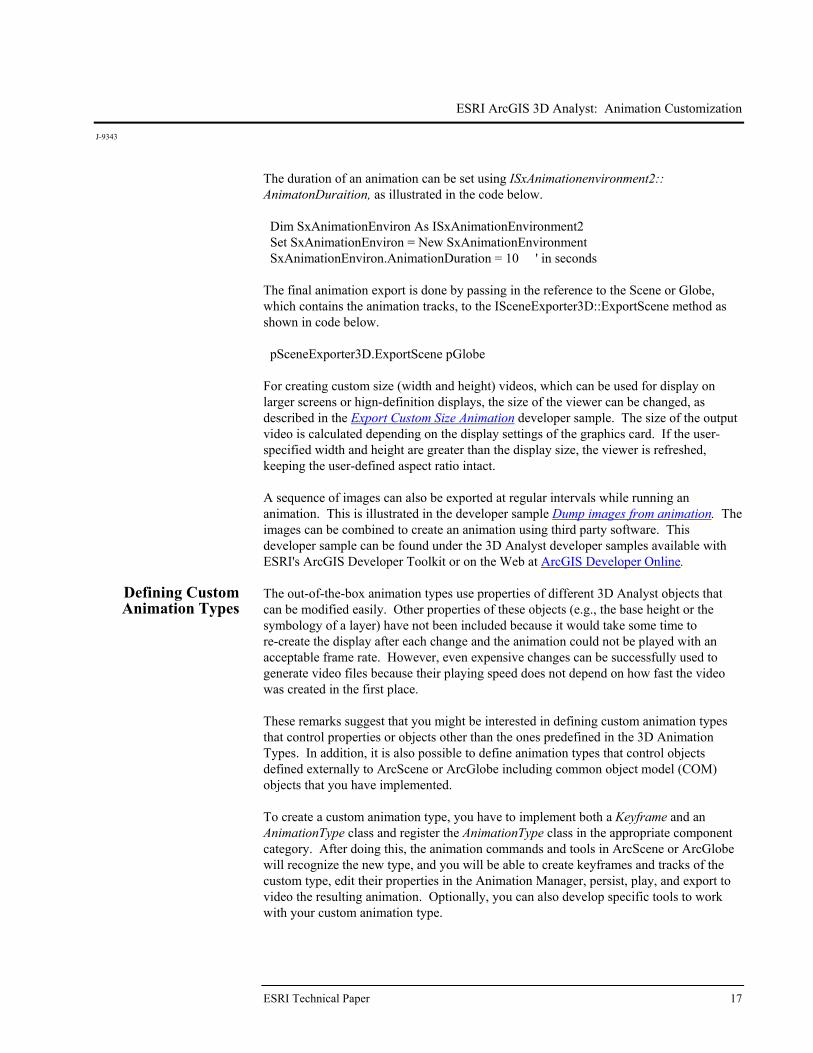
The duration of an animation can be set using ISxAnimationenvironment2:: AnimatonDuraition, as illustrated in the code below. Dim SxAnimationEnviron As ISxAnimationEnvironment2 Set SxAnimationEnviron = New SxAnimationEnvironment SxAnimationEnviron.AnimationDuration = 10 ' in seconds The final animation export is done by passing in the reference to the Scene or Globe, which contains the animation tracks, to the ISceneExporter3D::ExportScene method as shown in code below. pSceneExporter3D.ExportScene pGlobe For creating custom size (width and height) videos, which can be used for display on larger screens or hign-definition displays, the size of the viewer can be changed, as described in the Export Custom Size Animation developer sample. The size of the output video is calculated depending on the display settings of the graphics card. If the user-specified width and height are greater than the display size, the viewer is refreshed, keeping the user-defined aspect ratio intact. A sequence of images can also be exported at regular intervals while running an animation. This is illustrated in the developer sample Dump images from animation. The images can be combined to create an animation using third party software. This developer sample can be found under the 3D Analyst developer samples available with ESRI's ArcGIS Developer Toolkit or on the Web at ArcGIS Developer Online.
Defining Custom Animation Types
The out-of-the-box animation types use properties of different 3D Analyst objects that can be modified easily. Other properties of these objects (e.g., the base height or the symbology of a layer) have not been included because it would take some time to re-create the display after each change and the animation could not be played with an acceptable frame rate. However, even expensive changes can be successfully used to generate video files because their playing speed does not depend on how fast the video was created in the first place. These remarks suggest that you might be interested in defining custom animation types that control properties or objects other than the ones predefined in the 3D Animation Types. In addition, it is also possible to define animation types that control objects defined externally to ArcScene or ArcGlobe including common object model (COM) objects that you have implemented. To create a custom animation type, you have to implement both a Keyframe and an AnimationType class and register the AnimationType class in the appropriate component category. After doing this, the animation commands and tools in ArcScene or ArcGlobe will recognize the new type, and you will be able to create keyframes and tracks of the custom type, edit their properties in the Animation Manager, persist, play, and export to video the resulting animation. Optionally, you can also develop specific tools to work with your custom animation type.

ESRI ArcGIS 3D Analyst: Animation Customization
J-9343
November 2004 18
Suppose, for example, you have developed a COM class Radar that implements the interface IRadar, and you want to define a custom animation that controls three properties of this object, the type of radar, its azimuth angle, and its color. The sections below focus on the implementation of the animation objects.
Animation Type Implementation
The main role of the AnimationType component is to offer information about the specific properties of each animation type and allow clients to identify the objects that can be animated. First, you need to specify the type of objects that can be animated with your custom type (the Radar object). This can be done by implementing the AppliesToObject method. Private Property Get IAnimationType_AppliesToObject(ByVal pObject As Variant) As Boolean ' check that pObject is of type Radar IAnimationType_AppliesToObject = (TypeOf pObject Is IRadar) End Property It may also be desirable to find all the objects of the right type that are available to be animated. In this example, you can assume that you have a global pRadars array (of type Array) where the Radar objects are stored, so you just need to return the array. Private Property Get IAnimationType_ObjectArray(ByVal pScene As IScene) As IArray ' return array with Radar objects Set IAnimationType_ObjectArray = pRadars End Property Each animated object must have a unique ID assigned. This is required to persist the animation. Usually this ID is the index of the object in an array or list, but it can be any long integer that defines a unique object of its type. The value –1 is an invalid ID. First, you need to implement a method that returns the ID for a given object (passed as a Variant with an Unknown pointer type). In this case, it simply means finding the index of that Radar in your global array. Private Property Get IAnimationType_AnimationObjectID(ByVal pScene As IScene, ByVal pObject As Variant) As Long ' return index of Radar(index)=pObject Dim pRadarObj As IRadar Set pRadarObj = pObject Dim pRadar As IRadar Dim lIndex As Long For lIndex = 0 To (pRadars.Count - 1) Set pRadar = pRadars.Element(lIndex) If pRadar Is pRadarObj Then IAnimationType_AnimationObjectID = lIndex Exit Property End If

ESRI ArcGIS 3D Analyst: Animation Customization
J-9343
ESRI Technical Paper 19
Next lIndex IAnimationType_AnimationObjectID = -1 End Property A method that returns the animated object when given its ID also needs to be implemented. In this case, use the ID as an index in the global Radar array. Private Property Get IAnimationType_AnimationObjectByID(ByVal pScene As IScene, ByVal objectID As Long) As Variant ' return Radar(objectID) Set IAnimationType_AnimationObjectByID = pRadars.Element(objectID) End Property You may also want to display the names of the objects available for animation in ArcScene and ArcGlobe (for instance, one can be chosen from a drop-down list). Private Property Get IAnimationType_AnimationObjectName(ByVal pScene As IScene, ByVal pObject As Variant) As String ' return string for Radar equal to pObject Dim pRadar As IRadar Set pRadar = pObject IAnimationType_AnimationObjectName = pRadar.Name Exit Property End Property Other important information that is required is the object properties, which would be controlled by the custom animation type. In this example, you will assume three properties: the azimuth angle, the color, and the property type. Private Property Get IAnimationType_PropertyCount() As Long IAnimationType_PropertyCount = 3 End Property Private Property Get IAnimationType_PropertyName(ByVal Index As Long) As String Select Case Index Case 0 IAnimationType_PropertyName = "Azimuth" Case 1 IAnimationType_PropertyName = "Color" Case 2 IAnimationType_PropertyName = "Type" Case Else IAnimationType_PropertyName = "unknown" End Select End Property

ESRI ArcGIS 3D Analyst: Animation Customization
J-9343
November 2004 20
To use the methods of the Keyframe object to read and write property values, the type of each property should be known. In your example, the azimuth is a double and the color is an RGB color. Private Property Get IAnimationType_PropertyType(ByVal Index As Long) As esriAnimationPropertyType Select Case Index Case 0 IAnimationType_PropertyType = esriAnimationPropertyDouble Case 1 IAnimationType_PropertyType = esriAnimationPropertyRGBColor Case 2 IAnimationType_PropertyType = esriAnimationPropertyInt End Select End Property Long and integer properties can be used to represent enumerations. For instance, in the Camera animation type, the Projection Mode property is an enumeration with two values (see Appendix A). In your example, the Type property is also an enumeration with two values: Type A and Type B. You need to specify each of those values as an integer, for example, 1 = Type A, 2 = Type B. Private Property Get IAnimationType_IsEnumProperty(ByVal Index As Long) As Boolean ' only the "Type" property is enumerated If (Index = 2) Then IAnimationType_IsEnumProperty = True Else IAnimationType_IsEnumProperty = False End If End Property The maximum and minimum values allowed for the enumerated properties should also be specified. A symbolic name should also be provided to each of those valid values. Private Property Get IAnimationType_EnumPropertyMaxValue(ByVal Index As Long) As Long If (Index = 2) Then IAnimationType_EnumPropertyMaxValue = 2 Else IAnimationType_EnumPropertyMaxValue = -1 End If End Property Private Property Get IAnimationType_EnumPropertyMinValue(ByVal Index As Long) As Long If (Index = 2) Then IAnimationType_EnumPropertyMinValue = 1 Else IAnimationType_EnumPropertyMinValue = -1 End If

ESRI ArcGIS 3D Analyst: Animation Customization
J-9343
ESRI Technical Paper 21
End Property Private Property Get IAnimationType_EnumPropertyValueName(ByVal Index As Long, ByVal value As Long) As String If (Index = 2) Then Select Case value Case 1 IAnimationType_EnumPropertyValueName = "Type A" Case 2 IAnimationType_EnumPropertyValueName = "Type B" Case Else IAnimationType_EnumPropertyValueName = "Type unknown" End Select End If End Property The final role of the animation type class is the identification of the COM components. To identify the animation type to the user, the animation type should be provided with a unique name. Private Property Get IAnimationType_Name() As String IAnimationType_Name = "Radar" End Property ArcScene or ArcGlobe applications also need to be informed about the class ID of the animation type and its associated keyframe object so they can instantiate and compare classes. In Visual Basic, the class IDs are assigned when the dynamic link library (DLL) file is built, and they can be inspected using the OLE View tool. The UIDs must then be defined as constants in the code and returned in the proper methods. Const clsidRadarAnimType = "{63BD4248-E644-4B4D-B44D-D1D69BB45243}" Const clsidRadarKeyframe = "{A21A11E7-0C32-47FA-B960-41238EF3CC6F}" Private Property Get IAnimationType_CLSID() As IUID Dim objid As New UID objid = clsidRadarAnimType Set IAnimationType_CLSID = objid End Property Private Property Get IAnimationType_KeyframeCLSID() As IUID Dim objid As New UID objid = clsidRadarKeyframe Set IAnimationType_KeyframeCLSID = objid End Property
Keyframe Implementation
The other key component required to develop a custom animation type is the implementation of a Keyframe class that connects to the object to be animated (Radar in this case). In this class, you need to declare a number of private members that store information about the object properties.

ESRI ArcGIS 3D Analyst: Animation Customization
J-9343
November 2004 22
Private sName As String ' name of keyframe Private Const lPropertyCount As Long = 3 Private bIsActive(lPropertyCount) As Boolean Private dTimeStamp As Double Private bObjectNeedsRefresh As Boolean Private dAzimuth As Double ' property values Private pColor As IRgbColor ' property values Private iType As Integer ' property values The class initialization includes assigning a predefined keyframe name and initializing all the properties as active. Private Sub Class_Initialize() sName = "Radar Keyframe" bObjectNeedsRefresh = False Dim lProp As Long For lProp = 0 To (lPropertyCount - 1) bIsActive(lProp) = True Next lProp End Sub The methods for reading and writing the name and time stamp are trivial. More interesting are the methods that read and write the active properties. Private Property Let IKeyframe_ActiveProperties(ByVal arrayIndices As ILongArray) If (Not arrayIndices Is Nothing) Then Dim lProp As Long For lProp = 0 To (lPropertyCount - 1) bIsActive(lProp) = False Next lProp Dim lElements As Long lElements = arrayIndices.Count For lProp = 0 To (lElements - 1) Dim lProperty As Long lProperty = arrayIndices.Element(lProp) If (lProperty >= 0 And lProperty < lPropertyCount) Then bIsActive(lProperty) = True End If Next lProp End If End Property Private Property Get IKeyframe_ActiveProperties() As ILongArray Dim pArray As ILongArray Set pArray = New LongArray Dim lProp As Long For lProp = 0 To (lPropertyCount - 1) If (bIsActive(lProp)) Then pArray.Add lProp

ESRI ArcGIS 3D Analyst: Animation Customization
J-9343
ESRI Technical Paper 23
Next lProp Set IKeyframe_ActiveProperties = pArray End Property The methods for the "IsActiveProperty" property only read or write the Boolean value in the bIsActive vector of the class. A read-only property of the keyframe is its animation type. In this method, a reference to the custom AnimationType object is returned. In the code below, a new instance in each call is being returned. But the same instance can also be returned if it is defined as a global variable. Private Property Get IKeyframe_AnimationType() As IAnimationType Set IKeyframe_AnimationType = New RadarAnimationType End Property The next step is to implement the read and write methods for the types that correspond to the properties (double for "azimuth", RGB color for "color", and enumerated integer for "Type"). Private Property Let IKeyframe_PropertyValueDouble(ByVal propIndex As Long, ByVal num As Double) If (propIndex = 0) Then dAzimuth = num End If End Property Private Property Get IKeyframe_PropertyValueDouble(ByVal propIndex As Long) As Double If (propIndex = 0) Then IKeyframe_PropertyValueDouble = dAzimuth End If End Property Private Property Let IKeyframe_PropertyValueRGBColor(ByVal propIndex As Long, ByVal color As IColor) If (propIndex = 1) Then Set pColor = color End If End Property Private Property Get IKeyframe_PropertyValueRGBColor(ByVal propIndex As Long) As IColor If (propIndex = 1) Then Set IKeyframe_PropertyValueRGBColor = pColor End If End Property

ESRI ArcGIS 3D Analyst: Animation Customization
J-9343
November 2004 24
Private Property Let IKeyframe_PropertyValueInt(ByVal propIndex As Long, ByVal num As Long) If (propIndex = 2) Then Set iType = num End If End Property Private Property Get IKeyframe_PropertyValueInt(ByVal propIndex As Long) As Long If (propIndex = 2) Then Set IKeyframe_PropertyValueInt = iType End If End Property The keyframe properties can also be assigned to the keyframe from an object of the right type (this happens when the CreateKeyframe command in ArcScene is used). To do this, the following method must be implemented (you can assume that the Radar object has properties that match the ones in the keyframe). Private Sub IKeyframe_CaptureProperties(ByVal pScene As IScene, ByVal pObject As Variant) ' set keyframe props from pObject (a Radar object) props Dim pRadar As IRadar Set pRadar = pObject if (Not pRadar Is Nothing) Then dAzimuth = pRadar.Azimuth Set pColor = pRadar.Color iType = pRadar.Type End If End Sub The opposite operation is to set the state of the object from the property values stored in the keyframe. The object may need an additional call to be refreshed after some of its properties have changed. In your example, assume the IRadar::Update method must be called to refresh the Radar object. Private Sub IKeyframe_Apply(ByVal pScene As IScene, ByVal pObject As Variant) ' set properties in pObject (a Radar) from the props of this keyframe Dim pRadar As IRadar Set pRadar = pObject If (Not pRadar Is Nothing) Then pRadar.Azimuth = dAzimuth Set pRadar.Color = pColor pRadar.Type = iType End If pRadar.Update ' refresh Radar End Sub

ESRI ArcGIS 3D Analyst: Animation Customization
J-9343
ESRI Technical Paper 25
Finally, the Interpolate method needs to be implemented. This method calculates the value of a property between two keyframes or four (as described in Figure 4). The code below does a simple linear interpolation of the continuous properties (the azimuth and color) between the current keyframe and the next one, ignoring pPrevKeyframe and pAfterNextKeyframe. For the discrete property (the type), the value in the current keyframe is used. Private Sub IKeyframe_Interpolate(ByVal pScene As IScene, ByVal pObject As Variant, ByVal propertyIndex As Long, ByVal time As Double, ByVal pNextKeyframe As IKeyframe, ByVal pPrevKeyframe As IKeyframe, ByVal pAfterNextKeyframe As IKeyframe) Dim pRadar As IRadar Set pRadar = pObject If (pRadar Is Nothing) Then Exit Sub ' discrete property (type): use value in this keyframe if (propertyIndex = 2) Then pRadarType = iType bObjectNeedsRefresh = True Exit Sub End If ' continuous interpolation If (pNextKeyframe Is Nothing) Then Exit Sub Dim dNextTime As Double dNextTime = pNextKeyframe.TimeStamp if (dNextTime <= dTimeStamp Or time < dTimeStamp Or time > dNextTime) Then Exit Sub ' invalid times Dim dTimeFactor As Double dTimeFactor = (time - dTimeStamp) / (dNextTime - dTimeStamp) Select Case propertyIndex Case 0 ' dAzimuth Dim dNextAzimuth As Double dNextAzimuth = pNextKeyframe.PropertyValueDouble(propertyIndex) Dim dAzimuth_Interp As Double If (dNextAzimuth < dAzimuth) Then dAzimuth_Interp = dAzimuth - (dTimeFactor * (dAzimuth - dNextAzimuth)) Else dAzimuth_Interp = dAzimuth + (dTimeFactor * (dNextAzimuth - dAzimuth)) End If pRadar.Azimuth = dAzimuth_Interp bObjectNeedsRefresh = True Case 1 ' pColor Dim pNextColor As IRgbColor Set pNextColor = pNextKeyframe.PropertyValueRGBColor(propertyIndex) Dim pColor_Interp As IRgbColor Set pColor_Interp = New RgbColor pColor_Interp.Red = pColor.Red + (dTimeFactor * (pNextColor.Red - pColor.Red))

ESRI ArcGIS 3D Analyst: Animation Customization
J-9343
November 2004 26
pColor_Interp.Green = pColor.Green + (dTimeFactor * (pNextColor.Green - pColor.Green)) pColor_Interp.Blue = pColor.Blue + (dTimeFactor * (pNextColor.Blue - pColor.Blue)) Set pRadar.Color = pColor_Interp bObjectNeedsRefresh = True End Select End Sub Notice that the Interpolate method only calculates the value of one property in each call. This is why the object is not refreshed automatically. Inside Interpolate, an object with many properties would be refreshed each time one of them is updated, and that would be very inefficient. Instead, whenever one of the properties has changed, the bObjectNeedsRefresh flag is raised. The client reads this flag with the ObjectNeedsRefresh method to find out whether it needs to refresh the object. This is what ArcScene or ArcGlobe does when the animation is played (see also Sample 2a and Sample 2b). Private Property Get IKeyframe_ObjectNeedsRefresh() As Boolean IKeyframe_ObjectNeedsRefresh = bObjectNeedsRefresh End Property If the client finds that the object has been changed by the Interpolate method, it will call RefreshObject. In your example, call the Update method in the Radar to refresh it. Private Sub IKeyframe_RefreshObject(ByVal pScene As IScene, ByVal pObject As Variant) Dim pRadar As IRadar Set pRadar = pObject if (Not pRadar Is Nothing) Then pRadar.Update bObjectNeedsRefresh = False End Sub
Registration To make ArcScene or ArcGlobe recognize the custom animation type, it needs to be registered in the category of animation types. A simple way to perform the registration is to use the Categories.exe utility in the ArcGIS binary folder. For ArcScene animation types, search for the ESRI 3D Animation Types category and add the DLL file of your custom animation type. For ArcGlobe animation types, search for the ESRI 3D Animation Types for Globe category and add the DLL file of your custom animation type. Another option is to add the appropriate registry entry directly. You can do that by creating a text file with the .reg extension and double-clicking it. The file should look like the following: REGEDIT4 ; This Registry Script enters a CoClass Into a Component Category [HKEY_LOCAL_MACHINE\SOFTWARE\Classes\CLSID\{custom type ID}\Implemented Categories\{5980E69C-A95E-11d5-B2A0-00508BCDDE28}]
ESRI ArcGIS 3D Analyst: Animation Customization
J-9343
ESRI Technical Paper 27
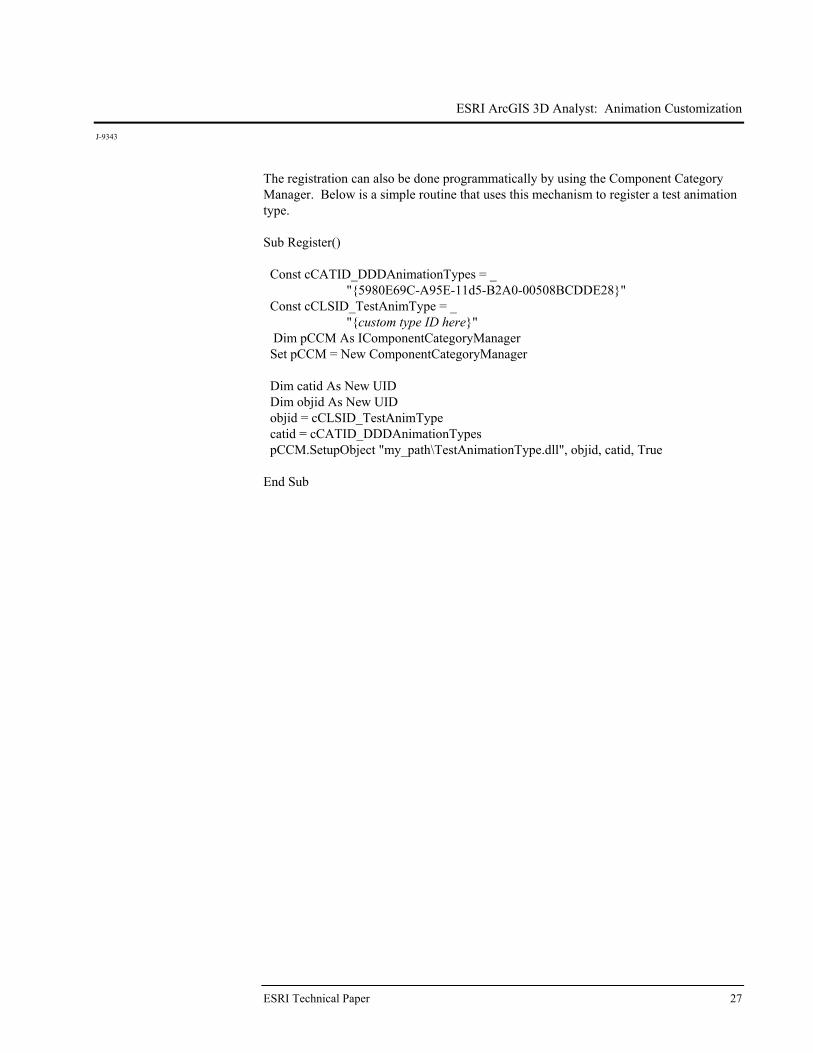
The registration can also be done programmatically by using the Component Category Manager. Below is a simple routine that uses this mechanism to register a test animation type. Sub Register() Const cCATID_DDDAnimationTypes = _ "{5980E69C-A95E-11d5-B2A0-00508BCDDE28}" Const cCLSID_TestAnimType = _ "{custom type ID here}" Dim pCCM As IComponentCategoryManager Set pCCM = New ComponentCategoryManager Dim catid As New UID Dim objid As New UID objid = cCLSID_TestAnimType catid = cCATID_DDDAnimationTypes pCCM.SetupObject "my_path\TestAnimationType.dll", objid, catid, True End Sub

J-9343
November 2004 28
Appendix A: Properties of Out-of-the-Box Animation Types
Properties of Out-of-the-Box
Animation Types in ArcScene
Camera Properties
Name Type
0 Projection Type Long* 1 Target Point 2 Azimuth Double 3 Inclination Double 4 Roll Double** 5 Distance Double 6 View Angle Double 7 Ortho Extent Extent
LAYER
PROPERTIES NAME TYPE
0 Visibility Boolean 1 Transparency Integer 2 Translation Point 3 Scale Point 4 Rotation Point** 5 Center Offset Point
SCENE
PROPERTIES NAME TYPE
0 Vertical Exaggeration Double 1 Sun Azimuth Integer** 2 Sun Inclination Integer** 3 Sun Contrast Integer 4 Background Color RGB Color
(*) This is an enumerated type. The possible values are 0 = Perspective, 1 = Ortho. (**) Units in degrees

ESRI ArcGIS 3D Analyst: Animation Customization
J-9343
ESRI Technical Paper 29
Properties of Out-of-the-Box
Animation Types in ArcGlobe
GlobeCamera Properties
Name Type
0 Orientation Long* 1 Target Latitude Double** 2 Target Longitude Double** 3 Target Altitude Double 4 Observer Latitude Double** 5 Observer Longitude Double** 6 Observer Altitude Double 7 View Angle Double**
GlobeLayer Properties Name Type
0 Visibility Boolean
1 Transparency Integer
(*) This is an enumerated type. The possible values are 0 = Global, 1 = Local. (**) Units in degrees

J-9343
November 2004 30
Appendix B: Code Samples Illustrating the Use of Animation Objects in ArcScene and ArcGlobe
Sample 1a VBA macro to create an animated rotation of the first layer by using the Apply method in a single Layer keyframe Public Sub RotateLayer1()
' get first layer in the scene Dim pSxDocument As ISxDocument Set pSxDocument = ThisDocument
Dim pScene As IScene Set pScene = pSxDocument.Scene
Dim pLayer As ILayer Set pLayer = pScene.Layer(0) If (pLayer Is Nothing) Then Exit Sub
' create keyframe Dim pKeyframe As IKeyframe Set pKeyframe = New LayerKeyframe
' set active properties (only rotation) Dim pProperties As ILongArray Set pProperties = New LongArray pProperties.Add (4) pKeyframe.ActiveProperties = pProperties
' animation loop Dim pSceneGraph As ISceneGraph Set pSceneGraph = pScene.SceneGraph
Dim angle As Integer
For angle = 0 To 360 Dim pAngles As IPoint Set pAngles = New Point pAngles.X = 0 pAngles.Y = 0 pAngles.Z = angle
pKeyframe.PropertyValuePoint(4) = pAngles ' set rotation pKeyframe.Apply pScene, pLayer ' apply it

ESRI ArcGIS 3D Analyst: Animation Customization
J-9343
ESRI Technical Paper 31
pSceneGraph.RefreshViewers Next angle End Sub

ESRI ArcGIS 3D Analyst: Animation Customization
J-9343
November 2004 32
Sample 1b VBA macro to create an animated rotation of the globe by using the Apply method in a single GlobeCamera keyframe Public Sub RotateGlobe1() ' get Globe Camera in the globe display Dim pGMxDocument As IGMxDocument Set pGMxDocument = ThisDocument Dim pScene As IScene Set pScene = pGMxDocument.Scene Dim pGlobe As IGlobe Set pGlobe = pScene Dim pGlobeDisplay As IGlobeDisplay Set pGlobeDisplay = pGlobe.GlobeDisplay Dim pGlobeCamera As IGlobeCamera Set pGlobeCamera = pGlobeDisplay.ActiveViewer.Camera ' create keyframe Dim pKeyframe As IKeyframe Set pKeyframe = New GlobeCameraKeyframe ' set active properties Dim pProperties As ILongArray Set pProperties = New LongArray pProperties.Add (4) ' Observer Lat. pProperties.Add (5) ' Observer Lon. pProperties.Add (6) ' Observer Alt. pKeyframe.ActiveProperties = pProperties ' animation loop Dim plongitude As Integer For plongitude = 0 To 360 pKeyframe.PropertyValueDouble(4) = 0 ' set latitude pKeyframe.PropertyValueDouble(5) = plongitude ' set longitude pKeyframe.PropertyValueDouble(6) = 20000 ' set altitude pKeyframe.Apply pGlobe, pGlobeCamera ' apply it pGlobeDisplay.RefreshViewers Next plongitude End Sub

ESRI ArcGIS 3D Analyst: Animation Customization
J-9343
ESRI Technical Paper 33
Sample 2a ArcScene—VBA macro to create an animated rotation of the ' first layer by interpolating between two Layer keyframes Public Sub RotateLayer2() ' get first layer in the scene Dim pSxDocument As ISxDocument Set pSxDocument = ThisDocument Dim pScene As IScene Set pScene = pSxDocument.Scene Dim pLayer As ILayer Set pLayer = pScene.Layer(0) If (pLayer Is Nothing) Then Exit Sub ' create initial and final keyframe Dim pKeyframe1 As IKeyframe Set pKeyframe1 = New LayerKeyframe Dim pKeyframe2 As IKeyframe Set pKeyframe2 = New LayerKeyframe pKeyframe1.TimeStamp = 0# pKeyframe2.TimeStamp = 1# ' set active properties (only rotation) Dim pProperties As ILongArray Set pProperties = New LongArray pProperties.Add (4) pKeyframe1.ActiveProperties = pProperties pKeyframe2.ActiveProperties = pProperties ' set initial and final rotation values Dim pAngles As IPoint Set pAngles = New Point pAngles.X = 0 pAngles.Y = 0 pAngles.Z = 0 ' initial azimuth rotation = 0 pKeyframe1.PropertyValuePoint(4) = pAngles pAngles.Z = 90 ' final azimuth rotation = 90 pKeyframe2.PropertyValuePoint(4) = pAngles ' animation loop Dim pSceneGraph As ISceneGraph Set pSceneGraph = pScene.SceneGraph Dim pAnimType As IAnimationType Set pAnimType = New AnimationTypeLayer Dim time As Double

ESRI ArcGIS 3D Analyst: Animation Customization
J-9343
November 2004 34
Dim iteration As Integer For iteration = 0 To 100 time = iteration / 100# ' reset object (only some animation types -layer- need this) pAnimType.ResetObject pScene, pLayer ' interpolate state of the object pKeyframe1.Interpolate pScene, pLayer, 4, time, pKeyframe2, pKeyframe1, pKeyframe2 ' refresh object (only some animation types -layer- need this) If (pKeyframe1.ObjectNeedsRefresh) Then pKeyframe1.RefreshObject pScene, pLayer End If pSceneGraph.RefreshViewers Next iteration End Sub

ESRI ArcGIS 3D Analyst: Animation Customization
J-9343
ESRI Technical Paper 35
Sample 2b ArcGlobe—VBA macro to create an animation to rotate the globe by interpolating between two GlobeCamera keyframes Public Sub RotateGlobe2() ' get Globe Camera in the globe display Dim pGMxDocument As IGMxDocument Set pGMxDocument = ThisDocument Dim pScene As IScene Set pScene = pGMxDocument.Scene Dim pGlobe As IGlobe Set pGlobe = pScene Dim pGlobeDisplay As IGlobeDisplay Set pGlobeDisplay = pGlobe.GlobeDisplay Dim pGlobeCamera As IGlobeCamera Set pGlobeCamera = pGlobeDisplay.ActiveViewer.Camera ' create initial and final keyframe Dim pKeyframe1 As IKeyframe Set pKeyframe1 = New GlobeCameraKeyframe Dim pKeyframe2 As IKeyframe Set pKeyframe2 = New GlobeCameraKeyframe pKeyframe1.TimeStamp = 0# pKeyframe2.TimeStamp = 1 ' set active properties Dim pProperties As ILongArray Set pProperties = New LongArray pProperties.Add (4) ' Observer Lat. pProperties.Add (5) ' Observer Lon. pProperties.Add (6) ' Observer Alt. pKeyframe1.ActiveProperties = pProperties pKeyframe2.ActiveProperties = pProperties ' set initial observer pKeyframe1.PropertyValueDouble(4) = 0 ' set latitude pKeyframe1.PropertyValueDouble(5) = 0 ' set longitude pKeyframe1.PropertyValueDouble(6) = 20000 ' set altitude ' set final observer pKeyframe2.PropertyValueDouble(4) = 0 ' set latitude pKeyframe2.PropertyValueDouble(5) = 180 ' set longitude pKeyframe2.PropertyValueDouble(6) = 20000 ' set altitude ' animation loop

ESRI ArcGIS 3D Analyst: Animation Customization
J-9343
November 2004 36
Dim pAnimType As IAnimationType Set pAnimType = New AnimationTypeGlobeCamera Dim time As Double Dim iteration As Integer For iteration = 0 To 500 time = iteration / 500# ' interpolate state of the object pKeyframe1.Interpolate pGlobe, pGlobeCamera, 5, time, pKeyframe2, pKeyframe1, pKeyframe2 pGlobeDisplay.RefreshViewers Next iteration End Sub

ESRI ArcGIS 3D Analyst: Animation Customization
J-9343
ESRI Technical Paper 37
Sample 3a ArcScene—VBA macro to create an animated rotation of the first layer by adding keyframes to an animation track Public Sub RotateLayer3() ' get first layer in the scene Dim pSxDocument As ISxDocument Set pSxDocument = ThisDocument Dim pScene As IScene Set pScene = pSxDocument.Scene Dim pLayer As ILayer Set pLayer = pScene.Layer(0) If (pLayer Is Nothing) Then Exit Sub ' create an animation track Dim pAnimationTrack As IAnimationTrack Set pAnimationTrack = New AnimationTrack ' set the type before adding keyframes Dim pAnimationType As IAnimationType Set pAnimationType = New AnimationTypeLayer Set pAnimationTrack.AnimationType = pAnimationType ' create four keyframes and add them to the track Dim pKeyframe As iKeyframe Dim nKeyframes As Integer nKeyframes = 4 Dim iKeyframe As Integer For iKeyframe = 0 To nKeyframes - 1 Set pKeyframe = New LayerKeyframe pAnimationTrack.InsertKeyframe pKeyframe, -1 pKeyframe.TimeStamp = 1# * (iKeyframe / (nKeyframes - 1)) ' set rotation values Dim pAngles As IPoint Set pAngles = New Point pAngles.X = 0 pAngles.Y = 0 pAngles.Z = 360# * (iKeyframe / (nKeyframes - 1)) pKeyframe.PropertyValuePoint(4) = pAngles Next iKeyframe ' set active properties in the track (only rotation) Dim pProperties As ILongArray Set pProperties = New LongArray pProperties.Add (4) pAnimationTrack.ActiveProperties = pProperties

ESRI ArcGIS 3D Analyst: Animation Customization
J-9343
November 2004 38
' attach the track to the layer pAnimationTrack.AttachObject pLayer ' animation loop Dim pSceneGraph As ISceneGraph Set pSceneGraph = pScene.SceneGraph Dim time As Double Dim iteration As Integer For iteration = 0 To 100 time = iteration / 100# ' reset pAnimationType.ResetObject pScene, pLayer ' interpolate by using track pAnimationTrack.InterpolateObjectProperties pScene, time pSceneGraph.RefreshViewers Next iteration End Sub

ESRI ArcGIS 3D Analyst: Animation Customization
J-9343
ESRI Technical Paper 39
Sample 3b ArcGlobe—VBA macro to create an animated rotation of the globe by adding keyframes to an animation track Public Sub RotateLayer3() ' get Globe Camera in the globe display Dim pGMxDocument As IGMxDocument Set pGMxDocument = ThisDocument Dim pScene As IScene Set pScene = pGMxDocument.Scene Dim pGlobe As IGlobe Set pGlobe = pScene Dim pGlobeDisplay As IGlobeDisplay Set pGlobeDisplay = pGlobe.GlobeDisplay Dim pGlobeCamera As IGlobeCamera Set pGlobeCamera = pGlobeDisplay.ActiveViewer.Camera ' create an animation track Dim pAnimationTrack As IAnimationTrack Set pAnimationTrack = New AnimationTrack ' set the type before adding keyframes Dim pAnimationType As IAnimationType Set pAnimationType = New AnimationTypeGlobeCamera Set pAnimationTrack.AnimationType = pAnimationType ' create four keyframes and add them to the track Dim pKeyframe As iKeyframe Dim nKeyframes As Integer nKeyframes = 4 Dim iKeyframe As Integer For iKeyframe = 0 To nKeyframes - 1 Set pKeyframe = New GlobeCameraKeyframe pAnimationTrack.InsertKeyframe pKeyframe, -1 pKeyframe.TimeStamp = 1# * iKeyframe / (nKeyframes - 1) ' set rotation values pKeyframe.PropertyValueDouble(4) = 0 ' set latitude pKeyframe.PropertyValueDouble(5) = 360* iKeyframe / (nKeyframes - 1) ' set longitude pKeyframe.PropertyValueDouble(6) = 20000 ' set altitude Next iKeyframe ' set active properties in the track Dim pProperties As ILongArray Set pProperties = New LongArray

ESRI ArcGIS 3D Analyst: Animation Customization
J-9343
November 2004 40
pProperties.Add (4) pProperties.Add (5) pProperties.Add (6) pAnimationTrack.ActiveProperties = pProperties ' attach the track to the GlobeCamera pAnimationTrack.AttachObject pGlobeCamera ' animation loop Dim time As Double Dim iteration As Integer For iteration = 0 To 500 time = iteration / 500# ' interpolate by using track pAnimationTrack.InterpolateObjectProperties pGlobe, time pGlobeDisplay.RefreshViewers Next iteration End Sub

ESRI ArcGIS 3D Analyst: Animation Customization
J-9343
ESRI Technical Paper 41
Sample 4a VBA macro to play the current animation in the scene using the system clock to time the duration Public Sub PlayAnimation() Dim pSxDocument As ISxDocument Set pSxDocument = ThisDocument Dim pScene As IScene Set pScene = pSxDocument.Scene Dim pSceneTracks As IAnimationTracks Set pSceneTracks = pScene ' animation loop Dim pSceneGraph As ISceneGraph Set pSceneGraph = pScene.SceneGraph Dim duration As Double duration = 10 Dim startTime As Single startTime = Timer Do Dim elapsedTime As Single elapsedTime = Timer - startTime If (elapsedTime > duration) Then elapsedTime = duration pSceneTracks.ApplyTracks pSceneGraph.ActiveViewer, elapsedTime, duration pSceneGraph.RefreshViewers Loop While elapsedTime < duration End Sub

ESRI ArcGIS 3D Analyst: Animation Customization
J-9343
November 2004 42
Sample 4b VBA macro to play the current animation in the globe using the system clock to time the duration Public Sub PlayAnimation() Dim pGMxDocument As IGMxDocument Set pGMxDocument = ThisDocument Dim pScene As IScene Set pScene = pDoc.Scene Dim pGlobe As IGlobe Set pGlobe = pScene Dim pGlobeDisplay As IGlobeDisplay Set pGlobeDisplay = pGlobe.GlobeDisplay Dim pGlobeTracks As IAnimationTracks Set pGlobeTracks = pGlobe ' animation loop Dim duration As Double duration = 10 Dim startTime As Single startTime = Timer Do Dim elapsedTime As Single elapsedTime = Timer - startTime If (elapsedTime > duration) Then elapsedTime = duration pGlobeTracks.ApplyTracks pGlobeDisplay.ActiveViewer, elapsedTime, duration pGlobeDisplay.RefreshViewers Loop While elapsedTime < duration End Sub

ESRI ArcGIS 3D Analyst: Animation Customization
J-9343
ESRI Technical Paper 43
VBA macro to load and play ArcScene animation (*.asa) in ArcScene Public Sub Scene_PlayInterval_Animation() Dim pSxDocument As ISxDocument Set pSxDocument = ThisDocument Dim pScene As IScene Set pScene = pSxDocument.Scene Dim pSceneGraph As ISceneGraph Set pSceneGraph = pScene.SceneGraph Dim pAnimTracks As IAnimationTracks Set pAnimTracks = pScene Dim pBasicScene As IBasicScene Set pBasicScene = pScene ' Load the ArcScene animation file (*.asa) 'pBasicScene.LoadAnimation "c:\animFile.asa" Dim pSxAnimationEnvironment As ISxAnimationEnvironment2 Set pSxAnimationEnvironment = New SxAnimationEnvironment ' Read the total duration of animation and the play in all viewers option Dim duration As Double duration = pSxAnimationEnvironment.AnimationDuration Debug.Print "The total duration of the animation is = " & duration & " seconds" Debug.Print "The animation will be played in all active viewers = " & pSxAnimationEnvironment.PlayInAllViewers ' Check the state of the "Play between intervals" option. ' If IsIntervalPlay = False, set it to True so that the ' animation can be played between the set time interval. Dim boolPlayBetweenIntervals As Boolean boolPlayBetweenIntervals = pSxAnimationEnvironment.IsIntervalPlay If boolPlayBetweenIntervals = False Then pSxAnimationEnvironment.IsIntervalPlay = True End If ' Get the beginTime and endTime of the play interval

ESRI ArcGIS 3D Analyst: Animation Customization
J-9343
November 2004 44
Dim beginTime As Double Dim endTime As Double pSxAnimationEnvironment.GetPlayInterval beginTime, endTime ' If beginTime = endTime the animation will not run. ' So give it some default time in this case. If beginTime = endTime Then beginTime = 0 endTime = pSxAnimationEnvironment.AnimationDuration End If ' Animation loop based on the Play Interval Dim startTime As Single startTime = Timer Do Dim elapsedTime As Single elapsedTime = Timer - startTime + beginTime If (elapsedTime > duration) Then elapsedTime = duration End If If elapsedTime >= beginTime And elapsedTime <= endTime Then pAnimTracks.ApplyTracks pSceneGraph.ActiveViewer, elapsedTime, duration pSxAnimationEnvironment.State = esriAnimationPlaying pSceneGraph.RefreshViewers ElseIf elapsedTime > endTime Then Exit Do End If Loop While elapsedTime < duration End Sub

ESRI ArcGIS 3D Analyst: Animation Customization
J-9343
ESRI Technical Paper 45
Sample 5b VBA macro to load and play ArcGlobe animation (*.aga) in ArcGlobe Public Sub Globe_PlayInterval_Animation() Dim pGMxDocument As IGMxDocument Set pGMxDocument = ThisDocument Dim pScene As IScene Set pScene = pGMxDocument.Scene Dim pGlobe As IGlobe Set pGlobe = pScene Dim pGlobeDisplay As IGlobeDisplay Set pGlobeDisplay = pGlobe.GlobeDisplay Dim pAnimTracks As IAnimationTracks Set pAnimTracks = pScene Dim pBasicScene As IBasicScene Set pBasicScene = pScene ' Load the ArcGlobe animation (*.aga) file ' pBasicScene.LoadAnimation "c:\animFile.aga" Dim pSxAnimationEnvironment As ISxAnimationEnvironment2 Set pSxAnimationEnvironment = New SxAnimationEnvironment ' Read the total duration of animation and the play in all viewers option Dim duration As Double duration = pSxAnimationEnvironment.AnimationDuration Debug.Print "The total duration of the animation is = " & duration & " seconds" Debug.Print "The animation will be played in all active viewers = " & pSxAnimationEnvironment.PlayInAllViewers ' Check the state of the "Play between intervals" option. ' If IsIntervalPlay = False, set it to True so that the ' animation can be played between the set time interval. Dim boolPlayBetweenIntervals As Boolean boolPlayBetweenIntervals = pSxAnimationEnvironment.IsIntervalPlay If boolPlayBetweenIntervals = False Then pSxAnimationEnvironment.IsIntervalPlay = True End If

ESRI ArcGIS 3D Analyst: Animation Customization
J-9343
November 2004 46
' Get the beginTime and endTime of the play interval Dim beginTime As Double Dim endTime As Double pSxAnimationEnvironment.GetPlayInterval beginTime, endTime ' If beginTime = endTime the animation will not run. ' So give it some default time in this case. If beginTime = endTime Then beginTime = 0 endTime = pSxAnimationEnvironment.AnimationDuration End If ' Animation loop based on the Play Interval Dim startTime As Single startTime = Timer Do Dim elapsedTime As Single elapsedTime = Timer - startTime + beginTime If (elapsedTime > duration) Then elapsedTime = duration End If If elapsedTime >= beginTime And elapsedTime <= endTime Then pAnimTracks.ApplyTracks pGlobeDisplay.ActiveViewer, elapsedTime, duration pSxAnimationEnvironment.State = esriAnimationPlaying pGlobeDisplay.RefreshViewers ElseIf elapsedTime > endTime Then Exit Do End If Loop While elapsedTime < duration End Sub

ESRI ArcGIS 3D Analyst: Animation Customization
J-9343
ESRI Technical Paper 47
Sample 6a VBA macro to set the Animation Environment and save an ArcScene animation (*.asa) Public Sub Scene_Save_Animation() Dim pSxDocument As ISxDocument Set pSxDocument = ThisDocument Dim pScene As IScene Set pScene = pSxDocument.Scene Dim pSceneGraph As ISceneGraph Set pSceneGraph = pScene.SceneGraph Dim pAnimTracks As IAnimationTracks Set pAnimTracks = pScene Dim pBasicScene As IBasicScene Set pBasicScene = pScene Dim pSxAnimationEnvironment As ISxAnimationEnvironment2 Set pSxAnimationEnvironment = New SxAnimationEnvironment ' Set the total duration of animation pSxAnimationEnvironment.AnimationDuration = 10 ' Specify whether the animation would be played in all viewers pSxAnimationEnvironment.PlayInAllViewers = False ' Specify the time interval for which the animation will be played pSxAnimationEnvironment.PutPlayInterval 3, 8 ' Check the state of the "Play between intervals" option. ' If IsIntervalPlay = False, set it to True so that the ' animation can be played between the set time interval. Dim boolPlayBetweenIntervals As Boolean boolPlayBetweenIntervals = pSxAnimationEnvironment.IsIntervalPlay If boolPlayBetweenIntervals = False Then pSxAnimationEnvironment.IsIntervalPlay = True End If ' Set the playing option of the animation to loop forward pSxAnimationEnvironment.PlayMode = esriAnimationPlayLoopForward ' Save the current animation as an ArcScene animation file (*.asa) pBasicScene.SaveAnimation "c:\animFile.asa" End Sub

ESRI ArcGIS 3D Analyst: Animation Customization
J-9343
November 2004 48
Sample 6b VBA macro to set the Animation Environment and save an ArcGlobe animation (*.aga) Public Sub Globe_Save_Animation() Dim pGMxDocument As IGMxDocument Set pGMxDocument = ThisDocument Dim pScene As IScene Set pScene = pGMxDocument.Scene Dim pGlobe As IGlobe Set pGlobe = pScene Dim pGlobeDisp As IGlobeDisplay Set pGlobeDisp = pGlobe.GlobeDisplay Dim pBasicScene As IBasicScene Set pBasicScene = pScene Dim pSxAnimationEnvironment As ISxAnimationEnvironment2 Set pSxAnimationEnvironment = New SxAnimationEnvironment ' Set the total duration of animation pSxAnimationEnvironment.AnimationDuration = 10 ' Specify whether the animation would be played in all viewers pSxAnimationEnvironment.PlayInAllViewers = False ' Specify the time interval for which the animation will be played pSxAnimationEnvironment.PutPlayInterval 3, 8 ' Check the state of the "Play between intervals" option. ' If IsIntervalPlay = False, set it to True so that the ' animation can be played between the set time interval. Dim boolPlayBetweenIntervals As Boolean boolPlayBetweenIntervals = pSxAnimationEnvironment.IsIntervalPlay If boolPlayBetweenIntervals = False Then pSxAnimationEnvironment.IsIntervalPlay = True End If ' Set the playing option of the animation to loop forward pSxAnimationEnvironment.PlayMode = esriAnimationPlayLoopForward ' Save the current animation as an ArcGlobe animation file (*.asa) pBasicScene.SaveAnimation "c:\animFile.aga" End Sub

ESRI ArcGIS 3D Analyst: Animation Customization
J-9343
ESRI Technical Paper 49
Sample 7a VBA macro to export the current animation in ArcScene to an AVI video file Public Sub Scene_ExportToAVI() Dim pSxDocument As ISxDocument Set pSxDocument = ThisDocument Dim pScene As IScene Set pScene = pSxDocument.Scene Dim pSceneExporter3D As ISceneExporter3d Set pSceneExporter3D = New AVIExporter ' Set the name of the movie file to be exported pSceneExporter3D.ExportFileName = "C:\Temp\TempAVI.avi" ' Set the viewer of the exporter Dim pSceneVideoExporter As ISceneVideoExporter Set pSceneVideoExporter = pSceneExporter3D Set pSceneVideoExporter.Viewer = pScene.SceneGraph.ActiveViewer ' Set the video duration in seconds Dim pSxAnimationEnvironment As ISxAnimationEnvironment2 Set pSxAnimationEnvironment = New SxAnimationEnvironment pSceneVideoExporter.VideoDuration = pSxAnimationEnvironment.AnimationDuration ' Set the quality percentage of the video (1-100): Dim pVideoExporterProperties As IVideoExporterProperties Set pVideoExporterProperties = pSceneExporter3D pVideoExporterProperties.Quality = 90 ' Do the export pSceneExporter3D.ExportScene pScene End Sub

ESRI ArcGIS 3D Analyst: Animation Customization
J-9343
November 2004 50
Sample 7b VBA macro to export the current animation in ArcGlobe to a QuickTime video file Public Sub Globe_ExportToQuickTime() Dim pGMxDocument As IGMxDocument Set pGMxDocument = ThisDocument Dim pGlobe As IGlobe Set pGlobe = pGMxDocument.Scene Dim pSceneExporter3D As ISceneExporter3d Set pSceneExporter3D = New QuickTimeExporter ' Set the name of the movie file to be exported pSceneExporter3D.ExportFileName = "C:\Temp\TempQT.mov" ' Set the viewer of the exporter Dim pSceneVideoExporter As ISceneVideoExporter Set pSceneVideoExporter = pSceneExporter3D Set pSceneVideoExporter.Viewer = pGlobe.GlobeDisplay.ActiveViewer ' Set the video duration in seconds Dim pSxAnimationEnvironment As ISxAnimationEnvironment2 Set pSxAnimationEnvironment = New SxAnimationEnvironment pSceneVideoExporter.VideoDuration = pSxAnimationEnvironment.AnimationDuration ' Set the quality percentage of the video (1-100): Dim pVideoExporterProps As IVideoExporterProperties Set pVideoExporterProps = pSceneExporter3D pVideoExporterProps.Quality = 90 ' Do the export pSceneExporter3D.ExportScene pGlobe End Sub

Australiawww.esriaustralia.com.au
Belgium/Luxembourgwww.esribelux.com
Bulgariawww.esribulgaria.com
Canadawww.esricanada.com
China (Beijing)www.esrichina-bj.cn
China (Hong Kong)www.esrichina-hk.com
Finlandwww.esri-finland.com
Francewww.esrifrance.fr
Germany/Switzerlandwww.esri-germany.de
www.esri-suisse.ch
Hungarywww.esrihu.hu
Indiawww.esriindia.com
Indonesia/Malaysia62-21-527-1023603-7874-9930
Italywww.esriitalia.it
Japanwww.esrij.com
Koreawww.esrikr.co.kr
Netherlandswww.esrinl.com
Polandwww.esripolska.com.pl
Portugalwww.esri-portugal.pt
Romaniawww.esriro.ro
Singaporewww.esrisa.com
Spainwww.esri-es.com
Swedenwww.esri-sweden.com
Thailandwww.esrith.com
United Kingdomwww.esriuk.com
Venezuelawww.esriven.com
No. GS-35F-5086H
Printed in USA
Place ESRI business partner or distributor address here.
For more than 30 years ESRI has been helping people manage and analyze geographic information. ESRI offers a framework for implementing GIS technology in any organization with a seamless link from personal GIS on the desktop
to enterprisewide GIS client/server and data management systems. ESRI GIS solutions are flexible and can be customized to meet the needs of our users. ESRI is a full-service GIS company, ready to help you begin, grow, and build success with GIS.
International Offices
Regional Offices
ESRI
380 New York Street
Redlands, California
92373-8100, USA
Telephone: 909-793-2853
Fax: 909-793-5953
For more information
on ESRI, call
1-800-447-9778(1-800-GIS-XPRT)
or contact an ESRI value-added
reseller near you.
Send e-mail inquiries to
Visit ESRI’s Web page at
www.esri.com
Corporate
Outside the United States,
contact your local ESRI distributor.
For the number of your distributor,
call ESRI at 909-793-2853,
ext. 1235,
or visit our Web site at
www.esri.com/international
ESRI–Minneapolis 651-454-0600ESRI–Olympia
360-754-4727ESRI–Boston 978-777-4543
ESRI–California909-793-2853 ext. 1-1906
ESRI–Denver 303-449-7779
ESRI–San Antonio 210-499-1044
ESRI–Charlotte704-541-9810
ESRI–Washington, D.C.703-506-9515
ESRI–St. Louis 636-949-6620 ESRI–Philadelphia
610-337-8380
ESRI–New York City212-349-3700