Virtualization Best Practices - SUSE Documentation
54
SUSE Linux Enterprise Server 12 SP5 Virtualization Best Practices SUSE Linux Enterprise Server 12 SP5 Publication Date: May 27, 2022 Contents 1 Virtualization Scenarios 2 2 Before You Apply Modifications 2 3 Recommendations 3 4 VM Host Server Configuration and Resource Allocation 3 5 VM Guest Images 26 6 VM Guest Configuration 37 7 VM Guest-Specific Configurations and Settings 43 8 Hypervisors Compared to Containers 46 9 Xen: Converting a Paravirtual (PV) Guest to a Fully Virtual (FV/HVM) Guest 50 10 External References 53 1 SLES 12 SP5
-
Upload
khangminh22 -
Category
Documents
-
view
5 -
download
0
Transcript of Virtualization Best Practices - SUSE Documentation

SUSE Linux Enterprise Server 12 SP5
Virtualization Best PracticesSUSE Linux Enterprise Server 12 SP5Publication Date: May 27, 2022
Contents
1 Virtualization Scenarios 2
2 Before You Apply Modifications 2
3 Recommendations 3
4 VM Host Server Configuration and Resource Allocation 3
5 VM Guest Images 26
6 VM Guest Configuration 37
7 VM Guest-Specific Configurations and Settings 43
8 Hypervisors Compared to Containers 46
9 Xen: Converting a Paravirtual (PV) Guest to a Fully Virtual (FV/HVM) Guest 50
10 External References 53
1 SLES 12 SP5

1 Virtualization Scenarios
Virtualization offers a lot of capabilities to your environment. It can be used in multiple sce-narios. For more details refer to Book “Virtualization Guide”, Chapter 1 “Virtualization Technology”,
Section 1.2 “Virtualization Capabilities” and Book “Virtualization Guide”, Chapter 1 “Virtualization Tech-
nology”, Section 1.3 “Virtualization Benefits”.
This best practice guide will provide advice for making the right choice in your environment.It will recommend or discourage the usage of options depending on your workload. Fixing con-figuration issues and performing tuning tasks will increase the performance of VM Guest's nearto bare metal.
2 Before You Apply Modifications
2.1 Back Up First
Changing the configuration of the VM Guest or the VM Host Server can lead to data loss oran unstable state. It is really important that you do backups of les, data, images, etc. beforemaking any changes. Without backups you cannot restore the original state after a data loss ora misconfiguration. Do not perform tests or experiments on production systems.
2.2 Test Your Workloads
The efficiency of a virtualization environment depends on many factors. This guide providesa reference for helping to make good choices when configuring virtualization in a productionenvironment. Nothing is carved in stone. Hardware, workloads, resource capacity, etc. should allbe considered when planning, testing, and deploying your virtualization infra-structure. Testingyour virtualized workloads is vital to a successful virtualization implementation.
2 Virtualization Scenarios SLES 12 SP5

3 Recommendations
3.1 Prefer the libvirt Framework
SUSE strongly recommends using the libvirt framework to configure, manage, and operateVM Host Servers, containers and VM Guest. It offers a single interface (GUI and shell) for allsupported virtualization technologies and therefore is easier to use than the hypervisor-specifictools.
We do not recommend using libvirt and hypervisor-specific tools at the same time, becausechanges done with the hypervisor-specific tools may not be recognized by the libvirt tool set.See Book “Virtualization Guide”, Chapter 8 “Starting and Stopping libvirtd” for more informationon libvirt.
3.2 qemu-system-i386 Compared to qemu-system-x86_64
Similar to real 64-bit PC hardware, qemu-system-x86_64 supports VM Guests running a 32-bit or a 64-bit operating system. Because qemu-system-x86_64 usually also provides betterperformance for 32-bit guests, SUSE generally recommends using qemu-system-x86_64 forboth 32-bit and 64-bit VM Guests on KVM. Scenarios where qemu-system-i386 is known toperform better are not supported by SUSE.
Xen also uses binaries from the qemu package but prefers qemu-system-i386 , which can beused for both 32-bit and 64-bit Xen VM Guests. To maintain compatibility with the upstreamXen Community, SUSE encourages using qemu-system-i386 for Xen VM Guests.
4 VM Host Server Configuration and ResourceAllocationAllocation of resources for VM Guests is a crucial point when administrating virtual machines.When assigning resources to VM Guests, be aware that overcommitting resources may affectthe performance of the VM Host Server and the VM Guests. If all VM Guests request all theirresources simultaneously, the host needs to be able to provide all of them. If not, the host'sperformance will be negatively affected and this will in turn also have negative effects on theVM Guest's performance.
3 Recommendations SLES 12 SP5

4.1 Memory
Linux manages memory in units called pages. On most systems the default page size is 4 KB.Linux and the CPU need to know which pages belong to which process. That information is storedin a page table. If a lot of processes are running, it takes more time to nd where the memory ismapped, because of the time required to search the page table. To speed up the search, the TLB(Translation Lookaside Buer) was invented. But on a system with a lot of memory, the TLBis not enough. To avoid any fallback to normal page table (resulting in a cache miss, which istime consuming), huge pages can be used. Using huge pages will reduce TLB overhead and TLBmisses (pagewalk). A host with 32 GB (32*1014*1024 = 33,554,432 KB) of memory and a 4KB page size has a TLB with 33,554,432/4 = 8,388,608 entries. Using a 2 MB (2048 KB) pagesize, the TLB only has 33554432/2048 = 16384 entries, considerably reducing TLB misses.
4.1.1 Configuring the VM Host Server and the VM Guest to use Huge Pages
Current CPU architectures support larger pages than 4 KB: huge pages. To determine the sizeof huge pages available on your system (could be 2 MB or 1 GB), check the flags line in theoutput of /proc/cpuinfo for occurrences of pse and/or pdpe1gb .
TABLE 1: DETERMINE THE AVAILABLE HUGE PAGES SIZE
CPU ag Huge pages size available
Empty string No huge pages available
pse 2 MB
pdpe1gb 1 GB
Using huge pages improves performance of VM Guests and reduces host memory consumption.
By default the system uses THP. To make huge pages available on your system, activate it atboot time with hugepages=1 , and—optionally—add the huge pages size with, for example,hugepagesz=2MB .
Note: 1 GB huge pages1 GB pages can only be allocated at boot time and cannot be freed afterward.
4 Memory SLES 12 SP5

To allocate and use the huge page table (HugeTlbPage) you need to mount hugetlbfs withcorrect permissions.
Note: Restrictions of Huge PagesEven if huge pages provide the best performance, they do come with some drawbacks.You lose features such as Memory ballooning (see Section 6.1.3, “virtio balloon”), KSM (seeSection 4.1.4, “KSM and Page Sharing”), and huge pages cannot be swapped.
PROCEDURE 2: CONFIGURING THE USE OF HUGE PAGES
1. Mount hugetlbfs to /dev/hugepages :
tux > sudo mount -t hugetlbfs hugetlbfs /dev/hugepages
2. To reserve memory for huge pages use the sysctl command. If your system has a hugepage size of 2 MB (2048 KB), and you want to reserve 1 GB (1,048,576 KB) for your VMGuest, you need 1,048,576/2048=512 pages in the pool:
tux > sudo sysctl vm.nr_hugepages=512
The value is written to /proc/sys/vm/nr_hugepages and represents the current num-ber of persistent huge pages in the kernel's huge page pool. Persistent huge pages will bereturned to the huge page pool when freed by a task.
3. Add the memoryBacking element in the VM Guest configuration le (by running virshedit CONFIGURATION ).
<memoryBacking> <hugepages/></memoryBacking>
4. Start your VM Guest and check on the host whether it uses hugepages:
tux > cat /proc/meminfo | grep HugePages_HugePages_Total: 1 512HugePages_Free: 2 92HugePages_Rsvd: 3 0HugePages_Surp: 4 0
1 Size of the pool of huge pages
2 Number of huge pages in the pool that are not yet allocated
5 Memory SLES 12 SP5

3 Number of huge pages for which a commitment to allocate from the pool has beenmade, but no allocation has yet been made
4 Number of huge pages in the pool above the value in /proc/sys/vm/nr_hugepages .The maximum number of surplus huge pages is controlled by /proc/sys/vm/nr_overcommit_hugepages
4.1.2 Transparent Huge Pages
Transparent huge pages (THP) provide a way to dynamically allocate huge pages with thekhugepaged kernel thread, rather than manually managing their allocation and use. Workloadswith contiguous memory access patterns can benefit greatly from THP. A 1000 fold decreasein page faults can be observed when running synthetic workloads with contiguous memory ac-cess patterns. Conversely, workloads with sparse memory access patterns (like databases) mayperform poorly with THP. In such cases it may be preferable to disable THP by adding the ker-nel parameter transparent_hugepage=never , rebuild your grub2 configuration, and reboot.Verify if THP is disabled with:
tux > cat /sys/kernel/mm/transparent_hugepage/enabledalways madvise [never]
If disabled, the value never is shown in square brackets like in the example above.
Note: XenTHP is not available under Xen.
4.1.3 Xen-specific Memory Notes
4.1.3.1 Managing Domain-0 Memory
When using the Xen hypervisor, by default a small percentage of system memory is reservedfor the hypervisor. All remaining memory is automatically allocated to Domain-0. When virtualmachines are created, memory is ballooned out of Domain-0 to provide memory for the virtualmachine. This process is called "autoballooning".
6 Memory SLES 12 SP5

Autoballooning has several limitations:
Reduced performance while dom0 is ballooning down to free memory for the new domain.
Memory freed by ballooning is not confined to a specific NUMA node. This can result inperformance problems in the new domain because of using a non-optimal NUMA config-uration.
Failure to start large domains because of delays while ballooning large amounts of memoryfrom dom0.
For these reasons, we strongly recommend to disable autoballooning and give Domain-0 thememory needed for its workload. Determining Domain-0 memory and vCPU sizing should followa similar process as any other virtual machine.
Autoballooning is controlled by the tool stack used to manage your Xen installation. For thexl/libxl tool stack, autoballooning is controlled by the autoballoon setting in /etc/xen/xl.conf . For the libvirt+libxl tool stack, autoballooning is controlled by the autoballoonsetting in /etc/libvirt/libxl.conf .
The amount of memory initially allocated to Domain-0 is controlled by the Xen hypervi-sor dom0_mem parameter. For example, to set the initial memory allocation of Domain-0 to8GB, add dom0_mem=8G to the Xen hypervisor parameters. The dom0_mem parameter canalso be used to specify the minimum and maximum memory allocations for Domain-0. Forexample, to set the initial memory of Domain-0 to 8GB, but allow it to be changed (bal-looned) anywhere between 4GB and 16GB, add the following to the Xen hypervisor parameters:dom0_mem=8G,min:4G,max:8G .
To set dom0_mem on SLE 11 products, modify /boot/grub/menu.lst , addingdom0_mem=XX to the Xen hypervisor (xen.gz) parameters. The change will be applied atnext reboot.
To set dom0_mem on SLE 12 products, modify /etc/default/grub , addingdom0_mem=XX to GRUB_CMDLINE_XEN_DEFAULT . See Section 7.5, “Change Kernel Parameters
at Boot Time” for more information.
Autoballooning is enabled by default since it is extremely difficult to determine a predefinedamount of memory required by Domain-0. Memory needed by Domain-0 is heavily dependenton the number of hosted virtual machines and their configuration. Users must ensure Domain-0has sufficient memory resources to accommodate virtual machine workloads.
7 Memory SLES 12 SP5

4.1.3.2 xenstore in tmpfs
When using Xen, we recommend to place the xenstore database on tmpfs . xenstore is used asa control plane by the xm/xend and xl/libxl tool stacks and the front-end and back-end driversservicing domain I/O devices. The load on xenstore increases linearly as the number of runningdomains increase. If you anticipate hosting many VM Guest on a Xen host, move the xenstoredatabase onto tmpfs to improve overall performance of the control plane. Mount the /var/lib/xenstored directory on tmpfs:
tux > sudo mount -t tmpfs tmpfs /var/lib/xenstored/
4.1.4 KSM and Page Sharing
Kernel Samepage Merging is a kernel feature that allows for lesser memory consumption on theVM Host Server by sharing data VM Guests have in common. The KSM daemon ksmd periodi-cally scans user memory looking for pages of identical content which can be replaced by a singlewrite-protected page. To enable KSM, run:
tux > sudo echo 1 > /sys/kernel/mm/ksm/run
One advantage of using KSM from a VM Guest's perspective is that all guest memory is backedby host anonymous memory. You can share pagecache, tmpfs or any kind of memory allocatedin the guest.
KSM is controlled by sysfs . You can check KSM's values in /sys/kernel/mm/ksm/ :
pages_shared : The number of shared pages that are being used (read-only).
pages_sharing : The number of sites sharing the pages (read-only).
pages_unshared : The number of pages that are unique and repeatedly checked for merg-ing (read-only).
pages_volatile : The number of pages that are changing too fast to be considered formerging (read-only).
full_scans : The number of times all mergeable areas have been scanned (read-only).
sleep_millisecs : The number of milliseconds ksmd should sleep before the next scan.A low value will overuse the CPU, consuming CPU time that could be used for other tasks.We recommend a value greater than 1000 .
8 Memory SLES 12 SP5

pages_to_scan : The number of present pages to scan before ksmd goes to sleep. A highvalue will overuse the CPU. We recommend to start with a value of 1000 , and then adjustas necessary based on the KSM results observed while testing your deployment.
merge_across_nodes : By default the system merges pages across NUMA nodes. Set thisoption to 0 to disable this behavior.
Note: Use CasesKSM is a good technique to over-commit host memory when running multiple instancesof the same application or VM Guest. When applications and VM Guest are heterogeneousand do not share any common data, it is preferable to disable KSM. In a mixed heteroge-neous and homogeneous environment, KSM can be enabled on the host but disabled ona per VM Guest basis. Use virsh edit to disable page sharing of a VM Guest by addingthe following to the guest's XML configuration:
<memoryBacking> <nosharepages/></memoryBacking>
Warning: Avoid Out-of-Memory ConditionsKSM can free up some memory on the host system, but the administrator should reserveenough swap to avoid out-of-memory conditions if that shareable memory decreases. Ifthe amount of shareable memory decreases, the use of physical memory is increased.
Warning: Memory Access LatenciesBy default, KSM will merge common pages across NUMA nodes. If the merged, commonpage is now located on a distant NUMA node (relative to the node running the VM GuestvCPUs), this may degrade VM Guest performance. If increased memory access latenciesare noticed in the VM Guest, disable cross-node merging with the merge_across_nodessysfs control:
tux > sudo echo 0 > /sys/kernel/mm/ksm/merge_across_nodes
9 Memory SLES 12 SP5

4.1.5 VM Guest: Memory Hotplug
To optimize the usage of your host memory, it may be useful to hotplug more memory for arunning VM Guest when required. To support memory hotplugging, you must rst configure the<maxMemory> tag in the VM Guest's configuration le:
<maxMemory 1 slots='16' 2 unit='KiB'>20971520 3 </maxMemory> <memory 4 unit='KiB'>1048576</memory><currentMemory 5 unit='KiB'>1048576</currentMemory>
1 Runtime maximum memory allocation of the guest.
2 Number of slots available for adding memory to the guest
3 Valid units are:
"KB" for kilobytes (1,000 bytes)
"k" or "KiB" for kibibytes (1,024 bytes)
"MB" for megabytes (1,000,000 bytes)
"M" or "MiB" for mebibytes (1,048,576 bytes)
"GB" for gigabytes (1,000,000,000 bytes)
"G" or "GiB" for gibibytes (1,073,741,824 bytes)
"TB" for terabytes (1,000,000,000,000 bytes)
"T" or "TiB" for tebibytes (1,099,511,627,776 bytes)
4 Maximum allocation of memory for the guest at boot time
5 Actual allocation of memory for the guest
To hotplug memory devices into the slots, create a le mem-dev.xml like the following:
<memory model='dimm'> <target> <size unit='KiB'>524287</size> <node>0</node> </target></memory>
And attach it with the following command:
tux > virsh attach-device vm-name mem-dev.xml
10 Memory SLES 12 SP5
For memory device hotplug, the guest must have at least 1 NUMA cell defined (see Section 4.6.3.1,
“VM Guest Virtual NUMA Topology”).
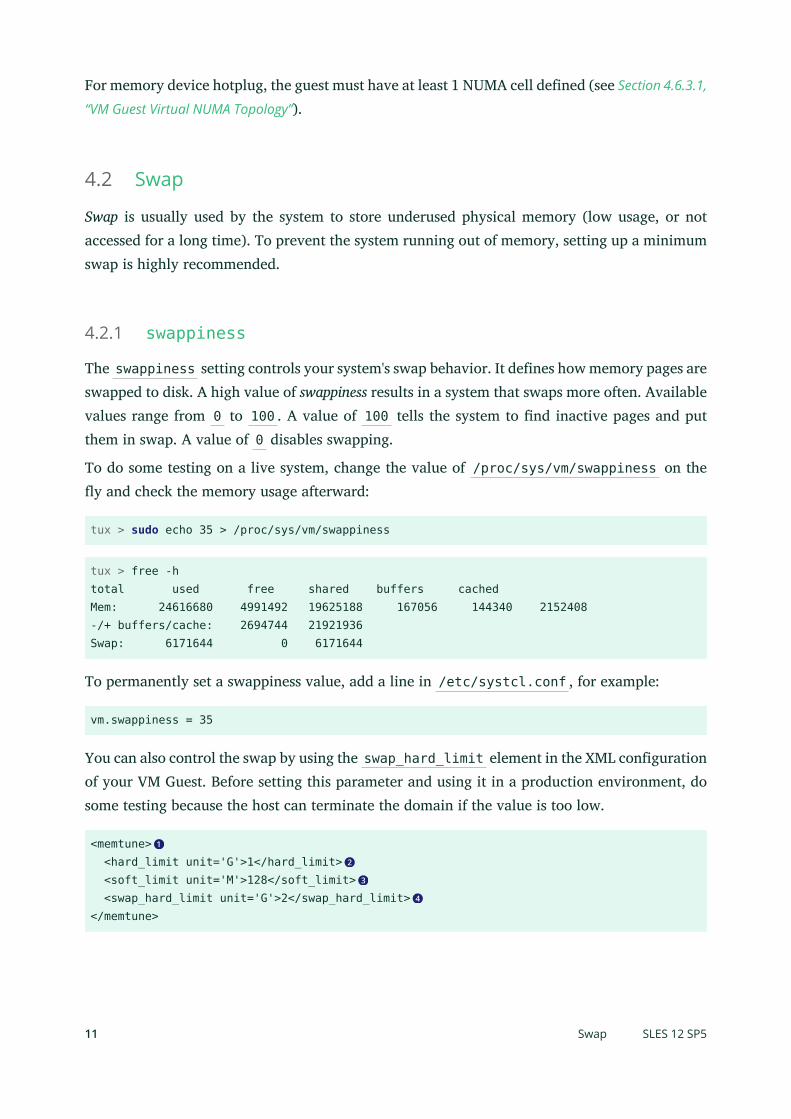
4.2 Swap
Swap is usually used by the system to store underused physical memory (low usage, or notaccessed for a long time). To prevent the system running out of memory, setting up a minimumswap is highly recommended.
4.2.1 swappiness
The swappiness setting controls your system's swap behavior. It defines how memory pages areswapped to disk. A high value of swappiness results in a system that swaps more often. Availablevalues range from 0 to 100 . A value of 100 tells the system to nd inactive pages and putthem in swap. A value of 0 disables swapping.
To do some testing on a live system, change the value of /proc/sys/vm/swappiness on they and check the memory usage afterward:
tux > sudo echo 35 > /proc/sys/vm/swappiness
tux > free -htotal used free shared buffers cachedMem: 24616680 4991492 19625188 167056 144340 2152408-/+ buffers/cache: 2694744 21921936Swap: 6171644 0 6171644
To permanently set a swappiness value, add a line in /etc/systcl.conf , for example:
vm.swappiness = 35
You can also control the swap by using the swap_hard_limit element in the XML configurationof your VM Guest. Before setting this parameter and using it in a production environment, dosome testing because the host can terminate the domain if the value is too low.
<memtune> 1
<hard_limit unit='G'>1</hard_limit> 2
<soft_limit unit='M'>128</soft_limit> 3
<swap_hard_limit unit='G'>2</swap_hard_limit> 4
</memtune>
11 Swap SLES 12 SP5

1 This element provides memory tunable parameters for the domain. If this is omitted, itdefaults to the defaults provided b the operating system.
2 Maximum memory the guest can use. To avoid any problems on the VM Guest it is stronglyrecommended not to use this parameter.
3 The memory limit to enforce during memory contention.
4 The maximum memory plus swap the VM Guest can use.
4.3 I/O
4.3.1 I/O Scheduler
The default I/O scheduler is Completely Fair Queuing (CFQ). The main aim of the CFQ scheduleris to provide a fair allocation of the disk I/O bandwidth for all processes that request an I/Ooperation. You can have different I/O schedulers for different devices.
To get better performance in host and VM Guest, use noop in the VM Guest (disable the I/Oscheduler) and the deadline scheduler for a virtualization host.
PROCEDURE 3: CHECKING AND CHANGING THE I/O SCHEDULER AT RUNTIME
1. To check your current I/O scheduler for your disk (replace sdX by the disk you want tocheck), run:
tux > cat /sys/block/sdX/queue/schedulernoop deadline [cfq]
The value in square brackets is the one currently selected ( cfq in the example above).
2. You can change the scheduler at runtime by running the following command as root :
root # echo mq-deadline > /sys/block/sdX/queue/scheduler
To permanently set an I/O scheduler for all disks of a system, use the kernel parameter el-evator . The respective values are elevator=deadline for the VM Host Server and eleva-tor=noop for VM Guests. See Section 7.5, “Change Kernel Parameters at Boot Time” for further in-structions.
12 I/O SLES 12 SP5
If you need to specify different I/O schedulers for each disk, create the le /usr/lib/tmp-files.d/IO_ioscheduler.conf with content similar to the following example. It defines thedeadline scheduler for /dev/sda and the noop scheduler for /dev/sdb . This feature is avail-able on SLE 12 only.
w /sys/block/sda/queue/scheduler - - - - deadlinew /sys/block/sdb/queue/scheduler - - - - noop
4.3.2 Asynchronous I/O
Many of the virtual disk back-ends use Linux Asynchronous I/O (aio) in their implementation.By default, the maximum number of aio contexts is set to 65536, which can be exceeded whenrunning hundreds of VM Guests using virtual disks serviced by Linux Asynchronous I/O. Whenrunning large numbers of VM Guests on a VM Host Server, consider increasing /proc/sys/fs/aio-max-nr.
PROCEDURE 4: CHECKING AND CHANGING AIO-MAX-NR AT RUNTIME
1. To check your current aio-max-nr setting run:
tux > cat /proc/sys/fs/aio-max-nr65536
2. You can change aio-max-nr at runtime with the following command:
tux > sudo echo 131072 > /proc/sys/fs/aio-max-nr
To permanently set aio-max-nr, add an entry to a local sysctl le. For example, append thefollowing to /etc/sysctl.d/99-sysctl.conf :
fs.aio-max-nr = 1048576
4.3.3 I/O Virtualization
SUSE products support various I/O virtualization technologies. The following table lists advan-tages and disadvantages of each technology. For more information about I/O in virtualizationrefer to Book “Virtualization Guide”, Chapter 1 “Virtualization Technology”, Section 1.5 “I/O Virtualiza-
tion”.
13 I/O SLES 12 SP5

TABLE 2: I/O VIRTUALIZATION SOLUTIONS
Technology Advantage Disadvantage
Device accessed directly bythe guest
No sharing among multipleguests
High performance Live migration is complex
PCI device limit is 8 perguest
Device Assignment (pass-through)
Limited number of slots on aserver
VM Guest compatibility Bad performanceFull virtualization (IDE, SA-TA, SCSI, e1000)
Easy for live migration Emulated operation
Good performance Modified guest (PV drivers)
Easy for live migration
Para-virtualization (vir-tio-blk, virtio-net, virtio-scsi)
Efficient host communicationwith VM Guest
14 I/O SLES 12 SP5

4.4 Storage and File System
Storage space for VM Guests can either be a block device (for example, a partition on a physicaldisk), or an image le on the le system:
TABLE 3: BLOCK DEVICES COMPARED TO DISK IMAGES
Technology Advantages Disadvantages
Block devices Better performance
Use standard tools foradministration/diskmodification
Accessible from host(pro and con)
Device management
Image les Easier system manage-ment
Easily move, clone, ex-pand, back up domains
Comprehensive toolkit(guestfs) for image ma-nipulation
Reduce overheadthrough sparse les
Fully allocate for bestperformance
Lower performancethan block devices
For detailed information about image formats and maintaining images refer to Section 5, “VM
Guest Images”.
If your image is stored on an NFS share, you should check some server and client parametersto improve access to the VM Guest image.
15 Storage and File System SLES 12 SP5
4.4.1 NFS Read/Write (Client)
Options rsize and wsize specify the size of the chunks of data that the client and server passback and forth to each other. You should ensure NFS read/write sizes are sufficiently large,especially for large I/O. Change the rsize and wsize parameter in your /etc/fstab byincreasing the value to 16 KB. This will ensure that all operations can be frozen if there is anyinstance of hanging.
nfs_server:/exported/vm_images 1 /mnt/images 2 nfs 3 rw 4 ,hard 5 ,sync 6 , rsize=8192 7 ,wsize=8192 8 0 0
1 NFS server's host name and export path name.
2 Where to mount the NFS exported share.
3 This is an nfs mount point.
4 This mount point will be accessible in read/write.
5 Determines the recovery behavior of the NFS client after an NFS request times out. hardis the best option to avoid data corruption.
6 Any system call that writes data to les on that mount point causes that data to be ushedto the server before the system call returns control to user space.
7 Maximum number of bytes in each network READ request that the NFS client can receivewhen reading data from a le on an NFS server.
8 Maximum number of bytes per network WRITE request that the NFS client can send whenwriting data to a le on an NFS server.
4.4.2 NFS Threads (Server)
Your NFS server should have enough NFS threads to handle multi-threaded workloads. Use thenfsstat tool to get some RPC statistics on your server:
tux > sudo nfsstat -rcClient rpc stats:calls retrans authrefrsh6401066 198 0 0
If the retrans is equal to 0, everything is ne. Otherwise, the client needs to retransmit, soincrease the USE_KERNEL_NFSD_NUMBER variable in /etc/sysconfig/nfs , and adjust accord-ingly until retrans is equal to 0 .
16 Storage and File System SLES 12 SP5

4.5 CPUs
Host CPU “components” will be “translated” to virtual CPUs in a VM Guest when being assigned.These components can either be:
CPU processor: this describes the main CPU unit, which usually has multiple cores and maysupport Hyper-Threading.
CPU core: a main CPU unit can provide more than one core, and the proximity of coresspeeds up the computation process and reduces energy costs.
CPU Hyper-Threading: this implementation is used to improve parallelization of computa-tions, but this is not as efficient as a dedicated core.
4.5.1 Assigning CPUs
CPU overcommit occurs when the cumulative number of virtual CPUs of all VM Guests becomeshigher than the number of host CPUs. Best performance is likely to be achieved when there isno overcommit and each virtual CPU matches one hardware processor or core on the VM HostServer. In fact, VM Guests running on an overcommitted host will experience increased latency,and a negative effect on per-VM Guest throughput is also likely to be observed. Therefore, youshould try to avoid overcommitting CPUs.
Deciding whether to allow CPU overcommit or not requires good a-priori knowledge of theworkload as a whole. For instance, if you know that all the VM Guest's virtual CPUs will notbe loaded more than 50%, then you can assume that overcommitting the host by a factor of 2(which means having 128 virtual CPUs in total, on a host with 64 CPUs) will work well. Onthe other hand, if you know that all the virtual CPUs of the VM Guest will try to run at 100%for most of the time then even having one virtual CPU more than the host has CPUs is alreadya misconfiguration.
Overcommitting to a point where the cumulative number of virtual CPUs is higher than 8 timesthe number of physical cores of the VM Host Server will most likely lead to a malfunctioningand unstable system and should hence be avoided.
Unless you know exactly how many virtual CPUs are required for a VM Guest, you should startwith one. A good rule of thumb is to target a CPU workload of approximately 70% inside yourVM (see Book “System Analysis and Tuning Guide”, Chapter 2 “System Monitoring Utilities”, Section 2.3
“Processes” for information on monitoring tools). If you allocate more processors than needed
17 CPUs SLES 12 SP5

in the VM Guest, this will negatively affect the performance of host and guest. Cycle efficiencywill be degraded, as the unused vCPU will still cause timer interrupts. In case you primarily runsingle threaded applications on a VM Guest, a single virtual CPU is the best choice.
A single VM Guest with more virtual CPUs than the VM Host Server has CPUs is always amisconfiguration.
4.5.2 VM Guest CPU Configuration
This section describes how to choose and configure a CPU type for a VM Guest. You will alsolearn how to pin virtual CPUs to physical CPUs on the host system. For more information aboutvirtual CPU configuration and tuning parameters refer to the libvirt documentation at https://
libvirt.org/formatdomain.html#elementsCPU .
4.5.2.1 Virtual CPU Models and Features
The CPU model and topology can be specified individually for each VM Guest. Configurationoptions range from selecting specific CPU models to excluding certain CPU features. PredefinedCPU models are listed in the /usr/share/libvirt/cpu_map.xml . A CPU model and topologythat is similar to the host generally provides the best performance. The host system CPU modeland topology can be displayed by running virsh capabilities .
Note that changing the default virtual CPU configuration will require a VM Guest shutdownwhen migrating it to a host with different hardware. More information on VM Guest migrationis available at Book “Virtualization Guide”, Chapter 10 “Basic VM Guest Management”, Section 10.7
“Migrating VM Guests”.
To specify a particular CPU model for a VM Guest, add a respective entry to the VM Guestconfiguration le. The following example configures a Broadwell CPU with the invariant TSCfeature:
<cpu mode='custom' match='exact'> <model>Broadwell</model> <feature name='invtsc'/> </cpu>
For a virtual CPU that most closely resembles the host physical CPU, <cpu mod-
e='host-passthrough'> can be used. Note that a host-passthrough CPU model may notexactly resemble the host physical CPU, since by default KVM will mask any non-migratable
18 CPUs SLES 12 SP5

features. For example invtsc is not included in the virtual CPU feature set. Changing the de-fault KVM behavior is not directly supported through libvirt, although it does allow arbitrarypassthrough of KVM command line arguments. Continuing with the invtsc example, you canachieve passthrough of the host CPU (including invtsc ) with the following command linepassthrough in the VM Guest configuration le:
<domain type='kvm' xmlns:qemu='http://libvirt.org/schemas/domain/qemu/1.0'> <qemu:commandline> <qemu:arg value='-cpu'/> <qemu:arg value='host,migratable=off,+invtsc'/> </qemu:commandline> ... </domain>
Note: The host-passthrough ModeSince host-passthrough exposes the physical CPU details to the virtual CPU, migrationto dissimilar hardware is not possible. See Section 4.5.2.3, “Virtual CPU Migration Considera-
tions” for more information.
4.5.2.2 Virtual CPU Pinning
Virtual CPU pinning is used to constrain virtual CPU threads to a set of physical CPUs. Thevcpupin element specifies the physical host CPUs that a virtual CPU can use. If this element isnot set and the attribute cpuset of the vcpu element is not specified, the virtual CPU is freeto use any of the physical CPUs.
CPU intensive workloads can benefit from virtual CPU pinning by increasing the physical CPUcache hit ratio. To pin a virtual CPU to a specific physical CPU, run the following commands:
tux > virsh vcpupin DOMAIN_ID --vcpu vCPU_NUMBERVCPU: CPU Affinity----------------------------------0: 0-7root # virsh vcpupin SLE12 --vcpu 0 0 --config
The last command generates the following entry in the XML configuration:
<cputune> <vcpupin vcpu='0' cpuset='0'/></cputune>
19 CPUs SLES 12 SP5

Note: Virtual CPU Pinning on NUMA NodesTo confine a VM Guest's CPUs and its memory to a NUMA node, you can use virtual CPUpinning and memory allocation policies on a NUMA system. See Section 4.6, “NUMA Tuning”
for more information related to NUMA tuning.
Warning: Virtual CPU Pinning and Live MigrationEven though vcpupin can improve performance, it can complicate live migration. SeeSection 4.5.2.3, “Virtual CPU Migration Considerations” for more information on virtual CPUmigration considerations.
4.5.2.3 Virtual CPU Migration Considerations
Selecting a virtual CPU model containing all the latest features may improve performance ofa VM Guest workload, but often at the expense of migratability. Unless all hosts in the clustercontain the latest CPU features, migration can fail when a destination host lacks the new features.If migratability of a virtual CPU is preferred over the latest CPU features, a normalized CPUmodel and feature set should be used. The virsh cpu-baseline command can help define anormalized virtual CPU that can be migrated across all hosts. The following command, whenrun on each host in the migration cluster, illustrates collection of all hosts' CPU capabilities inall-hosts-cpu-caps.xml .
tux > sudo virsh capabilities | virsh cpu-baseline /dev/stdin >> all-hosts-cpu-caps.xml
With the CPU capabilities from each host collected in all-hosts-cpu-caps.xml, use virsh cpu-baseline to create a virtual CPU definition that will be compatible across all hosts.
tux > sudo virsh cpu-baseline all-hosts-cpu-caps.xml
The resulting virtual CPU definition can be used as the cpu element in VM Guest configurationle.
At a logical level, virtual CPU pinning is a form of hardware passthrough. Pinning couples phys-ical resources to virtual resources, and can also be problematic for migration. For example, themigration will fail if the requested physical resources are not available on the destination host,or if the source and destination hosts have different NUMA topologies. For more recommenda-tions about Live Migration see Book “Virtualization Guide”, Chapter 10 “Basic VM Guest Management”,
Section 10.7.1 “Migration Requirements”.
20 CPUs SLES 12 SP5

4.6 NUMA Tuning
NUMA is an acronym for Non Uniform Memory Access. A NUMA system has multiple physicalCPUs, each with local memory attached. Each CPU can also access other CPUs' memory, knownas “remote memory access”, but it is much slower than accessing local memory. NUMA systemscan negatively impact VM Guest performance if not tuned properly. Although ultimately tuningis workload dependent, this section describes controls that should be considered when deployingVM Guests on NUMA hosts. Always consider your host topology when configuring and deployingVMs.
SUSE Linux Enterprise Server contains a NUMA auto-balancer that strives to reduce remotememory access by placing memory on the same NUMA node as the CPU processing it. In addi-tion, standard tools such as cgset and virtualization tools such as libvirt provide mechanismsto constrain VM Guest resources to physical resources.
numactl is used to check for host NUMA capabilities:
tux > sudo numactl --hardwareavailable: 4 nodes (0-3)node 0 cpus: 0 1 2 3 4 5 6 7 8 9 10 11 12 13 14 15 16 17 72 73 74 75 76 77 7879 80 81 82 83 84 85 86 87 88 89node 0 size: 31975 MBnode 0 free: 31120 MBnode 1 cpus: 18 19 20 21 22 23 24 25 26 27 28 29 30 31 32 33 34 35 90 91 92 9394 95 96 97 98 99 100 101 102 103 104 105 106 107node 1 size: 32316 MBnode 1 free: 31673 MBnode 2 cpus: 36 37 38 39 40 41 42 43 44 45 46 47 48 49 50 51 52 53 108 109 110111 112 113 114 115 116 117 118 119 120 121 122 123 124 125node 2 size: 32316 MBnode 2 free: 31726 MBnode 3 cpus: 54 55 56 57 58 59 60 61 62 63 64 65 66 67 68 69 70 71 126 127 128129 130 131 132 133 134 135 136 137 138 139 140 141 142 143node 3 size: 32314 MBnode 3 free: 31387 MBnode distances:node 0 1 2 30: 10 21 21 211: 21 10 21 212: 21 21 10 213: 21 21 21 10
The numactl output shows this is a NUMA system with 4 nodes or cells, each containing 36CPUs and approximately 32G memory. virsh capabilities can also be used to examine thesystems NUMA capabilities and CPU topology.
21 NUMA Tuning SLES 12 SP5

4.6.1 NUMA Balancing
On NUMA machines, there is a performance penalty if remote memory is accessed by a CPU.Automatic NUMA balancing scans a task's address space and unmaps pages. By doing so, itdetects whether pages are properly placed or whether to migrate the data to a memory nodelocal to where the task is running. In defined intervals (configured with numa_balancing_s-can_delay_ms ), the task scans the next scan size number of pages (configured with numa_bal-ancing_scan_size_mb ) in its address space. When the end of the address space is reached thescanner restarts from the beginning.
Higher scan rates cause higher system overhead as page faults must be trapped and data needsto be migrated. However, the higher the scan rate, the more quickly a task's memory is migratedto a local node when the workload pattern changes. This minimizes the performance impactcaused by remote memory accesses. These sysctl directives control the thresholds for scandelays and the number of pages scanned:
tux > sudo sysctl -a | grep numa_balancingkernel.numa_balancing = 1 1
kernel.numa_balancing_scan_delay_ms = 1000 2
kernel.numa_balancing_scan_period_max_ms = 60000 3
kernel.numa_balancing_scan_period_min_ms = 1000 4
kernel.numa_balancing_scan_size_mb = 256 5
1 Enables/disables automatic page fault-based NUMA balancing
2 Starting scan delay used for a task when it initially forks
3 Maximum time in milliseconds to scan a task's virtual memory
4 Minimum time in milliseconds to scan a task's virtual memory
5 Size in megabytes' worth of pages to be scanned for a given scan
For more information see Book “System Analysis and Tuning Guide”, Chapter 10 “Automatic Non-
Uniform Memory Access (NUMA) Balancing”.
The main goal of automatic NUMA balancing is either to reschedule tasks on the same node'smemory (so the CPU follows the memory), or to copy the memory's pages to the same node (sothe memory follows the CPU).
22 NUMA Tuning SLES 12 SP5

Warning: Task PlacementThere are no rules to define the best place to run a task, because tasks could share memorywith other tasks. For best performance, it is recommended to group tasks sharing memoryon the same node. Check NUMA statistics with # cat /proc/vmstat | grep numa_ .
4.6.2 Memory Allocation Control with the CPUset Controller
The cgroups cpuset controller can be used confine memory used by a process to a NUMA node.There are three cpuset memory policy modes available:
interleave : This is a memory placement policy which is also known as round-robin.This policy can provide substantial improvements for jobs that need to place thread localdata on the corresponding node. When the interleave destination is not available, it willbe moved to another node.
bind : This will place memory only on one node, which means in case of insufficientmemory, the allocation will fail.
preferred : This policy will apply a preference to allocate memory to a node. If there isnot enough space for memory on this node, it will fall back to another node.
You can change the memory policy mode with the cgset tool from the libcgroup-toolspackage:
tux > sudo cgset -r cpuset.mems=NODE sysdefault/libvirt/qemu/KVM_NAME/emulator
To migrate pages to a node, use the migratepages tool:
tux > migratepages PID FROM-NODE TO-NODE
To check everything is ne. use: cat /proc/PID/status | grep Cpus .
Note: Kernel NUMA/cpuset memory policyFor more information see Kernel NUMA memory policy (https://www.kernel.org/doc/Doc-
umentation/vm/numa_memory_policy.txt) and cpusets memory policy (https://www.ker-
nel.org/doc/Documentation/cgroup-v1/cpusets.txt) . Check also the Libvirt NUMA Tuning
documentation (https://libvirt.org/formatdomain.html#elementsNUMATuning) .
23 NUMA Tuning SLES 12 SP5

4.6.3 VM Guest: NUMA Related Configuration
libvirt allows to set up virtual NUMA and memory access policies. Configuring these settingsis not supported by virt-install or virt-manager and needs to be done manually by editingthe VM Guest configuration le with virsh edit .
4.6.3.1 VM Guest Virtual NUMA Topology
Creating a VM Guest virtual NUMA (vNUMA) policy that resembles the host NUMA topology canoften increase performance of traditional large, scale-up workloads. VM Guest vNUMA topologycan be specified using the numa element in the XML configuration:
<cpu>... <numa> <cell 1 id="0" 2 cpus='0-1' 3 memory='512000' unit='KiB'/> <cell id="1" cpus='2-3' memory='256000' 4
unit='KiB' 5 memAccess='shared' 6 /> </numa> ...</cpu>
1 Each cell element specifies a vNUMA cell or node
2 All cells should have an id attribute, allowing to reference the cell in other configurationblocks. Otherwise cells are assigned ids in ascending order starting from 0.
3 The CPU or range of CPUs that are part of the node
4 The node memory
5 Units in which node memory is specified
6 Optional attribute which can control whether the memory is to be mapped as shared orprivate . This is valid only for hugepages-backed memory.
To nd where the VM Guest has allocated its pages. use: cat /proc/PID/numa_maps and cat /sys/fs/cgroup/memory/sysdefault/libvirt/qemu/KVM_NAME/memory.numa_stat .
Warning: NUMA specificationThe libvirt VM Guest NUMA specification is currently only available for QEMU/KVM.
24 NUMA Tuning SLES 12 SP5

4.6.3.2 Memory Allocation Control with libvirt
If the VM Guest has a vNUMA topology (see Section 4.6.3.1, “VM Guest Virtual NUMA Topology”),memory can be pinned to host NUMA nodes using the numatune element. This method is cur-rently only available for QEMU/KVM guests. See Important: Non-vNUMA VM Guest for how to con-figure non-vNUMA VM Guests.
<numatune> <memory mode="strict" 1 nodeset="1-4,^3" 2 /> <memnode 3 cellid="0" 4 mode="strict" nodeset="1"/> <memnode cellid="2" placement="strict" 5 mode="preferred" nodeset="2"/></numatune>
1 Policies available are: interleave (round-robin like), strict (default) or preferred .
2 Specify the NUMA nodes.
3 Specify memory allocation policies for each guest NUMA node (if this element is not definedthen this will fall back and use the memory element).
4 Addresses the guest NUMA node for which the settings are applied.
5 The placement attribute can be used to indicate the memory placement mode for a domainprocess, the value can be auto or strict .
Important: Non-vNUMA VM GuestOn a non-vNUMA VM Guest, pinning memory to host NUMA nodes is done like in thefollowing example:
<numatune> <memory mode="strict" nodeset="0-1"/></numatune>
In this example, memory is allocated from the host nodes 0 and 1 . In case these memoryrequirements cannot be fulfilled, starting the VM Guest will fail. virt-install alsosupports this configuration with the --numatune option.
Warning: Memory and CPU across NUMA NodesYou should avoid allocating VM Guest memory across NUMA nodes, and prevent virtualCPUs from floating across NUMA nodes.
25 NUMA Tuning SLES 12 SP5

5 VM Guest ImagesImages are virtual disks used to store the operating system and data of VM Guests. They canbe created, maintained and queried with the qemu-img command. Refer to Book “Virtualization
Guide”, Chapter 28 “Guest Installation”, Section 28.2.2 “Creating, Converting and Checking Disk Images”
for more information on the qemu-img tool and examples.
5.1 VM Guest Image Formats
Certain storage formats which QEMU recognizes have their origins in other virtualization tech-nologies. By recognizing these formats, QEMU can leverage either data stores or entire gueststhat were originally targeted to run under these other virtualization technologies. Some formatsare supported only in read-only mode. To use them in read/write mode, convert them to a fullysupported QEMU storage format (using qemu-img ). Otherwise they can only be used as read-on-ly data store in a QEMU guest. See SUSE Linux Enterprise Release Notes (https://www.suse.com/
releasenotes/x86_64/SUSE-SLES/12/#fate-317891) to get the list of supported formats.
Use qemu-img info VMGUEST.IMG to get information about an existing image, such as: theformat, the virtual size, the physical size, snapshots if available.
Note: PerformanceIt is recommended to convert the disk images to either raw or qcow2 to achieve goodperformance.
Warning: Encrypted Images Cannot Be CompressedWhen you create an image, you cannot use compression ( -c ) in the output le togetherwith the encryption option ( -e ).
5.1.1 Raw Format
This format is simple and easily exportable to all other emulators/hypervisors.
It provides best performance (least I/O overhead).
If your le system supports holes (for example in Ext2 or Ext3 on Linux or NTFS on Win-dows*), then only the written sectors will reserve space.
26 VM Guest Images SLES 12 SP5

The raw format allows to copy a VM Guest image to a physical device ( dd if=VMGUEST.RAWof=/dev/sda ).
It is byte-for-byte the same as what the VM Guest sees, so this wastes a lot of space.
5.1.2 qcow2 Format
Use this to have smaller images (useful if your le system does not supports holes, forexample on Windows*).
It has optional AES encryption.
Zlib-based compression option.
Support of multiple VM snapshots (internal, external).
Improved performance and stability.
Supports changing the backing le.
Supports consistency checks.
Less performance than raw format.
l2-cache-size
qcow2 can provide the same performance for random read/write access as raw format, butit needs a well-sized cache size. By default cache size is set to 1 MB. This will give goodperformance up to a disk size of 8 GB. If you need a bigger disk size, you need to adjustthe cache size. For a disk size of 64 GB (64*1024 = 65536), you need 65536 / 8192B =8 MB of cache ( -drive format=qcow2,l2-cache-size=8M ).
Cluster Size
The qcow2 format offers the capability to change the cluster size. The value must be be-tween 512 KB and 2 MB. Smaller cluster sizes can improve the image le size whereaslarger cluster sizes generally provide better performance.
Preallocation
An image with preallocated metadata is initially larger but can improve performance whenthe image needs to grow.
Lazy Refcounts
27 VM Guest Image Formats SLES 12 SP5

Reference count updates are postponed with the goal of avoiding metadata I/O and im-proving performance. This is particularly beneficial with cache=writethrough . This op-tion does not batch metadata updates, but if in case of host crash, the reference counttables must be rebuilt, this is done automatically at the next open with qemu-img check-r all . Note that this takes some time.
5.1.3 qed format
qed is the next-generation qcow (QEMU Copy On Write). Its characteristics include:
Strong data integrity because of simple design.
Retains sparseness over non-sparse channels (for example HTTP).
Supports changing the backing le.
Supports consistency checks.
Fully asynchronous I/O path.
Does not support internal snapshots.
Relies on the host le system and cannot be stored on a logical volume directly.
5.1.4 VMDK format
VMware 3, 4, or 6 image format, for exchanging images with that product.
5.2 Overlay Disk Images
The qcow2 and qed formats provide a way to create a base image (also called backing le) andoverlay images on top of the base image. A backing le is useful to be able to revert to a knownstate and discard the overlay. If you write to the image, the backing image will be untouched andall changes will be recorded in the overlay image le. The backing le will never be modifiedunless you use the commit monitor command (or qemu-img commit ).
To create an overlay image:
root # qemu-img create -o 1 backing_file=vmguest.raw 2 ,backing_fmt=raw 3 \ -f 4 qcow2 vmguest.cow 5
28 Overlay Disk Images SLES 12 SP5
1 Use -o ? for an overview of available options.
2 The backing le name.
3 Specify the le format for the backing le.
4 Specify the image format for the VM Guest.
5 Image name of the VM Guest, it will only record the differences from the backing le.
Warning: Backing Image PathYou should not change the path to the backing image, otherwise you will need to adjustit. The path is stored in the overlay image le. To update the path, you should make asymbolic link from the original path to the new path and then use the qemu-img rebaseoption.
root # ln -sf /var/lib/images/vmguest.raw /var/lib/images/SLE12/vmguest.rawroot # qemu-img rebase 1 -u 2 -b 3 /var/lib/images/vmguest.raw /var/lib/images/SLE12/vmguest.cow 4
The rebase subcommand tells qemu-img to change the backing le image. The -u op-tion activates the unsafe mode (see note below). The backing image to be used is specifiedwith -b and the image path is the last argument of the command.
There are two different modes in which rebase can operate:
Safe: This is the default mode and performs a real rebase operation. The safe modeis a time-consuming operation.
Unsafe: The unsafe mode ( -u ) only changes the backing les name and the formatof the le name without making any checks on the les contents. You should usethis mode to rename or moving a backing le.
A common use is to initiate a new guest with the backing le. Let's assume we have asle12_base.img VM Guest ready to be used (fresh installation without any modification).This will be our backing le. Now you need to test a new package, on an updated systemand on a system with a different kernel. We can use sle12_base.img to instantiate the newSUSE Linux Enterprise VM Guest by creating a qcow2 overlay le pointing to this backing le( sle12_base.img ).
In our example we will use sle12_updated.qcow2 for the updated system, and sle12_ker-nel.qcow2 for the system with a different kernel.
29 Overlay Disk Images SLES 12 SP5

To create the two thin provisioned systems use the qemu-img command line with the -b option:
root # qemu-img create -b /var/lib/libvirt/sle12_base.img -f qcow2 \/var/lib/libvirt/sle12_updated.qcow2Formatting 'sle12_updated.qcow2', fmt=qcow2 size=17179869184backing_file='sle12_base.img' encryption=off cluster_size=65536lazy_refcounts=off nocow=offroot # qemu-img create -b /var/lib/libvirt/sle12_base.img -f qcow2 \/var/lib/libvirt/sle12_kernel.qcow2Formatting 'sle12_kernel.qcow2', fmt=qcow2 size=17179869184backing_file='vmguest-sle12_base.img' encryption=off cluster_size=65536lazy_refcounts=off nocow=off
The images are now usable, and you can do your test without touching the initialsle12_base.img backing le, all changes will be stored in the new overlay images. Addition-ally, you can also use these new images as a backing le, and create a new overlay.
root # qemu-img create -b sle12_kernel.qcow2 -f qcow2 sle12_kernel_TEST.qcow2
When using qemu-img info with the option --backing-chain , it will return all informationabout the entire backing chain recursively:
root # qemu-img info --backing-chain/var/lib/libvirt/images/sle12_kernel_TEST.qcow2image: sle12_kernel_TEST.qcow2file format: qcow2virtual size: 16G (17179869184 bytes)disk size: 196Kcluster_size: 65536backing file: sle12_kernel.qcow2Format specific information:compat: 1.1lazy refcounts: false
image: sle12_kernel.qcow2file format: qcow2virtual size: 16G (17179869184 bytes)disk size: 196Kcluster_size: 65536backing file: SLE12.qcow2Format specific information:compat: 1.1lazy refcounts: false
image: sle12_base.imgfile format: qcow2
30 Overlay Disk Images SLES 12 SP5

virtual size: 16G (17179869184 bytes)disk size: 16Gcluster_size: 65536Format specific information:compat: 1.1lazy refcounts: true
FIGURE 1: UNDERSTANDING IMAGE OVERLAY
5.3 Opening a VM Guest Image
To access the le system of an image, use the guestfs-tools . If you do not have this toolinstalled on your system you can mount an image with other Linux tools. Avoid accessingan untrusted or unknown VM Guest's image system because this can lead to security issues(for more information, read D. Berrangé's post (https://www.berrange.com/posts/2013/02/20/a-
reminder-why-you-should-never-mount-guest-disk-images-on-the-host-os/) ).
5.3.1 Opening a Raw Image
PROCEDURE 5: MOUNTING A RAW IMAGE
1. To be able to mount the image, nd a free loop device. The following command displaysthe rst unused loop device, /dev/loop1 in this example.
31 Opening a VM Guest Image SLES 12 SP5

root # losetup -f/dev/loop1
2. Associate an image ( SLE12.raw in this example) with the loop device:
root # losetup /dev/loop1 SLE12.raw
3. Check whether the image has successfully been associated with the loop device by gettingdetailed information about the loop device:
root # losetup -lNAME SIZELIMIT OFFSET AUTOCLEAR RO BACK-FILE/dev/loop1 0 0 0 0 /var/lib/libvirt/images/SLE12.raw
4. Check the image's partitions with kpartx :
root # kpartx -a 1 -v 2 /dev/loop1add map loop1p1 (254:1): 0 29358080 linear /dev/loop1 2048
1 Add partition device mappings.
2 Verbose mode.
5. Now mount the image partition(s) (to /mnt/sle12mount in the following example):
root # mkdir /mnt/sle12mountroot # mount /dev/mapper/loop1p1 /mnt/sle12mount
Note: Raw image with LVMIf your raw image contains an LVM volume group you should use LVM tools to mountthe partition. Refer to Section 5.3.3, “Opening Images Containing LVM”.
PROCEDURE 6: UNMOUNTING A RAW IMAGE
1. Unmount all mounted partitions of the image, for example:
root # umount /mnt/sle12mount
2. Delete partition device mappings with kpartx :
root # kpartx -d /dev/loop1
3. Detach the devices with losetup
32 Opening a VM Guest Image SLES 12 SP5

root # losetup -d /dev/loop1
5.3.2 Opening a qcow2 Image
PROCEDURE 7: MOUNTING A QCOW2 IMAGE
1. First you need to load the nbd (network block devices) module. The following exampleloads it with support for 16 block devices ( max_part=16 ). Check with dmesg whetherthe operation was successful:
root # modprobe nbd max_part=16root # dmesg | grep nbd[89155.142425] nbd: registered device at major 43
2. Connect the VM Guest image (for example SLE12.qcow2 ) to an NBD device ( /debv/nbd0in the following example) with the qemu-nbd command. Make sure to use a free NBDdevice:
root # qemu-nbd -c 1 /dev/nbd0 2 SLE12.qcow2 3
1 Connect SLE12.qcow2 to the local NBD device /dev/nbd0
2 NBD device to use
3 VM Guest image to use
Tip: Checking for a free NBD DeviceTo check whether an NBD device is free, run the following command:
root # lsof /dev/nbd0COMMAND PID USER FD TYPE DEVICE SIZE/OFF NODE NAMEqemu-nbd 15149 root 10u BLK 43,0 0t0 47347 /dev/nbd0
If the command produces an output like in the example above, the device is busy(not free). This can also be confirmed by the presence of the /sys/devices/vir-tual/block/nbd0/pid le.
3. Inform the operating system about partition table changes with partprobe :
root # partprobe /dev/nbd0 -s/dev/nbd0: msdos partitions 1 2
33 Opening a VM Guest Image SLES 12 SP5

root # dmesg | grep nbd0 | tail -1[89699.082206] nbd0: p1 p2
4. In the example above, the SLE12.qcow2 contains two partitions: /dev/nbd0p1 and /dev/nbd0p2 . Before mounting these partitions, use vgscan to check whether they belongto an LVM volume:
root # vgscan -v Wiping cache of LVM-capable devices Wiping internal VG cache Reading all physical volumes. This may take a while... Using volume group(s) on command line. No volume groups found.
5. If no LVM volume has been found, you can mount the partition with mount :
root # mkdir /mnt/nbd0p2# mount /dev/nbd0p1 /mnt/nbd0p2
Refer to Section 5.3.3, “Opening Images Containing LVM” for information on how to handleLVM volumes.
PROCEDURE 8: UNMOUNTING A QCOW2 IMAGE
1. Unmount all mounted partitions of the image, for example:
root # umount /mnt/nbd0p2
2. Disconnect the image from the /dev/nbd0 device.
root # qemu-nbd -d /dev/nbd0
5.3.3 Opening Images Containing LVM
PROCEDURE 9: MOUNTING IMAGES CONTAINING LVM
1. To check images for LVM groups, use vgscan -v . If an image contains LVM groups, theoutput of the command looks like the following:
root # vgscan -vWiping cache of LVM-capable devicesWiping internal VG cacheReading all physical volumes. This may take a while...
34 Opening a VM Guest Image SLES 12 SP5

Finding all volume groupsFinding volume group "system"Found volume group "system" using metadata type lvm2
2. The system LVM volume group has been found on the system. You can get more informa-tion about this volume with vgdisplay VOLUMEGROUPNAME (in our case VOLUMEGROUP-NAME is system ). You should activate this volume group to expose LVM partitions as de-vices so the system can mount them. Use vgchange :
root # vgchange -ay -vFinding all volume groupsFinding volume group "system"Found volume group "system"activation/volume_list configuration setting not defined: Checking onlyhost tags for system/homeCreating system-homeLoading system-home table (254:0)Resuming system-home (254:0)Found volume group "system"activation/volume_list configuration setting not defined: Checking onlyhost tags for system/rootCreating system-rootLoading system-root table (254:1)Resuming system-root (254:1)Found volume group "system"activation/volume_list configuration setting not defined: Checking onlyhost tags for system/swapCreating system-swapLoading system-swap table (254:2)Resuming system-swap (254:2)Activated 3 logical volumes in volume group system 3 logical volume(s) in volume group "system" now active
3. All partitions in the volume group will be listed in the /dev/mapper directory. You cansimply mount them now.
root # ls /dev/mapper/system-*/dev/mapper/system-home /dev/mapper/system-root /dev/mapper/system-swap
root # mkdir /mnt/system-rootroot # mount /dev/mapper/system-root /mnt/system-root
root # ls /mnt/system-root/bin dev home lib64 mnt proc root sbin srv tmp varboot etc lib lost+found opt read-write run selinux sys usr
35 Opening a VM Guest Image SLES 12 SP5

PROCEDURE 10: UNMOUNTING IMAGES CONTAINING LVM
1. Unmount all partitions (with umount )
root # umount /mnt/system-root
2. Deactivate the LVM volume group (with vgchange -an VOLUMEGROUPNAME )
root # vgchange -an -v systemUsing volume group(s) on command lineFinding volume group "system"Found volume group "system"Removing system-home (254:0)Found volume group "system"Removing system-root (254:1)Found volume group "system"Removing system-swap (254:2)Deactivated 3 logical volumes in volume group system0 logical volume(s) in volume group "system" now active
3. Now you have two choices:
In case of a qcow2 image, proceed as described in Step 2 ( qemu-nbd -d /dev/nbd0 ).
In case of a raw image, proceeds as described in Step 2 ( kpartx -d /dev/loop1 ;losetup -d /dev/loop1 ).
Important: Check for a Successful UnmountYou should double-check that umounting succeeded by using a system commandlike losetup , qemu-nbd , mount or vgscan . If this is not the case you may havetrouble using the VM Guest because its system image is used in different places.
5.4 File System Sharing
You can access a host directory in the VM Guest using the filesystem element. In the followingexample we will share the /data/shared directory and mount it in the VM Guest. Note thatthe accessmode parameter only works with type='mount' for the QEMU/KVM drive (mostother values for type are exclusively used for the LXC driver).
<filesystem type='mount' 1 accessmode='mapped' 2 > <source dir='/data/shared' 3 >
36 File System Sharing SLES 12 SP5
<target dir='shared' 4 /></filesystem>
1 A host directory to mount VM Guest.
2 Access mode (the security mode) set to mapped will give access with the permissions ofthe hypervisor. Use passthrough to access this share with the permissions of the userinside the VM Guest.
3 Path to share with the VM Guest.
4 Name or label of the path for the mount command.
To mount the shared directory on the VM Guest, use the following commands: Under the VMGuest now you need to mount the target dir='shared' :
root # mkdir /opt/mnt_sharedroot # mount shared -t 9p /opt/mnt_shared -o trans=virtio
See libvirt File System (https://libvirt.org/formatdomain.html#elementsFilesystems) and QE-
MU 9psetup (http://wiki.qemu.org/Documentation/9psetup) for more information.
6 VM Guest Configuration
6.1 Virtio Driver
To increase VM Guest performance it is recommended to use paravirtualized drivers withinthe VM Guests. The virtualization standard for such drivers for KVM are the virtio drivers,which are designed for running in a virtual environment. Xen uses similar paravirtualized devicedrivers (like VMDP (https://www.suse.com/products/vmdriverpack/) in a Windows* guest). Fora better understanding of this topic, refer to Book “Virtualization Guide”, Chapter 1 “Virtualization
Technology”, Section 1.5 “I/O Virtualization”.
6.1.1 virtio blk
virtio_blk is the virtio block device for disk. To use the virtio blk driver for a block device,specify the bus='virtio' attribute in the disk definition:
<disk type='....' device='disk'> .... <target dev='vda' bus='virtio'/>
37 VM Guest Configuration SLES 12 SP5
</disk>
Important: Disk Device Namesvirtio disk devices are named /dev/vd[a-z][1-9] . If you migrate a Linux guest froma non-virtio disk you need to adjust the root= parameter in the GRUB configuration, andregenerate the initrd le. Otherwise the system cannot boot. On VM Guests with otheroperating systems, the boot loader may need to be adjusted or reinstalled accordingly, too.
Important: Using virtio Disks with qemu-system-ARCHWhen running qemu-system-ARCH , use the -drive option to add a disk to the VM Guest.See Book “Virtualization Guide”, Chapter 28 “Guest Installation”, Section 28.1 “Basic Installation
with qemu-system-ARCH” for an example. The -hd[abcd] option will not work for virtiodisks.
6.1.2 virtio net
virtio_net is the virtio network device. The kernel modules should be loaded automaticallyin the guest at boot time. You need to start the service to make the network available.
<interface type='network'> ... <model type='virtio' /></interface>
6.1.3 virtio balloon
The virtio balloon is used for host memory over-commits for guests. For Linux guests, the balloondriver runs in the guest kernel, whereas for Windows guests, the balloon driver is in the VMDPpackage. virtio_balloon is a PV driver to give or take memory from a VM Guest.
Inflate balloon: Return memory from guest to host kernel (for KVM) or to hypervisor (forXen)
Deflate balloon: Guest will have more available memory
It is controlled by the currentMemory and memory options.
38 Virtio Driver SLES 12 SP5

<memory unit='KiB'>16777216</memory> <currentMemory unit='KiB'>1048576</currentMemory> [...] <devices> <memballoon model='virtio'/> </devices>
You can also use virsh to change it:
tux > virsh setmem DOMAIN_ID MEMORY in KB
6.1.4 Checking virtio Presence
You can check the virtio block PCI with:
tux > find /sys/devices/ -name virtio*/sys/devices/pci0000:00/0000:00:06.0/virtio0/sys/devices/pci0000:00/0000:00:07.0/virtio1/sys/devices/pci0000:00/0000:00:08.0/virtio2
To nd the block device associated with vdX :
tux > find /sys/devices/ -name virtio* -print -exec ls {}/block 2>/dev/null \;/sys/devices/pci0000:00/0000:00:06.0/virtio0/sys/devices/pci0000:00/0000:00:07.0/virtio1/sys/devices/pci0000:00/0000:00:08.0/virtio2vda
To get more information on the virtio block:
tux > udevadm info -p /sys/devices/pci0000:00/0000:00:08.0/virtio2P: /devices/pci0000:00/0000:00:08.0/virtio2E: DEVPATH=/devices/pci0000:00/0000:00:08.0/virtio2E: DRIVER=virtio_blkE: MODALIAS=virtio:d00000002v00001AF4E: SUBSYSTEM=virtio
To check all virtio drivers being used:
tux > find /sys/devices/ -name virtio* -print -exec ls -l {}/driver 2>/dev/null \;/sys/devices/pci0000:00/0000:00:06.0/virtio0lrwxrwxrwx 1 root root 0 Jun 17 15:48 /sys/devices/pci0000:00/0000:00:06.0/virtio0/driver -> ../../../../bus/virtio/drivers/virtio_console/sys/devices/pci0000:00/0000:00:07.0/virtio1lrwxrwxrwx 1 root root 0 Jun 17 15:47 /sys/devices/pci0000:00/0000:00:07.0/virtio1/driver -> ../../../../bus/virtio/drivers/virtio_balloon
39 Virtio Driver SLES 12 SP5

/sys/devices/pci0000:00/0000:00:08.0/virtio2lrwxrwxrwx 1 root root 0 Jun 17 14:35 /sys/devices/pci0000:00/0000:00:08.0/virtio2/driver -> ../../../../bus/virtio/drivers/virtio_blk
6.1.5 Find Device Driver Options
Virtio devices and other drivers have various options. To list all of them, use the help parameterof the qemu-system-ARCH command.
tux > qemu-system-x86_64 -device virtio-net,helpvirtio-net-pci.ioeventfd=on/offvirtio-net-pci.vectors=uint32virtio-net-pci.indirect_desc=on/offvirtio-net-pci.event_idx=on/offvirtio-net-pci.any_layout=on/off.....
6.2 Cirrus Video Driver
To get 16-bit color, high compatibility and better performance it is recommended to use thecirrus video driver.
Note: libvirtlibvirt ignores the vram value because video size has been hardcoded in QEMU.
<video> <model type='cirrus' vram='9216' heads='1'/></video>
6.3 Better Entropy
Virtio RNG (random number generator) is a paravirtualized device that is exposed as a hardwareRNG device to the guest. On the host side, it can be wired up to one of several sources of entropy(including a real hardware RNG device and the host's /dev/random ) if hardware support doesnot exist. The Linux kernel contains the guest driver for the device from version 2.6.26 andhigher.
40 Cirrus Video Driver SLES 12 SP5

The system entropy is collected from various non-deterministic hardware events and is mainlyused by cryptographic applications. The virtual random number generator device (paravirtual-ized device) allows the host to pass through entropy to VM Guest operating systems. This resultsin a better entropy in the VM Guest.
To use Virtio RNG, add an RNG device in virt-manager or directly in the VM Guest's XMLconfiguration:
<devices> <rng model='virtio'> <backend model='random'>/dev/random</backend> </rng></devices>
The host now should used /dev/random :
tux > lsof /dev/randomqemu-syst 4926 qemu 6r CHR 1,8 0t0 8199 /dev/random
On the VM Guest, the source of entropy can be checked with:
tux > cat /sys/devices/virtual/misc/hw_random/rng_available
The current device used for entropy can be checked with:
tux > cat /sys/devices/virtual/misc/hw_random/rng_currentvirtio_rng.0
You should install the rng-tools package on the VM Guest, enable the service, and start it.Under SLE12 do the following:
root # zypper in rng-toolsroot # systemctl enable rng-toolsroot # systemctl start rng-tools
6.4 Disable Unused Tools and Devices
Per host, use one virtualization technology only. For example, do not use KVM and Containerson the same computer. Otherwise, you may nd yourself with a reduced amount of availableresources, increased security risk and a longer software update queue. Even when the amountof resources allocated to each of the technologies is configured carefully, the host may sufferfrom reduced overall availability and degraded performance.
41 Disable Unused Tools and Devices SLES 12 SP5
Minimize the amount of software and services available on hosts. Most default installations ofoperating systems are not optimized for VM usage. Install what you really need and remove allother components in the VM Guest.
Windows* Guest:
Disable the screen saver
Remove all graphical effects
Disable indexing of hard disks if not necessary
Check the list of started services and disable the ones you do not need
Check and remove all unneeded devices
Disable system update if not needed, or configure it to avoid any delay while rebootingor shutting down the host
Check the Firewall rules
Schedule backups and anti-virus updates appropriately
Install the VMDP (https://www.suse.com/products/vmdriverpack/) paravirtualized driverfor best performance
Check the operating system recommendations, such as on the Microsoft Windows*
7 better performance (http://windows.microsoft.com/en-us/windows/optimize-windows-bet-
ter-performance#optimize-windows-better-performance=windows-7) Web page.
Linux Guest:
Remove or do not start the X Window System if not necessary
Check the list of started services and disable the ones you do not need
Check the OS recommendations for kernel parameters that enable better performance
Only install software that you really need
Optimize the scheduling of predictable tasks (system updates, hard disk checks, etc.)
42 Disable Unused Tools and Devices SLES 12 SP5

6.5 Updating the Guest Machine Type
QEMU machine types define details of the architecture that are particularly relevant for migra-tion and session management. As changes or improvements to QEMU are made, new machinetypes are added. Old machine types are still supported for compatibility reasons, but to takeadvantage of improvements, we recommend to always migrate to the latest machine type whenupgrading.
Changing the guest's machine type for a Linux guest will mostly be transparent. For Windows*guests, we recommend to take a snapshot or backup of the guest—in case Windows* has issueswith the changes it detects and subsequently the user decides to revert to the original machinetype the guest was created with.
Note: Changing the Machine TypeRefer to Book “Virtualization Guide”, Chapter 14 “Configuring Virtual Machines”, Section 14.10
“Changing the Machine Type with virsh” for documentation.
7 VM Guest-Specific Configurations and Settings
7.1 ACPI Testing
The ability to change a VM Guest's state heavily depends on the operating system. It is veryimportant to test this feature before any use of your VM Guests in production. For example,most Linux operating systems disable this capability by default, so this requires you to enablethis operation (mostly through PolKit).
ACPI must be enabled in the guest for a graceful shutdown to work. To check if ACPI is enabled,run:
tux > virsh dumpxml VMNAME | grep acpi
If nothing is printed, ACPI is not enabled for your machine. Use virsh edit to add the followingXML under <domain>:
<features> <acpi/></features>
43 Updating the Guest Machine Type SLES 12 SP5

If ACPI was enabled during a Windows Server* guest installation, it is not sufficient to turn it onin the VM Guest configuration only. For more information, see https://support.microsoft.com/en-
us/kb/309283 .
Regardless of the VM Guest's configuration, a graceful shutdown is always possible from withinthe guest operating system.
7.2 Keyboard Layout
Though it is possible to specify the keyboard layout from a qemu-system-ARCH command, it isrecommended to configure it in the libvirt XML le. To change the keyboard layout whileconnecting to a remote VM Guest using VNC, you should edit the VM Guest XML configurationle. For example, to add an en-us keymap, add in the <devices> section:
<graphics type='vnc' port='-1' autoport='yes' keymap='en-us'/>
Check the vncdisplay configuration and connect to your VM Guest:
tux > virsh vncdisplay sles12 127.0.0.1:0
7.3 Spice default listen URL
If no network interface other than lo is assigned an IPv4 address on the host, the default addresson which the spice server listens will not work. An error like the following one will occur:
tux > virsh start sles12error: Failed to start domain sles12error: internal error: process exited while connecting to monitor: ((null):26929): Spice-Warning **: reds.c:2330:reds_init_socket: getaddrinfo(127.0.0.1,5900): Address family for hostname not supported2015-08-12T11:21:14.221634Z qemu-system-x86_64: failed to initialize spice server
To x this, you can change the default spice_listen value in /etc/libvirt/qemu.confusing the local IPv6 address ::1 . The spice server listening address can also be changed ona per VM Guest basis, use virsh edit to add the listen XML attribute to the graphicstype='spice' element:
<graphics type='spice' listen='::1' autoport='yes'/>>
44 Keyboard Layout SLES 12 SP5

7.4 XML to QEMU command line
Sometimes it could be useful to get the QEMU command line to launch the VM Guest from theXML le.
tux > virsh domxml-to-native 1 qemu-argv 2 SLE12.xml 3
1 Convert the XML le in domain XML format to the native guest configuration
2 For the QEMU/KVM hypervisor, the format argument needs be qemu-argv
3 Domain XML le to use
tux > sudo virsh domxml-to-native qemu-argv /etc/libvirt/qemu/SLE12.xmlLC_ALL=C PATH=/usr/local/sbin:/usr/local/bin:/usr/sbin:/usr/bin:/sbin:/bin \ QEMU_AUDIO_DRV=none /usr/bin/qemu-system-x86_64 -name SLE12 -machine \ pc-i440fx-2.3,accel=kvm,usb=off -cpu SandyBridge -m 4048 -realtime \ mlock=off -smp 4,sockets=4,cores=1,threads=1 -uuid 8616d00f-5f05-4244-97cc-86aeaed8aea7 \ -no-user-config -nodefaults -chardev socket,id=charmonitor,path=/var/lib/libvirt/qemu/SLE12.monitor,server,nowait \ -mon chardev=charmonitor,id=monitor,mode=control -rtc base=utc,driftfix=slew \ -global kvm-pit.lost_tick_policy=discard -no-hpet \ -no-shutdown -global PIIX4_PM.disable_s3=1 -global PIIX4_PM.disable_s4=1 \ -boot strict=on -device ich9-usb-ehci1,id=usb,bus=pci.0,addr=0x4.0x7 \ -device ich9-usb-uhci1,masterbus=usb.0,firstport=0,bus=pci.0,multifunction=on,addr=0x4 \ -device ich9-usb-uhci2,masterbus=usb.0,firstport=2,bus=pci.0,addr=0x4.0x1 \ -device ich9-usb-uhci3,masterbus=usb.0,firstport=4,bus=pci.0,addr=0x4.0x2 \ -drive file=/var/lib/libvirt/images/SLE12.qcow2,if=none,id=drive-virtio-disk0,format=qcow2,cache=none \ -device virtio-blk-pci,scsi=off,bus=pci.0,addr=0x6,drive=drive-virtio-disk0,id=virtio-disk0,bootindex=2 \ -drive if=none,id=drive-ide0-0-1,readonly=on,format=raw \ -device ide-cd,bus=ide.0,unit=1,drive=drive-ide0-0-1,id=ide0-0-1 -netdev tap,id=hostnet0 \ -device virtio-net-pci,netdev=hostnet0,id=net0,mac=52:54:00:28:04:a9,bus=pci.0,addr=0x3,bootindex=1 \ -chardev pty,id=charserial0 -device isa-serial,chardev=charserial0,id=serial0 \ -vnc 127.0.0.1:0 -device cirrus-vga,id=video0,bus=pci.0,addr=0x2 \ -device virtio-balloon-pci,id=balloon0,bus=pci.0,addr=0x5 -msg timestamp=on
45 XML to QEMU command line SLES 12 SP5

7.5 Change Kernel Parameters at Boot Time
7.5.1 SUSE Linux Enterprise 11
To change the value for SLE 11 products at boot time, you need to modify your /boot/grub/menu.lst le by adding the OPTION=parameter . Then reboot your system.
7.5.2 SUSE Linux Enterprise 12
To change the value for SLE 12 products at boot time, you need to modify your /etc/de-fault/grub le. Find the variable starting with GRUB_CMDLINE_LINUX_DEFAULT and add atthe end OPTION=parameter (or change it with the correct value if it is already available).
Now you need to regenerate your grub2 configuration:
# grub2-mkconfig -o /boot/grub2/grub.cfg
Then reboot your system
7.6 Add a Device to an XML Configuration
To create a new VM Guest based on an XML le, you can specify the QEMU command line usingthe special tag qemu:commandline . For example, to add a virtio-balloon-pci, add this block atthe end of the XML configuration le (before the </domain> tag):
<qemu:commandline> <qemu:arg value='-device'/> <qemu:arg value='virtio-balloon-pci,id=balloon0'/></qemu:commandline>
8 Hypervisors Compared to ContainersTABLE 4: HYPERVISORS COMPARED TO CONTAINERS
Features Hypervisors Containers
Technologies Emulation of a physical com-puting environment
Use kernel host
46 Change Kernel Parameters at Boot Time SLES 12 SP5

Features Hypervisors Containers
System layer level Managed by a virtualizationlayer (Hypervisor)
Rely on kernel namespacesand cgroups
Level (layer) Hardware level Software level
Virtualization mode available FV or PV None, only user space
Security Strong WarningSecurity is very low
Confinement Full isolation WarningHost kernel (OS mustbe compatible withkernel version)
Operating system Any operating system Only Linux (must be "kernel"compatible)
Type of system Full OS needed Scope is an instance of Linux
Boot time Slow to start (OS delay) Really quick start
Overhead High Very low
Efficiency Depends on OS Very efficient
Sharing with host WarningComplex because ofisolation
Sharing is easy (host seeseverything; container sees itsown objects)
Migration Supports migration (livemode)
WarningNot possible
47 Hypervisors Compared to Containers SLES 12 SP5

8.1 Getting the Best of Both Worlds
Even if the above table seems to indicate that running a single application in a highly secure wayis not possible, virt-sandbox will allow running a single application in a KVM guest, startingwith SUSE Linux Enterprise Server 12 SP1. virt-sandbox bootstraps any command within aLinux kernel with a minimal root le system.
The guest root le system can either be the root le system mounted read-only or a disk image.The following steps will show how to set up a sandbox with qcow2 disk image as root le system.
1. Create the disk image using qemu-img :
root # qemu-img create -f qcow2 rootfs.qcow2 6G
2. Format the disk image:
root # modprobe nbd 1
root # /usr/bin/qemu-nbd --format qcow2 -n -c /dev/nbd0 $PWD/test-base.qcow2 2
root # mkfs.ext3 /dev/nbd0 3
1 Make sure the nbd module is loaded: it is not loaded by default and will only be usedto format the qcow image.
2 Create an NBD device for the qcow2 image. This device will then behave like anyother block device. The example uses /dev/nbd0 but any other free NBD device willwork.
3 Format the disk image directly. Note that no partition table has been created: virt-sandbox considers the image to be a partition, not a disk.The partition formats that can be used are limited: the Linux kernel bootstrappingthe sandbox needs to have the corresponding features built in. The Ext4 module isalso available at the sandbox start-up time.
3. Now populate the newly formatted image:
root # guestmount -a base.qcow2 -m /dev/sda:/ /mnt 1
root # zypper --root /mnt ar cd:///?devices=/dev/dvd SLES12_DVDroot # zypper --root /mnt in -t pattern Minimal 2
root # guestunmount /mnt 3
1 Mount the qcow2 image using the guestfs tools.
48 Getting the Best of Both Worlds SLES 12 SP5

2 Use Zypper with the --root parameter to add a SUSE Linux Enterprise Server repos-itory and install the Minimal pattern in the disk image. Any additional package orconfiguration change should be performed in this step.
Note: Using backing chainsTo share the root le system between several sandboxes, create qcow2 imageswith a common disk image as backing chain as described in Section 5.2, “Overlay
Disk Images”.
3 Unmount the qcow2 image.
4. Run the sandbox, using virt-sandbox . This command has many interesting options, readits man page to discover them all. The command can be run as root or as an unprivilegeduser.
root # virt-sandbox -n NAME \ -m host-image:/=$PWD/rootfs.qcow2 \ 1
-m host-bind:/srv/www=/guests/www \ 2
-m ram:/tmp=100MiB \ -m ram:/run=100MiB \ 3
-N source=default,address=192.168.122.12/24 \ 4
-- \ /bin/sh
1 Mount the created disk image as the root le system. Note that without any imagebeing mounted as / , the host root le system is read-only mounted as the guest one.The host-image mount is not reserved for the root le system, it can be used to mountany disk image anywhere in the guest.
2 The host-bind mount is pretty convenient for sharing les and directories betweenthe host and the guest. In this example the host directory /guests/www is mountedas /srv/www in the sandbox.
3 The RAM mounts are defining tmpfs mounts in the sandbox.
4 The network uses a network defined in libvirt. When running as an unprivileged user,the source can be omitted, and the KVM user networking feature will be used. Usingthis option requires the dhcp-client and iproute2 packages, which are part ofthe SUSE Linux Enterprise Server Minimal pattern.
49 Getting the Best of Both Worlds SLES 12 SP5

9 Xen: Converting a Paravirtual (PV) Guest to a FullyVirtual (FV/HVM) Guest
This chapter explains how to convert a Xen paravirtual machine into a Xen fully virtualizedmachine.
PROCEDURE 11: GUEST SIDE
In order to start the guest in FV mode, you have to run the following steps inside the guest.
1. Prior to converting the guest, apply all pending patches and reboot the guest.
2. FV machines use the -default kernel. If this kernel is not already installed, install thekernel-default package (while running in PV mode).
3. PV machines typically use disk names such as vda* . These names must be changed to theFV hd* syntax. This change must be done in the following les:
/etc/fstab
/boot/grub/menu.lst (SLES 11 only)
/boot/grub*/device.map
/etc/sysconfig/bootloader
/etc/default/grub (SLES 12 and later; only)
Note: Prefer UUIDsYou should use UUIDs or logical volumes within your /etc/fstab . Using UUIDsimplifies using attached network storage, multipathing, and virtualization. To ndthe UUID of your disk use the command blkid .
4. To avoid any error regenerating the initrd with the required modules you can create asymlink from /dev/hda2 to /dev/xvda2 etc. by using the ln :
ln -sf /dev/xvda2 /dev/hda2ln -sf /dev/xvda1 /dev/hda1.....
50 Xen: Converting a Paravirtual (PV) Guest to a Fully Virtual (FV/HVM) Guest SLES 12 SP5
5. PV and FV machines use different disk and network driver modules. These FV modulesmust be added to the initrd manually. The expected modules are xen-vbd (for disk) andxen-vnif (for network). These are the only PV drivers for a fully virtualized VM Guest.All other modules, such as ata_piix , ata_generic and libata , should be added au-tomatically.
Tip: Adding Modules to the initrd
On SLES 11, you can add modules to the INITRD_MODULES line in the /etc/sysconfig/kernel le. For example:
INITRD_MODULES="xen-vbd xen-vnif"
Run mkinitrd to build a new initrd containing the modules.
On SLES 12, open or create /etc/dracut.conf.d/10-virt.conf and addthe modules with force_drivers by adding a line as in the example below(mind the leading whitespace):
force_drivers+=" xen-vbd xen-vnif"
Run dracut -f --kver KERNEL_VERSION-default to build a new initrd (forthe -default version of the kernel) that contains the required modules.
Note: Find Your Kernel VersionUse the uname -r command to get the current version used on yoursystem.
6. Before shutting down the guest, set the default boot option to the -default kernel usingyast bootloader .
7. Under SUSE Linux Enterprise Server 11, if you have an X server running on your guest,you need to adjust the /etc/X11/xorg.conf le in order to adjust the X driver. Searchfor fbdev and change to cirrus .
Section "Device" Driver "cirrus" ......
51 Xen: Converting a Paravirtual (PV) Guest to a Fully Virtual (FV/HVM) Guest SLES 12 SP5
EndSection
Note: SUSE Linux Enterprise Server 12 and XorgUnder SUSE Linux Enterprise Server 12, Xorg will automatically adjust the driverneeded to be able to get a working X server.
8. Shut down the guest.
PROCEDURE 12: HOST SIDE
The following steps explain the action you have to perform on the host.
1. To start the guest in FV mode, the configuration of the VM must be modified to matchan FV configuration. Editing the configuration of the VM can easily be done using virshedit [DOMAIN] . The following changes are recommended:
Make sure the machine, the type and the loader entries in the OS section arechanged from xenpv to xenfv . The updated OS section should look similar to:
<os> <type arch='x86_64' machine='xenfv'>hvm</type> <loader>/usr/lib/xen/boot/hvmloader</loader> <boot dev='hd'/></os>
In the OS section remove anything that is specific to PV guest:
<bootloader>pygrub</bootloader>
<kernel>/usr/lib/grub2/x86_64-xen/grub.xen</kernel>
<cmdline>xen-fbfront.video=4,1024,768</cmdline>
In the devices section, add the qemu emulator as:
<emulator>/usr/lib/xen/bin/qemu-system-i386</emulator>
Update the disk configuration so the target device and bus use the FV syntax. Thisrequires replacing the xen disk bus with ide , and the vda target device with hda .The changes should look similar to:
<target dev='hda' bus='ide'/>
52 Xen: Converting a Paravirtual (PV) Guest to a Fully Virtual (FV/HVM) Guest SLES 12 SP5

Change the bus for the mouse and keyboard from xen to ps2 . Also add a new USBtablet device:
<input type='mouse' bus='ps2'/> <input type='keyboard' bus='ps2'/><input type='tablet' bus='usb'/>
Change the console target type from xen to serial :
<console type='pty'> <target type='serial' port='0'/></console>
Change the video configuration from xen to cirrus , with 8 M of VRAM:
<video> <model type='cirrus' vram='8192' heads='1' primary='yes'/></video>
If desired, add acpi and apic to the features of the VM:
<features> <acpi/> <apic/></features>
2. Start the guest (using virsh or virt-manager ). If the guest is running kernel-default (asverified through uname -a ), the machine is running in Fully Virtual mode.
Note: guestfs-toolsTo script this process, or work on disk images directly, you can use the suite describedin Book “Virtualization Guide”, Chapter 17 “libguestfs”, Section 17.3 “Guestfs Tools”. Numeroustools exist there to help modify disk images.
10 External ReferencesIncreasing memory density using KSM (https://kernel.org/doc/ols/2009/ols2009-
pages-19-28.pdf)
linux-kvm.org KSM (http://www.linux-kvm.org/page/KSM)
53 External References SLES 12 SP5
KSM's kernel documentation (https://www.kernel.org/doc/Documentation/vm/ksm.txt)
ksm - dynamic page sharing driver for linux v4 (https://lwn.net/Articles/329123/)
Memory Ballooning (http://www.espenbraastad.no/post/memory-ballooning/)
libvirt virtio (https://wiki.libvirt.org/page/Virtio)
CFQ's kernel documentation (https://www.kernel.org/doc/Documentation/block/cfq-
iosched.txt)
Documentation for sysctl (https://www.kernel.org/doc/Documentation/sysctl/kernel.txt)
LWN Random Number (https://lwn.net/Articles/525459/)
Dr. Khoa Huynh, IBM Linux Technology Center (http://events.linuxfoundation.org/sites/
events/files/slides/CloudOpen2013_Khoa_Huynh_v3.pdf)
Kernel Parameters (https://git.kernel.org/cgit/linux/kernel/git/torvalds/linux.git/plain/Docu-
mentation/admin-guide/kernel-parameters.txt)
Huge pages Administration (Mel Gorman) (https://lwn.net/Articles/374424/)
kernel hugetlbpage (https://www.kernel.org/doc/Documentation/vm/hugetlbpage.txt)
54 External References SLES 12 SP5