the-magpi-se1-en-201412.pdf - McLibre.org
132
ISSUE SE1 - 2014 A Magazine for Raspberry Pi Users http://www.themagpi.com Raspberry Pi is a trademark of The Raspberry Pi Foundation. This magazine was created using a Raspberry Pi computer. G G e e t t p p r r i i n n t t e e d d c c o o p p i i e e s s a a t t t t h h e e m m a a g g p p i i . . c c o o m m I I n n t t e e r r n n e e t t R R a a d d i i o o R R e e t t r r o o G G a a m m i i n n g g P P h h o o t t o o g g r r a a p p h h y y C C a a t t c c h h U U p p T T V V R R o o b b o o t t A A r r m m M M i i n n e e c c r r a a f f t t P P r r i i n n t t i i n n g g . . . . . . a a n n d d m m u u c c h h m m o o r r e e
-
Upload
khangminh22 -
Category
Documents
-
view
1 -
download
0
Transcript of the-magpi-se1-en-201412.pdf - McLibre.org

ISSUE SE1 - 2014
AA MMaaggaazziinnee ffoorr RRaassppbbeerrrryy PPii UUsseerrss
hhttttpp::////wwwwww..tthheemmaaggppii..ccoommRRaassppbbeerrrryy PPii iiss aa ttrraaddeemmaarrkk ooff TThhee RRaassppbbeerrrryy PPii FFoouunnddaattiioonn..TThhiiss mmaaggaazziinnee wwaass ccrreeaatteedd uussiinngg aa RRaassppbbeerrrryy PPii ccoommppuutteerr..
GGeett pprriinntteedd ccooppiieess
aatt tthheemmaaggppii..ccoomm
IInntteerrnneett RRaaddiioo
RReettrroo GGaammiinngg
PPhhoottooggrraapphhyy
CCaattcchh UUpp TTVV
RRoobboott AArrmm
MMiinneeccrraafftt
PPrriinnttiinngg
......aanndd mmuucchh mmoorree

Ash Stone - Chief Editor / Administration
Ian McAlpine - Issue Editor / Layout / Testing
W.H. Bell - Administration / Testing
Bryan Butler - Page Design / Graphics
Matt Judge - Website
Nick Hitch - Administration
The MagPi Team
Colin Deady - Testing / Proof Reading
Aaron Shaw - Administration
Dougie Lawson - Testing
Age-Jan (John) Stap - Testing
Tim Cox - Testing
Claire Price - Testing
2
SE1
Welcome to this Special Edition issue of The MagPi - a whopping 1 32 pages of articles taken from the
past 29 issues. This is not a "best of" issue.. . there are many, many other fantastic articles in every issue
of The MagPi. Instead we consider this Special Edition a taster of what you can find in every issue of
The MagPi, plus it is a great place to start if you have recently got a Raspberry Pi but are not sure what
to do with it. Whether you are 9 or 92, there is going to be something here to interest you.
The Raspberry Pi is a very versati le computer that can be used to learn a variety of different
programming languages, bui ld simple or complicated electronics projects and even control autonomous
vehicles. Getting to grips with the Raspberry Pi, in al l of its possible applications, introduces many ski l ls
that are vital in industry and research. I t is also a whole lot of fun for hobbyists!
This Special Edition contains some excel lent Scratch and Python programming articles that are suitable
for the complete beginner. They introduce concepts that can be expanded and implemented in other
programming languages. There are also several hardware projects. We introduce you to the GPIO with
simple buttons and LEDs, then explain how to control your garage door and a robot arm.
The Raspberry Pi camera is a popular addition to the Raspberry Pi and we have several articles that
show you how to get the best out of this device. Media is another popular topic and we explain how the
Raspberry Pi can be used to l isten to internet radio, watch TV programmes plus how to 'get your groove
on' with Sonic Pi.
Since the first issue of The MagPi appeared in May 201 2, we have produced over 1 ,200 pages of
content, created by 1 00+ different authors. There have also been over 50 volunteers who helped layout
the magazine, tested the hardware and code plus proof read the text. Hundreds of hours of work goes
into creating each issue of The MagPi, for your enjoyment and education.. . and it's free!
I f you want to know when each issue of The MagPi is avai lable, we invite you to join the 5,000+ other
people who are fol lowing us on Facebook at http://www.facebook.com/MagPiMagazine.
We hope you enjoy this col lection as much as we did putting it together. Thank you, from everyone at
The MagPi.

3
4 BEGINNERS GUIDEWhere can I get help? Answers to common questions
7Racing game, Frogger, Simon, GPIO interfacing, fractals, encryption, projecti le game, Mars lander
SCRATCH PROGRAMMING
Programming Minecraft, Minecraft and the GPIO, adding QR codes32 MINECRAFT
44The future of young hackers?AMY MATHER INTERVIEW
Introduction to the GPIO with buttons, switches and LEDs
PHYSICAL COMPUTING80
TV AND RADIO48Use your Raspberry Pi to watch TV and listen to internet radio
Arcade emulation, using game control lers, El ite, Python game58
GAMING
1 04How to use the Raspberry Pi camera plus time-lapse videoRASPBERRY PI CAMERA
A look at the diverse range of applications in the Pi Store
PI STORE76
88Garage door interface, "Magic Wand", control l ing a robot arm
HARDWARE PROJECTS
1 00Connect your Raspberry Pi to a printer
PRINTING
1 1 9Learn to program video gamesALGOID
1 24Programming Christmas carols plus get your groove on with samples, synths and studio effectsSONIC PI
http://www.themagpi.com
Contents

4
SKILL LEVEL : BEGINNER
Adrian Harper
MagPi Writer
Where can I get help?
There are numerous guides to getting started
with a Raspberry Pi that cover the basics of
setting up your new computer with the
recommended Raspbian Wheezy operating
system, running through raspi-config etc.
However, most setup guides stop once the
system boots into the windows style interface of
LXDE.
I regularly encourage people to buy and use
Raspberry Pis, especial ly if they have kids, but
time and again I hear people asking "Ok I'm at
the desktop, what now?", and "How do I do such
and such?".
The official forums at raspberrypi.org are a great
place to start looking for solutions to problems or
questions that you might have, though they can
be a bit daunting for a beginner. The search
functions on the forum are excel lent, so please
take a few minutes to search the existing posts
for answers to your questions before starting a
new thread.
The web offers some exceptional free user
guides that go into great detai l to cover the
instal lation of Raspbian Wheezy on an SD card
from Windows, OSX and Linux. Engadget's
Getting Started Guide is especial ly good -
http://engt.co/PZbUpT. These guides offer help
with troubleshooting basic issues as well as
providing ideas for that "What now?" moment
when everything is running and you're staring at
a large raspberry in the middle of the screen. The
Raspberry Pi Guide on the Embedded Linux wiki
is also recommended - http://bit.ly/pJfgMr.
Even with the user guides and forums, it is worth
mentioning the solutions to a few of the most
common questions asked by new Raspberry Pi
owners:
I would like to connect x device to myRaspberry Pi. How can I be sure it isgoing to work?
Unless you l ike the chal lenge of writing drivers
and figuring out why a piece of hardware
connected to your computer does not function as
it should, before buying any peripherals for your
Raspberry Pi, check the l ist of verified
peripherals on the Embedded Linux wiki -
http://bit.ly/Ae6JbF.
Members of the Raspberry Pi community are
extremely active in finding and documenting
which devices work and which don't, so you don't
have to!

5
How do I set my screen resolutionwhen using a monitor connected byVGA / DVI?
With an HDMI connection the Raspberry Pi can
detect and set the resolution correctly (in most
cases) for the screen that is being used. For
those of us that need to connect a monitor using
an HDMI to DVI cable or an HDMI to VGA
convertor box the resolution may need to be set
manually.
While not being as intuitive as selecting a
resolution from a preferences screen, a change
can be easi ly made by editing a config fi le in the
Terminal. To find the correct setting for your
device, look up the resolution l ist on the
Embedded Linux wiki - http://bit.ly/1 1 54mFm .
I t is normally easier to find the correct resolution
in the second list that shows the screen size in
pixels e.g. 1 024 x 768.
These values are valid if
hdmi_group=2 (DMT)
hdmi_mode=13 800x600 120Hz
hdmi_mode=14 848x480 60Hz
hdmi_mode=15 1024x768 43Hz
hdmi_mode=16 1024x768 60Hz
hdmi_mode=17 1024x768 70Hz
hdmi_mode=18 1024x768 75Hz
Make a note of the hdmi_mode=X setting for the
resolution you wish to apply.
Within terminal enter the fol lowing command:
sudo nano /boot/config.txt
This wil l open the configuration fi le in the Nano
editor to al low you to make a change. Scrol l
down the fi le to the comment
# uncomment to force a specific
# HDMI mode (this will force VGA)
Remove the # to uncomment the two lines
hdmi_group and hdmi_mode and then edit
them to read:
hdmi_group=2
hdmi_mode=xx
where xx is the number of the resolution mode
you wish to use. Fol lowing on from my example
above, for a 1 024 x 768 resolution, I would use
the l ine "hdmi_mode=16".
In this example, the relevant section of the
config.txt fi le would look l ike:
hdmi_force_hotplug=1
# uncomment to force a specific
# HDMI mode (this will force VGA)
hdmi_group=2
hdmi_mode=16
# uncomment to force a HDMI mode
# rather than DVI. This can make
# audio work in
# DMT (computer monitor) modes
#hdmi_drive=2
After saving the fi le in Nano (CTRL + X, Y to
confirm and Enter to overwrite) and rebooting
("sudo reboot") your Raspberry Pi should
restart with the new resolution.
Note: If you select a resolution from the first
list on the website, e.g. 720p 60Hz, you must
set hdmi_group to 1.
Where there are multiple resolution settings with
different refresh rates, e.g. 60Hz, 75Hz etc., you
might need to experiment to find the most
suitable setting.
Most computer monitors support refresh rates of
60 and 70 Hz; modern televisions are general ly
higher.

6
Why does the screen lock icon in thebottom right corner of the LXDEscreen not work?
The basic Raspbian Wheezy image does not
come pre-loaded with a screensaver; hence the
lock not functioning and you not being able to
find any screen saver preferences in the
application menu.
Fixing the issue is easy enough; you just need to
instal l the LXDE screen saver from the terminal
by giving the command:
sudo apt-get install xscreensaver
Once instal led, find and launch the screen saver
preferences from your application menu. You
should be immediately prompted that the screen
saver daemon is not running. Click ok to launch it
now.
Within the preferences dialog you can choose
which screen saver the system wil l use, the idle
time before it starts and if/when the system
requires a password to unlock. As soon as the
screen saver daemon is running the screen lock
icon wil l function correctly.
What do I have to do to get my nonUK keyboard to work correctly inLXDE?
Raspi-config does a good job of easi ly setting the
keyboard layout correctly in the console, but
those with non UK keyboard layouts often
complain about their layout setting not working in
LXDE.
The solution to this issue is quite simple as long
you know the two letter country code and layout
variant (if applicable). I f you do not know this
information you can find it easi ly from your
system (assuming you have selected the correct
keyboard settings in Raspi-config) by using the
command:
cat /etc/default/keyboard
and checking the entries XKBLAYOUT and
XKBVARIANT.
# KEYBOARD CONFIGURATION FILE
XKBMODEL="logicda"
XKBLAYOUT="ch"
XKBVARIANT="de_nodeadkeys"
XKBOPTIONS=""
With this information to hand, you can edit the
LXDE autostart configuration fi le to add the l ine
"@setxkbmap XX YY" where XX is the two
letter country code and YY the keyboard variant.
In my case I would edit the fi le by using the
command:
sudo nano
/etc/xdg/lxsession/LXDE/autostart
Then in the Nano editor, append the fol lowing
l ine to the end of the fi le:
@setxkbmap ch de_nodeadkeys
After saving the fi le in Nano and rebooting the
keyboard layout should be correct within LXDE.
I hope that I have given you some pointers to get
started with your Raspberry Pi and the
encouragement to dig into the avai lable
community resources to resolve any small issues
that you have.
For those looking for additional help I can highly
recommend the fol lowing three books that are
avai lable in both print and digital formats:
• Raspberry Pi User Guide by Eben Upton and
Gareth Halfacree - http://goo.gl/44UTXR
• Make:Projects - Getting Started with Raspberry
Pi by Matt Richardson and Shawn Wallace -
http://goo.gl/mMU5ZP
• Programming the Raspberry Pi: Getting Started
with Python by Simon Monk -
http://amzn.to/WyPM97

7
SKILL LEVEL : BEGINNER
W. H. Bell
MagPi Writer
RACING SCRATCHDodging arcade game
Crash, bang, wallop!Create a simple racing car game
One way to start programming is to write simple
video games. Scratch has several handy
functions which speed up the construction of
basic games. This article demonstrates how to
produce a racing car dodging game. The game
can be easi ly extended and the principles can be
used when writing games using Python or C.
The idea of the game is to drive the car around
several objects which scrol l down the screen.
The game ends if the car goes on the grass or
touches one of the objects.
The first step to produce this game is to create orchoose the sprites. The racing car was drawn with theScratch sprite editor. To make the sprite symmetric,half was copied and then mirrored. Once the workingcar has been produced, go to the Costumes tab of thesprite and cl ick on copy. Then cl ick on Edit for thesecond sprite.
The second costume wil l be used for the broken car.The Scratch editor was used to make the car lookbroken. Before writing the script for the car, someobjects are needed. In this case, the ball and the Legopiece were chosen from the Scratch sprite l ibrary. Thel ibrary of sprites can be viewed by cl icking on the foldericon, just below the stage.
8
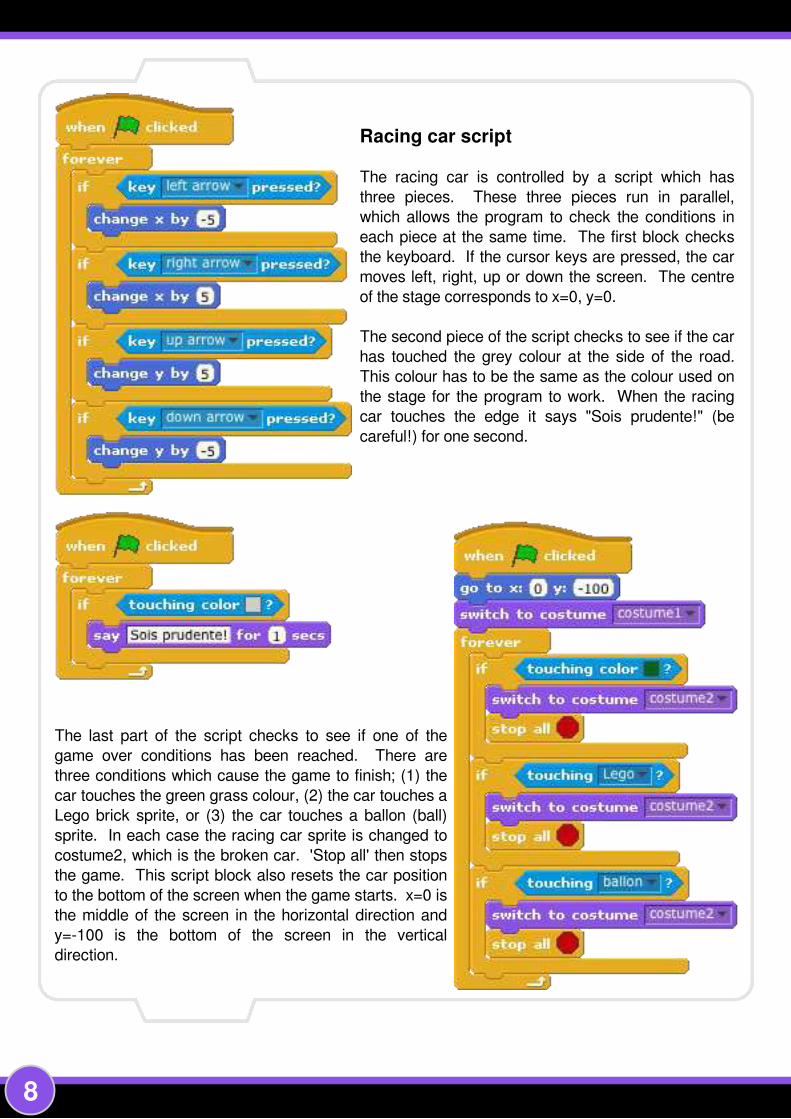
Racing car script
The racing car is control led by a script which has
three pieces. These three pieces run in paral lel ,
which al lows the program to check the conditions in
each piece at the same time. The first block checks
the keyboard. I f the cursor keys are pressed, the car
moves left, right, up or down the screen. The centre
of the stage corresponds to x=0, y=0.
The second piece of the script checks to see if the car
has touched the grey colour at the side of the road.
This colour has to be the same as the colour used on
the stage for the program to work. When the racing
car touches the edge it says "Sois prudente! " (be
careful! ) for one second.
The last part of the script checks to see if one of the
game over conditions has been reached. There are
three conditions which cause the game to finish; (1 ) the
car touches the green grass colour, (2) the car touches a
Lego brick sprite, or (3) the car touches a ballon (bal l)
sprite. In each case the racing car sprite is changed to
costume2, which is the broken car. 'Stop al l ' then stops
the game. This script block also resets the car position
to the bottom of the screen when the game starts. x=0 is
the middle of the screen in the horizontal direction and
y=-1 00 is the bottom of the screen in the vertical
direction.

9
The stage
To complete the program, draw the stage image. Similar to the racing car, half of the stage was
drawn, copied and mirrored. The green and grey colours used in the racing car script were used
for the edge of the road and the grass.
Possible extensions
There are several ways this program could be made better. The lines in the middle of the road
could be changed for another image to create the i l lusion of movement. Sounds could be added
for when the car moves or crashes. Some burning rubber marks could be added when the car
slows down. Instead of a Lego brick and ball , try creating some other cars or cars that drive from
the bottom of the screen to the top.
This game could be used as the basis for other games. For example, vertical scrol l ing space
invaders is quite similar. Try swapping the racing car stage picture for a star field. Then add in
some weird and wacky alien vehicles, which come racing down or drop things on the heroic
space ship.
Lego brick and ball
The lego brick and ball are control led by the
same program. To start writing the script for the
Lego brick, cl ick on the Lego brick sprite icon
under the stage window. Then create the script
given on the left of this page. When the script
has been written, select al l of it and cl ick on
copy. Then click on the ball and paste the script.
For the ball , change the wait statement from 2.2
seconds to 3 seconds. As long as the two wait
statements are not multiples of each other, the
two objects wil l not arrive at the same time.
The script for the Lego brick and ball starts by
hiding the sprite. The sprite is then put at the top
of the screen, pointing down. The script then
enters a loop. Each time the loop runs, the script
waits and then shows the sprite. It is then moved
to the top of the screen. The starting position is
chosen at random, along the x-axis (horizontal
plane). The sprite is then moved down the
screen by 5 units at a time, unti l i t touches the bottom of the stage. When the sprite touches the
bottom of the stage it is hidden and the outer loop moves it back to the top.

In this article we wil l make a very simple game in
Scratch.
Even if you haven't made many games in Scratch
before, you'l l soon be Scratching with the best of
them!
You can download this project from:
http://scratch.mit.edu/projects/racypy/2668257
The first thing to do is delete the cat sprite
because we won't be using that. Right-cl ick on
it and choose "delete".
Next, we need to create a background. To do
this, cl ick on the white square in the "stage"
area on the bottom right of the screen.
Then cl ick on "backgrounds" in the centre
panel and use the bui lt-in paint apl l ication to
make something l ike this.
Next you wil l need some sprites; one that
looks something l ike a frog and six identical
"logs". Cl ick on the star and paint-brush in the
"New Sprite" area, to create your sprites.
My attempt at drawing one was not very
impressive!
1 0

You'l l need something l ike this script for your frog.
The numbers referring to the positions of things
may be different depending on how you drew the
background. I 've used some sounds I found
onl ine, but you could use the ones that come with
Scratch - you'l l need to import them first. Cl ick on
"Sounds" in the centre window.
Now you'l l need six logs, each with a script. In the
pictures, you can see the first pair of scripts.
You'l l need to experiment with changing the y co-
ordinates for the other logs unti l you get them just
right. Remember the frog moves by 75 steps
each leap!
I hope you find this example helpful and go on to
make some fun games yourself. As a chal lenge
why not try to get the frog to ride along the logs?
Log script below. You need one for each log.
In each script change the starting x and y
coordinates and make the same change to
the y coordinate in the second loop.
You want 3 rows of 2 logs. Rows 1 and 3 should
move in the same direction. Can you get row 2 to
move in the opposite direction?
1 1

Make a "Simon" Memory Game!
This time we are going to use Scratch to make a
memory game based on the classic toy: "Simon".
I f you've never heard of it, ask your parents (or
grandparents! ) .
I t's a simple game. Simon plays four notes and
you have to repeat them in order. I f you get it
right, you get another sequence with more notes
to remember - and it goes faster each time!
The original "Simon".
First, make four quarter-circle sprites. I
d id it by making a circle first and then
selecting the bit I needed, discarding the
rest. You' l l need each one to have two
"costumes": one a dark colour and one
l ighter (to look l ike a l ight is on! )
I t's easy to make a second costume. After
you have made your sprite, you' l l see a
tab cal led "costumes" in the center
panel . Cl ick on it and make a new
costume.
That's the hard bit done! Now we can
write some scripts.
I f you get stuck you can download the
project from:
http: //scratch.mit.edu/projects/racypy/26
95321
1 2

The Scripts
Each segment sprite wi l l need these
scripts. You' l l need to vary the numbers
for the notes.
I used: 60, 62, 65 and 67.
This is the main script that
controls the game! I gave it
to the yel low segment sprite,
but it doesn't real ly matter
which sprite owns it.
These scripts control a sprite
that is just a button with
"New Game?" written on it.
1 3

Scratch Controlling GPIO
This article intends to make it as EASY AS PI to get up and running
with GPIO in Scratch and allow your Raspberry Pi to control some
lights and respond to switches and sensors.
This article is based on a post on the Cymplecy blog by Simon
Walters, a primary school ICT teaching assistant and general Scratch
guru! The latest details are at http://simplesi.net/scratchgpio/.
Minimum Requirements – a Raspberry Pi with Raspbian instal led and a working
internet connection, a breadboard, some Light Emitting Diodes (LEDs), some
resistors and some wire connectors. Total cost £5-£10 (not including the Pi) .
How to get a Rapsberry Pi to control the GPIO Pins from Scratch
Your Raspberry Pi needs to be connected to the internet to instal l the software
but internet is not needed to run Scratch GPIO. Copy the text below (starting
at sudo and ending at gpio.sh) and paste that into an LX Terminal window and
run it to download the instal ler:
sudo wget http: //goo. gl/xzJlz7 -O isgh6. sh
And then type, and run: sudo bash isgh6. sh
Whilst the Raspberry Pi is a great tool for the creation of software, using
languages such as Scratch, Python, C etc. , the best way to make it real ly come
al ive and to add even more enjoyment to this cheap, credit card sized
computer is to start playing around with hardware hacking and physical
computing. This involves using the Raspberry Pi to control things l ike LEDs and
respond to switches and sensors. More often than not it also includes
knowledge and learning of both hardware and software in a very interesting
practical environment – not just coding for the sake of coding but, for example,
creating robots and programming them to do cool things!
1 4

This wi l l instal l a l l the necessary extra software and some simple examples.
( I f you do not have internet on your Pi then put your SD card into a card
reader and try using your browser to right-cl ick and save the script direct to
your SD card and then put it back into your Pi and run the second instruction)
Connecting Components Up
Extreme care should be taken when connecting hardware to the GPIO pins as
it can damage your Pi – only do this if you're confident of your abi l i ty to fol low
these instructions correctly. At a minimum you should get a breadboard and
use some female-male 0.1 leads (avai lable from RS/CPC or your local Mapl in) .
Check out some GPIO pin guides to make sure you know what pins do what.
As in Figure 1 above, wire up Pin 1 (3.3V) to (at least) a 330ohm resistor –
connect that resistor to the long lead (this is the positive lead) of an LED and
then connect the other end of the LED to Pin 6 (Ground). This should cause the
LED to l ight up. If i t doesn’t work try reversing your LED, as you probably have
the polarities reversed. Once working, you can now move the red (or whatever
colour you have used) lead from Pin 1 to Pin 11, as in Figure 2 above.
You should now run the special Scratch icon (Scratch GPIO) on your desktop.
This is actual ly a completely normal version of Scratch, it just runs a l ittle
Python background program to al low Scratch to talk to the GPIO. If you have
any Python programs accessing the GPIO running already this could cause
your Pi to crash when opening Scratch GPIO. To avoid this, open an LX Terminal
window and run: sudo killall python
To test out the GPIO control in Scratch, cl ick Fi le>Open and select bl ink11 from
/home/pi/Scratch. Once the program has loaded, cl ick on the Green Flag and
your LED should now bl ink on for 1 second and off for 2 seconds – see
troubleshooting on the Cymplecy blog if this doesn’t happen.
Article bySimonWalters andAaron Shaw
Figure 1 - LED Test Figure 2 - GPIO Test
1 5

The Julia Set
Over the next four pages we are going to use Scratch to draw
some fractal patterns.
Gaston Jul ia, the French mathematician, did the early work on
fractals which is why the patterns we wi l l be creating are known
as " Jul ia Sets" . He was badly injured in World War One, which is
why he wore a patch over the centre of his face.
The program to draw these patterns is actual ly quite simple! Let's
start by deleting the cat sprite and making a new sprite with two
tiny costumes.Gaston Julia
(1893 - 1978)
Cl ick on the paint new sprite button and then zoom in
as far as possible. Erase what's there already and
draw the smal lest possible square (with the rectangle
tool) and fi l l i t in with red.
Cal l this costume "colour" and then make another
one the same, except black, and cal l that "black".
Mandelbrot continues Julia's work on fractals
In the 1970s the Pol ish mathematician Benoit B.
Mandelbrot began to use computers to create images
based on fractal mathematics. His book, "The Fractal
Geometry of Nature", was very popular and introduced
fractals to a much wider audience.
1 6

c = -0.7467 + 0.3515i
The Main Drawing Script
This is the main script that draws the fractal image.
It's crucial to create the variables correctly.
These variables MUST be "For this sprite only":
i terations, ZI , ZI2 , ZR, ZR2, Z_Im, Z_Re, x, y.
These must be "For all sprites" :
C_Im, C_Real , Col_offset, Max_It, X_zoom, Y_zoom.
Here's an example of
the type of images you
wi l l be able to create.
Scratch On!
This al lows the program to draw to several
parts of the screen at the same time which
wi l l speed things up a lot. I 've gone with 20
"strips" , you could try experimenting with
other arrangements.
In the first few l ines of the script, we set up which
area of the screen this sprite wi l l draw on.
This one does a strip 20 pixels wide: from x = -200
to x = -180.
When you have made this script you need
to "dupl icate" it 20 times.
Then change the values for x so that each
sprite does another 20 pixels.
The last sprite should be in charge of
x = 180 to x = 200.
1 7

i - the Imaginary Number
The imaginary number, i, is the square root of -1.
The difficulty with i is that it is impossible to find a "normal"
number that, when multipl ied by itself, becomes -1 .
Descartes did not l ike i and he gave it the name "imaginary
number" as a kind of insult. However, after the work of Euler
and Gauss, i quickly became an accepted part of
mathematics.
Complex Numbers
When we work with i we often use it as part of a "complex number". A complex
number has a real part and an imaginary part.
C = a + bi
In this equation C is a complex number and it is made by adding the real part, a,
to the imaginary part, b, multipl ied by i.
The mathematics of the Jul ia set requires us to use complex numbers. When we
make our fractal images you should picture the x axis of the screen as
representing the real part of the complex number (a) and the y axis as showing us
the value of the imaginary part (b).
Generating a Julia Set
As you wi l l see on the next page, we give the program the values for the real and
imaginary parts of C. Then the sprites visit every "pixel" in the region of the screen we
are drawing on, treating it as a graph of the complex plane (this is what we cal l the
visual isation of complex numbers that I explained above).
The current values for x and y are taken as the initia l real and imaginary parts of Z
(Z_Real and Z_Im). Then we iterate over a function:
z1 = z2 + c
I f the value of the sum of the squares of the real and imaginary parts of z is more than 4,
we consider that this location has "escaped" (if we carried on iterating, the number
would get bigger and bigger) and we use the number of iterations completed so far to
set the colour of the pixel .
I f the values stay lower than 4 within the maximum iterations we have chosen the
location is considered to be part of the Jul ia set and the pixel is coloured black.
The Wikipedia article on the Jul ia set is useful , i f this (rather skimpy) explanation has not
made the maths clear enough.
291 8

Douady's Rabbit
The Green Flag Script
This script is run when the green flag is cl icked. You
can give it to any of the sprites you've made (I 'd
suggest giving it to the first) .
The most important thing is to enter the values of
the real and imaginary part of C.
The colour image lower down on this page is
known as "Douady's Rabbit" and has the fol lowing
values for C:
Real : -0.123
Imaginary: 0.746
Next, you can specify the maximum number of
iterations. I 'd suggest you try about 20 at first. I f
you choose more you' l l get a smoother range of
shades in the picture but it wi l l take longer to draw.
Setting the "zoom" al lows you to focus in on a
smal ler area. A zoom of 1 is "normal size" . You
could see what happens when you enter 2 or 3
instead.
Complex Numbers to try
I f you search on-l ine for Jul ia set fractals you wi l l
find plenty of values for C to use in this program.
Here are a few that I have used whi le testing this
program:
Real : -0.4 Real : -0.8
Imaginary: 0.6 Imaginary: 0.156
Real : -0.1
Imaginary: 0.651
Real : -0.7467
Imaginary: 0.3515
A monochrome image
from an earlier version
of the program.
Download
I f you get stuck, you can get the
code here:
http: //tinyurl .com/gastonjul ia/
1 9

20
SKILL LEVEL : BEGINNER
antiloquax
MagPi Writer
Pretty poor privacy
SUBSTITUTION CIPHER
This program shows you how to implement a "simple substitution" cipher with a reciprocal key. In a reciprocal
key pairs of characters are mapped to each other. This makes l ife easier as we can use the same key to
encipher and decipher messages. The resulting cipher texts are not too difficult to crack, but it's a start!
The first thing to do is make some sprites that wil l be the buttons
we click to make things happen in our program (see the examples
on the right) .
To create a new sprite cl ick the "paint new sprite" button just
below the stage. You can delete the cat!
Here's the script that the "make key" button
activates (the remaining scripts are on the
fol lowing pages). To load a key you have
already made, make the “cipherAlpha” l ist
visible on the stage, then right-cl ick it and
“import” the key from the fi le in which it has
been saved.
Alternatively, cl ick the “make key” button. I t's
vital that your contact has a copy of your key so
that he/she wil l be able to decipher your
message. Right cl ick "cipherAlpha" and choose
"export" to save it to a text fi le for sharing.

21
Sprite 5 loads plain text from the "getText" l ist into a variable
cal led "inputText". I t puts in a "| " character to stand for l ine
endings.
Sprite 6 loads cipher text you've imported into "getText". I t
ignores any spaces (these are put in to separate the cipher
text into 5-character "words") .
Sprite 2 is run when the "encipher" button is cl icked and sprite 3 does the
deciphering. Both cal l the cipher script before outputting the properly
formatted text to the "textOut" l ist.

22
This is the "cipher" script. I t just goes through each character
that is in "inputText". I f the letter is a space, it changes it to a
"~" before enciphering it. (I f we are deciphering the dummy
spaces wil l already have been removed).
I t then looks through the key unti l i t finds the letter. In the key
letters are grouped in pairs. So if the index of the letter is an
even number, the letter is replaced with the next letter in the
l ist. Otherwise it is swapped for the letter before it.
After cal l ing the "cipher" block these scripts prepare the text for output. I f we are preparing cipher text it is
broken up into l ines - each of which can have up to five, five-character cipher "words".
I f we are preparing plain text any "| " symbols result in a newline being added, whi le a "~" is changed into a
space.
The resulting text is then avai lable in "textOut" and you can export to a text fi le if you wish.
Scratch On!
In this example I 've made the
"inputText" variable visible so
you can see that the message
has been loaded.
23
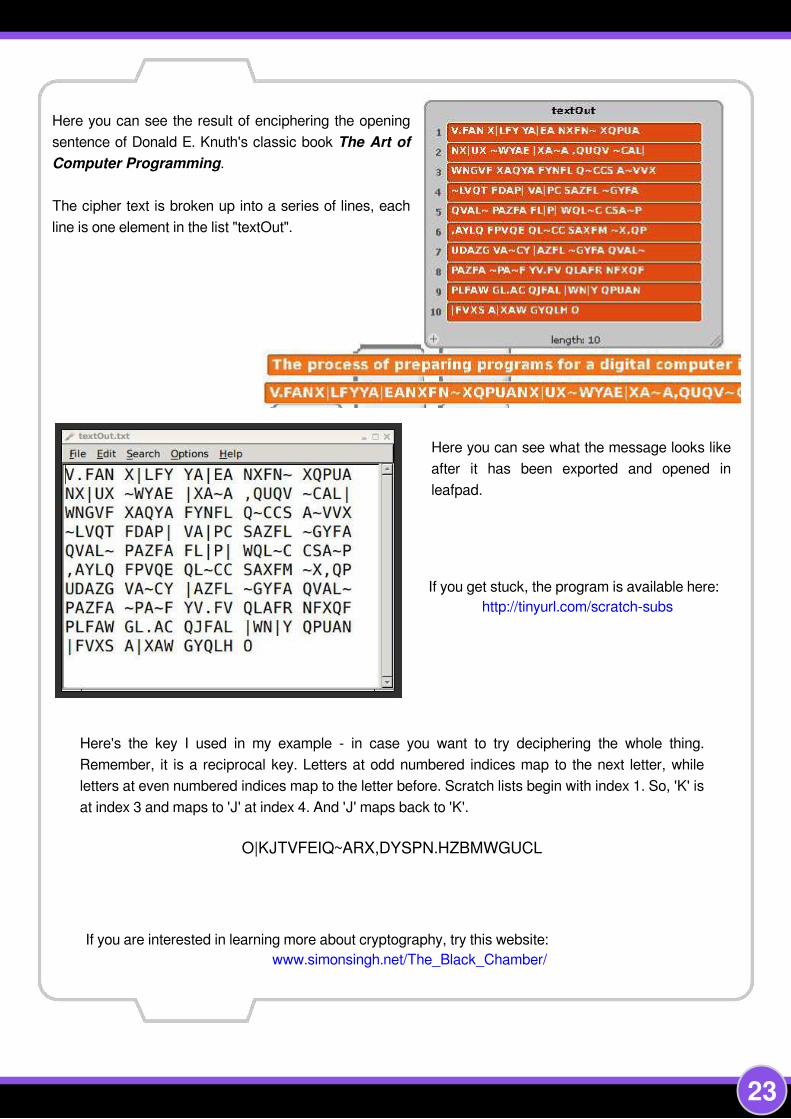
Here you can see the result of enciphering the opening
sentence of Donald E. Knuth's classic book The Art of
ComputerProgramming.
The cipher text is broken up into a series of l ines, each
l ine is one element in the l ist "textOut".
Here you can see what the message looks l ike
after it has been exported and opened in
leafpad.
I f you are interested in learning more about cryptography, try this website:
www.simonsingh.net/The_Black_Chamber/
I f you get stuck, the program is avai lable here:
http://tinyurl .com/scratch-subs
Here's the key I used in my example - in case you want to try deciphering the whole thing.
Remember, it is a reciprocal key. Letters at odd numbered indices map to the next letter, whi le
letters at even numbered indices map to the letter before. Scratch l ists begin with index 1 . So, 'K' is
at index 3 and maps to 'J ' at index 4. And 'J ' maps back to 'K'.
O|KJTVFEIQ~ARX,DYSPN.HZBMWGUCL

24
SKILL LEVEL : BEGINNER
W. H. Bell
MagPi Writer
GOING BALLISTICTarget practice arcade game
Physics of a cannon ball
In this article we wil l create another simple
arcade game. Similar to the racing car game,
there is plenty of scope for expanding or
modifying this game too.
The idea of the game is to try to hit the drum with
the cannon ball . The cannon is control led by the
cursor keys and the spacebar, where the left and
right keys change the angle of the cannon, the up
and down control the initial speed of the ball and
the spacebar fires the cannon.
There are three sprites in this program: the cannon, thecannon ball and the drum. The cannon was drawnusing the rectangle tool. Different shades of grey wereused to give the appearance of a round barrel. Thenthe picture was copied using the Copy button. Theoriginal picture was named ready and the copy wasnamed fired . A muzzle flash was added to the firedcostume.
The cannon ball is a marble taken from the Scratchl ibrary. The Drum is also from the Scratch l ibrary. Bothof these sprites were resized to the correct size.
The gun carriage is part of the stage, where thecannon was positioned on top within the cannon script.

25
Cannon script
The cannon script starts by setting the position and
costume of the cannon to the default. Then the script
initial ises al l of the global variables with 0. The firevariable is used as a boolean, where 0 is false and 1
is true. The start_velocity is the initial velocity
given to the cannon ball , when the ball is fired. The
centre of the cannon is stored in the cannon_x and
cannon_y variables. The cannon_angle is the
angle in degrees, where zero implies that the cannon
barrel is pointing straight up.
After the initial isation, the cannon reacts to either the
cursor keys or the spacebar. Pressing the left and
right cursor keys causes the cannon to rotate one
degree to the left or one degree to the right. Pressing
the up cursor key causes the initial speed given to the
ball to be increased by 0.2, whereas pressing the
down cursor key reduces the speed as long as it is
greater than zero.
Pressing the spacebar
wil l cause the cannon to
fire if fire is also set to
zero. The firevariable is used to
prevent the cannon ball
from being fired when
the cannon ball is in
fl ight. When the
cannon is fired, the
costume of the cannon
is changed to show a
flash. Then the firevariable is set to 1 and
the global variables that
describe the position of
the cannon are set.
After 0.5 seconds the
flash is removed by
resetting the costume.

26
Cannon ball scripts
The cannon ball has two scripts, one to hide the ball
when the green flag is pressed and another to control
the motion of the ball .
When the spacebar is pressed the global variables
cannon_x, cannon_y and cannon_angle are used
to set the position of the ball and its initial velocity.
Unl ike other programming languages that use radians,
Scratch uses degrees for the functions sine and cosine.
The 90 degree offset is used to convert the angle of
cannon, such that zero degrees corresponds to the
cannon pointing horizontal ly to the right. The sine and
cosine functions are then used to set the initial velocity
components.
The cannon ball moves through the air unti l i t touches either the colour green, the edge of the
stage or the drum. While none of these conditions are met, the vertical velocity component is
decremented by 0.05. This decrementation corresponds to the acceleration due to gravity. Next
the current x and y components of the velocity are used to move the ball through the air. The
speed with which the repeat-unti l loop executes corresponds to the time component.
The ball is hidden unless it has completely cleared the cannon barrel. This is achieved by
checking if the ball is not touching grey and is touching the colour of the sky. Lastly, when the
script finishes, the global variable fire is set to zero to allow the cannon to be fired again.

27
Rotating the cannon
In order for the cannon to be rotated around the centre of the cannon sprite, the Set costumecenter button should be cl icked. Then put the crosshairs for both costumes at the middle of the
sprite.
Projectile motion summary
The motion of a projecti le can be split into vertical and horizontal components. Gravity acts in the
vertical direction as a downward acceleration. In the program documented in this article, air
resistance is neglected. Therefore, the horizontal velocity component is constant and the
horizontal distance the projecti le travels is found by multiplying the initial horizontal velocity by the
time it is in the air. The time the projecti le is in the air is determined as the difference between the
start time and when the vertical position is equal to the ground. While the projecti le is in fl ight,
gravity continues to decrement the vertical velocity unti l the projecti le hits the ground. I f the initial
vertical velocity component is small , i t wi l l not take long for gravity to bring the projecti le down.
Notice that within this simple program the vertical position is evaluated in two steps, rather than in
one equation. There is one step to evaluate the change in velocity and another to update the
horizontal position.
The drum script
There is one drum script, which is
launched when the green flag is pressed.
When the ball is launched, the global
variable fire remains set to one unti l
the bal l touches down on the ground or
the drum. Therefore, combining the
fire variable requirement with touching
the ball sprite implies that the program
wil l enter the if statement once for one
cannon ball fl ight. Once the program has entered the if condition, the drum plays a simple sound
and increments the global variable score by 1 0 points.
Possible extensions
The drum could be replaced with other objects that move around to make the game harder. There
could be a time limit for the player to hit al l of the targets with the cannon. The equation of motion
used in this game does not include drag. Drag can be expressed as a constant force for a given
velocity squared. The problem of estimating the drag could be made harder by introducing wind,
which would cause the relative velocity of the ball with respect to the air to be higher.

28
SKILL LEVEL : BEGINNER
W. H. Bell
M agPi Wri ter
GOING BALLISTICSpace arcade game
Learning to land on Mars
Addi ng natural physics processes to games can
make them more real and thri l l i ng to play. I n the
previ ous arti cle, a si mple proj ecti le moti on game
was i ntroduced. The game i ncluded gravi ty and
i ni ti al veloci ty. These concepts can be used for
other types of games too.
Thi s month's game i ntroduces the si mulati on of a
spaceshi p landi ng on a remote planet, where the
landi ng craft obeys the normal laws of physi cs.
I n thi s case, the Lander has rocket motors to
change its di recti on.
The i dea of the game i s to land the spacecraft on thelanding pad. I f the spacecraft lands on the surroundi ngground, then i t wi l l explode. I f the spacecraft does nottouch down on the landi ng platform correctly, then it wi l lexplode too. The spacecraft must be travel l i ng slowlywhen it touches down or i t wi l l be destroyed.
The Lander spri te has three costumes, to show theLander with i ts engi nes on, when crashed, and whenthe engi nes are off. The costume wi th the engi nes offwas copi ed and then modi fied to form the othercostumes. The costumes were drawn on their si des,such that an angle of zero degrees corresponds to thespacecraft poi nti ng strai ght upwards. (M ore detai ls ofthe Scratch system of angles are gi ven i n I ssue 1 7.)

29
The Stage
Two backgrounds were created for the Stage, where the si ze of the landi ng pad and the amount of
surroundi ng red rock was chosen to be di fferent. Once the background i mages had been drawn,
the Lander spri te was resi zed to match landi ng pad by the ri ght cl icki ng the mouse on the Lander
spri te. The colours used for the surroundi ng ground and
the landi ng pad for the two backgrounds were chosen to
be the same, to al low tests based on the colours of the
spri te and the background. Then a simple scri pt was
wri tten to select a random Stage background when the
green flag i s pressed.
Controlling the Lander
The Lander i s control led wi th the left and right arrow keys and the space bar. To prevent the
controls from movi ng the lander when the game i s not taki ng place, a local vari able was created
cal led flying . I f the flying vari able i s set to one, then the controls wi l l change the angle of the
Lander spri te.
Tappi ng on the left arrow causes the Lander to turn 1 5
degrees to the left and tappi ng on the ri ght arrow
causes the lander to turn 1 5 degrees to the ri ght.
The space bar is used to fi re the thrusters, to slow
down the Lander and manoeuvre i t to the landi ng pad.
When the space bar i s pressed, the costume of the
Lander changes to the versi on that shows the engi nes
burni ng. The costume conti nues to show the engi nes
burni ng, whi le the space bar i s pressed. When the
space bar i s released, the costume changes back to
show the engi nes as bei ng off.
Whi le the space bar i s pressed the veloci ty of the
Lander i s i ncreased, accordi ng to i ts current di rection.
The si ne and cosi ne operators are used to calculate
the i ncrease of the x and y veloci ty components usi ng
the di recti on, where the velocity components are
stored i n local vari ables vx and vy respecti vely. The
di recti on i s zero, when the Lander poi nts strai ght
upwards, 1 80 when i t poi nts strai ght downwards,
posi ti ve when i t poi nts to the ri ght and negati ve when i t
poi nts to the left.

30
The Lander in flight
The Lander requi res one more scri pt block, to control
the fl ight of the Lander and to check to see i f i t has
crashed or landed. The scri pt on the left performs thi s
functional ity.
When the green flag i s pressed, the Lander is reset to
poi nt strai ght upwards, the engi nes are turned off and
i ts positi on i s chosen at random along the top of the
screen. The local variables for the x and y veloci ty
components and the fl i ght status are also reset. The
mai n repeat until loop conti nues to run unti l
the flying status has been reset to zero. The
fi rst step wi thi n the loop i s to reduce the vertical
velocity component by a small amount. Thi s
reduction of veloci ty is present to si mulate the
effect of gravi ty on the Lander. The next block
wi thi n the loop checks to see i f the Lander has
touched the surroundi ng ground. I f i t has
touched i t, then the costume i s changed to the
crashed versi on and the flying status i s set to zero. I f i t has not touched the surroundi ng
ground, then the program checks to see i f the landi ng feet have touched the landi ng pad or not. I f
they have touched the landi ng pad, then the verti cal velocity component and the di recti on of the
Lander i s checked. I f the touch down i s not successful, the Lander wi l l be shown as crashed. I f
the landi ng i s successful, then the Lander wi l l say "Landed! ". Whi le the Lander i s not i n contact
with the ground, the posi ti on of the Lander i s updated usi ng the veloci ty components. I n thi s
program, the speed of the loop regulates how fast ti me i s passi ng i n the simulati on.
To make the game harder or easi er, try changi ng the reducti on of the verti cal veloci ty i n the loop
(the effect of gravi ty) or try changi ng the effect of the thrusters. The lander could be gi ven a li mi ted
amount of fuel, by counti ng the number of ti mes the space bar is pressed.

32
SKILL LEVEL : INTERMEDIATE
Martin O'Hanlon
Guest Writer
Minecraft: Pi Edition
The game
Minecraft is a game which has achieved monumental
success - almost 30 mil l ion copies, across al l i ts versions,
have been sold; not bad for a game which doesn’t real ly
have a point! I t is classified as an Indie Sandbox game. I f i t
does have a point it is to make stuff (and people have
real ly made stuff) , from ful ly functioning computers to scale
models of the Starship Enterprise to The MagPi bird!
Now Minecraft has come to the Raspberry Pi and the two
best things about Minecraft: Pi Edition are it is free and
comes with an API - two things you do not get with any
other version of Minecraft (certainly not yet anyway).
Installing
I f you have the latest version of Raspbian then Minecraft
already comes preinstal led. I f you do not have the lastest
Raspbian then let's get going by instal l ing Minecraft and
testing that it works.
Open an LXTerminal window and enter:
cd ~wget https: //s3. amazonaws. com/assets. minecraft. net/pi/minecraft-pi-0. 1. 1. tar. gztar -zxvf minecraft-pi-0. 1. 1. tar. gz
Make a note of /home/pi/mcpi/api/python as we wil l need
that later. Test Minecraft with the fol lowing commands:
cd mcpi. /minecraft-pi
Playing Minecraft
The Raspberry Pi edition of Minecraft is a cut down version
of the pocket edition and currently only offers one playing
mode, Classic, which is al l about exploring and bui lding.
Cl ick 'create world' and start exploring and bui lding.
You control your player with the mouse and keyboard:
Moving - the mouse changes where you look, whi le
the arrow keys move you forward, backward, left
and right.
Up and down - pressing space wil l make you jump
while you are walking. Double tapping wil l start you
flying. While you are flying, space wil l make you
move up and shift wi l l make you go down.
Inventory - you can cycle through your inventory
using the mouse scrol l wheel (or keys 1 -8) and
change the blocks in your immediate inventory (the
strip along the bottom) by pressing E which brings
up all the blocks you can use.

33
Destroy blocks - press (hold) the left mouse button.
Place blocks - press the right mouse button.
Back to menu - press escape.
The API
The API al lows you to write programs which control, alter
and interact with the Minecraft world - unlocking a whole
load of Minecraft hacking. How about creating massive
structures at the cl ick of a button, a bridge which
automatical ly appears under your feet al lowing you to walk
across massive chasms, a game of minesweeper or a
huge clock?
Minecraft is a world of cubes
or blocks, al l with a relative
size of 1 m x 1 m x 1 m. Every
block has a position in the
world of x,y,z. x and z are the
horizontal positions and y is
the vertical.
The API works by changing the ‘server’ , which runs
underneath the game, al lowing you to interact with these
blocks and the player, such as:
Get the player’s position.
Change (or set) the player’s position.
Get the type of block.
Change a block.
Change the camera angle.
Post messages to the player.
Libraries
You can interact with the server directly by sending a
message to it, but the nice people at Mojang also provide
l ibraries for Python and Java which simplify and
standardise using the API. The l ibraries are instal led along
with the game in the ~/mcpi/api/java and ~/mcpi/api/python
directories.
The fol lowing example is written in Python and uses
Mojang’s Python API l ibrary. The first task is to create a
directory for your API program.
API example
1 ) Create directory
mkdir ~/minecraft-magpi
2) Open Idle (or your favourite editor) and create a
program fi le cal led minecraft-magpi. py in the
~/minecraft-magpi directory.
3) Next we import the sys package and add the API
directory to the system path so that Python can find the
Minecraft Python API packages. Note, please choose the
correct path depending if you instal led Minecraft or it came
pre-instal led:
#! /usr/bin/pythonimport syssys. path. insert(1, ' /home/pi/mcpi/api/python' )#sys. path. insert(1, ' /opt/minecraft-pi/api/python' )
We need to import 3 packages to connect to the Minecraft
world, bui ld blocks and introduce delays into our program:
import minecraft. minecraft as mineimport minecraft. block as blockimport time
Next, we need to use the Minecraft class in the Python
l ibrary to create a connection to the game’s server. We wil l
use this object to interact with the game and provide
access to al l the functions. When your program runs the
fol lowing statement, Minecraft wi l l have to be running and
you wil l need to be in a game, otherwise you wil l get errors.
mc = mine. Minecraft. create()
Using our minecraft object, mc, we can then interact with
the game and send the player a message. We wil l also put
a delay in using the time. sleep() function otherwise the
whole program wil l run too fast to see what is going on.
mc. postToChat("Hello Minecraft World")time. sleep(5)

34
Using the program built so far, you can test to make sure
everything is working. Load up Minecraft and create a
world (or enter an existing one). Press ALT+TAB to switch
to your editor. I f you’re using Idle select 'Run Module' from
the Run menu. I f al l has been setup correctly you wil l see
the “Hello Minecraft World” message in the game.
Interacting with the player is done through the player
class of the mc object al lowing us to find and change the
position of the player. The next block of code finds the
player's position using the getPos() command which
returns an object of x,y,z coordinates. The setPos()
command is then used to move the player 50 blocks up by
adding 50 to the player’s y coordinate. We then add a
delay so there is enough time for your player to fal l down to
the ground!
playerPos = mc. player. getPos()mc. player. setPos(playerPos. x, playerPos. y +
50, playerPos. z)mc. postToChat("Don' t look down")time. sleep(5)
You can use the position of the player as a starting point
for interacting with blocks. This way you can find out what
block the player is standing on or place blocks around the
player. There is however a chal lenge as the x,y,z
coordinates returned by the getPos() function are
decimals (aka floats) as the player can be in the middle of
a block. To interact with blocks we need to use whole
numbers (aka integers), so we need to use the function
getTilePos() which returns the block (or ti le) he’s
standing on.
The fol lowing code gets the player's ti le position. I t then
cal ls the Minecraft API ’s getBlock() function to find out
the type of block the player is standing on (by subtracting 1
from the y coordinate) before using setBlock() to create
blocks of the same type the player is standing on around
him. So if your player is standing on DIRT, he wil l end up
with DIRT surrounding him, however if he is standing on
STONE, STONE wil l appear.
playerTilePos = mc. player. getTilePos()blockBelowPlayerType =
mc. getBlock(playerTilePos. x, playerTilePos. y -1, playerTilePos. z)
mc. setBlock(playerTilePos. x + 1,playerTilePos. y + 1, playerTilePos. z,blockBelowPlayerType)
mc. setBlock(playerTilePos. x, playerTilePos. y+ 1, playerTilePos. z + 1, blockBelowPlayerType)
mc. setBlock(playerTilePos. x - 1,playerTilePos. y + 1, playerTilePos. z,blockBelowPlayerType)
mc. setBlock(playerTilePos. x, playerTilePos. y+ 1, playerTilePos. z - 1, blockBelowPlayerType)
mc. postToChat("Trapped you")time. sleep(5)
We have now trapped our player within four blocks
(providing he doesn’t break out! ) . In order to set him free
we need to remove a block. Removing blocks is done
using setBlock() , but rather than making the block sol id
l ike WOOD or STONE we set it to AIR.
mc. setBlock(playerTilePos. x + 1,playerTilePos. y + 1, playerTilePos. z,block. AIR)
mc. postToChat("Be free")time. sleep(5)
A ful l l ist of al l the avai lable blocks can be found in either
the Minecraft API specification or in the block.py module in
the Python API l ibrary ~/mcpi/api/python/mcpi/
block. py.
The API also al lows you to set many blocks at a time,
al lowing you to create cuboids very quickly using the
setBlocks() command. I t works by specifying 2 sets of
x,y,z coordinates between which it then fi l ls the gap with a
certain block you pass as the final parameter. The
fol lowing code wil l create a diamond floor underneath our
player 50 blocks (across) x 1 block (up) x 50 blocks
(along), with our player in the middle (i .e. 25 behind and to
the left, 25 in front and to the right) .

35
mc. setBlocks(playerTilePos. x - 25,playerTilePos. y - 1, playerTilePos. z - 25,playerTilePos. x + 25, playerTilePos. y -1,playerTilePos. z + 25, block. DIAMOND_BLOCK)
mc. postToChat("Now thats a big diamondfloor! ")
To recap on the functions covered in this article:
postToChat(message) - communicate with the
player(s) in the game.
getBlock(x, y, z) - get a block type for a specific
position.
setBlock(x, y, z, blockType, blockData) - set
(change) a block to a specific blockType.
setBlocks(x1 , y1 , z1 , x2, y2, z2, blockType,
blockData) - set lots of blocks al l at the same time
by providing 2 sets of co-ordinates (x, y, z) and fi l l
the gap between with a blockType.
player.getPos() - get the precise position of a
player.
player.setPos(x, y, z) - set (change) the players
position.
player.getTilePos() - get the position of the block
where the player currently is.
There are few other functions avai lable in the API which
should be explored. Using only the small number
discussed in this article it is possible with some
imagination and a small amount of programming
knowledge to create some quite fantastic constructions,
tools and uti l i ties.
I love Minecraft. I t is a tremendously creative game and
with the Raspberry Pi edition’s API it opens up new levels
of creativity and wil l hopeful ly encourage more people to
try their hand at programming.
Creating the Issue 1 1 coverfrom blocks to virtuality
Ian McAlpine created the
impressive Minecraft magpie
on the cover of Issue 1 1 . The
MagPi asked Ian how he
achieved this.
With the Minecraft API instal led
(see main article text) I decided
I wanted to create a large copy
of the magazine's logo that
would be easi ly recognisable in
the game world, using Python. This was my very first
Python program. Coding the magpie rather than bui lding
manually gave me the freedom to place the magpie
anywhere in the Minecraft world. The whole thing was
very experimental, balancing effort in terms of pixelation
while sti l l retaining an obviously recognisable image.
Having identified that I was l imited to eight shades of
black/grey/white and four shades of blue in terms of
Minecraft blocks, that partial ly determined the pixelation.
Using Gimp on my Raspberry Pi, I pixelated The MagPi
magpie image to 43x44 blocks. This seemed to be the
right balance... but sti l l meant manually mapping 1 892
squares to Minecraft blocks! I t could be made smaller
but the pixelation would be more coarse and the magpie
less recognisable.
In Python, the image is represented by a list of l ists (i .e.
a 2-dimensional array). Each cel l in the array was given
a character; 1 -8 for black, white and shades of grey plus
A-D for the shades of blue. 0 represented the "Air" block
type. Five other variables were used; three for the x, y, z
coordinates, one for the angle in the vertical plane (0,
90, 1 80 or 270 degrees) and a variable to indicate if the
magpie should be plotted or deleted. A nested for-loop
iterates through the 2-D array and plots the blocks.
Because some block types cannot be placed in free
space, it is important that you bui ld from the bottom up.
When deleting (i .e. replacing al l blocks with block type
"Air") you need to delete from the top down. I f you delete
from the bottom up some bricks wil l fal l before they can
be deleted thus leaving a pi le of rubble on the ground!
You should take a backup copy of your world before
creating large structures l ike this as you wil l l ikely use
the wrong coordinates. My 1 0 year old daughter Emily
was very unhappy when I obl iterated her vi l lage! Take a
copy of the hidden . minecraft directory in your home
directory (use ls -A to see all hidden fi les in a folder)
plus also the games directory in the mcpi directory.

36
SKILL LEVEL : INTERMEDIATE
W. H. Bell
MagPi Writer
Interfacing Minecraft withPiFace Digital
Minecraft is a very popular game that has more
recently been used as a teaching tool, to
encourage programming. The Raspberry Pi
version of Minecraft is avai lable for free. The
game is packaged with a Python application
programmer interface (API) , which al lows
interactions with players and blocks. An
introduction to this API was given in the previous
article. There are also additional teaching
resources, such as Craig Richardson’s "Python
Programming for Raspberry Pi" book.
The interaction with Minecraft via the Python API
is not l imited to just software. Input/output (I /O)
devices that are connected to a Raspberry Pi
can react to, or produce events in Minecraft.
This opens up a range of possibi l i ties. For
example, the garage door could open when the
Minecraft player goes into the garage or the
doorbel l could be connected to a Minecraft chat
message, etc. Since the Python API sends
commands to the Minecraft server process over
a network, the Raspberry Pi that is interacting
with the Minecraft session could be in the garden
monitoring the weather.
In this article, the Minecraft API is used with the
PiFace Digital expansion board to create some
traps around the selected player.
PiFace Digital
The PiFace Digital expansion board provides a
safe way to connect digital devices to the
Raspberry Pi, via buffered screw terminals.
The board includes two relays that are suitable
for low voltage applications, four switches, eight
digital inputs, eight open col lector outputs and
eight LED indicators. The Raspberry Pi
communicates with the PiFace via the SPI bus
on the 26 pin header. There are Python and
Scratch interfaces that are packaged for easy
instal lation using the Debian package manager.
More information on the PiFace can be found at:
http://www.piface.org.uk/products/piface_digital/

37
PiFace Python interface
Starting from a recent Raspbian image, make
sure that the Raspbian instal lation is up to date:
sudo apt-get updatesudo apt-get upgrade -y
Then start the raspi-config:
sudo raspi-config
Select the "Advanced Options" and choose
"SPI". Then set the value to "Yes", select "Ok"
and "Finish". (The Python l ibrary python-
pifacedigital io is already instal led in the latest
Raspbian image configuration.) PiFace example
Python programs can be found in:
/usr/share/doc/python-pifacedigitalio/examples/
Installing Minecraft
I f Minecraft is not already instal led, then type:
cd $HOMEwget https: //s3. amazonaws. com/assets. minecraft. net/pi/minecraft-pi-0. 1. 1. tar. gztar zxvf minecraft-pi-0. 1. 1. tar. gz
Rather than copying the API fi les, the directory
where the Python API is can be added to the
PYTHONPATH variable. Use nano to edit the
.bashrc fi le:
nano ~/. bashrc
Go to the end of the fi le and add:
# For MinecraftMCPI_PY=$HOME/mcpi/api/pythonif [[ -z $PYTHONPATH ] ] ; thenexport PYTHONPATH=$MCPI_PY
elif [[ $PYTHONPATH ! = *"$MCPI_PY"* ] ] ; thenexport PYTHONPATH="$PYTHONPATH: $MCPI_PY"
fiunset MCPI_PY
Then save the fi le.
Minecraft traps
There are many actions that could be triggered
by hardware input changes. In this article, some
dramatic events that are centred on a given
player are used.
Create a new fi le cal led McTraps.py in the
present working directory. Add the Python code
shown at the bottom of this page and save the
fi le. Then open a second fi le cal led mcControl.py
and add the Python code shown on page 38.
import mcpifrom mcpi. block import *import time
def sandTrap(mc):pos = mc. player. getTilePos()mc. setBlocks(pos. x-10, pos. y+15, pos. z-10, pos. x+10, pos. y+18, pos. z+10, SAND)mc. postToChat("Welcome to the beach! ")
def volcanoTrap(mc):pos = mc. player. getTilePos()mc. postToChat("Warning. . volcano! ")time. sleep(1)mc. setBlocks(pos. x, pos. y-50, pos. z, pos. x, pos. y-1, pos. z, LAVA)time. sleep(1)mc. setBlocks(pos. x-2, pos. y, pos. z-2, pos. x+2, pos. y+2, pos. z+2, LAVA)mc. postToChat("A bit too hot! ")
def holeTrap(mc):pos = mc. player. getTilePos()mc. postToChat("Watch your feet! ")time. sleep(1)mc. setBlocks(pos. x-2, pos. y-40, pos. z-2, pos. x+2, pos. y, pos. z+2, AIR)

38
#! /usr/bin/env pythonimport mcpifrom mcpi. minecraft import Minecraftimport pifacedigitaliofrom McTraps import *import sys, time
class McControl:def __init__(self, ips):
self. ips = []self. ips += ips
# Open connections with the Minecraft sessionsself. connections=for ip in self. ips:
try:#self. connections[ip] = Minecraft. create(ip)self. connections[ip] = None
except:print("ERROR: cannot connect to Minecraft on %s" % ip)sys. exit(1)
# Store the number of connections and initialise the current connection to be the first oneself. connectionNumber = 0self. numberOfConnection = len(ips)
# Setup an input event listener, one per switch on the PiFacepifacedigital = pifacedigitalio. PiFaceDigital()self. listener = pifacedigitalio. InputEventListener(chip=pifacedigital)for i in range(4):
self. listener. register(i, pifacedigitalio. IODIR_ON, self. switchPressed)
def listen(self):# Start listening to the PiFaceself. listener. activate()print(">> Listening to PiFace")
def shutdown(self):# Stop listening to the PiFaceself. listener. deactivate()print(">> Listeners shutdown")
def nextConnection(self):# Change to the connection associated with the next IP in the list.self. connectionNumber = self. connectionNumber + 1if self. connectionNumber >= self. numberOfConnection:
self. connectionNumber = 0print(">> Using connection to %s" % self. ips[self. connectionNumber] )
def getConnection(self):# Return the connection associated with the selected IPif not self. ips[self. connectionNumber] in self. connections. keys():
raise Exception("Error: no connection to %s" % self. ips[self. connectionNumber] )return self. connections[self. ips[self. connectionNumber] ]
def switchPressed(self, event):# Handle switch press events:# (0) - If the first switch has been pressed, change to the next IPif event. pin_num == 0:
self. nextConnection()return None
# Get the current Minecraft connectionmc = self. getConnection()

39
Set the mcControl.py fi le as executable:
chmod 755 mcControl. py
Then use a new terminal window to start
Minecraft, using the local Raspberry Pi:
cd mcpi. /minecraft-pi
Once Minecraft is running and a world has been
created. Click on the tab key, to break the
window focus. Then select the original terminal
window and type:
. /mcControl. py
By default, the program uses the localhost. To
access one or more remote Minecraft games,
type,
. /mcControl. py 192. 168. 1. 20 192. 168. 1. 21
etc., where the IP addresses are the IP
addresses of the Raspberry Pis running
Minecraft. The IP address of a Raspberry Pi can
be found by typing,
ifconfig
in a terminal window.
Once the mcControl.py program is running,
pressing switch 0 on the PiFace wil l cause the
program to change the connection used for the
tricks. This is useful when more than one
Minecraft session is in the connection dictionary.
Buttons 1 , 2 and 3 run the sandTrap,
volcanoTrap and holeTrap functions
respectively.
To prevent a lot of CPU being used, the
McControl class creates a InputEventListener
object. This l istener is then used to associate the
switchPressed function with one of the four
switches being pressed. Once the
l istener.activate() function has been called, the
program continues to l isten for PiFace switch
changes unti l i t is closed with CTRL-C.
# (1-3) - Use the switch number to decide which trap to runif event. pin_num == 1:
print(">> Sand trap")sandTrap(mc)
elif event. pin_num == 2:print(">> Volcano trap")volcanoTrap(mc)
elif event. pin_num == 3:print(">> Hole trap")holeTrap(mc)
else:raise Exception("ERROR: pin number is out of range. ")
if __name__ == "__main__":# If no command line options are provide, assume that the localhost is running Minecraftips = []if len(sys. argv) == 1:
ips += ["localhost"]else:
ips += sys. argv[1: ]
# Start the MineCraft connections and PiFace listeners.# The listeners are shutdown went the program exits.mcControl = McControl(ips)try:
mcControl. listen()while(1):
time. sleep(1000)except KeyboardInterrupt:
mcControl. shutdown()

40
SKILL LEVEL : BEGINNER
Dougie Lawson
MagPi Writer
Build QR Code structuresinside Minecraft
In this article I am going to show you how you
can dynamical ly display QR codes inside
Minecraft: Pi Edition. You can use these for many
ideas - from displaying clues to puzzles in your
Minecraft world to l inking to websites. I f you
skipped them, I encourage you to read the other
two Minecraft articles.
Getting started
I f you have the latest version of Raspbian then
Minecraft already comes preinstal led. I f you do
not have the latest Raspbian then let's get going
by instal l ing Minecraft and testing that it works.
Open an LXTerminal window and enter the
fol lowing commands:
cd ~wget https: //s3. amazonaws. com/assets. minecraft. net/pi/minecraft-pi-0. 1. 1. tar. gztar -zxvf minecraft-pi-0. 1. 1. tar. gz
Make a note of /home/pi/mcpi/api/python as
we wil l need that later. Test Minecraft with the
fol lowing commands:
cd ~/mcpi. /minecraft-pi
You should get the famil iar screen for Minecraft
and can bui ld a new world. Have a play around
and when you are done press <TAB> to get
control of the cursor. We can switch to the
LXTerminal window and close down Minecraft by
pressing the <CTRL>+<C> keys together. We
wil l come back to Minecraft later when we are
ready to run the Python program that is going to
bui ld our structure in the virtual world.
Getting QR encoder and testing yourfirst QR code
Although we could bui ld our own QR code maker
in Python, to keep things very simple and give us
instant results we wil l use a ready bui lt QR code
generator cal led qrencode .
Open an LXTerminal and issue the fol lowing
commands:
sudo apt-get install qrencodeqrencode -t ANSI "Hello World"
We have now got a QR code displaying in our
LXTerminal window. You may need to stretch the
window size so that the white borders at the top
and bottom are visible. Get your smart phone
and scan that QR code using any QR code app
to prove that everything is working correctly.

41
The qrencode program can generate QR codes
in various formats. In our Python program we are
going to generate an ASCII (plain text) format
QR code and edit the output with the stream
editor, sed . The qrencode program generates
"##" for every black square and a space for every
white square in the QR code, when we use the
-t ASCII option.
Open an LXTerminal and issue the fol lowing
complex command:
qrencode -t ASCII "Hello Minecraft" | \sed ' s/ / /g' | sed ' s/##/#/g' > ~/mc. qr. txt
Note the two spaces in ' s/ / /g' . We have
now generated the data that wil l be the input for
our Python program. Take a look at it with the
cat command or use the Leafpad editor.
Glueing it all together
To bui ld a QR code structure in Minecraft we are
going to use the Python application programming
interface (API) . That al lows us to control our
Minecraft world with a program. For example, we
can discover Steve's co-ordinates (Steve is the
protagonist, i .e. your playable character) and we
can teleport Steve from one location to another.
We can also add or delete blocks in the world.
So, we have the data bui lt from qrencode and
sed and we have a method to read that data and
bui ld some blocks in our Minecraft world. Let's
look at the Python program to do this. The
program is cal led mc. qr. py and I have stored it
in a directory cal led python , inside the home
directory.
First we import the sys package and add the API
directory to the system path so that Python can
find the Minecraft Python API packages. Note,
please choose the correct path depending if you
instal led Minecraft or it came pre-instal led:
#! /usr/bin/pythonimport syssys. path. insert(1, ' /home/pi/mcpi/api/python' )#sys. path. insert(1, ' /opt/minecraft-pi/api/python' )
Now we can import the API packages to connect
to the Minecraft world and bui ld blocks:
import mcpi. minecraft as mineimport mcpi. block as block
Next we create a connection and get the current
co-ordinates where Steve is standing:
mc = mine. Minecraft. create()pPos = mc. player. getTilePos()print "Player point: " , pPos. x, pPos. y, pPos. z
Now move Steve (teleport him) twenty blocks
back, forty blocks down and twenty blocks to his
left and read his new position:
mc. player. setTilePos(pPos. x - 20, pPos. y - 40,pPos. z - 20)nPos = mc. player. getTilePos()
Open the input fi le generated by qrencode and
read every l ine into an array:
qrc = open(' mc. qr. txt' , ' r' )arrayQR = []for line in qrc:
arrayQR. append(line)qrc. close()
We then initial ise the variables we use to position
the blocks as we generate them in the Minecraft
world:

42
print "Starting point: " , nPos. x, nPos. y, nPos. zx = nPos. xy = nPos. yz = nPos. z
The fi le generated by qrencode would come out
upside down if we just worked from the first
record to the last. So we need to read the last
l ine first (to bui ld the left hand l ine of blocks) and
work backwards to the top (right hand l ine of
blocks). Python has the reversed() function to
read arrays from the last record to the first
record. So each time round this FOR loop, the
variable i is the l ine we are working on.
We set the starting position for the height of the
block above Steve's position to the length of
each record and work down while reading the
l ine from left to right. Trust me, that gets the QR
code turned through 90 degrees but it is not back
to front. QR codes have the property that you can
read them up, down, left or right (those three
large squares in the corners tel l the QR code
reader how the code is oriented).
As we read the fi le, i f the character is a space
(white square) we bui ld a block of snow (block id
= 80) in the world. I f the character is a hash
(black square) we bui ld a block of obsidian
(block id = 49). You can find the block id codes
on the Minecraft Wiki at http://minecraft.
gamepedia.com/Data_values/Block_IDs:
for i in reversed(arrayQR):y = pPos. y + len(i)
for j in range(0, len(i)):if (i[j] == " "):
block = 80if (i[j] == "#"):
block = 49y = y - 1mc. setBlock(x, y, z, block)
x = x + 1
Final ly we teleport Steve back to his original
position:
mc. player. setPos(pPos. x, pPos. y, pPos. z)
Display the QR code in Minecraft
To get everything running we need to start
Minecraft then when it is running we start our
Python program. So we need two LXTerminal
windows. In the first LXTerminal window enter
the fol lowing commands:
cd ~/mcpi. /minecraft-pi
Login to your Minecraft world and find an area
without too much terrain (we don't want trees
blocking our view). Then press the
<ALT>+<TAB> keys together to switch to the
second LXterminal window. In that second
window enter the fol lowing commands:
cd ~/pythonchmod 755 . /mc. qr. py. /mc. qr. py
The screen wil l go blank because the last few
blocks are bui lt on top of Steve! When it is done
drive round to find your QR code in the Minecraft
world. I found I needed to bui ld a tower of stone
(or dirt) to get Steve positioned so that the QR
code was square on and fi l led the top half of the
screen without any keystoning effects. I was then
able to scan it with my smart phone.
I 'd l ike to thank Konrad, my 1 4 year old son and
Minecraft expert, for his patience and advice. I
started bui lding the code with diamond (block id
= 57) but Konrad suggested using snow for
better contrast.

Adrian Harper
MagPi Writer
Amy MatherThe future of young hackers?
In the unl ikely case that you haven't already seen
the video and don't know the name Amy Mather,
I would l ike to introduce you to a young lady who
hosted, quite possibly, the highl ight presentation
of the 201 3 Manchester Jamboree, and who
certainly has a bright future ahead of her in
computer science.
Amy's Game of Life presentation is avai lable on
YouTube (http://tinyurl .com/amyjamboree) and I
would encourage you to watch the video first and
then come back to read the remainder of this
MagPi article.
After watching the first time I was astounded at
Amy's confidence and abi l i ty and I had to watch
it a second time. I couldn't help but think that
Amy is a shining example of what al l our kids
could be if they are given the right resources,
teaching and encouragement to experiment
without fear.
[MagPi] Most people have watched your
presentation and have been astonished by your
achievements with the Raspberry Pi, what has
been the feedback from that video?
[Amy] The feedback from the Jamboree video
has been amazing, with people asking me to do
more talks at other conferences, interviews such
as this and even a request to design a website!
There have been so many lovely comments from
people that I 've never met - I 'm real ly grateful to
Alan O'Donohoe for giving me the opportunity to
speak. I was so surprised when I was asked to
talk alongside the l ikes of Steve Furber and Rob
Bishop!
[MagPi] How did you first come across the
Raspberry Pi?
[Amy] My Mum found out about the Raspberry Pi
on Twitter and ordered one for me on the day of
release. I t took a few weeks to arrive but as soon
as I got hold of it I took it to Ben Nuttal l 's first
Manchester Raspberry Jam. There I improved
upon my Scratch version of Pacman
(http://bit. ly/L51 Ycg) using a photograph of my
face as the Pacman sprite plus I made a bat
game for my little brother.
[MagPi] Before the Raspberry Pi came along,
what was your experience with computers and
electronics? Did you work with other platforms?
[Amy] After Alan's first Hack to the Future in
February 201 2 a very generous geek sent me an
Arduino kit through the post. I had a school
homework project to do at the time which was to
make and label a volcano for geography, so I
44

decided to incorporate my Arduino into that!
When it was finished I was asked to demonstrate
it at MadLab in response to a 'cal l for makers' for
the Manchester Mini Maker Faire that was being
held a couple of months later. Around the same
time I attended a Manchester Girl Geeks
workshop that introduced me to Codecademy. I
loved it so much that I went home and carried
on... I 've now got 50+ badges and have worked
on CSS, JavaScript, Python, PHP and HTML5
courses.
[MagPi] Obviously you are quite the
accomplished programmer now. What was your
first project with the Raspberry Pi?
[Amy] My first project on the Raspberry Pi was a
guessing game in Python. I t used the 'random'
l ibrary to choose a different number each time for
the answer and you had to guess which number
had been picked. I t told you if your answer was
too big or too small and deducted points each
time you got it wrong. I f you got one of the best
scores then it asked you for your name and
saved it to a high scores l ist.
[MagPi] No matter the country, there are often
articles in the press about the poor IT and
Computer Science teaching in schools. How
have you found this to be in your case? Is there
much interest in gaining a deeper knowledge of
computer science with your friends and
classmates?
[Amy] No, most of my friends at school use a bit
of HTML to update their Tumblr blogs and have
done Scratch, Al ice and Dreamweaver in ICT
lessons, but they don't real ly seem to want to
take it any further. I think that if the Raspberry Pi
and Arduino were incorporated into ICT lessons
(e.g. introduction to Python from age 1 1 ),
Texti les lessons (e.g. Arduino Li lypad) or Product
Design / Resistant Materials lessons (e.g. robots)
then that could show them that programming can
actual ly help you create some pretty awesome
stuff. Hopeful ly that would be enough to inspire
them to start hacking and coding their own
projects outside of school.
[MagPi] Are there Raspberry Pis avai lable in
your school already?
[Amy] No, unfortunately there aren't any
Raspberry Pis in my school at al l , but I 'd l ike to
change that ;)
[MagPi] What more can we do as a community to
get more young people, both boys and girls, into
computer science? How could our readers get
involved?
[Amy] I think that we need to set up more
community hackspaces, or places l ike MadLab,
that welcome kids through their doors. Readers
could set up these kid friendly spaces and run
events specifical ly for under 1 8's l ike MadLab's
CoderDojos or set up code clubs in their local
primary schools (http://bit. ly/HLRWwT). Your
local STEMnet team (http://bit. ly/B0z2q) could
help with setting this up if you're unsure.
Raspberry PI to Arduino to LED matrix. Amy is
not l imited to software hacking!
[MagPi] I f you were able to influence the
Raspberry Pi design team and introduce a new
model, what changes would you bring to the
table?
[Amy] I wonder if i t would be a good idea to
attach a 1 6x2 LCD screen to the board, so that
once you've written your code for a project and
it's on the Pi, you could then just plug in a
keyboard and a terminal-l ike environment would
come up on the LCD screen. This would mean
45

that you could run your code without having to
plug in a monitor, making it easier to incoporate
into projects. I would also l ike to see if the
design team could introduce a new board that
could be used in wearable electronics, along the
l ines of an Arduino Li lypad but even better! I l ike
the fact that the Li lypad is washable, l ightweight
and can be easi ly attached to fabric with
conductive thread. I f they could improve upon
this it would be great!
[MagPi] What are the best resources out there
that you can recommend for young Raspberry Pi
programmers, or people in general that are
giving programming a go for the first time?
[Amy] Obviously, the MagPi magazines are a
great resource :) but I think that the Super
Scratch Book (http://bit. ly/MVKOw8) looks l ike a
great book to help younger users of the
Raspberry Pi. For older users Simon Monk's
Python book (http://bit. ly/VXJZrI) provides a
great introduction to the language. There are
some very helpful resources onl ine - I real ly l ike;
GeekGurlDiaries: http://bit. ly/1 088jKG
Adafruit: http://bit. ly/LEQbiB
MakeZine: http://bit. ly/1 3Xr44a
Instructables: http://bit. ly/4kLr49
Arduino Tutorials: http://bit. ly/vfm8A
The Twitter feeds @mykidcancode and
@codingforkids often have great l inks, too.
[MagPi] Conway's Game of Life can be quite
daunting. What projects would you encourage
new young programmers to begin with?
[Amy] Scratch (http://bit. ly/y4Mw) is probably the
best place for young programmers to begin, but if
you prefer working towards goals then
Codecademy (http://bit. ly/oDjwOj) wi l l probably
be more helpful . On the Codecademy website
you can choose to learn a particular language or
work on a project e.g. one of the first games
you'l l make in the JavaScript course is Fizz Buzz.
Alternatively, simple guessing games or rock-
paper-scissors type games are a good place to
start and there are plenty of internet forums
where you can search for help with any queries
that you may have.
[MagPi] In your presentation you mentioned
Madlab and Manchester Hackspace. Can you
tel l us a l ittle about these resources and the
benefits you get from going there?
[Amy] Without MadLab (http://bit. ly/rrahU) I
wouldn't be talking to you today! They are
AWESOME! ! ! ! I 've met so many great people
there who are always wil l ing to share their
knowledge and teach me new things. At MadLab
I have met: Mike Little, who was my mentor for
YRS201 2, Ben Nuttal l who runs the Manchester
Raspberry Jam (http://bit. ly/YUE2yY), Alan
O'Donohoe who organised the Raspberry
Jamboree, John Beckerson a senior curator from
Manchester's Museum of Science and Industry
who invited me to display at the Mini Maker
Faire, Dr Lucie Green who is a space scientist,
plus lots and lots of other very kind people who
have taught me so much. I 've also been to lots of
workshops held by Manchester Girl Geeks
(http://bit. ly/PYsHEL) and have started helping to
teach at their workshops - there's just so much
going on there! Bob Clough from HacMan
(http://bit. ly/jGLhtz) showed me how to use
Inkscape to control the laser cutter when I was
making the case for my 'Conway's Game of Life
on Pi'. Al l the people at the hackspace are happy
to help people with any problems that they may
have - I wish there was a MadLab/HacMan in
every town to help other chi ldren discover their
inner geek!
Amy shares her knowledge by teaching others.
46

[MagPi] Are there many other kids around your
age going to the hack spaces on a regular basis?
Can you tel l us about the type of projects they
are working on?
[Amy] At MadLab's U1 8 CoderDojo there's
always lots of different activities going on. For
example there's a MaKey MaKey kit which most
of the younger chi ldren love making banana
pianos with (http://bit. ly/KkiMLO), a Lego WeDo
kit (http://bit. ly/1 2wCqup) and Bare Conductive
inks were bought for the last event
(http://bit. ly/1 6r9C3). The events are always ful ly
booked and there are always volunteers around
who can teach the chi ldren Scratch, Python,
PHP, Minecraft plus a variety of other ski l ls. At
the last event, the Minecraft table al l worked
together making fireworks and they
demonstrated their display at the end.
[MagPi] You already have access to some nice
gadgets such as laser cutters and 3D printers.
What technologies are on the horizon that excite
you?
[Amy] I love the idea of conductive inks. I met Dr
Kate Stone (http://bit. ly/5y6TPl) at the YRS
Festival of Code last year and she showed me a
pair of headphones that were made from paper,
some electronic greetings cards that she'd made
and also this jazz poster (http://bit. ly/1 7YXxZA).
I t was amazing to see what she'd achieved with
the technology. My mum bought some of Bare
Conductive's products at the Maker Faire UK
recently and I can't wait to try out the conductive
paint!
[MagPi] We're often asked by parents if their kids
are old enough for a Raspberry Pi. Given your
experience, what do you think is an ideal age for
kids to be introduced to programming and do you
think the tools avai lable are adequate?
[Amy] I don't think that there is a minimum age; if
a chi ld can read and type, then they can learn to
code!
[MagPi] As parents, what can we do, apart from
buying a Raspberry Pi obviously, to spark our
chi ldren's interest in computing?
[Amy] There are a couple of computing festivals
in the UK - #Include in Warwickshire that is
aimed at 1 1 -1 3yr olds and Sil icon Dreams in
Leicestershire in July. Also, during the summer
hol iday in August, Young Rewired State
(http://bit. ly/eAtCMI) is an event with centres
throughout the country holding a week-long
workshop, where chi ldren up to 1 8 years old
spend 5 days working with mentors on a project,
using openly avai lable data sets. Then, at the
weekend, al l the teams meet up in Birmingham
for the Festival of Code where they present their
projects.
[MagPi] Final ly, what new projects are you
working on at the moment? Are you able to give
us a sneak peek?
[Amy] I 've been offered a touch screen and larger
LED array which, when they arrive, I wi l l add into
my 'Game of Life on Pi' to show at the
Manchester Mini Maker Faire this summer.
Another idea is a 'T-Shirt of Life' which would be
a T-shirt made from recycled materials with
LEDs sewn on the front in a grid formation, which
would display the Conway's Game of Life. What
I 'd real ly love to see though, is a Maker Faire
exclusively for U1 8's - it could be called the Mini
Makers Faire! I t would be great if i t were run l ike
YRS with a week-long workshop beforehand
using Hack Spaces and FabLabs with volunteer
mentors and then at the weekend the chi ldren
would present what they've made at the Mini
Makers Faire. I f anybody out there would l ike to
help me do this, please get in touch!
Amy is a prime example of why we should be
getting Raspberry Pis into the hands of as many
kids as possible! I t is young people l ike her that
provide inspiration and drive to those within the
Raspberry Pi Foundation, The MagPi, and the
wider community, to keep doing what they're
doing.
This certainly won't be the last time you hear of
Amy in The MagPi. She is currently working on a
number of articles for the magazine to help us
encourage and challenge our younger readers.
47

48
SKILL LEVEL : BEGINNER
Geoff Harmer
Guest Writer
CATCH-UP TVAvoid missing your favourite programme
How to configure OpenELEC soyou can watch TV programmes
Do you want to watch TV programmes using
your Raspberry Pi?
• No need to buy a smart TV to get your HDTV to
connect to catch-up TV services such as BBC
iPlayer and ITV Player in the UK, or CTV and
Space and Bravo in Canada, or RTE1 and RTE2
in Ireland or Network1 0 in Austral ia.
• No need to have your Raspberry Pi keyboard
and mouse and their cables spoi l ing the look of
your HDTV.
• Use a Raspberry Pi with a Wi-fi USB dongle
running OpenELEC - a compact, high
performance Linux distribution that has XBMC
media centre software instal led - and then hide
the Raspberry Pi behind the HDTV.
• Use a remote control app on your Android, iOS
or Blackberry smartphone to control XBMC via
your home Wi-fi so you can select and watch
catch-up TV programmes on your HDTV.
• No Linux commands are needed to instal l or
use OpenELEC with the Raspberry Pi.
My style of television watching over the last few
years has switched from live viewing and
recording, to predominantly using catch-up TV.
Catch-up TV is particularly helpful when a
missed programme gets a good review the next
day from friends or from TV reviews in
newspapers or on the web.
I am going to show you how to instal l catch-up
TV services using XBMC and the OpenELEC
distribution on a Raspberry Pi to work with your
HDTV. I t takes about 60 minutes to set up and
requires no use of Linux commands either!
Permanent components
• Any Raspberry Pi.
• Good quality 5V power adapter for the
Raspberry Pi (minimum 700mA or greater) .
• HDMI cable to connect the Raspberry Pi to
your HDTV.
• Wi-fi nano USB dongle if you do not have easy
access to a wired internet connection (the Wi-fi
dongle from http://www.thepihut.com uses bui lt-
in drivers and does not require a powered USB
hub).
• 8GB+ SD card loaded with the latest NOOBS
software from http://www.raspberrypi.org.
• Android, iOS or Blackberry 1 0 device with a
downloaded app to remotely control XBMC, e.g.
XRMT for Blackberry 1 0 OS, or Official XMBC
Remote for Android, or Official XMBC Remote
for iOS.

49
Note: On a Model A/B the USB ports may not be
able to supply enough current for certain Wi-fi
dongles. This can result in video stuttering. I f
you have a good connection, the solution is to
use a powered USB hub with a minimum 2A
power supply, or use a Model A+/B+. Some
hubs wil l also back power the Raspberry Pi so
you only need one power supply. Check
http://el inux.org/RPi_Powered_USB_Hubs for a
l ist of good hubs.
Installation instructions
Step 1. GetNOOBS
Copy the latest NOOBS distribution onto a 8GB+
SD card. When finshed insert the SD card into
the Raspberry Pi, plug in the Wi-fi USB dongle
and use a HDMI cable to connect the Raspberry
Pi to your HDTV. The first time you start NOOBS
you wil l be asked to choose what operating
system to instal l . Choose OpenELEC . This wil l
take a few minutes to instal l , after which you can
reboot your Raspberry Pi.
Step 2. XBMC andnetworks
Note: I f you are using a Raspberry Pi Model
A/A+ then for this section you wil l temporari ly
need to use a powered USB hub so you can
connect both the Wi-fi dongle and a mouse.
After your Raspberry Pi has started, XBMC wil l
present its main screen known as Confluence
(blue bubbles background) fol lowed by an initial
setup wizard. Here you choose your region,
provide a friendly network name then choose
from a list of avai lable wireless connections. You
wil l need to know your wireless connection name
and security passphrase.
By default your network IP address and DNS
servers wil l be automatical ly configured.
However you may want to change the DNS
servers to watch overseas programming using
services l ike http://www.unblock-us.com, or you
may want to change the IP address to use a
static IP. I f you want to change the network
settings later, from the main screen select
SYSTEM, OpenELEC and then cl ick on
Connections . Cl ick on your connection and
choose Edit from the pop-up menu.
A static IP address tends to be more rel iable
because it remains fixed and so the remote app
on your smartphone wil l always connect. The IP
address created using DHCP can vary
depending on what other devices are connected
to the broadband router.
Setting up a static IP (optional)
Choose to Edit your connection, as described
above and cl ick on IPv4. You wil l see the IP
Address Method is currently set to DHCP. Cl ick
on this and change it to Manual . Now click on IP
Address and enter an unused address within the
range permitted by your broadband router e.g.
1 92.1 68.1 .50. You can leave the Subnet Mask
(e.g. 255.255.255.0) and Default Gateway
(e.g. 1 92.1 68.1 .254) at their default settings.
To change the DNS settings for your connection
choose DNS servers . You wil l see options to
enter IP addresses for up to three nameservers.
By default these wil l already have the IP
addresses of the DNS servers from your internet
provider, but you can choose to use others. For
example OpenDNS provides enhanced security
using its own free to use DNS server IP
addresses at http://www.opendns.com. [Ed: I

50
changed these to the Unblock-Us DNS servers
so, as an ex-pat, I can still watch BBC iPlayer
content in Canada] .
At this point it is a good idea to cl ick the Power
button on the main screen and reboot the
Raspberry Pi. When OpenELEC restarts you
should have a working network connection.
Step 3. Other important XBMC features
1 . Is the display too large for your screen or do
you see a black border? To change the screen
size select SYSTEM then Settings and cl ick on
Appearance . In the Skin section, change Zoom
(up and down keys) to set an appropriate
reduction.
2. Stop RSS feeds across the bottom of the
Confluence screen. From the Confluence screen
select SYSTEM then Settings and cl ick on
Appearance . In the Skin section cl ick on Show
RSS news feeds to turn it off.
3. To al low remote wireless control of XBMC
select SYSTEM then Settings and cl ick on
Services . In the Webserver section cl ick on
Allow control of XBMC via HTTP to turn
this option on. Note the default username is xbmc
with no password. You can optional ly change
these. In the Remote control section cl ick on
Allow programs on other systems to
control XBMC .
4. To ensure OpenELEC has your home
workgroup from the main screen select SYSTEM
then Settings and cl ick on Services . In the
SMB client section the Workgroup option is set
to WORKGROUP by default. I f your home
network has its own workgroup name then you
must change WORKGROUP to your home
workgroup name. You can find out your home
workgroup name from your Windows PC by
opening the Control Panel , open the System
and Security category then cl ick on System.
The workgroup is shown near the bottom.
Step 4. Install TVcatch-up files
Add-ons need to be added to XBMC in order to
use catch-up TV. Here are some examples that
have been tested to work.
UK & Ireland:
BBC iPlayer
http://code.google.com/p/xbmc-iplayerv2/
ITV player
http://code.google.com/p/xbmc-itv-player/
downloads/l ist
Channel 4 On Demand
http://code.google.com/p/mossy-xbmc-repo/
Irish TV
http://code.google.com/p/mossy-xbmc-repo/
Canada:
https://github.com/irfancharania/canada.on.dema
nd.repo
Australia:
http://code.google.com/p/xbmc-catchuptv-au/
The Canadian add-in is particularly good as it
covers 20 stations, but just l ike the BBC and ITV
add-ins, it is region locked. Fortunately
Austral ia's Network1 0 and Ireland's RTE stations
appear to be freely avai lable to al l .
Using your PC, copy the latest zip fi les onto a
USB memory stick without unzipping them. Now
plug the USB memory stick into the USB port of
your Raspberry Pi and power-up the Raspberry
Pi. To instal l these add-ons, from the main menu
select VIDEOS then Add-ons and cl ick on Get
More . At the top of the l ist cl ick on . . (i .e. two
dots). At the top of the next l ist again cl ick on . .
(i .e. two dots). Now click on Install from zip
file . A new window wil l pop-up. Select your
USB memory stick. I f i t is not visible remove it
and insert it again.
Navigate to the first add-on you wish to instal l
and cl ick it. I t gets instal led at this point within
about 30-40 seconds but it is not obvious. You
wil l be returned to the Install from zip file
menu and you may momentari ly observe (bottom

51
right of the screen) that the new add-on has been
instal led. Check by returning to VIDEOS and
selecting Add-ons and you should see the name
of the add-on you just instal led. I f i t is absent,
wait a few minutes for it to appear and if i t is sti l l
absent then reboot your Raspberry Pi. Repeat
for each add-on, one at a time.
Step 5. XBMC remote control
Download and instal l the Official XBMC Remote
app to your Android or iOS device, or instal l
XRMT for your Blackberry 1 0 OS device.
As an example, here is how to configure XRMT
on your Blackberry 1 0 OS device. Once instal led
open the app and cl ick the three dots icon
(bottom right) and select Add Server . For
Server name enter openelec (lower case). For
Server IP address enter the address that you
set up for the Raspberry Pi in step 2 on page 49.
Leave the Port code as 9090 then cl ick the icon
at bottom left.
Now scrol l down from the top of the app, cl ick on
Settings and change the Auto connect by
cl icking on openelec below it. Close the settings
screen. The app is now ready to use.
Once you have instal led an XBMC remote app
on your smartphone you are ready to control
XBMC without a mouse or keyboard. Simply use
the remote control app to navigate the XMBC
Confluence screen, select VIDEOS and then
select Add-ons . Your add-ons wil l be displayed.
Simply cl ick on an add-on such as iPlayer to run
it. Enjoy the catch-up TV programmes.
Interesting extra facts and tips
HDMI connections
Are all the HDMI sockets on your TV in use with
other devices such as a PVR, bluray player and
games console? Not enough HDMI sockets on
your TV for your Raspberry Pi? The solution is to
use a 2-in/1 -out HDMI switch (e.g. Belkin) . Thus
both the Raspberry Pi and the other device are
connected to the HDTV. The Belkin product has
a button on it for selecting which of the 2 inputs
to currently use.
XRMTconnection issue
I f you have been using a mouse to control
XBMC, you may find that your Blackberry XRMT
won't connect. Unplug the mouse and reboot the
Raspberry Pi and then XRMT should connect.
Command line access
Do you want to access the OpenELEC operating
system with Linux commands from your
Windows PC? You can do this using a program
called PuTTY. PuTTY uses the SSH protocol to
connect to the Raspberry Pi. Download the latest
version of PuTTY from http://www.chiark.
greenend.org.uk/~sgtatham/putty/download.html.
You also need to set OpenELEC to al low a SSH
connection. From the XBMC main screen select
SYSTEM then OpenElec and cl ick on Services .
Select the SSH option and cl ick to enable it.
Reboot the Raspberry Pi. Once PuTTY is
instal led on your Windows PC simply run the fi le
putty. exe . After the PuTTY screen has opened
enter the IP address of your Raspberry Pi. Leave
the Port as 22 and choose SSH as the connection
type. Click on Open then enter the username and
password. For OpenELEC the default username
is root and the default password is openelec .

52
SKILL LEVEL : INTERMEDIATE
Volker Ziemann
Guest Writer
INTERNET RADIOpowered by Raspberry Pi
Discover new radio contentacross the world
A few years ago I hacked a network router to
become an internet radio device by putting
OpenWRT on it and adding a USB sound card.
At that time this setup was the only way I could
figure out how to make an intel l igent box that
connected to the internet at one end and output
music at the other. That system, located in our
kitchen, is sti l l in use, but when we got a new
stereo in the l iving room it was time to revisit the
internet radio situation.
The Raspberry Pi has al l the necessary
hardware on board to enable wired or wireless
internet connectivity, plus analogue and digital
sound output. Having decided on the hardware,
some research on the web resulted in the
fol lowing strategy for the software.
• Use the music player daemon mpd for sound
• Control i t with the music player control ler
software mpc
• Use apache2 to serve a web interface with
forms and cgi-bin functional ity to select radio
channels from the playl ist
• Display what is currently playing
• Shutdown the Raspberry Pi graceful ly via the
web interface.
The last option proved to be tricky, but more on
that later.
There is no hardware work involved in this
approach, only some programming. The end
result is a system that can be control led from any
computer, smartphone or tablet device with web
access to the Raspberry Pi.
For the software approach I used Raspbian from
the latest release of NOOBS. You can download
this from http://www.raspberrypi.org/downloads. I
assume that you already have your Raspberry Pi
connected to your network, either by cable or
wireless. I f not, wired ethernet normally works
out of the box, if you have a DHCP server on
your network. Most routers offer this by default. I f
you have a wireless network (and a USB
wireless network adapter for your Raspberry Pi)
the easiest way to connect is to start the LXDE
window interface by typing startx on the
command line and then run WiFi Config , which
you can find on the desktop.
Once you are connected to your network, you
need to find out the IP address of your Raspberry
Pi. From the command line, enter:
ifconfig
This wil l display the settings for each network
adapter. Find the l ine that starts with inet addr
and the four numbers that fol low (e.g.

53
1 92.1 68.1 .97) is the IP address of your
Raspberry Pi. You wil l need this later when
control l ing the radio from your smartphone, etc. I f
you are connected by both cable and wireless,
ifconfig wil l l ist two interfaces - eth0 and
wlan0. The IP address of either network
interface wil l work for the internet radio.
Now we proceed by instal l ing the required
packages. From the command line, enter:
sudo apt-get updatesudo apt-get install mpd mpc apache2
Once instal led, for good measure I suggest you
shutdown then reboot the Raspberry Pi. I f you do
not use the HDMI cable for sound to your monitor
then, whi le the system is shutdown, it is a good
time to connect the Raspberry Pi to some active
loudspeakers with a bui lt in amplifier.
Alternatively, you can connect it to the Aux/Line
In input of your stereo amplifier. For this you
might need a cable that has a 3.5mm jack
connector attached to the Raspberry Pi audio
output and RCA/phono connectors that are
attached to the amplifier.
I t is time to test the basic software functional ity.
The mpd program is a daemon (background
process) that is started automatical ly at boot
time. We interact with the daemon using the mpc
program.
In order to play the radio stations we need to
inform the Raspberry Pi about the channels. For
this I prepared a small text fi le that contains the
internet addresses of the radio stations I want to
l isten to, one station per l ine, with the URL and
port number separated by a colon. Using either
Leafpad in LXDE or nano from the command
line, create a sample fi le with the fol lowing,
http: //108. 61. 73. 118: 8030http: //109. 123. 116. 202: 8022
and save it as playlist. txt (the actual name
does not matter - just pick any you prefer) . We
can now add our stations to the mpc playl ist.
From the command line, enter:
cat playlist. txt | mpc add
To check that the playl ist was added, enter:
mpc playlist
This wil l l ist the stations by their URL, or by their
name if they have been played.
Let's make some noise! To play the first station
in the playl ist enter,
mpc play 1
and to play the second station enter:
mpc play 2
Normally the play command connects to the
radio station in less than two seconds and should
result in some music. The first station is a classic
rock station, "1 81 .fm - The Eagle" whi le the
second station is a classical music station,
"Venice Classic Radio Ital ia". Look on the
taskbar and notice how little CPU is being used
(approximately 1 0%).
To display the current station plus the current
artist and song being played, enter:
mpc current
To stop l istening to internet radio, enter:
mpc stop
These are just the basic functions. For more
detai ls enter the fol lowing:
mpc helpman mpc
You can find a long l ist of internet radio stations
at the fol lowing locations:
http://www.l istenl ive.eu,
http://www.sky.fm,
http://www.internet-radio.com and
http://www.radio-locator.com.
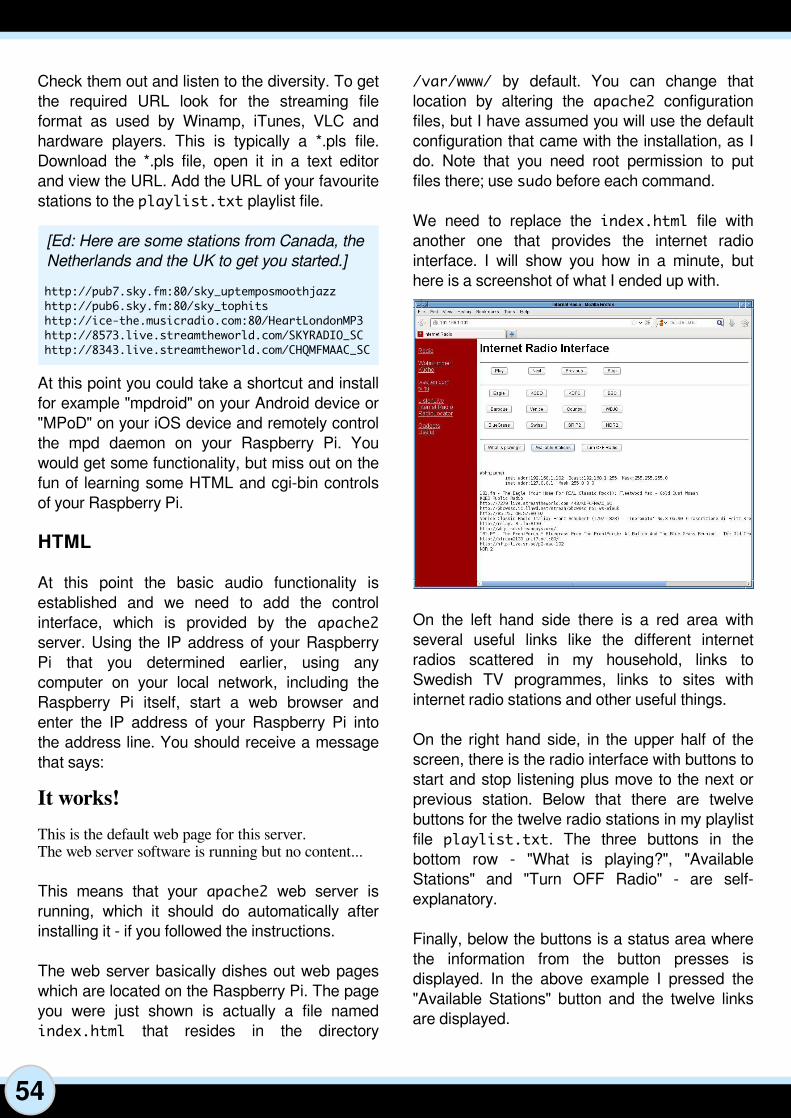
54
Check them out and l isten to the diversity. To get
the required URL look for the streaming fi le
format as used by Winamp, iTunes, VLC and
hardware players. This is typical ly a *.pls fi le.
Download the *.pls fi le, open it in a text editor
and view the URL. Add the URL of your favourite
stations to the playlist. txt playl ist fi le.
[Ed: Here are some stations from Canada, the
Netherlands and the UKto get you started.]
http: //pub7. sky. fm: 80/sky_uptemposmoothjazzhttp: //pub6. sky. fm: 80/sky_tophitshttp: //ice-the. musicradio. com: 80/HeartLondonMP3http: //8573. live. streamtheworld. com/SKYRADIO_SChttp: //8343. live. streamtheworld. com/CHQMFMAAC_SC
At this point you could take a shortcut and instal l
for example "mpdroid" on your Android device or
"MPoD" on your iOS device and remotely control
the mpd daemon on your Raspberry Pi. You
would get some functional ity, but miss out on the
fun of learning some HTML and cgi-bin controls
of your Raspberry Pi.
HTML
At this point the basic audio functional ity is
establ ished and we need to add the control
interface, which is provided by the apache2
server. Using the IP address of your Raspberry
Pi that you determined earl ier, using any
computer on your local network, including the
Raspberry Pi itself, start a web browser and
enter the IP address of your Raspberry Pi into
the address l ine. You should receive a message
that says:
It works!
This is the default web page for this server.The web server software is running but no content. . .
This means that your apache2 web server is
running, which it should do automatical ly after
instal l ing it - i f you fol lowed the instructions.
The web server basical ly dishes out web pages
which are located on the Raspberry Pi. The page
you were just shown is actual ly a fi le named
index. html that resides in the directory
/var/www/ by default. You can change that
location by altering the apache2 configuration
fi les, but I have assumed you wil l use the default
configuration that came with the instal lation, as I
do. Note that you need root permission to put
fi les there; use sudo before each command.
We need to replace the index. html fi le with
another one that provides the internet radio
interface. I wi l l show you how in a minute, but
here is a screenshot of what I ended up with.
On the left hand side there is a red area with
several useful l inks l ike the different internet
radios scattered in my household, l inks to
Swedish TV programmes, l inks to sites with
internet radio stations and other useful things.
On the right hand side, in the upper half of the
screen, there is the radio interface with buttons to
start and stop l istening plus move to the next or
previous station. Below that there are twelve
buttons for the twelve radio stations in my playl ist
fi le playlist. txt . The three buttons in the
bottom row - "What is playing?", "Avai lable
Stations" and "Turn OFF Radio" - are self-
explanatory.
Final ly, below the buttons is a status area where
the information from the button presses is
displayed. In the above example I pressed the
"Avai lable Stations" button and the twelve l inks
are displayed.
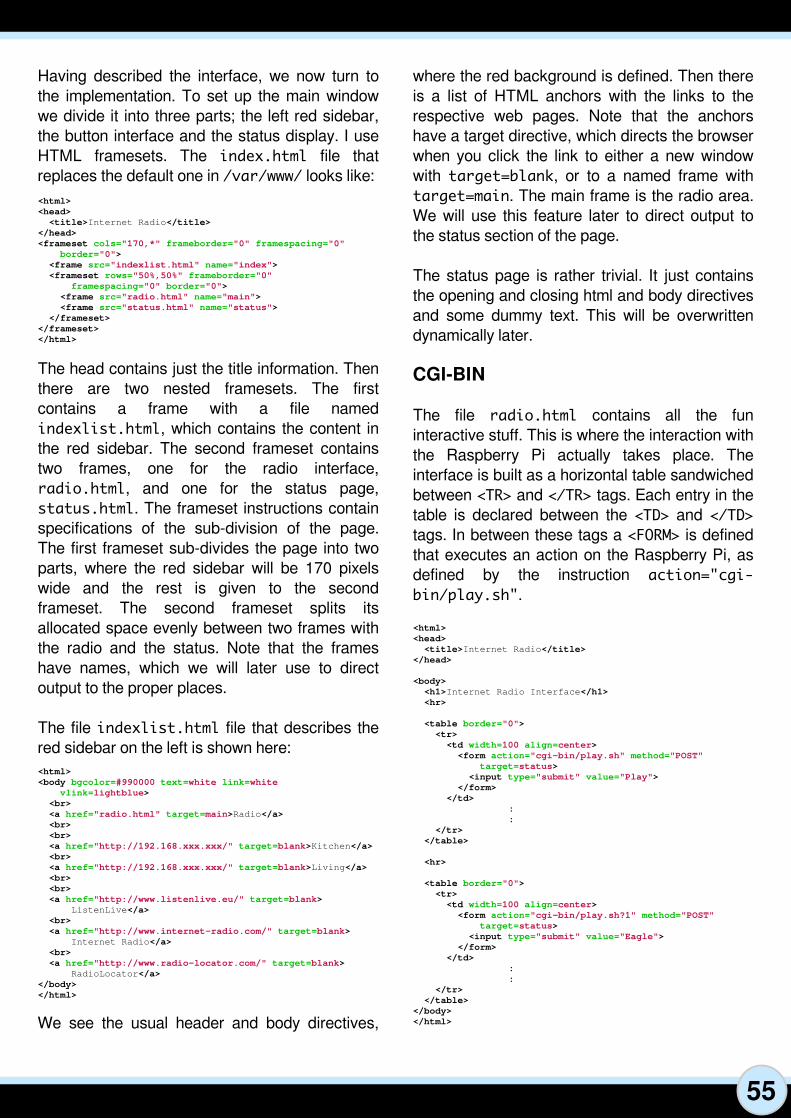
55
Having described the interface, we now turn to
the implementation. To set up the main window
we divide it into three parts; the left red sidebar,
the button interface and the status display. I use
HTML framesets. The index. html fi le that
replaces the default one in /var/www/ looks l ike:
<html>
<head>
<title>Internet Radio</title>
</head>
<frameset cols="170,*" frameborder="0" framespacing="0"
border="0">
<frame src="indexlist.html" name="index">
<frameset rows="50%,50%" frameborder="0"
framespacing="0" border="0">
<frame src="radio.html" name="main">
<frame src="status.html" name="status">
</frameset>
</frameset>
</html>
The head contains just the title information. Then
there are two nested framesets. The first
contains a frame with a fi le named
indexlist. html , which contains the content in
the red sidebar. The second frameset contains
two frames, one for the radio interface,
radio. html , and one for the status page,
status. html . The frameset instructions contain
specifications of the sub-division of the page.
The first frameset sub-divides the page into two
parts, where the red sidebar wil l be 1 70 pixels
wide and the rest is given to the second
frameset. The second frameset spl its its
al located space evenly between two frames with
the radio and the status. Note that the frames
have names, which we wil l later use to direct
output to the proper places.
The fi le indexlist. html fi le that describes the
red sidebar on the left is shown here:
<html>
<body bgcolor=#990000 text=white link=white
vlink=lightblue>
<br>
<a href="radio.html" target=main>Radio</a>
<br>
<br>
<a href="http://192.168.xxx.xxx/" target=blank>Kitchen</a>
<br>
<a href="http://192.168.xxx.xxx/" target=blank>Living</a>
<br>
<br>
<a href="http://www.listenlive.eu/" target=blank>
ListenLive</a>
<br>
<a href="http://www.internet-radio.com/" target=blank>
Internet Radio</a>
<br>
<a href="http://www.radio-locator.com/" target=blank>
RadioLocator</a>
</body>
</html>
We see the usual header and body directives,
where the red background is defined. Then there
is a l ist of HTML anchors with the l inks to the
respective web pages. Note that the anchors
have a target directive, which directs the browser
when you cl ick the l ink to either a new window
with target=blank, or to a named frame with
target=main . The main frame is the radio area.
We wil l use this feature later to direct output to
the status section of the page.
The status page is rather trivial . I t just contains
the opening and closing html and body directives
and some dummy text. This wil l be overwritten
dynamical ly later.
CGI-BIN
The fi le radio. html contains al l the fun
interactive stuff. This is where the interaction with
the Raspberry Pi actual ly takes place. The
interface is bui lt as a horizontal table sandwiched
between <TR> and </TR> tags. Each entry in the
table is declared between the <TD> and </TD>
tags. In between these tags a <FORM> is defined
that executes an action on the Raspberry Pi, as
defined by the instruction action="cgi-
bin/play. sh" .
<html>
<head>
<title>Internet Radio</title>
</head>
<body>
<h1>Internet Radio Interface</h1>
<hr>
<table border="0">
<tr>
<td width=100 align=center>
<form action="cgi-bin/play.sh" method="POST"
target=status>
<input type="submit" value="Play">
</form>
</td>
:
:
</tr>
</table>
<hr>
<table border="0">
<tr>
<td width=100 align=center>
<form action="cgi-bin/play.sh?1" method="POST"
target=status>
<input type="submit" value="Eagle">
</form>
</td>
:
:
</tr>
</table>
</body>
</html>

56
This uses the POST method and directs the
output of whatever the play. sh script produces
to the status window. To execute the form we
define a button through the <INPUT> tag which
displays "Play" and submits the request to
execute the play. sh script on the server. See
the excerpt from the radio. html fi le on the
previous page.
The <TD> block between the <TR> tags is
repeated four times to produce four rows of
buttons. In between there are four blocks with the
<TD> tags and the enclosed form. Notice that I
supply an argument to the play. sh script by
appending a question mark and a number.
You may wonder what these scripts are and
where they reside on the Raspberry Pi. When the
apache2 server is instal led, a directory cal led
/usr/lib/cgi-bin is automatical ly created and
you just put the scripts in there. Note that you
need root permission to put fi les there; use sudo.
Let's begin with the stop. sh script, because it is
one of the simplest. Here is the content of the fi le
/usr/lib/cgi-bin/stop. sh :
#! /bin/bash
echo "Content-type: text/plain"echoecho
/usr/bin/mpc stopecho "Radio stopped. . . "
The first l ine with #! /bin/bash tel ls the operating
system that the contents of this fi le should be
treated as a sequence of bash commands,
where bash is a common shel l (or command
interpreter) for Linux. The empty l ines in the fi le
are just for structuring and to 'guide the eye'. The
three l ines with echo tel l the browser what
content type to expect, plus two empty l ines. The
setup with the forms in the HTML causes the
output to be piped to the status section of our
web page.
The HTML interpreter of the browser that
receives that information is instructed by the
l ines that there is just plain text fol lowing and
therefore the browser has an idea how to format
it. The l ine with /usr/bin/mpc stop executes
the mpc stop command on the Raspberry Pi
and whatever output it generates ends up in the
status window. The last echo command writes
'Radio stopped... ' to the status window.
Final ly we need to make the fi le executable:
sudo chmod +x /usr/lib/cgi-bin/stop. sh
This changes fi le permissions by adding the
execute bit with chmod +x.
The script fi les for 'Next', 'Previous' and the
buttons in the bottom row all work in the same
fashion. First there's the #! /bin/bash l ine
fol lowed by the 'Content' stuff with the three echo
commands. Then there is just whatever mpc
commands are required, with the output piped to
the status window.
Retrieving command line arguments
The only exception is the play. sh command
because I pass arguments to it from the browser.
You can see from the radio. html code on the
previous page that I pass the station number
from the playl ist in the FORM tag with
action="cgi-bin/play. sh?1" .
So how do we recover the string "1 " when
executing the fi le play. sh? The FORM tag with
cgi-bin actual ly makes the arguments that fol low
the question mark avai lable within the executing
script, in the environment variable
$QUERY_STRING . Here is the content of
/usr/lib/cgi-bin/play. sh :
#! /bin/bashecho "Content-type: text/plain"echoechoif [ -z $QUERY_STRING ] ; then
/usr/bin/mpc playelse
/usr/bin/mpc play "$QUERY_STRING"fi
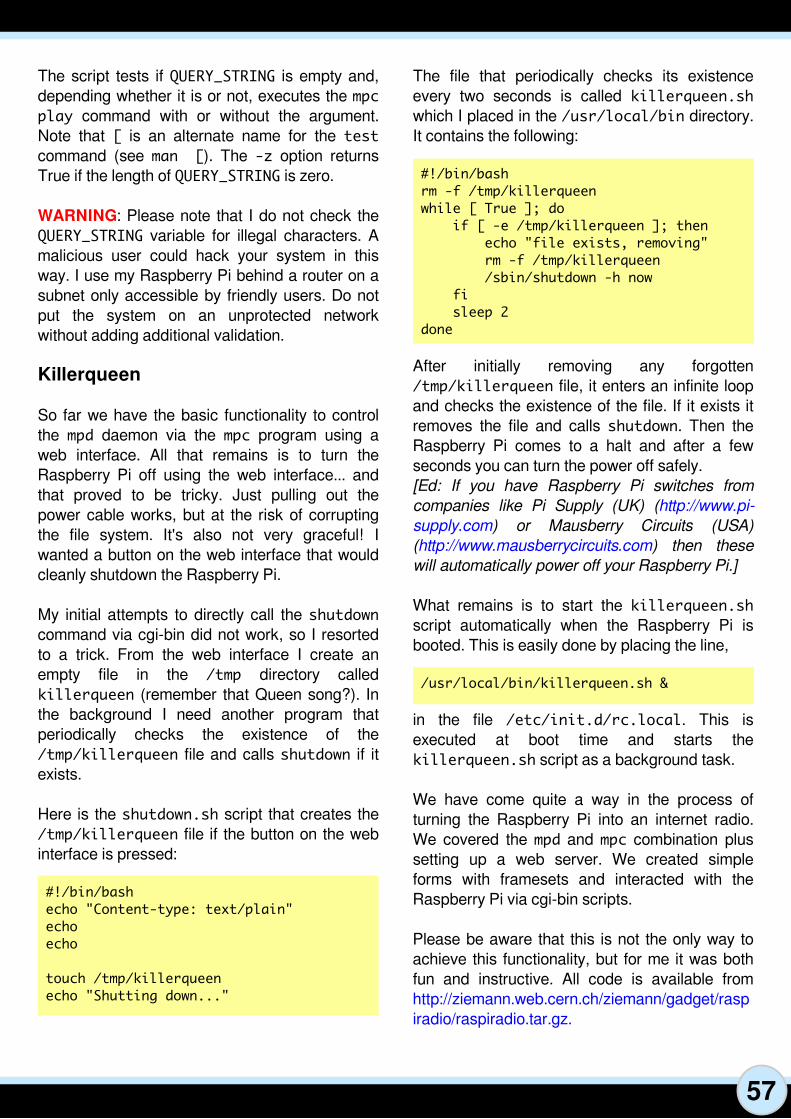
57
The script tests if QUERY_STRING is empty and,
depending whether it is or not, executes the mpc
play command with or without the argument.
Note that [ is an alternate name for the test
command (see man [) . The -z option returns
True if the length of QUERY_STRING is zero.
WARNING : Please note that I do not check the
QUERY_STRING variable for i l legal characters. A
malicious user could hack your system in this
way. I use my Raspberry Pi behind a router on a
subnet only accessible by friendly users. Do not
put the system on an unprotected network
without adding additional val idation.
Killerqueen
So far we have the basic functional ity to control
the mpd daemon via the mpc program using a
web interface. Al l that remains is to turn the
Raspberry Pi off using the web interface... and
that proved to be tricky. Just pul l ing out the
power cable works, but at the risk of corrupting
the fi le system. I t's also not very graceful! I
wanted a button on the web interface that would
cleanly shutdown the Raspberry Pi.
My initial attempts to directly cal l the shutdown
command via cgi-bin did not work, so I resorted
to a trick. From the web interface I create an
empty fi le in the /tmp directory cal led
killerqueen (remember that Queen song?). In
the background I need another program that
periodical ly checks the existence of the
/tmp/killerqueen fi le and cal ls shutdown i f i t
exists.
Here is the shutdown. sh script that creates the
/tmp/killerqueen fi le if the button on the web
interface is pressed:
#! /bin/bashecho "Content-type: text/plain"echoecho
touch /tmp/killerqueenecho "Shutting down. . . "
The fi le that periodical ly checks its existence
every two seconds is cal led killerqueen. sh
which I placed in the /usr/local/bin directory.
I t contains the fol lowing:
#! /bin/bashrm -f /tmp/killerqueenwhile [ True ] ; do
if [ -e /tmp/killerqueen ] ; thenecho "file exists, removing"rm -f /tmp/killerqueen/sbin/shutdown -h now
fisleep 2
done
After initial ly removing any forgotten
/tmp/killerqueen fi le, i t enters an infinite loop
and checks the existence of the fi le. I f i t exists it
removes the fi le and cal ls shutdown . Then the
Raspberry Pi comes to a halt and after a few
seconds you can turn the power off safely.
[Ed: If you have Raspberry Pi switches from
companies like Pi Supply (UK) (http://www.pi-
supply.com) or Mausberry Circuits (USA)
(http://www.mausberrycircuits.com) then these
will automatically power offyourRaspberryPi.]
What remains is to start the killerqueen. sh
script automatical ly when the Raspberry Pi is
booted. This is easi ly done by placing the l ine,
/usr/local/bin/killerqueen. sh &
in the fi le /etc/init. d/rc. local . This is
executed at boot time and starts the
killerqueen. sh script as a background task.
We have come quite a way in the process of
turning the Raspberry Pi into an internet radio.
We covered the mpd and mpc combination plus
setting up a web server. We created simple
forms with framesets and interacted with the
Raspberry Pi via cgi-bin scripts.
Please be aware that this is not the only way to
achieve this functional ity, but for me it was both
fun and instructive. Al l code is avai lable from
http://ziemann.web.cern.ch/ziemann/gadget/rasp
iradio/raspiradio.tar.gz.

58
SKILL LEVEL : INTERMEDIATE
Karl Welsh
Guest Writer
HISTORIC ARCADE GAMESMAME - Multiple Arcade Machine Emulator
Retro gaming with MAME
When arcades ruled
I remember the first video games arriving in the
late 1 970's. Historical ly, amusement arcades
were located at hol iday destinations and fi l led
with electro/mechanical games and pinbal l
machines dating back to the 1 950’s and 60’s.
Arcades changed with the introduction of the first
commercial ly successful ‘discrete logic’ or
‘digital ’ video game, Pong (Atari Inc: 1 972), and
then with second generation CPU powered
machines: Space Invaders (Taito/Midway:
1 978), Asteroids (Atari Inc.: 1 979), Galaxian
(Namco/Midway: 1 979), Defender (Wil l iams
Electronics: 1 980), Pac-Man (Namco/Midway:
1 980) and Donkey Kong (Nintendo: 1 981 ).
A behemoth of an industry was born. Arcade
games began appearing everywhere. Dedicated
arcades in towns and cities, game cabinets in
petrol stations, supermarkets, restaurants,
pubs/bars. I used to frequent a chip shop just
because it had Centipede (Atari Inc: 1 980).
At its peak in 1 981 , arcade games generated
annual revenues of over $5 bi l l ion in the USA
($1 2.79 bi l l ion in 201 3 dol lars) . In 1 983, the USA
endured ‘The Video Game Crash’ . Financial
markets lost faith in the 'passing fad' of video
games. The ‘Golden Age of Video Games’ was
over.
Retro gaming, emulation and MAME
Peter De Vries, an American editor, novel ist and
satirist wrote "Nostalgia isn't what it used to be",
but I disagree. ‘Old school’ or ‘retro gaming’ has
a substantial fol lowing and not just because of
nostalgia, but due to the restrictive/primitive
nature of the hardware. Many ‘retro games’ are
defined by their elegant simplicity and gameplay.
Atari Inc. co-founder Nolan Bushnel l ’s quote that
the perfect game is "Easy to learn, difficult to
master" describes the classics from the ‘Golden
Age of Video Games’.
An emulator is hardware or software (or both)
that duplicates the functions of one computer
system (the guest) in another computer system
(the host) which is different from the first one.
The emulated behavior closely resembles the
behavior of the real system (the guest) . When
running an emulator such as MAME (Multiple
Arcade Machine Emulator) , i t may seem odd that
some games may be slower on the Raspberry Pi.
Despite the increase in processing power, 32bit
ARM vs 8bit Z80/6502 or 1 6bit 68000 emulation
is VERY processor intensive. A ‘host’ system

59
often has to be many times more powerful than
its ‘guest’ system.
MAME was started in 1 997 by the Ital ian
programmer Nicola Salmoria, to emulate the
hardware of arcade game systems. I t was
original ly written for MS-DOS to emulate Pac-
Man, Pengo (Sega: 1 982), Crazy Climber
(Nichibutsu: 1 980), Lady Bug (Universal/Taito:
1 981 ) and Rally X (Namco/Midway: 1 980). I t
now supports over 1 0,000 ROMs (although not
al l are playable). With MAME you play the
original game code of classic arcade games
without the highly col lectable and expensive
original cabinets, or inserting any coins!
ROMs and samples
ROM fi les wil l be required to run specific games.
There are some ROMs available for non-
commercial use at http://mamedev.org/roms/
MAME requires the correct ROM revision for
individual versions of the core program. Lucki ly,
i t wi l l display and name the missing ROM fi les,
so just try another ROM revision.
Some early arcade games used additional
discrete logic circuits for sound (Astro Blaster
(Sega: 1 981 ), Berzerk (Stern Electronics: 1 980),
Donkey Kong (certain sounds e.g. The ‘Jump’) ,
Gorf (Bal ly Midway: 1 981 ) etc). MAME cannot
emulate these so samples are required to run
correctly.
Most games up to the mid/late 1 980's are fine,
but some require additional emulation processing
due to additional custom processors in the
original cabinet.
There is a l ist of some great games with the
game name, MAME code, revision required and
whether ‘samples’ are needed at:
http://www.raspberrypi.org/phpBB3/viewtopic.ph
p?f=78&t=29427
To run many of these MAME ROMs a license is
required:
http://www.mamedev.org/devwiki/index.php?title
=FAQ:ROMs
Compiling AdvMAME
AdvMAME can be compiled on a 256MB or
51 2MB Raspberry Pi. These instructions have
been tested with Raspbian Wheezy. Open a
LXTerminal window from the menu. Then before
continuing, make sure the Raspbian instal lation
is up to date:
sudo apt-get update
sudo apt-get upgrade -y
Download AdvMAME version 0.1 06.0
(advancemame-0.1 06.0.tar.gz) from,
http://sourceforge.net/projects/advancemame/fi le
s/advancemame/0.1 06.0/
This older version wil l produce better results on
the Raspberry Pi. Newer MAME releases offer
greater accuracy in emulation, but not
optimisation of performance.
Compil ing AdvMAME is resource intensive.
Therefore, before compilation use:
sudo raspi-config
to disable LXDE on boot. This wil l al low the
compilation to use the physical memory on top of
the ARM chip, rather than accessing swap space
on the SD card. With no overclocking, it wi l l take
around six hours to compile. Some overclocking
wil l improve the performance of the emulator.
Select the highest turbo overclocking mode that
is stable on your Raspberry Pi. Compilation is
possible with 64MB of RAM allocated to the
GPU (default setting) on a 256MB Raspberry Pi.
I f more memory is al located to the GPU, it wi l l
start to use the swap space a lot more and may
fai l to compile. After completing the
configuration, exit raspi-config and reboot.
Login using your account and password. Instal l
the dependencies l ibsdl1 .2-dev and gcc-4.7:
sudo apt-get install -y libsdl1. 2-dev \
gcc-4. 7
The gcc-4.7 compiler is needed to compile

60
AdvMAME with the least additional effort. (I t is
only possible to use the standard system
compiler if several of the AdvMAME source fi les
are modified.) To use the gcc 4.7 compiler type:
export CC=gcc-4. 7
export GCC=g++-4. 7
Then unpack the AdvMAME source code,
configure it and compile:
tar xvfz advancemame-0. 106. 0. tar. gz
cd advancemame-0. 106. 0
. /configure
make
The compilation wil l take four and a half to six
hours, depending on your overclocking setting.
When the compilation has finished type:
sudo make install
This is optional, but is useful as it negates the
need to change directory or set the PATH
manually.
Configuring AdvMAME
AdvMAME should be run once to setup al l the
correct folders and configuration fi les. Type:
advmame
I t wi l l give you a message tel l ing you that it has
set up the default options. To start LXDE type:
startx
There should now be a hidden folder cal led
.advance in your home directory (/home/pi by
default) . I f you cannot see it, right-cl ick your
mouse and tick the ‘Show Hidden’ box.
Now download some ROMs. As an example, the
Star Fire ROM can be downloaded from
http://mamedev.org/roms/starfire/starfire.zip
Then either use the fi le manager or type,
mv starfire. zip ~/. advance/rom/
to move it into place. I f the selected ROM has
samples, put those in the 'samples' directory.
There is no need to uncompress them!
Next, edit the fol lowing fi le,
nano . advance/advmame. rc
and add either,
device_video_clock 5 - 50 / 15. 62 / 50 ;
5 - 50 / 15. 73 / 60
(on one l ine) for HDMI output or,
device_video_clock 5 - 50 / 15. 73 / 60
for composite output. Then change the l ines,
display_resize mixed
display_artwork_backdrop yes
display_artwork_overlay yes
to,
display_resize fractional
display_artwork_backdrop no
display_artwork_overlay no
Save and close advmame.rc. MAME can be run
from LXDE, but using the console wil l
significantly increase the performance and
provide a ful lscreen display. Quit LXDE.
Running MAME
Now that MAME has been ful ly configured, type,
advmame Name_of_ROM
where Name_of_ROM is the name of the ROM
rather than the game title. For example:
advmame starfire
To get started press left cursor key then the right

61
cursor key and repeat a second time. To play
other games, download them and put the ROMs
into the .advanced/rom/ directory.
Controls
Control is with the cursor keys. The fire and jump
buttons are general ly Left-Ctrl , Space and Left-
Alt respectively. Joysticks and gamepads can
also be configured and used. Al l options for
control settings, video, sound, DIP switches etc.
are easi ly modified in the options menu and can
be saved for general ‘Al l Games’ or individual
games ‘This Game’. Other controls are:
5 - Add Coins
1 - 1 Player
2 - 2 Players
TAB - Options Menu (use Cursor Keys and
Enter)
ESCape - Exit
Other configuration options
MAME settings can be infinitely customised. The
defaults in advmame.rc are perfectly acceptable
for several games, but there are a few
exceptions:
1 . The default 'display_color' is ‘auto’ . Vector
games - Asteroids, Star Wars, etc. wi l l suffer
from an incorrect application error, so DON’T
change advmame.rc! In the Options Menu (TAB)
navigate to Video, Color and change ‘auto’ to
‘bgr1 6’ then ‘Save for this Game’.
2. The default 'display_mode' is ‘auto’ and
'display_magnify' is ‘1 ’ . Certain games suffer
from an incorrect application error in Aspect
Ratio (e.g. Burger Time (Data East: 1 982), I -
Robot (Atari Inc: 1 983) and Track & Field
(Konami: 1 983)) . Again, DON'T change
advmame.rc! In the Options Menu (TAB)
navigate to Video, Magnify and change ‘1 ’ to ‘2’
then ‘Save for this Game’.
3. Consider changing 'display_resizeeffect' from
‘auto’ to ‘none’ . Personal ly, I ’m not a fan of any of
these in emulations and they wil l be applied
when changing the magnification mode as
described above. However, they can be scrol led
through in the video options menu. Experiment
and see if you l ike any of them!
4. I f you are old enough to remember amusement
arcades, did the SAME game seem harder in
different venues? Well , i t probably WAS! Inside
the cabinet are toggle DIP switches that could be
set to change difficulty, l ives, extras, etc. These
are emulated in MAME and can be configured -
options (TAB), DIP Switches.
Don't like the command line?
The Advance suite of software also includes a
ful ly integrated front end for AdvMAME,
AdvMENU,
http://sourceforge.net/projects/advancemame/fi le
s/advancemenu/
A front end is a GUI (Graphical User Interface),
which al leviates the troublesome command line
typing for emulator control and execution. The
front end can also be helpful when your ROM
collection gets larger, since it can become hard
to remember al l the MAME codes (or what
ROMs are in the folder! ) . This can be instal led
using the exact same method as MAME itself.
Then just run the executable advmenu.
Older versions, better performance
Older versions of AdvMAME can often give
improved results, but require changes to the
scripts to compile correctly on the Raspberr Pi. I
suggest downloading 0.94.0, as it requires only a
few script changes. First, modify
/advance/l inux/vfb.c. Change 'MAP_SHARED !
MAP_FIXED' to 'MAP_SHARED', save and
close and compile as above.
In 1 999, Bi l ly Mitchel l achieved the first
perfect PacMan score of 3,333,360 by eating
every possible dot, power pel let, fruit and
enemy!
Steve Wiebe beat Bi l ly's 1 982 Donkey Kong
record. Many others have tried to get higher.
Hank S Chien is currently the champion with
1 ,1 38,600 points.

62
SKILL LEVEL : INTERMEDIATE
Mark Routledge
Guest Writer
CHOOSE YOUR WEAPONAdding console game control lers
Connecting an XBOX360, PS3 or
Wiimote controller to a Raspberry Pi
Choose your Weapon
I t is possible, and lots of fun, to use a variety oftoday's modern console control lers for yourRaspberry Pi projects. They are quite easy toinstal l , readi ly avai lable and you get quite a bit ofkit for your buck! This article describes how tosetup a Raspberry Pi to use a Microsoft® XBOX360 gamepad (wired and wireless), a Sony®PS3 gamepad and Nintendo® Wiimote.
For wireless devices you wil l need either theXBOX gamepad wireless adapter, or for theWiimote and PS3 gamepad you can use anexpensive bluetooth dongle. See http://www.el inux.org/RPi_USB_Bluetooth_adapters for al ist of known working bluetooth dongles.
I have tested al l the code on a Raspberry PiModel B, as well as on the new Model B+ board.
Before instal l ing any of the software ensure youare using a recent version of Raspbian and haveupdated your system. At the command line enter:
sudo apt-get update
sudo apt-get upgrade
To test al l of the hardware, an easy piece ofsoftware to use on the Raspberry Pi is jstest-gtk and the standard joystick l ibrary.
Enter the fol lowing command to instal l thesoftware:
sudo apt-get install jstest-gtk joystick
This program should now show up in yourdesktop ready for you to test. You wil l find thel ink under Menu → Other → joystick testingand configuration tool .
Once instal led it should display your hardwarefor example: Connecting your hardware.
A brief note about using the bluetooth adapter. Ihave found these can be a little tempremental attimes, so I strong recommend connecting yourdongle directly to the Raspberry Pi and connectany other hardware via a powered USB hub, e.g.the excel lent Raspberry Pi Hub! The bluetoothdongle wil l work from a powered hub on a lowlevel, but the bluetooth stack may not be able tosee it.
Setting up the XBOX gamepad
First open up LXTerminal and instal l the requireddriver for the XBOX 360 gamepad. The samedriver is used for both the wired gamepad andwireless gamepad, using the adapter. Enter:
sudo apt-get install xboxdrv

63
I t is possible to now use the XBOX gamepad witha variety of Linux games by using:
sudo xboxdrv --silent
However, this does not real ly give you muchcontrol over what each axis / button does. Youcan use the joystick testing andconfiguration tool mentioned earl ier but itcan be difficult to get setup. Lucki ly it is possibleto configure the XBOX gamead in a variety ofways. Each configuration requires a setup (text)fi le which you provide when launching thegamepad and driver. Through this you can turnone of the analogue sticks into a mouse and thebuttons into keypresses etc. This wil l make itusable with programs like Minecraft, Doom,Quake3 plus al l known emulators. Thepossibi l i ties are endless, and exciting.
Let us make a directory to store these setup fi les,which contain the button mappings. Enter:
cd ~
mkdir XBOX
cd XBOX
Create a configuration text fi le cal ledbasic_config . You can use any editor, butnano is quick and simple. Enter:
nano basic_config
Now enter the fol lowing mappings:
#----------------------------------------
# This file is the Basic Definition of
# the controller, allowing a deadzone.
# It will run silently.
#----------------------------------------
# Setup the DPad as buttons and triggers.
#
[xboxdrv]
silent=true
deadzone=6000
dpad-as-button=true
trigger-as-button=true
#
#----------------------------------------
# Map the right analog stick as absolute
# values (x2 and y2) and the left analog
# stick as mouse relative (x1 and y1).
#
[ui-axismap]
x2=ABS_X
y2=ABS_Y
x1=REL_X: 10
y1=REL_Y: -10
#
# ---------------------------------------
# Map the four coloured buttons a, b, x
# and y and set each one as a different
# key, or equivalent joystick button.
# In this case Left Shift, joystick
# buttons C and A and the key C.
# Map the triggers and bumpers in the
# same way; lt, rt, lb and rb.
# Map the DPad du, dl, dd, dr as WASD.
# Map the Back, Start and Guide (XBOX)
# buttons to Home, Escape and Enter.
#
[ui-buttonmap]
a=KEY_LEFTSHIFT
b=BTN_C
x=BTN_A
y=KEY_C
#
lb=KEY_LEFT
rb=KEY_RIGHT
lt=KEY_Z
rt=KEY_SPACE
#
dl=KEY_A
dr=KEY_D
du=KEY_W
dd=KEY_S
#
guide=KEY_HOME
back=KEY_ESC
start=KEY_ENTER
#--------------- EOF --------------------
Save and close the configuration fi le and exitfrom nano by pressing the <Ctrl>+<X> keystogether, fol lowed by the <Y> key then <Enter>.
Description of the XBOX config file
This fi le is the basic definition of the control ler,al lowing a deadzone. I t wi l l run si lently, meaningit wi l l not output additional information to theterminal.
The fi le sets up the DPad as buttons andtriggers. The next few sections are used to mapthe right analogue stick as absolute values on thex2 and y2 axes and the left analogue stick asmouse relative values on the x1 and y1 axes.

64
I t maps the four coloured buttons a, b, x and yand sets each one as a different key, orequivalent joystick button, in this case Left Shift,joystick buttons C and A, and the C key.
I t also maps the triggers and bumpers (lt, rt, lb,rb) in the same way.
Final ly it maps the DPad (du, dl, dd, dr) as theclassic W, A, S, D keyboard setup. I t also setsthe Back, Start and Guide (XBOX) buttons to theHome, Escape and Enter keys respectively.
You can now physical ly plug in your XBOXgamepad or adapter if you have not already doneso. I recommend connecting the gamepad oradapter for the XBOX 360 to a powered hub.
Do a quick l ist of USB devices to check that thegamepad or adapter has been detected. Enter:
lsusb
You should see an entry for the XBOX gamepador adapter simi lar to,
Bus 001 Device 009: ID 045e: 028e Microsoft
Corp. Xbox 360 Controller
or,
Bus 001 Device 008: ID 045e: 0719 Microsoft
Corp. Xbox 360 Wireless Adapter
Final ly cal l the basic configuration mapping usingthe --config switch with your configuration fi le:
sudo xboxdrv --config ~/XBOX/basic_config
You can run this command in the background byadding an & at the end of the command.
At this point you can either use the command,
sudo jstest /dev/input/js0
to test the gamepad from the command line or,
startx
and select the joystick testing andconfiguration tool .
For the wired gamepad you should be connectedand up and running.
I f you are using the wireless gamepad you wil lhave to sync it to the adapter. This is done bypushing the Sync button on the adapter thenpushing the Sync button on the gamepad.
Note: Even though the gamepad is connected,the XBOX pad quadrant l ight wil l continue toflash! There is no quick or easy way to turn offthe pad once you have finished using it, otherthan temporari ly removing the battery pack for afew seconds.
I f you are keen to test your new setup in Pythonfol low the excel lent tutorial provided by RhishiDespanda in The MagPi Issue 26, pages 1 2-1 3.
Setting up the PS3 gamepad
I f you have the PS3 gamepad wired into a USBhub with the charging cable, the Raspberry Pishould detect the gamepad and work almostimmediately. You may have to press the "PS"button to start though.
Alternatively you can use a bluetooth dongle.Again, connect the bluetooth dongle directly intoone of the Raspberry Pi 's USB ports, not via theUSB hub. The fol lowing drivers and settings wil lonly work with genuine PS3 gamepads. Cheapimports simply do not seem to work. Save yourmoney and buy an official second hand PS3gamepad!
Wired PS3 gamepad
To test a wired PS3 gamepad list the USBdevices with the command:
lsusb
You should see something similar to:
Bus 001 Device 008: ID 054c: 0268 Sony
Corp. Batoh Device / PlayStation 3
Controller
Either test from the console with the command,
sudo jstest /dev/input/js0
65
or,
startx
and use the joystick testing andconfiguration tool .
Wireless PS3 gamepad
Instal l the required l ibraries to start bluetooth.This may seem like a lot, but it wi l l save time andbother later. Enter:
sudo apt-get install bluez-utils
sudo apt-get install bluez-compat
sudo apt-get install bluez-hcidump
sudo apt-get install checkinstall
sudo apt-get install libusb-dev
sudo apt-get install libbluetooth-dev
Next download the drivers for pairing thebluetooth dongle to the PS3 gamepad. Enter:
sudo wget http: //www. pabr. org/sixlinux/si
xpair. c
gcc -o sixpair sixpair. c -lusb
Note: I f this second command fai ls ensure thatyou have instal led libusb-dev properly.
After this you should have a executable fi le cal ledsixpair .
Check that your bluetooth dongle is detected byl isting the USB devices with the command:
lsusb
You should see your adapter l isted, for example:
Bus 001 Device 004: ID 0a12: 0001 Cambridge
Silicon Radio, Ltd Bluetooth Dongle (HCI
mode)
Now connect your PS3 gamepad via a USBcable to the Raspberry Pi and use sudo toexecute the sixpair fi le:
sudo . /sixpair
I f you receive an error about hcitool then againmake sure you instal led al l the above packages.
The program should l ist two MAC addresses, butthey may not be the same. For example:
Current Bluetooth master:
00: 15: 83: 0c: bf: eb
Setting master bd_addr to
00: 1b: dc: 0f: ed: b5
Run the command again and you should see:
Current Bluetooth master:
00: 1b: dc: 0f: ed: b5
Setting master bd_addr to
00: 1b: dc: 0f: ed: b5
You have successful ly paired your control ler withyour bluetooth dongle. We now need to instal l theSixaxis drivers required for the PS3 gamepad towork l ike a joystick.
Install the Sixaxis joystick manager
We wil l download the latest archive and compileit. To get the driver tarbal l (compressed fi le)enter the fol lowing command all on one l ine:
sudo wget http: //sourceforge. net/projects
/qtsixa/files/QtSixA%201. 5. 1/QtSixA-1. 5. 1
-src. tar. gz
Expand the driver with the command:
tar xfvz QtSixA-1. 5. 1-src. tar. gz
Naviagate into the driver directory:
cd QtSixA-1. 5. 1/sixad
Make the required driver for the Raspbian bui ld:
sudo make
Make a directory to store different profi les for thePS3 gamepad with the command:
sudo mkdir -p ~/var/lib/sixad/profiles
Final ly, instal l the required driver that you havejust made. Enter:

66
sudo make install
sudo checkinstall
The last command automatical ly creates apackage for you, so you can easi ly uninstal l i tlater if you no longer need it or want to use adifferent system. To uninstal l , enter thecommand:
sudo dpkg -r sixad
Now to test it, launch temporary a sixad daemon.
sudo sixad --start
I f the gamepad is sti l l plugged in, unplug it andthen press the "PS" button on the Dualshockgamepad. I f you feel a vibration then it works.Congratulations!
You may not feel a vibration, but it should displaysome sort of connection on the screen. Forexample, you should see somethink l ike:
sixad-bin[6860] : Connected Sony Computer
Entertainment Wireless Controller
(04: 76: 6E: F1: 74: 3E)
Note: On both the PS3 gamepads that I havetested, NEITHER vibrated! Although both arecorrectly detected using the joystick testingand configuration tool , one of thegamepads shows no signs of connection (no redflashing LEDs) whi le the other continuouslyflashes! Both are offical "Dualshock 3" Sixaxisgamepads, but both are also second-hand and Icannot vouch for the working vibration as I do nothave a PS3!
To make the sixad daemon run automatical lyevery time you start the Raspberry Pi, enter thefol lowing command:
sudo update-rc. d sixad defaults
To end the connection with your gamepad onceyou are finished using it, run the fol lowing twocommands:
sudo sixad -stop
sudo service bluetooth stop
This wil l free up your PS3 gamepad and it shouldreturn to sleep!
Nintendo Wiimote
You wil l need to use a bluetooth dongle. I t isrecommend to always plug the bluetooth dongledirectly into one of the USB ports on theRaspberry Pi, not the USB hub!
Ensure that the bluetooth driver is correctlyinstal led with the command:
sudo apt-get install bluetooth
To check the status of the bluetooth driver, enterthe command:
sudo service bluetooth status
You should see something similar to:
[ ok ] bluetooth is running.
I f you do not see this then enter the command:
sudo service bluetooth start
Now instal l the CWiiD, WMInput and WMGuipackages. These are required to use a Wiimote:
sudo apt-get install python-cwiid
sudo apt-get install wminput wmgui
Run the hcitool to check the bluetooth adapter:
sudo hcitool dev
Start the Wiimote in detection mode by either

67
pressing the small red sync button or holdingbuttons 1 and 2 on the Wiimote unti l the l ightsflash. Now run the hcitool scan command tolocate your bluetooth Wiimote. Enter:
sudo hcitool scan
After a short period of time it should l ist yourWiimote as a Nintendo RVL. For example, youshould see something l ike:
Scanning . . .
00: 1D: BC: FB: 79: F0 Nintendo RVL-CNT-01
Write down whatever was displayed as the MACaddress for your Wiimote. We wil l use this later.
Universal input needs to be setup so it can beused by users other than 'root' users. We wil l editthe Wiimote rules using nano. Enter:
sudo nano /etc/udev/rules. d/wiimote. rules
Add the fol lowing l ine to the bottom of the fi le:
KERNEL=="uinput", MODE: ="0666"
Save and close the fi le by pressing <Ctrl>+<X>together, then press <Y> and <Enter>.
You need to reboot your Raspberry Pi for thechanges to take effect. Enter the command:
sudo reboot
Wiimote configuration file
We have setup and detected al l the hardware.We must now create a custom Wiimoteconfiguration fi le using nano that maps the inputsfrom the Wiimote to buttons. Enter:
nano /home/pi/mywminput
Now enter the fol lowing mappings:
# ---------------------------------------
# Setup for standard Wiimote
Wiimote. A = BTN_A
# The trigger is button B.
Wiimote. B = BTN_B
# Setup the DPad
Wiimote. Dpad. X = -ABS_Y
Wiimote. Dpad. Y = ABS_X
# Setup the remaining buttons
Wiimote. Minus = BTN_SELECT
Wiimote. Plus = BTN_START
Wiimote. Home = BTN_MODE
Wiimote. 1 = BTN_X
Wiimote. 2 = BTN_Y
#--------------- EOF --------------------
Save and close the fi le by pressing <Ctrl>+<X>together, then press <Y> and <Enter>.
Final ly it is time to test the Wiimote. Enter thefol lowing command on one line:
sudo wminput -d -c /home/pi/mywminput
<Wiimote address> &
Replace the <Wiimote address> with the MACaddress we wrote down earl ier.
The & at the end just means that this process wil lkeep running in the background while you doother things.. . l ike play games!
Final ly, test the Wiimote with the command:
sudo jstest /dev/input/js0
Game on!
Now that you have successful ly got yourcontrol ler working why not take it for a spin usingone of the games previously mentioned, setup anexcel lent emulator l ike Picodrive or try someLinux games that can be easi ly instal led. Try anyof the fol lowing games for some light rel ief:
sudo apt-get install abuse blobwars
sudo apt-get install frozen-bubble geki3
sudo apt-get install hex-a-hop ltris
sudo apt-get install supertux triplane
sudo apt-get install xblast-tnt xracer
sudo apt-get install xscavenger
I intend to write a fol low-up article where I wi l lgive examples of how to use each of thesedifferent devices from within Python and Linux.
For al l this and much more please visit myRaspberry Pi documentation project athttp://goo.gl/EEQ5J [Ed: I have added this pageto my favourites!]

68
SKILL LEVEL : BEGINNER
David Honess
Guest Writer
RISC OS ELITE
Fly your Cobra MkIII trading andcombat craft in this classic game
Unless you’re around my age, or older, two things are
probably true about you. One is that you have never played
Elite and the other is that the logo below probably looks l ike
it’s for a garden centre! Fear not, I am going to let you in on
al l these strongly guarded secrets. After reading this you
wil l be able to go up to older gamers and watch their jaws
hit the floor when you hold your own in a conversation
about a seminal game from the 1 980s.
Back in 1 987 Acorn Computers released the successor to
the BBC Micro. I t was cal led the Archimedes and it was
tremendously popular. I t had a new kind of processor
cal led a RISC chip (Reduced Instruction Set Computer) .
Acorn Computers evolved over the years into what is now
called ARM and you have an ARM processor in your
Raspberry Pi. So you could say that the Raspberry Pi is the
great-great-grandchi ld of the Archimedes? Up to you, but
that mantle probably belongs to Acorn's earl ier BBC
Microcomputer.
Acorn made an operating system for their RISC chips
cal led RISC OS which was a hugely popular, much loved,
operating system. I t is sti l l being developed and in
November 201 2 RISC OS was released for the Raspberry
Pi as an SD card image that you can download. I f you’re a
fan of drag and drop OSes you wil l get on fine with it.
El i te was a seminal computer game that changed the
entire landscape of gaming. Back in the early 1 980s
computer games were al l about getting the highest score
before your l ives ran out. El ite was an open ended game
that had no score, no levels and no bosses – just one
enormous galaxy within which you could do whatever you
wanted. This is what people cal l a “sandbox” game.
El ite original ly came out in 1 984 on the BBC Micro (above)
and had wireframe graphics. By the time the Archimedes
version was released in 1 991 they had improved the
graphics a fair bit. The Archimedes version of El ite is
widely regarded as the best version of the original game,
so in the instructions that fol low I am going to explain firstly
how to get the game running and secondly how to play it.
Our goal here is to run the Archimedes version of El ite on
your Raspberry Pi. Unfortunately Arc Elite wil l not run
natively on the Raspberry Pi because the Archimedes
processor is 26 bit whereas the Pi processor is 32 bit. So
we need to use an emulator. This is a program that wil l

69
basical ly fool the game into thinking it’s running on a real
Archimedes computer and thus wil l run normally. We wil l
use ArcEm which gives you a ful ly functional Archimedes
desktop environment to work in (within which we wil l run
the game).
The first thing we need to do though is instal l and boot
RISC OS. This was covered in Issue 9 of The MagPi (see
http://goo.gl/XsCqoL). I f you don't have a UK keyboard
you'l l want to change the keyboard setting. Double-cl ick on
the !Configure icon then cl ick on the Keyboard icon.
Change the keyboard to your locale.
A quick note about the RISC OS mouse. This had three
buttons. Clicking the mouse wheel on your modern mouse
wil l do the job of the middle mouse button (button 2). I t’s
actual ly the middle cl ick that gives you context menus
similar to those that you have in Windows. We’l l be using
those later.
To download the necessary Archimedes emulator and fi les
for El ite we wil l need to have an internet connection.
Alternatively you can copy the fi les over from a USB
memory stick. To configure network access, if i t is not
already working by default, double-left cl ick on the desktop
icon named !Configure and then double cl ick the Network
icon on the right. From here enable the TCP/IP protocol
suite in Internet configuration:
RISC OS behaves differently to Windows and Linux. When
you double-cl ick an application to start it (eg !NetSurf) it
might seem that nothing has happened. But look in the
bottom right-hand corner of the Icon Bar. Your application
is running.. . just cl ick on its icon to open it.
To obtain ArcEm load the !NetSurf browser, navigate to
http://arcem.sourceforge.net and download the latest
version via the “get it here” l ink. I f you have trouble finding
it type the fol lowing into the address bar on !NetSurf:
http://sourceforge.net/projects/arcem/fi les/latest/download
?source=fi les. Make sure you download the RISC OS
version and not the default Windows version!
Note that !NetSurf may display an error saying Bad type.
This is because it does not recognise the automatic
download that the Sourceforge site tries to launch. Click on
the direct l ink in Sourceforge and the download wil l start.
Tel l RISC OS where you want the downloaded fi le to go by
first double cl icking the SD card icon in the bottom left,
then use button 1 to drag the icon within the NetSurf
Download box into the SD card window (as above).
The zig-zag on the downloaded fi le is because it is a Zip
fi le (it has other fi les compressed inside it) . With some of
the download mirrors the fi le type is not set to Zip. You can
tel l when this happens because the download icon wil l be
green with the word "Data" and not a folder with a zig-zag.
To fix this move your mouse over the icon and cl ick the
middle mouse button (scrol l wheel) , choose "Fi le 'arcem-
1 /50-riscos'" -> Set type -> then change Data to Zip (ie
type Zip).
The next thing we need to do is create a new folder to
unzip the emulator into. Middle cl ick (mouse wheel)
somewhere in the SD card folder and a context menu wil l
appear.

70
Choose New Directory > (move the mouse over the arrow),
type ArcEm into the box and double cl ick the new ArcEm
folder. An empty window wil l display, Double cl ick on the
Zip fi le and you wil l see two folders. Open the "Apps" folder
then the "Misc" folder. You wil l see 3 fi les (!ArcEm,
COPYING and hostfs) . Select and drag these fi les into the
ArcEm folder.
Before we can run the emulator we need to give it a ROM
fi le. This is an image of the original Archimedes operating
system that the emulator wil l boot up into. We wil l use
RISC OS v3.1 0. Open !NetSurf, navigate to
http://home.tiscal i .nl/~jandboer/ and download the fi le
cal led ArchiEmu (5M). We now need to get the ROM fi le
out of the zip fi le. Double cl ick the archi.zip fi le. You wil l
see an icon cal led !Boot. I t’s actual ly a program, so don’t
double cl ick it – double cl icking on programs runs them.
Hold down the Shift key and then double cl ick it. You’ l l see
another window with a Resources folder. Double cl ick the
Resources folder to open it. Now hold down the Shift key
and double cl ick on !ArchiEmu. You’ l l see another window
with an OS folder. Double cl ick the OS folder and now
you’ l l see the fi le we want. I t’s named ro31 0. Drag it into
the SD card window.
We now need to change a few properties on this fi le so that
our ArcEm program wil l recognise it. These can each be
done by middle cl icking (mouse wheel) on the ro31 0 fi le.
First we must remove its access protection (Fi le 'r031 0' >
Access > Unprotected), then set its fi le type to Data (Fi le
'ro31 0' > Set type > type Data) and final ly rename the fi le
to ROM (File 'ro31 0' > Rename > type ROM in capitals) .
Open the ArcEm folder again. Hold down the Shift key and
double cl ick the !ArcEm icon. That wil l show the ArcEm
program fi les. Drag the ROM fi le here.
We can now run the emulator to see if i t works. Double
cl ick the !ArcEm icon. The screen wil l go black for a
moment and you wil l see the actual boot up sequence of
the original Archimedes computer.
I f the screen is a l ittle stretched you can fix this by pressing
F1 2 and a small command prompt wil l appear at the
bottom of the screen. Type wimpmode 28 and press Enter
twice. Now you should have a 4:3 screen ratio (640×480 at
256 colours).
You can make screen mode 28 permanent by setting it as
the default screen mode in the Archimedes configuration.
First double cl ick on the Apps icon in the bottom left and
then double cl ick !Configure. I t wi l l appear in the task area
in the bottom right. Cl ick on it and then cl ick the screen
icon. Set the Default screen mode setting to 28. You can
cl ick where the current number is and edit it as text.
In the bottom left corner of the screen you’ l l see an icon
named HostFS. This corresponds to the hostfs folder back
in Raspberry Pi land that you may have noticed before (see
below). Anything you put in here can then be accessed by
the emulated Archimedes. Guess what we need to put in
here? The game!
The emulator does not shut down very graceful ly, i f you
middle cl ick on the Acorn icon (bottom right) you can
choose Exit from the context menu. But this just causes a
hang. Unti l this bug is fixed you need to power cycle your
Pi (turn it off for a second, then back on again). I t is
perfectly safe to do this.
When the Pi has rebooted open !NetSurf again and
navigate to http://www.iancgbell .clara.net/el i te/arc/
The fi le we want is marked Click here to download Arc
Elite (41 9 Kbytes).
Drag the fi le into the SD card window, just l ike the other
downloads we did, and you’ l l now see a fi le cal led
b505241 0. We need to change the type of this fi le to Zip so
that we can extract the game. To do this middle cl ick
(mouse wheel) on the fi le and select Fi le 'b505241 0' > Set
type and enter Zip.
Now we can extract the zip fi le into ArcEm’s hostfs folder.
Open the ArcEm folder again, then the hostfs folder.
Double cl ick the b505241 0 zip fi le. You wil l now see the
game fi les. Position the hostfs and b505241 0 windows so
that they are side by side (drag the title bar) . Drag a box
around all the game fi les and final ly drag them all into the
hostfs folder. You wil l then see a copying dialog box as
shown below.
Run !ArcEm again and this time the game wil l be avai lable.
When you get to the Archimedes desktop, double cl ick the
HostFS icon and you should now see the game. Double
cl ick the icon named !el i te to start the game. You wil l be

71
asked if you have a high resolution monitor, press Y. The
game wil l appear in the bottom right corner as an icon and
probably named Jameson (the default commander name).
Cl ick this and you can then start playing!
When in the game you can press F1 2 to go back to the
desktop. I f you middle cl ick (mouse wheel) the Jameson
task icon you can get access to an Elite Preferences menu
where you can configure the game settings (see below). I
would suggest turning down mouse sensitivity to 1 , or
disabl ing the mouse altogether and playing the game with
keys. That way the mouse works when you’re in the menus
and you use keys for fl ight. There is also a save game
menu you can access from here.
In the Docs folder (above) there are some documents that
come with the game that you can read. The basic idea in
Elite is that you start off with a real ly poor space ship and
by trading goods, narcotics, radioactive material etc you
can earn money to buy better stuff for your ship, or buy a
whole new ship.
I f you want to fly using the mouse, this is a ski l l in itself. I
recommend you press the Caps Lock key to turn on an
auto centering feature which makes it 1 00% easier. Mouse
button 1 is the fire button while buttons 2 and 3 are for
speed up and slow down respectively.
On the keyboard the fl ight keys are S, X for pitch and <, >
for rol l , ? and Space bar for speed up and slow down and
A is fire. To jump to another star system, press F6, choose
the planet you want and then press H (for hyperspace).
This wil l give you a 1 0 second count down to your jump.
Manually docking with space stations is especial ly hard.
To help, here is a video of someone doing this on the BBC
version of El ite: http://youtu.be/X0czVxiEqNM
The basic idea is that you need to find the space station,
get yourself l ined up with its letter box shaped entrance,
then fly into it as straight as you can. I f you get it wrong
you're dead (the game is actual ly that brutal) . Here is how I
usual ly do it. After you do a hyperspace jump you’ l l see a
planet somewhere near you. Head towards it and press J
to jump. I f another ship gets near you a message saying
MASS LOCKED wil l appear – you can’t fire your jump
drive when something else is near you. I f i t’s a pirate you’ l l
need to fight. Often getting them to crash into your shields
is enough to ki l l them. Keep heading towards the planet. I t
should get bigger as your approach.
I f you look at the game screen shot to the left, you’ l l notice
there is a square box with a green cross hair, just below
the E in MISSILE. This is used to help you locate the space
station. I t wi l l show as a white dot if the station is in front of
you and a red dot if behind. Try and get the white dot in the
centre of the cross hair. That then means you’re flying
directly towards the space station. When you get near it,
start slowing down and get ready to do what you saw in the
video above. Fly roughly near the station, slow right down,
then point towards the centre of the planet, speed up again
and fly towards it for a few seconds. Slow down again, now
point yourself back to the station and you should now see
the entrance is pointing towards you (the entrance always
points at the centre of the planet) . Speed up again to about
1 /3 and head in for docking. You might need to repeat this
manoeuvre a few times to get yourself properly l ined up.
When you’re happy with your al ignment, you can try and
match your rotation with the rotation of the space station.
What I tend to do is get quite close, wait for the letter box to
be horizontal and then floor it through!
To real ly get into the Elite world, you can read "Elite: The
Dark Wheel", a short novel la by Robert Holdstock. I t's
avai lable at www.iancgbell .clara.net/el i te/dkwheel.htm.
Watch out for the Vipers, Commander Jameson!
The MagPi wishes to thank:
Ian Bell (www.iancgbell .clara.net/el i te) ,
David Braben (www.frontier.co.uk),
3QD Developments Ltd (www.riscos.com),
Castle Technology Ltd,
and RISC OS Open Ltd (www.riscosopen.org)
for their support with this article.

72
SKILL LEVEL : BEGINNER
Martin Hodgson
Guest Writer
TEXT ADVENTUREA Tim Hartnel l game in Python
Stronghold of theDwarven Lords
Introduction
In the early 1 980s, as early home computers boomed in popularity,
a l i ttle programming knowledge was essential . My first computer
was a Sinclair ZX81 with 1 KB of memory. I used to dream of being
able to afford a 1 6KB RAM expansion! To make the ZX81 do
anything at al l , you had to know a few BASIC commands.
Thankful ly, the computer’s manual included a good introduction to
BASIC programming. For those interested in more advanced
programming, magazines l ike ZX Computing and Creative
Computing included l istings of BASIC programs. These were
mostly games that could be typed in, played, saved and hacked to
your hearts content. I t was great fun and a fantastic way to learn
how to program.
During the early '80s, the late Tim Hartnel l was a prol ific author of
BASIC games and published many articles and over 30 books.
Second-hand copies of his books are sti l l readi ly avai lable onl ine
and a few PDFs can be found on vintage computer fan websites.
Stronghold of the Dwarven Lords
Stronghold of The Dwarven Lords is a simple adventure game,
from the 1 984 book "Tim Hartnel l ’s Giant Book of Computer Games". In my Python translation I try to stick as
closely as possible to Tim’s original BASIC version. The Python that fol lows is written in Python 3. Start by
opening the Python IDLE3 shel l . , then press Ctrl+N to open a new window. I suggest typing the program in
manually, just l ike we would have done 30 years ago. Try to work out how it works as you go along.

73
# STRONGHOLD OF THE DWARVEN LORDS v2. 1# Martin Hodgson - November 2013# Translated from Tim Hartnell' s original BASIC version. . .# . . . with a couple of updates. Now you can' t walk through walls!
import random
# VARIABLES, LISTSdata1 = [2, 2, 2, 3, 2, 4, 2, 5, 2, 6, 2, 7]data2 = [3, 7, 4, 7, 5, 7, 5, 6, 5, 5, 5, 4, 5, 3, 6, 3]data3 = [7, 3, 7, 4, 7, 5, 7, 6, 7, 7, 7, 8, 7, 9, 9, 8]data4 = [9, 9, 10, 8, 10, 7, 10, 6, 10, 5, 10, 4, 8, 8]data5 = [10, 3, 11, 3, 12, 3, 13, 3, 14, 3, 14, 2, 7, 10]data6 = [6, 10, 5, 10, 4, 10, 3, 10, 2, 10, 2, 11, 2, 12]data7 = [2, 13, 2, 14, 6, 11, 6, 12, 6, 13, 6, 14, 7, 12]data8 = [14, 12, 8, 12, 8, 14, 9, 12, 9, 13, 9, 14, 10, 12]data9 = [11, 9, 11, 10, 11, 11, 11, 12, 12, 9, 13, 9, 13, 10]data10 = [13, 11, 13, 12, 13, 13, 13, 14, 14, 14]data = data1 + data2 + data3 + data4 + data5 + data6 + data7 + data8 + data9 + data10
# FUNCTIONSdef new_game(): # GOSUB 640 in original BASIC version
global a, b, z, y, x, s, m, a, e, dprint ("================================================================\n")input ("STRONGHOLD OF THE DWARVEN LORDS\nNew Game - Press Enter. . . ")# Item zero and the zero at the beginning of each sub-list will be ignored. . .# . . . as the BASIC program uses indices 1-15a = [[0] , [0] , [0] , [0] , [0] , [0] , [0] , [0] , [0] , [0] , [0] , [0] , [0] , [0] , [0] , [0] ]b = random. randint(1, 3)z, y = 14, 14if b == 2:
y = 2if b == 3:
z = 2x, s = 1, 2for b in (range(1, 16)):
for c in (range(1, 16)):a[b] . append(x)if random. randint(1, 10) > 8:
a[b] [c] = sif c<2 or c>14 or b<2 or b>14:
a[b] [c] = xd, e = 2, 2for f in (range(0, 136, 2)):
b = data[f]c = data[f+1]a[b] [c] = s
a[z] [y] = s # Makes sure the gold isn' t in a wallm = -15return
def show_map(): # GOSUB 480 ' help' in original BASIC versionglobal b, mprint ("\n================================================================\n")print ("North")b = 15while b > 0:
strng = ""for c in (range(1, 16)):
if a[b] [c] == x:strng += ("#")
elif b == d and c == e:strng += "*"
elif a[b] [c] == s:strng += " "
print (strng)

74
b -= 1print ("South")m += 15a[d] [e] = s# Here I' ve omitted two lines from the BASIC version:# 600 FOR J = 1 TO 2000: NEXT J - Makes the prgram pause.# 610 CLS - Clear screen. Not possible in Python Shell?
def move(): # Lines 50 to 410 - Main game script from BASIC versionglobal m, d, em += 1print ("\n================================================================\n")print ("STEP NUMBER", m)if a[d+1] [e] == s:
print ("NORTH: OPEN")elif a[d+1] [e] == x:
print("NORTH: WALL")if a[d-1] [e] == s:
print ("SOUTH: OPEN")elif a[d-1] [e] == x:
print("SOUTH: WALL")if a[d] [e+1] == s:
print ("EAST: OPEN")elif a[d] [e+1] == x:
print("EAST: WALL")if a[d] [e-1] == s:
print ("WEST: OPEN")elif a[d] [e-1] == x:
print("WEST: WALL")print ("THE DWARVEN SOURCE BEAM READS: " , (100 * abs(z-d) + 10 * abs(y-e)))print ("Which direction do you want to move. . . ")a_string = input ("N - north, S - south, E - east, W - west, H - help ? ")a_string = a_string. upper() # Convert lowercase to upper caseif a_string == "H" :
show_map()elif a_string == "N" :
d += 1elif a_string == "S" :
d -= 1elif a_string == "E" :
e += 1elif a_string == "W" :
e -= 1else:
print("\nPardon? I don' t understand. . . ") # Inform the player that the command isn' t recognisedif z == d and y == e:
win()if a[d] [e] == x: # In the original you could walk through walls. . . Now you can' t!
print("\nOuch! You just walked into a wall. . . ")if a_string == "N" :
d -= 1elif a_string == "S" :
d += 1elif a_string == "E" :
e -= 1elif a_string == "W" :
e += 1
def win():print ("\nYou found the Dwarven riches in just", m, "steps! \n")show_map()# This feature has been added - The original version would just END.new_game()show_map()

75
# MAIN PROGRAMnew_game()show_map()while(1):
move()
How to play
First, read the fol lowing introduction by Tim Hartnel l , whose prose revealed his great enthusiasm for game
programming…
When the game starts you are shown a map of the cavern system with your position indicated as an asterisk * .
Your aim is to find the hidden gold with the minimum number of steps. Each turn you are given a brief description
of your surroundings and must choose the direction to take next. Once the map scrol ls off the screen you are
only al lowed to look at it again by choosing H for help. However, each time you ask for help you are penalised 1 5
steps.
How the program works
For those with a basic understanding of Python, you wil l see that the main parts of the program are structured as
fol lows:
• At the beginning there are a few data l ists of numbers that are combined together to make one big l ist.
• There are the functions: new_game() , show_map() , move() and win() .
• Then final ly there is the main program, which cal ls the functions in order to initiate the first game.
Tim’s original variable names are not very descriptive. For me this added to the fun of working out how the
program works. My code only uses basic Python constructs. The new_game() function is probably the most
complicated part of the program; it creates a l ist of 1 5 x 1 5-item ‘sub-l ists’ that represents the map. This is done
by first creating a grid that is designated as ‘al l wal l ’ , but with a few random spaces. Then more spaces are
added according to the data l ist. Hopeful ly, this wil l become clearer as you type in the program and play the
game.
Have fun finding Tim's gold!
STRONGHOLDOFTHEDWARVENLORDS
Deep beneath the earth you go, far into the Dwarven Heartland. Danger is on every side as you descend, but
your greed draws you on. Searching through the dusty stacks of uncatalogued manuscripts in room 546B of
the British Museum, you came across a faded and almost illegible map to a Dwarven hoard of gold. Since that
day you have been obsessedwith the idea of finding it.
As you go down into the labyrinth you realise that the Dwarven Lords, who secreted the gold here 7389 years
ago, have long since become extinct. So the main danger you face is from the layout of the cavern system
itself, rather than from Guards of the Stronghold.
In STRONGHOLD OFTHE DWARVEN LORDS you are in a cavern which holds the gold. Each time you play
this game, the gold can be in one of three places. The only information you get as to your progress is
information provided by the Dwarven Source Beam which you found as you made your way into the cave
system. This gives you feedback after each move as to the location of the gold, but you need to learn how to
interpret the information it gives you before you'll be able to make much use of it.

76
SKILL LEVEL : BEGINNER
Ian McAlpine
MagPi Writer
THE PI STORE
A look at the diverse range of
applications in the Pi Store
Two years ago the Pi Store was launched with
just 24 titles. Today there are over 1 20 titles and
the vast majority are free. The MagPi takes a
look at some of the diverse content in the Pi
Store, especial ly the non-free content, to help
you determine what is worthy of your time and
money.
Digital downloads
Apple was one of the first companies to
encourage the mass adoption of digital
downloads with its iTunes store for music and
movies. This was later fol lowed with the App
store, the iBooks store and final ly iTunes U for
students. The App store was the only way you
could get applications for Apple mobile devices
and later it was extended to Apple's MacBook
and iMac computers.
Amazon pioneered the digital download of books
and today most major bookstores have digital
download affi l iations. Of course the instant
gratification advantages of digital downloads
were not lost on game console manufacturers
with Microsoft, Sony and Nintendo all introducing
digital download stores for their respective game
consoles. Digital app stores are less prevalent for
Windows based PCs with notable exceptions
being game centric Steam and Origin.
Introducing the Pi Store
Ultimately al l of the previously mentioned digital
download stores have a commercial interest for
the host company. But this was not the case for
the Raspberry Pi Foundation when they
launched the Pi Store. Instead of thinking how
much money could be made, they saw all the
advantages of having an app store dedicated to
the Raspberry Pi:
- a place where developers of al l ages can
share their creations with the Raspberry Pi
community.
- a place where complete beginners can instal l
and remove great Raspberry Pi titles without
having to go near a command line.
- a place where every Raspberry Pi user can
discover new content for their computer.
Unfortunately some did not see this and criticised
the Foundation for teaching kids capital ism! But
is this any different from giving kids pocket
money for doing chores? Having said that, there
are currently 1 00+ apps and at the time of writing
only eleven cost money... and you can buy them
all and sti l l have change from US$20.00/£1 3.00.
The Pi Store content is divided into five
categories; Games, Apps, Tutorials, Dev Tools

77
and Media. Before we explore each of these
areas here are some navigation tips that wil l help
you find the content you want.
In the Explore tab of the Pi Store there is an
option to fi l ter the content by status and also an
option to specify the sort order. I f you want to
explore content which is sti l l work-in-progress
then change the status fi l ter to In Progress .
You can also set it to Show All to see all Pi
Store content.
There are many sort options, but the most useful
are Most Played , Newest First and Top
Rated . Note that currently the Pi Store does not
store these settings so the next time you open
the Pi Store the status wil l l ikely be reset to
Finished and the sort order wil l be reset to
Price - Highest .
Several programs in the Pi Store do not run on
LXDE and require a reboot before they start.
Although there is a warning on the application
page in the Pi Store, there is no final "Are you
sure?" after you cl ick on Launch . So make sure
you have everything saved first.
Don't forget to tip!
When you receive good service you leave a tip.
Almost everything in the Pi Store is free. I f you
enjoyed playing a game or found a title useful,
consider showing your appreciation by leaving a
tip for the developer. I t's easy to do. In your
l ibrary select the title you want to tip then cl ick
View Details . In the detai ls page cl ick Tip
this Project to send $1 .00/£1 .00 by default.
Games
Unsurprisingly this is the largest category in the
Pi Store. With 48 titles at the time of writing there
is something for al l gamers here.
In Dr Bulbaceous : Puzzle Solver (US$2.99/
£1 .99) you drop different coloured objects and
when 3 or more are touching they disappear. The
goal is to clear the screen before the objects
reach the top. Although I found the game too
easy, kids wil l enjoy it. I t is colourful and well
implemented. Tip: To swap your current object
for something more potent, press the Enter key.
I t looks l ike the mouse should work, but it didn't
for me.
Martian Invaders ($1 .60/£1 .00) is a retro space
shooter that al lows keyboard or joystick control.
DmazeD is a lot of fun. You search a maze for
the key to the exit, but it is dark so you have a
limited field of vision. Listen out for the monster
that is also in the maze with you!
Another game I found myself thoroughly enjoying
is The Little Crane That Could . Through
dexterous use of your crane and its many
movements you complete a series of increasingly
difficult tasks.
Many folks of a certain age (l ike myself! ) use
their Raspberry Pi to rel ive the golden age of
home computing and there is no shortage of
games inspired from that decade. In the Pi Store
these include Abandoned Farmhouse

78
Adventure and King's Treasure - classic text
based adventures, Chocolate Doom - play al l
versions of Doom, NXEngine - a clone of the
"Cave Story" platformer, Star Flite - a Star Trek
retro game plus an emulator for the Atari800.
Other excel lent games include Freeciv - an
empire bui lding strategy game, Sqrxz 2, Sqrxz
3 and Sqrxz 4 - platformers, the impressive
Open Arena - first person shooter and
OpenTTD - a simulation game based on
Transport Tycoon Deluxe. Alas the promising
Iridium Rising - a 3D space game, has been
offl ine for over a year so you can ignore it.
The first commercial game on the Pi Store was
Storm In A Teacup. I t remains one of my
favourite Raspberry Pi games, but unfortunately
it was recently removed from the Pi Store.
Hopeful ly it wi l l be back soon.
Apps
The second largest largest category in the Pi
Store, there is an incredible selection of titles
ranging from uti l i ties to emulators to media
programs to 'heavy-weight' applications.
Examples of the latter are Asterisk - a PBX
system and the bri l l iant LibreOffice - a Microsoft
Office compatible and equivalent office suite.
Four of the eleven paid applications can be found
here. 1 00 Tools Swiss File Knife
(US$1 .99/£1 .99) provides 1 00 command line
tools such as a simple FTP server, find/replace
text in fi les, treesize, spl it/join fi les, create/check
md5 checksums, print coloured text to the
terminal. . . and much, much more.
OMX Player Remote GUI (US$3.00/ £1 .80)
provides a web UI that can be used on a smart
phone or tablet device to control OMX Player
running on the Raspberry Pi. Simply enter the
given URL in your web browser, specify your
media folder and then have ful l control of
playl ists, volume and all the usual media
controls.
FastDosBox (US$2.37/£1 .35) is a fast 386
based PC emulator and is a great way to run 90's
era DOS based games. Another simi lar program
on the Pi Store is RPix86.
PiCon (US$1 .00/£0.60) is a very flexible
configuration manager for hardware tweaking. I t
provides a GUI for overclocking every aspect of
the Raspberry Pi, but for me its real strength is
with its video configuration. Visual ly get the
perfect monitor setup quickly and easi ly. No
more black bars! Multiple presets can be saved
so if you take your Raspberry Pi to different
locations (e.g. school, Raspberry Jam,
hackspace) you can get the best display
configuration quickly without changing your
'home' settings.
I was not famil iar with XIX Music Player, but it
is pleasantly surprising and is definitely worth
downloading. (Change the Status to "In
Progress" to see this) . I am using it to l isten to
internet radio (Absolute Radio from the UK, Hit
FM from Belgium, MacJingle Heartbeat from
Austria.. .) whi le I layout this article using Scribus
and all running smoothly on the Raspberry Pi.
Staying with the music theme there are two
music creation applications in the Pi Store.
Schism Tracker is both a MOD fi le player and a
music composition tool. Basic instructions
explaining its operation are in issues 2, 1 2 and
1 3 of The MagPi.
With PXDRUM you wil l have a lot of fun creating

79
cool beats. You can simultaneously play eight
different percussion instruments and change
their sound by loading different drum kits. Start
with one of the demo songs and get your groove
on!
Tutorials
The Tutorials category contains several very
useful guides including the Official Raspberry
Pi Educational User Manual . Other guides
include Python-SQL-Database - a tutorial on
how to create database applications using SQL
and Python plus Raspberry Invaders - a
Python programming course with 1 7 lessons
where you learn how to create a space invaders
style game using Python.
Dev Tools
This is the smallest category in the Pi Store yet it
contains useful col lections such as HUD Sprite
Pack, Effects Sprite Pack and Audio Effects
Pack for your Python and Scratch games plus
Michelle's Minetools and GLG Toolkit. . . of
course al l free to use.
There is also the very excel lent Pi3D, a Python
module that simplifies developing 3D worlds and
provides access to the power of the Raspberry Pi
GPU. In addition to both 3D and 2D rendering,
Pi3D can load textures, models, create fractal
landscapes and offers vertex and fragment
shaders. There are also 1 9 impressive demos.
Media
Last, but certainly not least, is the Media
category. This is where you wil l find every issue
of The MagPi - the first, and in my biased
opinion the best, magazine for the Raspberry
Pi.. . and of course it is free! There wil l typical ly
be a short lag between The MagPi being
released at the start of each month and it
appearing in the Pi Store. That is because the Pi
Store version is the same version that we use for
creating the printed version of the magazine so
we are doubly thorough with the quality control .
Conclusion
With over 4 mil l ion Raspberry Pis sold worldwide
and the Pi Store being located on the desktop of
Raspbian, it has the potential to be an incredible
resource and the "go to" place for Raspberry Pi
content. I t is easy to upload so why not share
your original programs or tutorials with others?
The Pi Store is there for your benefit and the
benefit of the community, so go use it.
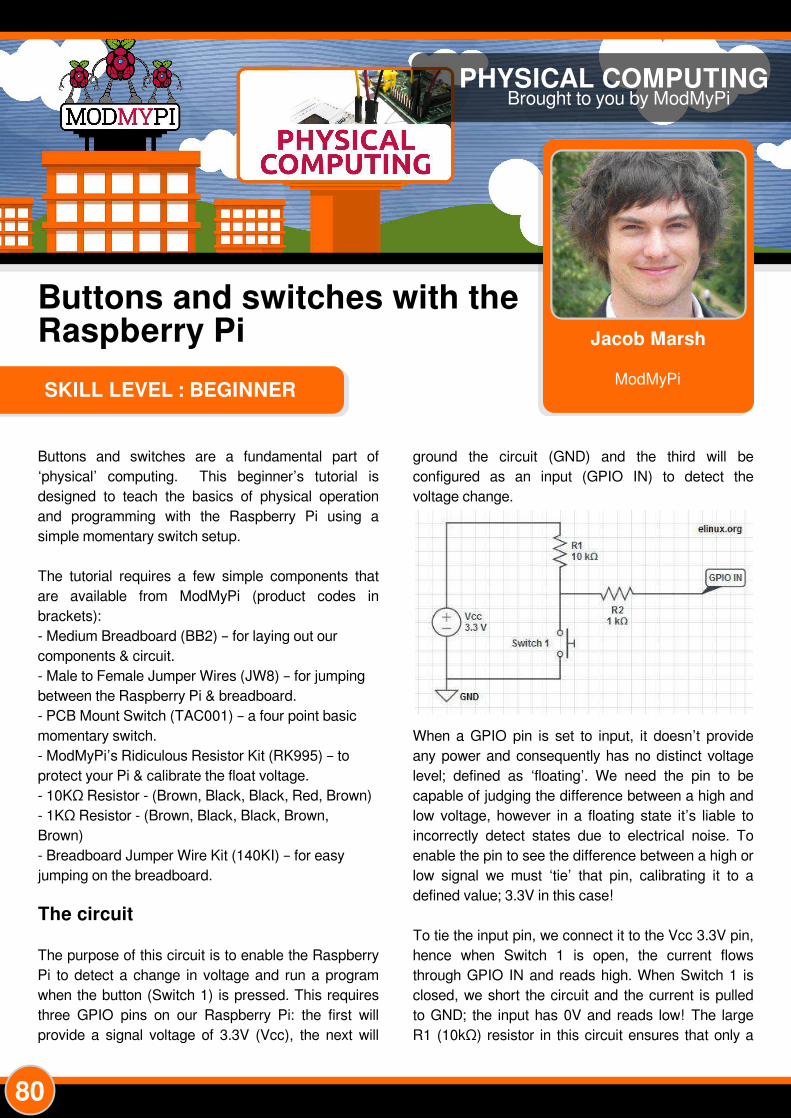
80
SKILL LEVEL : BEGINNER
Jacob Marsh
ModMyPi
PHYSICAL COMPUTINGBrought to you by ModMyPi
Buttons and switches with theRaspberry Pi
Buttons and switches are a fundamental part of
‘physical’ computing. This beginner’s tutorial is
designed to teach the basics of physical operation
and programming with the Raspberry Pi using a
simple momentary switch setup.
The tutorial requires a few simple components that
are avai lable from ModMyPi (product codes in
brackets):
- Medium Breadboard (BB2) – for laying out our
components & circuit.
- Male to Female Jumper Wires (JW8) – for jumping
between the Raspberry Pi & breadboard.
- PCB Mount Switch (TAC001 ) – a four point basic
momentary switch.
- ModMyPi’s Ridiculous Resistor Kit (RK995) – to
protect your Pi & calibrate the float voltage.
- 1 0KΩ Resistor - (Brown, Black, Black, Red, Brown)
- 1 KΩ Resistor - (Brown, Black, Black, Brown,
Brown)
- Breadboard Jumper Wire Kit (1 40KI) – for easy
jumping on the breadboard.
The circuit
The purpose of this circuit is to enable the Raspberry
Pi to detect a change in voltage and run a program
when the button (Switch 1 ) is pressed. This requires
three GPIO pins on our Raspberry Pi: the first wi l l
provide a signal voltage of 3.3V (Vcc), the next wil l
ground the circuit (GND) and the third wil l be
configured as an input (GPIO IN) to detect the
voltage change.
When a GPIO pin is set to input, i t doesn’t provide
any power and consequently has no distinct voltage
level; defined as ‘floating’ . We need the pin to be
capable of judging the difference between a high and
low voltage, however in a floating state it’s l iable to
incorrectly detect states due to electrical noise. To
enable the pin to see the difference between a high or
low signal we must ‘tie’ that pin, cal ibrating it to a
defined value; 3.3V in this case!
To tie the input pin, we connect it to the Vcc 3.3V pin,
hence when Switch 1 is open, the current flows
through GPIO IN and reads high. When Switch 1 is
closed, we short the circuit and the current is pul led
to GND; the input has 0V and reads low! The large
R1 (1 0kΩ) resistor in this circuit ensures that only a

81
l i ttle current is drawn when the switch is pressed. I f
we don’t use this resistor, we are essential ly
connecting Vcc directly to GND, which would al low a
large current to flow, potential ly damaging the Pi! To
make the circuit even safer in case we get something
wrong, we add the R2 (1 kΩ) resistor to l imit the
current to and from GPIO IN.
The switch
Four point switches are wired in a very similar
manner to two point switches. They’re simply more
versati le as you can have multiple isolated inputs into
the same switching point. Checking the diagrams,
pins 1 & 2 are always connected, as are pins 3 & 4.
However, both pin pairs are disconnected from each
other when the button is not pressed i.e. pins 1 & 2
are isolated from pins 3 & 4. When the button is
pressed the two sides of the switch are l inked and
pins 1 , 2, 3 & 4 are al l connected!
In ‘momentary’ switches the circuit disconnects when
pressure is removed from the button, as opposed to
‘toggle’ switches when one push connects and the
next push disconnects the internal switch circuit.
Where does it all go?
WARNING. When hooking up to GPIO points on your
Raspberry Pi care must be taken, as connecting the
wrong points could permanently damage your
Raspberry Pi. Please use a GPIO cheat-sheet, and
double check everything before switching it on. I wi l l
denote each GPIO point by its name and physical
location, for example GPIO P1 7 is actual ly located at
pin 1 1 , denoted: GPIO P1 7 [pin 1 1 ]. The irregularities
are a result of the pin names being referenced by the
on board chip rather than their physical location.
1 . Connect the Raspberry Pi to the Ground Rail . Use
a black jumper wire to connect GPIO GND [pin 6] on
the Pi to the Negative rai l on the breadboard – the rai l
on the edge of the board with the negative sign (-) .
2. Connect the Raspberry Pi 3.3V to the Positive Rail .
Use a red jumper wire to connect GPIO 3.3V [pin 1 ]
on the Pi to the Positive rai l on the breadboard – the
edge rai l with the positive sign (+).
3. Plug in your switch. When breadboarding, make
sure al l of the legs are in separate rows. To achieve
this, straddle the central channel on the breadboard.
4. Add the 1 0kΩ resistor. Connect this from Switch
pin 1 to the positive (+) rai l of the breadboard.
Orientation of standard fi lm resistors is unimportant.
5. Connect the switch to Ground. Use a breadboard
jumper wire to hook switch pin 3 to the ground (-) rai l .
6. Connect the switch to the 1 kΩ resistor. Add this
resistor between switch pin 1 and the 1 0kΩ resistor
and take it to a clear rai l .
7. Connect the switch to the Signal Port. We’ l l be
using GPIO P1 7 to detect the 3.3V signal when the
switch is pressed. Simply hook up a jumper between
GPIO P1 7 [pin 1 1 ] on the Raspberry Pi and the 1 kΩ
resistor rai l .
That’s our circuit bui lt! In the next article, we’ l l write a
simple program in Python to run when we press the
switch!
This article issponsored byModMyPi
All breakout boards and accessories used in this
tutorial are avai lable for worldwide shipping from
the ModMyPi webshop at www.modmypi.com

2082
SKILL LEVEL : BEGINNER
Jacob Marsh
ModMyPi
PHYSICAL COMPUTINGBrought to you by ModMyPi
Buttons and switches with theRaspberry Pi - Part 2
Buttons and switches are a fundamental part of
physical computing. This beginners tutorial is
designed to teach the basics of physical
operation with the Raspberry Pi using a simple
momentary switch setup. In the previous article,
we discussed and bui lt our switch circuit. In this
part we wil l go through the steps of programming
and interacting between the Raspberry Pi and
our components. The coding part of this tutorial
is in Python, a widely used general purpose
language. I t is also very readable, so we can
break down and explain the function of each l ine
of code. The purpose of our code wil l be to read
the I/O pin when the switch is pressed!
Using a switch
I f you have not already done so, start X by typing
startx and load the program IDLE3 . Since we
are starting a new project, open up a new
window File > New Window. Remember that
Python is case sensitive and indentation is
fundamental. Indentation, which is used to group
statements, wi l l occur automatical ly as you type
commands so make sure you stick to the
suggested layout. The first l ine of our code
imports the Python l ibrary for accessing the
GPIO.
import RPi. GPIO as GPIO
Next we need to set our GPIO pin numbering, as
either the BOARD numbering or the BCM
numbering. BOARD numbering refers to the
physical pin numbering of the headers. BCM
numbering refers to the channel numbers on the
Broadcom chip. Either wil l do, but I personal ly
prefer BCM numbering. I f you're confused, use a
GPIO cheat sheet to clarify which pin is which!
GPIO. setmode(GPIO. BCM)
Now you need to define the GPIO pins as either
inputs or outputs. In part 1 we set BCM Pin 1 7 /
BOARD Pin 1 1 (GPIO P1 7 [Pin 1 1 ]) as our input
pin. So our next l ine of code tel ls the GPIO library
to set this pin as an input.
GPIO. setup(17, GPIO. IN)
In part 1 of the tutorial , the input pin was tied high
by connecting it to our 3.3V pin. The purpose of
our Python program is to check to see if the input
pin has been brought low e.g. when the button
has been pressed. To check the high/low status
of the pin we are going to use a True or False
statement within an infinite loop. We need to tie

83
our True statement to the high value of our input
pin. To do so we need to create a new variable
cal led input_value and set it to the current value
of GPIO P1 7 [Pin 1 1 ].
while True:
input_value = GPIO. input(17)
The next step is to add a condition that wil l print
something when the button is pressed. For this
we wil l use a False condition. The input_value is
False when the button is pressed and the
associated signal is pul led low. This can be
checked with a simple Python it statement.
if input_value == False:
print("Who pressed my button?")
When the button is pressed the program wil l now
display the text, "Who pressed my button?". Feel
free to change this to anything you want.
while input_value == False:
input_value = GPIO. input(17)
The last two lines in the above code are very
important, they create a loop that tel ls Python to
keep checking the status of GPIO P1 7 [Pin 1 1 ]
unti l i t's no longer low (button released). Without
this, the program would loop while the button is
sti l l being pressed meaning the message wil l be
printed multiple times on the screen before you
release the button. The final program should
look l ike this in Python:
import RPi. GPIO as GPIO
GPIO. setmode(GPIO. BCM)
GPIO. setup(17, GPIO. IN)
while True:
input_value = GPIO. input(17)
if input_value == False:
print("Who pressed my button?")
while input_value == False:
input_value = GPIO. input(17)
Save the fi le as button. py. In order to run the
program open a new terminal window on the
Raspberry Pi and type the fol lowing command:
sudo python button. py
At first nothing wil l happen, but if you press the
button the program wil l print the defined
message. To exit a running Python script, simply
press <CTRL>+C on the keyboard to terminate.
I f i t hasn't worked don't worry. First check the
circuit is connected correctly on the breadboard
as defined in part 1 , then check that the jumper
wires are connected to the correct pins on the
GPIO port. I f i t sti l l fai ls to work, double check
each l ine of the program is correct remembering
that Python is case-sensitive and check that the
indentation is correct. I find that typing the code
out by hand wil l give better results than a simple
copy/paste. This is a deceptively simple program
that can be used for many purposes. The same
code could be used to read when the pins of
separate devices, such as a sensor or external
micro-control ler, have been pul led high or low.
Adding an LED
We wil l carry on using the same breadboard as
before but we require a couple of extra
components:
- An LED (l ight emitting diode), any colour you
l ike.
- ModMyPi’s Ridiculous Resistor Kit (RK995)
* 330Ω resistor - (Orange, Orange, Black,
Black, Brown)
An output pin on the GPIO port can be set to
either 0V (low) or 3.3V (high). Our expansion
circuit wi l l wire up an LED between an output pin
and a ground pin on the Raspberry Pi 's GPIO
port. We’ l l be using Python to trigger our output
pin high, causing a current to pass through the
LED, l ighting it up! We also add a 330Ω resistor
to l imit the current that is passed through the
LED.
For this exercise we wil l connect the LED to
GPIO P1 8 [Pin 1 2] which wil l be defined later in

84
our program as an output. We wil l use the same
ground pin GPIO GND [Pin 6] as before, which is
already connected to the negative rai l (-) on our
breadboard.
Building the Circuit
1 . Connect GPIO output to breadboard. Use a
green jumper wire to connect GPIO P1 8 [Pin1 2]
on the Pi to an empty row on the breadboard.
2. Add an LED. Insert the long leg (anode) of the
LED into the same row as the green jumper wire
and insert the shorter leg (cathode) into another
empty row on the breadboard. Note: Make sure
the LED is inserted the correct way round as it
wi l l only al low current to pass through it in one
direction. I f i t's wrong it won't l ight up!
3. Add the 330Ω resistor. Connect the resistor
between the cathode of the LED and the
negative rai l (-) on the breadboard. This protects
our LED from burning out by way of too much
current.
And that's our circuit bui lt!
Next time
In the next article, we’ l l add a timer function to
our script and a trigger function for our LED. As
the script wi l l be more complicated, it requires a
proper clean-up function, so we’ l l code that in
too!
This article issponsored byModMyPi
All breakout boards and accessories used in this
tutorial are avai lable for worldwide shipping from
the ModMyPi webshop at www.modmypi.com

85
SKILL LEVEL : BEGINNER
Jacob Marsh
ModMyPi
PHYSICAL COMPUTINGBrought to you by ModMyPi
Buttons and switches with theRaspberry Pi - Part 3
In the previous article we bui lt a simple button circuit
connected to our Raspberry Pi via the GPIO ports and
programmed a Python script to execute a command when
the button was pressed. We then expanded our circuit
with an LED. In this tutorial , we wil l be expanding our
script to include timer and trigger functions for our LED. As
the script wi l l be more complicated, it requires a proper
clean-up function. Start by reading the previous two
articles before trying this one!
Adding LED control code
Now that our LED expansion circuit has been bui lt, we wil l
add some code into our previous program. This additional
code wil l make the LED flash on and off when the button is
pressed. Start by booting your Raspberry Pi to the
Raspbian GUI (startx) . Then start IDLE3 and open the
previous example program button. py. Save this fi le as
button_led. py and open it.
Since we want the LED to flash on and off, we wil l need to
add a time function to al low Python to understand the
concept of time. We therefore need to import the time
module, which al lows various time related functional ity to
be used. Add another l ine of code underneath l ine 1 :
import time
Next, we need to define GPIO P1 8 [Pin 1 2] as an output to
power our LED. Add this to our GPIO.setup section (l ine
4), below the input pin setup l ine:
GPIO. setup(18, GPIO. OUT)
Once GPIO P1 8 [Pin 1 2] has been set as an output, we
can turn the LED on with the command GPIO.output(1 8,
True). This triggers the pin to high (3.3V). Since our LED
is wired directly to this output pin, i t sends a current
through the LED that turns it on. The pin can also be
triggered low (0V) to turn the LED off, by the command
GPIO.output(1 8, False).
Now we don’t just want our LED to turn on and off,
otherwise we would have simply wired it to the button and
a power supply. We want the LED to do something
interesting via our Raspberry Pi and Python code. For
example, let us make it flash by turning it on and off
multiple times with a single press of the button!
In order to turn the LED on and off multiple times we are
going to use a for loop. We want the loop to be triggered
when the button has been pressed. Therefore, it needs to
be inserted within the if condition 'I f input_value ==
False:', that we created in our original program. Add the
fol lowing below the l ine 'print(''Who pressed my button! ”) '
(l ine 9), making sure the indentation is the same:
for x in range(0, 3):

86
Any code below this function wil l be repeated three times.
Here the loop wil l run from 0 to 2, therefore running 3
times. Now we wil l add some code in the loop, such that
the LED flashes on and off:
GPIO. output(18, True)
time. sleep(1)
GPIO. output(18, False)
time. sleep(1)
The LED is triggered on with the command
GPIO.output(1 8, True). However, since we do not want to
immediately turn it back off, we use the function
time.sleep(1 ) to sleep for one second. Then the LED is
triggered off with the GPIO.output(1 8, False) command.
We use the time.sleep(1 ) function again to wait before the
LED is turned back on again.
The completed program should be of the form:
import RPi. GPIO as GPIO
import time
GPIO. setmode(GPIO. BCM)
GPIO. setup(17, GPIO. IN)
GPIO. setup(18, GPIO. OUT)
while True:
input_value = GPIO. input(17)
if input_value == False:
print("Who pressed my button?")
for x in range(0, 3):
GPIO. output(18, True)
time. sleep(1)
GPIO. output(18, False)
time. sleep(1)
while input_value == False:
input_value = GPIO. input(17)
Save the fi le and open a new terminal window. Then type
the fol lowing command:
sudo python button_led. py
This time when we press the button a message wil l appear
on the screen and the LED should also flash on and off
three times!
To exit the program script, simply type <CTRL>+C on the
keyboard to terminate it. I f i t hasn't worked do not worry.
Do the same checks we did before. First, check the circuit
is connected correctly on the breadboard. Then check that
the jumper wires are connected to the correct pins on the
GPIO port. Double check the LED is wired the right way
round. I f the program sti l l fai ls, double check each l ine of
the program, remembering that Python is case-sensitive
and correct indentation is needed.
I f everything is working as expected, you can start playing
around a bit with some of the variables. Try adjusting the
speed the LED flashes by changing the value given to the
time.sleep() function.
You can also change the number of times that the LED
flashes by altering the number of times that the for loop is
repeated. For example if you wanted the LED to flash 30
times, change the loop to 'for x in range(0, 30) '.
Have a go playing around with both of these variables and
see what happens!
Exiting a program cleanly
When a program is terminated due to an error, a keyboard
interrupt (<CTRL>+C) or simply because it's come to an
end, any GPIO ports that were in use wil l carry on doing
what they were doing at the time of termination. Therefore,
if you try to run the program again, a warning message wil l
appear when the program tries to 'set' a pin that’s already
in use from the previous execution of the program. The
program wil l probably run fine, but it is good practice to
avoid these sorts of messages, especial ly as your
programs become larger and more complex!
To help us exit a program cleanly we are going to use the
command GPIO.cleanup(), which wil l reset al l of the GPIO
ports to their default values.
For some programs you could simply place the
GPIO.cleanup() command at the end of your program.
This wil l cause the GPIO ports to be reset when the
program finishes. However, our program never ends by
itself since it constantly loops to check if the button has
been pressed. We wil l therefore use the try and except
syntax, such that when our program is terminated by a
keyboard interruption, the GPIO ports are reset
automatical ly.
The fol lowing Python code is an example of how the try
and except commands can be used together to exit a
program cleanly.

87
# Place any variable definitions and
# GPIO set-ups here
try:
# Place your main block of code or
# loop here
except KeyboardInterrupt:
GPIO. cleanup()
# Program will end and GPIO ports
# cleaned when you hit CTRL+C
finally:
GPIO. cleanup()
Note that Python wil l ignore any text placed after hash tags
(#) within a script. You may come across this a lot within
Python, since it is a good way of annotating programs with
notes.
After we have imported Python modules and setup our
GPIO pins, we need to place the main block of our code
within the try condition. This part wi l l run as usual, except
when a keyboard interruption occurs (<CTRL>+C). I f an
interruption occurs the GPIO ports wil l be reset when the
program exits. The finally condition is included such
that if our program is terminated by accident, i f there is an
error without using our defined keyboard function, then the
GPIO ports wil l be cleaned before exit.
Open button_led. py in IDLE3 and save it as
button_cleanup. py. Now we can add the code
previously described into our script. The finished program
should have the form:
import RPi. GPIO as GPIO
import time
GPIO. setmode(GPIO. BCM)
GPIO. setup(17, GPIO. IN)
GPIO. setup(18, GPIO. OUT)
try:
while True:
input_value = GPIO. input(17)
if input_value == False:
print("Who pressed my button?")
for x in range(0, 3):
GPIO. output(18, True)
time. sleep(1)
GPIO. output(18, False)
time. sleep(1)
while input_value == False:
input_value = GPIO. input(17)
except KeyboardInterrupt:
GPIO. cleanup()
# Program will end and GPIO ports cleaned
# when you hit CTRL+C
finally:
GPIO. cleanup()
Notice that only the loop part of the program is within the
try condition. Al l our imports and GPIO set-ups are left at
the top of the script. I t is also important to make sure that
al l of your indentations are correct!
Save the fi le. Then run the program as before in a terminal
window:
sudo python button_cleanup. py
The first time you run the fi le, you may see the warning
message appear since the GPIO ports have not been reset
yet. Exit the program by pressing <CTRL>+C. Then run
the program again and hopeful ly this time no warning
messages wil l appear!
This extra code may seem like a waste of time because the
program sti l l runs fine without it! However, when we are
programming, we always want to try and be in control of
everything that is going on. I t is good practice to add this
code, to reset the GPIO when the progam is terminated.
This article issponsored byModMyPi
All breakout boards and accessories used in this
tutorial are avai lable for worldwide shipping from
the ModMyPi webshop at www.modmypi.com
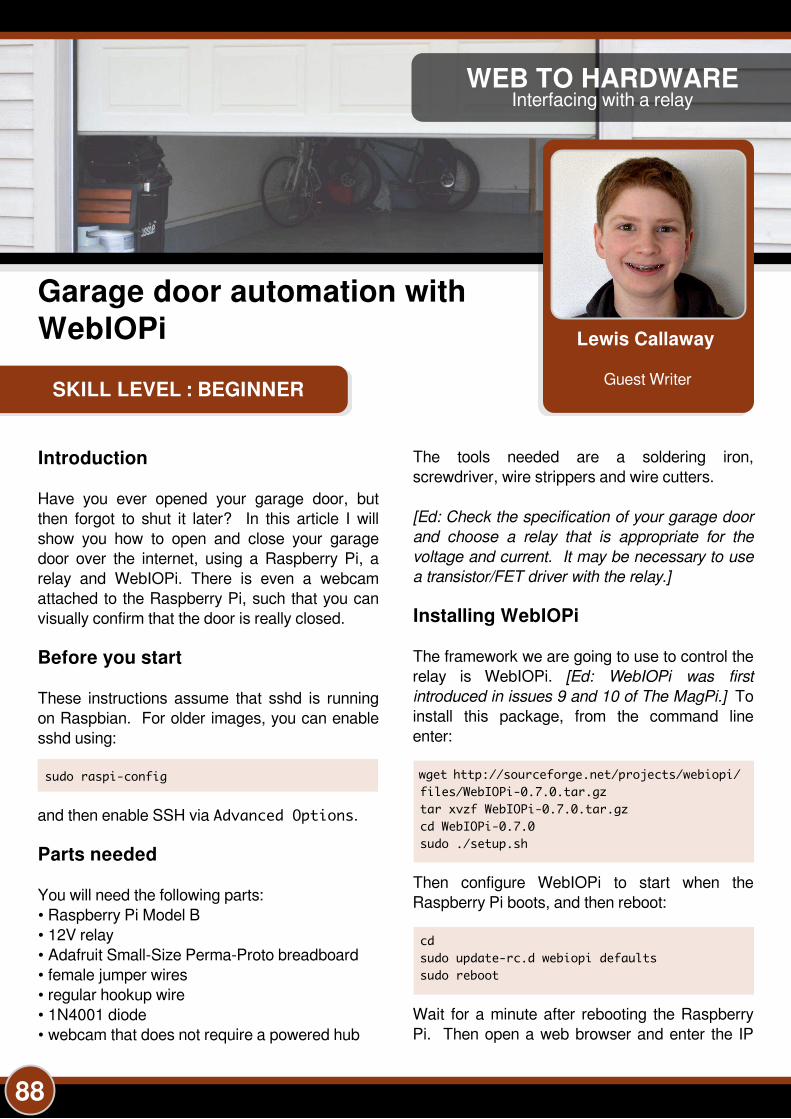
88
SKILL LEVEL : BEGINNER
Lewis Callaway
Guest Writer
WEB TO HARDWAREInterfacing with a relay
Garage door automation with
WebIOPi
Introduction
Have you ever opened your garage door, but
then forgot to shut it later? In this article I wi l l
show you how to open and close your garage
door over the internet, using a Raspberry Pi, a
relay and WebIOPi. There is even a webcam
attached to the Raspberry Pi, such that you can
visual ly confirm that the door is real ly closed.
Before you start
These instructions assume that sshd is running
on Raspbian. For older images, you can enable
sshd using:
sudo raspi-config
and then enable SSH via Advanced Options .
Parts needed
You wil l need the fol lowing parts:
• Raspberry Pi Model B
• 1 2V relay
• Adafruit Small-Size Perma-Proto breadboard
• female jumper wires
• regular hookup wire
• 1 N4001 diode
• webcam that does not require a powered hub
The tools needed are a soldering iron,
screwdriver, wire strippers and wire cutters.
[Ed: Check the specification of your garage door
and choose a relay that is appropriate for the
voltage and current. It may be necessary to use
a transistor/FETdriverwith the relay.]
Installing WebIOPi
The framework we are going to use to control the
relay is WebIOPi. [Ed: WebIOPi was first
introduced in issues 9 and 10 ofThe MagPi.] To
instal l this package, from the command line
enter:
wget http: //sourceforge. net/projects/webiopi/
files/WebIOPi-0. 7. 0. tar. gz
tar xvzf WebIOPi-0. 7. 0. tar. gz
cd WebIOPi-0. 7. 0
sudo . /setup. sh
Then configure WebIOPi to start when the
Raspberry Pi boots, and then reboot:
cd
sudo update-rc. d webiopi defaults
sudo reboot
Wait for a minute after rebooting the Raspberry
Pi. Then open a web browser and enter the IP

89
address of the Raspberry Pi fol lowed by the port
number of WebIOPi which is 8000, e.g.
http://1 92.1 68.2.1 5:8000.
When connecting to the Raspberry Pi using the
web browser, a login screen wil l appear.
The default login is:
User Name: webiopi
Password: raspberry
The next screen shows a virtual representation of
the Raspberry Pi 's GPIO pins. The relay can be
connected between a ground pin and a GPIO
pin. To activate the relay, cl ick on the
corresponding button to set it as an OUTput
instead of an INput. Now when the GPIO pin is
selected, it wi l l send a voltage to the relay
connected to it.
Configuration
To make the interface cleaner, WebIOPi can be
configured to offer one button instead of many
small ones.
Create folders to store the fi les:
mkdir -p garage/html
mkdir garage/python
The next step is to create a python fi le that helps
the HTML fi le control the garage door opener.
nano garage/python/script. py
Now copy the code below into the new fi le.
import webiopi
GPIO = webiopi. GPIO
Garage = 17 # GPIO pin using BCM numbering
# setup function is automatically called at
# WebIOPi startup
def setup():
# set the GPIO used by the light to output
GPIO. setFunction(Garage, GPIO. OUT)
# loop function, repeatedly called by WebIOPi
def loop():
# gives CPU some time before looping again
webiopi. sleep(1)
Then press CRTL-X and then Y to save the fi le.
WebIOPi wil l access this python script using an
HTML page that contains the single button. Use
nano to create a new HTML fi le,
nano garage/html/index. html
Then copy the HTML from the next page of this
article into the fi le and save it.

90
To use the Python script and new HTML fi le,
modify the WebIOPi configuration fi le:
sudo nano /etc/webiopi/config
Find the [SCRIPTS] section and add the
fol lowing l ine:
garage = /home/pi/garage/python/script. py
Then find the [HTTP] l ine and add the fol lowing
l ine:
doc-root = /home/pi/garage/html
Lastly, find the [REST] l ine and add the fol lowing
l ines:
gpio-export = 17
gpio-post-value = true
gpio-post-function = false
Then save the fi le and reboot the Raspberry Pi:
<! DOCTYPE html PUBLIC "-//W3C//DTD HTML 4. 01 Transitional//EN"><html><head>
<meta http-equiv="Content-Type" content="text/html; charset=UTF-8"><title>Garage Control</title><script type="text/javascript" src="/webiopi. js"></script><script type="text/javascript">
webiopi(). ready(function() // Create a "Light" labeled button for GPIO 17var button = webiopi(). createGPIOButton(17, "Garage");
// Append button to HTML element with ID="controls" using jQuery$("#controls"). append(button);
// Refresh GPIO buttons// pass true to refresh repeatedly of false to refresh oncewebiopi(). refreshGPIO(true);
);</script><style type="text/css">
button display: block;margin: 5px 5px 5px 5px;width: 1280px;height: 720px;font-size: 100pt;font-weight: bold;color: white;
#gpio17. LOW background-color: Black;
#gpio17. HIGH
background-color: Yellow;
</style></head><body>
<div id="controls" align="center"></div></body></html>

91
sudo reboot
Motion setup
The motion package can be used with a
webcam, to check the garage door's status.
While this article uses a USB webcam, the
Raspberry Pi camera can also be used. There
are specific instructions for using the motion
package with the Raspberry Pi camera at:
http://rbnrpi.wordpress.com/project-l ist/setting-
up-wireless-motion-detect-cam/
To use UVC camera support, make sure the
latest stable firmware is instal led by updating the
Raspbian instal lation:
sudo apt-get update; sudo apt-get upgrade -y
Then instal l the motion package:
sudo apt-get install motion
Next, open the configuration fi le in nano:
sudo nano /etc/motion/motion. conf
Change daemon off, to daemon on . This wil l
cause motion to run as a daemon process that
runs in the background. The default resolution of
320x240 is a reasonable choice. Change
webcam_localhost on to off. This al lows the
camera feed to be viewed from another device,
instead of just from the Raspberry Pi. Now save
the fi le.
To simply the setup, motion can be configured to
start when the Raspberry Pi boots by editing:
sudo nano /etc/default/motion
In this fi le change,
start_motion_daemon = no
to:
start_motion_daemon = yes
Then save the fi le and reboot the Raspberry Pi:
sudo reboot
Now that motion has been configured, plug in a
Debian Wheezy compatible webcam. The
webcam should then stream video to your
Raspberry Pi 's IP Address fol lowed by : 8081.
Hardware
The hardware in this project consists of a relay
that al lows the Raspberry Pi to switch a garage
door opener on or off. To hookup the relay to the
garage door opener, a Perma-Proto PCB was
used. The relay was soldered directly to the
Perma-Proto PCB, together with al l the wires. To
prevent an electrical short the bottom of the PCB
was covered with electrical tape after the
components were soldered on. A 1 N4001 diode
was placed across the relay coi l pins, to avoid
damaging the Raspberry Pi GPIO pin. This is
not optional . I f the diode is not used, it wi l l
eventual ly destroy the Raspberry Pi!
Use the datasheet for your relay to determine the
pinout. There is an example below of how a relay
can be connected. In the example, the Raspberry
Pi connects to the coi l with a diode in between
the control (red wire) and ground (black wire)
pins. The garage door is connected to the
normally open pin and relay switch pin (two grey
wires).
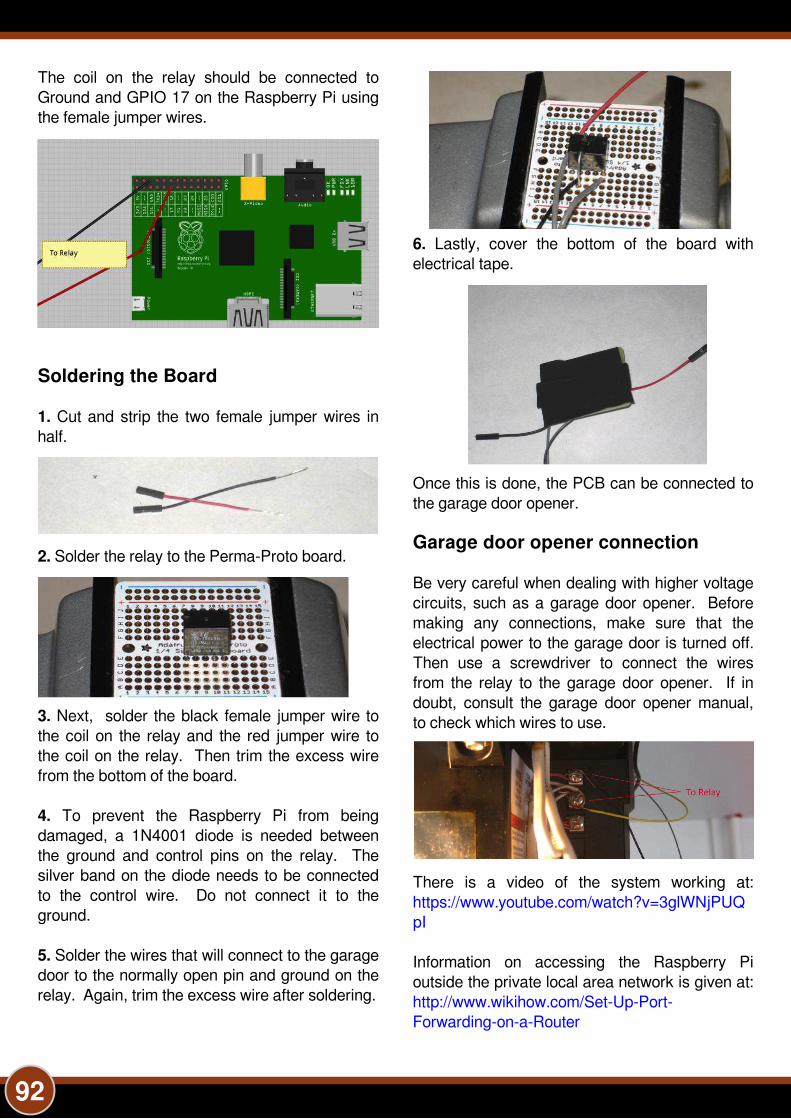
92
The coi l on the relay should be connected to
Ground and GPIO 1 7 on the Raspberry Pi using
the female jumper wires.
Soldering the Board
1 . Cut and strip the two female jumper wires in
half.
2. Solder the relay to the Perma-Proto board.
3. Next, solder the black female jumper wire to
the coi l on the relay and the red jumper wire to
the coi l on the relay. Then trim the excess wire
from the bottom of the board.
4. To prevent the Raspberry Pi from being
damaged, a 1 N4001 diode is needed between
the ground and control pins on the relay. The
si lver band on the diode needs to be connected
to the control wire. Do not connect it to the
ground.
5. Solder the wires that wil l connect to the garage
door to the normally open pin and ground on the
relay. Again, trim the excess wire after soldering.
6. Lastly, cover the bottom of the board with
electrical tape.
Once this is done, the PCB can be connected to
the garage door opener.
Garage door opener connection
Be very careful when dealing with higher voltage
circuits, such as a garage door opener. Before
making any connections, make sure that the
electrical power to the garage door is turned off.
Then use a screwdriver to connect the wires
from the relay to the garage door opener. I f in
doubt, consult the garage door opener manual,
to check which wires to use.
There is a video of the system working at:
https://www.youtube.com/watch?v=3glWNjPUQ
pI
Information on accessing the Raspberry Pi
outside the private local area network is given at:
http://www.wikihow.com/Set-Up-Port-
Forwarding-on-a-Router

94
SKILL LEVEL : INTERMEDIATE
Michael Giles
Guest Writer
PERSISTENCE OF VISION
Build a magic wand with anaccelerometer
Persistence of Vision displays create an image
by quickly displaying one column of pixels at a
time. When the device moves rapidly along a
linear path the human eye can view the image as
a whole as it is bui lt up column by column. When
I say rapid I mean rapid, at least one twenty-fifth
of a second. At this speed an afterimage is seen
in the retina and the viewer perceives the rapid
succession of LED blinks as a ful l image.
Operation
The magic wand displays five columns of pixels
for each specific letter in a user defined string.
The accelerometer is used to determine which
direction the wand is swinging to avoid
displaying the string in reverse.
Obtaining parts
To bui ld the circuit I
used the Pi
Prototyping Kit from
OpenElectrons.com.
I t has multiple
integrated circuit
footprints and
unwired through-
holes for great
prototyping flexibi l i ty.
For the accelerometer I used the LSM303
breakout board, also from OpenElectrons.com.
Magic wand assembly
The circuit bui ld
for the magic
wand required
soldering of
through-hole
components as
well as the
surface mount
PCF8574 chip. The datasheet showed the In/Out
ports of P0-P7 to which I connected the eight
LEDs. In the first bui ld I placed a bussed resistor
array between the 5V power and the LEDs to
l imit the current, but when I tested I real ized the
l ights were extremely difficult to see in the
Project parts list
1 x Raspberry Pi
1 x Pi Prototyping kit (OpenElectrons.com)
1 x LSM303 breakout (OpenElectrons.com)
1 x SmartUPS (OpenElectrons.com)
1 x PCF8574 chip, manufacturer part PCF8574ADW
1 x 1 0uF through-hole capacitor, ESK1 06M050AC3AA
2x 82K through-hole resistors, 271 -82K-RC
8x 4mm flat top red diff LEDs, HLMPM201

95
daylight. I then shorted the resistor array and the
LEDs became much more visible.
Connecting the LSM303 breakout was by far the
simplest part. The Pi Prototyping board has two
I2C female connections for a quick plug in for
breakout boards.
The ful l schematic for the project is shown below.
Apparatus assembly
In order to move the LEDs fast enough to see the
image, I attached the Raspberry Pi along with the
Pi Prototyping board to a long flat wooden stick
using screws and spacers. Wood was used to
avoid any shorting that may occur. On the back
of the stick I attached the SmartUPS to power
the Raspberry Pi and make my device more
mobile. The SmartUPS is powered by three AA
batteries and, though it has several functions, is
only used for power in this project. On the other
end of the wooden stick I dri l led a hole and
attached a rod to be used as a handle. This
al lowed me to easi ly swing the magic wand
around in a circle.
Installing packages
For this program I used the
OpenElectrons_LSM303 package instal led using
the pip package manager. I f you do not have pip
you can get it by opening a terminal window and
typing:
sudo easy_install pip
To instal l the OpenElectrons_LSM303 package
type:
sudo pip install OpenElectrons_LSM303
This command wil l instal l the
package as well as the
OpenElectrons_i2c package needed
for I2C functions.
Programming
In order to generate the ASCII
characters, I first created a look up table. The
table is just a dictionary in which each character
is a l ist containing five hexadecimal values. Each
value generates one vertical l ine of pixels. The
example below shows the hexadecimal for the
letters B, C and D. A ful l alphabet, with numbers
and symbols can be downloaded in the Python
sample programs avai lable from:
http://www.openelectrons.com/pages/63
With the look up table created, I then started
writing the program by importing any needed
fi les and defining my variables. Note that only
ACCEL is imported from the
OpenElectrons_LSM303 fi le. Because the
LSM303 chip contains a magnetometer, as well
as an accelerometer, the l ibrary contains two
separate classes. Also, notice the 'str' variable.
This is the string the magic wand wil l display.
import time
import os, sys
#5x7 ascii characters lookup table
lookuptable =
. . .
' B' : [0x7f, 0x49, 0x49, 0x49, 0x36] ,
' C' : [0x3e, 0x41, 0x41, 0x41, 0x22] ,
' D' : [0x7f, 0x41, 0x41, 0x41, 0x3e] ,
. . .

96
from OpenElectrons_i2c import
OpenElectrons_i2c
from OpenElectrons_LSM303 import ACCEL
test = 1
oe = OpenElectrons_i2c(0x38)
lsm = ACCEL()
str = "MagPi Rocks! ! ! "
length = len(str)
index = 0
test = 1
g = 9. 81
t = . 05
print str
The while loop starts by turning off the LEDs.
Next it reads the accelerometer value along the
X-axis then quickly reads the value again. With
these two values a simplified calculation of
acceleration can be performed.
The fol lowing if statement and while loop
actual ly l ight the LEDS. The while loop accesses
the look up table for every letter in the string one
at time. This al lows any message inserted into
the 'str' variable to be displayed without any other
changes in the program.
A link to the code in its entirety is shown below.
Have fun creating images and messages with
your own magic wand.
LSM303 Magnetometer
When creating your own magic
wand you may come across
various issues with certain
wand designs. I f the wand
changes direction at any given
time, you wil l encounter a rapid
deceleration. This causes the static and dynamic
accelerometer readings to clash, resulting in
unwanted input data. I f you are a mathematician
or are extremely knowledgeable about advance
physics concepts, this may be a fun project for
you. But for everyone else, you may want to use
the LSM303 magnetometer. The code has a few
differences, but once you figure out the proper
magnetic readings it is very easy. The
magnetometer reads the Earth's magnetic field
so readings wil l be different depending on
direction and location.
Useful links
OpenElectrons.com ful l magic wand project kit
and program:
http://www.openelectrons.com/pages/63
OpenElectrons.com SmartUPS:
http://www.openelectrons.com/pages/33
while test == 1:
#turn leds off
oe. simpleWriteByte(0xff)
#get first value
array = lsm. readArray(lsm. ACCEL_X_Y_Z | 0x80, 6)
aclraw = lsm. accl(array, 0)
time. sleep(t)
#get second value
array = lsm. readArray(lsm. ACCEL_X_Y_Z | 0x80, 6)
aclraw2 = lsm. accl(array, 0)
#divide values to compensate for gravity
#and subtract to find delta
acl = (aclraw2/g) - (aclraw/g)
#filter approximate still values
if acl <= 30 and acl >= -30:
acl = 0
#if moving from right to left display string
if (acl) > 0:
time. sleep(. 15)
while index < length:
for number in lookuptable[str[index] ] :
oe. simpleWriteByte(~number)
index = index + 1
#turn off leds for a short time to
#account for letter spacing
oe. simpleWriteByte(0xff)
time. sleep(. 0015)
#reset string
index = 0

97
SKILL LEVEL : BEGINNER
Peter Lavelle
Guest Writer
PYTHON CONTROLControl using a Python script
Controlling the Maplin/OWIrobotrobotic arm
Introduction
This article expands on the work by Jamie Scott,
et al in the Wikihow article at
http://www.wikihow.com/Use-a-USB-Robotic-
Arm-with-a-Raspberry-Pi-(Maplin) and al lows
you to control the movement of the arm using a
sequence of instructions read from a CSV
(Comma Separated Variables) formatted fi le by a
Python script.
This article assumes you are using the Raspbian
distribution but you should also be able to get
this working using the Occidental is distribution
from Adafruit. (More information about this
distribution can be found at
http://learn.adafruit.com/adafruit-raspberry-pi-
educational-l inux-distro/overview).
Configuring your Raspberry Pi
Before you can start using the script, there are a
few things you wil l have to do to get your
Raspberry Pi ready. The first thing you wil l need
to do is add the user account you are using on
the Raspberry Pi to the 'plugdev' group.
Assuming you are using the default 'pi ' user
account, the command to do this wil l be:
sudo usermod -aG plugdev pi
The next step is to add a udev rule to al low the
'pi ' user to send commands to the arm. To do
this, create a fi le cal led /etc/udev/rules.d/85-
robotarm.rules using the command,
sudo nano /etc/udev/rules. d/85-robotarm. rules
with the contents below:
SUBSYSTEM=="usb", ATTRSidVendor=="1267",
ATTRSidProduct=="0000", ACTION=="add",
GROUP="plugdev", MODE="0666"
To save the fi le, press Ctrl-X and then press ‘Y’
fol lowed by Enter.
You’ l l then need to instal l the Python USB
libraries. I found that the one from the Apt
repository was sl ightly out of date, so I had to
instal l the Apt version first and then upgrade it
using the pip command. The command below
wil l do this:
sudo apt-get install python-pip -y
sudo pip install pyusb --upgrade
When the Python USB libraries have been
instal led, reboot your Raspberry Pi so that the
changes to udev and the 'pi ' user account take
effect with the command:

98
sudo shutdown -r now
Connect the arm
When the Raspberry Pi has been rebooted,
connect the arm to a free USB port and turn it on.
A USB hub should not be needed here. To check
that the Pi has successful ly detected the arm,
execute the command:
dmesg | grep usb | grep 1267
I f the arm has been detected successful ly you
should see output simi lar to the l ine below:
[ 252. 790554] usb 1-1. 3: New USB device
found, idVendor=1267, idProduct=0000
I f you don’t see the result above, turn off
the arm using the power switch, unplug
from the USB port, plug the arm back in
and turn the power back on.
Getting the code
The scripts can be found on Github at
https://github.com/peterlavel le/maplinarm
You can clone the repository directly on to your
Pi if you have the Git cl ient instal led. Instal l ing
the Git cl ient on Raspbian is as simple as
running the command:
sudo apt-get install git-core
When you have the Git cl ient instal led, run the
command,
git clone https: //github. com/peterlavelle/
maplinarm
to pul l down a copy of the Python code. This
command wil l clone the repository into a
subdirectory cal led ‘maplinarm’ and should pul l
down the fi les l isted below:
cd maplinarm/
ls
commander. py commands. csv maplinrobot. py
README. md
Making the scripts executable
Now we need to make the scripts executable by
the Raspberry Pi. To do this, change into the
directory you cloned the repository down to using
the cd command and run the command chmod
755 *. py. This wil l give al l fi les ending in ‘.py’
executable permissions. You can double-check
this with the command ls -la *. py and looking
for the ‘x’ in the left-hand column of the output on
each l ine. See example l isting below:
Programming the arm
Ok, now on to the good part. The script
commander. py wil l read in commands from a
CSV fi le passed to it as an argument.
There is an example fi le cal led ‘commands.csv’
in the Git repository to help you get started. So
let's open this fi le up and take a look with the
command:
nano commands. csv
Contents are included below for reference:
shoulder-up, 1. 00, 1. 00
elbow-down, 1. 00, 2. 00
base-clockwise, 4. 00, 1. 00
shoulder-down, 1. 00, 1. 00
grip-close, 1. 00, 1. 00
base-anti-clockwise, 4. 00, 2. 00
grip-open, 1. 00, 1. 00
elbow-up, 1. 00, 2. 00
-rwxrwxr-x 1 pete pete 1726 May 19 14: 11 commander. py
-rwxrwxr-x 1 pete pete 2388 May 19 14: 11 maplinrobot. py
git clone https: //github. com/peterlavelle/maplinarm
Cloning into ' maplinarm' . . .
remote: Counting objects: 35, done.
remote: Compressing objects: 100% (23/23), done.
remote: Total 35 (delta 8), reused 12 (delta 2)
Unpacking objects: 100% (35/35), done.
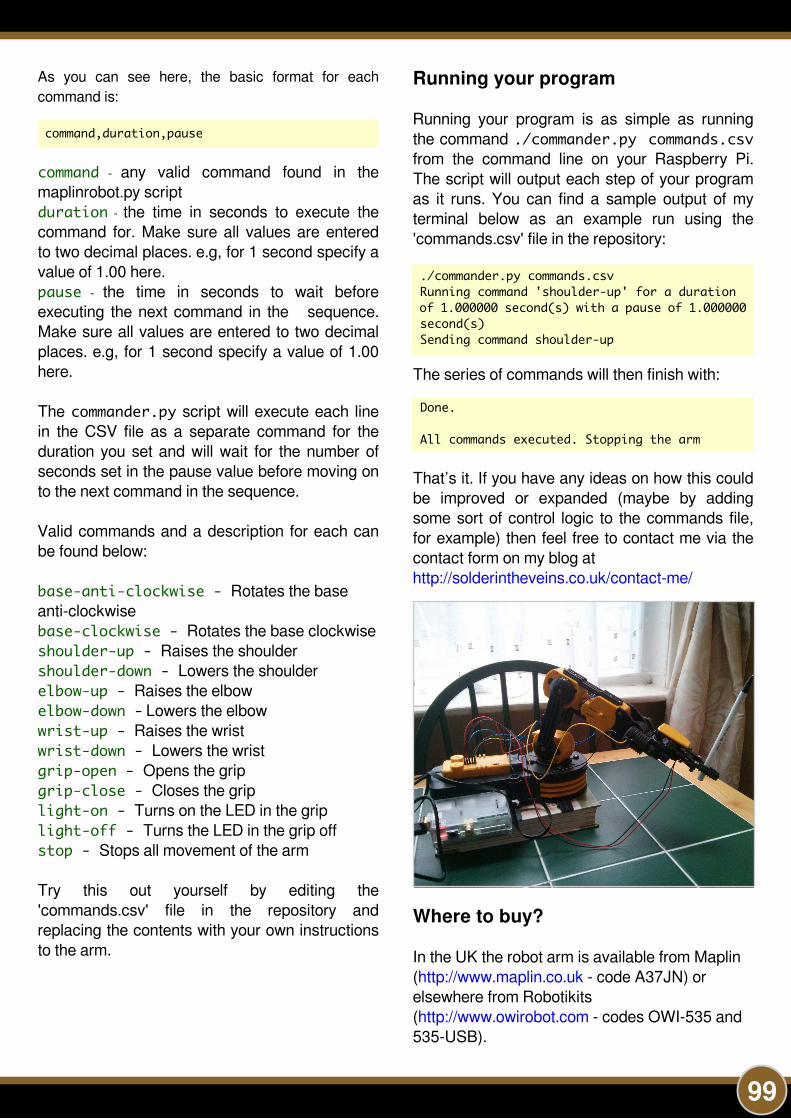
99
As you can see here, the basic format for each
command is:
command, duration, pause
command - any valid command found in the
maplinrobot.py script
duration - the time in seconds to execute the
command for. Make sure al l values are entered
to two decimal places. e.g, for 1 second specify a
value of 1 .00 here.
pause - the time in seconds to wait before
executing the next command in the sequence.
Make sure al l values are entered to two decimal
places. e.g, for 1 second specify a value of 1 .00
here.
The commander. py script wi l l execute each l ine
in the CSV fi le as a separate command for the
duration you set and wil l wait for the number of
seconds set in the pause value before moving on
to the next command in the sequence.
Valid commands and a description for each can
be found below:
base-anti-clockwise - Rotates the base
anti-clockwise
base-clockwise - Rotates the base clockwise
shoulder-up - Raises the shoulder
shoulder-down - Lowers the shoulder
elbow-up - Raises the elbow
elbow-down - Lowers the elbow
wrist-up - Raises the wrist
wrist-down - Lowers the wrist
grip-open - Opens the grip
grip-close - Closes the grip
light-on - Turns on the LED in the grip
light-off - Turns the LED in the grip off
stop - Stops all movement of the arm
Try this out yourself by editing the
'commands.csv' fi le in the repository and
replacing the contents with your own instructions
to the arm.
Running your program
Running your program is as simple as running
the command . /commander. py commands. csv
from the command line on your Raspberry Pi.
The script wi l l output each step of your program
as it runs. You can find a sample output of my
terminal below as an example run using the
'commands.csv' fi le in the repository:
. /commander. py commands. csv
Running command ' shoulder-up' for a duration
of 1. 000000 second(s) with a pause of 1. 000000
second(s)
Sending command shoulder-up
The series of commands wil l then finish with:
Done.
All commands executed. Stopping the arm
That’s it. I f you have any ideas on how this could
be improved or expanded (maybe by adding
some sort of control logic to the commands fi le,
for example) then feel free to contact me via the
contact form on my blog at
http://solderintheveins.co.uk/contact-me/
Where to buy?
In the UK the robot arm is avai lable from Maplin
(http://www.maplin.co.uk - code A37JN) or
elsewhere from Robotikits
(http://www.owirobot.com - codes OWI-535 and
535-USB).

1 00
SKILL LEVEL : BEGINNER
Stewart Watkiss
Guest Writer
PRINTING WITH CUPS
1 - Configuring CUPS
This is a two part tutorial on configuring printing on the
Raspberry Pi. In this article I am going to explain some of
the essentials of setting up printing and adding your printer
in Raspbian. This could be useful for printing from your
Raspberry Pi or to turn your USB printer into a network
enabled printer. Next month we wil l look at how we can
print from the command-l ine and from within your own
Python programs.
The standard method of printing on Linux is with the
Common Unix Printing SystemTM better known as CUPS.
Developed by Apple Inc., CUPS is open source software
using standards-based printing protocols.
The job of converting an application print request to
something that your printer can understand is a memory
hungry task. I therefore recommend using a 51 2MB model
B for printing directly from the Raspberry Pi. Even with a
51 2MB Raspberry Pi you can sti l l run into memory issues.
I f you have problems with printing then it is worth trying
with as few applications running as possible, before
looking at other causes.
First we need to instal l CUPS from the software
repositories:
sudo apt-get install cups
CUPS uses the lpadmin group to determine who is
authorised to administer the printers. To add a printer you
wil l need to add your user to the lpadmin group:
sudo usermod -a -G lpadmin pi
We are now going to use the CUPS web based interface
which is provided by default. Al l the functional ity is bui lt into
CUPS, so we do not need to worry about enabling a web
server. Just point your browser at http://1 27.0.0.1 :631 and
use your normal username and password when prompted
during configuration or when administering the printers.
Choose the Administration tab and then Add Printer.
CUPS wil l search for printers that are physical ly connected
to the Raspberry Pi or that it can see on the local network.
In my case it found my network printer "Epson Stylus Photo
PX720WD". You wil l also see some options for HP printers
as these are often shown even if there are no HP printers
connected.
After selecting the appropriate printer you can customise
the name and location of the printers. These can normally
be left at their defaults, although you could change the
name to one that is easier to remember. I f you are l ikely to
be printing from the command line then it can also be
useful to make the printer name shorter and avoid any
spaces.

1 01
An option you may like to enable is “Share this printer”
which can be used if you would l ike to use the Raspberry
Pi as a print server for other computers. This wil l al low you
to print to that printer from other computers on the same
local network.
The next page wil l show avai lable printer drivers and
attempt to find the closest match. I f you have a common
printer then there is a good chance of finding an exact
match, but if not then it may be possible to select a
different printer with simi lar functional ity. Some printer
manufacturers do provide Linux drivers that could be
instal led instead, although it depends upon the
manufacturer. I f CUPS is not able to find a suitable match
you should try the website of your printer manufacturer to
see if they have any Linux drivers and fol low their
instructions.
After selecting an appropriate printer you can choose
options for paper size and then the printer drivers wil l be
instal led. You can now view the printer through the Printers
tab, where you can change any parameters and print a test
page. I also suggest selecting the printer as the Server
default printer through that page, as that wil l make it easier
to print using the command line tools.
The printer should now be avai lable in any printer enabled
applications (e.g. office tools / web browsers) and printing
should be similar to that implemented on other operating
systems. I f you need any help then onl ine help is included
within the CUPS web page:
http://1 27.0.0.1 :631 /help/
On my Raspberry Pi I have instal led AbiWord which is a
l ightweight word processor that runs well on the Raspberry
Pi. You can see the standard print dialog in the screenshot.
You can instal l AbiWord with:
sudo apt-get install abiword
In the next article we wil l look at printing from the command
line and how to print from your own Python applications.
Because most of the content that we publish in The MagPi
is educational, i t does not age as fast as content in
traditional magazines.
To date we have now produced over 1 ,200 pages of
Raspberry Pi goodness and, unless you have had a
Raspberry Pi for some time, there is a good chance you do
not know about al l of the great articles that we have
published in previous issues. This special edition
represents only 1 0% of what we have published!
Here is a short l ist of just some of our earl ier articles, with
the issue numbers in parenthesis. You can download
every issue of The MagPi for FREE from
http://www.themagpi.com and the Pi Store.
Skutter - bui ld a robot (1 , 2, 3, 6, 8, 1 6)
Play and create computer music (2, 1 2, 1 3, 1 9, 23)
GPIO interfacing for beginners (1 7, 1 8, 1 9, 21 , 23, 27)
Command line / Bash (2, 3, 4, 5, 1 0, 1 2, 1 6, 21 , 23)
Customise the LXDE menu (4)
Pumpkin Pi - get ready for Halloween (6)
Arduino and Raspberry Pi (7, 8, 1 5, 1 6, 1 7, 28)
Home automation (8, 21 )
SD card backup and storage (9, 1 0, 29)
RISCOS (9, 1 1 , 1 3, 1 5)
Operating Systems (1 2)
BrickPi (1 7, 1 8, 23)
Project Curacao (1 8, 1 9, 20, 21 , 24, 29)
Quadcopter (1 9, 20)
Environment monitoring (21 , 23, 24, 29)
Raspberry Pi osci l loscope (24, 25, 26, 28)
Robotics (25, 26, 28, 29)
Mashberry - monitoring homebrew (26)
Git - mastering version control (27, 28, 29)
There have also been many tutorials for a variety of
programming languages.
C (3, 4, 5, 6, 9, 1 3, 1 7)
C++ (7, 8, 1 0, 1 8, 23, 24, 27)
Python (1 , 2, 3, 4, 5, 6, 7, 8, 9, 1 0, 1 3, 1 4, 29)
Scratch programming for kids (1 , 3, 4, 5, 1 3, 1 7, 29)
Ada (6, 8)
SQL (8, 22)
Charm (1 0, 1 1 , 1 4)
Java (1 4, 1 6, 25)
FUZE BASIC (25, 26, 27, 28, 29)

1 02
SKILL LEVEL : INTERMEDIATE
Stewart Watkiss
Guest Writer
PRINTING WITH CUPS
2 - Printing from Python
In the last article we added CUPS printing onto the
Raspberry Pi. Now that you have got your printer up and
running we can look at how to print from within our own
applications. We are going to be using the Python
programming language, but we wil l also take a look at
straightforward command line printing which can also be
used for printing from other programming languages.
First we wil l look at printing from the command line. This
can be useful within shel l scripts or by making a system
call within any programming language. The lp or lpr
commands are used for command line printing. The names
are an abbreviation of l ine-printer, although they are
seldom used for printing to a true l ine-printer these days.
Both commands work in a similar way but use different
options. This is historical from the early days of UNIX. Both
lp and lpr are avai lable on Linux so you can use
whichever you prefer.
The command to print a fi le to the default printer is:
lp <filename>
You can select a different printer or specify only certain
pages using different command line options. You can find
detai ls at:
http://www.cups.org/documentation.php/options.html
Alternatively look at the help page on your own CUPS
configuration page which we used in the previous article.
Unl ike the original commands which could only handle text
fi les, the lp and lpr commands instal led through CUPS
can handle other formats as well . When you use the
commands with a PDF, postscript or image fi le then CUPS
wil l convert the fi les using the printer drivers. We wil l be
using this feature later when we print a PDF fi le from a
Python script.
In some programming languages and GUI toolkits (see
box) it is possible to generate printer output using similar
instructions to how you generate graphical content for the
screen. This is the case in PyGTK, PyQt and WxPython;
but whi le the GTK and Qt toolkits are commonly used with
other programming languages they are less used and less
well documented on Python. WxPython can be useful i f you
are using Wx toolkit already. The most common graphical
toolkit on Python is Tkinter which has very l imited support
for printing.
Instead of using toolkit support I have chosen to generate a
PDF fi le using xhtml2pdf which is sent to the printer using a
CUPS library cal led PyCups. This is easy to use and has
the advantage that it doesn't need to be used in a graphical
environment. Therefore it can be used from within a
command line program or a daemon application running in
the background.
First we wil l instal l some additional packages. The python-
cups l ibrary provides the module that enables Python to
communicate with the CUPS printers, python-pip wil l make
instal l ing xhtml2pdf easier and the python-dev l ibraries are
needed to al low pip to instal l some of the l ibraries used by
GUI toolkitA GUI toolkit provides a standard set of buttons,
frames and other components to make creating
graphical programs easier and with a consistent look
and feel. Some include additional printer l ibraries that
make it easy to convert the graphical screen output to a
format ready for printing.

1 03
xhtml2pdf. Instal l these using the normal apt-get instal l :
sudo apt-get install python-cups python-pippython-dev
Then instal l xhtml2pdf using pip:
sudo pip install xhtml2pdf
This last stage wil l take a while to run as it wi l l download
and compile some additional l ibraries.
You can now use xhtml2pdf on the command line to
convert from an HTML page to a PDF fi le. You could try
using a saved web page, but in many cases it wi l l only
partial ly work due to the common use of Javascript (which
isn't rendered by xhtml2pdf) . Instead I recommend creating
the pages using standard HTML markup.
Below is a Python script which wil l l ist the avai lable printers
and then print to the first printer in the l ist. This is an
example created to show how you can add printing
capabil i ty to your own program. I f you are including this in
your own application then you should add additional error
checking as well as functional ity for the user to select the
appropriate printer (if multiple printers are instal led).
Line 4 imports the cups l ibrary and l ine 5 the xhtml2pdf
l ibrary (note that it is imported as pisa which is the former
name for the l ibrary and is how we wil l refer to it later) .
Lines 1 1 to 1 4 generate some basic HTML formatted
content. While you could include the usual HTML headers
and head section, which you would normally include in an
HTML page, I have just added the content of the body
section which is sufficient for xhtml2pdf. We then use
CreatePDF on line 1 6 to process the conversion and save
the PDF to the fi le specified in the variable “fi lename”.
I have included a very basic check for PDF errors at this
point as inval id HTML could cause this to fai l . This is only a
generic error message which you may like to improve on in
your own programs.
Line 1 9 is very important! The fi le needs to be closed so
that the write completes and it's possible to read the fi le
back in. Without this then nothing wil l print and in my case I
spent a lot of time tearing my hair out trying to work out
what was going wrong.
We create a connection to CUPS and use the getPrinters
command to get a l ist of the avai lable printers. I 've
del iberately included the print command on line 27 which is
the standard Python command to print a l ine of text to
stdout (screen). I t is nothing to do with sending anything to
the printer, so don't let that confuse you.
Final ly on l ines 29 and 30 we select the first printer and
print the fi le using the printFi le command.
When creating the script you need to create a name that
doesn't confl ict with any of the names of the l ibrary fi les
imported. For instance do not cal l the script “cups” as that
wil l confl ict with the cups l ibrary. I used cupsprint.py during
my testing.
This has shown one of the ways that you can add printing
to your own Python application. This method has been
chosen as it's easy to implement and can be used for
command line and server applications as well as graphical
applications. So over to you... what projects do you have
that need to be able to print?
1. #! /usr/bin/env python2. # Print a file to the printer3.4. import cups5. from xhtml2pdf import pisa6.7. def main():8. # Filename for temp file9. filename = "/home/pi/print. pdf"10.11. # generate content12. xhtml = "<h1>Test print</h1>\n"13. xhtml += "<h2>This is printed from
within a Python application</h2>\n"14. xhtml += "<p style=\"color: red; \">
Coloured red using css</p>\n"15.16. pdf = pisa. CreatePDF(xhtml,
file(filename, "w"))17. if not pdf. err:18. # Close PDF file - otherwise we can' t
read it19. pdf. dest. close()20.21. # print the file using cups22. conn = cups. Connection()23. # Get a list of all printers24. printers = conn. getPrinters()25. for printer in printers:26. # Print name of printers to stdout
(screen)27. print printer,
printers[printer] ["device-uri"]28. # get first printer from printer list29. printer_name = printers. keys()[0]30. conn. printFile(printer_name, filename,
"Python_Status_print", )31. else:32. print "Unable to create pdf file"33.34. if __name__=="__main__":35. main()

1 04
SKILL LEVEL : BEGINNER
James Hughes
Guest Writer
BASIC OPERATIONGetting to grips with the camera module
The Raspberry Pi camera - Part 1
The Raspberry Pi Foundation has launched their
first peripheral, a 5MP camera. Priced at $25,
the same price as the Model A, it’s a very small
PCB on which is an Omnivision OV5647 camera
module. I t connects to either the Model A or
Model B Raspberry Pi using a 1 5cm 1 5 way
ribbon connector.
Over the course of this series I wi l l take you
through initial connection of the camera to your
Raspberry Pi and wil l show you some of the
basic commands used to take both sti l l and video
imagery. At the end, some of the more
sophisticated features wil l also be explained. Not
every option wil l be covered (new options are
being added all the time so it’s difficult to keep
up) but hopeful ly this article wil l give enough
information for you to be able to cover most
image taking tasks. First though, a description of
how the camera module came to be...
History
From its first launch the Raspberry Pi has had a
connector on it to attach a camera to the GPU
(the VideoCore 4 Graphics Processing Unit on
the Raspberry Pi) . This connection uses the CSI-
2 electrical protocol and is a standard used in
most mobile phones. I t is an extremely fast
connection, which on the Raspberry Pi is
capable of sending 1 080p sized images
(1 920x1 080x1 0bpp) at 30 frames per second, or
lower resolution at even higher frame rates. I t
had always been intended at some point to
release a camera module that could use this
connection, as the abi l i ty to stream high speed
video data through the GPU without any
interaction with the ARM processor would always
make the camera much more efficient than any
USB attached webcam. It would also enable the
use of the GPU’s abi l i ty to encode H264 video or
JPEG images in hardware.
I t turns out that productising a tiny PCB like the
camera board is not a quick task! The prototype
was re-designed to remove some unnecessary
components, but more importantly, to move the
camera crystal, used for timing, to the PCB itself.

1 05
Electromagnetic compatibi l i ty (EMC) testing had
shown that the 25Mhz clock provided by the
GPU caused too much interference as it passed
up the ribbon cable to the PCB. Adding a crystal
to the PCB itself stopped this interference. A
couple more board designs later, to help with
production l ine manufacture and testing, and
eventual ly, about a year after the first prototypes,
the production board was ready.
Meanwhile, work had been ongoing to write a
couple of applications to make use of the
camera, to update the GPU firmware to support
the camera and to improve the camera tuning as
the basic tuning already in place had a number of
obvious defects.
Camera tuning is a complex task, which has
been covered on the Raspberry Pi website so I
won’t repeat it here. Suffice it to say, the end
results are well worth the extra effort put in by
David Plowman while at Broadcom. Thanks
David.
So, with the history out of the way, let’s take a
look at getting your camera going.
Setting up
I t’s important to start with a warning. Cameras
l ike these are static sensitive. You should earth
yourself prior to handl ing the PCB (a sink
tap/faucet or simi lar should suffice if you don’t
have an earthing strap).
There are only two connections to make, the
ribbon cable needs to be attached to the camera
PCB and the Raspberry Pi itself. You need to get
it the right way round or the camera wil l not work.
On the camera PCB, the blue backing on the
cable should be away from the PCB, and on the
Raspberry Pi it should be towards the ethernet
connection (or where the ethernet connector
would be if you are using a model A).
Although the connectors on the PCB and the Pi
are different, they work in a similar way. On the
Raspberry Pi you need to pul l up the tabs on
each end of the connector.
I t should sl ide up easi ly, and be able to pivot
around sl ightly. Ful ly insert the ribbon cable into
the slot, ensuring it is straight, then gently press
down the tabs to cl ip it into place. The camera
PCB itself also requires you to pul l the tabs away
from the board, gently insert the cable, then push
the tabs back.
The PCB connector is a l ittle more awkward than
the one on the Pi itself. There is a video at
http://youtu.be/GImeVqHQzsE which shows the
connections being made.
So, we now have the hardware al l attached, we
now need to make sure we have the correct
software instal led. As explained above, there are
some command line apps to instal l , and a
firmware upgrade with the camera driver and
tuning to instal l . This process may not be
necessary in future as newer distro’s are

1 06
released which already contain the required fi les.
To update the firmware, l ibraries and
applications, execute the fol lowing instructions
on the command line:
sudo apt-get updatesudo apt-get upgrade
Now you need to enable camera support using
the raspi-config program you wil l have used
when you first set up your Raspberry Pi:
sudo raspi-config
Use the cursor keys to move to the camera
option and select enable. When you exit raspi-
config it wi l l ask to reboot. The enable option wil l
ensure that on reboot the correct GPU firmware
wil l be running (with the camera driver and
tuning), and the GPU memory split is sufficient to
al low the camera to acquire enough memory to
run correctly. Running a camera and associated
encoder does take up a big chunk of memory, as
the images are large, and there needs to be at
least two of them in memory at any time in order
to provide a double (in some cases triple) buffer
which prevents 'tearing' of images during display.
Checking it works
OK, we have connected the hardware and
instal led the software. Now we need to see if i t is
al l working correctly! The quickest way is just to
type in:
raspistill -t 5000
This runs the sti l ls capture program for 5
seconds (or 5000 mil l iseconds. Note that al l
times used are in mil l iseconds). You should see
the whole display replaced with a moving image
of whatever the camera is looking at. I f you don’t
see the preview appear, or there are error
messages displayed, go straight to the
Troubleshooting section at the end of this article.
So, what can it do?
As with any camera, it can work in two ways. We
can capture sti l l images, just l ike a camera, or we
can capture video, l ike a camcorder. The two
demo applications provided handle these tasks
separately. Although it would be quite possible to
combine them into one application, that makes
the code more complicated and as demo code a
lot of effort was put in to make it as easy to
understand as possible. As an aside, the C
language source code for the applications is
publicly avai lable from the Foundation's github
repository. Anyone is welcome to play around
with it and alter it for their particular purposes.
The code is well commented and uses the
Doxygen commenting scheme so you can
produce HTML documentation directly from the
source code.
So, on to the applications themselves. They are
command line applications and do not need to be
run from a desktop environment since the
preview output from the apps is superimposed
over the top of any desktop or console being
used. Typing just the name of the application, or
adding --help or -? to the command line wil l
produce a list of al l the avai lable options. The l ist
is quite long, so you may want to pipe the output
into ‘less’ so you can scrol l up and down to read
it:
raspistill | lessraspivid | less

1 07
Basic options
Both applications use the -t option to specify the
length of time in mil l iseconds they should
continue running.
So “raspisti l l -t 3000” wil l run the camera for 3
seconds.
In the sti l ls case, and if a fi lename is specified,
the capture of the sti l l wi l l take place at the end of
the time period. In the video case, and again if a
fi lename is specified, the capture starts straight
away and wil l be as long as the time period.
To specify the fi lename of the output fi le, you use
the -o option. The fol lowing command runs the
camera for 2 seconds and at the end of the
period wil l take a sti l l image, saving it to the fi le
image.jpg:
raspistill -o image. jpg -t 2000
This command wil l do the same but wil l save a 2
second H264 video fi le cal led video.h264:
raspivid -o video. h264 -t 2000
You don’t need to specify a fi lename for the
output - if you don’t then no capture is done, but
the preview wil l sti l l be run for the specified time.
I f you don’t specify a time then 5 seconds is used
as a default.
The fol lowing wil l take a picture after 5 seconds:
raspistill -o image. jpg
So we have made some fi les, but how do we see
what they look l ike? Well , to view JPG images
the FBI program is quite useful. You can instal l i t
quickly using:
sudo apt-get install fbi
Then you can easi ly display your JPG images,
zoom in and out (use - and +) etc.
fbi image. jpg
To view video you can use the already instal led
omxplayer.
omxplayer video. h264
Preview options
You can specify whether you want the preview
disabled (-n), or whether it is to appear ful l
screen (-f) or in a window (-p). You can also
specify what opacity (-op) the preview window is
to have (so you can see the desktop underneath
if necessary).
To display the preview in a window at position
1 00,1 00, width 500, height 400 and at 50%
opacity (0-transparent to 255 -opaque), enter:
raspistill -p 100, 100, 500, 400 -op 128 -o image. jpg
To disable preview completely, enter:
raspistill -n -o image. jpg
In the next article some of the more advanced
features wil l be discussed!
Troubleshooting
I f your camera is not working there are a number
of things to check to ensure it is set up correctly.
1 ) Are the ribbon connectors al l firmly seated and
the right way round? 2) Is the camera module
connector firmly attached to the camera PCB?
3) Have you run sudo apt-get update, sudo apt-
get upgrade? 4) Have you run raspi-config and
enabled the camera?
So, if things are sti l l not working try the fol lowing:
Error : raspistill/raspivid not found. This
probably means your update/upgrade fai led in
some way. Try it again.
Error : ENOMEM displayed. Camera is not
starting up. Check all connections again.
Error : ENOSPC displayed. Camera is
probably running out of GPU memory. Check
config.txt in the /boot/ folder. The gpu_mem
option should be at least 1 28.

1 08
SKILL LEVEL : BEGINNER
James Hughes
Guest Writer
ADVANCED OPERATIONGo pro with the camera module
The Raspberry Pi camera - Part 2
Welcome back to part 2 of The MagPi mini
series covering the fantastic Raspberry Pi
camera module.
In part 1 we covered setting up your camera and
its basic operation. In this issue we begin to
introduce you to some of the advanced features
that the module is capable of, al lowing you to
capture images l ike a professional.
Prototype camera board (left) and final camera board (right)
Sizing options
Lets begin by looking at sizing options. You can
easi ly specify the size of your captures using the
-w (--width) and -h (--height) options. These
do exactly what you might expect; they change
the resolution of the resultant captures (either
sti l ls or video). But you can also change the
quality of the JPG sti l ls using -q (--quality)
and the quality of the H264 encoding using -b
(--bitrate) . Both these formats use what is
known as lossy compression, that is they throw
away detai l in order to compress the fi les. The
more detai l that is thrown away so the smaller
the fi le. I t’s simply a tradeoff between quality and
fi le size.
Some examples..
raspistill -w 640 -h 480 -q 10 -o smallpic. jpg
raspivid -w 640 -h 480 -b 500000 -o \
smallvid. h264
The bitrate option is measured in bits per
second. So in the example above 500000 is
0.5Mbits/s. This is quite a low bitrate for 1 080p
video but good enough for the small image size
requested here. Ful l HD recording (the default) is
supported, which is 1 920x1 080 at 30 frames per
second (abbreviated to 1 080p30). This requires
a higher bitrate to avoid odd compression
artefacts. I t is worth trying out various bitrates
just to see how it affects the image quality. I t is
sometimes very surprising how low you can go
before the video becomes unwatchable!

1 09
raspivid -t 10000 -b 1000000 -o \
highcompression. h264
In fact the raspisti l l appl ication al lows us to save
in 4 different fi le formats, although JPG is by far
the fastest (and most common). The other
formats supported are PNG, GIF and BMP.
These are al l lossless formats (no data is thrown
away in order to decrease fi le size) and the fi le
sizes are therefore much larger than JPG. They
also take longer to save as there is no dedicated
hardware acceleration in the GPU for them. You
can select the type of fi le to output using the -e
(--encoding) option:
raspistill -t 1000 -e png -o image. png
Timelapse mode
The raspisti l l app has a very useful feature cal led
timelapse mode. Instead of just taking one
picture, it takes a sequence of pictures at a
specified interval (use -tl ) unti l the timeout l imit
(-t) is reached. So, to take a picture every 5
seconds over a period of 50 seconds, use the
fol lowing:
raspistill -t 50000 -tl 5000 -o image%d. jpg
The -t and -tl options are fairly obvious but
what is that odd fi lename specification? Well , i f
you just specified something l ike:
raspistill -t 50000 -tl 5000 -o image. jpg
then al l your pictures would be saved to the
same fi lename, image.jpg. So you end up with
just one picture! By adding a %d in your fi lename
specifier, the image number is added to the
fi lename at the place where the %d is. So our first
example above would save a set of fi les as
image1 .jpg, image2.jpg.. . image1 0.jpg. In fact,
the fi lename is generated using the same
formatting as the C language printf statement,
so you can do something l ike this,
raspistill -t 50000 -tl 5000 -o image%04d. jpg
which specifies the number wil l be formated as 4
digits long and use preceding 0’s to pad out
those 4 digits, resulting in image0001 .jpg,
image0002.jpg.. . image001 0.jpg being saved.
See the printf format specifier documentation
(man printf on a console command line) for
more information.
Changing image parameters
Just l ike a compact camera, there are lots of
options that can be applied to the images to
change their effect, or the way they were taken.
The fol lowing options are equally applicable to
sti l ls or video mode. Also note that some options
may not be ful ly implemented at this stage and
you may see no effect when using them. This is
because the applications were written to the
ful l Camera API (application programming
interface) avai lable, not necessari ly what was
actual ly implemented under that API . I ’m only
going to describe working features here. Feel
free to try al l the options to see the effect they
provide and whether they actual ly do anything!
First, we have the basic image operations. These
are sharpness (-sh [-1 00 to 1 00]) , contrast (-co
[-1 00 to 1 00]) , brightness (-br [0 to 1 00] ) and
saturation (-sa [-1 00 to 1 00]) . Al l these settings
are commonly found on cameras or even LCD
televisions. Try them out with different numbers
to see what effect they have - here’s a starting
point:
raspistill -t 5000 -sh 100 -co 50 -br 25 \
-sa 50 -o image. jpg

1 1 0
Image effects (-ifx) are quite fun. These apply
interesting fi l ters to the image like negative or
emboss. Only one effect can be applied at a
time. The ful l set of effects avai lable are:
negative, solarise, sketch, denoise, emboss,
oilpaint, hatch, gpen, pastel, watercolour,
film, blur saturation, colourswap, washedout,
posterise, colourpoint, colourbalance, cartoon.
raspistill -t 5000 -ifx negative -o image. jpg
The colour effects option (-colfx) is interesting.
Internal ly, the image is represented using a YUV
colour space. YUV represents colour using the
luminance Y and blue–luminance and red–
luminance differences, UV. The colour effects
option al lows you to specify the values we are
going to use for U and V. This gives us a quick
and easy way to do black and white images; we
just need to set UV equally to the middle of the
range, which is 1 28. So
raspistill -t 5000 --colfx 128: 128 \
-o image. jpg
Other values for U and V give varying blue and
red differences from the middle. Try some
numbers!
The final image options I am going to talk about
are more about how the picture is taken rather
than what processes are applied to the image.
These are metering mode (-mm) and automatic
white balance mode (-awb) .
Metering mode specifies what area of the
incoming image is used for determining the
brightness of the image. Internal ly, there is a
target brightness that is required and
the camera system adjusts the internal gain to hit
that target. But to do that it needs to know what
brightness the incoming image is so it can be
boosted to the required level. The area of the
image that is used to determine that incoming
brightness is what is defined by the metering
mode. There are two useful ly distinct options:
average and spot . Spot takes the very centre of
the image and uses that whi le average uses the
whole image. So if you have a scene with a very
bright point in the centre, using spot wil l almost
certainly underexpose. In that case you should
use average:
raspistill -t 5000 -mm average -o image. jpg
AWB stands for automatic white balance. This is
a complicated subject, but in very simple terms it
is the adjustment made to the image to
compensate for different l ighting conditions to
make whites look white. For example, different
types of office l ight produce different l ighting
conditions and the system needs to compensate
for those conditions so the white walls sti l l look
white in the photograph. By default the AWB
selection is done automatical ly using Bayesian
analysis of the scene to make an educated guess
on the l ighting conditions. However, you can
specify the AWB approach being used
depending on the scene being captured. The
options are :
auto, sun, cloud, shade, tungsten, fluorescent,
incandescent, flash, horizon.
So to set up the AWB for a room lit by tungsten
fi lament bulbs you would use:
raspistill -t 5000 -awb tungsten -o image. jpg
Anything else?
We’ve covered many of the features avai lable on
the Raspberry Pi camera, but the best way to

find out about them is to play with the camera,
adjust settings and see what happens. To help
with this there is a demo mode avai lable which
runs through a lot of the options automatical ly.
The fol lowing example runs for 1 minute,
changing an effect every 500ms (½ second)
raspistill -d 500 -t 60000
One option not mentioned is the abi l i ty to output
the image or video stream to stdout, so it can be
piped to other applications (for example, network
streaming). To do this, instead of specifying a
fi lename for the -o option, you use the -
(hyphen). The fol lowing example outputs the jpg
data to stdout, where it is passed on to the fi le
image.jpg. The effect is the same as specifying
-o image. jpg .
raspistill -o - > image. jpg
Final words
As with everything Raspberry Pi, the camera is
meant to be a learning experience. Many options
are avai lable for you to try out, some might be
useful, some not so useful. Try them out,
experiment, you cannot break it using any of the
options!
The source code for the applications is publicly
avai lable and was written in a very straight-
forward fashion using C. There are lots of
comments to make it easier for people to modify
it to their own purposes.
Feel free to pi le in, change stuff, see what it
does. I f you add a great new feature, make sure
you post about it on the Raspberry Pi forums -
you never know, it might make it into the official
applications!
The MagPi print editionExperience hundreds of pages of Raspberry Pi hardware projects, software tutorials, reviews of the
latest expansion boards and interviews with the makers and creators involved.
Original ly funded through Kickstarter, The MagPi printed bundles of Volumes 1 , 2 and 3 bring al l the
information of this peer-reviewed magazine within arms reach.
Volume 1 : Issues 1 - 8
Volume 2: Issues 9 - 1 9
Volume 3: Issues 20 - 29
Available worldwide fom these resel lers:
swag.raspberrypi.org
www.modmypi.com
www.pi-supply.com
thepihut.com
www.adafruit.com (USA)
www.buyraspberrypi.com.au (Austral ia)
The MagPi is also avai lable on special offer to schools for a l imited time only:
www.themagpi.com/education
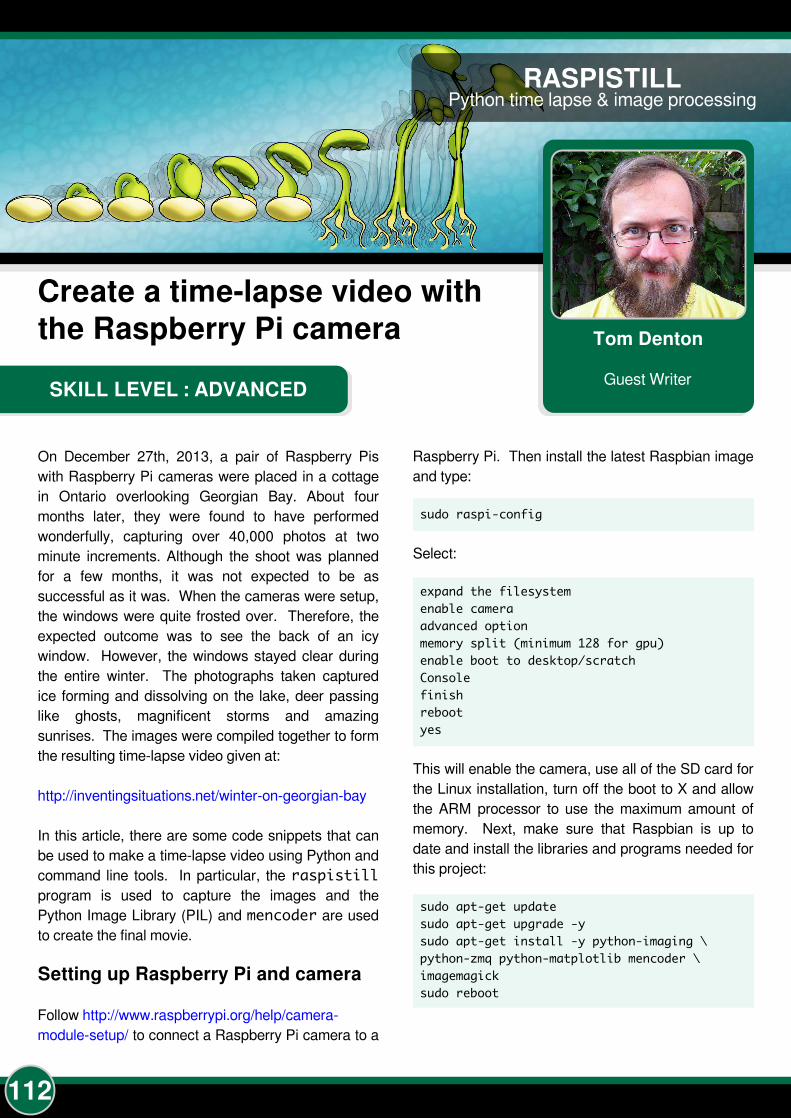
1 1 2
SKILL LEVEL : ADVANCED
Tom Denton
Guest Writer
RASPISTILLPython time lapse & image processing
Create a time-lapse video with
the Raspberry Pi camera
On December 27th, 201 3, a pair of Raspberry Pis
with Raspberry Pi cameras were placed in a cottage
in Ontario overlooking Georgian Bay. About four
months later, they were found to have performed
wonderful ly, capturing over 40,000 photos at two
minute increments. Although the shoot was planned
for a few months, it was not expected to be as
successful as it was. When the cameras were setup,
the windows were quite frosted over. Therefore, the
expected outcome was to see the back of an icy
window. However, the windows stayed clear during
the entire winter. The photographs taken captured
ice forming and dissolving on the lake, deer passing
l ike ghosts, magnificent storms and amazing
sunrises. The images were compiled together to form
the resulting time-lapse video given at:
http://inventingsituations.net/winter-on-georgian-bay
In this article, there are some code snippets that can
be used to make a time-lapse video using Python and
command line tools. In particular, the raspistill
program is used to capture the images and the
Python Image Library (PIL) and mencoder are used
to create the final movie.
Setting up Raspberry Pi and camera
Follow http://www.raspberrypi.org/help/camera-
module-setup/ to connect a Raspberry Pi camera to a
Raspberry Pi. Then instal l the latest Raspbian image
and type:
sudo raspi-config
Select:
expand the filesystem
enable camera
advanced option
memory split (minimum 128 for gpu)
enable boot to desktop/scratch
Console
finish
reboot
yes
This wil l enable the camera, use al l of the SD card for
the Linux instal lation, turn off the boot to X and allow
the ARM processor to use the maximum amount of
memory. Next, make sure that Raspbian is up to
date and instal l the l ibraries and programs needed for
this project:
sudo apt-get update
sudo apt-get upgrade -y
sudo apt-get install -y python-imaging \
python-zmq python-matplotlib mencoder \
imagemagick
sudo reboot

1 1 3
Taking photos with raspistill
The easiest way to use the Raspberry Pi camera is
via the raspistill command. I t has a time-lapse
option, which many people have used to good effect.
For an extremely long time lapse, finer control over
the images taken proved to be better than the
automatic settings. As a result, a Python script was
written to take photographs at regular intervals.
Calculations were used to make sure that the images
were of consistent qual ity. Image quality consistency
was maintained by the manipulation of shutter speed,
ISO and post capture alteration.
The two options that control the brightness of an
image are the shutter speed and the ISO
(International Standards Organization) setting. The
shutter speed controls how long the camera col lects
l ight to create an image, where a longer shutter speed
wil l create brighter images but wil l be more l ikely to
have motion blur if there is movement in the frame.
On the Raspberry Pi, the slowest shutter speed
avai lable is about 2.5 seconds; longer speeds wil l
cause the camera to hang and not take pictures unti l
the Raspberry Pi is rebooted. To be safe, the
maximum shutter speed was set to two seconds.
Shutter speeds in raspistill are measured in
microseconds. Therefore, a shutter speed of
1 000000 implies one second.
The ISO setting controls the sensitivity of the sensor,
within a range of 1 00 (low sensitivity) to 800 (high
sensitivity) . When the ISO setting is high, brighter
images are taken, but they wil l also tend to be much
more noisy.
The command raspistill can be used to take a
photograph with a set shutter speed and ISO setting.
The automatic settings should be avoided, apart from
AWB (auto white balancing):
raspistill -awb auto -n -t 10 -ss 1000000 \
-ISO 100 -o mypic. jpg
Python can be used to run raspistill by using a
subprocess cal l :
import subprocess
ss=1000000
iso=100
command=' raspistill -n -t 10 '
command+=' -ss ' +str(ss)
command+=' -ISO ' +str(iso)+' -o mypic. jpg'
subprocess. call(command , shell=True)
The goal for the project was to keep images at about
the same brightness over the course of a day. The
brightness of each image was measured. Then the
shutter speed and ISO setting were adjusted. Since
fast movements are not important for time lapse
pictures, the ISO was kept at 1 00 as much as
possible to ensure high quality images.
Calculating the average brightness
The Python Imaging Library (PIL) is great for
manipulating images in Python:
import Image
im=Image. open(' mypic. jpg' )
pixels=(im. size[0] *im. size[1] )
hist=im. convert(' L' ). histogram()
br=float(sum([i*hist[i] for i in
range(256)] ))/pixels
print br
This example opens an image and uses the image's
histogram to compute the average brightness of the
image. For a greyscale image, there are 256 possible
pixel values. The histogram counts how many pixels
there are for each value. The average brightness of
the images is calculated by adding up all of the pixel
brightness values and dividing by the number of
pixels.
Adjusting the shutter speed
To retain the same image brightness, as the l ight
increases or decreases, either the shutter speed or
the ISO setting should be adjusted. The brightness
from the previous image can be used to adjust the
shutter speed,
delta=128-br

1 1 4
ss=ss*(1 + delta/128)
where 1 28 is the target brightness and ss is the
shutter speed in the previous Python example. To
reduce fl icker in the time lapse video, the average
brightness from the last ten or twenty images was
used.
Since the camera used had an infrared fi l ter and the
l ight level was low during the night, a brightness
threshold was used to avoid storing images in very
dark conditions.
Installing the scripts
To instal l the scripts, type:
git clone https: //github. com/sdenton4/pipic
cd pipic
chmod 755 timelapse. py
chmod 755 deflicker. py
The time lapse program can be run with the default
settings,
. /timelapse. py
or the avai lable options can be listed:
. /timelapse. py -h
When the time lapse program runs, it writes the
pictures into the ~/pictures directory.
To start the time lapse program when the Raspberry
Pi boots type,
sudo nano /etc/crontab
and add,
@reboot pi python /home/pi/timelapse. py
Then save the fi le and exit nano.
Making the movie file
After running the time lapse program for a long time,
the photographs should be assembled into a movie.
This can be done very easi ly with mencoder :
mencoder "mf: //*. jpg" -mf fps=18: type=jpg \
-ovc lavc -lavcopts \
vcodec=mpeg4: mbd=2: trell: vbitrate=3000 \
-vf scale=512: 384 -oac copy -o movie. avi
This command uses al l of the .jpg fi les in the present
working directory and assembles them into a movie.
A sound track can be added to the movie, using an
existing audio fi le:
mencoder -ovc copy -audiofile MYMUSIC. mp3 \
-oac copy movie. avi -o movieWithMusic. avi
Post-processing
The movie can look a bit too grey. To create more
contrast, PIL's image manipulation capabil i ties can
be used. The greyscale histogram of a single image
can be plotted using Python and matplotlib :
import Image
from matplotlib import pyplot as plt
im=Image. open(' mypic. jpg' )
hist=im. convert(' L' ). histogram()
plt. plot(hist)
plt. savefig(' myhist. png' )
The matplotlib package can also be used to plot
the histograms of many images at once:
import Image, glob
import numpy as np
from matplotlib import pyplot as plt
M=[]
for x in glob. glob(' *. jpg' ):
im = Image. open(x)
M += [im. convert(' L' ). histogram()]
plt. pcolormesh(np. array(M))
plt. savefig(' mymanyhist. png' )
This example reads al l of the .jpg fi les in the present
working directory. In the resulting image each
horizontal l ine of pixels is one image in the time lapse.
The brightness of a pixel indicates how many pixels in
the original image have a given intensity.
Some of the images captured were sl ightly grey. This
implies that there is not very much contrast, because

1 1 5
most of the pixel values are clustered in the middle of
the histogram. In these cases, there were no
completely black pixels and only a few completely
white pixels. The image at the bottom left of this page
i l lustrates an example grey image.
To improve the balance, the image histogram can be
used and stretched out to fi l l the whole range (from 0
to 256). The first step is to find the bounds a and b,
pixels=im. size[0] *im. size[1]
a=0
count=0
while count<0. 03*pixels:
count+=hist[a]
a+=1
b=255
count=0
while count<0. 05*pixels:
count+=hist[b]
b-=1
where a and b are defined such that 97% of the
pixels are brighter than a and 97% are darker than b .
Now a and b can be used to stretch the histogram,
im3=Image. eval(im2, lambda x: (x-a)*255/(b-a))
where the eval function applies the function given
within the parentheses to each pixel in the image and
lambda is an easy way to make a simple function.
For example, the fol lowing code snippet prints 1 2.
f=lambda x: x*3
print f(4)
The histograms above are for the original (green) and
level led image (blue). The histogram for the level led
image is quite spread out. I t is also very jagged,
because the stretching removes many possible pixel
values. Fortunately, this is not very visible in the
level led image. In practice, the bounds 'a' and 'b'
were based on a rol l ing average from nearby
pictures, such that there were no dramatic changes.
The final level led image is shown at the bottom right
of this page.
The techniques discussed in this section can be
found in the deflicker. py script. Type,
. /deflicker. py -h
for a l ist of avai lable options. The script reads images
that are in the present working directory.
Before After
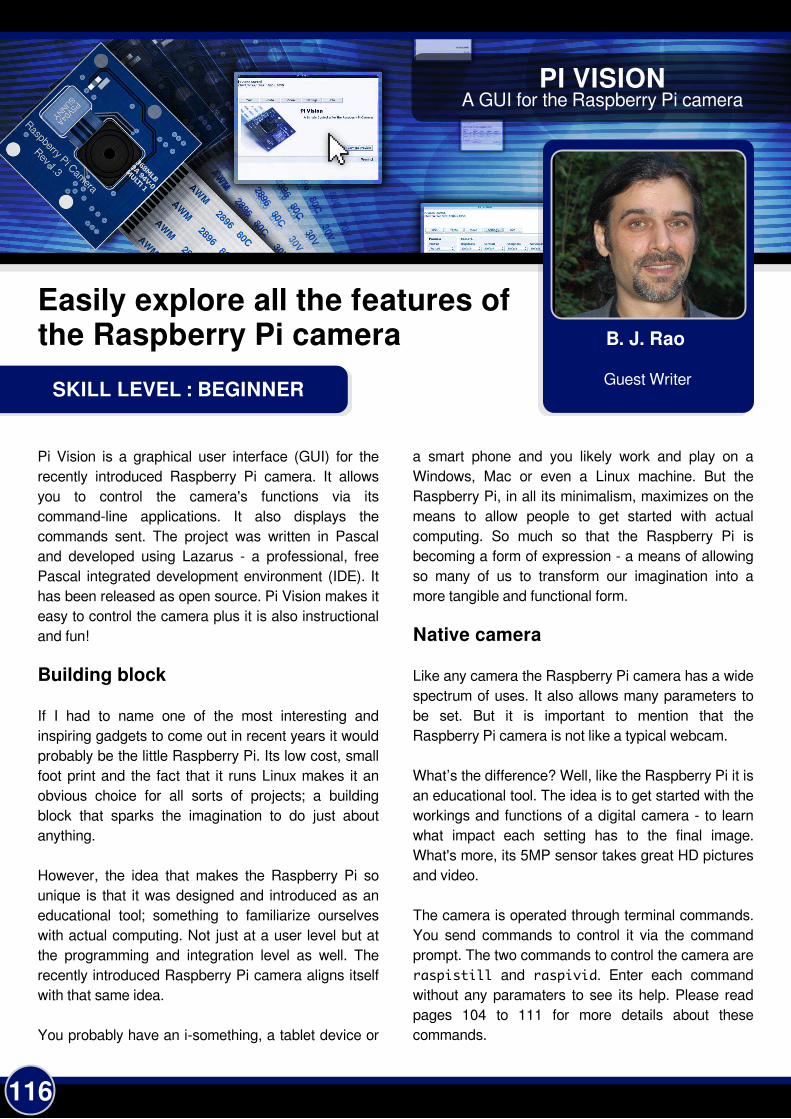
1 1 6
SKILL LEVEL : BEGINNER
B. J. Rao
Guest Writer
PI VISIONA GUI for the Raspberry Pi camera
Easily explore all the features ofthe Raspberry Pi camera
Pi Vision is a graphical user interface (GUI) for the
recently introduced Raspberry Pi camera. I t al lows
you to control the camera's functions via its
command-l ine applications. I t also displays the
commands sent. The project was written in Pascal
and developed using Lazarus - a professional, free
Pascal integrated development environment (IDE). I t
has been released as open source. Pi Vision makes it
easy to control the camera plus it is also instructional
and fun!
Building block
I f I had to name one of the most interesting and
inspiring gadgets to come out in recent years it would
probably be the l ittle Raspberry Pi. I ts low cost, small
foot print and the fact that it runs Linux makes it an
obvious choice for al l sorts of projects; a bui lding
block that sparks the imagination to do just about
anything.
However, the idea that makes the Raspberry Pi so
unique is that it was designed and introduced as an
educational tool; something to famil iarize ourselves
with actual computing. Not just at a user level but at
the programming and integration level as well . The
recently introduced Raspberry Pi camera aligns itself
with that same idea.
You probably have an i-something, a tablet device or
a smart phone and you l ikely work and play on a
Windows, Mac or even a Linux machine. But the
Raspberry Pi, in al l i ts minimalism, maximizes on the
means to al low people to get started with actual
computing. So much so that the Raspberry Pi is
becoming a form of expression - a means of al lowing
so many of us to transform our imagination into a
more tangible and functional form.
Native camera
Like any camera the Raspberry Pi camera has a wide
spectrum of uses. I t also al lows many parameters to
be set. But it is important to mention that the
Raspberry Pi camera is not l ike a typical webcam.
What’s the difference? Well , l ike the Raspberry Pi it is
an educational tool. The idea is to get started with the
workings and functions of a digital camera - to learn
what impact each setting has to the final image.
What's more, its 5MP sensor takes great HD pictures
and video.
The camera is operated through terminal commands.
You send commands to control i t via the command
prompt. The two commands to control the camera are
raspistill and raspivid . Enter each command
without any paramaters to see its help. Please read
pages 1 04 to 1 1 1 for more detai ls about these
commands.

1 1 7
Using the command-l ine provides an understanding
of how the camera is control led. I t al lows you to
configure commands in almost any combination you
want. I t also invites you to take the next step and
create your own interface for it.
Capturing the interest
Most young kids, l ike my kids, love playing video
games. Games are typical ly the first type of
interaction with computers. But many wil l reach a
point where they don't just want to “play” games -
they also want to “make” them as well . At the very
least they want to understand more about what goes
on 'behind the screen'. But finding an entry point to
basic computing is easier said than done.
Fortunately, the Raspberry Pi 's camera is proving to
be that entry point. I t not only captures their interests
but also seems to be maintaining it. My kids can now
type in commands that do something simple but
rewarding and which provide immediate visual
feedback. The trick here is to get the kids to take
pictures of themselves - usual ly whi le pul l ing funny
faces. I t is enough for them to type in another
command and make another picture.
Pi Vision
Where does Pi Vision fit into al l this? Pi Vision is a
simple, open source application which attempts to
leverage the entry point. The incentive of Pi Vision is
to al low for easy use of the Raspberry Pi camera
while also serving as an instructional tool.
Each time a picture or video is captured with Pi Vision
it shows you what commands are sent to the
Raspberry Pi to control and operate the camera. This
assists novice users in understanding the command
structure. What's more, since Pi Vision is open
source you can review and copy the code plus make
changes to suit your needs and interests.
In the next section of this article you wil l find more
detai ls about the Pi Vision open source project. For
now, assuming that you already have your Raspberry
Pi camera setup and running, lets instal l Pi Vision.
Pi Vision runs on the Raspbian OS. Start the LXDE
GUI with the terminal command startx. Download
the Pi Vision software from http://heywhatsthebigidea
.net/?ddownload=1 021 . Right-cl ick on the
downloaded fi le and choose "Xarchiver". Cl ick on the
"Extract fi les" icon and check the option "Extract fi les
with ful l path". This wil l create a new directory cal led
PiVision_RPi .
Important! In order to run the Pi Vision application
you need to first set permissions. Open the
PiVision_RPi directory and right-cl ick on the fi le
rpiCC - the Pi Vision application. Select Properties
and from the File Properties dialog select the
Permissions tab. There is a small check-box which
needs to be checked called “Make this fi le
executable”.
Double-cl ick on the Pi Vision application. The start-up
page of Pi Vision includes a button cal led “Test
Camera Preview”. This wil l start a 5 second 640 x
480 (VGA) camera preview in the upper left corner of
your screen. Assuming that your camera is set up
correctly and the preview is successful then you are
now ready to start using your camera with Pi Vision.
You wil l notice that Pi Vision wil l display the
commands sent in a text area in the upper region of
the application. Go ahead and experiment with
different settings in the Photo, Video and Settings
sections to see the results. Later you can try sending
the command instructions yourself. To do this take a
photo or video and then select and copy the raspisti l l
or raspivid command in the text area. Open a terminal
window by selecting the "Terminal" button at the
lower right region of the application. Open the "Edit"
menu and choose "Paste" .

1 1 8
Open source
The language of choice for the Raspberry Pi is
Python, and with good reason. Python offers
simplicity, i t is easy to understand and very easy to
use. I t subscribes to the novice developer, in
particular, very well .
Other ways to create programs/applications are also
avai lable, but when it comes to Rapid Application
Development (RAD) you wil l need something more
advanced. For me the choice was Pascal - more
specifical ly the Free Pascal Compiler (FPC) with the
Lazarus IDE.
The Lazarus IDE is an open source development
environment to aid writing applications using the
Pascal language. I t is very powerful and includes just
about everything necessary to make real ly great
applications very easi ly and with minimal effort.
Pascal is not the best language. There is no such
thing as "best". The question is what does it take to
satisfy the requirements and do it in a good, easy and
effective way?
Pascal is a strongly typed language and offers
important structured programming techniques. I t was
the teaching language of choice during the 80s and
early 90s. Additional ly, the Lazarus IDE and the FPC
run on most systems; Windows, OSX, Linux and of
course Raspbian. That means you can write code
and develop applications for the Raspberry Pi using a
powerful IDE which compiles to almost al l platforms.
Not surprisingly, Pi Vision was written in Pascal using
the Lazarus IDE. In fact the Lazarus IDE is part of the
Raspbian OS repository. You can download and
instal l i t directly. But should you choose to do so
please note that it wi l l consume 0.5GB of storage
space on your SD card.
First instal l Pascal by entering:
sudo apt-get install fpc
Then instal l Lazarus by entering:
sudo apt-get install lazarus
This can take some time to download and instal l .
After it has completed you wil l find Lazarus in the
¨Programming¨ section of your LXDE application
menu.
The Pi Vision project itself can be downloaded and
then opened and bui lt using Lazarus. Pi Vision is
hosted on Github. Simply download the entire project,
unpack it and open it using Lazarus. Ful l instructions
can also be found inside the project.
I t should be of interest to note that since you can also
instal l Lazarus on many other operating systems such
as Windows or Mac, you can open the Pi Vision
project and run it on those systems as well . Obviously
this would be only for review.
Links
Pi Vision
http://heywhatsthebigidea.net/projects/pi-vision-a-
raspberry-pi-camera-control ler/
Pi Vision Project Github Repository
https://github.com/local-vision/Pi-Vision
Lazarus Free Pascal Compiler
http://www.lazarus.freepascal.org/

1 1 9
SKILL LEVEL : BEGINNER
Yann Caron
Guest Writer
ALGOIDProgramming made simple and fun
Learning to programvideo games
Two years ago my 1 0 year old son asked me,
"Daddy, what is your job?". I repl ied that I write
computer programs which give the computer some
tasks. I didn't have to wait long for the second
question. "Ok, but how do you tel l the computer what
it has to do? How does a program work?".
That was when I decided to write Algoid to teach him
what computer programming is and how to do it.
Original ly Algoid was designed to run on the Android
platform but recently I discovered the Raspberry Pi;
this low cost, credit card sized computer exactly
designed for education.
What is AlgoIDE? AlgoIDE is a combination of an
integrated development environment (IDE) and its
own language (AL) designed together to simplify the
understanding of programming!
Principles
The AL language was developed with three ideas in
mind:
1) Its apprenticeship should be as progressive and
memorisable as possible.
Try to explain to a kid how the "for" loop works. You
wil l discover you need to explain variables,
conditions, boolean expressions and incrementation.. .
al l just to explain a simple loop!
Algoid's syntax was designed to be as easy to
memorise as possible. Al l i ts structure statements are
written the same way (variables, functions, arrays,
objects .. .)
2) Its syntax should be as close as possible to
industry standards.
Learning a language represents a large amount of
time so the day the kid wants to use Java, Python or
C++ they wil l not have to learn again unfamil iar
syntax and another nuances.
3) Its semantic should not be limited to one or two
paradigms.
When I was young I was very frustrated by the BASIC
language. After having understood how imperative
statements and procedures work, I was l imited to
them. To progress I had to learn another language
and another syntax.
Al l things considered, AlgoIDE tries to simplify
programming and its understanding. My first idea
was to create a step by step execution mode. With
two clicks the execution slows down and highl ights
appear in the source code on the l ine being executed.
This is possible with the debugging mode. We wil l
see later how it works. AlgoIDE also has the abi l i ty to
view the variables in use on its scope viewer and has
its own logger.

1 20
Algoid quick tour
I t is recommended to download the Java version of
Algoid from http://download.algoid.net. AlgoIDE is
also avai lable on the Pi Store at http://store.
raspberrypi.com/projects/algoid. I t is also avai lable
on the Google Play store at https://play.google.com/
store/apps/detai ls?id=fr.cyann.algoid.
Instal l i t on your Raspberry Pi and launch it from the
Desktop. From the Examples menu, choose
demo. al . Cl ick on the "Play" button and the demo
script wi l l run.
The program contains a function named poly and a
loop that draws a rose window. Note that the function
declaration is real ly special :
set poly = function (size, n)
;
In AL everything is an expression. Example
declarations are:
set size = 7;
set o = object ()
;
In AlgoIDE, check the "Step by step" box and cl ick
the "Play" button again. Now you can understand
where the program is at and what it is doing. The
number at the right of the check box allows you to
change the step by step speed.
Now uncheck step by step mode and check the
"Debug mode" box. Click on the number 12 in the
source code margin. This wil l add a new breakpoint.
Cl ick on the "Play" button to run the program.
Three new buttons appear - run to the next
breakpoint, run to the next l ine and run to the next
token. The Algoid debugger considers each token as
an object path and expression calculation. This is
perfect to understand the precedence order for
example. Try each of the three new buttons.
You can observe the current variables and their
values in the Scope Viewer window. For example
debug the binary tree program (Examples >
fractal > binary tree. al ) and set a
breakpoint on l ine 12 . Observe the value of it and
size in the Scope Viewer with each iteration.
Documentation
To learn a language and how to program, the most
important thing is documentation and sharing
experiences. The http://www.algoid.net web site
contains a complete language reference section and
a continuously updated tutorial l ist. The tutorials

1 21
contain a lot of examples and progressive exercises
to help explain each language statement and
function.
Algoid is also a community federated by the forum
http://forum.algoid.net. I t contains a lot of discussions,
problem solutions and mini-tutorials.
Another way to learn programming is with other
people! Some members have created a team to
develop games on Algoid. When programs are
interesting they are included in the next application
release. Everyone can learn from one another.
Everything in the Algoid environment is based on
sharing source code and knowledge.
Teaching
Algoid is also designed for teachers. As Algoid is a
free tool, al l help is greatly appreciated for tutorial
writing, documentation corrections, etc.
Algoid gives teachers the abi l i ty to write their own
learning plugins. A tutorial and an article explaining
how to do that is already avai lable. Writing a plugin in
Algoid is very simple. The teacher just needs to have
some basic Java and Swing development
knowledge.
Plugin development is divided in two steps:
1 ) Develop the l ibrary with objects and functions
needed for the course.
2) I f necessary, develop a new Java panel (view) and
bind it with the l ibrary.
A complete range of tools are avai lable to interact
with the AL language. The tutorial provides a
complete Java NetBeans project starter and
documentation.
This is an example of the l ibrary development:
This is the resulting the example panel:
Once complete, just copy the <plugin>. jar fi le to
the Algoid/plugin folder and that's it!
With this feature a lot of improvements can be added
to Algoid, l ike GPIO communications, a true 2D game
engine (planned for future development),
mathematical functions, etc. Everything you want to
teach or command can be added with this powerful
scripting language!

1 22
Video game development
One principle of Algoid is to be fun, because when it
is fun, learning becomes a pleasure. What is more fun
than creating your own game?
The game above contains only 300 lines of source
code and this include al l the graphics and animated
stars. You can play it from Examples > games >
star battle. al .
Tutorials
In this simple tutorial , we wil l see how to animate a
spaceship. Then features such as typing, stamps
and events wil l be discussed.
The first steps of the program are to hide the turtle,
create a spaceship and draw it.
algo. hide();
// ship
set ship = object ()
// define its position
set x = 0;
set y = 150;
// draw the ship
set stamp = algo. stamp. clone (
array
-1, -1, -1, 10, -1, -1, -1,
-1, -1, -1, 10, -1, -1, -1,
-1, -1, 02, 10, 02, -1, -1,
10, -1, 02, 10, 02, -1, 10,
10, 02, 02, 10, 02, 02, 10,
10, 02, 10, -1, 10, 02, 10,
10, 02, 02, -1, 02, 02, 10,
10, -1, -1, -1, -1, -1, 10,
, 7
);
// draw it
set draw = function ()
algo. goTo (x, y);
stamp. draw ();
;
;
Note how objects are defined:
set ship = object () ;
In AL everything is an expression. An object is
defined in the same way as a number or a string.
Objects, functions and arrays are al l declared using
the same expression syntax:
set [name] = [something] ;
In the case of objects, parenthesis are used for
inheritance and are used for members. Then to
define members of an object, al l you need to do is to
define another expression within the object:
set o = object ()
set attribute = 7;
set method = function ()
// do something
;
set nested = object ()
set method = function ()
;
;
;
The semi-colons in this code are optional.
Note: In AL, objects are directly created with their
declaration. An object can be used imediatel ly after it
is created. I f some more objects of the same class
are needed, it is possible to clone the initial object.
The next concept to introduce is a stamp. A stamp
works by cloning (creating a new instance of an

1 23
existing object) of the algo. stamp object.
The syntax begins with set :
set stamp = algo. stamp. clone ();
A stamp contains two pieces of information: a two
dimensional array of colours and the size of a pixel.
In AL, an array is declared using the array keyword.
set a = array 1, 2, 3, 4;
A nested array does not require a keyword.
set a = array 1, 2, 3, 4, 5, 6, 7
This example represents a tree. I t demonstrates how
simple it is to define data structures in AL. The AL
language is functional and uses the power of map /
fi l ter / reduce, simi lar to Python.
Numbers can be replaced by a function, or objects
and array of functions, etc. Imagine the capabil i ties of
this kind of flexibi l i ty.
Now the image needs to be drawn on the screen.
There are two steps to draw a stamp:
algo. goTo(x, y);
stamp. draw();
I f we draw the stamp again in another position, then
AL wil l draw an additional ship. This wil l create two
stamps on the screen. To create an animation, we
wil l l imit the number of simultaneous stamps on the
screen.
algo. setStack (1); // only one stamp in stack
The object can now be animated with an event:
util. pulse (function ()
ship. draw();
, 40);
AL is a complete functional language. Functions can
be passed as parameters and returned as results.
Events are based on a callback mechanism. I f a
function is passed as a parameter, then it is only
cal led when necessary. In this case, every 40 mil l i -
seconds.
Up to this point, nothing is moving. To show some
animation, let us modify the position each time like
this:
util. pulse (function ()
ship. y--; // Update position
ship. draw();
, 40);
Now we wil l add the abi l i ty to move the ship
according to the mouse position with the event
algo. onMove() .
algo. onMove (function (x, y)
ship. x = x;
);
Note: The mouse coordinates are given in the x and y
parameters of the cal lback function. Thus it is
possible to connect the ship x and y coordinates to
the mouse x and y coordinates.
That's it! Now you are able to move a stamp in
Algoid. This example can be used as the basis of a
complete game.
The steps of the program are:
1 ) Define objects, their coordonates, their graphic
stamp(s), their draw method etc.
2) Hide the turtle.
3) Determine how many stamp should be drawn
simultaneously.
4) Create frame drawing with util. pulse .
5) Create behaviours with Algoid's events l ike
onMove , onClick (or onTouch , onGravity and
other sensors on Android) .
Conclusion
Algoid is a great free tool, to learn or to teach
programming. For further questions, suggestions or
ideas, you can contact me at cyann74@gmail .com
or try the forum at http://forum.algoid.net.

1 24
SKILL LEVEL : BEGINNER
Claire Price
MagPi Writer
SONIC PI AT CHRISTMASLearning to program with Sonic Pi
Good KingWenceslas
Sonic Pi was developed by Sam Aaron and is an
excel lent, easy and creative way to learn
programming, especial ly as Ruby is embedded.
I t uses the MIDI note numbering system to play
sounds and this means you don’t have to be a
musical genius to make some music! A good
MIDI reference table can be found at
http://www.midikits.net/midi_analyser/midi_note_
numbers_for_octaves.htm
Getting started
I f you are using the latest version of NOOBS or
Raspbian Wheezy then Sonic Pi should already
be instal led. I f you do not see it on your
Raspberry Pi desktop, you can find Sonic Pi
under “Programming” in the main menu.
However, if you have older versions of these you
either need to download the latest image fi les or
you could type in the fol lowing into your terminal:
sudo apt-get update
sudo apt-get install sonic-pi
I t is important that you update Raspbian before
downloading Sonic Pi otherwise Sonic Pi won’t
work.
To hear the sound generated, you wil l need
speakers or a pair headphones - assuming you
can’t get sound through your monitor/screen.
Plug them into the sound jack port on your
Raspberry Pi (see Model A/B diagram below).
Now we have everything set up, let’s make some
music!
Making sounds
Open up Sonic Pi. You wil l see three panes (see
screenshot on the next page).

1 25
In the large pane type in:
play 48
By typing this we are tel l ing the program you
want to play MIDI note 48, which is the
equivalent of playing a C on a piano. To hear it,
we need to press Run. This is the triangle button
at the top of the page. We should hear a note and
in the output pane (which is found on the top right
of the screen) we wil l see what is happening (i .e.
note 48 is playing). I f you make a mistake while
typing in the code, don’t worry. The bottom right
hand pane wil l show you your mistake. Try typing
in,
ploy 48
and see what happens when you press Run.
To create a tune we need to play multiple notes.
Let’s type in the fol lowing:
play 48
play 52
play 55
Press Run. You wil l notice the three notes are
played together. This is great if we want to play a
number of notes at the same time, but no good if
we want to play separate notes. So to make sure
the notes play one after another we need to type
sleep fol lowed by the number of seconds wewant to wait between notes. For instance, if we
want a 1 second wait, we would type sleep 1.
Let’s try putting this into what we have just
written. Type in the fol lowing:
play 48
sleep 1
play 52
sleep 0. 5
play 55
Press Run. Can you hear how changing the
timings between the notes changes how the
melody sounds?
Writing chords
We may want to introduce chords into our tunes.
The easiest way to do this is to use the
play_chord function:
play_chord [48, 52, 55]
This tel ls the program we want to play notes 48,
52 and 55 at the same time. By adding the sleep
function after play_chord we can change thetimings between notes (see previous section).
Try this out by typing:
play_chord [48, 52, 55]
sleep 1
play 52
Using loops
I f we wanted to repeat this section, we could
rewrite everything we just typed or we could use
a loop. This is achieved by using times do. Bywriting a number in front of times do we canget the program to repeat the section that many
times. So if we write 2. times do everythingwil l be repeated twice. I f we write 3. times doeverything wil l be repeated three times and so
on. Adding end at the bottom of this section tel lsthe program we only want to repeat this section.
2. times do
play 48
sleep 1
play 52
sleep 0. 5
end

1 26
Press Run. You should hear al l the notes played
twice in the loop.
Playing patterns
In our tune we may have a series of notes that
require the same timing between each note, e.g.
play 48
sleep 1
play 52
sleep 1
play 55
sleep 1
There is nothing wrong with writing the code as
in the example, but we could write it another way:
play_pattern_timed [48, 52, 55] , [1]
This is a great way to write sequences as it is
more concise and reduces the chance of error as
you do not need to repeatedly type play andsleep . We can also use this format to shuffle,reverse and sort the notes we want to play.
By adding . shuffle , the program wil l play thenotes in a random order:
play_pattern_timed [48, 52, 55] . shuffle, [1]
Note the . shuffle comes after the notes. I f i t isplaced after the sleep command, i .e. [1 ] , then the
notes wil l be played in the exact order we have
written them. Try it and see:
play_pattern_timed [48, 52, 55] , [1] . shuffle
We can also reverse the order of the notes we
have asked the program to play by using
. reverse
play_pattern_timed [48, 52, 55] . reverse, [1]
Again if we put . reverse after the [1 ] the noteswil l be played in the order they have been typed.
We can also use . sort to order the pattern ofnotes we have written. This works particularly
well i f we have written a sequence of notes in any
sequence and then decide what we real ly want is
for the notes to be played in numerical order. For
instance, we might type,
play_pattern_timed [52, 48, 55] , [1]
but what we actual ly want is for the notes to be
played 48, 52, 55. By adding . sort this can beachieved:
play_pattern_timed [52, 48, 55] . sort, [1]
Playing two tunes at once
When writing a tune we may want to have
multiple melodies playing at the same time, l ike
when someone is playing a piano with both their
right and left hands. To do this we use
in_thread do.
in_thread do
play 48
sleep 1
play 52
sleep 1
end
in_thread do
2. times do
play 55
sleep 1
end
end
The sections we want to use, we encapsulate in
in_thread do and end so the program knowswhere to start and finish. The program wil l then
play these two sections at the same time. We
can also use other functions within the
in_thread do too, in this case 2. times do.
Changing the synth
pretty_bell is the default synth, but this canbe changed. There are a number of different
synth sounds to choose from. These are:
dull_bell , pretty_bell (the default
synth), fm, beep and saw_beep .
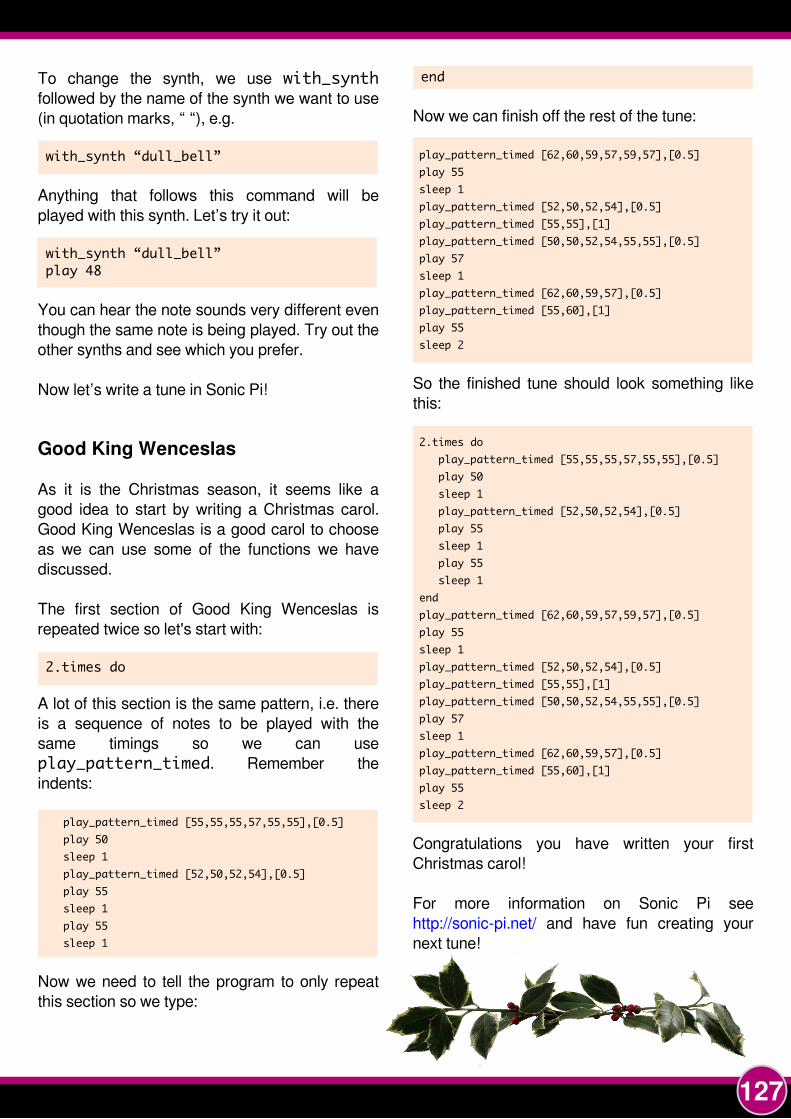
1 27
To change the synth, we use with_synthfol lowed by the name of the synth we want to use
(in quotation marks, “ “) , e.g.
with_synth “dull_bell”
Anything that fol lows this command wil l be
played with this synth. Let’s try it out:
with_synth “dull_bell”
play 48
You can hear the note sounds very different even
though the same note is being played. Try out the
other synths and see which you prefer.
Now let’s write a tune in Sonic Pi!
Good King Wenceslas
As it is the Christmas season, it seems like a
good idea to start by writing a Christmas carol.
Good King Wenceslas is a good carol to choose
as we can use some of the functions we have
discussed.
The first section of Good King Wenceslas is
repeated twice so let's start with:
2. times do
A lot of this section is the same pattern, i .e. there
is a sequence of notes to be played with the
same timings so we can use
play_pattern_timed . Remember the
indents:
play_pattern_timed [55, 55, 55, 57, 55, 55] , [0. 5]
play 50
sleep 1
play_pattern_timed [52, 50, 52, 54] , [0. 5]
play 55
sleep 1
play 55
sleep 1
Now we need to tel l the program to only repeat
this section so we type:
end
Now we can finish off the rest of the tune:
play_pattern_timed [62, 60, 59, 57, 59, 57] , [0. 5]
play 55
sleep 1
play_pattern_timed [52, 50, 52, 54] , [0. 5]
play_pattern_timed [55, 55] , [1]
play_pattern_timed [50, 50, 52, 54, 55, 55] , [0. 5]
play 57
sleep 1
play_pattern_timed [62, 60, 59, 57] , [0. 5]
play_pattern_timed [55, 60] , [1]
play 55
sleep 2
So the finished tune should look something l ike
this:
2. times do
play_pattern_timed [55, 55, 55, 57, 55, 55] , [0. 5]
play 50
sleep 1
play_pattern_timed [52, 50, 52, 54] , [0. 5]
play 55
sleep 1
play 55
sleep 1
end
play_pattern_timed [62, 60, 59, 57, 59, 57] , [0. 5]
play 55
sleep 1
play_pattern_timed [52, 50, 52, 54] , [0. 5]
play_pattern_timed [55, 55] , [1]
play_pattern_timed [50, 50, 52, 54, 55, 55] , [0. 5]
play 57
sleep 1
play_pattern_timed [62, 60, 59, 57] , [0. 5]
play_pattern_timed [55, 60] , [1]
play 55
sleep 2
Congratulations you have written your first
Christmas carol!
For more information on Sonic Pi see
http://sonic-pi .net/ and have fun creating your
next tune!

1 28
SKILL LEVEL : BEGINNER
Samuel Aaron
Guest Writer
SONIC PI 2.0Get your groove on!
Discover new samples, synths,
studio effects and Live Coding
Live Coding
The laser beams sliced through the wafts of
smoke as the subwoofer pumped bass deep into
the bodies of the crowd. The atmosphere was
ripe with a heady mix of synths and dancing.
However something wasn't quite right in this
nightclub. Projected in bright colours above the
DJ booth was futuristic text, moving, dancing,
flashing. This wasn't fancy visuals, i t was merely
a projection of a terminal containing Emacs. The
occupants of the DJ booth weren't spinning
disks, they were writing, editing and evaluating
code. This was a Meta-eX (http://meta-ex.com)
gig. The code was their musical interface and
they were playing it l ive.
Coding music l ike this is a growing trend and is
often described as Live Coding
(http://toplap.org). One of the recent directions
this approach to music making has taken is the
Algorave (http://algorave.com) - events where
artists code music for people to dance to.
However, you don't need to be in a nightclub to
Live Code. As one half of Meta-eX and author of
Sonic Pi, I designed version 2 to give you the
power to Live Code music anywhere you can
take your Raspberry Pi and a pair of
headphones, or some speakers. Once you reach
the end of this article, you'l l be programming your
own beats and modifying them live. Where you
go afterwards wil l only be constrained by your
imagination.
Getting Sonic Pi v2.0
For this article you wil l need version 2.0 of Sonic
Pi. Sonic Pi is now included in the latest release
of Raspbian. You should see the Sonic Pi icon on
the Raspberry Pi desktop. I f you are using an
older release of Raspbian, you can update to
Sonic Pi version 2.0 with:
sudo apt-get install sonic-pi

1 29
You can also open Sonic Pi by cl icking on the
main menu, and looking within Education ->
Sonic Pi .
What's New?
Some of you may have already had a play
around with Sonic Pi. Hopeful ly you al l had fun
making beeps of different pitches. You can take
all the music coding ski l ls you've learned with
version 1 and apply it to version 2. For those of
you that have yet to open Sonic Pi, now is
definitely the time to give it a try. You'l l be
amazed with what you can do with it. Here's a
quick l ist of the major new features:
* Ships with over 20 synth sounds
* Abil i ty to play any wav or aiff sample fi le
* Ships with over 70 samples
* Extremely accurate timing
* Support for over 1 0 studio effects: reverb, echo,
distortion, etc.
* Support for Live Coding: changing the code
while it runs
Let's have a look at al l of these features.
Playing a drum loop
Let's code up a simple drum loop. We can use
the amen break to get us started. In the main
code editor window of Sonic Pi, type the
fol lowing and then hit the Run button:
sample : loop_amen
Boom! Instant drums! Go on, press it a few
times. Have fun. I ' l l sti l l be here when you've
finished.
But that's not al l . We can mess around with the
sample. Try this:
sample : loop_amen, rate: 0. 5
Oooh, half speed. Go on, try changing the rate.
Try lower and higher numbers. What happens if
you use a negative number?
What if we wanted to play the loop a few times
over? One way to do this is to cal l sample a few
times with some sleeps in between:
sample : loop_amen
sleep 1. 753
sample : loop_amen
sleep 1. 753
sample : loop_amen
However, this could get a bit annoying if you
wanted to repeat it 1 0 times. So we have a nice
way of saying that with code:
10. times do
sample : loop_amen
sleep 1. 753
end
Of course, we can change the 1 0 to whatever
number we want. Go on, try it! What if we want to
loop forever? We simply say loop instead of
10. times . Also, I 'm sure you're asking what the
magic 1 .753 represents and how I got it. Well , i t
is the length of the sample in seconds and I got it
because I asked Sonic Pi:
puts sample_duration : loop_amen
And it told me 1 .75331 0657596372 - I just
shortended it to 1 .753 to make it easier for you to
type in. Now, the cool thing is, we can combine
this code and add a variable for fun:
sample_to_loop = : loop_amen
sample_rate = 0. 5
loop do
sample sample_to_loop, rate: sample_rate
sleep sample_duration sample_to_loop, rate:
sample_rate
end
Now, you can change the : loop_amen to any of
the other loop samples (use the auto-complete to
discover them). Change the rate too. Have fun!
For a complete l ist of avai lable samples cl ick the
Help button.

1 30
Adding Effects
One of the most exciting features in version 2.0
of Sonic Pi is the support for studio effects such
as reverb, echo and distortion. These are real ly
easy to use. For example take the fol lowing
sample trigger code:
sample : guit_e_fifths
To add some reverb to this, we simply need to
wrap it with a with_fx block:
with_fx : reverb do
sample : guit_e_fifths
end
To add some distortion, we can add more fx:
with_fx : reverb do
with_fx : disortion do
sample : guit_e_fifths
end
end
Just l ike synths and samples, FX also supports
parameters, so you can tinker with their settings:
with_fx : reverb, mix: 0. 8 do
with_fx : distortion, distort: 0. 8 do
sample : guit_e_fifths
end
end
Of course, you can wrap FX blocks around any
code. For example here's how you'd combine the
: ixi_techno FX and our drum loop:
with_fx : ixi_techno do
loop do
sample : loop_amen
sleep sample_duration : loop_amen
end
end
For a complete l ist of FX and their parameters
cl ick the Help button.
Live Coding a Synth Loop
Now we've mastered the basics of triggering
samples, sleeping and looping, let's do the same
with some synths and then jump head first into
l ive coding territory:
loop do
use_synth : tb303
play 30, attack: 0, release: 0. 3
sleep 0. 5
end
So, what do the numbers mean in this example?
Well , you could stop it playing, change a number,
then start it and see if you can hear the
difference. However al l that stopping and starting
gets quite annoying. Let's make it possible to l ive
code so you can instantly hear changes. We
need to put our code into a named function which
we loop:
define : play_my_synth do
use_synth : tb303
play 30, attack: 0, release: 0. 3
sleep 0. 5
end
loop do
play_my_synth
end
Now when you run this it wi l l sound exactly the
same as the simpler loop above. However, now
we have given our code a name (in this case,
play_my_synth) we can change the definition of
our code while things run. Fol low these steps:
1 . Write the code above (both the define and loop
blocks)
2. Press the Run button
3. Comment out the loop block (by adding # at
the beginning of each l ine)
4. Change the definition of your function
5. Press the Run button again
6. Keep changing the definition and pressing
Run!
7. Press Stop
For example, start with the code above. Hit Run.
Comment out the loop block then change the
play command to something different. Your
code should look similar to this:

1 31
define : play_my_synth do
use_synth : tb303
play 45, attack: 0, release: 0. 3, cutoff:
70
sleep 0. 5
end
# loop do
# play_my_synth
# end
Then hit the Run button again. You should hear
the note go higher. Try changing the attack,
release and cutoff parameters. Listen to the
effect they have. Notice that attack and release
change the length of the note and that cutoff
changes the 'brightness' of the sound. Try
changing the synth too - fun values are
: prophet , : dsaw and : supersaw. Press the
Help button for a ful l l ist.
There are lots of other things we can do now, but
unfortunately I 'm running out of space in this
article so I 'l l just throw a couple of ideas at you.
First, we can try some randomisation. A real ly fun
function is rrand . I t wi l l return a random value
between two values. We can use this to make
the cuffoff bounce around for a real ly cool effect.
Instead of passing a number l ike 70 to the cutoff
value, try rrand(40, 120) . Also, instead of only
playing note 45, let's choose a value from a list of
numbers. Try changing 45 to chord(: a3,
: minor). choose . Your play l ine should look l ike
this:
play chord(: a2, : minor). choose, attack: 0,
release: 0. 3, cutoff: rrand(40, 120)
Now you can start experimenting with different
chords and range values for cutoff. You can do
something similar with the pan value too:
play chord(: a2, : minor). choose, attack: 0,
release: 0. 3, cutoff: rrand(40, 120), pan:
rrand(-1, 1)
Now throw some FX in, mess around and just
have fun! Here are some interesting starting
points for you to play with. Change the code,
mash it up, take it in a new direction and perform
for your friends!
# Haunted Bells
loop do
sample : perc_bell, rate: (rrand 0. 125, 1. 5)
sleep rrand(0. 5, 2)
end
# FM Noise
use_synth : fm
loop do
p = play chord(: Eb3, : minor). choose -
[0, 12, -12] . choose, divisor: 0. 01, div_slide:
rrand(1, 100), depth: rrand(0. 1, 2), attack:
0. 01, release: rrand(0. 1, 5), amp: 0. 5
p. control divisor: rrand(0. 001, 50)
sleep [0. 5, 1, 2] . choose
end
# Driving Pulse
define : drums do
sample : drum_heavy_kick, rate: 0. 75
sleep 0. 5
sample : drum_heavy_kick
sleep 0. 5
end
define : synths do
use_synth : mod_pulse
use_synth_defaults amp: 1, mod_range: 15,
attack: 0. 03, release: 0. 6, cutoff: 80,
pulse_width: 0. 2, mod_rate: 4
play 30
sleep 0. 25
play 38
sleep 0. 25
end
in_thread(name: : t1)loopdrums
in_thread(name: : t2)loopsynths
#tron bike
loop do
with_synth : dsaw do
with_fx(: slicer, freq: [4, 8] . choose) do
with_fx(: reverb, room: 0. 5, mix: 0. 3) do
n1 = chord([: b1, : b2, : e1, : e2, : b3,
: e3] . choose, : minor). choose
n2 = chord([: b1, : b2, : e1, : e2, : b3,
: e3] . choose, : minor). choose
p = play n1, amp: 2, release: 8,
note_slide: 4, cutoff: 30, cutoff_slide: 4,
detune: rrand(0, 0. 2)
p. control note: n2, cutoff: rrand(80,
120)
end
end
end
sleep 8
end

The MagPi is a trademark of The MagPi Ltd. Raspberry Pi is a trademark of the Raspberry Pi Foundation. The MagPi magazine iscollaboratively produced by an independent group of Raspberry Pi owners, and is not affiliated in any way with the Raspberry PiFoundation. It is prohibited to commercially produce this magazine without authorization from The MagPi Ltd. Printing for non commercialpurposes is agreeable under the Creative Commons license below. The MagPi does not accept ownership or responsibility for the contentor opinions expressed in any of the articles included in this issue. All articles are checked and tested before the release deadline is met butsome faults may remain. The reader is responsible for all consequences, both to software and hardware, following the implementation ofany of the advice or code printed. The MagPi does not claim to own any copyright licenses and all content of the articles are submitted withthe responsibility lying with that of the article writer. This work is licensed under the Creative Commons Attribution-NonCommercial-ShareAlike 3.0 Unported License. To view a copy of this license, visit:
http://creativecommons.org/licenses/by-nc-sa/3.0/
Alternatively, send a letter to Creative Commons, 444 Castro Street, Suite 900, Mountain View, California, 94041 , USA.
Reader FeedbackYou guys are doing good work.
Continue!
Victor R
I just wanted to let you know that I
real ly enjoyed Martin Hodgson's
Python port of "Strongholds of the
Dwarven Lords". I plan on sharing
it with some of my middle school
students.
Jason K
After taking the plunge and
purchasing my very first
Raspberry Pi, I stumbled upon
your great magazine. As a
complete novice to the world of
the Raspberry Pi, The MagPi
magazine is an excel lent
resource. The variety of articles,
guides and project ideas are an
inspiration. There real ly is
something for everyone.
Caron J
I recently discovered your
fantastic magazine, which brought
back great memories of typing in
code from magazines into my
VIC-20. I look forward to getting
to know my little computer better
through your magazine.
Lynn W
I real ly love The MagPi and hope
that I get the ski l ls and find the
time to bui ld something amazing
that can be published as well .
Henner
Keep up the good work and make
sure you keep the simple type in
code each issue.
Al lan
Cannot wait to get my printed
copies. Printed versions are so
much easier to use.
Roger
I real ly enjoy the magazine with
my 1 0 year old daughter!
David
I just wanted you to know that I
love your magazine. I t is well laid
out and highly informative. I t is the
perfect introduction for students
(and also hobbyists) to the
wonderful world of Raspberry Pi.
Bel ieve me when I say, you are
helping create the next generation
of engineers, makers, hackers
and artists.
David S
Your publication is outstanding!
The variety of well composed
articles in each issue are
incredibly helpful . Please keep up
the good work!
T Gomez
Great job in making possibly the
most useful magazine I have ever
read! I 'm only 1 4 years old and
your magazine has inspired me to
start programming. Thanks!
J Forster
I f you are interested in writing for
The MagPi or would l ike to join
the team in the production of the
magazine, then please get in
touch by email ing the editor at: