
Splash-Proof Weighing Scale
11
Splash-Proof Weighing Scale Operation Manual VMC/WED
-
Upload
khangminh22 -
Category
Documents
-
view
0 -
download
0
Transcript of Splash-Proof Weighing Scale

Splash-Proof Weighing Scale
Operation Manual
VMC/WED
TABLE OF CONTENTS
1. SUMMARY--------------------------------------------------1
2. MAIN PERFORMANCE INDEX-----------------------1
3. BEFORE USING NOTES---------------------------------1
4. CAUTION ----------------------------------------------------2
5. INDICATIONS OF THE DISPLAY AND KEYS ----2
6. OPERATING INSTRUCTION---------------------------3
7. FAILURES AND TROUBLE SHOOTING------------8
8. MAINTENANCE AND SERVICE ----------------------9

1. SUMMARY The JZC-B/G/FWED waterproof series scales use high-precision
resistor strain type sensor and the latest carefully design and manufacture of single-chip microcomputer, mainly for the need of waterproof weighing places, such as shops, fish markets, seafood processing establishments.
2. MAIN PERFORMANCE INDEX With resistance strain weighing sensors. 6-digit led digital display. Full scale: 1500, 3000, 6000, 7500, 12000, 15000, 30000, 60000. (Unit:
g). Resolution: 1/6000~1/30000.
Power source: JZC-B/GWED: AC, Switching power supply 5V, built-in lithium battery, 3.7V/2200mAh. JZC-FWED: Work with DC only, unique replaceable lithium batteries, charging outwards.
Environment temperature: 0℃~+40℃. Storage and transportation temperature: -25℃~55℃. Warm-up time: 10~15 min.
3. BEFORE USING NOTES 3.1. Electronic scales on the secure desktop or flat ground, do not place on a
instability desk or bench. Adjustment of electronic balance adjustable leg, making smooth scales and level bubble circle in Central.
3.2. Avoid placing temperature changes too large or air flow of violent place, such as direct sunlight or air conditioner outlet.
3.3. Use of separate power outlet so as to avoid other electrical interference. 3.4. When the power is turned on, do not put the articles placed on the scales,
and warm up the scale more than 15 minutes.
1

4. CAUTION 4.1. Do not Overload (exceed the capacity) of the scale. Overload or
Dropping/shocking the scale could damage the scale. 4.2. Remove the batteries or charge regularly if the scale is not use for a long
time. 4.3. Calibrate the scale to maintain the accuracy every one year.
5. INDICATIONS OF THE DISPLAY AND KEYS Introduction of keys and function
: ON/OFF power switch. : Zero is used to return the display to zero if a small weight reading is
left while unloaded/empty. : TARE is used to deduct the weight of an item or container. The
symbol will appear and reading will go to zero. Press it again to exit the tare mode (when empty), the tare indication will disappear.
: Unit(kg, g, lb or oz) selection. Indicators symbol : Scale is in zero mode. : Scale is in tare mode.
: The display reading is stable : Battery indicator bar.
① Five indicators used to indicate battery voltage. ② Battery is undervoltage when only the bottom bar is lit.
When the bottom bar flashes, indicates that the scale needs to charge.
③ When charging, five indicator bar will change one by one. Until the full five indicator is lit.
④ If the all indicator is lit and extinguished in turn, this scales not equipped with battery or battery failure.
kg : The unit of measurement is kilograms. g : the unit of measurement is grams.
lb : the unit of measurement is pounds. oz : the unit of measurement is ounces.
2

6. OPERATING INSTRUCTION 6.1 Switch on
In shutdown state, emptying the scales, press key to power on .The scale will be self-test and zero, then turn to weighing mode. Before opening the JZC-FWED, please make sure that the battery is properly loaded in the Machine.
6.2 Switch off In power on state, press key to power off.
6.3 Zero function In the course of using, if no items on the scales, but there is little weight showed on the display, press key to make the display show zero. The zero flag indicator will appear.
6.4 Tare function Begin with the container on the scale. After the weight is stable, press key to make it zero. Net weight indicator light appears. Take the container away, it will appear a negative weight on the screen. Press this key again to cancel tare mode.
6.5 Unit conversion Press key to select the weighing unit which you want. Then the display will show corresponding unit indicator. Remarks: Four units which is kg, g, lb, oz can set opening or closing (detailed steps see 6.7, the " Units and display brightness presetting " ). Before selecting a weighing unit, the units need to be opened, Use key to select the weighing unit.
6.6 External calibration When the scale does not read accurately, you may calibrate it with weight. 6.6.1 Power on the scale and the scale will self-test. When the display shows “000000”, press + + + key in turn. Then press key to go into the external calibration. The display will show “CAL”. (If these 4 keys sequence error or timeout actions, It will return to normal weight status). 6.6.2 Press key to display " 0 " and wait for inputting calibration weights, proposals for the full range of 2/3 value ( unit: g ). Such as 3kg for the full range, enter a display " 2000 ".
3
6.6.3 Enter the calibration weights. Press key to changing the digital, press key to shift. Put a standard weight on the scales, waiting for the stable. 6.6.4 Press key to complete calibration. After that the display will show the current weight. If there is an outside the range of ±10% entered weight, display will show " Err c ", the external calibration is invalid.
6.7 Units and display brightness presetting JZC-B/G/FWED has kg, g, lb, oz four units supplying users to choose. Users can according to need to turn on several or all of the four units, in normal mode, you can use the key to select the unit that you need (detailed operation can be viewed 6.5, " Unit conversion " ), in order to convenient user operations. Setup steps are as follows: Power on the scale and the scale will self-test. When the display shows “000000”, press + + + key in turn. Then press key to go into presetting. 6.7.1 Units presetting: led lights and the display shows "on" ( corresponding units opened ) or " off " ( corresponding units off ), press key to choose units, press key to set the unit turned on or off, press key to confirm. 6.7.2 display brightness presetting: The display will show " led x " (x:0-4, from 0 to 4 Brightness will be more and more bright). Press the key to select, press key to confirm.
6.8 Multi - parameter setting Power on the scale and the scale will self-test. When the display shows
“000000”, press + + + key in turn. Then press key to set parameters. 6.8.1 Filter settings : The display will show " NB x " ( x:0-3 ), press key to select, press key to confirm. 6.8.2 The range of key zero setting: The display will show “kz x” ( 0 : ± 2.7%FS,1 : ± 5%FS,2 : ± 10%FS,3 : ± 20% FS ), press key to select, press key to confirm. 6.8.3 Zero trace range setting: The display will show “zt x.xd”(0.0d,1.0d,1.5d,2.0d,3.0d), press key to select, press key to confirm.
4
6.8.4 Zero display range setting: The display will show “zdip x” (0:disabled, 1:within a range±3D display as Zero, 2: zeros within ±5d display range), press key to select, press key to confirm. 6.8.5 Energy-saving features setting: The display will show “ec x” (0:disabled 1: stability for 10 seconds to enter the power saving mode , 2: stability for 30 seconds to enter the power saving mode, 3: 2 minutes to enter power saving mode), press key to select, press key to confirm. 6.8.6 Weighing display settings: The display will show “dis x”(0: the weighing display continuous change, 1: show stability changes), press key to select, press key to confirm.
6.9 Back display setting In the normal weighing mode, press key for about 3 seconds to enter set. The display show " Bled 0 " (the back display is closed ) or " Bled 1 " (the back display is opened ), When set to open back display " Bled 1 ", users will find in the process of using the scales the display in the rear window is the same value to the before display window. When set to turn off the back display " Bled 0 ", in the course of using any content of the back display window is not displayed. It is in the off state.
6.10 Under voltage charge When the indicator flashes, indicates that the user needs to charge. Please recharge it. Charged as follows: 6.10.1. JZC-B/GWED Connect the scale to AC power charging with the power cord. When charging, five indicator bar will change one by one. The charging is finished when full five indicator are lit. 6.10.2. JZG-FWED
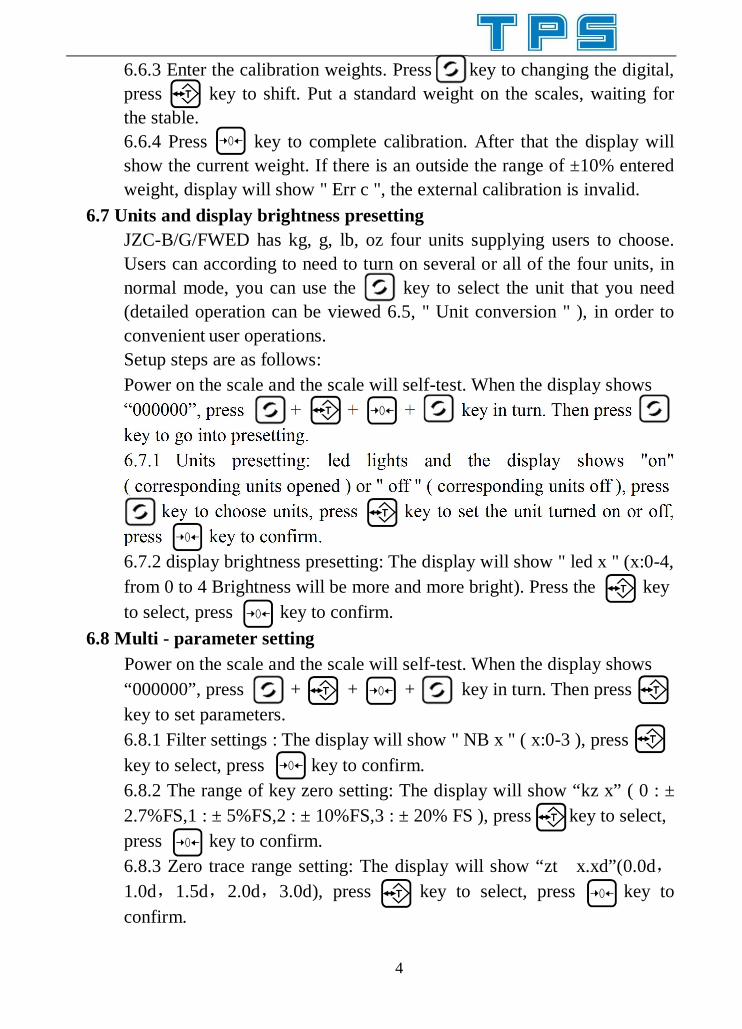
6.10.2.1 The power cable of scales in the package is placed inside the battery cover, you need to turn out the power cable from the battery cover in the use of new scales。As shown in Figure A.
5 Figure A
Battery cover buckle
Battery cover

6.10.2.2 internal note After opening the battery cover
Pull out the power cable ,and press to slot, Replace the battery cover, as shown in Figure C
Figure C 6.10.3 Internal battery installation and replacement instructions Battery installed in the bottom of the scale, press both hands after the battery cover buckle opened the battery cover. Figure A. Lift the battery cover, you can see the battery and next to a button. Figure B.
6
slot
Figure B
Battery OPEN location B
Buckle OPEN location A
cable
Install the battery steps: 1.、push the bucklet to OPEN location A 2、Battery into the slot and gently press down。 3、push the bucklet to OPEN location B Remove the battery Step: 1.、Press and hold down the battery 2、push the bucklet to OPEN location A 3、After removing the battery, release the snaps automatically return to the OPEN position B

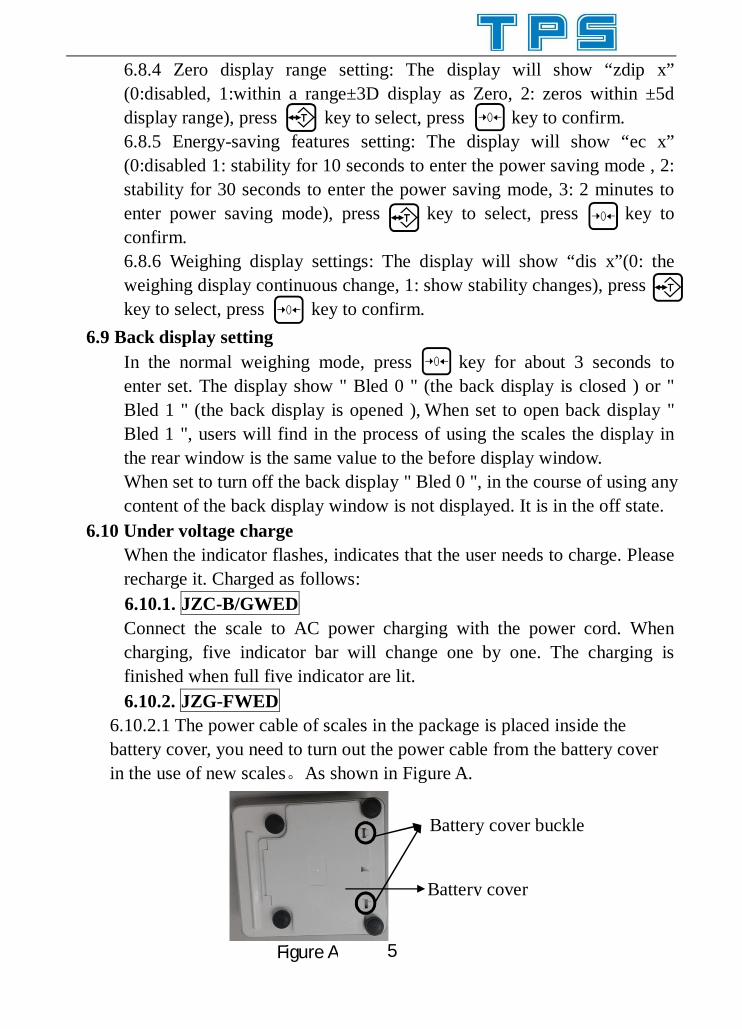
6.10.4 How to use the battery charger with the product.(optional) 6.10.4.1 Remove the battery, and charge with the charger. Figure 3 shows the recharging of equipment required. 6.10.4.2 Put the battery into the charger. Battery has two polar points, need to align the charger of two touch points, aimed at the way of the card slot. As shown in the figure 4 and 5. 6.10.4.3 Connect the charger to the power socket with adapter. 6.10.4.4 At this time, the light of chargers is red. The indicator turns to green when the charging is finished.
6.10.4.5 Push the battery out of the card slot, remove the battery.
Figure 3
Figure 4
6.10.4.6 Remount the battery to the scale .Battery has two polar points, need to align to two touch points on the card slot as charger, then push onward. Restore the cover at last.
7
Battery +:Battery cathode -:Battery anode
Card slot
Charging indicator The two contact points of charger
Charger with adapter connector
Connect to the adapter and the power outlet
Adapter
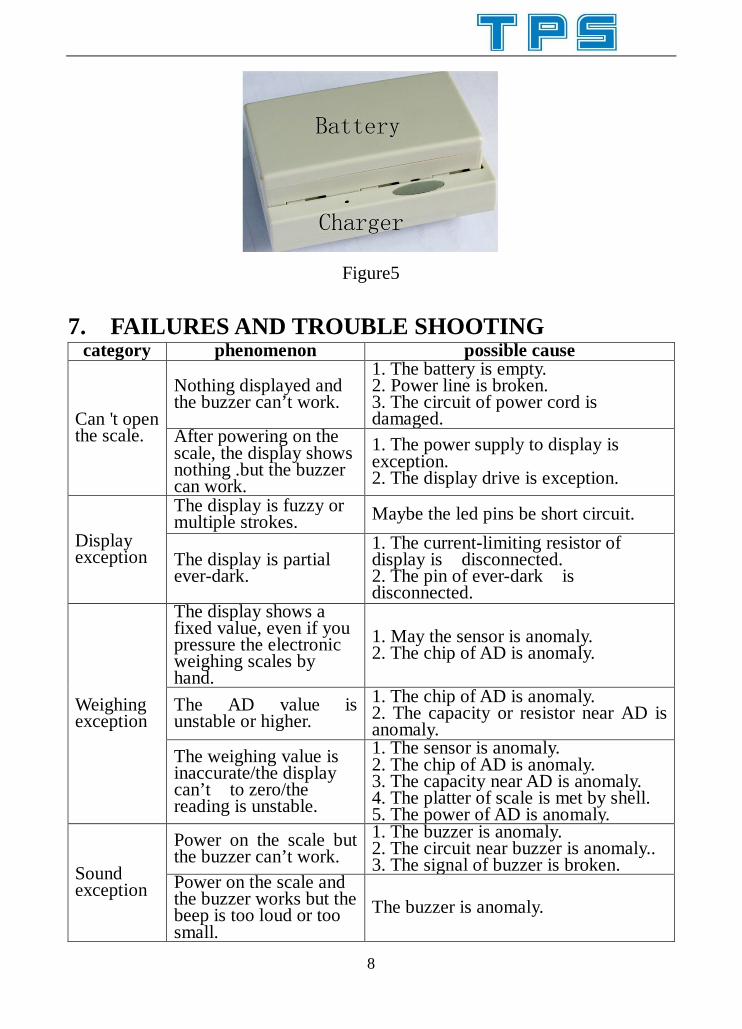
Figure5 7. FAILURES AND TROUBLE SHOOTING
category phenomenon possible cause
Can 't open the scale.
Nothing displayed and the buzzer can’t work.
1. The battery is empty. 2. Power line is broken. 3. The circuit of power cord is damaged.
After powering on the scale, the display shows nothing .but the buzzer can work.
1. The power supply to display is exception. 2. The display drive is exception.
Display exception
The display is fuzzy or multiple strokes. Maybe the led pins be short circuit.
The display is partial ever-dark.
1. The current-limiting resistor of display is disconnected. 2. The pin of ever-dark is disconnected.
Weighing exception
The display shows a fixed value, even if you pressure the electronic weighing scales by hand.
1. May the sensor is anomaly. 2. The chip of AD is anomaly.
The AD value is unstable or higher.
1. The chip of AD is anomaly. 2. The capacity or resistor near AD is anomaly.
The weighing value is inaccurate/the display can’t to zero/the reading is unstable.
1. The sensor is anomaly. 2. The chip of AD is anomaly. 3. The capacity near AD is anomaly. 4. The platter of scale is met by shell. 5. The power of AD is anomaly.
Sound exception
Power on the scale but the buzzer can’t work.
1. The buzzer is anomaly. 2. The circuit near buzzer is anomaly.. 3. The signal of buzzer is broken.
Power on the scale and the buzzer works but the beep is too loud or too small.
The buzzer is anomaly.
8

The indicator of battery exception.
The all battery indicator lights aflashing .
This scale is not equipped with battery or battery failure.
8. MAINTENANCE AND SERVICE Electronic scales are made up of sense of precision components and microcomputer circuit. So correct use and maintenance is to maintain accurate electronic scales must be conditions! 8.1. Handle with care avoiding strong vibration,shock or impact. 8.2. When using DC power, should charge the battery in a timely manner to prevent the battery voltage is too low lead to function improperly or does not power on. When not in use, should be switch off the power. 8.3. If the scale will not be used over a long time, the scale shall be wipe clean, wrapped in plastic bags with the desiccant. The scale should be charged once every three months to ensure that the battery life. 8.4. When you want to store the scale, please do not store in direct sunlight or moist place. Do not overload the scale, it could damage the scale and void your warranty.
9


![48216 Baack Final Proof [FM]](https://static.fdokumen.com/doc/165x107/631bfe5b3e8acd997705b218/48216-baack-final-proof-fm.jpg)

