iPhone 13 - Repair Manual
85
© 2022 Apple Inc. All rights reserved. Repair Manual iPhone 13
-
Upload
khangminh22 -
Category
Documents
-
view
0 -
download
0
Transcript of iPhone 13 - Repair Manual

© 2022 Apple Inc. All rights reserved.
Repair ManualiPhone 13

iPhone 13
073-00323-A | 2© 2022 Apple Inc. All rights reserved.
Contents
3 Introduction
Basics
6 Internal View 7 Orderable Parts 8 Screws9 Tools
Safety
14 Battery Safety17 Broken Glass
Procedures
19 First Steps20 SIM Tray21 Display53 Bottom Speaker57 Camera65 Taptic Engine70 Battery
Contents

iPhone 13
073-00323-A | 3© 2022 Apple Inc. All rights reserved.
Introduction
Introduction
This manual includes technical instructions for replacing genuine Apple parts in iPhone and is intended for individual technicians with the knowledge, experience, and tools required to repair electronic devices.
Important• Read the entire manual first. If you’re not comfortable performing the repairs as instructed in
this manual, don’t proceed.• Always use the latest version of this document available at support.apple.com/manuals/
repair+manual.
Warning• Failure to follow the repair instructions or to use genuine Apple parts or proper tools may
cause fire or other safety issues and lead to personal injury or death.• iPhone 7 and later are classified as Class 1 Laser products per IEC 60825-1 Ed. 3.
These devices comply with 21 CFR 1040.10 and 1040.11, except for conformance with IEC 60825-1 Ed. 3., as described in Laser Notice No. 56, dated May 8, 2019. These devices contain one or more lasers. Use other than as described in the user guide, repair, or disassembly may cause damage, which could result in hazardous exposure to infrared laser emissions that are not visible.
Failure to follow the repair instructions or to use genuine Apple parts or proper tools may damage the iPhone, parts, or other property, or compromise the device’s functionality or water resistance.
Caution
Warranty informationDamage caused by repairs performed outside of Apple or the Apple Authorized Service network is not covered by Apple’s warranty or AppleCare plans. Such damage may cause future repairs to be subject to out-of-warranty costs or render the device ineligible for future repairs by Apple or Apple Authorized Service Providers.

iPhone 13
073-00323-A | 4© 2022 Apple Inc. All rights reserved.
Introduction
Software tools
A System Configuration step may be required at the end of your repair. System Configuration is a postrepair software tool that completes the repair for genuine Apple parts. Running System Configuration has a number of purposes that vary based on the part replaced.
What System Configuration does Why it’s importantTransfers factory calibration values
Certain parts like displays, cameras, and ambient light sensors have calibration values that are customized to each individual part during manufacturing. Transferring these values ensures maximum performance and quality after a repair.
Links Secure Element and biometric authentication parts
After repair of a logic board or a biometric authentication part (Touch ID or Face ID), linking the biometric sensors to the Secure Enclave on the logic board is required to ensure device security.
Ensures repair integrity
After a hardware repair, software checks are performed to ensure repair integrity. Repair integrity means that a genuine Apple part has been correctly installed.
Assigns wireless region
To comply with regional communications regulations, a wireless region must be assigned to your logic board.
Updates firmware Keeping firmware up to date ensures that the device has all the latest security and performance features.
• The heated display removal fixture softens adhesive to allow separation of the display from the enclosure. The fixture is used with a heated display pocket designed for the device’s specific dimensions.
• The display press applies the appropriate amount of pressure to secure new adhesive during display installation. The display press is used with a repair tray and display adhesive press plate designed for the device’s specific dimensions.
• The battery press applies the appropriate amount of pressure to secure new adhesive during battery installation. The battery press is used with a repair tray designed for the device’s specific dimensions.
Ordering tools and parts
You can learn how to order genuine Apple parts and tools at support.apple.com/self-service-repair. During the purchase process, enter the manual ID WLBXAK to indicate that you’ve read this manual in its entirety and agree that you have the knowledge and experience to perform your intended repair.
Tools and partsHardware tools
Apple tools are designed to apply the appropriate heat, force, and torque during repairs, and towithstand high-volume professional use.

iPhone 13
073-00323-A | 5© 2022 Apple Inc. All rights reserved.
Introduction
System Configuration requires a strong Wi-Fi network capable of 1.0 Mbps download and upload speeds, with less than 400 ms latency and less than 2% packet loss. Estimated data usage to run System Configuration is 6–22 MB.
The device must be running the latest version of iOS and not a beta version.
Learn how to initiate the System Configuration process at support.apple.com/self-service-repair.
Important Supplemental information for successfully completing procedures; neither a Warning nor a Caution
Caution Instructions for reducing risk of data loss or device hardware damage
Alerts
Failure to follow alerts could result in fire, injury, data loss, or damage to the device, parts, or other property.
Warning Instructions for reducing risk of personal injury

iPhone 13
073-00323-A | 6© 2022 Apple Inc. All rights reserved.
Internal View
1. Top speaker2. TrueDepth camera assembly3. Cameras4. Camera flex cable5. Top battery adhesive tabs6. Battery7. Bottom battery adhesive tabs8. Bottom speaker9. Lightning connector10. Bottom microphones
11. Taptic Engine12. Taptic Engine connector cowling13. SIM reader14. SIM reader flex cable15. Battery flex cable16. Display/Multi-Touch connector17. Lower antenna flex cable18. Dock flex cable19. Logic board20. Ambient light/proximity sensor connector
Internal View

iPhone 13
073-00323-A | 7© 2022 Apple Inc. All rights reserved.
Orderable Parts
Name Numbers Screws
Battery 661-21991 —
Bottom speaker 923-06235 923-06243 (4)
Camera 661-21992 —
Camera cowling 923-06254 923-06660 (3)
Display 661-21988LL661-21988 (U.S.)
—
Display adhesive 923-06620 —
Lower cowling 923-06253 923-06249 (3)
Rubber gasket 923-06245 —
Security screws — 923-05080 (2), midnight923-05081 (2), starlight, pink, red, blue
SIM tray 923-06917 single, midnight923-06918 single, starlight923-06919 single, pink923-06920 single, red923-06921 single, blue923-06922 dual, midnight923-06923 dual, starlight923-06924 dual, pink923-06925 dual, red923-06926 dual, blue923-07228 single, green923-07229 dual, green
—
Taptic Engine 923-06237 923-07003 (1)
Taptic Engine connector cowling
923-06246 923-06247 (2)
Upper cowling 923-06252 923-06248 (1) upper left923-06249 (1) bottom923-06664 (1) upper right
Orderable Parts

iPhone 13
073-00323-A | 8© 2022 Apple Inc. All rights reserved.
Screws
• Never reinstall a screw after it has been removed. Install only new screws. iPhone screw grooves are covered in adhesive that can’t be reused.
• Use only the torque driver indicated to install new screws during reassembly. Both overtightened screws and loose screws can damage parts.
Warning
923-06664
923-06249
923-06249
923-06248
923-06249
923-06247
923-07003 923-06243
923-06660
Torque driver (black, 0.35 kgf cm)Torque driver (blue, 0.65 kgf cm)Torque driver (gray, 0.55 kgf cm)Torque driver (green, 0.45 kgf cm)
923-05080923-05081
Screws
Crosshead screwTrilobe screwSecurity screw
Single screw
Note: You can use any torque driver to remove screws.

iPhone 13
073-00323-A | 9© 2022 Apple Inc. All rights reserved.
Tools
Tools
923-02657 Battery press
Cut-resistant gloves923-06599Display adhesive press plate
923-01092Adhesive cutter
923-066176.1-inch back protective cover
923-06595 6.1-inch repair tray
923-048786.1-inch display protective cover
661-08916Display press
661-196206.1-inch heated display pocket
Tools with part numbers are available for purchase from the Self Service Repair Store. Tools without part numbers can be purchased from electronics supply retailers.

iPhone 13
073-00323-A | 10© 2022 Apple Inc. All rights reserved.
Safety glasses with side shields
ESD-safe cleaning solution
Ethanol wipes1661-17619 Heated display removal fixture
Heat-resistant gloves IPA wipes
ESD wrist strap with clip or plug
923-01290Micro stix® bit
922-5065 Nylon probe (black stick) Nitrile or lint-free gloves
Tools
ESD mat ESD-safe tweezers

iPhone 13
073-00323-A | 11© 2022 Apple Inc. All rights reserved.
Sand2
Tools
1 Ethanol wipes must contain at least 90% ethanol and no additives except isopropyl alcohol.2 Clean, dry, untreated sand (8–10 cups)3 Sand container (wide-mouthed, quick pour, nonbreakable plastic container with a flip-top lid)4 The black torque driver kit includes a black torque driver (0.35 kgf cm), Torx® security bit (923-0247), and JCIS bit (923-0246).
923-00105Torque driver (green, 0.45 kgf cm)
Sand container3
923-00738 Torque driver (gray, 0.55 kgf cm)
923-0248Torque driver (black, 0.35 kgf cm) kit4
923-0448Torque driver (blue, 0.65 kgf cm)

iPhone 13
073-00323-A | 12© 2022 Apple Inc. All rights reserved.
Tools | Heated Display Removal Fixture
Heated Display Removal Fixture
Note: A rented heated display removal fixture may have different packaging than shown. If your fixture came with a USB cable, set the cable aside. This setup doesn’t require it.
1. Remove the fixture from the box. Then remove the packing Styrofoam.
2. Cut and remove the zip tie from the handle.
Don’t lift the fixture by the knob.
Caution

iPhone 13
073-00323-A | 13© 2022 Apple Inc. All rights reserved.
Tools | Heated Display Removal Fixture
3. Turn the top knob on the fixture counterclockwise to raise the suction cup. Remove the packing Styrofoam.
4. Turn the emergency stop knob clockwise until it clicks and protrudes from the stop guard.
5. Plug the power cord into the fixture. The fixture won’t turn on until you flip the switch on the back.
iPhone 13
073-00323-A | 14© 2022 Apple Inc. All rights reserved.
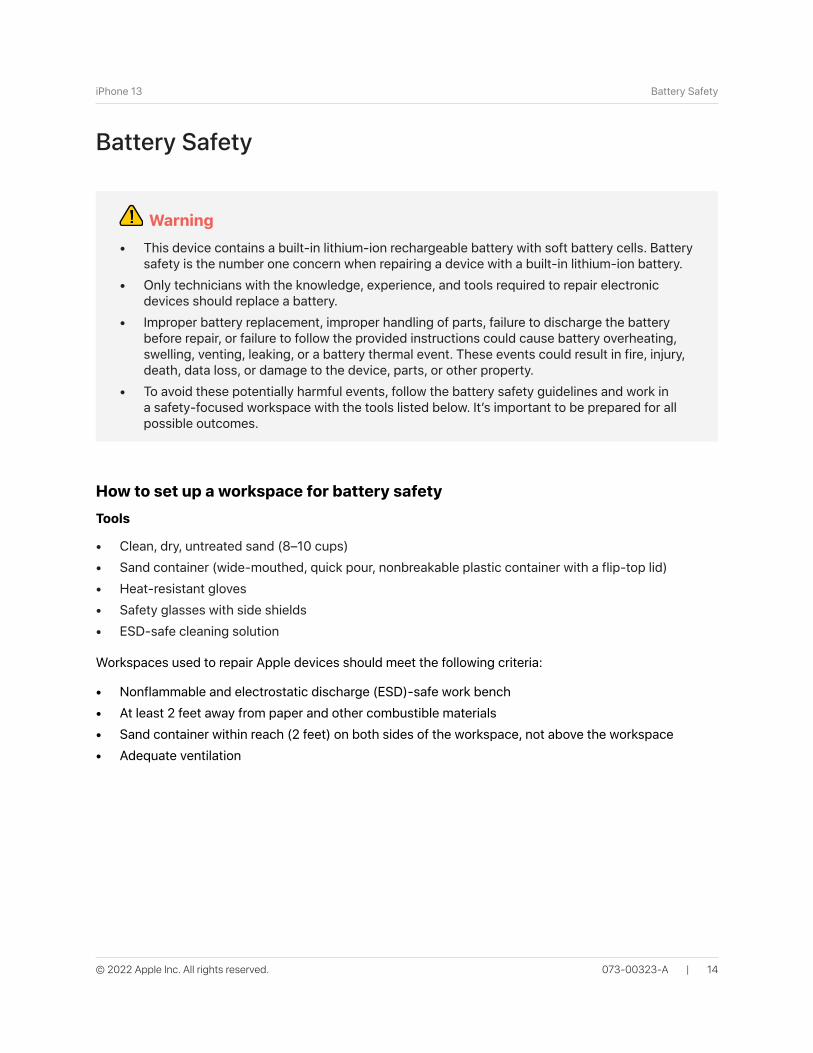
Battery Safety
Battery Safety
• Clean, dry, untreated sand (8–10 cups)• Sand container (wide-mouthed, quick pour, nonbreakable plastic container with a flip-top lid) • Heat-resistant gloves• Safety glasses with side shields• ESD-safe cleaning solution
Warning• This device contains a built-in lithium-ion rechargeable battery with soft battery cells. Battery
safety is the number one concern when repairing a device with a built-in lithium-ion battery.• Only technicians with the knowledge, experience, and tools required to repair electronic
devices should replace a battery.• Improper battery replacement, improper handling of parts, failure to discharge the battery
before repair, or failure to follow the provided instructions could cause battery overheating, swelling, venting, leaking, or a battery thermal event. These events could result in fire, injury, death, data loss, or damage to the device, parts, or other property.
• To avoid these potentially harmful events, follow the battery safety guidelines and work in a safety-focused workspace with the tools listed below. It’s important to be prepared for all possible outcomes.
How to set up a workspace for battery safetyTools
Workspaces used to repair Apple devices should meet the following criteria:
• Nonflammable and electrostatic discharge (ESD)-safe work bench• At least 2 feet away from paper and other combustible materials• Sand container within reach (2 feet) on both sides of the workspace, not above the workspace• Adequate ventilation

iPhone 13
073-00323-A | 15© 2022 Apple Inc. All rights reserved.
Battery Safety
How to handle a battery thermal event
Act immediately if you notice any of the following signs of a battery thermal event:
A battery thermal event is a rapid chemical chain reaction that occurs inside a battery cell. The energy stored in the battery is released suddenly, which can cause outgassing and fire. A battery thermal event can be triggered by physical damage to the battery, improper replacement or repair, or temperatures outside the battery’s operating range.
Don’t use water or an ABC or carbon dioxide fire extinguisher on a battery thermal event or a device that is undergoing one. Water and ABC or carbon dioxide fire extinguishers won’t stop the reaction.
Do smother the battery or device immediately with plenty of clean, dry sand. Dump the sand all at once. Timing is critical — the faster you pour all the sand, the sooner the reaction will be contained.
Do contact local fire authorities if further assistance is needed.
Do leave the room for 30 minutes after the reaction is contained. Ventilate the area. Don’t return until the area is clear of smoke.
Do wait 30 minutes before touching the device. Wear the heat-resistant gloves and safety glasses with side shields to remove the device from the sand.
Do wipe the affected area with water first. Then wipe the area with an ESD-safe cleaning solution.
Do dispose of the damaged battery or device (including any debris removed from the sand) according to local environmental laws and guidelines.
• The lithium-ion battery or a device that contains one begins to smoke or emit sparks or soot.• The battery pouch suddenly and quickly puffs out.• The lithium-ion battery or a device that contains one begins to emit hissing or popping sounds.
Warning

iPhone 13
073-00323-A | 16© 2022 Apple Inc. All rights reserved.
Battery Safety
• Disconnect all external cables.• Remove all cases and covers.• Turn on the flashlight from the Lock Screen, in Control Center, or by asking Siri. Wait until the device
has turned off and the flashlight is no longer illuminated.
How to handle batteries
The flashlight produces heat. Keep the iPhone in a well-ventilated area while the flashlight is illuminated.
Caution
Fully discharge the battery before you begin a repair. A discharged battery is less susceptible to a battery thermal event. If you can’t determine the battery level, don’t repair the device.
Warning
Perform the following steps to discharge the battery:
• To avoid noxious fumes or a battery thermal event, don’t puncture, strike, or crush a lithium-ion battery or a device that contains one.
• Keep your workspace clear of foreign objects and sharp materials.• Be careful when using sharp tools near the battery.• Don’t leave loose screws, extra screws, or small parts inside the device.• Don’t use tools that conduct electricity.• Don’t throw or drop the battery. • Don’t expose the battery to excessive heat or sunlight, or temperatures outside the battery’s
operating range.• Handle and dispose of waste batteries in accordance with local laws and regulations.
Best practices

iPhone 13
073-00323-A | 17© 2022 Apple Inc. All rights reserved.
Broken Glass
Broken Glass
Tools
WarningiPhone displays and some back covers are made of glass. The glass could break if the iPhone is dropped on a hard surface, receives a substantial impact, or is crushed, bent, or deformed. Don’t attempt to remove chipped or cracked glass shards.
If the iPhone glass is broken, perform the following steps before you begin a repair:
1. Put on safety glasses with side shields and the cut-resistant gloves.2. Use a vacuum cleaner to remove glass pieces from your workspace and the iPhone.3. Attach a protective cover to the broken glass to prevent injury or scattering of glass. Each protective
cover has a release liner underneath. Slowly pull the release liner out from under the protective cover while pressing the cover onto the enclosure.
4. Fold the release liner. Use the shiny side of the release liner to firmly press the protective cover onto the broken glass and smooth out any air bubbles.
5. Wait at least 12 minutes for the bond between the protective cover and the glass to strengthen.6. If the back glass is broken, place the iPhone into the heated display pocket.
• Back protective cover• Cut-resistant gloves• Display protective cover• Heated display pocket• Safety glasses with side shields• Vacuum cleaner

iPhone 13
073-00323-A | 18© 2022 Apple Inc. All rights reserved.
Broken Glass
If the iPhone has any of the following conditions, stop the repair:
• There’s no glass or insufficient glass for the protective cover to adhere to.• The protective cover doesn’t adhere to the iPhone.• The iPhone doesn’t fit in the heated display pocket.
You can find a service option at support.apple.com/repair.

iPhone 13
073-00323-A | 19© 2022 Apple Inc. All rights reserved.
First Steps
First Steps
Always perform the following steps before starting a repair:
• Back up the iPhone. • Discharge the battery fully.• Turn off the iPhone. • Disconnect all cables.• Remove all cases and covers.• Clear and clean your workspace.• Put on an ESD wrist strap and attach it to a properly grounded ESD mat.
Loose screws, extra screws, or small parts inside the device can damage the battery and cause safety issues. Set aside all parts and screws removed during the repair and account for them at the end of the repair.
ESD (electrostatic discharge, or the release of static electricity) can damage electronic components.
Warning
Caution
Be aware of the following while performing a repair:
• The manual for this model may show images of other models, but the procedures are the same. Ensure that you use the correct tools for the model you’re repairing.
• Take your time. Thoroughly read all instructions and alerts.• Magnetizing the torque drivers will make it easier to work with small screws.• The end of each flex cable must align with its connector. Press the end of each flex cable to its
connector until it clicks to ensure that it’s secure.

iPhone 13
073-00323-A | 20© 2022 Apple Inc. All rights reserved.
SIM Tray
• SIM-eject tool or paper clip
SIM Tray
Tools
Removal
1. Find your model to locate the SIM tray.
2. Insert a paper clip or SIM-eject tool into the hole next to the SIM tray.
3. Push the paper clip or SIM-eject tool toward the enclosure to eject the SIM tray.
4. Remove the SIM tray.
Reassembly
1. Press the SIM tray back into the side of the enclosure.

iPhone 13
073-00323-A | 21© 2022 Apple Inc. All rights reserved.
• 6.1-inch heated display pocket• 6.1-inch repair tray• Adhesive cutter • Display adhesive press plate• Display press • ESD-safe tweezers• Ethanol wipes or isopropyl alcohol (IPA) wipes• Heated display removal fixture • Heat-resistant gloves• JCIS bit • Micro stix bit • Nylon probe (black stick)• Torque driver (black, 0.35 kgf cm) • Torque driver (gray, 0.55 kgf cm)• Torque driver (green, 0.45 kgf cm)• Torx security bit
Display
Tools
• Read Battery Safety and follow workspace and battery handling guidelines before you begin.• Read Broken Glass before you begin.
Warning
Display | Before You begin
Before You Begin

iPhone 13
073-00323-A | 22© 2022 Apple Inc. All rights reserved.
Caution• To avoid damaging
the lenses, don’t touch the TrueDepth camera assembly or nearby parts.
• Don’t touch the back of the display. Touching the back of the display may affect image quality.
Display | Before You begin
• This procedure requires System Configuration. After you’ve completed all removal and reassembly steps, learn how to initiate the System Configuration process at support.apple.com/self-service-repair.
• Read Heated Display Removal Fixture if you’re setting up the fixture for the first time.
Important

iPhone 13
073-00323-A | 23© 2022 Apple Inc. All rights reserved.
Removal
1. Use a torque driver and the Torx security bit to remove the two security screws, one from each side of the Lightning connector. Set aside the screws.
2. Flip the switch on the back of the heated display removal fixture to turn it on. The internal fan will turn on. Wait for a checkmark to appear on the screen.
Display | Removal
Note: If an error codeappears on the screen, turnoff the fixture and turn itback on.

iPhone 13
073-00323-A | 24© 2022 Apple Inc. All rights reserved.
3. Take the iPhone out of the repair tray. Then gently insert the iPhone into the heated display pocket with the display faceup and the Lightning connector facing the bottom of the pocket.
4. Flip down the clamp on the side of the pocket to lock the iPhone into place.
Display | Removal
Ensure that the clamp on the side of the pocket is flipped up.
Important

iPhone 13
073-00323-A | 25© 2022 Apple Inc. All rights reserved.
5. Put on the heat-resistant gloves. Align the cutout on the bottom of the pocket with the rail on the fixture. Slide the pocket with the iPhone onto the rail on the fixture.
Don’t insert the pocket into the fixture without wearing the heat-resistant gloves.
Warning
Display | Removal

iPhone 13
073-00323-A | 26© 2022 Apple Inc. All rights reserved.
6. Slide the pocket into the fixture until you hear the pocket click into place.
Note: The screen on the fixture will turn red and the timer will count down from 2 minutes while the pocket heats to the correct temperature. When the timer ends, the fixture will start to beep and the screen will turn green.
Display | Removal

iPhone 13
073-00323-A | 27© 2022 Apple Inc. All rights reserved.
7. Turn the knob on the fixture clockwise to lower the suction cup as close to the iPhone as possible without touching the iPhone.
Note: The fixture will beep until the suction cup is lowered.
8. Grasp the handle and slide the suction cup straight out until the edge of the suction cup aligns with the bottom edge of the display.
CautionFailure to align the edges of the suction cup and the display may damage the iPhone.
CautionTo avoid damaging the iPhone, don’t turn the knob before the timer beeps.
Display | Removal

iPhone 13
073-00323-A | 28© 2022 Apple Inc. All rights reserved.
9. Turn the knob on the fixture clockwise to lower the suction cup onto the display (1). Then flip down the handle on the suction cup to secure the suction cup to the display (2).
Display | Removal
10. Slowly turn the knob on the fixture counterclockwise until the display begins to separate from the enclosure.
If you don’t see a gap between the display and the enclosure immediately, wait 30 seconds. If you still don’t see a gap, turn the silver part of the knob counterclockwise until the display begins to separate from the enclosure.
Important

iPhone 13
073-00323-A | 29© 2022 Apple Inc. All rights reserved.
11. Insert the edge of the adhesive cutter between the display and the enclosure. Run the cutter between the display and the enclosure to the right and left as shown until the display partially releases from the enclosure.
CautionTo avoid damaging the flex cables, don’t tilt up the bottom of the display more than 5 degrees.
Display | Removal

iPhone 13
073-00323-A | 30© 2022 Apple Inc. All rights reserved.
12. Flip up the handle to release the suction cup (1). Gently slide the flat end of the black stick under the edge of the suction cup to release it from the display (2).
13. Press the eject button on the side of the pocket to release the pocket from the fixture.
CautionDon’t turn the knob. Turning the knob may damage the flex cables.
Display | Removal

iPhone 13
073-00323-A | 31© 2022 Apple Inc. All rights reserved.
14. Hold both sides of the pocket and slide it straight out of the fixture.
15. Flip up the clamp on the side of the pocket to release the iPhone (1). Hold the area outlined in blue and gently remove the iPhone from the pocket (2).
16. Place the iPhone into the repair tray with the display faceup and the Lightning connector facing the cutout. Remove the gloves.
Display | Removal

iPhone 13
073-00323-A | 32© 2022 Apple Inc. All rights reserved.
17. Slide the display slightly toward the bottom of the iPhone.
18. Insert the edge of the adhesive cutter into the top of the iPhone between the display and the enclosure. Hold the adhesive cutter at a 45-degree angle. Start at the middle and cut along the top and sides of the iPhone until the display is free.
To avoid damaging the flex cables, don’t tilt up the bottom of the display more than 5 degrees.
Caution
Display | Removal

iPhone 13
073-00323-A | 33© 2022 Apple Inc. All rights reserved.
19. Insert the repair tray suction cups into the slots in the repair tray.
20. Tilt up the display toward the suction cups. Press the top and bottom edges of the display to secure it to the suction cups.
Caution• To avoid damaging the
enclosure or display, ensure that the internal display clips are released before you tilt up the display.
• Don’t damage the flex cables as you tilt up the display.
If the battery is dented, punctured, or otherwise damaged, stop the repair. You can find a serviceoption at support.apple.com/repair.
Warning
Display | Removal

iPhone 13
073-00323-A | 34© 2022 Apple Inc. All rights reserved.
21. Use a torque driver and the JCIS bit to remove the three crosshead screws from the lower cowling. Set aside the screws.
22. Use ESD-safe tweezers to remove the lower cowling. Save the cowling for reassembly.
23. Use a torque driver and the JCIS bit to remove two crosshead screws from the upper cowling. Set aside the screws.
Display | Removal

iPhone 13
073-00323-A | 35© 2022 Apple Inc. All rights reserved.
25. Use ESD-safe tweezers to tilt up the upper cowling (1). Then slide the cowling out from under the ambient light sensor flex cable (2). Save the cowling for reassembly.
24. Hold the upper cowling in place. Use a torque driver and the Micro stix bit to remove the trilobe screw from the upper cowling. Set aside the screw.
Don’t tear the ambient light sensor flex cable while removing the cowling.
Caution
Display | Removal

iPhone 13
073-00323-A | 36© 2022 Apple Inc. All rights reserved.
26. Use the black stick to lift the end of the battery flex cable off the connector.
27. Use the black stick to lift the end of the display flex cable off the connector.
Display | Removal
CautionYou must disconnect the battery flex cable first to ensure that the iPhone remains turned off.

iPhone 13
073-00323-A | 37© 2022 Apple Inc. All rights reserved.
29. Hold the display by the edges. Pull the tabs on the suction cups to release them from the display. Then set the display facedown on a clean, flat surface.
30. Remove the suction cups from the repair tray.
28. Use the black stick to lift the end of the ambient light sensor flex cable off the connector.
Display | Removal

iPhone 13
073-00323-A | 38© 2022 Apple Inc. All rights reserved.
31. Use ESD-safe tweezers to pick up the adhesive. Then pull the adhesive to remove it from the enclosure. Repeat this process until all the adhesive is removed from the perimeter of the enclosure.
Don’t touch the TrueDepth camera assembly, grounding springs, or nearby parts.
Caution
Display | Removal

iPhone 13
073-00323-A | 39© 2022 Apple Inc. All rights reserved.
33. Use ethanol wipes or IPA wipes to clean any adhesive residue from the enclosure.
Don’t use ethanol wipes or IPA wipes on the display. Ethanol or isopropyl alcohol may damage the display and affect image quality.
Caution
32. Use ESD-safe tweezers to remove the grounding foam from the top of the enclosure as shown.
Display | Removal

iPhone 13
073-00323-A | 40© 2022 Apple Inc. All rights reserved.
Reassembly
1. Inspect the internal display clips for damage before reassembly. Ensure that the internal display clips are at a 90-degree angle and aren’t bent or damaged.
2. Place the enclosure in the repair tray with the Lightning connector facing the cutout.
Display | Reassembly
• If the internal display clips are damaged, you may need to replace the display.
• If you’re installing a replacement display, peel the protective liner from the top and underside of it.
Important

iPhone 13
073-00323-A | 41© 2022 Apple Inc. All rights reserved.
3. Inspect the TrueDepth camera. Ensure that the top edge of the TrueDepth camera is under the lip of the enclosure.
If the TrueDepth camera is positioned incorrectly, use the black stick to move it into the correct position.
Caution
4. Align the replacement display adhesive over the enclosure with the grounding foam on top and the bottom tab on the right.
Ensure that you’ve removed all adhesive residue from the display and the enclosure before you apply the replacement display adhesive.
Caution
Display | Reassembly
Inspect the enclosure forloose or extra screws andsmall parts, which candamage the battery andcause safety issues.
Warning

iPhone 13
073-00323-A | 42© 2022 Apple Inc. All rights reserved.
5. The replacement display adhesive has a top release liner, a middle release liner, and a bottom release liner. Grasp the tab on the bottom release liner. Then slowly pull the bottom release liner (1) out from under the adhesive (2) while pressing the adhesive onto the enclosure.
Don’t remove the top release liner yet.
Important
Display | Reassembly
Bottom release liner
Adhesive
Note: The replacement display adhesive for your model may look different from the illustration, but the steps are the same.

iPhone 13
073-00323-A | 43© 2022 Apple Inc. All rights reserved.
6. Use the black stick to gently adhere the grounding foam as shown.
7. Place the display adhesive press plate on top of the enclosure with the icon in the top right corner as shown.
Failure to adhere the grounding foam may damage the display, Wi-Fi, or TrueDepth camera.
Caution
Display | Reassembly

iPhone 13
073-00323-A | 44© 2022 Apple Inc. All rights reserved.
8. Position the repair tray with the iPhone in the display press. Pull down the lever until the display press locks.
Display | Reassembly
9. Wait until the timer on the display press beeps. Pull down the lever (1) and pull out the release knob (2). Then lift the lever (3).

iPhone 13
073-00323-A | 45© 2022 Apple Inc. All rights reserved.
10. Remove the repair tray from the display press and remove the press plate.
11. Remove the left section of the top release liner first (1). Then remove the three sections running along the top (2), right (3), and bottom (4).
12. Insert the suction cups into the repair tray.
Don’t remove the middle release liner yet.
Important
Display | Reassembly
Top release liner

iPhone 13
073-00323-A | 46© 2022 Apple Inc. All rights reserved.
14. Press the ends of the display flex cable (1) and ambient light sensor flex cable (2) to the connectors. Press evenly along the length of each connector.
16. Use ESD-safe tweezers to position the lower cowling over the ends of the display and battery flex cables.
13. Align the left edge of the display with the left edge of the enclosure as shown. Gently press along the edges of the display to secure it to the suction cups.
Display | Reassembly
15. Press the end of the battery flex cable to the connector (3). Press evenly along the length of the connector.

iPhone 13
073-00323-A | 47© 2022 Apple Inc. All rights reserved.
17. Use ESD-safe tweezers to slide the tab of the upper cowling into the slot behind the ambient light sensor flex cable. Then tilt the cowling down over the end of the flex cable.
Ensure that you don’t tear the ambient light sensor flex cable as you reinstall the cowling.
Caution
18. Use the black torque driver and JCIS bit to install five new crosshead screws into the upper and lower cowlings (1).
19. Use the green torque driver and Micro stix bit to install one new trilobe screw into the upper cowling (2).
Display | Reassembly

iPhone 13
073-00323-A | 48© 2022 Apple Inc. All rights reserved.
21. Inspect the display adhesive to ensure that it’s in the correct position and not damaged or wrinkled. If the adhesive is damaged, remove it and apply replacement adhesive.
22. Repeat step 3 to ensure that the TrueDepth camera is in the correct position. Then continue to step 23.
20. Peel the first strip of the middle release liner (1) clockwise, starting at the bottom right of the enclosure. Peel the second strip (2) counterclockwise, starting at the bottom right of the enclosure. Peel the third strip (3) clockwise, starting at the bottom left of the enclosure.
Display | Reassembly
Inspect the enclosure for loose or extra screws and small parts, which can damage the battery andcause safety issues.
Warning
Middle release liner

iPhone 13
073-00323-A | 49© 2022 Apple Inc. All rights reserved.
23. Pull the tabs on the suction cups to release them from the display. Tilt down the display to rest on the enclosure.
24. Remove the suction cups from the repair tray.
Display | Reassembly

iPhone 13
073-00323-A | 50© 2022 Apple Inc. All rights reserved.
25. Press all four corners of the display simultaneously. Then press along the edges of the display until you hear a click and the display is flush with the enclosure.
Ensure that the flex cables aren’t trapped between the display and the enclosure. Feel the edges of the display for variations or gaps. If the display isn’t flush, repeat all removal steps and check the flex cables for damage. Then repeat reassembly steps 1 through 25.
Caution
Display | Reassembly

iPhone 13
073-00323-A | 51© 2022 Apple Inc. All rights reserved.
26. Position the repair tray with the iPhone in the display press. Pull down the lever until the display press locks.
Display | Reassembly
27. Wait until the timer on the display press beeps. Pull down the lever (1) and pull out the release knob (2). Then lift the lever (3).

iPhone 13
073-00323-A | 52© 2022 Apple Inc. All rights reserved.
28. Remove the repair tray from the display press.
29. Use the gray torque driver and Torx security bit to install two new security screws, one on each side of the Lightning connector. As you install the screws, press lightly on the display near the Lightning connector.
If the screws aren’t flush, remove and set aside the screws. Repeat step 29 to install another new set of screws. If the new screws still aren’t flush, repeat all removal and reassembly steps.
Caution
• System Configuration is required if you’ve installed a replacement display, battery, or camera. Disregard notifications about iPhone features on the Lock Screen until you complete System Configuration.
• After you’ve completed all removal and reassembly steps, learn how to initiate the System Configuration process at support.apple.com/self-service-repair.
Important
Display | Reassembly

iPhone 13
073-00323-A | 53© 2022 Apple Inc. All rights reserved.
Bottom Speaker
• 6.1-inch repair tray• ESD-safe tweezers• JCIS bit • Nylon probe (black stick)• Torque driver (blue, 0.65 kgf cm)
Tools
• Display
Remove the following part before you begin:
Read Battery Safety and follow workspace and battery handling guidelines before you begin.
Warning
Bottom Speaker | Before You begin
Before You Begin

iPhone 13
073-00323-A | 54© 2022 Apple Inc. All rights reserved.
1. Place the enclosure in the repair tray with the Lightning connector facing the cutout.
Removal
2. Use a torque driver and the JCIS bit to remove the four crosshead screws from the bottom speaker. Set aside the screws.
3. Use ESD-safe tweezers to grasp the upper right screw hole on the bottom speaker and lift it out of the enclosure.
Don’t damage the grounding springs on the bottom speaker.
Caution
Bottom Speaker | Removal

iPhone 13
073-00323-A | 55© 2022 Apple Inc. All rights reserved.
1. Rotate the repair tray. Ensure that the rubber gasket is positioned as shown. If the gasket is out of position, use ESD-safe tweezers to reposition it.
Reassembly
Bottom Speaker | Reassembly
2. Tilt down the bottom edge of the bottom speaker and lower it into the enclosure.

iPhone 13
073-00323-A | 56© 2022 Apple Inc. All rights reserved.
Bottom Speaker | Reassembly
• Display
Reinstall the following part to complete reassembly:
3. Rotate the repair tray. Use the blue torque driver and JCIS bit to install four new crosshead screws into the bottom speaker. Press the bottom speaker down as you install the screws.
Don’t damage the grounding springs on the bottom speaker.
Caution

iPhone 13
073-00323-A | 57© 2022 Apple Inc. All rights reserved.
Camera
• 6.1-inch repair tray• ESD-safe tweezers• JCIS bit • Nitrile or lint-free gloves• Nylon probe (black stick) • Torque driver (blue, 0.65 kgf cm)
Tools
• Display
Remove the following part before you begin:
Read Battery Safety and follow workspace and battery handling guidelines before you begin.
Warning
Camera | Before You begin
Caution• To avoid damaging
the lenses, don’t touch the TrueDepth camera assembly or nearby parts.
• Avoid the grounding springs on the top speaker and camera cowling.
This procedure requires System Configuration. After you’ve completed all removal and reassembly steps, learn how to initiate the System Configuration process at support.apple.com/self-service-repair.
Important
Before You Begin

iPhone 13
073-00323-A | 58© 2022 Apple Inc. All rights reserved.
2. Use a torque driver and the JCIS bit to remove the three crosshead screws from the camera cowling. Set aside the screws.
Removal
1. Place the enclosure in the repair tray with the Lightning connector facing the cutout.
3. Use ESD-safe tweezers to tilt up the right edge of the camera cowling (1). Then pull the cowling to the right to release the tabs on the left (2). Save the cowling for reassembly.
Camera | Removal

iPhone 13
073-00323-A | 59© 2022 Apple Inc. All rights reserved.
4. Use ESD-safe tweezers to gently lift the end of the top camera flex cable off the connector.
Note: One camera flex cable covers the other.
5. Use ESD-safe tweezers to gently lift the end of the bottom camera flex cable off the connector.
Camera | Removal

iPhone 13
073-00323-A | 60© 2022 Apple Inc. All rights reserved.
6. Use the flat end of the black stick to tilt up the cameras from the enclosure (1). Then lift the cameras out of the enclosure (2).
Don’t use the flex cables to lift the cameras.
Caution
Camera | Removal

iPhone 13
073-00323-A | 61© 2022 Apple Inc. All rights reserved.
1. Put on the gloves to prevent contamination of the camera lenses. Then hold the replacement cameras with the lenses facedown and remove the protective cover from the camera lenses.
2. Position the cameras in the enclosure. Ensure that the camera flex cables are inside the channel between the battery and the camera well.
Reassembly
Camera | Reassembly

iPhone 13
073-00323-A | 62© 2022 Apple Inc. All rights reserved.
3. Press the end of the bottom camera flex cable to the connector.
4. Press the end of the top camera flex cable to the connector.
Camera | Reassembly

iPhone 13
073-00323-A | 63© 2022 Apple Inc. All rights reserved.
6. Use ESD-safe tweezers to position the camera cowling so the tabs on the left side fit into the slots on the camera well. Then lower the cowling over the cameras.
Caution• Ensure that the
grounding spring on the camera cowling isn’t damaged. Avoid touching the grounding spring as you reinstall the camera cowling.
• Ensure that the screw cutouts in the camera cowling align with the screw holes. A misaligned camera cowling may affect display image quality.
5. Lightly press the cameras into the enclosure.
Camera | Reassembly

iPhone 13
073-00323-A | 64© 2022 Apple Inc. All rights reserved.
• Display
Reinstall the following part to complete reassembly:
7. Use the blue torque driver and JCIS bit to install three new crosshead screws into the camera cowling in the order shown.
After you’ve completed all removal and reassembly steps, learn how to initiate the System Configuration process at support.apple.com/self-service-repair.
Important
Camera | Reassembly

iPhone 13
073-00323-A | 65© 2022 Apple Inc. All rights reserved.
Taptic Engine
• 6.1-inch repair tray• ESD-safe tweezers• JCIS bit• Nylon probe (black stick)• Torque driver (blue, 0.65 kgf cm)
Tools
• Display
Remove the following part before you begin:
Read Battery Safety and follow workspace and battery handling guidelines before you begin.
Warning
Taptic Engine | Before You begin
Before You Begin

iPhone 13
073-00323-A | 66© 2022 Apple Inc. All rights reserved.
1. Place the enclosure in the repair tray with the Lightning connector facing the cutout.
Removal
2. Use a torque driver and the JCIS bit to remove the two crosshead screws from the Taptic Engine connector cowling. Set aside the screws.
3. Remove the Taptic Engine connector cowling and save it for reassembly.
Don’t damage the grounding spring on the cowling.
Caution
Taptic Engine | Removal

iPhone 13
073-00323-A | 67© 2022 Apple Inc. All rights reserved.
4. Use a torque driver and the JCIS bit to remove the crosshead screw from the Taptic Engine. Set aside the screw.
5. Lift the end of the Taptic Engine flex cable off the connector.
6. Use ESD-safe tweezers to remove the Taptic Engine.
Taptic Engine | Removal

iPhone 13
073-00323-A | 68© 2022 Apple Inc. All rights reserved.
1. Position the Taptic Engine in the enclosure.
Reassembly
2. Press the end of the Taptic Engine flex cable to the connector.
3. Use the blue torque driver and JCIS bit to install one new crosshead screw into the Taptic Engine.
Taptic Engine | Reassembly

iPhone 13
073-00323-A | 69© 2022 Apple Inc. All rights reserved.
4. Position the Taptic Engine connector cowling over the end of the flex cable.
5. Use the blue torque driver and JCIS bit to install two new crosshead screws into the Taptic Engine connector cowling.
Don’t damage the grounding spring on the cowling.
Caution
Reinstall the following part to complete reassembly:
• Display
Taptic Engine | Reassembly

iPhone 13
073-00323-A | 70© 2022 Apple Inc. All rights reserved.
Battery
• 6.1-inch repair tray• Battery press• ESD-safe cleaning solution• ESD-safe tweezers• Ethanol wipes or isopropyl alcohol (IPA) wipes• Heat-resistant gloves• Nitrile or lint-free gloves• Nylon probe (black stick) • Safety glasses with side shields• Sand• Sand container
Tools
• Display• Bottom speaker
Remove the following parts before you begin:
• A battery should be replaced only by individual technicians with the knowledge and experience to repair electronic devices. Improper battery replacement, improper handling of parts, or failure to follow the provided instructions could result in fire, injury, data loss, or damage to the device, parts, or other property.
• Read Battery Safety and follow workspace and battery handling guidelines before you begin.
Warning
Battery | Before You begin
Before You Begin

iPhone 13
073-00323-A | 71© 2022 Apple Inc. All rights reserved.
To avoid damaging the lenses, don’t touch the TrueDepth camera assembly or nearby parts.
Caution
This procedure requires System Configuration. After you’ve completed all removal and reassembly steps, learn how to initiate the System Configuration process at support.apple.com/self-service-repair.
Important
Battery | Before You begin

iPhone 13
073-00323-A | 72© 2022 Apple Inc. All rights reserved.
1. Place the enclosure in the repair tray with the Lightning connector facing the cutout.
2. Use ESD-safe tweezers to grasp the bottom right battery adhesive tab. Gently peel the adhesive tab away from the battery.
Removal
Note: The battery has four adhesive tabs.
Battery | Removal
Don’t scrape or puncture the battery with the tweezers.
Warning

iPhone 13
073-00323-A | 73© 2022 Apple Inc. All rights reserved.
3. Hold down the iPhone. Use ESD-safe tweezers to continue peeling the bottom right battery adhesive tab from the battery.
Peel the adhesive tab completely from the battery before twisting it around the tweezers.
Important
4. Keep the tweezers close and parallel to the battery and twist until you see white adhesive strip on the tweezers.
Don’t pull the tweezers until the white adhesive is wrapped around them.
Important
Battery | Removal

iPhone 13
073-00323-A | 74© 2022 Apple Inc. All rights reserved.
5. Pull the tweezers toward the bottom of the iPhone and continue to twist the adhesive until you’ve removed the entire strip.
Don’t pull the adhesive strip against parts or screws.
Caution
6. Use ESD-safe tweezers to grasp the bottom left battery adhesive tab. Gently peel the adhesive tab away from the battery.
7. Hold down the iPhone and peel the tab completely away from the battery. Then repeat steps 4 and 5 to remove the bottom left adhesive strip from the battery. If you remove the entire strip, continue to step 8.
Important• Pull the bottom left adhesive strip away from the Taptic Engine.• If the battery adhesive tab or strip breaks off and you can still see it, attempt to retrieve it with the
tweezers. Wrap the tab or strip around the tweezers and repeat steps 4 and 5. If you can’t see the tab or strip, continue to step 8.
ImportantIf the battery adhesive tab or strip breaks off and you can still see it, attempt to retrieve it with the tweezers. Wrap the tab or strip around the tweezers and repeat steps 4 and 5. If you can’t see the tab or strip, continue to step 6.
Battery | Removal

iPhone 13
073-00323-A | 75© 2022 Apple Inc. All rights reserved.
9. The top tabs are delicate. Hold down the iPhone. Then gently peel the battery adhesive tabs from the top of the battery.
10. Put on the nitrile or lint-free gloves.
8. Rotate the repair tray.
11. Hold down the iPhone. Use ESD-safe tweezers to grasp one battery adhesive tab. Then twist the tweezers to wrap the adhesive tab around them.
ImportantHold the tweezers close and parallel to the battery as you twist.
Battery | Removal

iPhone 13
073-00323-A | 76© 2022 Apple Inc. All rights reserved.
12. Keep the tweezers in the channel between the battery and the camera cowling. Continue to slowly twist the tweezers until you’ve removed the entire adhesive strip.
If the battery adhesive tab or strip breaks off and you can still see it, attempt to retrieve it with the tweezers. Wrap the tab or strip around the tweezers and repeat step 12. If you can’t see the tab or strip, continue to step 13.
Important
13. Repeat steps 11 and 12 to remove the remaining battery adhesive strip from the top of the battery. If you remove the entire strip, continue to step 14.
If all four strips were broken and can’t be retrieved, don’t forcibly pry the battery. Stop the repair. You can find a service option at support.apple.com/repair.
Warning
14. If all four battery adhesive strips were fully removed, continue to step 16. If at least one strip was fully removed, continue to step 15.
ImportantIf the battery adhesive tab or strip breaks off and you can still see it, attempt to retrieve it with the tweezers. Wrap the tab or strip around the tweezers and repeat step 12. If you can’t see the tab or strip, continue to step 14.
Battery | Removal

iPhone 13
073-00323-A | 77© 2022 Apple Inc. All rights reserved.
15. Insert the flat end of the black stick into one of the insertion points as shown. Ensure that the black stick is inserted into a point where the battery strip has been fully removed. Don’t insert the black stick into a point where the battery tab or strip is broken.
When using the black stick to remove the battery from the enclosure, don’t damage the flex cables. Don’t scrape, rip, tear, or otherwise damage the polyester film or other areas. If damage occurs, replace the iPhone.
Caution
Battery | Removal

iPhone 13
073-00323-A | 78© 2022 Apple Inc. All rights reserved.
16. Slightly lift the battery with the black stick just enough to grasp underneath the battery.
17. Remove the battery from the enclosure. Then inspect the enclosure for damage. If the enclosure is damaged, replace the iPhone.
If you can’t remove the battery, stop the repair. You can find a service option at support.apple.com/repair.
Warning
Battery | Removal
To avoid damage, don’t press the black stick on the edge of the enclosure as you lift the battery.
Caution

iPhone 13
073-00323-A | 79© 2022 Apple Inc. All rights reserved.
2. Use ethanol wipes or IPA wipes on the area shown in blue to remove any remaining adhesive from the enclosure.
Reassembly
1. Reinstall the bottom speaker.
CautionDon’t use ethanol wipes or IPA wipes on the areas outlined in red. Ethanol or isopropyl alcohol may damage the polyester film and wireless charging unit.
Battery | Reassembly
Inspect the enclosure forloose or extra screws andsmall parts, which candamage the battery andcause safety issues.
Warning

iPhone 13
073-00323-A | 80© 2022 Apple Inc. All rights reserved.
4. Hold the battery over the enclosure with the protective cover faceup. Align the bottom of the battery with the top of the speaker (1) and the left edge with the logic board (2). Then lower the battery into the enclosure.
3. Peel the pink release liner from the underside of the replacement battery.
Don’t remove the protective cover from the top of the battery yet.
Important
Battery | Reassembly

iPhone 13
073-00323-A | 81© 2022 Apple Inc. All rights reserved.
5. The center of the repair tray has two slots. Position the repair tray and enclosure onto the battery press with the left slot over the pin as shown.
6. Flip down the red lever to lower the roller onto the battery.
Battery | Reassembly

iPhone 13
073-00323-A | 82© 2022 Apple Inc. All rights reserved.
7. Slide the repair tray back and forth through the battery press three times to adhere the battery to the enclosure.
8. Flip up the red lever.
Battery | Reassembly

iPhone 13
073-00323-A | 83© 2022 Apple Inc. All rights reserved.
9. Position the repair tray and enclosure onto the battery press with the right slot over the pin.
10. Flip down the red lever.
Battery | Reassembly

iPhone 13
073-00323-A | 84© 2022 Apple Inc. All rights reserved.
11. Slide the repair tray back and forth through the battery press three times to adhere the battery to the enclosure.
12. Flip up the red lever.
Battery | Reassembly

iPhone 13
073-00323-A | 85© 2022 Apple Inc. All rights reserved.
• Display
Reinstall the following part to complete reassembly:
Gently shake the iPhone. If the battery sounds loose, remove the display and the battery. Then complete battery reassembly with another replacement battery.
Warning
13. Remove the repair tray from the battery press.
14. Hold the edges of the protective cover. Pull the release tabs on the protective cover to remove the cover from the battery.
Don’t press the area over the tab you’re releasing.
Important
After you’ve completed all removal and reassembly steps, learn how to initiate the System Configuration process at support.apple.com/self-service-repair.
Important
Battery | Reassembly
Micro stix® is a registered trademark of OSG CORPORATION. Torx® is a registered trademark of Acument Intellectual Properties, LLC.