Bachelor thesis - IS MUNI
71
M A S A R Y K U N I V E R S I T Y F A C U L T Y O F E D U C A T I O N Bachelor thesis Brno 2012 Irena Lněničková
-
Upload
khangminh22 -
Category
Documents
-
view
0 -
download
0
Transcript of Bachelor thesis - IS MUNI

M A S A R Y K U N I V E R S I T Y
F A C U L T Y O F E D U C A T I O N
Bachelor thesis
Brno 2012
Irena Lněničková

2
M A S A R Y K U N I V E R S I T Y
F A C U L T Y O F E D U C A T I O N
Department of English Language and Literature
Montessori education-focus on foreign language
education within the
Montessori system
Bachelor thesis
Brno 2012
Supervisor Authored by
Ailsa Marion Randall, M.A. Irena Lněničková

3
Declaration
I hereby declare that I have written this bachelor thesis on my own and that I have used only
the sources listed in the bibliography.
Brno 19 April 2012 ...............................................
Irena Lněničková
4
Acknowledgements
I would like to thank Mrs. Ailsa Marion Randall, M.A. for her help and patience.

5
Annotation
The aim of this thesis is to make the Montessori handbook of language. All the parts
are described generally and afterwards the materials with pictures are introduced. The use and
function of materials are commented.
The theoretical part is about the Montessori pedagogy and its principles generally.
These principles are Sensitive period and discovering new pieces of knowledge by child itself,
The polarization of concentration, Free choice of activity, Prepared surroundings, Age mixed
classes, Making new relationship between an adult and a child, Working with a mistake,
Montessori material.
It presents a short description of language development because it is important for
understanding the using of material.
The practical part is about the Montessori material and the description how to use it. It
includes several parts containing facts about lexicon, writing, reading, storytelling, grammar,
and language games.
Key words: Montessori pedagogy, The development of language, Montessori material, The
development of words, The basic principles, Writing, Reading, Grammar, Language games.
Anotace
Cílem této práce je vytvořit příručku montessori pedagogiky pro výuku jazyků. Vlastní
text je doplněn obrázky pomůcek a popisem užití materiálu.
Teoretická část práce se zabývá montessori pedagogikou a jejími principy. Tyto principy jsou
Senzitivní období a objevování nových informací samotným dítětem, Soustředění, Svobodná
volba, Připravené prostředí, Věkově smíšené skupiny, Vztah dospělý-dítě, Práce s chybou,
Montessori pomůcky. Součástí je i stručný popis vývoje jazyka, neboť je důležitou součástí
pro porozumění fungování a užití pomůcek.
Praktická část popisuje montessori pomůcky a jejich užití v praxi. Je rozdělena do
několika částí poskytujících informace o slovní zásobě, psaní, čtení, vyprávění příběhů,
gramatice a jazykových hrách.
Klíčová slova: Montessori pedagogika, Vývoj jazyka, Montessori pomůcky a materiál, Vývoj
slovní zásoby, Základní principy, Psaní, Čtení, Gramatika, Jazykové hry.

6
Content
Department of English Language and Literature ....................................................................... 2
Declaration ................................................................................................................................ 3
Introduction ................................................................................................................................ 8
1 Montessori educational system ............................................................................................... 9
1.1 Maria Montessori ......................................................................................................... 9
1.2 Montessori system ..................................................................................................... 10
2. Practical part ......................................................................................................................... 14
2.1 The development of vocabulary ..................................................................................... 14
2.2 Activities before Writing and Reading .......................................................................... 21
2.3 Writing ............................................................................................................................ 25
2.3.1 General about Writing .............................................................................................. 25
2.3. 2 Montessori Training and Materials for Writing ...................................................... 27
2.4 Reading ........................................................................................................................... 33
2.4.1 General about reading .............................................................................................. 33
2.4.2 Phonetic Reading .................................................................................................... 34
2.4.3 Pink Series .............................................................................................................. 35
2.4.4 Blue Series .............................................................................................................. 46
2.4.5 Book Reading (Types of Books, Book Corner) ....................................................... 53
2.5 Storytelling ................................................................................................................... 55
2.6 Grammar ........................................................................................................................ 57
2.6.1 Nouns, Adjectives .................................................................................................... 59
2.6.2 Verbs ........................................................................................................................ 63
2.6.3 Prepositions .............................................................................................................. 64
2.6.4 Finishing the grammar part ...................................................................................... 64
2.6.5 Green series .............................................................................................................. 66

7
2.7 Language games ............................................................................................................. 67
3. Conclusion ............................................................................................................................ 69
4. List of References: ............................................................................................................... 70

8
Introduction
The education is one of the important parts of our lives. It has been in the world since
the human being was born. It is a purposeful help and intentional development of each
personality. The aims, forms and methods of education have been changed during the times.
They are closely connected with the social and economic conditions in the society. At the
beginning, studying was only for rich people, especially men. The women were determined
only to take care of families. After a lot of years the attitude to the education is different.
Females can attend schools as students, there is a compulsory full-time education and
everybody has the right to study. As the science began blooming, the demands for knowledge
and information are much higher than the years before. The schools and educational
institutions have become to be more specialized. The society offer large scale of styles of
education. Man has the possibility to be educated in classical way of studying, or they can
choose the alternative schooling (as Montessori education, Waldorf education...)
However there is a tendency to connect these alternative ways of education with
disabled pupils. The reason is that people are not informed very much. They usually do not
know the alternative systems are for all children who want to try another style of learning,
who do not want to keep the traditional rules and are willing to experiment. Some of these
systems enable talented learners to go further beyond the educational framework, curriculum,
for given class.
Many teachers believe and try hard to get the alternative way to the same level in the
society’s point of view. They believe in better future for non-classical educational systems.

9
1 Montessori educational system
1.1 Maria Montessori
Montessori educational system was created by Maria Montessori. She was born in
Italian town Chiaravalle. She studied mathematics and engineering at the technological school
and then went to the university in Rome. She became the first woman in Italy who got the
diploma in medicine. She worked as a doctor for some time. Then she left this profession and
was interested in education and school teaching. She studied philosophy and anthropology.
Maria continued in her work with children coming from various backgrounds. She observed
them and discovered that they needed more than only medical and physical care for
development. Montessori put forward the style of education which concentrated on training
the senses and kinetic skills in “prepared environment”. If the children had suitable material,
they inclined to acquire the information and skills themselves, overcame their specific
problems better without the teachers’ help.
New way of education has to be created just from the birth and has to be further
strengthened. The education has to be re-built and be based on laws of nature, and not on
prejudicial theories and prejudices of the adults’ world.1
Maria Montessori said she found out the necessity to return to the biological
background and formulated basic rules how to work with the sense and kinetic system (Rýdl,
2007).
She tested this method on poor children. She founded the house Casa dei Bambini for
them and created the right conditions. She succeeded and established the school for “normal”
children. Montessori gave lectures and taught in England, the United States of America, the
Netherlands, Spain, Australia and India. Her work was prohibited in the states with
dictatorship because of educating the independent personalities.
She wrote a lot of books and materials. She also with her son Mario laid foundations
of the organization Association Montessori International, AMI. Maria Montessori died in the
Netherlands in 1952.
1Rýdl, Karel. “Metoda Montessori pro naše dítě. Inspirace pro rodiče a zájemce.” Univerzita Pardubice, 2007.

10
1.2 Montessori system
Montessori methodology with the help of special material and creating suitable
environment supports the natural child’s interest. It helps it to fix the working habits and to be
able to decide without any help.
It keeps to the needs of a small child, teaches it to develop its natural abilities and
sense perception. It is a result of a long observation, checking methods of small children
education in pre-school facilities, schools and also families.
This is a peace pedagogy which breaks all social, religious and ethnic boundaries. The
individual intelligence and creative behaviour during solving problems are supported. Maria
Montessori understood each human being as a unique personality. As she told every man is
“social being par excellence” (Rýdl, 2007).
Montessori system leads pupils to be independent and responsible for their own
studying and behaviour. The educational facilities have to conform to the child’s development
otherwise they would not use beneficial period of time. The schools play the role of
experience for life in society.
The teachers observe each child to get to know detail information about its interests,
level of knowledge, activities and problems. It is the first rule of the Montessori system:
Follow the child and respect signs which show us the right way.
The child needs a model, attendance and help in pedagogical prepared environment.
These factors enable him/her to find orientation for setting off its way. The idea of certainty,
background and order is fulfilled. The next rule is: Help me to be able to prove it alone.
Montessori system leads pupils to be independent and responsible for their own
studying and behaviour. The educational facilities have to conform to the child’s development
otherwise they would not use beneficial period of time. The schools play the role of
experience for life in society.
Pupils learn much better those things which they just want to learn. Therefore the
Montessori pedagogy offers the “free work”. The wish to study something particular matches
the level of momentary evolutionary degree and interest. Children need their own time and
space, conduct and finish their own work in peace. They work on the basis of inner
motivation. Step by step they gain independence.
Due to the children’s output the style of activities is different. Small children practice
the things from practical life. Thanks to work with the sensual material they gain the better
perception and operative intelligence. The school system supports the development of
mathematical skills, understanding language and complex system of nature based on their

11
own research during so called cosmic education. The aim is to connect interest, delight and
achievement.
Maria Montessori discussed the developmental stages with other psychologists like
Jean Piaget. She assigned each level of development to “sensitive period.” It is time when a
child is extremely sensitive and able to absorb or soak like a sponge much more learning
processes and information from its surroundings. These phases, which are called more like
“opening windows”, are “the offer of nature” (H.Roth). It is perfectly seen in the early periods
of life when a child can learn any kind of language. A little bit later it is able to manage not
only the mother language, but also a foreign one. However this sensitive period disappears
very quickly. For example: a ten-year –old child can learn a foreign language but with a help
of methodical guidance, not in a “natural” way like before.
The education in Montessori system is based on “material curriculum.” The process of
understanding in a brain follows the first seize of material by hands and using all senses. At
first each difficulty in material is isolated to build the strong connections and structures in the
children’s minds. The possibility of own errors self-control is found in each material and it
leads a child to work with its mistakes-how to recognize and correct them.
At the certain level, when a child is able to use abstraction, the significance of didactic
material steppes back. The material contains a logical structure. It is presented to children
individually. The teacher gives a lesson to the child how to use the material according to that
logical structure. When the child can find and manage the aim and the point of the material, it
works further alone. The child uses a principle of free work. It helps him/her to realize its own
needs. It respects the child’s interests.
The precondition for free work is prepared environment. It is all arranged material
according to the pedagogical-psychological rules. Everything has its own place and position.
It has to be clean and in a good state. Usually there is only one piece of each material. The
order should be clear and simple.
Each child can choose what he/she wants to do, which place to stay, who to work with,
and how long. As stated above, only one piece of material is available, so it is only up to
children to reach an agreement who will work with that particular material. The pupils respect
the order, or work in groups. There is also a type of work on projects. It is more demanding
on children’s self-reliance. They need to catch the initial thought and develop it to the final
product. They have to keep the special criteria and format of work.
The age of children acts an important role. In Montessori classes there are children of
different ages. Ordinarily there are three age mixed levels corresponding with the three

12
evolutionary grades. It is very beneficial because children learn from each other in mutual co-
operation. The ideal situation is the combination of three successive classes into one class.
This method of pedagogy prefers individual observing the child rather than comparing
the outputs of various children. Each pupil is taken as an individual unit. The teacher looks at
the pupil’s style of learning, its development, behaviour during the working period and school
days, and then prepares the output and development profile. There are usually no parents
meeting. The child comes with its parents to visit a teacher and they consult about the
situation. Each participant (child, parents, and teacher) tells his/her opinion.
The final evaluation of pupils for final reports is done on the basis of these
observations during the classroom lessons. The teacher keeps a journal and writes there down
all the information. It takes the rule not to compare children, their intelligences among them
into account. What is observed are the development changes in comparison with the last
period. The pupils are taught not to study for success, prize, reward or bonuses. They should
understand that they ate studying for themselves, for good feeling from new gained and learnt
information and skills. Therefore there are no marks as a kind of evaluation. The final reports
are written in words summarizing the work done by the child during that certain part of the
school year.
The aim is the children will gain the ability to evaluate themselves their own work.
The Montessori principle tries to teach that skill from an early age. There is self-control in
sense material, so even the small child learns to check and assess its own output. The dealing
with mistakes is developed further in higher classes. The pupils are led to check their fulfilled
tasks, correct their mistakes and thanks to that be better and better. They will gain much
stronger will.
The pupils will recognize that each man can once be mistaken. People grow personally
if they can get to know their problems and faults, and solve them. There is almost no chance
for creating the rivalry among the children and men.
The Montessori education tries to be complex. The roots are laid from the early
childhood. Parents have the possibility to attend the “playing groups”. These gatherings are
product of co-operation of parents with teachers. They have regular meetings where they
discuss and support children and enable them to have enough space for social contact with
their peers and other babies. When the children are older, they visit the pre-school facilities or
kindergartens. They are taught to use the “sense material”, understand the world around them,
development of the gross and mild motoric skills, speech production and sense perception.
Reaching the age of six, children become pupils and start going to the first grade of primary

13
schools. They are introduced to the social contacts and interaction, understanding the
universe, the relationships among people and people to the world. Many skills are evolved
and cultivated. They start to study subjects and deal with mathematics, geometry, cosmic
education, foreign languages in more details.
Language is one of the most important parts of human life. It enables people to
communicate, exchange ideas, opinions and experiences, and better understand the world
around us. The language studies are based on the grounds what each human is given from the
birth. Even the small babies, between the birth and eight months, use “universal speech”. It is
something like a differential language. The sounds from surroundings which are not important
are filtrated away. As it is stated above, the language develops. The first months of life
children are able to lip-read. When they are six months they repeat the syllables. This process
is called babbling. During the period from the 9th
to the 12th
month they start intentionally and
wilfully repeat the words they can hear and the words have the meaning. Later also the
objects around them have their own names. At about the 15th
month toddlers start to speak
and use the words, later phrases. From two years, it is the time for rapid increase and
development in vocabulary. Children start to make their first sentences. These all stages are
very individual for each child. It depends on many factors-the emotive area, family
background, parents’ attention... The first words that are pronounced are usually the nouns,
later verbs and adjectives. Sometimes children can be angry if people do not understand them.
It is stated that this anger acts like an engine in the language development.
The speech is not given to human beings. They all have to learn it. People gain this
and about 80% is the inner development. As Maria Montessori stated in her book The
Absorbed Mind: ...learning and teaching is not what the teacher does. It is a natural process
which developed spontaneously in every human being. Studying is not done by listening to
the words and information-however by the experience that a child gains thanks to the
everyday situations and communications. The role of teacher is not to speak, but to prepare
the suitable environment with a lot of stimuli for the cultivation of the language for children.
The success of Montessori education is based on the understanding that, from the
beginning, the child’s education must be viewed in its entirety. Goals and methods at each age
level must fit together to form a cohesive whole, from birth to adulthood (Lillard, 1996).

14
2. Practical part
The practical part is divided into several sections. Each section starts with the short
theoretical introduction to that particular topic. Then the practical use of material is described.
The activities are taken from books stated in the list of references. They are suitable for
teaching and learning either the mother language, or the second, foreign, language of the
child. The using of the material enables child to connect all the senses. The children see the
material, the certain realization of word; they hear it when the teacher pronounces it, they can
touch the letters of the moveable alphabet.
2.1 The development of vocabulary
Since the child’s birth, he/she has been absorbing the language and the language
structure from the surroundings. The child is listening to the speaking in common
conversations, during the communication with other children and adults. Later, the child itself
is able to take a part in a conversation. It gains new experience that support new language
skills. The adults should support this process by asking children the open questions, reading
and telling the stories from the real life and situations (later they can use fairy-tales and
fables), playing the word games and practising the language activities. In kindergartens, the
children are taught some poems, tongue twisters. They play the games focused on listening
and doing some funny activities.
This area comes under the part of the Practical Life and the Sense Part in Montessori
system. The sense material is used. It is focused on naming the activities and things, accurate
labelling, and describing of the procedure or activity (the course of some activities, what is
similar and different, comparison). These activities force the child to use new nouns,
adjectives, verbs and prepositions.
When the child is two and half and more years old, it starts with naming the objects.
For this type of activity, children use the things from the real word, models, and pictures and
connect them with the appropriate words. They name things around them prepared from the
real objects and phenomena, from models related to specific areas, and from pictures. The
material used is called the Classification cards. It is also possible to use jigsaw puzzles and

15
games used in every kindergarten. These games are especially puzzles for classification into
categories, games with professions, animals and other pictures, dominos, memory cards.
For recognizing the objects the materials “baskets” with objects from different areas of
various sorts (vegetables, fruit, clothing, tools, and things from kitchen-dishes...) are used.
The baskets should contain objects (“words”) known for a child and also some new objects
unknown for a child. It is recommended to change the objects or to prepare new ones
according to the topics that are interesting for a child, or are just taught at school within the
projects. There is a variation for readers: the preparation of cards with written words for
labelling these objects. Later the commands and various activities could be written on the
cards.
They read little slips on which were written different actions which they were to
execute, thus demonstrating that they understood them (Montessori, 1965).
Activity 1: Working with the basket
Material: Basket with objects from different areas, or classified according to the topics.
Objectives: To name the objects
Approximate age: Parents can begin this activity when the child is 2 ½ years old.
Recommended for children who have entered the kindergarten.
Children who start with the second language.
Presentation: The teacher and the child prepare a mat and place the basket on it. The child
takes one object from the basket, feels it by touch and names it. It goes on with other objects
in the same way. For the new words and objects the teacher uses the Three Period Lesson
(1. Teacher names the object. 2. Teacher asks the child the questions: “Is this a pencil? Is this
a ball? The child answers. 3. The teacher asks: “What is this?”, and points to that particular
object). Then the child is taught to name the whole group of objects (f.ex. a ball, a doll, a car
are toys). The teacher appeals the child to add what he/she thinks it could be in the category.

16
Variation: The teacher can cover the basket, he/she takes out one thing, and the child is
supposed to recognize the missing object.
Exercise: The child can practise this type of activity after the presentation in pairs with
his/her friend, or individually. He/ she changes the objects in basket according to the topics.
Activity 2: Naming the Objects with Pictures
Material: Objects that you want to practise with the child, appropriate pictures for the objects.
You can use the real objects (f. ex.: if teaching the food vocabulary, use real apple,
pear, orange, banana...)
Objectives: To name the objects and pictures.
To classify the objects into categories and memorize new words.
To become familiar with using the precise labelling of individual things and
super-ordinate words for naming the whole groups-categories.
Approximate age: Suitable for children who have gone through the Activity 1.
Presentation: The teacher and the child prepare a mat and place the basket with chosen objects
(f. ex.: animals) on it. The teacher spreads the pictures on the mat and explains that all the
objects in the basket and pictures on the mat belong into one big family called ANIMALS.
The child draws an object, names it and finds the suitable picture. The pictures are something
like a bridge between the objects and words. The child goes on with other objects and
pictures.
Variation: The teacher can cover the basket, he/she takes out one thing, and the child is
supposed to recognize the missing object.
The pictures can be placed into the basket and the objects on the mat. Pictures are
drawn and matched with the objects.

17
The teacher can spread the pictures on the mat and describe one object. The child
listens to him/her, finds the appropriate object in the basket and matches together with the
picture.
Exercise: The child can practise this type of activity after the presentation in pairs with
his/her friend, or individually. He/she changes the objects and pictures in basket according to
the topics (animals, village, household, room, school, toys, and food).
Activity 3: Working with the Classification Cards
Material: a) The pictures on the summary card + real objects
b) The pictures on the summary card + small objects representing the real objects
c) The pictures on the summary card + individual pictures on the cards (5-10)
d) The pictures on the summary card + individual pictures on the cards (5-10) +
words for the pictures + control cards with the particular word and picture
Objectives: To classify the objects into categories and memorize new words.
To become familiar with using the precise labelling of individual things
and super-ordinate words for naming the whole groups-categories.
Approximate age: Suitable for children who have gone through the Activity 2.
Presentation: The teacher places the objects on the mat next to each other. He/she chooses one
object, examines it, and names it: “This is...” The teacher finds the appropriate picture or the
summary card (or individual card) and places the object with the card to the left top of the
mat. The child chooses other objects and cards, and he/she continuous. He/she places them
under the first set into the column. When there is an unknown word for the child, the teacher
uses the Three Period Lesson. When all the objects and cards are matched, teacher tells the
child: “All these things are together called...” She/he uses the labelling for the category and
places the summary card above all the objects or pictures.

18
Variation: Teacher can ask the child: “What could we add to this group?”
Teacher can ask the child to look away and hide one object and then ask what
missing thing is.
Teacher invites a child to choose another category and objects belonging to that
group. The child can draw it or write it into his/her journal.
If the child can read, the teacher can use the definition cards (cards with no name of
the object, but only with a description of the object). The child reads them, matches with
pictures and finds a suitable summary card and a super-ordinate name.
Exercise: The child can practise this type of activity after the presentation in pairs with
his/her friend, or individually. He/she changes the objects and pictures in basket according to
the topics (animals, village, household, room, school, toys, food, plants, tools, kitchen things,
clothing, and types of weather...).
Activity 4: The Classification
Material: More baskets with some objects from the same category (clothing, food, toys...)-it is
good to use both, unknown and known words for a child. Each basket represents one
category.
Objectives: To classify the objects, name them and name the whole group by using the super-
ordinate word...
Approximate age: Suitable for children who have gone through the Activity 3.
Presentation: The child chooses one basket, examines the objects inside (not looking at them),
names them and labels the whole category. Then he/she looks at the objects in the basket,
checks, and goes on with other baskets. If there is a new word for the child, the teacher names
the object and explains it.

19
Variation: When the child has gone successfully through the first task, the contents of two
baskets are mixed. The child chooses names and sorts out the objects. He/she puts them back
into appropriate baskets. It is possible to mix the contents of more baskets.
If the child can read, he/she can add the naming cards and summary cards together with the
objects. Instead of objects, it is possible to use pictures.
The child can continue with making up his/her categories that he/she writes or draws into the
journal. He/she can prepare his/her own baskets for other children doing this activity.
Children can bring the advertisement leaflet from supermarkets and determine in which
department (category) they can find various (individual) items.
Activity 5: Picture Stories
Material: Pictures or photographs (from the real world, from fairy-tales, connected with the
topics taught in different subjects, i.e. the Cosmic education)
Objectives: To be able to tell the story from the beginning to the end.
To develop fluent speech and fantasy.
To describe the situation, keep the sequence of the story.
Approximate age: Suitable for children who have gone through the Activity 4.
Presentation: The child chooses one set of pictures or photos. He/she places the photos on the
mat, and examines them. Then she/he puts them into order and re-tells the story to a friend or
to the teacher. The children who can write make up their own story or a fairy-tale based on the
pictures/photos. They write it down into their journals. It is possible to draw pictures, too.
Variation: Teacher can prepare the baskets focused on particular topics. There can be objects,
pictures, photographs.
Child can draw one object and make up a story about it.

20
Children can choose a basket concerning to one area and play a game that they are in the
shop, at school, at the doctor...
Activity 6: Description of objects
Material: 2 cloth Stereognostic bags (bags that both contain the same objects. These objects
can be geometrical shapes, letters from wood or plastics, or various things).
Objectives: To recognize and name the objects.
Presentation: The child puts his/her hands into the bag, touches one object and describes it to
his/her friend. The friend who has the second bag listens to him/her and tries to find the
particular described object in his/her own bag.
Activity 7: Matching the pairs
Material: Pictures or objects with similar or different attributes.
Objectives: To be able to find similarities/differences and describe them.
Presentation: The child chooses one set of pictures or objects, places them on the mat, and
examines them. Then she/he matches two objects or pictures that are similar/ different, and
explains, describes the characteristics.
Variation: The pictures and objects can be matched according to the semantic meaning.

21
2.2 Activities before Writing and Reading
What beyond all questions was accomplished with the little child in the first steps of
our method was to establish the psycho-motor mechanism of the written word by a slow
process of maturation such as takes place in the natural growth of articulate speech, in other
words, by methodically exercising the psycho-motor paths (Montessori, 1965).
The activities before writing and reading serve as a preparation for reading and
writing, and have a great influence on development of senses. According to speaking, the
child understands the sense of the words; he/she actively uses vocabulary and has no
problems with articulation and pronunciation. This process is suitable to support by telling the
stories according to the sequences, by memorizing and telling the rhymes and poems, making
pairs (synonymy, antonyms...)
For visual distinguishing, it is recommended to classify the shapes, perceiving the
pictures, scales of colours, similarities and differences, recognizing the shapes of letters,
manual work-putting the beads on the strings, etc. These things help improve the eye-hand co-
ordination. The child should try to keep his/her eye on the movements of his/her hands are
doing. The motor activity is developed by training of the hand for smooth and accurate
movements needed for writing. It involves activities from screwing the cover of the bottle to
outlining the lines, from co-ordination of the body to working with a pencil.
Children should also train the orientation in the space-the directions-down, up, left, to
the right, under, over.
The sense of hearing is important to practise, too. The materials from the Sense
Education are used. For example: Sounding wood, Acoustic cylinders, and Bells.
The spelling plays an important role. It just starts at the age of three and half of the
child. The teacher is supposed to articulate very carefully, and children should do the same.
The parents are involved in this process at home. They take care of proper pronunciation and
usage of vocabulary.
Parents and teachers can introduce children into many activities:
- they spell the words to the child
- they practise the vowels at the beginning, consonants in the middle and at the
end of the words

22
- when children understand the first letters of the vocabulary, they can sort out
the things according to the first letters, play games “Find everything what begins
with the letter...”
- it is possible to use pictures and objects and spell their names
- the teacher or parents spell the names and children guess the word and find the
corresponding object.
(Taken from the Publication manual of the Montessori Centre. Literary Skills.
Montessori Centre International, 1998)
Activity 1: The First Spelling
Material: The box with little drawers for letters of the alphabet. The drawers are labelled with
letters (cursive and block letters, lower case and capital letters). Each drawer contains some
objects beginning with that particular letter (example: drawer labelled with a letter L can
contain a lollipop, lentil, wooden ladybird, and label). The most suitable is to have three
boxes-one with vowels at the beginning of the words, the second one with the consonants in
the middle part of the word, and the third one with the consonants at the end of the words. If
there is only one box, there are objects from all three categories listed above in one drawer
(example: drawer labelled with the letter G contains a toy of a dog, chewing gum, glue,
cogwheel...). The words for analyses should be short and phonetic according to the wanted
speech sound.
Objectives: To be able to recognize and find various letters of alphabet
To practise pronunciation
Presentation: The child chooses one box, places it on the mat, puts the objects out and places
them below each other, and finds out the appropriate vowels or consonants.
Variations:
1) Naming: The child names the objects which start with the letter L... The child’s attention is
focused on the beginning of the word. This activity is suitable for highlighting the analyzed
speech sound at the word beginning.

23
2) Classification: The child or the teacher places more objects on the mat and the child
chooses only the objects beginning on one specific sound speech that was agreed upon before.
Example: There are objects on the mat like a car, a figure of snowman, rubber snake, a pencil,
a ball... Teacher asks child: “Please, find the object that starts with the letter S from all these
things.”
Various boxes can be mixed. It is also possible to use for finding the sound speech in the
middle or at the beginning of the word.
3) Comparison (increasing): Classification of objects according to the position of the sound
speech.
Example: pen, napkin, cap
4) Classification of all speech sounds of chosen objects
Example: Teacher chooses some objects-a car, a book, a doll, and asks the child to identify
the first letters of these objects.
5) Classification of objects to the boxes labelled with the beginning letter, letter in the middle
or at the end of the word.
6) Classifying pictures to chosen letters. These letters can be tactile, or from the puzzled
alphabet.
7) Sorting pictures and objects to syllables with given speech sounds. (For example: in Czech
language-these are syllables with “ě”, diphthongs, “di/ ti/ ni/ dy/ ty/ ny).
8) Placing the speech sounds in the word. Materials used can be little wooden desks with
holes and clothes pegs, or stripes of sturdy paper with the files (space) corresponding with the
number of speech sounds. The position of wanted letter (speech sound) is highlighted with the
peg.
Later on the child’s mind is able to make use of the successive operations performed
with the written language which has been thus built up by the child as a matter of mechanical
execution (writing) and to a certain extent of intelligence interpretation (reading). Normally

24
this is an established fact at the age of five. When the child begins to think and to make use of
the written language to express his rudimentary thinking, he is ready for elementary work, and
this fitness is a question not of age or other incidental circumstance but of mental maturity
(Montessori, 1965).

25
2.3 Writing
Montessori argued that it was easier for the child under six to write before he can read.
A child’s hand at the age of six is fixed and less pliable and, therefore, any bad habits will be
difficult to redress. For a child to write legibly and speedily without tiring it is important that
the hand is trained (Montessori Centre International, 1998).
2.3.1 General about Writing
It is obvious that the children’s minds and hands are, or should be, already prepared
for writing when entering the elementary school. Almost all the activities they have gone
through until the age of six are the indirect preparation for writing and reading. The
knowledge comes very easy and spontaneous as a logical consequence of that preparation.
These activities were included in the sections of the Practical Life, Sensorial, Cultural, and
Creative Sections.
For successful writing the child should master:
- How to hold the pencil by using the Pincer grip.
- To touch the pencil with lightness.
- Be flexible.
- To be able to control the hand.
- To co-ordinate the hand and eye.
- To have kinaesthetic knowledge.
-To be able to use visual discrimination and memory.
- To reach the co-operation of the hand and mind under the control of the will.
- To feel self-esteem over his/ her own written work and effort.
- To be able to concentrate on work.
- To keep the sequences of writing process.
(Taken from the Publication manual of the Montessori Centre. Literary Skills. Montessori Centre
International, 1998)

26
Maria Montessori considered writing as the motor mechanism and the intellect. Both
of them should be distinguished and separate. Originally, she prepared three pieces of
material for –two for the development of the motor mechanism (the inset for design and
sandpaper letters) and one related to the intellect (the large moveable alphabet).
Through the time, more materials were found and made. Example: As the basic
materials for writing can the teacher use metal shapes, cursive tactile letters on little desks, cut
out cursive alphabet for composing the words.
The colours of the material play an important role. During the first working with the
alphabet the vowels are in blue colour and the consonants are in red or pink colour,
diphthongs are green.
The level of difficulty is also coded with colours. The easy level is in the pink colour,
blue colour is for practising without new difficulties, red colour is middle level, and green
level is for diphthongs.
It is suitable to hang the poster of alphabet on the wall and label things in the
surroundings of children with the nameplates.
The process of writing prepares child for reading and is supported by motor activity.
The child expresses the objects around him/her by symbols (the shapes of letters), and does
not have to be able to read immediately what he/she has written down. It is very individual for
children if they start reading or writing as the first activity. It depends on their interests.
The explosion of writing- the writing is a kind of challenge for the child. If the child is
prepared and is in a good mood, the gaining the skill of writing is spontaneous, easy and
quick...( translated from Randáková, 2010).
The writing develops during the child’s life. It is possible to divide it into several
sections. From half a year of the child to his/her 4 and half year the fine motor activity
blooms. Children start to touch and hold objects, they manipulate with them. They are
fascinated by small things. Around three years of the child, the interest in writing is evident.
Children copy the letters. One year later, the sensitive phase for working with letters begins. It
is suitable time for grapho-motor preparation, tactile letters, composing words from the letters
of alphabet, and copying the letters and their shapes. When the child is between the ages 6
and 12, after the preparation of co-ordination of hand-eye-ear, the real process of writing and
grammar can start. The writing is made automatic and getting better up to the certain level.
The level is individual for each child.

27
2.3. 2 Montessori Training and Materials for Writing
Activity 1: Insets for Design
Material: Ten geometric shapes in plastic or metal (= insets) with
corresponding frames.
Squares of different coloured paper-the same size as the frame.
Coloured pencils.
A tray.
Objectives: To prepare the child for writing.
To improve the child’s muscles for holding a pencil correctly.
To check the child’s ability to control his/her hand movements.
To develop pattern.
To be able to hold the pencil with lightness.
To win the experience in drawing, infilling the shapes and being careful and
thorough going when drawing (keep the parameters of the shape when infilling).
Approximate age: 3-4 years
Presentation: Teacher brings the material to a table or a mat, chooses a simple curved figure.
The child is asked to bring two pieces of paper, two coloured pencils. The teacher takes one
of the coloured pencils and shows the child how to cover the paper with the frame, using the
correct pencil grip; she/he draws slowly and lightly round the frame in an anti-clockwise
direction. Then he/she invites the child to try it alone. The teacher should pay attention to the
correct writing position of the child. A right-handed child has the paper positioned to the left
side and a left-handed child to the right. Then the teacher shows the child filling in the figures
28
by using other coloured pencil, making a zig-zag pattern across it, or up and down. After the
child completes it, he/she can follow with other frames.
Variation: When the child is successful, he/she can go on with various designs and produce
various decorative motifs. It is possible to draw symmetrical design (turn the frame 90
degrees or 180 degrees), combine two geometric shapes, shading the figure completely, use
several shapes to make a more complex design.
Exercise: The teacher together with children play also the games focused on relaxing the
wrist and hand. Such a game is “Taking Your Pen for a Walk”. Children sit, the teacher tells
them to start from the left-hand side of their paper, go along the bumpy lane, cross the stone
path, climb up the hill, and roll down.
When the children start to be keen on writing, they may make creative writing books where
they write their own stories, and illustrate them.
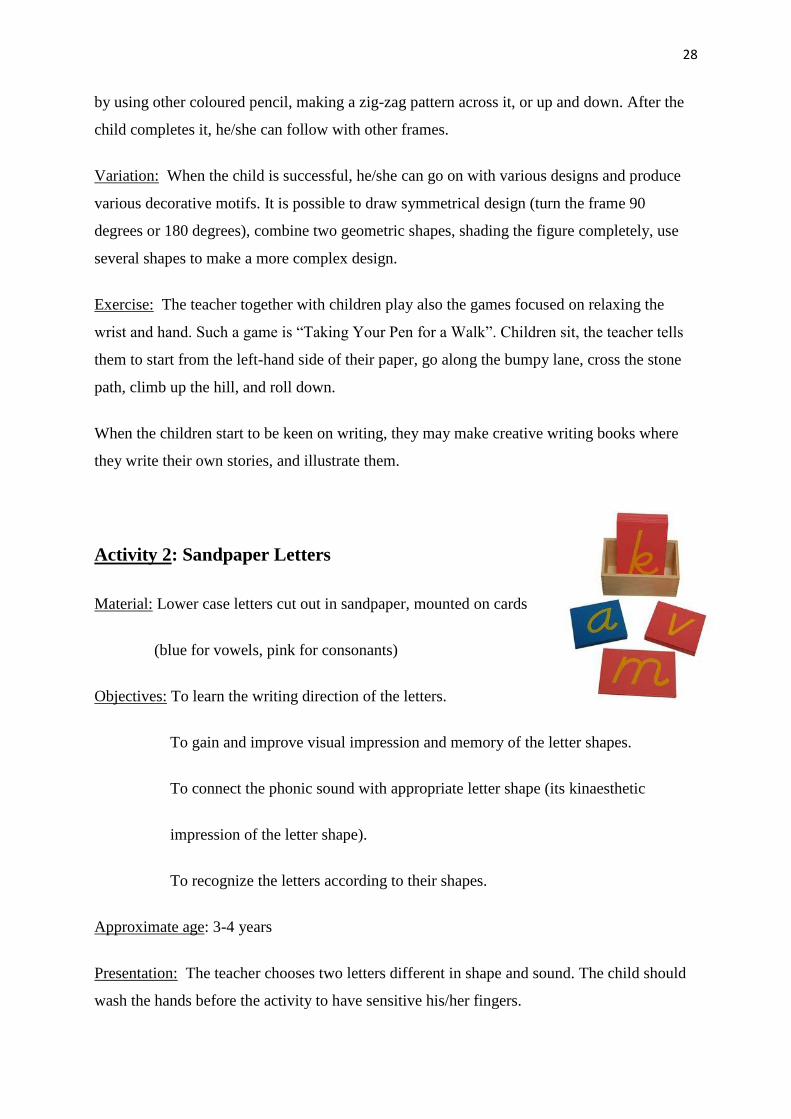
Activity 2: Sandpaper Letters
Material: Lower case letters cut out in sandpaper, mounted on cards
(blue for vowels, pink for consonants)
Objectives: To learn the writing direction of the letters.
To gain and improve visual impression and memory of the letter shapes.
To connect the phonic sound with appropriate letter shape (its kinaesthetic
impression of the letter shape).
To recognize the letters according to their shapes.
Approximate age: 3-4 years
Presentation: The teacher chooses two letters different in shape and sound. The child should
wash the hands before the activity to have sensitive his/her fingers.

29
First stage: The teacher places one letter in front of the child, touches it with the tips of
his/her index and middle fingers to indicate the entry point. (It is important for later joining of
the letters). The teacher slowly and lightly traces the letter in the writing direction, and says
the sound of that letter. Then he/she invites the child to repeat the action and try it alone. The
process should be repeated three or four times. It is individual for each child. The teacher
removes the first letter and starts to present the second one.
Second stage: After the presentation of the second letter, both letters are in front of the child.
Teacher asks the child to show him/her the letter he/she gives the sound for. The child should
trace the letter each time and say the sound.
Third stage: Both letters are in front of the child. The teacher points to one and asks the child,
“What is this?” It is repeated with other letters.
The teacher asks the child to find some words beginning with that practised letter.
If the child remembers the letters, he/she is encouraged to close his/her eyes, feel the letter
and name it.
The child is given a written letter and he/she reads it.
The child is allowed to write these practised letters on the board or into their journals, or in
the air.
Maria Montessori recommended teaching the vowels first, and consonants found in words
that have a special meaning for the child. Also the joining of consonant and vowel sounds is
welcomed as soon as the child had learned a new consonant sound, i.e., “ma”, “li”, etc.
It is good for practice to teach the child the letter shapes in their associated family grouping:
1) i l j t u y
2) v w x z k
3) b h m n p r
4) c a d e f g o q s

30
The children should write on the suitable surface, not hard, shiny, or smooth a lot. The
chairs and tables are supposed to be the right height for the children. The space and room
should be sufficient light.
The papers should be of a good quality. The pens, pencils and crayons are sharp
enough. The tripod pencil grips are suitable for writing, especially for those who have
difficulty with the pincer grip.
Writing direction picture:
Variation: Various games for recognizing, feeling and writing the letters are suitable.
-Children can shape the letters with their bodies and the others guess the letters performed.
- The teacher laminates the cards with the alphabet, spreads them on the floor. Children stand
in the circle around. The teacher asks them to bring particular letters, or each child chooses
one word, spells it and jumps the letters when spelling.
- The teacher or the children to each other can draw the letters with their index finger on the
back and guess the letter shape.
-The teacher spreads various objects on the floor and asks students to find and bring objects
beginning with the particular letter, or containing it, or finishing with that letter.
Activity3: Large Moveable Alphabet
This material is a great help used for writing messages
and words, playing games. Even the children with poor
motor skills enjoy expressing their thoughts through the

31
written words. It is sometimes called process of “writing without writing”.
Material: A large wooden box with “cut out” letters in cardboard. The vowels are blue and the
consonants are red. The letters are script or cursive, or both.
Objectives: To be able to build the words
Approximate age: 4 years and more
Presentation: The teacher places the box on the mat, takes some letters out and sounds them
as he/she lays them on the mat. Then he/she returns them to the box. The child is asked to find
the letters he/she knows and place them on the mat. If the child associates the phonemes with
the letters, he/she can continue with building the words. If not, the child should take the sand-
paper letters to assist in that activity. The teacher asks the child to feel the letter, say the sound
of the sandpaper letter and locate the letter from the large movable alphabet on the sandpaper
letter.
Variation:
-The teacher chooses a two/three-letter phonetic word (as “mat”, “tap”, “fox”), builds the
word to stress the individual sounds in the word, places the letters on the floor (on the mat).
The child is asked if he/she wants to try to build some words, too.
- The teacher may prepare individual boxes with objects and letters from large moveable
alphabet which are needed for building the names of the objects.
After the child is able to put the letters together and he/she starts writing, the teachers should
support the child to write creatively. At first, teachers can provide the opening sentences and
children are allowed to complete them on his/her own. Example: One day, on my way to
school, I found a magic book. I opened it and saw...
A good warm-up activity can be a brainstorming of words. Teacher says one word and
children write down words they associate with it. Then they write a story using these
brainstormed words. Other ideas are keeping a journal or a diary, writing about pictures,
writing stories about various objects, creating poems, writing letters to a pen friend, writing
messages. It is very important to explain how to make paragraphs, where to write capital
letters and how to keep the rules of punctuation. Writing is very closely connected with
32
reading. More the children read, more they fix the shapes of letters and are more creative
when writing their own stories.

33
2.4 Reading
2.4.1 General about reading
Strong reading skills will help students in other subjects. Through reading the children
learn about the world around them. It also improves the critical thinking, enlarges the scale of
vocabulary, spelling skills, and enables the practice of children’s imagination. To support
children to read, teachers should choose and provide students quality, age-appropriate
literature.
Reading to students is an interactive experience, through which teachers encourage
children to participate. They should be led to understand fiction, non-fiction (literature based
on facts). Every Montessori classroom should have a Book Centre or Library as its focal
point. The books are supposed to be divided according to the genres-sections for fiction
literature, for non-fiction, for poetry. The surroundings and the place should be comfortable
and inviting. It is usually placed in a quiet area. Whispering should be required there to
concentrate on reading, and enjoying it. It is a great advantage if students can borrow the
books from school library and take them home. Each child should keep a reading log in which
he/she records daily reading or the books he/she has read.
Children together with teachers can discover the beauties of poetry. It enriches their
vocabulary and imagination very much. The wonderful matter is that it can mean different
things to different readers. It is possible to discuss poems and their meanings during
the lessons, create their own pieces of work and illustrate them.
Parents also play an important role in a child’s rising development. They can
encourage children to read at home and show them that reading is also for pleasure.
Reading can be conducted in various forms and ways. The teacher reads aloud the text
chosen by teacher, students, or both. Another form is that teacher and students read a text of
their own choice silently for themselves at the same time. Share reading aloud is based on the
choice of a teacher or a child and they alternate who reads and for how long. Guided reading
aloud means that the teacher chooses the text and determines the reader. Another option
choice could be a guided silent reading. The teacher chooses the text and the children are
asked to read it for themselves. When reading in the classroom, it is suitable to pair up
younger students with older ones. Children can also share their own pieces of writing with
their classmates or friends, and give them to read their work. After reading, the discussions on
the reading helps children develop their speaking and listening skills.

34
The children in a Montessori preschool are introduced to phonetic sounds, the sounds
of speech and their written forms, phonograms, letter-sound combinations with more than one
grapheme or phoneme (such as AKE = cake, make, take), and puzzle words. Many of them
are fluent readers. When entering the elementary class, teacher should determine the reading
level of the child by using the movable alphabet and recognizing the sounds of letters. In most
Montessori kindergarten, children begin learning phonetic sounds at the age of three.
Grammar and word study go parallel to the early reading activities.
2.4.2 Phonetic Reading
The first reading is phonetic reading. The material used is movable alphabet
(described in the section of writing). It enables non-reading children to express
himself/herself in writing.
Teacher uses sounds students already know, and begins to blend phonemes into two or
three combinations (sa..t, sa,,,g, sa...p). Next step is to combine two phoneme blends, such as
ba...nd, se...nd, po..nd, and graphemes (the letters representing phonemes). For example: the
grapheme “c” and “s” correspond to the phoneme /s/, the grapheme “c” also to the phoneme
/k/. If the student knows enough of the phonetic sounds, he/she can continue on phonograms.
Phonograms are letter-sound combinations which contain more than one grapheme or
phoneme such as “ake” (make, fake, take). They are a preparation for reading and spelling,
too. Teacher should start with the most common ones (sh, ch, ea, ai, ow, ee, oo). The movable
alphabet and sets of matching pictures highlighting one phonogram at a time are needed for
these activities. The phonogram is always highlighted. Whatever colour can be used for
highlighting. It catches students’ attention. When a new phonogram is introduced, the child is
given a list containing the phonogram for practising the reading. The list for practising “sh”
will contain the words like ship, shut, shoe, shore, shine.
The child is taken from the basic phonetic words to complex words, more varied and
difficult vocabulary. It introduces the child to the concept of grammar. The materials for
reading are at the beginning similar or identical as material for writing, especially the
phonetic series. The difficulty is marked with colours. It goes on from the easiest level in pink
colour, middle level-the blue one, and the highest level-the green one.

35
Example:
2.4.3 Pink Series
The words used in this series are two- and three-letter phonic words. It includes short
vowel/consonant or consonant/short vowel/consonant. Some “Sight Words “are introduced to
the reader to learn and recognize instantly without using and reading their phonetic version.
The reason is that these words do not sound like their spelling. When the child understands
the sight words, it can accelerate his/her reading speed, and improve comprehension.
Activity1: Pink Box 1
Material: A pink box with six small objects representing two-
and three- letter phonic words.
Practising
phonograms
“sh“
ship
shut
shoe
shop
Practising
phonograms
“ea“
tea
meat
sea
seat

36
Large movable alphabet.
Objectives: To practise recognizing the two- and three phonic words into their basic sounds.
To prepare for later writing and reading.
Presentation: The teacher and the child bring the movable alphabet and the pink box 1, and
place them on the mat. The child opens the box and discusses which objects are inside. If the
child misnames the object, teacher names it correctly. The child chooses three things, places
them in a vertical line to the right of the box with movable alphabet, and names the first
object. Then he/she is asked to find the first letter, place it to the right of the object, and do the
same with other letters.
Exercise: The teacher may prepare two word lists with six words in each list relating to
objects in the box as a practice for reading at home or after using the material.
Activity 2: Pink Box 2
Material: A pink box containing six pictures representing
three-letter phonic words.
Large movable alphabet.
Objectives: To practise building the words.
To prepare for writing and reading.
Presentation: The same procedure as using the pink box 1 is followed. The teacher should find
out the child’s ability to work independently. If the child uses this material for longer time
and understands it, he/she can start to blend the sounds spontaneously and read the words.
Teacher writes two words lists for this box for practice.

37
Exercise: The child uses the large movable alphabet. The teacher asks him/her to build
a rime, e.g., “eg”, “at”, etc., and then to go through the alphabet and find the letters could be
add to these rimes to make a word (example: leg, peg, beg). It prepares the child for blending.
Example:
Activity 3: Pink Box3
Material: A pink box containing six objects representing three-letter phonic words.
Six word cards corresponding with the objects.
Objectives: To make easier the child’s first word reading.
To practise sounding out and blending sounds to read words.
Presentation: The child opens the box, takes out the objects and the word cards, names the
objects and places them vertically or horizontally on the table or the mat. The word cards are
placed in front of the child. The teacher asks the child to read out the first word. The child
sounds out each letter separately. The teacher demonstrates the child how to say the sounds
blending them together. The child places the card either underneath or alongside the object it
refers to.
Exercise: The child can work independently.
Variation:
- Another way of using this box is to have only objects and no cards. The teacher takes slips
of pink paper. The child places the objects on the mat. The teacher says that he/she is going to
think of one of them and is going to write the name of the object on the paper. The teacher
leg beg peg

38
gives the paper with the written word to the child and asks him/her to read and place it
alongside or underneath the particular object.
- The teacher asks the child to build the words using the large moveable alphabet. When the
child is finished, the teacher shows him/her how to check the words he/she has built with the
word cards.
Activity 4: Pink Box 4
Material: A pink box containing six picture cards representing three-letter phonic words.
Six word cards corresponding with the pictures.
Objectives: To expand child’s reading vocabulary.
To practise reading three-letter phonic words.
Approximate age: 4 years onwards
Presentation: After working with pink box 3, the child should be able to work independently
with the pink box 4. The teacher is on hand and assists the child if necessary. The child names
the pictures and writes the words corresponding to the pictures.
Variation: If the child has no problems with this activity, the teacher can place the word cards
or the objects from pink box 3 on a separate table, and asks the child to read the word card
and go and fetch the picture card or object. This process encourages the child to hold the word
in his/her memory when going to bring the picture card or object.
Activity 5: Pink Picture Card
Material: A4 size pink card with six to eight pictures in two rows
Separate corresponding word cards (kept in envelope attached to the back of the

39
card).
Objectives: To practise reading and enrich the vocabulary.
Presentation: The teacher introduces the material to the child, shows him/her where it is kept.
The child should be able to work independently. The teacher is on hand if the child needs any
assistance.
Variation: There are a lot of other games that are possible to use (Lotto cards, Memory card
game...)
Activity 6: Pink Box 5-The Mystery Box
Material: Pink box containing pieces of paper, folded in quarters, each with a two- or three-
letter word phonic word written on it.
Objectives: To practise further reading.
To be able to read silently.
To read without any contextual clue.

40
To practise memory skills.
Presentation: The teacher chooses one card with the word. He/she unfolds the slip of paper,
reads it quietly moving his/her lips, refolds the paper and places back into the box. He/she
continuous reading the remaining words and then asks the child to do the same. When the
child is finished, the teacher asks the child which reading he/she enjoyed the most.
Example:
Activity 7: Pink Reading List
This activity follows when all five activities have been done before, and the teacher is sure
that the child is able to read the words without contextual clues.
Material: Reading lists. One reading list contains eight to ten words with a picture at the top.
Each list can be focused on the medial, initial, final consonant sound.
Objectives: To extend reading practice and reading vocabulary.
Approximate age: 4 to 4,5 years
sun
cat
box

41
Presentation: The teacher introduces the material to the child and tells him/her to start reading
at the top. The child reads the list. There are many lists available for the child to read on
his/her own.
Exercise: The teacher should prepare more reading lists.
Activity 8: Sight Words
The child is not able to decode these sight words at this stage of his/her development.
Therefore these words are needed to be learnt through sight recognition very much along the
lines of “Look and Say”. The first words are the definite and indefinite articles.
Material: White cards with the new words written on them.
Objectives: To introduce words which the child cannot decode.
Presentation: The words are taught through the “Three Period Lesson”.
Variation: It is possible to play a game and thanks to this explain the grammar point.
Teacher tells the child: “Please, can you bring me a pencil?”(There are many in the
classroom.) “Please, can you bring me a chair?”(There are many in the classroom.)
BUT! “Please, can you bring me the vase?”(There is only one in the classroom.) “Please, can
you bring me the calendar?”(There is only in the classroom.) When the teacher says “a”, it
means one of many, but when he/she says “the”, it means that there is only one.
Many of the sight words that the child needs to learn are structure words and they can be
sometimes boring. However, if the teacher introduces them in a funny way, it is easier to go
through.
The most common sight words are: a, an, the, I, in, is, if, of, that, to, he, was.

42
To build the child’s sight reading vocabulary it would be suitable to teach him/her the words
stated below:
I up look we like and on at for he
is said go you are this going they away play
a am cat to come day the dog big my
mum no dad all get in went was of me
she see it yes can
Activity 9: Pink Phrase Strips
In this type of activity, the child is asked to read a string of words fluently and with
comprehension.
Material: Pink strips of card with a picture and corresponding phrase.
Objectives: To read with comprehension a string of words.
To practise reading the articles.
To develop fluency in reading.
Vocabulary: a green jumper, in the pocket, the fox in the wood
Presentation: The teacher introduces the child to the material and asks the child to read the
phrase, explaining any words with witch the child is not familiar. The child may use the
picture at the beginning to inform his/her comprehension of the phrase.
When the child is able to read the phrase strips with the pictures attached, the teacher
presents the child with the strips and separate picture cards. Then he/she asks the child to put
the pictures vertically on the table, read the phrases and place them beside the appropriate
picture cards. The child has to read and understands the phrase without the help of the picture.

43
Activity 10: Capital letters
This activity can be taught when using the capital sandpaper letters, or when the
capital letters arise in the environment. The teacher shows, or children can find as many
words as possible when the capital letters appear, i.e.: the child’s name, the name of the days
and months (in English, German language), the names of institutions, games, shops, the name
of food...
Material: Sandpaper letters.
Objectives: To learn to write capital letters
Useful groups are:
1. I L T F E H U J
2. C O Q G D B R P
3. A N M V W Y K X Z S
a b c d e f g h i j k l m n o p q r s t u v w x y z
A B C D E F G H I J K L M N O P Q R S T U V W X Y Z
a cat on the mat a boy in the bed

44
She has a red top.
Activity 11: Pink Sentence Strips
Material: Pink strips of card with a picture and corresponding sentence.
Objectives: To read for meaning.
To introduce the structure of a simple sentence (beginning of the sentence with
a capital letter and the end with a full-stop).
Vocabulary: Example of sentences: “The dog is on the mat.” “The sun is hot.”
Presentation: This activity follows the same rules and presentation as the activity with the
pink phrases (Activity 9). The teacher explains to the child that a sentence starts with a capital
letter and end with a full-stop.
It is useful to have some strips where the questions are asked, i.e, “Can the cat run?” “Is the
man fat?” The child can answer the questions. “Yes, the cat can run.” This is also a good
opportunity to introduce a new sight word “NO”. The child can respond: “No, the man is not
fat.”
Variation: The teacher may vary this activity and create a set of related sentences. The child
puts these sentences in order to make a story. If the child wants, he/she can draw the pictures
corresponding with the story, and matches them with the pictures.
Example:

45
Activity 11: Command Cards
Material: Sets of cards with commands. One set contains single actions (“Go to the door.
Open your book. Jump on the spot. Touch your nose.”) The second set contains two related
actions (“Go to the door and open it. Jump and sit down.”) The third set contains cards with
three or more actions. Teacher should use the words with phonograms the students have
learned.
Example:
Activity 12: Pink Level Reading Books
Material: Books containing the pink level language.
The books should be illustrated. If there are new sight words, the teacher writes
them on cards and places them in an envelope at the back of the book. The child can
get to know them before reading.
Objectives: To develop reading skills and enlarge the scale of vocabulary.
Go to the door.
Take the book and place it on the floor.
She opens the door, smiles and says hello.

46
Presentation: The child with the help of the teacher chooses a book. They sit down and
discuss what the story may be about. The child starts reading. The teacher listens to him.
When the child finishes reading, they discuss the story and the characters again. The teacher
gets an insight if the child is able to read with comprehension.
Example:
Hello!!!
My name is Sophia.
I am a grey bear with a blue nose.
I am five.
I am from Norway.
My best friend is a rabbit.
His name is Joe.
Joe is white and has got long ears.
Joe is nice and friendly.
We get a big box.
There are nice cups in the box.
We drink cacao.
We are happy.
Sight words: and, happy, is, am, we
2.4.4 Blue Series
When the child has made a progress in reading phrases and sentences in the pink
series, the teacher can introduce him/her to the next level, the blue series.
The blue series contains the same sequence and principles as the pink series. It starts
with the box 1 and goes on to the reading books. The child builds on the knowledge he/she

47
has acquired when going through the pink series. The teacher assists the child in this process
and introduces him/her double blends, triple blends, double consonants, diagraphs (“ng”,
“nk”,“sh”, “ch”, “tch”, “th”) and “schwa” vowel. The child will improve and enlarge the
vocabulary from the four-letter words to longer and more complex words.
Example of reading lists:
Activity 1: Blue Box 1
The teacher explains and demonstrates the initial double blends to the child, using the large
movable alphabet. (The first two letters in red before the blue one stress the pattern of two
consonants at the beginning of the word). The teacher pronounces the word. The child listens
to him and recognizes the double blend. The visual and auditory representations support each
other and it helps child to keep the new word and patter in memory.
Example of suitable words in the blue box 1:
clap tram flip
drum frog flag

48
Activity 2: Blue Box 2
The blue box 2 is similar to the pink box 2. However, it is a higher level. The picture cards
might be included. The large moveable alphabet highlights the patterning within the words. It
gives the child a visual representation of the blend.
Suitable words for the blue box 2:
rent desk pond silk risk test
The child can try to create his/her own rhymes. The teacher chooses one of the blends-“st”,
and the child can make onsets with blends-“fist, list, mist, vest, rest, test”
Example:

49
Activity 3: Blue Box 3
This box contains a scale of initial and final blends to reinforce, through reading, the word
building. It follows the blue boxes 1 and 2.
Activity 4: Blue Box 4
This box follows the blue box 3. It contains the words with initial and final blend, triple
blends, double consonants and the “ng/nk” digraphs. It is recommended to use the large
moveable alphabet. More practice enables child to understand this topic better.
Suitable words and pictures:
clock sock rock
pack duck block
Activity 5: Blue Picture Card
Blue Picture Cards are very similar to the Pink Picture Cards. Their purpose is to
reinforce multisyllabic and compound words, or the words with the “schwa” vowel. The
“schwa” vowel is the most common vowel sound in the English language. It is unaccented,
without an accent. Therefore, it is impossible to hear it as a clean vowel sound. It can cause
that children do not write it correctly when dealing with the word containing the “schwa”
vowel.
Suitable words:
along tunnel covers lemon
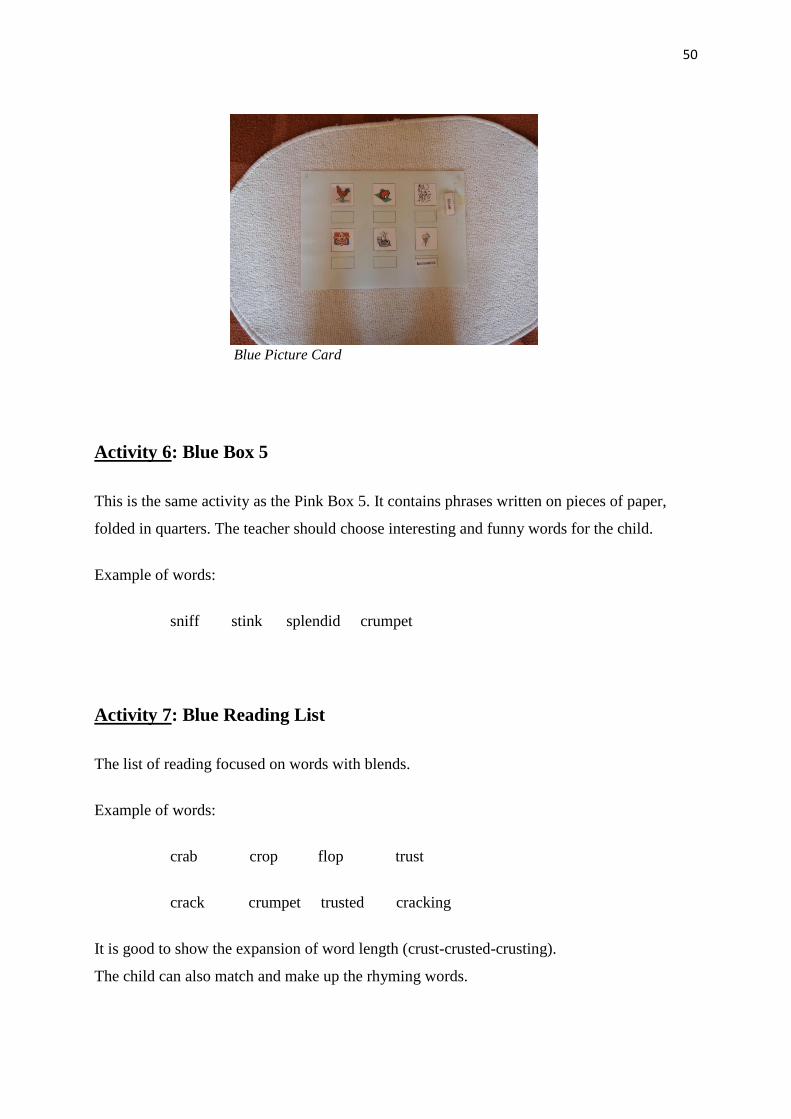
50
Blue Picture Card
Activity 6: Blue Box 5
This is the same activity as the Pink Box 5. It contains phrases written on pieces of paper,
folded in quarters. The teacher should choose interesting and funny words for the child.
Example of words:
sniff stink splendid crumpet
Activity 7: Blue Reading List
The list of reading focused on words with blends.
Example of words:
crab crop flop trust
crack crumpet trusted cracking
It is good to show the expansion of word length (crust-crusted-crusting).
The child can also match and make up the rhyming words.

51
Activity 8: Sight Words
The teacher still introduces the child to the sight words. The child practises the sight
words from the pink series and adds the new words he/she encounters in his/her reading or
environment.
Activity 9: Blue Phrase Strips
This activity is the same as activity with the phrases in the pink series. The child has
learnt a lot of new words. He/she is able to build new words. The teacher can ask the child to
take an object or picture and write a phrase describing it. The child uses the large moveable
alphabet, or he/she writes it into his/her journal.
It is suitable time to introduce the consonant digraphs/ trigraphs of “sh”, “ch”, “tch”,
“th”.
The phrases can be simple, i.e., “the short string”, or more complex, e.g., “the crimson
frill on the pink spotted dress”.
Example:
a Dutch shop
the fifth child
to crash the car
the rich architect
the royal ship
the high price
to catch a monkey

52
Activity 10: Blue Sentence Strips
The sentences follow the same principles as the sentences in the pink series. However, they
progress from easier sentences to more complex ones. The strips of paper should be about 8
inches by 3 inches.
Example: “The ten children sing.” “The ten little children sing a long song about a
pink ship.”
The teacher can prepare a story on the strips and add appropriate pictures. The child reads the
strips, puts the story together, and matches the strips with the pictures.
Example:
Activity 11: Blue Level Reading Books
The level of vocabulary that the child can read now, enables the teacher writing of books for
this blue level.

53
Example:
The ten piglets
The ten piglets were very small.
They went to the pond.
There were ten little ducklings on the pond.
The ten little piglets sang a song about rich James.
The ten little yellow ducklings ran away.
The ten pink piglets went home again.
Sight words: was, were, to
2.4.5 Book Reading (Types of Books, Book Corner)
2.4.5.1 Book Corner
This topic has been a little bit discusses in the section 5.1. General about Reading. It is
evident that if the teacher wants to support and encourages the child to love reading, he/she
has to prepare suitable environment. Usually, each school has its own library. It is suitable to
establish a book corner in every class. There are some rules the teacher should follow when
preparing the reading places.
The first important aspect to bear in mind is a quiet area of the classroom. The ideal
place is in the corner, far from the free play activities. It is possible to place there some
barriers around the book corner to enclose the area. The reading place is recommended to be
near a window because of natural light. It should be properly illuminated. The teacher chooses
the chairs or sofas of suitable size for children, or comfortable cushions and rugs for children
who prefer to sit on the floor. The low round tables could be included, too. It looks very nice
and cosy when the walls of the corner are painted. The choice of colour is very important. It
should be something cool and reflective, not strident and showy. Books are displayed on
child-sized shelves, or in the boxes on the floor.
The children are taught to be able to concentrate, to be tactful, and to respect other
children’s time for relaxing and reading. The teacher demonstrates the children how to handle
the books carefully. If the book is damaged, the child who is responsible has to be involved in
repair the book.

54
2.4.5.2. Types of Books
The little book was composed very carefully on the basis of rigid experimentation. As
the book is opened only one page of print appears, the tergo of the right hand page being
always blank. Nor does the text always cover the entire page. The spaces above and below the
print are decorated with designs (Montessori, 1965).
Books and stories provide a safe environment for the child to explore emotions,
experience the world. They lead the child into the world of imagination, another rules, and
fantasy. Reading contributes to improving the language, to enlarging the scale of vocabulary,
to understanding children’s own culture and also the cultures throughout the world. Therefore,
it is very important to choose the right books. It is necessary to consider the type of books and
the age ranges of the children.
The library should store the books for all types of readers, if it is possible. There could
be picture books, with very few words, the tactile/interactive noise books- for readers-
beginners, reality-based picture/story books which reflect real characters in real situations,
imaginative book (where animals talk and behave like people), books depicting natural
phenomena (planets, animals...), science books and encyclopaedias, books describing the
events in the life of a child (going to the doctor, at school...), picture dictionaries, poetry
books, books with nursery rhymes, and pieces of work that children love and know. It is good
to write a list of books that are stored in the library.

55
2.5 Storytelling
Storytelling is very beneficial for children. It is a type of great art which enables the
teacher to involve the children in the story and get them experience the tale.
The teacher prepares a rain stick or something like a silence card to calm down the
children when they become too noisy and excited. The new objects appearing in the story are
stored in the “story baskets”.
Before reading, the teacher should be properly prepared. Montessori Centre
International (1998) recommends:
- Read the story completely through about three times.
- List mentally the sequence of events. You are giving yourself a mental outline
of the important happenings.
- Reread the story, noting the events you did not remember.
- Go over the main events again and add the details that you remember. Think
about the meaning of the events and ways to express that meaning, rather than
memorise the words in the story.
- When you believe that you know the story, tell the story to a mirror.
- After you have practised two or three more times the wording will improve,
and you can change vocal pitch to differentiate characters.
- Change your posture or hand gestures to represent different characters.
- Do not be afraid to use pause to separate scenes.
- If in a class setting with other students, read aloud to each other and then to the
whole group.
The most demanding thing is to keep attention and interest of the children. If the
teacher has a large group, it is better to break it up into smaller age-related groups. Older
children have different needs to younger children.
At the beginning, the teacher should introduce the book, its author and the illustrator.
If the children do not know the word “illustrator”, the teacher explains it. Then he/she tells
what the story is about, and which characters appear in the story.
During the reading, the teacher should maintain eye contact as much as possible, use
intonation, different voices for different characters, and change the movement, speed, and
pace of the speech.

56
It is recommended to use pictures of the scenes and characters, so the children can
build the story according to the reading. At the end, the teacher and the children discuss the
story, characters, their behaviour, the individual scenes, the plot and the important events in
the tale. Some children are eager to re-tell the story. The teacher can also ask the questions
connected with the plot.
My own experience with storytelling is very positive. Children enjoy this activity very
much. They love listening to and reading stories, especially with a lot of pictures. I have tried
a lot of additional activities.
- I let the children draw the whole story, or just only some parts they like very
much.
- The children draw one of the characters appearing in the story.
- Next lesson after reading one story, I re-told the story but in a wrong way. I
changed some important events (Example: The Gingerbread man was not chased by
the fox, but the Gingerbread man chased the fox.), or characters, setting. The
children corrected me. Sometimes it was very funny for them and they started to
make up their own versions.
- The children were given the pictures from the story. They listened to the story
again and they put the story in sequences.
- I prepared a copy of the text of the story and erased some important words in
sentences. The children were listening to the reading and filled in the missing words.
- Next lesson, the children were given another set of pictures, and they created
their own story.
- The children chose one chapter or event from the historical book, read it
together, and then they prepared a drama based on reading. It was very beneficial for
them. Thanks to the connection of storytelling and playing drama, the children were
able to remember the historical facts and events much better than only by reading the
historical textbooks.

57
2.6 Grammar
Grammar is the study of the rules of a language. It looks how the words are combined
to make sentences. In Czech language, there are ten parts of speech, in Italian language there
are nine of them, in English language there are nine parts of the speech: the noun, adjective,
article, pronoun, verb, preposition, adverb, conjunction, and interjection. The whole concept
of grammar is divided into two parts-early grammar and later grammar. The first set of
grammar materials will be introduced to children when they are reading at the pink/blue level.
The second part, later grammar, is for children who have just completed the first part, and
gone through the green level of reading. It is usually in the primary school.
As stated above, the child can read at the pink/ blue level. Now, he/she is prepared to
start to focus on the parts of the speech and its function. It means that the child will know that
the nouns are also called naming words, verbs are for action or doing words. The goal is to
gain the general understanding and first meeting with the structure of the parts of the speech.
As soon as the child has the basis of reading, it can be taught simple grammar rules of that
particular language. The children know the sense of using the rules. However, they need to
get the right direction and the right explanation. When they say “mans”, “dided”, they show
the ability to try and make sense of irregularity, i.e., usually it is added “ed” to make the past
tense. It is a good background to build on. The children who are up to the age of six are in
what is called a sensitive period, in this case, for language. It means that the child has the
perfect and the most suitable time to absorb everything what is told and showed him/her
easily than after that “special” period is over.
Later on the child’s mind is able to make use of the successive operations performed
with the written language which has been thus built up by the child as a matter of mechanical
execution (writing) and to a certain extent of intelligence interpretation (reading). Normally it
is an established fact at the age of five. When the child begins to think and make use of
written language to express his rudimentary thinking, he is ready for elementary work, and
this fitness is a question not of age or other incidental circumstance but of mental maturity
(Montessori, 1965).
For better understanding the grammar symbols and materials, and preparation for later
work at the primary level, the grammar function and materials are colour-coded.

58
The colours are:
Nouns = black
Adjectives = royal blue
Verbs = red
Adverbs = orange
Prepositions = dark green
Conjunctions = pink
Interjections = gold
Articles are included, too. The colour code for them is light blue.
The Montessori grammar material consists of eight grammar boxes with coloured
compartments, 36 coloured filling boxes, printed words and sentences, command boxes,
command cards. If it is not possible to buy or find this equipment, the teacher can make
his/her own materials from paper and adapt presentations and activities as needed. Instead of
filling boxes it is possible to store the cards in large plastic organizing boxes, usually with
separate compartments.
When the teacher starts the presentation, it has specific order and rules:
Step 1-The teacher presents the function of the chosen part of speech.
Step 2- The teacher presents the activities from the section and uses the symbols from the
grammar box
Step 3-The teacher introduces the appropriate grammar box and filling box to give a student
time to absorb the new information.
Step 4- This step is optional. The teacher can introduces command cards and boxes. These
cards incorporate movement into the presentations and are suitable and most beneficial when
the children show they understand that particular part of speech well.
Step 5- The teacher encourages student to use the material independently after the
presentation.
There are eight grammar boxes. Each box is for a different part of speech. The boxes
have colour-coded compartments. For example: the first grammar box is used for nouns. It is
divided into one large compartment and two smaller ones. The large compartment is for
phrases. The two smaller compartments are for the article and the noun. The second box (for
adjectives) has one large compartment (for phrases) and three smaller ones (for the noun, the
article, and the adjective). The other grammar boxes continue in the same style.

59
The grammar boxes are filled with the printed cards. Some of them are large,
rectangular, coloured phrase cards; the others are small individual –word cards. These cards
can be stored in the filling boxes. Everything is completed according to the colours.
The command cards encourage students to move, experiment and work in groups. It is
useful to use them if a teacher needs to maintain the students’ attention and focus. However
these cards can be used only after the presentation of nouns, articles, adjectives and verbs.
2.6.1 Nouns, Adjectives
2.6.1.1 Nouns
A noun is a word referring to a person, place, thing, quality, or action. It functions as
the subject or object in a sentence. The nouns are divided into common and proper nouns. In
English language, proper nouns are always capitalized and denote individuals and
personifications.
Nouns and verbs may sometimes take the same form. Verbal nouns, or gerunds, have
features of both parts of speech.
Nouns can be masculine, feminine, or neuter. They may be inflected to indicate
number and case. In English, the gender has been eliminated, and only two forms, singular
and plural, indicate number. In English language there are three cases: nominative (subject),
genitive (possessive), and objective (the relationship between the noun and other words). The
words which can be experienced through the senses are called concrete nouns. The opposite
of a concrete noun is an abstract noun; it exists in people’s mind. It is experienced
emotionally or intellectually.

60
The noun, adjective and article creates the noun family. Teachers should introduce
how all these three parts work in relation to one another. Usually, parts of speech symbols are
demonstrated after the first introductory activity for each. However, in this particular case, the
grammar symbols for all three are introduced at the same time.
The presentation could follow this order:
1. Presentation of Nouns-Getting to know Nouns
2. Identifying Nouns
3. Getting to know Articles
4. Getting to know adjectives
5. Getting to know the grammar symbols: the noun family
6. Continue with other activities for the noun, article and adjective
The noun is represented by the large black triangle. In the noun family, it is a symbol
for a mother. The adjective has the grammar symbol a medium blue triangle. It symbolizes a
child. The article is represented by a small light blue triangle. It stands for an infant. The
purpose of the noun family is to help students to recognize that the article and adjective are
dependent on the noun, as an infant and a child are dependent on their mother. The noun, the
mother, can exist on its own within a sentence. The article and adjective must have a noun to
describe.
Activity 1: Nouns-black colour
Material: Box 1- Black cards with pink level words written ión them relatingto objects
within the environment, e.g., jug, cat, fox
Box 2- Black cards with blue level words written on them, relating to objects
within the environment, e. g., flock, desk, tunnel
Objectives: To o practise reading.
To learn the function of a noun as a naming word.

61
Presentation: It can be presented in a group. Each child reads his/her card, and matches the
card with appropriate object. The teacher points out that that all these cards are nouns. The
cards name all the objects.
Variation: The child reads the card, remembers it and goes to the mat where the objects are
placed, chooses the appropriate object and returns back. The child uses his/her memory skills.
Box 2: There is the same presentation and variation as a box 1.
Activity 2: Nouns-singular and plural
Material: Two sets of black cards with the singular and plural forms of the words written on
them: cat, cats
Two neutral coloured header cards with the words singular and plural.
Sets of objects relating to the word cards.
Black box with a small “s” written on the lid.
Objectives: To introduce singular and plural nouns.
To demonstrate the rule for making plurals.
Presentation: The child places the singular pile to the left-hand side. The plural pile of cards is
on the right-hand side. The teacher reads and explains the header card “singular”. Singular
means one thing. The teacher places the card at the top of the mat. Then he/she does the same
with the plural header card, and places it on the right side at the top of the mat.
The child takes some of the singular card, reads it and places it under the singular
header card. Then the child finds the appropriate object and places it to the left of the word
card. Then he/she goes through the plural cards and finds a word similar to the word he has
placed under the singular heading. When the child finds it, he/she places it under the header
card “plural”. He/she continues with other words in the same way. The teacher asks the child
to look at the words and find out what is added to make the words plural.

62
2.6.1.2 Adjectives
Activity 1: Adjectives-colour code royal blue
Material: Box 1-royal blue cards with pink and blue level words written on them.
Blue box.
Vocabulary: Pink, black, crimson, big, long, wet, etc.
Presentation: The teacher places various objects, e.g., a black box, a soft rag, a flat shape, a
pink cube, a big book, a long pencil, etc. He/she gives each child an adjective card and asks
him/her to place the adjective in front of the object that the card describes. When all the
children do it, the teacher concludes the presentation by saying that these cards are describing
cards, adjective cards. They tell what is special about the objects.
Placing the card in front of the object prepares the child for the concept that the adjectives
usually precede the noun in English.
Activity 2: Noun and adjective game
When the child has been introduced to the concept of nouns and adjectives, he/she can go
through this activity.
Material: Royal blue box containing one set of adjective cards, one set of noun cards with
appropriate header cards.
Objectives: To show the position of adjectives in relationship to the nouns.
To show that more adjectives can describe a noun.
Vocabulary: example of words
Adjectives Nouns
red socks
flat surface
wet T-shirt
great adventure

63
Presentation: The child prepares two piles of cards. The adjective cards are to the left of the
noun cards. The teacher reads the noun header card for the child and shows him/her where to
place it at the top of the mat, or the table. He/she asks the child to place the noun cards
vertically under the header card. Then the teacher reads the adjective header and encourages
the child to place it to the left of the noun header card. The child places other cards under
these two header cards. After complementing all the cards, the child reads the pairs and
discusses with the teacher if the connection has its own sense. The child may change it.
Variation: The teacher can choose only one noun and the child tries to match as many suitable
adjectives for this noun as possible.
2.6.2 Verbs
Activity 1: Verbs-colour code red
Material: Box 1- red box containing red cards with pink level words written on them, e. g.,
run hop fit hug
Box 2 – red box with cards of the blue level words
kiss skip jump clap
Objective: To understand the concept of a verb as an action word
Presentation: The teacher uses both boxes. Each child is given a card. He/she reads the card,
places it face down in front of him/her and acts out what is written on the card. The other
children guess what is written on the card. When all the children have read their card, the
teacher sums up that these words are action words, called verbs, and people can act them out.
Variation: When the children are able to perform single words, the teacher can give them
commands to carry out.
Example: “Open the door!”
“Touch the floor!”
“Stand up!”

64
2.6.3 Prepositions
Activity 1: Preposition box
Material: Dark green box with prepositions written on dark green cards.
Colour-coded cards to make a sentence.
Two objects which relate to the two noun cards.
Objective: To demonstrate the function of a preposition in a sentence.
Vocabulary: Early grammar prepositions: on, in, up, at, from, of
Presentation: The child takes two sets of cards and the objects, builds the sentence and reads
it. When the child finds out that the sentence does not make sense, e.g., “The cat sits the
roof,” the teacher tells the child that if he/she uses the special green card, the preposition card,
it will make sense, but he/she has to make space for the card between the action red card and
the grey card. The child is encouraged to move the cards and to place the objects above their
relevant cards. The child reads the first preposition card, places it in the sentence, reads the
sentence and moves the first object (the subject of the sentence) as designed by the
preposition in relation to the second object. The child then reads the next preposition card and
places it in the sentence and places the first object accordingly.
2.6.4 Finishing the grammar part
The theme box is used when the child has gone through all the parts of speech. It is the
culmination of the early grammar activities. The child has used the parts of grammar in
isolation. There is a change with this activity now. All the parts of speech are brought
together. The only new element for the child is the sentence structure using the grammar
cards.
Activity 1: Theme box –the farm box
Material: Collection of farm objects/animals.
Colour-coded grammar cards for nouns, adjectives, verbs, articles, conjunctions,
and prepositions.
Objective: To visualise and learn the structure of sentences and phrases through fun and
manipulation.

65
Vocabulary: Pink and blue level words.
Presentation:
1. part:
The teacher introduces the child the box. The child sets up the farm and discusses the objects
and what the various animals are doing. This is very good for second-language children and
language-delayed children. It gives them the opportunity to explore an environment in a calm
way without any pressure.
2. part:
When the child has worked with the noun cards in the early grammar, the teacher can
introduce the child to the noun cards in the farm. The child is asked to take up the black cards,
the naming cards. He/she reads the first card and either places it against the object, or brings
the object down to the card.
3. part:
The teacher introduces the child to the adjective cards in the farm box. He/she shows the child
that the adjective cards are placed in front of the noun cards. The child reads the noun card,
finds the object, reads through the adjective cards, and finds a word that describes the object.
4. part:
The next part introduces the child to the verb and article cards. The verb cards are placed after
the noun and the article cards are placed in front of the adjective cards. The child reads the
first noun card, finds the appropriate object, chooses a suitable adjective card, goes through
the verb cards, and finds the action what the object does. The teacher reminds the child that
each sentence starts with a capital letter, so the article card (as the first card in the sentence)
needs to start with a capital letter. The child finds the card with the word written with a capital
letter at the beginning and completes the sentence.
5. part
The child is introduced to conjunctions. The teacher explains that conjunctions are placed
after the verbs. They can also join the nouns, phrases, adjectives and sentences.
6. part
Prepositions may be introduced. The teacher explains the child where to place the
prepositions and that they describe the position of the objects.

66
2.6.5 Green series
When the child has gone through the early grammar without any problems, he/she is
prepared to continue with the green series of language material. The child will be introduced
to the other sounds (phonograms) and their corresponding spellings. The materials used in this
series are Small movable alphabet, Phonogram boxes, Phonograms in an envelope,
Phonogram lists, Phonogram booklets, Phonogram sentence strips, Phonogram books. The
four last mentioned things are used to give additional reading practice, extend vocabulary and
encourage independent reading.
When the child finishes the green series, he/she is able to read at the green level,
he/she can be introduced to the higher level of a language system, later grammar. It follows
exactly the same principles as early grammar, but the child is reading more complex words
with consonant and vowel digraphs. The teachers focus on the correct terminology for the
speech parts, i. e., nouns, verbs, etc. If the child is learning the second language, it depends on
the teacher if he/she wants the child knows the names of the parts of the speech in that
particular language. However, the child should know in his/her mother language what the
noun, verb and other parts of the speech are.

67
2.7 Language games
There are a lot of games to introduce various topics in language. One of these games is
“Simon Says”. It is ideal for introduction to grammar, as well as naming parts of the body,
asking children to bring things, pointing to different things, and performing the commands.
The teacher can involve most of the parts of the speech. He/she can ask the children to “jump”
(verb), “run fast” (adverb), bring the yellow pencil (adjective), put it under the table
(preposition), bring the book and the pen, but not the scissors (conjunction). This will
reinforce the children’s understanding. It is also very enjoyable and a good concrete
experience for children, long before they are introduced to these abstracts concepts formally.
The next great games are memory games. It involves reading and a visual memory of
words. The teacher can prepare a “Secret Path” game for children, displaying many pictures
along it, and children go through and try to memorise as many pictures as possible.
Another version is to prepare a tray with a few objects on it. The teacher asks the child
to look at them and remember them. Then the teacher covers the tray, takes one object away
and asks the child which one has been taken away.
At group time, the game “I went to Africa and I have packed ...” There are a lot of
variations. It depends on the topic the teacher wants to practise with children. If there is a
focus on the animals, the game can be changed and called: “I went to the zoo and saw an
elephant.” The first child tells the sentence. The second one repeats it and adds his/her new
word.
For enlarging and playing with words it is recommended to use the rhymes during the
lessons. Children can create their own poems; combine the given words according to the
rhymes.
A good introduction to phonemic awareness is through songs especially playing “I spy
with my little eye”, or “I hear with my little ear”(Montessori Centre International, 1998). The
teacher can choose two things, at first, and holding one up (e.g., a pen) he/she says, “I spy
with my little eye something beginning with “P”!” As the child sees the pen in the teacher’s
hand, he/she will associate the pen with the sound. The teacher does the same with other
objects. When the child shows that he/she is able to recognize the proper sound, the teacher
can use two or three objects together. He/she takes the objects, e. g., a pencil, a sharpener,
a paper, and asks the child to point the object beginning with “s”.

68
When teaching children where to put the stress in the sentence or discourse, the games
with poems or single sentences are used. The teacher prepares a short funny poem and strips
of paper with vocabulary of people (e.g., a mother, an ugly school caretaker, a happy old
women, a sick boy, a drunk man...) written on them. Each child is given a card. The task is to
read the poem as it would read the person written on the paper, and stress the important thing/
word in the poem for that person.
The visual memory is activated when playing the various Lotto games and memory
picture cards.
This is only a brief summary of games. There are many books focusing on the games
used for developing and understanding the language and its structure.
During playing games, the teacher has a great opportunity to observe the child in
different situations. He/she acts as a facilitator and can prepare suitable games for the children
and follows their needs. It is the basic principle of Montessori pedagogy.

69
3. Conclusion
The aim of this thesis is to introduce teachers who do not know Montessori pedagogy
to its principles and to understand it. It should demonstrate that even though it is an alternative
way of teaching, it is for all kinds of learners. It follows the learner’s pace; therefore it is very
individual and suitable for almost all children.
The sequences of the activities are constructed from the easiest ones to the more
difficult ones. The teacher should keep this order, observe the child and choose what other
steps are suitable for that child.
The material introduced in this thesis is used generally for teaching all the languages.
It does not matter if it is the first or the second (foreign) language for the child. The only
differences are only in some parts of grammar, e.g., the Czech language has seven cases, the
English language only two. The teacher is supposed to prepare suitable material for that
particular language. However, the structure of activities is kept.
The appropriate age recommended for activities is very individual. It differs from
child to child, from one school system to another one. In case of starting teaching the foreign
languages, some countries, or schools/kindergartens start to teach children the second
language just at the age of two or two and half. It follows the idea that the children are just in
their “sensitive” period. They act like “sponges” and soak all the information from their
surroundings. It is much easier for them to learn new things, vocabulary. If the adults and
teachers detect this period of time and encourage the child, the child will be able to
understand the language and think in that particular language. It means they understand the
signs and structure of the language. They do not translate the words in their minds as many
adult learners do.
To conclude, this study has not included all the possible activities and material. It is
only an overview for people who want to get to know the Maria Montessori’s theory.

70
4. List of References:
Hainstock, Elizabeth G. Metoda Montessori a jak ji učit doma, Školní léta. Praha: Pragma, 1999. Print.
Harald, Ludwig, kolektiv. Vychováváme a vzděláváme s Marií Montessoriovou. Praha:Univerzita
Pardubice, 2008. Print.
Lillard, P. P. Montessori Today. New York: Schocken Books, 1996. Print.
Lillard, P. P. Montessori in the Classroom- A Teacher’s Account of How Children Really Learn.
New York: Schocken Books, 1996. Print.
Montessori, Maria. The Advanced Montessori Method. Oxford: Clio Press, 1965. Print.
“Montessori Newsletter 20.” MontessoriMom.com, 14 Dec. 2010. Web. 16 May 2011.
Němcová, Monika.“Principles of Montessori Pedagogy. “ N.p., n.d.. Web.16 May 2011
N.p. Publication manual of the Montessori Centre. Literary Skills. Montessori Centre International,
1998. Print.
Randáková, Kamila. “Český jazyk pro vzdělávací kurz Montessori 2010.” Šance, 2010. Print.
Rýdl, Karel. “Metoda Montessori pro naše dítě. Inspirace pro rodiče a zájemce.” Univerzita
Pardubice, 2007.
Spietz, H. A. Montessori 101 (An Introduction to Montessori for the 21st Century). Rossmoor:
American Montessori Consulting, 2006. Serving School and Home Educators.Web. 17 May
2011. <http://www.amonco.org>.
Photograph Gallery:
Own photo gallery - p. 30-The Large Moveable Alphabet
-p. 43- Pink Phrase Strips
-p. 50- Blue Picture Cards
-p. 58- Grammar Symbols

71
-p. 59-Grammar Boxes
Other pictures taken from web sites:
http://www.absorbentminds.co.uk
http://www.alibaba.com
http://www.ehow.com/how_4509635_use-montessori-insets-design.html
www.google.cz
http://livingmontessorinow.com
http://www.montessorioutlet.cz
http://www.montessoriforeveryone.coml
http://thelearningark.blogspot.com