User Guide - Huawei
202
User Guide
-
Upload
khangminh22 -
Category
Documents
-
view
3 -
download
0
Transcript of User Guide - Huawei

User Guide
ContentsEssentials
Basic Gestures 1System Navigation 4Phone Clone 5Lock and Unlock Your Screen 7Get Familiar with the Home Screen 8Notification and Status Icons 9Shortcut Switches 11Home Screen Widgets 12Set Your Wallpaper 13Screenshots&Screen Recording 13View and Clear Notifications 19Adjust Sound Settings 20Enter Text 22Split-screen Mode and Floating Window 22Show Date and Time When the Screen Is Off 26Power On and Off or Restart Your Device 27Charging 28
Smart FeaturesHiVoice 30AI Lens 34HiTouch 38Easy Projection 39Multi-screen Collaboration 43Huawei Share 50Switch Audio Channels Between Devices 53
Camera and GalleryLaunch Camera 55Take Photos 56Shoot in Portrait, Night, and Wide Aperture Modes 58Master AI 61Zoom to Take Photos 63Super Macro 64Take Panoramic Photos 65Take Black and White Photos 66AR Lens 66Light Painting 68Take HDR Photos 69Moving Pictures 70
i

Add Stickers to Photos 70Documents Mode 71Underwater Mode 71Take High-Resolution Photos 72Pro Mode 73Record Videos 75AI Movie Effects 754K HD Videos 76Slow-Mo Recording 77Time-Lapse Photography 78Dual-View Mode 79Leica Colors 80Filters 80Use the Camera with Other Devices 81Adjust Camera Settings 82Manage Gallery 83Smart Photo Categorisation 91Huawei Vlog Editor 92Huawei Vlogs 95Highlights 95
AppsApps 98Contacts 99Phone 102Messaging 112Calendar 114Clock 117Notepad 119Recorder 121Email 122Calculator 126Torch 127Compass 127Mirror 127App Twin 128Quickly Access Frequently Used App Features 128Optimizer 129Phone Clone 134HiSuite 136Tips 137
SettingsSearch for Items in Settings 139
Contents
ii

Wi-Fi 139Bluetooth 140Mobile Data 142More Connections 149Home Screen&Wallpaper 160Display&Brightness 162Sounds&Vibration 165Notifications 168Biometrics&Password 170Apps 175Battery 176Storage 177Security 178Privacy 183Accessibility Features 186Users&Accounts 189System&Updates 190About Phone 197
Contents
iii

Essentials
Basic Gestures
Basic Gestures
Air Gestures
You can use gestures to take screenshots and scroll without touching the screen.
Go to Settings > Accessibility features > Shortcuts & gestures > Air gestures, andensure that Air scroll and Grabshot are enabled.
Air scrollHold the palm or back of your hand 20 to 40 cm (8 to 16 in.)
away from the screen, until or appears at the top ofthe screen. Then move your hand upwards or downwards toscroll up or down on the screen.
Take a screenshotHold the palm of your hand 20 to 40 cm (8 to 16 in.) away
from the screen, until appears at the top of the screen.Close your fist to take a screenshot.
System Navigation Gestures
Go to Settings > System & updates > System navigation and ensure that Gestures isselected.
BackSwipe inward from the left or right edge to return to theprevious screen.
Back to the home screenSwipe up from the bottom to go to the home screen.
1

View recent tasksSwipe up from the bottom of the screen and hold to viewrecent tasks.
Close an appOn the recent tasks screen, swipe up on an app preview toclose the app.
Knuckle Gestures
Go to Settings > Accessibility features > Shortcuts & gestures to enable Takescreenshot and Record screen.
Take a screenshotKnock twice on the screen with a knuckle to take a screenshot.
Take a scrollshotKnock on the screen with a knuckle and draw an "S" to take ascrolling screenshot.
Capture part of the screenKnock and draw an enclosed area with a knuckle to capturepart of the screen.
Record screenKnock twice on the screen with two knuckles to start or end ascreen recording.
Essentials
2

More Gestures
Access Home screen editing modePinch two fingers together on the home screen.
Display the shortcut panel on the lock screenSwipe up from the bottom of the lock screen.
Display the search barSwipe down on the home screen.
Open the notification panelSwipe down from the status bar.
Button Shortcuts
Power off and restartPress and hold the Power button until the Power off andRestart options appear.
Increase the volumePress the Volume up button.
Essentials
3

Decrease the volumePress the Volume down button.
Take a screenshotPress the Volume down and Power buttons simultaneously.
Ultra snapshotDouble-press the Volume down button when the screen is offor locked to take a photo.
System Navigation
Change the Navigation Mode
Go to Settings > System & updates > System navigation to select a navigation modeaccording to your preferences.
Navigate with Gestures
Go to Settings > System & updates > System navigation and enable or disableGestures.
After enabling Gestures, you can:
• Go back to the previous screen: Swipe inward from the left or right edge.
• Return to the home screen: Swipe up from the bottom of the screen.
• Access the recent tasks screen: Swipe up from the bottom of the screen and hold.
• Close an app from the recent tasks screen: Swipe up on an app preview.
• Switch apps: Swipe in a curve along the bottom edge of the screen, or when Swipe acrossbottom to switch apps is enabled, swipe horizontally across the bottom edge.
Three-Key Navigation
Go to Settings > System & updates > System navigation, and select Three-keynavigation.
Essentials
4

Touch Settings to select the navigation key combination you prefer.
The icons on the navigation bar are as follows:
• : Back key to return to the previous screen, exit an app, or close the onscreen keyboard.
• : Home key to return to the home screen.
• : Recents key to display the recent tasks screen.
• : Notification key to open the notification panel.
Customise the Navigation Key Combination
Go to Three-key navigation > Settings. You can:
• Select a navigation key combination.
• Enable Hide navigation keys to allow you to hide the navigation bar when not in use.
Navigation Dock
Go to Settings > System & updates > System navigation > More, and enableNavigation Dock.
After the Navigation dock button appears, you can:
• Drag the button to your desired position.
• Touch the button to go back.
• Double-touch the button to go back two steps.
• Touch and hold the button, then release it to go back to the home screen.
• Touch and hold the button, then swipe left or right to view recent tasks.
Phone Clone
Phone ClonePhone Clone lets you quickly and seamlessly move all the basic data (including contacts,calendar, images, and videos) from your old device to your new device.
Essentials
5

Clone Data from an Android Device
1 On your new device, open Phone Clone . Alternatively, go to Settings > System &updates > Phone Clone, touch This is the new phone, then touch Huawei or OtherAndroid.
2 Follow the onscreen instructions to download and install Phone Clone on your old device.
3 On your old device, open Phone Clone and touch This is the old phone. Follow theonscreen instructions to connect your old device with your new device by scanning a codeor connecting manually.
4 On your old device, select the data you want to clone, then touch Transfer to startcloning.
Phone Clone is only available on devices running Android 4.4 or later.
Clone Data from an iPhone or iPad
1 On your new device, open Phone Clone. Alternatively, go to Settings > System &updates > Phone Clone, touch This is the new phone, then touch iPhone/iPad.
2 Follow the onscreen instructions to download and install Phone Clone on your old device.
Essentials
6

3 On your old device, open Phone Clone and touch This is the old phone. Follow theonscreen instructions to connect your old device with your new device by scanning a codeor connecting manually.
4 On your old device, select the data you want to clone, then follow the onscreeninstructions to complete the data cloning.
Phone Clone is only available on devices running iOS 8.0 or later.
Lock and Unlock Your Screen
Lock and Unlock Your Screen
Lock the Screen
If your device remains inactive for a period of time, it will automatically lock the screen andenter sleep mode to save power.
Alternative, you can manually lock the screen in either of the following ways:
• Press the Power button.
• On the home screen, pinch two fingers together to enter screen editing mode. TouchWidgets, then drag the Screen Lock icon to the home screen. You can now touch theScreen Lock icon to lock the screen.
Set the Screen Timeout Period
Go to Settings > Display & brightness > Sleep and select a screen timeout period.
Keep the Screen On While Looking
You can set the screen to stay on while you are looking at it, such as when you are reading.
Go to Settings > Biometrics & password > Face Recognition, follow the onscreeninstructions to access the Face recognition settings screen, and make sure Keep screen onwhile looking is enabled.
Wake Screen
You can turn on the screen in either of the following ways:
• Press the Power button.
• Go to Settings > Accessibility features > Shortcuts & gestures > Wake screen andenable Raise to wake or Double-tap to wake.
• When Raise to wake is enabled, you can pick up your device to turn on the screen.
• When Double-tap to wake is enabled, you can touch the screen twice to turn it on.
Essentials
7

Unlock the Screen with Password
Once the screen is turned on, swipe up from the middle of the screen to display the passwordinput panel. Then, enter your lock screen password.
Use Face Unlock
Turn on the screen and align it with your face. Your device will unlock once your face isrecognised.
Use Fingerprint Unlock
Once the screen is turned on, the fingerprint icon will display on the screen. Touch the iconwith an enroled finger to unlock the screen.
Change the Lock Screen DisplayWhen using an official theme, you can set to display your step count and signature on thelock screen.
Display Your Signature on the Lock Screen
Go to Settings > Home screen & wallpaper, touch Lock screen signature, then typetext to display on the lock screen.
To remove the signature, touch Lock screen signature and delete the text.
Access Apps from the Lock ScreenYou can access commonly used apps such as Camera, Recorder, and Calculator from the lockscreen.
• Turn on the screen, touch and hold , then swipe up to open Camera.
• Turn on the screen, then swipe up from the bottom of the lock screen to open the shortcutpanel. Shortcuts for Recorder, Torch, Calculator, and Timer will be available.
Get Familiar with the Home Screen
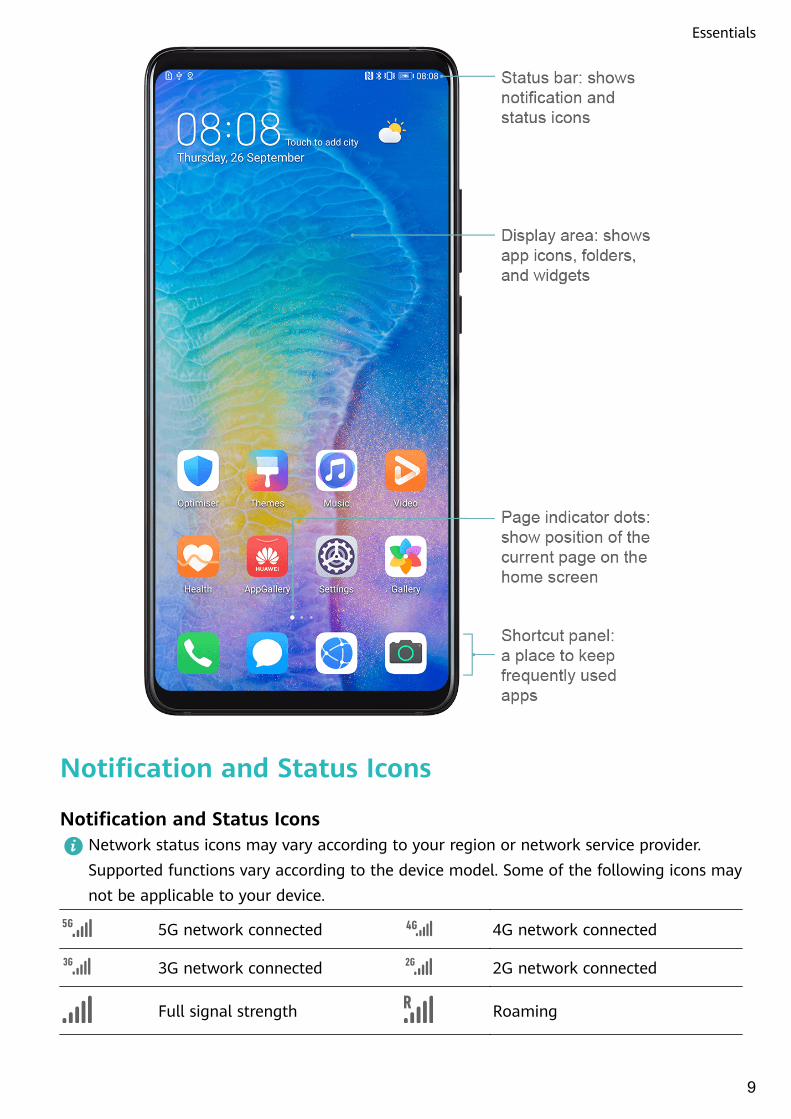
Get Familiar with the Home ScreenFrom the home screen, you can:
• Check the status of your device and notifications from the status bar at the top of thescreen.
• Swipe left or right to view apps and widgets displayed on the home screen.
Essentials
8
Notification and Status Icons
Notification and Status IconsNetwork status icons may vary according to your region or network service provider.Supported functions vary according to the device model. Some of the following icons maynot be applicable to your device.
5G network connected 4G network connected
3G network connected 2G network connected
Full signal strength Roaming
Essentials
9

Data saver enabled SIM card not found
Hotspot enabled Hotspot connected
Calling VoLTE enabled
Wi-Fi network connected SkyTone in use
Hotspot disconnectedNetwork being switched by Wi-Fi+
Airplane mode enabled Alarms set
Battery empty Battery low
Charging Quick charging
Super charging Power saving mode enabled
Bluetooth enabled Bluetooth device battery
Bluetooth device connected VPN connected
Driving mode Projection device connected
Location service enabled Eye comfort mode enabled
Headset connectedHeadset with a microphoneconnected
Missed call Unread SMS
Microphone disabled Muted
More notifications Vibrate only
NFC enabled Do Not Disturb mode enabled
Data syncing Data sync failed
Performance mode enabled New emails
Event reminders Digital balance enabled
Essentials
10

Shortcut Switches
Shortcut Switches
Turn on a Shortcut Switch
Swipe down from the status bar to open the notification panel, then swipe down on it againto show all shortcuts.
• Touch a shortcut switch to enable or disable the corresponding feature.
• Touch and hold a shortcut switch to enter the settings screen for that feature.
• Touch to open Settings.
Essentials
11

Customise Shortcut Switches
Touch , touch and hold an icon, then drag it to the desired position.
Home Screen Widgets
Home Screen WidgetsYou can add, move, or delete home screen widgets, such as Screen lock, Weather, Notepad,Clock, Contacts, and Calendar, according to your personal requirements.
Add a Widget to the Home Screen
1 Pinch two fingers on the home screen to access Home screen settings mode.
2 Touch Widgets, then swipe left to view all widgets.
3 Some widgets, like Weather, come in various formats. Touch the widget to view allformats, then swipe right to return.
4 Touch a widget to add it to the home screen. If there is no room on the current screenpage, touch and hold it, then drag it to a different screen page.
Essentials
12

Move or Delete a Widget
Touch and hold a widget on your home screen until your device vibrates, then drag it to thedesired position or touch Remove.
Set Your Wallpaper
Set Your Wallpaper
Use a Preset Wallpaper
1 Go to Settings > Home screen & wallpaper > Wallpaper.
2 Touch an image you want to set as the wallpaper.
3 Set the following according to your preferences:
• Blur: applies a blur effect, which can be adjusted by dragging the slider.
• Scrollable: enables the wallpaper to be scrollable on the home screen.
4 Touch , then determine whether you'd like to set the image as Lock screen, Homescreen, or both.
Set an Image from Gallery as Your Wallpaper
1 Open Gallery, and open the image you want to set as your wallpaper.
2 Go to > Set as > Wallpaper, then follow the onscreen instructions to complete thesetting.
Screenshots&Screen Recording
Take a Screenshot
Use the Grab Gesture to Take a Screenshot
Essentials
13
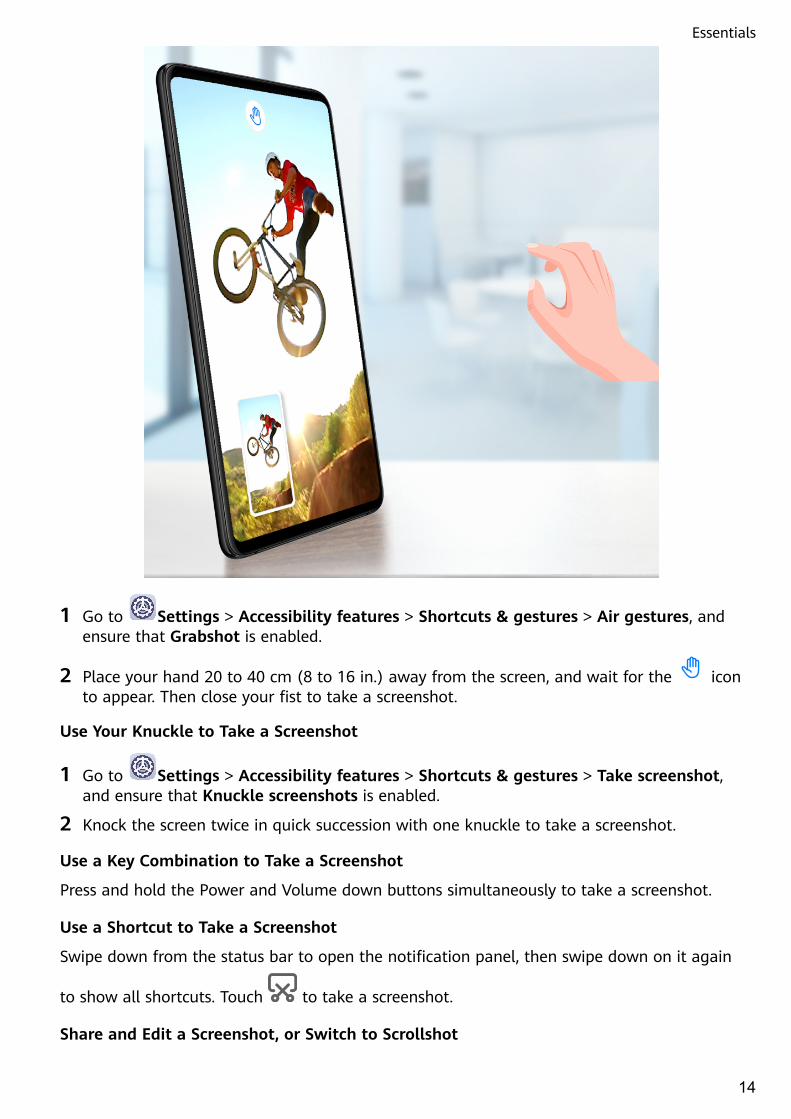
1 Go to Settings > Accessibility features > Shortcuts & gestures > Air gestures, andensure that Grabshot is enabled.
2 Place your hand 20 to 40 cm (8 to 16 in.) away from the screen, and wait for the iconto appear. Then close your fist to take a screenshot.
Use Your Knuckle to Take a Screenshot
1 Go to Settings > Accessibility features > Shortcuts & gestures > Take screenshot,and ensure that Knuckle screenshots is enabled.
2 Knock the screen twice in quick succession with one knuckle to take a screenshot.
Use a Key Combination to Take a Screenshot
Press and hold the Power and Volume down buttons simultaneously to take a screenshot.
Use a Shortcut to Take a Screenshot
Swipe down from the status bar to open the notification panel, then swipe down on it again
to show all shortcuts. Touch to take a screenshot.
Share and Edit a Screenshot, or Switch to Scrollshot
Essentials
14
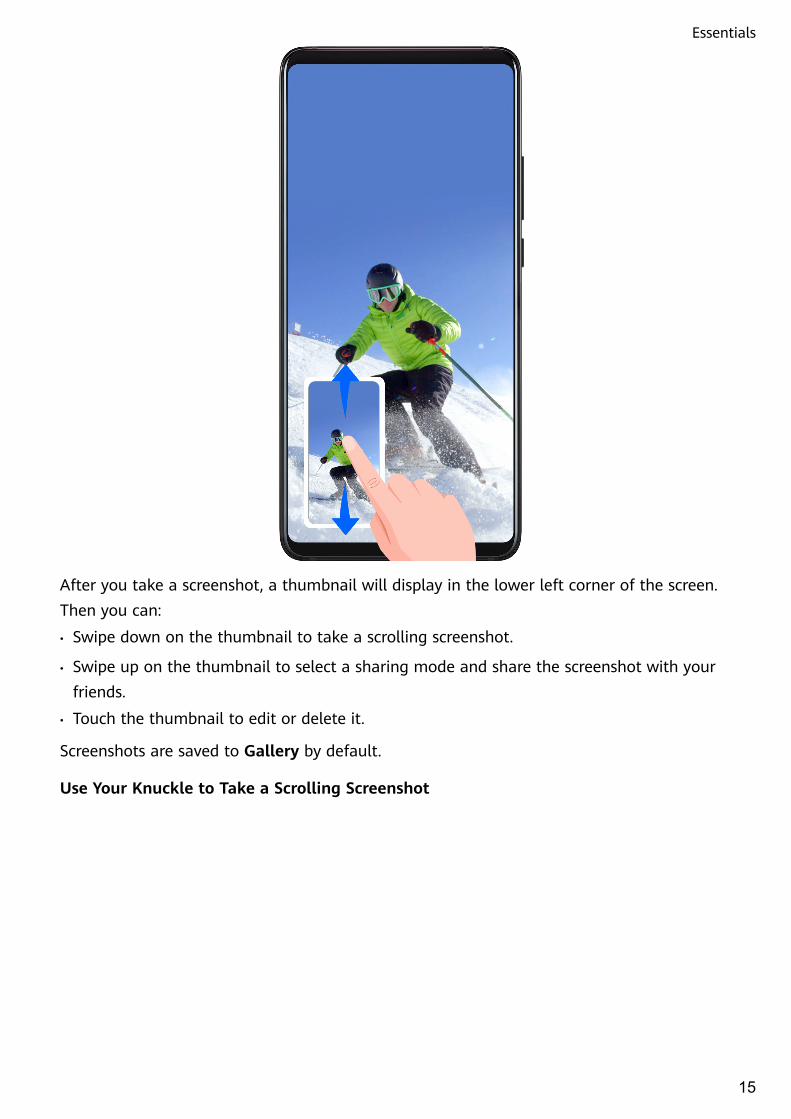
After you take a screenshot, a thumbnail will display in the lower left corner of the screen.Then you can:
• Swipe down on the thumbnail to take a scrolling screenshot.
• Swipe up on the thumbnail to select a sharing mode and share the screenshot with yourfriends.
• Touch the thumbnail to edit or delete it.
Screenshots are saved to Gallery by default.
Use Your Knuckle to Take a Scrolling Screenshot
Essentials
15

1 Knock the screen with a knuckle and hold to draw an "S". The screen will automaticallyscroll down to the bottom for you to capture the entire page.
2 You can touch the screen at any point to stop the screenshot.
Take a Partial Screenshot
Essentials
16

1 Knock the screen with a knuckle and hold to draw an outline around the part of thescreen that you want to capture. Make sure that your knuckle does not leave the screen.
2 The screen will display the movement trajectory of your knuckle and take a screenshot ofthe selected area. You can then:
• Drag the frame to the desired position or resize it.
• Touch a shape icon to determine the shape of the partial screenshot.
3 Touch to save the screenshot.
Precautions for Using Knuckle Screenshots• Please double knock the screen consecutively at the same place and at an appropriate
speed.
• Keep your knuckle vertical to the screen.
• If you want to take more than one screenshot, wait 2 seconds before knocking on thescreen again.
• If there is a screen protector on the screen, knock the screen harder or remove the screenprotector and try again.
Essentials
17

Record the ScreenRecord your screen activities in sharable videos to compose a tutorial, show off yourawesome gaming skills, and a lot more.
Use a Key Combination to Start Screen Recording
Press and hold the Power and Volume up buttons simultaneously to start screen recording. Tostop recording, press and hold both buttons again.
Use a Shortcut to Start Screen Recording
1 Swipe down from the status bar to open the notification panel, then swipe down on itagain to show all shortcuts.
2 Touch Screen Recorder to start screen recording.
3 To stop the recording, touch the timer at the top of the screen.
4 The recording will be saved to Gallery.
Use Two Knuckles to Start Screen Recording
1 Go to Settings > Accessibility features > Shortcuts & gestures > Record screen, andensure that Record screen is enabled.
Essentials
18

2 Knock the screen twice in quick succession with two knuckles to start screen recording. Tostop recording, knock twice again.
Record Your Voice During Screen Recording
You can enable the microphone to record your voice while recording the screen.
After starting a screen recording, touch the microphone icon and ensure that it is displayed as
. You can now record your voice.
If the microphone is disabled (if it is displayed as ), you will only be able to recordsystem sounds, such as music. If you don't want any system sounds in your screenrecording, mute your device and turn off any music or other media sounds before startingthe screen recording.
View and Clear Notifications
View and Clear Notifications
View Notifications
When there is a notification reminder, you can turn on the screen and swipe down from thestatus bar to open the notification panel and view the notification.
Essentials
19

Clear Notifications
• Swipe right on a notification reminder to clear the notification.
• Touch at the bottom of the notification panel to clear all notifications.
Block, Silence, or Delay Notifications
Swipe left on a notification, then touch to block, silence, or delay notifications from thatsource.
Some system notifications can't be blocked, cleared, or delayed.
Adjust Sound Settings
Adjust Sound Settings
Press a Volume Button to Adjust the Volume
Press the Volume up or down button to adjust the volume.
Essentials
20

Press the Power Button to Mute Your Device When It Rings
When your device rings for an incoming call or alarm, you can press the Power button tomute it.
Flip to Mute or Raise to Reduce Ringing Volume
When you receive an incoming call, you can flip your device to mute it, or raise it to reducethe ringing volume.
Go to Settings > Accessibility features > Shortcuts & gestures > Mute ringtone/Reduce volume, then enable Flip to mute ringtone and Raise to lower volume.
Set the Default Volume
Go to Settings > Sounds & vibration, then you can set the volume for the followingitems:
• Media (video, games, music, and more)
• Ringtones
• Alarms
• Calls
Essentials
21

Use a Shortcut to Switch Between Ring, Vibrating, or Mute Mode
1 Swipe down from the status bar to open the notification panel, then swipe down on itagain to show all shortcuts.
2 Touch the Sound, Silent, or Vibration icon to switch between differentmodes.
Enter Text
Edit TextYou can select text displayed on your screen, copy or cut it to the clipboard, then paste itsomewhere else. You can also share it in multiple ways.
1 Touch and hold the text until appears.In some apps, what happens after you touch and hold the text may differ. For example, ifyou touch and hold a sent or received message, an option menu will be displayed, and
will appear only after you touch Select text.
2 Drag and to select the text you need, or touch Select all to select all text.
3 Touch Copy or Cut as needed.
4 Touch and hold the space where you want to paste the text until Paste appears, thentouch Paste.
Split-screen Mode and Floating Window
Multi-WindowMulti-Window allows you to open apps in split screens or in a floating window formultitasking.
Essentials
22

Enable Split-screen Mode from the Multi-Window Dock
• Enable Split-screen mode:
1 Open an app and swipe inward from the left or right edge and hold to bring up theMulti-Window dock.
Essentials
23

2 Drag an app icon out of the Multi-Window dock.
• Switch the split-screen panes: Touch and hold or at the top of a split-screen paneuntil the pane shrinks. Then drag the pane to the other side of the screen to switch them.
• Exit Split-screen mode: Drag or in the middle of the split screen line horizontallyor vertically until either pane disappears.
• Support for Split-screen mode varies by app.
• The screen of a single app can't be split into two.
• Split-screen mode applies only to two apps at any given time.
Display the Floating Window from the Multi-Window Dock
While playing a game, you can also chat with your friend in a floating window, withouthaving to exit the game.
• Display the floating window:
1 Swipe inward from the left or right edge and hold to bring up the Multi-Window dock.
Essentials
24

2 Touch an app icon in the Multi-Window dock to open the app in a floating window.• Relocate the floating window: Drag the floating window to the desired location.
• Display in full screen: Touch on the floating window to display the content in thewindow in full screen.
• Close the floating window: Touch on the floating window to close it.
The size of the floating window cannot be adjusted.
Switch Between Split-screen and Floating Window
• Switch from Split-screen mode to floating window: Touch and hold a split-screen pane, thendrag it to the left or right when in Portrait mode, or drag it downwards in Landscape mode.
• Switch from floating window to Split-screen mode: Touch and hold the bar at the top of thefloating window, then drag it to the upper/lower part of the screen when in Portrait mode,or to the left or right when in Landscape mode.
Drag and Drop Between Apps with Multi-Window
Use the Multi-Window feature to easily drag and drop images, text, and documents betweenapps.
• Drag and drop an image: When taking notes with Notepad, open Files, select the photoyou want to add, and drag it into the Notepad editor.
• Drag and drop text: When sending a message with WeChat, open Notepad, touch and holdthe text you want to send, and drag it to the text input box in WeChat.
Essentials
25

• Drag and drop a document: When writing an email, open Files, select the document youwant to attach, and drag it into the email editor.
Not all apps fully support drag-and-drop with Multi-Window.
Add, Move, or Remove an App from the Multi-Window Dock
• Add an app: In the Multi-Window dock, touch , touch the app you want to add fromSuggested or More apps, then touch Done.
• Move an app: In the Multi-Window dock, touch , drag the desired app to any locationin the dock, then touch Done.
• Remove an app: In the Multi-Window dock, touch , touch in the upper right cornerof the icon of the app you want to remove, then touch Done.
Disable Multi-Window
Multi-Window is enabled by default. To disable it, go to Settings > Accessibility features> Multi-Window, then disable Multi-Window dock.
Show Date and Time When the Screen Is Off
Always On DisplayWith Always On Display enabled, the lock screen will show the date, time, and more whenthe screen is off.
Enable Always on Display
1 Go to Settings > Home screen & wallpaper > Always On Display > Always OnDisplay, and enable Always On Display.
2 Set the Start and End according to your preferences.
Set Clock Style for Always on Display
You can customise the clock style for Always On Display according to your preferences.
Essentials
26

1 On the Always On Display screen, touch Clock style, and swipe across to view theavailable clock styles.
2 Select a preferred clock style, and touch .
Power On and Off or Restart Your Device
Power On and Off or Restart Your Device
Power Your Device On and Off
To power off your device, press and hold the Power button for a few seconds, touch Poweroff and Touch to power off.
To power on your device, press and hold the Power button for a few seconds until your devicevibrates and displays the logo.
Restart Your Device
Restart your device on a regular basis to clear the cache and keep the device in an optimalstate. A restart can sometimes resolve the issue when your device encounters a problem.
Just press and hold the Power button for a few seconds, then touch Restart and Touch torestart.
Essentials
27
Force Restart Your Device
If your device isn't working or won't turn off normally, you can force restart it.
Just press and hold the Power button for 10 seconds or longer.
Charging
Charge Your DeviceYour device will alert you when it is running out of power. Please make sure to charge yourdevice in time to prevent it from turning off automatically when the power runs out.
Precautions for Charging
• Charge your device using the standard adapter and USB cable that came with your device.Using other chargers or USB cables may cause repeated restarts, slow charging,overheating, or other undesirable effects.
• Your device will automatically run a safety check when a charger or other device isconnected to the USB port. If moisture is detected in the USB port, your device willautomatically activate safety measures and stop charging. Disconnect your device from theUSB port and wait until the USB port is dry.
• The time required to fully charge the battery depends on the ambient temperature and ageof the battery.
• Batteries have a limited number of charge cycles. When the battery life becomes noticeablyshorter, go to an authorised Huawei Customer Service Centre to replace the battery.
• Do not cover your device or charger during charging.
• Your device may heat up when you have been using it for an extended period of time,especially in high temperatures. In this case, stop charging, disable some features, andmove your device to a cool place.
• Please do not use your device while it is charging.
• If your device does not respond after you press and hold the Power button, the battery mayhave run out. Charge for 10 minutes and then power it on.
Using the Charger that Came with Your Device
1 Use the USB cable that came with your device to connect your device and the adapter.
2 Plug the adapter into a power socket.
Charging Your Device With a PC
1 Connect your device to a PC or other device using a USB cable.
2 When the Use USB to dialog box is displayed on your device, touch Charge only.If another option has been set previously, the dialog box will not pop up. Swipe downfrom the status bar to open the notification panel, touch Settings, then select Chargeonly.
Essentials
28

Overview of Battery Icons
You can check the battery level from the battery icon on the device screen.
Battery Icon Battery Level
Less than 4% battery remaining
Charging, less than 10% battery remaining
Charging, 10% to 90% battery remaining
Charging, at least 90% battery remainingIf 100% is displayed next to the battery icon, or a charging completemessage is displayed on the lock screen, the battery is fully charged.
Reverse Charging with an OTG CableOn-The-Go (OTG) is a USB transmitting technology that allows a device to directly accessfiles on a USB flash drive or digital camera, or connect to an external device such as akeyboard or mouse, with the help of an OTG cable.
You can use your device to charge other devices using an OTG cable.
1 Connect your device with the device to be charged using an OTG cable.
2 When the Use USB to dialog box is displayed on your device, touch Reverse charge.If another option has been set previously, the dialog box will not pop up. Swipe downfrom the status bar to open the notification panel, touch Settings, and then selectReverse charge.
3 Follow the onscreen instructions on the device to be charged to start charging.
Essentials
29

Smart Features
HiVoice
HiVoiceYou can use HiVoice to interact with Huawei devices (such as smartphones, tablets) hands-free.
Countries and Regions Where HiVoice Can Be Used
Currently, you can communicate with HiVoice in English, French, and Spanish in the UK,France, Spain, Chile, Mexico, and Colombia.
To set your country and region, and the system language you want to use, go to Settings> System & updates > Language & input > Language and region. HiVoice can only bewoken up if you select one of the above countries.
You can select a language for communicating with HiVoice from the settings menu by
touching in full screen in HiVoice. Currently, only English, French, and Spanish aresupported.
Wake Up or Disable HiVoice
There are multiple ways to wake up HiVoice, depending on the device model you use. Forexample:
Press and hold the Power button for 1 second to wake up HiVoice
Before using this method, go to Settings > Accessibility features > HiVoice > Wakewith Power button, and enable Wake with Power button.
To wake up HiVoice, press and hold the Power button for 1 second.If you press and hold the Power button for 3 seconds, your device will power off.
Disable Wake with Power button if you do not need this method.
Say the wakeup word to wake up HiVoice
You need to record your wakeup word before using this method.
Go to Settings > Accessibility features > HiVoice > Voice wakeup, then enable Voicewakeup. Follow the onscreen instructions to enrol your wakeup voice command.
To wake up HiVoice, say the wakeup word loudly.
Disable Voice wakeup if you do not need this method.
30

You cannot wake up HiVoice when your device is in a call.You cannot wake up HiVoice with the wakeup word when your device is making an audioor screen recording. However, you can still use the Power button to wake up HiVoice.
When Can I Interact With HiVoice?
HiVoice can be in an idle, listening, or thinking state. It only takes commands when it islistening.
• Idle: HiVoice does not take voice commands in this state.
• Listening: HiVoice can communicate with you in this state.
• Thinking: HiVoice is carrying out your commands and doesn't take new commands in thisstate.
Check HiVoice Skills
After waking up HiVoice, swipe up on the screen to enter full-screen mode. Touch toview HiVoice skills.
Make Calls and Send SMS MessagesYou can use voice commands to make calls and send SMS messages hands-free.
Make Calls with Voice Commands
To make calls with voice commands, wake up HiVoice and give a command. For example:
• "Call Mom"
• "Call the police"
• "Call Dad"
Send SMS Messages with Voice Commands
To send SMS messages with voice commands, wake up HiVoice and give a command. Forexample:
• "I want to send a message"
• "Send a message"
• "Send Dad a message saying the party is tomorrow"
Translate with HiVoiceUse HiVoice to translate your speech or text inputs to easily overcome language barriers.
1 Wake up HiVoice and say "Voice translation".
2 This will bring up the voice translation screen where you can say or enter the content youwant to translate.
3 HiVoice will display the translation results in real time and read them out for you.
Smart Features
31

Face-to-Face TranslationYou can use HiVoice as your personal interpreter when travelling abroad or attendinginternational conferences.
1 Wake up HiVoice and say "Open face to face translation" to bring up the Face-to-facetranslation screen.
2 There will be two buttons on the screen, one for you and one for the other party. Both ofyou can touch and hold the button on your respective side and speak, then release thebutton.
3 HiVoice will display the translation results in real time and read them out for you.
Query Weather with Voice CommandsTo check the weather, simply wake up HiVoice and say:
• "What's the weather like today?"
• "What's the weather forecast for tomorrow?"
• "What's the temperature today?"
• "Will it be windy today?"
• "Is it going to rain tomorrow?"
Set Alarms with Voice CommandsTo set, turn off, or check an alarm, simply wake up HiVoice and give a command. Forexample:
Set an alarm
• "Wake me up at 8 AM tomorrow"
• "Set an alarm for 10 PM tonight"
• "Set a weekday alarm for 7 AM"
Turn off an alarm
• "Cancel my 7 AM alarm for tomorrow"
Check an alarm
• "Show my alarms"
Set Calendar Events with Voice CommandsTo create or check Calendar events, wake up HiVoice and give a command. For example:
Add an event
• "Schedule a meeting for 9 tomorrow morning"
• "Set a meeting for 2 o'clock tomorrow afternoon"
Check an event
• "What's my schedule for tomorrow morning?"
• "Do I have any appointments on Monday?"
Smart Features
32

• "Do I have anything scheduled tomorrow at 9 AM?"
Set Reminders with Voice CommandsTo create or check your reminders, wake up HiVoice and give a command. For example:
Create a reminder
• "Remind me I'm meeting John for coffee tomorrow at 3"
• "Remind me to pick up my package at 8 this evening"
Check a reminder
• "Do I have any reminders today?"
• "Show me all my reminders"
Open Camera, Tools, or Apps with Voice CommandsHiVoice allows you to quickly access Camera, tools or other apps on your device with voicecommands.
Access Camera with Voice Commands
To access your Camera, wake up HiVoice and give a command. For example:
• "I want to take a photo"
• "Take a photo"
Access Apps and Tools with Voice Commands
To access Torch, Calculator, or other tools with voice commands, wake up HiVoice and give acommand. For example:
Use Torch
• "Turn on the torch"
• "Turn off the torch"
Use Calculator
• "Calculator"
• "Open the calculator"
Currently, only built-in apps and tools can be opened with HiVoice.
Change System Settings with Voice CommandsTo set up the system voice commands, wake up HiVoice and give a command. For example:
• Wireless network: "Turn on Wi-Fi", or "Turn off Wi-Fi"
• Mobile network: "Turn on mobile network", or "Disable 4G"
• Airplane mode: "Turn on Airplane mode", or "Turn off Airplane mode"
• Bluetooth: "Turn on Bluetooth", or "Turn off Bluetooth"
• Brightness adjustment: "Increase the brightness", "Lower the brightness", "Enable auto-brightness", or "Disable auto-brightness"
Smart Features
33

• Comfort mode: "Turn on Eye comfort mode", or "Turn off Eye comfort mode"
• Volume adjustment: "Turn the volume up", "Turn the volume down", or "Turn the volumeup to max"
• Power saving: "Enable Power Saving mode", or "Disable Power Saving mode"
• Do Not Disturb: "Enable Do Not Disturb", or "Disable Do Not Disturb"
Search with HiVoiceIf you want to use the browser to search for something, wake up HiVoice and give a voicecommand, such as:
• Search for new Huawei products
• Use Google search for polar bear
• Search for finance websites on Google
AI Lens
Access AI LensThere are multiple ways to access AI Lens.
From Camera
Open the camera and select Photo mode. Touch to access AI Lens.
Smart Features
34

From the Search Bar
While the device is unlocked, swipe down on the screen to display the search bar. Then, touch
to access AI Lens.
Smart Features
35
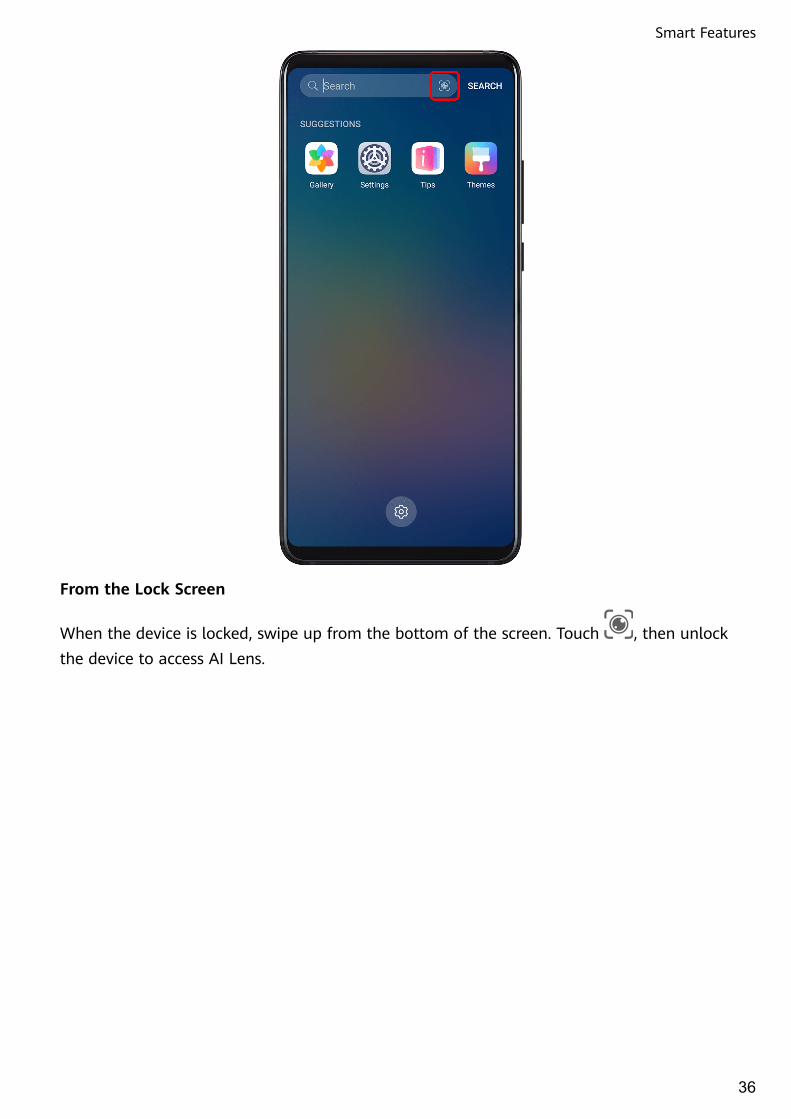
From the Lock Screen
When the device is locked, swipe up from the bottom of the screen. Touch , then unlockthe device to access AI Lens.
Smart Features
36

Scan CodesAI Lens can read QR codes and instantly direct you to the relevant app.
1 Open the camera, touch , then touch .
2 Position the QR code within the frame and wait for it to be recognised.
Scan to TranslateAI Lens has an Instant translation feature that can help you quickly translate text, such asroad signs, menus, or even descriptions on a medicine or cosmetic bottle.
1 Open the camera, touch , then touch .
2 Select the source and target languages from the language list.
3 Align the text you want to translate, and wait for it to be translated.
Scan to ShopAI Lens has a Shopping feature that lets you scan products when you are out shopping orreading a fashion magazine and gives you purchase recommendations for similar itemsonline.
1 Open the camera, touch , then touch .
Smart Features
37
2 Position the target object within the viewfinder. You will receive purchase
recommendations once the object has been recognised. You can also touch to take aphoto, which will be recognised automatically.
HiTouch
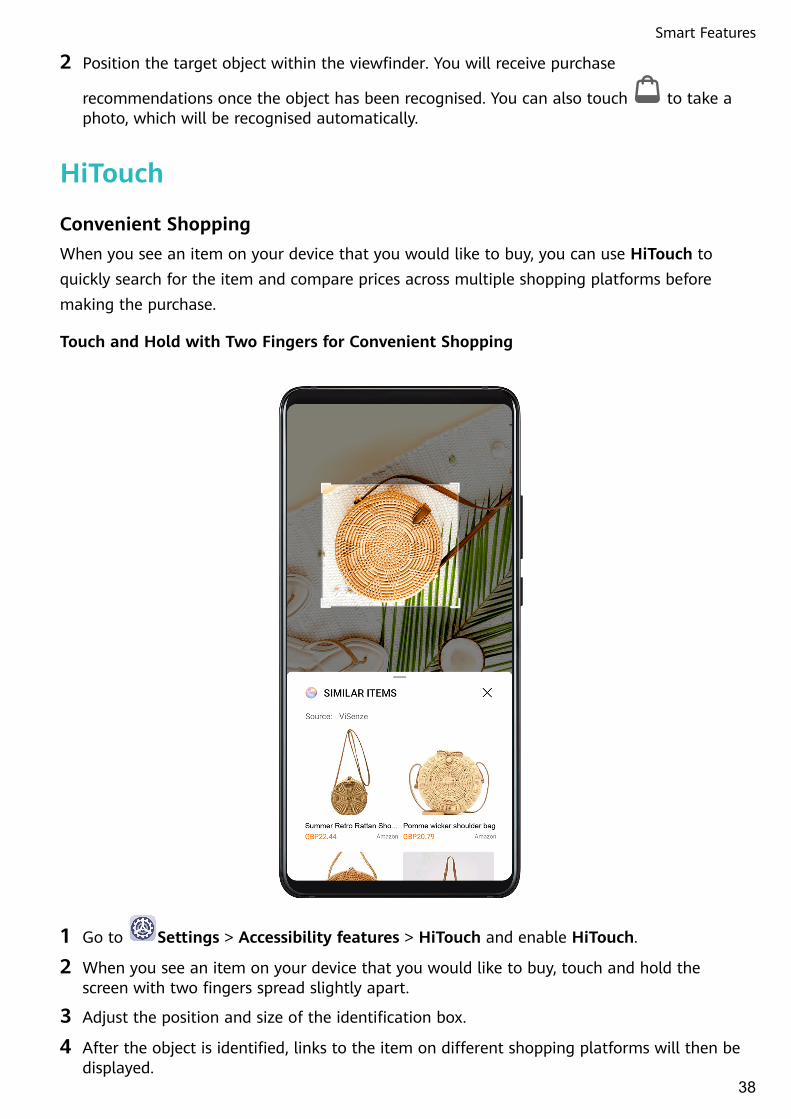
Convenient ShoppingWhen you see an item on your device that you would like to buy, you can use HiTouch toquickly search for the item and compare prices across multiple shopping platforms beforemaking the purchase.
Touch and Hold with Two Fingers for Convenient Shopping
1 Go to Settings > Accessibility features > HiTouch and enable HiTouch.
2 When you see an item on your device that you would like to buy, touch and hold thescreen with two fingers spread slightly apart.
3 Adjust the position and size of the identification box.
4 After the object is identified, links to the item on different shopping platforms will then bedisplayed.
Smart Features
38

5 Touch the links to view product details and make a purchase.
Easy Projection
Wireless ProjectionYou can connect your device to an external display (for example, a TV) wirelessly.
1 Based on the model and functions of your external display, do the following:
• If the external display supports Miracast, enable wireless projection on it.
• If not, use a wireless HDMI adapter to connect your device and external display. Ensurethat the wireless HDMI adapter is connected to a power supply.
To check whether your external display supports Miracast and how to enable wirelessprojection on it, consult the user guide or customer service of the external displaymanufacturer.
2 Swipe down from the status bar to open the notification panel, then touch to turn onWi-Fi.
3 Swipe down further on the notification panel to enable Wireless Projection. Your devicewill now search for the external display or the wireless HDMI adapter.
Smart Features
39

Alternatively, go to Settings > More connections > Easy Projection and enableWireless Projection.
4 Touch the name of the external display or the wireless HDMI adapter on the search resultlist to start projecting.
Wired ProjectionYou can connect your device to an external display (for example, a TV) using a wiredconnection.
It is recommended that you purchase the accessories recommended or specified by Huaweifrom authorised sources.
Projection Using a Type-C Cable
1 Prepare a Type-C cable.Use a Type-C to HDMI, Type-C to DP, or Type-C to MiniDP cable depending on yourexternal display.
2 Connect the Type-C end to your device and the other end to the external display.
Smart Features
40

3 On the external display, set the corresponding HDMI, DP, or MiniDP input as the signalsource.
Projection Using a Docking Station
If you need to connect your device to an external display and use a wired mouse andkeyboard, use a docking station with a USB port.
1 Prepare a docking station.Multiple types of ports are available on a docking station. If your external display supportsHDMI and you need to use a wired mouse and keyboard, use a docking station with atleast one HDMI port and two USB ports.
2 Connect your device and the external display through the docking station, then connectthe wired mouse and keyboard to the docking station.
Smart Features
41

3 On the external display, set the corresponding HDMI, DP, or MiniDP input as the signalsource.
Desktop ModeFor enhanced work efficiency, project your device's content onto an external display, swipedown from the status bar to open the notification panel, then enable DESKTOP MODE.
In DESKTOP MODE, the display of your device will be arranged in a desktop layout, andoperations on your device won't affect what's on the external display. For example, you canedit a document on the external display while chatting on your device. You don't need toworry about missing notifications, calls, or messages, as a red dot will appear on thenotification panel on the external display to keep you informed.
Use Your Device as a Touchpad
Swipe down from the status bar to open the notification panel, then touch TOUCHPAD. Youcan now do the following:
• Use gestures as instructed to simulate mouse commands.
• When no external keyboard is connected, click the text input box on the external display tobring out the onscreen keyboard to input text.
Smart Features
42

If an external keyboard is connected, the onscreen keyboard will not be available. In thiscase, you need to use the external keyboard to input text.
Project Your Device to an External Display to Facilitate Your Work
In DESKTOP MODE, you can use the following features:
• Multiple windows: Open more than one window at a time to multitask.
• File management: Save files to the desktop, create files or folders, and rename or deletefiles.
• Quick search: Search for documents, multimedia files, and apps using the start menu searchbox.
• Create app shortcuts: From the start menu, touch and hold an app and then drag it to thedesktop to create a shortcut. You can also right-click an app icon and select the option tocreate an app shortcut on the desktop.
• Audio output: Touch the audio output icon on the status bar, then select the externaldisplay or your Device as the audio output device.
• App projection: Touch and hold an app icon on your device to view the projection options.You can now project and open the app on the external display.
• Highlighter: Use the highlighter feature to mark projected content using the touchpad.
Exit Desktop Mode
Swipe down from the status bar to open the notification panel, then touch PHONE MODE.
Multi-screen Collaboration
Connect Your Device to a ComputerWhen you connect your device to a Huawei/Honor laptop, the device screen will be displayedin a window on the laptop screen, allowing you to easily operate your device while on yourlaptop.
Connect Your Device and Computer with a Tap
1 Make sure that your computer is marked with a Huawei Share icon or Magic-link icon
.
2 On your computer, enable Wi-Fi. Open PC Manager and agree to the End User LicenceAgreement (EULA).
• To connect with a tap, PC Manager must be version 9.0 or later. To establish aconnection for Multiscreen, PC Manager must be version 10.0 or later.
• To check the version of PC Manager, go to > About. To update it, go to >Check for updates.
Smart Features
43

3 Swipe down from the status bar on your device to open the notification panel, swipedown further to display all shortcut switches, and enable NFC, Wi-Fi, and Bluetooth.
4 Tap the NFC area at the back of your device against the Huawei Share icon or Magic-linkicon on your computer and hold it there until your device vibrates or plays a notificationsound.
5 Follow the onscreen instructions on your device and computer to complete theconnection.
Connect Your Device and Computer via Bluetooth
1 On your device, swipe down from the status bar to open the notification panel, and touch
to enable Bluetooth.
2 On the computer, open PC Manager (version 10.0 or later), select My Phone, and go toConnect > Search. Your computer will start searching for your device. Make sure that yourdevice is placed near your computer.
To check the version of PC Manager, go to > About. To update it, go to >Check for updates.
3 Follow the onscreen instructions on your device and computer to complete theconnection.
Connect Your Device and Computer by Scanning a QR Code
1 On your computer, open PC Manager (version 10.0 or later), select My Phone, and go toConnect > Scan.
To check the version of PC Manager, go to > About. To update it, go to >Check for updates.
2 Ensure that your device is connected to the Internet, and use it to scan the QR code onyour computer screen.
3 Follow the onscreen instructions on your device and computer to complete theconnection.
Connect Your Device to Computer with a Cable for Multi-Screen Collaboration
Use a USB cable to connect your device to a computer, and the device screen will bedisplayed in a window on the computer screen.
1 Use a USB cable to connect your device to a computer.
2 On your device, touch CONNECT in the Use USB to dialog box.
3 On the computer, open PC Manager (version 10.1 or later).
To check the version of PC Manager, go to > About. To update it, go to >Check for updates.
4 Accept the connection on your device.If you have cancelled the connection on your device and want to re-establish theconnection, go to Connect > Wired connection in PC Manager.
Smart Features
44

Disconnect Your Device from Computer
You can disconnect your device from computer using any of the following methods:
• On your computer, open PC Manager, and go to My Phone > Disconnect.
• On your device, swipe down from the status bar to open the notification panel and touchDISCONNECT.
• If connected via USB cable, remove the cable to disconnect your device from the computer.
Transfer Files Between Your Device and ComputerAfter connecting your device to a Huawei/Honor computer, you can transfer files betweenthem to make your work life more convenient and efficient.
Drag to Transfer Files Between Your Phone and Computer
After your phone is connected with your computer, you can drag files (such as pictures,videos, audio files, texts, office documents, and compressed packages) using a mouse totransfer them between your phone and computer.
• Transfer files from your phone to your computer:
Open Gallery in the phone window on your computer, click and hold a picture or video,select one or more files, click and hold the selected files again, wait for an icon for draggingfiles to display, then drag them to a folder on your computer.
Open Files in the phone window on your computer, then drag files to a folder on yourcomputer in the way described above.You can also drag pictures or text to documents that are open on your computer. Forexample, drag a photo or text from Notepad in the phone window across to an Officedocument open on your computer, then continue editing it on your computer.
• Transfer files from your computer to your phone:
Go to Gallery > Albums in the phone window on your computer, select pictures orvideos in batches from a local folder on your computer, then drag them across to Albums.
Open Files in the phone window on your computer, select files in batches from a localfolder on your computer, then drag them across to Files. By default, files transferred fromyour computer will be saved in the Huawei Share folder in Files. If a specific folder in Fileshas been opened, the files will be saved in it.You can also drag pictures or text to documents that are open on your phone. For example,drag a picture on your computer to a Notepad item open on your phone, then continueediting it on your phone.
Transfer Files Between Your Device and Computer with a Tap
You can quickly transfer files between your device and a computer with a single tap withoutthe hassle of using cables or third-party apps.
Smart Features
45

Currently, this feature is only supported by Huawei/Honor laptops marked with the Huawei
Share icon or Magic-link icon and installed with PC Manager.
Share Pictures and Videos with One Tap
• Share pictures and videos from your device to computer:
1 Select one or more pictures or videos in Gallery on your device.
2 Tap the NFC area on the back of your device against the Huawei Share or Magic-linkicon on the computer, and hold it there until your device vibrates or plays a notificationsound. The selected pictures or videos will be transferred to your computer.
If you want to identify, copy, or save text in the received picture on the computer, click the
picture to display the image viewer, then click to identify text and generate a text file.
• Share pictures from your computer to device:
1 Right-click an individual picture file on your computer, and open it with Huawei ImageViewer.
2 Exit Gallery or return to the home screen on your device, tap it against your computer(as instructed above), and the picture opened on your computer will be transferred toyour device.
PC Manager must be version 9.0 or later.
Smart Features
46

Record Your Computer Screen with One Tap
Ever wanted to show off your gaming skills or share video clips from your computer, butnever found a convenient way to do so? With a shake and a tap, what is shown on yourcomputer will be projected and synced to your device for recording.
1 Shake your device, then immediately tap its NFC area against the Huawei Share icon orMagic-link icon on the computer, and hold it there until your device vibrates or plays anotification sound. The computer screen will then be projected to your device and therecording will start. You can record for a maximum of 60 seconds.
2 Touch on your device to stop the recording. The screen recording will be saved toGallery.
• This feature is currently supported on Intel-based laptops only.
• This feature works with PC Manager 9.1 or later.
Share Files with One Tap
Smart Features
47

• From your device to computer:
1 On your device, use Microsoft Office to open the file you want to share.
2 Tap the NFC area on the back of your device against the Huawei Share or Magic-linkicon on the computer, and hold it there until your device vibrates or plays a notificationsound. The file opened on your device will be transferred to your computer.
• From your computer to device:
1 On your computer, use Microsoft Office to open the file you want to share.
2 After exiting Microsoft Office or returning to the home screen on your device, tap itagainst your computer (as instructed above), and the file opened on your computer willbe transferred to your device.
This feature works with PC Manager 9.1 or later.
Access Device Apps and Files on Your ComputerOnce your device is connected to your Huawei/Honor computer, you can access apps andfiles from your device on your computer without the hassle of having to frequently switchbetween the two devices.
Navigate the Device Window on Your Computer
Open/Exit an app and browse web pages in the window
Smart Features
48

• Open an app: Click an app in the window to open it.
• Browse pages: Scroll the mouse wheel to browse web pages and switch between screens ofyour device displayed in the window.
• Exit an app: Press the ESC key on the computer keyboard to exit the app opened in thewindow.
Use the keyboard to quickly process messages on your device
• Input text: Use the computer input method to enter text in the window, such as for sendingSMS messages and creating emails.
• Copy and paste text: Press Ctrl+C on the computer keyboard to copy text and press Ctrl+Vto paste it in the window.
• Quickly send messages: Press Ctrl+Enter to quickly send the message that you have editedin the window, such as for sending Facebook and Twitter messages.
Always display the device window at the front
Click at the top of the window to pin it at the front of the computer screen. Click itagain to unpin the window from the front.
Share Clipboard Content Between Your Device and Computer
1 Open PC Manager (version 9.1 or later) on the computer, go to My Phone > Enable, thenfollow the onscreen instructions to allow the computer to access data on your device. IfEnabled is displayed on the screen, it means that this feature is already enabled by dfault.
2 Text copied from your device can then be pasted to the computer, and vice versa.
Click the PC Manager icon in the lower right corner of the computer screen, and selectClipboard to view the text that you have copied.
Answer Voice or Video Calls to Your Device Using a Computer
Once your device is connected to a computer for multi-screen collaboration, you can directlyanswer voice and video calls using the computer without the hassle of switching between thetwo devices.
After answering calls on apps, such as WhatsApp and Skype, in the device window on thecomputer, the voice will be played from the computer or the audio output device (such as aheadset or speaker) connected to it.
Use Apps on a Computer to Open Files on Your Device
Once your device is connected to a computer for multi-screen collaboration, you can use theapps on the computer to directly open and edit files on your device.
• Documents: You can use an office app on your computer, such as Microsoft Office.
• Pictures: You can use an app for viewing or editing pictures on your computer, such asPhotoshop.
Smart Features
49

• Audio and video files: You can use an audio and video player on your computer, such asWindows Media Player.
• Web pages: You can use a browser on your computer, such as Internet Explorer.
• Compressed files: You can use a decompression app on your computer, such as WinRAR.
View Device Notifications on Computers
Once your device is connected to a computer for multi-screen collaboration, notificationsreceived on your device will be displayed in the Message Centre of PC Manager from whereyou can view and manage them.
1 Click the PC Manager icon in the lower right corner of the computer screen.
2 Open the device notifications displayed in Message and view them in the device windowon the computer screen.
Huawei Share
Huawei ShareHuawei Share is a wireless sharing technology that allows you to quickly transfer images,videos, documents, and other types of files between devices. This technology uses Bluetoothto discover nearby devices that supports Huawei Share and Wi-Fi Direct to transfer fileswithout using mobile data.
Enable or Disable Huawei Share
You can enable or disable Huawei Share in either of the following ways:
• Swipe down from the status bar to open the notification panel, then touch to enableor disable Huawei Share. Touch and hold the toggle to enter the Huawei Share settingsscreen.
• Go to Settings > More connections > Huawei Share, and enable or disable HuaweiShare.
Enabling Huawei Share automatically turns on Wi-Fi and Bluetooth.
Quickly Share Files Between Your Devices with Huawei Share
You can use Huawei Share to quickly share files between Huawei devices. The recipient canpreview the files before they are sent, then view the full content of the files once they havebeen received. For example, the recipient can view received pictures or videos in Gallery.
Smart Features
50

1 On the receiving device, enable Huawei Share.
2 On the sending device, touch and hold to select the files you want to share, then touch
. Touch Huawei Share, then touch the icon of the receiving device to send the files.These steps may be different if you are sharing files directly from an app.
3 On the receiving device, touch Accept to accept the transfer.
To view the received files, go to Files, then go to Internal storage > Huawei Share on theCategories tab.
Received pictures or videos can also be found in Gallery > Albums > Huawei Share.
Share Files Between Your Device and Computer with Huawei Share
You can use Huawei Share to quickly and easily share files wirelessly between your deviceand a computer (Windows or macOS).
Smart Features
51

1 Make sure your device and computer are connected to the same Wi-Fi network.
2 On your device, go to the Huawei Share settings screen and enable Huawei Share andComputer Share.
3 Make a note of the name displayed next to Name shown on computers and the username and password under Verification.
4 On the computer, go to:
• Windows: This PC (Computer) > Network.
• macOS: Finder > Go to > Network.Currently, this feature is only available on Macs running macOS 10.8 to 10.14.
5 On your computer, double-click the name of your device and enter the user name andpassword noted down previously.
6 Open a shared folder on your device, such as the Internal storage or Album folder to view,edit, or copy files from your device to your computer or vice versa.Changes made to files in the shared folders on your computer will be automaticallysynced to your device and vice versa.
One-Touch Printing with Huawei Share
When a printer that supports Huawei Share is nearby, you can use Huawei Share to find theprinter and print out pictures or PDF files stored on your device.
Smart Features
52

1 Depending on the type of printer, ensure the following:
• Wi-Fi capable printers: The printer must be powered on and connected to the samenetwork as your device.
• Wi-Fi Direct capable printers: The printer must be powered on and have Wi-Fi Directenabled.
• Bluetooth capable printers: The printer must be powered on and discoverable viaBluetooth.
2 On your device, preview the file to be printed, then go to Share > Huawei Share.
3 Once the printer has been discovered, touch its name on your device, and adjust thesettings on the preview screen. Then, touch PRINT to print.If you are connecting a Bluetooth printer to your device for the first time, find the printeron your device, touch the printer name, then press and hold the Power button on theprinter for about 1 second to confirm the connection.
For a list of supported printers, touch Help on the Huawei Share sharing screen, selectPrinters, then touch What printers are supported?.
Switch Audio Channels Between Devices
Smart Features
53

Switch Audio Channels Between DevicesWhen playing music or videos through your earphones, you can quickly switch the playbackto another device without having to unplug your wired earphones or disconnect yourBluetooth earphones.
1 Connect your wired earphones or Bluetooth audio devices (such as Bluetooth earphones,speaker, or in-car kit) to your device.
2 After pairing is successful, you will see the Current audio output device card when
swiping down the notification panel on your device. Touch on the card to display theaudio output devices that are currently available.Select the device you want to switch the audio to.
When non-Type-C wired earphones are connected to your device, the audio outputchannel of your device is switched from This device to wired earphones.
Smart Features
54

Camera and Gallery
Launch Camera
Launch CameraThere are multiple ways to open the Camera app.
From the Home Screen
From the home screen, open Camera.
From the Lock Screen
When the screen is locked, turn on the screen, then swipe up on the camera icon in the lowerright corner to open the camera.
Using Ultra Snapshot
When enabled, simply double-press the Volume down button to open the camera when thescreen is off.
55

1 Open Camera.
2 Go to > Ultra Snapshot and select Open Camera or Take a snapshot.
3 You can now open the camera or take a snapshot without unlocking your screen.
Take Photos
Take Photos
1 Open Camera.
2 You can then:
• Focus: Touch the location you want to focus on.
Camera and Gallery
56

To adjust focus and metering separately, touch and hold the viewfinder and drag therespective frame or ring to the desired location.
• Adjust brightness: Touch the viewfinder. When the symbol appears next to thefocus frame, drag it up or down.
• Zoom in or out: On the viewfinder, pinch in or out, or drag the zoom slider.
• Select a camera mode: Swipe up, down, left, or right across the camera mode options.
• Turn the flash on or off: Touch and select (Auto), (On), (Off), or
(Always on).
These features may not be available in some camera modes.
3 Touch to take a photo.
Take Burst Photos
Use Burst mode to take a sequence of photos in quick succession so you can choose the bestone.
Burst shooting is only available when using the rear camera.
1 Open Camera and select Photo mode.
2 Touch and hold or press and hold one of the Volume buttons to take a burst photo.When shooting, you'll see a counter, which indicates how many photos you've taken sofar.
3 Lift your finger to stop shooting.
Once you have finished, select photos you want to keep from the burst.
1 Open Gallery.
2 Touch a burst photo (which will be tagged with ), then touch .
3 Swipe through the burst photos, select the ones you want to keep, then touch andfollow the onscreen instructions.
4 To delete the whole burst photo, touch and hold to select the photo, then touch .
Take Timed Photos
The camera timer allows you to set a time delay so you can get into position after you havetouched the shutter button.
1 Open Camera.
2 Go to > Timer and select a delay option.
Camera and Gallery
57

3 Return to the viewfinder and touch the shutter button. Your device will take a photo whenthe countdown ends.
Use Audio Control to Take Photos
You can use your voice to take photos without having to touch the shutter button.
1 Open Camera.
2 Go to > Audio control, enable Audio control, and select an audio control option.
3 Go back to the viewfinder, then say your command to take a photo.
Shoot in Portrait, Night, and Wide Aperture Modes
Shoot in Portrait, Night, and Wide Aperture Modes
Use Portrait Mode to Shoot Portraits
Portrait mode lets you apply beauty and lighting effects to your photos to shoot stunningportraits.
1 Open Camera and select Portrait mode.
Camera and Gallery
58

2 Frame your subject within the viewfinder.
To take a selfie, touch .
3 You can then:
• Enable beauty effect: Touch and drag the slider to adjust beauty settings. A largervalue will produce a more pronounced beauty effect.
To disable the beauty effect, drag the setting to its lowest value, or touch .
• Set lighting effect: Touch and select an effect to your liking.
4 Touch to take a photo.
Take Night Shots
Night mode solves the issues caused by low light and night shooting to give your photossharper details and brighter colours.
You can also use Night mode when shooting backlit subjects and scenes with flowing water,such as waterfalls, to create a better contrast or a smooth, silky water effect.
1 Open Camera and select Night mode.
Camera and Gallery
59

2 If you are using the rear camera, touch on the viewfinder to adjust the ISO sensitivity
or to adjust the shutter speed.
3 Keep your device steady and touch .
4 Your device will adjust the exposure time based on the ambient brightness. Keep yourdevice steady.Do not stop shooting before the countdown finishes or your photos may come out blurry.
Use the Front Camera to Take Night Portraits
To take a selfie at night or when there is not enough light, you can use the front camera inNight mode.
In a dim environment, you can turn on the flash to get an illuminated photo of your face.
1 Open Camera and select Night mode.
2 Touch to switch to the front camera. Then you can:
• Touch the flash icon at the top.
This allows you to select (Auto), (Off), or (Always on).
• Touch and adjust the beauty level.
3 Keep your device steady and touch .
Shoot Wide Aperture Photos and Videos
Wide aperture mode allows you to shoot photos and videos where the background is blurredwhile your subject remains in sharp focus.
Camera and Gallery
60

1 Open Camera and select Aperture mode.
2 Touch where you want to focus. For best results, your device needs to be within 2 meters(about 7 ft.) of your subject.
3 Touch in the viewfinder and drag the slider to adjust aperture settings. A smalleraperture value will create a more blurred background.
4 Touch the shutter button to shoot a photo or video. When recording, touch the viewfinderto adjust the focus.
Edit Background Blur in Wide Aperture Photos
You can adjust the focus and background blur after you've taken a wide aperture photo.
1 Go to Gallery > Albums > Camera.
2 Touch a photo tagged with , then touch at the top of the photo.
3 Follow the instructions to touch the photo to re-focus. Drag the slider at the bottom toadjust the aperture.
4 Touch to save the settings.
Master AI
Camera and Gallery
61

Master AIMaster AI is a pre-installed camera feature that helps you take better photos by intelligentlyidentifying objects and scenes and optimising the camera settings accordingly.
Master AI is able to identify a variety of scenes, such as stages, beaches, blue skies, greenery,and text. It only works with the rear camera.
1 Open Camera and select Photo mode.
2 Touch to ensure that Master AI is enabled.
3 Frame the subject in the viewfinder. Once Master AI identifies what you are shooting, itwill automatically recommend a mode (such as portrait, greenery, or text).
4 To disable the recommended mode, touch next to the mode text or touch todisable Master AI.
Use Moon Mode
Camera and Gallery
62
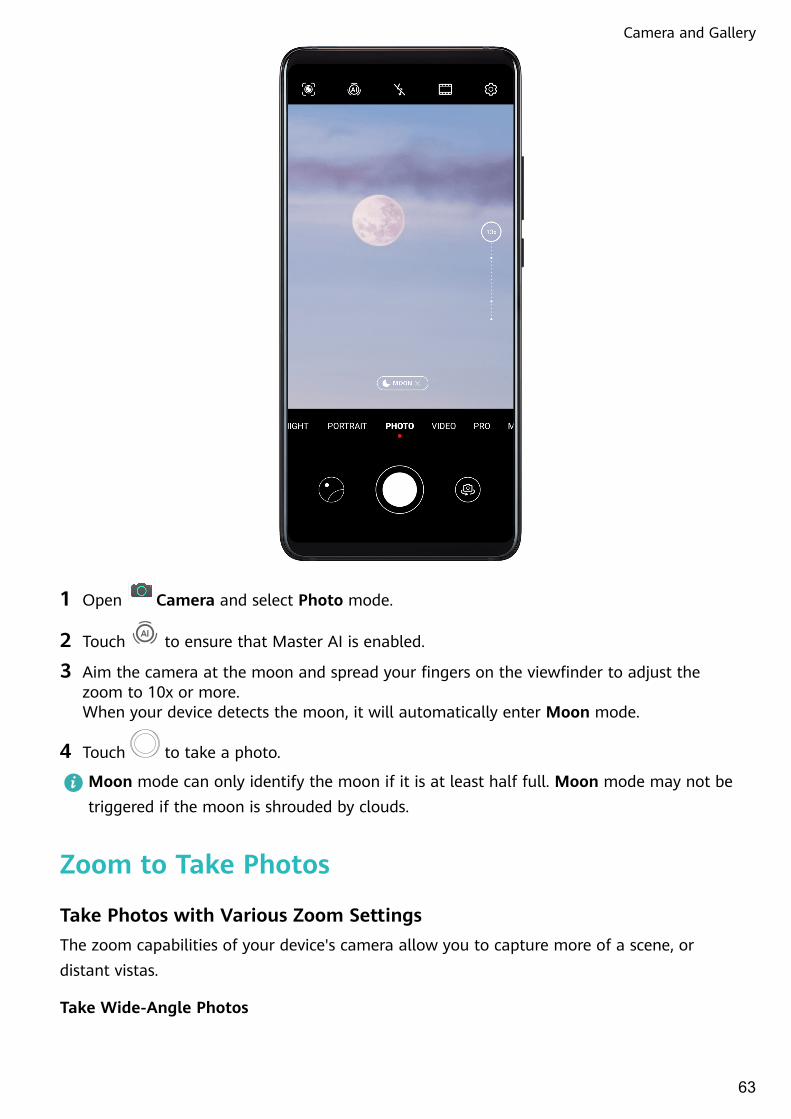
1 Open Camera and select Photo mode.
2 Touch to ensure that Master AI is enabled.
3 Aim the camera at the moon and spread your fingers on the viewfinder to adjust thezoom to 10x or more.When your device detects the moon, it will automatically enter Moon mode.
4 Touch to take a photo.
Moon mode can only identify the moon if it is at least half full. Moon mode may not betriggered if the moon is shrouded by clouds.
Zoom to Take Photos
Take Photos with Various Zoom SettingsThe zoom capabilities of your device's camera allow you to capture more of a scene, ordistant vistas.
Take Wide-Angle Photos
Camera and Gallery
63

1 Open Camera and select Photo mode.
2 Touch to ensure that Master AI is enabled.
3 Aim the camera at the object you want to take a photo of. The camera will automaticallyrecommend Wide mode if it detects a building. Touch Wide to have a wider angle ofview.You can also drag the zoom slider in the viewfinder, or pinch in or out to adjust the zoomlevel. A smaller value will result in a wider angle of view.
4 Touch to take a photo.
Take Photos from Far Away
1 Open Camera and select Photo mode.
2 Aim the camera at the distant object you want to take a photo of. Drag the zoom slider,or pinch in or out to adjust the zoom level.
3 In the viewfinder, touch where you want to focus. When the camera is in focus, touch .
Super Macro
Super MacroSuper macro mode makes it easier to shoot close-ups of small objects, such as dew dropsand leaves, as well as other everyday objects, to bring out details easily missed by the nakedeye.
Camera and Gallery
64
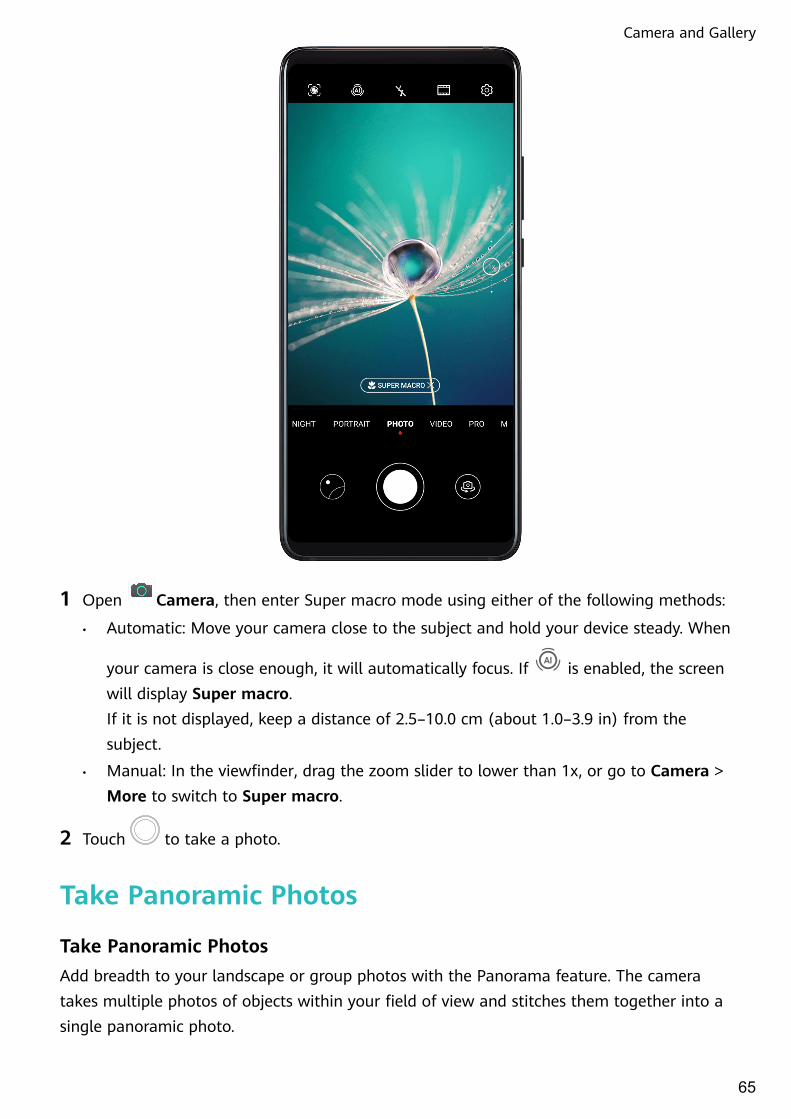
1 Open Camera, then enter Super macro mode using either of the following methods:
• Automatic: Move your camera close to the subject and hold your device steady. When
your camera is close enough, it will automatically focus. If is enabled, the screenwill display Super macro.If it is not displayed, keep a distance of 2.5–10.0 cm (about 1.0–3.9 in) from thesubject.
• Manual: In the viewfinder, drag the zoom slider to lower than 1x, or go to Camera >More to switch to Super macro.
2 Touch to take a photo.
Take Panoramic Photos
Take Panoramic PhotosAdd breadth to your landscape or group photos with the Panorama feature. The cameratakes multiple photos of objects within your field of view and stitches them together into asingle panoramic photo.
Camera and Gallery
65

Use the Rear Camera to Take Panoramic Photos
1 Go to Camera > More and select Panorama mode.
2 Touch at the bottom of the viewfinder to set the pan direction.
3 Point the camera at your starting point, then touch to start shooting.
4 Slowly move the camera in the direction of the arrow displayed on the screen. Keep yourdevice steady and the arrow on the centre line the entire time.
5 Touch when you are finished.
Use the Front Camera to Take Panoramic Selfies
1 In Panorama mode, touch to switch to the front camera.
2 Point the camera at the centre of your shot, then touch to take the first photo.
3 Turn the camera to the left and right slowly as instructed. When the two frames on theviewfinder overlap, the camera will automatically take the second and third photos.
After the three photos are taken, the camera will automatically combine them into apanoramic photo.
Take Black and White Photos
Take Black and White PhotosBlack and white photography removes distracting colours to help you focus more on form,shape, and texture.
1 Open Camera.
2 Go to More > Monochrome and select one of the following modes based on your subjectand scene:
• Normal: This mode suits all kinds of subjects.
• Aperture: This mode blurs the background and lends greater emphasis to the subject.
• Portrait: This mode blurs the background and lets you adjust the beauty effect.
• Pro: This mode allows you to adjust the camera settings, including the metering mode,sensitivity, and shutter speed.
3 Touch to take a photo.
AR Lens
Camera and Gallery
66

AR LensUse AR lens to make your photos fun and stand out.
Use 3D Qmoji to Create Your Own Qmojis
1 Go to Camera > More and select AR lens.
2 Touch 3D Qmoji and select an animated Qmoji. The Qmoji will then mimic and act outyour facial expressions accordingly.
3 Touch to enable or disable the background.
4 Touch to enable Qmoji, then look straight at the front camera.
5 Touch and hold to start recording.
6 After the recording is complete, add text or directly save the Qmoji. The Qmoji will besaved to Gallery in GIF format.
Use 3D Qmoji to Record Videos
1 Touch 3D Qmoji and select an animated Qmoji. The Qmoji will then mimic and act outyour facial expressions accordingly.
Camera and Gallery
67

2 Touch to enable or disable the background.
3 Touch to disable Qmoji, then look straight at the front camera.
4 Touch to start recording
5 Touch to finish recording.
Light Painting
Light PaintingLight painting helps you capture light trails by allowing the shutter to stay open for a longertime. No manual aperture and shutter adjustment is involved.
Just choose from the available options depending on the subjects and light conditions. Toreduce camera shake, a tripod is recommended to steady your device.
Capture Car Light Trails in Traffic Trails Mode
Traffic trails mode lets you create artistic photos of car tail lights at night.
Camera and Gallery
68

1 Go to Camera > More > Light painting > Traffic trails.
2 Find a spot where you'll see the light trails created by cars from a distance. Ensure thatcar headlights do not point directly at the camera, as this can overexpose the image.
3 Touch to start shooting. Observe the shot in the viewfinder. When the exposure is just
right, touch to finish shooting.
Capture Light Drawings in Light Graffiti Mode
Light graffiti lets you create patterns or write words by moving a light source in front of thecamera.
1 Go to Camera > More > Light painting > Light graffiti.
2 In a dark environment without distracting light sources, move a suitably bright lightsource of an appropriate colour, such as a small torch or glow stick, in front of thecamera. Avoid exaggerated body movement as this may affect the shooting results.
3 Touch to start shooting. Observe the shot in the viewfinder. When the exposure is just
right, touch to finish shooting.
Capture Rivers and Waterfalls in Silky Water Mode
Silky water lets you capture silky smooth photographs of waterfalls and rivers.
1 Go to Camera > More > Light painting > Silky water.
2 This feature works best when taking photos of a stream or waterfall where the water isflowing heavily.
3 Touch to start shooting. Observe the shot in the viewfinder. When the exposure is just
right, touch to finish shooting.
Capture the Beauty of the Stars in Star Track Mode
Star track lets you use your camera to capture the movement of the stars in the night sky.
1 Go to Camera > More > Light painting > Star trails.
2 For best results, choose a clear night in a location free of light pollution and with anunobstructed view of the sky.
3 Touch to start shooting. Observe the shot in the viewfinder. When the exposure is just
right, touch to finish shooting.
Take HDR Photos
Camera and Gallery
69

Take HDR PhotosWhen shooting photos with backlighting or a high light contrast, High Dynamic Range (HDR)mode can help you improve light and shadow effects in your photos, giving your photossharper details.
Use HDR with the Rear Camera
1 Go to Camera > More and select HDR.
2 Steady your device, with the help of a tripod if necessary.
3 Touch to take a photo.
Moving Pictures
Moving PicturesMoving pictures capture a second of movement and sound before you touch the shutterbutton, and a second after.
Take Moving Pictures
Go to Camera > More > Moving picture and touch to take a photo.
Play Moving Pictures
Moving pictures are saved in JPG format in Gallery.
Go to Gallery > Albums > Camera, touch a moving picture, then touch at the top ofthe picture to view it.
The moving picture will automatically stop after a complete playback. You can also touch thescreen to stop the playback.
Share Moving Pictures
You can share moving pictures with Huawei or Honor devices using various methods, such asWi-Fi Direct, Bluetooth, or Huawei Share.
Go to Gallery > Albums > Camera, touch and hold to select the moving pictures you
want to share, then touch to share them.
If you share moving pictures to third-party apps or incompatible devices, moving pictures willbe displayed as static images.
Add Stickers to Photos
Camera and Gallery
70

Add Stickers to PhotosAdd a watermark, such as time, location, weather, or mood, to spice up your photo.
1 Go to Camera > More > Stickers.
If this mode is not there, touch and then download Stickers.
2 Touch and select a watermark. The selected watermark will be displayed in theviewfinder.
3 Drag the watermark to change its position. You can also edit the text of some types ofwatermarks.
4 Touch to take a photo.
Documents Mode
Documents ModeImages shot at an angle always suffer from the problem of perspective. If you aren't able totake a perfectly straight photo of a document, use Documents mode.
The camera will automatically adjust skewed images shot in Documents mode.
Shoot Photos in Documents Mode
1 Go to Camera > More, then touch Documents.
If the option is not present, touch , then download Documents.
2 Frame the document you want to shoot within the viewfinder, then touch .
3 The camera will automatically identify the text area within the viewfinder and unskew theimage.
Adjust the Text Area
If you find the skew correction provided by Documents mode unsatisfactory, you can alsomanually adjust the text area.
This is only available for photos taken in Documents mode.
1 Go to Gallery > Albums > Camera, then touch the photo you wish to adjust.
2 Touch above the photo.
3 Drag the four corners to customise the correction area. Then touch .
Underwater Mode
Camera and Gallery
71

Underwater Mode• Before placing your device in water, make sure that it is in a waterproof case and that
the case is closed tight.
• Don't keep your device underwater for extended periods of time.
1 Go to Camera > More, then enable Underwater.
2 Now you can:
• Press the Volume up button to take a photo.
• Press and hold the Volume up button to take a burst photo.
• Press the Volume down button to record a video. During recording, press the Volumeup button to pause and the Volume down button to stop.
• Press the Power button to turn off the screen, and press it again to activate thecamera.
3 When you are finished, follow the onscreen instructions to exit the camera.
Take High-Resolution Photos
Take High-Resolution PhotosTake high-resolution photos if you would like to print them later or display them on a largescreen.
1 Go to Camera > More, then touch High-res.
2 Frame your subject within the viewfinder, then touch where you want to focus.High-res does not allow you to zoom in or out, or adjust the aspect ratio.
3 Touch to take a photo.It may take longer to take a photo in High-res mode. Keep your device steady when thephoto is being taken.
Camera and Gallery
72

Pro Mode
Pro ModePro mode gives you full control over focus mode, metering, exposure compensation, andmore when shooting, so that the photos and videos will look more professional.
Some of the above settings are not available when you shoot videos in Pro mode.
1 Open Camera and select Pro mode.
2 Customise camera settings to shoot unique and professional-looking photos. You can also
shoot high-quality videos by touching .
• Adjust the metering mode: Touch M and select a metering mode.
Camera and Gallery
73
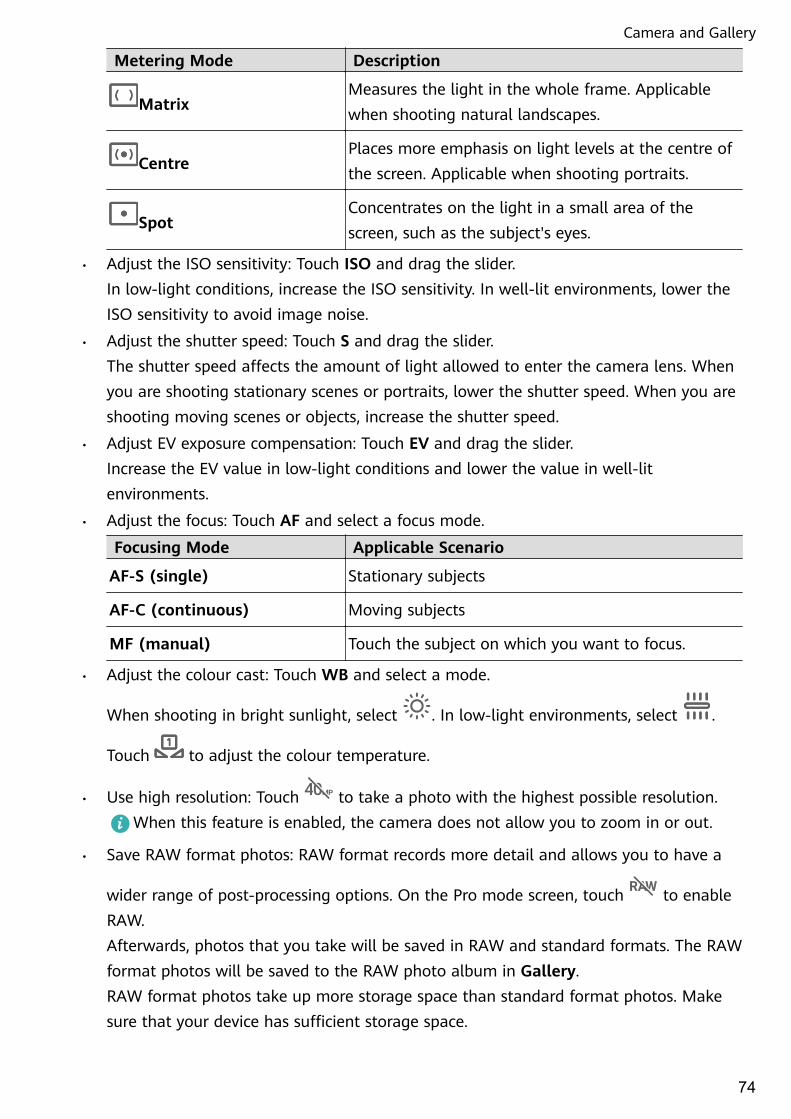
Metering Mode Description
MatrixMeasures the light in the whole frame. Applicablewhen shooting natural landscapes.
CentrePlaces more emphasis on light levels at the centre ofthe screen. Applicable when shooting portraits.
SpotConcentrates on the light in a small area of thescreen, such as the subject's eyes.
• Adjust the ISO sensitivity: Touch ISO and drag the slider.In low-light conditions, increase the ISO sensitivity. In well-lit environments, lower theISO sensitivity to avoid image noise.
• Adjust the shutter speed: Touch S and drag the slider.The shutter speed affects the amount of light allowed to enter the camera lens. Whenyou are shooting stationary scenes or portraits, lower the shutter speed. When you areshooting moving scenes or objects, increase the shutter speed.
• Adjust EV exposure compensation: Touch EV and drag the slider.Increase the EV value in low-light conditions and lower the value in well-litenvironments.
• Adjust the focus: Touch AF and select a focus mode.
Focusing Mode Applicable Scenario
AF-S (single) Stationary subjects
AF-C (continuous) Moving subjects
MF (manual) Touch the subject on which you want to focus.
• Adjust the colour cast: Touch WB and select a mode.
When shooting in bright sunlight, select . In low-light environments, select .
Touch to adjust the colour temperature.
• Use high resolution: Touch to take a photo with the highest possible resolution.When this feature is enabled, the camera does not allow you to zoom in or out.
• Save RAW format photos: RAW format records more detail and allows you to have a
wider range of post-processing options. On the Pro mode screen, touch to enableRAW.Afterwards, photos that you take will be saved in RAW and standard formats. The RAWformat photos will be saved to the RAW photo album in Gallery.RAW format photos take up more storage space than standard format photos. Makesure that your device has sufficient storage space.
Camera and Gallery
74

• Enable AF assist light: For better focus in low-light environments, touch to enableAF assist light.
3 Touch the shutter button to shoot a photo or video.
Record Videos
Record Videos
1 Open Camera and select Video mode.
2 Adjust the following settings:
• Zoom in or out: On the viewfinder, pinch or spread two fingers, or drag the zoomslider.
• Focus: Touch the location you want to focus on. Touch and hold the viewfinder to lockthe exposure and focus.
• Turn the flash on or off: Touch , then touch to keep the flash on, or toturn it off.
• Adjust the beauty effect: Touch and drag the slider to adjust beauty settings.
• Adjust the video resolution and frame rate: Go to > Video resolution and selectthe desired resolution. A higher resolution will result in a higher quality video with alarger file size.Touch Frame rate to select a frame rate.
• Select a video format that saves on storage space: Touch and enable Efficientvideo format.When this feature is enabled, your device will use a video format that takes up lessstorage space. However, this may result in other devices being unable to play the video.Please exercise caution when selecting this option.
3 Touch to start recording.
While recording, touch and hold or to smoothly zoom in or out.
Touch to take a photo while recording.
4 Touch to pause and to end the recording.
AI Movie Effects
Camera and Gallery
75

AI Movie EffectsUse AI movie effects to add unique artistic effects to your videos without the need for post-processing.
1 Open Camera and select Video mode.
2 Switch to the rear camera, touch , and select a special effect.
3 Go to > Video resolution and select 21:9 to give your video a cinematic character.
4 Touch to start recording.
While recording, touch to take a photo with the selected special effect.
5 Touch to end the recording.
4K HD Videos
4K HD VideosBoth the front and rear cameras of your device support 4K Ultra HD video recording.
Camera and Gallery
76

1 Open Camera and select Video mode.
2 Go to > Video resolution and select [16:9] 4K.Beauty mode and non-Leica filters do not support 4K recording, and will be automaticallydisabled when you select the 4K resolution.
3 Return to the Video screen and touch to record a video.
A higher resolution will result in a higher quality video, but will also take up morestorage space.
Slow-Mo Recording
Slow-Mo RecordingUse Slow-mo mode to capture fleeting moments in detail. Adjust the slow motion speedbased on how slow you want your footage to appear.
• 32x super slow-mo: When the camera detects a moving object in the viewfinder, it willrecord an epic, super slow motion video. This mode is suitable for shooting super highspeed motions, such as bubble popping and water splashing.
• 4x or 8x slow-mo: You can customise the overall shooting length and the length of theslow-mo portion. This mode is suitable for shooting breakdowns of fast movements, suchas diving and kicking a football.
Shoot Slow-Mo Videos at 32x
1 Go to Camera > More, then touch Slow-mo.
2 Ensure that the speed is 32X and motion detection is enabled ( should display at thetop of the screen).
3 Frame your subject in the viewfinder, then touch to start recording. When the cameradetects a moving object in the viewfinder, it will record an epic, super slow motion video.
Camera and Gallery
77

To record a video manually, touch to disable motion detection, then touch to startrecording.
Shoot Slow-Mo Videos
1 Go to Camera > More, then touch Slow-mo.
2 Touch and select a speed.
3 Touch to start recording.
4 Touch to end the recording.
Adjust the Slow-Mo Portion in Slow-Mo Videos
The length of the slow-mo portion in slow motion videos can be adjusted.This feature is only available for slow motion videos recorded at 4x or 8x.
1 Go to Gallery > Albums > Camera and select a slow motion video.
2 Touch to play the video. During playback, touch the video to bring up the editingarea.
3 Drag the slider to adjust the portion you want to be played back in slow motion.
4 Touch to adjust the volume of the background music and the brightness.
5 When you are finished, go to > Save slow-mo file to save your edits.
Time-Lapse Photography
Time-Lapse PhotographyYou can use Time-lapse to capture images slowly over several minutes or even hours, thencondense them into a short video. This allows you to capture the beauty of change –blooming flowers, drifting clouds, and more.
Camera and Gallery
78

1 Go to Camera > More, then touch Time-lapse.
2 Place your device in position. To reduce camera shake, use a tripod to steady your device.
3 By default, Auto mode is enabled. To manually adjust camera settings, touch Auto. Thenyou can:
• Touch to adjust the recording speed. For example, record traffic trails at 15x orblooming flowers at 1800x.A video recorded at a higher speed will play faster.
• Touch to set the recording duration.
• Touch to adjust the metering mode, shutter speed, ISO, and more.
4 Touch to start recording. If no recording duration is set, touch to end therecording.
The recorded video is automatically saved to Gallery.
Dual-View Mode
Dual-View ModeThe Dual-view feature splits the recording screen into two views, allowing you to watch theregular view side by side with a zoomed-in view.
Camera and Gallery
79

1 Go to Camera > More, then touch Dual-view.
2 Frame your subject in the viewfinder, then touch to start recording.The regular view and the zoomed-in view display side by side on the screen, with thezoomed-in area being the centre of the regular view. You can adjust the zoom level bypinching or spreading two fingers on the zoomed-in view.
3 Touch to end the recording.
Leica Colors
Leica Colours
1 Open Camera and switch to the rear camera.
2 Touch at the top of the viewfinder, then select Leica standard, Leica vivid, or Leicasmooth.
3 Touch the shutter button to shoot a photo or video.
Not all camera modes support Leica colours.
Filters
Filters
1 Open Camera and select Photo or Video mode.
2 Touch or and select a filter.
Some devices do not have the icon.
3 Touch the shutter button to shoot a photo or video.
Camera and Gallery
80

Use the Camera with Other Devices
Use a Bluetooth Snorkeling Case to Take Photos UnderwaterWhen using a dedicated Bluetooth snorkeling case, you can quickly launch the camera whenyou are swimming or diving, and easily take photos, zoom in or out, and switch betweenmodes.
• Purchase a dedicated Bluetooth snorkeling case from an official channel.
• Before using your device underwater, refer to the snorkeling case user guide to ensurethat the case is fully sealed.
• Refer to the depth and duration limits of the snorkeling case. Do not use your device indeep water for an extended period of time.
1 Swipe down from the status bar to open the notification panel, then touch to enableBluetooth on your device.
2 Refer to the snorkeling case user guide to enable Bluetooth on the case, and place thecase close to your device.
3 Your device will automatically detect the snorkeling case and prompt you to connect to it.
4 After the connection is set up, install the snorkeling case according to the instructions andensure that the case is airtight. Double-press the Power button to enter Underwatermode. You can then:
• Take a photo: Press the shutter button.
• Take a burst photo: Press and hold the shutter button.
• Zoom: Move the zoom joystick.
• Switch between photo and video modes: Double-press the Power button.
• Pause/Resume recording: Press the shutter button when recording.
Camera and Gallery
81

• End recording: Double-press the Power button.
• Switch between the front and rear cameras: Press the Power button three times.
• Turn the screen on or off: Press the Power button.
• Disable Bluetooth on the snorkeling case: Press and hold the Power button for 2seconds.
5 After you have finished shooting, take your device out of the water and follow theonscreen instructions to exit Underwater mode.
Adjust Camera Settings
Adjust Camera SettingsYou can adjust the camera settings to take photos and videos more quickly.
The following features may not be available in some camera modes.
Adjust the Aspect Ratio
1 Open Camera and touch to access the Settings screen.
2 Touch Aspect ratio to select an aspect ratio (for example, 1:1 or 4:3).
This feature is not available in some modes.
Enable Location Tag
Enable Location tag to tag your location in photos and videos.
Swipe up on a photo or video in Gallery to view its shooting location.
Add Device Watermarks to Photos
Enable Add watermark. Photos and videos shot with the rear camera will have a devicewatermark added.
Use the Assistive Grid to Compose Your Photos
Use the assistive grid to help you line up the perfect shot.
Camera and Gallery
82

1 Go to Camera > .
2 Enable Assistive grid.
3 Grid lines will appear in the viewfinder. Place the subject of your photo at one of theintersecting points, then touch the shutter button.
Enable Mirror Reflection
When using the front camera, touch to enable or disable Mirror reflection.
Mute the Shutter Sound
Enable Mute as needed.
Capture Smiles
Enable Capture smiles. The camera will take a photo automatically when it detects a smilein the viewfinder.
Use the Horizontal Level for Better Compositions
1 Touch to access the Settings screen.
2 Enable Horizontal level to display a horizontal guiding line on the viewfinder.When the dotted line overlaps with the solid line, it indicates that the camera is parallelwith the horizontal level.
Manage Gallery
View Photos and VideosIn Gallery, you can view, edit, and share your photos and videos, as well as browse the clipsautomatically generated from them.
Camera and Gallery
83

View by Shooting Time
Your photos and videos are stored in Gallery and can be viewed by time, location,category, or album.
On the Photos tab, pinch two fingers on the screen to switch to the monthly view and spreadthem to enter the daily view.
View by Album
You can view photos and videos by album on the Albums tab.
Some photos and videos are stored in default albums. For example, videos recorded with thecamera are saved in the Camera album. Screenshots and screen recordings are saved in theScreenshots album.
Camera and Gallery
84

View by Category
Gallery intelligently sorts photos into categories, allowing you to quickly sift through largealbums by category.
Touch a category album on the Discover tab (such as food, portrait, or scenery) to viewphotos in that album.
View Details About Photos and Videos
1 Touch a photo or video to view it in Full screen mode. Touch the screen again to hide themenu.
2 In Full screen mode, you can check the following:
• Basic information: Swipe up on the photo or video to view basic information.
• Shooting details: Touch and view shooting details in the popup box, including thestorage path, resolution, and size.
Search for PhotosQuickly locate a photo by searching with keywords in Gallery.
1 Open Gallery, then touch the search box.
Camera and Gallery
85

2 Enter a keyword (such as "food", "scenery", or "flower").
3 Photos related to that keyword will be displayed. Touch a suggested keyword or entermore keywords for more precise results.
Edit Photos and VideosGallery offers a wide range of editing features for photos and videos.
Basic Editing
1 Open Gallery, touch the thumbnail of the photo you want to edit, then touch Edit toaccess the editing features.
• Crop: Touch and drag the grid or its corners to select which part you want to keep.You can also select a fixed ratio and drag the corners of the grid to crop the photo.
• Rotate: Touch and drag the angle wheel to the desired orientation.You can also touch Rotate to rotate your photo or Mirror to flip it.
• Add filter effects: Touch to select a filter.
Camera and Gallery
86

• Adjust photo effects: Touch to adjust the brightness, contrast, saturation, andother qualities of the photo.
• Other: Touch to edit the photo in other ways, such as colour splash, blur, doodle,or adding a text element.
2 Touch to save your edits and touch to save the photo.
Add Stickers to Photos
1 Touch a photo, then go to Edit > > Stickers.
2 Select a type of sticker, such as Time, Location, Weather, or Mood.
3 Select a sticker and drag it to change its position. You can also edit the text of some typesof stickers.
4 Touch to save your edits and touch to save the photo.
Pixelate Photos
1 Touch a photo, then go to Edit > > Mosaic.
2 Select a mosaic style and size to cover parts of the photo.
3 To remove the mosaic, touch Eraser and wipe it off the photo.
4 Touch to save your edits and touch to save the photo.
Rename Photos
1 In Gallery, touch the photo thumbnail you want to rename.
2 Go to > Rename and enter a new name.
3 Touch OK.
Edit Videos
Camera and Gallery
87

1 Go to Gallery > Albums > Videos and touch the video you want to edit.
2 Touch . Then you can:
• Select a video template: Touch .
• Crop the video: Touch , then drag the slider at both ends of the video clip to select
which part you want to keep. Touch to preview the cropped video.
• Adjust the frame and video resolution: Touch , then touch Frame to select a frame,and Resolution to select a video resolution.
A higher resolution will result in a higher quality video, but will also take up morestorage space.
• Edit background music: Touch and choose from preset background music or yourlocally saved music.
To turn off the original video sounds, touch .
• Add filter effects: Touch to select a filter. Drag the slider to adjust the filter effect.
Camera and Gallery
88

• Edit the intro and outro: Touch to select an intro and outro. After the preview iscomplete, touch the screen to edit the text content and style of the intro.
3 When you are finished, touch to export the video.The edited videos are saved in the Video Editor album, and the original video is leftunchanged.
Share Photos and VideosThere are several ways to share photos and videos from Gallery.
1 Open Gallery.
2 Use either of the following methods:
• Share a single photo or video: Touch the photo or video, then touch .
• Share multiple photos or videos: In an album, touch and hold to select multiple photos
and videos, then touch .
Manage GalleryOrganise photos and videos into albums to easily sift through them.
Add Albums
1 Open Gallery, then touch Albums.
2 Touch Add album, then name the album.
3 Touch OK.
4 Select the photos or videos you want to add.
Move Photos and Videos
1 Open an album, then touch and hold to select the photos and videos you want to move.
2 Touch > Move to select the desired album.
3 Once the items are moved, they will no longer be in their original album.
The All photos and Videos albums show all photos and videos stored on your device.Moving items across albums will not affect the view in these albums.
Delete Photos and Videos
Touch and hold to select the items you want to delete, then go to > Delete.The All photos, Videos, and Camera albums cannot be deleted.
Deleted photos and videos will be temporarily moved to the Recently deleted album beforebeing permanently deleted after 30 days.
Camera and Gallery
89

To permanently delete a photo or video manually, touch and hold its thumbnail in the
Recently deleted album, then go to > Delete.
Recover Deleted Photos and Videos
In the Recently deleted album, touch and hold to select the items you want to recover, then
touch to restore them to their original albums.
If the original album has been deleted, a new one will be created.
Add Photos and Videos to Favorites
Open a photo or video, then touch .
The item will appear in both its original album and the My favourites album.
Hide AlbumsSystem albums such as Camera, Videos, My favourites, and Screenshots cannot behidden.
From the Albums tab, go to > Hide albums and toggle the switches on for albums thatyou want to hide.
Camera and Gallery
90
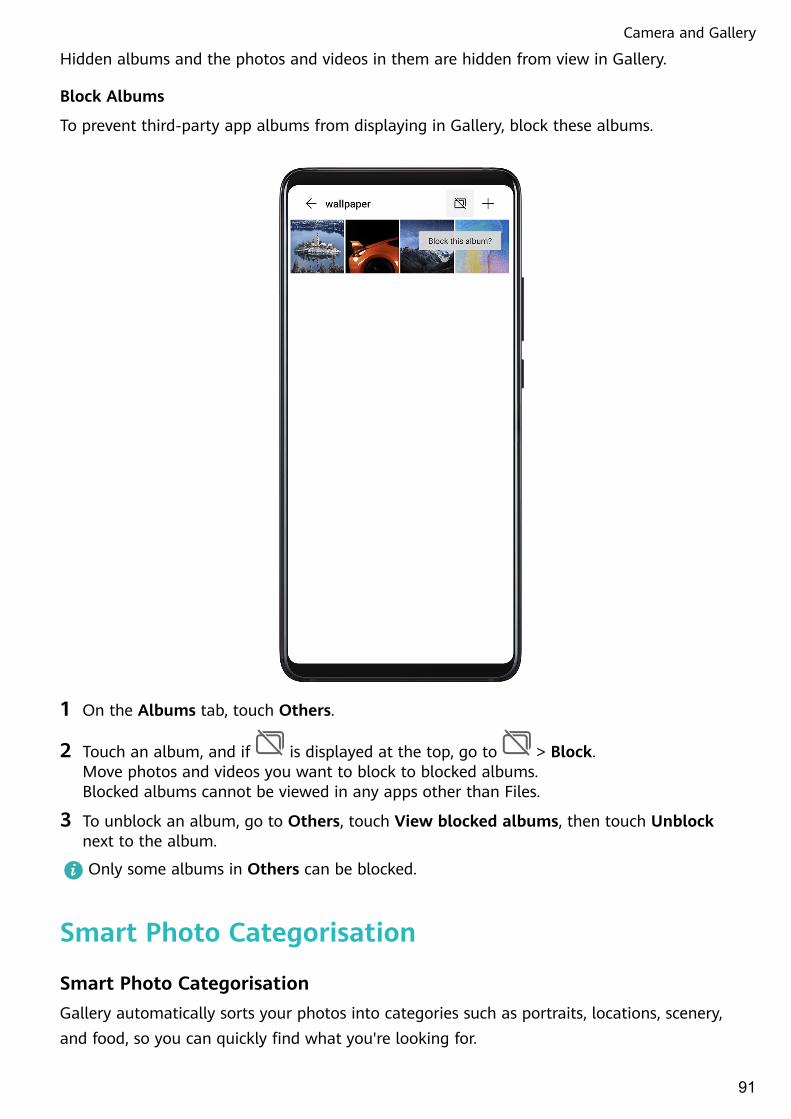
Hidden albums and the photos and videos in them are hidden from view in Gallery.
Block Albums
To prevent third-party app albums from displaying in Gallery, block these albums.
1 On the Albums tab, touch Others.
2 Touch an album, and if is displayed at the top, go to > Block.Move photos and videos you want to block to blocked albums.Blocked albums cannot be viewed in any apps other than Files.
3 To unblock an album, go to Others, touch View blocked albums, then touch Unblocknext to the album.
Only some albums in Others can be blocked.
Smart Photo Categorisation
Smart Photo CategorisationGallery automatically sorts your photos into categories such as portraits, locations, scenery,and food, so you can quickly find what you're looking for.
Camera and Gallery
91

Open Gallery, then touch the Discover tab to view your photos organised intocategories.
To remove a photo from an album, touch and hold to select the photo, then touch (or
for portraits).Not all photos can be removed from the category albums.
View and Set People Albums
Once you have taken a sufficient number of photos, Gallery will automatically create Peoplealbums of individuals or groups by identifying faces in your photos. This will happen whenyour device is charging and the screen is off.
You can name your People albums and set the relationship of individuals with you.
Group photo albums require a specific number of photos that contain 2 to 10 faces that havealready been named in People albums.
1 Go to Gallery > Discover and view the generated People albums.
2 Touch an album, go to > Edit > Add name, then set the name and relationship (suchas Baby or Mom).
Once you have finished, you can find a People album by entering the name or relationship inthe search bar.
Huawei Vlog Editor
Huawei Vlog EditorThe Huawei Vlog editor automatically creates Huawei Vlogs, such as Spotlight Reels,Highlights videos, and People albums, with added background music from your photos andvideos.
You can also select photos and videos yourself to create your own Huawei Vlogs.
Either way, you can edit and share your Huawei Vlogs at the touch of a finger.
Create a Video Clip with Photos and Videos
Camera and Gallery
92

1 Go to Gallery > Photos.
2 Touch and hold to select photos and videos, then go to > Video to create a video clip.You can then:
• Select a video template: Touch .
• Edit video materials: Touch to adjust the video frame or length, or add or deletevideo materials.
If you have selected a video, you can also touch on the video timeline, and thendrag the sliders at both ends to trim the video.
• Edit background music: Touch and choose from preset background music or musicfiles on your device.
• Add filter effects: Touch to select a filter. Drag the slider to adjust the filter effect.
• Edit the intro and outro: Touch to select an intro and outro. After the preview iscomplete, touch the intro text to edit its content and style.
Camera and Gallery
93

3 When you are finished, touch to save the video and follow the onscreen instructionsto export it.
View Spotlight Reels
Spotlight Reel analyses your videos to create highlight clips of people and objects in themand presents them to you with background music.
1 Go to Gallery > Albums > Videos.
2 Touch a video, then swipe up on the video. Touch a person's face or Best cut to view thecreated Spotlight Reel.If a clip has not yet been generated, touch GET STARTED to create one.
3 During playback, touch the video to edit the template, background music, filter, intro andoutro, and more.
This feature works automatically when your device is charging and the screen is off. Itonly works on local videos between 10 seconds and 3 minutes long.
Share Spotlight Reels
1 Go to Gallery > Albums > Video Editor, where you'll find all your exported videos.
2 Touch and hold to select the videos you want to share, then touch .
Camera and Gallery
94

Huawei Vlogs
People Album VideosGallery automatically creates People albums by identifying faces in photos.
View, edit, and share the videos generated in these People albums.
View Huawei Vlogs
1 Go to Gallery > Discover and touch a people album.
2 Touch on the album cover.
Edit People Album Videos
Apply special effects, filters, and background music to make your videos stand out.
1 Touch to play the video. During playback, you can:
• Select a video template: Touch .
• Edit video clips: Touch to adjust the video frame or length, or add or delete videoclips.
• Edit background music: Touch and choose from preset background music or yourlocally saved music.
• Add filter effects: Touch to select a filter. Drag the slider to adjust the filter effect.
• Edit the intro and outro: Touch to select an intro and outro. After the preview iscomplete, touch the intro text to edit its content and style.
2 When you are finished, touch to save the video and follow the onscreen instructionsto export it.
Share People Album Videos
The exported videos are saved in Gallery > Albums > Video Editor.
Touch and hold to select videos you would like to share, then touch .
Highlights
Camera and Gallery
95

HighlightsGallery automatically creates Highlights albums from your best photos and videos based ontime, location, and theme information, and even generates a short video clip so you caninstantly relive the good times.
• To start using Highlights, go to Camera > and enable Location tag.
• Highlights albums are created automatically when your device is charging, the screen isturned off, and the battery is at least 50% charged. This process may take some time.Highlights albums will not be created if there are fewer than 10 photos or videos in Gallery.
View Highlights Videos
1 Go to Gallery > Highlights and touch an album.
2 Touch to play the video.
Edit Highlights Videos
1 When you are watching a Highlights video, touch the video to select a preset template atthe bottom of the screen.
2 To make even more customisations, you can:
Camera and Gallery
96

• Select a video template: Touch .
• Edit video clips: Touch to adjust the video frame or length, or add or delete videoclips.
• Edit background music: Touch and choose from preset background music or yourlocally saved music.
• Add filter effects: Touch to select a filter. Drag the slider to adjust the filter effect.
• Edit the intro and outro: Touch to select an intro and outro. After the preview iscomplete, touch the intro text to edit its content and style.
3 When you are finished, touch to save the video and follow the onscreen instructionsto export it.
Share Highlights Videos
1 Go to Gallery > Albums > Video Editor, where you'll find all your exported videos.
2 Touch and hold to select the videos you want to share, then touch .
Add or Remove Photos and Videos from Highlights Albums
1 On the Highlights tab, touch an album.
2 You can then:
• Add photos or videos: Touch , select the items you want to add, then touch .
• Remove photos or videos: Touch and hold to select photos or videos you want to
remove, touch , then touch Move.
Rename Highlights Albums
1 On the Highlights tab, touch an album.
2 Go to > Rename and enter a new name.
Delete Highlights Albums
1 On the Highlights tab, touch an album.
2 Go to > Delete and touch Delete.
Camera and Gallery
97

Apps
Apps
Apps
Locate an Installed App
Swipe down from the middle of the home screen to show the search bar, and enter the app
name. When the app is found, touch next to its name.
Uninstall an App
You can uninstall an app using either of the following methods:
• Touch and hold the app icon you want to uninstall until your device vibrates, touchUninstall, then follow the onscreen instructions to uninstall the app.
• Go to Settings > Apps > Apps, touch the app you want to uninstall, then touchUninstall.
Some pre-installed system apps can't be uninstalled, as uninstalling them may causesystem errors.
Manage Background Apps
1 Access the recent tasks screen using either of the following methods, depending on thenavigation method you are using:
• Gestures: Swipe up from the bottom of the screen and hold.
• Three-key navigation: Touch .
2 On the recent tasks screen, you can:
• Swipe across to view app previews.
• Touch an app preview to access an app.
• Swipe up on an app preview to close an app.
• Swipe down on an app preview to lock it. will appear at the top of the app
preview. Touching will not close this app.
• Swipe down again to unlock it. will disappear.
• Touch to close all apps (except for those you have locked).
Clear the Cache of an App
Delete app cache files to free up storage space.
98

Go to Settings > Apps > Apps, select the app for which you want to clear the cache, thengo to Storage > Clear cache.
Contacts
Create and Edit Contact InformationYou can create contacts in multiple ways, as well as view and manage your contacts list.
Create Contacts
1 Open Phone, select the Contacts tab at the bottom of the screen, then touch .If you are creating a contact for the first time, touch Create new contact to start addinga contact.
Apps
99

2 Touch the camera image to set a profile picture for the contact, enter information such as
the name, organisation, and phone number of the contact, then touch .
Import Contacts
1 On the Contacts screen, go to > Settings > Import/Export.
2 Select Import via Bluetooth, Import via Wi-Fi Direct, or Import from storage, thenfollow the onscreen instructions to import contacts.
Scan Business Cards to Add Contacts
1 On the Contacts screen, go to > Scan or go to Business cards > Scan.
2 Place a business card on a flat surface, adjust the camera so that the contents on the
business card are clearly displayed in the viewfinder, then touch to capture a single ormultiple business cards in a row.
3 After the photos are taken, your device will automatically identify the contact information.
Touch to save the contact.
You can view the scanned business cards in Business cards.
Scan a QR Code to Add a Contact
If a QR code contains contact information, you can scan the QR code to quickly add acontact.
1 On the Contacts screen, go to > Scan or go to Business cards > Scan.
2 Take a photo of a QR code or select a photo of a QR card from Gallery, and contactinformation contained in the QR code can be identified and added.
Search for Contacts
1 From the Contacts screen, go to > Settings > Display preferences and touch Allcontacts to display all your contacts.
2 Search for contacts using either of the following methods:
• Swipe down from the middle of the home screen, enter a keyword for the contact youwant to find in the search box (such as their name, initials, or email address).You can also enter multiple keywords, such as "John London", to quickly find matchingcontacts.
• Enter keywords for the contact you want to find in the search box above the contactslist. Matching results will be displayed below the search box.
Share Contacts
1 On the Contacts screen, select the contact you want to share, then go to > Sharecontact.
Apps
100

2 Select a sharing method, then follow the onscreen instructions to share the contact.
Export Contacts
1 On the Contacts screen, go to > Settings > Import/Export.
2 Touch Export to storage and follow the onscreen instructions to export contacts.
The exported .vcf files are saved in the root directory of your device's internal storage bydefault. You can open Files to view the exported files in the internal storage.
Delete Contacts
Delete contacts using either of the following methods:
• Touch and hold the entry you want to delete, then touch Delete.
• On the Contacts screen, go to > Settings > Organise contacts > Delete multiple
contacts, select the entries you want to delete, then touch .
To restore deleted contacts, go to > Settings > Organise contacts > Recently deleted,touch and hold a contact you want to restore, select the check boxes of any others you also
want to restore, then touch .
Merge Duplicate Contacts
1 Open Phone, select the Contacts tab at the bottom of the screen, then touch >Settings > Organise contacts > Merge duplicate contacts.
2 Select duplicate contacts to be merged and touch Merge.
Manage Contact GroupsYou can conveniently send emails or messages to multiple contacts by creating andmanaging contact groups. Your device automatically groups contacts by company, city, andlast contact time, but you can also create new groups based on your preferences.
Create a Contact Group
1 Open Phone, select the Contacts tab at the bottom of the screen, then touch Groups.
2 Touch , enter the group name, such as "Family" or "Friends", then touch OK.
3 Follow the onscreen instructions to add contacts to the group, then touch .
Edit a Contact Group
1 On the Groups screen, select the group you want to edit and touch to add a newcontact.
Apps
101

2 Touch for Remove members, Group ringtone, Delete group, or Rename.
Send Group Messages or Emails
On the Groups screen, open a group, then touch to send a message or touch tosend an email.
Delete Contact Groups
On the Groups screen, touch and hold the group to be deleted, then touch Delete.
Create Personal InformationYou can create a business card containing your personal information to share with others.You can also add personal emergency information so you can call for help quickly in anemergency.
Create a Personal Business Card
1 Open Phone, select the Contacts tab at the bottom of the screen, then touch Mycard.
2 Set your profile picture, enter personal information such as your name, work address, andphone number.
3 Touch to automatically create a QR code business card.You can share your business card using the QR code.
Add Emergency Information
1 From the Contacts screen, go to My card > Emergency information.
2 Touch ADD and set your personal, medical, and emergency contact information.
Once you have added emergency contacts and you find yourself in an emergency, access thelock screen for inputting your password, go to Emergency > Emergency information >Emergency contacts, and select an emergency contact to make a call.
Erase Contact Traces
1 Open Phone, touch the Contacts tab at the bottom of the screen, then touch thecontact for whom you wish to erase contact traces.
2 Go to > Erase history > Erase to delete all call and message records for that contact.
Phone
Make a Call
Dial a Number or Select a Contact to Call
Use either of the following methods to make a call:
Apps
102

• Open Phone, enter part of a phone number, the first letter of a contact's name, or thecontact's initials to find a contact.
• On the Phone screen, touch the Contacts tab at the bottom, then select a contact to makea call.
Touch to end a call.
Use Speed Dial
Once you've set up speed dialling for a contact, you can quickly call that contact with theassigned number key.
Go to Phone > > Settings > Speed dial, select a number key, then set a contact forthis speed dial number.
Press the Power Button to End a Call
During a call, press the Power button to end the call.
Go to Phone > > Settings > More and enable Power button ends call.
Apps
103

Set a Call Background
You can set a wallpaper as the call background.
1 Go to Settings > Home screen & wallpaper > Wallpaper.
2 Select a picture and set it as the wallpaper.
You can also set a profile picture for a contact to be shown on the call background.
1 On the Phone screen, touch the Contacts tab at the bottom, then select the contact youwant to set a profile picture for.
2 Touch and then touch to set a profile picture for the contact.
Make an International Call
1 Contact your mobile carrier to activate and inquire about the international calling service.
2 Open Phone, touch the Contacts tab at the bottom, then select a contact to make acall.For numbers that are not in the contacts list, on the Phone screen, touch and hold the 0
number key to display +, enter the country code and phone number, then touch tomake an international call.
Manage Call LogsYou can merge the call logs of the same contact or number for a tidier and more conciseinterface, or delete call logs as required.
Merge Call Logs
1 Go to Phone > > Settings > Merge call log.
2 Select By contact and your device will automatically merge the call logs of the samenumber or contact.
View Missed Calls
1 To display all missed calls, open Phone, swipe down on the call log list, then touch theMissed tab.All missed calls are displayed in red in the call log list for you to quickly identify them onthe All screen.
2 Touch next to a call log to call back or send a message.
Delete Call Logs
Delete call logs using either of the following methods:
• On the Phone screen, touch and hold a call log, then touch Delete entry.
• On the Phone screen, go to > Delete entries. Select multiple call logs, then touch to delete them.
Apps
104

Set a Ringtone for Incoming CallsYou can set your favorite music or a video as the ringtone for incoming calls.
If two SIM cards have been inserted into your device, configure the ringtone separately forSIM 1 and SIM 2.
Set a Music Ringtone
1 Go to Phone > > Settings > Ringtone or Settings > Sounds & vibration >Phone ringtone.
2 Select a system ringtone, or touch Music on device to select a local song as the ringtone.
Set a Video Ringtone
Set a video as the ringtone for incoming calls.
1 Go to Phone > > Settings > Ringtone or Settings > Sounds & vibration >Phone ringtone.
2 Touch Video ringtones and select a video to preview the effect for incoming calls.
3 Touch Apply to set the video as the ringtone.
Apps
105

Set a Ringtone for a Contact
1 Open Phone, touch the Contacts tab at the bottom of the screen, then select thecontact you want to set a ringtone for.
2 On the contact details screen, touch Ringtone and select a ringtone.
Use VoLTE to Make CallsVoice over LTE (VoLTE) is an IP-based data transmission technology that delivers both calland data services over a 4G network.
Once VoLTE is enabled, you can make a call while accessing the Internet. If your devicesupports dual SIM dual VoLTE, you can receive an incoming call on a SIM card while theother SIM card is being used for a call.
VoLTE also provides you with a faster call connection time and higher quality voice and videocalls.
Enable VoLTE
1 Contact your mobile carrier to activate the 4G and VoLTE functions for your SIM card. Ifboth the primary and secondary SIM card trays of a dual-SIM device support 4G andVoLTE, 4G and VoLTE can be enabled for both SIM cards.
2 Go to Settings > Mobile network > Mobile data. In the network settings area of SIM1 or SIM 2, turn on the VoLTE calls switch.
• This feature may vary depending on your carrier.
• The 4G network is used as an example here. If your device supports 5G, the operationsare the same.
• 5G is only available in some countries and regions.
Make a Video Call
Video calls are only possible when both parties are using VoLTE-activated devices.
1 Open Phone, touch the Contacts tab at the bottom of the screen, then select thecontact you want to call.
2 Touch to make a video call.
During a voice call, you can also touch to switch to a video call.
Use VoWiFi to Make CallsThe VoWiFi function enables you to make calls on a Wi-Fi network. You can even makeVoWiFi calls in Airplane mode.
1 This function requires support from your mobile carrier. Contact your carrier to activatethe VoWiFi function.
Apps
106

2 Go to Phone > > Settings > Wi-Fi Calling, then enable Wi-Fi Calling.
Manage Incoming CallsYou can use the call waiting feature to answer incoming calls when you are already engagedin a previous call. If you cannot answer a call because your device is faulty or the networksignal is poor, you can also set call forwarding to forward calls to another number or device.
Answer or Reject an Incoming Call
If you receive a call when the screen is locked:
• Drag right to answer the call.
• Drag left to reject the call.
• Touch to reject the call and reply with an SMS message.
• Touch to set a callback reminder.
If you receive a call when the screen is unlocked:
• Touch to answer the call.
• Touch to reject the call.
• Touch to reject the call and reply with an SMS message.
• Touch to set a callback reminder.
Enable Call Waiting
The Call waiting feature lets you answer incoming calls when a call is already in progress byplacing the first call on hold.
This feature requires the support of your mobile carrier. For details, contact your carrier.
Go to Phone > > Settings. Under the SIM card you wish to enable call waiting on,go to More > Call waiting.
This feature may vary depending on your carrier.
Answer a New Incoming Call During a Call
1 When you receive an incoming call when you are already engaged in a previous call,
touch to answer it.
Apps
107

2 Touch or touch a held call in the call list to switch between the two calls.
Enable Call Forwarding
After the Call forwarding feature is enabled, calls that meet set conditions will beautomatically transferred to a specified phone number.
This feature requires the support of your mobile carrier. For details, contact your carrier.
1 On the Phone screen, go to > Settings, and touch Call forwarding.If your phone has two SIM cards, configure separate settings for SIM 1 and SIM 2.
2 Select and enable a forwarding method, then enter and confirm the target number.
This feature may vary depending on your carrier.
Disable Call Forwarding
1 On the Phone screen, go to > Settings, and touch Call forwarding under the SIMcard you wish to disable call forwarding on.
2 Select the forwarding mode that you wish to disable and disable it.
This feature may vary depending on your carrier.
Apps
108

Filter and Block Spam CallsSet different block rules to block sales, fraud, and other kinds of spam calls.
Filter Spam Calls
1 Go to Phone > > Blocked > and set the block rules.
Alternatively, go to Optimiser > Blocked > to set the block rules.
2 Touch Call block rules and toggle on the switches of corresponding block rules.
Block Incoming Calls from Specific Numbers
You can block incoming calls from specific numbers using either of the following methods:
• Go to Phone > > Blocked > > Blocklist, touch , then add the phonenumbers you want to block.
• On the Phone screen, touch the Contacts tab at the bottom, touch the contact you want to
block, then go to > Block contact.
Apps
109

Set Whether to Receive Notifications for Blocked Calls
Go to Phone > > Blocked > > Receive notifications and set whether to receivenotifications for blocked calls.
Emergency SOS and Calls
Use Emergency SOS
If you encounter an emergency, you can quickly and secretly send an SOS message to youremergency contacts.
1 Enable GPS and allow the Emergency SOS feature to access your location.
2 Go to Settings > Security > Emergency SOS, enable Also send SOS message, thenset your emergency contacts.
Once you have enabled the Emergency SOS feature, if you encounter an emergency, pressthe Power button five times in quick succession and your device will automatically send amessage with your current location to your emergency contacts.
Once the message is sent, your device will bring up the emergency call screen, from whichyou can quickly call an emergency service or one of your emergency contacts.
Make Emergency Calls
In the event of an emergency, you can make emergency calls directly from the lock screen ofyour device even if there is no signal.
The emergency call feature is subject to local regulations and individual mobile carriers.Network issues or other types of interference may lead to emergency calls not working.
1 From the lock screen, access the screen for inputting your password, and touchEmergency. If you are in an area with a good signal and your device has an Internetconnection, it will automatically obtain your location and display it on the screen.
2 Enter your local emergency number and touch to call the number. Alternatively,touch Emergency information and select an emergency contact to call.
Make Operations During a CallDuring a call, an in-call menu will be displayed.
Apps
110
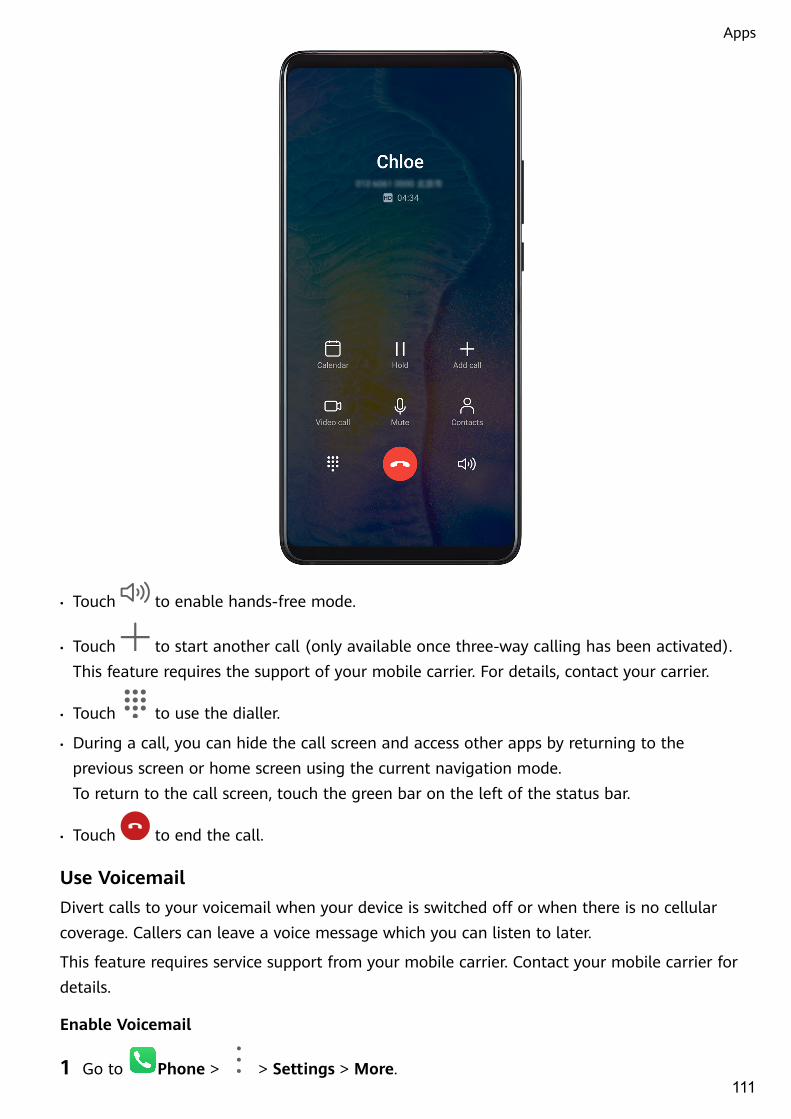
• Touch to enable hands-free mode.
• Touch to start another call (only available once three-way calling has been activated).This feature requires the support of your mobile carrier. For details, contact your carrier.
• Touch to use the dialler.
• During a call, you can hide the call screen and access other apps by returning to theprevious screen or home screen using the current navigation mode.To return to the call screen, touch the green bar on the left of the status bar.
• Touch to end the call.
Use VoicemailDivert calls to your voicemail when your device is switched off or when there is no cellularcoverage. Callers can leave a voice message which you can listen to later.
This feature requires service support from your mobile carrier. Contact your mobile carrier fordetails.
Enable Voicemail
1 Go to Phone > > Settings > More.
Apps
111

If two SIM cards have been inserted into your device, touch More under SIM 1 or SIM 2.
2 Go to Voicemail > Voicemail number, enter the voicemail number obtained from yourcarrier, and touch OK.
Listen to a Voicemail Message
Touch and hold the 1 key on the dialler and then enter your voicemail number.
Messaging
Send and Manage MessagesYou can send and receive messages that include text, emojis, pictures, audio files, and more.You can also manage your messages in the message list.
Apps
112

Send Messages
1 Open Messaging and touch .
2 On the New message screen, enter your message content. Touch to add other typesof content such as pictures and audio files.
3 In the recipient box, touch , select contacts or contact groups, then touch .To send a group message to those not included in your contacts list, touch anywhereblank in the recipient box and enter the recipients' phone number. Touch the return key inthe keyboard when you finish entering each of the phone numbers.
4 After finishing editing, touch to send the message.
Save a Draft Message
From the New message screen, touch to save a draft message.
Cancel Sending a Message
On the Messaging screen, go to > Settings > Advanced and enable Recall messages.
Within six seconds after the message is sent, you can double-touch the message to cancelsending it.
View and Reply to Messages
1 On the Messaging screen, select a contact to view your conversation with them.
2 To reply to a message, enter your message content in the text box, then touch .
New messages will be displayed in the notification panel in the form of banners and you cantouch them there to reply.
Mark Messages as Read
You can use any of the following methods to mark messages as read:
• New messages will be displayed in the notification panel in the form of a banner and youcan mark them as read there.
• On the Messaging screen, swipe left on the message that you want to mark as read, then
touch .
• On the Messaging screen, go to > Mark all as read.
Delete a Message
You can delete messages using either of the following methods:
• On the Messaging screen, swipe left the message to be deleted, then touch .
Apps
113

• Touch and hold a message, select multiple messages you wish to delete, then touch .Deleted messages cannot be recovered.
Filter and Block Spam MessagesSet different block rules, such as your blocklist, to block sales, fraud, and other kinds of spammessages.
Block Spam Messages
Go to Messaging > > Blocked > and set block rules.
You can also go to Optimiser > Blocked > to set block rules.
Block Messages from Specific Numbers
1 Go to Messaging > > Blocked > > Blocklist.
2 Touch and add the numbers you want to block. SMS and MMS messages sent bythese numbers will all be blocked.
Block Messages Containing Specific Keywords
1 Go to Messaging > > Blocked > > Keyword blocklist.
2 Touch and add the keywords to be filtered. All messages containing these keywordswill be blocked.
Set Whether to Receive Notifications for Blocked Messages
Go to Messaging > > Blocked > > Receive notifications and set whether toreceive notifications when messages are blocked.
Calendar
Add and Manage EventsEvents help you plan and manage activities in your daily life and work, such as attendingcompany meetings, arranging social get-togethers, and making credit card repayments. Youcan add events and set reminders to help you arrange your schedule in advance.
Apps
114

Create an Event
1 Open Calendar and touch .
2 Enter the details of the event, such as the title, location, and start and end times.
3 Touch Add reminder to set the reminder time for the event.
4 Touch to save the event.
Import Meeting Reminders
1 Go to Calendar > > Manage accounts.
2 Touch Add account, then follow the onscreen instructions to add your work emails (fromyour Exchange account) to the calendar to see meeting reminders.
Apps
115
Search for Events
1 On the Calendar screen, touch .
2 Enter keywords of your event in the search box, such as the title and location.
Share an Event
1 On the Calendar screen, touch an event on the calendar or under the schedule.
2 Touch and follow the onscreen instructions to share the event using whichevermethod you prefer.
Delete Events
You can delete events using the following methods:
• On the Calendar screen, touch the event to be deleted and touch .
• On the Calendar screen, touch and hold an event, select the events you want to delete,
then touch .
Set a Calendar NotificationSet the calendar notification type according to your requirements. You can set status barnotifications, banner notifications, sound notifications, and more.
You can also change the default reminder time to control when your device will send you areminder.
1 Go to Calendar > > Settings.
2 In the reminder settings, set Default reminder time and Reminder time for all-dayevents.
3 Touch Notifications and enable Allow notifications. Then follow the onscreeninstructions to set a notification type.
Customise the Calendar ViewSet the start day of the week, whether or not to show week numbers, and more in thecalendar view settings.
1 Go to Calendar > > Settings.
2 Set the start day of the week, whether or not to show week numbers, and so on.
Set Alternate CalendarsSet the Calendar to display other calendars as well, such as the Chinese lunar calendar or theIslamic calendar.
Go to Calendar > > Settings > Alternate calendars and select another calendar.
Apps
116

View National/Regional HolidaysView national/regional holidays in the calendar to help plan your travel.
1 Go to Calendar > > Settings > National/Regional holidays.
2 Turn on the switch of a country/region, and your device will automatically downloadholiday information for that country/region and display it in the Calendar.
Clock
AlarmYou can set alarms to play a sound or vibrate at specific times.
Set an Alarm
1 Go to Clock > Alarm, touch , and set a time.
2 Select a sound for the alarm. The sound will play when you select it. You can press theVolume buttons to adjust its volume.
3 Set the following options according to your preferences:
• Repeat
• Vibrate
• Ring duration
• Snooze duration
• Label
4 When you are finished, touch .
Modify or Delete an Alarm
Touch an existing alarm to modify or delete it.
Snooze an Alarm
If you don't want to get up when an alarm rings, simply touch the snooze button or press thePower button.
The snooze length is set when creating the alarm.
Turn Off an Alarm
When an alarm rings, swipe left or right on the button that appears at the bottom of thescreen to turn it off.
Timer and StopwatchYou can use the timer to count down from a specified time. You can also use the stopwatchto measure the duration of an event.
Apps
117
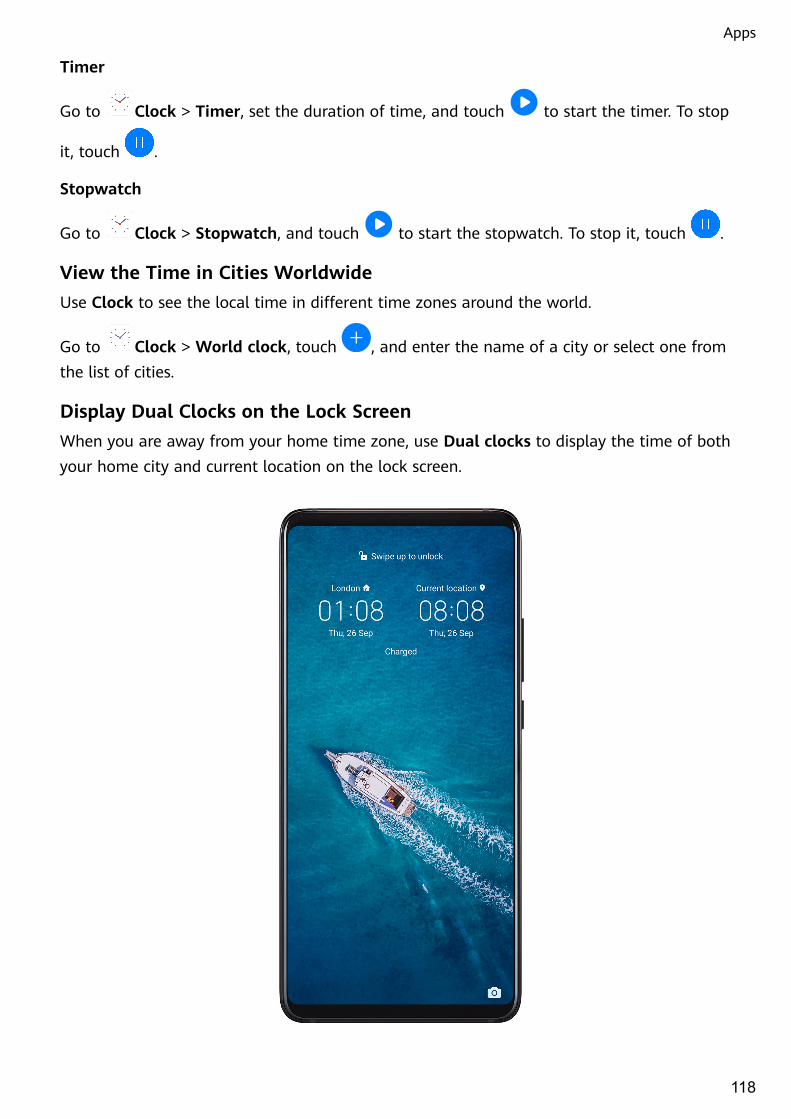
Timer
Go to Clock > Timer, set the duration of time, and touch to start the timer. To stop
it, touch .
Stopwatch
Go to Clock > Stopwatch, and touch to start the stopwatch. To stop it, touch .
View the Time in Cities WorldwideUse Clock to see the local time in different time zones around the world.
Go to Clock > World clock, touch , and enter the name of a city or select one fromthe list of cities.
Display Dual Clocks on the Lock ScreenWhen you are away from your home time zone, use Dual clocks to display the time of bothyour home city and current location on the lock screen.
Apps
118

Go to Settings > System & updates > Date & time, enable Dual clocks, and set aHome city. The time of your home city and current location will now both display on thelock screen.
Only one clock will display on the lock screen if your current location is in the same timezone as your home city.
Notepad
Manage Your NotepadYou can sort your Notepad items by category and put them into different folders, deleteunwanted items, and share items with other people.
When viewing a list of items or an individual item in Notepad, touch the status bar at the topof the screen to quickly return to the first item or the beginning of the item you are viewing.
Create a Note
You can create notes to record your thoughts and inspirations.
1 Go to Notepad > Notes, then touch .
Apps
119

2 Enter the title and content of the note.
3 Touch to insert a picture into the note as required. Touch and hold the picture, thendrag it to the desired position in the note.
4 If you want to organise your notes for easier access and viewing, touch to add a tagto your note after finishing it.
5 Touch to save the note.
Create To-Dos
You can create to-dos with a set time to remind you to complete them.
If you set a time, your device will send you a reminder notification at the specified time.
1 Go to Notepad > To-dos, then touch .
2 Enter your to-do.
3 Touch , set a reminder time, then touch OK.
4 Touch Done.
Sort Notepad Items by Category
Different types of notes or to-dos can be sorted by category and displayed in differentcolours for more convenient viewing.
You can sort notepad items using either of the following methods:
• On the All notes or All to-dos screen, swipe left on an item, touch , then select a tag.
• Touch and hold a note or to-do, select or drag over the check boxes of the notes or to-dos
you want to categorise under the same tag, then touch to select a tag.
Share Notepad Items
You can share your Notepad items as text files or images.
On the All notes or All to-dos screen, touch the item to be shared, touch , then followthe onscreen instructions to share it.
Delete Notepad Items
You can delete notepad items using either of the following method:
• On the All notes or All to-dos screen, swipe left on a note or to-do, then touch todelete it.
• Touch and hold a note or to-do you want to delete, select or drag over the check boxes of
any other notes or to-dos you want to delete as well, then touch .
Apps
120

To restore a deleted Notepad item, touch All notes or All to-dos, select the item you want to
restore in Recently deleted, then touch .
Recorder
Recorder
1 In the Tools folder, open Recorder, and touch to start a recording.
2 During a recording, you can touch to add a tag.
3 When you are finished, touch to stop recording.
4 You can also touch and hold a recording, then share, rename, or delete it.
Recordings are saved under Files > Categories > Internal storage > Sounds.
Play a Recording
Recording files are listed on the Recorder home screen. Touch a recording to play it.
On the recording playback screen, you can:
Apps
121

• Touch to skip the muted parts.
• Touch to adjust the playback speed.
• Touch to add a tag.
• Touch a tag to rename it.
Edit a Recording
1 On the Recorder home screen, touch a recording.
2 Touch to display the waveform of the recording.
3 Drag the start and end bars to adjust the clip length. Pinch your fingers on the waveformto zoom in or out to adjust the clip length more precisely.
4 Touch and select Keep selected part or Delete selected part.
Share Recordings
1 On the Recorder home screen, touch the recording you want to share to play it.
2 Go to > Share.
3 Select your preferred sharing method and follow the onscreen instructions to share therecording.
Add Email AccountsAdd your email account in Email and you can use your device for convenient email access atany time.
Add a Personal Email Account
1 Open Email on your device and select from the available mailbox providers or touchOther.
2 Enter the email address and password, touch Sign in, and follow the onscreen instructionsto configure the server settings. The system will automatically connect to the server andcheck the server settings.
Add an Exchange Account
Microsoft Exchange enables digital messaging within a company. If your company mailboxuses the Exchange server, you can log in to your company email account on your device.
1 Contact the company email server administrator to obtain the domain name, serveraddress, port number, and security type.
Apps
122

2 Open Email, and select Exchange.
3 Enter the email address, user name, and password.
4 Touch Manual setup. On the Account setup screen, set parameters such as the emaildomain name, server address, port number, and security type.
5 Touch Next, then follow the onscreen instructions to complete the configuration. Thesystem will automatically connect to the server and check the server settings.
Send EmailsSelect an email account and write emails to send them to the recipients' email addresses.
Send an Email
1 Open Email, then touch .
2 Enter the recipient's email address, or touch to select a contact or group, then touch
.
3 Add the addresses of any recipients to whom you wish to CC or BCC the email. If you havemore than one email account, you will also need to select the email address you wish tosend the email from.
4 Write the email and enter the subject, then touch .
Save an Email as a Draft
On the Compose screen, enter the recipient's email address, subject, or email content, and
touch to save the email as a draft.
Go to Inbox > Show all folders > Drafts to view draft emails.
Reply to an Email
1 On the Inbox screen, open the email you wish to reply to.
2 Touch to reply to just the email sender, or touch to reply to everyone on thethread.
3 After writing your reply, touch .
Set Encryption for Outgoing Emails
You can encrypt outgoing emails to protect your confidential information. Encrypted emailscan be viewed only by recipients who have the required digital certificates, ensuringinformation security.
1 Apply for and install a digital certificate.You need to apply for a digital certificate from a trusted third-party certificateauthority (CA) before installing it. The processing procedure varies between differentCAs. For details, refer to the relevant CA website.
Apps
123

2 From the Inbox screen, go to > Settings.
3 Touch the account you want to set encryption for, touch Email encryption, then enableEncrypt outgoing emails.
4 If the certificate has been installed, select Encryption certificate and set Encryptionalgorithm according to your preferences.If no certificate has been installed, enable Send encrypted emails without installingcertificates.
Set Automatic Replies for an Exchange Account
1 Go to Email > > Settings.
2 Select the Exchange account you want to set automatic replies for, touch Automaticreplies, and turn on the Automatic replies switch.
3 Set the time or content of the auto reply, then touch Done.
Set Email NotificationsSet a notification mode for your emails based on your needs.
1 Go to Email > > Settings > General > Notifications and enable Allownotifications.
2 Select the email account you want to set notifications for, turn on the Allow notificationsswitch, then select a notification mode.
View and Manage EmailsReceive, view and manage your emails in the inbox.
View an Email
1 Open Email, then swipe down on the Inbox screen to refresh the email list.If you have multiple email accounts, touch Inbox and select the email account you wantto view.
2 Open an email, then view, reply to, forward, or delete the email.
If you are notified about an important event in an email, touch > Add to calendar toimport the event into your calendar.
3 Swipe left or right to view the next or previous email.
Organise Emails by Subject
On the Inbox screen, go to > Settings > General, then enable Organise by subject.
Add an Email Contact to a Group
You can create email groups to communicate more efficiently.
1 On the Inbox screen, open an email, and touch Add to group.
2 Choose to add the email sender or recipient to the group, and touch OK.
Apps
124

3 On the group selection screen, select an existing group, then touch to save thecontact in the group.Alternatively, touch Create group, enter the group name, then touch Save.
Once you have created a group, you can select the group from the recipient drop-down list tosend emails to group members.
Sync Emails
After automatic email syncing is enabled, the emails on your device will be automaticallysynced with those on the email server.
1 On the Inbox screen, go to > Settings.
2 Touch the account you wish to sync emails for, then turn on the Sync Email switch.
3 Touch Sync frequency to set the automatic syncing period.
Search for an Email
On the Inbox screen, touch the search box, then enter keywords such as the subject orcontent of the email.
Delete Emails
On the Inbox screen, touch and hold the email to be deleted, drag over the check boxes of
any other emails you want to delete, then touch .
Manage Email AccountsYou can add multiple email accounts so you can manage them at the same time.
Add Email Accounts
1 Go to Email > > Settings > Add account.
2 Select an existing email service provider or touch Other, then follow the onscreeninstructions to add an email account. Repeat for each of the accounts you wish to add.
Switch Between Email Accounts
On the Inbox screen, touch Inbox and select the email account you wish to use.
Change Account Name and Signature
On the Inbox screen, go to > Settings and select an account. You can then set or changethe Account name, Signature, and Default account.
Log Out of an Email Account
On the Inbox screen, go to > Settings, select an account, and touch Remove account.
Apps
125

Manage VIP ContactsImportant email contacts can be added as VIP contacts. Emails from VIP contacts will beautomatically stored in the VIP inbox.
Add a VIP Contact
You can add VIP contacts using either of the following methods:
• Go to Email > > Settings > VIP contacts. On the VIP list screen, go to Add >Create or touch Add from contacts, then follow the onscreen instructions.
• Open an email, touch the account name of the sender or receiver, then touch Add to VIPlist.
Delete a VIP Contact
1 Go to Email > > Settings > VIP contacts.
2 On the VIP list screen, touch .
3 Select the VIP contact to be deleted, then touch .
Calculator
CalculatorUse the calculator on your device to perform basic mathematical calculations and forcalculating exponential, logarithmic, and trigonometric functions.
Use the Basic Calculator
You can open the calculator using either of the following methods:
• Swipe down from the middle of the home screen to display the search box. Search forCalculator, and the first result will be the preinstalled Calculator app.
• Find Calculator in the Tools folder.
• Swipe up from the bottom of the lock screen to display the shortcut panel, then touch to open the calculator.
Copy, Delete, or Clear Numbers
• Copy a calculation result: Touch and hold the calculation result, touch Copy, then paste theresult somewhere else, such as in a note or message.
• Delete the last digit: Touch .
• Clear the display: Touch . You can also touch to clear the display after touching
to complete the calculation.
Apps
126
Torch
TorchYou can turn on the torch using either of the following methods:
• Swipe down from the status bar to open the notification panel, and touch to turn thetorch on or off.
• Swipe up from the bottom edge of the lock screen to display the shortcut panel, and touch
to turn the torch on or off.
When turned on, a notification indicating that the torch has been turned on will be displayed
on the lock screen. Touch to turn off the torch.
Compass
Compass
1 You can open Compass using either of the following methods:
• Swipe down from the middle of the home screen to display the search box. Search forCompass, and the first result will be the preinstalled Compass app.
• Find Compass in the Tools folder.
2 To lock your current direction, touch the compass dial. The scale marks will turn blue ifyou go off course.
For accurate bearings, hold your device flat or straight up when using Compass.
Mirror
MirrorWhen you want to know how you look but don't have a real mirror with you, you can useyour device as a mirror instead.
Go to Tools > Mirror. While using your device as a mirror, you can:
• Zoom in or zoom out: Drag the zoom slider at the bottom. You can also touch the screentwice to zoom in and touch it twice again to zoom back out.
• Save the image: Touch the screen to pause the current image. Touch the screen again to
resume. When the image is paused, touch to save the image. You can find the savedimage in Gallery.
• Adjust mirror brightness: Touch or at the top of the screen.
Apps
127

• Make the mirror brighter: Touch and enable Blow. Then blow air into the microphonefor the screen to fog up. Wipe the screen to clear the fog.
• Change the mirror frame: Touch to use a different frame.
• Create a broken mirror effect: Touch and hold the screen to "break" the mirror, completewith a sound effect. Touch the screen again to "fix" the mirror.
App Twin
App TwinApp Twin enables you to log in to two Facebook accounts simultaneously without the hassleof having to constantly switch between them, allowing you to keep your work and privatelives separate.
App Twin will only work with certain apps.
1 Go to Settings > Apps > App Twin, and turn on the switch for the app you want tocreate a twin of.
2 Two icons for the same app will display on the home screen for you to log in to yourseparate accounts simultaneously.
3 To disable App twin, touch and hold the twinned version of the app, then touch Delete.All the data of the twin app will be deleted.
Quickly Access Frequently Used App Features
Quickly Access Frequently Used App FeaturesYou can access frequently used features of certain apps from app icons on the home screen,and even add shortcuts for these features to the home screen.
Quickly Access Frequently Used App Features
Apps
128
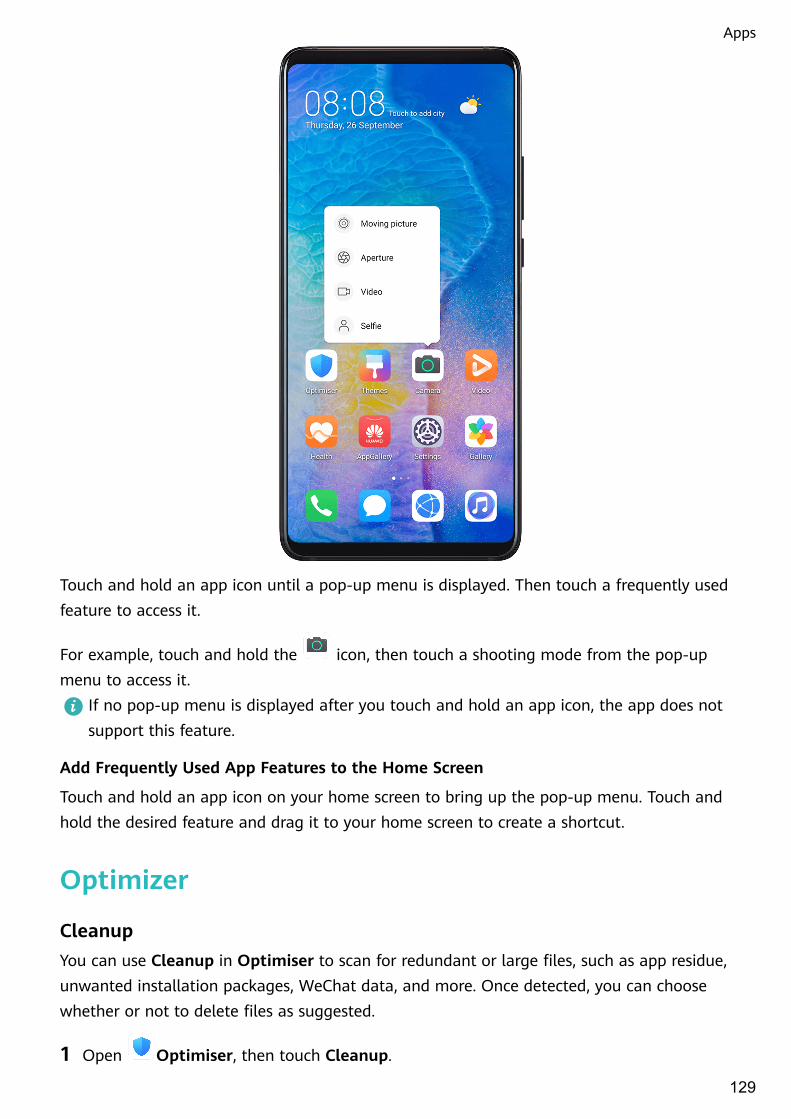
Touch and hold an app icon until a pop-up menu is displayed. Then touch a frequently usedfeature to access it.
For example, touch and hold the icon, then touch a shooting mode from the pop-upmenu to access it.
If no pop-up menu is displayed after you touch and hold an app icon, the app does notsupport this feature.
Add Frequently Used App Features to the Home Screen
Touch and hold an app icon on your home screen to bring up the pop-up menu. Touch andhold the desired feature and drag it to your home screen to create a shortcut.
Optimizer
CleanupYou can use Cleanup in Optimiser to scan for redundant or large files, such as app residue,unwanted installation packages, WeChat data, and more. Once detected, you can choosewhether or not to delete files as suggested.
1 Open Optimiser, then touch Cleanup.
Apps
129

2 When the scan is complete, touch Clean up after each item and delete any files you don'tneed.
Clean Up Duplicate Files
Optimiser can identify duplicate files on your device.
On the Cleanup screen, touch Duplicate files , then select unwanted files to delete them.
Manage Data Usage
Open Optimiser, then touch Data usage to view data usage and manage networkaccess.
View and Manage High Data Consumption Apps
1 You can find out how much data your apps are using in comparison to each other bygoing to Data usage this month on the Data usage screen.
2 Touch a high data consumption app to set mobile data, roaming data, or background datausage limits for it.
Apps
130

View and Set the Network Access Permission of an App
On the Data usage screen, touch Network access, then change the settings for apps thatconsume a large amount of data (such as video streaming apps) so they can only be usedwhen you are connected to a Wi-Fi network.
Enable or Disable Smart Data Saver
Enable Smart data saver to prevent apps from using mobile data in the background.
1 On the Data usage screen, touch Smart Data Saver, then enable it. The icon willthen display on the status bar.
2 If you want to allow unrestricted access to data for some apps even when they arerunning in the background, toggle on the switches for these apps.
Add Mobile Data Usage Reminders
Add data plans for your SIM cards and usage reminders in Optimiser to keep you informed ofyour data consumption.
1 On the data usage screen, go to More data settings > Monthly data limit and follow theonscreen instructions to add a data plan.
2 On the More data settings screen, touch Usage reminders. From there, you can setwhether a notification will be sent or if mobile data will be disabled once the monthlydata limit or roaming data limit has been topped.
3 On the More data settings screen, you can set whether to show data used when thescreen is locked.
Filter and Block Spam CallsSet different block rules to block sales, fraud, and other kinds of spam calls.
Filter Spam Calls
1 Go to Phone > > Blocked > and set the block rules.
Alternatively, go to Optimiser > Blocked > to set the block rules.
2 Touch Call block rules and toggle on the switches of corresponding block rules.
Apps
131
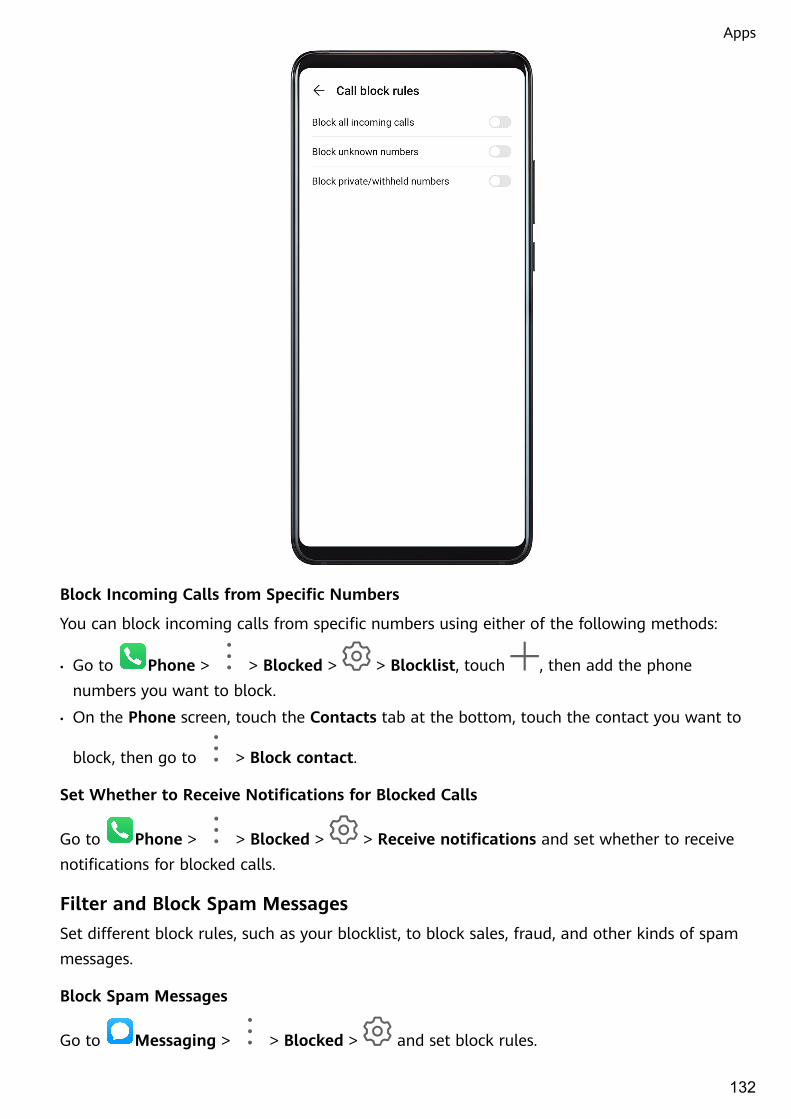
Block Incoming Calls from Specific Numbers
You can block incoming calls from specific numbers using either of the following methods:
• Go to Phone > > Blocked > > Blocklist, touch , then add the phonenumbers you want to block.
• On the Phone screen, touch the Contacts tab at the bottom, touch the contact you want to
block, then go to > Block contact.
Set Whether to Receive Notifications for Blocked Calls
Go to Phone > > Blocked > > Receive notifications and set whether to receivenotifications for blocked calls.
Filter and Block Spam MessagesSet different block rules, such as your blocklist, to block sales, fraud, and other kinds of spammessages.
Block Spam Messages
Go to Messaging > > Blocked > and set block rules.
Apps
132

You can also go to Optimiser > Blocked > to set block rules.
Block Messages from Specific Numbers
1 Go to Messaging > > Blocked > > Blocklist.
2 Touch and add the numbers you want to block. SMS and MMS messages sent bythese numbers will all be blocked.
Block Messages Containing Specific Keywords
1 Go to Messaging > > Blocked > > Keyword blocklist.
2 Touch and add the keywords to be filtered. All messages containing these keywordswill be blocked.
Set Whether to Receive Notifications for Blocked Messages
Go to Messaging > > Blocked > > Receive notifications and set whether toreceive notifications when messages are blocked.
One-Touch OptimisationUse the OPTIMISE feature of Optimiser to keep your device in an optimal state.
Apps
133

1 Open Optimiser and touch OPTIMISE.
2 Results and recommendations will be displayed once the optimisation is complete.
Phone Clone
Phone ClonePhone Clone lets you quickly and seamlessly move all the basic data (including contacts,calendar, images, and videos) from your old device to your new device.
Apps
134

Clone Data from an Android Device
1 On your new device, open Phone Clone . Alternatively, go to Settings > System &updates > Phone Clone, touch This is the new phone, then touch Huawei or OtherAndroid.
2 Follow the onscreen instructions to download and install Phone Clone on your old device.
3 On your old device, open Phone Clone and touch This is the old phone. Follow theonscreen instructions to connect your old device with your new device by scanning a codeor connecting manually.
4 On your old device, select the data you want to clone, then touch Transfer to startcloning.
Phone Clone is only available on devices running Android 4.4 or later.
Clone Data from an iPhone or iPad
1 On your new device, open Phone Clone. Alternatively, go to Settings > System &updates > Phone Clone, touch This is the new phone, then touch iPhone/iPad.
2 Follow the onscreen instructions to download and install Phone Clone on your old device.
Apps
135

3 On your old device, open Phone Clone and touch This is the old phone. Follow theonscreen instructions to connect your old device with your new device by scanning a codeor connecting manually.
4 On your old device, select the data you want to clone, then follow the onscreeninstructions to complete the data cloning.
Phone Clone is only available on devices running iOS 8.0 or later.
HiSuite
Introduction to HiSuiteHuawei HiSuite is a PC-based tool used for managing Huawei smart Android devices(including phones and tablets).
After you have installed HiSuite on your computer, you can manage data such as yourcontacts, messages, pictures, videos, and apps, back up data from and restore data to yourdevice, and update your device to the latest version.
1 Visit the official Huawei website on your computer, search for HiSuite, then download andinstall the latest version of HiSuite.
2 Use a USB cable to connect your device to the computer. When a dialog box entitled UseUSB to appears on your device, select Transfer files.
3 On the computer, open HiSuite, set the connection mode to USB cable. Then follow theonscreen instructions to establish a connection between your device and computer.
Back Up and Restore Data Using HiSuiteAfter installing HiSuite on your computer and connecting your computer with your device,you can use HiSuite to back up data (such as contacts, messages, call logs, photos, videos,audio files, and documents) from your device to your computer. You can also restore data onyour device from your computer.
Back Up Data to a Computer
1 On the HiSuite home page, click Back Up.
2 Select the items you want to back up.
3 Click Back Up, follow the onscreen instructions to set the password and password hint,and confirm the settings.Backup data won't be able to restore if you forget the password.
4 HiSuite will then back up the data you selected. Keep the USB cable connected when thedata is being backed up.
5 Click Done when all data has been backed up.
Backup data is saved under C:\Users\User name\Documents\Hisuite\backup on the
computer by default. To change the backup directory on the computer, go to > Settings> Backup.
Apps
136

Restore Data
1 On the HiSuite home page, click Restore.
2 Click Backup Files, select the items you want to restore to your device, then click Restore.
3 Enter the password for the backup data and click OK.
4 HiSuite will then restore the items you have selected. Keep the USB cable connectedwhen the data is being restored.
5 Click Done when all data has been restored successfully.
Update or Restore the System Using HiSuiteAfter installing HiSuite on your computer and connecting your computer with your device,you can use HiSuite to update the system of your device.
Update the System
• Your personal data may be erased during a system update. It is recommended that youback up your data before updating your device.
• Ensure that your device is at least 20% charged and keep the USB cable connectedthroughout the update process. Do not power off or restart your device, or remove orinsert a memory card.
• Some third-party apps, such as online banking and game apps, may not be compatiblewith the latest system version. It might take some time for the app developers tolaunch a compatible app version.
On the HiSuite home page, click Update. If a new version is detected, the version numberwill be displayed and you can click the version number to start updating the system.
Once the update is completed, your device will automatically restart.
Tips
Tips
Tips provides you with an abundance of information so you can quickly familiariseyourself with your device and make the best use of it. In Tips, you can also find a full set ofuser guides for more detailed instructions.
• Vividly depicted cards: Browse through the easy-to-read cards with a short clip or image toquickly get to grips with all the most useful features on your device. The cards arecategorised so you can jump directly to a category you are interested in.
• Recommended features: The Recommended section is packed with featured articles andposters arranged by usage scenario to help acquaint you with the more popular features.
• User guides: Find detailed instructions in the comprehensive user guides.
Apps
137

• Try out features: A TRY NOW button is available in certain cards for you to try out thefeature immediately.
• Search: Find what you're looking for by searching for it in the search bar of Tips. The searchresults will also include related topics you may want to know about.
Apps
138

Settings
Search for Items in Settings
Search for Items in SettingsTired of trudging through layers of settings? Just search for them using the search box.
• Swipe down from the middle of the screen to display the search box. Enter the name of asetting to obtain search results.
• Open Settings, and enter the name of a setting in the search box at the top of thescreen, to obtain search results.
Wi-Fi
Connect to a Wi-Fi NetworkConnecting to the Internet over Wi-Fi is an effective way to save mobile data. You can alsoenable Wi-Fi security monitoring to avoid risky hotspots and ensure safe Internet access.
139

Connect to a Wi-Fi NetworkBe extra careful when connecting to a free public Wi-Fi hotspot to avoid security risksand economic loss resulting from the leakage of your personal data.
1 Go to Settings > Wi-Fi, and enable Wi-Fi.
2 Connect to a Wi-Fi network on the Wi-Fi screen using either of the following methods:
• Select a Wi-Fi network to connect to under Available networks. A password isrequired for encrypted networks.
• To manually add a Wi-Fi network, scroll down to the bottom of the screen, touch Addnetwork, and enter the SSID and password as prompted to complete the connection.
The icon displayed on the status bar indicates that the device is connected to Wi-Fi.
Wi-Fi DirectYou can use Wi-Fi Direct to transfer data between Huawei devices. Wi-Fi Direct can transferbigger files more quickly than Bluetooth, without having to pair the devices.
1 On the receiving device, go to Settings > Wi-Fi and enable Wi-Fi.
2 Go to More settings > Wi-Fi Direct to start searching for nearby devices that have Wi-FiDirect enabled.
3 On the sending device, touch and hold to select the files you want to share, touch ,and select Wi-Fi Direct.
These steps may be different if you are sharing files directly from an app.
4 Touch the icon of the receiving device to establish a connection, then share the files.
5 On the receiving device, accept the Wi-Fi Direct transfer request.
To view the received files, open Files, then go to Internal storage > Wi-Fi Direct on theCategories tab.
Wi-Fi+When Wi-Fi+ is enabled, if your device detects a Wi-Fi network that it has previouslyconnected to or is free, it will automatically enable Wi-Fi and connect to the network. Yourdevice will also evaluate the quality of the current Wi-Fi network and switch to mobile data ifthe Wi-Fi signal is poor.
1 Go to Settings > Wi-Fi.
2 Touch More settings and enable or disable Wi-Fi+.
Bluetooth
Settings
140

Bluetooth BasicsYou can connect your device to Bluetooth headsets, speakers, and car kits. You can also useBluetooth to share data between your device and other devices.
Make sure your device is within 10 m (about 33 ft.) of other Bluetooth devices.
Enable or Disable Bluetooth
You can enable or disable Bluetooth in either of the following ways:
• Swipe down from the status bar to open the notification panel, then touch to enableor disable Bluetooth. Touch and hold the switch to enter the Bluetooth settings screen.
• Go to Settings > Bluetooth, then enable or disable Bluetooth.
Set a Bluetooth Name
Set a Bluetooth name for your device to easily identify it during connection.
1 On the Bluetooth settings screen, toggle the Bluetooth switch on.
2 Touch Device name, enter a name, then touch OK.
Pair with a Bluetooth Device
1 Enable Bluetooth on the target device and set it to discoverable. For detailed instructions,refer to the device's user guide.
2 From your device, access the Bluetooth settings screen, and enable Bluetooth to haveyour device automatically search for nearby Bluetooth devices.
3 From the list of Available devices, select the one you want to pair your device with, andfollow the onscreen instructions to complete pairing.
On the Bluetooth settings screen, touch to view tips for connecting various Bluetoothdevices.
Transfer Files via Bluetooth
You can use Bluetooth to transfer videos, pictures, contacts, and more to another deviceprovided that both devices are within the effective Bluetooth range.
1 Pair the sending and recipient devices via Bluetooth.
2 On the sending device, touch and hold a file, select the files you want to share, touch ,and select Bluetooth.
Operations may vary if you are sharing files from apps directly.
3 Touch the Bluetooth name of the recipient device to start sharing.
4 On the recipient device, accept the Bluetooth transfer request.
Unpair a Bluetooth Device
1 On the Bluetooth settings screen, enable the Bluetooth switch.
Settings
141
2 In the list of Paired devices, touch next to the name of the device you wish to unpair,then touch Unpair.
Mobile Data
Connect to Mobile Data
1 Make sure that mobile data is available on your SIM card.
2 Connect to mobile data using either of the following methods:
• Swipe down from the status bar to open the notification panel, then swipe down
further to show all shortcut switches. Touch to enable Mobile data.
• Go to Settings > Mobile network > Mobile data and enable Mobile data.
To conserve battery power and reduce data usage, disable the mobile data service when youdon't need it.
Enable 5G• 5G is only available in some countries and regions.
• Not all devices support 5G.
5G refers to the fifth generation of mobile communications technology. Compared with a 4Gnetwork, a 5G network has a higher data transmission rate and a shorter delay.
When two SIM cards are inserted, only the default mobile data SIM will support 5G, whilethe other will only support 4G/3G/2G.
1 5G service depends on the support of your carrier's network and its deployment ofrelevant services. Please contact your carrier to activate the 5G service.
2 If your device has two SIM cards inserted, go to Settings > Mobile network > SIMmanagement and set SIM 1 or SIM 2 as the default mobile data SIM.
3 Go to Settings > Mobile network > Mobile data and enable 5G for the defaultmobile data SIM.
5G service may be unavailable in certain areas due to frequency interference in the carriernetwork.
Manage SIM CardsYou can enable or disable SIM cards and name them for easier identification.
Enable or Disable a SIM Card
Go to Settings > Mobile network > SIM management, and turn on or off the switch forSIM 1 or SIM 2 according to your preferences.
Settings
142
Once disabled, a SIM card cannot be used for calling, messaging, or accessing the Internet.
Name Your SIM Card
You can name your SIM cards for easier identification and management. For example, youcould mark one SIM card as "Work" and the other as "Personal".
Go to Settings > Mobile network > SIM management and touch to edit the SIMcard name.
Configure Dual SIM SettingsIf your device has two SIM cards inserted, you can set one as the default mobile data SIMand the other as the default calling SIM, or set call forwarding between the two SIM cards.
This feature applies to dual-SIM devices only.
Set a Default Mobile Data and a Default Calling SIM
Go to Settings > Mobile network > SIM management and set SIM 1 or SIM 2 as thedefault mobile data or default calling SIM.
Enable Call Forwarding Between SIMs
After enabling call forwarding between two SIM cards, incoming calls to an unavailable SIMcard will be forwarded to the other one.
This feature requires the support of your mobile carrier. For details, contact your carrier.
1 Go to Settings > Mobile network > SIM management > Call forwarding betweenSIMs.
2 Select a call forwarding mode and turn on the corresponding switch.Call forwarding between SIMs is enabled when both switches are on.
eSIMEmbedded-SIM (eSIM) is a virtual SIM card that can be used instead of a physical SIM card.An eSIM card works in the same way as a physical SIM card, but occupies much less spaceand can be linked with multiple card numbers. You are free to switch between carriers to findthe best deal for you.
• This feature may vary depending on your carrier.
• This feature is only available in some countries and regions.
• This feature may vary by device.
Apply for an eSIM Card
Contact your carrier to apply for an eSIM card.
You need to provide the embedded-SIM ID (EID) information when applying for the eSIMcard. This information is related to whether your device has a built-in eSIM smart chipset. To
Settings
143

view the EID information, go to Settings > About phone > Show EID. If the EIDinformation is not displayed, it indicates that this feature is not supported on your device.
• You can apply for multiple eSIM cards, the maximum number of which is determinedby the eSIM chipset capacity of your device. When the maximum number is reached,you will see a prompt on your device indicating that you cannot add an eSIM card.
• Only one eSIM card can be used at a time.
Adding an eSIM card
1 Go to Settings > Mobile network > SIM management.If your device is a single-SIM device, there are still two options displayed on thescreen: SIM 1 and SIM 2.The eSIM card is installed in the SIM 2 slot by default.If your device is a dual-SIM device and a physical SIM card is already inserted in slot 2,SIM 2 will be disabled when you add an eSIM card. Inserting or removing SIM 2 willnot affect the eSIM services.
2 Go to SIM 2 > Add eSIM.
Perform either of the following operations:
• Scan the QR code: After you apply for an eSIM card number, the carrier will provide a QRcode. After you scan the QR code, your device will download and install the configurationfile and the new eSIM card will be enabled by default.
• Scan the image: If you cannot use the camera to scan the QR code provided by the carrier(for example, when you are applying for an eSIM card through the carrier's app), performthe following operations:
1 Save the QR code provided by the carrier as an image.
2 Touch Select from Gallery and select the QR code provided by your carrier. Your devicewill automatically identify the QR code and download and install the configuration file.
• Enter the activation code: Touch Enter manually. Follow the onscreen instructions to enterthe activation code provided by your carrier.
Enabling the eSIM card
Enable an eSIM card if you want to use it again.
On the SIM management screen, touch SIM 2. Enable the eSIM card as prompted.
Disabling an eSIM card
If you do not want to use an eSIM card or want to switch to another eSIM card, you candisable it easily.
After an account is disabled, you cannot use the account to communicate with others.However, the monthly fee will not be suspended or stopped. After the eSIM card is disabled,the eSIM card information is still in the eSIM list and you can enable the eSIM card again.
Settings
144

On the SIM management screen, touch SIM 2. Disable the eSIM card as prompted.
If you want to switch SIM2 to a physical card, touch Removable SIM. Your device willautomatically disable the eSIM card.
Some eSIM cards cannot be disabled after being enabled. For details, contact your carrier.
Naming the eSIM card
You can give different names to eSIM cards that are used for different purposes. For example,"Business" or "Personal".
On the SIM management screen, touch SIM 2. Follow the onscreen instructions to edit thename or number of the eSIM card.
Deleting an eSIM card number
You can delete an eSIM card that is no longer being used. The deleted eSIM card cannot berestored and will not be displayed in the eSIM list.
Disable the eSIM card before deleting it.
On the SIM management screen, touch Reset apps. Follow the onscreen instructions todelete the eSIM card.
• Some card numbers cannot be deleted. For details, contact your carrier.
• The account number cannot be restored after being deleted. You need to contact yourcarrier to register an account again. (Whether the original number can be retaineddepends on the carrier.)
• Deleting a card number does not mean that you have canceled the contract with thecarrier. The carrier will continue to charge for the card number. To stop charges beingincurred, contact your carrier to deregister your account.
Restoring the eSIM Card to Its Factory Settings
• If you select Reset but keep eSIMs when restoring your device to its factory settings, theeSIM card can still be used after the device is powered on again.
• If you select Reset, the information about the eSIM card will be deleted. Deleting a cardnumber does not mean that you have cancelled the contract with the carrier. The carrierwill continue to charge for the card number. To stop charges being incurred, contact yourcarrier to deregister your account. If you still want to use the eSIM card, you can contactyour carrier to download the eSIM card information again.
eSIM card information is your personal data. Please look after it carefully.
Personal HotspotOnce Personal hotspot has been enabled, you can share your mobile data or the Wi-Finetwork your device is currently connected to with other devices.
Settings
145

Share Your Network Connection via Personal Hotspot
1 Go to Settings > Mobile network > Personal hotspot.
2 Set Device name and Password.
3 Enable Personal hotspot and your device will share your mobile data or the Wi-Finetwork you are currently connected to with other devices.
4 In the case of a Wi-Fi network, you can set the AP frequency band of the Wi-Fi hotspot.Go to More > AP band and touch 2.4 GHz or 5 GHz.
5 In the case of mobile data, you can set a mobile data limit for a single session. Go toMore > Data limit and set the limit.When this limit has been reached, your device will automatically disable the hotspot.
Share Your Network Connection via Bluetooth
1 Go to Settings > Bluetooth, enable Bluetooth, select a device, then follow theonscreen instructions to complete pairing.
2 Go to Settings > Mobile network > Personal hotspot > More, and enable Bluetoothtethering.
3 On the Bluetooth settings screen of the paired device, touch next to your devicename, then enable Internet access to establish an Internet connection and share yournetwork connection.
Share Your Network Connection via USB
1 Use a USB cable to connect your device to a computer.
2 On your device, go to Settings > Mobile network > Personal hotspot > More andenable USB tethering to share your mobile data or Wi-Fi network.
Use VoLTE to Make CallsVoice over LTE (VoLTE) is an IP-based data transmission technology that delivers both calland data services over a 4G network.
Once VoLTE is enabled, you can make a call while accessing the Internet. If your devicesupports dual SIM dual VoLTE, you can receive an incoming call on a SIM card while theother SIM card is being used for a call.
VoLTE also provides you with a faster call connection time and higher quality voice and videocalls.
Enable VoLTE
1 Contact your mobile carrier to activate the 4G and VoLTE functions for your SIM card. Ifboth the primary and secondary SIM card trays of a dual-SIM device support 4G andVoLTE, 4G and VoLTE can be enabled for both SIM cards.
Settings
146

2 Go to Settings > Mobile network > Mobile data. In the network settings area of SIM1 or SIM 2, turn on the VoLTE calls switch.
• This feature may vary depending on your carrier.
• The 4G network is used as an example here. If your device supports 5G, the operationsare the same.
• 5G is only available in some countries and regions.
Make a Video Call
Video calls are only possible when both parties are using VoLTE-activated devices.
1 Open Phone, touch the Contacts tab at the bottom of the screen, then select thecontact you want to call.
2 Touch to make a video call.
During a voice call, you can also touch to switch to a video call.
Manage Data Usage
Open Optimiser, then touch Data usage to view data usage and manage networkaccess.
Settings
147

View and Manage High Data Consumption Apps
1 You can find out how much data your apps are using in comparison to each other bygoing to Data usage this month on the Data usage screen.
2 Touch a high data consumption app to set mobile data, roaming data, or background datausage limits for it.
View and Set the Network Access Permission of an App
On the Data usage screen, touch Network access, then change the settings for apps thatconsume a large amount of data (such as video streaming apps) so they can only be usedwhen you are connected to a Wi-Fi network.
Enable or Disable Smart Data Saver
Enable Smart data saver to prevent apps from using mobile data in the background.
1 On the Data usage screen, touch Smart Data Saver, then enable it. The icon willthen display on the status bar.
2 If you want to allow unrestricted access to data for some apps even when they arerunning in the background, toggle on the switches for these apps.
Settings
148

Add Mobile Data Usage Reminders
Add data plans for your SIM cards and usage reminders in Optimiser to keep you informed ofyour data consumption.
1 On the data usage screen, go to More data settings > Monthly data limit and follow theonscreen instructions to add a data plan.
2 On the More data settings screen, touch Usage reminders. From there, you can setwhether a notification will be sent or if mobile data will be disabled once the monthlydata limit or roaming data limit has been topped.
3 On the More data settings screen, you can set whether to show data used when thescreen is locked.
Enable Data RoamingOnce you have activated the international roaming service, you can enable this feature to usemobile data when traveling in a different country or region.
• This feature requires the support of your mobile carrier. For details, contact your carrier.
• Charges may apply when using the international roaming service. For details abouthow data roaming fees are charged, contact your carrier.
Go to Settings > Mobile network > Mobile data. Under the SIM card for which youwish to enable the data roaming feature, enable Data roaming.
More Connections
Airplane ModeWhen taking a flight, you can enable Airplane mode if required to do so by the airline. InAirplane mode, your device will not be able to make calls, send or receive SMS messages, oruse mobile data, but all other functions will be available.
You can enable or disable Airplane mode using either of the following methods:
• Swipe down from the status bar to open the notification panel, then swipe down again to
display all shortcuts. Touch to enable or disable Airplane mode.
• Go to Settings > Mobile network, and enable or disable Airplane mode.
When Airplane mode is enabled, Wi-Fi and Bluetooth will automatically be disabled. You canre-enable them if allowed to do so by the airline.
NFCNear Field Communication (NFC) is a short-range wireless communications technology thatallows mobile and other electronic devices to connect in countless ways.
Settings
149
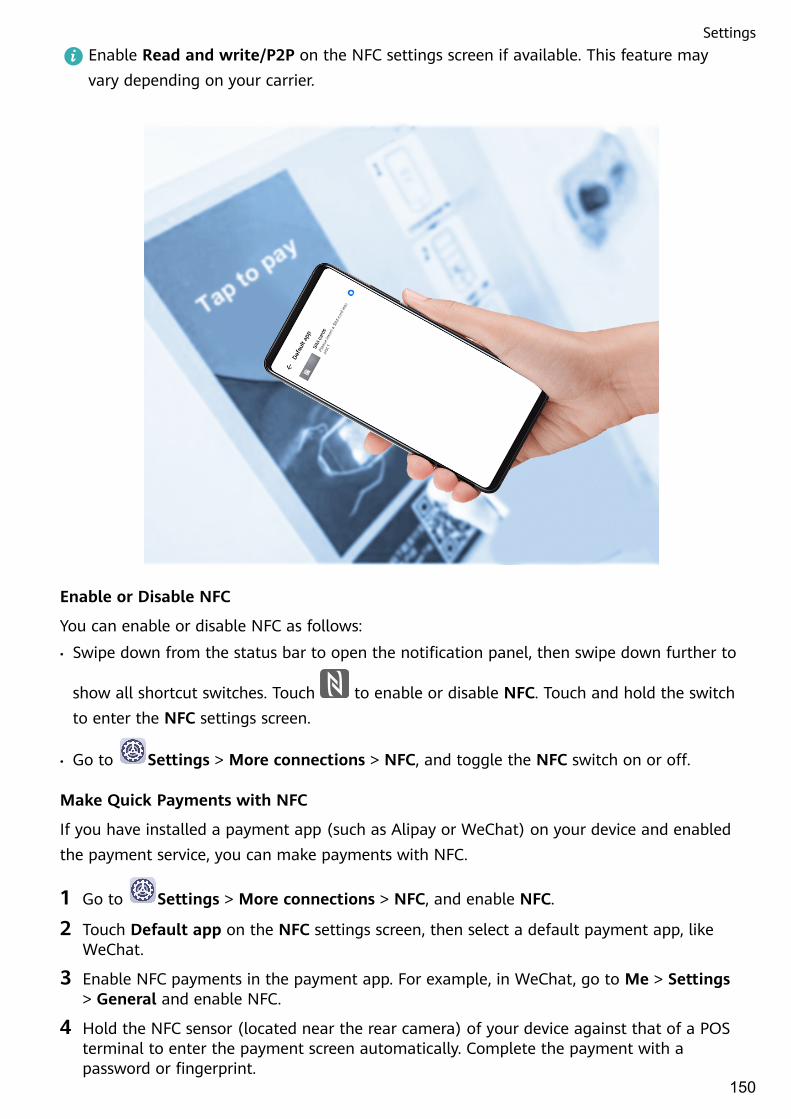
Enable Read and write/P2P on the NFC settings screen if available. This feature mayvary depending on your carrier.
Enable or Disable NFC
You can enable or disable NFC as follows:
• Swipe down from the status bar to open the notification panel, then swipe down further to
show all shortcut switches. Touch to enable or disable NFC. Touch and hold the switchto enter the NFC settings screen.
• Go to Settings > More connections > NFC, and toggle the NFC switch on or off.
Make Quick Payments with NFC
If you have installed a payment app (such as Alipay or WeChat) on your device and enabledthe payment service, you can make payments with NFC.
1 Go to Settings > More connections > NFC, and enable NFC.
2 Touch Default app on the NFC settings screen, then select a default payment app, likeWeChat.
3 Enable NFC payments in the payment app. For example, in WeChat, go to Me > Settings> General and enable NFC.
4 Hold the NFC sensor (located near the rear camera) of your device against that of a POSterminal to enter the payment screen automatically. Complete the payment with apassword or fingerprint.
Settings
150

Wireless ProjectionYou can connect your device to an external display (for example, a TV) wirelessly.
1 Based on the model and functions of your external display, do the following:
• If the external display supports Miracast, enable wireless projection on it.
• If not, use a wireless HDMI adapter to connect your device and external display. Ensurethat the wireless HDMI adapter is connected to a power supply.
To check whether your external display supports Miracast and how to enable wirelessprojection on it, consult the user guide or customer service of the external displaymanufacturer.
2 Swipe down from the status bar to open the notification panel, then touch to turn onWi-Fi.
3 Swipe down further on the notification panel to enable Wireless Projection. Your devicewill now search for the external display or the wireless HDMI adapter.
Alternatively, go to Settings > More connections > Easy Projection and enableWireless Projection.
4 Touch the name of the external display or the wireless HDMI adapter on the search resultlist to start projecting.
Settings
151
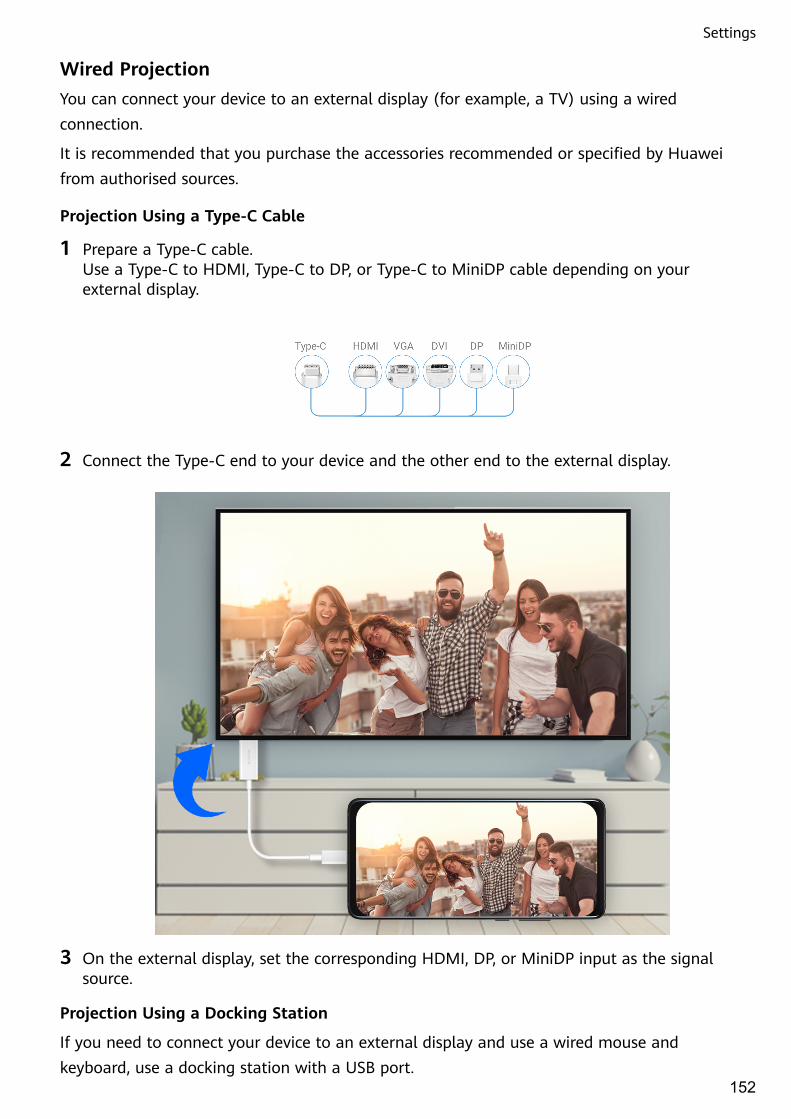
Wired ProjectionYou can connect your device to an external display (for example, a TV) using a wiredconnection.
It is recommended that you purchase the accessories recommended or specified by Huaweifrom authorised sources.
Projection Using a Type-C Cable
1 Prepare a Type-C cable.Use a Type-C to HDMI, Type-C to DP, or Type-C to MiniDP cable depending on yourexternal display.
2 Connect the Type-C end to your device and the other end to the external display.
3 On the external display, set the corresponding HDMI, DP, or MiniDP input as the signalsource.
Projection Using a Docking Station
If you need to connect your device to an external display and use a wired mouse andkeyboard, use a docking station with a USB port.
Settings
152

1 Prepare a docking station.Multiple types of ports are available on a docking station. If your external display supportsHDMI and you need to use a wired mouse and keyboard, use a docking station with atleast one HDMI port and two USB ports.
2 Connect your device and the external display through the docking station, then connectthe wired mouse and keyboard to the docking station.
3 On the external display, set the corresponding HDMI, DP, or MiniDP input as the signalsource.
Huawei BeamYou can hold the NFC sensors of two Huawei devices against each other to quickly transferdata between them, without the need to pair the devices or even having to touch to confirm.
Settings
153
Enable Read and write/P2P on the NFC settings screen if available. This feature mayvary depending on your carrier.
1 Go to Settings > More connections and enable NFC and Huawei Beam on thedevices of both the sender and recipient.
2 On the sending device, touch and hold a file, select the files you want to share, touch ,and select Huawei Beam.
Operations may vary if you are sharing files from apps directly.
3 Keep the two devices unlocked and the screen turned on, then hold the NFC sensors(located around the rear camera) of the two devices together until a beep is heard andthe sharing screen shrinks, which indicates that the connection was successful and thefiles have started transferring.
Once the transfer has started, you can separate the two devices slightly, but keepthem within 10 cm (4 in.) of each other.
Huawei ShareHuawei Share is a wireless sharing technology that allows you to quickly transfer images,videos, documents, and other types of files between devices. This technology uses Bluetoothto discover nearby devices that supports Huawei Share and Wi-Fi Direct to transfer fileswithout using mobile data.
Enable or Disable Huawei Share
You can enable or disable Huawei Share in either of the following ways:
• Swipe down from the status bar to open the notification panel, then touch to enableor disable Huawei Share. Touch and hold the toggle to enter the Huawei Share settingsscreen.
• Go to Settings > More connections > Huawei Share, and enable or disable HuaweiShare.
Enabling Huawei Share automatically turns on Wi-Fi and Bluetooth.
Quickly Share Files Between Your Devices with Huawei Share
You can use Huawei Share to quickly share files between Huawei devices. The recipient canpreview the files before they are sent, then view the full content of the files once they havebeen received. For example, the recipient can view received pictures or videos in Gallery.
Settings
154
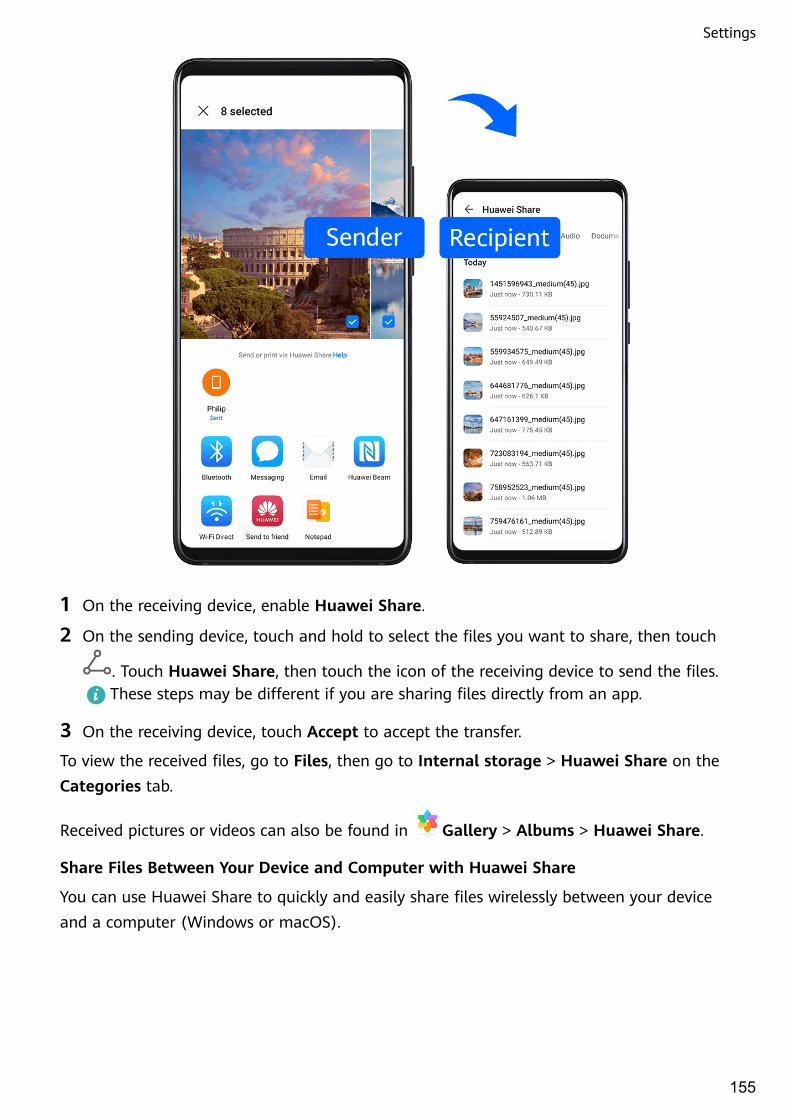
1 On the receiving device, enable Huawei Share.
2 On the sending device, touch and hold to select the files you want to share, then touch
. Touch Huawei Share, then touch the icon of the receiving device to send the files.These steps may be different if you are sharing files directly from an app.
3 On the receiving device, touch Accept to accept the transfer.
To view the received files, go to Files, then go to Internal storage > Huawei Share on theCategories tab.
Received pictures or videos can also be found in Gallery > Albums > Huawei Share.
Share Files Between Your Device and Computer with Huawei Share
You can use Huawei Share to quickly and easily share files wirelessly between your deviceand a computer (Windows or macOS).
Settings
155

1 Make sure your device and computer are connected to the same Wi-Fi network.
2 On your device, go to the Huawei Share settings screen and enable Huawei Share andComputer Share.
3 Make a note of the name displayed next to Name shown on computers and the username and password under Verification.
4 On the computer, go to:
• Windows: This PC (Computer) > Network.
• macOS: Finder > Go to > Network.Currently, this feature is only available on Macs running macOS 10.8 to 10.14.
5 On your computer, double-click the name of your device and enter the user name andpassword noted down previously.
6 Open a shared folder on your device, such as the Internal storage or Album folder to view,edit, or copy files from your device to your computer or vice versa.Changes made to files in the shared folders on your computer will be automaticallysynced to your device and vice versa.
One-Touch Printing with Huawei Share
When a printer that supports Huawei Share is nearby, you can use Huawei Share to find theprinter and print out pictures or PDF files stored on your device.
Settings
156

1 Depending on the type of printer, ensure the following:
• Wi-Fi capable printers: The printer must be powered on and connected to the samenetwork as your device.
• Wi-Fi Direct capable printers: The printer must be powered on and have Wi-Fi Directenabled.
• Bluetooth capable printers: The printer must be powered on and discoverable viaBluetooth.
2 On your device, preview the file to be printed, then go to Share > Huawei Share.
3 Once the printer has been discovered, touch its name on your device, and adjust thesettings on the preview screen. Then, touch PRINT to print.If you are connecting a Bluetooth printer to your device for the first time, find the printeron your device, touch the printer name, then press and hold the Power button on theprinter for about 1 second to confirm the connection.
For a list of supported printers, touch Help on the Huawei Share sharing screen, selectPrinters, then touch What printers are supported?.
Settings
157

Connect to a Laptop Using a USB Cable
1 Connect your device to a computer with a USB cable. After the driver is automaticallyinstalled on the computer, a drive letter corresponding to your device will be displayed.
2 On your device, swipe down from the status bar to open the notification panel, go toSettings > Touch for more options, and select one of the following modes:
• Transfer photos: Uses the Picture Transfer Protocol (PTP) to transfer photos betweenyour device and computer. In the new drive on the computer, you can view photosstored on your device, or copy and paste photos between the two devices.
• Transfer files: Uses the Media Transfer Protocol (MTP) to transfer media files betweenyour device and computer. In the new drive on the computer, you can view files storedon your device, or copy and paste files between the two devices.
Install Windows Media Player 11 or later on your computer to view media files onyour device.
• Input MIDI: Uses the Musical Instrument Digital Interface (MIDI) to use your device asan audio input device to play music on your computer.
PrintingConnect your device to a Mopria-certified printer via Wi-Fi, and then you will be able to printimages and documents from your device.
Connect Your Device to a Printer
1 Check the printer manual or consult with its manufacturer to verify that it is Mopria-certified.If it is not, consult with its manufacturer to install the corresponding app or plug-in for iton your device.
2 Connect your device and the printer to the same Wi-Fi network using any of the followingmethods:
• Connect to a router: Enable Wi-Fi on the printer and connect it to the router. On yourdevice, enable Wi-Fi, connect to the same router, then follow the onscreen instructionsto finish configuring the settings.
• Use Wi-Fi Direct: If your printer supports Wi-Fi Direct, follow the instructions in theprinter manual to enable this feature. On your device, enable Wi-Fi Direct, then touchthe printer to establish the connection.
• Connect to your printer's hotspot: If your printer can double as a Wi-Fi hotspot, followthe instructions in the printer manual to enable the hotspot and set a password. Onyour device, enable Wi-Fi, touch the printer's hotspot, then follow the onscreeninstructions to finish configuring the settings.
3 Go to Settings > More connections > Printing > Default Print Service, and enableDefault Print Service.
Settings
158

4 Select the printer from the search results and follow the onscreen instructions to add theprinter.
Print Files
To print files in Gallery and Notepad, do the following:
• Print an image: Open Gallery. Open the image you want to print, go to More > Printor export to PDF, select the printer, then follow the onscreen instructions to complete theprinting.
• Print a note: Open Notepad. Open the note you want to print, touch Print, then followthe onscreen instructions to complete the printing.
Connect to a VPN NetworkA virtual private network (VPN) is a temporary connection that extends a private networkacross a public network, encrypting data transmission to provide security.
When working outside the office, you can use a VPN to securely access your company'sIntranet.
The following types of servers are supported:
• PPTP: It stands for Point-to-Point Tunneling Protocol, offering MPPE encryption.
• L2TP: It stands for Layer 2 (Data Link Layer) Tunneling Protocol, offering IPSec PSK andIPSec RSA encryption.
• IPSec Xauth: Offering PSK, RSA, and Hybrid RSA encryption.
Connect to a PPTP Server
1 Obtain the VPN server name and address from your VPN server administrator.
2 Go to Settings > More connections > VPN > Add VPN network, enter the VPNname, set the server type to PPTP, then enter the server address.
3 If the VPN server does not have a DNS address, touch Show advanced options, thenenter the DNS domain, DNS server address, and forwarding route.
4 Touch Save.
5 Touch the VPN you have just set up, enter your VPN user name and password, then touchConnect.
Connect to a L2TP/IPSec PSK Server
1 Obtain the VPN server name, server address, L2TP key (optional), IPSec identifier(optional), and IPSec pre-shared key from your VPN server administrator.
2 Go to Settings > More connections > VPN > Add VPN network, enter the VPNserver name, set the server type to L2TP/IPSec PSK, then enter the server address, L2TPkey, IPsec identifier, and IPsec pre-shared key.
Settings
159

3 If the VPN server does not have a DNS address, touch Show advanced options and enterthe DNS domain, DNS server address, and forwarding route.
4 Touch Save.
5 Touch the VPN you have just set up, enter your VPN user name and password, then touchConnect.
Home Screen&Wallpaper
Manage the Home ScreenYou can customise the home screen layout to suit your device usage habits.
Move an App Icon on the Home Screen
Touch and hold an app icon until your device vibrates, then drag it to the desired position onthe home screen.
Keep Home Screen Icons Aligned
Pinch two fingers on the home screen to access Home screen settings mode, then enableAuto-align. With this feature enabled, empty spaces will automatically be filled when appsare removed.
Lock Home Screen Icon Positions
Pinch two fingers on the home screen to access Home screen settings mode, then enableLock layout.
Select the Home Screen Layout Pattern
Pinch two fingers on the home screen, go to Home screen settings > Layout, then select alayout pattern you prefer.
Put App Icons in Folders
For easy management of your app icons on the home screen, you can stack similar apps in afolder and name the folder.
1 Touch and hold an app icon until your device vibrates, then drag it over another app. Afolder will automatically be created to house these two apps.
2 Open a folder, touch its name, then enter a name for it.
Add App Icons to a Folder or Remove Them
Open a folder and touch . Then you can:
• Select one or more apps, and touch OK to add them to the folder.
• Deselect one or more apps, and touch OK to remove them from the folder. If you deselectall apps, the folder will be deleted.
Settings
160

App DrawerYou can put your apps in a drawer and display only frequently used apps on your homescreen to streamline your home screen.
Enable App Drawer
Go to Settings > Home screen & wallpaper > Home screen style, and select Drawer.
Once enabled, you can swipe up on the home screen to access all of your apps in the drawer.
Add Apps in the Drawer to the Home Screen
In Drawer mode, you can swipe up on the home screen to display the App Drawer. Touch andhold the app you want to add until your device vibrates, then drag it to the desired positionon the home screen.
Move Apps Back to the Drawer
Touch and hold an app icon until your device vibrates, then touch Remove. This operationwill only remove the app icon from your home screen but will not uninstall it.
You can still find it in the app drawer.
Settings
161

Disable the Drawer Style
To disable the drawer style, set Home screen style to Standard.
Display&Brightness
Brightness, Colour, and Colour TemperatureYou can set the screen brightness, colour mode, and colour temperature according to yourpreferences.
Automatically Adjust the Screen Brightness
Go to Settings > Display & brightness, and enable Automatic.
Your device will automatically adjust the screen brightness according to the ambient lightingconditions.
Manually Adjust the Screen Brightness
You can manually adjust the screen brightness using either of the following methods:
• Swipe down from the status bar to open the notification panel. In the section, drag theslider to adjust the screen brightness.
• Go to Settings > Display & brightness. In the section, drag the slider to adjust thescreen brightness.
Adjust the Colour Mode
Go to Settings > Display & brightness > Colour mode & temperature, and select thecolour mode that you prefer. Normal mode will be easier on your eyes and is thereforerecommended.
• Normal: natural colour tones
• Vivid: vivid colour tones
Adjust the Colour Temperature
Go to Settings > Display & brightness > Colour mode & temperature, and select thecolour temperature that you prefer. Default and Warm will be easier on your eyes and aretherefore recommended.
• Default: a natural tint
• Warm: a yellowish tint
• Cool: a whitish tint
• You can touch anywhere on the colour circle or drag the spot to adjust the colourtemperature.
Settings
162

Eye Comfort ModeEye comfort mode can effectively reduce blue light and adjust the screen to show warmercolours, relieving eye fatigue and protecting your eyesight.
• After every half hour of screen time, rest your eyes for at least 10 minutes.
• Look into the distance to adjust the focusing muscles of your eyes and to avoid eyefatigue.
• Cultivating good eye care habits will protect your vision and prevent near-sightedness.
Enable or Disable Eye Comfort Mode
• Swipe down from the status bar to open the notification panel, then swipe down on it
again to show all shortcuts. Touch to enable or disable Eye Comfort. Touch and hold
to access the Eye Comfort settings screen.
• Go to Settings > Display & brightness > Eye Comfort, and enable or disable Enableall day.
Once Eye Comfort is enabled, will be displayed in the status bar, and the screen willtake on a yellow tint as a result of emitting less blue light.
Set a Schedule for Eye Comfort Mode
Go to Settings > Display & brightness > Eye Comfort, enable Scheduled, then set Startand End according to your preferences.
Enable or Disable Flicker Reduction
Go to Settings > Display & brightness > Eye Comfort, and enable or disable Flickerreduction.
Enabling Flicker reduction will reduce the amount your screen flickers, but may also affectits colour and brightness.
Customise Eye Comfort Mode
Go to Settings > Display & brightness > Eye Comfort, enable Enable all day or set upScheduled, and adjust the slider under Filter level to customise how much blue light youwould like to be filtered.
Dark ModeIn low light conditions or at night, you can enable Dark mode to apply a darker colourscheme, which helps prevent excessive screen light from irritating your eyes.
Go to Settings > Display & brightness, and enable or disable Dark mode.
Settings
163

Adjust Text Style SettingsYou can adjust the system text size and app display size, as well as the text style.
Enlarge or Reduce Text Size
Go to Settings > Display & brightness > Text and display size, and drag the slider forText size.
Enlarge or Reduce Display Size
Display size determines the size of content (including text and images) displayed withinapps.
Go to Settings > Display & brightness > Text and display size, and drag the slider forDisplay size.
Screen Resolution
Use Smart Screen Resolution
Go to Settings > Display & brightness > Screen resolution, and enable SmartResolution. Your device will automatically adjust the screen resolution according to thecurrent running status.
Set the Screen Resolution
Go to Settings > Display & brightness > Screen resolution, and select a screenresolution according to your preferences. A higher screen resolution will result in a clearerdisplay, but will consume more power.
Display Carrier Name and Network Speed in the Status BarYou can check the carrier name and network speed with a single glance at the status bar.
Go to Settings > Display & brightness > More display settings, and enable or disableDisplay carrier name and Display network speed according to your preferences.
Switch Between Portrait and Landscape OrientationThe built-in gravity sensor of your device allows you to automatically switch betweenhorizontal and landscape orientations when you rotate the screen.
Swipe down from the status bar to open the notification panel, then swipe down on it again
to show all shortcuts. Touch to enable or disable this feature.
GPU TurboGPU Turbo represents a radical redesign of the graphics processing framework of the deviceat its most basic level, integrating hardware and software to achieve accelerated graphics
Settings
164

processing. It improves the device's graphics processing efficiency, image quality, andperformance, whilst simultaneously reducing system power consumption.
The end result is a great improvement in user experience when playing graphically intensegames.
Sounds&Vibration
Vibrate Mode and More Sound Settings
1 Go to Settings > Sounds & vibration, and enable or disable Vibrate in silent modeaccording to your preferences.
2 Touch More sound settings. Then you can set the sound for the following items:
• Keypad tones
• Screen lock
• Screenshot
• Screen touch
• Vibrate on touch
• Startup sound
This feature may vary by device.
Do Not DisturbDo Not Disturb helps you prevent interruptions when you need to focus. When this mode isenabled, calls and messages will be muted and banner notifications will not be displayed.
Enable or Disable Do Not Disturb
You can enable or disable Do not disturb using either of the following methods:
• Swipe down from the status bar to open the notification panel, then swipe down again to
display all shortcuts. Touch to enable or disable Do Not Disturb. You can touch and
hold to access the Do Not Disturb settings screen.
• Go to Settings > Sounds & vibration > Do Not Disturb, and enable or disable Do NotDisturb.
When Do not disturb is enabled, will be displayed in the status bar. You can check fornotifications on the lock screen or by swiping down from the status bar to open the
notification panel. Swipe left on a notification and touch to delay the notification.
When you receive calls, notifications, or messages, they will be muted, the screen will notlight up, and banner notifications will not be displayed.
Settings
165

Set a Schedule for Do Not Disturb
1 Go to Settings > Sounds & vibration > Do Not Disturb, and disable Do Not Disturb.
2 Enable Scheduled. Your device will enter Do not disturb mode at the specified time onSaturdays and Sundays by default.
3 Touch Scheduled to set the start time and repeat cycle.
4 You can also touch Add to set multiple start times.
Make Exceptions in Do Not Disturb Mode
While in Do Not Disturb mode, you can enable your device to ring for calls and messagesfrom certain sources so you don't miss anything important.
Go to Settings > Sounds & vibration > Do Not Disturb, and enable Do Not Disturb orScheduled. Then you can:
• Touch Calls or Messages and select one of the options. If you set an exception, your devicewill ring for calls or messages from the selected source.
• Once Repeated calls is enabled, a second call from the same number within 15 minuteswill not be silenced.
Set a Ringtone for Incoming CallsYou can set your favorite music or a video as the ringtone for incoming calls.
If two SIM cards have been inserted into your device, configure the ringtone separately forSIM 1 and SIM 2.
Set a Music Ringtone
1 Go to Phone > > Settings > Ringtone or Settings > Sounds & vibration >Phone ringtone.
2 Select a system ringtone, or touch Music on device to select a local song as the ringtone.
Set a Video Ringtone
Set a video as the ringtone for incoming calls.
Settings
166
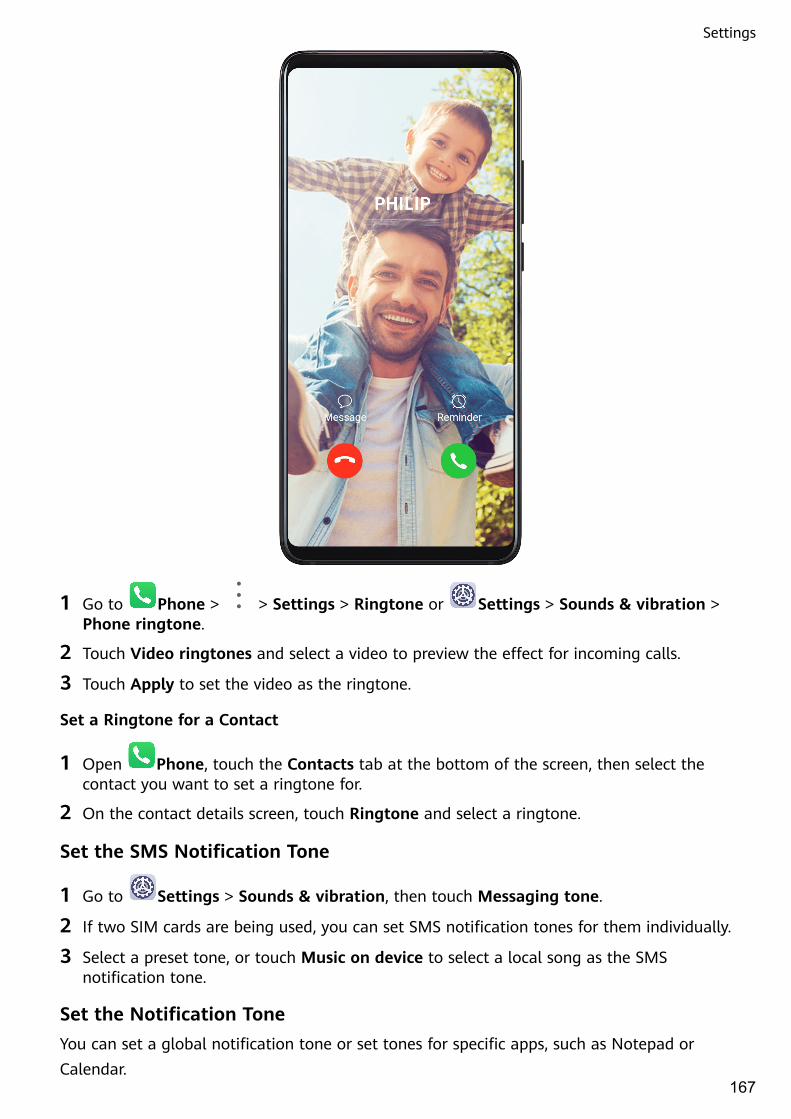
1 Go to Phone > > Settings > Ringtone or Settings > Sounds & vibration >Phone ringtone.
2 Touch Video ringtones and select a video to preview the effect for incoming calls.
3 Touch Apply to set the video as the ringtone.
Set a Ringtone for a Contact
1 Open Phone, touch the Contacts tab at the bottom of the screen, then select thecontact you want to set a ringtone for.
2 On the contact details screen, touch Ringtone and select a ringtone.
Set the SMS Notification Tone
1 Go to Settings > Sounds & vibration, then touch Messaging tone.
2 If two SIM cards are being used, you can set SMS notification tones for them individually.
3 Select a preset tone, or touch Music on device to select a local song as the SMSnotification tone.
Set the Notification ToneYou can set a global notification tone or set tones for specific apps, such as Notepad orCalendar.
Settings
167

Set the Default Notification Tone
1 Go to Settings > Sounds & vibration, and touch Notification sound.
2 Select a preset tone, or touch Music on device to select a local song as the notificationtone.
Set the Notification Tone for a Specific App
You can set the notification tone for certain apps by doing the following:
1 Go to Settings > Apps > Apps.
2 Select an app (for example, Notepad).
3 Go to Notifications > Notepad > Sound.
4 Select a preset tone, or touch Music on device to select a local song as the notificationtone.
Huawei Histen Sound EffectsHuawei Histen sound effects, with 3D surround sound support, deliver vibrant and crispsound to create an immersive audio experience.
Huawei Histen sound effects are only available when a headset is plugged in.
Go to Settings > Sounds & vibration > Huawei Histen sound effects and select anoption:
• Auto: Automatically identifies what you are playing and intelligently applies sound effectsto optimise your experience.
• 3D audio: Delivers 3D spatial sounds.
• Natural: Faithfully reproduces the original sounds.
• Standard: Requires less power for audio playback. You can also customise equaliser settingsyourself to achieve the exact sound you are looking for.
Auto, 3D audio, and Standard modes allow you to select a headset type so you can matchthe sound effects to your headset.
Notifications
App BadgesWhen new notifications arrive for an app, a badge will appear on the app icon. By default, anumbered badge is displayed. You can also set a dot as the badge, or hide the badge forsome or all apps.
Turn Off App Badges
1 Go to Settings > Notifications, and touch App icon badges.
Settings
168

2 Turn off the switch for some or all apps.
Change the Badge Display Mode
On the App icon badges screen, touch Badge display mode, and select Numbers or Dotsaccording to your preference.
Lock Screen NotificationsWith Face unlock enabled, your device can help keep your notification content private byusing the Swing Gesture Sensor. When a face other than yours is detected, the notificationcontent will be automatically hidden.
1 Ensure that your facial data has been enroled on your device.
2 Go to Settings > Notifications, and enable Hide notification content.
3 Unlock your device with face recognition, and the notification content will be displayed asnormal. If someone else's face is detected, your device will automatically hide thenotification content.
In strong light or low light, or when a face or the Swing Gesture Sensor is partiallycovered, face detection may be delayed or incorrectly performed, which will affect hownotification content is hidden.
The notification content will be automatically displayed after Hide notification content isdisabled. Notifications from apps protected by App lock will still be hidden unless your devicehas verified that you are the user.
If your facial data has not been enroled on your device, enabling Hide notification contentwill hide the notification content on the lock screen.
More Notification Settings
Go to Settings > Notifications > More notification settings and enable Wake screen.Your device will automatically turn on the screen when it receives a notification.
Disable or Change the App Notifications
Disable App Notifications
You can choose not to receive notifications from apps in any of the following ways:
• After you receive a notification from an app, find it on the notification panel, swipe left on
the notification, go to > More settings, and disable Allow notifications.
• Go to Settings > Notifications, find the app for which you want to disablenotifications, then disable Allow notifications.
• Go to Settings > Apps > Apps, touch the icon of the app you want to set, touchNotifications, and disable Allow notifications.
Settings
169

Change the Way How App Notifications Are Sent
1 Go to Settings > Notifications, select an app, and enable Allow notifications.
2 Follow the onscreen instructions to set up how notifications are sent:
• Mute notifications
• Select the notification style (including Lock screen notifications and Banners).
• Select a notification sound.
• Enable or disable notification vibration.
• Enable or disable the function that allow notifications from the app even when Do NotDisturb is enabled.
Notification methods supported by an app may vary.
Biometrics&Password
Fingerprint IDYou can enrol a fingerprint and then use it to unlock the screen and access your Safe, Applock, and more.
Enrol an In-Screen Fingerprint
Settings
170

1 Go to Settings > Biometrics & password > Fingerprint ID, and follow theinstructions to set or enter the lock screen password.
2 Touch New in-screen fingerprint to begin enroling your fingerprint.
3 Place your fingertip on the in-screen fingerprint sensor. When you feel a vibration, lift yourfinger then press again. Move your finger around to enrol different parts of it.
4 When the enrolment has been completed, touch OK.
When the screen is locked, lift your device and the in-screen fingerprint sensor will appear.You can now place your finger on the fingerprint sensor to unlock the screen.
Rename or Delete a Fingerprint
1 Go to Settings > Biometrics & password > Fingerprint ID and enter your lock screenpassword.
2 In the Fingerprint list section, touch an enroled fingerprint to rename or delete it.
Identify a Fingerprint
Fingerprint identification allows you to match your fingers with the enroled fingerprints.
1 Go to Settings > Biometrics & password > Fingerprint ID and enter your lock screenpassword.
Settings
171
2 In the Fingerprint list section, touch Identify fingerprint.
3 Touch the fingerprint sensor with your finger. The recognised fingerprint will behighlighted.
Use Your Fingerprint to Access Your Safe
1 Go to Settings > Biometrics & password > Fingerprint ID and enter your lock screenpassword.
2 Turn on the switch for Access Safe and follow the onscreen instructions to link yourfingerprint with the Safe.
Now you can go to Files > Categories, touch Safe, then use your fingerprint to access it.
Use Your Fingerprint to Access a Locked App
1 Go to Settings > Biometrics & password > Fingerprint ID and enter your lock screenpassword.
2 Turn on the switch for Access App Lock and follow the onscreen instructions to link yourfingerprint with App lock.
You can now touch a locked app on your home screen and use your fingerprint to access it.
Enable and Use Fingerprint Payment
You can use your fingerprint to verify your payments in a payment app.
Go to the payment app and follow the onscreen instructions to enable this feature.
Facial RecognitionFace Recognition allows you to unlock your device or access locked apps with your facialdata, even in dark environments.
Ensure that you are facing the device screen when using face recognition.
Settings
172

Enrol Facial Data
1 Go to Settings > Biometrics & password > Face Recognition, and enter your lockscreen password.
2 Select Enable raise to wake.
3 Touch Get started and follow the onscreen instructions to enrol your facial data.
Set an Alternate Look
You can add an alternate look for more accurate and convenient face recognition.
On the Face Recognition screen, touch Set an alternate look, and follow the onscreeninstructions to enrol the alternate facial data.
Enable Face Unlock
On the Face Recognition screen, touch Unlock device, and select an unlock method.If you have enabled PrivateSpace on or added multiple users to your phone, you can useFace unlock only in MainSpace or with the Owner account.
Access App Lock with Face Recognition
On the Face Recognition screen, enable Access App Lock, and follow the onscreeninstructions to add your facial data to App lock.
Settings
173

You can then touch a locked app on your home screen and use face recognition to access theapp.
Disable or Delete Facial Data
On the Face Recognition screen, you can do the following:
• Disable facial data for certain features: Disable Unlock device, or Access App Lock asrequired. This will not delete your facial data.
• Delete facial data: Touch Delete facial data and follow the onscreen instructions to deleteyour facial data.
Lock Screen PasswordYou can set a numeric, pattern, or hybrid password as your lock screen password.
Set the Lock Screen Password
You can set a numeric, pattern, or hybrid password.
1 Go to Settings > Biometrics & password and touch Lock screen password.
2 Enter a password containing 6 digits.
3 Alternatively, touch Change unlock method and select a password type, then follow theonscreen instructions to input a new password.
Settings
174

Change the Lock Screen Password
1 On the Biometrics & password screen, go to Change lock screen password.
2 Enter the original lock screen password.
3 Enter a new password, or touch Change unlock method to select a password type, thenfollow the onscreen instructions to input a new password.
Disable Lock Screen Password
On the Biometrics & password screen, go to Disable lock screen password.
Secure Lock SettingsThere are many ways your device can be unlocked. In some cases (such as if you are asleepwhile taking public transport), password unlock is more secure than other unlock methods.When Lockdown mode is enabled, you will only be able to unlock your device using your lockscreen password. Other unlock methods will be temporarily disabled.
You must set a lock screen password to use this feature.
1 Go to Settings > Biometrics & password > Secure lock settings, and enable ShowLockdown option.
2 Press and hold the Power button until the Lockdown option is displayed on the screen.
3 Touch Lockdown and follow the onscreen instructions to enable Lockdown mode. OnceLockdown mode is enabled, your device can only be unlocked using the lock screenpassword.
4 Lockdown mode is automatically disabled when you unlock your device. You can use otherunlock methods as usual the next time you unlock your device.If you need to re-enable Lockdown mode, press and hold the Power button and touch theLockdown option again.
Apps
App TwinApp Twin enables you to log in to two Facebook accounts simultaneously without the hassleof having to constantly switch between them, allowing you to keep your work and privatelives separate.
App Twin will only work with certain apps.
1 Go to Settings > Apps > App Twin, and turn on the switch for the app you want tocreate a twin of.
2 Two icons for the same app will display on the home screen for you to log in to yourseparate accounts simultaneously.
3 To disable App twin, touch and hold the twinned version of the app, then touch Delete.All the data of the twin app will be deleted.
Settings
175

View or Change App Settings
Go to Settings > Apps > Apps, and touch an app. You can force stop it, uninstall it, clearthe app cache, view and change app permissions, set notification modes, and more.
Battery
Check Power Consumption
Go to Settings > Battery (or Optimiser > ). You can:
• Touch Battery usage to view power-intensive apps. Touch a power-intensive app to enableor disable power consumption alerts.
• Touch Power consumption details to learn more about the software and hardware powerconsumption.
Power ManagementOn the Battery screen, you can check the estimated battery time remaining, and enable apower saving mode to extend the battery life of your device.
Optimise Device Power Settings
Go to Settings > Battery (or Optimiser > ) and touch Optimise battery usage.Your device will automatically analyse the current power consumption issues, optimisecertain settings, and recommend other setting optimisations.
Enable Power Saving Mode
Optimiser provides two power saving modes:
• Power Saving mode reduces power consumption by limiting background app activity,visual effects, and sounds.
• Ultra Power Saving mode strictly controls background apps to ensure that your device canstay on for as long as possible. In this mode, you will only be able to use selected apps, andall system switches, except for Wi-Fi and mobile data, will be turned off.
On the Battery screen, select a power saving mode:
• When the battery level is extremely low, enable Ultra Power Saving mode. Your device willthen display a black home screen.
To add apps you wish to use in Ultra Power Saving mode, touch and select the apps
from the list. You can touch to remove the apps or touch in the upper right cornerto exit Ultra Power Saving mode.
Settings
176

• When the battery level is not extremely low, but you would still like to save power, enable
Power Saving mode. The icon will then be displayed in the status bar.Ultra Power Saving mode is not available on some devices. If this option is notdisplayed, it indicates that your device does not support the feature.
Enable Performance ModePerformance mode adjusts power settings to deliver maximum performance. This will causethe battery to drain more quickly, especially when graphic-intensive apps are used.
When the battery level is sufficient, go to Settings > Battery (or Optimiser > )and enable Performance mode.
The icon will then be displayed in the status bar.Performance mode is not available on some devices. If this option is not displayed inOptimiser, it indicates that your device does not support the feature.
Battery SettingsYou can also set whether to display the battery percentage in the status bar, and whether tomaintain a network connection when the device screen is turned off.
Display Battery Percentage on the Status Bar
Go to Settings > Battery (or Optimiser > ), touch Battery percentage, andchoose to display the battery percentage, either inside or outside of the battery icon on thestatus bar.
Stay Connected while Your Device is Sleeping
If you would like your device to continue to receive messages or download data while it is insleep mode, set to keep your device connected when it sleeps. Please note that this mayincrease power consumption.
On the Battery screen, touch More battery settings, then enable or disable Stay connectedwhile asleep as required.
Storage
Check Storage Usage
Go to Settings > Storage to check storage usage and optimise it when you feelnecessary.
Settings
177

CleanupYou can use Cleanup in Optimiser to scan for redundant or large files, such as app residue,unwanted installation packages, WeChat data, and more. Once detected, you can choosewhether or not to delete files as suggested.
1 Open Optimiser, then touch Cleanup.
2 When the scan is complete, touch Clean up after each item and delete any files you don'tneed.
Clean Up Duplicate Files
Optimiser can identify duplicate files on your device.
On the Cleanup screen, touch Duplicate files , then select unwanted files to delete them.
Security
Password VaultPassword Vault saves your usernames and passwords and autofills them for you each timeyou log in to an app. This data is hardware encrypted and stored only on your device. Huaweidoes not have access to it, and will not upload it to the network or server.
• Before using Password Vault, set a lock screen password for your device.
• Password Vault is only compatible with certain apps.
Log In Faster with Password Vault
1 When you log in to an app for the first time, your device will automatically prompt you tosave the password. Touch SAVE when prompted.If you accidentally touch Never save, you can still enable the autofill feature for this app
by going to Settings > Security > Password Vault > Autofill settings, and togglingon the switch next to this app. When the switch is toggled off, the autofill feature will bedisabled.
2 If you log out of the app, the next time you log in, your device will autofill the usernameand password once you have verified your identity with your lock screen password,fingerprint, or face ID.
When you switch to a new Huawei device, you can use Phone Clone to transfer data inPassword Vault to your new device.
View or Delete Stored Usernames and Passwords
You can view or delete the usernames and passwords stored in Password Vault at any time.
Go to Settings > Security > Password Vault > ACCOUNTS to view or delete the storedusernames and passwords.
Settings
178
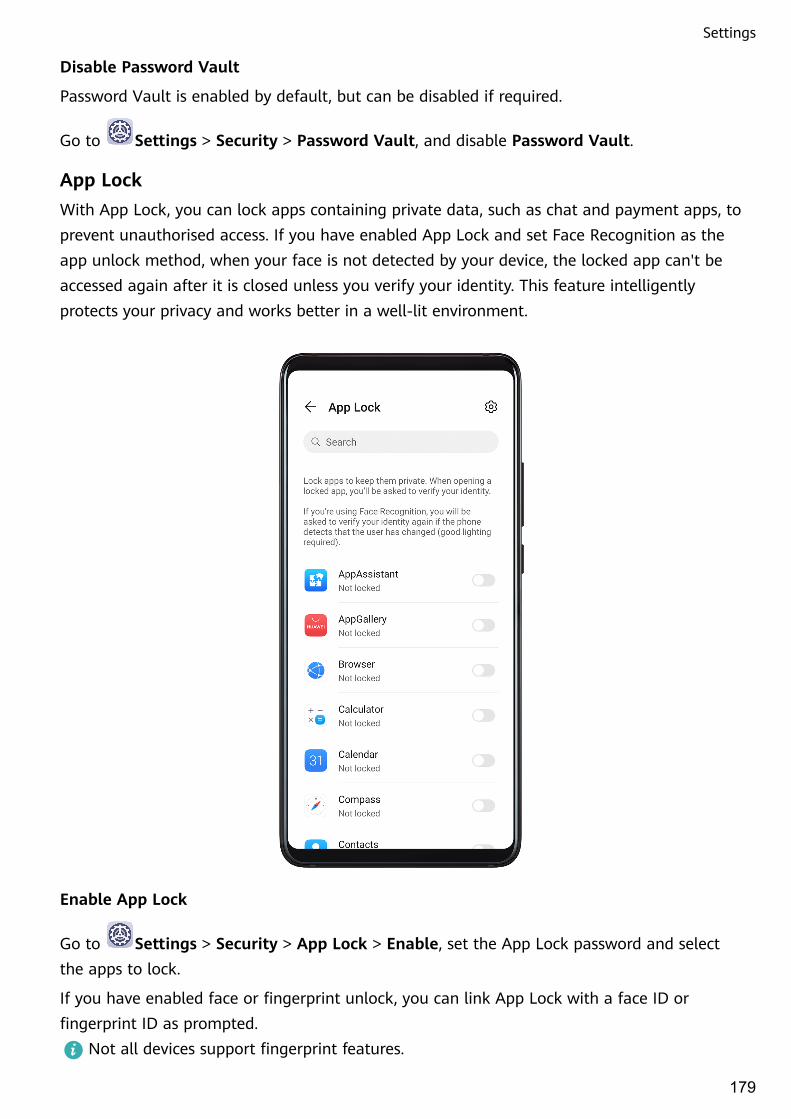
Disable Password Vault
Password Vault is enabled by default, but can be disabled if required.
Go to Settings > Security > Password Vault, and disable Password Vault.
App LockWith App Lock, you can lock apps containing private data, such as chat and payment apps, toprevent unauthorised access. If you have enabled App Lock and set Face Recognition as theapp unlock method, when your face is not detected by your device, the locked app can't beaccessed again after it is closed unless you verify your identity. This feature intelligentlyprotects your privacy and works better in a well-lit environment.
Enable App Lock
Go to Settings > Security > App Lock > Enable, set the App Lock password and selectthe apps to lock.
If you have enabled face or fingerprint unlock, you can link App Lock with a face ID orfingerprint ID as prompted.
Not all devices support fingerprint features.
Settings
179

Enable Intelligent Protection for Locked Apps
If you have enabled App Lock and set Face Recognition as the app unlock method, thesystem will intelligently detect that it is a different face to normal and provide furthersecurity protection for locked apps. If your face is not detected, such as when someone else isusing your device, the locked app can't be accessed again after it is closed unless you verifyyour identity. This feature works better in a well-lit environment.
The intelligent protection feature will be enabled automatically once you have set FaceRecognition as the app unlock method in either of the following ways:
• If you have enabled Face Recognition for your device, follow the onscreen instructions tolink your face when you enable App lock. The intelligent protection feature will then beenabled automatically.
• If you have not enabled Face Recognition on your device, go to Settings > Biometrics& password > Face Recognition and follow the onscreen instructions to enter the FaceRecognition screen and enrol your facial data. Then enable Access App Lock to link yourface with locked apps.
Change the App Lock Password or Security Questions
Enter the App Lock settings screen, go to > Password type, and select Lock screenpassword or Custom PIN as the App Lock password.
If you select Custom PIN, you can go on to set a new password and security questions.
Cancel or Disable App Lock
On the App Lock settings screen, do the following:
• Cancel App Lock: On the locked app list, toggle off the switches beside the apps for whichyou want to cancel the lock.
• Reset App Lock: Go to > Disable App Lock > DISABLE. This will cancel all locks, andclear all app lock settings.
Smart UnlockSmart Unlock enables you to unlock your device with a Bluetooth device, such as a smartband. When a compatible Bluetooth device is detected, you can unlock your device withoutthe need to verify your identity using a password, for example.
Settings
180

1 Set a lock screen password for your device.
2 Go to Settings > Biometrics & password > Smart Unlock, and enable Smart Unlock.
3 Touch to pair with a Bluetooth device, such as a smart band. After the pairing issuccessful, the Bluetooth device name will be displayed in the Paired devices list on theSmart Unlock settings screen.
4 Touch the Bluetooth device name in the Paired devices list, touch Ok, and follow theonscreen instructions to set this device as the Unlocking device.Afterwards, your device will automatically unlock when the Bluetooth device is in closeproximity to it.
To learn more about Smart Unlock, touch on the Smart Unlock settings screen.
Encrypt Memory Card DataYou can encrypt files stored on the memory card. Encrypted files can only be viewed andused on your device.
1 Insert a memory card into your device and ensure that the memory card has sufficientstorage space.
2 Go to Settings > Security > More settings > Encryption and credentials.
Settings
181

3 Touch Encrypt memory card and follow the onscreen instructions to encrypt the memorycard.During the encryption, do not restart your device or forcibly remove the memory card.Otherwise, the encryption may fail or data may be lost.
To decrypt a memory card, touch Decrypt memory card and follow the onscreen instructionsto decrypt files on the memory card. Formatting a memory card can also decrypt thememory card, but will erase all data on the memory card.
Encrypting and decrypting the memory card will not be supported if you are not loggedin as the Owner.
Set a SIM PIN LockA PIN is the identity code of a SIM card, and can be set as the SIM card lock. After doing so,you will be required to enter the correct PIN to unlock the SIM card every time you power onyour device or switch to a new device to prevent unauthorised access.
You need to obtain the PIN of your SIM card from your carrier before using this function.
1 Go to Settings > Security > More settings > Encryption and credentials to enter theSIM lock setup screen.
2 Enable Lock SIM card, enter the PIN code, and then touch OK.To modify the PIN, touch Change SIM PIN1 and follow the instructions.
• You will have to enter a PIN Unlocking Key (PUK) to unlock the SIM card if you exceedthe maximum number of failed attempts to enter the PIN. A new PIN needs to be setup once you successfully unlock your SIM with a PUK. Should you also exceed themaximum number of failed attempts to enter the PUK, your SIM card will be blocked.
• The PUK can only be obtained from your carrier.
Pin a ScreenYou can pin the screen of an app so you can stay focused on it. Try this feature when playinggames, watching videos, and more.
Go to Settings > Security > More settings > Screen pinning, and enable Screenpinning.
• When using gesture navigation, swipe up from the bottom of the screen and hold to access
the recent tasks screen, then touch on an app preview. To unpin, swipe up twice fromthe bottom of the screen.
• When using three-key navigation, touch to access the recent tasks screen, and touch
on an app preview. To unpin, touch and hold .
Settings
182
Safe ModeSafe mode uses a simplified operating system with only basic functions and pre-installedapps available. It can be used to locate third-party apps causing system failures.
Safe Mode Functions
After installing certain third-party apps, your device may fail to work properly. In this case,you can enter Safe mode to check whether the problem has been caused by a third-party appor by the system itself.
• If the system is running properly in Safe mode, the issue is likely caused by a third-party
app. In Safe mode, go to Settings > Apps > Apps, find the third-party app in question,and uninstall it after switching back to the normal mode.
• If the system runs abnormally in Safe mode, then the system is faulty. Back up your dataand take your device and proof of purchase to an authorised Huawei Customer ServiceCentre for assistance.
Enter and Exit Safe Mode
• Enter Safe mode: During the startup process, press and hold the Power and Volume upbuttons simultaneously until the selection screen is displayed. Press the Volume button toselect Safe mode and press the Power button to enter Safe mode. In Safe mode, Safemode is displayed in the lower left corner.
• Exit Safe mode: Restart your device to exit.
Privacy
Permission ManagementApps may require certain permissions, such as the Location permissions, in order to provideyou with corresponding services.
However, some apps may obtain too many unnecessary permissions, posing potential risks toyour privacy and information security. You can monitor the permissions granted to each appand deny those you deem unnecessary.
Manage the Location Permission
With the location permission, apps can obtain your location to provide location-basedservices. For example, if a map app obtains the location permission, it can provide you withlocation and navigation services. You can disable the permission if you do not need theseservices.
1 Go to Settings > Apps > Permissions.
2 On the Permissions screen, enter Location, touch the app you want to manage, andselect an option.
Settings
183

Manage Permissions to Access Other Private Data
You can also manage permissions to access your personal data, such as Contacts, Messaging,Call logs, Body sensors, Calendar, and Camera, to enjoy better services and protect yourprivacy.
On the Permissions screen, touch the permission you want to manage, and toggle the switchfor each app on or off as required.
Location ServicesSome apps need to obtain your location information to provide better services. You canenable or disable location services, and grant or deny the permission to access locationinformation for particular apps as required.
Enable or Disable Location Services
You can enable or disable location services in either of the following ways:
• Swipe down from the status bar to open the notification panel and swipe down further to
display all shortcut switches. Touch to enable or disable this function.
• Alternatively, go to Settings > Location and enable or disable Access my location.
After location services are disabled, your device will prevent all apps and services fromcollecting and using location information, with the exception of some built-in apps. Whenthese apps or services need to use location information, your device will remind you toenable location services again.
Increase the Accuracy of Location Services
You can improve the positioning accuracy of your device by allowing apps and services toscan for nearby Wi-Fi networks and Bluetooth devices.
Go to Settings > Location > Advanced settings, then enable Wi-Fi and Bluetoothscanning.
Allow or Forbid Apps to Obtain Location Information
You can allow or forbid an app to access location information, including granting one-time orpermanent access, or denying access to location information during use of the app.
1 Go to Settings > Privacy > Permissions, touch Location, and check which apps havebeen granted access to location information.
2 Touch the app for which you want to change settings and follow the onscreen instructionsto grant or deny permissions.
PrivateSpaceCreate a PrivateSpace that is completely independent of the MainSpace (the original space)of your device, which can be accessed using your fingerprint ID or a password.
Settings
184

You can move private photos and confidential business files to your PrivateSpace to preventunauthorised access. You can also move your payment and gaming apps to PrivateSpace tokeep them away from your child.
Enable and Access PrivateSpace
1 Go to Settings > Privacy > PrivateSpace > Enable, and follow the onscreeninstructions to create a PrivateSpace.
2 You can enter your PrivateSpace using either of the following methods:
• On the lock screen, access PrivateSpace using the fingerprint or password set for thespace.
• Alternatively, in MainSpace, go to Settings > Privacy > PrivateSpace, and touchLog in.
If you restart your device, you have to enter the password to access the MainSpacefirst, then switch to the PrivateSpace.
Hide or Unhide the Entrance to PrivateSpace
You can hide the entrance to PrivateSpace in the MainSpace settings, so that you can onlyaccess PrivateSpace using the fingerprint or password set for the space.
• To hide the entrance to PrivateSpace: In PrivateSpace, go to Settings > Privacy >PrivateSpace, and enable Hide PrivateSpace.
• To unhide the entrance to PrivateSpace: In MainSpace, go to Settings > Security >More settings, then go to Show all settings > OK.
Transfer Files Between MainSpace and PrivateSpace
1 In PrivateSpace, go to Settings > Privacy > PrivateSpace, and touch MainSpace toPrivateSpace or PrivateSpace to MainSpace.
2 Select the files (such as contacts, photos, videos, and audio files) you want to transfer,touch Move, and follow the onscreen instructions to transfer the files.
In the target space, go to Gallery > Albums > Others > SharedImages, or Gallery > Albums> Others > SharedVideos to view photos and videos.
Reset Password for PrivateSpace
You can set a security question when creating the password for PrivateSpace, which will helpyou to reset the password if you happen to forget it.
1 In PrivateSpace, go to Settings > Privacy > PrivateSpace, then touch Passwordprotection.
2 Follow the onscreen instructions to complete the verification, select and answer thesecurity question, then touch Finish.
Settings
185

3 In MainSpace, go to Settings > Privacy > PrivateSpace, then go to > Resetpassword, and follow the onscreen instructions to complete the verification and reset thepassword.
Transfer Data in PrivateSpace to Your New Device
You can quickly transfer your PrivateSpace data, such as contacts, photos, and files, from theold device to the new one.
1 On your new device, create and enter your PrivateSpace, go to Settings > Privacy >PrivateSpace > Space Clone, and select This is the new phone.
2 In your old device, enter your PrivateSpace, go to Settings > Privacy > PrivateSpace >Space Clone, and select This is the old phone.
3 Follow the onscreen instructions to scan the QR code or manually connect the old deviceto the new one.
4 On your old device, select the data to be transferred. You can cancel the data transferduring the process, and then continue it once you have connected your old device with thenew one again.
Delete PrivateSpace
If you delete PrivateSpace, all apps and data stored in the space will be deleted and cannotbe restored. Please exercise caution when deleting PrivateSpace.
You can delete PrivateSpace in either of the following ways:
• In MainSpace, go to Settings > Privacy > PrivateSpace, then go to > DeletePrivateSpace.
• Alternatively, in PrivateSpace, go to Settings > Privacy > PrivateSpace, then touchDelete.
Accessibility Features
AccessibilityScreen reader apps are designed to assist visually impaired users to use a device.
Enable Colour Correction to Customise the Screen Colour
Colour correction helps people with poor eyesight see the screen content more easily.
1 Go to Settings > Accessibility features > Accessibility > Colour correction andenable Colour correction.
2 Touch Correction mode to select a colour correction mode.
Use Magnification Gestures
Use magnification gestures to zoom in on the screen.
Settings
186

On the Accessibility > Magnification screen, touch Magnification, then enable it.
Zoom in or out by touching the screen three times in a row.
• While zoomed in, spread two or more fingers to further zoom in, then pinch two or morefingers together to zoom back out.
• Drag the screen with two or more fingers to view other parts of the screen.
Enable Colour Inversion
Colour inversion allows you to invert the colour of the text and the background. When Colourinversion is enabled, your device will display text in white and the background black.
On the Accessibility screen, enable Colour inversion.
Use a Shortcut to Activate an Accessibility Feature
You can use Volume buttons to quickly activate an accessibility feature.
1 On the Accessibility screen, touch Accessibility shortcut.
2 Touch Select feature to select the feature you want to activate with the shortcut.
3 Enable Accessibility shortcut. You can now press and hold the Volume up and downbuttons simultaneously for 3 seconds to activate the feature.
Adjust the Touch and Hold Delay
Touch & hold delay allows you to adjust the time the screen takes to respond when youtouch and hold something.
On the Accessibility screen, touch Touch & hold delay, then select a delay option accordingto your preferences.
One-Handed ModeYou can switch to a mini screen view so you can use your device with one hand more easily.
Settings
187

1 Go to Settings > Accessibility features > One-Handed mode, and enable One-Handed mode.
2 Access One-Handed mode using one of the following methods, depending on thenavigation mode you are using on your device.
• If you're using Gestures, swipe up diagonally from one of the bottom corners andhold.
• If you're using Three-key navigation, swipe left or right across the navigation bar.
3 Touch the blank area to exit.
One-Handed mode will not work if Gesture magnification is enabled on your device.
Smart Cover ModeFor best results, you are advised to use a standard Huawei flip cover.
Enable Smart Cover Mode
Go to Settings > Accessibility features > Smart Cover, and enable Smart Cover. If theflip cover comes with a display window, enable Use display window as well.
Settings
188
Open or Close the Flip Cover
• Flipping open the cover will wake your device and display the lock screen (or Magazineunlock screen).
• If a lock screen password has been set, closing the flip cover of your device will lock thescreen if it is on standby.
• When a flip cover with a display window is closed, you can check the date, time, weather,and more in the window.
Mistouch PreventionEnable Mistouch prevention to prevent unintended operations caused by accidental toucheson the screen, such as when your device is placed in your pocket or backpack.
Go to Settings > Accessibility features, and enable or disable Mistouch prevention asneeded.
Gloves ModeYour device can respond to your touches even when you are wearing gloves.
Go to Settings > Accessibility features, and enable Gloves mode.To ensure a higher success rate, apply adequate force when touching or swiping on thescreen.
Scheduled Power On/OffUse the Scheduled power on/off feature to power your device on and off at set times, tosave power and prevent interruptions while resting.
1 Go to Settings > Accessibility features > Scheduled power on/off, and enableScheduled power on/off.
2 Set the power on and off times, as well as the repeat cycle. Your device will power on andoff automatically at the specified times.
To stop using this feature, disable Scheduled power on/off.
Users&Accounts
Set Up Users
1 Go to Settings > Users & accounts > Users, touch Add user or Add guest, thenfollow the onscreen instructions to add an account.
2 Touch Switch to switch to the user or guest account. Configure the settings for the newaccount as prompted.
3 Install apps as needed. Note that if a newer version of an app has been installed byanother user, the app installation will fail.
Settings
189

A maximum of three user and one guest accounts can be added.
Authorise a User or Guest Account to Make Calls and Send Messages
You can set whether to allow a user or guest account to make calls, send SMS messages, andmore.
• After accessing your device as the administrator, go to Settings > Users & accounts >Users.
• Touch the related account, and select the permissions you want to authorise.
Switch Between the Administrator, User, and Guest
You can switch to a different account using either of the following methods:
• Swipe down from the status bar to open the notification panel, touch , then touch theprofile picture of the account you wish to switch to.
• Go to Settings > Users & accounts > Users, and touch the name of the account youwish to switch to.
Delete a User or Guest Account
Deleting a user or guest account will delete all its related data. Please exercise caution.
After accessing your device as the administrator, use either of the following methods todelete a user or guest account:
• Go to Settings > Users & accounts > Users, touch the name of the account you wishto delete, then follow the onscreen instructions to delete it.
• Swipe down from the status bar to open the notification panel, touch > More settings,touch the name of the account you wish to delete, then follow the onscreen instructions todelete it.
System&Updates
Language and Region
1 Go to Settings > System & updates > Language & input > Language and region,then select the language you want to use.
2 If the language is not listed, touch Add language, then locate and touch it to add it tothe list.
3 Touch Region to select a country/region, so the display content will adapt to the localculture and habits of the country/region you have selected.
Input MethodYou can download a third-party input method and set it as the default input method.
Settings
190

1 Download the input method from an official app market.
2 Follow the onscreen instructions to set it as the default input method, or go to Settings > System & updates > Language & input > Default keyboard and select theinput method.
Date and TimeYour device is able to sync to the local date, time, and time zone over a mobile network. Youcan also manually set the date, time, and time zone for your device.
Go to Settings > System & updates > Date & time, then set the options according toyour requirements.
Set the Date and Time Automatically or Manually
• Enable Set automatically, and your device will sync to the local date and time over amobile network.
• To manually set the date and time, disable Set automatically.
Change the Time Zone
• Enable Set automatically, and your device will sync to the local time zone over a mobilenetwork.
• To manually set the time zone, disable Set automatically.
Change the Time Format
• Enable 24-hour time and your device will display time in the 24-hour format.
• Disable 24-hour time and your device will display time in the 12-hour format.
Phone ClonePhone Clone lets you quickly and seamlessly move all the basic data (including contacts,calendar, images, and videos) from your old device to your new device.
Settings
191

Clone Data from an Android Device
1 On your new device, open Phone Clone . Alternatively, go to Settings > System &updates > Phone Clone, touch This is the new phone, then touch Huawei or OtherAndroid.
2 Follow the onscreen instructions to download and install Phone Clone on your old device.
3 On your old device, open Phone Clone and touch This is the old phone. Follow theonscreen instructions to connect your old device with your new device by scanning a codeor connecting manually.
4 On your old device, select the data you want to clone, then touch Transfer to startcloning.
Phone Clone is only available on devices running Android 4.4 or later.
Clone Data from an iPhone or iPad
1 On your new device, open Phone Clone. Alternatively, go to Settings > System &updates > Phone Clone, touch This is the new phone, then touch iPhone/iPad.
2 Follow the onscreen instructions to download and install Phone Clone on your old device.
Settings
192

3 On your old device, open Phone Clone and touch This is the old phone. Follow theonscreen instructions to connect your old device with your new device by scanning a codeor connecting manually.
4 On your old device, select the data you want to clone, then follow the onscreeninstructions to complete the data cloning.
Phone Clone is only available on devices running iOS 8.0 or later.
Back Up with an External Storage Device
Back Up with a Memory Card
Insert a memory card in your device so you can conveniently back up your data to keep itsafe.
1 Go to Settings > System & updates > Backup & restore > Data backup > Externalstorage and touch Memory card.
2 Touch BACK UP, select the data you want to back up, then touch Back up.
3 Follow the onscreen instructions to set the password and password hint. The data will beencrypted and backed up. The password will be required if you want to restore your databackup.
To reset the password, go to the Memory card backup screen, then > Resetpassword.
The new password is only valid for backups created thereafter.
4 After the backup is complete, you can find your data backup in the Huawei folder in Files> Categories > Memory card.
You can go to the Memory card backup screen and enable Auto-backup. Your device willthen automatically back up your data every seven days when it is being charged, the screenis turned off, and the battery level is at least 75%.
Restore Your Backup from a Memory Card
1 Go to Settings > System & updates > Backup & restore > Data backup > Externalstorage and touch Memory card.
2 Select the backup you want to restore from the RESTORE FROM BACKUP list.
3 Select the data you want to restore, touch Restore, and enter the password as prompted.
Back Up with a USB Storage Device
In case of insufficient storage space on your device, you can back up large files and any dataon a USB storage device, such as a USB flash drive or card reader.
1 Connect your device to a USB storage device via a USB OTG cable.
2 On the External storage screen of your device, touch USB storage.
3 Touch BACK UP, select the data you want to back up, then touch Back up.
Settings
193

4 Follow the onscreen instructions to set the password and password hint. The data will beencrypted and backed up. The password will be required if you want to restore your databackup.
To reset the password, go to the USB storage backup screen, then > Reset password.The new password is only valid for backups created thereafter.
Restore Your Data from a USB Storage Device
1 Connect your device to a USB storage device via a USB OTG cable.
2 On the External storage screen of your device, touch USB storage.
3 Select the backup you want to restore from the RESTORE FROM BACKUP list.
4 Select the data you want to restore, touch Restore, and enter the password as prompted.
Back Up with a NAS Device
You can back up your important data on a network-attached storage (NAS) device, alsoknown as a private cloud storage server. The NAS device provides shared folders for databackup.
1 On the External storage screen of your device, touch Shared folder.
2 On your device, scan for available NAS devices using your Wi-Fi network, then touch anapplicable one to access and add its shared folders.
3 Touch BACK UP, select the data you want to back up, then touch Back up.
4 Follow the onscreen instructions to set the password and password hint. The data will beencrypted and backed up. The password will be required if you want to restore your databackup.
To reset the password, go to the Shared folder backup screen, then > Resetpassword.
The new password is only valid for backups created thereafter.
Restore Your Data from an NAS Device
1 On the External storage screen of your device, touch Shared folder.
2 On your device, scan for available NAS devices using your Wi-Fi network, then touch anapplicable one to access and add its shared folders.
3 Select the backup you want to restore from the RESTORE FROM BACKUP list.
4 Select the data you want to restore, touch Restore, and enter the password as prompted.
Reset Your Device
Reset Network Settings
This operation will reset your Wi-Fi, mobile data network, and Bluetooth settings. It will notchange any other settings on your device or delete any data.
Settings
194

Go to Settings > System & updates > Reset, touch Reset network settings, then followthe onscreen instructions to reset network settings.
Reset All Settings
This operation will reset all network settings, fingerprints, face recognition data, and the lockscreen password of your device. It will not delete any data from your device.
Go to Settings > System & updates > Reset, touch Reset all settings, then follow theonscreen instructions to reset all settings.
Restore Factory Settings
This operation will erase all the data on your device, including your accounts, app data,system settings, installed apps, music, images, and all files on the internal storage. Make sureto back up your data before restoring your device to its factory settings.
Go to Settings > System & updates > Reset > Reset phone, touch Reset phone, thenfollow the onscreen instructions to restore your device to its factory settings.
Simple ModeSimple mode adopts a more concise layout for easy navigation, enlarges icons and fonts forthe home screen, and maximises the volume.
Settings
195
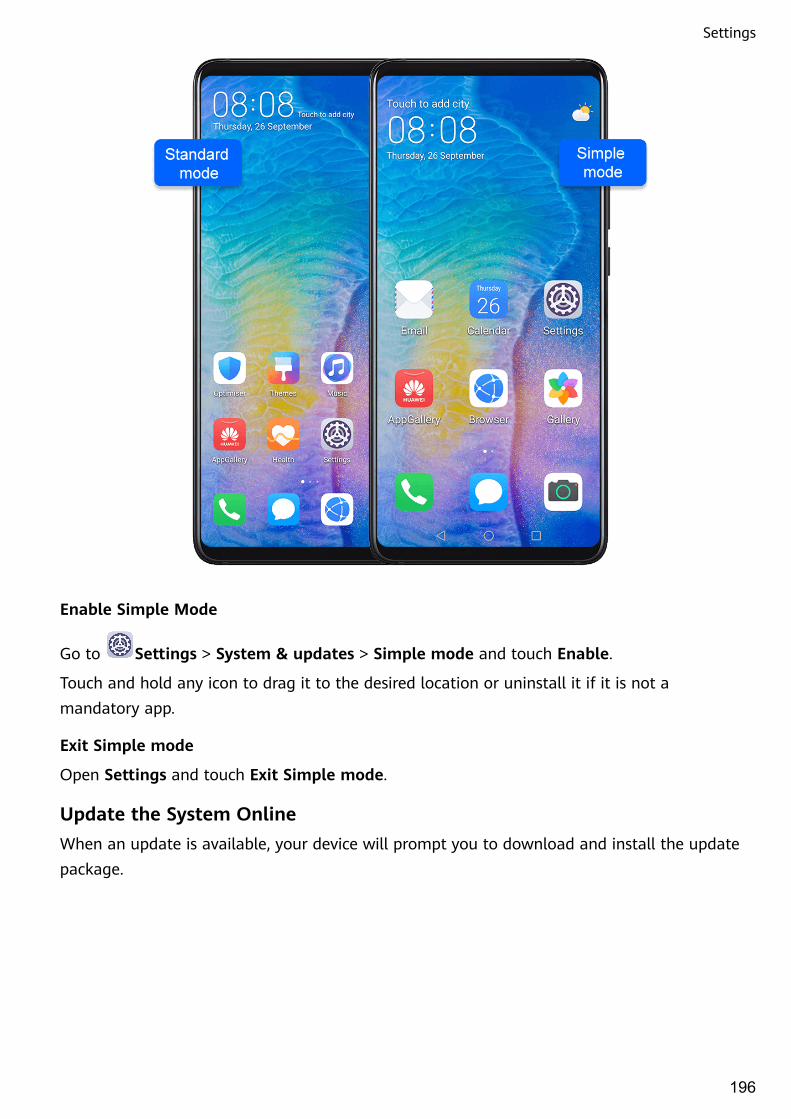
Enable Simple Mode
Go to Settings > System & updates > Simple mode and touch Enable.
Touch and hold any icon to drag it to the desired location or uninstall it if it is not amandatory app.
Exit Simple mode
Open Settings and touch Exit Simple mode.
Update the System OnlineWhen an update is available, your device will prompt you to download and install the updatepackage.
Settings
196

• Before updating, make sure your device is running an official system version.Otherwise, the update may fail and your device may experience unknown issues.
• Back up your user data before the update.
• After an update, third-party apps that aren't compatible with the new system versionmay become unavailable. In some cases, it may take some time for a compatible appversion to be released.
• During the update, do not power off or restart your device, remove the memory card,or insert a memory card.
1 Go to Settings > System & updates, and touch Software update.
2 When an update is available, you can either manually download and install the updatepackage, or update your device automatically overnight.
• Download and install the update package: Go to New version > DOWNLOAD ANDINSTALL. To avoid data usage, connect your device to a Wi-Fi network whendownloading the update package.Your device will automatically restart once the update is complete.
• Update overnight: Touch , and enable Auto-download over Wi-Fi and Updateovernight.Your device will automatically update and restart between 02:00 – 04:00.To ensure a successful overnight update, make sure that your device is powered on, thescreen is locked, there are no alarms set for this period of time, and the battery levelremains higher than 35%. Connect your device to a charger if necessary.
To disable automatic updates, touch on the Software update screen, then disable Auto-download over Wi-Fi.
About Phone
Legal DisclaimerCopyright © Huawei 2020. All rights reserved.
Settings
197

This guide is for your reference only. The actual product, including but not limited to the colour, size, and screen layout, may vary. All statements, information, and recommendations in this guide do not constitute a warranty of any kind, express or implied.
Please visit http://consumer.huawei.com/en/support/hotline for up to date support hotline and email address information for your country or region.
Model: ANA-NX9
EMUI 10.1_01