Trend Micro™ Threat Discovery Appliance 2.5 R2 Administrator's ...
200
Threat Discovery Appliance 2 Administrator’s Guide Endpoint Security e s Network Security n s
-
Upload
khangminh22 -
Category
Documents
-
view
1 -
download
0
Transcript of Trend Micro™ Threat Discovery Appliance 2.5 R2 Administrator's ...
Threat DiscoveryAppliance2
Administrator’s Guide
Endpoint Security
esNetwork Security
ns


Trend Micro™ Incorporated reserves the right to make changes to this document and to the products described herein without notice. Before installing and using the product, please review the readme files, release notes, and the latest version of the Administrator’s Guide, which are available from Trend Micro’s Web site at:
www.trendmicro.com/download/documentation/
Trend Micro, the Trend Micro logo, MacroTrap, VirusWall, Network VirusWall, Trend Micro Control Manager, and LeakProof are trademarks or registered trademarks of Trend Micro Incorporated. All other product or company names may be trademarks or registered trademarks of their owners.
Copyright © 2007-2009 Trend Micro Incorporated. All rights reserved. No part of this publication may be reproduced, photocopied, stored in a retrieval system, or transmitted without the express prior written consent of Trend Micro Incorporated.
Release Date: August 2009
Document Part No: APEM23577/80304
Patents Pending

Trend Micro™ Threat Discovery Appliance 2.5 R2 Administrator’s Guide
The Administrator’s Guide for Trend Micro™ Threat Discovery Appliance is intended to introduce the main features of the product, provide deployment information for your production environment, and provide information on configuring and using the product. Read through this document prior to deploying or using the product.
Detailed information about how to use specific features are available in the online help file and the online Knowledge Base at Trend Micro’s Web site.
Trend Micro always seeks to improve its documentation. Your feedback is always welcome. Please evaluate this documentation on the following site:
www.trendmicrcom/download/documentation/rating.asp
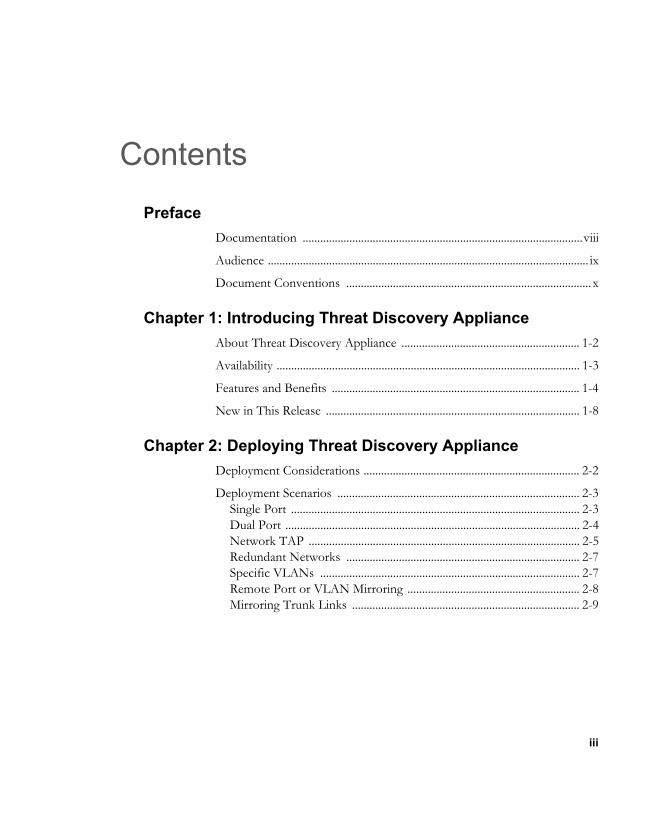
Contents
PrefaceDocumentation ................................................................................................viii
Audience .............................................................................................................. ix
Document Conventions .................................................................................... x
Chapter 1: Introducing Threat Discovery ApplianceAbout Threat Discovery Appliance ............................................................. 1-2
Availability ........................................................................................................ 1-3
Features and Benefits ..................................................................................... 1-4
New in This Release ....................................................................................... 1-8
Chapter 2: Deploying Threat Discovery ApplianceDeployment Considerations .......................................................................... 2-2
Deployment Scenarios ................................................................................... 2-3Single Port ................................................................................................... 2-3Dual Port ..................................................................................................... 2-4Network TAP ............................................................................................. 2-5Redundant Networks ................................................................................ 2-7Specific VLANs ......................................................................................... 2-7Remote Port or VLAN Mirroring ........................................................... 2-8Mirroring Trunk Links .............................................................................. 2-9
iii

Trend Micro™ Threat Discovery Appliance 2.5 R2 Administrator’s Guide
Chapter 3: Setting Up Threat Discovery ApplianceSetting Up the Appliance ...............................................................................3-2
Appliance Details ........................................................................................3-2General Installation ....................................................................................3-4Mounting the Appliance ............................................................................3-7Using the Liquid Crystal Display Module (LCM) ...............................3-12Accessing the Preconfiguration Console ..............................................3-12
Setting Up the Virtual Appliance ................................................................3-13System Requirements ...............................................................................3-13Installation .................................................................................................3-14Accessing the Preconfiguration Console ..............................................3-24
Chapter 4: The Preconfiguration ConsoleThe Preconfiguration Console ......................................................................4-2
Preconfiguration Console Access .................................................................4-2
Preconfiguration Menu ...................................................................................4-5Preconfiguration Menu: Device Information and Status .....................4-7Preconfiguration Menu: Device Settings ................................................4-8Preconfiguration Menu: Interface Settings ...........................................4-10Preconfiguration Menu: System Tasks ..................................................4-11Preconfiguration Menu: View System Logs .........................................4-21Preconfiguration Menu: Change Password ..........................................4-22Preconfiguration Menu: Log Off ...........................................................4-23
Chapter 5: Getting StartedNetwork Settings .............................................................................................5-2
Product Console ..............................................................................................5-3Product Console Password .......................................................................5-4
Network Interface Settings ............................................................................5-5
System Time .....................................................................................................5-7
Proxy Settings ..................................................................................................5-8
Product License and Activation Codes ........................................................5-8
iv

Contents
Component Updates .................................................................................... 5-10Update Source .......................................................................................... 5-12Manual Updates ........................................................................................ 5-13Scheduled Updates ................................................................................... 5-14
Chapter 6: Configuring Product SettingsNetwork Configuration .................................................................................. 6-2
Monitored Networks ................................................................................. 6-2Registered Domains ................................................................................... 6-3Registered Services ..................................................................................... 6-4Network Configuration Replication ........................................................ 6-5
Detections ........................................................................................................ 6-6Threat Detections ...................................................................................... 6-6Detection Exclusion List .......................................................................... 6-7Detected Files ............................................................................................. 6-8Application Filters .................................................................................... 6-10Client Identification ................................................................................. 6-11
Threshold Settings ........................................................................................ 6-12
Integration with Trend Micro Products and Services ............................. 6-13Threat Management Services ................................................................. 6-14Mitigation Devices ................................................................................... 6-15
Mitigation Exclusion List ................................................................... 6-16Trend Micro Control Manager .............................................................. 6-17LeakProof .................................................................................................. 6-20
Chapter 7: Viewing and Analyzing InformationStatus Indicators .............................................................................................. 7-2
Product Summary ........................................................................................... 7-4
Notifications .................................................................................................... 7-8Notifications: Potential Security Risks .................................................... 7-9Notifications: Known Security Risks .................................................... 7-10Notifications: High Risk Clients ............................................................ 7-11Notifications: High Network Traffic Usage ........................................ 7-12Notifications: Delivery Options ............................................................ 7-13
v

Trend Micro™ Threat Discovery Appliance 2.5 R2 Administrator’s Guide
Reports ............................................................................................................7-14Reports: Number of Incidents ...............................................................7-15Reports: High Risk Clients ......................................................................7-16Reports: Network Traffic ........................................................................7-18Reports: Delivery Settings .......................................................................7-19
Logs .................................................................................................................7-20Detection Logs .........................................................................................7-20Application Filter Logs ............................................................................7-22System Logs ...............................................................................................7-23Syslog Server .............................................................................................7-24Event Details .............................................................................................7-24
Chapter 8: MaintenanceLog Maintenance .............................................................................................8-2
Configuration Backup and Restore ..............................................................8-3
Firmware Update .............................................................................................8-4
Restart or Shutdown .......................................................................................8-6
Appliance Rescue ............................................................................................8-7
Chapter 9: Getting HelpFrequently Asked Questions (FAQs) ...........................................................9-2
Contacting Trend Micro .................................................................................9-6Technical Support ......................................................................................9-6The Trend Micro Knowledge Base .........................................................9-7TrendLabs ....................................................................................................9-8Security Information Center .....................................................................9-8Sending Suspicious Files to Trend Micro ...............................................9-9Documentation Feedback .........................................................................9-9
Appendix A: Glossary
Index
vi

Preface
Preface
Welcome to the Administrator’ Guide for Trend Micro™ Threat Discovery Appliance. This manual contains information about product setup and configuration.
This preface discusses the following topics: • Documentation on page viii• Audience on page ix• Document Conventions on page x
vii

Trend Micro™ Threat Discovery Appliance 2.5 R2 Administrator’s Guide
DocumentationTrend Micro™ Threat Discovery Appliance is available both as a device and as a virtual application installed on a VMware server.
The following terminology is used throughout the documentation:
The product documentation consists of the following:
TABLE P-1. Terminology used in the documentation
TERMINOLOGY DESCRIPTION
appliance Threat Discovery Appliance in device form.
virtual appliance Threat Discovery Appliance as a virtual application installed on a VMware server; its full name is Threat Discovery Virtual Appliance.
Threat Discovery Appliance
Pertains to both the appliance and virtual appliance. Also referred to as "product" in many instances.
TABLE P-2. Product documentation
DOCUMENTATION DESCRIPTION
Quick Start Guide Guides users in setting up and connecting the appliance to the network
Administrator’s Guide
A PDF document that discusses product setup and configuration
Help HTML files compiled in WebHelp format that provide "how to's", usage advice, and field-specific information.
To access the Help, open the product console and then click the help icon.
viii

Preface
The Quick Start Guide, Administrator’s Guide, and readme file are available in the Threat Discovery Appliance Solutions CD and at the following Web site:
http://www.trendmicro.com/download
AudienceThe Threat Discovery Appliance documentation is written for IT managers and administrators in medium and large enterprises. The documentation assumes a basic knowledge of security systems, including:• Antivirus and content security protection• Network concepts (such as IP address, Subnet Mask, LAN settings)• Network devices and their administration• Network configuration (such as the use of VLAN, SNMP)
Readme file Contains a list of known issues and basic installation steps. It may also contain late-breaking product information not found in the Help or printed documentation
License Agreement License agreements for Threat Discovery Appliance and third-party applications
Knowledge Base An online database of problem-solving and troubleshooting information. It provides the latest information about known product issues. To access the Knowledge Base, go to the following Web site:
http://esupport.trendmicro.com/support
TABLE P-2. Product documentation (Continued)
DOCUMENTATION DESCRIPTION
ix

Trend Micro™ Threat Discovery Appliance 2.5 R2 Administrator’s Guide
Document ConventionsTo help you locate and interpret information, the Threat Discovery Appliance documentation uses the following conventions.
TABLE P-3. Document conventions
CONVENTION DESCRIPTION
ALL CAPITALS Acronyms, abbreviations, and names of certain commands and keys on the keyboard
Bold Menus and menu commands, command buttons, tabs, options, and tasks
Italics References to other documentation or new technology components
LOGS > LOG MAINTENANCE
A "breadcrumb" found at the start of procedures that helps users navigate to the relevant Web console screen. Multiple breadcrumbs means that there are several ways to get to the same screen.
Note: textProvides configuration notes or recommendations
Tip: textProvides best practice information and Trend Micro recommendations
WARNING! textProvides warnings about activities that may harm computers on your network
x

Chapter 1
Introducing Threat Discovery Appliance
This chapter introduces product features, capabilities, and technology.
The topics discussed in this chapter are:• About Threat Discovery Appliance on page 1-2• Availability on page 1-3• Features and Benefits on page 1-4• New in This Release on page 1-8
1-1

Trend Micro™ Threat Discovery Appliance 2.5 R2 Administrator’s Guide
About Threat Discovery ApplianceThreat Discovery Appliance is a next-generation network monitoring product that uses a combination of intelligent rules, algorithms, and signatures to detect a variety of malware including worms, Trojans, backdoor programs, viruses, spyware, adware, and other threats. Detection is done at layers 2 to 7 of the Open Systems Interconnection Reference Model (OSI model).
Threat Discovery Appliance delivers high-performance throughput and availability and provides critical security information, alerts, and reports to IT administrators. Trend Micro Control Manager™ can manage Threat Discovery Appliance.
Although Threat Discovery Appliance is a standalone product, it can be integrated with Trend Micro Threat Mitigator™ to clean up and perform other threat mitigation tasks on infected endpoints. Threat Discovery Appliance also supports integration with Network VirusWall Enforcer™ or Trend Micro LeakProof™.
Additionally, you can register the product to Threat Management Services. Through these services, Trend Micro can assess threat-related logs and send weekly reports with detailed information, including recommended actions.
1-2

Introducing Threat Discovery Appliance
AvailabilityThreat Discovery Appliance is available as an appliance and as a virtual appliance. Both provide the same functionality but require different Activation Codes.
The following table highlights the differences between the appliance and the virtual appliance:
TABLE 1-1. Differences between the appliance and virtual appliance
FEATURES APPLIANCE VIRTUAL APPLIANCE
Appliance Health information (indicates the temperature and fan speed status of the product)
Available Not available
Preconfiguration All preconfiguration tasks can be performed.
Most preconfiguration tasks can be performed, except the following:
• Import and export the configuration file
• Import the HTTPS certificate
Serial number Serial number displays on the following:
• About page on the product console
• Device Information and Status screen on the Preconfiguration Console
No serial number
1-3

Trend Micro™ Threat Discovery Appliance 2.5 R2 Administrator’s Guide
Features and BenefitsThreat Discovery Appliance uses the mirror port of the switch to monitor network traffic and detect known and potential security risks. Threat Discovery Appliance provides the following features and benefits:
Virus Scan EngineThe Virus Scan Engine is a file-based detection-scanning engine that has true file type, multi-packed files, and IntelliTrap detection. The scan engine performs the actual scanning across the network and uses the virus pattern file to analyze the files traveling throughout your network. The virus pattern file contains binary patterns of known viruses. Trend Micro regularly releases new virus pattern files when new threats arise. To take advantage of the latest components, regularly update Threat Discovery Appliance (see Component Updates on page 5-10).
The virus scan engine has the following methods of detection:• True File Type• Multi-packed/Multi-layered files• IntelliTrap
True File TypeVirus writers can quickly rename files to disguise the file’s actual type. Threat Discovery Appliance confirms a file's true type by reading the file header and checking the file’s internally registered data type. Threat Discovery Appliance only scans file types capable of infection.
With true file type, Threat Discovery Appliance determines a file’s true type and skips inert file types. Inert file types include files such as .gif files, which make up a large volume of Internet traffic.
1-4

Introducing Threat Discovery Appliance
Multi-packed/Multi-layered FilesA multi-packed file is an executable file compressed using more than one packer or compression tool. For example, an executable file double or triple packed with Aspack, UPX, then with Aspack again.
A multi-layered file is an executable file placed in several containers or layers. A layer consists of a document, an archive, or a combination of both. An example of a multi-layered file is an executable file compressed using Zip compression and placed inside a document.
These methods hide malicious content by burying them under multiple layers of compression. Traditional antivirus programs cannot detect these threats because traditional antivirus programs do not support layered/compressed/packed file scanning.
IntelliTrap Virus writers often use different file compression schemes to circumvent virus filtering. IntelliTrap helps Threat Discovery Appliance evaluate compressed files that could contain viruses or other Internet threats.
Network Virus ScanThreat Discovery Appliance uses a combination of patterns and heuristics to proactively detect network viruses. The product monitors network packets and triggers events that can indicate an attack against a network. The product can also scan traffic in specific network segments.
Network Content Inspection EngineNetwork Content Inspection Engine is the program module used by Threat Discovery Appliance that scans the content that passes through the network layer.
Network Content Correlation EngineNetwork Content Correlation Engine is the program module used by Threat Discovery Appliance that implements rules or policies defined by Trend Micro. Trend Micro regularly updates these rules after analyzing the patterns and trends that new and modified viruses exhibit.
1-5

Trend Micro™ Threat Discovery Appliance 2.5 R2 Administrator’s Guide
Potential Risk File CaptureA potential risk file is a file the Network Content Inspection Engine categorizes as potentially malicious. However, the Virus Scan Engine does not recognize known signature patterns of verified malicious files and does not categorize the file as malicious or as a security risk. Threat Discovery Appliance captures potential risk files, enters a log in the database, and saves a copy of the file. Threat Discovery Appliance captures the file session and threat information as a file header and stores data in the log file.
Offline MonitoringThreat Discovery Appliance deploys in offline mode. It monitors the network traffic by connecting to the mirror port on a switch for minimal or no network interruption.
FIGURE 1-1. Product deployment
1-6
Introducing Threat Discovery Appliance
Multiple Protocol SupportThreat Discovery Appliance monitors network activities that use the HTTP, FTP, SMTP, SNMP, and P2P protocols.
Product IntegrationThreat Discovery Appliance integrates with Threat Mitigator, which performs cleanup tasks on infected computers. Threat Discovery Appliance also integrates with Network VirusWall Enforcer to regulate network access based on the security posture of endpoints. The product can be managed from Trend Micro Control Manager™, a software management solution that gives you the ability to control antivirus and content security programs from a central location—regardless of the program’s physical location or platform.
1-7

Trend Micro™ Threat Discovery Appliance 2.5 R2 Administrator’s Guide
New in This ReleaseThis product release includes the following new features:
New in version 2.5 R2This product version introduces the following new features and enhancements:
TABLE 1-1. New in Threat Discovery Appliance 2.5 R2
WHAT’S NEW DESCRIPTION
Database repair If the product database becomes corrupted, a reminder displays on the Summary screen and an email notification is sent to allow users to take immediate action (see Product Summary on page 7-4 for details).
Repair the corrupted files from the product console (see Log Maintenance on page 8-2 for details).
Client identification Threat Discovery Appliance can now identify the NetBIOS name, DNS domain name, or Active Directory domain and account name used on the endpoint at the time of threat detection. For details, see Client Identification on page 6-11.
CPU and memory usage display
CPU and memory usage information can now be viewed from the product console’s Summary screen. For details, see System Status on page 7-7.
CPU usage information is no longer available on the Preconfiguration Console’s Device Information and Status screen.
1-8

Introducing Threat Discovery Appliance
For new users, set up the appliance by following the steps outlined in Setting Up the Appliance on page 3-2, and the virtual appliance by following the steps outlined in Setting Up the Virtual Appliance on page 3-13.
For users who have deployed earlier versions of the appliance or virtual appliance, perform firmware update to upgrade to this product version.
Network interface port management
You can now monitor the status of the management and data ports from the product console. You can also manage the connection types for each data port, and capture packets on all the ports for debugging and troubleshooting purposes. For details, see Network Interface Settings on page 5-5.
The connection type for the management port can only be managed from the Preconfiguration Console. For details, see Preconfiguration Menu: Interface Settings on page 4-10.
New for the appliance • Supports RAID level 1 (RAID 1) to mirror data on hard drives.
• Supports preconfiguration menu output on both VGA and serial ports.
• Includes 7 data ports and 1 management port.
New for the virtual appliance
• Supports VMware Server ESX and ESXi 4.0 to enable allocation of more CPUs and memory to the product.
• Supports firmware updates from the product console. For details, see Firmware Update on page 8-4.
• Supports Network Content Inspection Engine updates from the product console. For details, see Component Updates on page 5-10.
TABLE 1-1. New in Threat Discovery Appliance 2.5 R2
WHAT’S NEW DESCRIPTION
1-9

Trend Micro™ Threat Discovery Appliance 2.5 R2 Administrator’s Guide
New in version 2.5
TABLE 1-2. New in Threat Discovery Appliance 2.5
WHAT’S NEW DESCRIPTION
HARDWARE
VMware™ ESX™ or ESXi server support
Trend Micro provides the option of using the hardware provided by Trend Micro or using the hardware supported by VMware ESX or ESXi server that best suits your needs.
Enhanced Multiple Port Scan
Threat Discovery Appliance can simultaneously monitor traffic on six separate networks using a dedicated port for each network.
SOFTWARE
Remote System Maintenance
Shut down, or restart Threat Discovery Appliance or its service from the product console.
Increased Simultaneous Connection Capacity
Threat Discovery Appliance supports more concurrent connections.
Network Flow Indicator Indicates the product’s capacity to scan all traffic on the network
CONFIGURATION
Setup Guide Step by step guide on configuring product settings. Access the setup guide from the Summary screen beside the Log Off button.
Outbreak Containment Services
Blocks and disconnects malware activities that have the potential to cause an outbreak.
Detection Exclusion List
Includes servers or computers that do not need to log potential security threats and should not be blocked by Outbreak Containment Services.
1-10

Introducing Threat Discovery Appliance
IP address range in Mitigation Settings
Assign an IP address range to a specific mitigation device.
Mitigation Exclusion List
Add the IP addresses to exclude the servers or computers from mitigation requests sent to mitigation devices.
LOGS
Additional Criteria in Detection Log Query
Trend Micro added more filters including Outbreak Containment Services, Mitigation, computer name, and Active Directory Domain name and account for Detection log query.
Threat Detail Information
Trend Micro added the Detection Type, Mitigation, Outbreak Containment Service, and Active Directory Domain Name and Account as additional threat details.
INTEGRATION
Enhanced Mitigation Capability
Trend Micro enhanced the Threat Discovery Appliance mitigation capability to target specific kinds of malware that query domain names Trend Micro considers suspicious, and malware that propagate through Windows fileshare (SMB) protocols.
Threat Management Services
Threat Discovery Appliance added real time transmission of detection on malware that have the potential to cause an outbreak to provide better monitoring services.
LeakProof Threat Discovery Appliance works with LeakProof servers to monitor information leakage across segments and throughout the network.
TABLE 1-2. New in Threat Discovery Appliance 2.5
WHAT’S NEW DESCRIPTION
1-11

Trend Micro™ Threat Discovery Appliance 2.5 R2 Administrator’s Guide
1-12

Chapter 2
Deploying Threat Discovery Appliance
This chapter provides tips, suggestions, and requirements for deploying Threat Discovery Appliance.
The topics discussed in this chapter are:• Deployment Considerations on page 2-2• Deployment Scenarios on page 2-3
2-1

Trend Micro™ Threat Discovery Appliance 2.5 R2 Administrator’s Guide
Deployment ConsiderationsConsider the following before deploying Threat Discovery Appliance to your network.• Port speeds must match
The destination port speed should be the same as the source port speed to ensure equal port mirroring. For example, if the destination port is unable to cope with the information due to the faster speed of the source port, the destination port might drop some data.
• The product monitors the complete data flow
Ensure that Threat Discovery Appliance monitors the complete data flow. This means that Threat Discovery Appliance should monitor all the data coming to and from the network.
2-2
Deploying Threat Discovery Appliance
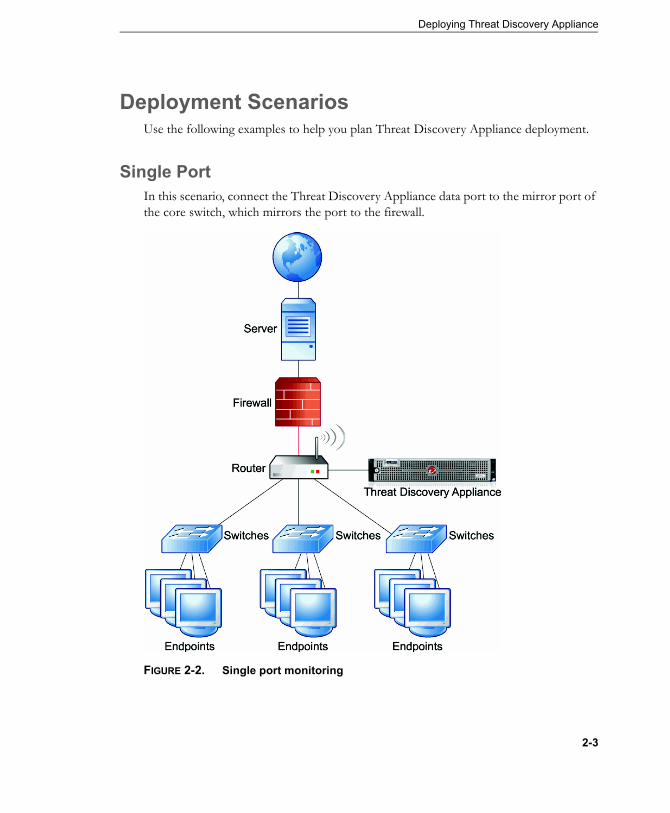
Deployment ScenariosUse the following examples to help you plan Threat Discovery Appliance deployment.
Single Port In this scenario, connect the Threat Discovery Appliance data port to the mirror port of the core switch, which mirrors the port to the firewall.
FIGURE 2-2. Single port monitoring
2-3

Trend Micro™ Threat Discovery Appliance 2.5 R2 Administrator’s Guide
Dual PortThreat Discovery Appliance can monitor different network segments using its different data ports. In this scenario, connect Threat Discovery Appliance data ports to the mirror ports of access or distribution switches.
FIGURE 2-3. Dual port monitoring
2-4

Deploying Threat Discovery Appliance
Network TAPNetwork TAPs can monitor the data flowing across the network from interconnected switches, routers, and computers. In this scenario, connect Threat Discovery Appliance to a network TAP.
FIGURE 2-4. Single Threat Discovery Appliance connected to a network TAP
2-5

Trend Micro™ Threat Discovery Appliance 2.5 R2 Administrator’s Guide
Additionally, use an Intrusion Detection System load balancer for better performance when deploying several instances of Threat Discovery Appliance.
FIGURE 2-5. Several Threat Discovery Appliances connected to a network TAP
2-6

Deploying Threat Discovery Appliance
Redundant NetworksMost enterprise environments use redundant networks to provide high availability. In these scenarios where asymmetric route is possible, connect Threat Discovery Appliance to the redundant switches.
FIGURE 2-6. Redundant network monitoring
Specific VLANsSome enterprise environments limit port scanning to specific VLANs. This can save some bandwidth and can be less resource intensive. In this scenario, Threat Discovery Appliance connection to the switches remains the same but the mirror configuration should be VLAN based.
2-7

Trend Micro™ Threat Discovery Appliance 2.5 R2 Administrator’s Guide
Remote Port or VLAN MirroringUse remote mirroring for the following scenarios:• Monitoring switches
• For the appliance, more than 6 switches• For the virtual appliance, more switches than the data ports that the VMware™
ESX or ESXi server hardware provides• Local switch does not have enough physical ports• Port speed on local switches do not match (GB/MB)
FIGURE 2-7. Remote port or VLAN mirroring
2-8

Deploying Threat Discovery Appliance
Mirroring Trunk LinksIn some instances, mirror the source port from a trunk link, which means there are multiple encapsulated VLANs in the same physical link. In this scenario, ensure that the switch mirrors the correct VLAN tag to Threat Discovery Appliance for both directions.
FIGURE 2-8. Mirroring trunk links
2-9

Trend Micro™ Threat Discovery Appliance 2.5 R2 Administrator’s Guide
2-10

Chapter 3
Setting Up Threat Discovery Appliance
This chapter is intended for new users who will set up the appliance and virtual appliance.
The topics discussed in this chapter are:• Setting Up the Appliance on page 3-2• Setting Up the Virtual Appliance on page 3-13
Note: For users who have deployed earlier versions of the appliance or virtual appliance, perform firmware update to upgrade to this product version.
3-1

Trend Micro™ Threat Discovery Appliance 2.5 R2 Administrator’s Guide
Setting Up the ApplianceThis section discusses how to set up Threat Discovery Appliance as an appliance.
Appliance DetailsThis section provides information on the hardware specifications of the appliance.
Hard DisksThreat Discovery Appliance has two identical hard disks, a primary hard disk and a secondary hard disk used for failover purposes.
Power SuppliesThreat Discovery Appliance provides two power supplies, one as the primary power supply and the other as a backup.
TABLE 3-1. Power supply specifications
SPECIFICATION DETAILS
Wattage 870 W (High Output)
Voltage 90–264 VAC, autoranging, 47-63 Hz
Heat dissipation 2968.6 BTU/hr maximum (High Output)
3-2
Setting Up Threat Discovery Appliance
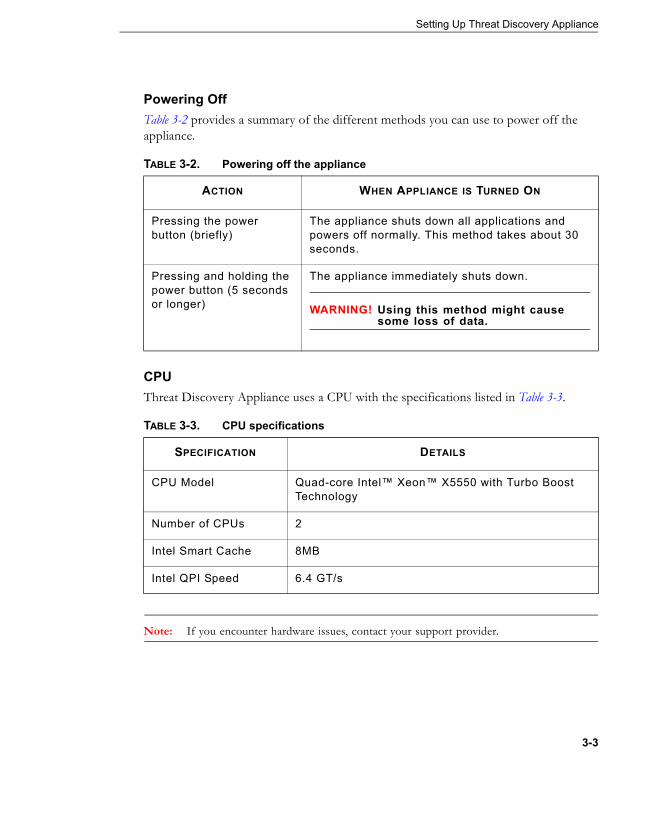
Powering OffTable 3-2 provides a summary of the different methods you can use to power off the appliance.
CPUThreat Discovery Appliance uses a CPU with the specifications listed in Table 3-3.
Note: If you encounter hardware issues, contact your support provider.
TABLE 3-2. Powering off the appliance
ACTION WHEN APPLIANCE IS TURNED ON
Pressing the power button (briefly)
The appliance shuts down all applications and powers off normally. This method takes about 30 seconds.
Pressing and holding the power button (5 seconds or longer)
The appliance immediately shuts down.
WARNING! Using this method might cause some loss of data.
TABLE 3-3. CPU specifications
SPECIFICATION DETAILS
CPU Model Quad-core Intel™ Xeon™ X5550 with Turbo Boost Technology
Number of CPUs 2
Intel Smart Cache 8MB
Intel QPI Speed 6.4 GT/s
3-3

Trend Micro™ Threat Discovery Appliance 2.5 R2 Administrator’s Guide
Rack MountingThe appliance is safety-certified as a free-standing unit and as a component for use in a Trend Micro rack cabinet using the customer rack kit. The installation of the appliance and rack kit in any other rack cabinet has not been approved by any safety agencies. It is your responsibility to ensure that the final combination of the appliance and rack complies with all applicable safety standards and local electric code requirements. Trend Micro disclaims all liability and warranties in connection with such combinations.
Appliances are considered to be components in a rack. Thus, "component" refers to any appliance as well as to various peripherals or supporting hardware.
WARNING! Before installing the appliance in a rack, install front and side stabilizers on stand-alone racks or the front stabilizer on racks joined to other racks. Failure to install stabilizers accordingly before installing the appliance in a rack could cause the rack to tip over, potentially resulting in bodily injury under certain circumstances. Therefore, always install the stabi-lizer(s) before installing components in the rack.
After installing the appliance/components in a rack, never pull more than one component out of the rack on its slide assemblies at one time. The weight of more than one extended component could cause the rack to tip over and may result in serious injury.
General InstallationThis guide provides instructions for trained service technicians installing one or more appliances in a rack cabinet. You can install the RapidRails™ configuration without tools in manufacturer's rack cabinets that have square holes; and you can install the VersaRails™ configuration in most industry-standard rack cabinets that have square or round holes. Each appliance requires one rack kit for installation in the rack cabinet.
3-4

Setting Up Threat Discovery Appliance
Before You Begin Before you begin installing the appliance in the rack, carefully read the Safety Sheet that comes with the appliance.
WARNING! When installing multiple appliances in a rack, complete all of the proce-dures for the current appliance before attempting to install the next one.
Rack cabinets can be extremely heavy and move easily on their casters. They do not have brakes. Use extreme caution while moving the rack cab-inet. Retract the leveling feet when relocating the rack cabinet. Avoid long or steep inclines or ramps where loss of cabinet control may occur. Extend the leveling feet for support and to prevent the cabinet from roll-ing.
Important Safety InformationObserve the safety precautions in the following subsections when installing the appliance in the rack.
WARNING! You must strictly follow the procedures in this document to protect your-self as well as others who may be involved. The appliance may be very large and heavy and proper preparation and planning is important to pre-vent injuring yourself and others. This precaution becomes increasingly important when installing appliances high up in the rack.
Do not install rack kit components designed for another device. Use only the rack kit for the appliance. Using the rack kit for another device may result in damage to the appliance and personal injury to yourself and to others.
Recommended Tools and SuppliesYou may need the following items to install the appliance in a four-post rack cabinet:• #2 Phillips screwdriver• Masking tape or a felt-tip pen, for use in marking the mounting holes to be used
3-5

Trend Micro™ Threat Discovery Appliance 2.5 R2 Administrator’s Guide
Rack Kit Contents• One pair of slide assemblies• One cable-management arm• One cable-management arm retainer• One status indicator cable (if applicable)• Eight 10-32 x 0.5-inch flange-head Phillips screws
Note: Identify the non-metric screws described in illustrations and in procedural steps by the size and number of threads per inch. For example, a #10 Phillips-head screw with 32 threads per inch is a 10-32 screw.
FIGURE 3-1. Rack Kit Contents
1 cable-management arm
2 cable-management arm retainer
3 slide assemblies
(2)
4 10-32 x 0.5-inch flange-head Phillips screws (8)
5 status indicator cable (if applicable)
4
1
5
3
2
3-6

Setting Up Threat Discovery Appliance
Mounting the ApplianceInstalling a rack kit involves performing the following tasks (described in detail in subsequent sections):
WARNING! Before performing the following procedure, review the safety instructions that came with the system.
Step 1: Unpack the SystemUnpack your system and identify each item.
Step 2: Install the Rails and System in a Rack
FIGURE 3-2. Rails and system assembly
Assemble the rails and install the system in the rack following the safety instructions and the rack installation instructions provided with your system.
3-7

Trend Micro™ Threat Discovery Appliance 2.5 R2 Administrator’s Guide
Step 3: (Optional) Connect the Keyboard, Mouse, and Monitor
FIGURE 3-3. Keyboard, mouse, and monitor connections
Connect the keyboard, mouse, and monitor (optional).
The connectors on the back of your system have icons indicating which cable to plug into each connector. Be sure to tighten the screws (if any) on the monitor's cable connector.
3-8
Setting Up Threat Discovery Appliance
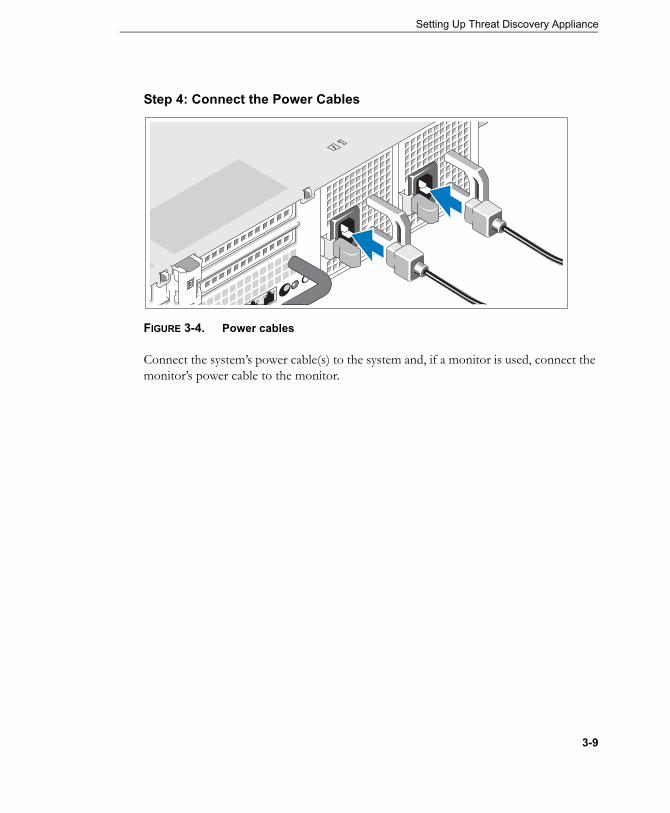
Step 4: Connect the Power Cables
FIGURE 3-4. Power cables
Connect the system’s power cable(s) to the system and, if a monitor is used, connect the monitor’s power cable to the monitor.
3-9

Trend Micro™ Threat Discovery Appliance 2.5 R2 Administrator’s Guide
Step 5: Secure the Power Cord
FIGURE 3-5. Power cord
Bend the system power cable into a loop as shown in the illustration and secure the cable to the bracket using the provided strap.
Plug the other end of the power cables into a grounded electrical outlet or a separate power source such as an uninterruptible power supply (UPS) or a power distribution unit (PDU).
3-10

Setting Up Threat Discovery Appliance
Step 6: Turn on the System
FIGURE 3-6. Power button
Press the power button on the system and the monitor. The power indicators should light.
Step 7: (Optional) Install the Bezel
FIGURE 3-7. Bezel
Install the bezel (optional).
3-11

Trend Micro™ Threat Discovery Appliance 2.5 R2 Administrator’s Guide
Using the Liquid Crystal Display Module (LCM)A liquid crystal display module (LCM) is located in the front part of the appliance. The display module includes the liquid crystal display (LCD) component, which displays the host name and IP address.
Reading the LCDThe LCD shows the following:• Host name—the default Threat Discovery Appliance host name• 192.168.252.1—the default IP address of the Threat Discovery Appliance
management port
Accessing the Preconfiguration ConsoleAccess the Preconfiguration Console to perform initial configuration. For details, see To access the Preconfiguration Console of the appliance: on page 4-2.
3-12

Setting Up Threat Discovery Appliance
Setting Up the Virtual ApplianceThis section discusses how to set up Threat Discovery Appliance as a virtual appliance.
System RequirementsTo deploy and configure the virtual appliance, you need the following:
Virtual Appliance RequirementsThe following are the recommended resources allotted to the virtual appliance. Allot more resources to increase the product’s performance.• Four (4) processors• 4GB of RAM• 100GB disk space• Two (2) network adapters to monitor a single network, or three (3) network adapters
to monitor two networks
Tip: Trend Micro recommends using a dedicated network adapter for each monitored network and a separate adapter for the management connection.
Application Requirements• VMware™ ESX™/ESXi server 3.5 or later
3-13

Trend Micro™ Threat Discovery Appliance 2.5 R2 Administrator’s Guide
InstallationPerform the following to install the virtual appliance:• Step 1: Preparing the VMware Server on page 3-14• Step 2: Configuring the Virtual Switch for Monitoring on page 3-15• Step 3: Extracting the Image on page 3-18• Step 4: Importing the VMware Image on page 3-19• Step 5: Configuring VMware Settings on page 3-21
Step 1: Preparing the VMware ServerEnsure that the VMware™ ESX™ or ESXi server meets the requirements for installation on a bare metal computer.
To prepare the VMware server:
1. Download and install VMWare ESX or ESXi server. You can download the installer from the following site:
http://vmware.com/download
Note: Trend Micro does not provide VMware applications. Contact your local VMware reseller for more information.
2. Enable virtualization technology from the BIOS.
Note: Check your server if this should still be enabled or if this feature is automatically enabled.
3. Install the VMware Infrastructure Client.a. Access a separate computer but on the same network as the server.
b. Use a browser to connect to the ESX Server Welcome page by typing HTTPS and the ESX server IP address as the URL:
https://<IP address>
c. Download the installer from the link provided.
d. Install the downloaded application.
3-14

Setting Up Threat Discovery Appliance
4. Run the VMware Infrastructure Client.5. Connect to the VMware ESX server.
FIGURE 3-8. VMware Infrastructure Client logon screen
Step 2: Configuring the Virtual Switch for MonitoringSet up a virtual switch on the VMware ESX/ESXi server to run in promiscuous mode to enable the virtual appliance to listen to traffic from the SPAN or mirror port of the switch.
3-15

Trend Micro™ Threat Discovery Appliance 2.5 R2 Administrator’s Guide
To configure the virtual switch:
1. Open the VMware Infrastructure Client.2. Select the Configuration tab. The Configuration screen appears.3. Click Networking under Hardware.
FIGURE 3-9. The Configuration screen
4. Click Add Networking, from the upper right corner. The Add Network Wizard screen appears.
FIGURE 3-10. The Add Network Wizard screen
3-16

Setting Up Threat Discovery Appliance
5. Select the Virtual Machine option.6. Click Next.7. Determine the adapter connected to the SPAN or mirror port of the switch.8. Enter a distinct name for the virtual switch. Ensure that this is something that can
help you distinguish one virtual switch from another.
Note: The default switch name of the image is Data Network.
9. Enable promiscuous mode:
FIGURE 3-11. The vSwitch Properties screen
3-17

Trend Micro™ Threat Discovery Appliance 2.5 R2 Administrator’s Guide
a. Double click vSwitch.
b. Click the Security tab.
c. Select the Accept option beside Promiscuous Mode.
d. Click OK.
e. Click Close.
Note: Create another virtual switch for sniffing if your network needs high network availability. This is to ensure the least amount of network interruption. If this is the case, follow the steps mentioned to create another virtual switch.
Step 3: Extracting the ImageRun the installer to extract the image to import to the VMware server.
To extract the image:
1. Go to the computer where you installed the VMware Infrastructure Client.2. Run the Threat Discovery Virtual Appliance Installer.3. Read the License agreement and click Agree if you agree to the End User License
Agreement (EULA) conditions. 4. Click Browse to indicate the location of the folder for the file extraction.5. Click Install.
3-18

Setting Up Threat Discovery Appliance
Step 4: Importing the VMware ImageImport the image using the VMware Infrastructure Client.
To import the image:
1. Run the VMware Infrastructure Client.2. Click File > Virtual Appliance > Import from the main menu. The Import
Location screen appears.
FIGURE 3-12. Import screen
3. Select Import from file > Browse to go to the folder location of the extracted .ovf image file from the Threat Discovery Virtual Appliance installation files.
4. Click Next.5. Specify a name for the virtual appliance or retain the default name.6. Click Next.7. If there is more than one hard drive on your server, select the installation drive.
Ensure that this drive has at least 100GB of hard disk space.
3-19

Trend Micro™ Threat Discovery Appliance 2.5 R2 Administrator’s Guide
8. Click Next. The Network Mapping screen appears.
FIGURE 3-13. The Network Mapping screen
9. Select the newly configured virtual switch beside the second (or third) Virtual Machine Network.
10. Click Next.
3-20

Setting Up Threat Discovery Appliance
Step 5: Configuring VMware SettingsEnsure optimal performance by changing some VMware settings.
To configure VMware settings:
1. Run the VMware Infrastructure Client.2. Click the Threat Discovery Virtual Appliance installation listed at left side.3. Click Edit Virtual Machine Settings.
FIGURE 3-14. Edit Virtual Machine Settings screen
4. Select the Options tab.
3-21

Trend Micro™ Threat Discovery Appliance 2.5 R2 Administrator’s Guide
5. Click Paravirtualization.
FIGURE 3-15. Virtual Machine Properties screen
6. Enable the Support VMI Paravirtualization option.
3-22

Setting Up Threat Discovery Appliance
7. Click VMware Tools.
FIGURE 3-16. VMware Tools screen
8. Set the Power Controls to the following settings:• Stop icon—Shutdown Guest• Pause icon—System Default (Suspend)• Refresh icon—Restart Guest
9. Enable the Synchronize guest time with host option.10. Click OK.
3-23

Trend Micro™ Threat Discovery Appliance 2.5 R2 Administrator’s Guide
Accessing the Preconfiguration ConsoleAccess the Preconfiguration Console to perform initial configuration. For details, see To access the Preconfiguration Console of the virtual appliance: on page 4-4.
3-24

Chapter 4
The Preconfiguration Console
This chapter explains how to use the Preconfiguration console to perform initial configuration and maintenance tasks.
The topics discussed in this chapter are:• The Preconfiguration Console on page 4-2• Preconfiguration Console Access on page 4-2• Preconfiguration Menu on page 4-5• Preconfiguration Menu: Device Information and Status on page 4-7• Preconfiguration Menu: Device Settings on page 4-8• Preconfiguration Menu: Interface Settings on page 4-10• Preconfiguration Menu: System Tasks on page 4-11• Preconfiguration Menu: View System Logs on page 4-21• Preconfiguration Menu: Change Password on page 4-22• Preconfiguration Menu: Log Off on page 4-23
4-1

Trend Micro™ Threat Discovery Appliance 2.5 R2 Administrator’s Guide
The Preconfiguration ConsoleThe Preconfiguration Console is a terminal communications program that allows you to configure or view any preconfiguration setting. These settings include:• Network settings• System logs
Use the Preconfiguration Console to do the following:• Configure initial settings, such as the product’s IP address and host name• Restart the product• View system logs
Note: Do not enable scroll lock on your keyboard when using HyperTerminal or you will not be able to enter data.
Preconfiguration Console AccessThis topic discusses how to access the Preconfiguration Console of the appliance and virtual appliance.
To access the Preconfiguration Console of the appliance:
1. There are several ways to access the Preconfiguration Console.
From a monitor with a VGA port:
Connect the VGA port to the VGA port of the appliance using a VGA cable.
From a computer with an ethernet port:
a. Connect the ethernet port to the management port of the appliance using a general ethernet cable.
Note: The computer’s IP address must be in the same subnet as the management port’s IP address.
4-2

The Preconfiguration Console
b. On the computer, open an SSH communication application such as PuTTY.
Note: To connect to the appliance from another computer in your network (not directly connected to the appliance), ensure that you access the computer connected to the management port.
c. Use the following values if you are accessing the console for the first time:
• IP address (for SSH connection only): by default, it is 192.168.252.1• User name: tda• Password: [press Enter]• Port number: 22
From a computer with a serial port:
a. Connect the serial port to the serial port of the appliance using an RS232 serial cable.
b. On the computer, open a serial communication application such as HyperTerminal.
c. Use the following values if you are accessing the console for the first time:
• Bits per second: 115200• Data bits: 8• Parity: None• Stop bits: 1• Flow control: None
4-3

Trend Micro™ Threat Discovery Appliance 2.5 R2 Administrator’s Guide
2. When the Preconfiguration Console screen opens, type the default password admin.
FIGURE 4-1. The Logon screen
To access the Preconfiguration Console of the virtual appliance:
1. Start the VMware™ ESX Server Infrastructure client.2. Access the Preconfiguration Console. The default password is admin. The logon
screen as shown in Figure 4-1 appears.
4-4

The Preconfiguration Console
Preconfiguration Menu
FIGURE 4-2. The Preconfiguration Console’s main menu
Menu ItemsThe Preconfiguration Console menu displays the following:
TABLE 4-1. Main menu item descriptions
MENU ITEMS DESCRIPTION
Device Information and Status
View product information and monitor CPU and memory usage.
Device Settings Modify the product’s host name, IP address, subnet mask, and the network default gateway address and DNS servers.
You can register Threat Discovery Appliance to Trend Micro Control Manager for centralized management.
4-5

Trend Micro™ Threat Discovery Appliance 2.5 R2 Administrator’s Guide
Navigation• To navigate the Preconfiguration Console, type the index number of the desired
selection and press the ENTER key.• To return to the Main Menu, press the Esc key. • To skip an entry or keep the current value, press the Up and Down keys.• To go back to the top of a menu tree or to exit the Preconfiguration Console from
the Main Menu, enter the Esc key.
Interface Settings By default, Threat Discovery Appliance automatically detects the network speed and duplex mode. However, if any issues with the connection arise, you can manually configure these settings.
System Tasks Roll back to the previous update, perform a diagnostic test, or restart the product.
If you have set up the appliance, you can also import and export the configuration file, and import the HTTPS certificate.
View System Logs View the security risks and incidents as they happen.
Change Password Change the root password.
Log Off with Saving Log off from the Preconfiguration Console after saving the changes.
Log Off without Saving Log off from the Preconfiguration Console without saving the changes.
TABLE 4-1. Main menu item descriptions (Continued)
MENU ITEMS DESCRIPTION
4-6

The Preconfiguration Console
Preconfiguration Menu: Device Information and Status
FIGURE 4-3. The Device Information and Status screen
View the product name, program version, serial number, and memory usage from this screen.• There is no serial number for the virtual appliance.• Memory usage information can also be viewed from the product console’s Summary
screen. For details, see Product Summary on page 7-4.
To view product information:
1. Log on to the Preconfiguration Console. The Main Menu appears.2. Type 1 to select Device Information & Status and press the ENTER key. The
Device Information and Status screen appears.
4-7
Trend Micro™ Threat Discovery Appliance 2.5 R2 Administrator’s Guide
Preconfiguration Menu: Device Settings
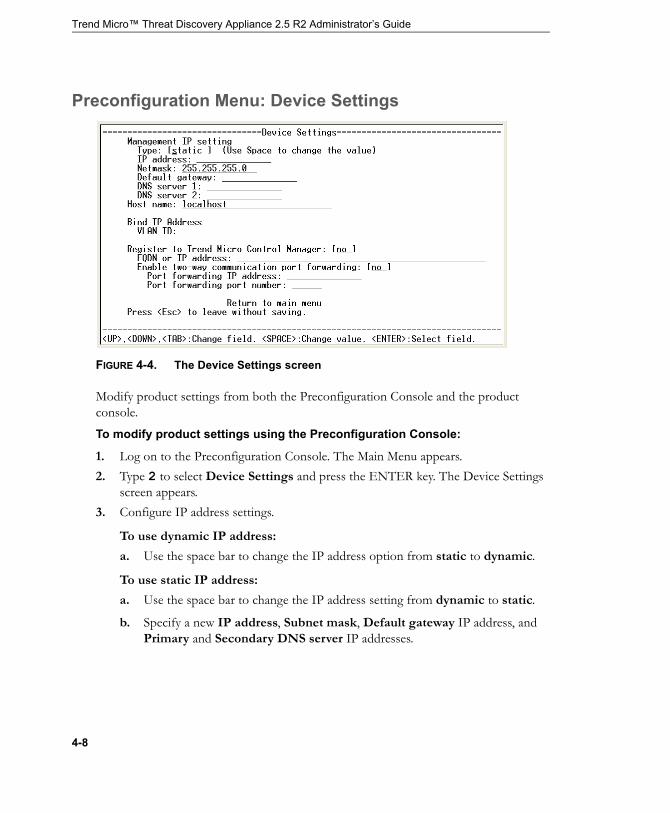
FIGURE 4-4. The Device Settings screen
Modify product settings from both the Preconfiguration Console and the product console.
To modify product settings using the Preconfiguration Console:
1. Log on to the Preconfiguration Console. The Main Menu appears.2. Type 2 to select Device Settings and press the ENTER key. The Device Settings
screen appears.3. Configure IP address settings.
To use dynamic IP address:
a. Use the space bar to change the IP address option from static to dynamic.
To use static IP address:
a. Use the space bar to change the IP address setting from dynamic to static.
b. Specify a new IP address, Subnet mask, Default gateway IP address, and Primary and Secondary DNS server IP addresses.
4-8

The Preconfiguration Console
4. Change the Host name.a. Navigate to the Host name option.
b. Specify the new host name.
5. (Optional) Bind the IP Address:a. Navigate to the Bind IP Address option.
b. Specify a VLAN ID. Press the ENTER key.
6. Register to Trend Micro Control Manager:
Note: Registration is optional. You can use the product console to register to Control Manager at a later time.
a. Use the down arrow to bring the cursor to Register to Control Manager and then use the spacebar to change the option to [yes].
b. Type the Control Manager server IP address in the FQDN or IP address field.
c. Use the spacebar to change the Enable two-way communication port forwarding option from no to yes.
d. Type the port number and IP address of your router or NAT device server in the Port forwarding IP address and Port forwarding port number fields. Threat Discovery Appliance uses the Port forwarding IP address and Port forwarding port number for two-way communication with Control Manager.
Note: Configuring the NAT device is optional and depends on the network environment. For more information on NAT, refer to the Trend Micro Control Manager Administrator’s Guide.
7. Navigate to Return to main menu. Press the ENTER key to return to main menu.8. Navigate to 7) Log Off with Saving. Press the ENTER key to save the settings.
4-9

Trend Micro™ Threat Discovery Appliance 2.5 R2 Administrator’s Guide
Preconfiguration Menu: Interface Settings
FIGURE 4-5. The Interface Settings screen
By default, Threat Discovery Appliance automatically detects the network speed and duplex mode for the management port (MGMT), so it is unlikely that you need to change this setting. However, if any issues with the connection arise, you can manually configure these settings.
Tip: To maximize throughput, Trend Micro recommends full-duplex mode.
Half-duplex is acceptable. However, network throughput is limited because half-duplex communication requires any computer transmitting data to wait and retransmit if a collision occurs.
Note: Data ports used by the product can be managed from the product console by navigating to Administration > Network Interface Settings. For details, see Network Interface Settings on page 5-5.
4-10

The Preconfiguration Console
To modify interface settings:
1. Log on to the Preconfiguration Console. The Main Menu appears.2. Type 3 to select Interface Settings and press the ENTER key. The Interface
settings of the Management and Data ports appear.3. To change the interface settings, type 1 and press the ENTER key.4. Use the space bar to change the values of the settings.
Tip: The available options are shown beneath the field settings.
5. Type 2 and press the ENTER key to Return to the main menu. Press the ENTER key to return to main menu.
6. Navigate down to 7) Log Off with Saving. Press the ENTER key to save the settings.
Preconfiguration Menu: System TasksUse the System Tasks screen if you encounter an error message that requires you to roll back the Threat Discovery Appliance update, or if you need to import or export the configuration file, import the HTTPS certificate or restart the product.
Tip: Importing and exporting the configuration file is also available from the product console.
Perform the following tasks:• Rolling back to the Previous Update on page 4-12• Performing a Diagnostic Test on page 4-19• Restarting Threat Discovery Appliance on page 4-19
The following tasks can only be performed on the appliance, and not the virtual appliance:• Importing the Configuration File on page 4-13• Exporting the Configuration File on page 4-16• Importing the HTTPS Certificate on page 4-18
4-11

Trend Micro™ Threat Discovery Appliance 2.5 R2 Administrator’s Guide
Rolling back to the Previous UpdateIf the update is not compatible with Threat Discovery Appliance, roll back to the previous update.
To roll back to the previous update:
1. Log on to the Preconfiguration Console. The Main Menu appears.2. Type 4 then press the ENTER key. The System Tasks screen appears.
FIGURE 4-6. The System Tasks screen
4-12

The Preconfiguration Console
3. Type 1 then press the ENTER key. The Rollback to previous update screen appears.
Note: Rolling back to previous update may require restarting the product.
FIGURE 4-7. The Rollback to previous update screen
4. Select OK and press the ENTER key.5. The product rolls back to the previous updates.
Importing the Configuration FileThis task can only be performed on the appliance, and not the virtual appliance.
If the appliance encounters errors with the current settings, you can restore the configuration and database from a backup file.
WARNING! Export the current configuration settings before importing the backup configuration file (see Exporting the Configuration File on page 4-16).
4-13
Trend Micro™ Threat Discovery Appliance 2.5 R2 Administrator’s Guide
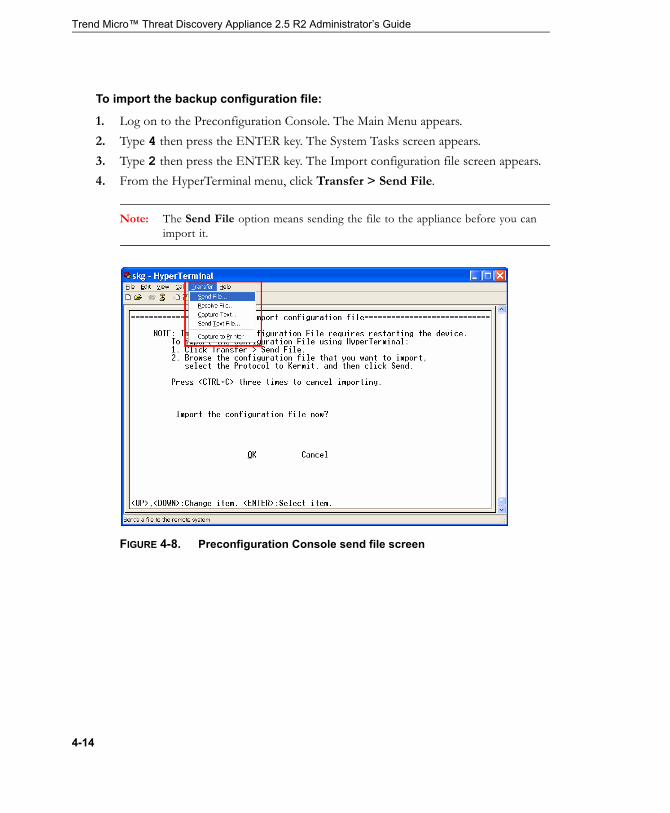
To import the backup configuration file:
1. Log on to the Preconfiguration Console. The Main Menu appears.2. Type 4 then press the ENTER key. The System Tasks screen appears.3. Type 2 then press the ENTER key. The Import configuration file screen appears.4. From the HyperTerminal menu, click Transfer > Send File.
Note: The Send File option means sending the file to the appliance before you can import it.
FIGURE 4-8. Preconfiguration Console send file screen
4-14

The Preconfiguration Console
5. Browse to the configuration file you want to import.
FIGURE 4-9. Send file screen
6. Change the protocol to Kermit and then click Send.
Tip: Trend Micro recommends exporting the current configuration settings before importing the backup configuration file.
FIGURE 4-10. Kermit file send screen
4-15

Trend Micro™ Threat Discovery Appliance 2.5 R2 Administrator’s Guide
7. The appliance imports the configuration file and uses the settings from the file.
Exporting the Configuration FileThis task can only be performed on the appliance, and not the virtual appliance.
Regularly back up the configuration files to ensure that you use the latest configuration settings when importing.
To export the configuration file:
1. Log on to the Preconfiguration Console. The Main Menu appears.2. Type 4 then press the ENTER key. The System Tasks screen appears.3. Type 3 then press the ENTER key. The Export configuration file screen appears.4. From the HyperTerminal menu, click Transfer > Receive File.
Note: The Receive File option means receiving the file from the appliance before exporting.
FIGURE 4-11. Preconfiguration Console receive file screen
4-16

The Preconfiguration Console
5. Browse to the configuration file you want to export.
FIGURE 4-12. Receive file screen
6. Change the protocol to Kermit, and then click Receive.
FIGURE 4-13. Kermit file receive screen
7. The appliance exports the configuration settings to a .dat file.8. Rename the exported configuration files to keep track of the latest configuration
files.
4-17

Trend Micro™ Threat Discovery Appliance 2.5 R2 Administrator’s Guide
Importing the HTTPS CertificateThis task can only be performed on the appliance, and not the virtual appliance.
You can import the HTTPS certificate to ensure connection to the correct server. Replace the HTTPS Certification from the product console’s HTTPS Certificate screen.
Use the following command to generate a certificate from a Linux operating system:
openssl req -new -x509 -days 365 -nodes -out FILE_NAME.pem -keyout FILE_NAME.pem
To import the HTTPS certificate:
1. Log on to the Preconfiguration Console. The Main Menu appears.2. Type 4 then press the ENTER key. The System Tasks screen appears.3. Type 4 then press the ENTER key. The Import HTTPS certificate screen appears.
FIGURE 4-14. The Import HTTPS Certificate screen
4. From the HyperTerminal menu, click Transfer > Send File.5. Browse to the configuration file you want to import.6. Change the Protocol to Kermit, then click Send.
4-18

The Preconfiguration Console
Performing a Diagnostic TestUse this feature to perform diagnostic tests of the system and application. This helps determine if there are any software or hardware issues.
To perform the diagnostic test:
1. Log on to the Preconfiguration Console. The Main Menu appears.2. Type 4 then press the ENTER key. The System Tasks screen appears.3. Type 5 then press the ENTER key. The Diagnostic Test screen appears.4. From the HyperTerminal menu, click Transfer > Capture Text.5. Browse to the folder and specify the file name for the log.6. Click Start.7. Under Run diagnostic test now?, navigate to OK and press the ENTER key.8. After Threat Discovery Appliance restarts, open the captured log to view the log
result.
Restarting Threat Discovery ApplianceTo restart the appliance, access the Preconfiguration Console using a serial communication application such as HyperTerminal or an SSH utility such as PuTTY. Using PuTTY to access the Preconfiguration Console means you can restart the appliance remotely.
Note: The appliance automatically starts when power is restored after a power failure. This means you do not have to physically turn the appliance back on. However, shutting down the appliance before a power failure means the appliance will not automatically start when power is restored.
To restart the virtual appliance, access the Preconfiguration Console from the VMWare Infrastructure Client console or from the VMWare host Web console.
When Threat Discovery Appliance starts, it checks the integrity of its configuration files. The product console password may reset if the configuration file containing password information is corrupted. If you are unable to log on to the console using your preferred password, log on using the default password admin.
4-19

Trend Micro™ Threat Discovery Appliance 2.5 R2 Administrator’s Guide
To restart Threat Discovery Appliance:
1. Log on to the Preconfiguration Console. The Main Menu appears.2. Type 4 then press the ENTER key. The System Tasks screen appears.3. Type 6 then press the ENTER key. The Reset Device screen appears.4. Under Reset Trend Micro Threat Discovery Appliance and keep current
configuration, navigate to OK and press the ENTER key.
FIGURE 4-15. The Reset Device screen
Threat Discovery Appliance restarts.
4-20

The Preconfiguration Console
Preconfiguration Menu: View System Logs
FIGURE 4-16. An example of a System log
The log format in the Preconfiguration Console displays the logs. For more organized and configurable logs, use the Detection Log Query on the product console. For details, see Detection Logs on page 7-20.
To view system logs in the Preconfiguration Console:
1. Log on to the Preconfiguration Console. The Main Menu appears.2. Type 5 then press the ENTER key. The System log screen appears.
Note: You will initially see a blank screen. Wait for a couple of seconds. The logs appear as soon as Threat Discovery Appliance detects activity in the network.
4-21

Trend Micro™ Threat Discovery Appliance 2.5 R2 Administrator’s Guide
Preconfiguration Menu: Change Password
FIGURE 4-17. The Change Password screen
Change the Threat Discovery Appliance password using the Preconfiguration Console.
To change the root password in the Preconfiguration Console:
1. Log on to the Preconfiguration Console. The Main Menu appears.2. Type 6 then press the ENTER key. The Change Password screen appears.3. Type the old and new passwords.4. Confirm the new password.5. Return to the main menu to save the settings.
4-22

The Preconfiguration Console
Preconfiguration Menu: Log OffYou have 2 options when logging off from the Preconfiguration Console:
Log off with Saving
FIGURE 4-18. The Leave Preconfiguration with Saving screen
4-23

Trend Micro™ Threat Discovery Appliance 2.5 R2 Administrator’s Guide
Log off without Saving
FIGURE 4-19. The Leave Preconfiguration without Saving screen
To log off and save:
Note: Some tasks, such as changing the password and resetting the product, are automatically saved and therefore do not require going through this process.
1. After making changes to the configuration settings, return to the main menu.2. Type 7 then press the ENTER key. The Leave Preconfiguration with Saving screen
appears.3. Under Save configuration settings and exit?, navigate to OK and press the
ENTER key.
4-24

The Preconfiguration Console
To log off without saving:
1. After making any changes to the configuration settings, return to the main menu.2. Type 8 then press the ENTER key. The Leave Preconfiguration without Saving
screen appears.3. Under Exit without saving configuration settings?, navigate to OK and press
the ENTER key.
4-25

Trend Micro™ Threat Discovery Appliance 2.5 R2 Administrator’s Guide
4-26

Chapter 5
Getting Started
This chapter introduces the settings you need to configure immediately after setting up Threat Discovery Appliance.
The topics discussed in this chapter are:• Network Settings on page 5-2• Product Console on page 5-3• Network Interface Settings on page 5-5• System Time on page 5-7• Proxy Settings on page 5-8• Product License and Activation Codes on page 5-8• Component Updates on page 5-10
5-1

Trend Micro™ Threat Discovery Appliance 2.5 R2 Administrator’s Guide
Network SettingsThe following format rules apply to Threat Discovery Appliance network settings.
Host Name FormatUse the Fully Qualified Domain Name (FQDN) for the host name; for example:
hostname.domain_1.com
The host name can contain alphanumeric characters and dashes (“A-Z”, “0-9”, “-”).
IP Address FormatIP addresses must be in the format: XXX.XXX.XXX.XXX, where x is a decimal value between 0 and 255. The IP address cannot be in any of the following formats:• AAA.XXX.XXX.XXX, where A is in the range 223 to 240 [Multicast Address]• 0.0.0.0 [Local Host name]• 255.255.255.255 [Broadcast Address]• 127.0.0.1 [Loopback Address]
Subnet Mask FormatSubnet masks are best explained by looking at the IP address and subnet mask in its binary format. The binary format of the subnet mask starts with a sequence of continuous 1s and ends with a sequence of continuous 0s.
For example:• 255.255.255.0—Binary format is 11111111.11111111.11111111.00000000• 255.255.252.0—Binary format is 11111111.11111111.11111100.00000000
Default Gateway Address FormatThe gateway must be in the same subnet as the IP address. The combination of the IP address and the subnet mask should not be the broadcast or network address.
VLAN IDThe VLAN ID is a valid VLAN identifier ranging from 1-4094.
5-2

Getting Started
Product ConsoleThreat Discovery Appliance provides a built-in Web-based product console through which you can configure all product settings. This section explains how to access the product console.
To open the product console:
1. From a computer in your network, open Microsoft™ Internet Explorer™ 6.0 or 7.0.
Note: To ensure that tool tips and reports appear, set the Internet Security level to Medium and enable ActiveX Binary and Script Behaviors.
2. Using the managed port IP address you set for the product during initial configuration (if you set up the appliance, refer to the Threat Discovery Appliance Quick Start Guide), type the following URL:
https://192.168.252.1/index.html
Note: The URL is case sensitive. Type the URL exactly as it appears.
3. Type the default password: admin
Note: Change the password immediately after logging on for the first time (see Product Console Password on page 5-4).
4. Click Log On.
Note: If you change the product IP address, update your browser bookmark to access the product console at the new IP address.
5-3

Trend Micro™ Threat Discovery Appliance 2.5 R2 Administrator’s Guide
Product Console PasswordThe default console password is admin. For improved security, Trend Micro recommends changing the password after logging on for the first time and periodically thereafter.
Passwords should be a mixture of alphanumeric characters such as 0-9, a-z, A-Z, !$%^ and must be 4 to 32 characters long.
The following are guidelines for creating a safe password:• Avoid words found in the dictionary.• Intentionally misspell words.• Use phrases or combine words.• Use both uppercase and lowercase letters.
If you lose the password, there is no way to recover it. Contact your support provider for assistance in resetting the password.
To change the product console password:PATH: ADMINISTRATION > PASSWORD
1. Type the current password. 2. Type the new password and confirm it.3. Click Save.
5-4

Getting Started
Network Interface SettingsThe Network Interface Settings screen allows you to manage the product’s IP address and network interface ports.
Threat Discovery Appliance requires its own IP address to ensure that the management port can access the product console. If there is a DHCP server on your network and you want it to dynamically assign an IP address to Threat Discovery Appliance, select Dynamic IP address (DHCP). Otherwise, select static IP address.
Threat Discovery Appliance uses a management port and several data ports. You can view the status of these ports, change the network speed/duplex mode for each of the data ports, and capture packets for debugging and troubleshooting purposes.
Note: The network speed/duplex mode for the management port can only be configured from the Preconfiguration Console. For details, see Preconfiguration Menu: Interface Settings on page 4-10.
To configure a dynamic IP address:PATH: ADMINISTRATION > NETWORK INTERFACE SETTINGS > APPLIANCE IP ADDRESS SET-
TINGS
1. In Appliance Host Name, specify the host name.2. Select Dynamic IP Address (DHCP).3. Click Save.
To configure a static IP address:PATH: ADMINISTRATION > NETWORK INTERFACE SETTINGS > APPLIANCE IP ADDRESS SET-
TINGS
1. In Appliance Host Name, specify the host name.2. Select Static IP address.3. Type the following:
• IP address—the numeric address specifically for Threat Discovery Appliance• Subnet Mask—indicates the subnet mask for the network to which the Threat
Discovery Appliance IP address belongs• (Optional) Gateway—the IP address of the network gateway
5-5

Trend Micro™ Threat Discovery Appliance 2.5 R2 Administrator’s Guide
• (Optional) DNS Server 1—the IP address of the primary server that resolves host names to an IP address
• (Optional) DNS Server 2—the IP address of the secondary server that resolves host names to an IP address
4. Click Save.
To manage network interface ports:PATH: ADMINISTRATION > NETWORK INTERFACE SETTINGS > NETWORK INTERFACE PORTS
1. View the status for each port.2. To change the port’s network speed and duplex mode, select from the options
under Connection Type.3. Select Check VLAN tags if VLAN tags are used to differentiate TCP connections.4. To capture packets on each port, click Start under Packet Capture. The date/time
of the packet capture session displays next to the button. The total amount of packets captured dynamically displays on the lower section of the screen.
Note: It is not possible to run multiple capture sessions. Wait for a session to finish before starting a new one.
5. Click Stop if the packet capture session is done.
Note: The maximum size of the file containing packet data is 30MB.
6. To view data for the particular packet capture session, click View.7. To export the data to a log file, click Export and then specify the target location of
the log file tcpdump.tgz.
Tip: Send the log file to Trend Micro if you need troubleshooting assistance.
8. To remove files containing packet data, click Reset.
5-6

Getting Started
System TimeSynchronize the system time with the Network Time Protocol (NTP) server, or manually configure the time.
To set the system time:PATH: ADMINISTRATION > SYSTEM TIME
1. Under System Time Settings, select either of the following:• Synchronize appliance time with an NTP server; or
i. In NTP Server, type the NTP server address.ii. Click Synchronize Now.
• Manually set the system timei. Type the month, day, and year using the mm/dd/yy format.ii. Select the hour, minute, and second.
2. Under Time zone, select the appropriate time zone from the list of standard time zones.
3. Click Save.
5-7

Trend Micro™ Threat Discovery Appliance 2.5 R2 Administrator’s Guide
Proxy SettingsConfigure proxy settings to download updates from the Trend Micro ActiveUpdate server or another update source, update the product license, connect to Threat Management Services, and query the Trend Micro URL Filtering server.
To configure proxy settings:PATH: ADMINISTRATION > PROXY SETTINGS
1. Select Use a proxy server for pattern, engine, and license updates.2. Select HTTP, SOCKS4, or SOCKS5 for the Proxy protocol. 3. Type the server name or IP address and the port number. For example, type
192.1.1.1 as the server IP address and 1234 as the port number. 4. If your proxy server requires authentication, type the User name and Password
under Proxy server authentication.5. Click Test Connection to verify connection settings.6. Click Save if connection was successful.
Product License and Activation CodesTo use the functionality of Threat Discovery Appliance, you need to register the product, obtain an Activation Code, and activate the license.
Included with the hardware is a Registration Key that you can use to register your software online to the Trend Micro Online Registration Web site at:
https://olr.trendmicro.com/registration/
A Registration Key has 22 characters (including the hyphens) and appears as follows:
xx-xxxx-xxxx-xxxx-xxxx
After registering Threat Discovery Appliance, you will receive an Activation Code through email. An Activation Code has 37 characters (including the hyphens) and appears as follows:
xx-xxxx-xxxxx-xxxxx-xxxxx-xxxxx-xxxxx
You can activate or renew the Threat Discovery Appliance license on the Product License screen.
5-8

Getting Started
Reminders display on the screen during the following instances:
If you have activated a full version of the product:• 60 days before expiration ends• 30 days before grace period ends • When the license expires and grace period elapses
Note: During this time, you will not be able to obtain technical support and perform component updates. Threat Discovery Appliance will still scan the network using out-of-date components. These out-of-date components may not be able to completely protect you from the latest security risks.
If you have activated an evaluation (trial) version of the product:• When the license expires
Note: During this time, Threat Discovery Appliance disables component updates, scanning, and Threat Management Services log transmission.
To activate/renew a license:PATH: ADMINISTRATION > PRODUCT LICENSE
1. Under License Information, click New Activation Code. The New Activation Code screen displays.
2. Type the new Activation Code and click Save. The Setup Guide screen displays. Read the setup guide and follow the steps after activating the product.
3. From the Product License Details screen, click Update Information to refresh the screen with the new license details and the status of the service. This screen also provides a link to your detailed license available on the Trend Micro Web site.
5-9

Trend Micro™ Threat Discovery Appliance 2.5 R2 Administrator’s Guide
Component UpdatesDownload and deploy product components used to scan for and detect network threats. Because Trend Micro regularly creates new component versions, perform regular updates to address the latest Internet threats.
ComponentsTo help protect your network, Threat Discovery Appliance uses the components listed in Table 5-1.
TABLE 5-1. Threat Discovery Appliance Components
COMPONENT DESCRIPTION
Virus Scan Engine Enables the product to scan for viruses and Trojans.
Virus Pattern Used for identifying virus signatures—unique patterns of bits and bytes that signal the presence of a virus.
Spyware Active-monitoring Pattern
Used for identifying unique patterns of bits and bytes that signal the presence of certain types of potentially undesirable files and programs, such as adware and spyware, or other grayware.
IntelliTrap Pattern Used for identifying real-time compressed executable file types that commonly hide viruses and other potential threats.
IntelliTrap Exception Pattern
Provides a list of real-time compressed executable file types that are commonly safe from viruses and other potential threats.
Network Content Inspection Engine
The engine used to perform network scanning.
Network Content Inspection Pattern
The pattern used by the Network Content Inspection Engine to perform network scanning.
Network Content Correlation Pattern
The pattern used by the Network Content Correlation Engine that implements rules defined by Trend Micro.
5-10

Getting Started
Update MethodsThere are several ways to update components:• Manual update—when you click Updates > Manual on the main menu, Threat
Discovery Appliance checks if any components are out of date and gives you the option to update the components (see Manual Updates on page 5-13).
Note: Threat Discovery Appliance updates all components. You cannot update components individually.
• Scheduled update—when you configure an update schedule, Threat Discovery Appliance automatically checks the update source at the frequency you specify (see Scheduled Updates on page 5-14). Scheduled update relieves you of the task of manually keeping components up-to-date.
• Firmware update—Threat Discovery Appliance provides a separate screen for updating the firmware by clicking Administration > Firmware Update on the main menu. For details, see Firmware Update on page 8-4.
Update TasksTo update components successfully, follow the procedures outlined in the following topics:1. Proxy Settings on page 5-82. Update Source on page 5-123. Manual Updates on page 5-134. Scheduled Updates on page 5-14
Threat Discovery Appliance Firmware
The program file used on by Threat Discovery Appliance.
Tip: Trend Micro recommends using the Firmware Update screen when updating the firmware.
TABLE 5-1. Threat Discovery Appliance Components (Continued)
COMPONENT DESCRIPTION
5-11

Trend Micro™ Threat Discovery Appliance 2.5 R2 Administrator’s Guide
Update SourceThreat Discovery Appliance downloads components from the Trend Micro ActiveUpdate server, the default update source. You can also configure Threat Discovery Appliance to download components from another update source, such as a custom update source specifically set up in your organization.
Note: You can configure Threat Discovery Appliance to download directly from Control Manager. Refer to the Trend Micro Control Manager Administrator’s Guide for more details on how a Control Manager server can act as an update source.
To configure the update source:PATH: UPDATES > SOURCE
1. Under Download Updates From, select one of the following update sources:• Trend Micro ActiveUpdate server—The Trend Micro ActiveUpdate server
is the default source for the latest components. • Other update source—Select this option to specify an update source different
from the default source. The update source must begin with "http://" or "https://". For example, http://activeupdate.mycompany.com or https://activeupdate.mycompany.com.
Note: Update sources cannot be specified in UNC path format.
2. (Optional) Enable Retry Unsuccessful Updates and then specify Number of retry attempts and Retry interval.
3. Click Save.
5-12

Getting Started
Manual UpdatesThreat Discovery Appliance allows you to perform updates on demand. This is a useful feature during outbreaks, when updates do not arrive according to a fixed schedule.
The following details appear in the Manual Download screen:• Component—the component name• Current Version—the version number of each component currently used by the
product• Latest Version—the latest version available on the server• Last Updated—the date and time of the last update
To perform manual updates:PATH: UPDATES > MANUAL
1. Click Update to start updating components. Threat Discovery Appliance automatically checks which components need updating.
2. A Restart button appears at the lower section of the screen if the Network Content Inspection Engine or firmware was updated. Click Restart immediately.
Note: When Threat Discovery Appliance starts, it checks the integrity of its configuration files. The product console password may reset if the configuration file containing password information is corrupted. If you are unable to log on to the console using your preferred password, log on using the default password admin.
5-13
Trend Micro™ Threat Discovery Appliance 2.5 R2 Administrator’s Guide
Scheduled UpdatesConfiguring an update schedule is an easy and effective way of ensuring that you always get the latest components. This minimizes your risk from security threats.
Tip: Schedule updates during off-peak hours.
If the Network Content Inspection Engine and firmware were updated during a scheduled update, you will receive an email notifying you to restart Threat Discovery Appliance. Restart the product immediately. When Threat Discovery Appliance starts, it checks the integrity of its configuration files. The product console password may reset if the configuration file containing password information is corrupted. If you are unable to log on to the console using your preferred password, log on using the default password admin.
To configure scheduled updates:PATH: UPDATES > SCHEDULED
1. Select Enable Scheduled Component Updates.2. Select the update schedule based on Minutes, Hours, Days, or Week, on and
specify the time or day.
Tip: Trend Micro recommends setting the update schedule to every two hours.
3. Click Save.
5-14
Chapter 6
Configuring Product Settings
This chapter explains how to configure Threat Discovery Appliance settings.
The topics discussed in this chapter are:• Network Configuration on page 6-2• Detections on page 6-6• Threshold Settings on page 6-12• Integration with Trend Micro Products and Services on page 6-13
6-1

Trend Micro™ Threat Discovery Appliance 2.5 R2 Administrator’s Guide
Network ConfigurationNetwork configuration defines and establishes the profile of the network Threat Discovery Appliance monitors. Identify monitored networks, services provided, and network domains to enable the Network Content Correlation Engine to establish its knowledge of the network.
See the following topics for details:• Monitored Networks on page 6-2• Registered Domains on page 6-3• Registered Services on page 6-4
You can replicate network configuration settings from one Threat Discovery Appliance to another by exporting the settings to a file and then importing the file to other Threat Discovery Appliances. For details, see Network Configuration Replication on page 6-5.
Monitored NetworksEstablish groups of monitored networks using IP addresses to allow Threat Discovery Appliance to determine whether attacks originate from within or outside the network.
To add monitored networks:PATH: NETWORK CONFIGURATION > MONITORED NETWORK
1. Click Add. The Add Monitored Network Group screen appears.2. Specify a group name.
Note: Provide specific groups with descriptive names for easy identification of the network to which the IP address belongs. For example, Finance network, IT network, Administration.
3. Specify an IP address range in the text box. You can add a maximum of 1,000 IP address ranges.• Use a dash to specify an IP address range, such as 192.168.1.0-192.168.1.255.• Use a slash to specify the subnet mask for IP addresses, such as
192.168.1.0/255.255.255.0 or 192.168.1.0/24.
6-2

Configuring Product Settings
4. Select the Network zone of network group.
Note: Selecting Trusted means this is a secure network and selecting Untrusted means there is a degree of doubt on the security of the network.
5. Click Add.6. Click Save.
To remove monitored networks:PATH: NETWORK CONFIGURATION > MONITORED NETWORK
1. Select the Group Name(s) that you want to remove.2. Click Delete.
Registered DomainsAdd domains used by companies for internal purposes or those considered trustworthy to establish the network profile. Identifying trusted domains ensures detection of unauthorized domains.
You can add a maximum of 1,000 domains, but add only trusted domains to ensure accuracy of your network profile.
Threat Discovery Appliance supports suffix matching for registered domains. This means adding domain.com also adds one.domain.com, two.domain.com, and so on.
To add registered domains:PATH: NETWORK CONFIGURATION > REGISTERED DOMAINS
1. Specify a domain name.2. (Optional) Click Analyze to display a list of domains that you can add to the list.3. Click Add.
To remove registered domains:PATH: NETWORK CONFIGURATION > REGISTERED DOMAINS
1. Select the domain(s) that you want to remove.2. Click Delete.
6-3

Trend Micro™ Threat Discovery Appliance 2.5 R2 Administrator’s Guide
Registered ServicesAdd different servers for specific services that your organization uses internally or considers trustworthy to establish the network profile. Identifying trusted services in the network ensures detection of unauthorized applications and services.
You can add a maximum of 1,000 services, but add only trusted services to ensure accuracy of your network profile.
To add a registered service:PATH: NETWORK CONFIGURATION > REGISTERED SERVICES
1. Select a service from the drop-down list.• DNS—the network server used as a DNS server • FTP—the network server used as an FTP server• HTTP Proxy—the network server used as an HTTP Proxy server• SMTP—the network server used as an SMTP server• SMTP Open Relay—the network server used as an SMTP Open Relay server• Software Update Server—the network server responsible for Windows Server
Update Services (WSUS) or the server that performs remote deployment• Security Audit Server—the network server used to detect both vulnerabilities
and insecure configurations2. (Optional) Click Analyze to display a list of domains that you can add to the list.3. (Optional) Specify a server name.4. Specify an IP address.
Note: IP address ranges cannot be specified.
5. Click Add.
To remove registered services:PATH: NETWORK CONFIGURATION > REGISTERED SERVICES
1. Select the service(s) you want to delete.2. Click Delete.
6-4

Configuring Product Settings
Network Configuration ReplicationNetwork configuration settings include the monitored networks, registered domains, registered services, and detection exclusion list that you have configured. You can replicate these settings from one Threat Discovery Appliance to another by exporting the settings to a file and then importing the file to other Threat Discovery Appliances.
The default file name is cav.xml, which you can change to your preferred file name.
Note: To replicate Threat Discovery Appliance settings, in addition to network configuration settings, see Configuration Backup and Restore on page 8-3.
To replicate network configuration settings:
1. On the Web console of the Threat Discovery Appliance containing settings to be replicated:a. Navigate to Network Configuration > Export/Import Configuration.
b. Under Export Configuration, click Export. A message prompts you to open or save the cav.xml file.
c. Click Save, browse to the target location of the file, and then click Save.
2. On the Web console of the other Threat Discovery Appliance:a. Navigate to Network Configuration > Export/Import Configuration.
b. Repeat steps 1b and 1c above to back up the current network configuration settings.
c. Under Import Configuration, click Browse.
d. Locate the cav.xml file and click Open.
e. Click Import.
6-5

Trend Micro™ Threat Discovery Appliance 2.5 R2 Administrator’s Guide
DetectionsDetections establish filters and exclusions for the product’s network detection features.
Threat DetectionsEnable or disable the following features.• Threat Detections—detects both known and potential threats. Trend Micro
enables this feature by default. • Outbreak Containment Services—detects unknown malware that has the
potential of starting an outbreak. Trend Micro enables this feature by default. • Block Traffic—resets network connections of unknown malware when detected.
Trend Micro disables this feature by default.
To configure threat detection:PATH: DETECTIONS > THREAT DETECTIONS
1. Enable the Enable threat detections option.2. Under Threat Detections, enable the second Enable threat detections option.3. Under Outbreak Containment Services, select the Enable outbreak detection
and block traffic option.4. Click Save.
6-6

Configuring Product Settings
Detection Exclusion ListThe Detection Exclusion List contains a list of IP addresses. Potential threats detected on any of the IP addresses will not be recorded in the logs.
Note: Known threats, including those detected by Application Filters, are recorded in the logs.
Outbreak Containment Services will also not block activities on the IP addresses that may lead to an outbreak. When configuring the exclusion list, ensure that you include only trusted IP addresses.
To configure the exclusion list for potential threats:PATH: DETECTIONS > DETECTION EXCLUSION LIST
1. Select the Potential Threat Detections tab.2. Select a Protocol from the drop-down list.3. Specify a unique name for easy identification.4. Specify an IP address or IP address range in the text field.
• Use a dash to specify an IP address range, such as 192.168.1.0-192.168.1.255.• Use a slash to specify the subnet mask for IP addresses, such as
192.168.1.0/255.255.255.0 or 192.168.1.0/24.5. Click Add.6. To remove an entry from the list, select the entry and click Delete.
To configure the exclusion list for Outbreak Containment Services:PATH: DETECTIONS > DETECTION EXCLUSION LIST
1. Select the Outbreak Containment Services tab.2. Specify a unique name for easy identification.3. Specify an IP address or IP address range in the text field.
• Use a dash to specify an IP address range, such as 192.168.1.0-192.168.1.255.• Use a slash to specify the subnet mask for IP addresses, such as
192.168.1.0/255.255.255.0 or 192.168.1.0/24.4. Click Add.5. To remove an entry from the list, select the entry and click Delete.
6-7

Trend Micro™ Threat Discovery Appliance 2.5 R2 Administrator’s Guide
Detected FilesThe Detected Files screen contains a list of files with potential security risks. Threat Discovery Appliance tags these files as potential security risks/threats and makes a copy of the files for assessment.
The Detected Files screen displays the following information:
Use the filter feature on the screen to search for specific files. You can save any of the files in the Detected Files screen and then submit them to Trend Micro for assessment.
TABLE 6-1. Information on the Detected Files screen
LOG INFORMATION DESCRIPTION
Date The date and time the incident occurred
To view details for a particular incident, click a link under Date. A new screen opens, with the details for the incident. For more information, see Event Details on page 7-24.
Protocol Protocols such as HTTP, FTP, SMTP, and POP3
Direction Indicates whether an incident happened inside the network or is an external attack
DstIP IP address of the threat target
SrcIP IP address of the source of the threat
RiskType The type of threat
File name File name of the potential threat
6-8

Configuring Product Settings
To specify filter criteria:PATH: DETECTIONS > DETECTED FILES
1. Click Filter. The Filter Criteria window opens.
Note: The next items are optional. Specifying additional items will produce more targeted results, but being too specific might also produce no result.
2. Select a protocol from the list. Use the Control (Ctrl) key to select more than one protocol.
3. Type an IP address.4. Select the traffic direction from the drop-down list.5. Select a date range. Set the date range by typing a date or clicking the calendar icon.6. Click Filter.
To save files:PATH: DETECTIONS > DETECTED FILES
1. Select the files you want to save.2. Click Save detected file(s). Threat Discovery Appliance archives the files to a
compressed file (.tgz).3. Save the compressed file to your preferred location.
WARNING! Do not open the compressed file as the files inside it might be infected.
6-9

Trend Micro™ Threat Discovery Appliance 2.5 R2 Administrator’s Guide
Application FiltersProtect the network by enabling Application Filters. Application Filters provide valuable information to help you quickly identify security risks and prevent the spread of malicious code.
Enable detection for the following applications:• Instant Messaging—a popular means of communicating and sharing information
and files with contacts• P2P—using peer-to-peer protocol to share files from one computer to another• Streaming Media—audio-visual content that plays while downloading
To configure Application Filters settings:PATH: DETECTIONS > APPLICATION FILTERS
1. Enable detection for Instant Messaging.a. Select the Instant Messaging check box.
b. Select the specific protocols for detection.
Tip: Use the CTRL key to select one or multiple protocol types.
c. Move the selected protocol under Selected Instant Messaging protocols.
2. Enable detection for P2P Traffic.a. Select the P2P Traffic check box.
b. Select the specific protocols for detection.
Tip: Use the CTRL key to select one or multiple protocol types.
c. Move the selected protocol under Selected Peer-to-Peer applications.
6-10

Configuring Product Settings
3. Enable detection for Streaming Media.a. Select the Streaming Media check box.
b. Select the specific protocols for detection.
Tip: Use the CTRL key to select one or multiple protocol types.
c. Move the selected protocol under Selected streaming media applications.
4. Click Save.
Client IdentificationWhen Threat Discovery Appliance detects a threat, it logs the IP address in use on the affected endpoint. If IP addresses are dynamically assigned in your organization, consider enabling client identification.
Client identification works by determining the NetBIOS name, DNS domain name, and Active Directory domain and account name used on the affected endpoint at the time of threat detection. These names display on the Product Summary screen and in the Event Details page.• To determine the NetBIOS name, Threat Discovery Appliance connects to the
endpoint through port 137.
Note: Security software residing on the endpoint may notify the user of the connection on port 137. If the notification can be disabled, consider disabling it to prevent any unnecessary disruptions to users.
• To determine the DNS domain name, Threat Discovery Appliance queries the DNS server.
• To determine the Active Directory domain and account name, Threat Discovery Appliance analyzes the Active Directory logon traffic.
6-11

Trend Micro™ Threat Discovery Appliance 2.5 R2 Administrator’s Guide
To configure client identification settings:PATH: DETECTIONS > CLIENT IDENTIFICATION
1. Enable identification of the following:• NetBIOS names• DNS domain names• Active Directory domain and account names
2. Click Save.3. To disable identification, clear any of the check boxes and then click Save.
Threshold SettingsA security risk meter displaying on the Summary screen and on the upper left-hand corner of the main menu indicates the network’s overall risk level based on the number of potential security risk events detected by Threat Discovery Appliance.
Note: The security risk meter only counts potential security risk events, not known security risks or threats.
Use threshold settings to define the number of events considered a low or critical risk.• Critical risk—any number that signifies a need for you to constantly monitor your
network or take preventive or corrective action. This can be any value you set. Threat Discovery Appliance considers anything lower than this value as low risk.
• Low risk—any number that signifies a need for monitoring the network. This can be any value you set. Threat Discovery Appliance considers anything lower than this value as normal network behavior.
6-12

Configuring Product Settings
To configure threshold settings:PATH: SUMMARY > SETTINGS
1. In the Low risk setting, specify the minimum number of potential security risk events per time unit considered a low risk. The default value for Low Risk is 20 events for every minute.
2. In the Critical risk setting, select the minimum number of potential security risk events for every time unit considered a critical risk. The default value for Critical Risk is 100 events for every minute.
Tip: Trend Micro recommends adjusting the default values according to the size of your network.
3. Click Save.
Integration with Trend Micro Products and Services
Threat Discovery Appliance is a stand-alone product. However, you can configure it to work with the following Trend Micro products and services:• Threat Management Services• Mitigation Devices• Trend Micro Control Manager• LeakProof
6-13

Trend Micro™ Threat Discovery Appliance 2.5 R2 Administrator’s Guide
Threat Management ServicesThreat Management Services is a security portal through which Trend Micro security experts can receive threat information from registered products, and then issue targeted reports to product users. Register Threat Discovery Appliance to Threat Management Services to respond to threats in a timely manner and receive up-to-date information about the latest and emerging threats.
Threat Management Services works with Threat Discovery Appliance by:• Analyzing threat information coming from Threat Discovery Appliance• Sending threat reports back to the user. Reports contain security threats and
suspicious network activities, and Trend Micro recommended actions to prevent or address them. Daily administrative reports enable IT administrators to track the status of threats, while threat summary reports keep executives informed about the overall security posture of the organization.
Threat Discovery Appliance uses proxy server settings configured on the Proxy Settings page to connect to Threat Management Services.
To configure Threat Management Services settings:PATH: THREAT MANAGEMENT SERVICES
1. Select Enable Threat Management Services Log Transmission.2. Type the server name or IP address of the server to which to send the logs. 3. Select the protocol. You can select either SSH or SSL.
• If you have set up a firewall, configure the firewall to allow traffic from Threat Discovery Appliance to Threat Management Services through port 443 (if you selected SSL) or port 22 (if you selected SSH).
• If you selected SSH and have set up Microsoft ISA Server, configure the tunnel port ranges on the ISA server to allow traffic from Threat Discovery Appliance to Threat Management Services through port 22.
4. Select the frequency of log transmissions.5. Type the Server name or IP address of the server to which to send status
information.6. Type the user name and password you used to log on to Threat Management
Services.7. Type the email address you used to register to Threat Management Services.
6-14

Configuring Product Settings
8. To check whether Threat Discovery Appliance can connect to Threat Management Services based on the settings you specified, click Test Connection.
9. Click Save if the test connection is successful.
Mitigation DevicesRegister Threat Discovery Appliance to mitigation devices such as Threat Mitigator to make full use of the integration between these two products. Integration ensures that mitigation devices receive the information gathered by Threat Discovery Appliance. Mitigation devices then filter the data and take appropriate action as indicated by the configured settings.
Note: You can register Threat Discovery Appliance to a maximum of 20 mitigation devices.
To register to mitigation devices:PATH: MITIGATION > MITIGATION SETTINGS
1. Under Mitigation Settings, type the mitigation device Server name or IP address.
2. Type a Description for the device.3. Specify IP address ranges.
Note: To save network bandwidth, specify IP address ranges for each mitigation device. Threat Discovery Appliance only sends mitigation tasks for specific IP addresses to the mitigation device. If the IP address range is empty, all mitigation requests will be sent to the mitigation device.
4. Click Register. The Cleanup Settings screen appears.5. Select the types of security risks/threats to send to the mitigation device.6. Click Apply.
6-15

Trend Micro™ Threat Discovery Appliance 2.5 R2 Administrator’s Guide
To unregister from mitigation devices:PATH: MITIGATION > MITIGATION SETTINGS
1. Select the mitigation devices to unregister from.2. Click Delete. The device is removed from the list. This task also triggers the
mitigation device to remove Threat Discovery Appliance from its list of data sources.
Mitigation Exclusion ListExclude IP addresses from mitigation actions. Threat Discovery Appliance still scans these IP addresses but does not send mitigation requests to the mitigation device if threats are found.
Before configuring the mitigation exclusion list, ensure that you have registered Threat Discovery Appliance to at least one mitigation device. For details, see Mitigation Devices on page 6-15.
You can add a maximum of 100 entries to the list.
To configure the mitigation exclusion list:PATH: MITIGATION > MITIGATION EXCLUSION LIST
1. Type a name for the exclusion. Specify a meaningful name for easy identification, such as "Lab Computers".
2. Specify an IP address or IP address range for exclusion from mitigation actions. For example, 192.1.1.1-192.253.253.253.
3. Click Add.4. To remove an entry from the list, select the entry and click Delete.
6-16

Configuring Product Settings
Trend Micro Control ManagerTrend Micro Control Manager is a software management solution that gives you the ability to control antivirus and content security programs from a central location, regardless of the program's physical location or platform. This application can simplify the administration of a corporate antivirus and content security policy.
Threat Discovery Appliance supports Control Manager 5.0.
Refer to the Trend Micro Control Manager Administrator’s Guide for more information about managing products using Control Manager.
Control Manager Components• Control Manager server—the computer upon which the Control Manager
application is installed. This server hosts the Web-based Control Manager product console
• Management Communication Protocol (MCP) Agent—an application installed along with Threat Discovery Appliance that allows Control Manager to manage the product. The agent receives commands from the Control Manager server, and then applies them to Threat Discovery Appliance. It also collects logs from the product, and sends them to Control Manager. The Control Manager agent does not communicate with the Control Manager server directly. Instead, it interfaces with a component called the Communicator
• Communicator—the communications backbone of the Control Manager system; it is part of the Trend Micro Management Infrastructure. Commands from the Control Manager server to Threat Discovery Appliance, and status reports from Threat Discovery Appliance to the Control Manager server all pass through this component.
• Entity—a representation of a managed product (such as Threat Discovery Appliance) on the Control Manager console’s directory tree. The directory tree includes all managed entities.
6-17

Trend Micro™ Threat Discovery Appliance 2.5 R2 Administrator’s Guide
You can use the Control Manager Settings screen on the product console to perform the following:• Check the connection between Threat Discovery Appliance and Control Manager• Check the latest MCP heartbeat with Control Manager• Register to a Control Manager server• Unregister from a Control Manager server• Verify if Threat Discovery Appliance can register to a Control Manager server
Note: Ensure that both Threat Discovery Appliance and the Control Manager server belong to the same network segment. If Threat Discovery Appliance is not in the same network segment as Control Manager, configure the port forwarding settings for Threat Discovery Appliance.
To register Threat Discovery Appliance to Control Manager:PATH: ADMINISTRATION > CONTROL MANAGER SETTINGS
1. Under Connection Settings, type the name that identifies Threat Discovery Appliance in the Control Manager Product Directory.
Note: Specify a unique and meaningful name to help you quickly identify Threat Discovery Appliance.
2. Under Control Manager Server Settings:a. Type the Control Manager server IP address or host name.
b. Type the port number that the MCP agent uses to communicate with Control Manager.
c. If the Control Manager security is set to medium (Trend Micro allows HTTPS and HTTP communication between Control Manager and the MCP agent of managed products) or high (Trend Micro only allows HTTPS communication between Control Manager and the MCP agent of managed products), select Connect through HTTPS.
d. If your network requires authentication, type the user name and password for your IIS server in the Username and Password fields.
6-18

Configuring Product Settings
3. If you use a NAT device, select Enable two-way communication port forwarding and type the NAT device’s IP address and port number in Port forwarding IP address and Port forwarding port number. Threat Discovery Appliance uses the Port forwarding IP address and Port forwarding port number for two-way communication with Control Manager.
Note: Configuring the NAT device is optional and depends on the network environment.
4. To check whether Threat Discovery Appliance can connect to the Control Manager server based on the settings you specified, click Test Connection.
5. Click Register if connection was successfully established.
To check the Threat Discovery Appliance status on the Control Manager console:
1. Open the Control Manager management console.
To open the Control Manager console, on any computer on the network, open a Web browser and type the following:
https://<Control Manager server name>/Webapp/login.aspx
Where <Control Manager server name> is the IP address or host name of the Control Manager server
2. In Main Menu, click Products.3. Select Managed Products from the list.4. Check if the Threat Discovery Appliance icon displays.
To manage connection with Control Manager after registration:PATH: ADMINISTRATION > CONTROL MANAGER SETTINGS
1. Under Connection Status, check the following:• If the product can connect to Control Manager. Restore the connection
immediately if the product is not connected.• The last heartbeat, which indicates the last communication between the MCP
agent (and Threat Discovery Appliance) and the Control Manager server.2. If you change any of the settings after registration, click Update Settings to notify
the Control Manager server of the changes.
6-19

Trend Micro™ Threat Discovery Appliance 2.5 R2 Administrator’s Guide
3. If you no longer want the Control Manager server to manage Threat Discovery Appliance, click Unregister. If you have several Control Manager servers, you can unregister the product from its current parent Control Manager server and then register it to another server.
LeakProofThreat Discovery Appliance works with the LeakProof™ server to monitor information leakage across segments and throughout the network. LeakProof™ enables companies to reduce the risk of data breaches and ensures privacy and compliance. It also understands the content of data at rest, in use, or in motion on every enterprise endpoint, providing protection of sensitive data.
Trend Micro offers LeakProof as an enterprise class solution for preventing information leakage. LeakProof is a comprehensive solution which includes the detection of sensitive content like passwords and credit card numbers defined by administrators or users.
LeakProof allows you to:• Protect customer privacy and/or intellectual property• Secure laptops and desktops• Meet compliance-driven information technology initiatives
To configure LeakProof settings:PATH: LEAKPROOF
1. (Optional) Select Enable/Disable LeakProof service.
Note: You can register the LeakProof server without enabling the LeakProof service.
2. Specify the IP address of the LeakProof Server to receive the information leakage prevention policies, sensitive document signatures, keywords, and entities databases.
3. Specify a unique endpoint name and valid domain to distinguish Threat Discovery Appliance from other devices.
4. Click Save.
6-20

Chapter 7
Viewing and Analyzing Information
This chapter includes information about identifying security risks and evaluating practices to protect against security risks.
The topics discussed in this chapter are:• Status Indicators on page 7-2• Product Summary on page 7-4• Notifications on page 7-8• Reports on page 7-14• Logs on page 7-20
7-1

Trend Micro™ Threat Discovery Appliance 2.5 R2 Administrator’s Guide
Status IndicatorsThreat Discovery Appliance displays status indicators on the upper left-hand corner of the main menu. The indicators are slightly different for the appliance and the virtual appliance.
FIGURE 7-1. Status indicators for the appliance
FIGURE 7-2. Status indicators for the virtual appliance
Risk MeterRisk Meter indicates the network’s overall risk level based on the number of potential security risk events detected by Threat Discovery Appliance. The Risk Meter status indicates the following:• Normal—a green indicator signifies that there are minimal or no risks that need to
be monitored or no actions needs to be performed.• Low risk—a yellow indicator signifies that there is a need to monitor the network.• Critical risk—a red indicator signifies that there is a need to constantly monitor the
network and take preventive or corrective action.
You can configure the number of events considered a low or critical risk from the Threshold Settings screen. For details, see Threshold Settings on page 6-12.
7-2

Viewing and Analyzing Information
Appliance HealthAppliance Health displays the temperature and fan speed status of the appliance. This indicator is not available on the virtual appliance.• Normal—a green indicator signifies that the appliance temperature is normal.• Warning—a yellow indicator signifies that the appliance or CPU temperature is
between 90-100% of the limit. Check the appliance temperature or ensure that the fan is working.
• Critical—a red indicator signifies that the appliance or CPU temperature is 100% or higher than the safe range. Check the appliance temperature or ensure that the fan is working.
Network FlowThe network flow status indicates the following:• Normal—a green indicator signifies that Threat Discovery Appliance is able to
handle traffic flowing through the network.• Critical—a red indicator signifies that the network flow exceeds Threat Discovery
Appliance capacity. Verify the capacity of the switch mirror port and the network traffic.
7-3

Trend Micro™ Threat Discovery Appliance 2.5 R2 Administrator’s Guide
Product SummaryThe Summary screen displays when you open the product console or click Summary on the main menu. The Summary screen has three sections:• The Reminders section on top of the screen displays only when there are
important reminders regarding the product license and database.• The Detection Status tab provides information about the latest detected threats
and system events, such as component updates.• The System Status tab shows CPU and memory usage information.
The Summary screen automatically resets every 10 seconds. Click Refresh to display the latest information on the screen.
RemindersImportant reminders about the product license and database display in this section of the Summary screen.
FIGURE 7-3. Reminders section on top of the Summary screen
Product License Reminders
Reminders display during the following instances:
If you have activated a full version of the product:• 60 days before expiration ends• 30 days before grace period ends • When the license expires and grace period elapses
If you have activated an evaluation (trial) version of the product:• When the license expires
For details on managing the product license, see Product License and Activation Codes on page 5-8.
7-4

Viewing and Analyzing Information
Database Corruption Reminder
A reminder displays when the product database becomes corrupted. Repair the corrupted database files immediately from the Log Maintenance screen. For details, see Log Maintenance on page 8-2.
Detection Status - Detections in Past 24 HoursThis section of the Summary screen displays the incidents that Threat Discovery Appliance detected over the past 24 hours.
FIGURE 7-4. Detections in past 24 hours section
Security Risk Meter
View the network’s overall risk level based on the number of potential security risk events detected by Threat Discovery Appliance. The Risk Meter status indicates the following:• Normal—a green indicator signifies that there are minimal or no risks that need to
be monitored or no actions needs to be performed.• Low risk—a yellow indicator signifies that there is a need to monitor the network.• Critical risk—a red indicator signifies that there is a need to constantly monitor the
network and take preventive or corrective action.
You can configure the number of events considered a low or critical risk from the Threshold Settings screen. For details, see Threshold Settings on page 6-13.
7-5

Trend Micro™ Threat Discovery Appliance 2.5 R2 Administrator’s Guide
Potential Security Risks/Threats
View the number of potential security risks/threats. This means certain actions or events alerted Threat Discovery Appliance of a possible security risk/threat originating from within or outside the network.
Note: Click the number of detections for details on the incident.
Known Security Risks/Threats
View the number of known security risks/threats originating from within or outside the network.
Note: Click the number of detections for details on the incident.
Outbreak Containment Services
View the number of potential malware activities that might cause an outbreak.
Note: Click the number of events for additional information.
Detection Status - Recent AlertsThis section of the Summary screen lists the most recent incidents detected by the product.
FIGURE 7-5. Recent Alerts section
7-6

Viewing and Analyzing Information
20 Recent Security Risks/Threats
• View the most recent potential and known threats with "High" severity rating.• The IP address, MAC address, host name, and description of the security
risks/threats display.• Click a link under IP Address or Mac Address. An Event Log table displays. Click
a link under Date. A new screen opens, providing details for the event. For more information, see Event Details on page 7-24.
• Click the Export button to export additional security risks/threats details to a .csv file.
• The Description column displays information about known and potential threats.
Note: Contents in this alert are not limited to the past 24 hours.
System Events in Past 24 Hours
View system events (such as when the product restarts or encounters problems) and component updates.
System StatusMonitor system performance from the System Status screen.
FIGURE 7-6. System Status screen
7-7

Trend Micro™ Threat Discovery Appliance 2.5 R2 Administrator’s Guide
Memory Usage
This section shows both the percentage of currently used memory and actual available memory. The indicator color is green if memory usage is 89% or less. It turns yellow when memory usage is between 90% and 99%, and red if 100%.
Note: Memory usage information is also available on the Preconfiguration Console. For details, see Preconfiguration Menu: Device Information and Status on page 4-7.
CPU Usage
This section shows the percentage of CPU consumption for each CPU used by Threat Discovery Appliance.
The indicator color is green if CPU usage is 89% or less. It turns yellow when CPU usage is between 90% and 99%, and red if 100%.
NotificationsPATH: NOTIFICATIONS > NOTIFICATION SETTINGS
You can configure Threat Discovery Appliance to send notifications for the following events that occur in the network:• Detection of potential security risks—the notification received by administrators
or designated individuals when outbound or inbound traffic meets the threshold you set or when Threat Discovery Appliance detects potential security risks
• Detection of known security risks—the notification received by administrators or designated individuals when outbound or inbound traffic meets the threshold you set or when Threat Discovery Appliance detects known security risks
• Detection of high risk clients—the notification received by administrators or designated individuals when the number of detections for every IP Address meets the threshold
• High network traffic usage—the notification received by administrators or designated individuals when your network traffic exceeds the normal traffic pattern
7-8

Viewing and Analyzing Information
Notifications: Potential Security RisksThreat Discovery Appliance can send an email when it detects potential security risks. Use the Potential Security Risk Notification screen to configure the notifications sent to the designated individuals.
To configure notifications for detection of potential security risks:PATH: NOTIFICATIONS > NOTIFICATION SETTINGS > DETECTION OF POTENTIAL SECURITY
RISKS
1. Select Notify administrator.2. Under Notify if number of detections for, configure the number of detections
that triggers an alert for the following types of logs:• Outbound traffic means detections from monitored networks• Inbound traffic means detections from outside the network
3. Specify the number of hours or minutes within which Threat Discovery Appliance must detect the specified number of events to trigger an alert.
Tip: Trend Micro recommends using the default settings.
4. Under Detect the following, select which security risks would trigger the notification.
5. Click Save.
To disable notifications:PATH: NOTIFICATIONS > NOTIFICATION SETTINGS > DETECTION OF POTENTIAL SECURITY
RISKS
1. Clear Notify administrator.2. Click Save.
7-9

Trend Micro™ Threat Discovery Appliance 2.5 R2 Administrator’s Guide
Notifications: Known Security RisksThreat Discovery Appliance can send an email when it detects known security risks. Use the Known Security Risk Notifications screen to configure the notifications sent to the designated individuals.
To configure notifications for detection of known security risks:PATH: NOTIFICATIONS > NOTIFICATION SETTINGS > DETECTION OF KNOWN SECURITY RISKS
1. Select Notify administrator.2. Under Notify if number of detections for, configure the number of detections
which triggers an alert for the following types of logs:• Outbound traffic means detections from monitored networks• Inbound traffic means detections from outside the network
3. Specify the number of hours or minutes within which Threat Discovery Appliance must detect the specified number of log records.
Tip: Trend Micro recommends using the default settings.
4. Under Detect the following, select which security risks would trigger the notification.
5. Click Save.
To disable notifications:PATH: NOTIFICATIONS > NOTIFICATION SETTINGS > DETECTION OF KNOWN SECURITY RISKS
1. Clear Notify administrator.2. Click Save.
7-10

Viewing and Analyzing Information
Notifications: High Risk ClientsThreat Discovery Appliance can send an email when it detects high risk clients. Threat Discovery Appliance classifies these clients as high risk when they exceed the specified number of detections. Use the High Risk Client Notification screen to configure the notifications sent to the designated individuals. These notifications contain information that can help you determine why a client is reporting a high number of detections and how to resolve this issue before it becomes the source of an outbreak.
To configure notifications for detection of high risk clients:PATH: NOTIFICATIONS > NOTIFICATION SETTINGS > DETECTION OF HIGH RISK CLIENTS
1. Select Notify administrator.2. Under Notify if number of detections per IP address, configure the number of
detections per IP address that triggers an alert.3. Specify the number of hours or minutes within which Threat Discovery Appliance
must detect the specified number of log records.
Tip: Trend Micro recommends using the default settings.
4. Click Save.
To disable notifications:PATH: NOTIFICATIONS > NOTIFICATION SETTINGS > DETECTION OF HIGH RISK CLIENTS
1. Clear Notify administrator.2. Click Save.
7-11

Trend Micro™ Threat Discovery Appliance 2.5 R2 Administrator’s Guide
Notifications: High Network Traffic UsageThreat Discovery Appliance can send an email when network traffic usage exceeds a certain threshold, which might happen if there is an external attack. Use the High Traffic Usage Notification screen to configure notifications sent to designated individuals.
The data on the screen resets if the product restarts or shuts down.
Note: The numbers 0 to 23 on the horizontal axis of the Normal Traffic Pattern graph indicate the amount of time that passed since Threat Discovery Appliance scanned and produced the graph. They do not signify the time Threat Discovery Appliance scanned the network. 0 indicates the current size of scanned traffic, while 4 indicates the size 4 hours ago.
To configure notifications for detection of high network traffic usage:PATH: NOTIFICATIONS > NOTIFICATION SETTINGS > HIGH NETWORK TRAFFIC USAGE
1. Select Notify administrator.2. Click Auto-Detect for Threat Discovery Appliance to define the normal traffic
threshold or manually identify the traffic threshold at certain hours of the day.• The traffic threshold default unit is 1GB. • The amount of network traffic is rounded to the nearest whole number. For
example, 1.2GB displays as 2GB and 2.6GB displays as 3GB.3. Click Save.
To disable notifications:PATH: NOTIFICATIONS > NOTIFICATION SETTINGS > HIGH NETWORK TRAFFIC USAGE
1. Clear Notify administrator.2. Click Save.
7-12

Viewing and Analyzing Information
Notifications: Delivery OptionsUse the Delivery Options screen to configure the default sender, recipients, and settings of the notifications sent to designated individuals for specific events in the network. Configure these settings for the recipients to receive the necessary information to prevent or contain an outbreak.
To configure the delivery options:PATH: NOTIFICATIONS > DELIVERY OPTIONS
1. Under Notification recipient, type the recipient. Use a semicolon ";" to separate multiple addresses.
2. Under Sender's email address, type the sender. You can only add one valid email address.
3. Type the SMTP server name or IP address and port.4. If the SMTP server requires authentication, specify the user name and password for
the SMTP server. Ensure that you add the Threat Discovery Appliance IP address to the SMTP relay list.
5. Specify the maximum number of notifications and the number of minutes to check the mail queue.
Tip: Trend Micro recommends using the default settings.
6. Click Save.
7-13

Trend Micro™ Threat Discovery Appliance 2.5 R2 Administrator’s Guide
ReportsThreat Discovery Appliance reports provide an online collection of figures about incidents or detections, clients, and network traffic. Reports display in a variety of formats, including tables, bar, line, and pie graphs. On the Reports screen on the product console, there are three tabs containing the following reports:• Reports: Number of Incidents• Reports: High Risk Clients• Reports: Network Traffic
Users can receive email messages reminding them about the latest reports available on the product console. For details, see Reports: Delivery Settings on page 7-19.
7-14

Viewing and Analyzing Information
Reports: Number of IncidentsPATH: REPORTS > NUMBER OF INCIDENTS
The Number of Incidents tab displays daily reports on security risks detected in the network and separates the incidents by protocol, detection type, and time of day. You can quickly view and print these bar and pie graph reports.
FIGURE 7-7. Number of Incidents report
Number of Incidents by ProtocolThe Number of Incidents by Protocol displays the protocols (such as HTTP, FTP, SMTP, POP3, IRC, and IM) and the percentage of its occurrence within the past 24 hours. These protocols and percentages are seen in the pie graph and legend list.
7-15

Trend Micro™ Threat Discovery Appliance 2.5 R2 Administrator’s Guide
Number of Incidents by Detection TypeThe Number of Incidents by Detection Type displays the detection types (such as virus/malware, spyware/grayware, and fraud) and the percentage of its occurrence within the past 24 hours. These detection types and percentages are seen in the pie graph and legend list.
Number of Incidents by Time of DayThe numbers 0 to 23 on the horizontal axis of the Number of Incidents by Time of Day graph indicate the amount of time that passed since Threat Discovery Appliance scanned and produced the graph. They do not signify the time Threat Discovery Appliance scanned the network. 0 indicates the current number of incidents, while 4 indicates the number of incidents 4 hours ago.
Reports: High Risk ClientsPATH: REPORTS > HIGH RISK CLIENTS
The High Risk Client tab displays daily reports of the riskiest clients, top propagation source, and top matched rule.
FIGURE 7-8. High Risk Clients report
7-16

Viewing and Analyzing Information
Riskiest ClientsThe Riskiest Clients table displays the IP addresses in the monitored network with the most number of incidents or attacks.
Top Propagation SourceThe Top Propagation Source table displays the IP addresses in the monitored network propagating the most number of incidents.
Top Matched RuleThe Top Matched Rule table displays the triggered rules, the number of incidents, and rule descriptions that have the most number of incidents. Triggered rules are established by Trend Micro using the Network Content Inspection Engine and Network Content Correlation Engine. Trend Micro continuously updates the Network Content Inspection Engine and Network Content Correlation Pattern and rules.
7-17

Trend Micro™ Threat Discovery Appliance 2.5 R2 Administrator’s Guide
Reports: Network TrafficPATH: REPORTS > TRAFFIC
The Traffic tab displays the daily traffic scanned per hour of the day, traffic scanned per protocol (such as HTTP and SMTP), and file types that go through the network. The data on the tables resets if the product restarts or shuts down.
FIGURE 7-9. Traffic report
Total Traffic (in GB) ScannedThe numbers 0 to 23 on the horizontal axis of the Total Traffic (in GB) Scanned graph indicate the amount of time that passed since Threat Discovery Appliance scanned and produced the graph. They do not signify the time Threat Discovery Appliance scanned the network. 0 indicates the current size of scanned traffic, while 4 indicates the size 4 hours ago.
7-18
Viewing and Analyzing Information
Traffic (in GB) Scanned Per Protocol The Traffic (in GB) Scanned per Protocol graphs display the network traffic (for the HTTP, SMTP, and other protocols) scanned for the past 24 hours.
Traffic by File Types (Number of Files) The Traffic by File Types (Number of Files) table displays the types of files either sent or received from the network for the past 7 days.
Reports: Delivery SettingsUse the report delivery settings to receive email messages reminding you about reports available on the product console. Email messages are sent daily.
To receive email messages:PATH: REPORTS > REPORT DELIVERY SETTINGS
1. Select Send email notifications everyday at 5:00 AM.2. Click Save.
To stop receiving email messages:PATH: REPORTS > REPORT DELIVERY SETTINGS
1. Clear Send email notifications everyday at 5:00 AM.2. Click Save.
7-19

Trend Micro™ Threat Discovery Appliance 2.5 R2 Administrator’s Guide
LogsThreat Discovery Appliance keeps comprehensive logs about security risk incidents, events, and updates. The log contains all the results of the assessment and the status of computers. These log entries are stored on the product’s hard disk.
You can store these logs in the Trend Micro Control Manager database or a Syslog server. You can also perform log queries to gather information and create reports from the log database.
Detection LogsEach time Threat Discovery Appliance scans the network and detects a threat, it stores the results of the assessment and the status of the scanned computers on the Detection Log. Use this screen to obtain information from these logs.
If you registered Threat Discovery Appliance to Control Manager, Control Manager stores the scan results received from Threat Discovery Appliance.
To query detection logs:PATH: LOGS > DETECTION LOG QUERY
1. Select the Protocol type. Select more than one protocol by pressing SHIFT and the protocols or CTRL and the selected protocols.
2. Select the Traffic direction. Select from Internal attacks, External detections, or both.
TABLE 7-1. Log types
TYPE DESCRIPTION
Detection Logs
Information on potential and known threats, external attacks, and internal detections.
Application Filter Logs
Information on the application filter activities.
System Logs Summaries of events regarding the product, such as component updates and product restarts.
7-20

Viewing and Analyzing Information
3. Select the Detection type. Select items from Potential security risks, Known security risks, Files not scanned, and Outbreak Containment Services.
Note: The Constraint met option under Files not scanned refers to the files that exceeded the file scanning limitation.
4. Select Mitigation type of endpoint computers. Select from Mitigated and/or Un-Mitigated.
5. Select the Severity of the security risk. Select from High, Medium, Low, and/or Informational logs.
6. Select the Group name:• Group name—select from one of the group names in the list• Specify group name—type the specific group name, including deleted group
names• Removed group—select this option if the group name is not available in the
list and you are unable to remember the exact name or if the group name has been deleted
• No group—select this option for those that do not fall under any of the other categories
7. Select the Network Zone. Select from Trusted, Untrusted, and/or No network zone.
8. Specify the Date range or click the calendar icon and select the date you want.9. Select the IP address(es). Select from All, IP address, or a range of IP addresses.10. (Optional) Type the MAC Address, Computer Name, and Active Directory
Domain Name and Account.
Note: Computer name and Active Directory domain name and account queries support partial matching.
11. Enable Show executive logs to view only logs with high risks and need immediate action.
12. Click Display Logs. An Event Log table displays at the lower section of the screen.
7-21

Trend Micro™ Threat Discovery Appliance 2.5 R2 Administrator’s Guide
13. To view details for a particular event, click a link under Date. A new screen opens, with the details for the event. For more information, see Event Details on page 7-24.
14. (Optional) Mouse over the source IP address or destination IP address results and select from Monitored Network, Registered Domain, or Registered Service to add the IP address to the network configuration lists.
15. (Optional) Click Print to print the logs or Export Logs to export the file to a .CSV file.
Application Filter LogsEach time Threat Discovery Appliance performs application filtering, Threat Discovery Appliance stores the results in the logs. The log contains the application activities. Threat Discovery Appliance stores these logs in the product’s hard drive.
To query application filter logs:PATH: LOGS > APPLICATION FILTER LOG QUERY
1. Select the protocol type. You can select Instant Messaging, P2P, or Streaming Media Traffic.
2. Select the traffic direction. You can select Internal attacks, External detections, or both.
3. Select the group name:• Group name—select from one of the group names in the list• Specify group name—type the specific group name the name including
deleted group names• Removed group—select this option if the group name is not available in the
list and you cannot remember the exact name, for example, if the group name has been deleted
• No group—select this option for those that do not fall under any of the other categories
4. Select the network zone. You can select from Trusted, Untrusted, and/or No network zone.
5. Specify the date range or click the calendar icon and select the date you want.6. Select from the IP addresses options. You can select all the IP addresses, a certain
IP address, or a range of IP addresses.
7-22

Viewing and Analyzing Information
7. Specify the MAC address of the client computer.8. Click Display Logs. An Event Log table displays at the lower section of the
screen.9. To view details for a particular event, click a link under Date. A new screen opens,
with the details for the event. For more information, see Event Details on page 7-24.10. (Optional) Click Print to print the logs or Export Logs to export the file to a .CSV
file.
System LogsThreat Discovery Appliance stores system events and component update results in the logs. Threat Discovery Appliance stores these logs in the product’s hard drive.
To query system logs:PATH: LOGS > SYSTEM LOG QUERY
1. Select a log type. Select System events, Update events, or both.2. Specify the date range or click the calendar icon to select a specific date.3. Click Display Logs.
7-23

Trend Micro™ Threat Discovery Appliance 2.5 R2 Administrator’s Guide
Syslog ServerIf you have set up Syslog servers to maintain and organize logs coming from different products, configure Threat Discovery Appliance to send logs to the Syslog servers.
To send logs to Syslog servers:PATH: LOGS > SYSLOG SERVER SETTINGS
1. Select Enable Syslog Server.2. Type the IP address and port number of the Syslog server.3. Select the syslog facility and severity.4. Select the logs to send to the Syslog server.5. Click Save.
Event DetailsThreat Discovery Appliance logs the details of each Internet threat it identifies. The Event Details screen on the product console may contain any of the following information, depending on the protocol, file and other factors:
7-24
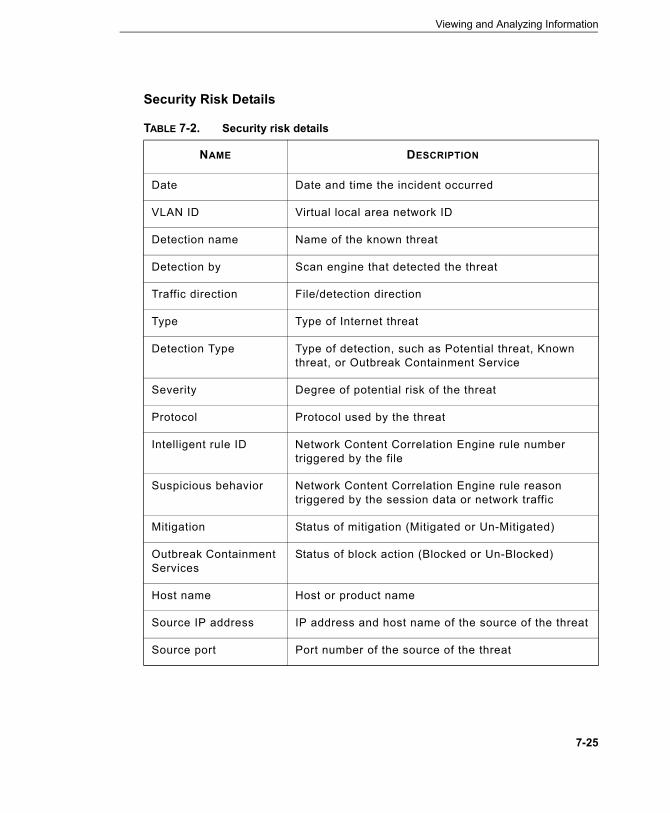
Viewing and Analyzing Information
Security Risk Details
TABLE 7-2. Security risk details
NAME DESCRIPTION
Date Date and time the incident occurred
VLAN ID Virtual local area network ID
Detection name Name of the known threat
Detection by Scan engine that detected the threat
Traffic direction File/detection direction
Type Type of Internet threat
Detection Type Type of detection, such as Potential threat, Known threat, or Outbreak Containment Service
Severity Degree of potential risk of the threat
Protocol Protocol used by the threat
Intelligent rule ID Network Content Correlation Engine rule number triggered by the file
Suspicious behavior Network Content Correlation Engine rule reason triggered by the session data or network traffic
Mitigation Status of mitigation (Mitigated or Un-Mitigated)
Outbreak Containment Services
Status of block action (Blocked or Un-Blocked)
Host name Host or product name
Source IP address IP address and host name of the source of the threat
Source port Port number of the source of the threat
7-25

Trend Micro™ Threat Discovery Appliance 2.5 R2 Administrator’s Guide
Source MAC address MAC address and vendor name of the source of the threat
Source group Group name of the source of the threat
Source network zone Network zone of the source of the threat
Source Active Directory Domain\Account
Active Directory domain name and account used to log on to the source of the threat and the corresponding timestamp
Destination IP address IP address and host name of the threat destination
Destination port Port number of the threat destination
Destination MAC address
MAC address of the threat destination
Destination group Group name of the threat destination
Destination network zone
Network zone of the threat destination
Destination Active Directory Domain\Account
Active Directory domain name and account used to log on to the destination of the threat
TABLE 7-2. Security risk details (Continued)
NAME DESCRIPTION
7-26

Viewing and Analyzing Information
<Protocol> Details
File Details
TABLE 7-3. Event details for traffic through various protocols
NAME DESCRIPTION
User name Name of the logged on user
Sender Email address that sent the suspicious file
Recipient Email address of the suspicious file recipient
Subject Subject of the suspicious email
User agent Client application used with a particular network protocol
Target share Shared folder where the malicious file is dropped
Channel name Name of the IRC channel
TABLE 7-4. File details
NAME DESCRIPTION
File name Name of the file tagged as a potential/known risk
File size Size of the file tagged as a potential/known risk
File extension Extension of the file tagged as potential/known risk
File name in archive Name of the file in the archive tagged as potential/known risk
7-27

Trend Micro™ Threat Discovery Appliance 2.5 R2 Administrator’s Guide
Additional Details
TABLE 7-5. Additional event details
NAME DESCRIPTION
Authentication Whether the protocol requires authentication
URL Link included in the email or the instant message content
BOT command Command used in IRC for BOTs
BOT URL URL used in IRC for BOTs
Constraint Type Reasons Threat Discovery Appliance stops scanning files in the network
7-28

Chapter 8
Maintenance
This chapter explains how to perform maintenance tasks for Threat Discovery Appliance.
The topics discussed in this chapter are:• Log Maintenance on page 8-2• Configuration Backup and Restore on page 8-3• Firmware Update on page 8-4• Restart or Shutdown on page 8-6• Appliance Rescue on page 8-7
8-1

Trend Micro™ Threat Discovery Appliance 2.5 R2 Administrator’s Guide
Log MaintenanceThreat Discovery Appliance maintains the logs in the product’s hard disk and displays them on the Log Maintenance screen on the product console. Manually delete logs on a regular basis to keep the size of logs from occupying too much space on the hard disk. Deletion of logs depends on your environment and the quantity of logs that you want to retain.
Threat Discovery Appliance automatically deletes logs if 1,000,000 logs have been accumulated. One percent of the logs are automatically deleted, beginning with the oldest logs.
Note: Threat Discovery Appliance can send logs to a Syslog server or Trend Micro Control Manager. For details, see Syslog Server on page 7-24 and Trend Micro Control Manager on page 6-17.
You can also view the status of the product database and repair corrupted database files from the Log Maintenance screen.
To configure log maintenance settings:PATH: LOGS > LOG MAINTENANCE
1. Select the logs you want to delete. For example, you can select all logs under Known Threats/Risk Logs and System Logs, or you can Select all logs.
2. Select an option under action. You can select to Delete all logs selected above or Delete logs selected above older than the specified number of days you chose.
3. Click Delete Now.
To perform maintenance tasks for the product database:PATH: LOGS > LOG MAINTENANCE
1. Click Check Database.2. If one or more database files are corrupted, click Repair. The product begins to
repair the corrupted files and informs you of the status.
8-2

Maintenance
Configuration Backup and RestoreConfiguration settings include both the Threat Discovery Appliance and network configuration settings. You can back up the settings by exporting them to an encrypted file. You can then import the file to restore settings in case of a problem.
You can also reset Threat Discovery Appliance by restoring the default settings that shipped with the product.
Take note of the following:• Settings related to Threat Discovery Appliance registration to mitigation devices or
other services are not backed up.• The encrypted file cannot be modified.• Importing an encrypted file overwrites all the current settings on Threat Discovery
Appliance.• The encrypted file can also be used to replicate settings on another Threat
Discovery Appliance. • Threat Discovery Appliance reverts to the default IP address settings after
importing an encrypted file. Record the current IP address settings for Threat Discovery Appliance so you can re-configure the settings after importing the file. For details, see Network Interface Settings on page 5-5.
To back up settings to an encrypted file:PATH: ADMINISTRATION > BACKUP/RESTORE
1. Click Backup under Backup Current Configuration. A File Download screen displays.
2. Click Save, browse to the target location of the file, and then click Save.
To import an encrypted file:PATH: ADMINISTRATION > BACKUP/RESTORE
1. Before importing a file, back up the current configurations by performing the steps under To back up settings to an encrypted file: on page 8-3.
1. Click Browse under Restore Configuration (from backup). The Choose File screen appears.
2. Select the encrypted file to import and click Restore Configuration. A confirmation message appears.
8-3

Trend Micro™ Threat Discovery Appliance 2.5 R2 Administrator’s Guide
3. Click OK. Threat Discovery Appliance restarts after importing the configuration file.
Threat Discovery Appliance reverts to the following default IP address settings:• Host name: localhost
For static IP addresses:• IP Address: 192.168.252.1• Subnet Mask: 255.255.255.0• Gateway: 192.168.252.254
4. Configure IP address settings. For details, see Network Interface Settings on page 5-5.
To restore the default settings that shipped with the product:PATH: ADMINISTRATION > BACKUP/RESTORE
1. Before restoring settings, back up the current configurations by performing the steps under To back up settings to an encrypted file: on page 8-3.
1. Click Reset to Default Settings. A confirmation message appears.2. Click OK. Threat Discovery Appliance restarts.
Firmware UpdateTrend Micro may release a new firmware so you can upgrade the product to a new version or enhance its performance. You can choose to migrate the current settings on the product after the update is complete so that you do not need to re-configure settings.
Before updating the firmware:
1. Back up configuration settings. For details, see Configuration Backup and Restore on page 8-3.
2. If you have registered Threat Discovery Appliance to Control Manager, record the Control Manager registration details. You need to re-register to Control Manager after the firmware update is complete.
3. Download the Threat Discovery Appliance firmware image from the Trend Micro Web site or obtain the image from your Trend Micro reseller or support provider.
4. Save the image to any folder on a computer.
8-4

Maintenance
To update the firmware:PATH: ADMINISTRATION > FIRMWARE UPDATE
1. Click Browse and then locate the folder to which you saved the firmware image (the image file has an .R extension).
2. Click Upload Firmware. The Migration configuration option appears. Enable this option to retain the current product settings after the update, or disable it to revert to the product’s default settings after the update.
Note: Performing the next step will restart Threat Discovery Appliance. Ensure that you have finished all your product console tasks before performing this next step.
3. Click Continue. Threat Discovery Appliance restarts after the update. The Log on screen appears after the product restarts.
Note: When Threat Discovery Appliance starts, it checks the integrity of its configuration files. The product console password may reset if the configuration file containing password information is corrupted. If you are unable to log on to the console using your preferred password, log on using the default password admin.
After updating the firmware:
1. If Threat Discovery Appliance is registered to Control Manager, register the product again. For details, see Trend Micro Control Manager on page 6-17.
8-5

Trend Micro™ Threat Discovery Appliance 2.5 R2 Administrator’s Guide
Restart or ShutdownShut down or restart Threat Discovery Appliance or its associated services from the System Maintenance screen on the product console.
When Threat Discovery Appliance starts, it checks the integrity of its configuration files. The product console password may reset if the configuration file containing password information is corrupted. If you are unable to log on to the console using your preferred password, log on using the default password admin.
To shut down Threat Discovery Appliance:PATH: ADMINISTRATION > SYSTEM MAINTENANCE
1. Select Shut down under System Maintenance.2. (Optional) Specify a reason for shutting down the product.3. Click Ok.
To restart Threat Discovery Appliance or its services:PATH: ADMINISTRATION > SYSTEM MAINTENANCE
1. Click Restart.a. To restart Threat Discovery Appliance, click System.
b. To restart services, click Service.
2. (Optional) Specify a reason for restarting the services beside Comment.3. Click Ok.
8-6

Maintenance
Appliance RescueRescuing the appliance means reinstalling the product’s application and reverting to saved or default settings.
Note: The rescue task does not apply to the virtual appliance.
As an alternative, you can use the Web-based product console to rescue the appliance (see Configuration Backup and Restore on page 8-3) or update the firmware (see Firmware Update on page 8-4).
You might need to rescue the application if the application files become corrupted. Rescuing the application reinstalls the Threat Discovery Appliance application that instructs Threat Discovery Appliance to monitor traffic and create logs.
Rescuing the application is not the same as applying a patch:• Rescuing—replaces application files and keeps or restores the default settings. • Applying a patch—updates the existing application files to enhance features.
WARNING! Before rescuing the application, create a backup of your settings. For details, see Configuration Backup and Restore on page 8-3).
To enter rescue mode:
1. Log on to the Preconfiguration Console through a serial connection to the management port. For details, see The Preconfiguration Console on page 4-2).
2. Type 4 then press the ENTER key. The System Tasks screen appears.
8-7

Trend Micro™ Threat Discovery Appliance 2.5 R2 Administrator’s Guide
3. Type 5 then press the ENTER key. The Reset Device screen appears.
FIGURE 8-1. The Reset Device screen
4. Select OK. The appliance restarts.
8-8

Maintenance
5. When the Press the ESC button message appears in the boot screen, press ESC immediately. The boot menu appears.
FIGURE 8-2. The Boot menu
8-9

Trend Micro™ Threat Discovery Appliance 2.5 R2 Administrator’s Guide
6. Type 4 then press the ENTER key. The Threat Discovery Appliance rescue mode screen appears.
FIGURE 8-3. The Threat Discovery Appliance rescue mode screen
7. Locate the Threat Discovery Appliance Rescue Tool (TDARescue.exe). Double-click the tool.
WARNING! Ensure you are in Rescue mode before using the Rescue Tool.
8. Browse to the latest image file.9. Click Update. The Threat Discovery Appliance Rescue Tool uploads the new
image.
Note: During the update, do not turn off or reset the appliance.
8-10

Maintenance
10. After the file uploads successfully, click Finish.
FIGURE 8-4. File upload successful
11. In HyperTerminal, type Y to migrate the previous configuration files. Press the ENTER key to continue. Threat Discovery Appliance starts migrating the configuration files.
FIGURE 8-5. The configuration file migration screen
8-11

Trend Micro™ Threat Discovery Appliance 2.5 R2 Administrator’s Guide
FIGURE 8-6. Configuration migration screen
12. After migration, open the Preconfiguration Console and configure the Threat Discovery Appliance network settings (see Preconfiguration Menu: Device Settings on page 4-8).
8-12

Chapter 9
Getting Help
This chapter answers questions you might have about Threat Discovery Appliance and describes how to troubleshoot problems that may arise.
The topics discussed in this chapter are:• Frequently Asked Questions (FAQs) on page 9-2• Contacting Trend Micro on page 9-6
9-1

Trend Micro™ Threat Discovery Appliance 2.5 R2 Administrator’s Guide
Frequently Asked Questions (FAQs)The following is a list of frequently asked questions and answers.
InstallationWill the Threat Discovery Appliance installation disrupt network traffic?
No. Threat Discovery Appliance installation should not disrupt the network traffic since the product connects to the mirror port of the switch and not directly to the network.
ActivationDo I need to activate Threat Discovery Appliance after installation?
Yes. Use a valid Activation Code to enable the Threat Discovery Appliance features. Additionally, you can register for Threat Management Services and get daily and weekly threat analysis reports.
ConfigurationHow many seconds of inactivity does the Preconfiguration Console accept before logging off ?
After five minutes of inactivity, Threat Discovery Appliance logs out of the inactive session.
Can I register Threat Discovery Appliance to more than one Control Manager server?
No, you cannot register Threat Discovery Appliance to more than one Control Manager server. To register Threat Discovery Appliance to a Control Manager server, refer to Trend Micro Control Manager on page 6-17.
9-2

Getting Help
Will changing the Threat Discovery Appliance IP address prevent it from communicating with the Control Manager server?
Yes, changing the Threat Discovery Appliance IP address through the Preconfiguration Console or product console will cause temporary disconnection (30 seconds). During the time the MCP agent is disconnected from Control Manager, the MCP agent logs off from Control Manager and then logs on and provides Control Manager with the updated information.
I typed the wrong password three times when logging on to the Preconfiguration Console. Then, I could no longer log on to the Preconfiguration Console. What should I do?
If you typed the wrong password three consecutive times, the product will lock for 30 seconds before you can try to log on again. Wait for 30 seconds and try to log on again if this happens.
Is there anything that the administrator needs to configure in the firewall settings?
If you use Threat Discovery Appliance only for monitoring the network, you do not need to configure the firewall settings. However, if Threat Discovery Appliance connects to the Internet for updates or for Threat Management Services Portal, you need to configure the firewall to allow Ports 80, 22 or 443 traffic from Threat Discovery Appliance.
I am unable to register to Threat Management Services Portal, what can I do?
Ensure that:• The Threat Management Services logon details are correct. • Ensure that you have configured your firewall settings to allow port 22 or 443
traffic.• Ensure that you are using the correct proxy settings.
If the problem persists, consult your support provider.
9-3

Trend Micro™ Threat Discovery Appliance 2.5 R2 Administrator’s Guide
Product UpdatesBy default, where does Threat Discovery Appliance download updated components from?
Threat Discovery Appliance receives updated components from the Trend Micro ActiveUpdate server by default. If you want to receive updates from other sources, configure an update source for both scheduled and manual updates.
How often should I update Threat Discovery Appliance?
Trend Micro typically releases virus pattern files on a daily basis and recommends updating both the server and clients daily. You can preserve the default schedule setting in the Scheduled Update screen to update the product every 2 hours.
Does Threat Discovery Appliance restart during an update?
Yes, Threat Discovery Appliance needs to restart if there is an update for the Network Content Inspection Engine and Threat Discovery Appliance firmware. For scheduled updates, Threat Discovery Appliance sends an email to the user to click the Restart button in the product console. For manual updates, the Restart button appears in the Manual Update screen until you restart the product.
Why does Threat Discovery Appliance still use the old components after updating the software and restarting the product?
Updating Threat Discovery Appliance components follows the product constraints. This means that when updating components, the product updates the software first. Restart the product and update the Network Content Inspection Engine. Restart the product again before updating the other components.
9-4

Getting Help
LogsWhy does the Log Query screen display no result or takes a long time before the results appear?
When Threat Discovery Appliance queries the database and there is a heavy volume of traffic and logs, there might be some delay in displaying the information. Please wait for the information to show. Do not click anything or Threat Discovery Appliance might start to query the logs once again.
DocumentationWhat documentation is available with this version of Threat Discovery Appliance?
This version of Threat Discovery Appliance includes the following documentation:• Quick Start Guide (use only if you are setting up the appliance)• Administrator's Guide• Readme file• Safety sheet• Hardware maintenance sheet • Help
9-5

Trend Micro™ Threat Discovery Appliance 2.5 R2 Administrator’s Guide
Contacting Trend Micro
Technical SupportTrend Micro provides technical support, pattern downloads, and program updates for one year to all registered users, after which you must purchase renewal maintenance. If you need help or just have a question, please feel free to contact us. We also welcome your comments.
Trend Micro Incorporated provides worldwide support to all registered users.• Get a list of the worldwide support offices at:
http://www.trendmicro.com/support• Get the latest Trend Micro product documentation at:
http://www.trendmicro.com/download
In the United States, you can reach the Trend Micro representatives through phone, fax, or email:
Trend Micro, Inc.
10101 North De Anza Blvd., Cupertino, CA 95014
Toll free: +1 (800) 228-5651 (sales)
Voice: +1 (408) 257-1500 (main)
Fax: +1 (408) 257-2003
Web address:
http://www.trendmicro.com
Email: [email protected]
9-6

Getting Help
Speeding Up Your Support CallWhen you contact Trend Micro, to speed up your problem resolution, ensure that you have the following details available:• Microsoft Windows and Service Pack versions• Network type• Computer brand, model, and any additional hardware connected to your computer• Amount of memory and free hard disk space on your computer• Detailed description of the install environment• Exact text of any error message given• Steps to reproduce the problem
The Trend Micro Knowledge BaseThe Trend Micro Knowledge Base, maintained at the Trend Micro Web site, has the most up-to-date answers to product questions. You can also use Knowledge Base to submit a question if you cannot find the answer in the product documentation. Access the Knowledge Base at:
http://esupport.trendmicro.com
Trend Micro updates the contents of the Knowledge Base continuously and adds new solutions daily. If you are unable to find an answer, however, you can describe the problem in an email and send it directly to a Trend Micro support engineer who will investigate the issue and respond as soon as possible.
9-7
Trend Micro™ Threat Discovery Appliance 2.5 R2 Administrator’s Guide
TrendLabsTrendLabsSM is the global antivirus research and support center of Trend Micro. Located on three continents, TrendLabs has a staff of more than 250 researchers and engineers who operate around the clock to provide you, and every Trend Micro customer, with service and support.
You can rely on the following post-sales service:• Regular virus pattern updates for all known "zoo" and "in-the-wild" computer
viruses and malicious codes• Emergency virus outbreak support• Email access to antivirus engineers• Knowledge Base, the Trend Micro online database of technical support issues
TrendLabs has achieved ISO 9002 quality assurance certification.
Security Information CenterComprehensive security information is available at the Trend Micro Web site.
http://www.trendmicro.com/vinfo/
Information available:• List of viruses and malicious mobile code currently "in the wild," or active• Computer virus hoaxes• Internet threat advisories• Virus weekly report• Virus Encyclopedia, which includes a comprehensive list of names and symptoms
for known viruses and malicious mobile code• Glossary of terms
9-8
Getting Help
Sending Suspicious Files to Trend MicroIf you think you have an infected file but the scan engine does not detect it or cannot clean it, Trend Micro encourages you to send the suspect file to us. For more information, refer to the following site:
http://subwiz.trendmicro.com/subwiz
You can also send Trend Micro the URL of any Web site you suspect of being a phish site, or other so-called "disease vector" (the intentional source of Internet threats such as spyware and viruses).• Send an email to the following address and specify "Phish or Disease Vector" as the
subject.
[email protected]• You can also use the Web-based submission form at:
http://subwiz.trendmicro.com/subwiz
Documentation FeedbackTrend Micro always seeks to improve its documentation. If you have questions, comments, or suggestions about this or any Trend Micro document, please go to the following site:
http://www.trendmicro.com/download/documentation/rating.asp
9-9

Trend Micro™ Threat Discovery Appliance 2.5 R2 Administrator’s Guide
9-10
Appendix A
Glossary
This glossary describes terms used in Threat Discovery Appliance documentation.
TABLE A-1. Glossary of Terms
TERM DEFINITION
Active This refers to the device currently in use.
ActiveUpdate ActiveUpdate is a function common to many Trend Micro products. Connected to the Trend Micro update Web site, ActiveUpdate provides up-to-date downloads of virus pattern files, scan engines, program, and other Trend Micro component files through the Internet or the Trend Micro Total Solution CD.
ActiveX A type of open software architecture that implements object linking and embedding, enabling some of the standard interfaces, such as downloading of Web pages.
A-1

Trend Micro™ Threat Discovery Appliance 2.5 R2 Administrator’s Guide
ActiveX malicious code
An ActiveX control is a component object embedded in a Web page which runs automatically when viewing the page. ActiveX controls allow Web developers to create interactive, dynamic Web pages with broad functionality such as HouseCall, Trend Micro's free online scanner.
Hackers, virus writers, and others who want to cause mischief or worse may use ActiveX malicious code as a vehicle to attack the system. Change the browser's security settings to "high" so that these ActiveX controls do not execute.
Address Refers to a networking address (see IP address) or an email address, which is the string of characters that specify the source or destination of an email message.
Administrator Refers to “system administrator"—the person in an organization who is responsible for activities such as setting up new hardware and software, allocating user names and passwords, monitoring disk space and other IT resources, performing back ups, and managing network security.
Administrator account A user name and password that has administrator-level privileges.
Administrator email address
The address used by the administrator of your Trend Micro product to manage notifications and alerts.
Adware Advertising-supported software in which advertising banners display while the program is running. See also Spyware.
Alert A message intended to inform a system's users or administrators about a change in the operating conditions of that system or about some kind of error condition.
TABLE A-1. Glossary of Terms (Continued)
TERM DEFINITION
A-2

Glossary
Antivirus Computer programs designed to detect and clean computer viruses.
Archive A single file containing one or (usually) more separate files plus information to allow them to be extracted (separated) by a suitable program, such as a .zip file.
Attachment A file attached to (sent with) an email message.
Authentication The verification of the identity of a person or a process. Authentication ensures that the system delivers the digital data transmissions to the intended receiver. Authentication also assures the receiver of the integrity of the message and its source (where or whom it came from).
The simplest form of authentication requires a user name and password to gain access to a particular account. Other authentication protocols are secret-key encryption, such as the Data Encryption Standard (DES) algorithm, or public-key systems using digital signatures.
Also see public-key encryption and digital signature.
Boot sector A sector is a designated portion of a disk (the physical device from which the computer reads and writes the data on). The boot sector contains the data used by your computer to load and initialize the computer’s operating system.
TABLE A-1. Glossary of Terms (Continued)
TERM DEFINITION
A-3

Trend Micro™ Threat Discovery Appliance 2.5 R2 Administrator’s Guide
Boot sector virus A boot sector virus is a virus targeted at the boot sector (the operating system) of a computer. Computer systems are most vulnerable to attack by boot sector viruses when you boot the system with an infected disk from the floppy drive - the boot attempt does not have to be successful for the virus to infect the hard drive.
Also, there are a few viruses that can infect the boot sector from executable programs. These are multi-partite viruses and they are relatively rare. Once the system is infected, the boot sector virus will attempt to infect every disk accessed by that computer. In general, most antivirus software can successfully remove boot sector viruses.
Bridge A device that forwards traffic between network segments based on data link layer information. These segments have a common network layer address.
Browser A program that allows a person to read hypertext, such as Internet Explorer. The browser gives some means of viewing the contents of nodes (or "pages") and of navigating from one node to another. A browser acts as a client to a remote Web server.
Cache A small fast memory, holding recently accessed data, designed to speed up subsequent access to the same data. The term is most often applied to processor-memory access, but also applies to a local copy of data accessible over a network.
COM file infector An executable program with a .com file extension. Also see DOS virus.
Compressed file A single file containing one or more separate files plus information for extraction by a suitable program, such as WinZip.
TABLE A-1. Glossary of Terms (Continued)
TERM DEFINITION
A-4

Glossary
Configuration Selecting options for how your Trend Micro product will function, for example, selecting whether to quarantine or delete a virus-infected email message.
Cookie A mechanism for storing information about an Internet user, such as name, preferences, and interests, which is stored in your Web browser for later use. The next time you access a Web site for which your browser has a cookie, your browser sends the cookie to the Web server, which the Web server can then use to present you with customized Web pages. For example, you might enter a Web site that welcomes you by name.
Daemon A program not explicitly invoked, but lays dormant waiting for some condition(s) to occur. The perpetrator of the condition need not be aware that a daemon is lurking.
Default A value that pre-populates a field in the management console interface. A default value that represents a logical choice and provided for convenience. Use default values as-is, or change them.
Denial of Service (DoS) attack
Group-addressed email messages with large attachments that clog your network resources to the point where messaging service is noticeably slow or even stopped.
Dialer A type of Trojan that, when executed, connects the user's system to a pay-per-call location in which the unsuspecting user is billed for the call without his or her knowledge.
Digital signature Extra data appended to a message which identifies and authenticates the sender and message data using a technique called public-key encryption. Also see public-key encryption and authentication.
TABLE A-1. Glossary of Terms (Continued)
TERM DEFINITION
A-5

Trend Micro™ Threat Discovery Appliance 2.5 R2 Administrator’s Guide
Directory A node, which is part of the structure on a hierarchical computer file system. A directory typically contains other nodes, folders, or files. For example, C:\Windows is the Windows directory in the C drive.
Directory path The subsequent layers within a directory where a file can be found, for example, the directory path for the ISVW for SMB Quarantine directory is:C:\Programs\Trend Micro\ISVW\Quarantine
Disclaimer A statement appended to the beginning or end of an email message that states certain terms of legality and confidentiality regarding the message.
DNS Domain Name System—A general-purpose data query service chiefly used in the Internet for translating host names into IP addresses.
DNS resolution When a DNS client requests host name and address data from a DNS server, the process is called resolution. Basic DNS configuration results in a server that performs default resolution. For example, a remote server queries another server for data in a computer in the current zone. Client software in the remote server queries the resolver, which answers the request from its database files.
(Administrative) domain
A group of computers sharing a common database and security policy.
Domain name The full name of a system, consisting of its local host name and its domain name, for example, tellsitall.com. A domain name should be sufficient to determine a unique Internet address for any host in the Internet. This process, called "name resolution", uses the Domain Name System (DNS).
TABLE A-1. Glossary of Terms (Continued)
TERM DEFINITION
A-6

Glossary
DOS virus Also referred to as “COM” and “EXE file infectors.” DOS viruses infect DOS executable programs- files that have the extensions *.COM or *.EXE. Unless they have overwritten or inadvertently destroyed part of the original program's code, most DOS viruses try to replicate and spread by infecting other host programs.
Download (verb) To transfer data or code from one computer to another. Downloading often refers to transfer from a larger "host" system (especially a server or mainframe) to a smaller "client" system.
Dropper Droppers are programs that serve as delivery mechanisms to carry and drop viruses, Trojans, or worms into a system.
Dynamic Host Configuration Protocol (DHCP)
A protocol for assigning dynamic IP addresses to devices in a network. With dynamic addressing, a device can have a different IP address everytime it connects to the network. In some systems, the device’s IP address can even change while it is still connected. DHCP also supports a mix of static and dynamic IP addresses.
TABLE A-1. Glossary of Terms (Continued)
TERM DEFINITION
A-7

Trend Micro™ Threat Discovery Appliance 2.5 R2 Administrator’s Guide
Encryption Encryption is the process of changing data into a form that only the intended receiver can read. To decipher the message, the receiver of the encrypted data must have the proper decryption key. In traditional encryption schemes, the sender, and the receiver use the same key to encrypt and decrypt data. Public-key encryption schemes use two keys: a public key, which anyone may use, and a corresponding private key, possessed only by the person who created it. With this method, anyone may send a message encrypted with the owner's public key, but only the owner has the private key necessary to decrypt it. PGP (Pretty Good Privacy) and DES (Data Encryption Standard) are two of the most popular public-key encryption schemes.
Ethernet A local area network (LAN) technology invented at the Xerox Corporation, Palo Alto Research Center. Ethernet is a best-effort delivery system that uses CSMA/CD technology. A variety of cable schemes can run over the Ethernet, including thick coaxial, thin coaxial, twisted pair, and fiber optic cable. Ethernet is a standard for connecting computers into a local area network. The most common form of Ethernet is the 10BaseT, which denotes a peak transmission speed of 10 Mbps using copper twisted-pair cable.
Executable file A binary file containing a program in computer language which is ready to be executed (run).
EXE file infector An executable program with an .exe file extension. Also see DOS virus.
False positive An email message that was "caught" by the spam filter and identified as spam, but is actually not spam.
TABLE A-1. Glossary of Terms (Continued)
TERM DEFINITION
A-8

Glossary
FAQ Frequently Asked Questions—A list of questions and answers about a specific topic.
File An element of data, such as an email message or HTTP download.
File-infecting virus File-infecting viruses infect executable programs (generally, files that have extensions of .com or .exe). Most such viruses simply try to replicate and spread by infecting other host programs, but some inadvertently destroy the program they infect by overwriting a portion of the original code. Some of these viruses are very destructive and attempts to format the hard drive at a pre-determined time or perform some other malicious action.
In many cases, you can successfully remove a file-infecting virus from the infected file. However, if the virus has overwritten part of the program's code, the original file will be unrecoverable
File type The kind of data stored in a file. Most operating systems use the file name extension to determine the file type. The file type used to select an appropriate icon to represent the file in a user interface, and the correct application with which to view, edit, run, or print the file.
File name extension The portion of a file name (such as .dll or .xml) which indicates the kind of data stored in the file. Apart from informing the user what type of content the file holds, file name extensions are typically used to decide which program to launch when a file is run.
Firewall A gateway computer with special security precautions in it, used to service outside network (especially Internet) connections and dial-in lines.
TABLE A-1. Glossary of Terms (Continued)
TERM DEFINITION
A-9

Trend Micro™ Threat Discovery Appliance 2.5 R2 Administrator’s Guide
FPGA Field Programmable Gate Array - a programmable integrated circuit.
FTP A client-server protocol which allows a user on one computer to transfer files to and from another computer over a TCP/IP network. Also refers to the client program the user executes to transfer files.
Gateway An interface between an information source and a Web server.
Grayware A category of software that may be legitimate, unwanted, or malicious. Unlike threats such as viruses, worms, and Trojans, grayware does not infect, replicate, or destroy data, but it may violate your privacy. Examples of grayware include spyware, adware, and remote access tools.
Hacker See virus writer.
Hard disk (or hard drive)
One or more rigid magnetic disks rotating about a central axle with associated read/write heads and electronics, used to read and write hard disks or floppy disks, and to store data. Most hard disks are permanently connected to the drive (fixed disks) though there are also removable disks.
Heuristic rule-based scanning
Scanning network traffic, using a logical analysis of properties that reduces or limits the search for solutions.
HTML virus A virus targeted at Hyper Text Markup Language (HTML), the authoring language used to create information in a Web page. The virus resides in a Web page and downloads through a user’s browser.
TABLE A-1. Glossary of Terms (Continued)
TERM DEFINITION
A-10

Glossary
HTTP Hypertext Transfer Protocol—The client-server TCP/IP protocol used in the World Wide Web for the exchange of HTML documents. It conventionally uses port 80.
HTTPS Hypertext Transfer Protocol Secure—A variant of HTTP used for handling secure transactions.
HouseCall A free virus scanning and cleaning product from Trend Micro. HouseCall can detect and clean viruses found in your hard drive, but HouseCall does not provide real-time protection. In other words, HouseCall can help you to discover and clean up an existing problem, but will not prevent future ones, nor will HouseCall protect against worms, or mass-mailing programs. For preventive protection, you need Trend Micro security products.
Image Refers to the Trend Micro Threat Discovery firmware or program file.
Image file A file containing data representing a two-dimensional scene, in other words, a picture. These files are real world images taken using a digital camera, or generated by the computer using graphics software.
IntelliScan IntelliScan is a Trend Micro scanning technology that optimizes performance by examining file headers using true file type recognition, and scanning only file types known to potentially harbor malicious code. True file type recognition helps identify malicious code disguised by a harmless extension name.
TABLE A-1. Glossary of Terms (Continued)
TERM DEFINITION
A-11

Trend Micro™ Threat Discovery Appliance 2.5 R2 Administrator’s Guide
Internet A client-server hypertext information retrieval system, based on a series of networks connected with routers. The Internet is a modern information system and a widely accepted medium for advertising, online sales, and services, as well as university and many other research networks. The World Wide Web is the most familiar aspect of the Internet.
IP Internet Protocol—See IP address.
IP address Internet address for a device in a network, typically expressed using dot notation such as 123.123.123.123.
IP gateway Also called a router, a gateway is a program or a special-purpose device that transfers IP datagrams from one network to another before reaching the final destination.
IT Information technology, to include hardware, software, networking, telecommunications, and user support.
Java file Java is a general-purpose programming language developed by Sun Microsystems. A Java file contains Java code. Java supports programming for the Internet in the form of platform-independent Java "applets." (An applet is a program written in Java programming language that can be included in an HTML page. When you use a Java-technology enabled browser to view a page that contains an applet, the applet transfers its code to your system and the browser’s Java Virtual Machine executes the applet.)
Java malicious code Virus code written or embedded in Java. Also see Java file.
TABLE A-1. Glossary of Terms (Continued)
TERM DEFINITION
A-12

Glossary
JavaScript virus JavaScript is a simple programming language developed by Netscape that allows Web developers to add dynamic content to HTML pages displayed in a browser using scripts.
A JavaScript virus is a virus that targets scripts in the HTML code. This enables the virus to reside in Web pages and download to a user’s desktop through the user’s browser.
Also see VBscript virus.
Joke program An executable program that is annoying or causes users undue alarm. Unlike viruses, joke programs do not self-propagate. However, you should still remove these from your system.
KB Kilobyte—1024 bytes of memory.
Keylogger Keyloggers are programs that catch and store all keyboard activity. There are legitimate keylogging programs used by corporations to monitor employees and by parents to monitor their children. However, criminals also use keystroke logs to sort for valuable information such as logon credentials and credit card numbers.
L2 devices Short for layer 2 devices. These devices refer to the hardware devices connected to the Data Link layer of the OSI model. Switches are examples of L2 devices.
L3 devices Short for layer 3 devices. These devices refer to the hardware devices connected to the Network layer of the OSI model. Routers are examples of L3 devices.
LCM console Also referred to as the LCD module. It is composed of the LCD and the Control Panel, which is located on the Trend Micro Threat Discovery Appliance front panel.
TABLE A-1. Glossary of Terms (Continued)
TERM DEFINITION
A-13

Trend Micro™ Threat Discovery Appliance 2.5 R2 Administrator’s Guide
Liquid Crystal Display (LCD)
A 5x7 dot display LCD on the Threat Discovery Appliance front panel capable of displaying 2x16 character messages.
Link (also called hyperlink)
A reference from some point in one hypertext document to some point in another document or another place in the same document. You can distinguish links because these usually have a different color or style of text, such as underlined blue text. When you activate the link, for example, by clicking it with a mouse, the browser displays the target of the link.
Listening port A port utilized for client connection requests for data exchange.
Logic bomb Code surreptitiously inserted into an application or operating system that causes it to perform some destructive or security-compromising activity whenever it meets specified conditions.
Macro A command used to automate certain functions within an application.
MacroTrap A Trend Micro utility that performs a rule-based examination of all macro code saved in association with a document. Macro virus code is typically contained in part of the invisible template that travels with many documents (.dot, for example, in Microsoft Word documents). MacroTrap checks the template for signs of a macro virus by seeking out key instructions that perform virus-like activity—instructions such as copying parts of the template to other templates (replication), or instructions to execute potentially harmful commands (destruction).
TABLE A-1. Glossary of Terms (Continued)
TERM DEFINITION
A-14
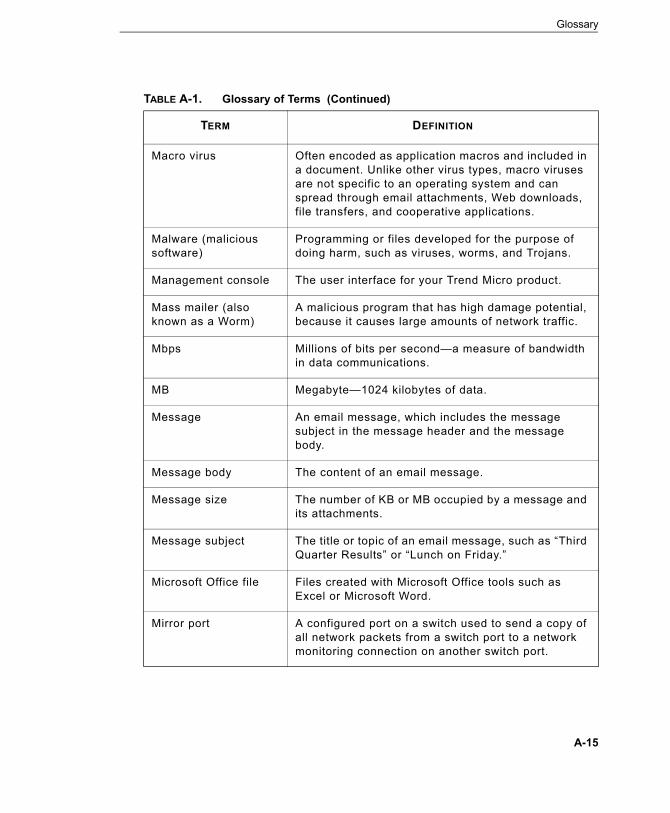
Glossary
Macro virus Often encoded as application macros and included in a document. Unlike other virus types, macro viruses are not specific to an operating system and can spread through email attachments, Web downloads, file transfers, and cooperative applications.
Malware (malicious software)
Programming or files developed for the purpose of doing harm, such as viruses, worms, and Trojans.
Management console The user interface for your Trend Micro product.
Mass mailer (also known as a Worm)
A malicious program that has high damage potential, because it causes large amounts of network traffic.
Mbps Millions of bits per second—a measure of bandwidth in data communications.
MB Megabyte—1024 kilobytes of data.
Message An email message, which includes the message subject in the message header and the message body.
Message body The content of an email message.
Message size The number of KB or MB occupied by a message and its attachments.
Message subject The title or topic of an email message, such as “Third Quarter Results” or “Lunch on Friday.”
Microsoft Office file Files created with Microsoft Office tools such as Excel or Microsoft Word.
Mirror port A configured port on a switch used to send a copy of all network packets from a switch port to a network monitoring connection on another switch port.
TABLE A-1. Glossary of Terms (Continued)
TERM DEFINITION
A-15

Trend Micro™ Threat Discovery Appliance 2.5 R2 Administrator’s Guide
Mixed threat attack Complex attacks that take advantage of multiple entry points and vulnerabilities in enterprise networks, such as the “Nimda” or “Code Red” threats.
Multi-partite virus A virus that has characteristics of both boot sector viruses and file-infecting viruses.
Network Address Translation (NAT)
A standard for translating secure IP addresses to temporary, external, registered IP address from the address pool. This allows Trusted networks with privately assigned IP addresses to have access to the Internet. This also means that you do not have to get a registered IP address for every computer in your network.
NetBIOS (Network Basic Input Output System)
An application program interface (API) that adds functionality such as network capabilities to disk operating system (DOS) basic input/output system (BIOS).
NetScreen Redundancy Protocol (NSRP)
A proprietary protocol that provides configuration and run time object (RTO) redundancy and a device failover mechanism for GateLock units in a high availability (HA) cluster.
Network segment A section of a network that falls within the bounds of bridges, routers, or switches. Dividing an Ethernet into multiple segments is one of the most common ways of increasing available bandwidth on the LAN. IF segmented correctly, most network traffic remains within a single segment, enjoying the full 10 Mbps bandwidth. Hubs and switches connect each segment to the rest of the LAN.
Network Time Protocol (NTP)
Refers to an Internet standard protocol (built on top of TCP/IP) that assures accurate synchronization to the millisecond of computer clock times in a network of computers.
TABLE A-1. Glossary of Terms (Continued)
TERM DEFINITION
A-16

Glossary
Network virus A type of virus that uses network protocols, such as TCP, FTP, UDP, HTTP, and email protocols to replicate. Network viruses often do not alter system files or modify the boot sectors of hard disks. Instead, they infect the memory of client computers, forcing them to flood the network with traffic, which can cause slowdowns or even complete network failure.
Notification
(Also see action and target)
A message that is forwarded to one or more of the following:- system administrator- sender of a message- recipient of a message, file download, or file transferThe purpose of the notification is to communicate that an action took place, or been attempted, such as a virus being detected in an attempted HTTP file download.
Offensive content Words or phrases in messages or attachments that are considered offensive to others, for example, profanity, sexual harassment, racial harassment, or hate mail.
Open source Programming code that is available to the general public for use or modification free of charge and without license restrictions.
Operating system The software which handles tasks such as the interface to peripheral hardware, scheduling tasks, and allocating storage. In this documentation, the term also refers to the software that presents a window system and graphical user interface.
TABLE A-1. Glossary of Terms (Continued)
TERM DEFINITION
A-17

Trend Micro™ Threat Discovery Appliance 2.5 R2 Administrator’s Guide
Open System Interconnection (OSI) model
This model defines a networking framework for implementing protocols in seven layers. Passing control from one layer to the next, starting at the application layer in one station, proceeding to the bottom layer, over the channel to the next station and back up the hierarchy.
Outgoing Email messages or other data leaving your network, routed out to the Internet.
Packer A compression tool for executable files.
Partition A logical portion of a disk. (Also see sector, which is a physical portion of a disk.)
Password cracker An application program used to recover a lost or forgotten password. An intruder can use these applications to gain unauthorized access to a computer or network resources.
Pattern file (also known as Official Pattern Release)
The pattern file, as referred to as the Official Pattern Release (OPR), is the latest compilation of patterns for identified viruses. Passed a series of critical tests to ensure that you get optimum protection from the latest virus threats. This pattern file is most effective when used with the latest scan engine.
Payload Payload refers to an action that a virus performs on the infected computer. This can be something relatively harmless, such as displaying messages or ejecting the CD drive, or something destructive, such as deleting the entire hard drive.
Polymorphic virus A virus that is capable of taking different forms.
TABLE A-1. Glossary of Terms (Continued)
TERM DEFINITION
A-18

Glossary
POP3 Post Office Protocol, version 3—A messaging protocol that allows a client computer to retrieve electronic mail from a server through a temporary connection, for example, a mobile computer without a permanent network connection.
POP3 server A server which hosts POP3 email, from which clients in your network will retrieve POP3 messages.
Port A logical channel or channel endpoint in a communications system, used to distinguish between different logical channels in the same network interface on the same computer. Each application program has a unique port number associated with it.
Port mirroring Method of monitoring network traffic by copying source port or VLAN specific traffic to a destination port for analysis.
Preconfiguration Console
The console used to preconfigure the device.
Proxy A process providing a cache of items available on other servers which are presumably slower or more expensive to access.
Proxy server A World Wide Web server which accepts URLs with a special prefix, used to fetch documents from either a local cache or a remote server, then returns the URL to the requester.
Public-key encryption An encryption scheme where each person gets a pair of “keys,” called the public key and the private key. The software publishes the public key while keeping the private key a secret. Messages are encrypted using the intended recipient's public key and can only be decrypted using his or her private key. Also see authentication and digital signature.
TABLE A-1. Glossary of Terms (Continued)
TERM DEFINITION
A-19

Trend Micro™ Threat Discovery Appliance 2.5 R2 Administrator’s Guide
Purge To delete all, as in getting rid of old entries in the logs.
Recipient The person or entity to whom an email message is addressed.
Relay To convey by means of passing through various other points.
Remote Port Mirroring An implementation of port mirroring designed to support source ports, source VLANs, and destination ports across different switches.
Removable drive A removable hardware component or peripheral device of a computer, such as a zip drive.
RJ-45 Resembling a standard phone connector, an RJ-45 connector is twice as wide (with eight wires) and hooks up computers to local area networks (LANs) or phones with multiple lines.
Scan To examine items in a file in sequence to find those that meet a particular criteria.
Scan engine The module that performs antivirus scanning and detection in the host product to which it is integrated.
Secure Password Authentication
An authentication process, which can protect communications, using for example, encryption and challenge/response mechanisms.
Secure Socket Layer (SSL)
Secure Socket Layer (SSL), is a protocol designed by Netscape for providing data security layered between application protocols (such as HTTP, Telnet, or FTP) and TCP/IP. This security protocol provides data encryption, server authentication, message integrity, and optional client authentication for a TCP/IP connection.
TABLE A-1. Glossary of Terms (Continued)
TERM DEFINITION
A-20

Glossary
Sender The person who is sending an email message to another person or entity.
Server A program that provides some service to other (client) programs. The connection between client and server is normally by means of message passing, often over a network, and uses some protocol to encode the client's requests and the server's responses. The server may run continuously (as a daemon), waiting for requests to arrive, or it may be invoked by some higher-level daemon which controls a number of specific servers.
Signature See virus signature.
SMTP Simple Mail Transfer Protocol—A protocol used to transfer electronic mail between computers, usually over Ethernet. It is a server-to-server protocol but uses other protocols to access the messages.
SMTP server A server that relays email messages to their destinations.
SNMP Simple Network Management Protocol—A protocol that supports monitoring of devices attached to a network for conditions that merit administrative attention.
SNMP trap A trap is a programming mechanism that handles errors or other problems on a computer program. An SNMP trap handles errors related to network device monitoring. See SNMP.
SOCKS4 A protocol that relays transmission control protocol (TCP) sessions at a firewall host to allow application users transparent access across the firewall.
TABLE A-1. Glossary of Terms (Continued)
TERM DEFINITION
A-21

Trend Micro™ Threat Discovery Appliance 2.5 R2 Administrator’s Guide
Spam Unsolicited email messages meant to promote a product or service.
Spyware Advertising-supported software that typically installs tracking software in your system, capable of sending information about you to another party. The danger is that users cannot control what the collected data is, or how it is used.
Switch A device that filters and forwards packets between LAN segments.
Total Solution CD A CD containing the latest product versions and all the patches applied during the previous quarter. The Total Solution CD is available to all Trend Micro Premium Support customers.
Traffic Data flowing between the Internet and your network, both incoming and outgoing.
Traffic Mirroring Used on network devices such as switches to send a copy of specific network packets that pass one switch port (or an entire VLAN) to a network monitoring connection on another switch port. This is commonly used for network appliances that require monitoring of network traffic such as Threat Discovery Appliance.
Trojan Horse A malicious program disguised as something benign. A Trojan is an executable program that does not replicate, but instead, resides in a system to perform malicious acts, such as opening a port for an intruder.
True file type Used by IntelliScan, a virus scanning technology, to identify the type of information in a file by examining the file headers, regardless of the file name extension.
TABLE A-1. Glossary of Terms (Continued)
TERM DEFINITION
A-22
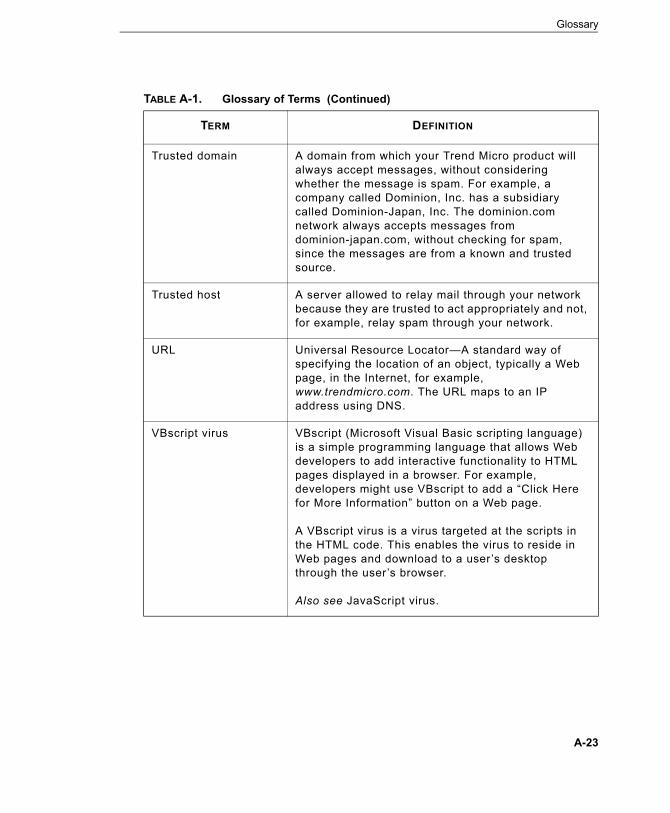
Glossary
Trusted domain A domain from which your Trend Micro product will always accept messages, without considering whether the message is spam. For example, a company called Dominion, Inc. has a subsidiary called Dominion-Japan, Inc. The dominion.com network always accepts messages from dominion-japan.com, without checking for spam, since the messages are from a known and trusted source.
Trusted host A server allowed to relay mail through your network because they are trusted to act appropriately and not, for example, relay spam through your network.
URL Universal Resource Locator—A standard way of specifying the location of an object, typically a Web page, in the Internet, for example, www.trendmicro.com. The URL maps to an IP address using DNS.
VBscript virus VBscript (Microsoft Visual Basic scripting language) is a simple programming language that allows Web developers to add interactive functionality to HTML pages displayed in a browser. For example, developers might use VBscript to add a “Click Here for More Information” button on a Web page.
A VBscript virus is a virus targeted at the scripts in the HTML code. This enables the virus to reside in Web pages and download to a user’s desktop through the user’s browser.
Also see JavaScript virus.
TABLE A-1. Glossary of Terms (Continued)
TERM DEFINITION
A-23

Trend Micro™ Threat Discovery Appliance 2.5 R2 Administrator’s Guide
Virtual Local Area Network (VLAN)
A logical (rather than physical) grouping of devices that constitute a single broadcast domain. You do not identify VLAN members by their location on a physical subnetwork but through the use of tags in the frame headers of their transmitted data. The IEEE 802.1Q standard describes VLANs more thoroughly.
Virus A computer virus is a program – a piece of executable code – that has the unique ability to infect. Like biological viruses, computer viruses can spread quickly and are often difficult to eradicate.
In addition to replication, some computer viruses share another commonality: a damage routine that delivers the virus payload. While payloads may only display messages or images, they can also destroy files, reformat your hard drive, or cause other damage. Even if the virus does not contain a damage routine, it can cause trouble by consuming storage space and memory, and degrading the overall performance of your computer.
Virus kit A template of source code for building and executing a virus, available from the Internet.
Virus signature A virus signature is a unique string of bits that identifies a specific virus. Virus signatures are stored in the Trend Micro virus pattern file. The Trend Micro scan engine compares code in files, such as the body of an email message, or the content of an HTTP download, to the signatures in the pattern file. If the scan engine finds a match, they will detect and act upon the virus (for example, cleaned, deleted, or quarantined) according to your security policy.
Virus writer Another name for a computer hacker, someone who writes virus code.
TABLE A-1. Glossary of Terms (Continued)
TERM DEFINITION
A-24

Glossary
Web The World Wide Web, also called the Web or the Internet.
Wildcard A term used in reference to content filtering, where an asterisk (*) represents any characters. For example, in the expression *ber, this expression can represent barber, number, plumber, timber, and so on. The term originates from card games, in which a specific card, identified as a "wildcard," can be used for any number or suit in the card deck.
Worm A self-contained program (or set of programs) that is able to spread functional copies of itself or its segments to other computer systems.
Zip file A compressed archive (in other words, “zip file") from one or more files using an archiving program such as WinZip.
TABLE A-1. Glossary of Terms (Continued)
TERM DEFINITION
A-25

Trend Micro™ Threat Discovery Appliance 2.5 R2 Administrator’s Guide
A-26

IndexIndex
Numerics20 recent security risks/threats 7-7
AActiveUpdate server 5-12Appliance health
critical 7-3normal 7-3warning 7-3
Application filters 6-10instant messaging 6-10peer-to-peer 6-10streaming media 6-10
BBackup
device configuration settings 8-3network configuration 6-5
bezel 3-11
CChange password 4-22, 5-4Components
firmware 5-11IntelliTrap exception pattern 5-10IntelliTrap pattern 5-10network content correlation engine 1-5,
5-10network content correlation pattern 5-10
network content inspection engine 1-5, 5-10
network content inspection pattern 5-10pattern file 5-10scan engine 1-4, 5-10spyware pattern file 5-10
Configuration settingsdevice 8-3network 6-5
Contents listedRapidRails kit 3-6
Control Manager 6-17console 6-19
Control Manager registration 4-9
DDefault gateway 5-2Delivery options 7-13Deployment
considerations 2-2dual port 2-4mirroring trunk links 2-9network tap 2-5redundant networks 2-7remote port 2-8single port 2-3specific VLAN 2-7VLAN mirroring 2-8
Detected files 6-8
IN-1

Trend Micro™ Threat Discovery Appliance 2.5 R2 Administrator’s Guide
Detection Exclusion List 1-10Detection exclusion list 6-7
about 6-7Detection log query 7-20Detections in past 24 hours 7-4Device configuration settings
about 8-3Device information and status 4-7Diagnostic test 4-19Disk image 3-18Documentation
conventions xdownload iFAQs 9-5feedback ii
documentation feedback 9-9Dual port monitoring 2-4Duplex mode 4-10
EEnd user license agreement 3-18Enhanced Mitigation 1-11EULA 3-18
FFAQs 9-2Firmware 5-11Four-post rack kit
RapidRails kit contents 3-6tools and supplies 3-5
Frequently asked questions 9-2
GGeneral rack installation 3-4Glossary A-1
HHigh network traffic usage notifications 7-12High risk client notifications 7-11High risk clients 7-16Host name 5-2
IIM 6-10Image 3-18Indicators
about 7-2appliance health 7-3network flow 1-10, 7-3risk meter 7-2
Installationpreparation 3-14virtual 3-13–3-14
Instant Messaging 6-10Integration
about 6-13control manager 6-17LeakProof 1-11mitigation devices 6-15mitigation servers 1-11Network VirusWall 1-7threat management services 1-11
IntelliTrap 1-5IntelliTrap exception pattern 5-10IntelliTrap pattern 5-10Interface speed and duplex mode settings
4-10IP address 5-2IP Address settings 5-5
KKit contents
RapidRails 3-6
IN-2

Index
Knowledge Base 9-7Known security risks notifications 7-10Known security risks/threats 7-6
LLCD 3-12LCM 3-12License
activation 5-8renewal 5-8
License agreement 3-18Liquid crystal display module 3-12Log maintenance 8-2Logs
about 7-20application filter 7-20detection log query 1-11, 7-20detection logs 7-20maintenance 8-2syslog server settings 7-24system 7-20system log query 7-23
MManagement console 5-3Minimum requirements 3-13Mitigation devices 6-15Mitigation Exclusion List 1-11Monitored networks 6-2Mounting the device 3-7Multi-layered files 1-5Multi-packed files 1-5
NNetwork configuration
about 6-2detection exclusion list 6-7
monitored networks 6-2registered domains 6-3
Network configuration settingsabout 6-5export 6-5
Network content correlationengine 5-10pattern 5-10
Network content inspectionengine 5-10pattern 5-10
Network flowcritical 7-3normal 7-3
Network mapping 3-20Network settings
default gateway format 5-2host name format 5-2IP address format 5-2subnet mask format 5-2VLAN ID format 5-2
Network time protocol 5-7Network Virus Scan 1-5Notifications
about 7-8delivery options 7-13high network traffic usage 7-12high risk clients 7-11known security risks 7-10potential security risks 7-9
NTP 5-7Number of incidents
about 7-15detection type 7-16protocol 7-15time of day 7-16
IN-3

Trend Micro™ Threat Discovery Appliance 2.5 R2 Administrator’s Guide
OOffline Monitoring 1-6Outbreak Containment Services 1-10, 6-6, 7-6
PP2P 6-10Paravirtualization 3-22Password 4-22, 5-3–5-4Pattern file 5-10Peer-to-Peer 6-10Port
multiple support 1-10Potential Risk File 1-6Potential security risks notification 7-9Potential security risks/threats 7-6Power supplies
about 3-2Powering off 3-3Preconfiguration console 4-2, 8-7
changing root password 4-22device information and status 4-7import configuration file 4-13import HTTPS certificates 4-18interface speed and duplex mode settings
4-10log off 4-23navigation 4-6overview 4-5rollback 4-12system logs 4-21system tasks 4-11
Product console 5-3Promiscuous mode 3-18Protocol
support 1-7Proxy settings 5-8
RRack installation 3-4Rack mount precautions 3-5Rack mounting 3-4, 3-7
connecting the keyboard, mouse, and monitor 3-8
connecting the power cables 3-9installing the bezel 3-11installing the rails and system 3-7securing the power cord 3-10turning on the system 3-11unpacking the system 3-7
RapidRails 3-4kit contents 3-6
Recent alerts 7-6Register to Trend Micro Control Manager
4-9Registered domains 6-3Reports
about 7-14delivery settings 7-19high risk clients 7-16number of incidents 7-15traffic 7-18
Rescue mode 8-7Rescuing the device 8-7Restarting the device 4-19Risk meter 7-2
critical risk 7-2, 7-5low risk 7-2, 7-5normal 7-2, 7-5
Rollback update 4-12Root password 4-22
SSafety
information 3-5
IN-4

Index
Scan engine 1-4, 5-10Security Information Center 9-8Setup Guide 1-10Single port monitoring 2-3Spyware pattern file 5-10Streaming media 6-10Subnet mask 5-2Summary
20 recent security risks/threats 7-7detections in past 24 hours 7-4outbreak containment services 7-6potential security risks/threats 7-6recent alerts 7-6system events 7-7
Summary screen 7-4suspicious files 9-9Syslog server settings 7-24System events 7-7System log query 7-23System logs 4-21System Maintenance
remote 1-10System maintenance
about 8-6System requirements 3-13System time settings 5-7
TThreat Detail 1-11Threat detections
about 6-6block traffic 6-6outbreak containment services 6-6
Threat Discovery Applianceabout 1-2features 1-4monitoring
dual port monitoring 2-4
single port monitoring 2-3Threat Discovery Appliance components
5-10Threat Discovery Appliance rescue tool 8-10Threat Discovery Virtual Appliance
about 1-2Threshold settings
about 6-12critical risk 6-12low risk 6-12
TMCM 6-17Tools and supplies
four-post rack kit 3-5Traffic 7-18True File Type 1-4Turning off the device 3-3
UUpdate settings 5-11Updates
about 5-10ActiveUpdate server 5-12firmware 8-4manual 5-11, 5-13scheduled 5-11, 5-14settings 5-11source 5-12
VVersaRails 3-4Virtual switch 3-15Virus pattern file 5-10Virus Scan Engine 1-4Virus scan engine 5-10VLAN ID 5-2VMware 1-10
download 3-14image 3-19
IN-5

Trend Micro™ Threat Discovery Appliance 2.5 R2 Administrator’s Guide
infrastructure client 3-14installation 3-13–3-14paravirtualization 3-22power controls 3-23requirements 3-13server preparation 3-14settings 3-21tools 3-23virtual switch 3-15
vSwitch 3-17
WWeb console 5-3Web-based console 5-3What’s New
configuration 1-10hardware 1-10integration 1-11logs 1-11software 1-10
IN-6