ThinkSystem® Intelligent Monitoring Unified Manager 9.8 ...
32
ThinkSystem ® Intelligent Monitoring Unified Manager 9.8 Installation Guide for Red Hat ® and CentOS Linux Version 9.8
-
Upload
khangminh22 -
Category
Documents
-
view
6 -
download
0
Transcript of ThinkSystem® Intelligent Monitoring Unified Manager 9.8 ...
ThinkSystem® Intelligent Monitoring Unified
Manager 9.8
Installation Guide for Red Hat® and CentOS
Linux
Version 9.8

Second edition (May 2021)
© Copyright Lenovo 2020, 2021.
LIMITED AND RESTRICTED RIGHTS NOTICE: If data or software is delivered pursuant to a General Services
Administration (GSA) contract, use, reproduction, or disclosure is subject to restrictions set forth in Contract No.
GS-35F-05925
Contents
Chapter 1. Introduction to ThinkSystem Intelligent Monitoring Unified Manager . . . . . . . . . . . . . 1What the Unified Manager server does . . . . . . . 1
ThinkSystem Intelligent Monitoring Unified Manager product documentation . . . . . . . . . 1
Overview of the installation sequence . . . . . . . 2
Chapter 2. Requirements for installing Unified Manager . . . . . . . 3Virtual infrastructure and hardware system requirements . . . . . . . . . . . . . . . . . 3
Linux software and installation requirements . . . . 4
Supported browsers . . . . . . . . . . . . . . 6
Protocol and port requirements. . . . . . . . . . 6
Completing the worksheet . . . . . . . . . . . 7
Chapter 3. Installing, upgrading, and removing Unified Manager software . . 9Overview of the installation process . . . . . . . . 9
Setting up required software repositories . . . . . . 9
Manually configuring the EPEL repository . . . . 9
Manually configuring the MySQL repository . . 10
SELinux requirements for mounting /opt/netapp or /opt/netapp/data on an NFS or CIFS share. . . 10
Installing Unified Manager on Linux systems . . . 11
Creating a custom user home directory and umadmin password prior to installation . . . . 12
Downloading Unified Manager . . . . . . . 12
Installing Unified Manager . . . . . . . . . 13
Users created during Unified Manager installation . . . . . . . . . . . . . . . 15
Changing the JBoss password . . . . . . . 15
Upgrading Unified Manager on Red Hat Enterprise Linux or CentOS . . . . . . . . . . . . . . 16
Upgrading Unified Manager . . . . . . . . 16
Upgrading the host OS from Red Hat Enterprise Linux 7.x to 8.x . . . . . . . . . 18
Upgrading third-party products. . . . . . . . . 19
Upgrading OpenJDK on Linux . . . . . . . 19
Upgrading MySQL on Linux . . . . . . . . 20
Restarting Unified Manager . . . . . . . . . . 21
Removing Unified Manager . . . . . . . . . . 21
Removing the custom umadmin user and maintenance group . . . . . . . . . . . . . 22
Appendix A. Contacting Support . . . 23
Appendix B. Notices. . . . . . . . . . 25Trademarks . . . . . . . . . . . . . . . . 26
© Copyright Lenovo 2020, 2021 i

ii ThinkSystem® Intelligent Monitoring Unified Manager 9.8 Installation Guide for Red Hat® and CentOS Linux
Chapter 1. Introduction to ThinkSystem Intelligent Monitoring Unified Manager
ThinkSystem Intelligent Monitoring Unified Manager enables you to monitor and manage the health and performance of your ONTAP storage systems from a single interface. You can deploy Unified Manager on a Linux server, on a Windows server, or as a virtual appliance on a VMware host.
After you have completed the installation and have added the clusters that you want to manage, Unified
Manager provides a graphical interface that displays the capacity, availability, protection, and performance
status of the monitored storage systems.
What the Unified Manager server does
The Unified Manager server infrastructure consists of a data collection unit, a database, and an application server. It provides infrastructure services such as discovery, monitoring, role-based access control (RBAC), auditing, and logging.
Unified Manager collects cluster information, stores the data in the database, and analyzes the data to see if
there are any cluster issues.
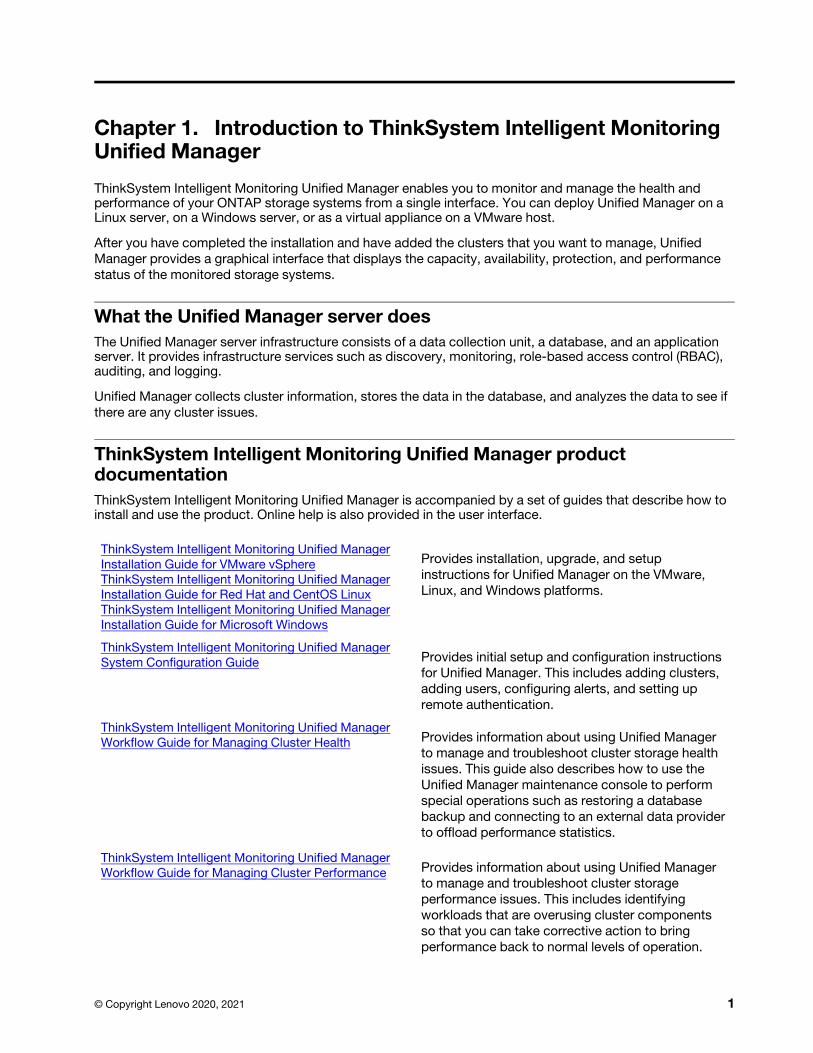
ThinkSystem Intelligent Monitoring Unified Manager product documentation
ThinkSystem Intelligent Monitoring Unified Manager is accompanied by a set of guides that describe how to install and use the product. Online help is also provided in the user interface.
ThinkSystem Intelligent Monitoring Unified Manager
Installation Guide for VMware vSphere
ThinkSystem Intelligent Monitoring Unified Manager
Installation Guide for Red Hat and CentOS Linux
ThinkSystem Intelligent Monitoring Unified Manager
Installation Guide for Microsoft Windows
Provides installation, upgrade, and setup
instructions for Unified Manager on the VMware,
Linux, and Windows platforms.
ThinkSystem Intelligent Monitoring Unified Manager
System Configuration Guide Provides initial setup and configuration instructions
for Unified Manager. This includes adding clusters,
adding users, configuring alerts, and setting up
remote authentication.
ThinkSystem Intelligent Monitoring Unified Manager
Workflow Guide for Managing Cluster Health Provides information about using Unified Manager
to manage and troubleshoot cluster storage health
issues. This guide also describes how to use the
Unified Manager maintenance console to perform
special operations such as restoring a database
backup and connecting to an external data provider
to offload performance statistics.
ThinkSystem Intelligent Monitoring Unified Manager
Workflow Guide for Managing Cluster Performance Provides information about using Unified Manager
to manage and troubleshoot cluster storage
performance issues. This includes identifying
workloads that are overusing cluster components
so that you can take corrective action to bring
performance back to normal levels of operation.
© Copyright Lenovo 2020, 2021 1
ThinkSystem Intelligent Monitoring Unified Manager
Protection GuideProvides information about how to create protection
relationships, monitor and troubleshoot SnapMirror
and SnapVault relationships, and restore data when
it is overwritten or lost.
ThinkSystem Intelligent Monitoring Unified Manager
Reporting GuideProvides information about using Unified Manager
to create custom reports about the capacity, health,
performance, and protection status of your ONTAP
storage objects. This includes scheduling the report
for delivery to specified users on a regular schedule
through email.
ThinkSystem Intelligent Monitoring Unified Manager
API Developer's GuideProvides information about the REST architecture in
Unified Manager, conceptual and task information
for using the REST APIs, and key workflows and
sample code.
ThinkSystem Intelligent Monitoring Unified Manager
Online Help
Provides information about using Unified Manager
to manage and troubleshoot cluster storage health
and performance issues. Additionally, it provides
field level descriptions for every UI page in the
product. The online help is included with the
software.
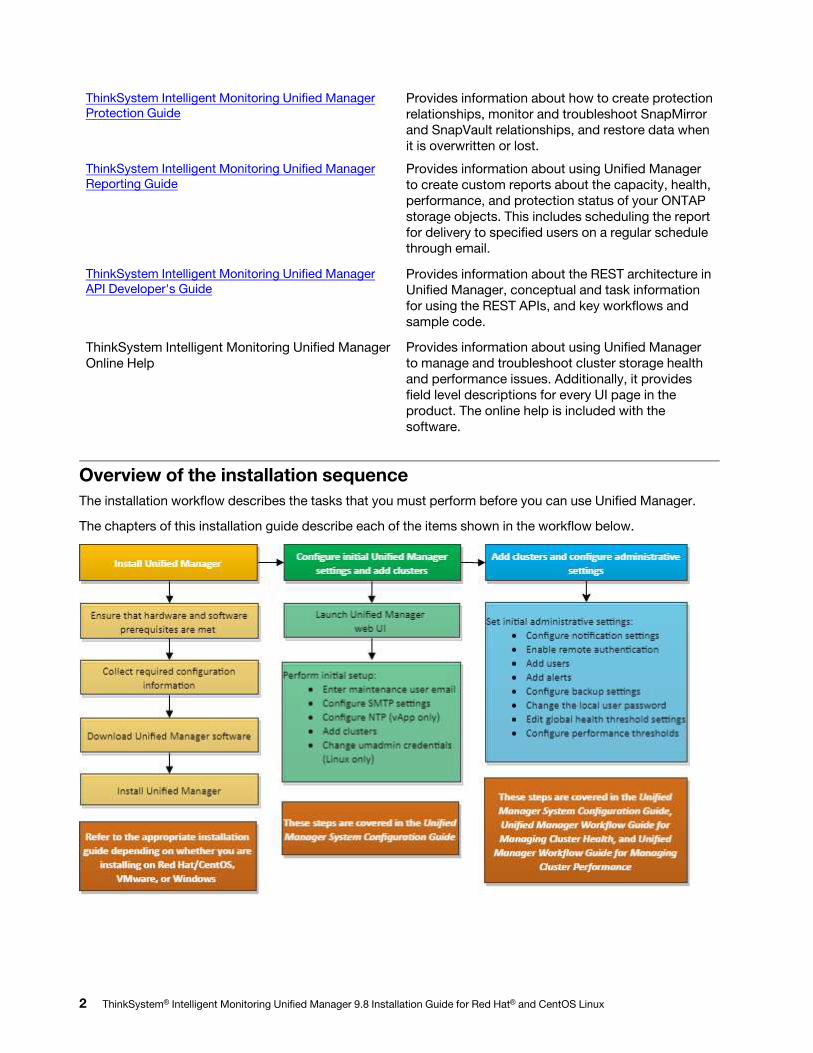
Overview of the installation sequence
The installation workflow describes the tasks that you must perform before you can use Unified Manager.
The chapters of this installation guide describe each of the items shown in the workflow below.
2 ThinkSystem® Intelligent Monitoring Unified Manager 9.8 Installation Guide for Red Hat® and CentOS Linux
Chapter 2. Requirements for installing Unified Manager
Before you begin the installation process, ensure that the server on which you want to install Unified Manager meets the specific software, hardware, CPU, and memory requirements.
Note that Lenovo does not support any modification of the Unified Manager application code. If you need to
apply any security measures to the Unified Manager server, you must make those changes to the operating
system on which Unified Manager is installed.
Virtual infrastructure and hardware system requirements
Installing Unified Manager on virtual infrastructure or a physical system should meet the minimum requirements for memory, CPU, and disk space.
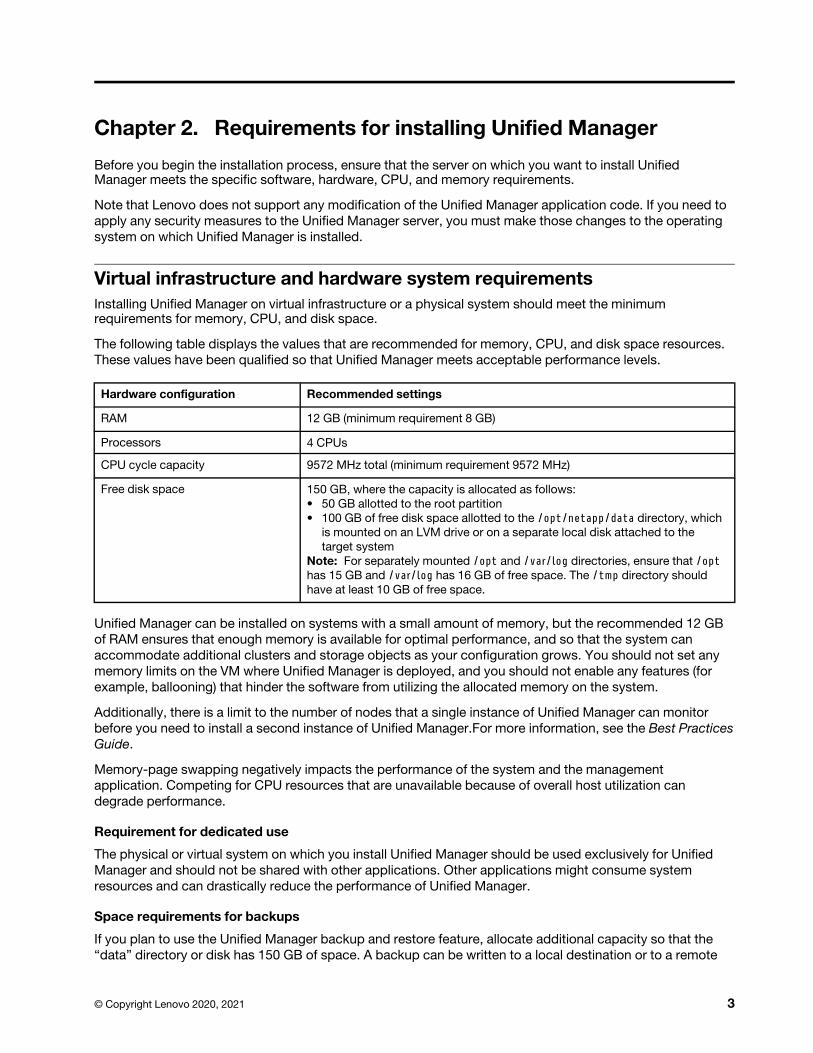
The following table displays the values that are recommended for memory, CPU, and disk space resources.
These values have been qualified so that Unified Manager meets acceptable performance levels.
Hardware configuration Recommended settings
RAM 12 GB (minimum requirement 8 GB)
Processors 4 CPUs
CPU cycle capacity 9572 MHz total (minimum requirement 9572 MHz)
Free disk space 150 GB, where the capacity is allocated as follows:
• 50 GB allotted to the root partition
• 100 GB of free disk space allotted to the /opt/netapp/data directory, which is mounted on an LVM drive or on a separate local disk attached to the
target system
Note: For separately mounted /opt and /var/log directories, ensure that /opt has 15 GB and /var/log has 16 GB of free space. The /tmp directory should have at least 10 GB of free space.
Unified Manager can be installed on systems with a small amount of memory, but the recommended 12 GB
of RAM ensures that enough memory is available for optimal performance, and so that the system can
accommodate additional clusters and storage objects as your configuration grows. You should not set any
memory limits on the VM where Unified Manager is deployed, and you should not enable any features (for
example, ballooning) that hinder the software from utilizing the allocated memory on the system.
Additionally, there is a limit to the number of nodes that a single instance of Unified Manager can monitor
before you need to install a second instance of Unified Manager.For more information, see the Best Practices
Guide.
Memory-page swapping negatively impacts the performance of the system and the management
application. Competing for CPU resources that are unavailable because of overall host utilization can
degrade performance.
Requirement for dedicated use
The physical or virtual system on which you install Unified Manager should be used exclusively for Unified
Manager and should not be shared with other applications. Other applications might consume system
resources and can drastically reduce the performance of Unified Manager.
Space requirements for backups
If you plan to use the Unified Manager backup and restore feature, allocate additional capacity so that the
“data” directory or disk has 150 GB of space. A backup can be written to a local destination or to a remote
© Copyright Lenovo 2020, 2021 3

destination. The best practice is to identify a remote location that is external to the Unified Manager host
system that has a minimum of 150 GB of space.
Requirements for host connectivity
The physical system or virtual system on which you install Unified Manager should be configured in such a
way that you can successfully ping the host name from the host itself. In case of IPv6 configuration, you
should verify that ping6 to the host name is successful to ensure that the Unified Manager installation
succeeds.
You can use the host name (or the host IP address) to access the product web UI. If you configured a static
IP address for your network during deployment, then you designated a name for the network host. If you
configured the network using DHCP, you should obtain the host name from the DNS.
If you plan to allow users to access Unified Manager by using the short name instead of using the fully
qualified domain name (FQDN) or IP address, then your network configuration has to resolve this short name
to a valid FQDN.
Related tasks
“SELinux requirements for mounting /opt/netapp or /opt/netapp/data on an NFS or CIFS share” on page 10
Linux software and installation requirements
The Linux system on which you install Unified Manager requires specific versions of the operating system and supporting software.
Operating system software
The Linux system must have the following versions of the operating system and supporting software
installed:
• Red Hat Enterprise Linux or CentOS version 7.x and 8.x based on x86_64 architecture
Third-party software
Unified Manager is deployed on a WildFly web server. WildFly17 is bundled and configured with Unified
Manager.
The following third-party packages are required, but not included with Unified Manager. These packages are
automatically installed by the yum installer during installation, provided you have configured the repositories as mentioned in the following sections.
• MySQL Community Edition version 8.0.21 or later versions in the 8.0 family (from the MySQL repository)
Note: Make sure that you have removed any previously installed version of MySQL 5.7. The base MySQL
version must be 8.0.21.
• OpenJDK version 11.0.7 (from the Red Hat Extra Enterprise Linux Server repository)
• Python 3.6.x
• p7zip version 16.02 or later (from the Red Hat Extra Packages for Enterprise Linux repository)
Note: You must shutdown all running instance of Unified Manager before upgrading any third-party
software. After the third-party software installation is complete, you can restart Unified Manager.
User authorization requirements
Installation of Unified Manager on a Linux system can be performed by the root user or by non-root users by
using the sudo command.
4 ThinkSystem® Intelligent Monitoring Unified Manager 9.8 Installation Guide for Red Hat® and CentOS Linux
Installation requirements
The best practices for installing Red Hat Enterprise Linux or CentOS and the associated repositories on your
system are listed below. Systems installed or configured differently, or deployed off premise (in the cloud),
might require additional steps, and Unified Manager might not run properly in such deployments.
• You must install Red Hat Enterprise Linux or CentOS according to Red Hat best practices, and you should
select the following default options, which requires selecting the “Server with GUI” base environment.
• While installing Unified Manager on Red Hat Enterprise Linux or CentOS, the system must have access to
the appropriate repository so that the installation program can access and install all the required software
dependencies.
• For the yum installer to find dependent software in the Red Hat Enterprise Linux repositories, you must
have registered the system during the Red Hat Enterprise Linux installation or afterwards by using a valid
Red Hat subscription. See the Red Hat documentation for information about the Red Hat Subscription
Manager.
• You must enable the Extra Packages for Enterprise Linux (EPEL) repository to successfully install the
required third-party utilities on your system.If the EPEL repository is not configured on your system, you
must manually download and configure the repository.
“Manually configuring the EPEL repository” on page 9
• If the correct version of MySQL is not installed, you must enable the MySQL repository to successfully
install MySQL software on your system.If the MySQL repository is not configured on your system, you
must manually download and configure the repository.
“Manually configuring the MySQL repository” on page 10
If your system does not have internet access, and the repositories are not mirrored from an internet-
connected system to the unconnected system, you should follow the installation instructions to determine
the external software dependencies of your system. Then you can download the required software to the
internet-connected system, and copy the .rpm files to the system on which you plan to install Unified
Manager. To download the artifacts and packages, you must use the yum install command. You must
ensure that the two systems are running the same operating system version and that the subscription license
is for the appropriate Red Hat Enterprise Linux or CentOS version.
Important: You must not install the required third-party software from repositories other than the
repositories that are listed here. Software installed from the Red Hat repositories is designed explicitly for
Red Hat Enterprise Linux, and conforms to Red Hat best practices (directory layouts, permissions, and so
on). Software from other locations might not follow these guidelines, which might cause the Unified Manager
installation to fail, or might cause issues with future upgrades.
Port 443 requirement
Generic images of Red Hat Enterprise Linux and CentOS might block external access to port 443. Due to this
restriction, you might be unable to connect to the Administrator web UI after installing Unified Manager.
Running the following command allows access to port 443 for all external users and applications on a
generic Red Hat Enterprise Linux or CentOS system.
# firewall-cmd --zone=public --add-port=443/tcp --permanent; firewall-cmd --reload
You must install Red Hat Enterprise Linux and CentOS with the “Server with GUI” base environment. It
provides the commands used by Unified Manager installation instructions. Other base environments might
require you to install additional commands to validate or complete the installation. If the firewall-cmd is not available on your system, you must install it by running the following command:
# sudo yum install firewalld
Contact your IT department before running the commands to see if your security policies require a different
procedure.
Chapter 2. Requirements for installing Unified Manager 5
Note: THP (Transparent Huge Pages) should be disabled on CentOS and Red Hat systems. When enabled,
in some cases it can cause Unified Manager to be shut down when certain processes consume too much
memory and are terminated.
Supported browsers
To access the Unified Manager UI, use a supported browser.
For all browsers, disabling popup blockers ensures that software features are displayed properly.
If you plan to configure Unified Manager for SAML authentication, so that an identity provider (IdP) can
authenticate users, check the list of browsers supported by the IdP as well.
Protocol and port requirements
The required ports and protocols enable communication between the Unified Manager server and the managed storage systems, servers, and other components.
Connections to the Unified Manager server
In typical installations you do not have to specify port numbers when connecting to the Unified Manager web
UI, because default ports are always used. For example, because Unified Manager always attempts to run on
its default port, you can enter https://<host> instead of https://<host>:443.
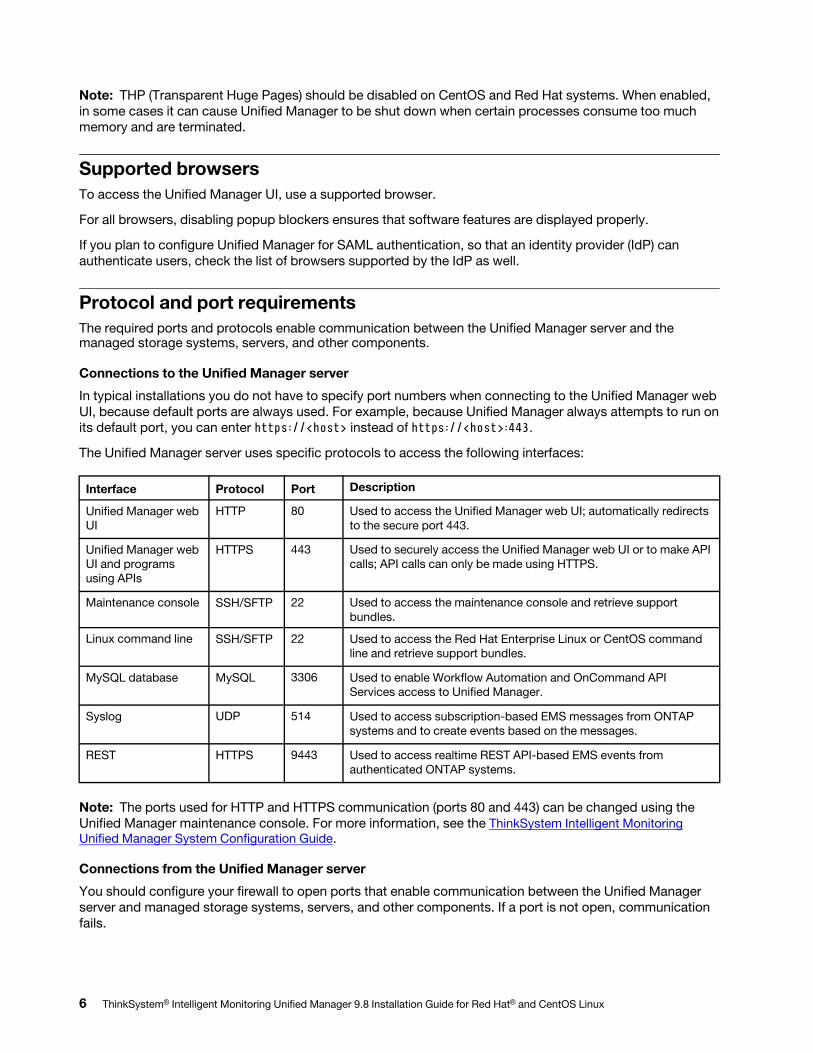
The Unified Manager server uses specific protocols to access the following interfaces:
Interface Protocol Port Description
Unified Manager web
UI
HTTP 80 Used to access the Unified Manager web UI; automatically redirects
to the secure port 443.
Unified Manager web
UI and programs
using APIs
HTTPS 443 Used to securely access the Unified Manager web UI or to make API
calls; API calls can only be made using HTTPS.
Maintenance console SSH/SFTP 22 Used to access the maintenance console and retrieve support
bundles.
Linux command line SSH/SFTP 22 Used to access the Red Hat Enterprise Linux or CentOS command
line and retrieve support bundles.
MySQL database MySQL 3306 Used to enable Workflow Automation and OnCommand API
Services access to Unified Manager.
Syslog UDP 514 Used to access subscription-based EMS messages from ONTAP
systems and to create events based on the messages.
REST HTTPS 9443 Used to access realtime REST API-based EMS events from
authenticated ONTAP systems.
Note: The ports used for HTTP and HTTPS communication (ports 80 and 443) can be changed using the
Unified Manager maintenance console. For more information, see the ThinkSystem Intelligent Monitoring
Unified Manager System Configuration Guide.
Connections from the Unified Manager server
You should configure your firewall to open ports that enable communication between the Unified Manager
server and managed storage systems, servers, and other components. If a port is not open, communication
fails.
6 ThinkSystem® Intelligent Monitoring Unified Manager 9.8 Installation Guide for Red Hat® and CentOS Linux
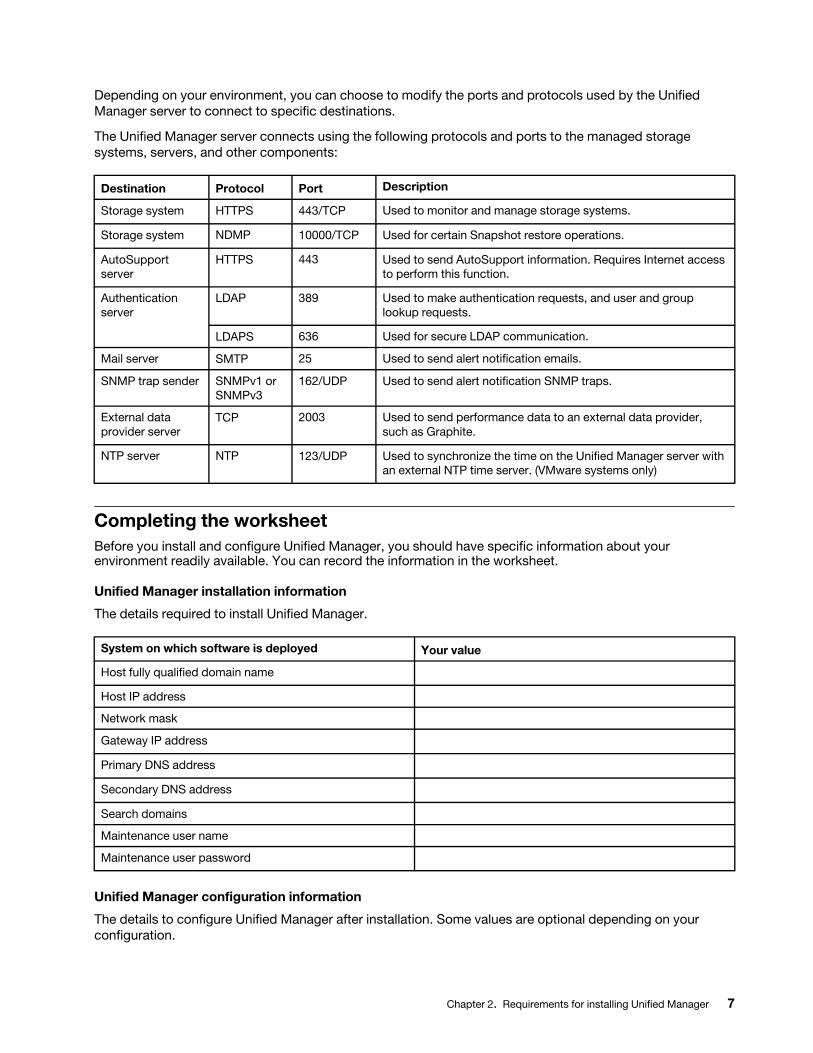
Depending on your environment, you can choose to modify the ports and protocols used by the Unified
Manager server to connect to specific destinations.
The Unified Manager server connects using the following protocols and ports to the managed storage
systems, servers, and other components:
Destination Protocol Port Description
Storage system HTTPS 443/TCP Used to monitor and manage storage systems.
Storage system NDMP 10000/TCP Used for certain Snapshot restore operations.
AutoSupport
server
HTTPS 443 Used to send AutoSupport information. Requires Internet access
to perform this function.
Authentication
server
LDAP 389 Used to make authentication requests, and user and group
lookup requests.
LDAPS 636 Used for secure LDAP communication.
Mail server SMTP 25 Used to send alert notification emails.
SNMP trap sender SNMPv1 or
SNMPv3
162/UDP Used to send alert notification SNMP traps.
External data
provider server
TCP 2003 Used to send performance data to an external data provider,
such as Graphite.
NTP server NTP 123/UDP Used to synchronize the time on the Unified Manager server with
an external NTP time server. (VMware systems only)
Completing the worksheet
Before you install and configure Unified Manager, you should have specific information about your environment readily available. You can record the information in the worksheet.
Unified Manager installation information
The details required to install Unified Manager.
System on which software is deployed Your value
Host fully qualified domain name
Host IP address
Network mask
Gateway IP address
Primary DNS address
Secondary DNS address
Search domains
Maintenance user name
Maintenance user password
Unified Manager configuration information
The details to configure Unified Manager after installation. Some values are optional depending on your
configuration.
Chapter 2. Requirements for installing Unified Manager 7

Setting Your value
Maintenance user email address
SMTP server host name or IP address
SMTP user name
SMTP password
SMTP port 25 (Default value)
Email from which alert notifications are sent
Authentication server host name or IP address
Active Directory administrator name or LDAP bind distinguished name
Active Directory password or LDAP bind password
Authentication server base distinguished name
Identity provider (IdP) URL
Identity provider (IdP) metadata
SNMP trap destination host IP addresses
SNMP port
Cluster information
The details for the storage systems that you manage using Unified Manager.
Cluster 1 of N Your value
Host name or cluster-management IP address
ONTAP administrator user name
Note: The administrator must have been assigned the
“admin” role.
ONTAP administrator password
Protocol HTTPS
8 ThinkSystem® Intelligent Monitoring Unified Manager 9.8 Installation Guide for Red Hat® and CentOS Linux
Chapter 3. Installing, upgrading, and removing Unified Manager software
On Linux systems, you can install Unified Manager software, upgrade to a newer version of software, or remove Unified Manager.
Unified Manager can be installed on Red Hat Enterprise Linux or CentOS servers. The Linux server on which
you install Unified Manager can be running either on a physical machine or on a virtual machine running on
VMware ESXi, Microsoft Hyper-V, or Citrix XenServer.
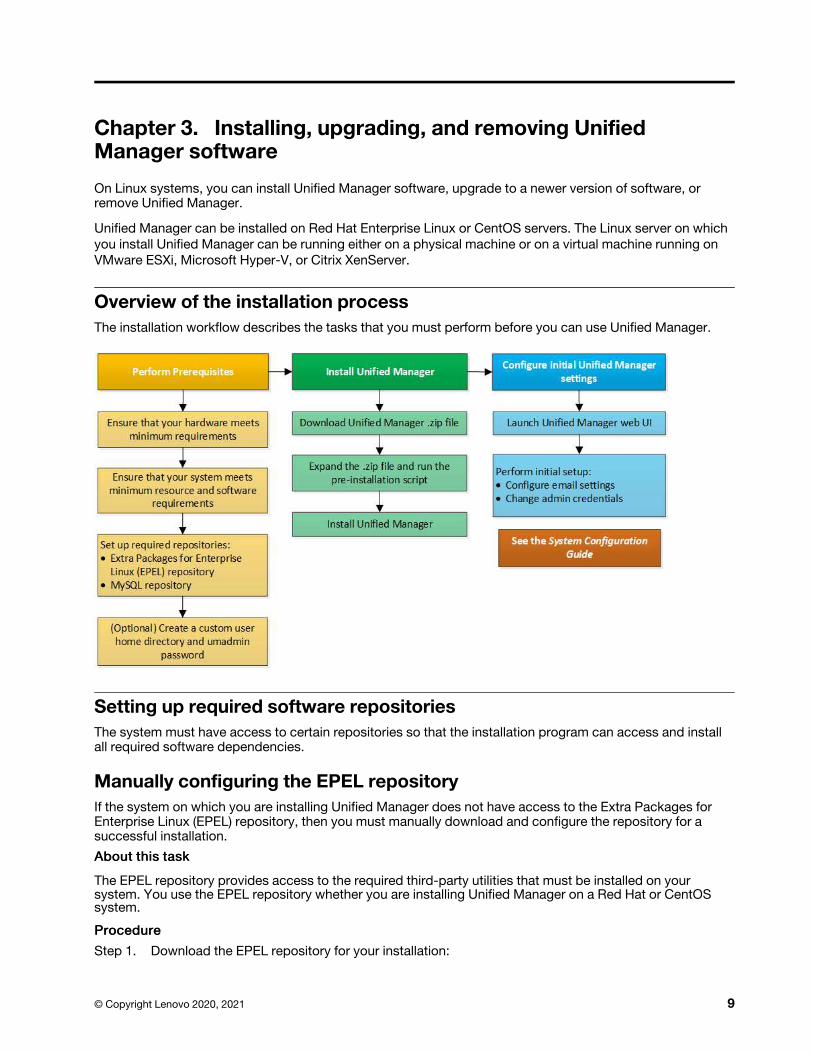
Overview of the installation process
The installation workflow describes the tasks that you must perform before you can use Unified Manager.
Setting up required software repositories
The system must have access to certain repositories so that the installation program can access and install all required software dependencies.
Manually configuring the EPEL repository
If the system on which you are installing Unified Manager does not have access to the Extra Packages for Enterprise Linux (EPEL) repository, then you must manually download and configure the repository for a successful installation.
AAbboouutt tthhiiss ttaasskk
The EPEL repository provides access to the required third-party utilities that must be installed on your system. You use the EPEL repository whether you are installing Unified Manager on a Red Hat or CentOS system.
PPrroocceedduurree
Step 1. Download the EPEL repository for your installation:
© Copyright Lenovo 2020, 2021 9
For Red Hat Enterprise Linux 7, download it from:
wget https://dl.fedoraproject.org/pub/epel/epel-release-latest-7.noarch.rpm For version 8, download it from:
wget https://dl.fedoraproject.org/pub/epel/epel-release-latest-8.noarch.rpm
Step 2. Configure the EPEL repository: yum install epel-release-latest-<version>.noarch.rpm
AAfftteerr yyoouu ffiinniisshh
For Red Hat Enterprise Linux 8 systems, if you have internal repositories with modular RPM packages, for example, javapackages-filesystem-<version>.module.rpm, ensure that the metadata for the modular packages is also available in the same repository.
Manually configuring the MySQL repository
If the system on which you are installing Unified Manager does not have access to the MySQL Community Edition repository, then you must manually download and configure the repository for a successful installation.
AAbboouutt tthhiiss ttaasskk
The MySQL repository provides access to the required MySQL software that must be installed on your system.
Note: This task might fail if the system does not have Internet connectivity. Refer to the MySQL documentation if the system on which you are installing Unified Manager does not have Internet access.
PPrroocceedduurree
Step 1. Download the appropriate MySQL repository for your installation:
For Red Hat Enterprise Linux 7, download it from:
wget http://repo.mysql.com/yum/mysql-8.0-community/el/7/x86_64/mysql80-community- release-el7-3.noarch.rpm For version 8, download it from:
wget http://repo.mysql.com/yum/mysql-8.0-community/el/8/x86_64/mysql80-community- release-el8-1.noarch.rpm
Step 2. Configure the MySQL repository: yum install mysql80-community-release-<version>.noarch.rpm
AAfftteerr yyoouu ffiinniisshh
For Red Hat Enterprise Linux 8 system, if you have internal repositories with java-11-openjdk, p7zip, and other software packages provided by the AppStream repository, you must disable your AppStream repository and install MySQL Community Server. Run the following command:
# sudo yum –disablerepo=rhel-8-for-x86_64-appstream-rpms install mysql-community-server
SELinux requirements for mounting /opt/netapp or /opt/netapp/data on an NFS or CIFS share
If you are planning to mount /opt/netapp or /opt/netapp/data on an NAS or SAN device, and you have SELinux enabled, you need to be aware of the following considerations.
AAbboouutt tthhiiss ttaasskk
If are planning to mount /opt/netapp or /opt/netapp/data from anywhere other than the root file system, and you have SELinux enabled in your environment, you must set the correct context for the mounted directories. Follow these two steps for setting and confirming the correct SELinux context.
• Configure SELinux context when /opt/netapp/data is mounted
• Configure SELinux context when /opt/netapp is mounted
10 ThinkSystem® Intelligent Monitoring Unified Manager 9.8 Installation Guide for Red Hat® and CentOS Linux
Configuring the SELinux context when /opt/netapp/data is mounted
If you have mounted /opt/netapp/data in your system and SELinux is set to Enforcing, ensure that the SELinux context type for /opt/netapp/data is set to mysqld_db_t, which is the default context element for
the location of the database files.
1. Run this command to check the context: ls -dZ /opt/netapp/data A sample output: drwxr-xr-x. mysql root unconfined_u:object_r:default_t:s0 /opt/netapp/data
In this output, the context is default_t that must be changed to mysqld_db_t.
2. Perform these steps to set the context based on how you have mounted /opt/netapp/data.
a. Run the following commands to set the context to mysqld_db_t: semanage fcontext -a -t mysqld_db_t "/opt/netapp/data" restorecon -R -v /opt/netapp/data
b. If you have configured /opt/netapp/data in /etc/fstab, you must edit the /etc/fstab file. For the /opt/netapp/data/ mount option, add the MySQL label as: context=system_u:object_r:mysqld_db_t:s0
c. Unmount and remount /opt/netapp/data/ for enabling the context.
d. If you have a direct NFS mount, run the following command to set the context to mysqld_db_t: mount <nfsshare>:/<mountpoint> /opt/netapp/data -o context=system_u:object_r:mysqld_db_t:s0
3. Verify whether the context is set correctly: ls -dZ /opt/netapp/data/ drwxr-xr-x. mysql root unconfined_u:object_r:mysqld_db_t:s0 /opt/netapp/data/
Configuring the SELinux context when /opt/netapp is mounted
After setting the correct context for /opt/netapp/data/, ensure that the parent directory /opt/netapp does not have the SELinux context set to file_t.
1. Run this command to check the context: ls -dZ /opt/netapp
A sample output:
drwxr-xr-x. mysql root unconfined_u:object_r:file_t:s0 /opt/netapp
In this output, the context is file_t that must be changed. The following commands set the context to usr_t. You can set the context to any value other than file_t based on your security requirements.
2. Perform these steps to set the context, based on how you have mounted /opt/netapp.
a. Run the following commands to set the context: semanage fcontext -a -t usr_t "/opt/netapp" restorecon -v /opt/netapp
b. If you have configured /opt/netapp in /etc/fstab, you must edit the /etc/fstab file. For the /opt/ netapp mount option, add the MySQL label as: context=system_u:object_r:usr_t:s0
c. Unmount and remount /opt/netapp for enabling the context.
d. If you have a direct NFS mount, run the following command to set the context: mount <nfsshare>:/<mountpoint> /opt/netapp -o context=system_u:object_r:usr_t:s0
3. Verify whether the context is set correctly: ls -dZ /opt/netapp drwxr-xr-x. mysql root unconfined_u:object_r:usr_t:s0 /opt/netapp
Installing Unified Manager on Linux systems
It is important that you understand that the sequence of steps to download and install Unified Manager varies according to your installation scenario.
Chapter 3. Installing, upgrading, and removing Unified Manager software 11
Creating a custom user home directory and umadmin password prior to installation
You can create a custom home directory and define your own umadmin user password prior to installing Unified Manager. This task is optional, but some sites might need the flexibility to override Unified Manager installation default settings.
BBeeffoorree yyoouu bbeeggiinn
• The system must meet the requirements described in “Hardware system requirements” on page 3.
• You must be able to log in as the root user to the Red Hat Enterprise Linux or CentOS system.
AAbboouutt tthhiiss ttaasskk
The default Unified Manager installation performs the following tasks:
• Creates the umadmin user with /home/umadmin as the home directory.
• Assigns the default password “admin” to the umadmin user.
Because some installation environments restrict access to /home, the installation fails. You must create the
home directory in a different location. Additionally, some sites might have rules about password complexity
or require that passwords be set by local administrators rather than being set by the installing program.
If your installation environment requires that you override these installation default settings, follow these
steps to create a custom home directory and to define the umadmin user's password.
When this information is defined prior to installation, the installation script discovers these settings and uses
the defined values instead of using the installation default settings.
Additionally, the default Unified Manager installation includes the umadmin user in the sudoers files (ocum_ sudoers and ocie_sudoers) in the /etc/sudoers.d/ directory. If you remove this content from your
environment because of security policies, or because of some security monitoring tool, you must add it back.
You need to preserve the sudoers configuration because some Unified Manager operations require these
sudo privileges.
The security policies in your environment must not restrict sudo privileges for the Unified Manager
maintenance user. Some Unified Manager operations might fail if the privileges are restricted. Verify that you
are able to run the following sudo command when logged in as the umadmin user after successful
installation.
sudo /etc/init.d/ocie status This command should return the appropriate status of the ocie service without any errors.
PPrroocceedduurree
Step 1. Log in as the root user to the server.
Step 2. Create the umadmin group account called “maintenance”: groupadd maintenance
Step 3. Create the user account “umadmin” in the maintenance group under a home directory of your choice: adduser –home <home_directory> -g maintenance umadmin
Step 4. Define the umadmin password: passwd umadmin The system prompts you to enter a new password string for the umadmin user.
AAfftteerr yyoouu ffiinniisshh
After you have installed Unified Manager you must specify the umadmin user login shell.
Downloading Unified Manager
You must download the Unified Manager .zip file from the Lenovo Support Site to install Unified Manager.
12 ThinkSystem® Intelligent Monitoring Unified Manager 9.8 Installation Guide for Red Hat® and CentOS Linux
BBeeffoorree yyoouu bbeeggiinn
You must have login credentials for the Lenovo Support Site.
AAbboouutt tthhiiss ttaasskk
You download the same Unified Manager installation package for both Red Hat Enterprise Linux and CentOS systems.
PPrroocceedduurree
Step 1. Log in to the Lenovo Support Site, and navigate to the Download page for Unified Manager.
Lenovo Data Center Support
Step 2. Select the required version of Unified Manager.
Step 3. Download the Unified Manager installer file for Linux, and save the .zip file to a directory on the target system.
Note: Ensure that you download the correct version of the installer file for your Red Hat Enterprise
Linux system. Based on whether you have Red Hat Enterprise Linux 7 or 8 installed, ensure that
you download the appropriate version of the Unified Manager.zip file.
Step 4. Verify the checksum to ensure that the software downloaded correctly.
Installing Unified Manager
You can install Unified Manager on a physical or virtual Red Hat Enterprise Linux or CentOS platform.
BBeeffoorree yyoouu bbeeggiinn
• The system on which you want to install Unified Manager must meet the system and software
requirements. “Hardware system requirements” on page 3
“Red Hat and CentOS software and installation requirements” on page 4
• You must have downloaded the Unified Manager .zip file from the Lenovo Support Site to the target
system.
• You must have a supported web browser.
• Your terminal emulation software must have scrollback enabled.
AAbboouutt tthhiiss ttaasskk
The Red Hat Enterprise Linux or CentOS system might have all the required versions of the required supporting software (Java, MySQL, additional utilities) installed, only some of the required software installed, or might be a newly installed system with none of the required software installed.
PPrroocceedduurree
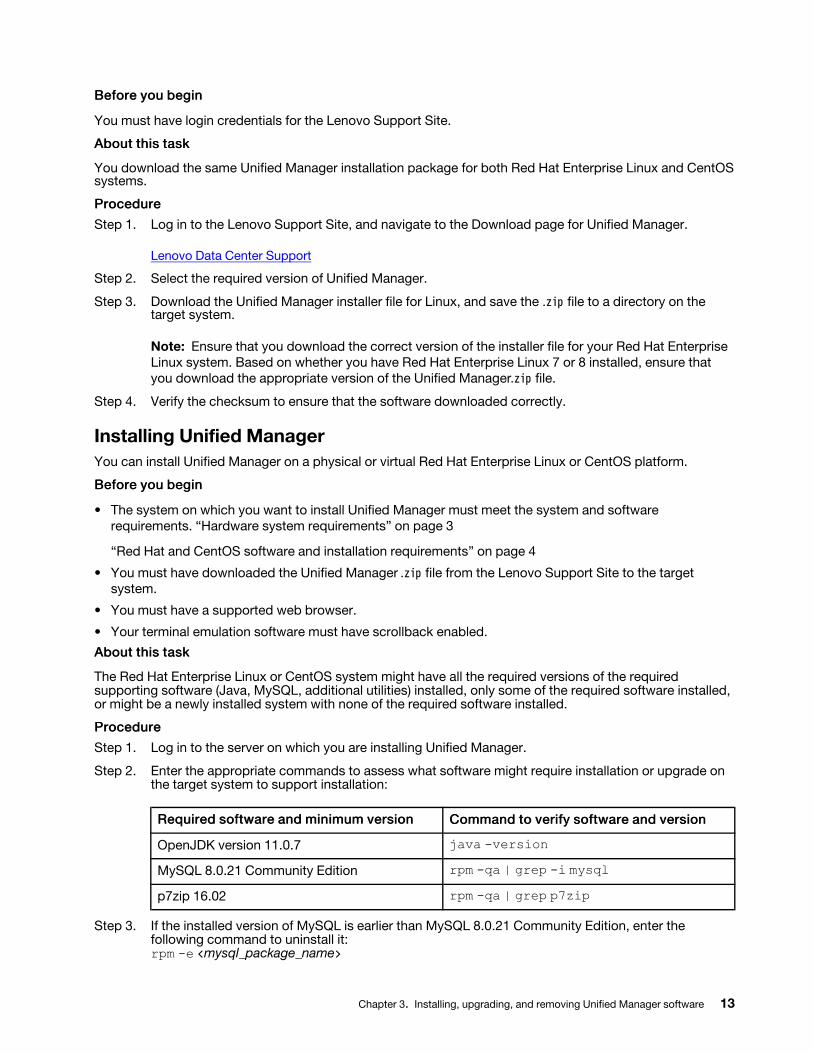
Step 1. Log in to the server on which you are installing Unified Manager.
Step 2. Enter the appropriate commands to assess what software might require installation or upgrade on the target system to support installation:
RReeqquuiirreedd ssooffttwwaarree aanndd mmiinniimmuumm vveerrssiioonn CCoommmmaanndd ttoo vveerriiffyy ssooffttwwaarree aanndd vveerrssiioonn
OpenJDK version 11.0.7 java -version MySQL 8.0.21 Community Edition rpm -qa | grep -i mysql p7zip 16.02 rpm -qa | grep p7zip
Step 3. If the installed version of MySQL is earlier than MySQL 8.0.21 Community Edition, enter the following command to uninstall it: rpm -e <mysql_package_name>
Chapter 3. Installing, upgrading, and removing Unified Manager software 13
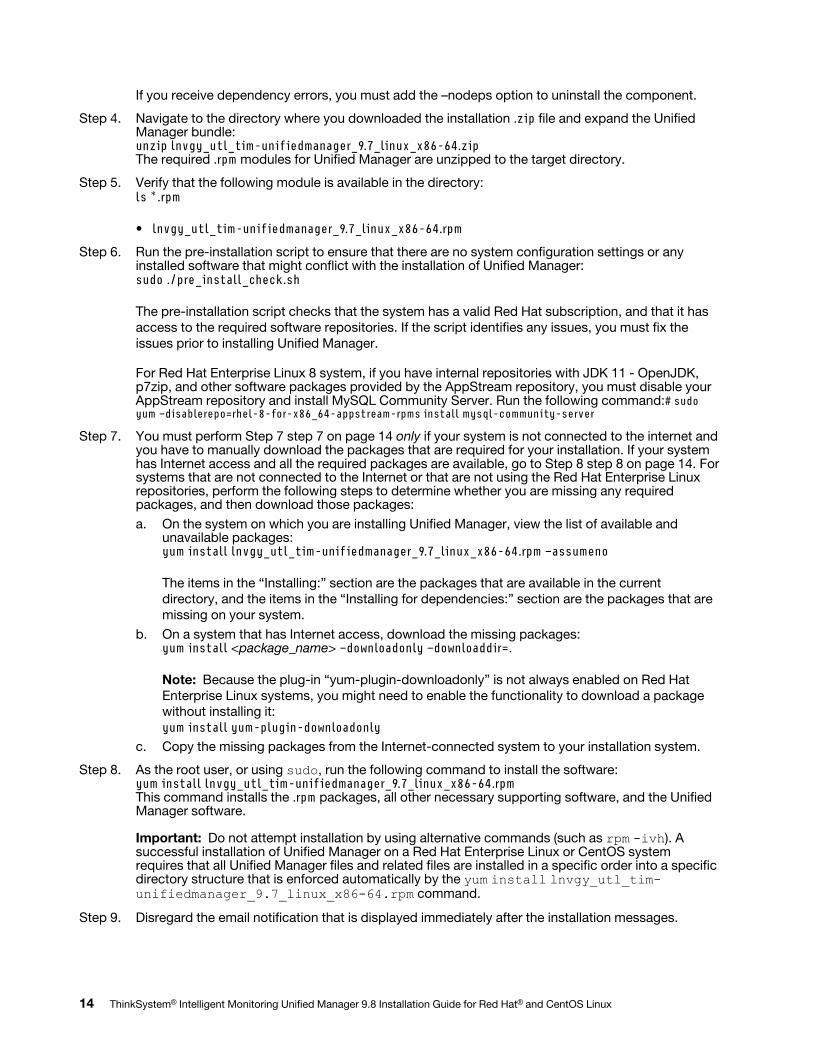
If you receive dependency errors, you must add the –nodeps option to uninstall the component.
Step 4. Navigate to the directory where you downloaded the installation .zip file and expand the Unified Manager bundle: unzip lnvgy_utl_tim-unifiedmanager_9.7_linux_x86-64.zip The required .rpm modules for Unified Manager are unzipped to the target directory.
Step 5. Verify that the following module is available in the directory: ls *.rpm
• lnvgy_utl_tim-unifiedmanager_9.7_linux_x86-64.rpm
Step 6. Run the pre-installation script to ensure that there are no system configuration settings or any installed software that might conflict with the installation of Unified Manager: sudo ./pre_install_check.sh
The pre-installation script checks that the system has a valid Red Hat subscription, and that it has
access to the required software repositories. If the script identifies any issues, you must fix the
issues prior to installing Unified Manager.
For Red Hat Enterprise Linux 8 system, if you have internal repositories with JDK 11 - OpenJDK, p7zip, and other software packages provided by the AppStream repository, you must disable your AppStream repository and install MySQL Community Server. Run the following command:# sudo yum –disablerepo=rhel-8-for-x86_64-appstream-rpms install mysql-community-server
Step 7. You must perform Step 7 step 7 on page 14 only if your system is not connected to the internet and you have to manually download the packages that are required for your installation. If your system has Internet access and all the required packages are available, go to Step 8 step 8 on page 14. For systems that are not connected to the Internet or that are not using the Red Hat Enterprise Linux repositories, perform the following steps to determine whether you are missing any required packages, and then download those packages:
a. On the system on which you are installing Unified Manager, view the list of available and unavailable packages: yum install lnvgy_utl_tim-unifiedmanager_9.7_linux_x86-64.rpm –assumeno
The items in the “Installing:” section are the packages that are available in the current
directory, and the items in the “Installing for dependencies:” section are the packages that are
missing on your system.
b. On a system that has Internet access, download the missing packages: yum install <package_name> –downloadonly –downloaddir=.
Note: Because the plug-in “yum-plugin-downloadonly” is not always enabled on Red Hat
Enterprise Linux systems, you might need to enable the functionality to download a package
without installing it:
yum install yum-plugin-downloadonly
c. Copy the missing packages from the Internet-connected system to your installation system.
Step 8. As the root user, or using sudo, run the following command to install the software: yum install lnvgy_utl_tim-unifiedmanager_9.7_linux_x86-64.rpm This command installs the .rpm packages, all other necessary supporting software, and the Unified Manager software.
Important: Do not attempt installation by using alternative commands (such as rpm -ivh). A successful installation of Unified Manager on a Red Hat Enterprise Linux or CentOS system requires that all Unified Manager files and related files are installed in a specific order into a specific directory structure that is enforced automatically by the yum install lnvgy_utl_tim- unifiedmanager_9.7_linux_x86-64.rpm command.
Step 9. Disregard the email notification that is displayed immediately after the installation messages.
14 ThinkSystem® Intelligent Monitoring Unified Manager 9.8 Installation Guide for Red Hat® and CentOS Linux
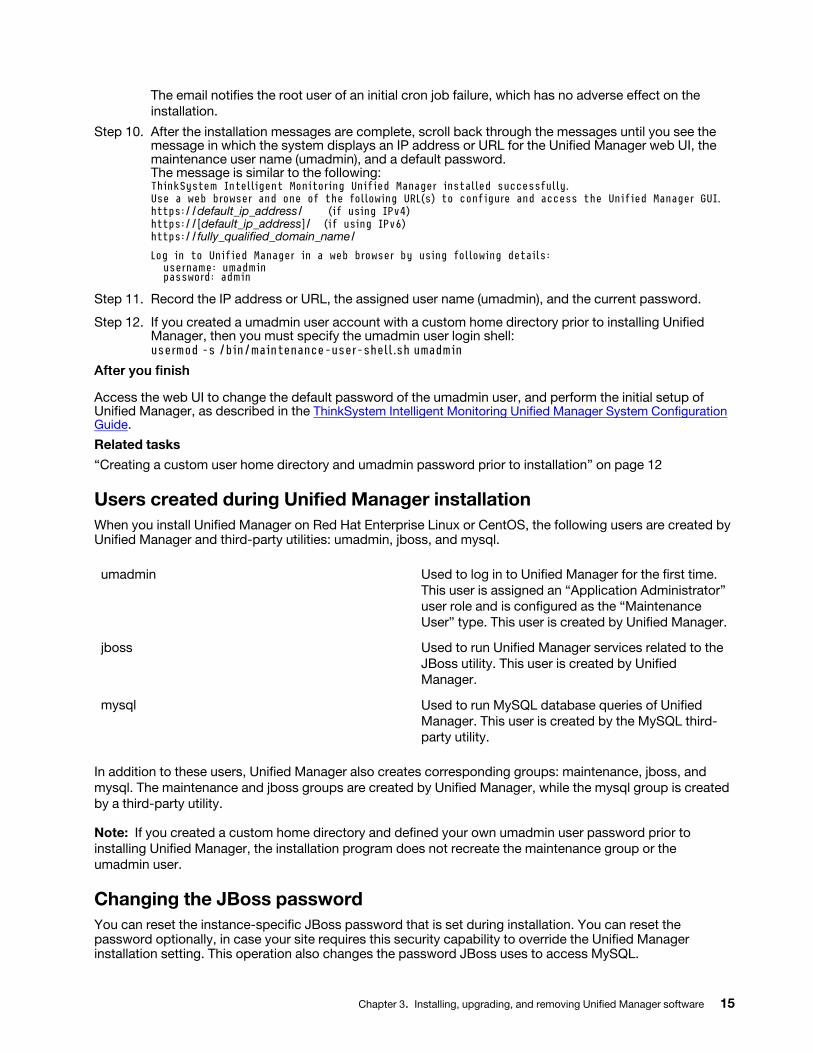
The email notifies the root user of an initial cron job failure, which has no adverse effect on the
installation.
Step 10. After the installation messages are complete, scroll back through the messages until you see the message in which the system displays an IP address or URL for the Unified Manager web UI, the maintenance user name (umadmin), and a default password. The message is similar to the following: ThinkSystem Intelligent Monitoring Unified Manager installed successfully. Use a web browser and one of the following URL(s) to configure and access the Unified Manager GUI. https://default_ip_address/ (if using IPv4) https://[default_ip_address]/ (if using IPv6) https://fully_qualified_domain_name/
Log in to Unified Manager in a web browser by using following details: username: umadmin password: admin
Step 11. Record the IP address or URL, the assigned user name (umadmin), and the current password.
Step 12. If you created a umadmin user account with a custom home directory prior to installing Unified Manager, then you must specify the umadmin user login shell: usermod -s /bin/maintenance-user-shell.sh umadmin
AAfftteerr yyoouu ffiinniisshh
Access the web UI to change the default password of the umadmin user, and perform the initial setup of Unified Manager, as described in the ThinkSystem Intelligent Monitoring Unified Manager System Configuration Guide.
Related tasks
“Creating a custom user home directory and umadmin password prior to installation” on page 12
Users created during Unified Manager installation
When you install Unified Manager on Red Hat Enterprise Linux or CentOS, the following users are created by Unified Manager and third-party utilities: umadmin, jboss, and mysql.
umadmin Used to log in to Unified Manager for the first time.
This user is assigned an “Application Administrator”
user role and is configured as the “Maintenance
User” type. This user is created by Unified Manager.
jboss Used to run Unified Manager services related to the
JBoss utility. This user is created by Unified
Manager.
mysql Used to run MySQL database queries of Unified
Manager. This user is created by the MySQL third-
party utility.
In addition to these users, Unified Manager also creates corresponding groups: maintenance, jboss, and
mysql. The maintenance and jboss groups are created by Unified Manager, while the mysql group is created
by a third-party utility.
Note: If you created a custom home directory and defined your own umadmin user password prior to
installing Unified Manager, the installation program does not recreate the maintenance group or the
umadmin user.
Changing the JBoss password
You can reset the instance-specific JBoss password that is set during installation. You can reset the password optionally, in case your site requires this security capability to override the Unified Manager installation setting. This operation also changes the password JBoss uses to access MySQL.
Chapter 3. Installing, upgrading, and removing Unified Manager software 15
BBeeffoorree yyoouu bbeeggiinn
• You must have root user access to the Red Hat Enterprise Linux or CentOS system on which Unified
Manager is installed.
• You must be able to access the Lenovo-provided password.sh script in the directory /opt/netapp/ essentials/bin.
PPrroocceedduurree
Step 1. Log in as root user on the system.
Step 2. Stop the Unified Manager services by entering the following commands in the order shown: systemctl stop ocieau systemctl stop ocie
Do not stop the associated MySQL software.
Step 3. Enter the following command to begin the password change process: /opt/netapp/essentials/bin/password.sh resetJBossPassword
Step 4. When prompted, enter the new JBoss password, and then enter it a second time for confirmation.
Note that the password should be between 8 and 16 characters, and must contain at least a digit,
an upper case and lower case characters, and at least one of these special characters:
!@%^*-_+=[]:<>.?/~
Step 5. When the script completes, start the Unified Manager services by entering the following commands in the order shown: systemctl start ocie systemctl start ocieau
Step 6. After all of the services are started, you can log in to the Unified Manager UI.
Upgrading Unified Manager on Red Hat Enterprise Linux or CentOS
You can upgrade Unified Manager when a new version of software is available.
Patch releases of Unified Manager software, when provided by Lenovo, are installed using the same
procedure as new releases.
If Unified Manager is paired with an instance of Workflow Automation, and there are new versions of software
available for both products, you must disconnect the two products and then set up a new Workflow
Automation connection after performing the upgrades. If you are performing an upgrade to only one of the
products, then you should log into Workflow Automation after the upgrade and verify that it is still acquiring
data from Unified Manager.
Upgrading Unified Manager
You can upgrade from Unified Manager 9.6 or 9.7 to 9.8 by downloading and running the installation file on the Red Hat platform.
BBeeffoorree yyoouu bbeeggiinn
• The system on which you are upgrading Unified Manager must meet the system and software
requirements. “Hardware system requirements” on page 3
“Red Hat and CentOS software and installation requirements” on page 4
• You must install, or upgrade, to the correct version of OpenJDK prior to upgrading Unified Manager.
“Upgrading JRE on Linux” on page 19
• MySQL is automatically upgraded to 8.0.21 during Unified Manager upgrade. However, you may want to
upgrade MySQL to the latest minor version on your system. Before an upgrade to the next minor version,
16 ThinkSystem® Intelligent Monitoring Unified Manager 9.8 Installation Guide for Red Hat® and CentOS Linux
ensure that the base version of MySQL on your system is 8.0.21. “Upgrading MySQL on Linux” on page
20
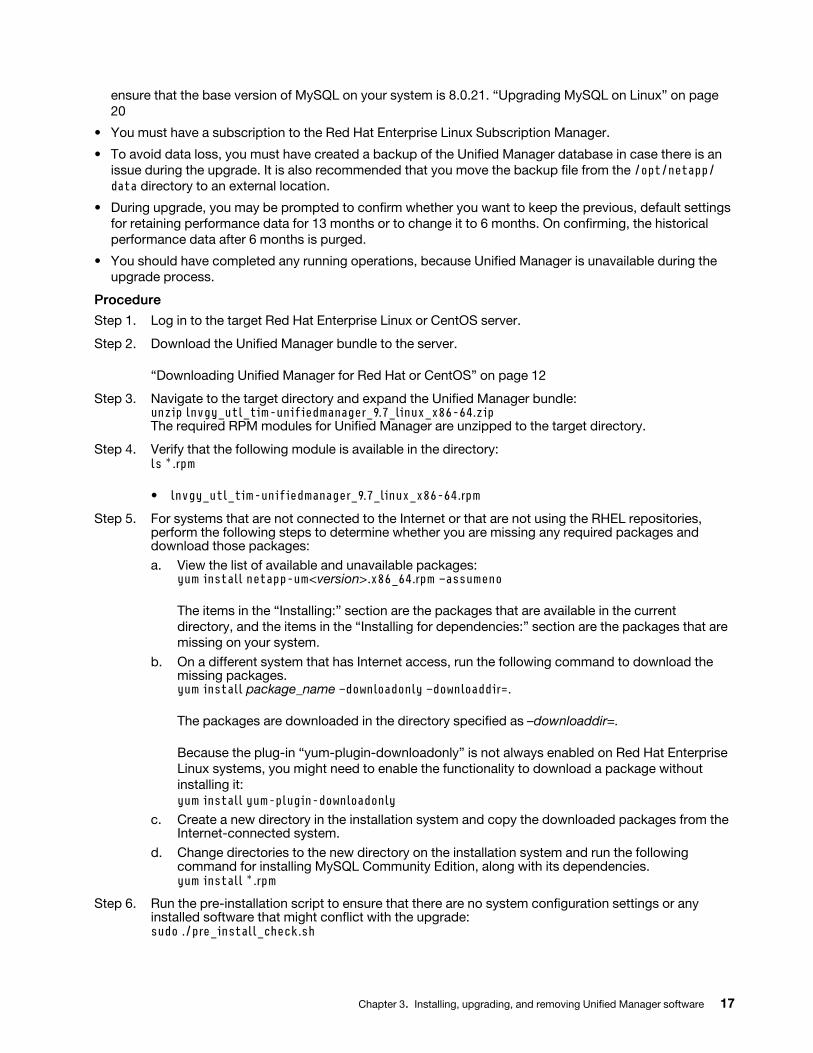
• You must have a subscription to the Red Hat Enterprise Linux Subscription Manager.
• To avoid data loss, you must have created a backup of the Unified Manager database in case there is an
issue during the upgrade. It is also recommended that you move the backup file from the /opt/netapp/ data directory to an external location.
• During upgrade, you may be prompted to confirm whether you want to keep the previous, default settings
for retaining performance data for 13 months or to change it to 6 months. On confirming, the historical
performance data after 6 months is purged.
• You should have completed any running operations, because Unified Manager is unavailable during the
upgrade process.
PPrroocceedduurree
Step 1. Log in to the target Red Hat Enterprise Linux or CentOS server.
Step 2. Download the Unified Manager bundle to the server.
“Downloading Unified Manager for Red Hat or CentOS” on page 12
Step 3. Navigate to the target directory and expand the Unified Manager bundle: unzip lnvgy_utl_tim-unifiedmanager_9.7_linux_x86-64.zip The required RPM modules for Unified Manager are unzipped to the target directory.
Step 4. Verify that the following module is available in the directory: ls *.rpm
• lnvgy_utl_tim-unifiedmanager_9.7_linux_x86-64.rpm
Step 5. For systems that are not connected to the Internet or that are not using the RHEL repositories, perform the following steps to determine whether you are missing any required packages and download those packages:
a. View the list of available and unavailable packages: yum install netapp-um<version>.x86_64.rpm –assumeno
The items in the “Installing:” section are the packages that are available in the current
directory, and the items in the “Installing for dependencies:” section are the packages that are
missing on your system.
b. On a different system that has Internet access, run the following command to download the missing packages. yum install package_name –downloadonly –downloaddir=.
The packages are downloaded in the directory specified as –downloaddir=.
Because the plug-in “yum-plugin-downloadonly” is not always enabled on Red Hat Enterprise
Linux systems, you might need to enable the functionality to download a package without
installing it:
yum install yum-plugin-downloadonly
c. Create a new directory in the installation system and copy the downloaded packages from the Internet-connected system.
d. Change directories to the new directory on the installation system and run the following command for installing MySQL Community Edition, along with its dependencies. yum install *.rpm
Step 6. Run the pre-installation script to ensure that there are no system configuration settings or any installed software that might conflict with the upgrade: sudo ./pre_install_check.sh
Chapter 3. Installing, upgrading, and removing Unified Manager software 17
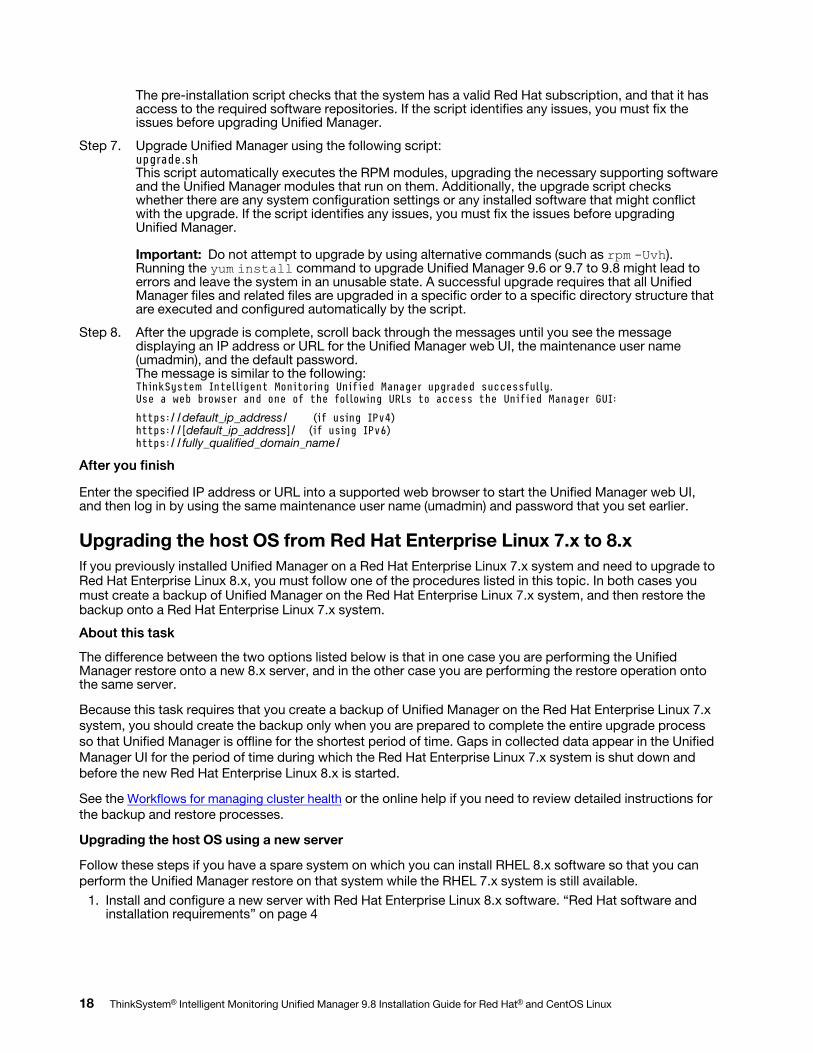
The pre-installation script checks that the system has a valid Red Hat subscription, and that it has access to the required software repositories. If the script identifies any issues, you must fix the issues before upgrading Unified Manager.
Step 7. Upgrade Unified Manager using the following script: upgrade.sh This script automatically executes the RPM modules, upgrading the necessary supporting software and the Unified Manager modules that run on them. Additionally, the upgrade script checks whether there are any system configuration settings or any installed software that might conflict with the upgrade. If the script identifies any issues, you must fix the issues before upgrading Unified Manager.
Important: Do not attempt to upgrade by using alternative commands (such as rpm -Uvh). Running the yum install command to upgrade Unified Manager 9.6 or 9.7 to 9.8 might lead to errors and leave the system in an unusable state. A successful upgrade requires that all Unified Manager files and related files are upgraded in a specific order to a specific directory structure that are executed and configured automatically by the script.
Step 8. After the upgrade is complete, scroll back through the messages until you see the message displaying an IP address or URL for the Unified Manager web UI, the maintenance user name (umadmin), and the default password. The message is similar to the following: ThinkSystem Intelligent Monitoring Unified Manager upgraded successfully. Use a web browser and one of the following URLs to access the Unified Manager GUI:
https://default_ip_address/ (if using IPv4) https://[default_ip_address]/ (if using IPv6) https://fully_qualified_domain_name/
AAfftteerr yyoouu ffiinniisshh
Enter the specified IP address or URL into a supported web browser to start the Unified Manager web UI, and then log in by using the same maintenance user name (umadmin) and password that you set earlier.
Upgrading the host OS from Red Hat Enterprise Linux 7.x to 8.x
If you previously installed Unified Manager on a Red Hat Enterprise Linux 7.x system and need to upgrade to Red Hat Enterprise Linux 8.x, you must follow one of the procedures listed in this topic. In both cases you must create a backup of Unified Manager on the Red Hat Enterprise Linux 7.x system, and then restore the backup onto a Red Hat Enterprise Linux 7.x system.
AAbboouutt tthhiiss ttaasskk
The difference between the two options listed below is that in one case you are performing the Unified Manager restore onto a new 8.x server, and in the other case you are performing the restore operation onto the same server.
Because this task requires that you create a backup of Unified Manager on the Red Hat Enterprise Linux 7.x
system, you should create the backup only when you are prepared to complete the entire upgrade process
so that Unified Manager is offline for the shortest period of time. Gaps in collected data appear in the Unified
Manager UI for the period of time during which the Red Hat Enterprise Linux 7.x system is shut down and
before the new Red Hat Enterprise Linux 8.x is started.
See the Workflows for managing cluster health or the online help if you need to review detailed instructions for
the backup and restore processes.
Upgrading the host OS using a new server
Follow these steps if you have a spare system on which you can install RHEL 8.x software so that you can
perform the Unified Manager restore on that system while the RHEL 7.x system is still available.
1. Install and configure a new server with Red Hat Enterprise Linux 8.x software. “Red Hat software and installation requirements” on page 4
18 ThinkSystem® Intelligent Monitoring Unified Manager 9.8 Installation Guide for Red Hat® and CentOS Linux
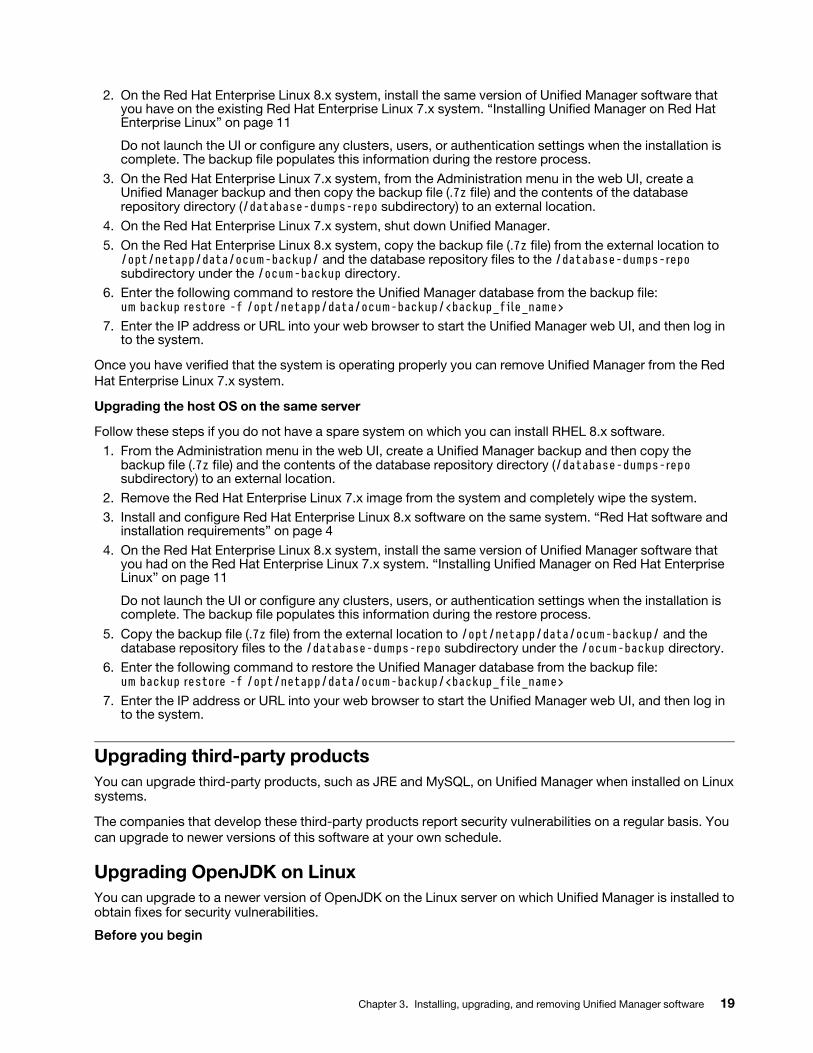
2. On the Red Hat Enterprise Linux 8.x system, install the same version of Unified Manager software that you have on the existing Red Hat Enterprise Linux 7.x system. “Installing Unified Manager on Red Hat Enterprise Linux” on page 11
Do not launch the UI or configure any clusters, users, or authentication settings when the installation is complete. The backup file populates this information during the restore process.
3. On the Red Hat Enterprise Linux 7.x system, from the Administration menu in the web UI, create a Unified Manager backup and then copy the backup file (.7z file) and the contents of the database repository directory (/database-dumps-repo subdirectory) to an external location.
4. On the Red Hat Enterprise Linux 7.x system, shut down Unified Manager.
5. On the Red Hat Enterprise Linux 8.x system, copy the backup file (.7z file) from the external location to /opt/netapp/data/ocum-backup/ and the database repository files to the /database-dumps-repo subdirectory under the /ocum-backup directory.
6. Enter the following command to restore the Unified Manager database from the backup file: um backup restore -f /opt/netapp/data/ocum-backup/<backup_file_name>
7. Enter the IP address or URL into your web browser to start the Unified Manager web UI, and then log in to the system.
Once you have verified that the system is operating properly you can remove Unified Manager from the Red
Hat Enterprise Linux 7.x system.
Upgrading the host OS on the same server
Follow these steps if you do not have a spare system on which you can install RHEL 8.x software.
1. From the Administration menu in the web UI, create a Unified Manager backup and then copy the backup file (.7z file) and the contents of the database repository directory (/database-dumps-repo subdirectory) to an external location.
2. Remove the Red Hat Enterprise Linux 7.x image from the system and completely wipe the system.
3. Install and configure Red Hat Enterprise Linux 8.x software on the same system. “Red Hat software and installation requirements” on page 4
4. On the Red Hat Enterprise Linux 8.x system, install the same version of Unified Manager software that you had on the Red Hat Enterprise Linux 7.x system. “Installing Unified Manager on Red Hat Enterprise Linux” on page 11
Do not launch the UI or configure any clusters, users, or authentication settings when the installation is complete. The backup file populates this information during the restore process.
5. Copy the backup file (.7z file) from the external location to /opt/netapp/data/ocum-backup/ and the database repository files to the /database-dumps-repo subdirectory under the /ocum-backup directory.
6. Enter the following command to restore the Unified Manager database from the backup file: um backup restore -f /opt/netapp/data/ocum-backup/<backup_file_name>
7. Enter the IP address or URL into your web browser to start the Unified Manager web UI, and then log in to the system.
Upgrading third-party products
You can upgrade third-party products, such as JRE and MySQL, on Unified Manager when installed on Linux systems.
The companies that develop these third-party products report security vulnerabilities on a regular basis. You
can upgrade to newer versions of this software at your own schedule.
Upgrading OpenJDK on Linux
You can upgrade to a newer version of OpenJDK on the Linux server on which Unified Manager is installed to obtain fixes for security vulnerabilities.
BBeeffoorree yyoouu bbeeggiinn
Chapter 3. Installing, upgrading, and removing Unified Manager software 19
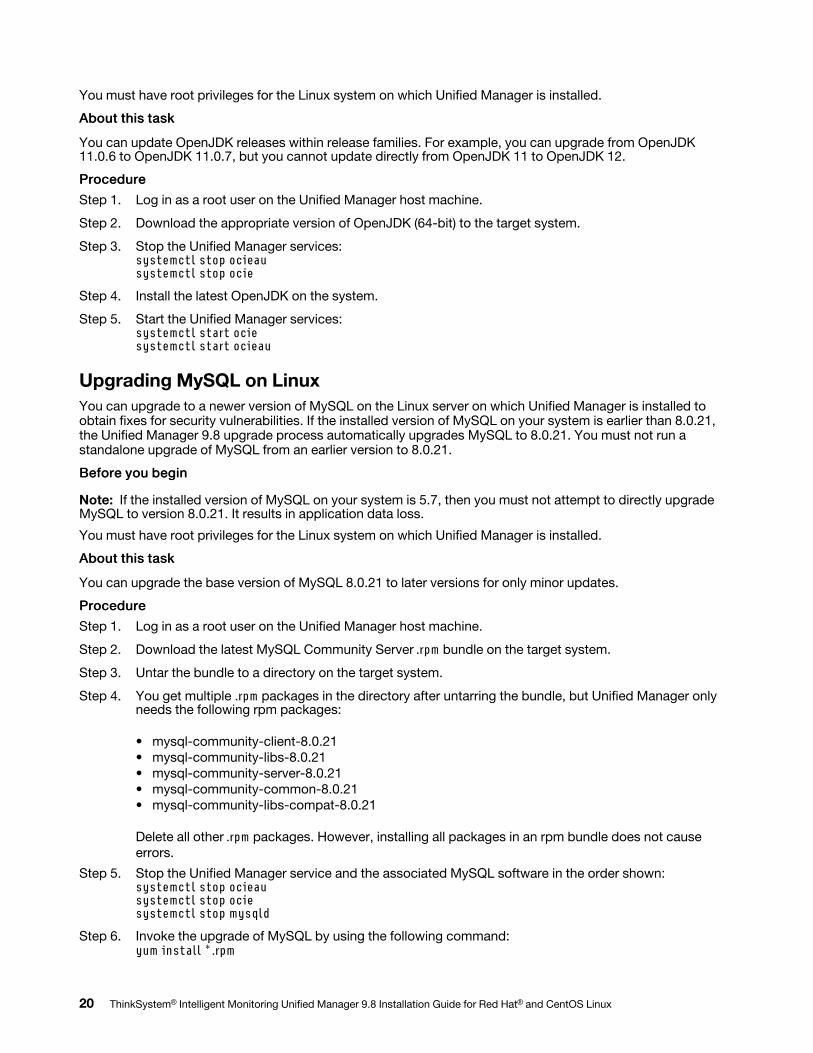
You must have root privileges for the Linux system on which Unified Manager is installed.
AAbboouutt tthhiiss ttaasskk
You can update OpenJDK releases within release families. For example, you can upgrade from OpenJDK 11.0.6 to OpenJDK 11.0.7, but you cannot update directly from OpenJDK 11 to OpenJDK 12.
PPrroocceedduurree
Step 1. Log in as a root user on the Unified Manager host machine.
Step 2. Download the appropriate version of OpenJDK (64-bit) to the target system.
Step 3. Stop the Unified Manager services: systemctl stop ocieau systemctl stop ocie
Step 4. Install the latest OpenJDK on the system.
Step 5. Start the Unified Manager services: systemctl start ocie systemctl start ocieau
Upgrading MySQL on Linux
You can upgrade to a newer version of MySQL on the Linux server on which Unified Manager is installed to obtain fixes for security vulnerabilities. If the installed version of MySQL on your system is earlier than 8.0.21, the Unified Manager 9.8 upgrade process automatically upgrades MySQL to 8.0.21. You must not run a standalone upgrade of MySQL from an earlier version to 8.0.21.
BBeeffoorree yyoouu bbeeggiinn
Note: If the installed version of MySQL on your system is 5.7, then you must not attempt to directly upgrade MySQL to version 8.0.21. It results in application data loss.
You must have root privileges for the Linux system on which Unified Manager is installed.
AAbboouutt tthhiiss ttaasskk
You can upgrade the base version of MySQL 8.0.21 to later versions for only minor updates.
PPrroocceedduurree
Step 1. Log in as a root user on the Unified Manager host machine.
Step 2. Download the latest MySQL Community Server .rpm bundle on the target system.
Step 3. Untar the bundle to a directory on the target system.
Step 4. You get multiple .rpm packages in the directory after untarring the bundle, but Unified Manager only needs the following rpm packages:
• mysql-community-client-8.0.21
• mysql-community-libs-8.0.21
• mysql-community-server-8.0.21
• mysql-community-common-8.0.21
• mysql-community-libs-compat-8.0.21
Delete all other .rpm packages. However, installing all packages in an rpm bundle does not cause
errors.
Step 5. Stop the Unified Manager service and the associated MySQL software in the order shown: systemctl stop ocieau systemctl stop ocie systemctl stop mysqld
Step 6. Invoke the upgrade of MySQL by using the following command: yum install *.rpm
20 ThinkSystem® Intelligent Monitoring Unified Manager 9.8 Installation Guide for Red Hat® and CentOS Linux
*.rpm refers to the .rpm packages in the directory where you downloaded the newer version of MySQL.
Step 7. Start Unified Manager in the order shown: systemctl start mysqld systemctl start ocie systemctl start ocieau
Restarting Unified Manager
You might have to restart Unified Manager after making configuration changes.
BBeeffoorree yyoouu bbeeggiinn
You must have root user access to the Red Hat Enterprise Linux or CentOS server on which Unified Manager
is installed.
PPrroocceedduurree
Step 1. Log in as root user to the server on which you want to restart the Unified Manager service.
Step 2. Stop the Unified Manager service and the associated MySQL software in the order shown: systemctl stop ocieau systemctl stop ocie systemctl stop mysqld
Step 3. Start Unified Manager in the order shown: systemctl start mysqld systemctl start ocie systemctl start ocieau
Removing Unified Manager
You can stop and uninstall Unified Manager from the Red Hat Enterprise Linux or CentOS host with a single command.
BBeeffoorree yyoouu bbeeggiinn
• You must have root user access to the server from which you want to remove Unified Manager.
• Security-Enhanced Linux (SELinux) must be disabled on the Red Hat machine. Change the SELinux
runtime mode to “Permissive” by using the setenforce 0 command.
• All clusters (data sources) must be removed from the Unified Manager server before removing the
software.
PPrroocceedduurree
Step 1. Log in as root user to the server on which you want to remove Unified Manager.
Step 2. Stop and remove Unified Manager from the server: rpm -e netapp-um This step removes all the associated Lenovo RPM packages. It does not remove the prerequisite software modules, such as Java, MySQL, and p7zip.
Step 3. If appropriate, remove the supporting software modules, such as Java, MySQL, and p7zip: rpm -e p7zip mysql-community-client mysql-community-server mysql-community-common mysql- community-libs java-x.y
RReessuulltt
After this operation is complete, the software is removed. All the data from the /opt/netapp/data directory is moved to the /opt/netapp/data/BACKUP folder after uninstallation. Uninstalling Unified Manager removes the Java and MySQL packages also, unless the packages are required and used by any other application on the system. However, MySQL data is not deleted.
Chapter 3. Installing, upgrading, and removing Unified Manager software 21
Removing the custom umadmin user and maintenance group
If you created a custom home directory to define your own umadmin user and maintenance account prior to installing Unified Manager, you should remove these items after you have uninstalled Unified Manager.
AAbboouutt tthhiiss ttaasskk
The standard Unified Manager uninstallation does not remove a custom-defined umadmin user and maintenance account. You must delete these items manually.
PPrroocceedduurree
Step 1. Log in as the root user to the Red Hat Enterprise Linux server.
Step 2. Delete the umadmin user: userdel umadmin
Step 3. Delete the maintenance group: groupdel maintenance
22 ThinkSystem® Intelligent Monitoring Unified Manager 9.8 Installation Guide for Red Hat® and CentOS Linux
Appendix A. Contacting Support
You can contact Support to obtain help for your issue.
You can receive hardware service through a Lenovo Authorized Service Provider. To locate a service
provider authorized by Lenovo to provide warranty service, go to https://datacentersupport.lenovo.com/
serviceprovider and use filter searching for different countries. For Lenovo support telephone numbers, see https://datacentersupport.lenovo.com/supportphonelist for your region support details.
© Copyright Lenovo 2020, 2021 23

24 ThinkSystem® Intelligent Monitoring Unified Manager 9.8 Installation Guide for Red Hat® and CentOS Linux
Appendix B. Notices
Lenovo may not offer the products, services, or features discussed in this document in all countries. Consult your local Lenovo representative for information on the products and services currently available in your area.
Any reference to a Lenovo product, program, or service is not intended to state or imply that only that
Lenovo product, program, or service may be used. Any functionally equivalent product, program, or service
that does not infringe any Lenovo intellectual property right may be used instead. However, it is the user's
responsibility to evaluate and verify the operation of any other product, program, or service.
Lenovo may have patents or pending patent applications covering subject matter described in this
document. The furnishing of this document is not an offer and does not provide a license under any patents
or patent applications. You can send inquiries in writing to the following:
Lenovo (United States), Inc.
8001 Development Drive
Morrisville, NC 27560
U.S.A.
Attention: Lenovo Director of Licensing
LENOVO PROVIDES THIS PUBLICATION “AS IS” WITHOUT WARRANTY OF ANY KIND, EITHER EXPRESS
OR IMPLIED, INCLUDING, BUT NOT LIMITED TO, THE IMPLIED WARRANTIES OF NON-INFRINGEMENT,
MERCHANTABILITY OR FITNESS FOR A PARTICULAR PURPOSE. Some jurisdictions do not allow
disclaimer of express or implied warranties in certain transactions, therefore, this statement may not apply to
you.
This information could include technical inaccuracies or typographical errors. Changes are periodically made
to the information herein; these changes will be incorporated in new editions of the publication. Lenovo may
make improvements and/or changes in the product(s) and/or the program(s) described in this publication at
any time without notice.
The products described in this document are not intended for use in implantation or other life support
applications where malfunction may result in injury or death to persons. The information contained in this
document does not affect or change Lenovo product specifications or warranties. Nothing in this document
shall operate as an express or implied license or indemnity under the intellectual property rights of Lenovo or
third parties. All information contained in this document was obtained in specific environments and is
presented as an illustration. The result obtained in other operating environments may vary.
Lenovo may use or distribute any of the information you supply in any way it believes appropriate without
incurring any obligation to you.
Any references in this publication to non-Lenovo Web sites are provided for convenience only and do not in
any manner serve as an endorsement of those Web sites. The materials at those Web sites are not part of the
materials for this Lenovo product, and use of those Web sites is at your own risk.
Any performance data contained herein was determined in a controlled environment. Therefore, the result
obtained in other operating environments may vary significantly. Some measurements may have been made
on development-level systems and there is no guarantee that these measurements will be the same on
generally available systems. Furthermore, some measurements may have been estimated through
extrapolation. Actual results may vary. Users of this document should verify the applicable data for their
specific environment.
© Copyright Lenovo 2020, 2021 25
Trademarks
LENOVO, LENOVO logo, and THINKSYSTEM are trademarks of Lenovo. All other trademarks are the property of their respective owners. © 2021 Lenovo.
26 ThinkSystem® Intelligent Monitoring Unified Manager 9.8 Installation Guide for Red Hat® and CentOS Linux


![Mission Manager[1]](https://static.fdokumen.com/doc/165x107/6313fe215cba183dbf075a68/mission-manager1.jpg)