
Security Guide for Cisco Unified Communications Manager ...
280
Security Guide for Cisco Unified Communications Manager, Release 14 First Published: 2021-03-31 Americas Headquarters Cisco Systems, Inc. 170 West Tasman Drive San Jose, CA 95134-1706 USA http://www.cisco.com Tel: 408 526-4000 800 553-NETS (6387) Fax: 408 527-0883
-
Upload
khangminh22 -
Category
Documents
-
view
12 -
download
0
Transcript of Security Guide for Cisco Unified Communications Manager ...

Security Guide for Cisco Unified Communications Manager, Release14First Published: 2021-03-31
Americas HeadquartersCisco Systems, Inc.170 West Tasman DriveSan Jose, CA 95134-1706USAhttp://www.cisco.comTel: 408 526-4000
800 553-NETS (6387)Fax: 408 527-0883

THE SPECIFICATIONS AND INFORMATION REGARDING THE PRODUCTS IN THIS MANUAL ARE SUBJECT TO CHANGE WITHOUT NOTICE. ALL STATEMENTS,INFORMATION, AND RECOMMENDATIONS IN THIS MANUAL ARE BELIEVED TO BE ACCURATE BUT ARE PRESENTED WITHOUT WARRANTY OF ANY KIND,EXPRESS OR IMPLIED. USERS MUST TAKE FULL RESPONSIBILITY FOR THEIR APPLICATION OF ANY PRODUCTS.
THE SOFTWARE LICENSE AND LIMITED WARRANTY FOR THE ACCOMPANYING PRODUCT ARE SET FORTH IN THE INFORMATION PACKET THAT SHIPPED WITHTHE PRODUCT AND ARE INCORPORATED HEREIN BY THIS REFERENCE. IF YOU ARE UNABLE TO LOCATE THE SOFTWARE LICENSE OR LIMITED WARRANTY,CONTACT YOUR CISCO REPRESENTATIVE FOR A COPY.
The Cisco implementation of TCP header compression is an adaptation of a program developed by the University of California, Berkeley (UCB) as part of UCB's public domain version ofthe UNIX operating system. All rights reserved. Copyright © 1981, Regents of the University of California.
NOTWITHSTANDING ANY OTHERWARRANTY HEREIN, ALL DOCUMENT FILES AND SOFTWARE OF THESE SUPPLIERS ARE PROVIDED “AS IS" WITH ALL FAULTS.CISCO AND THE ABOVE-NAMED SUPPLIERS DISCLAIM ALL WARRANTIES, EXPRESSED OR IMPLIED, INCLUDING, WITHOUT LIMITATION, THOSE OFMERCHANTABILITY, FITNESS FOR A PARTICULAR PURPOSE AND NONINFRINGEMENT OR ARISING FROM A COURSE OF DEALING, USAGE, OR TRADE PRACTICE.
IN NO EVENT SHALL CISCO OR ITS SUPPLIERS BE LIABLE FOR ANY INDIRECT, SPECIAL, CONSEQUENTIAL, OR INCIDENTAL DAMAGES, INCLUDING, WITHOUTLIMITATION, LOST PROFITS OR LOSS OR DAMAGE TO DATA ARISING OUT OF THE USE OR INABILITY TO USE THIS MANUAL, EVEN IF CISCO OR ITS SUPPLIERSHAVE BEEN ADVISED OF THE POSSIBILITY OF SUCH DAMAGES.
Any Internet Protocol (IP) addresses and phone numbers used in this document are not intended to be actual addresses and phone numbers. Any examples, command display output, networktopology diagrams, and other figures included in the document are shown for illustrative purposes only. Any use of actual IP addresses or phone numbers in illustrative content is unintentionaland coincidental.
All printed copies and duplicate soft copies of this document are considered uncontrolled. See the current online version for the latest version.
Cisco has more than 200 offices worldwide. Addresses and phone numbers are listed on the Cisco website at www.cisco.com/go/offices.
Cisco and the Cisco logo are trademarks or registered trademarks of Cisco and/or its affiliates in the U.S. and other countries. To view a list of Cisco trademarks, go to this URL:https://www.cisco.com/c/en/us/about/legal/trademarks.html. Third-party trademarks mentioned are the property of their respective owners. The use of the word partner does not imply apartnership relationship between Cisco and any other company. (1721R)
© 2021 Cisco Systems, Inc. All rights reserved.

C O N T E N T S
Preface xvP R E F A C E
Purpose xv
Audience xvi
Organization xvi
Related Documentation xviii
Conventions xviii
Obtain Documentation, Support, and Security Guidelines xviii
Cisco Product Security Overview xix
An Introduction to Unified CM Security 21P A R T I
An Overview 1C H A P T E R 1
System Requirements 1
Best Practices 1
Device Resets, Server and Cluster Reboots, and Service Restarts 2
Reset Devices, Servers, Clusters, and Services 3
Media Encryption with Barge Setup 3
Common Icons 3
Configurations 5C H A P T E R 2
Security Configurations 5
Default Security 7C H A P T E R 3
Default Security Overview 7
Initial Trust List 7
Certificate Management Changes for ITLRecovery Certificate 9
Security Guide for Cisco Unified Communications Manager, Release 14iii

ITLRecovery Certificate 9
Interactions and Restrictions 10
Trust Verification Service 10
Authentication, Integrity, and Authorization 10
Image Authentication 11
Device Authentication 11
File Authentication 11
Signaling Authentication 12
Digest Authentication 12
Authorization 14
Encryption 14
Secure End Users Login Credentials 15
Signaling Encryption 15
Media Encryption 15
AES 256 Encryption Support for TLS and SIP SRTP 17
AES 80-Bit Authentication Support 19
Self-encrypting drive 20
Configuration File Encryption 20
NMAP Scan Operation 21
Default Security Administration Tasks 21
Update ITL File for Cisco Unified IP Phones 22
Obtain ITL File Status 22
Obtain Cisco Unified IP Phone Support List 23
Autoregistration 23
Roll Back Cluster to a Pre-8.0 Release 23
Switch Back to Release 8.6 or Later After Revert 24
Perform Bulk Reset of ITL File 25
Migrate IP Phones Between Clusters with Cisco Unified Communications Manager and ITL Files26
Reset CTL Localkey 27
View the Validity Period of ITLRecovery Certificate 27
Set Up Authentication and Encryption 28
Basic System Security 31P A R T I I
Security Guide for Cisco Unified Communications Manager, Release 14iv
Contents

Certificates 33C H A P T E R 4
Certificate Management 33
Certificate Overview 33
Certificate Types 34
Phone Certificate Types 34
Server Certificate Types 36
Third-Party CA-Signed Certificates 37
Support for Certificates from External CAs 37
Certificate Signing Request Key Usage Extensions 38
Certificate Tasks 39
Bulk Certificate Export 39
Show Certificates 40
Download Certificates 40
Install Intermediate Certificates 41
Delete a Trust Certificate 41
Generate a Certificate Signing Request 42
Generate Self-Signed Certificate 44
Regenerate a Certificate 47
Add Certificate Authority-Signed CAPF Root Certificate to the Trust Store 53
Update the CTL File 53
Interactions and Restrictions 53
Certificate Monitoring and Revocation 54
Certificate Monitoring Overview 54
Certificate Monitoring Configuration 54
Certificate Revocation Overview 54
Certificate Revocation Configuration 54
Simplified Certificate Management 56
Simplified Certificate Management Overview 56
Simplified Certificate Management User Interface Updates 57
Reuse Multi-Server Tomcat Certificate for CallManager 58
Certificate Authority Proxy Function 59C H A P T E R 5
Certificates Authority Proxy Function Overview 59
Security Guide for Cisco Unified Communications Manager, Release 14v
Contents

Certificates Authority Proxy Function Configuration Task Flow 61
Upload Root Certificate for Third-Party CAs 62
Upload Certificate Authority (CA) Root Certificate 62
Configure Online Certificate Authority Settings 63
Configure Offline Certificate Authority Settings 64
Activate or Restart CAPF Services 64
Configure CAPF Settings in a Universal Device Template 65
Update CAPF Settings via Bulk Admin 66
Configure CAPF Settings for a Phone 67
Set KeepAlive Timer 68
Certificates Authority Proxy Function Administration Task Flow 68
Run Stale LSC Report 68
LSC Generation via CAPF 69
View Pending CSR List 69
Delete Stale LSC Certificates 70
CAPF System Interactions and Restrictions 70
CAPF Examples with 7942 and 7962 Phones 71
CAPF Interaction with IPv6 Addressing 72
Security Modes 75C H A P T E R 6
Security Modes Overview 75
Non Secure Mode (Default Mode) 75
Configure Secure Mode 75
Mixed Mode 76
Verify Security Mode 76
SIP OAuth Mode 77
SIP OAuth Configuration Through CLI 77
SIP OAuth Mode 79C H A P T E R 7
SIP OAuth Mode Overview 79
SIP OAuth Mode Prerequisites 80
SIP OAuth Mode Configuration Task Flow 80
Upload CA Certificate to the Phone Edge Trust 81
Enable OAuth Access Token for Devices 81
Security Guide for Cisco Unified Communications Manager, Release 14vi
Contents

Configure Refresh Logins 82
Configure OAuth Ports 82
Enable SIP OAuth Mode 83
Restart Cisco CallManager Service 83
Configure Device Security Mode in Phone Security Profile 84
Configure SIP Oauth Registered Phones for MRA Mode 84
TFTP Encryption 87C H A P T E R 8
TFTP Encrypted Configuration Files Overview 87
TFTP Encrypted Configuration Files Tips 88
Encryption for Phone Configuration File Task Flow 89
Enable TFTP Encryption 89
Configure SHA-512 Signing Algorithm 90
Set Up Manual Key Distribution 90
Enter Phone Symmetric Key 91
Verify LSC or MIC Certificate Installation 91
Update CTL File 92
Restart Services 92
Reset Phones 93
Disable TFTP Encrypted Configuration Files 93
Cipher Management 95C H A P T E R 9
Cipher Management 95
Recommended Ciphers 96
Configure Cipher String 97
Cipher Limitations 100
Cipher Restrictions 109
Phone Security 111C H A P T E R 1 0
Phone Security Overview 111
Phone Hardening Overview 112
Set Up Phone Hardening 115
Trusted Devices 116
Cisco Unified Communications Manager Administration 116
Security Guide for Cisco Unified Communications Manager, Release 14vii
Contents

Phone Model Support 117
View Phone Security Settings 117
Set Up Phone Security 118
Preferred Vendor SIP Phone Security Set Up 118
Set Up Preferred Vendor SIP Phone Security Profile Per-Device Certificates 118
Set Up Preferred Vendor SIP Phone Security Profile Shared Certificates 119
Phone Security Interactions and Restrictions 120
Phone Security Profiles 120
Phone Security Profile Settings 121
Phone Security Configuration Task Flow 130
Find Phone Security Profile 131
Set Up Phone Security Profile 131
Apply Security Profiles to Phone 132
Synchronize Phone Security Profile with Phones 132
Delete Phone Security Profile 133
Find Phones with Phone Security Profiles 133
SIP Trunk Security Profile Interactions and Restrictions 134
Digest Authentication for SIP Phones Overview 134
Digest Authentication for SIP Phones Prerequisite 134
Digest Authentication for SIP Phones Configuration Task Flow 135
Assign Digest Credentials to Phone User 135
Enable Digest Authentication in Phone Security Profile 136
Assign Digest Authentication to the Phone 136
Configure SIP Station Realm 136
End User Digest Credential Settings 137
Secure Tones and Icons 139C H A P T E R 1 1
Secure Tones and Icons Overview 139
Secure Phone Call Identification 141
Secure Icons and Tones Tips 141
Supported Devices Secure Tones 142
Protected Devices Secure Tones 142
Secure Icons and Tones Configuration Tasks 143
Set Up Secure Icon Policy 143
Security Guide for Cisco Unified Communications Manager, Release 14viii
Contents

Enable Secure Indication Tone for Cluster 144
Configure Phone As a Protected Device 144
Secure Calls and Tones Limitations and Restrictions 145
Trunk and Gateway SIP Security 147C H A P T E R 1 2
Trunk and Gateway SIP Security Overview 147
SIP Trunk Encryption 147
Cisco IOS MGCP Gateway Encryption 148
H.323 Gateway and H.323/H.225/H.245 Trunk Encryption 149
About SIP Trunk Security Profile Setup 150
SIP Trunk Security Profile Setup Tips 150
Configure Trunk and Gateway SIP Security Task Flow 150
Set Up Secure Gateways and Trunks 151
Set Up SIP Trunk Security Profile 151
SIP Trunk Security Profile Settings 152
Apply SIP Trunk Security Profile 157
Synchronize SIP Trunk Security Profile with SIP Trunks 158
Setup IPsec 158
Allow SRTP Using Unified Communications Manager Administration 158
TLS Setup 161C H A P T E R 1 3
TLS Overview 161
TLS Prerequisites 161
TLS Configuration Task Flow 162
Set Minimum TLS Version 163
Set TLS Ciphers 163
Configure TLS in a SIP Trunk Security Profile 163
Add Secure Profile to a SIP Trunk 164
Configure TLS in a Phone Security Profile 164
Add Secure Phone Profile to a Phone 165
Add Secure Phone Profile to a Universal Device Template 166
TLS Interactions and Restrictions 166
TLS Interactions 167
TLS Restrictions 167
Security Guide for Cisco Unified Communications Manager, Release 14ix
Contents

User Security 173P A R T I I I
Identity Management 175C H A P T E R 1 4
User Security Overview 175
Identity Management Overview 176
SAML SSO Deployment 176
LDAP Authentication 177
Configure LDAP Authentication 178
Local Database Authentication 178
OAuth Framework 179
Configure SIP OAuth Mode 180
Revoke Existing OAuth Refresh Tokens 180
Credential Policies 181C H A P T E R 1 5
Credential Policy Overview 181
JTAPI and TAPI Support for Credential Policies 182
Configure Default Credential Policy 183
Edit User Credentials or Credential Policy 184
Enable PIN Synchronization 184
Monitor Authentication Activity 185
Configuring Credential Caching 186
Manage Session Termination 186
Contact Search Authentication 189C H A P T E R 1 6
Contact Search Authentication Overview 189
Contact Search Authentication Task Flow 189
Confirm Phone Support for Contact Search Authentication 190
Enable Contact Search Authentication 190
Configure Secure Directory Server for Contact Search 190
Advanced System Security 193P A R T I V
FIPS Mode Setup 195C H A P T E R 1 7
Security Guide for Cisco Unified Communications Manager, Release 14x
Contents

FIPS 140-2 Setup 195
Enable FIPS 140-2 Mode 196
CiscoSSH Support 198
Disable FIPS 140-2 Mode 199
Check FIPS 140-2 Mode Status 199
FIPS 140-2 Mode Server Reboot 200
Enhanced Security Mode 201
Configure Enhanced Security Mode 201
Common Criteria Mode 202
Common Criteria Configuration Task Flow 202
Enable TLS 203
Configure Common Criteria Mode 203
V.150 Minimum Essential Requirements 205C H A P T E R 1 8
V.150 Overview 205
Configure V.150 Task Flow 205
Configure Media Resource Group Task Flow 206
Configure Media Resource Group for Non-V.150 Endpoints 207
Configure a Media Resource Group List for Non-V.150 Endpoints 208
Configure Media Resource Group for V.150 Endpoints 208
Configure a Media Resource Group List for V.150 Endpoints 208
Configure the Gateway for Cisco V.150 (MER) 209
Configure V.150 MGCP Gateway Port Interface 209
Configure V.150 SCCP Gateway Port Interface 210
Configure V.150 Support for Phone 210
Configure SIP Trunk Task Flow 211
Configure SIP Profile for V.150 212
Set the Clusterwide V.150 Filter 212
Add V.150 Filter to SIP Trunk Security Profile 213
Configure SIP Trunk for V.150 213
IPSec Setup 215C H A P T E R 1 9
IPSec Overview 215
Security Guide for Cisco Unified Communications Manager, Release 14xi
Contents

Authentication and Encryption Setup for CTI, JTAPI, and TAPI 217C H A P T E R 2 0
Authentication for CTI, JTAPI, and TAPI Applications 217
Encryption for CTI, JTAPI, and TAPI Applications 218
CAPF Functions for CTI, JTAPI, and TAPI Applications 219
CAPF System Interactions and Requirements for CTI, JTAPI, and TAPI Applications 220
Certificate Authority Proxy Function Service Activation 221
Set Up Application User or End User CAPF Profile 221
CAPF Settings 222
Update CAPF Service Parameters 223
Delete Application User CAPF or End User CAPF Profile 224
Securing CTI, JTAPI, and TAPI 225
Add Application and End Users to Security-Related Access Control Groups 226
Set Up JTAPI/TAPI Security-Related Service Parameters 227
View Certificate Operation Status for Application or End User 227
Secure Recording and Monitoring 229C H A P T E R 2 1
About Secure Call Monitoring and Recording Setup 229
Set Up Secure Call Monitoring and Recording 230
VPN Client 231C H A P T E R 2 2
VPN Client Overview 231
VPN Client Configuration Task Flow 231
Complete Cisco IOS Prerequisites 232
Configure Cisco IOS SSL VPN to Support IP Phones 233
Complete ASA Prerequisites for AnyConnect 234
Configure ASA for VPN Client on IP Phone 235
Upload VPN Concentrator Certificates 237
Configure VPN Gateway 238
VPN Gateway Fields for VPN Client 238
Configure VPN Group 239
VPN Group Fields for VPN Client 239
Configure VPN Profile 240
VPN Profile Fields for VPN Client 240
Security Guide for Cisco Unified Communications Manager, Release 14xii
Contents

Configure VPN Feature Parameters 241
VPN Feature Parameters 241
Add VPN Details to Common Phone Profile 243
Operating System and Security Hardening 245C H A P T E R 2 3
Security Hardening 245
Troubleshooting 249P A R T V
Security Troubleshooting Overview 251C H A P T E R 2 4
Remote Access 251
Cisco Secure Telnet 251
Firewall Protection 252
Cisco Secure Telnet Design 252
Cisco Secure Telnet Structure 252
Security Guide for Cisco Unified Communications Manager, Release 14xiii
Contents

Security Guide for Cisco Unified Communications Manager, Release 14xiv
Contents

Preface
• Purpose, on page xv• Audience, on page xvi• Organization, on page xvi• Related Documentation, on page xviii• Conventions, on page xviii• Obtain Documentation, Support, and Security Guidelines, on page xviii• Cisco Product Security Overview, on page xix
PurposeCisco Unified Communications Manager Security Guide helps system and phone administrators perform thefollowing tasks:
• Configure authentication.
• Configure encryption.
• Configure digest authentication.
• Install server authentication certificate that is associated with HTTPS
• Configure the Cisco CTL Client.
• Configure security profiles.
• Configure Certificate Authority Proxy Function (CAPF) to install, upgrade, or delete locally significantcertificates on supported Cisco Unified IP Phone models.
• Configure phone hardening.
• Configure Survivable Remote Site Telephony (SRST) references for security.
• Configure gateways and trunks for security.
• Configure FIPS (Federal Information Processing Standard) 140-2 mode.
Security Guide for Cisco Unified Communications Manager, Release 14xv

AudienceThis guide provides a reference and procedural guide for system and phone administrators who plan toconfigure call security features for Cisco Unified Communications Manager.
OrganizationThe following table lists the major sections of this guide:
Table 1: Guide Overview
DescriptionChapter
Security Basics
Provides an overview of security terminology, system requirements, interactionsand restrictions, installation requirements, and a configuration checklist; describesthe different types of authentication and encryption.
Security Overview
Provides an overview of HTTPS and describes how to install the serverauthentication certificate in the trusted folder.
Hypertext TransferProtocol Over SecureSockets Layer (HTTPS)
Provides information about the Security by Default feature, which providesautomatic security features for Cisco Unified IP Phones.
Default Security Setup
Describes how to configure authentication by installing and configuring theCiscoCTL Client.
Cisco CTL Client Setup
TLS Setup
Certificates
Certificate Overview
Security for Phones and Voice Mail Ports
Describes how Unified Communications Manager and the phone use security;provides a list of tasks that you perform to configure security for the phone.
Phone Security
Describes how to configure the security profile and apply it to the phones inUnified Communications Manager.
Phone Security ProfileSetup
Describes how to configure a phone to play a secure-indication tone.Secure and Nonsecureindication Tone Setup
Describes how to configure a secure SCCP connection to analog endpoints.Encryption to AnalogEndpoint Setup
Describes how to configure encrypted phone configuration files in UnifiedCommunications Manager.
Encrypted PhoneConfiguration File Setup
Security Guide for Cisco Unified Communications Manager, Release 14xvi
PrefaceAudience

DescriptionChapter
Describes how to configure digest authentication on the phone that is runningSIP in Unified Communications Manager Administration.
Digest Authentication forSIP phones Setup
Describes how to tighten the security on the phone by using UnifiedCommunications Manager Administration.
Phone Hardening
Describes how to configure media encryption for secure conferences.Secure ConferenceResources Setup
Describes how to configure security for voice mail ports in UnifiedCommunications Manager Administration.
Voice-Messaging PortsSecurity Setup
Describes how to configure secure call monitoring and recording.Secure Call Monitoringand Recording Setup
Virtual Private Networks for CiscoIPPhones
Security for CTI, JTAPI, and TAPI
Describes how to configure the Application User CAPF Profile and End UserCAPF Profiles in Unified Communications Manager.
Authentication andEncryption Setup for CTI,JTAPI and TAPI
Security for SRST References, Gateways, Trunks, and Cisco Unified Mobility Advantage Servers
Describes how to configure the SRST reference for security in UnifiedCommunications Manager Administration.
Secure SurvivableRemoteSite Telephony (SRST)Reference
Describes how Unified Communications Manager communicates with a securegateway or trunk; describes IPSec recommendations and considerations.
Encryption Setup forGateways and Trunks
Describes how to configure and apply the SIP trunk security profile in UnifiedCommunications Manager Administration.
SIP Trunk SecurityProfile Setup
Describes how to configure digest authentication for the SIP trunk in UnifiedCommunications Manager Administration.
Digest Authenticationsetup for SIP Trunks
Describes how to configure a Cisco Unified Mobility Advantage server securityprofile in Unified Communications Manager Administration.
Cisco Unified MobilityAdvantage Server securityProfile Setup
Describes how to configure FIPS (Federal Information Processing Standard)140-2 mode in Unified Communications Manager Administration.
FIPS 140-2 Mode Setup
Describes how to configure the V.150 feature, which allows you to make securecalls in a modem over IP network.
Cisco V.150 MinimumEssential Requirements(MER)
Security Guide for Cisco Unified Communications Manager, Release 14xvii
PrefacePreface

Related DocumentationEach chapter contains a list of related documentation for the chapter topic.
Refer to the following documents for further information about related CiscoIP telephony applications andproducts:
• Cisco Unified IP Phone Administration Guide for Cisco Unified Communications Manager
• Media and Signaling Authentication and Encryption Feature for Cisco IOS MGCP Gateways
• Cisco Unified Communications Manager Integration Guide for Cisco Unity
• Cisco Unified Communications Manager Integration Guide for Cisco Unity Connection
• Cisco Unified Survivable Remote Site Telephony (SRST) administration documentation that supportsthe SRST-enabled gateway
• Cisco IP Phone Administration Guide for your phone model
ConventionsNotes use the following conventions:
Means reader take note. Notes contain helpful suggestions or references to material not covered in thepublication.
Note
Tips use the following conventions:
Means the following are useful tips.Tip
Cautions use the following conventions:
Means reader be careful. In this situation, you might do something that could result in equipment damage orloss of data.
Caution
Obtain Documentation, Support, and Security GuidelinesFor information on obtaining documentation, obtaining support, providing documentation feedback, securityguidelines, and also recommended aliases and general Ciscodocuments, see the monthly What'sNew inCiscoProduct Documentation, which also lists all new and revised Ciscotechnical documentation, athttp://www.cisco.com/en/US/docs/general/whatsnew/whatsnew.html
Security Guide for Cisco Unified Communications Manager, Release 14xviii
PrefaceRelated Documentation

Cisco Product Security OverviewThis product contains cryptographic features and is subject to United States and local country laws governingimport, export, transfer and use. Delivery of Cisco cryptographic products does not imply third-party authorityto import, export, distribute or use encryption. Importers, exporters, distributors and users are responsible forcompliance with U.S. and local country laws. By using this product you agree to comply with applicable lawsand regulations. If you are unable to comply with U.S. and local laws, return this product immediately.
Further information regarding U.S. export regulations may be found at http://www.access.gpo.gov/bis/ear/ear_data.html.
Security Guide for Cisco Unified Communications Manager, Release 14xix
PrefaceCisco Product Security Overview

Security Guide for Cisco Unified Communications Manager, Release 14xx
PrefaceCisco Product Security Overview

P A R T IAn Introduction to Unified CM Security
• An Overview, on page 1• Configurations, on page 5• Default Security, on page 7


C H A P T E R 1An Overview
• System Requirements, on page 1• Best Practices, on page 1• Common Icons, on page 3
System RequirementsThe following are the system requirements to authenticate or encrypt the Unified Communications Manager:
• Login to Cisco Unified Communications Manager Administration CLI of the Unified CommunicationsManager publisher and run util ctl command to set the cluster to mixed mode (Secure Mode).
• Locally Significant Certificates (LSC) exist in all phones to authenticate the TLS connection with UnifiedCommunications Manager.
A few Endpoints also use MICs if the LSC is not present but we alwaysrecommend you to use LSCs.
Note
Best PracticesCisco strongly recommends the following best practices:
• Always perform installation and configuration tasks in a secure lab environment before you deploy to awide-scale network.
• Use IPSec for gateways and other application servers at remote locations.
Failure to use IPSec in these instances results in session encryption keys getting transmitted in the clear.Warning
• To prevent toll fraud, configure conference enhancements that are described in the System ConfigurationGuide for Cisco Unified Communications Manager. Likewise, you can perform configuration tasks to
Security Guide for Cisco Unified Communications Manager, Release 141

restrict external transferring of calls. For more information on how to perform this task, see FeatureConfiguration Guide for Cisco Unified Communications Manager.
Device Resets, Server and Cluster Reboots, and Service RestartsThe following table lists the security actions with reset, restart, and reboot details:
Table 2: Security Actions with Reset, Restart, and Reboot details:
Restart (Yes / No)Reset (Yes / No)ActionSl No
NoYesApply Security Profile1
——Apply Phone Hardening2
Yes. Restart CallManagerservice.
Yes. All devicesSecurity Mode Changes3
Yes.All encrypted andauthenticated phones needto be reset to ensure theyget an updated CTL file.
—CTL File Update4
Yes. Restart the CTLProvider Service.
—Update Ports for TLSConnection
5
Yes. Restart the CiscoCertificate AuthorityProxy Function service
—Update /Configure CAPFservice parameters
6
—Yes. Reset dependentdevices
Configure secure SRSTreferences
7
Yes—Change the Smart Cardservice to Started andAutomatic
8
Yes. Restart the Cisco IPManager Assistantservice, CiscoWebDialerWeb Service, and theCisco Extended Functionsservice after
—Configure security-relatedservice parameters that areassociated with theapplication User CAPFProfile.
9
To restart the Unified Communications Manager service, see Administration Guide for Cisco UnifiedCommunications Manager.
To reset a single device after you update the phone configuration, see topics related to applying the PhoneSecurity Profiles.
Security Guide for Cisco Unified Communications Manager, Release 142
An Introduction to Unified CM SecurityDevice Resets, Server and Cluster Reboots, and Service Restarts

Reset Devices, Servers, Clusters, and ServicesThis section provides information on when to reset devices, servers, clusters, and services in Cisco UnifiedServiceability.
To reset all devices in a cluster, perform the following procedure:
Procedure
Step 1 From Unified Communications Manager, choose System > CiscoUnifiedCM.Step 2 Click Find.
A list of configured Unified Communications Manager servers appears.
Step 3 Choose the Unified Communications Manager on which you want to reset devices.Step 4 Click Reset.Step 5 Perform Step 2 and Step 4 for each server in the cluster.
Media Encryption with Barge SetupConfigure barge for Cisco Unified IP Phones 7962 and 7942 for encryption and perform the following tasksin Cisco Unified Communications Manager Administration.
• Update the Cluster Security Mode parameter in the CTL client.
• Update the Builtin Bridge Enable parameter in the Service Parameter window.
On completion of the tasks, the following message appears.
If you configure encryption for Cisco Unified IP Phone models 7962 and 7942, the encrypted devices can'taccept a barge request when they are participating in an encrypted call. The barge attempt fails when the callis encrypted.
Attention
Cisco Unified IP Phones 7962 and 7942 configured with an encrypted security profile doesn't display themessage in the Phone Configuration window. You choose Default for the Built In Bridge setting or thedefault setting equals Default. The same restriction applies for either selection.
Reset the dependent CiscoIP devices for changes to take effect.Tip
Common IconsUnified Communications Manager provides a security status for calls based on security levels configured forall servers and devices participating in the call.
Security Guide for Cisco Unified Communications Manager, Release 143
An Introduction to Unified CM SecurityReset Devices, Servers, Clusters, and Services

All phones that support security icons display call security level.
• A shield icon appears for calls with authenticated level of signaling security. A shield identifies a securedconnection between CiscoIP devices, which means that the devices are authenticated and are usingencrypted signaling.
• A lock icon appears for calls with encrypted media, which means that the devices are using encryptedsignaling and encrypted media.
Some phone models only display the lock icon.Note
The security status of a call can change for point-to-point, intracluster, intercluster, and multihop calls. SCCPline, SIP line, and H.323 signaling support notification of call security status changes to participating endpoints.
The audio and video call provide basis for the call security status. The call is secure only if both the audioand video are secure.
The “Override BFCPApplication Encryption StatusWhenDesignating Call Security Status” service parameterdisplays a lock icon when the parameter value is True and audio is secure. This condition ignores the securitystatuses of all other media channels. The default parameter value is False.
Note
For conference and barge calls, the security icon displays the security status for the conference.
Security Guide for Cisco Unified Communications Manager, Release 144
An Introduction to Unified CM SecurityCommon Icons

C H A P T E R 2Configurations
• Security Configurations, on page 5
Security ConfigurationsThis chapter provides end to end security solutions and references to various security task flows and theirbrief descriptions.
Table 3: Security Configurations
DescriptionProcedureSteps
Configure and exchange certificates for your system.Generate CertificatesStep 1
Configure the system to monitor certificate expiryand to revoke certificates automatically through theOnline Certificate Status Protocol (OCSP).
Configure CertificateMonitoring andRevocation
Step 2
When mixed mode is enabled, your system uses theCertificate Trust List (CTL) file for security if you'redeploying Cisco Unified IP Phone, TelePresenceEndpoints, or Jabber without OAuth.
Enable Mixed ModeStep 3
Configure CAPF to generate LSC certificates forphones.
Configure Certificate AuthorityProxy Function (CAPF)
Step 4
Configure encrypted TFTP so that the initial phoneconfiguration file sent to the phone is encrypted.
Configure Encrypted TFTPStep 5
Configure Phone Security profiles to include itemslike TFTP encryption and TLS signaling for yourphones.
Configure Phone SecurityStep 6
Configure optional product-specific configurationsto harden the connection to the phone.
Configure Phone HardeningStep 7
Configure secure trunks to enable TLS and digestauthentication on trunks.
Configure Secure TrunksStep 8
Security Guide for Cisco Unified Communications Manager, Release 145

DescriptionProcedureSteps
Configure SIP Trunk for SRTP.Enable SIP on TrunksStep 9
Configure your Identity Management Framework.
SAML SSO is recommended for IdentityManagement. However, you can also use LDAPAuthentication or Local authentication.
Enable SAML SSOStep 10
Assign end users to access control groups to containroles and access privileges that they need.
Configure User AccessStep 11
Configure default credential policies for userpasswords, user PINs, and application user passwords.
Configure Credential PoliciesStep 12
Ensure authentication of all directory searches tosecure the company directory.
Configure Contact SearchAuthentication
Step 13
Configure TLS signaling through Phone Security andTrunk Security Profiles.
Enable TLSStep 14
Customize the list of encryption ciphers that aresupported on your system.
Configure Cipher ManagementStep 15
Configure IPSec Policies for your system.Configure IPSec PoliciesStep 16
Configure secure gateway for your system.Configure Gateway SecurityStep 17
Configure OS Hardening.Configure OS HardeningStep 18
Configure FIPSmode, Enhanced SecurityMode, andCommon Criteria Mode to meet complianceguidelines around encryption and data security.
Configure FIPSStep 19
Configure optional security features, such as:
• Secure Monitoring and Recording
• Secure Conferencing
• Secure Tones and Icons
• V.150
• Mobile and Remote Access
• AS-SIP
Configure Security FeaturesStep 20
Security Guide for Cisco Unified Communications Manager, Release 146
An Introduction to Unified CM SecuritySecurity Configurations

C H A P T E R 3Default Security
• Default Security Overview, on page 7• Default Security Administration Tasks, on page 21
Default Security OverviewThe Default Security features provides a basic level of security for supported Cisco Unified IP Phone withoutany extra configuration requirement.
This feature provides the following default security for supported IP Phones:
• Default Authentication of TFTP
• Optional Encryption
• Certificate Verifications
Default Security uses the following components to provide basic security in non secure environments:
• Identity Trust List (ITL)—this file is created only after TFTP service is activated at cluster installationand is used by Cisco Unified IP Phone to establish trust.
• Trust Verification Service—This service runs on all Unified Communications Manager nodes andauthenticates certificates for Cisco Unified IP Phone. The TVS certificate, along with a few other keycertificates, is bundled in the ITL file.
Initial Trust ListThe Initial Trust List (ITL) file is used for the initial security, so that the endpoints can trust UnifiedCommunications Manager. ITL does not need any security features to be enabled explicitly. The ITL file isautomatically created when the TFTP service is activated and the cluster is installed. The UnifiedCommunications Manager's TFTP server’s private key is used to sign the ITL file.
When the Unified CommunicationsManager cluster or server is in non-securemode, the ITL file is downloadedon every supported Cisco Unified IP Phone. You can view the contents of an ITL file using the CLI commandadmin:show itl.
Cisco Unified IP Phone need the ITL file to perform the following tasks:
• Communicate securely to CAPF, a prerequisite to support the configuration file encryption.
Security Guide for Cisco Unified Communications Manager, Release 147

• Authenticate the configuration file signature
• Authenticate application servers, such as EM services, directory, andMIDlet during HTTPS establishmentusing TVS.
If the Cisco IP Phone does not have an existing CTL file, it trusts the first ITL file automatically. The TVSmust be able to return the certificate corresponding to the signer.
If the Cisco IP Phone has an existing CTL file, it uses the CTL file to authenticate the ITL file signature.
The SHA-1or MD5 algorithm value changes only when there is a change in the Initial Trust List (ITL) filevalue. You can use the checksum value of the ITL files to identify the difference between the ITL file of CiscoIP Phone and Unified Communications Manager cluster. The checksum value of the ITL file changes onlywhen you modify the ITL file.
Note
The Initial Trust List (ITL) file has the same format as the CTL file. However, it is a smaller and leaner version.
The following attributes apply to the ITL file:
• The system builds the ITL file automatically when the TFTP service is activated and you install thecluster. The ITL file is updated automatically if the content is modified.
• The ITL file does not require eTokens. It uses a soft eToken (the private key associated with TFTPserver's CallManager certificate).
• The Cisco Unified IP Phone download the ITL file during a reset, restart, or after downloading the CTLfile.
The ITL file contains the following certificates:
• ITLRecovery Certificate—This certificate signs the ITL File.
• The CallManager certificate of the TFTP server—This certificate allows you to authenticate the ITL filesignature and the phone configuration file signature.
• All the TVS certificates available on the cluster—These certificates allow the phone to communicate toTVS securely and to request certificates authentication.
• The CAPF certificate—These certificates support configuration file encryption. The CAPF certificateisn't required in the ITL File (TVS can authenticate it), however, it simplifies the connection to CAPF.
The ITL file contains a record for each certificate. Each record contains:
• A certificate
• Pre-extracted certificate fields for easy lookup by the Cisco IP Phone
• Certificate role (TFTP, CUCM, TFTP+CCM, CAPF, TVS, SAST)
The TFTP server's CallManager certificate is present in two ITL records with two different roles:
• TFTP or the TFTP and CCM role—To authenticate configuration file signature.
• SAST role—To authenticate the ITL file signature.
Security Guide for Cisco Unified Communications Manager, Release 148
An Introduction to Unified CM SecurityInitial Trust List

Certificate Management Changes for ITLRecovery Certificate• The validity of ITLRecovery has been extended from 5 years to 20 years to ensure that the ITLRecoverycertificate remains same for a longer period.
The default validity period of ITLRecovery certificate is 5 years. However, youcan also configure the validity period of ITLRecovery certificate to 5, 10, 15, or20 years. While upgrading Unified Communications Manager, the ITLRecoverycertificate gets copied to the later release.
Note
• Before you regenerate an ITLRecovery certificate, a warning message appears on both the CLI and theGUI. This warningmessage displays that if you use a tokenless CTL and if you regenerate the CallManagercertificate, ensure that the CTL file has the updated CallManager certificate and that certificate is updatedto endpoints.
ITLRecovery CertificateWhen the ITL files are updated (like the renewal of CM certificates), the phones reset and get new ITL files.There is a possibility that some phones do not get the latest ITL file and retain the old one. And, the systemdisplays the centralized report of phones with mismatched ITL files in the user interface.
This feature introduces a new drop-down list ITL File Status with corresponding values such as Match,Mismatch, Not Installed, Unknown under the Find and List Phones page. The new option now allowsadministrators to identify phones that have older ITL so that they can take necessary action for these phones.Following are the different use cases to be noted:
Tftp service activaton:
• When the TFTP Service is activated, the hash of the generated ITL file along with the server hostnameis stored in the DB. It is updated every time an ITL update happens in TFTP code.
• If TFTP hostname is already present in the table, the generated ITL hash is compared against the storedvalue.
• If the ITL hash is not the same, the new ITL hash is updated in the DB.
• If the ITL hash is the same, the TFTP log shows "Tftp Itl hash not changed".
Device Registration and download of ITLFile
• When a phone registers with Unified CommunicationsManager, if the details of ITLFile (Server hostname,hash, timestamp) present in the server does not exist in the DB, it is inserted.
• When a phone registers with Unified Communications Manager, it sends a SIP alarm which contains thedetails of the ITL file applied on the phone. This is compared against the hash of the ITL file stored inDB.
• If the ITL hash is the same, the device hash information is updated with the new timestamp.
• If the ITL hash is not the same, the reported ITL hash and timestamp are updated against the device.
• When the phone unregisters, the trust hash information of that device is deleted.
Security Guide for Cisco Unified Communications Manager, Release 149
An Introduction to Unified CM SecurityCertificate Management Changes for ITLRecovery Certificate

Interactions and RestrictionsIf a Unified Communications Manager cluster has more than 39 certificates, then the ITL file size on CiscoIP Phone exceeds 64 kilobytes. Increase in the ITL file size affects the ITL to load properly on the phonecausing the phone registration to fail with Unified Communications Manager.
Trust Verification ServiceThere are large number of phones in a network and Cisco Unified IP Phone have limited memory. Hence,Unified Communications Manager acts as a remote trust store through TVS and so that a certificate trust storedoesn’t have to be placed on each phone. The Cisco Unified IP Phones contact TVS server for verification,because it cannot verify a signature or certificate through CTL or ITL files. Thus, having a central trust storeis easier to manage than having the trust store on all the Cisco Unified IP Phones.
TVS enables Cisco Unified IP Phone to authenticate application servers, such as EM services, directory, andMIDlet, during HTTPS establishment.
TVS provides the following features:
• Scalability—Cisco Unified IP Phone resources are not impacted by the number of certificates to trust.
• Flexibility—Addition or removal of trust certificates are automatically reflected in the system.
• Security by Default—Non-media and signaling security features are part of the default installation anddon't require user intervention.
When you enable secure signaling and media, create a CTL file and then set the cluster to mixed mode. Tocreate a CTL file and set the cluster to mixed mode, use the CLI command utils ctl set-cluster mixed-mode.
Note
The following are the basic concepts that describe TVS:
• TVS runs on the Unified Communications Manager server and authenticates certificates on behalf of theCisco IP Phone.
• Cisco Unified IP Phone only needs to trust TVS, instead of downloading all the trusted certificates.
• The ITL file is generated automatically without user intervention. The ITL file is downloaded by CiscoUnified IP Phone and trust flows from there.
Authentication, Integrity, and AuthorizationIntegrity and authentication protect against the following threats:
• TFTP file manipulation (integrity)
• Modification of call-processing signaling between the phone and Unified Communications Manager(authentication)
• Man-in-the-middle attacks (authentication), as defined in Acronyms section.
• Phone and server identity theft (authentication)
• Replay attack (digest authentication)
Security Guide for Cisco Unified Communications Manager, Release 1410
An Introduction to Unified CM SecurityInteractions and Restrictions

Authorization specifies what an authenticated user, service, or application can do. You can implement multipleauthentication and authorization methods in a single session.
Image AuthenticationThis process prevents tampering with the binary image, the firmware load, prior to loading it on the phone.Tampering with the image causes the phone to fail the authentication process and reject the image. Imageauthentication occurs through signed binary files that automatically install when you install UnifiedCommunications Manager. Likewise, firmware updates that you download from the web also provide signedbinary images.
Device AuthenticationThis process validates the identity of the communicating device and ensures that the entity is who it claimsto be.
Device authentication occurs between the Unified Communications Manager server and supported CiscoUnified IP Phones, SIP trunks, or JTAPI/TAPI/CTI applications (when supported). An authenticated connectionoccurs between these entities only when each entity accepts the certificate of the other entity. Mutualauthentication describes this process of mutual certificate exchange.
Device authentication relies on the creation of the CiscoCTL file (for authenticating Unified CommunicationsManager server node and applications), and the Certificate Authority Proxy Function (for authenticatingphones and JTAPI/TAPI/CTI applications).
A SIP user agent that connects via a SIP trunk authenticates to Unified Communications Manager if theCallManager trust store contains the SIP user agent certificate and if the SIP user agent contains the UnifiedCommunications Manager certificate in its trust store. For information on updating the CallManager truststore, refer to the Administration Guide for Cisco Unified Communications Manager that supports this UnifiedCommunications Manager release.
Tip
File AuthenticationThis process validates digitally signed files that the phone downloads; for example, the configuration, ringlist, locale, and CTL files. The phone validates the signature to verify that file tampering did not occur afterthe file creation. For a list of devices that are supported, see “Phone Model Support”.
If you configure the cluster for mixed mode, the TFTP server signs static files, such as ring list, localized,default.cnf.xml, and ring list wav files, in.sgn format. The TFTP server signs files in <device name>.cnf.xmlformat every time that the TFTP server verifies that a data change occurred for the file.
The TFTP server writes the signed files to disk if caching is disabled. If the TFTP server verifies that a savedfile has changed, the TFTP server re-signs the file. The new file on the disk overwrites the saved file that getsdeleted. Before the phone can download the new file, the administrator must restart affected devices in UnifiedCommunications Manager.
After the phone receives the files from the TFTP server, the phone verifies the integrity of the files by validatingthe signature on the file. For the phone to establish an authenticated connection, ensure that the followingcriteria are met:
• A certificate must exist in the phone.
Security Guide for Cisco Unified Communications Manager, Release 1411
An Introduction to Unified CM SecurityImage Authentication

• The CTL file must exist on the phone, and the Unified Communications Manager entry and certificatemust exist in the file.
• You configured the device for authentication or encryption.
Signaling AuthenticationThis process, also known as signaling integrity, uses the TLS protocol to validate that no tampering occurredto signaling packets during transmission.
Signaling authentication relies on the creation of the Certificate Trust List (CTL)file.
Digest AuthenticationThis process for SIP trunks and phones allows Unified Communications Manager to challenge the identityof a device that is connecting to Unified Communications Manager. When challenged, the device presents itsdigest credentials, similar to a username and password, to Unified Communications Manager for verification.If the credentials that are presented match those that are configured in the database for that device, digestauthentication succeeds, and Unified Communications Manager processes the SIP request.
Be aware that the cluster security mode has no effect on digest authentication.Note
If you enable digest authentication for a device, the device requires a unique digest user ID and password toregister.
Note
You configure SIP digest credentials in the Unified Communications Manager database for a phone user orapplication user.
• For applications, you specify digest credentials in the Application User Configuration window.
• For phones that are running SIP, you specify the digest authentication credentials in the End User window.To associate the credentials with the phone after you configure the user, you choose a Digest User, theend user, in the Phone Configuration window. After you reset the phone, the credentials exist in thephone configuration file that the TFTPserver offers to the phone. See topics related to encrypted phoneconfiguration file setup to ensure digest credentials do not get sent in the clear in TFTP downloads.
• For challenges received on SIP trunks, you configure a SIP realm, which specifies the realm username(device or application user) and digest credentials.
When you enable digest authentication for an external phone or trunk that is running SIP and configure digestcredentials, Unified Communications Manager calculates a credentials checksum that includes a hash of theusername, password, and the realm. The system uses a nonce value, which is a random number, to calculatethe MD5 hash. Unified Communications Manager encrypts the values and stores the username and thechecksum in the database.
To initiate a challenge, Unified Communications Manager uses a SIP 401 (Unauthorized) message, whichincludes the nonce and the realm in the header. You configure the nonce validity time in the SIP device securityprofile for the phone or trunk. The nonce validity time specifies the number of minutes that a nonce valuestays valid. When the time interval expires, Unified Communications Manager rejects the external device andgenerates a new number.
Security Guide for Cisco Unified Communications Manager, Release 1412
An Introduction to Unified CM SecuritySignaling Authentication

Unified Communications Manager acts as a user agent server (UAS) for SIP calls that are originated byline-side phones or devices that are reached through the SIP trunk, as a user agent client (UAC) for SIP callsthat it originates to the SIP trunk, or a back-to-back user agent (B2BUA) for line-to-line or trunk-to-trunkconnections. In most environments, Unified Communications Manager acts primarily as B2BUA connectingSCCP and SIP endpoints. (A SIP user agent represents a device or application that originates a SIP message.)
Note
Digest authentication does not provide integrity or confidentiality. To ensure integrity and confidentiality forthe device, configure the TLS protocol for the device, if the device supports TLS. If the device supportsencryption, configure the device security mode as encrypted. If the device supports encrypted phoneconfiguration files, configure encryption for the files.
Tip
Digest Authentication for Phones
When you enable digest authentication for a phone, Unified CommunicationsManager challenges all requestsfor phones that are running SIP except keepalive messages. Unified Communications Manager does notrespond to challenges from line-side phones.
After receiving a response, Unified Communications Manager validates the checksum for the username thatis stored in the database against the credentials in the response header.
Phones that are running SIP exist in the Unified Communications Manager realm, which is defined in UnifiedCommunications Manager Administration at installation. You configure the SIP Realm for challenges tophones with the service parameter SIP Station Realm. Each digest user can have one set of digest credentialsper realm.
If you enable digest authentication for an end user but do not configure the digest credentials, the phone willfail registration. If the cluster mode is nonsecure and you enable digest authentication and configure digestcredentials, the digest credentials get sent to the phone, and Unified Communications Manager still initiateschallenges.
Tip
Digest Authentication for Trunks
When you enable digest authentication for a trunk, Unified Communications Manager challenges SIP trunkrequests from SIP devices and applications that connect through a SIP trunk. The system uses the Cluster IDenterprise parameter in the challenge message. SIP user agents that connect through the SIP trunk respondwith the unique digest credentials that you configured for the device or application in Unified CommunicationsManager.
When Unified Communications Manager initiates a SIP trunk request, a SIP user agent that connects throughthe SIP trunk can challenge the identity of Unified CommunicationsManager. For these incoming challenges,you configure a SIP Realm to provide the requested credentials for the user. When Unified CommunicationsManager receives a SIP 401(Unauthorized) or SIP 407 (Proxy Authentication Required) message, UnifiedCommunications Manager looks up the encrypted password for the realm that connects though the trunk andfor the username that the challengemessage specifies. Unified CommunicationsManager decrypts the password,calculates the digest, and presents it in the response message.
Security Guide for Cisco Unified Communications Manager, Release 1413
An Introduction to Unified CM SecurityDigest Authentication

The realm represents the domain that connects through the SIP trunk, such as xyz.com, which helps to identifythe source of the request.
Tip
To configure the SIP Realm, see topics related to digest authentication for SIP trunks. You must configure aSIP Realm and username and password in Unified Communications Manager for each SIP trunk user agentthat can challenge Unified Communications Manager. Each user agent can have one set of digest credentialsper realm.
AuthorizationUnified Communications Manager uses the authorization process to restrict certain categories of messagesfrom phones that are running SIP, from SIP trunks, and from SIP application requests on SIP trunks.
• For SIP INVITE messages and in-dialog messages, and for phones that are running SIP, UnifiedCommunications Manager provides authorization through calling search spaces and partitions.
• For SIP SUBSCRIBE requests from phones, Unified Communications Manager provides authorizationfor user access to presence groups.
• For SIP trunks, Unified Communications Manager provides authorization of presence subscriptions andcertain non-INVITE SIP messages; for example, out-of-dial REFER, unsolicited notification, and anySIP request with the replaces header. You specify authorization in the SIP Trunk Security ProfileConfiguration window when you check the allowed SIP requests in the window.
To enable authorization for SIP trunk applications, check the Enable Application Level Authorization and theDigest Authentication check box in the SIP Trunk Security Profile window; then, check the allowed SIPrequest check boxes in the Application User Configuration window.
If you enable both SIP trunk authorization and application level authorization, authorization occurs for theSIP trunk first and then for the SIP application user. For the trunk, Unified CommunicationsManager downloadsthe trunk Access Control List (ACL) information and caches it. The ACL information gets applied to theincoming SIP request. If the ACL does not allow the SIP request, the call fails with a 403 Forbidden message.
If the ACL allows the SIP request, Unified Communications Manager checks whether digest authenticationis enabled in the SIP Trunk Security Profile. If digest authentication is not enabled and application-levelauthorization is not enabled, Unified CommunicationsManager processes the request. If digest authenticationis enabled, Unified Communications Manager verifies that the authentication header exists in the incomingrequest and then uses digest authentication to identify the source application. If the header does not exist,Unified Communications Manager challenges the device with a 401 message.
Before an application-level ACL gets applied, Unified Communications Manager authenticates the SIP trunkuser agent through digest authentication. Therefore, you must enable digest authentication in the SIP TrunkSecurity Profile before application-level authorization can occur.
Encryption
Encryption capability installs automatically when you install Unified Communications Manager on a server.Tip
This section describes the types of encryption that Unified Communications Manager supports:
Security Guide for Cisco Unified Communications Manager, Release 1414
An Introduction to Unified CM SecurityAuthorization

Secure End Users Login CredentialsFrom Unified Communications Manager Release 12.5(1), all end users login credentials are hashed withSHA2 to provide enhanced security. Earlier than Unified Communications Manager Release 12.5(1), all endusers login credentials were hashed with SHA1 only. Unified Communications Manager Release 12.5(1) alsoincludes the “UCM Users with the Out-Of-Date Credential Algorithm” report. This report is available in theCisco Unified Reporting page. This report helps the administrator to list all the end users whose passwordsor PINs are hashed with SHA1.
All end users passwords or PINs that are hashed with SHA1 are migrated to SHA2 automatically upon theirfirst successful login. The end users with SHA1 hashed (out of date) credentials can update their PINs orpasswords using one of the following ways:
• Update the PIN by logging into Extension Mobility or Directory access on the phone.
• Update the password by logging into Cisco Jabber, Cisco Unified Communications Self Care Portal, orCisco Unified CM Administration.
For more information on how to generate the report, see the Cisco Unified CM Administration Online Help.
Signaling EncryptionSignaling encryption ensures that all SIP and SCCP signaling messages that are sent between the device andthe Unified Communications Manager server are encrypted.
Signaling encryption ensures that the information that pertains to the parties, DTMF digits that are enteredby the parties, call status, media encryption keys, and so on, are protected against unintended or unauthorizedaccess.
Cisco does not support Network Address Translation (NAT) with Unified Communications Manager if youconfigure the cluster for mixed mode; NAT does not work with signaling encryption.
You can enable UDP ALG in the firewall to allow media stream firewall traversal. Enabling the UDP ALGallows the media source on the trusted side of the firewall to open a bidirectional media flow through thefirewall by sending the media packet through the firewall.
Hardware DSP resources cannot initiate this type of connection and, therefore, must exist outside the firewall.Tip
Signaling encryption does not support NAT traversal. Instead of using NAT, consider using LAN extensionVPNs.
Media EncryptionMedia encryption, which uses Secure Real-Time Protocol (SRTP), ensures that only the intended recipientcan interpret the media streams between supported devices. Media encryption includes creating a media masterkey pair for the devices, delivering the keys to the devices, and securing the delivery of the keys while thekeys are in transport. Unified Communications Manager supports SRTP primarily for IOS gateways andUnified Communications Manager H.323 trunks on gatekeeper-controlled and non-gatekeeper-controlledtrunks as well as on SIP trunks.
Security Guide for Cisco Unified Communications Manager, Release 1415
An Introduction to Unified CM SecuritySecure End Users Login Credentials

Cisco Unified Communications Manager handles media encryption keys differently for different devices andprotocols. All phones that are running SCCP get their media encryption keys from Unified CommunicationsManager, which secures themedia encryption key downloads to phones with TLS encrypted signaling channels.Phones that are running SIP generate and store their own media encryption keys. Media encryption keys thatare derived by Unified Communications Manager system securely get sent via encrypted signaling paths togateways over IPSec-protected links for H.323 and MGCP or encrypted TLS links for SCCP and SIP.
Note
Devices must state upon negotiation if it can use SRTP. CUCM does not support SRTP if the device usescached previous negotiations SDP with different devices within the same call.
If the devices support SRTP, the system uses a SRTP connection. If at least one device does not support SRTP,the system uses an RTP connection. SRTP-to-RTP fallback may occur for transfers from a secure device toa non-secure device, transcoding, music on hold, and so on.
Formost security-supported devices, authentication and signaling encryption serve as theminimum requirementsfor media encryption; that is, if the devices do not support signaling encryption and authentication, mediaencryption cannot occur. CiscoIOS gateways and trunks support media encryption without authentication.For CiscoIOS gateways and trunks, you must configure IPSec when you enable the SRTP capability (mediaencryption).
Before you configure SRTP or signaling encryption for gateways and trunks, Ciscostrongly recommends thatyou configure IPSec because CiscoIOS MGCP gateways, H.323 gateways, and H.323/H.245/H.225 trunksrely on IPSec configuration to ensure that security-related information does not get sent in the clear. UnifiedCommunications Manager does not verify that you configured IPSec correctly. If you do not configure IPSeccorrectly, security-related information may get exposed.
SIP trunks rely on TLS to ensure that security-related information does not get sent in the clear.
Warning
The following example demonstrates media encryption for SCCP and MGCP calls.
1. Device A and Device B, which support media encryption and authentication, register with UnifiedCommunications Manager.
2. When Device A places a call to Device B, Unified Communications Manager requests two sets of mediasession master values from the key manager function.
3. Both devices receive the two sets: one set for the media stream, Device A—Device B, and the other setfor the media stream, Device B—Device A.
4. Using the first set of master values, Device A derives the keys that encrypt and authenticate the mediastream, Device A—Device B.
5. Using the second set of master values, Device A derives the keys that authenticate and decrypt the mediastream, Device B—Device A.
6. Device B uses these sets in the inverse operational sequence.
7. After the devices receive the keys, the devices perform the required key derivation, and SRTP packetprocessing occurs.
Security Guide for Cisco Unified Communications Manager, Release 1416
An Introduction to Unified CM SecurityMedia Encryption

Phones that are running SIP and H.323 trunks/gateways generate their own cryptographic parameters andsend them to Unified Communications Manager.
Note
For media encryption with conference calls, refer to topics related to secure conference resources.
AES 256 Encryption Support for TLS and SIP SRTPCisco Collaboration Solutions use Transport Layer Security (TLS) and Secure Real-time Transport Protocol(SRTP) for signaling and media encryption. Currently, Advanced Encryption Standard (AES) with a 128-bitencryption key is used as the encryption cipher. AES also uses Hash-based Message Authentication CodeSecure Hash Algorithm-1 (HMAC-SHA-1) as the authenticationmethod. These algorithms cannot effectivelyscale to meet the required changing security and performance needs. To meet escalating security andperformance requirements, the algorithms and protocols for encryption, authentication, digital signatures, andkey exchange in Next-Generation Encryption (NGE) are developed. Also, AES 256 encryption support isprovided instead of AES 128 for TLS and Session Initiation Protocol (SIP) SRTP that supports NGE.
The AES 256 encryption support for TLS and SIP SRTP is enhanced to focus on AES 256 cipher support insignaling and media encryption. This feature is useful for the applications that run on Unified CommunicationsManager to initiate and support TLS 1.2 connections with the AES-256 based ciphers that conform to SHA-2(Secure Hash Algorithm) standards and is Federal Information Processing Standards (FIPS) compliant.
This feature has the following requirements:
• The connection that the SIP trunk and SIP line initiates.
• The ciphers that Unified Communications Manager supports for SRTP calls over SIP line and SIP trunk.
AES 256 and SHA-2 Support in TLS
The Transport Layer Security (TLS) protocol provides authentication, data integrity, and confidentiality forcommunications between two applications. TLS 1.2 is based on Secure Sockets Layer (SSL) protocol version3.0, although the two protocols are not compatible with each other. TLS operates in a client/server modewhere one side acts as a server and the other side acts as a client. SSL is positioned as a protocol layer betweenthe Transmission Control Protocol (TCP) layer and the application to form a secure connection between clientsand servers so that they can communicate securely over a network. To operate, TLS requires TCP as thereliable transport layer protocol.
In Unified Communications Manager, AES 256 and SHA-2 (Secure Hash Algorithm-2) support in TLS 1.2is an enhancement to handle the connection that is initiated by the SIP Trunk and the SIP line. The supportedciphers, which are AES 256 and SHA-2 compliant, are listed as follows:
• TLS_ECDH_RSA_WITH_AES_128_GCM_SHA256—The cipher string isECDH-RSA-AES128-GCM-SHA256.
• TLS_ECDH_RSA_WITH_AES_256_GCM_SHA384—The cipher string isECDH-RSA-AES256-GCM-SHA384.
where:
• TLS is Transport Layer Security
• ECDH is Elliptic curve Diffie–Hellman, which is an algorithm
• RSA is Rivest Shamir Adleman, which is an algorithm
Security Guide for Cisco Unified Communications Manager, Release 1417
An Introduction to Unified CM SecurityAES 256 Encryption Support for TLS and SIP SRTP

• AES is Advanced Encryption Standards
• GCM is Galois/Counter Mode
In addition to the newly-supported ciphers, Unified Communications Manager continues to supportTLS_RSA_WITH_AES_128_CBC_SHA. The cipher string of this cipher is AES128-SHA.
• The Unified Communications Manager certificates are based on RSA.
• In Unified Communications Manager, Cisco Endpoints (phones) do not support the above mentionednew ciphers for TLS 1.2.
• With AES 256 and SHA-2 (Secure Hash Algorithm-2) support in TLS 1.2 enhancement in UnifiedCommunications Manager, the default key size for Certificate Authority Proxy Function (CAPF) isincreased to 2048 bits.
Note
AES 256 Support in SRTP SIP Call Signaling
Secure Real-time Transport Protocol (SRTP) defines the methods of providing confidentiality and data integrityfor both Real-time Transport Protocol (RTP) voice and video media and their corresponding Real-timeTransport Control Protocol (RTCP) streams. SRTP implements this method through the use of encryptionand message authentication headers. In SRTP, encryption applies to the payload of the RTP packet only, andnot to the RTP header. However, message authentication applies to both the RTP header and the RTP payload.Also, SRTP indirectly provides protection against replay attacks because message authentication applies tothe RTP sequence number within the header. SRTP uses Advanced Encryption Standards (AES) with a 128-bitencryption key as the encryption cipher. It also uses Hash-based Message Authentication Code Secure HashAlgorithm-1 (HMAC-SHA-1) as the authentication method.
Unified Communications Manager supports crypto ciphers for the SRTP calls over SIP line and SIP trunk.These crypto ciphers are AEAD_AES_256_GCM and AEAD_AES_128_GCM, where AEAD isAuthenticated-Encryption with Associated-Data, and GCM is Galois/Counter Mode. These ciphers are basedon GCM. If these ciphers are present in the Session Description Protocol (SDP), they are treated with higherpriority as compared to the AES 128 and SHA-1 based ciphers. Cisco Endpoints (phones) do not supportthese new ciphers that you add for Unified Communications Manager for SRTP.
In addition to the newly supported ciphers, Unified Communications Manager continues to support thefollowing ciphers:
• AES_CM_128_HMAC_SHA1_80
• AES_CM_128_HMAC_SHA1_32
• F8_128_HMAC_SHA1_80
AES 256 encryption is supported in the following calls:
• SIP line to SIP line call signaling
• SIP line to SIP trunk signaling
• SIP trunk to SIP trunk signaling
Security Guide for Cisco Unified Communications Manager, Release 1418
An Introduction to Unified CM SecurityAES 256 Support in SRTP SIP Call Signaling

Cisco Unified Communications Manager Requirements
• Support for TLS Version 1.2 on the SIP trunk and SIP line connections is available.
• Cipher support—TLS_ECDHE_RSA_WITH_AES_256_GCM_SHA384 (cipher stringECDHE-RSA-AES256-GCM-SHA384) and TLS_ECDHE_RSA_WITH_AES_128_GCM_SHA256(cipher string ECDHE-RSA-AES128-GCM-SHA256)—is available when the TLS 1.2 connection ismade. These ciphers are based on GCM and conform to SHA-2 category.
• Unified Communications Manager initiates TLS1.2 with theTLS_ECDHE_RSA_WITH_AES_256_GCM_SHA384 andTLS_ECDHE_RSA_WITH_AES_128_GCM_SHA256 ciphers. If the peer does not support TLS1.2,then Unified Communications Manager will fall back to TLS 1.0 with the existing AES128-SHA cipher.
• The SRTP calls over SIP line and SIP trunk support the GCM-based AEAD_AES_256_GCM andAEAD_AES_128_GCM ciphers.
Interactions and Restrictions
• Unified Communications Manager requirements apply to SIP line and SIP trunk, and basic SIP to SIPcalls only.
• The device types that are based on non-SIP protocols will continue to support the existing behavior withthe TLS versions with the supported ciphers. Skinny Call Control Protocol (SCCP) also supports TLS1.2 with the earlier supported ciphers.
• SIP to non-SIP calls will continue to use AES 128 and SHA-1 based ciphers.
AES 80-Bit Authentication SupportUnified Communications Manager supports Advanced Encryption Standard (AES) with a 128-bit encryptionkey and an 80-bit authentication tag used as the encryption cipher on Music On Hold (MOH), InteractiveVoice Response (IVR), and Annunciator. By default, the phones that support the 80-bit authentication tagplay the MOH, IVR, and Annunciator using the AES_CM_128_HMAC_SHA1_80 crypto ciphers.
When a phone securely connects with IP Voice Media Streaming (IPVMS), precedence is given to theAES_CM_128_HMAC_SHA1_80 crypto cipher. If the phone does not support 80-bit authentication, it revertsto the AES_CM_128_HMAC_SHA1_32 cipher. If a phone does not support 80-bit or 32-bit authenticationtag, the negotiation occurs over Real-Time Transport Protocol (RTP).
The SCCP phone supports only 32-bit authentication tag. Hence, negotiation between the phone and IPVMShappens only over the AES_CM_128_HMAC_SHA1_32 cipher.
Note
If Phone A supports AES_CM_128_HMAC_SHA1_80 and Phone B supports theAES_CM_128_HMAC_SHA1_32 crypto cipher, and when User A (Phone A) dials User B (Phone B) andthe call is placed on hold by User B, then Phone A connects to MOH. The negotiation between Phone A andMOH occurs through AES_CM_128_HMAC_SHA1_80 cipher because Phone A supports only the 80-bitauthentication tag.
If User B (Phone B) dials User A (Phone A) and the call is placed on hold by User A, the negotiation betweenPhone B and MOH occurs through the AES_CM_128_HMAC_SHA1_32 cipher because Phone B supportsonly the 32-bit authentication tag.
Security Guide for Cisco Unified Communications Manager, Release 1419
An Introduction to Unified CM SecurityCisco Unified Communications Manager Requirements

If a phone supports 80-bit authentication tag, the negotiation between a phone and an IVR or Annunciatoroccurs through AES_CM_128_HMAC_SHA1_80.
The following table shows the supported crypto ciphers on the phones and their negotiation cipher.
Table 4: Phones Capabilities vs. Negotiated Cipher
Negotiated CipherPhones Capabilities
AES_CM_128_HMAC_SHA1_80AES_CM_128_HMAC_SHA1_32 andAES_CM_128_HMAC_SHA1_80
AES_CM_128_HMAC_SHA1_32AES_CM_128_HMAC_SHA1_32
AES_CM_128_HMAC_SHA1_80AES_CM_128_HMAC_SHA1_80
Revert to RTP.Other than AES_CM_128_HMAC_SHA1_32 andAES_CM_128_HMAC_SHA1_80
Self-encrypting driveUnified CM supports self-encrypting drives (SED). This is also called Full Disk Encryption (FDE). FDE isa cryptographic method that is used to encrypt all the data that is available on the hard drive. The data includesfiles, operating system, and software programs. The hardware available on the disk encrypts all the incomingdata and decrypts all the outgoing data.
When the drive is locked, an encryption key is created and stored internally. All data that is stored on thisderive is encrypted using that key and stored in the encrypted form. The FDE comprises a key ID and a securitykey.
For more information, see https://www.cisco.com/c/en/us/td/docs/unified_computing/ucs/c/sw/gui/config/guide/2-0/b_Cisco_UCS_C-series_GUI_Configuration_Guide_201/b_Cisco_UCS_C-series_GUI_Configuration_Guide_201_chapter_010011.html#concept_E8C37FA4A71F4C8F8E1B9B94305AD844
Configuration File EncryptionUnified Communications Manager pushes confidential data such as digest credentials and administratorpasswords to phones in configuration file downloads from the TFTP server.
Unified Communications Manager uses reversible encryption to secure these credentials in the database. Tosecure this data during the download process, Cisco recommends that you configure encrypted configurationfiles for all Cisco IP Phones that support this option.When this option is enabled, only the device configurationfile gets encrypted for download.
In some circumstances, you may choose to download confidential data to phones in the clear; for example,to troubleshoot the phone.
Note
Unified Communications Manager encodes and stores encryption keys in the database. The TFTP serverencrypts and decrypts configuration files by using symmetric encryption keys:
• If the phone has PKI capabilities, Unified Communications Manager can use the phone public key toencrypt the phone configuration file.
Security Guide for Cisco Unified Communications Manager, Release 1420
An Introduction to Unified CM SecuritySelf-encrypting drive
• If the phone does not have PKI capabilities, you must configure a unique symmetric key in UnifiedCommunications Manager and in the phone.
You enable encrypted configuration file settings in the Phone Security Profile window in UnifiedCommunications Manager Administration, which you then apply to a phone in the Phone Configurationwindow.
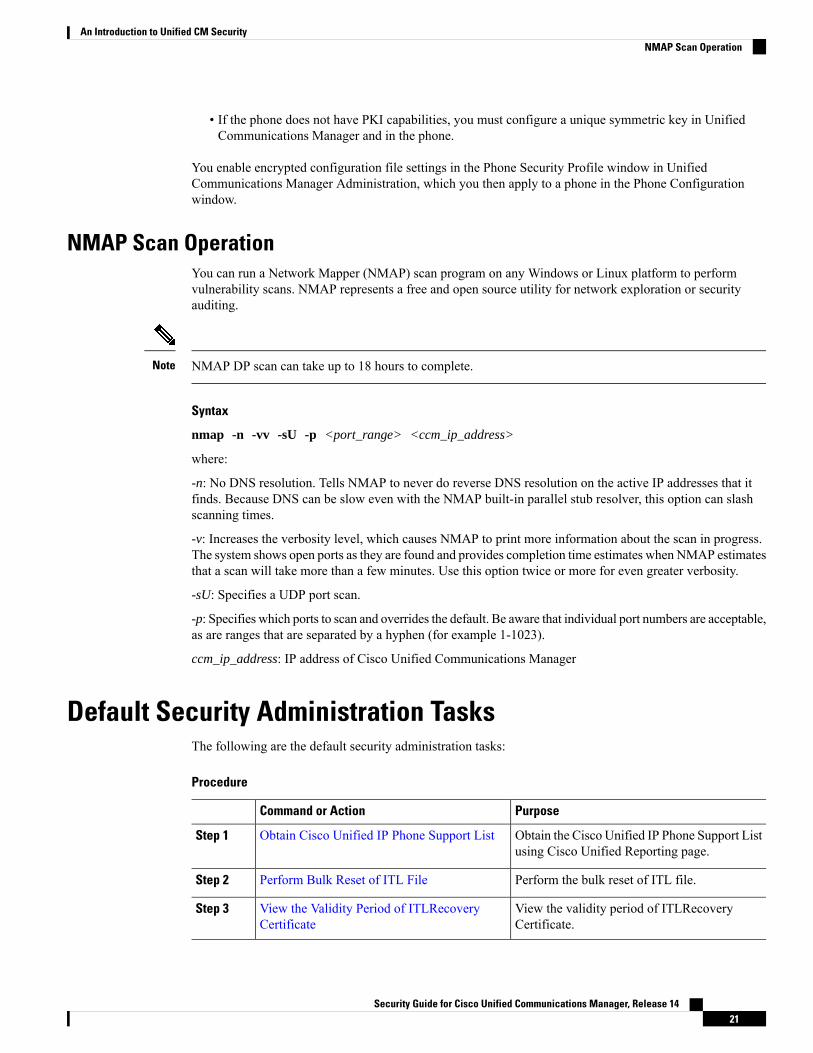
NMAP Scan OperationYou can run a Network Mapper (NMAP) scan program on any Windows or Linux platform to performvulnerability scans. NMAP represents a free and open source utility for network exploration or securityauditing.
NMAP DP scan can take up to 18 hours to complete.Note
Syntax
nmap -n -vv -sU -p <port_range> <ccm_ip_address>
where:
-n: No DNS resolution. Tells NMAP to never do reverse DNS resolution on the active IP addresses that itfinds. Because DNS can be slow even with the NMAP built-in parallel stub resolver, this option can slashscanning times.
-v: Increases the verbosity level, which causes NMAP to print more information about the scan in progress.The system shows open ports as they are found and provides completion time estimates when NMAP estimatesthat a scan will take more than a few minutes. Use this option twice or more for even greater verbosity.
-sU: Specifies a UDP port scan.
-p: Specifies which ports to scan and overrides the default. Be aware that individual port numbers are acceptable,as are ranges that are separated by a hyphen (for example 1-1023).
ccm_ip_address: IP address of Cisco Unified Communications Manager
Default Security Administration TasksThe following are the default security administration tasks:
Procedure
PurposeCommand or Action
Obtain the Cisco Unified IP Phone Support Listusing Cisco Unified Reporting page.
Obtain Cisco Unified IP Phone Support ListStep 1
Perform the bulk reset of ITL file.Perform Bulk Reset of ITL FileStep 2
View the validity period of ITLRecoveryCertificate.
View the Validity Period of ITLRecoveryCertificate
Step 3
Security Guide for Cisco Unified Communications Manager, Release 1421
An Introduction to Unified CM SecurityNMAP Scan Operation

PurposeCommand or Action
View the ITL File using the CLI command.View the Validity Period of ITLRecoveryCertificate
Step 4
Update ITL File for Cisco Unified IP PhonesA centralized TFTP with Unified CommunicationManager using Security By Default with ITL files installedon the phones does not validate TFTP configuration files.
Perform the following procedure before any phones from the remote clusters are added to the centralizedTFTP deployment.
Procedure
Step 1 On the Central TFTP server, enable the Enterprise Parameter Prepare cluster for pre CM-8.0 rollback.Step 2 Restart TVS and TFTP.Step 3 Reset all phones to verify that they download the new ITL file that disables ITL signature verification.Step 4 Configure Enterprise Parameter Secure https URLs to use HTTP instead of HTTPS.
Unified Communications Manager Release 10.5 and later automatically resets phones after youenable the Prepare cluster for pre CM-8.0 rollback Enterprise Parameter. For Central TFTPserver's Unified Communications Manager version and how to enable this parameter, see "RollBack Cluster to a Pre-8.0 Release" section in the Security Guide for Cisco Unified CommunicationsManager.
Note
Obtain ITL File StatusUse the following procedure to obtain an ITL file status of the phones.
Procedure
Step 1 From Cisco Unified Communications Manager Administration choose Device > Phone.Step 2 Choose ITL File Status in Find Phone where drop-down list and select the criteria.
DescriptionField
ITL Hash of server and phone are the sameMatch
ITL Hash of the server is not as that of the phoneMisMatch
The phone fails to registere to a new CUCM serverand bounces back to its prior server
Not Installed
The ITL Hash of the Phone or the server is unknownUnknown
Security Guide for Cisco Unified Communications Manager, Release 1422
An Introduction to Unified CM SecurityUpdate ITL File for Cisco Unified IP Phones

Step 3 Click Find.
Obtain Cisco Unified IP Phone Support ListUse the Cisco Unified Reporting tool to generate a list of Cisco endpoints that support Security By Default.
Procedure
Step 1 From Cisco Unified Reporting, choose System Reports.Step 2 From the System Reports list, choose Unified CM Phone Feature List.Step 3 From the Product drop-down list, choose Security By Default.Step 4 Click Submit.
A report is generated with the list of supported features for the particular phone.
AutoregistrationThe system supports autoregistration in both mixed mode and nonsecure mode. The default configuration filewill also be signed. Cisco IP Phones that do not support Security by Default will be served a nonsigned defaultconfiguration file.
Roll Back Cluster to a Pre-8.0 ReleaseBefore you roll back a cluster to a pre-8.0 release of Unified Communications Manager, you must preparethe cluster for rollback using the Prepare Cluster for Rollback to pre-8.0 enterprise parameter.
To prepare the cluster for rollback, follow this procedure on each server in the cluster.
Procedure
Step 1 From Unified Communications Manager Administration, choose System > Enterprise ParametersConfiguration.
The Enterprise Parameters Configuration window displays.
Set the Prepare Cluster for Rollback to pre-8.0 enterprise parameter to True.
Enable this parameter only if you are preparing to rollback your cluster to a pre-8.0 release ofUnified Communications Manager. Phone services that use https (for example, extension mobility)will not work while this parameter is enabled. However, users will be able to continue making andreceiving basic phone calls while this parameter is enabled.
Note
Step 2 Wait ten minutes for the Cisco IP Phones to automatically restart and register with Unified CommunicationsManager.
Step 3 Revert each server in the cluster to the previous release.
Security Guide for Cisco Unified Communications Manager, Release 1423
An Introduction to Unified CM SecurityObtain Cisco Unified IP Phone Support List

For more information about reverting a cluster to a previous version, see Administration Guide for CiscoUnified Communications Manager .
Step 4 Wait until the cluster finishes switching to the previous version.Step 5 If you are running one of the following releases in mixed mode, you must run the CTL client:
• Unified Communications Manager Release 7.1(2)
• All regular releases of 7.1(2)
• All ES releases of 712 prior to 007.001(002.32016.001)
• Unified Communications ManagerRelease 7.1(3)
• All regular releases of 713 prior to 007.001(003.21900.003) = 7.1(3a)su1a
• All ES releases of 713 prior to 007.001(003.21005.001)
For more information about running the CTL client, see the “Configuring the CTL Client”chapter.
Note
Step 6 If “Prepare Cluster for Rollback to pre 8.0” is set to True in Enterprise Parameters then the following changemust be made for Corporate Directories to work:
Under Device > Device Settings > Phone Services > Corporate Directory you must change the ServiceURL from Application:Cisco/CorporateDirectory to http://<ipaddr>:8080/ccmcip/xmldirectoryinput.jsp.
Step 7 If “Prepare Cluster for Rollback to pre 8.0” is set to True in Enterprise Parameters then the following changemust be made for Personal Directories to work:
Under Device > Device Settings > Phone Services > Personal Directory you must change the Service URLfromApplication:Cisco/PersonalDirectory to 'http://<ipaddr>>:8080/ccmpd/pdCheckLogin.do?name=undefined.
Switch Back to Release 8.6 or Later After RevertIf you decide to switch back to the release 8.6 or later partition after you revert the cluster to Release 7.x,follow this procedure.
Procedure
Step 1 Follow the procedure for switching the cluster back to the inactive partition. For more information, see theAdministration Guide for Cisco Unified Communications Manager .
Step 2 If you were running one of the following releases in mixed mode, you must run the CTL client:
Unified Communications Manager Release 7.1(2)
• All regular releases of 7.1(2)
• All ES releases of 712 prior to 007.001(002.32016.001)
• Unified Communications Manager Release 7.1(3)
• All regular releases of 713 prior to 007.001(003.21900.003) = 7.1(3a)su1a
Security Guide for Cisco Unified Communications Manager, Release 1424
An Introduction to Unified CM SecuritySwitch Back to Release 8.6 or Later After Revert

• All ES releases of 713 prior to 007.001(003.21005.001)
For more information about running the CTL client, see the “Configuring the CTL Client”chapter.
Note
Step 3 From Unified Communications Manager Administration, choose System > Enterprise ParametersConfiguration.
The Enterprise Parameters Configuration window displays.
Set the Prepare Cluster for Rollback to pre-8.6 enterprise parameter to False.
Step 4 Wait ten minutes for the Cisco Unified IP Phones to automatically restart and register with UnifiedCommunications Manager.
Perform Bulk Reset of ITL FileMake sure you perform this procedure only from the Unified Communications Manager publisher.
The bulk reset of the ITL file is performed, when phones no longer trust the ITL file signer and also cannotauthenticate the ITL file provided by the TFTP service locally or using TVS.
To perform a bulk reset, use the CLI command utils itl reset. This command generates a new ITL recoveryfile and re-establishes the trust between phones and the TFTP service on CUCM.
When you install Unified Communications Manager, use the CLI command file get tftp ITLRecovery.p12toexport the ITL Recovery pair and then perform a backup through DR. You will also be prompted to enter theSFTP server (where the key is exported) and password.
Tip
Procedure
Step 1 Perform any one of the following steps:
• Run utils itl reset localkey.• Run utils itl reset remotekey.
For utils itl reset localkey, the local key resides on the publisher. When issuing this command, theITL file is signed temporarily by the CallManager key while the ITL Recovery key is resetting.
Note
Step 2 Run show itl to verify that the reset was successful.Step 3 From Cisco Unified CM Administration, choose System > Enterprise Parameters.Step 4 Click Reset.
The devices restart. They are ready to download the ITL file that is signed by the CallManager key and acceptconfiguration files.
Step 5 Restart the TFTP service and restart all devices.
Security Guide for Cisco Unified Communications Manager, Release 1425
An Introduction to Unified CM SecurityPerform Bulk Reset of ITL File

Restarting the TFTP service causes the ITL File to be signed by the ITLRecovery Key and rollingback the changes in Step 1.
Note
The devices download the ITL file that is signed with the ITLRecovery Key and register correctly to UnifiedCommunications Manager again.
Migrate IP Phones Between Clusters with Cisco Unified CommunicationsManager and ITL Files
Unified Communications Manager 8.0(1) and later introduced the new Security By Default feature and theuse of Initial Trust List (ITL) files. With this new feature, you must be careful when moving phones betweendifferent Unified CM clusters and ensure that you follow the proper steps for migration.
Failure to follow the proper steps may lead to a situation where thousands of phones must manually have theirITL files deleted.
Caution
Cisco IP Phones that support the new ITL file must download this special file from their Unified CM TFTPserver. Once an ITL file is installed on a phone, all future configuration files and ITL file updates must besigned by one of the following items:
• The TFTP server certificate that is currently installed on the phone or
• A TFTP certificate that can be validated TVS services on one of the clusters. You can find the certificatesof TVS services within the cluster listed in the ITL file.
With this new security functionality in mind, three problems can occur when moving a phone from one clusterto another cluster:
1. The ITL file of the new cluster is not signed by the current ITL file signer, so the phone cannot acceptthe new ITL file or configuration files.
2. The TVS servers listed in the existing ITL of the phone may not be reachable when the phones are movedto the new cluster.
3. Even if the TVS servers are reachable for certificate verification, the old cluster servers may not have thenew server certificates.
If one or more of these three problems are encountered, one possible solution is to delete the ITL file manuallyfrom all phones being moved between clusters. However, this is not a desirable solution since it requiresmassive effort as the number of phones increases.
The most preferred option is to make use of the Cisco Unified CM Enterprise Parameter Prepare Cluster forRollback to pre-8.0. Once this parameter is set to True, the phones download a special ITL file that containsempty TVS and TFTP certificate sections.
When a phone has an empty ITL file, the phone accepts any unsigned configuration file (for migrations toUnified CM pre-8.x clusters), and also accepts any new ITL file (for migrations to different Unified CM 8.xclusters).
Security Guide for Cisco Unified Communications Manager, Release 1426
An Introduction to Unified CM SecurityMigrate IP Phones Between Clusters with Cisco Unified Communications Manager and ITL Files

The empty ITL file can be verified on the phone by checking Settings > Security > Trust List > ITL. Emptyentries appear where the old TVS and TFTP servers used to be.
The phones must have access to the old Unified CM servers only as long as it takes them to download thenew empty ITL files.
If you plan to keep the old cluster online, disable the Prepare Cluster for Rollback to pre-8.0 EnterpriseParameter to restore Security By Default.
Reset CTL LocalkeyWhen devices on a Unified Communications Manager cluster are locked and lose their trusted status, performa reset of the Cisco Trust List (CTL) file with the CLI command utils ctl reset localkey. This commandgenerates a new CTL file.
Procedure
Step 1 Run utils ctl reset localkey
For utils ctl reset localkey, the local key resides on the publisher. When issuing this command, theCTL file is temporarily signed by the CallManager key.
Note
Step 2 Run show ctl to verify that the reset was successful.Step 3 From Cisco Unified CM Administration, choose System > Enterprise Parameters.
The Enterprise Parameters Configuration page appears.Step 4 Click Reset.
The devices restart. They are ready to download the CTL file that is signed by the CallManager key and acceptconfiguration files.
Step 5 Run the utils ctl update CTLFile and restart the necessary services rolling back the changes in Step 1.
The devices restart. They are ready to download the CTL file that is signed by the ITLRecovery key andaccept configuration files.
The devices download the CTL file that is signed using the required keys and register correctly to UnifiedCommunications Manager again.
View the Validity Period of ITLRecovery CertificateThe ITLRecovery certificate has a long validity period with phones. You can navigate to the Certificate FileData pane to view the validity period or any other ITLRecovery certificate details.
Procedure
Step 1 From Cisco Unified OS Administration, choose Security > Certificate Management.Step 2 Enter the required search parameters to find the certificate and view its configuration details.
The list of certificates that match the criteria appears in the Certificate List page.
Security Guide for Cisco Unified Communications Manager, Release 1427
An Introduction to Unified CM SecurityReset CTL Localkey

Step 3 Click the ITLRecovery link to view the validity period.
The ITLRecovery certificate details appear in the Certificate File Data pane.
The validity period is 20 years from the current year.
Set Up Authentication and Encryption
This procedure applies to the CTL Client encryption option. You may also set up encryption by using theutils ctl CLI command set. For more information about this option, see the Command Line Interface Guidefor Cisco Unified Communications Solutions.
Important
The following procedure provides all the tasks that you must perform to implement authentication andencryption. See the related topics for chapter references which contain tasks that you must perform for thespecified security feature.
• To implement authentication and encryption for a new install, refer to the following table.• To add a node to a secure cluster, see Installing Cisco Unified Communications Manager, which describeshow to add a node and how to configure security for the new node.
Procedure
Step 1 Activate the Cisco CTL Provider service in Cisco Unified Serviceability
Be sure to activate the CiscoCTL Provider service on each Unified Communications Manager server in thecluster.
If you activated this service prior to a Unified Communications Manager upgrade, you do not needto activate the service again. The service automatically activates after the upgrade.
Tip
Step 2 Activate the Cisco Certificate Authority Proxy service in Cisco Unified Serviceability to install, upgrade,troubleshoot, or delete locally significant certificates.
Activate the Cisco Certificate Authority Proxy service on the first node only.
Performing this task before you install and configure the CiscoCTL client ensures that you do nothave to update the CTL file to use CAPF.
Timesaver
Step 3 If you do not want to use the default port settings, configure ports for the TLS connection.
If you configured these settings prior to a Unified Communications Manager upgrade, the settingsmigrate automatically during the upgrade.
Tip
Step 4 If using the Cisco CTL client for encryption, obtain at least two security tokens and the passwords, hostnames/IPaddresses, and port numbers for the servers that you will configure for the CiscoCTL client.
You do not need hardware security tokens for the utils ctl CLI option.Note
Step 5 Install the CiscoCTL client.
Security Guide for Cisco Unified Communications Manager, Release 1428
An Introduction to Unified CM SecuritySet Up Authentication and Encryption

To update the CiscoCTL file after an upgrade to this Unified Communications Manager release,youmust install the plug-in that is available in this Unified CommunicationsManager Administrationrelease.
Tip
Step 6 Configure the CiscoCTL client.
If you created the CiscoCTL file prior to a Unified CommunicationsManager upgrade, the CiscoCTLfile migrates automatically during the upgrade. To update the CiscoCTL file after an upgrade tothis Unified Communications Manager release, you must install and configure the latest version ofthe CiscoCTL client.
Tip
Step 7 Configure the phone security profiles.
Perform the following tasks when you configure the profiles:
a) Configure the device security mode.
The device security mode migrates automatically during the Unified CommunicationsManagerupgrade. If you want to configure encryption for devices that only supported authentication ina prior release, you must choose a security profile for encryption in the Phone Configurationwindow.
Tip
b) Configure CAPF settings (for some phones that are running SCCP and SIP).
Additional CAPF settings display in the Phone Configuration window.
c) If you plan to use digest authentication for phones that are running SIP, check the Enable DigestAuthentication check box.
d) To enable encrypted configuration files (for some phones that are running SCCP and SIP), check theEncrypted Confide check box.
e) To exclude digest credentials in configuration file downloads, check the Exclude Digest Credential inConfiguration File check box.
Step 8 Apply the phone security profiles to the phones.Step 9 Configure CAPF to issue certificates to the phones.
If you performed certificate operations before the upgrade to this Unified CommunicationsManagerrelease and CAPF ran on a subscriber server, you must copy the CAPF data to the publisher databaseserver before you upgrade a cluster to this Unified Communications Manager release.
Tip
The CAPF data on the Unified Communications Manager subscriber server does not migrate to theUnified Communications Manager database, and a loss of data occurs, if you do not copy the datato the database. If a loss of data occurs, the locally significant certificates that you issued with theCAPF utility remain in the phones, but the CAPF utility for this release must reissue the certificates,which are no longer valid.
Caution
The following steps are optional:
Step 10 Verify that the locally significant certificates are installed on supported Cisco Unified IP Phones.Step 11 Configure digest authentication for phones that are running SIP.Step 12 Perform phone-hardening tasks.
If you configured phone-hardening settings prior to a Unified Communications Manager upgrade,the device configuration settings migrate automatically during the upgrade.
Tip
Step 13 Configure conference bridge resources for security.
Security Guide for Cisco Unified Communications Manager, Release 1429
An Introduction to Unified CM SecuritySet Up Authentication and Encryption

Step 14 Configure voice mail ports for security.
For more information, see the applicable Cisco Unity or Cisco Unity Connection integration guide for thisUnified Communications Manager release.
Step 15 Configure security settings for SRST references.
If you configured secure SRST references in a previous Unified Communications Manager release,the configuration automatically migrates during the Unified Communications Manager upgrade.
Tip
Step 16 Configure IPSec.
For more information, see the Administration Guide for Cisco Unified Communications Manager .
Step 17 Configure the SIP trunk security profile.
If you plan to use digest authentication, check the Enable Digest Authentication check box in the profile.
For trunk-level authorization, check the authorization check boxes for the allowed SIP requests.
If youwant application-level authorization to occur after trunk-level authorization, check the Enable ApplicationLevel Authorization check box.
You cannot check application-level authorization unless digest authentication is checked.
Step 18 Apply the SIP trunk security profile to the trunk.Step 19 Configure digest authentication for the trunk.Step 20 If you checked the Enable Application Level Authorization check box in the SIP trunk security profile,
configure the allowed SIP requests by checking the authorization check boxes in the Application UserConfiguration window.
Step 21 Reset all phones.Step 22 Reboot all servers.
Security Guide for Cisco Unified Communications Manager, Release 1430
An Introduction to Unified CM SecuritySet Up Authentication and Encryption

P A R T IIBasic System Security
• Certificates, on page 33• Certificate Authority Proxy Function, on page 59• Security Modes , on page 75• SIP OAuth Mode, on page 79• TFTP Encryption , on page 87• Cipher Management, on page 95• Phone Security , on page 111• Secure Tones and Icons, on page 139• Trunk and Gateway SIP Security , on page 147• TLS Setup, on page 161


C H A P T E R 4Certificates
• Certificate Management, on page 33• Certificate Monitoring and Revocation, on page 54• Simplified Certificate Management, on page 56
Certificate ManagementCertificateManagement feature provides an overview of the various certificate types, tasks involved to managecertificates, and how to monitor and revoke certificates.
Certificate OverviewCertificates are critical for establishing secure connections in a deployment. They authenticate individuals,computers, and other services on the network. Implementing certificate management provides a good levelof protection while reducing complexity.
A Certificate is a file that proves the identity of the certificate owner and contains the following information:
• Certificate Holder Name
• Public Key
• Digital Signature of the Certificate Authority issuing the Certificate
Unified Communications Manager uses certificates that use the Public Key Infrastructure (PKI) to enableencryption and validate server - client identity. It doesn't trust other systems and denies access, unless it hasa matching certificate in the appropriate trust store.
Root Certificates secure connections between users and hosts, including devices and application users.Certificates secure and add the client and server identities to the root trust stores.
Administrators can view the fingerprint of server certificates, regenerate self-signed certificates, and deletetrust certificates from Unified Communications Manager interface. They can also regenerate and viewself-signed certificates using CLI.
For more information on how to update the Unified Communications Manager trust store and managecertificates, see Administration Guide for Cisco Unified Communications Manager.
Security Guide for Cisco Unified Communications Manager, Release 1433

Unified Communications Manager supports only PEM (.pem) and DER (.der) formatted certificates. Themaximum size of certificate supported for DER or PEM is 4096 bits.
Note
When you upload two certificates, make sure that they have the same name and validity period but differentserial numbers and signature algorithms.
For Example,
Root CA with 27:20:41:0c:5b:08:69:80:42:62:4f:13:bd:16:06:6aserial number and SHA-1 algorithmexists in Unified Communications Manager tomcat-trust.
When you attempt to upload the certificate with 7b:35:33:71:0b:7c:08:b2:47:b3:aa:f9:5c:0d:ca:e4
serial number and SHA-256 algorithm, the certificate management:
• Verifies the incoming certificate validity
• Searches the certificate with the same name in the Tomcat trust folder
• Compares the serial number of the certificate existing in the Tomcat trust folder and the incomingcertificate that you're uploading
If the serial numbers are different, it verifies the validity start date of both the certificates. If the start timestampof the new incoming certificate is the latest, then it replaces the existing certificate else it's not uploaded.
Both SHA-1 and SHA-256 algorithms have same subject name or common name, which implies that theybelong to the same entity. The Unified Communications Manager framework doesn't support both thesealgorithms on the Unified Communications Manager server simultaneously. It supports only one certificatethat belongs to any entity in a particular trust folder, irrespective of the signature algorithm.
Certificate TypesThis section provides an overview of the different types of certificates and certificate signing request keyusage extensions.
Phone Certificate TypesA phone certificate is a unique identifier which authenticates phones. It's crucial for security against IP attacks.
Phone Certificates are as follows:
Table 5:
DescriptionPhone Certificates
MICs are signed by Cisco Manufacturing CA and we automatically install thiscertificate in supported Cisco Unified IP Phone.
MICs authenticate with CiscoCertificate Authority Proxy Function (CAPF) forLocally Significant Certificates (LSC) installation or download an encryptedconfiguration file. Cannot use after expiry, as administrators can’t modify, delete,or revoke the certificates.
Manufacture InstalledCertificate (MIC)
Security Guide for Cisco Unified Communications Manager, Release 1434
Basic System SecurityCertificate Types

DescriptionPhone Certificates
Cisco Unified IP Phones require an LSC to operate in secure mode and is usedfor authentication and encryption. They are signed by CAPF, Online or OfflineCA and takes precedence over MIC.
After you perform the necessary tasks that are associated with CAPF, thiscertificate gets installed on supported phones. The LSC secures the connectionbetween Unified Communications Manager and the phone after you configurethe device security mode for authentication or encryption.
Locally SignificantCertificates (LSC)
We recommend that you use only MICs for LSC installation. We support LSCs to authenticate the TLSconnection with Unified Communications Manager. When phone configurations use MICs for TLSauthentication or for any other purpose, we assume no liability asMIC root certificates get easily compromised.
Tip
Upgrade Cisco Unified IP Phones 6900, 7900, 8900, and 9900 series to use LSCs for a TLS connection toUnified CommunicationsManager. RemoveMIC root certificates from the Unified CommunicationsManagertrust store to avoid possible future compatibility issues.
Phone models that use MICs for TLS connection to Unified Communications Manager may not be able toregister.
Note
Administrators should remove the followingMIC root certificates from the Unified CommunicationsManagertrust store:
• CAP-RTP-001
• CAP-RTP-002
• Cisco_Manufacturing_CA
• Cisco_Root_CA_2048
• Cisco_Manufacturing_CA_SHA2
• Cisco_Root_CA_M2
• ACT2_SUDI_CA
MIC root certificates that stay in the CAPF trust store get used for certificate upgrades. For information onupdating the Unified Communications Manager trust store and managing certificates, see AdministrationGuide for Cisco Unified Communications Manager.
In Unified Communications Manager Release 12.5.1SU2 and earlier, the Secure Onboarding feature doesn’twork if you remove the Cisco Manufacturing certificates from the CallManger-trust store, because it can’tvalidate theManufacture Installed Certificates (MICs) from phones. However, this feature works fromUnifiedCommunications Manager Release 12.5.1SU3 onwards, because it uses the CAPF-trust store to validate theMICs from phones.
Note
Security Guide for Cisco Unified Communications Manager, Release 1435
Basic System SecurityPhone Certificate Types

Server Certificate TypesServer Certificates are basically to identify a server. The server certificates serve the rationale of encryptingand decrypting the content.
Self-signed (own) certificate types in Unified Communications Manager servers are as follows:
Unified Communications Manager imports the following certificate types to the Unified CommunicationsManager trust store:
Table 6: Certificate Type and Description
DescriptionCertificate Type
Cisco Unity and Cisco Unity Connection use this self-signed root certificate tosign the Cisco Unity SCCP and Cisco Unity Connection SCCP device certificates.For CiscoUnity, the CiscoUnity Telephony IntegrationManager (UTIM)manages
this certificate. For Cisco Unity Connection, Cisco Unity ConnectionAdministration manages this certificate.
Cisco Unity server orCisco Unity Connection
certificate
Cisco Unity and Cisco Unity Connection SCCP devices use this signed certificateto establish a TLS connection with Unified Communications Manager.
Cisco Unity and CiscoUnity Connection SCCP
device certificates
A SIP user agent that connects via a SIP trunk authenticates to UnifiedCommunications Manager if the CallManager trust store contains the SIP useragent certificate and if the SIP user agent contains the Unified Communications
Manager certificate in its trust store.
SIP Proxy servercertificate
The certificate name represents a hash of the certificate subject name, which is based on the voice-mail servername. Every device (or port) gets issued a certificate that is rooted at the root certificate.
Note
The following additional trust store exists:
• Common trust store for Tomcat and web applications
• IPSec-trust
• CAPF-trust
• Userlicensing-trust
• TVS-trust
• Phone-SAST-trust
• Phone-CTL-trust
For more information about CA trust certificates for Cisco Unity Connection, see the Administration Guidefor Cisco Unified Communications Manager. These trust-certificates secure connections to Exchange orMeeting Place Express for fetching e-mails, calendar information, or contacts.
Security Guide for Cisco Unified Communications Manager, Release 1436
Basic System SecurityServer Certificate Types

Third-Party CA-Signed CertificatesCA-Signed certificates are trusted third party certificates which signs and issues digital certificates.
By default, Unified Communications Manager uses self-signed certificates for all connections. However, youcan add security by configuring a third-party CA to sign certificates. To use a third-party CA, install the CAroot certificate chain in Cisco Unified Communications Manager Administration.
To issue CA-signed certificates, submit a Certificate Signing Request (CSR) so that the CA can issue andsign a certificate. For details on how to Upload, Download, and View Certificates, see the Self-SignedCertificates section.
Configuration
If youwant to use CA-signed certificates from another system connecting to Unified CommunicationsManager,do the following in Cisco Unified Communications Manager Administration:
• Upload the root certificate chain of the CA that signed the certificates.
• Upload the CA-signed certificates from the other system.
If you want to use CA-signed certificates for Unified Communications Manager:
• Complete a CSR to request CA-signed certificates in Cisco Unified Communications ManagerAdministration.
• Download both the CA root certificate chain and the CA-signed certificates in Cisco UnifiedCommunications Manager Administration
• Upload both the CA root certificate chain and the CA-signed certificates.
For details on how to obtain and configure root certificates for your CA, see the Certificate Authoritydocumentation.
Support for Certificates from External CAsUnified CommunicationsManager supports integration with third-party certificate authorities (CAs) by usinga PKCS#10 certificate signing request (CSR) mechanism, which is accessible at the Unified CommunicationsManager GUI.
Customers who currently use third-party CAs should use the CSR mechanism to issue certificates for:
• Unified Communications Manager
• CAPF
• IPSec
• Tomcat
• TVS
Multiserver (SAN) CA-signed certificates only applies to nodes in the cluster when the certificate gets uploadedto the Publisher. Generate a new multiserver certificate. Upload it to the cluster every time you add a newnode or build it again.
Note
Security Guide for Cisco Unified Communications Manager, Release 1437
Basic System SecurityThird-Party CA-Signed Certificates
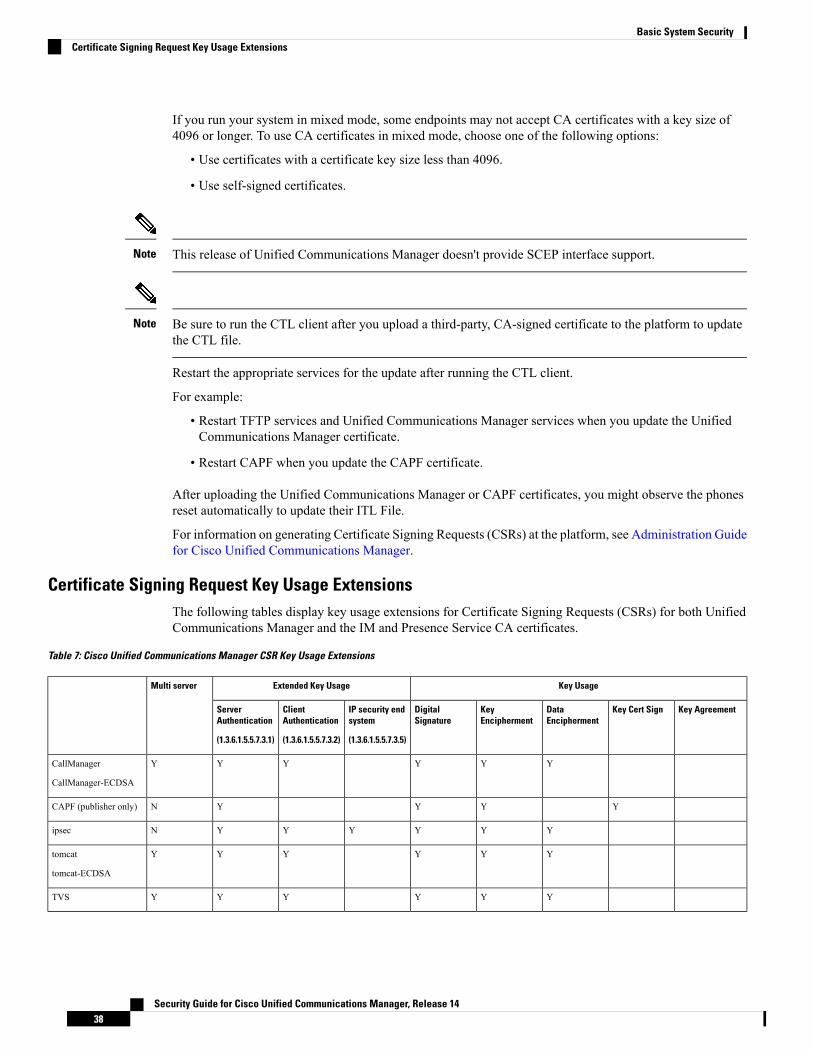
If you run your system in mixed mode, some endpoints may not accept CA certificates with a key size of4096 or longer. To use CA certificates in mixed mode, choose one of the following options:
• Use certificates with a certificate key size less than 4096.
• Use self-signed certificates.
This release of Unified Communications Manager doesn't provide SCEP interface support.Note
Be sure to run the CTL client after you upload a third-party, CA-signed certificate to the platform to updatethe CTL file.
Note
Restart the appropriate services for the update after running the CTL client.
For example:
• Restart TFTP services and Unified Communications Manager services when you update the UnifiedCommunications Manager certificate.
• Restart CAPF when you update the CAPF certificate.
After uploading the Unified Communications Manager or CAPF certificates, you might observe the phonesreset automatically to update their ITL File.
For information on generating Certificate Signing Requests (CSRs) at the platform, see Administration Guidefor Cisco Unified Communications Manager.
Certificate Signing Request Key Usage ExtensionsThe following tables display key usage extensions for Certificate Signing Requests (CSRs) for both UnifiedCommunications Manager and the IM and Presence Service CA certificates.
Table 7: Cisco Unified Communications Manager CSR Key Usage Extensions
Key UsageExtended Key UsageMulti server
Key AgreementKey Cert SignDataEncipherment
KeyEncipherment
DigitalSignature
IP security endsystem
(1.3.6.1.5.5.7.3.5)
ClientAuthentication
(1.3.6.1.5.5.7.3.2)
ServerAuthentication
(1.3.6.1.5.5.7.3.1)
YYYYYYCallManager
CallManager-ECDSA
YYYYNCAPF (publisher only)
YYYYYYNipsec
YYYYYYtomcat
tomcat-ECDSA
YYYYYYTVS
Security Guide for Cisco Unified Communications Manager, Release 1438
Basic System SecurityCertificate Signing Request Key Usage Extensions

Table 8: IM and Presence Service CSR Key Usage Extensions
Key UsageExtended Key UsageMulti server
Key AgreementKey Cert SignDataEncipherment
KeyEncipherment
DigitalSignature
IP security endsystem
(1.3.6.1.5.5.7.3.5)
ClientAuthentication
(1.3.6.1.5.5.7.3.2)
ServerAuthentication
(1.3.6.1.5.5.7.3.1)
YYYYYYYNcup
cup-ECDSA
YYYYYYYYcup-xmpp
cup-xmpp-ECDSA
YYYYYYYYcup-xmpp-s2s
cup-xmpp-s2s-ECDSA
YYYYYYNipsec
YYYYYYtomcat
tomcat-ECDSA
Certificate TasksThis section lists all the procedures to manage certificates.
Bulk Certificate ExportIf both the old and new clusters are online at the same time, you can use the Bulk Certificate migration method.
Remember that the Cisco Unified IP Phones verify every downloaded file against either the ITL file, or againsta TVS server that exists in the ITL file. If the phone needs to move to a new cluster, the ITL file that the newcluster presents must be trusted by the old cluster TVS certificate store.
The Bulk Certificate Export method only works if both clusters are online with network connectivity whilethe phones are being migrated.
Note
During bulk certificate import, you need to import an additional ITLRecovery certificate on both the visitingcluster and the home cluster for Cisco Extension Mobility Cross Cluster (EMCC) to continue functioning. Anew option to import ITL_Recovery certificate is added in Bulk Certificate Management for the CertificateType drop-down list.
Note
To use the Bulk Certificate Export method complete the following procedure:
Procedure
Step 1 From Cisco Unified Operating System Administration, choose Security > Bulk Certificate Management.
Security Guide for Cisco Unified Communications Manager, Release 1439
Basic System SecurityCertificate Tasks

Step 2 Export certificates from new destination cluster (TFTP only) to a central SFTP server.Step 3 Consolidate certificates (TFTP only) on the SFTP server using the Bulk Certificate interface.Step 4 On the origination cluster use the Bulk Certificate function to import the TFTP certificates from the central
SFTP server.Step 5 Use DHCP option 150, or some other method, to point the phones to the new destination cluster.
The phones download the new destination cluster ITL file and attempt to verify it against their existing ITLfile. The certificate is not in the existing ITL file so the phone requests the old TVS server to verify thesignature of the new ITL file. The phone sends a TVS query to the old origination cluster on TCP port 2445to make this request.
If the certificate export/consolidate/import process works correctly then the TVS returns success, and thephone replaces the ITL file in memory with the newly downloaded ITL file.
The phones can now download and verify the signed configuration files from the new cluster.
Show CertificatesUse the filter option on the Certificate List page, to sort and view the list of certificates, based on their commonname, expiry date, key type, and usage. The filter option thus allows you to sort, view, and manage your dataeffectively.
From Unified Communications Manager Release 14, you can choose the usage option to sort and view thelist of identity or trust certificates.
Procedure
Step 1 From Cisco Unified OS Administration, choose Security > Certificate Management.The Certificate List page appears.
Step 2 From the Find Certificate List where drop-down list, choose the required filter option, enter the search itemin the Find field, and click the Find button.
For example, to view only identity certificates, chooseUsage from the Find Certificate List where drop-downlist, enter Identity in the Find field, and click the Find button.
Download CertificatesUse the download certificates task to have a copy of your certificate or upload the certificate when you submita CSR request.
Procedure
Step 1 From Cisco Unified OS Administration, choose Security > Certificate Management.Step 2 Specify search criteria and then click Find.Step 3 Choose the required file name and Click Download.
Security Guide for Cisco Unified Communications Manager, Release 1440
Basic System SecurityShow Certificates

Install Intermediate CertificatesTo install an intermediate certificate, you must install a root certificate first and then upload the signedcertificate. This step is required only if the certificate authority provides a signed certificate with multiplecertificates in the certificate chain.
Procedure
Step 1 From Cisco Unified OS Administration, click Security > Certificate Management.Step 2 Click Upload Certificate / Certificate Chain.Step 3 Choose the appropriate trust store from the Certificate Purpose drop-down list to install the root certificate.Step 4 Enter the description for the certificate purpose selected.Step 5 Choose the file to upload by performing one of the following steps:
• In the Upload File text box, enter the path to the file.• Click Browse and navigate to the file; then click Open.
Step 6 Click Upload.Step 7 Access the Cisco Unified Intelligence Center URL using the FQDN after you install the customer certificate.
If you access the Cisco Unified Intelligence Center using an IP address, you will see the message “Click hereto continue”, even after you successfully install the custom certificate.
• TFTP service should be deactivated and later activated when a Tomcat certificate is uploaded.Else, the TFTP continues to offer the old cached self-signed tomcat certificate.
Note
Delete a Trust CertificateA trusted certificate is the only type of certificate that you can delete. You cannot delete a self-signed certificatethat is generated by your system.
Deleting a certificate can affect your system operations. It can also break a certificate chain if the certificateis part of an existing chain. Verify this relationship from the username and subject name of the relevantcertificates in the Certificate List window. You cannot undo this action.
Caution
Procedure
Step 1 From Cisco Unified OS Administration, choose Security > Certificate Management.Step 2 Use the Find controls to filter the certificate list.Step 3 Choose the filename of the certificate.Step 4 Click Delete.Step 5 Click OK.
Security Guide for Cisco Unified Communications Manager, Release 1441
Basic System SecurityInstall Intermediate Certificates

• If you delete the “CAPF-trust”, “tomcat-trust”, “CallManager-trust”, or “Phone-SAST-trust”certificate type, the certificate is deleted across all servers in the cluster.
• If you import a certificate into the CAPF-trust, it is enabled only on that particular node andis not replicated across the cluster.
Note
Generate a Certificate Signing RequestGenerate a Certificate Signing Request (CSR) which is a block of encrypted text that contains certificateapplication information, public key, organization name, common name, locality, and country. A certificateauthority uses this CSR to generate a trusted certificate for your system.
If you generate a new CSR, you overwrite any existing CSRs.Note
Procedure
Step 1 From Cisco Unified OS Administration, choose Security > Certificate Management.Step 2 Click Generate CSR.Step 3 Configure fields on the Generate Certificate Signing Request window. See the online help for more
information about the fields and their configuration options.Step 4 Click Generate.
Certificate Signing Request Fields
Table 9: Certificate Signing Request Fields
DescriptionField
From the drop-down box, select a value:
• CallManager
• CallManager-ECDSA
Certificate Purpose
Select a Unified Communications Manager server.
When you select this field for multiserver for ECDSA, the syntax is:Callmanager-ecdsa common name: <host-name>-EC-ms.<domain>
When you select this field for multiserver for RSA, the syntax is:Callmanager common name: <host-name>-ms.<domain>
Distribution
Shows the name of the Unified Communications Manager applicationthat you selected in the Distribution field by default.
Common Name
Security Guide for Cisco Unified Communications Manager, Release 1442
Basic System SecurityGenerate a Certificate Signing Request

DescriptionField
This field appears in Subject Alternate Names (SANs) section. It liststhe host names that are to be protected by a single certificate.
Auto-populated Domains
This field appears in Subject Alternate Names (SANs) section. It showsthe default domain name. You canmodify the domain name, if required.
Parent Domain
This field identifies the type of key used for encryption and decryptionfor the public-private key pair.
Unified Communications Manager supports EC and RSA key types.
Key Type
From the Key Length drop-down box, select one of the values.
Depending on the key length, the CSR request limits the hash algorithmchoices. By having the limited hash algorithm choices, you can use ahash algorithm strength that is greater than or equal to the key lengthstrength. For example, for a key length of 256, the supported hashalgorithms are SHA256, SHA384, or SHA512. Similarly, for the keylength of 384, the supported hash algorithms are SHA384 or SHA512.
Certificates with a key length value of 3072 or 4096 canonly be selected for RSA certificates. These options are notavailable for ECDSA certificates.
Note
Some phone models may fail to register if the RSA keylength selected for the CallManagerCertificate Purpose isgreater than 2048. From the Unified CM Phone Feature ListReport on the Cisco Unified Reporting Tool (CURT), youcan check the 3072/4096 RSA key size support feature forthe list of supported phone models.
Note
Key Length
Select a value from the Hash Algorithm drop-down box to havestronger hash algorithm as the elliptical curve key length. From theHash Algorithm drop-down box, select one of the values.
Note • The values for theHash Algorithm field change basedon the value you select in the Key Length field.
• If your system is running on FIPSmode, it is mandatorythat you select SHA256 as the hashing algorithm.
Hash Algorithm
Download a Certificate Signing Request
Download the CSR after you generate it and have it ready to submit to your certificate authority.
Procedure
Step 1 From Cisco Unified OS Administration, choose Security > Certificate Management.Step 2 Click Download CSR.
Security Guide for Cisco Unified Communications Manager, Release 1443
Basic System SecurityDownload a Certificate Signing Request

Step 3 Choose the certificate name from the Certificate Purpose drop-down list.Step 4 Click Download CSR.Step 5 (Optional) If prompted, click Save.
Generate Self-Signed Certificate
Procedure
Step 1 From Cisco Unified OS Administration, choose Security > Certificate Management.The Certificate List window appears.
Step 2 Enter search parameters to find a certificate and view its configuration details.The system displays the records that match all the criteria in the Certificate List window.
Step 3 Click Generate Self-Signed Certificate to generate a new self-signed certificate.The Generate New Self-Signed Certificate window appears.
Step 4 From the Certificate Purpose drop-down box, select a system security certificate, such asCallManager-ECDSA.
Step 5 Configure the fields in the Generate New Self-Signed Certificate window. See the Related Topics sectionfor more information about the fields and their configuration options.
Step 6 Click Generate.
Related TopicsSelf-signed Certificate Fields, on page 45
Security Guide for Cisco Unified Communications Manager, Release 1444
Basic System SecurityGenerate Self-Signed Certificate

Self-signed Certificate Fields
Table 10: Self-signed Certificate Fields
DescriptionField
Choose the required option from the drop-down list.
When you choose any of the following options, the Key Type fieldis automatically set to RSA.
• tomcat
• ipsec
• ITLRecovery
• CallManager
• CAPF
• TVS
When you choose any of the following options, the Key Type fieldis automatically set to EC (Elliptical Curve).
• tomcat-ECDSA
• CallManager-ECDSA
Certificate Purpose
Choose a Unified Communications Manager server from thedrop-down list.
Distribution
Displays the name of the Unified Communications Manager serverthat you have chosen using the Distribution drop-down list.
Common Name
Appears only if you have chosen any of the following options usingthe Certificate Purpose drop-down list.
• tomcat
• tomcat-ECDSA
• CallManager
• CallManager-ECDSA
• TVS
This field lists the host names that are protected by a singlecertificate. The certificate common name is the same as the hostname.Both, CallManager-ECDSA and tomcat-ECDSAcertificate has acommon name that is different from the hostname.
The field displays the fully qualified domain name forCallManager-ECDSA certificate.
Auto-populated Domains
Security Guide for Cisco Unified Communications Manager, Release 1445
Basic System SecuritySelf-signed Certificate Fields

DescriptionField
This field lists the type of keys used for encryption and decryptionof the public-private key pair.
Unified CommunicationsManager supportsEC andRSA key types.
Key Type
Choose any of the following values from the drop-down list:
• 1024
• 2048
• 3072
• 4096
Depending on the key length, the self-signed certificate request,limits the hash algorithm choices. With the limited hash algorithmchoices, you can use a hash algorithm strength that is greater thanor equal to the key length strength.
• If the key length value is 256, the supported hash algorithmsare SHA256, SHA384, or SHA512.
• If the key length value is 384, the supported hash algorithmsare SHA384 or SHA512.
Certificates with a key length value of 3072 or 4096 arechosen only for RSA certificates. These options are notavailable for ECDSA certificates.
Note
Some phone models might fail to register if the RSA keylength value chosen for the CallManager CertificatePurpose is greater than 2048.
For more information, navigate to Unified CM PhoneFeature List Report on the Cisco Unified ReportingTool (CURT), to check the 3072/4096 RSA key sizesupport for the list of supported phone models.
Note
Key Length
Choose a value that is greater than or equal to the key length fromthe drop-down list:
Note • The values in the Hash Algorithm drop-down listchanges based on the value you have chosen in theKey Length field.
• If your system is running in FIPS mode, it ismandatory to choose SHA256 as the hashingalgorithm.
Hash Algorithm
Security Guide for Cisco Unified Communications Manager, Release 1446
Basic System SecuritySelf-signed Certificate Fields
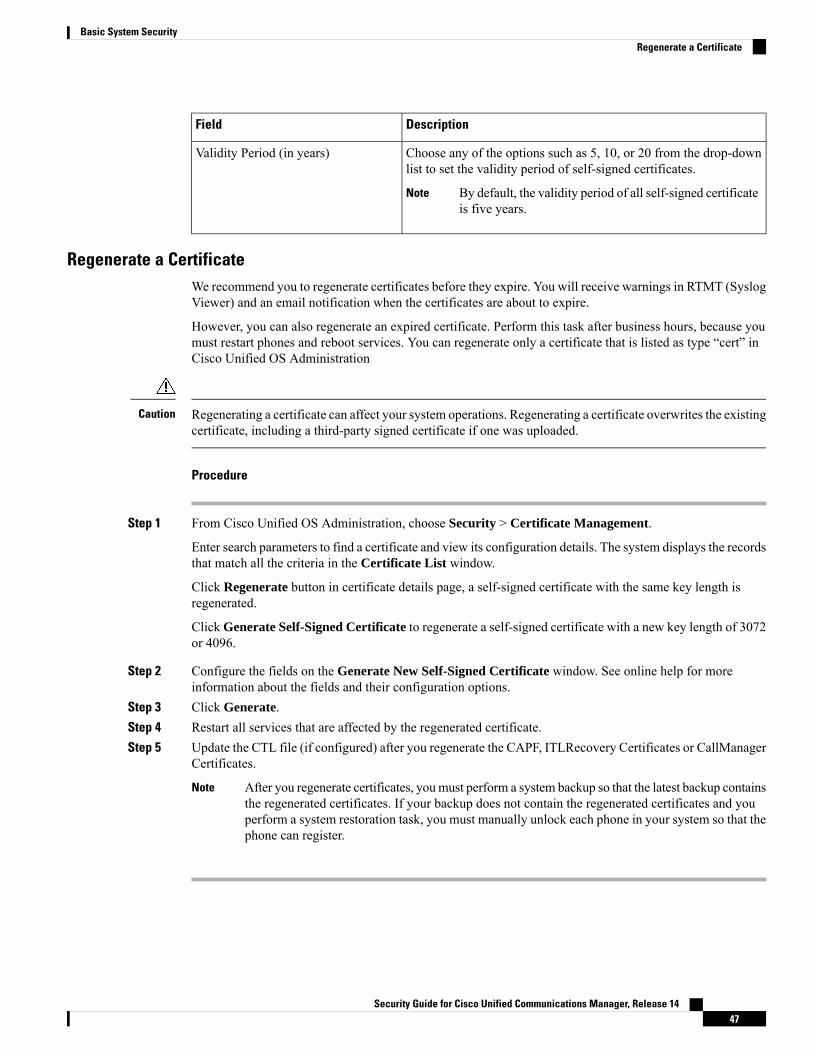
DescriptionField
Choose any of the options such as 5, 10, or 20 from the drop-downlist to set the validity period of self-signed certificates.
By default, the validity period of all self-signed certificateis five years.
Note
Validity Period (in years)
Regenerate a CertificateWe recommend you to regenerate certificates before they expire. You will receive warnings in RTMT (SyslogViewer) and an email notification when the certificates are about to expire.
However, you can also regenerate an expired certificate. Perform this task after business hours, because youmust restart phones and reboot services. You can regenerate only a certificate that is listed as type “cert” inCisco Unified OS Administration
Regenerating a certificate can affect your system operations. Regenerating a certificate overwrites the existingcertificate, including a third-party signed certificate if one was uploaded.
Caution
Procedure
Step 1 From Cisco Unified OS Administration, choose Security > Certificate Management.
Enter search parameters to find a certificate and view its configuration details. The system displays the recordsthat match all the criteria in the Certificate List window.
Click Regenerate button in certificate details page, a self-signed certificate with the same key length isregenerated.
Click Generate Self-Signed Certificate to regenerate a self-signed certificate with a new key length of 3072or 4096.
Step 2 Configure the fields on the Generate New Self-Signed Certificate window. See online help for moreinformation about the fields and their configuration options.
Step 3 Click Generate.Step 4 Restart all services that are affected by the regenerated certificate.Step 5 Update the CTL file (if configured) after you regenerate the CAPF, ITLRecovery Certificates or CallManager
Certificates.
After you regenerate certificates, youmust perform a system backup so that the latest backup containsthe regenerated certificates. If your backup does not contain the regenerated certificates and youperform a system restoration task, you must manually unlock each phone in your system so that thephone can register.
Note
Security Guide for Cisco Unified Communications Manager, Release 1447
Basic System SecurityRegenerate a Certificate

Certificate Names and Descriptions
The following table describes the system security certificates that you can regenerate and the related servicesthat must be restarted. For information about regenerating the TFTP certificate, see the Cisco UnifiedCommunications Manager Security Guide at http://www.cisco.com/c/en/us/support/unified-communications/unified-communications-manager-callmanager/products-maintenance-guides-list.html.
Table 11: Certificate Names and Descriptions
Related ServicesDescriptionName
Cisco Tomcat Services, CiscoCallManager Service
This certificate is used byWebServices and CiscoCallManager services when SIPOauth mode is enabled.
tomcat
tomcat-ECDSA
CallManager - N/A
CallManager-ECDSA - CiscoCallManager Service
This is used for SIP, SIP trunk,SCCP, TFTP etc.
CallManager
CallManager-ECDSA
N/AUsed by the CAPF service runningon the Unified CommunicationsManager Publisher. This certificateis used to issue LSC to theendpoints (except online and offlineCAPF mode)
CAPF
N/AThis is used by Trust verificationservice, which acts as a secondarytrust verificationmechanism for thephones in case the server certificatechanges.
TVS
A new enterprise parameter Phone Interaction on Certificate Update under section Security Parameter isintroduced to reset phones either manually or automatically as applicable when one of the TVS, CAPF, orTFTP certificates are updated. This parameter is by default set to reset the phones automatically.
Note
Regenerate CAPF Certificate
To regenerate the CAPF certificate, perform the following steps:
If the CAPF certificate is on the publisher, you might observe the phones restarting automatically to updatetheir ITL file. This is applicable when the Phone interaction on Certificate Update parameter is automaticallyreset.
Note
Security Guide for Cisco Unified Communications Manager, Release 1448
Basic System SecurityCertificate Names and Descriptions

Procedure
Step 1 Regenerate the CAPF certificate.Step 2 If you have a CTL file then you must Update the CTL File.
For more information see Regenerate Certificate, section in the Cisco Unified Communications ManagerSecurity Guide.
Step 3 CAPF service is automatically restarted when CAPF certificate is regenerated.
See the “Activating the Certificate Authority Proxy Function Service” section, in the Cisco UnifiedCommunications Manager Security Guide.
Regenerate TVS Certificate
If you plan to regenerate both TVS and TFTP certificates, regenerate the TVS certificate, wait for the possiblephone restarts to complete, and then regenerate the TFTP certificate. This is applicable when the Phoneinteraction on Certificate Update parameter is automatically reset.
Note
Procedure
Step 1 Regenerate the TVS certificate.Step 2 If you have a CTL file then you must Update the CTL File.
For more information see Regenerate Certificate, section in the Cisco Unified Communications ManagerSecurity Guide.
Step 3 TVS service is automatically restarted when TVS certificate is regenerated.
Regenerate TFTP Certificate
To regenerate a TFTP certificate, follow these steps:
If you plan to regenerate multiples certificates you must regenerate the TFTP certificate last. Wait for thepossible phone restarts to complete before you regenerate the TFTP certificate. You might need to manuallydelete the ITL File from all Cisco IP Phones, if you do not follow this procedure. This is applicable when thePhone interaction on Certificate Update parameter is automatically reset.
Note
Procedure
Step 1 Regenerate the TFTP certificate.
Security Guide for Cisco Unified Communications Manager, Release 1449
Basic System SecurityRegenerate TVS Certificate

For more information see Administration Guide for Cisco Unified Communications Manager .
Step 2 If the TFTP service was activated, wait until all the phones have automatically restarted.Step 3 If your cluster is in mixed mode, Update the CTL File.Step 4 If the cluster is part of an EMCC deployment, repeat the steps for bulk certificate provisioning.
For more information see Administration Guide for Cisco Unified Communications Manager .
System Back-Up Procedure After TFTP Certificate Regeneration
The trust anchor for the ITL File is a software entity: the TFTP private key. If the server crashes, the key getslost, and phones will not be able to validate new ITL File.
In Unified Communications Manager Release 10.0, the TFTP certificate and private key both get backed upby the Disaster Recovery System. The system encrypts the backup package to keep the private key secret. Ifthe server crashes, the previous certificates and keys will be restored.
Whenever the TFTP certificate gets regenerated, youmust create a new system backup. For backup procedures,see the Administration Guide for Cisco Unified Communications Manager .
Regenerate ITLRecovery Certificate
Do not regenerate the ITLRecovery Certificate very frequently as this certificate has a long validity withphones and also it contains the CallManager Certificate.
Warning
Regenerate ITLRecovery Certificate for Non-Secure Cluster
1. Verify if the ITL File is valid and that all phones in the cluster trust the current ITL File.
2. Regenerate the ITLRecovery Certificate.
Navigate to the publisher in each cluster to regenerate the ITLRecovery Certificate.
a. From the Unified OS Administration, choose Security > Certificate Management
b. Click Find.
The Certificate List window appears.
c. Click the ITLRecovery.pem Certificate link from the list of certificates displayed.
d. Click Regenerate, to regenerate the ITLRecovery Certificate.
e. In the confirmation message pop-up, click OK.
3. Sign the ITL file using utils itl reset localkey in the CallManager Certificate to accept the new ITLfile.
4. Reset in batches all the phones in the cluster.
Make sure all the phones in the cluster are registered.Note
Security Guide for Cisco Unified Communications Manager, Release 1450
Basic System SecuritySystem Back-Up Procedure After TFTP Certificate Regeneration

5. Restart TFTP Service to have the ITL file re-signed by the New ITLRecovery Certificate.
New ITLRecovery Certificates are uploaded on phones while they reset.
6. Reset in batches all phones in the cluster for a second time to pick up the new ITL File.
7. Phones are uploaded with the new ITLRecovery Certificate after the reset.
Regenerate ITLRecovery Certificate for Secure Cluster
If you want to migrate from a token based ITL file to tokenless ITL file, refer the migration section in securityguide.
1. Verify if the ITL File is valid and that all phones in the cluster trust the current ITL File.
2. Verify the CTL File using show ctl command.
3. Regenerate the ITLRecovery Certificate.
Navigate to the publisher in each cluster to regenerate the ITLRecovery Certificate.
a. From the Unified OS Administration, Choose Security > Certificate Management > Find
b. Click Find to find the list of Certificates.
The Certificate List window appears.
c. Click the ITLRecovery.pem Certificate link from the list of Certificates displayed.
d. Click Regenerate, to regenerate the ITLRecovery Certificate.
e. In the confirmation message pop-up, click OK.
4. Sign the CTLFile with utils ctl reset localkey in the CallManager Certificate. This also updates theCTLFile with the new ITLRecovery Certificate.
5. Reset in batches all the phones in the cluster to pick up the newCTLFile with new ITLRecovery Certificate.
• Make sure all the phones in the cluster are registered.
• Regenerating ITLRecovery will affect SAML SSO login of cluster incase system wide certificate is usedfor enablement.
Note
6. Update the CTLFile to have it re-signed by the new ITLRecovery Certificate utils ctl update CTLFile.
7. Reset in batches all phones in the cluster for a second time to pick up the new CTLFile signed by the newITLRecovery Certificate.
8. Phones are uploaded with the new ITLRecovery Certificate after the reset.
Tomcat Certificate Regeneration
To regenerate the Tomcat certificate, perform the following steps:
Security Guide for Cisco Unified Communications Manager, Release 1451
Basic System SecurityTomcat Certificate Regeneration

Procedure
Step 1 Regenerate the Tomcat certificate.
For more information see Administration Guide for Cisco Unified Communications Manager .
Step 2 Restart the Tomcat Service.
For more information see Administration Guide for Cisco Unified Communications.
Step 3 If the cluster is part of an EMCC deployment, repeat the steps for bulk certificate provisioning.
For more information see Administration Guide for Cisco Unified Communications Manager .
Regenerate Keys for OAuth Refresh Logins
Use this procedure to regenerate both the encryption key and the signing key using the Command LineInterface. Complete this task only if the encryption key or signing key that Cisco Jabber uses for OAuthauthenticationwith Unified CommunicationsManager has been compromised. The signing key is asymmetricand RSA-based whereas the encryption key is a symmetric key.
After you complete this task, the current access and refresh tokens that use these keys become invalid.
We recommend that you complete this task during off-hours to minimize the impact to end users.
The encryption key can be regenerated only via the CLI below, but you can also use the Cisco Unified OSAdministration GUI of the publisher to regenerate the signing key. Choose Security > CertificateManagement, select the AUTHZ certificate, and click Regenerate.
Procedure
Step 1 From the Unified Communications Manager publisher node, log in to the Command Line Interface .Step 2 If you want to regenerate the encryption key:
a) Run the set key regen authz encryption command.b) Enter yes.
Step 3 If you want to regenerate the signing key:a) Run the set key regen authz signing command.b) Enter yes.
The Unified Communications Manager publisher node regenerates keys and replicates the new keys toall Unified Communications Manager cluster nodes, including any local IM and Presence Service nodes.
You must regenerate and sync your new keys on all of your UC clusters:
• IM and Presence central cluster—If you have an IM and Presence centralized deployment, your IM andPresence nodes are running on a separate cluster from your telephony. In this case, repeat this procedureon the Unified Communications Manager publisher node of the IM and Presence Service central cluster.
• Cisco Expressway or Cisco Unity Connection—Regenerate the keys on those clusters as well. See yourCisco Expressway and Cisco Unity Connection documentation for details.
Security Guide for Cisco Unified Communications Manager, Release 1452
Basic System SecurityRegenerate Keys for OAuth Refresh Logins

You must restart the Cisco XCP Authentication Service in the following scenarios:
• When you regenerate Authz certificate
• When youmake a new entry to the centralized deployment in the IM and Presence administratorconsole
Note
Add Certificate Authority-Signed CAPF Root Certificate to the Trust StoreAdd the root certificate to the Unified Communications Manager trust store when using a CertificateAuthority-Signed CAPF Certificate.
Procedure
Step 1 From Cisco Unified OS Administration, choose Security > Certificate Management.Step 2 Click Upload Certificate/Certificate Chain.Step 3 In theUpload Certificate/Certificate Chain popup window, chooseCallManager-trust from theCertificate
Purpose drop-down list and browse to the certificate authority-signed CAPF root certificate.Step 4 Click Upload after the certificate appears in the Upload File field.
Update the CTL FileUse this procedure to update the CTL file via a CLI command. If mixed mode is enabled, you must updatethe CTL file whenever you upload a new certificate.
Procedure
Step 1 From the Unified Communications Manager publisher node, log in to the Command Line Interface.Step 2 Run the utils ctl update CTLFile command. When the CTL file regenerates, the file gets uploaded to the
TFTP server and sent to phones automatically.
Interactions and Restrictions• SIP devices that do not support TLS_ECDHE_ECDSA_WITH_AES256_SHA384 and
TLS_ECDHE_ECDSA_WITH_AES128_SHA256 can still connect withTLS_ECDHE_RSA_WITH_AES_256_SHA384,TLS_ECDHE_RSA_WITH_AES_128_SHA256,or AES128_SHA. These options are dependent on the TLS cipher option that you choose. If you chooseECDSA only option, then the device that does not support the ECDSA ciphers will not be able make aTLS connection to the SIP interface.When you choose theECDSA only option, the value of this parameterare TLS_ECDHE_ECDSA_WITH_AES128_SHA256 andTLS_ECDHE_ECDSA_WITH_AES256_SHA384.
Security Guide for Cisco Unified Communications Manager, Release 1453
Basic System SecurityAdd Certificate Authority-Signed CAPF Root Certificate to the Trust Store

• CTI Manager Secure clients do not support TLS_ECDHE_RSA_WITH_AES_128_SHA256 ,TLS_ECDHE_RSA_WITH_AES_256_SHA384,TLS_ECDHE_ECDSA_WITH_AES_128_SHA256,andTLS_ECDHE_ECDSA_WITH_AES_256_SHA384. However, they can connectwithAES128_SHA.
Certificate Monitoring and RevocationThis section allows you to monitor certificates that have to be renewed and revoke certificates which areexpired.
Certificate Monitoring OverviewAdministrators must be able to track and renew certificates when Unified Communications Manager and IMand Presence Service services contain automated systems. Certificate Monitoring helps administrators knowthe certificate status on an ongoing basis and email you when a certificate is approaching expiration.
Certificate Monitoring ConfigurationThe Cisco Certificate Expiry Monitor network service must be running. By default, this service is enabled,but you can confirm if the service is running in Cisco Unified Serviceability application by choosing Tools >Control Center - Network Services and verifying that theCisco Certificate Expiry Monitor Service statusis Running.
Procedure
Step 1 From the Cisco Unified OS Administration, Choose Security > Certificate Monitor
Step 2 Enter or choose the configuration details.Step 3 Click Save to save the configuration.
By default, the certificate monitor service runs once every 24 hours. When you restart the certificatemonitor service, it starts the service and then calculates the next schedule to run only after 24 hours.The interval doesn't change even when the certificate is close to the expiry date of seven days. Itruns every one hour when the certificate either has expired or is going to expire in one day.
Note
Certificate Revocation OverviewThis section allows you to understand certificate revocation. Cisco UCM provisions the Online CertificateStatus Protocol (OCSP) for monitoring certificate revocation. Every time there's a certificate uploaded and atscheduled timelines, system checks for its status to confirm validity.
For FIPS deployments with Common Criteria mode enabled, OCSP helps your system comply with CommonCriteria requirements.
Certificate Revocation ConfigurationValidation Checks Unified CommunicationsManager checks the status of the certificate and confirms validity.
Security Guide for Cisco Unified Communications Manager, Release 1454
Basic System SecurityCertificate Monitoring and Revocation

The certificate validation procedure is as follows:
• Unified Communications Manager uses the Delegated Trust Model (DTM) and checks the Root CA orIntermediate CA for the OCSP signing attribute. The Root CA or the Intermediate CA must sign theOCSP Certificate to check the status.
• If the Delegated Trust Model fails, falls back to the Trust Responder Model (TRP). UnifiedCommunications Manager then uses a designated OCSP response signing certificate from an OCSPserver to validate certificates.
OCSP Responder must be running to check the revocation status of the certificates.Note
Configure OCSP so that the system revokes expired certificates automatically. Enable OCSP option in theCertificate Revocation window to provide a secure means of checking certificate revocation in real time.Choose from options to use the OCSP URI from certificate or from the configured OCSP URI.
TLS clients like syslog, FileBeat, SIP, ILS, LBM, and so on, receive the revocation response in real time fromOCSP.
Note
Make sure that your system has certificates required for OCSP checks. You can use Root or Intermediate CAcertificates configured with the OCSP response attribute or designated OCSP signing certificates uploadedto the tomcat-trust.
Procedure
Step 1 From the Cisco Unified OS Administration, choose Security > Certificate Revocation.
Step 2 Check the Enable OCSP check box.Step 3 Click the Use OCSP URI from Certificate option if the certificate is configured with an OCSP responder
URI.
OR
Step 4 Click Use Configured OCSP URI option if you want to specify an OCSP responder for OCSP checks.Step 5 Enter the OCSP Configured URI of the responder.Step 6 Check the Enable Revocation Check check box to enable a revocation check.Step 7 Enter a frequency to check for revocation status and click the time interval from Hours or Days.Step 8 Click Save.
A popup alerts you to restart a list of Cisco Services and enable realtime OCSP. The popup appearsonly when you check the Enable OCSP check box or save the subsequent changes.
Note
The OCSP Responder return one of the following statuses based on the validations and when the CommonCriteria mode is ON.
• Good— indicates that the OCSP responder sends a positive response to the status inquiry. The certificateisn't revoked but doesn't mean that the certificate was ever issued or the response time is within the
Security Guide for Cisco Unified Communications Manager, Release 1455
Basic System SecurityCertificate Revocation Configuration

validity interval of the certificate. Response extensions convey more claims made by the responder onthe certificate status such as issuance, validity, and so on.
• Revoked— indicates that the certificate is in revoked (on hold) status either permanently or temporarily.
• Unknown— indicates that the OCSP responder doesn't know about the requested certificate.
When you enable Common Criteria mode, the connection fails in Revoked and Unknowncases. When you disable Common Criteria mode, the connection succeeds in Unknown case.
Warning
Step 9 (Optional) If you have CTI, IPsec or LDAP links, you must also complete these steps in addition to the abovesteps to enable OCSP revocation support for those long uninterrupted connections:a) From Cisco Unified CM Administration, choose System > Enterprise Parameters.b) Navigate to Certificate Revocation and Expiry pane.c) Set the Certificate Validity Check parameter to Enabled.d) Enter a value for the Validity Check Frequency parameter.
The interval value of the Enable Revocation Check parameter in the Certificate Revocationpage takes precedence over the value of the Validity Check Frequency enterprise parameter.
Note
e) Click Save.
Simplified Certificate ManagementIt is now easier to accomplish certificate requirements due to a collection of updates that reduces a significantnumber of certificates that you need tomanage. Unified CommunicationsManager has eight identity certificates.They are CallManager, CallManager-ECDSA, Tomcat, Tomcat-ECDSA, IPsec, CAPF, TVS, ITL Recoveryfor each node. These certificates have to be renewed periodically based on their validity period. Hence, in amulti-cluster deployment scenario, it is difficult to manage these certificates.
Simplified Certificate Management OverviewTo manage certificates efficiently, you now have an option to reduce and reuse the number of certificates.
• TVS Supports Multiserver SAN Certificates—TVS now supports multi-server SAN certificates forboth self-signed and CA-signed options, letting you deploy a single certificate for the cluster. Thesecertificates are cluster-based. For each cluster, there is an option to have only one TVS certificate thatreduces the ITL file size and the management overhead. For example, if there were 21 nodes, now youneed only one single certificate for each cluster.
• CAPF Certificates Generated from Publisher Node—CAPF certificates are now generated only fromthe publisher node, letting you deploy a single certificate for the cluster. However, the CAPF certificateis available as a trust-certificate (Callmanager-trust) on both the publisher and subscriber nodes forendpoint registration.
• Support for Multi-server SAN Self-Signed Certificates—Tomcat, Tomcat-ECDSA, CallManager,CallManager-ECDSA certificates now support multi-server SAN self-signed certificates. Earlier,multi-server SAN certificates were supported only for CA-signed certificates. You can now avoid the
Security Guide for Cisco Unified Communications Manager, Release 1456
Basic System SecuritySimplified Certificate Management

cost of managing a CA from a third-party certificate authority by using the multi-server SAN self-signedcertificate.
• Reuse Multi-Server Tomcat certificate for CallManager—You can now reuse multi-server Tomcatcertificates for CallManager certificates, because there is no need to generate separate certificates foreach. For more details on how to reuse multi-server tomcat certificates for CallManager certificate, seeReuse Multi-Server Tomcat Certificate for CallManager, on page 58.
• Validity Period of Self-signed Certificates—The default validity period of self-signed certificates arereduced. By reducing the validity period, the keys are renewed periodically in a short span, and it removesthe outdated certificates. The longer the validity period of the certificates, the higher are the chances ofthe private key being compromised. The default validity period of all self-signed certificates is five years.
You also have an option to configure the validity period of the self-signed certificates using the ValidityPeriod field. For more details, see the Generate Self-Signed Certificate.
Table 12: Cisco Unified Communications Manager CSR Key Usage Extensions
From Unified CM Release 14 onwardsEarlier than Unified CM Release 14
Node/ClusterBased
No.of certificatesto manage in a 10node cluster
SupportsMulti-ServerCA-Signed
SupportsMulti-Server SANSelf-Signed
Node/ClusterBased
No.of certificatesto manage in a 10node cluster
SupportsMulti-Server SANCA-Signed
SupportsMulti-Server SANSelf-Signed
Certificates
Cluster-based1YYNode-Basedwhenself-signed
1YNTomcat
Cluster-based1YYNode-Basedwhenself-signed
1YNTomcat-ECDSA
Cluster-based0YYNode-Basedwhenself-signed
1YNCallManager
Cluster-based0YYNode-Basedwhenself-signed
1YNCallManager-ECDSA
Cluster-based1YYNode-based10NNTVS
Only on Publisher1NYNode-based10NNCAPF
Node-based0NNNode-based10NNIPsec
Cluster-based1NNNode-based1NNITLRecovery
Simplified Certificate Management User Interface Updates
The following user interface updates are introduced:
• Reuse Certificate—The Certificate Management window includes this new option that lets you sharea Tomcat multi-server certificate with the CallManager application. This reduces the size of the ITL file,thereby reducing overhead.
• Show Certificates—The CertificateManagement window in Cisco Unified OSAdministration interfaceincludes new filtering options that let you view the list of identity and trust certificates.
•
Security Guide for Cisco Unified Communications Manager, Release 1457
Basic System SecuritySimplified Certificate Management User Interface Updates

Reuse Multi-Server Tomcat Certificate for CallManagerYou can now reuse Tomcat multi-server certificate for CallManager application. You can procure one certificatefrom the CA and reuse it across applications. This ensures lower management overhead and cost optimization.
Before you reuse Tomcat certificate, make sure that it is a multi-server SAN support certificate.Note
Procedure
Step 1 From Cisco Unified OS Administration, choose Security > Certificate Management.The Certificate List window appears.
Step 2 Click Reuse Certificate.The Use Tomcat Certificates For Other Services page appears.
Step 3 From the Choose Tomcat type drop-down list, choose either tomcat or tomcat-ECDSA.Step 4 From the Replace Certificate for the following purpose pane, check either the CallManager or
CallManager-ECDSA check box.Step 5 Click Finish to replace the CallManager certificate with the tomcat multi-server SAN certificate.
• If you choose tomcat as the certificate type, CallManager is enabled as the replacement.
• If you choose tomcat-ECDSA as the certificate type, CallManager-ECDSA is enabled as thereplacement.
Note
Security Guide for Cisco Unified Communications Manager, Release 1458
Basic System SecurityReuse Multi-Server Tomcat Certificate for CallManager

C H A P T E R 5Certificate Authority Proxy Function
• Certificates Authority Proxy Function Overview, on page 59• Certificates Authority Proxy Function Configuration Task Flow, on page 61• Certificates Authority Proxy Function Administration Task Flow, on page 68• CAPF System Interactions and Restrictions, on page 70
Certificates Authority Proxy Function OverviewThe Certificate Authority Proxy Function (CAPF) issues Locally Significant Certificates (LSCs) andauthenticates endpoints.
The CAPF service runs on Unified Communications Manager and performs the following tasks:
• Issues LSCs to supported Cisco Unified IP Phones.
• Authenticates phones while in mixed mode.
• Upgrades existing LSCs for phones.
• Retrieves phone certificates for viewing and troubleshooting.
CAPF Service Certificate
The CAPF service gets automatically installed with the Unified Communications Manager installation and aCAPF-specific system certificate gets generated.
You can configure CAPF to operate in the following modes:
Table 13: CAPF Running Modes
DescriptionModes
By default, the CAPF service on Unified CommunicationsManager issues CAPFservice signed LSCs.
Cisco Authority ProxyFunction
Use this option to have an external online CA signed LSC for phones. The CAPFservice connects automatically to the external CA. The CA-signed LSC
automatically returns when a Certificate Signing Request(CSR) gets submitted.
Online CA
Security Guide for Cisco Unified Communications Manager, Release 1459

DescriptionModes
Use this option if you want to use an offline external CA to sign LSC for phones.Manually download the LSC, submit them to the CA, and then upload the
CA-signed certificates after they are ready.
We recommend Online CA option instead of Offline CA when youwant to use a third-party CA to sign LSC. Online CA is automated,
much quicker, and less likely to encounter problems.
Note
Offline CA
Before you generate LSCs, make sure that you have the following:
• Unified Communications Manager Release 12.5 or later.
• Endpoints that use CAPF for certificates (includes Cisco Unified IP Phones and Jabber).
• Microsoft Windows Server 2012 and 2016 with CA configured.
• Domain Name Service (DNS).
As a pre-requisite, also decide how you want to authenticate your phones.
Upload CA root and HTTPS certificates before generating LSCs to the required trust stores. The InternetInformation Services (IIS) hosts the HTTPS certificate. During a secure SIP connection, HTTPS certificategoes through the CAPF-trust and the CA root certificate goes through both the CAPF-trust and the UnifiedCommunications Manager-trust. The CA root certificate is used to sign the Certificate Signing Requests(CSRs).
Following are the scenarios to upload the various certificates:
Table 14: Upload Certificate Scenarios
ActionsScenarios
Upload the CA root certificate.CA root and HTTPScertificates are same.
Upload the CA root certificate.CA root and HTTPScertificates are differentand the same CA rootcertificate issues theHTTPS certificates.
Upload the CA root certificate.CA root certificate issuesthe intermediate CA andHTTPS certificates whichare different.
Upload CA root and HTTPS certificate.The same CA rootcertificate issues CA rootand HTTPS certificateswhich are different.
Security Guide for Cisco Unified Communications Manager, Release 1460
Basic System SecurityCertificates Authority Proxy Function Overview

We recommend using CAPF during a scheduled maintenance window as generating multiple certificatessimultaneously may cause call-processing interruptions.
Note
Certificates Authority Proxy Function Configuration Task FlowComplete these tasks to configure the Certificate Authority Proxy Function (CAPF) service to issue LSCs forendpoints:
You don't have to restart the CAPF service after regenerating or uploading the new CAPF certificate.Note
Procedure
PurposeCommand or Action
If you want your LSCs to be third-partyCA-signed, upload the CA root certificate chain
Upload Root Certificate for Third-Party CAsStep 1
to the CAPF-trust store. Otherwise, you canskip this task.
Upload the CA root certificate to the UnifiedCommunications Manager Trust store.
Upload Certificate Authority (CA) RootCertificate , on page 62
Step 2
Use this procedure to generate phone LSCcertificates.
Configure Online Certificate Authority Settings,on page 63
Step 3
Use this procedure to generate phone LSCcertificates using an Offline CA.
Configure Offline Certificate Authority SettingsStep 4
After you configure the CAPF system settings,activate essential CAPF services.
Activate or Restart CAPF ServicesStep 5
Add the CAPF settings to Phone Configurationusing one of the following options:
Configure CAPF settings in UnifiedCommunications Manager using one of thefollowing procedures:
Step 6
• If you haven't synced your LDAPdirectory, add CAPF settings to a• Configure CAPF Settings in a Universal
Device Template, on page 65 Universal Device Template and applysettings through the initial LDAP sync.• Update CAPF Settings via Bulk Admin,
on page 66 • Use Bulk Administration Tool to applyCAPF settings to many phones in a singleoperation.
• Configure CAPF Settings for a Phone, onpage 67
• You can apply CAPF settings on aphone-by-phone basis.
Security Guide for Cisco Unified Communications Manager, Release 1461
Basic System SecurityCertificates Authority Proxy Function Configuration Task Flow

PurposeCommand or Action
Set a keepalive value for the CAPF-Endpointconnection so that it's not timed out by afirewall. The default value is 15 minutes.
Set KeepAlive Timer, on page 68Step 7
Upload Root Certificate for Third-Party CAsUpload the CA root certificate to the CAPF-trust store and the Unified Communications Manager trust storeto use an external CA to sign LSC certificates.
Skip this task if you don't want to use a third-party CA to sign LSCs.Note
Procedure
Step 1 From Cisco Unified OS Administration choose Security > Certificate Management.Step 2 Click Upload Certificate/Certificate chain.Step 3 From the Certificate Purpose drop-down list, choose CAPF-trust.Step 4 Enter a Description for the certificate. For example, Certificate for External LSC-Signing CA.Step 5 Click Browse, navigate to the file, and then click Open.Step 6 Click Upload.Step 7 Repeat this task, uploading certificates to callmanager-trust for the Certificate Purpose.
Upload Certificate Authority (CA) Root CertificateUpload the cluster-wide certificate, to distribute it to all the servers within the cluster.
Procedure
Step 1 From Cisco Unified OS Administration choose Security > Certificate Management.Step 2 Click Upload Certificate/Certificate chain.Step 3 From the Certificate Purpose drop-down list, choose callmanager-trust.Step 4 Enter a Description for the certificate. For example, Certificate for External LSC-Signing CA.Step 5 Click Browse, navigate to the file, and then click Open.Step 6 Click Upload.
Security Guide for Cisco Unified Communications Manager, Release 1462
Basic System SecurityUpload Root Certificate for Third-Party CAs

Configure Online Certificate Authority SettingsUse this procedure in Unified Communications Manager to generate phone LSCs using Online CAPF.
FIPS enabled mode doesn't support Online CAPF and CAPFv3.Note
Procedure
Step 1 From Cisco Unified CM Administration, choose System > Service Parameters.Step 2 From the Server drop-down list, choose a node where you activated the Cisco Certificate Authority Proxy
Function (Active) service.Step 3 From the Service drop-down list, choose Cisco Certificate Authority Proxy Function (Active). Verify that
the word “Active” is displayed next to the service name.Step 4 From the Certificate Issuer to Endpoint drop-down list, choose Online CA. For CA-signed certificates, we
recommend using an Online CA.Step 5 In the Duration Of Certificate Validity (in days) field, enter a number between 1 and 1825 to represent the
number of days that a certificate issued by CAPF is valid.Step 6 In the Online CA Parameters section, set the following parameters in order to create the connection to the
Online CA section.
• Online CA Hostname—The subject name or the Common Name (CN) should be the same as the FullyQualified Domain Name (FQDN) of HTTPS certificate.
The hostname configured is the same as the Common Names (CN) of the HTTPs certificatehosted by Internet Information Services (IIS) running on Microsoft CA.
Note
• Online CA Port—Enter the port number for Online CA. For example, 443
• Online CA Template—Enter the name of the template. Microsoft CA creates the template.
• Online CA Type—Choose the default type, Microsoft CA.
• Online CA Username—Enter the username of the CA server.
• Online CA Password—Enter the password for the username of the CA server.
Step 7 Complete the remaining CAPF service parameters. Click the parameter name to view the service parameterhelp system.
Step 8 Click Save.Step 9 Restart Cisco Certificate Authority Proxy Function for the changes to take effect. It automatically restarts
the Cisco Certificate Enrollment service.
Current Online CA limitations
• For Online CA operation, EST servers use TVS certificates from CUCM and if the TVS certificate isCA signed, then the Online CA will not work.
• The Online CA feature does not work if the CA server uses any other language apart from English. TheCA server should respond only in English.
Security Guide for Cisco Unified Communications Manager, Release 1463
Basic System SecurityConfigure Online Certificate Authority Settings

• The Online CA feature does not support mTLS authentication with CA
Configure Offline Certificate Authority SettingsFollow this high-level process if you decide to generate phone LSC certificates using an Offline CA.
The offline CA option is more time-consuming than online CAs, involving numerous manual steps. Restartthe process if there are any issues (for example, a network outage or phone reset) during the certificategeneration and transmission process.
Note
Procedure
Step 1 Download the root certificate chain from the third-party certificate authority.Step 2 Upload the root certificate chain to the required trusts (CallManager trust CAPF trust) in Unified
Communications Manager.Step 3 Configure Unified CommunicationsManager to use Offline CAs by setting theCertificate Issue to Endpoint
service parameter to Offline CA.Step 4 Generate CSRs for your phone LSCs.Step 5 Send the CSRs to the certificate authority.Step 6 Obtain the signed certificates from the CSR.
For more detailed example on how to generate phone LSCs using an Offline CA, see CUCM Third-PartyCA-Signed LSCs Generation and Import Configuration.
Activate or Restart CAPF ServicesActivate the essential CAPF services after you configure the CAPF system settings. Restart if the CAPFservice is already activated.
Procedure
Step 1 From Cisco Unified Serviceability, choose Tools > Service Activation.Step 2 From the Server drop-down list, select the publisher node and click Go.Step 3 From the Security Services pane, check the services that apply:
• Cisco Certificate Enrollment Service—Check this service if you're using an Online CA else leave itunchecked.
• Cisco Certificate Authority Proxy Function—Check this service if unchecked (Deactivated). Restartif the service is already activated.
Security Guide for Cisco Unified Communications Manager, Release 1464
Basic System SecurityConfigure Offline Certificate Authority Settings

Step 4 Click Save if you modified any settings.Step 5 If the Cisco Certificate Authority Proxy Function service was already checked (Activated), restart it:
a) From the Related Links drop-down list, select Control Center - Feature Services and click Go.b) From Security Settings pane, check the Cisco Certificate Authority Proxy Function service and click
Restart.
Step 6 Complete one of the following procedures to configure CAPF settings against individual phones.a) Configure CAPF Settings in a Universal Device Template, on page 65b) Update CAPF Settings via Bulk Admin, on page 66c) Configure CAPF Settings for a Phone, on page 67
Configure CAPF Settings in a Universal Device TemplateUse this procedure to configure CAPF settings to a Universal Device Template. Apply the template againstan LDAP directory sync through the feature group template configuration. The CAPF settings in the templateapply to all synced devices that use this template.
You can only add the Universal Device Template to an LDAP directory that hasn't been synced. If your initialLDAP sync has occurred, use Bulk Administration to update phones. For details, see Update CAPF Settingsvia Bulk Admin, on page 66.
Note
Procedure
Step 1 From Cisco Unified CMAdministration, chooseUser Management >User/Phone Add >Universal DeviceTemplate.
Step 2 Do either of the following:
• Click Find and Select an existing template.• Click Add New.
Step 3 Expand the Certificate Authority Proxy Function (CAPF) Settings area.Step 4 From the Certificate Operation drop-down list, select Install/Upgrade.Step 5 From the Authentication Mode drop-down list menu, select an option for the device to authenticate itself.Step 6 If you chose to use an authentication string, enter theAuthentication String in the text box, or clickGenerate
String to have the system generate a string for you.
Authentication fails if this string isn't configured on the device itself.Note
Step 7 From the remaining fields, configure the key information. For help with the fields, see the online help.Step 8 Click Save.
Make sure you have configured the devices that use this template with the same authenticationmethod that you assigned in this procedure. Otherwise, device authentication fails. See your phonedocumentation for details on how to configure authentication for phones.
Note
Security Guide for Cisco Unified Communications Manager, Release 1465
Basic System SecurityConfigure CAPF Settings in a Universal Device Template

Step 9 Apply the template settings to devices that use this profile.a) Add the Universal Device Template to a Feature Group Template Configuration.b) Add the Feature Group Template to an LDAP Directory Configuration that isn't synced.c) Complete an LDAP sync. The CAPF settings get applied to all synced devices.
For details on configuring feature group templates and LDAP directories, see the "Configure End Users"section of System Configuration Guide for Cisco Unified Communications Manager.
Update CAPF Settings via Bulk AdminUse Update Phones query of Bulk Administration to configure CAPF settings and LSC certificates for manyexisting phones in a single operation.
If you haven't provisioned the phones, use Insert Phones menu of the Bulk Administration to provision newphones with CAPF settings from a CSV file. See the "Phones Insertions" section of Bulk AdministrationGuide for Cisco Unified Communications Manager for details on how to insert phones from CSV files.
Note
Make sure you have configured your phones with the same string and authentication method that you plan toadd in this procedure. Else, your phones don't authenticate to CAPF. See your Phone Documentation fordetails on how to configure authentication on the phone.
Procedure
Step 1 FromCisco Unified CMAdministration, chooseBulk Administration > Phones >Update Phones >Query.Step 2 Use filter options to limit the search to the phones that you want to update and click Find.
For example, use Find phones where drop-down list to select all phones, where LSC expires before a specificdate or in a specific Device Pool.
Step 3 Click Next.Step 4 From theLogout/Reset/Restart section, choose theApply Config radio button.When the job runs, the CAPF
updates get applied to all updated phones.Step 5 Under Certification Authority Proxy Function (CAPF) Information, check the Certificate Operation
check box.Step 6 From the Certificate Operation drop-down list, choose Install/Upgrade to have CAPF install a new LSC
certificate on the phone.Step 7 From the Authentication Mode drop-down list, choose how you want the phone to authenticate itself during
the LSC installation.
Configure the same authentication method on the phone.Note
Step 8 Complete one of the following steps if you selected By Authentication String as the Authentication Mode:
• CheckGenerate unique authentication string for each device if you want to use a unique authenticationstring for each device.
Security Guide for Cisco Unified Communications Manager, Release 1466
Basic System SecurityUpdate CAPF Settings via Bulk Admin

• Enter the string inAuthentication String text box, or clickGenerate String if you want to use the sameauthentication string for all devices.
Step 9 Complete the remaining fields in theCertification Authority Proxy Function (CAPF) Information sectionof the Update Phones window. For help with the fields and their settings, see the online help.
Step 10 From the Job Information section, select Run Immediately.
Select Run Later if you want run the job at a scheduled time. For details on scheduling jobs, seethe "Manage Scheduled Jobs" section in Bulk Administration Guide for Cisco UnifiedCommunications Manager.
Note
Step 11 Click Submit.
Apply configurations in the Phones Configuration window for all updated phones if you didn'tselect the Apply Config option in this procedure.
Note
Configure CAPF Settings for a PhoneUse this procedure to configure CAPF settings for LSC certificates on an individual phone.
Use Bulk Administration or sync LDAP directory to apply CAPF settings to a large number of phones.Note
Configure your phone with the same string and authentication method that you plan to add in this procedure.Else, the phone doesn't authenticate itself to CAPF. See your Phone Documentation for details on how toconfigure authentication on the phone.
Procedure
Step 1 From Cisco Unified CM Administration, choose Device > Phone.Step 2 Click Find and select an existing phone. The Phone Configuration page appears.Step 3 Navigate to the Certification Authority Proxy Function (CAPF) Information pane.Step 4 From the Certificate Operation drop-down list, choose Install/Upgrade for CAPF to install a new LSC
certificate on the phone.Step 5 From the Authentication Mode drop-down list, choose how you want the phone to authenticate itself during
the LSC installation.
The phone should be configured to use the same authentication method.Note
Step 6 Enter a text string or click Generate String to generate a string for you if you selected By AuthenticationString.
Step 7 Enter the details in the remaining fields in theCertification Authority Proxy Function (CAPF) Informationpane of the Phone Configuration page. For help with the fields and their settings, see the online help.
Step 8 Click Save.
Security Guide for Cisco Unified Communications Manager, Release 1467
Basic System SecurityConfigure CAPF Settings for a Phone

Set KeepAlive TimerUse this procedure to set the clusterwide keepalive timer for the CAPF–Endpoint connection so that theconnection doesn't get timed out by a firewall. The timer has a default value of 15 minutes. After each interval,the CAPF service sends a keepalive signal to the phone to keep the connection open.
Procedure
Step 1 Use the Command Line Interface to login to the publisher node.Step 2 Run the utils capt set keep_alive CLI command.Step 3 Enter a number between 5 and 60 (minutes) and click Enter.
Certificates Authority Proxy Function Administration Task FlowAdminister LSC certificates on an ongoing basis once the CAPF is configured andcLSC certificates are issued.
Procedure
PurposeCommand or Action
Configure CAPF and add the configuredauthentication string on the phone. The keys
LSC Generation via CAPFStep 1
and certificate exchange occurs between thephone and CAPF.
Run a Stale LSC report from Cisco UnifiedReporting. Stale LSCs are certificates that were
Run Stale LSC ReportStep 2
generated in response to an endpoint CSR, butwere never installed because a new CSR wasgenerated by the endpoint before the old LSCwas installed.
View a list of pending CAPF CSR files. AllCSR files are timestamped.
View Pending CSR ListStep 3
Delete stale LSC certificates from the system.Delete Stale LSC CertificatesStep 4
Run Stale LSC ReportUse this procedure to run a Stale LSC report from Cisco Unified Reporting. Stale LSCs are certificates thatwere generated in response to an endpoint CSR, but were never installed because a new CSR was generatedby the endpoint before the stale LSC was installed.
Security Guide for Cisco Unified Communications Manager, Release 1468
Basic System SecuritySet KeepAlive Timer

You can also obtain a list of stale LSC certificates by running the utils capf stale-lsc listCLI commandon the publisher node.
Note
Procedure
Step 1 From Cisco Unified Reporting, choose System Reports.Step 2 In the left navigation bar, choose Stale LSCs.Step 3 Click Generate a new report.
LSC Generation via CAPFAfter you configure CAPF, add the configured authentication string on the phone. The keys and certificateexchange occurs between the phone and CAPF and the following occurs:
• The phone authenticates itself to CAPF using the configured authentication method.
• The phone generates its public-private key pair.
• The phone forwards its public key to CAPF in a signed message.
• The private key remains in the phone and never gets exposed externally.
• CAPF signs the phone certificate and sends the certificate to the phone in a signed message.
Be aware that the phone user can abort the certificate operation or view the operation status on the phone.Note
Key generation set at low priority allows the phone to function while the action occurs. Although the phonefunctions during certification generation, additional TLS traffic may causeminimal call-processing interruptionswith the phone. For example, audio glitches may occur when the certificate is written to flash at the end ofthe installation
Note
View Pending CSR ListUse this procedure to view a list of pending CAPF CSR files. All CSR files are timestamped.
Procedure
Step 1 Use the Command Line Interface to login to the publisher node.Step 2 Run the utils capf csr list CLI command.
Security Guide for Cisco Unified Communications Manager, Release 1469
Basic System SecurityLSC Generation via CAPF

A timestamped list of pending CSR files displays.
Delete Stale LSC CertificatesUse this procedure to delete stale LSC certificates from the system.
Procedure
Step 1 Use the Command Line Interface to login to the publisher node.Step 2 Run the utils capf stale-lsc delete all CLI command
The system deletes all stale LSC certificates from the system.
CAPF System Interactions and RestrictionsTable 15: CAPF System Interactions and Restrictions
InteractionFeature
Enter the same authentication string on the phone after the operation in CAPFauthenticationmethod else the operation fails. The phonemay fail and not recoveruntil the matching authentication string is entered on the phone if TFTP EncryptedConfiguration enterprise parameter is enabled and you fail to enter theauthentication string.
Authentication String
All servers in the Unified Communications Manager cluster must use the sameadministrator username and password, so CAPF can authenticate all servers inthe cluster
Cluster Server Credentials
If a secure phone gets moved to another cluster, the Unified CommunicationsManager doesn't trust the LSC certificate sent by the phone because it was issuedby another CAPF, whose certificate isn't in the CTL file.
Delete the existing CTL file to enable the secure phone to register. You can thenuse the Install/Upgrade option to install a new LSC certificate with a new CAPFand reset the phone for the new CTL file (or use the MIC). Use theDelete optionin the CAPF section on the Phone Configuration window to delete the existingLSC before you move the phones.
Migrating secure phone
Security Guide for Cisco Unified Communications Manager, Release 1470
Basic System SecurityDelete Stale LSC Certificates

InteractionFeature
We recommend upgrading Cisco Unified IP Phones 6900, 7900, 8900, and 9900series to use LSCs for TLS connection to Unified CommunicationsManager andremovingMIC root certificates from the Unified CommunicationsManager truststore to avoid possible future compatibility issues. Some phone models that useMICs for TLS connection to Unified Communications Manager may not be ableto register.
Administrators should remove the following MIC root certificates from theUnified Communications Manager trust store:
• CAP-RTP-001
• CAP-RTP-002
• Cisco_Manufacturing_CA
• Cisco_Root_CA_2048
Cisco Unified IP Phones6900, 7900, 8900, and9900 series
The following information applies when a communication or power failure occurs.
• The phone attempts to obtain the certificate three times in 30-second intervalsif a communication failure occurs while installing the certificate on thephone. You can't configure these values.
• If there's a power failure while the phone attempts a session with CAPF, thephone uses authenticationmode stored in flash. System clears the flash valueif the phone can't load a new configuration file from the TFTP server.
Power Failures
Beginning from Unified Communications Manager Release 11.5(1) SU1,SHA-256 algorithm signs all the LSC certificates issued by CAPF service.Therefore, IP Phones 7900/8900/9900 series models supports SHA-256 signedLSC certificates and external SHA2 identity certificates (Tomcat, UnifiedCommunications Manager, CAPF, TVS, and so on). Only SHA-1 supports anyother cryptographic operation that requires validation of signature.
We recommend using the Unified Communications Manager before11.5(1) SU1 release for phonemodels in End of SoftwareMaintenanceor End of Life,
Note
Certificate Encryption
CAPF Examples with 7942 and 7962 PhonesConsider how CAPF interacts with the Cisco Unified IP Phone 7962 and 7942 when a user or UnifiedCommunications Manager resets the phone.
In the examples, CAPF certificate operation fails if LSC doesn't exist in the phone and you chooseBy ExistingCertificate for the CAPF Authentication Mode.
Note
Security Guide for Cisco Unified Communications Manager, Release 1471
Basic System SecurityCAPF Examples with 7942 and 7962 Phones

Example-Nonsecure Device Security Mode
The phone resets after you configure the Device Security Mode to Nonsecure and the CAPF AuthenticationMode to By Null String or By Existing Certificate (Precedence). After the phone resets, it immediatelyregisters with the primary Unified Communications Manager and receives the configuration file. The phonethen automatically initiates a session with CAPF to download the LSC. After the phone installs the downloadedLSC, configure the Device Security Mode to Authenticated or Encrypted.
Example-Authenticated/Encrypted Device Security Mode
The phone resets after you configure the Device Security Mode to Authenticated or Encrypted and theCAPF Authentication Mode to By Null String or By Existing Certificate (Precedence). The phone doesn’tregister with the primary Unified CommunicationsManager until the CAPF session ends and the phone installsthe LSC. After the session ends, the phone registers and immediately runs in authenticated or encrypted mode.
You can’t configure By Authentication String in this example because the phone doesn’t automaticallycontact the CAPF server. The registration fails if the phone doesn’t have a valid LSC.
CAPF Interaction with IPv6 AddressingCAPF issues and upgrades certificates to a phone that uses an IPv4, an IPv6, or both types of addresses. Toissue or upgrade certificates for phones running SCCP using an IPv6 address, set the Enable IPv6 serviceparameter to True in Cisco Unified Communications Manager Administration.
CAPF uses configurations from Enable IPv6 enterprise parameter to issue or upgrade the certificate to thephone. If the enterprise parameter is False, CAPF ignores/rejects connections from phones that use IPv6addresses, and the phone doesn’t receive the certificate.
The following table describes how a phone that has an IPv4, IPv6, or both types of addresses connects toCAPF.
Table 16: How IPv6 or IPv4 Phone Connects to CAPF
How Phone Connects toCAPF
CAPF IP AddressIP Addresses on PhoneIP Mode of Phone
Phone uses an IPv6address to connect toCAPF. If the phone can’tconnect through an IPv6address, it attempts toconnect by using an IPv4address.
IPv4, IPv6IPv4 and IPv6 availableTwo stack
Phone uses an IPv4address to connect toCAPF.
IPv4, IPv6IPv4Two stack
Phone uses an IPv6address to connect toCAPF. If the attempt fails,the phone uses an IPv4address to connect toCAPF.
IPv4, IPv6IPv6Two stack
Security Guide for Cisco Unified Communications Manager, Release 1472
Basic System SecurityCAPF Interaction with IPv6 Addressing

How Phone Connects toCAPF
CAPF IP AddressIP Addresses on PhoneIP Mode of Phone
Phone uses an IPv4address to connect toCAPF.
IPv4IPv4Two stack
Phone uses and IPv6address to connect toCAPF.
IPv6IPv4 and IPv6 availableTwo stack
Phone uses an IPv4address to connect toCAPF.
IPv4IPv4 and IPv6 availableTwo stack
Phone can’t connect toCAPF.
IPv6IPv4Two stack
Phone can’t connect toCAPF.
IPv4IPv6Two stack
Phone uses an IPv6address to connect toCAPF.
IPv6IPv6Two stack
Phone uses an IPv4address to connect toCAPF.
IPv4, IPv6IPv4IPv4 stack
Phone uses an IPv6address to connect toCAPF.
IPv4, IPv6IPv6IPv6 stack
Phone uses an IPv4address to connect toCAPF.
IPv4IPv4IPv4 stack
Phone can’t connect toCAPF.
IPv6IPv4IPv4 stack
Phone uses an IPv6address to connect toCAPF.
IPv6IPv6IPv6 stack
Phone can’t connect toCAPF.
IPv4IPv6IPv6 stack
Security Guide for Cisco Unified Communications Manager, Release 1473
Basic System SecurityCAPF Interaction with IPv6 Addressing

Security Guide for Cisco Unified Communications Manager, Release 1474
Basic System SecurityCAPF Interaction with IPv6 Addressing

C H A P T E R 6Security Modes
• Security Modes Overview , on page 75• Non Secure Mode (Default Mode), on page 75• Configure Secure Mode, on page 75
Security Modes OverviewTo implement security mechanisms to prevent tampering of data or information, Unified CommunicationsManager provides the following security modes:
• Non-Secure Mode—default mode
• Secure Mode or Mixed Mode—supports secure and non-secure endpoints.
• SIP Auth Mode—uses OAuth refresh tokens for Cisco Jabber authentication in secure environments
Non Secure Mode (Default Mode)The non secure mode is the default security mode when you install Unified Communications Manager for thefirst time. In this mode, Unified Communications Manager doesn't provide any secure signaling or mediaservices.
Configure Secure ModeTo apply security, configure the security mode that applies to your deployment.
Procedure
PurposeCommand or Action
Enable mixed mode to add security for CiscoIP Phones and Webex devices. Provides
Mixed ModeStep 1
information on how to enable and verify mixedmode.
Security Guide for Cisco Unified Communications Manager, Release 1475

PurposeCommand or Action
Configure SIP OAuth Mode to add security forCisco Jabber clients and other devices.
SIP OAuth ModeStep 2
Mixed ModeThe mixed mode or secure mode supports secure and non-secure endpoints. When you install UnifiedCommunications Manager fresh on a cluster or server, by default it's in non-secure mode. However, you canconvert the security mode from non-secure to secure or mixed mode.
To change a cluster from a non-secure mode to a mixed mode (secure mode), perform the following:
• Enable Certificate Authority Proxy Function (CAPF) service on the publisher.
• Enable Certificate Trust List (CTL) service on the publisher.
For endpoint security, Transport Layer Security (TLS) is used for signaling and Secure RTP (SRTP) is usedfor media.
Note
To enable mixedmode, log in to the Command Line Interface on the publisher node and Run the CLI commandutils ctl set-cluster mixed-mode.
Make sure that Unified Communications Manager is registered with the Cisco Smart Software Manager orCisco Smart Software Manager satellite. The Registration Token received from the Smart account or Virtualaccount has Allow Export-Controlled functionality enabled while registering with this cluster.
Note
You can verify the security mode, if you have changed it from non-secure to secure or mixed mode. To verifythe mode, navigate to the Enterprise Parameters Configuration page to verify if your cluster or server isin mixed mode or not. See Verify Security Mode topic for more information.
Verify Security ModeYou can verify the security mode, if you have changed it from non-secure to secure or mixed mode. To verifythe mode, navigate to the Enterprise Parameters Configuration page to verify if your cluster or server isin mixed mode or not.
Perform the following procedure to verify the security mode:
Procedure
Step 1 From Unified Communications Manager Administration, choose System > Enterprise Parameters.The Enterprise Parameters Configuration page appears.
Step 2 Navigate to the Security Parameters pane.You’ll find the Cluster Security Mode field with the appropriate value. If the value displays as 1, you havesuccessfully configured Unified Communications Manager for mixed mode. You can't configure this value
Security Guide for Cisco Unified Communications Manager, Release 1476
Basic System SecurityMixed Mode

in Cisco Unified CM Administration page. This value displays after you have entered the CLI command setutils cli.
The cluster security mode configures the security capability for a standalone server or a cluster.Note
SIP OAuth ModeSIP OAuth mode allows you to use OAuth refresh tokens for Cisco Jabber authentication in secureenvironments. Supporting OAuth on the Unified Communications Manager SIP line allows secure signallingand media without CAPF. OAuth token validation during SIP registration is completed when OAuth basedauthorization is enabled on Unified Communication Manager cluster and Cisco Jabber endpoints.
.OAuth support for SIP registrations is available for Cisco Jabber devices and certain Phone models.For moreinformation on SIP OAuth, see Feature Configuration Guide for Cisco Unified Communications Manager.
SIP OAuth Configuration Through CLIThrough the CLI, you can configure the Cluster SIP OAuth mode.
For more information on how to configure SIP OAuth mode on Cisco Unified Communication Manager, seeFeature Configuration Guide for Cisco Unified Communications Manager, Release 14.
Note
Consider the following points:
• When Cluster SIP OAuth mode is enabled, Cisco Unified Communication Manager accepts SIPregistrations with an OAuth token from secure devices.
Once enabled, the following TLS ports are opened which are configurable through Cisco UnifiedCommunications Manager user interface.
• SIP OAuth Port
• SIP OAuth MRA Port
You can configure the ports from Cisco Unified CM Administration, choose System > Cisco UnifiedCM > CallManager page.
• Restart the Cisco CallManager service in all the nodes for the parameter change to take effect.
The encryption option consists of the following CLI commands:
admin:utils sipOAuth-modeCheck the status of SIP OAuth mode in the cluster.
utils sipOAuth-mode enableEnables the SIP OAuth mode in the cluster.
utils sipOAuth-mode disableDisables the SIP OAuth mode in the cluster.
Run the CLI commands only on the publisher node.Note
Security Guide for Cisco Unified Communications Manager, Release 1477
Basic System SecuritySIP OAuth Mode

Security Guide for Cisco Unified Communications Manager, Release 1478
Basic System SecuritySIP OAuth Configuration Through CLI

C H A P T E R 7SIP OAuth Mode
• SIP OAuth Mode Overview, on page 79• SIP OAuth Mode Prerequisites, on page 80• SIP OAuth Mode Configuration Task Flow, on page 80
SIP OAuth Mode OverviewSecure registrations to Unified Communications Manager involves a process of updating CTL files, settingup a mutual certificate trust store and so on. If devices are switching between on-premises and off-premises,it is difficult to update LSCs and renew Certificate Authority Proxy Function (CAPF) enrolment each timewhen a secure registration is completed.
SIP OAuth mode allows you to use OAuth refresh tokens for all devices authentication in secure environments.This feature enhances the security ofUnified Communications Manager.
Unified Communications Manager verifies the token presented by the endpoints and serves the configurationfiles only to authorized ones. OAuth token validation during SIP registration is completed when OAuth basedauthorization is enabled on Unified Communications Manager cluster and other Cisco devices.
OAuth support for SIP registrations is extended for
• Cisco Jabber devices from Cisco Unified Communications Manager 12.5 release onwards
• SIP Phones from Cisco Unified Communications ManagerRelease 14 onwards
By default, TFTP is secure for SIP phones when SIP OAUth is enabled. TFTP file download happens throughsecured channel, and only for authenticated phones. SIP OAuth provides end to end secure signaling andmedia encryption without CAPF on-premises as well as over MRA.
Note
The following are the Phone Security Profile Types that can be configured for OAuth.
• Cisco Dual Mode For iPhone (TCT device)
• Cisco Dual Mode For Android (BOT device)
• Cisco Unified Client Service Framework (CSF device)
• Cisco Jabber for Tablet (TAB device)
Security Guide for Cisco Unified Communications Manager, Release 1479

• Universal Device Template
• Cisco 8811
• Cisco 8841
• Cisco 8851
• Cisco 8851NR
• Cisco 8861
• Cisco 7811
• Cisco 7821
• Cisco 7841
• Cisco 7861
• Cisco 8845
• Cisco 8865
• Cisco 8865NR
• Cisco 7832
• Cisco 8832
• Cisco 8832NR
SIP OAuth Mode PrerequisitesThis feature assumes that you have already completed the following:
• Ensure Mobile and Remote Access is configured and the connection is established between UnifiedCommunication Manager and Expressway.
• Ensure Unified Communications Manager is registered to a Smart or Virtual account with allowexport-controlled functionality.
• Ensure client firmware supports SIP OAuth.
SIP OAuth Mode Configuration Task FlowComplete the following tasks to configure SIP OAuth for your system.
Procedure
PurposeCommand or Action
Upload CA Certificate to the phone edge trustto get the tokens. This step is not applicable forCisco Jabber device.
Upload CACertificate to the Phone Edge TrustStep 1
Security Guide for Cisco Unified Communications Manager, Release 1480
Basic System SecuritySIP OAuth Mode Prerequisites

PurposeCommand or Action
Enable OAuth for SIP registrations in Cisco IPPhone 7800 and 8800 enterprise series. Thisstep is not applicable for Cisco Jabber device.
Enable OAuth Access Token for DevicesStep 2
Enable oauth with refresh login flow on UnifiedCommunicationsManager to register the devicevia SIP OAuth.
Configure Refresh Logins, on page 82Step 3
Assign the ports for OAuth for each node thathas OAuth registration.
Configure OAuth Ports, on page 82Step 4
Enable OAuth services using a CLI commandon the publisher node.
Enable SIP OAuth Mode, on page 83Step 5
Restart this service on all nodes that haveOAuth registrations.
Restart Cisco CallManager Service, on page 83Step 6
Configure OAuth support within a PhoneSecurity Profile if you are deploying encryptionfor the endpoints.
Configure Device Security Mode in PhoneSecurity Profile
Step 7
Configure SIP OAuth registered phones inMRA mode. This step is not applicable forCisco Jabber device.
(Optional) Configure SIP Oauth RegisteredPhones for MRA Mode
Step 8
Upload CA Certificate to the Phone Edge TrustUse this procedure to upload the root certificate of Tomcat signed certificate to the Phone Edge Trust.
This procedure is performed only for Cisco Phones and not applicable for Cisco Jabber.Note
Procedure
Step 1 From Cisco Unified OS Administration, choose Security > Certificate Management.Step 2 Click Upload Certificate/Certificate chain.Step 3 In the Upload Certificate/Certificate chain window, from the Certificate Purpose drop-down list choose
Phone-Edge-Trust.Step 4 In the Upload File field, click Browse and upload the certificate.Step 5 Click Upload.
Enable OAuth Access Token for DevicesUse this procedure to enable OAuth access token for phones.
Security Guide for Cisco Unified Communications Manager, Release 1481
Basic System SecurityUpload CA Certificate to the Phone Edge Trust

Configure this enterprise parameter only for OAuth support for SIP registrations for phones.Note
Procedure
Step 1 From Cisco Unified CM Administration, choose System > Enterprise Parameters.Step 2 In SSO and OAuth Configuration section, ensure that the value of OAuth Access Token for Devices
drop-down list is set to Implicit:Already registered devices.
Set the value ofOAuth Access Token for Devices toExplicit:Activation Code device onboardingrequired to disable implicitly receiving tokens for SIP OAuth registration and only support receivingtokens through activation code. The tokens can then be used for SIP OAuth registration if indicatedin the security profile.
From Release 14 onwards, the default value of the enterprise parameter OAuth Access Token forDevices is Implicit:Already registered devices.
Note
Step 3 Click Save.
Configure Refresh LoginsUse this procedure to configure Refresh Logins with OAuth access tokens and refresh tokens for Cisco Jabberclients.
Procedure
Step 1 From Cisco Unified CM Administration, choose System > Enterprise Parameters.Step 2 Under SSO and OAuth Configuration, set the OAuth with Refresh Login Flow parameter to Enabled.Step 3 (Optional) Set any other parameters in the SSO and OAuth Configuration section. For parameter descriptions,
click on the parameter name.Step 4 Click Save.
Configure OAuth PortsUse this procedure to assign the ports that are used for SIP OAuth.
Procedure
Step 1 From Cisco Unified CM Administration, choose, System > Cisco Unified CM.Step 2 Do the following for each server that uses SIP OAuth.Step 3 Select the server.
Security Guide for Cisco Unified Communications Manager, Release 1482
Basic System SecurityConfigure Refresh Logins

Step 4 Under Cisco Unified Communications Manager TCP Port Settings, set the port values for the followingfields:
• SIP Phone OAuth Port
Default value is 5090. Acceptable configurable range is 1024 to 49151.
• SIP Mobile and Remote Access Port
Default value is 5091. Acceptable configurable range is 1024 to 49151.
Cisco Unified Communications Manager uses SIP Phone OAuth Port (5090) to listen for SIP lineregistration from Jabber OnPremise devices over TLS. However, Unified CM uses SIP MobileRemote Access Port (default 5091) to listen for SIP line registrations from Jabber over Expresswaythrough mTLS.
Both ports use the Tomcat certificate and Tomcat-trust for incoming TLS/mTLS connections. Makesure that your Tomcat-trust store is able to verify the Expressway-C certificate for SIP OAuth modefor Mobile and Remote Access to function accurately.
You need to perform extra steps to upload the Expressway-C certificate into the Tomcat certificateof Unified Communications Manager, when:
• Expressway-C certificate and Tomcat certificate is not signed by the same CA certificate.
• Unified CM Tomcat certificate is not CA signed.
Note
Step 5 Click Save.Step 6 Repeat this procedure for each server that uses SIP OAuth.
Enable SIP OAuth ModeUse the Command Line Interface to enable SIP OAuth mode. Enabling this feature on the publisher node alsoenables the feature on all cluster nodes.
Procedure
Step 1 On the Unified Communications Manager publisher node, log in to the Command Line Interface.Step 2 Run the utils sipOAuth-mode enable CLI command.
The system updates the read-only Cluster SIPOAuth Mode enterprise parameter to Enabled.
Restart Cisco CallManager ServiceAfter enabling SIP OAuth through CLI, restart the Cisco CallManager service on all nodes where endpointsregister through SIP OAuth.
Security Guide for Cisco Unified Communications Manager, Release 1483
Basic System SecurityEnable SIP OAuth Mode

Procedure
Step 1 From Cisco Unified Serviceability, choose Tools > Control Center > Feature Services.Step 2 From the Server drop-down list, select the server.Step 3 Check the Cisco CallManager service and click Restart.
Configure Device Security Mode in Phone Security ProfileUse this procedure to configure the device security mode in the phone security profile and is required only ifyou have set the Device Security Mode within that phone’s Phone Security Profile to Encrypted.
Procedure
Step 1 From Cisco Unified CM Administration, choose System > Security > Phone Security Profile.Step 2 Perform either of the following:
• Search for an existing phone security profile
• Click Add New
Step 3 In the Phone Security Profile Information section, from the Device Security Mode drop-down list, chooseEncrypted.
Step 4 From the Transport Type drop-down list, choose TLS.Step 5 Check the Enable OAuth Authentication check box.Step 6 Click Save.Step 7 Associate the Phone Security Profile to the phone. For more information on how to apply the phone security
phones, see "Apply Security Profiles to Phone" section in Security Guide for Cisco Unified CommunicationsManager.
Reset your phone for the changes to take effect.Note
When SIP OAuth Mode is enabled, Enable Digest Authentication and TFTP Encrypted Configoptions are not supported. Phones will download the TFTP config file securely over https(6971)and use the token for authentication.
Note
Configure SIP Oauth Registered Phones for MRA ModeUse this procedure to configure SIP OAuth registered phones to MRA mode.
Security Guide for Cisco Unified Communications Manager, Release 1484
Basic System SecurityConfigure Device Security Mode in Phone Security Profile
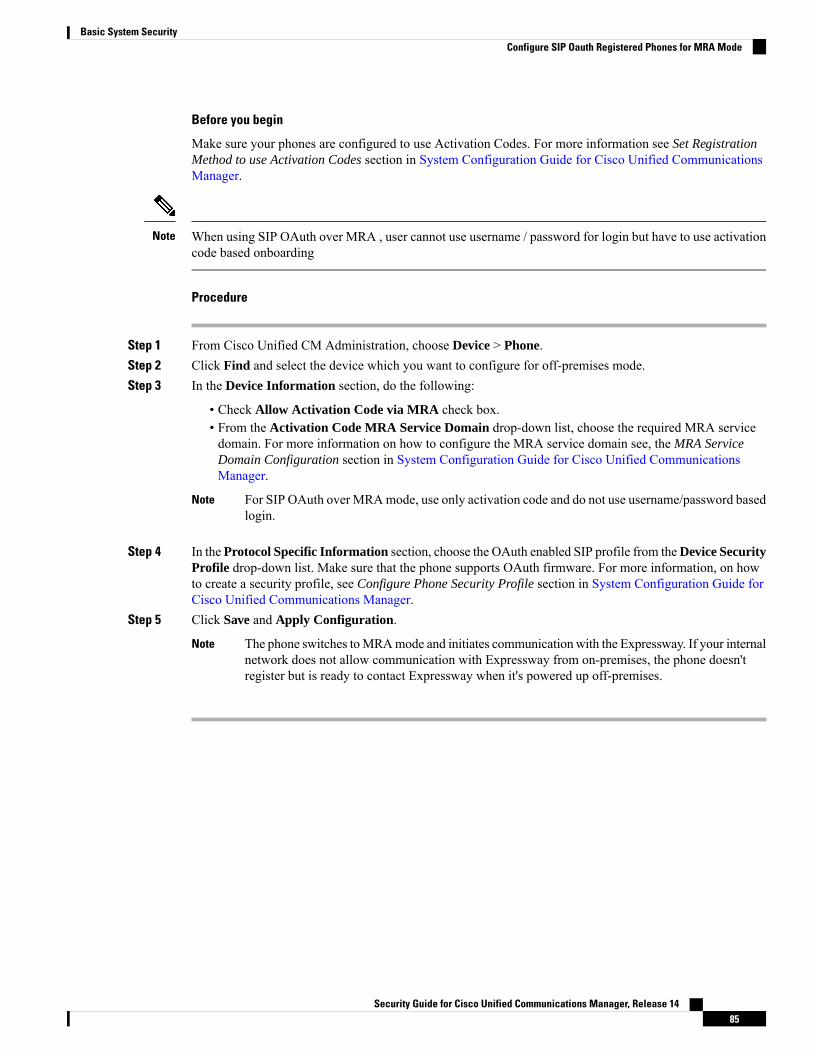
Before you begin
Make sure your phones are configured to use Activation Codes. For more information see Set RegistrationMethod to use Activation Codes section in System Configuration Guide for Cisco Unified CommunicationsManager.
When using SIP OAuth over MRA , user cannot use username / password for login but have to use activationcode based onboarding
Note
Procedure
Step 1 From Cisco Unified CM Administration, choose Device > Phone.Step 2 Click Find and select the device which you want to configure for off-premises mode.Step 3 In the Device Information section, do the following:
• Check Allow Activation Code via MRA check box.• From the Activation Code MRA Service Domain drop-down list, choose the required MRA servicedomain. For more information on how to configure the MRA service domain see, the MRA ServiceDomain Configuration section in System Configuration Guide for Cisco Unified CommunicationsManager.
For SIP OAuth over MRAmode, use only activation code and do not use username/password basedlogin.
Note
Step 4 In the Protocol Specific Information section, choose the OAuth enabled SIP profile from theDevice SecurityProfile drop-down list. Make sure that the phone supports OAuth firmware. For more information, on howto create a security profile, see Configure Phone Security Profile section in System Configuration Guide forCisco Unified Communications Manager.
Step 5 Click Save and Apply Configuration.
The phone switches toMRAmode and initiates communication with the Expressway. If your internalnetwork does not allow communication with Expressway from on-premises, the phone doesn'tregister but is ready to contact Expressway when it's powered up off-premises.
Note
Security Guide for Cisco Unified Communications Manager, Release 1485
Basic System SecurityConfigure SIP Oauth Registered Phones for MRA Mode

Security Guide for Cisco Unified Communications Manager, Release 1486
Basic System SecurityConfigure SIP Oauth Registered Phones for MRA Mode

C H A P T E R 8TFTP Encryption
• TFTP Encrypted Configuration Files Overview, on page 87• Encryption for Phone Configuration File Task Flow, on page 89• Disable TFTP Encrypted Configuration Files, on page 93
TFTP Encrypted Configuration Files OverviewTFTP configuration protects your data during device registration by encrypting the configuration file that thephone downloads from the TFTP server during the registration process. This file contains confidentialinformation such as usernames, passwords, IP addresses, port details, phone SSH credentials, and so on. Ifthis feature is not configured, the configuration file is sent in cleartext. Deploying this feature ensures that anattacker cannot intercept this information during the registration process. This information is unencrypted andsent in cleartext. Hence, we recommend that you encrypt the TFTP configuration file in order to protect yourdata.
If you have enabled the digest authentication option for SIP phones and disabled the TFTP encryptedconfiguration option, the digest credentials are sent in the cleartext.
Warning
After TFTP configuration, the TFTP server:
• Deletes all the cleartext configuration files on disk
• Generates encrypted versions of the configuration files
If the phone supports encrypted phone configuration files and you have performed the tasks for phoneconfiguration file encryption, the phone requests an encrypted version of the configuration file.
Some phones don't support encrypted phone configuration files. The phone model and protocol determine themethod that the system uses to encrypt the configuration file. Supported methods rely on UnifiedCommunications Manager functionality and a firmware load that supports encrypted configuration files. Ifyou downgrade the phone firmware load to a version that doesn't support encrypted configuration files, theTFTP server offers an unencrypted configuration file that provides minimal configuration settings, and thephone may not perform as expected.
Encryption Key Distribution
To ensure that you maintain the privacy of the key information, we recommend that you perform the tasksthat are associated with encrypted phone configuration files in a secure environment.
Security Guide for Cisco Unified Communications Manager, Release 1487

Unified Communications Manager supports the following methods:
• Manual key distribution
• Symmetric key encryption with a phone public key
The setup information provided for manual key distribution and symmetric key encryption with a phone publickey assume that you have configured mixed mode and enabled the TFTP Encrypted Config option in CiscoUnified CM Administration.
TFTP Encrypted Configuration Files TipsWe recommend that you enable the TFTP Encrypted Configuration file to secure confidential data in phonedownloads. For phones that don't have PKI capabilities, you must also configure a symmetric key in UnifiedCommunications Manager Administration and in the phone. If the symmetric key is missing from either thephone or Unified CommunicationsManager or if a mismatch occurs when the TFTP Encrypted Configurationfile is set, the phone can't register.
Consider the following information when you configure encrypted configuration files in UnifiedCommunications Manager:
• Only phones that support encrypted configuration files display the TFTP Encrypted Config check boxin the Phone Security Profile Configuration page. You can't configure encrypted configuration filesfor Cisco Unified IP Phones 7800, 7942, and 7962 (SCCP only) because these phones don't receiveconfidential data in the configuration file download.
• By default, the TFTP Encrypted Config check box is unchecked. If you apply this default setting, thenon secure profile to the phone, the digest credentials, and secured passwords are sent in the cleartext.
• For Cisco Unified IP Phones that use Public Key Encryption, Unified Communications Manager doesnot require you to set the Device Security Mode to Authenticated or Encrypted to enable encryptedconfiguration files. Unified CommunicationsManager uses the CAPF process for downloading its Publickey during registration.
• You may choose to download the unencrypted configuration files to the phones if you know that yourenvironment is secure or to avoid manually configuring symmetric keys for phones that are notPKI-enabled. However, we don't recommend that you use this method.
• For Cisco Unified IP Phones 7800, 7942, and 7962 (SIP only), Unified Communications Managerprovides a method of sending digest credentials to the phone that is easier, but less secure, than using anencrypted configuration file. This method, which uses the Exclude Digest Credential in ConfigurationFile setting, is useful for initializing digest credentials because it doesn't require you to first configure asymmetric key and enter it on the phone. With this method, you send the digest credentials to the phonein an unencrypted configuration file. After the credentials are in the phone, we recommend that youdisable the TFTP Encrypted Config option and then enable the Exclude Digest Credential inConfiguration File on the Phone Security Profile Configuration page. This will exclude digestcredentials from future downloads.
• After digest credentials exist in these phones and an incoming file doesn't contain digest credentials, theexisting credentials remain in place. The digest credentials remain intact until the phone is factory resetor new credentials (including blanks) are received. If you change digest credentials for a phone or enduser, temporarily disable the Exclude Digest Credential in Configuration File on the correspondingPhone Security Profile Information page to download the new digest credentials to the phone.
Security Guide for Cisco Unified Communications Manager, Release 1488
Basic System SecurityTFTP Encrypted Configuration Files Tips

Encryption for Phone Configuration File Task FlowTo set up encryption for TFTP configuration files, make sure that the cluster security is in mixed mode, verifyphones in your cluster that support manual key encryption and public key encryption, verify the phones thatsupport SHA-1 and SHA-512 and complete the tasks below.
If you enable SHA-512 clusterwide, and your phones don't support it, those phones do not work.Note
Procedure
PurposeCommand or Action
Enable the TFTP Configuration File option foryour phones. You can enable this option in thePhone Security Profile.
Enable TFTP Encryption, on page 89Step 1
When TFTP file encryption is enabled, SHA-1is configured by default as the signing
Configure SHA-512 Signing Algorithm, onpage 90
Step 2
algorithm. Use this procedure to update thesystem to use the stronger SHA-512 algorithm.
For phones that use public keys, verify thecertificate installation.
Verify LSC or MIC Certificate Installation, onpage 91
Step 3
After you complete your TFTP config fileupdates, regenerate the CTL file.
Update CTL File, on page 92Step 4
Restart the Cisco CallManager and Cisco TFTPservices.
Restart Services, on page 92Step 5
After you complete your encrypted TFTP configfile updates, reset your phones.
Reset Phones, on page 93Step 6
Enable TFTP EncryptionYou can enable this TFTP within the phone security profile for a given phone model. Perform this procedureto enable TFTP encryption for files downloaded from the TFTP server.
Procedure
Step 1 From Cisco Unified CM Administration, choose System > Security > Phone Security Profile.Step 2 Click Find and choose a phone security profile.Step 3 Check the TFTP Encrypted Config check box.Step 4 Click Save.Step 5 Repeat these steps for any other phone security profiles that are used in the cluster.
Security Guide for Cisco Unified Communications Manager, Release 1489
Basic System SecurityEncryption for Phone Configuration File Task Flow

To disable encryption for the phone configuration files, you must uncheck the TFTP EncryptedConfig check box in the phone security profile in Cisco Unified Communications ManagerAdministration and then save your change.
Note
Configure SHA-512 Signing AlgorithmSHA-1 is the default algorithm for TFTP file signing. You can use the below optional procedure to upgradethe system to use the stronger SHA-512 algorithm for TFTP configuration files such as digital signatures.
Make sure that your phones support SHA-512. If not, the phones don't work after you update your system.Note
Procedure
Step 1 From Cisco Unified CM Administration, choose System > Enterprise Parameters.Step 2 Go to the Security Parameters pane.Step 3 From the TFTP File Signature Algorithm drop-down list, choose SHA-512.Step 4 Click Save.
Restart the affected services listed in the pop-up window to complete the procedure.
Set Up Manual Key DistributionFor phones that use manual keys, you must set up manual key distribution.
Before you begin
The following procedure assumes that:
• Your phone exists in the Unified Communications Manager database.
• A compatible firmware load exists on the TFTP server.
• You have enabled the TFTP Encrypted Config parameter in Unified Communications ManagerAdministration.
• Your phone supports manual key distribution.
Procedure
Step 1 From Cisco Unified CM Administration, choose Device > Phone.Step 2 Click Find.
Security Guide for Cisco Unified Communications Manager, Release 1490
Basic System SecurityConfigure SHA-512 Signing Algorithm

Step 3 After the Phone Configuration window displays, configure the manual key distribution settings.
After you have configured the settings, you should not change the key.Note
Step 4 Click Save.Step 5 Enter the symmetric key on the phone and then reset the phone.
For information on how to perform these tasks, refer to the phone administration guide that supports yourphone model.
Enter Phone Symmetric KeyIf you used the previous procedure to configure a manual key for your phone in Unified CommunicationsManager, use this procedure to enter the key on the phone.
Procedure
Step 1 Press the Settings button on the phone.Step 2 If the configuration is locked, scroll down the Settings menu, highlight Unlock Phone and press the Select
softkey. Enter the phone password and press the Accept softkey.
The phone accepts the password.
Step 3 Scroll down the Settings menu, highlight Security Configuration, and press the Select softkey.Step 4 In the Security Configurationmenu, highlight the Set Cfg Encrypt Key option and press the Select softkey.Step 5 When prompted for the encryption key, enter the key (in hex). If you need to clear the key, enter 32 zero
digits.Step 6 After you have finished entering the key, press the Accept softkey.
The phone accepts the encryption key.
Step 7 Reset the phone.
After the phone resets, the phone requests encrypted configuration files.
Verify LSC or MIC Certificate InstallationFor phones that use public keys, verify the certificate installation.
This procedure applies to Cisco Unified IP Phones that uses PKI encryption. To determine, if your phonesupports PKI encryption, see Phone Models Supporting Encrypted Configuration File section.
Note
The following procedure assumes that the phone exists in Unified Communications Manager database andyou have enabled the TFTP Encrypted Config parameter in Unified Communications Manager.
Security Guide for Cisco Unified Communications Manager, Release 1491
Basic System SecurityEnter Phone Symmetric Key

Procedure
Step 1 Verify that a Manufacture-Installed Certificate (MIC) or a Locally Significant Certificate (LSC) exists in thephone.
Step 2 From Cisco Unified CM Administration, choose Device > Phone.The lists of phones appear.
Step 3 Click the Device Name.The Phone Configuration page appears.
Choose theTroubleshoot option in the CAPF settings section from the Phone Configuration page,to verify whether an LSC or MIC exists in the phone in Unified Communications Manager. TheDelete and Troubleshoot options don't appear when a certificate doesn't exist in the phone.
Tip
You can also verify that an LSC or MIC exists in the phone by checking the security configurationon the phone. For more information, see the administration guides for Cisco Unified IP Phones thatsupport this version of Unified Communications Manager.
Tip
Step 4 If a certificate doesn't exist, install an LSC by using the CAPF functionality on the Phone Configurationwindow. For information on how to install an LSC, see topics related to the Certificate Authority ProxyFunction.
Step 5 Click Save after you configure the CAPF settings.Step 6 Click Reset.
The phone requests an encrypted configuration file from the TFTP server after the phone resets.
Update CTL FileUpdate the CTL file, when you have done any modifications to Unified CommunicationsManager. Since youhave enabled the TFTP file encryption, you have to regenerate the CTL file.
Procedure
Step 1 Log in to the Command Line Interface.Step 2 On the publisher node, run the utils ctl update CTLfile command.
Restart ServicesAfter you have completed your encrypted TFTP configuration file updates, make sure that you restart yourCisco TFTP and Cisco CallManager services for the changes to take effect.
Procedure
Step 1 From Cisco Unified Serviceability, choose Tools > Control Center – Feature Services.Step 2 Choose the following two services.
Security Guide for Cisco Unified Communications Manager, Release 1492
Basic System SecurityUpdate CTL File

• Cisco CallManager• Cisco TFTP
Step 3 Click Restart. However, after regenerating or updating CallManager certificate, you don't have to manuallyrestart TFTP service.
Reset PhonesMake sure that you reset your phones after you complete all your encrypted TFTP configuration file updates.
Procedure
Step 1 From Cisco Unified CM Administration, choose Device > Phones.Step 2 Click Find.Step 3 Click Select All.Step 4 Click Reset Selected.
Disable TFTP Encrypted Configuration Files
If digest authentication is True for the phone that is running SIP when the TFTP encrypted configurationsetting is False, digest credentials may get sent in the clear.
Warning
After you update the setting, the encryption keys for the phone remain in the Unified CommunicationsManagerdatabase.
Cisco Unified IP Phones 7911G, 7931G (SCCP only), 7941G, 7941G-GE, 7942G, 7945G, 7961G, 7961G-GE,7962G, 7965G, and 7975G request an encrypted file (.enc.sgn file) when the encrypted configuration settinggets updated to False, the phone requests an unencrypted, signed file (.sgn file).
If Cisco Unified IP Phones are running on SCCP and SIP, request an encrypted file when the encryptionconfiguration setting gets updated to False. Remove the symmetric key from the phone GUI so that the phonerequests an unencrypted configuration file the next time that it is reset.
• Cisco Unified IP Phones running on SCCP: 6901, 6911, 6921, 6941, 6945, 6961, 7906G, 7911G, 7925G,7925G-EX, 7926G, 7931G, 7941G, 7941G-GE, 7942G, 7945G, 7961G, 7961G-GE, 7962G, 7965G,7975G, 8941, 8945.
• Cisco Unified IP Phones running on SIP: 6901, 6911, 6921, 6941, 6945, 6961, 7906G, 7911G, 7941G,7941G-GE, 7942G, 7961G, 7961G-GE,7962G, 7965G, 7975G, 8941, 8945, 8961, 9971, 7811, 78321,7841, 7861, 7832, 8811, 8841, 8845, 8851, 8851NR, 8861, 8865, 8865NE, 8821, 8831, 8832, 8832NR.
Security Guide for Cisco Unified Communications Manager, Release 1493
Basic System SecurityReset Phones

Procedure
PurposeCommand or Action
To disable encryption for the phoneconfiguration files, UncheckTFTP Encrypted
Step 1
Config check box in the phone security profileassociated to the phone.
For Cisco Unified IP Phones 7942 and 7962(SIP only), Enter a 32-byte 0 as the key value
Step 2
for the symmetric key at the phone screen todisable encryption.
For information on how to perform these tasks,see the phone administration guide that supportsyour phone model.
For Cisco Unified IP Phones (SIP only), deletethe symmetric key at the phone screen to disableencryption.
Step 3
Security Guide for Cisco Unified Communications Manager, Release 1494
Basic System SecurityDisable TFTP Encrypted Configuration Files

C H A P T E R 9Cipher Management
• Cipher Management, on page 95• Configure Cipher String, on page 97• Cipher Limitations, on page 100• Cipher Restrictions, on page 109
Cipher ManagementCipher management is an optional feature that enables you to control the set of security ciphers that is allowedfor every TLS and SSH connection. Cipher management allows you to disable weaker ciphers and thus enablea minimum level of security.
The Cipher Management page has no default values. Instead, the Cipher Management feature takes effectonly when you configure the allowed ciphers. Certain weak ciphers are never allowed, even if they areconfigured on the Cipher Management page.
You can configure ciphers on the following TLS and SSH interfaces:
• All TLS—The ciphers that are assigned in this field are applicable to all server and client connectionsthat support the TLS protocol on Unified Communications Manager and IM and Presence Service.
• HTTPS TLS—The ciphers that are assigned in this field are applicable to all Cisco Tomcat connectionson ports 443 and 8443 that support the TLS protocol on Unified Communications Manager and IM andPresence Service.
If you assign ciphers on HTTPS TLS and All TLS fields, the ciphers that areconfigured on HTTPS TLS override All TLS ciphers.
Note
• SIP TLS—The ciphers that are assigned in this field are applicable to all encrypted connections to orfrom the SIP TLS interfaces that support the TLS protocol on Unified Communications Manager. It isnot applicable for SCCP or CTI devices.
SIP interface in authenticated mode only supports NULL-SHA ciphers.
If you configure ciphers in the SIP interface or All interface, authenticated mode is no longer supported.
If you assign ciphers in SIP TLS andAll TLS fields, then the ciphers you configured on SIP TLS overridethe All TLS ciphers.
Security Guide for Cisco Unified Communications Manager, Release 1495

• SSH Ciphers—The ciphers that are assigned in this field are applicable to SSH connections on UnifiedCommunications Manager and IM and Presence Service.
• SSH Key Exchange—The Key Exchange algorithms that are assigned in this field are applicable to theSSH interface on Unified Communications Manager and IM and Presence Service.
Curve Negotiation
Following are the points for negotiating the curves:
• ECDSA ciphers are negotiated with different EC curves based on the key size of the ECDSA certificate.
• The RSA ciphers are negotiated with all the EC curves irrespective of key size of the certificate.
• The key size of a ECDSA certificate must be same as the curve size for the TLS negotiation to happen.
Example:
The 384 key certificate and ECDSA ciphers are negotiated, when the client offers P-384 EC curve.
Curve negotiation is based on the client preference for both RSA and ECDSA ciphers.
When the certificate size is 384 bits and client offerings are P-521, P-384, P-256 EC curves thenTLS negotiation happen with the P-521 curve. Since curve offered by the client is P-521 at the firstand P- 384 curve is also available on the list. When the certificate size is 384 bits and client offeringsare P-521, P-256 EC curves then TLS negotiation will not happen because the P-384 curve is notoffered by the client.
The following are the supported ciphers for EC curves:TLS_ECDHE_RSA_WITH_AES_256_GCM_SHA384TLS_ECDHE_ECDSA_WITH_AES_128_GCM_SHA256TLS_ECDHE_ECDSA_WITH_AES_256_GCM_SHA384TLS_ECDHE_RSA_WITH_AES_128_GCM_SHA256TLS_ECDHE_ECDSA_WITH_3DES_EDE_CBC_SHATLS_ECDHE_ECDSA_WITH_AES_128_CBC_SHATLS_ECDHE_ECDSA_WITH_AES_256_CBC_SHATLS_ECDHE_RSA_WITH_3DES_EDE_CBC_SHATLS_ECDHE_RSA_WITH_AES_128_CBC_SHATLS_ECDHE_RSA_WITH_AES_256_CBC_SHATLS_ECDHE_ECDSA_WITH_AES_128_CBC_SHA256TLS_ECDHE_ECDSA_WITH_AES_256_CBC_SHA384TLS_ECDHE_RSA_WITH_AES_128_CBC_SHA256TLS_ECDHE_RSA_WITH_AES_256_CBC_SHA384
Recommended CiphersThis section lists the recommended ciphers. Make sure that the ciphers configured are part of the recommendedciphers. Otherwise, you may encounter interoperability issues with other products over secure interfaces.After configuring the recommended ciphers, restart the affected services or reboot the server for the changesto take effect.
Security Guide for Cisco Unified Communications Manager, Release 1496
Basic System SecurityRecommended Ciphers

Configuring hmac-sha2-512 in SSH MAC interface affects the DRS and CDR functionality.
Configuring ciphers [email protected], [email protected] in "SSH Cipher's" field orconfiguring only ecdh-sha2-nistp256 algorithm in "SSH KEX" will break the DRS and CDR functionalities.
Warning
We recommend the following cipher strings for the TLS and SSH interface configuration:
TLS
ECDHE-RSA-AES256-GCM-SHA384:ECDHE-RSA-AES256-SHA384:ECDHE-RSA-AES256-SHA:AES256-GCM-SHA384:AES256-SHA256:AES256-SHA:ECDHE-RSA-AES128-GCM-SHA256:ECDHE-RSA-AES128-SHA256:ECDHE-RSA-AES128-SHA:AES128-GCM-SHA256:AES128-SHA256:AES128-SHA
SSH Ciphers
aes128-ctr,aes192-ctr,aes256-ctr
SSH MAC
hmac-sha2-256,hmac-sha1
SSH KEX for FIPS
ecdh-sha2-nistp521,ecdh-sha2-nistp384,diffie-hellman-group14-sha1,diffie-hellman-group-exchange-sha256,diffie-hellman-group-exchange-sha1
SSH KEX for Non-FIPS
ecdh-sha2-nistp521,ecdh-sha2-nistp384,diffie-hellman-group14-sha1,diffie-hellman-group1-sha1,diffie-hellman-group-exchange-sha256,diffie-hellman-group-exchange-sha1
Configure Cipher String• Make sure you enter the cipher string in OpenSSL cipher string format inAll TLS, SIP TLS, andHTTPS
TLS fields.
• Make sure that you also enter the ciphers or algorithms in OpenSSH format in SSH Ciphers,algorithmsin SSH MAC, and SSH Key Exchange fields.
• Review Recommended Ciphers, on page 96.
To configure the cipher string on different secure interfaces, see the Cipher Restrictions section.
Procedure
Step 1 From Cisco Unified OS Administration, choose Security > Cipher Management.The Cipher Management page appears.
Step 2 To configure the cipher string inAll TLS, SIP TLS, orHTTPS TLS field, enter the cipher string in OpenSSLcipher string format in the Cipher String field.
Security Guide for Cisco Unified Communications Manager, Release 1497
Basic System SecurityConfigure Cipher String

Step 3 If you don't configure the cipher string in the following fields:
• All TLS or HTTPS TLS field—the HTTPS TLS interface port (8443) takes configuration from theEnterprise parameters (HTTPS ciphers) page.
• All TLS or SIP TLS field—the SIP interface port (5061) takes configuration from the Enterpriseparameters (TLS ciphers) page in encrypted mode and NULL-SHA ciphers in authenticated mode.
If you don't configure the cipher string in the HTTPS TLS or SIP TLS field, the system takes theconfiguration from the All TLS field by default.
Note
For more information about OpenSSL cipher string format, see https://www.openssl.org/docs/man1.0.2/apps/ciphers.html.
Step 4 To configure the cipher string in the SSH Ciphers field, enter the cipher string in OpenSSH cipher stringformat in the Cipher String field.
For more information about OpenSSH cipher string format for SSHCiphers, see https://www.ssh.com/manuals/server-admin/44/Ciphers_and_MACs.html.
If you don't configure any cipher string in the SSH Ciphers field, the following ciphers are applicable to allSSH connections by default:
In FIPS mode:
aes128-ctr, aes192-ctr, aes256-ctr,[email protected], [email protected]
In non-FIPS mode:
aes128-ctr, aes192-ctr, aes256-ctr,[email protected], [email protected]
Step 5 To configure the key exchange algorithm in the SSH Key Exchange field, enter the algorithm string inOpenSSH string format in the Algorithm String field.
For more information about OpenSSH algorithm string format for SSH Key Exchange, see thehttps://tools.ietf.org/id/draft-ietf-curdle-ssh-kex-sha2-09.html.
If you don't configure any key exchange algorithm in the SSH Key Exchange field, the following key exchangealgorithms are applicable to all SSH connections by default:
In FIPS mode:
diffie-hellman-group1-sha1,diffie-hellman-group14-sha1,diffie-hellman-group-exchange-sha1,diffie-hellman-group-exchange-sha256,ecdh-sha2-nistp256,ecdh-sha2-nistp384,ecdh-sha2-nistp521
In non-FIPS mode:
diffie-hellman-group1-sha1, diffie-hellman-group14-sha1,diffie-hellman-group-exchange-sha1,diffie-hellman-group-exchange-sha256,ecdh-sha2-nistp256,ecdh-sha2-nistp384,ecdh-sha2-nistp521
Step 6 To configure MAC algorithm in the SSH MAC field, enter the algorithm string in OpenSSH string format inthe Algorithm String field.
For more information about OpenSSH algorithm string format for SSH MAC, see https://www.ssh.com/manuals/server-admin/44/Ciphers_and_MACs.html.
Security Guide for Cisco Unified Communications Manager, Release 1498
Basic System SecurityConfigure Cipher String

If you don't configure anyMAC algorithm in the SSH MAC field, the followingMAC algorithms are applicableto all SSH connections by default:
In FIPS mode:hmac-sha1
In non-FIPS mode:hmac-sha1
Step 7 Click Save.
You can't edit Cipher Expansion String and Algorithm Expansion String fields.Note
The system validates the ciphers in the All TLS, SIP TLS, HTTPS TLS , and SSH Ciphers fields and autopopulates ciphers in the Cipher Expansion String field.
If you enter invalid ciphers in the Cipher String field, the Cipher Expansion String field doesn't autopopulate and the following error message appears:
You have entered an invalid Cipher String.
The system validates the algorithms in the SSH Key Exchange and SSH MAC fields, and auto populates thealgorithms in the Algorithm Expansion String field.
If you enter invalid algorithms in the Algorithm String field, the Algorithm Expansion String field doesn'tauto populate and the following error messge appears:
You have entered an invalid Algorithm String.
The ciphers or algorithms auto populated in Cipher Expansion String and Algorithm ExpansionString fields are not the effective ciphers or algorithms. The system chooses the ciphers or algorithmsfrom the Cipher Expansion String or Algorithm Expansion String field.
Note
If you have configured ciphers in the corresponding fields, you have to either reboot or restart the respectiveservices.
Table 17: Configured Ciphers and their corresponding Actions
ActionConfigured Cipher Fields
Reboot all nodes in the cluster for the cipher string totake effect.
All TLS
Restart the Cisco Tomcat service on all nodes for thecipher string to take effect.
HTTPS TLS
Restart Unified Communications Manager on allnodes for the cipher string to take effect.
SIP TLS
Reboot all nodes in the cluster for the cipher string totake effect.
SSH Ciphers
Reboot all nodes in the cluster for the algorithm stringto take effect.
SSH Key Exchange or SSH MAC
Security Guide for Cisco Unified Communications Manager, Release 1499
Basic System SecurityConfigure Cipher String

You can enable ciphers by entering them in the Cipher String fields of the Cipher Management page. Ifyou don’t enter them, all default ciphers supported by the application are enabled. However, you can alsodisable certain weak ciphers by not entering them in the Cipher String fields of the Cipher Managementpage.
Note
Cipher LimitationsAlthough the Cipher Management configuration page allows you to configure any number of ciphers, eachapplication has a list of ciphers it supports on its interfaces. For example, All TLS interfaces may showECDHE or DHE or ECDSA-based ciphers, but an application such as Unified CommunicationsManager maynot support these ciphers because EC curves or DHE algorithms are not enabled for this application's interfaces.For more information, see Application Ciphers Support, on page 101 section for a list of ciphers supported byindividual application interfaces.
Validation in GUI
The ciphers on Cipher Management page are validated according to the OpenSSL guidelines. For example,if a cipher configured is ALL:BAD:!MD5, the cipher string will be considered as valid even though "BAD"is not a recognized cipher suite. OpenSSL considers this as a valid string. If AES128_SHA is configuredinstead of AES128-SHA (using an underscore instead of a hyphen) however, OpenSSL identifies this as aninvalid cipher suite.
Authenticated Mode (NULL Ciphers)
If NULL ciphers are in use by an application interface, you can revoke the support for NULL ciphers byconfiguring any cipher list in All TLS or SIP TLS fields on Cipher Management page.
Examples of application interfaces that use NULL ciphers are:
• All TLS Interface: Unified Communications Manager SIP Proxy in IM and Presence through the TLSContext Configuration page.
• SIP TLS Interface:Unified CommunicationsManager through SIP or SCCP, when anyDevice SecurityProfile is set to Authenticated mode.
Don't configure ciphers for either of these two interfaces if NULL ciphers must be used.
Override Functionality
The settings on the Cipher Management page overrides the default settings for each application and anyother location where ciphers have been configured. This means that if no ciphers are configured on theCipherManagement page, then the original functionality on all interfaces will be retained.
For example, if the Enterprise Parameter “TLS Ciphers” is configured with “ALL Supported Ciphers” andtheCipher Management page is configured with ciphers “AES256-GCM-SHA384:AES256-SHA256” onAllTLS interfaces, all application SIP interfaces will support only the “AES256-GCM-SHA384:AES256-SHA256”ciphers and ignores the Enterprise Parameter value.
Security Guide for Cisco Unified Communications Manager, Release 14100
Basic System SecurityCipher Limitations

Application Ciphers Support
The following table lists the application interfaces and the all corresponding ciphers and algorithms that aresupported on TLS and SSH interfaces.
Table 18: Unified Communications Manager Cipher Support for TLS Ciphers
Supported CiphersPortProtocolApplication /Process
ECDHE-RSA-AES256-GCM-SHA384:ECDHE-RSA-AES256-SHA384:ECDHE-RSA-AES256-SHA:AES256-GCM-SHA384:AES256-SHA256:AES256-SHA:CAMELLIA256-SHA:ECDHE-RSA-AES128-GCM-SHA256:ECDHE-RSA-AES128-SHA256:ECDHE-RSA-AES128-SHA:AES128-GCM-SHA256:AES128-SHA256:AES128-SHA:CAMELLIA128-SHA
2443TCP / TLSCiscoCallManager
ECDHE-RSA-AES256-GCM-SHA384:ECDHE-RSA-AES256-SHA384:ECDHE-RSA-AES256-SHA:DHE-RSA-CAMELLIA256-SHA:AES256-GCM-SHA384:AES256-SHA256:AES256-SHA:CAMELLIA256-SHA:ECDHE-RSA-AES128-GCM-SHA256:ECDHE-RSA-AES128-SHA256:ECDHE-RSA-AES128-SHA:DHE-RSA-CAMELLIA128-SHA:AES128-GCM-SHA256:AES128-SHA256:AES128-SHA:CAMELLIA128-SHA
4040TCP / TLSDRS
Security Guide for Cisco Unified Communications Manager, Release 14101
Basic System SecurityCipher Limitations

Supported CiphersPortProtocolApplication /Process
ECDHE-RSA-AES256-GCM-SHA384:ECDHE-RSA-AES256-SHA384:ECDHE-RSA-AES256-SHA:DHE-RSA-AES256-GCM-SHA384:DHE-RSA-AES256-SHA256:DHE-RSA-AES256-SHA:DHE-RSA-CAMELLIA256-SHA:AES256-GCM-SHA384:AES256-SHA256:AES256-SHA:CAMELLIA256-SHA:ECDHE-RSA-AES128-GCM-SHA256:ECDHE-RSA-AES128-SHA256:ECDHE-RSA-AES128-SHA:DHE-RSA-AES128-GCM-SHA256:DHE-RSA-AES128-SHA256:DHE-RSA-AES128-SHA:DHE-RSA-CAMELLIA128-SHA:AES128-GCM-SHA256:AES128-SHA256:AES128-SHA:CAMELLIA128-SHA:ECDHE-RSA-DES-CBC3-SHA:EDH-RSA-DES-CBC3-SHA:DES-CBC3-SHAECDHE-ECDSA-AES256-GCM-SHA384:ECDHE-ECDSA-AES256-SHA384:ECDHE-ECDSA-AES256-SHA:ECDHE-ECDSA-AES128-GCM-SHA256:ECDHE-ECDSA-AES128-SHA256:ECDHE-ECDSA-AES128-SHA:ECDHE-ECDSA-DES-CBC3-SHA
8443 / 443TCP / TLSCisco Tomcat
ECDHE-RSA-AES256-GCM-SHA384:ECDHE-ECDSA-AES256-GCM-SHA384ECDHE-RSA-AES256-SHA384:ECDHE-ECDSA-AES256-SHA384:ECDHE-RSA-AES256-SHAECDHE-ECDSA-AES256-SHA:AES256-GCM-SHA384:AES256-SHA256:AES256-SHA:CAMELLIA256-SHAECDHE-ECDSA-AES128-GCM-SHA256ECDHE-RSA-AES128-GCM-SHA256:ECDHE-RSA-AES128-SHA256ECDHE-ECDSA-AES128-SHA256:ECDHE-RSA-AES128-SHAECDHE-ECDSA-AES128-SHA:AES128-GCM-SHA256:AES128-SHA256:AES128-SHA:CAMELLIA128-SHA:ECDHE-ECDSA-DES-CBC3-SHA
5061TCP / TLSCiscoCallManager
AES256-GCM-SHA384:AES256-SHA256:AES256-SHA:CAMELLIA256-SHA:AES128-GCM-SHA256:AES128-SHA256:AES128-SHA:CAMELLIA128-SHA:
2444TCP / TLSCisco CTLProvider
AES256-GCM-SHA384:AES256-SHA256:AES256-SHA:CAMELLIA256-SHA:AES128-GCM-SHA256:AES128-SHA256:AES128-SHA:CAMELLIA128-SHA:
3804TCP / TLSCisco CertificateAuthority ProxyFunction
Security Guide for Cisco Unified Communications Manager, Release 14102
Basic System SecurityCipher Limitations

Supported CiphersPortProtocolApplication /Process
ECDHE-RSA-AES256-GCM-SHA384:ECDHE-RSA-AES256-SHA384:ECDHE-RSA-AES256-SHA:AES256-GCM-SHA384:AES256-SHA256:AES256-SHA:CAMELLIA256-SHA:ECDHE-RSA-AES128-GCM-SHA256:ECDHE-RSA-AES128-SHA256:ECDHE-RSA-AES128-SHA:AES128-GCM-SHA256:AES128-SHA256:AES128-SHA:CAMELLIA128-SHA
2749TCP / TLSCTIManager
AES256-GCM-SHA384:AES256-SHA256:AES256-SHA:CAMELLIA256-SHA:AES128-GCM-SHA256:AES128-SHA256:AES128-SHA:CAMELLIA128-SHA
2445TCP / TLSCisco TrustVerificationService
ECDHE-RSA-AES256-GCM-SHA384:ECDHE-RSA-AES256-SHA384:ECDHE-RSA-AES256-SHA:AES256-GCM-SHA384:AES256-SHA256:AES256-SHA:CAMELLIA256-SHA:ECDHE-RSA-AES128-GCM-SHA256:ECDHE-RSA-AES128-SHA256:ECDHE-RSA-AES128-SHA:AES128-GCM-SHA256:AES128-SHA256:AES128-SHA:CAMELLIA128-SHA:
7501TCP / TLSCiscoInterclusterLookup Service
ECDHE-RSA-AES256-GCM-SHA384:ECDHE-RSA-AES256-SHA384:ECDHE-RSA-AES256-SHA:DHE-RSA-CAMELLIA256-SHA:AES256-GCM-SHA384:AES256-SHA256:AES256-SHA:CAMELLIA256-SHA:ECDHE-RSA-AES128-GCM-SHA256:ECDHE-RSA-AES128-SHA256:ECDHE-RSA-AES128-SHA:DHE-RSA-CAMELLIA128-SHA:AES128-GCM-SHA256:AES128-SHA256:AES128-SHA:CAMELLIA128-SHA:ECDHE-ECDSA-AES256-GCM-SHA384:ECDHE-ECDSA-AES256-SHA384:ECDHE-ECDSA-AES256-SHA:ECDHE-ECDSA-AES128-SHA256:ECDHE-ECDSA-AES128-SHA:ECDHE-ECDSA-DES-CBC3-SHA:
6971, 6972TCP / TLSSecureConfigurationdownload(HAPROXY)
Security Guide for Cisco Unified Communications Manager, Release 14103
Basic System SecurityCipher Limitations

Supported CiphersPortProtocolApplication /Process
ECDHE-RSA-AES256-GCM-SHA384:ECDHE-RSA-AES256-SHA384:ECDHE-RSA-AES256-SHA:DHE-RSA-CAMELLIA256-SHA:AES256-GCM-SHA384:AES256-SHA256:AES256-SHA:CAMELLIA256-SHA:ECDHE-RSA-AES128-GCM-SHA256:ECDHE-RSA-AES128-SHA256:ECDHE-RSA-AES128-SHA:DHE-RSA-CAMELLIA128-SHA:AES128-GCM-SHA256:AES128-SHA256:AES128-SHA:CAMELLIA128-SHA:ECDHE-ECDSA-AES256-GCM-SHA384:ECDHE-ECDSA-AES256-SHA384:ECDHE-ECDSA-AES256-SHA:ECDHE-ECDSA-AES128-SHA256:ECDHE-ECDSA-AES128-SHA:ECDHE-ECDSA-DES-CBC3-SHA:
9443TCP / TLSAuthenticatedContact Search
Table 19: Unified Communications Manager IM & Presence Cipher Support for TLS Ciphers
Supported CiphersPortProtocolApplication /Process
ECDHE-RSA-AES256-GCM-SHA384:ECDHE-ECDSA-AES256-GCM-SHA384:ECDHE-RSA-AES256-SHA384:ECDHE-ECDSA-AES256-SHA384:ECDHE-RSA-AES256-SHA:ECDHE-ECDSA-AES256-SHA:AES256-GCM-SHA384:AES256-SHA256:AES256-SHA:CAMELLIA256-SHA:ECDHE-RSA-AES128-GCM-SHA256:ECDHE-ECDSA-AES128-GCM-SHA256:ECDHE-RSA-AES128-SHA256:ECDHE-ECDSA-AES128-SHA256:ECDHE-RSA-AES128-SHA:ECDHE-ECDSA-AES128-SHA:AES128-GCM-SHA256:AES128-SHA256:AES128-SHA:CAMELLIA128-SHA:ECDHE-RSA-DES-CBC3-SHA:ECDHE-ECDSA-DES-CBC3-SHA:DES-CBC3-SHA
5061TCP / TLSCisco SIP Proxy
Security Guide for Cisco Unified Communications Manager, Release 14104
Basic System SecurityCipher Limitations

Supported CiphersPortProtocolApplication /Process
ECDHE-RSA-AES256-GCM-SHA384:ECDHE-ECDSA-AES256-GCM-SHA384:ECDHE-RSA-AES256-SHA384:ECDHE-ECDSA-AES256-SHA384:ECDHE-RSA-AES256-SHA:ECDHE-ECDSA-AES256-SHA:AES256-GCM-SHA384:AES256-SHA256:AES256-SHA:CAMELLIA256-SHA:ECDHE-RSA-AES128-GCM-SHA256:ECDHE-ECDSA-AES128-GCM-SHA256:ECDHE-RSA-AES128-SHA256:ECDHE-ECDSA-AES128-SHA256:ECDHE-RSA-AES128-SHA:ECDHE-ECDSA-AES128-SHA:AES128-GCM-SHA256:AES128-SHA256:AES128-SHA:CAMELLIA128-SHA:ECDHE-RSA-DES-CBC3-SHA:ECDHE-ECDSA-DES-CBC3-SHA:DES-CBC3-SHA
5062TCP / TLSCisco SIP Proxy
ECDHE-RSA-AES256-GCM-SHA384:ECDHE-ECDSA-AES256-GCM-SHA384:ECDHE-RSA-AES256-SHA384:ECDHE-ECDSA-AES256-SHA384:ECDHE-RSA-AES256-SHA:ECDHE-ECDSA-AES256-SHA:AES256-GCM-SHA384:AES256-SHA256:AES256-SHA:CAMELLIA256-SHA:ECDHE-RSA-AES128-GCM-SHA256:ECDHE-ECDSA-AES128-GCM-SHA256:ECDHE-RSA-AES128-SHA256:ECDHE-ECDSA-AES128-SHA256:ECDHE-RSA-AES128-SHA:ECDHE-ECDSA-AES128-SHA:AES128-GCM-SHA256:AES128-SHA256:AES128-SHA:CAMELLIA128-SHA:ECDHE-RSA-DES-CBC3-SHA:ECDHE-ECDSA-DES-CBC3-SHA:DES-CBC3-SHA
8083TCP / TLSCisco SIP Proxy
Security Guide for Cisco Unified Communications Manager, Release 14105
Basic System SecurityCipher Limitations

Supported CiphersPortProtocolApplication /Process
ECDHE-RSA-AES256-GCM-SHA384:ECDHE-RSA-AES256-SHA384:ECDHE-RSA-AES256-SHA:DHE-RSA-AES256-GCM-SHA384:DHE-RSA-AES256-SHA256:DHE-RSA-AES256-SHA:DHE-RSA-CAMELLIA256-SHA:AES256-GCM-SHA384:AES256-SHA256:AES256-SHA:CAMELLIA256-SHA:ECDHE-RSA-AES128-GCM-SHA256:ECDHE-RSA-AES128-SHA256:ECDHE-RSA-AES128-SHA:DHE-RSA-AES128-GCM-SHA256:DHE-RSA-AES128-SHA256:DHE-RSA-AES128-SHA:DHE-RSA-CAMELLIA128-SHA:AES128-GCM-SHA256:AES128-SHA256:AES128-SHA:CAMELLIA128-SHA:ECDHE-RSA-DES-CBC3-SHA:EDH-RSA-DES-CBC3-SHA:DES-CBC3-SHAECDHE-ECDSA-AES256-GCM-SHA384:ECDHE-ECDSA-AES256-SHA384:ECDHE-ECDSA-AES256-SHA:ECDHE-ECDSA-AES128-GCM-SHA256:ECDHE-ECDSA-AES128-SHA256:ECDHE-ECDSA-AES128-SHA:ECDHE-ECDSA-DES-CBC3-SHA
8443, 443TCP / TLSCisco Tomcat
ECDHE-RSA-AES256-GCM-SHA384:ECDHE-ECDSA-AES256-GCM-SHA384:ECDHE-RSA-AES256-SHA384:ECDHE-ECDSA-AES256-SHA384:ECDHE-RSA-AES256-SHA:ECDHE-ECDSA-AES256-SHA:AES256-GCM-SHA384:AES256-SHA256:AES256-SHA:CAMELLIA256-SHA:ECDHE-RSA-AES128-GCM-SHA256:ECDHE-ECDSA-AES128-GCM-SHA256:ECDHE-RSA-AES128-SHA256:ECDHE-ECDSA-AES128-SHA256:ECDHE-RSA-AES128-SHA:ECDHE-ECDSA-AES128-SHA:AES128-GCM-SHA256:AES128-SHA256:AES128-SHA:CAMELLIA128-SHA:ECDHE-RSA-DES-CBC3-SHA:ECDHE-ECDSA-DES-CBC3-SHA:DES-CBC3-SHA
5269TCP /TLSCisco XCPXMPPFederationConnectionManager
Security Guide for Cisco Unified Communications Manager, Release 14106
Basic System SecurityCipher Limitations

Supported CiphersPortProtocolApplication /Process
ECDHE-RSA-AES256-GCM-SHA384:ECDHE-ECDSA-AES256-GCM-SHA384:ECDHE-RSA-AES256-SHA384:ECDHE-ECDSA-AES256-SHA384:ECDHE-RSA-AES256-SHA:ECDHE-ECDSA-AES256-SHA:AES256-GCM-SHA384:AES256-SHA256:AES256-SHA:CAMELLIA256-SHA:ECDHE-RSA-AES128-GCM-SHA256:ECDHE-ECDSA-AES128-GCM-SHA256:ECDHE-RSA-AES128-SHA256:ECDHE-ECDSA-AES128-SHA256:ECDHE-RSA-AES128-SHA:ECDHE-ECDSA-AES128-SHA:AES128-GCM-SHA256:AES128-SHA256:AES128-SHA:CAMELLIA128-SHA:ECDHE-RSA-DES-CBC3-SHA:ECDHE-ECDSA-DES-CBC3-SHA:DES-CBC3-SHA
5222TCP / TLSCisco XCPClientConnectionManager
Table 20: Cipher Support for SSH Ciphers
Ciphers/AlgorithmsService
• Ciphersaes128-ctraes192-ctraes256-ctraes128-gcm@[email protected]
• MAC algorithms:hmac-sha2-256hmac-sha1
• Kex algorithms:ecdh-sha2-nistp521ecdh-sha2-nistp384ecdh-sha2-nistp256diffie-hellman-group14-sha1diffie-hellman-group1-sha1diffie-hellman-group-exchange-sha256diffie-hellman-group-exchange-sha1
SSH Server
Security Guide for Cisco Unified Communications Manager, Release 14107
Basic System SecurityCipher Limitations

Ciphers/AlgorithmsService
• Ciphers:[email protected]@openssh.com
• MAC algorithms:hmac-sha2-256hmac-sha1
• Kex algorithms:ecdh-sha2-nistp521ecdh-sha2-nistp384ecdh-sha2-nistp256diffie-hellman-group14-sha1diffie-hellman-group1-sha1diffie-hellman-group-exchange-sha256diffie-hellman-group-exchange-sha1
SSH Client
• Ciphers:
aes256-ctraes256-cbcaes128-ctraes128-cbcaes256-ctrblowfish-cbc
• MAC algorithms:hmac-md5hmac-sha2-256hmac-sha1hmac-sha1-96hmac-md5-96
• Kex algorithms:ecdh-sha2-nistp256ecdh-sha2-nistp384ecdh-sha2-nistp521diffie-hellman-group14-sha1diffie-hellman-group-exchange-sha256diffie-hellman-group-exchange-sha1diffie-hellman-group1-sha1
DRS Client
Security Guide for Cisco Unified Communications Manager, Release 14108
Basic System SecurityCipher Limitations

Ciphers/AlgorithmsService
• Ciphers:aes128-ctraes192-ctraes256-ctr
• MAC algorithms:hmac-sha2-256hmac-sha1
• Kex algorithms:ecdh-sha2-nistp521ecdh-sha2-nistp384diffie-hellman-group14-sha1diffie-hellman-group1-sha1diffie-hellman-group-exchange-sha256diffie-hellman-group-exchange-sha1
SFTP client
Cipher RestrictionsTheCipher Management page allows configuration of ciphers supported byOpenSSL or OpenSSH. However,some of the ciphers are disabled internally based on Cisco’s security standards to avoid accidental exposureof critical data.
When you configure ciphers on theCipher Management page, the following ciphers are essentially disabled.
TLS Disabled Ciphers
EDH-RSA-DES-CBC-SHA:EDH-DSS-DES-CBC-SHA:ADH-DES-CBC-SHA:DES-CBC-SHA:KRB5-DES-CBC-SHA:KRB5-DES-CBC-MD5:EXP-EDH-RSA-DES-CBC-SHA:EXP-EDH-DSS-DES-CBC-SHA:EXP-ADH-DES-CBC-SHA:EXP-DES-CBC-SHA:EXP-RC2-CBC-MD5:EXP-KRB5-RC2-CBC-SHA:EXP-KRB5-DES-CBC-SHA:EXP-KRB5-RC2-CBC-MD5:EXP-KRB5-DES-CBC-MD5:EXP-ADH-RC4-MD5:EXP-RC4-MD5:EXP-KRB5-RC4-SHA:EXP-KRB5-RC4-MD5:ADH-AES256-GCM-SHA384:ADH-AES256-SHA256:ADH-AES256-SHA:ADH-CAMELLIA256-SHA:ADH-AES128-GCM-SHA256:ADH-AES128-SHA256:ADH-AES128-SHA:ADH-SEED-SHA:ADH-CAMELLIA128-SHA:ADH-DES-CBC3-SHA:ADH-RC4-MD5:AECDH-AES256-SHA:AECDH-AES128-SHA:AECDH-DES-CBC3-SHA:AECDH-RC4-SHA:AECDH-NULL-SHA:DES-CBC3-MD5:IDEA-CBC-MD5:RC2-CBC-MD5:RC4-MD5:ECDHE-RSA-RC4-SHA:ECDHE-ECDSA-RC4-SHA:ECDH-RSA-RC4-SHA:ECDH-ECDSA-RC4-SHA:RC4-SHA:RC4-MD5:PSK-RC4-SHA:KRB5-RC4-SHA:KRB5-RC4-MD5:IDEA-CBC-SHA:KRB5-IDEA-CBC-SHA:KRB5-IDEA-CBC-MD5:DHE-RSA-SEED-SHA:DHE-DSS-SEED-SHA:SEED-SHA:KRB5-DES-CBC3-MD5:NULL-MD5:PSK-AES256-CBC-SHA:PSK-AES128-CBC-SHA:PSK-3DES-EDE-CBC-SHA:ECDHE-RSA-NULL-SHA:ECDHE-ECDSA-NULL-SHA:ECDH-RSA-NULL-SHA:ECDH-ECDSA-NULL-SHA:NULL-SHA256:NULL-SHA
SSH Disabled Ciphers
3des-cbc,aes128-cbc,aes192-cbc,aes256-cbc,[email protected]
SSH Disabled KEX Algorithms
[email protected],gss-gex-sha1-,gss-group1-sha1-,gss-group14-sha1-
SSH Disabled MAC Algorithms
Security Guide for Cisco Unified Communications Manager, Release 14109
Basic System SecurityCipher Restrictions

[email protected],[email protected]
Security Guide for Cisco Unified Communications Manager, Release 14110
Basic System SecurityCipher Restrictions

C H A P T E R 10Phone Security
• Phone Security Overview, on page 111• Phone Security Profiles, on page 120• Digest Authentication for SIP Phones Overview, on page 134• Digest Authentication for SIP Phones Prerequisite, on page 134• Digest Authentication for SIP Phones Configuration Task Flow, on page 135
Phone Security OverviewAt installation, Unified Communications Manager boots up in nonsecure mode. When the phones boot upafter the Unified Communications Manager installation, all devices register as nonsecure with UnifiedCommunications Manager.
After you upgrade from Unified Communications Manager 4.0(1) or a later release, the phones boot up in thedevice security mode that you enabled prior to the upgrade; all devices register by using the chosen securitymode.
The Unified Communications Manager installation creates a self-signed certificate on the UnifiedCommunications Manager and TFTP server. You may also choose to use a third-party, CA-signed certificatefor Unified CommunicationsManager instead of the self-signed certificate. After you configure authentication,Unified CommunicationsManager uses the certificate to authenticate with supported Cisco Unified IP Phones.After a certificate exists on the Unified CommunicationsManager and TFTP server, Unified CommunicationsManager does not reissue the certificates during each Unified Communications Manager upgrade. You mustupdate the ctl file using CLI command util ctl update CTLFile with the new certificate entries.
For information on unsupported or nonsecure scenarios, see topics related to interactions and restrictions.Tip
Unified Communications Manager maintains the authentication and encryption status at the device level. Ifall devices that are involved in the call register as secure, the call status registers as secure. If one deviceregisters as nonsecure, the call registers as nonsecure, even if the phone of the caller or recipient registers assecure.
Unified Communications Manager retains the authentication and encryption status of the device when a useruses Cisco ExtensionMobility. Unified CommunicationsManager also retains the authentication and encryptionstatus of the device when shared lines are configured.
Security Guide for Cisco Unified Communications Manager, Release 14111

When you configure a shared line for an encrypted Cisco IP Phone, configure all devices that share the linesfor encryption; that is, ensure that you set the device security mode for all devices to encrypted by applyinga security profile that supports encryption.
Tip
Phone Hardening OverviewThis section provides an overview of the phone hardening behaviours like Gratuitous ARP Disable, WebAccess Disable, PC Voice VLAN Access Disable, Setting Access Disable and PC Port Disable and so on.
The following optional settings are used to harden the connection to Cisco IP Phones. These settings appearin the Product-Specific Configuration Layout of the Phone Configuration window.
To apply them to a set of phones, or all phones enterprise-wide, these settings also appear in the CommonPhone Profile Configuration window and the Enterprise Phone Configuration window.
Table 21: Phone Hardening Behaviour
DescriptionPhone Hardening Behaviour
By default, Cisco Unified IPPhones accept Gratuitous ARPpackets. Gratuitous ARP packets,which devices use, announce thepresence of the device on thenetwork. However, attackers canuse these packets to spoof a validnetwork device; for example, anattacker could send out a packetthat claims to be the default router.If you choose to do so, you candisable Gratuitous ARP in thePhone Configuration window.
Disabling thisfunctionality does notprevent the phone fromidentifying its defaultrouter.
Note
Gratuitous ARP Disable
Security Guide for Cisco Unified Communications Manager, Release 14112
Basic System SecurityPhone Hardening Overview

DescriptionPhone Hardening Behaviour
Disabling the web serverfunctionality for the phone blocksaccess to the phone internal webpages, which provide statistics andconfiguration information.Features, such as CiscoQualityReport Tool, do not functionproperly without access to thephone web pages. Disabling theweb server also affects anyserviceability application, such asCiscoWorks, that relies on webaccess.
To determine whether the webservices are disabled, the phoneparses a parameter in theconfiguration file that indicateswhether the services are disabledor enabled. If the web services aredisabled, the phone does not openthe HTTP port 80 for monitoringpurposes and blocks access to thephone internal web pages.
Web Access Disable
By default, Cisco IP Phonesforward all packets that arereceived on the switch port (the onethat faces the upstream switch) tothe PC port. If you choose todisable the PC Voice VLANAccess setting in the PhoneConfigurationwindow, packets thatare received from the PC port thatuse voice VLAN functionality willdrop. Various Cisco IP Phones usethis functionality differently.
• Cisco Unified IP Phones 7942and 7962 drop any packetsthat are tagged with the voiceVLAN, in or out of the PCport.
PC Voice VLAN Access Disable
Security Guide for Cisco Unified Communications Manager, Release 14113
Basic System SecurityPhone Hardening Overview

DescriptionPhone Hardening Behaviour
By default, pressing theApplications button on a Cisco IPPhone provides access to a varietyof information, including phoneconfiguration information.Disabling the Setting Accessparameter in the PhoneConfiguration window prohibitsaccess to all options that normallydisplay when you press theApplications button on the phone;for example, the Contrast, RingType, Network Configuration,Model Information, and Statussettings.
The preceding settings do notdisplay on the phone if you disablethe setting in UnifiedCommunications ManagerAdministration. If you disable thissetting, the phone user cannot savethe settings that are associated withthe Volume button; for example,the user cannot save the volume.
Disabling this setting automaticallysaves the current Contrast, RingType, Network Configuration,Model Information, Status, andVolume settings that exist on thephone. To change these phonesettings, you must enable theSetting Access setting in UnifiedCommunications ManagerAdministration.
Setting Access Disable
Security Guide for Cisco Unified Communications Manager, Release 14114
Basic System SecurityPhone Hardening Overview

DescriptionPhone Hardening Behaviour
By default, UnifiedCommunicationsManager enablesthe PC port on all Cisco IP Phonesthat have a PC port. If you chooseto do so, you can disable the PCPort setting in the PhoneConfiguration window. Disablingthe PC port proves useful for lobbyor conference room phones.
The PC port is availableon some phones andallows the user toconnect their computerto the phone. Thisconnection methodmeans that the user onlyneeds one LAN port.
Note
PC Port Disable
Set Up Phone HardeningPhone Hardening consists of optional settings that you can apply to your phones in order to harden theconnection. You can apply settings using one of three configuration windows:
• Phone Configuration - use Phone Configuration window to apply the settings to an individual phone
• Common Phone Profile - use the Common Phone Profile window to apply the settings to all of thephones that use this profile
• Enterprise Phone - use theEnterprise Phonewindow to apply the settings to all of your phones enterprisewide
If conflicting settings appear in each of these windows, following is the priority order the phone uses todetermine the correct setting: 1) Phone Configuration, 2) Common Phone Profile, 3)Enterprise Phone
Note
To setup phone hardening, perform the following procedure:
Procedure
Step 1 From Cisco Unified Communications Manager Administration, choose Device > Phone.Step 2 Specify the criteria to find the phone and click Find to display a list of all phones.Step 3 Click the device name.Step 4 Locate the following product-specific parameters:
a) PC Portb) Settings Access
Security Guide for Cisco Unified Communications Manager, Release 14115
Basic System SecuritySet Up Phone Hardening

c) Gratuitous ARPd) PC Voice VLAN Accesse) Web Access
To review information on these settings, click the help icon that appears next to the parametersin the Phone Configuration window.
Tip
Step 5 Choose Disabled from the drop-down list for each parameter that you want to disable. To disable thespeakerphone or speakerphone and headset, check the corresponding check boxes.
Step 6 Click Save.Step 7 Click Reset.
Trusted DevicesUnified Communications Manager allows Security icons to be enabled by phone model on Cisco IP Phones.The Security icon indicates whether the call is secure and the connected device is trusted.
A Trusted Device represents a Cisco device or a third-party device that has passed Cisco security criteria fortrusted connections. This includes, but is not limited to, signaling/media encryption, platform hardening, andassurance. If a device is trusted, a Security icon displays and a secure tone plays on supported devices. Also,the device may provide other features or indicators that are related to secure calls.
Unified Communications Manager determines whether a device is trusted when you add it to your system.The security icon displays for information purposes only, and the administrator cannot configure it directly.
Unified Communications Manager also indicates whether a gateway is trusted by displaying an icon and amessage in Unified Communications Manager Administration.
This section describes the behavior of the security icon for trusted devices on both the Cisco IP Phones andin Unified Communications Manager Administration.
Cisco Unified Communications Manager AdministrationThe following windows in Unified Communications Manager Administration indicate whether a device istrusted:
Gateway Configuration
For each gateway type, the Gateway Configuration window (Device > Gateway) displays either Device istrusted or Device is not trusted, along with a corresponding icon.
The system determines whether the device is trusted, based on the device type. You cannot configure whetherthe device is trusted.
Phone Configuration
For each phone device type, the Phone Configuration window (Device > Phone) displays either Device istrusted or Device is not trusted, along with a corresponding icon.
The system determines whether the device is trusted, based on the device type. You cannot configure whetherthe device is trusted.
Security Guide for Cisco Unified Communications Manager, Release 14116
Basic System SecurityTrusted Devices

Device Called Trust Determination Criteria
The type of device that a user calls affects the security icon that displays on the phone. The system considersthe following three criteria to determine whether the call is secure:
• Are all devices on the call trusted?
• Is the signaling secure (authenticated and encrypted)?
• Is the media secure?
Before a supported Cisco Unified IP Phone displays the Lock Security icon, be aware that all three of thesecriteria must be met. For calls that involve a device that is not trusted, regardless of signaling and mediasecurity, the overall status of the call will stay unsecure, and the phone will not display the Lock icon. Forexample, if you include an untrusted device in a conference, the system considers its call leg, as well as theconference itself, to be unsecure.
Phone Model SupportThere are two categories of phone models which support security in Unified Communications Manager:Secure Cisco phones and Secure Preferred Vendor phones. Secure Cisco phones are pre-installed with aManufacture-Installed Certificate (MIC) and support automatic generation and exchange of Locally-SignificantCertificates (LSC) using the Certificate Authority Proxy Function (CAPF). Secure Cisco phones are capableof registering with Cisco Unified CM using theMICwithout additional certificate management. For additionalsecurity, you can create and install an LSC on the phone using CAPF. See topics related to phone securitysetup and settings for more information.
Secure Preferred Vendor phones do not come pre-installed with aMIC, and do not support CAPF for generatingLSCs. In order for Secure Preferred Vendor phones to connect to Cisco Unified CM, a certificate must beprovided with the device, or generated by the device. The phone supplier must provide the details on how toacquire or generate a certificate for the phone. Once you obtain the certificate, you must upload the certificateto the Cisco Unified CM using the OS Administration Certificate Management interface. See topics relatedto preferred vendor SIP phone security set up for more information.
For a list of security features that are supported on your phone, refer to the phone administration and userdocumentation that supports this Unified Communications Manager release or the firmware documentationthat supports your firmware load.
You can also use Cisco Unified Reporting to list the phones that support a particular feature. For moreinformation about using Cisco Unified Reporting, see the Cisco Unified Reporting Administration Guide.
View Phone Security SettingsYou can configure and view certain security-related settings on phones that support security; for example,you can viewwhether a phone has a locally significant certificate or manufacture-installed certificate installed.For additional information on the security menu and icons, refer to the Cisco IP Phone Administration Guideand Cisco IP Phone User Guide that supports your phone model.
When Unified Communications Manager classifies a call as authenticated or encrypted, an icon is displayedon the phone and indicates the call state. It also determines when Unified CommunicationsManager classifiesthe call as authenticated or encrypted.
Security Guide for Cisco Unified Communications Manager, Release 14117
Basic System SecurityDevice Called Trust Determination Criteria

Set Up Phone SecurityThe following procedure describes the tasks to configure security for supported phones.
Procedure
Step 1 If you have not already done so, configure the Cisco CTL Client and ensure that the Unified CommunicationsManager security mode equals Mixed Mode.
Step 2 If the phone does not contain a locally significant certificate (LSC) or manufacture-installed certificate (MIC),install a LSC by using the Certificate Authority Proxy Function (CAPF).
Step 3 Configure phone security profiles.Step 4 Apply a phone security profile to the phone.Step 5 After you configure digest credentials, choose the Digest User from the Phone Configuration window.Step 6 On Cisco Unified IP Phone 7962 or 7942 (SIP only), enter the digest authentication username and password
(digest credentials) that you configured in the End User Configuration window.
This document does not provide procedures on how to enter the digest authentication credentialson the phone. For information on how to perform this task, see to theCisco IP Phone AdministrationGuide that supports your phone model.
This document does not provide procedures on how to enter the digest authentication credentialson the phone. For information on how to perform this task, see Administration Guide for CiscoUnified Communications Manager that supports your phone model and this version of UnifiedCommunications Manager.
Note
Step 7 Encrypt the phone configuration file, if the phone supports this functionality.Step 8 To harden the phone, disable phone settings.
Preferred Vendor SIP Phone Security Set UpSecure Preferred Vendor phones are phone types that are manufactured by third-party vendors but are installedin the Cisco Unified database via a COP file. Unified Communications Manager provides security for apreferred vendor SIP phone. In order to support security, you must enable Security Encryption or SecurityAuthentication for the preferred vendor SIP phone in the COP file. These phone types appear in the drop-downlist in the Add a New Phone window. While all preferred vendor phones support Digest Authorization, notall preferred vendor phones support TLS security. Security capabilities is based on the phone model. If thePhone Security Profile includes a “Device Security Mode” field, then it supports TLS security.
If the preferred vendor phone supports TLS security, there are twomodes that are possible: per-device certificateand shared certificate. The phone supplier must specify which mode is applicable for the phone as well asinstructions on generating or acquiring a certificate for the phone.
Set Up Preferred Vendor SIP Phone Security Profile Per-Device CertificatesTo configure the preferred vendor SIP phone security profile with per-device certificates, perform the followingprocedure:
Security Guide for Cisco Unified Communications Manager, Release 14118
Basic System SecuritySet Up Phone Security

Procedure
Step 1 Upload the certificate for each phone using the OS Administration Certificate Management interface.Step 2 In the Cisco Unified Administration, choose System > Security > Phone Security Profile.Step 3 Configure a new Phone Security Profile for the device type of this phone and in the Device Security Mode
drop-down list, choose Encrypted or Authenticated.Step 4 To configure the new SIP phone in the CCMAdmin interface, choose Device > Phone > Add New.Step 5 Select Phone type.Step 6 Fill in the required fields.Step 7 In the Device Security Profile drop-down list, select the profile you just created.
Set Up Preferred Vendor SIP Phone Security Profile Shared CertificatesTo configure the preferred vendor SIP phone security profile with shared certificates, perform the followingprocedure:
Procedure
Step 1 Using instructions from the phone vendor, generate a certificate with a Subject Alternate Name (SAN) string.The SANmust be of type DNS.Make a note of the SAN specified in this step. For example, X509v3 extensions:
• X509v3 Subject Alternative Name
• DNS:AscomGroup01.acme.com
The SAN must be of type DNS or security will not be enabled.Note
Step 2 Upload the shared certificate using the OS Administration Certificate Management interface.Step 3 In the Cisco Unified Administration, choose System > Security > Phone Security Profile.Step 4 In theName field, enter the name of the Subject Alt Name (SAN), which is the name on the certificate provided
by the preferred vendor, or if there is no SAN enter the Certificate Name.
The name of the security profile must match the SAN in the certificate exactly or security will notbe enabled.
Note
Step 5 In the Device Security Mode drop-down list, choose Encrypted or Authenticated.Step 6 In the Transport type drop-down list, choose TLS.Step 7 To configure the new SIP phone in the CCMAdmin interface, choose Device > Phone > Add New.Step 8 Select Phone type.Step 9 Fill in the required fieldsStep 10 In the Device Security Profile drop-down list, select the profile you just created.
Security Guide for Cisco Unified Communications Manager, Release 14119
Basic System SecuritySet Up Preferred Vendor SIP Phone Security Profile Shared Certificates

Phone Security Interactions and RestrictionsThis section provides the interaction and restriction on Phone Security.
Table 22: Phone Security Interactions and Restrictions
Interaction and RestrictionFeature
Beginning from Unified Communications Manager Release 11.5(1) SU1, all theLSC certificates issued by CAPF service are signed with SHA-256 algorithm.Therefore, Cisco Unified IP Phone 7900 Series, 8900 Series, and 9900 Seriessupports SHA-256 signed LSC certificates and external SHA2 identity certificates(Tomcat, CallManager, CAPF, TVS, and so on). For any other cryptographicoperation that require validation of signature, only SHA-1 is supported.
If you use phone models which are in End of Software Maintenanceor End of Life, we strongly recommend using the UnifiedCommunications Manager before 11.5(1)SU1 release.
Note
Certificate Encryption
Phone Security ProfilesUnified Communications Manager, groups the security-related settings for phone type and protocol intosecurity profiles. Hence, you can assign this single security profile to multiple phones. The security-relatedsettings include device security mode, digest authentication, and some of the CAPF settings. Installing UnifiedCommunications Manager provides a set of predefined, non-secure security profiles for auto-registration.
You can apply the configured settings to a phone by choosing the security profile in the Phone Configurationwindow. To enable security features for a phone, you must configure a new security profile for the devicetype and protocol, and then apply that profile to the phone. Only the security features that the selected deviceand protocol support are displayed in the security profile settings window.
Prerequisites
Consider the following information before you configure the phone security profiles:
• When you configure phones, choose a security profile in the Phone Configurationwindow. If the devicedoes not support security or a secure profile, apply a non-secure profile.
• You cannot delete or change the predefined non-secure profiles.
• You cannot delete a security profile that is currently assigned to a device.
• If you change the settings in a security profile that is already assigned to a phone, the re-configuredsettings apply to all phones that are assigned that particular profile.
• You can rename security files that are assigned to devices. The phones that are assigned with the earlierprofile name and settings assume the new profile name and settings.
• The CAPF settings, the authentication mode and the key size, are displayed in the Phone Configurationwindow. You must configure CAPF settings for certificate operations that involve MICs or LSCs. Youcan update these fields directly in the Phone Configuration window.
Security Guide for Cisco Unified Communications Manager, Release 14120
Basic System SecurityPhone Security Interactions and Restrictions

• If you update the CAPF settings in the security profile, the settings are also updated in the PhoneConfiguration window.
• If you update the CAPF settings in the Phone Configuration window and a matching profile is found,Unified Communications Manager applies the matching profile to the phone.
• If you update the CAPF settings in the Phone Configuration window, and no matching profiles are found,Unified Communications Manager creates a new profile and applies that profile to the phone.
• If you have configured the device security mode earlier to an upgrade, Unified CommunicationsManagercreates a profile that is based on that model and protocol and applies the profile to the device.
• We recommend that you use MICs for LSC installation only. Cisco support LSCs to authenticate theTLS connectionwith Unified CommunicationsManager. SinceMIC root certificates can be compromised,users who configure phones to use MICs for TLS authentication or for any other purpose do so at theirown risk. Cisco assumes no liability if MICs are compromised.
• We recommend that you upgrade Cisco IP Phones to use LSCs for TLS connections and remove theMIC root certificates from the CallManager trust store to avoid compatibility issues.
Phone Security Profile SettingsThe following table describes the settings for the security profile for the phone that is running SCCP.
Only settings that the selected phone type and protocol support display.
Table 23: Security Profile for Phone That Is Running SCCP
DescriptionSetting
Enter a name for the security profile.
When you save the new profile, the name displays in theDevice Security Profiledrop-down list in the Phone Configuration window for the phone type andprotocol.
Include the device model and protocol in the security profile name tofind the correct profile while searching for a profile or updating aprofile.
Tip
Name
Enter a description for the security profile. The description can include up to 50characters in any language, but it cannot include double-quotes ("), percentagesign (%), ampersand (&), back-slash (\), or angle brackets (<>).
Description
Security Guide for Cisco Unified Communications Manager, Release 14121
Basic System SecurityPhone Security Profile Settings

DescriptionSetting
Device Security Mode
Security Guide for Cisco Unified Communications Manager, Release 14122
Basic System SecurityPhone Security Profile Settings

DescriptionSetting
From the drop-down list, choose one of the following options:
• Non Secure—No security features except image, file, and deviceauthentication exist for the phone. A TCP connection opens to UnifiedCommunications Manager.
• Authenticated—Unified Communications Manager provides integrity andauthentication for the phone. A TLS connection that uses NULL/SHA opensfor signaling.
• Encrypted—Unified Communications Manager provides integrity,authentication, and signalling encryption for the trunk.
The following are the supported ciphers:
TLS Ciphers
This parameter defines the ciphers that are supported by the UnifiedCommunications Manager for establishing SIP TLS and inbound CTIManager TLS connections.
Strongest- AES-256 SHA-384 only: RSA Preferred
• TLS_ECDHE_RSA with AES256_GCM_SHA384
• TLS_ECDHE_RSA with AES256_GCM_SHA384
It is recommended that the value of the parameter 'SRTP Ciphers'be set to the value 'Strongest - AEAD AES-256 GCM cipher
Note
only'. With this option chosen, the phones will not register onauthenticated mode.
Strongest- AES-256 SHA-384 only: ECDSA Preferred
• TLS_ECDHE_ECDSA with AES256_GCM_SHA384
• TLS_ECDHE_RSA with AES256_GCM_SHA384
Medium- AES-256 AES-128 only: RSA Preferred
It is recommended that the value of the parameter 'SRTP Ciphers'be set to the value 'Strongest - AEAD AES-256 GCM cipher
Note
only'. With this option chosen, the phones will not register onauthenticated mode.
• TLS_ECDHE_RSA with AES256_GCM_SHA384
• TLS_ECDHE_ECDSA with AES256_GCM_SHA384
• TLS_ECDHE_RSA with AES128_GCM_SHA256
• TLS_ECDHE_ECDSA with AES128_GCM_SHA256
It is recommended that the value of the parameter 'SRTP Ciphers'be set to the value 'Medium - AEAD AES-256,AES-128 GCM
Note
ciphers only'. With this option chosen, the phones will not registeron authenticated mode.
Medium- AES-256 AES-128 only: ECDSA Preferred
Security Guide for Cisco Unified Communications Manager, Release 14123
Basic System SecurityPhone Security Profile Settings

DescriptionSetting
• TLS_ECDHE_ECDSA with AES256_GCM_SHA384
• TLS_ECDHE_RSA with AES256_GCM_SHA384
• TLS_ECDHE_ECDSA with AES128_GCM_SHA256
• TLS_ECDHE_RSA with AES128_GCM_SHA256
It is recommended that the value of the parameter 'SRTP Ciphers'be set to the value 'Medium - AEAD AES-256,AES-128 GCMciphers only'. With this option chosen, the phones will not registeron authenticated mode.
Note
All Ciphers, RSA Preferred:
• TLS_ECDHE_RSA with AES256_GCM_SHA384
• TLS_ECDHE_ECDSA with AES256_GCM_SHA384
• TLS_ECDHE_RSA with AES128_GCM_SHA256
• TLS_ECDHE_ECDSA with AES128_GCM_SHA256
• TLS_RSA with AES_128_CBC_SHA1
All Ciphers, ECDSA Preferred:
• TLS_ECDHE_ECDSA with AES256_GCM_SHA384
• TLS_ECDHE_RSA with AES256_GCM_SHA384
• TLS_ECDHE_ECDSA with AES128_GCM_SHA256
• TLS_ECDHE_RSA with AES128_GCM_SHA256
• TLS_RSA with AES_128_CBC_SHA1
If the trunks are configured with Device Security Profile optionselected as Authenticated, thenUnified CommunicationsManagerstarts a TLS connection that uses NULL_SHA cipher (withoutdata encryption). These trunks will not register or make calls ifthe destination devices do not support NULL_SHA cipher. Fordestination devices that do not support NULL_SHA cipher, thetrunks should be configured with Device Security Profile optionselected as Encrypted.With this device security profile, the trunksoffer additional TLS ciphers that enables data encryption.
Note
When this check box is checked, Unified Communications Manager encrypts aphone downloads from the TFTP server.
TFTP Encrypted Config
Security Guide for Cisco Unified Communications Manager, Release 14124
Basic System SecurityPhone Security Profile Settings
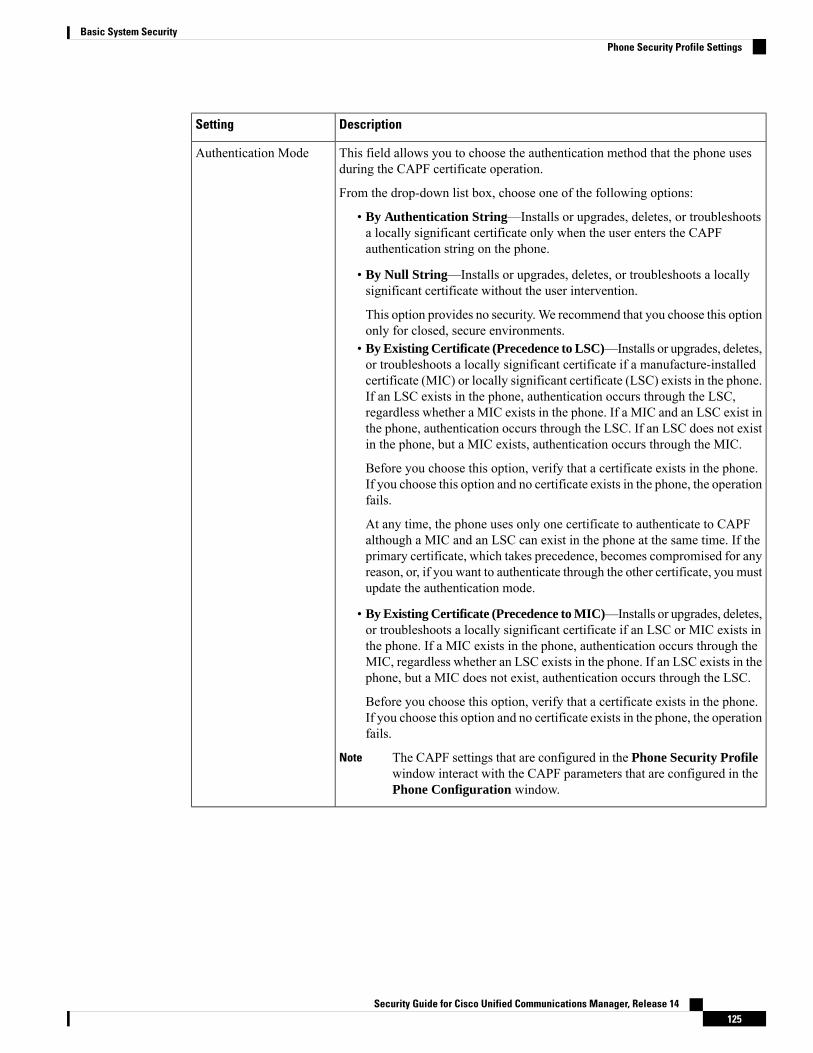
DescriptionSetting
This field allows you to choose the authentication method that the phone usesduring the CAPF certificate operation.
From the drop-down list box, choose one of the following options:
• By Authentication String—Installs or upgrades, deletes, or troubleshootsa locally significant certificate only when the user enters the CAPFauthentication string on the phone.
• By Null String—Installs or upgrades, deletes, or troubleshoots a locallysignificant certificate without the user intervention.
This option provides no security. We recommend that you choose this optiononly for closed, secure environments.
• By Existing Certificate (Precedence to LSC)—Installs or upgrades, deletes,or troubleshoots a locally significant certificate if a manufacture-installedcertificate (MIC) or locally significant certificate (LSC) exists in the phone.If an LSC exists in the phone, authentication occurs through the LSC,regardless whether a MIC exists in the phone. If a MIC and an LSC exist inthe phone, authentication occurs through the LSC. If an LSC does not existin the phone, but a MIC exists, authentication occurs through the MIC.
Before you choose this option, verify that a certificate exists in the phone.If you choose this option and no certificate exists in the phone, the operationfails.
At any time, the phone uses only one certificate to authenticate to CAPFalthough a MIC and an LSC can exist in the phone at the same time. If theprimary certificate, which takes precedence, becomes compromised for anyreason, or, if you want to authenticate through the other certificate, you mustupdate the authentication mode.
• By Existing Certificate (Precedence to MIC)—Installs or upgrades, deletes,or troubleshoots a locally significant certificate if an LSC or MIC exists inthe phone. If a MIC exists in the phone, authentication occurs through theMIC, regardless whether an LSC exists in the phone. If an LSC exists in thephone, but a MIC does not exist, authentication occurs through the LSC.
Before you choose this option, verify that a certificate exists in the phone.If you choose this option and no certificate exists in the phone, the operationfails.
The CAPF settings that are configured in the Phone Security Profilewindow interact with the CAPF parameters that are configured in thePhone Configuration window.
Note
Authentication Mode
Security Guide for Cisco Unified Communications Manager, Release 14125
Basic System SecurityPhone Security Profile Settings
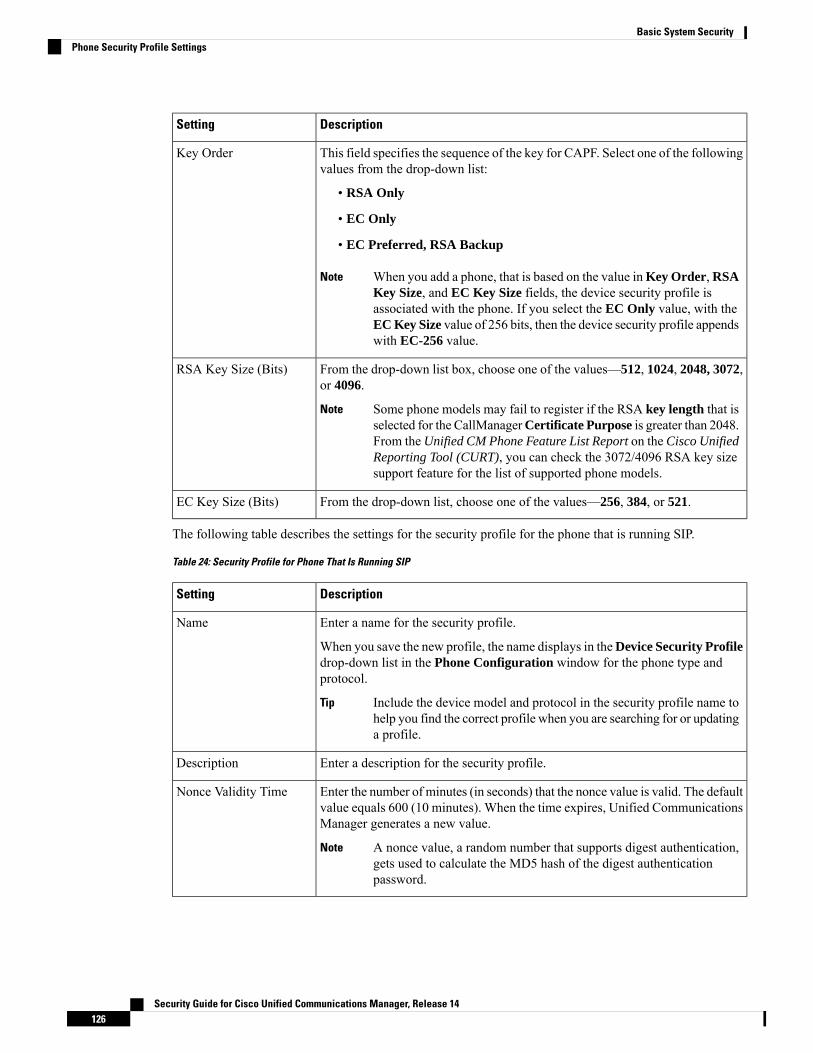
DescriptionSetting
This field specifies the sequence of the key for CAPF. Select one of the followingvalues from the drop-down list:
• RSA Only
• EC Only
• EC Preferred, RSA Backup
When you add a phone, that is based on the value inKey Order,RSAKey Size, and EC Key Size fields, the device security profile isassociated with the phone. If you select the EC Only value, with theEC Key Size value of 256 bits, then the device security profile appendswith EC-256 value.
Note
Key Order
From the drop-down list box, choose one of the values—512, 1024, 2048, 3072,or 4096.
Some phone models may fail to register if the RSA key length that isselected for the CallManagerCertificate Purpose is greater than 2048.From theUnified CM Phone Feature List Report on the Cisco UnifiedReporting Tool (CURT), you can check the 3072/4096 RSA key sizesupport feature for the list of supported phone models.
Note
RSA Key Size (Bits)
From the drop-down list, choose one of the values—256, 384, or 521.EC Key Size (Bits)
The following table describes the settings for the security profile for the phone that is running SIP.
Table 24: Security Profile for Phone That Is Running SIP
DescriptionSetting
Enter a name for the security profile.
When you save the new profile, the name displays in theDevice Security Profiledrop-down list in the Phone Configuration window for the phone type andprotocol.
Include the device model and protocol in the security profile name tohelp you find the correct profile when you are searching for or updatinga profile.
Tip
Name
Enter a description for the security profile.Description
Enter the number of minutes (in seconds) that the nonce value is valid. The defaultvalue equals 600 (10 minutes). When the time expires, Unified CommunicationsManager generates a new value.
A nonce value, a random number that supports digest authentication,gets used to calculate the MD5 hash of the digest authenticationpassword.
Note
Nonce Validity Time
Security Guide for Cisco Unified Communications Manager, Release 14126
Basic System SecurityPhone Security Profile Settings

DescriptionSetting
From the drop-down list, choose one of the following options:
• Non Secure—No security features except image, file, and deviceauthentication exist for the phone. A TCP connection opens to UnifiedCommunications Manager.
• Authenticated—Unified Communications Manager provides integrity andauthentication for the phone. A TLS connection that uses NULL/SHA opensfor signaling.
• Encrypted—Unified Communications Manager provides integrity,authentication, and encryption for the phone. A TLS connection that usesAES128/SHA opens for signaling, and SRTP carries the media for all phonecalls on all SRTP-capable hops.
If the trunks are configured with Device Security Profile optionselected as Authenticated, thenUnified CommunicationsManagerstarts a TLS connection that uses NULL_SHA cipher (withoutdata encryption). These trunks will not register or make calls ifthe destination devices do not support NULL_SHA cipher. Fordestination devices that do not support NULL_SHA cipher, thetrunks should be configured with Device Security Profile optionselected as Encrypted.With this device security profile, the trunksoffer additional TLS ciphers that enables data encryption.
Note
Device Security Mode
When Device SecurityMode isNon Secure, choose one of the following optionsfrom the drop-down list (some options may not display):
• TCP—Choose the Transmission Control Protocol to ensure that packets getreceived in the same order as the order in which they are sent. This protocolensures that no packets get dropped, but the protocol does not provide anysecurity.
• UDP—Choose the User Datagram Protocol to ensure that packets arereceived quickly. This protocol, which can drop packets, does not ensurethat packets are received in the order in which they are sent. This protocoldoes not provide any security.
• TCP + UDP—Choose this option if you want to use a combination of TCPand UDP. This option does not provide any security.
When Device Security Mode is Authenticated or Encrypted, TLS specifies theTransport Type. TLS provides signaling integrity, device authentication, andsignaling encryption (encrypted mode only) for SIPphones.
If Device Security Mode cannot be configured in the profile, the transport typespecifies UDP.
Transport Type
Security Guide for Cisco Unified Communications Manager, Release 14127
Basic System SecurityPhone Security Profile Settings

DescriptionSetting
If you check this check box, Unified Communications Manager challenges allSIP requests from the phone.
Digest authentication does not provide a device authentication, integrity, orconfidentiality. Choose a security mode of authenticated or encrypted to use thesefeatures.
Enable DigestAuthentication
When this check box is checked, Unified CommunicationsManager encrypts thephone downloads from the TFTP server. This option exists for Cisco phonesonly.
We recommend that you enable this option and configure a symmetrickey to secure digest credentials and administrative passwords.
Tip
TFTP Encrypted Config
This check box is available, when you choose Encrypted from the DeviceSecurity Profile drop-down list.
When this check box is checked, Unified Communications Manager allows thedevice that is associated with the phone security profile to register on the SIPOAuth port. By default, this check box is unchecked.
You can enable the SIP OAuth when:
• Transport type is TLS.
• Device security mode is encrypted.
• Digest authentication is disabled.
• Encrypted configuration is disabled.
FromUnified CommunicationsManager Release 12.5, Jabber devicessupport SIP OAuth authentication.
Note
Enable OAuthAuthentication
When this check box is checked, Unified CommunicationsManager omits digestcredentials in the phone downloads from the TFTP server. This option exists forCisco IP Phones, 7942, and 7962 (SIP only).
Exclude DigestCredentials inConfiguration File
Security Guide for Cisco Unified Communications Manager, Release 14128
Basic System SecurityPhone Security Profile Settings

DescriptionSetting
This field allows you to choose the authentication method that the phone usesduring the CAPF certificate operation. This option exists for Cisco phones only.
From the drop-down list, choose one of the following options:
• By Authentication String—Installs or upgrades or troubleshoots a locallysignificant certificate only when the user enters the CAPF authenticationstring on the phone.
• By Null String—Installs or upgrades or troubleshoots a locally significantcertificate without the user intervention.
This option provides no security; we recommend that you choose this optiononly for closed, secure environments.
• By Existing Certificate (Precedence to LSC)—Installs or upgrades ortroubleshoots a locally significant certificate if a manufacture-installedcertificate (MIC) or locally significant certificate (LSC) exists in the phone.If an LSC exists in the phone, authentication occurs through the LSC,regardless whether a MIC exists in the phone. If an LSC does not exist inthe phone, but a MIC does exist, authentication occurs through the MIC.
Before you choose this option, verify that a certificate exists in the phone.If you choose this option and no certificate exists in the phone, the operationfails.
At any time, the phone uses only one certificate to authenticate to CAPFalthough a MIC and an LSC can exist in the phone at the same time. If theprimary certificate, which takes precedence, becomes compromised for anyreason, or, if you want to authenticate through the other certificate, you mustupdate the authentication mode.
• By Existing Certificate (Precedence to MIC)—Installs or upgrades ortroubleshoots a locally significant certificate if an LSC or MIC exists in thephone. If a MIC exists in the phone, authentication occurs through the MIC,regardless whether an LSC exists in the phone. If an LSC exists in the phone,but a MIC does not exist, authentication occurs through the LSC.
Before you choose this option, verify that a certificate exists in the phone.If you choose this option and no certificate exists in the phone, the operationfails.
The CAPF settings that are configured in the Phone Security Profilewindow interact with the CAPF parameters that are configured in thePhone Configuration window.
Note
Authentication Mode
Security Guide for Cisco Unified Communications Manager, Release 14129
Basic System SecurityPhone Security Profile Settings

DescriptionSetting
For this setting that is used for CAPF, choose the key size for the certificate fromthe drop-down list. The default setting equals 1024. The other option for key sizeis 512.
If you choose a higher key size than the default setting, the phones take longerto generate the entropy that is required to generate the keys. Key generation,which is set at low priority, allows the phone to function while the action occurs.Depending on the phone model, you may notice that key generation takes up to30 or more minutes to complete.
The CAPF settings that are configured in the Phone Security Profilewindow interact with the CAPF parameters that are configured in thePhone Configuration window.
Note
Key Size
This setting applies to phones that are running SIP that uses UDP transport.
Enter the port number for Cisco Unified IP Phone (SIP only) that use UDP tolisten for SIP messages from Unified Communications Manager. The defaultsetting equals 5060.
Phones that use TCP or TLS ignore this setting.
SIP Phone Port
Phone Security Configuration Task FlowPerform the following tasks to configure phone security:
Procedure
PurposeCommand or Action
Search for the phone security profile to securea phone.
(Optional) Find Phone Security Profile, on page131
Step 1
Set up the phone security profile to secure aphone.
Set Up Phone Security ProfileStep 2
Apply the phone security profile to secure aphone.
Apply Security Profiles to PhoneStep 3
Synchronize all the phone security profiles withselected phones.
Synchronize SIP Trunk Security Profile withSIP Trunks
Step 4
Delete all the phone security profiles associatedto a phone.
(Optional) Delete Phone Security ProfileStep 5
Find all phones associated with phone securityprofiles.
Find Phones with Phone Security ProfilesStep 6
SIP trunk security profile interations andrestrictions
SIP Trunk Security Profile Interactions andRestrictions
Step 7
Security Guide for Cisco Unified Communications Manager, Release 14130
Basic System SecurityPhone Security Configuration Task Flow

Find Phone Security ProfileTo find a phone security profile, perform the following procedure:
Procedure
Step 1 From Cisco Unified Communications Manager Administration, choose System > Security Profile > PhoneSecurity Profile.
Records from an active (prior) query may also display in the window.
Step 2 To find all records in the database, ensure the dialog box is empty; go to Step 3, on page 131.
To filter or search records
a) From the first drop-down list, choose a search parameter.b) From the second drop-down list, choose a search pattern.c) Specify the appropriate search text, if applicable.
To add additional search criteria, click the + button. When you add criteria, the system searchesfor a record that matches all criteria that you specify. To remove criteria, click the – button toremove the last added criterion or click Clear Filter to remove all added search criteria.
Note
Step 3 Click Find.
All matching records display. You can change the number of items that display on each page by choosing adifferent value from the Rows per Page drop-down list.
Step 4 From the list of records that display, click the link for the record that you want to view.
To reverse the sort order, click the up or down arrow, if available, in the list header.Note
The window displays the record that you choose.
Set Up Phone Security ProfileTo setup a phone security profile, perform the following procedure:
Procedure
Step 1 From Cisco Unified Communications Manager Administration, choose System > Security Profile > PhoneSecurity Profile.
Step 2 Perform one of the following tasks:a) To add a new profile, click Add New.b) To copy an existing security profile, locate the appropriate profile, click Copy next to the security profile
that you want to copy, and continue.c) To update an existing profile, locate the appropriate security profile and continue.
When you click Add New, the configuration window displays with the default settings for each field.When you click Copy, the configuration window displays the copied settings.
Security Guide for Cisco Unified Communications Manager, Release 14131
Basic System SecurityFind Phone Security Profile

Step 3 Enter appropriate settings for phones that are running SCCP or SIP.Step 4 Click Save.
Apply Security Profiles to PhoneBefore you apply a security profile that uses certificates for authentication of the phone, make sure that theparticular phone contains a Locally Significant Certificate (LSC) or Manufacture-Installed Certificate (MIC).
To enable security features for a phone, you must configure a new security profile for the device type andprotocol and apply it to the phone. However, if the phone does not contain a certificate, perform the followingtasks:
• In the Phone Configuration window, apply a non-secure profile.
• In the Phone Configuration window, install a certificate by configuring the CAPF settings.
• In the Phone Configurationwindow, apply a device security profile that is configured for authenticationor encryption.
To apply a phone security profile to a device, perform the following procedure:
Procedure
Step 1 Go to the Protocol Specific Information section in the Phone Configuration window.Step 2 From the Device Security Profile drop-down list, choose the security profile that applies to the device.
The phone security profile that is configured only for the phone type and the protocol is displayed.Step 3 Click Save.Step 4 To apply the changes to the applicable phone, click Apply Config.
To delete security profiles, check the check boxes next to the appropriate security profile in theFind and List window, and click Delete Selected.
Note
Synchronize Phone Security Profile with PhonesTo synchronize phone security profile with phones, perform the following procedure:
Procedure
Step 1 FromUnified CommunicationsManager Administration, choose System > Security Profile >Phone SecurityProfile.
Step 2 Choose the search criteria to use and click Find.The window displays a list of phone security profiles that match the search criteria.
Step 3 Click the phone security profile to which you want to synchronize the applicable phones.Step 4 Make any additional configuration changes.Step 5 Click Save.
Security Guide for Cisco Unified Communications Manager, Release 14132
Basic System SecurityApply Security Profiles to Phone

Step 6 Click Apply Config.The Apply Configuration Information dialog box appears.
Step 7 Click OK.
Delete Phone Security ProfileBefore you can delete a security profile from Unified Communications Manager, you must apply a differentprofile to the devices or delete all devices that use the profile.
To find out which devices use the profile, perform Step 1:
Procedure
Step 1 In the Security Profile Configuration window, choose Dependency Records from the Related Linksdrop-down list and click Go.
If the dependency records feature is not enabled for the system, go to System > Enterprise ParametersConfiguration and change the Enable Dependency Records setting to True. A message displays informationabout high CPU consumption that relates to the dependency records feature. Save your change to activatedependency records. For more information about dependency records, see System Configuration Guide forCisco Unified Communications Manager
This section describes how to delete a phone security profile from the Unified Communications Managerdatabase.
Step 2 Find the security profile to delete.Step 3 To delete multiple security profiles, check the check boxes next to the appropriate check box in the Find and
Listwindow; then, clickDelete Selected. You can delete all configurable records for this selection by clickingSelect All and then clicking Delete Selected.
Step 4 To delete a single security profile, perform one of the following tasks:a) In the Find and List window, check the check box next to the appropriate security profile; then, click
Delete Selected.
Step 5 When prompted to confirm the delete operation, click OK to delete or Cancel to cancel the delete operation.
Find Phones with Phone Security ProfilesTo find the phones that use a specific security profile, perform the following procedure:
Procedure
Step 1 From Cisco Unified Communications Manager Administration, choose Device > Phone.Step 2 From the first drop-down list, choose the search parameter Security Profile.
a) From the drop-down list, choose a search pattern.b) Specify the appropriate search text, if applicable.
Security Guide for Cisco Unified Communications Manager, Release 14133
Basic System SecurityDelete Phone Security Profile

To add additional search criteria, click +. When you add criteria, the system searches for arecord that matches all criteria that you specify. To remove criteria, click – to remove the lastadded criterion or click Clear Filter to remove all added search criteria.
Note
Step 3 Click Find.
All matching records display. You can change the number of items that display on each page by choosing adifferent value from the Rows per Page drop-down list.
Step 4 From the list of records that display, click the link for the record that you want to view.
To reverse the sort order, click the up or down arrow, if available, in the list header.Note
The window displays the record that you choose.
SIP Trunk Security Profile Interactions and RestrictionsThe following table contains feature interactions and restrictions for SIP Trunk Security Profiles.
Table 25: SIP Trunk Security Profile Interactions and Restrictions
Interactions and RestrictionsFeature
You cannot deploy a secure SIP trunk while running with a 90-day evaluationperiod. To deploy a secure SIP trunk, your systemmust have registered to a SmartSoftware Manager account with the Allow export-controlled functionalityproduct registration token selected.
90-day EvaluationLicense
Digest Authentication for SIP Phones OverviewDigest authentication allows Unified Communications Manager to challenge request messages for phonesthat are running SIP. This includes all request messages with the exception of keepalives. UnifiedCommunications Manager authenticates through digest credentials the end user, as configured in the EndUser Configuration window, to validate the credentials that the phone offers.
If the phone supports Extension Mobility, Unified Communications Manager uses the digest credentials forthe Extension Mobility end user, as configured in the End User Configuration window, when the ExtensionMobility user logs in.
Digest Authentication for SIP Phones PrerequisiteIf you enable digest authentication for a device, the device requires a unique digest user ID and password toregister. You must configure SIP digest credentials in the Unified Communications Manager database for aphone user or an application user.
Make sure that you do the following:
Security Guide for Cisco Unified Communications Manager, Release 14134
Basic System SecuritySIP Trunk Security Profile Interactions and Restrictions

• For applications, specify digest credentials in the Application User Configuration window.
• For phones that are running SIP, specify the digest authentication credentials in the EndUser Configurationwindow.
To associate the credentials with the phone after you configure the user, choose a Digest User, in thePhone Configuration window. After you reset the phone, the credentials exist in the phone configurationfile that the TFTP server offers to the phone.
• For challenges received on SIP trunks, configure a SIP realm, which specifies the realm username (deviceor application user) and digest credentials.
Be aware that the cluster security mode has no effect on digest authentication.Note
Digest Authentication for SIP Phones Configuration Task FlowComplete these tasks to configure Digest Authentication for SIP phones.
Procedure
PurposeCommand or Action
Assign the digest credentials to the end userwhom owns the phone.
Assign Digest Credentials to Phone UserStep 1
Enable digest authentication in the PhoneSecurity Profile that associates to the phone.
Enable Digest Authentication in Phone SecurityProfile
Step 2
In Phone Configuration, assign the user as adigest user. Make sure the digest
Assign Digest Authentication to the PhoneStep 3
authentication-enabled security profile isassigned.
Set the end user digest credentials.End User Digest Credential SettingsStep 4
Assign the string for the Realm field thatUnified CM uses to challenge a SIP request dueto a 401 Unauthorized message.
Configure SIP Station Realm, on page 136Step 5
Assign Digest Credentials to Phone UserUse this procedure to assign digest credentials to the end user who owns the phone. Phones use the credentialsto authenticate.
Procedure
Step 1 From Cisco Unified Communications Manager Administration, choose User Management > End User.
Security Guide for Cisco Unified Communications Manager, Release 14135
Basic System SecurityDigest Authentication for SIP Phones Configuration Task Flow

Step 2 Click Find and choose the end user who owns the phone.Step 3 Enter the credentials in the following fields:
• Digest Credentials
• Confirm Digest Credentials
Step 4 Click Save.
Enable Digest Authentication in Phone Security ProfileUse this procedure to enable digest authentication for a phone through the Phone Security Profile.
Procedure
Step 1 From Cisco Unified CM Administration, choose System > Security > Phone Security Profile.Step 2 Click Find and choose the phone security profile that is associated to the phone.Step 3 Check the Enable Digest Authentication check box.Step 4 Click Save.
Assign Digest Authentication to the PhoneUse this procedure to associate the digest user and digest authentication-enabled security profile to the phone.
Procedure
Step 1 From Cisco Unified Communications Manager Administration, choose Device > Phone.Step 2 Click Find and choose the phone for which you want to assign digest authentication.Step 3 From the Digest User drop-down list, assign the end user for whom you assigned digest credentials.Step 4 Make sure that the phone security profile for which you enabled digest authentication is assigned through the
Device Security Profile drop-down list.Step 5 Click Save.Step 6 Click Reset.
After you associate the end user with the phone, save the configuration and reset the phone.
Configure SIP Station RealmAssign the string that Cisco Unified Communications Manager uses in the Realm field when challenging aSIP phone in the response to a 401 Unauthorized message. This applies when the phone is configured fordigest authentication.
Security Guide for Cisco Unified Communications Manager, Release 14136
Basic System SecurityEnable Digest Authentication in Phone Security Profile

The default string for this service parameter is ccmsipline.Note
Procedure
Step 1 From Unified Communications Manager, choose System > Service Parameters.Step 2 From the Server drop-down list, choose a node where you activated the CiscoCallManager service.Step 3 From the Service drop-down list, choose the CiscoCallManager service. Verify that the word “Active” displays
next to the service name.Step 4 Update the SIP Realm Station parameter, as described in the help. To display help for the parameters, click
the question mark or the parameter name link.Step 5 Click Save.
End User Digest Credential SettingsTo view the digest credentials details, perform the following procedure:
From Cisco Unified Communications Manager Administration, choose User Management > End User andclick the User ID and the End User Configuration window appears. The digest credentials are available inthe User Information pane of the End User Configuration window.
Table 26: Digest Credentials
DescriptionSetting
Enter a string of alphanumeric characters.Digest Credentials
To confirm that you entered the digest credentials correctly, enter the credentialsin this field.
Confirm DigestCredentials
Security Guide for Cisco Unified Communications Manager, Release 14137
Basic System SecurityEnd User Digest Credential Settings

Security Guide for Cisco Unified Communications Manager, Release 14138
Basic System SecurityEnd User Digest Credential Settings

C H A P T E R 11Secure Tones and Icons
• Secure Tones and Icons Overview, on page 139• Secure Icons and Tones Tips , on page 141• Secure Icons and Tones Configuration Tasks, on page 143• Secure Calls and Tones Limitations and Restrictions , on page 145
Secure Tones and Icons OverviewSecure Icons and Secure Tone provide audio and visual indicators that alert you as to the security status of acall. Both of these features alert call participants of the security level of a call, so that participants knowwhether it’s safe to exchange confidential information.
• Secure Icons—Refers to an icon that displays on the phone to indicate the level of security for a call.
• Secure Tones—Refers to a 2-second tone that plays at the start of a call to indicate whether the call issecure or non-secure.
Secure Icons
Security icons provide a visual indicator that appears on the phone display, letting you know whether a callis secure or nonsecure. The icon appears on the phone right next to the call duration timer.
The following table displays the security icons along with a description of its meaning:
Table 27: Secure Icons
DescriptionSecurity LevelSecurity Icon
Both call signaling (with TLS) and call media (with SRTP) areencrypted.
It’s always required that the audio stream be encrypted inorder for the Encryption icon to display on the phone.Encryption for additional media streams (video, BFCPand iX channel) may be required depending on how youconfigure the Call Secure Status Policy parameter. Thedefault value is that the media is considered encrypted solong as the audio and video streams are both encrypted.
Note
Encrypted CallLock
Security Guide for Cisco Unified Communications Manager, Release 14139

DescriptionSecurity LevelSecurity Icon
Call signaling is encrypted with TLS, call media is either unencryptedor partially encrypted.
For example, the audio is encrypted, but not video. However, theCall Secure Status Policy indicates both must be encrypted for thecall to have an Encrypted status.
Authenticated callShield
Unauthenticated device with non secure audio and videoNon secure callNo icon
Additional Information
• Some phone models display only the lock icon (encrypted) and do not display the shield icon(authenticated)
• The security status of a call can change for point-to-point, intracluster, intercluster, and multihop calls.SCCP line, SIP line, and H.323 signal toning support notification of call security status changes toparticipating endpoints.
• For conference and barge calls, the security icon displays the security status of the conference.
Secure Tones Overview
Secure Tones can be configured to play on a Protected Phone at the start of a call. The tone alerts you towhether the other device in the call is secure or non secure—if the other device is non secure, you hear thenonsecure tone, if the other device is secure, you hear the secure tone.
Unlike Secure Icons, which display on all phones, Secure Tones play only on phones that are configured asa Protected Device. If both phones in a call are secured, but only one phone is Protected, only the ProtectedPhone hears the tone.
The following table lists the type of tone and what each means:
Table 28: Secure Tones
DescriptionSecure Tones
Secure call. Other phone is a secure phone.Three long beeps
Non secure call. Other phone is non secure.Six short beeps
Midcall Changes
If the security status of the call changes during the call, a new secure or nonsecure tone plays midcall in orderto alert the caller on a Protected Device of the new security status. Only a user who is on a Protected Devicehears the tone:
Types of Calls
Secure tone works for the following types of calls:
• Intracluster calls (IP to IP)
• Intercluster calls that are deemed protected
Security Guide for Cisco Unified Communications Manager, Release 14140
Basic System SecuritySecure Tones and Icons Overview

• IP to TDM calls over anMGCP gateway E1 connection (the MGCP gateway must be a protected device)
Secure Phone Call IdentificationYou can establish and identify a secure call when your phone and the phone on the other end is configuredfor secure calling. Conference calls support secure calls after secure conference bridge is set.
A secured call is established when you initiate a call from a secured phone (secured mode). A secure iconappears on the phone screen and indicates that the phone is configured for secure calls, but does not meanthat the other phone connected is also secured.
You will hear a security tone if the call connects to another secured phone, indicating that both ends of theconversation are encrypted and secured.
If the call connects to a non secure phone, you will not hear the security tone.Note
Secure Icons and Tones TipsSecure calling is supported between two phones. For protected phones, features such as conference calling,shared lines, and Extension Mobility, are not available when secure calling is configured. Only callers onprotected phones can hear secure and non secure indication tones. Callers on non protected phones don’t hearthese tones. For video calls, the system plays secure and non secure indication tones on protected devices.
All phones that support security icons display call security level.
• The phone displays a shield icon for calls with a signaling security level of authentication. A shieldicon identifies a secured connection between Cisco IP devices. This icon indicates that the devices useencrypted signaling.
• The phone displays a lock icon for calls with encrypted media. This icon indicates that the devicesuse encrypted signaling and encrypted media.
• Some phone models display only the lock icon.
The security status of a call can change for point-to-point, intracluster, intercluster, and multihop calls. SCCPline, SIP line, and H.323 signaling support notification of call security status changes to participating endpoints.
The protected phones only play the secure or nonsecure indication tones. The non protected phones neverplay indication tones. If the overall call status changes during the call, the indication tone changes and theprotected phone play the appropriate tone.
Below are few scenarios when a protected phone plays an appropriate tone:
• If you enable the Play Secure Indication Tone option.
• When end-to-end secure media is established and the call status is secure, the phone plays the secureindication tone—three long beeps with pauses.
• When end-to-end non-secure media is established and the call status is non secure, the phone plays thenon secure indication tone—six short beeps with brief pauses.
Security Guide for Cisco Unified Communications Manager, Release 14141
Basic System SecuritySecure Phone Call Identification

• If you disable the Play Secure Indication Tone option, the tones are not played.
Supported Devices Secure TonesUse this procedure to obtain a list of phones that support secure tones.
Procedure
Step 1 From Cisco Unified Reporting, click System Reports.Step 2 Click Unified CM Phone Features List.Step 3 Click Generate a New Report.Step 4 From the Features drop-down list, choose Secure Tone.Step 5 Click Submit.
For more information about using Cisco Unified Reporting, see Administration Guide for Cisco UnifiedCommunications Manager.
Protected Devices Secure TonesYou can configure only supported Cisco Unified IP Phones and MGCP E1 PRI gateways as protected devicesin Unified Communications Manager. Unified Communications Manager can also direct an MGCP IOSgateway to play secure and non secure indication tones when the system determines the protected status of acall.
You can make the following types of calls that use secure and non secure indication tones:
• Intracluster IP-to-IP calls
• Intercluster calls that the system determines are protected
• IP-to-Time-Division-Multiplexing (TDM) calls through a protected MGCP E1 PRI gateway
For video calls, the system plays secure and nonsecure indication tones on protected devices.
The protected devices provide the following functions:
• You can configure phones that are running SCCP or SIP as protected devices.
• Protected devices can call non protected devices that are either encrypted or non-encrypted. In such cases,the call specifies non protected and the system plays non secure indication tone to the phones on the call.
• When a protected phone calls another protected phone, and the media is not encrypted, the system playsa nonsecure indication tone to the phones on the call.
To set a phone to protected state, check the Protected Device check box in the Phone Configurationwindowof the Cisco Unified CM Administration page.
Security Guide for Cisco Unified Communications Manager, Release 14142
Basic System SecuritySupported Devices Secure Tones

Secure Icons and Tones Configuration TasksYou can configure secure icons and secure tones using the following tasks:
Procedure
PurposeCommand or Action
Call Secure Status Policy outlines which mediastreams within a call must be encrypted for the
Set Up Secure Icon PolicyStep 1
Secure Icon feature to display the call asEncrypted. The default is that audio and video(for video calls) must both be encrypted. Youcan reconfigure the setting to consider BFCPand iX Channel as well.
Enable the secure indication tone on a protectedphone.
Enable Secure Indication Tone for ClusterStep 2
Configure supported Cisco Unified IP Phonesas protected devices in Unified CommunicationsManager.
Configure Phone As a Protected DeviceStep 3
Set Up Secure Icon PolicyCall Secure Status Policy controls display of secure status icon on phones. The following are the policy options:
• All media except BFCP and iX application streams must be encrypted
This is the default value. The security status of the call is not dependent on the encryption status of BFCPand iX application streams.
• All media except iX application streams must be encrypted
The security status of the call is not dependent on the encryption status iX application streams.
• All media except BFCP application streams must be encrypted
The security status of the call is not dependent on the encryption status BFCP.
• All media in a session must be encrypted
The security status of the call is dependent on the encryption status of all the media streams of anestablished phone session.
• Only Audio must be encrypted
The security status of the call is dependent on the encryption of the audio stream.
Changes to the policy impacts display of the secure icon and playing of secure tone on the phone.Note
Security Guide for Cisco Unified Communications Manager, Release 14143
Basic System SecuritySecure Icons and Tones Configuration Tasks

Procedure
Step 1 From Unified Communications Manager Administration, choose System > Service Parameters.Step 2 From Select Server and Service pane, choose your server and the CallManager service.Step 3 Go to Clusterwide Parameters (Feature - Call Secure Status Policy) pane.Step 4 From the Secure Call Icon Display Policy field, choose a policy from the drop-down list.
A warning message with the impact on video calls and secure tone is displayed.Step 5 Click Save.
The window refreshes, and Unified Communications Manager updates the policy in the Service ParameterConfiguration page.
Enable Secure Indication Tone for ClusterThe secure indication tone plays on a protected phone when the overall status of the call specifies protected,when the system determines that the call is encrypted. You have to set the indication tone to True.
Procedure
Step 1 From Unified Communications Manager Administration, choose System > Service Parameters.Step 2 From Select Server and Service pane, choose your server and the CallManager service.Step 3 Navigate to Clusterwide Parameters (Feature - Secure Tone) pane.Step 4 Set the Play Tone to Indicate Secure/Non-Secure Call Status option to True. By default, the option is
False.After configuring the cluster for Secure Indication Tone, configure individual phones as Protected Phones.Only a protected phone can hear the secure and non secure tones.
Configure Phone As a Protected DeviceYou can configure supported Cisco Unified IP Phones as protected devices in Unified CommunicationsManager. Only callers on a protected phone can hear the secure and non secure indication tones.
Procedure
Step 1 From Cisco Unified CM Administration, choose Device > Phone.The list of phone appears.
Step 2 Click the phone for which you want to set the secure tone parameters.Step 3 Navigate to the Device Information pane and perform the following:
a. From the Softkey Template drop-down list, choose Standard Protected Phone
You must use a new softkey template without supplementary service softkeys for a protectedphone.
Note
Security Guide for Cisco Unified Communications Manager, Release 14144
Basic System SecurityEnable Secure Indication Tone for Cluster

b. Check the Protected Device check box.
Step 4 Navigate to the Protocol Specific Information pane.Step 5 From the Device Security Profile drop-down list, choose an encrypted security phone profile that is already
configured in the Phone Security Profile Configuration page.Step 6 Click Save.
Secure Calls and Tones Limitations and RestrictionsThe following are the limitations and restrictions with reference to the secure calls and tones:
Table 29: Secure Icons and Secure Tones Interactions and Restrictions
Interactions and RestrictionsFeature
Secure icons not supported over H.323 trunksH.323 Trunks
The encryption lock icon may not display on the phone when you perform taskssuch as transferring or putting a call on hold. The status changes from encryptedto non-secure if the media streams that are associated with these tasks are notencrypted.
Call Transfer and Hold
For calls that involve the PSTN, the security icon shows the security status foronly the IP domain portion of the call.
PSTN calls
With secure icons:
• Non secure or authenticated Cisco IP Phones can barge encrypted calls. Thesecurity icon indicates the security status for the conference calls.
With secure tones:
• If a caller barges a secure SIP call, the system provides tone-on-hold, andUnified Communications Manager classifies the call as non secure duringthe tone.
• If a caller barges a secure SCCP call, the system uses an internal tone-playingmechanism at the target device and the status remains secure.
Barge
Security Guide for Cisco Unified Communications Manager, Release 14145
Basic System SecuritySecure Calls and Tones Limitations and Restrictions

Security Guide for Cisco Unified Communications Manager, Release 14146
Basic System SecuritySecure Calls and Tones Limitations and Restrictions
C H A P T E R 12Trunk and Gateway SIP Security
• Trunk and Gateway SIP Security Overview, on page 147• Configure Trunk and Gateway SIP Security Task Flow, on page 150
Trunk and Gateway SIP Security OverviewThis section provides an overview of SIP trunk encryption, gateway encryptions and security profile setuptips.
SIP Trunk EncryptionSIP trunks can support secure calls both for signaling as well as media; TLS provides signaling encryptionand SRTP provides media encryption.
To configure signaling encryption for the trunk, choose the following options when you configure the SIPtrunk security profile (in the System > Security Profile > SIP Trunk Security Profile window):
• From the Device Security Mode drop-down list, choose “Encrypted.”
• From the Incoming Transport Type drop-down list, choose “TLS.”
• From the Outgoing Transport Type drop-down list, choose “TLS.”
After you configure the SIP trunk security profile, apply it to the trunk (in the Device > Trunk > SIP Trunkconfiguration window).
To configure media encryption for the trunk, check the SRTP Allowed check box (also in theDeviceTrunkSIPTrunk configuration window).
If you check this check box, we recommend that you use an encrypted TLS profile, so that keys and othersecurity-related information do not get exposed during call negotiations. If you use a non- secure profile,SRTP will still work but the keys will be exposed in signaling and traces. In that case, you must ensure thesecurity of the network between Unified Communications Manager and the destination side of the trunk.
Caution
Security Guide for Cisco Unified Communications Manager, Release 14147

Cisco IOS MGCP Gateway EncryptionUnified Communications Manager supports gateways that use the MGCP SRTP package, which the gatewayuses to encrypt and decrypt packets over a secure RTP connection. The information that gets exchanged duringcall setup determines whether the gateway uses SRTP for a call. If the devices support SRTP, the system usesa SRTP connection. If at least one device does not support SRTP, the system uses a RTP connection.SRTP-to-RTP fallback (and vice versa) may occur for transfers from a secure device to a non-secure device,conferencing, transcoding, music on hold, and so on.
When the system sets up an encrypted SRTP call between two devices, Unified Communications Managergenerates a master encryption key and salt for secure calls and sends them to the gateway for the SRTP streamonly. Unified CommunicationsManager does not send the key and salt for SRTCP streams, which the gatewayalso supports. These keys get sent to the gateway over the MGCP signaling path, which you should secureby using IPSec. AlthoughUnified CommunicationsManager does not recognize whether an IPSec connectionexists, the system sends the session keys to the gateway in the cleartext if IPSec is not configured. Confirmthat the IPSec connection exists, so the session keys get sent through a secure connection.
If the MGCP gateway, which is configured for SRTP, is involved in a call with an authenticated device, forexample, an authenticated phone that is running SCCP, a shield icon displays on the phone because UnifiedCommunications Manager classifies the call as authenticated. Unified Communications Manager classifies acall as encrypted if the SRTP capabilities for the devices are successfully negotiated for the call. If the MGCPgateway is connected to a phone that can display security icons, the phone displays the lock icon when thecall is encrypted.
Tip
The following are the facts about MGCP E1 PRI gateways:
• Youmust configure theMGCP gateway for SRTP encryption. Configure the gateway using the followingcommand: mgcppackage-capabilitysrtp-package
• The MGCP gateway must specify an Advanced IP Services or Advanced Enterprise Services image.
For example, c3745-adventerprisek9-mz.124-6.T.bin
• Protected status gets exchanged with the MGCP E1 PRI gateway by using proprietary FacilityIE in theMGCP PRI Setup, Alert, and Connect messages.
• Unified Communications Manager plays the secure indication tone only to the Cisco Unified IP Phone.A PBX in the network plays the tone to the gateway end of the call.
• If the media between the Cisco Unified IP Phone and the MGCP E1 PRI gateway is not encrypted, thecall drops.
For more information about encryption for MGCP gateways, see Media andSignaling Authentication and Encryption Feature for Cisco IOS MGCP Gatewaysfor the version of Cisco IOS software that you are using.
Note
Security Guide for Cisco Unified Communications Manager, Release 14148
Basic System SecurityCisco IOS MGCP Gateway Encryption

H.323 Gateway and H.323/H.225/H.245 Trunk EncryptionH.323 gateways and gatekeeper or non-gatekeeper controlled H.225/H.323/H.245 trunks that support securitycan authenticate to Unified Communications Manager if you configure an IPSec association in the CiscoUnified Communications Operating System. For information on creating an IPSec association between UnifiedCommunications Manager and these devices, refer to the Administration Guide for Cisco UnifiedCommunications Manager .
The H.323, H.225, and H.245 devices generate the encryption keys. These keys get sent to UnifiedCommunications Manager through the signaling path, which you secure through IPSec. Although UnifiedCommunications Manager does not recognize whether an IPSec connection exists, the session keys get sentin the clear if IPSec is not configured. Confirm that the IPSec connection exists, so the session keys get sentthrough a secure connection.
In addition to configuring an IPSec association, you must check the SRTP Allowed check box in the deviceconfiguration window in Unified CommunicationsManager Administration; for example, the H.323 Gateway,the H.225 Trunk (Gatekeeper Controlled), the Inter-Cluster Trunk (Gatekeeper Controlled), and the Inter-ClusterTrunk (Non-Gatekeeper Controlled) configuration windows. If you do not check this check box, UnifiedCommunications Manager uses RTP to communicate with the device. If you check the check box, UnifiedCommunications Manager allows secure and nonsecure calls to occur, depending on whether SRTP isconfigured for the device.
If you check the SRTP Allowed check box in Unified Communications Manager Administration, Ciscostrongly recommends that you configure IPSec, so security-related information does not get sent in the clear.
Unified Communications Manager does not confirm that you configured the IPSec connection correctly. Ifyou do not configure the connection correctly, security-related information may get sent in the clear.
Caution
If the system can establish a secure media or signaling path and if the devices support SRTP, the system usesa SRTP connection. If the system cannot establish a secure media or signaling path or if at least one devicedoes not support SRTP, the system uses a RTP connection. SRTP-to-RTP fallback (and vice versa) may occurfor transfers from a secure device to a non-secure device, conferencing, transcoding, music on hold, and soon.
If the call uses pass-through capable MTP, if the audio capabilities for the device match after region filtering,and if theMTPRequired check box is not checked for any device, Unified CommunicationsManager classifiesthe call as secure. If the MTP Required check box is checked, Unified Communications Manager disablesaudio pass-through for the call and classifies the call as nonsecure. If no MTP is involved in the call, UnifiedCommunications Manager may classify the call as encrypted, depending on the SRTP capabilities of thedevices.
For SRTP-configured devices, Unified Communications Manager classifies a call as encrypted if the SRTPAllowed check box is checked for the device and if the SRTP capabilities for the devices are successfullynegotiated for the call. If the preceding criteria are not met, Unified Communications Manager classifies thecall as nonsecure. If the device is connected to a phone that can display security icons, the phone displays thelock icon when the call is encrypted.
Unified Communications Manager classifies outbound faststart calls over a trunk or gateway as nonsecure.If you check the SRTP Allowed check box in Unified Communications Manager Administration, UnifiedCommunications Manager disables the Enable Outbound FastStart check box.
Tip
Security Guide for Cisco Unified Communications Manager, Release 14149
Basic System SecurityH.323 Gateway and H.323/H.225/H.245 Trunk Encryption

Unified Communications Manager allows some types of gateways and trunks to transparently pass throughthe shared secret (Diffie-Hellman key) and other H.235 data between twoH.235 endpoints, so the two endpointscan establish a secure media channel.
To enable the passing through of H.235 data, check the H.235 pass through allowed check box in theconfiguration settings of the following trunks and gateways:
• H.225 Trunk
• ICT Gatekeeper Control
• ICT non-Gatekeeper Control
• H.323 Gateway
For information about configuring trunks and gateways, see the Administration Guide for Cisco UnifiedCommunications Manager .
About SIP Trunk Security Profile SetupUnified Communications Manager Administration groups security-related settings for the SIP trunk to allowyou to assign a single security profile to multiple SIP trunks. Security-related settings include device securitymode, digest authentication, and incoming/outgoing transport type settings. You apply the configured settingsto the SIP trunk when you choose the security profile in the Trunk Configuration window.
Installing Unified Communications Manager provides a predefined, nonsecure SIP trunk security profile forautoregistration. To enable security features for a SIP trunk, configure a new security profile and apply it tothe SIP trunk. If the trunk does not support security, choose a nonsecure profile.
Only security features that the SIP trunk supports display in the security profile settings window.
SIP Trunk Security Profile Setup TipsConsider the following information when you configure SIP trunk security profiles in Unified CommunicationsManager Administration:
• When you are configuring a SIP trunk, you must select a security profile in the Trunk Configurationwindow. If the device does not support security, apply a nonsecure profile.
• You cannot delete a security profile that is currently assigned to a device.
• If you change the settings in a security profile that is already assigned to a SIP trunk, the reconfiguredsettings apply to all SIP trunks that are assigned that profile.
• You can rename security files that are assigned to devices. The SIP trunks that are assigned the old profilename and settings assume the new profile name and settings.
• If you configured the device security mode prior to a Unified Communications Manager 5.0 or laterupgrade, Unified Communications Manager creates a profile for the SIP trunk and applies the profile tothe device.
Configure Trunk and Gateway SIP Security Task FlowThis section provides description on all the trunk and gateway SIP security configurations.
Security Guide for Cisco Unified Communications Manager, Release 14150
Basic System SecurityAbout SIP Trunk Security Profile Setup

Set Up Secure Gateways and TrunksUse this procedure in conjunction with the document, Media and Signaling Authentication and EncryptionFeature for Cisco IOS MGCP Gateways, which provides information on how to configure your CiscoIOSMGCP gateways for security.
Procedure
Step 1 Verify that you have run the utils ctl command to set the cluster in mixed mode.Step 2 Verify that you configured the phones for encryption.Step 3 Configure IPSec.
Youmay configure IPSec in the network infrastructure, or youmay configure IPSec between UnifiedCommunications Manager and the gateway or trunk. If you implement one method to set up IPSec,you do not need to implement the other method.
Tip
Step 4 For H.323 IOS gateways and intercluster trunks, check the SRTP Allowed check box in UnifiedCommunications Manager.
The SRTP Allowed check box displays in the Trunk Configuration or Gateway Configuration window.For information on how to display these windows, refer to the trunk and gateway chapters in the AdministrationGuide for Cisco Unified Communications Manager.
Step 5 For SIP trunks, configure the SIP trunk security profile and apply it to the trunk(s), if you have not alreadydone so. Also, be sure to check the SRTP Allowed check box in the Device > Trunk > SIP TrunkConfiguration window.
If you check the SRTP Allowed check box, we recommend that you use an encrypted TLS profile,so that keys and other security-related information does not get exposed during call negotiations.If you use a non-secure profile, SRTP will still work but the keys will be exposed in signaling andtraces. In that case, you must ensure the security of the network between Unified CommunicationsManager and the destination side of the trunk.
Caution
Step 6 Perform security-related configuration tasks on the gateway.
For more information, seeMedia and Signaling Authentication and Encryption Feature for Cisco IOS MGCPGateways.
Set Up SIP Trunk Security ProfileTo add, update, or copy a SIP trunk security profile, perform the following procedure:
Procedure
Step 1 From Cisco Unified Communications Manager Administration, choose System > Security Profile > SIPTrunk Security Profile.
Step 2 Perform one of the following tasks:
Security Guide for Cisco Unified Communications Manager, Release 14151
Basic System SecuritySet Up Secure Gateways and Trunks

a) To add a new profile, click Add New in the Find window.
(You can also display a profile and then click Add New.)
The configuration window displays the default settings for each field.
b) To copy an existing security profile, locate the appropriate profile and click the Copy icon for that recordin the Copy column.
(You can also display a profile and then click Copy.)
The configuration window displays the configured settings.
c) To update an existing profile, locate and display the appropriate security profile as described in Find SIPTrunk Security Profile.
The configuration window displays the current settings.
Step 3 Enter the appropriate settings as described in SIP Trunk Security Profile Settings.Step 4 Click Save.
After you create the security profile, apply it to the trunk. If you configured digest authentication for SIPtrunks, you must configure the digest credentials in the SIP Realm window for the trunk and ApplicationUser window for applications that are connected through the SIP trunk, if you have not already done so. Ifyou enabled application-level authorization for applications that are connected through the SIP trunk, youmust configure the methods that are allowed for the application in the Application User window, if you havenot already done so.
SIP Trunk Security Profile SettingsThe following table describes the settings for the SIP Trunk Security Profile.
Table 30: SIP Trunk Security Profile Configuration Settings
DescriptionSetting
Enter a name for the security profile. When you save the new profile, the namedisplays in the SIP Trunk Security Profile drop-down list in the TrunkConfiguration window.
Name
Enter a description for the security profile. The description can include up to 50characters in any language, but it cannot include double-quotes ("), percentagesign (%), ampersand (&), back-slash (\), or angle brackets (<>).
Description
Security Guide for Cisco Unified Communications Manager, Release 14152
Basic System SecuritySIP Trunk Security Profile Settings

DescriptionSetting
From the drop-down list, choose one of the following options:
• Non Secure—No security features except image authentication apply. ATCP or UDP connection opens to Unified Communications Manager.
• Authenticated—Unified Communications Manager provides integrity andauthentication for the trunk. A TLS connection that uses NULL/SHA opens.
• Encrypted—Unified Communications Manager provides integrity,authentication, and signaling encryption for the trunk. A TLS connectionthat uses AES128/SHA opens for signaling.
If the trunks are configuredwith Device Security Profile option selectedas Authenticated, then Unified Communications Manager starts aTLS connection that uses NULL_SHA cipher (without dataencryption).
These trunks will not register or make calls if the destination devicesdo not support NULL_SHA cipher.
For destination devices that do not support NULL_SHA cipher, thetrunks should be configured with Device Security Profile optionselected as Encrypted. With this device security profile, the trunksoffer additional TLS ciphers that enables data encryption.
Note
Device Security Mode
When Device Security Mode is Non Secure TCP+UDP specifies the transporttype.
When Device Security Mode is Authenticated or Encrypted, TLS specifies thetransport type.
The Transport Layer Security (TLS) protocol secures the connectionbetween Unified Communications Manager and the trunk.
Note
Incoming Transport Type
From the drop-down list, choose the outgoing transport mode.
When Device Security Mode is Non Secure, choose TCP or UDP.
When Device Security Mode is Authenticated or Encrypted, TLS specifies thetransport type.
TLS ensures signaling integrity, device authentication, and signalingencryption for SIP trunks.
Note
You must use UDP as the outgoing transport type when connectingSIP trunks between Unified Communications Manager systems andIOS gateways that do not support TCP connection reuse.
Tip
Outgoing Transport Type
Security Guide for Cisco Unified Communications Manager, Release 14153
Basic System SecuritySIP Trunk Security Profile Settings

DescriptionSetting
Check this check box to enable digest authentication. If you check this checkbox, Unified Communications Manager challenges all SIP requests from thetrunk.
Digest authentication does not provide device authentication, integrity orconfidentiality. Choose a security mode of Authenticated or Encrypted to usethese features.
Use digest authentication to authenticate SIP trunk users on trunksthat are using TCP or UDP transport.
Tip
Enable DigestAuthentication
Enter the number of minutes (in seconds) that the nonce value is valid. The defaultvalue equals 600 (10 minutes). When the time expires, Unified CommunicationsManager generates a new value.
A nonce value, a random number that supports digest authentication,gets used to calculate the MD5 hash of the digest authenticationpassword.
Note
Nonce Validity Time
This field applies if you configured TLS for the incoming and outgoing transporttype.
For device authentication, enter the name of the Secure Certificate Subject orSubject Alternate Name certificate for the SIP trunk device. If you have a UnifiedCommunications Manager cluster or if you use SRV lookup for the TLS peer, asingle trunk may resolve to multiple hosts, which results in multiple SecureCertificate Subject or Subject Alternate Name for the trunks. If multiple SecureCertificate Subject or Subject Alternate Name exists, enter one of the followingcharacters to separate the names: space, comma, semicolon, or a colon.
You can enter up to 4096 characters in this field.
The subject name corresponds to the source connection TLS certificate.Ensure subject names are unique for each subject name and port. Youcannot assign the same subject name and incoming port combinationto different SIP trunks. Example: SIP TLS trunk1 on port 5061 hasSecure Certificate Subject or Subject Alternate Name my_cm1,my_cm2. SIP TLS trunk2 on port 5071 has Secure Certificate Subjector Subject Alternate Name my_cm2, my_cm3. SIP TLS trunk3 onport 5061 can have Secure Certificate Subject or Subject AlternateNamemy_ccm4 but cannot have Secure Certificate Subject or SubjectAlternate Name my_cm1.
Tip
Secure Certificate Subjector Subject AlternateName
Choose the incoming port. Enter a value that is a unique port number from0-65535. The default port value for incoming TCP and UDP SIP messagesspecifies 5060. The default SIP secured port for incoming TLSmessages specifies5061. The value that you enter applies to all SIP trunks that use the profile.
All SIP trunks that use TLS can share the same incoming port; all SIPtrunks that use TCP + UDP can share the same incoming port. Youcannot mix SIP TLS transport trunks with SIP non-TLS transport trunktypes on the same port.
Tip
Incoming Port
Security Guide for Cisco Unified Communications Manager, Release 14154
Basic System SecuritySIP Trunk Security Profile Settings

DescriptionSetting
Application-level authorization applies to applications that are connected throughthe SIP trunk.
If you check this check box, you must also check the Enable DigestAuthentication check box and configure digest authentication for the trunk.Unified Communications Manager authenticates a SIP application user beforechecking the allowed application methods.
When application level authorization is enabled, trunk-level authorization occursfirst, and application-level authorization then occurs, which means that UnifiedCommunications Manager checks the methods that are authorized for the trunk(in this security profile) before the methods that are authorized for the SIPapplication user in the Application User Configuration window.
Consider using application-level authorization if you do not trust theidentity of the application or if the application is not trusted on aparticular trunk; that is, application requests may come from a differenttrunk than you expect.
Tip
Enable Application LevelAuthorization
If you want Unified Communications Manager to accept presence subscriptionrequests that come via the SIP trunk, check this check box.
If you checked the Enable Application Level Authorization check box, go tothe Application User Configuration window and check the Accept PresenceSubscription check box for any application users that are authorized for thisfeature.
When application-level authorization is enabled, if you check theAccept PresenceSubscription check box for the application user but not for the trunk, a 403 errormessage gets sent to the SIP user agent that is connected to the trunk.
Accept PresenceSubscription
If you want Unified CommunicationsManager to accept incoming non-INVITE,Out-of-Dialog REFER requests that come via the SIP trunk, check this checkbox.
If you checked the Enable Application Level Authorization check box, go to theApplication User Configuration window and check theAccept Out-of-DialogRefer check box for any application users that are authorized for this method.
Accept Out-of-DialogRefer
If you want Unified CommunicationsManager to accept incoming non-INVITE,unsolicited notification messages that come via the SIP trunk, check this checkbox.
If you checked the Enable Application Level Authorization check box, go totheApplication User Configurationwindow and check theAccept UnsolicitedNotification check box for any application users that are authorized for thismethod.
Accept UnsolicitedNotification
Security Guide for Cisco Unified Communications Manager, Release 14155
Basic System SecuritySIP Trunk Security Profile Settings

DescriptionSetting
If you want Unified Communications Manager to accept new SIP dialogs, whichhave replaced existing SIP dialogs, check this check box.
If you checked the Enable Application Level Authorization check box, go tothe Application User Configuration window and check the Accept HeaderReplacement check box for any application users that are authorized for thismethod.
Accept Replaces Header
If you want Unified CommunicationsManager to transmit the security icon statusof a call from the associated SIP trunk to the SIP peer, check this check box.
Default: This box is not checked.
Transmit Security Status
From the drop-down list, select one of the following filter options:
• Use Default Filter—The SIP trunk uses the default filter that is indicatedin the SIP V.150 Outbound SDP Offer Filtering service parameter. To locatethe service parameter, go to System > Service Parameters > ClusterwideParameters (Device-SIP) in Cisco Unified Communications ManagerAdministration.
• No Filtering—The SIP trunk performs no filtering of V.150 SDP lines inoutbound offers.
• Remove MER V.150—The SIP trunk removes V.150 MER SDP lines inoutbound offers. Select this option to reduce ambiguity when the trunk isconnected to a pre-MER V.150 Unified Communications Manager.
• Remove Pre-MER V.150—The SIP trunk removes any non-MER compliantV.150 lines in outbound offers. Select this option to reduce ambiguity whenyour cluster is contained in a network of MER-compliant devices that areincapable of processing offers with pre-MER lines.
SIP V.150 Outbound SDPOffer Filtering
Security Guide for Cisco Unified Communications Manager, Release 14156
Basic System SecuritySIP Trunk Security Profile Settings

DescriptionSetting
From the drop-down list, select one of the following filter options:
• Use Default Filter—The SIP trunk uses the default filter that is indicatedin the SIP V.150 Outbound SDP Offer Filtering service parameter. To locatethe service parameter, go to System > Service Parameters > ClusterwideParameters (Device-SIP) in Cisco Unified Communications ManagerAdministration.
• No Filtering—The SIP trunk performs no filtering of V.150 SDP lines inoutbound offers.
• Remove MER V.150—The SIP trunk removes V.150 MER SDP lines inoutbound offers. Select this option to reduce ambiguity when the trunk isconnected to a pre-MER V.150 Unified Communications Manager.
• Remove Pre-MER V.150—The SIP trunk removes any non-MER compliantV.150 lines in outbound offers. Select this option to reduce ambiguity whenyour cluster is contained in a network of MER compliant devices that areincapable of processing offers with pre-MER lines.
You have to configure IOS on SIP for V.150 to make a secure callconnection. For more information to configure IOS on UnifiedCommunicationsManager, see http://www.cisco.com/c/en/us/td/docs/ios/12_4t/12_4t4/mer_cg_15_1_4M.html.
Note
SIP V.150 Outbound SDPOffer Filtering
Apply SIP Trunk Security ProfileYou apply a SIP trunk security profile to the trunk in the Trunk Configuration window. To apply a securityprofile to a device, perform the following procedure:
Procedure
Step 1 Find the trunk, as described in the Administration Guide for Cisco Unified Communications Manager.Step 2 After the Trunk Configuration window displays, locate the SIP Trunk Security Profile setting.Step 3 From the security profile drop-down list, choose the security profile that applies to the device.Step 4 Click Save.Step 5 To reset the trunk, click Apply Config.
If you applied a profile enabling digest authentication for SIP trunks, you must configure the digest credentialsin the SIP Realm window for the trunk. If you applied a profile enabling application-level authorization, youmust configure the digest credentials and allowed authorization methods in the Application User window,if you have not already done so.
Security Guide for Cisco Unified Communications Manager, Release 14157
Basic System SecurityApply SIP Trunk Security Profile
Synchronize SIP Trunk Security Profile with SIP TrunksTo synchronize SIP trunks with a SIP Trunk Security Profile that has undergone configuration changes,perform the following procedure, which will apply any outstanding configuration settings in the least-intrusivemanner possible. (For example, you may not need to perform a reset/restart on some affected devices.)
Procedure
Step 1 Choose System > Security Profile > SIP Trunk Security Profile.Step 2 Choose the search criteria to use.Step 3 Click Find.
The window displays a list of SIP trunk security profiles that match the search criteria.
Step 4 Click the SIP trunk security profile to which you want to synchronize applicable SIP trunks.Step 5 Make any additional configuration changes.Step 6 Click Save.Step 7 Click Apply Config.
The Apply Configuration Information dialog appears.
Step 8 Click OK.
Setup IPsecIPsec is a framework that ensures private, secure communications over IP networks through the use ofcryptographic security services. IPsec policies are used to configure IPsec security services. The policiesprovide varying levels of protection for most traffic types in your network. You can configure IPsec policiesto meet the security requirements of a computer, organizational unit (OU), domain, site, or global enterprise.
Allow SRTP Using Unified Communications Manager AdministrationThe SRTP Allowed check box displays in the following configuration windows in Unified CommunicationsManager:
• H.323 Gateway Configuration window
• H.225 Trunk (Gatekeeper Controlled) Configuration window
• Inter-Cluster Trunk (Gatekeeper Controlled) Configuration window
• Inter-Cluster Trunk (Non-Gatekeeper Controlled) Configuration window
• SIP Trunk Configuration window
To configure the SRTP Allowed check box for H.323 gateways and gatekeeper or non-gatekeeper controlledH.323/H.245/H.225 trunks or SIP trunks, perform the following procedure:
Security Guide for Cisco Unified Communications Manager, Release 14158
Basic System SecuritySynchronize SIP Trunk Security Profile with SIP Trunks

Procedure
Step 1 Find the gateway or trunk, as described in the Unified Communications Manager.Step 2 After you open the configuration window for the gateway/trunk, check the SRTP Allowed check box.
If you check the SRTP Allowed check box for a SIP trunk, we recommend that you use an encryptedTLS profile, so keys and other security-related information are not exposed during call negotiations.If you use a non-secure profile, SRTP will still work but the keys will be exposed in signaling andtraces. In that case, you must ensure the security of the network between Unified CommunicationsManager and the destination side of the trunk.
Caution
Step 3 Click Save.Step 4 To reset the device, click Reset.Step 5 Verify that you configured IPSec correctly for H323. (For SIP, make sure you configured TLS correctly.)
Security Guide for Cisco Unified Communications Manager, Release 14159
Basic System SecurityAllow SRTP Using Unified Communications Manager Administration

Security Guide for Cisco Unified Communications Manager, Release 14160
Basic System SecurityAllow SRTP Using Unified Communications Manager Administration

C H A P T E R 13TLS Setup
• TLS Overview, on page 161• TLS Prerequisites, on page 161• TLS Configuration Task Flow, on page 162• TLS Interactions and Restrictions, on page 166
TLS OverviewTransport Layer Security (TLS) provides secure and reliable signaling and data transfer between two systemsor devices, by using secure ports and certificate exchange. TLS secures and controls connections amongUnified Communications Manager-controlled systems, devices, and processes to prevent access to the voicedomain.
TLS PrerequisitesBefore you configure the minimum TLS version, make sure that your network devices and applications bothsupport the TLS version. Also, make sure that they are enabled for TLS that you want to configure withUnified Communications Manager and IM and Presence Services. If you have any of the following productsdeployed, confirm that they meet the minimumTLS requirement. If they do not meet this requirement, upgradethose products:
• Skinny Client Control Protocol (SCCP) Conference Bridge
• Transcoder
• Hardware Media Termination Point (MTP)
• SIP Gateway
• Cisco Prime Collaboration Assurance
• Cisco Prime Collaboration Provisioning
• Cisco Prime Collaboration Deployment
• Cisco Unified Border Element (CUBE)
• Cisco Expressway
Security Guide for Cisco Unified Communications Manager, Release 14161

• Cisco TelePresence Conductor
You will not be able to upgrade conference bridges, Media Termination Point (MTP), Xcoder, PrimeCollaboration Assurance, and Prime Collaboration Provisioning.
If you are upgrading from an earlier release of Unified Communications Manager, make sure that all yourdevices and applications support the higher version of TLS before you configure it. For example, UnifiedCommunications Manager and IM and Presence Services, Release 9.x supports TLS 1.0 only.
Note
TLS Configuration Task FlowComplete the following tasks to configure Unified Communications Manager for TLS connections.
Procedure
PurposeCommand or Action
By default, Unified Communications Managersupports a minimumTLS version of 1.0. If your
Set Minimum TLS Version, on page 163.Step 1
security needs require a higher version of TLS,reconfigure the system to use TLS 1.1 or 1.2.
Configure the TLS cipher options that UnifiedCommunications Manager supports.
(Optional) Set TLS Ciphers, on page 163.Step 2
Assign TLS connections to a SIP Trunk. Trunksthat use this profile use TLS for signaling. You
Configure TLS in a SIP Trunk Security Profile,on page 163.
Step 3
can also use the secure trunk to add TLSconnections to devices, such as conferencebridges.
Assign a TLS-enabled SIP trunk security profileto a SIP trunk to allow the trunk to support TLS.
Add Secure Profile to a SIP Trunk, on page 164.Step 4
You can use the secure trunk to connectresources, such as conference bridges.
Assign TLS connections to a phone securityprofile. Phones that use this profile use TLS forsignaling.
Configure TLS in a Phone Security Profile, onpage 164.
Step 5
Assign the TLS-enabled profile that you createdto a phone.
Add Secure Phone Profile to a Phone, on page165.
Step 6
Assign a TLS-enabled phone security profileto a universal device template. If you have the
Add Secure Phone Profile to a Universal DeviceTemplate, on page 166.
Step 7
LDAP directory synchronization configuredwith this template, you can provision phoneswith security through the LDAP sync.
Security Guide for Cisco Unified Communications Manager, Release 14162
Basic System SecurityTLS Configuration Task Flow

Set Minimum TLS VersionBy default, Unified Communications Manager supports a minimum TLS version of 1.0. Use this procedureto reset the minimum supported TLS version for Unified Communications Manager and the IM and PresenceService to a higher version, such as 1.1 or 1.2.
Make sure that the devices and applications in your network support the TLS version that you want to configure.For details, see TLS Prerequisites, on page 161.
Procedure
Step 1 Log in to the Command Line Interface.Step 2 To confirm the existing TLS version, run the show tls min-version CLI command.Step 3 Run the set tls min-version <minimum> CLI command where <minimum> represents the TLS version.
For example, run set tls min-version 1.2 to set the minimum TLS version to 1.2.
Step 4 Perform Step 3 on all Unified Communications Managerand IM and Presence Service Service cluster nodes.
Set TLS CiphersYou can disable the weaker cipher, by choosing available strongest ciphers for the SIP interface. Use thisprocedure to configure the ciphers that Unified Communications Manager supports for establishing TLSconnections.
Procedure
Step 1 From Cisco Unified CM Administration, choose System > Enterprise Parameters.Step 2 In Security Parameters, configure a value for theTLS Ciphers enterprise parameter. For help on the available
options, refer to the enterprise parameter online help.Step 3 Click Save.
Configure TLS in a SIP Trunk Security ProfileUse this procedure to assign TLS connections to a SIP Trunk Security Profile. Trunks that use this profile useTLS for signaling.
Procedure
Step 1 From Cisco Unified CM Administration, choose System > Security > SIP Trunk Security Profile.Step 2 Perform one of the following steps:
• Click Add New to create a new SIP trunk security profile.
Security Guide for Cisco Unified Communications Manager, Release 14163
Basic System SecuritySet Minimum TLS Version

• Click Find to search and select an existing profile.
Step 3 In the Name field, enter a name for the profile.Step 4 Configure the Device Security Mode field value to Encrypted or Authenticated.Step 5 Configure both the Incoming Transport Type and Outgoing Transport Type field values to TLS.Step 6 Complete the remaining fields of the SIP Trunk Security Profile window. For help on the fields and their
configuration, see the online help.Step 7 Click Save.
Add Secure Profile to a SIP TrunkUse this procedure to assign a TLS-enabled SIP trunk security profile to a SIP trunk. You can use this trunkto create a secure connection to resources, such as conference bridges.
Procedure
Step 1 From Cisco Unified CM Administration, choose Device > Trunk.Step 2 Click Find to search and select an existing trunk.Step 3 For the Device Name field, enter a device name for the trunk.Step 4 From the Device Pool drop-down list, choose a device pool.Step 5 From the SIP Profile drop-down list, choose a SIP Profile.Step 6 From the SIP Trunk Security Profile drop-down list, choose the TLS-enabled SIP Trunk Profile that you
created in the previous task.Step 7 In the Destination area, enter the destination IP address. You can enter up to 16 destination addresses. To
enter additional destinations, click the (+) button.Step 8 Complete the remaining fields in the Trunk Configuration window. For help with the fields and their
configuration, see the online help.Step 9 Click Save.
If you are connecting the trunk to a secure device, you must upload a certificate for the secure deviceto Unified Communications Manager. For certificate details, see the Certificates section.
Note
Configure TLS in a Phone Security ProfileUse this procedure to assign TLS connections to a Phone Security Profile. Phones that use this profile useTLS for signaling.
Procedure
Step 1 From Cisco Unified CM Administration, choose System > Security > Phone Security Profile.Step 2 Perform one of the following steps:
Security Guide for Cisco Unified Communications Manager, Release 14164
Basic System SecurityAdd Secure Profile to a SIP Trunk

• Click Add New to create a new profile.• Click Find to search and select an existing profile.
Step 3 If you are creating a new profile, select a phone model and protocol, and click Next.
If you want to use a universal device template and LDAP sync to provision security through theLDAP sync, select Universal Device Template as the Phone Security Profile Type.
Note
Step 4 Enter a name for the profile.Step 5 From the Device Security Mode drop-down list, select either Encrypted or Authenticated.Step 6 (For SIP phones only) From the Transport Type, select TLS.Step 7 Complete the remaining fields of the Phone Security Profile Configurationwindow. For help with the fields
and their configuration, see the online help.Step 8 Click Save.
Add Secure Phone Profile to a PhoneUse this procedure to assign the TLS-enabled phone security profile to a phone.
To assign a secure profile to a large number of phones at once, use the Bulk Administration Tool to reassignthe security profile for them.
Note
Procedure
Step 1 From Cisco Unified CM Administration, choose Device > Phone.Step 2 Perform one of the following steps:
• Click Add New to create a new phone.• Click Find to search and select an existing phone.
Step 3 Select the phone type and protocol and click Next.Step 4 From the Device Security Profile drop-down list, assign the secure profile that you created to the phone.Step 5 Assign values for the following mandatory fields:
• MAC address• Device Pool• SIP Profile• Owner User ID• Phone Button Template
Step 6 Complete the remaining fields of the Phone Configuration window. For help with the fields and theirconfiguration, see the online help.
Step 7 Click Save.
Security Guide for Cisco Unified Communications Manager, Release 14165
Basic System SecurityAdd Secure Phone Profile to a Phone

Add Secure Phone Profile to a Universal Device TemplateUse this procedure to assign a TLS-enabled phone security profile to a universal device template. If you haveLDAP directory sync configured, you can include this universal device template in the LDAP sync througha feature group template and user profile.When the sync occurs, the secure profile is provisioned to the phones.
Procedure
Step 1 From Cisco Unified CMAdministration, chooseUser Management >User/Phone Add >Universal DeviceTemplate.
Step 2 Perform one of the following steps:
• Click Add New to create a new template.• Click Find to search and select an existing template.
Step 3 For the Name field, enter a name for the template.Step 4 From the Device Pool drop-down list, select a device pool.Step 5 From the Device Security Profile drop-down list, select the TLS-enabled security profile that you created.
The Phone Security Profile must have been created with Universal Device Template as the devicetype.
Note
Step 6 Select a SIP Profile.Step 7 Select a Phone Button Template.Step 8 Complete the remaining fields of the Universal Device Template Configuration window. For help with the
fields and their configuration, see the online help.Step 9 Click Save.
Include the Universal Device template in an LDAP directory synchronization. For details on how to set upan LDAP Directory sync, see the “Configure End Users” part of the System Configuration Guide for CiscoUnified Communications Manager.
TLS Interactions and RestrictionsThis chapter provides information about the TLS Interactions and Restrictions.
Security Guide for Cisco Unified Communications Manager, Release 14166
Basic System SecurityAdd Secure Phone Profile to a Universal Device Template

TLS InteractionsTable 31: TLS Interactions
InteractionFeature
You can enable Common Criteria mode along with configuration of minimumTLS version. If you do so, the applications continue to comply with CommonCriteria requirements and disable TLS 1.0 secure connections at application level.When the common criteria mode is enabled, you can configure the minimumTLS version as either 1.1 or 1.2 for the applications. For details on CommonCriteria mode, see the Compliance to Common Criteria topic of the CommandLine Interface Reference Guide for Cisco Unified Communications Solutions.
Common Criteria mode
TLS RestrictionsThe following table highlights issues that you may run into when implementing Transport Layer Security(TLS) version 1.2 on legacy phones, such as 79xx, 69xx, 89xx, 99xx, 39xx, and IP Communicator. To verifywhether your phone supports secure mode in this release, see the Phone Feature List Report in Cisco UnifiedReporting. The feature restrictions on legacy phones and the workaround to implement the feature is listed inthe following table:
The workarounds are designed to get the impacted feature functioning in your system. However, they do notguarantee TLS 1.2 compliance for that feature.
Note
Table 32: Transport Layer Security Version 1.2 Restrictions
RestrictionFeature
Legacy phones in Encrypted Mode do not work. There is no workaround.Legacy phones inEncrypted Mode
Legacy phones in Authenticated Mode do not work. There is no workaround.Legacy phones inAuthenticated Mode
IP Phone services using secure URLs based on HTTPS do not work.
Workaround to use IP Phone services: Use HTTP for all underlying serviceoptions. For example, corporate directory and personal directory. However, HTTPis not recommended as HTTP is not as secure if you need to enter sensitive datafor features, such as Extension Mobility. The drawbacks of using HTTP include:
• Provisioning challenges when configuring HTTP for legacy phones andHTTPS for supported phones.
• No resiliency for IP Phone services.
• Performance of the server handling IP phone services can be affected.
IP Phone services usingsecure URLs based onHTTPS.
Security Guide for Cisco Unified Communications Manager, Release 14167
Basic System SecurityTLS Interactions

RestrictionFeature
EMCC is not supported with TLS 1.2 on legacy phones.
Workaround: Complete the following tasks to enable EMCC:
1. Enable EMCC over HTTP instead of HTTPS.
2. Turn on mixed-mode on all Unified Communications Manager clusters.
3. Use the sameUSB eTokens for all Unified CommunicationsManager clusters.
ExtensionMobility CrossCluster (EMCC) onlegacy phones
LSC is not supported with TLS 1.2 on legacy phones. As a result, 802.1x andphone VPN authentication based on LSC are not available.
Workaround for 802.1x: Authentication based on MIC or password withEAP-MD5 on older phones. However, those are not recommended.
Workaround for VPN:Use phoneVPN authentication based on end-user usernameand password.
Locally SignificantCertificates (LSC) onlegacy phones
Encrypted Trivial File Transfer Protocol (TFTP) configuration files are notsupported with TLS 1.2 on legacy phones even with Manufacturer InstalledCertificate (MIC).
There is no workaround.
Encrypted Trivial FileTransfer Protocol (TFTP)configuration files
Legacy phones lose trust when CallManager certificate is renewed. For example,a phone cannot get new configurations after renewing the certificate. This isapplicable only in Unified Communications Manager 11.5.1
Workaround: To prevent legacy phones from losing trust, complete the followingsteps:
1. Before you enable the CallManager certificate, set theCluster For Roll Backto Pre 8.0 enterprise parameter to True. By default, this setting disables thesecurity.
2. Temporarily allow TLS 1.0 (multiple Unified Communications Managerreboots).
CallManager certificaterenewal causes legacyphones to lose trust
TLS 1.2 connections to older versions of Unified Communications Manager thatdo not support the higher TLS version do not work. For example, a TLS 1.2 SIPtrunk connection to Unified CommunicationsManager Release 9.x does not workbecause that release does not support TLS 1.2.
You can use one of the following workarounds:
• Workaround to enable connections: Use nonsecure trunks, although this isnot a recommended option.
• Workaround to enable connections while using TLS 1.2: Upgrade thenon-supported version to a release that does support TLS 1.2.
Connections tonon-supported versions ofCisco UnifiedCommunicationsManager
Security Guide for Cisco Unified Communications Manager, Release 14168
Basic System SecurityTLS Restrictions

RestrictionFeature
CTL client does not support TLS 1.2.
You can use one of the following workarounds:
• Temporarily allow TLS 1.0 when using the CTL client and then move theCluster to Common Criteria mode. Configure Minimum TLS to 1.1 or 1.2
• Migrate to the Tokenless CTL by using the CLI Command utils ctlset-cluster mixed-mode in Common Criteria mode. Configure MinimumTLS to 1.1 or 1.2
Certificate Trust List(CTL) Client
There is no workaround.Address BookSynchronizer
Cisco Unified Communications Manager Ports Affected by Transport Layer Security Version 1.2
The following table lists the Unified Communications Manager Ports Affected By TLS Version 1.2
Table 33: Cisco Unified Communications Manager Ports Affected by Transport Layer Security Version 1.2
Cisco Unified CommunicationsManager Operating in CommonCriteria Mode
Cisco Unified CommunicationsManager Operating in Normalmode
Destination/ Listener
ProtocolApplication
MinimumTLSversion 1.2
MinimumTLSversion 1.1
MinimumTLSversion 1.0
MinimumTLSversion 1.2
MinimumTLSversion 1.1
MinimumTLSversion 1.0
TLS 1.2TLS 1.1,TLS 1.2
TLS 1.1TLS 1.2TLS 1.1,TLS v1.2
TLS 1.0,TLS 1.1,TLS 1.2
443HTTPSTomcat
TLS 1.2TLS 1.1,TLS 1.2
TLS 1.1TLS 1.2TLS 1.1,TLS 1.2
TLS 1.0,TLS 1.1,TLS 1.2
2443SignallingConnectionControlPart(SCCP)
SCCP -SEC - SIG
TLS 1.2TLS 1.1,TLS 1.2
TLS 1.1TLS 1.2TLS 1.1,TLS 1.2
TLS 1.0,TLS 1.1,TLS 1.2
2444ProprietaryCTL-SERV
TLS 1.2TLS 1.1,TLS 1.2
TLS 1.1TLS 1.2TLS 1.1,TLS 1.2
TLS 1.0,TLS 1.1,TLS 1.2
2749QuickBufferEncoding(QBE)
ComputerTelephonyIntegration(CTI)
TLS 1.2TLS 1.1,TLS 1.2
TLS 1.1TLS 1.2TLS 1.1,TLS 1.2
TLS 1.0,TLS 1.1,TLS 1.2
3804TransmissionControlProtocol(TCP)
CAPF-SERV
Security Guide for Cisco Unified Communications Manager, Release 14169
Basic System SecurityTLS Restrictions

Cisco Unified CommunicationsManager Operating in CommonCriteria Mode
Cisco Unified CommunicationsManager Operating in Normalmode
Destination/ Listener
ProtocolApplication
MinimumTLSversion 1.2
MinimumTLSversion 1.1
MinimumTLSversion 1.0
MinimumTLSversion 1.2
MinimumTLSversion 1.1
MinimumTLSversion 1.0
TLS 1.2TLS 1.1,TLS 1.2
TLS 1.1TLS 1.2TLS 1.1,TLS 1.2
TLS 1.0,TLS 1.1,TLS 1.2
7501Notapplicable
InterclusterLookupService(ILS)
TLS 1.2TLS 1.1,TLS 1.2
TLS 1.1TLS 1.2TLS 1.1,TLS 1.2
TLS 1.0,TLS 1.1,TLS 1.2
8443SimpleObjectAccessProtocol(SOAP)
AdministrativeXML(AXL)
TLS 1.2TLS 1.2TLS 1.1TLS 1.2TLS 1.2TLS 1.29443TCPHighAvailable-Proxy(HA-Proxy)
TLS 1.2TLS 1.1,TLS 1.2
TLS 1.1TLS 1.2TLS 1.1,TLS 1.2
TLS 1.0,TLS 1.1,TLS 1.2
5061(configurablewithtrunk)
SessionInitiationProtocol(SIP)
SIP-SIG
TLS 1.2TLS 1.1,TLS 1.2
TLS 1.1TLS 1.2TLS 1.2TLS 1.26971,6972
TCPHA Proxy
8443: TLS1.2
8443: TLS1.1, TLS1.2
TLS 1.18443: TLS1.2
8443: TLS1.1, TLS1.2
8443: TLS1.0, TLS1.1, TLS1.2
8080,8443
HTTPSCiscoTomcat
TLS 1.2TLS 1.1,TLS 1.2
TLS 1.1TLS 1.2TLS 1.1,TLS 1.2
TLS 1.0,TLS 1.1,TLS 1.2
2445ProprietaryTrustVerificationService(TVS)
Instant Messaging and Presence Ports Affected by Transport Layer Security Version 1.2
The following table lists the IM and Presence Service Ports Affected By Transport Layer Security Version1.2:
Security Guide for Cisco Unified Communications Manager, Release 14170
Basic System SecurityTLS Restrictions

Table 34: Instant Messaging & Presence Ports Affected by Transport Layer Security Version 1.2
Instant Messaging & Presence Operatingin Common Criteria mode
Instant Messaging & Presence Operatingin Normal mode
Destination/Listener
MinimumTLS version1.2
MinimumTLS version1.1
MinimumTLS version1.0
MinimumTLS version1.2
MinimumTLS version1.1
MinimumTLSversion 1.0
TLS 1.2TLS 1.1,TLS 1.2
TLS 1.1TLS 1.2TLS 1.1,TLS 1.2
TLS 1.0,TLS 1.1,TLS 1.2
443
TLS 1.2TLS 1.1,TLS 1.2
TLS 1.1TLS 1.2TLS 1.1,TLS 1.2
TLS 1.0,TLS 1.1,TLS 1.2
5061
TLS 1.2TLS 1.1,TLS 1.2
TLS 1.1TLS 1.2TLS 1.1,TLS 1.2
TLS 1.0,TLS 1.1,TLS 1.2
5062
TLS 1.2TLS 1.1,TLS 1.2
TLS 1.1TLS 1.2TLS 1.1,TLS 1.2
TLS 1.0,TLS 1.1,TLS 1.2
7335
TLS 1.2TLS 1.1,TLS 1.2
TLS 1.1TLS 1.2TLS 1.1,TLS 1.2
TLS 1.0,TLS 1.1,TLS 1.2
8083
TLS 1.2TLS 1.1,TLS 1.2
TLS 1.1TLS 1.2TLS 1.1,TLS 1.2
TLS 1.0,TLS 1.1,TLS 1.2
8443
Security Guide for Cisco Unified Communications Manager, Release 14171
Basic System SecurityTLS Restrictions

Security Guide for Cisco Unified Communications Manager, Release 14172
Basic System SecurityTLS Restrictions

P A R T IIIUser Security
• Identity Management, on page 175• Credential Policies, on page 181• Contact Search Authentication, on page 189


C H A P T E R 14Identity Management
• User Security Overview, on page 175• Identity Management Overview, on page 176
User Security OverviewUser Access
User Security consists of the platforms which protect our users, endpoints, and their online activity to moreefficiently correlate threats. As users are increasingly logging in to networks through their personal devices,securing personal devices are as important as securing company owned devices.
For more information on Users and Security, see Configure End Users in System Configuration Guide forCisco Unified Communications Manager and Manage Security in Administration Guide for Cisco UnifiedCommunications Manager.
Assign end users to Access Control Groups associated to Roles to manage User Access in UnifiedCommunications Manager.
Access Control essentially allows the right people to access your network while simultaneously blockingthose people who shouldn't be. Access Control refers to the visibility of who and what is accessing yournetwork. It ensures that the right people are using the right devices, to access the right resources. AccessControl regulates the spread of information and prevents unwanted visitors gaining access to your data.
Roles and Access Control Groups provide multiple levels of security to Unified Communications Manager.Each role defines a set of permissions for a specific resource within Unified Communications Manager. EndUsers get access permissions defined by the role when you assign roles and then assign end users to an accesscontrol group.
Upon installation, Unified CommunicationsManager comeswith predefined default roles assigned to predefineddefault access control groups. You can assign end users to the default access control groups, or you cancustomize access settings by setting up new access control groups and roles.
For more information on Users and Access Control, seeConfigure End Users in System Configuration Guidefor Cisco Unified Communications Manager and Manage Users in Administration Guide for Cisco UnifiedCommunications Manager.
Security Guide for Cisco Unified Communications Manager, Release 14175

Identity Management
Use SAML Single Sign-On (SSO) to access a defined set of Cisco applications after signing into one of thoseapplications. SAML describes the exchange of security-related information between trusted business partners.It's an authentication protocol used by service providers (such as Cisco Unified Communications Manager)to authenticate a user.With SAML, an identity provider and a service provider exchanges security authenticationinformation. This feature provides secure mechanisms to use common credentials and relevant informationacross various applications. For more information on Identity management, seeManage SAMLSingle Sign-Onin Administration Guide for Cisco Unified Communications Manager.
Contact Search Authentication
Contact Search Authentication requires you to authenticate yourselves before searching the directory for otherusers. Navigate to the following topics for more information on Contact Search Authentication.
1. Confirm Phone Support for Contact Search Authentication, on page 190
2. Enable Contact Search Authentication, on page 190
3. Configure Secure Directory Server for Contact Search, on page 190
Identity Management OverviewIdentity Management is an essential component of your Cisco Collaboration deployment. Because Identityis often the main target for hackers, it’s essential to configure secure authentication and authorization servicesin order to secure your system. Cisco Unified Communications Manager provides a number of options formanaging identity, authentication and authorization for services.
• SAML SSO Deployment with Third-Party Identity Provider
• LDAP authentication
• Local DB Authentication
SAML SSO DeploymentSAML SSO improves your enterprise security, while improving productivity at the same time. Using theSAML 2.0 protocol, SAML SSO connects your Cisco Collaboration infrastructure to a third-party IdentityProvider for secure login and authentication services for administrator and client logins across domains andacross products. Worker productivity is improved as the Identity Provider stores a single login—once youlogin successfully to one of your Collaboration applications, you can access any of them without having tologin again.
SAML SSO provides the following benefits to your Identity Framework:
• Reduces password fatigue by removing the need for entering different user name and passwordcombinations.
• Transfers the authentication from your system that hosts the applications to a third party system.
• Protects and secures authentication information. SAML SSO provides encryption functions to protectauthentication information passed between the IdP, service provider, and user. SAML SSO can also hideauthentication messages passed between the IdP and the service provider from any external user.
Security Guide for Cisco Unified Communications Manager, Release 14176
User SecurityIdentity Management Overview

• Improves productivity because you spend less time re-entering credentials for the same identity.
• Reduces costs as fewer help desk calls are made for password reset, thereby leading to more savings.
Trust Relationship with IdP
SAML SSODeployments rely on the creation of a trust relationship between a Service Provider (Cisco UnifiedCommunicationsManager) and the third-party Identity Provider. You can configure a SAMLSSO relationshipsusing one of two SSO modes:
• Per Node agreement—The UC metadata zip file contains separate XML files for each node
• Per Cluster agreement—A single metadata file for the cluster
This trust relationship is created through an initial exchange of metadata files. The Cisco UC metadata file isan XML file which contains the following information:
• A unique identifier
• Organization
• Expiration time for this information
• Caching period
• XML signature of this information
• Contact persons
• Unique identifier of the entity (entity ID)
• Description of SAML role of this SAML instance (identity provider, service provider, and so forth)
Authorization
Once authentication is provided by the IdP, user access to Cisco Unified Communications Manager resourcesis determined by locally configured access control groups and the role permissions that those groups provide.
SAML SSO Configuration and Identity Provider Requirements
For more detailed information on SAML SSO, including configuration information and requirements forIdentity Providers, see the SAML SSO Deployment Guide for Cisco Unified Communications Applications.
LDAP AuthenticationIf you have not deployed SAML SSO, and you have users synced against a company LDAP Directory, LDAPAuthentication lets you authenticate user passwords against the credentials that are stored in the companyLDAP directory. This option enables the Identity Management System (IMS) library on Cisco UnifiedCommunications Manager to use the company LDAP directory to authenticate user passwords for LDAPsynchronized users.
When end users login to the Self-Care Portal, they enter their company password (for example, their ADpassword), as configured in the company LDAP directory.
When this option is configured:
Security Guide for Cisco Unified Communications Manager, Release 14177
User SecurityLDAP Authentication

• End user passwords of users imported from LDAP are authenticated against the corporate directory bya simple bind operation.
• End user passwords for local users are authenticated against the Unified CM database.
• Application user passwords are authenticated against the Unified CM database.
• End user PINs are authenticated against the Unified CM database.
Configure LDAP AuthenticationUse this procedure to enable LDAPAuthentication for end user passwords. You can add LDAPAuthenticationto an existing LDAP Directory sync.
Before you begin
This procedure assumes you already have an existing LDAP Directory sync configured. If you have not yetconfigured an LDAP Directory sync, refer to the System Configuration Guide for Cisco UnifiedCommunications Manager to set one up.
Procedure
Step 1 From Cisco Unified CM Administration, choose System > LDAP > LDAP Authentication.Step 2 Check the Use LDAP Authentication for End Users check box.Step 3 For theLDAP Manager Distinguished Name, enter the user ID of the LDAPManager who is an administrative
user that has access rights to the LDAP directory in question.Step 4 Enter the Password and Confirm the Password.Step 5 Enter the LDAP Directory server address information.Step 6 Complete the remaining fields in the LDAP Authentication Configuration window.Step 7 Click Save.
Local Database AuthenticationLocal Authentication against the Cisco Unified Communications Manager database is required for end usersif you are not deploying SAML SSO with a third-party Identity provider, or if you do not have LDAPAuthentication configured. With this option, user passwords are stored in the local database and are managedvia the End User Configuration.
For both application users and end user PINs, local database authentication is always used to manageauthentication. The following table highlights the three main password types and how they are managed.
Security Guide for Cisco Unified Communications Manager, Release 14178
User SecurityConfigure LDAP Authentication

Table 35:
Credential ManagementPassword Types
If you are not using SAML SSO or LDAP authentication, end user passwordsare managed locally in the End User Configuration window for individual endusers.
All passwords can be updated via the End User Configuration. End users can edittheir own passwords via the Self-Care Portal.
End User Passwords
Irrespective of whether you have SAML SSO or LDAPAuthentication deployed,end user PINs are always managed in End User Configuration window of CiscoUnified CM Administration.
As administrator, you can edit existing end user PINs via the End UserConfiguration window.
End User PINs
Irrespective of whether you have SAML SSO or LDAPAuthentication deployed,application user passwords are stored in the local database and are managed inthe ApplicationUser Configuration window of Cisco Unified CMAdministration.
Application UserPasswords
All local passwords and PINs are stored in the database in an encrypted format.Note
OAuth FrameworkThe OAuth Authorization Framework is defined by IETF under RFC 6749. The OAuth 2.0 authorizationprotocol lets a resource owner (for example, Cisco Unified CommunicationsManager) authorize a third-partyapplication to obtain limited access to an HTTP service. With Cisco Unified Communications Manager, theOAuth framework uses access tokens to provide access and refresh tokens to provide access to resources overthe life of the token. OAuth eliminates the need for web sites to ask for passwords when you are attemptingto access information. With OAuth, the resource own authorizes a client to access resources on a server.
Cisco Jabber clients use OAuth Refresh Logins to obtain access to resources from Cisco UnifiedCommunications Manager. After an initial login, OAuth access tokens and refresh tokens provide seamlessaccess to resources over the life of the tokens.
OAuth Refresh Logins
With OAuth Refresh Logins, short-lived access tokens let Jabber authenticate, providing access while thetoken is valid the life of the token (the default lifespan for an access token is 60 minutes). The longer-livedrefresh tokens provide Jabber with new access tokens as the old access tokens expire. So long as the refreshtoken is valid (the default life is 60 days) the Jabber client can obtain new access tokens dynamically, therebyproviding seamless acess, without the user having to reauthenticate.
Every time that the OAuth token reaches 75% of its lifespan, the user is given the option to authenticate,thereby generating a new refresh token. If the refresh token reaches 100% of its lifespan, they will need toreauthenticate before they can generate new access tokens.
Security Guide for Cisco Unified Communications Manager, Release 14179
User SecurityOAuth Framework

SIP OAuth Mode
SIP OAuth Mode enhances the OAuth framework, enabling the usage of OAuth access tokens and refreshtokens for SIP lines, thereby removing the need to install LSC certificates on Jabber clients. SIP OAuth Modeallows for secure signing and media for Jabber without CAPF. Token validation is completed during SIPregistration. In this mode, Jabber can perform media and signaling encryption without an LSC, and withoutthe need to enable mixed-mode on Unified CM.
Regenerating Keys for OAuth
If you believe the keys that are used for signing and encrypting OAuth tokens have been compromised, usethe following CLI commands to generate new keys. The signing key is asymmetric and RSA-based whereasthe encryption key is a symmetric key.
• set key regen authz encryption
• set key regen authz signing
Configure SIP OAuth ModeFor detailed procedures on how to configure SIP OAuth Mode so that you can use OAuth Refresh Logins forSIP lines, refer to the "SIP OAuth Mode" chapter of the Feature Configuration Guide for Cisco UnifiedCommunications Manager.
Revoke Existing OAuth Refresh TokensUse an AXLAPI to revoke existing OAuth refresh tokens. For example, if an employee leaves your company,you can use this API to revoke that employee's current refresh token so that they cannot obtain new accesstokens and will no longer be able to log in to the company account. The API is a REST-based API that isprotected by AXL credentials. You can use any command-line tool to invoke the API. The following commandprovides an example of a cURL command that can be used to revoke a refresh token:
curl -k -u "admin:password" https://<UCMaddress:8443/ssosp/token/revoke?user_id=<end_user>
where:
• admin:password is the login ID and password for the Cisco Unified Communications Manageradministrator account.
• UCMaddress is the FQDN or IP address of the Cisco Unified Communications Manger publisher node.
• end_user is the user ID for the user for whom you want to revoke refresh tokens.
Security Guide for Cisco Unified Communications Manager, Release 14180
User SecurityConfigure SIP OAuth Mode

C H A P T E R 15Credential Policies
• Credential Policy Overview, on page 181• Configure Default Credential Policy, on page 183• Edit User Credentials or Credential Policy, on page 184• Enable PIN Synchronization , on page 184• Monitor Authentication Activity, on page 185• Configuring Credential Caching, on page 186• Manage Session Termination, on page 186
Credential Policy OverviewCredential policies control the authentication process for resources in Cisco Unified CommunicationsManager.A credential policy defines password requirements and account lockout details such as failed login attempts,expiration periods and lockout durations for end user passwords, end user PINs, and application user passwords.Credential policies can be assigned broadly to all accounts of a specific credential types, such as all end userPINs, or they can be customized for a specific application user, or end user.
Credential Types
In Credential Policy Configuration you can configure a new credential policy and then apply that new policyas the default credential policy for each of the following three credential types:
• End User PINs
• End User Passwords
• Application User Passwords
You can also apply the credential policy to a specific end user PIN, end user password, or application userpassword.
Credential Policies with LDAP Authentication Enabled
If your system is configured for LDAP Authentications with the corporate directory:
• With LDAP Autthentication enabled, credential policies do not apply to end user passwords.
• Credential policies do apply to end user PINs and application user passwords, irrespective of whetherLDAP Authentication is enabled. These password types use local authentication.
Security Guide for Cisco Unified Communications Manager, Release 14181

Credential policies do not apply to operating system users or CLI users. These administrators use standardpassword verification procedures that the operating system supports.
Note
Trivial Passwords
The system can be configured to check for trivial passwords and PINs. A trivial password is a credential thatcan be easily hacked, such as a password that be guessed easily such as using ABCD as your password or123456 as your PIN.
Non-trivial passwords meet the following requirements:
• Must contain three of the following four characteristics: uppercase character, lowercase character, number,or symbol.
• Must not use a character or number more than three times consecutively.
• Must not repeat or include the alias, username, or extension.
• Cannot consist of consecutive characters or numbers. For example, passwords such as 654321 orABCDEFG are not allowed.
PINs can contain digits (0-9) only. A non-trivial PIN meets the following criteria:
• Must not use the same number more than two times consecutively.
• Must not repeat or include the user extension, mailbox, or the reverse of the user extension or mailbox.
• Must contain three different numbers. For example, a PIN such as 121212 is trivial.
• Must not match the numeric representation (that is, dial by name) for the first or last name of the user.
• Must not contain groups of repeated digits, such as 408408, or patterns that are dialed in a straight lineon a keypad, such as 2580, 159, or 753.
JTAPI and TAPI Support for Credential PoliciesBecause the Cisco Unified Communications Manager Java telephony applications programming interface(JTAPI) and telephony applications programming interface (TAPI) support the credential policies that areassigned to application users, developers must create applications that respond to the password expiration,PIN expiration, and lockout return codes for credential policy enforcement.
Applications use an API to authenticate with the database or corporate directory, regardless of the authenticationmodel that an application uses.
For more information about JTAPI and TAPI for developers, see the developer guides at http://www.cisco.com/c/en/us/support/unified-communications/unified-communications-manager-callmanager/products-programming-reference-guides-list.html.
Security Guide for Cisco Unified Communications Manager, Release 14182
User SecurityJTAPI and TAPI Support for Credential Policies

Configure Default Credential PolicyUse this procedure to configure clusterwide default credential policies that get applied to newly provisionedusers. You can apply a separate credential policy for each of the following credential types:
• Application User Passwords
• End User Passwords
• End User PINs
Procedure
Step 1 Configure settings for a credential policy:a) FromCisco Unified CMAdministration, chooseUser Management >User Settings >Credential Policy.b) Do either of the following:
• Click Find and select an existing credential policy.
• Click Add New to create a new credential policy.
c) If you want the system to check for easily hacked passwords such as ABCD or 123456, check the Checkfor Trivial Passwords check box.
d) Complete the fields in the Credential Policy Configuration window. For help with the fields and theirsettings, see the online help.
e) Click Save.f) If you want to create a different credential policy for one of the other credential types, repeat these steps.
Step 2 Apply the credential policy to one of the credential types:a) FromCisco Unified CMAdministration, chooseUser Management >User Settings >Credential Policy
Default.b) Select the credential type to which you want to apply your credential policy.c) From the Credential Policy drop-down, select the credential policy that you want to apply for this
credential type. For example, you might select the credential policy that you created.d) Enter the default passwords in both the Change Credential and Confirm Credential fields. Users have
to enter these passwords at next login.e) Configure the remaining fields in the Credential Policy Default Configuration window. For help with
the fields and their settings, see the online help.f) Click Save.g) If you want to assign a credential policy for one of the other credential types, repeat these steps.
For individual users, you can also assign a policy to a specific user credential from theEnd User Configurationwindow or Application User Configuration window for that user. Click the Edit Credential button that isadjacent to the credential type (password or PIN) to open the Credential Configuration settings for that usercredential.
Note
Security Guide for Cisco Unified Communications Manager, Release 14183
User SecurityConfigure Default Credential Policy

Edit User Credentials or Credential PolicyUse this procedure if you want to edit an existing user credential or to edit the policy that is assigned to a usercredential. After resetting the credential, you can apply a rule such as mandating that the user update credentialsat next login. You may want to do this if:
• You have local DB authentication configured, and you want to reset an end user password
• You want to reset an end user PIN or application user password
• You want to change the credential policy that is assigned to a specific user credential
Procedure
Step 1 From Cisco Unified CM Administration, choose one of the following:
• For end user passwords and PINs, choose User Management > End Users.• For application user passwords, choose User Management > Application Users.
Step 2 Click Find and select the appropriate user.Step 3 If you want to change an existing password or PIN, enter the new credential in the Password/Confirm
Password or PIN/Confirm PIN fields and click Save.Step 4 If you want to change the credential policy that is assigned to a user credential, or if you want to apply rules
such as requiring that the user enter a new password or PIN at next login:a) Click theEdit Credential button that is adjacent to the Password or PIN. TheCredential Configuration
window opens for that user credential.b) Optional. To assign a new credential policy, select the policy from the Authentication Rule drop-down.c) Optional. Check the User Must Change at Next Login check box if you want the user to update the
password or PIN at the next login.d) Complete the remaining fields. Refer to the online help for field descriptions.e) Click Save.
Enable PIN SynchronizationUse this procedure to enable PIN synchronization so that the end users can log in to Extension Mobility,Conference Now, Mobile Connect, and the Cisco Unity Connection Voicemail using the same PIN.
Before you begin
This procedure assumes that you already have your application server connection to Cisco Unity Connectionsetup. If not, for more information on how to add a new application server, see the Related Topics section.
To enable PIN Synchronization feature, you need to first upload a valid certificate for the Cisco Unity Serverconnection from the Cisco Unified OS Administration page to the Cisco Unified Communications Managertomcat-trust. For more information on how to upload the certificate, see the “Manage Security Certificates”chapter in the Administration Guide for Cisco Unified Communications Manager at http://www.cisco.com/
Security Guide for Cisco Unified Communications Manager, Release 14184
User SecurityEdit User Credentials or Credential Policy

c/en/us/support/unified-communications/unified-communications-manager-callmanager/products-maintenance-guides-list.html.
The user ID in the Cisco Unity Connection Server must match the user ID in Cisco Unified CommunicationsManager.
Procedure
Step 1 From Cisco Unified CM Administration, choose System > Application Servers.Step 2 Select the application server that you set up for Cisco Unity Connection.Step 3 Check the Enable End User PIN Synchronization check box.
Step 4 Click Save.
Related TopicsConfigure Application Servers
Monitor Authentication ActivityThe system shows the most current authentication results, such as last hack attempt time, and counts for failedlogon attempts.
The system generates log file entries for the following credential policy events:
• Authentication success
• Authentication failure (bad password or unknown)
• Authentication failure because of
• Administrative lock
• Hack lock (failed logon lockouts)
• Expired soft lock (expired credential)
• Inactive lock (credential not used for some time)
• User must change (credential set to user must change)
• LDAP inactive (switching to LDAP authentication and LDAP not active)
• Successful user credential updates
• Failed user credential updates
If you use LDAP authentication for end user passwords, LDAP tracks only authentication successes andfailures.
Note
All event messages contain the string “ims-auth” and the user ID that is attempting authentication.
Security Guide for Cisco Unified Communications Manager, Release 14185
User SecurityMonitor Authentication Activity

Procedure
Step 1 From Cisco Unified CM Administration, choose User Management > End Users.Step 2 Enter search criteria, click Find, and then choose a user from the resulting list.Step 3 Click Edit Credential to view the user's authentication activity.
What to do next
You can view log files with the Cisco Unified Real-Time Monitoring Tool (Unified RTMT). You can alsocollect captured events into reports. For detailed steps about how to use Unified RTMT, see the Cisco UnifiedReal-Time Monitoring Tool Administration Guide at http://www.cisco.com/c/en/us/support/unified-communications/unified-communications-manager-callmanager/products-maintenance-guides-list.html.
Configuring Credential CachingEnable credential caching to increase system efficiency. Your system does not have to perform a databaselookup or invoke a stored procedure for every single login request. An associated credential policy is notenforced until the caching duration expires.
This setting applies to all Java applications that invoke user authentication.
Procedure
Step 1 From Cisco Unified CM Administration, choose System > Enterprise Parameters.Step 2 Perform the following tasks as needed:
• Set the Enable Caching enterprise parameter to True. With this parameter enabled, Cisco UnifiedCommunications Manager uses cached credentials for up to 2 minutes.
• Set the Enable Caching enterprise parameter to False to disable caching, so that the system does notuse cached credentials for authentication. The system ignores this setting for LDAP authentication.Credential caching requires a minimal amount of additional memory per user.
Step 3 Click Save.
Manage Session TerminationAdministrators can use this procedure to terminate a user's active sign-in session specific to each node.
Security Guide for Cisco Unified Communications Manager, Release 14186
User SecurityConfiguring Credential Caching

• An administrator with privilege level 4 only can terminate the sessions.
• Session Management terminates the active sign-in sessions on a particular node. If the administratorwants to terminate all the user sessions across different nodes, then the administrator has to sign-in toeach node and terminate the sessions.
Note
This applies to the following interfaces:
• Cisco Unified CM Administration
• Cisco Unified Serviceability
• Cisco Unified Reporting
• Cisco Unified Communications Self Care Portal
• Cisco Unified CM IM and Presence Administration
• Cisco Unified IM and Presence Serviceability
• Cisco Unified IM and Presence Reporting
Procedure
Step 1 From Cisco Unified OS Administration or Cisco Unified IM and Presence OS Administration, chooseSecurity > Session Management.The Session Management window is displayed.
Step 2 Enter the user ID of the active signed-in user in the User ID field.Step 3 Click Terminate Session.Step 4 Click OK.
If the terminated user refreshes the signed-in interface page, then the user is signed out. An entry is made inthe audit log and it displays the terminated userID.
Security Guide for Cisco Unified Communications Manager, Release 14187
User SecurityManage Session Termination

Security Guide for Cisco Unified Communications Manager, Release 14188
User SecurityManage Session Termination

C H A P T E R 16Contact Search Authentication
• Contact Search Authentication Overview, on page 189• Contact Search Authentication Task Flow, on page 189
Contact Search Authentication OverviewContact Search Authentication provides additional security for your system by ensuring that users whomaccess the company directory must authenticate themselves. This feature secures the directory from beingaccessed by external parties.
Contact Search Authentication Task FlowComplete the following tasks to set up Contact Search Authentication in Unified Communications Manager.When this feature is configured, users must authenticate themselves before searching the directory for otherusers.
Procedure
PurposeCommand or Action
Confirm that your phones support this feature.Run the Unified CM Phone Feature List
Confirm Phone Support for Contact SearchAuthentication, on page 190
Step 1
report in Cisco Unified Reporting to get a listof phone models that support the feature.
Configure Unified Communications Managerfor Contact Search Authentication.
Enable Contact Search Authentication, on page190
Step 2
Use this procedure to configure UnifiedCommunications Manager with the URL to
Configure Secure Directory Server for ContactSearch, on page 190
Step 3
which phone users are directed when theysearch the directory for other users.
Security Guide for Cisco Unified Communications Manager, Release 14189

Confirm Phone Support for Contact Search AuthenticationConfirm that the phones in your deployment support contact search authentication. Run a Phone Feature Listreport to obtain a full list of phone models that support the feature.
Procedure
Step 1 From Cisco Unified Reporting, click System Reports.Step 2 Select Unified CM Phone Feature.Step 3 Click the Unified CM Phone Feature report.Step 4 Leave the Product field at the default value.Step 5 From the Feature drop-down, choose Authenticated Contact Search.Step 6 Click Submit.
Enable Contact Search AuthenticationUse this procedure on Unified CommunicationsManager to configure contact search authentication for phoneusers.
Procedure
Step 1 Log in to the Command Line Interface.Step 2 Run the utils contactsearchauthentication status command to confirm the contact search authentication
setting on this node.Step 3 If you need to configure contact search authentication:
• To enable authentication, run the utils contactsearchauthentication enable command.• To disable authentication, run the utils contactsearchauthentication disable command.
Step 4 Repeat this procedure on all Unified Communications Manager cluster nodes.
You must reset phones in order for the changes to take effect.Note
Configure Secure Directory Server for Contact SearchUse this procedure to configure Unified Communications Manager with the directory server URL to whichUDS sends user search requests. The default value ishttps://<cucm-fqdn-or-ip>:port/cucm-uds/users.
Security Guide for Cisco Unified Communications Manager, Release 14190
User SecurityConfirm Phone Support for Contact Search Authentication

The default UDS port is 8443. When contact search authentication becomes enabled, the default UDS portswitches to 9443. If you then disable contact search authentication, you must change the UDS port back to8443 manually.
Note
Procedure
Step 1 From Cisco Unified Communications Manager Administration, choose System > Enterprise Parameters.Step 2 In the Secure Contact Search URL text box, enter the URL for secure UDS directory requests.
We recommend that for the URL, you choose a node that is not running the Cisco TFTP service.The CiscoTFTP and UDS services may disrupt each other if either service gets restarted.
Note
Step 3 Click Save.
Security Guide for Cisco Unified Communications Manager, Release 14191
User SecurityConfigure Secure Directory Server for Contact Search

Security Guide for Cisco Unified Communications Manager, Release 14192
User SecurityConfigure Secure Directory Server for Contact Search

P A R T IVAdvanced System Security
• FIPS Mode Setup, on page 195• V.150 Minimum Essential Requirements, on page 205• IPSec Setup, on page 215• Authentication and Encryption Setup for CTI, JTAPI, and TAPI, on page 217• Secure Recording and Monitoring, on page 229• VPN Client, on page 231• Operating System and Security Hardening, on page 245


C H A P T E R 17FIPS Mode Setup
• FIPS 140-2 Setup, on page 195• Enhanced Security Mode, on page 201• Common Criteria Mode, on page 202
FIPS 140-2 Setup
FIPS mode is only supported on releases that have been through FIPS compliance. Be warned that FIPS modeshould be disabled before you upgrade to a non-FIPS compliance version of Unified CommunicationsManager.
For information about which releases are FIPS compliant and to view their certifications, see the FIPS 140document at https://www.cisco.com/c/en/us/solutions/industries/government/global-government-certifications/fips-140.html.
Caution
FIPS, or Federal Information Processing Standard, is a U.S. and Canadian government certification standard.It defines requirements that cryptographic modules must follow.
Certain versions of Unified CommunicationsManager are FIPS 140-2 compliant, in accordance with the U.S.National Institute of Standards (NIST). They can operate in FIPS mode, level 1 compliance.
Unified Communications Manager
• Reboots
• Runs certification self-tests at startup
• Performs the cryptographic modules integrity check
• Regenerates the keying materials
when you enable FIPS 140-2 mode. At this point, Unified Communications Manager operates in FIPS 140-2mode.
FIPS requirements include the following:
• Performance of startup self-tests
• Restriction to a list of approved cryptographic functions
Security Guide for Cisco Unified Communications Manager, Release 14195

FIPS mode uses the following FIPS 140-2 level 1 validated cryptographic modules:
• CiscoSSL 1.0.2n.6.2.194 with FIPS Module CiscoSSL FOM 6_2_0
• CiscoJ 5.2.1
• RSA CryptoJ 6_2_3
• Openssh 7.5.9
• Libreswan
• NSS
You can perform the following FIPS-related tasks:
• Enable FIPS 140-2 mode
• Disable FIPS 140-2 mode
• Check the status of FIPS 140-2 mode
• By default, your system is in non-FIPS mode, you must enable it.
• Ensure that the security password length is minimum 14 characters before you upgrade to FIPS, CommonCriteria, or Enhanced Security mode on the cluster. Update the password even if the prior version wasFIPS enabled.
Note
If you generate a Self-Signed Certificate or Certificate Signing Request (CSR) on FIPS mode, certificatesmust be encrypted using the SHA256 hashing algorithm and can't select SHA1.
Enable FIPS 140-2 ModeConsider the following before you enable FIPS 140-2 mode on Unified Communications Manager:
• When you switch from non-FIPS to FIPS mode, the MD5 and DES protocols aren't functional.
• In single server clusters, because certificates are regenerated, you need to run the CTL Client or applythe Prepare Cluster for Rollback to pre-8.0 enterprise parameter before you enable FIPS mode. If youdo not perform either of these steps, you must manually delete the ITL file after you enable FIPS mode.
• After you enable FIPS mode on a server, please wait until the server reboots and the phones re-registersuccessfully before enabling FIPS on the next server.
Before you enable FIPS mode, we strongly recommend that you perform a system backup. If FIPS checksfail at start-up, the system halts and requires a recovery CD to be restored.
Caution
Security Guide for Cisco Unified Communications Manager, Release 14196
Advanced System SecurityEnable FIPS 140-2 Mode

Procedure
Step 1 Start a CLI session.
For more information, see “Start CLI Session” in the Command Line Interface Reference Guide for CiscoUnifed Communications Solutions.
Step 2 In the CLI, enter utils fips enable
If you enter a password less than 14 characters, the following prompt appear:
The cluster security password must be at least 14 characters long beforesecurity modes such as FIPS, Common Criteria and Enhanced Security modes can beenabled. Update the cluster security password using the 'set password usersecurity' CLI command on all nodes and retry this command.**********************************************************************************Executed command unsuccessfully
If you enter a password more than 14 characters, the following prompts appear:
Security Warning: The operation will regenerate certificates for
1)CallManager2)Tomcat3)IPsec4)TVS5)CAPF6)SSH7)ITLRecoveryAny third party CA signed certificates that have been uploaded for the abovecomponents will need to be re-uploaded. If the system is operating in mixedmode, then the CTL client needs to be run again to update the CTL file.If there are other servers in the cluster, please wait and do not changethe FIPS Settings on any other node until the FIPS operation on this nodeis complete and the system is back up and running.
If the enterprise parameter 'TFTP File Signature Algorithm' is configuredwith the value 'SHA-1' which is not FIPS compliant in the current version of theUnified Communications Manager, though the signing operationwill continue to succeed, it is recommended the parameter value be changed toSHA-512 in order to be fully FIPS. Configuring SHA-512 as the signing algorithmmay reqiure all the phones that are provisioned in the cluster to be capable ofverifying SHA-512 signed configuration file, otherwise the phone registrationmay fail. Please refer to the Cisco Unified Communications Manager Security Guidefor more details.******************************************************************************This will change the system to FIPS mode and will reboot.******************************************************************************
WARNING: Once you continue do not press Ctrl+C. Canceling this operation afteritstarts will leave the system in an inconsistent state; rebooting the system andrunning "utils fips status" will be required to recover.******************************************************************************Do you want to continue (yes/no)?
Step 3 Enter Yes.
The following message appears:
Security Guide for Cisco Unified Communications Manager, Release 14197
Advanced System SecurityEnable FIPS 140-2 Mode
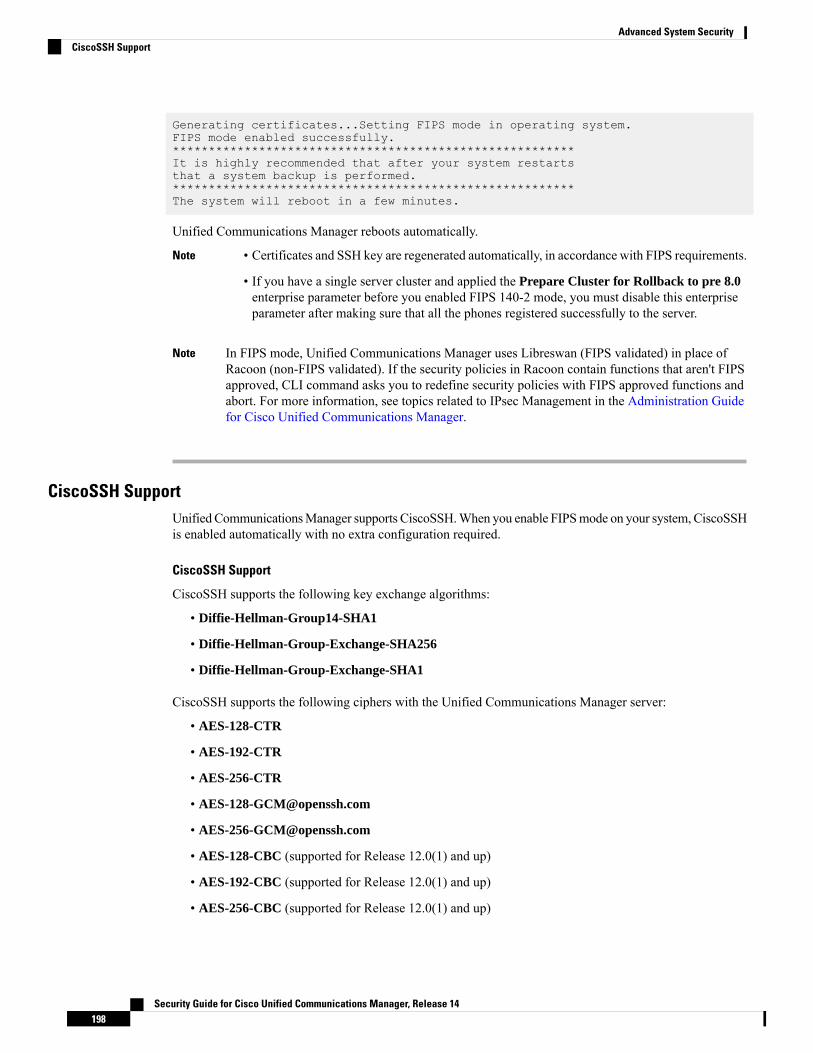
Generating certificates...Setting FIPS mode in operating system.FIPS mode enabled successfully.********************************************************It is highly recommended that after your system restartsthat a system backup is performed.********************************************************The system will reboot in a few minutes.
Unified Communications Manager reboots automatically.
• Certificates and SSH key are regenerated automatically, in accordance with FIPS requirements.
• If you have a single server cluster and applied the Prepare Cluster for Rollback to pre 8.0enterprise parameter before you enabled FIPS 140-2 mode, you must disable this enterpriseparameter after making sure that all the phones registered successfully to the server.
Note
In FIPS mode, Unified Communications Manager uses Libreswan (FIPS validated) in place ofRacoon (non-FIPS validated). If the security policies in Racoon contain functions that aren't FIPSapproved, CLI command asks you to redefine security policies with FIPS approved functions andabort. For more information, see topics related to IPsec Management in the Administration Guidefor Cisco Unified Communications Manager.
Note
CiscoSSH SupportUnified CommunicationsManager supports CiscoSSH.When you enable FIPSmode on your system, CiscoSSHis enabled automatically with no extra configuration required.
CiscoSSH Support
CiscoSSH supports the following key exchange algorithms:
• Diffie-Hellman-Group14-SHA1
• Diffie-Hellman-Group-Exchange-SHA256
• Diffie-Hellman-Group-Exchange-SHA1
CiscoSSH supports the following ciphers with the Unified Communications Manager server:
• AES-128-CTR
• AES-192-CTR
• AES-256-CTR
• AES-128-CBC (supported for Release 12.0(1) and up)
• AES-192-CBC (supported for Release 12.0(1) and up)
• AES-256-CBC (supported for Release 12.0(1) and up)
Security Guide for Cisco Unified Communications Manager, Release 14198
Advanced System SecurityCiscoSSH Support

CiscoSSH supports the following ciphers for clients:
• AES-128-CTR
• AES-192-CTR
• AES-256-CTR
• AES-128-CBC
• AES-192-CBC
• AES-256-CBC
Disable FIPS 140-2 ModeConsider the following information before you disable FIPS 140-2mode onUnified CommunicationsManager:
• In single or multiple server clusters, we recommend you to run the CTL Client. If the CTL Client is notrun on a single server cluster, you must manually delete the ITL File after disabling FIPS mode.
• In multiple server clusters, each server must be disabled separately, because FIPS mode is not disabledcluster-wide but rather on a per-server basis.
To disable FIPS 140-2 mode, perform the following procedure:
Procedure
Step 1 Start a CLI Session.
For more information, see the Starting a CLI Session section in the Command Line Interface Reference Guidefor Cisco Unified Communications Solutions.
Step 2 In the CLI, enter utils fips disable
Unified Communications Manager reboots and is restored to non-FIPS mode.
Certificates and SSH key are regenerated automatically.Note
Check FIPS 140-2 Mode StatusTo confirm if the FIPS 140-2 mode is enabled, check the mode status from the CLI.
To check the status of FIPS 140-2 mode, perform the following procedure:
Security Guide for Cisco Unified Communications Manager, Release 14199
Advanced System SecurityDisable FIPS 140-2 Mode

Procedure
Step 1 Start a CLI Session.
For more information, see the Starting a CLI Session section in the Command Line Interface Reference Guidefor Cisco Unified Communications Solutions.
Step 2 In the CLI, enter utils fips status
The following message appears to confirm that FIPS 140-2 mode is enabled.
admin:utils fips statusThe system is operating in FIPS mode. Self test status:
- S T A R T ---------------------Executing FIPS selftestsrunlevel is N 3Start time: Thu Apr 28 15:59:24 PDT 2011NSS self tests passed.Kernel Crypto tests passed.Operating System OpenSSL self tests passed.Libreswan self tests passed.OpenSSL self tests passed.CryptoJ self tests passed...
FIPS 140-2 Mode Server RebootFIPS startup self-tests in each of the FIPS 140-2 modules are triggered after rebooting when UnifiedCommunications Manager server reboots in FIPS 140-2 mode.
If any of these self-tests fail, the Unified Communications Manager server halts.Caution
Unified Communications Manager server is automatically rebooted when FIPS is enabled or disabled withthe corresponding CLI command. You can also initiate a reboot.
Note
If the startup self-test failed because of a transient error, restarting the Unified Communications Managerserver fixes the issue. However, if the startup self-test error persists, it indicates a critical problem in the FIPSmodule and the only option is to use a recovery CD.
Caution
Security Guide for Cisco Unified Communications Manager, Release 14200
Advanced System SecurityFIPS 140-2 Mode Server Reboot

Enhanced Security ModeEnhanced Security Mode runs on a FIPS-enabled system. Both Unified Communications Manager and theIM and Presence Service can be enabled to operate in Enhanced Security Mode, which enables the systemwith the following security and risk management controls:
• Stricter credential policy is implemented for user passwords and password changes.
• Contact search authentication feature becomes enabled by default.
• If the protocol for remote audit logging is set to TCP or UDP, the default protocol is changed to TCP. Ifthe protocol for remote audit logging is set to TLS, the default protocol remains TLS. In Common CriteriaMode, strict hostname verification is implemented. Hence, it is required to configure the server with afully qualified domain name (FQDN) which matches the certificate.
When Unified Communications Manager is in FIPS mode, the devices that you set as a backup device mustbe FIPS compliance. The key exchange algorithm diffie-hellman-group1-sha1 is not supported in FIPSmode. If you configure diffie-hellman-group1-sha1 algorithm in a non-FIPSmode of Unified CommunicationsManager, this algorithm is automatically removed from SSH Key Exchange when you enable FIPS mode.
Credential Policy Updates
When Enhanced Security Mode is enabled, a stricter credential policy takes effect for new user passwordsand password changes. After Enhanced Security Mode is enabled, administrators can use the set password*** series of CLI commands to modify any of these requirements:
• Password Length should be between 14 to 127 characters.
• Password should have at least 1 lowercase, 1 uppercase, 1 digit and 1 special character.
• Any of the previous 24 passwords cannot be reused.
• Minimum age of the password is 1 day and Maximum age of the password is 60 days.
• Any newly generated password's character sequence will need to differ by at least 4 characters from theold password's character sequence.
Configure Enhanced Security ModeEnable FIPS before you enable Enhanced Security Mode.
Use this procedure on all Unified Communications Manager or IM and Presence Service cluster nodes toconfigure Enhanced Security Mode.
Procedure
Step 1 Log in to the Command Line Interface.Step 2 Run utils EnhancedSecurityMode status command to confirmwhether Enhanced SecurityMode is enabled.Step 3 Run one of the following commands on a cluster node:
• To enable Enhanced Security Mode, run utils EnhancedSecurityMode enable command.
Security Guide for Cisco Unified Communications Manager, Release 14201
Advanced System SecurityEnhanced Security Mode

• To disable Enhanced Security Mode, run utils EnhancedSecurityMode disable command.
Step 4 After the node updates, repeat this procedure on the next node. Repeat for each Unified CommunicationsManager and IM and Presence Service cluster node.
Do not run either utils EnhancedSecurityMode enable or utils EnhancedSecurityMode disableCLI commands on all nodes simultaneously.
Note
Common Criteria ModeCommon Criteria mode allows both Unified Communications Manager and IM and Presence Service Serviceto comply with Common Criteria guidelines. Common Criteria mode can be configured with the followingset of CLI commands on each cluster node:
• utils fips_common_criteria enable
• utils fips_common_criteria disable
• utils fips_common_criteria status
Common Criteria Configuration Task Flow• FIPS mode must be running to enable Common Criteria mode. If FIPS isn't already enabled, you'll beprompted to enable it when you try to enable Common Criteria mode. Enabling FIPS does requirecertificate regeneration. For more information, see Enable FIPS 140-2 Mode, on page 196.
• X.509 v3 certificates are required in Common Criteria mode. X.509 v3 certificates enable secureconnections when using TLS 1.2 as a communication protocol for the following:
• Remote audit logging
• Establishing connection between the FileBeat client and the logstash server.
To configure Unified Communications Manager and IM and Presence Service for Common Criteria mode,perform the following:
Procedure
PurposeCommand or Action
TLS is a prerequisite for configuring CommonCriteria mode.
Enable TLS, on page 203Step 1
Configure Common Criteria mode on allUnified Communications Manager and IM andPresence Service cluster nodes.
Configure CommonCriteriaMode, on page 203Step 2
Security Guide for Cisco Unified Communications Manager, Release 14202
Advanced System SecurityCommon Criteria Mode

Enable TLSTLS 1.2 version or TLS version 1.1 is a requirement for Common Criteria mode. Secure connections usingTLS version 1.0 are not permitted after enabling Common Criteria mode.
• During establishment of a TLS connection, the extendedKeyUsage extension of the peer certificate ischecked for proper values.
• The peer certificate should have serverAuth as extendedKeyUsage extension if the peer is a server.
• The peer certificate should have clientAuth as extendedKeyUsage extension if the peer is a client.
If the extendedKeyUsage extension does not exist in the peer certificate or is not set properly, the connectionis closed.
To support TLS version 1.2, perform the following:
Procedure
Step 1 Install Soap UI version 5.2.1.Step 2 If you are running on the Microsoft Windows platform:
a) Navigate to C:\Program Files\SmartBear\SoapUI-5.2.1\bin.b) Edit the SoapUI-5.2.1.vmoptions file to add -Dsoapui.https.protocols=TLSv1.2,TLSv1,SSLv3
and save the file.
Step 3 If you are running on Linux, edit the bin/soaup.sh file to add JAVA_OPTS="$JAVA_OPTS
-Dsoapui.https.protocols=SSLv3,TLSv1.2" and save the file.Step 4 If you are running OSX:
a) Navigate to /Applications/SoapUI-{VERSION}.app/Contents.b) Edit the vmoptions.txt file to add -Dsoapui.https.protocols=TLSv1.2,TLSv1,SSLv3 and save the
file.
Step 5 Restart the SoapUI tool and proceed with AXL testing
Configure Common Criteria ModeUse this procedure to configure Common Criteria mode for Unified Communications Manager and IM andPresence Service Service.
Procedure
Step 1 Log in to the Command Line Interface prompt.Step 2 Run utils fips_common_criteria status command to verify whether the system is operating in Common
Criteria mode.Step 3 Run one of the following commands on a cluster node:
• To enable the Common Criteria mode, run utils fips_common_criteria enable.
• To disable the Common Criteria mode, run utils fips_common_criteria disable.
Security Guide for Cisco Unified Communications Manager, Release 14203
Advanced System SecurityEnable TLS

When Common Criteria mode is disabled, a prompt is displayed to set the minimum TLS version.
Do not run these commands on all nodes simultaneously.Note
Step 4 To enable Common CriteriaMode across a single cluster, repeat this procedure on all Unified CommunicationsManager and IM and Presence Service cluster nodes.
• CTL client does not connect to Unified Communications Manager node when server is in theCommon Criteria mode, as CTL client does not support TLS 1.1 and TLS 1.2 protocols.
• Only phonemodels that support TLS 1.1 or TLS 1.2 such as DX series and 88XX series phonesare supported in Common Criteria mode. Phone models that support only TLSv1.0 such as7975 and 9971 are not supported in the Common Criteria mode.
• Temporarly allow TLS 1.0 when using the CTL Client and then move the Cluster to CommonCriteria mode. Configure Minimum TLS to 1.1 or 1.2.
• Migrate to Tokenless CTL by using the CLI Command utils ctl set-cluster mixed-mode inCommon Criteria mode. Configure Minimum TLS to 1.1 or 1.2.
Note
Step 5 To enable the Common Criteria mode in a multi cluster setup where ICSA is already configured between thenodes, enable Common Criteria mode in each of the nodes in the following order:
a. Unified Communications Manager - Cluster 1 (Publisher)
b. IM and Presence Service - Cluster 1 (Publisher)
c. IM and Presence Service - Cluster 1 (Subscriber or subscribers)
d. Unified Communications Manager - Cluster 2 (Publisher)
e. IM and Presence Service - Cluster 2 (Publisher)
f. IM and Presence Service - Cluster 2 (Subscriber or subscribers)
Step 6 In case of a cert sync failure, see.
Security Guide for Cisco Unified Communications Manager, Release 14204
Advanced System SecurityConfigure Common Criteria Mode

C H A P T E R 18V.150 Minimum Essential Requirements
• V.150 Overview, on page 205• Configure V.150 Task Flow, on page 205
V.150 OverviewThe V.150 Minimum Essential Requirements feature allows you to make secure calls in a modem over IPnetwork. The feature uses a dial-upmodem for large installed bases of modems and telephony devices operatingon a traditional public switched telephone network (PSTN). The V.150.1 recommendation specifically defineshow to relay data from modems and telephony devices on a PSTN into and out of an IP network through amodem. The V.150.1 is an ITU-T recommendation for using a modem over IP networks that support dial-upmodem calls.
The Cisco V.150.1 Minimum Essential Requirements feature complies with the requirements of the NationalSecurity Agency (NSA) SCIP-216 Minimum Essential Requirements (MER) for V.150.1 recommendation.The SCIP-216 recommendation has simplified the existing V.150.1 requirements.
Cisco V.150.1 MER feature supports the following interfaces:
• Media Gateway Control Protocol(MGCP) T1(PRI and CAS) and E1(PRI) trunks
• Session Initiation Protocol (SIP) trunks
• Skinny Client Control Protocol (SCCP) for analog gateway endpoints
• Secure Communication Interoperability Protocol-End Instruments (SCIP-EI)
Configure V.150 Task FlowComplete these tasks to add V.150 support in Unified Communications Manager.
Security Guide for Cisco Unified Communications Manager, Release 14205

Procedure
PurposeCommand or Action
Add Media Resource Group and MediaResource Group List for V.150 and non V.150devices.
To Configure Media Resource Group TaskFlow, on page 206, perform the followingsubtasks:
Step 1
• Configure Media Resource Group forNon-V.150 Endpoints, on page 207
• Configure a Media Resource Group Listfor Non-V.150 Endpoints, on page 208
• Configure Media Resource Group forV.150 Endpoints, on page 208
• Configure a Media Resource Group Listfor V.150 Endpoints, on page 208
Add V.150 functionality to a gateway.Configure the Gateway for Cisco V.150 (MER),on page 209
Step 2
If you want to use V.150 support across anMGCP gateway, add V.150 support to the portinterface.
Configure V.150 MGCP Gateway PortInterface, on page 209
Step 3
If you want to use V.150 support across anSCCP gateway, add V.150 support to the portinterface.
Configure V.150 SCCPGateway Port Interface,on page 210
Step 4
Add V.150 support to the phones that will beplacing V.150 calls.
Configure V.150 Support for Phone, on page210
Step 5
Add V.150 support to the SIP trunk that will beused for V.150 calls.
To Configure SIP Trunk Task Flow, on page211, perform one or any of the followingsubtasks:
Step 6
• Configure SIP Profile for V.150, on page212
• Set the Clusterwide V.150 Filter, on page212
• Add V.150 Filter to SIP Trunk SecurityProfile, on page 213
• Configure SIP Trunk for V.150, on page213
For more information on IOS gatewayconfiguration settings, see
To use the V.150 MER feature, you also needto configure IOS on your gateway to supportthe feature.
Step 7
http://www.cisco.com/c/en/us/td/docs/ios/12_4t/12_4t4/mer_cg_15_1_4M.html.
Configure Media Resource Group Task FlowYour system should already be set up with basic call control functionality. For instructions on how to set upthe call control system, see System Configuration Guide for Cisco Unified Communications Manager.
Security Guide for Cisco Unified Communications Manager, Release 14206
Advanced System SecurityConfigure Media Resource Group Task Flow

For Unified Communications Manager, you must have one of the following releases installed:
• The minimum version is Release 10.5(2) SU3
• For 11.0, the minimum version will be 11.0(1) SU2
• All releases from 11.5(1) on support this feature
• You must have Cisco IOS Release 15.6(2)T or later.
V.150 is not supported with Media Termination Point (MTP). We recommend that you remove MTP fromdevices, trunks, and gateways that are handling V.150 calls.
Complete these tasks to configure two sets of media resource groups: a media resource group with MTPresources for non-V.150 calls, and a media resource group without MTP resources for V.150 calls.
Procedure
PurposeCommand or Action
You can configure the Media Resource Groupwith MTP for non-V.150 endpoints.
Configure Media Resource Group forNon-V.150 Endpoints, on page 207
Step 1
Configure a Media Resource Group list thatincludes your MTP Media Resources fornon-V.150 endpoints.
Configure a Media Resource Group List forNon-V.150 Endpoints, on page 208
Step 2
ConfigureMedia ResourceGroupwithoutMTPresources for secure V.150 calls.
Configure Media Resource Group for V.150Endpoints, on page 208
Step 3
Configure aMedia Resource Group list withoutMTP after adding the required resources in the
Configure a Media Resource Group List forV.150 Endpoints, on page 208
Step 4
Media Resource Group for secure V.150endpoints.
Configure Media Resource Group for Non-V.150 EndpointsUse this procedure to add a new media resource group that includes MTP resources for non-V.150 endpoints.
Procedure
Step 1 FromCisco Unified CommunicationsManager Administration, chooseMedia Resources > Media ResourceGroup.
Step 2 Click Add New.Step 3 In the Name field, enter the media resource group name as Do not use with V.150 devices.Step 4 From the Available Media Resources field, choose only MTP devices and click the down-arrow key.
The selected devices appear in the Selected Media Resources field.Step 5 Click Save.
Security Guide for Cisco Unified Communications Manager, Release 14207
Advanced System SecurityConfigure Media Resource Group for Non-V.150 Endpoints

Configure a Media Resource Group List for Non-V.150 EndpointsConfigure Media Resource Group for Non-V.150 Endpoints, on page 207
Use this procedure to add new media resource group list with MTP resources for non-V.150 end points.
Procedure
Step 1 FromCisco Unified CommunicationsManager Administration, chooseMedia Resources > Media ResourceGroup List.
Step 2 Click Add New.Step 3 In the Name field, enter a name for the media resource group list as Non- V.150.Step 4 From the Available Media Resources field, choose the V.150 MER resource group named Do not use with
V.150 Devices and click the down-arrow key.The selected devices appear in the Selected Media Resources field.
Step 5 Click Save.
Configure Media Resource Group for V.150 EndpointsUse this procedure to add new media resource group without MTP resources for V.150 devices.
Procedure
Step 1 FromCisco Unified CommunicationsManager Administration, chooseMedia Resources > Media ResourceGroup.
Step 2 Click Add New.Step 3 In the Name field, enter the media resource group name as For use with V.150 devices.Step 4 From the Available Media Resources field, choose multiple devices except the MTP resources and click the
down-arrow key.The selected devices appear in the Selected Media Resources field.
Step 5 Click Save.
Configure a Media Resource Group List for V.150 EndpointsConfigure Media Resource Group for V.150 Endpoints, on page 208
Use this procedure to add a media resource group list without MTP resources for V.150 devices.
Procedure
Step 1 FromCisco Unified CommunicationsManager Administration, chooseMedia Resources > Media ResourceGroup List.
Step 2 Click Add New.
Security Guide for Cisco Unified Communications Manager, Release 14208
Advanced System SecurityConfigure a Media Resource Group List for Non-V.150 Endpoints

Step 3 In the Name field, enter a name for the media resource group list as V.150.Step 4 From theAvailable Media Resources field, choose the V.150MER resource group named For V.150 Devices
and click the down-arrow key.The selected media resource groups appear in the Selected Media Resources field.
Step 5 Click Save.
Configure the Gateway for Cisco V.150 (MER)Use this procedure to configure the gateway for Cisco V.150 (MER).
Procedure
Step 1 From Cisco Unified Communications Manager Administration, choose Device > Gateway.Step 2 Click Add New.Step 3 Choose the gateway from the Gateway Type drop-down list.Step 4 Click Next.Step 5 From the Protocol drop-down list, choose a protocol.Step 6 Depending on which Protocol you chose for the gateway, perform:
• For MGCP, in the Domain Name field, enter the domain name that is configured on the gateway.• For SCCP, in the MAC Address (Last 10 Characters) field, enter the gateway MAC address.
Step 7 From the Unified Communications Manager Group drop-down list, choose Default.Step 8 In the Configured Slots, VICs and Endpoints area, perform the following steps:
a) From each Module drop-down list, select the slot that corresponds to the Network Interface Modulehardware that is installed on the gateway.
b) From each Subunit drop-down list, select the VIC that is installed on the gateway.c) Click Save.
The port icons appear. Each port icon corresponds to an available port interface on the gateway. Youcan configure any port interface by clicking the corresponding port icon.
Step 9 Complete the remaining fields in theGateway Configurationwindow. See the online help for more informationabout the fields and their configuration options.
Step 10 Click Save.
Configure V.150 MGCP Gateway Port InterfaceUse this procedure to configure V.150 MGCP gateway port interface.
Procedure
Step 1 From Cisco Unified Communications Manager Administration, choose Device > Gateway.Step 2 Enter the appropriate search criteria to modify the settings for an existing gateway and click Find.
Security Guide for Cisco Unified Communications Manager, Release 14209
Advanced System SecurityConfigure the Gateway for Cisco V.150 (MER)

Step 3 In the Configured Slots, VICs, and Endpoints area, locate the module and subunit on which you want toconfigure a port for V.150 MER and click the corresponding port icon.
Step 4 From the Device Protocol drop-down list, choose Digital Access T1 or Digital Access PRI and click Next.
TheDevice Protocol drop-down list is displayed only if T1 port is selected in theConfigured Slots,VICs, and Endpoints area.
Note
The Gateway Configuration window now displays the port interface configuration.
Step 5 Select the Media Resource Group List named V.150.Step 6 Check the V150 (subset) check box.Step 7 Configure the remaining fields, if applicable. See the online help for more information about the fields and
their configuration options.Step 8 Click Save.Step 9 (Optional) If you want to configure additional port interfaces for the gateway, from the Related Links
drop-down list, chooseBack to MGCP Configuration and clickGo. You can select a different port interface.
Configure V.150 SCCP Gateway Port InterfaceUse this procedure to configure V.150 SCCP gateway port interface.
Procedure
Step 1 From Cisco Unified Communications Manager Administration, choose Device > Gateway.Step 2 Enter the appropriate search criteria to modify the settings for an existing SCCP gateway and click Find.Step 3 In the Configured Slots, VICs, and Endpoints area, locate the module and subunit on which you want to
configure a port for V.150 MER and click the corresponding port icon.Step 4 Select the Media Resource Group List named “V.150”.Step 5 In theProduct Specific Configuration Layout area, if theLatent Capability Registration Setting drop-down
list appears, select Modem Relay or Modem Relay and Passthrough.Step 6 Configure the remaining fields, if applicable. See the online help for more information about the fields and
their configuration options.Step 7 Click Save.
Configure V.150 Support for PhoneUse this procedure to add V.150 support for a phone. The following phone types support V.150:
• Cisco 7962—Third party SCCP end point registered as Cisco 7962
• Cisco 7961G-GE—Third party SCCP end point registered as Cisco 7961G-GE
• Third Party AS-SIP Endpoints
Security Guide for Cisco Unified Communications Manager, Release 14210
Advanced System SecurityConfigure V.150 SCCP Gateway Port Interface

Procedure
Step 1 Required: Create an End User with the User ID same as the intended phone number.Step 2 Required: Configure the Digest Credentials field in the End User Configuration window for Third Party
AS-SIP SIP endpoints.
For more information on how to configure a new End User, see the “Provision End Users Manually” chapterin the System Configuration Guide for Cisco Unified Communications Manager
Step 3 From Cisco Unified Communications Manager Administration, choose Device > Phone.Step 4 Perform either of the following steps:
• To configure V.150 on an existing phone, click Find and select the phone.• To configure a new phone for V.150, click Add New.
Step 5 From the Phone Type drop-down list, select one of the phone types that supports V.150, and click Next.Step 6 For third party SCCP endpoints registered as Cisco 7962, select SCCP from the Device Protocol drop-down
list, and click Next.Step 7 From the Media Resource Group List drop-down menu, select V.150.Step 8 For third party AS-SIP SIP endpoints only, Configure the following fields:
• From the Digest User drop-down select the end user for this phone. The end user will be used for digestauthentication.
• Leave the Media Termination Point Required check box unchecked.
• Check the Early Offer support for voice and video calls check box.
Step 9 Click Save.Step 10 Click Apply Config.Step 11 Click OK.
Configure SIP Trunk Task FlowUse this procedure to configure SIP Trunk task flow.
Procedure
PurposeCommand or Action
Configure a SIP Profile with SIP Best EffortEarly Offer support for the SIP trunk.
Configure SIP Profile for V.150, on page 212Step 1
Optional. Configure a clusterwide defaultsetting for SIP V.150 SDP Offer Filtering.
Set the Clusterwide V.150 Filter, on page 212Step 2
Configure a V.150 Filter within a SIP TrunkSecurity Profile that you can assign to specificSIP trunks.
Add V.150 Filter to SIP Trunk Security Profile,on page 213
Step 3
Security Guide for Cisco Unified Communications Manager, Release 14211
Advanced System SecurityConfigure SIP Trunk Task Flow

PurposeCommand or Action
Configure V.150 support for the SIP trunks thatwill handle V.150 calls.
Configure SIP Trunk for V.150, on page 213Step 4
Configure SIP Profile for V.150Use this procedure to configure a SIP Profile with SIP Best Effort Early Offer support for the SIP trunk.
Procedure
Step 1 In Cisco Unified Communications Manager Administration, choose Device > Device Settings > SIP Profile.
Step 2 Perform either of the following steps:
• To create a new profile, click Add New.• To select an existing profile, click Find and select a SIP profile.
Step 3 In the Name field, enter the SIP name for V.150.Step 4 In the Description field, enter the description for V.150.Step 5 From the Early Offer Support for Voice and video class drop-down list, choose Select Best Effort (no
MTP inserted).Step 6 Enter any other configuration settings that you want. See the online help for more information about the fields
and their configuration options.Step 7 Click Save.
Set the Clusterwide V.150 FilterUse this procedure to configure a clusterwide default setting for SIP V.150 SDP Offer filtering.
If you configure a SIP V.150 SDP Offer Filtering value within a SIP Trunk Security Profile that is differentthan the clusterwide service parameter setting, the security profile setting overrides the cluster-wide serviceparameter setting for the trunks that use that security profile.
Note
Procedure
Step 1 From Cisco Unified Communications Manager Administration, choose System > Service Parameters.Step 2 From the Server drop-down list, choose an active server.Step 3 From the Service drop-down list, choose Cisco CallManager.Step 4 In the Clusterwide Parameters ( Device- SIP) section, configure a value for the SIP V.150 SDP Offer
Filtering service parameter.Step 5 Choose SIP V.150 SDP Offer Filtering from the drop-down list.Step 6 Specify the desired filtering action.
Security Guide for Cisco Unified Communications Manager, Release 14212
Advanced System SecurityConfigure SIP Profile for V.150

Step 7 Click Save.
Add V.150 Filter to SIP Trunk Security ProfileUse this procedure to assign a V.150 Filter within a SIP Trunk Security Profile.
If you configure a SIP V.150 SDP Offer Filtering value within a SIP Trunk Security Profile that is differentthan the clusterwide service parameter, the security profile setting overrides the cluster-wide service parametersetting for the trunks that use that security profile.
Note
Procedure
Step 1 From Cisco Unified Communications Manager Administration, choose System > Security > SIP TrunkSecurity Profile.
Step 2 Perform one of the following tasks:
• Enter search criteria and Click Find to choose an existing profile from the list to modify the settings foran existing SIP Trunk Security Profile.
• Click Add New to add a new SIP Trunk Security Profile.
Step 3 Configure a value for the SIP V.150 Outbound SDP Offer Filtering drop-down list.
The default setting is to use the value of the SIP V.150 Outbound SDP Offer Filtering cluster-wideservice parameter.
Note
Step 4 Configure any remaining fields in the SIP Trunk Security Profile Configuration window. See the onlinehelp for more information about the fields and their configuration options.
Step 5 Click Save.
Configure SIP Trunk for V.150Use this procedure to configure settings for a SIP trunk.
Procedure
Step 1 From Cisco Unified Communications Manager Administration, choose Device > Trunk.Step 2 Perform either of the following steps:
• To create a new profile, click Add New.• Click Find and select a SIP trunk, to select an existing trunk.
Step 3 For new trunks, do the following:
• From the Trunk Type drop-down list, choose SIP Trunk.• From the Protocol Type drop-down list, choose SIP.
Security Guide for Cisco Unified Communications Manager, Release 14213
Advanced System SecurityAdd V.150 Filter to SIP Trunk Security Profile

• From the Trunk Service Type drop-down list, choose None(Default).• Click Next.
Step 4 Enter the SIP trunk name in the Name field.Step 5 Enter the SIP trunk description in the Description field.Step 6 From the Media Resource Group List drop-down list, choose the Media resource group list named “V.150”.Step 7 Configure the destination address for the SIP trunk:
a) In the Destination Address text box, enter an IPv4 address, fully qualified domain name, or DNS SRVrecord for the server or endpoint that you want to connect to the trunk.
b) If the destination is a DNS SRV record, check the Destination Address is an SRV check box.c) To add additional destinations, click (+) button. You can add up to 16 destinations for a SIP trunk.
Step 8 From the SIP Trunk Security Profile drop-down list, assign the SIP trunk security profile that you configuredfor this trunk.
Step 9 From the SIP Profile drop-down list, assign the SIP profile that you set up with the Best Effort Early Offersetting.
Step 10 Leave the Media Termination Point Required check box unchecked.Step 11 Configure any additional fields in theTrunk Configurationwindow. See the online help for more information
about the fields and their configuration options.Step 12 Click Save.
Security Guide for Cisco Unified Communications Manager, Release 14214
Advanced System SecurityConfigure SIP Trunk for V.150

C H A P T E R 19IPSec Setup
• IPSec Overview, on page 215
IPSec OverviewIPsec Setup Within Network Infrastructures
This section does not describe how to configure IPsec. Instead, it provides considerations and recommendationsfor configuring IPsec in your network infrastructure. If you plan to configure IPsec in the network infrastructureand not between Unified Communications Manager and the device, review the following information beforeyou configure IPsec:
• We recommend you to provision IPsec in the infrastructure rather than in the Unified CommunicationsManager itself.
• Before you configure IPsec, consider existing IPsec or VPN connections, platformCPU impact, bandwidthimplications, jitter or latency, and other performance metrics.
• Review the Voice and Video Enabled IPsec Virtual Private Networks Solution Reference Network DesignGuide.
• Review the CiscoIOS Security Configuration Guide, Release 12.2 (or later).
• Terminate the remote end of the IPsec connection in the secure CiscoIOS MGCP gateway.
• Terminate the host end in a network device within the trusted sphere of the network where the telephonyservers exist; for example, behind a firewall, access control list (ACL), or other layer three device.
• The equipment that you use to terminate the host-end IPsec connections depends on the number ofgateways and the anticipated call volume to those gateways; for example, you could use Cisco VPN 3000Series Concentrators, Catalyst 6500 IPsec VPN Services Module, or Cisco Integrated Services Routers.
• Perform the steps in the order that is specified in the topics related to setting up secure gateways andtrunks.
Failing to configure the IPsec connections and verify that the connections are active and may compromiseprivacy of the media streams.
Caution
Security Guide for Cisco Unified Communications Manager, Release 14215

To Configure and Manage IPsec Setup Between Unified Communications Manager and Gateway or Trunks
For information on configuring IPSec between Unified CommunicationsManager and the gateways or trunksthat are described in this chapter, see Administration Guide for Cisco Unified Communications Manager.
Security Guide for Cisco Unified Communications Manager, Release 14216
Advanced System SecurityIPSec Overview

C H A P T E R 20Authentication and Encryption Setup for CTI,JTAPI, and TAPI
This chapter provides a brief overview of how to secure the CTI, JTAPI, and TAPI applications. It alsodescribes the tasks that you must perform in Unified Communications Manager Administration to configureauthentication and encryption for CTI/TAPI/JTAPI applications.
This document does not describe how to install the CiscoJTAPI or TSP plug-ins that are available in UnifiedCommunications Manager Administration, nor does it describe how to configure the security parametersduring the installation. Likewise, this document does not describe how to configure restrictions forCTI-controlled devices or lines.
• Authentication for CTI, JTAPI, and TAPI Applications, on page 217• Encryption for CTI, JTAPI, and TAPI Applications, on page 218• CAPF Functions for CTI, JTAPI, and TAPI Applications, on page 219• Securing CTI, JTAPI, and TAPI, on page 225• Add Application and End Users to Security-Related Access Control Groups, on page 226• Set Up JTAPI/TAPI Security-Related Service Parameters, on page 227• View Certificate Operation Status for Application or End User, on page 227
Authentication for CTI, JTAPI, and TAPI ApplicationsUnified CommunicationsManager allows you to secure the signaling connections andmedia streams betweenCTIManager and CTI/JTAPI/TAPI applications.
We assume that you configured security settings during the CiscoJTAPI/TSP plug-in installation. We alsoassume that the Cluster Security Mode equals Mixed Mode, as configured in the Cisco CTL Client or throughthe CLI command set utils ctl. If these settings are not configured when you perform the tasks that are describedin this chapter, CTIManager and the application connect via a nonsecure port, Port2748.
Note
CTIManager and the application verify the identity of the other party through a mutually authenticated TLShandshake (certificate exchange). When a TLS connection occurs, CTIManager and the application exchangeQBE messages via the TLS port, Port2749.
Security Guide for Cisco Unified Communications Manager, Release 14217

To authenticate with the application, CTIManager uses the Unified Communications Manager certificate —either the self-signed certificate that installs automatically on the Unified Communications Manager serverduring installation or a third-party, CA-signed certificate that you uploaded to the platform.
After you generate the CTL file through the CLI command set utils ctl or the Cisco CTLClient, this certificateis added automatically to the CTL file. Before the application attempts to connect to CTIManager, theapplication downloads the CTL file from the TFTP server.
The first time that the JTAPI/TSP client downloads the CTL file from the TFTP server, the JTAPI/TSP clienttrusts the CTL file. We recommend that the download occur in a secure environment because the JTAPI/TSPclient does not validate the CTL file. The JTAPI/TSP client verifies subsequent downloads of the CTL file;for example, after you update the CTL file, the JTAPI/TSP client uses the security tokens in the CTL file toauthenticate the digital signature of the new CTL file it downloads. Contents of the file include the UnifiedCommunications Manager certificates and CAPF server certificate.
If the CTL file appears compromised, the JTAPI/TSP client does not replace the downloaded CTL file; theclient logs an error and attempts to establish a TLS connection by using an older certificate in the existingCTL file. The connection may not succeed if the CTL file has changed or is compromised. If the CTL filedownload fails and more than one TFTP server exists, you can configure another TFTP server to downloadthe file. The JTAPI/TAPI client does not connect to any port under the following circumstances:
• The client cannot download the CTL file for some reason; for example, no CTL file exists.
• The client does not have an existing CTL file.
• You configured the application user as a secure CTI user.
To authenticate with CTIManager, the application uses a certificate that the Certificate Authority ProxyFunction (CAPF) issues. To use TLS for every connection between the application and CTIManager, eachinstance that runs on the application PC must have a unique certificate. One certificate does not cover allinstances. To ensure that the certificate installs on the node whereCisco Unified Communications ManagerAssistant service is running, you configure a unique Instance ID for each Application User CAPF ProfileConfiguration or End User CAPF Profile Configuration in Cisco Unified Communications ManagerAdministration, as described in CAPF Settings.
If you uninstall the application from one PC and install it on another PC, you must install a new certificatefor each instance on the new PC.
Tip
You must also add the application users or the end users to the Standard CTI Secure Connection user groupin Unified Communications Manager to enable TLS for the application. After you add the user to this groupand install the certificate, the application ensures that the user connects via the TLS port.
Encryption for CTI, JTAPI, and TAPI Applications
Authentication serves as the minimum requirement for encryption; that is, you cannot use encryption if youhave not configured authentication.
Unified Communications Manager, Cisco QRT, and Cisco Web Dialer do not support encryption. CTI clientsthat connect to the CTIManager service may support encryption if the client sends voice packets.
Tip
Security Guide for Cisco Unified Communications Manager, Release 14218
Advanced System SecurityEncryption for CTI, JTAPI, and TAPI Applications

To secure the media streams between the application and CTIManager, add the application users or the endusers to the Standard CTI Allow Reception of SRTP Key Material user group in Unified CommunicationsManager. If these users also exist in the Standard CTI Secure Connection user group and if the cluster securitymode equals Mixed Mode, CTIManager establishes a TLS connection with the application and provides thekey materials to the application in a media event
Cluster security mode configures the security capability for your standalone server or cluster.Note
Although applications do not record or store the SRTP key materials, the application uses the key materialsto encrypt its RTP stream and decrypt the SRTP stream from CTIManager.
If the application connects to the nonsecure port, Port 2748, for any reason, CTIManager does not send thekeying material. If CTI/JTAPI/TAPI cannot monitor or control a device or directory number because youconfigured restrictions, CTIManager does not send the keying material.
For an application to receive SRTP session keys, the application or end user must exist in three groups:Standard CTI Enabled, Standard CTI Secure Connection, and Standard CTI Allow Reception of SRTP KeyMaterial.
Tip
Although Unified CommunicationsManager can facilitate secure calls to and from CTIports and route points,youmust configure the application to support secure calls because the application handles themedia parameters.
CTIports/route points register through dynamic or static registration. If the port/route point uses dynamicregistration, the media parameters get specified for each call; for static registration, media parameters getspecified during registration and cannot change per call. When CTIports/route points register to CTIManagerthrough a TLS connection, the device registers securely, and the media gets encrypted via SRTP if theapplication uses a valid encryption algorithm in the device registration request and if the other party is secure.
When the CTI application begins to monitor a call that is already established, the application does not receiveany RTP events. For the established call, the CTI application provides a DeviceSnapshot event, which defineswhether the media for the call is secure or nonsecure; this event provides no keying material.
CAPF Functions for CTI, JTAPI, and TAPI ApplicationsCertificate Authority Proxy Function (CAPF), which automatically installs with Unified CommunicationsManager, performs the following tasks for CTI/TAPI/TAPI applications, depending on your configuration:
• Authenticates to the JTAPI/TSP client via an authentication string.
• Issues Locally Significant Certificates (LSC) to CTI/JTAPI/TAPI applicationusers or end users.
• Upgrades existing Locally Significant Certificates.
• Retrieves certificates for viewing and troubleshooting.
When the JTAPI/TSP client interacts with CAPF, the client authenticates to CAPF by using an authenticationstring; the client then generates its public key and private key pair and forwards its public key to the CAPFserver in a signed message. The private key remains in the client and never gets exposed externally. CAPFsigns the certificate and then sends the certificate back to the client in a signed message.
Security Guide for Cisco Unified Communications Manager, Release 14219
Advanced System SecurityCAPF Functions for CTI, JTAPI, and TAPI Applications

You issue certificates to application users or end users by configuring the settings in the Application UserCAPF Profile Configuration window or End User CAPF Profile Configuration window, respectively. Thefollowing information describes the differences between the CAPF profiles that Unified CommunicationsManager supports:
• Application User CAPF Profile—This profile allows you to issue locally significant certificates tosecure application users so that a TLS connection opens between the CTIManager service and theapplication.
One Application User CAPF Profile corresponds to a single instance of the service or application on aserver. If you activate multiple web services or applications on the same server, you must configuremultiple Application User CAPF Profiles, one for each service on the server.
If you activate a service or application on two servers in the cluster, you must configure two ApplicationUser CAPF Profiles, one for each server.
• End User CAPF Profile—This profile allows you to issue locally significant certificates to CTI clientsso that the CTI client communicates with the CTIManager service via a TLS connection.
The JTAPI client stores the LSC in Java Key Store format in the path that you configure in the JTAPIPreferences window. The TSP client stores the LSC in an encrypted format in the default directory or in thepath that you configure.
Tip
The following information applies when a communication or power failure occurs.
• If a communication failure occurs while the certificate installation is taking place, the JTAPI clientattempts to obtain the certificate three more times in 30-second intervals. You cannot configure thisvalue.
For the TSP client, you can configure the retry attempts and the retry timer. Configure these values byspecifying the number of times that the TSP client tries to obtain the certificate in an allotted time. Forboth values, the default equals 0. You can configure up to 3 retry attempts by specifying 1 (for one retry),2, or 3. You can configure no more than 30 seconds for each retry attempt.
• If a power failure occurs while the JTAPI/TSP client attempts a session with CAPF, the client attemptsto download the certificate after power gets restored.
CAPF System Interactions and Requirements for CTI, JTAPI, and TAPIApplications
The following requirements exist for CAPF:
• Before you configure the Application User and End User CAPF Profiles, verify that the Cluster SecurityMode in the Enterprise Parameters Configuration window is 1 (mixed mode).
• To use CAPF, you must activate the Cisco Certificate Authority Proxy Function service on the publishernode.
• Generatingmany certificates at the same timemay cause call-processing interruptions and we recommendthat you use CAPF during a scheduled maintenance window.
• Ensure that the publisher node is functional and running during the entire certificate operation.
Security Guide for Cisco Unified Communications Manager, Release 14220
Advanced System SecurityCAPF System Interactions and Requirements for CTI, JTAPI, and TAPI Applications

• Ensure that the CTI/ JTAPI/TAPI application is functional during the entire certificate operation.
Certificate Authority Proxy Function Service ActivationUnified Communications Managerdoes not automatically activate the Certificate Authority Proxy Functionservice in Cisco Unified Serviceability.
To use the CAPF functionality, you must activate this service on the first node.
If you did not activate this service before you installed and configured the Cisco CTL Client, you must updatethe CTL file.
After you activate the Cisco Certificate Authority Proxy Function service, CAPF automatically generates akey pair and certificate that is specific for CAPF. The CAPF certificate, which the Cisco CTL Client copiesto your standalone server or all server(s) in the cluster, uses the .0 extension. The CAPF certificate is thendisplayed at the Cisco Unified Communications Operating System GUI as a verification that the CAPFcertificate exists.
Set Up Application User or End User CAPF ProfileUse CAPF Settings as a reference when you install/upgrade/troubleshoot locally significant certificates forJTAPI/TAPI/CTI applications.
We recommend that you configure Application User CAPF Profiles before you configure End User CAPFProfiles.
Tip
Procedure
Step 1 From Cisco Unified Communications Manager Administration, choose one of the following options:a) User Management > User Settings > Application User CAPF Profileb) User Management > User Settings > End User CAPF Profile.
Step 2 Perform one of the following tasks:a) To edit an existing profile, click Find and select the existing profile.b) To create a new profile, click Add New.c) To copy settings from an existing profile to a new profile, click Find and select the existing profile with
the settings that you want. Click Copy and name the new profile that will contain those settings. Thenedit the new profile as needed.
Step 3 Enter the appropriate settings as described in CAPF Settings.Step 4 Click Save.Step 5 Repeat this procedure to create additional CAPF Profiles. Create as many profiles as your users need.
If you configured the CCMQRTSecureSysUser, IPMASecureSysUser, or WDSecureSysUser in theApplication User CAPF Profile Configuration window, you must configure Service Parameters.
Security Guide for Cisco Unified Communications Manager, Release 14221
Advanced System SecurityCertificate Authority Proxy Function Service Activation

CAPF SettingsThe following table describes the CAPF settings in the Application User CAPF Profile Configuration andEnd User CAPF Profile Configuration windows.
Table 36: Application and End User CAPF Profile Configuration Settings
DescriptionSetting
From the drop-down list, choose the application user for the CAPFoperation.This setting shows configured application users.
This setting does not display in the End User CAPF Profile window.
Application User
From the drop-down list, choose the end user for the CAPF operation. Thissetting shows configured end users.
This setting does not display in the Application User CAPF Profile window.
End User ID
Enter 1-128 alphanumeric characters (a-zA-Z0-9). The Instance ID identifies theuser for the certificate operation.
You can configure multiple connections (instances) of an application.To securethe connection between the application and CTIManager, ensure that each instancethat runs on the application PC (for end users) or server (for application users)has a unique certificate.
This field relates to the CAPF Profile Instance ID for Secure Connection toCTIManager service parameter that supports web services and applications.
Instance ID
From the drop-down list, choose one of the following options:
• No Pending Operation—Displayswhen no certificate operation is occurring.(Default Setting)
• Install/Upgrade—Installs a new or upgrades an existing Locally SignificantCertificate for the application.
Certificate Operation
The authentication mode for the Install/Upgrade certificate operation specifiesBy Authentication String, which means CAPF installs/upgrades or troubleshootsa locally significant certificate only when the user/administrator enters the CAPFauthentication string in the JTAPI/TSP Preferences window.
Authentication Mode
Manually enter a unique string or generate a string by clicking the GenerateString button.
Ensure that the string contains 4 to 10 digits.
To install or upgrade a Locally Significant Certificate, you must enter theauthentication string in the JTAPI/TSP preferences GUI on the applicationPC.This string supports one-time use only; after you use the string for the instance,you cannot use it again.
Authentication String
If you want CAPF to automatically generate an authentication string, click theGenerate String button. The 4- to10-digit authentication string displays in theAuthentication String field.
Generate String
Security Guide for Cisco Unified Communications Manager, Release 14222
Advanced System SecurityCAPF Settings

DescriptionSetting
This field specifies the sequence of the key for CAPF. Select one of the followingvalues from the drop-down list:
• RSA Only
• EC Only
• EC Preferred, RSA Backup
When you add a phone based on the value in Key Order, RSA KeySize, and EC Key Size fields, the device security profile is associatedwith the phone. If you select theEC Only value with theEC Key Sizevalue of 256 bits then the device security profile appends withEC-256value.
Note
Key Order
From the drop-down list, choose one of the these values—512, 1024, 2048, 3072,or 4096.
RSA Key Size (Bits)
From the drop-down list, choose one of the these values—256, 384, or 521.EC Key Size (Bits)
This field, which supports all certificate operations, specifies the date and timeby which you must complete the operation.
The values displayed apply for the first node.
Use this settingwith theCAPF Operation Expires in (days) enterprise parameter,which specifies the default number of days in which the certificate operationmust be completed. You can update this parameter any time.
Operation Completes by
This field displays the progress of the certificate operation, such as pending,failed, or successful.
You cannot change the information that displays in this field.
Certificate OperationStatus
Update CAPF Service ParametersThe Service Parameterwindow contains optional settings for the Cisco Certificate Authority Proxy Function.You can configure settings such as the Certificate Issuer, Online CA connection settings, Certificate Validityduration, and key size for the CAPF certificate.
For the CAPF service parameters to display as Active in Cisco Unified Communications ManagerAdministration, Activate the Certificate Authority Proxy Function service in Cisco Unified Serviceability.
If you updated the CAPF service parameters when you used CAPF for the phones, you do not need to updatethe service parameters again.
Tip
To update the CAPF service parameters, perform the following procedure:
Security Guide for Cisco Unified Communications Manager, Release 14223
Advanced System SecurityUpdate CAPF Service Parameters

Procedure
Step 1 From Cisco Unified Communications Manager Administration, choose System > Service Parameters.Step 2 From the Server drop-down list, choose the server.
You must choose the publisher node in the cluster.Tip
Step 3 From the Service drop-down list, choose the CiscoCertificate Authority Proxy Function service. Verifythat the word “Active” displays next to the service name.
Step 4 Update theCAPF service parameters, as described in the Online help. To display help for theCAPF serviceparameters, click the question mark or the parameter name link.
Step 5 For the changes to take effect, restart the Cisco Certificate Authority Proxy Function service in CiscoUnified Serviceability.
For more information on how to configure the Certificate Authority Proxy Function, SeeCertificateAuthority Proxy Function chapter.
Note
Delete Application User CAPF or End User CAPF ProfileBefore you can delete an Application User CAPF Profile or End User CAPF Profile from Cisco UnifiedCommunications Manager Administration, you must apply a different profile to the devices or delete alldevices that use the profile. To find out which devices use the profile, choose Dependency Records from theRelated Links drop-down list in the Security Profile Configuration window and click Go.
If the dependency records feature is not enabled for the system, the dependency records summary windowdisplays a message that shows the action that you can take to enable the dependency records; the messagealso displays information about high CPU consumption that is related to the dependency records feature. Formore information about dependency records, refer to the System Configuration Guide for Cisco UnifiedCommunications Manager.
This section describes how to delete an Application User CAPF Profile or End User CAPF Profile from theUnified Communications Manager database.
Procedure
Step 1 Find the Application User CAPF Profile or End User CAPF Profile.Step 2 Perform one of the following tasks:
a) To delete multiple profiles, check the check boxes next to the appropriate check box in the Find and Listwindow; then, clickDelete Selected. You can delete all configurable records for this selection by clickingSelect All and then clicking Delete Selected.
b) To delete a single profile, check the check box next to the appropriate profile In the Find and Listwindow;then, click Delete Selected.
Step 3 When prompted to confirm the delete operation, click OK to delete or Cancel to cancel the delete operation.
Security Guide for Cisco Unified Communications Manager, Release 14224
Advanced System SecurityDelete Application User CAPF or End User CAPF Profile

Securing CTI, JTAPI, and TAPIThe following procedure provides the tasks that you perform to secure the CTI/JTAPI/TAPI application.
Procedure
Step 1 Verify that the CTI application and any JTAPI/TSP plug-ins are installed and running.
Assign the application user to the Standard CTI Enabled group.Tip
See the following documentation for more information:
• Cisco JTAPI Installation Guide for Unified Communications Manager
• Cisco TAPI Installation Guide for Unified Communications Manager
Step 2 Verify that the following Unified Communications Manager security features are installed (if not installed,install and configure these features):
• Verify if the CTL Client is installed and run the CTL file to create it.
• Verify if the CTL provider service is installed and that the service is activated.
• Verify if the CAPF service is installed and that the service is activated. If necessary, update CAPF serviceparameters.
The CAPF service must run for the CiscoCTL Client to include the CAPF certificate in theCTL file. If you updated these parameters when you used CAPF for the phones, you do notneed to update the parameters again.
Tip
• Verify if the cluster security mode is set to Mixed Mode. (Cluster security mode configures the securitycapability for your standalone server or cluster.)
The CTI/JTAPI/TAPI application cannot access the CTL file if the cluster security mode doesnot equal Mixed Mode.
Tip
Step 3 Assign your end users and application users to access control groups that contain the permissions they need.Assign your users to all of the following groups so that they can use TLS and SRTP over CTI connections:
• Standard CTI Enabled
• Standard CTI Secure Connection
• Standard CTI Allow Reception of SRTP Key Material
A CTI application can be assigned to either an application user or an end user, but not both.Tip
The user must already exist in the Standard CTI Enabled and Standard CTI Secure Connection usergroup. The application or end user cannot receive SRTP session keys if it does not exist in these three groups.For more information, see topics related to User access control group configurations.
Cisco Unified Communications Manager Assistant, Cisco QRT, and Cisco Web Dialer do notsupport encryption. CTI clients that connect to the CTIManager service may support encryption ifthe client sends voice packets.
Note
Security Guide for Cisco Unified Communications Manager, Release 14225
Advanced System SecuritySecuring CTI, JTAPI, and TAPI

Step 4 Configure CAPF Profiles for your end users and application users. For more information, see CertificateAuthority Proxy Function chapter.
Step 5 Enable the corresponding security-related parameters in the CTI/JTAPI/TAPI application.
Add Application and End Users to Security-Related AccessControl Groups
The Standard CTI Secure Connection user group and the Standard CTI AllowReception of SRTPKeyMaterialuser group display in Unified Communications Manager by default. You cannot delete these groups.
To secure the user connection to CTIManager, you must add the application user or end users to the StandardCTI Secure Connection user group. You can assign a CTI application to either an application user or an enduser, but not both.
If you want the application and CTIManager to secure the media streams, you must add the application useror end users to the Standard CTI Allow Reception of SRTP Key Material user group.
Before the application and end user can use SRTP, the user must exist in the Standard CTI Enabled andStandard CTI Secure Connection user groups, which serve as a baseline configuration for TLS. SRTPconnections require TLS. After the user exists in these groups, you can add the user to the Standard CTI AllowReception of SRTP KeyMaterial user group. For an application to receive SRTP session keys, the applicationor end user must exist in three groups: Standard CTI Enabled, Standard CTI Secure Connection, andStandard CTI Allow Reception of SRTP Key Material.
You do not need to add the application users, CCMQRTSecureSysUser, IPMASecureSysUser, and theWDSecureSysUser, to the Standard CTI Allow Reception of SRTP Key Material user group because CiscoUnified Communications Manager Assistant, CiscoQRT, and Cisco Web Dialer do not support encryption.
For information on deleting an application or end user from a user group, refer to the Administration Guidefor Cisco Unified Communications Manager. For information about security-related settings in the RoleConfiguration window, refer to the Administration Guide for Cisco Unified Communications Manager.
Tip
Procedure
Step 1 From Cisco Unified Communications Manager Administration, choose User Management > User Groups.Step 2 To display all user groups, click Find.Step 3 Depending on what you want to accomplish, perform one of the following tasks:
a) Verify that the application or end users exist in the Standard CTI Enabled group.b) To add an application user or end users to the Standard CTI Secure Connection user group, click the
Standard CTI Secure Connection link.c) To add an application user or end users to the Standard CTI Allow Reception of SRTP Key Material
user group, click the Standard CTI Allow Reception of SRTP Key Material link.
Step 4 To add an application user to the group, perform steps 5 through 7.Step 5 Click Add Application Users to Group.
Security Guide for Cisco Unified Communications Manager, Release 14226
Advanced System SecurityAdd Application and End Users to Security-Related Access Control Groups

Step 6 To find an application user, specify the search criteria; then, click Find.
Clicking Find without specifying search criteria displays all available options.
Step 7 Check the check boxes for the application users that you want to add to the group; then, click Add Selected.
The users are displayed in the User Group window.
Step 8 To add end users to the group, perform steps 9 through 11.Step 9 Click Add Users to Group.Step 10 To find an end user, specify the search criteria; then, click Find.
Clicking Find without specifying search criteria displays all available options.
Step 11 Check the check boxes for the end users that you want to add to the group; then, click Add Selected.
The users are displayed in the User Group window.
Set Up JTAPI/TAPI Security-Related Service ParametersAfter you configure the Application User CAPF Profile or End User CAPF Profile, you must configure thefollowing service parameters for Cisco IP Manager Assistant service:
• CTIManager Connection Security Flag
• CAPF Profile Instance ID for Secure Connection to CTIManager
To access the service parameters, perform the following procedure:
Procedure
Step 1 From Cisco Unified Communications Manager Administration, choose System > Service Parameters.Step 2 From the Server drop-down list, choose the server where theCisco IP Manager Assistant service is activated.Step 3 From the Service drop-down list, choose the Cisco IP Manager Assistant service.Step 4 After the parameters display, locate theCTIManager Connection Security Flag andCAPF Profile Instance
ID for Secure Connection to CTIManager parameters.Step 5 Update the parameters, as described in the help that displays when you click the question mark or parameter
name link.Step 6 Click Save.Step 7 Repeat the procedure on each server where the service is activated.
View Certificate Operation Status for Application or End UserYou can view the certificate operation status in a specific Application User or End User CAPF Profileconfiguration window (not the Find/List window) or in the JTAPI/TSP Preferences GUI window.
Security Guide for Cisco Unified Communications Manager, Release 14227
Advanced System SecuritySet Up JTAPI/TAPI Security-Related Service Parameters

Security Guide for Cisco Unified Communications Manager, Release 14228
Advanced System SecurityView Certificate Operation Status for Application or End User

C H A P T E R 21Secure Recording and Monitoring
• About Secure Call Monitoring and Recording Setup, on page 229• Set Up Secure Call Monitoring and Recording, on page 230
About Secure Call Monitoring and Recording SetupSecure calls can be monitored and recorded, as described in this section:
• A supervisor can establish a secured monitoring session for a secured or a non-secured call.
• The call security of the original call is never impacted or downgraded as a result of a call monitoringrequest.
• The monitoring call is allowed to proceed only when it can be established and maintained at the samesecurity level as the device capability of the agent.
• The original call between the agent and customer must have different crypto keys than that of monitoringcall. In a monitoring session, the system encrypts the mixed voices of the agent and customer with thenew key first before sending to the supervisor.
Unified Communications Manager supports call recording for authenticated calls while using a nonsecurerecorder. For calls with a secure call recorder, recording is allowed only if the recorder supports SRTP fallback,so that the media stream to the recorder falls back to RTP.
To record calls that use authenticated phones:
• Set theAuthenticated Phone Recording, a Cisco CallManager service parameter, toAllow Recording.In this case, the call is authenticated, but the connection to the recording server is unauthenticated andunencrypted.
• Ensure that the Cluster SIPOAuth Mode field a Cisco CallManager enterprise parameter, is set toEnabled.
Note
Security Guide for Cisco Unified Communications Manager, Release 14229

Set Up Secure Call Monitoring and RecordingUse this procedure to configure Secure Call Monitoring and Recording.
Procedure
Step 1 Provision secure capability on agent and supervisor phones.Step 2 Create a secure SIP trunk with the following configuration:
• Set the Device Security Mode to Encrypted.
• Check the Transmit Security Status check box.
• Check the SRTP Allowed check box.
• Configure the TLS SIP trunk to the recorder.
Step 3 Configure monitoring and recording, in the same way you would for non-secure monitoring and recording.a) Configure a built-in bridge for the agent phone.b) Configure the Recording Option (Automatic Call Recording Enabled and Application Invoked Call
Recording Enabled.) using the Directory Number page on the agent phone.c) Create a route pattern for the recorder.d) Add a call recording profile to the Directory Number.e) Provision monitoring and recording tones as needed.
For more information and detailed procedures, see the “Monitoring and Recording” chapter in the FeatureConfiguration Guide for Cisco Unified Communications Manager.
Security Guide for Cisco Unified Communications Manager, Release 14230
Advanced System SecuritySet Up Secure Call Monitoring and Recording

C H A P T E R 22VPN Client
• VPN Client Overview, on page 231• VPN Client Configuration Task Flow, on page 231
VPN Client OverviewThe Cisco VPN Client for Cisco Unified IP Phone creates a secure VPN connection for employees whotelecommute. All settings of the Cisco VPN Client are configured through Cisco Unified CommunicationsManager Administration. After the phone is configured within the Enterprise, the users can plug it into theirbroadband router for instant connectivity.
The VPN menu and its options are not available in the U.S. export unrestricted version of UnifiedCommunications Manager.
Note
VPN Client Configuration Task FlowPre-provision the phone and establish the initial connection inside the corporate network to retrieve the phoneconfiguration. You can make subsequent connections using VPN, as the configuration is already retrieved onthe phone.
Procedure
PurposeCommand or Action
Complete Cisco IOS prerequisites. Performthis action if you want to configure Cisco IOSVPN.
Complete Cisco IOS Prerequisites, on page232
Step 1
Configure Cisco IOS for VPN client on an IPPhone. Perform this action if you want toconfigure Cisco IOS VPN.
Configure Cisco IOS SSL VPN to Support IPPhones , on page 233
Step 2
Complete ASA prerequisites for AnyConnect.Perform this action if you want to configureASA VPN.
Complete ASA Prerequisites for AnyConnect,on page 234
Step 3
Security Guide for Cisco Unified Communications Manager, Release 14231

PurposeCommand or Action
Configure ASA for VPN client on an IP Phone.Perform this action if you want to configureASA VPN.
Configure ASA for VPN Client on IP Phone,on page 235
Step 4
To avoid long delays when the user upgradesthe firmware or configuration information on
Configure the VPN concentrators for eachVPN Gateway.
Step 5
a remote phone, set up the VPN concentratorclose in the network to the TFTP or UnifiedCommunicationsManager server. If this is notfeasible in your network, you can set up analternate TFTP or load server that is next tothe VPN concentrator.
Upload the VPN concentrator certificates.Upload VPN Concentrator Certificates, onpage 237
Step 6
Configure the VPN gateways.Configure VPN Gateway, on page 238Step 7
After you create a VPN group, you can addone of the VPN gateways that you justconfigured to it.
Configure VPN Group, on page 239Step 8
You must configure a VPN profile only if youhave multiple VPN groups. The VPN Profile
Perform one of the following:Step 9
• Configure VPN Profile, on page 240 fields take precedence over the VPN FeatureConfiguration fields.• Configure VPN Feature Parameters, on
page 241
Add the VPN Group and VPN Profile to aCommon Phone Profile.
Add VPN Details to Common Phone Profile,on page 243
Step 10
To run the Cisco VPN client, a supported CiscoUnified IP Phone must be running firmware
Upgrade the firmware for Cisco Unified IPPhone to a version that supports VPN.
Step 11
release 9.0(2) or higher. For more informationabout upgrading the firmware, see CiscoUnified IP Phone Administration Guide forUnified Communications Manager foryourCisco Unified IP Phone model.
Connect your Cisco Unified IP Phone to aVPN.
Using a supported Cisco Unified IP Phone,establish the VPN connection.
Step 12
Complete Cisco IOS PrerequisitesUse this procedure to complete Cisco IOS Prerequisites.
Procedure
Step 1 Install Cisco IOS Software version 15.1(2)T or later.
Feature Set/License: Universal (Data & Security & UC) for IOS ISR-G2 and ISR-G3
Security Guide for Cisco Unified Communications Manager, Release 14232
Advanced System SecurityComplete Cisco IOS Prerequisites

Feature Set/License: Advanced Security for IOS ISR
Step 2 Activate the SSL VPN License.
Configure Cisco IOS SSL VPN to Support IP PhonesUse this procedure to complete Cisco IOS SSL VPN to Support IP Phones.
Procedure
Step 1 Configure Cisco IOS locally.a) Configure the Network Interface.
Example:router(config)# interface GigabitEthernet0/0router(config-if)# description "outside interface"router(config-if)# ip address 10.1.1.1 255.255.255.0router(config-if)# duplex autorouter(config-if)# speed autorouter(config-if)# no shutdownrouter#show ip interface brief (shows interfaces summary)
b) Configure static and default routes by using this command:
router(config)# ip route <dest_ip> < mask> < gateway_ip>
Example:router(config)# ip route 10.10.10.0 255.255.255.0 192.168.1.1
Step 2 Generate and register the CAPF certificate to authenticate the IP phones with an LSC.Step 3 Import the CAPF certificate from Unified Communications Manager.
a) From the Cisco Unified OS Administration, choose Security > Certificate Management.
This location changes based on the Unified Communications Manager version.Note
b) Find the Cisco_Manufacturing_CA and CAPF certificates. Download the.pem file and save as.txt file.c) Create trustpoint on the Cisco IOS software.
hostname(config)# crypto pki trustpoint trustpoint_namehostname(config-ca-trustpoint)# enrollment terminalhostname(config)# crypto pki authenticate trustpoint
When prompted for the base 64-encoded CA certificate, copy and paste the text in the downloaded .pemfile along with the BEGIN and END lines. Repeat the procedure for the other certificates.
d) Generate the following Cisco IOS self-signed certificates and register themwith Unified CommunicationsManager, or replace with a certificate that you import from a CA.
• Generate a self-signed certificate.Router> enableRouter# configure terminalRouter(config)# crypto key generate rsa general-keys label <name><exportable -optional>Router(config)# crypto pki trustpoint <name>
Security Guide for Cisco Unified Communications Manager, Release 14233
Advanced System SecurityConfigure Cisco IOS SSL VPN to Support IP Phones

Router(ca-trustpoint)# enrollment selfsignedRouter(ca-trustpoint)# rsakeypair <name> 2048 2048Router(ca-trustpoint)#authorization username subjectname commonnameRouter(ca-trustpoint)# crypto pki enroll <name>Router(ca-trustpoint)# end
• Generate a self-signed certificate with Host-id check enabled on the VPN profile in UnifiedCommunications Manager.
Example:Router> enableRouter# configure terminalRouter(config)# crypto key generate rsa general-keys label <name><exportable -optional>Router(config)# crypto pki trustpoint <name>Router(ca-trustpoint)# enrollment selfsignedRouter(config-ca-trustpoint)# fqdn <full domainname>Router(config-ca-trustpoint)# subject-name CN=<full domainname>, CN=<IP>Router(ca-trustpoint)#authorization usernamesubjectname commonnameRouter(ca-trustpoint)# crypto pki enroll <name>Router(ca-trustpoint)# end
• Register the generated certificate with Unified Communications Manager.
Example:Router(config)# crypto pki export <name> pem terminal
Copy the text from the terminal and save it as a.pem file and upload it to the Unified CommunicationsManager using the Cisco Unified OS Administration.
Step 4 Install AnyConnect on Cisco IOS.
Download the Anyconnect package from cisco.com and install to flash.
Example:router(config)#webvpn install svcflash:/webvpn/anyconnect-win-2.3.2016-k9.pkg
Step 5 Configure the VPN feature.
To use the phone with both certificate and password authentication, create a user with the phoneMAC address. Username matching is case sensitive. For example:username CP-7975G-SEP001AE2BC16CB password k1kLGQIoxyCO4ti9 encrypted
Note
Complete ASA Prerequisites for AnyConnectUse this procedure to complete ASA Prerequisites for AnyConnect.
Procedure
Step 1 Install ASA software (version 8.0.4 or later) and a compatible ASDM.Step 2 Install a compatible AnyConnect package.
Security Guide for Cisco Unified Communications Manager, Release 14234
Advanced System SecurityComplete ASA Prerequisites for AnyConnect

Step 3 Activate License.a) Check features of the current license using the following command:
show activation-key detail
b) If necessary, obtain a new license with additional SSL VPN sessions and enable the Linksys phone.
Step 4 Make sure that you configure a tunnel-group with a non-default URL as follows:tunnel-group phonevpn type remote-accesstunnel-group phonevpn general-attributeaddress-pool vpnpool
tunnel-group phonevpn webvpn-attributesgroup-url https://172.18.254.172/phonevpn enable
Consider the following when configuring non-default URL:
• If the IP address of the ASA has a public DNS entry, you can replace it with a Fully Qualified DomainName (FQDN).
• You can only use a single URL (FQDN or IP address) on the VPN gateway in Unified CommunicationsManager.
• It is preferred to have the certificate CN or subject alternate name match the FQDN or IP address in thegroup-url.
• If the ASA certificate CN or SAN does not match with the FQDN or IP address, uncheck the host IDcheck box in the Unified Communications Manager.
Configure ASA for VPN Client on IP PhoneUse this procedure to configure ASA for VPN Client on IP Phone.
Replacing ASA certificates results in non-availability of Unified Communications Manager.Note
Procedure
Step 1 Local configurationa) Configure network interface.
Example:ciscoasa(config)# interface Ethernet0/0ciscoasa(config-if)# nameif outsideciscoasa(config-if)# ip address 10.89.79.135 255.255.255.0ciscoasa(config-if)# duplex autociscoasa(config-if)# speed autociscoasa(config-if)# no shutdownciscoasa#show interface ip brief (shows interfaces summary)
b) Configure static routes and default routes.
Security Guide for Cisco Unified Communications Manager, Release 14235
Advanced System SecurityConfigure ASA for VPN Client on IP Phone

ciscoasa(config)# route <interface_name> <ip_address> <netmask> <gateway_ip>
Example:ciscoasa(config)# route outside 0.0.0.0 0.0.0.0 10.89.79.129
c) Configure the DNS.
Example:ciscoasa(config)# dns domain-lookup insideciscoasa(config)# dns server-group DefaultDNSciscoasa(config-dns-server-group)# name-server 10.1.1.5 192.168.1.67 209.165.201.6
Step 2 Generate and register the necessary certificates for Unified Communications Manager and ASA.
Import the following certificates from the Unified Communications Manager.
• CallManager - Authenticating the Cisco UCM during TLS handshake (Only required for mixed-modeclusters).
• Cisco_Manufacturing_CA - Authenticating IP phones with a Manufacturer Installed Certificate (MIC).
• CAPF - Authenticating IP phones with an LSC.
To import these Unified Communications Manager certificates, do the following:
a) From the Cisco Unified OS Administration, choose Security > Certificate Management.b) Locate the certificates Cisco_Manufacturing_CA and CAPF. Download the.pem file and save asa .txt
file.c) Create trustpoint on the ASA.
Example:ciscoasa(config)# crypto ca trustpoint trustpoint_nameciscoasa(ca-trustpoint)# enrollment terminalciscoasa(config)# crypto ca authenticate trustpoint_name
When prompted for base 64 encoded CA Certificate, copy-paste the text in the downloaded .pem filealong with the BEGIN and END lines. Repeat the procedure for the other certificates.
d) Generate the following ASA self-signed certificates and register them with Unified CommunicationsManager, or replace with a certificate that you import from a CA.
• Generate a self-signed certificate.
Example:ciscoasa> enableciscoasa# configure terminalciscoasa(config)# crypto key generate rsa general-keys label <name>ciscoasa(config)# crypto ca trustpoint <name>ciscoasa(ca-trustpoint)# enrollment selfciscoasa(ca-trustpoint)# keypair <name>ciscoasa(config)# crypto ca enroll <name>ciscoasa(config)# end
• Generate a self-signed certificate with Host-id check enabled on the VPN profile in UnifiedCommunications Manager.
Example:
Security Guide for Cisco Unified Communications Manager, Release 14236
Advanced System SecurityConfigure ASA for VPN Client on IP Phone

ciscoasa> enableciscoasa# configure terminalciscoasa(config)# crypto key generate rsa general-keys label <name>ciscoasa(config)# crypto ca trustpoint <name>ciscoasa(ca-trustpoint)# enrollment selfciscoasa(ca-trustpoint)# fqdn <full domain name>ciscoasa(config-ca-trustpoint)# subject-name CN=<full domain name>,CN=<IP>ciscoasa(config)# crypto ca enroll <name>ciscoasa(config)# end
• Register the generated certificate with Unified Communications Manager.
Example:ciscoasa(config)# crypto ca export <name> identity-certificate
Copy the text from the terminal and save it as a.pem file and upload it to Unified CommunicationsManager.
Step 3 Configure the VPN feature. You can use the Sample ASA configuration summary below to guide you withthe configuration.
To use the phone with both certificate and password authentication, create a user with the phoneMAC address. Username matching is case sensitive. For example:ciscoasa(config)# username CP-7975G-SEP001AE2BC16CB password k1kLGQIoxyCO4ti9encryptedciscoasa(config)# username CP-7975G-SEP001AE2BC16CB attributesciscoasa(config-username)# vpn-group-policy GroupPhoneWebvpnciscoasa(config-username)#service-type remote-access
Note
ASA Certificate Configuration
For more information on ASA certificate configuration, see Configure AnyConnect VPN Phone withCertificate Authentication on an ASA
Upload VPN Concentrator CertificatesGenerate a certificate on the ASA when you set it up to support the VPN feature. Download the generatedcertificate to your PC or workstation and then upload it to Unified Communications Manager using theprocedure in this section. Unified Communications Manager saves the certificate in the Phone-VPN-trust list.
The ASA sends this certificate during the SSL handshake, and the Cisco Unified IP Phone compares it againstthe values stored in the Phone-VPN-trust list.
If a Locally Significant Certificate (LSC) is installed on the Cisco Unified IP Phone, it will send its LSC bydefault.
To use device level certificate authentication, install the root MIC or CAPF certificate in the ASA, so that theCisco Unified IP Phone are trusted.
To upload certificates to Unified Communications Manager, use the Cisco Unified OS Administration.
Security Guide for Cisco Unified Communications Manager, Release 14237
Advanced System SecurityUpload VPN Concentrator Certificates

Procedure
Step 1 From Cisco Unified OS Administration, choose Security > Certificate Management.Step 2 Click Upload Certificate.Step 3 From the Certificate Purpose drop-down list, choose Phone-VPN-trust.Step 4 Click Browse to choose the file that you want to upload.Step 5 Click Upload File.Step 6 Choose another file to upload or click Close.
For more information, see Certificate Management chapter.
Configure VPN GatewayEnsure that you have configured VPN concentrators for each VPN gateway. After configuring the VPNconcentrators, upload the VPN concentrator certificates. For more information, see Upload VPNConcentratorCertificates, on page 237.
Use this procedure to configure the VPN Gateway.
Procedure
Step 1 From Cisco Unified CM Administration, choose Advanced Features > VPN > VPN Gateway.Step 2 Perform one of the following tasks:
a) Click Add New to configure new profile.b) Click the Copy next to the VPN gateway that you want to copy.c) Locate the appropriate VPN gateway and modify the settings to update an existing profile.
Step 3 Configure the fields in the VPN Gateway Configuration window. For more information, see VPN GatewayFields for VPN Client, on page 238.
Step 4 Click Save.
VPN Gateway Fields for VPN ClientThe table describes the VPN Gateway fields for VPN Client.
Table 37: VPN Gateway Fields for VPN Client
DescriptionField
Enter the name of the VPN gateway.VPN Gateway Name
Enter a description of the VPN gateway.VPN GatewayDescription
Security Guide for Cisco Unified Communications Manager, Release 14238
Advanced System SecurityConfigure VPN Gateway

DescriptionField
Enter the URL for the main VPN concentrator in the gateway.
You must configure the VPN concentrator with a group URL and usethis URL as the gateway URL.
Note
For configuration information, refer to the documentation for the VPNconcentrator, such as the following:
• SSL VPN Client (SVC) on ASA with ASDM Configuration Example
VPN Gateway URL
Use the up and down arrow keys to assign certificates to the gateway. If you donot assign a certificate for the gateway, the VPN client fails to connect to thatconcentrator.
You can assign up to 10 certificates to a VPN gateway, and you mustassign at least one certificate to each gateway. Only certificates thatare associated with the Phone-VPN-trust role appear in the availableVPN certificates list.
Note
VPN Certificates in thisGateway
Configure VPN GroupUse this procedure to configure VPN Group.
Procedure
Step 1 From Cisco Unified CM Administration, choose Advanced Features > VPN > VPN Group.Step 2 Perform one of the following tasks:
a) Click Add New to configure new profile.b) Click Copy next to the VPN group that you want to copy an existing VPN group.c) Locate the appropriate VPN group and modify the settings to update an existing profile.
Step 3 Configure the fields in the VPN Group Configuration window. For more information, see VPN GatewayFields for VPN Client, on page 238 for the field description details.
Step 4 Click Save.
VPN Group Fields for VPN ClientThe table describes the VPN Group Fields for VPN Client.
Table 38: VPN Group Fields for VPN Client
DefinitionField
Enter the name of the VPN group.VPN Group Name
Enter a description of the VPN group.VPN Group Description
Security Guide for Cisco Unified Communications Manager, Release 14239
Advanced System SecurityConfigure VPN Group

DefinitionField
Scroll to see all available VPN gateways.All Available VPNGateways
Use the up and down arrow buttons to move available VPN gateways into andout of this VPN group.
If the VPN client encounters critical error and cannot connect to a particular VPNgateway, it will attempt to move to the next VPN gateway in the list.
You can add up to a maximum of three VPN gateways to a VPN group.Also, the total number of certificates in the VPN group cannot exceed10.
Note
Selected VPN Gatewaysin this VPN Group
Configure VPN ProfileUse this procedure to configure the VPN Profile.
Procedure
Step 1 From Cisco Unified CM Administration, choose Advanced Features > VPN > VPN Profile.Step 2 Perform one of the following tasks:
a) Click Add New to configure new profle.b) Click Copy next to the VPN profile that you want to copy an existing profile.c) To update an existing profile, specify the appropriate filters in the Find VPN Profile Where, click Find,
and modify the settings.
Step 3 Configure the fields in the VPN Profile Configuration window. For more information, see VPN ProfileFields for VPN Client, on page 240 for the field description details.
Step 4 Click Save.
VPN Profile Fields for VPN ClientThe table describes the VPN profile field details.
Table 39: VPN Profile Field Details
DefinitionField
Enter a name for the VPN profile.Name
Enter a description for the VPN profile.Description
When you check this check box, the VPN client can only run when it detects thatit is out of the corporate network.
Default: Disabled.
Enable Auto NetworkDetect
Security Guide for Cisco Unified Communications Manager, Release 14240
Advanced System SecurityConfigure VPN Profile

DefinitionField
Enter the size, in bytes, for the Maximum Transmission Unit (MTU).
Default: 1290 bytes.
MTU
This field specifies the amount of time to wait for login or connect operations tocomplete while the system creates the VPN tunnel.
Default: 30 seconds
Fail to Connect
When you check this check box, the gateway certificate subjectAltName or CNmust match the URL to which the VPN client is connected.
Default: Enabled
Enable Host ID Check
From the drop-down list, choose the client authentication method:
• User and password
• Password only
• Certificate (LSC or MIC)
Client AuthenticationMethod
When you check this check box, a user password gets saved in the phone untileither a failed log in attempt occurs, a user manually clears the password, or thephone resets or loses power.
Enable PasswordPersistence
Configure VPN Feature Parameters
Procedure
Step 1 FromCiscoUnified CMAdministration, chooseAdvanced Features >VPN >VPN Feature Configuration.Step 2 Configure the fields in the VPN Feature Configuration window. For more information, see VPN Feature
Parameters, on page 241.Step 3 Click Save.
Perform the following tasks:
• Upgrade the firmware for Cisco Unified IP Phones to a version that supports VPN. For more informationabout upgrading the firmware, seeCisco Unified IP Phone Administration Guide for your Cisco UnifiedIP Phone model.
• Using a supported Cisco Unified IP Phone, establish the VPN connection.
VPN Feature ParametersThe table describes the VPN feature parameters.
Security Guide for Cisco Unified Communications Manager, Release 14241
Advanced System SecurityConfigure VPN Feature Parameters

Table 40: VPN Feature Parameters
DefaultField
When True, the VPN client can only run when it detects that it is out of thecorporate network.
Default: False
Enable Auto NetworkDetect
This field specifies the maximum transmission unit:
Default: 1290 bytes
Minimum: 256 bytes
Maximum: 1406 bytes
MTU
This field specifies the rate at which the system sends the keep alive message.
If it is non zero and less than the value specified in UnifiedCommunications Manager, the keep alive setting in the VPNconcentrator overwrites this setting.
Note
Default: 60 seconds
Minimum: 0
Maximum: 120 seconds
Keep Alive
This field specifies the amount of time to wait for login or connect operations tocomplete while the system creates the VPN tunnel.
Default: 30 seconds
Minimum: 0
Maximum: 600 seconds
Fail to Connect
From the drop-down list, choose the client authentication method:
• User and password
• Password only
• Certificate (LSC or MIC)
Default: User And Password
Client AuthenticationMethod
When True, a user password gets saved in the phone, if Reset button or “**#**”is used for reset. The password does not get saved and the phone prompts forcredentials if the phone loses power or you initiate a factory reset.
Default: False
Enable PasswordPersistence
When True, the gateway certificate subjectAltName or CN must match the URLto which the VPN client is connected.
Default: True
Enable Host ID Check
Security Guide for Cisco Unified Communications Manager, Release 14242
Advanced System SecurityVPN Feature Parameters

Add VPN Details to Common Phone ProfileUse this procedure to add VPN details to common phone profile.
Procedure
Step 1 From Cisco Unified CM Administration, choose Device > Device Settings > Common Phone Profile.Step 2 Click Find and choose common phone profile to which you want to add the VPN details.Step 3 In the VPN Information section, choose the appropriate VPN Group and VPN Profile.Step 4 Click Save and then Apply Config.Step 5 Click OK in apply configuration window.
Security Guide for Cisco Unified Communications Manager, Release 14243
Advanced System SecurityAdd VPN Details to Common Phone Profile

Security Guide for Cisco Unified Communications Manager, Release 14244
Advanced System SecurityAdd VPN Details to Common Phone Profile

C H A P T E R 23Operating System and Security Hardening
• Security Hardening, on page 245
Security HardeningWe provide the following overview of security features in Unified CommunicationsManager 12.5SU3. Someof the items below are prior to the availability of planned updates to Cisco’s standard product documentation.
Unified CommunicationsManager runs as a virtual machine on top of virtualized hardware based on VMwarevSphere ESXi. Unlike conventional server-based products, Unified Communications Manager is a softwareproduct distributed as a closed-system, turnkey-packaged, “appliance” workload, which:
• Reduces the attack surface
• Provides a more stable, higher performance configuration
• Avoids vulnerabilities from configuration errors
• Simplifies administration and corrective maintenance without requiring OS / DB skill sets
Highlights of Unified Communications Manager workload-layer hardening include:
• Unified Communications Manager isn't a general-purpose / open-system workload.
• It doesn't use a general-purpose OS distribution.
• Unused modules are excluded from the image and unused services are disabled / removed.
• Wemake proprietary hardening changes to specific modules (for example, OpenSSL is hardenedby Cisco’s Security and Trust Organization; the resulting CiscoSSL is incorporated into theproduct).
• Native interfaces to guest Operating System, Database, runtime, and other workload softwarecomponents are not exposed.
• They are either removed or hidden and locked-down.
• Access is only through Cisco-provided browser-based GUI, CLI, or API, with variousmechanisms to secure those interfaces (e.g., CLI via SSH, or pull files into workload via SecureFTP).
Security Guide for Cisco Unified Communications Manager, Release 14245

• The product comprises a carefully controlled stack that contains all software required to operate,maintain, secure, and manage the application.We specify, install and update all this software throughimages provided and digitally signed by Cisco.
• All of the above information are subject to the development and test processes of the Cisco SecureProduct Lifecycle development approach, as described here:https://www.cisco.com/c/dam/en_us/about/doing_business/trust-center/docs/cisco-secure-development-lifecycle.pdf
• The Unified Communications Manager workload layer does not support insertion of non-Cisco softwareor software updates/changes outside the above-mentioned controlled Cisco-provided interfaces.
• All software within the workload is provided by Cisco and digitally signed and delivered as amonolithic image (.ISO file).
• The only way to install, upgrade and update software is by using a Cisco-provided .ISO or .COPfile.
• .ISO file installs or updates one, some, or all of the software elements in the Cisco image .COP filesare used to update single elements, most commonly user locales and phone firmware updates.
• The following are not enabled or possible:
• onboard agents like anti-virus clients, UPS agents, management agents and so on.
• customer-uploadable or externally-uploadable software.
• 3rd-party applications.
• “Root access” to the guest OS inside the workload is not enabled:
• Customers use authentication in the Cisco-provided GUI, CLI, and/or API.
• All exposed interfaces to the workload are secured (e.g., enforced password complexity rules, SSHinstead of telnet, TLS 1.2 with configurable minimum version and so on.)
• For emergency issues that are not fixable in the field thru the normal GUI/CLI/API, customers canset up a temporary "Remote Account" so that a Cisco Technical Assistance Center (TAC) expertcan gain root access. The customer maintain controls and can turn on or turn off this account withauto-expiry. The customer can see what the TAC representative is doing with all actions beingperformed by TAC being logged.
• Built-in Intrusion Prevention Capabilities:
• SELinux enforcing mode, providing host-based intrusion protection.
• SELinux enforcing mode is enabled by default. This mode enforces mandatory access controlsthat confine applications, daemons, etc. to the “least privilege” required to do their job.
• IPTables host-based firewall:
• IPTables is enabled by default.
• The rules are adjusted by Cisco Service Activation to open the appropriate ports and includethe correct rate limiting for the services being used on that server.
• The IPTable rules can be displayed using the following commands:
• utils firewall ipv4 list
Security Guide for Cisco Unified Communications Manager, Release 14246
Advanced System SecuritySecurity Hardening

• utils firewall ipv6 list
In addition to the above hardening features, Unified Communications Manager workload performs securityaudit logging for OS, DB and application software. There are three security audit logs included:
• Linux auditd log.
• Unified CM Application audit log.
• Informix database audit log.
There are also configuration settings that allow the system administrator to configure the system to complywith the organization’s infosec requirements. The system administrator-configurable security settings andutilities include, but are not limited to:
• Defining password policies. All passwords and PINs are hashed or encrypted and not stored as clear text.
• Account lockout settings and credential policy.
• Warning banner text.
• Enabling TLS/SRTP for signaling and media.
• Phone hardening settings.
• IPSec to secure connections which do not use TLS.
• Changing the self-signed PKI certificates to CA signed.
• Enabling FIPS mode or Common Criteria mode.
• Enabling SAML Single Sign-On which includes support for smart cards or bio-metric readers.
• View all network connections, processes, active packages.
• "show network status detail all nodns” Retrieves details on open ports, equivalent to a "netstat -an"Unix command.
• "show process list detail” Retrieves a list of all the processes and critical information about eachprocess, equivalent to a "ps -ef" Unix command.
• “show packages active” Displays the name and version for installed and active packages.
More details on configurable security options are in the Security Guide for Cisco Unified CommunicationsManager.
Cisco’s UC offerings are regularly tested and validated to be compliant with a range of governmentcertifications, including:
• Department of Defense Information Network Approved Products List (DoDIN APL)
• FIPS 140-2 Level 1
• FedRAMP
• Common Criteria
• Applicable U.S. Department of Defense Security Technical Implementation Guides (STIGs)
Security Guide for Cisco Unified Communications Manager, Release 14247
Advanced System SecuritySecurity Hardening

For additional information on Cisco government certifications, seehttps://www.cisco.com/c/en/us/solutions/industries/government/global-government-certifications.html
For security vulnerability alerts and management, the entire Unified CommunicationsManager workload fallsunder the umbrella of the Cisco Product Security Incident Response Team (PSIRT). Cisco PSIRT is a dedicated,global team that manages the receipt, investigation, and public reporting of information about securityvulnerabilities and issues related to Cisco products. You should:
• Monitor the Cisco Security Advisories and Alerts page(https://tools.cisco.com/security/center/publicationListing.x) for alerts concerning security issues thatmay affect your deployment.
• View the Cisco.com security advisory page for a given PSIRT to learn affected products, workarounds,and permanent fixes.
For more information, see: https://tools.cisco.com/security/center/resources/security_vulnerability_policy.html
Security Guide for Cisco Unified Communications Manager, Release 14248
Advanced System SecuritySecurity Hardening

P A R T VTroubleshooting
• Security Troubleshooting Overview, on page 251


C H A P T E R 24Security Troubleshooting Overview
• Remote Access, on page 251• Cisco Secure Telnet, on page 251
Remote AccessRemote access provides you with the ability to establish Terminal Services (remote port 3389), HTTP (remoteport 80), and Telnet (remote port 23) sessions to all the necessary equipment.
When you are setting up dial-in, do not use login:cisco or password:cisco because they constitute a vulnerabilityto the system.
Caution
Youmay resolvemany issues very quickly by allowing the TAC engineer remote access to the devices throughone of the following methods:
• Equipment with public IP address.
• Dial-in access—In decreasing order of preference: analog modem, Integrated Services Digital Network(ISDN) modem, virtual private network (VPN).
• Network Address Translation (NAT)—IOS and private Internet exchange (PIX) to allow access toequipment with private IP addresses.
Ensure that firewalls do not obstruct IOS traffic and PIX traffic during engineer intervention and that allnecessary services, such as Terminal Services, start on the servers.
TAC handles all access information with the utmost discretion, and no changes will get made to the systemwithout customer consent.
Note
Cisco Secure TelnetCisco Secure Telnet offers Cisco Service Engineers (CSE) transparent firewall access to UnifiedCommunications Manager servers on your site.
Security Guide for Cisco Unified Communications Manager, Release 14251

Cisco Secure Telnet works by enabling a Telnet client inside the Cisco Systems firewall to connect to a Telnetdaemon behind your firewall. This secure connection allows remote monitoring and maintenance of yourUnified Communications Manager servers without requiring firewall modifications.
Cisco accesses your network only with your permission. You must provide a network administrator at yoursite to help initiate the process.
Note
Firewall ProtectionVirtually all internal networks use firewall applications to restrict outside access to internal host systems.These applications protect your network by restricting IP connections between the network and the publicInternet.
Firewalls work by automatically blocking TCP/IP connections that are initiated from the outside, unless thesoftware is reconfigured to allow such access.
Corporate networks normally permit communication with the public Internet but only if connections directedto outside hosts originate from inside the firewall.
Cisco Secure Telnet DesignCisco Secure Telnet takes advantage of the fact that Telnet connections can easily be initiated from behind afirewall. Using an external proxy machine, the system relays TCP/IP communications from behind yourfirewall to a host behind another firewall at the Cisco Technical Assistance Center (TAC).
Using this relay server maintains the integrity of both firewalls while secure communication between theshielded remote systems get supported.
Figure 1: Cisco Secure Telnet System
Cisco Secure Telnet StructureThe external relay server establishes the connection between your network and Cisco Systems by building aTelnet tunnel. This enables you to transmit the IP address and password identifier of your UnifiedCommunications Manager server to your CSE.
The password comprises a text string upon which your administrator and the CSE mutually agree.Note
Security Guide for Cisco Unified Communications Manager, Release 14252
TroubleshootingFirewall Protection

Your administrator starts the process by initiating the Telnet tunnel, which establishes a TCP connection frominside your firewall out to the relay server on the public Internet. The Telnet tunnel then establishes anotherconnection to your local Telnet server, creating a two-way link between the entities.
The Telnet client at the Cisco TAC runs in compliance with systems that run on Windows NT and Windows2000 or with UNIX operating systems.
Note
After the Cisco Communications Manager at your site accepts the password, the Telnet client that is runningat the Cisco TAC connects to the Telnet daemon that is running behind your firewall. The resulting transparentconnection allows the same access as if the machine were being used locally.
After the Telnet connection is stable, the CSE can implement all remote serviceability functionality to performmaintenance, diagnostic, and troubleshooting tasks on your Unified Communications Manager server.
You can view the commands that the CSE sends and the responses that your Unified CommunicationsManagerserver issues, but the commands and responses may not always be completely formatted.
Security Guide for Cisco Unified Communications Manager, Release 14253
TroubleshootingCisco Secure Telnet Structure

Security Guide for Cisco Unified Communications Manager, Release 14254
TroubleshootingCisco Secure Telnet Structure

I N D E X
A
allowing remote access 251how to 251
authentication 10, 217device 10digest 10overview 10with CTI/JTAPI/TAPI applications 217
authentication string 219with CTI/JTAPI/TAPI applications 219
authorization 10, 151, 152configuration settings (table) 152
for SIP trunk 152configuring for SIP trunk 151overview 10
B
barge 3encryption restrictions with 3
C
Certificate Authority Proxy Function (CAPF) 219, 220, 221, 222, 223, 224, 227
configuration settings (table) 222for CTI/JTAPI/TAPI applications 222
configuring an application user or end user CAPF profile 221deleting an application user or end user CAPF profile 224viewing certificate operation status for application user or end
user 227with CTI/JTAPI/TAPI applications 219, 220, 223
interactions and requirements 220overview 219updating service parameters 223
Cisco Secure Telnet 251, 252design 252server access 251structure 252system 252
Cisco Unified Communications Manager JTAPI 182using credential policy 182using user directory 182
Cisco Unified Communications Manager TAPI 182using credential policy 182
Cisco Unified IP Phone 87, 117, 118configuration checklist (table) for security 118encrypted configuration file 87viewing security settings 117
computer telephony integration (CTI) 225, 226configuration checklist (table) for securing 225secure user groups 226
adding application users and end users 226configuration file 14
encryption 14Configuration Task Flow 189Contact Search Authentication 189, 190credential policy 182
JTAPI/TAPI support 182
D
device authentication 10, 121, 131, 151, 152configuration settings (table) 121, 152
for phone that is running SCCP 121for phone that is running SIP 121for SIP trunk 152
configuring for phones 131configuring for SIP trunk 151overview 10
digest authentication 10, 121, 131, 135, 136, 137, 151, 152associating digest user with a phone 136configuration checklist (table) 136
for phones 136configuration settings (table) 121, 137, 152
for end user 137for phone that is running SIP 121for SIP trunk 152
configuring digest credentials 135for end user 135
configuring for phones 131configuring for SIP trunk 151configuring service parameters 136overview 10
Security Guide for Cisco Unified Communications Manager, Release 14IN-1

E
Enable 190encrypted configuration file 87, 88, 90, 91, 93
configuration tips 88configuring manual key distribution 90disabling 93entering symmetric key 91understanding 87using symmetric key encryption w/public key 91
encryption 3, 14, 121, 131, 147, 148, 149, 151, 152, 158, 218configuration checklist (table) for gateways and trunks 151configuration settings (table) 121, 152
for phone that is running SCCP 121for phone that is running SIP 121for SIP trunk 152
configuring for phones 131configuring SRTP allowed check box 158configuring with barge 3for H.323 gateway 149for H.323/H.225/H.245 trunk 149for MGCP gateway 148for SIP trunk 147overview 14signaling 131, 151
configuring for phones 131configuring for SIP trunk 151
with CTI/JTAPI/TAPI applications 218
F
file authentication 10, 131configuring for phones 131overview 10
firewall protection 252
I
image authentication 10overview 10
integrity 10overview 10
IPSec 151configuration checklist (table) for IPSec 151
J
JTAPI 182, 225, 227Cisco Unified Communications Manager JTAPI 182configuration checklist (table) for securing 225configuring security service parameters 227
L
locally significant certificate (LSC) 219with CTI/JTAPI/TAPI applications 219
M
media encryption, See encryptionMGCP gateway 151
configuration checklist (table) for security 151
N
NMAP scans 21running 21
P
phone hardening 115configuring 115
phone security profile 132synchronizing configuration to applicable phones 132
Phone Support 190
R
remote access 251
S
Secure Directory Server URL 190security 1, 3, 10, 14, 28, 252
authentication overview 10authorization overview 10best practices 1configuration checklist for authentication and encryption
(table) 28encryption overview 14firewall integrity 252rebooting the cluster 3rebooting the server 3resetting devices 3restarting Cisco Unified Communications Manager service 3using barge with encryption 3
security profile 121, 131, 132, 133, 150, 151, 152, 157applying for SIP trunk 157applying to phones 132configuration settings (table) 121, 152
for phone that is running SCCP 121for phones that is running SIP 121for SIP trunk 152
configuring for phones 131configuring for SIP trunk 151deleting for phones 133finding for phones 131
Security Guide for Cisco Unified Communications Manager, Release 14IN-2
INDEX

security profile (continued)finding phones that use 133overview for SIP trunk 150
signaling authentication 10overview 10
signaling encryption 14overview 14
SIP Trunk security profile 158synchronizing configuration to applicable SIP trunks 158
SRST 195overview for securing 195
SRST reference 196, 199configuring 196, 199
T
TAC 251allowing remote access 251
TAPI 225, 227configuration checklist (table) for securing 225configuring security service parameters 227
Telnet 251, 252Cisco Secure 251, 252design 252structure 251
transport security 121, 131, 151, 152configuration settings (table) 121, 152
for phone that is running SCCP 121for phone that is running SIP 121for SIP trunk 152
configuring for phones that are running SIP 131configuring for SIP trunk 151
troubleshooting 251remote access for TAC 251
Security Guide for Cisco Unified Communications Manager, Release 14IN-3
INDEX

Security Guide for Cisco Unified Communications Manager, Release 14IN-4
INDEX


![Mission Manager[1]](https://static.fdokumen.com/doc/165x107/6313fe215cba183dbf075a68/mission-manager1.jpg)