StoreFront 2203 - Citrix Product Documentation
342
StoreFront 2203 Citrix Product Documentation | docs.citrix.com May 13, 2022
-
Upload
khangminh22 -
Category
Documents
-
view
1 -
download
0
Transcript of StoreFront 2203 - Citrix Product Documentation

StoreFront 2203
Citrix Product Documentation | docs.citrix.com May 13, 2022

StoreFront 2203
Contents
StoreFront 2203 Long Term Service Release 3
What’s new 3
Fixed issues in 2203 4
Known issues in 2203 5
Third party notices 6
System requirements 6
Plan your StoreFront deployment 12
User access options 18
User authentication 26
Optimize the user experience 37
StoreFront high availability andmulti-site configuration 41
Install, set up, upgrade, and uninstall 45
Create a new deployment 68
Join an existing server group 74
Reset a server to factory defaults 75
Configure server groups 77
Configure authentication and delegation 79
Configure the authentication service 80
XML service-based authentication 85
Configure smart card authentication 87
Configure the password expiry notification period 92
Configure andmanage stores 93
Create or remove a store 94
© 1999‒2022 Citrix Systems, Inc. All rights reserved. 2

StoreFront 2203
Create an unauthenticated store 100
Export store provisioning files for users 102
Advertise and hide stores to users 103
Manage the resources made available in stores 104
Manage remote access to stores through Citrix Gateway 105
Certificate Revocation List (CRL) checking 108
Configure two StoreFront stores to share a common subscription datastore 119
Manage subscription data for a store 120
Store subscription data using Microsoft SQL Server 126
Advanced store settings 147
Manage a Citrix Receiver for Web site 152
Create a Citrix Receiver for Web site 153
Configure Citrix Receiver for Web sites 154
Support for the unified user experience 160
Create andmanage featured apps 183
Configure workspace control 185
Configure Citrix Workspace app for HTML5 use of browser tabs 187
Configure communication timeout duration and retry attempts 187
Configure user access 189
Configure StoreFront to launch applications and desktops in WindowedMode 193
Set up highly available multi-site stores 194
Integrate with Citrix Gateway and Citrix ADC 212
Add a Citrix Gateway connection 215
Import a Citrix Gateway 217
© 1999‒2022 Citrix Systems, Inc. All rights reserved. 3

StoreFront 2203
Configure Citrix Gateway connection settings 226
Load balancing with Citrix ADC appliance 229
Configure two URLs for the same Citrix Gateway 247
Configure Citrix ADC and StoreFront for Delegated Forms Authentication (DFA) 258
Authenticate using different domains 261
Configure beacon points 272
Create a single Fully Qualified Domain Name (FQDN) to access a store internally and exter-nally 274
Advanced configurations 292
Configure Resource Filtering 293
Configure using configuration files 294
Configure StoreFront using the configuration files 295
Configure Citrix Receiver for Web sites using the configuration files 300
Secure your StoreFront deployment 301
Export and import the StoreFront configuration 310
StoreFront SDK 319
Troubleshoot StoreFront 334
© 1999‒2022 Citrix Systems, Inc. All rights reserved. 4

StoreFront 2203
StoreFront 2203 Long Term Service Release
April 6, 2022
StoreFront 2203 Long Term Service Release (LTSR) is the latest version of StoreFront. This documen-tation reflects the features and configurations in this latest release.
StoreFront is an enterprise app store that aggregates applications and desktops from Citrix VirtualAppsandDesktops sites intoa singleeasy touse store forusers. StoreFront is an integral componentofCitrix Virtual Apps andDesktopswhich canbeusedwith several versionsof Virtual Apps andDesktops.
Users can use Citrix Workspace app or supported versions of Citrix Receiver to access StoreFrontstores. If a specific version behaves differently, or the user interface text refers to both, it is calledout. Otherwise the documentation refers to “Citrix Workspace app”.
Earlier releases
For documentation on previous releases, see:
• StoreFront 1912 LTSR• StoreFront 3.12 LTSR
The product lifecycle strategy for Citrix Virtual Apps and Desktops Current Releases (CR) and LongTermService Releases (LTSR) is described in LifecycleMilestones. Additional Lifecycle Information forStoreFront is provided in CTX200356.
Note:
Upgrades to the latest Current Release version of StoreFront from earlier unsupported versionsis not supported. If you are using Current Releases youmust ensure that you are on a supportedStoreFront Current Release version always.
What’s new
March 29, 2022
What’s new in 2203
The StoreFront version 2203 includes the following new features and enhancements:
© 1999‒2022 Citrix Systems, Inc. All rights reserved. 5

StoreFront 2203
Categories view for Unified user experience
In the collapsedmodeof theCategories section, the apps that are uncategorized are no longer placedin theUncategorized folder. Instead, theappsappeardirectly under the first layerof the category fold-ers. With this feature, you have a faster access to the applications and an enhanced user experience.
To enable these settings, do the following steps:
1. Go toManage Receiver for Web sites > Configure > Categories Settings.2. Select the Collapsed section of the Category view.3. Select theMove uncategorized apps into an Uncategorized folder checkbox.
Upload StoreFront identity to broker via a header
With this feature, you can determine if specific calls are received fromDelivery Controller Monitors onCitrix Gateway, or the Advanced Health Check feature on the StoreFront store. This information helpsprovide alerts to administrators on commonmisconfiguration.
Administrators can disable this feature using the following PowerShell script on a StoreFront server:Add-STFFeatureState -Name ”Citrix.StoreFront.Wing.UploadServerIdentity”-IsEnabled $False
Support ended for TLS 1.0 and TLS 1.1
From this release onward, StoreFront no longer supports TLS 1.0, and TLS 1.1 protocols between Cit-rix Virtual Apps and Desktops (formerly XenApp and XenDesktop) and Citrix Receiver, and WorkspaceHub.
Fixed issues in 2203
March 29, 2022
The following issues have been fixed since version 1912 LTSR CU4:
• When you attempt to launch a user session using Citrix StoreFront services API, the parameterspassed to the launch request might be incorrect. [CVADHELP-16834]
• SAML authentication might fail on the Citrix Workspace app that is connected internally to aStoreFront. [CVADHELP-17295]
• This fix is an enhancement to StoreFront supporting the Local Host Cache feature in Citrix DaaSdeployment. This enhancement allows users to launch resources from locationswhere connec-tors are not added to the StoreFront as Delivery Controllers when the service is not in the cloudoutage mode. [CVADHELP-17385]
© 1999‒2022 Citrix Systems, Inc. All rights reserved. 6
StoreFront 2203
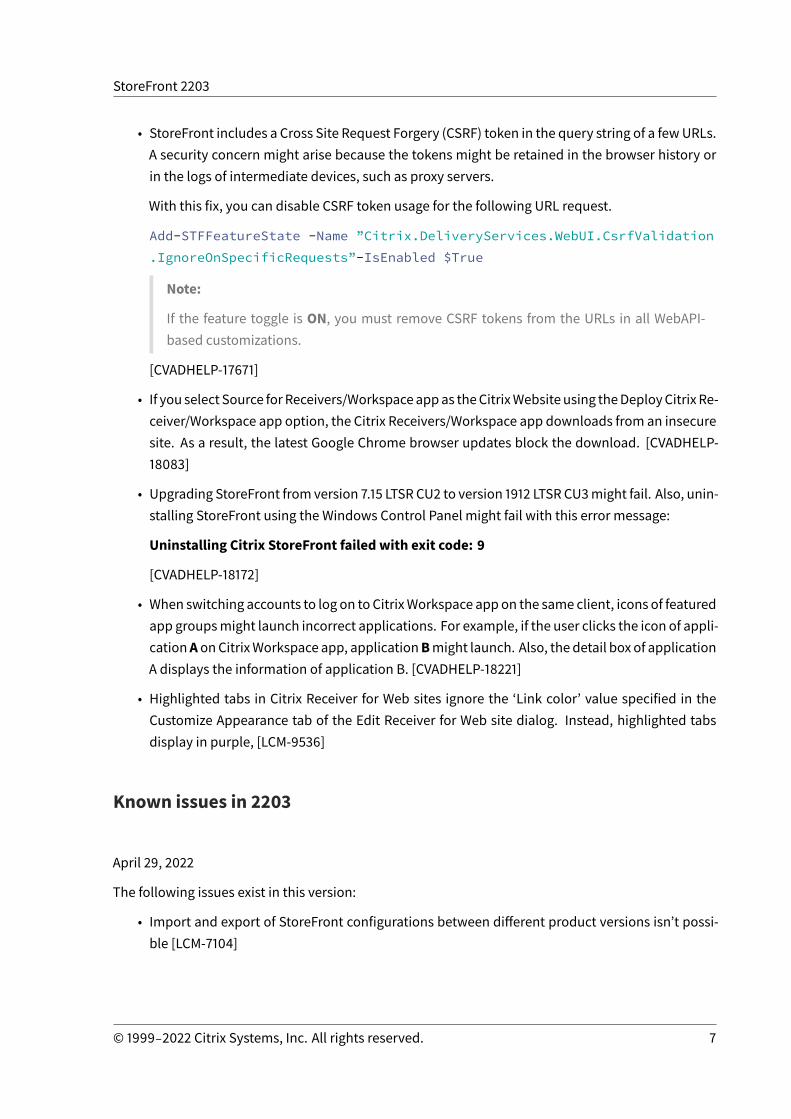
• StoreFront includes a Cross Site Request Forgery (CSRF) token in the query string of a fewURLs.A security concern might arise because the tokens might be retained in the browser history orin the logs of intermediate devices, such as proxy servers.
With this fix, you can disable CSRF token usage for the following URL request.
Add-STFFeatureState -Name ”Citrix.DeliveryServices.WebUI.CsrfValidation.IgnoreOnSpecificRequests”-IsEnabled $True
Note:
If the feature toggle is ON, you must remove CSRF tokens from the URLs in all WebAPI-based customizations.
[CVADHELP-17671]
• If you select Source forReceivers/Workspaceappas theCitrixWebsiteusing theDeployCitrix Re-ceiver/Workspace app option, the Citrix Receivers/Workspace app downloads from an insecuresite. As a result, the latest Google Chrome browser updates block the download. [CVADHELP-18083]
• Upgrading StoreFront from version 7.15 LTSR CU2 to version 1912 LTSR CU3might fail. Also, unin-stalling StoreFront using the Windows Control Panel might fail with this error message:
Uninstalling Citrix StoreFront failed with exit code: 9
[CVADHELP-18172]
• When switching accounts to log on to CitrixWorkspace appon the same client, icons of featuredapp groupsmight launch incorrect applications. For example, if the user clicks the icon of appli-cationA onCitrixWorkspace app, applicationBmight launch. Also, the detail box of applicationA displays the information of application B. [CVADHELP-18221]
• Highlighted tabs in Citrix Receiver for Web sites ignore the ‘Link color’ value specified in theCustomize Appearance tab of the Edit Receiver for Web site dialog. Instead, highlighted tabsdisplay in purple, [LCM-9536]
Known issues in 2203
April 29, 2022
The following issues exist in this version:
• Import and export of StoreFront configurations between different product versions isn’t possi-ble [LCM-7104]
© 1999‒2022 Citrix Systems, Inc. All rights reserved. 7

StoreFront 2203
• Applications in a StoreFront store fail to count and launch, and an SSL connection error is re-ported. It happens if you use the Citrix ADC load balancing feature to distribute the load to thedelivery controller servers. And StoreFront is using HTTPS to communicate with the load bal-ancing delivery controller services. To resolve this issue, the cipher suite order list on Citrix ADCmust include only the TLS_ECDHE_* cipher suites. Assign a delivery controller server as STAServer in Citrix ADC or StoreFront outside your site. Also ensure that the cipher suite order liston StoreFront includes the cipher suites. These cipher suites must precede any other ciphersuites. [LCM-9308]
Third party notices
December 18, 2019
StoreFront might include third party software licensed under the terms defined in the following doc-ument:
StoreFront Third Party Notices (PDF Download)
System requirements
March 21, 2022
When planning your installation, Citrix recommends that you allow at least an additional 2 GB of RAMfor StoreFront over andabove the requirements of anyother products installedon the server. The sub-scription store service requires aminimumof 5MBdisk space, plus approximately 8MB for every 1000application subscriptions. All other hardware specifications must meet the minimum requirementsfor the installed operating system.
Note:
Upgrading to the latest current release fromanolder current release that is nowEnd of Life is notsupported. For more information see CTX200356.
Citrix has tested and provides support for StoreFront installations on the following platforms:
• Windows Server 2022 Datacenter and Standard editions• Windows Server 2019 Datacenter and Standard editions• Windows Server 2016 Datacenter and Standard editions
Upgrading the operating system version on a server running StoreFront is not supported. Citrix rec-ommends that you install StoreFront on a new installation of the operating system. All the servers
© 1999‒2022 Citrix Systems, Inc. All rights reserved. 8

StoreFront 2203
in a multiple server deployment must run the same operating system version with the same localesettings.
StoreFront server groups containing mixtures of operating system versions and locales are not sup-ported. StoreFront server groups can contain a maximum of six servers. However, from a capacityperspective based on simulations, there is no advantage of server groups containingmore than threeservers. Ideally, all servers in a server group should reside in the same location (data center, availabil-ity zone), but server groups can span locations within the same region provided that links betweenservers in the groupmeet minimum latency criteria. See Scalability.
Before you can install StoreFront, Windows PowerShell (version 4.0 or later) and Microsoft Manage-ment Console (version 3.0 or later) must be installed on the web server. These are both default com-ponents of Windows Server.
The StoreFront installer checks that the following prerequisites are installed and enabled before in-stalling StoreFront. By default these prerequisites are provided as feature packages by the OS. If theStoreFront installer detects that any of these prerequisites are missing or disabled, they are automat-ically installed and enabled:
• Microsoft .NET Framework (version 4.7.2 or later)
• Microsoft ASP.NET (version 4.7.2 or later)
• Microsoft Visual C++ 2017 (x64) Runtime (v141)
• Microsoft Internet Information Services (IIS)
IIS is added by the web server ‘Windows Server’ role, with its version dependent on the chosenoperating system. For reference, the StoreFront installer adds the following IIS roles:
– Web-Static-Content– Web-Default-Doc– Web-Http-Errors– Web-Http-Redirect– Web-Http-Logging– Web-Mgmt-Console– Web-Scripting-Tools– Web-Windows-Auth– Web-Basic-Auth– Web-AppInit– Web-Asp-Net45– Net-Wcf-Tcp-PortSharing45
The relative path to StoreFront in IIS must be the same on all the servers in a server group.
StoreFront uses the following ports for communication. Ensure your firewalls and other network de-vices permit access to these ports.
© 1999‒2022 Citrix Systems, Inc. All rights reserved. 9

StoreFront 2203
• TCP ports 80 and 443 are used for HTTP andHTTPS communications, respectively, andmust beaccessible from both inside and outside the corporate network.
• TCP port 808 is used for communications between StoreFront servers and must therefore beaccessible.
• A TCP port randomly selected from all unreserved ports is used for communications betweenthe StoreFront servers in a server group. When you install StoreFront, a Windows Firewall ruleis configured enabling access to the StoreFront executable. However, since the port is assignedrandomly, you must ensure that any firewalls or other devices on your internal network do notblock traffic to any of the unassigned TCP ports.
• TCP port 8008 is used by Citrix Workspace app for HTML5, or supported versions of Citrix Re-ceiver and Citrix Workspace app, where enabled, for communications from local users on theinternal network to the servers providing their desktops and applications.
StoreFront supports both pure IPv6 networks and dual-stack IPv4/IPv6 environments.
Storing subscription data using Microsoft SQL Server
You can optionally Store subscription data using Microsoft SQL Server. StoreFront supports same Mi-crosoft SQL Server versions for this as Citrix Virtual Apps and Desktops does for databases. In CitrixVirtual Apps and Desktops system requirements, see Databases.
Infrastructure requirements
Citrix has tested and provides support for StoreFront when used with the following Citrix product ver-sions.
Citrix server requirements
StoreFront supports the following versions of Citrix Virtual Apps and Desktops:
• Citrix Virtual Apps and Desktops 7 2203 LTSR• Citrix Virtual Apps and Desktops 7 2112• Citrix Virtual Apps and Desktops 7 2109• Citrix Virtual Apps and Desktops 7 2106• Citrix Virtual Apps and Desktops 7 2103• Citrix Virtual Apps and Desktops 7 2012• Citrix Virtual Apps and Desktops 7 1912 LTSR• XenApp and XenDesktop 7.15 LTSR
* For more information about using this Current Release (CR) in a Long Term Service (LTSR) environ-ment and other frequently asked questions, see Knowledge Center article.
© 1999‒2022 Citrix Systems, Inc. All rights reserved. 10

StoreFront 2203
Citrix Gateway requirements
The followingversionsofCitrixGatewayandNetScalerGatewaycanbeused toprovideaccess toStore-Front for users on public networks.
• Citrix Gateway 13.1• Citrix Gateway 13.0• Citrix Gateway 12.1
Citrix Workspace app for HTML5 requirements
To enable users to access desktops and applications using Citrix Workspace app for HTML5 runningon Receiver for Web sites, the following additional requirements apply.
For internal network connections, Citrix Workspace app for HTML5 enables access to desktops andapplications provided by the following products.
• Citrix Virtual Apps and Desktops 7 2203 LTSR• Citrix Virtual Apps and Desktops 7 2112• Citrix Virtual Apps and Desktops 7 2109• Citrix Virtual Apps and Desktops 7 2106• Citrix Virtual Apps and Desktops 7 2103• Citrix Virtual Apps and Desktops 7 2012• Citrix Virtual Apps and Desktops 7 1912 LTSR• XenApp and XenDesktop 7.15 LTSR
Note:
Citrix Workspace app for HTML5 only launches desktops and apps using internal network con-nections when secure connections to the VDAs hosting those resources have been configured.You cannot use HTTP connections to the VDAs that host the apps and desktops.
For remote users outside the corporate network, Citrix Workspace app for HTML5 enables access todesktops and applications through the following versions of Citrix Gateway and NetScaler Gateway.
• Citrix Gateway 13.0• Citrix Gateway 12.1• NetScaler Gateway 12.0• NetScaler Gateway 11.1
For users connecting through Citrix Gateway, Citrix Workspace app for HTML5 enables access to desk-tops and applications provided by the following products.
• Citrix Virtual Apps and Desktops 7 1912 LTSR• Citrix Virtual Apps and Desktops 7 1909• Citrix Virtual Apps and Desktops 7 1906
© 1999‒2022 Citrix Systems, Inc. All rights reserved. 11

StoreFront 2203
• Citrix Virtual Apps and Desktops 7 1903• Citrix Virtual Apps and Desktops 7 1811• Citrix Virtual Apps and Desktops 7 1808• XenApp and XenDesktop 7.15 LTSR• XenApp and XenDesktop 7.6 LTSR
User device requirements
StoreFront provides a number of different options for users to access their desktops and applica-tions. Citrix Workspace app users can either access stores through Citrix Workspace app, or use aweb browser to log on to a Citrix Receiver for Web site for the store. For users who cannot install CitrixWorkspace appbutwhohave anHTML5-compatiblewebbrowser, you canprovide access to desktopsand applications directlywithin thewebbrowser by enabling CitrixWorkspace app forHTML5on yourCitrix Receiver for Web site.
Users with PCs running the Citrix Desktop Lock, along with older Citrix clients that cannot be up-graded, must connect through the XenApp Services URL for the store.
To deliver Microsoft Application Virtualization (App-V) sequences to users, you also require a sup-ported version of the Microsoft Application Virtualization Desktop Client. For more information,see Managing Streamed Applications. Users cannot access offline applications or App-V sequencesthrough Citrix Receiver for Web sites.
Using Citrix Workspace app to access StoreFront stores
You can use all currently supported versions of Citrix Workspace app to access StoreFront stores fromboth internal network connections and through Citrix Gateway. For Citrix Workspace app and CitrixReceiver lifecycle dates, see https://www.citrix.com/support/product-lifecycle/milestones/receiver.html.
You can connect to StoreFront stores through Citrix Gateway using the Citrix Gateway plug-in, ICAproxy or clientless VPN (cVPN). See Unified user experience.
Accessing stores through Citrix Receiver for Web sites
ToaccessCitrix Receiver forWeb sites fromboth internal network connections and throughCitrixGate-way, use latest version of the following browsers:
OnWindows
• Internet Explorer 11• Microsoft Edge
© 1999‒2022 Citrix Systems, Inc. All rights reserved. 12

StoreFront 2203
• Google Chrome• Mozilla Firefox
OnMac
• Safari• Google Chrome• Mozilla Firefox
On Linux
• Google Chrome• Mozilla Firefox
Connections through Citrix Gateway can bemade using the Citrix Gateway plug-in, ICA proxy or client-less VPN (cVPN). Additionally, specific versions of Citrix Gateway are required to enable connectionsfrom outside the corporate network. For more information, see Infrastructure requirements.
Launching resources through Citrix Receiver for Web sites
Citrix Receiver for Web sites support launches either via a natively installed Citrix Workspace app, orviaCitrixWorkspaceapp forHTML5. All of thebrowsers listedaboveareHTML5compliant andsupportHTML5 resource launches. Depending on your Receiver for Web configuration, it is possible for endusers to switch between the two launchmethods.
Accessing stores through XenApp Services URLs
You can use XenApp Services URLs to access StoreFront stores with reduced functionality. XenAppServices URLs provide backward compatible legacy support for connections made by Citrix Receiver3.4 Enterprise and older clients that only support connections via PNAgent. Connections throughCitrix Gateway, where supported, can be made using both the Citrix Gateway plug-in and clientlessaccess.
Smart card requirements
Using Citrix Receiver for Windows 4.x, and Citrix Workspace app 1808 for Windows or later,with smart cards
Citrix tests for compatibility with the U.S. Government Dept. Of Defense Common Access Card (CAC),U.S. National Institute of Standards and Technology Personal Identity Verification (NIST PIV) cards,
© 1999‒2022 Citrix Systems, Inc. All rights reserved. 13

StoreFront 2203
and some USB smart card tokens. You can use contact card readers that comply with the USB Chip/S-martCard InterfaceDevices (CCID) specificationandare classifiedby theGermanZentralerKreditauss-chuss (ZKA) as Class 1 smart card readers. ZKA Class 1 contact card readers require that users inserttheir smart cards into the reader. Other types of smart card readers, including Class 2 readers (whichhave keypads for entering PINs), contactless readers, and virtual smart cards based on Trusted Plat-formModule (TPM) chips, are not supported.
For Windows devices, smart card support is based on Microsoft Personal Computer/Smart Card(PC/SC) standard specifications. As a minimum requirement, smart cards and card readers must besupported by the operating system and have received Windows Hardware Certification.
For more information about Citrix-compatible smart cards and middleware, see Smart cards in theCitrix Virtual Apps and Desktops documentation, and http://www.citrix.com/ready.
Authenticating through Citrix Gateway
The followingversionsofCitrixGatewaycanbeused toprovideaccess toStoreFront forusersonpublicnetworks authenticating with smart cards.
• Citrix Gateway 13.0• Citrix Gateway 12.1• NetScaler Gateway 12.0• NetScaler Gateway 11.1
Citrix Analytics service requirements
You can configure Citrix StoreFront so that Citrix Workspace App can send data to the Citrix Analyticsservice. Configuration details are described in Citrix Analytics service. This functionality is supportedfor the following scenarios:
• Stores which are accessed by browsing to Citrix Receiver for Web sites in HTML5-compatiblebrowsers. Citrix Analytics service data is supplied when launching resources using either thenative Citrix Workspace app or using HTML5.
• Stores which are accessed from Citrix Workspace app 1903 for Windows or later.• Stores which are accessed from Citrix Workspace app 1901 for Linux or later.
Plan your StoreFront deployment
July 8, 2020
StoreFront employs Microsoft .NET technology running on Microsoft Internet Information Services(IIS) to provide enterprise app stores that aggregate resources and make them available to users.
© 1999‒2022 Citrix Systems, Inc. All rights reserved. 14

StoreFront 2203
StoreFront integrates with your Citrix Virtual Apps and Desktops deployments, providing users with asingle, self-service access point for their desktops and applications.
StoreFront comprises the following core components:
• Theauthentication serviceauthenticatesusers toMicrosoftActiveDirectory, ensuring thatusersdo not need to log on again to access their desktops and applications. For more information,see User authentication.
• Stores enumerate and aggregate desktops and applications from Citrix Virtual Apps and Desk-tops. Users access stores through Citrix Workspace app, Citrix Receiver for Web sites, and Xe-nApp Services URLs. For more information, see User access options.
• The subscription store service records details of users’ application subscriptions and updatestheir devices toensureaconsistent roamingexperience. Formore informationaboutenhancingthe experience for your users, see Optimize the user experience.
StoreFront can be configured either on a single server or as a multiple server deployment. Multipleserver deployments not only provide additional capacity, but also greater availability. The modulararchitecture of StoreFront ensures that configuration information and details of users’ applicationsubscriptions are stored on and replicated between all the servers in a server group. This means thatif a StoreFront server becomes unavailable for any reason, users can continue to access their storesusing the remaining servers. Meanwhile, the configuration and subscription data on the failed serverare automatically updatedwhen it reconnects to the server group. Subscriptiondata is updatedwhenthe server comes back online but you must propagate configuration changes if any were missed bythe server while offline. In the event of a hardware failure that requires replacement of the server,you can install StoreFront on a new server and add it to the existing server group. The new server isautomatically configured and updated with users’ application subscriptions when it joins the servergroup.
The figure shows a typical StoreFront deployment.
© 1999‒2022 Citrix Systems, Inc. All rights reserved. 15

StoreFront 2203
Load balancing
For multiple server deployments, external load balancing through, for example, Citrix ADC or Win-dows Network Load Balancing is required. Configure the load balancing environment for failover be-tween servers to provide a fault-tolerant deployment. For more information about load balancingwith Citrix ADC , see Load Balancing. For more information about Windows Network Load Balanc-ing, see https://docs.microsoft.com/en-us/previous-versions/windows/it-pro/windows-server-2012-R2-and-2012/hh831698(v=ws.11).
Active loadbalancing of requests sent fromStoreFront to Citrix Virtual Desktops sites andCitrix VirtualApps farms is recommended for deploymentswith thousands of users orwhere high loads occur, suchas when a large number of users log on over a short period of time. Use a load balancer with built-inXMLmonitors and session persistency, such as Citrix ADC .
If youdeploySSL-terminating loadbalanceror if youneed to troubleshoot, youcanuse thePowerShellcmdlet Set-STFWebReceiverCommunication.
Syntax:
1 Set-STFWebReceiverCommunication [-WebReceiverService] <WebReceiverService> [[-Loopback] <On | Off | OnUsingHttp>] [[-
© 1999‒2022 Citrix Systems, Inc. All rights reserved. 16

StoreFront 2203
LoopbackPortUsingHttp] <Int32>]
The valid values are:
• On - This is the default value for new Citrix Receiver for Web sites. Citrix Receiver for Web usesthe schema (HTTPS or HTTP) and port number from the base URL but replaces the host withthe loopback IP address to communicate with StoreFront Services. This works for single serverdeployments and deployments with a non SSL-terminating load balancer.
• OnUsingHttp - Citrix Receiver for Web uses HTTP and the loopback IP address to communicatewith StoreFront Services. If you are using an SSL-terminating load balancer, select this value.Youmust also specify the HTTP port if it is not the default port 80.
• Off - This turns off loopback and Citrix Receiver for Web uses the StoreFront base URL to com-municate with StoreFront Services. If you perform an in-place upgrade, this is the default valueto avoid disruption to your existing deployment.
For example, if you are using an SSL-terminating load balancer, your IIS is configured to use port 81 forHTTP and the path of your Citrix Receiver for Web site is /Citrix/StoreWeb, you can run the followingcommand to configure the Citrix Receiver for Web site:
1 $wr = Get-STFWebReceiverService -VirtualPath /Citrix/StoreWeb2 Set-STFWebReceiverCommunication -WebReceiverService $wr -Loopback
OnUsingHttp -LoopbackPortUsingHttp 81
Note:
Switch off loopback to use anywebproxy tool like Fiddler to capture the network traffic betweenCitrix Receiver for Web and StoreFront Services.
Active Directory considerations
For single server deployments you can install StoreFront on a non-domain-joined server (but certainfunctionality will be unavailable); otherwise, StoreFront servers must reside either within the ActiveDirectory domain containing your users’ accounts or within a domain that has a trust relationshipwith the user accounts domain unless you enable delegation of authentication to the Citrix VirtualApps and Desktops sites or farms. All the StoreFront servers in a group must reside within the samedomain.
User connections
In a production environment, Citrix recommends using HTTPS to secure communications betweenStoreFront and users’ devices. To use HTTPS, StoreFront requires that the IIS instance hosting the au-thentication service and associated stores is configured for HTTPS. In the absence of the appropriate
© 1999‒2022 Citrix Systems, Inc. All rights reserved. 17

StoreFront 2203
IIS configuration, StoreFront uses HTTP for communications. You can change fromHTTP to HTTPS atany time, provided the appropriate IIS configuration is in place.
If you plan to enable access to StoreFront from outside the corporate network, Citrix Gateway is re-quired to provide secure connections for remote users. Deploy Citrix Gateway outside the corporatenetwork, with firewalls separating Citrix Gateway from both the public and internal networks. Ensurethat Citrix Gateway is able to access the Active Directory forest containing the StoreFront servers.
Multiple Internet Information Services (IIS) websites
StoreFront enables you to deploy different Stores in different IIS websites per Windows server so thateach store can have a different host name and certificate binding.
Start by creating two websites, in addition to the default web site. After creating multiple websites inIIS, use the PowerShell SDK to create a StoreFront deployment in each of those IIS websites. Formoreinformation about creating websites in IIS, see How to set up your first IIS Website.
Note:
The StoreFront and PowerShell consoles cannot be open at the same time. Always close theStoreFront management console before using the PowerShell console to administer your Store-Front configuration. Likewise, close all instances of PowerShell before opening the StoreFrontconsole.
Example: To create two IIS website deployments—one for applications and one for desktop
1 Add-STFDeployment -SiteID 1 -HostBaseURL ”https://www.storefront.app.com”
2 Add-STFDeployment -SiteID 2 -HostBaseURL ”https://www.storefront.desktop.com”
StoreFront disables the management console when it detects multiple sites and displays a messageto that effect.
For more information, see Before installing and configuring.
Scalability
The number of Citrix Workspace app users supported by a StoreFront server group depends on thehardware you use and on the level of user activity. Based on simulated activity where users log on,enumerate 100 published applications, and start one resource, expect a single StoreFront server withthe minimum recommended specification of two virtual CPUs running on an underlying dual IntelXeon L5520 2.27 Ghz processor server to enable up to 30,000 user connections per hour.
© 1999‒2022 Citrix Systems, Inc. All rights reserved. 18

StoreFront 2203
Expect a server group with two similarly configured servers in the group to enable up to 60,000 userconnections per hour; three nodes up to 90,000 connections per hour; four nodes up to 120,000 con-nectionsper hour; fivenodesup to 150,000connectionsper hour; six nodesup to 175,000connectionsper hour.
The throughput of a single StoreFront server can also be increased by assigning more virtual CPUs tothe system, with four virtual CPUs enabling up to 55,000 user connections per hour and eight virtualCPUs enabling 80,000 connections per hour.
Theminimum recommendedmemory allocation for each server is 4GB.Whenusing Citrix Receiver forWeb, assign an additional 700 bytes per resource, per user in addition to the basememory allocation.As with using Citrix Receiver forWeb, when using Citrix Workspace app, design environments to allowanextra 700bytesper resource, per user on topof thebase4GBmemory requirements for this versionof StoreFront.
As your usage patterns might be different than those simulated above, your servers might supportmore or fewer numbers of users connections per hour.
Important:
StoreFront server groupdeployments areonly supportedwhere linksbetween servers in a servergroup have latency of less than 40 ms (with subscriptions disabled) or less than 3 ms (with sub-scriptions enabled). Ideally, all servers in a server group should reside in the same location (datacenter, availability zone), but server groups can span locations within the same region providedthat links between servers in the group meet these latency criteria. Examples include servergroups spanning availability zones within a cloud region, or between metropolitan area datacenters. Note that latency between zones varies by cloud provider. Citrix do not recommendspanning locations as a disaster recovery configuration, but it may be suitable for high availabil-ity.
StoreFront server groups containing mixtures of operating system versions, or mixtures of oper-ating system languages or locale configurations, are not supported.
Timeout considerations
Occasionally, network issues or other problems can occur between a StoreFront store and the serversthat it contacts, causingdelays or failures for users. You canuse the timeout settings for a store to tunethis behavior. If you specify a short timeout setting, StoreFront quickly abandons a server and triesanother one. This is useful if, for example, you have configuredmultiple servers for failover purposes.
If you specify a longer timeout, StoreFront waits longer for a response from a single server. This isbeneficial in environments where network or server reliability is uncertain and delays are common.
Citrix Receiver for Web also has a timeout setting, which controls how long a Citrix Receiver for Website waits for a response from the store. Set this timeout setting to a value at least as long as the store
© 1999‒2022 Citrix Systems, Inc. All rights reserved. 19

StoreFront 2203
timeout. A longer timeout setting allows for better fault tolerance, but users might experience longdelays. A shorter timeout setting reduces delays for users, but they might experience more failures.
For information about setting timeouts, see Communication time-out duration and server retry at-tempts and Communication time-out duration and retry attempts.
User access options
June 3, 2020
Three different methods are available for users to access StoreFront stores.
• Citrix Receiver or Citrix Workspace app - Users with compatible versions of Citrix Receiver orCitrixWorkspace app can access StoreFront storeswithin the Citrix Receiver or CitrixWorkspaceapp user interface. This provides the best user experience and the greatest functionality.
• Citrix Receiver forWeb sites - Users with compatible web browsers can access StoreFront storesby browsing to Citrix Receiver for Web sites. By default, users also require a compatible versionof Citrix Receiver or Citrix Workspace app to access their desktops and applications. However,you can configure your Citrix Receiver for Web sites to enable users with HTML5-compatiblebrowsers to access their resources without installing Citrix Receiver or Citrix Workspace app.When you create a new store, a Citrix Receiver for Web site is created for the store by default.
• XenApp Services URLs - Users of domain-joined desktop appliances and repurposed PCs run-ning the Citrix Desktop Lock, along with users who have older Citrix clients that cannot be up-graded, can access stores using the XenApp Services URL for the store. When you create a newstore, the XenApp Services URL is enabled by default.
The figure shows the options for users to access StoreFront stores:
© 1999‒2022 Citrix Systems, Inc. All rights reserved. 20

StoreFront 2203
Citrix Receiver or Citrix Workspace app
Accessing stores from within the Citrix Receiver or Citrix Workspace app user interface provides thebest user experience and the greatest functionality. For the Citrix Receiver or Citrix Workspace appversions that can be used to access stores in this way, see System Requirements. References to “Cit-rix Workspace app” in this document also represent the supported versions of Citrix Receiver unlessotherwise noted.
Citrix Workspace app uses internal and external URLs as beacon points. By attempting to contactthese beacon points, Citrix Workspace app can determine whether users are connected to local orpublic networks. When a user accesses a desktop or application, the location information is passedto the server providing the resource so that appropriate connection details can be returned to CitrixWorkspace app. This enables Citrix Workspace app to ensure that users are not prompted to log onagainwhen they access a desktop or application. Formore information, see Configure beacon points.
After installation, Citrix Workspace appmust be configured with connection details for the stores pro-viding users’ desktops and applications. You canmake the configuration process easier for your usersby providing themwith the required information in one of the following ways.
Important:
By default, Citrix Workspace app requires HTTPS connections to stores. If StoreFront is not con-figured for HTTPS, usersmust carry out additional configuration steps to use HTTP connections.Citrix strongly recommends that you do not enable unsecured user connections to StoreFront ina production environment. Formore information, see Configure and install using command-lineparameters in the Citrix Receiver for Windows or Citrix Workspace app for Windows documenta-
© 1999‒2022 Citrix Systems, Inc. All rights reserved. 21

StoreFront 2203
tion.
Provisioning files
You can provide users with provisioning files containing connection details for their stores. After in-stallingCitrixWorkspaceapp, users open the .cr file to automatically configure accounts for the stores.By default, Citrix Receiver for Web sites offer users a provisioning file for the single store for which thesite is configured. You could instruct your users to visit the Receiver for Web sites for the stores theywant to access and download provisioning files from those sites. Alternatively, for a greater level ofcontrol, you can use the Citrix StoreFrontmanagement console to generate provisioning files contain-ing connection details for one or more stores. You can then distribute these files to the appropriateusers. For more information, see Export store provisioning files for users.
Auto-generated setup URLs
For users running Mac OS, you can use the Citrix Receiver for Mac or Citrix Workspace app for MacSetup URL Generator to create a URL containing connection details for a store. After installing Cit-rix Workspace app, users click on the URL to configure an account for the store automatically. Enterdetails of your deployment into the tool and generate a URL that you can distribute to your users.
Manual configuration
More advanced users can create new accounts by entering store URLs into Citrix Workspace app. Formore information, see the Citrix Workspace app documentation.
Email-based account discovery
Users who install Citrix Workspace app on a device for the first time can set up accounts by enteringtheir email addresses, provided that they download Citrix Workspace app from the Citrix website ora Citrix Workspace app download page hosted within your internal network. You configure ServiceLocation (SRV) locator resource records for Citrix Gateway or StoreFront on your Microsoft Active Di-rectory Domain Name System (DNS) server. Users do not need to know the access details for theirstores, instead they enter their email addresses during the Citrix Workspace app initial configurationprocess. Citrix Workspace app contacts the DNS server for the domain specified in the email addressand obtains the details you added to the SRV resource record. Users are then presented with a list ofstores that they can access through Citrix Workspace app.
Configure email-based account discovery
Configure email-based account discovery to enable users who install Citrix Workspace app on a de-vice for the first time to set up their accounts by entering their email addresses. Provided that they
© 1999‒2022 Citrix Systems, Inc. All rights reserved. 22

StoreFront 2203
download Citrix Workspace app from the Citrix website or a Citrix Workspace app download pagehosted within your internal network, users do not need to know the access details for their storeswhen they install and configure Citrix Workspace app. Email-based account discovery is available ifCitrix Workspace app is downloaded from any other location, such as a Receiver for Website. Notethat ReceiverWeb.exe or ReceiverWeb.dmg downloaded from Citrix Receiver for Web does not promptusers to configure a store. Users can still use Add Account and enter their email address
During the initial configuration process, Citrix Workspace app prompts users to enter either an emailaddress or a store URL. When a user enters an email address, Citrix Workspace app contacts the Mi-crosoft Active Directory Domain Name System (DNS) server for the domain specified in the email ad-dress to obtain a list of available stores fromwhich the user can select.
To enable Citrix Workspace app to locate available stores on the basis of users’ email addresses, youconfigureServiceLocation (SRV) locator resource records forCitrixGatewayorStoreFrontonyourDNSserver. As a fallback, you can also deploy StoreFront on a server named “discoverReceiver.domain,”where domain is the domain containing your users’ email accounts. If no SRV record is found in thespecified domain, Citrix Workspace app searches for amachine named “discoverReceiver” to identifya StoreFront server.
You must install a valid server certificate on the Citrix Gateway appliance or StoreFront server to en-able email-based account discovery. The full chain to the root certificate must also be valid. For thebest user experience, install a certificate with a Subject or Subject Alternative Name entry of discover-Receiver.domain,where domain is the domain containing your users’ email accounts. Although youcan use a wildcard certificate for the domain containing your users’ email accounts, you must firstensure that the deployment of such certificates is permitted by your corporate security policy. Othercertificates for the domain containing your users’ email accounts can also be used, but users will seea certificate warning dialog box when Citrix Workspace app first connects to the StoreFront server.Email-based account discovery cannot be used with any other certificate identities.
To enable email-based account discovery for users connecting from outside the corporate network,youmust also configure Citrix Gatewaywith the StoreFront connection details. Formore information,see Connecting to StoreFront by Using Email-Based Discovery.
Add an SRV record to your DNS server
1. On the Windows Start screen, click Administrative Tools and, in the Administrative Toolsfolder, click DNS.
2. In the left pane of DNS Manager, select your domain in the forward or reverse lookup zones.Right-click the domain and selectOther New Records.
3. In the Resource Record Type dialog box, select Service Location (SRV) and then click CreateRecord.
© 1999‒2022 Citrix Systems, Inc. All rights reserved. 23

StoreFront 2203
4. In theNewResourceRecorddialogbox, enter in theServicebox thehost value_citrixreceiver.
5. Enter in the Protocol box the value _tcp.
6. In theHost offering this service box, specify the fully qualified domain name (FQDN) and portfor your Citrix Gateway appliance (to support both local and remote users) or StoreFront server(to support local users only) in the form servername.domain:port.
If your environment includes both internal and external DNS servers, you can add a SRV recordspecifying the StoreFront server FQDN on your internal DNS server and another record on yourexternal server specifying the Citrix Gateway FQDN. With this configuration, local users are pro-vided with the StoreFront details, while remote users receive Citrix Gateway connection infor-mation.
7. If you configured an SRV record for your Citrix Gateway appliance, add the StoreFront connec-tion details to Citrix Gateway in a session profile or global setting.
Citrix Receiver for Web sites
Users with compatible web browsers can access StoreFront stores by browsing to Citrix Receiver forWeb sites. When you create a new store, a Citrix Receiver for Web site is automatically created for thestore. Thedefault configuration forCitrixReceiver forWebsites requires thatusers install a compatibleversionofCitrixWorkspaceapp toaccess theirdesktopsandapplications. Formore informationaboutthe Citrix Workspace app and web browser combinations that can be used to access Citrix Receiverfor Web sites, see User device requirements.
By default, when a user accesses a Citrix Receiver for Web site from a computer running Windowsor Mac OS X, the site attempts to determine whether Citrix Workspace app is installed on the user’sdevice. If Citrix Workspace app cannot be detected, the user is prompted to download and installit for their platform. The default download location is the Citrix website, but you can also copy theinstallation files to the StoreFront server and provide users with these local files instead. Storing theCitrixWorkspace app installation files locally enables you to configure the site to offer userswith olderclients the option to upgrade to the version on the server. For more information about configuringdeployment of Citrix Receiver for Windows or Citrix Workspace app for Windows and Citrix Receiverfor Mac or Citrix Workspace app for Mac, see Configure Citrix Receiver for Web sites.
Citrix Workspace app for HTML5
Citrix Workspace app for HTML5 is a component of StoreFront that is integrated by default with CitrixReceiver for Web sites. You can enable Citrix Workspace app for HTML5 on your Citrix Receiver forWeb sites so that users who cannot install Citrix Workspace app can still access their resources. WithCitrix Workspace app for HTML5, users can access desktops and applications directly within HTML5-compatible web browsers without needing to install Citrix Workspace app. When a site is created,
© 1999‒2022 Citrix Systems, Inc. All rights reserved. 24

StoreFront 2203
Citrix Workspace app for HTML5 is disabled by default. For more information about enabling CitrixWorkspace app for HTML5, see citrix-receiver-download-page-template.html.
To access their desktops and applications using Citrix Workspace app for HTML5, users must accessthe Citrix Receiver for Web site with an HTML5-compatible browser. For more information about theoperating systems andweb browsers that can be usedwith Citrix Workspace app for HTML5, see Userdevice requirements.
Citrix Workspace app for HTML5 can be used by both users on the internal network and remote usersconnecting through Citrix Gateway. For connections from the internal network, Citrix Workspace appforHTML5only supports access todesktopsandapplicationsprovidedbya subsetof theproducts sup-ported by Citrix Receiver forWeb sites. Users connecting through Citrix Gateway can access resourcesprovided by awider range of products if you chose CitrixWorkspace app for HTML5 as an optionwhenconfiguring StoreFront. Specific versions of Citrix Gateway are required for use with Citrix Workspaceapp for HTML5. For more information, see Infrastructure requirements.
For local users on the internal network, access through Citrix Workspace app for HTML5 to resourcesprovided by Citrix Virtual Apps and Desktops is disabled by default. To enable local access to desk-tops and applications using Citrix Workspace app for HTML5, you must enable the ICA WebSocketsconnections policy on your Citrix Virtual Apps and Desktops servers. Ensure your firewalls and othernetwork devices permit access to the Citrix Workspace app for HTML5 port specified in the policy. Formore information, see WebSockets policy settings.
By default, Citrix Workspace app for HTML5 starts desktops and applications in a new browser tab.However, when users start resources from shortcuts using Citrix Workspace app for HTML5, the desk-top or application replaces the Citrix Receiver for Web site in the existing browser tab rather thanappearing in a new tab. You can configure Citrix Workspace app for HTML5 so that resources are al-ways started in the same tab as the Receiver for Web site. For more information, see Configure CitrixWorkspace app for HTML5 use of browser tabs.
Resource shortcuts
You can generate URLs that provide access to desktops and applications available through Citrix Re-ceiver for Web sites. Embed these links on websites hosted on the internal network to provide userswith rapid access to resources. Users click on a link and are redirected to the Receiver for Web site,where they log on if they have not already done so. The Citrix Receiver for Web site automaticallystarts the resource. In the case of applications, users are also subscribed to the application if theyhave not subscribed previously. For more information about generating resource shortcuts, see Con-figure Citrix Receiver for Web sites.
As with all desktops and applications accessed from Citrix Receiver for Web sites, users must eitherhave installed Citrix Workspace app, or be able to use Citrix Workspace app for HTML5 to access re-sources through shortcuts. The method used by a Citrix Receiver for Web site depends on the site
© 1999‒2022 Citrix Systems, Inc. All rights reserved. 25

StoreFront 2203
configuration, on whether Citrix Workspace app can be detected on users’ devices, and on whetheranHTML5-compatiblebrowser is used. For security reasons, Internet Explorer usersmaybepromptedto confirm that they want to start resources accessed through shortcuts. Instruct your users to addthe Receiver for Web site to the Local intranet or Trusted sites zones in Internet Explorer to avoid thisextra step. By default, both workspace control and automatic desktop starts are disabled when usersaccess Citrix Receiver for Web sites through shortcuts.
When you create an application shortcut, ensure that no other applications available from the CitrixReceiver for Web site have the same name. Shortcuts cannot distinguish betweenmultiple instancesof an application with the same name. Similarly, if you make multiple instances of a desktop froma single desktop group available from the Citrix Receiver for Web site, you cannot create separateshortcuts for each instance. Shortcuts cannot pass command-line parameters to applications.
To create application shortcuts, you configure StoreFront with the URLs of the internal websites thatwill host the shortcuts. When a user clicks on an application shortcut on awebsite, StoreFront checksthat website against the list of URLs you entered to ensure that the request originates from a trustedwebsite. However, for users connecting through Citrix Gateway, websites hosting shortcuts are notvalidated because theURLs are not passed to StoreFront. To ensure that remote users can only accessapplication shortcuts on trusted internal websites, configure Citrix Gateway to restrict user access toonly those specific sites. For more information, see http://support.citrix.com/article/CTX123610.
Customize your sites
Citrix Receiver for Web sites provide a mechanism for customizing the user interface. You can cus-tomize strings, the cascading style sheet, and the JavaScript files. You can also add a custom pre-logon or post-logon screen, and add language packs.
Important considerations
Users accessing stores through a Citrix Receiver for Web site benefit from many of the features avail-able with store access within Citrix Workspace app, such as application synchronization. When youdecide whether to use Citrix Receiver for Web sites to provide users with to access your stores, con-sider the following restrictions.
• Only a single store can be accessed through each Citrix Receiver for Web site.• Citrix Receiver for Web sites cannot initiate Secure Sockets Layer (SSL) virtual private network(VPN) connections. Users logging on through Citrix Gateway without a VPN connection cannotaccess web applications for which App Controller requires that such a connection is used.
• Subscribed applications are not available on the Windows Start screen when accessing a storethrough a Citrix Receiver for Web site.
• File type associationbetween local documents andhosted applications accessed throughCitrixReceiver for Web sites is not available.
© 1999‒2022 Citrix Systems, Inc. All rights reserved. 26

StoreFront 2203
• Offline applications cannot be accessed through Citrix Receiver for Web sites.• Citrix Receiver for Web sites do not support Citrix Online products integrated into stores. CitrixOnlineproductsmustbedeliveredwithAppController ormadeavailable ashostedapplicationsto enable access through Citrix Receiver for Web sites.
• Citrix Workspace app for HTML5 can be used over HTTPS connections if the VDA is XenApp 7.6or XenDesktop 7.6 and has SSL enabled or if the user is connecting using Citrix Gateway.
• To use Citrix Workspace app for HTML5 with Mozilla Firefox over HTTPS connections, usersmust type about:config in the Firefox address bar and set the network.websocket.allowInsecureFromHTTPS preference to true.
XenApp Services URLs
Users with older Citrix clients that cannot be upgraded can access stores by configuring their clientswith the XenApp Services URL for a store. You can also enable access to your stores through XenAppServicesURLs fromdomain-joineddesktopappliancesand repurposedPCs running theCitrixDesktopLock. Domain-joined in this context means devices that are joined to a domain within the MicrosoftActive Directory forest containing the StoreFront servers.
StoreFront supports pass-through authentication with proximity cards through Citrix Workspace appto XenApp Services URLs. Citrix Ready partner products use the Citrix Fast Connect API to streamlineuser logons through Citrix Receiver for Windows or Citrix Workspace app for Windows to connect tostores using the XenApp Services URL. Users authenticate to workstations using proximity cards andare rapidly connected to desktops and applications provided by Citrix Virtual Apps and Desktops. Formore information, see the most recent Citrix Receiver for Windows documentation.
When you create a new store, the XenAppServicesURL for the store is enabled by default. The XenAppServices URL for a store has the form http[s]://serveraddress/Citrix/storename/PNAgent/config.xml,where serveraddress is the fully qualified domain name of the server or load balancing environmentfor your StoreFront deployment and storename is the name specified for the store when it was cre-ated. This allows Citrix Workspace apps that can only use the PNAgent protocol to connect to Store-front. For the clients that can be used to access stores through XenApp Services URLs, see User devicerequirements.
Important considerations
XenAppServicesURLs are intended to support userswho cannot upgrade toCitrixWorkspace appandfor scenarios where alternative access methods are not available. When you decide whether to useXenApp Services URLs to provide users with access to your stores, consider the following restrictions.
• You cannot modify the XenApp Services URL for a store.• You cannot modify XenApp Services URL settings by editing the configuration file, config.xml.
© 1999‒2022 Citrix Systems, Inc. All rights reserved. 27

StoreFront 2203
• XenApp Services URLs support explicit, domain pass-through, smart card authentication, andpass-through with smart card authentication. Explicit authentication is enabled by default.Only one authenticationmethod can be configured for each XenApp Services URL and only oneURL is available per store. If you need to enable multiple authentication methods, you mustcreate separate stores, eachwith a XenApp Services URL, for each authenticationmethod. Yourusers must then connect to the appropriate store for their method of authentication. For moreinformation, see XML-based authentication.
• Workspace control is enabled by default for XenApp Services URLs and cannot be configured ordisabled.
• User requests to change their passwords are routed to the domain controller directly throughthe Citrix Virtual Apps and Desktops servers providing desktops and applications for the store,bypassing the StoreFront authentication service.
User authentication
April 25, 2022
StoreFront supports several different authentication methods for users accessing stores; although,not all are available depending on the user access method and their network location. For securityreasons, some authentication methods are disabled by default when you create your first store. Formore information about enabling and disabling user authentication methods, see Create and config-ure the authentication service.
User name and password
Users enter their credentials and are authenticated when they access their stores. Explicit authenti-cation is enabled by default. All user access methods support explicit authentication.
When a user employs Citrix Gateway to access Citrix Receiver for Web, Citrix Gateway handles thelogon and password change at expiration. Users can make elective password changes with the CitrixReceiver forWebUI. After an elective password change, the Citrix Gateway session terminates and theuser must log on again. Citrix Receiver for Linux or Citrix Workspace app for Linux users can changeonly expired passwords.
SAML authentication
Usersauthenticate toaSAML IdentityProviderandareautomatically loggedonwhen theyaccess theirstores. StoreFront can support SAML authentication directly within the corporate network, withoutthe need to go through Citrix Gateway.
© 1999‒2022 Citrix Systems, Inc. All rights reserved. 28

StoreFront 2203
SAML (Security Assertion Markup Language) is an open standard used by identity and authenticationproducts such as Microsoft AD FS (Active Directory Federation Services). With the integration of SAMLauthentication through StoreFront, administrators can allow users to, for example, log on once totheir corporate network and then get single sign-on to their published apps.
Requirements:
• Implementation of the Citrix Federated Authentication Service.• SAML 2.0-compliant identity providers (IdPs):
– Microsoft AD FS v4.0 (Windows Server 2016) using SAML bindings only (not WS-Federationbindings). For more information, see AD FS Deployment and AD FS Operations.
– Microsoft AD FS v3.0 (Windows Server 2012 R2)– Citrix Gateway (configured as an IdP)
• Configure SAML authentication in StoreFront using the StoreFront management console in anew deployment (see Create a new deployment), or in an existing deployment (see Configurethe authentication service). You can also configure SAML authentication using PowerShellcmdlets, see StoreFront SDK.
• Citrix Receiver (4.6 and later) or Citrix Workspace app for Windows, or Citrix Receiver for Web.
Using SAML authentication with Citrix Gateway is supported with Receiver for Web sites.
Domain pass-through
Users authenticate to their domain-joined Windows computers, and their credentials are used to logthem on automatically when they access their stores.
When you install StoreFront, domain pass-through authentication is disabled by default. You can en-abledomainpass-throughauthentication forusers connecting to stores throughCitrixWorkspaceappand XenApp Services URLs. Citrix Receiver forWeb sites support domain pass-through authenticationfor Internet Explorer, Microsoft Edge, Mozilla Firefox, and Google Chrome on domain-joinedWindowsclient machines.
Note:
To use this option, pass-through authentication must be enabled when Citrix Receiver for Win-dows is installed on users’ devices. Domain pass-through for Citrix Receiver for Web is limited toWindows operating systems using Internet Explorer, Microsoft Edge, Mozilla Firefox, and GoogleChrome, and the browsers rely on successful client detection to communicate with native CitrixWorkspace apps. It’s a prerequisite for domain pass-through authentication to function.
To enable domain pass-through authentication
1. Install Citrix Receiver forWindowsor CitrixWorkspace app forWindowsor theCitrix Online plug-in for Windows on user devices. Ensure that pass-through authentication is enabled.
© 1999‒2022 Citrix Systems, Inc. All rights reserved. 29

StoreFront 2203
2. In the Citrix Receiver for Web site node in the administration console, enable domain pass-through authentication.
3. Configure SSONonCitrix Receiver forWindows or CitrixWorkspace app forWindows, describedin Configure domain pass-through authentication. Citrix Workspace app for HTML5 does notsupport domain pass-through authentication.
4. Windows’ default behavior is “Automatic logon only in the Intranet zone.” For Internet Explorer,Mozilla FirefoxandGoogleChrome, either configureyourCitrixReceiver forWebsitesas Intranetsites using the Internet Options, or enable automatic logon for the Trusted zone. For MicrosoftEdge youmust configure your Citrix Receiver for Web sites as Intranet sites.
5. For Mozilla Firefox, modify the browser advanced settings to trust the Citrix Receiver for Win-dows or Citrix Workspace app for Windows URI.
Warning:
Editing the advanced settings incorrectly can cause serious problems. Make edits at yourown risk.
a) Start Firefox, enter about:config in the address field and select “I accept the risk!”b) Type ntlm to the search box.c) Double-click onnetwork.automatic-ntlm-auth.trusted-uris and type the Citrix Receiver
for Windows or Citrix Workspace app for Windows site URL to the pop-up dialog.d) ClickOK.
Pass-through from Citrix Gateway
Users authenticate to Citrix Gateway and are automatically logged on when they access their stores.Pass-through from Citrix Gateway authentication is enabled by default when you first configure re-mote access to a store. Users can connect throughCitrix Gateway to stores using CitrixWorkspace appor Citrix Receiver forWeb sites. Formore information about configuring StoreFront for Citrix Gateway,see Add a Citrix Gateway connection.
StoreFront supports pass-through with the following Citrix Gateway authentication methods.
• Security token. Users log on to Citrix Gateway using passcodes that are derived from to-kencodes generated by security tokens combined, sometimes, with personal identificationnumbers. If you enable pass-through authentication by security token only, ensure that theresources you make available do not require extra or alternative forms of authentication, suchas users’ Microsoft Active Directory domain credentials.
• Domain and security token. Users logging on to Citrix Gateway are required to enter both theirdomain credentials and security token passcodes.
• Client certificate. Users log on to Citrix Gateway and are authenticated based on the attributesof the client certificate presented to Citrix Gateway. Configure client certificate authentication
© 1999‒2022 Citrix Systems, Inc. All rights reserved. 30

StoreFront 2203
to enable users to log on to Citrix Gateway using smart cards. Client certificate authenticationcan also be used with other authentication types to provide double-source authentication.
StoreFront uses the Citrix Gateway authentication service to provide pass-through authentication forremoteusers so that theyonlyneed toenter their credentials once. However, bydefault, pass-throughauthentication is only enabled for users logging on to Citrix Gateway with a password. To configurepass-through authentication from Citrix Gateway to StoreFront for smart card users, delegate creden-tial validation to Citrix Gateway. For more information, see Create and configure the authenticationservice.
Users can connect to stores within Citrix Workspace app with pass-through authentication througha Secure Sockets Layer (SSL) virtual private network (VPN) tunnel using the Citrix Gateway plug-in.Remoteuserswhocan’t install theCitrix Gatewayplug-in canuse clientless access to connect to storeswithin Citrix Workspace app with pass-through authentication. To use clientless access to connect tostores, users require a version of Citrix Workspace app that supports clientless access.
Also, you can enable clientless access with pass-through authentication to Citrix Receiver for Websites. To do this, configure Citrix Gateway to act as a secure remote proxy. Users log on to Citrix Gate-way directly and use the Citrix Receiver for Web site to access their applications without needing toauthenticate again.
Users connecting with clientless access to Endpoint Management resources can only access externalsoftware-as-a-service (SaaS) applications. To access internal web applications, remote users mustuse the Citrix Gateway plug-in.
If you configure double-source authentication to Citrix Gateway for remote users accessing storesfrom within Citrix Workspace app, you must create two authentication policies on Citrix Gateway.ConfigureRADIUS (RemoteAuthenticationDial-InUserService) as theprimaryauthenticationmethodand LDAP (Lightweight Directory Access Protocol) as the secondarymethod. Modify the credential in-dex to use the secondary authentication method in the session profile so that LDAP credentials arepassed to StoreFront. When you add the Citrix Gateway appliance to your StoreFront configuration,set theLogon type toDomainandsecurity token. Formore information, seehttp://support.citrix.com/article/CTX125364
To enablemultidomain authentication through Citrix Gateway to StoreFront, set SSO Name Attributeto userPrincipalName in the Citrix Gateway LDAP authentication policy for each domain. You can re-quire users to specify a domain on the Citrix Gateway logon page so that the appropriate LDAP policyto use can be determined. When you configure the Citrix Gateway session profiles for connections toStoreFront, do not specify a single sign-on domain. You must configure trust relationships betweeneach of the domains. Ensure that you allow users to log on to StoreFront from any domain by notrestricting access to explicitly trusted domains only.
Where supported by your Citrix Gateway deployment, you can use SmartAccess to control user ac-cess to Citrix Virtual Apps and Desktops resources based on Citrix Gateway session policies. For more
© 1999‒2022 Citrix Systems, Inc. All rights reserved. 31

StoreFront 2203
information about SmartAccess, see How SmartAccess works for Citrix Virtual Apps and Desktops.
Smart cards
Users authenticate using smart cards and PINs when they access their stores. When you install Store-Front, smart card authentication is disabled by default. Smart card authentication can be enabled forusers connecting to stores throughCitrixWorkspaceapp, Citrix Receiver forWeb, andXenAppServicesURLs.
Use smart card authentication to streamline the logonprocess for your userswhile also enhancing thesecurity of user access to your infrastructure. Access to the internal corporate network is protectedby certificate-based two-factor authentication using the public key infrastructure. Private keys areprotected by hardware controls and never leave the smart card. Your users get the convenience ofaccessing their desktops and applications from a range of corporate devices using their smart cardsand PINs.
You can use smart cards for user authentication through StoreFront to desktops and applications pro-vided by Citrix Virtual Apps and Desktops. Smart card users logging on to StoreFront can also accessapplications provided by the Endpoint Management. However, users must authenticate again to ac-cess Endpoint Management web applications that use client certificate authentication.
To enable smart card authentication, users’ accounts must be configured either within the MicrosoftActive Directory domain containing the StoreFront servers or within a domain that has a direct two-way trust relationship with the StoreFront server domain. Multi-forest deployments involving two-way trusts are supported.
The configuration of smart card authentication with StoreFront depends on the user devices, theclients installed, and whether the devices are domain-joined. In this context, domain-joined meansdevices that are joined to a domain within the Active Directory forest containing the StoreFrontservers.
Use smart cards with Citrix Receiver for Windows or Citrix Workspace app for Windows
Users with devices running Citrix Receiver for Windows or Citrix Workspace app for Windows can au-thenticate using smart cards, either directly or through Citrix Gateway. Both domain-joined and non-domain-joined devices can be used, although the user experience is slightly different.
The figure shows the options for smart card authentication through Citrix Receiver for Windows orCitrix Workspace app for Windows.
© 1999‒2022 Citrix Systems, Inc. All rights reserved. 32

StoreFront 2203
For local userswith domain-joined devices, you can configure smart card authentication so that usersare only prompted for their credentials once. Users log on to their devices using their smart cards andPINs and, with the appropriate configuration in place, aren’t prompted for their PINs again. Usersare silently authenticated to StoreFront and also when they access their desktops and applications.To achieve this, you configure Citrix Receiver for Windows or Citrix Workspace app for Windows forpass-through authentication and enable domain pass-through authentication to StoreFront.
Users log on to their devices and then authenticate to Citrix Receiver forWindows or Citrix Workspaceapp for Windows using their PINs. There’s no further PIN prompts when they try to start apps anddesktops
Because users of non-domain-joineddevices log on toCitrix Receiver forWindowsor CitrixWorkspaceapp for Windows directly, you can enable users to fall back to explicit authentication. If you configureboth smart card and explicit authentication, users are initially prompted to log on using their smartcards and PINs but have the option to select explicit authentication if they experience any issues withtheir smart cards.
Users connecting throughCitrix Gatewaymust log onusing their smart cards andPINs at least twice toaccess their desktops and applications. This applies to both domain-joined and non-domain-joined
© 1999‒2022 Citrix Systems, Inc. All rights reserved. 33

StoreFront 2203
devices. Users authenticate using their smart cards and PINs, and, with the appropriate configurationin place, are only prompted to enter their PINs again when they access their desktops and applica-tions. To achieve this, you enable pass-through with Citrix Gateway authentication to StoreFront anddelegate credential validation to Citrix Gateway. Then, create an extra Citrix Gateway virtual serverthrough which you route user connections to resources. In the case of domain-joined devices, youmust also configureCitrix Receiver forWindowsor CitrixWorkspace app forWindows for pass-throughauthentication.
Note:
If you’re using Citrix Receiver for Windows or Citrix Workspace app for Windows, you can set upa second virtual server and use the optimal gateway routing feature to remove the need for PINprompts when starting apps and desktops.
Users can log on to Citrix Gateway using either their smart cards and PINs, or with explicit credentials.This enables you to provide users with the option to fall back to explicit authentication for Citrix Gate-way logons. Configure pass-through authentication from Citrix Gateway to StoreFront and delegatecredential validation to Citrix Gateway for smart card users so that users are silently authenticated toStoreFront.
Use smart cards with XenApp Services URLs
Users of PCs running the Citrix Desktop Lock can authenticate using smart cards. Unlike other accessmethods, pass-through of smart card credentials is automatically enabled when smart card authenti-cation is configured for a XenApp Services URL.
The figure shows smart card authentication from a domain-joined device running the Citrix DesktopLock.
Users log on to their devices using their smart cards and PINs. The Citrix Desktop Lock then silentlyauthenticates users to StoreFront through the XenApp Services URL. Users are automatically authen-
© 1999‒2022 Citrix Systems, Inc. All rights reserved. 34

StoreFront 2203
ticated when they access their desktops and applications, and aren’t prompted for their PINs again.
Use smart cards with Citrix Receiver for Web
You can enable smart card authentication to Citrix Receiver for Web from the StoreFront Administra-tion Console.
1. Select the Citrix Receiver for Web node in the left panel.2. Select the site that you want to use smart card authentication.3. Select the Choose Authentication Methods task in the right panel.4. Check the Smart card check box in the popup dialog screen and click OK.
If youenablepass-throughwith smart cardauthentication toCitrix Virtual AppsandDesktops forCitrixReceiver for Windows or Citrix Workspace app for Windows users with domain-joined devices who donot access stores through Citrix Gateway, this setting applies to all users of the store. To enable bothdomain pass-through andpass-throughwith smart card authentication to desktops and applications,youmust create separate stores for each authenticationmethod. Your usersmust then connect to theappropriate store for their method of authentication.
If youenablepass-throughwith smart cardauthentication toCitrix Virtual AppsandDesktops forCitrixReceiver for Windows or Citrix Workspace app for Windows users with domain-joined devices access-ing stores through Citrix Gateway, this setting applies to all users of the store. To enable pass-throughauthentication for some users and require others to log on to their desktops and applications, youmust create separate stores for each group of users. Then, direct your users to the appropriate storefor their method of authentication.
Use smart cards with Citrix Workspace app for iOS and Android
Users with devices running Citrix Workspace app for iOS and Android can authenticate using smartcards, either directly or through Citrix Gateway. Non-domain-joined devices can be used.
In the case of devices on the local network, the minimum number of logon prompts that users canreceive is two. When users authenticate to StoreFront or initially create the store, they’re prompted
© 1999‒2022 Citrix Systems, Inc. All rights reserved. 35

StoreFront 2203
for the smart card PIN. With the appropriate configuration in place, users are prompted to enter theirPINs again only when they access their desktops and applications. To achieve this, you enable smartcard authentication to StoreFront and install smart card drivers on the VDA.
With these Citrix Workspace apps, you have the option of specifying smart cards OR domain creden-tials. If you created a store to use smart cards and youwant to connect to the same store usingdomaincredentials, youmust add a separate store without turning on smart cards.
Users connecting through Citrix Gateway must log on using their smart cards and PINs at least twiceto access their desktops and applications. Users authenticate using their smart cards and PINs, and,with the appropriate configuration in place, are only prompted to enter their PINs again when theyaccess their desktops and applications. To achieve this, you enable pass-through with Citrix Gatewayauthentication to StoreFront and delegate credential validation to Citrix Gateway. Then, create anextra Citrix Gateway virtual server through which you route user connections to resources.
Users can log on to Citrix Gateway using either their smart cards and PINs or with explicit credentials,depending on how you specified the authentication for the connection. Configure pass-through au-thentication from Citrix Gateway to StoreFront and delegate credential validation to Citrix Gatewayfor smart card users so that users are silently authenticated to StoreFront. If you want to change theauthentication method, youmust delete and recreate the connection.
Use smart cards with Citrix Receiver for Linux or Citrix Workspace app for Linux
Userswith devices runningCitrix Receiver for Linux or CitrixWorkspace app for Linux can authenticateusing smart cards in a similar way to users of non-domain-joined Windows devices. Even if the userauthenticates to the Linux device with a smart card, Citrix Receiver for Linux or Citrix Workspace appfor Linux has nomechanism to acquire or reuse the PIN entered.
Configure the server-side components for smart cards the same way that you configure them for usewith the Citrix Receiver for Windows or Citrix Workspace app for Windows. Refer to Configure smartcard authentication and for instructions on using smart cards, see Citrix Receiver for Linux.
The minimum number of logon prompts that users can receive is one. Users log on to their devicesand then authenticate to Citrix Receiver for Linux or Citrix Workspace app for Linux using their smartcards and PINs. Users aren’t prompted to enter their PINs again when they access their desktops andapplications. To achieve this, you enable smart card authentication to StoreFront.
Because users log on to Citrix Receiver for Linux or Citrix Workspace app for Linux directly, you can en-able users to fall back to explicit authentication. If you configure both smart card and explicit authen-tication, users are initially prompted to log on using their smart cards and PINs but have the optionto select explicit authentication if they experience any issues with their smart cards.
Users connecting through Citrix Gateway must log on using their smart cards and PINs at least onceto access their desktops and applications. Users authenticate using their smart cards and PINs and,
© 1999‒2022 Citrix Systems, Inc. All rights reserved. 36

StoreFront 2203
with the appropriate configuration in place, aren’t prompted to enter their PINs again when they ac-cess their desktops and applications. To achieve this, you enable pass-through with Citrix Gatewayauthentication to StoreFront and delegate credential validation to Citrix Gateway. Then, create anextra Citrix Gateway virtual server through which you route user connections to resources.
Users can log on to Citrix Gateway using either their smart cards and PINs, or with explicit credentials.This enables you to provide users with the option to fall back to explicit authentication for Citrix Gate-way logons. Configure pass-through authentication from Citrix Gateway to StoreFront and delegatecredential validation to Citrix Gateway for smart card users so that users are silently authenticated toStoreFront.
Smart cards for Citrix Receiver for Linux or Citrix Workspace app for Linux aren’t supported with theXenApp Services Support sites.
Once smart card support is enabled for both the server and Citrix Workspace app, provided the appli-cationpolicy of the smart card certificates allow it, you canuse smart cards for the followingpurposes:
• Smart card logon authentication. Use smart cards to authenticate users to Citrix Virtual Appsand Desktops servers.
• Smart card application support. Enable smart card-aware published applications to access lo-cal smart card devices.
Use smart cards with XenApp Services Support
Users loggingon toXenAppServices Support sites to start applications anddesktops canauthenticateusing smart cards without depending on specific hardware, operating systems, and Citrix Workspaceapps. When a user accesses a XenApp Services Support site and successfully enters a smart card andPIN, PNA determines the user identity, authenticates the user with StoreFront, and returns the avail-able resources.
For pass-through and smart card authentication to work, you must enable Trust requests sent to theXML service.
Use an accountwith local administrator permissions on the Delivery Controller to startWindows Pow-erShell and, at a command prompt, enter the following commands to enable the Delivery Controllerto trust XML requests sent from StoreFront. The following procedure applies to XenApp 7.5 through7.8 and XenDesktop 7.0 through 7.8.
1. Load the Citrix cmdlets by typing asnp Citrix*. (including the period).2. Type Add-PSSnapin citrix.broker.admin.v2.3. Type Set-BrokerSite -TrustRequestsSentToTheXmlServicePort $True.4. Close PowerShell.
For information about configuring the XenApp Services Support smart card authentication method,see Configure authentication for XenApp Services URLs.
© 1999‒2022 Citrix Systems, Inc. All rights reserved. 37

StoreFront 2203
Important considerations
Use of smart cards for user authentication with StoreFront is subject to the following requirementsand restrictions.
• To use virtual private network (VPN) tunnels with smart card authentication, users must installthe Citrix Gateway plug-in and log on through a webpage, using their smart cards and PINs toauthenticate at each step. Pass-through authentication to StoreFront with the Citrix Gatewayplug-in isn’t available for smart card users.
• Multiple smart cardsandmultiple readers canbeusedon thesameuserdevice, but if youenablepass-through with smart card authentication, users must ensure that only one smart card isinserted when accessing a desktop or application.
• When a smart card is used within an application, such as for digital signing or encryption, usersmight see extra prompts to insert a smart card or enter a PIN. This can occur if more than onesmart card has been inserted at the same time. It can also occur due to configuration settings- such as middleware settings like PIN caching that are typically configured using group policy.Userswhoareprompted to insert a smart cardwhen the smart card is already in the readermustclick Cancel. If users are prompted for a PIN, they must enter their PINs again.
• If you enable pass-through with smart card authentication to Citrix Virtual Apps and Desktopsfor Citrix Receiver for Windows or Citrix Workspace app for Windows users with domain-joineddevices who do not access stores through Citrix Gateway, this setting applies to all users of thestore. To enable both domain pass-through and pass-through with smart card authenticationto desktops and applications, youmust create separate stores for each authenticationmethod.Your users must then connect to the appropriate store for their method of authentication.
• If you enable pass-through with smart card authentication to Citrix Virtual Apps and Desktopsfor Citrix Receiver for Windows or Citrix Workspace app for Windows users with domain-joineddevices accessing stores through Citrix Gateway, this setting applies to all users of the store. Toenable pass-through authentication for some users and require others to log on to their desk-tops and applications, you must create separate stores for each group of users. Then, directyour users to the appropriate store for their method of authentication.
• Only one authentication method can be configured for each XenApp Services URL and onlyone URL is available per store. If you need to enable other types of authentication in additionto smart card authentication, you must create separate stores, each with a XenApp ServicesURL, for each authentication method. Then, direct your users to the appropriate store for theirmethod of authentication.
• When StoreFront is installed, the default configuration in Microsoft Internet Information Ser-vices (IIS) only requires that client certificates are presented for HTTPS connections to the cer-tificate authentication URL of the StoreFront authentication service. IIS does not request clientcertificates for any other StoreFront URLs. This configuration enables you to provide smart card
© 1999‒2022 Citrix Systems, Inc. All rights reserved. 38

StoreFront 2203
users with the option to fall back to explicit authentication if they experience any issues withtheir smart cards. Subject to the appropriate Windows policy settings, users can also removetheir smart cards without needing to reauthenticate.
If youdecide toconfigure IIS to require client certificates forHTTPSconnections toall StoreFrontURLs, theauthentication service and storesmustbe colocatedon the sameserver. Youmustusea client certificate that is valid for all the stores. With this IIS site configuration, smart card userscan’t connect through Citrix Gateway and can’t fall back to explicit authentication. Users mustlog on again if they remove their smart cards from their devices.
Optimize the user experience
November 14, 2019
StoreFront includes features designed to enhance the user experience. These features are configuredby default when you create new stores and their associated Citrix Receiver for Web sites, and XenAppServices URLs.
Workspace control
Asusersmovebetweendevices,workspace control ensures that theapplications theyareusing followthem. Users can keep working with the same application instances across multiple devices ratherthan having to restart all their applications each time they log on to a new device. This enables, forexample, clinicians in hospitals to save time as theymove fromworkstation to workstation accessingpatient data.
Workspace control is enabled by default for Citrix Receiver for Web sites and connections to storesthrough XenApp Services URLs. When users log on, they are automatically reconnected to any appli-cations that they left running. For example, consider a user logging on to a store, either through theCitrix Receiver for Web site or the XenApp Services URL, and starting some applications. If the userthen logs on to the same store using the same access method but on a different device, the runningapplications are automatically transferred to the new device. All the applications that the user startsfromaparticular store areautomatically disconnected, butnot shutdown,when theuser logsoff fromthat store. In the case of Citrix Receiver for Web sites, the same browser must be used to log on, startthe applications, and log off.
Workspace control for XenApp Services URLs cannot be configured or disabled. For more informa-tion about configuring workspace control for Citrix Receiver for Web sites, see Configure workspacecontrol.
Use of workspace control on Citrix Receiver for Web sites is subject to the following requirements andrestrictions.
© 1999‒2022 Citrix Systems, Inc. All rights reserved. 39

StoreFront 2203
• Workspace control is not available when Citrix Receiver for Web sites are accessed from hosteddesktops and applications.
• For users accessing Citrix Receiver for Web sites from Windows devices, workspace control isonly enabled if the site can detect that Citrix Workspace app is installed on users’ devices or ifCitrix Workspace app for HTML5 is used to access resources.
• To reconnect todisconnectedapplications, users accessingCitrix Receiver forWeb sites throughInternet Explorer must add the site to the Local intranet or Trusted sites zones.
• If there is only onedesktop available for a user on aCitrix Receiver forWeb site that is configuredto start single desktops automatically when the user logs on, that user’s applications are notreconnected, regardless of the workspace control configuration.
• Usersmust disconnect from their applications using the same browser that was originally usedto start them. Resources started using a different browser, or started locally from the desktop orStartmenu using CitrixWorkspace app, cannot be disconnected or shut downby Citrix Receiverfor Web sites.
Content redirection
Where users have subscribed to the appropriate application, content redirection enables local fileson users’ devices to be opened using subscribed applications. To enable redirection of local files,associate the application with the required file types in Citrix Virtual Apps and Desktops. File type as-sociation is enabled by default for new stores. Formore information, see Disable file type association.
User changed password
You can enable Citrix Receiver for Web site users logging on with Microsoft Active Directory domaincredentials to change their passwords at any time. Alternatively, you can restrict password changesto users whose passwords have expired. This means you can ensure that users are never preventedfrom accessing their desktops and applications by an expired password.
Users logging on to Desktop Appliance sites can only change expired passwords, even if you enableusers to change their passwords at any time. Desktop Appliance sites do not provide controls to en-able users to change their passwords after they have logged on.
When you create the authentication service, the default configuration prevents Citrix Receiver forWebsite users from changing their passwords, even if the passwords have expired. If you decide to enablethis feature, ensure that the policies for the domains containing your servers do not prevent usersfrom changing their passwords. StoreFront must be able to contact the domain controller to changeusers’ passwords.
Enabling users to change their passwords exposes sensitive security functions to anyone who canaccess any of the stores that use the authentication service. If your organization has a security policy
© 1999‒2022 Citrix Systems, Inc. All rights reserved. 40

StoreFront 2203
that reserves user password change functions for internal use only, ensure that none of the stores areaccessible from outside your corporate network.
Citrix Receiver for Web site desktop and application views
Whenbothdesktops andapplications are available fromaCitrix Receiver forWeb site, the site displaysseparate desktop and application views by default. Users see the desktop view first when they log onto the site. Regardless of whether applications are also available from a Citrix Receiver for Web site, ifonly a single desktop is available for a user, the site starts that desktop automatically when the userlogs on. You can configure which views appear for your sites and prevent Citrix Receiver for Web sitesfrom automatically starting desktops for users. For more information, see Configure how resourcesare displayed for users.
The behavior of the views on Citrix Receiver for Web sites depends on the types of resources beingdelivered. For example, users must subscribe to applications before they appear in the applicationview, whereas all the desktops available to a user are automatically displayed in the desktop view.For this reason, users cannot remove desktops from the desktop view and cannot reorganize thembydragging and dropping the icons. When desktop restarts are enabled by the Citrix Virtual Desktopsadministrator, controls that enable users to restart their desktops are provided in the desktop view. Ifusers have access to multiple instances of a desktop from a single desktop group, Citrix Receiver forWeb sites differentiate the desktops for users by appending numerical suffixes to the desktop names.
For users connecting to stores within Citrix Workspace app, or through XenApp Services URLs, theway in which desktops and applications are displayed, and their behavior, is determined by the Citrixclient being used.
Additional recommendations
When delivering applications with Citrix Virtual Apps and Desktops, consider the following options toenhance the experience for users when they access their applications through your stores. For moreinformation about delivering applications, see Create a Delivery Group application.
• Organize applications into folders tomake it easier for users to findwhat they needwhenbrows-ing through the available resources. The folders you create in Citrix Virtual Apps and Desktopsappear as categories in Citrix Workspace app. You could, for example, group applications ac-cording to type or, alternatively, create folders for different user roles in your organization.
• Ensure that you include meaningful descriptions when you deliver applications, as these de-scriptions are visible to users in Citrix Workspace app.
• You can specify that all users have a core set of applications that cannot be removed from theCitrix Workspace app home screen by appending the string KEYWORDS:Mandatory to the ap-
© 1999‒2022 Citrix Systems, Inc. All rights reserved. 41

StoreFront 2203
plication description. Users can still use the self-service UI to addmore applications or removenonmandatory applications.
• You can automatically subscribe all users of a store to an application by appending the stringKEYWORDS:Auto to the description you provide when you deliver the application. When userslog on to the store, the application is automatically provisioned without users needing to man-ually subscribe.
• To automatically subscribe all users of a store to a web or software-as-a-service (SaaS) appli-cation managed by App Controller, select the App is available in Citrix Receiver or CitrixWorkspace app to all users automatically check box when you configure the applicationsettings.
• Advertise Citrix Virtual Apps and Desktops applications to users or make commonly used appli-cations easier to find by listing them in the Featured list in Citrix Workspace app. To do this,append the string KEYWORDS:Featured to the application description.
Note:
Multiple keywords must be separated by spaces only; for example, KEYWORDS:AutoFeatured.
• By default, Citrix Virtual Apps and Desktops hosted shared desktops are treated like other desk-tops by Citrix Receiver for Web sites. To change this behavior, append the string KEYWORDS:TreatAsApp to the desktop description. The desktop is displayed in the application views ofCitrix Receiver for Web sites rather than the desktop views and users are required to subscribebefore they can access the desktop. In addition, the desktop is not automatically started whenthe user logs on to the Citrix Receiver for Web site and is not accessed with the Desktop Viewer,even if the site is configured to do this for other desktops.
• ForWindows users, you can specify that the locally installed version of an application should beused in preference to the equivalent delivered instance if both are available. To do this, appendthe string KEYWORDS:prefer=”application” to the application description, where applica-tion is either one or more complete words in the name of the local application as given by theshortcut file name, or the absolute path including the executable file name to the local applica-tion from the \Start Menu folder. When a user subscribes to an application with this keyword,Citrix Workspace app searches for the specified name or path on the user’s device to determinewhether the application is already installed locally. If the application is found, Citrix Workspaceapp subscribes the user to the delivered application, but does not create a shortcut. When theuser starts the delivered application from Citrix Workspace app, the locally installed instanceruns instead. For more information, see Configuring application delivery.
• In Citrix Virtual Apps and Desktops, when users launch a published application from within apublished desktop, administrators can control whether the application is launched in that desk-top session or as a published application in the same Delivery Group. Use a PowerShell cmdlet
© 1999‒2022 Citrix Systems, Inc. All rights reserved. 42

StoreFront 2203
on the Broker Service and a policy setting in Citrix Receiver for Windows (vPrefer) to controlthis behavior. This feature works with Citrix Receiver for Windows or Citrix Workspace app forWindows launches of published apps only. It cannot be used to launch an app locally if thepublished app is launched through the StoreFront site in a web browser. In previous releases,“double-hop” application launch control required the use of the KEYWORDS:Prefer tag in Stu-dio.TheKEYWORDS:Prefer tag can still be used. If both theKEYWORDSand the vPrefermethodhave been configured, vPrefer takes precedence.
For more information, see CTX232210, the Applications article in Citrix Virtual Apps and Desk-tops, and the Citrix Receiver for Windows documentation.
StoreFront high availability andmulti-site configuration
July 1, 2019
StoreFront includes a number of features that combine to enable loadbalancing and failover betweenthe deployments providing resources for stores. You can also specify dedicated disaster recovery de-ployments for increased resiliency. These features enable you to configure StoreFront deploymentsdistributed over multiple sites to provide high availability for your stores. For more information, seeSet up highly available multi-site store configurations.
Resource aggregation
By default, StoreFront enumerates all the deployments providing desktops and applications for astore and treats all those resources as distinct. This means that if the same resource is available fromseveral deployments, users see an icon for each resource, which might be confusing if the resourceshave the same name. When you set up highly availablemulti-site configurations, you can group CitrixVirtual Apps and Desktops deployments that deliver the same desktop or application so that iden-tical resources can be aggregated for users. Grouped deployments do not need to be identical, butresources must have the same name and path on each server to be aggregated.
When a desktop or application is available from multiple Citrix Virtual Apps and Desktops deploy-ments configured for a particular store, StoreFront aggregates all instances of that resource andpresents users with a single icon. App Controller applications cannot be aggregated. When a userstarts an aggregated resource, StoreFront determines the most appropriate instance of that resourcefor the user on the basis of server availability, whether the user already has an active session, and theordering you specified in your configuration.
StoreFront dynamicallymonitors servers that fail to respond to requests on thebasis that such serversare either overloaded or temporarily unavailable. Users are directed to resource instances on other
© 1999‒2022 Citrix Systems, Inc. All rights reserved. 43

StoreFront 2203
servers until communications are re-established. Where supported by the servers providing the re-sources, StoreFront attempts to reuse existing sessions to deliver additional resources. If a user al-ready has an active session on a deployment that also provides the requested resource, StoreFrontreuses the session if it is compatible with that resource. Minimizing the number of sessions for eachuser reduces the time taken to start additional desktops or applications and can allow for more effi-cient use of product licenses.
After checking for availability andexistinguser sessions, StoreFrontuses theordering specified in yourconfiguration to determine the deployment to which the user is connected. If multiple equivalent de-ployments are available to the user, you can specify that users are connected either to the first avail-able deployment or randomly to any deployment in the list. Connecting users to the first availabledeployment enables you to minimize the number of deployments in use for the current number ofusers. Randomly connecting users provides a more even distribution of users across all the availabledeployments.
You can override the specified deployment ordering for individual Citrix Virtual Apps and Desktopsresources to define preferred deployments to which users are connected when they access a partic-ular desktop or application. This enables you to, for example, specify that users are preferentiallyconnected to a deployment specifically adapted to deliver a particular desktop or application, butuse other deployments for other resources. To do this, append the string KEYWORDS:Primary to thedescription of the desktop or application on the preferred deployment and KEYWORDS:Secondaryto the resource on other deployments. Where possible, users are connected to the deployment pro-viding the primary resource, regardless of the deployment ordering specified in your configuration.Users are connected to deployments providing secondary resources when the preferred deploymentis unavailable.
Map users to resources
By default, users accessing a store see an aggregate of all the resources available from all the deploy-ments configured for that store. To provide different resources for different users, you can configureseparate stores or even separate StoreFront deployments. However, when you set up highly avail-ablemulti-site configurations, you canprovide access to particular deployments on the basis of users’membership of Microsoft Active Directory groups. This enables you to configure different experiencesfor different user groups through a single store.
For example, you can group common resources for all users on one deployment and finance applica-tions for the Accounts department on another deployment. In such a configuration, a user who is nota member of the Accounts user group sees only the common resources when accessing the store. Amember of the Accounts user group is presented with both the common resources and the financeapplications.
Alternatively, you can create a deployment for power users that provides the same resources as your
© 1999‒2022 Citrix Systems, Inc. All rights reserved. 44

StoreFront 2203
other deployments, but with faster and more powerful hardware. This enables you to provide an en-hanced experience for business-critical users, such as your executive team. All users see the samedesktops and applications when they log on to the store, but members of the Executives user groupare preferentially connected to resources provided by the power user deployment.
Subscription synchronization
If you enable your users to access the same applications from similar stores in different StoreFrontdeployments, users’ application subscriptionsmust be synchronized between the server groups. Oth-erwise, users who subscribe to an application in a store on one StoreFront deployment might needto resubscribe to the application when they log on to a different server group. To provide a seamlessexperience for users moving between separate StoreFront deployments, you can configure periodicsynchronization of users’ application subscriptions between stores in different server groups. Choosebetween regular synchronization at a specific interval or schedule synchronization to occur at partic-ular times throughout the day. For more information, see Configure subscription synchronization.
Dedicated disaster recovery resources
You can configure specific disaster recovery deployments that are not used unless all other deploy-ments are unavailable. Typically, disaster recovery deployments are not colocated with the maindeployments, provide only a subset of the resources that are normally available, and might offer adegraded user experience. When you specify that a deployment is to be used for disaster recovery,the deployment will not be used for load balancing or failover. Users cannot access desktops and ap-plications provided by disaster recovery deployments unless all the other deployments for which thedisaster recovery deployments are configured become unavailable.
When access to any other deployment is re-established, users cannot start more disaster recoveryresources, even if they are already using such a resource. Users running disaster recovery resourcesare not disconnected from those resources when access to other deployments is restored. However,they cannot start disaster recovery resources again once they have exited these resources. Similarly,StoreFrontdoesnotattempt to reuseexisting sessionswithdisaster recoverydeployments if anyotherdeployments have subsequently become available.
Optimal Citrix Gateway routing
If you have configured separate Citrix Gateway appliances for your deployments, StoreFront enablesyou to define the optimal appliance for users to access each of the deployments providing resourcesfor a store. For example, if you create a store that aggregates resources from two geographical loca-tions, each with a Citrix Gateway appliance, users connecting through an appliance in one locationcan start a desktop or application in the other location. However, by default, the connection to the
© 1999‒2022 Citrix Systems, Inc. All rights reserved. 45

StoreFront 2203
resource is then routed through the appliance to which the user originally connected andmust there-fore traverse the corporate WAN.
To improve the user experience and reduce network traffic over theWAN, you can specify the optimalCitrix Gateway appliance for each of your deployments. With this configuration, user connectionsto resources are automatically routed through the appliance local to the deployment providing theresources, regardless of the location of the appliance through which the user accesses the store.
Optimal Citrix Gateway routing can also be used in the special case where local users on the internalnetwork are required to log on to Citrix Gateway for endpoint analysis. With this configuration, usersconnect to the store through theCitrixGatewayappliance, but there isnoneed to route theconnectionto the resource through the appliance as the user is on the internal network. In this case, you enableoptimal routing, but do not specify an appliance for the deployment, so user connections to desktopsandapplicationsare routeddirectlyandnot throughCitrixGateway. Note that youmustalsoconfigurea specific internal virtual server IP address for the Citrix Gateway appliance. Additionally, specify aninaccessible internal beacon point so that Citrix Workspace app is always prompted to connect toCitrix Gateway, regardless of the user’s network location.
Citrix Gateway global server load balancing
StoreFront supportsCitrixGatewaydeployments configured for global server loadbalancingwithmul-tiple appliances configuredwith a single fully qualified domain name (FQDN). For user authenticationand to route user connections through the appropriate appliance, StoreFront must be able to distin-guish between the appliances. Because the appliance FQDN cannot be used as a unique identifier ina global server load balancing configuration, youmust configure StoreFrontwith unique IP addressesfor each of the appliances. Typically, this is the IP address of the Citrix Gateway virtual server.
For information about load balancing, see Load balancing with Citrix ADC.
Important considerations
When you decidewhether to set up highly availablemulti-site configurations for your stores, considerthe following requirements and restrictions.
• Desktops and applications must have the same name and path on each server to be aggre-gated. In addition, the properties of aggregated resources, such as names and icons, must bethe same. If this is not the case, users could see the properties of their resources change whenCitrix Workspace app enumerates the available resources.
• Assigned desktops, both pre-assigned and assigned-on-first-use, should not be aggregated. En-sure that Delivery Groups providing such desktops do not have the samename and path in sitesthat you configure for aggregation.
• App Controller applications cannot be aggregated.
© 1999‒2022 Citrix Systems, Inc. All rights reserved. 46

StoreFront 2203
• If you configure synchronization of users’ application subscriptions between stores on separateStoreFront deployments, the stores must have the same name in each server group. In addi-tion, both server groups must reside within the Active Directory domain containing your users’accounts or within a domain that has a trust relationship with the user accounts domain.
• StoreFront only provides access to backup deployments for disaster recovery when all the pri-mary sites in the equivalent deployment set are unavailable. If a backup deployment is sharedbetween multiple equivalent deployment sets, all the primary sites in each of the sets must beunavailable before users can access the disaster recovery resources.
Install, set up, upgrade, and uninstall
June 17, 2020
Before installing and configuring
To install and configure StoreFront, complete the following steps in order:
1. If you plan to use StoreFront to deliver Citrix Virtual Apps and Desktops resources to users, en-sure that the StoreFront server is joined to either the Microsoft Active Directory domain con-taining your users’ accounts or a domain that has a trust relationship with the user accountsdomain.
Important:
• For single server deployments you can install StoreFront on a non-domain-joinedserver.
• StoreFront cannot be installed on a domain controller.
2. If not already present, StoreFront requires Microsoft .NET Framework, which can be down-loaded fromMicrosoft. Youmust haveMicrosoft .NET installedbefore you can install StoreFront.
3. Optionally, if you plan to configure a multiple server StoreFront deployment, set up a load bal-ancing environment for your StoreFront servers.
To use Citrix ADC for loadbalancing, youdefine a virtual server to proxy your StoreFront servers.For more information on configuring Citrix ADC for load balancing, see Load balancing with Cit-rix ADC.
a) Ensure that load balancing is enabled on your Citrix ADC appliance.
b) For each StoreFront server, create individual HTTP or SSL load balancing services, as ap-propriate, using the StoreFront monitor type.
© 1999‒2022 Citrix Systems, Inc. All rights reserved. 47

StoreFront 2203
c) Configure the services to insert the client IP address into the X-Forwarded-For HTTPheader of requests forwarded to StoreFront, overriding any global policies.
StoreFront requires users’ IP addresses to establish connections to their resources.
d) Create a virtual server and bind the services to the virtual server.
e) On the virtual server, configure persistence using either the Client IP or Cookie Insertmethod. Ensure the Time To Live (TTL) is sufficient to enable users to stay logged on tothe server as long as required.
Persistence ensures that only the initial user connection is load balanced, after which sub-sequent requests from that user are directed to the same StoreFront server.
4. Optionally, enable the following features.
• .NET Framework Features > .NET Framework, ASP.NET
Optionally, enable the following roles and their dependencies on the StoreFront server.
• WebServer (IIS) >WebServer > CommonHTTPFeatures >Default Document, HTTPErrors,Static Content, HTTP Redirection
• Web Server (IIS) > Web Server > Health and Diagnostics > HTTP Logging
• Web Server (IIS) > Web Server > Security > Request Filtering, Windows Authentication
TheStoreFront installer checks thatall thepreceding featuresandserver rolesareenabled.
5. Install StoreFront.
If you intend the server to be part of a server group, both the StoreFront installation locationand IIS website settings, physical path and site IDs must be consistent across them.
6. Optionally, configure Microsoft Internet Information Services (IIS) for HTTPS if you plan to useHTTPS to secure communications between StoreFront and users’ devices.
HTTPS is required for smart card authentication. By default, Citrix Workspace app requiresHTTPS connections to stores. To configure IIS so that you can use an HTTPS hostbaseURL inStoreFront, create an HTTPS binding to the default website and link it to the StoreFront servercertificate. For more information about adding HTTPS binding to an IIS site, see Secure yourStoreFront deployment.
7. Ensure your firewalls and other network devices permit access to TCP port 80 or 443, as ap-propriate, from both inside and outside the corporate network. In addition, ensure that anyfirewalls or other devices on your internal network do not block traffic to any of the unassignedTCP ports.
When you install StoreFront, a Windows Firewall rule is configured enabling access to the Store-Front executable through a TCP port randomly selected from all unreserved ports. This port isused for communications between the StoreFront servers in a server group.
© 1999‒2022 Citrix Systems, Inc. All rights reserved. 48

StoreFront 2203
8. If you plan to use multiple Internet Information Services (IIS) websites, after creating the web-sites in IIS, use the PowerShell SDK to create a StoreFront deployment in each of those IIS web-sites. For more information, see Multiple Internet Information Services (IIS) websites.
Note:
StoreFront disables the management console when it detects multiple sites and displaysa message to that effect.
9. Use the Citrix StoreFront management console to configure your server.
Install StoreFrontImportant
To avoid potential errors and data loss when installing StoreFront, ensure all applications areclosed and no other tasks or operations are running on the target system.
1. Download the installer from the download page.
2. Log on to the StoreFront server using an account with local administrator permissions.
3. Ensure that the required Microsoft .NET Framework is installed on the server.
4. Locate CitrixStoreFront-x64.exe, and run the file as an administrator.
5. Read and accept the license agreement, and click Next.
6. If the Review prerequisites page appears, click Next.
7. On the Ready to install page, check the prerequisites and StoreFront components that are listedfor installation and click Install.
Before the components are installed, the following roles are enabled if they are not already con-figured on the server.
• WebServer (IIS) >WebServer > CommonHTTPFeatures >Default Document, HTTPErrors,Static Content, HTTP Redirection
• Web Server (IIS) > Web Server > Health and Diagnostics > HTTP Logging
• Web Server (IIS) > Web Server > Security > Request Filtering, Windows Authentication
• Web Server (IIS) > Management Tools > IIS Management Console, IIS Management Scriptsand Tools
The following features are also enabled if they are not already configured.
• .NET Framework Features > .NET Framework, ASP.NET
8. When the installation is complete, click Finish. The Citrix StoreFront management consolestarts automatically. You can also open StoreFront from the Start screen.
© 1999‒2022 Citrix Systems, Inc. All rights reserved. 49

StoreFront 2203
9. In the Citrix StoreFront management console, click Create a new deployment.
a) Specify the URL of the StoreFront server in the Base URL box.b) On the Store Name page, specify a name for your store, and click Next.
On the Delivery Controllers page, enter details of the Citrix Virtual Apps and Desktops deploymentsthat that provide the resources you want to make available in the store.
1. Set the Transport type and the Port, such as HTTP and port 80, or HTTPS and port 443, andclickOK.
2. On the Remote Access page, select None. If you are using Citrix Gateway, select No VPN Tunneland enter your gateway details.
3. On the Remote Access page, select Create. Once the store has been created, click Finish.
Your store is now available for users to access through the Citrix Receiver for Web site, which enablesusers to access their desktops and apps through a webpage.
The URL for users to access the Citrix Receiver for Web site for the new store is displayed. For ex-ample: example.net/Citrix/StoreWeb/. Log on and you access the new user interface in Citrix
© 1999‒2022 Citrix Systems, Inc. All rights reserved. 50

StoreFront 2203
Workspace app.
To install StoreFront at a command prompt
1. Log on to the StoreFront server using an account with local administrator permissions.
2. Ensure that the requirements for installation of StoreFront aremet before installing StoreFront.Refer to Before installing and configuring for details.
3. Browse your installationmediaor downloadpackage, locateCitrixStoreFront-x64.exe, and copythe file to a temporary location on the server.
4. At a commandprompt, navigate to the folder containing the installation file and type the follow-ing command.
1 CitrixStoreFront-x64.exe [-silent] [-INSTALLDIRinstallationlocation] [-WINDOWS_CLIENT filelocation\filename.exe] [-MAC_CLIENT filelocation\filename.dmg]
2 <!--NeedCopy-->
Use the -silent argument to silently install StoreFront and its prerequisites. By default, Store-Front is installed at C:\Program Files\Citrix\Receiver StoreFront. However, you can specify a dif-
© 1999‒2022 Citrix Systems, Inc. All rights reserved. 51

StoreFront 2203
ferent installation location using the -INSTALLDIR argument, where installationlocation is thedirectory inwhich to install StoreFront. If you intend the server tobepart of a server group, boththe StoreFront installation location and IIS website settings, physical path and site IDs must beconsistent across them.
By default, if a Citrix Receiver for Web site cannot detect Citrix Workspace app on aWindows orMacOS Xdevice, the user is prompted to download and install the appropriate CitrixWorkspaceapp for their platform from the Citrix website. You canmodify this behavior so that users down-load the Citrix Workspace app installation files from the StoreFront server instead. For moreinformation, see Configure how resources are displayed for users.
If you plan to make this configuration change, specify the -WINDOWS_CLIENT and -MAC_CLIENT arguments to copy Citrix Receiver for Windows or Citrix Workspace app forWindows, and Citrix Receiver for Mac or Citrix Workspace app for Mac installation files, respec-tively, to the appropriate location in your StoreFront deployment. Replace filelocationwith thedirectory containing the installation file that you want to copy, and filename with the nameof the installation file. Citrix Receiver for Windows or Citrix Workspace app for Windows, andCitrix Receiver for Mac or Citrix Workspace app for Mac installation files are included on yourCitrix Virtual Apps and Desktops installation media.
CEIP
If you participate in the Citrix Customer Experience Improvement Program (CEIP), anonymous statis-tics andusage informationare sent toCitrix to improve thequality andperformanceofCitrix products.
Bydefault, you are automatically enrolled in CEIPwhen you install StoreFront. The first uploadof dataoccurs approximately seven days after you install StoreFront. You can change this default in a registrysetting. If you change the registry setting before installing StoreFront, that value is used. If you changethe registry setting before upgrading StoreFront, that value is used.
Warning:
Editing the registry incorrectly can cause serious problems thatmay require you to reinstall youroperating system. Citrix cannot guarantee that problems resulting from the incorrect use of Reg-istry Editor can be solved. Use Registry Editor at your own risk. Be sure to back up the registrybefore you edit it.
Registry setting that controls automatic upload of analytics (default = 1):
1 Location: HKLM:\Software\Citrix\Telemetry\CEIP2 Name: Enabled3 Type: REG_DWORD4 Value: 0 = disabled, 1 = enabled
© 1999‒2022 Citrix Systems, Inc. All rights reserved. 52

StoreFront 2203
5 <!--NeedCopy-->
Bydefault, theEnabledproperty is hidden in the registry. When it remains unspecified, the automaticupload feature is enabled.
Using PowerShell, the following cmdlet disables enrollment in CEIP:
New-ItemProperty -Path HKLM:\SOFTWARE\Citrix\Telemetry\CEIP -Name Enabled -PropertyType DWORD -Value 0
Note:
The registry setting controls the automatic upload of anonymous statistics and usage informa-tion for all components on the same server. For example, if you have installed StoreFront on thesame server as the Delivery Controller and decide to opt-out of CEIP using the registry setting,the opt-out applies to both components.
CEIP data collected from StoreFront
The following table gives examples of the type of anonymous information collected. The data doesnot contain any details that identify you as a customer.
Data Description
StoreFront version String denoting the installed version ofStoreFront. For example, “3.8.0.0”
Stores count A counter for the number of stores in thedeployment.
Server Count in server group A counter for the number of Servers in theServer group.
Delivery Controller Count per store List of numeric values indicating the number ofDelivery Controllers available for each store inthe Deployment.
HTTPS enabled String denoting whether HTTPS is enabled(“True” or “False”) for the deployment.
HTML5 setting for Citrix Receiver for Web List of Strings denoting the HTML5 Receiversetting (“Always”, “Fallback”, or “Off”) for eachReceiver for Web site.
Workspace control enabled for CitrixReceiver/Workspace app
List of Booleans denoting whether “WorkspaceControl” is enabled (“True” or “False”) for eachReceiver for Web site.
© 1999‒2022 Citrix Systems, Inc. All rights reserved. 53

StoreFront 2203
Data Description
Remote Access enabled for store List of Strings denoting whether “RemoteAccess” is enabled (“ENABLED” or “DISABLED”)for each store in the Deployment.
Gateways count A counter for the number of Citrix Gatewaysconfigured in the deployment.
Citrix Analytics service
If you are a Citrix Cloud customer and you have an on-premises StoreFront deployment, you can con-figure StoreFront so that data is sent to the Citrix Analytics service in Citrix Cloud. When configured,CitrixWorkspace app—andCitrix Receiver forWeb sites accessed fromHTML5-compatible browsers—send user events to Citrix Analytics for processing. Citrix Analytics aggregates metrics on users, appli-cations, endpoints, networks, and data to provide comprehensive insights into user behavior. To readabout this feature in the Citrix Analytics documentation, seeOnboard Virtual Apps andDesktops Sitesusing StoreFront.
To configure this behavior:
• Download a configuration file from Citrix Analytics.• Import Citrix Analytics data into your on-premises StoreFront deployment using PowerShell.
After StoreFront is configured, Citrix Workspace app can send data from StoreFront stores when theCitrix Analytics service requests it.
Important:
Your StoreFront deploymentmust be able to contact the following addresses at port 443 for thisfeature to work properly and consume the Citrix Cloud services:
• https://*.cloud.com• https://*.citrixdata.com
Download the configuration file from Citrix AnalyticsImportant:
Aconfiguration file containing sensitive information is required for initial configuration. Keep thefile safe after downloading. Do not share this file with anyone outside of your organization. Afterconfiguration you can delete this file. If you need to reapply the configuration again on anothermachine, you candownload the file again from theCitrix Analytics servicemanagement console.
1. Log on to Citrix Cloud (https://citrix.cloud.com/) using an administrator account.
© 1999‒2022 Citrix Systems, Inc. All rights reserved. 54

StoreFront 2203
2. Select a Citrix Cloud customer.
3. Open the Citrix Analytics service management console by clickingManage.
4. In the Citrix Analytics service management console, select Settings > Data Sources.
5. In the Virtual App and Desktops card, select the ( ) menu icon then select Connect StoreFrontdeployment.
6. On theConnect StoreFrontDeploymentpage, selectDownloadFile todownload theStoreFront-ConfigurationFile.json file.
Example configuration file
1 {23 ”customerId”: ”<yourcloudcustomer>”,4 ”enablementService”: ” https://api.analytics.cloud.com /casvc/<
yourcloudcustomer>/ctxana/v1/cas/<yourcloudcustomer>/XenDesktop/<deviceid>/dsconfigdata”,
5 ”cwsServiceKey”: ”PFJTPn … … .. T4=”,6 ”enablementServiceStatus”: ” https://api.analytics.cloud.com /casvc/<
yourcloudcustomer>/ctxana/v1/cas/storefront/config”,7 ”instanceId”: ”d98f21d0-56e0-11e9-ba52-5136d90862fe”,8 ”name”: ”CASSingleTenant”9 }1011 <!--NeedCopy-->
where
customerId is the unique ID for the current Citrix Cloud customer.
© 1999‒2022 Citrix Systems, Inc. All rights reserved. 55

StoreFront 2203
cwsServiceKey is a unique key identifying the current Citrix Cloud customer account.
instanceID is a generated ID used to sign (secure) requests made from Citrix Workspace app to CitrixAnalytics. If you registermultiple StoreFront servers or server groupswith Citrix Cloud, then each onehas a unique instanceID.
Import Citrix Analytics data into your StoreFront deployment
1. Copy the StoreFrontConfigurationFile.json file to a suitable folder on theon-premises StoreFrontserver (or one server in a StoreFront server group). The following commands assume that thefile is saved to the Desktop.
2. Open PowerShell ISE and select Run as Administrator.
3. Run the following commands:
1 Import-STFCasConfiguration -Path ”$Env:UserProfile\Desktop\StoreFrontConfigurationFile.json”
2 Get-STFCasConfiguration3 <!--NeedCopy-->
4. This command returns a copy of the imported data and displays it in the PowerShell console.
Note:
On-premises StoreFront servers, which are installed on Windows Server 2012 R2, may requirethe C++ run time software components to be manually installed, so that they can register withCAS. If StoreFront is installed during Citrix Virtual Apps and Desktops installation, this step is notrequired, because the CVADmetainstaller already installs the C++ run time components. If Store-Front is installed using just the CitrixStoreFront-x64.exe metainstaller without the C++ runtime,it may fail to register with Citrix Cloud after you have imported the CAS configuration file.
© 1999‒2022 Citrix Systems, Inc. All rights reserved. 56

StoreFront 2203
Propagate Citrix Analytics data to a StoreFront server group
If you are performing these actions on a StoreFront server group, you must propagate the importedCitrix Analytics data to all members of the server group. This step is not necessary in a single Store-Front server deployment.
To propagate the data, use one of the following approaches:
• Use the StoreFront management console.• Use the PowerShell cmdlet Publish-STFServerGroupConfiguration.
Check StoreFront server group ID
To check whether your deployment has successfully registered with the Citrix Analytics service, youcan use PowerShell to discover the ServerGroupID for your deployment.
1. Log on to your StoreFront server, or to one StoreFront server in the server group.
2. Open PowerShell ISE and select Run as Administrator.
3. Run the following commands:
1 $WebConfigPath = ”C:\Program Files\Citrix\Receiver StoreFront\Framework\FrameworkData\Framework.xml”
2 $XMLObject = (Get-Content $WebConfigPath) -as [Xml]3 $XMLObject.framework.properties.property4 <!--NeedCopy-->
For example, these commands generate output like the following:
1 name value2 ---- -----3 ClusterId 8b8ff5c8-44ba-46e4-87f0-2df8cff314324 HostBaseUrl https://storefront.example.com/5 SelectedIISWebSiteId 16 AdminConsoleOperationMode Full7 <!--NeedCopy-->
Stop sending data to Citrix Analytics from StoreFront
1. Open PowerShell ISE and select Run as Administrator.
© 1999‒2022 Citrix Systems, Inc. All rights reserved. 57

StoreFront 2203
2. Run the following commands:
Remove-STFCasConfiguration
Get-STFCasConfiguration
Get-STFCasConfiguration returns nothing if the previously imported Citrix Analytics data hasbeen successfully removed.
3. If you are performing these actions on a StoreFront server group, propagate the change andremove the imported Citrix Analytics data from all members of the server group. On one serverin the server group, run the following command:
Publish-STFServerGroupConfiguration
4. Onanyother server groupmembers, run the following command to confirm thatCitrix Analyticsconfiguration has been successfully removed from all servers in the group:
Get-STFCasConfiguration
5. Log on to Citrix Cloud (https://citrix.cloud.com/) using an administrator account.
6. Select a Citrix Cloud customer.
7. Open the Citrix Analytics service management console by clickingManage.
8. In the Citrix Analytics service management console, select Settings > Data Sources.
9. In the Virtual App and Desktops card, select the StoreFront deployment count:
10. Identify the StoreFront deployment you want to remove by referring to its host base URL andServerGroupID.
11. In the ( ) menu, select Remove StoreFront deployment from Analytics.
© 1999‒2022 Citrix Systems, Inc. All rights reserved. 58

StoreFront 2203
Note:
If you remove the configuration from the server side, but not fromCitrix Analytics, the StoreFrontdeployment entry remains in Citrix Analytics but receives nodata fromStoreFront. If you removethe configuration only from Citrix Analytics, the StoreFront deployment entry is re-added at thenext App pool recycle (done on an IIS reset or automatically every 24 hours).
Configure StoreFront to use a web proxy to contact Citrix Cloud and register with CitrixAnalytics
If StoreFront is placed on a host webserver behind a web proxy, registration with Citrix Analyticswill fail. If StoreFront administrators use an HTTP proxy in their Citrix deployment, StoreFront traf-fic bound for the Internet must pass through the web proxy before it reaches Citrix Analytics in thecloud. StoreFront does not automatically use the hosting OS’s proxy settings; additional configura-tion is required to instruct the store to send outbound traffic through the web proxy. You can config-ure a <system.net> proxy configuration by adding a new section to the storeweb.config file. Do thisfor every store on the StoreFront server that will be used to send data to Citrix Analytics.
Method 1: Set the store proxy configuration via Powershell for one or more stores (recom-mended)
Running the Powershell script Config-StoreProxy.ps1 automates this process for one or more storesand automatically inserts valid XML to configure <system.net>. The script also backs up the storeweb.config file to the current user’s desktop, allowing the unmodified web.config file to be restored ifnecessary.
Note:
Running the scriptmore thanoncemay result inmultiple copiesof the<system.net>XMLbeingadded. Each store should only have a single entry for <system.net>. Adding multiple copiesprevents the Store proxy configuration fromworking correctly.
1. Open up the Powershell ISE and select Run as Admin.
© 1999‒2022 Citrix Systems, Inc. All rights reserved. 59

StoreFront 2203
2. Set $Stores = @(”Store”,”Store2”) to include the stores you wish to configure with aweb proxy.
3. Specify either:
• an IP address, OR• an FQDN for the web proxy
4. Run the following Powershell:
1 $Stores = @(”Store”,”Store2”)2 $ProxyIP = ”10.0.0.1”3 $ProxyFQDN = ”proxyserver.example.com”4 $ProxyPort = 888856 # Set this for every Store using Stores array7 function Set-StoreProxyServer() # Tested with both IP and FQDN8 {910 [CmdletBinding()]11 param([Parameter(Mandatory=$true,ParameterSetName=”ProxyIP”)][
Parameter(Mandatory=$true,ParameterSetName=”ProxyFQDN”)][array]$Stores,
12 [Parameter(Mandatory=$true,ParameterSetName=”ProxyIP”)][string]$ProxyIP,
13 [Parameter(Mandatory=$true,ParameterSetName=”ProxyFQDN”)][string]$ProxyFQDN,
14 [Parameter(Mandatory=$true,ParameterSetName=”ProxyIP”)][Parameter(Mandatory=$true,ParameterSetName=”ProxyFQDN”)][int]$ProxyPort)
1516 foreach($Store in $Stores)17 {1819 Write-Host ”Backing up the Store web.config file for store
$Store before making changes...” -ForegroundColor ”Yellow”
20 Write-Host ”`n”2122 if(!(Test-Path ”$env:UserProfile\desktop\$Store\”))23 {2425 Write-Host ”Creating $env:UserProfile\desktop\$Store\
directory for backup...” -ForegroundColor ”Yellow”26 New-Item -Path ”$env:UserProfile\desktop\$Store\” -
© 1999‒2022 Citrix Systems, Inc. All rights reserved. 60

StoreFront 2203
ItemType ”Directory” | Out-Null27 Write-Host ”`n”28 }293031 Write-Host ”Copying c:\inetpub\wwwroot\Citrix\$Store\web.
config to $env:UserProfile\desktop\$Store\...” -ForegroundColor ”Yellow”
32 Copy-Item -Path ”c:\inetpub\wwwroot\Citrix\$Store\web.config” -Destination ”$env:UserProfile\desktop\$Store\”-Force | Out-Null
3334 if(Test-Path ”$env:UserProfile\desktop\$Store\web.config”)35 {3637 Write-Host ”$env:UserProfile\desktop\$Store\web.config
file backed up” -ForegroundColor ”Green”38 }3940 else41 {4243 Write-Host ”$env:UserProfile\desktop\$Store\web.config
file NOT found!” -ForegroundColor ”Red”44 }4546 Write-Host ”`n”4748 Write-Host ”Setting the proxy server to $ProxyAddress for
Store $Store...” -ForegroundColor ”Yellow”49 Write-Host ”`n”5051 $StoreConfigPath = ”c:\inetpub\wwwroot\Citrix\$Store\web.
config”52 $XMLObject = (Get-Content $StoreConfigPath) -as [Xml]5354 if([string]::IsNullOrEmpty($ProxyFQDN))55 {5657 $ProxyServer = (”HTTP://$ProxyIP”+”:”+$ProxyPort)58 }5960 else61 {62
© 1999‒2022 Citrix Systems, Inc. All rights reserved. 61

StoreFront 2203
63 $ProxyServer = (”HTTP://$ProxyFQDN”+”:”+$ProxyPort)64 }656667 $XMLObject = (Get-Content $StoreConfigPath) -as [Xml]6869 # Create 3 elements70 $SystemNet = $XMLObject.CreateNode(”element”,”system.net”,
””)71 $DefaultProxy = $XMLObject.CreateNode(”element”,”
defaultProxy”,””)72 $Proxy = $XMLObject.CreateNode(”element”,”proxy”,””)73 $Proxy.SetAttribute(”proxyaddress”,”$ProxyServer”)74 $Proxy.SetAttribute(”bypassonlocal”,”true”)7576 # Move back up the XML tree appending new child items in
reverse order77 $DefaultProxy.AppendChild($Proxy)78 $SystemNet.AppendChild($DefaultProxy)79 $XMLObject.configuration.AppendChild($SystemNet)8081 # Save the modified XML document to disk82 $XMLObject.Save($StoreConfigPath)8384 Write-Host ”Getting the proxy configuration for c:\inetpub
\wwwroot\Citrix\$Store...” -ForegroundColor ”Yellow”85 $XMLObject = (Get-Content $StoreConfigPath) -as [Xml]86 $ConfiguredProxyServer = $XMLObject.configuration.'system.
net'.defaultProxy.proxy.proxyaddress | Out-Null87 Write-Host (”Configured proxy server for Store $Store”+”:
”+ $ConfiguredProxyServer) -ForegroundColor ”Green”88 Write-Host ”`n”89 }9091 Write-Host ”Restarting IIS...” -ForegroundColor ”Yellow”92 IISReset /RESTART93 }949596 Set-StoreProxyServer -Stores $Stores -ProxyFQDN $ProxyFQDN -
ProxyPort $ProxyPort97 # OR98 Set-StoreProxyServer -Stores $Stores -ProxyIP $ProxyIP -ProxyPort
$ProxyPort99 <!--NeedCopy-->
© 1999‒2022 Citrix Systems, Inc. All rights reserved. 62

StoreFront 2203
5. Check that the C:\inetpub\wwwroot\Citrix< Store>\web.config now contains a new <system.net> section at the end of the web.config file.
1 </dependentAssembly>2 </assemblyBinding>3 </runtime>4 <system.net>5 <defaultProxy>6 <proxy proxyaddress=”HTTP://proxyserver.example.com:8888”
bypassonlocal=”true” />7 </defaultProxy>8 </system.net>9 </configuration>10 <!--NeedCopy-->
6. Import the Citrix Analytics data as described in Import Citrix Analytics data into your StoreFrontdeployment.
Method 2: Manually add a <system.net> section to the store web.config file
This must be done for every store on the StoreFront server that will be used to send data to CitrixAnalytics.
1. Back up the web.config file for the store and copy it to another location outside ofC:\inetpub\wwwroot\Citrix< Store>\web.config.
2. Modify the following XMLwith your proxy settings using either an FQDN-and-port combination,or using an IP-and-port combination.
For example, using an FQDN-and-port combination, use the following<system.net> element:
1 <system.net>2 <defaultProxy>3 <proxy proxyaddress=”HTTP://proxyserver.example.com:8888”
bypassonlocal=”true” />4 </defaultProxy>5 </system.net>6 <!--NeedCopy-->
For example, using an IP-and-port combination, use the following <system.net> element:
© 1999‒2022 Citrix Systems, Inc. All rights reserved. 63

StoreFront 2203
1 <system.net>2 <defaultProxy>3 <proxy proxyaddress=”HTTP://10.0.0.1:8888” bypassonlocal=”true
” />4 </defaultProxy>5 </system.net>6 <!--NeedCopy-->
3. At the end of the store web.config file, insert the appropriate <system.net> element whereindicated here:
1 <runtime>2 <gcServer enabled=”true” />3 <assemblyBinding xmlns=”urn:schemas-microsoft-com:asm.v1”>4 <dependentAssembly>5 <assemblyIdentity name=”System.Web.MVC” publicKeyToken=”31
BF3856AD364E35” culture=”neutral” />6 <bindingRedirect oldVersion=”0.0.0.0-5.0.0.0” newVersion=”
5.0.0.0” />7 </dependentAssembly>8 <dependentAssembly>9 <assemblyIdentity name=”Newtonsoft.Json” publicKeyToken=”30
ad4fe6b2a6aeed” culture=”neutral” />10 <bindingRedirect oldVersion=”0.0.0.0-9.0.0.0” newVersion=”
9.0.0.0” />11 </dependentAssembly>12 </assemblyBinding>13 </runtime>1415 Insert the <system.net> element here1617 </configuration>18 <!--NeedCopy-->
4. Import the Citrix Analytics data as described in Import Citrix Analytics data into your StoreFrontdeployment.
Upgrade StoreFrontWarning:
When you upgrade to StoreFront 1912, any Desktop Appliance sites in your deployment are au-
© 1999‒2022 Citrix Systems, Inc. All rights reserved. 64

StoreFront 2203
tomatically removed. If you need to preserve your Desktop Appliance sites, do not upgrade. Asan alternative, Citrix recommend using Citrix Workspace app Desktop Lock for all non-domain-joined use cases.
Upgrading preserves your StoreFront configuration and leaves users’ application subscription dataintact so that users do not need to resubscribe to all of their applications. By contrast, uninstallingStoreFront removesStoreFront andassociated services, sites, application subscriptiondata (on stand-alone servers), and associated configuration.
Good to know
• Upgrading the operating system version on a server running StoreFront is not supported. Citrixrecommends that you install StoreFront on a new installation of the operating system.
• Upgrading to the latest StoreFront current release froman older current release that is nowEndof Life is not supported. For more information see CTX200356.
• StoreFront does not support multiple server deployments containing different product ver-sions, so all servers in a server group must be upgraded to the same version before you grantaccess to the deployment.
• StoreFront does not support multiple server deployments containing different server OSs, soall servers in a server groupmust be on the sameWindows Server OS.
• Concurrent upgrade is not supported for multiple server deployments, servers must beupgraded sequentially.
• Any storeswhichuse the classic user experienceareupdated touse theunified experiencewhenyouupgrade to this versionof StoreFront. We recommend that youmakeusers awareof thenewexperience which the upgrade introduces, described in Unified user experience. If you havecustomized the unified experience, your customizations are preserved when you upgrade tothis version of StoreFront. Check that the appearance of your customizations is still suitablewith the new unified experience.
• Before the StoreFront upgrade runs it performs some pre-upgrade checks. If any pre-upgradecheck fails, the upgrade does not start and you are notified of the failures. Your StoreFront in-stallation remains unchanged. After fixing the cause of the failures, rerun the upgrade.
• If the StoreFront upgrade itself fails, your existing StoreFront installationmay lose its initial con-figuration. Restore your StoreFront installation to a functional state then rerun the upgrade. Torestore StoreFront to a functional state consider the following approaches:
– restoring the VM snapshot you created before the upgrade,– importing the StoreFront configuration you exported before the upgrade (see Export andimport the StoreFront configuration,
– performing the troubleshooting advice in Troubleshoot StoreFront upgrade issues.• Any StoreFront upgrade failures which occur from the Citrix Virtual Apps and Desktops metain-staller are reported in a dialog, with a link to the relevant failure log.
© 1999‒2022 Citrix Systems, Inc. All rights reserved. 65

StoreFront 2203
Get ready to upgrade
Before you start the upgrade, we recommend that you perform the following stepswhich can preventupgrade failure:
• Plan your backup strategy before upgrading.• If you have made modifications to files in C:\inetpub\wwwroot\Citrix\<StoreName>\App_Data, such as default.ica and usernamepassword.tfrm, back them up for each store. Afterthe upgrade you can restore them to reinstate your modifications.
• Close all other applications on the StoreFront server.• Close the StoreFront management console.• Close all command line and PowerShell windows.• Closeall StoreFront-related folders suchasC:\inetpub\wwwroot\Citrix\StoreandC:\inetpub\wwwroot\Citrix\StoreWeb.This prevents Windows Explorer from taking an exclusive lock on them.
• Beforeupgradingaserver, restart it toensure that therearenoexclusive locksonStoreFront filesor folders. (Restarting the explorer process—for example by closing all instances of Windowsexplorer—is not enough).
• Run the upgrade immediately without starting any other programs on the server.• Upgrade the server using an admin accountwith no other installations running and aminimumof other applications.
Upgrade a stand-alone StoreFront server
1. Disconnect users from the StoreFront deployment to prevent them from accessing the serverswhile the upgrade is in progress. This ensures that all StoreFront files are accessible by the in-staller during the upgrade. If the installer cannot access any files, they are not replaced and theupgrade fails, resulting in the removal of the existing StoreFront configuration.
2. Back up the server by creating a VM snapshot.
3. Export the existing StoreFront configuration (recommended).
4. Run the installation file for this version of StoreFront.
To upgrade a StoreFront server group
Upgrading StoreFront server groups involves using one of the servers to remove the other serversfrom the group. The removed servers retain configuration related to the group, which can preventthem being joined to a new server group. Before they can be reused to build new server groups, or asstandalone StoreFront servers, they must be reset to factory defaults, or have StoreFront reinstalledon them.
Before upgrading a server group:
© 1999‒2022 Citrix Systems, Inc. All rights reserved. 66

StoreFront 2203
• Back up all servers in the group by creating VM snapshots. This allows you to quickly revert toa working three node server group if the upgrade does not go as planned.
• Export the existing StoreFront configuration (recommended). Only export the server groupconfiguration from one server. Provided you have propagated all changes between them, allservers in a server group maintain identical copies of the configuration. This backup allowsyou to easily build a new server group.
Example 1: Upgradea three-nodeStoreFront servergroupduring scheduledmaintenancedown-time
This describes upgrading a StoreFront server group of three servers A, B, and C, during scheduleddowntime.
1. Disable user access to the server groupby disabling the loadbalancingURL. This prevents usersfrom connecting to the deployment during the upgrade process.
2. Use server A to remove servers B and C from the group.
Servers B and C are now ‘orphaned’ from the server group.
3. Upgrade server A by running the installation file for this version of StoreFront.
4. Ensure that server A has been successfully upgraded.
5. On servers B and C, uninstall the currently installed version of StoreFront, then install the newversion of StoreFront.
6. Join servers B and C to the upgraded server A to create an upgraded server group. This servergroup consists of one upgraded server (A) and two freshly installed servers (B and C).
The Join existing server group process automatically propagates all configuration data and sub-scription data to new servers B and C.
7. Check all servers are functioning correctly.
8. Enable user access to the upgraded server group by enabling the load balancing URL.
Example 2: Upgrade a three-node StoreFront server groupwithout scheduled downtime
This describes upgrading a StoreFront server group of three servers A, B, and C, without scheduleddowntime.
Before upgrading a server group:
1. Export subscription data from server A using Export-STFStoreSubscriptions. This backup isnecessary because servers are factory reset later in the process, which deletes subscription andconfiguration data. See Manage subscription data for a store.
© 1999‒2022 Citrix Systems, Inc. All rights reserved. 67

StoreFront 2203
2. Disable user access to server C by disabling the load balancer service that represents serverC. This prevents users from connecting to server C during the upgrade process. Keep the loadbalanced service representing servers A and B enabled, so your users can continue to use them.
3. Use server A to remove server C from the group.Servers A and B continue to provide access to your users’ resources. Server C is now orphanedfrom the server group, and is factory reset.
4. Reset the orphaned server C to factory defaults using Clear-STFDeployment.
5. Import the StoreFront configuration you previously exported into server C using Import-STFConfiguration. Server C now has an identical configuration to the old server group. It isnot necessary to repeat this step again later. Only one server needs a copy of the configurationdata to propagate it to any other servers that join the group.
6. Upgrade server C by running the installation file for this version of StoreFront. Server C nowhasan identical configuration to the old server group, and is upgraded to a new version of Store-Front.
7. Import the subscription data which you exported previously into server C. It is not necessary torepeat this step again later. Only one server needs a copy of the subscription data to propagateit to any other servers that join the group.
8. Repeat steps 2, 3, 4, and 6 using server B. (Do not repeat step 5.) During this time, only server Ais providing users with access to resources. It is therefore recommended to do this step duringquiet working periods, where load on the StoreFront server group is expected to beminimal.
9. Join server B to server C using the Join existing server group process. This gives a single serverdeployment on the current version of StoreFront (server A), and a new two-node server groupon the new StoreFront version (servers B and C).
10. Enable the load balanced services for both server B and C so they can take over from server A.
11. Disable the load balanced service for server A so that users are directed to the newly upgradedservers B and C.
12. Repeat steps 2–6 using server A.The server group upgrade process is now complete. Servers A, B, and C have identical configu-ration and subscription data from the original group.
Note:
During the brief periodwhen server A is the only accessible server, subscriptions canbe lost (step9). This can cause the new server group to have a slightly outdated copy of the subscriptiondatabase after upgrade, and any new subscription records to be lost.
This has no functional impact because subscription data is not essential for users to be able to
© 1999‒2022 Citrix Systems, Inc. All rights reserved. 68

StoreFront 2203
log on and launch resources. Users would, however, need to subscribe to a resource again afterserver A is factory reset and joined to thenewly upgradedgroup. Although it is unlikely thatmorethan a few subscription records would ever be lost, it is a possible consequence of upgrading alive StoreFront production environment with no downtime.
Configure StoreFront
When the Citrix StoreFront management console first starts, two options are available.
• Create a deployment. Configure the first server in a new StoreFront deployment. Single-serverdeployments are ideal for evaluating StoreFront or for small production deployments. Onceyou have configured your first StoreFront server, you can add more servers to the group at anytime to increase the capacity of your deployment.
• Join existing server group. Addanother server to anexistingStoreFront deployment. Select thisoption to rapidly increase the capacity of your StoreFront deployment. External load balancingis required for multiple server deployments. To add a server, you need access to an existingserver in the deployment. Citrix recommends nomore than 6 servers to a server group.
Uninstall StoreFront
In addition to the product itself, uninstalling StoreFront removes the authentication service, stores,Citrix Receiver forWeb sites, XenAppServicesURLs, and their associated configurations. The subscrip-tion store service containing users’ application subscription data is also deleted. In single-server de-ployments, details of users’ application subscriptions are therefore lost. However, in multiple serverdeployments thesedataare retainedonother servers in thegroup. Prerequisites enabledby theStore-Front installer, such as the .NET Framework features and the Web Server (IIS) role services, are notremoved from the server when StoreFront is uninstalled.
1. Log on to the StoreFront server using an account with local administrator permissions.2. Close the StoreFront admin console if it is open.3. Close any PowerShell sessions that may have been used to manage StoreFront via its Power-
Shell SDK.4. On the Windows Start screen or Apps screen, locate the Citrix StoreFront tile. Right-click the
tile and click Uninstall.5. In the Programs and Features dialog box, select Citrix StoreFront and click Uninstall to re-
move all StoreFront components from the server.6. In the Uninstall Citrix StoreFront dialog box, click Yes. When the uninstallation is complete,
clickOK.
© 1999‒2022 Citrix Systems, Inc. All rights reserved. 69

StoreFront 2203
Create a new deployment
March 13, 2019
1. If the Citrix StoreFrontmanagement console is not already open after installation of StoreFront,on the Windows Start screen or Apps screen, locate and click the Citrix StoreFront tile.
2. In the results pane of the Citrix StoreFront management console, click Create a new deploy-ment.
3. Specify theURLof the StoreFront server or the loadbalancing environment for amultiple serverdeployment in the Base URL box.
If youhavenot yet setupyour loadbalancingenvironment, enter the serverURL. Youcanmodifythe base URL for your deployment at any time.
4. Click Next to set up the authentication service, which authenticates users to Microsoft ActiveDirectory.
To use HTTPS to secure communications between StoreFront and users’ devices, youmust con-figureMicrosoft Internet Information Services (IIS) for HTTPS. In the absence of the appropriateIIS configuration, StoreFront uses HTTP for communications.
By default, Citrix Workspace app requires HTTPS connections to stores. If StoreFront is not con-figured forHTTPS, usersmust carry out additional configuration steps touseHTTPconnections.HTTPS is required for smart card authentication. You can change from HTTP to HTTPS at anytime after configuring StoreFront, provided the appropriate IIS configuration is in place. Formore information, see Configure server groups.
You can change from HTTP to HTTPS at any time using the Change Base URL task in the Store-Front management console, provided that Microsoft Internet Information Services (IIS) is con-figured for HTTPS.
5. On the Store Name page, specify a name for your store, specify whether youwant to allow onlyunauthenticated (anonymous) users access to the store, and click Next.
StoreFront stores aggregate desktops and applications, making them available to users. Storenames appear in CitrixWorkspace appunder users’ accounts, so choose aname that gives usersinformation about the content of the store.
6. On the Delivery Controllers page, list the infrastructure providing the resources that you wantto make available in the store. To add desktops and applications to the store, follow the appro-priate described in Add Citrix Virtual Apps and Desktops resources to the store. You can con-figure stores to provide resources from any mixture of Citrix Virtual Apps and Desktops deploy-ments. Repeat the procedures, as necessary, to add all the deployments providing resourcesfor the store.
© 1999‒2022 Citrix Systems, Inc. All rights reserved. 70
StoreFront 2203
7. When you have added all the required resources to the store, on theDelivery Controllers page,click Next.
8. On the Remote Access page, specify whether and how users connecting from public networkscan access the internal resources.
• Tomake the store available to users on public networks, check the Enable remote accessbox. If you leave this box unchecked, only local users on the internal network are able toaccess the store.
• To make only resources delivered through the store available through Citrix Gateway, se-lect Allow users to access only resources delivered through StoreFront (No VPN tun-nel). Users log on using either ICAProxy or clientless VPN (cVPN) to Citrix Gateway and donot need to use the Citrix Gateway plug-in to establish a full VPN.
• To make the store and all other resources on the internal network available through a Se-cure Sockets Layer (SSL) virtual private network (VPN) tunnel, select Allows users to ac-cess all resources on internal network (Full VPN tunnel). Users require the Citrix Gate-way plug-in to establish the VPN tunnel.
When you enable remote access to the store, the Pass-through from Citrix Gateway authenti-cationmethod is automatically enabled. Users authenticate to Citrix Gateway and are automat-ically logged on when they access their stores.
9. If you enabled remote access, Citrix Gateway appliances lists the deployments throughwhichusers can access the store. To add a Citrix Gateway deployment to this list, follow the appropri-ate procedure described in Provide remote access to the store through a Citrix Gateway appli-ance. Repeat the procedures, as necessary, to add further deployments.
10. In the Citrix Gateway appliances list, select the deployments through which users can accessthe store. If you enable access throughmultiple deployments, specify theDefault appliance tobe used to access the store. Click Next.
11. On the Authentication Methods page, select the methods your users will use to authenticateto the store and click Next. You can select from the following methods:
• Username and password: Users enter their credentials and are authenticated when theyaccess their stores.
• SAML Authentication: Users authenticate to an Identity Provider and are automaticallylogged on when they access their stores.
• Domain pass-through: Users authenticate to their domain-joined Windows computersand their credentials are used to log themon automatically when they access their stores.
• Smart card: Users authenticate using smart cards and PINswhen they access their stores.• HTTP basic: Users authenticate with the StoreFront server’s IIS web server.• Pass-through through Citrix Gateway: Users authenticate to Citrix Gateway and are au-tomatically logged on when they access their stores. This is automatically checked when
© 1999‒2022 Citrix Systems, Inc. All rights reserved. 71

StoreFront 2203
the remote access is enabled.1. On the Configure Password Validation page, select theDelivery Controllers to provide the password validation, click Next.
12. On the XenApp Services URL page, configure the XenApp Service URL for users who use PNA-gent to access the applications and desktops.
13. After the store has been create, further options become available in the Citrix StoreFront man-agement console. For more information, see Configure andmanage stores.
Your store is now available for users to access with Citrix Workspace app, which must be configuredwith access details for the store. There are a number of ways in which you can provide these detailsto users to make the configuration process easier for them. For more information, see User accessoptions.
Alternatively, users can access the store through the Citrix Receiver for Web site, which enables usersto access their desktops and applications through a webpage. The URL for users to access the CitrixReceiver for Web site for the new store is displayed when you create the store.
When you create a new store, the XenApp Services URL is enabled by default. Users of domain-joineddesktop appliances and repurposed PCs running the Citrix Desktop Lock, along with users who haveolder Citrix clients that cannot be upgraded, can access stores directly using the XenApp Services URLfor thestore. TheXenAppServicesURLhas the formhttp[s]://serveraddress/Citrix/storename/PNAgent/config.xml,where serveraddress is the fully qualified domain name of the server or load balancing environmentfor your StoreFront deployment and storename is the name you specified for the store in Step 5.
To quickly add more servers to your deployment, select the option to join an existing server groupwhen installing further instances of StoreFront.
Add Citrix Virtual Apps and Desktops resources to the store
Complete the following steps to make desktops and applications provided by Citrix Virtual Apps andDesktops available in the store that you create as part of the initial configuration of your StoreFrontserver. It is assumed that youhavecompletedSteps 1 to6 in the “Createanewdeployment”procedureat the top of this article.
1. On the Delivery Controllers page, list the infrastructure providing the resources that you wantto make available in the store. Click Add.
2. In the Add Delivery Controller dialog box, specify a Display name that will help you to identifythe deployment and select a Type to indicate how the resources made available in the storeare provided. Type defaults to Citrix Virtual Apps and Desktops. XenApp 6.5 is available as aType, however it reached End of Life in June 2018, and is now covered by the Extended SupportProgram.
3. TomakedesktopsandapplicationsprovidedbyCitrix VirtualAppsandDesktopsandXenApp6.5available in the store, add the names or IP addresses of your servers to the Servers list. Specify
© 1999‒2022 Citrix Systems, Inc. All rights reserved. 72

StoreFront 2203
multiple servers to enable fault tolerance, listing theentries inorder of priority to set the failoversequence. For Citrix Virtual Apps and Desktops sites, give details of Delivery Controllers. In thecase of XenApp 6.5 farms, list servers running the Citrix XML Service.
4. Select from the Transport type list the type of connections for StoreFront to use for communi-cations with the servers.
• To send data over unencrypted connections, select HTTP. If you select this option, youmust make your own arrangements to secure connections between StoreFront and yourservers.
• To send data over secure HTTP connections using Transport Layer Security (TLS), selectHTTPS. If you select this option for Citrix Virtual Apps and Desktops servers, ensure thatthe Citrix XML Service is set to share its port with Microsoft Internet Information Services(IIS) and that IIS is configured to support HTTPS.
• To senddataover secure connections toXenApp6.5 servers using theSSLRelay toperformhost authentication and data encryption, select SSL Relay.
Note:
If you are using HTTPS or the SSL Relay to secure connections between StoreFrontand your servers, ensure that the names you specify in the Servers list match exactly(including the case) the names on the certificates for those servers.
5. Specify the Port for StoreFront to use for connections to the servers. The default port is 80 forconnections using HTTP and the SSL Relay, and 443 for HTTPS connections. In the case of CitrixVirtual Apps and Desktops servers, the specified port must be the port used by the Citrix XMLService.
6. If youareusing theSSLRelay to secureconnectionsbetweenStoreFrontandXenApp6.5 servers,specify the TCP port of the SSL Relay in SSL Relay port. The default port is 443. Ensure that allthe servers running the SSL Relay are configured to monitor the same port.
7. Click OK. You can configure stores to provide resources from any mixture of Citrix Virtual Appsand Desktops deployments. To add further Citrix Virtual Desktops sites or Citrix Virtual Appsfarms, repeat the procedure above. When you have added all the required resources to thestore, return to Step 7 in the “Create a new deployment” procedure at the top of this article.
Provide remote access to the store through a Citrix Gateway appliance
Complete the following steps to configure remote access through a Citrix Gateway appliance to thestore that you create as part of the initial configuration of your StoreFront server. It is assumed thatyou have completed Steps 1 to 9 in the “Create a newdeployment” procedure at the top of this article.
1. On the Remote Access page of the StoreFront console Create Store dialog box, click Add.
© 1999‒2022 Citrix Systems, Inc. All rights reserved. 73

StoreFront 2203
2. In the AddCitrix GatewayAppliance dialog box, on theGeneral Settingspage, specify aDisplayname for the Citrix Gateway appliance that will help users to identify it.
Users see the display name you specify in CitrixWorkspace app, so include relevant informationin the name to help users decidewhether to use that gateway. For example, you can include thegeographical location in the display names for your Citrix Gateway deployments so that userscan easily identify the most convenient or closest gateway to their location.
3. For Citrix Gateway URL, type the URL:port combination of the Citrix Gateway virtual server foryour deployment. If a port is not specified, then the default https:// port of 443 is used. It isnot necessary to specify port 443 in the URL.
For information about creating a single Fully Qualified Domain Name (FQDN) to access a storeinternally and externally, see Create a single Fully Qualified Domain Name (FQDN) to access astore internally and externally.
4. Select the Usage or role of the Citrix Gateway from the available options.
• Authentication and HDX routing: The Citrix Gateway will be used for Authentication, aswell as for routing any HDX sessions.
• Authentication Only: The Citrix Gateway will be used for Authentication and not for anyHDX session routings.
• HDX routing Only: The Citrix Gateway will be used for HDX session routings and not forAuthentication.
5. For all deployments where you are making resources provided by Citrix Virtual Apps and Desk-tops or XenApp 6.5 available in the store, on the Secure Ticket Authority page, add SecureTicket Authority (STA) URLs for servers running the STA. Add URLs formultiple STAs to enablefault tolerance, listing the servers in order of priority to set the failover sequence.
The STA is hosted on Citrix Virtual Apps and Desktops, or XenApp 6.5 servers and issues sessiontickets in response to connection requests. These session tickets form the basis of authentica-tion and authorization for access to Citrix Virtual Apps and Desktops, or XenApp 6.5 resources.Use the correct STA URL (such as HTTPS:// or HTTP://) depending on how your Delivery Con-trollers are configured. The STA URL must also be identical to the one configured within CitrixGateway on your virtual server.
6. To ensure Citrix Virtual Apps and Desktops, or XenApp 6.5 keep disconnected sessions openwhile Citrix Workspace app attempts to reconnect automatically, select Enable session relia-bility.
7. If you configuremultiple STAs andwant to ensure that session reliability is always available, se-lectRequest tickets from two STAs, where available. Then StoreFront obtains session ticketsfrom two different STAs and user sessions are not interrupted if one STA becomes unavailableduring the course of the session. If, for any reason, StoreFront is unable to contact two STAs, itfalls back to using a single STA.
© 1999‒2022 Citrix Systems, Inc. All rights reserved. 74

StoreFront 2203
8. On the Authentication Settings page, type the VServer IP address (VIP) of the Citrix Gatewayappliance.
Use the private IP address for the Citrix Gateway virtual server rather than the public IP addressthat is NATed to the private IP address. Gateways are usually identified by StoreFront via theirURLs. If you are using global server load balancing (GSLB), you must add the VIP to each gate-way. This allows StoreFront to identify multiple gateways which all use the same URL (GSLBdomain name) as distinct gateways. For example, three gateways may be configured for thestore with the same URL such as https://gslb.domain.com but would each have uniqueVIPs configured such as 10.0.0.1, 10.0.0.2 and 10.0.0.3.
9. If you are adding an appliance running Citrix Gateway, select from the Logon type list the au-thentication method you configured on the appliance for Citrix Workspace app users.
• If users are required to enter their Microsoft Active Directory domain credentials, selectDomain.
• If users are required to enter a tokencode obtained from a security token, select Securitytoken.
• If users are required toenter both their domain credentials anda tokencodeobtained froma security token, select Domain and security token.
• If users are required to enter a one-time password sent by text message, select SMS au-thentication.
• If users are required to present a smart card and enter a PIN, select Smart card.
If you configure smart card authentication with a secondary authentication method to whichusers can fall back if they experience any issues with their smart cards, select the secondaryauthentication method from the Smart card fallback list.
10. If you are configuring StoreFront for Citrix Gateway and want to use Smart Access, then youmust type a Callback URL. StoreFront automatically appends the standard portion of the URL.Enter the internally accessible URL of the appliance. StoreFront contacts the Citrix Gatewayauthentication service to verify that requests received from Citrix Gateway originate from thatappliance.
When using GSLB, we recommend that you configure unique callback URLs for each of yourGSLB gateways. StoreFrontmust be able to resolve each of the unique Callback URLs to the pri-vate VIPs configured for each of the GSLB gateway virtual servers. For example, emeagateway.domain.com, usgateway.domain.com and apacgateway.domain.com should resolve tothe correct gateway VIP.
11. Click Create to add your Citrix Gateway appliance to the list in the Remote Access Settingsdialog box.
Information about the configuration of your Citrix Gateway appliances is saved to the .cr provi-sioning file for the store. This enables Citrix Workspace app to send the appropriate connection
© 1999‒2022 Citrix Systems, Inc. All rights reserved. 75

StoreFront 2203
request when contacting appliances for the first time.
12. Return to Step 10 in the “Create a new deployment” procedure at the top of this article.
Join an existing server group
April 9, 2019
A server group can contain a maximum of five servers. However, from a capacity perspective basedon simulations, there is no advantage to server groups containing more than three servers.
Before installing StoreFront on a server you are adding to the group, ensure that:
• The server you are adding is running the same operating system version with the same localesettings as the other servers in the group. StoreFront server groups containing mixtures of op-erating system versions and locales are not supported.
• The relative path to StoreFront in IIS on the server you are adding is the same as on the otherservers in the group.
If the StoreFront server you are adding previously belonged to a server group and has been removed,before it can be added again, to the same or a different server group, you must reset the StoreFrontserver to a factory default state. See Reset a server to factory defaults
Important:
Whenyouaddanewserver to a server group, StoreFront service accounts are addedasmembersof the local administrators group on the new server. These services require local administratorpermissions to join and synchronize with the server group. If you use Group Policy to preventaddition of new members to the local administrator group or if you restrict the permissions ofthe local administrator group on your servers, StoreFront cannot join a server group.
1. If the Citrix StoreFrontmanagement console is not already open after installation of StoreFront,on the Windows Start screen or Apps screen, locate and click the Citrix StoreFront tile.
2. In the results pane of the Citrix StoreFront management console, click Join existing servergroup.
3. Log on to a server in the StoreFront deployment that you wish to join and open the Citrix Store-Front management console. Select the Server Group node in the left pane of the console and,in the Actions pane, click Add Server. Make a note of the authorization code that is displayed.
4. Return to the new server and, in the Join Server Group dialog box, specify the name of the exist-ing server in the Authorizing server box. Enter the authorization code obtained from that serverand click Join.
© 1999‒2022 Citrix Systems, Inc. All rights reserved. 76

StoreFront 2203
Once joined to the group, the configuration of the new server is updated to match the configu-ration of the existing server. All the other servers in the group are updated with details of thenew server.
Tomanage amultiple server deployment, use only one server at a time tomake changes to the config-uration of the server group. Ensure that the Citrix StoreFront management console is not running onany of the other servers in the deployment. Any configuration changes youmakemust be propagatedto the other servers in the group to ensure a consistent configuration across the deployment.
Reset a server to factory defaults
April 18, 2019
In some situations, there is a need to reset a StoreFront installation to its initial installation state. Thisis necessary, for example, before you can re-add a StoreFront server to a server group.
A manual uninstall and reinstall can be performed, but this is more time consuming and may causeother unforeseen issues. Instead you can run the Clear-STFDeployment PowerShell cmdlet to reseta StoreFront server to a factory default state.
1. Ensure that the StoreFront management console is closed.
2. Open the PowerShell ISE and select Run as Administrator.
3. Set the PowerShell path:
1 $env:PSModulePath = [Environment]::GetEnvironmentVariable('PSModulePath','Machine')
2 <!--NeedCopy-->
4. Import the Citrix StoreFront module.
1 Import-Module citrix.storefront -verbose2 <!--NeedCopy-->
© 1999‒2022 Citrix Systems, Inc. All rights reserved. 77

StoreFront 2203
5. After themodule is imported, run the Clear-STFDeployment command to reset the StoreFrontserver to the default settings:
1 Clear-STFDeployment -Confirm $False2 <!--NeedCopy-->
6. When thecommandhas completed successfully, open theStoreFrontmanagement consoleandconfirm that all settings are reset. The options to Create a new deployment or Join existingserver group are available.
© 1999‒2022 Citrix Systems, Inc. All rights reserved. 78

StoreFront 2203
Configure server groups
December 18, 2019
The tasks below enable you to modify settings for multiple-server StoreFront deployments. To man-age amultiple-server deployment, use only one server at a time tomake changes to the configurationof the server group. Ensure that the Citrix StoreFront management console is not running on any ofthe other servers in the deployment. Any configuration changes youmakemust be propagated to theother servers in the group to ensure a consistent configuration across the deployment.
You must configure servers comprising a StoreFront server group identically in terms of both Store-Front installation location and IIS website settings, such as physical path and site IDs.
Add a server to a server group
Use the Add Server task to obtain an authorization code to enable you to join a newly installed Store-Front server to your existing deployment. Formore information about adding new servers to existingStoreFront deployments, see Join an existing server group. See the Scalability section of Plan yourStorefront deployment to assess howmany servers you need in your group.
Remove servers from a server group
Use the Remove Server task to delete servers from a multiple-server StoreFront deployment. Youcan remove any server in the group apart from the server on which you are running the task. Beforeremovinga server fromamultiple-serverdeployment, first remove the server fromthe load-balancingenvironment.
Before a removed StoreFront server can be added again, to the same or to a different server group,youmust reset it to a factory default state. See Reset a server to factory defaults
Propagate local changes to a server group
Use the Propagate Changes task to update the configuration of all the other servers in a multiple-server StoreFront deployment to match the configuration of the current server. Propagation of con-figuration information is initiated manually so that you retain control over when and if the serversin the group are updated with configuration changes. While running this task, you cannot make anyfurther changes until all the servers in the group have been updated.
Important:
Any changesmadeonother servers in the group are discardedduring propagation. If youupdatethe configuration of a server, propagate the changes to the other servers in the group to avoid
© 1999‒2022 Citrix Systems, Inc. All rights reserved. 79

StoreFront 2203
losing those changes if you later propagate changes from different server in the deployment.
The information propagated between servers in the group includes the following:
• Contents of all web.config files, which contain the StoreFront configuration.• Contents of C:\Program Files\Citrix\Receiver StoreFront\Receiver Clients,such as C:\Program Files\Citrix\Receiver StoreFront\Receiver Clients\Windows\CitrixWorkspaceAppWeb.exe and C:\Program Files\Citrix\ReceiverStoreFront\Receiver Clients\MAC\CitrixWorkspaceAppWeb.dmg.
• Contents of C:\inetpub\wwwroot\Citrix\StoreWeb\Custom\contrib.• Contents of C:\inetpub\wwwroot\Citrix\StoreWeb\Custom\custom folder, such ascopied images and customisation.js files.
• Contents of the Citrix Delivery Services certificate store, except any manually imported Certifi-cate Revocation Lists (CRLs). (For details on distributing local CRLs, see Certificate RevocationList (CRL) checking.
Note:
Subscription data is synchronized with the other servers independently of the PropagateChanges mechanism. It happens automatically without the Propagate Changes task beinginitiated.
Change the base URL for a deployment
Use the Change Base URL task to modify the URL that is used as the root of the URLs for the storesand other StoreFront services hosted on a deployment. Formultiple-server deployments, specify theload-balanced URL. You can use this task to change from HTTP to HTTPS at any time, provided thatMicrosoft Internet Information Services (IIS) is configured for HTTPS, and you add an HTTPS bindingto the default website. For more information, see Secure your StoreFront deployment.
Configure server bypass behavior
To improve performance when some of the servers providing resources become unavailable, Store-Front temporarily bypasses servers that fail to respond. While a server is being bypassed, StoreFrontignores that server and does not use it to access resources. Use these parameters to specify the dura-tion of the bypass behavior:
• All failed bypass duration specifies a reduced duration inminutes that StoreFront uses insteadof Bypass duration if all servers for a particular Delivery Controller are being bypassed. Thedefault is 0 minutes.
• Bypass duration specifies the time in minutes that StoreFront bypasses an individual serverafter a failed attempt to contact that server. The default bypass duration is 60 minutes.
© 1999‒2022 Citrix Systems, Inc. All rights reserved. 80

StoreFront 2203
Considerations when specifying All failed bypass duration
Setting a larger All failed bypass duration reduces the impact of unavailability of a particular De-livery Controller; however, it has the negative affect that resources from this Delivery Controller areunavailable to users for the specified duration after a temporary network outage or server unavailabil-ity. Consider the use of largerAll failed bypass durationvalueswhenmanyDelivery Controllers havebeen configured for a store, particularly for nonbusiness-critical Delivery Controllers.
Setting a smaller All failed bypass duration increases the availability of resources served by thatDelivery Controller but increases the possibility of client-side timeouts if many Delivery Controllersare configured for a store and several of them become unavailable. It is worth keeping the default0-minute value when not many farms are configured and for business-critical Delivery Controllers.
To change the bypass parameters for a storeImportant:
In multiple-server deployments, use only one server at a time tomake changes to the configura-tion of the server group. Ensure that the Citrix StoreFront management console is not runningon any of the other servers in the deployment. Once complete, propagate your configurationchanges to the server group so the other servers in the deployment are updated.
1. On the Windows Start screen or Apps screen, locate and click the Citrix StoreFront tile.2. Select the Stores node in the left pane of the Citrix StoreFront management console and click
Manage Delivery Controllers in the Actions pane.3. Select a controller, click Edit, and then click Settings on the Edit Delivery Controller screen.4. In Advanced Settings click Settings.5. In the Configure Advanced Settings dialog:
a) On the All failed bypass duration row, click in the second column and enter a time, inminutes, for which a Delivery Controller is considered offline after all its servers fail to re-spond.
b) On the Bypass duration row, click in the second column and enter a time, in minutes, forwhich a single server is considered offline after it fails to respond.
Configure authentication and delegation
March 21, 2022
Depending on your requirements, there are several authentication and delegations methods.
© 1999‒2022 Citrix Systems, Inc. All rights reserved. 81

StoreFront 2203
Method Detail
Configure the authentication service The authentication service authenticates usersto Microsoft Active Directory, ensuring thatusers do not need to log on again to accesstheir desktops and applications.
XML service-based authentication When StoreFront is not in the same domain asCitrix Virtual Apps and Desktops, and it is notpossible to put Active Directory trusts in place,you can configure StoreFront to use the CitrixVirtual Apps and Desktops XML Service toauthenticate the user name and passwordcredentials.
Smart card authentication Set up smart card authentication for all thecomponents in a typical StoreFrontdeployment.
Password expiry notification period If you enable Citrix Receiver for Web site usersto change their passwords at any time, localusers whose passwords are about to expire areshown a warning when they log on.
Configure the authentication service
April 25, 2022
Manage authenticationmethods
You can enable or disable user authentication methods set up when the authentication service wascreated by selecting an authentication method in the results pane of the Citrix StoreFront manage-ment console and, in the Actions pane, clicking Manage Authentication Methods.
1. On the Windows Start screen or Apps screen, locate and click the Citrix StoreFront tile.2. Select the Store node in the left pane of the Citrix StoreFront management console and, in the
Actions pane, clickManage Authentication Methods.3. Specify the access methods that you want to enable for your users.
© 1999‒2022 Citrix Systems, Inc. All rights reserved. 82

StoreFront 2203
• Select the Username and password check box to enable explicit authentication. Users entertheir credentials when they access their stores.
• Select the SAMLAuthentication check box to enable integrationwith a SAML Identity Provider.Users authenticate to an Identity Provider and are automatically loggedwhen they access theirstores. From the Settings drop-downmenu:
– Select Identity Provider to configure the trust to the Identity Provider.– Select Service Provider to configure the trust for the Service Provider. This information isrequired by the Identity Provider.
• Select Domain pass-through to enable pass-through of Active Directory domain credentialsfromusers’ devices. Users authenticate to their domain-joinedWindows computers and are au-tomatically logged on when they access their stores. To use this option, pass-through authenti-cationmust be enabled when Citrix Receiver for Windows or Citrix Workspace app for Windowsis installed on users’ devices.
Note:
The domain pass-through for Citrix Receiver for Web is limited to Windows operating sys-tems using Internet Explorer, Microsoft Edge, Mozilla Firefox, and Google Chrome, and thebrowsers rely on successful client detection to communicate with native Citrix Workspace
© 1999‒2022 Citrix Systems, Inc. All rights reserved. 83

StoreFront 2203
apps. It’s a prerequisite for domain pass-through authentication to function.
• Select Smart card to enable smart card authentication. Users authenticate using smart cardsand PINs when they access their stores.
• SelectHTTPBasic to enableHTTPBasic authentication. Users authenticatewith theStoreFrontserver’s IIS web server.
• Select Pass-through from Citrix Gateway to enable pass-through authentication from CitrixGateway. Users authenticate to Citrix Gateway and are automatically logged on when they ac-cess their stores.
To enable pass-through authentication for smart card users accessing stores through Citrix Gateway,use the Configure Delegated Authentication task.
Configure trusted user domains
Use the Trusted Domains task to restrict access to stores for users logging on with explicit domaincredentials, either directly or using pass-through authentication from Citrix Gateway.
1. On the Windows Start screen or Apps screen, locate and click the Citrix StoreFront tile.
2. Select the Stores node in the left pane of the Citrix StoreFront management console and, in theresults pane, select the appropriate authentication method. In the Actions pane, clickManageAuthentication Methods.
3. From the User name and password > Settings list, select Configure Trusted Domains.
4. Select Trusted Domains only and click Add to enter the name of a trusted domain. Users withaccounts in that domain will be able to log on to all stores that use the authentication service.To modify a domain name, select the entry in the Trusted domains list and click Edit. To dis-continue access to stores for user accounts in a domain, select the domain in the list and clickRemove.
How you specify the domain name determines the format in which users must enter their cre-dentials. If you want users to enter their credentials in domain user name format, add the Net-BIOS name to the list. For users to enter their credentials in user principal name format, addthe fully qualified domain name to the list. If you want to enable users to enter their creden-tials in both domain user name format and user principal name format, youmust add both theNetBIOS name and the fully qualified domain name to the list.
5. If you configure multiple trusted domains, select from the Default domain list the domain thatis selected by default when users log on.
6. If you want to list the trusted domains on the logon page, select the Show domains list in thelogon page check box.
© 1999‒2022 Citrix Systems, Inc. All rights reserved. 84

StoreFront 2203
Enable users to change their passwords
Use the Manage Password Options task to enable Citrix Workspace app and Receiver for Web siteusers logging on with domain credentials to change their passwords. When you create the authenti-cation service, the default configuration prevents Citrix Workspace app, and Citrix Receiver for Website users from changing their passwords, even if the passwords have expired. If you decide to enablethis feature, ensure that the policies for the domains containing your servers do not prevent usersfrom changing their passwords. Enabling users to change their passwords exposes sensitive securityfunctions to anyone who can access any of the stores that use the authentication service. If your or-ganization has a security policy that reserves user password change functions for internal use only,ensure that none of the stores are accessible from outside your corporate network.
1. Citrix Receiver for Web supports password changes on expiration, and elective passwordchanges. All desktop Citrix Workspace apps support password change through Citrix Gatewayon expiration only. On the Windows Start screen or Apps screen, locate and click the CitrixStoreFront tile.
2. In the left pane of the Citrix StoreFront management console Actions pane, select the Storesnode and clickManage Authentication Methods.
3. From the User name and passwords > Settings drop-down menu, select Manage PasswordOptions. Specify the circumstances under which Citrix Receiver for Web site users logging onwith domain credentials are able to change their passwords.
• To enable users to change their passwords whenever they want, select At any time. Localusers whose passwords are about to expire are shown a warning when they log on. Pass-word expiry warnings are only displayed to users connecting from the internal network.By default, the notification period for a user is determined by the applicable Windows pol-icy setting. Formore information about setting customnotification periods, see Configurethe password expiry notification period. Supported only with Citrix Receiver for Web.
• To enable users to change their passwords onlywhen thepasswords have already expired,select When expired. Users who can’t log on because their passwords have expired areredirected to theChangePassworddialogbox. This is supported forCitrixWorkspaceapps,and Citrix Receiver for Web.
Note:
Ensure that there’s sufficient disk space on your StoreFront servers to store profilesfor all your users. To check whether a user’s password is about to expire, StoreFrontcreates a local profile for that user on the server. StoreFront must be able to contactthe domain controller to change users’ passwords.
• To prevent users from changing their passwords, do not select Allow users to changepasswords. If you do not select this option, you must make your own arrangements to
© 1999‒2022 Citrix Systems, Inc. All rights reserved. 85

StoreFront 2203
support users who can’t access their desktops and applications because their passwordshave expired.
• To prevent users from changing their passwords, do not select Allow users to changepasswords. If you do not select this option, you must make your own arrangements tosupport users who can’t access their desktops and applications because their passwordshave expired.
Citrix Workspace apps
User can change anexpired password ifenabled onStoreFront
User is notified thatpassword will expire
User can changepassword before itexpires if enabled onStoreFront
Windows Yes
Mac Yes
Android
iOS
Linux Yes
Web Yes Yes Yes
Shared authentication service settings
Use theSharedAuthenticationServiceSettings task to specify stores thatwill share theauthenticationservice enabling single sign-on between them.
1. On the Windows Start screen or Apps screen, locate and click the Citrix StoreFront tile.2. Select the Stores node in the left pane of the Citrix StoreFrontmanagement console and, in the
results pane, select a store. In the Actions pane, clickManage Authentication Methods.3. From the Advanced drop-downmenu, select Shared authentication service settings.4. Click theUse shared authentication service check box and select a store from the Store name
drop-downmenu.
Note:
There’s no functional difference between a shared and dedicated authentication service. An au-thentication service shared bymore than two stores is treated as a shared authentication serviceand any configuration changes affect the access to all the stores using the shared authenticationservice.
© 1999‒2022 Citrix Systems, Inc. All rights reserved. 86

StoreFront 2203
Delegate credential validation to Citrix Gateway
Use the Configure Delegated Authentication task to enable pass-through authentication for smartcard users accessing stores through Citrix Gateway. This task is only available when Pass-throughfrom Citrix Gateway is enabled and selected in the results pane.
When credential validation is delegated to Citrix Gateway, users authenticate to Citrix Gateway withtheir smart cards and are automatically logged on when they access their stores. This setting is dis-abled by default when you enable pass-through authentication from Citrix Gateway, so that pass-through authentication only occurs when users log on to Citrix Gateway with a password.
XML service-based authentication
July 17, 2019
When StoreFront is not in the same domain as Citrix Virtual Apps and Desktops, and it is not possibleto put Active Directory trusts in place, you can configure StoreFront to use the Citrix Virtual Apps andDesktops XML Service to authenticate the user name and password credentials.
Enable XML service-based authentication
1. On the Windows Start screen or Apps screen, locate and click the Citrix StoreFront tile.
2. Select the Stores node in the left pane of the Citrix StoreFrontmanagement console and, in theActions pane, clickManage Authentication Methods.
3. On theManage AuthenticationMethods page, from theUser name and password > Settingsdrop-downmenu, select Configure Password Validation.
© 1999‒2022 Citrix Systems, Inc. All rights reserved. 87

StoreFront 2203
4. From the Validation Password Via list, select Delivery Controllers, and then click Configure.
© 1999‒2022 Citrix Systems, Inc. All rights reserved. 88

StoreFront 2203
5. Follow the Configure Delivery Controllers screens to add one or more Delivery Controllersfor validating the user credentials and clickOK.
Disable XML service-based authentication
1. On the Windows Start screen or Apps screen, locate and click the Citrix StoreFront tile.2. Select the Stores node in the left pane of the Citrix StoreFrontmanagement console and, in the
Actions pane, clickManage Authentication Methods.3. On theManage AuthenticationMethods page, from theUser name and password > Settings
list, select Configure Password Validation.4. From the Validation Password Via drop-down menu, select Active Directory, and then click
OK.
Configure smart card authentication
November 14, 2019
This article gives an overview of the tasks involved in setting up smart card authentication for all the
© 1999‒2022 Citrix Systems, Inc. All rights reserved. 89

StoreFront 2203
components in a typical StoreFront deployment. For more information and step-by-step configura-tion instructions, see the documentation for the individual products.
The document Smart card configuration for Citrix environments describes how to configure a Citrixdeployment for smart cards uses a specific smart card type. Similar steps apply to smart cards fromother vendors.
Note:
In this article,mentions of “CitrixWorkspace app” also represent the supported versions of CitrixReceiver unless otherwise noted.
Prerequisites
• Ensure that accounts for all users are configured either within the Microsoft Active Directorydomain inwhich youplan to deploy your StoreFront servers orwithin a domain that has a directtwo-way trust relationship with the StoreFront server domain.
• If you plan to enable pass-throughwith smart card authentication, ensure that your smart cardreader types, middleware type and configuration, and middleware PIN caching policy permitthis.
• Install your vendor’s smart cardmiddleware on the virtual or physicalmachines running the Vir-tual Delivery Agent that provide users’ desktops and applications. For more information aboutusing smart cards with Citrix Virtual Desktops, see Smart cards.
• Before continuing, ensure that your public-key infrastructure is configured appropriately.Check that certificate to account mapping is configured correctly for your Active Directoryenvironment and that user certificate validation can be performed successfully.
Configure Citrix Gateway
• On your Citrix Gateway appliance, install a signed server certificate from a certification author-ity. For more information, see Installing and Managing Certificates.
• On your Citrix Gateway appliance, install the root certificate of the certification authority issuingyour smart card user certificates. Formore information, see To install a root certificate on CitrixGateway.
• Create and configure a virtual server for client certificate authentication. Create a certificate au-thentication policy, specifying SubjectAltName:PrincipalName for user name extraction fromthe certificate. Then, bind the policy to the virtual server and configure the virtual server to re-quest client certificates. For more information, see Configuring and Binding a Client CertificateAuthentication Policy.
• Bind the certification authority root certificate to the virtual server. For more information, seeTo add a root certificate to a virtual server.
© 1999‒2022 Citrix Systems, Inc. All rights reserved. 90

StoreFront 2203
• To ensure that users do not receive an additional prompt for their credentials at the virtualserver when connections to their resources are established, create a second virtual server.When you create the virtual server, disable client authentication in the Secure Sockets Layer(SSL) parameters. For more information, see Configuring smart card authentication.
You must also configure StoreFront to route user connections to resources through this addi-tional virtual server. Users log on to the first virtual server and the second virtual server is usedfor connections to their resources. When the connection is established, users do not need toauthenticate to Citrix Gateway but are required to enter their PINs to log on to their desktopsand applications. Configuring a second virtual server for user connections to resources is op-tional unless you plan to enable users to fall back to explicit authentication if they experienceany issues with their smart cards.
• Create session policies and profiles for connections from Citrix Gateway to StoreFront and bindthem to the appropriate virtual server. Formore information, see Access to StoreFront ThroughCitrix Gateway.
• If you configured the virtual server used for connections to StoreFront to require client certifi-cate authentication for all communications, you must create a further virtual server to providethe callback URL for StoreFront. This virtual server is used only by StoreFront to verify requestsfrom the Citrix Gateway appliance and so does not need to be publically accessible. A sepa-rate virtual server is requiredwhen client certificate authentication ismandatory becauseStore-Front cannot present a certificate to authenticate. For more information, see Creating VirtualServers.
Configure StoreFront
• You must use HTTPS for communications between StoreFront and users’ devices to en-able smart card authentication. Configure Microsoft Internet Information Services (IIS)for HTTPS by obtaining an SSL certificate in IIS and then adding HTTPS binding to thedefault website. For more information about creating a server certificate in IIS, seehttps://docs.microsoft.com/en-us/previous-versions/windows/it-pro/windows-server-2012-R2-and-2012/hh831637(v=ws.11)#create-certificate-wizard. For more informationabout adding HTTPS binding to an IIS site, see https://docs.microsoft.com/en-us/previous-versions/orphan-topics/ws.11/hh831632(v=ws.11).
• If you want to require that client certificates are presented for HTTPS connections to all Store-Front URLs, configure IIS on the StoreFront server.
When StoreFront is installed, the default configuration in IIS only requires that client certificatesare presented for HTTPS connections to the certificate authentication URL of the StoreFront au-thentication service. This configuration is required to provide smart card users with the option
© 1999‒2022 Citrix Systems, Inc. All rights reserved. 91

StoreFront 2203
to fall back to explicit authentication and, subject to the appropriate Windows policy settings,enable users to remove their smart cards without needing to reauthenticate.
When IIS is configured to require client certificates forHTTPSconnections toall StoreFrontURLs,smart card users cannot connect through Citrix Gateway and cannot fall back to explicit authen-tication. Usersmust log on again if they remove their smart cards from their devices. To enablethis IIS site configuration, the authentication service and storesmust be colocated on the sameserver, and a client certificate that is valid for all the stores must be used. Moreover, this config-uration where IIS is requiring client certificates for HTTPS connections to all StoreFront URLs,will conflict with authentication for Citrix Receiver for Web clients. For this reason, this configu-ration should be used when Citrix Receiver for Web client access is not required.
• Install and configure StoreFront. Create the authentication service and add your stores, as re-quired. If you configure remote access through Citrix Gateway, do not enable virtual privatenetwork (VPN) integration. For more information, see Install and set up StoreFront.
• Enable smart card authentication to StoreFront for local users on the internal network. Forsmart card users accessing stores through Citrix Gateway, enable the pass-through with CitrixGateway authentication method and ensure that StoreFront is configured to delegate creden-tial validation to Citrix Gateway. If you plan to enable pass-through authentication when youinstall Citrix Receiver for Windows or Citrix Workspace app for Windows on domain-joined userdevices, enable domain pass-through authentication. For more information, see Configure theauthentication service.
To allow Citrix Receiver for Web client authentication with smart cards, you must enable theauthenticationmethodper Citrix Receiver forWeb site. Formore information, see theConfigureCitrix Receiver for Web sites instruction.
If you want smart card users to be able to fall back to explicit authentication if they experienceany issues with their smart cards, do not disable the user name and password authenticationmethod.
• If you plan to enable pass-through authentication when you install Citrix Receiver for Windowsor Citrix Workspace app for Windows on domain-joined user devices, edit the default.ica filefor the store to enable pass-through of users’ smart card credentials when they access theirdesktops and applications. For more information, see Enable pass-through with smart cardauthentication for Citrix Receiver for Windows or Citrix Workspace app for Windows.
• If you created an additional Citrix Gateway virtual server to be used only for user connections toresources, configure optimal Citrix Gateway routing through this virtual server for connectionsto the deployments providing the desktops and applications for the store. For more informa-tion, see Configure optimal HDX routing for a store.
• ToenableusersofPCs running theCitrixDesktopLock toauthenticateusing smart cards, enablepass-through with smart card authentication to your XenApp Services URLs. For more informa-
© 1999‒2022 Citrix Systems, Inc. All rights reserved. 92

StoreFront 2203
tion, see Configure authentication for XenApp Services URLs.
Configure user devices
• Ensure that your vendor’s smart card middleware is installed on all user devices.
• For users with repurposed PCs, install Receiver for Windows Enterprise using an account withadministrator permissions. Configure Receiver for Windows with the XenApp Services URL forthe appropriate store. Once you have confirmed that you can log on to the device with a smartcard and access resources from the store, install the Citrix Desktop Lock. Formore information,see To install the Desktop Lock.
• For all other users, install the appropriate version of Citrix Workspace app on the user device.To enable pass-through of smart card credentials to Citrix Virtual Apps and Desktops for userswith domain-joined devices, use an account with administrator permissions to install CitrixWorkspace app for Windows at a command prompt with the /includeSSON option. For moreinformation, see Using command-line parameters.
Ensure that Citrix Workspace app for Windows is configured for smart card authentication ei-ther through a domain policy or a local computer policy. For a domain policy, use the GroupPolicy Management Console to import the Citrix Workspace app for Windows Group Policy Ob-ject template file, icaclient.adm, onto the domain controller for the domain containing yourusers’ accounts. To configure an individual device, use the Group Policy Object Editor on thatdevice to configure the template. For more information, see Smart card.
Enable the Smart card authentication policy. To enable pass-through of users’ smart card cre-dentials, select Use pass-through authentication for PIN. Then, to pass users’ smart card cre-dentials through to Citrix Virtual Apps and Desktops, enable the Local user name and passwordpolicy and select Allow pass-through authentication for all ICA connections. For more informa-tion, see ICA Settings Reference.
If you enabled pass-through of smart card credentials to Citrix Virtual Apps and Desktops forusers with domain-joined devices, add the store URL to the Local intranet or Trusted sites zonein Internet Explorer. Ensure that Automatic logon with the current user name and password isselected in the security settings for the zone.
• Where necessary, provide users with connection details for the store (for users on the internalnetwork) or Citrix Gateway appliance (for remote users) using an appropriatemethod. Formoreinformation about providing configuration information to your users, see ICA Settings Refer-ence.
© 1999‒2022 Citrix Systems, Inc. All rights reserved. 93

StoreFront 2203
Enable pass-throughwith smart card authentication for Receiver for Windows or CitrixWorkspace app for Windows
You can enable pass-through authenticationwhen you install Receiver forWindowsondomain-joineduser devices. To enable pass-through of users’ smart card credentials when they access desktops andapplications hosted by Citrix Virtual Apps and Desktops, you edit the default.ica file for the store.
Important:
In multiple server deployments, use only one server at a time tomake changes to the configura-tion of the server group. Ensure that the Citrix StoreFront management console is not runningon any of the other servers in the deployment. Once complete,propagate your configuration changes to the server group so that the other servers in the deploy-ment are updated.
1. Use a text editor to open the default.ica file for the store, which is typically located in theC:\inetpub\wwwroot\Citrix\storename\App_Data\ directory, where storename is the namespecified for the store when it was created.
2. Toenablepass-throughof smart cardcredentials foruserswhoaccess storeswithoutCitrixGate-way, add the following setting in the [Application] section.
DisableCtrlAltDel=Off
This setting applies to all users of the store. To enable both domain pass-through and pass-throughwith smart card authentication to desktops and applications, youmust create separatestores for each authenticationmethod. Then, direct your users to the appropriate store for theirmethod of authentication.
3. To enable pass-through of smart card credentials for users accessing stores through Citrix Gate-way, add the following setting in the [Application] section.
UseLocalUserAndPassword=On
This setting applies to all users of the store. To enable pass-through authentication for someusers and require others to log on to access their desktops and applications, you must createseparate stores for each groupof users. Then, direct your users to the appropriate store for theirmethod of authentication.
Configure the password expiry notification period
January 24, 2019
If you enable Citrix Receiver for Web site users to change their passwords at any time, local userswhose passwords are about to expire are shown a warning when they log on. By default, the noti-
© 1999‒2022 Citrix Systems, Inc. All rights reserved. 94

StoreFront 2203
fication period for a user is determined by the applicable Windows policy setting. To set a customnotification period for all users, you edit the configuration file for the authentication service.
Important: Inmultiple-server deployments, use only one server at a time tomake changes to the con-figuration of the server group. Ensure that the Citrix StoreFront management console is not runningon any of the other servers in the deployment. Once complete, propagate your configuration changesto the server group so that the other servers in the deployment are updated.
1. On the Windows Start screen or Apps screen, locate and click the Citrix StoreFront tile.2. Select the Stores node in the left pane of the Citrix StoreFrontmanagement console and, in the
Actions pane, clickManage Authentication Methods.3. On theManage AuthenticationMethods page, from theUser name and password > Settings
drop-down menu, select Manage Password Options, and select the Allow users to changepasswords check box.
4. Select At any time… andmake a choice under Remind users before their passwords expire.
Note:
StoreFront does not support Fine-Grained Password Policies in Active Directory.
Configure andmanage stores
December 18, 2019
In Citrix StoreFront, you can create andmanage stores that aggregate applications and desktops fromCitrix Virtual Apps and Desktops giving users on-demand, self-service access to resources.
Task Detail
Create or remove a store Configure as many additional stores as youneed.
Create an unauthenticated store Configure additional unauthenticated stores tosupport access for unauthenticated(anonymous) users.
Export store provisioning files for users Generate files containing connection details forstores, including any Citrix Gatewaydeployments and beacons configured for thestores.
© 1999‒2022 Citrix Systems, Inc. All rights reserved. 95
StoreFront 2203
Task Detail
Hide and advertise stores to users Prevent stores being presented to users to addto their accounts when they configure CitrixWorkspace app through email-based accountdiscovery or FQDN.
Manage the resources made available in stores Add and remove resources from stores.
Manage remote access to stores through CitrixGateway
Configure access to stores through CitrixGateway for users connecting from publicnetworks.
Configure two StoreFront stores to share acommon subscription datastore
Configure two stores to share a commonsubscription database.
Advanced store settings Configure advanced store settings.
Create or remove a store
November 14, 2019
Use the Create Store task to configure additional stores. You can create as many stores as you need;for example, you can create a store for a particular group of users or to group together a specific setof resources.
To create a store, you identify and configure communicationswith the servers providing the resourcesthat you want to make available in the store. Then, optionally, you configure remote access to thestore through Citrix Gateway.
On the Store Name page, selecting Allow only unauthenticated users to access this store allowsyou to create an unauthenticated store which is anonymous, or unauthenticated. When you createan unauthenticated store, AuthenticationMethods andRemote Access pages are not available, andServer Group Node in the left and Action panes are replaced by Change Base URL. (This is the onlyoption available because server groups are not available in nondomain-joined servers.)
Important:
In multiple server deployments, use only one server at a time tomake changes to the configura-tion of the server group. Ensure that the Citrix StoreFront management console is not runningon any of the other servers in the deployment. Once complete,propagate your configuration changes to the server group so that the other servers in the deploy-ment are updated.
© 1999‒2022 Citrix Systems, Inc. All rights reserved. 96

StoreFront 2203
Add desktops and applications to the store
1. On the Windows Start screen or Apps screen, locate and click the Citrix StoreFront tile.
2. Select the Stores node in the left pane of the Citrix StoreFrontmanagement console and, in theActions pane, click Create Store.
3. On the Store Name page, specify a name for your store and click Next.
Store names appear in CitrixWorkspace appunder users’ accounts, so choose aname that givesusers information about the content of the store.
4. On the Delivery Controllers page, list the infrastructure providing the resources that you wantto make available in the store. Click Add.
5. In the Add Delivery Controller dialog box, specify a Display name that will help you to identifythe deployment. Specify Type to indicate how the resources made available in the store areprovided. Type defaults to Citrix Virtual Apps and Desktops. XenApp 6.5 is available as a Type,however it reached End of Life in June 2018, and is now covered by the Extended Support Pro-gram.
6. TomakedesktopsandapplicationsprovidedbyCitrix VirtualAppsandDesktopsandXenApp6.5available in the store, add the names or IP addresses of your servers to the Servers list. Specifymultiple servers to enable fault tolerance, listing theentries inorder of priority to set the failoversequence. For Citrix Virtual Apps and Desktops sites, give details of Delivery Controllers. In thecase of XenApp 6.5 farms, list servers running the Citrix XML Service.
7. Select from the Transport type list the type of connections for StoreFront to use for communi-cations with the servers.
• To send data over unencrypted connections, select HTTP. If you select this option, youmust make your own arrangements to secure connections between StoreFront and yourservers.
• To send data over secure HTTP connections using Transport Layer Security (TLS), selectHTTPS. If you select this option for Citrix Virtual Apps and Desktops servers, ensure thatthe Citrix XML Service is set to share its port with Microsoft Internet Information Services(IIS) and that IIS is configured to support HTTPS.
• To senddataover secure connections toXenApp6.5 servers using theSSLRelay toperformhost authentication and data encryption, select SSL Relay.
Note:
If you are using HTTPS or the SSL Relay to secure connections between StoreFrontand your servers, ensure that the names you specify in the Servers list match exactly(including the case) the names on the certificates for those servers.
© 1999‒2022 Citrix Systems, Inc. All rights reserved. 97

StoreFront 2203
8. Specify the Port for StoreFront to use for connections to the servers. The default port is 80 forconnections using HTTP and the SSL Relay, and 443 for HTTPS connections. In the case of CitrixVirtual Apps and Desktops servers, the specified port must be the port used by the Citrix XMLService.
9. If youareusing theSSLRelay to secureconnectionsbetweenStoreFrontandXenApp6.5 servers,specify the TCP port of the SSL Relay in SSL Relay port. The default port is 443. Ensure that allthe servers running the SSL Relay are configured to monitor the same port.
10. Click OK. You can configure stores to provide resources from any mixture of Citrix Virtual Appsand Desktops deployments. Repeat Steps 4 to 10, as necessary, to list additional deploymentsproviding resources for the store. When you have added all the required resources to the store,click Next.
11. On the Remote Access page, specify whether and how users connecting from public networkscan access the store through Citrix Gateway.
• To make the store unavailable to users on public networks, do not check Enable RemoteAccess. Only local users on the internal network will be able to access the store.
• To enable remote access, select Enable Remote Access.
– Tomake only resources delivered through the store available through Citrix Gateway,select No VPN tunnel. Users log on using either ICAProxy or clientless VPN (cVPN) toCitrix Gateway and do not need to use the Citrix Gateway plug-in to establish a fullVPN.
– Tomake the store and other resources on the internal network available through a Se-cure Sockets Layer (SSL) virtual private network (VPN) tunnel, select Full VPN tunnel.Users require the Citrix Gateway plug-in to establish the VPN tunnel.
When you enable remote access to the store, the Pass-through from Citrix Gateway au-thentication method is automatically enabled. Users authenticate to Citrix Gateway andare automatically logged on when they access their stores.
12. If you enabled remote access, in the Citrix Gateway appliances list, select from the appliances(deployments) through which users can access the store. Any deployments you configuredpreviously for this and other stores are available for selection in the list. If you enable accessthrough multiple appliances by selecting more than one entry in the list, specify the Defaultappliance to be used to access the store. To add further appliances to the list, follow the pro-cess described in Provide remote access to the store through Citrix Gateway.
13. On the Authentication Methods page, select the methods your users will use to authenticateto the store and click Next. You can select from the following methods:
• Username and password: Users enter their credentials and are authenticated when theyaccess their stores.
© 1999‒2022 Citrix Systems, Inc. All rights reserved. 98

StoreFront 2203
• SAML Authentication: Users authenticate to an Identity Provider and are automaticallylogged on when they access their stores.
• Domain pass-through: Users authenticate to their domain-joined Windows computersand their credentials are used to log themon automatically when they access their stores.
• Smart card: Users authenticate using smart cards and PINswhen they access their stores.• HTTP basic: Users authenticate with the StoreFront server’s IIS web server.• Pass-through through Citrix Gateway: Users authenticate to Citrix Gateway and are au-tomatically logged on when they access their stores. This is automatically checked whenthe remote access is enabled.1. On the Configure Password Validation page, select theDelivery Controllers to provide the password validation, click Next.
14. On the XenApp Services URL page, configure the URL for users who use PNAgent to accessapplication and desktops and click Create.
15. When the store has been created, click Finish.
Accessing the store
Your store is now available for users to access with Citrix Workspace app, which must be configuredwith access details for the store. There are a number of ways in which you can provide these detailsto users to make the configuration process easier for them. For more information, see User accessoptions.
Alternatively, users can access the store through the Receiver for Web site, which enables users toaccess their desktops and applications through a webpage. The URL for users to access the Receiverfor Web site for the new store is displayed when you create the store.
When you create a new store, the XenApp Services URL is enabled by default. Users of PCs runningthe Citrix Desktop Lock, along with users who have older Citrix clients that cannot be upgraded, canaccess stores directly using the XenApp Services URL for the store. The XenApp Services URL has theform http[s]://serveraddress/Citrix/storename/PNAgent/config.xml, where server-address is the FQDN of the server or load balancing environment for your StoreFront deploymentand storename is the name you specified for the store in Step 3.
Provide remote access to the store through Citrix Gateway
Complete the following steps to configure remote access through Citrix Gateway to the store that youcreated in the previous procedure. It is assumed that you have completed all the preceding steps.
1. On the Remote Access page of the Create Storewizard, click Add.
2. In the Add Citrix Gateway Appliance dialog, on the General Settings page, specify a Displayname for the Citrix Gateway appliance that will help users to identify it.
© 1999‒2022 Citrix Systems, Inc. All rights reserved. 99

StoreFront 2203
Users see the display name you specify in CitrixWorkspace app, so include relevant informationin the name to help users decidewhether to use that gateway. For example, you can include thegeographical location in the display names for your Citrix Gateway deployments so that userscan easily identify the most convenient or closest gateway to their location.
3. For Citrix Gateway URL, type the URL:port combination of the Citrix Gateway virtual server foryour deployment. If a port is not specified, then the default https:// port of 443 is used. It isnot necessary to specify port 443 in the URL.
The fully qualified domain name (FQDN) for your StoreFront deployment must be unique anddifferent from the Citrix Gateway virtual server FQDN. Using the same FQDN for StoreFront andthe Citrix Gateway virtual server is not supported.
4. Select the Usage or role of the Citrix Gateway from the available options.
• Authentication and HDX routing: The Citrix Gateway will be used for Authentication, aswell as for routing any HDX sessions.
• Authentication Only: The Citrix Gateway will be used for Authentication and not for anyHDX session routings.
• HDX routing Only: The Citrix Gateway will be used for HDX session routings and not forAuthentication.
5. For all deployments where you are making resources provided by Citrix Virtual Apps and Desk-tops or XenApp 6.5 available in the store, on the Secure Ticket Authority page list the SecureTicket Authority (STA) URLs for servers running the STA. Add URLs for multiple STAs to enablefault tolerance, listing the servers in order of priority to set the failover sequence.
The STA is hosted on Citrix Virtual Apps and Desktops, or XenApp 6.5 servers and issues sessiontickets in response to connection requests. These session tickets form the basis of authentica-tion and authorization for access to Citrix Virtual Apps and Desktops, or XenApp 6.5 resources.Use the correct STA URL (such as HTTPS:// or HTTP://) depending on how your Delivery Con-trollers are configured. The STA URL must also be identical to the one configured within CitrixGateway on your virtual server.
6. Choose to set the Secure Ticket Authority to be load balanced. You can also specify the timeinterval after which the non-responding STAs are bypassed.
7. To ensure Citrix Virtual Apps and Desktops, or XenApp 6.5 keep disconnected sessions openwhile Citrix Workspace app attempts to reconnect automatically, select Enable session relia-bility.
8. If you configuremultiple STAs andwant to ensure that session reliability is always available, se-lectRequest tickets from two STAs, where available. Then StoreFront obtains session ticketsfrom two different STAs and user sessions are not interrupted if one STA becomes unavailableduring the course of the session. If, for any reason, StoreFront is unable to contact two STAs, itfalls back to using a single STA.
© 1999‒2022 Citrix Systems, Inc. All rights reserved. 100

StoreFront 2203
9. On the Authentication Settings page, type the VServer IP address (VIP) of the Citrix Gatewayappliance.
Use the private IP address for the Citrix Gateway virtual server rather than the public IP addressthat is NATed to the private IP address. Gateways are usually identified by StoreFront via theirURLs. If you are using global server load balancing (GSLB), you must add the VIP to each gate-way. This allows StoreFront to identify multiple gateways which all use the same URL (GSLBdomain name) as distinct gateways. For example, three gateways may be configured for thestore with the same URL such as https://gslb.domain.com but would each have uniqueVIPs configured such as 10.0.0.1, 10.0.0.2 and 10.0.0.3.
10. If you are adding an appliance running Citrix Gateway, select from the Logon type list the au-thentication method you configured on the appliance for Citrix Workspace app users.
• If users are required to enter their Microsoft Active Directory domain credentials, selectDomain.
• If users are required to enter a tokencode obtained from a security token, select Securitytoken.
• If users are required toenter both their domain credentials anda tokencodeobtained froma security token, select Domain and security token.
• If users are required to enter a one-time password sent by text message, select SMS au-thentication.
• If users are required to present a smart card and enter a PIN, select Smart card.
If you configure smart card authentication with a secondary authentication method to whichusers can fall back if they experience any issues with their smart cards, select the secondaryauthentication method from the Smart card fallback list.
11. If you are configuring StoreFront for Citrix Gateway and want to use Smart Access, then youmust type a Callback URL. StoreFront automatically appends the standard portion of the URL.Enter the internally accessible URL of the appliance. StoreFront contacts the Citrix Gatewayauthentication service to verify that requests received from Citrix Gateway originate from thatappliance.
When using GSLB, we recommend that you configure unique callback URLs for each of yourGSLB gateways. StoreFrontmust be able to resolve each of the unique Callback URLs to the pri-vate VIPs configured for each of the GSLB gateway virtual servers. For example, emeagateway.domain.com, usgateway.domain.com and apacgateway.domain.com should resolve tothe correct gateway VIP.
12. Click Create to add your Citrix Gateway appliance to the list in the Remote Access Settingsdialog box.
Information about the configuration of your Citrix Gateway appliances is saved to the .cr provi-sioning file for the store. This enables Citrix Workspace app to send the appropriate connection
© 1999‒2022 Citrix Systems, Inc. All rights reserved. 101

StoreFront 2203
request when contacting appliances for the first time.
Remove a store
Use the Remove Store task to delete a store. When you remove a store, any associated Receiver forWeb sites, and XenApp Services URLs are also deleted.
Important:
In multiple server deployments, use only one server at a time tomake changes to the configura-tion of the server group. Ensure that the Citrix StoreFront management console is not runningon any of the other servers in the deployment. Once complete, propagate your configurationchanges to the server group so that the other servers in the deployment are updated.
Create an unauthenticated store
March 15, 2019
Use the Create Store task to configure additional unauthenticated stores to support access for unau-thenticated (anonymous) users. You can create as many unauthenticated stores as you need; for ex-ample, you can create an unauthenticated store for a particular group of users or to group together aspecific set of resources.
Remote access through a Citrix Gateway cannot be applied to unauthenticated stores.
To create an unauthenticated store, you identify and configure communications with the servers pro-viding the resources that you want to make available in the store.
Important:
In multiple server deployments, use only one server at a time tomake changes to the configura-tion of the server group. Ensure that the Citrix StoreFront management console is not runningon any of the other servers in the deployment. Once complete,propagate your configuration changes to the server group so that the other servers in the deploy-ment are updated.
Add desktops and applications to the store
1. On the Windows Start screen or Apps screen, locate and click the Citrix StoreFront tile.
2. Select the Stores node in the left pane of the Citrix StoreFront management console and, in theActions pane, click Create Store.
© 1999‒2022 Citrix Systems, Inc. All rights reserved. 102

StoreFront 2203
3. On the Store Name page, specify a name for your store, select Allow only unauthenticated(anonymous) users to access this store, and click Next.
Store names appear in Citrix Receiver under users’ accounts, so choose a name that gives usersinformation about the content of the store.
4. On the Delivery Controllers page, list the infrastructure providing the resources that you wantto make available in the store. Click Add.
5. In the Add Delivery Controller dialog box, specify a name that will help you to identify the de-ployment and indicate whether the resources that you want to make available in the store areprovided by Citrix Virtual Apps and Desktops, or by XenApp 6.5. (Note XenApp 6.5 has reachedEnd of Life (EOL) and is now covered by the Extended Support Program.) When assigning Deliv-ery Controllers, ensure that you are only using those which support the anonymous apps fea-ture. Configuring your unauthenticated store with Controllers that do not support this featuremay lead to no anonymous apps being available from the store.
Tomakedesktops and applications providedby XenApp6.5 farms available in the store, add thenamesof each individual server in the farm to theServers list. Specifymultiple servers to enablefault tolerance, listing the entries in order of priority to set the failover sequence. For CitrixVirtual Desktops sites, give details of Controllers. For XenApp 6.5 farms, list servers running theCitrix XML Service.
6. Select from the Transport type list the type of connections for StoreFront to use for communi-cations with the servers.
• To send data over unencrypted connections, select HTTP. If you select this option, youmust make your own arrangements to secure connections between StoreFront and yourservers.
• To send data over secure HTTP connections using Secure Sockets Layer (SSL) or Trans-port Layer Security (TLS), selectHTTPS. If you select this option for Citrix Virtual Apps andDesktops servers, ensure that the Citrix XML Service is set to share its port with MicrosoftInternet Information Services (IIS) and that IIS is configured to support HTTPS.
Note:
If you are using HTTPS to secure connections between StoreFront and your servers,ensure that the names you specify in the Servers list match exactly (including thecase) the names on the certificates for those servers.
7. Specify the port for StoreFront to use for connections to the servers. The default port is 80 forconnections using HTTP and 443 for HTTPS connections. In the case of Citrix Virtual Apps andDesktops servers, the specified port must be the port used by the Citrix XML Service.
8. Click OK. You can configure stores to provide resources from any mixture of Citrix Virtual Appsand Desktops deployments. Repeat Steps 4 to 9, as necessary, to list additional deployments
© 1999‒2022 Citrix Systems, Inc. All rights reserved. 103

StoreFront 2203
providing resources for the store. When you have added all the required resources to the store,click Create.
Your unauthenticated store is now available for use. To enable user access to the new store, CitrixWorkspace app must be configured with access details for the store. There are a number of ways inwhich you can provide these details to users to make the configuration process easier for them. Formore information, seeUser access options.
Alternatively, users can access the store through the Receiver for Web site, which enables users toaccess their desktops and applications through a web page. By default with unauthenticated stores,Receiver for Web displays the applications in a folder hierarchy that includes a breadcrumb path. TheURL for users to access the Receiver for Web site for the new store is displayed when you create thestore.
When you create a new store, the XenApp Services URL is enabled by default. Users of domain-joineddesktop appliances and repurposed PCs running the Citrix Desktop Lock, along with users who haveolder Citrix clients that cannot be upgraded, can access stores directly using the XenApp ServicesURL for the store. The XenApp Services URL has the form http[s]://serveraddress/Citrix/storename/PNAgent/config.xml, where serveraddress is the FQDN of the server or load balanc-ing environment for your StoreFront deployment and storename is the name you specified for thestore in Step 3.
Note:
In StoreFront configurations where the web.config file has been configured with the parame-ter LogoffAction=”terminate”, Citrix Receiver for Web sessions accessing this unauthenticatedstore will not terminate. Typically, the web.config file can be found at C:\inetpub\wwwroot\Citrix\storename\, where storename is the name specified for the store when it was cre-ated. To ensure these sessions terminate properly, the XenApp server being used by this storemust have the Trust XML requests option enabled as shown in Configuring the Citrix XML ServicePort and Trust.
Export store provisioning files for users
March 12, 2019
Use the Export Multi-Store Provisioning File and Export Provisioning File tasks to generate filescontaining connection details for stores, including any Citrix Gateway deployments and beacons con-figured for the stores. Make these files available to users to enable them to configure CitrixWorkspaceapp automatically with details of the stores. Users can also obtain Citrix Workspace app provisioningfiles from Receiver for Web sites.
© 1999‒2022 Citrix Systems, Inc. All rights reserved. 104

StoreFront 2203
Important:
In multiple server deployments, use only one server at a time tomake changes to the configura-tion of the server group. Ensure that the Citrix StoreFront management console is not runningon any of the other servers in the deployment. Once complete,propagate your configuration changes to the server group so that the other servers in the deploy-ment are updated.
1. On the Windows Start screen or Apps screen, locate and click the Citrix StoreFront tile. Selectthe Stores node in the left pane of the Citrix StoreFront management console.
2. To generate a provisioning file containing details for multiple stores, in the Actions pane, clickExport Multi-Store Provisioning File and select the stores to include in the file.
3. Click Export and Save the provisioning file with a .cr extension to a suitable location on yournetwork.
Advertise and hide stores to users
March 12, 2019
Use the Hide Store task to prevent stores being presented to users to add to their accounts when theyconfigure Citrix Workspace app through email-based account discovery or FQDN. By default, whenyou create a store it is presented as an option for users to add in Citrix Receiverwhen they discover theStoreFront deployment hosting the store. Hiding a store does not make it inaccessible, instead usersmust configure Citrix Workspace app with connection details for the store, either manually, using asetup URL, or with a provisioning file. To resume advertising a hidden store, use the Advertise Storetask.
Important:
In multiple server deployments, use only one server at a time tomake changes to the configura-tion of the server group. Ensure that the Citrix StoreFront management console is not runningon any of the other servers in the deployment. Once complete,propagate your configuration changes to the server group so that the other servers in the deploy-ment are updated.
1. On the Windows Start screen or Apps screen, locate and click the Citrix StoreFront tile.2. Select the Stores node in the left pane of the Citrix StoreFrontmanagement console and, in the
Actions pane, click Configure Store Settings > Advertise Store.3. On the Advertise Store page, select either Advertise Store orHide Store.
© 1999‒2022 Citrix Systems, Inc. All rights reserved. 105

StoreFront 2203
Manage the resources made available in stores
February 27, 2020
Use theManageDeliveryControllers task toaddand remove fromstores resourcesprovidedbyCitrixVirtual Apps and Desktops, and to modify the details of the servers providing these resources.
Important:
In multiple server deployments, use only one server at a time tomake changes to the configura-tion of the server group. Ensure that the Citrix StoreFront management console is not runningon any of the other servers in the deployment. Once complete,propagate your configuration changes to the server group so that the other servers in the deploy-ment are updated.
1. On the Windows Start screen or Apps screen, locate and click the Citrix StoreFront tile.2. Select the Stores node in the left pane of the Citrix StoreFront management console and, in the
results pane, select a store. In the Actions pane, clickManage Delivery Controllers.3. In the Manage Delivery Controllers dialog box:
a) click Add to include desktops and applications from another Citrix Virtual Apps and Desk-tops deployment in the store.
b) click Edit to modify the settings for a deployment.c) select an entry in the Delivery controllers list and click Remove to stop the resources pro-
vided by the deployment being available in the store.4. In the Add Controller or Edit Controller dialog box, specify aDisplay name that will help you to
identify the deployment.5. Tomakedesktops andapplicationsprovidedbyCitrix Virtual Apps andDesktops available in the
store, click Add to enter the name or IP address of a server. Depending on how the web.configfile is configured, specifying multiple servers enables either load balancing or failover, as indi-cated in the dialog box. Load balancing is configured by default. If failover is configured, listthe entries in order of priority to set the failover sequence. For Citrix Virtual Desktops sites, givedetails of Delivery Controllers. In the case of Citrix Virtual Apps farms, list servers running theCitrix XML Service. To modify the name or IP address of a server, select the entry in the Serverslist and click Edit. Select an entry in the list and clickRemove to stop StoreFront contacting theserver to enumerate the resources available to the user.
6. We recommend that you select the option Servers are load balanced to ensure that load isdistributed between all Delivery Controllers within the Citrix Virtual Apps and Desktops site.StoreFront selects a Delivery Controller at random from the Servers list during each launch anddistributes the load across all servers in the Citrix Virtual Apps and Desktops site. If this optionis not selected, the Servers list is treated as a failover list in priority order. In this case 100%of launches occur on the first Delivery Controller in the list. If that server goes offline, 100% of
© 1999‒2022 Citrix Systems, Inc. All rights reserved. 106

StoreFront 2203
launches occur using the second in the list, and so on.7. Select from the Transport type list the type of connections for StoreFront to use for communi-
cations with the servers.• To send data over unencrypted connections, select HTTP. If you select this option, youmust make your own arrangements to secure connections between StoreFront and yourservers.
• To send data over secure HTTP connections using Secure Sockets Layer (SSL) or Trans-port Layer Security (TLS), selectHTTPS. If you select this option for Citrix Virtual Apps andDesktops servers, ensure that the Citrix XML Service is set to share its port with MicrosoftInternet Information Services (IIS) and that IIS is configured to support HTTPS.
• To send data over secure connections to Citrix Virtual Apps servers using the SSL Relay toperform host authentication and data encryption, select SSL Relay.
Note:If you are using HTTPS or the SSL Relay to secure connections between StoreFrontand your servers, ensure that the names you specify in Servers list match exactly (in-cluding the case) the names on the ertificates for those servers.
8. Specify the port for StoreFront to use for connections to the servers. The default port is 80 forconnections using HTTP and the SSL Relay, and 443 for HTTPS connections. In the case of CitrixVirtual Apps and Desktops servers, the specified port must be the port used by the Citrix XMLService.
9. If you are using the SSL Relay to secure connections between StoreFront and Citrix Virtual Appsservers, specify the TCP port of the SSL Relay in the SSL Relay port box. The default port is 443.Ensure that all the servers running the SSL Relay are configured to monitor the same port.
10. Click OK. You can configure stores to provide resources from any mixture of Citrix Virtual Appsand Desktops deployments. Repeat Steps 3 to 9, as necessary, to add or modify other deploy-ments in the Delivery controllers list.
Manage remote access to stores through Citrix Gateway
July 1, 2019
Use the Remote Access Settings task to configure access to stores through Citrix Gateway for usersconnecting frompublic networks. Remote access through aCitrix Gateway cannot be applied to unau-thenticated stores.
Important:
In multiple server deployments, use only one server at a time tomake changes to the configura-tion of the server group. Ensure that the Citrix StoreFront management console is not running
© 1999‒2022 Citrix Systems, Inc. All rights reserved. 107

StoreFront 2203
on any of the other servers in the deployment. Once complete,propagate your configuration changes to the server group so that the other servers in the deploy-ment are updated.
1. On the Windows Start screen or Apps screen, locate and click the Citrix StoreFront tile.
2. Select the Stores node in the right pane of the Citrix StoreFront management console and, inthe results pane, select a store. In the Actions pane, click Configure Remote Access Settings.
3. In the Configure Remote Access Settings dialog box, specify whether and how users connectingfrom public networks can access the store through Citrix Gateway.
• To make the store unavailable to users on public networks, do not check Enable remoteaccess. Only local users on the internal network will be able to access the store.
• To enable remote access, check Enable Remote Access.
– To make resources delivered through the store available through Citrix Gateway, se-lect No VPN tunnel. Users log on using either ICAProxy or clientless VPN (cVPN) toCitrix Gateway and do not need to use the Citrix Gateway plug-in to establish a fullVPN.
– Tomake the store and other resources on the internal network available through a Se-cure Sockets Layer (SSL) virtual private network (VPN) tunnel, select Full VPN tunnel.Users require the Citrix Gateway plug-in to establish the VPN tunnel.
When you enable remote access to the store, the Pass-through from Citrix Gateway au-thentication method is automatically enabled. Users authenticate to Citrix Gateway andare automatically logged on when they access their stores.
4. If you enabled remote access, select from the Citrix Gateway appliances list the deploymentsthrough which users can access the store. Any deployments you configured previously for thisand other stores are available for selection in the list. If you want to add a further deploymentto the list, click Add. Otherwise, continue to Step 14.
5. On the General Settings page, specify aDisplay name for the Citrix Gateway appliance that willhelp users to identify it.
Users see the display name you specify in CitrixWorkspace app, so include relevant informationin the name to help users decidewhether to use that gateway. For example, you can include thegeographical location in the display names for your Citrix Gateway deployments so that userscan easily identify the most convenient or closest gateway to their location.
6. For Citrix Gateway URL, type the URL:port combination of the Citrix Gateway virtual server foryour deployment. If a port is not specified, then the default https:// port of 443 is used. It isnot necessary to specify port 443 in the URL.
7. Select the usage of the Citrix Gateway from the available options.
© 1999‒2022 Citrix Systems, Inc. All rights reserved. 108

StoreFront 2203
• Authentication and HDX routing: The Citrix Gateway will be used for Authentication, aswell as for routing any HDX sessions.
• Authentication Only: The Citrix Gateway will be used for Authentication and not for anyHDX session routings.
• HDX routing Only: The Citrix Gateway will be used for HDX session routings and not forAuthentication.
8. For all deployments where you are making resources provided by Citrix Virtual Apps and Desk-tops or XenApp 6.5 available in the store, on the Secure Ticket Authority page list the SecureTicket Authority (STA) URLs for servers running the STA. Add URLs for multiple STAs to enablefault tolerance, listing the servers in order of priority to set the failover sequence.
The STA is hosted on Citrix Virtual Apps and Desktops, or XenApp 6.5 servers and issues sessiontickets in response to connection requests. These session tickets form the basis of authentica-tion and authorization for access to Citrix Virtual Apps and Desktops, or XenApp 6.5 resources.Use the correct STA URL (such as HTTPS:// or HTTP://) depending on how your Delivery Con-trollers are configured. The STA URL must also be identical to the one configured within CitrixGateway on your virtual server.
9. Choose to set the Secure Ticket Authority to be load balanced. You can also specify the timeinterval after which the non-responding STAs are bypassed.
10. To ensure Citrix Virtual Apps and Desktops, or XenApp 6.5 keep disconnected sessions openwhile Citrix Workspace app attempts to reconnect automatically, select Enable session relia-bility.
11. If you configuremultiple STAs andwant to ensure that session reliability is always available, se-lectRequest tickets from two STAs, where available. Then StoreFront obtains session ticketsfrom two different STAs and user sessions are not interrupted if one STA becomes unavailableduring the course of the session. If, for any reason, StoreFront is unable to contact two STAs, itfalls back to using a single STA.
12. On the Authentication Settings page, type the VServer IP address (VIP) of the Citrix Gatewayappliance.
Use the private IP address for the Citrix Gateway virtual server rather than the public IP addressthat is NATed to the private IP address. Gateways are usually identified by StoreFront via theirURLs. If you are using global server load balancing (GSLB), you must add the VIP to each gate-way. This allows StoreFront to identify multiple gateways which all use the same URL (GSLBdomain name) as distinct gateways. For example, three gateways may be configured for thestore with the same URL such as https://gslb.domain.com but would each have uniqueVIPs configured such as 10.0.0.1, 10.0.0.2 and 10.0.0.3.
13. If you are adding an appliance running Citrix Gateway, select from the Logon type list the au-thentication method you configured on the appliance for Citrix Workspace app users.
© 1999‒2022 Citrix Systems, Inc. All rights reserved. 109

StoreFront 2203
• If users are required to enter their Microsoft Active Directory domain credentials, selectDomain.
• If users are required to enter a tokencode obtained from a security token, select Securitytoken.
• If users are required toenter both their domain credentials anda tokencodeobtained froma security token, select Domain and security token.
• If users are required to enter a one-time password sent by text message, select SMS au-thentication.
• If users are required to present a smart card and enter a PIN, select Smart card.
If you configure smart card authentication with a secondary authentication method to whichusers can fall back if they experience any issues with their smart cards, select the secondaryauthentication method from the Smart card fallback list.
14. If you are configuring StoreFront for Citrix Gateway and want to use Smart Access, then youmust type a Callback URL. StoreFront automatically appends the standard portion of the URL.Enter the internally accessible URL of the appliance. StoreFront contacts the Citrix Gatewayauthentication service to verify that requests received from Citrix Gateway originate from thatappliance.
When using GSLB, we recommend that you configure unique callback URLs for each of yourGSLB gateways. StoreFrontmust be able to resolve each of the unique Callback URLs to the pri-vate VIPs configured for each of the GSLB gateway virtual servers. For example, emeagateway.domain.com, usgateway.domain.com and apacgateway.domain.com should resolve tothe correct gateway VIP.
15. Click Create to add your Citrix Gateway appliance to the list in the Remote Access Settingsdialog box.
Information about the configuration of your Citrix Gateway appliances is saved to the .cr provi-sioning file for the store. This enables Citrix Workspace app to send the appropriate connectionrequest when contacting appliances for the first time.
16. Repeat Steps 4 to 13, as necessary, to addmore Citrix Gateway appliances to the Citrix Gatewayappliances list. If you enable access through multiple appliances by selecting more than oneentry in the list, specify the Default appliance to be used to access the store.
17. ClickOK to save the configuation and close the Configure Remote Access dialog.
Certificate Revocation List (CRL) checking
July 29, 2019
© 1999‒2022 Citrix Systems, Inc. All rights reserved. 110

StoreFront 2203
Introduction
You can configure StoreFront to check the status of TLS certificates used byCVAD delivery controllers using a published certificate revocation list (CRL).Youmay need to revoke access to a certificate if:
• you believe the private key has been compromised• the CA is compromised• the affiliation has been changed• the certificate has been superseded
Note:
This topic is only relevant when HTTPS connections between StoreFront andCitrix Virtual Apps and Desktops delivery controllers are used. HTTP connectionsto delivery controllers do not require a certificate, so the-CertRevocationPolicy setting for the Store, described here, has no effect.
StoreFront supports certificate revocation checking using CRL DistributionPoint (CDP) certificate extensions and locally installed certificate revocationlists (CRLs). StoreFront supports full CRLs only: delta CLRs are not supported.
CRL Distribution Points (CDP) extensions
StoreFront does not enumerate resources from Citrix Virtual Apps and Desktopsdelivery controllers which are using revoked certificates whose serial numbersare listed in the published CRL. To detect which certificates have been revoked,StoreFront must be able to access the published CRL using one of the URLsdefined in the CDP certificate extensions.
© 1999‒2022 Citrix Systems, Inc. All rights reserved. 111

StoreFront 2203
CRL publishing interval
Tomake StoreFront detect revoked certificates on the delivery controller morequickly, reduce the CRL publishing interval on the CA. Edit the properties ofthe CLR Distribution Points extension to set a lower CLR publishing intervalvalue appropriate to your public key infrastructure.
© 1999‒2022 Citrix Systems, Inc. All rights reserved. 112

StoreFront 2203
Client CRL caching
The Windows public key infrastructure client caches CRLs locally. A more recentCRL is not downloaded until the locally cached CRL has expired.
StoreFront’s access to certificate revocation lists (CRLs)
Certificate revocation checking relies on StoreFront’s ability to access CRLs.Consider carefully how StoreFront contacts the webserver or the certificateauthority (CA) that publishes the CRL, and how StoreFront receives CRL updates.
Internal enterprise CAs and private certificates on delivery controllers
To use private CAs and certificates, StoreFront requires a correctly configuredenterprise CA and a published CRL which it can access within your organizationand internal network. Refer to Microsoft documentation for information onconfiguring the enterprise CA to publish CDP extensions. Any certificates onyour delivery controllers, which existed before the CA was configured to includeCDP extensions, may need to be reissued.
It is typical for StoreFront and Citrix Virtual Apps and Desktops servers to bein isolated private networks without access to the Internet. In this scenario,private CAs should be used.
External public CAs and public certificates on delivery controllers
StoreFront servers and Citrix Virtual Apps and Desktops delivery controllers canuse certificates issued by public CAs. StoreFront must be able to contact thepublic CA’s webserver via the Internet, using the URL referenced in the CDPextensions. If StoreFront cannot download a copy of the CRL using a CDP URLafter a public certificate has been revoked, then StoreFront cannot perform theCRL check.
Certificate revocation policy settings
Use the Citrix StoreFront PowerShell cmdlets Get-STFStoreFarmConfigurationand Set-STFStoreFarmConfiguration to set the certificate revocation policyfor a store. Running Get-Help Set-STFStoreFarmConfiguration -detaileddisplays the PowerShell help and examples containing the option-CertRevocationPolicy. For more information of these StoreFront PowerShellcmdlets, see Citrix StoreFront SDK PowerShell Modules.
© 1999‒2022 Citrix Systems, Inc. All rights reserved. 113

StoreFront 2203
The -CertRevocationPolicy option can be set to the following values:
Setting Description
NoCheck StoreFront does not check the revocation stateof the certificate on the delivery controller.StoreFront still enumerates resources fromdelivery controllers that use revokedcertificates. This is the default setting.
MustCheck This is the most secure option. StoreFrontattempts to obtain a CRL by contacting theURLs referenced in the CDP extensions of thecertificate on the delivery controller.StoreFront fails to enumerate from the deliverycontroller if the CRL is not available or if thecertificate in use on the delivery controller hasbeen revoked. The URL can point to an internalwebserver if the certificate is private, or to apublic internet webserver if the certificate isissued by a public CA.
FullCheck StoreFront attempts to contact the URLspublished in the CDP extensions of the deliverycontroller certificate. If StoreFront fails toobtain a copy of the CRL from the URLs, then itstill allows enumeration of resources from thedelivery controller. If StoreFront successfullyobtains the CRL and the delivery controller’scertificate has been revoked, then StoreFrontdoes not enumerate resources. The URL canpoint to an internal webserver if the certificateis private, or to a public internet webserver ifthe certificate is issued by a public CA.
© 1999‒2022 Citrix Systems, Inc. All rights reserved. 114

StoreFront 2203
Setting Description
NoNetworkAccess Only CRLs, which have been imported locallyinto the Citrix Delivery Servers certificate storeon the StoreFront server are checked.StoreFront does not attempt to contact any ofthe URLs specified in the CDP extensions. IfStoreFront fails to obtain a a local copy of theCRL, then it still allows enumeration ofresources from the delivery controller. IfStoreFront successfully obtains a local copy ofthe CRL from the Citrix Delivery Serverscertificate store, and the delivery controller’scertificate has been revoked, then StoreFrontdoes not enumerate resources.
Configure a store for certificate revocation checking
To set the certificate revocation policy for a store, open the PowerShell ISEwith Run As Admin, then run the following PowerShell cmdlets. If you havemultiple stores, repeat this procedure on them all. -CertRevocationPolicy is astore-level setting which affects all delivery controllers configured for thestore specified in $StoreVirtualPath.
1 $SiteID = 12 $StoreVirtualPath = ”/Citrix/Store”3 $StoreObject = Get-STFStoreService -SiteId $SiteID -VirtualPath4 $StoreVirtualPath5 Set-STFStoreFarmConfiguration -StoreService $StoreObject -
CertRevocationPolicy6 ”MustCheck”
To check that the setting has been correctly applied, or to view the current-CertRevocationPolicy configuration, run the following:
1 (Get-STFStoreFarmConfiguration -StoreService $StoreObject).CertRevocationPolicy
© 1999‒2022 Citrix Systems, Inc. All rights reserved. 115

StoreFront 2203
Using locally imported CRLs on the StoreFront server
Using locally imported CRLs is supported, but Citrix does not recommend itbecause:
• They are difficult to manage and update in large enterprise deployments,where multiple StoreFront server groups may be involved.
• Manually updating CRLs on every StoreFront server, every time a certificateis revoked, is much less efficient than using CDP extensions and publishedCRLs on the entire active directory domain.
Using locally installed or updated CRLs can be used if -CertRevocationPolicy isset to “NoNetworkAccess”, and you have the means to distribute the CRLefficiently to all StoreFront servers.
To use locally imported CLRs
1. Copy the CRL to the StoreFront server’s desktop. If the StoreFront server ispart of a server group, copy it to all the StoreFront servers in the group.
2. Open the MMC snap-in and select File > Add/remove Snapins > Certificates > Computer Ac-count > Citrix Delivery Services certificate store.
3. Right click and select All Tasks > Import, then browse to the .CRL fileand choose Select All Files > Open > Place all certificates in the following Store > Citrix De-livery Services.
© 1999‒2022 Citrix Systems, Inc. All rights reserved. 116

StoreFront 2203
To add the CRL to the Citrix Delivery Services certificate store via PowerShell or the commandline
1. Log into StoreFront and copy the .CRL file to the desktop of the currentuser.
2. Open the PowerShell ISE and select Run as Admin.
3. Run the following:
1 certutil -addstore ”Citrix Delivery Services” ”$env:UserProfile\Desktop\Example-DC01-CA.crl”
If successful, the following is returned:
1 Citrix Delivery Services2 CRL ”CN=Example-DC01-CA, DC=example, DC=com” added to store.3 CertUtil: -addstore command completed successfully.
© 1999‒2022 Citrix Systems, Inc. All rights reserved. 117

StoreFront 2203
You can use this command as an example to distribute the CRL to all StoreFrontservers in your deployment automatically via scripts.
XML authentication using delivery controllers
You can configure StoreFront to delegate user authentication to Citrix VirtualApps and Desktops delivery controllers. Users are prevented from signing in toStoreFront if the certificate on the delivery controller has been revoked. Thisbehaviour is desirable as active directory users should not be able to sign into StoreFront if the certificate on the Citrix Virtual Apps and Desktopsdelivery controller, responsible for authenticating them, has been revoked.
To delegate user authentication to delivery controllers
1. Configure the store for certificate revocation as described in the previoussection Configure a store for certificate revocation checking.
2. Configure the delivery controller to use HTTPS, following the proceduredescribed in XML service-based authentication.
Configure an XML authentication service for certificate revocation checking
These steps are only required if you are using XML authentication in yourdeployment.
Note:
StoreFront supports twomodels for mapping stores to an authenticationservice. The recommended approach is a one-to-one mapping between store andAuthentication Service. In this case youmust perform the steps in this sectionon all stores and their respective authentication services.
Make sure that the certificate revocation mode is set to the same valuefor both the store and the authentication service. Alternatively, if theauthentication configuration is identical for all stores, multiple stores can beconfigured to share a single authentication service.
The authentication service PowerShell cmdlets have no equivalent ofSet-STFStoreFarmConfiguration, so a slightly different PowerShell approachis required. Use the same Certificate revocation policy settings describe in the earlier section.
1. Open the PowerShell ISE and select Run As Admin.
© 1999‒2022 Citrix Systems, Inc. All rights reserved. 118

StoreFront 2203
1 $SiteID = 12 $StoreVirtualPath = ”/Citrix/Store”3 $AuthVirtualPath = ”/Citrix/StoreAuth”
2. Select the store service, authentication service, and delivery controller tobe used for XML authentication. Ensure that the delivery controller isalready configured for the Store.
1 $StoreObject = Get-STFStoreService -SiteId $SiteID -VirtualPath$StoreVirtualPath
2 $FarmObject = Get-STFStoreFarm -StoreService $StoreObject -FarmName ”CVAD”
3 $AuthObject = Get-STFAuthenticationService -SiteID $SiteID -VirtualPath $AuthVirtualPath
3. Modify the CertRevocationPolicy property of the authentication servicedirectly.
1 $AuthObject.FarmsConfiguration.CertRevocationPolicy = ”FullCheck”2 $AuthObject.Save()3 Enable-STFXmlServiceAuthentication -AuthenticationService
$AuthObject -Farm $FarmObject
4. Confirm that you have set the correct certificate revocation mode.
1 $AuthObject = Get-STFAuthenticationService -SiteID 1 -VirtualPath$AuthVirtualPath
2 $AuthObject.FarmsConfiguration.CertRevocationPolicy
Windows Event Viewer errors to expect
When CRL checking is enabled, errors are reported in the Windows Event Viewer onthe StoreFront server.
To open the Event Viewer:
• On the StoreFront server type Run.• Type eventvwr then press enter.• In Applications and Services look for Citrix Delivery Services events.
© 1999‒2022 Citrix Systems, Inc. All rights reserved. 119

StoreFront 2203
Example Error: Store cannot contact a delivery controller with a revoked certificate
1 An SSL connection could not be established: An error occurred duringSSL
2 crytography: Access is denied.34 This message was reported from the Citrix XML Service at address5 https://deliverycontrollerTLS.domain.com/scripts/wpnbr.dll.67 The specified Citrix XML Service could not be contacted and has been
temporarily8 removed from the list of active services.
Example Error: From Receiver for Web if user cannot log in due to failing XML authentication
1 An unexpected response was received during the authentication process.23 Citrix.DeliveryServicesClients.Authentication.Exceptions.
ExplicitAuthenticationFailure,4 Citrix.DeliveryServicesClients.Authentication, Version=3.20.0.0,5 Culture=neutral, PublicKeyToken=null67 General Authentication Failure89 ExplicitResult.State: 51011 AuthenticationControllerRequestUrl:12 https://storefront.example.com/Citrix/StoreWeb/ExplicitAuth/
LoginAttempt1314 ActionType: LoginAttempt1516 at17 Citrix.Web.AuthControllers.Controllers.ExplicitAuthController.
GetExplicitAuthResult(ActionType18 type, Dictionary`2 postParams)
© 1999‒2022 Citrix Systems, Inc. All rights reserved. 120

StoreFront 2203
Configure two StoreFront stores to share a common subscriptiondatastore
January 24, 2019
The StoreFront installation process installs a Windows datastore locally on each StoreFront server tomaintain its subscription data. In StoreFront server group environments, each server also maintainsa copy of the subscription data used by its store. This data is propagated to other servers to maintainuser subscriptions across the whole group. By default, StoreFront creates a single datastore for eachstore. Each subscription datastore is updated independently from each other store.
Wheredifferent configuration settings are required, it is common for administrators to configureStore-Front with two distinct stores; one for external access to resources using Citrix Gateway and anotherfor internal access using the corporate LAN. You can configure both “external” and “internal” storesto share a common subscription datastore by making a simple change to the store web.config file.
In the default scenario involving two stores and their corresponding subscription datastores, a usermust subscribe to the same resource twice. Configuring the two stores to share a common subscrip-tion database improves and simplifies the roaming experience when users access the same resourcefrom inside or outside the corporate network. With a shared subscription datastore it does notmatterwhether they use the “external” or “internal” store when they initially subscribe to a new resource.
• Each store has a web.config file located in C:\inetpub\wwwroot\citrix<storename>.• Each store web.config contains a client endpoint for the Subscription Store Service.
<clientEndpoint uri=”net.pipe://localhost/Citrix/Subscriptions/1__Citrix_<StoreName>”authenticationMode=”windows”transferMode=”Streamed”>
The subscription data for each Store is located in:
C:\Windows\ServiceProfiles\NetworkService\AppData\Roaming\Citrix\SubscriptionsStore\1__Citrix_<StoreName>
For two stores to share a subscription datastore, you need only point one store to the subscriptionserviceendpointof theother store. In thecaseofa servergroupdeployment, all servershave identicalpairs of stores defined and identical copies of the shared datastore they both share.
Note:
The Citrix Virtual Apps and Desktops controllers configured on each store must match exactly;otherwise, an inconsistent set of resource subscriptions onone store compared to anothermightoccur. Sharing a datastore is supported only when the two stores reside on the same StoreFrontserver or server group deployment.
© 1999‒2022 Citrix Systems, Inc. All rights reserved. 121

StoreFront 2203
StoreFront subscription datastore endpoints
1. On a single StoreFront deployment, open the external store web.config file using Notepad andsearch for the clientEndpoint. For example:
1 <subscriptionsStoreClient enabled=”true”>2 <clientEndpoint uri=”net.pipe://localhost/Citrix/Subscriptions/1
__Citrix_External” authenticationMode=”windows” transferMode=”Streamed”>
3 <clientCertificate thumbprint=”0” />4 </clientEndpoint>5 </subscriptionsStoreClient>6 <!--NeedCopy-->
2. Change the external to match the internal store endpoint:
1 <subscriptionsStoreClient enabled=”true”>2 <clientEndpoint uri=”net.pipe://localhost/Citrix/Subscriptions/1
__Citrix_Internal” authenticationMode=”windows” transferMode=”Streamed”>
3 <clientCertificate thumbprint=”0” />4 </clientEndpoint>5 </subscriptionsStoreClient>6 <!--NeedCopy-->
3. If using StoreFront server group then propagate any changesmade to the web.config file of theprimary node to all other nodes.
Both stores are now set to share the internal store subscription datastore.
Manage subscription data for a store
April 30, 2019
Manage subscription data for a store using PowerShell cmdlets.
Note:
Use either the StoreFrontmanagement console or PowerShell tomanage StoreFront. Do not usebothmethods at the same time. Always close the StoreFrontmanagement console before usingPowerShell to change your StoreFront configuration. Citrix also recommends that you take a
© 1999‒2022 Citrix Systems, Inc. All rights reserved. 122

StoreFront 2203
backup of your existing subscription data before making changes so that rollback to a previousstate is possible.
Purge subscription data
A folder and datastore containing subscription data exists for each store in your deployment.
1. Stop the Citrix Subscriptions Store service on the StoreFront server. If the Citrix SubscriptionsStore service is running, it is not possible to delete subscription data for any of your stores.
2. Locate thesubscriptionstore folderon theStoreFront server: C:\Windows\ServiceProfiles\NetworkService\AppData\Roaming\Citrix\SubscriptionsStore\1__Citrix_<StoreName>
3. Delete the contents of the subscription store folder, but do not delete the folder itself.4. Restart the Citrix Subscriptions Store service on the StoreFront server.
In StoreFront 3.5 or later, you can use the following PowerShell script to purge subscription data for astore. Run this PowerShell function as an administrator with rights to stop or start services and deletefiles. This PowerShell function achieves the same result as the manual steps described above.
To run the cmdlets successfully, the Citrix Subscriptions Store service must be running on the server.
1 function Remove-SubscriptionData23 {45 [CmdletBinding()]67 [Parameter(Mandatory=$False)][String]$Store = ”Store”89 $SubsService = ”Citrix Subscriptions Store”1011 # Path to Subscription Data in StoreFront version 2.6 or later1213 $SubsPath = ”C:\Windows\ServiceProfiles\NetworkService\AppData\
Roaming\Citrix\SubscriptionsStore\1__Citrix_$Store\*”1415 Stop-Service -displayname $SubsService1617 Remove-Item $SubsPath -Force -Verbose1819 Start-Service -displayname $SubsService2021 Get-Service -displayname $SubsService
© 1999‒2022 Citrix Systems, Inc. All rights reserved. 123

StoreFront 2203
22 }232425 Remove-SubscriptionData -Store ”YourStore”26 <!--NeedCopy-->
Export subscription data
You can obtain a backup of the Store subscription data in the form of a tab separated .txt file using thefollowing PowerShell cmdlet.
1 $StoreObject = Get-STFStoreService -SiteID 1 -VirtualPath ”/citrix/<yourstore>”
23 Export-STFStoreSubscriptions -StoreService $StoreObject -FilePath ”$env
:USERPROFILE\Desktop\Subscriptions.txt”
If you aremanaging amultiple-server deployment, you can run this PowerShell cmdlet on any serverwithin theStoreFront server group. Each server in the server groupmaintainsan identical syncedcopyof the subscription data from its peers. If you believe you are experiencing issues with subscriptionsynchronization between the Storefront servers, then export the data from all servers in the groupand compare them to see differences.
Restore subscription data
Use Restore-STFStoreSubscriptions to overwrite your existing subscription data. You can restore aStore’s subscription data using the tab separated .txt file backup you created earlier using Export-STFStoreSubscriptions.
1 $StoreObject = Get-STFStoreService -SiteID 1 -VirtualPath ”/citrix/<yourstore>”
23 Restore-STFStoreSubscriptions -StoreService $StoreObject -FilePath ”
$env:USERPROFILE\Desktop\Subscriptions.txt”
For more information on Restore-STFStoreSubscriptions, see https://developer-docs.citrix.com/projects/storefront-powershell-sdk/en/latest/Restore-STFStoreSubscriptions/
© 1999‒2022 Citrix Systems, Inc. All rights reserved. 124

StoreFront 2203
Restoring Data on a Single StoreFront Server
In a single server deployment, there is no need to shut down the Subscriptions Store service. There isalso no need to purge the existing subscription data before restoring the subscription data.
Restoring Data on a StoreFront Server Group
To restore subscription data to a server group, the following steps are required.
Example Server Group Deployment containing three StoreFront servers.
• StoreFrontA• StoreFrontB• StoreFrontC
1. Back up of the existing subscription data from any of the three servers.2. Stop the Subscriptions Store service on servers StoreFrontB and C. This action prevents the
servers from sending or receiving subscription data during the update of StoreFrontA.3. Purge the subscription data from servers StoreFrontB and C. This prevents mismatch of the re-
stored subscription data.4. Restore thedataonStoreFrontAusing theRestore-STFStoreSubscriptions cmdlet. It is notnec-
essary to stop the Subscriptions Store service, or to purge the subscription data on StoreFrontA(it is overwritten during the restore operation).
5. Restart theSubscriptionsStore serviceon servers StoreFrontBandStoreFrontC. The servers canthen receive a copy of the data from StoreFrontA.
6. Wait for synchronization to occur between all servers. The time required depends on the num-ber of records that exist onStoreFrontA. If all servers areona local network connection, synchro-nization normally occurs quickly. Synchronization of subscriptions across a WAN connectionmay take longer.
7. Export the data from StoreFrontB and C to confirm that the synchronization has completed, orview the Store Subscription counters.
Import subscription data
Use Import-STFStoreSubscriptions when there is no subscription data for the Store. This cmdletalso allows subscription data to be transferred from one Store to another or if subscription data isimported to newly provisioned StoreFront servers.
1 $StoreObject = Get-STFStoreService -SiteID 1 -VirtualPath ”/citrix/<yourstore>”
2
© 1999‒2022 Citrix Systems, Inc. All rights reserved. 125

StoreFront 2203
3 Import-STFStoreSubscriptions -StoreService $StoreObject -FilePath ”$env:USERPROFILE\Desktop\Subscriptions.txt”
For more information on Import-STFStoreSubscriptions, see https://developer-docs.citrix.com/projects/storefront-powershell-sdk/en/latest/Import-STFStoreSubscriptions/
Subscription data file details
The subscription data file is a text file containing one line per user subscription. Each line is a tab-separated sequence of values:
<user-identifier> <resource-id> <subscription-id> <subscription-status> <property-name> <property-value> <property-name> <property-value> ...
where:
• <user-identifier> - Required. A sequence of characters identifying the user. This identifieris the user’s Windows Security Identifier.
• <resource-id> - Required. A sequence of characters identifying the subscribed resource.• <subscription-id> - Required. A sequence of characters uniquely identifying the subscrip-tion. This value is not used (although, a value must be present in the data file).
• <subscription-status> - Required. The status of the subscription: subscribed or unsub-scribed.
• <property-name> and <property-value> - Optional. A sequence of zero or more pairs ofproperty name/value pairs. These represent properties associated with the subscription by aStoreFront client (typically a Citrix Workspace app). A property with multiple values that is rep-resented by multiple name/value pairs that have the same name (for example, “… MyProp AMyProp B…” represents the property MyProp with values A, B).
Example
S-0-0-00-0000000000-0000000000-0000000000-0000 XenApp.Excel 21EC2020-3AEA-4069-A2DD-08002B30309D Subscribed dazzle:position 1
© 1999‒2022 Citrix Systems, Inc. All rights reserved. 126

StoreFront 2203
Size of subscription data on the StoreFront server disk
Size of import and export .txt files
Store Subscription Counters
You can use Microsoft Windows Performance Monitor counters (Start > Run > perfmon) to show, forexample, the total numbers of subscription records on the server or number of records synchronizedbetween StoreFront server groups.
© 1999‒2022 Citrix Systems, Inc. All rights reserved. 127
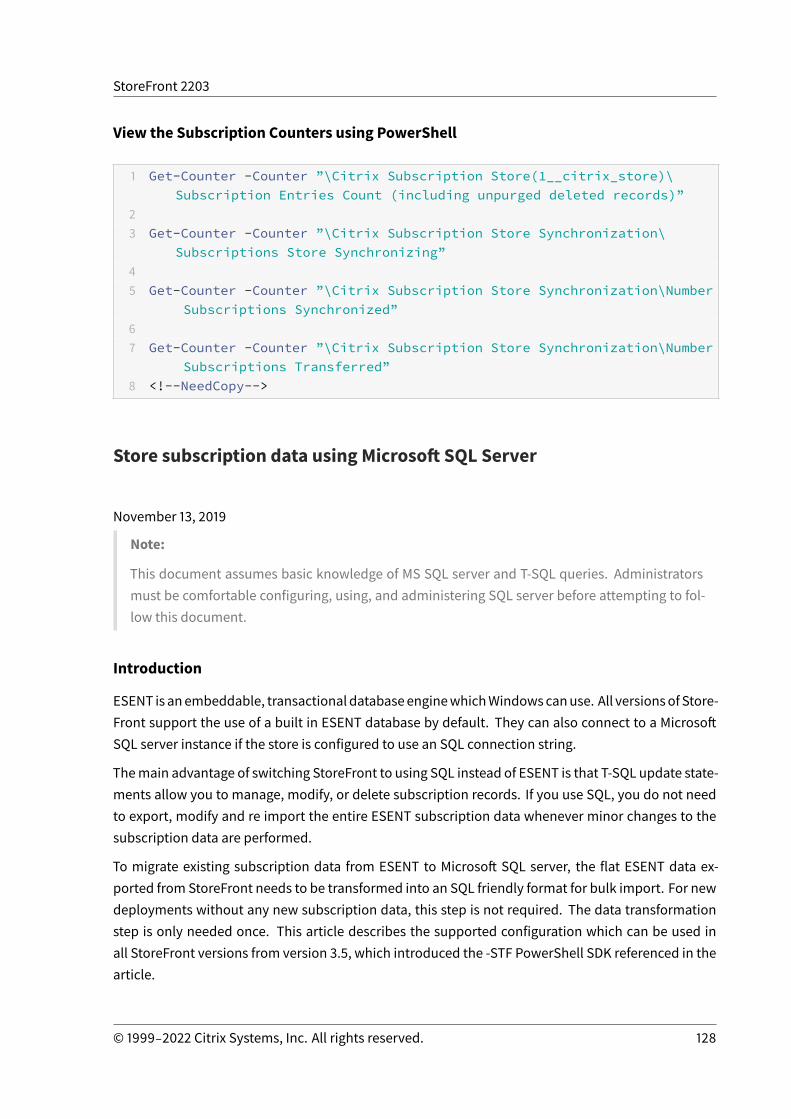
StoreFront 2203
View the Subscription Counters using PowerShell
1 Get-Counter -Counter ”\Citrix Subscription Store(1__citrix_store)\Subscription Entries Count (including unpurged deleted records)”
23 Get-Counter -Counter ”\Citrix Subscription Store Synchronization\
Subscriptions Store Synchronizing”45 Get-Counter -Counter ”\Citrix Subscription Store Synchronization\Number
Subscriptions Synchronized”67 Get-Counter -Counter ”\Citrix Subscription Store Synchronization\Number
Subscriptions Transferred”8 <!--NeedCopy-->
Store subscription data using Microsoft SQL Server
November 13, 2019
Note:
This document assumes basic knowledge of MS SQL server and T-SQL queries. Administratorsmust be comfortable configuring, using, and administering SQL server before attempting to fol-low this document.
Introduction
ESENT is anembeddable, transactional databaseenginewhichWindowscanuse. All versionsof Store-Front support the use of a built in ESENT database by default. They can also connect to a MicrosoftSQL server instance if the store is configured to use an SQL connection string.
Themain advantage of switching StoreFront to using SQL instead of ESENT is that T-SQL update state-ments allow you to manage, modify, or delete subscription records. If you use SQL, you do not needto export, modify and re import the entire ESENT subscription data whenever minor changes to thesubscription data are performed.
To migrate existing subscription data from ESENT to Microsoft SQL server, the flat ESENT data ex-ported from StoreFront needs to be transformed into an SQL friendly format for bulk import. For newdeployments without any new subscription data, this step is not required. The data transformationstep is only needed once. This article describes the supported configuration which can be used inall StoreFront versions from version 3.5, which introduced the -STF PowerShell SDK referenced in thearticle.
© 1999‒2022 Citrix Systems, Inc. All rights reserved. 128

StoreFront 2203
Note:
Failures to connect to the SQL server instance used by StoreFront to store the subscription datadue to network outages do not render the StoreFront deployment unusable. Outages only resultin a temporarily degraded user experience; users cannot add, remove, or view favorite resourcesuntil the connection to SQL server is restored. Resources can still be enumerated and launchedduring the outage. The expected behavior is the same as if the Citrix Subscription Store servicewere to stop while using ESENT.
Tip:
Resources configured with KEYWORDS:Auto or KEYWORDS:Mandatory behave the same waywhen using both ESENT or SQL. New SQL subscription records are created automatically whena user first logs on if either KEYWORD is included in the user’s resources.
Advantages of ESENT and SQL server
ESENT SQL
Default and requires no addition configurationto use StoreFront “out of the box”.
Muchmore manageable and subscription datacan bemanipulated or updated easily usingT-SQL queries. Allows records per user to bedeleted or updated Allows easy means tocount records per application, deliverycontroller or user. Allows easy means toremove unnecessary user data for users whohave left the company/organization. Allowseasy means to update delivery controllerreferences such as when the admin switches tousing aggregation or new delivery controllersare provisioned.
Simpler to configure replication betweendifferent server groups using subscriptionsyncing and pull schedules. See Configuresubscription synchronization
Decoupled from StoreFront so no need to backup the subscription data before StoreFrontupgrade as the data is maintained on aseparate SQL server. Subscription backup isindependent of StoreFront and uses SQLbackup strategies andmechanisms.
© 1999‒2022 Citrix Systems, Inc. All rights reserved. 129

StoreFront 2203
ESENT SQL
SQL unnecessary when subscriptionmanagement is not needed. If the subscriptiondata will never need updating, ESENT is likelyto meet customer needs.
Single copy of the subscription data shared byall members of the server group so less chanceof data differences between servers or datasyncing issues.
Disadvantages of ESENT and SQL server
ESENT SQL
No easy means to manage subscription dataeasily and in a granular manner. Requiressubscription manipulations to be done inexported .txt files. The whole subscriptiondatabase must be exported and re imported.Potentially thousands of records may need tobe changed using find and replace techniques,which is labor intensive and potentially errorprone.
Requires basic SQL expertise andinfrastructure. Can require an SQL license to bepurchased, which increases total cost ofownership of StoreFront deployment.Although a Citrix Virtual Apps and Desktopsdatabase instance can also be shared withStoreFront to reduce costs.
A copy of the ESENT database must bemaintained on each StoreFront server within aserver group. On rare occasions this databasecan get out of sync within a server group orbetween different server groups.
Replicating subscription data between servergroups is a non-trivial deployment task. Itrequires multiple SQL instances andtransaction replication between each of themper data center. This requires specialized MSSQL expertise.
Data migration from ESENT andtransformation to SQL friendly formatrequired. This process is only required once.
Extra windows servers and licenses may beneeded.
Extra steps to deploy StoreFront.
Deployment scenariosNote:
Each store configured within StoreFront requires either an ESENT database or a Microsoft SQL
© 1999‒2022 Citrix Systems, Inc. All rights reserved. 130
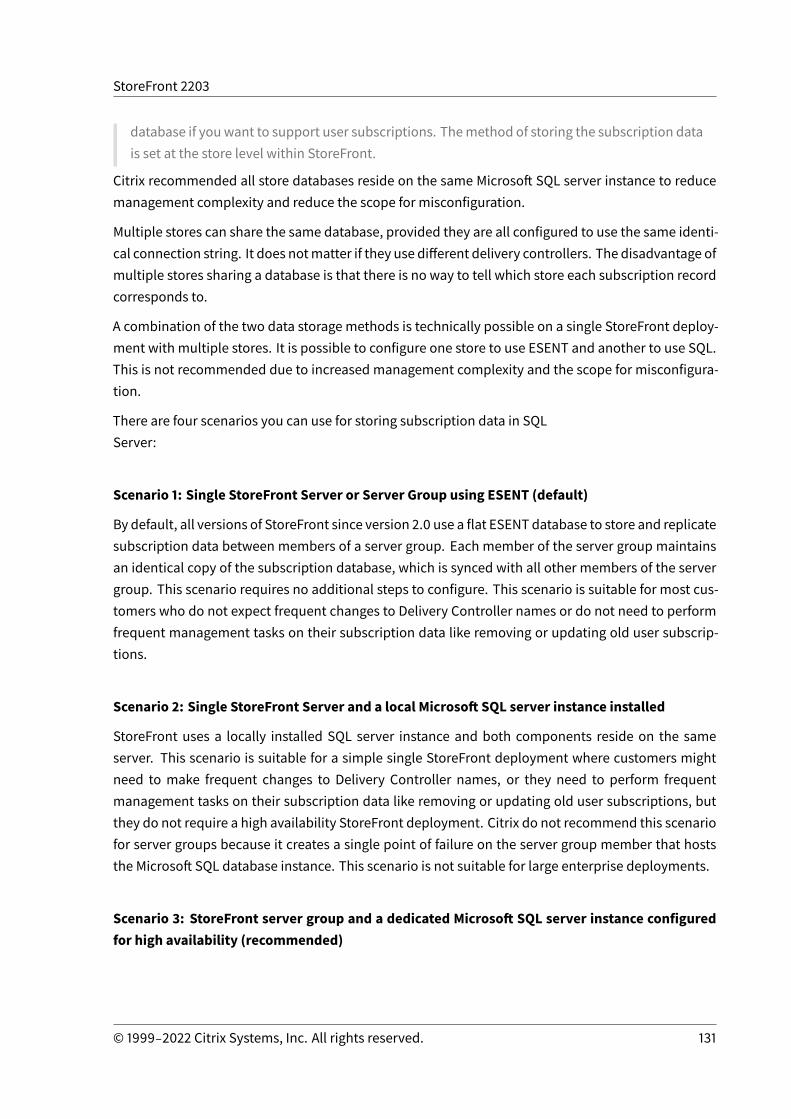
StoreFront 2203
database if youwant to support user subscriptions. Themethod of storing the subscription datais set at the store level within StoreFront.
Citrix recommended all store databases reside on the same Microsoft SQL server instance to reducemanagement complexity and reduce the scope for misconfiguration.
Multiple stores can share the same database, provided they are all configured to use the same identi-cal connection string. It does notmatter if they use different delivery controllers. The disadvantage ofmultiple stores sharing a database is that there is no way to tell which store each subscription recordcorresponds to.
A combination of the two data storage methods is technically possible on a single StoreFront deploy-ment with multiple stores. It is possible to configure one store to use ESENT and another to use SQL.This is not recommended due to increased management complexity and the scope for misconfigura-tion.
There are four scenarios you can use for storing subscription data in SQLServer:
Scenario 1: Single StoreFront Server or Server Group using ESENT (default)
By default, all versions of StoreFront since version 2.0 use a flat ESENT database to store and replicatesubscription data between members of a server group. Each member of the server group maintainsan identical copy of the subscription database, which is synced with all other members of the servergroup. This scenario requires no additional steps to configure. This scenario is suitable for most cus-tomers who do not expect frequent changes to Delivery Controller names or do not need to performfrequent management tasks on their subscription data like removing or updating old user subscrip-tions.
Scenario 2: Single StoreFront Server and a local Microsoft SQL server instance installed
StoreFront uses a locally installed SQL server instance and both components reside on the sameserver. This scenario is suitable for a simple single StoreFront deployment where customers mightneed to make frequent changes to Delivery Controller names, or they need to perform frequentmanagement tasks on their subscription data like removing or updating old user subscriptions, butthey do not require a high availability StoreFront deployment. Citrix do not recommend this scenariofor server groups because it creates a single point of failure on the server group member that hoststhe Microsoft SQL database instance. This scenario is not suitable for large enterprise deployments.
Scenario 3: StoreFront server group and a dedicated Microsoft SQL server instance configuredfor high availability (recommended)
© 1999‒2022 Citrix Systems, Inc. All rights reserved. 131

StoreFront 2203
All StoreFront server group members connect to the same dedicated Microsoft SQL server instanceor SQL failover cluster. This is the most suitable model for large enterprise deployments where Citrixadministrators want to make frequent changes to delivery controller names or want to perform fre-quentmanagement tasks on their subscription data like removing or updating old user subscriptionsand require high availability.
Scenario 4: Multiple StoreFront server groups and a dedicated Microsoft SQL server instance ineach data center per server group
Note:
This is an advanced configuration. Only attempt it if you are an experienced SQL server admin-istrator familiar with transaction replication, and you have the necessary skills to deploy it suc-cessfully.
This is the sameas scenario 3, but extends it to situationswheremultiple StoreFront server groups arerequired in different remote data centers. Citrix Administrators may choose to synchronize subscrip-tion data between different server groups in the same or different data centers. Each server group inthe data center connects to its own dedicated Microsoft SQL server instance for redundancy, failover,and performance. This scenario requires considerable extra Microsoft SQL server configuration andinfrastructure. It relies entirely on Microsoft SQL technology to replicate the subscription data and itsSQL transactions.
© 1999‒2022 Citrix Systems, Inc. All rights reserved. 132

StoreFront 2203
Resources
You can download the following scripts from https://github.com/citrix/sample-scripts/tree/master/storefront to help you:
Configuration scripts
• Set-STFDatabase.ps1 – sets theMSSQL connection string for eachStore. Runon theStoreFrontserver.
• Add-LocalAppPoolAccounts.ps1 –grants the local StoreFront server’s apppools readandwriteaccess to the SQL database. Run for scenario 2 on the SQL server.
• Add-RemoteSFAccounts.ps1 – grants the all StoreFront servers in a server group readandwriteaccess to the SQL database. Run for scenario 3 on the SQL server.
• Create-StoreSubscriptionsDB-2016.sql – creates the SQL database and schema. Run on theSQL server.
Data transformation and import scripts
• Transform-SubscriptionDataForStore.ps1–exports and transformsexisting subscriptiondatawithin ESENT into an SQL friendly format for import.
© 1999‒2022 Citrix Systems, Inc. All rights reserved. 133

StoreFront 2203
• Create-ImportSubscriptionDataSP.sql – creates a stored procedure to import the data trans-formed by Transform-SubscriptionDataForStore.ps1. Run this script once on the SQL server af-ter you have created the database schema using Create-StoreSubscriptionsDB-2016.sql.
Configure the StoreFront server’s local security group on the SQL Server
Scenario 2: Single StoreFront Server and a local Microsoft SQL server instance installed
Create a local security group called <SQLServer>\StoreFrontServers on the Microsoft SQLserver, and add the virtual accounts for the IIS APPPOOL\DefaultAppPool and IIS APPPOOL\Citrix Receiver for Web to allow the locally installed StoreFront to read and write to SQL. Thissecurity group is referenced in the .SQL script that creates the store subscription database schema,so ensure that the group namematches.
You can download the script Add-LocalAppPoolAccounts.ps1 to help you.
Install StoreFront before running the Add-LocalAppPoolAccounts.ps1 script. The script depends on theability to locate the IIS APPPOOL\Citrix Receiver for Web virtual IIS account, which does notexist until StoreFront has been installed and configured. IIS APPPOOL\DefaultAppPool is createdautomatically by installing the IIS webserver role.
1 # Create Local Group for StoreFront servers on DB Server2 $LocalGroupName = ”StoreFrontServers”3 $Description = ”Contains StoreFront Server Machine Accounts or
StoreFront AppPool Virtual Accounts”45 # Check whether the Local Group Exists6 if ([ADSI]::Exists(”WinNT://$env:ComputerName/$LocalGroupName”))7 {89 Write-Host ”$LocalGroupName already exists!” -ForegroundColor ”
Yellow”10 }1112 else13 {1415 Write-Host ”Creating $LocalGroupName local security group” -
ForegroundColor ”Yellow”1617 # Create Local User Group18 $Computer = [ADSI]”WinNT://$env:ComputerName,Computer”19 $LocalGroup = $Computer.Create(”group”,$LocalGroupName)
© 1999‒2022 Citrix Systems, Inc. All rights reserved. 134

StoreFront 2203
20 $LocalGroup.setinfo()21 $LocalGroup.description = $Description22 $Localgroup.SetInfo()23 Write-Host ”$LocalGroupName local security group created” -
ForegroundColor ”Green”24 }2526 $Group = [ADSI]”WinNT://$env:ComputerName/$LocalGroupName,group”2728 # Add IIS APPPOOL\DefaultAppPool29 $objAccount = New-Object System.Security.Principal.NTAccount(”IIS
APPPOOL\DefaultAppPool”)30 $StrSID = $objAccount.Translate([System.Security.Principal.
SecurityIdentifier])31 $DefaultSID = $StrSID.Value3233 $Account = [ADSI]”WinNT://$DefaultSID”34 $Group.Add($Account.Path)3536 # Add IIS APPPOOL\Citrix Receiver for Web37 $objAccount = New-Object System.Security.Principal.NTAccount(”IIS
APPPOOL\Citrix Receiver for Web”)38 $StrSID = $objAccount.Translate([System.Security.Principal.
SecurityIdentifier])39 $WebRSID = $StrSID.Value4041 $Account = [ADSI]”WinNT://$WebRSID”42 $Group.Add($Account.Path)4344 Write-Host ”AppPools added to $LocalGroupName local group” -
ForegroundColor ”Green”45 <!--NeedCopy-->
Enable named pipes within your local SQL instance using SQL server configuration manager. Namedpipes are required for interprocess communication between StoreFront and SQL server.
© 1999‒2022 Citrix Systems, Inc. All rights reserved. 135

StoreFront 2203
Ensure the Windows firewall rules are correctly configured to allow SQL server connections using ei-ther a specific port or dynamic ports. Refer to Microsoft documentation for how to do this in yourenvironment.
Tip:
If connection to the local SQL instance fails, check that localhost or <hostname> used in theconnection string resolves to the correct IPv4 address. Windowsmay attempt to use IPv6 insteadof IPv4, and DNS resolution of localhost may return ::1 instead of the correct IPv4 address of theStoreFront and SQL server. Completely disabling the IPv6 network stack on the host server maybe required to resolve this problem.
Scenario 3: StoreFront server group and a dedicated Microsoft SQL server instance
Createa local security groupcalled<SQLServer>\StoreFrontServerson theMicrosoftSQLserverand add all members of the StoreFront server group. This security group is referenced later in theCreate-StoreSubscriptionsDB-2016.sql script that creates the subscription database schemawithinSQL.
© 1999‒2022 Citrix Systems, Inc. All rights reserved. 136

StoreFront 2203
Addall StoreFront servergroupdomaincomputeraccounts to the<SQLServer>\StoreFrontServersgroup. Only StoreFront server domain computer accounts listed in the group will be able to readandwrite subscription records in SQL if Windows authentication is used by SQL server. The followingPowerShell function, provided in script Add-RemoteSFAccounts.ps1, creates the local security groupand adds two StoreFront servers to it named StoreFrontSQL1 and StoreFrontSQL2.
1 function Add-RemoteSTFMachineAccounts2 {34 [CmdletBinding()]5 param([Parameter(Mandatory=$True)][string]$Domain,6 [Parameter(Mandatory=$True)][array]$StoreFrontServers)78 # Create Local Group for StoreFront servers on DB Server9 $LocalGroupName = ”StoreFrontServers”10 $Description = ”Contains StoreFront Server Machine Accounts or
StoreFront AppPool virtual accounts”1112 # Check whether the Local Security Group already exists13 if ([ADSI]::Exists(”WinNT://$env:ComputerName/$LocalGroupName”))14 {1516 Write-Host ”$LocalGroupName already exists!” -ForegroundColor ”
Yellow”17 }18
© 1999‒2022 Citrix Systems, Inc. All rights reserved. 137

StoreFront 2203
19 else20 {2122 Write-Host ”Creating $LocalGroupName local group” -ForegroundColor
”Yellow”2324 # Create Local Security Group25 $Computer = [ADSI]”WinNT://$env:ComputerName,Computer”26 $LocalGroup = $Computer.Create(”group”,$LocalGroupName)27 $LocalGroup.setinfo()28 $LocalGroup.description = $Description29 $Localgroup.SetInfo()30 Write-Host ”$LocalGroupName local group created” -ForegroundColor ”
Green”31 }3233 Write-Host ”Adding $StoreFrontServers to $LocalGroupName local group” -
ForegroundColor ”Yellow”3435 foreach ($StoreFrontServer in $StoreFrontServers)36 {3738 $Group = [ADSI]”WinNT://$env:ComputerName/$LocalGroupName,group”39 $Computer = [ADSI]”WinNT://$Domain/$StoreFrontServer$”40 $Group.Add($Computer.Path)41 }4243 Write-Host ”$StoreFrontServers added to $LocalGroupName” -
ForegroundColor ”Green”44 }4546 Add-RemoteSTFMachineAccounts -Domain ”example” -StoreFrontServers @(”
StoreFrontSQL1”,”StoreFrontSQL2”)47 <!--NeedCopy-->
Configure the subscription database schemawithinMicrosoft SQL Server for each store
Create a named instance on your Microsoft SQL server for use by StoreFront. Set the path within the.SQL script to correspond towhere your version of SQL is installed, or its database files are stored. Theexample script Create-StoreSubscriptionsDB-2016.sql uses SQL Server 2016 Enterprise.
Create an empty database using SQL Server Management Studio (SSMS) by right clicking Databasesthen selectingNew Database.
© 1999‒2022 Citrix Systems, Inc. All rights reserved. 138

StoreFront 2203
Type a Database name to match your store, or choose a different name such as STFSubscriptions.
Before running the script, for each store in your StoreFront deployment, modify the references in theexample script to match your StoreFront and SQL deployments. For example, modify:
• Nameeachdatabaseyoucreate tomatch thestorename inStoreFront inUSE [STFSubscriptions].
• Set the path to the database .mdf and .ldf files to where you want to store the database.
C:\Program Files\Microsoft SQL Server\MSSQL13.SQL2016\MSSQL\DATA\STFSubscriptions.mdf
C:\Program Files\Microsoft SQL Server\MSSQL13.SQL2016\MSSQL\DATA\
© 1999‒2022 Citrix Systems, Inc. All rights reserved. 139

StoreFront 2203
STFSubscriptions.ldf
• Set the reference to your SQL server’s name within the script:
CREATE LOGIN [SQL2016\StoreFrontServers] FROM WINDOWS;
ALTER LOGIN [SQL2016\StoreFrontServers]
Run the script. After successful configuration of the schema, three database tables are created:SchemaDetails, Subscription, and User.
The following database diagram shows the subscriptions database schema that the Create-StoreSubscriptionsDB-2016.sql script creates:
© 1999‒2022 Citrix Systems, Inc. All rights reserved. 140

StoreFront 2203
Configure the SQL Server Connection String for each StoreFront store
Scenario 1Tip:
Theoriginal subscriptiondata storedondisk in the ESENTdatabase is not destroyedor removed.If youdecide to revert fromMicrosoftSQL server to using ESENT, it is possible to remove the storeconnection string and simply switchback tousing theoriginal data. Any additional subscriptionsthat were createdwhile SQLwas in use for the store will not exist in ESENT and users will not seethese new subscription records. All original subscriptions records will still be present.
To re-enable ESENT subscriptions on a store
Open the PowerShell ISE and select Run as Administrator.
Use the -UseLocalStorage option to specify the store you want to re-enable ESENT subscriptions on:
1 $SiteID = 12 $StoreVirtualPath = ”/Citrix/Store1”
© 1999‒2022 Citrix Systems, Inc. All rights reserved. 141

StoreFront 2203
34 # Sets SQL DB Connection String5 $StoreObject = Get-STFStoreService -SiteID $SiteID -VirtualPath
$StoreVirtualPath67 # Removes the SQL DB Connection string and reverts back to using ESENT8 Set-STFStoreSubscriptionsDatabase -StoreService $StoreObject -
UseLocalStorage9 Get-STFStoreSubscriptionsDatabase -StoreService $StoreObject10 <!--NeedCopy-->
Scenarios 2, 3 and 4
Open the PowerShell ISE and select Run as Administrator.
Specify the store you want to set a connection string for using $StoreVirtualPath
1 $SiteID = 12 $VirtualPath= ”/Citrix/Store1”3 $DBName = ”Store1”4 $DBServer = ”SQL2016Ent”5 $DBLocalServer = ”localhost”6 $DBInstance = ”StoreFrontInstance”78 # For a remote database instance9 $ConnectionString = ”Server=$DBServer\$SQLInstance;Database=$DBName;
Trusted_Connection=True;” Database=$DBName;Trusted_Connection=True;”10 <!--NeedCopy-->
OR
1 # For a locally installed database instance2 $ConnectionString = ”$DBLocalServer\$SQLInstance;Database=$DBName;
Trusted_Connection=True;”34 # Sets SQL DB Connection String5 $StoreObject = Get-STFStoreService -SiteID $SiteID -VirtualPath ”/
Citrix/Store”6 Set-STFStoreSubscriptionsDatabase -StoreService $StoreObject -
ConnectionString $ConnectionString7 Get-STFStoreSubscriptionsDatabase -StoreService $StoreObject8 <!--NeedCopy-->
© 1999‒2022 Citrix Systems, Inc. All rights reserved. 142

StoreFront 2203
Repeat the process for every store in your deployment if youwant to configure them all to use an SQLconnection string.
Migrate existing data from ESENT into Microsoft SQL Server
To migrate your existing ESENT data to SQL a two-step data transformation process is required. Twoscripts are provided to assist you in performing this one-time operation. If the connection string inStoreFront and the SQL instance are correctly configured, then all new subscriptions are created au-tomatically within SQL in the correct format. After migration, the historic ESENT subscription data istransformed into an SQL format and users can also see their previously subscribed resources.
Example: four SQL subscriptions for the same domain user
Step 1Use the Transform-SubscriptionDataForStore.ps1 script to convert the ESENTdata into anSQL friendly format for bulk import
Log into the StoreFront server that you want to transform ESENT data from.
Any member of a server group is suitable provided they all contain the same number of subscriptionrecords.
Open the PowerShell ISE and select Run as Administrator.
Run the script Transform-SubscriptionDataForStore.ps1 which exports a <StoreName>.txt file fromthe ESENT database to the current user’s desktop.
The PowerShell script provides verbose feedback on each subscription row that is processed to aiddebugging and help you assess the success of the operation. This may take a long time to process.
The transformed data is written out to <StoreName>SQL.txt on the current user’s desktop after thescript has completed. The script summarizes the number of unique user records and the total numberof subscriptions processed.
Repeat this process for every store you want to migrate to SQL server.
Step 2 Use a T-SQL stored procedure to bulk SQL import the transformed data
Each store’s data must be imported one store at a time.
© 1999‒2022 Citrix Systems, Inc. All rights reserved. 143

StoreFront 2203
Copy the <StoreName>SQL.txt file created in Step 1 from the StoreFront server’s desktop to C:\ onthe Microsoft SQL server and rename it to SubscriptionsSQL.txt.
The Create-ImportSubscriptionDataSP.sql script creates a T-SQL stored procedure to bulk import thesubscription data. It removes duplicate entries for each unique user so the resulting SQL data is cor-rectly normalized and split into the correct tables.
Before executing Create-ImportSubscriptionDataSP.sql, change USE [STFSubscriptions] tomatch the database under which you want to create the Stored Procedure.
Open the Create-ImportSubscriptionDataSP.sql file using SQL ServerManagement Studio and executethe code within it. This script adds the ImportSubscriptionDataSP Stored Procedure to the databaseyou created earlier.
After successful creation of the Stored Procedure the followingmessage is shown in the SQL console,and the ImportSubscriptionDataSP Stored Procedure is added to the database:
Commands completed successfully.
Execute the Stored Procedure by right clicking it, then select Execute Stored Procedure, and clickOK.
© 1999‒2022 Citrix Systems, Inc. All rights reserved. 144

StoreFront 2203
Return value 0 indicates all data imported successfully. Any problemson import are logged to the SQLconsole. After the stored procedure has run successfully, compare the total number of subscriptionrecordsanduniqueusers thatTransform-SubscriptionDataForStore.ps1provideswith the result of thetwo SQL queries below. The two totals should match.
The total number of subscriptions from the transformation script should match the total number re-ported from SQL by
1 SELECT COUNT(*) AS TotalSubscriptions2 FROM [Subscription]3 <!--NeedCopy-->
The number of unique uses from the transformation script shouldmatch the number of records in theUser table reported from SQL by
1 SELECT COUNT(*) AS TotalUsers2 FROM [User]3 <!--NeedCopy-->
If the transformation script shows 100 unique users and 1000 total subscription records, then SQLshould show the same two numbers after successful migration.
Log in to StoreFront to checkwhether existing users can see their subscription data. Existing subscrip-tion records are updated in SQL when users subscribe or unsubscribe their resources. New users andsubscription records are also created in SQL.
© 1999‒2022 Citrix Systems, Inc. All rights reserved. 145

StoreFront 2203
Step 3 Run T-SQL queries on your imported data
Note:
All Delivery Controller names are case sensitive andmust exactlymatch the case and name usedwithin StoreFront.
1 -- Get all SQL subscription records2 Use [STFSubscriptions]3 SELECT * FROM [Subscription]4 SELECT * FROM [User]5 <!--NeedCopy-->
1 -- Get all subscription records for a particular user SID2 Use [STFSubscriptions]3 SELECT * FROM [Subscription]4 INNER JOIN [User]5 ON [Subscription].[user_id] = [User].[id]6 WHERE [User].[username] = 'S-1-5-21-xxxxxxxxxx-xxxxxxxxxx-xxxxxxxxxx-
xxxx'78 -- Get total number of Subscription records for a particular user SID9 Use [STFSubscriptions]10 SELECT COUNT(Subscription.id)11 FROM [Subscription]12 INNER JOIN [User]13 ON [Subscription].[user_id] = [User].[id]14 WHERE [User].[username] = 'S-1-5-21-xxxxxxxxxx-xxxxxxxxxx-xxxxxxxxxx-
xxxx'15 <!--NeedCopy-->
1 -- Get all subscription records for a particular delivery controller2 Use [STFSubscriptions]3 SELECT * FROM [Subscription]4 WHERE [resource_id] LIKE 'DeliveryController.%'56 -- OR for aggregated resources use the name of the aggregation group7 Use [STFSubscriptions]8 SELECT * FROM [Subscription]9 WHERE [resource_id] LIKE 'DefaultAggregationGroup.%'10
© 1999‒2022 Citrix Systems, Inc. All rights reserved. 146

StoreFront 2203
11 -- Get all subscription records for a particular application12 Use [STFSubscriptions]13 SELECT * FROM [Subscription]14 WHERE [resource_id] = ' DeliveryController.Application'15 <!--NeedCopy-->
Update or delete existing subscription records using T-SQLDISCLAIMER:
All example SQL update and delete statements are used entirely at your own risk. Citrix is notresponsible for any loss or accidental alteration of your subscription data by incorrect use of theprovided examples. The following T-SQL statements are provided as a guide to enable simpleupdates to be performed. Back up all subscription data in SQL database full backups beforeattempting to update your subscriptions or remove obsolete records. Failure to perform the nec-essary backups may result in data loss or corruption. Before executing your own T-SQL UPDATEor DELETE statements against the production database, test themondummydata or on a redun-dant copy of the production data away from the live production database.
Note:
All Delivery Controller names are case sensitive andmust exactlymatch the case and name usedwithin StoreFront.
1 -- Update the delivery controller used in all subscriptions.2 Use [STFSubscriptions]3 UPDATE [Subscription]4 SET [resource_id] = REPLACE(resource_id,'OldDeliveryController.','
NewDeliveryController.')5 WHERE [resource_id] LIKE 'OldDeliveryController.%'67 -- OR for aggregated resources use the name of the aggregation group8 Use [STFSubscriptions]9 UPDATE [Subscription]10 SET [resource_id] = REPLACE(resource_id,'OldDeliveryController.','
DefaultAggregationGroup.')11 WHERE [resource_id] LIKE 'OldDeliveryController.%'12 <!--NeedCopy-->
1 -- Delete all subscription records for a particular Delivery Controller2 Use [STFSubscriptions]
© 1999‒2022 Citrix Systems, Inc. All rights reserved. 147

StoreFront 2203
3 DELETE FROM [Subscription]4 WHERE [resource_id] LIKE 'DeliveryController.%'56 -- OR for aggregated resources use the name of the aggregation group7 Use [STFSubscriptions]8 DELETE FROM [Subscription]9 FROM [Subscription]10 WHERE [resource_id] LIKE 'DefaultAggregationGroup.%'1112 -- Delete all subscription records for a particular application13 Use [STFSubscriptions]14 DELETE FROM [Subscription]15 FROM [Subscription]16 WHERE [resource_id] LIKE '%.Application'1718 -- Delete all subscription records for an application published via a
specific delivery controller19 Use [STFSubscriptions]20 DELETE FROM [Subscription]21 FROM [Subscription]22 WHERE [resource_id] = 'DeliveryController.Application'23 <!--NeedCopy-->
1 -- Delete all subscription records for a particular user SID2 Use [STFSubscriptions]3 DELETE FROM [Subscription]4 INNER JOIN [User]5 ON [Subscription].[user_id] = [User].[id]6 WHERE [User].[username] = 'S-1-5-21-xxxxxxxxxx-xxxxxxxxxx-xxxxxxxxxx-
xxxx'78 Use [STFSubscriptions]9 DELETE FROM [User]10 WHERE [User].[username] = 'S-1-5-21-xxxxxxxxxx-xxxxxxxxxx-xxxxxxxxxx-
xxxx'11 <!--NeedCopy-->
1 -- Delete ALL subscription data from a particular database and resetthe primary key clustered index to start numbering from 0.
2 -- USE WITH EXTREME CARE AND NOT ON LIVE PRODUCTION DATABASES.3 -- Can be useful whilst debugging data import issues to start with a
© 1999‒2022 Citrix Systems, Inc. All rights reserved. 148

StoreFront 2203
clean database.45 Use [STFSubscriptions]6 DELETE FROM [Subscription]7 DBCC CHECKIDENT ([Subscription], RESEED, 0)8 DELETE FROM [User]9 DBCC CHECKIDENT ([User], RESEED, 0)10 <!--NeedCopy-->
Advanced store settings
May 14, 2020
You can configure advanced store properties by using the Advanced Settings page in the ConfigureStore Settings.
Important:
In multiple server deployments, use only one server at a time tomake changes to the configura-tion of the server group. Ensure that the Citrix StoreFront management console is not runningon any of the other servers in the deployment. Once complete, propagate your configurationchanges to the server group so that the other servers in the deployment are updated.
1. On the Windows Start screen or Apps screen, locate and click the Citrix StoreFront tile.
2. Select the Stores node in the left pane of the Citrix StoreFront management console, select astore in the center pane, and in the Action pane, select Configure Store Settings.
3. On the Configure Store Settings page, select Advanced Settings, select the advance optionyou want to configure, make the required change, and clickOK.
Address resolution type
Use theAdvancedSettingspage to specify the type of address to request from the server. The defaultis DnsPort. From the Address resolution type drop-downmenu onAdvanced Settings, select one ofthe following:
• Dns• DnsPort• IPV4• IPV4Port• Dot• DotPort
© 1999‒2022 Citrix Systems, Inc. All rights reserved. 149

StoreFront 2203
• Uri• NoChange
Allow font smoothing
You can specify if you want font smoothing for HDX sessions. The default is On.
Use the Advanced Settings task, select the Allow font smoothing option, and clickOK.
Allow session reconnect
You can specify if you want HDX sessions to be reconnected. The default is On.
Use the Advanced Settings task, select the Allow session reconnect option, and click OK to enablesession reconnect.
Allow special folder redirection
Use the Advanced Settings task to enable or disable special folder redirection. With special folderredirection configured, users can map Windows special folders for the server to those on their lo-cal computers. Special folders refer to standard Windows folders, such as \Documents and \Desktop,which are always presented in the same way regardless of the operating system.
Use the Advanced Settings task, select or deselect the Allow special folder redirection option toenable or disable special folder redirection, and clickOK.
Background health check polling period
StoreFront runs periodic health checks on each Citrix Virtual Desktops broker and Citrix Virtual Appsserver to reduce the impact of intermittent server availability. The default is every minute (00:01:00).Use the Advanced Settings task, specify a time for the Background health-check Polling period,and clickOK to control the frequency of the health check.
Communication time-out duration
By default, requests from StoreFront to a server providing resources for a store time out after 30 sec-onds. The server is considered unavailable after 1 unsuccessful communication attempt. Use the Ad-vanced Settings task, make your changes to the default time, and clickOK to change these settings.
© 1999‒2022 Citrix Systems, Inc. All rights reserved. 150

StoreFront 2203
Connection timeout
You can specify the number of seconds towait when establishing an initial connectionwith a DeliveryController. The default is 6.
Use theAdvancedSettings task, specify the seconds towait when establishing the initial connection,and clickOK
Enable enhanced enumeration
This option controls whether StoreFront queries Delivery Controllers concurrently or sequentiallywhen enumerating apps and desktops across multiple Citrix Virtual Apps and Desktops Sites. Con-current enumeration provides faster responses to user queries when aggregating resources acrossmultiple Sites. When this option is selected (the default), StoreFront sends out enumeration requeststo all Delivery Controllers at the same time and aggregates responses when they have all responded.You can use the optionsMaximum concurrent enumerations and Minimum farms for concurrentenumeration to tune this behavior.
Use the Advanced Settings task, select (or deselect) the Enable enhanced enumeration option, andclickOK.
Enable socket pooling
Socket pooling is disabled by default in stores. When socket pooling is enabled, StoreFront main-tains a pool of sockets, rather than creating a socket each time one is needed and returning it to theoperating system when the connection is closed. Enabling socket pooling enhances performance,particularly for Secure Sockets Layer (SSL) connections. To enable socket pooling, you edit the storeconfiguration file. Use the Advanced Settings task, select the Enable socket pooling option, andclickOK to enable socket pooling.
Filter resources by excluded keywords
You can filtermatching resources by excluded keywords. Specifying exclusion keywords removes anypreviously configured inclusion keywords. The default is No filtering (no resource types excluded).
Use the Advanced Settings task, select Filter resources by excluded keywords, click to the right ofit, enter a semicolon-separated list of keywords in the enter keywords box, and clickOK.
© 1999‒2022 Citrix Systems, Inc. All rights reserved. 151

StoreFront 2203
Filter resources by included keywords
You can filter matching resources by inclusion keywords. Specifying inclusion keywords removes anypreviously configured exclusion keywords. The default is No filtering (no resource types excluded).
Use the Advanced Settings task, select Filter resources by included keywords, click to the right ofit, enter a semicolon-separated list of keywords in the enter keywords box, and clickOK.
Filter resources by type
Choose the resource types to be included in resource enumeration. The default is No filtering (allresource types included).
Use the Advanced Settings task, select Filter resources by type, click to the right of it, choose theresource types to include in the enumeration, and clickOK.
© 1999‒2022 Citrix Systems, Inc. All rights reserved. 152

StoreFront 2203
Maximum concurrent enumerations
Specify the maximum number of concurrent requests to send to all Delivery Controllers. This optiontakes effect when the option Enable enhanced enumeration is enabled. The default is 0 (No Limit).
Use the Advanced Settings task, select Maximum concurrent enumerations, enter a number, andclickOK.
Minimum farms for concurrent enumeration
Specify the minimum number of Delivery Controllers required to trigger concurrent enumeration.This option takes effect when the option Enable enhanced enumeration is enabled. The default is 3.
Use the Advanced Settings task, selectMinimum farms for concurrent enumerations, enter a num-ber, and clickOK.
Override ICA client name
Overrides the client name setting in the .ica launch filewith an ID generatedbyCitrix Receiver forWeb.When disabled, Citrix Workspace app specifies the client name. The default is Off.
Use the Advanced Settings task, select theOverride the ICA client name option, and clickOK.
Require token consistency
When enabled, StoreFront enforces consistency between the gateway used to authenticate and thegateway used to access the store. When the values are inconsistent, users must reauthenticate. Youmust enable this for Smart Access. The default is On.
Use the Advanced Settings task, select the Require token consistency option, and clickOK.
Server communication attempts
Specify the number of attempts to communicate with Delivery Controllers before marking them un-available. The default is 1.
Use the Advanced Settings task, select Server communication attempts, enter a number, and clickOK.
Show Desktop Viewer for legacy clients
Specify whether to show the Citrix Desktop Viewer window and toolbar when users access their desk-top from legacy clients. The default is Off.
© 1999‒2022 Citrix Systems, Inc. All rights reserved. 153

StoreFront 2203
Use theAdvancedSettings task, select theShowDesktopViewer for legacy clientsoption, and clickOK.
Treat desktops as apps
Specify whether, when the store is accessed, Desktops are displayed in the Apps view rather than inthe Desktops view. The default is Off.
Use the Advanced Settings task, select the Treat desktops as apps option, and clickOK.
Manage a Citrix Receiver for Web site
December 18, 2019
A Citrix Receiver for Web site is a website used as an app store. Users can open the site in a browserand securely access applications, data, and desktops published for them through Citrix Virtual Appsand Desktops.
Use the StoreFront management console to perform the following Citrix Receiver for Web-relatedtasks:
Task Detail
Create a Citrix Receiver for Web site Create Citrix Receiver for Web sites, whichenable users to access stores through a webpage.
Configure Citrix Receiver for Web sites Modify settings for your Receiver for Web sites.
Unified user experience StoreFront supports the unified userexperience. The unified experience delivers acentrally managed HTML5 user experience.
Create andmanage featured apps Create product featured app groups for yourend users that are related to or fit in a specificcategory.
Configure workspace control Workspace control lets applications followusers as they move between devices.
© 1999‒2022 Citrix Systems, Inc. All rights reserved. 154

StoreFront 2203
Task Detail
Configure Citrix Workspace app for HTML5 useof browser tabs
Specify when users start resources fromshortcuts using Citrix Receiver for HTML5 orCitrix Workspace app for HTML5, whether thedesktop or application replaces the CitrixReceiver for Web site in the existing browsertab rather than appearing in a new tab.
Configure communication time-out durationand retry attempts
By default, requests from a Citrix Receiver forWeb site to the associated store time out afterthree minutes. The store is consideredunavailable after one unsuccessfulcommunication attempt. You can change thedefault settings.
Create a Citrix Receiver for Web site
January 16, 2020
When you create a store, a Citrix Receiver for Web site is created for it automatically. You can addadditional Citrix Receiver for Web sites to existing stores.
Important:
In multiple server deployments, use only one server at a time tomake changes to the configura-tion of the server group. Ensure that the Citrix StoreFront management console is not runningon any of the other servers in the deployment. Once complete,propagate your configuration changes to the server group so that the other servers in the deploy-ment are updated.
1. On the Windows Start screen or Apps screen, locate and click the Citrix StoreFront tile.
2. Select the Store node in the left pane of the Citrix StoreFront management console, select thestore for which youwant to create the Citrix Receiver for Web site, and in the Actions pane, clickManage Receiver for Web Sites.
3. Click Add to create a new Citrix Receiver for Web site. Type the desiredWeb Site Path and clickNext.
4. Select the Citrix Receiver experience and click Next.
5. Select authentication methods, click Create and when the site has been created, click Finish.
© 1999‒2022 Citrix Systems, Inc. All rights reserved. 155

StoreFront 2203
The URL for users to access the Citrix Receiver for Web site is displayed. For more informationabout modifying settings for Citrix Receiver for Web sites, see Configure Citrix Receiver for Websites.
By default, when a user accesses a Receiver for Web site from a computer running Windows or MacOS X, the site attempts to determine whether Citrix Workspace app is installed on the user’s device.If Citrix Workspace app cannot be detected, the user is prompted to download and install it for theirplatform from the Citrix website. For more information about modifying this behavior, see Configuresite behavior for users without Citrix Workspace app.
The default configuration for Receiver for Web sites requires that users install a compatible versionof Citrix Workspace app to access their desktops and applications. However, you can enable Cit-rix Workspace app for HTML5 on your Receiver for Web sites so that users who cannot install CitrixWorkspace app can still access resources. Formore information, see Configure Citrix Receiver forWebsites.
Configure Citrix Receiver for Web sites
December 13, 2019
The tasks below enable you to modify settings for your Citrix Receiver for Web sites. Some advancedsettings can only be changed by editing the site configuration files. For more information, see Config-ure Citrix Receiver for Web sites using the configuration files.
Important:
In multiple server deployments, use only one server at a time tomake changes to the configura-tion of the server group. Ensure that the Citrix StoreFront management console is not runningon any of the other servers in the deployment. Once complete,propagate your configuration changes to the server group so that the other servers in the deploy-ment are updated.
Choose authenticationmethods
Use the Manage Authentication Methods task to assign authentication methods for users connectingto theCitrixReceiver forWebsite. This actionallowsyou to specify a subsetof authenticationmethodsfor each Receiver for Web site.
1. On the Windows Start screen or Apps screen, locate and click the Citrix StoreFront tile.
2. Select the Stores node in the left pane of the Citrix StoreFront management console and selectthe relevant store that you want to modify from the Stores pane.
© 1999‒2022 Citrix Systems, Inc. All rights reserved. 156

StoreFront 2203
3. In the Stores pane, clickManage Receiver forWeb Sites, click Configure, and choose Authen-tication Methods to specify the access methods that you want to enable for your users.
• Select User name and password to enable explicit authentication. Users enter their cre-dentials when they access their stores.
• Select SAML Authentication to enable integration with a SAML Identity Provider. Usersauthenticate to an Identity Provider and are automatically logged on when they accesstheir stores. From the Settings drop-downmenu:
– Select Identity Provider to configure the trust to the Identity Provider.– Select Service Provider to configure the trust for the Service Provider. This informa-tion is required by the Identity Provider.
• Select Domain pass-through to enable pass-through of Active Directory domain creden-tials from users’ devices. Users authenticate to their domain-joined Windows computersand are automatically logged onwhen they access their stores. In order to use this option,pass-through authentication must be enabled when Citrix Receiver for Windows or CitrixWorkspace app for Windows is installed on users’ devices.
Note:
Domain pass-through for Citrix Receiver for Web is limited toWindows operating sys-tems using Chrome, Firefox, and Internet Explorer.
• Select Smart card to enable smart card authentication. Users authenticate using smartcards and PINs when they access their stores.
• Select Pass-through from Citrix Gateway to enable pass-through authentication fromCitrix Gateway. Users authenticate to Citrix Gateway and are automatically logged onwhen they access their stores.
4. Once the authentication method has been selected, clickOK.
For more information about modifying settings for authentication methods, see Configure theauthentication service.
Add resource shortcuts to other websites
Use the Add Shortcuts to Websites task to provide users with rapid access to desktops and applica-tions from trustedwebsites hostedon the internal network. YougenerateURLs for resources availablethrough the Citrix Receiver for Web site and embed these links on your websites. Users click on a linkand are redirected to the Receiver for Web site, where they log on if they have not already done so.The Receiver for Web site automatically starts the resource. In the case of applications, users are alsosubscribed to the application if they have not subscribed previously.
© 1999‒2022 Citrix Systems, Inc. All rights reserved. 157

StoreFront 2203
Before you can generate resource shortcuts, you must add the URLs of host websites to the “trustedURLs” list, using the Citrix StoreFront management console or using PowerShell. Trusted URLsare listed in the <trustedUrls> section of the web.config file for the Citrix Receiver for Web site.web.config is typically located in the C:\inetpub\wwwroot\Citrix\storenameWeb\ directory,where storename is the name specified for the store when it was created.
By default, StoreFront warns users if they attempt to launch resource shortcuts from untrusted web-sites, but users can still choose to launch the resource. To stop thesewarnings appearing, in theStorespane clickManageReceiver forWebSites, clickConfigure, chooseAdvancedSettings, and clear theoption Prompt for untrusted shortcuts.
Add trusted websites using themanagement console
1. On the Windows Start screen or Apps screen, locate and click the Citrix StoreFront tile.2. Select the Stores node in the left pane of the Citrix StoreFront management console and select
the site from the results pane.3. In theActionspane, clickManageReceiver forWebSites, clickConfigure, andchooseWebsite
Shortcuts.4. Click Add to enter the URL for a website on which you plan to host shortcuts. URLs must be
specified in the form http[s]://hostname[:port], where hostname is the fully qualified domainnameof thewebsitehost andport is theport used for communicationwith thehost if thedefaultport for the protocol is not available. Paths to specific pages on thewebsite are not required. Tomodify a URL, select the entry in the Websites list and click Edit. Select an entry in the list andclick Remove to delete the URL for a website on which you no longer want to host shortcuts toresources available through the Citrix Receiver for Web site.
5. Click Get shortcuts and then click Save when you are prompted to save your configurationchanges.
6. Log on to the Citrix Receiver for Web site and copy the URLs you require to your website.
Add trusted websites using PowerShell
You can add ‘trusted’ URLs using the Set-STFWebReceiverApplicationShortcuts PowerShell cmdletdescribed in https://developer-docs.citrix.com/projects/storefront-powershell-sdk/en/latest/Citrix.StoreFront.SubscriptionsStore/.
Set session timeout
Bydefault, user sessions onCitrix Receiver forWeb sites timeout after 20minutes of inactivity. Whenasession times out, users can continue to use any desktops or applications that are already running butmust log on again to access Citrix Receiver for Web site functions such as subscribing to applications.
© 1999‒2022 Citrix Systems, Inc. All rights reserved. 158

StoreFront 2203
Use the Session Timeout task in the Manage Receiver for Web Sites to change the session timeoutvalue.
1. On the Windows Start screen or Apps screen, locate and click the Citrix StoreFront tile.2. Select the Stores node in the left pane and in theActions pane, clickManageReceiver forWeb
Sites, clickConfigure, chooseSessionSettings. You can specifyminutes andhours forSessiontimeout. Theminimumvalue for all time intervals is 1. Themaximumequates to 1 year for eachtime interval.
Specify different views for applications and desktops
Use the Application and Desktops view on Receiver for Web task in theManage Receiver for WebSites to change the session timeout value.
1. On the Windows Start screen or Apps screen, locate and click the Citrix StoreFront tile.2. Select the Stores node in the left pane and in the Actions pane, click Manage Receiver for Web
Sites, click Configure, and choose Client Interface Settings.3. FromtheSelectviewandDefaultviewdrop-downmenus, select theviewsyouwantdisplayed.
To enable folder view:
1. On the Windows Start screen or Apps screen, locate and click the Citrix StoreFront tile.2. Select the Stores node in the left pane and in theActions pane, clickManageReceiver forWeb
Sites and click Configure.3. Select Advanced Settings and check Enable folder view.
Stop offering provisioning files to users
By default, Citrix Receiver for Web sites offer provisioning files that enable users to configure CitrixReceiver or Citrix Workspace app automatically for the associated store. The provisioning files con-tain connection details for the store that provides the resources on the site, including details of anyCitrix Gateway deployments and beacons configured for the store. In this article, mentions of “CitrixWorkspace app” also represent the supported versions of Citrix Receiver unless otherwise noted.
Use the Enable Receiver configuration task in the Manage Receiver for Web Sites to change thesession timeout value.
1. On the Windows Start screen or Apps screen, locate and click the Citrix StoreFront tile.2. Select the Stores node in the left pane and in theActions pane, clickManageReceiver forWeb
Sites, click Configure, and choose Client Interface Settings.3. Select Enable Receiver/Workspace app configuration.
© 1999‒2022 Citrix Systems, Inc. All rights reserved. 159

StoreFront 2203
Configure site behavior for users without Citrix Workspace app
Use theDeploy Citrix Receiver/Workspace app task to configure the behavior of a Citrix Receiver forWeb site when a Windows or Mac OS X user without Citrix Workspace app installed accesses the site.By default, Citrix Receiver forWeb sites automatically attempt to determinewhether CitrixWorkspaceapp is installed when accessed from computers running Windows or Mac OS X.
If Citrix Workspace app cannot be detected, the user is prompted to download and install it fortheir platform. The default download location is the Citrix website, but you can also copy the CitrixWorkspace app installers to the StoreFront server and allow users to download copies of thesedirectly from the StoreFront server instead.
For userswho cannot install CitrixWorkspace app, you can enable CitrixWorkspace app for HTML5 onyour Citrix Receiver for Web sites. Citrix Workspace app for HTML5 enables users to access desktopsand applications directly within HTML5-compatible web browsers without needing to install CitrixWorkspace app. Both internal network connections and connections through Citrix Gateway are sup-ported. However, for connections from the internal network, Citrix Workspace app for HTML5 onlyenables access to resources provided by specific products. Additionally, specific versions of CitrixGateway are required to enable connections from outside the corporate network. For more informa-tion, see Infrastructure requirements.
For local users on the internal network, access through Citrix Workspace app for HTML5 to resourcesprovidedbyCitrix Virtual Apps andDesktops is disabled by default. To enable local access to desktopsand applications using CitrixWorkspace app for HTML5, youmust enable the ICAWebSockets connec-tions policy on your Citrix Virtual Apps and Desktops servers. Citrix Virtual Apps and Desktops usesport 8008 for Citrix Workspace app for HTML5 connections. Ensure your firewalls and other networkdevices permit access to this port. For more information, see WebSockets policy settings.
For Citrix Virtual Apps and Desktops resource launches to succeed using Citrix Workspace app forHTML5when connecting directly to StoreFront, TLS connections to the VDAs that host apps and desk-tops must be configured. Remote connections through a Citrix Gateway can launch resources usingCitrix Workspace app for HTML5 without configuring TLS connections to the VDA.
1. On the Windows Start screen or Apps screen, locate and click the Citrix StoreFront tile.
2. Select the Stores node in the left pane of the Citrix StoreFrontmanagement console and, in theresults pane, select a site. In the Actions pane, clickManage Receiver for Web Sites and clickConfigure.
3. Choose Deploy Citrix Receiver/Workspace app and specify a Deployment option.
• select Always use Receiver for HTML5 if you want the site always to access resourcesthrough an HTML5-compatible browser without prompting the user to download and in-stall Citrix Workspace app. With this option selected, users always access desktops andapplications on the site through Citrix Workspace app for HTML5, provided they use an
© 1999‒2022 Citrix Systems, Inc. All rights reserved. 160

StoreFront 2203
HTML5-compatible browser. Users without an HTML5-compatible browser cannot accessresources. Access through any locally installed Citrix Workspace app is disabled.
• select Use Receiver for HTML5 if local Receiver is unavailable if you want the site toprompt the user to download and install Citrix Workspace app, but fall back to CitrixWorkspace app for HTML5 if Citrix Workspace app cannot be installed. Users withoutCitrix Workspace app are prompted to download and install it every time they log on tothe site.
• select Install locally if you want the site always to access resources through a locally in-stalled CitrixWorkspace app. Users are prompted to download and install the appropriateCitrix Workspace app for their platform. Access through HTML5-compatible browsers isdisabled.– If you select Allow users to download HDX engine (plug in), the Citrix Receiver forWeb allows the user to download and install Citrix Workspace app on the end userclient if the Citrix Workspace app is not available.
– If you select Upgrade plug-in at logon, the Citrix Receiver for Web offers users achoice to upgrade the Citrix Workspace app client when they log on. Users maychoose to skip the upgrade and will not be prompted to upgrade again unless CitrixReceiver for Web browser cookies are cleared. To enable this feature, ensure theCitrix Workspace app files are available on the StoreFront server.
– Select a source from the drop-down list.
Make Citrix Workspace app installation files available on the server
By default, when a user accesses a Citrix Receiver for Web site from a computer running Windowsor Mac OS X, the site attempts to determine whether Citrix Workspace app is installed on the user’sdevice. If Citrix Workspace app cannot be detected, the user is prompted to download and install itfor their platform from the Citrix website or by downloading the correct installer from the StoreFrontserver.
1. On the Windows Start screen or Apps screen, locate and click the Citrix StoreFront tile.2. Select the Stores node in the left pane of the Citrix StoreFrontmanagement console and, in the
results pane, select a site. In the Actions pane, clickManage Receiver for Web Sites and clickConfigure.
3. Choose Deploy Citrix Receiver/Workspace app and Source for Receivers/Workspace app,and then browse to the installation files.
Run the prompt to install Citrix Workspace app after logon
Before logging on to StoreFront, Citrix Receiver for Web prompts a user to install the latest CitrixWorkspace app if it is not already installed on the user’s computer. Depending on the configuration,
© 1999‒2022 Citrix Systems, Inc. All rights reserved. 161

StoreFront 2203
the prompt may also display if the user’s installation of Citrix Workspace app can be upgraded.
You can configure Citrix Receiver for Web to display the prompt after logging on to StoreFront.
1. On theWindows Start screen or Apps screen, locate and click the Citrix StoreFront tile.2. Select the Stores node in the left pane of the Citrix StoreFront management console and select
the site from the results pane.3. In the Actions pane, clickManage Receiver for Web Sites, click Configure.4. Select Advanced Settings and check Prompt to install Citrix Receiver/Workspace app after
logon.
Remove Citrix Receiver for Web sites
Use the Manage Receiver for Web Sites in the Actions pane to delete a Citrix Receiver for Web site.When you remove a site, users can no longer use that webpage to access the store.
Support for the unified user experience
March 31, 2020
Note:
“StoreFront” continues to be the name used to refer to the enterprise app store that aggregatesapplications and desktops from Citrix Virtual Apps and Desktops sites into a single easy to usestore for users. Citrix Receiver technology is now included in Citrix Workspace app. Implement-ing this transition in our products and documentation is an ongoing process. In-product contentmight still contain former names—for example, the unified experience refers to “Citrix Receiver”.Your patience during this transition is appreciated. For more detail about our new names, seehttps://www.citrix.com/products/.
StoreFront supports the unified user experience. The unified experience delivers a centrallymanagedHTML5 user experience to all web and native CitrixWorkspace apps. This supports customization andfeatured app groups management.
Stores created using this version of StoreFront use the unified experience.
Use the StoreFront management console to do the following Citrix Receiver for Web related tasks:
• Create a Citrix Receiver for Web site.• Change the Citrix Receiver for Web site experience.• Select a unified Citrix Receiver for Web site to associate with the store.• Customize the Receiver appearance.
© 1999‒2022 Citrix Systems, Inc. All rights reserved. 162

StoreFront 2203
Use Javascript and CSS to customize Citrix Receiver for Web pages.
Inmultiple server deployments, use only one server at a time tomake changes to the configuration ofthe server group. Ensure that the Citrix StoreFront management console is not running on any of theother servers in the deployment. Once complete, propagate your configuration changes to the servergroup so that the other servers in the deployment are updated.
Note:
If using XenApp 6.x, applications set to Stream to client or Streamed if possible, otherwiseaccessed from a server are not supported with the unified experience enabled.
Create a Citrix Receiver for Webwebsite
ACitrix Receiver forWeb site is createdautomatically, whenever you create a store. You canalso createadditional Receiver for Web sites using this procedure.
1. On the Windows Start screen or Apps screen, locate and click the Citrix StoreFront tile.2. Select the Stores node in the left pane of the Citrix StoreFront management console and, in the
Actions pane, clickManage Receiver for Web Sites > Add and follow the wizard.
Select a unified Citrix Receiver for Web site to associate with the store
When a new store is created using StoreFront, a Citrix Receiver for Web site is automatically createdand associated with the store. Citrix Receiver for Web sites use the unified experience. When a storehas multiple Receiver for Web sites, you need to select which Receiver for Web site is displayed whenusers access the store using Citrix Workspace app.
1. On the Windows Start screen or Apps screen, locate and click the Citrix StoreFront tile.2. Select the Stores node in the left pane of the Citrix StoreFront management console, select a
store in the center pane, and click Configure Unified Experience in the Actions pane. If you donot have a Citrix Receiver for Web website created, a message displays including a link to theAdd Receiver for Web site wizard.
3. Select the default Receiver for Web site which Citrix Workspace app clients display when usersaccess this store.
4. ClickOK.
Customize the Citrix Receiver appearance
1. On the Windows Start screen or Apps screen, locate and click the Citrix StoreFront tile.2. Select the Stores node in the left pane of the Citrix StoreFront management console and in the
Actions pane, clickManage Receiver for Web Sites and click Configure.
© 1999‒2022 Citrix Systems, Inc. All rights reserved. 163

StoreFront 2203
3. SelectCustomizeAppearanceandmake selections to customizehow thewebsitedisplays afterlogging on.
Further customization using Javascript and CSSNote:
In theexamples in this section, addJavascript to the script.js file (forexample inC:\inetpub\wwwroot\Citrix\StoreWeb\custom),and add CSS to the style.css file in the same directory.
Add a static header to the login page in Receiver for Web
Here ‘static’ here means fixed text like a welcome message, or a company name. For something thatchanges, such as a news message or server status, see Add a dynamic header to the login page inReceiver for Web.
You can add static text in four positions using the following lines of javascript:
1 $('.customAuthHeader').html(”Example one - top of login screen”);
© 1999‒2022 Citrix Systems, Inc. All rights reserved. 164

StoreFront 2203
2 $('.customAuthTop').html(”Example two - above login box”);3 $('.customAuthBottom').html(”Example three - below login box”);4 $('.customAuthFooter').html(”Example four - bottom of login screen”);5 <!--NeedCopy-->
Tomake the text more obvious, add the following styling to custom.css:
1 .customAuthHeader,2 .customAuthFooter,3 .customAuthTop,4 .customAuthBottom5 {67 font-size:16px;8 color:yellow;9 text-align: center;10 }1112 <!--NeedCopy-->
This gives the following result:
© 1999‒2022 Citrix Systems, Inc. All rights reserved. 165

StoreFront 2203
To use HTML formatting, replace the 4 lines of javascript with the following:
1 $('.customAuthHeader').html(”<b>Example one</b> ‒ top of login screen”);
2 $('.customAuthTop').html(”<div style='background:black'>Example two ‒above login box</div>”);
3 $('.customAuthBottom').html(”<i>Example three ‒ below login box</i>”);4 $('.customAuthFooter').html(”<img src='logo.png'>Example four ‒ bottom
of login screen”);5 <!--NeedCopy-->
Note:
The fourth example line expects an image named logo.png in the custom directory.
Add a dynamic header to the login page in Receiver for Web
Here ‘dynamic’ means that some content is loaded and displayed every time, rather than beingcached. Web browsers often cache things when they can, but Citrix Workspace app always caches
© 1999‒2022 Citrix Systems, Inc. All rights reserved. 166

StoreFront 2203
the UI, and always loads the previously cached UI. That means if you use the previous example forsomething like service status, you do not get what you intended.
Instead, you need to make an Ajax call to dynamically load the content and insert it into the page. Todo this:
1. Define a useful utility function which fetches the content from a page in the \customweb direc-tory on the server, and adds it to the page. This does the equivalent of the .html examplesabove, and the custom page can contain text, or an HTML snippet. Use the \customweb direc-tory because it gets copied to all servers in a StoreFront server group (just like the \custom di-rectory) but it does not get downloaded and cached.
2. Arrange for this function to be called at a suitable point. Calling the function too early causesproblems in Citrix Workspace app, because the script runs before the configuration has beenfully loaded. A good time for this sort of action is beforeDisplayHomeScreen (but if you wanttodisplaycontenton the loginpage, thenusebeforeLogin instead). The followingcodehandlesboth cases, and is suitable for web and native clients.
The full script is as follows:
1 function setDynamicContent(txtFile, element) {23 CTXS.ExtensionAPI.proxyRequest({45 url: ”customweb/”+txtFile,6 success: function(txt) {7 $(element).html(txt); }8 }9 );10 }111213 var fetchedContent=false;14 function doFetchContent(callback)15 {1617 if(!fetchedContent) {1819 fetchedContent = true;20 setDynamicContent(”ReadMe.txt”, ”#customScrollTop”);21 }2223 callback();24 }
© 1999‒2022 Citrix Systems, Inc. All rights reserved. 167

StoreFront 2203
252627 CTXS.Extensions.beforeDisplayHomeScreen = doFetchContent;28 CTXS.Extensions.beforeLogon = doFetchContent;29 <!--NeedCopy-->
This loads content from \customweb\readme.txtwhich, by default, contains some uninteresting infor-mation. Add your own file (status.txt) and adjust the script to call it for more useful results.
Show a click-through disclaimer before or after login
The followingexample is alreadyprovided in the script.js file asanexample, butneedsuncommenting.There are two versions of this code: the first is done pre-login for web browsers, and the second isdone pre-main UI for native clients. If you only want a post-login message, delete the first function.However, using a pre-login message on its own is not a good option, as the login flow is only seen onwebbrowsers (andnot onnative clients). Even then, the login flow is hiddenwhenusers are accessingfrom Citrix Gateway.
1 var doneClickThrough = false;23 // Before web login4 CTXS.Extensions.beforeLogon = function (callback) {56 doneClickThrough = true;7 CTXS.ExtensionAPI.showMessage({89 messageTitle: ”Welcome!”,10 messageText: ”Only for WWCo Employees”,11 okButtonText: ”Accept”,12 okAction: callback13 }14 );15 }16 ;1718 // Before main screen (both web and native)19 CTXS.Extensions.beforeDisplayHomeScreen = function (callback) {2021 if (!doneClickThrough) {2223 CTXS.ExtensionAPI.showMessage({24
© 1999‒2022 Citrix Systems, Inc. All rights reserved. 168

StoreFront 2203
25 messageTitle: ”Welcome!”,26 messageText: ”Only for WWCo Employees”,27 okButtonText: ”Accept”,28 okAction: callback29 }30 );31 }32 else {3334 callback();35 }3637 }38 ;39 <!--NeedCopy-->
Make the click-through disclaimer box wider
The message box used for CTXS.ExtensionAPI.showMessage() is pre-styled. You can adjustthis style to make it larger, so that it looks OK for other messages. Add the following examplefunction to script.js to shrink the style again afterwards. Call showLargeMessage() instead ofCTXS.ExtensionAPI.showMessage()when you want a larger box.
1 function mkLargeMessageExitFn(origfn)2 {34 if(origfn) {56 return function() {78 origfn();9 window.setTimeout(function() {10 $('body').removeClass('largeMessage'); }11 ,500);12 }13 ;14 }1516 }171819 function showLargeMessage(details)
© 1999‒2022 Citrix Systems, Inc. All rights reserved. 169

StoreFront 2203
20 {2122 $('body').addClass('largeMessage');23 details.cancelAction = mkLargeMessageExitFn(details.cancelAction);24 details.okAction = mkLargeMessageExitFn(details.okAction);25 CTXS.ExtensionAPI.showMessage(details);26 }27 ;28 <!--NeedCopy-->
This adds a marker class when the large message is being shown. When the box is closed, it removesthis marker class after a small delay (needed to avoid a nasty ‘jump’).
Add some CSS to adjust the size of this box based on the presence of this marker class. For example,try the following in custom\style.css:
1 .largeTiles .largeMessage .messageBoxPopup2 {34 width:800px;5 }67 <!--NeedCopy-->
Then, when a messageBoxPopup is shown on a large UI and the largeMessage flag is set, it is 800pixels wide. Existing code ensures that it is centered. (On a small UI such as a mobile phone, thedefault message box is already full width).
© 1999‒2022 Citrix Systems, Inc. All rights reserved. 170

StoreFront 2203
To squeeze in evenmore text, you can reduce font size by adding the following to custom\style.css, oralternatively consider adding scrollable content.
1 .largeTiles .largeMessage .messageBoxText2 {34 font-size:10px;5 }67 <!--NeedCopy-->
Make the click-through disclaimer box have scrollable content
When you call showMessage you can pass some HTML rather than just a string, to add style. To dothis, replace messageText, in any of the previous example calls to showMessage, with the following:
1 CTXS.ExtensionAPI.showMessage({23 messageTitle: ”Welcome!”,4 messageText: ”<div class='disclaimer'>rhubarb rhubarb
rhubarb ... rhubarb rhubarb</div>”,5 okButtonText: ”Accept”,6 okAction: callback }7 );8 <!--NeedCopy-->
Then add the following to style.css:
1 .disclaimer {23 height: 200px;4 overflow-y: auto;5 }67 <!--NeedCopy-->
This gives the following result:
© 1999‒2022 Citrix Systems, Inc. All rights reserved. 171

StoreFront 2203
Add a footer to every page
There is another custom area specifically for this. You can add the following line of Javascript to setits content:
1 $('#customBottom').html(”For ACME Employees Only”);2 <!--NeedCopy-->
Define the style in style.css. Set position:static to ensure that the scrolling area works as ex-pected.
1 #customBottom2 {34 text-align:center;
© 1999‒2022 Citrix Systems, Inc. All rights reserved. 172

StoreFront 2203
5 font-size:30px;6 position:static;7 }89 <!--NeedCopy-->
Note:
If you dynamically resize this area using a script, you must call the CTXS.ExtensionAPI.resize()command to let Citrix Workspace app know that something has changed.
Make the folder view the default, when users go to the Apps tab
To do this, monitor for the ‘view change’ event. If the view to the ‘store’ (the internal name for theapps view) changes, navigate to the root folder. Watch out for:
• When theonViewChange event fires, to say the store view is changing, the viewhasnot finisheddrawing. Therefore, if younavigate to the folder immediately, the initializationcode for the storeview simply undoes your work, because it runs after your code. To avoid this, add a 1 ms delayto ensure that your code executes after the current stack unwinds.
• The three lines containing the word ‘whitespace’ ensure that the initial All Apps UI is drawn offscreen by putting a large customarea above it. This stops the All Apps view flickering before thefolders appear.
Add the following code to script.js as usual:
1 $('#customScrollTop').append('<div class=”whitespace”></div>');
23 CTXS.Extensions.onViewChange = function(view) {45 if (view == ”store”) {67 $('.whitespace').height(5000);8 window.setTimeout(function() {910 CTXS.ExtensionAPI.navigateToFolder(”/”);11 $('.whitespace').height(0);12 }13 , 1);14 }1516 }
© 1999‒2022 Citrix Systems, Inc. All rights reserved. 173

StoreFront 2203
17 ;18 <!--NeedCopy-->
Hide apps from All Apps that also appear in a featured category
You can use the following code to achieve this. Start by remembering every app in a bundle, and thenremove them from the ‘All Apps display’ list.
1 var bundleApps = [];23 CTXS.Extensions.sortBundleAppList = function(apps,bundle, defaultfn) {45 for (var i = 0; i < apps.length; i++) {67 bundleApps.push(apps[i]);8 }910 defaultfn();11 }12 ;1314 CTXS.Extensions.filterAllAppsDisplay = function(allapps) {1516 for (var i = 0; i < allapps.length; i++) {1718 if ($.inArray(allapps[i], bundleApps) != -1) {1920 allapps.splice(i, 1);21 i--;22 }2324 }2526 }27 ;28 <!--NeedCopy-->
If you use this customization, it is a good idea to change the text string “All Apps” to say “Other Apps”,to avoid users getting confused. To do this edit the strings.en.js file in the custom directory, then adda tag for the AllAppsTitle. For example, with changes in yellow:
© 1999‒2022 Citrix Systems, Inc. All rights reserved. 174

StoreFront 2203
1 (function ($) {23 $.localization.customStringBundle(”en”, {45 <span style=”background-color: yellow;”>AllAppsTitle: ”Other Apps”
,</span>6 Example1: ”This is an example”,7 Example2: ”This is another example”8 }9 );10 }11 )(jQuery);12 <!--NeedCopy-->
Change the default UI text
You can change any of the text used in the UI if you know what its label is called. For example, tochange the ‘Install’ screen used in Receiver for Web on Google Chrome to ‘Get Started’, add a customstring as follows:
1 (function ($) {23 $.localization.customStringBundle(”en”, {45 <span style=”background-color: yellow;”>Install: ”Get Started”,</
span>6 Example1: ”This is an example”,7 Example2: ”This is another example”8 }9 );10 }11 )(jQuery);12 <!--NeedCopy-->
© 1999‒2022 Citrix Systems, Inc. All rights reserved. 175

StoreFront 2203
To discover the name of the label to change:
1. On theStoreFront server look in thedirectoryC:\inetpub\wwwroot\citrix\StoreWeb\receiver\js\localization\en(assuming your store is called ‘Store’).
2. Open the file ctxs.strings_something.js in notepad.3. Look for the string youwant to change. Note: instead of editing this file directly, create override
values in the custom directory as for the ‘install’ example.
Change the background images for featured categoriesImportant:
Do not try to overwrite the images on the server. This confuses any clients that have alreadydownloaded the images, because they do not know they have changed. It also makes upgradehard, or impossible.
You can add your own images to the \custom directory, and add CSS to reference them. Each featuredcategory (called ‘bundles’ internally) uses two images:
• The first image is used as a tile in the carousel.• The second image is used as a background image behind the header on the detail page. Thisimage is stretched to fill the width of the screen, and a blur is added to its bottom edge.
You can use different images for each screen. Consider using the same image but double its back-ground height in the detail page, so that only the top half of the image is displayed. Because theimage is stretched on the detail page, use an image which looks good if deformed.
The first bundle has class ‘appBundle1’, the second ‘appBundle2’ and so on up to ‘appBundle8’. Thefollowingexampleuses image ‘clouds.png’,which youcandownloadby right-clickingon the followingimage:
© 1999‒2022 Citrix Systems, Inc. All rights reserved. 176

StoreFront 2203
1. Save the image in the \custom directory. The image needs to be about 520 × 256 pixels to beconsistent with the others (but it is scaled as needed).
2. Add the following to style.css:
1 .appBundle1 {23 background-image: url('clouds.png');4 }567 .bundleDetail.appBundle1 {89 background-image: url('clouds.png');10 background-size: 100% 200%;11 }1213 <!--NeedCopy-->
This gives the following result:
© 1999‒2022 Citrix Systems, Inc. All rights reserved. 177

StoreFront 2203
Prevent a company logo looking blurry
Receiver forWebneeds tohandleboth regular (‘lowDPI’) screens, andnewerhi-res (‘highDPI’) screensthat have a higher number of pixels per square inch, correctly. For example, Apple Retina screensare twice the resolution of non-retina screens. On laptops, screens are typically x1.5, x2 or even x3the “normal” number of pixels for their size. As x2 is by far the most common, and makes the mostdifference, Citrix Workspace app has most of its image assets at two resolutions. An image that is 100× 100 pixels on a normal screen, also has a x2 version at 200 × 200 pixels.
When you upload logo images from the StoreFront management console, make sure they are x2 im-ages. In other words, they are approximately double the width and height of the ‘space’ on a regularscreen. (Images uploaded at x1 are not enlarged to x2.) The ‘space’ on a regular screen is 170 × 40pixels, so the logo image you upload should be around 340 × 80 pixels.
StoreFront creates a copy of the logo and scales it to half the size. This image is used on low DPIdisplays.
Occasionally, this results in a blurred image because half the image detail has been discarded. Thisis rare as logos tend to be bold and simple. If your logo suffers from this problem, use the followingworkaround:
1. Create two versions of your logo, one at the x1 size and one at the x2 size, and save them in the\custom directory.
2. Edit the custom\style.css so that it references the twodifferent images. This give something like:
1 <span style=”color: green;”>/* The following section of the file isreserved for use by StoreFront. */</span>
2 <span style=”color: green;”>/* CITRIX DISCLAIMER: START OF MANAGEDSECTION. PLEASE DO NOT EDIT ANY STYLE IN THIS SECTION */</span>
3 <span style=”color: green;”>/* CITRIX DISCLAIMER: END OF MANAGEDSECTION. */</span>
© 1999‒2022 Citrix Systems, Inc. All rights reserved. 178

StoreFront 2203
4 <span style=”color: green;”>/* You may add custom styles below thisline. */</span>
56 .logo-container {78 background-image: url('mylogo_x1.png');9 background-size: 169px 21px;10 }111213 .highdpi .logo-container {1415 background-image: url('mylogo_x2.png');16 background-size: 169px 21px;17 }1819 <!--NeedCopy-->
Note:
• Ensure that these custom styles are not inside the ‘managed section’. Otherwise they areoverwritten, or they confuse the StoreFront management console.
• Both styles specify the samebackgroundsize. This is because the size is specified in ‘logical’units, and for the x2 image, the background size is half the width and height of the actuallogo.
Set a background imageNote:
The unified experience is designed for a simple white background. Background images tend tobe distracting. If you add a background image, try to use an image that is light and simple. Ifnecessary, adjust any fonts so that they continue to work against this image.
Example 1: CSS reference to uploaded image
Change the custom.css as follows:
1 .storeViewSection {23 background: url('images/background.jpg') no-repeat center center
fixed;4 background-size: cover;
© 1999‒2022 Citrix Systems, Inc. All rights reserved. 179

StoreFront 2203
5 }67 <!--NeedCopy-->
Note:
The background-size:cover; statement does not work in some older browsers.
Example 2: CSS reference to existing image with tweaks
Change the custom.css as follows:
1 .storeViewSection {23 background: url('../media/bg_bubbles.jpg') no-repeat center center
fixed;4 background-size: cover;5 color: white;6 }789 // Tweak fonts10 .smallTiles .storeapp .storeapp-name,11 .largeTiles .storeapp .storeapp-name {1213 color: white;14 }151617 // Tweak bundle area so it doesn't clash as badly18 .largeTiles .applicationBundleContainer {1920 background-color: rgba(255, 255, 255, 0.4);21 margin-top: 0;22 padding-top: 25px;23 }242526 .smallTiles .applicationBundleContainer {2728 background-color: rgba(255, 255, 255, 0.4);29 margin-top: 0;30 padding-top: 14px;
© 1999‒2022 Citrix Systems, Inc. All rights reserved. 180

StoreFront 2203
31 }3233 <!--NeedCopy-->
This gives the following result:
Find errors in your code
There are several ways to debug. Always try a browser first. This is far easier than debugging cus-tomizations in Citrix Workspace app. You can add the following arguments after the ? or # in the pageURL, and you can string several together. For example:
1 http://storefront.wwco.net/Citrix/StoreWeb/#-tr-nocustom2 <!--NeedCopy-->
-errors—Normally, we try to suppress any errors that might occur in the code, but you can highlightthem instead. This argument displays an alert box when an error occurs.
-debug— This argument disables any exception handling for customization code. This is useful withthe development tools built into modern browsers (like F12 in Google Chrome or Internet Explorer),and you are debugging exceptions yourself.
-nocustom — This argument disables your script and CSS customizations. This is useful if CitrixWorkspace app is not working, and you want to find out if it is due to an error you have introduced.
-tr— This argument provides tracing of the Citrix Workspace app UI code in a separate browser tab,including any tracing you add with calls to CTXS.ExtensionAPI.trace().
© 1999‒2022 Citrix Systems, Inc. All rights reserved. 181

StoreFront 2203
Unified user experience
This section describes the features and appearance of the unified experience.
Card layout
Apps in the store are represented in a “card” layout. You can expand a panel below each card to showmore details and actions.
Note:
The unified experience does not allow you to re-arrange applications using drag-and-drop.
Home
Home displays the favorites.
Favorites
Click or tap the star to make an item a favorite:
© 1999‒2022 Citrix Systems, Inc. All rights reserved. 182

StoreFront 2203
Search
Search across all apps, desktops, and categories:
Settings
Access settings from the drop-downmenu:
Themenu shows the user name, taken from the Active Directory display name. If the display name isleft blank (we do not recommend this), the domain and account name display. Use themenu to openthe Settings page, check Citrix Workspace app version, or log off.
© 1999‒2022 Citrix Systems, Inc. All rights reserved. 183

StoreFront 2203
Settings allow you to resume any disconnected sessions, and disconnect all of your current sessionsand log you out respectively. Display the settings page in card or list layout:
Connect. Resumes any disconnected sessions.
Disconnect. Disconnects all of your current sessions and logs you off.
Activate Citrix Receiver. Downloads a file that adds this store to the local Citrix Workspace app.
Change Citrix Receiver. Opens a page that checks for a local Citrix Workspace app. This also allowsusers to switch between launching resources using the locally installed Citrix Workspace app, andlaunching them in an HTML5 browser.
© 1999‒2022 Citrix Systems, Inc. All rights reserved. 184

StoreFront 2203
Create andmanage featured apps
February 1, 2019
You can create product featured app groups for your end users that are related to or fit in a specific cat-egory. For example, you can create a Sales Department featured app group containing applicationsthat are used by that department. You can define featured apps in the StoreFront administration con-sole by using application names or by using keywords or application categories that were defined inthe Studio console.
Use the Featured App Groups task to add, edit, or remove featured app groups.
Important:
In multiple server deployments, use only one server at a time tomake changes to the configura-tion of the server group. Ensure that the Citrix StoreFront management console is not runningon any of the other servers in the deployment. Once complete,propagate your configuration changes to the server group so that the other servers in the deploy-ment are updated.
1. On the Windows Start screen or Apps screen, locate and click the Citrix StoreFront tile.2. Select the Stores node in the left pane of the Citrix StoreFront management console and in the
Actions pane, clickManage Receiver for Web Sites and click Configure.3. Select Featured App Groups.4. In the Featured App Groups dialog box, click Create to define a new featured app group.5. In the Create Featured App Group dialog box, specify a featured app group name, description
(optional), background, and themethod by which you define the featured app groups. You canchoose keywords, application names, or application category, and clickOK.
Option Description
Keywords Define the keywords in Studio.
Application category Define the application category in Studio.
© 1999‒2022 Citrix Systems, Inc. All rights reserved. 185

StoreFront 2203
Option Description
Application names Use the application name to define thefeatured app group. All applications namesmatching the name included here in the Createa Featured App Group dialog screen areincluded in the featured app group. StoreFrontdoes not support wildcards in applicationnames. The match is not case sensitive, but itdoes match whole words. For example, if youtype Excel, StoreFront matches a publishedapp named Microsoft Excel 2013 but typing Excdoes not match anything.
Example:
We created two featured app groups:
• Collaboration - Created bymatching apps in the Collaboration category in Studio.• Engineering - Created by naming the app group and specifying a collection of app names.
© 1999‒2022 Citrix Systems, Inc. All rights reserved. 186

StoreFront 2203
Configure workspace control
April 5, 2022
Workspace control lets applications follow users as they move between devices. This enables, forexample, clinicians in hospitals to move from workstation to workstation without having to restarttheir applications on each device. Workspace control is enabled by default for Citrix Receiver for Websites. To disable or configure workspace control, you edit the site configuration file.
Important:
In multiple server deployments, use only one server at a time tomake changes to the configura-tion of the server group. Ensure that the Citrix StoreFront management console is not runningon any of the other servers in the deployment. Once complete, propagate your configurationchanges to the server group so that the other servers in the deployment are updated.
1. On the Windows Start screen or Apps screen, locate and click the Citrix StoreFront tile.
2. In the left pane, select Stores and in the Action pane, select Manage Receiver for Web Sites,
© 1999‒2022 Citrix Systems, Inc. All rights reserved. 187

StoreFront 2203
and click Configure.
3. SelectWorkspace Control.
4. Configure default settings for workspace control as follows:
• Specify the Logoff action. The logoff actions are as follows:– Disconnect: When you log off from the site, the app and desktop sessions are auto-matically disconnected from the client device.
– Terminate: When you log off the site, app and desktop sessions are automatically areterminated on the server.
– None: When users log off from the site, app and desktop sessions remain running.
• Select the Enable workspace control check box.• Select the Automatically reconnect to the sessions when users logon check box under
© 1999‒2022 Citrix Systems, Inc. All rights reserved. 188

StoreFront 2203
Automatic reconnections when users logon.
For more information on configuring workspace control, see the following articles:
• Workspace control• Disable or enable workspace control reconnect
Configure Citrix Workspace app for HTML5 use of browser tabs
May 2, 2019
By default, Citrix Workspace app for HTML5 starts desktops and applications in a new browser tab.However, when users start resources from shortcuts using Citrix Workspace app for HTML5, the desk-top or application replaces the Citrix Receiver for Website in the existing browser tab rather than ap-pearing in a new tab.
Important:
In multiple server deployments, use only one server at a time tomake changes to the configura-tion of the server group. Ensure that the Citrix StoreFront management console is not runningon any of the other servers in the deployment. Once complete, propagate your configurationchanges to the server group so that the other servers in the deployment are updated.
1. On the Windows Start screen or Apps screen, locate and click the Citrix StoreFront tile.2. In the left pane, select Stores and in the Action pane, select Manage Receiver for Web Sites,
and click Configure.3. Select Deploy Citrix Receiver/Workspace app.4. In the Deployment options list select Always use Receiver for HTML 5 and, depending on the
tab inwhich youwant to start applications, select or deselect Launch applications in the sametab as Receiver for Web.
Configure communication timeout duration and retry attempts
February 11, 2020
By default, requests from a Citrix Receiver for Web site to the associated store timeout after threeminutes. The store is considered unavailable after one unsuccessful communication attempt. Usethe Session Settings task to change the default settings.
© 1999‒2022 Citrix Systems, Inc. All rights reserved. 189

StoreFront 2203
Important:
In multiple server deployments, use only one server at a time tomake changes to the configura-tion of the server group. Ensure that the Citrix StoreFront management console is not runningon any of the other servers in the deployment. Once complete, propagate your configurationchanges to the server group so that the other servers in the deployment are updated.
1. On the Windows Start screen or Apps screen, locate and click the Citrix StoreFront tile.2. Select the Stores node in the left pane of the Citrix StoreFront management console, select a
store in the center pane, and in theActionpane, selectManageReceiver forWebSite, and clickConfigure.
3. Select Session Settings, make your changes, and clickOK/Apply to save the changes.
Configure the session timeout
If the session timeout is not appropriately configured on StoreFront, the users may see the followingtimeout message - “Your session has timed out due to inactivity.” You can reset the session timeoutvalue to increase the inactivity timer to suit your users’ usage pattern.
Complete the following steps to configure the session timeout on StoreFront:
Increase the session timeout for StoreFront
1. On StoreFront, navigate to c:\inetpub\wwwroot\Citrix<StoreWeb>.2. Locate the entry: <sessionState timeout=”20”/> in the web.config file.3. Change the sessionState timeout to the desired value in minutes.
Increasemaximum token lifetime of Authentication Service
If you increase the session timeout for the Citrix Receiver for Web to be more than one hour, you alsohave to increase the tokenmaximum lifetime appropriately in the Authentication Service.
Increase session timeout for Citrix Workspace app
1. For the Citrix Workspace app installed on the StoreFront Server, navigate to the path of yourstore’s auth service. In recent StoreFront versions, this path is c:\inetpub\wwwroot\Citrix\<Store>Auth (which could be one of several auth services depending on how many Storesyou have).
In older StoreFront versions, the path is c:\inetpub\wwwroot\Citrix\Authentication(which could be shared between auth services or be the only one on the server).
© 1999‒2022 Citrix Systems, Inc. All rights reserved. 190

StoreFront 2203
2. In the web.config file, locate the entry: <defaultLifetime=”01:00:00”maxLifetime=”01:00:00”>.
3. Change the maxLifetime to desired value.
Note:
CitrixWorkspace app forWindows and CitrixWorkspace app for Linux. After logging out from thecurrent session, you may see Citrix Virtual Apps and Desktops in the background. However, youshould enter your credentials again when you click on any app or desktop after the StoreFrontsession timeout.
Increase authentication token lifetime
If the desired timeout value is greater than eight hours, edit theweb.config file under Citrix Receiverfor Web to increase the Authentication token lifetime:
1. On StoreFront, navigate to c:\inetpub\wwwroot\Citrix<StoreWeb>.2. Locate the entry: <authentication tokenLifeTime=”08:00:00”method=”Auto”/>3. Change the tokenLifeTime to a desired value.
Restart IIS
• Run the iisreset command to apply the changes. Running this command logs off the usersfrom Citrix Receiver for Web, and it does not impact their current ICA session.
Note:
The completed lifetime format is .d.hh:mm:ss[.ff]. The maximum lifetime is not limited to24 hours.
Additional resources
• Citrix Blog - Idle timeout Receiver for Web• Security Token Services API
Configure user access
December 18, 2019
© 1999‒2022 Citrix Systems, Inc. All rights reserved. 191

StoreFront 2203
Configure support for connections through XenApp Services URLs
Use the Configure XenApp Services Support task to configure access to your stores through XenAppServices URLs. Users of repurposed PCs running the Citrix Desktop Lock, along with users who haveolder Citrix clients that cannot be upgraded, can access stores directly using the XenApp Services URLfor the store. When you create a new store, the XenApp Services URL is enabled by default.
Important:
In multiple server deployments, use only one server at a time tomake changes to the configura-tion of the server group. Ensure that the Citrix StoreFront management console is not runningon any of the other servers in the deployment. Once complete, propagate your configurationchanges to the server group so that the other servers in the deployment are updated.
1. On the Windows Start screen or Apps screen, locate and click the Citrix StoreFront tile.
2. Select the Stores node in the left pane of the Citrix StoreFrontmanagement console and, in theresults pane, select a store. In the Actions pane, click Configure XenApp Services Support.
3. Select or clear Enable XenApp Services Support to enable or disable user access to the storethrough the displayed XenApp Services URL.
The XenApp Services URL for a store has the form http[s]://<serveraddress>/Citrix/<storename>/PNAgent/config.xml*, where serveraddress is the fully qualified domainname of the server or load balancing environment for your StoreFront deployment and store-name is the name specified for the store when it was created.
4. If you enable XenApp Services Support, optionally specify a default store in your StoreFrontdeployment for users with the Citrix Online plug-in.
Specify aDefault store so that your users can configure the Citrix Online plug-inwith the serverURL or load-balanced URL of the StoreFront deployment, rather than the XenApp Services URLfor a particular store.
Disable or enable workspace control reconnect
Workspace control enables applications to follow users as they move between devices. This allows,for example, clinicians in hospitals tomove fromworkstation toworkstationwithout having to restarttheir applications on each device.
StoreFront contains a configuration to disable workspace control reconnect in the Store Service forCitrix Workspace app. Manage this feature by using the StoreFront console or PowerShell.
Use the StoreFront management console
1. On the Windows Start screen or Apps screen, locate and click the Citrix StoreFront tile.
© 1999‒2022 Citrix Systems, Inc. All rights reserved. 192

StoreFront 2203
2. Select the Stores node in the left pane of the Citrix StoreFrontmanagement console and, in theActions pane, click Configure Store Settings.
3. Select Advanced Settings and check or uncheck Allow session reconnect.
Use PowerShell
Close the Administration Console then run the following code snippet to import the StoreFront Pow-erShell modules:
1 $dsInstallProp = Get-ItemProperty `2 -Path HKLM:\SOFTWARE\Citrix\DeliveryServicesManagement -Name InstallDir3 $dsInstallDir = $dsInstallProp.InstallDir4 & $dsInstallDir\..\Scripts\ImportModules.ps1
Then the PowerShell command Set-DSAllowSessionReconnect turns Workspace control reconnecton or off.
Syntax
Set-DSAllowSessionReconnect [[-SiteId] <Int64>] [[-VirtualPath] <String> ][[-IsAllowed] <Boolean>]
For example, to turn off workspace control reconnect for a store in /Citrix/Store, the following com-mand configures the store:
Set-DSAllowSessionReconnect -SiteId 1 -VirtualPath /Citrix/Store -IsAllowed$false
Configure user subscriptions
Use the User Subscriptions task to do select one of the following options:
• Require users to subscribe to applications before using them (Self Service Store).• Enable users to receive all applications when they connect to the store (Mandatory Store).
Disablinguser subscriptions for a storewithin StoreFront alsoprevents thedisplay of the Favorites tabto users in Citrix Workspace app. Disabling subscriptions does not delete the Store subscription data.Re-enabling subscriptions for the store will allow the user to see their subscribed apps in Favoriteswhenever they next log on.
1. On the Windows Start screen or Apps screen, locate and click the Citrix StoreFront tile.2. Select the Stores node in the left pane of the Citrix StoreFront management console and, in
the results pane, select a store. In the Actions pane, click Configure Store Settings > UserSubscriptions to toggle the user subscriptions feature off or on.
© 1999‒2022 Citrix Systems, Inc. All rights reserved. 193

StoreFront 2203
3. Choose Enable user subscriptions (Self Service Store) to make users subscribe to the appli-cations to use them. Any previously specified subscriptions are still available.
4. Choose Disable user subscriptions (Mandatory Store) to make all applications published tothe users available on the Home screen without users subscribing to them. Their subscriptionsare not deleted and they can recover them if you re-enable the feature.
In StoreFront 3.5 or later, you can use the following PowerShell script to configure user subscriptionsfor a store:
1 $StoreObject = Get-STFStoreService -SiteID 1 -VirtualPath ”/citrix/<yourstore>”
2 Set-STFStoreService -StoreService $StoreObject -LockedDown $True -Confirm:$False
For more information on Get-STFStoreService, see https://developer-docs.citrix.com/projects/storefront-powershell-sdk/en/latest/Get-STFStoreService/
© 1999‒2022 Citrix Systems, Inc. All rights reserved. 194

StoreFront 2203
Configure StoreFront to launch applications and desktops in WindowedMode
May 2, 2019
Launching the applications seamlessly depends on availability of StoreFront in deployment. If youdisable the seamless option for applications and desktops, consider launching your resources in Win-dowed Mode instead.
The following is an example of a published Notepad. Use the name of the published application ex-actly as shown in the application set of the Citrix Virtual Apps and Desktops console.
Note:
Most of the settings in ICA files are not case sensitive except for the DesiredHRES andDesiredVRES settings. When applying the windowed app version, use the browser name toreference the app in the default.ica file on the StoreFront server. Verify the browser name of theapplication by using PowerShell on Delivery Controller:
>>asnp citrix*
>>Get-BrokerApplication -ApplicationName
To configure StoreFront
1. Edit the default.ica file on the StoreFront server in the \inetpub\wwwroot\Citrix\StoreName\App_Data directory.
2. In the default.ica file, locate the lines: [ApplicationServers] application= .
3. Create a line after application=, and add the following parameters:
1 [Notepad]2 TWIMode=Off3 DesiredHRES=10244 DesiredVRES=7685 <!--NeedCopy-->
4. Save the file.
For published desktops from Citrix Virtual Apps and Desktops 7.x and StoreFront 3.x
1. Edit the web.config file on the StoreFront server in the C:\inetpub\wwwroot\Citrix\storeWeb directory.
2. In the web.config file, locate the following line: showDesktopViewer=''true''.
© 1999‒2022 Citrix Systems, Inc. All rights reserved. 195

StoreFront 2203
3. Modify the value from True to False.
4. On the Client side or from AD-GPMC, use the administrative template file (receiver.adm orreceiver.admx\receiver.adml, depending on the Operating system) to configure the fol-lowing policy:
• Computer configuration > Citrix Components > Citrix Receiver > User Experience >Client Display Settings: Enable
• Seamless windows: False• Windowwidth: <As per requirement>, Window height: <As per requirement>
Notes
DeisredHRES and DesiredVRES can be set to any desired resolution, such as 800x600 or 1024x768.
If the application needs to run in a percent of screen size, then after setting TWIMode=Off, add theline ScreenPercent=90 which configures the screen to 90 percent. You can also accomplish thiswith the XenApp Services site. Ensure that the corresponding file under the conf folder for that site(Inetpub\wwwroot\Citrix\PNAgent\conf) is edited.
If you are using the 10.x client and editing the default.ica or template.ica file, add only theTWIMode=Off line. It obtains the HRES and VRES settings from the published application properties.Otherwise, an error appears indicating duplicate entries in the ICA file when a user tries to launch theapplication.
Set up highly available multi-site stores
July 8, 2020
Important:
In multiple server deployments, use only one server at a time tomake changes to the configura-tion of the server group. Ensure that the Citrix StoreFront management console is not runningon any of the other servers in the deployment. Once complete, propagate your configurationchanges to the server group so that the other servers in the deployment are updated.
For stores that aggregate resources frommultiple deployments, particularly geographically disperseddeployments, you can configure load balancing and failover between deployments,mapping of usersto deployments, and specific disaster recovery deployments to provide highly available resources.Where you have configured separate Citrix Gateway appliances for your deployments, you can definethe optimal appliance for users to access each of the deployments.
© 1999‒2022 Citrix Systems, Inc. All rights reserved. 196

StoreFront 2203
Configure user mapping and aggregation
The StoreFront management console enables you to:
• Mapusers to deployments: Based on Active Directory groupmembership, you can limit whichusers have access to particular deployments.
• Aggregate deployments: You can specify which deployments have resources that you wantto aggregate. Matching resources from aggregated deployments are presented to the user as asingle highly-available resource.
• Associate a zone with a deployment: When accessed with Citrix Gateway in a global load-balancing configuration, StoreFront prioritizes deployments from zones matching the gatewayzone when launching resources.
1. Ensure that you have configured the storewith details of all the Citrix Virtual Apps andDesktopsdeployments that you want to use in your configuration. For more information about addingdeployments to stores, see Manage the resources made available in stores.
2. On the Windows Start screen or Apps screen, locate and click the Citrix StoreFront tile.
3. Select the Stores node in the left pane of the Citrix StoreFront management console and clickManage Delivery Controllers in the Actions pane.
4. If two ormore controllers are defined, clickUserMapping andMulti-Site Aggregation Config-uration > Configure.
5. Click Map users to controllers and make selections on the screens to specify which DeliveryControllers are available to which users.
6. Click Aggregate resources to aggregate resources frommultiple deployments. When DeliveryControllers are aggregated, applications and desktops from Delivery Controllers with the samedisplay nameandpath are presented as a single application or desktop in CitrixWorkspace app.
a) To aggregate Delivery Controllers, select multiple controllers and click Aggregate.
b) Select Aggregated Controller Settings options:
Controllers publish identical resources - When selected, StoreFront enumeratesresources from only one of the controllers in the aggregated set. When not selected,StoreFront enumerates resources fromall controllers in the aggregated set (to accumulatethe user’s entire set of available resources). Selecting this option gives a performanceimprovement when enumerating resources, but we do not recommend it unless you arecertain that the list of resources is identical across all aggregated deployments.
Load balance resources across controllers - When selected, launches are distributedevenly among the available controllers. When not selected, launches are directed to thefirst controller specified in the usermapping dialog screen, failing over to subsequent con-trollers if the launch fails.
© 1999‒2022 Citrix Systems, Inc. All rights reserved. 197

StoreFront 2203
7. In the User Mapping and Multi-Site Aggregation Configuration dialog, clickOK.
8. In the Manage Delivery Controllers dialog, clickOK.
Advanced configurations
You can configuremany commonmulti-site and high availability operations with the StoreFrontman-agement console. You can also configure StoreFront using PowerShell or by editing the StoreFrontconfiguration files, which provides the following extra functionality:
• Ability to specify multiple groupings of deployments for aggregation.– Themanagementconsoleallowsonlya singlegroupingofdeployments,which is sufficientfor most cases.
– For stores with many deployments with disjointed sets of resources, multiple groupingsmight give performance improvements.
• Ability to specify complex preference orders for aggregated deployments. The managementconsole allows aggregated deployments to be load balanced or to be used as a single failoverlist.
• Ability to define disaster recovery deployments (deployments accessed only when all other de-ployments are unavailable).
Warning:
After configuring advanced multi-site options by manually editing the configuration file, sometasks become unavailable in the Citrix StoreFront management console to prevent misconfigu-ration.
1. Ensure that you have configured the storewith details of all the Citrix Virtual Apps andDesktopsdeployments that you want to use in your configuration, including disaster recovery deploy-ments. For more information about adding deployments to stores, see Manage the resourcesmade available in stores.
2. Use a text editor to open the web.config file for the store, which is typically located in the di-rectory C:\inetpub\wwwroot\Citrix\storename\, where storename is the name specified for thestore when it was created.
3. Locate the following section in the file.
1 <resourcesWingConfigurations>2 <resourcesWingConfiguration name=”Default” wingName=”Default” />3 </resourcesWingConfigurations>4 <!--NeedCopy-->
© 1999‒2022 Citrix Systems, Inc. All rights reserved. 198

StoreFront 2203
4. Specify your configuration as shown below.
1 <resourcesWingConfigurations>2 <resourcesWingConfiguration name=”Default” wingName=”Default”>3 <userFarmMappings>4 <clear />5 <userFarmMapping name=”user_mapping”>6 <groups>7 <group name=”domain\usergroup” sid=”securityidentifier” />8 <group ... />9 ...10 </groups>11 <equivalentFarmSets>12 <equivalentFarmSet name=”setname” loadBalanceMode=”{13 LoadBalanced | Failover }14 ”15 aggregationGroup=”aggregationgroupname”>16 <primaryFarmRefs>17 <farm name=”primaryfarmname” />18 <farm ... />19 ...20 </primaryFarmRefs>21 <backupFarmRefs>22 <farm name=”backupfarmname” />23 <farm ... />24 ...25 </backupFarmRefs>26 </equivalentFarmSet>27 <equivalentFarmSet ... >28 ...29 </equivalentFarmSet>30 </equivalentFarmSets>31 </userFarmMapping>32 <userFarmMapping>33 ...34 </userFarmMapping>35 </userFarmMappings>36 </resourcesWingConfiguration>37 </resourcesWingConfigurations>38 <!--NeedCopy-->
Use the following elements to define your configuration.
• userFarmMapping—Specifies groups of deployments and defines the load balancing and
© 1999‒2022 Citrix Systems, Inc. All rights reserved. 199

StoreFront 2203
failover behavior between those deployments. Identifies deployments to be used for disasterrecovery. Controls user access to resources by mapping Microsoft Active Directory user groupsto the specified groups of deployments.
• groups—Specifies the names and security identifiers (SIDs) of Active Directory user groups towhich the associated mapping applies. User group names must be entered in the format do-main\usergroup. Wheremore than one group is listed, themapping is only applied to userswhoaremembers of all the specified groups. To enable access for all Active Directory user accounts,set the group name & sid to everyone.
• equivalentFarmSet—Specifies a group of equivalent deployments providing resources to beaggregated for loadbalancing or failover, plus an optional associated groupof disaster recoverydeployments.
The loadBalanceMode attribute determines the allocation of users to deployments. Set thevalue of the loadBalanceMode attribute to LoadBalanced to randomly assign users to deploy-ments in the equivalent deployment set, evenly distributing users across all the available de-ployments. When the value of the loadBalanceMode attribute is set to Failover, users are con-nected to the first available deployment in the order in which they are listed in the configura-tion, minimizing the number of deployments in use at any given time. Specify names for ag-gregation groups to identify equivalent deployment sets providing resources to be aggregated.Resources provided by equivalent deployment sets belonging to the same aggregation groupare aggregated. To specify that the deployments defined in a particular equivalent deploymentset should not be aggregated with others, set the aggregation group name to the empty string”“.
The identical attribute accepts the values true and false, and specifies whether all deploy-mentswithin anequivalent deployment set provide exactly the sameset of resources. When thedeployments are identical, StoreFront enumerates the user’s resources from just one primarydeployment in the set. When the deployments provide overlapping but not identical resources,StoreFront enumerates from each deployment to obtain the full set of resources available toa user. Load balancing (at launch time) can take place whether or not the deployments areidentical. The default value for the identical attribute is false, although it is set to true whenStoreFront is upgraded to avoid altering the pre-existing behavior following an upgrade.
• primaryFarmRefs—Specifies a set of equivalent Citrix Virtual Apps and Desktops sites wheresome or all of the resources match. Enter the names of deployments that you have alreadyadded to the store. The names of the deployments you specify must match exactly the namesyou entered when you added the deployments to the store.
• optimalGatewayForFarms—Specifies groups of deployments and defines the optimal CitrixGateway appliances for users to access resources provided by these deployments. Typically,the optimal appliance for a deployment is colocated in the same geographical location as that
© 1999‒2022 Citrix Systems, Inc. All rights reserved. 200

StoreFront 2203
deployment. You only need to define optimal Citrix Gateway appliances for deploymentswherethe appliance through which users access StoreFront is not the optimal appliance.
Configure subscription synchronization
To configure periodic pull synchronization of users’ subscriptions from stores in different StoreFrontdeployments, you execute Windows PowerShell commands.
Note:
The StoreFront and PowerShell consoles cannot be open at the same time. Always close theStoreFront admin console before using the PowerShell console to administer your StoreFrontconfiguration. Likewise, closeall instancesofPowerShell beforeopening theStoreFront console.
When establishing your subscription synchronization, note that the configured Delivery Controllersmust be named identically between the synchronized Stores and that the Delivery Controller namesare case sensitive. Failing to duplicate the Delivery Controller names exactly may lead to users hav-ing different subscriptions across the synchronized Stores. If you synchronizing subscriptions fromaggregated resources, the name of the aggregation groups used by both Stores must also match. De-livery Controller names and Aggregation Group names are case sensitive; for example, XenDesktop7is different to Xendesktop7.
1. Use an account with local administrator permissions to start the Windows PowerShell ISE.
2. To configure synchronization to occur at a particular time every day, run the following com-mand.
1 $RepeatMinutes = 302 Add-STFSubscriptionSynchronizationSchedule -StartTime (Get-Date -
Format t) -RepeatMinutes $RepeatMinutes34 <!--NeedCopy-->
Use -StartTime to specify when the synchronization schedule starts. Using (Get-Date -Formatt) starts the synchronization schedule immediately, whereas specifying 10:00 starts the repeat-ing schedule at the specified time.
-RepeatMinutes sets the frequency the schedule will run at. For example, 30 runs the scheduleevery half hour, and 180 runs the schedule every 3 hrs. We recommend that you stagger pullschedules to avoid two server groups attempting to pull subscription data from each other atthe same time. For example, a schedule to pull data from each server group every 60 minswould be configured as follows. Server group 1 pulls data from server group 2 at 01:00, 02:00,03:00 and so on. Server group 2 pulls data from server group 1 at 01:30, 02:30, 03:30 and so on.
© 1999‒2022 Citrix Systems, Inc. All rights reserved. 201

StoreFront 2203
3. To specify the remote StoreFront deployment containing the store to be synchronized, type thefollowing command. You must configure this for each data center where a StoreFront servergroup resides so it can pull subscription data from other remote datacenters. See the followingUS and UK datacenter examples:
• Run on US data center StoreFront servers to pull data from the UK datacenter servers:
1 $StoreObject = Get-STFStoreService -SiteID 1 -VirtualPath ”/Citrix/Store”
2 Add-STFSubscriptionSynchronizationSource -FriendlyName ”SyncFromUKStore” -StoreService $StoreObject -RemoteStoreFrontAddress ”UKloadbalancedStoreFront.example.com”
3 <!--NeedCopy-->
• Run on UK data center StoreFront servers to pull data from the US datacenter servers:
1 $StoreObject = Get-STFStoreService -SiteID 1 -VirtualPath ”/Citrix/Store”
2 Add-STFSubscriptionSynchronizationSource -FriendlyName ”SyncFromUSStore” -StoreService $StoreObject -RemoteStoreFrontAddress ”USloadbalancedStoreFront.example.com”
3 <!--NeedCopy-->
where FriendlyName is a name that helps you identify the remote deployment andRemoteStore-FrontAddress is the FQDN of the StoreFront server or load-balanced server group for the remotedeployment. To synchronize application subscriptions between two or more stores, all storeswhich are to be synchonised must have the same name in their respective StoreFront deploy-ments.
4. Add the Microsoft Active Directory domain machine accounts for each StoreFront server in theremote deployment to the local Windows user group CitrixSubscriptionSyncUsers on the cur-rent server.
This allows the current servers to pull new or updated subscription data from the re-mote servers listed in in CitrixSubscriptionSyncUsers once you have configured a syn-chronization schedule. For more information about modifying local user groups, seehttps://docs.microsoft.com/en-us/previous-versions/windows/it-pro/windows-server-2008-R2-and-2008/cc772524(v=ws.11).
© 1999‒2022 Citrix Systems, Inc. All rights reserved. 202

StoreFront 2203
5. When you have configured the schedule as you intend, use the Citrix StoreFront managementconsole, or the Powershell below, to propagate the subscription synchronization schedules andsources to the all other servers in the group.
1 Publish-STFServerGroupConfiguration2 <!--NeedCopy-->
For more information about propagating changes in a multiple server StoreFront deployment,see Configure server groups.
6. To removeanexisting subscription synchronization schedule, run the following command, thenpropagate the configuration change to the other StoreFront servers in the deployment.
1 Clear-STFSubscriptionSynchronizationSchedule2 <!--NeedCopy-->
7. To remove a specific subscription synchronization source, run the following command, thenpropagate the configuration change to the other StoreFront servers in the deployment.
1 Remove-STFSubscriptionSynchronizationSource -FriendlyName ”SyncFromUKStore”
2 <!--NeedCopy-->
© 1999‒2022 Citrix Systems, Inc. All rights reserved. 203

StoreFront 2203
8. To remove all existing subscription synchronization sources, run the following command, thenpropagate the configuration change to the other StoreFront servers in the deployment.
1 Clear-STFSubscriptionSynchronizationSource2 <!--NeedCopy-->
9. To list the subscription synchronization schedules currently configured for your StoreFront de-ployment, run the following command.
1 Get-STFSubscriptionSynchronizationSchedule2 <!--NeedCopy-->
10. To list the subscription synchronization sources currently configured for yourStoreFrontdeploy-ment, run following command.
1 Get-STFSubscriptionSynchronizationSource2 <!--NeedCopy-->
Configure optimal HDX routing for a store
The difference between a farm and a zone when defining optimal gatewaymappings for a store
In StoreFront versions released before 3.5, you couldmap an optimal gateway only to a farmor farms.The concept of zones enables you to divide a Citrix Virtual Apps and Desktops deployment into zonesbasedon thedata center or geographic locationwhere theCitrix Virtual AppsandDesktops controllersand published resources reside. Define zones in Citrix Virtual Apps and Desktops Studio. StoreFrontinteroperateswith Citrix Virtual Apps andDesktops, and any zones defined in StoreFrontmust exactlymatch the zone names defined in Citrix Virtual Apps and Desktops.
StoreFront also allows you to create an optimal gateway mapping for all of the Delivery Controllerslocated in the defined zone. Mapping a zone to an optimal gateway is almost identical to creatingmappings using farms, with which you might already be familiar. The only difference is that zonestypically represent much larger containers with many more Delivery Controllers. You do not need toadd every Delivery Controller to an optimal gateway mapping. To place the controllers into the de-sired zone, you need only tag each Delivery Controller with a zone name that matches a zone alreadydefined in Citrix Virtual Apps and Desktops. You canmap an optimal gateway tomore than one zone,but typically you should use a single zone. A zone usually represents a data center in a geographic
© 1999‒2022 Citrix Systems, Inc. All rights reserved. 204

StoreFront 2203
location. It is expected that each zone has at least one optimal Citrix Gateway that is used for HDXconnections to resources within that zone.
For more information about zones, see Zones.
Place a Delivery Controller into a zone
Set the zone attribute on every Delivery Controller you wish to place within a Zone.
1. On the Windows Start screen or Apps screen, locate and click the Citrix StoreFront tile.2. Select the Stores node in the left pane of the Citrix StoreFront management console and click
Manage Delivery Controllers in the Actions pane.3. Select a controller, click Edit, and then click Settings on the Edit Delivery Controller screen.4. On the Zones row, click in the second column.5. Click Add on the Delivery Controller Zone Names screen and then add a zone name.
Configure optimal Citrix Gateway routing to optimize the handling of ICA connection routing fromthe HDX engine to published resources such as XenDesktop VDAs or Citrix Virtual Apps and Desktopspublished applications using StoreFront. Typically, the optimal gateway for a site is colocated in thesame geographical location.
YouneedonlydefineoptimalCitrixGatewayappliances for deploymentswhere theappliance throughwhichusers accessStoreFront is not theoptimal gateway. If launches shouldbedirectedback throughthe gatewaymaking the launch request, StoreFront does this automatically.
© 1999‒2022 Citrix Systems, Inc. All rights reserved. 205

StoreFront 2203
Example scenario using farms
1 x UK Gateway -> 1 x UK StoreFront
• UK Apps and Desktops local• US Apps and Desktops used only for UK failover
1 x US Gateway -> 1 x US StoreFront
• US Apps and Desktops local• UK Apps and Desktops used only for US failover
A UK gateway provides remote access to UK hosted resources such as apps and desktops using a UKStoreFront.
The UK StoreFront has both a UK-based and US-based Citrix Gateway defined and UK and US con-trollers in its Delivery Controller list. UK users access remote resources through their geographicallycolocated gateway, StoreFront, and farms. If their UK resources become unavailable, they can con-nect to US resources as a temporary failover alternative.
Without optimal gateway routing all ICA launches would pass through the UK gateway that made thelaunch request regardless of where the resources are geographically located. By default, gatewaysused to make launch requests are identified dynamically by StoreFront when the request is made.Optimal gateway routing overrides this and forces US connections through the gateway closest to theUS farms that provides apps and desktops.
Note:
You canmap only one optimal gateway per site for each StoreFront store.
Example scenario using zones
1 x CAMZone -> 2 x UK StoreFronts
• Cambridge, UK: Apps and Desktops• Fort Lauderdale, Eastern US: Apps and Desktops• Bangalore, India: Apps and Desktops
1 x FTLZone -> 2 x US StoreFronts
• Fort Lauderdale, Eastern US: Apps and Desktops• Cambridge, UK: Apps and Desktops• Bangalore, India: Apps and Desktops
1 x BGLZone -> 2 x IN StoreFronts
• Bangalore, India: Apps and Desktops• Cambridge, UK: Apps and Desktops• Fort Lauderdale, Eastern US: Apps and Desktops
© 1999‒2022 Citrix Systems, Inc. All rights reserved. 206

StoreFront 2203
Figure 1. Suboptimal gateway routing
Figure 2. Optimal gateway routing
© 1999‒2022 Citrix Systems, Inc. All rights reserved. 207

StoreFront 2203
Use the Citrix StoreFront management console
After you have configured separate Citrix Gateway appliances for your deployments, you can definethe optimal appliance for users to access each of the deployments.
1. On the Windows Start screen or Apps screen, locate and click the Citrix StoreFront tile.2. Select the Stores node in the left pane of the Citrix StoreFrontmanagement console and, in the
results pane, select a store. In the Actions pane, click Configure Store Settings.3. On the Settings >Optimal HDX Routing page, select a gateway.4. If you select the External Only check box, it is equivalent to -enabledOnDirectAccess = false
and Direct HDX Connection is equivalent to using Set-DSFarmsWithNullOptimalGateway forfarms or zones.
Add a new gateway
One of the options in the previous procedure is to Add gateway. After you choose Add gateway, theAdd Citrix Gateway screen displays.
1. On the General Settings screen, complete the Display name, Citrix Gateway URL, and Usageor Role settings to configure access to stores through Citrix Gateway for users connecting frompublicnetworks. Remoteaccess throughaCitrixGatewaycannotbeapplied tounauthenticatedstores.
2. On the Secure Ticket Authority (STA) screen, complete the options displayed. STA is hostedon Citrix Virtual Apps andDesktops servers and issues session tickets in response to connectionrequests. These session tickets form the basis of authentication and authorization for access toCitrix Virtual Apps and Desktops resources.
3. On the Authentication Settings screen, enter the settings that specify how the remote userprovides authentication credentials.
© 1999‒2022 Citrix Systems, Inc. All rights reserved. 208

StoreFront 2203
Use PowerShell to configure optimal Citrix Gateway routing for a store
PowerShell API parameters
-SiteId (Int)—Site ID within IIS. This is typically 1 for the site in IIS where StoreFront is installed bydefault.
-ResourcesVirtualPath (String)—Path to the store that is to be configured to have a farm to optimalgatewaymapping.
Example: “/Citrix/Store”
-GatewayName (String)—Name given to identify the Citrix Gateway within StoreFront.
Example 1: ExternalGateway
Example 2: InternalGateway
-Hostnames (String Array)—Specifies the fully qualified domain name (FQDN) and port of the opti-mal Citrix Gateway appliance.
Example1 for standard vServer port 443: gateway.example.com
Example2 for nonstandard vServer port 500: gateway.example.com:500
-Farms (String Array)—Specifies a set of (typically colocated) Citrix Virtual Apps and Desktops de-ployments that share a common optimal Citrix Gateway appliance. A farm can contain one or moreDelivery Controllers that provide published resources.
You can configure a Citrix Virtual Desktops Site in StoreFront under Delivery Controllers as “XenDesk-top”. This represents a single farm. This could contain multiple Delivery Controllers in its failover list.
Example: “XenDesktop”
XenDesktop-A.example.com
XenDesktop-B.example.com
XenDesktop-C.example.com
-Zones (String Array)—Specifies a data center or data centers containing many Delivery Controllers.This requires you tag Delivery Controller objects in StoreFrontwith the appropriate zone towhich youwant to allocate them.
-staUrls (String Array)—Specifies the URLs for Citrix Virtual Apps and Desktops servers running theSecure Ticket Authority (STA). If using multiple farms, list the STA servers on each using a commaseparated list:
Example: http://xenapp-a.example.com/scripts/ctxsta.dll,http://xendesktop-a.example.com/scripts/ctxsta.dll
-StasUseLoadBalancing (Boolean)—Set to true: randomly obtains session tickets from all STAs,evenly distributing requests across all the STAs. Set to false: users are connected to the first available
© 1999‒2022 Citrix Systems, Inc. All rights reserved. 209

StoreFront 2203
STA in the order in which they are listed in the configuration, minimizing the number of STAs in useat any given time.
-StasBypassDuration—Set the time period, in hours, minutes, and seconds, for which an STA is con-sidered unavailable after a failed request.
Example: 02:00:00
-EnableSessionReliability (Boolean)—Set to true: keepsdisconnected sessions openwhile Receiverattempts to reconnect automatically. If you configuredmultiple STAs andwant to ensure that sessionreliability is always available, set the value of the useTwoTickets attribute to true to obtain sessiontickets from two different STAs in case one STA becomes unavailable during the session.
-UseTwoTickets (Boolean)—Set to true: obtains session tickets from two different STAs in case oneSTA becomes unavailable during the session. Set to false: uses only a single STA server.
-EnabledOnDirectAccess (Boolean)—Set to true: ensures that when local users on the internal net-work log on to StoreFront directly, connections to their resources are still routed through the optimalappliance defined for the farm. Set to false: connections to resources are not routed through theoptimal appliance for the farm unless users access StoreFront through a Citrix Gateway.
When PowerShell scripts span multiple lines such as shown below, each line must end with the back-tick (‘) character.
Tip:
Citrix recommends copying any code examples into the Windows PowerShell Integrated Script-ing Environment (ISE) to validate the Powershell code using the format checker before you runit.
Configure an optimal gateway for a farmNote:
ConfigurationofOptimalHDXroutingwith theoldPowerShell cmdletSet-DSOptimalGatewayForFarms,does not work.
To work around this issue:
1. Configure a global gateway with the settings you want for Optimal HDX routing using theAdd-DSGlobalV10Gateway command and provide default values for the authenticationsettings.
2. Use the Add-DSStoreOptimalGateway command to add the optimal gateway configura-tion.
Example:
Add-DSGlobalV10Gateway -Id 2eba0524-af40-421e-9c5f-a1ccca80715f -Name
© 1999‒2022 Citrix Systems, Inc. All rights reserved. 210

StoreFront 2203
LondonGateway -Address ”http://example”-Logon Domain -SecureTicketAuthorityUrls@(”http://staurl1”, ”http://staurl2”)
Add-DSStoreOptimalGateway -SiteId 1 -VirtualPath /Citrix/Store1 -GatewayId2eba0524-af40-421e-9c5f-a1ccca80715f -Farms @(”Controller”)-EnabledOnDirectAccess$true
Example
Create or overwrite Optimal Gateway For Farmsmappings for the store Internal.
1 & ”$Env:PROGRAMFILES\Citrix\Receiver StoreFront\Scripts\ImportModules.ps1”
23 Set-DSOptimalGatewayForFarms -SiteId 1 \`45 -ResourcesVirtualPath /Citrix/Internal \`6 \-GatewayName ”gateway1” \`7 \-Hostnames ”gateway1.example.com:500” \`8 \-Farms ”XenApp”,”XenDesktop” \`9 \-StaUrls ”https://xenapp.example.com/scripts/ctxsta.dll”,”https://
xendesktop.example.com/scripts/ctxsta.dll” \`10 \-StasUseLoadBalancing:$false \`11 \-StasBypassDuration 02:00:00 \`12 \-EnableSessionReliability:$false \`13 -UseTwoTickets:$false \`14 \-EnabledOnDirectAccess:$true15 <!--NeedCopy-->
Configure an optimal gateway for a zone
Example
Create or overwrite Optimal Gateway For Farmsmappings for the zone CAMZone.
1 **& ”$Env:PROGRAMFILES\Citrix\Receiver StoreFront\Scripts\ImportModules.ps1” **
23 **Set-DSOptimalGatewayForFarms -SiteId 1 \`**45 **-ResourcesVirtualPath /Citrix/Internal \`
© 1999‒2022 Citrix Systems, Inc. All rights reserved. 211

StoreFront 2203
6 \-GatewayName ”gateway1” \`7 \-Hostnames ”gateway1.example.com:500” \`8 \-Zones ”CAMZone” \`9 \-StaUrls ”https://xenapp.example.com/scripts/ctxsta.dll”,”https://
xendesktop.example.com/scripts/ctxsta.dll” \`10 \-StasUseLoadBalancing:$false \`11 \-StasBypassDuration 02:00:00 \`12 \-EnableSessionReliability:$false \`13 \-UseTwoTickets:$false \`14 \-EnabledOnDirectAccess:$true **15 <!--NeedCopy-->
Example
This script returns all Optimal Gateway For Farmsmappings for the store Internal.
Get-DSOptimalGatewayForFarms -SiteId 1 ‒ResourcesVirtualPath ”/Citrix/Internal”
Example
Remove all optimal gateway for farmsmappings for store called Internal.
Remove-DSOptimalGatewayForFarms -SiteId 1 -ResourcesVirtualPath ”/Citrix/Internal”Configure direct HDX connections for farms
Example
This script prevents all ICA launches from passing through a gateway for the list of specified farms forthe store called Internal.
Set-DSFarmsWithNullOptimalGateway -SiteId 1 -ResourcesVirtualPath /Citrix/Store -Farms ”Farm1”,”Farm2”
Example
This script returns all farms that are configured to prevent ICA launches from passing through a gate-way for a store called Internal.
Get-DSFarmsWithNullOptimalGateway -SiteId 1 -ResourcesVirtualPath ”/Citrix/Internal”
© 1999‒2022 Citrix Systems, Inc. All rights reserved. 212

StoreFront 2203
Determine if your Optimal Gateway For Farmsmappings are being used by StoreFront
1. Enable StoreFront tracing on all server group nodes using PowerShell by running:
1 & ”$Env:PROGRAMFILES\Citrix\Receiver StoreFront\Scripts\ImportModules.ps1”`
23 \#Traces output is to c:\Program Files\Citrix\Receiver Storefront\
admin\trace\4 Set-DSTraceLevel -All -TraceLevel Verbose5 <!--NeedCopy-->
2. Open the Debug View tool on the desktop of a StoreFront server. If you are using a storefrontserver group, youmight have to do this on all nodes to ensure you obtain traces from the nodethat receives the launch request.
3. Enable Capture Global Win32 events.
4. Save the trace output as a .log file and open the file with Notepad. Search for the log entriesshown in the example scenarios below.
5. Turn tracing off afterwards, as it consumes a lot of disk space on your StoreFront servers.
Set-DSTraceLevel -All -TraceLevel Off
Tested optimal gateway scenarios
1 - External client logs on **Gateway1**. Launch is directed through thedesignated optimal gateway **Gateway2** for the farm **Farm2**.
23 `Set-DSOptimalGatewayForFarms -onDirectAccess=false`45 Farm2 is configured to use the optimal gateway Gateway2.
© 1999‒2022 Citrix Systems, Inc. All rights reserved. 213

StoreFront 2203
67 Farm2 has optimal gateway on direct access disabled.89 The optimal gateway Gateway2 will be used for the launch.1011 - Internal client logs on using StoreFront. Launch is directed through
the designated optimal gatewayGateway1 for the farm Farm1.1213 `Set-DSOptimalGatewayForFarms -onDirectAccess=true`1415 No dynamically identified gateway in request. StoreFront was
contacted directly.1617 Farm1 is configured to use the optimal gateway Gateway1.1819 Farm1 has optimal gateway on direct access enabled.2021 The optimal gateway Gateway1 will be used for the launch.2223 - Internal client logs on using Gateway1. Launches of resources on
Farm1 are prevented from passing through any gateway and StoreFrontis contacted directly.
2425 `Set-DSFarmsWithNullOptimalGateway`2627 Dynamically identified gateway in request: Gateway12829 Farm1 is configured to not use a gateway. No gateway will be used
for launch.
Integrate with Citrix Gateway and Citrix ADC
December 18, 2019
Use Citrix Gateway with StoreFront to provide secure remote access for users outside the corporatenetwork and Citrix ADC to provide load balancing.
Plan gateway and server certificate usage
Integrating StoreFront with Citrix Gateway and Citrix ADC requires a plan for gateway and server cer-tificate usage. Consider which Citrix components are going to require server certificate(s) within yourdeployment:
© 1999‒2022 Citrix Systems, Inc. All rights reserved. 214

StoreFront 2203
• Plan to obtain certificates for Internet-facing servers and gateways from external certificate au-thorities. Client devicesmaynot automatically trust certificates signedby an internal certificateauthority.
• Plan for both external and internal server names. Many organizations have separate names-paces for internal and external use—such as example.com (external) and example.net (inter-nal). A single certificate can containbothof these kindsof namebyusing theSubject AlternativeName (SAN) extension. This is not normally recommended. A public certificate authority willonly issue a certificate if the top-level domain (TLD) is registered with IANA. In this case, somecommonly used internal server names (such as example.local) cannot be used, and separatecertificates for external and internal names are required anyway.
• Use separate certificates for external and internal servers, where possible. A gateway may sup-port multiple certificates, either by binding a different certificate to each interface.
• Avoid sharing certificates between Internet-facing and non-Internet-facing servers. These cer-tificates are likely to be different—with different validity periods and different revocation poli-cies than certificates issued by your internal certificate authorities.
• Share “wildcard” certificates only between equivalent services. Avoid sharing a certificate be-tween different types of server (for example StoreFront servers, and other kinds of servers).Avoid sharing a certificate between servers which are under different administrative control, orwhich have different security policies. Typical examples of servers which provided equivalentservice are:
– A group of StoreFront servers and the server that performs load balancing between them.– A group of Internet-facing gateways within GSLB.– A group of Citrix Virtual Apps and Desktops controllers, which provide equivalentresources.
• Plan for hardware-secured private key storage. Gateways and servers, including some CitrixADC models, can store the private key securely within a hardware security module (HSM) orTrusted Platform Module (TPM). For security reasons, these configurations are not usually in-tended to support sharing of certificates and their private keys, Consult the documentationfor the component. If implementing GSLB with Citrix Gateway, this may require each gatewaywithin GSLB to have an identical certificate, which contains all the FQDNs you wish to use.
Formore information about securing your Citrix deployment, see thewhite paper End-To-End Encryp-tion with Citrix Virtual Apps and Desktops and the Citrix Virtual Apps and Desktops Secure section.
Configure StoreFront Log Onwhen authentication is disabled on Citrix Gateway VIP
Log on to StoreFront when authentication is disabled on Citrix Gateway VIP. This procedure works intwo scenarios:Internal networks. App launch fails from remote locations because STAs cannot be used when au-thentication is disabled on the Citrix Gateway if the X-Citrix-Gateway header is getting passed to Store-
© 1999‒2022 Citrix Systems, Inc. All rights reserved. 215

StoreFront 2203
Front.Citrix Receiver for Web. Receiver clients do not authenticate if authentication is not enabled at theCitrix Gateway VIP.
Changes on the StoreFront Server
1. Disable the Require Token Consistency field:
• StoreFront 3.0a) Edit the web.config file for the store website. For example, if a StoreFront store
name is NoAuth, the web.config file in the StoreFront server has the path inet-pub\wwwroot\Citrix\NoAuth.
a) Locate the following line in the web.config file and change the value from True to False.Before<resourcesGateways requireTokenConsistency=”true”>After<resourcesGateways requireTokenConsistency=”false”>
Note:
On StoreFront 3.x, Require Token Consistency is a checkbox in the GUI. For moreinformation, see Advanced store settings.
b) Save the web.config file and then restart the IIS service.
2. Open the Citrix StoreFront Management console.
3. ClickManage Receiver for Web Sites for the web.
4. Select the corresponding Citrix Receiver for Web site, click Configure and then select Authen-tication Methods.
5. Ensure that the Pass-through from Citrix Gateway option is cleared.
Note:
Citrix Gateway and Enable Remote Access are assumed to be set up on the StoreFront server.
Changes on the Citrix Gateway
1. Open the Citrix Gateway virtual server.
2. Click the Authentication tab and ensure that Enable Authentication check-box is cleared.
3. Bind the corresponding session policy to the Citrix Gateway virtual server.
4. Test the connection.
© 1999‒2022 Citrix Systems, Inc. All rights reserved. 216

StoreFront 2203
Add a Citrix Gateway connection
July 1, 2019
Use the Add Citrix Gateway Appliance task to add Citrix Gateway deployments through which userscanaccess your stores. Youmust enable thepass-through fromCitrix Gatewayauthenticationmethodbefore you can configure remote access to your stores through Citrix Gateway. For more informationabout configuring Citrix Gateway for StoreFront, see Using WebFront to Integrate with StoreFront.
Important:
In multiple server deployments, use only one server at a time tomake changes to the configura-tion of the server group. Ensure that the Citrix StoreFront management console is not runningon any of the other servers in the deployment. Once complete,propagate your configuration changes to the server group so that the other servers in the deploy-ment are updated.
1. On the Windows Start screen or Apps screen, locate and click the Citrix StoreFront tile.
2. Select the Stores node in the left pane of the Citrix StoreFront management console and in theActions pane, clickManage Citrix Gateways.
3. Click Add and General Settings, specify aDisplay name for the Citrix Gateway deployment thatwill help users to identify it.
Users see the display name you specify in Citrix Receiver, so include relevant information in thename to help users decide whether to use that deployment. For example, you can include thegeographical location in the display names for your Citrix Gateway deployments so that userscan easily identify the most convenient deployment for their location.
4. Enter the URL of the virtual server or user logon point (for Access Gateway 5.0) for your deploy-ment. Specify the product version used in your deployment.
The fully qualified domain name (FQDN) for your StoreFront deployment must be unique anddifferent from the Citrix Gateway virtual server FQDN. Using the same FQDN for StoreFront andthe Citrix Gateway virtual server is not supported.
5. If you are adding an Access Gateway 5.0 deployment, continue to Step 7. Otherwise, specify thesubnet IP address of the Citrix Gateway appliance, if necessary. A subnet IP address is requiredfor Access Gateway 9.3 appliances, but optional for more recent product versions.
The subnet address is the IP address that Citrix Gateway uses to represent the user devicewhencommunicatingwith servers on the internal network. This can alsobe themapped IP address ofthe Citrix Gateway appliance. Where specified, StoreFront uses the subnet IP address to verifythat incoming requests originate from a trusted device.
© 1999‒2022 Citrix Systems, Inc. All rights reserved. 217

StoreFront 2203
6. If you are adding an appliance running Citrix Gateway, select from the Logon type list the au-thentication method you configured on the appliance for Citrix Workspace app users.
The information you provide about the configuration of your Citrix Gateway appliance is addedto the provisioning file for the store. This enables Citrix Workspace app to send the appropriateconnection request when contacting the appliance for the first time.
• If users are required to enter their Microsoft Active Directory domain credentials, selectDomain.
• If users are required to enter a tokencode obtained from a security token, select Securitytoken.
• If users are required toenter both their domain credentials anda tokencodeobtained froma security token, select Domain and security token.
• If users are required to enter a one-time password sent by text message, select SMS au-thentication.
• If users are required to present a smart card and enter a PIN, select Smart card.
If you configure smart card authentication with a secondary authentication method to whichusers can fall back if they experience any issues with their smart cards, select the secondaryauthentication method from the Smart card fallback list. Continue to Step 8.
7. To add an Access Gateway 5.0 deployment, indicate whether the user logon point is hosted ona standalone appliance. If you are adding a cluster, click Next and continue to Step 9.
8. If you are configuring StoreFront for Citrix Gateway or a single Access Gateway 5.0 appliance,complete the Citrix Gateway authentication service URL in the Callback URL box. StoreFrontautomatically appends the standard portion of the URL. Click Next and continue to Step 11.
Enter the internally accessible URL of the appliance. StoreFront contacts the Citrix Gatewayauthentication service to verify that requests received from Citrix Gateway originate from thatappliance.
9. To configure StoreFront for an Access Gateway 5.0 cluster, list on the Appliances page the IPaddresses or FQDNs of the appliances in the cluster and click Next.
10. On the Enable Silent Authentication page, list URLs for the authentication service running onthe Access Controller servers. Add URLs for multiple servers to enable fault tolerance, listingthe servers in order of priority to set the failover sequence. Click Next.
StoreFront uses the authentication service to authenticate remote users so that they do notneed to re-enter their credentials when accessing stores.
11. For all deployments, if you are making resources provided by Citrix Virtual Apps and Desktopsavailable in the store, list on the Secure Ticket Authority (STA) pageURLs for servers running theSTA. Add URLs for multiple STAs to enable fault tolerance, listing the servers in order of priorityto set the failover sequence.
© 1999‒2022 Citrix Systems, Inc. All rights reserved. 218

StoreFront 2203
The STA is hosted on Citrix Virtual Apps and Desktops servers and issues session tickets in re-sponse to connection requests. These session tickets form the basis of authentication and au-thorization for access to Citrix Virtual Apps and Desktops resources.
12. If you want Citrix Virtual Apps and Desktops to keep disconnected sessions open while CitrixWorkspace app attempts to reconnect automatically, select the Enable session reliability checkbox. If you configured multiple STAs and want to ensure that session reliability is always avail-able, select the Request tickets from two STAs, where available check box.
When the Request tickets from two STAs, where available check box is selected, StoreFront ob-tains session tickets from two different STAs so that user sessions are not interrupted if one STAbecomes unavailable during the course of the session. If, for any reason, StoreFront is unableto contact two STAs, it falls back to using a single STA.
13. Click Create to add details of your Citrix Gateway deployment. Once the deployment has beenadded, click Finish.
Formore informationaboutupdating thedetails of yourdeployments, seeConfigureCitrixGate-way connection settings.
To provide access to stores through Citrix Gateway, one internal beacon point and at least two ex-ternal beacon points are required. Citrix Workspace app uses beacon points to determine whetherusers are connected to local or public networks and then selects the appropriate access method. Bydefault, StoreFront uses the server URL or load-balanced URL of your deployment as the internal bea-con point. The Citrixwebsite and the virtual server or user logonpoint (for Access Gateway 5.0) URL ofthe first Citrix Gateway deployment you add are used as external beacon points by default. For moreinformation about changing beacon points, see Configure beacon points.
To enable users to access your stores through Citrix Gateway, ensure that you configure remote useraccess for those stores.
Import a Citrix Gateway
July 1, 2019
Remote access settings configuredwithin the Citrix Gateway administration console have to be identi-cal to those configured in StoreFront. This article shows you how to import details of a Citrix Gatewayvirtual server so that Citrix Gateway and StoreFront are configured correctly to work together.
Requirements
• NetScaler 11.1.51.21 or later is required to export multiple gateway vServers to a ZIP file.
© 1999‒2022 Citrix Systems, Inc. All rights reserved. 219

StoreFront 2203
Note:
Citrix ADC appliances can only export gateway vServers created using the Citrix VirtualApps and Desktops wizard.
• It must be possible for DNS to resolve, and for StoreFront to contact, all STA (Secure Ticket Au-thority) serverURLs in theGatewayConfig.json filewithin theZIP file generatedby theCitrix ADCappliance.
• The GatewayConfig.json file within the ZIP file generated by the Citrix ADC appliance must con-tain the URL of an existing Citrix Receiver for Web site on the StoreFront server. Citrix ADC 11.1and later takes care of this by contacting the StoreFront server and enumerating all existingstores and Citrix Receiver for Web sites before generating the ZIP file for export.
• StoreFront must be able to resolve the callback URL in DNS to the gateway VPN vServer IP ad-dress for authentication using the imported gateway to succeed.
The callback URL and port combination you use is usually the same as the gateway URL andport combination, as long as StoreFront can resolve this URL.
or
The callbackURL and port combinationmay be different from the gatewayURL and port combi-nation if you use different external and internal DNS namespaces in your environment. If yourgateway is located in a DMZ and uses an <example.com>URL and StoreFront is on your privatecorporate network and uses an <example.local> URL you may use an <example.local>callback URL to point back to the gateway vServer in the DMZ.
Import a Citrix Gateway using the console
You can import one ormore Citrix Gateway virtual server configurations using the same import file. Ifyou havemultiple gateway virtual servers fromdifferent Citrix ADC appliances, youmust usemultipleimport files.
Important:
Citrix does not support manual editing of the configuration file exported from Citrix Gateway.
1. Select Stores in the left pane of the Citrix StoreFront management console, and in the Actionspane, clickManage Citrix Gateways.
2. On the Manage Citrix Gateways screen, click the imported from file link.
© 1999‒2022 Citrix Systems, Inc. All rights reserved. 220

StoreFront 2203
3. Browse to the Citrix Gateway virtual server configuration file.
4. A list of gateway vServers from the selected ZIP file is displayed. Select the gateway vServer youwant to import and click Import. If you are repeating an import of a vServer, the Import buttondisplays as Update. If you choose Update, you have the option later to overwrite or create anew gateway.
5. Review the Logon type for the selected gateway and specify a Callback URL if required. Thelogon type is the authentication method that you configured on the Citrix Gateway appliancefor Citrix Workspace app users. Some logon types require callback URLs (see table).
• Click Verify to check that the Callback URL is valid and reachable from the StoreFrontserver.
© 1999‒2022 Citrix Systems, Inc. All rights reserved. 221

StoreFront 2203
Logon type in console LogonType in JSON file Callback URL required
Domain Domain No
Domain and security token DomainAndRSA No
Security token RSA Yes
Smart card - no fallback SmartCard Yes
Smart card - domain SmartCardDomain Yes
Smart card - domain andsecurity token
SmartCardDomainAndRSA Yes
Smart card - security token SmartCardRSA Yes
Smart card - SMSauthentication
SmartCardSMS Yes
SMS authentication SMS Yes
If a callback URL is required, StoreFront will autofill Callback URL based on the gateway URLfound in the ZIP file. You can change this to any valid URL that points back to the correct CitrixGateway VIP. For GSLB gateways, unique callback URLs are required for each of the gatewaysyou import.
To use Smart Access, a Callback URL is required.
6. Click Next.
7. StoreFront contacts all the STA (Secure Ticket Authorities) server URLs listed in the ZIP file usingDNS, and validates that they are functional STA ticketing servers. The import will not continueif one or more of the STA URLs is invalid.
© 1999‒2022 Citrix Systems, Inc. All rights reserved. 222

StoreFront 2203
8. Click Next.
9. Review the details of the import. If a gateway with the same gateway URL and port combina-tion (GatewayURL:port) already exists, use the drop-down to select a gateway to overwrite it, orcreate a new gateway.
StoreFront uses the GatewayURL:port combination to determine whether a gateway you aretrying to import matches an existing gateway that you may wish to update. If a gateway has adifferent GatewayURL:port combination then StoreFront treats it as a new gateway. This tableof gateway settings shows which settings you can update.
Gateway Setting Can be updated
Gateway URL:Port Combination No
GSLB URL Yes
Netscaler Trust Certificate & Thumbprint Yes
Callback URL Yes
Receiver for Web Site URL Yes
Gateway Address/VIP Yes
STA URL and STA ID Yes
© 1999‒2022 Citrix Systems, Inc. All rights reserved. 223

StoreFront 2203
Gateway Setting Can be updated
All Logon Types Yes
10. Click Import. If the StoreFront server is part of a server group, amessage is displayed remindingyou to propagate the imported gateway settings to the other servers in the group.
11. Click Finish.
To import another vServer configuration, repeat the steps above.
Note:
The default gateway for a store is the gateway that Citrix Workspace apps try to connect throughunless they are configured to use a different gateway. If no gateways are configured for thestore, the first gateway imported from the ZIP file will become the default gateway used by CitrixWorkspace apps. Importing subsequent gateways does not change the default gateway alreadyset for the store.
Import multiple Citrix Gateways using PowerShell
Read-STFNetScalerConfiguration
• Copy the ZIP file to the desktop of the currently logged on StoreFront administrator.
• Read the contents of theCitrix Gateway virtual server configuration file ZIP file intomemory andlook at the three gateways it contains using their index values.
1 $ImportedGateways = Read-STFNetScalerConfiguration -path ”$env:USERPROFILE\desktop\GatewayConfig.zip”
2 <!--NeedCopy-->
View the three gateway objects in memory which were read in from the Netscaler ZIP importpackage using the Read-STFNetScalerConfiguration cmdlet.
1 $ImportedGateways.Document.Gateways[0]2 $ImportedGateways.Document.Gateways[1]3 $ImportedGateways.Document.Gateways[2]45 GatewayMode : CVPN6 CallbackUrl :7 GslbAddressUri : https://gslb.example.com/
© 1999‒2022 Citrix Systems, Inc. All rights reserved. 224

StoreFront 2203
8 AddressUri : https://emeagateway.example.com/9 Address : https://emeagateway.example.com:44310 GslbAddress : https://gslb.example.com:44311 VipAddress : 10.0.0.112 Stas : {13 STA298854503, STA909374257 }1415 StaLoadBalance : True16 CertificateThumbprints : {17 F549AFAA29EBF61E8709F2316B3981AD503AF387 }1819 GatewayAuthType : Domain20 GatewayEdition : Enterprise21 ReceiverForWebSites : {22 Citrix.StoreFront.Model.Roaming.NetScalerConfiguration.
ReceiverForWebSite }232425 GatewayMode : CVPN26 CallbackUrl :27 GslbAddressUri : https://gslb.example.com/28 AddressUri : https://emeagateway.example.com/29 Address : https://emeagateway.example.com:44430 GslbAddress : https://gslb.example.com:44331 VipAddress : 10.0.0.232 Stas : {33 STA298854503, STA909374257 }3435 StaLoadBalance : True36 CertificateThumbprints : {37 F549AFAA29EBF61E8709F2316B3981AD503AF387 }3839 GatewayAuthType : DomainAndRSA40 GatewayEdition : Enterprise41 ReceiverForWebSites : {42 Citrix.StoreFront.Model.Roaming.NetScalerConfiguration.
ReceiverForWebSite }434445 GatewayMode : CVPN46 CallbackUrl : https://emeagateway.example.com:44547 GslbAddressUri : https://gslb.example.com/48 AddressUri : https://emeagateway.example.com/49 Address : https://emeagateway.example.com:44550 GslbAddress : https://gslb.example.com:443
© 1999‒2022 Citrix Systems, Inc. All rights reserved. 225

StoreFront 2203
51 VipAddress : 10.0.0.252 Stas : {53 STA298854503, STA909374257 }5455 StaLoadBalance : True56 CertificateThumbprints : {57 F549AFAA29EBF61E8709F2316B3981AD503AF387 }5859 GatewayAuthType :SmartCard60 GatewayEdition : Enterprise61 ReceiverForWebSites : {62 Citrix.StoreFront.Model.Roaming.NetScalerConfiguration.
ReceiverForWebSite }6364 <!--NeedCopy-->
Import-STFNetScalerConfiguration without specifying a CallbackURL
Copy the ZIP file to the desktop of the currently logged in StoreFront administrator. Read in the CitrixGateway configuration ZIP import package into memory and look at the three gateways it containsusing their index values.
1 $ImportedGateways = Read-STFNetScalerConfiguration -path ”$env:USERPROFILE\desktop\GatewayConfig.zip”
2 <!--NeedCopy-->
Import three new gateways into StoreFront using the Import-STFNetScalerConfiguration cmdletand specifying the gateway indexes you require. Using the -Confirm:$False parameter prevents thePowershell GUI from prompting you to allow every gateway to be imported. Remove this if you wishto carefully import one gateway at a time.
1 ```2 Import-STFNetScalerConfiguration -Configuration $ImportedGateways -
GatewayIndex 0 -Confirm:$False3 Import-STFNetScalerConfiguration -Configuration $ImportedGateways -
GatewayIndex 1 -Confirm:$False4 Import-STFNetScalerConfiguration -Configuration $ImportedGateways -
GatewayIndex 2 -Confirm:$False5 <!--NeedCopy--> ```
© 1999‒2022 Citrix Systems, Inc. All rights reserved. 226

StoreFront 2203
Import-STFNetScalerConfiguration specifying your own CallbackURL
Import three new gateways into StoreFront using the Import-STFNetScalerConfiguration cmdletand specify a callback URL of your choice using the -callbackURL parameter.
1 $ImportedGateways = Read-STFNetScalerConfiguration -path ”$env:USERPROFILE\desktop\GatewayConfig.zip”
23 Import-STFNetScalerConfiguration -Configuration $ImportedGateways -
GatewayIndex 0 -CallbackUrl ”https://emeagatewaycb.example.com:443 -Confirm:$False
45 Import-STFNetScalerConfiguration -Configuration $ImportedGateways -
GatewayIndex 1 -CallbackUrl ”https://emeagatewaycb.example.com:444 -Confirm:$False
67 Import-STFNetScalerConfiguration -Configuration $ImportedGateways -
GatewayIndex 2 -CallbackUrl ”https://emeagatewaycb.example.com:445 -Confirm:$False
8 <!--NeedCopy-->
Import-STFNetScalerConfiguration override the authenticationmethod stored in the importfile and specify your own CallbackURL
Import three new gateways into StoreFront using the Import-STFNetScalerConfiguration cmdletand specify a callback URL of your choice using the -callbackURL parameter.
1 $ImportedGateways = Read-STFNetScalerConfiguration -path ”$env:USERPROFILE\desktop\GatewayConfig.zip”
23 Import-STFNetScalerConfiguration -Configuration $ImportedGateways -
GatewayIndex 0 -LogonType ”SmartCard” -CallbackUrl ”https://emeagatewaycb.example.com:443” -Confirm:$False
45 Import-STFNetScalerConfiguration -Configuration $ImportedGateways -
GatewayIndex 1 -LogonType ”SmartCard” -CallbackUrl ”https://emeagatewaycb.example.com:444” -Confirm:$False
67 Import-STFNetScalerConfiguration -Configuration $ImportedGateways -
GatewayIndex 2 -LogonType ”SmartCard” -CallbackUrl ”https://emeagatewaycb.example.com:445” -Confirm:$False
© 1999‒2022 Citrix Systems, Inc. All rights reserved. 227

StoreFront 2203
Configure Citrix Gateway connection settings
July 1, 2019
The tasks below enable you to update details of the Citrix Gateway deployments throughwhich usersaccess your stores. For more information about configuring Citrix Gateway for StoreFront, see UsingWebFront to Integrate with StoreFront.
If you make any changes to your Citrix Gateway deployments, ensure that users who access storesthrough these deployments update Citrix Workspace app with the modified connection information.Where a Citrix Receiver for Web site is configured for a store, users can obtain an updated CitrixWorkspace app provisioning file from the site. Otherwise, you can export a provisioning file for thestore andmake this file available to your users.
Important: Inmultiple server deployments, use only one server at a time tomake changes to the con-figuration of the server group. Ensure that the Citrix StoreFront management console is not runningon any of the other servers in the deployment. Once complete,propagate your configuration changes to the server group so that the other servers in the deploymentare updated.
Change general Citrix Gateway settings
Use the ChangeGeneral Settings task tomodify the Citrix Gateway deployment names shown to usersand to update StoreFront with changes to the virtual server or user logon point URL, and the deploy-ment mode of your Citrix Gateway infrastructure.
1. On the Windows Start screen or Apps screen, locate and click the Citrix StoreFront tile.
2. Select the Stores node in the left pane of the Citrix StoreFront management console and pane,click Manage Citrix Gateways.
3. Specify a name for the Citrix Gateway deployment that will help users to identify it.
Users see the display name you specify in CitrixWorkspace app, so include relevant informationin the name to help users decidewhether to use that deployment. For example, you can includethe geographical location in the display names for your Citrix Gateway deployments so thatusers can easily identify the most convenient deployment for their location.
4. Enter the URL of the virtual server or user logon point (for Access Gateway 5.0) for your deploy-ment. Specify the product version used in your deployment.
The fully qualified domain name (FQDN) for your StoreFront deployment must be unique anddifferent from the Citrix Gateway virtual server FQDN. Using the same FQDN for StoreFront andthe Citrix Gateway virtual server is not supported.
© 1999‒2022 Citrix Systems, Inc. All rights reserved. 228

StoreFront 2203
5. If your deployment is running Access Gateway 5.0, continue to Step 7. Otherwise, specify thesubnet IP address of the Citrix Gateway appliance, if necessary.
The subnet address is the IP address that Citrix Gateway uses to represent the user devicewhencommunicatingwith servers on the internal network. This can alsobe themapped IP address ofthe Citrix Gateway appliance. Where specified, StoreFront uses the subnet IP address to verifythat incoming requests originate from a trusted device.
6. If your appliance is running Citrix Gateway, select from the Logon type list the authenticationmethod you configured on the appliance for Citrix Workspace app users.
The information you provide about the configuration of your Citrix Gateway appliance is addedto the provisioning file for the store. This enables Citrix Workspace app to send the appropriateconnection request when contacting the appliance for the first time.
• If users are required to enter their Microsoft Active Directory domain credentials, selectDomain.
• If users are required to enter a tokencode obtained from a security token, select Securitytoken.
• If users are required toenter both their domain credentials anda tokencodeobtained froma security token, select Domain and security token.
• If users are required to enter a one-time password sent by text message, select SMS au-thentication.
• If users are required to present a smart card and enter a PIN, select Smart card.
If you configure smart card authentication with a secondary authentication method to whichusers can fall back if they experience any issues with their smart cards, select the secondaryauthentication method from the Smart card fallback list.
7. If your deployment consists of Citrix Gateway, or a single Access Gateway 5.0 appliance, com-plete the Citrix Gateway authentication service URL in the Callback URL box. StoreFront auto-matically appends the standard portion of the URL.
Enter the internally accessible URL of the appliance. StoreFront contacts the Citrix Gatewayauthentication service to verify that requests received from Citrix Gateway originate from thatappliance.
Manage Access Gateway 5.0 appliances
Use theManage Appliances task to add, edit, or remove fromStoreFront the IP addresses or FQDNs ofthe appliances in your Access Gateway 5.0 cluster.
© 1999‒2022 Citrix Systems, Inc. All rights reserved. 229

StoreFront 2203
Enable silent user authentication through Access Controller
Use the Enable Silent Authentication task to add, edit, or remove URLs for the authentication servicerunning on the Access Controller servers for your Access Gateway 5.0 cluster. Enter URLs for multipleservers to enable fault tolerance, listing the servers in order of priority to set the failover sequence.StoreFront uses the authentication service to authenticate remote users so that they do not need tore-enter their credentials when accessing stores.
Manage Secure Ticket Authorities
Use the Secure Ticket Authority task to update the list of Secure Ticket Authorities (STAs) fromwhichStoreFront obtains user session tickets and to configure session reliability. The STA is hosted on Cit-rix Virtual Apps and Desktops servers and issues session tickets in response to connection requests.These session tickets form the basis of authentication and authorization for access to Citrix VirtualApps and Desktops resources.
1. On the Windows Start screen or Apps screen, locate and click the Citrix StoreFront tile.
2. Select the Stores node in the left pane of the Citrix StoreFront management console and, inthe results pane, select a Citrix Gateway deployment. In the Actions pane, click Manage CitrixGateways.
3. Click Add to enter theURL for a server running the STA. Specify URLs formultiple STAs to enablefault tolerance, listing the servers in order of priority to set the failover sequence. To modify aURL, select the entry in the Secure Ticket Authority URLs list and click Edit. Select a URL in thelist and click Remove to stop StoreFront obtaining session tickets from that STA.
4. If you want Citrix Virtual Apps and Desktops to keep disconnected sessions open while CitrixWorkspace app attempts to reconnect automatically, select the Enable session reliability checkbox. If you configured multiple STAs and want to ensure that session reliability is always avail-able, select the Request tickets from two STAs, where available check box.
When the Request tickets from two STAs, where available check box is selected, StoreFront ob-tains session tickets from two different STAs so that user sessions are not interrupted if one STAbecomes unavailable during the course of the session. If, for any reason, StoreFront is unableto contact two STAs, it falls back to using a single STA.
Remove Citrix Gateway deployments
In the Actions pane, use the Remove task from Manage Citrix Gateways to delete the details of aCitrix Gateway deployment fromStoreFront. Once a Citrix Gateway deployment is removed, users areno longer be able to access stores through that deployment.
© 1999‒2022 Citrix Systems, Inc. All rights reserved. 230

StoreFront 2203
Load balancing with Citrix ADC appliance
July 1, 2019
This article provides guidance on how to deploy a StoreFront server group containing two or moreStoreFront servers in all active load balanced configuration. The article provides details of how toconfigure a Citrix ADC appliance to load balance incoming requests from Citrix Workspace app, andCitrix Receiver for Web between the StoreFront nodes in the server group. This article also shows youhow to configure StoreFront Monitor for use with a Citrix ADC appliance.
The examples in this section have been tested in the following environment:
• Four Windows Server 2012 R2 StoreFront 3.x nodes in a single server group.• One Citrix ADC appliance 12.1 load balancer configured for Least Connection and CookieInsert“sticky” load balancing.
• One Windows 10 test client with Citrix Workspace app installed.
Server certificate requirements for the load balanced deployment if you intend to useHTTPS
Review the section Plan gateway and server certificate usage.
Consider the following options before purchasing a certificate froma commercial certificate authorityor issuing one from your enterprise certificate authority.
• Option 1: Use a *.example.com wildcard certificate on both the Citrix ADC appliance load bal-ancing vServer and on the StoreFront server group nodes. This simplifies the configuration andallows you to add extra StoreFront servers in the future without the need to replace the certifi-cate.
• Option 2: Use a certificate including Subject Alternative Names (SANs) on both the Citrix ADCappliance load balancing vServer and on the StoreFront server group nodes. Extra SANs withinthe certificate that match all of StoreFront server fully qualified domain names (FQDNs) are op-tional, but recommended, as this allows greater flexibility in the StoreFront deployment. In-clude a SAN for email-based discovery discoverReceiver.example.com.
For details of email-based discovery configuration, see http://blogs.citrix.com/2013/04/01/configuring-email-based-account-discovery-for-citrix-receiver/.
Note:
When exporting the private key associated with the certificate is not feasible. Use two separatecertificates: one on the Citrix ADC appliance load balancing vServer and a different certificate onthe StoreFront server group nodes. Both certificates must include Subject Alternative Names.
© 1999‒2022 Citrix Systems, Inc. All rights reserved. 231

StoreFront 2203
© 1999‒2022 Citrix Systems, Inc. All rights reserved. 232

StoreFront 2203
Create a server certificate for the Citrix ADC appliance load balancer and all StoreFrontservers
Import a certificate issued from aWindows Certificate Authority onto a Citrix ADC appliance
• WinSCP is a useful thirdparty and free tool tomove files fromaWindowsmachine to aCitrix ADCappliance file system. Copy certificates for import to the /nsconfig/ssl/ folder within the CitrixADC appliance file system.
• You can also use OpenSSL tools on the Citrix ADC appliance to extract the certificate and keyfrom a PKCS12/PFX file to create a two separate .CER and .KEY X.509 files in PEM format thatCitrix ADC can use.
1. Copy the PFX file into /nsconfig/ssl/ on the Citrix ADC appliance or VPX.2. Open the Citrix ADC appliance command line interface (CLI).3. Type Shell to exit the Citrix ADC appliance CLI and switch to the FreeBSD shell.4. Change directory using cd /nsconfig/ssl/.5. Runopenssl pkcs12 -in <imported cert file>.pfx -nokeys -out <certfilename
>.cer and enter the PFX password when prompted.6. Runopenssl pkcs12 -in <imported cert file>.pfx -nocerts -out <keyfilename
>.key and enter the PFX password when prompted, and then set the private key PEMpassphrase to protect the .KEY file.
7. Run ls -al to check the .CER and .KEY files have been successfully created inside /nsconfig/ssl/.
8. Type Exit to return to the Citrix ADC appliance CLI.
Configure the server certificate on the Citrix ADC appliance after it is imported
1. Log on to the Citrix ADC appliance management GUI.2. Select Traffic Management > SSL > SSL Certificates and click Install.3. On the Install Certificate window, enter the certificate and private key pair names.
• Select the .cer certificate file on the Citrix ADC appliance file system under /nsconfig/ssl/.• Select the .key file containing the private key from the same location.
© 1999‒2022 Citrix Systems, Inc. All rights reserved. 233

StoreFront 2203
Create DNS records for the StoreFront server group load balancer
Create a DNS A and PTR record for your chosen shared FQDN. Clients within your network use thisFQDN to access the StoreFront server group using the Citrix ADC appliance load balancer.
Example: storefront.example.com resolves to the load balancing vServer virtual IP (VIP).
Scenario 1: End-to-end HTTPS 443 secure connection between the client and the Citrix ADCappliance load balancer, and between the load balancer andmultiple StoreFront 3.x servers
This scenario uses a modified StoreFront monitor using port 443.
Add individual StoreFront server nodes to the Citrix ADC appliance load balancer
© 1999‒2022 Citrix Systems, Inc. All rights reserved. 234

StoreFront 2203
1. Log onto the Citrix ADC appliance management GUI.
2. Select Traffic Management > Load Balancing > Servers > Add and add each of the four Store-Front nodes to be load balanced.
Example = 4 x 2012R2 StoreFront Nodes named 2012R2-A to -D.
3. Use IP-based server configuration and enter the server IP address for each StoreFront node.
Define a StoreFront monitor to check the status of all StoreFront nodes in the server group
1. Log onto the Citrix ADCmanagement GUI.
2. Select Traffic Management > Load Balancing >Monitors > Add and add a newmonitor calledStoreFront and accept all default settings.
3. From the Type drop downmenu, select StoreFront.
4. If you are using HTTPS connections between your load balancing vServer and StoreFront, en-sure that the Secure option is selected; otherwise leave this option unselected.
5. In the Special Parameters tab, type the Store Name.
6. In the Special Parameters tab, select theCheckBackendServices option. This option enablesmonitoring of services running on the StoreFront server. StoreFront services are monitored byprobing a Windows service that runs on the StoreFront server, which returns the status of thefollowing services:
• W3SVC (IIS)• WAS (Windows Process Activation Service)• CitrixCredentialWallet• CitrixDefaultDomainService
© 1999‒2022 Citrix Systems, Inc. All rights reserved. 235

StoreFront 2203
Create an HTTPS 443 service group containing all of the StoreFront servers
1. Within your Service Group, select theMembers option on the right hand side and add all of theStoreFront server nodes you defined previously in the Servers section.
2. Set the TLS port and give each node a unique server ID as you add it.
© 1999‒2022 Citrix Systems, Inc. All rights reserved. 236

StoreFront 2203
3. On theMonitors tab, select the StoreFront monitor you created earlier.
4. On the Certificates tab, bind the server certificate you imported earlier.
5. Bind theCA certificate used to sign the server certificate you imported earlier, and any other CAsthat might be part of the PKI chain of trust.
© 1999‒2022 Citrix Systems, Inc. All rights reserved. 237

StoreFront 2203
Create a load balancing vServer for user traffic
1. Log onto the Citrix ADC appliance management GUI.
2. Select TrafficManagement > Load Balancing > Virtual Servers > Add to create a new vServer.
3. Select the load balancingmethod for the vServer. Common choices for StoreFront load balanc-ing are round robin or least connection.
4. Bind the Service Group you created earlier to the load balancing vServer.
5. Bind the same server and CA certificate you previously bound to the service group, to the loadbalancing vServer.
6. Fromwithin the load balancing vServermenu, selectPersistenceon the right hand side and setthe persistence method to be COOKIEINSERT.
7. Name the cookie. For example, NSC_SFPersistence, as this makes it easy to identify in Fiddlertraces during debugging.
8. Set backup persistence toNONE.
© 1999‒2022 Citrix Systems, Inc. All rights reserved. 238

StoreFront 2203
Scenario 2: HTTPS termination—HTTPS 443 communication between the client and the CitrixADC load balancer, and HTTP 80 connections between the load balancer and the StoreFront 3.xservers behind it
This scenario uses the default StoreFront monitor using port 8000.
Add individual StoreFront server servers to the Citrix ADC load balancer
1. Log onto the Citrix ADCmanagement GUI.2. Select Traffic Management > Load Balancing > Servers > Add and add each of the four Store-
Front servers to be load balanced. Example = 4 x 2012R2 Storefront servers called 2012R2-A to-D. 3.
3. Use IP based Server configuration and enter the server IP address for each Storefront server.
Define an HTTP 8000 StoreFront monitor to check the status of all StoreFront servers in theserver group
1. Log onto the Citrix ADCmanagement GUI.2. Select Traffic Management > Monitors > Add and add a newmonitor called StoreFront.3. Add a name for the newmonitor and accept all default settings.4. In the Type list select StoreFront.5. In the Special Parameters tab, type the Store Name.6. Type 8000 into Destination Port. This matches the default monitor instance that is created on
each StoreFront server.
© 1999‒2022 Citrix Systems, Inc. All rights reserved. 239

StoreFront 2203
7. In the Special Parameters tab, select theCheckBackendServices option. This option enablesmonitoring of services running on the StoreFront server. StoreFront services are monitored byprobing to a Windows service that runs on the StoreFront server, which returns the status of allrunning StoreFront services.
Create an HTTP 80 service group containing all of the StoreFront servers
1. Within your Service Group, select theMembers option on the right hand side and add all of theStoreFront server nodes you defined previously in the Servers section.
2. Set the HTTP port to 80 and give each server a unique server ID as you add it.3. On theMonitors tab, select the StoreFront monitor you created earlier.
Create an HTTPS terminating load balancing vServer for user traffic
1. Select TrafficManagement > Load Balancing > Virtual Servers > Add to create a new vServer.
2. Select the load balancing method vServer will use. Common choices for StoreFront load bal-ancingare round robin or least connection.
3. Bind the Service Group you created earlier to the load balancing vServer.
4. Bind the same server and CA certificate you previously bound to the service group, to the loadbalancing vServer.
Note:
If the client is not allowed to store the HTTP cookie, the subsequent requests do not havethe HTTP cookie and Persistence is not used.
5. Fromwithin the load balancing vServermenu, selectPersistenceon the right hand side and setthe persistence method to be COOKIEINSERT.
6. Name the cookie. For example, NSC_SFPersistence, as this makes it easy to identify in Fiddlertraces during debugging.
7. Set backup persistence toNONE.
Create a load balancing vServer for subscription synchronization between server groups
Considerations before creating a load balancing vServer include the following:
• Option 1: Create a single vServer: to load balance only user traffic. This is all that is needed ifperforming only ICA launches of published apps and desktops. (Mandatory and usually all thatis required.)
© 1999‒2022 Citrix Systems, Inc. All rights reserved. 240

StoreFront 2203
• Option 2: Create a pair of vServers: one to load balance user traffic for performing ICA launchesof published apps and desktops and another for load balancing subscription data synchroniza-tion operations. (Necessary only when propagating subscription data between two or moreload balanced StoreFront server groups in a large multi-site deployment.)
If a multisite deployment consists of two or more StoreFront server groups located in separate ge-ographic locations, you can replicate subscription data between them using a pull strategy on a re-peating schedule. StoreFront subscription replication uses TCP port 808, so using an existing loadbalancing vServer onHTTP port 80 or HTTPS 443 fails. To provide high availability for this service, cre-ate a second vServer on each Citrix ADC appliance in your deployment to load balance TCP port 808for each of the StoreFront server groups. When configuring the replication schedule, specify a servergroup address that matches the subscription synching vServer virtual IP address. Ensure the servergroup address is the FQDN of the load balancer for the server group at that location.
Configure a service group for subscription synchronization
1. Log onto the Citrix ADC appliance management GUI.2. Select Traffic Management > Service Groups > Add and add a new service group.3. Change the protocol to TCP.4. Within your Service Group, select theMembers option on the right hand side and add all of the
StoreFront server nodes you defined previously in the Servers section.5. On theMonitors tab, select the TCPmonitor.
Create a load balancing vServer for subscription synchronization between server groups
1. Log onto the Citrix ADC appliance management GUI.2. Select Traffic Management > Service Groups > Add and add a new service group.3. Set the load balancing method to round robin.4. Change the protocol to TCP.5. Enter 808 and NOT 443 as the port number.
© 1999‒2022 Citrix Systems, Inc. All rights reserved. 241

StoreFront 2203
Membership within CitrixSubscriptionsSyncUsers
For StoreFront server A at Location A to request and pull subscription data from server B at a differ-ent location, server Amustbeamemberof theCitrixSubscriptionsSyncUsers local security grouponserver B. The CitrixSubscriptionsSyncUsers local group contains an access control list of all remoteStoreFront servers authorized to pull subscription data froma particular server. For bidirectional sub-scription synchronization, server B must also be a member of the CitrixSubscriptionsSyncUsers se-curity group on server A to pull subscription data from it.
© 1999‒2022 Citrix Systems, Inc. All rights reserved. 242

StoreFront 2203
Scenario 1: Configure the StoreFront server group using HTTPS between Citrix ADC andStoreFront
1. Import the same certificate and private key that was deployed on the Citrix ADC appliance loadbalancing vServer to every StoreFront node in the server group.
2. Create an HTTPS binding in IIS on every StoreFront node, and then bind the certificate you im-ported earlier to it.
© 1999‒2022 Citrix Systems, Inc. All rights reserved. 243

StoreFront 2203
3. If you are usingHTTPS between the Citrix ADC load balancer and StoreFront, youmust use a cer-tificate containing the load balanced FQDN as a CommonName (CN) or as a Subject AlternativeName (SAN).
See Create a server certificate for the Citrix ADC appliance loadbalancer and StoreFront servers.
Scenario 2: Configure the StoreFront server group using HTTP between Citrix ADC andStoreFront
1. Remove the HTTPS binding in IIS from every StoreFront node if this already exists.
2. Ensure that the HTTP binding is present in IIS, and that it is set to use port 80.
3. Configure the loopback settings within Receiver for Web as OnUsingHTTP and port 80. Thisstep is essential to ensure that client detection between native Citrix Workspace App and Re-ceiver for Web succeeds.
© 1999‒2022 Citrix Systems, Inc. All rights reserved. 244

StoreFront 2203
Steps common to both Scenarios 1 and 2
1. Install StoreFront on every node in the server group.
2. During installation of StoreFront, set the host base URL on the primary node to be theshared FQDN used by all members of the server group. This should always be https://storefrontlb.domain.com for both scenario 1 and 2 andmust match the FQDN of the CitrixADC load balancing vServer.
See the Create a server certificate for the Citrix ADC appliance load balancer and StoreFrontservers.
3. After you have completed the initial StoreFront configuration, join each of the nodes, one afterthe other, to the server group using the primary node.
4. Select Server Group > Add Server > Copy the Authorization Code to the joining Server.
5. Propagate the configuration from theprimary node to all other server groupnodes in the group.
© 1999‒2022 Citrix Systems, Inc. All rights reserved. 245

StoreFront 2203
6. Test the loadbalanced server groupusing a client that can contact and resolve the shared FQDNof the load balancer.
Citrix Service Monitor
To enable external monitoring of the run-state of the Windows services on which StoreFront relies forcorrect operation, use the Citrix Service MonitorWindows service. This service has no other servicedependenciesandcanmonitor and report the failureofother critical StoreFront services. Themonitorenables the relative health of a StoreFront server deployment to be determined externally by otherCitrix components, such as a Citrix ADC appliance. Third party software can consume the StoreFrontmonitor XML response to monitor the health of essential StoreFront services.
After StoreFront is deployed, a default monitor that uses HTTP and port 8000 is created.
Note:
Only one instance of a monitor can exist within a Storefront deployment.
Tomakeany changes to the existingdefaultmonitor, such as changing theprotocol andport toHTTPS443, use PowerShell cmdlets to view or reconfigure the StoreFront monitor service URL.
Remove the default Service Monitor and replace it with one that uses HTTPS and port 443
1. Open the PowerShell Integrated Scripting Environment (ISE) on the primary StoreFront serverand run the following commands to change the default monitor to HTTPS 443.
1 $ServiceUrl = ”https://localhost:443/StorefrontMonitor”2 Set-STFServiceMonitor -ServiceUrl $ServiceUrl3 Get-STFServiceMonitor4 <!--NeedCopy-->
2. Once completed, propagate the changes to all other servers in the StoreFront server group.
3. To perform a quick test on the new monitor, enter the following URL into the browser on theStoreFront server or any other machine with network access to the StoreFront server. Thebrowser should return an XML summary of the status of every Storefront service.
https://<loadbalancingFQDN>:443/StoreFrontMonitor/GetSFServicesStatus
© 1999‒2022 Citrix Systems, Inc. All rights reserved. 246

StoreFront 2203
Citrix Gateway and load balancing vServers on the same Citrix ADC appliance
If you have configured the Citrix Gateway virtual server and load balancing vServer on the same CitrixADC appliance, internal domain users might experience issues when trying to access the StoreFrontload balanced host base URL directly rather than passing through the Citrix Gateway virtual server.
In this scenario StoreFront assumes that the end user has already authenticated at the Citrix Gatewaybecause StoreFront correlates the source IP address of the incoming userwith the Citrix Gateway Sub-net IP Address (SNIP). This triggers StoreFront to attempt to use the AGBasic protocol to performCitrixGateway silent authentication, rather than actually prompting the user to log on with their domaincredentials. To avoid this issue, omit a SNIP address as shown below or enter a VIP so that usernameand password authentication is used instead of the AGBasic logon protocol.
© 1999‒2022 Citrix Systems, Inc. All rights reserved. 247

StoreFront 2203
Configure a Citrix Gateway on the Storefront Server Group
Enter the Citrix Gateway VIP and into the VServer IP address field. Do NOT use the SNIP for the CitrixGateway if the load balancing vServer resides on the same Citrix ADC appliance.
Loopback options when load balancing a StoreFront server group using a Citrix ADCappliance
You can set loopback options using PowerShell.
Example Receiver for Webweb.config file
1 <communication attempts=”2” timeout=”00:01:00” loopback=”On”loopbackPortUsingHttp=”80”>
2 <!--NeedCopy-->
Example PowerShell command
© 1999‒2022 Citrix Systems, Inc. All rights reserved. 248

StoreFront 2203
1 & ”c:\program files\Citrix\receiver storefront\scripts\ImportModules.ps1”
2 Set-DSLoopback -SiteId 1 -VirtualPath ”/Citrix/StoreWeb” -Loopback ”OnUsingHttp” -LoopbackPortUsingHttp 81
3 <!--NeedCopy-->
The -Loopback parameter can take three possible values:
Value Context
On—Changes the host of the URL to 127.0.0.1.The schema and port (if specified) are notchanged.
Cannot be used if TLS-terminating loadbalancer is used.
OnUsingHttp—Changes the host to 127.0.0.1and schema to HTTP andmodifies the port thevalue configured for loopbackPortUsingHttpattribute.
Use only when the load balancer is TLSterminating. Communication between the loadbalancer and StoreFront servers is with HTTP.You can explicitly configure the HTTP portusing the -loopbackPortUsingHttp attribute.
Off—The URL in the request is not modified inany way.
Use for trouble shooting. Tools like Fiddlercannot capture the traffic between Receiver forWeb and StoreFront Services if loopback is settoOn.
Configure two URLs for the same Citrix Gateway
August 22, 2019
In StoreFront, you can add a single Citrix Gateway URL from the StoreFront management console inManage Citrix Gateways > Add or Edit. It is also possible to add both a public Citrix Gateway URLand a GSLB (Global Server Load Balancing) URL inManage Citrix Gateways > imported from file.
This article shows you how to use PowerShell cmdlets and the StoreFront PowerShell SDK to use anoptional parameter, -gslburl, to set theGslbLocation attribute of a gateway. This feature simplifies theCitrix Gateway administration in StoreFront in the following use cases:
1. GSLB and multiple Citrix Gateways. Use GSLB and multiple Citrix Gateways to load balanceremote connections to published resources in two ormore locations within a large global Citrixdeployment.
2. Single Citrix Gateway using a public or private URL. Use the same Citrix Gateway for external
© 1999‒2022 Citrix Systems, Inc. All rights reserved. 249

StoreFront 2203
access using a public URL, and for internal access using a private URL.
This is an advanced feature and topic. If you are new to StoreFront gateway and Global Server LoadBalancing (GSLB) concepts, see the Related information links at the end of this article.
This feature offers the following benefits:
• Support two simultaneous URLs for a single gateway object.• Users can switch between two different URLs to access the Citrix Gateway without the adminis-trator reconfiguring the StoreFront gateway object tomatch the gateway URL the user wants touse.
• Shorter setup and test times to validate the StoreFront gateway configuration when using mul-tiple GSLB gateways.
• Use the same Citrix Gateway object in StoreFront inside the DMZ for both external and internalaccess.
• Support bothURLs for optimal gateway routing. Formore information onoptimal gateway rout-ing, see Set up highly available multi-site stores.
Deployment considerations when using two Gateway URLs
• The gatewayURL FQDN is displayed for each gatewaywithin the StoreFront admin console. TheGSLBURL property of each gateway is only visible via the use of PowerShell cmdlets.
• ThegatewayURL is usedbynativeCitrix Receivers andCitrixWorkspaceapps for authentication.• The gatewayURL is included in the location tag within the provisioning file (receiver.cr) used toconfigure Citrix Receivers and Citrix Workspace apps with store and gateway information.
• Use the provided Powershell tomodify Store and Roamingweb.config files. Do not do thisman-ually.
Important:
Before configuringa secondgatewayURLusing the -gslburl parameter, reviewwhat server certifi-cates you have in place and how your organization performs DNS resolution. Any URLs that youwant touse in your Citrix GatewayandStoreFront deploymentmust bepresent in your server cer-tificates. For more information about server certificates, see Plan gateway and server certificateusage.
DNS
• Split DNS. It is common for large enterprises to use split DNS. Split DNS involves using differentnamespaces and different DNS servers for public and private DNS resolution. Check if you havethe existing DNS infrastructure to support this.
• Single URL for external and internal access to published resources. Decide if you want touse the same URL to access published resources from both outside and inside your corporate
© 1999‒2022 Citrix Systems, Inc. All rights reserved. 250

StoreFront 2203
network, or consider if two different URLs are acceptable such as example.com and example.net.
Server certificate examples
This section contains example server certificate deployments when using two Gateway URLs.
Example server certificate for a load balanced StoreFront deployment
A privately signed wildcard server certificate should contain the FQDN *.storefront.example.net.
Or
A privately signed SAN server certificate should contain all the FQDNs needed to load balance threeStoreFront servers.
1 loadbalancer.storefront.example.net2 server1.storefront.example.net3 server2.storefront.example.net4 server3.storefront.example.net5 <!--NeedCopy-->
Set the host base URL of the StoreFront server group to be the shared FQDN, which resolves to theload balancer IP address:
1 loadbalancer.storefront.example.net2 <!--NeedCopy-->
Example server certificate for a Citrix Gateway which is accessed both externally and internallyusing split DNS
A publically signed SAN server certificate for both external and internal access should contain boththe external and internal FQDNs.
1 gateway.example.com2 gateway.example.net3 <!--NeedCopy-->
© 1999‒2022 Citrix Systems, Inc. All rights reserved. 251

StoreFront 2203
Example server certificate for all GSLB Gateways which are accessed externally
A publically signed SAN server certificate for external access through GSLB should contain the FQDNs.
1 gslbdomain.example.com2 emeagateway.example.com3 usgateway.example.com4 apacgateway.example.com5 <!--NeedCopy-->
This allows the user to access the closest gateway using GSLB or to pick a gateway in the location oftheir choice using its unique FQDN.
Use Case #1: Receiver for Web: GSLB andmultiple Citrix Gateways
Theadministrator usesGSLBandmultiple Citrix Gateways to loadbalance remote connections topub-lished resources in two or more locations within a large global Citrix deployment.
In this example:
• Each location or data center contains at least one gateway, one or more StoreFront servers,and one or more XenApp and XenDesktop Controllers to provide published resources for thatlocation. Each GSLB service configured on the GSLB Citrix ADC Appliances within the global
© 1999‒2022 Citrix Systems, Inc. All rights reserved. 252

StoreFront 2203
deployment represents a gateway VPN vServer. All of the StoreFront servers in the deploymentmust be configured to contain all of the Citrix Gateway virtual servers that make up the GSLBlayer. The GSLB Citrix Gateways are used in active/active mode but can also provide failover ifthe network connection, DNS, gateway, StoreFront server or Citrix Virtual Apps and DesktopsControllers at one location fail. Users are automatically directed to another gateway if a GSLBservice is unavailable.
• External clientsaredirected to theclosestgatewaybasedon theconfiguredGSLB loadbalancingalgorithm such as round trip time (RTT) or Static Proximity whenmaking remote connections.
• The unique URL for each gateway allows users to manually select which data center they wantto launch resources from by choosing the location-specific URL for the gateway they want touse.
• GSLB can be bypassed when GSLB or a DNS delegation is not working as expected. Users cancontinue to access remote resources at any data center using its location-specific URL until anyGSLB related issues are resolved.
Use Case #1: Receiver for Web, and Citrix Receivers or Citrix Workspace apps: GSLB andmultiple Citrix Gateways
Gateway attributes
To use GSLB with native Citrix Receivers or Citrix Workspace apps, use Add-STFRoamingGateway(create) or Set-STFRoamingGateway (modify) to specify the following attributes:
-GatewayUrl— set as the shared FQDN for all GSLB gateways
-GSLBurl— set as the unique gateway FQDN for each gateway
Note:
This may seem counterintuitive but it has no impact on this web use case. It ensures that na-tive Citrix Receivers or Citrix Workspace apps receive the shared FQDN used by GSLB within thediscovery document found by accessing the endpoint https://storefront.domain.com/citrix/<storename>/discovery. It also ensures that the provisioning file (receiver.cr ) ex-ported by StoreFront’s Export Provisioning File command contains the shared GSLB FQDN.
Example provisioning files
Example file 1 using-GatewayUrl https://gslb.domain.com. This allowsnative Citrix Receiversor Citrix Workspace apps to use GSLB to connect to gateways.
© 1999‒2022 Citrix Systems, Inc. All rights reserved. 253

StoreFront 2203
Example file2using-GatewayUrl https://emeagateway.domain.com, https://usgateway.domain.com and https://apacgateway.domain.com. This allows native Citrix Receivers orCitrix Workspace apps to use the unique URLs to connect to gateways.
The shared FQDN is used for authentication by native Citrix Receivers and Citrix Workspace apps.
© 1999‒2022 Citrix Systems, Inc. All rights reserved. 254

StoreFront 2203
Use Case #2: Single Citrix Gateway using a public or private URL
The administrator uses the same Citrix Gateway for both external access using a public URL, and alsointernally using a private URL.
In this example:
• The administrator wants all access to published resources and HDX launch traffic to passthrough a Citrix Gateway even if the client is internal.
• The Citrix Gateway is located in a DMZ.• There are two different network routes to the Citrix Gateway through the two firewalls on eitherside of the DMZ.
• The public-facing, external namespace is different from the internal namespace.
PowerShell cmdlet examples
Use the PowerShell cmdlets Add-STFRoamingGateway and Set-STFRoamingGateway with the pa-rameter, -gslburl, to set the GslbLocation attribute on the StoreFront gateway object. For example:
1 Add-STFRoamingGateway -Name ”EMEAGateway” -GatewayUrl ”https://emeagateway.example.com” -GSLBurl ”https://gslb.example.com” -SubnetIPAddress ”10.0.0.1” -CallbackUrl ”https://emeagateway.example.com” -LogonType ”DomainAndRSA” -SmartCardFallbackLogonType ”None” -Version ”Version10_0_69_4” -SecureTicketAuthorityUrls ”https://emea-controller.example.com/scripts/ctxsta.dll,https://us-controller.example.com/scripts/ctxsta.dll,https://apac-controller.example.com/scripts/ctxsta.dll”
2 Set-STFRoamingGateway -Name ”EMEAGateway” -GatewayUrl ”https://emeagateway.example.com” -GSLBurl ”https://gslb.example.com”
© 1999‒2022 Citrix Systems, Inc. All rights reserved. 255
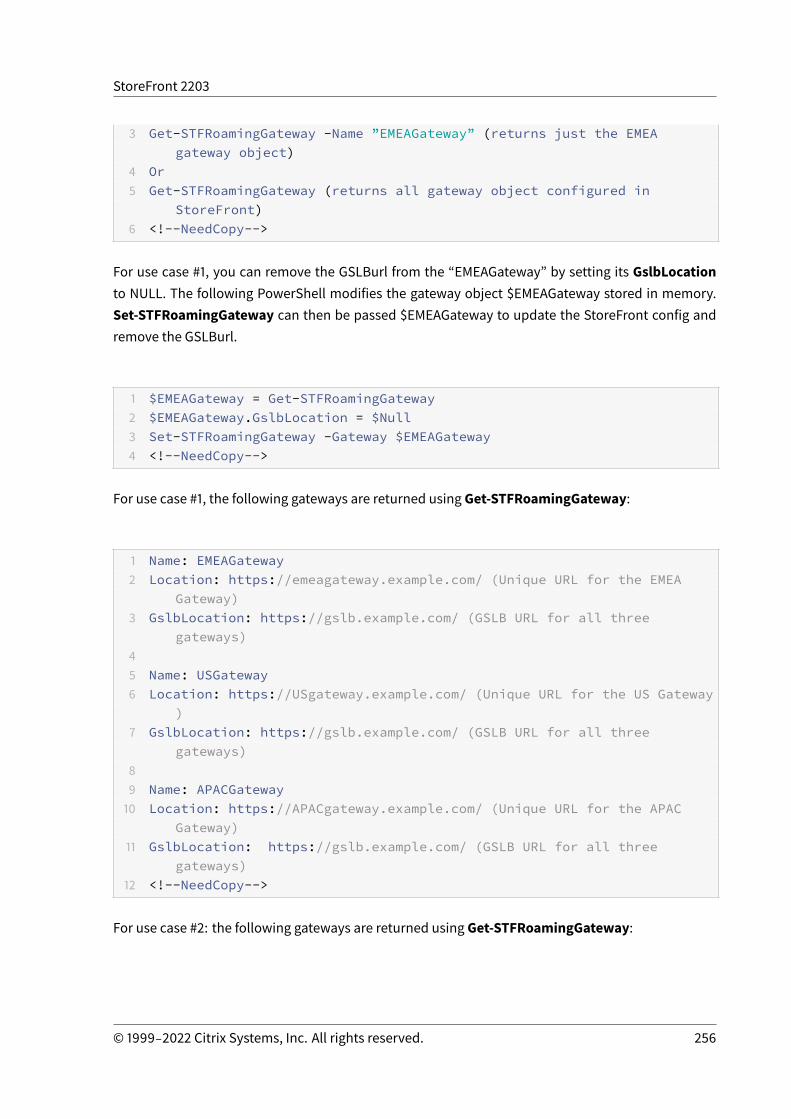
StoreFront 2203
3 Get-STFRoamingGateway -Name ”EMEAGateway” (returns just the EMEAgateway object)
4 Or5 Get-STFRoamingGateway (returns all gateway object configured in
StoreFront)6 <!--NeedCopy-->
For use case #1, you can remove the GSLBurl from the “EMEAGateway” by setting its GslbLocationto NULL. The following PowerShell modifies the gateway object $EMEAGateway stored in memory.Set-STFRoamingGateway can then be passed $EMEAGateway to update the StoreFront config andremove the GSLBurl.
1 $EMEAGateway = Get-STFRoamingGateway2 $EMEAGateway.GslbLocation = $Null3 Set-STFRoamingGateway -Gateway $EMEAGateway4 <!--NeedCopy-->
For use case #1, the following gateways are returned using Get-STFRoamingGateway:
1 Name: EMEAGateway2 Location: https://emeagateway.example.com/ (Unique URL for the EMEA
Gateway)3 GslbLocation: https://gslb.example.com/ (GSLB URL for all three
gateways)45 Name: USGateway6 Location: https://USgateway.example.com/ (Unique URL for the US Gateway
)7 GslbLocation: https://gslb.example.com/ (GSLB URL for all three
gateways)89 Name: APACGateway10 Location: https://APACgateway.example.com/ (Unique URL for the APAC
Gateway)11 GslbLocation: https://gslb.example.com/ (GSLB URL for all three
gateways)12 <!--NeedCopy-->
For use case #2: the following gateways are returned using Get-STFRoamingGateway:
© 1999‒2022 Citrix Systems, Inc. All rights reserved. 256

StoreFront 2203
1 Name: EMEAGateway2 Location: https://emeagateway.example.com/ (Public URL for the Gateway)3 GslbLocation: https://emeagateway.example.net/ (Private URL for the
Gateway)4 <!--NeedCopy-->
Forusecase#1,OptimalGatewayRouting is returnedusingGet-STFStoreRegisteredOptimalLaunchGateway:
1 $StoreObject = Get-STFStoreService -SiteId 1 -VirtualPath ”/Citrix/<YourStore>”
23 Get-STFStoreRegisteredOptimalLaunchGateway -StoreService $StoreObject45 Hostnames: {6 emeagateway.example.com, gslb.example.com }78 Hostnames: {9 usgateway.example.com, gslb.example.com }1011 Hostnames: {12 apacgateway.example.com, gslb.example.com }1314 <!--NeedCopy-->
GSLB URL or Internal URL for each Gateway is stored in the Roaming serviceweb.config file
StoreFrontdoesnotdisplay theGSLBURLor internalURL for eachGatewaywithin theStoreFrontman-agement console, however it is possible to view the configured GSLBLocation path for all GSLB gate-waysbyopening the roamingserviceWeb.Config file location inC:\inetpub\wwwroot\Citrix\Roaming\web.configon the StoreFront server.
Use Case #1 Gateways in Roaming web.config file
1 <gateway id=”cca13269-18c1-10fd-a0df-7931b3897aa8” name=”EMEAGateway”default=”false” edition=”Enterprise” version=”Version10_0_69_1” auth=”DomainAndRSA” smartcardfallback=”None” ipaddress=”10.0.0.1” rwmode=”NONE” deployment=”Appliance” callbackurl=https://emeagateway.example.com/CitrixAuthService/AuthService.asmx sessionreliability=”
© 1999‒2022 Citrix Systems, Inc. All rights reserved. 257

StoreFront 2203
true” requesttickettwosta=”false” stasUseLoadBalancing=”false”stasBypassDuration=”01:00:00”>
2 <location path=”https://emeagateway.example.com/” /><gslbLocation path=”https://gslb.example.com/” /><clusternodes>
3 <clear />4 </clusternodes>5 <silentauthenticationurls>6 <clear />7 </silentauthenticationurls>8 <secureticketauthorityurls>9 <clear />10 <location path=”https://emea-controller.example.com/scripts/ctxsta.dll”
/>11 <location path=”https://us-controller.example.com/scripts/ctxsta.dll”
/>12 <location path=”https://apac-controller.example.com/scripts/ctxsta.dll”
/>13 </secureticketauthorityurls>14 </gateway>1516 <gateway id=”b8ec720c-d85e-1889-8188-1cf08a2cf762” name=”USGateway”
default=”false” edition=”Enterprise” version=”Version10_0_69_1” auth=”DomainAndRSA” smartcardfallback=”None” ipaddress=”10.0.0.2” rwmode=”NONE” deployment=”Appliance” callbackurl=”https://usgateway.example.com/CitrixAuthService/AuthService.asmx” sessionreliability=”true” requesttickettwosta=”false” stasUseLoadBalancing=”false”stasBypassDuration=”01:00:00”><location path=”https://usgateway.example.com/” /><gslbLocation path=”https://gslb.example.com/” /><clusternodes>
17 <clear />18 </clusternodes>19 <silentauthenticationurls>20 <clear />21 </silentauthenticationurls>22 <secureticketauthorityurls>23 <clear />24 <location path=”https://emea-controller.example.com/scripts/ctxsta.dll”
/>25 <location path=”https://us-controller.example.com/scripts/ctxsta.dll”
/>26 <location path=”https://apac-controller.example.com/scripts/ctxsta.dll”
/>27 </secureticketauthorityurls>28 </gateway>29
© 1999‒2022 Citrix Systems, Inc. All rights reserved. 258

StoreFront 2203
30 <gateway id=”c57117b5-e111-1eed-9117-a1ffa1c8100e” name=”APACGateway”default=”false” edition=”Enterprise” version=”Version10_0_69_1” auth=”DomainAndRSA” smartcardfallback=”None” ipaddress=”10.0.0.3” rwmode=”NONE” deployment=”Appliance” callbackurl=”https://apacgateway.example.com/CitrixAuthService/AuthService.asmx” sessionreliability=”true” requesttickettwosta=”false” stasUseLoadBalancing=”false”stasBypassDuration=”01:00:00”><location path=”https://apacGateway.example.com/” /><gslbLocation path=”https://gslb.example.com/” /><clusternodes>
31 <clear />32 </clusternodes>33 <silentauthenticationurls>34 <clear />35 </silentauthenticationurls>36 <secureticketauthorityurls>37 <clear />38 <location path=”https://emea-controller.example.com/scripts/ctxsta.dll”
/>39 <location path=”https://us-controller.example.com/scripts/ctxsta.dll”
/>40 <location path=”https://apac-controller.example.com/scripts/ctxsta.dll”
/>41 </secureticketauthorityurls>42 </gateway>43 <!--NeedCopy-->
Use Case #2: Gateways in Roaming web.config file
1 <gateway id=”cca13269-18c1-10fd-a0df-7931b3897aa8” name=”EMEAGateway”default=”false” edition=”Enterprise” version=”Version10_0_69_1” auth=”Domain” smartcardfallback=”None” ipaddress=”10.0.0.1” rwmode=”NONE” deployment=”Appliance” callbackurl=”https://emeagateway.example.com/CitrixAuthService/AuthService.asmx” sessionreliability=”true”requesttickettwosta=”false” stasUseLoadBalancing=”false”stasBypassDuration=”01:00:00”>
2 <location path=”https://emeagateway.example.com/” />3 <gslbLocation path=” https://emeagateway.example.net/” />4 <clusternodes>5 <clear />6 </clusternodes>7 <silentauthenticationurls>8 <clear />9 </silentauthenticationurls>
© 1999‒2022 Citrix Systems, Inc. All rights reserved. 259

StoreFront 2203
10 <secureticketauthorityurls>11 <clear />12 <location path=”https://emea-controller.example.net/scripts/ctxsta.dll”
/>13 </secureticketauthorityurls>14 </gateway>15 <!--NeedCopy-->
Related information
In Developer Documentation see Citrix StoreFront SDK PowerShell Modules.
Configure Citrix ADC and StoreFront for Delegated Forms Authentication(DFA)
July 1, 2019
Extensible authentication provides a single customization point for extension of the Citrix ADC appli-ance’s and StoreFront’s form-based authentication. To achieve an authentication solution using theExtensible Authentication SDK, youmust configureDelegated FormAuthentication (DFA) between theCitrix ADC appliance and StoreFront. The Delegated Forms Authentication protocol allows generationand processing of authentication forms, including credential validation, to be delegated to anothercomponent. For example, Citrix Gateway delegates it authentication to StoreFront, which then inter-acts with a third party authentication server or service.
Configuring Delegated Forms Authentication on Citrix Gateway is described in CTX200383.
Installation recommendations
• To ensure communication between the Citrix ADC appliance and StoreFront is protected, useHTTPS instead of HTTP protocol.
• For cluster deployment, ensure that all the nodes have the same server certificate installed andconfigured in IIS HTTPS binding prior to configuration steps.
• Ensure that the Citrix ADC appliance has the issuer of StoreFront’s server certificate as a trustedcertificate authority when HTTPS is configured in StoreFront.
StoreFront cluster installation considerations
• Install a third party authentication plugin on all the nodes prior to joining them up together.
© 1999‒2022 Citrix Systems, Inc. All rights reserved. 260

StoreFront 2203
• Configure all the Delegated Forms Authentication related settings on one node and propagatethe changes to the others. See the “Enable Delegated Forms Authentication.”
Enable Delegated Forms Authentication
Because there is no GUI to set up Citrix pre-shared key setting in StoreFront, use the PowerShell con-sole to install Delegated Forms Authentication.
1. Install Delegated Forms Authentication. It is not installed by default and you need to install itusing the PowerShell console.
1 PS C:\Users\administrator.PTD.000> cd 'C:\Program Files\Citrix\Receiver StoreFront\Scripts'
2 PS C:\Program Files\Citrix\Receiver StoreFront\Scripts> & .\ImportModules.ps1
3 Adding snapins4 Importing modules5 Loading 'C:\Program Files\Citrix\Receiver StoreFront\Admin\Citrix.
DeliveryServices.ConfigurationProvider.dll'6 Loading 'C:\Program Files\Citrix\Receiver StoreFront\Admin\Citrix.
DeliveryServices.ConfigurationProvider.dll'78 PS C:\Program Files\Citrix\Receiver StoreFront\Scripts> Install-
DSDFAServer9 Id : bf694fbc-ae0a-4d56-8749-
c945559e897a10 ClassType : e1eb3668-9c1c-4ad8-bbae-
c08b2682c1bc11 FrameworkController : Citrix.DeliveryServices.Framework
.FileBased.FrameworkController12 ParentInstance : 8dd182c7-f970-466c-ad4c-27
a5980f716c13 RootInstance : 5d0cdc75-1dee-4df7-8069-7375
d79634b314 TenantId : 860e9401-39c8-4f2c-928d-34251102
b84015 Data : {16 }1718 ReadOnlyData : {19 [Name, DelegatedFormsServer], [Cmdlet, Add-DSWebFeature], [Snapin
, Citrix.DeliverySer20 vices.Web.Commands], [Tenant, 860
© 1999‒2022 Citrix Systems, Inc. All rights reserved. 261

StoreFront 2203
e9401-39c8-4f2c-928d-34251102b840] }
2122 ParameterData : {23 [FeatureClassId, e1eb3668-9c1c-4ad8-bbae-c08b2682c1bc], [
ParentInstanceId, 8dd182c7-f24 970-466c-ad4c-27a5980f716c], [
TenantId, 860e9401-39c8-4f2c-928d-34251102b840] }
2526 AdditionalInstanceDependencies : {27 b1e48ef0-b9e5-4697-af9b-0910062aa2a3 }2829 IsDeployed : True30 FeatureClass : Citrix.DeliveryServices.Framework
.Feature.FeatureClass31 <!--NeedCopy-->
2. AddCitrix Trusted Client. Configure the shared secret key (passphrase) between StoreFront andtheCitrix ADCappliance. Yourpassphraseandclient IDmustbe identical towhat youconfiguredon the Citrix ADC appliance.
1 PS C:\Program Files\Citrix\Receiver StoreFront\Scripts> Add-DSCitrixPSKTrustedClient -clientId netscaler.fqdn.com -passphrase secret
2 <!--NeedCopy-->
3. Set the Delegated Forms Authentication conversation factory to route all the traffic tothe custom form. To find the conversation factory, look for ConversationFactory inC:\inetpub\wwwroot\Citrix\Authentication\web.config.This is an example of what you mightsee.
1 <example connectorURL=”http://Example.connector.url:8080/adapters-sf-aaconnector-webapp”>
2 <routeTable order=”1000”>3 <routes>4 <route name=”StartExampleAuthentication” url=”Example-
Bridge-Forms/Start”>5 <defaults>6 <add param=”controller” value=”
ExplicitFormsAuthentication” />
© 1999‒2022 Citrix Systems, Inc. All rights reserved. 262

StoreFront 2203
7 <add param=”action” value=”AuthenticateStart” />8 <add param=”postbackAction” value=”Authenticate” />9 <add param=”cancelAction” value=”CancelAuthenticate”
/>10 <add param=”conversationFactory” value=”
ExampleBridgeAuthentication” />11 <add param=”changePasswordAction” value=”
StartChangePassword” />12 <add param=”changePasswordController” value=”
ChangePassword” />13 <add param=”protocol” value=”CustomForms” />14 </defaults>15 </route>16 <!--NeedCopy-->
4. In PowerShell, set the Delegated Forms Authentication conversation factory. In this example,to ExampleBridgeAuthentication.
1 PS C:\Program Files\Citrix\Receiver StoreFront\Scripts> Set-DSDFAProperty -ConversationFactory ExampleBridgeAuthentication
2 <!--NeedCopy-->
PowerShell argumentsarenotcase-sensitive: -ConversationFactory is identical to -conversationfactory.
Uninstall StoreFront
Before you uninstall StoreFront, uninstall any third party authentication plugin, as it will impact thefunctionality of StoreFront.
Authenticate using different domains
July 1, 2019
Some organizations have policies in place that do not allow them to give third-party developers orcontractors access to published resources in a production environment. This article shows you howto give access to published resources in a test environment by authenticating through Citrix Gatewaywith one domain. You can then use a different domain to authenticate to StoreFront and the Receiverfor Web site. Authentication through Citrix Gateway described in this article is supported for userslogging on through the Receiver for Web site. This authentication method is not supported for usersof native desktop or mobile Citrix Receiver or Citrix Workspace apps.
© 1999‒2022 Citrix Systems, Inc. All rights reserved. 263

StoreFront 2203
Set up a test environment
This example uses a production domain called production.com and a test domain called develop-ment.com.
production.com domain
The production.com domain in this example is set up as follows:
• Citrix Gateway with production.com LDAP authentication policy configured.• Authentication through the gateway occurs using a production\testuser1 account and pass-word.
development.com domain
The development.com domain in this example is set up as follows:
• StoreFront, Citrix Virtual App andDesktops and VDAs are all on thedevelopment.comdomain.• Authentication to the Citrix Receiver forWeb site occurs using a development\testuser1 accountand password.
• There is no trust relationship between the two domains.
Configure a Citrix Gateway for the store
To configure a Citrix Gateway for the store:
1. Select Stores in the left pane of the Citrix StoreFront management console, and in the Actionspane, clickManage Citrix Gateways.
2. On the Manage Citrix Gateways screen, click Add.
3. Complete the General Settings, Secure Ticket Authority, and Authentication steps.
© 1999‒2022 Citrix Systems, Inc. All rights reserved. 264
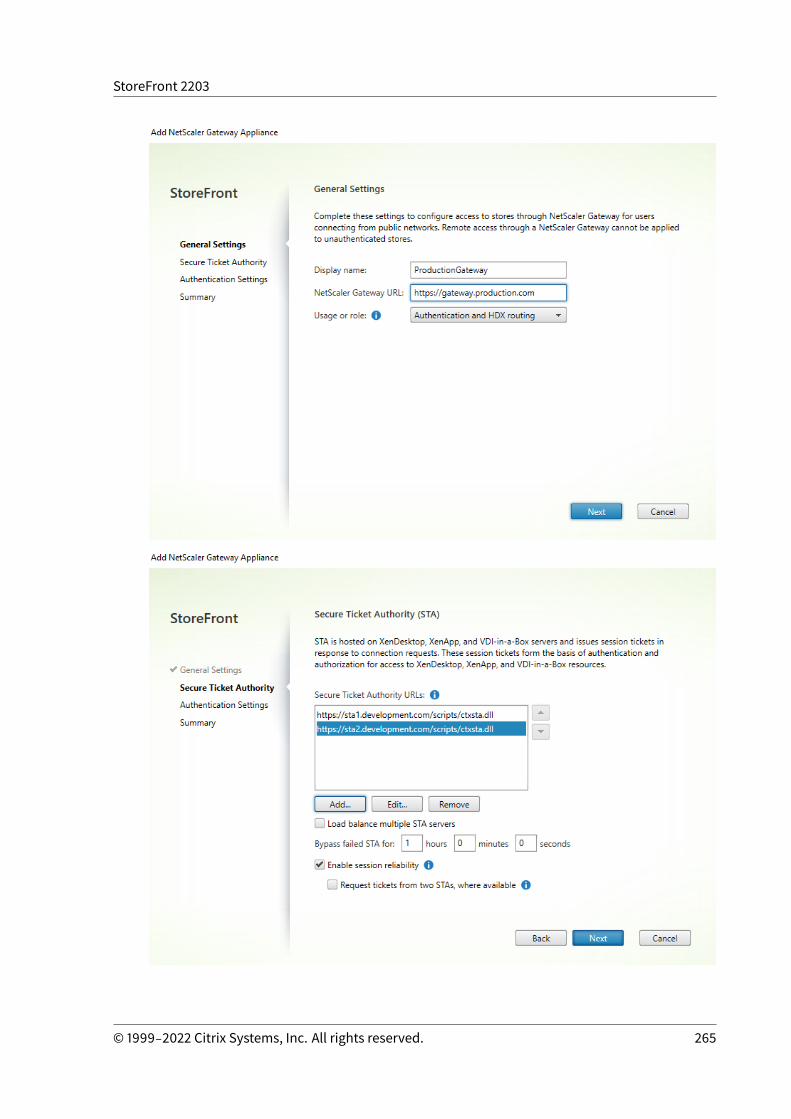
StoreFront 2203
© 1999‒2022 Citrix Systems, Inc. All rights reserved. 265

StoreFront 2203
Note:
DNS conditional forwarders may need to be added so that the DNS servers in use on both do-mains can resolve FQDNs on the other domain. The Citrix ADC appliancemust be able to resolvetheSTAserver FQDNson thedevelopment.comdomainusing itsproduction.comDNSserver.StoreFront should also be able to resolve the callback URL on the production.com domain us-ing its development.com DNS server. Alternatively, a development.com FQDN can be usedwhich resolves to the Citrix Gateway virtual server virtual IP (VIP).
Enable pass-through from Citrix Gateway
1. Select Stores in the left pane of the Citrix StoreFront management console, and in the Actionspane, clickManage Authentication Methods.
2. On the Manage Authentication Methods screen, select Pass-through from Citrix Gateway.3. ClickOK.
© 1999‒2022 Citrix Systems, Inc. All rights reserved. 266

StoreFront 2203
Configure the store for remote access using the Gateway
1. Select the Stores node in the left pane of the Citrix StoreFrontmanagement console and, in theresults pane, select a store. In the Actions pane, click Configure Remote Access Settings.
2. Select Enable Remote Access.3. Ensure that you have registered the Citrix Gateway with your store. If you do not register the
Citrix Gateway, the STA ticketing will not work.
© 1999‒2022 Citrix Systems, Inc. All rights reserved. 267

StoreFront 2203
Disable token consistency
1. Select the Stores node in the left pane of the Citrix StoreFrontmanagement console and, in theresults pane, select a store. In the Actions pane, click Configure Store Settings.
2. On the Configure Store Settings page, select Advanced Settings.
3. Clear the Require token consistency check box. For more information, see Advanced storesettings.
4. ClickOK.
© 1999‒2022 Citrix Systems, Inc. All rights reserved. 268

StoreFront 2203
Note:
TheRequire token consistency setting is selected (on) bydefault. If youdisable this setting, Smar-tAccess features used for Citrix ADC End Point Analysis (EPA) stopworking. Formore informationon SmartAccess, see CTX138110.
Disable pass-through from Citrix Gateway for the Receiver for Web siteImportant:
Disabling pass-through from Citrix Gateway prevents Receiver for Web from trying to use theincorrect credentials from the production.com domain passed from the Citrix ADC appliance.Disabling pass-through from Citrix Gateway causes Receiver for Web to prompt the user to entercredentials. These credentials are different from the credentials used to log on through theCitrixGateway.
1. Select the Stores node in the left pane of the Citrix StoreFront management console.
2. Select the store that you want to modify.
3. In the Actions pane, clickManage Receiver for Web Sites.
4. In Authentication Methods, clear Pass-through from Citrix Gateway.
© 1999‒2022 Citrix Systems, Inc. All rights reserved. 269

StoreFront 2203
5. ClickOK.
Log on to Gateway using a production.com user and credentials
To test, log on to Gateway using a production.com user and credentials.
After logon, the user is prompted to enter development.com credentials.
© 1999‒2022 Citrix Systems, Inc. All rights reserved. 270

StoreFront 2203
Add a trusted domain drop-down list in StoreFront (optional)
This setting is optional, but itmay help prevent the user fromaccidentally entering thewrong domainto authenticate through the Citrix Gateway.
If the user name is the same for both domains, entering the wrong domain is more likely. New usersmay also be used to leaving out the domain when they log on through the Citrix Gateway. Users maythen forget to enter domain\username for the second domain when they are prompted to log on tothe Receiver for Web site.
1. Select Stores in the left pane of the Citrix StoreFront management console, and in the Actionspane, clickManage Authentication Methods.
2. Select the drop-down arrow next toUser name and password.3. Click Add to add development.com as a trusted domain, and select the Show domains list in
logon page check box.4. ClickOK.
© 1999‒2022 Citrix Systems, Inc. All rights reserved. 271

StoreFront 2203
Note:
Browser password caching is not recommended in this authentication scenario. If users havedifferent passwords for the two different domain accounts, password caching can lead to a poorexperience.
Citrix Gateway clientless VPN (CVPN) session action policy
• If Single Sign-on to web applications is enabled within your Citrix Gateway session policy, in-correct credentials sent by Citrix ADC appliance to Receiver for Web are ignored because youdisabled the Pass-through from Citrix Gateway authentication method on the Receiver forWeb site. Receiver for Web prompts for credentials regardless of what this option is set to.
• Populating the Single Sign-on entries in the Client Experience and Published App tabs in CitrixADC appliance does not change the behavior described in this article.
© 1999‒2022 Citrix Systems, Inc. All rights reserved. 272

StoreFront 2203
© 1999‒2022 Citrix Systems, Inc. All rights reserved. 273

StoreFront 2203
Configure beacon points
July 1, 2019
Use the Manage Beacons task to specify URLs inside and outside your internal network to be used asbeacon points. Citrix Workspace app attempts to contact beacon points and uses the responses todetermine whether users are connected to local or public networks. When a user accesses a desktopor application, the location information is passed to the server providing the resource so that appro-priate connection details can be returned to Citrix Workspace app. This ensures that users are notprompted to log on again when they access a desktop or application.
© 1999‒2022 Citrix Systems, Inc. All rights reserved. 274

StoreFront 2203
For example, if the internal beacon point is accessible, this indicates that the user is connected to thelocalnetwork. However, if CitrixWorkspaceappcannot contact the internalbeaconpoint and receivesresponses from both the external beacon points, this means that the user has an Internet connectionbut is outside the corporate network. Therefore, the user must connect to desktops and applicationsthough Citrix Gateway. When the user accesses a desktop or application, the server providing theresource is notified to provide details of the Citrix Gateway appliance through which the connectionmust be routed. This means that the user does not need to log on to the appliance when accessingthe desktop or application.
By default, StoreFront uses the server URL or load-balanced URL of your deployment as the internalbeacon point. The Citrix website and the virtual server or user logon point (for Access Gateway 5.0)URL of the first Citrix Gateway deployment you add are used as external beacon points by default.
If you change any beacon points, ensure that users update Citrix Workspace app with the modifiedbeacon information. Where a Receiver for Web site is configured for a store, users can obtain an up-dated Citrix Workspace app provisioning file from the site. Otherwise, you can export a provisioningfile for the store andmake this file available to your users.
Important:
In multiple server deployments, use only one server at a time tomake changes to the configura-tion of the server group. Ensure that the Citrix StoreFront management console is not runningon any of the other servers in the deployment. Once complete,propagate your configuration changes to the server group so that the other servers in the deploy-ment are updated.
1. On the Windows Start screen or Apps screen, locate and click the Citrix StoreFront tile.
2. Select the Stores node in the left pane of the Citrix StoreFrontmanagement console and, in theActions pane, clickManage Beacons.
3. Specify the URL to use as the internal beacon point.
• To use the server URL or load-balanced URL of your StoreFront deployment, select Usethe service URL.
• To use an alternativeURL, selectSpecify beaconaddress and enter a highly availableURLwithin your internal network.
4. Click Add to enter the URL of an external beacon point. To modify a beacon point, select theURL in the External beacons list and click Edit. Select a URL in the list and click Remove to stopusing that address as a beacon point.
You must specify at least two highly available external beacon points that can be resolvedfrom public networks. The beacon URLs should be fully qualified domain names (http://example.com) and not the abbreviated NetBIOS name (http://example). This enablesCitrix Workspace app to determine whether users are located behind an Internet paywall, such
© 1999‒2022 Citrix Systems, Inc. All rights reserved. 275

StoreFront 2203
as in a hotel or Internet café. In such cases, all the external beacon points connect to the sameproxy.
Create a single Fully Qualified Domain Name (FQDN) to access a storeinternally and externally
August 20, 2020
Youcanprovideaccess to resources fromwithinyour corporatenetworkand fromthe Internet throughaCitrixGatewayand simplify theuser experienceby creatinga single FQDN forboth internal and roam-ing external clients.
Creating a single FQDN is helpful to users who configure any of the native Receivers. They need re-member only a single URL whether they are currently connected to an internal or public network.
StoreFront beacons for Citrix Workspace app
CitrixWorkspaceappattempts to contactbeaconpoints anduses the responses todeterminewhetherusers are connected to local or public networks. When a user accesses a desktop or application, thelocation information is passed to the server providing the resource so that appropriate connectiondetails can be returned to Citrix Workspace app. This ensures that users are not prompted to log onagain when they access a desktop or application. For information about configuring beacon points,see Configure beacon points.
Note:
In this article, mentions of “Citrix Workspace app” also apply to the supported versions of CitrixReceiver unless otherwise noted.
Configure the Citrix Gateway virtual server and SSL Certificate
The shared FQDN resolves either to an external firewall router interface IP or Citrix Gateway virtualserver IP in the DMZ when external clients try to access resources from outside of the corporate net-work. Ensure theCommonNameandSubjectAlternativeName fieldsof theSSLcertificate contain theshared FQDN to be used to access the store externally. By using a third party root CA such as Verisigninstead of an enterprise Certification Authority (CA) to sign the gateway certificate, any external clientautomatically trusts the certificate bound to the gateway vServer. If you use a third party root CA suchas Verisign, no additional root CA certificates need to be imported on to external clients.
To deploy a single certificate with the Common Name of the shared FQDN to both the Citrix Gatewayand the StoreFront server, consider whether you want to support remote discovery. If so, make sure
© 1999‒2022 Citrix Systems, Inc. All rights reserved. 276

StoreFront 2203
the certificate follows the specification for the Subject Alternative Names.
Citrix Gateway virtual server example certificate: storefront.example.com
1. Ensure that the shared FQDN, the callback URL, and the accounts alias URL are included in theDNS field as Subject Alternative Name (SANs).
2. Ensure that the private key is exportable so the certificate and key can be imported into theCitrix Gateway.
3. Ensure that Default Authorization is set to Allow.
4. Sign the certificate using a third party CA such as Verisign or an enterprise root CA for your orga-nization.
Two-node server group example SANs
storefront.example.com (mandatory)
© 1999‒2022 Citrix Systems, Inc. All rights reserved. 277

StoreFront 2203
storefrontcb.example.com (mandatory)
accounts.example.com (mandatory)
storefrontserver1.example.com (optional)
storefrontserver2.example.com (optional)
Sign the Citrix Gateway virtual server SSL certificate using a Certification Authority(CA)
Based on your requirements, you have two options for choosing the type of CA signed certificate.
• Option 1 - Third Party CA signed certificate: If the certificate bound to the Citrix Gateway virtualserver is signed by a trusted third party, external clients will likely NOT need any root CA certifi-cates copied to the their trusted root CA certificate stores. Windows clients shipwith the root CAcertificates of themost common signing agencies. Examples of commercial third party CAs thatcould be used include DigiCert, Thawte, and Verisign. Note that mobile devices such as iPads,iPhones, and Android tablets and phones might still require the root CA to be copied onto thedevice to trust the Citrix Gateway virtual server.
• Option 2 - Enterprise Root CA signed certificate: If you choose this option, every external clientrequires the enterprise rootCA certificate copied to their trusted rootCA stores. If usingportabledevices with native Receiver installed, such as iPhones and iPads, create a security profile onthese devices.
Import the root certificate into portable devices
• iOS devices can import .CER x.509 certificate files using email attachments, because accessingthe local storage of iOS devices is usually not possible.
• Android devices require the same .CER x.509 format. The certificate can be imported from thedevice local storage or email attachments.
External DNS: storefront.example.com
Ensure that the DNS resolution provided by your organization’s Internet service provider resolves tothe externally facing IPof the firewall router on theoutside edgeofDMZor to theCitrix Gateway virtualserver VIP.
Split view DNS
• When split-viewDNS is correctly configured, the source address of the DNS request should sendthe client to the correct DNS A record.
© 1999‒2022 Citrix Systems, Inc. All rights reserved. 278

StoreFront 2203
• When clients roambetween public and corporate networks, their IP should change. Dependingon the network to which they are currently connected, they should receive the correct A recordwhen they query storefront.example.com.
Import certificates issued from aWindows CA to Citrix Gateway
WinSCP is a useful and free third party tool tomove files from aWindowsmachine to a Citrix Gatewayfile system. Copy certificates for import to the /nsconfig/ssl/ folder within the Citrix Gateway file sys-tem. You can use the OpenSSL tools on the Citrix Gateway to extract the certificate and key from aPKCS12/PFX file to create two separate .CER and .KEY X.509 files in PEM format that can be used bythe Citrix Gateway
1. Copy the PFX file into /nsconfig/ssl on the Citrix Gateway appliance or VPX.2. Open the Citrix Gateway command line interface.3. To switch to the FreeBSD shell, type Shell to exit the Citrix Gateway command line interface.4. To change directory, use cd /nsconfig/ssl.5. Runopenssl pkcs12 -in <imported cert file>.pfx -nokeys -out <certfilename
>.cer and enter the PFX password when prompted.6. Runopenssl pkcs12 -in <imported cert file>.pfx -nocerts -out <keyfilename
>.key7. Enter the PFX password when prompted and then set a private key PEM passphrase to protect
the .KEY file.8. To ensure that the .CER and .KEY files were successfully created inside /nsconfig/ssl/, run ls ‒
al.9. To return to the Citrix Gateway command line interface, type Exit.
Citrix Receivers for Windows, or Citrix Receivers for Mac, Citrix Gateway session policy
REQ.HTTP.HEADER User-Agent CONTAINS CitrixReceiver && REQ.HTTP.HEADER X-Citrix-Gateway EX-ISTS
Receiver for Web Gateway session policy
REQ.HTTP.HEADER User-Agent NOTCONTAINS CitrixReceiver && REQ.HTTP.HEADER Referer EXISTS
cVPN and Smart Access Settings
If you use SmartAccess, enable smart access mode on the Citrix Gateway virtual server propertiespage. Universal Licenses are required for every concurrent user who accesses remote resources.
© 1999‒2022 Citrix Systems, Inc. All rights reserved. 279

StoreFront 2203
Receiver profile
Configure the session profile accounts service URL to be https://accounts.example.com/Citrix/Roaming/Accounts NOT https://storefront.example.com/Citrix/Roaming/Accounts.
© 1999‒2022 Citrix Systems, Inc. All rights reserved. 280

StoreFront 2203
Also add this URL as an additional <allowedAudiences> in the authentication and roamingweb.configfiles on the StoreFront server. For more information, see the “Configure the StoreFront server hostbase URL, gateway, and SSL certificate” section below.
© 1999‒2022 Citrix Systems, Inc. All rights reserved. 281

StoreFront 2203
Receiver for Web profile
© 1999‒2022 Citrix Systems, Inc. All rights reserved. 282

StoreFront 2203
ICA Proxy & Basic Mode settings
If you use ICA proxy, enable basic mode on the Citrix Gateway virtual server properties page. Only aCitrix ADC platform license is required.
© 1999‒2022 Citrix Systems, Inc. All rights reserved. 283

StoreFront 2203
Receiver profile
© 1999‒2022 Citrix Systems, Inc. All rights reserved. 284

StoreFront 2203
Receiver for Web profile
© 1999‒2022 Citrix Systems, Inc. All rights reserved. 285

StoreFront 2203
Configure the StoreFront server host base URL, gateway, and SSL certificate
The same shared FQDN that resolves to the Citrix Gateway virtual server should also resolve directlyto the StoreFront load balancer, if a StoreFront cluster was created or a single StoreFront IP that hoststhe store.
Internal DNS: Create three DNS A records
• storefront.example.com should resolve to the storefront load balancer or single StoreFrontserver IP.
• storefrontcb.example.com should resolve to the gateway vServer VIP so if a firewall exists be-tween the DMZ and the enterprise local network, allow for this.
• accounts.example.com — create as a DNS alias for storefront.example.com. It also resolves tothe load balancer IP for the StoreFront cluster or a single StoreFront server IP.
StoreFront server example certificate: storefront.example.com
1. Create a suitable certificate for the StoreFront server or server group before installing Store-Front.
2. Add the shared FQDN to theCommonnameandDNS fields. Ensure thismatches the FQDNusedin the SSL certificate bound to the Citrix Gateway virtual server that you created earlier or usethe same certificate bound to the Citrix Gateway virtual server.
3. Add the account’s alias (accounts.example.com) as another SAN to the certificate. Note thatthe accounts alias used in the SAN is the one used in the Citrix Gateway Session Profile in theearlier procedure - Native Receiver Gateway session policy and profile.
© 1999‒2022 Citrix Systems, Inc. All rights reserved. 286

StoreFront 2203
4. Ensure that the private key is exportable so the certificate can be transferred to another serveror to multiple StoreFront server group nodes.
© 1999‒2022 Citrix Systems, Inc. All rights reserved. 287

StoreFront 2203
5. Sign the certificate using a third party CA such as VeriSign, your enterprise root CA, or interme-diate CA.
6. Export the certificate in PFX format including the private key.
7. Import the certificate and private key into the StoreFront server. If deploying a Windows NLBStoreFront cluster, import the certificate into every node. If using an alternative load balancer,such as a Citrix ADC load balancing virtual server, import the certificate there instead.
8. Create an HTTPS binding in IIS on the StoreFront server and bind the imported SSL certificateto it.
© 1999‒2022 Citrix Systems, Inc. All rights reserved. 288

StoreFront 2203
9. Configure thehostbaseURLon theStoreFront server tomatch thealreadychosen sharedFQDN.
Note:
StoreFront always auto selects the last Subject Alternative Name in the list of SANs withinthe certificate. This ismerely a suggestedhostbaseURL toassist StoreFront administratorsand is usually correct. You can manually set it to any valid HTTPS://<FQDN> provided itexists within the certificate as a SAN. Example: https://storefront.example.com.
Change the server base URL fromHTTP to HTTPS
The host base URL option is available when configuring Single Server deployment or Server Groupdeployment on Citrix StoreFront. This applies to customers who have installed and configured Cit-rix StoreFront without a server certificate. After installing the certificate, ensure StoreFront and itsservices use a secure connection moving forward.
Note:
The IT Administrator must generate and install a server certificate on Citrix StoreFront server be-fore running this procedure. In addition, an IIS binding needs to be created over HTTPS (443) to
© 1999‒2022 Citrix Systems, Inc. All rights reserved. 289

StoreFront 2203
secure any new connection.
Complete the following steps to change the base URL on StoreFront 3.x:
1. In the StoreFront, click Server Group on the left panel.
2. Click Change Base URL on the right panel.
3. Type the base URL and clickOK.
Configure the Gateway on the StoreFront server: storefront.example.com
1. From the Stores node, click onManage Citrix Gateways in the Actions pane.
2. Select the Gateway from the list and click Edit.
3. On the General Settings page, type the shared FQDN in the Citrix Gateway URL field.
4. Select theAuthenticationSettings tab and type the callback FQDN into theCallbackURL field.
© 1999‒2022 Citrix Systems, Inc. All rights reserved. 290

StoreFront 2203
5. Select the Secure Ticket Authority tab and ensure that the Secure Ticket Authority (STA)servers match the list of Delivery Controllers already configured within the Store node.
6. Enable remote access for the store.
7. Manually set the internal beacon to the accounts alias (accounts.example.com) and it mustnot be resolvable from outside the gateway. This FQDN must be distinct from the externalbeacon that is shared by the StoreFront hostbase URL and Citrix Gateway virtual server (store-front.example.com). DO NOT use the shared FQDN, as this creates a situation where both theinternal and external beacons are identical.
© 1999‒2022 Citrix Systems, Inc. All rights reserved. 291

StoreFront 2203
Support discovery usingmultiple different FQDNs
To support discovery using multiple different FQDNs, use these steps. If the provisioning file configu-ration is enough or if you are using only Receiver for Web, you can skip the following steps.
Addanadditional<allowedAudiences>entry inC:\inetpub\wwwroot\Citrix\Authentication\web.config.There are two <allowedAudiences> entries in this file. Only the first entry in the file for the Authen-tication Token Producer requires you to add an additional <allowedAudience> entry.
1. In the section <service id>, find the <allowedAudiences> string. Add a line for audience=”https://accounts.example.com/” as shown here. Save, and close the web.config file.
1 \<service id=”abd6f54b-7d1c-4a1b-a8d7-14804e6c8c64” displayName=”Authentication Token Producer”>
2 ...3 \<allowedAudiences>4 \<add name=”https-storefront.example.com” audience=”https://
storefront.example.com/” />
© 1999‒2022 Citrix Systems, Inc. All rights reserved. 292

StoreFront 2203
5 \<add name=”https-accounts.example.com” audience=”https://accounts.example.com/” />
6 \</allowedAudiences>7 <!--NeedCopy-->
2. In C:\inetpub\wwwroot\Citrix\Roaming\web.config, locate the <tokenManager> section and adda line for audience=”https://accounts.example.com/” as shown here. Save, and closethe web.config file.
1 \<tokenManager>2 \<services>3 \<clear />4 ...5 \</trustedIssuers>6 \<allowedAudiences>7 \<add name=”https-storefront.example.com” audience=”https://
storefront.example.com/” />8 \<add name=`https-accounts.example.com” audience=”https://accounts
.example.com/” />9 \</allowedAudiences>10 \</service>11 \</services>12 \</tokenManager>13 <!--NeedCopy-->
Alternatively, you can export the native receiver .CR provisioning file for the store. This eliminates theneed for First Time Use configuration of Citrix Workspace app. Distribute this file to all Windows andMAC Citrix Workspace app clients.
© 1999‒2022 Citrix Systems, Inc. All rights reserved. 293

StoreFront 2203
If Citrix Workspace app is installed on the client, the .CR file type is recognized and double clicking onthe provisioning file starts the import.
Advanced configurations
December 18, 2019
You can configure the following advancedoptionusing the StoreFront console, PowerShell, certificateproperties, or configuration files.
Task Detail
Configure Resource Filtering Filter enumeration resources based onresource type and keywords.
© 1999‒2022 Citrix Systems, Inc. All rights reserved. 294

StoreFront 2203
Configure Resource Filtering
January 25, 2019
This topic explains how to filter enumeration resources based on resource type and keywords. Youcan use this type of filtering with the more advanced customization offered by the Store Customiza-tion SDK. Using this SDK, you can control which apps and desktops are displayed to users, modify ac-cess conditions, and adjust launch parameters. For more information, see the Citrix StoreFront SDKPowerShell Modules.
Note:
The StoreFront and PowerShell consoles cannot be open at the same time. Always close theStoreFront admin console before using the PowerShell console to administer your StoreFrontconfiguration. Likewise, closeall instancesofPowerShell beforeopening theStoreFront console.
Configure filtering
Configure the filter using PowerShell cmdlets defined within the StoresModule. Use the followingPowerShell snippet to load the required modules:
1 $dsInstallProp = Get-ItemProperty `2 -Path HKLM:\SOFTWARE\Citrix\DeliveryServicesManagement -Name
InstallDir3 $dsInstallDir = $dsInstallProp.InstallDir4 & $dsInstallDir\..\Scripts\ImportModules.ps15 <!--NeedCopy-->
Filter by type
Use this to filter the resource enumeration by resource type. This is an inclusive filter, meaning itremoves any resources that are not of the specified types from the resource enumeration result. Usethe following cmdlets:
Set-DSResourceFilterType: Sets up enumeration filtering based on resource types.
Get-DSResourceFilterType: Gets the list of resource types that Storefront is allowed to return in enu-meration.
Note: Resource types are applied before keywords.
© 1999‒2022 Citrix Systems, Inc. All rights reserved. 295

StoreFront 2203
Filter by keywords
Use this to filter resources based on keywords, such as resources derived from Citrix Virtual Appsand Desktops. Keywords are generated from mark-up in the description field of the correspondingresource.
The filter can operate either in inclusive or exclusive mode, but not both. The inclusive filter allowsenumeration of resources matching the configured keywords and removes non matching resourcesfromtheenumeration. Theexclusive filter removes resourcesmatching theconfiguredkeywords fromthe enumeration. Use the following cmdlets:
Set-DSResourceFilterKeyword: Sets up enumeration filtering based on resource keywords.
Get-DSResourceFilterKeyword: Gets the list of filter keywords.
The following keywords are reserved andmust not be used for filtering:
• Auto• Mandatory
For more information on keywords, see Optimize the user experience and Configuring applicationdelivery.
Examples
This command sets filtering to exclude workflow resources from enumeration:
1 Set-DSResourceFilterKeyword -SiteId 1 -VirtualPath ”/Citrix/Store” -ExcludeKeywords @(”WFS”)
2 <!--NeedCopy-->
This example sets allowed resource types to applications only:
1 Set-DSResourceFilterType -SiteId 1 -VirtualPath ”/Citrix/Store” -IncludeTypes @(”Applications”)
2 <!--NeedCopy-->
Configure using configuration files
December 18, 2019
© 1999‒2022 Citrix Systems, Inc. All rights reserved. 296

StoreFront 2203
You can use configuration files to configure additional settings for Citrix StoreFront andCitrix Receiverfor Web that cannot be set with the Citrix StoreFront management console.
The Citrix StoreFront settings you can configure include:
• Enable ICA file signing• Disable file type association• Customize the Citrix Workspace app logon dialog box• Prevent Citrix Workspace app for Windows from caching passwords and usernames
The Citrix Receiver for Web settings you can configure include:
• How resources are displayed for users• Disable the My Apps Folder View
Configure StoreFront using the configuration files
March 12, 2019
This article describes additional configuration tasks that cannot be carried out using the Citrix Store-Front management console.
Important:
In multiple server deployments, use only one server at a time tomake changes to the configura-tion of the server group. Ensure that the Citrix StoreFront management console is not runningon any of the other servers in the deployment. Once complete,propagate your configuration changes to the server group so that the other servers in the deploy-ment are updated.
Enable ICA file signing
StoreFront provides the option to digitally sign ICA files so that versions of Citrix Workspace app thatsupport this feature can verify that the file originates from a trusted source. When file signing is en-abled inStoreFront, the ICA file generatedwhenauser starts anapplication is signedusingacertificatefrom the personal certificate store of the StoreFront server. ICA files can be signed using any hash al-gorithm supported by the operating system running on the StoreFront server. The digital signatureis ignored by clients that do not support the feature or are not configured for ICA file signing. If thesigning process fails, the ICA file is generated without a digital signature and sent to Citrix Receiver,the configuration of which determines whether the unsigned file is accepted.
To be used for ICA file signing with StoreFront, certificates must include the private key and be withinthe allowed validity period. If the certificate contains a key usage extension, this must allow the key
© 1999‒2022 Citrix Systems, Inc. All rights reserved. 297

StoreFront 2203
to be used for digital signatures. Where an extended key usage extension is included, it must be set tocode signing or server authentication.
For ICA file signing, Citrix recommends using a code signing or SSL signing certificate obtained froma public certification authority or from your organization’s private certification authority. If you areunable to obtain a suitable certificate from a certification authority, you can either use an existingSSL certificate, such as a server certificate, or create a new root certification authority certificate anddistribute it to users’ devices.
ICA file signing is disabled by default in stores. To enable ICA file signing, you edit the store configura-tion file and execute Windows PowerShell commands. For more information about enabling ICA filesigning inCitrixWorkspaceapp, see ICAFileSigning toprotect against applicationordesktop launchesfrom untrusted servers.
Note:
The StoreFront and PowerShell consoles cannot be open at the same time. Always close theStoreFront admin console before using the PowerShell console to administer your StoreFrontconfiguration. Likewise, closeall instancesofPowerShell beforeopening theStoreFront console.
1. Ensure that the certificate you want to use to sign ICA files is available in the Citrix Delivery Ser-vices certificate store on the StoreFront server and not the current user’s certificate store.
2. Use a text editor to open the web.config file for the store, which is typically located in theC:\inetpub\wwwroot\Citrix\storename\ directory, where storename is the name specified forthe store when it was created.
3. Locate the following section in the file.
1 <certificateManager>2 <certificates>3 <clear />4 <add ... />5 ...6 </certificates>7 </certificateManager>8 <!--NeedCopy-->
4. Include details of the certificate to be used for signing.
1 <certificateManager>2 <certificates>3 <clear />4 <add id=”certificateid” thumb=”certificatethumbprint” />
© 1999‒2022 Citrix Systems, Inc. All rights reserved. 298

StoreFront 2203
5 <add ... />6 ...7 </certificates>8 </certificateManager>9 <!--NeedCopy-->
Where certificateid is a value that helps you to identify the certificate in the store configurationfile and certificatethumbprint is the digest (or thumbprint) of the certificate data produced bythe hash algorithm.
5. Locate the following element in the file.
1 <icaFileSigning enabled=”False” certificateId=”” hashAlgorithm=”sha1” />
2 <!--NeedCopy-->
6. Change the value of the enabled attribute to True to enable ICA file signing for the store. Set thevalue of the certificateId attribute to the ID you used to identify the certificate, that is, certifi-cateid in Step 4.
7. If youwant touseahashalgorithmother thanSHA-1, set the valueof thehashAgorithmattributeto sha256, sha384, or sha512, as required.
8. Usinganaccountwith local administratorpermissions, startWindowsPowerShell and, at a com-mand prompt, type the following commands to enable the store to access the private key.
1 Add-PSSnapin Citrix.DeliveryServices.Framework.Commands2 $certificate = Get-DSCertificate ”certificatethumbprint”3 Add-DSCertificateKeyReadAccess -certificate $certificates[0] -
accountName ”IIS APPPOOL\Citrix Delivery Services Resources”4 <!--NeedCopy-->
Where certificatethumbprint is thedigest of the certificatedataproducedby thehashalgorithm.
Disable file type association
By default, file type association is enabled in stores so that content is seamlessly redirected to users’subscribed applications when they open local files of the appropriate types. To disable file type asso-ciation, you edit the store configuration file.
1. Use a text editor to open the web.config file for the store, which is typically located in theC:\inetpub\wwwroot\Citrix\storename\ directory, where storename is the name specified forthe store when it was created.
© 1999‒2022 Citrix Systems, Inc. All rights reserved. 299

StoreFront 2203
2. Locate the following element in the file.
1 <farmset ... enableFileTypeAssociation=”on” ... >2 <!--NeedCopy-->
3. Change the value of the enableFileTypeAssociation attribute to off to disable file type associa-tion for the store.
Customize the Citrix Workspace app logon dialog box
When users log on to a store, no title text is displayed on the logon dialog box, by default. You can dis-play the default text “Please log on” or compose your own custommessage. To display and customizethe title text on the logon dialog box, you edit the files for the authentication service.
1. Use a text editor to open the UsernamePassword.tfrm file for the authentication service, whichis typically located in the C:\inetpub\wwwroot\Citrix\Authentication\App_Data\Templates\ di-rectory.
2. Locate the following lines in the file.
1 @* @Heading(”ExplicitAuth:AuthenticateHeadingText”) *@2 <!--NeedCopy-->
3. Uncomment the statement by removing the leading and trailing leading@* and trailing *@.
1 @Heading(”ExplicitAuth:AuthenticateHeadingText”)2 <!--NeedCopy-->
CitrixWorkspace app users see the default title text “Please log on”, or the appropriate localizedversion of this text, when they log on to stores that use this authentication service.
4. Tomodify the title text, use a text editor to open the ExplicitFormsCommon.xx.resx file for the au-thenticationservice,which is typically located in theC:\inetpub\wwwroot\Citrix\Authentication\App_Data\resources\directory.
5. Locate the following elements in the file. Edit the text enclosed within the <value> element tomodify the title text that users see on the logon dialog boxwhen they access stores that use thisauthentication service.
© 1999‒2022 Citrix Systems, Inc. All rights reserved. 300

StoreFront 2203
1 <data name=”AuthenticateHeadingText” xml:space=”preserve”>2 <value>My Company Name</value>3 </data>4 <!--NeedCopy-->
Tomodify the logon dialog box title text for users in other locales, edit the localized files Explici-tAuth.languagecode.resx, where languagecode is the locale identifier.
Prevent Citrix Workspace app for Windows from caching passwords and usernames
By default, Citrix Workspace app forWindows stores users’ passwords when they log on to StoreFrontstores. To prevent Citrix Receiver for Windows or Citrix Workspace app for Windows, but not Citrix Re-ceiver forWindowsEnterprise, fromcachingusers’ passwords, you edit the files for the authenticationservice.
1. Usea texteditor toopen the file inetpub\wwwroot\Citrix\Authentication\App_Data\Templates\UsernamePassword.tfrm.
2. Locate the following line in the file.
1 @SaveCredential(id: @GetTextValue(”saveCredentialsId”), labelKey:”ExplicitFormsCommon:SaveCredentialsLabel”, initiallyChecked:ControlValue(”SaveCredentials”))
2 <!--NeedCopy-->
3. Comment the statement as shown below.
1 <!-- @SaveCredential(id: @GetTextValue(”saveCredentialsId”),labelKey: ”ExplicitFormsCommon:SaveCredentialsLabel”,initiallyChecked: ControlValue(”SaveCredentials”)) -->
2 <!--NeedCopy-->
Users must enter their passwords every time they log on to stores that use this authenticationservice. This setting does not apply to Citrix Receiver for Windows Enterprise.
Warning:
Using Registry Editor incorrectly can cause serious problems that can require you to reinstall theoperating system. Citrix cannot guarantee that problems resulting from incorrect use of RegistryEditor can be solved. Use Registry Editor at your own risk. Make sure you back up the registrybefore you edit it.
© 1999‒2022 Citrix Systems, Inc. All rights reserved. 301

StoreFront 2203
By default, Citrix Receiver for Windows automatically populated the last username entered. To su-press population of the username field, edit the registry on the user device:
1. Create a REG_SZ value HKLM\SOFTWARE\Citrix\AuthManager\RememberUsername.2. Set its value “false”.
Configure Citrix Receiver for Web sites using the configuration files
March 12, 2019
This article describes additional configuration tasks for Citrix Receiver for Web sites that cannot becarried out using the Citrix StoreFront management console.
Important:
In multiple server deployments, use only one server at a time tomake changes to the configura-tion of the server group. Ensure that the Citrix StoreFront management console is not runningon any of the other servers in the deployment. Once complete,propagate your configuration changes to the server group so that the other servers in the deploy-ment are updated.
Configure how resources are displayed for users
When both desktops and applications are available from a Citrix Receiver for Web site, separate desk-top and application views are displayed by default. Users see the desktop view first when they logon to the site. If only a single desktop is available for a user, regardless of whether applications arealso available from a site, that desktop starts automatically when the user logs on. To change thesesettings, you edit the site configuration file.
1. Use a text editor to open the web.config file for the Citrix Receiver for Web site, which is typi-cally located in the C:\inetpub\wwwroot\Citrix\storenameWeb\ directory, where storename isthe name specified for the store when it was created.
2. Locate the following element in the file.
1 <uiViews showDesktopsView=”true” showAppsView=”true” defaultView=”desktops” />
2 <!--NeedCopy-->
3. Change the value of the showDesktopsView and showAppsView attributes to false to preventdesktops and applications, respectively, being displayed to users, even if they are available
© 1999‒2022 Citrix Systems, Inc. All rights reserved. 302

StoreFront 2203
from the site. When both the desktop and application views are enabled, set the value of thedefaultView attribute to apps to display the application view first when users log on to the site.
4. Locate the following element in the file.
1 <userInterface ... autoLaunchDesktop=”true”>2 <!--NeedCopy-->
5. Change the value of the autoLaunchDesktop attribute to false to prevent Citrix Receiver forWeb sites fromautomatically starting a desktopwhen a user logs on to the site and only a singledesktop is available for that user.
When the autoLaunchDesktop attribute is set to true and a user for whom only one desktopis available logs on, that user’s applications are not reconnected, regardless of the workspacecontrol configuration.
Note:
To enable Citrix Receiver for Web sites to start their desktops automatically, users accessing thesite through Internet Explorer must add the site to the Local intranet or Trusted sites zones.
Disable the My Apps Folder View
1. Use a text editor to open the web.config file for the Citrix Receiver for Web site, which is typi-cally located in the C:\inetpub\wwwroot\Citrix\storenameWeb\ directory, where storename isthe name specified for the store when it was created.
2. Locate the following element in the file.
1 <userInterface enableAppsFolderView=”true”>2 <!--NeedCopy-->
3. Change the value of the enableAppsFolderView attribute to false to disable Citrix Receiver forWeb My Apps Folder View.
Secure your StoreFront deployment
March 29, 2022
This article highlights areas that may have an impact on system security when deploying and config-uring StoreFront.
© 1999‒2022 Citrix Systems, Inc. All rights reserved. 303

StoreFront 2203
Configure Microsoft Internet Information Services (IIS)
You can configure StoreFront with a restricted IIS configuration. Note that this is not the default IISconfiguration.
Filename extensions
You can disallow unlisted file name extensions.
StoreFront requires the following file name extensions in Request Filtering:
• . (blank extension)• .appcache• .aspx• .cr• .css• .dtd• .png• .htm• .html• .ica• .ico• .jpg• .js• .png• .svg• .txt• .xml
If download or upgrade of Citrix Workspace app is enabled for Citrix Receiver for Web, StoreFront alsorequires these file name extensions:
• .dmg• .exe
If Citrix Workspace app for HTML5 is enabled, StoreFront also requires these file name extensions:
• .eot• .ttf• .woff
MIME Types
You can remove MIME Types corresponding to the following file types:
© 1999‒2022 Citrix Systems, Inc. All rights reserved. 304

StoreFront 2203
• .exe• .dll• .com• .bat• .csh
Request Filtering
StoreFront requires the following HTTP verbs in Request Filtering. You can disallow unlisted verbs.
• GET• POST• HEAD
Other Microsoft IIS settings
StoreFront does not require:
• ISAPI filters• ISAPI extensions• CGI programs• FastCGI programs
Important:
• Do not configure IIS Authorization Rules. StoreFront supports authentication directly, anddoes not use or support IIS authentication.
• Do not selectClient certificates: Require, in the SSL Settings for the StoreFront site. Store-Front installation configures the appropriate pages of the StoreFront site with this setting.
• StoreFront requires cookies. The Use Cookies setting must be selected. Do not select thecookieless/Use URI setting.
• StoreFront requires Full Trust. Do not set the global .NET trust level to High or lower.• StoreFront does not support a separate application pool for each site. Do notmodify thesesite settings. However, you can set the application pool idle time-out, and the amount ofvirtual memory an application pool uses.
Configure user rightsNote:
Microsoft IIS is enabled as part of StoreFront installation. Microsoft IIS grants the logon right Logon as a batch job, and the privilege Impersonate a client after authentication to the built-ingroup IIS_IUSRS. This is normal Microsoft IIS installation behavior. Do not change these user
© 1999‒2022 Citrix Systems, Inc. All rights reserved. 305

StoreFront 2203
rights. Refer to Microsoft documentation for details.
When you install StoreFront, its application pools are granted the logon right Log on as a serviceand the privileges Adjust memory quotas for a process, Generate security audits, and Replace aprocess level token. This is normal installation behavior when application pools are created. The ap-plication pools are Citrix Configuration Api, Citrix Delivery Services Resources, Citrix Delivery ServicesAuthentication, and Citrix Receiver for Web.
You do not need to change these user rights. These privileges are not used by StoreFront and areautomatically disabled.
StoreFront installation creates the following Windows services:
• Citrix Configuration Replication (NT SERVICE\CitrixConfigurationReplication)• Citrix Cluster Join (NT SERVICE\CitrixClusterService)• Citrix Peer Resolution (NT SERVICE\Citrix Peer Resolution Service)• Citrix Credential Wallet (NT SERVICE\CitrixCredentialWallet)• Citrix Subscriptions Store (NT SERVICE\CitrixSubscriptionsStore)• Citrix Default Domain Services (NT SERVICE\CitrixDefaultDomainService)
If you configure StoreFront Kerberos constrained delegation for XenApp 6.5, this creates the CitrixStoreFront Protocol Transition service (NT SERVICE\SYSTEM). This service requires a privilege not nor-mally granted to Windows services.
Configure service settings
The StoreFront Windows services listed above in the “Configure user rights” section are configuredto log on as the NETWORK SERVICE identity; do not change this configuration. The Citrix StoreFrontProtocol Transition service logs on as SYSTEM; do not change this configuration.
Configure groupmemberships
When you configure a StoreFront server group, the following services are added to the Administratorssecurity group:
• Citrix Configuration Replication (NT SERVICE\CitrixConfigurationReplication)• Citrix Cluster Join (NT SERVICE\CitrixClusterService) . This service is only seen on servers whichare part of a group, and only runs while the join is in progress.
These groupmemberships are required for StoreFront to operate correctly, to:
• Create, export, import and delete certificates, and set access permissions on them• Read and write the Windows registry• Add and remove Microsoft .NET Framework assemblies in the Global Assembly Cache (GAC)• Access the folder Program Files\Citrix\<StoreFrontLocation>
© 1999‒2022 Citrix Systems, Inc. All rights reserved. 306

StoreFront 2203
• Add, modify, and remove IIS app pool identities and IIS web applications• Add, modify, and remove local security groups and firewall rules• Add and remove Windows services and PowerShell snap-ins• Register MicrosoftWindows Communication Framework (WCF) endpoints
In updates to StoreFront, this list of operations might change without notice.
StoreFront installation also creates the following local security groups:
• CitrixClusterMembers• CitrixCWServiceReadUsers• CitrixCWServiceWriteUsers• CitrixDelegatedAuthenticatorUsers• CitrixDelegatedDirectoryClaimFactoryUsers• CitrixPNRSUsers• CitrixStoreFrontPTServiceUsers• CitrixSubscriptionServerUsers• CitrixSubscriptionsStoreServiceUsers• CitrixSubscriptionsSyncUsers
StoreFront maintains the membership of these security groups. They are used for access controlwithin StoreFront, and are not applied to Windows resources such as files and folders. Do not modifythese groupmemberships.
Certificates in StoreFront
Server certificates
Server certificates are used for machine identification and Transport Layer Security (TLS) transportsecurity in StoreFront. If you decide to enable ICA file signing, StoreFront can also use certificates todigitally sign ICA files.
To enable email-based account discovery for users installing Citrix Workspace app on a device for thefirst time, youmust install a valid server certificate on the StoreFront server. The full chain to the rootcertificatemustalsobevalid. For thebestuserexperience, install a certificatewithaSubjectorSubjectAlternative Name entry of discoverReceiver.domain, where domain is the Microsoft Active Directorydomain containing your users’ email accounts. Although you can use a wildcard certificate for thedomain containing your users’ email accounts, you must first ensure that the deployment of suchcertificates is permittedbyyour corporate security policy. Other certificates for thedomain containingyour users’ email accounts can also be used, but users will see a certificate warning dialog box whenCitrixWorkspaceapp first connects to theStoreFront server. Email-basedaccountdiscovery cannotbeused with any other certificate identities. For more information, see Configure email-based accountdiscovery.
© 1999‒2022 Citrix Systems, Inc. All rights reserved. 307

StoreFront 2203
If your users configure their accounts by entering store URLs directly into Citrix Workspace app anddo not use email-based account discovery, the certificate on the StoreFront server need only be validfor that server and have a valid chain to the root certificate.
Tokenmanagement certificates
Authentication services and stores each require certificates for tokenmanagement. StoreFront gener-atesa self-signedcertificatewhenanauthentication serviceor store is created. Self-signedcertificatesgenerated by StoreFront should not be used for any other purpose.
Citrix Delivery Services certificates
StoreFront holds a number of certificates in a custom Windows certificate store (Citrix Delivery Ser-vices). The Citrix Configuration Replication service, Citrix Credential Wallet service, and Citrix Sub-scriptions Store service use these certificates. Each StoreFront server in a cluster has a copy of thesecertificates. These services do not rely on TLS for secure communications, and these certificates arenot used as TLS server certificates. These certificates are created when a StoreFront store is createdor StoreFront is installed. Do not modify the contents of this Windows certificate store.
Code signing certificates
StoreFront includes a number of PowerShell scripts (.ps1) in the folder in <InstallDirectory>\Scripts.The default StoreFront installation does not use these scripts. They simplify the configuration stepsfor specific and infrequent tasks. These scripts are signed, allowing StoreFront to support PowerShellexecution policy. We recommend the AllSigned policy. (The Restricted policy is not supported, asthis prevents PowerShell scripts from executing.) StoreFront does not alter the PowerShell executionpolicy.
Although StoreFront does not install a code signing certificate in the Trusted Publishers store, Win-dows can automatically add the code signing certificate there. This happens when the PowerShellscript is executed with the Always run option. (If you select the Never run option, the certificate isadded to the Untrusted Certificates store, and StoreFront PowerShell scripts will not execute.) Oncethe code signing certificate has been added to the Trusted Publishers store, its expiration is no longercheckedbyWindows. You can remove this certificate from the TrustedPublishers store after the Store-Front tasks have been completed.
StoreFront communications
In aproduction environment, Citrix recommendsusing the Internet Protocol security (IPsec) orHTTPSprotocols to secure data passing between StoreFront and your servers. IPsec is a set of standard ex-tensions to the Internet Protocol that provides authenticated and encrypted communications with
© 1999‒2022 Citrix Systems, Inc. All rights reserved. 308

StoreFront 2203
data integrity and replay protection. Because IPsec is a network-layer protocol set, higher level proto-cols can use it without modification. HTTPS uses the Secure Sockets Layer (SSL) and Transport LayerSecurity (TLS) protocols to provide strong data encryption.
The SSL Relay can be used to secure data traffic between StoreFront and Citrix Virtual Apps servers.TheSSLRelay is a default component of Citrix Virtual Apps that performshost authentication anddataencryption.
Important:
From this release onward, StoreFront no longer supports TLS 1.0, and TLS 1.1 protocols betweenCitrix Virtual Apps and Desktops (formerly XenApp and XenDesktop) and Citrix Receiver, andWorkspace Hub.
Citrix recommends that you disable TLS 1.0 and 1.1 support in theWeb Server hosting StoreFront. Youshould enforce this via group policy objects, which create the necessary registry settings on the Store-Front server to disable older protocols like TLS 1.0 and TLS 1.1. See also theMicrosoft TLS/SSL Settingsreference topic.
Citrix recommends securingcommunicationsbetweenStoreFrontandusers’ devicesusingCitrixGate-way and HTTPS. To use HTTPS, StoreFront requires that the Microsoft Internet Information Services(IIS) instance hosting the authentication service and associated stores is configured for HTTPS. Inthe absence of the appropriate IIS configuration, StoreFront uses HTTP for communications. Citrixstrongly recommends that you do not enable unsecured user connections to StoreFront in a produc-tion environment.
StoreFront security separation
If you deploy any web applications in the same web domain (domain name and port) as StoreFront,then any security risks in those web applications could potentially reduce the security of your Store-Front deployment. Where a greater degree of security separation is required, Citrix recommends thatyou deploy StoreFront in a separate web domain.
Delivering SaaS andweb apps through Storefront
You can securely deliver your SaaS andweb applications to users through your StoreFront store. WithCitrix Cloud and the Access Control Sync for StoreFront utility, you can employ enhanced security andweb-filtering policies for these apps to protect your users and network frommalware and data leaks.Users access their StoreFront storeasusual to launch theSaaSandWebapps that youhaveconfiguredin Citrix Cloud. For more information see Access control for SaaS and Web apps in StoreFront.
© 1999‒2022 Citrix Systems, Inc. All rights reserved. 309

StoreFront 2203
ICA file signing
StoreFront provides the option to digitally sign ICA files using a specified certificate on the server sothat versions of Citrix Workspace app that support this feature can verify that the file originates froma trusted source. ICA files can be signed using any hash algorithm supported by the operating systemrunning on the StoreFront server, including SHA-1 and SHA-256. Formore information, see Enable ICAfile signing.
User change password
You can enable Receiver for Web site users logging on with Active Directory domain credentials tochange their passwords, either at any time or only when they have expired. However, this exposessensitive security functions to anyone who can access any of the stores that use the authenticationservice. If your organization has a security policy that reserves user password change functions forinternal use only, ensure that none of the stores are accessible from outside your corporate network.When you create the authentication service, the default configuration prevents Receiver for Web siteusers from changing their passwords, even if they have expired. For more information, see Optimizethe user experience.
Change StoreFront server base URL fromHTTP to HTTPS
To use HTTPS to secure communications between StoreFront and users’ devices, youmust configureMicrosoft Internet Information Services (IIS) for HTTPS. If you install and configure Citrix StoreFrontwithout first installing and configuring an SSL certificate, StoreFront uses HTTP for communications.
If you install and configure an SSL certificate at some time later, use the following procedure to ensureStoreFront and its services use HTTPS connections.
Example:
Before changing base URL to HTTPS:
After changing base URL to HTTPS:
1. Configure Microsoft Internet Information Services (IIS) for HTTPS on the StoreFront server:
a) Use the Internet Information Services (IIS) Manager console to import an SSL server certifi-cate signed by your Microsoft Active Directory domain certification authority.
b) Add an IIS binding over HTTPS (443) to the default web site.
© 1999‒2022 Citrix Systems, Inc. All rights reserved. 310

StoreFront 2203
For detailed instructions, see CTX200292.
2. In the Citrix StoreFront management console, in the left pane select Server Group.
3. In the Actions pane, select Change Base URL.
4. Type the base URL and clickOK.
Customizations
To strengthen security, donotwrite customizations that load content or scripts fromservers not underyour control. Copy the content or script into the Citrix Receiver for Web site custom folder where youare making the customizations. If StoreFront is configured for HTTPS connections, ensure that anylinks to custom content or scripts also use HTTPS.
Additional security informationNote:
This information may change at any time, without notice.
Your organization may want to perform security scans of StoreFront for regulatory reasons. The pre-ceding configuration options can help to eliminate some findings in security scan reports.
If there is a gatewaybetween the security scanner andStoreFront, particular findingsmay relate to thegateway rather than to StoreFront itself. Security scan reports usually do not distinguish these find-ings (for example, TLS configuration). Because of this, technical descriptions in security scan reportscan bemisleading.
When interpreting security scan reports, note the following:
• HTMLpages inStoreFrontmaynot include clickjackingprotection (byContent Security Policy orX-Frame-Options response headers). However, these HTML pages consist only of static content,and therefore clickjacking attacks are not relevant.
• The version of Microsoft IIS and the use of ASP.NET are visible in HTTP headers. However, thisinformation is already apparent from thepresenceof StoreFront itself, because it relies on thesetechnologies.
• When launching applications and desktops, StoreFront uses a token to protect against cross-site request forgery (CSRF). This token is sent as a cookie in a response without being markedas Secure or HttpOnly. When later sent in a request, the token is included in the query string ofa URL. However, StoreFront does not rely on this mechanism to authenticate HTTP requests.
• StoreFront uses the open source component jQuery. One version used is jQuery 1.3.2. Accord-ing to the jQuery open source project, a change wasmade in jQuery 1.12.0 tomitigate potentialvulnerabilities in a specific form of cross-domain request. This change was not a mitigation
© 1999‒2022 Citrix Systems, Inc. All rights reserved. 311

StoreFront 2203
to a vulnerability in jQuery itself; it was a mitigation to potential misuse by application logic.The relevant Citrix application logic, in the Receiver for Web feature shared by NetScaler andStoreFront, does not use this specific form of cross-domain request, is not affected by this vul-nerability, and did not benefit from this mitigation.
This mitigation was later removed in jQuery 1.12.3 for compatibility reasons. Since the Citrixapplication logic did not benefit from this mitigation, this removal has no material impact inthe versions of NetScaler and StoreFront using jQuery 1.12.4.
Export and import the StoreFront configuration
August 11, 2020
Note:
You can only import StoreFront configurations which are the same StoreFront version as the tar-get StoreFront installation.
You can export the entire configuration of a StoreFront deployment. This includes both single serverdeployments and server group configurations. If an existing deployment is already present on theimporting server, thecurrent configuration is erasedand then replacedby theconfigurationcontainedwithin the backup archive. If the target server is a clean factory default installation, a newdeploymentis created using the imported configuration stored within the backup. The exported configurationbackup is in the form of a single .zip archive if unencrypted, or a .ctxzip if you choose to encrypt thebackup file when it is created.
Scenarios where configuration export and import can be used
• Only backup StoreFront deployments in a working and trusted state. Any changes to the config-uration requires a new backup to be taken to replace the old one. You cannot modify existingbackups as a file hash of the backup.zip file prevents modification.
• Backup BEFORE upgrading StoreFront for disaster recovery.• Cloning existing testing StoreFront deployments to put into production• Creating user acceptance environments by cloning production deployments into a test environ-ment.
• MovingStoreFront duringOSmigrations suchas upgrading thehostingOS from2008R2 to 2019.• Building extra server groups inmultigeo deployments such as in large enterpriseswithmultipledatacenters.
© 1999‒2022 Citrix Systems, Inc. All rights reserved. 312

StoreFront 2203
Things to consider when exporting and importing a StoreFront configuration
• Do you currently use any Citrix published authentication SDK examples, such as Magic Wordauthentication or third party authentication customizations? If so, you must install these pack-ages on ALL importing servers BEFORE importing a configuration containing extra authentica-tion methods. The configuration import fails if required authentication SDK packages are notinstalled on any of the importing servers. If importing a configuration into a server group, installthe authentication packages on all members of the group.
• You can encrypt or decrypt your configuration backups. The exporting and importing Power-Shell cmdlets support both use cases.
• You can decrypt encrypted backups (.ctxzip) later, but StoreFront cannot re-encrypt unen-crypted backup files (.zip). If an encrypted backup is required, perform the export again usinga PowerShell credential object containing a password of your choice.
• The SiteID of the website in IIS where StoreFront is currently installed (exporting server) mustmatch the SiteID of the target website in IIS (importing server) where you want to restore thebacked up StoreFront configuration.
PowerShell cmdlets
Export-STFConfiguration
Parameter Description
-TargetFolder (String) The export path to the backup archive.Example: “$env:userprofile\desktop\”
-Credential (PSCredential Object) Specify a credential object to create anencrypted .ctxzip backup archive duringexport. The PowerShell credential objectshould contain the password to use forencryption and decryption. Do not use-Credential at the same time as the-NoEncryption parameter. Example:$CredObject
-NoEncryption (Switch) Specify that the backup archive should be anunencrypted .zip. Do not use -NoEncryption atthe same time as the -Credential parameter.
© 1999‒2022 Citrix Systems, Inc. All rights reserved. 313

StoreFront 2203
Parameter Description
-ZipFileName (String) The name for the StoreFront configurationbackup archive. Do not add a file extension,such as .zip or .ctxzip. The file extension isadded automatically depending on whetherthe -Credential or -NoEncryption parameteris specified during export. Example: “backup”
-Force (Boolean) This parameter automatically overwritesbackup archives with the same file name asexisting backup files already present in thespecified export location.
Important:
TheSiteIDparameter found in StoreFront 3.5was deprecated in version 3.6. It is no longer neces-sary to specify the SiteIDwhen performing an import, as the SiteID containedwithin the backuparchive is always be used. Ensure the SiteID matches the existing StoreFront website alreadyconfiguredwithin IIS on the importing server. SiteID 1 to SiteID 2 configuration imports are NOTsupported.
Import-STFConfiguration
Parameter Description
-ConfigurationZip (String) The full path to the backup archive you want toimport. This should also include the fileextension. Use .zip for unencrypted and .ctxzipfor encrypted backup archives. Example: $env:userprofile\desktop\backup.ctxzip
-Credential (PSCredential Object) Specify a credential object to decrypt anencrypted backup during import. Example:$CredObject
-HostBaseURL (String) If this parameter is included, the Host base URLyou specify is used instead of the Host baseURL from the exporting server. Example:https://<importingserver>.example.com
© 1999‒2022 Citrix Systems, Inc. All rights reserved. 314

StoreFront 2203
Unprotect-STFConfigurationBackup
Parameter Description
-TargetFolder (String) The export path to the backup archive.Example: $env:userprofile\desktop\
-Credential (PSCredential Object) Use this parameter to create an unencryptedcopy of the encrypted backup archive. Specifythe PowerShell credential object containingthe password to use for decryption. Example:$CredObject
-EncryptedConfigurationZip (String) The full path of the encrypted backup archiveyou want to decrypt. Youmust specify the fileextension .ctxzip. Example: $env:userprofile\\desktop\\backup.ctxzip
-OutputFolder (String) The path to create an unencrypted copy (.zip)of the encrypted (.ctxzip) backup archive. Theoriginal encrypted copy of the backup isretained so it can be reused. Do not specify afile name and file extension for theunencrypted copy. Example:$env:userprofile\desktop\
-Force (Boolean) This parameter automatically overwritesbackup archives with the same file name asexisting backup files already present in thespecified export location.
Configuration export and import examples
Import the StoreFront cmdlets into the current PowerShell session
Open the PowerShell Integrated Scripting Environment (ISE) on the StoreFront server and run:
1 $env:PSModulePath = [Environment]::GetEnvironmentVariable('PSModulePath','Machine')
2 $SDKModules = 'C:\Program Files\Citrix\Receiver StoreFront\PowerShellSDK\Modules\Citrix.StoreFront'
3 Import-Module ”$SDKModules\Citrix.StoreFront.psd1” -verbose4 Import-Module ”$SDKModules.Authentication\Citrix.StoreFront.
© 1999‒2022 Citrix Systems, Inc. All rights reserved. 315

StoreFront 2203
Authentication.psd1” -verbose5 Import-Module ”$SDKModules.Roaming\Citrix.StoreFront.Roaming.psd1” -
verbose6 Import-Module ”$SDKModules.Stores\Citrix.StoreFront.Stores.psd1” -
verbose7 Import-Module ”$SDKModules.WebReceiver\Citrix.StoreFront.WebReceiver.
psd1” -verbose
Single server scenarios
Create an unencrypted backup of an existing configuration on Server A and restore it onto thesame deployment
Export the configuration of the server you wish to back up.
1 Export-STFConfiguration -targetFolder ”$env:userprofile\desktop\” -zipFileName ”backup” -NoEncryption
Copy the backup.zip file to a safe location. You can use this backup for disaster recovery to restore theserver to its previous state.
1 Import-STFConfiguration -configurationZip ”$env:userprofile\desktop\backup.zip” -HostBaseURL ”https://storefront.example.com”
Back up an existing configuration on Server A and restore it onto Server B to create a clone of anexisting server
Export the configuration of the server you wish to back up.
1 Export-STFConfiguration -targetFolder ”$env:userprofile\desktop\” -zipFileName ”backup” -NoEncryption
Copy the backup.zip file to the desktop of server B.
1 Import-STFConfiguration -configurationZip ”$env:userprofile\desktop\backup.zip” -HostBaseURL ”https://serverB.example.com”
© 1999‒2022 Citrix Systems, Inc. All rights reserved. 316

StoreFront 2203
StoreFront is already deployed onto a customwebsite in IIS. Restore the configuration onto an-other customwebsite deployment
Server A has StoreFront deployed on a customwebsite location rather than the usual default websitewithin IIS. The IIS SiteID for the second website created in IIS is 2. The StoreFront website’s physicalpath can be on another nonsystem drive such as d:\ or on the default c:\ system drive but should usean IIS SiteID greater than 1.
A new website called StoreFront has been configured within IIS, which uses SiteID = 2. StoreFront isalreadydeployedon the customwebsite in IISwith its physical pathondrived:\inetpub\wwwrooot.
1. Export a copy of the Server A configuration.
2. On Server B, configure IIS with a new website called StoreFront, which also uses SiteID 2.
3. Import the Server A configuration onto Server B. The site ID contained in the backup is used andmust match the target website where you want to import the StoreFront configuration.
Import-STFConfiguration -configurationZip ”$env:userprofile\desktop\backup.ctxzip”-HostBaseURL ”https://serverB.example.com”
Server group scenarios
Scenario 1: Backup an existing server group configuration and restore it later onto the sameserver group deployment
© 1999‒2022 Citrix Systems, Inc. All rights reserved. 317

StoreFront 2203
A previous configuration backup was taken while only two StoreFront servers, 2012R2-A and 2012R2-B, were members of the server group. Within the backup archive is a record of the CitrixCluster-Membership at the time the backupwas taken containing only the two original servers 2012R2-A and2012R2-B. The StoreFront server group deployment has subsequently increased in size since the orig-inal backup was taken due to business demand, so an additional node 2012R2-C has been added tothe server group. The underlying StoreFront configuration of the server group held in the backup hasnot changed. The current CitrixClusterMembership of three serversmust bemaintained even if an oldbackup containing only the two original server group nodes is imported. During import the currentcluster membership is preserved and then written back once the configuration has been successfullyimported onto the primary server. The import also preserves the current CitrixClusterMembership ifserver group nodes were removed from the server group since the original backup was taken.
1. Export theServerGroup 1 configuration from2012R2-A,which is theprimary server used toman-age the entire server group.
1. Later you add an additional server, 2012R2-C to the existing server group.
© 1999‒2022 Citrix Systems, Inc. All rights reserved. 318

StoreFront 2203
1. The configuration of the server group must be restored to a known previously working state.StoreFront backs up the current CitrixClusterMembership of three servers during the importprocess, and then restores it after the import has succeeded.
2. Import the Server Group 1 configuration back onto node 2012R2-A.
Import-STFConfiguration -configurationZip ”$env:userprofile\desktop\backup.ctxzip”-HostBaseURL ”https://servergroup1.example.com”
3. Propagate the newly imported configuration to the entire server group, so all servers have aconsistent configuration after import.
Scenario 2: Backup an existing configuration from Server Group 1 and use it to create a newServerGrouponadifferent factorydefault installation. Youcan thenaddothernewservergroupmembers to the new primary server
Server Group 2 is created containing two new servers, 2012R2-C and 2012R2-D. The Server Group 2configuration will be based on the configuration of an existing deployment, Server Group 1, whichalso contains two servers 2012R2-A and 2012R2-B. The CitrixClusterMembership contained within thebackup archive is not used when creating a new server group. The current CitrixClusterMembershipis always backed up and then restored after the import is successful. When creating a new deploy-ment using an imported configuration, the CitrixClusterMembership security group contains only theimporting server until additional servers are joined to the new group. Server Group 2 is a new deploy-ment and intended to coexist alongside Server Group 1. Specify the -HostBaseURL parameter. ServerGroup 2 will be created using a new factory default StoreFront installation.
1. Export theServerGroup 1 configuration from2012R2-A,which is theprimary server used toman-age the entire server group.
2. Import the Server Group 1 configuration onto node 2012R2-C, which will be the primary serverused to manage the newly created Server Group 2.
Import-STFConfiguration -configurationZip ”$env:userprofile\desktop\backup.ctxzip”-HostBaseURL ”https://servergroup2.example.com”
3. Joinanyadditional servers thatwill bepart of thenewServerGroup2deployment. Propagationof the newly imported configuration from Server Group 1 to all newmembers of Server Group 2is automatic, as this forms part of the normal join process when a new server is added.
Scenario 3: Backup an existing configuration from Server Group A and use it to overwrite theexisting Server Group B configuration
ServerGroup 1andServerGroup2alreadyexist in twoseparatedata centers. ManyStoreFront configu-rationchangesaremadeonServerGroup 1,whichyoushouldapply toServerGroup2 in theotherdata
© 1999‒2022 Citrix Systems, Inc. All rights reserved. 319

StoreFront 2203
center. You can port the changes from Server Group 1 to Server Group 2. Do not use the CitrixClus-terMembershipwithin the backup archive on Server Group 2. Specify the -HostBaseURL parameterduring import, as the Server Group 2 host base URL should not be changed to the same FQDN that iscurrently in use by Server Group 1. Server Group 2 is an existing deployment.
1. Export theServerGroup 1 configuration from2012R2-A,which is theprimary server used toman-age the entire server group.
2. Import the Server Group 1 configuration onto the factory default installation on node 2012R2-C,which will be the primary server of the new Server Group 2.
Import-STFConfiguration -configurationZip ”$env:userprofile\desktop\backup.zip”-NoEncryption -HostBaseURL ”https://servergroup2.example.com”
Create an encrypted backup of your server configuration
A PowerShell credential object comprises both a Windows account username and a password. Pow-erShell credential objects ensure that your password stays protected in memory.
Note:
To encrypt a configuration backup archive, you need only the password to perform encryptionand decryption. The username stored within the credential object is not used. You must createa credential object containing the same password within the PowerShell session that is used onboth the exporting and importing servers. Within the credential object you can specify any user.
PowerShell requires that you specify a userwhen creating a new credential object. This example codeobtains the currently logged on Windows user for convenience.
Create a PowerShell Credential Object within your Powershell session on the exporting server.
1 $User = [System.Security.Principal.WindowsIdentity]::GetCurrent().Name2 $Password = ”Pa55w0rd”3 $Password = $Password | ConvertTo-SecureString -asPlainText -Force4 $CredObject = New-Object System.Management.Automation.PSCredential(
$User,$Password)
Export the configuration to backup.ctxzip which is an encrypted zip file.
1 Export-STFConfiguration -targetFolder ”$env:userprofile\desktop\” -zipFileName ”backup” -Credential $CredObject
© 1999‒2022 Citrix Systems, Inc. All rights reserved. 320

StoreFront 2203
Create an identical PowerShell Credential Object within your Powershell session on the importingserver.
1 Import-STFConfiguration -configurationZip ”$env:userprofile\desktop\backup.ctxzip” -Credential $CredObject -HostBaseURL ”https://storefront.example.com”
Unprotect an existing encrypted backup archive
1 $User = [System.Security.Principal.WindowsIdentity]::GetCurrent().Name2 $Password = ”Pa55w0rd”3 $Password = $Password | ConvertTo-SecureString -asPlainText -Force4 $CredObject = New-Object System.Management.Automation.PSCredential(
$User,$Password)56 Unprotect-STFConfigurationExport -encryptedConfigurationZip ”$env:
userprofile\desktop\backup.ctxzip” -credential $CredObject -outputFolder ”c:\StoreFrontBackups” -Force
StoreFront SDK
December 18, 2019
Citrix StoreFront provides an SDK based on a number of Microsoft Windows PowerShell version 3.0modules. With the SDK, you can perform the same tasks as you would with the StoreFront MMC con-sole, together with tasks you cannot do with the console alone.
For the SDK Reference, see StoreFront SDK.
Key differences between the StoreFront 3.0 and current StoreFront SDK
• High-levelSDKExamples - This versionprovideshigh-level SDKscripts that enableyou toscriptand automate StoreFront deployments quickly and easily. You can tailor the high-level exam-ples to your particular requirements enabling you to create a new deployment simply by run-ning one script.
• New low-level SDK - Citrix provides a documented low-level StoreFront SDK enabling the con-figurationofdeployments including stores, authenticationmethods, CitrixReceiver forWebandUnified Citrix Receiver sites, as well as remote access with Citrix Gateway.
© 1999‒2022 Citrix Systems, Inc. All rights reserved. 321

StoreFront 2203
• Backwards Compatibility - StoreFront 3.6 still contains the StoreFront 3.0 and earlier APIs soexisting scripts can be gradually transitioned to the new SDK.
Important:
Backwards compatibility with StoreFront 3.0 has been maintained where possible and practi-cable. However, Citrix recommends when writing new scripts, use the new Citrix.StoreFront.*modules, as the StoreFront 3.0 SDK is deprecated and will eventually be removed.
Use the SDK
The SDK comprises of a number of PowerShell snap-ins installed automatically by the installationwizard when you install and configure various StoreFront components.
To access and run the cmdlets:
1. Start a shell in PowerShell 3.0.
You must run the shell or script using a member of the local administrators group on the Store-Front server.
2. To use SDK cmdlets within scripts, set the execution policy in PowerShell.
For more information about PowerShell execution policy, see your Microsoft documentation.
3. Add the modules you require into the PowerShell environment using the Add -Module com-mand in the Windows PowerShell console. For example, type:
Import-Module Citrix.StoreFront
To import all the cmdlets, type:
Get-Module -ListAvailable | Where-Object { $_.Name.StartsWith(”Citrix.StoreFront”)} | Import-Module
After importing, you have access to the cmdlets and their associated help.
Get started with the SDK
To create a script, perform the following steps:
1. Take one of the provided SDK examples installed by StoreFront into the %Program-Files%\Citrix\Receiver StoreFront\PowerShellSDK\Examples folder.
2. To help you customize your own script. review the example script to understandwhat each partis doing. For more information, see the example use case, which explains in detail the script’sactions.
3. Convert and adapt the example scripts to turn them into a script that is more consumable. Todo this:
© 1999‒2022 Citrix Systems, Inc. All rights reserved. 322

StoreFront 2203
• Use the PowerShell ISE or a similar tool to edit the script.• Use variables to assign values that are to be reused or modified.• Remove any commands that are not required.• Note that StoreFront cmdlets can be identified by the prefix STF.• Use the Get-Help cmdlet supplying the cmdlet name and -Full parameter for more infor-mation on a specific command.
ExamplesNote:
When creating a script, to ensure you always get the latest enhancements and fixes, Citrix recom-mends you follow the procedure described above rather than copying and pasting the examplescripts.
Examples Description
Create a Simple Deployment Script: creates a simple deployment with aStoreFront controller configured with a singleXenDesktop server.
Create a Remote Access Deployment Script: builds on the previous script to addremote access to the deployment.
Create a Remote Access Deployment withOptimal Launch Gateway
Script: builds on the previous script to addpreferred optimal launch gateways for a betteruser experience.
Example: Create a simple deployment
The following example shows how to create a simple deployment configured with one XenDesktopcontroller.
Before you begin, make sure you follow the steps detailed in Get Started with the SDK. This exam-ple can be customized using the methods described to produce a script for automating StoreFrontdeployment.
Note:
To ensure you always get the latest enhancements and fixes, Citrix recommends you follow theprocedure described in this document, rather than copying and pasting the example script.
Understand the script
© 1999‒2022 Citrix Systems, Inc. All rights reserved. 323

StoreFront 2203
This section explains what each part of the script produced by StoreFront is doing. This will help youwith the customization of your own script.
• Sets the error handling requirements and imports the required StoreFront modules. Importsare not required in newer versions of PowerShell.
1 Param(2 [Parameter(Mandatory=$true)]3 [Uri]$HostbaseUrl,4 [long]$SiteId = 1,5 [ValidateSet(”XenDesktop”,”XenApp”,”AppController”,”VDIinaBox
”)]6 [string]$Farmtype = ”XenDesktop”,7 [Parameter(Mandatory=$true)]8 [string[]]$FarmServers,9 [string]$StoreVirtualPath = ”/Citrix/Store”,10 [bool]$LoadbalanceServers = $false,11 [int]$Port = 80,12 [int]$SSLRelayPort = 443,13 [ValidateSet(”HTTP”,”HTTPS”,”SSL”)]14 [string]$TransportType = ”HTTP”15 )16 \# Import StoreFront modules. Required for versions of
PowerShell earlier than 3.0 that do not supportautoloading
17 Import-Module Citrix.StoreFront18 Import-Module Citrix.StoreFront.Stores19 Import-Module Citrix.StoreFront.Authentication20 Import-Module Citrix.StoreFront.WebReceiver21 <!--NeedCopy-->
• Automates the virtual path of the authentication and Citrix Receiver for Web services based onthe $StoreVirtualPath supplied. $StoreVirtualPath is equivalent to $StoreIISpath becauseVirtual paths are always the path in IIS. Therefore in Powershell they have a value such as “/C-itrix/Store”, “/Citrix/StoreWeb”, or “/Citrix/StoreAuth”.
1 \# Determine the Authentication and Receiver virtual path to usebased of the Store
2 $authenticationVirtualPath = ”$($StoreIISPath.TrimEnd('/'))Auth”3 $receiverVirtualPath = ”$($StoreVirtualPath.TrimEnd('/'))Web”4 <!--NeedCopy-->
© 1999‒2022 Citrix Systems, Inc. All rights reserved. 324

StoreFront 2203
• Creates a new deployment if one is not already present iin preparation for adding the requiredStoreFront services. -Confirm:$false supresses the requirement to confirm the deploymentcan procede.
1 \# Determine if the deployment already exists2 $existingDeployment = Get-STFDeployment3 if(-not $existingDeployment)4 {56 \# Install the required StoreFront components7 Add-STFDeployment -HostBaseUrl $HostbaseUrl -SiteId $SiteId -
Confirm:$false8 }910 elseif($existingDeployment.HostbaseUrl -eq $HostbaseUrl)11 {1213 \# The deployment exists but it is configured to the desired
hostbase url14 Write-Output ”A deployment has already been created with the
specified hostbase url on this server and will be used.”15 }1617 else18 {1920 Write-Error ”A deployment has already been created on this
server with a different host base url.”21 }2223 <!--NeedCopy-->
• Creates a new authentication service if one does not exist at the specified virtual path. Thedefault authentication method of username and password is enabled.
1 \# Determine if the authentication service at the specifiedvirtual path exists
2 $authentication = Get-STFAuthenticationService -VirtualPath$authenticationVirtualPath
3 if(-not $authentication)4 {5
© 1999‒2022 Citrix Systems, Inc. All rights reserved. 325

StoreFront 2203
6 \# Add an Authentication service using the IIS path of theStore appended with Auth
7 $authentication = Add-STFAuthenticationService$authenticationVirtualPath
8 }910 else11 {1213 Write-Output ”An Authentication service already exists at the
specified virtual path and will be used.”14 }1516 <!--NeedCopy-->
• Creates the new store service configured with one XenDesktop controller with the servers de-fined in the array $XenDesktopServers at the specified virtual path if one does not already ex-ist.
1 \# Determine if the store service at the specified virtual pathexists
2 $store = Get-STFStoreService -VirtualPath $StoreVirtualPath3 if(-not $store)4 {56 \# Add a Store that uses the new Authentication service
configured to publish resources from the supplied servers7 $store = Add-STFStoreService -VirtualPath $StoreVirtualPath -
AuthenticationService $authentication -FarmName $Farmtype -FarmType $Farmtype -Servers $FarmServers -LoadBalance$LoadbalanceServers \`
8 -Port $Port -SSLRelayPort $SSLRelayPort -TransportType$TransportType
9 }1011 else12 {1314 Write-Output ”A Store service already exists at the specified
virtual path and will be used. Farm and servers will beappended to this store.”
15 \# Get the number of farms configured in the store16 $farmCount = (Get-STFStoreFarmConfiguration $store).Farms.
© 1999‒2022 Citrix Systems, Inc. All rights reserved. 326

StoreFront 2203
Count17 \# Append the farm to the store with a unique name18 Add-STFStoreFarm -StoreService $store -FarmName ”Controller$(
$farmCount + 1)” -FarmType $Farmtype -Servers $FarmServers-LoadBalance $LoadbalanceServers -Port $Port \`
19 -SSLRelayPort $SSLRelayPort -TransportType $TransportType20 }2122 <!--NeedCopy-->
• Adds a Citrix Receiver for Web service at the specified IIS virtual path to access applicationspublished in the store created above.
1 \# Determine if the receiver service at the specified virtualpath exists
2 $receiver = Get-STFWebReceiverService -VirtualPath$receiverVirtualPath
3 if(-not $receiver)4 {56 \# Add a Receiver for Web site so users can access the
applications and desktops in the published in the Store7 $receiver = Add-STFWebReceiverService -VirtualPath
$receiverVirtualPath -StoreService $store8 }910 else11 {1213 Write-Output ”A Web Receiver service already exists at the
specified virtual path and will be used.”14 }1516 <!--NeedCopy-->
• Enables XenApp services for the store so older Citrix Receiver or Citrix Workspace app clientscan connect to published applications.
1 \# Determine if PNA is configured for the Store service2 $storePnaSettings = Get-STFStorePna -StoreService $store3 if(-not $storePnaSettings.PnaEnabled)4 {
© 1999‒2022 Citrix Systems, Inc. All rights reserved. 327

StoreFront 2203
56 \# Enable XenApp services on the store and make it the default
for this server7 Enable-STFStorePna -StoreService $store -AllowUserPasswordChange
-DefaultPnaService8 }910 <!--NeedCopy-->
Example: Create a remote access deployment
The following example builds on the previous script to add a deployment with remote access.
Before you begin, make sure you follow the steps detailed in Get Started with the SDK. This exam-ple can be customized using the methods described to produce a script for automating StoreFrontdeployment.
Note:
To ensure you always get the latest enhancements and fixes, Citrix recommends you follow theprocedure described in this document, rather than copying and pasting the example script.
Understand the script
This section explains what each part of the script produced by StoreFront is doing. This will help youwith the customization of your own script.
• Sets the error handling requirements and import the required StoreFrontmodules. Imports arenot required in newer versions of PowerShell.
1 Param(2 [Parameter(Mandatory=$true)]3 [Uri]$HostbaseUrl,4 [Parameter(Mandatory=$true)]5 [long]$SiteId = 1,6 [string]$Farmtype = ”XenDesktop”,7 [Parameter(Mandatory=$true)]8 [string[]]$FarmServers,9 [string]$StoreVirtualPath = ”/Citrix/Store”,10 [bool]$LoadbalanceServers = $false,11 [int]$Port = 80,12 [int]$SSLRelayPort = 443,13 [ValidateSet(”HTTP”,”HTTPS”,”SSL”)]
© 1999‒2022 Citrix Systems, Inc. All rights reserved. 328

StoreFront 2203
14 [string]$TransportType = ”HTTP”,15 [Parameter(Mandatory=$true)]16 [Uri]$GatewayUrl,17 [Parameter(Mandatory=$true)]18 [Uri]$GatewayCallbackUrl,19 [Parameter(Mandatory=$true)]20 [string[]]$GatewaySTAUrls,21 [string]$GatewaySubnetIP,22 [Parameter(Mandatory=$true)]23 [string]$GatewayName24 )25 Set-StrictMode -Version 2.02627 \# Any failure is a terminating failure.28 $ErrorActionPreference = 'Stop'29 $ReportErrorShowStackTrace = $true30 $ReportErrorShowInnerException = $true31 \# Import StoreFront modules. Required for versions of PowerShell
earlier than 3.0 that do not support autoloading32 Import-Module Citrix.StoreFront33 Import-Module Citrix.StoreFront.Stores34 Import-Module Citrix.StoreFront.Roaming35 <!--NeedCopy-->
• Create an internal access StoreFront deployment by calling the previous examples script. Thebase deployment will be extended to support remote access.
1 \# Create a simple deployment by invoking the SimpleDeploymentexample
2 $scriptDirectory = Split-Path -Path $MyInvocation.MyCommand.Definition -Parent
3 $scriptPath = Join-Path $scriptDirectory ”SimpleDeployment.ps1”4 & $scriptPath -HostbaseUrl $HostbaseUrl -SiteId $SiteId -
FarmServers $FarmServers -StoreVirtualPath $StoreVirtualPath -Farmtype $Farmtype \`
5 -LoadbalanceServers $LoadbalanceServers -Port $Port -SSLRelayPort $SSLRelayPort -TransportType $TransportType
6 <!--NeedCopy-->
• Gets services created in the simple deployment as they need to be updated to support the re-mote access scenario.
© 1999‒2022 Citrix Systems, Inc. All rights reserved. 329

StoreFront 2203
1 \# Determine the Authentication and Receiver sites based on theStore
2 $store = Get-STFStoreService -VirtualPath $StoreVirtualPath3 $authentication = Get-STFAuthenticationService -StoreService
$store4 $receiverForWeb = Get-STFWebReceiverService -StoreService $store5 <!--NeedCopy-->
• Enables CitrixAGBasic on the Citrix Receiver for Web service required for remote access usingCitrix Gateway. Get the Citrix Receiver for Web CitrixAGBasic and ExplicitForms authenticationmethod from the supported protocols.
1 \# Get the Citrix Receiver for Web CitrixAGBasic andExplicitForms authentication method from the supportedprotocols
2 \# Included for demonstration purposes as the protocol name canbe used directly if known
3 $receiverMethods = Get-STFWebReceiverAuthenticationMethodsAvailable | Where-Object {
4 $_ -match ”Explicit” -or $_ -match ”CitrixAG” }56 \# Enable CitrixAGBasic in Receiver for Web (required for remote
access)7 Set-STFWebReceiverService $receiverForWeb -AuthenticationMethods
$receiverMethods8 <!--NeedCopy-->
• Enables CitrixAGBasic on the authentication service. This is required for remote access.
1 \# Get the CitrixAGBasic authentication method from the protocolsinstalled.
2 \# Included for demonstration purposes as the protocol name canbe used directly if known
3 $citrixAGBasic = Get-STFAuthenticationProtocolsAvailable | Where-Object {
4 $_ -match ”CitrixAGBasic” }56 \# Enable CitrixAGBasic in the Authentication service (required
for remote access)7 Enable-STFAuthenticationServiceProtocol -AuthenticationService
$authentication -Name $citrixAGBasic
© 1999‒2022 Citrix Systems, Inc. All rights reserved. 330

StoreFront 2203
8 <!--NeedCopy-->
• Adds a new remote access Gateway, adding the optional subnet ipaddress is supplied and reg-isters it with the store to be accessed remotely.
1 \# Add a new Gateway used to access the new store remotely2 Add-STFRoamingGateway -Name ”NetScaler10x” -LogonType Domain -
Version Version10_0_69_4 -GatewayUrl $GatewayUrl '3 \-CallbackUrl $GatewayCallbackUrl -SecureTicketAuthorityUrls
$GatewaySTAUrls4 \# Get the new Gateway from the configuration (Add-
STFRoamingGateway will return the new Gateway if -PassThru issupplied as a parameter)
5 $gateway = Get-STFRoamingGateway -Name $GatewayName6 \# If the gateway subnet was provided then set it on the gateway
object7 if($GatewaySubnetIP)8 {910 Set-STFRoamingGateway -Gateway $gateway -SubnetIPAddress
$GatewaySubnetIP11 }1213 \# Register the Gateway with the new Store14 Register-STFStoreGateway -Gateway $gateway -StoreService $store -
DefaultGateway15 <!--NeedCopy-->
Example: Create a remote access deployment with optimal launch Gateway
The following example builds on the previous script to add a deployment with optimal launch Gate-way remote access.
Before you begin, make sure you follow the steps detailed in Get Started with the SDK. This exam-ple can be customized using the methods described to produce a script for automating StoreFrontdeployment.
Note:
To ensure you always get the latest enhancements and fixes, Citrix recommends you follow theprocedure described in this document, rather than copying and pasting the example script.
© 1999‒2022 Citrix Systems, Inc. All rights reserved. 331

StoreFront 2203
Understand the script
This section explains what each part of the script produced by StoreFront is doing. This will help youwith the customization of your own script.
• Sets the error handling requirements and imports the required StoreFront modules. Importsare not required in newer versions of PowerShell.
1 Param(2 [Parameter(Mandatory=$true)]3 [Uri]$HostbaseUrl,4 [long]$SiteId = 1,5 [string]$Farmtype = ”XenDesktop”,6 [Parameter(Mandatory=$true)]7 [string[]]$FarmServers,8 [string]$StoreVirtualPath = ”/Citrix/Store”,9 [bool]$LoadbalanceServers = $false,10 [int]$Port = 80,11 [int]$SSLRelayPort = 443,12 [ValidateSet(”HTTP”,”HTTPS”,”SSL”)]13 [string]$TransportType = ”HTTP”,14 [Parameter(Mandatory=$true)]15 [Uri]$GatewayUrl,16 [Parameter(Mandatory=$true)]17 [Uri]$GatewayCallbackUrl,18 [Parameter(Mandatory=$true)]19 [string[]]$GatewaySTAUrls,20 [string]$GatewaySubnetIP,21 [Parameter(Mandatory=$true)]22 [string]$GatewayName,23 [Parameter(Mandatory=$true)]24 [Uri]$OptimalGatewayUrl,25 [Parameter(Mandatory=$true)]26 [string[]]$OptimalGatewaySTAUrls,27 [Parameter(Mandatory=$true)]28 [string]$OptimalGatewayName29 )30 Set-StrictMode -Version 2.031 \# Any failure is a terminating failure.32 $ErrorActionPreference = 'Stop'33 $ReportErrorShowStackTrace = $true34 $ReportErrorShowInnerException = $true35 \# Import StoreFront modules. Required for versions of PowerShell
earlier than 3.0 that do not support autoloading
© 1999‒2022 Citrix Systems, Inc. All rights reserved. 332

StoreFront 2203
36 Import-Module Citrix.StoreFront37 Import-Module Citrix.StoreFront.Stores38 Import-Module Citrix.StoreFront.Roaming39 <!--NeedCopy-->
• Calls into the remote access deployment script to configure the basic deployment and add re-mote access.
1 \# Create a remote access deployment2 $scriptDirectory = Split-Path -Path $MyInvocation.MyCommand.
Definition -Parent3 $scriptPath = Join-Path $scriptDirectory ”RemoteAccessDeployment.
ps1”4 & $scriptPath -HostbaseUrl $HostbaseUrl -SiteId $SiteId -
FarmServers $FarmServers -StoreVirtualPath $StoreVirtualPath -Farmtype $Farmtype \`
5 -LoadbalanceServers $LoadbalanceServers -Port $Port -SSLRelayPort $SSLRelayPort -TransportType $TransportType\`
6 -GatewayUrl $GatewayUrl -GatewayCallbackUrl$GatewayCallbackUrl -GatewaySTAUrls $GatewaySTAUrls -GatewayName $GatewayName
7 <!--NeedCopy-->
• Adds the preferred optimal launch gateway and get it from the list of configured gateways.
1 \# Add a new Gateway used for remote HDX access to desktops andapps
2 $gateway = Add-STFRoamingGateway -Name $OptimalGatewayName -LogonType UsedForHDXOnly -GatewayUrl $OptimalGatewayUrl -SecureTicketAuthorityUrls $OptimalGatewaySTAUrls -PassThru
3 <!--NeedCopy-->
• Gets the store service to use the optimal gateway, register it assigning it to launches from thefarm named.
1 \# Get the Store configured by SimpleDeployment.ps12 $store = Get-STFStoreService -VirtualPath $StoreVirtualPath3 \# Register the Gateway with the new Store for launch against all
of the farms (currently just one)
© 1999‒2022 Citrix Systems, Inc. All rights reserved. 333

StoreFront 2203
4 $farmNames = @($store.FarmsConfiguration.Farms | foreach {5 $_.FarmName }6 )7 Register-STFStoreOptimalLaunchGateway -Gateway $gateway -
StoreService $store -FarmName $farmNames8 <!--NeedCopy-->
Example: Exchangemetadata between the Identity Provider and the Service Provider(StoreFront) for SAML authentication
SAML authentication can be configured in the StoreFront management console (see Configure theauthentication service or using the following PowerShell cmdlets:
• Export-STFSamlEncryptionCertificate• Export-STFSamlSigningCertificate• Import-STFSamlEncryptionCertificate• Import-STFSamlSigningCertificate• New-STFSamlEncryptionCertificate• New-STFSamlIdPCertificate• New-STFSamlSigningCertificate
You can use the cmdlet, Update-STFSamlIdPFromMetadata, to exchange metadata (identifiers, cer-tificates, endpoints and other configuration) between the Identity Provider and the Service Provider,which is StoreFront in this case.
For a StoreFront Store, named “Store”, with its dedicated authentication service, the metadata end-point will be:
https://<storefront host>/Citrix/StoreAuth/SamlForms/ServiceProvider/Metadata
If your Identity Provider supports metadata import, then you can point it at the above URL. Note::This must be done over HTTPS.
For StoreFront to consume the metadata from an Identity Provider, the following PowerShell can beused:
1 Get-Module ”Citrix.StoreFront*” -ListAvailable | Import-Module23 # Remember to change this with the virtual path of your Store.4 $StoreVirtualPath = ”/Citrix/Store”56 $store = Get-STFStoreService -VirtualPath $StoreVirtualPath
© 1999‒2022 Citrix Systems, Inc. All rights reserved. 334

StoreFront 2203
7 $auth = Get-STFAuthenticationService -StoreService $store89 # To read the metadata directly from the Identity Provider, use the
following:10 # Note again this is only allowed for https endpoints11 Update-STFSamlIdPFromMetadata -AuthenticationService $auth -Url https:
//example.com/FederationMetadata/2007-06/FederationMetadata.xml1213 # If the metadata has already been download, use the following:14 # Note: Ensure that the file is encoded as UTF-815 Update-STFSamlIdPFromMetadata -AuthenticationService $auth -FilePath ”C
:\Users\exampleusername\Downloads\FederationMetadata.xml”16 <!--NeedCopy-->
Example: List themetadata and ACS endpoints for a specified store for SAML authentication
You can use the following script to list out the metadata and ACS (Assertion Consumer Service) end-points for a specified store.
1 # Change this value for your Store2 $storeVirtualPath = ”/Citrix/Store”34 $auth = Get-STFAuthenticationService -Store (Get-STFStoreService -
VirtualPath $storeVirtualPath)5 $spId = $auth.AuthenticationSettings[”samlForms”].SamlSettings.
ServiceProvider.Uri.AbsoluteUri6 $acs = New-Object System.Uri $auth.Routing.HostbaseUrl, ($auth.
VirtualPath + ”/SamlForms/AssertionConsumerService”)7 $md = New-Object System.Uri $auth.Routing.HostbaseUrl, ($auth.
VirtualPath + ”/SamlForms/ServiceProvider/Metadata”)8 $samlTest = New-Object System.Uri $auth.Routing.HostbaseUrl, ($auth.
VirtualPath + ”/SamlTest”)9 Write-Host ”SAML Service Provider information:10 Service Provider ID: $spId11 Assertion Consumer Service: $acs12 Metadata: $md13 Test Page: $samlTest”14 <!--NeedCopy-->
Example of the output:
© 1999‒2022 Citrix Systems, Inc. All rights reserved. 335

StoreFront 2203
1 SAML Service Provider information:2 Service Provider ID: https://storefront.example.com/Citrix/StoreAuth3 Assertion Consumer Service: https://storefront.example.com/Citrix/
StoreAuth/SamlForms/AssertionConsumerService4 Metadata: https://storefront.example.com/Citrix/StoreAuth/SamlForms/
ServiceProvider/Metadata5 Test Page: https://storefront.example.com/Citrix/StoreAuth/SamlTest6 <!--NeedCopy-->
Troubleshoot StoreFront
January 7, 2020
When StoreFront is installed or uninstalled, the following log files are created by the StoreFront in-staller in the C:\Windows\Temp\StoreFront directory. The file names reflect the components that cre-ated them and include time stamps.
• Citrix-DeliveryServicesRoleManager-*.log—Created when StoreFront is installed interactively.• Citrix-DeliveryServicesSetupConsole-*.log—Created when StoreFront is installed silently andwhen StoreFront is uninstalled, either interactively or silently.
• CitrixMsi-CitrixStoreFront-x64-*.log—Created when StoreFront is installed and uninstalled, ei-ther interactively or silently.
StoreFront supports Windows event logging for the authentication service, stores, and Receiver forWeb sites. Any events that are generated are written to the StoreFront application log, which can beviewed using Event Viewer under either Application and Services Logs > Citrix Delivery Services orWindows Logs > Application. You can control the number of duplicate log entries for a single eventby editing the configuration files for the authentication service, stores, and Receiver for Web sites.
The Citrix StoreFront management console automatically records tracing information. By default,tracing for other operations is disabled and must be enabled manually. Logs created by WindowsPowerShell commands are stored in the \Admin\logs\ directory of the StoreFront installation, typi-cally located at C:\Program Files\Citrix\Receiver StoreFront. The log file names contain commandactions and subjects, along with time stamps that can be used to differentiate command sequences.
Important:
In multiple server deployments, use only one server at a time tomake changes to the configura-tion of the server group. Ensure that the Citrix StoreFront management console is not runningon any of the other servers in the deployment. Once complete,propagate your configuration changes to the server group so that the other servers in the deploy-
© 1999‒2022 Citrix Systems, Inc. All rights reserved. 336

StoreFront 2203
ment are updated.
To configure log throttling
1. Use a text editor to open the web.config file for the authentication service, store, or Receiverfor Web site, which are typically located in the C:\inetpub\wwwroot\Citrix\Authentication\,C:\inetpub\wwwroot\Citrix\storename\, and C:\inetpub\wwwroot\Citrix\storenameWeb\directories, respectively, where storename is the name specified for the store when it wascreated.
2. Locate the following element in the file.
<logger duplicateInterval=”00:01:00”duplicateLimit=”10”>
Bydefault, StoreFront is configured to limit thenumberof duplicate log entries to 10perminute.
3. Change the value of the duplicateInterval attribute to the set the time period in hours, minutes,and seconds over which duplicate log entries are monitored. Use the duplicateLimit attributeto set the number of duplicate entries that must be logged within the specified time interval totrigger log throttling.
When log throttling is triggered, a warning message is logged to indicate that further identical logentrieswill be suppressed. Once the time limit elapses, normal logging resumes and an informationalmessage is logged indicating that duplicate log entries are no longer being suppressed.
To enable tracing for debuggingImportant:
The StoreFront and PowerShell consoles cannot be open at the same time. Always close theStoreFront admin console before using the PowerShell console to administer your StoreFrontconfiguration. Likewise, close all instances of the PowerShell console before opening the Store-Front console.
Trace output is sent to c:\Program Files\Citrix\Receiver StoreFront\admin\trace
© 1999‒2022 Citrix Systems, Inc. All rights reserved. 337

StoreFront 2203
Note:
RunGet-Help Set-STFDiagnostics -detailed toobtainPowershell helpand instructionson how to use the Set-STFDiagnostics cmdlet.
Use an accountwith local administrator permissions to startWindowsPowerShell and, at a commandprompt, specify the following mandatory parameters to enable or disable tracing.
• -All. A flag indicating that tracing should be updated for all instances and services.• -TraceLevel. In increasing levels of tracing detail, allowed values for -TraceLevel are: Off, Error,Warning, Info, or Verbose. Due to the large amount of data that can be generated, tracing maysignificantly impact the performance of StoreFront. The Info or Verbose levels are not recom-mended unless specifically required for troubleshooting.
Optional parameters:
• -FileSizeKb. The trace file size in KB.• -FileCount. The number of trace files to maintain on disk at a time.• -confirm:$False. Suppresses Windows prompts to allow the StoreFront cmdlet to run eachtime.
Examples
To enable Verbose level tracing for all service for debugging purposes:
© 1999‒2022 Citrix Systems, Inc. All rights reserved. 338

StoreFront 2203
1 Set-STFDiagnostics -All -TraceLevel ”Verbose” -confirm:$False2 <!--NeedCopy-->
To disable Verbose level tracing, and set the tracing level back to the default value for all services:
1 Set-STFDiagnostics -All -TraceLevel ”Error” -confirm:$False2 <!--NeedCopy-->
For more information on the Set-STFDiagnostics cmdlet, see the StoreFront PowerShell SDK docu-mentation.
To enable logging of the launch.ica file
Save the information in the launch.ica file to the client computer to troubleshootmultiple issues. Thelaunch.ica file is generated by Citrix Web Interface or Citrix StoreFront Servers.
To enable logging of the launch.ica file, complete the following steps:
1. Navigate to the following registry key by using the registry editor:
32-bit Systems: HKEY_LOCAL_MACHINE\SOFTWARE\Citrix\ICA Client\Engine\Configuration\Advanced\Modules\Logging
64-bit Systems: HKEY_LOCAL_MACHINE\SOFTWARE\Wow6432Node\Citrix\ICA Client\Engine\Configuration\Advanced\Modules\Logging
2. Set the following two string key values:
• LogFile=”path to the log file”• LogICAFile=true
For example:
1 LogFile=C:\ica\ica.log2 LogICAFile=true3 <!--NeedCopy-->
Additional resourcesNote:
© 1999‒2022 Citrix Systems, Inc. All rights reserved. 339

StoreFront 2203
The use of an ICA file in your environment for anything other than troubleshooting purposes isfurther outlined in CTX200126.
Troubleshoot StoreFront upgrade issues
Use the following steps to troubleshoot StoreFront upgrade issues.
Before attempting an upgrade
1. Confirm that you have a backup of all StoreFront servers.2. Verify that you are not attempting to upgrade from an End of Life StoreFront version. For more
information see CTX200356.3. Verify that youare upgrading froma supported versionof StoreFront to the current versiononly.4. If the StoreFront server is part of a StoreFront server group, all servers in the group must be
upgraded sequentially. Simultaneously upgrading a StoreFront server group is not supported.5. Delete any thumbs.db files inside C:\inetpub\wwwroot\citrix or its subdirectories. Show hidden
files to complete this step: Folder Options > View, choose option Show hidden files, foldersand drives and clear the optionHide protected operating system files (Recommended).
6. Disable antivirus software before starting the upgrade procedure.7. Confirm that servers being upgraded are removed from any load balancer, and that they have
no active user sessions connected.8. Reboot the StoreFront server before performing the upgrade.9. Manually stop the following Services:
• CitrixConfigurationReplication• CitrixCredentialWallet• CitrixDefaultDomainService• CitrixPeerResolutionService• CitrixSubscriptionsStore
10. Ensure that the StoreFront management console is closed.
If the upgrade fails
1. In C:\Windows\Temp\StoreFront, open the latest CitrixMsi*.log and search for any exception er-rors.
Thumbs.db Access exceptions: caused by thumbs.db files inside C:\inetpub\wwwroot\citrix orin its subdirectories. Delete any thumbs.db files found.
Cannot get exclusive file access \in use exceptions: restore the snapshot/backup if available,or restart the server, andmanually stop any StoreFront services.
© 1999‒2022 Citrix Systems, Inc. All rights reserved. 340

StoreFront 2203
Service cannot be started exceptions: restore the snapshot/backup if available, or install thefull version of .NET framework 4.5 (not client profile).
2. If there are no exception errors in CitrixMsi*.log, check the server’s Event Viewer > DeliveryServices for any errors containing the preceding exception error messages. Follow the corre-sponding advice.
3. If there are no exception errors in the Event Viewer, check the Admin logs in C:\ProgramFiles\Citrix\Receiver StoreFront\logs for any errors containing the preceding exception errormessages. Follow the corresponding advice.
Tomanually remove StoreFront
Warning:
Manually removing StoreFront clears all existing information.
Tomanually remove StoreFront:
1. Uninstall StoreFront.2. Remove Web Server Role.3. Delete the folder C:\Program Files\Citrix\Receiver StoreFront.4. Delete any subdirectories under C:\Program Files\Citrix\StoreFront Install.5. Delete the folder C:\Inetpub.
You can now reinstall StoreFront.
© 1999‒2022 Citrix Systems, Inc. All rights reserved. 341

LocationsCorporate Headquarters | 851 Cypress Creek Road Fort Lauderdale, FL 33309, United StatesSilicon Valley | 4988 Great America Parkway Santa Clara, CA 95054, United States
© 2022 Citrix Systems, Inc. All rights reserved. Citrix, the Citrix logo, and other marks appearing herein are property of
Citrix Systems, Inc. and/or one or more of its subsidiaries, andmay be registered with the U.S. Patent and Trademark Office
and in other countries. All other marks are the property of their respective owner(s).
Citrix Product Documentation | docs.citrix.com May 13, 2022