Server Security in a Citrix Presentation/Terminal Server ...
Upload
khangminh22Category
view
8download
0
Citrix Workspace app 2203.1 LTSRfor Windows
Citrix Product Documentation | docs.citrix.com July 14, 2022

Citrix Workspace app 2203.1 LTSR for Windows
Contents
About this release 3
Fixed issues 4
Known Issues 4
Third party notices 5
System requirements and compatibility 5
Install and Uninstall 11
Deploy 23
Update 30
Get started 38
Configure 57
Configuring Single sign-on to Workspace app 149
Authenticate 152
Secure communications 170
Storebrowse 179
Citrix Workspace app Desktop Lock 187
Software Development Kit (SDK) and API 193
ICA Settings Reference 194
© 1999‒2022 Citrix Systems, Inc. All rights reserved. 2

Citrix Workspace app 2203.1 LTSR for Windows
About this release
April 7, 2022
What’s new in 2203.1 LTSR
Citrix Workspace app 2203.1 is the most recent Long Term Service Release (LTSR) of Citrix Workspaceapp for Windows.
Note:
This release supports features that were included in Citrix Workspace app 2002 for Windowsto Citrix Workspace app 2202 for Windows, except the features pertaining to components men-tioned in the Notable exclusions section.
Audio redirection enhancement
Improvedaudioechocancellation support for all audio codecs includingAdaptiveaudioandall legacyaudio codecs.
Microsoft Teams optimization
• Support for secondary ringer: You can use theSecondary ringer feature to select a secondarydevice on which you want to get the incoming call notification when Microsoft Teams is opti-mized (Citrix HDX optimized in About/Version). For example, if you have set a speaker as theSecondary ringer and your endpoint is connected to headphones, Microsoft Teams sends theincoming call signal to the speaker even thoughyour headphones are theprimaryperipheral forthe audio call itself. If you aren’t connected to more than one audio device, or if the peripheralis not available (for example, Bluetooth headset), you can’t set a secondary ringer.
Note:
This feature is available only after the roll-out of a future update from Microsoft Teams.When the update is rolled-out byMicrosoft, seeMicrosoft 365 roadmap, you can also checkCTX253754 for the documentation update and the announcement.
• App Protection and Microsoft Teams enhancement: Microsoft Teams supports incomingvideo and screen sharing when Citrix Workspace app for Windowswith App Protection enabledis on Desktop Viewer mode only. Published apps in seamless mode don’t render incomingvideo and screen sharing.
© 1999‒2022 Citrix Systems, Inc. All rights reserved. 3

Citrix Workspace app 2203.1 LTSR for Windows
Service continuity
Service continuity removes or minimizes the dependency on the availability of components that areinvolved in the connection process. Users can launch their virtual apps and desktops regardless ofthe health status of the cloud services.
For more information, see Service continuity section in the Citrix Workspace documentation.
Fixed issues
April 7, 2022
• Citrix ADC appliance might crash when certain conditions are triggered from Citrix Workspaceapp for Windows. [HDX-39496]
• When you try to redirect to the preferred webcam as set in the Citrix Workspace app for Win-dows, the setting might not be executed as configured.
With this fix, the preferred webcam will be the only available webcam in the user session. Thisprovides better control whenmultiple webcams are available in the user session.
[HDX-38214]
• With this fix, youcansetTWITaskbarGroupingMode toGroupNoneunder theHKEY_LOCAL_MACHINEroot registry tree, insteadof setting itunderbothHKEY_CURRENT_USERandHKEY_LOCAL_MACHINE.TheTWITaskbarGroupingModekey isavailableunderHKEY_LOCAL_MACHINE\SOFTWARE\Citrix\ICAClient\Engine\Lockdown Profiles\All Regions\Lockdown\Virtual Channels\Seamless Windows.[CVADHELP-19106]
• Attempts to add Citrix Gateway URLmight fail intermittently with the following error message:
Authentication Service cannot be contacted.
[CVADHELP-19415]
Known Issues
May 12, 2022
Known issues in 2203.1 LTSR
• CitrixWorkspaceapp forWindows installation inofflinemodemight failwhen installer can’t findMicrosoft Edge WebView2 on your system.
© 1999‒2022 Citrix Systems, Inc. All rights reserved. 4

Citrix Workspace app 2203.1 LTSR for Windows
As a workaround install MicrosoftEdgeWebView2RuntimeInstallerX86.exe as an administra-tor and then try to install Citrix Workspace app for Windows.
[RFWIN-26329]
• Battery status notification and automatic keyboard pop-up dialogmight not appear during thesession when Automatic keyboard display policy is enabled on the DDC. [HDX-39558]
• When you plug-in an USB device or access files, Citrix Workspace appmight show legacy CitrixWorkspace - Security Warning dialog. [LCM-10369]
Third party notices
April 7, 2022
Citrix Workspace app 2203.1 LTSR for Windows might include third party software licensed under theterms defined in the following document:
Citrix Workspace app for Windows Third-Party Notices (PDF Download)
System requirements and compatibility
June 13, 2022
Requirements
• Minimum 1 GB RAM.
• Microsoft Edge WebView2 Runtime version 92 or later.
Note:
Starting with Version 2107, Microsoft Edge WebView2 Runtime installer is packaged withthe Citrix Workspace app installer.During Workspace app installation, the installer checks whether the Microsoft Edge Web-View2 Runtime is present on the system and installs it if not found.
• Self-Service plug-in requires .NET 4.8. It allows you to subscribe to and launch the apps anddesktops from the Workspace app user interface or command line. For more information, seeUsing command-line parameters.
© 1999‒2022 Citrix Systems, Inc. All rights reserved. 5

Citrix Workspace app 2203.1 LTSR for Windows
When you try to install or upgrade to Citrix Workspace app 1904 or later and the requisite .NETFramework version isn’t available on your Windows system, the Citrix Workspace app installerdownloads and installs the required .NET Framework version.
Note:
The installation fails when you try to install or upgrade Citrix Workspace app with non-administrator privileges and .NET Framework 4.8 or greater isn’t present on the system.
• Latest version of Microsoft Visual C++ Redistributable.
Note:
Citrix recommends that you use the latest version of Microsoft Visual C++ Redistributable.Otherwise, a restart prompt might appear during an upgrade.
Starting with Version 1904, Microsoft Visual C++ Redistributable installer is packaged with theCitrix Workspace app installer. DuringWorkspace app installation, the installer checks whetherthe Microsoft Visual C++ Redistributable package is present on the system and installs it if nec-essary.
Note:
If Microsoft Visual C++ Redistributable package doesn’t exist on your system, CitrixWorkspace app installation with non-administrator privileges might fail.
Only an administrator can install the Microsoft Visual C++ Redistributable package.
For troubleshooting issueswith the .NET Framework or theMicrosoft Visual C++ Redistributableinstallation, see Citrix Knowledge Center article CTX250044.
Note:
You must be connected to the internet to download and install Microsoft Edge WebView2 Run-time, .NET Framework, and Microsoft Visual C++ Redistributable. If not, the administrator caninstall these requirements using a deployment method, for example, SCCM.
Compatibility matrix
CitrixWorkspace app is compatiblewith all the currently supported versions of Citrix Virtual Apps andDesktops, Citrix DaaS (formerly Citrix Virtual Apps and Desktops service) and Citrix Gateway as listedin the Citrix Product Lifecycle Matrix.
Citrix Workspace app for Windows is compatible with the following Windows operating systems:
Note:
• Citrix Workspace app 2203.1 LTSR for Windows is the last release to support the following
© 1999‒2022 Citrix Systems, Inc. All rights reserved. 6

Citrix Workspace app 2203.1 LTSR for Windows
operating systems:– Windows 8.1– Windows Server 2012 R2
• Support for Windows 7 has been stopped from Version 2006 onwards.• The Citrix Gateway End-Point Analysis Plug-in (EPA) is supported on Citrix Workspace. Onthe native Citrix Workspace app, it’s supported only when using nFactor authentication.Formore information, see Configure pre-auth and post-auth EPA scan as a factor in nFactorauthentication in the Citrix ADC documentation.
Operating system
Windows 11
Windows 10 Enterprise (32-bit and 64-bit Editions). For more information about compatibleWindows 10 versions, see Windows 10 Compatibility with Citrix Workspace app for Windows.
Windows 10 Enterprise (2016 LTSB 1607, LTSC 2019)
Windows 10 (IoT Enterprise*, Home edition**, Pro)
Windows Server 2022
Windows Server 2019
Windows Server 2016
*Supports Windows 10 IoT Enterprise 2015 LTSB, Windows 10 IoT Enterprise 2016 LTSB, AnniversaryUpdate, Creators Update, Falls Creators Update.**No support for domain pass-through authentication, Desktop Lock, FastConnect API, and configu-rations that require domain-joined Windowsmachine.
Windows 10 Compatibility with Citrix Workspace app for Windows
With the Windows 10 operating system, Microsoft introduced a new way to build, deploy, and serviceWindows: Windows as a service. New features are packaged into FeatureUpdates (major versions like20H2, 21H1, 21H2). Bug fixes and security fixes are packaged into Quality Updates. These updates thatcan be deployed using existing management tools like SCCM.
Note:
• We don’t recommend installing Citrix software versions that are earlier to the Semi-AnnualChannel version.
• Once aWindows 10 version reaches End of Service that version is no longer serviced or sup-ported by the Microsoft. Citrix supports running its software only on an operating system
© 1999‒2022 Citrix Systems, Inc. All rights reserved. 7

Citrix Workspace app 2203.1 LTSR for Windows
that its manufacturer supports. For information about Windows 10 End of Service, see Mi-crosoft’s Windows Lifecycle Fact Sheet.
The following table lists the Windows 10 version number and the corresponding compatible CitrixWorkspace app for Windows release/s.
Windows 10 Version number Build number Citrix Workspace app Version
21H2 19044 2112.1 and later
21H1 19043.928 2106 and later
20H2 19042.508 2012 and later
2004 19041.113 2006.1 and later
1909 18363.418 1911 and later
1903 18362.116 1909 and later
1809 17763.107 1812 and later
1803 17134.376 1808 and later
Note:
Windows 10 versions are compatible with mentioned Citrix Workspace app versions only. Forexample, Windows 10 Version 21H1 isn’t compatible with the version earlier than 2106.
Validating free disk space
The following table provides details on the required disk space to install the Citrix Workspace app.
Installation type Required disk space
Fresh installation 572 MB
Upgrade 350 MB
Citrix Workspace app does a check for the required disk space to complete the installation. The verifi-cation is done both during a fresh installation and an upgrade.
Note:
• The installer does the check on the disk space only after extracting the installation package.
© 1999‒2022 Citrix Systems, Inc. All rights reserved. 8

Citrix Workspace app 2203.1 LTSR for Windows
• When the system is low on disk space during silent installation, the dialog does not appearbut the error message is recorded in the CTXInstall\\_TrolleyExpress-\*.log.
Connections, Certificates, and Authentication
Connections
• HTTP store• HTTPS store• Citrix Gateway 10.5 and later
CertificatesNote:
Citrix Workspace app for Windows is digitally signed. The digital signature is time-stamped. So,the certificate is valid even after the certificate is expired.
• Private (self-signed)• Root• Wildcard• Intermediate
Private (self-signed) certificates
If a private certificate exists on the remote gateway, install the root certificate of the organization’scertificate authority on the user device that’s accessing the Citrix resources.
Note:
If the remote gateway’s certificate cannot be verified upon connection, an untrusted certificatewarning appears. This warning appearswhen the root certificate ismissing in the local Keystore.When a user chooses to continue through the warning, the apps are displayed but cannot belaunched.
Root certificates
For domain-joined computers, you can use a Group Policy Object administrative template todistribute and trust CA certificates.
For non-domain joined computers, the organization can create a custom install package to distributeand install the CA certificate. Contact your system administrator for assistance.
© 1999‒2022 Citrix Systems, Inc. All rights reserved. 9

Citrix Workspace app 2203.1 LTSR for Windows
Wildcard certificates
Wildcard certificates are used on a server within the same domain.
Citrix Workspace app supports wildcard certificates. Use wildcard certificates by following your orga-nization’s security policy. An alternative to wildcard certificates is a certificate with the list of servernames and the Subject Alternative Name (SAN) extension. Private and public certificate authoritiesissue these certificates.
Intermediate certificates
If your certificate chain includes an intermediate certificate, the intermediate certificate must be ap-pended to the Citrix Gateway server certificate. For information, see Configuring Intermediate Certifi-cates.
Authentication
Authentication to StoreFront
Workspacefor web
StoreFrontServices site(native)
StoreFront,Citrix VirtualApps andDesktops(native),Citrix DaaS
CitrixGateway toWorkspacefor web
CitrixGateway toStoreFrontServices site(native)
Anonymous Yes Yes
Domain Yes Yes Yes Yes* Yes*
Domainpass-through
Yes Yes Yes
Securitytoken
Yes* Yes*
Two-factorauthentica-tion (domainwith securitytoken)
Yes* Yes*
SMS Yes* Yes*
Smart card Yes Yes Yes Yes
© 1999‒2022 Citrix Systems, Inc. All rights reserved. 10

Citrix Workspace app 2203.1 LTSR for Windows
Workspacefor web
StoreFrontServices site(native)
StoreFront,Citrix VirtualApps andDesktops(native),Citrix DaaS
CitrixGateway toWorkspacefor web
CitrixGateway toStoreFrontServices site(native)
Usercertificate
Yes (CitrixGatewayplug-in)
Yes (CitrixGatewayplug-in)
* With or without the Citrix Gateway plug-in installed on the device.
Note:
Citrix Workspace app supports two-factor authentication (domain plus security token) using Cit-rix Gateway to the StoreFront native service.
Certificate revocation list
Certificate revocation list (CRL) allows Citrix Workspace app to check if the server’s certificate is re-voked. The certificate check improves the server’s cryptographic authentication and the overall secu-rity of the TLS connection between the user device and a server.
You can enable CRL checking at several levels. For example, it’s possible to configure CitrixWorkspaceapp to checkonly its local certificate list or to check the local andnetwork certificate lists. You canalsoconfigure certificate checking to allow users to log on only if all the CRLs are verified.
If you’re configuring certificate checking on your local computer, exit Citrix Workspace app. Check ifall the Citrix Workspace components, including the Connection Center, are closed.
For more information, see the Transport Layer Security section.
Install and Uninstall
April 7, 2022
You can install the Citrix Workspace app either by:
• Downloading theCitrixWorkspaceApp.exe installationpackage from theDownloadpageor• From your company’s download page (if available).
You can install the package by:
© 1999‒2022 Citrix Systems, Inc. All rights reserved. 11

Citrix Workspace app 2203.1 LTSR for Windows
• Running an interactive Windows-based installation wizard. Or• Typing the installer file name, installation commands and installation properties usingthe command-line interface. For information about installing Citrix Workspace app usingcommand-line interface, see Using command-line parameters.
Installation with administrator and non-administrator privileges:
Both users and administrators can install Citrix Workspace app. Administrator privileges are requiredonly when using pass-through authentication and Citrix Ready workspace hub with Citrix Workspaceapp for Windows.
The following table describes the differences when Citrix Workspace app is installed as an administra-tor or a user:
Installation folder Installation type
Administrator C:\Program Files(x86)\Citrix\ICA Client
Per-system installation
User %USERPROFILE%\AppData\Local\Citrix\ICAClient
Per-user installation
Note:
Administrators can override the user-installed instance of Citrix Workspace app and continuewith the installation successfully.
Using aWindows-based installer
You can install Citrix Workspace app for Windows by manually running the CitrixWorkspaceApp.exe installer package, using the following methods:
• Installation media• Network share• Windows Explorer• Command-line interface
By default, the installer logs are at %temp%\CTXReceiverInstallLogs*.logs.
1. Launch the CitrixWorkspaceApp.exe file and click Start.2. Read and accept the EULA and continue with the installation.3. When installing on a domain-joined machine with administrator privileges, a single sign-on di-
alog appears. See Domain pass-through authentication for more information.4. Follow the Windows-based installer to complete the installation.
© 1999‒2022 Citrix Systems, Inc. All rights reserved. 12

Citrix Workspace app 2203.1 LTSR for Windows
When the installation is complete, Citrix Workspace app requests that you add an account. For infor-mation on how to add an account, see Add accounts or switch servers.
Using command-line parameters
You can customize the Citrix Workspace app installer by specifying different command-line options.The installer package self-extracts to the system temp directory before launching the setup program.The space requirement includes program files, user data, and tempdirectories after launching severalapplications.
To install the Citrix Workspace app using the Windows command line, launch the command promptand type the following on a single line:
• installer file name,• installation commands, and• installation properties
The available installation commands and properties are as follows:
CitrixWorkspaceApp.exe [commands] [properties]
List of command-line parameters
The parameters are broadly classified as follows:
• Common parameters• Install parameters• HDX features parameters• Preferences and user interface parameters• Authentication parameters
Common parameters
• /? Or /help - Lists all the installation commands and properties.
• /silent - Disables installation dialogs and prompts during installation.
• /noreboot - Suppresses the prompts to reboot during installation. When you suppress thereboot prompt, USB devices that are in a suspended state aren’t recognized. The USB devicesare activated only after the device is restarted.
• /includeSSON - Requires you to install as an administrator. Indicates that theCitrixWorkspaceapp is installed with the single sign-on component. See Domain pass-through authenticationfor more information.
© 1999‒2022 Citrix Systems, Inc. All rights reserved. 13

Citrix Workspace app 2203.1 LTSR for Windows
• /rcu - The /rcu switch is effective only when upgrading from an unsupported version of thesoftware. Indicates that Citrix Workspace app install or upgrade is done by uninstalling the ex-isting version. The /rcu switch also cleans up existing or older settings.
Note:
The /rcu switch is deprecated as of Version 1909. Formore information, see Deprecation.
• /forceinstall - This switch is effectivewhencleaningupanyexisting configurationor entriesof Citrix Workspace app in the system. Use this switch in the following scenarios:
– Upgrading from an unsupported version of Citrix Workspace app version.– The installation or upgrade is unsuccessful.
Install parameters
/AutoUpdateCheck
Indicates that Citrix Workspace app detects when an update is available.
Note:
The /AutoUpdateCheck is a mandatory parameter that youmust set to configure other param-eters like /AutoUpdateStream, /DeferUpdateCount, /AURolloutPriority.
• Auto (default) - You’re notified when an update is available. Example, CitrixWorkspaceApp.exe /AutoUpdateCheck=auto.
• Manual - You aren’t notifiedwhen anupdate is available. Check for updatesmanually. Example,CitrixWorkspaceApp.exe /AutoUpdateCheck=manual.
• Disabled -Disablesauto-updates. Example,CitrixWorkspaceApp.exe /AutoUpdateCheck=disabled.
/AutoUpdateStream
If you have enabled auto-update, you can choose the version you want to update. See Lifecycle Mile-stones for more information.
• LTSR - Auto-updates to Long Term Service Release cumulative updates only. Example,CitrixWorkspaceApp.exe /AutoUpdateStream=LTSR.
• Current -Auto-updates to the latest versionofCitrixWorkspaceapp. Example,CitrixWorkspaceApp.exe /AutoUpdateStream=Current.
/DeferUpdateCount
Indicates the number of times that you can defer notifications when an update is available. For moreinformation, see Citrix Workspace Updates.
© 1999‒2022 Citrix Systems, Inc. All rights reserved. 14

Citrix Workspace app 2203.1 LTSR for Windows
• -1(default) - Allowsdeferringnotificationsanynumberof times. Example,CitrixWorkspaceApp.exe /DeferUpdateCount=-1.
• 0 - Indicates that you receive one notification (only) for every available update. Doesn’t remindyou again about the update. Example, CitrixWorkspaceApp.exe /DeferUpdateCount=0.
• Any other number ‘n’ - Allows deferring notifications ‘n’ number of times. The Remindme later option is displayed in the ‘n’ count. Example, CitrixWorkspaceApp.exe /DeferUpdateCount=<n>.
/AURolloutPriority
When a new version of the app is available, Citrix rolls out the update for a specific delivery period.With this parameter, you can control at what time during the delivery period you can receive the up-date.
• Auto (default) - You receive the updates during the delivery period as configured by Citrix. Ex-ample, CitrixWorkspaceApp.exe /AURolloutPriority=Auto.
• Fast - You receive theupdatesat thebeginningof thedeliveryperiod. Example,CitrixWorkspaceApp.exe /AURolloutPriority=Fast.
• Medium - You receive the updates at themid-delivery period. Example, CitrixWorkspaceApp.exe /AURolloutPriority=Medium.
• Slow-You receive theupdatesat theendof thedeliveryperiod. Example,CitrixWorkspaceApp.exe /AURolloutPriority=Slow.
/includeappprotection
Provides enhanced security by restricting the ability of clients to be compromised by keylogging andscreen-capturing malware.
• CitrixWorkspaceApp.exe /includeappprotection
See App protection for more information.
/InstallEmbeddedBrowser
Excludes the Citrix Embedded Browser binaries. Run the /InstallEmbeddedBrowser=N switch toexclude the embedded browser feature.
INSTALLDIR
Specifies the custom installation directory for Citrix Workspace app installation. The default path isC:\Program Files\Citrix. Example, CitrixWorkspaceApp.exe INSTALLDIR=C:\ProgramFiles\Citrix.
© 1999‒2022 Citrix Systems, Inc. All rights reserved. 15

Citrix Workspace app 2203.1 LTSR for Windows
ADDLOCAL
Installs one or more of the specified components. For example, CitrixWorkspaceapp.exeADDLOCAL=ReceiverInside,ICA_Client,AM,SELFSERVICE,DesktopViewer,Flash,Vd3d,WebHelper,BrowserEngine,WorkspaceHub,USB.
Note:
By default, ReceiverInside, ICA_Client, and AM are installed when installing the CitrixWorkspace app.
HDX features parameters
ALLOW_BIDIRCONTENTREDIRECTION
Indicates if bidirectional content redirection between the client and the host is enabled. For moreinformation, see the Bidirectional content redirection policy settings section in the Citrix Virtual Appsand Desktops documentation.
• 0 (default) – Indicates that the bidirectional content redirection is disabled. Example,CitrixWorkspaceApp.exe ALLOW_BIDIRCONTENTREDIRECTION=0.
• 1 - Indicates that thebidirectional content redirection is enabled. Example,CitrixWorkspaceApp.exe ALLOW_BIDIRCONTENTREDIRECTION=1.
FORCE_LAA
Indicates that Citrix Workspace app is installed with the client-side Local App Access component. In-stall the workspace app with administrator privileges for this component to work. See the Local AppAccess section in the Citrix Virtual Apps and Desktops documentation for more information.
• 0 (default)- Indicates that the Local App Access component isn’t installed. Example,CitrixWorkspaceApp.exe FORCE_LAA =0.
• 1 - Indicates that the client-end Local App Access component is installed. Example,CitrixWorkspaceApp.exe FORCE_LAA =1.
LEGACYFTAICONS
Specifies if you want to display icons for documents or files that have file type association with sub-scribed applications.
• False (default) - Display icons for documents or files that have file type associations withsubscribed applications. When set to false, the operation system generates an icon for thedocument that doesn’t have a specific icon assigned to it. The icon generated by the operation
© 1999‒2022 Citrix Systems, Inc. All rights reserved. 16

Citrix Workspace app 2203.1 LTSR for Windows
system is a generic icon overlaid with a smaller version of the application icon. Example,CitrixWorkspaceApp.exe LEGACYFTAICONS=False.
• True - Doesn’t display icons for documents or files that have file type associations with sub-scribed applications. Example, CitrixWorkspaceApp.exe LEGACYFTAICONS=True.
ALLOW_CLIENTHOSTEDAPPSURL
Enables the URL redirection feature on the user device. See the Local App Access section in the CitrixVirtual Apps and Desktops documentation for more information.
• 0 (default)-Disables theURL redirection featureon theuserdevice. Example,CitrixWorkspaceApp.exe ALLOW_CLIENTHOSTEDAPPSURL=0.
• 1- Enables the URL redirection feature on the user devices. Example, CitrixWorkspaceApp.exe ALLOW_CLIENTHOSTEDAPPSURL=1.
Preference and user interface parameters
ALLOWADDSTORE
Allows you to configure the stores (HTTP or https) based on the specified parameter.
• S(default)- Allows you to add or remove secure stores only (configured with HTTPS). Example,CitrixWorkspaceApp.exe ALLOWADDSTORE=S.
• A – Allows you to add or remove both secure stores (HTTPS) and non-secure stores (HTTP). Notapplicable if Citrix Workspace app is per-user installed. Example, CitrixWorkspaceApp.exeALLOWADDSTORE=A.
• N – Never allow users to add or remove their own store. Example, CitrixWorkspaceApp.exeALLOWADDSTORE=N.
ALLOWSAVEPWD
Allows you to save the store credentials locally. This parameter applies only to stores using the CitrixWorkspace app protocol.
• S(default) - Allowssaving thepassword for secure storesonly (configuredwithHTTPS). Example,CitrixWorkspaceApp.exe ALLOWSAVEPWD=S.
• N -Doesnotallowsaving thepassword. Example,CitrixWorkspaceApp.exe ALLOWSAVEPWD=N.
• A - Allows saving the password for both secure stores (HTTPS) and non-secure stores (HTTP).Example, CitrixWorkspaceApp.exe ALLOWSAVEPWD=A.
© 1999‒2022 Citrix Systems, Inc. All rights reserved. 17

Citrix Workspace app 2203.1 LTSR for Windows
STARTMENUDIR
Specifies the directory for the shortcuts in the Start menu.
• <Directory Name> - By default, applications appear under Start > All Programs. You canspecify the relative path of the shortcuts in the \Programs folder. For example, to place short-cuts under Start > All Programs >Workspace, specify STARTMENUDIR=\Workspace.
DESKTOPDIR
Specifies the directory for shortcuts on the Desktop.
Note:
When using the DESKTOPDIR option, set the PutShortcutsOnDesktop key to True.
• <Directory Name> - You can specify the relative path of the shortcuts. For example, to placeshortcuts under Start > All Programs >Workspace, specify DESKTOPDIR=\Workspace.
SELFSERVICEMODE
Controls access to the self-service Workspace app user interface.
• True - Indicates that the user has access to the self-service user interface. Example,CitrixWorkspaceApp.exe SELFSERVICEMODE=True.
• False - Indicates that the user does not have access to the self-service user interface. Example,CitrixWorkspaceApp.exe SELFSERVICEMODE=False.
ENABLEPRELAUNCH
Controls session pre-launch. See Application launch time for more information.
• True - Indicates that session pre-launch is enabled. Example, CitrixWorkspaceApp.exeENABLEPRELAUNCH=True.
• False - Indicates that session pre-launch is disabled. Example, CitrixWorkspaceApp.exeENABLEPRELAUNCH=False.
DisableSetting
Hides theShortcutsandReconnectoption frombeingdisplayed in theAdvancedPreferences sheet.See Hiding specific settings from the Advanced Preferences sheet for more information.
• 0 (default) – Displays both Shortcuts and Reconnect options in the Advanced Preferencessheet. Example, CitrixWorkspaceApp.exe DisableSetting=0.
© 1999‒2022 Citrix Systems, Inc. All rights reserved. 18

Citrix Workspace app 2203.1 LTSR for Windows
• 1 – Displays only the Reconnect option in the Advanced Preferences sheet. Example,CitrixWorkspaceApp.exe DisableSetting=1.
• 2 – Displays only the Shortcuts option in the Advanced Preferences sheet. Example,CitrixWorkspaceApp.exe DisableSetting=2.
• 3 – Both Shortcuts and Reconnect options are hidden from the Advanced Preferences sheet.Example, CitrixWorkspaceApp.exe DisableSetting=3.
EnableCEIP
Indicates your participation in the Customer Experience Improvement Program. See CEIP for moreinformation.
• True (default)- Opt in to the Citrix Customer Improvement Program (CEIP). Example,CitrixWorkspaceApp.exe EnableCEIP=True.
• False -Optoutof theCitrixCustomer ImprovementProgram(CEIP). Example,CitrixWorkspaceApp.exe EnableCEIP=False.
EnableTracing
Controls the Always-on tracing feature.
• True (default)- Enables the Always-on tracing feature. Example. CitrixWorkspaceApp.exeEnableTracing=true.
• False - Disables the Always-on tracing feature. Example, CitrixWorkspaceApp.exeEnableTracing=false.
CLIENT_NAME
Specifies the name used to identify the user device to the server.
• <ClientName> - Specifies the name used identify the user device on the server. Thedefault name is %COMPUTERNAME%. Example, CitrixReceiver.exe CLIENT_NAME=%COMPUTERNAME%.
ENABLE_DYNAMIC_CLIENT_NAME
Allows the client name to be the same as the computer name. When you change the computer name,the client name changes too.
• Yes (default) – Allows the client name to be the same as the computer name. Example,CitrixWorkspaceApp.exe ENABLE_DYNAMIC_CLIENT_NAME=Yes.
© 1999‒2022 Citrix Systems, Inc. All rights reserved. 19

Citrix Workspace app 2203.1 LTSR for Windows
• No - Does not allow the client name to be the same as the computer name. Spec-ify a value for the CLIENT_NAME property. Example, CitrixWorkspaceApp.exeENABLE_DYNAMIC_CLIENT_NAME=No.
Authentication parameters
ENABLE_SSON
Enables single sign-on when the Workspace app is installed with the /includeSSON command. SeeDomain pass-through authentication for more information.
• Yes (default) - Indicates that single sign-on is enabled. Example, CitrixWorkspaceApp.exeENABLE_SSON=Yes.
• No - Indicates that single sign-on is disabled. Example, CitrixWorkspaceApp.exeENABLE_SSON=No.
ENABLE_KERBEROS
Specifies whether the HDX engine must use Kerberos authentication, required only when you enablesingle sign-on authentication. For more information, see Domain pass-through authentication withKerberos.
• Yes - Indicates that theHDXenginemustuseKerberosauthentication. Example,CitrixWorkspaceApp.exe ENABLE_KERBEROS=Yes.
• No - Indicates that the HDX engine doesn’t use Kerberos authentication. Example,CitrixWorkspaceApp.exe ENABLE_KERBEROS=No.
In addition to the aboveproperties, you can also specify the storeURL that is usedwith theWorkspaceapp. You can add up to 10 stores. Use the following property to do so:
STOREx=”storename;http[s]://servername.domain/IISLocation/discovery;[On,Off]; [storedescription]”
Values:
• x - Integers 0 through 9 used to identify a store.• storename - Name of the store. This value must match the name configured on the StoreFrontserver.
• servername.domain - The fully qualified domain name of the server hosting the store.• IISLocation - the path to the store within IIS. The store URL must match the URL in the Store-Front provision file. The store URL is in the following format /Citrix/store/discovery. Toget the URL, export a provisioning file from StoreFront, launch it in Notepad and copy the URLfrom the Address element.
© 1999‒2022 Citrix Systems, Inc. All rights reserved. 20

Citrix Workspace app 2203.1 LTSR for Windows
• [On, Off] - The Off option lets you deliver disabled stores, giving users the choice of whetherthey access them. When the store status isn’t specified, the default setting isOn.
• storedescription - Description of the store, such as HR App Store.
Examples of a command-line installation
To specify the Citrix Gateway store URL:
CitrixWorkspaceApp.exe STORE0= HRStore;https://ag.mycompany.com##Storename;On;Store
Where, Storename indicates the name of the store that needs to be configured.
Note:
• The Citrix Gateway store URL configured using this method does not support the PNA Ser-vices Sites that are using Citrix Gateway.
• In a multi-store setup, the Citrix Gateway store URL must be first in the list. Only one CitrixGateway store URL configuration is allowed.
To install all components silently and specify two application stores:
CitrixWorkspaceApp.exe /silentSTORE0=”AppStore;https://testserver.net/Citrix/MyStore/discovery;on;HR AppStore”STORE1=”BackUpAppStore;https://testserver.net/Citrix/MyBackupStore/discovery;on;Backup HR App Store”
Note:
• It’smandatory to include/discovery in the storeURL for successful pass-through authen-tication.
• The Citrix Gateway store URLmust be the first entry in the list of configured store URLs.
Reset Citrix Workspace app
Resetting Citrix Workspace app restores the default settings.
The following items are reset when you reset Citrix Workspace app:
• All the configured accounts and stores.• Apps delivered by the self-service plug-in, their icons, and registry keys.• File type associations created by the self-service plug-in.• Cached files and saved passwords.• Per-user registry settings.• Per-machine installations, and their registry settings.
© 1999‒2022 Citrix Systems, Inc. All rights reserved. 21

Citrix Workspace app 2203.1 LTSR for Windows
• Citrix Gateway registry settings for Citrix Workspace app.
Run the following command from the command line interface to reset the Citrix Workspace app:
C:\Program Files (x86)\Citrix\ICA Client\SelfServicePlugin\CleanUp.exe”-cleanUser
For silent reset, use the following command:
C:\Program Files (x86)\Citrix\ICA Client\SelfServicePlugin\CleanUp.exe”/silent -cleanUser
Note:
Use uppercase U in the parameter.
Resetting Citrix Workspace app does not impact the following:
• Citrix Workspace app or plug-in installation.• Per-machine ICA lockdown settings.• Group policy object (GPO) administrative template configurations for Citrix Workspace app.
Uninstall
UsingWindows-based uninstaller:
You can uninstall Citrix Workspace app using the Windows Programs and Features utility (Add or Re-move Programs).
Note:
During CitrixWorkspace app installation, you get a prompt to uninstall the Citrix HDX RTME pack-age. ClickOK to continue the uninstallation.
Using the command-line interface:
You can uninstall Citrix Workspace app, from a command line by typing the following command:
CitrixWorkspaceApp.exe /uninstall
For silent uninstallation of Citrix Workspace app, run the following switch:
CitrixWorkspaceApp.exe /silent /uninstall
Note:
Citrix Workspace app installer doesn’t control GPO related registry keys, so they are kept afteruninstallation. If you find any entries, update them using gpedit or delete themmanually.
© 1999‒2022 Citrix Systems, Inc. All rights reserved. 22

Citrix Workspace app 2203.1 LTSR for Windows
Deploy
April 7, 2022
You can deploy the Citrix Workspace app in the following methods:
• UseActiveDirectory and sample startup scripts todeploy theCitrixWorkspaceapp forWindows.For information about Active Directory, see Using Active Directory and sample scripts.
• Before launching workspace for web, install the Workspace app for Windows. For more infor-mation, see Using workspace for web.
• Use an Electronic Software Distribution (ESD) tool like the Microsoft System Center Configura-tion Manager 2012 R2. For more information, see Using System Center Configuration Manager2012 R2.
• Use Microsoft Endpoint Manager (Intune). For more information, see Deploy Citrix Workspaceapp in Microsoft Endpoint Manager (Intune).
Using Active Directory and sample scripts
You can use Active Directory Group Policy scripts to deploy Citrix Workspace app based on your or-ganizational structure. Citrix recommends using the scripts rather than extracting the .msi files. Forgeneral information about startup scripts, see the Microsoft documentation.
To use the scripts with Active Directory:
1. Create the Organizational Unit (OU) for each script.2. Create a Group Policy Object (GPO) for the newly created OU.
Edit scripts
Edit the scripts with the following parameters in the header section of each file:
• Current Versionof package - The specified versionnumber is validated and if it isn’t presented,thedeploymentproceeds. For example, setDesiredVersion= 3.3.0.XXXX to exactlymatchthe version specified. If you specify a partial version, for example, 3.3.0, it matches any versionwith that prefix (3.3.0.1111, 3.3.0.7777, and so on).
• Package Location/Deployment directory - This specifies the network share containing the Cit-rix Workspace app installer packages and is not authenticated by the script. The shared foldermust have Read permission set to EVERYONE.
• Script Logging Directory - The network share where the install logs are copied and the onesthat script didn’t authenticate. The shared folder must have Read and Write permissions forEVERYONE.
© 1999‒2022 Citrix Systems, Inc. All rights reserved. 23

Citrix Workspace app 2203.1 LTSR for Windows
• Package Installer Command Line Options- These command-line options are passed to theinstaller. For the command-line syntax, see Using command-line parameters.
Scripts
CitrixWorkspaceapp installer includes the sampleof bothper-computer andper-user scripts to installand uninstall Citrix Workspace app. The scripts are present in the Citrix Workspace app for WindowsDownloads page.
Deployment type To deploy To remove
Per-computer CheckAndDeployWorkspacePerMachineStartupScript.bat
CheckAndRemoveWorkspacePerMachineStartupScript.bat
Per-user CheckAndDeployWorkspacePerUserLogonScript.bat
CheckAndRemoveWorkspacePerUserLogonScript.bat
To add the startup scripts:
1. Open the Group Policy Management Console.2. Select Computer Configuration or User Configuration > Policies > Windows Settings >
Scripts.3. In the right-hand pane of the Group Policy Management Console, select Logon.4. Select Show Files, copy the appropriate script to the folder displayed, and close the dialog.5. In the Propertiesmenu, click Add and Browse to find and add the newly created script.
To deploy Citrix Workspace app for Windows:
1. Move the user devices assigned to receive this deployment to the OU that you created.2. Reboot the user device and log on.3. Verify that the newly installed package is listed in the Program and Features.
To remove Citrix Workspace app for Windows:
1. Move the user devices chosen for removal to the OU you created.2. Reboot the user device and log on.3. Verify that the newly installed package isn’t listed in the Program and Features.
Using workspace for web
Theworkspace for aweb enables you to access StoreFront stores through a browser using awebpage.
Before connecting to an app from a browser, do the following:
1. Install the Citrix Workspace app for Windows.
© 1999‒2022 Citrix Systems, Inc. All rights reserved. 24
Citrix Workspace app 2203.1 LTSR for Windows
2. Deploy the Citrix Workspace app fromworkspace for web
Ifworkspace forwebdetects that a compatible versionof CitrixWorkspace app isn’t present, a promptappears. The prompt shows that youmust download and install Citrix Workspace app for Windows.
Note:
The workspace for the web does not support email-based account discovery.
Use the following configuration to prompt for the server address only.
1. Download CitrixWorkspaceApp.exe to your local computer.2. Rename CitrixWorkspaceApp.exeto CitrixWorkspaceAppWeb.exe.3. Deploy the renamed executable using your regular deployment method. If you use StoreFront,
see Configure StoreFront using the configuration files in the StoreFront documentation.
Using System Center Configuration Manager 2012 R2
You can use Microsoft System Center Configuration Manager (SCCM) to deploy Citrix Workspace app.
You can deploy the Citrix Workspace app using the SCCM using the following four parts:
1. Adding Citrix Workspace app to the SCCM deployment2. Adding distribution points3. Deploying the Citrix Workspace app to the software center4. Creating Device Collections
Adding Citrix Workspace app to the SCCM deployment
1. Copy the downloaded Citrix Workspace app installation folder to a folder on the ConfigurationManager server and launch the Configuration Manager console.
2. Select Software Library > ApplicationManagement. Right-click Application and click CreateApplication.The Create Application wizard appears.
3. In the General pane, selectManually specify the application information and click Next.
4. In the General Information pane, specify the application information, such as Name, Manu-facturer, Software version.
5. In the Application Catalog wizard, specify additional information such as Language, Applica-tion name, User category and so on and click Next.
Note:
Users can see the information that you specify here.
© 1999‒2022 Citrix Systems, Inc. All rights reserved. 25

Citrix Workspace app 2203.1 LTSR for Windows
6. In theDeployment Typepane, clickAdd to configure the deployment type for CitrixWorkspaceapp setup.
The Create Deployment Type wizard appears.
7. In theGeneral pane: Set the deployment type toWindows Installer (*.msi file), selectManuallyspecify the deployment type information, and click Next.
8. In the General Information pane: Specify deployment type details (For example: WorkspaceDeployment) and click Next.
9. In the Content pane:
a) Provide the path where the Citrix Workspace app setup file is present. For example: Toolson SCCM server.
b) Specify Installation program as one of the following:• CitrixWorkspaceApp.exe /silent for default silent installation.• CitrixWorkspaceApp.exe /silent /includeSSON to enable domain pass-through.
• CitrixWorkspaceApp.exe /silent SELFSERVICEMODE=false to install CitrixWorkspace app in non-Self Service Mode.
c) Specify Uninstall program as CitrixWorkspaceApp.exe /silent /uninstall (toenable uninstallation through SCCM).
10. In the DetectionMethod pane: Select Configure rules to detect the presence of this deploy-ment type and click Add Clause.The Detection Rule dialog appears.
• Set Setting Type to File System.• Under Specify the file or folder to detect the application, set the following:
– Type – From the drop-downmenu, select File.– Path – %ProgramFiles(x86)%\Citrix\ICA Client\Receiver\– File or folder name – receiver.exe– Property – From the drop-downmenu, select Version– Operator - From the drop-downmenu, select Greater than or equal to– Value - Type 4.3.0.65534
Note:
This rule combination applies to Citrix Workspace app for Windows upgrades as well.
11. In the User Experience pane, set:
• Installation behavior - Install for system• Logon requirement - Whether a user is logged on• Installation program visibility - NormalClick Next.
© 1999‒2022 Citrix Systems, Inc. All rights reserved. 26
Citrix Workspace app 2203.1 LTSR for Windows
Note:
Do not specify any requirements and dependencies for this deployment type.
12. In the Summary pane, verify the settings for this deployment type. Click Next.
A success message appears.
13. In the Completion pane, a new deployment type (Workspace Deployment) is listed under theDeployment types.
14. Click Next and click Close.
Add distribution points
1. Right-click Citrix Workspace app in the Configuration Manager console and select DistributeContent.
The Distribute Content wizard appears.
2. In the Content Distribution pane, click Add > Distribution Points.
The Add Distribution Points dialog appears.
3. Browse to the SCCM server where the content is available and clicksOK.
In the Completion pane, a success message appears
4. Click Close.
Deploy Citrix Workspace app to the software center
1. Right-click Citrix Workspace app in the Configuration Manager console select Deploy.
The Deploy Software wizard appears.
2. Select Browse against Collection (can be Device Collection or User Collection) where the appli-cation is to be deployed and click Next.
3. In theDeployment Settings pane, set Action to Install and Purpose to Required (enables unat-tended installation). Click Next.
4. In the Scheduling pane, specify the schedule to deploy the software on target devices.
5. In the User Experience pane, set the User notifications behavior; select Commit changes atdeadline or during amaintenancewindow (requires restart) and clickNext to complete theDeploy Software wizard.
In the Completion pane, a success message appears.
Reboot the target endpoint devices (required only to start installation immediately).
© 1999‒2022 Citrix Systems, Inc. All rights reserved. 27

Citrix Workspace app 2203.1 LTSR for Windows
Onendpointdevices, CitrixWorkspaceapp is visible in theSoftwareCenterunderAvailableSoftware.Installation is triggered automatically based on the configured schedule. You can also schedule orinstall on demand. The installation status is displayed in the Software Center after the installationstarts.
Creating device collections
1. Launch the Configuration Manager console and click Assets and Compliance > Overview >Devices.
2. Right-click Device Collections and select Create Device Collection.
The Create Device Collectionwizard appears.
3. In the General pane, type the Name for the device and click Browse for Limiting collection.
This determines the scope of devices, which can be one the defaultDevice Collections createdby SCCM.Click Next.
4. In theMembership Rules pane, click Add Rule for filtering the devices.
The Create Direct Membership Rulewizard appears.
• In the Search for Resources pane, select the Attribute name based on the devices youwant to filter and provide the Value for Attribute name to select the devices.
5. Click Next. In the Select Resources pane, select the devices that are required to be part of thedevice collection.
In the Completion pane, a success message appears.
6. Click Close.
7. In the Membership rules pane, a new rule is listed under Click Next.
8. In the Completion pane, a successmessage appears. ClickClose to complete theCreateDeviceCollectionwizard.
The new device collection is listed in Device Collections. The new device collection is a part ofthe Device Collections while browsing in the Deploy Softwarewizard.
Note:
Configuring Citrix Workspace app using SCCMmight fail when theMSIRESTARTMANAGERCON-TROL attribute is set to False.As per our analysis, Citrix Workspace app for Windows is not the cause of this failure. Also, retry-ing might yield successful deployment.
© 1999‒2022 Citrix Systems, Inc. All rights reserved. 28

Citrix Workspace app 2203.1 LTSR for Windows
Deploy Citrix Workspace app in Microsoft Endpoint Manager (Intune)
To deploy Citrix Workspace app – native Win 32 app in Microsoft Endpoint Manager (Intune), do thefollowing:
1. Create the following folders:
• A folder to store all the source files required for the installation, for example, C:\CitrixWorkspace_Executable.
• A folder for the output file. Output files are in .intunewin file, for example, C:\Intune_CitrixWorkspaceApp.
• A folder for theMicrosoftWin32ContentPrepTool, for example,C:\Intune_WinAppTool. This tool helps to convert the installation files into the .intunewin format. You candownload the packaging tool fromMicrosoft-Win32-Content-Prep-Tool.
2. Convert all the source files that are needed for the installation to a .intunewin file:
a) Launch the command prompt and go to the folder, where the Microsoft Win32 ContentPrep Tool exists, for example, C:\Intune_WinAppTool.
b) Run the IntuneWinAppUtil.exe command.c) On the prompt, enter the following information:
• Source folder: C:\CitrixWorkspace_Executable• Setup file: CitrixWorkspaceApp.exe• Output folder: C:\Intune_CitrixWorkspaceAppThe .intunewin file is created.
3. Add the package to Microsoft Endpoint Manager (Intune):
a) Open the Microsoft Endpoint Manager (Intune) console: https://endpoint.microsoft.com/##home.
Note:
The following instruction can be performed only on https://endpoint.microsoft.com/##home. You can also add the package through https://portal.azure.com.
b) Click Apps >Windows app and then click +Add.
c) SelectWindows app (Win 32) from the App type drop-down list.
d) Click App package file, locate the CitrixWorkspaceApp.intunewin file, and then clickOK.
e) ClickApp information and fill in themandatory information, Name, Description, and Pub-lisher and then clickOK.
f) Click Program, enter the following information, and clickOK:
© 1999‒2022 Citrix Systems, Inc. All rights reserved. 29

Citrix Workspace app 2203.1 LTSR for Windows
• Install command: CitrixWorkspaceApp.exe /silent• Uninstall command: CitrixWorkspaceApp.exe /uninstall• Install behavior: System
g) Click Requirement, enter the required information, and then clickOK.
Note:
Select both x64 and x32 from the Operation System Architecture list. Operation Sys-tem version can be anything with Win 1607 and later.
h) Click Detection rules, select Manually configure detection rules as the Rules format,and then clickOK.
i) Click Add, select the required Rule type, and then clickOK.
• If Rule type is File then the path can be, for example, C:\Program Files (x86)\Citrix\ICA Client\wfica32.exe.
• If Rule type is Registry, then enter HKEY_CURRENT_USER\Software\Citrix asPath and Key exists as the Detectionmethod.
j) Click Return codes, check if the default return codes are valid and then clickOK.
k) Click Add to add the app to Intune.
4. Verify if the deployment is successful:
a) ClickHome > Apps >Windows.
b) Click Device install status.
Device status displays the number of devices where Citrix Workspace app is installed.
Update
April 7, 2022
Manual update
If you have already installed Citrix Workspace app for Windows, download and install the latest ver-sion of the app from the Citrix Downloads page. For information on the installation, see Install andUninstall.
© 1999‒2022 Citrix Systems, Inc. All rights reserved. 30

Citrix Workspace app 2203.1 LTSR for Windows
Automatic update
When a new version of the Citrix Workspace app is available, Citrix pushes the update on the systemthat has the Citrix Workspace app installed.
Note:
• If you’ve configured an SSL intercepting outbound proxy, add an exception to theWorkspace auto-update signature service https://citrixupdates.cloud.com/ andthe download location https://downloadplugins.citrix.com/ to receive updatesfrom Citrix.
• Your systemmust have an internet connection to receive updates.• By default, CitrixWorkspace updates are disabled on the VDA. This includes RDSmulti-userserver machines, VDI, and Remote PC Access machines.
• Citrix Workspace updates are disabled onmachines where Desktop Lock is installed.• Workspace for web users can’t download the StoreFront policy automatically.• Citrix Workspace updates can be limited to LTSR updates only.• Citrix HDX RTME for Windows is included in Citrix Workspace Updates. A notificationappears when updates to the HDX RTME on both LTSR and current release of the CitrixWorkspace app are available.
• Starting with Version 2105, Citrix Workspace Updates log paths are modified. TheWorkspace Updates logs are present at C:\Program Files (x86)\Citrix\Logs. For informationon logging, see Log collection section.
• A non-administrator can update Citrix Workspace app on an admin-installed instance. Youcan do that by right-clicking the Citrix Workspace app icon in the notification area and se-lecting Check for Updates. The Check for Updates option is available on both the user-installed and the admin-installed instances of Citrix Workspace app.
Restart the Citrix Workspace app for Windows after a manual or automatic update.
Advanced configuration for automatic updates (Citrix Workspace Updates)
You can configure Citrix Workspace Updates using the following methods:
1. Group Policy Object (GPO) administrative template2. Command-line interface3. GUI4. StoreFront
Configure Citrix Workspace Updates using the Group Policy Object administrative template
1. Open the Citrix Workspace app Group Policy Object administrative template by runninggpedit.msc and navigate to the Computer Configuration node.
© 1999‒2022 Citrix Systems, Inc. All rights reserved. 31

Citrix Workspace app 2203.1 LTSR for Windows
2. Go to Administrative Templates > Citrix Components > Citrix Workspace >Workspace Up-dates.
3. Enable or disable updates – Select Enabled or Disabled to enable or disable Workspace Up-dates.
Note:
When you selectDisabled, you aren’t notified of new updates. Disabled option also hidesthe Workspace Updates option from the Advanced Preferences sheet.
4. Update notification – When an update is available, you can choose to be automatically noti-fied or check for themmanually. After you have enabled Workspace updates, select one of thefollowing options from the Enable Citrix Workspace Update Policy drop-down list:
• Auto - You’re notified when an update is available (default).• Manual - You aren’t notified when an update is available. Check for updates manually.
5. Select LTSR ONLY to get updates for LTSR only.
© 1999‒2022 Citrix Systems, Inc. All rights reserved. 32
Citrix Workspace app 2203.1 LTSR for Windows
6. From the Citrix-Workspace-Update-DeferUpdate-Count drop-down list, select a valuebetween -1 and 30:
• If the value is 0 then the Remind Me Later option appears. Update available prompt isshown on every periodic automatic check for update.
• If the value is -1 then the Remind Me Later option appears with the Update availableprompt. You can defer the update notification any number of times.
• A value between 1-30 defines the number of times the Remind Me Later option with theUpdateavailablepromptmust appear. Youcandefer theupdatenotificationbasedon thevaluedefined in this field. However, theUpdateavailableprompt continues toappearbutwithout the Remind Me Later option.
Configure the delay in checking for updates
When a new version of the Workspace app is available, Citrix rolls out the update during a specificdelivery period. With this property, you can control at what stage during the delivery period you canreceive the update.
To configure the delivery period, run gpedit.msc to launch the Group Policy Object administrativetemplate. Under Computer Configuration node, go to Administrative Templates > Citrix Compo-nents > Citrix Workspace > Set the Delay in Checking for Update.
© 1999‒2022 Citrix Systems, Inc. All rights reserved. 33

Citrix Workspace app 2203.1 LTSR for Windows
Select Enabled, and from the Delay Group drop-down list, select one of the following:
• Fast – Update rollout happens at the beginning of the delivery period.• Medium – Update rollout happens at the mid-delivery period.• Slow – Update rollout happens at the end of the delivery period.
Note:
When you select Disabled, you aren’t notified of available updates. Disabled also hides theWorkspace Updates option from the Advanced Preferences sheet.
Configure Citrix Workspace Updates using the command-line interface
By specifying command-line parameters while installing Workspace app:
© 1999‒2022 Citrix Systems, Inc. All rights reserved. 34

Citrix Workspace app 2203.1 LTSR for Windows
You can configure Workspace updates by specifying command-line parameters during the CitrixWorkspace app installation. See Install parameters for more information.
By using command-line parameters after Citrix Workspace app has been installed:
Citrix Workspace Updates can also be configured after installing the Citrix Workspace app for Win-dows. Navigate to the locationofCitrixReceiverUpdater.exeusing theWindows command line.
Typically, CitrixReceiverUpdater.exe is at CitrixWorkspaceInstallLocation\Citrix\IcaClient\Receiver. You might run the CitrixReceiverUpdater.exe binary along with thecommand-line parameters listed in the Install parameters section.
For example,
CitrixReceiverUpdater.exe /AutoUpdateCheck=auto /AutoUpdateStream=Current /DeferUpdateCount=-1 /AURolloutPriority= fast
Note:
The /AutoUpdateCheck is a mandatory parameter that youmust set to configure other param-eters like /AutoUpdateStream, /DeferUpdateCount, /AURolloutPriority.
Configure Citrix Workspace Updates using the graphical user interface
Individual user can override the Citrix Workspace Updates setting using the Advanced Preferencesdialog. This is a per-user configuration and the settings apply only to the current user.
1. Right-click Citrix Workspace app icon from the notification area.2. Select Advanced Preferences > Citrix Workspace Updates.3. Select the notification preference and click Save.
© 1999‒2022 Citrix Systems, Inc. All rights reserved. 35

Citrix Workspace app 2203.1 LTSR for Windows
Note:
You can hide all or part of the Advanced Preferences sheet available from the Citrix Workspaceapp icon. For more information, see the Advanced Preferences sheet section.
Configure Citrix Workspace Updates using StoreFront
1. Use a text editor to open the web.config file, which is typically at C:\inetpub\wwwroot\Citrix\Roaming directory.
2. Locate the user account element in the file (Store is the account name of your deployment)
For example: <account id=... name=”Store”>
Before the </account> tag, navigate to the properties of that user account:
1 <properties>2 <clear/>3 </properties>4 <!--NeedCopy-->
3. Add the auto-update tag after the <clear /> tag.
1 <account>23 <clear />45 <account id=”d1197d2c-ac82-4f13-9346-2ee14d4b0202” name=”
F84Store”67 description=”” published=”true” updaterType=”Citrix”
remoteAccessType=”None”>89 <annotatedServices>1011 <clear />1213 <annotatedServiceRecord serviceRef=”1__Citrix_F84Store”>1415 <metadata>1617 <plugins>18
© 1999‒2022 Citrix Systems, Inc. All rights reserved. 36

Citrix Workspace app 2203.1 LTSR for Windows
19 <clear />2021 </plugins>2223 <trustSettings>2425 <clear />2627 </trustSettings>2829 <properties>3031 <property name=”Auto-Update-Check” value=”auto” />3233 <property name=”Auto-Update-DeferUpdate-Count” value
=”1” />3435 <property name=”Auto-Update-LTSR-Only” value
=”FALSE” />3637 <property name=”Auto-Update-Rollout-Priority” value=
”fast” />3839 </properties>4041 </metadata>4243 </annotatedServiceRecord>4445 </annotatedServices>4647 <metadata>4849 <plugins>5051 <clear />5253 </plugins>5455 <trustSettings>5657 <clear />5859 </trustSettings>60
© 1999‒2022 Citrix Systems, Inc. All rights reserved. 37

Citrix Workspace app 2203.1 LTSR for Windows
61 <properties>6263 <clear />6465 </properties>6667 </metadata>6869 </account>7071 <!--NeedCopy-->
Themeaning of the properties and their possible values are detailed as follows:
• Auto-update-Check: Indicates that Citrix Workspace app detects an update automaticallywhen available.
• Auto-update-LTSR-Only: Indicates that the update is for LTSR only.• Auto-update-Rollout-Priority: Indicates the delivery period in which you can receive the up-date.
• Auto-update-DeferUpdate-Count: Indicates the number of counts that you can defer the noti-fications for the updates.
Get started
June 16, 2022
This article is a reference document to help you set up your environment after you install CitrixWorkspace app.
Prerequisites:
Verify that all the requirements are met as listed in the System requirements section.
Validating free disk space
See the following table for details on disk space required before installation:
Installation type Minimum disk space required
Fresh installation 572 MB
Upgrade 350 MB
© 1999‒2022 Citrix Systems, Inc. All rights reserved. 38

Citrix Workspace app 2203.1 LTSR for Windows
Citrix Workspace app does a check to verify available disk space to complete the installation. Theverification is done both during a fresh installation and an upgrade.
During a fresh installation, the installation stops and the following dialog appears when there’s insuf-ficient disk space:
When you’re upgrading Citrix Workspace app, the installation ends and the following dialog box ap-pears when there’s insufficient disk space.
Note:
• The installer checks the disk space only after extracting the installation package.• When the system is low on disk space during silent installation, the dialog does not appearbut the error message is recorded in the CTXInstall\\_TrolleyExpress-\*.log.
Configure the following before using the Citrix Workspace app:
• Group Policy Object administrative template• StoreFront• Citrix Gateway Store• User accounts• Client drive mapping• Domain Name Service name resolution
© 1999‒2022 Citrix Systems, Inc. All rights reserved. 39

Citrix Workspace app 2203.1 LTSR for Windows
Group Policy Object administrative template
We recommend that you use the Group Policy Object administrative template to configure rules for:
• Network routing• Proxy servers• Trusted server configuration• User routing• Remote user devices• User experience.
You canuse thereceiver.admx /receiver.adml template fileswithdomainpolicies and local com-puter policies. For domain policies, import the template file using the Group Policy Management con-sole. Importing is usefulwhen applying CitrixWorkspace app settings to several different user devicesthroughout the enterprise. Tomodify on a single user device, import the template file using the localGroup Policy Editor on the device.
Citrix recommends using the Windows Group Policy Object (GPO) administrative template to config-ure Citrix Workspace app.
The installation directory includes CitrixBase.admx and CitrixBase.adml, and, administrativetemplate files (receiver.adml or receiver.admx‘receiver.adml‘).
Note:
The .admx and .adml files are for use with Windows Vista, Windows Server 2008, and other laterversions of Windows.
For example: \<installation directory\>\Online Plugin\Configuration.
If Citrix Workspace app is installed without the VDA, the admx/adml files are typically found in theC:\Program Files\Citrix\ICA Client\Configuration directory.
See the following table for information about CitrixWorkspace app template files and their respectivelocations.
Note:
Citrix recommends that you use the GPO template files provided with latest version of CitrixWorkspace app.
File type File location
receiver.adm <Installation Directory>\ICAClient\Configuration
© 1999‒2022 Citrix Systems, Inc. All rights reserved. 40

Citrix Workspace app 2203.1 LTSR for Windows
receiver.admx <Installation Directory>\ICAClient\Configuration
receiver.adml <Installation Directory>\ICAClient\Configuration\[MUIculture]
CitrixBase.admx <Installation Directory>\ICAClient\Configuration
CitrixBase.adml <Installation Directory>\ICAClient\Configuration\[MUIculture]
Note:
• If theCitrixBase.admx\adml isn’t added to the localGPO, theEnable ICAFileSigningpolicymight be lost.
• When upgrading Citrix Workspace app, add the latest template files to local GPO. Earliersettings are retained after import. For more information, see the following procedure:
To add the receiver.admx/adml template files to the local GPO:
You can use .adm template files to configure both the Local and the domain-based GPO. Refer to theMicrosoft MSDN article about managing ADMX files here.
After installing Citrix Workspace app, copy the following template files:
File type Copy from Copy to
receiver.admx Installation Directory\ICA Client\Configuration\receiver.admx
%systemroot%\policyDefinitions
CitrixBase.admx Installation Directory\ICA Client\Configuration\CitrixBase.admx
%systemroot%\policyDefinitions
receiver.adml Installation Directory\ICA Client\Configuration\[MUIculture]receiver.adml
%systemroot%\policyDefinitions\[MUIculture]
© 1999‒2022 Citrix Systems, Inc. All rights reserved. 41

Citrix Workspace app 2203.1 LTSR for Windows
File type Copy from Copy to
CitrixBase.adml Installation Directory\ICA Client\Configuration\[MUIculture]\CitrixBase.adml
%systemroot%\policyDefinitions\[MUIculture]
Note:
Add the CitrixBase.admx/CitrixBase.adml to the \PolicyDefinitions folder to view the tem-plate files in Administrative Templates > Citrix Components > Citrix Workspace.
StoreFront
Configure Citrix Gateway to enable users to connect from outside the internal network. For example,users who connect from the Internet or from remote locations.
Note:
Youmight see the old StoreFront user interface if you select The Show all Stores option.
To configure StoreFront:
Install and configure StoreFront as described in the StoreFront documentation. Citrix Workspace apprequires an HTTPS connection. On an HTTP configured StoreFront, set the registry key as describedin Using command-line parameters.
Note:
Citrix provides a template you can use to create a download site for Citrix Workspace app forWindows.
Citrix Gateway Store
To add or specify a Citrix Gateway using the Group Policy Object administrative template:
1. Open the Citrix Workspace app Group Policy Object administrative template by runninggpedit.msc.
2. Under the Computer Configuration node, go to Administrative Templates > Classic Admin-istrative Templates (ADM) > Citrix Components > Citrix Workspace > StoreFront.
3. Select Citrix Gateway URL/StoreFront Accounts List.
4. Edit the settings.
© 1999‒2022 Citrix Systems, Inc. All rights reserved. 42

Citrix Workspace app 2203.1 LTSR for Windows
• Store name – Indicates the displayed store name• Store URL – Indicates the URL of the store• #Store name – Indicates the name of the store behind Citrix Gateway• Store enabled state –Indicates the state of the store, On or Off• Store Description – Provides description of the store
5. Add or specify the Citrix Gateway URL. Enter the name of the URL, delimited by a semi-colon:
Example: CitrixWorkspaceApp.exe STORE0= HRStore;https://ag.mycompany.com##Storename;On;StoreWhere #Store name is the name of the store behind Citrix Gateway.
Startingwith Version 1808, changesmade to theCitrix GatewayURL/StoreFront Account List policyare applied in a session after app restart. A reset isn’t required.
Note:
Citrix Workspace app Version 1808 and later doesn’t require resetting on a fresh installation. Ifthere’s an upgrade to 1808 or later, you must reset the Citrix Workspace app for the changes totake effect.
Limitations:
• Citrix Gateway URLmust be listed as first followed by StoreFront URLs.• No support for Multiple Citrix Gateway URLs.• Citrix GatewayURL configured using thismethoddoes not support the PNAServices site behindCitrix Gateway.
Manage workspace control reconnect
Workspace control lets applications follow users as they move between devices. For example,workspace control enables clinicians in hospitals to move from workstation to workstation with-out having to restart their applications on each device. For Citrix Workspace app, you manageworkspace control on client devices by modifying the registry. Workspace control can also be donefor domain-joined client devices using Group Policy.
Caution
Editing the registry incorrectly can cause serious problems that might require you to reinstallyour operating system. Citrix can’t guarantee that problems resulting from the incorrect use ofthe Registry Editor can be solved. Use the Registry Editor at your own risk. Be sure to back upthe registry before you edit it.
Create WSCReconnectModeUser and modify the existing registry key WSCReconnectMode in theMaster Desktop Image or in the Citrix Virtual Apps server. The published desktop can change the be-havior of the Citrix Workspace app.
© 1999‒2022 Citrix Systems, Inc. All rights reserved. 43
Citrix Workspace app 2203.1 LTSR for Windows
WSCReconnectMode key settings for Citrix Workspace app:
• 0 = do not reconnect to any existing sessions• 1 = reconnect on application launch• 2 = reconnect on application refresh• 3 = reconnect on application launch or refresh• 4 = reconnect when Citrix Workspace interface opens• 8 = reconnect on Windows sign-on• 11 = combination of both 3 and 8
Disable workspace control
To disable workspace control, create the following key:
HKEY_LOCAL_MACHINE\SOFTWARE\Wow6432Node\Citrix\Dazzle (64-bit)
HKEY_LOCAL_MACHINE\SOFTWARE\Citrix\\Dazzle (32-bit)
Name: WSCReconnectModeUser
Type: REG_SZ
Value data: 0
Modify the following key from the default value of 3 to zero
HKEY_LOCAL_MACHINE\SOFTWARE\Wow6432Node\Citrix\Dazzle (64-bit)
HKEY_LOCAL_MACHINE\SOFTWARE\Citrix\Dazzle (32-bit)
Name: WSCReconnectMode
Type: REG_SZ
Value data: 0
Note:
You can also set theWSCReconnectAll key to false if you don’t want to create a key.
Changing the status indicator timeout
You can change theamount of time the status indicator displayswhenauser is launching a session. Toalter the time-out period, create a REG_DWORD value SI INACTIVE MS in HKEY_LOCAL_MACHINE\SOFTWARE\Citrix\ICA CLIENT\Engine\. The REG_DWORD value can be set to 4 if you want thestatus indicator to disappear sooner.
© 1999‒2022 Citrix Systems, Inc. All rights reserved. 44

Citrix Workspace app 2203.1 LTSR for Windows
Customizing location for application shortcut using command line
The start menu integration and desktop shortcut only feature lets you bring published applicationshortcuts into the Windows Start menu and onto the desktop. Users do not have to subscribe toapplications from the Citrix Workspace user interface. Start menu integration and desktop shortcutmanagement provide a seamless desktop experience for groups of users. Also for users who needaccess to a core set of applications in a consistent way.
The flag is calledSelfServiceModeand is set toTruebydefault. When the administrator sets theSelf-ServiceMode flag to False, you can’t access the self-service user interface. Instead, you can accesssubscribed apps from the Start menu and desktop shortcuts that is referred as shortcut-only mode.
Users and administrators can use several registry settings to customize the way shortcuts are set up.
Working with shortcuts
• Users can’t remove apps. All apps are mandatory when working with the SelfServiceModeflag set to false (shortcut-only mode). If you remove a shortcut icon from the desktop, the iconcomesbackwhen theuser selectsRefresh fromtheCitrixWorkspaceapp icon in thenotificationarea.
• Users can configure only one store. The Account and Preferences options aren’t available toprevent the user from configuring more stores. The administrator can give a user special privi-leges to addmore thanoneaccount using theGroupPolicyObject template. Administrators canalso provide special privileges bymanually adding a registry key (HideEditStoresDialog) on theclient machine. When the administrator gives a user this privilege, the user has a Preferencesoption in the notification area, where they can add and remove accounts.
• Users can’t remove apps using theWindows Control Panel.• You can add desktop shortcuts via a customizable registry setting. Desktop shortcuts aren’tadded by default. After editing the registry settings, restart the Citrix Workspace app.
• Shortcuts are created in theStartmenuwith a category path as thedefault, UseCategoryAsStart-MenuPath.
Note:
Windows 8/8.1 andWindows 10 donot allow the creation of nested folderswithin the Startmenu.Applications are displayed individually or under the root folder. But, notwithin the Category subfolders that are defined with Citrix Virtual Apps.
• You can add a flag [/DESKTOPDIR=”Dir_name”] during installation to bring all shortcuts into asingle folder. CategoryPath is supported for desktop shortcuts.
• AutoReinstallModifiedApps featurecanbeenabledusing the registrykeyAutoReInstallModifiedApps. When AutoReInstallModifiedApps is enabled, any changes to the publishedapps and desktops attributes on the server are displayed on the client machine. When
© 1999‒2022 Citrix Systems, Inc. All rights reserved. 45

Citrix Workspace app 2203.1 LTSR for Windows
AutoReInstallModifiedApps is disabled, apps and desktop attributes aren’t up-dated and shortcuts aren’t restored on refresh if deleted on the client. By default, theAutoReInstallModifiedApps is enabled.
Customizing location for application shortcut using the Registry editorNote:
• By default, registry keys use the String format.• Change registry keys before you configure a store. If at any time you or a user wants tocustomize the registry keys, you or the user must:
1. reset Citrix Workspace app2. configure the registry keys, and then3. reconfigure the store.
Registry keys for 32-bit machines
Registry key: WSCSupported
Value: True
Key path:
1 - HKEY_CURRENT_USER\Software\Citrix\Dazzle2 - HKEY_CURRENT_USER\Software\Citrix\Receiver\SR\Store” +
primaryStoreID +\Properties3 - HKEY_LOCAL_MACHINE\Software\Policies\Citrix\Dazzle4 - HKEY_LOCAL_MACHINE\Software\Citrix\Dazzle
Registry key: WSCReconnectAll
Value: True
Key path:
1 - `HKEY_CURRENT_USER\Software\Citrix\Dazzle`2 - `HKEY_CURRENT_USER\Software\Citrix\Receiver\SR\Store” +
primaryStoreID + \Properties`3 - `HKEY_LOCAL_MACHINE\Software\Policies\Citrix\Dazzle`4 - `HKEY_LOCAL_MACHINe\Software\Citrix\Dazzle`
© 1999‒2022 Citrix Systems, Inc. All rights reserved. 46

Citrix Workspace app 2203.1 LTSR for Windows
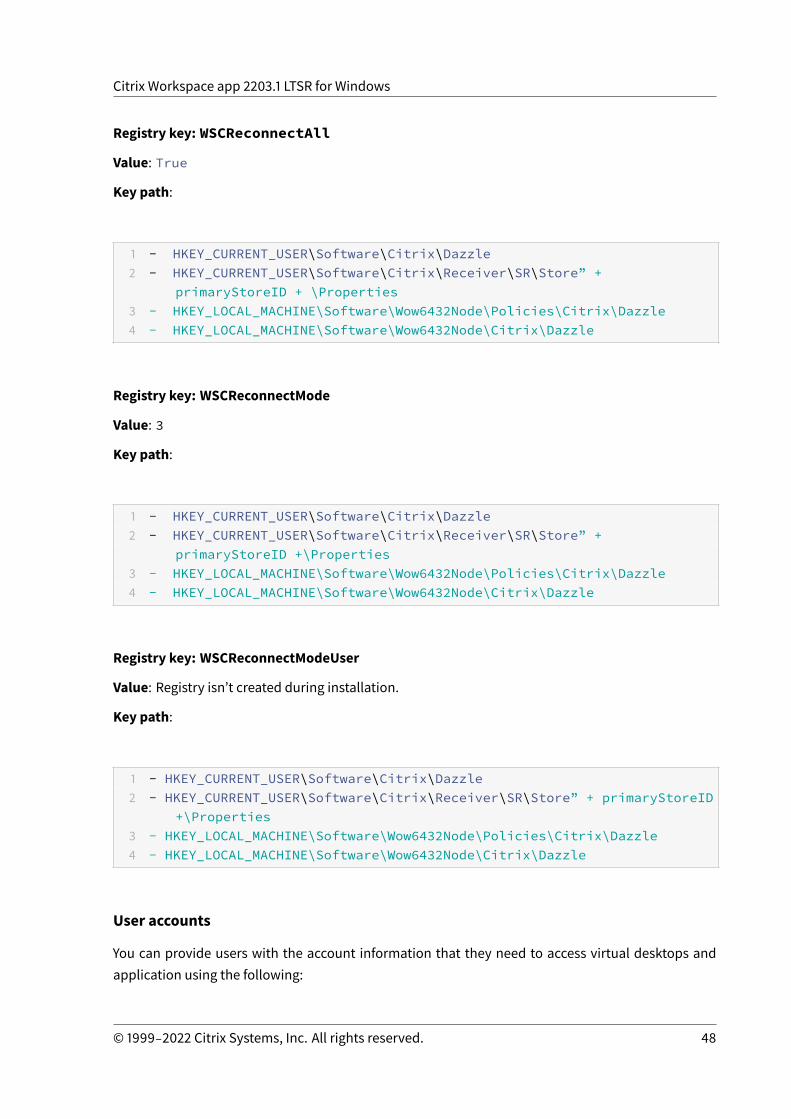
Registry key: WSCReconnectMode
Value: 3
Key path:
1 - HKEY_CURRENT_USER\Software\Citrix\Dazzle2 - HKEY_CURRENT_USER\Software\Citrix\Receiver\SR\Store” +
primaryStoreID +\Properties3 - HKEY_LOCAL_MACHINE\Software\Policies\Citrix\Dazzle4 - HKEY_LOCAL_MACHINE\Software\Citrix\Dazzle
Registry key: WSCReconnectModeUser
Value: Registry isn’t created during installation.
Key path:
1 - HKEY_CURRENT_USER\Software\Citrix\Dazzle2 - HKEY_CURRENT_USER\Software\Citrix\Receiver\SR\Store” + primaryStoreID
+\Properties3 - HKEY_LOCAL_MACHINE\Software\Policies\Citrix\Dazzle4 - HKEY_LOCAL_MACHINE\Software\Citrix\Dazzle
Registry keys for 64-bit machines:
Registry key: WSCSupported
Value: True
Key path:
1 - HKEY_CURRENT_USER\Software\Citrix\Dazzle2 - HKEY_CURRENT_USER\Software\Citrix\Receiver\SR\Store” + primaryStoreID
+\Properties3 - HKEY_LOCAL_MACHINE\Software\Wow6432Node\Policies\Citrix\Dazzle4 - HKEY_LOCAL_MACHINE\Software\Wow6432Node\Citrix\Dazzle
© 1999‒2022 Citrix Systems, Inc. All rights reserved. 47
Citrix Workspace app 2203.1 LTSR for Windows
Registry key: WSCReconnectAll
Value: True
Key path:
1 - HKEY_CURRENT_USER\Software\Citrix\Dazzle2 - HKEY_CURRENT_USER\Software\Citrix\Receiver\SR\Store” +
primaryStoreID + \Properties3 - HKEY_LOCAL_MACHINE\Software\Wow6432Node\Policies\Citrix\Dazzle4 - HKEY_LOCAL_MACHINE\Software\Wow6432Node\Citrix\Dazzle
Registry key: WSCReconnectMode
Value: 3
Key path:
1 - HKEY_CURRENT_USER\Software\Citrix\Dazzle2 - HKEY_CURRENT_USER\Software\Citrix\Receiver\SR\Store” +
primaryStoreID +\Properties3 - HKEY_LOCAL_MACHINE\Software\Wow6432Node\Policies\Citrix\Dazzle4 - HKEY_LOCAL_MACHINE\Software\Wow6432Node\Citrix\Dazzle
Registry key: WSCReconnectModeUser
Value: Registry isn’t created during installation.
Key path:
1 - HKEY_CURRENT_USER\Software\Citrix\Dazzle2 - HKEY_CURRENT_USER\Software\Citrix\Receiver\SR\Store” + primaryStoreID
+\Properties3 - HKEY_LOCAL_MACHINE\Software\Wow6432Node\Policies\Citrix\Dazzle4 - HKEY_LOCAL_MACHINE\Software\Wow6432Node\Citrix\Dazzle
User accounts
You can provide users with the account information that they need to access virtual desktops andapplication using the following:
© 1999‒2022 Citrix Systems, Inc. All rights reserved. 48

Citrix Workspace app 2203.1 LTSR for Windows
• Configuring email-based account discovery• Provisioning file• Providing users with account information to enter manually
Important
Citrix recommends that you restart Citrix Workspace app after the installation to ensure that:
• Restart ensures that users can add accounts and• CitrixWorkspace app candiscoverUSBdevices thatwere in a suspended state during instal-lation.
A dialog appears to indicate a successful installation, followed by the Add Account dialog. For a firsttime user, the Add Account dialog requires you to enter an email or server address to set up an ac-count.
Provide users with account information to enter manually
Upon successful installationof CitrixWorkspaceapp, the following screenappears. Users are requiredto enter an email or server address to access the apps and desktops. When a user enters the detailsfor a new account, Citrix Workspace app tries to verify the connection. If successful, Citrix Workspaceapp prompts the user to log on to the account.
© 1999‒2022 Citrix Systems, Inc. All rights reserved. 49
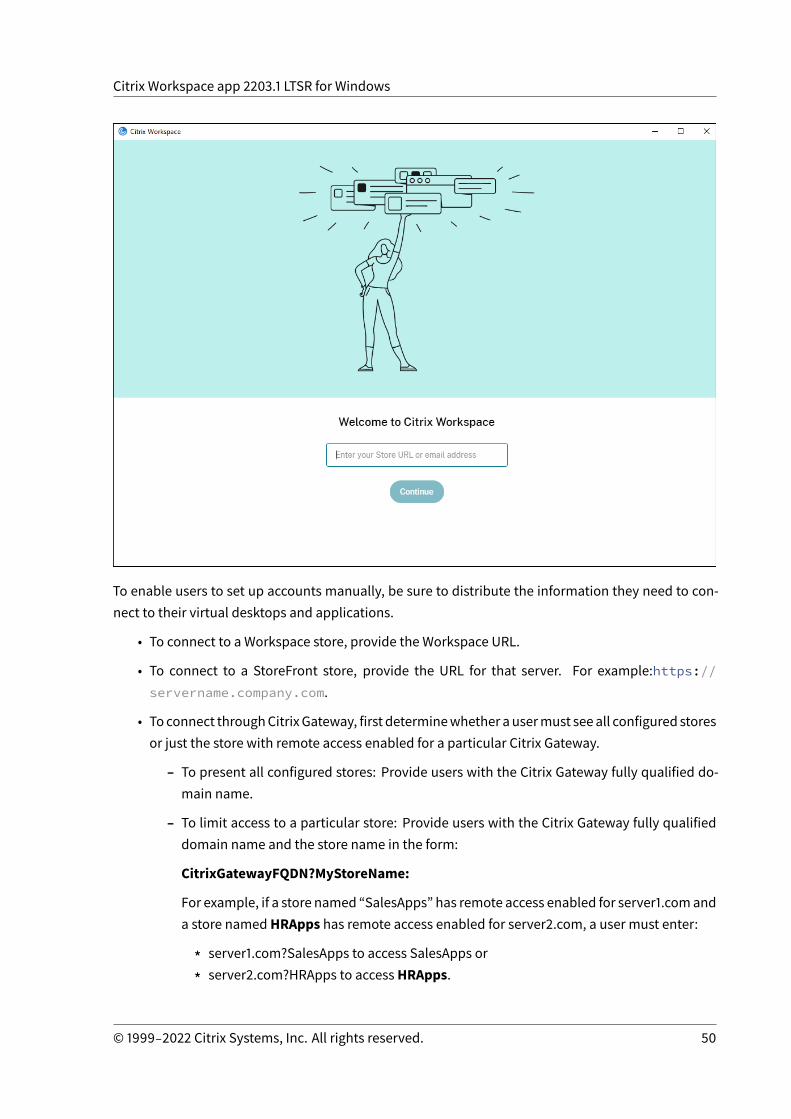
Citrix Workspace app 2203.1 LTSR for Windows
To enable users to set up accounts manually, be sure to distribute the information they need to con-nect to their virtual desktops and applications.
• To connect to a Workspace store, provide the Workspace URL.
• To connect to a StoreFront store, provide the URL for that server. For example:https://servername.company.com.
• To connect throughCitrixGateway, first determinewhether ausermust seeall configured storesor just the store with remote access enabled for a particular Citrix Gateway.
– To present all configured stores: Provide users with the Citrix Gateway fully qualified do-main name.
– To limit access to a particular store: Provide users with the Citrix Gateway fully qualifieddomain name and the store name in the form:
CitrixGatewayFQDN?MyStoreName:
For example, if a store named “SalesApps” has remote access enabled for server1.comanda store namedHRApps has remote access enabled for server2.com, a user must enter:
* server1.com?SalesApps to access SalesApps or
* server2.com?HRApps to accessHRApps.
© 1999‒2022 Citrix Systems, Inc. All rights reserved. 50

Citrix Workspace app 2203.1 LTSR for Windows
CitrixGatewayFQDN?MyStoreName feature requires a new user to create an account byentering a URL and isn’t available for email-based discovery.
Once the Workspace app is configured with the Store URL, the account can be managed from theAccounts option in the profile menu.
Configure email-based account discovery
When you configure Citrix Workspace app for email-based account discovery, users enter their emailaddress rather than a server URL during initial Citrix Workspace app installation and configuration.Citrix Workspace app determines the Citrix Gateway or StoreFront Server associated with the emailaddress based on Domain Name System (DNS) Service (SRV) records. The app then prompts the userto log on to access virtual desktops and applications.
For more information, see Configuring email based account discovery.
Provide users with provisioning files
StoreFront provides provisioning files that users can open to connect to stores.
You can use StoreFront to create provisioning files that include connection details for accounts. Makethese files available to your users to enable them to configure Citrix Workspace app automatically.After installing Citrix Workspace app, users simply open the file to configure Citrix Workspace app.If you configure workspace for web, users can also get Citrix Workspace app provisioning files fromthose sites.
Formore information, seeToexport storeprovisioning files forusers in theStoreFrontdocumentation.
© 1999‒2022 Citrix Systems, Inc. All rights reserved. 51

Citrix Workspace app 2203.1 LTSR for Windows
Provide users with account information to enter manually
To enable users to set up accounts manually, be sure to distribute the information they need to con-nect to their virtual desktops and applications.
• To connect to a StoreFront store, provide the URL for that server. For example:https://servername.company.com.
• To connect throughCitrixGateway, first determinewhether ausermust seeall configured storesor just the store with remote access enabled for a particular Citrix Gateway.
– To present all configured stores: Provide users with the Citrix Gateway fully qualified do-main name.
– To limit access to a particular store: Provide users with the Citrix Gateway fully qualifieddomain name and the store name in the form:
CitrixGatewayFQDN?MyStoreName:
For example, if a store named “SalesApps” has remote access enabled for server1.com and a storenamedHRApps has remote access enabled for server2.com, a user must enter:
• server1.com?SalesApps to access SalesApps or• server2.com?HRApps to accessHRApps.
CitrixGatewayFQDN?MyStoreName feature requires a new user to create an account by entering aURL and isn’t available for email-based discovery.
When a user enters the details for a new account, Citrix Workspace app tries to verify the connection.If successful, Citrix Workspace app prompts the user to log on to the account.
Tomanageaccounts, open theCitrixWorkspaceapphomepage, andclick , and thenclickAccounts.
Sharingmultiple stores accounts automatically
Warning
Using the Registry Editor incorrectly can cause serious problems that require you to reinstall theoperating system. Citrix can’t guarantee that problems resulting from incorrect use of the Reg-istry Editor can be solved. Use the Registry Editor at your own risk. Back up the registry beforeyou edit it.
If you’ve more than one store account, you can configure Citrix Workspace app for Windows to au-tomatically connect to all accounts when establishing a session. To automatically view all accountswhen opening Citrix Workspace app:
For 32-bit systems:
Key path: HKEY_LOCAL_MACHINE\Software\Citrix\Dazzle
© 1999‒2022 Citrix Systems, Inc. All rights reserved. 52

Citrix Workspace app 2203.1 LTSR for Windows
KeyName: CurrentAccount
Value: AllAccount
Type: REG_SZ
For 64-bit systems:
Key path: HKEY_LOCAL_MACHINE\\Software\\Wow6432Node\\Citrix\\Dazzle
KeyName: CurrentAccount
Value: AllAccount
Type: REG_SZ
Client drive-mapping
CitrixWorkspace app forWindows supports devicemapping on user devices so they’re available fromwithin a session. Users can:
• Transparently access local drives, printers, and COM ports• Cut and paste between the session and the local Windows clipboard• Hear audio (system sounds and .wav files) played from the session
CitrixWorkspace app informs the server of the available client drives, COMports, and LPTports duringsign-in. By default, client drives aremapped to server drive letters and server print queues are createdfor client printers, whichmake them appear to be directly connected to the session. Thesemappingsare available only for the current user during the current session. They’re deleted when the user logsoff and recreated the next time the user logs on.
You can use the redirection policy settings to map user devices not automatically mapped at logon.For more information, see the Citrix Virtual Apps and Desktops documentation.
Disable user devicemappings
You can configure user device-mapping including options for drives, printers, and ports, using theWindows Server Manager tool. For more information about the available options, see your RemoteDesktop Services documentation.
Redirect client folders
Client folder redirection changes the way client-side files are accessible on the host-side session. En-abling only client drive mapping on the server, client-side full volumes automatically maps to thesessions as Universal Naming Convention (UNC) links. When you enable client folder redirection onthe server and the user configures it on the user device, part of the user specified local volume getsredirected.
© 1999‒2022 Citrix Systems, Inc. All rights reserved. 53

Citrix Workspace app 2203.1 LTSR for Windows
Only theuser-specified folders appearasUNC links inside the sessions, insteadof thecomplete file sys-temon the user device. If you disable UNC links through the registry, client folders appear asmappeddrives inside the session. For more information, including how to configure client folder redirectionfor user devices, see the Citrix Virtual Apps and Desktops documentation.
Map client drives to host-side drive letters
Client drivemapping redirects drive letters on the host-side to drives that exist on the user device. Forexample, drive H in a Citrix user session can be mapped to drive C of the user device running CitrixWorkspace app for Windows.
Client drivemapping is built into the standard Citrix device redirection facilities transparently. To FileManager, Windows Explorer, and your applications, these mappings appear like any other networkmappings.
The server hosting virtual desktops and applications can be configured during installation to mapclient drives automatically to a given set of drive letters. The default installation maps drive lettersassigned to client drives starting with V and works backward, assigning a drive letter to each fixeddrive and CD-ROM drive. (Floppy drives are assigned their existing drive letters.) This method yieldsthe following drive mappings in a session:
Client drive letter Accessible by the server as:
A A
B B
C V
D U
The server can be configured so that the server drive letters don’t conflict with the client drive letters.So, the server drive letters are changed to higher drive letters.In the following example, changing server drives C toMandD toN allows client devices to access theirC and D drives directly. This method yields the following drive mappings in a session:
Client drive letter Accessible by the server as:
A A
B B
C C
D D
© 1999‒2022 Citrix Systems, Inc. All rights reserved. 54
Citrix Workspace app 2203.1 LTSR for Windows
The drive letter used to replace the server drive C is defined during Setup. All other fixed drive and CD-ROM drive letters are replaced with sequential drive letters (for example; C > M, D > N, E > O). Thesedrive lettersmust not conflict with any existing network drivemappings. If youmap the network driveto the same drive letter as a server drive letter, the network drive mapping isn’t valid.
Connecting a user device to a server, reestablishes client mappings unless automatic client devicemapping is disabled. Client drive mapping is enabled by default. To change the settings, use theRemote Desktop Services (Terminal Services) Configuration tool. You can also use policies to give youmore control over how client devicemapping is applied. Formore information about policies, see theCitrix Virtual Apps and Desktops documentation.
HDX Plug and Play USB device redirection
HDXPlug andPlayUSBdevice redirection enables dynamic redirection ofmedia devices to the server.Themedia device includes cameras, scanners, media players, and point of sale (POS) devices. You orthe user can restrict the redirection of all or some of the devices. Edit policies on the server or applygroup policies on the user device to configure the redirection settings. Formore information, see USBand client drive considerations in the Citrix Virtual Apps and Desktops documentation.
Important
If youprohibit Plug andPlayUSBdevice redirection in a server policy, the user can’t override thatpolicy setting.
Auser can setpermissions inCitrixWorkspaceapp toallowor reject device redirectionalwaysornotifyeach time a device is connected. The setting affects only devices plugged in after the user changes thesetting.
Tomap a client COM port to a server COM port:
ClientCOMportmappingallowsdevicesattached to theCOMportsof theuserdevice tobeusedduringsessions. These mappings can be used like any other network mappings.
You canmap client COMports at the commandprompt. You can also control client COMportmappingfrom the Remote Desktop (Terminal Services) Configuration tool or using policies. For informationabout policies, see the Citrix Virtual Apps and Desktops documentation.
Important
COM port mapping isn’t TAPI-compatible.
1. For Citrix Virtual Apps andDesktopsdeployments, enable theClient COMport redirectionpolicysetting.
2. Log on to Citrix Workspace app.
3. At a command prompt, type:
© 1999‒2022 Citrix Systems, Inc. All rights reserved. 55

Citrix Workspace app 2203.1 LTSR for Windows
net use comx: \\\\\client\\comz:
where:
• x is the number of the COMport on the server (ports 1 through 9 are available formapping)and
• z is the number of the client COM port you want to map
4. To confirm the operation, type:
net use
The prompt displays mapped drives, LPT ports, andmapped COM ports.
To use this COM port in a virtual desktop or application, install your user device to themapped name.For example, if you map COM1 on the client to COM5 on the server, install your COM port device onCOM5 during the session. Use this mapped COM port as you would a COM port on the user device.
Domain Name Service name resolution
You can configure Citrix Workspace app for Windows that uses the Citrix XML Service to request a Do-main Name Service (DNS) name for a server instead of an IP address.
Important:
Unless your DNS environment is configured specifically to use this feature, Citrix recommendsthat you do not enable DNS name resolution on the server.
By default, DNS name resolution is disabled on the server and enabled on the Citrix Workspace app.WhenDNSname resolution isdisabledon the server, anyCitrixWorkspaceapp request for aDNSnamereturns an IP address. There’s no need to disable DNS name resolution on Citrix Workspace app.
To disable DNS name resolution for specific user devices:
If your server deployment uses DNS name resolution and you experience issues with specific userdevices, you can disable DNS name resolution for those devices.
Caution
Using the Registry Editor incorrectly might cause serious problems that require you to reinstallthe operating system. We do not guarantee that problems resulting from incorrect use of theRegistry Editor can be solved. Use the Registry Editor at your own risk. Back up of the registrybefore you edit it.
1. Add a string registry key xmlAddressResolutionType to HKEY\\_LOCAL\\_MACHINE\Software\Wow6432Node\Citrix\ICA Client\Engine\Lockdown Profiles\AllRegions\Lockdown\Application Browsing.
2. Set the value to IPv4-Port.3. Repeat for each user of the user devices.
© 1999‒2022 Citrix Systems, Inc. All rights reserved. 56
Citrix Workspace app 2203.1 LTSR for Windows
Customweb stores
This feature provides access to your organization’s custom web store from the Citrix Workspace appfor Windows. To use this feature, the admin must add the domain or custom web store to the GlobalApp Configuration Service allowed URLs.
For more information about configuring web store URLs for end-users, see Global App ConfigurationService.
You can now provide the custom web store URL in the Add Account screen in Citrix Workspace app.The customweb store opens in the native Workspace app window.
To remove the customweb store, go to Accounts > Add or Remove accounts, select the customwebstore URL, and click Remove.
Workspace with intelligence
This version of Citrix Workspace app for Windows is optimized to take advantage of theWorkspace in-telligence featureswhen they’re released. Formore information, seeWorkspace Intelligence Features- Microapps.
Configure
May 20, 2022
When using the Citrix Workspace app for Windows, the following configurations allow you to accesstheir hosted applications and desktops.
Microsoft Teams
• Screen sharing• Encoder performance estimator• Acoustic Echo Cancellation
Screen sharing
Starting with Version 2006.1, new functionalities in the outgoing screen sharing feature for the Mi-crosoft Teams application that uses HDX optimization are introduced.
The contents sharedusingMicrosoftTeamsare limited to the contentsof theDesktopViewerwindow.Areas outside the Desktop Viewerwindow (client local desktop, apps) are blacked out.
© 1999‒2022 Citrix Systems, Inc. All rights reserved. 57

Citrix Workspace app 2203.1 LTSR for Windows
On a Windows 10 operating system, the following aren’t blacked out when they overlap the DesktopViewerwindow:
• Start menu, Search menu, and Task View.• Notification bar and Notifications that appear at the right-side of the task bar.• On a multi-monitor set up with different DPI settings, if a local app is overlapping 2 differentmonitorsand itsDPIdoesn’tmatch themainmonitorDPIwhichhas theDesktopViewerwindow.
• App and preview shown when youmouse-hover over the app’s icon in the task bar.
Encoder performance estimator
The HdxRtcEngine.exe is the WebRTC media engine embedded in Citrix Workspace app that han-dlesMicrosoft Teams redirection. Starting fromCitrixWorkspace app 1912 or higher, HdxRtcEngine.exe can estimate the best encoding resolution that the endpoint’s CPU can sustain without overload-ing. Possible values are 240p, 360p, 480p, 720p, and 1080p.
The performance estimation process (also called webrtcapi.EndpointPerformance) runs whenHdxTeams.exe initializes. The macroblock code determines the best resolution that can be achievedwith the particular endpoint. The Codec negotiation includes the highest possible resolution. TheCodec negotiation can be between the peers, or between the peer and the conference server.
Thereare fourperformancecategories for endpoints thathave itsownmaximumavailable resolution:
Endpoint performance Maximum resolution Registry key value
fast 1080p (1920x1080 16:9 @ 30fps)
3
medium 720p (1280x720 16:9 @ 30 fps) 2
slow 360p (either 640x360 16:9 @30 fps, or 640x480 4:3 @ 30fps)
1
very slow 240p (either 320x180 16:9 @30 fps, or 320x240 4:3 @ 30fps)
0
Registry Path in Citrix Workspace app:
Navigate to the registry path HKEY_CURRENT_USER\SOFTWARE\Citrix\HDXMediaStream and createthe following key:
© 1999‒2022 Citrix Systems, Inc. All rights reserved. 58

Citrix Workspace app 2203.1 LTSR for Windows
Name Type Values Description
OverridePerformance DWORD 0;1;2;3 Force desiredperformance. Valuemust be in the rangebetween 0 and 3,where 0 indicatesslow and 3 fast.
For more information about Microsoft Teams optimization, see Optimization for Microsoft Teams.
Acoustic Echo Cancellation
Echo cancellation in HdxRtcEngine.exe can be disabled to troubleshoot audio performance issuesor compatibility with peripherals that have built-in AEC capabilities.
Navigate to the registry path HKEY_CURRENT_USER\SOFTWARE\Citrix\HDXMediaStream and createthe following key:
Name: EnableAECType: REG_DWORDData: 0(0 disables AEC. 1 enables AEC. If Regkey isn’t present, the default behavior in HdxRtcEngine is toenable AEC, irrespective of the peripheral’s hardware capabilities.)
Enhancements to Microsoft Teams optimization
• Starting fromCitrix Workspace app 2112.1 forWindows, the following features are available onlyafter future update roll-out fromMicrosoft Teams.
When the update is rolled-out by Microsoft, you can check CTX253754 for the documentationupdate and the announcement.
– Multi-window chat and meetings for Microsoft Teams: You can use multiple windowsfor chat and meetings in Microsoft Teams (1.4.00.16771 or higher) when optimized by HDXin Citrix Virtual Apps and Desktops (2112 or later). You can pop out the conversations ormeetings in variousways. For details on the pop-outwindow feature, seeMicrosoft TeamsPop-Out Windows for Chats and Meetings on the Microsoft Office 365 site.
If you’re running an older version of Citrix Workspace app or Virtual Delivery Agent (VDA),Microsoft might deprecate the single-window code in the future. However, you can up-grade to the VDA or Citrix Workspace app version that supports multiple windows (2112and later), before nine months after the feature is GA.
© 1999‒2022 Citrix Systems, Inc. All rights reserved. 59

Citrix Workspace app 2203.1 LTSR for Windows
– App sharing: Previously, you weren’t able to share an app using the Screen sharing fea-ture in Microsoft Teams when you enable the HDX 3D Pro policy in Citrix Studio.StartingwithCitrixWorkspace app2112.1 forWindowsandCitrix Virtual Apps andDesktops2112, Screen sharing feature allows you to share app in Microsoft Teams. You can sharean app when HDX 3D Pro policy is enabled.
– Give control: You can use the Give control button to give control access of your sharedscreen to other users participating in the meeting. The other participant can make selec-tions andmodify the shared screen through keyboard, mouse, and clipboard input. You’llboth have control of the shared screen and you can take back the control anytime.
– Take control: During screen sharing sessions, any participants can request control accessthrough the Request control button. The person sharing the screen can then approve ordeny the request. When you’ve the control, you can control the keyboard andmouse inputon the screen shared and release the control to stop sharing control.
Limitation:
The Request control option is not available during the peer-to-peer call between an optimizeduser and a user on the native Microsoft Teams desktop client that is running on the endpoint.As a workaround, users can join a meeting to get the Request control option.
– Dynamic e911: Citrix Workspace app supports dynamic emergency calling. When used inMicrosoft Calling Plans, Operator Connect, and Direct Routing, it provides the option to:
* configure and route emergency calls
* notify security personnel
The notification is sent based on the current location of the CitrixWorkspace app that runson the endpoint, instead of the Microsoft Teams client on the VDA.Ray Baum’s law requires the 911 caller’s dispatchable location to be transmitted to the ap-propriate Public Safety Answering Point (PSAP). Starting from Citrix Workspace app 2112.1for Windows, Microsoft Teams Optimization with HDX is compliant with Ray Baum’s law.
• Starting fromCitrixWorkspace app 2109.1 forWindows, the following features are available onlyafter the future update roll-out fromMicrosoft Teams.
When the update is rolled-out by Microsoft, you can check CTX253754 for the documentationupdate and the announcement.
– Support for WebRTC: Citrix Workspace app 2109.1 for Windows supports WebRTC 1.0 fora better video conferencing experience along with Gallery View.
– Screen sharing enhancement: You can share individual applications, windows, or fullscreen using the screen sharing feature in Microsoft Teams. Citrix Virtual Delivery Agent2109 is a prerequisite for this feature.
© 1999‒2022 Citrix Systems, Inc. All rights reserved. 60

Citrix Workspace app 2203.1 LTSR for Windows
– App Protection compatibility: When App Protection is enabled, you can now share con-tent through Microsoft Teams with HDX optimization. With this feature, you can share anapplication window running in the virtual desktop. Citrix Virtual Delivery Agent 2109 is aprerequisite for this feature.
Note:
Fullmonitor or desktop sharing is disabledwhenAppProtection is enabled for thedeliverygroup.
– Live captions: Citrix Workspace app 2109.1 for Windows supports real-time transcriptionof what the speaker is saying when Live Captions is enabled in Microsoft Teams.
– Citrix Workspace app 2109.1 for Windows supports the following in an optimizedMicrosoftTeams on VM hosted apps:
* peer-to-peer audio and video call
* conference call
* screen sharing
• Starting from Citrix Workspace app 2106 for Windows:
– when theDesktopViewer is in full screenmode, theuser can select one fromall the screenscovered by the Desktop Viewer to share. In windowmode, the user can share the DesktopViewer window. In seamless mode, the user can select one from all the screens to share.When the Desktop Viewer changes the window mode (maximized, restore, or minimize),the screen share stops.
• Starting from Citrix Workspace app 2105 for Windows:
– You can configure a preferred network interface for media traffic.
Navigate to\HKEY_CURRENT_USER\SOFTWARE\Citrix\HDXMediaStream and create akey called NetworkPreference(REG_DWORD).
Select one of the following values as required:
* 1: Ethernet
* 2: Wi-Fi
* 3: Cellular
* 5: Loopback
* 6: Any
By default and if no value is set, the WebRTC media engine chooses the best availableroute.
– You can disable the audio devicemodule 2 (ADM2) so that the legacy audio devicemodule(ADM) is used for quad-channel microphones. Disabling ADM2 helps in resolving issuesrelated to microphones in a call.
© 1999‒2022 Citrix Systems, Inc. All rights reserved. 61

Citrix Workspace app 2203.1 LTSR for Windows
TodisableADM2, navigate to\HKEY_CURRENT_USER\SOFTWARE\Citrix\HDXMediaStreamand create a key named DisableADM2 (REG_DWORD) and set the value to 1.
• Starting from Citrix Workspace app 2103.1 for Windows:
– The VP9 video codec is now disabled by default.
– Enhancement to echo cancellation, auto gain control, noise suppression configurations:If Microsoft Teams configures these options, Citrix-redirected Microsoft Teams honors thevalues as configured. Otherwise, these options are set to True by default.
– DirectWShow is now the default renderer.
To change the default renderer, do the following:
1. Launch the Registry editor.
2. Navigate to the following key location: HKEY_CURRENT_USER\SOFTWARE\Citrix\HDXMediaStream.
3. Update the following value: ”UseDirectShowRendererAsPrimary”=dword:00000000
Other possible values:
* 0: Media Foundation
* 1: DirectShow (Default)
4. Relaunch the Citrix Workspace app.
• Starting from Citrix Workspace app 2012 for Windows:
– Peers can now see the presenter’s mouse pointer in a screen sharing session.– The WebRTCmedia engine now honors the proxy server configured on the client device.
• Starting from Citrix Workspace app 2009.6 for Windows:
– Microsoft Teams displays previously used peripheral devices in thePreferred devices list.– The WebRTCmedia engine accurately determines the maximum encoding resolution pos-sible on an endpoint. The WebRTCmedia engine estimates multiple times a day and notonly on first launch.
– The Citrix Workspace app installer is packaged with the Microsoft Teams ringtones.– Echo cancellation improvements - Reduced echo level when a peer has a speaker or mi-crophone that generates an echo.
– Screen sharing improvements - when you share your screen, only the Desktop Viewerscreen is captured in native bitmap format. Previously, client local windows that overlaidon top of the Desktop Viewerwindowwere blacked out.
• Starting from Citrix Workspace app 2002 for Windows:
© 1999‒2022 Citrix Systems, Inc. All rights reserved. 62

Citrix Workspace app 2203.1 LTSR for Windows
– when you share your workspace using Microsoft Teams, Citrix Workspace app displays ared border around the area of the monitor that is currently being shared. You can shareonly the Desktop Viewer window, or any local window overlaid on top of it. When youminimize the Desktop Viewerwindow, screen sharing is paused.
Administrator tasks and considerations
This article discusses the tasks and considerations that are relevant for administrators of CitrixWorkspace app for Windows.
Feature flagmanagement
If an issue occurs with Citrix Workspace app in production, we can disable an affected feature dynam-ically in Citrix Workspace app even after the feature is shipped.
To do so, we use feature flags and a third-party service called LaunchDarkly. You do not need tomakeanyconfigurations toenable traffic toLaunchDarkly, exceptwhenyouhavea firewall orproxyblockingoutbound traffic. In that case, you enable traffic to LaunchDarkly via specific URLs or IP addresses,depending on your policy requirements.
You can enable traffic and communication to LaunchDarkly in the following ways:
Enable traffic to the following URLs
• events.launchdarkly.com• stream.launchdarkly.com• clientstream.launchdarkly.com• Firehose.launchdarkly.com• mobile.launchdarkly.com
List IP addresses in an allow list
If youmust list IP addresses in an allow list, for a list of all current IP address ranges, see LaunchDarklypublic IP list. You can use this list to know that your firewall configurations are updated automaticallyin keeping with the infrastructure updates. For details about the status of the infrastructure changes,see the LaunchDarkly Status page.
LaunchDarkly system requirements
Verify if the apps can communicate with the following services if you have split tunneling on the CitrixADC set toOFF for the following services:
© 1999‒2022 Citrix Systems, Inc. All rights reserved. 63

Citrix Workspace app 2203.1 LTSR for Windows
• LaunchDarkly service.• APNs listener service
App protectionDisclaimer
App protection policies filter the access to required functions of the underlying operating system(specific API calls required to capture screens or keyboard presses). App protection policies pro-vide protection even against custom and purpose-built hacker tools. However, as operating sys-tems evolve, new ways of capturing screens and logging keys might emerge. While we continueto identify and address them, we cannot guarantee full protection in specific configurations anddeployments.
App protection is an add-on feature that provides enhanced security when using Citrix Virtual AppsandDesktops and Citrix DaaS (formerly Citrix Virtual Apps andDesktops service). The feature restrictsthe ability of clients to compromise with keylogging and screen capturing malware. App protectionprevents exfiltration of confidential information such as user credentials and sensitive information onthe screen. The feature prevents users and attackers from taking screenshots and from using keylog-gers to glean and exploit sensitive information.
App protection requires that you install an add-on license on your License Server. A Citrix Virtual Desk-tops licensemust also be present. For information on Licensing, see the Configure section in the CitrixVirtual Apps and Desktops documentation.
Requirements:
• Citrix Virtual Apps and Desktops Version 1912 or later.• StoreFront Version 1912.• Citrix Workspace app Version 1912 or later.
Prerequisites:
• The app protection feature must be enabled on the Controller. For more information, see Appprotection in Citrix Virtual Apps and Desktops documentation.
You can include the app protection component with Citrix Workspace app either:
• During Citrix Workspace app installation using the command-line interface or the GUI OR• During an app launch (on-demand installation).
Note:
• This feature is supported only on desktop operating systems such asWindows 10, Windows8.1.
• Starting with Version 2006.1, Citrix Workspace app isn’t supported on Windows 7. So, app
© 1999‒2022 Citrix Systems, Inc. All rights reserved. 64

Citrix Workspace app 2203.1 LTSR for Windows
protection doesn’t work on Windows 7. For more information, see Deprecation.• This feature isn’t supported over Remote Desktop Protocol (RDP).
On-premises HDX session protection:
Two policies provide anti-keylogging and anti-screen-capturing functionality in a session. These poli-cies must be configured through PowerShell. No GUI is available for the purpose.
Note:
Starting with Version 2103, Citrix DaaS supports app protection with StoreFront only.
For information on app protection configuration on Citrix Virtual Apps and Desktops, see App protec-tion.
App protection - Configuration in Citrix Workspace appNote:
• Include the appprotection componentwithCitrixWorkspace apponly if your administratorhas instructed you to do so.
• Adding the app protection component might impact the screen-capturing capabilities onyour device.
During theCitrixWorkspaceapp installation, youcan includeappprotectionusingoneof the followingmethods:
• GUI• Command-line interface
GUI
During the Citrix Workspace app installation, use the following dialog to include the app protectioncomponent. Select Enable app protection and then click Install to continue with the installation.
© 1999‒2022 Citrix Systems, Inc. All rights reserved. 65

Citrix Workspace app 2203.1 LTSR for Windows
Note:
Not enabling app protection during installation causes a prompt to appear when you launch aprotected app. Follow the prompt to install the app protection component.
Command-line interface
Use the command-line switch /includeappprotectionduring CitrixWorkspace app installation toadd the app protection component.
The following table provides information on screens protected depending on deployment:
App protection deployment Screens protected Screens not protected
Included in Citrix Workspaceapp
Self-Service plug-in and Authmanager / User credentialsdialog
Connection Center, Devices,Any Citrix Workspace apperror messages, Auto clientreconnect, Add account
© 1999‒2022 Citrix Systems, Inc. All rights reserved. 66

Citrix Workspace app 2203.1 LTSR for Windows
App protection deployment Screens protected Screens not protected
Configured on the Controller ICA session screen (both appsand desktops)
Connection Center, Devices,Any Citrix Workspace apperror messages, Auto clientreconnect, Add account
In earlier releases, the entire screen including thenon-protectedapps in thebackgroundused toblackout, when taking a screenshot of a protected window.
Starting with Version 2008, when you’re taking a screenshot, only the protected window is blackedout. You can take a screenshot of the area outside the protected window.
Expected Behavior:
The expected behavior depends upon the method by which users access the StoreFront that has theprotected resources.
Note:
• Citrix recommends that you only use the native Citrix Workspace app to launch a protectedsession.
• Behavior on the workspace for web:
The app protection component isn’t supported on theworkspace for web configurations. Appli-cations that are protected by app protection policies aren’t enumerated. For more informationabout the resources assigned, contact your system administrator.
• Behavior on Citrix Workspace app versions that do not support app protection:
On Citrix Workspace app Version 1911 and earlier, applications that are protected by app protec-tion policies aren’t enumerated on StoreFront.
• Behavior of apps that have the app protection feature configured on the Controller:
Onanappprotection configured-Controller, if you try to launch anapplication that is protected,the app protection is installed on-demand. The following dialog appears:
© 1999‒2022 Citrix Systems, Inc. All rights reserved. 67

Citrix Workspace app 2203.1 LTSR for Windows
Click Yes to install the app protection component. You can then launch the protected app.
• Behavior of protected session in case of Remote Desktop Protocol(RDP)
– Your active protected session disconnects, if you launch a Remote Desktop Protocol(RDP)session.
– You can’t launch a protected session in a Remote Desktop Protocol(RDP) session.
Enhancement to app protection configuration
Previously, the authentication manager and the Self-Service plug-in dialogs were protected by de-fault.
Starting with Version 2012, you can configure the anti-keylogging and anti-screen-capturing function-alities separately for both the authentication manager and Self-Service plug-in interfaces. You canconfigure the functionalities by using a Group Policy Object (GPO) policy.
Note:
This GPO policy isn’t applicable for ICA and SaaS sessions. The ICA and SaaS sessions continueto be controlled using the Delivery Controller and Citrix Gateway Service.
Configuring app protection for the Self-Service plug-in interface:
1. Open theCitrixWorkspace appGroupPolicyObject administrative template by runninggpedit.msc.
2. Under the Computer Configuration node, go to Administrative Templates > Citrix Compo-nents > Citrix Workspace.
3. To configure anti-keylogging and anti-screen-capturing for the Self-Service plug-in dialog, se-lect Self Service >Manage app protection policy.
4. Select one or both the following options:• Anti-key logging: Prevents keyloggers from capturing keystrokes.• Anti-screen-capturing: Prevents users from taking screenshots and sharing their screen.
5. Click Apply andOK.
© 1999‒2022 Citrix Systems, Inc. All rights reserved. 68

Citrix Workspace app 2203.1 LTSR for Windows
Configuring app protection for authenticationmanager:
1. Open theCitrixWorkspace appGroupPolicyObject administrative template by runninggpedit.msc.
2. Under the Computer Configuration node, go to Administrative Templates > Citrix Compo-nents > Citrix Workspace.
3. To configure anti-keylogging and anti-screen-capturing for the authentication manager, selectUser authentication >Manage app protection policy.
4. Select one or both the following options:• Anti-key logging: Prevents keyloggers from capturing keystrokes.• Anti-screen-capturing: Prevents users from taking screenshots and sharing their screen.
5. Click Apply andOK.
App protection error logs:
Starting with Version 2103, the app protection logs are collected as part of Citrix Workspace app logs.For more information about log collection, see Log collection.
You do not need to install or use a third-party app to collect the app protection logs specifically. How-ever, DebugView can still be continued to be used for log collection.
The app protection logs are registered to the debug output. To collect these logs, do the following:
1. Download and install the DebugView app from the Microsoft website.
2. Launch the command prompt and run the following command:
Dbgview.exe /t /k /v /l C:\logs.txt
From the example above, you can view the logs in log.txt file.
The command indicates the following:
• /t – The DebugView app starts minimized in the notification area.• /k – Enable kernel capture.• /v – Enable verbose kernel capture.• /l – Log the output to a specific file.
Uninstalling the app protection component:
To uninstall the app protection component, you must uninstall Citrix Workspace app from your sys-tem. Restart the system for the changes to take effect.
Note:
App protection is supported only on upgrade from Version 1912 onwards.
Known issues or limitations:
• This feature isn’t supportedonMicrosoftServer operating systems suchasWindowsServer 2012R2 and Windows Server 2016.
© 1999‒2022 Citrix Systems, Inc. All rights reserved. 69
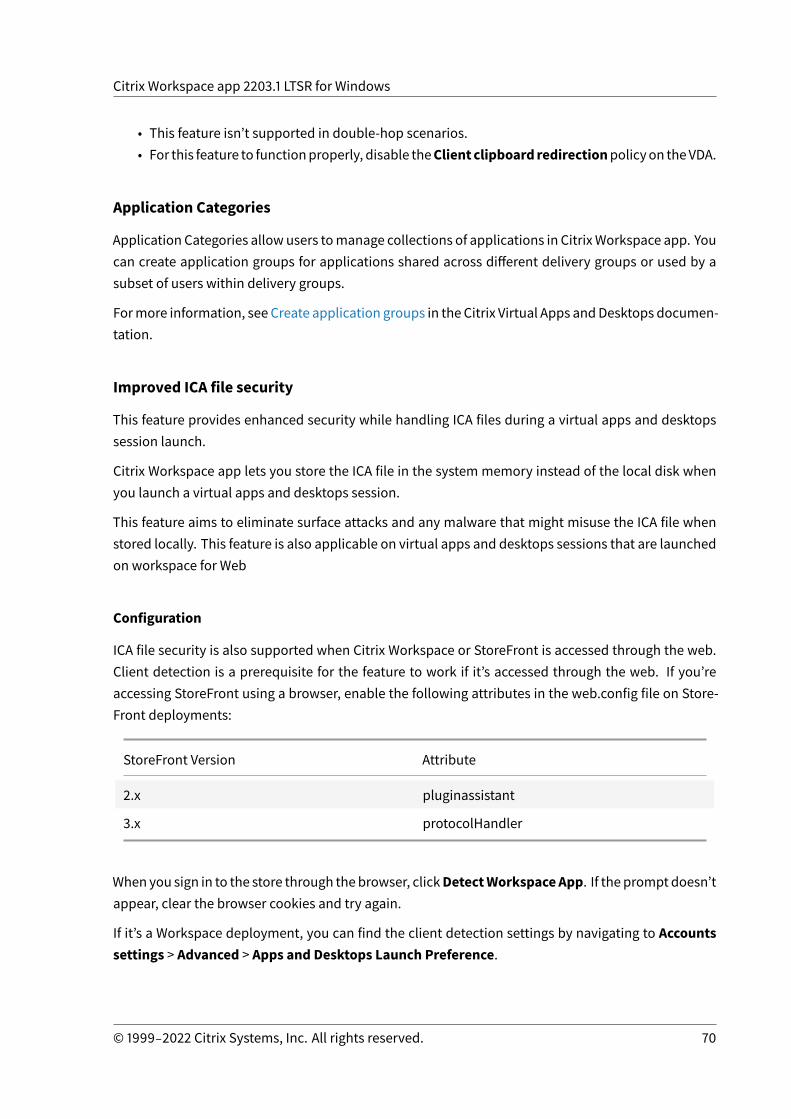
Citrix Workspace app 2203.1 LTSR for Windows
• This feature isn’t supported in double-hop scenarios.• For this feature to functionproperly, disable theClient clipboard redirectionpolicyon theVDA.
Application Categories
Application Categories allowusers tomanage collections of applications in CitrixWorkspace app. Youcan create application groups for applications shared across different delivery groups or used by asubset of users within delivery groups.
Formore information, see Create application groups in the Citrix Virtual Apps andDesktops documen-tation.
Improved ICA file security
This feature provides enhanced security while handling ICA files during a virtual apps and desktopssession launch.
Citrix Workspace app lets you store the ICA file in the system memory instead of the local disk whenyou launch a virtual apps and desktops session.
This feature aims to eliminate surface attacks and any malware that might misuse the ICA file whenstored locally. This feature is also applicable on virtual apps and desktops sessions that are launchedon workspace for Web
Configuration
ICA file security is also supported when Citrix Workspace or StoreFront is accessed through the web.Client detection is a prerequisite for the feature to work if it’s accessed through the web. If you’reaccessing StoreFront using a browser, enable the following attributes in the web.config file on Store-Front deployments:
StoreFront Version Attribute
2.x pluginassistant
3.x protocolHandler
When you sign in to the store through the browser, clickDetectWorkspaceApp. If the prompt doesn’tappear, clear the browser cookies and try again.
If it’s a Workspace deployment, you can find the client detection settings by navigating to Accountssettings > Advanced > Apps and Desktops Launch Preference.
© 1999‒2022 Citrix Systems, Inc. All rights reserved. 70

Citrix Workspace app 2203.1 LTSR for Windows
You can take extra measures so that sessions are launched only using the ICA file stored on systemmemory. Use any of the following methods:
• Group Policy Object (GPO) Administrative template on the client.• Global App Config Service.• Workspace for web.
Using the GPO:
To block session launches from ICA files that are stored on the local disk, do the following:
1. Open theCitrixWorkspace appGroupPolicyObject administrative template by runninggpedit.msc.
2. Under the Computer Configuration node, go to Administrative Templates > Citrix Compo-nents > Citrix Workspace > Client Engine.
3. Select the Secure ICA file session launch policy and set it to Enabled.4. Click Apply andOK.
Using the Global App Config Service:
To block session launches from ICA files that are stored on the local disk, do the following:
Set the Block Direct ICA File Launches attribute to True.
Formore information aboutGlobal AppConfig Service, seeGlobal AppConfig Service documentation.
Using workspace for web:
To disallow ICA file download on the local disk when using workspace for Web, do the following:
Run the PowerShell module. See Configure DisallowICADownload.
Note:
The DisallowICADownload policy isn’t available for StoreFront deployments.
Log collection
Log collection simplifies the process of collecting logs for Citrix Workspace app. The logs help Citrixto troubleshoot, and, in cases of complicated issues, provides support.
You can collect logs using the GUI.
Collecting logs:
1. Right-click the Citrix Workspace app icon in the notification area and select Advanced Prefer-ences.
2. Select Log collection.The Log collection dialog appears.
© 1999‒2022 Citrix Systems, Inc. All rights reserved. 71

Citrix Workspace app 2203.1 LTSR for Windows
3. Select one of the following log levels:
• Low• Medium• Verbose
4. Click Start collecting logs to reproduce the issue and collect the latest logs.
The log collection process starts.
© 1999‒2022 Citrix Systems, Inc. All rights reserved. 72

Citrix Workspace app 2203.1 LTSR for Windows
5. Click Stop collecting logs after the issue is reproduced.
6. Click Save log to save the logs to a desired location.
HDX adaptive throughput
HDX adaptive throughput intelligently fine-tunes the peak throughput of the ICA session by adjustingoutput buffers. The number of output buffers is initially set at a high value. This high value allowsdata to be transmitted to the client more quickly and efficiently, especially in high latency networks.
Provides better interactivity, faster file transfers, smoother video playback, higher framerate, and res-olution results in an enhanced user experience.
Session interactivity is constantly measured to determine whether any data streams within the ICAsession are adversely affecting interactivity. If that occurs, the throughput is decreased to reduce theimpact of the large data stream on the session and allow interactivity to recover.
This feature is supported only on Citrix Workspace app 1811 for Windows and later.
Important:
HDX adaptive throughput changes the output buffers bymoving themechanism from the clientto the VDA. So, adjusting the number of output buffers on the client as described in CTX125027has no effect.
Adaptive transport
Adaptive Transport is a mechanism in Citrix Virtual Apps and Desktops and Citrix DaaS that allows touse Enlightened Data Transport (EDT) as the transport protocol for ICA connections. For more infor-mation, see Adaptive transport section in the Citrix Virtual Apps and Desktops documentation.
© 1999‒2022 Citrix Systems, Inc. All rights reserved. 73
Citrix Workspace app 2203.1 LTSR for Windows
Advanced Preferences sheet
Startingwith Version 4.10, you can customizeAdvancedPreferences sheet’s availability and contentspresent in the right-click menu of the Citrix Workspace app icon in the notification area. Doing soensures that users can apply only administrator-specified settings on their systems. Specifically, youcan:
• Hide the Advanced Preferences sheet altogether• Hide the following, specific settings from the sheet:
– Data collection– Connection Center– Configuration checker– Keyboard and Language bar– High DPI– Support information– Shortcuts and Reconnect– Citrix Files– Citrix Casting
Hiding Advanced Preferences option from the right-clickmenu
You can hide the Advanced Preferences sheet by using the Citrix Workspace app Group Policy Object(GPO) administrative template:
1. Open the Citrix Workspace app Group Policy Object administrative template by runninggpedit.msc.
2. Under theComputerConfigurationnode, go toAdministrativeTemplates>CitrixWorkspace> Self Service > Advanced Preferences Options.
3. Select the Disable Advance Preferences policy.4. Select Enabled to hide the Advanced Preferences option from the right-click menu of the Citrix
Workspace app icon in the notification area.
Note:
By default, the Not Configured option is selected.
Hiding specific settings from the Advanced Preferences sheet
You can hide specific user-configurable settings from the Advanced Preferences sheet by using theCitrix Workspace app Group Policy Object administrative template. To hide the settings:
1. Open the Citrix Workspace app Group Policy Object administrative template by runninggpedit.msc.
© 1999‒2022 Citrix Systems, Inc. All rights reserved. 74

Citrix Workspace app 2203.1 LTSR for Windows
2. Under theComputerConfigurationnode, go toAdministrativeTemplates>CitrixWorkspace> Self Service > Advanced Preferences Options.
3. Select the policy for the setting you want to hide.
The following table lists the options that you can select and the effect of each:
Options Action
Not Configured Displays the setting
Enabled Hides the setting
Disabled Displays the setting
You can hide the following specific settings from the Advanced Preferences sheet:
• Configuration checker• Connection Center• High DPI• Data collection• Delete saved passwords• Keyboard and Language bar• Shortcuts and Reconnect• Support information• Citrix Files• Citrix Casting
Hiding the Reset Workspace option from the Advanced Preferences sheet using the Registryeditor
You can hide the Reset Workspace option from the Advanced Preferences sheet only using the Reg-istry editor.
1. Launch the registry editor.2. Navigate to HKEY_LOCAL_MACHINE\SOFTWARE\Citrix\Dazzle.3. Create a String Value key EnableFactoryReset and set it to any of the following options:
• True - Displays the Reset Workspace option in the Advanced Preferences sheet.• False - Hides the Reset Workspace option in the Advanced Preferences sheet.
Hiding Citrix Workspace Updates option from the Advanced Preferences sheet
© 1999‒2022 Citrix Systems, Inc. All rights reserved. 75

Citrix Workspace app 2203.1 LTSR for Windows
Note:
The policy path for the Citrix Workspace Updates option is different from the other optionspresent in the Advanced Preferences sheet.
1. Open the Citrix Workspace app Group Policy Object administrative template by runninggpedit.msc.
2. Under the Computer Configuration node, go to Administrative Templates > Citrix Compo-nents > Citrix Workspace >Workspace Updates.
3. Select theWorkspace Updates policy.4. SelectDisabled to hide theWorkspaceUpdates settings from theAdvancedPreferences sheet.
StoreFront to Workspace URL Migration
This feature is inTechnicalPreview. StoreFront toWorkspaceURLmigrationenables you to seamlesslymigrate your end users from a StoreFront store to Workspace store with minimal user interaction.
Consider, all your end users have a StoreFront store storefront.com added to their Workspaceapp. As an administrator, you can configure a StoreFront URL to Workspace URL Mapping {‘store-front.com’:’xyz.cloud.com’} in the Global App Configuration Service. The Global App Config Servicepushes the setting to all Citrix Workspace app instances, on both managed and unmanaged devices,that have the StoreFront URL storefront.com added.
Once the setting is detected, Citrix Workspace app adds the mapped Workspace URL xyz.cloud.com as another store. When the end user launches the Citrix Workspace app, the Citrix Workspacestore opens. The previously added StoreFront store storefront.com remains added to theWorkspace app. Users can always switch back to the StoreFront store storefront.com using theSwitch Accounts option in the Workspace app. Admins can control the removal of the StoreFrontstore storefront.com from the Workspace app at the users’ end points. The removal can be donethrough the global app config service.
To enable the feature, do the following steps:
1. Configure StoreFront to Workspace mapping using the Global App Config Service. For moreinformation on Global App config service, see Global App Configuration Service.
2. Edit the payload in the app config service:
1 {2 ”serviceURL”: Unknown macro: \{3 ”url” }45 ,6 ”settings”:{
© 1999‒2022 Citrix Systems, Inc. All rights reserved. 76

Citrix Workspace app 2203.1 LTSR for Windows
78 ”name”:”Productivity Apps”, [New Store Name]9 ”description”:”Provides access StoreFront to Workspace Migration”,10 ”useForAppConfig”:true,11 ”appSettings”:12 {13 ”windows”:[ Unknown macro: \{14 ”category” }1516 ]17 }1819 }2021 }2223 <!--NeedCopy-->
Note:
If you’re configuring the payload for the first time, use POST.If you’re editing the existing payload configuration, use PUT and check that you have thepayload that consists of all the supported settings.
3. Specify the StoreFront URL storefront.com as the value forURL in the serviceURL section.
4. Configure the Workspace URL xyz.cloud.com inside the sectionmigrationUrl.
5. Use storeFrontValidUntil to set the timeline for the removal of the StoreFront store from theWorkspace app. This field is optional. You can set the following value based on your require-ment:
• Valid date in the format (YYYY-MM-DD)
Note:
If you have provided a past date, then the StoreFront store is removed immediatelyupon URL migration. If you have provided a future date, then the StoreFront store isremoved on the set date.
Once the app config service settings are pushed, the following screen appears:
© 1999‒2022 Citrix Systems, Inc. All rights reserved. 77

Citrix Workspace app 2203.1 LTSR for Windows
When the user clicks Switch to Citrix Workspace now, the Workspace URL is added to CitrixWorkspace app and the authentication prompt appears. Users have a limited option to delay thetransition up to three times.
Application delivery
When delivering applications with Citrix Virtual Apps and Desktops and Citrix DaaS, consider the fol-lowing options to enhance the user experience:
• Web Access Mode - Without any configuration, Citrix Workspace app provides browser-basedaccess to applications and desktops. You can open a browser to a workspace for web to selectand use the applications youwant. In thismode, no shortcuts are placed on the user’s desktop.
• Self-Service Mode - By adding a StoreFront account to Citrix Workspace app or configuring Cit-rix Workspace app to point to a StoreFront website, you can configure self-service mode. Self-Service mode allows you to subscribe to applications from the Citrix Workspace app user inter-face. The enhanced user experience is similar to that of a mobile app store. In a self-servicemode, you can configure mandatory, auto-provisioned, and featured app keyword settings asrequired.
© 1999‒2022 Citrix Systems, Inc. All rights reserved. 78

Citrix Workspace app 2203.1 LTSR for Windows
Note:
By default, Citrix Workspaces app allows you to select the applications to display in the Startmenu.
• App shortcut-only mode - Administrators can configure Citrix Workspace app to automaticallyplace application anddesktop shortcuts directly in the Startmenuor on the desktop. The place-ment is similar to Citrix Workspace app Enterprise. The new shortcut only mode allows you tofind all the published apps within the familiar Windows navigation schema where you wouldexpect to find them.
For more information, see the Create Delivery Groups section in the Citrix Virtual Apps and Desktopsdocumentation.
Configure self-service mode
By simply adding a StoreFront account to Citrix Workspace app or configuring Citrix Workspace appto point to a StoreFront site, you can configure self-service mode. The configuration allows users tosubscribe to applications from the Citrix Workspace user interface. The enhanced user experience issimilar to that of a mobile app store.
Note:
By default, Citrix Workspace app allows users to select the applications they want to display intheir Start menu.
In self-service mode, you can configure mandatory, auto-provisioned, and featured app keyword set-tings as needed.
Append keywords to the descriptions you provide for delivery group applications:
• Tomake an individual appmandatory, so that it cannot be removed fromCitrixWorkspace app,append the string KEYWORDS: Mandatory to the application description. There is no Removeoption for users to unsubscribe to mandatory apps.
• To automatically subscribe all users of a store to an application, append the string KEYWORDS:Auto to the description. When users log on to the store, the application is automatically provi-sioned without users needing to manually subscribe to the application.
• To advertise applications to users or to make commonly used applications easier to find by list-ing them in the Citrix Workspace Featured list, append the string KEYWORDS: Featured to theapplication description.
Customize the app shortcut location using the Group Policy Object template
1. Open the Citrix Workspace app Group Policy Object administrative template by runninggpedit.msc.
© 1999‒2022 Citrix Systems, Inc. All rights reserved. 79

Citrix Workspace app 2203.1 LTSR for Windows
2. Under the Computer Configuration node, go to Administrative Templates > Citrix Compo-nents > Citrix Workspace > Self Service.
3. SelectManage SelfServiceMode policy.a) Select Enabled to view the Self-service user interface.b) SelectDisabled to subscribe to the appsmanually. This option hides the Self-service user
interface.4. SelectManage App Shortcut policy.5. Select the options as required.6. Click Apply andOK.7. Restart Citrix Workspace app for the changes to take effect.
Using StoreFront account settings to customize app shortcut locations
You can set up shortcuts in the Start menu and on the desktop from the StoreFront site. The follow-ing settings can be added in the web.config file in C:\inetpub\wwwroot\Citrix\Roamingin the<annotatedServices> section:
• To put shortcuts on the desktop, use PutShortcutsOnDesktop. Settings: “true” or “false” (de-fault is false).
• To put shortcuts in the Start menu, use PutShortcutsInStartMenu. Settings: “true” or “false”(default is true).
• To use the category path in the Start menu, use UseCategoryAsStartMenuPath. Settings: “true”or “false” (default is true).
Note:
Windows8, 8.1 andWindows 10donot allow the creation of nested folderswithin the Startmenu.Instead, display theapplications individually or under the root folder. Applications arenotwithinthe Category sub folders defined with Citrix Virtual Apps and Desktops.
• To set a single directory for all shortcuts in the Start menu, use StartMenuDir. Setting: Stringvalue, being the name of the folder into which shortcuts are written.
• To reinstall modified apps, use AutoReinstallModifiedApps. Settings: “true” or “false” (defaultis true).
• To show a single directory for all shortcuts on the desktop, use DesktopDir. Setting: Stringvalue, being the name of the folder into which shortcuts are written.
• Tonotcreateanentryon theclients ‘add/removeprograms’, useDontCreateAddRemoveEntry. Settings: “true” or “false” (default is false).
• To remove shortcuts and Citrix Workspace icon for an application that was previously availablefrom the Store but now is not available, use SilentlyUninstallRemovedResources. Set-tings: “true” or “false” (default is false).
In theweb.config file, add the changes in theXML section for the account. Find this sectionby locating
© 1999‒2022 Citrix Systems, Inc. All rights reserved. 80

Citrix Workspace app 2203.1 LTSR for Windows
the opening tab:
<account id=... name=”Store”
The section ends with the </account> tag.
Before the end of the account section, in the first properties section:
<properties> <clear> <properties>
Properties can be added into this section after the <clear /> tag, one per line, giving the name andvalue. For example:
<property name=”PutShortcutsOnDesktop”value=”True”/>
Note:
Property elements added before the <clear /> tagmight invalidate them. Removing the <clear />tag when adding a property name and value is optional.
An extended example for this section is:
<properties <property name=”PutShortcutsOnDesktop”value=”True”<propertyname=”DesktopDir”value=”Citrix Applications”>
Important
In multiple server deployments, use only one server at a time to change the configuration of theserver group. Ensure that the Citrix StoreFrontmanagement console is not running on any of theother servers in the deployment. Once complete, propagate your configuration changes to theserver group, so that the other servers in the deployment are updated. For more information,see StoreFront documentation.
Using per-app settings in Citrix Virtual Apps and Desktops 7.x to customize app shortcutlocations
Citrix Workspace app can be configured to automatically place application and desktop shortcutsdirectly in the Start menu or on the desktop. However, this configuration is similar to the previousWorkspace forWindows versions. However, release 4.2.100 introduced the ability to control the place-ment of the app shortcut using Citrix Virtual Apps per app settings. The functionality is useful in envi-ronments with a handful of applications that need to be displayed in consistent locations.
Using per app settings in XenApp 7.6 to customize app shortcut locations
To configure a per app publishing shortcut in XenApp 7.6:
1. In Citrix Studio, locate the Application Settings screen.
© 1999‒2022 Citrix Systems, Inc. All rights reserved. 81

Citrix Workspace app 2203.1 LTSR for Windows
2. In the Application Settings screen, select Delivery. Using this screen, you can specify howapplications are delivered to users.
3. Select the appropriate icon for the application. Click Change to browse to the location of therequired icon.
4. In theApplication category field, optionally specify the category in CitrixWorkspace appwherethe application appears. For example, if you are adding shortcuts to Microsoft Office applica-tions, enter Microsoft Office.
5. Select the Add shortcut to user’s desktop check box.
6. Click OK.
Reducing enumeration delays or digitally signing application stubs
Citrix Workspace app provides functionality to copy the .EXE stubs from a network share, if:
• there is a delay in app enumeration at each sign-in, or• there is a need to sign application stubs digitally.
This functionality involves several steps:
1. Create the application stubs on the client machine.2. Copy the application stubs to a common location accessible from a network share.3. If necessary, prepare an allow list (or, sign the stubs with an Enterprise certificate.4. Add a registry key to enable Workspace for Windows to create the stubs by copying them from
the network share.
If RemoveappsOnLogoff and RemoveAppsonExit are enabled, and users are experiencing delays inapp enumeration at every logon, use the following workaround to reduce the delays:
1. Use regedit to add HKEY_CURRENT_USER\Software\Citrix\Dazzle /v ReuseStubs /tREG_SZ /d “true”.
2. Use regedit to add HKEY_LOCAL_MACHINE\Software\Citrix\Dazzle /v ReuseStubs /tREG_SZ /d “true”. HKEY_CURRENT_USER has preference over HKEY_LOCAL_MACHINE.
© 1999‒2022 Citrix Systems, Inc. All rights reserved. 82

Citrix Workspace app 2203.1 LTSR for Windows
Caution
Editing the registry incorrectly can cause serious problems that might require you to reinstallyour operating system. Citrix cannot guarantee that problems resulting from the incorrect useof the Registry Editor can be solved. Use the Registry Editor at your own risk. Be sure to back upthe registry before you edit it.
Enable a machine to use pre-created stub executables that are stored on a network share:
1. On a client machine, create stub executables for all apps. To accomplish create stub executa-bles, add all the applications to the machine using Citrix Workspace app. Citrix Workspace appgenerates the executables.
2. Harvest the stub executables from%APPDATA%\Citrix\SelfService. Youonly need the .exefiles.
3. Copy the executables to a network share.4. For each client machine that is locked down, set the following registry keys:
a) Reg add HKEY_LOCAL_MACHINE\Software\Citrix\Dazzle /v CommonStubDirectory/t REG_SZ /d “\\ShareOne\WorkspaceStubs”
b) Reg add HKEY_LOCAL_MACHINE\Software\Citrix\Dazzle /vc) CopyStubsFromCommonStubDirectory /t REG_SZ /d “true”. It’s also possible to con-
figure these settings on HKEY_CURRENT_USER if you prefer. HKEY_CURRENT_USER haspreference over HKEY_LOCAL_MACHINE.
d) Exit and restart Citrix Workspace app for the changes to take effect.
Example use cases:
This topic provides use cases for app shortcuts.
Allowing users to choose what they want in the Start menu (Self-Service)
If you have dozens or even hundreds of apps, allow users to select the applications to add to Favoriteand Startmenu:
If you want the user to choose the applications,they want in their Start menu.
configure Citrix Workspace app in self-servicemode. In this mode, you also configureauto-provisioned andmandatory app keywordsettings as needed.
© 1999‒2022 Citrix Systems, Inc. All rights reserved. 83

Citrix Workspace app 2203.1 LTSR for Windows
If you want the user to choose the applications,they want in their Start menu but also wantspecific app shortcuts on the desktop.
configure Citrix Workspace app without anyoptions and then use per app settings for thefew apps that you want on the desktop. Useauto provisioned andmandatory apps asneeded.
No app shortcuts in the Start menu
If a user has a family computer, you might not need or want app shortcuts at all. In such scenarios,the simplest approach is browser access; install Citrix Workspace app without any configuration andbrowse to workspace for web. You can also configure Citrix Workspace app for self-service accesswithout putting shortcuts anywhere.
If you want to prevent Citrix Workspace appfrom putting application shortcuts in the Startmenu automatically.
configure Citrix Workspace app withPutShortcutsInStartMenu=False. CitrixWorkspace app doesn’t put apps in the Startmenu even in self-service mode unless you putthem using per app settings.
All app shortcuts in the Start menu or on the Desktop
If the user has only a few apps, put them all in the Start menu or on the desktop, or in a folder on thedesktop.
If you want Citrix Workspace app to put allapplication shortcuts in the start menuautomatically.
configure Citrix Workspace app withSelfServiceMode =False. All available appsappear in the Start menu.
If you want all application shortcuts to put onthe desktop.
configure Citrix Workspace app withPutShortcutsOnDesktop = true. All availableapps appear in the desktop.
© 1999‒2022 Citrix Systems, Inc. All rights reserved. 84

Citrix Workspace app 2203.1 LTSR for Windows
If you want all shortcuts to be, put on thedesktop in a folder.
configure Citrix Workspace app withDesktopDir=Name of the desktop folder whereyou want applications.
Per app settings in XenApp 6.5 or 7.x
If youwant to set the location of shortcuts so every user finds them in the same place use XenApp perApp Settings:
If you want per-app settings to determinewhere applications are placed independentlyof whether in self-service mode or Start menumode.
configure Citrix Workspace app withPutShortcutsInStartMenu=false and enable perapp settings.
Apps in category folders or in specific folders
If you want applications displayed in specific folders use the following options:
If you want the application shortcuts CitrixWorkspace app places in the start menu to beshown in their associated category (folder).
configure Citrix Workspace app withUseCategoryAsStartMenuPath=True.
If you want the applications that CitrixWorkspace app puts in the Start menu to be ina specific folder.
configure Citrix Workspace app withStartMenuDir=the name of the Start menufolder name.
Remove apps on logoff or exit
If you don’t want users to see apps while another user share the end point, you can remove the appswhen the user logs off and exits.
© 1999‒2022 Citrix Systems, Inc. All rights reserved. 85

Citrix Workspace app 2203.1 LTSR for Windows
If you want Citrix Workspace app to remove allapps on logoff.
configure Citrix Workspace app withRemoveAppsOnLogoff=True.
If you want Citrix Workspace app to removeapps on exit.
configure Citrix Workspace app withRemoveAppsOnExit=True.
Configuring Local App Access applications
When configuring Local App Access applications:
• To specify that a locally installed application must be used instead of an application availablein Citrix Workspace app, append the text string KEYWORDS:prefer=”pattern.” This feature is re-ferred to as Local App Access.
Before you install an application on a user’s computer, Citrix Workspace app searches for thespecified patterns to determine if the application is installed locally. If it is, Citrix Workspaceapp subscribes the application and does not create a shortcut. When the user starts the appli-cation from the Citrix Workspace app window, Citrix Workspace app starts the locally installed(preferred) application.
If a user uninstalls a preferred application outside of CitrixWorkspace app, the application is un-subscribed during the next CitrixWorkspace app refresh. If a user uninstalls a preferred applica-tion from the Citrix Workspace app dialog, Citrix Workspace app unsubscribes the applicationbut does not uninstall it.
Note:
The keyword prefer is applied when Citrix Workspace app subscribes an application. Adding thekeyword after the application is subscribed has no effect.
You can specify the prefer keyword multiple times for an application. Only one match is needed toapply the keyword to an application. The following patterns can be used in any combination:
• To specify that a locally installed application must be used instead of an application availablein Citrix Workspace app, append the text string KEYWORDS:prefer=”pattern”. This feature is re-ferred to as Local App Access.
Before you install an application on a user’s computer, Citrix Workspace app searches for thespecified patterns to determine if the application is installed locally. If it is, Citrix Workspaceapp subscribes the application and does not create a shortcut. When the user starts the appli-cation from the Citrix Workspace app dialog, Citrix Workspace app starts the locally installed(preferred) application.
© 1999‒2022 Citrix Systems, Inc. All rights reserved. 86

Citrix Workspace app 2203.1 LTSR for Windows
If a user uninstalls a preferred application outside of Citrix Workspace app, the application isunsubscribed during the next Citrix Workspace app refresh. If a user uninstalls a preferred ap-plication from the CitrixWorkspace app, CitrixWorkspace app unsubscribes the application butdoes not uninstall it.
Note:
The keyword prefer is applied when Citrix Workspace app subscribes an application. Adding thekeyword after the application is subscribed has no effect.
You can specify the prefer keyword multiple times for an application. Only one match is needed toapply the keyword to an application. The following patterns can be used in any combination:
• prefer=”ApplicationName”
The application name pattern matches any application with the specified application name inthe shortcut file name. The applicationnamecanbeawordor aphrase. Quotationmarks are re-quired for phrases. Matching is not allowedonpartialwordsor file paths and is case-insensitive.Theapplicationnamematchingpattern is useful for overridesperformedmanually byanadmin-istrator.
KEYWORDS:prefer= Shortcut under Programs Matches?
Word \Microsoft Office\MicrosoftWord 2010
Yes
MicrosoftWord \Microsoft Office\MicrosoftWord 2010
Yes
Console McAfee\VirusScan Console Yes
Virus McAfee\VirusScan Console No
Console McAfee\VirusScan Console Yes
• prefer=”\\Folder1\Folder2\…\ApplicationName”
Theabsolutepathpatternmatches the entire shortcut file pathplus the entire applicationnameunder the Start menu. The Programs folder is a sub folder of the Start menu directory, so youmust include it in the absolute path to target an application in that folder. Quotation marksare required if the path contains spaces. The matching is case-sensitive. The absolute pathmatching pattern is useful for overrides implemented programmatically in Citrix Virtual Appsand Desktops and Citrix DaaS.
© 1999‒2022 Citrix Systems, Inc. All rights reserved. 87

Citrix Workspace app 2203.1 LTSR for Windows
KEYWORDS:prefer= Shortcut under Programs Matches?
\Programs\MicrosoftOffice\MicrosoftWord 2010
\Programs\MicrosoftOffice\MicrosoftWord 2010
Yes
\Microsoft Office \Programs\MicrosoftOffice\MicrosoftWord 2010
No
\MicrosoftWord 2010 \Programs\MicrosoftOffice\MicrosoftWord 2010
No
\Programs\MicrosoftWord2010
\Programs\MicrosoftWord2010
Yes
• prefer=”\Folder1\Folder2\…\ApplicationName”
The relative path pattern matches the relative shortcut file path under the Start menu. The rel-ative path provided must contain the application name and can optionally include the folderswhere the shortcut resides. Matching is successful if the shortcut file path ends with the rela-tive path provided. Quotation marks are required if the path contains spaces. The matchingis case-sensitive. The relative path matching pattern is useful for overrides implemented pro-grammatically.
KEYWORDS:prefer= Shortcut under Programs Matches?
\Microsoft Office\MicrosoftWord 2010
\Microsoft Office\MicrosoftWord 2010
Yes
\Microsoft Office \Microsoft Office\MicrosoftWord 2010
No
\MicrosoftWord 2010 \Microsoft Office\MicrosoftWord 2010
Yes
\MicrosoftWord \MicrosoftWord 2010 No
For information about other keywords, see “Additional recommendations” in Optimize the user expe-rience section in the StoreFront documentation.
Virtual display layout
This feature lets you define a virtual monitor layout that applies to the remote desktop. You can alsosplit a single client monitor virtually into up to eight monitors on the remote desktop. You can con-figure the virtual monitors on the Monitor Layout tab in the Desktop Viewer. There, you can draw
© 1999‒2022 Citrix Systems, Inc. All rights reserved. 88

Citrix Workspace app 2203.1 LTSR for Windows
horizontal or vertical lines to separate the screen into virtual monitors. The screen is split accordingto specified percentages of the client monitor resolution.
You can set a DPI for the virtual monitors that is used for DPI scaling or DPI matching. After applying avirtual monitor layout, resize or reconnect the session.
This configuration applies only to full-screen, single-monitor desktop sessions, and does not affectany published applications. This configuration applies to all subsequent connections from this client.
Starting from Citrix Workspace app for Windows 2106, virtual display layout is also supported for full-screen and multi-monitor desktop sessions. Virtual display layout is enabled by default. In a multi-monitor scenario, the same virtual display layout is applied to all the session monitors if the totalnumber of virtual displays doesn’t exceed eight virtual displays. In case this limit is exceeded, thevirtual display layout is ignored and not applied to any session monitor.
Multi-monitor enhancement can be disabled by setting the following registry key:
• HKEY_CURRENT_USER\Software\Citrix\XenDesktop\DesktopViewer
Name: SplitAllMonitorsType: DWORD
Values:
1 - Enabled
0 - Disabled
Application launch time
Use the session prelaunch feature to reduce application launch timeduring normal or high traffic peri-ods, thus providinguserswith abetter experience. Theprelaunch feature allows to create aprelaunchsession. Prelaunch session is created when a user logs on to Citrix Workspace app, or at a scheduledtime if the user has signed in.
The prelaunch session reduces the launch timeof the first application. When a user adds newaccountconnection to Citrix Workspace app for Windows, session prelaunch doesn’t take effect until the nextsession. The default application ctxprelaunch.exe is running in the session, but it is not visible to you.
Formore information, see sessionprelaunch and session linger guidance in theCitrix Virtual Apps andDesktops article titled Manage delivery groups.
Sessionprelaunch isdisabledbydefault. Toenable sessionprelaunch, specify theENABLEPRELAUNCH=true parameter on theWorkspace command line or set the EnablePreLaunch registry key to true.The default setting, null, means that prelaunch is disabled.
© 1999‒2022 Citrix Systems, Inc. All rights reserved. 89

Citrix Workspace app 2203.1 LTSR for Windows
Note:
If the client machine has been configured to support Domain Passthrough (SSON) authentica-tion, prelaunch is automatically enabled. If you want to use Domain Pass-through (SSON) with-out prelaunch, set the EnablePreLaunch registry key value tofalse.
The registry locations are:
• HKEY_LOCAL_MACHINE\Software\[Wow6432Node\]Citrix\\Dazzle
• HKEY_CURRENT_USER\Software\Citrix\Dazzle
There are two types of prelaunch:
• Just-in-time prelaunch- prelaunch starts immediately after the user’s credentials are authen-ticated whether it is a high-traffic period. Typically used for normal traffic periods. A user cantrigger just-in-time prelaunch by restarting the Citrix Workspace app.
• Scheduled prelaunch- prelaunch starts at a scheduled time. Scheduled prelaunch starts onlywhen the user device is already running and authenticated. If those two conditions are notmetwhen the scheduled prelaunch time arrives, a session does not launch. To share network andserver load, the session launches within a window when it is scheduled. For example, if thescheduled prelaunch is scheduled for 13:45, the session actually launches between 13:15 and13:45. Typically used for high-traffic periods.
Configuring prelaunch on a Citrix Virtual Apps server consists of:
• creating, modifying, or deleting prelaunch applications, and• updating user policy settings that control the prelaunch application.
You cannot customize theprelaunch featureusing thereceiver.admx file. However, you can changethe prelaunch configuration by modifying registry values. Registry values can be modified during orafter Citrix Workspace app for Windows installation.
• The HKEY_LOCAL_MACHINE values are written during client installation.• The HKEY_CURRENT_USER values enable you to provide different users on the same machinewith different settings. Users can change theHKEY_CURRENT_USER valueswithout administra-tive permission. You can provide your users with scripts to change the values.
HKEY_LOCAL_MACHINE registry values:
For 64-bit Windows operating systems: HKEY_LOCAL_MACHINE\SOFTWARE\Wow6432Node\Citrix\ICA Client\Prelaunch
For 32-bit Windows operating systems: HKEY_LOCAL_MACHINE\SOFTWARE\Citrix\ICA Client\Prelaunch
Name: UserOverrideType: REG_DWORD
© 1999‒2022 Citrix Systems, Inc. All rights reserved. 90

Citrix Workspace app 2203.1 LTSR for Windows
Values:
0 - Use the HKEY_LOCAL_MACHINE values even if HKEY_CURRENT_USER values are also present.
1 - Use the HKEY_CURRENT_USER values if they exist; otherwise, use the HKEY_LOCAL_MACHINE val-ues.
Name: StateType: REG_DWORD
Values:
0 - Disable prelaunch.
1 - Enable just-in-time prelaunch. (prelaunch starts after the user’s credentials are authenticated.)
2 - Enable scheduled prelaunch. (prelaunch starts at the time configured for Schedule.)
Name: ScheduleType: REG_DWORD
Value:
The time (24-hour format) and days of a week for the scheduled prelaunch entered in the followingformat:
HH:MM M:T:W:TH:F:S:SU where HHand MM are hours andminutes. M:T:W:TH:F:S:SU isthe days of the week. Forexample, to enable scheduledprelaunch on Monday,Wednesday, and Friday at13:45, set Schedule asSchedule=13:45
1:0:1:0:1:0:0. The sessionactually launches between13:15 and 13:45.
HKEY_CURRENT_USER registry values:
HKEY_CURRENT_USER\SOFTWARE\Citrix\ICA Client\Prelaunch
The State and Schedule keys have the same values as for HKEY_LOCAL_MACHINE.
Bidirectional content redirection
The bidirectional content redirection policy allows you to enable or disable client to host and hostto client URL redirection. Server policies are set in Studio, and client policies are set from the CitrixWorkspace app Group Policy Object administration template.
© 1999‒2022 Citrix Systems, Inc. All rights reserved. 91

Citrix Workspace app 2203.1 LTSR for Windows
Citrix offers host to client redirection and Local App Access for client to URL redirection. However, werecommend that you use bidirectional content redirection for domain-joined Windows clients.
You can enable bidirectional content redirection using one of the following methods:
1. Group Policy Object (GPO) administrative template2. Registry editor
Note:
• Bidirectional content redirection does not work on the session where Local App Access isenabled.
• Bidirectional content redirectionmust be enabled both on the server and the client. Whenit is disabled either on the server or the client, the functionality is disabled.
• When you includeURLs, you can specify oneURLor a semi-colondelimited list of URLs. Youcan use an asterisk (*) as a wildcard.
To enable bidirectional content redirection using the GPO administrative template:
UseGroupPolicyObject administrative template configurationonly for a first-time installationofCitrixWorkspace app for Windows.
1. Open the Citrix Workspace app Group Policy Object administrative template by runninggpedit.msc.
2. Under theUserConfigurationnode, go toAdministrativeTemplates>ClassicAdministrativeTemplates (ADM) > Citrix Components > Citrix Workspace > User experience.
3. Select the Bidirectional Content Redirection policy.
© 1999‒2022 Citrix Systems, Inc. All rights reserved. 92

Citrix Workspace app 2203.1 LTSR for Windows
1. In the Published Application or Desktop name field, provide the name of the resource used tolaunch the redirected URL.
Note:
When you include URLs, specify a single URL or a semi-colon delimited list of URLs. Youcan use an asterisk (*) as a wildcard.
2. From the Above Name is for Published Type, select Application orDesktop of the resource asappropriate.
3. In the Allowed URLs to be redirected to VDA field, enter the URL that must be redirected. Sep-
© 1999‒2022 Citrix Systems, Inc. All rights reserved. 93

Citrix Workspace app 2203.1 LTSR for Windows
arate the list with a semicolon.
4. Select the Enable URL-specific published application for desktop overrides? option to over-ride a URL.
5. Click Show to display a list where the value name must match any of the URLs listed in theAllowedURLs tobe redirected to theVDA field. The valuemustmatch a published applicationname.
6. In the Allowed URLs to be redirected to Client: field, enter the URL that must be redirectedfrom the server to the client. Separate the list with a semicolon.
Note:
When you include URLs, specify a single URL or a semi-colon delimited list of URLs. Youcan use an asterisk (*) as a wildcard.
7. Click Apply andOK.
8. From the command line, run the gpupdate /force command.
To enable bidirectional content redirection using the registry:
To enable bidirectional content redirection, run the redirector.exe /RegIE command from theCitrix Workspace app installation folder C:\Program Files (x86)\Citrix\ICA Client).
© 1999‒2022 Citrix Systems, Inc. All rights reserved. 94

Citrix Workspace app 2203.1 LTSR for Windows
Important:
• Ensure that the redirection rule does not result in a looping configuration. A loopingconfiguration results if VDA rules are set so that, for example, a URL, https://www.my\\_company.com is configured to be redirected to the client, and the VDA.
• URL redirection supports only explicit URLs: URLs appearing in the address bar of thebrowser or found using the in-browser navigation, depending on the browser).
• If two applications with same display name use multiple StoreFront accounts, the displayname in the primary StoreFront account is used for launching the application or a desktopsession.
• New browser window opens only when a URL is redirected to the client. When a URL isredirected to VDA, if the browser is already open, then the redirected URL opens in the newtab.
• Embedded links in files like documents, emails, PDF is supported.• Ensure that only one of the server file type associations exist and the host content redirec-tion policies are set to Enabled on the samemachine. Citrix recommends that you disableeither the server file type association or the Host Content (URL) Redirection feature to con-firm that URL redirection works properly.
Limitation:
No fallback mechanism is present if the redirection fails due to session launch issues.
Bi-directional URL support with Chromium-based browsers
Bidirectional content redirection allows you to configure URLs to redirect from client to server andfrom server to client using policies on the server and the client.
Server policies are set on the Delivery Controller and client policies on Citrix Workspace app. Thepolicies are set using the Group Policy Object (GPO) administrative template.
Starting with Version 2106, bidirectional URL redirection support has been added for Google Chromeand Microsoft Edge.
Prerequisites:
• Citrix Virtual Apps and Desktops Version 2106 or later.• Browser redirection extension version 5.0.
To register Google Chromebrowser to bidirectional URL redirection, run the following command fromthe Citrix Workspace app installation folder:
%ProgramFiles(x86)%\Citrix\ICA Client\redirector.exe /regChrome /verbose
© 1999‒2022 Citrix Systems, Inc. All rights reserved. 95

Citrix Workspace app 2203.1 LTSR for Windows
Note:
When using these commands on Chrome browsers, the bidirectional content redirection exten-sion installs automatically from the ChromeWeb Store.
To unregister Google Chromebrowser frombidirectional URL redirection, run the following commandfrom the Citrix Workspace app installation folder:
%ProgramFiles(x86)%\Citrix\ICA Client\redirector.exe /unregChrome /verbose
Note:
If you get the following error when accessing the Browser Extensions page, ignore the message:
Websocket connection to wss://... failed.
For information on configuring URL redirection on Citrix Workspace app, see Bidirectional contentredirection.
To prevent the desktop viewer window from dimming:
If youhavemultiple Desktop Viewerwindows, by default the desktops that are not active are dimmed.If users want to view multiple desktops simultaneously, information on them might be unreadable.You can disable the default behavior and prevent theDesktop Viewerwindow from dimming by edit-ing the Registry editor.
Caution
Editing the registry incorrectly can cause serious problems that might require you to reinstallyour Operating system. Citrix cannot guarantee that problems resulting from the incorrect useof the Registry Editor can be solved. Use the Registry Editor at your own risk. Be sure to back upthe registry before you edit it
• On the user device, create a REG_DWORD entry called DisableDimming in one of the followingkeys, depending on whether you want to prevent dimming for the current user of the device orthe device itself. An entry exists if the Desktop Viewer has been used on the device:
– HKEY_CURRENT_USER\Software\Citrix\XenDesktop\DesktopViewer– HKEY_LOCAL_MACHINE\Software\Citrix\XenDesktop\DesktopViewer
Optionally, instead of controlling dimming, you can define a local policy by creating the sameREG_WORD entry in one of the following keys:
• HKEY_CURRENT_USER\Software\Policies\Citrix\XenDesktop\DesktopViewer• HKEY_LOCAL_MACHINE\Software\Policies\Citrix\XenDesktop\DesktopViewer
Before using these keys, check whether the Citrix Virtual Apps and Desktops and Citrix DaaS adminis-trator has set a policy for this feature.
Set the entry to any non-zero value such as 1 or true.
© 1999‒2022 Citrix Systems, Inc. All rights reserved. 96

Citrix Workspace app 2203.1 LTSR for Windows
If no entries are specified or the entry is set to 0, the Desktop Viewerwindow is dimmed. If multipleentries are specified, the following precedence is used. The first entry in this list and its value deter-mine whether the window is dimmed:
1. HKEY_CURRENT_USER\Software\Policies\Citrix\…2. HKEY_LOCAL_MACHINE\Software\Policies\Citrix\…3. HKEY_CURRENT_USER\Software\Citrix\…4. HKEY_LOCAL_MACHINE\Software\Citrix\…
Citrix Casting
The Citrix Readyworkspace hub combines digital and physical environments to deliver apps and datawithin a secure smart space. The complete system connects devices (or things), like mobile apps andsensors, to create an intelligent and responsive environment.
Citrix Ready workspace hub is built on the Raspberry Pi 3 platform. The device running CitrixWorkspace app connects to the Citrix Ready workspace hub and casts the apps or desktops on alarger display. Citrix Casting is supported only on Microsoft Windows 10 Version 1607 and later orWindows Server 2016.
Citrix Casting feature allows instant and secure access of any app fromamobile device and display ona large screen.
Note:
• Citrix Casting for Windows supports Citrix Ready workspace hub Version 2.40.3839 andlater. Workspace hub with earlier versions might not get detected or cause a casting error.
• The Citrix Casting feature is not supported on Citrix Workspace app for Windows (Store).
Prerequisites:
• Bluetooth enabled on the device for hub discovery.• Both Citrix Ready workspace hub and Citrix Workspace appmust be on the same network.• Port 55555 is allowed between the device running Citrix Workspace app and the Citrix Readyworkspace hub.
• For Citrix Casting, port 1494must not be blocked.• Port 55556 is the default port for SSL connections betweenmobile devices and the Citrix Readyworkspace hub. You can configure a different SSL port on the Raspberry Pi’s settings page. Ifthe SSL port is blocked, users cannot establish SSL connections to the workspace hub.
• Citrix Casting is supported only on Microsoft Windows 10 Version 1607 and later or WindowsServer 2016.
Configure Citrix Casting launch
© 1999‒2022 Citrix Systems, Inc. All rights reserved. 97

Citrix Workspace app 2203.1 LTSR for Windows
Note:
You can hide all or part of the Advanced Preferences sheet. For more information, see AdvancedPreferences sheet.
1. Right-click the Citrix Workspace app icon from the notification area and select Advanced Pref-erences.
The Advanced Preferences dialog appears.
2. Select Citrix Casting.
The Citrix Casting dialog appears.
3. Select one of the options:
• Yes – Indicates that Citrix Casting is launched when Citrix Workspace app starts.• No, do not launch the Citrix Casting on startup – Indicates that Citrix Casting does notlaunch when Citrix Workspace app starts.
Note:
Selecting the optionNo does not terminate the current screen casting session. The settingis applied only at the next Citrix Workspace app launch.
4. Click Save to apply the changes.
How to use Citrix Casting with Citrix Workspace app
1. Log on to Citrix Workspace app and enable Bluetooth on your device.
© 1999‒2022 Citrix Systems, Inc. All rights reserved. 98

Citrix Workspace app 2203.1 LTSR for Windows
The list of available hubs is displayed. The list is sorted by the RSSI value of the workspace hubbeacon package.
2. Select the workspace hub to cast your screen and choose one of the following:
• Mirror to duplicate the primary screen and cast the display to the connected workspacehub device.
• Extend to use the workspace hub device screen as your secondary screen.
Note:
Exiting Citrix Workspace app does not exit Citrix Casting.
In the Citrix Casting notification dialog, the following options are available:
1. The current screen casting session displayed at the top.2. Refresh icon.3. Disconnect to stop the current screen casting session.4. Star icon to add the workspace hub to Favorites.5. Right-click the workspace hub icon in the notification area and select Exit to disconnect the
screen casting session and to exit Citrix Ready workspace hub.
Self-check list
If Citrix Workspace app cannot detect and communicate with any available workspace hubs in range,ensure that you do the following as part of self-check:
1. Citrix Workspace app and Citrix Ready workspace hub are connected to the same network.
© 1999‒2022 Citrix Systems, Inc. All rights reserved. 99

Citrix Workspace app 2203.1 LTSR for Windows
2. Bluetooth is enabled and working properly on the device where Citrix Workspace app islaunched.
3. The device where Citrix Workspace app is launched is within range (less than 10 meters andwithout any obstructing objects such as walls) of Citrix Ready workspace hub.
4. Launch a browser in Citrix Workspace app and type http://<hub_ip>:55555/device-details.xml to check whether it displays the details of workspace hub device.
5. Click Refresh in Citrix Ready workspace hub and try reconnecting to the workspace hub.
Known issues and limitations
1. Citrix Casting does not work unless the device is connected to the same network as the CitrixReady workspace hub.
2. If there are network issues, there might be a lag in display on the workspace hub device.3. When you select Extend, the primary screen where Citrix Ready workspace app is launched
flashes multiple times.4. In Extendmode, you cannot set the secondary display as the primary display.5. The screen casting session automatically disconnects when there is any change in the display
settings on the device. For example, change in screen resolution, change in screen orientation.6. During the screen casting session, if the device running Citrix Workspace app locks, sleeps or
hibernates, an error appears at login.7. Multiple screen casting sessions are not supported.8. The maximum screen resolution supported by Citrix Casting is 1920 x 1440.9. Citrix Casting supports Citrix Readyworkspace hub Version 2.40.3839 and later. Workspace hub
with earlier versions might not get detected or cause a casting error.10. This feature is not supported on Citrix Workspace app for Windows (Store).11. On Windows 10, Build 1607, Citrix Casting in Extendmodemight not be properly positioned.
For more information about Citrix Ready workspace hub, see the Citrix Ready workspace hub sectionin the Citrix Virtual Apps and Desktops documentation.
Composite USB device redirection
USB 2.1 and later supports the notion of USB composite devices where multiple child devices sharea single connection with the same USB bus. Such devices employ a single configuration space andshared bus connection where a unique interface number 00-ff is used to identify each child device.Such devices are also not the same as a USB hub which provides a new USB bus origin for other inde-pendently addressed USB devices for connection.
Composite devices found on the client endpoint can be forwarded to the virtual host as either:
• a single composite USB device, or
© 1999‒2022 Citrix Systems, Inc. All rights reserved. 100

Citrix Workspace app 2203.1 LTSR for Windows
• a set of independent child devices (split devices)
When a composite USB device is forwarded, the entire device becomes unavailable to the endpoint.Forwarding also blocks the local usage of the device for all applications on the endpoint, includingthe Citrix Workspace client needed for an optimized HDX remote experience.
Consider a USB headset device with both audio device and HID button for mute and volume control.If the entire device is forwarded using a generic USB channel, the device becomes unavailable forredirection over the optimized HDX audio channel. However, you can achieve best experience whentheaudio is sent through theoptimizedHDXaudio channel unlike theaudio sentusinghost-sideaudiodrivers through generic USB remoting. The behavior is because of the noisy nature of the USB audioprotocols.
You also notice issues when the system keyboard or pointing device are part of a composite devicewith other integrated features required for the remote session support. When a complete compos-ite device is forwarded, the system keyboard or mouse becomes inoperable at the endpoint, exceptwithin the remote desktop session or application.
To resolve these issues, Citrix recommends that you split the composite device and forward only thechild interfaces that use a generic USB channel. Suchmechanism ensures that the other child devicesare available for use by applications on the client endpoint, including, the Citrix Workspace app thatprovides optimized HDX experiences, while allowing only the required devices to be forwarded andavailable to the remote session.
Device Rules:
Aswith regular USB devices, device rules set in the policy or client CitrixWorkspace app configurationon the end point select the composite devices for forwarding. Citrix Workspace app uses these rulesto decide which USB devices to allow or prevent from forwarding to the remote session.
Each rule consists of an action keyword (Allow, Connect, or Deny), a colon (:), and zero or more fil-ter parameters that match actual devices at the endpoints USB subsystem. These filter parameterscorrespond to the USB device descriptor metadata used by every USB device to identify itself.
Device rules are clear text with each rule on a single line and an optional comment after a # character.Rules are matched top down (descending priority order). The first rule that matches the device orchild interface is applied. Subsequent rules that select the same device or interface are ignored.
Sample device rules:
• ALLOW: vid=046D pid=0102 # Allow a specific device by vid/pid• ALLOW: vid=0505 class=03 subclass=01 # Allow any pid for vendor 0505 when subclass=01• DENY: vid=0850 pid=040C # Deny a specific device (incl all child devices)• DENY: class=03 subclass=01 prot=01 # Deny any device that matches all filters• CONNECT: vid=0911 pid=0C1C # Allow and auto-connect a specific device• ALLOW: vid=0286 pid=0101 split=01 # Split this device and allow all interfaces
© 1999‒2022 Citrix Systems, Inc. All rights reserved. 101

Citrix Workspace app 2203.1 LTSR for Windows
• ALLOW: vid=1050 pid=0407 split=01 intf=00,01 # Split and allow only 2 interfaces• CONNECT: vid=1050 pid=0407 split=01 intf=02 # Split and auto-connect interface 2• DENY: vid=1050 pid=0407 split=1 intf=03 # Prevent interface 03 from being remoted
You can use any of the following filter parameters to apply rules to the encountered devices:
Filter parameter Description
vid=xxxx USB device vendor ID (four-digit hexadecimalcode)
pid=xxxx USB device product ID (four-digit hexadecimalcode)
rel=xxxx USB device release ID (four-digit hexadecimalcode)
class=xx USB device class code (two-digit hexadecimalcode)
subclass=xx USB device subclass code (two-digithexadecimal code)
prot=xx USB device protocol code (two-digithexadecimal code)
split=1 (or split=0) Select a composite device to be split (ornon-split)
intf=xx[,xx,xx,…] Selects a specific set of child interfaces of acomposite device (comma separated list oftwo-digit hexadecimal codes)
The first six parameters select the USB devices for which the rulemust be applied. If any parameter isnot specified, the rule matches a device with ANY value for that parameter.
The USB Implementors Forum maintains a list of defined class, subclass, and protocol values in De-fined Class Codes. USB-IF also maintains a list of registered vendor IDs. You can check the vendor,product, release, and interface IDs of a specific device directly in the Windows device manager or us-ing a free tool like UsbTreeView.
When present, the last two parameters apply only to USB composite devices. The split parameterdetermines if a composite device must be forwarded as split devices or as a single composite device.
• Split=1 indicates that the selected child interfaces of a composite device must be forwarded assplit devices.
• Split=0 indicates that the composite device must not be split.
© 1999‒2022 Citrix Systems, Inc. All rights reserved. 102

Citrix Workspace app 2203.1 LTSR for Windows
Note:
If the split parameter is omitted, Split=0 is assumed.
The intf parameter selects the specific child interfaces of the composite device to which the actionmust be applied. If omitted, the action applies to all interfaces of the composite device.
Consider a composite USB headset device with three interfaces:
• Interface 0 - Audio class device endpoints• Interface 3 - HID class device endpoints (volume andmute buttons)• Interface 5 - Management/update interface
The suggested rules for this type of device are:
• CONNECT: vid=047F pid=C039 split=1 intf=03 # Allow and auto-connect HID device• DENY: vid=047F pid=C039 split=1 intf=00 # Deny audio end points• ALLOW: vid=047F pid=C039 split=1 intf=05 # Allowmgmt intf but don’t auto-connect
Enable Device Rules policy:
CitrixWorkspace app forWindows includes a set of default device rules that filters certain undesirableclasses of devices and allow one that customers often encounter.
You can check these default device rules in the system registry at either:
• HKEY_LOCAL_MACHINE\Software\Citrix\ICA Client\GenericUSB (32 bit Windows) or• HKEY_LOCAL_MACHINE\Software\WOW6432Node\Citrix\ICA Client\GenericUSB (64bit Windows), in the multistring value named DeviceRules.
However, in theCitrixWorkspace app forWindow, you canapplyUSBDeviceRulespolicy tooverwritethese default rules.
To enable device rules policy for Citrix Workspace app for Windows:
1. Open the Citrix Workspace app Group Policy Object administrative template by runninggpedit.msc.
2. Under the User Configuration node, go to Administrative Templates > Citrix Components >Citrix Workspace > Remoting client devices > Generic USB Remoting.
3. Select the USB Device Rules policy.4. Select Enabled.5. In the USB Device Rules text box, paste (or edit directly) the USB device rules to be deployed.6. Click Apply andOK.
Citrix recommends preserving the default rules shipped with the client when creating this policy bycopying the original rules and inserting new rules to alter the behavior as desired.
Connecting USB devices:
© 1999‒2022 Citrix Systems, Inc. All rights reserved. 103

Citrix Workspace app 2203.1 LTSR for Windows
In a desktop session, split USB devices are displayed in the Desktop Viewer under Devices. Also, youcan view split USB devices from Preferences > Devices.
Note:
CONNECT keyword enables automatic connection of a USB device. However, if the CONNECTkeyword is not used when you split a composite USB device for generic USB redirection, youmust manually select the device from the Desktop Viewer or Connection Center to connect anallowed device.
In an application session, split USB devices are displayed in the Connection Center.
To automatically connect an interface:
The CONNECT keyword introduced in Citrix Workspace app for Windows 2109 allows for automaticredirection of USB devices. The CONNECT rule can replace the ALLOW rule if the administrator allowsthe device or selected interfaces to automatically connect in the session.
1. Open the Citrix Workspace app Group Policy Object administrative template by runninggpedit.msc.
© 1999‒2022 Citrix Systems, Inc. All rights reserved. 104
Citrix Workspace app 2203.1 LTSR for Windows
2. Under the User Configuration node, go to Administrative Templates > Citrix Components >Citrix Workspace > Remoting client devices > Generic USB Remoting.
3. Select the USB Device Rules policy.
4. Select Enabled.
5. In the USB Device Rules text box, add the USB device that you want to auto connect.
For example, CONNECT: vid=047Fpid=C039split=01 intf=00,03–allows for splittingacompositedevice and auto connection of interfaces 00 and 03 interface and restriction other interfaces ofthat device.
6. Click Apply andOK to save the policy.
Changing USB device auto-connection preferences:
Citrix Workspace app automatically connects USB devices taggedwith CONNECT action based on thepreferences set for the current desktop resource. You can change the preferences in the Desktopviewer toolbar as shown in the following image.
© 1999‒2022 Citrix Systems, Inc. All rights reserved. 105

Citrix Workspace app 2203.1 LTSR for Windows
The two check boxes at the bottom of the pane controls if the devices must connect automatically orwait formanual connection in the session. These settings are not enabled by default. You can changethe preferences if generic USB devices must be connected automatically.
Alternatively, an administrator can override the user preferences by deploying the corresponding poli-cies from Citrix Workspace app Group Policy Object administrative template. Both machine and userpolicies can be found under Administrative Templates > Citrix Components > Citrix Workspace >Remoting client devices > Generic USB Remoting. The corresponding policies are labeled as Exist-ing USB Devices and New USB Devices respectively.
Change split device default setting:
By default, the Citrix Workspace app for Windows only splits composite devices that are explicitlytagged as Split=1 in the device rules. However, it is possible to change the default disposition to splitall composite devices that are not otherwise tagged with Split=0 in a matching device rule.
1. Open the Citrix Workspace app Group Policy Object administrative template by running
© 1999‒2022 Citrix Systems, Inc. All rights reserved. 106

Citrix Workspace app 2203.1 LTSR for Windows
gpedit.msc.2. Under the User Configuration node, go to Administrative Templates > Citrix Components >
Citrix Workspace > Remoting client devices > Generic USB Remoting.3. Select the SplitDevices policy.4. Select Enabled.5. Click Apply andOK to save the policy.
Note:
Citrix recommends using explicit device rules to identify specific devices or interfaces that needto be split instead of changing the default. This setting will be deprecated in a future release.
Limitation:
Citrix recommends that youdonot split interfaces for awebcam. As aworkaround, redirect thedeviceto a single device using Generic USB redirection. For a better performance, use the optimized virtualchannel.
Bloomberg keyboards
CitrixWorkspace app supports the use of Bloomberg keyboard in a virtual apps and desktops session.The required components are installed with the plug-in. You can enable the Bloomberg keyboardfeature when installing Citrix Workspace app for Windows or by using the Registry editor.
Bloomberg keyboards provide other functionalitywhen compared to standard keyboards, that allowsthe user to access financial market data and perform trades.
The Bloomberg keyboard consists of multiple USB devices built into one physical shell:
• the keyboard• a fingerprint reader• an audio device• a USB hub to connect all of these devices to the system• HID buttons, for example, Mute, Vol Up, and Vol Down for the audio device
In addition to the normal functionality of these devices, the audio device includes support for somekeys, control of the keyboard, and keyboard LEDs.
To use the specialized functionality inside a session, you must redirect the audio device as a USB de-vice. This redirectmakes the audio device available to the session, but prevents the audio device frombeing used locally. In addition, the specialized functionality can only be used with one session andcannot be shared betweenmultiple sessions.
Multiple sessions with Bloomberg keyboards are not recommended. The keyboard operates in asingle-session environment only.
Configuring Bloomberg keyboard 5:
© 1999‒2022 Citrix Systems, Inc. All rights reserved. 107

Citrix Workspace app 2203.1 LTSR for Windows
You must configure various interfaces of the Bloomberg keyboard. From Citrix Workspace Applica-tion for Windows 2109, a new CONNECT keyword is introduced to allow automatic connection of USBdevices at session startup and device insertion. The CONNECT keyword can be used to replace the AL-LOW keyword when the user wants a USB device or interface to connect automatically. The followingexample uses the CONNECT keyword.
1. Open the Citrix Workspace app Group Policy Object administrative template by runninggpedit.msc.
2. Under the Computer Configuration node, go to Administrative Templates > Citrix Compo-nents > Citrix Workspace > Remoting client devices > Generic USB Remoting.
3. Select the SplitDevices policy.
4. Select Enabled.
5. In the USB Device Rules text box, add the following rules if it doesn’t exist.
• CONNECT: vid=1188 pid=A101 - Bloomberg 5 Biometric module• DENY: vid=1188 pid=A001 split=01 intf=00 - Bloomberg 5 Primary keyboard• CONNECT: vid=1188 pid=A001 split=01 intf=01 - Bloomberg 5 Keyboard HID• DENY: vid=1188 pid=A301 split=01 intf=02 - Bloomberg 5 Keyboard Audio Channel• CONNECT: vid=1188 pid=A301 split=01 intf=00,01 - Bloomberg 5 Keyboard Audio HID
6. Click Apply andOK to save the policy.
7. In the Preferences window, select the Connections tab, and select one or both check boxesto the connect devices automatically. The Preferenceswindow is accessible from the DesktopToolbar or Connection Manager.
This procedure makes the Bloomberg keyboard 5 ready for use. The DENY rules that are mentionedin the steps enforce the redirection of the primary keyboard and audio channel over an optimizedchannel but not over Generic USB. TheCONNECT rules enable automatic redirection of the fingerprintmodule, special keys on the keyboard, and keys related to audio control.
Configure Bloomberg keyboard 4 or 3:
Caution
Editing the registry incorrectly can cause serious problems that might require you to reinstallyour operating system. Citrix cannot guarantee that problems resulting from the incorrect useof the Registry editor can be solved. Use the Registry editor at your own risk. Be sure to back upthe registry before you edit it.
1. Locate the following key in the registry:
HKEY_LOCAL_MACHINE\SOFTWARE\Citrix\ICA Client\GenericUSB
2. Do one of the following:
© 1999‒2022 Citrix Systems, Inc. All rights reserved. 108

Citrix Workspace app 2203.1 LTSR for Windows
• To enable this feature, for the entry with type DWORD and Name EnableBloombergHID,set the value to 1.
• To disable this feature, set the value to 0.
Bloomberg keyboard 3 support is available in the online plug-in 11.2 for Windows and subsequentversions.
Bloomberg keyboard 4 support is available for Windows Receiver 4.8 and later versions.
Determining if Bloomberg keyboards support is enabled:
• Tocheck if Bloombergkeyboard support is enabled in theonlineplug-in, checkhowtheDesktopViewer reports theBloomberg keyboarddevices. If theDesktopViewer isn’t used, you can checkthe registry on the machine where the online plug-in is running.
• If support for Bloomberg keyboards is not enabled, the Desktop Viewer shows:
– twodevices for the Bloomberg keyboard 3, that appears asBloomberg Fingerprint Scan-ner and Bloomberg Keyboard Audio.
– one policy redirected device for Bloomberg keyboard 4. This device appears asBloomberg LP Keyboard 2013.
• If support for Bloomberg keyboards is enabled, there are two devices shown in the Desk-top Viewer. One appears as Bloomberg Fingerprint Scanner as before, and the other asBloomberg Keyboard Features.
• If the driver for the Bloomberg Fingerprint Scanner device is not installed, the Bloomberg Fin-gerprint Scanner entry might not appear in the Desktop Viewer. If the entry is missing, theBloomberg Fingerprint Scanner might not be available for redirection. You can still check thename of the other Bloomberg device where Bloomberg keyboards support is enabled.
• You can also check the value in the registry to know if the support is enabled:HKEY_LOCAL_MACHINE\SOFTWARE\Citrix\ICAClient\GenericUSB\EnableBloombergHID
If the value doesn’t exist or is 0 (zero), support for Bloomberg keyboards is not enabled. If thevalue is 1, support is enabled.
Enabling Bloomberg keyboard support:
Note:
Citrix Receiver for Windows 4.8 introduced the support for composite devices through the Split-Devices policy. However, you must use the Bloomberg keyboard feature instead of this policyfor the Bloomberg keyboard 4.
The support for the Bloomberg keyboard changes the way certain USB devices are redirected to asession. This support is not enabled by default.
© 1999‒2022 Citrix Systems, Inc. All rights reserved. 109

Citrix Workspace app 2203.1 LTSR for Windows
• Toenable thesupportduring the installation time, specify thevalueof theENABLE_HID_REDIRECTIONproperty as TRUE at the installation command-line. For example:
CitrixOnlinePluginFull.exe /silentADDLOCAL=”ICA_CLIENT,PN_AGENT,SSON,USB”ENABLE_SSON=”no”INSTALLDIR=”c:\test”ENABLE_DYNAMIC_CLIENT_NAME=”Yes”DEFAULT_NDSCONTEXT=”Context1,Context2”SERVER_LOCATION=”http://testserver.net”ENABLE_HID_REDIRECTION=”TRUE”
• To enable support after installing the online plug-in, edit the Windows Registry on the systemwhere the online plug-in is running:
1. Open Registry Editor.2. Navigate to the following key:
HKEY_LOCAL_MACHINE\SOFTWARE\Citrix\ICA Client\GenericUSB3. If the value EnableBloombergHID exists, modify it so that the value data is 1.4. If the value EnableBloombergHID does not exist, create a DWORD value with the name
EnableBloombergHID and provide the value data as 1.
Disabling support for the Bloomberg keyboard:
You can disable support for the Bloomberg keyboard in the online plug-in as follows:
1. Open Registry Editor on the system running the online plug-in software.
2. Navigate to the following key:HKEY_LOCAL_MACHINE\SOFTWARE\Citrix\ICA Client\GenericUSB
3. If the value EnableBloombergHID exists, modify it so that the value data is 0 (zero).
If the value EnableBloombergHIDdoesn’t exist, it indicates that the support for the Bloombergkeyboard is not enabled. In such case, you don’t have to modify any registry values.
Using Bloomberg keyboards without enabling support:
• You can use the keyboardwithout enabling the Bloomberg keyboard support in the online plug-in. However, you cannot have the benefit of sharing the specialized functionality among multi-ple sessions and youmight experience increased network bandwidth from audio.
• Bloomberg keyboard ordinary keys are available in the same way as any other keyboard. Youdon’t have to take any special action.
• To use the specialized Bloomberg keys, you must redirect the Bloomberg keyboard audio de-vice into the session. If you are using the Desktop Viewer, the manufacturer name and devicename of the USB devices appears and Bloomberg Keyboard Audio appears for the BloombergKeyboard audio device.
© 1999‒2022 Citrix Systems, Inc. All rights reserved. 110

Citrix Workspace app 2203.1 LTSR for Windows
• To use the fingerprint reader, youmust redirect the device to Bloomberg Fingerprint Scanner. Ifthe drivers for the fingerprint reader are not installed locally, the device only shows:
– if the online plug-in is set to connect devices automatically or– to let the user choose whether to connect devices.
Also, if the Bloomberg keyboard is connected before establishing the session and drivers forthe fingerprint reader doesn’t exist locally, then the fingerprint reader doesn’t appear and isn’tusable within the session.
Note:
For Bloomberg 3, a single session or the local system can use the fingerprint reader, and cannotbe shared. Bloomberg 4 is prohibited for redirection.
Using Bloomberg keyboards after enabling support:
• If you enable support for Bloomberg keyboards in the online plug-in, you have the benefit ofsharing the specialized keyboard functionality with multiple sessions. You also experience lessnetwork bandwidth from the audio.
• Enabling support for the Bloomberg keyboard prevents the redirection of the Bloomberg Key-board audio device. Instead, a new device is made available. If you are using the DesktopViewer, this device is called Bloomberg Keyboard Features. Redirecting this device providesthe specialized Bloomberg keys to the session.
Enabling the Bloomberg keyboard support only affects the specialized Bloomberg keys and the au-dio device. Because the ordinary keys and fingerprint reader are used in the same way as when thesupport is not enabled.
DPI scaling
Citrix Workspace app allows the operating system to control the session resolution.
You can apply high DPI in a session but the feature is disabled by default. Session scaling follows theoperating system resolution.
You can configure DPI scaling using the following options:
1. Group Policy Object (GPO) administrative template (per-machine configuration)2. Advanced Preferences (per-user configuration)
Limitations:
• Even with this feature enabled, a slight blur has been observed in the Desktop Viewer.• In a session, when you change the DPI settings and relaunch it, the size of the session windowmight not be appropriate. As a workaround, resize the session window.
To configure DPI scaling using GPO administrative template:
© 1999‒2022 Citrix Systems, Inc. All rights reserved. 111

Citrix Workspace app 2203.1 LTSR for Windows
1. Open the Citrix Workspace app Group Policy Object administrative template by runninggpedit.msc.
2. Under the Computer Configuration node, go to Administrative Templates> Citrix Compo-nents > Citrix Workspace > DPI
3. SelectHigh DPI policy.
4. Select from one of the following options:
a) Yes - Indicates that high DPI is applied in a session.b) No, use the native resolution - Indicates that the resolution is set by the operating system.
5. Click Apply and OK.
6. From the command line, run the gpupdate /force command to apply the changes.
Configure DPI scaling using the graphical user interface:
© 1999‒2022 Citrix Systems, Inc. All rights reserved. 112

Citrix Workspace app 2203.1 LTSR for Windows
Note:
You can hide all or part of the Advanced Preferences sheet. For more information, see AdvancedPreferences sheet.
1. Right-click Citrix Workspace app icon from the notification area.
2. Select Advanced Preferences and click DPI settings.
The DPI settings dialog appears.
3. Select one of the following options:
a) Yes - Indicates that high DPI is applied in a session.b) No, use the native resolution - Indicates that the Workspace app detects the DPI on the
VDA and applies it.c) Let the operating system scale the resolution - By default, this option is selected. It allows
the Windows to handle the DPI scaling. This option also means that the High DPI policy isset to disabled.
4. Click Save.
5. Restart the Citrix Workspace app session for the changes to take effect.
DPI scaling options
There are three possible settings for DPI scaling in the Citrix Workspace app - Scaled, Unscaled, andOperating system scaling. The use cases for the different settings are as follows.
Scaled:
© 1999‒2022 Citrix Systems, Inc. All rights reserved. 113

Citrix Workspace app 2203.1 LTSR for Windows
The scaled setting scales the resolutionon the VDA similarly toOperating systemscaling, however thissetting supportsmixedDPI scenarios. The scaled setting corresponds to theUI settingYes, or theHighDPI policy set to Enabled in the GPO policy. UI setting Yes works well for mixed DPI scenarios whenconnecting tomodernVDAsandallowsway toscale seamless sessions. Scalingmight causeblurrinessin the images, particularly in the case of text. There can be poor performance when connecting tolegacy VDAs (6.5, or configured for Legacy Graphics). Local App Access, RTOP, and other plug-ins thatuse screen positioning APIs might not be compatible with scaling. By design, seamless apps jumpsbetweenmonitors in this mode to maintain correct scaling.This setting is recommended for users onWindows 10 connecting tomodern VDAs. It supports mixedDPI without any additional impact on server resources.
Unscaled:
The unscaled setting sends the full resolution of all monitors in the session. These resolutions are un-scaled and can result in small text and icons in apps and desktops. The unscaled setting correspondsto the UI setting No and the HighDPI policy is set to Enabled in the GPO. UI setting No doesn’t causeany blurriness due to scaling, but can result in small text and icons. When connecting to a desktopsession, the DPI can be set within the VDA resulting in the desired scaling. However, such setting isnot possible on RDS desktops, or seamless applications. Enabling this setting causes sessions withhigher resolution which can impact server performance and scalability.This setting is recommended for desktop sessions requiring the best image quality, where the addi-tional server resources are acceptable. It can also be used in cases where the small text and icons arenot an issue for the user.
Operating system scaling:
Operating system scaling is the default and corresponds to the UI setting Let the operating systemscale the resolution. The High DPI policy set to Disabled in this scenario. Based on this setting, theWindows Operating system handles the DPI scaling for a session. The resolution on the VDA is scaledbased on the DPI, resulting in a smaller resolution than the client device. This works well for singlemonitor sessions, and is efficient when connecting to 6.5 VDAs, or VDAs configured for Legacy Graph-ics. Thismethoddoes not supportMixedDPI- allmonitorsmust have the sameDPI or the sessiondoesnot work. Scaling can cause blurriness in the images, particularly in the case of text. Theremight alsobe issues with cursor sizes on the Windows 10 Operating system.Citrix recommends this setting for users onWindows 7 endpoints, or those connecting to legacy VDAs.It can also be used on Windows 10 if there is no Mixed DPI.
Virtual display layout
This feature lets you define a virtual monitor layout for the remote desktop. You can also split a sin-gle client monitor virtually into up to eight monitors on the remote desktop. You can configure thevirtual monitors on the Monitor Layout tab in the Desktop Viewer. There, you can draw horizontal
© 1999‒2022 Citrix Systems, Inc. All rights reserved. 114

Citrix Workspace app 2203.1 LTSR for Windows
or vertical lines to separate the screen into virtual monitors. The screen is split according to specifiedpercentages of the client monitor resolution.
You can set a DPI for the virtual monitors that is used for DPI scaling or DPI matching. After applying avirtual monitor layout, resize or reconnect the session.
This configuration applies only to full-screen, single-monitor desktop sessions, and does not affectany published applications. This configuration applies to all subsequent connections from this client.
Generic client Input Method Editors (IME)Note:
If you’re using a Windows 10 Version 2004 operating system, you might face certain technicalissues when using the IME feature in a session. Those issues are the result of a third-party limita-tion. For more information, see the Microsoft Support article.
Configuring generic client IME using the command-line interface:
• To enable generic client IME, run the wfica32.exe /localime:on command from the CitrixWorkspace app installation folder C:\Program Files (x86)\Citrix\ICA Client.
• Todisablegeneric client IME, run thewfica32.exe /localime:off command fromtheCitrixWorkspace app installation folder C:\Program Files (x86)\Citrix\ICA Client.
Note:
You can use the command-line switch wfica32.exe /localime:on to enable both genericclient IME and keyboard layout synchronization.
© 1999‒2022 Citrix Systems, Inc. All rights reserved. 115

Citrix Workspace app 2203.1 LTSR for Windows
• To disable generic client IME, run the wfica32.exe /localgenericime:off commandfrom the Citrix Workspace app installation folder C:\Program Files (x86)\Citrix\ICAClient. This command does not affect keyboard layout synchronization settings.
If you have disabled generic client IME using the command-line interface, you can enable the featureagain by running the wfica32.exe /localgenericime:on command.
Toggle:
Citrix Workspace app supports toggle functionality for this feature. You can run the wfica32.exe/localgenericime:on command to enable or disable the feature. However, the keyboard layoutsynchronization settings take precedence over the toggle switch. If keyboard layout synchronizationis set toOff, toggling does not enable generic client IME.
Configure generic client IME using the graphical user interface:
Generic client IME requires VDA Version 7.13 or later.
Generic client IME feature can be enabled by enabling keyboard layout synchronization. For moreinformation, see Keyboard layout synchronization.
CitrixWorkspace appallows you to configuredifferent options touse generic client IME. You can selectfrom one these options based on your requirements and usage.
1. Right-click the CitrixWorkspace app icon in the notification area and selectConnectionCenter.
2. Select Preferences and Local IME.
© 1999‒2022 Citrix Systems, Inc. All rights reserved. 116

Citrix Workspace app 2203.1 LTSR for Windows
The following options are available to support different IMEmodes:
1. Enable Server IME – Disables local IME and only the languages set on the server can be used.2. Set Local IME toHighPerformancemode –Uses local IMEwith limitedbandwidth. This option
restricts the candidate window functionality.3. Set Local IME to Best Experience mode – Uses local IME with best user experience. This op-
tion consumes high bandwidth. By default, this option is selected when generic client IME isenabled.
The changes are applied only for the current session.
Enabling hotkey configuration using a registry editor:
When generic client IME is enabled, you can use the Shift+F4 hotkeys to select different IME modes.The different options for IMEmodes appear in the top-right corner of the session.
By default, the hotkey for generic client IME is disabled.
In the registry editor, navigate to HKEY_CURRENT_USER\SOFTWARE\Citrix\ICA Client\Engine\Lockdown Profiles\All Regions\Lockdown\Client Engine\Hot Key.
Select AllowHotKey and change the default value to 1.
You can use the Shift+F4 hotkeys to select different IMEmodes in a session.
© 1999‒2022 Citrix Systems, Inc. All rights reserved. 117

Citrix Workspace app 2203.1 LTSR for Windows
Thedifferent options for IMEmodes appear in the top-right corner of the sessionwhile switchingusingthese hotkey combinations.
Limitations:
• Generic client IME does not support UWP (UniversalWindows Platform) apps such as SearchUI,and the Edgebrowser of theWindows 10 operating system. As aworkaround, use the server IMEinstead.
• Generic client IME is not supported on Internet Explorer Version 11 in Protected Mode. As aworkaround, you can disable Protected Mode by using Internet Options. To disable, click Se-curity and clear Enable Protected Mode.
H.265 video encoding
Citrix Workspace app supports the use of the H.265 video codec for hardware acceleration of remotegraphics and videos. H.265 video codec must be supported and enabled on both the VDA and CitrixWorkspace app. If the GPU on the endpoint doesn’t support H.265 decoding using the DXVA interface,the H265 Decoding for graphics policy setting is ignored and the session falls back H.264 video codec.
Prerequisites:
1. VDA 7.16 and later.2. Enable theOptimize for 3D graphics workload policy on the VDA.3. Enable the Use hardware encoding for video codec policy on the VDA.
Note:
H.265 encoding is supported only on the NVIDIA GPU.
In Citrix Workspace app for Windows, this feature is set to Disabled by default.
Configuring Citrix Workspace app to use H.265 video encoding using Citrix Group Policy Object(GPO) administrative template:
1. Open the Citrix Workspace app Group Policy Object administrative template by runninggpedit.msc.
© 1999‒2022 Citrix Systems, Inc. All rights reserved. 118

Citrix Workspace app 2203.1 LTSR for Windows
2. Under theComputerConfigurationnode, go toAdministrativeTemplates>CitrixWorkspace> User Experience.
3. Select theH265 Decoding for graphics policy.4. Select Enabled.5. Click Apply andOK.
Configuring H.265 video encoding using Registry editor:
Enabling H.265 video encoding on a non-domain joined network on a 32-bit operating system:
1. Launch the Registry Editor using regedit on the Run command.2. Navigate to HKEY_LOCAL_MACHINE\SOFTWARE\Policies\Citrix\ICA Client\
Graphics Engine.3. Create a DWORD key by name EnableH265 and set the value of the key to 1.
Enabling H.265 video encoding on a non-domain joined network on a 64-bit operating system:
1. Launch the Registry Editor using regedit on the Run command.2. Navigate to HKEY_LOCAL_MACHINE\SOFTWARE\Wow6432Node\Policies\Citrix\ICA
Client\Graphics Engine.3. Create a DWORD key by name EnableH265 and set the value of the key to 1.
Restart the session for the changes to take effect.
Note:
• If the Hardware acceleration for Graphics policy is disabled in the Citrix Workspace appforWindowsGroupPolicyObject administrative template, theH265Decoding forgraphicspolicy settings are ignored and the feature does not work.
• Run theHDXMonitor 3.x tool to identify if theH.265 video encoder is enabledwithin the ses-sions. For more information about HDX Monitor 3.x tool, see the Knowledge Center articleCTX135817.
Keyboard layout and language bar
Keyboard layoutNote:
You can hide all or part of the Advanced Preferences sheet available from the Citrix Workspaceapp icon in the notification area. For more information, see Advanced Preferences sheet.
Keyboard layout synchronization enables you to switch among preferred keyboard layouts on theclient device. This feature is disabled by default. The keyboard layout synchronization allows theclient keyboard layout to automatically synchronize to the virtual apps and desktops session.
To configure keyboard layout synchronization using the GPO administrative template:
© 1999‒2022 Citrix Systems, Inc. All rights reserved. 119

Citrix Workspace app 2203.1 LTSR for Windows
Note:
The GPO configuration takes precedence over the StoreFront and the GUI configurations.
1. Open the Citrix Workspace app Group Policy Object administrative template by runninggpedit.msc.
2. Under the Computer Configuration or User Configuration node, go to Administrative Tem-plates > Administrative Templates (ADM) > Citrix Components > Citrix Workspace > Userexperience.
3. Select the Keyboard settings policy.
4. Select Enabled and select one the following options:• Allow dynamic sync - From the drop-down menu, select Yes or No. This option synchro-nizes the client keyboard layout to the serverwhen you change the client keyboard layout.When selected, this option also enables the client IME for East Asian languages.Selecting Yes for this option overrides the following two options.
• Sync mode on session launch - From the drop-down menu, select one of the followingoptions:– Synconlyonce -whensession launches - Synchronizes the client keyboard layout tothe server when the session launches. Any changes you make to the client keyboardlayout during the session do not take effect immediately. To apply the changes, log
© 1999‒2022 Citrix Systems, Inc. All rights reserved. 120

Citrix Workspace app 2203.1 LTSR for Windows
off and log back on.– Don’t sync - Indicates that the client uses the keyboard layout present on the server.
5. Select Apply andOK.
To configure keyboard layout synchronization using the graphical user interface:
1. From the Citrix Workspace app icon in the notification area icon, select Advanced Preferences> Keyboard and Language bar.
The Keyboard and Language bar dialog appears.
2. Select from one of the following options:
• Sync only once - when the session launches - Indicates that the keyboard layout issynced from the VDA only once at the session launch.
• Allowdynamic sync - Indicates that the keyboard layout is synced dynamically to the VDAwhen the client keyboard is changed in a session.
• Don’t sync - Indicates that the client uses the keyboard layout present on the server.
3. Click Save.
© 1999‒2022 Citrix Systems, Inc. All rights reserved. 121

Citrix Workspace app 2203.1 LTSR for Windows
To configure keyboard layout synchronization using CLI:
Run the following command from the Citrix Workspace app for Windows installation folder.
Typically, Citrix Workspace app installation folder is at C:\Program files (x86)\Citrix\ICAClient.
• To enable: wfica32:exe /localime:on• To disable: wfica32:exe /localime:off
Using theclientkeyboard layoutoptionactivates theClient IME (InputMethodEditor). If usersworkingin Japanese, Chinese, or Korean prefer to use the Server IME, they must disable the client keyboardlayout option by selectingNo, or runningwfica32:exe /localime:off. The session reverts to thekeyboard layout provided by the remote server when they connect to the next session.
Sometimes, switching the client keyboard layout does not take effect in an active session. To resolvethis issue, log off from Citrix Workspace app and login again.
Configuring keyboard sync onWindows VDA
Note:
The followingprocedure applies only onWindows server 2016and later. OnWindowsServer 2012R2 and earlier, the keyboard sync feature is enabled by default.
1. Launch the Registry editor and navigate to HKEY_LOCAL_MACHINE\Software\Citrix\IcaIme.
2. Create the DWORD entry DisableKeyboardSync and set its value to 0.1 disables the keyboard layout sync feature.
3. Restart the session for the changes to take effect.
After youenable the keyboard layout onboth theVDAandCitrixWorkspace app, the followingwindowappears when you switch keyboard layouts.
This window indicates that the session keyboard layout is being switched to the client keyboard lay-out.
Configuring keyboard sync on Linux VDA
Launch the command prompt and run the following command:
/opt/Citrix/VDA/bin/ctxreg update -k ”HKEY_LOCAL_MACHINE\System\CurrentControlSet\Control\Citrix\LanguageBar”-v ”SyncKeyboardLayout”-d ”0x00000001”
Restart the VDA for the changes to take effect.
© 1999‒2022 Citrix Systems, Inc. All rights reserved. 122

Citrix Workspace app 2203.1 LTSR for Windows
For more information about the keyboard layout synchronization feature on Linux VDA, see Dynamickeyboard layout synchronization.
Hide the keyboard layout switch notification dialog:
The keyboard layout change notification dialog lets you know that the VDA session is switching thekeyboard layout. The keyboard layout switch needs approximately two seconds to switch. When youhide the notification dialog, wait for some time before you start typing to avoid incorrect characterinput.
Warning
Editing the registry incorrectly can cause serious problems that might require you to reinstallyour operating system. Citrix cannot guarantee that problems resulting from the incorrect useof the Registry Editor can be solved. Use the Registry Editor at your own risk. Be sure to back upthe registry before you edit it.
Hide the keyboard layout switch notification dialog using the Registry editor:
1. Launch the Registry editor and navigate to HKEY_LOCAL_MACHINE\Software\Citrix\IcaIme.
2. Create a String Value key by nameHideNotificationWindow.3. Set the DWORD value to 1.4. ClickOK.5. Restart the session for the changes to take effect.
Limitations:
• Remote applications which run with elevated privilege (for example, right-click an applicationicon > Run as administrator) cannot be synchronized with the client keyboard layout. As aworkaround, manually change the keyboard layout on the server side (VDA) or disable UAC.
• If the user changes the keyboard layout on the client to a layout that isn’t supported on theserver, the synchronization feature of the keyboard layout is disabled for security reasons. Anunrecognized keyboard layout is treated as a potential security threat. To restore the keyboardlayout synchronization feature, log off and relog in to the session.
• In an RDP session, you cannot change the keyboard layout using Alt + Shift shortcuts. As aworkaround, use the language bar in the RDP session to switch the keyboard layout.
Language bar
The language bar displays the preferred input language in a session. The language bar appears in asession by default.
© 1999‒2022 Citrix Systems, Inc. All rights reserved. 123

Citrix Workspace app 2203.1 LTSR for Windows
Note:
This feature is available in sessions running on VDA 7.17 and later.
Configure the language bar using the GPO administrative template:
The language bar displays the preferred input language in an application session.
1. Open the Citrix Workspace app Group Policy Object administrative template by runninggpedit.msc.
2. Under the Computer Configuration or User Configuration node, go to Administrative Tem-plates > Administrative Templates (ADM) > Citrix Components > Citrix Workspace > Userexperience.
3. Select the Language bar policy.4. Select Enabled and select one of the following options:
• Yes – Indicates that the language bar is displayed in an application session.• No, hide the language bar – Indicates that the language bar is hidden in an applicationsession.
5. Click Apply andOK.
Configure language bar using the graphical user interface:
1. Right-click the Citrix Workspace app icon from the notification area and select Advanced Pref-erences.
2. Select Keyboard and Language bar.
3. Select the Language bar tab.
4. Select from one of the following options:
a) Yes - Indicates that the language bar is displayed in a session.b) No, hide the language bar - Indicates that the language bar is hidden in a session.
5. Click Save.
The setting changes take effect immediately.
© 1999‒2022 Citrix Systems, Inc. All rights reserved. 124

Citrix Workspace app 2203.1 LTSR for Windows
Note:
• You can change the settings in an active session.• The remote language bar does not appear in a session if there is only one input language.
Hide the language bar tab from the Advanced Preferences sheet:
You can hide the language bar tab from the Advanced Preferences sheet by using the registry.
1. Launch the registry editor.2. Navigate toHKEY_LOCAL_MACHINE\SOFTWARE\Citrix\ICA Client\Engine\Configuration
\Advanced\Modules\LocalIME.3. Create aDWORDvalue key,ToggleOffLanguageBarFeature, and set it to 1 to hide the Language
bar option from the Advanced Preferences sheet.
USB support
USB support enables you to interact with a wide range of USB devices when connected to a CitrixVirtual Apps and Desktops and Citrix DaaS. You can plug USB devices into their computers and thedevices are remote to their virtual desktop. USB devices available for remoting include flash drives,smartphones, PDAs, printers, scanners, MP3 players, security devices, and tablets. Desktop Viewer
© 1999‒2022 Citrix Systems, Inc. All rights reserved. 125

Citrix Workspace app 2203.1 LTSR for Windows
users can control whether USBdevices are available on the Citrix Virtual Apps andDesktops and CitrixDaaS using a preference in the toolbar.
Isochronous features in USB devices, such as webcams, microphones, speakers, and headsets aresupported in typical low latency or high-speed LAN environments. Such environment allows thesedevices to interact with packages, like Microsoft Office Communicator and Skype.
The following types of device are supported directly in a virtual apps and desktops session, and sodoes not use USB support:
• Keyboards• Mice• Smart cards
Specialist USB devices (for example, Bloomberg keyboards and 3-D mice) can be configured to useUSB support. For information on configuring Bloomberg keyboards, seeConfigure Bloomberg keyboards.
For information on configuring policy rules for other specialist USB devices, see Knowledge CenterarticleCTX122615.
By default, certain types of USB devices are not supported for remoting through Citrix Virtual Appsand Desktops and Citrix DaaS. For example, a user might have a NIC attached to the system board byinternal USB. Remoting this device would not be appropriate. The following types of USB device arenot supported by default in a virtual apps and desktops session:
• Bluetooth dongles• Integrated NIC• USB hubs• USB graphics adapters
USB devices connected to a hub can be remote, but the hub itself cannot be remote.
The following types of USB device are not supported by default for use in a virtual apps session:
• Bluetooth dongles• Integrated NIC• USB hubs• USB graphics adapters• Audio devices• Mass storage devices
HowUSB support works:
When a user plugs in a USB device, it is checked against the USB policy, and, if allowed, remoted tothe virtual desktop. If the default policy denies a device, it is available only to the local desktop.
© 1999‒2022 Citrix Systems, Inc. All rights reserved. 126

Citrix Workspace app 2203.1 LTSR for Windows
When a user plugs in a USB device, a notification appears to inform the user about a new device. Theuser can select which USB devices must be remoted to the virtual desktop each time they connect.Alternatively, theuser canconfigureUSBsupport so thatallUSBdevicesplugged inbothbeforeand/orduring a session is automatically remoted to the virtual desktop that is in focus.
Mass storage devices
For mass storage devices only, in addition to USB support, remote access is available through clientdrivemapping. Youcanconfigure this through theCitrixWorkspaceapp forWindowspolicyRemotingclient devices > Client drive mapping. When you apply this policy, the drives on the user deviceautomatically map to drive letters on the virtual desktop when users log on. The drives are displayedas shared folders with mapped drive letters.
The main differences between the two types of remoting policy are:
Feature Client drive mapping USB support
Enabled by default Yes No
Read-only accessconfigurable
Yes No
Safe to remove device duringa session
No Yes, if the user clicks SafelyRemove Hardware in thenotification area
If you enable bothGeneric USBand the client drive-mapping policies and insert amass storage devicebefore a session starts, it is redirected using client drive mapping first, before being considered forredirection through USB support. If it is inserted after a session has started, it will be considered forredirection using USB support before client drive mapping.
USB device classes allowed by default:
Default USB policy rules allow different classes of USB device.
Although theyareon this list, someclassesareonly available for remoting in virtual appsanddesktopssessions after additional configuration. Such USB device classes are as follows.
• Audio (Class 01)- Includes audio input devices (microphones), audio output devices, and MIDIcontrollers. Modern audio devices generally use isochronous transfers that XenDesktop 4 orlater supports. Audio (Class01) is not applicable to Citrix Virtual Apps because these devices arenot available for remoting in Citrix Virtual Apps using USB support.
© 1999‒2022 Citrix Systems, Inc. All rights reserved. 127

Citrix Workspace app 2203.1 LTSR for Windows
Note:
Some specialty devices (for example, VOIP phones) require additional configuration. For moreinformation, see Knowledge Center article CTX123015.
• Physical Interface Devices (Class 05)- These devices are similar to Human Interface Devices(HIDs), but generally provide “real-time” input or feedbackand include force feedback joysticks,motion platforms, and force feedback endoskeletons.
• Still Imaging (Class 06)- Includes digital cameras and scanners. Digital cameras often supportthe still imaging class which uses the Picture Transfer Protocol (PTP) or Media Transfer Protocol(MTP) to transfer images to a computer or other peripheral. Camerasmight also appear asmassstorage devices. It might be also possible to configure a camera to use either class, through thesetupmenus provided by the camera itself.
Note:
If a camera appears as a mass storage device, client drive mapping is used and USB support isnot required.
• Printers (Class 07)- In general most printers are included in this class, although some usevendor-specific protocols (class ff). Multi-function printers might have an internal hub or becomposite devices. In both cases the printing element generally uses the Printers class and thescanning or fax element uses another class; for example, Still Imaging.
Printers normally work appropriately without USB support.
Note
This class of device (in particular printerswith scanning functions) requires additional con-figuration. For instructions, see Knowledge Center article CTX123015.
• Mass Storage (Class 08)- The most commonmass storage devices are USB flash drives; othersinclude USB-attached hard drives, CD/DVD drives, and SD/MMC card readers. There are a widevariety of deviceswith internal storage that also present amass storage interface; these includemedia players, digital cameras, and mobile phones. Mass Storage (Class 08) is not applicableto Citrix Virtual Apps because these devices are not available for remoting in Citrix Virtual Appsusing USB support. Known subclasses include:
– 01 Limited flash devices– 02 Typically CD/DVD devices (ATAPI/MMC-2)– 03 Typically tape devices (QIC-157)– 04 Typically floppy disk drives (UFI)– 05 Typically floppy disk drives (SFF-8070i)– 06 Most mass storage devices use this variant of SCSI
© 1999‒2022 Citrix Systems, Inc. All rights reserved. 128

Citrix Workspace app 2203.1 LTSR for Windows
Mass storage devices can often be accessed through client drive mapping, and so USB supportis not required.
• Content Security (Class 0d)- Content security devices enforce content protection, typically forlicensing or digital rights management. This class includes dongles.
• Video (Class 0e)- The video class cover devices that are used to manipulate video or video-relatedmaterial. Devices, such aswebcams, digital camcorders, analog video converters, sometelevision tuners, and some digital cameras that support video streaming.
Important
Most video streaming devices use isochronous transfers that XenDesktop 4 or later supports.Some video devices (for example webcams with motion detection) require additional configu-ration. For instruction, see Knowledge Center article CTX123015.
• Personal Healthcare (Class 0f)- These devices include personal healthcare devices such asblood pressure sensors, heart rate monitors, pedometers, pill monitors, and spirometry.
• Application and Vendor Specific (Classes fe and ff)- Many devices use vendor-specific proto-cols or protocols not standardized by the USB consortium, and such devices usually appear asvendor-specific (class ff).
USB devices classes denied by default
Default USB policy rules don’t allow the following different classes of USB device:
• Communications and CDC Control (Classes 02 and 0a). The default USB policy doesn’t allowthese devices, because one of the devicesmight be providing the connection to the virtual desk-top itself.
• Human Interface Devices (Class 03). Includes a wide variety of both input and output devices.Typical Human Interface Devices (HIDs) are keyboards, mice, pointing devices, graphic tablets,sensors, game controllers, buttons, and control functions.
Subclass 01 is known as the “boot interface” class and is used for keyboards andmice.
The default USB policy doesn’t allow USB keyboards (class 03, subclass 01, protocol 1), or USBmice (class 03, subclass 01, protocol 2). The reason is most keyboards and mice are handledappropriately without USB support. Also, it is normally necessary to use these devices locallyas well remotely when you connect to a virtual desktop.
• USB Hubs (Class 09). USB hubs allow extra devices to be connected to the local computer. It isnot necessary to access these devices remotely.
• Smart Card (Class 0b). Smart card readers include contactless and contact smart card readers,and also USB tokens with an embedded smart card-equivalent chip.
© 1999‒2022 Citrix Systems, Inc. All rights reserved. 129

Citrix Workspace app 2203.1 LTSR for Windows
Smart card readers are accessed using smart card remoting and do not require USB support.
• WirelessController (Class e0). Someof thesedevicesmightbeprovidingcritical networkaccess,or connecting critical peripherals, such as Bluetooth keyboards or mice.
ThedefaultUSBpolicydoesnotallow thesedevices. However, theremightbeparticulardevicesto which it is appropriate to provide access using USB support.
• Miscellaneous network devices (Class ef, subclass 04)- Some of these devices might be pro-viding critical network access. The default USB policy does not allow these devices. However,theremight beparticular devices towhich it is appropriate toprovide access usingUSBsupport.
Update the list of USB devices available for remoting
Edit the Citrix Workspace for Windows template file to update the range of USB devices available forremoting to desktops. The update allows you to make changes to the Citrix Workspace for Windowsusing Group Policy. The file is in the following installed folder:
\C:\Program Files\Citrix\ICA Client\Configuration\en
Alternatively, you can edit the registry on each user device, adding the following registry key:
HKEY_LOCAL_MACHINE\SOFTWARE\Policies\Citrix\ICAClient\GenericUSBType=StringName=”DeviceRules”Value=
Important
Editing the Registry incorrectly can cause serious problems that might require you to reinstallyour operating system. Citrix cannot guarantee that problems resulting from the incorrect useof the Registry Editor can be solved. Use the Registry Editor at your own risk. Be sure to back upthe registry before you edit it.
The product default rules are stored in:
HKEY_LOCAL_MACHINE\SOFTWARE\Citrix\ICAClient\GenericUSBType=MultiSzName=”DeviceRules”Value=
Do not edit the product default rules.
For more information about USB devices policy settings, see USB devices policy settings in Citrix Vir-tual Apps and Desktops documentation.
Configuring USB audioNote:
• When you upgrade or install Citrix Workspace app for Windows for the first time, add thelatest template files to the local GPO. For more information on adding template files to the
© 1999‒2022 Citrix Systems, Inc. All rights reserved. 130

Citrix Workspace app 2203.1 LTSR for Windows
local GPO, see Group Policy Object administrative template. For upgrade, the existing set-tings are retained while importing the latest files.
• This feature is available only on Citrix Virtual Apps server.
To configure USB audio devices:
1. Open the Citrix Workspace app Group Policy Object administrative template by runninggpedit.msc.
2. Under the Computer Configuration node, go to Administrative Templates > Classic Admin-istrative Templates (ADM) > Citrix Components > Citrix Workspace > User experience, andselect Audio through Generic USB Redirection.
3. Edit the settings.4. Click Apply andOK.5. Open the cmd prompt in administrator mode.6. Run the following command
gpupdate /force.
vPrefer launch
In earlier releases, you can specify that the instance of an app installed on the VDA (referred to as localinstance in this document)must be launched in preference to the published application by setting theKEYWORDS:prefer=”application” attribute in Citrix Studio.
Startingwith Version 4.11, in a double-hop scenario (where CitrixWorkspace app is running on the VDAthat hosts your session), you can now control whether Citrix Workspace app launches:
• the local instance of an application installed on the VDA (if available as a local app) or• a hosted instance of the application.
vPrefer is available on StoreFront Version 3.14 and Citrix Virtual Desktops 7.17 and later.
When you launch the application, Citrix Workspace app reads the resource data present on the Store-Front server and applies the settings based on the vprefer flag at the time of enumeration. CitrixWorkspace app searches for the application’s installation path in the Windows registry of the VDA. Ifpresent, launches the local instance of the application. Otherwise, a hosted instance of the applica-tion is launched.If you launch an application that is not on the VDA, Citrix Workspace app launches the hosted applica-tion. For more information on how StoreFront handled the local launch, see Control of local applica-tion launch on published desktops in the Citrix Virtual Apps and Desktops documentation.
If you do not want the local instance of the application to be launched on the VDA, set the Lo-calLaunchDisabled to True using the PowerShell on the Delivery Controller. For more information,see the Citrix Virtual Apps and Desktops documentation.
© 1999‒2022 Citrix Systems, Inc. All rights reserved. 131

Citrix Workspace app 2203.1 LTSR for Windows
This feature helps to launch applications faster, thereby providing a better user experience. You canconfigure it by using the Group Policy Object (GPO) administrative template. By default, vPrefer isenabled only in a double-hop scenario.
Note:
When you upgrade or install Citrix Workspace app for the first time, add the latest template filesto the local GPO. For more information on adding template files to the local GPO, see GroupPolicy Object administrative template. For an upgrade, the existing settings are retained whileimporting the latest files.
1. Open the Citrix Workspace app GPO administrative template by running gpedit.msc.2. Under theComputerConfigurationnode, go toAdministrativeTemplate>CitrixComponent
> Citrix Workspace > SelfService.3. Select the vPrefer policy.4. Select Enabled.5. From the Allow apps drop-down list, select one of the following options:
• Allow all apps: This option launches the local instance of all apps on the VDA. CitrixWorkspace app searches for the installed application, including the native Windowsapps such as Notepad, Calculator, WordPad, Command prompt. It then launches theapplication on the VDA instead of the hosted app.
• Allow installed apps: This option launches the local instance of the installed app on theVDA. If the app is not installed on the VDA, it launches the hosted app. By default, Allowinstalled apps is selectedwhen the vPrefer policy is set to Enabled. This option excludesthe native Windows operating system applications like Notepad, Calculator, and so on.
• Allow network apps: This option launches the instance of an app that is published on ashared network.
6. Click Apply andOK.7. Restart the session for the changes to take effect.
Limitation:
• Workspace for web does not support this feature.
Workspace configuration
Citrix Workspace app for Windows supports configuring Workspace for subscribers, whomight be us-ing one or more services available from Citrix Cloud.
Citrix Workspace app intelligently displays only the specific workspace resources to which users areentitled. All your digital workspace resources available in Citrix Workspace app are powered by theCitrix Cloud Workspace experience service.
A workspace is part of a digital workspace solution that enables IT to securely deliver access to apps
© 1999‒2022 Citrix Systems, Inc. All rights reserved. 132

Citrix Workspace app 2203.1 LTSR for Windows
from any device.This screenshot is an example of what the workspace experience looks like to your subscribers. Thisinterface is evolving and might look different to what your subscribers are working with today. Forexample, it might say “StoreFront” at the top of the page instead of “Workspace”.
Content Collaboration Service integration
This release introduces integration of Citrix Content Collaboration Service with Citrix Workspace app.Citrix ContentCollaborationenables you toeasily and securely exchangedocuments, send largedocu-mentsbyemail, securelyhandledocument transfers to thirdparties, andaccessacollaborationspace.Citrix Content Collaboration provides many ways to work, including a web-based interface, mobileclients, desktop apps, and integration with Microsoft Outlook and Gmail.
You can access Citrix Content Collaboration functionality from the Citrix Workspace app using theFiles tab displayed within Citrix Workspace app. You can view the Files tab only if Content Collabora-tion Service is enabled in the Workspace configuration from the Citrix Cloud console.
Note:
Citrix Content Collaboration integration in Citrix Workspace app isn’t supported on WindowsServer 2012 and 2016 due to operating system’s security option.
The following image displays example contents of the Files tab of the new Citrix Workspace app:
© 1999‒2022 Citrix Systems, Inc. All rights reserved. 133

Citrix Workspace app 2203.1 LTSR for Windows
Limitations:
• Resetting Citrix Workspace app does not cause Citrix Content Collaboration to log off.
• Switching stores in Citrix Workspace app does not cause Citrix Content Collaboration to log off.
Configure download location for Citrix Files using the Registry editor:
1. Launch the Registry editor and navigate to HKEY_CURRENT_USER\Software\Citrix\Dazzle\.
2. Create a String Value key by name DownloadPreference.3. Copy and paste the preferred download path for Citrix Files to the Value column.4. If you want a prompt for every download, set the Value column to *.
For information about configuring Citrix Files download location using theAdvancedPreferencesUI,see Configuring download location using Advanced Preferences in Citrix Workspace app for WindowsHelp documentation.
© 1999‒2022 Citrix Systems, Inc. All rights reserved. 134

Citrix Workspace app 2203.1 LTSR for Windows
SaaS apps
Secure access to SaaS applications provides a unified user experience that delivers published SaaSapplications to the users. SaaS apps are availablewith single sign-on. Administrators cannowprotectthe organization’s network and end-user devices from malware and data leaks. Administrators canachieve this by filtering access to specific websites and website categories.
CitrixWorkspace app forWindows support the use of SaaS apps using theCitrix Secure Private Access.The service enables administrators to provide a cohesive experience, integrating single sign-on, andcontent inspection.
Delivering SaaS apps from the cloud has the following benefits:
• Simple configuration – Easy to operate, update, and consume.• Single sign-on – Hassle-free log on with single sign-on.• Standard template for different apps – Template-based configuration of popular.
CitrixWorkspace app launches the SaaS apps onCitrixWorkspaceBrowser. For information, seeCitrixWorkspace Browser documentation.
Limitations:
1. When you launch a published app with the print option enabled and download disabled, andgive a print commandon a launched app, you can still save the PDF. As aworkaround, to strictlydisable the download functionality, disable the print option.
2. Videos embedded in an appmight not work.
For more information about Workspace configuration, see Workspace configuration in Citrix Cloud.
PDF printing
CitrixWorkspace app forWindows supports PDF printing in a session. The Citrix PDFUniversal Printerdriver allows you to print documents that are launched using hosted applications and desktops run-ning on Citrix Virtual Apps and Desktops and Citrix DaaS.
When you select the Citrix PDF Printer option from the Print dialog, the printer driver converts thefile to a PDF and transfers the PDF to the local device. The PDF is then launched using the default PDFviewer for viewing and prints from a locally attached printer.
Citrix recommends the Google Chrome browser or Adobe Acrobat Reader for PDF viewing.
You can enable Citrix PDF printing using Citrix Studio on the Delivery Controller.
Prerequisites:
• Citrix Workspace app Version 1808 or later.• Citrix Virtual Apps and Desktops Version 7 1808 or later.• At least one PDF viewer must be installed on your computer.
© 1999‒2022 Citrix Systems, Inc. All rights reserved. 135

Citrix Workspace app 2203.1 LTSR for Windows
To enable PDF printing:
1. On the Delivery Controller, use the Citrix Studio, to select the Policy node in the left pane. Youcan either create a policy or edit an existing policy.
2. Set the Auto-create PDF Universal Printer policy to Enabled.
Restart the Citrix Workspace app session for the changes to take effect.
Limitation:
• PDF viewing and printing aren’t supported on the Microsoft Edge browser.
Expanded tablet mode in Windows 10 using Windows Continuum
Windows Continuum is a Windows 10 feature that adapts to the way the client device is used. CitrixWorkspace app for Windows Version 4.10 and later supports Windows Continuum, including dynamicchange of modes.
For touch-enabled devices, the Windows 10 VDA starts in tablet mode when there’s no keyboard ormouse attached. It starts in desktop mode when either a keyboard or a mouse or both are attached.Detaching or attaching the keyboard on any client device or the screen on a 2-in-1 device like a SurfacePro toggles between tablet and desktop modes. For more information, see Tablet mode for touch-screen devices in Citrix Virtual Apps and Desktops documentation.
On a touch-enabled client device, the Windows 10 VDA detects the presence of a keyboard or mousewhen you connect or reconnect to a session. It also detects when you attach or detach a keyboardor mouse during the session. This feature is enabled by default on the VDA. To disable the feature,modify the Tablet mode toggle policy using Citrix Studio.
Tablet mode offers a user interface that is better suited to touchscreens:
• Slightly larger buttons.• The Start screen and all the apps you start open in a full screen.• The taskbar includes a Back button.• Icons are removed from the taskbar.
Desktopmodeoffers the traditional user interfacewhere you interact in the samemanner as aPCwitha keyboard andmouse.
Note:
Workspace for web doesn’t support the Windows Continuum feature.
Citrix Analytics
Citrix Workspace app is instrumented to securely transmit logs to Citrix Analytics. The logs are ana-lyzed and stored on Citrix Analytics servers when enabled. For more information about Citrix Analyt-
© 1999‒2022 Citrix Systems, Inc. All rights reserved. 136

Citrix Workspace app 2203.1 LTSR for Windows
ics, see Citrix Analytics.
Relativemouse
The relative mouse feature determines how far the mouse has moved since the last frame within awindow or screen.The relativemouse uses the pixel delta between themousemovements. When you change, for exam-ple, the direction of the camera using mouse controls, the feature is efficient. Apps also often hidethe mouse cursor because the position of the cursor relative to the screen coordinates isn’t relevant,whenmanipulating a 3-D object or scene.
Relativemouse support provides an option to interpret themouse position in a relative rather than anabsolute manner. The interpretation is required for applications that demand relative mouse inputrather than absolute.
You can configure the feature both on a per-user and a per-session basis, which gives more granularcontrol on the feature availability.
Note
This feature can be applied in a published desktop session only.
Configuring the feature using the Registry Editor or the default.ica file allows the setting to be persis-tent even after the session is terminated.
Configuring relativemouse using the Registry editor
To configure the feature, set the following registry keys as applicable and then restart the session forthe changes to take effect:
Tomake the feature available on a per-session basis:HKEY_LOCAL_MACHINE\SOFTWARE\Policies\Citrix\ICA Client\Engine\LockdownProfiles\All Regions\Lockdown\Virtual Channels\RelativeMouse
Tomake the feature available on a per-user basis:HKEY_CURRENT_USER\Software\Policies\Citrix\ICA Client\Engine\LockdownProfiles\All Regions\Lockdown\Virtual Channels\RelativeMouse
• Name: RelativeMouse• Type: REG_SZ• Value: True
Note:
• The values set in the Registry editor take precedence over the ICA file settings.• The values set in HKEY_LOCAL_MACHINE and HKEY_CURRENT_USER must be the same.
© 1999‒2022 Citrix Systems, Inc. All rights reserved. 137

Citrix Workspace app 2203.1 LTSR for Windows
Different values might cause conflicts.
Configuring the relativemouse using the default.ica file
1. Open the default.ica file typically at C:\inetpub\wwwroot\Citrix\<site name>\conf\default.ica, where sitename is the name specified for the site while creating. For StoreFrontcustomers, the default.ica file is typically at C:\inetpub\wwwroot\Citrix\<Storename>\App_Data\default.ica, where storename is the name set for the store when created.
2. Add a key by name RelativeMouse in the WFClient section. Set its value to the same configura-tion as the JSON object.
3. Set the value as required:• true – To enable relative mouse• false – To disable relative mouse
4. Restart the session for the changes to take effect.
Note:
The values set in the Registry editor take precedence over the ICA file settings.
Enabling relativemouse from the Desktop Viewer
1. Log on to Citrix Workspace app.
2. Launch a published desktop session.
3. From the Desktop Viewer toolbar, select Preferences.
The Citrix Workspace - Preferences window appears.
4. Select Connections.
5. Under Relative Mouse settings, enable Use relativemouse.
6. Click Apply andOK.
Note:
Configuring the relative mouse from the Desktop Viewer applies the feature to per-session only.
Hardware decoding
When using Citrix Workspace app (with HDX engine 14.4), the GPU can be used for H.264 decodingwherever it’s available at the client. The API layer used for GPUdecoding is DirectX VideoAcceleration.
To enable hardware decoding using Citrix Workspace app Group Policy Object administrativetemplate:
© 1999‒2022 Citrix Systems, Inc. All rights reserved. 138

Citrix Workspace app 2203.1 LTSR for Windows
1. Open the Citrix Workspace app Group Policy Object administrative template by runninggpedit.msc.
2. Under theComputerConfigurationnode, go toAdministrativeTemplates>CitrixWorkspace>User Experience.
3. SelectHardware Acceleration for graphics.4. Select Enabled and click Apply andOK.
To validate if the policy is set and hardware acceleration is used for an active ICA session, check thefollowing registry entries:
Registry Path: HKEY_CURRENT_USER\SOFTWARE\Citrix\ICA Client\CEIP\Data\GfxRender.
Tip
The value forGraphics_GfxRender_Decoder andGraphics_GfxRender_Renderermust be 2. If
© 1999‒2022 Citrix Systems, Inc. All rights reserved. 139

Citrix Workspace app 2203.1 LTSR for Windows
the value is 1, that means CPU-based decoding is being used.
When using the hardware decoding feature, consider the following limitations:
• If the client has two GPUs and if one of themonitors is active on the second GPU, CPU decodingis used.
• When connecting to a Citrix Virtual Apps server running on Windows Server 2008 R2, don’t usehardware decoding on the user’s Windows device. If enabled, issues like slow performancewhile highlighting text and flickering issues are seen.
Microphone input
Citrix Workspace app supports multiple client-side microphone inputs. You can use locally installedmicrophones for:
• Real-time activities, such as softphone calls and Web conferences.• Hosted recording applications, such as dictation programs.• Video and audio recordings.
CitrixWorkspace appusers can selectwhether to usemicrophones attached to their device using Con-nection Center. Citrix Virtual Apps and Desktops and Citrix DaaS users can also use the Citrix VirtualApps and Desktops viewer Preferences to disable their microphones and webcams.
Client drive-mapping
Client drive mapping supports the transfer of data between the host and the client as a stream. Thefile transfer adapts to the changing network throughput conditions. It also uses any available extrabandwidth to scale up the data transfer rate.
By default, this feature is enabled.
To disable this feature, set the following registry key and then restart the server:
Path: HKEY_LOCAL_MACHINE\System\Currentcontrolset\services\picadm\ParametersName: DisableFullStreamWriteType: REG_DWORDValue:0x01 - disables0 or delete - enables
Multi-monitor support
You can use up to eight monitors with Citrix Workspace app for Windows.
© 1999‒2022 Citrix Systems, Inc. All rights reserved. 140

Citrix Workspace app 2203.1 LTSR for Windows
Eachmonitor in amultiplemonitor configurationhas its own resolutiondesignedby itsmanufacturer.Monitors can have different resolutions and orientations during sessions.
Sessions can spanmultiple monitors in two ways:
• Full screen mode, with multiple monitors shown inside the session; applications snap to moni-tors as they would locally.
Citrix Virtual Apps and Desktops and Citrix DaaS: To display the Desktop Viewer windowacross any rectangular subset ofmonitors, resize thewindow across any part of thosemonitorsand clickMaximize.
• Windowed mode, with one single monitor image for the session, applications do not snap toindividual monitors.
Citrix Virtual Apps and Desktops and Citrix DaaS:When any desktop in the same assignment (for-merly “desktop group”) is launched then, the window setting is preserved and the desktop is dis-played across the samemonitors. Multiple virtual desktops can be displayed on one device providedthe monitor arrangement is rectangular. If the primary monitor on the device is used by the virtualapps and desktops session, it becomes the primary monitor in the session. Otherwise, the numeri-cally lowest monitor in the session becomes the primary monitor.
To enable multi-monitor support, check the following:
• The user device is configured to support multiple monitors.• The operating system can detect each of the monitors. On Windows platforms, to verify thatthis detection occurs, go to Settings > System and clickDisplay and confirm that eachmonitorappears separately.
• After your monitors are detected:– Citrix Virtual Desktops: Configure the graphics memory limit using the Citrix MachinePolicy setting Display memory limit.
– Citrix Virtual Apps: Depending on the version of the Citrix Virtual Apps server, you’ve in-stalled:
* Configure the graphics memory limit using the Citrix Computer Policy setting Dis-play memory limit.
* From the Citrixmanagement console for the Citrix Virtual Apps server, select the farmand in the task pane, select:· Modify Server Properties > Modify all properties > Server Default > HDXBroadcast > Display or
· Modify Server Properties >Modify all properties > Server Default > ICA > Dis-play) and
* Set the Maximummemory to use for each session’s graphics.
Check if the setting is large enough (in kilobytes) to provide sufficient graphic memory. If this settingisn’t high enough, the published resource is restricted to the subset of the monitors that fits within
© 1999‒2022 Citrix Systems, Inc. All rights reserved. 141

Citrix Workspace app 2203.1 LTSR for Windows
the size specified.
Using Citrix Virtual desktops on dual monitor:
1. Select the Desktop Viewer and click the down arrow.
2. SelectWindow.
3. Drag the Citrix Virtual Desktops screen between the two monitors. Ensure that about half thescreen is present in eachmonitor.
4. From the Citrix Virtual Desktop toolbar, select Full-screen.
The screen is now extended to both the monitors.
For calculating the session’s graphic memory requirements for Citrix Virtual Apps and Desktops andCitrix DaaS, see Knowledge Center article CTX115637.
Printer
To override the printer settings on the user device
1. From the Printmenu available from an application on the user device, choose Properties.2. On the Client Settings tab, click Advanced Optimizations and modify the Image Compression
and Image and Font Caching options.
On-screen keyboard control
To enable touch-enabled access to virtual applications and desktops from Windows tablets, CitrixWorkspace app automatically displays the on-screen keyboard when:
• you activate a text entry field and• when the device is in tent or tablet mode.
On some devices and in some circumstances, Citrix Workspace app can’t accurately detect the modeof the device. The on-screen keyboard might also appear when you don’t want it to.
To suppress the on-screen keyboard from appearing when using a convertible device:
• create a REG_DWORD value DisableKeyboardPopup in HKEY\\_CURRENT\\_USER\\SOFTWARE\\Citrix\\ICA Client\\Engine\\Configuration\\Advanced\\Modules\\MobileReceiver and
• set the value to 1.
Note:
Onax64machine, create thevalue inHKEY_LOCAL_MACHINE\SOFTWARE\Wow6432Node\Citrix\ICAClient\Engine\Configuration\Advanced\Modules\MobileReceiver.
© 1999‒2022 Citrix Systems, Inc. All rights reserved. 142

Citrix Workspace app 2203.1 LTSR for Windows
The keys can be set to the following 3 different modes:
• Automatic: AlwaysKeyboardPopup = 0; DisableKeyboardPopup = 0• Always popup (on-screen keyboard): AlwaysKeyboardPopup = 1; DisableKeyboardPopup = 0• Never popup (on-screen keyboard): AlwaysKeyboardPopup = 0; DisableKeyboardPopup = 1
Keyboard shortcuts
You can configure combinations of keys that Citrix Workspace app interprets as having special func-tionality. When the keyboard shortcuts policy is enabled, you can specify Citrix Hotkey mappings,behavior of Windows hotkeys, and keyboard layout for sessions.
1. Open the Citrix Workspace app Group Policy Object administrative template by runninggpedit.msc.
2. Under the Computer Configuration node, go to Administrative Templates> Citrix Compo-nents > Citrix Workspace > User Experience.
3. Select the Keyboard shortcuts policy.
4. Select Enabled, and the required options.
5. Restart the Citrix Workspace app session for the changes to take effect.
Citrix Workspace app support for 32-bit color icons:
Citrix Workspace app supports 32-bit high color icons. To provide for seamless applications, it auto-matically selects the color depth for:
• applications visible in the Connection Center dialog,• the Start menu, and• task bar
Caution
Editing the registry incorrectly can cause serious problems that might require you to reinstallyour operating system. Citrix can’t guarantee that problems resulting from the incorrect use ofthe Registry Editor can be solved. Use the Registry Editor at your own risk. Be sure to back upthe registry before you edit it.
To set a preferred depth, you can add a string registry key named TWIDesiredIconColor to HKEY\\_LOCAL\\_MACHINE\SOFTWARE\Wow6432Node\Citrix\ICA Client\Engine\LockdownProfiles\All Regions\Preferences and set it to the required value. The possible color depthsfor icons are 4, 8, 16, 24, and 32 bits-per-pixel. The user can select a lower color depth for icons if thenetwork connection is slow.
© 1999‒2022 Citrix Systems, Inc. All rights reserved. 143

Citrix Workspace app 2203.1 LTSR for Windows
Desktop Viewer
Different enterprises might have different corporate needs. Your requirements for the way users ac-cess virtual desktopsmight vary fromuser touser andas your corporateneedsevolve. Theuser experi-ence of connecting to virtual desktops and the extent at which the user can configure the connectionsdepend Citrix Workspace app for Windows setup.
Use the desktop viewer when users need to interact with their virtual desktop. The user’s virtualdesktop can be a published virtual desktop, or a shared or dedicated desktop. In this access scenario,the Desktop Viewer toolbar functionality allows the user to open a virtual desktop in a window andpan and scale that desktop inside their local desktop. Users can set preferences and work on morethan one desktop usingmultiple Citrix Virtual Apps and Desktops and Citrix DaaS connections on thesame user device.
Note:
Use Citrix Workspace app to change the screen resolution on their virtual desktops. You can’tchange Screen Resolution using the Windows Control Panel.
Keyboard input in Desktop Viewer
In Desktop Viewer sessions, theWindows logo key+L is directed to the local computer.
Ctrl+Alt+Delete is directed to the local computer.
Key presses that activate certain Microsoft accessibility features, for example, Sticky Keys, Filter Keys,and Toggle Keys are normally directed to the local computer.
As anaccessibility featureof theDesktopViewer, pressingCtrl+Alt+Breakdisplays theDesktopViewertoolbar buttons in a pop-up window.
Ctrl+Esc is sent to the remote, virtual desktop.
Note:
By default, if the Desktop Viewer is maximized, Alt+Tab switches focus between windows insidethe session. If the Desktop Viewer is displayed in a window, Alt+Tab switches focus betweenwindows outside the session.
Hotkey sequences are key combinations designed by Citrix. Hotkey sequences are, for example, theCtrl+F1 sequence reproduces Ctrl+Alt+Delete, and Shift+F2 switches applications between full-screenand windowedmode.
Note:
You can’t use hotkey sequences with virtual desktops displayed in the Desktop Viewer, that is,
© 1999‒2022 Citrix Systems, Inc. All rights reserved. 144

Citrix Workspace app 2203.1 LTSR for Windows
with virtual apps and desktops sessions. However, you can use them with published applica-tions, that is, with virtual apps sessions.
Virtual desktops
Fromwithin a desktop session, users can’t connect to the same virtual desktop. If the user tries do so,disconnects the existing desktop session. So, Citrix recommends:
• Administrators must not configure the clients on a desktop to point to a site that publishes thesame desktop
• Usersmust not browse site that hosts the samedesktop if the site is configured to automaticallyreconnect users to existing sessions
• Users must not browse to a site that hosts the same desktop and try to launch it
A user who logs on locally to a computer that is acting as a virtual desktop, blocks connection to thatdesktop.
Citrix recommends working with them to define device mapping:
• if your users connect to virtual applications, published with Citrix Virtual Apps, from a virtualdesktop and
• your organization has a separate Citrix Virtual Apps administrator.
Device mapping checks if the desktop devices are mapped consistently within desktop and applica-tion sessions. Because local drives are displayed as network drives in desktop sessions, the CitrixVirtual Apps administrator needs to change the drive-mapping policy to include network drives.
Status indicator time-out
You can change the amount of time the status indicator displays when a user is launching a session.
To alter the time-out period, do the following steps:
1. Launch the Registry Editor.2. Navigate to the following path:
• On a 64-bit: HKEY_LOCAL_MACHINE\SOFTWARE\Wow6432Node\Citrix\ICA CLIENT\Engine
• On a 32-bit: HKEY_LOCAL_MACHINE\SOFTWARE\Citrix\ICA CLIENT\Engine\3. Create a registry key as follows:
• Type: REG_DWORD• Name: SI INACTIVE MS• Value: 4, if you want the status indicator to disappear sooner.
When you configure this key, the status indicator might appear and disappear frequently. This behav-ior is as designed. To suppress the status indicator, do the following:
© 1999‒2022 Citrix Systems, Inc. All rights reserved. 145

Citrix Workspace app 2203.1 LTSR for Windows
1. Launch the Registry Editor.
2. Navigate to the following path:
• On a 64-bit: HKEY_LOCAL_MACHINE\SOFTWARE\Wow6432Node\Citrix\ICA CLIENT\• On a 32-bit: HKEY_LOCAL_MACHINE\SOFTWARE\Citrix\ICA CLIENT\
3. Create a registry key as follows:
• Type: REG_DWORD• Name: NotificationDelay• Value: Any value in millisecond (for example, 120000)
Inactivity Timeout for Workspace Sessions
Admins can configure the inactivity timeout value to specify the amount of idle time allowed beforethe users automatically sign out of the Citrix Workspace session. You’re automatically signed out ofWorkspace if the mouse, keyboard, or touch is idle for the specified interval of time. The inactivitytimeout doesn’t affect the active virtual apps and desktops sessions or Citrix StoreFront stores.
The inactivity timeout value can be set starting from a 1 minute to 1,440 minutes. By default, the in-activity timeout isn’t configured. Admins can configure the inactivityTimeoutInMinutes property byusing a PowerShell module. Click here to download the PowerShell modules for Citrix WorkspaceConfiguration.
The end-user experience is as follows:
• A notification appears in your session window three minutes before you’re signed out, with anoption to stay signed in, or sign out.
• The notification appears only if the configured inactivity timeout value is greater than or equalto five minutes.
• Users can click Stay signed in to dismiss the notification and continue using the app, in whichcase the inactivity timer is reset to its configured value. You can also click Sign out to end thesession for the current store.
Note:
Admins can configure the inactivity timeout only for Workspace (cloud) sessions.
Customer Experience Improvement Program (CEIP)
© 1999‒2022 Citrix Systems, Inc. All rights reserved. 146

Citrix Workspace app 2203.1 LTSR for Windows
Data collected Description What we use it for
Configuration and usage data The Citrix CustomerExperience ImprovementProgram (CEIP) gathersconfiguration and usage datafrom Citrix Workspace app forWindows and automaticallysends the data to Citrix andGoogle Analytics.
This data helps Citrix improvethe quality, reliability, andperformance of CitrixWorkspace app.
Additional information
Citrix handles your data according to the terms of your contract with Citrix, and protect it as specifiedin the Citrix Services Security Exhibit. Citrix Services Security Exhibit is available on the Citrix TrustCenter.
Citrix also uses Google Analytics to collect certain data from Citrix Workspace app as part of CEIP.Review how Google handles data collected for Google Analytics.
You can stop sending CEIP data to Citrix and Google Analytics by:
1. Right-click the Citrix Workspace app icon from the notification area.2. Select Advanced Preferences.
The Advanced Preferences dialog appears.3. Select Data Collection.4. SelectNo, Thanks to disable CEIP or to forego participation.5. Click Save.
Note:
You can stop sending CEIP data except for the operating system and Workspace app versionscollected for Google Analytics indicated by an * in the second table.
You can also navigate to the following registry entry and set the value as suggested:
Path: HKEY_LOCAL_MACHINE\ SOFTWARE\Citrix\ICA Client\CEIP
Key: Enable_CEIP
Value: False
Note:
Once you selectNo Thanks or set the Enable_CEIP key to False, to stop sending the final twoCEIP data elements, that is, Operating System and Workspace app version, navigate to the fol-
© 1999‒2022 Citrix Systems, Inc. All rights reserved. 147

Citrix Workspace app 2203.1 LTSR for Windows
lowing registry entry and set the value:
Path: HKEY_LOCAL_MACHINE\ SOFTWARE\Citrix\ICA Client\CEIP
Key: DisableHeartbeat
Value: True
The specific CEIP data elements collected by Citrix are:
Operating systemversion
Workspace appversion
External devicesconnected
Screen resolution
Flash version Desktop Lockconfiguration
Touch enabled Authenticationconfiguration
Session launchmethod
Graphicsconfiguration
Desktop Viewerconfiguration
Printing
Connection error Time to launch Workspace applanguage
VDA information
SSON state Installer state Time to install Connection protocol
Internet Explorerversion
The specific CEIP data elements collected by Google Analytics are:
Operating systemversion*
Workspace appversion*
Authenticationconfiguration
Workspace applanguage
Session launchmethod
Connection error Connection protocol VDA information
Installerconfiguration
Installer state Client keyboardlayout
Store configuration
Auto-updatepreference
Connection Centerusage
App protectionconfiguration
Reason for the offlinebanner
© 1999‒2022 Citrix Systems, Inc. All rights reserved. 148

Citrix Workspace app 2203.1 LTSR for Windows
Regional settings
Citrix Workspace app displays the date, time, and number based on the locale of the browser or end-point device.
Starting from Citrix Workspace app 2106, you can customize regional date, time, and number formatsthrough Regional Settings. Changes made in these settings are saved for an individual user and ap-plied across all devices.
Note:
This option is available only on Cloud deployments.
For more information, see Regional Settings.
Configuring Single sign-on to Workspace app
April 7, 2022
Single sign-on using Azure Active Directory
This section explains how to implement single sign-on (SSO) using Azure Active Directory (AAD) asan identity provider with domain joined workloads in hybrid or AAD enrolled endpoints. With thisconfiguration, you can authenticate to Workspace using Windows Hello or FIDO2 on endpoints thatare enrolled to AAD.
Note:
If youuseWindowsHello, as a standaloneauthentication, you canachieve single sign-on toCitrixWorkspace app. However, you are prompted for your user name and password while accessingpublished virtual apps or desktops. As aworkaround, consider implementing Federated Authen-tication Service (FAS).
Prerequisites
• An active Azure Active Directory connection to Citrix Cloud. For more information, see ConnectAzure Active Directory to Citrix Cloud.
• An Azure Active Directory workspace authentication. For more information, see Enable AzureAD authentication for workspaces.
• Verify if you have configured Azure AD Connect. For more information, see Getting started withAzure AD Connect using express settings.
© 1999‒2022 Citrix Systems, Inc. All rights reserved. 149

Citrix Workspace app 2203.1 LTSR for Windows
• Activate Pass-through authentication on Azure AD Connect. Also, verify if the Single sign-onand the Pass-through options work on the Azure portal. Formore information, see Azure ActiveDirectory Pass-through Authentication: Quickstart.
Configuration
Do the following steps to configure SSO on your device:
1. Install the Citrix Workspace app using the Windows command line with the includeSSON op-tion:
CitrixWorkspaceApp.exe /includeSSON
1. Reboot your device.
2. Open theCitrixWorkspace appGroupPolicyObject administrative template by runninggpedit.msc.
3. Go toAdministrative Templates >Citrix Components >CitrixWorkspace >User Authentica-tion > Local user name and password.
4. Select Enable pass-through authentication. Depending on the configuration and security set-tings, select the Allow pass-through authentication for all ICA option for pass-through au-thentication to work.
5. Modify the User Authentication settings in Internet Explorer. To modify the settings:
• Open Internet Properties from the Control panel.
• Navigate to General Properties > Local Intranet and click Sites.
• In the Local Intanetwindow, clickAdvanced, add trusted sites, add the following trustedsites, and click Close:
– https://aadg.windows.net.nsatc.net– https://autologon.microsoftazuread-sso.com– The name of your tenant, for example: https://xxxtenantxxx.cloud.com
6. Disable extra authentication prompts by disabling the prompt=login attribute in your tenant.For more information, see User Prompted for Additional Credentials on Workspace URLs WhenUsing Federated Authentication Providers. You can contact Citrix technical support to disablethe prompt=login attribute in your tenant to successfully configure Single sign-on.
7. Enable domain pass-through authentication on the Citrix Workspace app client. Formore infor-mation, see Domain pass-through authentication.
8. Restart the Citrix Workspace app for the changes to take effect.
© 1999‒2022 Citrix Systems, Inc. All rights reserved. 150

Citrix Workspace app 2203.1 LTSR for Windows
Single sign-on using Okta and Federated Authentication Service
This section explains how you can implement single sign-on (SSO) using Okta as an identity providerwith domain joined device and Federated Authentication Service (FAS). With this configuration, youcan authenticate to Workspace using Okta to enable single sign-on and prevent a second logonprompt. For this authentication mechanism to work, you need to use the Citrix Federated Authenti-cation Service with Citrix Cloud. For more information, see Connect Citrix Federated AuthenticationService to Citrix Cloud.
Prerequisites
• Cloud Connector. For more information about installing the Cloud Connector, see Cloud Con-nector Installation.
• An Okta agent. For more information about installing an Okta agent, see Install the Okta ActiveDirectory agent. Also, you can cofigure the Okta IWA Web agent to login from a Windows Do-main joined device. Formore information, see Install and configure the Okta IWAWeb agent forDesktop single sign-on
• An active Azure Active Directory connection to Citrix Cloud. For more information, see ConnectAzure Active Directory to Citrix Cloud.
• Federated Authentication Service. For more information, see Install the Federated Authentica-tion Service.
Configuration
Do the following steps to configure SSO on your device:
Connect Citrix Cloud to your Okta organization:
1. Downloadand install theOkta ActiveDirectory agent. Formore information, see Install theOktaActive Directory agent.
2. Sign in to Citrix Cloud at https://citrix.cloud.com.
3. From the Citrix Cloudmenu, select Identity and Access Management.
4. Locate Okta and select Connect from the ellipsis menu.
5. InOkta URL, enter your Okta domain.
6. InOkta API Token, enter the API token for your Okta organization.
7. In Client ID and Client Secret, enter the client ID and secret from the OIDCweb app integrationyou created earlier. To copy these values from the Okta console, select Applications and locateyour Okta application. Under Client Credentials, use the Copy to Clipboard button for eachvalue.
© 1999‒2022 Citrix Systems, Inc. All rights reserved. 151

Citrix Workspace app 2203.1 LTSR for Windows
8. Click Test and Finish. Citrix Cloud verifies your Okta details and tests the connection.
Enable Okta authentication for workspaces:
1. From the Citrix Cloudmenu, selectWorkspace Configuration > Authentication.
2. SelectOkta. When prompted, select I understand the impact on the subscriber experience.
3. Click Accept to accept the permissions request.
Enable Federated Authentication Service:
1. From the Citrix Cloudmenu, selectWorkspace Configuration and then select Authentication.
2. ClickEnableFAS. This changemight takeup to fiveminutes tobeapplied to subscriber sessions.
Afterward, theFederatedAuthenticationService is active for all virtual appanddesktop launches fromCitrix Workspace.
When subscribers sign in to their workspace and launch a virtual app or desktop in the same resourcelocation as the FAS server, the app or desktop starts without prompting for credentials.
Note:
If all FAS servers in a resource location are down or in maintenance mode, application launchessucceed, but single sign-on isn’t active. Subscribers are prompted for their AD credentials toaccess each application or desktop.
Authenticate
May 20, 2022
To maximize the security of your environment, you must secure the connections between CitrixWorkspace app and the resources you publish. You can configure various types of authentication foryour Citrix Workspace app, including domain pass-through, smart card, and Kerberos pass-through.
Domain pass-through authentication
Single sign-on lets you authenticate to a domain and use Citrix Virtual Apps and Desktops and CitrixDaaS (formerly Citrix Virtual Apps and Desktops service) without having to reauthenticate again.
When you log on to Citrix Workspace app, your credentials are passed through to StoreFront, alongwith the apps and desktops and Start menu settings. After configuring single sign-on, you can log onto Citrix Workspace app and launch virtual apps and desktops sessions without having to retype yourcredentials.
© 1999‒2022 Citrix Systems, Inc. All rights reserved. 152

Citrix Workspace app 2203.1 LTSR for Windows
All web browsers require you to configure single sign-on using the Group Policy Object(GPO) adminis-trative template. Formore informationabout configuring single sign-onusing theGroupPolicyObject(GPO) administrative template, see Configure single sign-on with Citrix Gateway.
You can configure single sign-ononboth fresh installationor upgrade setup, using anyof the followingoptions:
• Command-line interface• GUI
Configure single sign-on during fresh installation
To configure single sign-on during fresh installation, do the following steps:
1. Configuration on StoreFront.2. Configure XML trust services on the Delivery Controller.3. Modify Internet Explorer settings.4. Install Citrix Workspace app with single sign-on.
Configure single sign-on on StoreFront
Single sign-on lets you authenticate to a domain and use Citrix Virtual Apps and Desktops and CitrixDaaS from the same domain without having to reauthenticate to each app or desktop.
When you add a store using the Storebrowse utility, your credentials pass through the Citrix Gatewayserver, along with the apps and desktops enumerated for you, including your Start menu settings.After configuring single sign-on, youcanadd the store, enumerateyourappsanddesktops, and launchthe required resources without having to type your credentials multiple times.
Depending on the Citrix Virtual Apps and Desktops deployment, single sign-on authentication can beconfigured on StoreFront using the Management Console.
Use the following table for different use cases and its respective configuration:
Use case Configuration details Additional information
Configured SSON onStoreFront
Launch Citrix Studio, go toStores >ManageAuthentication Methods -Store > enable Domainpass-through.
When Citrix Workspace appisn’t configured with Singlesign-on, it automaticallyswitches the authenticationmethod from Domainpass-through toUser nameand password, if available.
© 1999‒2022 Citrix Systems, Inc. All rights reserved. 153

Citrix Workspace app 2203.1 LTSR for Windows
Use case Configuration details Additional information
When workspace for web isrequired
Launch Stores >Workspacefor Web Sites >ManageAuthentication Methods -Store > enable Domainpass-through.
When Citrix Workspace appisn’t configured with Singlesign-on, it automaticallyswitches the authenticationmethod from Domainpass-through to User nameand password, if available.
Configure single sign-on with Citrix Gateway
You enable single sign-on with Citrix Gateway using the Group Policy Object administrative template.
1. Open the Citrix Workspace app GPO administrative template by running gpedit.msc.2. Under the Computer Configuration node, go to Administrative Template > Citrix Compo-
nents > Citrix Workspace > User Authentication, and select Single Sign-on for Citrix Gate-way policy.
3. Select Enabled.4. Click Apply andOK.5. Restart Citrix Workspace app for the changes to take effect.
Configure XML trust services on the Delivery Controller
On Citrix Virtual Apps and Desktops and Citrix DaaS, run the following PowerShell command as anadministrator on the Delivery Controller:
asnp Citrix* ; Set-BrokerSite -TrustRequestsSentToTheXmlServicePort $True
Modify the Internet Explorer settings
1. Add the StoreFront server to the list of trusted sites using Internet Explorer. To add:a) Launch Internet Options from the Control panel.b) Click Security > Local Internet and click Sites.
The Local intranetwindow appears.c) Select Advanced.d) Add the URL of the StoreFront FQDNwith the appropriate HTTP or HTTPS protocols.e) Click Apply andOK.
2. Modify the User Authentication settings in Internet Explorer. To modify:a) Launch Internet Options from the Control panel.
© 1999‒2022 Citrix Systems, Inc. All rights reserved. 154

Citrix Workspace app 2203.1 LTSR for Windows
b) Click Security tab > Trusted Sites.c) Click Custom level. The Security Settings – Trusted Sites Zonewindow appears.d) In the User Authentication pane, select Automatic logon with current user name and
password.
e) Click Apply andOK.
Configure single sign-on using the command-line interface
Install Citrix Workspace app with the /includeSSON switch and restart Citrix Workspace app for thechanges to take effect.
Note:
When you install Citrix Workspace app for Windows without the single sign-on component, up-grade to the CitrixWorkspace app latest versionwith the /includeSSON switch isn’t supported.
Configure single sign-on using the GUI
1. Locate the Citrix Workspace app installation file (CitrixWorkspaceApp.exe).2. Double-click CitrixWorkspaceApp.exe to launch the installer.3. In the Enable Single Sign-on installationwizard, select the Enable Single Sign-on option.4. Click Next and follow the prompts to complete the installation.
You can now log on to an existing store (or configure a new store) using Citrix Workspace app withoutentering user credentials.
Configure single sign-on on workspace for web
You can configure single sign-on on workspace for web using the Group Policy Object administrativetemplate.
1. Open the workspace for web GPO administrative template by running gpedit.msc.2. Under theComputerConfigurationnode, go toAdministrativeTemplate>CitrixComponent
> Citrix Workspace > User Authentication.3. Select the Local user name and password policy and set it to Enabled.4. Click Enable pass-through authentication. This option allows the workspace for web to use
your login credentials for authentication on the remote server.
© 1999‒2022 Citrix Systems, Inc. All rights reserved. 155

Citrix Workspace app 2203.1 LTSR for Windows
5. Click Allow pass-through authentication for all ICA connections. This option bypasses anyauthentication restriction and allows credentials to pass-through on all the connections.
6. Click Apply andOK.7. Restart the workspace for web for the changes to take effect.
Verify that the single sign-on is enabled by launching the Task Manager and check if the ssonsvr.exe process is running.
Configure single sign-on using Active Directory
Complete the following steps to configure Citrix Workspace app for pass-through authentication us-ing Active Directory group policy. In this scenario, you can achieve the single sign-on authenticationwithout using the enterprise software deployment tools, such as the Microsoft System Center Config-uration Manager.
1. Download and place the Citrix Workspace app installation file (CitrixWorkspaceApp.exe) ona suitable network share. It must be accessible by the target machines you install CitrixWorkspace app on.
2. Get the CheckAndDeployWorkspacePerMachineStartupScript.battemplate from theCitrix Workspace app for Windows Download page.
3. Edit the content to reflect the location and the version of CitrixWorkspaceApp.exe.
4. In theActiveDirectoryGroupPolicyManagementconsole, typeCheckAndDeployWorkspacePerMachineStartupScript.bat as a startup script. For more information on deploying the startup scripts, see the ActiveDirectory section.
5. In the Computer Configuration node, go to Administrative Templates > Add/Remove Tem-plates to add the receiver.adml file.
6. After adding the receiver.adml template, go to Computer Configuration > AdministrativeTemplates > Citrix Components > Citrix Workspace > User authentication. For more infor-mation about adding the template files, see Group Policy Object administrative template.
7. Select the Local user name and password policy and set it to Enabled.
8. Select Enable pass-through authentication and click Apply.
9. Restart the machine for the changes to take effect.
Configure single sign-on on StoreFront
StoreFront configuration
1. Launch Citrix Studio on the StoreFront server and select Stores > Manage AuthenticationMethods - Store.
© 1999‒2022 Citrix Systems, Inc. All rights reserved. 156

Citrix Workspace app 2203.1 LTSR for Windows
2. Select Domain pass-through.
Authentication tokens
Authentication tokens are encrypted and stored on the local disk so that you don’t need to reenteryour credentials when your system or session restarts. Citrix Workspace app provides an option todisable the storing of authentication tokens on the local disk.
For enhanced security, we now provide a Group Policy Object (GPO) policy to configure the authenti-cation token storage.
Note:
This configuration is applicable only in cloud deployments.
To disable storing of authentication tokens using the Group Policy Object (GPO) policy:
1. Open theCitrixWorkspace appGroupPolicyObject administrative template by runninggpedit.msc.
2. Under the Computer Configuration node, go to Administrative Templates > Citrix Compo-nents > SelfService.
3. In the Store authentication tokens policy, select one of the following:
• Enabled: Indicates that the authentication tokens are stored on the disk. By default, setto Enabled.
• Disabled: Indicates that the authentication tokens aren’t stored on the disk. Reenter yourcredentials when your system or session restarts.
4. Click Apply andOK.
© 1999‒2022 Citrix Systems, Inc. All rights reserved. 157

Citrix Workspace app 2203.1 LTSR for Windows
Starting with Version 2106, Citrix Workspace app provides another option to disable the storing of au-thentication tokens on the local disk. Along with the existing GPO configuration, you can also disablethe storing of authentication tokens on the local disk using the Global App Configuration Service.
In the Global App Configuration Service, set the Store Authentication Tokens attribute toFalse.
For more information, see the Global App Configuration Service documentation.
Configuration Checker
Configuration Checker lets you run a test to check if the single sign-on is configured properly. Thetest runs on different checkpoints of the single sign-on configuration and displays the configurationresults.
1. Right-click Citrix Workspace app icon in the notification area and click Advanced Preferences.The Advanced Preferences dialog appears.
2. Click Configuration Checker.The Citrix Configuration Checkerwindow appears.
© 1999‒2022 Citrix Systems, Inc. All rights reserved. 158

Citrix Workspace app 2203.1 LTSR for Windows
3. Select SSONChecker from the Select pane.
4. Click Run. A progress bar appears, displaying the status of the test.
The Configuration Checkerwindow has the following columns:
1. Status: Displays the result of a test on a specific check point.
• A green check mark indicates that the specific checkpoint is configured properly.• A blue I indicates information about the checkpoint.• A Red X indicates that the specific checkpoint isn’t configured properly.
2. Provider: Displays the name of themodule onwhich the test is run. In this case, single sign-on.
3. Suite: Indicates the category of the test. For example, Installation.
4. Test: Indicates the name of the specific test that is run.
5. Details: Provides additional information about the test, for both pass and fail.
The user gets more information about each checkpoint and the corresponding results.
The following tests are done:
© 1999‒2022 Citrix Systems, Inc. All rights reserved. 159

Citrix Workspace app 2203.1 LTSR for Windows
1. Installed with single sign-on.2. Logon credential capture.3. Network Provider registration: The test result against Network Provider registration displays
a green check mark only when “Citrix Single Sign-on” is set to be first in the list of NetworkProviders. If Citrix Single Sign-on appears anywhere else in the list, the test result against Net-work Provider registration appears with a blue I and additional information.
4. Single sign-on process is running.5. Group Policy: By default, this policy is configured on the client.6. Internet Settings for Security Zones: Make sure that you add the Store/XenApp Service URL to
the list of Security Zones in the Internet Options.If the Security Zones are configured via Group policy, any change in the policy requires the Ad-vanced Preferences window to be reopened for the changes to take effect and to display thecorrect status of the test.
7. Authentication method for StoreFront.
Note:
• If you’re accessing workspace for web, the test results aren’t applicable.• If Citrix Workspace app is configured with multiple stores, the authentication method testruns on all the configured stores.
• You can save the test results as reports. The default report format is .txt.
Hide the Configuration Checker option from the Advanced Preferences window
1. Open the Citrix Workspace app GPO administrative template by running gpedit.msc.2. Go to Citrix Components > Citrix Workspace > Self Service > DisableConfigChecker.3. Click Enabled to hide the Configuration Checker option from the Advanced Preferenceswin-
dow.4. Click Apply andOK.5. Run the gpupdate /force command.
Limitation:
Configuration Checker does not include the checkpoint for the configuration of trust requests sent tothe XML service on Citrix Virtual Apps and Desktops servers.
Beacon test
CitrixWorkspace app allows you to do a beacon test using the Beacon checker that is available as partof the Configuration Checker utility. The Beacon test helps to confirm if the beacon (ping.citrix.com)is reachable. This diagnostic test helps to eliminate one of themany possible causes for slow resourceenumeration, that is the beacon not being available. To run the test, right-click the Citrix Workspace
© 1999‒2022 Citrix Systems, Inc. All rights reserved. 160
Citrix Workspace app 2203.1 LTSR for Windows
app in the notification area and select Advanced Preferences > Configuration Checker. Select theBeacon checker option from the list of Tests and click Run.
The test results can be any of the following:
• Reachable – Citrix Workspace app is successfully able to contact the beacon.• Not reachable - Citrix Workspace app is unable to contact the beacon.• Partially reachable - Citrix Workspace app can contact the beacon intermittently.
Note:
• The test results aren’t applicable on workspace for web.• The test results can be saved as reports. The default format for the report is .txt.
Domain pass-through authentication with Kerberos
This topic applies only to connections between Citrix Workspace app for Windows and StoreFront,Citrix Virtual Apps and Desktops, and Citrix DaaS.
Citrix Workspace app supports Kerberos for domain pass-through authentication for deploymentsthat use smart cards. Kerberos is one of the authenticationmethods included in IntegratedWindowsAuthentication (IWA).
When enabled, Kerberos authenticates without passwords for Citrix Workspace app. As a result, pre-vents Trojan horse-style attacks on the user device that try to gain access to passwords. Users canlog on using any authentication method and access published resources, for example, a biometricauthenticator such as a fingerprint reader.
When you log on using a smart card to Citrix Workspace app, StoreFront, Citrix Virtual Apps and Desk-tops and Citrix DaaS configured for smart card authentication- the Citrix Workspace app:
1. Captures the smart card PIN during single sign-on.
2. Uses IWA (Kerberos) to authenticate the user to StoreFront. StoreFront then provides yourWorkspace appwith information about available the Citrix Virtual Apps andDesktops and CitrixDaaS.
Note
EnableKerberos toavoidanextranPINprompt. If Kerberosauthentication isn’t used, CitrixWorkspace app authenticates to StoreFront using the smart card credentials.
3. The HDX engine (previously referred to as the ICA client) passes the smart card PIN to the VDAto log the user on to Citrix Workspace app session. Citrix Virtual Apps and Desktops and CitrixDaaS then delivers the requested resources.
To use Kerberos authentication with Citrix Workspace app, check if the Kerberos configuration con-forms to the following.
© 1999‒2022 Citrix Systems, Inc. All rights reserved. 161

Citrix Workspace app 2203.1 LTSR for Windows
• Kerberos works only between Citrix Workspace app and servers that belong to the same or totrusted Windows Server domains. Servers are trusted for delegation, an option you configurethrough the Active Directory Users and Computers management tool.
• Kerberos must be enabled both on the domain and Citrix Virtual Apps and Desktops and CitrixDaaS. For enhanced security and tomake sure that Kerberos is used, disable any non-KerberosIWA options on the domain.
• Kerberos logon isn’t available for Remote Desktop Services connections that’re configured touse either Basic authentication, always use specified logon information, or always prompt fora password.
Warning
Using the Registry editor incorrectly might cause serious problems that can require you to rein-stall the operating system. Citrix can’t guarantee that problems resulting from incorrect use ofthe Registry editor can be solved. Use the Registry Editor at your own risk. Make sure you backup the registry before you edit it.
Domain pass-through authentication with Kerberos for use with smart cards
Before continuing, see Secure your deployment section in the Citrix Virtual Apps and Desktops docu-ment.
When you install Citrix Workspace app for Windows, include the following command-line option:
• /includeSSON
This option installs the single sign-on component on the domain-joined computer, enablingyour workspace to authenticate to StoreFront using IWA (Kerberos). The single sign-on compo-nent stores the smart card PIN, used by the HDX engine when it remotes the smart card hard-ware and credentials to Citrix Virtual Apps and Desktops and Citrix DaaS. Citrix Virtual Apps andDesktops and Citrix DaaS automatically selects a certificate from the smart card and gets thePIN from the HDX engine.
A related option, ENABLE_SSON, is enabled by default.
If a security policy prevents you from enabling single sign-on on a device, configure Citrix Workspaceapp using Group Policy Object administrative template.
1. Open the Citrix Workspace app Group Policy Object administrative template by runninggpedit.msc.
2. Choose Administrative Templates > Citrix Components > CitrixWorkspace >User authenti-cation > Local user name and password
3. Select Enable pass-through authentication.
© 1999‒2022 Citrix Systems, Inc. All rights reserved. 162

Citrix Workspace app 2203.1 LTSR for Windows
4. Restart Citrix Workspace app for the changes to take effect.
To configure StoreFront:
When you configure the authentication service on the StoreFront server, select the Domain pass-through option. That setting enables Integrated Windows Authentication. You do not need to selectthe Smart card option unless you also have non domain-joined clients connecting to StoreFrontusing smart cards.
For more information about using smart cards with StoreFront, see Configure the authentication ser-vice in the StoreFront documentation.
Support for Conditional Access with Azure Active Directory
Conditional Access is a tool used by Azure Active Directory to enforce organizational policies.Workspace administrators can configure and enforce Azure Active Directory conditional access
© 1999‒2022 Citrix Systems, Inc. All rights reserved. 163

Citrix Workspace app 2203.1 LTSR for Windows
policies for users authenticating to the Citrix Workspace app. The Windows machine running theWorkspace appmust have Microsoft Edge WebView2 Runtime version 92 or later installed.
For complete details and instructions about configuring conditional access policies with AzureActive Directory, see Azure AD Conditional Access documentation at Docs.microsoft.com/en-us/azure/active-directory/conditional-access/.
Note:
This feature is supported only on Workspace (Cloud) deployments.
Other ways to authenticate to Citrix Workspace
You can configure the following authentication mechanisms with the Citrix Workspace app. Forthe following authentication mechanisms to work as expected, the Windows machine running theWorkspace appmust have Microsoft Edge WebView2 Runtime version 92 or later installed.
1. WindowsHello based authentication – For instructions about configuringWindowsHello basedauthentication, see ConfigureWindowsHello for Business Policy settings - Certificate Trustat _Docs.microsoft.com/en-us/windows/security/identity-protection/hello-for-business/hello-cert-trust-policy-settings.
Note:
Windows Hello based authentication with domain pass-through is not supported.
1. FIDO2 Security Keys based authentication – FIDO2 security keys provide a seamless way forenterprise employees to authenticate without entering a user name or password. You can con-figure FIDO2 Security Keys based authentication to Citrix Workspace. If you would like yourusers to authenticate to Citrix Workspace with their Azure AD account using a FIDO2 securitykey, see Enable passwordless security key sign-in at Docs.microsoft.com/en-us/azure/active-directory/authentication/howto-authentication-passwordless-security-key.
2. You can also configure Single Sign-On (SSO) toCitrixWorkspace app fromMicrosoftAzure ActiveDirectory (AAD) joinedmachineswith AADas an identity provider. Formoredetails about config-uring Azure Active Directory Domain services, seeConfiguring Azure Active Directory Domainservices at Docs.microsoft.com/en-us/azure/active-directory-domain-services/overview. For in-formation about how to connect Azure ActiveDirectory toCitrix Cloud, seeConnect Azure ActiveDirectory to Citrix Cloud.
Smart card
Citrix Workspace app for Windows supports the following smart card authentication:
• Pass-through authentication (single sign-on) - Pass-through authentication captures thesmart card credentials when users log on to Citrix Workspace app. Citrix Workspace app uses
© 1999‒2022 Citrix Systems, Inc. All rights reserved. 164

Citrix Workspace app 2203.1 LTSR for Windows
the captured credentials as follows:
– Users of domain-joined devices who log on to Citrix Workspace app using the smart cardcan start virtual desktops and applications without needing to reauthenticate.
– Citrix Workspace app running on non-domain joined devices with the smart card creden-tials must type their credentials again to start a virtual desktop or application.
Pass-through authentication requires configuration both on StoreFront and Citrix Workspaceapp.
• Bimodal authentication - Bimodal authentication offers users a choice between using a smartcard and typing the user name and password. This feature is effective when you can’t use thesmart card. For example, the logon certificate has expired. Dedicated storesmust be set up persite to allow Bimodal authentication, using the DisableCtrlAltDelmethod set to False to allowsmart cards. Bimodal authentication requires StoreFront configuration.
Using the Bimodal authentication, the StoreFront administrator can allow both user name andpassword and smart card authentication to the same store by selecting them in the StoreFrontconsole. See StoreFront documentation.
• Multiple certificates - Multiple certificates can be availed for a single smart card and if multi-ple smart cards are in use. When you insert a smart card in a card reader, the certificates areapplicable to all applications running on the user device, including Citrix Workspace app.
• Client certificateauthentication - Client certificate authentication requiresCitrix GatewayandStoreFront configuration.
– For access to StoreFront through Citrix Gateway, you must reauthenticate after removingthe smart card.
– When the Citrix Gateway SSL configuration is set toMandatory client certificate authen-tication, operation is more secure. However, mandatory client certificate authenticationisn’t compatible with bimodal authentication.
• Double hop sessions - If a double-hop is required, a connection is established between CitrixWorkspace app and the user’s virtual desktop.
• Smart card-enabled applications - Smart card-enabled applications, such as Microsoft Out-look andMicrosoft Office, allow users to digitally sign or encrypt documents available in virtualapps and desktops sessions.
Limitations:
• Certificates must be stored on the smart card and not on the user device.• Citrix Workspace app does not save the choice of the user certificate, but stores the PIN whenconfigured. The PIN is cached in non-paged memory only during the user session and isn’tstored on the disk.
• Citrix Workspace app does not reconnect to a session when a smart card is inserted.
© 1999‒2022 Citrix Systems, Inc. All rights reserved. 165

Citrix Workspace app 2203.1 LTSR for Windows
• When configured for smart card authentication, Citrix Workspace app does not support virtualprivate network (VPN) single-sign on or session pre-launch. To use VPNwith smart card authen-tication, install the Citrix Gateway Plug-in. Log on through a webpage using their smart cardsandPINs to authenticate at each step. Pass-through authentication to StoreFrontwith theCitrixGateway Plug-in isn’t available for smart card users.
• Citrix Workspace app updater communications with citrix.com and the Merchandising Serveraren’t compatible with smart card authentication on Citrix Gateway.
Warning
Some configuration requires registry edits. Using the Registry editor incorrectly might causeproblems that can require you to reinstall the operating system. Citrix can’t guarantee that prob-lems resulting from incorrect use of the Registry Editor can be solved. Make sure you back up theregistry before you edit it.
To enable single sign-on for smart card authentication:
To configure Citrix Workspace app for Windows, include the following command-line option duringinstallation:
• ENABLE_SSON=Yes
Single sign-on is another term for pass-through authentication. Enabling this setting preventsCitrix Workspace app from displaying a second prompt for a PIN.
• In the Registry editor, navigate to the following path and set the SSONCheckEnabled string toFalse if you have not installed the single sign-on component.
HKEY_CURRENT_USER\Software{ Wow6432 } \Citrix\AuthManager\protocols\integratedwindows\
HKEY_LOCAL_MACHINE\Software{ Wow6432 } \Citrix\AuthManager\protocols\integratedwindows\
The key prevents theCitrixWorkspace app authenticationmanager fromchecking for the singlesign-on component and allows Citrix Workspace app to authenticate to StoreFront.
To enable smart card authentication to StoreFront instead of Kerberos, install Citrix Workspace appfor Windows with the following command-line options:
• /includeSSON installs single sign-on (pass-through) authentication. Enables credentialcaching and the use of pass-through domain-based authentication.
• If the user logs on to the endpoint with a different authentication method, for example, username and password, the command line is:
/includeSSON LOGON_CREDENTIAL_CAPTURE_ENABLE=No
This type of authentication prevents capturing of the credentials at logon time and allows CitrixWorkspace app to store the PIN during Citrix Workspace app login.
© 1999‒2022 Citrix Systems, Inc. All rights reserved. 166

Citrix Workspace app 2203.1 LTSR for Windows
1. Open the Citrix Workspace app Group Policy Object administrative template by runninggpedit.msc.
2. Go toAdministrative Templates >Citrix Components >CitrixWorkspace >User Authentica-tion > Local user name and password.
3. Select Enable pass-through authentication. Depending on the configuration and security set-tings, select Allow pass-through authentication for all ICA option for pass-through authenti-cation to work.
To configure StoreFront:
• When you configure the authentication service, select the Smart card check box.
For more information about using smart cards with StoreFront, see Configure the authentication ser-vice in the StoreFront documentation.
To enable user devices for smart card use:
1. Import the certificate authority root certificate into the device’s keystore.2. Install your vendor’s cryptographic middleware.3. Install and configure Citrix Workspace app.
To change how certificates are selected:
By default, if multiple certificates are valid, Citrix Workspace app prompts the user to choose a cer-tificate from the list. Instead, you can configure Citrix Workspace app to use the default certificate(per the smart card provider) or the certificate with the latest expiry date. If there are no valid logoncertificates, the user is notified, and given the option to use an alternate logonmethod if available.
A valid certificate must have all of these characteristics:
• The current time of the clock on the local computer is within the certificate validity period.• The Subject public key must use the RSA algorithm and have a key length of 1024 bits, 2048bits, or 4096 bits.
• Key usage must include digital signature.• Subject Alternative Namemust include the User Principal Name (UPN).• Enhanced key usagemust include smart card logon and client authentication, or all key usages.• One of the Certificate Authorities on the certificate’s issuer chainmustmatch one of the allowedDistinguished Names (DN) sent by the server in the TLS handshake.
Change how certificates are selected by using either of the following methods:
• On theCitrixWorkspaceappcommand line, specify theoptionAM_CERTIFICATESELECTIONMODE={ Prompt | SmartCardDefault | LatestExpiry }.
Prompt is the default. For SmartCardDefault or LatestExpiry, if multiple certificatesmeetthe criteria, Citrix Workspace app prompts the user to choose a certificate.
© 1999‒2022 Citrix Systems, Inc. All rights reserved. 167
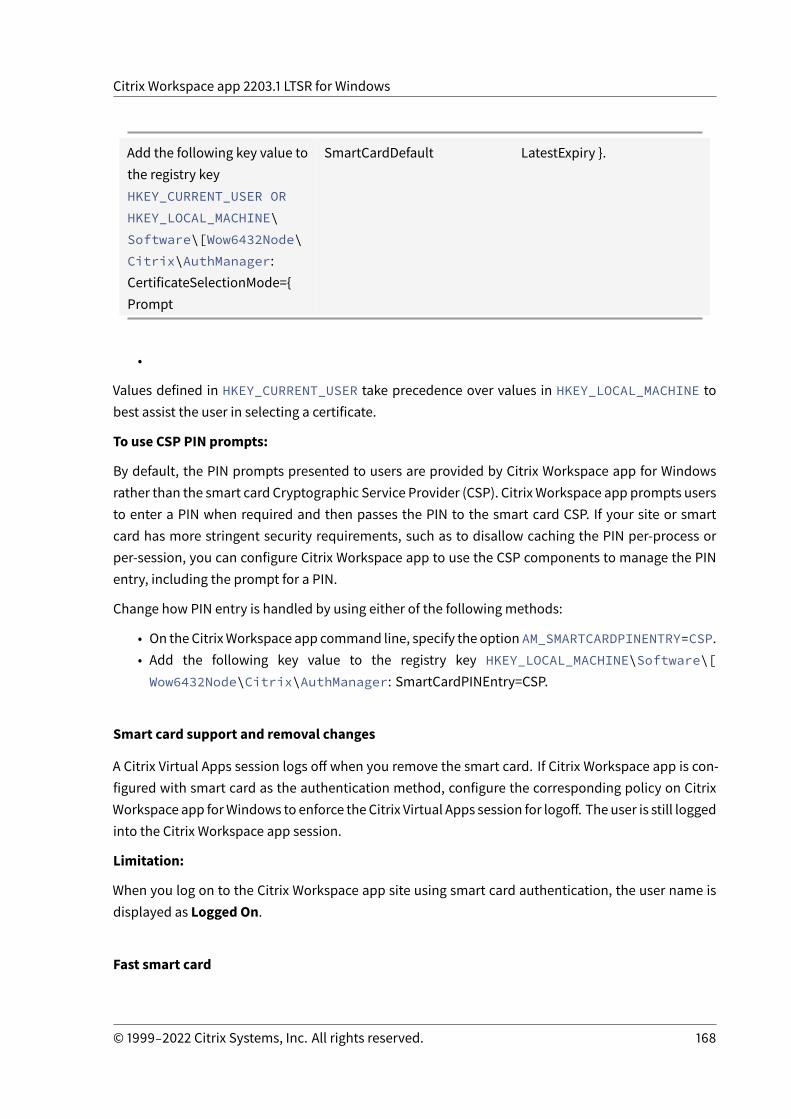
Citrix Workspace app 2203.1 LTSR for Windows
Add the following key value tothe registry keyHKEY_CURRENT_USER ORHKEY_LOCAL_MACHINE\Software\[Wow6432Node\Citrix\AuthManager:CertificateSelectionMode={Prompt
SmartCardDefault LatestExpiry }.
•
Values defined in HKEY_CURRENT_USER take precedence over values in HKEY_LOCAL_MACHINE tobest assist the user in selecting a certificate.
To use CSP PIN prompts:
By default, the PIN prompts presented to users are provided by Citrix Workspace app for Windowsrather than the smart card Cryptographic Service Provider (CSP). Citrix Workspace app prompts usersto enter a PIN when required and then passes the PIN to the smart card CSP. If your site or smartcard has more stringent security requirements, such as to disallow caching the PIN per-process orper-session, you can configure Citrix Workspace app to use the CSP components to manage the PINentry, including the prompt for a PIN.
Change how PIN entry is handled by using either of the following methods:
• On the CitrixWorkspace app command line, specify the optionAM_SMARTCARDPINENTRY=CSP.• Add the following key value to the registry key HKEY_LOCAL_MACHINE\Software\[Wow6432Node\Citrix\AuthManager: SmartCardPINEntry=CSP.
Smart card support and removal changes
A Citrix Virtual Apps session logs off when you remove the smart card. If Citrix Workspace app is con-figured with smart card as the authentication method, configure the corresponding policy on CitrixWorkspace app forWindows to enforce the Citrix Virtual Apps session for logoff. The user is still loggedinto the Citrix Workspace app session.
Limitation:
When you log on to the Citrix Workspace app site using smart card authentication, the user name isdisplayed as Logged On.
Fast smart card
© 1999‒2022 Citrix Systems, Inc. All rights reserved. 168

Citrix Workspace app 2203.1 LTSR for Windows
Fast smart card is an improvement over the existing HDX PC/SC-based smart card redirection. It im-proves performance when smart cards are used in high-latency WAN environments.
Fast smart cards are supported on Linux VDA only.
To enable fast smart card logon on Citrix Workspace app:
Fast smart card logon is enabled by default on the VDA and disabled by default on Citrix Workspaceapp. To enable fast smart card logon, include the following parameter in the default.ica file of theassociated StoreFront site:
1 copy[WFClient]2 SmartCardCryptographicRedirection=On3 <!--NeedCopy-->
To disable fast smart card logon on Citrix Workspace app:
Todisable fast smart card logononCitrixWorkspaceapp, remove theSmartCardCryptographicRedirectionparameter from the default.ica file of the associated StoreFront site.
For more information, see smart-cards.
Silent authentication for Citrix Workspace
CitrixWorkspaceapp introduces aGroupPolicyObject (GPO)policy to enable silent authentication forCitrixWorkspace. This policy enables CitrixWorkspace app to log in to CitrixWorkspace automaticallyat system startup. Use this policy only when domain pass-through (single sign-on) is configured forCitrix Workspace on domain-joined devices.
For this policy to function, the following criteria must be met:
• Single sign-onmust be enabled.• The SelfServiceMode key must be set to Off in the Registry editor.
Enabling silent authentication:
1. Open theCitrixWorkspace appGroupPolicyObject administrative template by runninggpedit.msc.
2. Under theComputerConfigurationnode, go toAdministrativeTemplates>CitrixWorkspace> Self Service.
3. Click the Silent authentication for Citrix Workspace policy and set it to Enabled.4. Click Apply andOK.
© 1999‒2022 Citrix Systems, Inc. All rights reserved. 169
Citrix Workspace app 2203.1 LTSR for Windows
Secure communications
April 7, 2022
To secure the communication between Citrix Virtual Apps and Desktops server and Citrix Workspaceapp, you can integrate your Citrix Workspace app connections using a range of secure technologiessuch as the following:
• Citrix Gateway: For information, see the topics in this section and the Citrix Gateway, and Store-Front documentation.
• A firewall: Network firewalls can allow or block packets based on the destination address andport.
• Transport Layer Security (TLS) versions 1.0 through 1.2 are supported.• Trusted server to establish trust relations in Citrix Workspace app connections.• ICA file signing• Local Security Authority (LSA) protection• Proxy server for Citrix Virtual Apps deployments only: A SOCKS proxy server or secure proxyserver. Proxy servers help to limit access to and from the network. They also handle the con-nections between Citrix Workspace app and the server. Citrix Workspace app supports SOCKSand secure proxy protocols.
• Outbound proxy
Citrix Gateway
Citrix Gateway (formerly Access Gateway) secures connections to StoreFront stores. Also, lets admin-istrators control user access to desktops and applications in a detailed way.
To connect to desktops and applications through Citrix Gateway:
1. Specify theCitrixGatewayURL that youradministratorprovidesusingoneof the followingways:
• The first time you use the self-service user interface, you are prompted to enter the URL inthe Add Account dialog box.
• When you later use the self-service user interface, enter the URL by clicking Preferences >Accounts > Add.
• If you’re establishing a connection with the storebrowse command, enter the URL at thecommand line
The URL specifies the gateway and, optionally, a specific store:
• To connect to the first store that Citrix Workspace app finds, use a URL in the following format:
– https://gateway.company.com
© 1999‒2022 Citrix Systems, Inc. All rights reserved. 170

Citrix Workspace app 2203.1 LTSR for Windows
• To connect to a specific store, use a URL of the form, for example: https://gateway.company.com?<storename>. This dynamic URL is in a non-standard form; do not include “=” (the“equals” sign character) in the URL. If you’re establishing a connection to a specific store withstorebrowse, youmight need quotation marks around the URL in the storebrowse command.
1. When prompted, connect to the store (through the gateway) using your user name, password,and security token. For more information about this step, see the Citrix Gateway documenta-tion.
When authentication is complete, your desktops and applications are displayed.
Connecting through firewall
Network firewalls can allow or block packets based on the destination address and port. If you’reusing a firewall, Citrix Workspace app for Windows can communicate through the firewall with boththe Web server and the Citrix server.
Common Citrix Communication Ports
Source Type Port Details
Citrix Workspace app TCP 80/443 Communication withStoreFront
ICA or HDX TCP/UDP 1494 Access to applicationsand virtual desktops
ICA or HDX withSession Reliability
TCP/UDP 2598 Access to applicationsand virtual desktops
ICA or HDX over TLS TCP/UDP 443 Access to applicationsand virtual desktops
For more information about the ports, see the Citrix Knowledge Center article CTX101810.
Transport Layer Security
Transport Layer Security (TLS) is the replacement for the SSL (Secure Sockets Layer) protocol. TheInternet Engineering Taskforce (IETF) renamed it TLSwhen it took over responsibility for the develop-ment of TLS as an open standard.
TLS secures data communications by providing server authentication, encryption of the data stream,andmessage integrity checks. Some organizations, including U.S. government organizations, require
© 1999‒2022 Citrix Systems, Inc. All rights reserved. 171

Citrix Workspace app 2203.1 LTSR for Windows
the use of TLS to secure data communications. These organizations might also require the use ofvalidated cryptography, such as Federal Information Processing Standard (FIPS) 140. FIPS 140 is astandard for cryptography.
To use TLS encryption as the communication medium, you must configure the user device and theCitrix Workspace app. For information about securing StoreFront communications, see the Securesection in the StoreFront documentation. For information about securing VDA, see Transport LayerSecurity (TLS) in the Citrix Virtual Apps and Desktops documentation.
You can use the following policies to:
• Enforce use of TLS: We recommend that you use TLS for connections using untrusted networks,including the Internet.
• Enforce use of FIPS (Federal Information Processing Standards): Approved cryptography andfollow the recommendations in NIST SP 800-52. These options are disabled by default.
• Enforce use of a specific version of TLS and specific TLS cipher suites: Citrix supports the TLS1.0, TLS 1.1, and TLS 1.2 protocols.
• Connect only to specific servers.• Check for revocation of the server certificate.• Check for a specific server-certificate issuance policy.• Select a particular client certificate, if the server is configured to request one.
Important:The following cipher suites are deprecated for enhanced security:
• Cipher suites RC4 and 3DES• Cipher suites with prefix “TLS_RSA_*”• TLS_RSA_WITH_AES_256_GCM_SHA384 (0x009d)• TLS_RSA_WITH_AES_128_GCM_SHA256 (0x009c)• TLS_RSA_WITH_AES_256_CBC_SHA256 (0x003d)• TLS_RSA_WITH_AES_256_CBC_SHA (0x0035)• TLS_RSA_WITH_AES_128_CBC_SHA (0x002f)• TLS_RSA_WITH_RC4_128_SHA (0x0005)• TLS_RSA_WITH_3DES_EDE_CBC_SHA (0x000a)
For information on the supported cipher suites, see the Citrix Knowledge Center articleCTX250104.
TLS support
1. Open the Citrix Workspace app GPO administrative template by running gpedit.msc.
2. Under theComputerConfigurationnode, go toAdministrativeTemplates>CitrixWorkspace> Network routing, and select the TLS and Compliance Mode Configuration policy.
© 1999‒2022 Citrix Systems, Inc. All rights reserved. 172

Citrix Workspace app 2203.1 LTSR for Windows
3. Select Enabled to enable secure connections and to encrypt communication on the server. Setthe following options:
Note:
Citrix recommends TLS for secure connections.
a) Select Require TLS for all connections to force Citrix Workspace app to use TLS for con-nections to published applications and desktops.
b) From the Security Compliance Modemenu, select the appropriate option:
i. None - No compliance mode is enforced.ii. SP800-52 - Select SP800-52 for compliance with NIST SP 800-52. Select this option
only if the servers or gateway follow NIST SP 800-52 recommendations.
Note:
If you select SP800-52, FIPS Approved cryptography is automatically used, even if
© 1999‒2022 Citrix Systems, Inc. All rights reserved. 173

Citrix Workspace app 2203.1 LTSR for Windows
Enable FIPS isn’t selected. Also, enable the Windows security option, System Cryp-tography: Use FIPS-compliant algorithms for encryption, hashing, and signing.Otherwise, Citrix Workspace app might fail to connect to the published applicationsand desktops.
If you selectSP800-52, set theCertificateRevocationCheckPolicy setting to Full accesscheck and CRL required.
When you selectSP800-52, CitrixWorkspace app verifies that the server certificate followsthe recommendations in NIST SP 800-52. If the server certificate does not comply, CitrixWorkspace appmight fail to connect.
i. Enable FIPS - Select this option to enforce the use of FIPS approved cryptography.Also, enable the Windows security option from the operating system group policy,System Cryptography: Use FIPS-compliant algorithms for encryption, hashing,and signing. Otherwise, Citrix Workspace app might fail to connect to published ap-plications and desktops.
c) From the Allowed TLS servers drop-down menu, select the port number. Use a comma-separated list to ensure that the Workspace app connects only to a specified server. Youcan specify wildcards and port numbers. For example, *.citrix.com: 4433 allows connec-tions to any server whose common name ends with .citrix.com on port 4433. The issuerof the certificate asserts the accuracy of the information in a security certificate. If CitrixWorkspace does not recognize or trust the issuer, the connection is rejected.
d) From the TLS versionmenu, select one of the following options:
• TLS 1.0, TLS 1.1, or TLS 1.2 - This is the default setting. This option is recommended onlyif there is a business requirement for TLS 1.0 for compatibility.
• TLS 1.1 or TLS 1.2 - Use this option to ensure that the connections use either TLS 1.1 or TLS1.2.
• TLS 1.2 - This option is recommended if TLS 1.2 is a business requirement.
a) TLS cipher set - To enforce use of a specific TLS cipher set, select Government (GOV),Commercial (COM), or All (ALL). For more information, see Citrix Knowledge Center arti-cle CTX250104.
b) From the Certificate Revocation Check Policymenu, select any of the following:
• Check with No Network Access - Certificate Revocation list check is done. Only local cer-tificate revocation list stores are used. All distribution points are ignored. A CertificateRevocation List check that verifies the server certificate available from the target SSL Re-lay/Citrix Secure Web Gateway server isn’t mandatory.
• Full Access Check - Certificate Revocation List check is done. Local Certificate RevocationList stores and all distribution points are used. If revocation information for a certificate is
© 1999‒2022 Citrix Systems, Inc. All rights reserved. 174

Citrix Workspace app 2203.1 LTSR for Windows
found, the connection is rejected. Certificate Revocation List check for verifying the servercertificate available from the target server isn’t critical.
• Full Access Check and CRL Required - Certificate Revocation List check is done, exceptfor the root Certificate Authority. Local Certificate Revocation List stores and all distribu-tion points are used. If revocation information for a certificate is found, the connection isrejected. Finding all required Certificate Revocation Lists is critical for verification.
• Full AccessCheckandCRLRequiredAll - CertificateRevocation List check is done, includ-ing the root CA. Local Certificate Revocation List stores andall distributionpoints are used.If revocation information for a certificate is found, the connection is rejected. Finding allrequired Certificate Revocation Lists is critical for verification.
• No Check - No Certificate Revocation List check is done.
a) Using the Policy Extension OID, you can limit Citrix Workspace app to connect only toservers with a specific certificate issuance policy. When you select Policy Extension OID,CitrixWorkspace appaccepts only server certificates that contain thePolicy ExtensionOID.
b) From the Client Authenticationmenu, select any of the following:
• Disabled - Client Authentication is disabled.
• Display certificate selector - Always prompt the user to select a certificate.
• Select automatically if possible - Prompt the user only if there a choice of the certificateto identify.
• Not configured - Indicates that client authentication isn’t configured.
• Use specified certificate - Use the client certificate as set in the Client Certificate option.
a) Use the Client Certificate setting to specify the identifying certificate’s thumbprint toavoid prompting the user unnecessarily.
b) Click Apply andOK to save the policy.
For information on the internal and external network connections matrix, see the Citrix KnowledgeCenter article CTX250104.
Trusted server
Trusted server configuration identifies and enforces trust relations in Citrix Workspace app connec-tions.
When you enable Trusted server, Citrix Workspace app specifies the requirements and decides if theconnection to the server can be trusted. For example, a Citrix Workspace app connecting to a certainaddress, such as https://\*.citrix.comwith a specific connection type (such as TLS) is directedto a trusted zone on the server.
© 1999‒2022 Citrix Systems, Inc. All rights reserved. 175

Citrix Workspace app 2203.1 LTSR for Windows
When you enable this feature, the connected server is in theWindows Trusted Sites zone. For instruc-tions about adding servers to theWindows Trusted Sites zone, see the Internet Explorer online help.
To enable trusted server configuration using Group Policy Object administrative template
Prerequisite:
Exit from the Citrix Workspace app components including the Connection Center.
1. Open the Citrix Workspace app GPO administrative template by running gpedit.msc.2. Under the Computer Configuration node, go to Administrative Templates > Citrix Compo-
nents > Citrix Workspace > Network Routing > Configure trusted server configuration.3. Select Enabled to force Citrix Workspace app for region identification.4. Select Enforce trusted server configuration. This option forces the client to perform the iden-
tification using a trusted server.5. From theWindows internet zone drop-down menu, select the client-server address. This set-
ting is applicable only to the Windows Trusted Site zone.6. In the Address field, set the client-server address for the trusted site zone other than the Win-
dows. You can use a comma-separated list.7. ClickOK and Apply.
ICA file signing
The ICA file signing helps protect you from an unauthorized application or desktop launch. CitrixWorkspace app verifies that a trusted source generated the application or desktop launch based onan administrative policy and protects against launches from untrusted servers. You can configure ICAfile signing using the Group policy objects administrative template or StoreFront. The ICA file signingfeature isn’t enabled by default.
For information about enabling ICA file signing for StoreFront, see Enable ICA file signing in StoreFrontdocumentation.
Configure ICA file signatureNote:
If the CitrixBase.admx\adml isn’t added to the local GPO, the Enable ICA File Signing policymight not be present.
1. Open the Citrix Workspace app Group Policy Object administrative template by runninggpedit.msc
2. Under the Computer Configuration node, go to Administrative Templates > Citrix Compo-nents.
3. Select Enable ICA File Signing policy and select one of the options as required:
© 1999‒2022 Citrix Systems, Inc. All rights reserved. 176

Citrix Workspace app 2203.1 LTSR for Windows
a) Enabled - Indicates that you can add the signing certificate thumbprint to the allow list oftrusted certificate thumbprints.
b) Trust Certificates - Click Show to remove the existing signing certificate thumbprint fromthe allow list. You can copy and paste the signing certificate thumbprints from the signingcertificate properties.
c) Security policy - Select one of the following options from themenu.i. Only allow signed launches (more secure): Allows only signed application and desk-
top launches froma trusted server. A securitywarningappearswhen there’s an invalidsignature. The session launch fails because of non-authorization.
ii. Prompt user onunsigned launches (less secure) - Amessageprompt appearswhenanunsigned or invalidly signed session is launched. You can choose to either continuethe launch or cancel the launch (default).
4. Click Apply andOK to save the policy.5. Restart the Citrix Workspace app session for the changes to take effect.
To select and distribute a digital signature certificate:
When selecting a digital signature certificate, we recommend you choose from the following prioritylist:
1. Buy a code-signing certificate or SSL signing certificate from a public Certificate Authority (CA).2. If your enterprise has a private CA, create a code-signing certificate or SSL signing certificate
using the private CA.3. Use an existing SSL certificate.4. Create a root CA certificate and distribute it to user devices using GPO or manual installation.
Local Security Authority (LSA) protection
Citrix Workspace app supports Windows Local Security Authority (LSA) protection, which maintainsinformation about all aspects of local security on a system. This support provides the LSA level ofsystem protection to hosted desktops.
Connecting through proxy server
Proxy servers are used to limit access to and from your network, and to handle connections betweenCitrix Workspace app for Windows and servers. Citrix Workspace app supports SOCKS and secureproxy protocols.
When communicatingwith the server, Citrix Workspace app uses proxy server settings that are config-ured remotely on the server running workspace for web.
When communicating with the web server, Citrix Workspace app uses the proxy server settings con-figured through the Internet settings of the default web browser on the user device. Configure the
© 1999‒2022 Citrix Systems, Inc. All rights reserved. 177

Citrix Workspace app 2203.1 LTSR for Windows
Internet settings of the default web browser on the user device accordingly.
To enforce proxy settings through the ICA file on StoreFront, see Citrix Knowledge Center articleCTX136516.
Outbound proxy support
SmartControl allows administrators to configure and enforce policies that affect the environment.For instance, you might want to prohibit users from mapping drives to their remote desktops. Youcan achieve the granularity using the SmartControl feature on the Citrix Gateway.
The scenario changes when the Citrix Workspace app and the Citrix Gateway belong to separate en-terprise accounts. In such cases, the client domain can’t apply the SmartControl feature because thegateway doesn’t exist on the domain. You can then use the Outbound ICA Proxy. The Outbound ICAProxy feature lets you use the SmartControl feature even when Citrix Workspace app and Citrix Gate-way are deployed in different organizations.
Citrix Workspace app supports session launches using the NetScaler LAN proxy. Use the outboundproxy plug-in to configure a single static proxy or select a proxy server at runtime.
You can configure outbound proxies using the following methods:
• Static proxy: Proxy server is configured by giving a proxy host name and port number.• Dynamic proxy: A single proxy server can be selected among one or more proxy servers usingthe proxy plug-in DLL.
You can configure the outbound proxy using the Group Policy Object administrative template or theRegistry editor.
For more information about outbound proxy, see Outbound ICA Proxy support in the Citrix Gatewaydocumentation.
Outbound proxy support - ConfigurationNote:
If both static proxy and dynamic proxies are configured, the dynamic proxy configuration takesprecedence.
Configuring the outbound proxy using the GPO administrative template:
1. Open the Citrix Workspace app Group Policy Object administrative template by runninggpedit.msc.
2. Under theComputerConfigurationnode, go toAdministrativeTemplates>CitrixWorkspace> Network routing.
3. Select one of the following options:
© 1999‒2022 Citrix Systems, Inc. All rights reserved. 178

Citrix Workspace app 2203.1 LTSR for Windows
• For static proxy: Select the Configure NetScaler LAN proxy manually policy. Select En-abled and then provide the host name and port number.
• For dynamic proxy: Select the Configure NetScaler LAN proxy using DLL policy. SelectEnabled and then provide the full path to the DLL file. For example, C:\Workspace\Proxy\ProxyChooser.dll.
4. Click Apply andOK.
Configuring the outbound proxy using the Registry editor:
• For static proxy:
– Launch the Registry editor and navigate to HKEY_LOCAL_MACHINE\SOFTWARE\Policies\Citrix\ICA Client\Engine\Network Routing\Proxy\NetScaler.
– Create DWORD value keys as follows:
”StaticProxyEnabled”=dword:00000001”ProxyHost”=”testproxy1.testdomain.com”ProxyPort”=dword:000001bb
• For dynamic proxy:
– Launch the Registry editor and navigate to HKEY_LOCAL_MACHINE\SOFTWARE\Policies\Citrix\ICA Client\Engine\Network Routing\Proxy\NetScalerLAN Proxy.
– Create DWORD value keys as follows:”DynamicProxyEnabled”=dword:00000001”ProxyChooserDLL”=”c:\\Workspace\\Proxy\\ProxyChooser.dll”
Storebrowse
April 7, 2022
Storebrowse is a command-line utility that interacts between the client and the server. It’s used toauthenticate all the operations within StoreFront and with Citrix Gateway.
Using the Storebrowse utility, administrators can automate the following operations:
• Add a store.• List the published apps and desktops from a configured store.• Generate an ICA file by selecting any published virtual apps and desktops manually.• Generate an ICA file using the Storebrowse command line.• Launch the published application.
© 1999‒2022 Citrix Systems, Inc. All rights reserved. 179

Citrix Workspace app 2203.1 LTSR for Windows
The Storebrowse utility is a part of the Authmanager component. When Citrix Workspace app instal-lation is complete, the Storebrowse utility is in the AuthManager installation folder.
To confirm that the Storebrowse utility is installed along with the Authmanager component, checkthe following registry path:
When Citrix Workspace app is installed by administrators:
On a 32-bit machine [HKEY_LOCAL_MACHINE\SOFTWARE\Citrix\AuthManager\Install]
On a 64-bit machine [HKEY_LOCAL_MACHINE\SOFTWARE\WOW6432Node\Citrix\AuthManager\Install]
When Citrix Workspace app is installed by users (non-administrators):
On a 32-bit machine [HKEY_CURRENT_USER\SOFTWARE\Citrix\AuthManager\Install]
On a 64-bit machine [HKEY_CURRENT_USER\SOFTWARE\WOW6432Node\Citrix\AuthManager\Install]
Requirements
• Citrix Workspace app Version 1808 for Windows or later.• Minimum of 530 MB of free disk space.• 2 GB RAM.
Compatibility Matrix
Storebrowse utility is compatible with the following operating systems:
Operating system
Windows 10 32-bit and 64-bit editions
Windows 8.1, 32-bit and 64-bit editions
Windows 7 SP1, 32-bit and 64-bit editions
Windows Thin PC
Windows Server 2016
Windows Server 2012 R2, Standard, and, Data center editions
© 1999‒2022 Citrix Systems, Inc. All rights reserved. 180

Citrix Workspace app 2203.1 LTSR for Windows
Operating system
Windows Server 2012, Standard, and, Data center editions
Windows Server 2008 R2, 64-bit edition
Windows Server 2008 R2, 64-bit edition
Connections
Storebrowse utility supports the following types of connections:
• HTTP store• HTTPS store• Citrix Gateway 11.0 and later
Note:
On an HTTP store, the Storebrowse utility does not accept credentials using the command-line.
Authenticationmethods
StoreFront servers
StoreFront supports different authentication methods to access stores, however, not all are recom-mended. For security purposes, some of the authentication methods are disabled by default whilecreating a store.
• Username and Password: Enter the credentials to be authenticated to access stores. By de-fault, Explicit authentication is enabled when you create your first store.
• Domain Pass-through: After authenticating to the domain-joined Windows computers, you’reautomatically signed in to stores. To use this option, enable pass-through authenticationwheninstalling the Citrix Workspace app. For more information on domain pass-through, see Config-uring Pass-through authentication.
• HTTP Basic: Enable HTTP Basic authentication so that the Storebrowse utility can communi-cate with the StoreFront servers. This option is disabled by default on the StoreFront server.Enable theHTTP Basic authenticationmethod.
Storebrowse utility supports authentication methods in any of the following methods:
• Using the AuthManager that is in-built along with the Storebrowse utility. Note: Enable theHTTP Basic authenticationmethod on the StoreFront while working with the Storebrowse util-ity. This applies when the user provides the credentials using the Storebrowse commands.
• External Authmanager that can be included with Citrix Workspace app for Windows.
© 1999‒2022 Citrix Systems, Inc. All rights reserved. 181

Citrix Workspace app 2203.1 LTSR for Windows
Single sign-on with Citrix Gateway
In addition to the newly added Citrix Gateway support, you can now use single sign-on with it. Youcan add a store and list the published resources without having to provide your user credentials.
Formore information about single sign-on supportwith Citrix Gateway, see Support for single sign-onwith Citrix Gateway.
Note:
This feature is supportedonlyondomain-joinedmachineswhere theCitrixGateway is configuredwith the single sign-on authentication.
Launch published desktop or application
You can now launch a resource directly from the store without having to use an ICA file.
Command usage
The following section provides detailed information about the commands that you can use from theStorebrowse utility.
-a, --addstore
Description:
Adds new store. Returns the full URL of the store. If the return fails, an error is reported.
Note:
Multi-store configuration is supported on the Storebrowse utility.
Command example on StoreFront:
Command:
storebrowse.exe ‒U *username* -P *password* -D *domain* -a *URL of Storefront*
Example:
.\storebrowse.exe ‒U { Username } ‒P { Password } ‒D { Domain } ‒a [https://my.firstexamplestore.net](https://my.firstexamplestore.net)
Command example on Citrix Gateway:
Command:
© 1999‒2022 Citrix Systems, Inc. All rights reserved. 182

Citrix Workspace app 2203.1 LTSR for Windows
storebrowse.exe ‒U *username* -P *password* -D *domain* -a *URL of CitrixGateway*
Example:
.\storebrowse.exe ‒U { Username } ‒P { Password } ‒D { Domain } ‒a <https://mysecondexample.com>
/?
Description:
Provides details on Storebrowse utility usage.
(-l), --liststore
Description:
Lists the stores that are added by the user.
Command Example on StoreFront:
.\storebrowse.exe ‒l
Command Example on Citrix Gateway:
.\storebrowse.exe ‒l
(-M 0x2000 -E)
Description:
Enumerates resources.
Command example on StoreFront:
.\storebrowse.exe ‒U { Username } ‒P { Password } ‒D { Domain } ‒M 0x2000 ‒E<https://my.firstexamplestore.net/Citrix/Store/discovery>
Command example on Citrix Gateway:
.\storebrowse.exe ‒U { Username } ‒P { Password } ‒D { Domain } ‒M 0x2000 ‒E<https://my.secondexample.net>
-q, --quicklaunch
Description:
© 1999‒2022 Citrix Systems, Inc. All rights reserved. 183

Citrix Workspace app 2203.1 LTSR for Windows
Generates the ICA file for published apps and desktops using the Storebrowse utility. Thequicklaunch option requires a launch URL as an input along with the Store URL. The launch URLwhich can either be the StoreFront server or the Citrix Gateway URL. The ICA file is generated in the%LocalAppData%\Citrix\Storebrowse\cache directory.
You can get the launch URL for any published apps and desktops by running the following command:
.\storebrowse ‒M 0X2000 ‒E https://myfirstexamplestore.net/Citrix/Second/discovery
A typical launch URL is as follows:
'Controller.Calculator''Calculator''\' ''http://abc-sf.xyz.com/Citrix/Stress/resources/v2/Q29udHJvbGxlci5DYWxjdWxhdG9y/launch/ica
Command example on StoreFront:
.\storebrowse.exe ‒U { Username } ‒P { Password } ‒D { Domain } ‒q { Launch_URL_of_published_apps and desktops } <https://my.firstexamplestore.net/Citrix/Store/resources
/v2/Q2hJkOlmNoPQrSTV9y/launch/ica> <https://my.firstexamplestore.net/Citrix/Store/discovery>
Command example on Citrix Gateway:
.\storebrowse.exe ‒U { Username } ‒P { Password } ‒D { Domain } ‒q { Launch_URL_of_published_apps and desktops } <https://my.secondexmaplestore.com>
-L, --launch
Description:
Generates the required ICA file for published apps and desktops using the Storebrowse utility. Thelaunch option requires the nameof the resource alongwith the StoreURL. The namewhich can eitherbe the StoreFront server or the Citrix Gateway URL. The ICA file is generated in the %LocalAppData%\Citrix\Storebrowse\cache directory.
Run the following command to get the display name of the published apps and desktops:
.\storebrowse ‒M 0X2000 ‒E https://myfirstexamplestore.net/Citrix/Second/discovery
This command results in the following output:
'Controller.Calculator''Calculator''\' ''http://abc-sf.xyz.com/Citrix/Stress/resources/v2/Q29udHJvbGxlci5DYWxjdWxhdG9y/launch/ica
The name that is in bold in the previous output is used as an input parameter to the launch option.
Command example on StoreFront:
© 1999‒2022 Citrix Systems, Inc. All rights reserved. 184

Citrix Workspace app 2203.1 LTSR for Windows
.\storebrowse.exe -U { Username } ‒P { Password } ‒D { Domain } ‒L “{Resource_Name } <https://my.firstexamplestore.net/Citrix/Store/discovery>
Command example on Citrix Gateway:
<.\storebrowse.exe ‒U { Username } ‒P { Password } ‒D { Domain } ‒L { Resource_Name} https://my.secondexamplestore.com>
-S, --sessionlaunch
Description:
With this command, you can adda store, verify, and launch the published resources. This option takesthe following as parameters:
• User name• Password• Domain• Name of the resource to be launched• Store URL
However, if the user does not provide the credentials, the AuthManager prompts to enter the creden-tials and then the resource is launched.
You can get the name of the resource of published apps and desktops by running the following com-mand:
.\storebrowse ‒M 0X2000 ‒E https://myfirstexamplestore.net/Citrix/Second/discovery
This command results in the following output:
'Controller.Calculator''Calculator''\' ''http://abc-sf.xyz.com/Citrix/Stress/resources/v2/Q29udHJvbGxlci5DYWxjdWxhdG9y/launch/ica
The name that is in bold in the previous output is used as the input parameter to the -S option.
Command example on StoreFront:
.\storebrowse.exe -U { Username } ‒P { Password } ‒D { Domain } ‒S “{Friendly_Resource_Name } <https://my.firstexamplestore.net/Citrix/Store/discovery >
Command example on Citrix Gateway:
.\storebrowse.exe ‒U { Username } ‒P { Password } ‒D { Domain } ‒S { Friendly_Resource_Name} <https://my.secondexamplestore.com>
© 1999‒2022 Citrix Systems, Inc. All rights reserved. 185

Citrix Workspace app 2203.1 LTSR for Windows
-f, --filefolder
Description:
Generates the ICA file in the custom path for the published apps and desktops.
The launch option requires a folder name and the name of the resource as the input with the StoreURL. The Store URL can either be the StoreFront server or the Citrix Gateway URL.
Command example on StoreFront:
.\storebrowse.exe ‒f “C:\Temp\Launch.ica” ‒L “Resource_Name” { Store }
Command example on the Citrix Gateway:
.\storebrowse.exe ‒f “C:\Temp\Launch.ica” ‒L “Resource_Name” { NSG_URL }
-t, --traceauthentication
Description:
Generates logs for theAuthManager component. Logsaregeneratedonly if theStorebrowseutility isusing an in-built AuthManager. Logs are generated in the localappdata%\Citrix\Storebrowse\logs directory.
Note:
This option must not be the last parameter listed in the user’s command line.
Command example on StoreFront:
.\storebrowse.exe ‒t ‒U { UserName } ‒P { Password } ‒D { Domain } ‒a {StoreURL }
Command example on Citrix Gateway:
.\storebrowse.exe ‒t ‒U { UserName } ‒P { Password } ‒D { Domain } ‒a {NSG_URL }
-d, --deletestore
Description:
Deletes existing StoreFront or Citrix Gateway store.
Command example on StoreFront:
.\storebrowse.exe ‒d https://my.firstexamplestore.net/Citrix/Store/discovery
Command example on Citrix Gateway:
.\storebrowse.exe ‒d https://my.secondexmaplestore.com
© 1999‒2022 Citrix Systems, Inc. All rights reserved. 186

Citrix Workspace app 2203.1 LTSR for Windows
Single sign-on support with Citrix Gateway
Single sign-on lets you authenticate to a domain and use the Citrix Virtual Apps and Desktops andCitrix DaaS (formerly Citrix Virtual Apps and Desktops service)that the domain provides. You can signin without having to reauthenticate to each app or desktop. When you add a store, your credentialspass through the Citrix Gateway server, along with the Citrix Virtual Apps and Desktops and CitrixDaaS, and Start menu settings.
This feature is supported on Citrix Gateway Version 11 and later.
Prerequisites:
For the prerequisites on how to configure Single Sign-On for the Citrix Gateway, see Configure domainpass-through authentication.
The single sign-on feature with Citrix Gateway can be enabled using the Group Policy Object (GPO)administrative template.
1. Open the Citrix Workspace app GPO administrative template by running gpedit.msc2. Under theComputerConfigurationnode, go toAdministrativeTemplate>CitrixComponent
> Citrix Workspace > User Authentication > Single Sign-on for Citrix Gateway.3. Use the toggle options to Enable or Disable the Single Sign-On option.4. Click Apply andOK.5. Restart the Citrix Workspace app session for the changes to take effect.
Limitations:
• Enable theHTTPBasicAuthenticationmethodon theStoreFront server for credential injectionoperations with the Storebrowse utility.
• If you have an HTTP store and try to connect to the store using the utility to check or launch thepublished virtual apps and desktops, the credential injection using the command-line option isunsupported. As a workaround, use the external AuthManagermodule if you do not providecredential using the command line.
• Storebrowse utility currently supports only single store configured the Citrix Gateway on theStoreFront server.
• Credential Injection in the Storebrowse utility works only if the Citrix Gateway is configuredwith Single-Factor Authentication.
• The command-line optionsUsername (-U), Password (-P) andDomain (-D)of theStore-browse utility are case-sensitive andmust be in upper case only.
Citrix Workspace app Desktop Lock
April 7, 2022
© 1999‒2022 Citrix Systems, Inc. All rights reserved. 187

Citrix Workspace app 2203.1 LTSR for Windows
You can use the Citrix Workspace app Desktop Lock when you do not need to interact with the localdesktop. You can use the Desktop Viewer (if enabled), however it has only the following set of optionson the toolbar:
• Ctrl+Alt+Del• Preferences• Devices• Disconnect.
Citrix Workspace app for Windows with Desktop Lock works on domain-joinedmachines that are sin-gle sign-on enabled and store configured. It doesn’t support PNA sites. Previous versions of DesktopLock aren’t supported when you upgrade to Citrix Receiver for Windows 4.2 or later.
Install CitrixWorkspace app forWindowswith the /includeSSON flag. Configure the store and singlesign-on, either using the adm/admx file or command line option. For more information, see Install.
Then, install theCitrixWorkspaceappDesktopLockasanadministratorusing theCitrixWorkspaceDesktopLock.msi available in the Citrix Downloads page.
System requirements
• Microsoft Visual C++ 2005 Service Pack 1 Redistributable Package. For more information, seethe Microsoft Download page.
• Supported on Windows 8, and Windows 8.1, Windows 10 (Anniversary update included), andWindows 11.
• Connects to StoreFront through native protocols only.• Domain-joined end points.• User devices must be connected to a LAN or WAN.
Local App AccessImportant
Enabling Local App Access might allow local desktop access unless a full lockdown has beenapplied with the Group Policy Object template or a similar policy. For more information, see theConfigure Local App Access and URL redirection section in the Citrix Virtual Apps and Desktopsdocumentation.
Working with Citrix Workspace app Desktop Lock
• You can use Citrix Workspace app Desktop Lock with the following Citrix Workspace app fea-tures:
– 3Dpro, Flash, USB, HDX Insight, Microsoft Lync 2013 plug-in, and Local App Access
© 1999‒2022 Citrix Systems, Inc. All rights reserved. 188

Citrix Workspace app 2203.1 LTSR for Windows
– Domain, two-factor authentication, or smart card authentication only• Disconnecting the Citrix Workspace app Desktop Lock session logs out the end device.• Flash redirection is disabled on Windows 8 and later versions. Flash redirection is enabled onWindows 7.
• TheDesktop Viewer is optimized for CitrixWorkspace appDesktop Lockwith noHome, Restore,Maximize, and Display properties.
• Ctrl+Alt+Del is available on the Desktop Viewer toolbar.• Most windows shortcut keys are passed to the remote session, except for Windows+L.• Ctrl+F1 triggers Ctrl+Alt+Del when you disable the connection or Desktop Viewer for desktopconnections.
Note:
With the Desktop Lock installed, and LiveInDesktopDisconnectOnLock set to False in theregistry path HKEY_LOCAL_MACHINE\SOFTWARE\Citrix\Dazzle Or HKEY_LOCAL_MACHINE\SOFTWARE\Wow6432Node\Citrix\Dazzle, the active session gets disconnected when theend-point wakes up from hibernation or standbymode.
Install Citrix Workspace app Desktop Lock
This procedure installs Citrix Workspace app for Window so that virtual desktops appear using CitrixWorkspace app Desktop Lock. For deployments that use smart cards, seeSmart card.
1. Sign in using a local administrator account.
2. At a command prompt, run the following command:
For example:
1 CitrixWorkspaceApp.exe2 /includeSSON3 STORE0=”DesktopStore;https://my.storefront.server/Citrix/MyStore/
discovery;on;Desktop Store”4 <!--NeedCopy-->
The command is available in the Citrix Workspace app and Plug-ins > Windows > CitrixWorkspace app folder on the installation media. For command details, see the CitrixWorkspace app install documentation at Install.
3. In the same folder on the installation media, double-click CitrixWorkspaceDesktopLock.msi. The Desktop Lock wizard appears. Follow the prompts.
© 1999‒2022 Citrix Systems, Inc. All rights reserved. 189

Citrix Workspace app 2203.1 LTSR for Windows
4. When the installation completes, restart theuserdevice. If youhavepermission toaccess adesk-top and you sign in as a domain user, the device appears using Citrix Workspace app DesktopLock.
You can allow administration of the user device after installation, the account used to installCitrixWorkspaceDesktopLock.msi is excluded from the replacement shell. If that account islater deleted, you can’t sign in and administer the device.
To run a silent install of Citrix Workspace Desktop Lock, use the following command line:
msiexec /i CitrixWorkspaceDesktopLock.msi /qn
Configure Citrix Workspace app Desktop Lock
Whenyou’ve signed in as anon-administrator, DesktopLockautomatically launches anassigneddesk-top session.
Using Active Directory policies prevent users from hibernating virtual desktops.
Use the same administrator account to configure Citrix Workspace app Desktop Lock as you did toinstall it.
• Check if the receiver.admx (or receiver.adml) and receiver_usb.admx (.adml) files are loadedinto Group Policy (where the policies appear in Computer Configuration or User Configura-tion > Administrative Templates > Classic Administrative Templates (ADMX) > Citrix Com-ponents). The .admx files are in %Program Files%\Citrix\ICA Client\Configuration\.
• USB preferences - When a user plugs in a USB device, that device is automatically remoted tothe virtual desktop and no user interaction is required. The virtual desktop controls the USBdevice and displaying it in the user interface.
– Enable the USB policy rule.– InCitrixWorkspaceapp>Remotingclientdevices>GenericUSBRemoting, enable andconfigure the Existing USB Devices and New USB Devices policies.
• Drivemapping - In CitrixWorkspace app >Remoting client devices, enable and configure theClient drive mapping policy.
• Microphone - In Citrix Workspace app > Remoting client devices, enable and configure theClient microphone policy.
Configure smart cards for use with Windows Desktop Lock
1. Configure StoreFront.a) Configure the XML Service to use DNS Address Resolution for Kerberos support.b) Configure StoreFront sites for HTTPS access, create a server certificate signed by your do-
main certificate authority, and add HTTPS binding to the default website.
© 1999‒2022 Citrix Systems, Inc. All rights reserved. 190

Citrix Workspace app 2203.1 LTSR for Windows
c) Make sure that pass-through authentication with the smart card is enabled (enabled bydefault).
d) Enable Kerberos.e) Enable Kerberos and pass-through authentication with smart card.f) Enable Anonymous access on the IIS Default website and use IntegratedWindows Authen-
tication.g) Ensure that the IIS Default website doesn’t require SSL and ignores client certificates.
2. Use the Group Policy Management Console to configure Local Computer Policies on the userdevice.a) Import theReceiver.admxtemplate from%ProgramFiles%\Citrix\ICAClient\Configuration\.b) Expand Administrative Templates > Classic Administrative Templates (ADMX) > Citrix
Components > Citrix Workspace > User authentication.c) Enable Smart card authentication.d) Enable Local user name and password.
3. Configure the user device before installing Citrix Workspace app Desktop Lock.a) Add the URL for the Delivery Controller to theWindows Internet Explorer Trusted Sites list.b) Add the URL for the first Delivery Group to the Internet Explorer Trusted Sites list. Add the
URL in the form desktop://delivery-group-name.c) Enable Internet Explorer to use automatic logon for Trusted Sites.
WhenCitrixWorkspace appDesktop Lock is installed on the user device, it enforces a consistent smartcard removal policy. For example, if the Windows smart card removal policy is set to Force logoff forthe desktop, the usermust log off from the user device, regardless of theWindows smart card removalpolicy set on it. Desktop Lock ensures that the user device isn’t left in an inconsistent state. Thisapplies only to user devices with the Citrix Workspace app Desktop Lock.
Remove Desktop Lock
Be sure to remove both of the components listed as follows:
1. Sign in with the same local administrator account that was used to install and configure CitrixWorkspace app Desktop Lock.
2. From the Windows feature for removing or changing programs:• Remove Citrix Workspace app Desktop Lock.• Remove Citrix Workspace app for Windows.
Passing Windows shortcut keys to the remote session
Most Windows shortcut keys are passed to the remote session. This section highlights some of thecommon ones.
© 1999‒2022 Citrix Systems, Inc. All rights reserved. 191

Citrix Workspace app 2203.1 LTSR for Windows
Windows
• Win+D - Minimize all windows on the desktop.• Alt+Tab - Change active window.• Ctrl+Alt+Delete - via Ctrl+F1 and the Desktop Viewer toolbar.• Alt+Shift+Tab• Windows+Tab• Windows+Shift+Tab• Windows+All Character keys
Windows 8
• Win+C - Open charms.• Win+Q - Search charm.• Win+H - Share charm.• Win+K - Devices charm.• Win+I - Settings charm.• Win+Q - Search apps.• Win+W - Search settings.• Win+F - Search files.
Windows 8 apps
• Win+Z - Get to app options.• Win+. - Snap app to the left.• Win+Shift+. - Snap app to the right.• Ctrl+Tab - Cycle through app history.• Alt+F4 - Close an app.
Desktop
• Win+D - Open desktop.• Win+, - Peek at desktop.• Win+B - Back to desktop.
Other
• Win+U - Open Ease of Access Center.• Ctrl+Esc - Start screen.• Win+Enter - Open Windows Narrator.
© 1999‒2022 Citrix Systems, Inc. All rights reserved. 192
Citrix Workspace app 2203.1 LTSR for Windows
• Win+X - Open the system utility settings menu.• Win+PrintScrn - Take a screenshot and save to pictures.• Win+Tab - Open switch list.• Win+T - Preview open windows in taskbar.
Software Development Kit (SDK) and API
April 7, 2022
Certificate Identity Declaration SDK
The Certificate Identity Declaration (CID) SDK lets developers create a plug-in. The plug-in lets CitrixWorkspace app authenticate to the StoreFront server by using the certificate that is installed on theclient machine. CID declares the user’s smart card identity to a StoreFront server without performinga smart card-based authentication.
For more information, see the Certificate Identity Declaration SDK for Citrix Workspace app for Win-dows documentation.
Citrix Common Connection Manager SDK
CommonConnectionManager (CCM)SDKprovides a set of nativeAPIs that enables you to interact andperform basic operations programmatically. This SDK does not require a separate download becauseit is a part of the Citrix Workspace app for Windows installation package.
Note:
Some of the APIs that are related to launch require the ICA file to initiate the launch process tovirtual apps and desktops sessions.
The CCM SDK capabilities include:
• Session launch– Allows launching applications and desktops using the generated ICA file.
• Session disconnect– Similar to the disconnect operation using the Connection Center. The disconnect can befor all the sessions or to a specific user.
• Session logoff– Similar to the logoff operation using the Connection Center. The logoff can be for all thesessions or to a specific user.
• Session information
© 1999‒2022 Citrix Systems, Inc. All rights reserved. 193

Citrix Workspace app 2203.1 LTSR for Windows
– Provides different methods to get connection-related information of the sessionslaunched. The session includes desktop session, application session, and reverseseamless application session
For more information about the SDK documentation, see Programmers guide to Citrix CCM SDK.
Citrix Virtual Channel SDK
The Citrix Virtual Channel software development kit (SDK) supports writing server-side applicationsand client-side drivers for more virtual channels using the ICA protocol. The server-side virtual chan-nel applications are on Citrix Virtual Apps and Desktops servers. If youwant towrite virtual drivers forother client platforms, contact Citrix Technical support.
The Virtual Channel SDK provides:
• TheCitrix Virtual Driver ApplicationProgramming Interface (VDAPI) is usedwith the virtual chan-nel functions in theCitrix Server API SDK (WFAPI SDK) to create newvirtual channels. The virtualchannel support provided by VDAPI makes it easy to write your own virtual channels.
• TheWindowsMonitoring API, which enhances the visual experience and support for third-partyapplications integrated with ICA.
• Working source code for virtual channel sample programs to demonstrate programming tech-niques.
• The Virtual Channel SDK requires the WFAPI SDK to write the server side of the virtual channel.
Formore information, see Citrix Virtual Channel SDK for Citrix Workspace app for Windows documen-tation.
Fast Connect 3 Credential Insertion API
The Fast Connect 3 Credential Insertion API provides an interface that supplies user credentials to thesingle sign-on (SSON) feature. This feature is available in Citrix Workspace app for Windows Version4.2 and later. With this API, Citrix partners can provide authentication and SSO products that useStoreFront to log users on to virtual applications or desktops and then disconnect users from thosesessions.
For more information, see Fast Connect 3 Credential Insertion API for Citrix Workspace app for Win-dows documentation.
ICA Settings Reference
April 7, 2022
© 1999‒2022 Citrix Systems, Inc. All rights reserved. 194

Citrix Workspace app 2203.1 LTSR for Windows
The ICA Settings Reference file provides registry settings and ICA file settings lists, allowing admin-istrators to customize the behavior of the Citrix Workspace app. You can also use the ICA SettingsReference to troubleshoot an unexpected Citrix Workspace app behavior.
ICA Settings Reference (PDF download)
© 1999‒2022 Citrix Systems, Inc. All rights reserved. 195

LocationsCorporate Headquarters | 851 Cypress Creek Road Fort Lauderdale, FL 33309, United StatesSilicon Valley | 4988 Great America Parkway Santa Clara, CA 95054, United States
© 2022 Citrix Systems, Inc. All rights reserved. Citrix, the Citrix logo, and other marks appearing herein are property of
Citrix Systems, Inc. and/or one or more of its subsidiaries, andmay be registered with the U.S. Patent and Trademark Office
and in other countries. All other marks are the property of their respective owner(s).
Citrix Product Documentation | docs.citrix.com July 14, 2022
Copyright © 2022 FDOKUMEN