Parent Child Unmanned Aerial Vehicles and the Structural ...
136
Parent Child Unmanned Aerial Vehicles and the Structural Dynamics of an Outboard Horizontal Stabilizer Aircraft by Jason Kepler Submitted to the Department of Aeronautics and Astronautics in partial fulfillment of the requirements for the degree of Master of Science in Aeronautics and Astronautics at the MASSACHUSETTS INSTITUTE OF TECHNOLOGY June 2002 © Massachusetts Institute of Technology. All Rights Reserved. A u th o r ....................................................... .. F--------- ----- Departni n autics an A ronautics A May 12, 2002 Certified by .................................... f &hn J. Deyst Professor of Aeronautics and Astronautics Thesis Supervisor A ccepted by ............................. Wallace E. Vander Velde Professor of Aeronautics and Astronautics Chairman, Committee of Graduate Studies MASSACHOSETTS WNSTITUTE OF TECHNOLOGY AERO AUG 13 2002 LIBRARIES
-
Upload
khangminh22 -
Category
Documents
-
view
0 -
download
0
Transcript of Parent Child Unmanned Aerial Vehicles and the Structural ...

Parent Child Unmanned Aerial Vehicles and the Structural
Dynamics of an Outboard Horizontal Stabilizer Aircraft
by
Jason Kepler
Submitted to the Department of Aeronautics and Astronautics inpartial fulfillment of the requirements for the degree of
Master of Science in Aeronautics and Astronautics
at the
MASSACHUSETTS INSTITUTE OF TECHNOLOGY
June 2002
© Massachusetts Institute of Technology. All Rights Reserved.
A u th o r ....................................................... .. F- ----- --- -----Departni n autics an A ronautics
A May 12, 2002
Certified by ....................................f &hn J. Deyst
Professor of Aeronautics and AstronauticsThesis Supervisor
A ccepted by .............................Wallace E. Vander Velde
Professor of Aeronautics and AstronauticsChairman, Committee of Graduate Studies
MASSACHOSETTS WNSTITUTEOF TECHNOLOGY
AERO AUG 13 2002
LIBRARIES

2

Parent Child Unmanned Aerial Vehicles and theStructural Dynamics of an Outboard Horizontal
Stabilizer Aircraftby
Jason Kepler
Submitted to the Department of Aeronautics and Astronautics onMay 12, 2002, in partial fulfillment of the requirements for thedegree of Master of Science in Aeronautics and Astronautics
Abstract
In the fall of 1998, MIT and Draper Laboratory formed a partnership program called Par-ent Child Unmanned Aerial Vehicle (PCUAV) to provide a means of providing upclosesurveillance at a distance. The premise of the project was to create a tiered system of coop-erative autonomous aircraft. A large Parent aircraft was designed to carry a smaller Miniaircraft to a target site and release it to descend for upclose surveillance. Meanwhile, theParent provides a communications link between the Mini and a ground station at the pointof departure. At the completion of a surveillance mission the Parent retrieves the Mini andcarries it home.
This thesis discusses the system components for the PCUAV project, specifically concen-trating on the flight vehicles. The design, building, and flight testing phases for each vehi-cle are detailed. Special attention is given to the Parent vehicle, which utilizes anOutboard Horizontal Stabilizer (OHS) configuration. The structural dynamics and bothaeroelastic and servo aeroelastic properties of the plane were studied using Aswing andare reported on here.
Thesis Supervisor: John J. DeystTitle: Professor of Aeronautics and Astronautics
Thesis Supervisor: Marthinus C. van SchoorTitle: Lecturer, Department of Aeronautics and Astronautics
3

4

Table of Contents
Table of Contents ................................................................................................... 5List of Figures ....................................................................................................... 7List of Tables ............................................................................................................ 11Acknow ledgm ents .................................................................................................. 13List of Acronym s and Sym bols .............................................................................. 151. Introduction ....................................................................................................... 17
1.1 Background and M otivations of PCUAV .............................................. 171.2 Background of the Outboard Horizontal Stabilizer Configuration ..... 191.3 Thesis Overview ................................................................................... 20
2. PCU AV System ................................................................................................... 212.1 Chapter Overview ................................................................................. 212.2 The PCUAV System Concepts ................................................................ 21
2.2.1 Typical Flight .............................................................................. 212.2.2 Key Enablers .............................................................................. 232.2.3 Reintegration .............................................................................. 24
2.3 Com ponents of PCUAV ........................................................................ 272.3.1 Parent Vehicle ............................................................................ 282.3.2 M ini Vehicle ............................................................................... 292.3.3 Avionics Testbed Aircraft ............................................................ 312.3.4 Payload Delivery Vehicle ............................................................ 322.3.5 Mini-Parent Integration Mechanism (MPIM) ............... 332.3.6 M id-Air Recovery System .......................................................... 362.3.7 Com m unications and Surveillance .............................................. 372.3.8 Flight Avionics ............................................................................ 38
2.4 Chapter Sum m ary ................................................................................ 433. UAV Building and Testing .................................................................................. 45
3.1 Chapter Overview ................................................................................ 453.2 OH S Parent Vehicle .............................................................................. 45
3.2.1 Advantages and Disadvantages of the OHS ................................ 453.2.2 OH S Parent Design Process ....................................................... 473.2.3 OHS Construction ........................................ 483.2.4 OH S Testing and Updating ......................................................... 52
3.3 M ini Vehicle .......................................................................................... 563.3.1 M ini Design Process ................................................................... 563.3.2 M ini Construction ........................................................................ 573.3.3 M ini Testing ................................................................................. 60
3.4 Avionics Testbed Aircraft ...................................................................... 613.4.1 Advantages and Disadvantages of the ATA ................................ 613.4.2 W ork done on ATAs ................................................................... 62
3.5 ATA Testing ......................................................................................... 633.6 Chapter Sum m ary ................................................................................ 63
4. Structural M odeling of the Parent ..................................................................... 654.1 Chapter Overview ................................................................................. 65
5

4.2 Structural and Inertial Properties of the Parent ..................................... 654.2.1 Area M oments of Inertia ............................................................. 654.2.2 W eight and M ass M oment of Inertia ............................................ 70
4.3 Analysis Process .................................................................................. 714.4 Natural Frequencies and M ode Shapes of the Parent ........................... 754.5 Chapter Overview ................................................................................ 77
5. Aeroelasticity .................................................................................................... 795.1 Chapter Overview ................................................................................ 795.2 Aeroelasticity of the Parent UAV ......................................................... 795.3 Flight Dynamics of Parent ..................................................................... 825.4 Servo Aeroelasticity of Parent .............................................................. 845.5 Chapter Summary ................................................................................ 88
6. Summary and Conclusions ................................................................................. 896.1 Thesis Summary ................................................................................... 89
6.1.1 PCUAV System Summary ............................................................. 896.1.2 Suggestions for UAV Improvements ......................................... 906.1.3 Flight Tests .................................................................................. 926.1.4 Structural Modeling of OHS Aircraft Summary and Conclusions . 92
Appendix A Vehicle Drawings ......................................................................... 97A. 1 Three View Drawings of PCUAV Parent Aircraft ............................... 98A.2 Three View Drawings of PCUAV NGM I ............................................... 99A.3 Three View Drawings of PCUAV NGM II ............................................. 100A.4 Three View Drawings of PCUAV ATA I&II .................... 101A.5 Building Plans for NGM II ...................................................................... 102A.6 W ing M oment of Inertia Spreadsheet ...................................................... 104
Appendix B Aswing and Related Code for the Parent .......................................... 105B.1 Description of Aswing ............................................................................. 105B.2 Aswing Code for the Parent ..................................................................... 107
Appendix C Aswing Results ................................................................................. 113C.1 M ode Shapes ............................................................................................ 114C.2 Bode Plots ................................................................................................ 125
6

List of Figures
Figure 1.1 Multi-Tiered System Concept ......................................................... 18Figure 1.2 Outboard Horizontal Stabilizer Parent Vehicle ................................ 19Figure 2.1 Communications Hierarchy for PCUAV .......................................... 23Figure 2.2 Phase One of Reintegration .............................................................. 25Figure 2.3 Phase Two Detection and Navigation System ................................. 26Figure 2.4 Parent Aircraft Inside a Dodge Caravan .......................................... 29Figure 2.5 (Left) NGMI, (Right) NGMII .......................................................... 30Figure 2.6 The First Avionics Testbed Aircraft ................................................. 32Figure 2.7 Payload Delivery Vehicle ................................................................. 33Figure 2.8 Original M PIM Design ........................................................................ 34Figure 2.9 Parent Aircraft with MPIM Attached .................................................. 34Figure 2.10 D etail of M PIM ................................................................................ 35Figure 2.11 MARS Directional Finder ................................................................ 37Figure 2.12 Rover with Surveillance Equipment on Top .................................... 38Figure 2.13 NGMII Flight Control Avionics ....................................................... 39Figure 2.14 Parent's Avionics Structure .............................................................. 43Figure 3.1 Vortex Induced Angle of Attack at Tail Position ............................ 46Figure 3.2 Parent's Spar D etail .......................................................................... 49
Figure 3.3 Parent Wing Composite Layup ....................................................... 50Figure 3.4 (Left) Author with Parent's Tail, (Right) Parent's Fuselage Frame .... 51Figure 3.5 Bending Moment in Parent's Wing ................................................ 53Figure 3.6 Second Landing of OHS Parent ....................................................... 54
Figure 3.7 Avionics Inside NGMII Fuselage ..................................................... 58Figure 3.8 Cross Section of NGMII Wing ....................................................... 59Figure 4.1 Cross Section of the Parent's Tail Booms ....................................... 66Figure 4.2 Cross Section of the Parent's Wing ................................................. 68Figure 4.3 Aswing Geometry for Parent ............................................................ 72Figure 4.4 Velocity Sweep of Parent ................................................................ 74
Figure 4.5 Root Locus Plot for Parent .............................................................. 75Figure 5.1 First flutter mode of OHS Parent ..................................................... 80Figure 5.2 Root Locus Plot of OHS Parent with Three Pound Weights
on Each Tail and Counterweight Attached to Fuselage ................... 81Figure 5.3 Root Locus Plot of OHS Parent with Three Pound Weights
on Each Tail and Counterweight Attached to Wingtips' Leading Edges 82Figure 5.4 Blow Up of Root Locus Near Origin .............................................. 83Figure 5.5 Bode Plots of Parent Roll Rate Response to Unit Aileron Input,
A irspeed = 70 ft/sec., @ S.L. .............................................................. 85Figure 5.6 Bode Plots of Parent Pitch Rate Response to Unit Elevator Input,
A irspeed = 70 ft/sec., @ S.L. .............................................................. 86Figure 5.7 Bode Plots of Parent Yaw Rate Response to Unit Rudder Input,
A irspeed = 70 ft/sec., @ S.L. .............................................................. 87Figure A. 1 Orthogonal Views of OHS Parent ................................................... 98Figure A.2 Orthogonal Views of New Generation Mini .................................... 99
7

FigureFigureFigure
A.3A.4A.5
Figure A.6Figure C.1
Figure C.2
Figure C.3
Figure C.4
Figure C.5
Figure C.6
Figure C.7
Figure C.8
Figure C.9
Figure C.10
Figure C.11
Figure C.12
Figure C.13
Figure C.14
Figure C.15
Figure C.16
Figure C.17
Figure C.18
Figure C.19
Figure C.20
Figure C.21
Orthogonal Views of Second New Generation Mini ..........................Orthogonal Views of Two Avionics Testbed Aircraft ........................Building Plans for NGM II Fuselage ..............................................
100101102
Building Plans for NGM II W ing and Tail .......................................... 103First Mode Shape of OHS Parent, Asymmetric VerticalTail Boom Bending, Airspeed = 70 ft/sec, @ Sea Level .................... 114Second Mode Shape of OHS Parent, Asymmetric HorizontalTail Boom Bending, Airspeed = 70 ft/sec, @ Sea Level .................... 115Third Mode Shape of OHS Parent, Symmetric Wing Bending,Airspeed = 70 ft/sec, @ Sea Level ...................................................... 116Fourth Mode Shape of OHS Parent, Asymmetric Wing Twist,Airspeed = 70 ft/sec, @ Sea Level ...................................................... 117Fifth Mode Shape of OHS Parent, Symmetric Wing Twist,Airspeed = 70 ft/sec, @ Sea Level ...................................................... 118Sixth Mode Shape of OHS Parent, Asymmetric HorizontalStabilizer Bending, Airspeed = 70 ft/sec, @ Sea Level ...................... 119Seventh Mode Shape of OHS Parent, Symmetric HorizontalStabilizer Bending, Airspeed = 70 ft/sec, @ Sea Level ...................... 120Eighth Mode Shape of OHS Parent, Second Wing Bending,Airspeed = 70 ft/sec, @ Sea Level ...................................................... 121Ninth Mode Shape of OHS Parent, Fore-Aft Wing Bending,Airspeed = 70 ft/sec, @ Sea Level ...................................................... 122Tenth Mode Shape of OHS Parent, Asymmetric VerticalTail Bending, Airspeed = 70 ft/sec, @ Sea Level ............................... 123Eleventh Mode Shape of OHS Parent, Symmetric VerticalTail Bending, Airspeed = 70 ft/sec, @ Sea Level ............................... 124Gain Plot of Roll Rate vs. Aileron Input Frequency forFlexible OHS Parent, Airspeed = 70 ft/sec, @ Sea LevelPhase Plot of Roll Rate vs. Aileron Input Frequency ForFlexible OHS Parent, Airspeed = 70 ft/sec, @ Sea LevelGain Plot of Pitch Rate vs. Elevator Input Frequency,Flexible OHS Parent, Airspeed = 70 ft/sec, @ Sea LevelPhase Plot of Pitch Rate vs. Elevator Input Frequency,Flexible OHS Parent, Airspeed = 70 ft/sec, @ Sea LevelGain Plot of Yaw rate vs Rudder Input Frequency ForFlexible OHS Parent, Airspeed = 70 ft/sec, @ Sea LevelPhase Plot of Yaw Rate vs. Rudder Input Frequency ForFlexible OHS Parent, Airspeed = 70 ft/sec, @ Sea LevelGain Plot of Roll Rate vs. Aileron Input Frequency for
125
................... 126
................... 127
................... 128
................... 129
................... 130
Rigid OHS Parent, Airspeed = 70 ft/sec, @ Sea Level ....................... 131Phase Plot of Roll Rate vs. Aileron Input Frequency ForRigid OHS Parent, Airspeed = 70 ft/sec, @ Sea Level ....................... 132Gain Plot of Pitch Rate vs. Elevator Input Frequency,Rigid OHS Parent, Airspeed = 70 ft/sec, @ Sea Level ....................... 133Phase Plot of Pitch Rate vs. Elevator Input Frequency,Rigid OHS Parent, Airspeed = 70 ft/sec, @ Sea Level ....................... 134
8

Figure C.22 Gain Plot of Yaw rate vs. Rudder Input Frequency ForRigid OHS Parent, Airspeed = 70 ft/sec, @ Sea Level ....................... 135
Figure C.23 Phase Plot of Yaw Rate vs. Rudder Input Frequency ForRigid OHS Parent, Airspeed = 70 ft/sec, @ Sea Level ....................... 136
9

10

List of Tables
Table 3.1 OH S Final Dim ensions...................................................................... 48Table 3.2 Final Dimensions of NGM II .............................................................. 60Table 3.3 Comparison of ATAI and ATAII Dimensions................................... 62Table 4.1 Cross Sectional Flexural Properties of Parent ................................... 68Table 4.2 Weights and Mass Moments of Inertia of Parent Components...... 70Table 4.3 Mode Shapes and Natural Frequencies of Parent,
Airspeed = 70 ft/sec, @ S.L. ............................................................. 76Table 5.1 Computed Flight Dynamic Modes Compared with Aswing Results .... 84
11

12

Acknowledgments
First I would like to thank the Lord God for his help and guidance through this project.He has provided me with more opportunity than I could have hoped for. Without Him Iwould have floundered long ago.
I also would like to thank my grandfather, Dave Dolese, who passed away during thewriting of this thesis. He was a good friend and did a lot to encourage me in my academicpursuits. Without his financial support I would never have been able to attend as fine ofinstitutions as I did.
Thank you to Professor John Deyst for his support and guidance. You treated us likeyour own children, which was more than I ever expected from an advisor at MIT. Also,thank you Dr. Tienie van Schoor for your time and effort, I really learned a lot from youboth in class and while working on this thesis. Thanks to Professor Mark Drela for yourhelp and for creating the software I needed to finish this thesis; I hope I can continue todraw on your vast knowledge.
I would like to thank Don Weiner for his help in the shop, his experience was invalu-able, and his grandfatherly advise on life was dearly appreciated. Thanks to Dick Per-dichizzi for his help with the windtunnel and all of the other facilities. Thanks to Col.Young for his aircraft building advice and infinite supply of stories.
Thank you to the other members of the PCUAV team. Francois Urbain was a greatfriend who I enjoyed building airplanes with. Sanghyuk Park never ceases to amaze mewith his hard work and seemingly unlimited intelligence. Thomas Jones was always goodfor a funny story. I appreciated the discussions I had with Alexander Olmenchenko aboutRussia and hockey, with Sarah Saleh about England and mad cows, and Richard Pourtrelabout flying. Good luck to Richard on his new flying career. Thanks to Damien Jourdan,it was nice to have another brother in Christ during the last months of the project.
Thank you to my parents, Chris and Susan Kepler, and my sister Caity, who all tooktime to come from across the country to visit frequently, and were always interested inwhat I was doing here. My parents inspiration was vital to my drive to excel in life andengineering.
Finally, I would like to thank the most important person in my life, my wife Christy.Thank you for marrying me and moving across the country to the big city so that I couldfulfill my dream. You have been the most supportive and loving wife a man can ask for. Ilove you.
13

14

List of Acronyms and Symbols
Acronymsa.c.Aero/AstroATA(I)&(II)AVLc.g.CPUDGPSDOSFMGM-15GPSIMUJPEGMACMARSMAVMITMPIMNASANACANGM(I)&(II)OHSPCMPCUAVPDVR/C or RCRFRxSBCS.L.UAVWASPWLAN
Symbols
(0Ab
Aerodynamic centerDepartment of Aeronautics and AstronauticsAvionics Testbed Aircraft, (I)&(II) refer to the different versions builtAthena Vortex LatticeCenter of GravityComputer Processing UnitDifferential Global Positioning SystemDisk Operating SystemFrequency ModulationGilbert Morris AirfoilGlobal Positioning SystemInertial Measurement UnitJoint Photographic Experts GroupMean Aerodynamic ChordMid-Air Retrieval SystemMicro Autonomous VehicleMassachusetts Institute of TechnologyMini-Parent Integration MechanismNational Air and Space AdministrationNational Advisory Committee for AeronauticsNew Generation Mini, (I)&(II) refer to the different versions builtOutboard Horizontal StabilizerPulse Coded ModulationParent and Child Unmanned Aerial VehiclePayload Delivery VehicleRemote ControlRadio FrequencyReceiverSingle Board ComputerSea LevelUnmanned Air VehicleWide Area Surveillance ProjectileWireless Local Area Network
Linear DeflectionDamping RatioEigenvalueAngular DeflectionFrequencyAreaSide Length
15

b, Wing Span
CL Coefficient of Liftcw Wing ChordD Dragd DistanceE Young's Modulus of ElasticityF ForceG Modulus of Rigidity
g Acceleration of Gravity on Earthh Side LengthHz Hertz (cycles per second)Ixx Area Moment of Inertia About x-axisIYY Area Moment of Inertia About y-axis
Izz Area Moment of Inertia About z-axisL Length, LiftL p Roll Moment Due to Sideslip AngleLr Roll Moment Due to Yaw RateLht Distance from Wing Quarter Chord to Horizontal Tail Quarter ChordLvt Distance from Wing Quarter Chord to Vertical Tail Quarter ChordJO Polar Moment of InertiakHz Kilohertz (thousand cycles per second)m MassMCC Pitch Moment Due to Angle of AttackMa Pitch Moment Due to Change in Angle of AttackMq Pitch Moment Due to Pitch RateMHz Megahertz (million cycles per second)No Yaw Moment Due to Sideslip AngleNr Yaw Moment Due to Yaw Rater radius
Sht Vertical Tail AreaSvt Horizontal Tail AreaSW Wing AreaT Torqueuo Initial VelocityV Volt
Vht Horizontal Tail Volume CoefficientVvt Vertical Tail Volume CoefficientX Coordinate Along x-axisY Coordinate Along y-axisYp Sideways Acceleration Due to Sideslip Angle
Yr Sideways Velocity Due to Yaw RateZ Vertical Acceleration Due to Angle of Attack
16

Chapter
1Introduction
1.1 Background and Motivations of PCUAV
In the fall of 1998, Draper Laboratory and MIT formed a project under their partnership,
known as the Parent Child Unmanned Aerial Vehicle (PCUAV) project. This was the sec-
ond of such projects formed under the Draper/MIT partnership, the first being the Wide
Area Surveillance Projectile (WASP) project that has since been taken over exclusively by
Draper Laboratory.
In forming the PCUAV project, the members of the team were addressing what was
perceived as an important aspect of military surveillance, namely to observe some point of
interest, at close range, from a distance. Current long range UAV surveillance aircraft are
inadequate for getting right down in the thick of where things are happening. Alterna-
tively, smaller micro air vehicles, with high maneuverability and low detectabillity, have
had such a short range and endurance that they had to be launched at close proximity to
the point of interest.
The goal of PCUAV is to create a system that would provide the benefits of both large
UAVs and small Micro Air Vehicles (MAVs) without incurring their associated disadvan-
tages. To do this, a concept evolved to use large scale UAVs to transport smaller aircraft to
17

a point of interest, launch them, provide a communications relay back to a ground station,
and then retrieve and bring back the smaller vehicles. When this concept was expanded to
include vehicles of many different sizes, the solution turned into a tiered system in which a
large Parent vehicle with an extended range and endurance could transport and launch
smaller Child, or Mini, vehicles as well as even smaller MAVs. The surveillance of each
vehicle could then be communicated back through each of the tiers to an operator at the
point of departure. When the mission is complete, either all or some of the aircraft could
be retrieved by the Parent and brought back for reuse.
Tier 1
T ier 2 - - - - - - - - - - - - - - - - - - -
Tier 3 a
Figure 1.1 Multi-Tiered System Concept
To accomplish such a mission, many key technologies must be investigated and dem-
onstrated. Some of them are as follows:
- Autonomous navigation of aircraft of various sizes
- Rendezvousing and reintegrating autonomous vehicles
" Visual surveillance and transmission of images between multiple aircraft
During the first two years of the PCUAV project the team concentrated on designing
the aircraft for the system and developing and building the guidance and control systems
18 Chap~ter 1: Introduction

for those vehicles. In the third year, when the author joined the project, and continuing
into the fourth year, the aircraft were built and flown, the control systems were validated
and work progressed toward demonstrating autonomous docking of the Parent and Mini
vehicles. The other technology that has been investigated and demonstrated during the
length of the project is surveillance and transmission of images between ground cameras,
a flying UAV, and an operator station.
1.2 Background of the Outboard Horizontal Stabilizer Configuration
The outboard horizontal stabilizer configuration, or OHS, was chosen for the parent vehi-
cle for reasons described in Chapters 2 and 3. This configuration looks somewhat foreign
to a first time observer. The aircraft has a center fuselage with no tail attached to it. Tail
booms extend rearward from each wing tip to both vertical and horizontal surfaces. The
horizontal surface extends outboard of the tail boom, leaving empty space between the tail
booms. As might be expected, this configuration has some unusual aerodynamics associ-
ated with it. See Figure 1.2 for a picture of PCUAV's Parent vehicle.
Figure 1.2 Outboard Horizontal Stabilizer Parent Vehicle
The OHS configuration was developed to some degree in the 1940s by Chance
Vought's XF5U Flying Pancake, and more recently by Scaled Composites for NASA and
Section 1.2: Background of the Outboard Horizontal Stabilizer Configuration 19

at the University of Calgary where Prof. John Kentfield and Dr. Jason Mukherjee designed
and built a few models. The author has created structural dynamic models of the OHS air-
craft and performed analysis to determine the effects of the structure's flexibility on the
control of the aircraft.
1.3 Thesis Overview
This thesis consists of two basic parts. The objective of the first part is to discuss the com-
ponents and the workings of the PCUAV system. Emphasis will be placed on the author's
contributions to the project, but much will be said about work done by other members of
the PCUAV team. The second part of the thesis will discuss the author's work on the struc-
tural and aeroelastic modeling of the Parent aircraft and the findings from that work.
Chapter two discusses the components of the PCUAV system. This includes discus-
sion of the aircraft developed, the control and navigation system, the communications and
surveillance system, and the reintegration system.
Chapter three focuses on the work done on the project by the author. More detail is
given to the building and testing of the various vehicles.
Chapter four describes the work done on the structural modeling of the Parent,
describing the analysis process and the some of the results from that analysis. Attention is
mostly given to the natural frequencies and mode shapes of the aircraft.
Chapter five discuses the aeroelasticity, flight dynamics, and servo aeroelasticity of the
flexible the OHS Parent aircraft; providing information that could be useful in modifying
the plane's flight controller.
Chapter six provides a summary of the PCUAV system and the structural modeling
done by the author.
20 Chaoter 1: Introduction

Chapter
2PCUAV System
2.1 Chapter Overview
This chapter explains the concepts of the PCUAV system. A basic overview of the sys-
tem's procedures is discussed, followed by a description of the subcomponents of the sys-
tem.
2.2 The PCUAV System Concepts
This section describes the potential roles of the PCUAV system, the process that the sys-
tem's components follow to achieve a successful flight, and some of the key enablers for a
successful mission.
2.2.1 Typical Flight
PCUAV could be utilized whenever there is a need to perform up-close surveillance in
hazardous situations, without risking human life. This could be in a wide variety of con-
texts including collecting soil, air, and water samples from a nuclear waste site; taking
images of a battle zone simultaneously from several altitudes and positions; and locating
targets that may be undetectable from satellites or high altitude UAVs.
21

22 Chanter 2: PCUAV System
In a typical flight, a Parent would be loaded with two Minis, up to six Payload Deliv-
ery Vehicles (PDVs) and MAVs, and enough fuel for a trip of one to two hundred miles,
with a five hour loitering time over the target. Of course range and payload could be
traded for endurance. The Parent would take off from either an airport or an unimproved
landing strip and fly either autonomously or remotely to a predetermined point of interest.
Meanwhile, a communications link would be maintained with a ground operator at the
point of departure. After arriving at the target zone, the Parent would deploy a Mini which
could descend to a lower altitude for surveillance until it ran low on fuel, at which point it
would return for reintegration with the Parent and the second Mini could be deployed. The
first Mini could then be refueled and the process repeated. During the time of the Minis'
operation, the Parent would drop PDVs and MAVs to gather soil samples or provide even
closer surveillance than can be achieved with the Minis. Some of the soil samples might
be collected by a balloon rendezvous with the Mini and brought back to the Parent for
reintegration and transport home. During the whole mission, a communications network
between each of the aircraft would also provide a link back to the ground operator to pro-
cess the data gathered by each vehicle and sensor. When the Parent returned to base, it
would be fueled and readied for a second flight. With the use of just two systems working
concurrently it is feasible to expect a indefinitely sustained presence over a target.
22

Section 2.2: The PCUAV System Concepts 23
PARENT
Figure 2.1 Communications Hierarchy for PCUAV
2.2.2 Key Enablers
Some of the keys to the above hypothetical mission are:
- Building a Parent capable of carrying a large load a long distance,
- Maintaining stability of the Parent when combined with one or two Minis as well as
without them,
- Creating a robust procedure for the system to follow during reintegration to mini-
mize the chance of failure,
- Creating a communications network that is dynamic and dependable between all of
the aircraft.
During the first year of the project, much work was done to size the potential vehicles.
It was hypothesized that a capable Parent aircraft would have a wingspan of about twelve
to fifteen feet and each Mini would have a wingspan of roughly 3 to 5 feet. These projec-
tions were determined assuming that the best possible custom made micro-electronics and
power plants would be utilized. The downside of this assumption is that these things are
expensive and difficult to obtain. Using off the shelf electronics and standard remote con-
Section 2.2: The PCUAV System Concepts 23

24 Chanter 2: PCUAV System
trol aircraft engines meant that both aircraft grew considerably and limited the possibility
of completing the desired mission. For this reason, a distinction was made between objec-
tive and demonstration vehicles. The objective vehicles would make use of the best avail-
able products and would be of similar size to the group's original designs. However, the
demonstration vehicles are designed to show that implementing the other keys to the prob-
lem is possible, leaving the problem of creating a high load carrying, long endurance Par-
ent and smaller Minis to future development.
Looking at the key enablers of the mission, it becomes apparent that one of the most
difficult parts to achieve, which has not been investigated in detail before, is the reintegra-
tion procedure. The concept of joining two aircraft in midair is not new. It dates back to
the days of dirigibles that carried biplanes and moves through to the 1960's when work
was done investigating the docking of parasite aircraft such as the Goblin to large bombers
like the B-52. Now, the joining of aircraft is done every day through midair refueling. The
difference in the case of PCUAV comes in the fact that these aircraft are autonomous, with
minimal onboard avionics. The advantages of reintegration extend past the use of the
PCUAV system as a reconnaissance tool. Some examples might include aerial refueling of
UAVs and recovery of soldiers floated aloft by balloons.
2.2.3 Reintegration
To assure that the aircraft will make a rendezvous with a minimum chance of aborting the
procedure, it is important to establish a routine for the planes to follow every time. For this
reason, the rendezvous process was divided into 3 phases. Phase one is designed to bring
the aircraft from arbitrary positions and velocities in the sky to a point where the Parent is
flying about 30 feet in front of the Mini. Phase two brings the Mini into contact with the
Parent, and phase three locks the interface between the aircraft and positions the Mini in a
24

place suitable for transport, such that the combined Mini and Parent have minimum aero-
dynamic drag. During the PCUAV project, the goal is to demonstrate the first two phases,
leaving the third phase for design of the objective vehicles.
In phase one, the Parent is assumed to be circling at a higher altitude, while the Mini is
performing surveillance below. The planes communicate their GPS obtained positions to
each other and the Mini computes a trajectory to follow for rendezvous. This trajectory is
broken into four steps: a climb, a straight leg, a turn toward the Parent's circle, and another
straight leg. The climb brings the Mini to the same altitude as the Parent. The length of the
first straight leg is then computed so that when the Mini performs the turn and second
straight leg at a constant velocity it will enter the Parent's circle 10-30 meters behind the
Parent. In Figure 2.2, the climb, first straight leg, turn, and final straight leg are denoted by
numbers 1, 2, 3, and 4 respectively. MO and PO are the Mini's and Parent's initial posi-
tions. The scale for Figure 2.2 is in meters.
3)600
404)
2 20000
800
600
400
200
0
y axis -200 -200 0 200 400 600 800 1000
x axis
Figure 2.2 Phase One of Reintegration
Section 2.2: The PCUAV System Concepts 25

All of phase one is done under GPS navigation using a proportional navigation algo-
rithm. Onboard GPS data is gathered at a rate of 5 Hertz, and at that same 5 Hertz rate,
points are chosen on the trajectory 100 meters ahead of the current position of the Mini.
The plane flies toward that point until a new point is chosen .2 seconds later. During the
climb and the first straight leg, the trajectory is recomputed at 5 Hz as well. Later, during
the turn and second straight leg, the trajectory is fixed and the velocity is updated instead
so as to align both the planes' position and velocity at the point of rendezvous.
Once the Mini comes to its proper position behind the Parent, phase two begins. Dur-
ing phase two the aircraft navigation is performed using a vision based system. A camera
is mounted under each wing of the Mini at about half span. A cooperative light mounted
on the parent is imaged by the cameras. Using stereoscopic vision the relative position of
the planes can be computed to an accuracy of a few millimeters. The original system
developed in the second and third year of the project relied on two color cameras whose
images were downloaded by a frame grabber to the computer. The images were analyzed
to find the target, which was a large red light the size of a car's headlight. Once the cam-
eras detected the red light the computer used the pixels in the image to determine where
the Parent was.
Infrared Detector
.................
Infrared LEDs Infrared Detector
Figure 2.3 Phase Two Detection and Navigation System
26 Chaoter 2: PCUAV System

Section 2.3: Components of PCUAV 27
This approach and equipment had several problems. First, many things on the ground
are red and create false targets. Second, the range of the cameras for finding the target was
around 10 meters, thus the close proximity required tested the accuracy of the GPS,
increasing the likelihood of a midair collision. Third, the position of the sun had a large
impact on the quality of the images from the cameras. Sunlight, reflected from various
parts of the Parent tended to produce false images and confuse the guidance system. The
final problem was that the update of the frame grabber used was around two seconds when
the whole image was processed. To get around this, the image was zoomed in once the
cameras had a lock on the target. This required the frame grabber to capture many fewer
pixels and the processing time was brought down to 0.2 seconds. Because of these four
problems, an alternative was sought. The cameras were eventually replaced by infrared
detectors that measure the location of the centroid of the light from the target. These elim-
inate the need for the frame grabber. Instead, all that is needed for position processing is
four analog to digital converters to compare the signals from each detector on both axes.
By pulsing the infrared light of the target at 4 kHz the signal is likely to be different from
anything occurring in nature, thus reducing the probability of locking onto a false target
and the possibility of the cameras being saturated by the sun's light. Finally, the range of
the LED system is four times that of the headlight system using the same power output,
even though the surface area of the target light is reduced to 25% of the original headlight.
This means the GPS navigation does not need to bring the planes as close together, and the
drag penalty for the Parent is reduced by the smaller light.
2.3 Components of PCUAV
This section contains descriptions of the components of PCUAV. These include the Parent
and Mini vehicles, Avionics Testbed Aircraft, Payload Delivery Vehicles, the Mini-Parent

28 Chanter 2: PCUAV System
Integration Mechanism, the Mid-Air Recovery System, the communications and surveil-
lance systems, and the flight avionics used in the system.
2.3.1 Parent Vehicle
During the first two years of the PCUAV project much was done to choose a design for the
Parent vehicle. A set of requirements was established for the ideal, or objective, vehicle.
These are as follows:
- 100 mile range
- 5.0 hour loiter time
- Autonomous navigation
- Carry a load of two Minis and six Micro vehicles or payload delivery vehicles.
- Capable of performing reintegration with Minis
- Operate from unimproved fields
- Be transportable in a convenient package
Many different concepts were evaluated, most of which used fairly conventional con-
figurations. Some examples are discussed by Sanghyuk Park and Francois Urbain in their
theses, [8] and [10]. As the work progressed, the scale of the Mini continued to grow due
to the need to use large off the shelf electronics. This made the scale of the Parent grow to
the size of an ultralight or small general aviation aircraft, if it was to carry two Minis. As a
consequence, the requirements had to be changed for the demonstration vehicle. It was
decided that the key to the PCUAV concept was to demonstrate reintegration of autono-
mous aircraft. This meant that the requirements for the demonstration vehicle were
changed to the following:
* Be transportable in the MIT Aero/Astro department minivan, see Figure 2.4
28

______________________________________________________________ _____________~~~1 ~ - ~-- - - -
Section 2.3: Components of PCUAV 29
- Fly autonomously
- Loiter for .5-1 hour.
- Maintain speeds suitable for reintegration
- Provide a relatively stationary, stable target for the Mini
- Continue flying after docking with one Mini
Figure 2.4 Parent Aircraft Inside a Dodge Caravan
The team decided that the best option, with the most advantages for reintegration, was
the OHS configuration. Many large scale UAVs are capable of the first five requirements
for the demonstration vehicle, but with a conventional configuration there is concern
about the aerodynamic interference associated with having the tails of both aircraft in
close proximity to each other. With the OHS configuration, the tails of the Parent are well
outboard from the Mini and the interference is minimized. Other advantages of the OHS
are presented in more detail in Section 3.2.1.
2.3.2 Mini Vehicle
As with the Parent design process, in the design of the Mini vehicle there were discrepan-

cies between the objective vehicle and the demonstration vehicle requirements, yet these
differences do little in changing the configuration of the aircraft. However, due to the size
of available electronics, the demonstration vehicle is much larger than the objective vehi-
cle would be. The requirements for the demonstration Mini vehicle are as follows:
- Fly and navigate autonomously
- Maintain a speed appropriate for reintegration
- Maneuver to hit a target on the Parent for reintegration
- Minimize detrimental effects on the flight of the Parent
For these reasons a design was created featuring a pusher propeller, a vertical direct
side force fin, and flaperons that can be positioned both up and down. The pusher configu-
ration decreases the chance of a prop strike when the Mini approaches the Parent from
behind, and also clears an area for a probe to extrude from the nose for reintegration. Hav-
ing a vertical fin over the center of gravity of the aircraft creates the possibility of moving
side to side without yawing or banking when the fin is combined with both aileron and
rudder deflections. Likewise, it is possible to make the plane move up and down with the
combination of flaperons, elevator, and throttle without pitching or changing airspeed.
Figure 2.5 (Left) NGMI, (Right) NGMII
The first Mini was built in the second year of the project. It was made of fiberglass
reinforced foam and had a wingspan of roughly four feet. It was used to do wind tunnel
Chapter 2: PCUAV System30

testing to determine flight characteristics and aerodynamic derivatives to be used in the
control system. This aircraft was later damaged in an office fire, which led to the building
of a second Mini called the New Generation Mini, or NGMI, that is 25% larger than the
first. Later it was found that even this increase in size was insufficient to accommodate the
flight computers, and a third Mini, NGMII, was built 15% larger than the second. These
two vehicles are shown in Figure 2.5. More details of the Mini's construction are pre-
sented in Section 3.3.
2.3.3 Avionics Testbed Aircraft
Testing new avionics and control systems is a risky venture, and can easily lead to crashes.
Realizing that the building time of several months for one Mini or Parent aircraft was
more than the group could afford in the event of accidents, other solutions to testing avion-
ics were investigated. A surrogate aircraft, called the Avionics Testbed Aircraft (ATA),
was found in the Hobbico Superstar 60. This kit plane is available "almost ready to fly"
and only requires a few weeks of work to modify for carrying PCUAV flight computers.
The ATA aircraft is shown in Figure 2.6. Two of these aircraft were built and they both
provided large amounts of insight into what did and did not work. Unfortunately, they both
crashed and were damaged beyond repair. However this was much better than what might
have resulted if these accidents had happened with any of the other aircraft. More about
Section 2.3: Components of PCUAV 31

the work done on the ATAs is presented in Section 3.4.
Figure 2.6 The First Avionics Testbed Aircraft
2.3.4 Payload Delivery Vehicle
During the second year of PCUAV, a payload delivery vehicle (PDV) was developed. This
vehicle was designed to be dropped from the Parent and to deploy ground sensors or
robots. The requirements of the PDVs are as follows:
- Carry a payload the size of a six inch cube and weighing one to two pounds
- Impact the ground at less than 16 feet per second
- Withstand a 30g impact load
- Land within 45 feet of a target
- Be no larger than 6 inches by 6 inches by 20 inches to fit inside the Parent
- Weigh less than 3.5 pounds.
- Cost less than $5000 each for expendability
" Drop from approximately 6000 feet.
Several configurations were considered including a parafoil, a winged body, a cylin-
drical body, a lifting body, and a rotating wing controlled descent aircraft. Out of these
options, a lifting body concept was chosen because it offered the most control and the least
32 Chapter 2: PCUAV System

33
susceptibility to wind due to its relatively high descent speed. A concept vehicle (see Fig-
ure 2.7) was built using a foam core that was covered in fiberglass, carbon, and kevlar. The
body is a NACA airfoil with three symmetric tail surfaces for stability and control. This
vehicle met or exceeded all of the requirements. It was tested by dropping it from the top
of a 60 foot building onto asphalt. The aircraft demonstrated stable flight and descended at
its design angle of decent of 60 degrees.
Figure 2.7 Payload Delivery Vehicle
2.3.5 Mini-Parent Integration Mechanism (MPIM)
The Mini-Parent Integration Mechanism, or MPIM, is the physical mechanism that forms
the connection between the Mini and Parent. Many ideas were explored for the MPIM.
The original idea for the objective vehicles was an extending arm that protruded at an
angle up and behind the Parent. (See Figure 2.8) The arm had a grabbing claw that would
clamp down on a catching ring on the nose of the Mini and then the arm would retract and
bring the Mini to the top of the Parent where it could be locked down for transport. This
system is somewhat complex and heavy and requires high navigational accuracy because
SEE
Section 2.3: Components of PCUAV

34 Chanter 2: PCUAV System
of the limited target size.
Figure 2.8 Original MPIM Design
Another idea was a drogue trailing from the Parent and a probe on the Mini similar to refu-
eling aircraft. The line would be reeled in after contact was made between the planes. The
problem seen with this system is the possibility of a pendulum effect between the two air-
craft when the line between them becomes short.
Figure 2.9 Parent Aircraft with MPIM Attached
Because the goal of the PCUAV project is to demonstrate phases one and two, it is
only necessary to make contact between the two planes, meaning they do not need to be
physically attached to each other in flight. A system was designed and constructed to pro-
34

Section 2.3: Components of PCUAV
vide a target without a locking mechanism. (See Figure 2.9) This system is a three foot
high truss that is attached to the top of the Parent's fuselage. The truss is made of 5/8 inch
carbon/epoxy tubes that are wrapped by 1/16 inch balsa sheet that provide an aerodynamic
shape to reduce drag. The target light sits on the top of the truss, and a drogue "catcher" is
attached six inches below the light. The drogue is a four inch diameter, eight inch long
fiberglass cylinder that expands into a conical net with an eighteen inch diameter. A wood
block was inserted into the mouth of the cylinder. The block has an oblong hole in it that
aligns with the probe attached to the front of the Mini. This hole restricts the rolling of the
Mini, keeping the wings parallel to the wings of the Parent. The drogue is attached to the
carbon truss with a steel axle that allows the Mini to pitch against the resistance of a
spring. Because the Mini can apply the most moment on the truss through pitch, a spring
attachment lessens the load on the truss. At the same time, both roll and yaw are con-
strained.
A rudimentary spring loaded locking mechanism was built inside the cylinder as a
concept for phase three. (See Figure 2.10) The probe on the Mini has a knob that slides
between two arms that are snapped behind the knob by springs. When it is time to disen-
gage the two planes, a servo spreads the two arms, releasing the Mini to fall back.
Locking Mechonism
Figure 2.10 Detail of MPIM
35

2.3.6 Mid-Air Recovery System
During the course of a typical mission it may be desirable to recover something from the
ground, such as soil samples or valuable equipment, and, on a large scale, possibly even
people. A Mid-Air Recovery System, or MARS, was developed in the PCUAV project for
such a purpose. The system consists of a balloon to carry the desired package, an RF trans-
mitter attached to the balloon, and a directional receiver onboard the rendezvousing plane.
To collect a soil sample, a PDV would deliver a collector from the Parent to the desired
position on the ground. A sample would be taken by the collector, the balloon would
inflate, and the collector would rise to the altitude of the Mini, where an RF transmitter
would send an omnidirectional signal. The receiver on the Mini would find the bearing
toward the transmitter and steer the Mini towards it. The Mini would then fly through the
cable connecting the sample to the balloon and retrieve the sample at the wingtip while
cutting away the balloon.
A transmitter and a directional receiver were designed and constructed. The receiver
uses four antennas oriented in a pyramidal orientation as seen in Figure 2.11. The strength
of the signal is compared between each antenna. When the strength is equal on each, the
transmitter is directly ahead of the Mini. The system could be calibrated to determine the
angle toward the transmitter based on the signal from each of the antennae. This system
36

Section 2.3: Components of PCUAV 37
could also prove useful for reintegration with the Parent as a supplement to both the GPS
and vision systems.
Figure 2.11 MARS Directional Finder
2.3.7 Communications and Surveillance
Work was done by Alexander Olmenchenko on the communications and surveillance
aspect of PCUAV [7]. The surveillance system consists of a computer stack separate from
the one used for navigation, a video camera, and a WLAN system. The system was flown
in both the ATA and NGMI. The first concept demonstrated was the ability to take video
images from the air and transmit them via WLAN to a laptop computer on the ground. The
pictures are recorded, compressed into JPEG form, and transmitted to the laptop at a rate
of one frame every two seconds. The second concept used a camera placed on the ground,
which transmitted images to a UAV overhead which relayed them to the laptop. At the
same time, the laptop operator was able to move the ground camera through commands
sent back through the aircraft. The third concept demonstrated was the ability to send and
receive images from both the airplane and the ground cameras at the same time. The next
concept to be demonstrated will be putting the ground camera on a rover to show that it
can be operated by the laptop with a signal relayed through the airplane. The final surveil-
lance concept to be demonstrated will combine all of the previous concepts with GPS so

that the airplane can be made to orbit a moving rover based on its GPS position. This
would allow the user to view both an image from the rover and an image from the aircraft
of the rover at the same time. Figure 2.12 shows the rover and ground camera used for sur-
veillance.
Figure 2.12 Rover with Surveillance Equipment on Top
2.3.8 Flight Avionics
The three PCUAV flight vehicles utilize similar avionics packages. They all have com-
puter stacks, RC receivers, RF transceivers, GPS, air data sensors, relay switches, gyro-
scopes, and accelerometers. In addition, the Mini has two infrared detectors and their
related electronics for use during Phase two of reintegration. Figure 2.13 shows how the
38 Chapter 2: PCUAV System

Section 2.3: Components of PCUAV 39
avionics components are configured in the Mini.
ElectricalRadio
.... RS232
Figure 2.13 NGMII Flight Control Avionics
The CPU used in the computer stack of each plane is a 233 MHz processor made by
Real Time Devices USA, Inc. that runs DOS. This computer interfaces with all of the ana-
log flight sensors through a Real Time Devices 16-bit databoard. The system is powered
through a power board made by TriM that provides +/-5V and +/-12V. Programs are
downloaded, and flight data uploaded through a CM312 utility board from Real Time
Devices. This module provides communication between the computer and the GPS, RF
transceiver, and SBC2000s.
The SBC2000s, made by Micro Pilot, provide an interface between the aircraft's ser-
vos and either the pilot or the flight computer. In pilot-in-command mode they read the
pilot's inputs through the RC receiver #1 and send the appropriate pulse width signal to
each of the servos. In computer-in-control mode, the SBC2000s produce the same signals
based on input from the computer. The computer creates this input based on several
Section 2.3: Components of PCUAV 39

40 Chanter 2: PCIJAV qvot-m
sources of information. The primary source of information during Phase one of reintegra-
tion comes from the GPS. The system used for PCUAV is an All-Star GPS from BAE Sys-
tems, Canada. It provides information at a rate of 5 Hz. Because PCUAV's aircraft are
relatively small and have small time constants of motion, they require higher accuracy of
position from the GPS than is available in order to achieve navigation based solely on
position. For this reason, velocity and acceleration are measured and combined with fil-
tered position data to aid in producing smooth, stable guidance, navigation, and control of
the vehicles.
Other key information for navigation comes from a set of rate gyros, an accelerometer,
and pressure sensors. The rate gyros are made by Tokin. These gyros are capable of detect-
ing deflection rates of up to 300 degrees per second with a resolution of 1 degree per sec-
ond. They do have a large drift rate of about 1/3 of a degree per second, and are
susceptible to vibration noise. For the purpose of redundancy, there are six gyros in total,
two per axis. The accelerometer, made by Crossbow, provides information in three direc-
tions with a range of 4g's and an accuracy of 0.005g's. Pressure sensors from Omega pro-
vide static and dynamic pressure for both altitude and airspeed information. The airspeed
sensors for both the NGMII and the Parent were calibrated in the MIT Wright Brothers
Wind Tunnel.
During Phase two of reintegration, the primary information role of GPS in the Mini is
superseded by the vision system described in Section 2.2.3. This system consists of two
infrared detectors, made by Pacific Silicon Sensors, Inc. The signal from each camera is
sent through an analog to digital conversion board and combined to determine the position
of the aircraft relative to the target.
40

The information from all of the sources described above is communicated between the
two vehicles as well as with the ground station through RF transceivers made by Max-
Stream Inc. These have a range of about 1.5 miles with the antenna chosen for PCUAV.
The aircraft are controlled by the pilot through standard RC radio gear made by Fut-
aba. The copilot uses a similar set of radio gear to turn the computer on and off and switch
between pilot in control and computer-in-control modes. The range of RC equipment can
be affected by the computer's electromagnetic interference, reducing the range of the
pilot's control in a field test by as much as half when the computer is switched on. Manu-
facturers other than Futaba were also tested, but Futaba was found to produce the best
range. Efforts were made to shield the computer's noise, and the best range was achieved
when the antennas from the pilot's and copilot's receivers were separated as far as possi-
ble. The other choice in radio gear is between FM and PCM. This choice has little effect
on range, the main difference being how the aircraft behaves when signal is lost. In FM,
the servos start to jitter when the signal weakens, whereas they hold their last known posi-
tion in PCM mode. Even though the FM jittering makes signal loss easier to detect, PCM
was chosen for PCUAV because other onboard electronic devices are adversely affected
by jitter noise.
The final, and one of the most important components of the onboard avionics, is a six
channel relay switch. During flight, the pilot may choose to fly in one of two modes, nor-
mal mode and safe mode. In normal mode the pilot's signal from the receiver is routed
through the relays to the SBC2000s and then to the aircraft's servos, which allows the
computer to control the plane. When the pilot switches to safe mode, the relays bypass the
SBC2000s, providing a hardwire connection from the receiver to the servos. This mode
could save the plane in the event of a computer malfunction. Unfortunately, this mode
switch was a factor in the destruction of the second ATA. The plane had stalled while
Section 2.3: Components of PCUAV 41

under computer control and went into a steep dive. The pilot switched to safe mode, but
applied full up elevator before making the switch, the result was that the plane experi-
enced an instantaneous 7g pull up that snapped the wing at the root. Afterwards, a proce-
dure was created for switching to safe mode. Before making the switch, the pilot centers
all of the control surfaces so that when the switch happens minimum stress is induced
before any maneuvering is attempted.
Three sets of avionics were built for PCUAV. One for the ATA and NGMII, one for the
Parent, and a third that was used in the lab to test flight codes. Because the avionics can be
difficult to remove from the aircraft, and there is a chance of disturbing connections while
moving the avionics, it was important to have a separate and identical set in the lab for
testing. This set was connected to a hardware in the loop simulator which consists of ser-
vos similar to those on the aircraft that are linked to potentiometers that provide feedback
to the simulator computer. In this way all flight codes could be tested on the ground before
ever being put in the aircraft.
The ATA and NGMII have virtually identical avionics while the Parent's is similar, but
splits the controls into three parts. The Parent was built with one receiver in the fuselage to
control the throttle and nose gear and one receiver in each wingtip to control the rudder,
elevator, and aileron on each side. This shortens the length of the servo wires for these
controls to reduce the RF interference associated with long wires. To achieve autonomous
flight, a relay, a SBC2000, and a battery must be added to each of the three receivers. A
serial link along the underside of the wing connects the wingtip avionics with the central
computer in the fuselage, which differs from the Mini's avionics only by the replacement
42

of the rate gyros with an inertial measurement system built by Crossbow. See Figure 2.14
for more detail on the Parent's Avionics.
GS treceiver
RF transceiver
electrical
radio lapto_-,- radi RF transceiver 6 - lpo- serial pilot co-pilot
Figure 2.14 Parent's Avionics Structure
2.4 Chapter Summary
Chapter two presented a background of the PCUAV System. Section 2.2 presented a
description of the mission of PCUAV as well as some of the key enablers of the mission.
Special attention was given to the parts of the mission in which demonstration is desirable,
particularly reintegration, which was separated into three phases. Phase one being oper-
ated under GPS navigation, Phase two under guidance of a vision system, and Phase three
making a solid physical connection between the two aircraft. Section 2.3 went on to
describe the components of the PCUAV system, stressing those components the author
was most involved with in the project. These include much of the design and building of
the Parent and Mini vehicles, the Avionics Testbed Aircraft, the Payload Delivery Vehicle,
Section 2.4: Chapter Summarv 43

Chapter 2: PCUAV System
the Mini-Parent Integration Mechanism, and the various avionics utilized in each of the
flight vehicles.
44

Chapter
3UAV Building and Testing
3.1 Chapter Overview
This chapter discusses in depth the vehicle designs, including their dimensions, structural
materials selection, and techniques employed by the author and other team members in
building these aircraft. A brief commentary on flight testing for each vehicle is also pre-
sented.
3.2 OHS Parent Vehicle
This section describes the Outboard Horizontal Stabilizer configured Parent vehicle built
by the author and Francois Urbain. The advantages and disadvantages of the OHS config-
uration are discussed, as well as the dimensions and performance of the aircraft. The con-
struction of the three main components of the aircraft, namely the wing, the tails, and the
fuselage is also described.
3.2.1 Advantages and Disadvantages of the OHS
The key demonstration goal for PCUAV is reintegration of the Mini and OHS vehicles.
For this reason, both vehicle designs were created with that purpose in mind. The unique
tail configuration of OHS aircraft provides a maximum amount of clear space behind the
45

Chapter 3: UAV Building and Testing
fuselage. This keeps the tail surfaces away from any flow disturbances from the Mini and
reduces the chances of a collision between the Mini and the Parent's tail when compared
to a conventional configuration. Analysis was done using computational fluid dynamics to
determine that the OHS Parent would remain controllable even after a losing one tail sec-
tion as a result of a midair collision. The other advantage of the OHS configuration is the
fact that the horizontal stabilizers are flying through the upwash of the wingtip trailing
vortex. (see Figure 3.1) The lift is thus distributed to the tail as well as the wing. This
means more lift is possible with the same wing area as a conventional configuration where
the tail is in the downwash of the wing's vortex and usually pushes down, requiring more
lift from the wing.
-2j
0
02
0 0.2 0.4 0.6 0.8 1 1.2 1.4 1.6 1.8 2
y/b
Figure 3.1 Vortex Induced Angle of Attack at Tail Position
The main disadvantage of the OHS aircraft comes from the moments generated by the
lifting tail on the wingtips. The wing must be stiffer and stronger in torsion than wings on
conventional aircraft. This can be achieved most easily with a thick airfoil of relatively
low aspect ratio.
46

3.2.2 OHS Parent Design Process
After deciding on the configuration of the Parent, the next step was to design and size the
specific aircraft applicable for the project. A few things were drivers for the final design.
First, the plane needed to be large enough that the Mini would have little trouble clearing
the Parent's tails with its wingtips. For this reason the wingspan of the Parent was chosen
to be roughly twice that of the Mini. Second, the wing had to be stiff enough to resist the
torsional moment from the tail booms. This led to an aspect ratio of 8.0 with a NACA
2412 airfoil. At the same time, the wing needed to fit in the back of a mini van. For this
reason the wing was built in two pieces, each about 7.5 feet long. The tail booms are also
detachable to enable transport, as shown in Figure 2.4.
The tail volumes were chosen [9] to provide stability similar to general aviation single
engine aircraft. These are calculated by (eq. 3.1) and (eq. 3.2), where vvt is the vertical
tail volume coefficient and Vht is the horizontal tail volume coefficient. The other sym-
bols are listed in the list of symbols and acronyms on page 6.
V = Lvt XSvt (eq. 3.1)vt bw x S
Vht Lht xSht (eq. 3.2)c, X SW
The values picked were vvt = 0.04 and vht = 0.7. The tail length was set by the avail-
ability of carbon tubes. It was desirable to use a tube that was of a diameter similar to the
thickness of the wing so it could blend smoothly into the wingtip. The tubes chosen have
diameters of 1.125 inches and are sold in six foot lengths, thus fixing the length of the tail
and the tail area for the chosen tail volumes. A NACA 0012 airfoil was picked for the tail
airfoil since it is a common, well proven airfoil shape that is relatively easy to build. A
Section 3.2: OHS Parent Vehicle 47

more efficient design, such as those done at University of Calgary and described in [3] and
[5], would use a non symmetric lifting airfoil for the horizontal tail.
The size of the fuselage was largely driven by the size of the avionics package which
requires a 1 Ox 1 Ox 18 inch box. Attached to the front of this box is a section large enough
for the fuel tank, tapering to the engine. To the rear of the box is a tapered section to
reduce the possibility of laminar airflow separation. The initial engine chosen was an O.S.
max- 160FX which is the largest glow powered, two stroke, single cylinder engine built by
O.S. It produces 3.7 horsepower. As described in Section 3.2.4, this engine was later
replaced with a more powerful Moki 2.10 engine.
The final dimensions of the Parent are presented in Table 3.1.
Table 3.1 OHS Final Dimensions
Wing Span 180 in. Length 103 in.
Wing Chord 21.25 in. Height (w/o truss) 45 in.
Wing Area 3825 in.2 Height (w/ truss) 56 in.
Tail Span 233 in. Fuselage Dim. 10.5 x 10.5 x 43 in.
Horiz. Tail Area 738 in.2 Empty Weight 41.1 pounds
Vert. Tail Area 426 in.2 Airfoil NACA 2412
Avg. Tail Chord 12 in. Engine (hp) Moki 2.1 in. 3 (4.9)
3.2.3 OHS Construction
Construction of the OHS Parent began with the wings. Each of the two main wing spar
halves were made from two pieces of 1/4 inch plywood sandwiching three pieces of 1/4
inch balsa. A layer of 2-ounce fiberglass was epoxied between each layer of wood at a 45
degree orientation to help strengthen the spar in the shear direction. The two spar halves
overlap at the center by ten inches, with the plywood pieces interlacing each other. Two 1/
48 Chapter 3: UAV Building, and Testing,

4-20 steel bolts hold this center section together with a two degree dihedral angle. Using a
milling machine, the spars were beveled on the top and bottom to match the contour of the
airfoil. Finally, seven layers of unidirectional carbon fiber were laid on the top and bottom
faces of the spars to support the bending load of the wing. (see Figure 3.2) Despite the fact
that the length of the spar is only 40% of wingspan, and it is only 1.5 inches wide, it repre-
sents 30% of the total weight of the wing and provides most of its bending strength. A rear
spar of half inch balsa runs the full length of the trailing edge. It is reinforced with 1/8"
plywood at the wing root, where the two halves are bolted together.
UnidirectionalCarbon Fiber
Balsa
%" Plywood
Fiberglass BetweenWood Layers
Figure 3.2 Parent's Spar Detail
While the spar was being manufactured, a foam core was cut for the rest of the wing
using a foam cutter. Because of the size of the cutter, each wing had to be made from three
sections of foam epoxied together. The inboard section was notched to accommodate the
spar. The leading and trailing edges were cut off and later a solid balsa leading edge and a
hollow balsa trailing edge were glued on. The skin of the wing was made from 1/16 inch
balsa sheets with the grain running along the length of the wing to resist bending. The
49

50
balsa was reinforced with a composite layup on the internal side. A layer of 4-ounce fiber-
glass was laid along the full span at a 45 degree orientation to provide torsional stiffness,
as well as two extra layers at the wingtips to give extra stiffness where the tail booms con-
nect to the wing. One layer of unidirectional carbon and one layer of carbon fiber cloth
oriented parallel to the span was laid over the area of the spar. These carbon layers were
cut into a diamond shape to smooth the transition of the bending stress from the wingtips
into the spar and then again into the center section of the spar. (see Figure 3.3) Once the
fiberglass and carbon was laid on the balsa sheeting, the skins were placed on the top and
bottom of the foam cores with the spar halves epoxied in them. The entire wing was then
placed in a vacuum bag and put under pressure. Because the composite layup was put on
the internal side of the balsa, little sanding was required to produce a smooth finish after
the wing came out of the vacuum bag.
Heavy Carbon Fiber @ 45 deg Unidirectional CarbonFiber
Spar
4-oz Fiberglass @ 45 deg Extra FiberglassLayers
Figure 3.3 Parent Wing Composite Layup
When building the tail section it was important to keep the weight as low as possible to
reduce the moment on the wingtip produced from the inertia of the tail during landing. For
this reason, the tail was built with balsa in lieu of a foam core fiberglass surface. Eighth
inch balsa ribs were glued to a 1/4 inch balsa spar and the leading 25% of the tail was
sheeted with 1/16 inch balsa. The horizontal and vertical surfaces were fiberglassed to a
Chapter 3: UAV Building and Testing

Section 3.2: OHS Parent Vehicle
solid piece of balsa that had been sanded to a streamlined shape and notched to fit to the
end of the carbon tail booms. The horizontal surfaces were given eight degrees of dihedral
to avoid ground contact in a wing low landing. (see Figure 3.4) The tail booms were glued
into a wingtip pod that was bolted into two oak blocks epoxied into the front and back of
the wing's tips.
Figure 3.4 (Left) Author with Parent's Tail, (Right) Parent's Fuselage Frame
The last component of the aircraft to be built was the fuselage. This was built using 5/
8 inch carbon tubes to form a truss structure. (see Figure 3.4) The carbon tubes were held
together by epoxy embedded with shreds of fiberglass. This truss connects all of the high
stress locations; which are the engine and nose gear mount, the front main spar mount, the
rear spar mount, the main landing gear, and finally the attachment points for the MPIM.
This structure provides excellent strength with little weight. The frame was wrapped with
1/4 inch balsa to give it the appropriate shape. The bolts that hold the main spar together
also bolt into the frame, while the rear spar is rubber banded to the frame. The main land-
ing gear were bolted into an oak block, and the firewall was made from 1/4 inch plywood.
51

52
3.2.4 OHS Testing and Updating
This section describes the testing that was done on the OHS aircraft as well as changes
that were made due to the results of that testing. Included are structural testing and both
taxi and flight testing.
3.2.4.1 OHS Structural Testing
Structural tests were done on the wing for strength in the bending, torsional, and longitudi-
nal directions. The bending load was tested to the same standard that the Federal Aviation
Administration requires for normal category aircraft, 3.5g's, plus a factor of safety of 1.5.
Linear deflection of the wingtips was observed all the way to 5.5g's at a rate of 1/8 inch
per g-force. The OHS configuration actually has an advantage over normal aircraft struc-
turally when it comes to bending moments on the wing. Because the mass of the plane is
not concentrated at the wing root, but is also distributed to the wingtips, the bending
moment actually switches direction at about half span, leaving a point where there is actu-
ally no bending stress. (see Figure 3.5) This point happens to be close to the end of the
spar, which decreases the adverse affect of having a discontinuity in the structure there.
The overall effect is that the stress at the wing root for the OHS is about half what it would
Chapter 3: UAV Building and Testing

Section 3.2: OHS Parent Vehicle 53
be in a standard configuration.
Bending Moment3000
Standard Configuration-- OHS
2500 ---------- - ------------ ------------ ------------- --------------
2000 --------- --- ---------------------------- ------------- --------------
C 1500 -------------- ---------- ----------- ----------- -------------
E 1000 ------- - ---------- --------------- -- -------------
500-------------
0 -------- -- ------- -- --- -- -- - ----
-5000 20 40 60 80 100
Span (in.)
Figure 3.5 Bending Moment in Parent's Wing
The torsional stiffness of the wing was tested by applying weight to the tails up to 5g's.
Again, linearity was observed in the deformation.
The last direction that the wing's strength was tested was in the forward longitudinal
direction. This is important for loads seen at high angle of attack, when the lift has a load
component parallel to the wing's chord. The resulting moment can be up to 14% of the
total bending moment on the wing. This load was tested, and no deflection was observ-
able.
3.2.4.2 OHS Taxi and Flight Testing
Once the aircraft was completely built and assembled, taxi tests were done. It was imme-
diately obvious that the landing gear performed less than satisfactorily. The nose gear
oscillated side to side as much as four or five inches even at walking speeds. The main
gear oscillated front and back at higher speeds as well. This problem was fixed by brazing

Chapter 3: UAV Building and Testing
steel rods to the sides of the landing gear to increase the appropriate moments of inertia.
Tests were performed on both a hard surface and a grass surface. On the hard surface, the
tail booms oscillated with moderate amplitude. Even so, the elevator still demonstrated
some authority and could lift the nose while taxiing at about 50% of takeoff speed. How-
ever, on the rougher grass surface the tails oscillated at high frequency and amplitude, and
the engine struggled to get the plane to high speeds. For this reason operations of the Par-
ent were limited to hard surface runways only.
During the first takeoff of the Parent the tails oscillated at slow speed, but gradually
grew stiffer as speed increased until there were no observable oscillations at takeoff speed.
The aircraft flew smoothly without any undesirable flying characteristics. It was some-
what slower than expected, but had no trouble climbing, and once was glided to the run-
way, after the engine stalled, with a shallow glide angle. (See Figure 3.6 to see an example
of engine out flight.)
Figure 3.6 Second Landing of OHS Parent
For the second flight test, the MPIM was attached to the top of the plane. (see Figure
2.9) This produced significant drag and required full power to keep the plane in the air.
The engine stalled at one point, resulting in a rough landing because the plane's glide ratio
54

had decreased significantly. The MPIM was later better streamlined and the engine was
replaced with a Moki 2.10 that provided 30% more horsepower.
During a third flight test these changes proved that the plane flew reliably and with
performance adequate for reintegration even with the MPIM attached. The flight speed
envelope was measured to range from 18 to 28 m/sec, which is comparable to that of the
Mini. Another problem was observed during this flight test. The pilot found that the plane
would not pitch down from level flight at high speeds even when full down elevator was
applied. At first this was attributed to aeroelastic effects. With OHS aircraft, when the lift
is increased on the tail to pitch the plane down, the lift from the wing decreases, which
decreases the strength of the wingtip vortex, lessening the lift from the tail. This makes for
a very stable system, but also introduces a lag into the elevator effectiveness. This phe-
nomenon should be equally present in both up and down pitch however, which was not
observed in the case of the Parent. The solution was found in the strength of the elevator's
servos. The servos that were being used were the same as what had been used on all of
PCUAV's aircraft, Hitec HS-85MG Mighty Micros. The servos did not provide adequate
torque for surfaces as large as the Parent's elevator. Because the Parent's trim condition
required a few degrees of down elevator, the servos were already being worked to keep the
plane level, thus the asymmetric effectiveness of the elevator. These servos were replaced
with high performance Futaba S9402 servos that delivered 40% more torque.
During the fourth flight test the Parent operated autonomously under computer con-
trol. The plane successfully flew continuous circles, maintaining altitude and position
within half of a wingspan. This was done with winds of 12 miles per hour with even
higher gusts. The control system for the aircraft had been designed for winds only up to 10
miles per hour, so better results are expected with better conditions. In addition, the pres-
Section 3.2: OHS Parent Vehicle 55

56
sure sensor for the altimeter malfunctioned during flight, which meant that all altitude
information came from GPS. The accuracy of this information is only +/- 5 meters.
3.3 Mini Vehicle
This section discusses the design, construction, and testing of the three Mini vehicles and
the continuing evolution of its design. The advantages and disadvantages of the design are
presented. Special attention is given to the construction of the NGMII, which the author
was primarily responsible for building.
3.3.1 Mini Design Process
Like the Parent, the Mini was also designed primarily to perform reintegration. This meant
that the objective vehicle needed to be maneuverable, yet stable, and large enough to carry
the avionics package, yet small enough to be carried by the Parent. A few designs were
proposed during the first year of the project, but they all shared a few common things. All
of the ideas incorporated a pusher propeller to keep the prop away from the Parent, and all
had extra vertical fins to produce sideways movements. Some had the extra fins at the
nose or on the wingtips and others over the center of gravity. Some were low wing aircraft,
with the idea of blending the wing into the wing of the Parent after docking, while others
were high wing planes with the idea of blending the fuselages of the planes together with
the wings arranged in a tandem position to help provide lift to the Parent. All of the initial
designs had a wingspan of less than 60 inches, which may be appropriate for an objective
vehicle. For a demonstration vehicle however, it is only necessary for the Parent and Mini
to make contact, and not necessarily have the Parent carry the Mini, so the size of the Mini
is less restrictive. The first Mini built was more of an objective vehicle in its size and lay-
out. It was a high wing pusher with a vertical surface over the center of gravity. The
Chap~ter 3: UAV Building and Testing

Section 3.3: Mini Vehicle 57
NGMI was designed to be a larger demonstration vehicle. It had the same layout as the
Mini, with the wing and tail being scaled up 25%, and the fuselage made large enough to
theoretically accommodate the flight avionics. However, the team had been optimistic
when sizing the avionics, forcing the building of the 15% larger NGMII.
Because the primary mission of an objective Mini is to loiter over a target, the wing
was designed as a GM-15 airfoil, who's drag bucket fit the mission profile well. A rela-
tively high aspect ratio of 9.1 was chosen for aerodynamic efficiency, as well as Hoerner
wingtips to reduce induced drag. The tail surfaces of the Mini were sized for
V = 0.04 and Vht = 0.54. This makes the Mini a little less stable longitudinally than the
Parent, but still within the bounds set by Raymer in [9].
As was mentioned above, the Mini configuration has advantages from the pusher pro-
peller and the extra vertical fin. There are also some disadvantages associated with the
Mini's design. First, because the engine is behind the wing, it is difficult to place the cen-
ter of gravity far enough forward. It requires either a very long nose or a large nose weight.
Fortunately for PCUAV, the avionics provide nearly enough weight by themselves to bal-
ance the NGMII, so only a small amount of extra ballast weight is required. Second, the
position of the pusher prop limits the amount the plane can rotate during takeoff and land-
ing. This problem could be alleviated somewhat if the main landing gear was both length-
ened and moved rearward. Finally, as will be discussed in Section 3.3.3, the tail booms are
long, giving the tails a lot of mechanical advantage on the attachment point on the fuse-
lage.
3.3.2 Mini Construction
The first Mini was built with a foam core wing, tail, and fuselage; with a few layers of
fiberglass on each. The plane never flew but was used in wind tunnel tests to determine its

flying characteristics. Later the plane was destroyed in an office fire.
The second Mini, also called the New Generation Mini or NGMI, was 75% complete
when the author joined PCUAV. The fuselage was made of 3/32 inch plywood reinforced
with fiberglass. The tail was made of balsa ribs and connected to the fuselage by 3/8 inch
carbon tubes. The wing had a solid plywood spar in a foam core and was sheeted with
balsa and several layers of fiberglass. This resulted in a relatively heavy fuselage and wing
and drove the wing loading to 75% higher than aircraft of similar size. The plane was
powered by an O.S. 0.61FX engine. The NGMI flew well when on long paved runways,
but had a high speed and a limited load capacity. For this reason a second, larger, lighter,
and more powerful NGMII was built.
Figure 3.7 Avionics Inside NGMII Fuselage
The fuselage construction of the NGMII drew from that of the Parent. A truss structure
was made from 3/8" carbon tube connecting the engine, landing gear, and wing. This truss
was sheeted with 3/32" balsa. The nose bulkhead and engine firewall are plywood and the
main landing gear is bolted into an oak block. The nose cone was formed from a shaped
block of foam covered with six layers of four ounce fiberglass. Most of the foam was
removed, leaving a hollow area for a battery compartment surrounded by about an inch of
58 Chapter 3: UAV Building and Testing

foam for impact resistance. The nose was hinged on the left side of the fuselage so it is
able to open for easy access to the batteries much like some military cargo aircraft. The
locking mechanism on the right side can be seen in Figure 3.7.
The tail of the NGMII was made of balsa stick with a bass wood spar and balsa sheet-
ing on the leading 25%. It is attached to the fuselage by 3/8" carbon tubes that are braced
both at the firewall and the landing gear.
1/16' Balsa Skin
End Grain Balsa Core1/8' Balso Rib Carbon Spar Caps
Carbon Web
Figure 3.8 Cross Section of NGMII Wing
Since most of the weight of the NGMI is in the wings, most of the effort to reduce the
weight of the NGMII went into its wing. Instead of using a foam core, this wing was
"built-up." It has a nearly full span spar, balsa ribs, and full wing balsa sheeting. Each spar
cap is made from two half inch wide carbon laminate strips that taper from .06" thick at
the root to .0 14" at the tip. The spar web was made from half inch end cut balsa as the core
material and a 0.5" by 0.03" carbon shear web along the leading edge of the spar. (See Fig-
ure 3.8) These parts were epoxied together and vacuum bagged with two degrees of dihe-
dral and a two inch overlap of the carbon layers at the root. The 1/8" balsa ribs were split
into front and rear pieces and then glued to the spar. Balsa leading and trailing edges were
added and the whole wing was sheeted with 1/16" balsa whose grain is oriented in the
Section 3.3: Mini Vehicle 59

spanwise direction for bending stiffness. See the full set of construction plans in Appendix
A and the final dimensions in Table 3.2.
Table 3.2 Final Dimensions of NGMII
Wing Span 100 in. Length 63 in.
Wing Chord 11 in. Height 21 in.
Wing Area 1070 in.2 Fuselage Dim. 10.5 x 7.25 x 40 in.
Tail Span 30 in. Empty Weight 15 pounds
Horiz. Tail Area 187.5 in.2 Airfoil NACA 2412
Vert. Tail Area 130 in.2 Engine (hp) O.S. 91FX (2.8)
Avg. Tail Chord 6.25 in.
3.3.3 Mini Testing
The first Mini was tested in the Wright Brothers Wind Tunnel during the first year of
PCUAV. Aerodynamic derivatives were found by measuring forces and moments in all six
degrees of freedom while varying control deflection, airspeed, angle of attack, and side-
slip. This data was used to develop the control systems for the subsequent Mini vehicles.
NGMI was first flown in the second year of PCUAV. It flew stably under remote pilot
control and was responsive to controls in all directions. It was heavy however and required
long smooth runways for operation. Later, after the NGMII had been built, NGMI's engine
was replaced with an O.S.max .91FX and the landing gear were upgraded, giving it
enough power and robustness to be useful. It was later used to test the surveillance and
communications systems described in Section 2.3.7, which could fit in the plane's rela-
tively limited cargo space.
Before its first flight, NGMII's wing was load tested to 3.5g's. Sandbags totalling 66
pounds were laid in an elliptical distribution along the bottom surface of the inverted
wing. Linear deflection was observed throughout the loading process, and the wing
60 Chapter 3: UAV Builind tQin

returned to its undeformed state. The wing was also tested in the longitudinal direction,
putting sandbags totalling four pounds on the wingtips. No deflection was observable.
The NGMII first flew in the third year of PCUAV. On its maiden flight, problems were
encountered with the elevator control. The aircraft went into a shallow dive and the pilot
had to use full up elevator and full elevator trim to recover. The joints between the tail
booms and the fuselage were reinforced to reduce the amount that the booms flexed, but
the elevator effectiveness was still not desirable. There was a lag of about half of a second
between the elevator command and the change in pitch due to the flexibility of the booms.
Thin strips of carbon, one inch wide, were fiberglassed edge-on along the length of the tail
booms, increasing their moments of inertia by 215%. This stiffened the booms sufficiently
for responsive flight. The Mini was then used to demonstrate autonomous flights, flying
prescribed circles and simulated paths for phase one of reintegration. These tests were suc-
cessful, with the plane remaining within 4 meters of its prescribed position at all times,
even in the presence of crosswinds and gusts.
3.4 Avionics Testbed Aircraft
This section discusses the avionics testbed aircraft or ATA. Included are the reasons for
the ATA's existence, the work done on the ATA, and the final design of the aircraft.
3.4.1 Advantages and Disadvantages of the ATA
The Avionics Testbed Aircraft was necessary to reduce the risk involved with flying
autonomously. Because the aircraft was relatively cheap and easy to construct, it did not
matter as much if it was destroyed in a crash as if a Mini or Parent vehicle crashed. One
disadvantage of the ATA was that it had a puller propeller, which was undesirable for dem-
onstrating reintegration. The second disadvantage was that the original kit plane was
Section 3.4 Avionics Testbed Aircraft 61

62
designed to be a five pound aircraft, and, when loaded, it weighed three times that amount.
This made the wing loading and structural stress high. Two ATAs were built and flown
during the course of PCUAV. Both were destroyed in crashes. The first was overloaded
and stalled on takeoff. The second plane had extended wings and a larger engine to deal
with the large load, but the wing proved to not be strong enough when it snapped in half
during a 7g recovery from a dive as described in Section 2.3.8.
3.4.2 Work done on ATAs
The ATAs were modified Hobbico Superstar 60's. These kit planes come 90% complete
out of the box and only require a few days work to finish. However, the modifications
done for the ATA took a few weeks. First the fuselage center section was removed and
replaced with one large enough for the avionics package. This fuselage section was built
from bass wood sheeted with balsa. The wings were extended by five inches on each tip
and the center section of the wing was reinforced with fiberglass. Servos were fitted into
each wing for the ailerons instead of having one servo in the center. This allowed the aile-
rons to also be used as flaps. Both the vertical and horizontal control surfaces were
enlarged proportionally with the wing. An O.S. .91FX engine powered the ATAs. Table
3.3 compares the final dimensions of each ATA. Notice that despite the significant
increase in size for the second plane, the weight actually went down. This was the result of
better planning and experience with building. The fuselage section for the ATAII was built
much more minimally, and yet strong enough to carry the avionics.
Table 3.3 Comparison of ATAI and ATAII Dimensions
ATAI ATAII ATAI ATAII
Wing Span 70 inches 81 inches Wing Loading 28.3 oz/ft2 19.7 oz/ft2
Wing Area 910 sq. in. 1053 sq. in. Horiz. Tail Area 166 sq. in. 193.2 sq. in.
Length 62 inches 69 inches Horiz. Tail Vol. 0.484 0.548
Chapter 3: UAV Building and Testing

Table 3.3 Comparison of ATAI and ATAII Dimensions
ATAI ATAII ATAI ATAII
Weight 11 pounds 9 pounds Engine (hp) O.S. 61FX (1.9) O.S. 91FX (2.8)
3.5 ATA Testing
The ATA's were used to validate flight codes for autonomous flight. ATAI demonstrated
the ability to hold a bank angle commanded by the copilot. By varying the bank angle
command, the plane could fly circles under the computer's control. The plane was also
used in an attempt to test Phase two of reintegration. In the test, a mini van was driven
down the runway with the target light on top of it. The pilot attempted to maneuver the
plane into a position 10 meters behind the van so that the vision system could lock onto
the light and the plane could automatically hold its position relative to the van. Unfortu-
nately, ATAI was destroyed at one of these test flights during takeoff. Afterwards, it was
decided that this test was too risky and too difficult for the pilot to attempt with the ATAII.
The ATAII's role in PCUAV was primarily to test autonomous flight under GPS navi-
gation as would be required in Phase one. The plane did successfully fly a circle autono-
mously. It was in one of these circles that the plane was lost. The ATAII did not have any
pressure sensors, and relied on maintaining ground speed measured by GPS. When the
plane turned downwind its airspeed decreased to the point of a stall, the result of which
was described in 2.3.8. To fix this problem, NGMII and the Parent were fitted with pitot
tubes to measure airspeed, and all of the flight codes were modified to ensure that the
plane stayed above stall speed.
3.6 Chapter Summary
Chapter three described the designing, building, and testing of the PCUAV unmanned
aerial vehicles. These included an outboard horizontal stabilizer configured Parent vehi-
Section 3.5: ATA Testing 63

64 Chapter 3: UAV Building and Testing
cle, three versions of the Mini vehicle, and two avionics testbed aircraft. A detailed
description of the building process was given for those planes that the author worked most
on, namely the Parent, NGMII, and ATAII. The testing described included both structural
and flight testing. Details were given about how the results of the testing changed the
designs of the aircraft.

Chapter
4Structural Modeling of the Parent
4.1 Chapter Overview
This chapter lays out the work done on analyzing the structural dynamics of the OHS Par-
ent vehicle. The natural frequencies and mode shapes of the plane are discussed as well as
the process followed to achieve these results.
4.2 Structural and Inertial Properties of the Parent
Chapter three presented the building process and materials used for building the Parent. A
three view drawing of the plane appears in Appendix A. From these drawings and a
knowledge of the construction, an attempt was made to calculate the structural properties
of the plane. This section describes the process followed and the results obtained.
4.2.1 Area Moments of Inertia
The most important properties for the analysis were the area moments of inertia along
with the Young's modulus of elasticity. The moment of inertia of the tail booms are the
easiest to calculate on the aircraft. They are found from (eq. 4.1) and (eq. 4.2).
4 4
( = = r 2 (eq. 4.1)xx yy4
65

66
4 4n( r 1 - r 2 )
I = 2 (eq. 4.2)
Notice that JO is twice Ixx or I, or more appropriately, as for all symmetric shapes:
JO = xx + Iyy (eq. 4. 3)
The radii, axes, and origin for these equations are shown in Figure 4. 1.
Figure 4.1 Cross Section of the Parent's Tail Booms
The moments of inertia, IXX and Iyy, of the tail surfaces were estimated by only taking
into account the main spar and rear spar, which are both rectangular cross sections. These
moments of inertia were found about the area centroid, calculated by (eq. 4.4). X and Y
are the cartesian coordinates of the center of area of a cross section.
Y =
IAi
(eq. 4.4)
-i
X =
IA
Chapter 4: Structural Modeling of the Parent

The moments of inertia of a rectangle about its local axes are calculated from (eq. 4.5).
The moments of inertia of the two spars are combined, using the parallel axis theorem
given in (eq. 4.6) and (eq. 4.7). In these equations, the x'-y' axes are the local frame of ref-
erence of each rectangle, the x-y axes are the coordinates of the cross section at the area
centroid, and d is the perpendicular distance between the two axes. The length of the rect-
angle's side parallel to the x axis is denoted by b, while side h is parallel to the y axis, and
A is the area of the relevant rectangle.
bh 3b 3hIX= 2 IYY, = 2 (eq. 4.5)
- 2=xx IxIx, +Ad (eq. 4.6)
- 2I = +Ad (eq. 4. 7)
Finally, the wing's area moments of inertia were estimated as the total inertia of the
main and rear spars combined with the balsa and composite skin. The properties of the
spars were calculated with (eq. 4.5) through (eq. 4.7), while the properties of the skin were
computed using a spreadsheet, which appears in Appendix A. The skin was discretized
into lumped areas every 2.5% to 10% of the wing's chord and were added into the total
inertia of the wing through the parallel axis theorem. The contribution of the balsa and the
composites were calculated separately. After each component's contribution to the inertia
Section 4.2: Structural and Inertial Properties of the Parent 67

68
was calculated, they were multiplied by their respective Young's modulus and modulus of
rigidity, then added together to find the overall flexural properties of the wing.
Composite Layup Ba sa Skin
Foam Core
Balsa BalsaLeading Edge Main Spar Rear Spar Trailing Edge
Figure 4.2 Cross Section of the Parent's Wing
Figure 4.2 provides a cross sectional view of the wing near the wing root, revealing the
components used in calculating it's moment of inertia. The cross sectional properties
change along the span due to the spar ending and the addition of the diamond shaped sec-
tion of carbon fiber as seen in Figure 3.3. The flexural properties of the different compo-
nents of the vehicle are presented in Table 4.1. The wing is broken up into sections
denoted by inches from the wing root. Those sections not listed are calculated as a linear
function between the adjacent sections. For the wing and tail, the x-axis is parallel to the
Table 4.1 Cross Sectional Flexural Properties of Parent
Component EIxx (lbs in.2) EIyy (lbs in.2) GJo (lbs in.2)
Tail Booms 350,000 350,000 230,000
Tail Surface Roots 25,200 1,080,000 25,000
Tail Surface Tips 5,700 221,000 5,100
Wing (0-5) 1,327,000 6,720,000 160,000
Wing (5) 1,613,000 25,536,000 720,000
Wing (20-36) 4,872,000 50,400,000 1,800,000
Wing (51-90) 340,000 11,600,000 410,000
Chapter 4: Structural Modeling of the Parent

chord, while the y-axis is perpendicular to both the chord and span. The axes for the tail
boom are defined in Figure 4.1. Note that the fuselage was assumed to be infinitely rigid
for this analysis.
The properties calculated as described above were later validated by experiment. The
wing and tail sections were assembled and the main spar was placed in a vice. Deflections
were measured when weights varying from one to four pounds were placed at the wing tip
and on the tail root. The flexural properties were then calculated by (eq. 4.8) and (eq. 4.9).
In (eq. 4.8), F is a force down on the wing tip, L is the distance from the point of cantilever
to the point where the force was applied, and 8 is the deflection at that point. In (eq. 4.9),
T is the torque applied on the wing by the weight placed on the tail, L is the distance from
the vice to the point where the torque is applied to the wing, and 4 is the angle of twist, in
radians, of the wing due to the applied torque. This experiment provided EIxx and GJo for
the wing. In the next experiment, the tail boom was put in the vice near the wingtip attach-
ment and deflections were measured when weights were placed on the tail surfaces. Using
(eq. 4.8), EIxx and EIyy were found for the tail booms.
FL3 (eq. 4.8)36
G J - (eq. 4.9)
The values found from direct experimentation were used to modify those found from
calculation. The calculated values were all larger than those found from experiment. This
could be due to assumptions made about both the Young's modulus and the modulus of
rigidity of the different materials, as well as the fiber orientation of both the composites
and the wood. Imperfect lamination and fiber-to-resin ratios could also be factors. The val-
69Section 4.2: Structural and Inertial Properties of the Parent

70
ues listed in Table 4.1 are the final figures used during the analysis process. They were
further validated using Aswing, as described in Section 4.3.
4.2.2 Weight and Mass Moment of Inertia
Each component of the aircraft was weighed separately. The mass moment of inertia was
calculated for each as well, using the approximation that each resembled a rectangular
block. The mass moment of inertia of a block can be calculated by (eq. 4.10), where m is
the mass of the block, and a and b are the sides of the block perpendicular to the axis of
rotation. The moments of inertia of each component were summed around the center of
gravity of the plane using the parallel axis theorem given in (eq. 4.11), where R is the per-
pendicular distance between the local and global coordinate systems. The global coordi-
nate system has it's origin at the center of gravity of the aircraft. The positive y-axis
extends spanwise along the right wing, the x-axis runs backwards from the c.g., and, using
the right hand rule, the z-axis points straight up relative to the plane.
2 2
lxt m(a + b ) (eq. 4.10)Ix, =12
Ix Ix,+mR 2 (eq. 4.11)
Table 4.2 presents the weights and mass moments of inertia about the plane's c.g. for
each component of the aircraft and the total for the entire aircraft. These figures were later
used to check the computer model described in 4.3.
Table 4.2 Weights and Mass Moments of Inertia of Parent Components
Component Weight (lbs.) Ix (lb ft.2 ) ly (lb ft.2) Iz (lb ft.2)
Fuselage, Fuel, and Avionics 20.8 0.033 0.251 0.234
Wing 14.25 1.676 0.052 1.708
Right Boom and Tail 3.1 1.079 0.201 1.275
Chapter 4: Structural Modeling of the Parent

Table 4.2 Weights and Mass Moments of Inertia of Parent Components
Left Boom and Tail 3.1 1.079 0.201 1.275
Total 41.25 3.867 0.705 4.493
4.3 Analysis Process
The analysis of the Parent's structural dynamics was done using Aswing, which is a pro-
gram created by Professor Mark Drela that combines computational fluid dynamics with
structural finite element methods to analyze both the steady and unsteady aerodynamics of
flexible bodies. A description of Aswing appears in Appendix B. 1.
Code was written for Aswing to describe the dimensions, structural properties, and
aerodynamics of the Parent. This code can be found in Appendix B.2. In the computer
model, the aircraft is broken up into six components: the fuselage, wing, right tail boom,
left tail boom, right tail surfaces, and left tail surfaces. The fuselage was modeled as an
infinitely stiff, tapered cylinder with a radius of 6 inches at its thickest part. The engine,
avionics, and fuel tank were modeled as point masses attached to the fuselage. The wing
was modeled as a beam with elastic properties varying as described in Table 4.1. Aerody-
namic properties were assigned to the wing including the lift versus a curve slope, maxi-
mum and minimum coefficients of lift, and pitching moment coefficients. Ailerons are
modeled as changes in the lift distribution over the wing due to input deflection angles.
Each tail surface is modeled as a single beam element running from the tip of the vertical
stabilizer, down through the root, to the tip of the horizontal stabilizer. Like the wing, both
structural and aerodynamic properties are assigned to each tail cluster. Finally, the tail
booms are each modeled as cylinders with a diameter of 1.125 inches and the proper stiff-
ness properties. Each component is given a mass distribution of weight per unit span.
Once a model was complete, it was fed into Aswing where the geometry could be
viewed and validated in a plot. (See Figure 4.3) Aswing computes the weight of each com-
Section 4.3: Analysis Process 71

72 Chanter 4: Structural Modelinar of the Parent
ponent and the total weight of the aircraft, as well as the center of gravity. The model came
to within 1/4 of a pound of the actual aircraft weight, and the center of gravity within 1/4
of an inch. This was deemed as acceptable since the actual weight and c.g. change by a
larger amount during flight as the fuel level decreases. The mass moments of inertia of
some of the components are also displayed in Aswing, and were validated to be within 1%
of those calculated for Table 4.2.
Z
RIZ - -EM'EL - 2 ASWING 5.43
Figure 4.3 Aswing Geometry for Parent
Aswing allows the user to place test weights at various locations on the aircraft. With
this feature it is possible to measure the static deflections of the aircraft's structure when
weight is applied. It was easy to validate the model with the experiments described in Sec-
tion 4.2. The stiffnesses of the beam components in the model were modified until the
deflections measured were within 1% of those observed in reality.
The natural frequencies of the tail booms were observed during the experiments in
Section 4.2. The natural frequency of movement in the vertical direction was measured to
be 2.2 Hertz, while the movement in the horizontal direction occurred at 4.6 Hertz. These
72
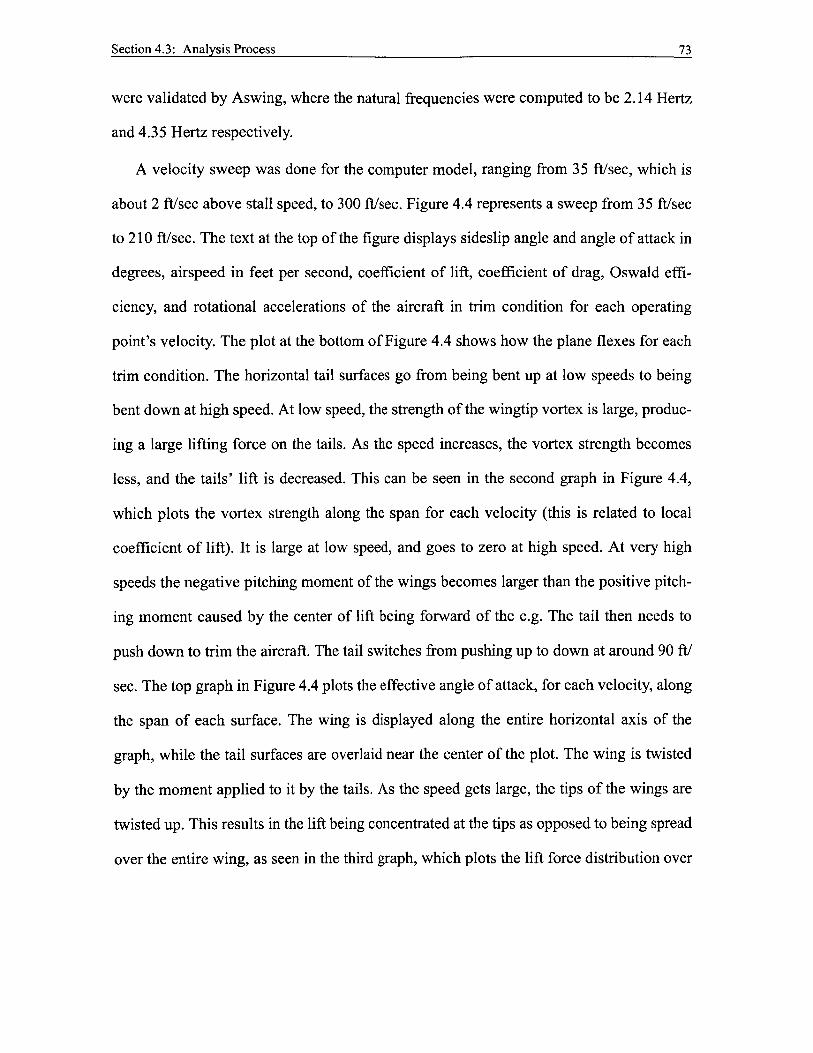
were validated by Aswing, where the natural frequencies were computed to be 2.14 Hertz
and 4.35 Hertz respectively.
A velocity sweep was done for the computer model, ranging from 35 ft/sec, which is
about 2 ft/sec above stall speed, to 300 ft/sec. Figure 4.4 represents a sweep from 35 ft/sec
to 210 ft/sec. The text at the top of the figure displays sideslip angle and angle of attack in
degrees, airspeed in feet per second, coefficient of lift, coefficient of drag, Oswald effi-
ciency, and rotational accelerations of the aircraft in trim condition for each operating
point's velocity. The plot at the bottom of Figure 4.4 shows how the plane flexes for each
trim condition. The horizontal tail surfaces go from being bent up at low speeds to being
bent down at high speed. At low speed, the strength of the wingtip vortex is large, produc-
ing a large lifting force on the tails. As the speed increases, the vortex strength becomes
less, and the tails' lift is decreased. This can be seen in the second graph in Figure 4.4,
which plots the vortex strength along the span for each velocity (this is related to local
coefficient of lift). It is large at low speed, and goes to zero at high speed. At very high
speeds the negative pitching moment of the wings becomes larger than the positive pitch-
ing moment caused by the center of lift being forward of the c.g. The tail then needs to
push down to trim the aircraft. The tail switches from pushing up to down at around 90 ft/
sec. The top graph in Figure 4.4 plots the effective angle of attack, for each velocity, along
the span of each surface. The wing is displayed along the entire horizontal axis of the
graph, while the tail surfaces are overlaid near the center of the plot. The wing is twisted
by the moment applied to it by the tails. As the speed gets large, the tips of the wings are
twisted up. This results in the lift being concentrated at the tips as opposed to being spread
over the entire wing, as seen in the third graph, which plots the lift force distribution over
Section 4.3: Analysis Process 73

the span of the wing. In Section 4.4, the aircraft is analyzed at each of the velocities in the
sweep to determine how it's natural frequencies and mode shapes change with velocity.
" 0
0.000.000.000.00.D00.DD0.000.000.000.00
a"u
12.823.700.53
-D.39-1.D B-1.9 L9
-1.53-2. 12-2.40-2.70
V r35.050.070,90.0
110.0130.0150.0170. 0190.0210.0
CL1.0720.5260.2680.1620.1090.07810.050.0450.0360.030
CD
0.05050.00970.00320.00180.00 IL0.00130.00130.00140.00150.0017
e1.1521.1771.057D.BB3D. BDLD.3710.2080.1110.0500.035
0. 0
0.0D. 0
0. 0D. 0
D. 00.00. 0
a?0.0a. aa. a0.00.00.00.00. 00.00.0
- L
------------------------------------ ----------
1.5 --------. .. .. .. ---- --- ---- --- ---- --- .--- ---
2 [~/cV,
(CL)
0.50
1 . - -------- - - - --- ------- ----- -
flirt U5y
5-0. -- ---------- ------ ------------
S . 0 . .. .. .....
9/
.- -
------ -------------------------------
.. . . . .. . . .
-- -- - - -- - - -- - - ------- ---------.-- - - - - - - - - - -- - - . - - - - - - - -
----------- -------- - ------- ----- --- -
-- - .------------- --- ....... -----
sii
I
Figure 4.4 Velocity Sweep of Parent
8.00
Woff;L4. 0
0.0
-'4.0a
-8.01
.
74 Chapter 4: Structural Modelingz of the Parent

Section 4.4: Natural Frequencies and Mode Shapes of the Parent 75
4.4 Natural Frequencies and Mode Shapes of the Parent
The analysis described in the previous section provided information about the trim condi-
tions of the Parent for a variety of velocities. The aircraft was then analyzed at each of
these velocities to find the mode shapes and natural frequencies of deformation. When
these frequencies are plotted in the imaginary plane, they provide a root locus plot for the
aircraft (see Figure 4.5). The first 10 mode shapes and natural frequencies of the aircraft,
......... ............ .0
1 -0 1. . . .-...... 8.
4.0
2.020.0...............................
2.0
-202.0
-4.0
.................
Figure 4.5 Root Locus Plot for Parent
flying at cruise speed, are presented in Table 4.3. These are the first ten modes following

Chapter 4: Structural Modeling of the Parent
the six rigid body translational and rotational modes. All of these mode shapes appear as
figures in Appendix C. 1. Note that the natural frequencies of the first two modes stay rela-
tively constant and damping gets larger as speed increases to about 150 ft/sec at which
point the frequencies increase while the damping decreases.
Table 4.3 Mode Shapes and Natural Frequencies of Parent, Airspeed = 70 ft/sec, @ S.L.
All of these modes were found to be stable. Some have very small damping ratios.
These may not be realistic since Aswing does not include structural damping. The damp-
ing properties of the foam in the wing alone could be quite high, increasing the damping
Mode Number Mode Shape Natural DampingFrequency (Hz) Ratio
1 Asymmetric Tail Boom 3.145 .286Bending (x-z plane)
Asymmetric Tail Boom 4.113 .1162 Bending (x-y plane)
3 Symmetric Wing 5.395 .083Bending
4 Asymmetric Wing 5.511 .072Twist
5 Symmetric Wing 6.818 .058Twist
6 Asymmetric Horiz. Sta- 8.622 .091bilizer Bending
7 Symmetric Horiz 9.038 .086Stabilizer Bending
8 Second Wing 16.96 .049Bending
9 Wing Bending 18.01 .006(Fore-Aft)
10 Asymmetric Vert. Tail 22.29 .046Bending
7676

ratios in Table 4.3 by .02 or more. This would not significantly change the natural frequen-
cies, however.
4.5 Chapter Overview
Chapter four discussed the work done by the author in forming a computer model of the
Parent and using it for flight analysis. The calculations and experiments done to find the
plane's elastic behavior were presented. The basics of coding in Aswing as well as the
analysis procedure were discussed here and are elaborated on in Appendix B. Finally, the
mode shapes and natural frequencies found with Aswing were presented in Table 4.3.
Section 4.5: Chapter Overview 77

78 Chapter 4: Structural Modeling of the Parent

Chapter
5Aeroelasticity
5.1 Chapter Overview
Chapter four discussed the process of creating an aerodynamic and structural model of the
Parent using Aswing. Also included were results of studying the natural frequencies and
mode shapes of the flying aircraft. Chapter five continues to discuss the results of the
Aswing analysis. The aeroelastic properties inferred from these studies, including flutter
and divergence analyses are presented. Also included are servo aeroelastic properties of
the aircraft, obtained from these studies, that may be used to augment the current control
laws, used for autonomous flight of the Parent.
5.2 Aeroelasticity of the Parent UAV
As described in chapter four, the Aswing model of the Parent was run through a sweep of
velocities ranging from 35 ft/sec, which is just above stall speed, up to 300 ft/sec. Chapter
four mainly focused on the general trends of the mode shapes and natural frequencies at
speeds expected during PCUAV missions. Under any normal conditions the aircraft was
not observed to flutter or diverge. It was not until about 240 ft/sec that the first flutter
mode was encountered. This is recognizable on the root locus plot as the speed when the
root crosses to the positive real side of the imaginary axis. The first flutter mode observed
79

is the asymmetric tail boom bending mode, or mode one in Table 4.3. See Figure 5.1 or
Figure C. 1 for a visualization of this mode.
PCUAV PARENT Model 1.]Dp.Point.i 3Mad@ IJF - 3.CE UCI1cl/9C - 0.28028* - 0'
EL -AGUING 5.1.1
Figure 5.1 First flutter mode of OHS Parent
In this mode, as the wingtip pitches up, the inertia of the tail tends to twist the wingtips
more, causing more lift on the wing and a greater bending moment on the tail boom. At
slow speeds the tail also sees an angle of attack change when the wing tip twists up, and
the lift generated by the tail counteracts the inertia. As the speed increases however, the
inertia of the tails overcome the restoring lift, to the point where the mode becomes unsta-
ble. To test the effect of the tails' inertia on this flutter mode, the Aswing model was run
with simulated three pound weights added to each tail and a six pound counterweight
attached to the nose of the fuselage by an infinitely stiff pylon. The length of the pylon
was adjusted to maintain the original c.g. location. The same mode was observed to flutter,
but at a speed of 120 ft/sec. The symmetric wing bending mode, mode four of Table 4.3,
80

Section 5.2: Aeroelasticity of the Parent UAV 81
also encountered flutter at 160 ft/sec. These modes flutter in the same manner, with the
first mode being an asymmetric version of the second. See Figure 5.2 for a view of the
root locus plot when the weights were added to the tail.
90-1............... . ............................................
20.0 --+-+ + --. -+ +-+-+ -ir-.. -+- + -I/S .................. ................ ......... ....... ..... . Uyls'
2.0
D.0 a
1-L-
-2.19
-3.0
25.0 -20.0 -J.D -LG.a -5D 0.0 5.0 Da 1/s
Figure 5.2 Root Locus Plot of OHS Parent with Three Pound Weights on Each Tail andCounterweight Attached to Fuselage
This analysis amplifies the need for a stiff wing and light tail section when building
OHS aircraft. Another solution for flutter problems was found to be the addition of a coun-
terweight extending forward from the wingtip. This configuration was tested in Aswing,
with the same three pound weights on the tails, but with three pound weights attached to
each wingtip to balance the plane. With these counterweights in place no flutter was

82 Chapter 5: Aeroelasticity
observed, and in fact the modes became stiffer with increased airspeed. See Figure 5.3 for
the root locus plot with the counterweights on the wingtips.
0.0. ...........-- -.-.. - + -
-3.0
/ - r- cycles/s
2.0
10.
1.0
Aill: -
-Z. D
-20.0 .. .. ..... ... .... .. ..
-3D. 0
-20. -Z.0 1J.D 45a 0 ,,s-0
Figure 5.3 Root Locus Plot of OHS Parent with Three Pound Weights on Each Tail andCounterweight Attached to Wingtips' Leading Edges
5.3 Flight Dynamics of Parent
Figure 5.4 is a zoomed in version of Figure 4.5, to show in more detail the movement of

Secton .3:Fligt Dnamcs o Paent83
the phugoid, short period, dutch roll, and spiral modes of the aircraft.
a.
"-4-.-'
a.
Phugoid
a a a pitral
Dutch Roll
Short Period
2.0
-0.0
Frequency(Hz)
*-2.0t
Sigma = 0
Figure 5.4 Blow Up of Root Locus Near Origin
As expected, the Dutch roll mode becomes stiffer, the spiral mode becomes more sta-
ble, the phugoid becomes less stiff, and the short period becomes more heavily damped
with increased airspeed. These modes were also estimated using standard aircraft flight
dynamics equations. The frequency and damping ratio of the phugoid mode were calcu-
lated by (eq. 5.1), the short period by (eq. 5.2), the Dutch roll by (eq. 5.3), and the non-
oscillatory real root of the spiral mode by (eq. 5.4). See the list of symbols on page six for
definitions of the variables in these equations
(oph = U0
Z M
U0
phF2(L/D)
M +M.+ aq a u
sp 2osp
(eq. 5.1)
(eq. 5.2)
Section 5.3: Flight Dynamics of Parent 83

84 Chanter 5: Aeroelasticity
(1) -r+ 0, 1 Y +u~odr Y 1 r' dr = I ir( U1A (eq. 5.3)
u0 2o)dr( u0
LgN -LNXspiral = Lrp (eq. 5.4)
In Table 5.1, the results of these computations are compared with the results obtained
through Aswing for flight at cruise velocity and standard sea level temperature and pres-
sure. The phugoid modes have similar frequencies, but quite different damping ratios. The
reason for this comes from low drag calculated by Aswing, where the plane was modelled
as a much more clean aircraft with a L/D ratio of 35 instead of a more realistic number like
10. The short period frequencies appear to be quite different. However, the damping ratios
are quite high making the discrepancy less important. The difference is highly dependent
on c.g. location and center of pressure positions, which could be slightly different from the
actual aircraft in both models. Finally, the Dutch roll properties found by Aswing appear
to be consistent with those calculated by (eq. 5.3).
Table 5.1 Computed Flight Dynamic Modes Compared with Aswing Results
Mode Computed o Computed ( Aswing co Aswing (
Phugoid .07 Hz .22 .05 Hz .02
Short Period 2.5 Hz .78 .64 Hz .94
Dutch Roll .54 Hz .21 .41 Hz .20
5.4 Servo Aeroelasticity of Parent
Bode plots were created in Aswing to analyze the transfer functions between rates of rota-
tion and control input frequencies. These included roll rate versus aileron deflection, pitch
rate versus elevator deflection, and yaw rate versus rudder deflection. All of these bode
plots appear in full page format in Appendix C.2. The frequency range chosen for the
84 Chapter 5: Aeroelasticity

Section 5.4: Servo Aeroelasticity of Parent 85
Bode plots was from .01 Hertz to 18 Hertz. This is consistent with the control capabilities
of the flight avionics. Sanghyuk Park also produced similar bode plots using a rigid air-
craft model and aerodynamic properties found using a fluid dynamics program developed
by Prof. Drela called AVL. The details of these studies appear in [8]. These plots were
confirmed by running the Aswing model with near infinite stiffness, achieved by multiply-
ing all stiffnesses by 10,000. The bode plots for the two rigid aircraft models appear to be
nearly the same, with the gain obtained from Aswing being about twice as high as San-
ghyuk's model for the aileron and elevator plots.
Bode Plot of Roll Rate vs. Aileion Frequency forOHS Parent10 . 1. . ...............
............ igi...... I- -FlexibleI.... III)::::......~10~ ... ,...,. .
. . . .. .e e . . e . .. . . . e. . . . . . a . . . . e. . .. .. . . . . . . .
.................... . .. . .
.*11 . . . . . i e . . . N - I.. . . ........
110- I 1 0 1 0 10
Aileron Input Frequency (Hz);
.100...........................................
-2S'i e e t e ... .... a '
30010F 1o, 10C 160 101 o
A ileo mn I nput Frequ ency (Hz)
Figure 5.5 Bode Plots of Parent Roll Rate Response to Unit Aileron Input,Airspeed= 70 ft/sec. @ S.L.
From Figure 5.5, it appears that the flexible and rigid models are similar at low fre-
quencies. The Dutch Roll natural frequency can be seen as a resonance in the gain plots

between .4 and .5 Hertz. From this point on the gain drops off and the phase goes through
a 90 degree shift. The two plots differ above 10 Hertz however, where the flexible body
creates a resonance in the gain at around 17 Hertz, which is associated with the eighth
mode listed in Table 4.3.
Bode Pbt of Pitch Rate vs. Elevator Frequency for OHS Parent
....... .......
Flexible-...--. Aswing Rigid .
.. . .. .|.|. .|. . |.|.
10
02
0
10~
10Elevator input Frequency (Hz)
10Elevator In put Frequency (Hz):
1010 1
10 1
103
10310
Figure 5.6 Bode Plots of Parent Pitch Rate Response to Unit Elevator Input,Airspeed = 70 ft/sec., @ S.L.
The pitch rate versus elevator input bode plots are also similar at low frequencies for
rigid and flexible aircraft models. Both have a peak in the gain near the phugoid fre-
quency, although that of the flexible model is less damped. For the flexible plane another
resonance in the gain curve occurs at 5.4 Hertz, associated with the first wing bending
10'2
**101
100
~10,
10~
-100
-B-200
-3.CL _4M
~a-0010
86 Chapter 5: Aeroelasticity
.. . . .. . . . . .. ... . .. ... . . , , . ,
" ..... ..

mode, or mode 3 in Table 4.3. Lastly, near the upper frequency of the flexible aircraft,
there is a resonance at 18 Hertz associated with the fore-aft wing bending mode.
10 2
j
' 10CS
1010
300
200
100
0
-IL
Bode Pbt of Yaw Rate vs. Rudder Frequency forOHS Parent
-R igid
. . .. N .. .. .. . . . .. . . .... .. . . . --- Asw ing Rigd............................... .. ,,................. ...
- -- -- - ----- - ---- - --- --- -- - -- ---- - ---- -- - - - - -- -- --.k-- -
~7 10 1~ 10 10 10Rudder Input Frequency (Hz)
10~" 10~I 1~ 10* 10 10lR udder Input Frequency (Hz):
Figure 5.7 Bode Plots of Parent Yaw Rate Response to Unit Rudder Input,Airspeed = 70 ft/sec., @ S.L.
3)
10 :
Again, in Figure 5.7 the plots are similar, with a zero in the gain at .09 Hertz, and a res-
onance near the Dutch roll at about 0.5 Hertz. However, the flexible vehicle also produces
a significant gain peak at 5.5 Hertz, associated with the wing twisting mode 4 of Table 4.3.
In summary, the Bode plots for each of the three control axes are similar for both rigid
and flexible aircraft models at low frequencies. Both models provide information about
I:a.
.. . . . ... . . . . . . . . . . . . . ..
Section 5.4 Servo Aeroelasticity of Parent 87

88 Chanter 5: Aeroelasticitv
the flight dynamic modes. The flexible model does introduce information about how the
flexible modes found in Chapter 4 affect the controllability of the aircraft. This informa-
tion should be augmented into the control system of the Parent aircraft. The control system
could be modified to avoid exciting the control surfaces at the natural frequencies found in
the flexible aircraft, thus reducing the amplitude of the aircraft's deformations and conse-
quent fatigue, thereby increasing the longevity of the aircraft's structure. Servo-aeroelastic
instabilities will be avoided by decreasing the gain of the flight controller at the flexible
aircraft's resonant frequencies.
5.5 Chapter Summary
Chapter five continued the discussion started in chapter four of the results obtained from
Aswing, focusing on the aeroelastic behavior of the Parent. There was no flutter or diver-
gence observed at normal operating speeds, and the first flutter mode appears at over three
times the reintegration airspeed of the aircraft, this mode is the wing's first bending mode
seen in Figure 5.1. The flutter can be induced more quickly by adding inertia to the tail
surfaces. It was found that a solution for OHS flutter is to add counterweights to the lead-
ing edge of the wingtips, which eliminates flutter and causes the flutter modes to actually
become stiffer with airspeed.
The flight dynamics of the Parent were discussed including the phugoid, dutch roll,
short period, and spiral modes. Bode plots were created with Aswing for a flexible aircraft
model and were compared with plots created in Matlab with a rigid aircraft model. It was
found that the flexible modes of the Parent should not be ignored in the design of the con-
trol system of the aircraft since flexible modes are present within the bandwidth of the
flight controller.
88

Chapter
6Summary and Conclusions
6.1 Thesis Summary
This section summarizes the information contained in this thesis. Chapter one introduced
the concepts of PCUAV. Chapter two expounded on those concepts and presented the
methods and tools used to complete PCUAV's objectives. Chapter three discussed the
designing, building, and testing of the unmanned air vehicles used in PCUAV. Chapter
four described the work done by the author to model and evaluate the structural dynamics
of the Parent aircraft. Finally, Chapter five discussed the aeroelastic properties and flight
dynamics of the flexible Parent.
6.1.1 PCUAV System Summary
The PCUAV project was formed, under the MIT/Draper Technology Development Part-
nership, to fill a perceived national need in UAV technology. Current UAVs are either
large aircraft capable of flying long distances at high altitudes, or small, maneuverable air-
craft capable of up-close surveillance of a target near the point of departure. No known
UAV is capable of both long range and up-close surveillance. PCUAV is an attempt to
combine existing types of UAVs into a system of cooperative aircraft capable of up-close
surveillance at a distance.
89

90
To demonstrate the practicality of PCUAV, two types of UAVs were designed, built
and flown as a system of cooperating planes. The first aircraft, called the Parent, is repre-
sentative of a long range autonomous vehicle that can attain high altitude. The second air-
craft, called the Mini, is smaller, less detectable by an enemy, and more maneuverable.
During a mission, the Parent carries the Mini to a target site, releases it, provides a com-
munications link between the Mini and home base, and finally retrieves the Mini and
brings it home.
Chapter two of this thesis discussed in more detail the steps to the above mission, and
pointed out the key technologies that must be demonstrated for it to succeed. It was
pointed out that the most important of these keys is the reintegration of the two aircraft.
The chapter went on to describe the procedure followed (Phases one, two, and three), and
the tools used to accomplish demonstration, such as the outboard horizontal stabilizer Par-
ent aircraft, the three Mini aircraft, the Avionics Testbed Aircraft, and the avionics sys-
tems.
Chapter three brought to light the work done by the author and other members of the
PCUAV group in designing, building, and flying the three types of aircraft used in the
project. The advantages and disadvantages of each design were presented. Details were
given about the building methods utilized for each aircraft. The results of flight tests
achieved by the time of this writing were presented as well as plans for future flight tests.
6.1.2 Suggestions for UAV Improvements
This section provides information on what the author believes would be improvements on
the building techniques for these aircraft as described in this chapter. This is presented as
changes that would be advantageous if building a replacement for each of the aircraft.
Chapter 6: Summary and Conclusions

When building a replacement Parent, a big advantage would be gained by replacing
homemade steel wire landing gear with off the shelf composite gear. Not only would this
be easier to assemble, it would be stronger and more reliable. During flights with the cur-
rent plane the landing gear proved to be unreliable, causing landings to always be more
difficult and risky. In addition to changing the landing gear, the fuselage of the aircraft
could be modified to make the length of the nose gear shorter to reduce the moment
applied to it by the ground. Secondly, a gas powered two stroke engine should be consid-
ered for this plane as long as the spark ignition could be shielded so as not to interfere with
the flight computers. The power available, even from the Moki 2.10, is marginal when in
extreme flight configurations. Finally, the spars for the tail surfaces were made incorrectly
on the current plane. A future plane's tails should not have full thickness spars, but instead
have bass spar caps with balsa webbing between the ribs, similar to the design for the tail
of the NGMII.
Like the Parent, the NGMII's landing gear are inadequate. A future plane should uti-
lize heftier gear. The vertical tail surfaces should either be braced by flying wires or rein-
forced at the attachment to the horizontal stabilizer. The current tail feathers proved to be
fragile at that joint and had to be repaired repeatedly. The GM- 15 airfoil used for the plane
is quite thin and difficult to keep torsionally stiff even with full balsa sheeting. It is also
difficult to "build-up" due to the undercamber of the airfoil. It is probably worth a little
extra weight to build the wing with a foam core and fiberglass and carbon skins. The time
required would be significantly less and the quality better. Finally, it may be advantageous
to use 5/8 inch carbon tubes for the aircraft's fuselage. Dremel tools of this size are readily
available, but 3/8 inch tools were never found. These tools are necessary to shape the ends
of the carbon tube to interface with one another when building the truss. The author cus-
Section 6. 1: Thesis Summary 91

92 Chapter 6: Summary and Conclusions
tom made tools of appropriate size, however these broke easily and had to be remade after
forming just a few truss members.
The ATAII came close to perfection as a test aircraft. It was relatively easy to build and
flew well. The final demise of the aircraft resulted from the wing strength being inade-
quate for recovering from a dive while fully loaded. It would help to add either another
layer of fiberglass or carbon fiber to the wing root.
6.1.3 Flight Tests
At the time of this writing both the NGMII and the Parent had been flight tested for auton-
omous navigation and had independently flown their respective parts for phase one of
reintegration. The team was waiting for the weather to be good enough to test phase one
with both vehicles in the air. In this test, both planes will be taken off under pilot control,
the parent will be switched to computer control, and will enter its orbiting circle. The Mini
will then be switched to computer control at an arbitrary location and will fly a phase one
path to rendezvous with the Parent. It will follow the Parent at a distance of 40 meters. A
future flight test is planned in which phase one will be flown in the same manner, but the
vision system will take control and the aircraft will continue in a circle as they perform
phase two navigation until the two planes make contact. At the conclusion of these two
flight tests reintegration of two unmanned aerial vehicles will have been demonstrated,
fulfilling the primary goal of PCUAV.
6.1.4 Structural Modeling of OHS Aircraft Summary and Conclusions
Chapter four discussed the work done to put together a computer structural and aerody-
namic model of the OHS Parent vehicle. The structural properties of the aircraft's compo-
nents were derived and the process of creating the computer model in Aswing was

described. A description of Aswing appears in Appendix B as well. Chapter four went on
to discuss the analysis results pertaining to the natural frequencies and mode shapes of the
Parent aircraft. These mode shapes are all illustrated in Appendix C. All of the flexible
modes of the aircraft appear to be stable for normal flight speeds of 35 to 50 miles per
hour.
Chapter five continued a discussion of the analysis results. It was found that the Parent
flutters at about 230 ft/sec, well beyond speeds actually experienced in flight. This flutter
mode is the asymmetric vertical tail bending mode. It was found that this mode could be
made to flutter at slower speeds by adding mass to the tails, and could be eliminated by
adding mass to the leading edge of the wingtips. Chapter five went on to present the flight
dynamics of the Parent, comparing the results from Aswing with those calculated using
standard dynamics equations. Those flight dynamic modes also appear in the Bode plots at
the end of the chapter. These Bode plots describe roll rate versus aileron input frequency,
pitch rate versus elevator input frequency, and yaw rate versus rudder input frequency. A
comparison was made between the results obtained using Aswing's flexible model and
Sanghyuk Park's rigid aircraft model, as well as a rigid model created in Aswing by multi-
plying the stiffnesses of the plane by 10,000. From these plots it was found that some of
the flexible modes of the aircraft affected the effectiveness of each of the control surfaces,
particularly at higher input frequencies. It is recommended that this information be used to
modify the current flight code used for autonomous flight.
Section 6. 1: Thesis Summary 93

94 Chapter 6: Summary and Conclusions

References
[1] Beer, Ferdinand P., and E. Russel Johnston, Jr. Mechanics of Materials. 2nd ed. NewYork: McGraw-Hill, Inc., 1992.
[2] Drela, Mark. Aswing 5.4 Technical Description. Internet. March 1999. Available:http://raphael.mit.edu/aswing/
[3] Kentfield, J.A.C. Upwash Flowfields at the Tails of Aircraft With OutboardHorizontal Stabilizers. AIAA 98-0757, 36th Aerospace Sciences Meeting & Exhibit.January 12-15, 1998.
[4] Lennon, Andy. Basics of R/C Model Aircraft Design: Practical Techniques forBuilding Better Models. Ridgefield, CT: Air Age Inc., 1999.
[5] Mukherjee, Jason. Automatic Control of an OHS Aircraft. Doctorate of Philosophyin Department of Mechanical and Manufacturing Engineering, University ofCalgary, March, 2000.
[6] Nelson, Robert C. Flight Stability and Automatic Control. 2nd ed. Boston: WCBMcGraw-Hill, 1998.
[7] Omelchenko, Alexander. Communication and Video Surveillance in the Parent andChild Unmanned Air Vehicles. Master of Science in Aeronautics and Astronautics,Massachusetts Institiute of Technology. 2001.
[8] Park, Sanghyuk. Integration of Parent-Child Unmanned Air Vehicle Focusing onControl System Development. Master of Science in Aeronautics and Astronautics;Massachusetts Institute of Technology. 2001.
[9] Raymer, Daniel P. Aircraft Design: A Conceptual Approach. 3rd ed. Reston, VA:AIAA Education Series, 1999.
[10] Urbain Francois. Vehicle Design, Flight Control Avionics, and Flight Tests for theParent and Child Unmanned Air Vehicle. Master of Science in Aeronautics andAstronautics, Massachusetts Institute of Technology. 2001.
[11] van Schoor Marthinus C. and Andreas H. von Flotow. "Aeroelastic Characteristics ofa Highly Flexible Aircraft." Journal of Aircraft, Vol. 27, (October 1990): pg. 901.
95

References96

Appendix
Vehicle Drawings
97

98 Appendix A: Vehicle Drwns
A.1 Three View Drawings of PCUAV Parent Aircraft
a?
'.0
Figure A. 1 Orthogonal Views of OHS Parent
Annendix A: Vehicle Drawings

Section A.2: Three View Drawings of PCUAV NGM I 99
A.2 Three View Drawings of PCUAV NGM I
rt-9
du 43C ZD
Figure A.2 Orthogonal Views of New Generation Mini
99Section A.2: Three View Drawings of PCUAV NGM I

100
A.3 Three View Drawings of PCUAV NGM II
%QCU
Appendix A: Vehicle Drawings
CU
CU
C>C>
Figure A.3 Orthogonal Views of Second New Generation Mini

Section A.4: Three View Drawings of PCUAV ATA I&II 101
A.4 Three View Drawings of PCUAV ATA I&II
Figure A.4 Orthogonal Views of Two Avionics Testbed Aircraft
101Section A.4 Three View Drawings of PCUAV ATA I&II

PARENT CHILD UNMANNED AIR VEHICLES & DRAPER LABSNew Generation Mini II Drawn & Built by Jason KepterDesigned by: PCUAV Drawn Moxrch 29, 2002
1 Bult' FoQk 2001MASSACHUSETTS INSTITUTE OF TECHNOLOGY
Notes'D) Top Hatches Made Fron Two Layersof Fiberglass Velcroed to Fuselage.2) Horiz. Stab Should be Same Levelas Wing, w/o Incidence.3) L.E. Stabilizer is 24' Behind T.E. WingSee Attached 3 View for Configuration.
Made FromBolsa
Ply
IL j -Throttle Servo____-3/32' Balsa
3/8" Oak Block w/ 3/8 Bass Dowelfor Rubber Bands to Attach WingPlace for Proper C.G. _
7.
A
Front Bulkhead
Note' Make Holes In Forward Bulkheadfor Bottery Access. Mount Nose GearBetween the Holes, One Inch Leftof Center.
Firewall
Lock w/ 1/8'Screws <x2)
tap-I
CD
cIQ
~2
Ca
-a0'-1
z0
Ca
a
CD
0(Q0
It
)0 O

Section A.5: Building Plans for NGM II 103
Ai9
9 LA
1 I
x01
0
a-
IL
Ni -- o
Figure A.6 Building Plans for NGM II Wing and Tail

Xu Yu Ai* i lAixi real i Ai* i^29 Ai~xi^2yA . y y
0 0.0% 0.0% 0.00 0.001.25 1.3% 2.2% 0.27 0.46 0.003171 0.228438 0.132813 Front Spar A 0.000724 0.000421 0.036656 0.000165468 -6.92427 0.152032.5 2.5%1 3.0% 0.53 0.64 0.0032 0.546125 0.398438 0 0.001748 0.001275 0.354344 0.000954496 -6.65864 0.1418935 5.0% 4.1% 1.06 0.8e 0.005839 0.7565 0.796875 Front Spar x 0.004417 0.0046531 0.564719 0.003341479 -6.26021 0.228822
7.5 7.5%j 5.0% 1.59 1.s 0.005598 0.965813 1.328125 0.00 0.005406 0.007434 0.774031 0.005221435 -5.72896 0.1837210 10.0%] 5.6% 2.13 1.20 0.0055 1.125188 1.859375 Front Spar 1 0.006189 0.010227 0.933406 0.006963226 -5.19771 0.14858815 15.0% 6.6% 3.19 1.40 0.010827 1.3005 2.65625 0 0.014081 0.02876 1.108719 0.018311981 -4.40083 0.20969320 20.0%1 7.3% 4.25 1.54 0.010714 1.473688 3.71875 Rear Spar A 0.01579 0.039844 1.281906 0.023269061 -3.338331 0.11940625 25.0% 7.7% 5.31 1.63 0.010661 1.586313 4.78125 0.016911 0.050971 1.394531 0.026826353 -2.275831 0.05521630 30.0% 7.9% 6.38 1.67 0.0106341.652188 5.84375 Rear Spar xi 0.01757 0.062145' 1.460406 0.029028882 -1.21333 0.015656140 40.0%. 7.8% 8.50 1.66 0.021251 1.6661 7.43751 17.00 0.0354041 0.158052 1.474219 0.058982452 0.380418 0.003075150 50.0%1 7.2% 10.63 1.54 0.021283 1.598 9.5625 Rear Spar 1 0.034011 0.203521 1.406219, 0.054349104 250541810.13359860 60.0% 6.4% 12.75 1.35 0.021332 1.445 11.6875 0.0308251 0.249319 1.253219 0.044542003 4.630418 0.457377170 70.0% 5.2% 14.88 1.10 0.021397 1.226125 13.8125 0.026236! 0.295552! 1.034344 0.032168524 6.755418 0.97648680 80.0% 3.8% 17.00 0.80 0.021466 0.9488131 15.9375 ] 0.0203671 0.342117 0.757031 0.019324817 8.880418 1.69286190 90.0% 2.1% 19.13 0.44 0.021544 0.6194381 18.0625 0.0133451 0.389144 0.427656 0.008266602 11.00542 2.609427,95 95.0% 1.1% 20.19 0.24 0.010811 0.342125 19.65625' 0.0036991 0.212506 0.150344 0.001265438 12.59917 1.716149
100 100.0% 0.1% 21.25 0.03 0.01084 0.134938 20.718751 0.0014631 0.224583 -0.05684 0.000197369 13.66167 2.023116Lower face 0.0% 0.0% 0.001 000 0.2125
1.3% -1.7% 0.271 -o.35 0.004399 -0.17531 0.132813 -0.00077 0.000584 -0.367091 0.000135195 -6.92427 0.2109032.5% -2.3% 0.531 -0.48 0.002965 -0.4165 0.398438 1{-0.00123 0.001181 -0.60828 0.000514352 -6.65864 0.1314635.0% -3.0% 1.06 -0.64 0.00554 -0.561 0.796875 -0.00311 0.004415 -0.75278 0.001743663 -6.26021 0.2171277.5% -3.5% 1.59, -0.74 0.005398 -0.68744 1.328125 -0.00371] 0.007169 -0.87922 0.002550876 -5.72896 0.177163
10.0% -3.8% 2.13 -0.80 0.005348 -0.76606 1.859375 -0.00411 0.009944 -0.95784 0.003138555 -5.19771 0.14448615.0% -4.1% 3.19] -0.87 0.010651 -0.83406 2.65625 -0.008881 0.028292 -1.02584 0.007409477 -4.40083 0.20628120.0% -4.2% 4.25 -0.90 0.010629 -0.88506 3.71875 -0.00941 0.039525 -1.07684 0.008325754 -3.33833 0.1184525.0% -4.2% 5.31 -0.90 0.010625 -0.89781 4.78125 -0.00954 0.050801, -1.08959 0.008564482 -2.27583 0.05503130.0% -4.1% 6.38 -0.e 0.010627 -0.88613 5.84375 -0.00942 0.062102 -1.07791 0.008344605 -1.21333 0.01564540.0% -3.8% 8.50 -o.8i 0.021261 -0.8415 7.4375 -0.01789 0.158128 -1.03328 0.0150553 0.3804181 0.003077
-3.3%
-1.5%
10.6312.7514.88
-0.71 0.021272 -0.75863-o.59, 0.021286 -0.64813-0.451 0.0212911 -0.52063
17.00 -0.32 0.021293 -0.3867519.13 -0.17 0.021299 -0.246520.191 -0.1021.251
0.01065-0.031 0.010651
-0.13813-0.06481
9.562511.687513.812515.937518.0625
19.6562520.71875
_ _1 10.643754 _
Neutral AxisX= 7.057082Y= 0.191781
Moments of InertiaIx=ly=
0.42064321.6456522.0663
-0.01614 0.2034181 -0.95041 0.012242561 2.505418 0.13353-0.0138 0.2487771 -0.83991] 0.00894140414.6304181 0.456382
-0.01108 0.294079 -0.712411 0.005770881 6.755418-0.008241 0.3393651-0.00525 0.3847151-0.00147
-0.57853-0.43828
0.97162
Unit airfoil geometry
0.0031849841 8.880418 1.6792420.00129418 11.005421 2.579727
0.209331 -0.329911 0.0002031771 12.599171 1.690497-0.00069 0.2206750.12346 4.543024
Upper face x
50.0%,60.0% -2.8%170.0% -2.1%180.0%l90.0% -0.8%95.0% -0.5%J
100.0% -0.1%
airfoil wvith chord - 151
, ,
,
50
O
(+
0
-ol
9=
CA
00
i xi real xi

Appendix
BAswing and Related Code for theParent
B.1 Description of Aswing
Aswing is an analysis tool created at MIT by Professor Mark Drela. It combines computa-
tional fluid dynamics and finite element methods to provide analysis of aerodynamics,
structural dynamics, and control of flexible aircraft with high aspect ratio surfaces and
fuselage beams. The structural components of aircraft are modeled as fully nonlinear Ber-
noilli-Euler beams broken into finite elements. The fluid dynamics part of the program is a
lifting-line model that employs wind-aligned trailing vorticity, a Prandtl-Glauert com-
pressibility transformation, and local-stall lift coefficients to predict flight characteristics.
It is possible to predict divergence and flutter speeds, aileron reversal speeds, the deforma-
tion of the aircraft and its effects on stability and control, and the stresses in the structural
components.
The code written for the model of the Parent appears in the next section. The first sec-
tion of the code describes the units used for the model, in this case, the length unit is .0833
feet or one inch, time units are in seconds, and force units are in pounds. The constant
block defines gravity in inches per second squared, sea level density in slugs per square
105

inch, and the speed of sound in inches per second. The next section, the reference block,
lays out the wing area, chord, and span in inches. The point where global velocity, acceler-
ation, and momentum are calculated is defined in this section as well. In the case of the
parent, the global coordinate system has its origin at the firewall and at the same vertical
level as the bottom of the wing. The velocity measuring point defined in the reference sec-
tion is 21.4 inches behind the origin. This is roughly the center of gravity of the aircraft.
The weight block of the code defines point masses attached to the structural beams of the
aircraft. Weights and their placements are defined for the engine, the avionics in the fuse-
lage, the avionics in the wingtips, and the fuel tank. Two weights were defined for the fuel,
one for a full tank and the other for half of a tank. Aswing ignores a line when a "!" is
placed in front of it, so the plane can be flown with either fuel condition just by moving
the "!." The last weights defined are test weights. These are weights that are placed either
on the tail or the wingtip to simulate actual experiment, as discussed in Section 4.2. The
engine thrust information is given in the engine block. The joint block defines the points
on each structural beam's local axis where they are attached to another beam. The fuselage
is labeled beam 0, the wing is beam 1, the right tail boom and tail surface are beams 2 and
3, while the left boom and tail surface are labeled -2 and -3. The last block before the
geometry definition is the ground block, which defines where the plane is held while
doing static tests. In this case, it is right behind the spar, which is where the wing was held
during testing.
Each geometry element is defined as either a surface beam or a fuselage beam. Both
types of beams are given geometry definition as well as mass and stiffness distributions.
Surface beams are also given aerodynamic properties, as described in Chapter 4.
106 Appendix B: Aswing and Related Code for the Parent

Secton .2: swig Coe fr th Paent107
B.2 Aswing Code for the Parent
NamePCUAV PARENT Model 1.1End
UnitsL 0.083333 ftT 1.0 sF 1.0 lbEnd
Constant#g rhoSL VsoSL386.16 1.1468E-07 13380.0
End
Reference# Sref Cref Bref
3825 21.25 180
# Xmom Ymom Zmom21.4 0.0 0.0
# Xacc Yacc Zacc21.4 0.0 0.0
# Xvel Yvel Zvel21.4 0.0 0.0
End
Weight# Nbeam t Xo Yo Zo Weight CDA* 1.0 1.0 1.0 1.0 1.0 1.0 1.0# Engine
0 0.0 -3.0 0.0 -2.0 3.0# Payload
0 12.0 12.0 0.0 -5.0 5.0# Fuel
0 9.0 9.0 0.0 -5.0 3.00 0 9.0 9.0 0.0 -5.0 1.5
# Wingtips1 85.0 12.0 85.0 3.1 0.51 -85.0 12.0 -85.0 3.1 0.5
# test mass
Vol
0.1 0.0
0.0 0.0
0.0 0.00.0 0.0
0.0 0.00.0 0.0
83. 83. 85.0 7.085. 18. 85. 3.185. 83. 85. 7.
3.0 0. 0.4. 0. 0.3. 0. 0.
Engine# Keng Nbeam t Xo Yo Zo Fx/Peng Fy/Peng Fz/Peng* 1.0 1.0 1.0 1.0 1.0 1.0 1.0
1 0 0.0 -3.0 0.0 -2.0 20.0 0.0 0.0End
E3n
End
Section B.2: Aswing Code for the Parent 107

108 Appendix B: Aswing and Related Code for the Parent
Joint# Nbeaml Nbeam2 ti t2
0 1 18.0 0.01 3 85.0 20.01 -3 -85.0 20.03 2 82.0 0.0
-3 -2 82.0 0.0End
Ground# Nbeam t Kground
0 18.0 0End
Beam 0Fuselage
t x y z radius mg Cdf Cdp+ 0.0 0.0 0.0 -6.0 0.0 0.0 0.0 0.0* 1.0 1.0 1.0 1.0 1.0 0.15 0.005 0.3
0.0 0.0 0. 0. 2.0 2.0 1.0 1.09.0 9.0 0. 0. 6.0 2.0 1.0 1.09.0 9.0 0. 0. 6.0 2.0 1.0 1.0
29.0 29.0 0. 0. 6.0 1.0 1.0 1.029.0 29.0 0. 0. 6.0 1.0 1.0 1.048.0 48.0 0. 0. 0.0 1.0 1.0 1.0
End
Beam 1Wing
t chord x y z Xax twist Ccg mgnn*1.0 1.0 1.0 1.0 1.0 1.0 1.0 1.0 1.00.0 21.25 18.0 0.0 0.0 0.39 0.0 0.25 2.3890.0 21.25 18.0 90.0 3.1 0.39 0.0 0.25 2.38
t alpha Cm CLmax CLmin*1.0 1.0 1.0 1.0 1.00.0 2.2 -0.05 1.1 -0.8
90.0 2.2 -0.05 1.1 -0.8
t dCLdadCLdF1 dCMdF1 dCLdF2 dCMdF2*1.0 1.0 1.0 1.0 1.0 1.0-90.0 6.28 0.0 0.0 0.0 0.0-78.0 6.28 0.0 0.0 0.0 0.0-78.0 6.28 0.055 -0.011 0.055 -0.011-36.0 6.28 0.055 -0.011 0.055 -0.011-36.0 6.28 0.0 0.0 0.0 0.00.0 6.28 0.0 0.0 0.0 0.036.0 6.28 0.0 0.0 0.0 0.036.0 6.28 -0.055 0.011 0.055 -0.01178.0 6.28 -0.055 0.011 0.055 -0.01178.0 6.28 0.0 0.0 0.0 0.090.0 6.28 0.0 0.0 0.0 0.0
t mg Cea Nea GJ Elnn Elcc* 1.0 0.06 1.0 1.0 10000.0 168000.0 168000.0
0.0 1.0 -1.5 0.35 16.0 40.0 7.95.0 1.0 -1.5 0.35 16.0 40.0 7.95.0 2.0 -0.1 0.32 72.0 152.0 9.6
108 Appendix B: Aswing and Related Code for the Parent

Section B.2: Aswing Code for the Parent 109
20.020.036.036.051.051.090.0
2.02.02.01.01.01.01.0
0.00.00.03.63.33.33.3
0.320.320.320.290.280.280.28
End
Beam 2Right Stabilizer Unit
t x y z chord X0. 82.0 85.0 7.1 0.01.0 1.0 1.0 1.0 1.0
-17.75 0.0 0.0 17.75 9.00.0 0.0 0.0 0.0 15.00.0 0.0 0.0 0.0 15.0
30.75 0.0 30.75 4.25 9.0
t dCLda dCLdF3-17.75 5.28 0.055
0.0 5.28 0.0550.0 5.28 0.0
30.75 5.28 0.0
t* 1.0-17.75
0.00.0
30.75End
Cea1.0-2.36
-6.64-1.69
2.68
ax twist a0.0 0.0
1.0 1.00.56 0.0
0.73 0.00.4 -8.0
0.0 -8.0
lpha0.0
1.00.0
0.00.0
0.0
dCMdF3 dCLdF4 dCMdF4-0.011 0.0 0.0
-0.011 0.0 0.00.0 0.055 -0.011
0.0 0.055 -0.011
Ccg mg1.0 1.0
-1.44-4.95 00.0 0.3.6 0.
mgnn1.0
0.02 0..04 1.004 1.002 0.1
119
GJ Elnn Elcc0.0 168.0 168.0
510.5 1313.9 33.782547.2 6457.4 149.4
2547.2 6457.4 149.4510.5 1313.9 33.78
Beam -2Left Stabilizer Unit
t x y z chord Xax twist alpha+ 0. 82.0 -85.0 7.1 0.0 0.0 0.0 0.0* 1.0 1.0 -1.0 1.0 1.0 1.0 -1.0 -1.0-17.75 0.0 0.0 17.75 9.0 0.56 0.0 0.00.0 0.0 0.0 0.0 15.0 0.73 0.0 0.00.0 0.0 0.0 0.0 1 5.0 0.4 -8.0 0.030.75 0.0 30.75 4.25 9.0 0.0 -8.0 0.0
t dCLda* 1.0 1.0-17.75 5.28
0.0 5.280.0 5.28
30.75 5.28
t* 1.0-17.75
0.00.0
dCLdF3 dCMdF3 dCLdF4 dCMdF41.0 1.0 -1.0 -1.0
0.055 -0.011 0.0 0.00.055 -0.011 0.0 0.00.0 0.0 0.055 -0.0110.0 0.0 0.055 -0.011
Cea Ccg mg mgnn GJ Elnn EIcc1.0 1.0 1.0 1.0 10.0 168.0 168.0-2.36 -1.44 0.02 0.19 510.5 1313.9 33.78
-6.64 -4.95 0.04 1.0 2547.2 6457.4 149.4-1.69 0.0 0.04 1.0 2547.2 6457.4 149.4
180.0180.0180.0170.041.041.041.0
300.0300.0300.069.069.069.069.0
29.029.029.021.0
2.02.02.0
+ -*
Section B.2: Aswing Code for the Parent 109

110 Appendix B: Aswing and Related Code for the Parent
30.75 2.68 3.6 0.02 0.19 510.5 1313.9 33.78End
Beam 3Right Boom
t x y z radius Cdf Cdp+ 0.0 0.0 85 3.1 0.5625 0.0 0.0* 1.0 1.0 1.0 1.0 1.0 0.005 0.3
20.0 20.0 0.0 0.0 0.0 1.0 1.083.0 83.0 0.0 4.0 0.0 1.0 1.0
t mg mgnn mgcc GJ* 1.0 0.016 0.001 0.001 23.0
20.0 1.0 9.4 9.4 10000.083.0 1.0 9.4 9.4 10000.0
End
Elnn35.0
10000.10000.
Elcc35.0
0 10000.00 10000.0
Beam -3Left Boom
t x y z radius+ 0.0 0.0 -85 3.1 0.* 1.0 1.0 1.0 1.0 1.0
20.083.0
20.0 0.0 0.0 0.083.0 0.0 4.0 0.0
t mg mgnn mgcc* 1.0 0.016 0.001 0.01
20.0 1.0 9.4 9.483.0 1.0 9.4 9.4
End
Cdf Cdp625 0.0 0.0
0.005 0.31.0 1.01.0 1.0
GJ Enn Elcc23.0 35.0 35.0
10000.0 10000.0 10000.010000.0 10000.0 10000.0
110 Appendix B: Aswing and Related Code for the Parent
5

Section B.2: Aswing Code for the Parent 111

112 Appendix B: Aswing and Related Code for the Parent

Appendix
Aswing Results
113

Appendix C: Aswing Rest
C.1 Mode Shapes
m
In
Lb
Id,
-I
-~1
A,-o0
HzLu
cr0~
C-,
4-ICCL
uS )
V Co
E- %J
1<
N
eIn 4n
I Cri
I II
Figure C. 1 First Mode Shape of OHS Parent, Asymmetric Vertical Tail Boom Bending,Airspeed = 70 ft/sec, @ Sea Level
114ADDendix C: Aswing Results

Section C. 1: Mode Shapes
m
InU,
LO3r
-I
-IJ
CL
CL.
C
C3
U 3
r- r'.i
-4 -- 1.
(n
- E L. I
1<
N
en* Lfl
h4 -J= LIi
Figure C.2 Second Mode Shape of OHS Parent, Asymmetric Horizontal Tail BoomBending, Airspeed = 70 ft/sec, @ Sea Level
1 15115

Appendix C: Aswing Results
m
In
In
h4
0
I Ni
1,- -
Figure C.3 Third Mode Shape of OHS Parent, Symmetric Wing Bending,Airspeed = 70 ft/sec, @ Sea Level
116
-D
I-
CD
'-I
SrU') CU
Mn 00to M II3I
-- C&; O%
Crn
C
0

a,
13-
Co,
4aC
("4
M
U5C
U-i 6
N -
Figure C.4 Fourth Mode Shape of OHS Parent, Asymmetric Wing Twist,Airspeed = 70 ft/sec, @ Sea Level
Section C. 1: Mode Shapes 1 17
M
Ln
cD
Ln
0U.,.0n) U2
I E
I= II
117

Appendix C: Aswing Results
Ln
LOU,
:3LnE
'I I r2
Figure C.5 Fifth Mode Shape of OHS Parent, Symmetric Wing Twist,Airspeed = 70 ft/sec, @ Sea Level
118
F-
:z
a_-
q:
0L-
m c
0,do C
C4.'C0.
0.0

Section C. 1: Mode Shanes 1 19
rn
in
CC1
--
CL.
CDU
U r
U0 LflCD ED
C3
4- onc
D. MD.- 0 1, 11 I
Mo3 2: Ce. %J 4b.
4<
N
01171nI LFlI CU
1 11
= Lii
Figure C.6 Sixth Mode Shape of OHS Parent, Asymmetric Horizontal Stabilizer Bending,Airspeed = 70 ft/sec, @ Sea Level
119

Appendix C: Aswing Rest
Ln
Lb
1< 0r o
III2
Figure C.7 Seventh Mode Shape of OHS Parent, Symmetric Horizontal StabilizerBending, Airspeed = 70 ft/sec, @ Sea Level
120
F-
LU
-
ED0)
M
~r c
I- II ICin to.
C-C0
CyJ
Atmendix C: Aswing Results

-4
C3 w
w o'
a m C
CL a
Figure C.8 Eighth Mode Shape of OHS Parent, Second Wing Bending,Airspeed = 70 ft/see, @ Sea Level
Section C. 1: Mode Shapes 121
m.1
LO
-4
-4ID
DrH-
ulcr0~
In U3F)Lf

Appendix C: Aswirng Rest
z
Lfn
4<
N
0W7 0I riJ
1 11
Figure C.9 Ninth Mode Shape of OHS Parent, Fore-Aft Wing Bending,Airspeed = 70 ft/sec, @ Sea Level
122
-4
a_--D
m
CL
a,
C -
a.- C I I I
Annendix C: Aswing Results

Section C. 1: Mode Shapes
m
LA
LD
V)cc
r- Da-Z
-3
a- 03 1't
C3 X: L- J *& PLU
Figure C. 10 Tenth Mode Shape of OHS Parent, Asymmetric Vertical Tail Bending,Airspeed = 70 ft/sec, @ Sea Level
123

Appendix C: Aswing Results
In
cc
L0P-0 Lfl
Figure C. 11 Eleventh Mode Shape of OHS Parent, Symmetric Vertical Tail Bending,Airspeed = 70 ft/sec, @ Sea Level
124
-D
CL
0)
CU
I
Li-
C4
Z-IL
:F'
La
o aC3 C3

Section C.2: Bode Plots 125
C.2 Bode Plots
PCURV PARENT Model 1.1
Operating point: 3
Response to unit 6F,
i.D
n ]
ref (2 = 1.00000 deg/si n
S . . .. L ... . . . . .. .. . .. .. .. .
.. . .... ... . ... . .- -.. . . . --.-. . . . .
.L .t J . .J LJ . . . . . . . . ............. .... . . . . L J --.--.. ....- - -- - . J . J. J-
0.01 0.1 1.0 10.0 cycles/5 iaao
Figure C.12 Gain Plot of Roll Rate vs. Aileron Input Frequency for Flexible OHS Parent,Airspeed = 70 ft/sec, @ Sea Level
.I
Section C.2: Bode Plots 125

126 Annendix C: Aswin2 Results
PCURV PARENT Hodel 1.1
Operating point: 3
Response to unit 6F,
270.0
210.0-
90.00.
I 0K deg............. ..............
e e . e . . . . . . -- . .. .j 1 1- . . --------. = . . e e e e e
0.1 1.0 10.0 cycles/s 100.001
Figure C. 13 Phase Plot of Roll Rate vs. Aileron Input Frequency For Flexible OHS Parent,Airspeed = 70 ft/sec, @ Sea Level
K
126

Section C.2: Bode Plots 127
PCURV PARENT Model 1.1
Operating point: 3
Response to unit 6F.
ref Qh = 1.00000 deg/s
.................................................................... a............................... .,..... ........... ..... . . . e ... . . a . ._ e ... .d 1 r1 . . . . .. . e . . sr . . .. | -- -ri~ -N -v i %r--
r- 1-1. . . . . . a . a . . . . . . . . . . . . . a . . .I e . . .,r- ---
.......... ........ ,............. ,... ,......... e.,......... ,.....,........ ,...,............................,.. ... .... ..... , --.----. .----. .-
. . . . . . eer -ri. . ... r.. . . . s . . . . . . . . . . . . . . . .,- --- 4 ---
S . .. - . . .j_.. ..... L .... J L A L. . J. . . . . .e . . J . . . . . . . ._ JJ J. . . . .%
s.... . . ..... . . . . . . . .
- I- . . .. . . - . r - ,- * .F .r . " 1 F. 1*. -- - -- 4
0.. . .. . . . . . . . . . . . e
. . . . e . . , , . . . . e .e . . . r a r . . . . e -- -- . . . . . . . . .
e~ , , , e . .. . . . .. ,. .e l . . . . a . e . . . . .
a.. .. . . . .. .. , , e,., , , , . .. , , , , , , , , e . , , ,
.... ....... ... .. . .L. ........L...... ......L.L.JJ.................. .L JJ ............--.. .. ... J- . ,
..... . . . . . . . . . . . .. . r . . . . . . . 14 - - - - - - - -
. ........I . ...... .1 .0 .. ... ,-e/ 1 0 - 0 -
F , C 1 G Plot . . ..R a t v E l v t .I F uen c y F ex i e O H S are..... A Irsd. . . . Se - L " ... a . . .Leve l . . ... -
S a e a . a. . . . . . . . . . L .. . . a a a e a a a e. . . . . . . .
Figure~~~ C. 14 Gai Plo of Pic ateae vs .lvao Inu Freqeny Flxil OH Parent.. ..
aeAir esee = 70 f/ec @ Sa eeleee. eeeeea

128 Appendix C: Aswing Results
PCURV PARENT Hodel 1.1
Operating point: 3
Response to unit 6F.
L Og deg
-BD.-
. .--- ..... .... ,.. J . . . . L. .. ........ L.. -.L.-J.---A.- .
D D 0 . .. ,. . .. .. . L . -. . .... . . .---. . .. . .... ..
Tt
-540.00.01 0.1 1.0 10.0 cycles/s in0o
Figure C. 15 Phase Plot of Pitch Rate vs. Elevator Input Frequency, Flexible OHS Parent,Airspeed = 70 ft/sec, @ Sea Level

Section C.2: Bode Plots 129
PCURV PARENT Model 1.1
Operating point: B
Response to unit 6 F.
ref 2z = 1.00000 deg/s
....... A.L... ............. .....
10t L J. L.LJ. .. . . .JtJ. . L.J.J.J.L.
D.]
2- I 1- 4 1~ ~~~- - --- --4 -- 4 --- 44-2 - 4 4 4 44
0.01 0.1 1.0 10.- cycles/s 100.0
Figure C. 16 Gain Plot of Yaw rate vs Rudder Input Frequency For Flexible OHS Parent,
Airspeed = 70 ft/see, @ Sea Level

130 Appendix C: Aswing Results
PCURV PARENT Model 1.1
Operating point: 3
Response to unit 6F,
£ Oz deg
60.0 ......
. A .. . . .. .... .. ... . .. L... ... -4 . . . . ..... .. . ... .L . . . .. . . .. . . .. . . .
1 0 . . . . . .. . . . . .. . . . . . . . . . ... ...
......... I.... I... -.-.. -. J -6 ........ L...- L...- .J.. L.JL ........ L....L..J..J..L LJ. LL........ L.. . . J-..J.A - L J
-3DD.+0.01 0.1 1.0 10.0 Cycles/s 100.0
Figure C. 17 Phase Plot of Yaw Rate vs. Rudder Input Frequency For Flexible OHS Parent,Airspeed = 70 ft/sec, @ Sea Level

Section C.2: Bode Plots 131
PCURV PRRENT Model 1.1
Operating point: 3
Response to unit 6FI
ref = 1.J000 deg/s
,.,..,,. .. .. ......
........................................ I .I........ ............ ...........................
.... ......................... ... I
- L.--------. ..-. .. ... .L L---------~t~ .
D.]0.01 0.1 1.0 ID. Ucycles/s -0
Figure C. 18 Gain Plot of Roll Rate vs. Aileron Input Frequency for Rigid OHS ParentAirspeed= 70 ft/sec, @ Sea Level

132 Appendix C: Aswing Results
PCURV PRRENT Model 1.1
Operating point: 3
Response to unit 6Fj
L 0 deg
90.00.01 .1 1.0 10.0 cycles/s 10.0
Figure C. 19 Phase Plot of Roll Rate vs. Aileron Input Frequency For Rigid OHS Parent,Airspeed = 70 ft/sec, @ Sea Level

Section C.2: Bode Plots 133
PCURV PRRENT Model 1.1
Operating point: 3
Response to unit 6F,
ref Qi = 1.DOOOOdeg/s100.0"I ......-----.
- .... L... .J..t. J........L....J...L...L.L . . J....J...L...J.J. J.L -. . .. J J. 6- - -- + -*4 ..... . .i-.4.+. . . . . ..- -- --- - ..--..-- I
-- -- -- - -4-------- -- - - - --- I-
.... .......... ... 6.....................
................ .... ... L.J4.....--..j-1JJ.
1.0.
1~~ DL ..... - .. ......_. J . .. tL .L.. . J.-- -- ... t..tJ.J . . -.1....I. .I 1.- .-
. 2-~ ~ -1- 4- -- -- 14 -4 -44
D.]0.01 0.1 1.0 10.0 cycles/s 100.0
Figure C.20 Gain Plot of Pitch Rate vs. Elevator Input Frequency, Rigid OHS Parent,Airspeed = 70 ft/sec, @ Sea Level

134 Appendix C: Aswing Results
PCURV PRRENT Model 1.1
Operating point: 3
Response to unit 6F4
L Ow deg
s . .. .. . . ... . ..... . ... . . .... .. . . .... . ......
-30D.0 1 11:
0.01 0.1 1.0 10.0 cycles/s [00.0
Figure C.21 Phase Plot of Pitch Rate vs. Elevator Input Frequency, Rigid OHS Parent,Airspeed = 70 ft/sec, @ Sea Level

Section C.2: Bode Plots 135
PCURV PRRENT Model 1.1
Operating point: 3
Response to unit 6 F3
ref Q, = 1. DOOtJ deg/s. . . . . . . . . . . .. .. . . . . . . . - - - - - - - --. . . . . . . . .
.. . C.. . . . ... . . 1. . . .... . . . ..- . . . ...-. .-. e . .- -.. . . ....- -. . . . ....
. . . .. . . e . . . . . . ... . . e . . . . .,e - - - -i-, . . .. . .... . . .. ........
I-- -L--I--I- A-.LJ. -..... . ... L Le . J."J - I. J L .. J .. - . . ...
"I-- - - - - -------- - -e------- -- - - -
. . . . . . . . - . . - - -
.. . . . .. -A A , -, -. . A -
F,... .. ....4. ... . . . ... .F. 4. 4 .. 4 4 -.- . . .... .... . . .4 4a~~~~~~~~~ ~~~~ . . . . .
. a . . . s . ..................... . . .. . .. .... . e. ... ,
D. ...-
S . . . . . . .... ... ... .. -----.. --- . . . . . . . . .. . . ... . . . . . e - .L . e1- -1 --------. . . . . . a. . . . .. .... ... . . - . . -, -
. . ...... .... . ... L . . . . . . .
, ~ ~ ~~~ -. . .. . .... ............. a e.. . . . e a , e e . .
e- 4 . - F -. . . . . . . . . F F 4 4 .-0 l- . . 4 4 4 . . .
0.01 0.11.0 10.0cycles/s 10.
Figure C.22 Gain Plot of Yaw rate vs. Rudder Input Frequency For Rigid OHS Parent,
Airspeed = 70 ft/sec, @ Sea Level

136 Appendix C: Aswing Results
PCURV PRRENT Model 1.1
Operating point: 3
Response to unit 6F3
L Oz deg
. .L - . . . . . . .- . . - - . . . . - . L - . . J. L . . . . . . . L L - . .-.
D . .. .. . e- - r . .- . .- -r .r . T ,--- - re -r .I -f i r . -- -- - r ... .- .1 .1 1" , -- -- - , ,e ,- e- .,
1 .. ,.... . ,,, , ......... ..........
-120. 00.01 0 1 1 0 , a cycles/ , 1000
Figure C.23 Phase Plot of Yaw Rate vs. Rudder Input Frequency For Rigid OHS Parent,Airspeed = 70 ft/sec, @ Sea Level
. a . . a e , e . . , a . . s . . , a . . a , 'e .', a e a a.a . . a aa a , aa. , .,1 , e'. e a ea .. . . H K.. ) ', w 'k 1 e, , e a,