Novell AppArmor Administration Guide
124
Novell AppArmor www.novell.com 2.0.1 May 14, 2007 Novell AppArmor Administration Guide
-
Upload
khangminh22 -
Category
Documents
-
view
1 -
download
0
Transcript of Novell AppArmor Administration Guide

Novell AppArmorwww.novell.com2.0.1
May 14, 2007 Novell AppArmor Administration Guide

Novell AppArmor Administration GuideAll content is copyright © Novell, Inc.
Legal Notice
This manual is protected under Novell intellectual property rights. By reproducing, duplicating ordistributing this manual you explicitly agree to conform to the terms and conditions of this licenseagreement.
This manual may be freely reproduced, duplicated and distributed either as such or as part of a bundledpackage in electronic and/or printed format, provided however that the following conditions are ful-filled:
That this copyright notice and the names of authors and contributors appear clearly and distinctivelyon all reproduced, duplicated and distributed copies. That this manual, specifically for the printedformat, is reproduced and/or distributed for noncommercial use only. The express authorization ofNovell, Inc must be obtained prior to any other use of any manual or part thereof.
For Novell trademarks, see the Novell Trademark and Service Mark list http://www.novell.com/company/legal/trademarks/tmlist.html. * Linux is a registered trademark ofLinus Torvalds. All other third party trademarks are the property of their respective owners. A trademarksymbol (®, ™ etc.) denotes a Novell trademark; an asterisk (*) denotes a third party trademark.
All information found in this book has been compiled with utmost attention to detail. However, thisdoes not guarantee complete accuracy. Neither Novell, Inc., SUSELINUXProducts GmbH, the authors,nor the translators shall be held liable for possible errors or the consequences thereof.

Contents
About This Guide v
1 Immunizing Programs 11.1 Introducing the AppArmor Framework . . . . . . . . . . . . . . . . 21.2 Determining Programs to Immunize . . . . . . . . . . . . . . . . . . 41.3 Immunizing cron Jobs . . . . . . . . . . . . . . . . . . . . . . . . 51.4 Immunizing Network Applications . . . . . . . . . . . . . . . . . . 5
2 Profile Components and Syntax 112.1 Breaking a Novell AppArmor Profile into Its Parts . . . . . . . . . . . 122.2 #include Statements . . . . . . . . . . . . . . . . . . . . . . 142.3 Capability Entries (POSIX.1e) . . . . . . . . . . . . . . . . . . . . 15
3 Building and Managing Profiles with YaST 173.1 Adding a Profile Using the Wizard . . . . . . . . . . . . . . . . . . 193.2 Manually Adding a Profile . . . . . . . . . . . . . . . . . . . . . 263.3 Editing Profiles . . . . . . . . . . . . . . . . . . . . . . . . . . 273.4 Deleting a Profile . . . . . . . . . . . . . . . . . . . . . . . . . 323.5 Updating Profiles from Log Entries . . . . . . . . . . . . . . . . . . 333.6 Managing Novell AppArmor and Security Event Status . . . . . . . . . 34
4 Building Profiles from the Command Line 374.1 Checking the AppArmor Module Status . . . . . . . . . . . . . . . 374.2 Building AppArmor Profiles . . . . . . . . . . . . . . . . . . . . . 394.3 Adding or Creating an AppArmor Profile . . . . . . . . . . . . . . . 404.4 Editing an AppArmor Profile . . . . . . . . . . . . . . . . . . . . 40

4.5 Deleting an AppArmor Profile . . . . . . . . . . . . . . . . . . . . 404.6 Two Methods of Profiling . . . . . . . . . . . . . . . . . . . . . . 414.7 Paths and Globbing . . . . . . . . . . . . . . . . . . . . . . . . 604.8 File Permission Access Modes . . . . . . . . . . . . . . . . . . . . 614.9 Important Filenames and Directories . . . . . . . . . . . . . . . . . 65
5 Profiling Your Web Applications Using ChangeHat 675.1 Apache ChangeHat . . . . . . . . . . . . . . . . . . . . . . . . 685.2 Configuring Apache for mod_apparmor . . . . . . . . . . . . . . . 75
6 Managing Profiled Applications 796.1 Monitoring Your Secured Applications . . . . . . . . . . . . . . . . 796.2 Configuring Security Event Notification . . . . . . . . . . . . . . . . 806.3 Configuring Reports . . . . . . . . . . . . . . . . . . . . . . . . 836.4 Reacting to Security Event Rejections . . . . . . . . . . . . . . . . 1026.5 Maintaining Your Security Profiles . . . . . . . . . . . . . . . . . 103
7 Support 1057.1 Updating Novell AppArmor Online . . . . . . . . . . . . . . . . . 1057.2 Using the Man Pages . . . . . . . . . . . . . . . . . . . . . . . 1057.3 For More Information . . . . . . . . . . . . . . . . . . . . . . 1077.4 Troubleshooting . . . . . . . . . . . . . . . . . . . . . . . . . 1087.5 Reporting Bugs for AppArmor . . . . . . . . . . . . . . . . . . . 109
A Background Information on AppArmor Profiling 111
Glossary 113

About This GuideNovell® AppArmor is designed to provide easy-to-use application security for bothservers and workstations. Novell AppArmor is an access control system that lets youspecify per program which files the program may read, write, and execute. AppArmorsecures applications by enforcing good application behavior without relying on attacksignatures, so can prevent attacks even if they are exploiting previously unknown vul-nerabilities.
Novell AppArmor consists of:
• A library of AppArmor profiles for common Linux* applications describing whatfiles the program needs to access.
• A library of AppArmor profile foundation classes (profile building blocks) neededfor common application activities, such as DNS lookup and user authentication.
• A tool suite for developing and enhancing AppArmor profiles, so that you canchange the existing profiles to suit your needs and create new profiles for your ownlocal and custom applications.
• Several specially modified applications that are AppArmor enabled to provide en-hanced security in the form of unique subprocess confinement, including Apacheand Tomcat.
• The Novell AppArmor–loadable kernel module and associated control scripts toenforce AppArmor policies on your SUSE Linux Enterprise® system.
This guide covers the following topics:
Immunizing ProgramsDescribes the operation of Novell AppArmor and describes the types of programsthat should have Novell AppArmor profiles created for them.
Profile Components and SyntaxIntroduces the profile components and syntax.
Building and Managing Profiles with YaSTDescribes how to use the AppArmor YaST modules to build, maintain and updateprofiles.

Building Profiles from the Command LineDescribes how to use the AppArmor command line tools to build, maintain andupdate profiles.
Profiling Your Web Applications Using ChangeHatEnables you to create subprofiles for the Apache Web server that allow you totightly confine small sections of Web application processing.
Managing Profiled ApplicationsDescribes how to perform Novell AppArmor profile maintenance, which involvestracking common issues and concerns.
SupportIndicates support options for this product.
GlossaryProvides a list of terms and their definitions.
1 FeedbackWe want to hear your comments and suggestions about this manual and the other doc-umentation included with this product. Please use the User Comments feature at thebottom of each page of the online documentation and enter your comments there.
2 Documentation ConventionsThe following typographical conventions are used in this manual:
• /etc/passwd: filenames and directory names
• placeholder: replace placeholder with the actual value
• PATH: the environment variable PATH
• ls, --help: commands, options, and parameters
• user: users or groups
vi Novell AppArmor Administration Guide
• Alt, Alt + F1: a key to press or a key combination; keys are shown in uppercase ason a keyboard
• File, File > Save As: menu items, buttons
• Dancing Penguins (Chapter Penguins, ↑Another Manual): This is a reference to achapter in another manual.
About This Guide vii


1Immunizing ProgramsNovell®AppArmor provides immunization technologies that protect applications fromthe inherent vulnerabilities they possess. After installing Novell AppArmor, setting upNovell AppArmor profiles, and rebooting the computer, your system becomes immu-nized because it begins to enforce the Novell AppArmor security policies. Protectingprograms with Novell AppArmor is referred to as immunizing.
Novell AppArmor sets up a collection of default application profiles to protect standardLinux services. To protect other applications, use the Novell AppArmor tools to createprofiles for the applications that you want protected. This chapter introduces the philos-ophy of immunizing programs. Proceed to Chapter 2, Profile Components and Syntax(page 11), Chapter 3, Building and Managing Profiles with YaST (page 17), or Chap-ter 4, Building Profiles from the Command Line (page 37) if you are ready to build andmanage Novell AppArmor profiles.
Novell AppArmor provides streamlined access control for network services by specifyingwhich files each program is allowed to read, write, and execute. This ensures that eachprogram does what it is supposed to do and nothing else. Novell AppArmor quarantinesprograms to protect the rest of the system from being damaged by a compromisedprocess.
Novell AppArmor is a host intrusion prevention or mandatory access control scheme.Previously, access control schemes were centered around users because they were builtfor large timeshare systems. Alternatively, modern network servers largely do not permitusers to log in, but instead provide a variety of network services for users, such asWeb,mail, file, and print servers. Novell AppArmor controls the access given to networkservices and other programs to prevent weaknesses from being exploited.
Immunizing Programs 1

TIP: Background Information for Novell AppArmor
To get a more in-depth overview of AppArmor and the overall concept behindit, refer to Appendix A, Background Information on AppArmor Profiling(page 111).
1.1 Introducing the AppArmorFramework
This section provides a very basic understanding of what is happening “behind thescenes” (and under the hood of the YaST interface) when you run AppArmor.
An AppArmor profile is a plain text file containing path entries and access permissions.See Section 2.1, “Breaking a Novell AppArmor Profile into Its Parts” (page 12) for adetailed reference profile. The directives contained in this text file are then enforcedby the AppArmor routines to quarantine the process or program.
The following tools interact in the building and enforcement of AppArmor profiles andpolicies:
aa-unconfinedaa-unconfined detects any application running on your system that listens for net-work connections and is not protected by an AppArmor profile. Refer to Section“aa-unconfined—Identifying Unprotected Processes” (page 59) for detailed infor-mation about this tool.
aa-autodepaa-autodep creates a basic skeleton of a profile that needs to be fleshed out beforeit is put to productive use. The resulting profile is loaded and put into complainmode, reporting any behavior of the application that is not (yet) covered by App-Armor rules. Refer to Section “aa-autodep—Creating Approximate Profiles”(page 44) for detailed information about this tool.
aa-genprofaa-genprof generates a basic profile and asks you to refine this profile by executingthe application, generating log events that need to be taken care of by AppArmorpolicies. You are guided through a series of questions to deal with the log events
2 Novell AppArmor Administration Guide

that have been triggered during the application's execution. After the profile hasbeen generated, it is loaded and put into enforce mode. Refer to Section “aa-gen-prof—Generating Profiles” (page 47) for detailed information about this tool.
aa-logprofaa-logprof interactively scans and reviews the log entries generated by an applicationthat is confined by an AppArmor profile in complain mode. It assists you in gener-ating new entries in the profile concerned. Refer to Section “aa-logprof—Scanningthe System Log” (page 54) for detailed information about this tool.
aa-complainaa-complain toggles the mode of an AppArmor profile from enforce to complain.Exceptions to rules set in a profile are logged, but the profile is not enforced. Referto Section “aa-complain—Entering Complain or Learning Mode” (page 45) fordetailed information about this tool.
aa-enforceaa-enforce toggles the mode of an AppArmor profile from complain to enforce.Exceptions to rules set in a profile are logged, but not permitted—the profile isenforced. Refer to Section “aa-enforce—Entering Enforce Mode” (page 46) fordetailed information about this tool.
Once a profile has been built and is loaded, there are two ways in which it can get pro-cessed:
complainIn complain mode, violations of AppArmor profile rules, such as the profiled pro-gram accessing files not permitted by the profile, are detected. The violations arepermitted, but also logged. To improve the profile, turn complain mode on, run theprogram through a suite of tests to generate log events that characterize the program'saccess needs, then postprocess the log with the AppArmor tools (YaST or aa-log-prof) to transform log events into improved profiles.
enforceIn enforce mode, violations of AppArmor profile rules, such as the profiled programaccessing files not permitted by the profile, are detected. The violations are loggedand not permitted. The default is for enforce mode to be enabled. To log the viola-tions only, but still permit them, use complain mode. Enforce toggles with complainmode.
Immunizing Programs 3

1.2 Determining Programs toImmunize
Now that you have familiarized yourself with AppArmor, start selecting the applicationsfor which to build profiles. Programs that need profiling are those that mediate privilege.The following programs have access to resources that the person using the programdoes not have, so they grant the privilege to the user when used:
cron JobsPrograms that are run periodically by cron. Such programs read input from a varietyof sources and can run with special privileges, sometimes with as much as rootprivilege. For example, cron can run /usr/sbin/logrotate daily to rotate,compress, or even mail system logs. For instructions for finding these types ofprograms, refer to Section 1.3, “Immunizing cron Jobs” (page 5).
Web ApplicationsPrograms that can be invoked through a Web browser, including CGI Perl scripts,PHP pages, and more complexWeb applications. For instructions for finding thesetypes of programs, refer to Section 1.4.1, “Immunizing Web Applications”(page 7).
Network AgentsPrograms (servers and clients) that have open network ports. User clients, such asmail clients and Web browsers mediate privilege. These programs run with theprivilege to write to the user's home directory and they process input from poten-tially hostile remote sources, such as hostile Web sites and e-mailed maliciouscode. For instructions for finding these types of programs, refer to Section 1.4.2,“Immunizing Network Agents” (page 9).
Conversely, unprivileged programs do not need to be profiled. For instance, a shellscript might invoke the cp program to copy a file. Because cp does not have its ownprofile, it inherits the profile of the parent shell script, so can copy any files that theparent shell script's profile can read and write.
4 Novell AppArmor Administration Guide
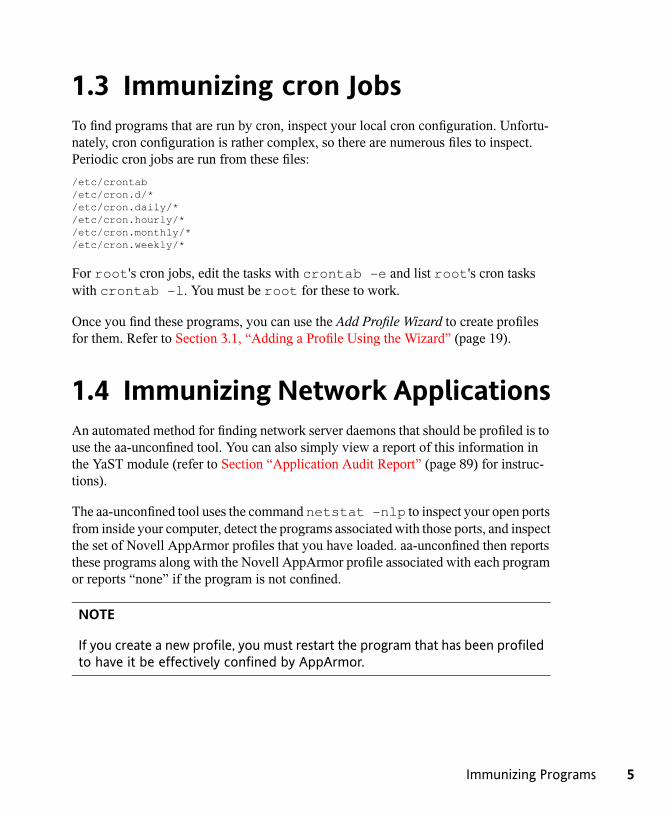
1.3 Immunizing cron JobsTo find programs that are run by cron, inspect your local cron configuration. Unfortu-nately, cron configuration is rather complex, so there are numerous files to inspect.Periodic cron jobs are run from these files:/etc/crontab /etc/cron.d/* /etc/cron.daily/* /etc/cron.hourly/*/etc/cron.monthly/* /etc/cron.weekly/*
For root's cron jobs, edit the tasks with crontab -e and list root's cron taskswith crontab -l. You must be root for these to work.
Once you find these programs, you can use the Add Profile Wizard to create profilesfor them. Refer to Section 3.1, “Adding a Profile Using the Wizard” (page 19).
1.4 Immunizing Network ApplicationsAn automated method for finding network server daemons that should be profiled is touse the aa-unconfined tool. You can also simply view a report of this information inthe YaST module (refer to Section “Application Audit Report” (page 89) for instruc-tions).
The aa-unconfined tool uses the command netstat -nlp to inspect your open portsfrom inside your computer, detect the programs associated with those ports, and inspectthe set of Novell AppArmor profiles that you have loaded. aa-unconfined then reportsthese programs along with the Novell AppArmor profile associated with each programor reports “none” if the program is not confined.
NOTE
If you create a new profile, you must restart the program that has been profiledto have it be effectively confined by AppArmor.
Immunizing Programs 5

Below is a sample aa-unconfined output:
2325 /sbin/portmap not confined 3702❶ /usr/sbin/sshd❷ confined by '/usr/sbin/sshd❸ (enforce)' 4040 /usr/sbin/ntpd confined by '/usr/sbin/ntpd (enforce)' 4373 /usr/lib/postfix/master confined by '/usr/lib/postfix/master (enforce)'
4505 /usr/sbin/httpd2-prefork confined by '/usr/sbin/httpd2-prefork (enforce)'5274 /sbin/dhcpcd not confined 5592 /usr/bin/ssh not confined 7146 /usr/sbin/cupsd confined by '/usr/sbin/cupsd (complain)'
❶ The first portion is a number. This number is the process ID number (PID) of thelistening program.
❷ The second portion is a string that represents the absolute path of the listeningprogram
❸ The final portion indicates the profile confining the program, if any.
NOTE
aa-unconfined requires root privileges and should not be run from a shellthat is confined by an AppArmor profile.
aa-unconfined does not distinguish between one network interface and another, so itreports all unconfined processes, even those that might be listening to an internal LANinterface.
Finding user network client applications is dependent on your user preferences. Theaa-unconfined tool detects and reports network ports opened by client applications, butonly those client applications that are running at the time the aa-unconfined analysis isperformed. This is a problem because network services tend to be running all the time,while network client applications tend only to be running when the user is interestedin them.
ApplyingNovell AppArmor profiles to user network client applications is also dependenton user preferences. Therefore, we leave profiling of user network client applicationsas an exercise for the user.
6 Novell AppArmor Administration Guide
To aggressively confine desktop applications, the aa-unconfined command supports aparanoid option, which reports all processes running and the corresponding App-Armor profiles that might or might not be associated with each process. The user canthen decide whether each of these programs needs an AppArmor profile.
If you have new or modified profiles, you can submit them to the [email protected] [mailto:[email protected]]mailing list along with a use case for the application behavior that you exercised. TheAppArmor team reviews andmay submit the work into openSUSE.We cannot guaranteethat every profile will be included, but we make a sincere effort to include as much aspossible so that end users can contribute to the security profiles that ship in openSUSE.
1.4.1 Immunizing Web ApplicationsTo findWeb applications, investigate your Web server configuration. The ApacheWebserver is highly configurable and Web applications can be stored in many directories,depending on your local configuration. SUSE Linux Enterprise, by default, stores Webapplications in /srv/www/cgi-bin/. To the maximum extent possible, each Webapplication should have an Novell AppArmor profile.
Once you find these programs, you can use the AppArmor Add Profile Wizard to createprofiles for them. Refer to Section 3.1, “Adding a Profile Using the Wizard” (page 19).
Because CGI programs are executed by the Apache Web server, the profile for Apacheitself,usr.sbin.httpd2-prefork for Apache2 on SUSELinux Enterprise, mustbe modified to add execute permissions to each of these programs. For instance, addingthe line/srv/www/cgi-bin/my_hit_counter.pl rpx grants Apache permis-sion to execute the Perl script my_hit_counter.pl and requires that there be adedicated profile for my_hit_counter.pl. If my_hit_counter.pl does nothave a dedicated profile associated with it, the rule should say/srv/www/cgi-bin/my_hit_counter.pl rix to causemy_hit_counter.pl to inherit the usr.sbin.httpd2-prefork profile.
Immunizing Programs 7

Some users might find it inconvenient to specify execute permission for every CGIscript that Apache might invoke. Instead, the administrator can grant controlled accessto collections of CGI scripts. For instance, adding the line/srv/www/cgi-bin/*.{pl,py,pyc} rix allows Apache to execute all filesin /srv/www/cgi-bin/ ending in .pl (Perl scripts) and .py or .pyc (Pythonscripts). As above, the ix part of the rule causes Python scripts to inherit the Apacheprofile, which is appropriate if you do not want to write individual profiles for eachPython script.
NOTE
If you want the subprocess confinement module (apache2-mod-apparmor)functionality when Web applications handle Apache modules (mod_perl andmod_php), use the ChangeHat features when you add a profile in YaST or atthe command line. To take advantage of the subprocess confinement, refer toSection 5.1, “Apache ChangeHat” (page 68).
ProfilingWeb applications that usemod_perl andmod_php requires slightly differenthandling. In this case, the “program” is a script interpreted directly by the modulewithin the Apache process, so no exec happens. Instead, the Novell AppArmor versionof Apache calls change_hat() using a subprofile (a “hat”) corresponding to thename of the URI requested.
NOTE
The name presented for the script to execute might not be the URI, dependingon how Apache has been configured for where to look for module scripts. Ifyou have configured your Apache to place scripts in a different place, the dif-ferent names appear in log file when Novell AppArmor complains about accessviolations. See Chapter 6, Managing Profiled Applications (page 79).
8 Novell AppArmor Administration Guide
For mod_perl and mod_php scripts, this is the name of the Perl script or the PHPpage requested. For example, adding this subprofile allows the localtime.php pageto execute and access the local system time:/usr/bin/httpd2-prefork { # ... ^/cgi-bin/localtime.php { /etc/localtime r, /srv/www/cgi-bin/localtime.php r, /usr/lib/locale/** r, }}
If no subprofile has been defined, the Novell AppArmor version of Apache applies theDEFAULT_URI hat. This subprofile is basically sufficient to display an HTML Webpage. The DEFAULT_URI hat that Novell AppArmor provides by default is the follow-ing:
/usr/sbin/suexec2 ixr, /var/log/apache2/** rwl,/home/*/public_html/** r, /srv/www/htdocs/** r, /srv/www/icons/*.{gif,jpg,png} r, /usr/share/apache2/** r,
To use a single Novell AppArmor profile for all Web pages and CGI scripts served byApache, a good approach is to edit the DEFAULT_URI subprofile.
1.4.2 Immunizing Network AgentsTo find network server daemons and network clients (such as fetchmail, Firefox, amaroKor Banshee) that should be profiled, you should inspect the open ports on your machine,consider the programs that are answering on those ports, and provide profiles for asmany of those programs as possible. If you provide profiles for all programs with opennetwork ports, an attacker cannot get to the file system on your machine without passingthrough a Novell AppArmor profile policy.
Scan your server for open network ports manually from outside the machine using ascanner, such as nmap, or from inside the machine using the netstat --inet -n-p command. Then inspect the machine to determine which programs are answeringon the discovered open ports.
Immunizing Programs 9

TIP
Refer to the man page of the netstat command for a detailed reference ofall possible options.
10 Novell AppArmor Administration Guide
2Profile Components andSyntaxYou are ready to build Novell AppArmor profiles after you select the programs toprofile. To do so, it is important to understand the components and syntax of profiles.AppArmor profiles contain several building blocks that help build simple and reusableprofile code: #include files, abstractions, program chunks, and capability entries.#include statements are used to pull in parts of other AppArmor profiles to simplifythe structure of new profiles. Abstractions are #include statements grouped bycommon application tasks. Program chunks are chunks of profiles that are specific toprogram suites. Capability entries are profile entries for any of the POSIX.1e Linuxcapabilities.
For help determining the programs to profile, refer to Section 1.2, “Determining Pro-grams to Immunize” (page 4). To start building AppArmor profiles with YaST, proceedto Chapter 3, Building and Managing Profiles with YaST (page 17). To build profilesusing the AppArmor command line interface, proceed to Chapter 4, Building Profilesfrom the Command Line (page 37).
Profile Components and Syntax 11

2.1 Breaking a Novell AppArmorProfile into Its Parts
Novell AppArmor profile components are called Novell AppArmor rules. Currentlythere are two main types of Novell AppArmor rules, path entries and capability entries.Path entries specify what the process can access in the file system and capability entriesprovide a more fine-grained control over what a confined process is allowed to dothrough other system calls that require privileges. Includes are a type of meta rule ordirectives that pull in path and capability entries from other files.
The easiest way of explaining what a profile consists of and how to create one is toshow the details of a sample profile. Consider, for example, the following shortenedprofile for the program/usr/lib/postfix/flush (for the complete version, referto /etc/apparmor.d/usr.lib.postfix.flush):
# profile to confine postfix/flush❶
#include <tunables/global>❷
/usr/lib/postfix/flush❸
{❹
#include <abstractions/base>❺ ... capability setgid❻, ... /usr/lib/postfix/flush rix, /{var/spool/postfix/,}❼deferred r, ... /{var/spool/postfix/,}flush rwl, ... /{var/spool/postfix/,}incoming r, ... /{var/spool/postfix/,}public/qmgr w, /etc/mtab❽ r, /etc/postfix/main.cf r, /etc/postfix/virtual.db r, @{HOME}❾/.forward r, /proc/stat r, /proc/sys/kernel/ngroups_max r, /var/spool/postfix/pid/unix.flush rw,}
❶ A comment naming the program that is confined by this profile. Always precedecomments like this with the # sign.
12 Novell AppArmor Administration Guide
❷ This loads a file containing variable definitions.
❸ The absolute path to the program that is confined.
❹ The curly braces ({}) serve as a container for include statements of other profilesas well as for path and capability entries.
❺ This directive pulls in components of Novell AppArmor profiles to simplify pro-files.
❻ Capability entry statements enable each of the 29 POSIX.1e draft capabilities.
❼ The curly braces ({}) make this rule apply to the path both with and without thecontent enclosed by the braces.
❽ A path entry specifying what areas of the file system the program can access. Thefirst part of a path entry specifies the absolute path of a file (including regularexpression globbing) and the second part indicates permissible access modes (rfor read, w for write, and x for execute). A whitespace of any kind (spaces or tabs)can precede pathnames or separate the pathname from the access modes. Spacesbetween the access mode and the trailing comma is optional. Find a comprehensiveoverview of the available access modes in Section 4.8, “File Permission AccessModes” (page 61).
❾ This variable expands to a value that can be changed without changing the entireprofile.
TIP: Using Variables in Profiles
With the current AppArmor tools, variables as presented in the above examplecan only be used when manually editing and maintaining a profile.
A typical example when variables come in handy are network scenarios in whichuser home directories are not mounted in the standard location /home/username, but under a custom location. Find the variable definitions for thisuse case (@{HOME} and @{HOMEDIRS}) in the /etc/apparmor.d/tunables/home file.
When a profile is created for a program, the program can access only the files, modes,and POSIX capabilities specified in the profile. These restrictions are in addition to thenative Linux access controls.
Profile Components and Syntax 13
Example: To gain the capability CAP_CHOWN, the program must have both accessto CAP_CHOWN under conventional Linux access controls (typically, be a root-ownedprocess) and have the capability chown in its profile. Similarly, to be able to write tothe file /foo/bar the program must have both the correct user ID and mode bits setin the files attributes (see the chmod and chown man pages) and have /foo/barw in its profile.
Attempts to violate Novell AppArmor rules are recorded in /var/log/audit/audit.log if theaudit package is installed or otherwise in/var/log/messages.In many cases, Novell AppArmor rules prevent an attack from working because neces-sary files are not accessible and, in all cases, Novell AppArmor confinement restrictsthe damage that the attacker can do to the set of files permitted by Novell AppArmor.
2.2 #include Statements#include statements are directives that pull in components of other Novell AppArmorprofiles to simplify profiles. Include files fetch access permissions for programs. Byusing an include, you can give the program access to directory paths or files that arealso required by other programs. Using includes can reduce the size of a profile.
By default, AppArmor adds /etc/apparmor.d to the path in the #includestatement. AppArmor expects the include files to be located in /etc/apparmor.d.Unlike other profile statements (but similar to C programs), #include lines do notend with a comma.
To assist you in profiling your applications, Novell AppArmor provides two classes of#includes: abstractions and program chunks.
2.2.1 AbstractionsAbstractions are #includes that are grouped by common application tasks. Thesetasks include access to authentication mechanisms, access to name service routines,common graphics requirements, and system accounting. Files listed in these abstractionsare specific to the named task. Programs that require one of these files usually requiresome of the other files listed in the abstraction file (depending on the local configurationas well as the specific requirements of the program). Find abstractions in /etc/apparmor.d/abstractions.
14 Novell AppArmor Administration Guide

2.2.2 Program ChunksThe program-chunks directory (/etc/apparmor.d/program-chunks) containssome chunks of profiles that are specific to program suites and not generally usefuloutside of the suite, thus are never suggested for use in profiles by the profile wizards(aa-logprof and aa-genprof). Currently program chunks are only available for thepostfix program suite.
2.3 Capability Entries (POSIX.1e)Capabilities statements are simply the word capability followed by the name ofthe POSIX.1e capability as defined in the capabilities(7) man page.
Profile Components and Syntax 15

3Building and ManagingProfiles with YaSTYaST is an easy way to build profiles and manage Novell® AppArmor. It provides twointerfaces: a fully graphical one and a text-based one. The text-based interface consumesless resources and bandwidth, making it a better choice for remote administration orfor times when a local graphical environment is inconvenient. Although the interfaceshave differing appearances, they offer the same functionality in similar ways. Anotheralternative is to use AppArmor commands, which can control AppArmor from a terminalwindow or through remote connections. The command line tools are described inChapter 4, Building Profiles from the Command Line (page 37).
Start YaST from the main menu and enter your root password when prompted for it.Alternatively, start YaST by opening a terminal window, logging in as root, and en-tering yast2 for the graphical mode or yast for the text-based mode.
Building and Managing Profiles with YaST 17

Figure 3.1 YaST Controls for AppArmor
The right frame shows the Novell AppArmor options:
Add Profile WizardFor detailed steps, refer to Section 3.1, “Adding a Profile Using the Wizard”(page 19).
Manually Add ProfileAdd a Novell AppArmor profile for an application on your systemwithout the helpof the wizard. For detailed steps, refer to Section 3.2, “Manually Adding a Profile”(page 26).
Edit ProfileEdits an existing Novell AppArmor profile on your system. For detailed steps, referto Section 3.3, “Editing Profiles” (page 27).
Delete ProfileDeletes an existing Novell AppArmor profile from your system. For detailed steps,refer to Section 3.4, “Deleting a Profile” (page 32).
18 Novell AppArmor Administration Guide
Update Profile WizardFor detailed steps, refer to Section 3.5, “Updating Profiles from Log Entries”(page 33).
AppArmor ReportsFor detailed steps, refer to Section 6.3, “Configuring Reports” (page 83).
AppArmor Control PanelFor detailed steps, refer to Section 3.6, “Managing Novell AppArmor and SecurityEvent Status” (page 34).
3.1 Adding a Profile Using the WizardAdd Profile Wizard is designed to set up Novell AppArmor profiles using the NovellAppArmor profiling tools, aa-genprof (Generate Profile) and aa-logprof (Update Profilesfrom Learning Mode Log File). For more information about these tools, refer to Sec-tion 4.6.3, “Summary of Profiling Tools” (page 44).
1 Stop the application before profiling it to ensure that application start-up is in-cluded in the profile. To do this, make sure that the application or daemon is notrunning.
For example, enter /etc/init.d/PROGRAM stop in a terminal windowwhile logged in as root, replacing PROGRAM with the name of the program toprofile.
2 Start YaST and select Novell AppArmor > Add Profile Wizard.
Building and Managing Profiles with YaST 19

3 Enter the name of the application or browse to the location of the program.
4 Click Create. This runs an AppArmor tool named aa-autodep, which performsa static analysis of the program to profile and loads an approximate profile intothe AppArmor module. For more information about aa-autodep, refer to Section“aa-autodep—Creating Approximate Profiles” (page 44).
The AppArmor Profile Wizard window opens.
20 Novell AppArmor Administration Guide

In the background, AppArmor also sets the profile to learning mode. For moreinformation about learning mode, refer to Section “aa-complain—EnteringComplain or Learning Mode” (page 45).
5 Run the application to profile.
6 Perform as many of the application functions as possible so learning mode canlog the files and directories to which the program requires access to functionproperly. Be sure to include restarting and stopping the program in the exercisedfunctions. AppArmor needs to handle these events as well as any other programfunction.
7 Click Scan system log for AppArmor events to parse the learning mode log files.This generates a series of questions that you must answer to guide the wizard ingenerating the security profile.
If requests to add hats appear, proceed to Chapter 5, Profiling Your Web Appli-cations Using ChangeHat (page 67).
The questions fall into two categories:
• A resource is requested by a profiled program that is not in the profile (seeFigure 3.2, “Learning Mode Exception: Controlling Access to Specific Re-sources” (page 22)). Allow or deny access to a specific resource.
• A program is executed by the profiled program and the security domaintransition has not been defined (see Figure 3.3, “Learning Mode Exception:Defining Execute Permissions for an Entry” (page 22)). Define executepermissions for an entry.
Each of these cases results in a series of questions that you must answer to addthe resource to the profile or to add the program to the profile. For an exampleof each case, see Figure 3.2, “Learning Mode Exception: Controlling Access toSpecific Resources” (page 22) and Figure 3.3, “Learning Mode Exception:Defining Execute Permissions for an Entry” (page 22). Subsequent steps describeyour options in answering these questions.
NOTE: Varying Processing Options
Depending on the type of entry processed, the available options vary.
Building and Managing Profiles with YaST 21
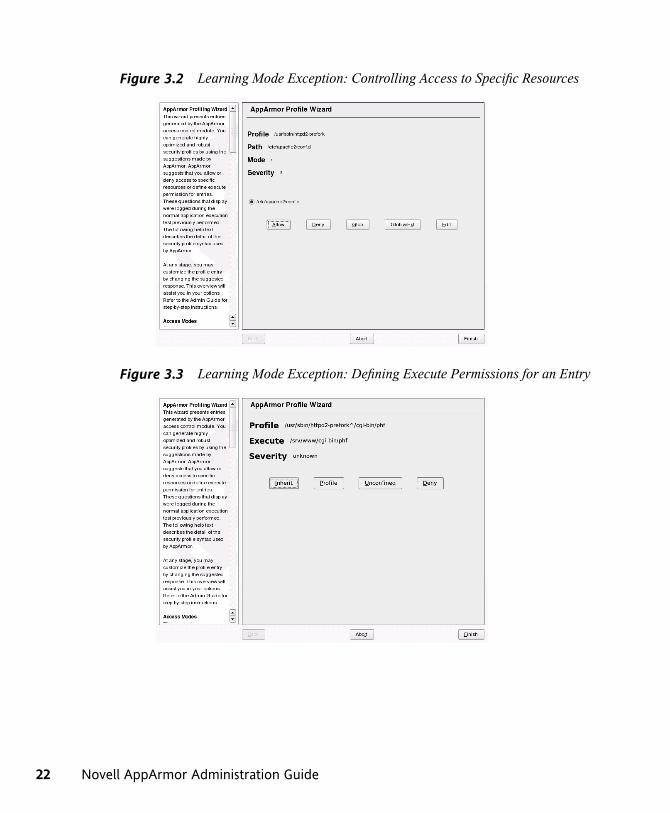
Figure 3.2 Learning Mode Exception: Controlling Access to Specific Resources
Figure 3.3 Learning Mode Exception: Defining Execute Permissions for an Entry
22 Novell AppArmor Administration Guide

8 The Add Profile Wizard begins suggesting directory path entries that have beenaccessed by the application profiled (as seen in Figure 3.2, “Learning Mode Ex-ception: Controlling Access to Specific Resources” (page 22)) or requires youto define execute permissions for entries (as seen in Figure 3.3, “Learning ModeException: Defining Execute Permissions for an Entry” (page 22)).
• For Figure 3.2: Learning Mode Exception: Controlling Access to SpecificResources: Select the option that satisfies the request for access, which couldbe a suggested include, a particular globbed version of the path, or the actualpathname. Depending on the situation, these options are available:
#includeThe section of a Novell AppArmor profile that refers to an include file.Include files give access permissions for programs. By using an include,you can give the program access to directory paths or files that are alsorequired by other programs. Using includes can reduce the size of aprofile. It is good practice to select includes when suggested.
Globbed VersionAccessed by clickingGlob. For information about globbing syntax, referto Section 4.7, “Paths and Globbing” (page 60).
Actual PathnameLiteral path that the program needs to access to run properly.
After selecting a directory path, process it as an entry to the Novell AppArmorprofile by clicking Allow or Deny. If you are not satisfied with the directorypath entry as it is displayed, you can also Glob or Edit it.
The following options are available to process the learning mode entries andbuild the profile:
AllowGrant the program access to the specified directory path entries. TheAdd ProfileWizard suggests file permission access. For more informationabout this, refer to Section 4.8, “File Permission Access Modes”(page 61).
DenyClick Deny to prevent the program from accessing the specified paths.
Building and Managing Profiles with YaST 23

GlobClicking this modifies the directory path (using wild cards) to includeall files in the suggested directory. Double-clicking it grants access toall files and subdirectories beneath the one shown. For more informationabout globbing syntax, refer to Section 4.7, “Paths and Globbing”(page 60).
Glob w/ExtModify the original directory path while retaining the filename extension.A single click causes/etc/apache2/file.ext to become/etc/apache2/*.ext, adding the wild card (asterisk) in place of the file-name. This allows the program to access all files in the suggested direc-tories that endwith the.ext extension.When you double-click it, accessis granted to all files with the particular extension and subdirectoriesbeneath the one shown.
EditEdit the highlighted line. The new edited line appears at the bottom ofthe list.
AbortAbort aa-logprof, losing all rule changes entered so far and leaving allprofiles unmodified.
FinishClose aa-logprof, saving all rule changes entered so far and modifyingall profiles.
Click Allow or Deny for each learning mode entry. These help build theNovell AppArmor profile.
NOTE
The number of learning mode entries corresponds to the complexityof the application.
• For Figure 3.3: Learning Mode Exception: Defining Execute Permissionsfor an Entry: From the following options, select the one that satisfies the re-quest for access. For detailed information about the options available, referto Section 4.8, “File Permission Access Modes” (page 61).
24 Novell AppArmor Administration Guide
InheritStay in the same security profile (parent's profile).
ProfileRequire a separate profile to exist for the executed program. When se-lecting this option, also select whether AppArmor should sanitize theenvironment when switching profiles by removing certain environmentvariables that can modify the execution behavior of the child process.Unless these variables are absolutely required to properly execute thechild process, always choose the more secure, sanitized option.
UnconfinedExecute the program without a security profile. When prompted, haveAppArmor sanitize the environment to avoid adding security risks byinheriting certain environment variables from the parent process.
WARNING: Risks of Running Unconfined
Unless absolutely necessary, do not run unconfined. Choosingthe Unconfined option executes the new program without anyprotection from AppArmor.
DenyClick Deny to prevent the program from accessing the specified paths.
AbortAbort aa-logprof, losing all rule changes entered so far and leaving allprofiles unmodified.
FinishClose aa-logprof, saving all rule changes entered so far and modifyingall profiles.
9 Repeat the previous steps if you need to execute more functionality of the appli-cation.
When you are done, click Finish. In the following pop-up, click Yes to exit theProfile Creation Wizard. The profile is saved and loaded into the AppArmormodule.
Building and Managing Profiles with YaST 25

3.2 Manually Adding a ProfileNovell AppArmor enables you to create a Novell AppArmor profile bymanually addingentries into the profile. Select the application for which to create a profile then add en-tries.
1 Start YaST and select Novell AppArmor >Manually Add Profile.
2 Browse your system to find the application for which to create a profile.
3 When you find the application, select it and click Open. A basic, empty profileappears in the AppArmor Profile Dialog window.
4 In AppArmor Profile Dialog, add, edit, or delete AppArmor profile entries byclicking the corresponding buttons and referring to Section 3.3.1, “Adding anEntry” (page 29), Section 3.3.2, “Editing an Entry” (page 31), or Section 3.3.3,“Deleting an Entry” (page 32).
5 When finished, click Done.
26 Novell AppArmor Administration Guide

3.3 Editing ProfilesAppArmor enables you to edit Novell AppArmor profiles manually by adding, editing,or deleting entries. To edit a profile, proceed as follows:
1 Start YaST and select Novell AppArmor > Edit Profile.
2 From the list of profiled applications, select the profile to edit.
3 Click Next. The AppArmor Profile Dialog window displays the profile.
Building and Managing Profiles with YaST 27

4 In the AppArmor Profile Dialog window, add, edit, or delete Novell AppArmorprofile entries by clicking the corresponding buttons and referring to Section 3.3.1,“Adding an Entry” (page 29), Section 3.3.2, “Editing an Entry” (page 31), orSection 3.3.3, “Deleting an Entry” (page 32).
5 When you are finished, click Done.
6 In the pop-up that appears, click Yes to confirm your changes to the profile andreload the AppArmor profile set.
TIP: Syntax Checking in AppArmor
AppArmor contains a syntax check that notifies you of any syntax errors inprofiles you are trying to process with the YaST AppArmor tools. If an erroroccurs, edit the profile manually as root and reload the profile set withrcapparmor reload.
28 Novell AppArmor Administration Guide

3.3.1 Adding an EntryThe Add Entry option can be found in Section 3.2, “Manually Adding a Profile”(page 26) or Section 3.3, “Editing Profiles” (page 27). When you select Add Entry, alist shows the types of entries you can add to the Novell AppArmor profile.
From the list, select one of the following:
FileIn the pop-up window, specify the absolute path of a file, including the type of ac-cess permitted. When finished, click OK.
You can use globbing if necessary. For globbing information, refer to Section 4.7,“Paths and Globbing” (page 60). For file access permission information, refer toSection 4.8, “File Permission Access Modes” (page 61).
DirectoryIn the pop-up window, specify the absolute path of a directory, including the typeof access permitted. You can use globbing if necessary. When finished, click OK.
For globbing information, refer to Section 4.7, “Paths and Globbing” (page 60).For file access permission information, refer to Section 4.8, “File Permission AccessModes” (page 61).
Building and Managing Profiles with YaST 29
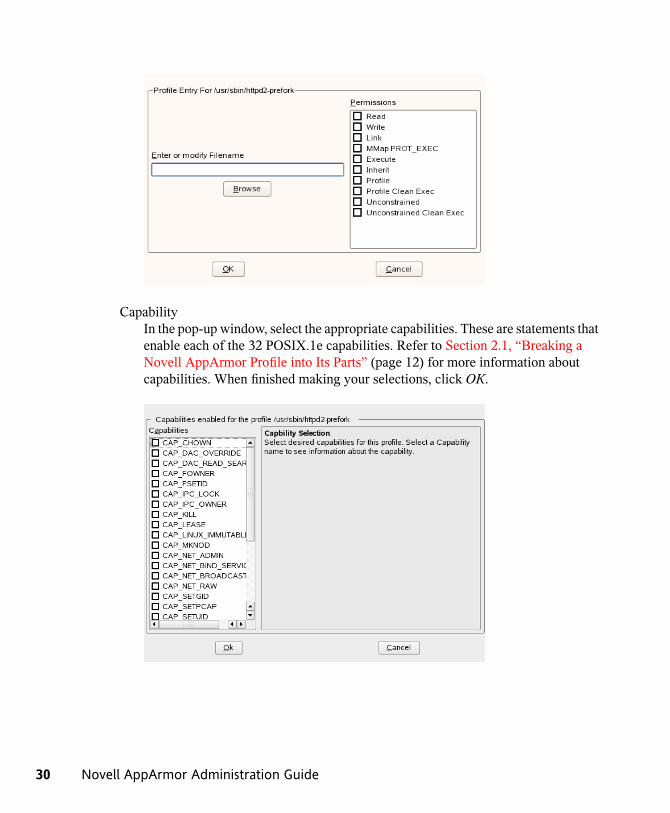
CapabilityIn the pop-up window, select the appropriate capabilities. These are statements thatenable each of the 32 POSIX.1e capabilities. Refer to Section 2.1, “Breaking aNovell AppArmor Profile into Its Parts” (page 12) for more information aboutcapabilities. When finished making your selections, click OK.
30 Novell AppArmor Administration Guide

IncludeIn the pop-up window, browse to the files to use as includes. Includes are directivesthat pull in components of other Novell AppArmor profiles to simplify profiles.For more information, refer to Section 2.2, “#include Statements” (page 14).
HatIn the pop-up window, specify the name of the subprofile (hat) to add to your currentprofile and click Create Hat. For more information, refer to Chapter 5, ProfilingYour Web Applications Using ChangeHat (page 67).
3.3.2 Editing an EntryWhen you select Edit Entry, the file browser pop-up window opens. From here, editthe selected entry.
Building and Managing Profiles with YaST 31

In the pop-up window, specify the absolute path of a file, including the type of accesspermitted. You can use globbing if necessary. When finished, click OK.
For globbing information, refer to Section 4.7, “Paths and Globbing” (page 60). Forfile access permission information, refer to Section 4.8, “File Permission AccessModes”(page 61).
3.3.3 Deleting an EntryTo delete an entry in a given profile, selectDelete Entry. AppArmor removes the selectedprofile entry.
3.4 Deleting a ProfileAppArmor enables you to delete an AppArmor profile manually. Simply select theapplication for which to delete a profile then delete it as follows:
1 Start YaST and select Novell AppArmor > Delete Profile.
2 Select the profile to delete.
3 Click Next.
32 Novell AppArmor Administration Guide

4 In the pop-up that opens, click Yes to delete the profile and reload the AppArmorprofile set.
3.5 Updating Profiles from Log EntriesThe Novell AppArmor profile wizard uses aa-logprof, the tool that scans log files andenables you to update profiles. aa-logprof tracks messages from the Novell AppArmormodule that represent exceptions for all profiles running on your system. These excep-tions represent the behavior of the profiled application that is outside of the profiledefinition for the program. You can add the new behavior to the relevant profile byselecting the suggested profile entry.
1 Start YaST and select Novell AppArmor > Update Profile Wizard.
Running Update Profile Wizard (aa-logprof) parses the learning mode log files.This generates a series of questions that you must answer to guide aa-logprof togenerate the security profile. The exact procedure is the same as with creating anew profile. Refer to Step 7 (page 21) in Section 3.1, “Adding a Profile Usingthe Wizard” (page 19) for details.
Building and Managing Profiles with YaST 33
2 When you are done, click Finish. In the following pop-up, click Yes to exit theAdd Profile Wizard. The profile is saved and loaded into the Novell AppArmormodule.
3.6 Managing Novell AppArmor andSecurity Event Status
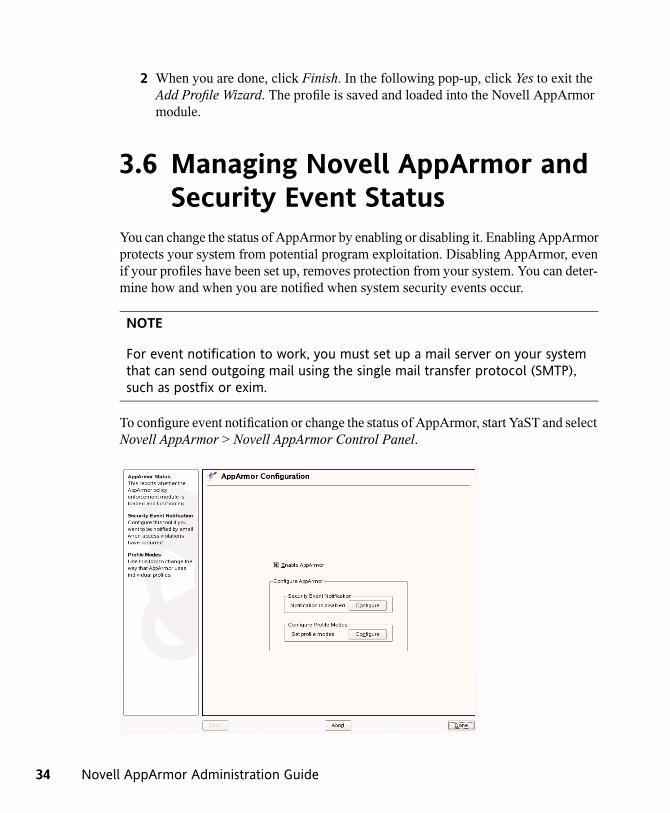
You can change the status of AppArmor by enabling or disabling it. Enabling AppArmorprotects your system from potential program exploitation. Disabling AppArmor, evenif your profiles have been set up, removes protection from your system. You can deter-mine how and when you are notified when system security events occur.
NOTE
For event notification to work, you must set up a mail server on your systemthat can send outgoing mail using the single mail transfer protocol (SMTP),such as postfix or exim.
To configure event notification or change the status of AppArmor, start YaST and selectNovell AppArmor > Novell AppArmor Control Panel.
34 Novell AppArmor Administration Guide

From the AppArmor Configuration screen, determine whether Novell AppArmor andsecurity event notification are running by looking for a status message that reads enabledor configure the mode of individual profiles.
To change the status of Novell AppArmor, continue as described in Section 3.6.1,“Changing Novell AppArmor Status” (page 35). To change the mode of individualprofiles, continue as described in Section 3.6.2, “Changing the Mode of IndividualProfiles” (page 35). To configure security event notification, continue as described inSection 6.2, “Configuring Security Event Notification” (page 80).
3.6.1 Changing Novell AppArmor StatusWhen you change the status of AppArmor, set it to enabled or disabled.WhenAppArmoris enabled, it is installed, running, and enforcing the AppArmor security policies.
1 Start YaST and select Novell AppArmor > AppArmor Control Panel.
2 Enable AppArmor by checking Enable AppArmor or disable AppArmor by des-electing it.
3 Click Done in the AppArmor Configuration window.
4 Click File > Quit in the YaST Control Center.
3.6.2 Changing the Mode of IndividualProfiles
AppArmor can apply profiles in two different modes. In complain or learning mode,violations of AppArmor profile rules, such as the profiled program accessing files notpermitted by the profile, are detected. The violations are permitted, but also logged.This mode is convenient for developing profiles and is used by the AppArmor tools forgenerating profiles. Loading a profile in enforce mode enforces the policy defined inthe profile and reports policy violation attempts to syslogd.
Building and Managing Profiles with YaST 35

The Profile Modes dialog allows you to view and edit the mode of currently loadedAppArmor profiles. This feature is useful for determining the status of your systemduring profile development. During the course of systemic profiling (see Section 4.6.2,“Systemic Profiling” (page 42)), you can use this tool to adjust and monitor the scopeof the profiles for which you are learning behavior.
To edit an application's profile mode, proceed as follows:
1 Start YaST and select Novell AppArmor > AppArmor Control Panel.
2 In the Configure Profile Modes section, select Configure.
3 Select the profile for which to change the mode.
4 Select Toggle Mode to set this profile to complain mode or to enforce mode.
5 Apply your settings and leave YaST with Done.
To change the mode of all profiles, use Set All to Enforce or Set All to Complain.
TIP: Listing the Profiles Available
By default, only active profiles are listed—any profile that has a matching ap-plication installed on your system. To set up a profile before installing the re-spective application, click Show All Profiles and select the profile to configurefrom the list that appears.
36 Novell AppArmor Administration Guide

4Building Profiles from theCommand LineNovell® AppArmor provides the ability to use a command line interface rather than agraphical interface to manage and configure your system security. Track the status ofNovell AppArmor and create, delete, or modify AppArmor profiles using the AppArmorcommand line tools.
TIP: Background Information
Before starting to manage your profiles using the AppArmor command linetools, check out the general introduction to AppArmor given in Chapter 1,Immunizing Programs (page 1) and Chapter 2, Profile Components and Syntax(page 11).
4.1 Checking the AppArmor ModuleStatus
An AppArmor module can be in any one of three states:
UnloadedThe AppArmor module is not loaded into the kernel.
RunningThe AppArmor module is loaded into the kernel and is enforcing AppArmor pro-gram policies.
Building Profiles from the Command Line 37

StoppedThe AppArmor module is loaded into the kernel, but no policies are enforced.
Detect the state of the AppArmor module by inspecting /sys/kernel/security/apparmor/profiles. If cat/sys/kernel/security/apparmor/profiles reports a list of profiles,AppArmor is running. If it is empty and returns nothing, AppArmor is stopped. If thefile does not exist, AppArmor is unloaded.
Manage AppArmor through the script rcapparmor, which can perform the followingoperations:
rcapparmor startBehavior depends on the AppArmor module state. If it is unloaded, start loadsthe module and starts it, putting it in the running state. If it is stopped, startcauses the module to rescan the AppArmor profiles usually found in /etc/apparmor.d and puts the module in the running state. If the module is alreadyrunning, start reports a warning and takes no action.
rcapparmor stopStops the AppArmor module if it is running by removing all profiles from kernelmemory, effectively disabling all access controls, and putting the module into thestopped state. If the AppArmor module is unloaded or already stopped, stop triesto unload the profiles again, but nothing happens.
rcapparmor restartCauses the AppArmor module to rescan the profiles in /etc/apparmor.dwithout unconfining running processes. Freshly created profiles are enforced andrecently deleted ones are removed from the /etc/apparmor.d directory.
rcapparmor killUnconditionally removes the AppArmor module from the kernel. This is unsafe,because unloading modules from the Linux kernel is unsafe. This command isprovided only for debugging and emergencies when the module might need to beremoved.
38 Novell AppArmor Administration Guide

WARNING
AppArmor is a powerful access control system and it is possible to lockyourself out of your own machine to the point where you must boot themachine from a rescue medium (such as CD 1 of SUSE Linux Enterprise)to regain control.
To prevent such a problem, always ensure that you have a running, uncon-fined, root login on the machine being configured when you restart theAppArmor module. If you damage your system to the point where loginsare no longer possible (for example, by breaking the profile associatedwith the SSH daemon), you can repair the damage using your running rootprompt then restart the AppArmor module.
4.2 Building AppArmor ProfilesThe AppArmor module profile definitions are stored in the /etc/apparmor.d di-rectory as plain text files. For a detailed description of the syntax of these files, referto Chapter 2, Profile Components and Syntax (page 11).
All files in the /etc/apparmor.d directory are interpreted as profiles and areloaded as such. Renaming files in that directory is not an effective way of preventingprofiles from being loaded. You must remove profiles from this directory to preventthem from being read and evaluated effectively.
You can use a text editor, such as vim, to access and make changes to these profiles.The following options contain detailed steps for building profiles:
Adding or Creating AppArmor ProfilesRefer to Section 4.3, “Adding or Creating an AppArmor Profile” (page 40)
Editing AppArmor ProfilesRefer to Section 4.4, “Editing an AppArmor Profile” (page 40)
Deleting AppArmor ProfilesRefer to Section 4.5, “Deleting an AppArmor Profile” (page 40)
Building Profiles from the Command Line 39
4.3 Adding or Creating an AppArmorProfile
To add or create an AppArmor profile for an application, you can use a systemic orstand-alone profiling method, depending on your needs. Learn more about these twoapproaches in Section 4.6, “Two Methods of Profiling” (page 41).
4.4 Editing an AppArmor ProfileThe following steps describe the procedure for editing an AppArmor profile:
1 If you are not currently logged in as root, enter su in a terminal window.
2 Enter the root password when prompted.
3 Go to the profile directory with cd /etc/apparmor.d/.
4 Enter ls to view all profiles currently installed.
5 Open the profile to edit in a text editor, such as vim.
6 Make the necessary changes then save the profile.
7 Restart AppArmor by entering rcapparmor restart in a terminal window.
4.5 Deleting an AppArmor ProfileThe following steps describe the procedure for deleting an AppArmor profile.
1 If you are not currently logged in as root, enter su in a terminal window.
2 Enter the root password when prompted.
3 Go to the AppArmor directory with cd /etc/apparmor.d/.
40 Novell AppArmor Administration Guide

4 Enter ls to view all the AppArmor profiles that are currently installed.
5 Delete the profile with rm profilename.
6 Restart AppArmor by entering rcapparmor restart in a terminal window.
4.6 Two Methods of ProfilingGiven the syntax for AppArmor profiles in Chapter 2, Profile Components and Syntax(page 11), you could create profiles without using the tools. However, the effort involvedwould be substantial. To avoid such a hassle, use the AppArmor tools to automate thecreation and refinement of profiles.
There are two ways to approach AppArmor profile creation. Tools are available forboth methods.
Stand-Alone ProfilingA method suitable for profiling small applications that have a finite run time, suchas user client applications like mail clients. For more information, refer to Sec-tion 4.6.1, “Stand-Alone Profiling” (page 42).
Systemic ProfilingA method suitable for profiling large numbers of programs all at once and forprofiling applications that may run for days, weeks, or continuously across reboots,such as network server applications like Web servers and mail servers. For moreinformation, refer to Section 4.6.2, “Systemic Profiling” (page 42).
Automated profile development becomes more manageable with the AppArmor tools:
1 Decide which profiling method suits your needs.
2 Perform a static analysis. Run either aa-genprof or aa-autodep, depending on theprofiling method chosen.
3 Enable dynamic learning. Activate learning mode for all profiled programs.
Building Profiles from the Command Line 41

4.6.1 Stand-Alone ProfilingStand-alone profile generation and improvement is managed by a program called aa-genprof. This method is easy because aa-genprof takes care of everything, but is limitedbecause it requires aa-genprof to run for the entire duration of the test run of your pro-gram (you cannot reboot the machine while you are still developing your profile).
To use aa-genprof for the stand-alone method of profiling, refer to Section “aa-gen-prof—Generating Profiles” (page 47).
4.6.2 Systemic ProfilingThis method is called systemic profiling because it updates all of the profiles on thesystem at once, rather than focusing on the one or few targeted by aa-genprof or stand-alone profiling. With systemic profiling, profile construction and improvement aresomewhat less automated, but more flexible. This method is suitable for profiling long-running applications whose behavior continues after rebooting or a large number ofprograms all at once.
Build an AppArmor profile for a group of applications as follows:
1 Create profiles for the individual programs that make up your application.
Although this approach is systemic, AppArmor only monitors those programswith profiles and their children. To get AppArmor to consider a program, youmust at least have aa-autodep create an approximate profile for it. To create thisapproximate profile, refer to Section “aa-autodep—Creating Approximate Pro-files” (page 44).
2 Put relevant profiles into learning or complain mode.
Activate learning or complain mode for all profiled programs by enteringaa-complain /etc/apparmor.d/* in a terminal window while loggedin as root. This functionality is also available through the YaST Profile Modemodule, described in Section 3.6.2, “Changing the Mode of Individual Profiles”(page 35).
When in learningmode, access requests are not blocked even if the profile dictatesthat they should be. This enables you to run through several tests (as shown in
42 Novell AppArmor Administration Guide

Step 3 (page 43)) and learn the access needs of the program so it runs properly.With this information, you can decide how secure to make the profile.
Refer to Section “aa-complain—Entering Complain or LearningMode” (page 45)for more detailed instructions for using learning or complain mode.
3 Exercise your application.
Run your application and exercise its functionality. How much to exercise theprogram is up to you, but you need the program to access each file representingits access needs. Because the execution is not being supervised by aa-genprof,this step can go on for days or weeks and can span complete system reboots.
4 Analyze the log.
In systemic profiling, run aa-logprof directly instead of letting aa-genprof run it(as in stand-alone profiling). The general form of aa-logprof is:aa-logprof [ -d /path/to/profiles ] [ -f /path/to/logfile ]
Refer to Section “aa-logprof—Scanning the System Log” (page 54) for moreinformation about using aa-logprof.
5 Repeat Step 3 (page 43) and Step 4 (page 43).
This generates optimum profiles. An iterative approach captures smaller datasets that can be trained and reloaded into the policy engine. Subsequent iterationsgenerate fewer messages and run faster.
6 Edit the profiles.
You might want to review the profiles that have been generated. You can openand edit the profiles in /etc/apparmor.d/ using vim.
7 Return to enforce mode.
This is when the system goes back to enforcing the rules of the profiles, not justlogging information. This can be done manually by removing theflags=(complain) text from the profiles or automatically by using theaa-enforce command, which works identically to the aa-complain com-mand, except it sets the profiles to enforce mode. This functionality is also
Building Profiles from the Command Line 43
available through the YaST Profile Mode module, described in Section 3.6.2,“Changing the Mode of Individual Profiles” (page 35).
To ensure that all profiles are taken out of complain mode and put into enforcemode, enter aa-enforce /etc/apparmor.d/*.
8 Rescan all profiles.
To have AppArmor rescan all of the profiles and change the enforcement modein the kernel, enter rcapparmor restart.
4.6.3 Summary of Profiling ToolsAll of the AppArmor profiling utilities are provided by the apparmor-utils RPMpackage and are stored in /usr/sbin. Each tool has a different purpose.
aa-autodep—Creating Approximate ProfilesThis creates an approximate profile for the program or application selected. You cangenerate approximate profiles for binary executables and interpreted script programs.The resulting profile is called “approximate” because it does not necessarily containall of the profile entries that the program needs to be properly confined by AppArmor.The minimum aa-autodep approximate profile has at least a base include directive,which contains basic profile entries needed by most programs. For certain types ofprograms, aa-autodep generates a more expanded profile. The profile is generated byrecursively calling ldd(1) on the executables listed on the command line.
To generate an approximate profile, use the aa-autodep program. The program argumentcan be either the simple name of the program, which aa-autodep finds by searchingyour shell's path variable, or it can be a fully qualified path. The program itself can beof any type (ELF binary, shell script, Perl script, etc.). aa-autodep generates an approx-imate profile to improve through the dynamic profiling that follows.
The resulting approximate profile is written to the/etc/apparmor.d directory usingthe AppArmor profile naming convention of naming the profile after the absolute pathof the program, replacing the forward slash (/) characters in the path with period (.)characters. The general form of aa-autodep is to enter the following in a terminal windowwhen logged in as root:
44 Novell AppArmor Administration Guide

aa-autodep [ -d /path/to/profiles ] [program1 program2...]
If you do not enter the program name or names, you are prompted for them./path/to/profiles overrides the default location of /etc/apparmor.d,should you keep profiles in a location other than the default.
To begin profiling, you must create profiles for each main executable service that ispart of your application (anything that might start without being a child of anotherprogram that already has a profile). Finding all such programs depends on the applicationin question. Here are several strategies for finding such programs:
DirectoriesIf all the programs to profile are in one directory and there are no other programsin that directory, the simple command aa-autodep/path/to/your/programs/* creates basic profiles for all programs in thatdirectory.
ps commandYou can run your application and use the standard Linux ps command to find allprocesses running. Then manually hunt down the location of these programs andrun the aa-autodep for each one. If the programs are in your path, aa-autodepfinds them for you. If they are not in your path, the standard Linux command findmight be helpful in finding your programs. Execute find / -name'my_application' -print to determine an application's path(my_application being an example application). You may use wild cards ifappropriate.
aa-complain—Entering Complain or Learning ModeThe complain or learning mode tool (aa-complain) detects violations of AppArmorprofile rules, such as the profiled program accessing files not permitted by the profile.The violations are permitted, but also logged. To improve the profile, turn complainmode on, run the program through a suite of tests to generate log events that characterizethe program's access needs, then postprocess the log with the AppArmor tools totransform log events into improved profiles.
Manually activating complain mode (using the command line) adds a flag to the top ofthe profile so that /bin/foo becomes /bin/foo flags=(complain). To usecomplain mode, open a terminal window and enter one of the following lines as root:
Building Profiles from the Command Line 45
• If the example program (program1) is in your path, use:aa-complain [program1 program2 ...]
• If the program is not in your path, specify the entire path as follows:aa-complain /sbin/program1
• If the profiles are not in /etc/apparmor.d, use the following to override thedefault location:aa-complain /path/to/profiles/ program1
• Specify the profile for program1 as follows:aa-complain /etc/apparmor.d/sbin.program1
Each of the above commands activates the complain mode for the profiles or programslisted. If the program name does not include its entire path, aa-complain searches $PATHfor the program. For instance, aa-complain /usr/sbin/* finds profiles associ-ated with all of the programs in /usr/sbin and puts them into complain mode.aa-complain /etc/apparmor.d/* puts all of the profiles in/etc/apparmor.d into complain mode.
TIP: Toggling Profile Mode with YaST
YaST offers a graphical front-end for toggling complain and enforce mode. SeeSection 3.6.2, “Changing the Mode of Individual Profiles” (page 35) for infor-mation.
aa-enforce—Entering Enforce ModeThe enforce mode detects violations of AppArmor profile rules, such as the profiledprogram accessing files not permitted by the profile. The violations are logged and notpermitted. The default is for enforce mode to be enabled. To log the violations only,but still permit them, use complain mode. Enforce toggles with complain mode.
Manually activating enforce mode (using the command line) adds a flag to the top ofthe profile so that /bin/foo becomes /bin/foo flags=(enforce). To useenforce mode, open a terminal window and enter one of the following lines as root.
46 Novell AppArmor Administration Guide
• If the example program (program1) is in your path, use:aa-enforce [program1 program2 ...]
• If the program is not in your path, specify the entire path, as follows:aa-enforce /sbin/program1
• If the profiles are not in /etc/apparmor.d, use the following to override thedefault location:aa-enforce /path/to/profiles/program1
• Specify the profile for program1 as follows:aa-enforce /etc/apparmor.d/sbin.program1
Each of the above commands activates the enforce mode for the profiles and programslisted.
If you do not enter the program or profile names, you are prompted to enter one./path/to/profiles overrides the default location of /etc/apparmor.d.
The argument can be either a list of programs or a list of profiles. If the program namedoes not include its entire path, aa-enforce searches $PATH for the program.
TIP: Toggling Profile Mode with YaST
YaST offers a graphical front-end for toggling complain and enforce mode. SeeSection 3.6.2, “Changing the Mode of Individual Profiles” (page 35) for infor-mation.
aa-genprof—Generating Profilesaa-genprof is AppArmor's profile generating utility. It runs aa-autodep on the specifiedprogram, creating an approximate profile (if a profile does not already exist for it), setsit to complain mode, reloads it into AppArmor, marks the log, and prompts the user toexecute the program and exercise its functionality. Its syntax is as follows:aa-genprof [ -d /path/to/profiles ] program
Building Profiles from the Command Line 47
To create a profile for the the Apache Web server program httpd2-prefork, do the fol-lowing as root:
1 Enter rcapache2 stop.
2 Next, enter aa-genprof httpd2-prefork.
Now aa-genprof does the following:
1. Resolves the full path of httpd2-prefork using your shell's path variables.You can also specify a full path. On SUSE Linux Enterprise, the default fullpath is /usr/sbin/httpd2-prefork.
2. Checks to see if there is an existing profile for httpd2-prefork. If there isone, it updates it. If not, it creates one using the aa-autodep as described inSection 4.6.3, “Summary of Profiling Tools” (page 44).
3. Puts the profile for this program into learning or complain mode so thatprofile violations are logged but are permitted to proceed. A log event lookslike this (see /var/log/audit/audit.log):
type=APPARMOR msg=audit(1145623282.763:447): PERMITTING r access to /usr/lib/apache2/mod_setenvif.so (httpd2-prefork(5312) profile /usr/sbin/httpd2-prefork active /usr/sbin/httpd2-prefork)
If you are not running the audit daemon, the AppArmor events are loggedto /var/log/messages:
Apr 21 14:43:27 figwit kernel: audit(1145623407.898:449): PERMITTING r access to /usr/lib/apache2/mod_setenvif.so (httpd2-prefork(5425) profile /usr/sbin/httpd2-prefork active /usr/sbin/httpd2-prefork)
They also can be viewed using the dmesg command:
audit(1145623407.898:449): PERMITTING r access to /usr/lib/apache2/mod_setenvif.so (httpd2-prefork(5425) profile /usr/sbin/httpd2-prefork active /usr/sbin/httpd2-prefork)
4. Marks the log with a beginning marker of log events to consider. For exam-ple:
48 Novell AppArmor Administration Guide

Sep 13 17:48:52 figwit root: GenProf: e2ff78636296f16d0b5301209a04430d
3 When prompted by the tool, run the application to profile in another terminalwindow and perform as many of the application functions as possible. Thus, thelearning mode can log the files and directories to which the program requiresaccess in order to function properly. For example, in a new terminal window,enter rcapache2 start.
4 Select from the following options that are available in the aa-logprof terminalwindow after you have executed the program function:
• S runs aa-logprof on the system log from where it was marked when aa-genprof was started and reloads the profile. If system events exist in the log,AppArmor parses the learning mode log files. This generates a series ofquestions that you must answer to guide aa-genprof in generating the securityprofile.
• F exits the tool and returns to the main menu.
NOTE
If requests to add hats appear, proceed to Chapter 5, Profiling Your WebApplications Using ChangeHat (page 67).
5 Answer two types of questions:
• A resource is requested by a profiled program that is not in the profile (seeExample 4.1, “Learning Mode Exception: Controlling Access to SpecificResources” (page 50)).
• A program is executed by the profiled program and the security domaintransition has not been defined (see Example 4.2, “LearningMode Exception:Defining Execute Permissions for an Entry” (page 51)).
Each of these categories results in a series of questions that you must answer toadd the resource or program to the profile. Example 4.1, “LearningMode Excep-tion: Controlling Access to Specific Resources” (page 50) and Example 4.2,“Learning Mode Exception: Defining Execute Permissions for an Entry”
Building Profiles from the Command Line 49

(page 51) provide examples of each one. Subsequent steps describe your optionsin answering these questions.
• Dealing with execute accesses is complex. You must decide how to proceedwith this entry regarding which execute permission type to grant to this entry:
Example 4.1 Learning Mode Exception: Controlling Access to Specific ResourcesReading log entries from /var/log/audit/audit.log.Updating AppArmor profiles in /etc/apparmor.d.
Profile: /usr/sbin/xinetdProgram: xinetdExecute: /usr/lib/cups/daemon/cups-lpdSeverity: unknown
[(I)nherit] / (P)rofile / (U)nconfined / (D)eny / Abo(r)t / (F)inish
Inherit (ix)The child inherits the parent's profile, running with the same accesscontrols as the parent. This mode is useful when a confined programneeds to call another confined program without gaining the permissionsof the target's profile or losing the permissions of the current profile.This mode is often used when the child program is a helper application,such as the /usr/bin/mail client using less as a pager or theMozilla* Web browser using Adobe Acrobat* to display PDF files.
Profile (px)The child runs using its own profile, which must be loaded into the ker-nel. If the profile is not present, attempts to execute the child fail withpermission denied. This is most useful if the parent program is invokinga global service, such as DNS lookups or sendingmail with your system'sMTA.
Choose the profile with clean exec (Px) option to scrub the environmentof environment variables that could modify execution behavior whenpassed to the child process.
Unconfined (ux)The child runs completely unconfined without any AppArmor profileapplied to the executed resource.
50 Novell AppArmor Administration Guide

Choose the unconfined with clean exec (Ux) option to scrub the environ-ment of environment variables that could modify execution behaviorwhen passed to the child process. This option introduces a security vul-nerability that could be used to exploit AppArmor. Only use it as a lastresort.
mmap (m)This permission denotes that the program running under the profile canaccess the resource using the mmap system call with the flagPROT_EXEC. This means that the data mapped in it can be executed.You are prompted to include this permission if it is requested during aprofiling run.
DenyPrevents the program from accessing the specified directory path entries.AppArmor then continues to the next event.
AbortAborts aa-logprof, losing all rule changes entered so far and leaving allprofiles unmodified.
FinishCloses aa-logprof, saving all rule changes entered so far and modifyingall profiles.
• Example 4.2, “LearningMode Exception: Defining Execute Permissions foran Entry” (page 51) shows AppArmor suggesting directory path entries thathave been accessed by the application being profiled. It might also requireyou to define execute permissions for entries.
Example 4.2 LearningMode Exception: Defining Execute Permissions for an EntryAdding /bin/ps ix to profile.
Profile: /usr/sbin/xinetdPath: /etc/hosts.allowNew Mode: r
[1 - /etc/hosts.allow]
[(A)llow] / (D)eny / (N)ew / (G)lob / Glob w/(E)xt / Abo(r)t / (F)inish
Building Profiles from the Command Line 51
AppArmor provides one or more paths or includes. By entering the optionnumber, select the desired options then proceed to the next step.
NOTE
All of these options are not always presented in the AppArmor menu.
#includeThis is the section of an AppArmor profile that refers to an include file,which procures access permissions for programs. By using an include,you can give the program access to directory paths or files that are alsorequired by other programs. Using includes can reduce the size of aprofile. It is good practice to select includes when suggested.
Globbed VersionThis is accessed by selecting Glob as described in the next step. For in-formation about globbing syntax, refer to Section 4.7, “Paths and Glob-bing” (page 60).
Actual PathThis is the literal path to which the program needs access so that it canrun properly.
After you select the path or include, process it as an entry into the AppArmorprofile by selecting Allow orDeny. If you are not satisfied with the directorypath entry as it is displayed, you can also Glob it.
The following options are available to process the learning mode entries andbuild the profile:
Select EnterAllows access to the selected directory path.
AllowAllows access to the specified directory path entries. AppArmor suggestsfile permission access. For more information, refer to Section 4.8, “FilePermission Access Modes” (page 61).
DenyPrevents the program from accessing the specified directory path entries.AppArmor then continues to the next event.
52 Novell AppArmor Administration Guide

NewPrompts you to enter your own rule for this event, allowing you tospecify a regular expression. If the expression does not actually satisfythe event that prompted the question in the first place, AppArmor asksfor confirmation and lets you reenter the expression.
GlobSelect a specific path or create a general rule using wild cards that matcha broader set of paths. To select any of the offered paths, enter thenumber that is printed in front of the path then decide how to proceedwith the selected item.
For more information about globbing syntax, refer to Section 4.7, “Pathsand Globbing” (page 60).
Glob w/ExtThis modifies the original directory path while retaining the filenameextension. For example,/etc/apache2/file.ext becomes/etc/apache2/*.ext, adding the wild card (asterisk) in place of the file-name. This allows the program to access all files in the suggested direc-tory that end with the .ext extension.
AbortAborts aa-logprof, losing all rule changes entered so far and leaving allprofiles unmodified.
FinishCloses aa-logprof, saving all rule changes entered so far and modifyingall profiles.
6 To view and edit your profile using vim, enter vim/etc/apparmor.d/profilename in a terminal window.
7 Restart AppArmor and reload the profile set including the newly created oneusing the rcapparmor restart command.
Building Profiles from the Command Line 53
aa-logprof—Scanning the System Logaa-logprof is an interactive tool used to review the learning or complain mode outputfound in the log entries in /var/log/audit/audit.log or /var/log/messages (if auditd is not running) and generate new entries in AppArmor securityprofiles.
When you run aa-logprof, it begins to scan the log files produced in learning or complainmode and, if there are new security events that are not covered by the existing profileset, it gives suggestions for modifying the profile. The learning or complain mode tracesprogram behavior and enters it in the log. aa-logprof uses this information to observeprogram behavior.
If a confined program forks and executes another program, aa-logprof sees this andasks the user which execution mode should be used when launching the child process.The execution modes ix, px, Px, ux, and Ux are options for starting the child process.If a separate profile exists for the child process, the default selection is px. If one doesnot exist, the profile defaults to ix. Child processes with separate profiles have aa-autodeprun on them and are loaded into AppArmor, if it is running.
When aa-logprof exits, profiles are updated with the changes. If the AppArmor moduleis running, the updated profiles are reloaded and, if any processes that generated secu-rity events are still running in the null-complain-profile, those processes are set to rununder their proper profiles.
To run aa-logprof, enter aa-logprof into a terminal window while logged in asroot. The following options can be used for aa-logprof:
aa-logprof -d /path/to/profile/directory/Specifies the full path to the location of the profiles if the profiles are not locatedin the standard directory, /etc/apparmor.d/.
aa-logprof -f /path/to/logfile/Specifies the full path to the location of the log file if the log file is not located inthe default directory, /var/log/audit/audit.log or /var/log/messages (if auditd is not running).
54 Novell AppArmor Administration Guide

aa-logprof -m "string marker in logfile"Marks the starting point for aa-logprof to look in the system log. aa-logprof ignoresall events in the system log before the specified mark. If the mark contains spaces,it must be surrounded by quotes to work correctly. For example:aa-logprof -m"17:04:21"
orlogprof -m e2ff78636296f16d0b5301209a04430d
aa-logprof scans the log, asking you how to handle each logged event. Each questionpresents a numbered list of AppArmor rules that can be added by pressing the numberof the item on the list.
By default, aa-logprof looks for profiles in /etc/apparmor.d/ and scans the login /var/log/messages. In many cases, running aa-logprof as root is enoughto create the profile.
However, there might be times when you need to search archived log files, such as ifthe program exercise period exceeds the log rotation window (when the log file isarchived and a new log file is started). If this is the case, you can enter zcat -f `ls-1tr /var/log/messages*` | aa-logprof -f -.
aa-logprof Example 1The following is an example of how aa-logprof addresses httpd2-prefork accessing thefile /etc/group. [] indicates the default option.
In this example, the access to /etc/group is part of httpd2-prefork accessing nameservices. The appropriate response is 1, which includes a predefined set of AppArmorrules. Selecting 1 to #include the name service package resolves all of the futurequestions pertaining to DNS lookups and also makes the profile less brittle in that anychanges to DNS configuration and the associated name service profile package can bemade just once, rather than needing to revise many profiles.
Profile: /usr/sbin/httpd2-preforkPath: /etc/groupNew Mode: r
[1 - #include <abstractions/nameservice>] 2 - /etc/group[(A)llow] / (D)eny / (N)ew / (G)lob / Glob w/(E)xt / Abo(r)t / (F)inish
Building Profiles from the Command Line 55
Select one of the following responses:
Select EnterTriggers the default action, which is, in this example, allowing access to the specifieddirectory path entry.
AllowAllows access to the specified directory path entries. AppArmor suggests file per-mission access. For more information about this, refer to Section 4.8, “File Permis-sion Access Modes” (page 61).
DenyPrevents the program from accessing the specified directory path entries. AppArmorthen continues to the next event.
NewPrompts you to enter your own rule for this event, allowing you to specify whateverform of regular expression you want. If the expression entered does not actuallysatisfy the event that prompted the question in the first place, AppArmor asks forconfirmation and lets you reenter the expression.
GlobSelect either a specific path or create a general rule using wild cards that matcheson a broader set of paths. To select any of the offered paths, enter the number thatis printed in front of the paths then decide how to proceed with the selected item.
For more information about globbing syntax, refer to Section 4.7, “Paths andGlobbing” (page 60).
Glob w/ExtThis modifies the original directory path while retaining the filename extension.For example,/etc/apache2/file.ext becomes/etc/apache2/*.ext,adding the wild card (asterisk) in place of the filename. This allows the programto access all files in the suggested directory that end with the .ext extension.
AbortAborts aa-logprof, losing all rule changes entered so far and leaving all profilesunmodified.
FinishCloses aa-logprof, saving all rule changes entered so far and modifying all profiles.
56 Novell AppArmor Administration Guide
aa-logprof Example 2For example, when profiling vsftpd, see this question:Profile: /usr/sbin/vsftpdPath: /y2k.jpgNew Mode: r
[1 - /y2k.jpg]
(A)llow / [(D)eny] / (N)ew / (G)lob / Glob w/(E)xt / Abo(r)t / (F)inish
Several items of interest appear in this question. First, note that vsftpd is asking for apath entry at the top of the tree, even though vsftpd on SUSE Linux Enterprise servesFTP files from /srv/ftp by default. This is because httpd2-prefork uses chroot and,for the portion of the code inside the chroot jail, AppArmor sees file accesses in termsof the chroot environment rather than the global absolute path.
The second item of interest is that you might want to grant FTP read access to all JPEGfiles in the directory, so you could use Glob w/Ext and use the suggested path of/*.jpg. Doing so collapses all previous rules granting access to individual .jpg filesand forestalls any future questions pertaining to access to .jpg files.
Finally, you might want to grant more general access to FTP files. If you select Globin the last entry, aa-logprof replaces the suggested path of /y2k.jpg with /*. Alter-natively, you might want to grant even more access to the entire directory tree, in whichcase you could use theNew path option and enter /**.jpg (which would grant accessto all .jpg files in the entire directory tree) or /** (which would grant access to allfiles in the directory tree).
These items deal with read accesses. Write accesses are similar, except that it is goodpolicy to be more conservative in your use of regular expressions for write accesses.Dealing with execute accesses is more complex. Find an example in Example 4.1,“Learning Mode Exception: Controlling Access to Specific Resources” (page 50).
In the following example, the /usr/bin/mail mail client is being profiled and aa-logprof has discovered that /usr/bin/mail executes/usr/bin/less as a helperapplication to “page” long mail messages. Consequently, it presents this prompt:
/usr/bin/nail -> /usr/bin/less(I)nherit / (P)rofile / (U)nconfined / (D)eny
Building Profiles from the Command Line 57
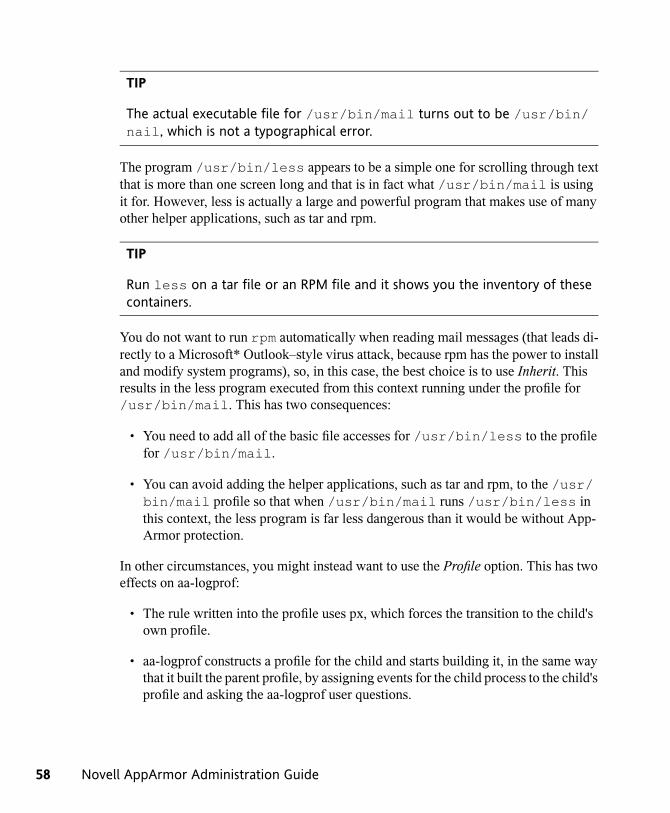
TIP
The actual executable file for /usr/bin/mail turns out to be /usr/bin/nail, which is not a typographical error.
The program /usr/bin/less appears to be a simple one for scrolling through textthat is more than one screen long and that is in fact what /usr/bin/mail is usingit for. However, less is actually a large and powerful program that makes use of manyother helper applications, such as tar and rpm.
TIP
Run less on a tar file or an RPM file and it shows you the inventory of thesecontainers.
You do not want to run rpm automatically when reading mail messages (that leads di-rectly to a Microsoft* Outlook–style virus attack, because rpm has the power to installand modify system programs), so, in this case, the best choice is to use Inherit. Thisresults in the less program executed from this context running under the profile for/usr/bin/mail. This has two consequences:
• You need to add all of the basic file accesses for /usr/bin/less to the profilefor /usr/bin/mail.
• You can avoid adding the helper applications, such as tar and rpm, to the /usr/bin/mail profile so that when /usr/bin/mail runs /usr/bin/less inthis context, the less program is far less dangerous than it would be without App-Armor protection.
In other circumstances, you might instead want to use the Profile option. This has twoeffects on aa-logprof:
• The rule written into the profile uses px, which forces the transition to the child'sown profile.
• aa-logprof constructs a profile for the child and starts building it, in the same waythat it built the parent profile, by assigning events for the child process to the child'sprofile and asking the aa-logprof user questions.
58 Novell AppArmor Administration Guide

If a confined program forks and executes another program, aa-logprof sees this andasks the user which execution mode should be used when launching the child process.The execution modes of inherit, profile, unconfined or an option to deny the executionare presented.
If a separate profile exists for the child process, the default selection is profile. If aprofile does not exist, the default is inherit. The inherit option, or ix, is described inSection 4.8, “File Permission Access Modes” (page 61).
The profile option indicates that the child program should run in its own profile—asecondary question asks whether to sanitize the environment that the child programinherits from the parent. If you choose to sanitize the environment, this places the exe-cution modifier Px in your AppArmor profile. If you select not to sanitize, px is placedin the profile and no environment sanitizing occurs. The default for the execution modeis px if you select profile execution mode.
The unconfined execution mode is not recommended and should only be used in caseswhere there is no other option to generate a profile for a program reliably. Selectingunconfined opens a warning dialog asking for confirmation of the choice. If you aresure and choose Yes, a second dialog ask whether to sanitize the environment. ChoosingYes uses the execution mode Ux in your profile. Choosing No uses the execution modeux for your profile. The default value selected is Ux for unconfined execution mode.
IMPORTANT: Running Unconfined
Choosing ux is very dangerous and provides no enforcement of policy from asecurity perspective of resulting execution behavior of the child program.
aa-unconfined—Identifying Unprotected ProcessesThe aa-unconfined command examines open network ports on your system,compares that to the set of profiles loaded on your system, and reports network servicesthat do not have AppArmor profiles. It requires root privileges and that it not beconfined by an AppArmor profile.
aa-unconfined must be run as root to retrieve the process executable link from the/proc file system. This program is susceptible to the following race conditions:
• An unlinked executable is mishandled
Building Profiles from the Command Line 59

• A process that dies between netstat(8) and further checks is mishandled
NOTE
This program lists processes using TCP and UDP only. In short, this program isunsuitable for forensics use and is provided only as an aid to profiling all net-work-accessible processes in the lab.
4.7 Paths and GlobbingGlobbing (or regular expression matching) is when youmodify the directory path usingwild cards to include a group of files or subdirectories. File resources can be specifiedwith a globbing syntax similar to that used by popular shells, such as csh, Bash, andzsh.
Substitutes for any number of any characters,except /.
*
Example: An arbitrary number of a path element,including entire directories.
Substitutes for any number of characters, includ-ing /.
**
Example: an arbitrary number of path elements,including entire directories.
Substitutes for any single character, except /.?
Substitutes for the single character a, b, or c.[abc]
Example: a rule that matches/home[01]/*/.plan allows a program toaccess .plan files for users in both /home0and /home1.
Substitutes for the single character a, b, or c.[a-c]
60 Novell AppArmor Administration Guide
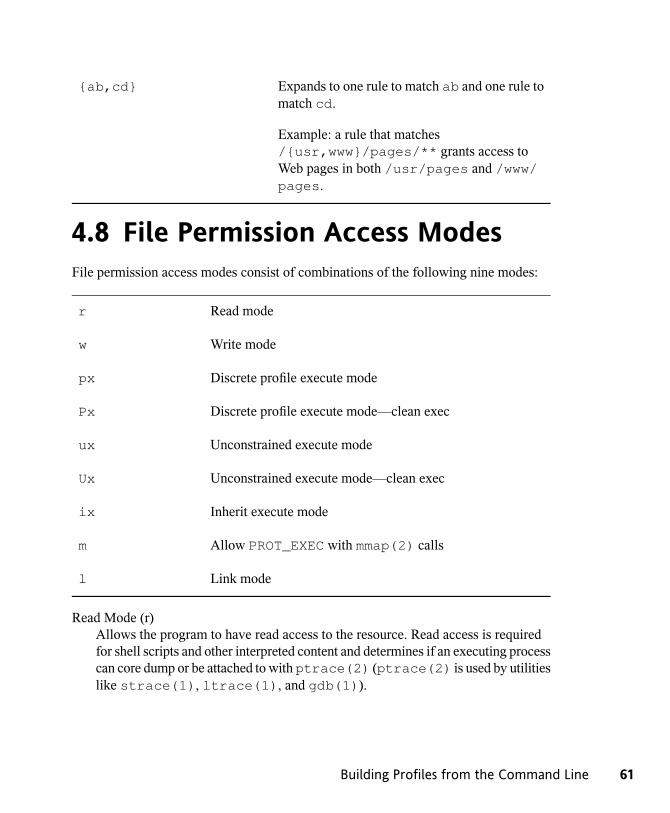
Expands to one rule to match ab and one rule tomatch cd.
{ab,cd}
Example: a rule that matches/{usr,www}/pages/** grants access toWeb pages in both /usr/pages and /www/pages.
4.8 File Permission Access ModesFile permission access modes consist of combinations of the following nine modes:
Read moder
Write modew
Discrete profile execute modepx
Discrete profile execute mode—clean execPx
Unconstrained execute modeux
Unconstrained execute mode—clean execUx
Inherit execute modeix
Allow PROT_EXEC with mmap(2) callsm
Link model
Read Mode (r)Allows the program to have read access to the resource. Read access is requiredfor shell scripts and other interpreted content and determines if an executing processcan core dump or be attached to withptrace(2) (ptrace(2) is used by utilitieslike strace(1), ltrace(1), and gdb(1)).
Building Profiles from the Command Line 61

Write Mode (w)Allows the program to have write access to the resource. Files must have this per-mission if they are to be unlinked (removed).
Discrete Profile Execute Mode (px)This mode requires that a discrete security profile is defined for a resource executedat an AppArmor domain transition. If there is no profile defined, the access is denied.
WARNING: Using the Discrete Profile Execute Mode
px does not scrub the environment of variables such as LD_PRELOAD. Asa result, the calling domain may have an undue amount of influence overthe called item.
Incompatible with Ux, ux, Px, and ix.
Discrete Profile Execute Mode (Px)—Clean ExecPx allows the named program to run in pxmode, but AppArmor invokes the Linuxkernel's unsafe_exec routines to scrub the environment, similar to setuid pro-grams. See ld.so(8) for some information about setuid and setgid environmentscrubbing.
Incompatible with Ux, ux, px, and ix.
Unconstrained Execute Mode (ux)Allows the program to execute the resource without any AppArmor profile appliedto the executed resource. Requires listing execute mode as well.
This mode is useful when a confined program needs to be able to perform a privi-leged operation, such as rebooting the machine. By placing the privileged sectionin another executable and granting unconstrained execution rights, it is possible tobypass the mandatory constraints imposed on all confined processes. For more in-formation about what is constrained, see the apparmor(7) man page.
62 Novell AppArmor Administration Guide

WARNING: Using Unconstrained Execute Mode (ux)
Use ux only in very special cases. It enables the designated child processesto be run without any AppArmor protection. ux does not scrub the envi-ronment of variables such as LD_PRELOAD. As a result, the calling domainmay have an undue amount of influence over the called resource. Use thismode only if the child absolutely must be run unconfined and LD_PRELOADmust be used. Any profile using this mode provides negligible security. Useat your own risk.
This mode is incompatible with Ux, px, Px, and ix.
Unconstrained Execute Mode (Ux)—Clean ExecUx allows the named program to run in uxmode, but AppArmor invokes the Linuxkernel's unsafe_exec routines to scrub the environment, similar to setuid pro-grams. See ld.so(8) for some information about setuid and setgid environmentscrubbing.
WARNING: Using Unconstrained Execute Mode (Ux)
Use Ux only in very special cases. It enables the designated child processesto run without any AppArmor protection. Use this mode only if the childabsolutely must be run unconfined. Use at your own risk.
Incompatible with ux, px, Px, and ix.
Inherit Execute Mode (ix)ix prevents the normal AppArmor domain transition on execve(2) when theprofiled program executes the named program. Instead, the executed resource in-herits the current profile.
This mode is useful when a confined program needs to call another confined pro-gramwithout gaining the permissions of the target's profile or losing the permissionsof the current profile. There is no version to scrub the environment because ixexecutions do not change privileges.
Incompatible with Ux, ux, Px, and px. Implies m.
Building Profiles from the Command Line 63

Allow Executable Mapping (m)This mode allows a file to bemapped intomemory usingmmap(2)'sPROT_EXECflag. This flag marks the pages executable. It is used on some architectures to pro-vide nonexecutable data pages, which can complicate exploit attempts. AppArmoruses this mode to limit which files a well-behaved program (or all programs onarchitectures that enforce nonexecutable memory access controls) may use as li-braries, to limit the effect of invalid -L flags given to ld(1) and LD_PRELOAD,LD_LIBRARY_PATH, given to ld.so(8).
Link ModeThe link mode mediates access to hard links. When a link is created, the target filemust have the same access permissions as the link created (with the exception thatthe destination does not need link access).
When choosing one of the Ux or Px file permission access modes, take into accountthat the following environment variables are removed from the environment before thechild process inherits it. As a consequence, applications or processes relying on any ofthese variables do not work anymore if the profile applied to them carries Ux or Pxflags:
• GCONV_PATH
• GETCONF_DIR
• HOSTALIASES
• LD_AUDIT
• LD_DEBUG
• LD_DEBUG_OUTPUT
• LD_DYNAMIC_WEAK
• LD_LIBRARY_PATH
• LD_ORIGIN_PATH
• LD_PRELOAD
• LD_PROFILE
64 Novell AppArmor Administration Guide

• LD_SHOW_AUXV
• LD_USE_LOAD_BIAS
• LOCALDOMAIN
• LOCPATH
• MALLOC_TRACE
• NLSPATH
• RESOLV_HOST_CONF
• RES_OPTIONS
• TMPDIR
• TZDIR
4.9 Important Filenames andDirectories
The following list contains the most important files and directories used by the App-Armor framework. If you intend to manage and troubleshoot your profiles manually,make sure that you know about these files and directories:
/sys/kernel/security/apparmor/profilesVirtualized file representing the currently loaded set of profiles.
/etc/apparmor/Location of AppArmor configuration files.
/etc/apparmor.d/Location of profiles, named with the convention of replacing the / in paths with. (not for the root /) so profiles are easier to manage. For example, the profile forthe program /usr/sbin/ntpd is named usr.sbin.ntpd.
Building Profiles from the Command Line 65
/etc/apparmor.d/abstractions/Location of abstractions.
/etc/apparmor.d/program-chunks/Location of program chunks.
/proc/*/attr/currentCheck this file to review the confinement status of a process and the profile that isused to confine the process. The ps auxZ command retrieves this informationautomatically.
66 Novell AppArmor Administration Guide

5Profiling Your WebApplications Using ChangeHatA Novell® AppArmor profile represents the security policy for an individual programinstance or process. It applies to an executable program, but if a portion of the programneeds different access permissions than other portions, the program can “change hats”to use a different security context, distinctive from the access of the main program.This is known as a hat or subprofile.
ChangeHat enables programs to change to or from a hat within a Novell AppArmorprofile. It enables you to define security at a finer level than the process. This featurerequires that each application be made “ChangeHat aware” meaning that it is modifiedtomake a request to the Novell AppArmormodule to switch security domains at arbitrarytimes during the application execution. Two examples for ChangeHat-aware applicationsare the Apache Web server and Tomcat.
A profile can have an arbitrary number of subprofiles, but there are only two levels: asubprofile cannot have further sub-subprofiles. A subprofile is written as a separateprofile and named as the containing profile followed by the subprofile name, separatedby a ^. Subprofiles must be stored in the same file as the parent profile.
NOTE: For More Information
For more information, see the change_hat man page.
Profiling Your Web Applications Using ChangeHat 67
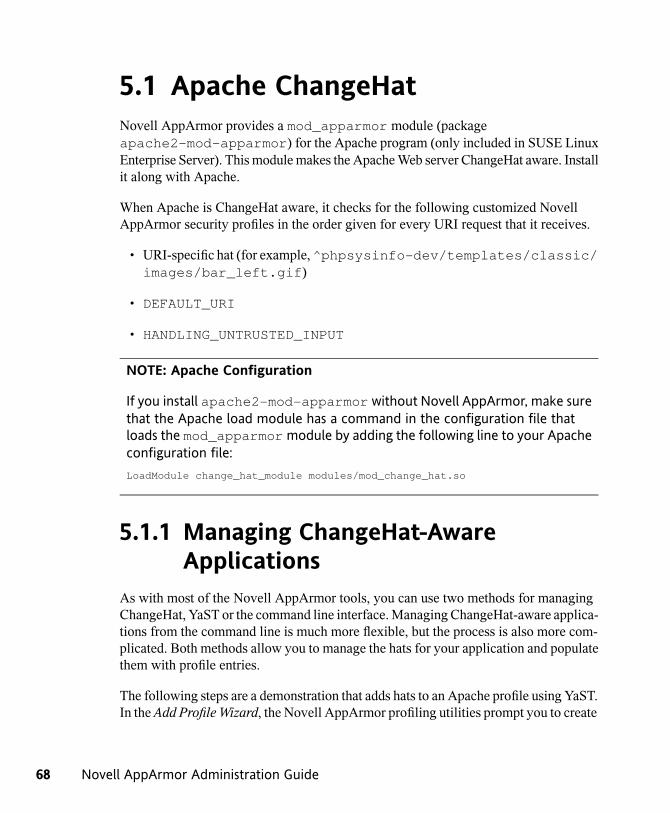
5.1 Apache ChangeHatNovell AppArmor provides a mod_apparmor module (packageapache2-mod-apparmor) for the Apache program (only included in SUSE LinuxEnterprise Server). This module makes the ApacheWeb server ChangeHat aware. Installit along with Apache.
When Apache is ChangeHat aware, it checks for the following customized NovellAppArmor security profiles in the order given for every URI request that it receives.
• URI-specific hat (for example,^phpsysinfo-dev/templates/classic/images/bar_left.gif)
• DEFAULT_URI
• HANDLING_UNTRUSTED_INPUT
NOTE: Apache Configuration
If you install apache2-mod-apparmor without Novell AppArmor, make surethat the Apache load module has a command in the configuration file thatloads the mod_apparmormodule by adding the following line to your Apacheconfiguration file:LoadModule change_hat_module modules/mod_change_hat.so
5.1.1 Managing ChangeHat-AwareApplications
As with most of the Novell AppArmor tools, you can use two methods for managingChangeHat, YaST or the command line interface.Managing ChangeHat-aware applica-tions from the command line is much more flexible, but the process is also more com-plicated. Both methods allow you to manage the hats for your application and populatethem with profile entries.
The following steps are a demonstration that adds hats to an Apache profile using YaST.In the Add Profile Wizard, the Novell AppArmor profiling utilities prompt you to create
68 Novell AppArmor Administration Guide

new hats for distinct URI requests. Choosing to create a new hat allows you to createindividual profiles for each URI. You can create very tight rules for each request.
If the URI that is processed does not represent significant processing or otherwise doesnot represent a significant security risk, safely select Use Default Hat to process thisURI in the default hat, which is the default security profile.
This example creates a new hat for the URI phpsysinfo-dev and its subsequentaccesses. Using the profiling utilities, delegate what to add to this new hat. The resultinghat becomes a tight-security container that encompasses all the processing on the serverthat occurs when the phpsysinfo-dev URI is passed to the Apache Web server.
The URI runs the application phpsysinfo (refer to http://phpsysinfo.sourceforge.net for more information). The phpsysinfo-dev package isassumed to be installed in/srv/www/htdocs/phpsysinfo-dev in a clean (new)install of SUSE Linux Enterprise and AppArmor.
1 Once phpsysinfo-dev is installed, you are ready to add hats to the Apacheprofile. From the Novell AppArmor GUI, select Add Profile Wizard.
2 In Application to Profile, enter httpd2-prefork.
3 Click Create Profile.
Profiling Your Web Applications Using ChangeHat 69

4 Restart Apache by entering rcapache2 restart in a terminal window.
Restart any program you are profiling at this point.
5 Openhttp://localhost/phpsysinfo-dev/ in aWeb browser window.The browser window should display network usage and system information.
NOTE: Data Caching
To ensure that this request is processed by the server and you do notreview cached data in your browser, refresh the page. To do this, clickthe browser Refresh button to make sure that Apache processes the re-quest for the phpsysinfo-dev URI.
6 Click Scan System Log for Entries to Add to Profiles. Novell AppArmorlaunches the aa-logprof tool, which scans the information learned in theprevious step. It begins to prompt you with profile questions.
7 aa-logprof first prompts with Add Requested Hat or Use Default Hat because itnoticed that the phpsysinfo-dev URI was accessed. Select Add RequestedHat.
70 Novell AppArmor Administration Guide
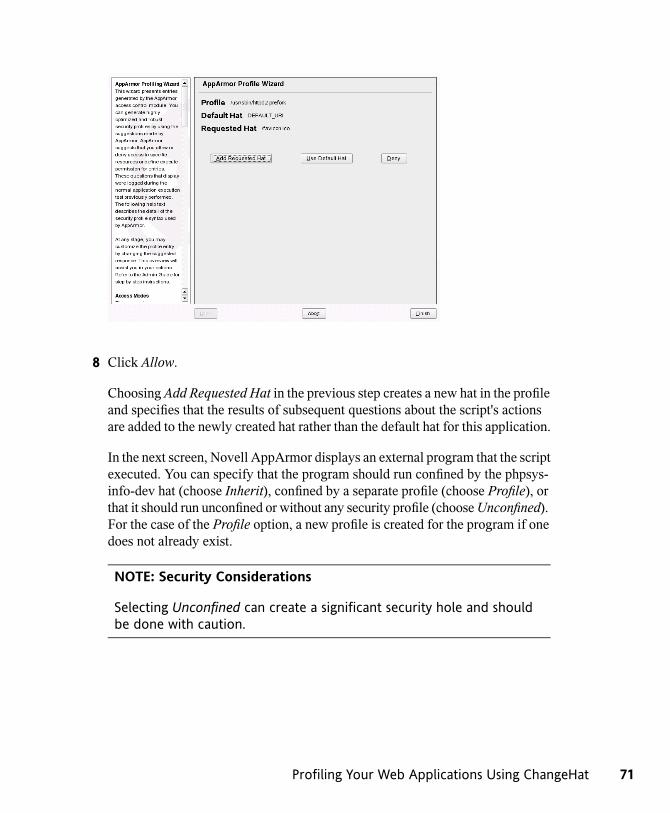
8 Click Allow.
Choosing Add Requested Hat in the previous step creates a new hat in the profileand specifies that the results of subsequent questions about the script's actionsare added to the newly created hat rather than the default hat for this application.
In the next screen, Novell AppArmor displays an external program that the scriptexecuted. You can specify that the program should run confined by the phpsys-info-dev hat (choose Inherit), confined by a separate profile (choose Profile), orthat it should run unconfined or without any security profile (chooseUnconfined).For the case of the Profile option, a new profile is created for the program if onedoes not already exist.
NOTE: Security Considerations
Selecting Unconfined can create a significant security hole and shouldbe done with caution.
Profiling Your Web Applications Using ChangeHat 71

8a Select Inherit for the /bin/bash path. This adds /bin/bash/ (accessedby Apache) to the phpsysinfo-dev hat profile with the necessary permissions.
8b Click Allow.
9 The remaining questions prompt you to generate new hats and add entries to yourprofile and its hats. The process of adding entries to profiles is covered in detailin the Section 3.1, “Adding a Profile Using the Wizard” (page 19).
When all profiling questions are answered, click Finish to save your changesand exit the wizard.
The following is an example phpsysinfo-dev hat.
72 Novell AppArmor Administration Guide

Example 5.1 Example phpsysinfo-dev Hat^phpsysinfo { #include <abstractions/base> /bin/df ix, /bin/bash ix, /dev/tty rw, /etc/SuSE-release r, /etc/fstab r, /etc/hosts r, /etc/mtab r, /proc/** r, /sbin/lspci ix, /srv/www/htdocs/sysinfo/** r, /sys/bus/pci/devices r, /sys/devices/** r, /usr/bin/who ix, /usr/share/pci.ids r, /var/log/apache2/{access,error}_log w, /var/run/utmp r, }
NOTE: Hat and Parent Profile Relationship
The profile ^phpsysinfo-dev is only valid in the context of a process runningunder the parent profile httpd2-prefork.
5.1.2 Adding Hats and Entries to HatsWhen you use the Edit Profile dialog (for instructions, refer to Section 3.3, “EditingProfiles” (page 27)) or when you add a new profile usingManually Add Profile (forinstructions, refer to Section 3.2, “Manually Adding a Profile” (page 26)), you aregiven the option of adding hats (subprofiles) to your Novell AppArmor profiles. Adda ChangeHat subprofile from theAppArmor Profile Dialogwindow as in the following.
Profiling Your Web Applications Using ChangeHat 73

1 From the AppArmor Profile Dialog window, click Add Entry then select Hat.The Enter Hat Name dialog box opens:
2 Enter the name of the hat to add to the Novell AppArmor profile. The name isthe URI that, when accessed, receives the permissions set in the hat.
3 Click Create Hat. You are returned to the AppArmor Profile Dialog screen.
4 After adding the new hat, click Done.
74 Novell AppArmor Administration Guide

NOTE: For More Information
For an example of an Novell AppArmor profile, refer to Example 5.1, “Examplephpsysinfo-dev Hat” (page 73).
5.2 Configuring Apache formod_apparmor
Apache is configured by placing directives in plain text configuration files. The mainconfiguration file is usuallyhttpd.conf.When you compile Apache, you can indicatethe location of this file. Directives can be placed in any of these configuration files toalter the way Apache behaves.When you make changes to the main configuration files,you need to start or restart Apache so the changes are recognized.
5.2.1 Virtual Host DirectivesVirtual host directives control whether requests that contain trailing pathname informa-tion following an actual filename or that refer to a nonexistent file in an existing direc-tory are accepted or rejected. For Apache documentation on virtual host directives, referto http://httpd.apache.org/docs-2.2/mod/core.html#virtualhost.
The ChangeHat-specific configuration keyword is AADefaultHatName. It is usedsimilarly to AAHatName, for example, AADefaultHatNameMy_Funky_Default_Hat.
The configuration option is actually based on a server directive, which enables you touse the keyword outside of other options, setting it for the default server. Virtual hostsare considered internally within Apache to be separate “servers,” so you can set a defaulthat name for the default server as well as one for each virtual host, if desired.
When a request comes in, the following steps reflect the sequence in whichmod_apparmor attempts to apply hats.
1. A location or directory hat as specified by the AAHatName keyword
Profiling Your Web Applications Using ChangeHat 75

2. A hat named by the entire URI path
3. A default server hat as specified by the AADefaultHatName keyword
4. DEFAULT_URI (if none of those exist, it goes back to the “parent” Apache hat)
5.2.2 Location and Directory DirectivesLocation and directory directives specify hat names in the program configuration fileso the program calls the hat regarding its security. For Apache, you can find documen-tation about the location and directory directives at http://httpd.apache.org/docs-2.0/sections.html.
The location directive example below specifies that, for a given location,mod_apparmor should use a specific hat:<Location /foo/> AAHatName MY_HAT_NAME </Location>
This tries to use MY_HAT_NAME for any URI beginning with /foo/ (/foo/, /foo/bar, /foo/cgi/path/blah_blah/blah, etc.).
The directory directive works similarly to the location directive, except it refers to apath in the file system as in the following example:
<Directory "/srv/www/www.immunix.com/docs"> # Note lack of trailing slash AAHatName immunix.com </Directory>
Example: The program phpsysinfo is used to illustrate a location directive in thefollowing example. The tarball can be downloaded from http://phpsysinfo.sourceforge.com.
1 After downloading the tarball, install it into /srv/www/htdocs/sysinfo.
2 Create /etc/apache2/conf.d/sysinfo.conf and add the followingtext to it:
<Location "/sysinfo"> AAHatName sysinfo</Location>
76 Novell AppArmor Administration Guide
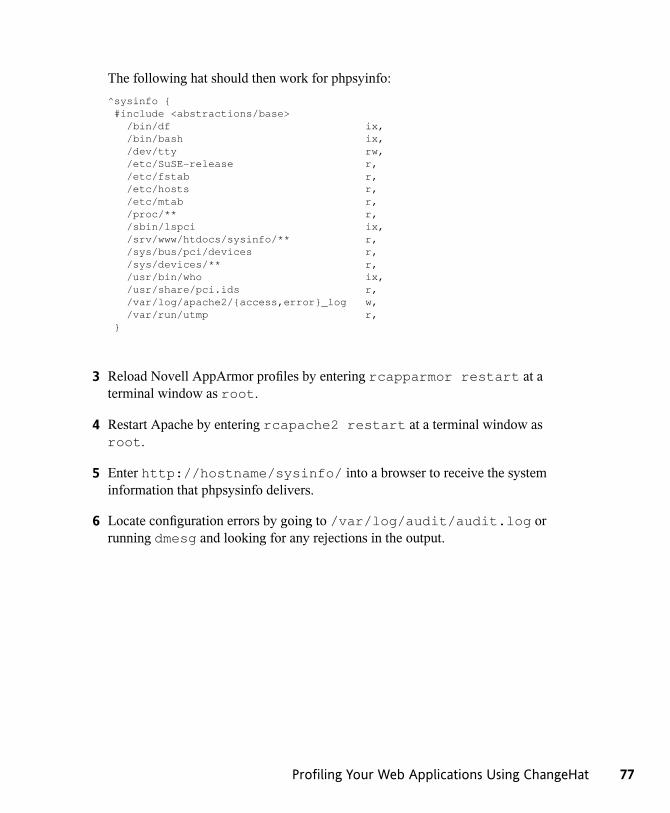
The following hat should then work for phpsyinfo:^sysinfo { #include <abstractions/base> /bin/df ix, /bin/bash ix, /dev/tty rw, /etc/SuSE-release r, /etc/fstab r, /etc/hosts r, /etc/mtab r, /proc/** r, /sbin/lspci ix, /srv/www/htdocs/sysinfo/** r, /sys/bus/pci/devices r, /sys/devices/** r, /usr/bin/who ix, /usr/share/pci.ids r, /var/log/apache2/{access,error}_log w, /var/run/utmp r, }
3 Reload Novell AppArmor profiles by entering rcapparmor restart at aterminal window as root.
4 Restart Apache by entering rcapache2 restart at a terminal window asroot.
5 Enter http://hostname/sysinfo/ into a browser to receive the systeminformation that phpsysinfo delivers.
6 Locate configuration errors by going to /var/log/audit/audit.log orrunning dmesg and looking for any rejections in the output.
Profiling Your Web Applications Using ChangeHat 77

6Managing ProfiledApplicationsAfter creating profiles and immunizing your applications, SUSE Linux Enterprise®becomes more efficient and better protected if you performNovell®AppArmor profilemaintenance, which involves analyzing log files and refining your profiles as well asbacking up your set of profiles and keeping it up-to-date. You can deal with these issuesbefore they become a problem by setting up event notification by e-mail, running peri-odic reports, updating profiles from system log entries by running the aa-logprof toolthrough YaST, and dealing with maintenance issues.
6.1 Monitoring Your SecuredApplications
Applications that are confined by Novell AppArmor security profiles generate messageswhen applications execute in unexpected ways or outside of their specified profile.These messages can be monitored by event notification, periodic report generation, orintegration into a third-party reporting mechanism.
For reporting and alerting, AppArmor uses a userspace daemon(/usr/sbin/aa-eventd). This daemonmonitors log traffic, sends out notifications,and runs scheduled reports. It does not require any end user configuration and it isstarted automatically as part of the security event notification through the YaST App-Armor Control Panel or by the configuration of scheduled reports in the YaSTAppArmorReports module.
Managing Profiled Applications 79

Apart from transparently enabling and disabling aa-eventd with the YaST modules,you can manually toggle its status with the rcaaeventd init script. The AppArmorevent daemon is not required for proper functioning of the profiling process (such asenforcement or learning). It is just required for reporting.
Find more details on security event notification in Section 6.2, “Configuring SecurityEvent Notification” (page 80) and on scheduled reports in Section 6.3, “ConfiguringReports” (page 83).
6.2 Configuring Security EventNotification
Security event notification is a Novell AppArmor feature that informs youwhen systemicNovell AppArmor activity occurs. Activate it by selecting a notification frequency(receiving daily notification, for example). Enter an e-mail address, so you can be noti-fied by e-mail when Novell AppArmor security events occur. Select one of the followingnotification types:
TerseTerse notification summarizes the total number of system events without providingdetails. For example:[email protected] has had 29 security events since Mon May 22 16:32:38 2006
Summary NotificationSummary notification displays the logged Novell AppArmor security events andlists the number of individual occurrences, including the date of the last occurrence.For example:AppArmor: PERMITTING access to capability ’setgid’ (httpd2-prefork(6347) profile /usr/sbin/httpd2-prefork active /usr/sbin/httpd2-prefork) 2 times, the latest at Sat Oct 9 16:05:54 2004.
Verbose NotificationVerbose notification displays unmodified, loggedNovell AppArmor security events.It tells you every time an event occurs and writes a new line in the verbose log.These security events include the date and time the event occurred, when the appli-cation profile permits and rejects access, and the type of file permission access thatis permitted or rejected. Verbose notification also reports several messages that the
80 Novell AppArmor Administration Guide

aa-logprof tool (see Section “aa-logprof—Scanning the System Log” (page 54))uses to interpret profiles. For example:type=APPARMOR msg=audit(1148308355.074:198): REJECTING w access to /var/log/apache2/error_log (httpd2-prefork(5173) profile /usr/sbin/httpd2-prefork active /usr/sbin/httpd2-prefork)
NOTE
You must set up a mail server that can send outgoing mail using the SMTPprotocol (for example, postfix or exim) for event notification to work.
1 In the Enable Security Event Notification section of the AppArmor Configurationwindow, click Configure.
2 In the Security Event Notification window, enable Terse, Summary, or Verboseevent notification.
2a In each applicable notification type section, enter the e-mail addresses ofthose who should receive notification in the field provided. If notification isenabled, youmust enter an e-mail address. Separate multiple e-mail addresseswith commas.
2b For each notification type enabled, select the frequency of notification.
Managing Profiled Applications 81

Select a notification frequency from the following options:
• Disabled
• 1 minute
• 5 minutes
• 10 minutes
• 15 minutes
• 30 minutes
• 1 hour
• 1 day
• 1 week
2c For each selected notification type, select the lowest severity level for whicha notification should be sent. Security events are logged and the notificationsare sent at the time indicated by the interval when events are equal to orgreater than the selected severity level. If the interval is 1 day, the notificationis sent daily, if security events occur.
NOTE: Severity Levels
Novell AppArmor sends out event messages for things that are inthe severity database and above the level selected. Severity levelsare numbered 1 through 10, with 10 being the most severe securityincident. The /etc/severity.db file defines the severity level ofpotential security events. The severity levels are determined by theimportance of different security events, such as certain resourcesaccessed or services denied.
3 Click OK.
4 Click Done in the Novell AppArmor Configuration window.
82 Novell AppArmor Administration Guide

5 Click File > Quit in the YaST Control Center.
After configuring security event notification, read the reports and determine whetherevents require follow up. Follow upmay include the procedures outlined in Section 6.4,“Reacting to Security Event Rejections” (page 102).
6.3 Configuring ReportsNovell AppArmor's reporting feature adds flexibility by enhancing the way users canview security event data. The reporting tool performs the following:
• Creates on-demand reports
• Exports reports
• Schedules periodic reports for archiving
• E-mails periodic reports
• Filters report data by date
• Filters report data by other options, such as program name
Using reports, you can read important Novell AppArmor security events reported inthe log files without manually sifting through the messages only useful to the aa-logproftool. Narrow down the size of the report by filtering by date range or program name.You can also export an html or csv file.
The following are the three types of reports available in Novell AppArmor:
Executive Security SummaryA combined report, consisting of one or more security incident reports from oneor more machines. This report can provide a single view of security events onmultiplemachines. For more details, refer to Section “Executive Security Summary”(page 92).
Application Audit ReportAn auditing tool that reports which application servers are running and whetherthe applications are confined by AppArmor. Application servers are applications
Managing Profiled Applications 83
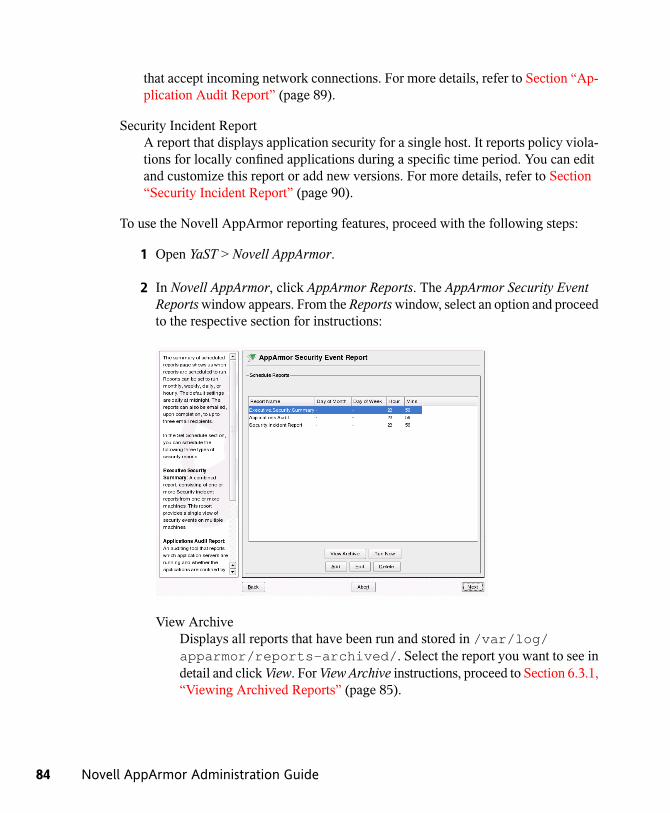
that accept incoming network connections. For more details, refer to Section “Ap-plication Audit Report” (page 89).
Security Incident ReportA report that displays application security for a single host. It reports policy viola-tions for locally confined applications during a specific time period. You can editand customize this report or add new versions. For more details, refer to Section“Security Incident Report” (page 90).
To use the Novell AppArmor reporting features, proceed with the following steps:
1 Open YaST > Novell AppArmor.
2 In Novell AppArmor, click AppArmor Reports. The AppArmor Security EventReportswindow appears. From the Reportswindow, select an option and proceedto the respective section for instructions:
View ArchiveDisplays all reports that have been run and stored in /var/log/apparmor/reports-archived/. Select the report you want to see indetail and click View. For View Archive instructions, proceed to Section 6.3.1,“Viewing Archived Reports” (page 85).
84 Novell AppArmor Administration Guide
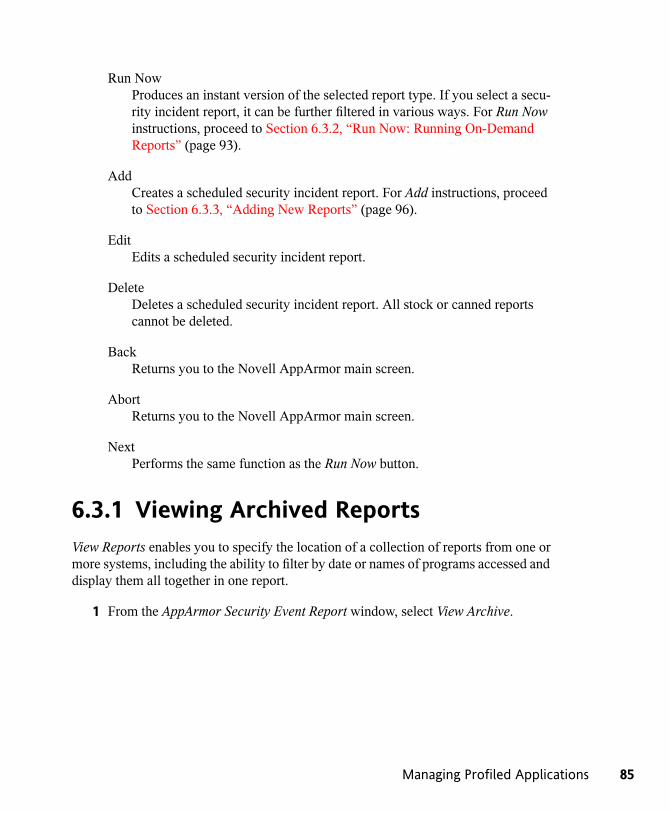
Run NowProduces an instant version of the selected report type. If you select a secu-rity incident report, it can be further filtered in various ways. For Run Nowinstructions, proceed to Section 6.3.2, “Run Now: Running On-DemandReports” (page 93).
AddCreates a scheduled security incident report. For Add instructions, proceedto Section 6.3.3, “Adding New Reports” (page 96).
EditEdits a scheduled security incident report.
DeleteDeletes a scheduled security incident report. All stock or canned reportscannot be deleted.
BackReturns you to the Novell AppArmor main screen.
AbortReturns you to the Novell AppArmor main screen.
NextPerforms the same function as the Run Now button.
6.3.1 Viewing Archived ReportsView Reports enables you to specify the location of a collection of reports from one ormore systems, including the ability to filter by date or names of programs accessed anddisplay them all together in one report.
1 From the AppArmor Security Event Report window, select View Archive.
Managing Profiled Applications 85
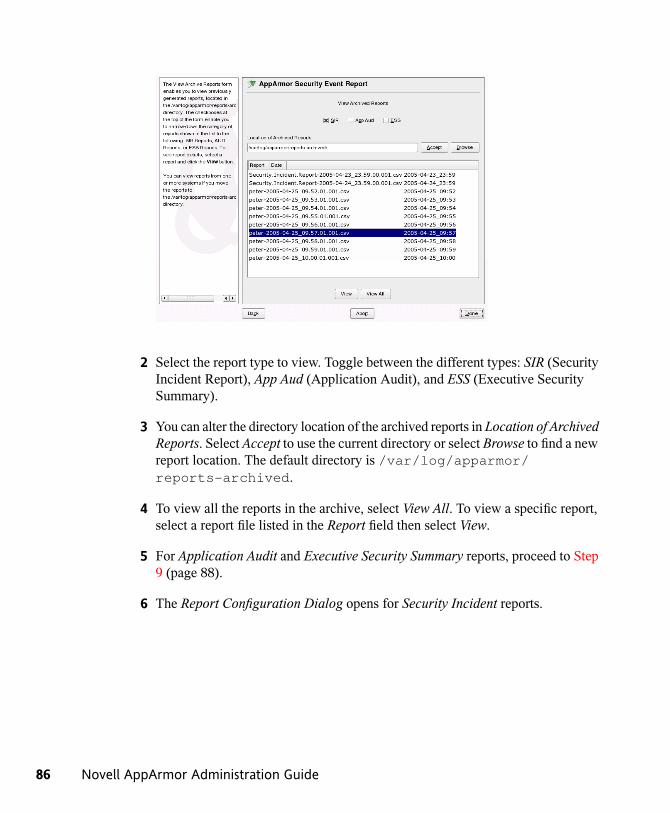
2 Select the report type to view. Toggle between the different types: SIR (SecurityIncident Report), App Aud (Application Audit), and ESS (Executive SecuritySummary).
3 You can alter the directory location of the archived reports in Location of ArchivedReports. Select Accept to use the current directory or select Browse to find a newreport location. The default directory is /var/log/apparmor/reports-archived.
4 To view all the reports in the archive, select View All. To view a specific report,select a report file listed in the Report field then select View.
5 For Application Audit and Executive Security Summary reports, proceed to Step9 (page 88).
6 The Report Configuration Dialog opens for Security Incident reports.
86 Novell AppArmor Administration Guide

7 The Report Configuration dialog enables you to filter the reports selected in theprevious screen. Enter the desired filter details. The fields are:
Date RangeTo display reports for a certain time period, select Filter By Date Range.Enter the start and end dates that define the scope of the report.
Program NameWhen you enter a program name or pattern that matches the name of the bi-nary executable of the program of interest, the report displays security eventsthat have occurred for a specific program.
Profile NameWhen you enter the name of the profile, the report displays the securityevents that are generated for the specified profile. You can use this to seewhat is being confined by a specific profile.
PID NumberPID number is a number that uniquely identifies one specific process orrunning program (this number is valid only during the lifetime of that pro-cess).
Managing Profiled Applications 87
SeveritySelect the lowest severity level for security events to include in the report.The selected severity level and above are then included in the reports.
DetailA source to which the profile has denied access. This includes capabilitiesand files. You can use this field to report the resources to which profilesprevent access.
Access TypeThe access type describes what is actually happening with the security event.The options are PERMITTING, REJECTING, or AUDITING.
ModeTheMode is the permission that the profile grants to the program or processto which it is applied. The options are all (all modes without filtering), r(read), w (write), l (link),x (execute), and m (mmap).
Export TypeEnables you to export a CSV (comma separated values) or HTML file. TheCSV file separates pieces of data in the log entries with commas using astandard data format for importing into table-oriented applications. You canenter a path for your exported report by typing the full path in the field pro-vided.
Location to Store LogEnables you to change the location at which to store the exported report. Thedefault location is/var/log/apparmor/reports-exported.Whenyou change this location, select Accept. Select Browse to browse the filesystem.
8 To see the report, filtered as desired, selectNext. One of the three reports displays.
9 Refer the following sections for detailed information about each type of report.
• For the application audit report, refer to Section “Application Audit Report”(page 89).
• For the security incident report, refer to Section “Security Incident Report”(page 90).
88 Novell AppArmor Administration Guide

• For the executive summary report, refer to Section “Executive SecuritySummary” (page 92).
Application Audit ReportAn application audit report is an auditing tool that reports which application serversare running and whether they are confined by AppArmor.
The following fields are provided in an application audit report:
HostThe machine protected by AppArmor for which the security events are reported.
DateThe date during which security events occurred.
ProgramThe name and path of the executing process.
ProfileThe absolute name of the security profile that is applied to the process.
Managing Profiled Applications 89

PIDA number that uniquely identifies one specific process or running program (thisnumber is valid only during the lifetime of that process).
StateThis field reveals whether the program listed in the program field is confined. If itis not confined, you might consider creating a profile for it.
TypeThis field reveals the type of confinement the security event represents. It says eithercomplain or enforce. If the application is not confined (state), no type of confinementis reported.
Security Incident ReportA security incident report displays security events of interest to an administrator. TheSIR reports policy violations for locally confined applications during the specified timeperiod. It also reports policy exceptions and policy engine state changes. These twotypes of security events are defined as follows:
Policy ExceptionsWhen an application requests a resource that is not defined within its profile, a se-curity event is triggered. A report is generated that displays security events of interestto an administrator. The SIR reports policy violations for locally confined applica-tions during the specified time period. The SIR reports policy exceptions and policyengine state changes.
Policy Engine State ChangesEnforces policy for applications andmaintains its own state, including when enginesstart or stop, when a policy is reloaded, and when global security feature are enabledor disabled.
90 Novell AppArmor Administration Guide

The fields in the SIR report have the following meanings:
HostThe machine protected by AppArmor for which the security events are reported.
DateThe date during which security events occurred.
ProgramThe name of the executing process.
ProfileThe absolute name of the security profile that is applied to the process.
PIDA number that uniquely identifies one specific process or running program (thisnumber is valid only during the lifetime of that process).
SeveritySeverity levels of events are reported from the severity database. The severitydatabase defines the importance of potential security events and numbers them 1through 10, 10 being the most severe security incident. The severity levels are de-
Managing Profiled Applications 91

termined by the threat or importance of different security events, such as certainresources accessed or services denied.
ModeThe mode is the permission that the profile grants to the program or process towhich it is applied. The options are r (read), w (write), l (link), and x (execute).
DetailA source to which the profile has denied access.This includes capabilities and files.You can use this field to report the resources to which the profile prevents access.
Access TypeThe access type describes what is actually happening with the security event. Theoptions are PERMITTING, REJECTING, or AUDITING.
Executive Security SummaryA combined report consisting of one or more high-level reports from one or more ma-chines. This report can provide a single view of security events on multiple machinesif each machine's data is copied to the report archive directory, which is /var/log/apparmor/reports-archived. One line of the ESS report represents a range ofSIR reports.
92 Novell AppArmor Administration Guide
The following fields are provided in an executive security summary:
HostThe machine protected by AppArmor for which the security events are reported.
Start DateThe first date in a range of dates during which security events are reported.
End DateThe last date in a range of dates during which security events are reported.
Num RejectsIn the date range given, the total number of security events that are rejected accessattempts.
Num EventsIn the date range given, the total number of security events.
Ave. SevThis is the average of the severity levels reported in the date range given. Unknownseverities are disregarded in this figure.
High SevThis is the severity of the highest severity event reported in the date range given.
6.3.2 Run Now: Running On-DemandReports
The Run Now report feature enables you to instantly extract report information fromthe Novell AppArmor event logs without waiting for scheduled events. If you needhelp navigating to the main report screen, see Section 6.3, “Configuring Reports”(page 83). Perform the following steps to run a report from the list of reports:
1 Select the report to run instantly from the list of reports in the Schedule Reportswindow.
2 Select Run Now or Next. The next screen depends on which report you selectedin the previous step. As an example, select a security incident report.
Managing Profiled Applications 93

3 The Report Configuration Dialog opens for security incident reports.
4 The Report Configuration Dialog enables you to filter the reports selected in theprevious screen. Enter the desired filter details. The following filter options areavailable:
Date RangeTo limit reports to a certain time period, select Filter By Date Range. Enterthe start and end dates that determine the scope of the report.
Program NameWhen you enter a program name or pattern that matches the name of the bi-nary executable for the program of interest, the report displays security eventsthat have occurred for the specified program only.
Profile NameWhen you enter the name of the profile, the report displays the securityevents that are generated for the specified profile. You can use this to seewhat is confined by a specific profile.
PID NumberA number that uniquely identifies one specific process or running program(this number is valid only during the lifetime of that process).
94 Novell AppArmor Administration Guide
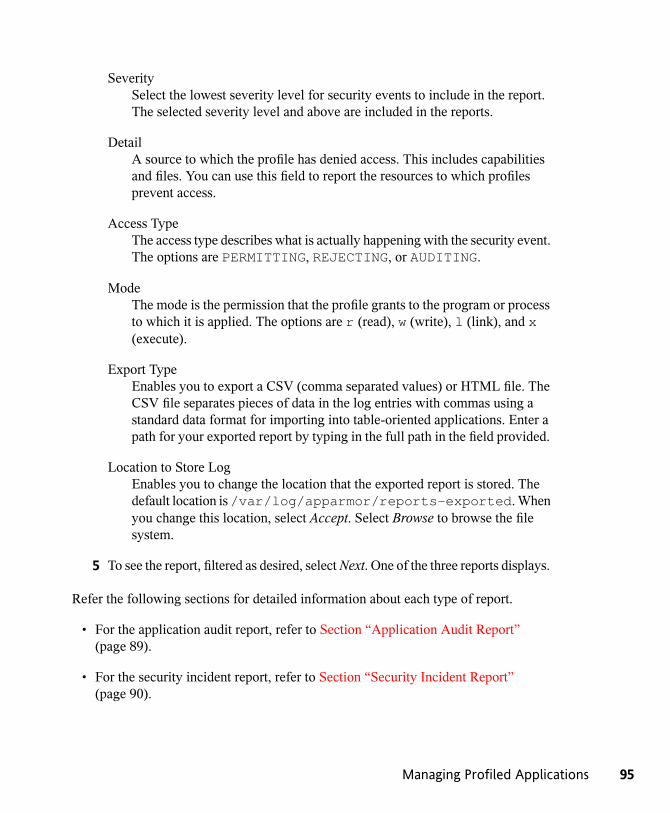
SeveritySelect the lowest severity level for security events to include in the report.The selected severity level and above are included in the reports.
DetailA source to which the profile has denied access. This includes capabilitiesand files. You can use this field to report the resources to which profilesprevent access.
Access TypeThe access type describes what is actually happening with the security event.The options are PERMITTING, REJECTING, or AUDITING.
ModeThe mode is the permission that the profile grants to the program or processto which it is applied. The options are r (read), w (write), l (link), and x(execute).
Export TypeEnables you to export a CSV (comma separated values) or HTML file. TheCSV file separates pieces of data in the log entries with commas using astandard data format for importing into table-oriented applications. Enter apath for your exported report by typing in the full path in the field provided.
Location to Store LogEnables you to change the location that the exported report is stored. Thedefault location is/var/log/apparmor/reports-exported.Whenyou change this location, select Accept. Select Browse to browse the filesystem.
5 To see the report, filtered as desired, selectNext. One of the three reports displays.
Refer the following sections for detailed information about each type of report.
• For the application audit report, refer to Section “Application Audit Report”(page 89).
• For the security incident report, refer to Section “Security Incident Report”(page 90).
Managing Profiled Applications 95

• For the executive summary report, refer to Section “Executive Security Summary”(page 92).
6.3.3 Adding New ReportsAdding new reports enables you to create a scheduled security incident report that dis-plays Novell AppArmor security events according to your preset filters. When a reportis set up in Schedule Reports, it periodically launches a report of Novell AppArmorsecurity events that have occurred on the system.
You can configure a daily, weekly, monthly, or hourly report to run for a specified pe-riod. You can set the report to display rejections for certain severity levels or to filterby program name, profile name, severity level, or denied resources. This report can beexported to anHTML (HypertextMarkup Language) or CSV (CommaSeparatedValues)file format.
NOTE
Return to the beginning of this section if you need help navigating to the mainreport screen (see Section 6.3, “Configuring Reports” (page 83)).
To add a new scheduled security incident report, proceed as follows:
1 ClickAdd to create a new security incident report. The first page of Add ScheduledSIR opens.
96 Novell AppArmor Administration Guide
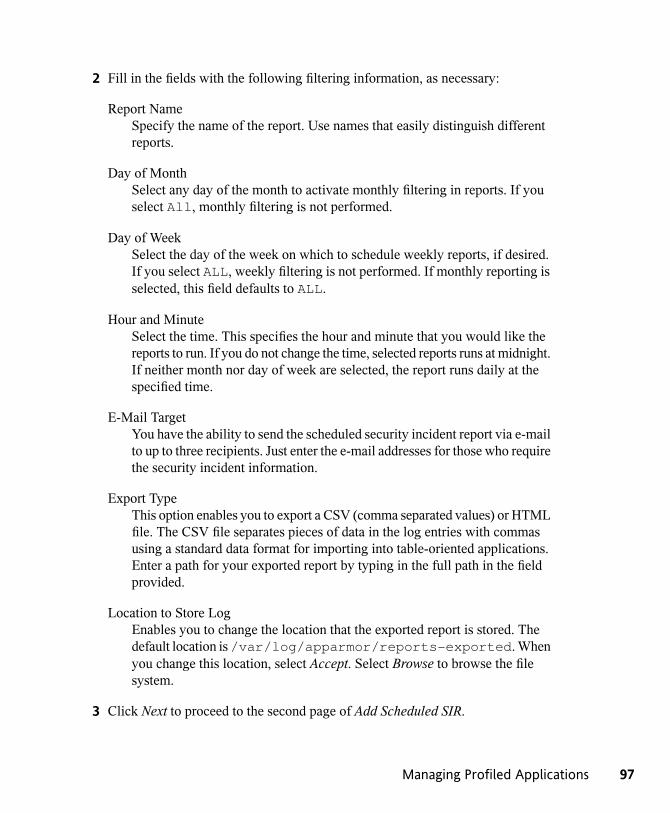
2 Fill in the fields with the following filtering information, as necessary:
Report NameSpecify the name of the report. Use names that easily distinguish differentreports.
Day of MonthSelect any day of the month to activate monthly filtering in reports. If youselect All, monthly filtering is not performed.
Day of WeekSelect the day of the week on which to schedule weekly reports, if desired.If you select ALL, weekly filtering is not performed. If monthly reporting isselected, this field defaults to ALL.
Hour and MinuteSelect the time. This specifies the hour and minute that you would like thereports to run. If you do not change the time, selected reports runs at midnight.If neither month nor day of week are selected, the report runs daily at thespecified time.
E-Mail TargetYou have the ability to send the scheduled security incident report via e-mailto up to three recipients. Just enter the e-mail addresses for those who requirethe security incident information.
Export TypeThis option enables you to export a CSV (comma separated values) or HTMLfile. The CSV file separates pieces of data in the log entries with commasusing a standard data format for importing into table-oriented applications.Enter a path for your exported report by typing in the full path in the fieldprovided.
Location to Store LogEnables you to change the location that the exported report is stored. Thedefault location is/var/log/apparmor/reports-exported.Whenyou change this location, select Accept. Select Browse to browse the filesystem.
3 Click Next to proceed to the second page of Add Scheduled SIR.
Managing Profiled Applications 97

4 Fill in the fields with the following filtering information, as necessary:
Program NameYou can specify a program name or pattern that matches the name of thebinary executable for the program of interest. The report displays securityevents that have occurred for the specified program only.
Profile NameYou can specify the name of the profile for which the report should displaysecurity events. You can use this to see what is being confined by a specificprofile.
PID NumberA number that uniquely identifies one specific process or running program(this number is valid only during the lifetime of that process).
DetailA source to which the profile has denied access. This includes capabilitiesand files. You can use this field to create a report of resources to whichprofiles prevent access.
SeveritySelect the lowest severity level of security events to include in the report.The selected severity level and above are included in the reports.
98 Novell AppArmor Administration Guide
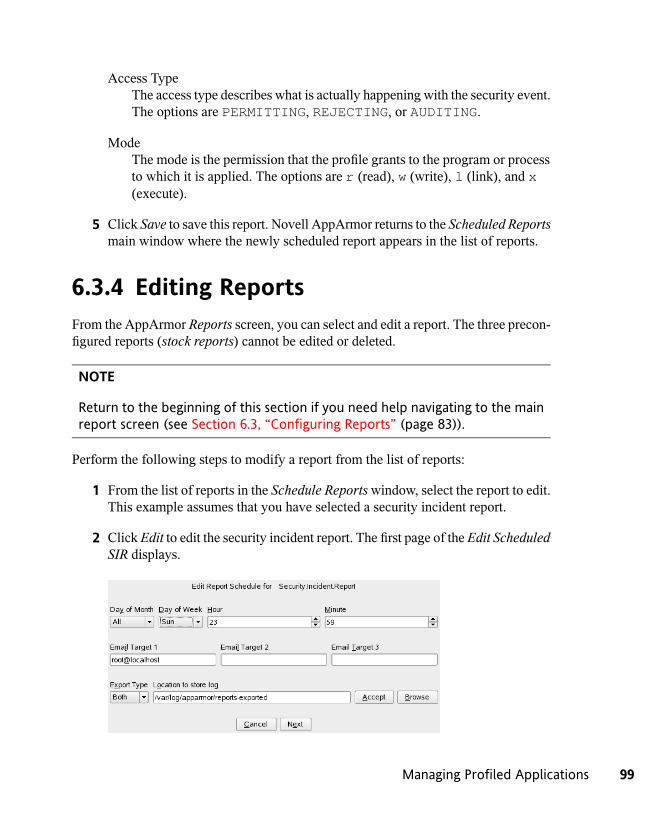
Access TypeThe access type describes what is actually happening with the security event.The options are PERMITTING, REJECTING, or AUDITING.
ModeThe mode is the permission that the profile grants to the program or processto which it is applied. The options are r (read), w (write), l (link), and x(execute).
5 Click Save to save this report. Novell AppArmor returns to the Scheduled Reportsmain window where the newly scheduled report appears in the list of reports.
6.3.4 Editing ReportsFrom the AppArmor Reports screen, you can select and edit a report. The three precon-figured reports (stock reports) cannot be edited or deleted.
NOTE
Return to the beginning of this section if you need help navigating to the mainreport screen (see Section 6.3, “Configuring Reports” (page 83)).
Perform the following steps to modify a report from the list of reports:
1 From the list of reports in the Schedule Reportswindow, select the report to edit.This example assumes that you have selected a security incident report.
2 Click Edit to edit the security incident report. The first page of the Edit ScheduledSIR displays.
Managing Profiled Applications 99

3 Modify the following filtering information, as necessary:
Day of MonthSelect any day of the month to activate monthly filtering in reports. If youselect All, monthly filtering is not performed.
Day of WeekSelect the day of the week on which to schedule the weekly reports. If youselectAll, weekly filtering is not performed. If monthly reporting is selected,this defaults to All.
Hour and MinuteSelect the time. This specifies the hour and minute that you would like thereports to run. If you do not change the time, the selected report runs atmidnight. If neither the day of the month nor day of the week is selected, thereport runs daily at the specified time.
E-Mail TargetYou have the ability to send the scheduled security incident report via e-mailto up to three recipients. Just enter the e-mail addresses for those who requirethe security incident information.
Export TypeThis option enables you to export a CSV (comma separated values) or HTMLfile. The CSV file separates pieces of data in the log entries with commasusing a standard data format for importing into table-oriented applications.Enter a path for your exported report by typing the full path in the field pro-vided.
Location to Store LogEnables you to change the location where the exported report is stored. Thedefault location is/var/log/apparmor/reports-exported.Whenyou change this location, select Accept. Select Browse to browse the filesystem.
4 Click Next to proceed to the next Edit Scheduled SIR page. The second page ofEdit Scheduled Reports opens.
100 Novell AppArmor Administration Guide
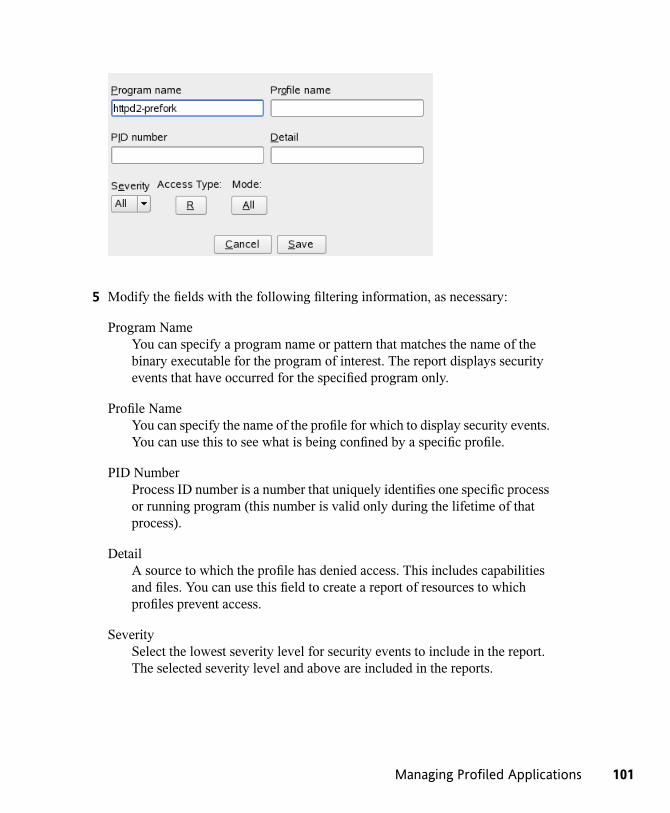
5 Modify the fields with the following filtering information, as necessary:
Program NameYou can specify a program name or pattern that matches the name of thebinary executable for the program of interest. The report displays securityevents that have occurred for the specified program only.
Profile NameYou can specify the name of the profile for which to display security events.You can use this to see what is being confined by a specific profile.
PID NumberProcess ID number is a number that uniquely identifies one specific processor running program (this number is valid only during the lifetime of thatprocess).
DetailA source to which the profile has denied access. This includes capabilitiesand files. You can use this field to create a report of resources to whichprofiles prevent access.
SeveritySelect the lowest severity level for security events to include in the report.The selected severity level and above are included in the reports.
Managing Profiled Applications 101

Access TypeThe access type describes what is actually happening with the security event.The options are PERMITTING, REJECTING, or AUDITING.
ModeThe mode is the permission that the profile grants to the program or processto which it is applied. The options are r (read), w (write), l (link), and x(execute).
6 Select Save to save the changes to this report. Novell AppArmor returns to theScheduled Reports main window where the scheduled report appears in the listof reports.
6.3.5 Deleting ReportsDelete a Report enables you to permanently remove a report from the list of NovellAppArmor scheduled reports. To delete a report, follow these instructions:
1 To remove a report from the list of reports, highlight the report and click Delete.
2 From the confirmation pop-up, select Cancel if you do not want to delete theselected report. If you are sure you want to remove the report permanently fromthe list of reports, select Delete.
6.4 Reacting to Security EventRejections
When you receive a security event rejection, examine the access violation and determineif that event indicated a threat or was part of normal application behavior. Application-specific knowledge is required to make the determination. If the rejected action is partof normal application behavior, run aa-logprof at the command line or the UpdateProfile Wizard in Novell AppArmor to update your profile.
If the rejected action is not part of normal application behavior, this access should beconsidered a possible intrusion attempt (that was prevented) and this notification shouldbe passed to the person responsible for security within your organization.
102 Novell AppArmor Administration Guide

6.5 Maintaining Your Security ProfilesIn a production environment, you should plan on maintaining profiles for all of the de-ployed applications. The security policies are an integral part of your deployment. Youshould plan on taking steps to back up and restore security policy files, plan for softwarechanges, and allow any needed modification of security policies that your environmentdictates.
6.5.1 Backing Up Your Security ProfilesBecause you take the time to make profiles, it makes sense to back them up. Backingup profiles might save you from having to reprofile all your programs after a disk crash.Also, if profiles are changed, you can easily restore previous settings by using thebacked up files.
Back up profiles by copying the profile files to a specified directory.
1 You should first archive the files into one file.To do this, open a terminal windowand enter the following as root:tar zclpf profiles.tgz /etc/apparmor.d
The simplest method to ensure that your security policy files are regularly backedup is to include the directory /etc/apparmor.d in the list of directories thatyour backup system archives.
2 You can also use scp or a file manager like Konqueror or Nautilus to store thefiles on some kind of storage media, the network, or another computer.
6.5.2 Changing Your Security ProfilesMaintenance of security profiles includes changing them if you decide that your systemrequires more or less security for its applications. To change your profiles in NovellAppArmor, refer to Section 3.3, “Editing Profiles” (page 27).
Managing Profiled Applications 103

6.5.3 Introducing New Software into YourEnvironment
When you add a new application version or patch to your system, you should alwaysupdate the profile to fit your needs. You have several options that depend on yourcompany's software deployment strategy. You can deploy your patches and upgradesinto a test or production environment. The following explains how to do this with eachmethod.
If you intend to deploy a patch or upgrade in a test environment, the best method forupdating your profiles is one of the following:
• Run the profiling wizard by selecting Add Profile Wizard in YaST. This creates anew profile for the added or patched application. For step-by-step instructions, referto Section 3.1, “Adding a Profile Using the Wizard” (page 19).
• Run aa-genprof by typing aa-genprof in a terminal while logged in as root.For detailed instructions, refer to Section “aa-genprof—Generating Profiles”(page 47).
If you intend to deploy a patch or upgrade directly into a production environment, thebest method for updating your profiles is one of the following:
• Monitor the system frequently to determine if any new rejections should be addedto the profile and update as needed using aa-logprof. For detailed instructions, referto Section “aa-logprof—Scanning the System Log” (page 54).
• Run the YaST Update Profile Wizard to learn the new behavior (high security riskas all accesses are allowed and logged, not rejected). For step-by-step instructions,refer to Section 3.5, “Updating Profiles from Log Entries” (page 33).
104 Novell AppArmor Administration Guide

7SupportThis chapter outlines maintenance-related tasks. Learn how to update Novell® App-Armor and get a list of available man pages providing basic help for using the commandline tools provided by Novell AppArmor. Use the troubleshooting section to learn aboutsome common problems encountered with Novell AppArmor and their solutions. Reportdefects or enhancement requests for Novell AppArmor following the instructions inthis chapter.
7.1 Updating Novell AppArmor OnlineUpdates for Novell AppArmor packages are provided in the same way as any otherupdate for SUSE Linux Enterprise. Retrieve and apply them exactly like for any otherpackage that ships as part of SUSE Linux Enterprise.
7.2 Using the Man PagesThere are man pages available for your use. In a terminal, enter man apparmor toopen the apparmor man page. Man pages are distributed in sections numbered 1 through8. Each section is specific to a category of documentation:
Support 105

Table 7.1 Man Pages: Sections and Categories
CategorySection
User commands1
System calls2
Library functions3
Device driver information4
Configuration file formats5
Games6
High level concepts7
Administrator commands8
The section numbers are used to distinguish man pages from each other. For example,exit(2) describes the exit system call, while exit(3) describes the exit C libraryfunction.
The Novell AppArmor man pages are:
• unconfined(8)
• autodep(1)
• complain(1)
• enforce(1)
• genprof(1)
• logprof(1)
• change_hat(2)
• logprof.conf(5)
106 Novell AppArmor Administration Guide

• apparmor.conf(5)
• apparmor.d(5)
• apparmor.vim(5)
• apparmor(7)
• apparmor_parser(8)
7.3 For More InformationFind more information about the AppArmor product on the Novell AppArmor productpage at Novell: http://www.novell.com/products/apparmor/. Find theproduct documentation for Novell AppArmor, including this document, at http://www.novell.com/documentation/apparmor/ or in the installed system in/usr/share/doc/manual.
There are specific mailing lists for AppArmor that users can post to or join to commu-nicate with developers.
[email protected] [ mailto:[email protected] ]
This is a mailing list for end users of AppArmor. It is a good place for questionsabout how to use AppArmor to protect your applications.
[email protected] [ mailto:[email protected] ]
This is a developer mailing list for AppArmor developers and community members.This list is for questions about development of core AppArmor features—the kernelmodule and the profiling tools. If you are interested in reviewing the code forAppArmor and contributing reviews or patches, this would be the list for you.
[email protected] [mailto:[email protected]]
This is a low traffic list announcing the availability of new releases or features.
Support 107

7.4 TroubleshootingThis section lists the most common problems and error messages that may occur usingNovell AppArmor.
Odd Application BehaviorIf you notice odd application behavior or any other type of application problem,you should first check the reject messages in the log files to see if AppArmor istoo closely constricting your application. To check reject messages, start YaST >Novell AppArmor and go to AppArmor Reports. Select View Archive and App Audfor the application audit report. You can filter dates and times to narrow down thespecific periods when the unexpected application behavior occurred.
If you detect reject messages that indicate that your application or service is tooclosely restricted by AppArmor, update your profile to properly handle your usecase of the application. Do this with the Update Profile Profile Wizard in YaST,as described in Section 3.5, “Updating Profiles from Log Entries” (page 33).
If you decide to run your application or service without AppArmor protection, re-move the application's profile from /etc/apparmor.d or move it to anotherlocation.
Issues with ApacheApache is not starting properly or it is not servingWeb pages and you just installeda newmodule or made a configuration change.When you install additional Apachemodules (like apache2-mod-apparmor) or make configuration changes toApache, you should profile Apache again to catch any additional rules that needto be added to the profile.
Reports Not Sent by E-MailWhen the reporting feature generates an HTML or CSV file that exceeds the defaultsize, the file is not sent. Mail servers have a default, hard limit for e-mail size. Thislimitation can impede AppArmor's ability to send e-mails that are generated forreporting purposes. If your mail is not arriving, this could be why. Consider themail size limits and check the archives if e-mails have not been received.
Excluding Certain Profiles from the List of Profiles UsedAppArmor always loads and applies all profiles that are available in its profile di-rectory (/etc/apparmor.d/). If you decide not to apply a profile to a certain
108 Novell AppArmor Administration Guide

application, delete the appropriate profile or move it to another location whereAppArmor would not check for it.
AppArmor Syntax ErrorManually editing Novell AppArmor profiles can introduce syntax errors. If youattempt to start or restart AppArmor with syntax errors in your profiles, error resultsare shown. This example shows the syntax of the entire parser error.
localhost:~ # rcapparmor startLoading AppArmor profilesAppArmor parser error, line 2: Found unexpected character: ’h’Profile /etc/apparmor.d/usr.sbin.squid failed to loadfailed
Using the AppArmor YaST tools, a graphical error message indicates which profilecontained the error and requests you to fix it.
To fix a syntax error, log in to a terminal window as root, open the profile, andcorrect the syntax. Reload the profile set with rcapparmor reload.
7.5 Reporting Bugs for AppArmorThe developers of AppArmor and SUSE Linux Enterprise are eager to deliver productsof the highest quality. Your feedback and your bug reports help us keep the qualityhigh.Whenever you encounter a bug in AppArmor, file a bug report against this product:
1 Use yourWeb browser to go tohttps://bugzilla.novell.com/index.cgi.
Support 109

2 Enter the account data of your Novell account and click Login
or
Create a new Novell account as follows:
2a Click Create New Account on the Login to Continue page.
2b Provide a username and password and additional address data and clickCreate Login to immediately proceed with the login creation.
or
Provide data on which other Novell accounts you maintain to sync all theseto one account.
3 Check whether a problem similar to yours has already been reported by clickingSearch Reports. Use a quick search against a given product and keyword or usethe Advanced Search.
4 If your problem has already been reported, check this bug report and add extrainformation to it, if necessary.
5 If your problem has not been reported yet, select New from the top navigationbar and proceed to the Enter Bug page.
6 Select the product against which to file the bug. In your case, this would be yourproduct's release. Click Submit.
7 Select the product version, component (AppArmor in this case), hardware plat-form, and severity.
8 Enter a brief headline describing your problem and add a more elaborate descrip-tion including log files. Youmay create attachments to your bug report for screenshots, log files, or test cases.
9 Click Submit after you have entered all the details to send your report to the de-velopers.
110 Novell AppArmor Administration Guide

ABackground Information onAppArmor ProfilingFor more information about the science and security of Novell AppArmor, refer to thefollowing papers:
SubDomain: Parsimonious Server Security by Crispin Cowan, Steve Beattie, GregKroah-Hartman, Calton Pu, Perry Wagle, and Virgil Gligor
Describes the initial design and implementation of Novell AppArmor. Publishedin the proceedings of the USENIXLISAConference, December 2000, NewOrleans,LA. This paper is now out of date, describing syntax and features that are differentfrom the current Novell AppArmor product. This paper should be used only forscientific background and not for technical documentation.
Defcon Capture the Flag: Defending Vulnerable Code from Intense Attack by CrispinCowan, Seth Arnold, Steve Beattie, Chris Wright, and John Viega
A good guide to strategic and tactical use of Novell AppArmor to solve severe se-curity problems in a very short period of time. Published in the Proceedings of theDARPA Information Survivability Conference and Expo (DISCEX III), April 2003,Washington, DC.

GlossaryApache
Apache is a freely available UNIX-based Web server. It is currently the mostcommonly used Web server on the Internet. Find more information about Apacheat the Apache Web site at http://www.apache.org.
application firewallingNovell AppArmor contains applications and limits the actions they are permittedto take. It uses privilege confinement to prevent attackers from using maliciousprograms on the protected server and even using trusted applications in unintendedways.
attack signaturePattern in system or network activity that signals a possible virus or hacker attack.Intrusion detection systems might use attack signatures to distinguish between le-gitimate and potentially malicious activity.
By not relying on attack signatures, Novell AppArmor provides "proactive" insteadof "reactive" defense from attacks. This is better because there is no window ofvulnerability where the attack signature must be defined for Novell AppArmor asit does for products using attack signatures to secure their networks.
GUIGraphical user interface. Refers to a software front-end meant to provide an attrac-tive and easy-to-use interface between a computer user and application. Its elementsinclude such things as windows, icons, buttons, cursors, and scroll bars.
globbingFilename substitution.
HIPHost intrusion prevention.Works with the operating system kernel to block abnormalapplication behavior in the expectation that the abnormal behavior represents anunknown attack. Blocks malicious packets on the host at the network level beforethey can “hurt” the application they target.

mandatory access controlA means of restricting access to objects that is based on fixed security attributesassigned to users, files, and other objects. The controls are mandatory in the sensethat they cannot be modified by users or their programs.
profile foundation classesProfile building blocks needed for common application activities, such as DNSlookup and user authentication.
RPMThe RPM Package Manager. An open packaging system available for anyone touse. It works on Red Hat Linux, SUSE Linux Enterprise, and other Linux andUNIX systems. It is capable of installing, uninstalling, verifying, querying, andupdating computer software packages. See http://www.rpm.org/ for moreinformation.
SSHSecure Shell. A service that allows you to access your server from a remote com-puter and issue text commands through a secure connection.
streamlined access controlNovell AppArmor provides streamlined access control for network services byspecifying which files each program is allowed to read, write, and execute. Thisensures that each program does what it is supposed to do and nothing else.
URIUniversal resource identifier. The generic term for all types of names and addressesthat refer to objects on the World Wide Web. A URL is one kind of URI.
URLUniform Resource Locator. The global address of documents and other resourceson the World Wide Web.
The first part of the address indicates what protocol to use and the second partspecifies the IP address or the domain name where the resource is located.
For example, in http://www.novell.com, http is the protocol to use.
vulnerabilitiesAn aspect of a system or network that leaves it open to attack. Characteristics ofcomputer systems that allow an individual to keep it from correctly operating or
114 Novell AppArmor Administration Guide

that allows unauthorized users to take control of the system. Design, administrative,or implementation weaknesses or flaws in hardware, firmware, or software. If ex-ploited, a vulnerability could lead to an unacceptable impact in the form of unau-thorized access to information or disruption of critical processing.
Glossary 115