Microsoft Word 2013 Level 2 - University of Regina
19
Microsoft Word 2013 Level 2
-
Upload
khangminh22 -
Category
Documents
-
view
0 -
download
0
Transcript of Microsoft Word 2013 Level 2 - University of Regina

Microsoft
Word 2013 Level 2

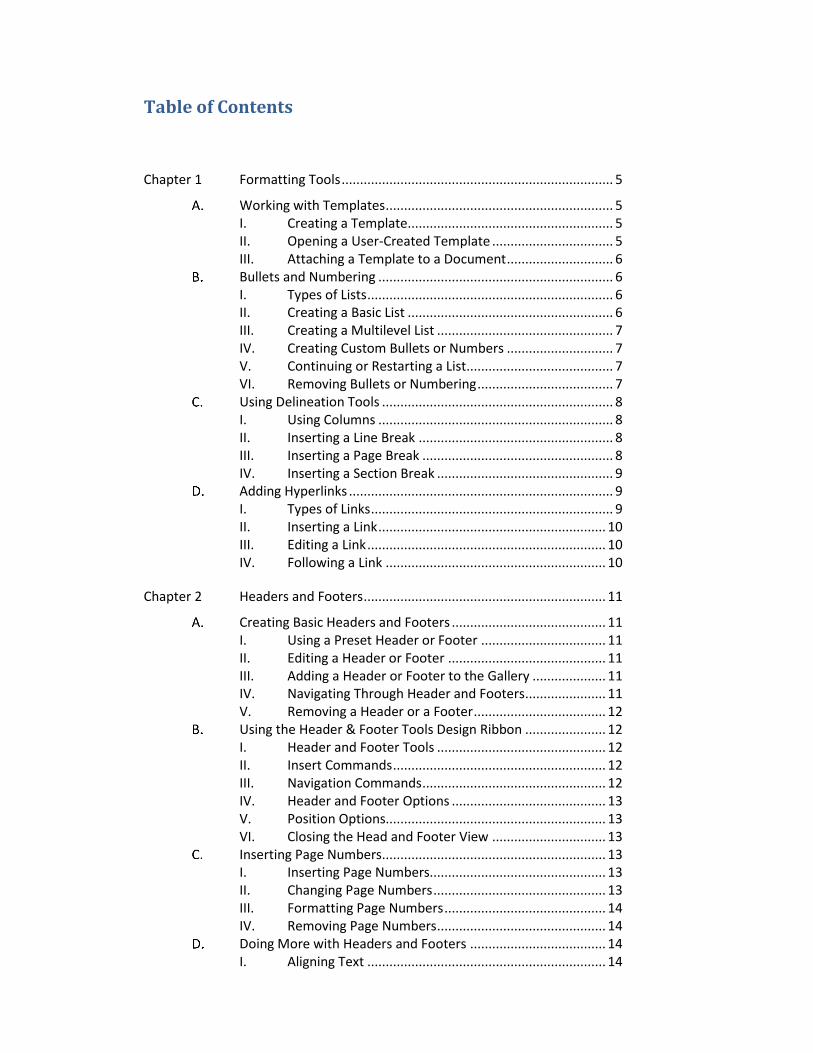
Table of Contents
Chapter 1 Formatting Tools .......................................................................... 5
Working with Templates .............................................................. 5 I. Creating a Template ........................................................ 5 II. Opening a User-Created Template ................................. 5 III. Attaching a Template to a Document ............................. 6
Bullets and Numbering ................................................................ 6 I. Types of Lists ................................................................... 6 II. Creating a Basic List ........................................................ 6 III. Creating a Multilevel List ................................................ 7 IV. Creating Custom Bullets or Numbers ............................. 7 V. Continuing or Restarting a List ........................................ 7 VI. Removing Bullets or Numbering ..................................... 7
Using Delineation Tools ............................................................... 8 I. Using Columns ................................................................ 8 II. Inserting a Line Break ..................................................... 8 III. Inserting a Page Break .................................................... 8 IV. Inserting a Section Break ................................................ 9
Adding Hyperlinks ........................................................................ 9 I. Types of Links .................................................................. 9 II. Inserting a Link .............................................................. 10 III. Editing a Link ................................................................. 10 IV. Following a Link ............................................................ 10
Chapter 2 Headers and Footers .................................................................. 11
Creating Basic Headers and Footers .......................................... 11 I. Using a Preset Header or Footer .................................. 11 II. Editing a Header or Footer ........................................... 11 III. Adding a Header or Footer to the Gallery .................... 11 IV. Navigating Through Header and Footers ...................... 11 V. Removing a Header or a Footer .................................... 12
Using the Header & Footer Tools Design Ribbon ...................... 12 I. Header and Footer Tools .............................................. 12 II. Insert Commands .......................................................... 12 III. Navigation Commands .................................................. 12 IV. Header and Footer Options .......................................... 13 V. Position Options............................................................ 13 VI. Closing the Head and Footer View ............................... 13
Inserting Page Numbers ............................................................. 13 I. Inserting Page Numbers................................................ 13 II. Changing Page Numbers ............................................... 13 III. Formatting Page Numbers ............................................ 14 IV. Removing Page Numbers .............................................. 14
Doing More with Headers and Footers ..................................... 14 I. Aligning Text ................................................................. 14

II. Adding Pictures ............................................................. 14 III. Inserting the Date and Time ......................................... 15 IV. Linking and Unlinking Headers and Footers ................. 15
Chapter 3 Using Time – Saving Tools .......................................................... 16
Using the Thesaurus .................................................................. 16 Inserting Pre-Defined Text ......................................................... 16
I. Using and Customizing AutoCorrect ............................. 16 II. Inserting a Symbol ........................................................ 16 III. Inserting Special Characters ......................................... 17
Chapter 4 Additional Information .............................................................. 18
I. File Properties ............................................................... 18 II. Document Inspector ..................................................... 18 III. Marking a Document as Final ....................................... 18 IV. Encrypting a Document ................................................ 19

University of Regina Word Level 2 • 2018 P a g e | 5
Chapter 1 Formatting Tools
Working with Templates
A template is a document that contains styles, graphics, objects and sample text. Its purpose is to provide a format to place text and save time while keeping documents consistent.
I. Creating a Template To create a template:
1. Open and edit a document until it is the desired template. 2. Open the Office Menu and choose Save As. 3. Click Browse. 4. Use the drop-down menu to choose “Word Template”. 5. Choose where to save the template. 6. Click Save.
II. Opening a User-Created Template To open your template:
1. Open the Office Menu. 2. Click New. 3. Click Personal. 4. Click on the template desired.

6 | P a g e Word Level 2 • 2018 University of Regina
III. Attaching a Template to a Document To apply a new template to an existing file:
1. Make sure the Developer ribbon is visible. This can be enabled in Options. 2. Open the document to attach the template to. 3. Click the Document Template on the Developer ribbon. 4. Click the attach button. 5. Choose the template to attach. 6. Check “Automatically update document styles” and click Ok.
Bullets and Numbering
Making lists is a common part of most documents. Bullets and numbering can better organize the document.
I. Types of Lists There are three basic types of lists that can be created in Word:
1. Simple Bulleted List
2. Numbered List
3. Multilevel List
II. Creating a Basic List To create a simple bulleted or numbered list:
1. Select the text to create as a list or select where to begin the list. 2. Click either the bullet or numbered icon in the Paragraph chunk of the Home ribbon. 3. Use the drop-down arrow to change the icons used for the list.
University of Regina Word Level 2 • 2018 P a g e | 7
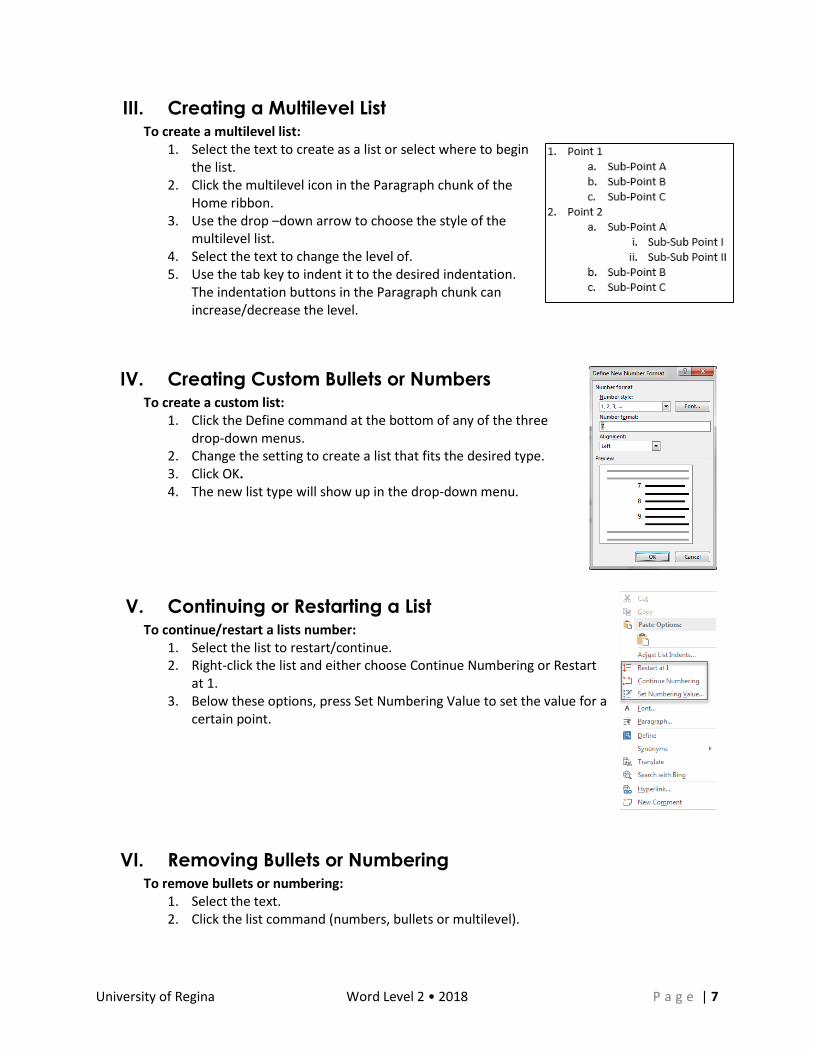
III. Creating a Multilevel List To create a multilevel list:
1. Select the text to create as a list or select where to begin the list.
2. Click the multilevel icon in the Paragraph chunk of the Home ribbon.
3. Use the drop –down arrow to choose the style of the multilevel list.
4. Select the text to change the level of. 5. Use the tab key to indent it to the desired indentation.
The indentation buttons in the Paragraph chunk can increase/decrease the level.
IV. Creating Custom Bullets or Numbers To create a custom list:
1. Click the Define command at the bottom of any of the three drop-down menus.
2. Change the setting to create a list that fits the desired type. 3. Click OK. 4. The new list type will show up in the drop-down menu.
V. Continuing or Restarting a List To continue/restart a lists number:
1. Select the list to restart/continue. 2. Right-click the list and either choose Continue Numbering or Restart
at 1. 3. Below these options, press Set Numbering Value to set the value for a
certain point.
VI. Removing Bullets or Numbering
To remove bullets or numbering: 1. Select the text. 2. Click the list command (numbers, bullets or multilevel).
8 | P a g e Word Level 2 • 2018 University of Regina
Using Delineation Tools
Delineation refers to the ability to manually insert line breaks, page breaks and section breaks, which splits a document into sections.
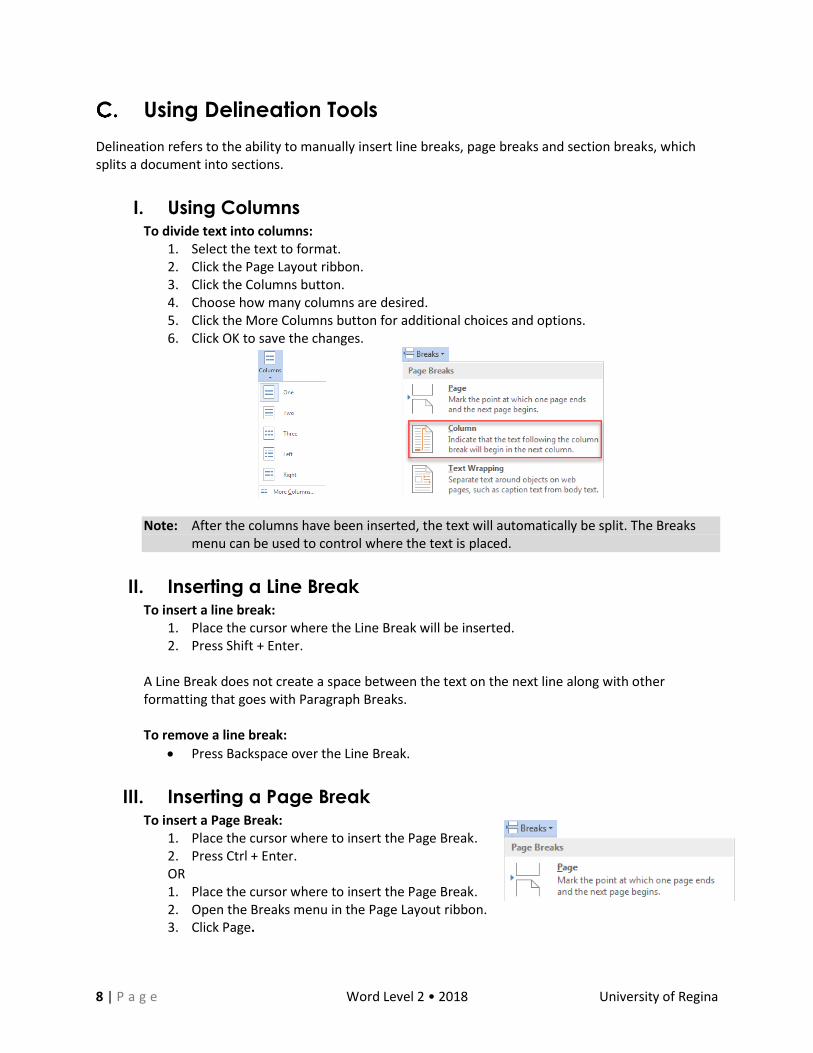
I. Using Columns To divide text into columns:
1. Select the text to format. 2. Click the Page Layout ribbon. 3. Click the Columns button. 4. Choose how many columns are desired. 5. Click the More Columns button for additional choices and options. 6. Click OK to save the changes.
Note: After the columns have been inserted, the text will automatically be split. The Breaks
menu can be used to control where the text is placed.
II. Inserting a Line Break To insert a line break:
1. Place the cursor where the Line Break will be inserted. 2. Press Shift + Enter.
A Line Break does not create a space between the text on the next line along with other formatting that goes with Paragraph Breaks. To remove a line break:
Press Backspace over the Line Break.
III. Inserting a Page Break To insert a Page Break:
1. Place the cursor where to insert the Page Break. 2. Press Ctrl + Enter. OR 1. Place the cursor where to insert the Page Break. 2. Open the Breaks menu in the Page Layout ribbon. 3. Click Page.

University of Regina Word Level 2 • 2018 P a g e | 9
To remove a Page Break: 1. Place the cursor at the new page. 2. Press Backspace to remove the break.
IV. Inserting a Section Break Section breaks divide a document into different sections that allow different header and footers per section. To insert a Section Break:
1. Place the cursor where to insert the Section Break. 2. Open the Break menu in the Page Layout ribbon. 3. Choose what kind of section break to use.
Adding Hyperlinks
Inserting links can be a useful feature for long documents, complex projects, directing people to a Web page or providing contact information.
I. Types of Links There are four types of links that can be created:
To an existing file - Link to an existing fill on the computer. These links do not work if the document is shared.
To this document - Link to another place within the document.
To a webpage - Links that open a web browser to a specific page.
To an email address - Links that open a new email message to the link clicked.
10 | P a g e Word Level 2 • 2018 University of Regina
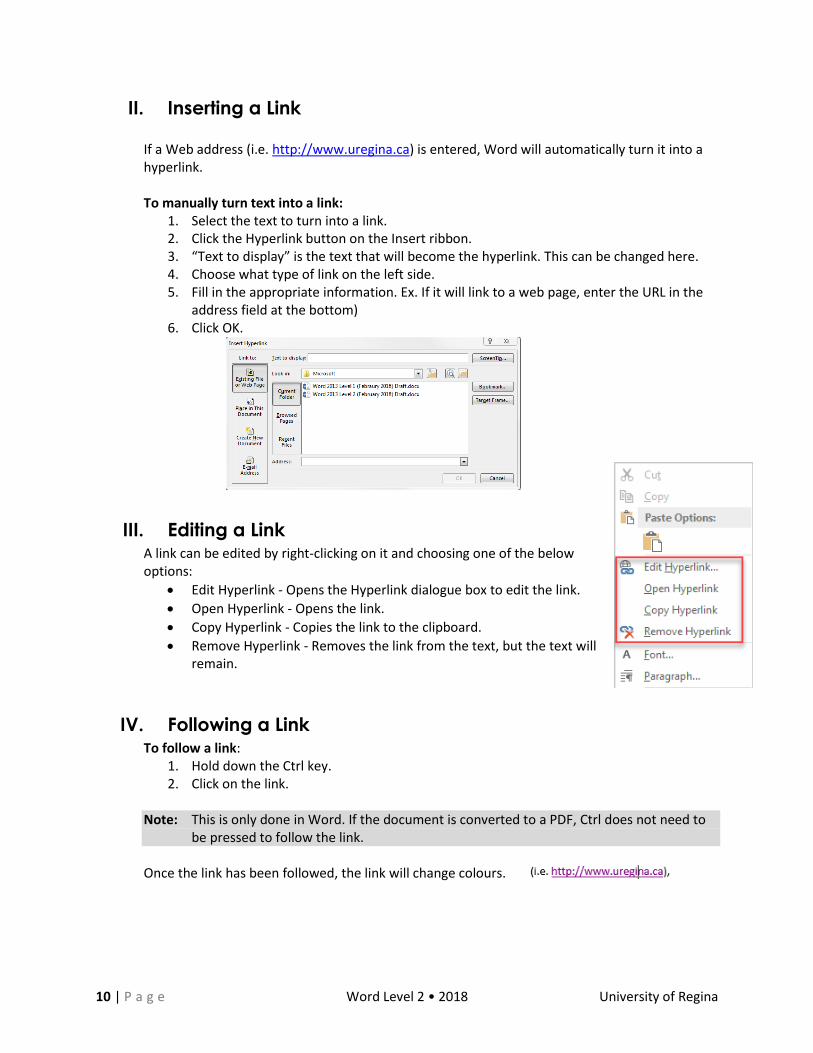
II. Inserting a Link If a Web address (i.e. http://www.uregina.ca) is entered, Word will automatically turn it into a hyperlink. To manually turn text into a link:
1. Select the text to turn into a link. 2. Click the Hyperlink button on the Insert ribbon. 3. “Text to display” is the text that will become the hyperlink. This can be changed here. 4. Choose what type of link on the left side. 5. Fill in the appropriate information. Ex. If it will link to a web page, enter the URL in the
address field at the bottom) 6. Click OK.
III. Editing a Link A link can be edited by right-clicking on it and choosing one of the below options:
Edit Hyperlink - Opens the Hyperlink dialogue box to edit the link.
Open Hyperlink - Opens the link.
Copy Hyperlink - Copies the link to the clipboard.
Remove Hyperlink - Removes the link from the text, but the text will remain.
IV. Following a Link To follow a link:
1. Hold down the Ctrl key. 2. Click on the link.
Note: This is only done in Word. If the document is converted to a PDF, Ctrl does not need to
be pressed to follow the link. Once the link has been followed, the link will change colours.

University of Regina Word Level 2 • 2018 P a g e | 11
Chapter 2 Headers and Footers
Creating Basic Headers and Footers
Headers (top of the page) and footers (bottom of the page) are groups of information set apart from the body of a document. Headers and footers can make a document more user-friendly, and make it appear polished and professional. They can also save time because the header can appear on every page. For example, the title of a book appearing at the top of every page may be set as a header.
I. Using a Preset Header or Footer To create a preset header or footer:
1. Click the Header or Footer button in the Insert ribbon 2. Choose the type of header or footer. That footer or header will then appear on every
page. 3. Add text where indicated. 4. Once complete click the Close Header and Footer button in the Header and Footer Tools
Design ribbon.
II. Editing a Header or Footer To edit a header or footer:
1. Double-click in either in the header or footer portion of the page. This will open the Header and Footer Tools Design ribbon and the text of the footer or header can once again be edited.
2. Once complete, click the Close Header and Footer button in the Header and Footer Tools Design ribbon.
III. Adding a Header or Footer to the Gallery A footer or header can be added to the selection gallery to easily add it to future documents. To add a header or footer to the gallery:
1. Double-click the header or footer to add it to the gallery. 2. Select the parts that would be added to future documents. 3. Click the Footer or Header button (depending on what the
selection is). 4. Click Save Selection to Gallery. 5. A pop-up window will appear. Complete the appropriate
fields.
IV. Navigating Through Header and Footers To navigate through headers and footers:
1. Double-click on a footer or header to open the Design ribbon. 2. Use the commands on the Navigation chunk to toggle between
the header and footer, to navigate between sections and delink to previous section(s).
12 | P a g e Word Level 2 • 2018 University of Regina
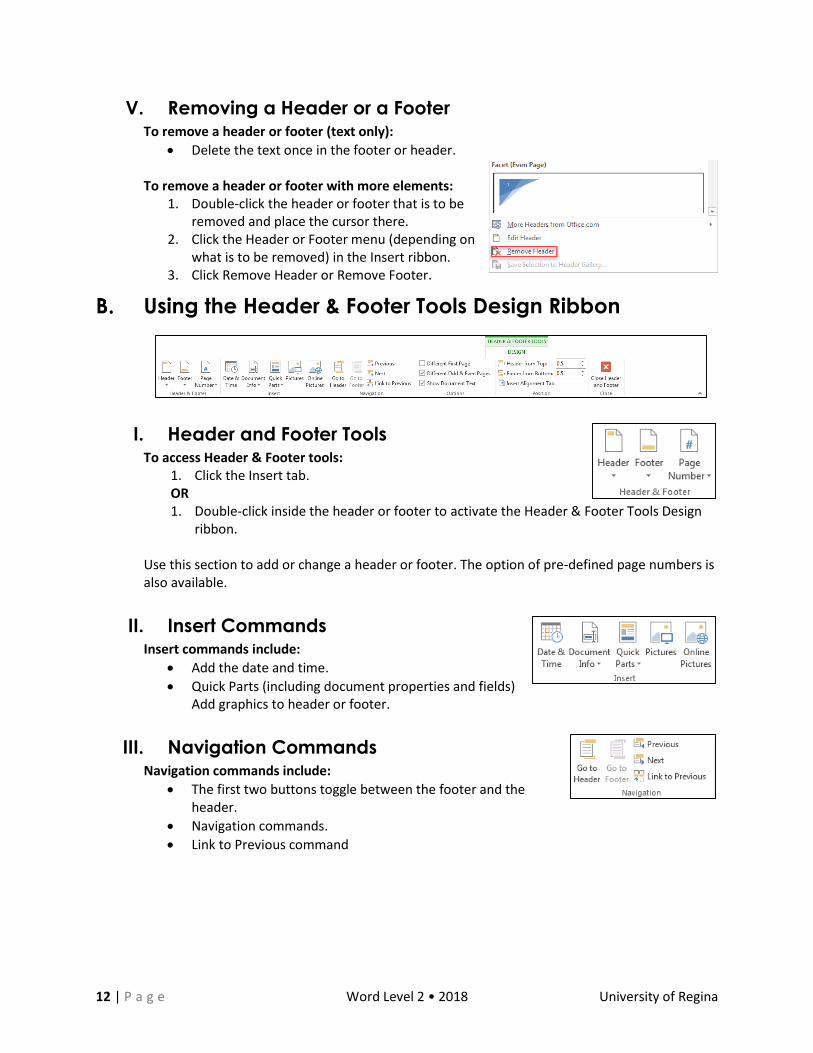
V. Removing a Header or a Footer To remove a header or footer (text only):
Delete the text once in the footer or header. To remove a header or footer with more elements:
1. Double-click the header or footer that is to be removed and place the cursor there.
2. Click the Header or Footer menu (depending on what is to be removed) in the Insert ribbon.
3. Click Remove Header or Remove Footer.
Using the Header & Footer Tools Design Ribbon
I. Header and Footer Tools To access Header & Footer tools:
1. Click the Insert tab. OR 1. Double-click inside the header or footer to activate the Header & Footer Tools Design
ribbon. Use this section to add or change a header or footer. The option of pre-defined page numbers is also available.
II. Insert Commands Insert commands include:
Add the date and time.
Quick Parts (including document properties and fields) Add graphics to header or footer.
III. Navigation Commands Navigation commands include:
The first two buttons toggle between the footer and the header.
Navigation commands.
Link to Previous command

University of Regina Word Level 2 • 2018 P a g e | 13
IV. Header and Footer Options Options include:
Choose a different header or footer for the first and/or odd and even pages.
Show or hide document text when editing the footer/header.
V. Position Options Position Options control the exact position of the header or footer on the page. The alignment of the text can also be changed.
VI. Closing the Head and Footer View Exit Footer and Header editing.
Inserting Page Numbers
Page numbers are treated as headers and footers as they are typically placed at the top or bottom of the page. The pages numbers can be formatted the same as other text and page numbers automatically generate the page number. This should be used rather than typing in the numbers manually.
I. Inserting Page Numbers To insert page numbers:
1. Either click the Page Number button from the Insert ribbon or the Header and Footer Tools Design ribbon.
2. Choose where the page number should be. 3. A list of possible styles will appear. 4. These can be edited in the same way as any other header and footer.
II. Changing Page Numbers To change a page number styles:
1. Like header and footers, enter the Page Numbers menu, choose a different style and it will update the entire document.

14 | P a g e Word Level 2 • 2018 University of Regina
III. Formatting Page Numbers To format page numbers:
1. Select the page number. 2. Format using the Font chunk in the Home ribbon 3. If desired, the change can be saved to the gallery by using
the Top of Page or the Bottom of Page menu. 4. To change the style of the numbers, open the Page
Number menu and select the command to format page numbers.
5. Change the desired fields then click OK.
IV. Removing Page Numbers To remove page numbers:
1. Click to place the cursor on the set of page numbers to remove. 2. Click the Page Number command either in the Insert ribbon or Header
and Footer Design ribbon. 3. Click Remove Page Numbers
Doing More with Headers and Footers
I. Aligning Text The best way to align text in a header or footer is to use the Insert Alignment Tab command on the Header and Footer Tools Design ribbon. To change the alignment:
1. Place the cursor in front of the text to align. 2. Click the Insert Alignment Tab button. 3. In the dialogue box that appears, choose an alignment and a
leader (characters that will fill the space between the margin and the text).
4. Click OK.
II. Adding Pictures To add a picture:
1. Click where to add the graphic. 2. Click the Pictures button on the Insert chunk of the Header and Footer Tools
Design ribbon. 3. Navigate to the file and open it.
Note: Use the Alignment Tab to align the photo.
University of Regina Word Level 2 • 2018 P a g e | 15
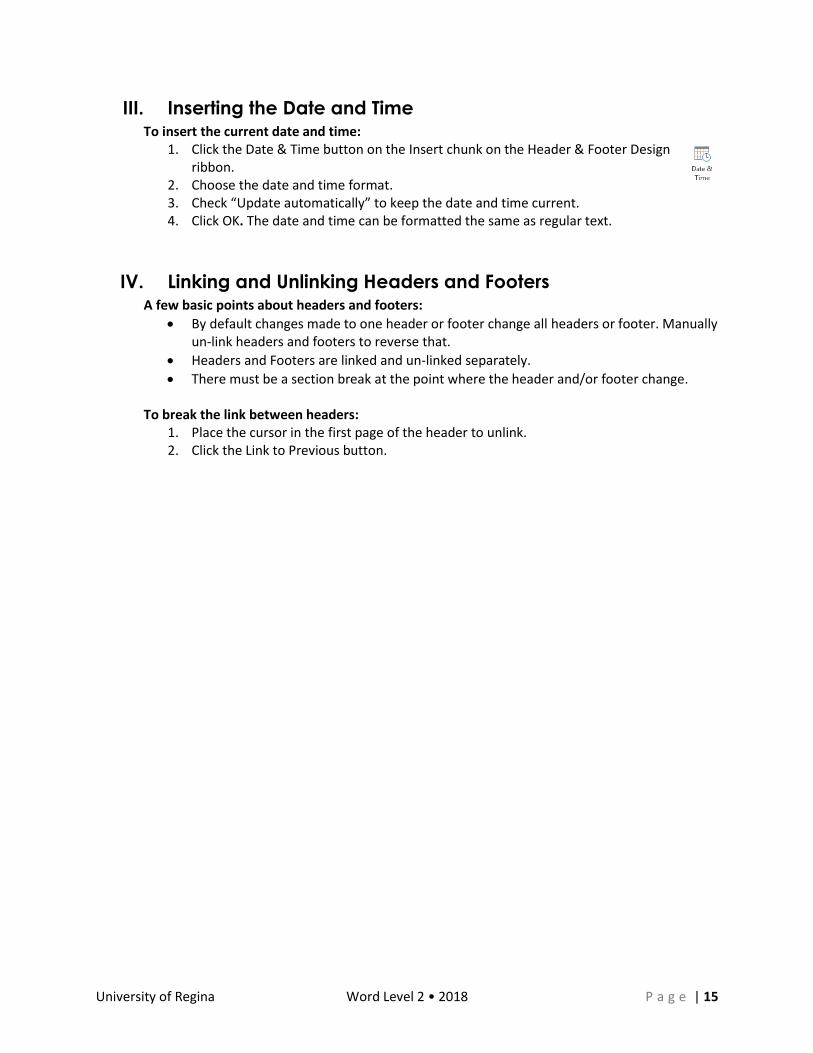
III. Inserting the Date and Time To insert the current date and time:
1. Click the Date & Time button on the Insert chunk on the Header & Footer Design ribbon.
2. Choose the date and time format. 3. Check “Update automatically” to keep the date and time current. 4. Click OK. The date and time can be formatted the same as regular text.
IV. Linking and Unlinking Headers and Footers A few basic points about headers and footers:
By default changes made to one header or footer change all headers or footer. Manually un-link headers and footers to reverse that.
Headers and Footers are linked and un-linked separately.
There must be a section break at the point where the header and/or footer change.
To break the link between headers: 1. Place the cursor in the first page of the header to unlink. 2. Click the Link to Previous button.

16 | P a g e Word Level 2 • 2018 University of Regina
Chapter 3 Using Time – Saving Tools
Using the Thesaurus
There are two way to use the Thesaurus: Method 1:
1. Right-click the word. 2. Choose Synonyms and look at the list. Click the new word and it
will replace the old one. Method 2:
1. Click the Thesaurus button in the Review ribbon to open the Thesaurus tool. 2. The Thesaurus pane will open on the right-side. Use this to search words and
get a longer list. Clicking a word will not replace the old one; instead, the word clicked on will be searched instead.
3. Right-click the word to either insert it or copy it to the clipboard.
Inserting Pre-Defined Text
I. Using and Customizing AutoCorrect To customize AutoCorrect:
1. Open the Office Menu. 2. Click Options near the bottom left. 3. Click the Proofing Tab. 4. Click Control AutoCorrect Options to customize
AutoCorrect. 5. Once complete press OK.
II. Inserting a Symbol To insert symbols:
1. Click on the Symbol button in the Insert ribbon. 2. Click on a symbol to insert. 3. If the symbol is not in the list, click More
Symbols. 4. Select a symbol then click Insert. 5. Click Close when finished.

University of Regina Word Level 2 • 2018 P a g e | 17
III. Inserting Special Characters To insert special characters:
1. Click on the Symbol button in the Insert ribbon 2. Click More Symbols. 3. Open the Special Characters tab 4. Select the character to insert and press Insert.
Note: AutoCorrect and Shortcuts for these Special Characters can be edited in this menu by
using the buttons at the bottom.
18 | P a g e Word Level 2 • 2018 University of Regina
Chapter 4 Additional Information
I. File Properties To view the properties of the current file:
1. Open the Office menu. 2. Click Info. 3. The properties appear on the right.
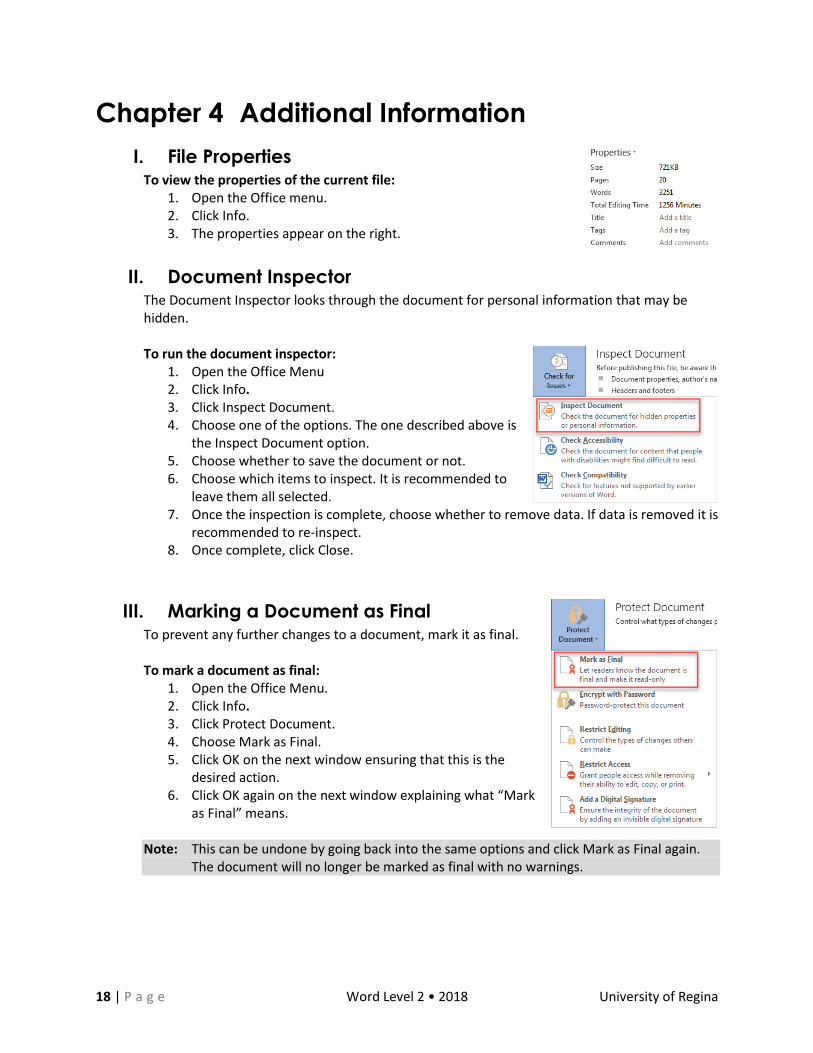
II. Document Inspector The Document Inspector looks through the document for personal information that may be hidden. To run the document inspector:
1. Open the Office Menu 2. Click Info. 3. Click Inspect Document. 4. Choose one of the options. The one described above is
the Inspect Document option. 5. Choose whether to save the document or not. 6. Choose which items to inspect. It is recommended to
leave them all selected. 7. Once the inspection is complete, choose whether to remove data. If data is removed it is
recommended to re-inspect. 8. Once complete, click Close.
III. Marking a Document as Final To prevent any further changes to a document, mark it as final. To mark a document as final:
1. Open the Office Menu. 2. Click Info. 3. Click Protect Document. 4. Choose Mark as Final. 5. Click OK on the next window ensuring that this is the
desired action. 6. Click OK again on the next window explaining what “Mark
as Final” means. Note: This can be undone by going back into the same options and click Mark as Final again.
The document will no longer be marked as final with no warnings.

University of Regina Word Level 2 • 2018 P a g e | 19
IV. Encrypting a Document Encrypted files are a measure to keep a document protected. Once encrypted, the document will need a password to access it. To encrypt a document:
1. Open the Office Menu. 2. Click Info. 3. Click Protect Document. 4. Click Encrypt with Password. 5. Enter the password for the encryption then press OK.
Note: The difference between encrypting a document and setting a password through the
Save As dialogue is that encryption is much stronger. In most cases, if you want to set a password, encryption is the easiest, most reliable, and best option to use.