LONG-ACTING REVERSIBLE CONTRACEPTIVE (LARC ...
190
MANUAL FOR TRAINING DOCTORS AND NURSE/MIDWIVES ON LONG-ACTING REVERSIBLE CONTRACEPTIVE (LARC) METHODS (IUDs and Contraceptive Implants) • Trainer's Manual 2015
-
Upload
khangminh22 -
Category
Documents
-
view
0 -
download
0
Transcript of LONG-ACTING REVERSIBLE CONTRACEPTIVE (LARC ...

MANUAL
FOR TRAINING
DOCTORS AND NURSE/MIDWIVES
ON
LONG-ACTING REVERSIBLE
CONTRACEPTIVE (LARC) METHODS
(IUDs and Contraceptive Implants)
·Trainer's Manual
2015

2
FOREWORD
The unacceptably poor maternal and child health indices in Nigeria have been of much concern to various governments at all levels in the country. In efforts to address these unfavorable indices, Family Planning which is one of the pillars of safe motherhood is being vigorously implemented through series of interventions. Notable amongst these, is the introduction of Task Shifting policy for Community Health Extension Workers, CHEWS to provide Injectables with mentoring for ensuring wider coverage of FP services in the country. The success being achieved led stakeholders to seek for Federal Government's approval for the provision of Long Acting Reversible Contraceptive Methods (IUDs and contraceptive Implants) which was approved by the National Council on Health in 2014.
To this end the Federal Ministry of Health, Marie Stopes International Organisation Nigeria (MSION), Clinton Health Access Initiative (CHAI), United Nations Population Fund (UNFPA), and other partners met and developed a draft Training Manual, Participant Reference Book and Supervisory Checklist for impacting knowledge and skills on CHEWS to provide quality family planning services to clients who need IUDs and implant contraceptives. This intervention is expected to reduce the high unmet need for services and accelerate achievement of the target Family Planning Blueprint of 36 percent Contraceptive Prevalence Rate by the year 2018.
The Federal Ministry of Health recognizes and appreciates all the development partners, especially Marie Stopes Nigeria, for their efforts in making all these interventions realizable and assures partners of government supports for further efforts at improving the health and well-being of our women and children in the country.
May I say that it is one thing to develop valuable documents and it is another to make effective use of them. Therefore, it is my expectation that all stakeholders will make the best use of these manuals and checklist to improve skills of service providers for provision of quality family planning services in Nigeria.
I thank you all while strongly recommending the National Long Acting Reversible Contraceptive (LARC) Manuals and Supervisory Checklists for use to support provision of quality family planning services in the country.
Professor Isaac Folorunso Adewole FAS, FSPSP, D.Sc (Hons)Honourable Minister of Health
November, 2015

3
ACKNOWLEDGEMENT
The development of the Long Acting Reversible Contraceptive (LARC) Training Manual has been recognised as another milestone in building the technical competence of the health workers in the provision of quality Family planning service. This achievement has been through the concerted effort of the Ministry and its technical partners.
The Federal Ministry of Health would like to extend its gratitude to individuals and organizations who contributed to the development of this competency based Long Acting Reversible Contraceptive Training manual for health workers in the provision of Family Planning services. The manual will continually strengthen the skills and capacity of health workers.
I commend the support of our esteemed partners particularly United Nations Population Fund (UNFPA) who provided technical support to Federal Ministry of Health in the development of the LARC Training Manual
I also acknowledge the contributions of other stakeholders such as NPHCDA, MSION, ARFH, MSD, JHPIEGO, Pathfinder International, NURHI, Bayer Health Care and Independent consultant Prof. Adekunle Adeyemi who worked tirelessly to make the manual a success.
Finally, I want to thank the Head, Reproductive Health Division, Dr Kayode Afolabi and also commend the immense contribution of the technical officers in FP branch of the RH Division for their drive and support in the development of the training manual for health workers in the country.
Dr. Wapada Balami mni
Director, Family Health Department
Federal Ministry of Health

4
TABLE OF CONTENTS Foreword 2
Acknowledgement 3
Table of Contents 4-5
Acronyms 8
Course Overview
§ Introduction§ Course Goal§ Training Objectives
SECTION A: INTRODUCTION TO TRAINING PROGRAMME 9§ Mastery Approach to Training 9§ Key Features of Effective Clinical Training 10§ Use of Training Package 10§ Course Overview 11§Workshop Agenda 12§ Climate Setting 17
SECTION B: MODULE FRAMEWORK AND PRESENTATIONS 18
Module 1: Overview of Family Planning in Nigeria 19-25
Module 2: Introduction to IUCD and Implants 26-42
Session 1: Product Profile CuT380A and Medical Eligibility Criteria for IUDs 27
R R R Session 2: Product Profile of Jadelle , Zarin and Implanon and Medical Eligibility Criteria for Contraceptive Implants 33
Module 3: Using Learning Guides during Model and Clinical Practice 43-50
Module 4: Insertion and Removal Techniques for IUD and Implants 51-92
Session 1: IUD Insertion Techniques 52R R
Session 2: Jadelle and Zarin Implants Insertion Techniques 59RSession 3: Implanon Insertion Technique 67
Session 4: IUD Removal Techniques 76Session 5: Implant Removal Techniques 83
Module 5: Model and Clinical Practice 93-103
Module 6: Counselling for IUDs and Implants 104-119
Session 1: Introduction to Counselling 105Session 2: The Balanced Counselling Strategy Plus 112

5
Module 7: Problem Management/Information and Support during IUD and Implant Use 120-131
Session 1: Problem Management during use of Copper-bearing IUDs 121Session 2: Problem Management during use of contraceptive
Subdermal Implants 127
Module 8: Infection Prevention Practices during IUD and Implant Insertion and Removal Techniques 132-153
Session 1: Asepsis, Hand washing and Gloving 133Session 2: Disinfection and Sterilization 140Session 3: Disposal of Sharps and Waste 147
Module 9: Record Keeping Management Information System (MIS)Contraceptive Logistics Management System (CLMS) 154-165
Session 1: Record Keeping and Management Information System (MIS) 155
Session 2: Contraceptive Logistics Management System (CLMS) 160
Module 10: Resources Management 166-176Session 1: Clinic facilities and requirement 191
Session 2: Personnel Requirement 197
SECTION C: TRAINER'S EVALUATION TOOLS 177
a) Participants' Needs Assessment Form 178b) Pre-/Post-Test 182c) Participants' Daily Evaluation Form 188d) Participants' End-of-Course Evaluation Form 189

6
LIST OF CONTRIBUTORS
Dr Kayode Afolabi Director/Head, Reproductive Health Division FMOH
Mr Greg Izuwa Deputy Director, Family Planning Logistics FMOH
Mr Lawrence Anyanwu Deputy Director, Family Planning Services FMOH
Mrs Nneka Oteka Asst. Director, Family Planning Services FMOH
Mr Ralph Olayele Asst. Director, Family Planning Logistics FMOH
Mr Adeoye Adetunji Asst. Director NPHCDA
Mr Alex Ugochukwu Chief Pharmacist FMOH
Mrs Elizabeth Oluyomi CNO, Family Planning Services FMOH
Mrs Temitope Bombata CNO, Family Planning Services FMOH
Prof Oladapo Olayemi HOD O&G Dept UCH
Dr Adebola Roberts Consultant O&G UCH
Prof Adeyemi Adekunle Consultant Dr Kayode Osungbade Consultant Mr Aliyu Adamu ACNO Nursing&Midwifery Council
Dr Tony Udoh ACHRO FMOH
Dr Gabriel Ortonga SMO1 FMOH
Dr C.O. Tetsola FP Coordinator Delta SMOH
Z.A. Otajele Asst. FP Coordinator Kogi SMOH
Dr George Udeji Reproductive Health Coordinator Imo SMOH
Mrs Stella Falaye Family Planning Coordinator Oyo SMOH
Mrs Idowu Okanlawon Family Planning Coordinator Lagos SMOH
Mr John Mboli Director PHC Taraba SMOH
Mrs Mariam Momoh Family Planning Coordinator FCT PHCB
Safiya Garba-Kaita RH/FP Coordinator Katsina State PHCB
Mrs S.B. Asaju
DDHE
Kwara SMOH
Dr Ibrahim Idris
Dep. Director, Public Health
Niger SMOH
Dr A. Olayemi
Head, RH Division
Kogi SMOH
Sarah Shaw
Advisor
MSI
Mr Effiom N. Effiom
Country Director
MSION
Mr Onoriode Ezire
Chief of Party, FH+
MSION
Dr Kingsley Odogwu
Director, Clinical Services
MSION
Dr Dawodu Adegoke
Family Planning Analyst
UNFPA
Mrs Titilola Opasina
Programme Coordinator
ARFH
Dr Adewole Adefalu
Programme Coordinator
ARFH
Dr Uwaila Akpan
Programme Manager (Family Planning)
CHAI
Zainab Saidu
Associate for Family Planning
CHAI
Dr Habeeb Salami
Programme Manager (FP)
Pathfinder International
Jerry Yem
FP Specialist
MSD
Mr Bright Orji
Director of Programmes
JHPIEGO
Mrs Hannatu Abdullahi
FP/RH&Gender Advisor
JHPIEGO
Dr Sada Dan Musa
Project Director
PALLADIUM
Dr Garba Rufai
SMO1
NPHCDA
Osikwemhe Peter
Scientific Officer
NPHCDA

7
Ohifeme Adeola Asst Chief Scientific Officer NPHCDA
Elizabeth Igharo Director, Advocacy&Policy JSI
Aishat Ejigbo Strategic&Demand Planning JSI
Dr Hameed Adediran Consultant to FMOH MSION
MSION
Amagbakhen Kenneth Rapporteur Oreoluwa Ojo Rapporteur Kayode Morenikeji Programme Manager (RH) USAID
Mrs H.A.T. Awotunde PHC TUTOR CHPRB
Dr S.K. Ahmadu Clinical Advisor IPAS
Rakiya Idris Q.A. Senior Manager SFH
Adejoke Oyewo Q.A. SSO NURHI
Stella Akinso State Team Lead NURHI Mrs. Ronke Atamewalen Clinical Services Manager

8
ACRONYMS
AIDS Acquired Immune Deficiency SyndromeANC Antenatal CareART Antiretroviral TherapyARV AntiretroviralBCS Balanced Counselling StrategyBCS+ The Balanced Counselling Strategy PlusCBA Community Based Association/AttendantCBO Community Based OrganizationCLMS Contraceptive Logistics Management SystemCSO Community Serving OrganizationFMOH Federal Ministry of Health FP Family PlanningGON Government of NigeriaHCT HIV Counselling and TestingHIV Human Immunodeficiency Virus HLD High-level DisinfectionIEC Information Education and Communication IUD Intrauterine Contraceptive DeviceLARC Long-acting Contraceptive MethodLGA Local Government AreaM&E Monitoring and Evaluation MEC Medical Eligibility CriteriaMIS Management Information SystemMVA Manual Vacuum AspirationNACA National Agency for the Control of AIDSNDHS Nigeria Demographic and Health SurveyNGO Non-Governmental Organization NPC National Population CommissionPEP Post Exposure PreventionPLWHA Persons Living with HIV and AIDSPMTCT Prevention of Mother to Child TransmissionPPIUD Post-partum Intrauterine Contraceptive DeviceRTI Reproductive Tract InfectionsSDP Service Delivery PointSOP Standard Operating ProcedureSTI Sexually Transmitted InfectionSOPs Standard Operating Procedures/Standards of PracticeVCT Voluntary Counselling and TestingWHO World Health Organization

9
SECTION A
INTRODUCTION TO THE TRAINING PROGRAM
BEFORE STARTING THIS TRAINING COURSEThis training course will be conducted in a way that is very different from traditional training courses. First of all, it is based on the assumption that people participate in training courses because they:
·Are interested in the topic
·Wish to improve their knowledge or skills, and thus their job performance
·Desire to be actively involved in course activities.
The training approach used in this course is based on the JHPIEGO training model which stresses the importance of the cost-effective use of resources and application of relevant educational technologies including use of humane training techniques. The latter
®encompasses the use of anatomic models, such as the ZOE pelvic model or the implants training arm, to minimize client risk and facilitate learning.
MASTERY LEARNING APPROACH
The mastery learning approach to clinical training assumes that all participants can master (learn) the required knowledge, attitudes or skills provided sufficient time is allowed and appropriate training methods are used. The goal of mastery is that 100 percent of those being trained will “master” the knowledge and skills on which the training is based.
While some participants are able to acquire new knowledge or a new skill immediately, others may require additional time or alternative learning methods before they are able to demonstrate mastery. Not only do people vary in their abilities to absorb new material, but individuals learn best in different ways – through written, spoken or visual means. Mastery learning takes these differences into account and uses a variety of teaching and training methods.
The mastery learning approach also enables the participant to have a self-directed learning experience. This is achieved by having the clinical trainer serve as facilitator and by changing the concept of testing and how test results are used. In courses that use traditional testing methods, the trainer administers pre-and post-tests to document an increase in the participants' knowledge, often without regard for how this change affects job performance.By contrast, the philosophy underlying the mastery learning approach is one of a continual assessment of participant learning. With this approach, it is essential that the clinical trainer regularly inform participants of their progress in learning new information and skills, and not allow this to remain the trainer's secret.
With the mastery learning approach, assessment of learning is:
·Competency-based, which means assessment is keyed to the course objectives and emphasizes acquiring the essential knowledge, attitudinal concepts and skills needed to perform a job, not simply acquiring new knowledge.

10
·Dynamic, because it enables clinical trainers to provide participants with continual feedback on how successful they are in meeting the course objectives and, when appropriate, to adapt the course to meet learning needs.
·Less stressful, because from the outset participants, both individually and as a group, know what they are expected to learn and where to find the information, and have ample opportunity for discussion with the clinical trainer.
KEY FEATURES OF EFFECTIVE CLINICAL TRAINING
Effective clinical training is designed and conducted according to adult learning principles-learning is participatory, relevant and practical-and:
·Uses behaviour modeling
·Is competency-based
·Incorporates humanistic training techniques
Behaviour Modeling
Social learning theory states that when conditions are ideal, a person learns most rapidly and effectively from watching someone perform (model) a skill or activity. For modeling to be successful, the trainer must clearly demonstrate the skill or activity so that participants have a clear picture of the performance expected of them.
Learning to perform a skill takes place in three stages. In the first stage, skill acquisition, the participant sees others perform the procedure and acquires a mental picture of the required steps. Once the mental image is acquired, the participant attempts to perform the procedure, usually with supervision. Next, the participant practices until skill competency is achieved and the individual feels confident performing the procedure. The final stage, skill proficiency, only occurs with repeated practice over time.
USING THIS TRAINING PACKAGE
At the beginning of each course, an assessment is made of each participant's knowledge. The results of this pre-test are then used jointly by the participants and the advanced or master trainer to adapt the course content as needed so that the training focuses on acquisition of new information and skills.
A second feature relates to the use of the reference manual and course handbook. The Reference Manual is designed to provide all of the essential information needed to conduct the course in a logical manner. Because it serves as the “text” for the participants and the “reference source” for the trainer, special handouts or supplemental materials are not needed. In addition, because the manual only contains information that is consistent with the course goals objectives, it becomes an integral part of all classroom exercises-such a giving an illustrated lecture or providing problems-solving information.
The Trainer's Notebook contains material for the trainer. This includes the course outline, pre-test answer key, post-test and answer key and competency-based qualification checklists.

11
COURSE OVERVIEW
TRAINING GOAL
The overall goal of the training programme is to provide participants (service providers) with the management skills necessary to provide quality IUD and Implant services.
Overall Objective:
To develop skills of service providers in the administration of long-acting reversible contraceptives (LARC)
Specific Objectives:
Specifically, by the end of the workshop, participants will be expected to be able to:
·Describe the mechanism of action, effectiveness and side effects of IUDs and implants
·Describe the essentials of client counselling and follow-up ·Demonstrate the preparation and care of the clients before, during, and after
insertion and removal procedures.·Demonstrate insertion and removal skills of IUCD and implants using sterile
techniques and following standard protocols;·Insert 5 IUDs each using the standard protocol and remove 5 implants each using
the standard protocol·Demonstrate actions to be taken in the event of complications and procedures for
follow up care;·Describe the management skills needed to provide quality IUCD and implant
services.
COURSE DESIGN
The course consists of classroom and clinic sessions that focus on key aspects of IUCD and Implant service delivery. Successful completion of the course will be based on acquisition of
Day 1 Day 2
Day 3 Day 4 Day 5 Day 6
Lectures 4 hours
Lecture/ Discussion 2 hours
Lecture/ Discussion 1 hour 30 mins
Lecture/ Discussion 3 hours
Lecture/ Discussion 2 hours
Lecture/ Discussion 4 hours
Demonstration/ Model Practice 1 hour 30 min
Model Practice/Clinic Practice
4 hours 45 mins
Clinical Practice 5 hours 45 mins
Clinical Practice 4 hours 15 mins
Clinical Practice 3 hours 45 mins
Evaluation /Closing 2 hours 30 mins

12
TEACHING/LEARNING METHODS· Discussions/Brainstorming sessions· Illustrated lectures· Individual and group exercises· Role play/Case studies· Simulated practice (on models)· Guided clinical activities· Demonstration/Return demonstration
TEACHING MATERIALS· Teaching Videos/VCDs· Anatomic model – Pelvic, Arm · Audio-visual AIDs· Power Point projector and Laptop· Flip Charts/Stand· IUCD Insertion and Removal Learning Guides· Implant Insertion and Removal Learning Guides· Participants' Handbook· Trainers' Manual
EVALUATION
· Participants' Daily Evaluation· Pre- and post–course questionnaires· Pre-test Matrix· Counselling and Clinical Skills Checklists· End-of-Course Evaluation
DURATION OF TRAINING - Six Days
WORKSHOP AGENDA
Note: To make the training programme very participatory, all sessions on Warm-up, Review of agenda, Review of the Day's activities and Review of Previous day's activities must be conducted by the Participants (except on the first day)
Monday - Day 1
8:00 a.m. – 8:30 a.m. Participants' Registration
8:30 a.m. – 8:45 a.m. Opening
8:45 a.m. – 9:15 a.m. Warm-Up/Introduction
9:15 a.m. – 9:30 a.m. Course Overview/Ground Rules
9:30 a.m. – 10:00 a.m. Pre-Test
10:00 a.m. – 11:00 a.m. Overview of Family Planning in Nigeria(Module 1)

13
11:00 a.m. – 11:30 a.m. Tea Break
11:30 a.m. - 12:30 p.m. Product Profile and Medical Eligibility Criteria for CuT 380A (Module 2: Session 1)
R12:30 p.m. – 1:30 p.m. Product Profile and Medical Eligibility Criteria for Jadelle , R R
Zarin and Implanon (Module 2: Session 2)
1:30 p.m. - 2:30 p.m. Observations of Clinical demonstrationIUD and Implant Insertions by Trainers and
Preceptors2:30 p.m. – 3:30 p.m. Lunch
3:30 p.m. - 4:30 p.m. Using Learning Guides during Model and Clinical Practice (Module 3)
4:30 p.m. – 5:30 p.m. IUD Insertion Techniques/Practice on Arm Models(Module 4: Session 1)
5:30 p.m. – 5:45 p.m. Recap of the Day's Activities
Tuesday - Day 2.
9:00 a.m. – 9:10 a.m. Warm Up
9:10 a.m. - 9:20 a.m. Review of the Day's Agenda
9:20 a.m. – 9:30 a.m. Reflections of Previous Day's Activities
9:30 a.m. – 10:30 a.m. Implant Insertion Techniques and Model Practice(Module 4: Session 2)
10:30 a.m. – 10:15 a.m. Tea Break
10:15 a.m. – 2:00 p.m. Demonstration and Clinical Practice(Module 5)
Group A: Clinical Practice (IUDs)
Group B: Clinical Practice (Implants)
2:00 p.m. – 3:00 p.m. Lunch
3:00 p.m. – 3:30 p.m. Reflections from Clinical Practice Sessions3:30 p.m. – 4:30 p.m. Introduction to Counselling
(Module 6: Session 1)
4:30 p.m. – 5:30 p.m. The Balanced Strategy Plus (BCS+)(Module 6: Session 2)

14
Wednesday - Day 3.
9:00 a.m. – 9:10 a.m. Warm Up
9:10 a.m.- 9:20 a.m. Review of the Day's Agenda
9:20 a.m. – 9:30 a.m. Reflections of Previous Day's Activities
9:30 a.m. – 10:30 a.m. Implant Removal Techniques (Module 4: Session 3)
10:30 a.m. – 10:15 a.m. Tea Break
10:15 a.m. – 2:00 p.m. Clinical Practice (Module 5)
Group A: Clinical Practice (Implants)
Group B: Clinical Practice (IUDs)
2:00 p.m. – 3:00 p.m. Lunch
3:00 p.m. – 3:30 p.m. Reflections from Clinical Practice Sessions
3:30 p.m. – 4:30 p.m. IUD Removal Techniques (Module 4: Session 4)
4:30 p.m. – 5:00 p.m. Recap of the Day's Activities
Thursday - Day 4.
9:00 a.m. – 9:10 a.m. Warm Up
9:10 a.m.- 9:20 a.m. Review of the Day's Agenda
9:20 a.m. – 9:30 a.m. Reflections of Previous Day's Activities
9:30 a.m. – 10:30 a.m. Infection Prevention Practices: Hand washing and Gloving(Module 8: Session 1)
10:30 a.m. – 10:15 a.m. Tea Break
10:15 a.m. – 2:00 p.m. Group A: Clinical Practice (IUDs)
Group B: Clinical Practice (Implants)
2:00 p.m. – 3:00 p.m. Lunch
3:00 p.m. – 3:30 p.m. Reflections from Clinical Practice Sessions

3:30 p.m. – 4:30 p.m. Infection Prevention Practices: Disinfection and Sterilization(Module 8: Session 2)
4:30 p.m. – 5:30 p.m. Infection Prevention Practices: Disposal of Sharps and Wastes(Module 8: Session 3)
5:30 p.m. – 5:45 p.m. Recap of the Day's Activities
Friday - Day 4.
9:00 a.m. – 9:10 a.m. Warm Up
9:10 a.m.- 9:20 a.m. Review of the Day's Agenda
9:20 a.m. – 9:30 a.m. Reflections of Previous Day's Activities
9:30 a.m. – 10:30 a.m. Management of Complications arising from Use of IUDs(Module 7: Session 1)
10:30 a.m. – 10:15 a.m. Tea Break
10:15 a.m. – 2:00 p.m. Group A: Clinical Practice (Implants)
Group B: Clinical Practice (IUDs)
2:00 p.m. – 3:00 p.m. Lunch
3:00 p.m. – 3:30 p.m. Reflections from Clinical Practices
3:30 p.m. – 4:30 p.m. Management of Complications arising from Use of Implants(Module 7: Session 2)
4:30 p.m. – 5:00 p.m. Recap of the Day's Activities
Saturday - Day 6.
9:00 a.m. – 9:10 a.m. Warm Up
9:10 a.m.- 9:20 a.m. Review of the Day's Agenda
9:20 a.m. – 9:30 a.m. Reflections of Previous Day's Activities
9:30 a.m. – 10:30 a.m. Record Keeping and Management Information System (MIS)(Module 9: Session 1)
10:30 a.m. – 10:15 a.m. Tea Break
10:15 a.m. – 11:15 a.m. Contraceptive Logistics Management System (MIS)(Module 9: Session 2)
11:15 a.m. – 11:30 a.m. Tea – Break
15
16
11:30 a.m. – 12:15 p.m. Clinic Facilities and Requirement (Module 10: Session 1)
12:15 p.m. – 1:00 p.m. Personnel Management(Module 10: Session 2)
1: 00 p.m. – 1:30 p.m. Post-Test
1:30 p.m. – 2:30 p.m. End-of-Course Evaluation/Closing
2:30 p.m. Lunch and Departure
Participant Selection Criteria
Participants for this course should be service providers (physician, nurses or midwives (who are proficient in providing one or more short-acting contraceptive methods. In addition, they should be currently working in a facility where services on long-acting methods are planned to be initiated.
Methods of Evaluation
Participant·Pre – and post-tests
·Daily Feedback from participants
·Checklists for Classroom presentation, Clinical Demonstration and Clinical Coaching Skills (completed by clinical trainer)
·End-of-Course Evaluation (to be completed by each participant)
Course Duration
·6 days

17
Participants have five minutes to find an object in the training room or in the immediate
environment that symbolises them or their work in some way; encourage each other to be
creative.
Interview Exercise
After participants locate their symbols, they form pairs. Each pair interviews each other and obtains answers to the questions written on the flip chart. (Use Visual Aid A1 as a guide)
After 10 minutes (or when everyone is finished), each pair stands and introduces each other and describes the symbols they chose to represent themselves.
Guide to Getting to know you!
To learn more about each other, interview your partner and find out the answers to the following questions.
1. Name, title, and organisation or place of work.
2. Something unique or humorous about the person.
(Example: My partner speaks five languages.)(Example: My partner snores, but only in soprano.)
3. Explain the symbol selected that represents the person's work.
(Example: cup of coffee – needs a lot of energy)
4. What is your own personal goal for this workshop?Feel free to find out more interesting information and share that, too!
CLIMATE SETTING
WELCOME
Organisers of the workshop will deliver opening remarks and welcome all the participants to the workshop. They will emphasise that the most important people in the room are the participants. Without them, there would be no workshop. Therefore, special care has been taken to shape the workshop to address their needs and to make the workshop as interactive and participatory as possible. The organisers will also stress that since this is a skills development workshop, the facilitators will model for participants the desired skills, role and responsibilities during the training.
INTRODUCTIONS
There are many different introduction exercises to use. The objective is to create fun to as both the participants and trainers begin to learn each other's names, hobbies, interests, positions, work site and expectations for the workshop. Here are two suggestions: The Symbols and The Interview.
Symbols Exercise

18
SECTION B
MODULE FRAMEWORK AND PRESENTATIONS

19
MODULE ONE
OVERVIEW OF FAMILY PLANNING IN NIGERIA

20
Module 1: Overview of Family Planning in Nigeria
Time: 1 hour
Learning Objectives:
By the end of the session participants should be able to:
§ Describe Nigeria's rapid population growth and the Age Structure of Nigeria's population
§ Discuss the trends in Nigeria's Fertility Rates and how they impact development§ Compare Nigeria's Fertility Rate with those of other countries§ Discuss the use of modern contraception§ Discuss the trends in Nigeria's Contraceptive Prevalence Rates (CPR)§ Mention the effects of High Fertility on Education, Health, Agriculture, Economy
and Security§Classify the different types of modern contraceptives methods§Discuss the barriers to the use of modern contraception in Nigeria
Session Overview
§ Nigeria's Rapid Population Growth§ Age Structure of Nigeria's population§ Trends in Nigeria's Fertility Rates and how they impact development§ Comparison of Nigeria's Fertility Rate with those of other countries§ Use of modern contraception in Nigeria§ The effects of High Fertility on Education, Health, Economy and Security. § Classification of the different types of modern contraceptives methods§ The barriers to the use of modern contraception in Nigeria
Methods
§ Lecture§ Presentation§ Discussion§ Brainstorming§ Exercises
Materials
§ Flip chart§ Markers§ LCD Projector § Laptop

21
Module 1: Overview of Family Planning in Nigeria
MODULE PLAN
Title Duration Objectives Methods Materials Nigeria's Population Growth and its Effects on Economy and Social Development
1 hour 30 minutes
? Describe Nigeria’s rapid population growth and the Age Structure of Nigeria’s population
? Discuss the trends in Nigeria’s Fertility Rates and how they impact development.
? Compare Nigeria’s fertility rates with those of other countries
? Discuss the use of modern contraception
? Discuss the trends in Nigeria’s Contraceptive Prevalence Rates (CPR)
? Mention the effects of High Fertility on Education, Health, Economy and Security.
? Classify the different types of modern contraceptives methods
? Discuss the barriers to the use of modern contraception in Nigeria
? Lecture ? Presentation ? Discussion ? Brainstorming ? Exercises
? Flip chart ? Markers ? LCD
Projector ? Laptop

22
MODULE 1: OVERVIEW OF FAMILY PLANNING IN NIGERIA
MODULE PRESENTATION
Learning Objectives
Time Frame
Learning Methodology/Activity
Introduction – Describe Nigeria’s rapid population growth the age structure of the population
10 minutes ? The Trainer displays and reviews the learning objectives for this module
? The Trainer displays the slide containing Figure 1.1 – “Population of Nigeria –Rapid Growth” and emphasizes that:
o The country has tripled its population
between 1963 and 2011 (48 years) with: ? Sustained fertility Rate of 5.7, and ? Growth Rate of 3%
? The Trainer displays and explains the slide containing Figure 1.1.2 – “Age Structure of Nigeria’s Population”
? The trainer emphasizes the following:
o The ratio of people who are in the working-age to people who are too young or old to work (dependents) is low, about 1:4.
o That is, every working class person is
feeding at least four mouths, and little is left to grow its economy, such as investing in economic activities, business, and more education.
o This implies that the more dependents a
population has, the harder it is for it to grow its economy because all the money is spent on just trying to help these dependents to survive (feeding them, giving them the basics they need to survive).

23
Discuss the trends in Nigeria’s Fertility Rates and how they impact development
10 minutes ? The Trainer displays the slide containing Figure 1.3 – “Current Fertility Rates by Zones”, and notes that: o The average woman in Nigeria gives birth to
almost six children. o There is a regional variation in Nigeria; it is
higher in the North—more than seven children per woman—and in the South a little under five. So, 5.5 is the national average.
? The Trainer emphasizes that this is also
contributing to the rapid population growth and poor development of the country.
? The Trainer provides the participants with following information:
o Fertility decline helps many families out of
poverty.
o “Slower population growth has encouraged overall economic growth in developing countries”
o It is known that fertility can relate to
development because if families have fewer children per woman, then they have fewer mouths to feed.
o At the family level, having fewer mouths to
feed could help to reduce poverty and free more money to educate or help each child.
o Many analysts, incl uding UNFPA analysts,
have done research that shows slower population growth also reduces poverty at the national level.

24
Compare Nigeria’s Fertility Rates with those of other countries
5 minutes
?
The Trainer displays the slide containing Figure 1.4
–
“Comparison of Nigeria’s Fertility Rates with Other Countries”, and notes that:
o
Nigeria has very high fertility compared with other nations, whether they are Christian, Muslim, wealthier or poorer, larger or smaller.
o
One main reason that fertility is high in
Nigeria is the low use of modern
contraceptives.
o
Only 15 % of our married women of
childbearing age use modern contraception
right now.
o
In comparison, some of the other countries
have up to 77% of married women using
modern contraception.
Discuss the use of modern contraceptive methods
5 minutes ?The Trainer also displays the slide containing Figure 1.1.8 – “Trends in Contraceptive Prevalence Rates” and notes that:o Nigeria is far from attaining the MDG Goal of
35% at current contraceptive prevalence rate in the country.
Mention the effects of High Fertility on Education, Health, Economy and Security.
10 minutes
?
The Trainer discusses the effects of High Fertility
as it affects:
?
Education:
o
High Fertility leads to increased population of students, need
for more schools, more teachers
o
Low Fertility will lead to
fewer students, less pressure to build more schools.
?
Health
o
High Fertility Scenario => More strain on the nation’s health system and health workers
o
Low Fertility Scenario => Less strain on the nation’s health system and health workers.
?
Agriculture
o
High Fertility Scenario => Food requirements increase leading to more food importation.
o Low Fertility Scenario => Less money needed to pay for food importation.
?Economy
o High Fertility Scenario => More people, average GPD will not grow very fast.
o Low Fertility Scenario => Fewer people, the nation can invest in them, spread the wealth among fewer people; GPD per person will grow faster.

25
Discuss the different types of modern contraceptive methods
5 minutes ? The Trainer displays the slide on “Classification of Family Planning Methods”
? The Trainer emphasizes that:
o
The wide choice of family planning methods now available allows health programmes to offer an appropriate method to each individual.
o
Most
family planning methods are virtually without risk and in addition, offer substantial benefits besides preventing pregnancies.
Discuss the barriers to the use of modern contraception in Nigeria
5
minutes
?
The Trainer
request the participants to brainstorm on what they consider as barriers to the use of modern contraceptive methods in their communities.
?
S/he displays the slide of Figure 1.6 –
“Barriers to the use of Contraception” displaying the various barriers
and fills in the gaps
.
Summary/
Evaluation
5
minutes
?
The Trainer reminds the participants about the adverse effects of rapidly growing population on the quality of life, development and security, and advocates for:
o
Increased funding for and availability of family planning commodities and services.
o
Adequate support for family planning at the state, local, and community levels.
o
Expanded access to family planning commodities through community distribution.
o
Strengthened health systems.
o
Passage of the National Health Bill to support primary he alth care, including reproductive health.

26
MODULE TWO
INTRODUCTION TO IUCD AND IMPLANTS
Session 1: Product Profile and Medical Eligibility Criteria for CuT 380A
R RSession 2: Product Profile and Medical Eligibility Criteria for Jadelle , Zarin
Rand Implanon

27
Module Two: Session 1: Product Profile of CuT 380A and Medical Eligibility Criteria for IUDs
Time: 1 hour
Learning Objectives:
By the end of this session, the participants should be able to:
§Define the Intrauterine Contraceptive Device (IUD) and classify the types available;
§Mention the mechanism of action, effectiveness, advantages and the disadvantages
§Discuss the Medical Eligibility Criteria for use of IUDs
Session Overview
§Definition of the Intrauterine Contraceptive Device (IUD) §Classification of the types available;§Mechanism of action, effectiveness, advantages and disadvantages §Medical Eligibility Criteria for use of IUDs
Methods
§Lecture§Discussion§Brainstorming
Materials
§Flip chart/Newsprint§Markers§LCD Projector and Laptop§Samples of IUDs§Hand models

28
Module Two: Session 1: Product Profile of CuT 380A and Medical Eligibility Criteria for IUDs
MODULE PLAN
Title Duration Objectives Methods Materials Product Profile of CuT 380A and Medical Eligibility Criteria for IUDs
1 hour ? Define the Intrauterine Contraceptive Device (IUD) and classify the types available;
? Mention the mechanism of action, effectiveness, advantages and the disadvantages
? Discuss the Medical Eligibility Criteria for use of IUDs
? Lecture ? Presentation ? Discussion ? Brainstorming ? Exercises
? Flip chart ? Markers ? LCD
Projector ? Laptop

29
Module Two: Session 1: Product Profile of CuT 380A and Medical Eligibility Criteria for IUDs
MODULE PRESENTATION
Learning Objectives
Time Frame
Learning Methodology/Activity
Introduction – Define the Intrauterine Contraceptive Device (IUD) and classify the types available
15 minutes (Brainstorm- ing/Lecture)
? The Trainer displays and reviews the learning objectives for this module
? The Trainer requests the participants to define IUDs and notes the answers on the flip chart.
? The Trainer clarifies the participants’ responses
by defining IUDs as “small flexible devices made of metal and/or plastic that can prevent pregnancy when inserted into a woman’s uterus through her vagina.”
? Similarly, the Trainer requests the participants to classify IUDs and notes the answers on the flip chart.
? Again, the Trainer clarifies the participants’ responses by classifying IUDs as:
A. Non-medicated (or first generation) IUCDs, e.g.
? Lippes loop, ? Dalkon Shield.
B. Medicated IUCDs (or second generation)
i.e., - those which serve as carriers or vehicles for pharmacologically active anti -fertility agents, e.g. ? Copper T-200, Copper 7, Copper
T380A ? Multiload (MLCu-375), ? Nova T, (which contains copper and
silver, ? Mirena (which contains
levonorgestrel). ? LNG IUS( contain Levonogestel)
o The Trainer displays the slide containing Figure
2.1.1 – “The Lippes Loop” and briefly describes it.
o The Trainer displays the slide containing Figure 2.1.2 – “The Dalkon Shield” and briefly describes it.

30
o The Trainer displays the slide containing Figure 2.1.3 – “The Levonorgestre IUS (Mirena)” and briefly describes it.
o The Trainer displays the slide containing Figure 2.1.4 – “The Copper T 380A” and describes it as:
o A T-shaped intrauterine device (IUD), measuring 32 mm horizontally and 36 mm vertically, with a 3 mm diameter bulb at the tip of the vertical stem.
o A monofilament polyethylene thread is tied through the tip, resulting in two white threads, each at least 10.5 cm in length, to aid in detection and removal of the device.
o The T-frame is made of polyethylene with barium sulfate to aid in detecting the device under x-ray.
S/he displays Figure 2.2 5 – “Presentation in the package” and informs the participants that:
o Cu T 380A also contains copper: approximately 176 mg of wire coiled along the vertical stem and a 68.7 mg collar on each side of the horizontal arm.
o The total exposed copper surface area is 380 ± 23 mm2. One unit weighs less than one (1) gram.
o Each Cu T 380A is packaged together with an insertion tube and solid white rod in a sterilized pouch.
o A moveable flange on the insertion tube aids in gauging the depth of insertion through the cervical canal and into the uterine cavity.

31
Mention the mechanism of action, effectiveness, advantages and the disadvantages
15 minutes (Lecture)
? The Trainer requests the participants to brainstorm on the following, and notes their responses: o Mechanism of Action of Cu T 380A o Effectiveness o Advantages of Copper-bearing IUDs o Disadvantages of Copper-bearing IUDs
o S/he clarifies the participants’ responses.
Discuss the Medical Eligibility Criteria for use of IUDs
25 minutes ? The Trainer describes the WHO Medical Eligibility Criteria (MEC) as: o “A document that reviews the medical
eligibility criteria for use of contraception, offering guidance on the safety of use of different methods for women and men with specific characteristics or known medical conditions. The recommendations are based on systematic reviews of available clinical and epidemiological research.”
? The Trainer displays the slide on the Table on
“How to select a contraceptive method using the WHO MEC ” and explains the content to the participants.
? S/she requests for any clarifications and
addresses the concer ns of the participants (if any).
? The Trainer then requests the participants to
read out (in turns) indications specified under each of the four categories. o WHO Category 1: Women who can use IUDs
without restriction o WHO Category 2: Women who can generally
use IUDs; some follow up may be needed o WHO Category 3: Use of IUDs is not
recommended in these women o WHO Category 4: Women who should not use
IUDs
tThe Trainer addresses the concerns of the participants regarding the WHO MEC for IUDs.

32
Summary/ Evaluation
5 minutes ? The Trainer reminds the participants that:
o Intrauterine contraceptive devices are effective and reversible contraceptive methods that are acceptable to many women in Nigeria.
o Cu T380A is the current copper -bearing IUD being used in Nigeria.
o Most side effects and other health problems
associated with the use of IUDs are not serious.
o Changes in the menstrual bleeding pattern,
especially some increase in the amount and duration of menstrual bleeding, are the most common adverse side effects.
? The trainer requests the participants to provide answers to the following questions: o Mention the three types of IUDs available
worldwide? o What are the advantages and disadvantages
of IUDs? o Mention the four categories of WHO Medical
Eligibility Criteria (MEC) for IUDs.

33
Module Two - Session 2: Product Profile of Contraceptive Implants and Medical Eligibility Criteria for Implants
Time: 1 hour
Learning Objectives:
By the end of this session, participants should be able to:
§Describe the types, characteristics, effectiveness and mechanism of action of implants;
§List the advantages and disadvantages of contraceptive implants;
R R§Mention the special characteristics of Jadelle , Implanon , Implanon NXT™ and
RZarin
§Discuss the Medical Eligibility Criteria for Implant use
R R§Observe the insertion and removal of Jadelle and Implanon on video tape
Session Overview
§Types, characteristics, effectiveness and mechanism of action of implants; §Describe the types, characteristics, effectiveness and mechanism of action of
implants; §Advantages and disadvantages of contraceptive implants;
R R R§Special characteristics of Jadelle , Implanon and Zarin §Medical Eligibility Criteria for Implant use
R§Demonstrate the unique insertion techniques of Implanon and Implanon NXT™ implants
R R §Video film of insertion and removal of Jadelle and Implanon and Implanon NXT™
Methods
§Lecture/Presentation§Discussion§Brainstorming
Materials
§Flip chart/Newsprint§Markers§LCD Projector and Laptop

Module Two - Session 2: Product Profile of Contraceptive Implants and Medical Eligibility Criteria for Implants
MODULE PLAN
Title Duration Objectives Methods Materials Product Profile of Contraceptive Implants and Medical Eligibility Criteria for Implants
1 hour ? Describe the types, characteristics, effectiveness and mechanism of action of implants;
? List the advantages and disadvantages of contraceptive implants;
? Mention the
special characteristics of JadelleR, ImplanonR (and NXT™) and ZarinR
? Discuss the Medical Eligibility Criteria for Implant use;
? Demonstrate the unique insertion technique of ImplanonR and NXT™ Implants
? Observe the insertion and removal of JadelleR and ImplanonR on video tape
? Lecture ? Presentation ? Discussion ? Brainstorming ? Exercises
? Flip chart ? Markers ? LCD
Projector ? Laptop
34

35
Module Two - Session 2: Product Profile of Contraceptive Implants and Medical Eligibility Criteria for Implants
MODULE PRESENTATION
Learning Objectives
Time Frame
Learning Methodology/Activity
Describe the types, characteristics, effectiveness and mechanism of action of implants;
15 minutes
(Brainstorm- ing/Lecture)
? The Trainer displays and reviews the learning objectives for this module
? The Trainer requests the participants to define Contraceptive
Implants and notes the answers on the flip chart. ? The Trainer clarifies the participants’ responses by defining
Implants as:
o Contraceptive implants are progestin-only contraceptives inserted under the skin of woman’s upper arm by a minor surgical procedure.
o A blood level of the progestin sufficient to prevent conception is reached within a few hours after placement of the implants and is maintained at an effective level for at least 3 to five years.
? Similarly, the Trainer requests the participants to classify
Contraceptive Implants and notes the answers on the flip chart.
? Again, the Trainer clarifies the participants’ responses by classifying Contraceptive Implants as:
o Jadelle® — two silicon rods; each containing 75 mg
levonorgestrel. It is an improved version of Norplant. Jadelle is effective for 5 years.
o Implanon® —one rod containing a progestin called etonogestrel. Implanon® is effective for 3 years.
o Zarin® (Sinoplant or sino -implant) — two thin flexible silicon
rods that contain 75 mg levonorgestrel each (similar to Jadelle). Effective for 5 years.
o Uniplant® — one rod that contains 55mg of nomegestrol
acetate. o Norplant® — six soft plastic rods that each contain 36 mg
levonorgestrel. Effective for 5 -7 years. Norplant has been discontinued due to the availability of newer and better implants, but there are still women using it who will be due for removal over the next few years.
36
®Product Profile of Jadelle
The Trainer displays the slide containing Figure 2.2.1 – “The Jadelle Implant” and briefly describes it as:
o “An implant system that provides effective, long-acting, reversible contraception for women.
o Two thin, flexible rods made of silicone tubing and filled with levonorgestrel, a synthetic progestin, are inserted just under the skin of a woman's upper, inner arm in a minor surgical procedure.
o Protection from pregnancy is provided within 24 hours, when insertion is performed during the first week of a woman's menstrual cycle.
o The woman rapidly returns to her normal fertility when ®the implants are removed. Since Jadelle does not
contain estrogen, the most common side effects are changes in menstrual bleeding patterns.
o Most other common side effects are similar to those experienced by women who use other hormonal contraceptives.”
The Trainer displays the slide containing Figure 2.2.2 – ®
“The Composition of Jadelle ” and briefly describes it as follows:
®o The outer part of the Jadelle rod is silicone rubber tubing, similar to the material used in catheters and heart valves since the 1950s. It also is the same kind of
®material used in Norplant capsules, another contraceptive implant system.
o The rods release levonorgestrel, a synthetic progestin that has been used in combined oral contraceptives and in progestin-only pills for more than 30 years.
o What is "new" about the rods is their delivery system, which can provide contraceptive protection for up to
®o The Jadelle system consists of two rods, unlike the ®Norplant system that has six capsules. Because there
®are fewer implants, Jadelle is easier to insert and remove than Norplant.
five years. The levonorgestrel diffuses out of the silicon rubber at a constant rate every day for five years.

o Each Jadelle rod is 43 millimeters long and 2.5 millimeters in diameter.
o Each rod contains 75 mg of levonorgestrel for a total of ®150 mg. The levonorgestrel crystals in Jadelle capsule
are packed within a rubber sheath, which is then sealed at each end.
o A core of mixed levonorgestrel and elastomer (a polymer having the elastic properties of natural rubber) is enclosed within the rubber sheath, which is then sealed at each end with medical adhesive.
The Trainer requests the participants to brainstorm on the following, and notes their responses:
®o Mechanism of Action of Jadelle®o Effectiveness of Jadelle
S/he clarifies the participants' responses. Mechanism of Action
o Pregnancy is prevented in Jadelle® users by a combination of mechanisms. The most important are the:
o inhibition of ovulation and o thickening of the cervical mucus, making it
impermeable to sperm.
o Other mechanisms may add to these contraceptive effects.
Effectiveness
o Jadelle® is one of the most effective reversible contraceptives available.
o The cumulative pregnancy rate in clinical trials was 0.3 for three years and 1.1 percent for five years.
o Jadelle® has a lower failure rate than the pill and most IUDs.
o Its efficacy is comparable to that of surgical sterilization.
o The implant has also been approved for 5 years' use.
37

®Product Profile of Zarin
The Trainer displays the slide containing Figure 2.2.3 – ®
“The Zarin Implant” and briefly describes it as:o “A two-rod system manufactured since 1994 by Shanghai
Dahua Pharmaceutical Company Ltd., provides four years of protection against pregnancy at about 30 percent to 40 percent of the cost (based on the comparison product and volume purchased by international donors) of existing implants.
o The lower price will enable programs to serve more clients per dollar investment in contraceptive commodities.
o To date, 7 million units of Sino-Implant (II) have been distributed in China and Indonesia. Most recently, the product has been registered in Kenya and Sierra Leone
®under the trade name Zarin .
o Currently, the method is under review by national drug regulatory authorities in many other countries.
The Trainer provides the following information about the ®
composition of Zarin Implants:
®o The Zarin contraceptive implant is as set of two flexible, cylindrical rods made of milky –white, medical grade silicone elastomer.
o Each rod contains 75 mg of levonorgestrel, the active ingredient, for a total of 150 mg.
o The rods are inserted into tubes composed of a colourless, transparent form of silicone elastomer. Both ends of each tube are sealed with adhesive.
The Trainer requests the participants to brainstorm on the following, and notes their responses:
®o Mechanism of Action of Zarin®o Effectiveness of Zarin
o S/he clarifies the participants' responses.
® Product Profile of Implanon and Implanon NXT™
The Trainer displays the slide containing Figure 2.2.4 – ®
“The Implanon Implant” and briefly describes it as:
38

39
o A reversible, non-biodegradable, long-acting hormonal, subdermal contraceptive that contains etonorgestrel.
o It is a single-rod system with a disposable applicator. A newer version of Implanon is now available. It's called Nexplanon or Implanon NXT™.It's radio opaque. This means it can be seen on X-ray, which is useful for checking the location of the implant.
o Implanon NXT™ also has a preloaded, sterile applicator which is for single use and disposable. Inserters familiar with the applicator for Implanon classic need to familiarize themselves with the one for Implanon NXT™
® ®o Implanon and Nexplanon are the only contraceptive implants with Food and Drug Administration (FDA) approval available in the U.S.
The Trainer displays Figure 2.2.5 – “Structural Formula ®of Implanon ” and NXT™ and provides the following
®information about the composition of Implanon Implants:
o Implanon releases 3-keto-desogestrel, which is the active metabolite of the well-known progestogen, desogestrel, developed by Organon.
o The molecule 3-keto-desogestrel has been given the international non-proprietary name of etonorgestrel (ENG), as shown in the Figure 2.2.5.
o Each Implanon implant contains 68 mg of etonorgestrel.
o Desogestrel has been used in combined oral contraceptives for many years and therefore the pharmacological effects of desogestrel, and consequently those of etonorgestrel, have been established.
o However, Implanon continuously releases etonorgestrel and the first-pass effect is avoided, therefore the clinical pharmacology is not completely covered by former experiences with desogestrel-containing combined oral contraceptives (COCs).
The Trainer requests the participants to brainstorm on the following, and notes their responses:
o Mechanism of Action of Implanono Effectiveness of Implanon
o S/he clarifies the participants' responses.

40
Mechanism of Action
® o The contraceptive effect of Implanon is primarily
achieved by inhibition of ovulation. ®
o Besides inhibition of ovulation, Implanon also causes changes in the cervical mucus, which hinders the passage of spermatozoa.
Effectiveness
o Less than one pregnancy per 100 women (1 per 1,000 women) for over three years' use of Implanon.
®o The contraceptive efficacy of Implanon is comparable
with that known for combined Ocs.
Mention the advantages and the disadvantages of Contraceptive Implants
15 minutes(Brainstorming/Lecture)
The Trainer requests the participants to brainstorm on the Advantages of contraceptive implants, and notes the responses on the flip chart.
S/he summarizes and clarifies their responses as follows:
o No repeated visits to the clinic are required
o Contraceptive implants are effective immediately if inserted within the first 7 days of menstrual cycle (5 days for Implanon)
o They are very effective in preventing pregnancy and safe for majority of women
o They are long-acting
o They may help prevent iron deficiency anemia, symptomatic pelvic inflammatory disease, and ectopic pregnancy
o Do not disturb breast milk production
o Less likely to cause headaches or raised blood pressures than estrogen-containing contraceptives
o No increased risk of cardio-vascular complications
The Trainer requests the participants to brainstorm on the disadvantages of contraceptive implants, and notes the responses on the flip chart.
S/he summarizes and clarifies their responses as follows:

41
o Contraceptive implants have common side effects:Ømay cause spotting and irregular vaginal bleeding
for 60–70% of users;
Øamenorrhea (less common than irregular bleeding with all implants, but Implanon)
Øheadaches, abdominal pain, weight gain, breast tenderness, dizziness, nausea, mood change, acne
Øsome women may develop enlarged ovarian follicles
o Insertion and removal involve minor surgical procedures and therefore may be associated with bruising (discolouration of the arm), infection or bleeding
o The client cannot discontinue the method on her own
o Outline of the rods may be visible under the skin of some women, especially when the skin is stretched
o Contraceptive implants do not protect a woman from STIs/HIV/AIDS
Discuss the Medical Eligibility Criteria for use of Implants
25 minutes
The Trainer reminds the participants about the WHO Medical Eligibility Criteria (MEC) which is:
o “A document that reviews the medical eligibility criteria for use of contraception, offering guidance on the safety of use of different methods for women and men with specific characteristics or known medical conditions. The recommendations are based on systematic reviews of available clinical and epidemiological research.”
The Trainer again displays the slide on the Table on “How to select a contraceptive method using the WHO MEC and explains the content to the participants.
S/he requests for any clarifications and addresses the concerns of the participants (if any).
The Trainer then requests the participants to read out (in turns) indications specified under each of the four categories.

42
o WHO Category 1: Women who can use Contraceptive Implants without restriction
o WHO Category 2: Women who can generally use Contraceptive Implants; some follow up may be needed
o WHO Category 3: Use of Contraceptive Implants is not recommended in these women
o WHO Category 4: Women who should not use Contraceptive Implants
The Trainer addresses the concerns of the participants regarding the WHO MEC for Contraceptive Implants
Summary/Evaluation
5 minutes The Trainer reminds the participants that:
o Since contraceptive implants are progestin-only methods, they are suitable for a wide range of women.
o They make family planning possible throughout reproductive life.
o They may be used to postpone a first pregnancy or used to 'space' pregnancies.
o They may also be used to provide long-term contraception when the desired family size is reached.
o Since implants do not contain estrogen, they can be used in women who do not want to or cannot use combined oral contraceptives (COCs).
o The contraceptive actions of implants are reversible which is apparent from rapid from the rapid return of the normal menstrual cycle after removal of the implants.
The trainer requests the participants to provide answers to the following questions:
o Mention the three types of Contraceptive Implants available in Nigeria?
o What are the advantages and disadvantages of Contraceptive Implants?
o Mention the four categories of WHO Medical Eligibility Criteria (MEC) for Contraceptive Implants.

43
MODULE THREE
USING LEARNING GUIDES DURING MODEL AND CLINICAL PRACTICE
Module Three: Using Learning Guides during Model and Clinical Practice
Time: 1 Hour
Learning Objectives
By the end of this session, participants should be able to:
§Discuss the terms associated with skill acquisition§Explain the use of learning guides and checklist
·Discuss the advantages and disadvantages of competency-based skill assessment instruments
§Demonstrate the use of competency-based assessment instrument§Discuss the care of anatomic models
Session Overview§Terms associated with skill acquisition §Description of learning guides and checklist
·Advantages and disadvantages of competency-based skill assessment instruments
§Demonstration of the use of competency-based Assessment Instrument§Care of anatomic models
Methods§Illustrated Lecture§Discussion§Group work§Demonstration & Return Demonstration
Materials§LCD Projector§Laptop§Markers and Flip Charts§Varieties of clinical skills Learning Guides and Checklists§ Anatomic models § Sample 3.1: Learning Guide for IUD Insertion Techniques § Sample 3.2: Learning Guide for IUD Counselling Skills
R RSample 3.3: Learning Guide for Implant (Jadelle and Zarin Insertion Techniques
RSample 3.4: Learning Guide for Implant (Implanon ) Insertion Techniques
Sample 3.5: Learning Guide for Implant Removal Skills (All Implants)

44
Module Three: Using Learning Guides during Model and Clinical Practice
MODULE PLAN
Title Duration Objectives Methods Materials Using Learning Guides during Model and Clinical Practice
1 hour ? Discuss the terms associated with skill acquisition
? Explain the use of learning guides and checklist
? Discuss the
advantages and disadvantages of competency-based skill assessment instruments
? Demonstrate the use of competency based assessment instrument
? Discuss the care of anatomic models
? Illustrated Lecture
? Discussion ? Group work ? Demonstration
& Return Demonstration
? LCD Projector? Laptop ? Markers and
Flip Charts ? Varieties of
clinical skills Learning Guides and Checklists
? Anatomic models
? Sample 3.1: Learning Guide for IUD Insertion Techniques
? Sample 3.2: Learning Guide for IUD Counselling Skills
o Sample 3.3: Learning Guide for Implant (JadelleR and ZarinR Insertion Techniques
o Sample 3.4: Learning Guide for Implant (ImplanonR) Insertion Techniques
o Sample 3.5: Learning Guide for Implant Removal Skills (All Implants)

45
Module Three: Using Learning Guides during Model and Clinical Practice
MODULE PRESENTATION
Learning Objectives
Time Frame
Learning Methodology/Activity
Introduction - Discuss the terms associated with skill acquisition
15 minutes(Lecture/Brainstorm-ing)
The Trainer displays and reviews the learning objectives for this module
The Trainer explains to the participants that:
o In the past, deciding whether a participant was competent (qualified) to perform a skill or activity during and, most important, after clinic al training was often extremely difficult.
o This was due, in part, to the fact that competency was tied to the completion of a specified number of supervised procedures or activities.
o Unfortunately, unless part ic ipant performance is objectively measured relative to a predetermined standard, it is difficult to determine competency.
o Competency-based skill assessments (learning guides and checklists), which measure clinical skills or other observable behaviours relative to a predetermined standard, have made this task much easier.
o While learning guides are used to facilitate learning the steps or tasks (and sequence, if necessary) in performing a particular skill or activity, checklist are used to evaluate performance of the skill or activity objectively.
The Trainer requests the participants to define the following terms associated with Skill acquisition:
o Psychomotor domaino Competency-based skill assessment
S/he notices the responses of the participants and clarifies appropriately.

The Trainer emphasizes that progress in the skill area is measured with reference to various levels or stages of performance. The three levels of performance in acquiring a new skill are:
o Skill Acquisition - This represents the initial phase in learning a new clinical skill or activity. Assistance and coaching are necessary to achieve correct performance of the skill or activity.
o Skill Competency - This represents an intermediate phase in learning a new clinical skill or activity. The participant can perform the required steps in the proper sequence (if necessary) but may not progress from step to step efficiently.
o Skill Proficiency - This represents the final phase in learning a new clinical skill or activity. The participant efficiently and precisely performs the steps in the proper sequence (if necessary).
The Trainer expatiates on these levels of skill acquisition and cites examples of tasks that involve psychomotor or skill area, such as:
o Counselling a cliento Inserting contraceptive implantso Inserting a Copper T 380A IUDo Putting on sterile gloves
Explain the use of Learning Guides and Checklist
15 minutesThe Trainer informs the participants that:
o A learning guide contains the individual steps or tasks in sequence (if necessary) required to perform a skill or activity in a standardized way.
o Learning guides are designed to help the participant learn the correct steps and sequence in which they should be performed (skill acquisition), and measure progressive learning in small steps as the participant gains confidence and skill (skill competency).
o Learning guides can be used as a self-or peer assessment tool. Examples of how learning guides can be used at different stages of the course are given below.
46

47
The Trainer reiterates that the participant is not expected to perform all the steps or tasks correctly the first time s/he practices them. Instead the learning guides are intended to:
o Assist the participant in learning the correct steps and sequence in which they should be performed (skill acquisition)
o Measure progressive learning in small steps as the participant gains confidence and skill (skill competency).
The Trainer emphasizes that this is also contributing to the rapid population growth and poor development of the country.
The Trainer provides the participants with following information on the use of the learning guides:
o Initially, participants can use the learning guides to follow the steps as the clinical trainer ro le-p lays counse l l ing a c l ien t or demonstrates a clinical procedure using anatomic models.
o Subsequently, during the classroom sessions in which participants are paired, one “service provider” participant performs the procedure while the other participant uses the learning guide to prompt the “service provider” on each step.
o During these session, the clinical trainer(s) can circulate from group to group to monitor how learning is progressing and check to see that the participants are following the steps outlined in the learning guide.
o After participants become confident in performing the skill or activity (e.g. inserting an IUD in the pelvic model), they can use the learning guide to rate each other's performance. This exercise can serve as a point of discussion during a clinical conference before participants provide services to clients.
48
o Before the first clinic session, participants again are paired. Here, one “service provider” participant performs the procedure while the other observes and uses the learning guide to remind the “service provider” of any missed steps. During this session, the clinical trainer circulates, coaching the participants as necessary as they perform the procedure.
The Trainer explains that:
o The Checklist generally is derived from a learning guide. Unlike learning guides, which are by necessity quite detailed, competency-based checklists should contain only sufficient detail to permit the clinical trainer to evaluate and record the overall performance of the skill or activity.
o If a checklist is too detailed, it can distract the clinical trainer from the primary purpose, which is to observe the overall performance of the participant objectively.
o Using checklists in competency-based clinical training:§ Ensures that participants have
mastered the clinical skills and activities, first with models and then with clients
§ Ensures that all participants will have their skills measured according to the same standard
Forms the basis for follow up observations and evaluations
Demonstrate the use of competency-based assessment instrument
10 minutes The Trainer demonstrates the use of one or two of the following learning guides on a task performed on an anatomic model:
o Sample 3.1: Learning Guide for IUD Insertion Techniques
o Sample 3.2: Learning Guide for IUD Counselling Skills
o Sample 3.3: Learning Guide for Implant R R(Jadelle and Zarin Insertion Techniques

49
o Sample 3.4: Learning Guide for Implant R(Implanon ) Insertion Techniques
o Sample 3.5: Learning Guide for Implant Removal Skills (All Implants)
Discuss the advantages and disadvantages of competency-based skill assessment instruments
10 minutes(Lecture)
The Trainer informs the participants that:
o The single greatest advantage of a competency-based assessment is that it can be used to facilitate learning a wide variety of skills or activities and measure participant behaviour in a realistic job-related situation.
o Competency-based assessment instruments such as learning guides:
§Focus on a skill that the participant typically would be expected to perform on the job, and
§Break down the skill or activity into the essential steps required to complete the procedure.
The Trainer emphasizes that using competency-based clinical training:
o Ensures that training is based on a standardized procedure
o Standardizes training materials and audiovisual aids
o Forms the basis of classroom or clinical demonstrations as well as participant practice sessions.
The Trainer informs the participants about the “Limitations of competency-based skill assessment instruments, which include the following:
o It will take time and energy first to develop the instruments/tools and then to apply them to each participant.
o An assessment can be applied only by a clinical trainer who is proficient in the clinical procedure or activity being learned.
o An adequate number of skilled clinical trainers must be available to conduct the training because competency-based clinical training usually requires a one-on-one relationship.

Discuss and demonstrate the care of anatomic models
5 minutes(Discussion/Demonstra-tion)
The Trainer demonstrates the care of the pelvic and arm models, emphasizing the guidelines for:o Handling during useo Dismantling the arm models to retrieve
inserted implants or IUDs
Summary/Evaluation
5 minutes(Discussion)
The Trainer summarizes the module by stating that:
o Providing participants with good counselling and clinical skills is one of the central purposes of most family planning training courses.
o Being able to measure learning progress satisfactorily and evaluate performance objectively are extremely important elements in the process of improving the quality of clinical training.
o The checklists can be used to measure a wide variety of participant skills and behaviours in realistic job-related situations.
o The Trainer requests the participants to respond to the following questions:
o What are the terms associated with learning?
o What is a competency-based training?
o State three advantages of using the learning guide during training.
50

51
MODULE FOUR
INSERTION AND REMOVAL TECHNIQUES FOR IUD AND IMPLANTS
Session 1: CuT 380A Insertion Techniques
Session 2: Jadelle and Zarin Implants Insertion Techniques
TMSession 3: Implanon and Implanon NXT Insertion Technique
Session 4: IUD Removal Techniques
Session 5: Implant Removal Techniques

52
Module Four - Session 1: IUD Insertion Techniques
Time: 1 hour
Learning Objectives
By the end of this session, participants should be able to:
§Identify the equipment and materials for IUD insertion procedures§List timing of insertion with regard to menstruation, postpartum, post abortion and
lactation periods§Demonstrate the correct steps in the IUD insertion procedure and explain the
rationale for each step.§Demonstrate loading of the IUD in the package.§Explain the instructions to be given to clients after insertion.§Schedule follow-up appointments with the clients after the procedure.
Session Overview
§Equipment and materials for IUD insertion procedures§Timing of insertion with regard to menstruation, postpartum, post abortion and
lactation periods§Demonstration of loading of the IUD in the package.§Demonstration of the correct steps in the IUD insertion procedure and the rationale
for each step.§Instructions to be given to clients after insertion.§Scheduling follow-up appointments with the clients after the procedure.
Methods
§Lecture/Presentation§Demonstration and Return Demonstration§Discussion§Brainstorming
Materials
§Flip chart/Newsprint§Markers§LCD Projector and Laptop§CuT 380 A IUDs§Hand Models§Pelvic Models (Madam Zoe)§Learning Guide for IUD Insertion Techniques

53
Module Four - Session 1: IUD Insertion Techniques
MODULE PLAN
Title Duration Objectives Methods Materials IUD Insertion Techniques
1 hour ? Identify the equipment and materials for IUD insertion procedures
? List timing of insertion with regard to menstruation, postpartum, post abortion and lactation periods
? Demonstrate the
correct steps in the IUD insertion procedure and explain the rationale for each step.
? Demonstrate
loading of the IUD in the package.
? Explain the
instructions to be given to clients after insertion.
? Schedule follow-
up appointments with the clients after the procedure.
? Lecture ? Presentation ? Demonstration and Return
Demonstration ? Discussion ? Brainstorming ? Exercises
? Flip chart ? Markers ? LCD
Projector ? Laptop ? Hand
models ? Pelvic
Models ? Learning
Guide for IUD Insertion Techniques

54
Module Four - Session 1: IUD Insertion Techniques
MODULE PRESENTATION
Learning Objectives
Time Frame Learning Methodology/Activity
Introduction – List the timing of insertion with regard to menstruation, postpartum, post-abortion and lactation periods
10 minutes The Trainer displays and reviews the learning objectives for this module.
The Trainer informs the participants that:
o Many of the problems associated with CuT 380A IUDs (expulsion, infection and perforation) are due to improper or careless insertion.
o To minimize post-insertion problems, all phases of the insertion process must be performed carefully and gently.
The Trainer displays the slide on “Time of Insertion” and emphasizes the following:
o Interval and postpartum: IUD can be inserted:
§anytime during the menstrual cycle, provided pregnancy has been ruled out
§if woman is within the first 12 days of her menstrual cycle, no need for a pregnancy test or other means to rule out pregnancy
§if it is more than 12 days after the start of monthly bleeding, provider should rule-out pregnancy by other means (pregnancy checklist, pregnancy test, etc.)
§no back-up method is needed after IUD insertion regardless of timing
§immediately or within the first 12 days after
abortion if there is no infection
§four to six weeks after a vaginal delivery or caesarean section (if was not inserted within the first 48 hours postpartum)
o Postpartum IUD (PPIUD) can be inserted only by trained personnel:
§within 10 minutes post-delivery of placenta — post-placental
§after 10 minutes but within 48 hours of delivery — pre-discharge
§during caesarean section — trans-Caesarean

55
Identify the equipment and materials for IUD insertion procedures
10 minutes o The Trainer displays the equipment and materials for IUD insertion procedures and requests the participants to identify each, including the following:
o Examination couch/insertion couch o Light source (torch or angle-poised lamp)o A trolley containing the following: §Speculum (various sizes)§Tenaculum/stopes forceps (or vulsellum)§Sponge holding
forceps§Uterine sound (plastic preferably)§A pair of
scissors§Sterile
gloves§Plastic
dilators§Straight artery forceps
o Sodium hydrochloride bleach (e.g. Jik, Parozone) 0.5%
The Trainer emphasizes that:
o If the instruments come in a sterile or HLD pack, do not open the pack before the screening pelv ic examination has been completed and a final decision to insert the IUD has been made.
Demonstrate the correct steps in the IUD insertion procedure and explain the rationale for each step including loading of the IUD in the package.
20 minutes(Presentation/Demonstration)
The Trainer demonstrates the following steps:
o Client preparationo General examination (including breasts
and abdomen)o Pelvic examination (including speculum
examination)o Cleaning of the vaginao Placement of the tenaculum/stopes
forceps / Bonney stopeso Passage of uterine sound
§The Trainer displays the slide containing Figure 4.1.1 – “Loading the IUD in the package” and demonstrates the activity as s/he displays the slides containing Figures 4.1.2 (Bending the T-arms and pushing into the tube), 4.1.3 (Pushing the T-arms into the Tube), and 4.1.4 (IUD loaded in the package; ready for insertion).

56
§ The Trainer explains and demonstrates the steps for intrauterine placement of the pre-loaded CuT 380A as s/he displays the slides containing Figures 4.1.5 (Introducing loaded IUD into the uterus), Figure 4.1.6 (Withdrawing the tube to release the T-arms), Figure 4.1.7 (Pushing the tube up without moving the rod), Figure 4.1.8 (Holding the tube steady while withdrawing the white rod) and Figure 4.1.9 (IUD correctly placed in the uterine cavity).
Explain the instructions to be given the clients after insertion
10 minutes(Demonstration/Role Play)
The Trainer demonstrates the Post-Insertion Procedure for CuT 380A as follows:
o Asks the client about pain, fainting attacks, or any other discomfort
o Allows the client to rest on the couch for a few minutes and then help her down
o Records findings and give 4–6 weeks appointment
The Trainer should emphasize that participants must inform the client that there may be increased bleeding and/or cramping for a few days and that these are normal.
S/he advises the client as follows:o Heavier menstrual bleeding, and possible
bleeding between periods, is common for the first 3–6 months after insertion;
o Inspect all sanitary pads or panties during menses because expulsion is more common during menstruation.
o Check for string after each menstrual period
(recommended, but not required if woman is uncomfortable inserting fingers into vagina);
o If at risk of STIs (e.g. multiple sexual partners, or partner with multiple partners), use condoms in addition to IUD for dual protection
o Tell the client that she may have sexual intercourse as soon as it is comfortable for her;
o Report to the nearest family planning clinic if you notice any of the following:

57
§P - period late or abnormal bleeding §A - abnormal pain or pain with
intercourse §I - infection exposure, such as
gonorrhoea, abnormal discharges§N - not feeling well, fever or chills§S - strings missing, shorter or longer
o Inform your physician of the presence of an
IUD if you are going for any gynaecological surgical procedure
o Maintain good personal hygiene
Schedule follow-up appointments with the clients after the procedure
10 minutes The Trainer displays the slide on “Follow-up Visits” and outlines the instructions as follows:
First visit (4–6 weeks after insertion)o Ask the client about her health generally
o Ask about any complaints
o Ask about variations in her menstrual cycle, including inter-menstrual bleeding or spotting, excessive blood loss, and painful menstruation
o Ask her when she last felt the strings of the device (if she checks the strings)
o Carry out abdominal and pelvic examination
o Inspect the cervix to confirm the presence of strings, if long, trim
o Note any cervical discharge
o Palpate for pelvic tenderness
o Advise client on personal hygiene
Schedule of subsequent follow-ups (if all is well):
o Yearly visits until the client wishes to have the device removed or the life span of the device expires - Copper T-380A — 12 years;
o Repeat the activities of first visit at each subsequent visit;
o Encourage a pap smear every two years

Summary/
EvaluationThe Trainer summarizes the session by stating that:
o Long-term success, as defined by satisfied clients and high continuation rates, will occur only if CuT 380A IUD insertion is properly conducted and the provider recognizes the importance of providing follow-up care (including counsell ing) and prompt management of side effects as well as other problems should they occur.
o The Trainer requests the participants to respond to the following questions:
o Mention the steps of the correct procedure for Cu T380A IUD insertion;
o Present the post-insertion instructions and correct procedure for follow-up visits.
State the warning signs a client must report after IUD insertion.
58

59
R RModule Four- Session 2: Jadelle and Zarin Implants' Insertion Techniques
Time: 1 hour
Learning Objectives
By the end of this session, participants should be able to:
§List the timing of insertion with regard to menstruation, postpartum, post abortion and lactation periods
R R§Identify the equipment and materials for Jadelle and Zarin Implants insertion
procedures§Demonstrate the correct insertion technique with regard to asepsis, anaesthesia,
location of incision, and careful correct placement of the implantsR R
§Demonstrate the unique insertion techniques of Jadelle and Zarin implants§Demonstrate the correct application of dressing after insertion.§Explain the instructions to be given to clients after insertion.§Schedule follow-up appointments with the clients after the procedure.
Session Overview
R R§Equipment and materials for Jadelle and Zarin implants' insertion procedures§Timing of insertion with regard to menstruation, postpartum, post abortion and
lactation periodsR R§Demonstration of the correct insertion technique for Jadelle and Zarin implants
with regard to asepsis, anaesthesia, location of incision, and careful correct placement of the implants
§Demonstration of the correct application of dressing after insertion.§Instructions to be given to clients after insertion.§Scheduling follow-up appointments with the clients after the procedure.
Methods
§Lecture/Presentation§Demonstration and Return Demonstration§Discussion§Brainstorming
Materials
§Flip chart/Newsprint§Markers§LCD Projector and Laptop
R R§Jadelle and Zarin implants §Arm Models
R R§Learning Guide for Jadelle and Zarin implants'Insertion Techniques

60
Title Duration Objectives Methods Materials JadelleR and ZarinR Implants’ Insertion Techniques
1 hour 30 minutes
? List the timing of insertion with regard to menstruation, postpartum, post abortion and lactation periods;
? Identify the equipment
and materials for JadelleR and ZarinR Implants insertion procedures;
? Demonstrate the correct
insertion technique with regard to asepsis, anaesthesia, location of incision, and careful correct placement of the implants;
? Demonstrate the unique
insertion techniques of JadelleR and ZarinR implants;
? Demonstrate the correct
application of dressing after insertion;
? Explain the instructions
to be given to clients after insertion;
? Schedule follow-up
appointments with the clients after the procedure.
? Lecture ? Presentation ? Discussion ? Brainstorming ? Demonstratio
n and Return
Demonstration
? Flip chart ? Markers ? LCD
Projector ? Laptop ? JadelleR
and ZarinR Implants
? Learning Guide for JadelleR and ZarinR Implants’ Insertion Techniques
R RModule Four- Session 2: Jadelle and Zarin Implants' Insertion Techniques
MODULE PLAN

61
R RModule Four- Session 2: Jadelle and Zarin Implants' Insertion Techniques
MODULE PRESENTATION
Learning Objectives
Time Frame Learning Methodology/Activity
Introduction – List the timing of insertion with regard to menstruation, postpartum, post-abortion and lactation periods
10 minutes The Trainer displays and reviews the learning objectives for this module.
The Trainer informs the participants that:
o Insertion techniques involve correct subdermal placement of the implants.
o The insertion procedure for Implanon being slightly different from those of and Jadelle and Zarin is described separately.
The Trainer displays the slide on “Time of Insertion” and emphasizes the following:
Having menstrual cycles
o Any time it is reasonably certain that she is not pregnant; If she is not at risk of pregnancy (for example, has not had sex since last menstrual period), she may start using Implant at any time she wants;
o If starting during the first 7 days after menstrual bleeding starts, and she is still bleeding, no back-up method is needed for extra protection;
o If she is not bleeding or she is starting on or after day 8 of her menstrual period, she should use condoms or spermicide or avoid sex for 48 hours after insertion. If possible, give her condoms or spermicide
Breastfeeding
o As early as 6 weeks after childbirth;
o Fully or nearly fully breastfeeding effectively prevents pregnancy for at least 6 months or until she has a menstrual period, whichever comes first, implants can give her extra protection if she wants it.

62
o If only partially breastfeeding and child receives much other food or drink, 6 weeks after childbirth is the best time to start using implants. If she waits longer, fertility may return.
o If menstrual periods have returned, she can start implant any time it is reasonably certain that she is not pregnant. See “Having Menstrual Cycles”, above
After Childbirth, if not Breastfeeding
o Immediately or at any time in the first 6 weeks after childbirth. No need to wait for her menstrual period to return;
o After 6 weeks, any time it is reasonably certain, that she is not pregnant. If not reasonably certain, she should avoid sex or use condoms or spermicide until her first period begins and then start Norplant implants.
After Miscarriage or Abortion
o Immediately or in the first 7 days after either first or second – trimester miscarriage or abortion
o Later, any time it is reasonably certain that she is not pregnant
When stopping another methodo Immediately
Identify the equipment and materials
Rfor Jadelle R
and Zarin Implants insertion procedures.
10 minutes The Trainer displays the equipment and materials for IUD insertion procedures and requests the participants to identify each, including the following:
o One set of implant capsules o Trocar and cannula as supplied o Sterilized surgical drapes o Sterile gloves preferably devoid of talcum powder o Antiseptic solution like Hibitane povidone or
Betadine o Local anesthetic agent like Xylocaine 1% o Syringe and needle o Sterile gauzeIcotton wool o Plaster o Artery forceps (2) o Examination couch with arm rest o Disinfectant solution, e.g. Jiko Plastic bowl

Demonstrate the correct insertion technique with regard to asepsis, anaesthesia, location of incision, and careful correct placement of the implants;
20 minutes(Presentation/Demonstration)
The Trainer demonstrates the following steps as Client preparation
o Give clear information about probable changes in bleeding pattern during the menstrual cycle and other possible side effects;
o Describe the insertion and removal procedures and what the client should expect during and afterwards;
o Ensure client's cooperation and relaxation;
o Review client assessment data to determine if the client is an appropriate candidate for implants or if she has any problems that should be monitored more frequently while the implants are in place;
o Do a general examination;
o Do a pelvic examination if needed or requested by client (pelvic examinations are not necessary for safe implant initiation and use, but may be indicated for other reasons and are part of the preventive medicine practices and health promotion);
o Instruct the client to lie on the couch with arm stretched out comfortably
o Support arm with arm rest
o Use proper infection prevention procedure
o Wash hands
o Ask the patient to lie down on the examination table with her non-dominant arm extended on a sterile cloth on the other table, at right angles to her body.
o Clean the area of insertion with antiseptic solution: iodine (if available) and finally with spirit
o Apply sterile drapes exposing the insertion area only (under the skin of the upper arm).
63

Demonstrate
the correct
insertion
technique with
regard to
asepsis,
anaesthesia,
location of
incision, and
careful correct
placement of
the implants;
64
§ The Trainer explains and demonstrates the steps for the correct and subdermal
R Rplacement of Jadelle or Zarin as s/he displays the following slides containing:
o Figures 4.2.1(showing the correct and subdermal placement of the implants),
o Figure 4.2.2 (Anaesthetizing the insertion area),
o Figure 4.2.3 (The trocar and cannula),
o Figure 4.2.4 (Introducing the trocar just beneath the skin);
o Figure 4.2.5 (Advancing to the mark while tenting);
o Figure 4.2.6 (Removing the plunger and loading the first implant );
o Figure 4.2.7 (Holding the plunger steady and pulling the trocar to the mark near the tip;
o Figure 4.2.8 (Inserting the second implant. Advancing again to the mark following a narrow V)
o Figure 4.2.9 (Loading the second implant)
o Figure 4.2.10 (Holding the plunger steady while pulling the trocar back)
o Figure 4.2.11 (Closing the incision)
The Trainer informs the participants that the client should be observed at the clinic for 10 – 15 minutes for signs of syncope or bleeding from the incision before she is discharged.
The Trainer provides the participants with clear instructions regarding Waste Disposal and Decontamination as follows:
o Before removing gloves, place instruments into a container filled with 0.5% chlorine solution for decontamination.
o The surgical drape (if used) must be washed before reuse. Place in a dry covered container and remove to the designated washing area.
o While still wearing gloves, place all contaminated objects (gauze, cotton and other waste items) in a properly marked, leak-proof container with a tight-fitting lid or in a plastic bag.
o Immerse both gloved hand briefly in chlorine solution and then carefully remove gloves by turning inside out and place in the waste container;
o Wash hands thoroughly with soap and water.
o All waste materials should be disposed of by burning or burying

65
Explain the instructions to be given the clients after insertion
10 minutes(Demonstration/Role Play)
The Trainer demonstrates the following procedure to be followed after the insertion of the implants:
Covering the Insertion
o Bring the edges of the incision together and use a band-aid or surgical tape with sterile cotton to cover the incision. Sutures are not necessary and may increase scarring.
o Check for any bleeding.
o Cover the insertion area with a dry compress (pressure dressing) and wrap gauze snugly around the arm to be sure there is no bleeding and to minimize the bruising (subcutaneous bleeding)
Client Care
o Place a note in the client's record indicating the location of the capsules and specifying any unusual events that may have occurred during insertion. (A simple drawing showing the approximate location of the capsules in the client's arm is helpful).
o Observe the client for at least 15 to 20 minutes for bleeding from the incision or adverse effects before sending her home. She should be given written post insertion care instructions (if available) as appropriate.
Client 's instructions for wound care at home
o There may be bruising, swelling or tenderness at the insertion site for a few days. This is normal.
o Keep the area around the insertion site dry and clean for at least 48 hours. The incision could become infected if the area gets wet while bathing.
o Leave the gauze pressure and plaster in place for 48 hours and the band-aid or surgical tape in place until the incision heals (i.e. normally 3 to 5 days).
o Routine work can be done immediately. Avoid bumping the area, carrying heavy loads or applying unusual pressure to the site.
o After healing, the area can be touched and washed with normal pressure.
o If signs of infection occur, such as fever with inflammation (redness plus heat) at the site, or if there is persistent arm pain for several days, return to the clinic.

66
Schedule follow-up appointments with the clients after the procedure
10 minutes
Summary/ Evaluation
The Trainer summarizes the session by stating that:
o Insertion techniques involve paying attention to asepsis, anaesthesia, as well as the length and location of the puncture site.
o Careful subdermal placement ensures easy removal thereafter.
o Standard insertion techniques are similar for Jadelle and Zarin, while Implanon has a single use pre-loaded applicator as will be discussed in the next session.
o The Trainer requests the participants to respond to the following questions:
o Mention the steps of the correct procedure for Jadelle and Zarin insertion technique.
o List the post-insertion instructions given to the client.
o State the correct procedure for follow-up visits.
o State the warning signs a client must report after implant insertion
The Trainer displays the slide on “Follow-up Visits” and outlines the instructions as follows:
First visit (3 – 5 days after insertion)
o Ask the client about her health generally;
o Inspect the wound at the insertion site.
o Ask about any complaints
Third Month after insertion
o Ask about variations in her menstrual cycle, including inter-menstrual bleeding or spotting and excessive blood loss.
Schedule of subsequent follow-ups (if all is well):
o Ask about variations in her menstrual cycle, including inter-menstrual bleeding or spotting and excessive blood loss.
o Yearly visits until the client wishes to have the device removed or the life span of the device expires – at 5 years
o Repeat the activities of first visit at each subsequent visit;
o Encourage a pap smear every two years

67
RModule Four- Session 3: Implanon Contraceptive Implants' Insertion Techniques
Time: 1 hour
Learning Objectives
By the end of this session, participants should be able to:
R§List timing of insertion of Implanon and Implanon NXT™ implants with regard to menstruation, postpartum, post abortion and lactation periods
R§Identify the equipment and materials for Implanon and Implanon §NXT™ Implants insertion procedures §Demonstrate the correct insertion technique with regard to asepsis, anaesthesia,
location of incision, and careful correct placement of the implants R
§Demonstrate the unique insertion techniques of Implanon and Implanon NXT™ implants
§Demonstrate the correct application of dressing after insertion.§Explain the instructions to be given to clients after insertion.§Schedule follow-up appointments with the clients after the procedure.
Session Overview
R R§Equipment and materials for Implanon (Implanon and NXT™ ) implants' insertion procedures
§Timing of insertion with regard to menstruation, postpartum, post abortion and lactation periods
R§Demonstration of the correct insertion technique for Implanon implants with regard to asepsis, anaesthesia, location of incision, and careful correct placement of the implants
§Demonstration of the correct application of dressing after insertion.§Instructions to be given to clients after insertion.§Scheduling follow-up appointments with the clients after the procedure.
Methods
§Lecture/Presentation§Demonstration and Return Demonstration§Discussion§Brainstorming
Materials
§Flip chart/Newsprint§Markers§LCD Projector and Laptop
TM§ImplanonR (classic and Implanon NXT implants §Arm Models
TM§Learning Guide for ImplanonR (classic) and Implanon NXT implants' Insertion §Techniques

68
RModule Four- Session 3: Implanon Contraceptive Implants' Insertion Techniques
MODULE PLAN
Title Duration Objectives Methods Materials 1 hour ? List timing of
insertion with regard to menstruation, postpartum, post abortion and lactation periods
? Identify the equipment and materials for ImplanonR Implants insertion procedures
? Demonstrate the
correct insertion technique with regard to asepsis, anaesthesia, location of incision, and careful correct placement of the implants
? Demonstrate the
unique insertion techniques of ImplanonR implants
? Demonstrate the
correct application of dressing after insertion.
? Explain the
instructions to be given to clients after insertion.
? Schedule follow-up
appointments with the clients after the procedure.
? Lecture ? Presentation ? Discussion ? Brainstorming ? Demonstration and Return Demonstration
? Flip chart ? Markers ? LCD
Projector ? Laptop ? ImplanonR
Implants ? Learning
Guide for ImplanonR Implants’ Insertion Techniques
RImplanon Contraceptive Implants'

69
RModule Four- Session 3: Implanon Contraceptive Implants' Insertion Techniques
MODULE PRESENTATION
Learning Objectives
Time Frame Learning Methodology/Activity
Introduction – List the timing of insertion with regard to menstruation, postpartum, post-abortion and lactation periods
10 minutes The Trainer displays and reviews the learning objectives for this module.
The Trainer informs the participants that:
o Only a physician who is familiar with the R
procedure of Implanon and Implanon NXT™ insertion should undertake the procedure and it must be done under aseptic conditions.
o Insertion of both Implanon and Implanon NXT™ is performed with the specially designed applicator (Figure 4.3.1).
The Trainer displays the slide on “Time of Insertion” and notes that it is similar to that described for Jadelle and Zarin earlier.
Identify the equipment and materials for Implanon Implants insertion procedures.
10 minutes The Trainer displays the equipment and materials for IUD insertion procedures.
S/he also displays the slide containing Figure 4.3.2 – “Materials required for Implanon insertion” and requests the participants to identify each, including the following itemized below with the number they are labeled with in the picture placed in parenthesis:
o One set of implant capsules o Examining table for the patient to rest her
arm ono Sterile cloth (1)o Marker pen (2)o Antiseptic solution (3)o Sterile gloves (4)o Local anaesthetic spray, or injection of I ml
lidocaine [Xylocaine] (5)o Preloaded, sterile Implanon applicator
containing a single rod (6)Sterile gauze and compress (7)

70
Demonstrate the correct insertion technique with regard to asepsis, anaesthesia, location of incision, and careful correct placement of the implants;
20 minutes(Presentation/Demonstration)
The Trainer demonstrates the following steps as Client preparation
o Give clear information about probable changes in bleeding pattern during the menstrual cycle and other possible side effects;
o Describe the insertion and removal procedures and what the client should expect during and afterwards;
o Ensure client's cooperation and relaxation;
o Review client assessment data to determine if the client is an appropriate candidate for
RImplanon implants or if she has any problems that should be monitored more frequently while the implants are in place;
o Do a general examination;
o Do a pelvic examination if needed or requested by client (pelvic examinations are not necessary for safe implant initiation and use, but may be indicated for other reasons and are part of the preventive medicine practices and health promotion);
o Instruct the client to lie on the couch with arm stretched out comfortably
o Support arm with arm rest
o Use proper infection prevention procedure
o Wash hands
o Ask the patient to lie down on the examination table with her non-dominant arm extended on a sterile cloth on the other table, at right angles to her body.
o Clean the area of insertion with antiseptic solution: iodine (if available) and finally with spirit
o Apply sterile drapes exposing the insertion area only (under the skin of the upper arm).

71
Demonstrate the correct insertion technique with regard to asepsis, anaesthesia, location of incision, and careful correct placement of the implants Classic;
§ The Trainer explains and demonstrates the steps for the correct and subdermal
Rplacement of Implanon as s/he displays the following slides containing:
o Figures 4.3.2 (showing the correct and subdermal placement of the implants at the inner side of the arm),
o Figure 4.3.3 (Inserting the needle at 020 ),
o Figure 4.3.4 (Lowering the application to the horizontal position);
o Figure 4.3.5 (Lifting the skin with the needle during insertion);
o Figure 4.3.6 (Breaking the seal of the applicator);
0o Figure 4.3.7 (Turning the obturator 90 );
o Figure 4.3.8 (Retracting the cannula [needle] out of the skin);
o Figure 4.3.9 (Checking the needle for the absence of the implant)
The Trainer instructs the participants to note that they should:
o Never push against the obturator.
o Check the needle for the absence of the implant. Do not confuse the protruding end of the obturator with the implant (same colour). (Figure 4.3.9)
o Note that this procedure is opposite to giving an injection, where the plunger is pushed and the syringe is fixed. By keeping the obturator in its place and simultaneously pulling the cannula, the implant will remain in the upper arm.
o Always verify the presence of the implant by palpation and have the woman palpate it herself.
o Apply sterile gauze with a pressure bandage to prevent bruising

The Trainer informs the participants that the client should be observed at the clinic for 10 – 15 minutes for signs of syncope or bleeding from the incision before she is discharged.
The Trainer provides the participants with clear instructions regarding Waste Disposal and Decontamination as follows:
Ro Properly discard the Implanon Inserter.
o Before removing gloves, place any used instrument into a container filled with 0 . 5 % c h l o r i n e s o l u t i o n f o r decontamination.
o The surgical drape (if used) must be washed before reuse. Place in a dry covered container and remove to the designated washing area.
o While still wearing gloves, place all contaminated objects (gauze, cotton and other waste items) in a properly marked, leak-proof container with a tight-fitting lid or in a plastic bag.
o Immerse both gloved hand briefly in chlorine solution and then carefully remove gloves by turning inside out and place in the waste container;
o Wash hands thoroughly with soap and water.
o All waste materials should be disposed of by burning or burying
Demonstrate the correct insertion technique with regard to asepsis, anaesthesia, location of incision, and careful correct placement of the implantsNXT™
The Trainer reminds the participants thato Implanon NXT™ is a subdermal, long-
acting hormonal contraceptive, effective for up to 3 years.
o It is a progestogen-only implant preloaded in a disposable applicator
o Implanon NXT™ is radiopaque and R
comparable to Implanon .o It has a preloaded, sterile applicator
which is for single use and disposable. o Inserters familiar with the applicator for
RImplanon need to familiarize themselves with the one for Implanon NXT™
72

o Insertion of Implanon NXT™ should be performed under aseptic conditions
o Insertion of the implant should only be performed with the preloaded applicator
o It is recommended that the health care provider performs the procedure in a sitting position
o Confirm no allergies to antiseptic and anesthetic
o Allow the woman to lie on her back with her non-dominant arm turned
o outwards and bent at the elbow o To minimize the risk of neural or
vascular damage, the implant should be inserted sub dermally at the inner side of the non-dominant upper arm about 8-10 cm above the medial epicondyle of the humerus in order to avoid the large blood vessels and nerves that lie deeper in the subcutaneous tissue in the sulcus between the triceps and biceps muscles Figures 5.3.1 (Correct Placement of
TMImplanon NXT Subdermally), o Figure 5.3.3 (Removing the sterile
disposable applicator carrying the o implant from its blister) o Figure 5.3.4 (Puncture the skin with the
tip of the needle angled about 30°c)o Figure 5.3.5 (Sliding the needle to its full
length )o Figure 5.3.6 ( Unlocking the purple
slider by pushing it slightly down )o Figure 5.3.7 (Feeling the Implant under
the skin)
Explain the instructions to be given the clients after insertion
10 minutes(Demonstration/Role Play)
The Trainer demonstrates the following procedure to be followed after the insertion of the implants:
Covering the Insertion
o Bring the edges of the incision together and use a band-aid or surgical tape with sterile cotton to cover the incision. Sutures are not necessary and may increase scarring.
o Check for any bleeding.
73

o Cover the insertion area with a dry compress (pressure dressing) and wrap gauze snugly around the arm to be sure there is no bleeding and to minimize the bruising (subcutaneous bleeding)
Client Care
o Place a note in the client's record indicating the location of the capsules and specifying any unusual events that may have occurred during insertion. (A s i m p l e d r a w i n g s h o w i n g t h e approximate location of the capsules in the client's arm is helpful).
o Observe the client for at least 15 to 20 minutes for bleeding from the incision or adverse effects before sending her home. She should be given written post insertion care instructions (if available) as appropriate.
Client 's instructions for wound care at home
o There may be bruising, swelling or tenderness at the insertion site for a few days. This is normal.
o Keep the area around the insertion site dry and clean for at least 48 hours. The site could become infected if the area gets wet while bathing.
o Leave the gauze pressure and plaster in place for 48 hours and the band-aid or surgical tape in place until the incision heals (i.e. normally 3 to 5 days).
o Routine work can be done immediately. Avoid bumping the area, carrying heavy loads or applying unusual pressure to the site.
o After healing, the area can be touched and washed with normal pressure.
o If signs of infection occur, such as fever with inflammation (redness plus heat) at the site, or if there is persistent arm pain for several days, return to the clinic.
74

Schedule follow-up appointments with the clients after the procedure
10 minutes The Trainer displays the slide on “Follow-up Visits” and outlines the instructions as follows:
First visit (3 – 5 days after insertion)
o Ask the client about her health generally;
o Inspect the wound at the insertion site.
o Ask about any complaints
Third Month after insertion
o Ask about variations in her menstrual cycle, including inter-menstrual bleeding or spotting and excessive blood loss.
Schedule of subsequent follow-ups (if all is well):
o Ask about variations in her menstrual cycle, including inter-menstrual bleeding or spotting and excessive blood loss.
o Yearly visits until the client wishes to have the device removed or the life span of the device expires – at 5 years
o Repeat the activities of first visit at each subsequent visit;
o Encourage a pap smear every two years
The Trainer summarizes the session by stating that:
o As in the Jadelle and Zarin Insertion techniques attention must be paid to asepsis, anaesthesia, as well as the length and location of the puncture site.
o Careful subdermal placement ensures easy removal thereafter.
o Implanon (and NXT™) has a single use pre-loaded applicator unlike Jadelle and Zarin implants.
o The Trainer requests the participants to respond to the following questions:
o Mention the steps of the correct procedure for Implanon and Implanon NXT™ insertion
o List the post-insertion instructions given to the client.
o State the correct procedure for follow-up visits following Implanon and NXT™ insertion.
o State the warning signs a client must report after Implanon and NXT™ insertion
Summary/ Evaluation
75
Module Four – Session 4: IUD Removal Techniques
Time: 1 hour
Learning Objectives:
By the end of this session, participants should be able to:§Identify the indications for removal of IUDs.§Identify the equipment and materials for IUD removal procedures§Demonstrate the correct removal techniques with regards to asepsis, and removal
procedure. §List what to do when difficulties arise during removal.§List appropriate steps for reinsertion, if needed.§Demonstrate post-removal counselling techniques.
Session Overview:
§Indications for removal of IUDs.§Equipment and materials for IUD removal procedures§Demonstration of the correct removal techniques with regards to asepsis, and
removal procedure. §What to do when difficulties arise during removal.§Appropriate steps for reinsertion, if needed.§Demonstration of post-removal counselling techniques
METHODS
§Lecture§Discussion§Demonstration and Return Demonstration
MATERIALS
§Training Arm§Video Films or Removal Techniques and VCR§Removal Kit§Overhead Projector§Implant Capsules §Plaster and Dressing§Antiseptic Solution§Sterile Gloves
76

Module Four – Session 4: IUD Removal Techniques
MODULE PLAN
Title Duration Objectives Methods Materials IUD Removal Techniques
1 hour ? Identify the indications for removal of IUDs.
? Identify the
equipment and materials for IUD removal procedures;
? Demonstrate the
correct removal techniques with regards to asepsis, and removal procedure.
? List what to do
when difficulties arise during removal.
? List appropriate
steps for reinsertion, if needed.
? Demonstrate post-
removal counselling techniques.
? Brainstorming ? Lecture ? Presentation ? Discussion ? Demonstration and Return Demonstration
? Flip chart ? Markers ? LCD
Projector ? Laptop ? Pelvic
Model ? CuT 380A
IUD ? Learning
Guide for CuT 380A IUD Insertion Techniques
77

Module Four – Session 4: IUD Removal Techniques
MODULE PRESENTATION
78
Learning Objectives
Time Frame Learning Methodology/Activity
Introduction – Identify the indications for removal of CuT 380A IUD
10 minutes(Lecture/Brainstorming)
The Trainer displays and reviews the learning objectives for this module.
The Trainer informs the participants that:
o Copper-releasing IUDs such as Cu T 380A can be removed/replaced after 12 years.
o Unless an IUD is being removed for a medical reason or at the client's request, a new IUD can be inserted immediately after removing the old, if the client so desires.
o IUD removal is usually a routine, uncomplicated and painless procedure provided the provider is gentle and careful.
o For routine removals, especially if the client wants a replacement, it may be easier to remove the IUD during the menses.
o To avoid breaking the strings, the provider should apply gently, steady traction and remove the IUD slowly.
o As with IUD insertion, to minimize the risk of infection with IUD removal, the same infection prevention practices must be followed.
The Trainer requests the participants to mention the indications for removal of CuT 380A IUD, and notes their responses on the flip chart.
The Trainer displays the slide on “Reasons for Removal of IUDs” and clarifies the responses of the participants as follows:

Reasons for removal
o Client desires pregnancy o Menopause, no need for contraception o Client desires another method of
contraception o Life of IUD has expired o Accidental pregnancy o Client is not able/willing to tolerate side
effects o Dyspareunia (painful intercourse) o Partial expulsion of the device o Cervical perforation o Uterine perforation
The Trainer requests the participants when to remove CuT 380A IUD, and notes their responses on the flip chart.
The Trainer clarifies the participants' responses by stating that:
o IUDs can be removed whenever a client insists on having it removed or when there are indications for removal.
o The best time to remove is during menses, because the cervix is slightly dilated, soft and removal is less uncomfortable.
Identify the equipment and materials for CuT 380A IUD removal procedures.
10 minutes(Demonstration/Discussion)
The Trainer displays the equipment and materials for CuT 380A IUD removal procedures.
The Trainer informs the participants that:
o The instruments and equipment for removal are the same as for insertion.
o In addition, an alligator forceps and a retrieval hook should be available. All instruments should be high-level disinfected (or sterilized).
79

Demonstrate
the correct removal techniques with regards to asepsis.
10 minutes (Demonstration)
The Trainer demonstrates the removal procedure for CuT 380A as follows using a pelvic model:
o Explains the removal procedure to the client to ensure her cooperation and relaxation.
o Ensures that the client has emptied her bladder
o Places the client in the dorsal position with the legs flexed at the hip and knees;
o With sterile-gloved hand, parts the labia and
gently pass a Cusco's speculum; o Visualises the cervix; o Cleans the cervix and fornices with
antiseptic solution; o Tells the client that you are going to remove
the IUD.
o Asks her to take slow, deep breaths and relax.
o Informs her that there may be some cramping, which is normal.
o Grasps the IUD strings near the external os with artery forceps and applies gentle and steady traction to remove device.
o To avoid breaking the strings, applies steady, but gentle, traction and remove the IUD slowly;
o If the strings break off, but the IUD is still visible, grasps the device with the forceps and remove it.
o Checks that no part has broken off the device;
o Shows device to the client; o Cleans the cervix with an antiseptic solution; o Applies a perineal pad.
The Trainer emphasizes to the participants that:
o The device can usually be removed without difficulty and excessive force should not be applied.
80

List what to
do when difficulties arise during removal.
10 minutes(Brainstorming/Lecture)
The trainer requests the participants to mention what to do when difficulties arise during removal and notes their responses on the flip chart.
S/he displays the slides on “Difficulty in the removal of IUDs” and clarifies the responses of the participants as follows:
o If traction, as described above, does not result in the removal of the device, or strings are not visible or strings are too short, proceed as follows: §Probe the cervical canal with narrow artery
forceps and attempt removal (if this fails, device is probably embedded in the endometrium)
§Explore the uterine cavity with alligator forceps, Sharman's curette, or retriever hook ;
§If this fails, dilate the cervix with small dilators and attempt removal again (cervical block may be necessary, or give appropriate analgesics);
§X-ray or scan with ultrasound to exclude
partial or complete extrusion through the uterine wall. If this is found, explore the uterine cavity under general anesthesia and be prepared to remove a completely extruded IUD by laparoscopy or laparotomy.
The Trainer informs the participants that only trained family planning doctors should conduct the removal of IUDs.
Demonstrate post-removal counselling techniques for CuT 380A IUD.
10 minutes The Trainer discusses the following post-removal instructions with the participants:
o Explain to the client that slight vaginal spotting may continue for a few days;
o If client wishes to use another method of
contraception, counsel and/or initiate accordingly
81

Summary/Evaluation
The Trainer summarizes the session by stating that:
o IUD removal is usually a routine, uncomplicated and painless procedure provided the provider is gentle and careful.
o For routine removals, especially if the client wants a replacement, it may be easier to remove the IUD during the menses.
o To avoid breaking the strings, the provider should apply gently, steady traction and remove the IUD slowly.
o As with IUD insertion, to minimize the risk of infection with IUD removal, the same infection prevention practices must be followed.
o The Trainer requests the participants to respond to the following questions:
o List the essential steps in standard removal technique.
o List 5 key points for successful removal.
o Enumerate indications for removal.
82

Module Four - Session 5: Implant Removal Techniques
Time: 60 minutes
Learning Objectives
By the end of this session, the participants should be able to:
§List the indications for removal.§Identify the equipment and materials for implant removal procedures§Demonstrate the correct removal techniques with regards to asepsis, anaesthetic,
length and location of incision, and removal procedure. §List what to do when difficulties arise during removal.§List appropriate steps for reinsertion.§Demonstrate post-removal counselling techniques.
Session Overview
§Indications for removal.§Equipment and materials for implant removal procedures§Demonstration of the correct removal techniques with regards to asepsis,
anaesthetic, length and location of incision, and removal procedure. §What to do when difficulties arise during removal.§Appropriate steps for reinsertion.§Demonstration of post-removal counselling techniques.
Methods
§Brainstorming§Lecture§Discussion§Demonstration and Return Demonstration
Materials
§Training Arm§Video Films or Removal Techniques and VCR§Removal Kit§Overhead Projector§Implant Capsules §Plaster and Dressing§Antiseptic Solution§Sterile Gloves
83

Module Four - Session 5: Implant Removal Techniques
MODULE PLAN
Title Duration Objectives Methods Materials Implant Removal Techniques
1 hour ? List the indications for removal.
? Identify the
equipment and materials for implant removal procedures
? Demonstrate the
correct removal techniques with regards to asepsis, anaesthetic, length and location of incision, and removal procedure.
? List what to do
when difficulties arise during removal.
? List appropriate
steps for reinsertion.
? Demonstrate post-
removal counselling techniques.
? Brainstorming ? Lecture ? Presentation ? Discussion ? Demonstration and Return Demonstration
? Flip chart ? Markers ? LCD
Projector ? Laptop ? Arm Model ? Learning
Guide for Implant Insertion Techniques
84

85
Module Four - Session 5: Implant Removal Techniques
MODULE PRESENTATION
Learning Objectives
Time Frame Learning Methodology/Activity
Introduction – List the indications for removal of contraceptive implants.
10 minutes(Lecture/Brainstorming)
The Trainer displays and reviews the learning objectives for this module.
The Trainer informs the participants that:
o Unlike insertion, removal of implants does not have to be timed to the menses and can be done at any time.
o Correct insertion – with the capsules placed subdermally – makes the removal procedure much easier.
o While all types of clinicians (physicians, nurses and midwives) can be trained to insert and remove the capsules, a clinician skilled in removal should be consulted if difficulty in removing the capsules is anticipated.
o Clinicians need to work gently, carefully and patiently when removing capsules.
o As with insertion, using the recommended practices for the prevention of infection is essential for minimizing the risk of disease transmission and infections following removal of the implants.
o Removal requires more patience and skill than insertion. Moreover, with atypically placed capsules (i.e., those inserted too deep and/or in an irregular pattern), removal using any technique takes longer and is associated with more blood loss than insertion (WHO, 1990).
The Trainer requests the participants to mention the indications for removal of Implants, and notes their responses on the flip chart.
The Trainer displays the slide on “Indications for Removal of IUDs” and clarifies the responses of the participants as follows:

86
Indications for Removal
Medical Reasons
§Excessive bleeding§Pregnancy§Jaundice§Seizure§Migraine§Severe headache§Blurred vision§Weight problems
Personal Reasons
§Planned pregnancy§Client dissatisfaction (her reason to stop)§At the end of 3-5 years depending on the
type being used.
The Trainer emphasizes to the participants that:
o The indication for removal may be personal or medical.
o Providers may perceive implants as 3-5 years method, however clients need constant reassuring that the implant may be removed at any time and for any reason.
o One of the advantages of Implant is that when the implanted capsules are removed, the woman's fertility returns to normal almost immediately.
o If the woman wishes to have the implant removed, it is important that access to removal is readily available.
o Experience shows that in some instances, where the providers have been trained to do insertion only, they may be hesitant about doing removal thus preventing easy access to removal for the client.
The Trainer informs the participants to offer Pre-removal Counselling which includes:
o Before removing the capsules, talk with the client about her reason for removal and answer any questions.
o Ask the client about her present reproductive goals (e.g. does she want to continue spacing or limiting births?).
o Briefly describe the removal process and what she should expect both during the removal and afterwards.

87
Identify the equipment and materials for implant removal procedures.
10 minutes(Demonstration/Discussion)
The Trainer displays the equipment and materials for implant removal procedures. They include:
o Examining table for the woman to lie ono Arm support or side tableo Soap for washing the armo Sterile (or clean), dry surgical drapeo Three bowls (one for the antiseptic solution,
one for cotton balls soaked in boiled or sterile water to remove the talc from gloves and one containing 0.5% chlorine solution for decontaminating removed capsules);
o Pairs of sterile (or high-level disinfected) surgical gloves;
o Antiseptic solutiono Local anaesthetic - 1:5 concentration without
epinephrine (adrenaline)o Syringe (5 or 10 ml) and 2.5 to 4cm (1 – 1 ½
inches) long needle (22 gauge)o Scalpel with #11 bladeo Curved and straight forceps (mosquito and
Crile)o Norplant / Jadelle holding forcepso Ordinary and straight forceps (mosquito and
Crile)o Ordinary band-aid or sterile gauze with surgical
tape or plastero Sterile gauze and compresses o Epinephrine (Adrenaline) readily available for
emergency use in anaphylactic shock.
The Trainer displays the slide containing Figure 4.5.1 to emphasize the “Basic items required for removal of implants.”
Demonstrate the correct removal techniques with regards to asepsis.
10 minutes (Demonstration)
§The Trainer explains and demonstrates the steps for the removal of implants as s/he displays the following slides containing:
o Figures 4.5.2 (Locating the capsules by palpation),
o Figure 4.5.3 (Marking the position of the capsules)
o Figure 4.5.4 (Injecting local anaesthetic under the narrow V-end of the implants),
o Figure 4.5.5 (Making an incision),

88
o Figure 4.5.6 (Pushing the implant with the fingers gently towards the incision);
o Figure 4.5.7 (Inserting the curved mosquito forceps);
o Figure 4.5.8 (Opening the tissue capsule);
o Figure 4.5.9 (Grasping the end of the implant with crile forceps);
o Figure 4.5.10 (Releasing the mosquito forceps and removing the implant gently)
o Figure 4.5.10 (Be sure that both implants [for R RJadelle and Zarin and 1implant for
RImplanon ] are removed).
The Trainer informs the participant about the following procedures to be followed immediately after removal of implant:
Covering the Incision.
o If the client does not want another set of implants, clean the area around the incision site with a small amount of antiseptic solution applied to a cotton or gauze swab.
o Use the forceps to hold the edges of the incision together briefly (10 to 15 seconds). This will help reduce bleeding from the incision. Then apply gauze soaked in slight iodine solution to the incision area.
o With the edges of the incision together, close with a band-aid, or surgical tape with sterile cotton. Sutures are not necessary and may increase scarring. Check for any bleeding.
Waste Disposal Decontamination
o Before removing gloves, gently place instruments into a container filled with a 0.5% chlorine solution for decontamination. Soak all items for 10 minutes, then rinse immediately with clean water to avoid discoloration or corrosion of metal items.

89
o While still wearing gloves, place all
contaminated objects (capsules, gauze, cotton and other waste items) in a properly marked, leak-proof container with a tight-fitting lid or in a plastic bag.
o Immerse both gloved hands briefly in
chlorine solution and then carefully removed gloves by turning inside out and place in the waste container.
o Wash hands thoroughly with soap and water
o All waste material should be disposed of by
burning or burying.
The Trainer informs the participants that the client should be observed at the clinic for 10 – 15 minutes for signs of syncope or bleeding from the incision before she is discharged.
List what to do when difficulties arise during removal of implants.
10 minutes(Brainstorming/Lecture)
The trainer requests the participants to mention what to do when difficulties arise during removal and notes their responses on the flip chart.
S/he displays the slides on “Removing Hard-to-Retrieve Capsules” and clarifies the responses of the participants as follows:
Removing Hard-to-Retrieve Capsules
o Feel both tips of the capsule with the
forefinger and middle finger. Keeping the middle finger on the tip of the capsule nearest the client's shoulder and the forefinger on the tip nearest elbow, push the capsule as close to the incision as possible.
o Insert the forceps (curved mosquito or Crile)
into the incision until the jaws are well beneath the capsule. At the same time keep pressure on the capsule with your fingers to stabilize it.
o Firmly grasp the capsule from below with the
jaws of the curved forceps.

90
o Although 1 to 2 cm of the forceps is now inside the incision, do not try to pull the capsule out. Instead, while continuing to push the capsule toward the incision, flip the handle of the forceps
0180 toward the client's shoulder and grasp the handle with the opposite hand.
o If the capsule does not become visible after 0
flipping, twist the forceps 180 around its main axis. With gentle pulling, the tip of the capsule should then become visible in the incision on the opposite side of the forceps.
o Clean off and open the fibrous tissue sheath surrounding the capsule by rubbing with sterile gauze to expose the tip of the capsule. Alternatively, if rubbing with gauze does not open the fibrous tissue sheath, the scalpel can be used.
o After opening the fibrous sheath, use the second forceps to grasp the part of the capsule that becomes visible. Release the first forceps and gently remove the capsule.
The Trainer informs the participants to note that remaining “difficult-to-remove” capsule can be removed using the same technique. If necessary, inject additional small amounts of local anaesthetic under any remaining capsules.
The Trainer informs the participants that only trained family planning doctors/nurses should conduct the removal of implants.
List the appropriate steps for re-insertions.
5 minutes(Discussion)
The Trainer informs the participants that if the client wants to continue using implants, a new set of capsules can be inserted at the time the current set is removed. The provider should note the following:
o The capsules may be placed through the same incision in the same general direction as the previous set.
o Alternatively, the capsules can be inserted in the opposite direction. Be sure the tips of the capsules do not lie so close to the elbow fold as to interfere with movement.
o A new incision should be necessary only if there is too much soft tissue trauma (bruising) in the area of the original insertion or if there is not enough room between the incision and the elbow fold.
In the unlikely event that the removal site is unsuitable, or at the client's request, the new set can be inserted in the other arm.

91
Demonstrate post-removal counselling techniques for implants
10 minutes(Lecture/Discussion)
The Trainer displays the various slides on “Procedure to follow after removal of capsules” and discusses the following issues:
Client Care
o Place a note in the client's record indicating the date of removal and specifying any unusual events that may have occurred during removal
o Observe the client for at least 15 to 20 minutes for bleeding from the incision or adverse effects before sending her home.
Client Instructions for Wound Care at Home
o There may be bruising swelling or tenderness at the insertion site for a few days. Clients should be reassured that this is normal.
o Keep the area around the removal site dry and clean for at least 48 hours. (The incision could become infected if the area gets wet while bathing)
o If used, leave the gauze pressure and plaster in place for 48 hours and the band-aid or surgical tape in place until the incision heals (i.e. normally 3 to 5 days)
o Routine work can be done immediately. Avoid bumping the area, carrying heavy loads or applying unusual pressure to the site.
o After healing, the area can be touched and washed with normal pressure.
o If signs of infection occur, such as fever, inflammation (redness plus heat) at the site or persistent arm pain for several days, return to the clinic
o The client should be told when to come back for a follow-up visit, if needed.
o Discuss what to do if she experiences any problems. Answer any questions
The Trainer informs the participant to note the fibrous sheaths in the arm (tracks where the capsules were located) may be felt for some time. This sensation will disappear within a few months.

92
Summary/Evaluation
5 minutes(Discussion)
The Trainer summarizes the session by stating that:o Correct removal techniques involve paying
proper attention to asepsis, adequate anaesthesia and appropriate location of the incision.
o The provider needs to work gently, carefully and patiently. Removal procedures take longer time than insertions.
o The removal procedure can be interrupted if difficulties are encountered and the client asked to return after 4-6 weeks for completion of the removal of remaining capsule(s).
o Clients should always be given instructions for wound care at home on discharge.
o The Trainer requests the participants to respond to the following questions:
o List the essential steps in standard removal technique of implants.
o List 5 key points for successful removal of implants.
o Enumerate indications for removal of contraceptive implants.

93
MODULE FIVE
MODEL AND CLINICAL PRACTICE
Module Five: Model and Clinical Practice
Time: 1 hour
Learning Objectives
By the end of this session, participants should be able to:
§Explain the rationale for the use of models during IUD and implant training§Discuss the “Clients' Rights” during clinical training§List the guidelines for clinical observation and practice and decorum in the
clinical area§Mention “Infection Prevention Reminders”§Discuss the guidelines for the daily Post-practice sessions§List the guidelines for completing the “Clinical Procedures Record Sheet”
Session Overview
§ Rationale for the use of models during IUD and implant training§“Clients' Rights” during clinical training§Guidelines for clinical observation and practice, and decorum in the clinical area§ “Infection Prevention Reminders”§Guidelines for the daily Post-practice sessions§Guidelines for completing the “Clinical Procedures Record Sheet”
Methods
§Illustrated lecture§Discussion§Brainstorming
Materials
§Flip Chart and Stand§Markers§LCD Projector§Lap top

94
Module Five: Model and Clinical Practice
MODULE PLAN
Title Duration Objectives Methods Materials Model and Clinical Practice
1 hour ? Explain the rationale for the use of models during IUD and implant training;
? Discuss the “Clients’
Rights” during clinical training;
? List the guidelines
for clinical observation and practice and decorum in the clinical area;
? Mention “Infection
Prevention Reminders”
? Discuss the
guidelines for the daily Post-practice sessions;
? List the guidelines
for completing the “Clinical Procedures Record Sheet”
? Brainstorming ? Lecture ? Presentation ? Discussion ? Demonstration and Return Demonstration
? Flip chart ? Markers ? LCD
Projector ? Laptop ? Arm
Models ? Pelvic
Models ? Trocar and
cannula ? JadelleR,
ZarinR and ImplanonR Implants
? Learning Guide for Implant Insertion Techniques

95
Module Five: Model and Clinical Practice
MODULE PRESENTATION
Learning Objectives
Time Frame Learning Methodology/Activity
Introduction – Explain the rationale for the use of models during IUD and implant training;
20 minutes(Lecture/Brainstorming)
The Trainer displays and reviews the learning objectives for this module.
The Trainer informs the participants that:
o This module includes guidance on the clinical practice for this training programme.
o Most of the participants' time will be spent on clinical practice.
o Since this is a competency-based course, the participants will practice IUD and implant insertion and removal skills on models first, observe these same procedures on clients and then perform them under supervision on clients.
o A major component of humanistic training is the use of anatomic models, which simulates the human body, and other learning aids such as slide sets and videotapes. The effective use of models:
§Facilitates learning,§Shortens training time, and§Helps participants to correct mistakes in
technique that could hurt the client.
The Trainer intimates the participants with the procedures that will be adopted for the clinical practice, which are:
o Before a participant attempts a clinical procedure with a client, two learning activities should occur:
§The clinical trainer should demonstrate the required skills and client interactions several times using an anatomic model and appropriate audiovisual aids (e.g. slide sets or videotapes).
§While being supervised, the participant should practice the required skills and client interactions using the model and actual instruments in a simulated setting which is as similar as possible to the real situation.

96
o The participants will practice using the Learning Guides for Clinical Skills in IUD and Implant Insertion and Removal Techniques on models;
o The trainer(s) will evaluate each participant's performance using the Observation Checklist. Once the participant passes the assessment on the model, s/he will be allowed to practice on clients.
o The final skills evaluation will be done while the participant is performing IUD and Implant Insertion and Removal Techniques on clients.
o The participants must be supervised by the trainers at all times during the clinical practice.
o The number of procedures each participant must perform on models or clients before achieving competency will vary according to the participant's skill and experience.
o Only when skill competency and some degree of skill proficiency have been demonstrated with models, however, should participants have their first contacts with clients.
Discuss the clients' rights during training
10 minutes(Presentation/Discussion)
The Trainer displays the slide on “Clients' Rights during Training” and informs the participants that client safety and client satisfaction are the goals of this training in long-acting contraceptive services. Therefore, the client's rights of privacy and confidentiality are a part of clinical training.
o The client's permission must be obtained
before any participant observer assists with or performs any services. The client should understand that she has the right to refuse care from a participant (provider-in-training) without loss or postponement of services. If the client should refuse participant assisted or performed services, the trainer or other staff members should perform the procedure.
o Clients who consent to participate in training
should be informed in advance that they will receive care from a trainee under the direct supervision of a qualified trainer.

97
o When conducting counselling, performing a
physical examination or giving services, an environment that protects the client's bodily privacy and confidentiality of speech must be created and maintained.
o Communication between the participant and the trainer during feedback encounters or coaching must be discreet.
o Corrective feedback should be limited to situations that could harm or cause discomfort to the client.
o The client's right to confidentiality must be protected. This may be challenging to maintain strictly during training situations when specific cases are used in learning exercises. However, such discussion should take place in private areas out of hearing of other staff and clients; no reference should be made to any client by her name. Hallways, corridors, waiting areas, and other public areas are not appropriate places for discussions of clients.
The Trainer seeks for any clarifications from the participants and addresses any concerns raised by them.
List the guidelines for clinical observation and practice and decorum in the clinical area.
10 minutes(Presentation/Discussion)
The Trainer displays the slide on “Guidelines for clinical observation and practice” and informs the participants that the most important concerns during clinical observation/practice are ensuring the client's comfort and providing a safe, effective procedure. Therefore:
o The operating clinician (whether a trainer or a
participant) should give a running commentary to the other participants throughout the procedure.
o If a participant performing a procedure wants
the trainer to take over the procedure, he or she should make a straightforward request such as ''I need help'' or ''Please, show me again how to do this''.
o If a participant notices a complication that is
unobserved by the operator, he or she has a responsibility to report the situation immediately to the trainer. This should be done in a way that does not alarm the client.

98
o If a complication arises during any procedure, the trainer is responsible for managing the situation and will complete the procedure.
o If the trainer wants to take over the procedure from a participant, he or she will say something like “Let me help you with this step'' or “Perhaps, I can show you an easier or better way to do this'' or “The client is uncomfortable, so I'll finish the procedure. You can watch and do the next case”.
o The participants who are observing the procedure should not interfere with the work of the participant conducting the procedure.
o The participants who are observing should hold all questions and comments until after the procedure is completed and until they are not in the presence of the client.
o The participant performing the procedure should answer the client's questions.
o If the client becomes impatient, angry, anxious, or restless during the procedure and if the participant is unable to reassure her, the trainer should take over the procedure.
o If complications arise during the procedure, the trainer must be in charge. The trainer may choose to permit a participant to manage the complication, as a learning experience, but only under supervision.
o If a participant notices a problem or a break in sterile technique that was unobserved by the trainer, that participant is responsible for reporting the situation to the trainer immediately in a way that does not alarm the client.
The Trainer seeks for any clarifications from the participants and addresses any concerns raised by them.
99
Discuss the
highlights of Client-Provider Interaction
10 minutes(Presentation/Discussion)
The Trainer displays the slide on “Client-Provider Interaction Highlights” and clarifies the following:
o When performing an IUD or implant insertion and removal procedures, it is important to remember the principles of effective client-provider interaction. Clients will be concerned about the procedure and the amount of pain they may feel. By using gentle techniques, providers can avoid giving women more pain.
o The provider can do several things to minimize the client's tension and maximize her comfort, which will contribute to the safe and efficient performance of the procedure.
o Some clients like to be informed of each step of the procedure, while others prefer to be distracted. Ask the client what will help her to relax.
o Inform the client that she might feel some discomfort. Request that she tells you if she feels any discomfort or pain.
o Before, during, and after the procedure, be aware of the client's need for privacy and her concerns about modesty.
List the “Infection Prevention Reminders”.
5 minutes(Presentation/Discussion)
The Trainer displays the slide on “Infection Prevention Reminders” and discusses the following with the participants:
Before the procedure:
o Insertion and removal of IUD or implants can be performed in an examination room or a special room. Wash hands thoroughly before putting on gloves and after each client.
During the procedure:
o Use instruments, gloves, and drapes that have been sterilized or high-level disinfected. Maintain asepsis
After the procedure:
o While still wearing gloves, dispose of contaminated wastes (gauze, cotton, and other waste items) in a covered, leak-proof container of plastic bag.

o Ensure that instruments and reusable items are decontaminated in a 0.5% chlorine solution for 10 minutes immediately after use, while they are still in the procedure room.
o Ensure that the examination table, instrument stands, and other surfaces contaminated during the procedure are decontaminated by wiping with a cloth soaked in a 0.5% chlorine solution. If organic material remains after decontamination, w a s h w i t h d e t e r g e n t a n d w a t e r. Decontamination and cleaning of the examination tables and couches between clients is important.
o Wash hands after removing gloves.
Discuss the expectations from the participants during Clinical Observation.
5 minutes
(Discussion)
The Trainer informs the participants that:
o They will all have the opportunity to observe procedures performed by the trainer and by other participants during the training programme.
o In addition to insertion and removal techniques, they will also observe, whenever possible, pre-procedure activities (such as client assessment) and post-procedure activities (such as giving instructions to the client). The goal is for them to have a comprehensive understanding of all the service-delivery steps.
o During observation of cases, participants should follow along with the IUD or implant Clinical Skills Learning Guides.
o In addition to watching for the steps of insertion and or removal, they will also observe how the provider interacts with the client and what the provider does in terms of infection prevention practices.
100

101
Mention the
guidelines for supervised clinical practice.
5 minutes(Discussion)
The Trainer informs the participants that:
o Once their skills have been evaluated as satisfactory on the models, they may insert IUDs or implant under the trainer's supervision. The participants should not perform an insertion on a client until the trainer has evaluated their skills on the model using the appropriate IUD or Implant Clinical Skills Learning Guide.
o The following tips may help a participant with clinical practice:
§Depending on his/her prior clinical experience, a participant may begin by observing an IUD or implant insertion, assisting the trainer in performing an insertion, or performing an insertion with the trainer's guidance.
§The participant must exercise patience. The participant should realise that s/he is learning a new technique, and it will take repetitive performance on the model and on clients before s/he feels comfortable with the technique.
§The participant should start with model practice and continue model practice during the early portion of his/her training to help fine-tune the skills and help him/her correct problems s/he is having in clinical practice.
§During clinical training, the trainer is present to provide the participant with support and guidance. S/he should ask questions and seek help if needed, being careful not to cause the client any extra concern.
§After each practice session, all participants will have time to review and discuss the cases with the trainers and other observers. The trainer will provide the participants with coaching as needed during this post-practice session.
§When you and the trainer determine that a participant is ready, the trainer will evaluate his/her performance using the appropriate IUD or implant Clinical Skills Checklists.
The Trainer seeks clarifications from the participants and addresses their concerns (if any).

102
Discuss the guidelines for the daily post-practice sessions.
10minutes(Presentation/Discussion)
The Trainer displays the slide on “Guidelines for the daily post-practice sessions” and requests the participants to note that:
o At the post-practice meeting the trainers will provide an opportunity for self-assessment in relation to the focus for the day.
o The participants may use the Learning Guide to assess their own performance.
o The trainers will use the post-practice meeting to give feedback to the entire group, and to jointly develop problem-solving approaches for skills difficulties.
o During the post-practice meeting, the following questions will be used to review the day's experience:§ What went well?§ What new learning needs did you
have?§ What new skill(s) did you learn?§ What did not go well?§ What do you think would have helped
to make the procedures go better?§ How could problems, which arose,
have been avoided?§ What was done to solve the problem?§ How did the team members work
together? How could they have worked more effectively?
§ Are there steps that you want to review before the next clinical practice session?
o The feedback should highlight the positive aspects and address the mistakes.
The Trainer seeks clarifications from the participants and addresses their concerns (if any).
List the guidelines for completing the “Clinical Procedures Record Sheet”.
5 minutes(PresentationDiscussion)
The Trainer displays the slide on “Guidelines for completing the participant's Clinical Service Procedures Record Sheet” and requests the participants to note that:
o The participants' Clinical Service Record Sheet (Appendix 5.1) is to assist each participant to keep a track of all the procedures observed or performed during the training programme.
o These record sheets are not expected to replace the clinic Client Record Form that must be completed for each client by the participant.

103
Summary/
Evaluation5 minutes(Discussion)
The Trainer summarizes the session by stating that:o This module provides the information and
guidelines as to how the model and clinical practice sessions of this training programme will be conducted so that IUDs and implants will be correctly inserted and/or removed safely.
o The ultimate goal is to provide high quality IUD and implant services both during and after the training programme. The client's right to confidentiality must be protected. The priority concerns during clinical observation and practice are the client's comfort as well as safety and performing an effective procedure.
o The Trainer requests the participants to respond to the following questions:
o Why are models used during IUD and Implant training programmes?
o Mention the rights of the client during clinical training programme.
o Why must decorum be maintained in the clinical area during training?
o Mention four “infection prevention reminders” during clinical practice,

104
MODULE SIX
COUNSELLING FOR IUDS AND IMPLANTS
Session 1: Introduction to Counselling
Session 2: The Balanced Counselling Strategy Plus

105
Module Six - Session 1: Introduction to Counselling
Time: 1 hour
Learning Objectives:
By the end of this session, participants should be able to:
§Define counselling§State the objectives of counselling in Family Planning§Discuss the qualities of a successful counselor§Mention the types of counselling required for IUD and Implant services§Discuss the concerns and perceptions of potential users of IUDs and Implants§Explain the term “Informed Choice”§Discuss the “Rights of the Client”
Session Overview
§Definition of counselling§Objectives of counselling in Family Planning§Qualities of a successful counselor§Types of counselling required for IUD and Implant services§Concerns and perceptions of potential users of IUDs and Implants§ “Informed Choice”§“Rights of the Client”
Methods
§Brainstorming§Presentation§Discussion§Demonstration and Return Demonstration§Role Play
Materials
§Flip chart§Markers§LCD Projector§Laptop§CuT 380A IUD
R R R§Jadelle , Zarin and Implanon Implants §Learning Guide for IUD Counselling Techniques§Learning Guide for Implant Counselling Techniques

Module Six - Session 1: Introduction to Counselling
MODULE PLAN
Title Duration Objectives Methods Materials Introduction to Counselling
1 hour ? Define counselling;
? State the
objectives of counselling in Family Planning;
? Discuss the
qualities of a successful counselor;
? Mention the
types of counselling required for IUD and Implant services;
? Discuss the
concerns and perceptions of potential users of IUDs and Implants;
? Explain the term
“Informed Choice”;
? Discuss the
“Rights of the Client”.
? Brainstorming ? Presentation ? Discussion ? Demonstratio
n and Return Demonstration ? Role Play
? Flip chart ? Markers ? LCD Projector ? Laptop ? CuT 380A IUD ? JadelleR, ZarinR
and ImplanonR Implants
? Learning Guide for IUD Counselling Techniques
? Learning Guide for Implant Counselling Techniques
106

Module Six - Session 1: Introduction to Counselling
MODULE PRESENTATION
Learning Objectives
Time Frame Learning Methodology/Activity
Introduction – Define Counselling
10 minutes (Brainstorming/ Lecture)
? The Trainer displays and reviews the learning objectives for this module.
? The Trainer requests the participants to define Counselling and notes their responses on the flip chart.
? The Trainer clarifies the responses and
defines Counselling as: o A form of interpersonal communication in
which the counselor helps the client to identify, clarify and resolve problems, makes informe d decision and act on the decision.
? The Trainer informs the participants that: o Counselling refers to providing the client
with information and support to allow her to make a decision regarding her immediate reproductive health needs, for example, by describing to the woman (and sometimes her partner as well) the contraceptive options available to her, the benefits and risks of the methods, and what side effects to expect.
State the objectives of Counselling in Family Planning
5 minutes (Brainstorming/ Lecture)
? The Trainer requests the participants to state the objectives of Counselling and notes their responses on the flip chart.
? The Trainer clarifies their responses and
states the objectives as: ? To provide complete, accurate
information in terms the client can understand;
? identify and discuss any concerns or fears a client may have
? To help the client choose the best family planning method for her and
? To inform the client adequately about effectiveness, side effects, benefits, and risks on available methods.
107

108
Discuss the qualities of a successful Counselor
10 minutes (Brainstorming/ Lecture)
The Trainer requests the participants to state the qualities of a successful Counselor and notes their responses on the flip chart.
The Trainer clarifies the responses and stating that a successful Counselor has:
o A sensitivity that earns the trust of the client;
o A good understanding of all available family planning methods, not only IUDs and subdermal implants.
o An understanding of the cultural and psychological factors that affect a woman's or a couple's decision to use IUD or subdermal implants or other family planning methods;
o A non-judgmental approach, treating the client with respect and kindness
o A way of encouraging clients to ask questions;
o An ability to listen;
o The ability to recognize when he or she cannot sufficiently help a client and to refer the client to other professionals;
o An appreciation of non-verbal communication (body language).
The Trainer informs the participants to note that:o When counselling is done effectively,
women will be more satisfied with their choices and less likely to discontinue use after a short period of time or because of unexpected bleeding disturbances.
o Sound knowledge and good communication skills are essential if the counsellor is to discuss IUDs or subdermal implants (and other methods) appropriately and to reduce the number of women who discontinue the method because of ignorance or unnecessary anxiety.

109
Mention the types of counselling required for IUD and Implant services
20 minutes(Presentation/Discussion)
The Trainer displays the slides on “What types of Counselling are Required?” and informs the participants that Cu T 380A and subdermal implant users will need three stages of counselling as follows:
Pre Insertion Counselling
o Given prior to a decision to use IUD and subdermal Implants
o Discuss the woman's (or couple's) fertility intentions.
o Then provide information on all available contraceptive methods,
o Present an overview of Cu T 380A and subdermal implants: §facts, §reversibility, §advantages and disadvantages including
side-effects (particularly those related to menstrual irregularities),
§the timing of insertion,§the contraceptive to use until insertion and §the freedom of the client to discontinue the
method whenever desired.
Post-Insertion Counselling
o Though usually given immediately after the insertion of the IUD or implant, some elements of post-insertion counselling should be given earlier and reinforced at this time (e.g. post-insertion care).
o Information on a follow-up schedule and indications for a quick return to the clinic must be provided.
Follow-up Counselling
o Information given during post-insertion counselling should be reinforced at each visit.
o Counselors need to listen attentively and be prepared to answer questions on the problems the patient has encountered. Answering questions helps a client to cope with any problem or side effects.
o Again, counselors should reassure clients that removal is available on demand.

110
Discuss the myths, misconceptions and perceptions of users of IUDs and Implants.
10 minutes(Brainstorming/Discussion
The Trainer requests the participants to mention
the myths, misconceptions and perceptions of users of IUDs and Implants, and notes their responses on the flip chart.
The Trainer clarifies their responses and refers
them to the Participants' Reference Book on the listed myths, misconceptions and perceptions of users of IUDs and Implants.
The Trainer addresses any issues or concerns
raised by the participants.
Explain the term “Informed Choice”
10minutes(Discussion)
The Trainer requests the participants to define “Informed Choice” and notes their responses on the flip chart.
The Trainer clarifies their responses and states that “Informed” means that:
o Clients have the clear, accurate, and specific
information they need to make their own reproductive choices including a choice among family planning methods.
o Good quality family planning programs can
explain each family planning method as needed, without information overload and can help clients use each method effectively and safely.
Furthermore, the Trainer clarifies “Choice” as:
o Clients having a range of family planning
methods to choose from. Good quality family planning services offer different methods to suit people's differing needs – not just 1 or 2 methods. If programs cannot provide a method or service, they refer clients somewhere else for that method.
The Trainer emphasizes that:
o Clients make their own decisions. Family
planning providers help clients think through their decisions, but they do not pressure clients to make a certain choice or to use a certain method.

111
Discuss the “Rights of the Client”.
10 minutes(Discussion)
The Trainer informs the participants that he health provider must endeavour to respect the rights of the client seeking family planning and reproductive health services by providing them with relevant information concerning their reproductive health. Such rights include:
o Informationo Access to serviceso Informed Choiceo Safe serviceso Privacy and Confidentialityo Dignity, comfort and expression of opinion
The Trainer discusses these issues and addresses any concerns raised by the participants.
Summary/Evaluation
5 minutes(Discussion)
The Trainer summarizes the session by stating that:
o Counsel l ing provides c l ients wi th information that would help her make informed choice.
o A good counselor is sensitive to the clients' needs and is ready to address user concerns regarding future reproductive goals, choice of contraceptive method and adverse effect of the chosen method.
o The Trainer requests the participants to respond to the following questions:
o What is counselling?o Why is counselling important?o What types of counselling are mandatory
when providing IUD and implant services?

Module Six - Session 2: The Balanced Counselling Strategy Plus (BCS+)
Time: 1 hour
Learning Objectives:
By the end of this session, participants should be able to:
§Define the Balanced Counselling Strategy Plus§State the objectives of the Balanced Counselling Strategy Plus§Discuss the tools and job aids necessary for offering Balanced Counselling
Strategy Plus§Discuss the steps in the Balanced Strategy Plus§Effectively counsel family planning clients using the steps, tools and job-aids in
the Balanced Strategy Plus
Session Overview
§Definition of the Balanced Counselling Strategy Plus§Objectives of the Balanced Counselling Strategy Plus§Tools and job aids necessary for offering Balanced Counselling Strategy Plus§Steps in the Balanced Strategy Plus§Demonstration of counselling family planning clients using the steps, tools and
job-aids in the Balanced Strategy Plus
Methods
§Brainstorming§Presentation§Discussion§Demonstration and Return Demonstration§Role Play
Materials
§ Flip chart and flip chart stand§ Markers§ LCD Projector§ Laptop§ Tools and Job Aids of BCS+
112

Module Six - Session 2: The Balanced Counselling Strategy Plus (BCS+)
MODULE PLAN
Title Duration Objectives Methods Materials The Balanced Counselling Strategy Plus (BCS+)
1 hour ? Define the Balanced Counselling Strategy Plus;
? State the objectives
of the Balanced Counselling Strategy Plus;
? Discuss the tools
and job aids necessary for offering Balanced Counselling Strategy Plus’
? Discuss the steps in
the Balanced Strategy Plus;
? Effectively counsel
family planning clients using the steps, tools and job-aids in the Balanced Strategy Plus
? Brainstorming ? Presentation ? Discussion ? Demonstration and Return Demonstration ? Role Play
? Flip chart and flip chart stand
? Markers ? LCD
Projector ? Laptop ? Tools and
Job Aids of BCS+
113

Module Six - Session 2: The Balanced Counselling Strategy Plus
MODULE PRESENTATION
Learning Objectives
Time Frame Learning Methodology/Activity
Introduction –Define the Balanced Counselling Strategy (BCS) and the Balanced Counselling Strategy Plus (BCS+);
10 minutes (Brainstorming/ Lecture)
? The Trainer displays and reviews the learning objectives for this module.
? The Trainer requests the participants to define the Balanced Counselling Strategy (BCS) and notes their responses on the flip chart.
? The Trainer clarifies the responses and defines
Balanced Counselling Strategy (BCS) as: o A practical, interactive, and client-friendly
strategy for improving counselling within family planning consultations. This strategy comprises a series of steps to determine the contraceptive method that best suits the client according to her/his preferences and needs.
o This strategy improves the quality of the provider’s counselling and allows the client to take ownership of the decision.
? The Trainer states that the Balanced
Counselling Strategy Plus (BCS+) integrates counselling on STI/HIV transmission and prevention along with family planning by helping the provider to conduct an STI/HIV risk assessment, discuss dual protection, and discuss and offer the client opportunities for HIV C&T.
State the objectives of the Balanced Counselling Strategy Plus (BCS+)
5 minutes (Discussion)
? The Trainer states that the objectives Balanced
Counselling Strategy Plus (BCS+) as follows: o The BCS+ assumes that the motive of a
client’s visit is for family planning but serves to also offer the client STI/HIV services in the clinic or through referral.
? The Trainer clarifies any issues raised by the
participants.
114

115
Discuss the tools and job aids necessary for offering Balanced Counselling Strategy Plus (BCS+).
15 minutes (Discussion/ Demonstration)
The Trainer informs the participants that the BCS uses three key job aids for counselling clients about family planning:
§An algorithm to guide the provider through the counselling process,
§A set of counselling cards for contraceptive methods, and
§Corresponding brochures for each method
The BCS Algorithm
o This summarizes the 19 steps recommended to implement the BCS during a family planning consultation.
o The steps are organized under four stages of the consul ta t ion: pre-choice needs assessment; method choice; post-choice actions; and STI/HIV prevention, risk assessment, and counselling and testing.
o During each stage of the consultation, the provider is given step-by step guidance on how to use the BCS+ job aids. Depending on the client's response to the issues discussed, the algorithm outlines which action to take.
The Counselling Cards
o These are the cards that a provider uses during a counselling session. There are 19 counselling cards.
§The first card contains 6 questions that the service provider asks to rule out whether a client is pregnant.
§There are 14 method-specific cards that contain information about each family planning method.
§Each method card has an illustration of the contraceptive method on the front side of the card. The back of the card contains a list 5 to 7 key features of the method and describes the method's effectiveness.
§These cards are used to first exclude those methods that are inappropriate for the client's reproductive intentions and then to narrow down the choice to reach a final decision.
116
§Four counselling cards provide information on STI/HIV transmission and prevention, risk assessment, dual protection, and HIV C&T that are used during the fourth stage of the consultation.
Method Brochures
o These brochures on each of the 14 contraceptive methods are designed to help the client better understand the method chosen.
o The provider gives the client the brochure of the selected method and a brochure with information on condoms to take home.
o Providers should encourage low-literate clients to take the brochure home so that their partner or other trusted friend can review the brochure with them again.
Discuss the steps in the Balanced Counselling Strategy Plus (BCS+).
20 minutes(Discussion/Demonstration)
The Trainer informs the participants that:
o The BCS+ is divided into four counselling stages. Each stage contains a sequence of steps to follow:
Pre-Choice Stage
o During this stage, the provider creates the conditions that help a client select a family planning method.
Method Choice Stage
o During this stage, the provider offers more extensive information about the methods that have not been set aside, including their effectiveness.
o This helps the client select a method suited to his/her reproductive needs.
o Following the steps in the BCS+ algorithm, the provider continues to narrow down the number of counselling method cards until a method is chosen.
117
Post-Choice Stage
o During this stage, the provider uses the method
brochure to give the client complete information about the method that has been chosen.
o If the client has conditions where the method is
not advised or is not satisfied with the method, the provider returns to the Method Choice Stage to help the client select another method.
STI/HIV Prevention, Risk Assessment, and Counselling and Testing Stage
o During this stage, the provider uses the four
counselling cards to discuss STI/HIV transmission and prevention, conduct a risk assessment, define dual protection, and discuss and offer the client opportunities for HIV C&T.
o If the client is willing to be tested, the provider
encourages the client to disclose their STI/HIV status to their partner(s), and lets the client know both the benefits and risks of disclosure.
o The provider gives follow-up instructions, the
method brochure and condom brochure, emphasizing dual protection.
Effectively counsel family planning clients using the steps, tools and job-aids in the Balance Counselling Strategy Plus (BCS+).
20 minutes(Demonstra-tion/Role Play)
The Trainer demonstrates (through a Role Play) how to effectively counsel family planning clients using the Algorithm for Balance Counselling Strategy Plus (BCS+).
Pre-Choice Stage
Step 1: Establish and maintain a warm, cordial relationship. Listen to the client's contraceptive needs.
Step 2: Rule out pregnancy using the pregnancy using the pregnancy checklist card with 6 questions.
Step 3: Display all of the method cards. Determine whether the client wants a particular method.
Step 4: Ask questions using the displayed method cards. Set aside cards based on the client's responses.

118
Method Choice Stage
Step 5: Give information on the methods that have not been set aside and indicate their effectiveness.
Step 6: Ask the client to choose the method that is most convenient for her/him.
Step 7: Using the method-specific brochure, determine whether the client has any conditions for which the method is not advised.
Post-Choice Stage
Step 8: Discuss the method chosen with the client using the method brochure as a counselling tool.
Step 9: Determine the client's comprehension and reinforce key information.
Step 10: Make sure the client has made a definite decision: Give her/him the method chosen and/or a referral and back-up method, depending on the method selected.
Step 11: Encourage the client to involve partner(s) in decisions about/practice of contraception through discussion or a visit to the clinic.
STI/HIV Prevention, Risk Assessment, and Counselling and Testing Stage
Step 12: Discuss STI transmission and prevention and the client's HIV status using the counselling card.
Step 13: Conduct STI/HIV risk assessment using the counselling card. If the client has STI symptoms, treat her/him syndromically.
Step 14: Discuss dual protection using the counselling card. Offer condoms and instruct client in correct and consistent use.
Step 15: Conduct HIV counselling and testing (C & T) awareness using the counselling card. If the client is HIV positive, skip to Step 17.
Step 16: Discuss and offer the client an opportunity for HIV C & T.
Step 17: Encourage the client to disclose HIV status to her/his partner(s). Let the client know the benefits and risks of disclosure.
Step 18: Give follow-up instructions, a condom brochure and the brochure of the method chosen.
Step 19: Complete the counselling session. Invite the client to return at any time. Thank her/him for the visit. End the session.

119
Summary/Evaluation
5 minutes(Discussion)
The Trainer summarizes the session by stating that:
o The Balanced Counselling Strategy Plus (BCS+) is a practical, interactive, and client-friendly tool for improving counselling within family planning consultations.
o The strategy improves the quality of the provider's counselling and allows the client to take ownership of the decision.
o The BCS has proved to be an effective tool that assists family planning providers to improve the quality of their care. The approach is practical, low cost, and easy to adapt to local contexts.
The Trainer requests the participants to respond to the following questions:
o Mention the job aids of the BCS+
o List the four counselling stages of the BCS+
o Why is important to give the BCS+ Method Brochure to the client to take home?

MODULE SEVEN
PROBLEM MANAGEMENT/INFORMATION AND SUPPORT DURING IUD AND IMPLANT USE
Session 1: Problem Management during IUD Use.
Session 2: Problem Management during Implant Use
120

Module Seven – Session 1: Problem Management during use of Copper bearing
IUDs
Time: 1 hour
Learning Objectives
By the end of this session, participants should be able to:
§List the common side effects, the occasional side effects and the warning signs
requiring prompt medical attention in IUD users.
§Indicate what action should be taken medically for each side effect.
§Demonstrate through case studies and role plays ways of handling client concerns
about side effects of IUDs.
Session Overview
§Common side effects, the occasional side effects and the warning signs requiring
prompt medical attention in IUD users.
§ Action should be taken medically for each side effect.
§Demonstration of ways of handling client concerns about side effects of IUDs
(through case studies and role plays).
Methods
§Brainstorming
§Discussion
§Illustrated Lecture
§Small group discussion
§Case Studies
§Role Play
Materials
§Flip chart and Stand
§Markers
§Lap top
§LCD Projector
§Handouts of Case studies
121

Module Seven – Session 1: Problem Management during use of Copper bearing IUDs
MODULE PLAN
Title Duration Objectives Methods Materials Problem Management during use of Copper bearing IUDs
1 hour ? List the common side effects, the occasional side effects and the warning signs requiring prompt medical attention in IUD users.
? Indicate what action
should be taken medically for each side effect.
? Demonstrate
through case studies and role plays ways of handling client concerns about side effects of IUDs.
? Brainstorming ? Presentation ? Discussion ? Demonstration and Return Demonstration ? Role Play
? Flip chart and flip chart stand
? Markers ? LCD
Projector ? Laptop ? Hand outs
of Case Studies
122

123
Module Seven – Session 1: Problem Management during use of Copper-bearing IUDs
MODULE PRESENTATION
Learning Objectives
Time Frame Learning Methodology/Activity
–
10 minutes (Brainstorming)
? The Trainer displays and reviews the learning objectives for this module.
? The Trainer inform the participants that: o Most side effects and other health problems
associated with the use of IUDs are not serious.
o Changes in the menstrual in the menstrual pattern, especially some increase in the amount and duration of the menstrual bleeding, are the most common adverse side effects.
? The Trainer requests the participants to
mention the common health problems and side effects associated with use of IUD use and notes the responses on the flip chart.
? The Trainer clarifies the responses from the
participants and classifies these common health problems and side effects associated with implant use of IUD use as:
o Suspected perforation o Bleeding changes o Severe pain in the lower abdomen o Pain and/or cramping o Missing strings o Uterine perforation o IUD expulsion
Indicate what action should be taken medically for each side effect.
30 minutes (Presentation/ Brainstorming/ Discussion)
Introduction – List the common side effects, the occasional side effects and the warning signs requiring prompt medical attention in IUD users
The Trainer displays the slide on “Suspected
perforation” and discusses the actions that
should be taken medically:
o If perforation is suspected based on the
signs such as fainting during or after
insertion, pain, rapid pulse and respiration,
fatigue
o If intra-abdominal bleeding is suspected

124
The Trainer displays the slide on “Bleeding
changes” and discusses the actions that should
be taken medically:
o If there is spotting or irregular bleeding
o If there is heavy or prolonged monthly bleeding
o If irregular, heavy or prolonged bleeding continues or starts after several months of normal bleeding or long after the IUD was inserted.
The Trainer displays the slide on “Severe pain in the lower abdomen” and discusses the actions that should be taken medically:
o If there is suspicion of PIDo If there is suspicion of ectopic pregnancy.
The Trainer displays the slide on “Pain and/or Cramping” and discusses the actions that should be taken medically:
o If pain or cramps occurred since IUD insertion (first three months) and are linked to monthly bleeding;
o If cramping continues and occurs outside of monthly bleeding.
The Trainer displays the slide on “Missing Strings” and discusses the actions that should be taken medically:
o If strings are neither visible nor felt and client is not pregnant;
o If tail is found.o If strings are not found after cervical
exploration;
o If the IUD is located within the uterine cavity;o If ultrasonography or x-ray indicates that the
device is in the abdominal cavity.
125
The Trainer displays the slide on “Uterine pregnancy” and discusses the actions that should be taken medically:
o If strings are visible;
o If strings are not visible.
The Trainer displays the slide on “IUD expulsion” and discusses the action that should be taken medically:
o If strings are unusually long or stem of device
is at cervical os and pregnancy is ruled out;
o If strings are unusually long or stem of device
is at cervical os, and unable to exclude pregnancy;
o If client reports that IUD came out.
The Trainer informs the participants to strongly consider hospitalization or referral for hospitalization with acute low abdominal pain if:
§diagnosis is uncertain§surgical emergency (e.g. appendicitis,
ectopic pregnancy) is suspected§pelvic abscess is suspected§client is pregnant §client is unable to follow or tolerate
outpatient therapy §client fails to respond to outpatient therapy§outpatient follow-up after 48–72 hours
cannot be arranged.
Demonstrate through case studies and role plays, ways of handling client concerns about side effects of IUDs.
15 minutes(Case Studies/ Discussion/Role Play)
The Trainer distributes handouts of prepared case studies and request the participants to either:
o Discuss them, oro Act them as Role Plays.
The Trainer clarifies any issues raised by the participants during the discussion of the case studies or role plays.

126
Summary/Evaluation
5 minutes(Discussion)
The Trainer summarizes the session by stating that:
o Long-term success, as defined by satisfied clients and high continuation rates, will occur only if clinic staff recognize the importance of providing follow-up care (including counselling) and prompt management of side effects as well as other problems should they occur.
o Most side effects and other health problems associated with IUD are not serious.
The Trainer requests the participants to respond to the following questions:
o List the common side effects of the use of IUDs.
o What are the warning signs requiring prompt medical attention?
o Discuss the management of IUD-related pregnancy.
o Discuss the management of a missing string.

Module Seven – Session 2: Problem Management during use of Contraceptive Sub-dermal Implants
Time: 1 hour
Learning Objectives:
By the end of this session, participants should be able to:§List the common side effects, the occasional side effects and the warning signs
requiring prompt medical attention in implant users.§Indicate what action should be taken medically for each side effect.§Demonstrate through case studies and role plays ways of handling client concerns
about side effects of implant§Demonstrate counselling clients on side effects of implants in clear everyday
language
Session Overview:
§List the common side effects, the occasional side effects and the warning signs requiring prompt medical attention in implant users.
§ Indicate what action should be taken medically for each side effect.§Demonstrate through case studies and role plays ways of handling client concerns
about side effects of implant§Demonstrate counselling clients on side effects of implants in clear everyday
language
Methods:
§Brainstorming§Discussion§Illustrated Lecture§Small group discussion
Materials:
§Flip chart and Stand§Markers§Lap top§LCD Projector§Handouts of Case studies
127
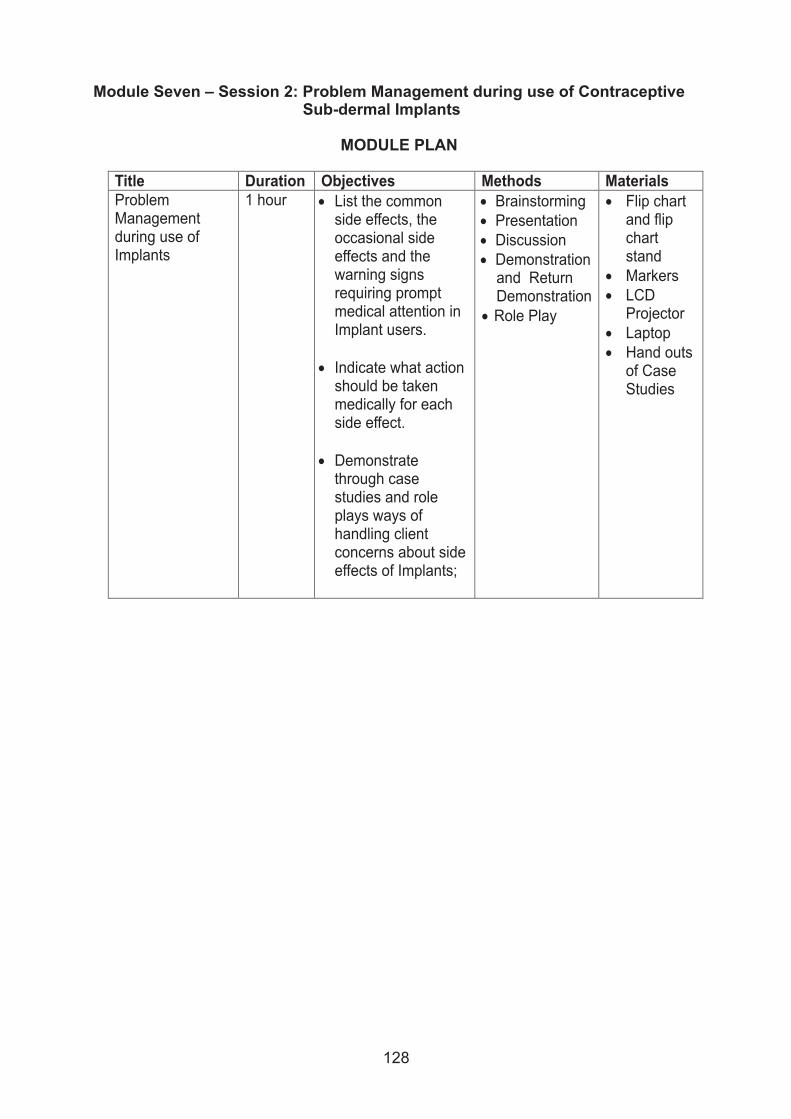
Module Seven – Session 2: Problem Management during use of Contraceptive Sub-dermal Implants
MODULE PLAN
Title Duration Objectives Methods Materials Problem Management during use of Implants
1 hour ? List the common side effects, the occasional side effects and the warning signs requiring prompt medical attention in Implant users.
? Indicate what action
should be taken medically for each side effect.
? Demonstrate
through case studies and role plays ways of handling client concerns about side effects of Implants;
? Brainstorming ? Presentation ? Discussion ? Demonstration and Return Demonstration ? Role Play
? Flip chart and flip chart stand
? Markers ? LCD
Projector ? Laptop ? Hand outs
of Case Studies
128

129
Module Seven – Session 2: Problem Management during use of Contraceptive Sub-dermal Implants
MODULE PRESENTATION
Learning Objectives
Time Frame Learning Methodology/Activity
10 minutes (Brainstorming)
Introduction – List the common side effects, the occasional side effects and the warning signs requiring prompt medical attention in Implant users.
The Trainer displays and reviews the learning objectives for this session.
The Trainer inform the participants that:
o Most side effects and other health problems associated with the use of implants are not serious.
o Changes in menstrual bleeding patterns are by far the most common adverse effect.
o In addition to menstrual bleeding changes, women using Jadelle implants occasionally develop enlarged ovarian follicles. Fortunately, they rarely cause symptoms and usually are discovered only incidentally at pelvic examinations. In addition, they generally shrink and disappear spontaneously and rarely require treatment.
o Ectopic pregnancies also have occurred, although clinical studies have shown no increase in the rate of ectopic pregnancies per year among implants users compared with women not using any contraceptive method.
The Trainer requests the participants to mention the common health problems and side effects associated with use of Implants use and notes the responses on the flip chart.
The Trainer clarifies the responses from the participants and classifies these common health problems and side effects associated with implant use of Implant use as:
o Pain after insertion or removalo Infection at the insertion siteo Irregular or heavy bleedingo Severe pain in the lower abdomeno Headaches
The Trainer also informs the participants that several other conditions that may or may not be associated with the use of implants have been reported. They include breast tenderness and/or discharge, weight gain, increased body or facial hair (hirsutism) and vaginal infection (vaginitis).

130
Indicate what action should be taken medically for each side effect.
30 minutes(Presentation/Brainstorming/Discussion)
The Trainer displays the slide on “Pain after insertion or removal” and discusses the actions that should be taken medically:
o If no signs of infection;
The Trainer displays the slide on “Infection at the insertion site” and discusses the actions that should be taken medically:
o If there is redness, heat, pain, pus;
o If there is an abscess
The Trainer displays the slide on “Irregular or Heavy vaginal bleeding” and discusses the actions that should be taken medically:
o If no underlying condition is suspected (implant is still in place and bleeding started after implant initiation);
o If bleeding is due to gynaecological problems;
o Unexplained abnormal vaginal bleeding that suggests underlying medical condition unrelated to method use.
The Trainer displays the slide on “Severe Pain in the lower abdomen” and discusses the actions that should be taken medically:
o If ectopic pregnancy or another serious condition is suspected;
o If pain is due to ovarian cyst.
o The Trainer displays the slide on “Missing Strings” and discusses the actions that should be taken medically:
o If it is ordinary headache;
o If migrainous headaches with aura (blurred vision, temporary loss of vision, seeing flashing lights or zigzag line);
o If there is no pregnancy and amenorrhea is
less than six weeks;
o If the client is pregnant.

131
The Trainer informs the participants to note the Warning Signs/Special Concerns of Implant use. The client should report to the nearest family planning clinic if she notices any of the following: §Severe lower abdominal pain§Heavy vaginal bleeding§Arm pain§Pus or bleeding at the insertion site (this
may indicate infection)§Expulsion of an implant (this rarely occurs
with proper placement)§Episodes of migraine, repeated severe
headaches, or blurred vision§Delayed menstrual cycles after along
interval of regular cycles§Suspicion of pregnancy§Jaundice
Demonstrate through case studies and role plays, ways of handling client concerns about side effects of Implants.
15 minutes(Case Studies/ Discussion/Role Play)
The Trainer distributes handouts of prepared case studies and request the participants to either:
o Discuss them, oro Act them as Role Plays.
The Trainer clarifies any issues raised by the participants during the discussion of the case studies or role plays.
Summary/Evaluation
5 minutes(Discussion)
The Trainer summarizes the session by stating that:
o Most of the health problems associated with implants' use are mild.
o Good counselling about these side effects enables the client to tolerate them while improving continuation rates.
o Changes in menstrual bleeding patterns are by far the most common side effect.
o Management of the side effects ranges from simple reassurance, medical treatment, to referral for further care.
o User concerns must be patiently listened to and addressed accordingly.
The Trainer requests the participants to respond to the following questions:
o List the common side effects of implants' use.
o What are the warning signs requiring prompt medical attention
.o What are the known medical treatments for
vaginal bleeding in implant users.
o Describe five examples of user concerns.

MODULE EIGHT
INFECTION PREVENTION PRACTICES DURING IUD AND IMPLANTINSERTION AND REMOVAL TECHNIQUES
Session 1: Asepsis, Hand washing and Gloving
Session 2: Disinfection and Sterilization
Session 3: Disposal of Sharps and Waste
132

Module Eight – Session 1: Asepsis, Hand Washing and Gloving
Time: 45 Minutes
Learning Objectives
By the end of this session, participants should be able to:
§Discuss importance of Infection Prevention and the Disease Transmission Cycle§Identify potential consequences of poor Infection Prevention practices§Define Infection Prevention Terms§Define Aseptic technique§Explain the importance of hand washing in Infection Prevention§Demonstrate the steps of surgical hand scrub§Demonstrate the gloving process§Describe ways to properly prepare a client for clinical procedures§Explain the importance of establishing and maintaining a sterile field
Session Overview
§Importance of Infection Prevention and the Disease Transmission Cycle§Potential consequences of poor Infection Prevention practices§Definition of Infection Prevention Terms§Definition of Aseptic techniques§Importance of hand washing in Infection Prevention§Steps of surgical hand scrub§Proper use of gloves§Appropriate attire for procedure§Preparation of a client for clinical procedures§Importance of establishing and maintaining a sterile field
Methods
§Discussion§Demonstration and return demonstration handout§Handout§Case studies
Materials
§Video CDs§Projector Screen§LCD Projector§Laptop §Samples
133

Module Eight – Session 1: Asepsis, Hand Washing and Gloving
MODULE PLAN
Title Duration Objective Methods Materials Asepsis, Hand Washing and Gloving
1 hour ? Discuss importance of Infection Prevention and the Disease Transmission Cycle;
?
Identify potential consequences of poor Infection Prevention practices;
?
Define Infection Prevention Terms;
?
Define Aseptic technique;
?
Explain the importance of hand washing in Infection Prevention;
?
Demonstrate the steps of surgical hand scrub;
?
Demonstrate the gloving process;
?
Describe ways to properly prepare a client for clinical procedures;
?
Explain the importance of establishing and maintaining a sterile field.
? Brainstorming ? Presentation ? Discussion ?
Demonstration
and Return
Demonstration
?
Role Play
? Flip chart and flip chart stand
?
Markers
?
LCD Projector
?
Laptop
134

Module Eight – Session 1: Asepsis, Hand Washing and Gloving
MODULE PRESENTATION
Learning Objectives
Time Frame Learning Methodology/Activity
Discuss importance of Infection Prevention and the Disease Transmission Cycle;
10 minutes (Lecture/ Discussion)
? The Trainer displays and reviews the learning objectives for this session.
? The Trainer informs the participants that: o Proper infection prevention practices must
be followed in order to minimize the risk of infection and serious disease for the client, the provider, and all facility staff members.
o People with infections, both clients and staff member, may not have any sign or symptoms of the infections they carry.
o This is particularly notable for HIV and
hepatitis viruses, but is the case for other infections as well.
o Therefore, it is important for all staff to
practice proper infection prevention with all clients at all times.
o All health providers are responsible for
client and staff safety. This includes ensuring that appropriate infection prevention practices are followed at the facilities.
Identify the potential Consequences of poor Infection Prevention practices.
10 minutes (Brainstorming/ Discussion)
? The Trainer requests the participants to mention the potential consequences of poor Infection Prevention practices and notes the responses on the flip chart.
? The Trainer clarifies the responses from the participants and states the potential consequences of poor Infection Prevention practices as:
o Infection, such as HIV, hepatitis and others
commonly found in clinic settings (e.g. Staphylococcus and Streptococcus) may be transmitted to clients, providers or clinic staff.
135

136
o Many infections related to service use are
consequences of inappropriate IP procedure used during the service provision.
o A provider-caused (iatrogenic) reproductive tract infection, such as endometritis or pelvic inflammatory disease (PID), may result from poor infection prevention practices.
o A client who acquires a post-procedure infection as a result of using a family planning method may never want to use the method again.
Define Infection Prevention terms
10 minutes(Brainstorming/Discussion)
The Trainer requests the participants to define the following Infection Prevention terms and notes the responses on the flip chart:§Microorganisms§Antisepsis§Decontamination§Cleaning§Disinfection§High-level Disinfection (HLD)§Sterilization
The Trainer clarifies the responses of the participants and refers them to the definitions in the Participants Reference Manual.
Define Aseptic technique
10 minutes(Brainstorming/Discussion)
The Trainer requests the participants to define Aseptic Technique and notes the responses on the flip chart.
The Trainer clarifies the responses of the participants and states that:
o Asepsis and Aseptic Technique are general terms used to describe the combination of e f f o r t s made t o p reven t en t r y o f microorganisms into any area of the body where they are likely to cause infection.
o The goal of asepsis is to reduce to a safe level, or eliminate, the number of microorganism on both animate (living) surfaces such as skin and tissue, and inanimate objects such as surgical instruments and other items.
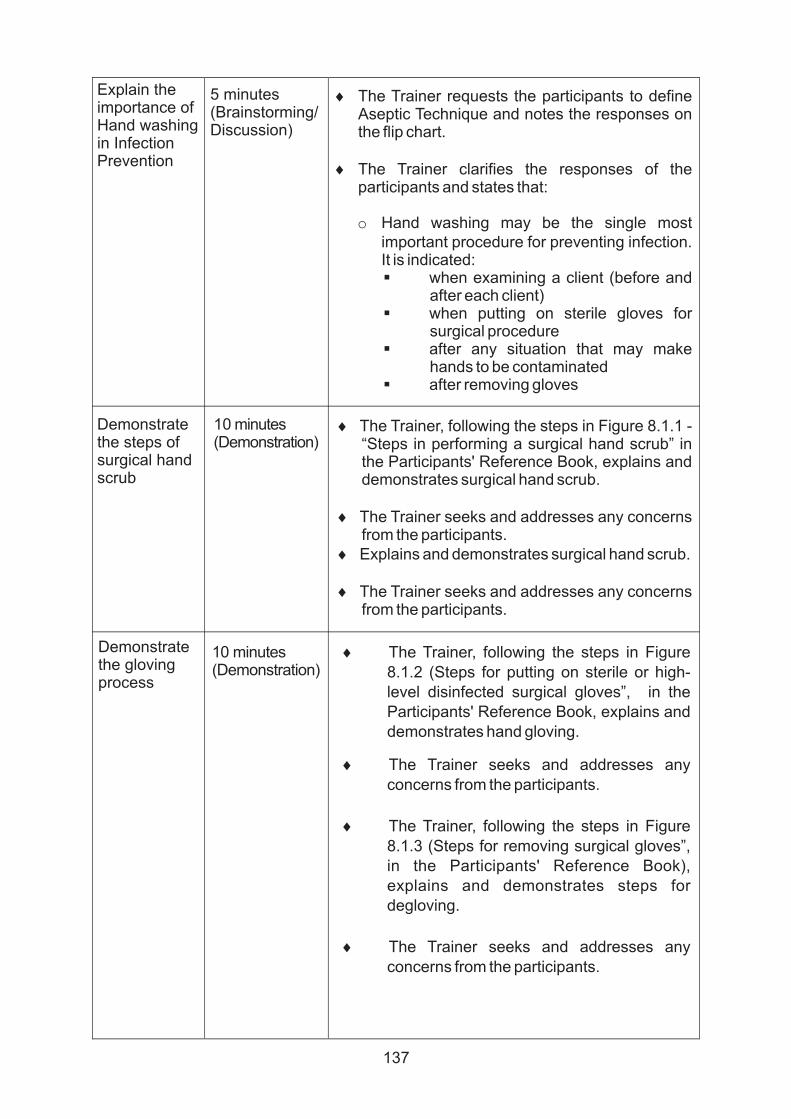
137
Explain the importance of Hand washing in Infection Prevention
5 minutes(Brainstorming/Discussion)
The Trainer requests the participants to define Aseptic Technique and notes the responses on the flip chart.
The Trainer clarifies the responses of the participants and states that:
o Hand washing may be the single most important procedure for preventing infection. It is indicated:§when examining a client (before and
after each client)§when putting on sterile gloves for
surgical procedure§after any situation that may make
hands to be contaminated §after removing gloves
Demonstrate the steps of surgical hand scrub
10 minutes(Demonstration)
The Trainer, following the steps in Figure 8.1.1 - “Steps in performing a surgical hand scrub” in the Participants' Reference Book, explains and demonstrates surgical hand scrub.
The Trainer seeks and addresses any concerns from the participants.Explains and demonstrates surgical hand scrub.
The Trainer seeks and addresses any concerns from the participants.
Demonstrate the gloving process
10 minutes(Demonstration)
The Trainer, following the steps in Figure 8.1.2 (Steps for putting on sterile or high-level disinfected surgical gloves”, in the Participants' Reference Book, explains and demonstrates hand gloving.
The Trainer seeks and addresses any concerns from the participants.
The Trainer, following the steps in Figure 8.1.3 (Steps for removing surgical gloves”, in the Participants' Reference Book), explains and demonstrates steps for degloving.
The Trainer seeks and addresses any concerns from the participants.

138
Describe ways to properly prepare a client for clinical procedures.
5 minutes(Discussion)
The Trainer requests the participants to describe ways to properly prepare a client for clinical procedures, and notes the responses on the flip chart.
The Trainer clarifies the responses of the participants and states that:
o Client preparation before a clinical procedure involves using an antiseptic solution on the client's skin, vagina, or cervix to destroy or prevent the growth of microorganisms.
o Most surgical-site infections result from contamination during surgery – not, as many people believe, because clients do not keep the wound clean after surgery. Frequently, bacteria from the client's skin or tissues is the cause of infections.
o Thus, it is critical to pay strict attention to proper preparation of the client before a procedure.
Describe the importance of establishing and maintaining a sterile field.
10 minutes(Presentation/Discussion)
The Trainer requests the participants to describe ways to properly prepare a client for clinical procedures, and notes the responses on the flip chart.
The Trainer clarifies the responses of the participants and states that:
Steps for maintaining a sterile field
o Place only sterile items within the sterile field;
o Open, dispense, and transfer sterile items without contaminating them;
o Consider items located below the level of draped painted as unsterile;
o Do not allow scrubbed personnel to reach across unsterile areas or touch unsterile items;
o Do not allow unscrubbed personnel to reach across sterile field or touch sterile items'
o Recognize and maintain sterile field.
o Recognize that the edges of a package containing sterile items are unsterile;
o Recognize that a sterile barrier that has been
penetrated is considered contaminated.
o Be conscious of where you are at all times and move within or around the sterile field.
o Do not place sterile items near open windows or doors.

139
Steps for maintaining a safer environment
o Limit entry of unauthorized individuals to surgical/procedure areas;
o Close doors and draw curtains during all procedures;
o Ensure that all personnel in the surgical area wear clean clothes, masks, caps and good footwear;
o Enclose the surgical procedure area; to minimize dust and eliminate insects, air-condition the room;
o Decontaminate and clean examination/operating tables, counters, instrument trolleys, etc, before a new client is brought into the room;
o Remove used gloves before touching anything.
Countertops, faucets, and pens and pencils are frequently contaminated because health care workers touch them while wearing used gloves.
o Processing gloves for reuse is not recommended, since gloves are difficult to properly process. Processing and reusing disposable gloves is especial ly not recommended.
o Studies have shown that invisible holes or tears are likely to occur when gloves are processed.
o Surgical gloves are the most expensive. Whenever possible, they should be used only for procedures in which there will be contact with the bloodstream or tissues under the skin.
The Trainer summarizes the session by stating that:
o Adoption of Aseptic Techniques when conducting medical procedures remains one of the major strategies for preventing infection.
o The understanding of the various procedures of proper hand washing, gloving and removal of used gloves and the wearing of proper attires is imperative for the maintenance of a sterile field.
The Trainer requests the participants to respond to the following questions:
o Why is infection prevention important in family planning services?
o Define Asepsis, Antisepsis, Decontamination, High Level Disinfectant and Sterilization.
o Demonstrate proper hand-washing during IUD and implant services.
o Demonstrate the proper use of gloves.
o Explain the Importance of maintaining a sterile field.

Module Eight - Session 2: Disinfection and Sterilization
Time 1 hour
Learning Objectives
By the end of this session, participants should be able to:
§List the steps of processing instruments and other items§Explain the steps of processing instruments and other items§Discuss the correct way of preparing 0.5% chlorine solution§Explain the types and steps of processing instruments and other items by
sterilization§Explain the types and steps of processing instruments and other items by High-
level Disinfection (HLD)§Discuss how to appropriately store processed instruments and other items
Session Overview
§Steps of processing instruments and other items§Correct way of preparing 0.5% chlorine solution§Types and steps of processing instruments and other items by sterilization§Types and steps of processing instruments and other items by High-level
Disinfection (HLD)§Storage of processed instruments.
Methods
§Lecture§Discussion§Demonstration and return demonstration§Hand out§Case studies
Materials
§Flip charts stand and paper§Colored markers§Masking tape§Laptop§LCD projector§Projector Screen§Video Cds
140

Module Eight - Session 2: Disinfection and Sterilization
MODULE PLAN
Title Duration Objectives Methods Materials Disinfection and Sterilization
1 hour ? List the steps of processing instruments and other items;
? Explain the steps of
processing instruments and other items;
? Discuss the correct
way of preparing 0.5% chlorine solution;
? Explain the types
and steps of processing instruments and other items by sterilization;
? Explain the types
and steps of processing instruments and other items by High-level Disinfection (HLD);
? Discuss how to
appropriately store processed instruments and other items
? Brainstorming ? Presentation ? Discussion ? Demonstration and Return Demonstration ? Role Play
? Flip chart and flip chart stand
? Markers ? LCD
Projector ? Laptop ? Video CDs
141

142
Module Eight - Session 2: Disinfection and Sterilization
MODULE PRESENTATION
Learning Objectives
Time Frame Learning Methodology/Activity
Introduction- List the steps of processing instruments and other items.
10 minutes (Lecture/ Discussion)
? The Trainer displays and reviews the learning o bjectives for this session.
? The Trainer informs the participants that:
o To prevent transmission of infections via medical instruments, each step of instrument processing i.e., ? decontamination, ? cleaning, and ? sterilization or high level disinfection, must
be done properly.
Explain the steps of processing instruments and other items.
10 minutes (Lecture/ Discussion)
The Trainer displays the slide on “Step 1: Decontamination” and discusses the content as follows:
o Decontamination kills many disease-causing microorganisms such as hepatitis virus and HIV, making instruments and other items safer for handling during cleaning.
o Decontamination is performed by soaking used instruments and other items in 0.5% Chlorine solution for 10 minutes.
The Trainer displays the slide on “Making a Chlorine Solution” and explains the formula on how to prepare a dilute chlorine.
The Trainer displays the slide on “Step 2: Cleaning” and discusses the content as follows:
o Cleaning instruments with detergent and water removes blood and particulate matter and improves the quality of subsequent high-level disinfection or sterilization.
o A brush should be used for cleaning most instruments. Staff members must wear thick utility gloves while cleaning instruments.
The Trainer displays the slide on “Step 3: Sterilization or High-level Disinfection” and discusses the content as follows:
o To be effective, both sterilization and high-level disinfection (HLD) must be preceded by decontamination, careful cleaning, and thorough rinsing. When sterilization of instruments is not possible, HLD is the only acceptable alternative.

143
Explain the types and steps of processing instruments and other items by Sterilization.
15 minutes(Lecture/Discussion)
The Trainer informs the participants that : o Sterilization using steam, dry heat, or
c h e m i c a l s o l u t i o n d e s t r o y s a l l microorganisms (bacteria, viruses, fungi, and parasites) including bacterial endospores, from instruments and other items.
o Sterilization is the method recommended for items that come in contact with the blood stream or tissues beneath the skin (such as reusable needles, syringes, and surgical and many delivery instruments):
§Jointed instruments, such as ring forceps, should be open or unlocked for sterilization.
§Sterilization can be done using steam (autoclaving), dry heat (oven) or chemical solutions.
§Sterilization items should then be used immediately or stored in a sterile, covered container.
The Trainer displays the slide on “Steam Sterilization” and explains that:
o Instruments may be sterilized either wrapped or unwrapped;
o If items are to be wrapped before steam sterilization, use two layers of paper wrap or two layers of cotton fabric (do not use canvas);
o The unwrapped items or wrapped packs should be arranged to allow free circulation of steam:
o Steam items at 121 degrees C (250 degrees 2F) and 106 kPa pressure (15 ibs/in ). Steam
30 minutes for wrapped, 20 minutes for unwrapped items.
The Trainer emphasizes that:
o Timing should not begin until the steam sterilizer reaches the desired temperature and pressure.

144
o Allow unwrapped items or wrapped packs to
dry before removing them from the steam sterilizer. Allow items to cool before storage or use.
The Trainer displays the slide on “Dry Heat Sterilization” and explains that:
o Items can be wrapped in foil or double-
layered cotton fabric before dry heat sterilization.
o Sterilize items at 170 degrees C (340 degrees
F) for 60 minutes, or 160 degrees C (320 degrees F) for 120 minutes.
o Dry heat can dull sharp instruments and needles. These items should not be sterilized at temperatures higher than 160 degrees C.
o Items should be allowed to cool before they are removed from the oven.
The Trainer emphasizes that:
o Timing should not begin until the oven reaches the desired temperature.
The Trainer explains displays the slide on “Chemical Sterilization” and explains the process as:
o Cover all items with correct dilution of
glutaraldehyde solution (Cidex); do not use sporicidin for sterilization, or an 8% formaldehyde solution (least desirable because it is dangerous to breathe).
o Jointed instruments such as ring forceps,
should be opened or unlocked.
o Soak items for 10 hours for Cidex, or 24 hours
for formaldehyde, or as per manufacturer's instructions.
o Nothing should be added to or removed from
the chemical solution once timing has begun.
o After soaking items, rinse them with sterile
water air dry before use or storage.

145
Explain the steps of processing instruments and other items by
15 minutes(Lecture/Discussion)
The Trainer informs the participants that:
o If sterilization is not available, high level disinfection is the only acceptable alternative for preparing instruments and other reusable items for use in PPIUD insertion.
o High-level disinfection (HLD) is effective in eliminating all microorganisms except some bacterial endospores.
o There are two methods of HLD: boiling and chemical HLD
o After either HLD procedure, items that are not used immediately should be air-dried and stored in a covered high-level disinfected container (for up to one week).
The Trainer explains displays the slide on “High Level Disinfection by Steaming” and explains that:
o The best method of high-level disinfection of gloves and a useful method of high-level disinfection of cannulae used during manual vacuum aspiration (MVA) is to steam them in a steamer containing one to three tiers of gloves or cannulae.
o MVA cannulae may be high-level disinfected or sterilized by other methods. However, high-level disinfection of gloves by other methods is less appropriate and not recommended.
The Trainer displays the slide showing “Steps of HLD by Steaming” and explains the steps (Figure 8.2.1 and 8.2.2).
The Trainer displays the slide showing “Steps of Chemical HLD” and explains that:
o All items should be covered with the correct dilution of properly stored disinfectant:§ Glutaraldehyde solution§ 0.5% or 0.1% chlorine solution§ 8% formaldehyde solution
o Joined instruments, such as ring forceps, should be opened or unlocked;
o Items should be for 20 minutes or as per manufacturer's instructions;
o Nothing should be added to or removed from the chemical solution once timing has begun. After soaking items, rinse them with boiled water.
o Items should be air-dried before use or storage.

146
Discuss how to appropriately store processed equipment and instruments.
10 minutes(Discussion)
The Trainer informs the participants that proper storage of HLD or sterilized items is as important as the HLD or sterilization process itself. Therefore:
o Items should be stored dry;
o If possible, store processed items in an enclosed cabinet.
o Do not store pick-up forceps in a bottle filled with antiseptic solution (microorganisms will multiply in the standing solution even if an antiseptic has been added);
o HLD or sterilize pick-up forceps each day and
store them dry in a high-level disinfected or sterile bottle.
o Wrapped i tems must be considered contaminated when:§ The package is torn or damaged§ The wrapping is wet§ The expiration date is exceeded.
o Wrapped items can be used for up to one week. Wrapped items sealed in plastic can be used for up to one month.
o Unwrapped items must be used immediately or stored in a covered sterile or HLD container (for up to one week)
Summary/Evaluation
5 minutes(Discussion)
The Trainer summarizes the session by stating that:
o The session highlighted the importance of processing instruments and other medical i tems in stepwise manner to avoid contamination.
o Infections prevention in medical settings relies on the effective decontamination and sterilization of instrument in use.
The Trainer requests the participants to respond to the following questions:
o Describe steps for processing instrument and other medical items.
o Demonstrate appropriate order for processing instrument in the health facility
o Explain strategies for storing processed instrument.
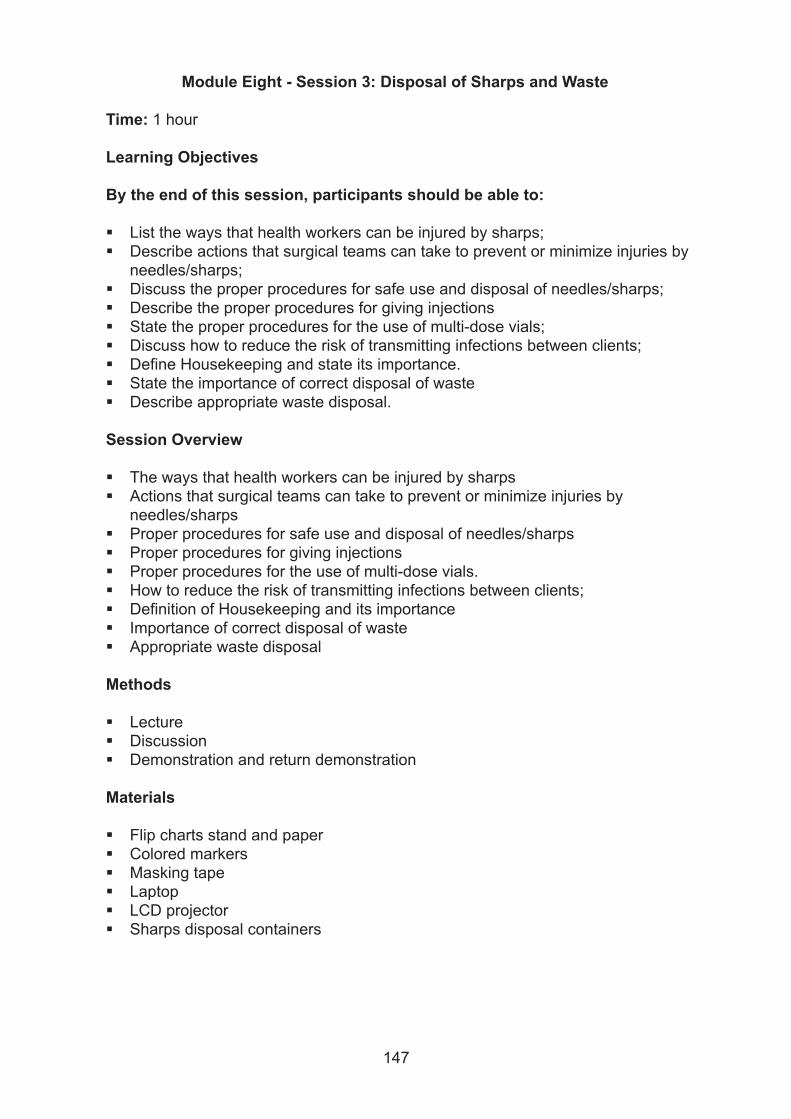
Module Eight - Session 3: Disposal of Sharps and Waste
Time: 1 hour
Learning Objectives
By the end of this session, participants should be able to:
§List the ways that health workers can be injured by sharps;§Describe actions that surgical teams can take to prevent or minimize injuries by
needles/sharps;§Discuss the proper procedures for safe use and disposal of needles/sharps;§Describe the proper procedures for giving injections §State the proper procedures for the use of multi-dose vials;§Discuss how to reduce the risk of transmitting infections between clients;§Define Housekeeping and state its importance.§State the importance of correct disposal of waste§Describe appropriate waste disposal.
Session Overview
§The ways that health workers can be injured by sharps§Actions that surgical teams can take to prevent or minimize injuries by
needles/sharps§Proper procedures for safe use and disposal of needles/sharps§Proper procedures for giving injections §Proper procedures for the use of multi-dose vials.§How to reduce the risk of transmitting infections between clients;§Definition of Housekeeping and its importance§Importance of correct disposal of waste§Appropriate waste disposal
Methods
§Lecture§Discussion§Demonstration and return demonstration
Materials
§Flip charts stand and paper§Colored markers§Masking tape§Laptop§LCD projector§Sharps disposal containers
147

Module Eight - Session 3: Disposal of Sharps and Waste
MODULE PLAN
Title Duration Objectives Methods Materials Disposal of Sharps and Waste
1 hour ? List the ways that health workers can be injured by sharps;
? Describe actions that surgical teams can take to prevent or minimize injuries by needles/sharps;
? Discuss the proper procedures for safe use and disposal of needles/sharps;
? Describe the proper procedures for giving injections
? State the proper procedures for the use of multi-dose vials;
? Discuss how to reduce the risk of transmitting infections between clients;
? Define Housekeeping and state its importance.
? Describe appropriate waste disposal;
? State the importance of correct disposal of waste
? Brainstorming ? Presentation ? Discussion ? Demonstration
and Return Demonstration
? Role Play
? Flip chart and flip chart stand
? Markers ? LCD
Projector ? Laptop ? Video CDs
148

Module Eight - Session 3: Disposal of Sharps and Waste
MODULE PRESENTATION
Learning Objectives
Time Frame Learning Methodology/Activity
Introduction- List the ways that health workers can be injured by sharps;
10 minutes (Brainstorming/ Presentation/ Discussion)
? The Trainer displays and reviews the learning objectives for this session.
? The Trainer informs the participants that: o All staff that come in contact with sharps
– from doctors and nurse to those who dispose of the trash – are at risk of infections.
? The Trainer requests the participants to list the ways that health workers can be injured by sharps, and notes their responses on the flip chart.
? The Trainer clarifies the participants’ responses and displays the slide on “How Injuries commonly occur”. S/he also refers them to the Participant’s Reference Book.
Describe actions that surgical teams can take to prevent or minimize injuries by needles/sharps;
10 minutes (Presentation/ Discussion)
? The Trainer requests the participants to list the ways that health workers can be injured by sharps, and notes their responses on the flip chart.
? The Trainer clarifies the participants’ responses and displays the slides on “How to prevent Injuries” and “The Hand-free Technique for passing Sharps during Clinical Procedures.” S/he also refers them to the Participant’s Reference Book.
? The Trainer notes and addresses any
concerns by the participants.
Describe the proper procedures for safe use and disposal of needles/sharps;
(Discussion/ Demonstration)
? The Trainer informs the participants that:
o Improper disposal of contaminated sharp objects can cause infections in the health care facility and the community.
o Hypodermic needles and other sharps should be made unusable by incinerating them.
149
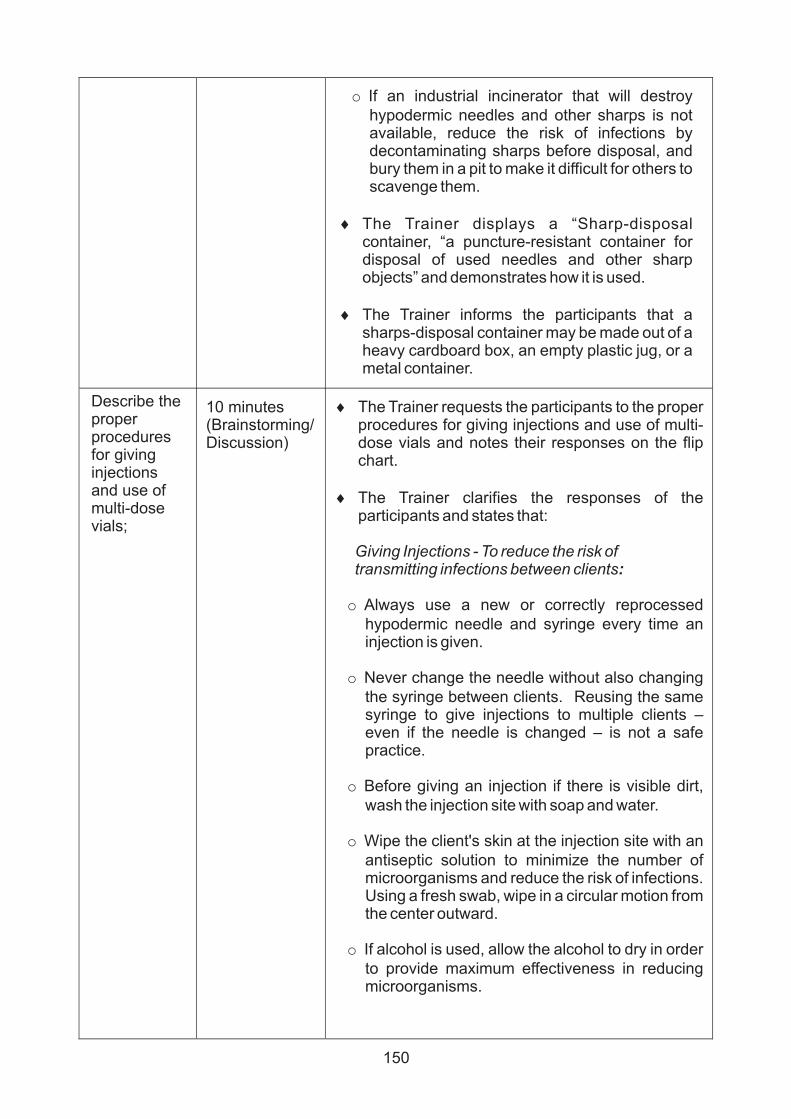
150
o If an industrial incinerator that will destroy hypodermic needles and other sharps is not available, reduce the risk of infections by decontaminating sharps before disposal, and bury them in a pit to make it difficult for others to scavenge them.
The Trainer displays a “Sharp-disposal container, “a puncture-resistant container for disposal of used needles and other sharp objects” and demonstrates how it is used.
The Trainer informs the participants that a sharps-disposal container may be made out of a heavy cardboard box, an empty plastic jug, or a metal container.
Describe the proper procedures for giving injections and use of multi-dose vials;
10 minutes(Brainstorming/Discussion)
The Trainer requests the participants to the proper procedures for giving injections and use of multi-dose vials and notes their responses on the flip chart.
The Trainer clarifies the responses of the participants and states that:
Giving Injections - To reduce the risk of transmitting infections between clients:
o Always use a new or correctly reprocessed hypodermic needle and syringe every time an injection is given.
o Never change the needle without also changing the syringe between clients. Reusing the same syringe to give injections to multiple clients – even if the needle is changed – is not a safe practice.
o Before giving an injection if there is visible dirt, wash the injection site with soap and water.
o Wipe the client's skin at the injection site with an antiseptic solution to minimize the number of microorganisms and reduce the risk of infections. Using a fresh swab, wipe in a circular motion from the center outward.
o If alcohol is used, allow the alcohol to dry in order to provide maximum effectiveness in reducing microorganisms.

151
To avoid transmitting infections when giving IV fluids:
o Unhook the needle or catheter from the IV line,
and dispose of it in a sharps-disposal container.
o Throw away the IV line and any remaining fluid.
Microorganisms can survive and grow in IV fluids; if the IV line and bag/bottle of fluid are used again, infection can be transmitted to other clients.
o Never use the same IV line and fluid bag/bottle
with multiple clients.
The Trainer emphasizes that unexpected client motion at the time of injection can lead to accidents. Therefore, always warn clients when you are about to give an injection.
State the proper procedures for the use of multi-dose vials;
5 minutes(Discussion)
The Trainer informs the participants that before filling a syringe from a multidose vial, they should:
o Check the vial to be sure there are no leaks or
cracks;
o Check the solution to be sure it is not cloudy
and that there is no particulate matter in the vial. (Most solutions that come in vials are clear. One exception is the injectable contraceptive Depo-Provera, which is milky).
o Wipe the top of the vial with a fresh cotton
swab soaked with 60-70% alcohol; allow to dry.
Discuss how to reduce the risk of transmitting infections between clients;
10 minutes(Brainstorming/Presentation/Discussion)
The Trainer requests the participants to list the ways that health workers can reduce the risk of transmitting infections between clients, and notes their responses on the flip chart.
The Trainer clarifies the participants' responses and displays the slides on “How to reduce the risk of transmitting infections between clients.” S/he also refers them to the Participant's Reference Book.
The Trainer notes and addresses any concerns by the participants.
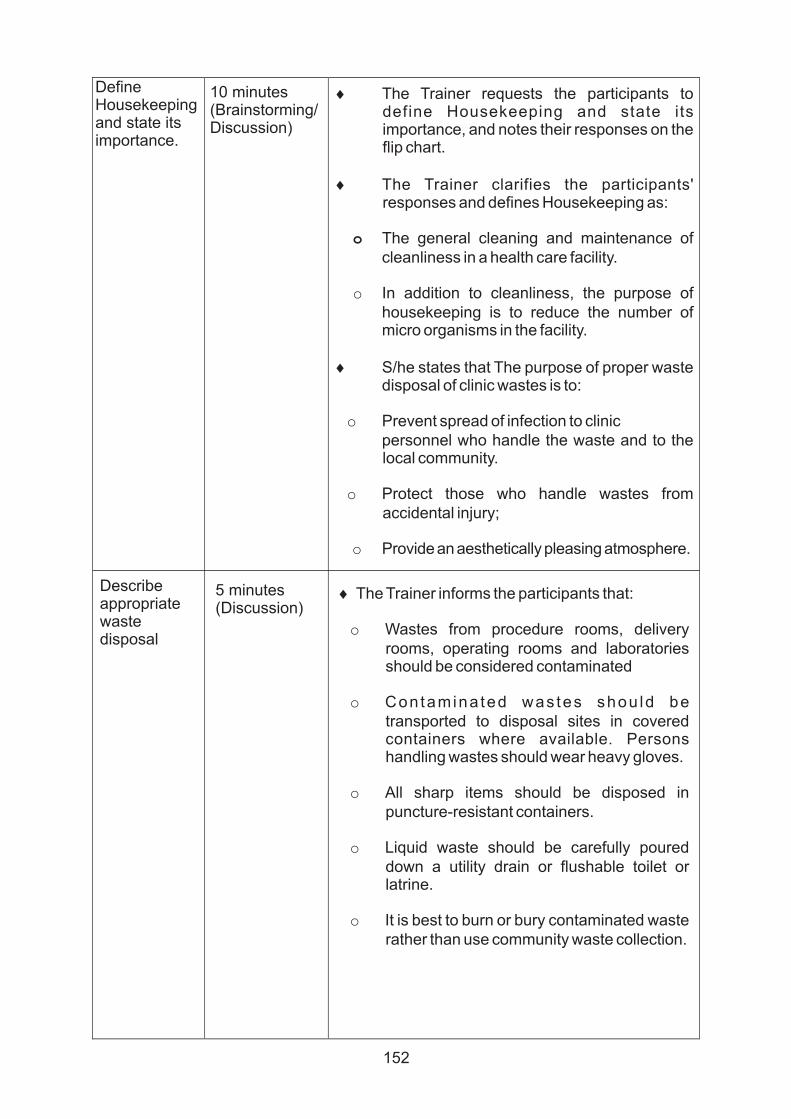
152
Define Housekeeping and state its importance.
10 minutes(Brainstorming/Discussion)
The Trainer requests the participants to define Housekeeping and state its importance, and notes their responses on the flip chart.
The Trainer clarifies the participants' responses and defines Housekeeping as:
o The general cleaning and maintenance of cleanliness in a health care facility.
o In addition to cleanliness, the purpose of housekeeping is to reduce the number of micro organisms in the facility.
S/he states that The purpose of proper waste disposal of clinic wastes is to:
o Prevent spread of infection to clinic personnel who handle the waste and to the local community.
o Protect those who handle wastes from accidental injury;
o Provide an aesthetically pleasing atmosphere.
Describe appropriate waste disposal
5 minutes(Discussion)
The Trainer informs the participants that:
o Wastes from procedure rooms, delivery rooms, operating rooms and laboratories should be considered contaminated
o Contamina ted was tes shou ld be transported to disposal sites in covered containers where available. Persons handling wastes should wear heavy gloves.
o All sharp items should be disposed in puncture-resistant containers.
o Liquid waste should be carefully poured down a utility drain or flushable toilet or latrine.
o It is best to burn or bury contaminated waste rather than use community waste collection.

Summary/Evaluation
5 minutes(Discussion)
The Trainer summarizes the session by stating that:
o All staff that come in contact with sharps – from doctors and nurse to those who dispose of the trash – are at risk of injury and infections.
o Proper disposal of sharps, effective
housekeeping within the health facility, and appropriate disposal of dry and wet wastes are essential for infection prevention.
o Observing the general guidelines for housekeeping is the easiest way to keep the facility infection free.
The Trainer requests the participants to respond to the following questions:
o List ways by which health care workers can be injured by sharps.
o Describe strategies for the prevention of injuries during surgery.
o Describe the appropriate procedures for the disposal of needles and sharps.
o Mention five Housekeeping guidelines.
153

MODULE NINE RECORD KEEPING, MANAGEMENT INFORMATION SYSTEM (MIS)
AND CONTRACEPTIVE LOGISTICS MANAGEMENT SYSTEM (CLMS)
Session 1: Record Keeping and Management Information System (MIS)
Session 2: Contraceptive Logistics Management System (CLMS)
154

Module Nine - Session 1: Record Keeping and Management Information System (MIS)
Time: 45 Minutes
Learning Objectives:
By the end of this session, participants should be able to:
§Describe the MIS§Mention the importance of MIS §State the reasons for accurate record keeping and its implication for data quality§List the advantages of Record Keeping§Explain the disadvantages of NOT keeping records§Explain the content of the various national record keeping forms
Session Overview
§Description of the MIS§The importance of MIS §Reasons for accurate record keeping and its implication for data quality§Advantages of Record Keeping§Disadvantages of NOT keeping records§Content of the various national record keeping forms
Methods
§Brainstorming§Discussion§Lecture§Group work
Materials
§Flip chart stand/paper§Markers§Laptop §Multimedia Projector§Various MIS tools
155

Module Nine - Session 1: Record Keeping and Management Information System (MIS)
MODULE PLAN
Title Duration Objectives Methods Materials Record Keeping and Management Information System (MIS)
1 hour ? Describe the MIS;
? Mention the importance of MIS;
? State the reasons
for accurate record keeping and its implication for data quality;
? List the advantages
of Record Keeping;
? Explain the disadvantages of NOT keeping records;
? Explain the content
of the various national record keeping forms
? Brainstorming ? Presentation ? Discussion ? Demonstration
and Return Demonstration
? Flip chart and flip chart stand
? Markers ? LCD
Projector ? Laptop ? Various
MIS tools
156

Module Nine - Session 1: Record Keeping and Management Information System (MIS)
MODULE PRESENTATION
Learning Objectives
Time Frame Learning Methodology/Activity
Introduction- Describe the MIS;
10 minutes (Brainstorming/ Presentation/ Discussion)
? The Trainer displays and reviews the learning objectives for this session.
? The Trainer informs the participants that: o This session discusses the importance of
Record Keeping in FP Programme, information needed to measure programme success and inform programme or service delivery Improvement.
? The Trainer requests the participants to define Management Information System (MIS), and notes their responses on the flip chart.
? The Trainer clarifies the participants’ responses and stares that:
o Management Information System (MIS) is
an organized way of recording, collating, and interpreting information for planning and decision-making
Mention the importance of MIS;
10 minutes (Presentation/ Discussion)
? The Trainer requests the participants to mention the importance of MIS, and notes their responses on the flip chart.
? The Trainer clarifies the participants’ responses and displays the slides on “Importance of MIS.” S/he also refers them to the Participant’s Reference Book.
? The Trainer notes and addresses any
concerns by the participants. List the advantages of Record Keeping
10 minutes (Brainstorming/ Discussion)
? The Trainer requests the participants to state the advantages of Record Keeping, and notes their responses on the flip chart.
? The Trainer clarifies the participants’ responses and states that Record Keeping allows the programme to: o Know the total number of client
157

o Know the number of new clients and old
clients to determine the rate of new acceptors and revisits for each method.
o Know the number of female clients attending the family planning clinics at the various locations in the community for comparison.
o Use data for assessment, planning, implementation, evaluation e.g.§give an account of commodities and
determine future needs§determine future needs regarding
staffing and facilities§know the progress of family planning in
the community and society§use data for future planning §use data for research purpose§Use for referral purposes
Explain the disadvantages of NOT keeping record.
10 minutes(Brainstorming/Discussion)
The Trainer requests the participants to state the disadvantages of NOT keeping records, and notes their responses on the flip chart.
The Trainer clarifies the participants' responses and states that the provider would not:
o Know the total number of clients served;
o Be able to determine the rate of acceptors for each method/procedure;
o Be able to compare number of clients with other Family Planning facilities in the community;
o Be able to assess or plan for future improvements and evaluate up-to-date progress;
o Be able to supply evidence of past work;
o Be able to conduct good research due to e.g. lack of statistics;
o Give good impression of clinic activities;
o Be able to help planners determine the general needs of the clinic;
o Be able to make planning and evaluation easy;
o Be able to obtain other adequate information in case a problem of a legal nature arises.
158

Explain the content of the national record keeping forms.
10 minutesDiscussion/Demonstration)
The Trainer informs the participants that MIS tools are used for keeping track of various services provided by the programme and activities performed and explains the use of the various Types of National Family Planning MIS Tools:
o Client Record form/Instruction (Form A)
o Tally Sheets/daily activity summary Forms (Form B1.1 & B1.2)
o Monthly Summary Form (Form C1.1 & C1.2)
o Facility Based Referral Form (Form D)
o Quarterly Summary Form (Form E)
o Annual Summary forms (Form F)
o Outreach activity Form (Form G)
o Monthly Outreach Summary Form (Form H.1)
o Quarterly/annual Outreach Summary form (Form H.2)
o Outreach Referral Forms (Form J)
o Appointment Card (Form K)
Summary/Evaluation
5 minutes(Discussion)
159

Module Nine - Session 2: Contraceptive Logistics Management System (CLMS)
Time: 30 Minutes
Learners' Objectives
By the end of this session, participants should be able to:
§Explain logistics management§State the objectives of the CLMS;§Describe National Contraceptive Logistics Management system (CLMS)§Demonstrate use of CLMS tools
Session Overview
§Introduction§Logistics management §Objectives of the CLMS;§The National Contraceptive Logistics Management System (CLMS)§Demonstration of use of CLMS tools
Methods
§Brain storming§Discussion§Lecture
Materials
§Flip Chart/Markers§Flip Chart Stand§Laptop§LCD Projector§Screen§Handout
160

Module Nine - Session 2: Contraceptive Logistics Management System (CLMS)
MODULE PLAN
Title Duration Objectives Methods Materials
Contraceptive Logistics Management System (CLMS)
1 hour ? Explain logistics management;
? State the objectives of the CLMS;
? Describe National Contraceptive Logistics Management system (CLMS);
?
Demonstrate use of CLMS
tools.
? Brainstorming
? Presentation
? Discussion
? Demonstration and Return Demonstration
? Flip chart and flip chart stand
? Markers
? LCD Projector
? Laptop
? Various MIS tools
161

Module Nine - Session 2: Contraceptive Logistics Management System (CLMS)
MODULE PRESENTATION
Learning Objectives
Time Frame Learning Methodology/Activity
Introduction- Explain logistics management;
10 minutes (Brainstorming/ Presentation/ Discussion)
? The Trainer displays and reviews the learning objectives for this session.
? The Trainer informs the participants that:
o A logistics management system is an organized system that uses data and information gathered from various communities and service sites to provide a steady supply of consumables that are required to maintain uninterrupted services in those communities.
o The Contraceptive Logistics Management System (CLMS) provides commodities for effective contraceptive services at all service points, ensuring that all Nigerians are able to receive the contraceptives they need through their service delivery point or community based agents (CBA).
State the objectives of the CLMS;
10 minutes (Presentation/ Discussion)
? The Trainer requests the participants to mention the objectives of the CLMS, and notes their responses on the flip chart.
? The Trainer clarifies the participants’ responses and displays the slides on “Objectives of the CLMS.” S/he also refers them to the Participant’s Reference Book.
? The Trainer notes and addresses any
concerns by the participants.
Describe National Contraceptive Logistics Management system (CLMS);
10 minutes (Brainstorming/ Discussion)
? The Trainer explains the following:
Contraceptive Security o This is guaranteed by a program’s ability
to:
? Accurately estimate requirements ? Control financial resources ? Technical capacity to procure products
162

§Distribute products to the customer for the
medium to long-term§Guarantee maximizing quality through
good storage practices§Guarantee maximizing quality through
Inventory control§Ensure maximizing quality through
supervision of supplies
Flow of contraceptives through the public sector supply system:
o The CLMS focuses on forecasting and procuring the right contraceptive quantities, storing and distributing them through all levels of the health system and delivering them to clients, as displayed in Figure 9.2.1 (Participants' Reference Book).
Contraceptive Commodities Selection
o Selection depends on factors such as the pattern of: clients' preferences, the capacity of service providers to offer wide range of FP methods and the quality of care.
Contraceptive Commodities Forecasting and Procurement
o Once the commodities to be procured are determined, the next step is to ascertain the quantities required for procurement.
o The process of determining those quantities to procure is what is called forecasting.
o Forecasting is usually done at LGA or state levels and covers a period of more than one year. The following data sources are used to forecast:
§Logistics data: This is applied in availability of consumption and stock position.
§Demographic data: this takes into account the population being served and the extent of unmet need for FP in the area.
§Service statistics: This is very important in forecasting because it helps inform the project managers whether there is the need to recruit more staff to achieve the goals of the forecast or to reduce on expected consumption due to limited staff in the field.
163

§Targets: Every service point should have annual targets in volume of services to be rendered, which will derive from LGA and State targets.
§Once the forecast has been discussed and approved, then a procurement plan is developed.
Contraceptive Commodities Distribution and Storage
o The commodities distribution process begins when the commodities are sent from the manufacturers or suppliers and ends when the commodity consumption information is sent to the Central Medical store.
o An effective system should not only maintain a constant supply of the commodities but also keep the commodities in good conditions throughout the distribution process, minimize losses due to spoilage and expiry, maintain accurate records, reduce theft and fraud and provide information for forecasting future commodity needs.
Contraceptive commodity consumption
o The CLMS delivers the correct commodities to the service delivery points.
o Rational use of the commodities requires that FP clients receive FP methods that are appropriate to their needs and choices, in adequate doses that meet their individual requirements, for the adequate period of time, at the lowest cost to them and their community.
Management Support
o The commodity logistics management cycle is driven by factors that must be in place for the system to operate smoothly.
o These factors include: §competent human resources, §sufficient finances to fund the activities and
purchase the commodities, §a functional logistics management
information system that provides vital information for planning, and
§managerial support in form of supervision and evaluation.
164

Summary/Evaluation
5 minutes(Discussion)
The Trainer summarizes the session by stating that:
o Prompt and regular remittance of data compiled from good records kept on contraceptive services rendered at service points to the CBA Supervisor helps the CLMS to place orders for adequate quantity of c o n t r a c e p t i v e c o m m o d i t i e s f r o m manufacturers, which are then distributed to the service sites to ensure uninterrupted availability of services to clients..
The Trainer requests the participants to respond to the following questions:
o Explain CLMS;
o Mention 4 objectives of the CLMS;
o Describe the flow of contraceptive through the public sector supply system.
165

MODULE TEN
RESOURCES MANAGEMENT
Session 1: Clinic Facilities and Requirement
Session 2: Personnel Requirement
166

Module Ten - Session 1: Clinic Facilities and Requirement
Time: 45 Minutes
Learning Objectives:
By the end of this session, participants should be able to:
§Identify the facilities requirements of an IUD and implant service delivery point (SDP)
§Discuss how their own facilities can be made more convenient and accessible to clients
§Discuss their concerns regarding provision of IUD and implant services at the service delivery points.
Method:
§Discussion§Lecture§Group work
Materials:
§Handouts§Flipchart stand/paper§Markers§Laptop§LCD Projector§Group work
167

Module Ten - Session 1: Clinic Facilities and Requirement
MODULE PLAN
Title Duration Objectives Methods Materials
Module Ten - Session 1: Clinic Facilities and Requirement
1 hour ? Identify the facilities requirements of an IUD and implant service delivery point (SDP);
? Discuss how their own facilities can be made more convenient and accessible to clients;
?
Discuss their concerns regarding provision of IUD and implant services at the service delivery points.
? Brainstorming
? Presentation
? Discussion
? Group Work
? Flip chart and flip chart stand
? Markers
? LCD Projector
? Laptop
168

Module Ten - Session 1: Clinic Facilities and Requirement
MODULE PRESENTATION
Learning Objectives
Time Frame Learning Methodology/Activity
Introduction- Identify the facilities requirements of an IUD and implant service delivery point (SDP);
10 minutes (Brainstorming/ Presentation/ Discussion)
? The Trainer displays and reviews the learning objectives for this session.
? The Trainer informs the participants that: o IUD and Implant services can be provided
in most existing clinic environments. o The only special need for these reversible
long-term contraceptive methods’ use is an area for insertion/removal procedures.
o Physical examination and counselling
session facilities are the same as for other methods.
o While each clinic has certain limitations
caused by actual space available, finances, client load etc, being conscious of the ‘best way’ to organize the physical environment should lead to creative solutions, even when resources are limited.
o If the clinic set-up is too uncomfortable to
the woman, she may simply avoid returning.
Discuss how their own facilities can be made more convenient and accessible to clients;
10 minutes (Brainstorming/ Group Work)
? The Trainer requests the participants to mention the ‘areas’ and resources are recommended for IUDs and implants to be offered successfully. , and notes their responses on the flip chart.
? The Trainer displays the points on the slide on “Areas and Resources Recommended for IUD and Implants Services” and clarifies the participants’ responses as follows:
Areas and Resources Recommended for
IUD and Implants Services
o Reception area for admitting clients – the client’s first clinic contact
169

o Waiting area – may also serve as an
informational resources locationo Counselling area - or perhaps two areas,
one for group presentations and another for private discussions;
o Examination procedural area – as private as possible
o Surgical scrub area/area for cleaning, sterilizing instruments and equipment
o Area for insertion/removal procedureso Post-procedure rest areao Storage area - cool, secure, and well-
ventilatedo Suitable area for office work,
maintenance and storage of client records and informational materials
o Suitable washing facilities and toilets for client and staff
o Water and light sources
The Trainer notes and addresses any concerns by the participants.
Discuss how their own facilities can be made more convenient and accessible to clients;
10 minutes(Brainstorming/Group Work))
The Trainer informs the participants that there will be a group work, and divides them into groups of four participants.
The Trainer requests the participants to reflect on their facilities and identify problems that need adaptation and improvement to meet IUD and implant insertion/removal needs, and record their submissions on the flip chart.
The Trainer requests each group to appoint a moderator (to moderate the discussions)and a rapporteur (who will also present for the group);
Each group will discuss for 10 minutes and record their input on a flip chart. This will be presented at the plenary session.
The Trainer moderates the plenary session and clarifies any issue raised by the participants.
170

Discuss their concerns regarding provision of IUD and implant services at the service delivery points.
The Trainer requests each participant to express his/her concerns regarding provision of IUD and implant services at the service delivery points.
S/he notes these on the flip chart and addresses them, first requesting other participants to comment on them before clarifying the issues.
Summary/Evaluation
5 minutes(Discussion)
The Trainer summarizes the session by stating that:
o Requirements for establishment of IUD and implant services are modest and include clinic adaptation to provide a clean environment for insertions/removals and privacy.
o Other procedures (physical examination and counselling) are the same as for other methods.
o If both the clinic personnel consider the various aspects of IUD and implants when arranging the physical facilities, both the clinic and the user will benefit.
o Since discussions about contraceptive options include intimate questions regarding reproductive histories, as well as possible physical examination, most women would appreciate curtains in examining rooms and a private room or corner where personal information can be given.
o Perhaps the traffic pattern can also be designed to facilitate privacy while such examinations or discussions are taking place.
The Trainer requests the participants to respond to the following questions:
o How are IUD and implant services different from other family planning methods?
o What adjustments could be made at your facility to be able to provide implant services?
171

Module Ten - Session 2: Personnel Requirement
Time: 1 hour
Learning Objectives:
By the end of this session, participants should be able to:
§Identify the tasks needed in a facility providing IUD and implant services;§Discuss the staffing patterns in their own facilities and how these tasks can be
fulfilled;§Analyse the training needed in order for staff to properly fulfil each role.
Session Objectives:
§Identification of the tasks needed in a facility providing IUD and implant services§Staffing patterns in their own facilities and how these tasks can be fulfilled§Analysis of the training needed in order for staff to properly fulfil each role
Method:
§Discussion§Lecture§Group work
Materials:
§Handouts§Flipchart stand/paper§Markers§Laptop§LCD Projector
172

Module Ten - Session 2: Personnel Requirement
MODULE PLAN
Title Duration Objectives Methods Materials Module Ten - Session 2: Personnel Requirement
1 hour ? Identify the tasks needed in a facility providing IUD and implant services;
? Discuss the staffing
patterns in their own facilities and how these tasks can be fulfilled;
? Analyse the training
needed in order for staff to properly fulfil each role.
? Brainstorming ? Presentation ? Discussion ? Group Work
? Flip chart and flip chart stand
? Markers ? LCD
Projector ? Laptop
173

Module Ten - Session 2: Personnel Requirement
MODULE PRESENTATION
Learning Objectives
Time Frame Learning Methodology/Activity
Introduction- Identify the tasks needed in a facility providing IUD and implant services;
10 minutes (Brainstorming/ Presentation/ Discussion)
? The Trainer displays and reviews the learning objectives for this session.
? The Trainer informs the participants that: o In general, the IUD and implant methods
require attention to clinic services to achieve optimal results. This is especially true regarding counselling services, which are often most needed during the first several months that each client begins IUD and implant use.
o The actual number of people necessary to
perform the functions in a clinic offering IUD and implant services will differ depending on such things as: ? clinic size, ? other services provided, ? service hours including special fixed
times for removals, and ? case load.
o However, the functions to be performed
should not vary greatly. Focusing on task to be done rather than absolute number of personnel to hire should make staffing plans more relevant.
? The Trainer displays the slide showing the
“List of the functions that should be allocated to personnel on a regular basis.” The list consists of the following: List of the functions that should be allocated to personnel on a regular basis. 1) Manage clinic 2) Supervise staff 3) Clean the facility 4) Order IUDs, implants and other supplies 5) Store and log in implants and other
supplies 6) Keep books, financial data
174

175
7) Schedule appointment for clients8) Counsel clients (at various points in time)9) Provide informational materials to clients
and assure continuing availability of these materials for clients and staff
10) Take and record medical history of clients11) Perform and record physical exams12) Screen clients for medical contraindications13) Sterilize instruments and linen (aseptic
techniques)14) Insert and remove implants15) Schedule follow-up visits16) Follow-up clients who do not return for
appointments17) Be responsible for any outreach activities to
recruit new clients18) Assess user satisfaction with implant
services19) Maintain medical records, filling20) Collect and report data
The Trainer inspects the participants to note that:
o Several functions may be done by the same
person, or
o In some cases, several persons may have
responsibilities. This list can be used practically within a clinic: after reviewing the list, add the position (or an individual name) of the person in your clinic who would be responsible for carrying out the function.
Discuss the staffing patterns in their own facilities and how these tasks can be fulfilled;
15 minutes(Brainstorming/Individual Exercise)
The Trainer informs the participants that there will be an individual exercise.
The Trainer requests the participants to reflect on their facilities and after reviewing the list, add the position (or an individual name) of the person in his/her clinic who would be responsible for carrying out the function.
Each participant will work for 10 minutes and record his/her suggestions on a flip chart. This will be presented at the plenary session.
The Trainer moderates the plenary session and clarifies any issue raised by the participants.

Analyse the training needed in order for staff to properly fulfil each role.
15 minutes(Brainstorming/Individual Exercise)
The Trainer informs the participants that there will be another individual exercise.
The Trainer requests the participants to reflect on the list prepared for his/her facility and analyse the training needed in order for staff to properly fulfil each role.
Each participant will work for 10 minutes and record his/her suggestions on a flip chart. This will be presented at the plenary session.
The Trainer moderates the plenary session and clarifies any issue raised by the participants.
Summary/Evaluation
5 minutes
(Discussion)
The Trainer summarizes the session by stating that:
o The personnel required to provide IUD and implant services depend on choice, size and other services provided.
o Staff should be allocated clear-cut function each day and the supervisor should ensure the tasks are properly performed and supervision requires training.
The Trainer requests the participants to respond to the following question:
o List 6 tasks to be completed on a daily basis and who should execute them?
176

SECTION C
TRAINER'S EVALUATION TOOLS
a) Participants' Needs Assessment Form
b) Pre-/Post-Test
c) Participants' Daily Evaluation Form
d) Checklist for IUD Insertion and Removal Procedures
e) Checklists for Implant Insertion and Removal Procedures
f) Participants' End-of-Course Evaluation Form
177

TRAINING PROGRAMME IN INTRAUTERINE CONTRACEPTIVE DEVICE (IUD) AND IMPLANT INSERTION AND REMOVAL TECHNIQUES
PARTICIPANTS' NEEDS ASSESSMENT FORM
Introduction:
Please complete this Needs Assessment Form and submit it at the Registration Desk.
A. BIODATA 1. Name _______________________________________________________
(First Name) (Middle Name) (Surname)
2. Address: __________________________________________________
_____________________________________________________________
_____________________________________________________________
3. Sex: _____ Telephone: _____________ E-mail: ___________________
4. Hospital/Clinic Address: _________________________________________
_____________________________________________________________
5. Designation _________________________________________________
6. Nationality: _______________ Date of Birth: ____ __________ ________ (Day) (Month) (Year)
7. Professional Qualifications:
School/College or University Year Degrees Obtained
________________________________ ___________ ____________________________________________ ___________ ____________
________________________________ ___________ ____________
________________________________ ___________ ____________
________________________________ ___________ ____________
178

REPRODUCTIVE HEALTH/FP SKILLS AND SERVICE EXPERIENCE
Which of the following Reproductive Health/Family Planning Courses have you attended?
Course Description Training Institution/ Dates Location
(a) General Family Planning includingIUD Insertion/Removal Skills _______________________ _______
(b) Minilaparotomy/LA _________________________ _______
(c ) Implant Training _________________________ _______ (d) Post-Abortion Care _________________________ _______
(e) PPIUD Training _________________________ _______
(f) Infection Prevention __________________________ _______
(g) FP/RH Counselling _________________________ _______
(h) STDs/HIV Counselling _________________________ _______
(i) Syndromic Management ofSTDs __________________________ _______
(j) Quality of Care in FP __________________________ _______
(k) Emergency Contraception __________________________ _______
(j) Supervisory Skills __________________________ _______
(j) Cervical Screening (Specifytype__________________) __________________________ _______
(l) Others (please specify) __________________________ _______
2. List current or previous responsibilities in providing family planning services.
(a)
(b)
©
179

3. Of the underlisted tasks, kindly indicate (√) those which you currently know how to perform and those you would like to have additional training:
Task Currently Need additionalperformed training
Yes No Yes No
(a). Obtain and record client's history ____ ____ ____ ____
(b) Perform client's record keeping ____ ____ ____ ____
(c) Perform physical examination ____ ____ ____ ____
(d) Perform pelvic examination ____ ____ ____ ____
(e) Take a Pap Smear ____ ____ ____ ____
(f) Perform laboratory pregnancy tests ____ ____ ____ ____
(g) Counsel for contraceptives ____ ____ ____ ____
(h) Insert and remove IUCD ____ ____ ____ ____
(i) Insert Implant capsules ____ ____ ____ ____
(j) Remove Implant capsules ____ ____ ____ ____
(k) Prepare Chlorine solution for Decontamination ____ ____ ____ ____
(l) Sterilize/Autoclave instruments ____ ____ ____ ____
(m) Give health talks on MCH/FP ____ ____ ____ ____
4. List three or more things you would like to learn from this Course.
(a)
(b)
(c)
(d)
4. What are your plans to utilize the skills acquired from this Course?
(a)
(b)
(c)
180

C. GENERAL
1. Estimate percentage of your time spent in the following (total must add up to
100%).
Patient care _________ %
Teaching (including training of staff) _________ %
Administration (including supervision of staff) _________%
Research __________%
Other (specify) ________________________ __________%
TOTAL 100 %
2. What are your concerns about Family Planning and Reproductive Health programmes in Nigeria?
3. What are your concerns about this training programme?
THANK YOU.
____________________________________ ______________ Signature of Applicant Date
181

TRAINING PROGRAMME IN INTRAUTERINE CONTRACEPTIVE DEVICE (IUD) AND IMPLANT INSERTION AND REMOVAL TECHNIQUES
PRE-/POST-TEST
Identification Number (Code) of Participant.................................
Instructions: Circle the letter of the SINGLE BEST ANSWER to each question.
SECTION A: IUD COUNSELLING SKILLS
1. The selection of a contraceptive method is done most appropriately by:
a. The woman seeking a contraceptive method.b. The general practitioner providing health services to the womanc. The obstetrician providing health services to the womand. The nurse practitioner providing health services to the woman.
e. The woman's husband2. The most important part of counselling is:
a. Providing brochures about contraceptive methods to the woman for review with her partner.
b. Identifying the woman's concerns about using contraceptives and answering her questions.
c. Obtaining formal consent for the procedures from the clientd. Describing adverse side effectse. Getting to know the client very well.
3. Allowing the client to handle a sample of Copper T 380A IUD should be:
a. discouraged because it will only frighten herb. encouraged because it will reassure her and help her to know what the strings feel
like.c. avoided because it is a waste of expensive material and she probably will not
understand what she is looking for.d. avoided because it will neither reassure her or help her to know what the device
feels likee. none of the above
4. Post – insertion counselling should inform the woman of the common side effects of IUD use such as:
a. nausea (feeling sick) and headachesb. Amenorrheac. mild cramping for days and possible intermenstrual spotting.d. increased risk of heart disease or strokee. increased risk of ectopic pregnancy.
5. The Copper T 380A IUD should not be left in place for more than:
a. 2 yearsb. 4 yearsc. 6 yearsd. 8 yearse. 12 years
182

183
SECTION B: IUD MEDICAL ELIGIBILITY CRITERIA
6. A good candidate for using IUD is a woman who:
a. has a purulent discharge from the cervixb. has a past history of an ectopic pregnancyc. has unexplained vaginal bleedingd. is 6weeks or more post-partume. has multiple uterine fibroids with endometrial cavity distortion
7. A precaution of IUD use is a finding of:
a. Fe deficiency anaemiab. Recent pelvic infection (PID)c. Retroverted (posterior) uterusd. severe dysmenorrheae. all of the above.
8. Women who can use IUDs without restriction are:
a. Women who are pregnantb. Women who have purulent cervicitis.c. Women who have pelvic TBd. Women with post abortal sepsis.
ste. Women who are within the 1 48hrs post-partum.
9. The use of IUD is recommended in this group of women:
a. Women who are at increased individual risk of STI.b. Women between 48hrs and 6wks post-partumc. Women who smoke irrespective of age.d. Women with benign gestational trophoblastic diseasee. Women who have ovarian cancer
10. The use of IUDs is NOT recommended in these women (WHO Category4)
a. Women who have current sexually transmitted diseases (STIs) such as gonorrhea or Chlamydia
b. Women who have cervical cancer (pre-treatment)c. Women who have fibroids with cavity distortiond. All of the abovee. None of the above
SECTION C: IUD CLINICAL SKILLS
11. Physical examination of a prospective IUD client must include at least:
a. abdominal and bimanual pelvic examinationb. abdominal, speculum and bimanual (pelvic) and breast examinationsc. abdominal, speculum and bimanual (pelvic) and breast examinationsd. general, breast, abdominal, speculum and bimanual (pelvic) examinatione. breast and bimanual (pelvic) examinations.

184
12.The metal instruments used for IUD insertion, (i.e., the vaginal speculum, uterine sound and tenaculum/stopes forceps) can be safety used if after thorough cleaning, they are:
a. dried and stored in a sterile containerb. high-level disinfectedc. soaked in Savlon for 30 minutesd. used immediatelye. all of the above.
13.To minimize the risk of transmitting hepatitis B or HIV viruses to staff during the cleaning process, all used (soiled) instruments and reusable gloves first should be:
a. rinsed in water and scrubbed with a brush before disinfecting by boilingb. soaked in a fresh solution of 0.5% chlorine for 10 minutes before cleaningc. rinsed in water and scrubbed with a brush before sterilizingd. soaked overnight in 8% formaldehydee. boiled immediately after use.
14. Correctly loading the Copper T 380A IUD in the sterile package:
a. should be done only if sterile gloves are availableb. assures that the IUD will remain sterile until it is removed from the packagec. is difficult to learn to do.d. all of the abovee. none of the above.
15. The purpose of sounding the uterus before an IUD insertion is:
a. To check for obstruction in the cervical canalb. To measure the distance between the external Os and the uterine fundusc. To ensure correct positioning of the inserterd. All of the abovee. None of the above
SECTION D: IMPLANT COUNSELLING SKILLS
16. Which of the following clients could be a candidate for using Implant?
a. a woman who has acute liver diseaseb. a woman who is considering sterilization, but is not ready to make a final decision.c. a woman who has undiagnosed abnormal genital bleedingd. all of the abovee. none of the abovef. a&b above
R17. If inserted within the first seven days of the menses, the Jadelle Implants become
effective in preventing pregnancy within:
a. one (1) monthb. seven (7) daysc. 24 hours (1 day)d. ten (10) dayse. none of the above

185
R18. The Jadelle implant can be left in place:
a. for 2 yearsb. for 4 yearsc. for 5 yearsd. for 6 yearse. for 8 years
19. Removal of Implant capsules:
a. usually takes less time than insertionb. usually causes less blessingc. required gentleness and patienced. is always very painfule. all of the above
20. The Implant user should return to the clinic if she has any of the following problems:
a. pus or bleeding at the insertion siteb. delayed menstrual cycles after an interval of regular cyclesc. wants to have the implants removed for any reasond. sudden increase in weighte. all of the above
21. Post-insertion counselling should inform the woman of common side effects of Implant use, such as:
a. increased risk of gall bladder diseaseb. heavy vaginal discharge requiring frequent personal hygiene (douching)c. change in the menstrual bleeding pattern (e. g., prolonged bleeding during the first
months of use, spotting, amenorrhoea)d. change in bowel habitse. none of the above
22. Jadelle implant contains:
a. 3-ketodesogestrelb. Etonorgestrelc. Levonorgestreld. Normogestrele. None of the above.
SECTION E: IMPLANT MEDICAL ELIGIBILITY CRITERIA
23. Women known to suffer from any of the following conditions should, if they use Implants have more frequent and supervised clinical follow-ups:
a. the woman has diabetesb. the woman has breast nodulesc. the woman is hypertensived. all of the abovee. none of the above

186
24. A woman who has a past history of acute pelvic inflammatory disease (PID):
a. would not be considered a good candidate for Implantb. can use Implant only if she has at least three living childrenc. would be an appropriate candidate for Implantd. would definitely experience severe complications with the use of Implante. Is more likely to discontinue the use of Implant within 3 months of insertion
25. Women who can use implants without restriction (WHO Category 1) include:
a. women who are of any age and parity, including nulliparousb. women who have fibroidsc. women who are breastfeeding within six weeks to six monthsd. All of the abovee. None of the above
26. The following women can generally use implants although follow-up may be needed (WHO Category 2) include:
140a. hypertension higher than /90 mmHgb. history of DVT or current DVT while established on anticoagulant therapyc. major surgery with prolonged hospitalizationd. All of the abovee. None of the above
SECTION F: CONTRACEPTIVE IMPLANT CLINICAL SKILLS
27. There is less risk the client may be pregnant if implant capsules are inserted:
a. within seven days from the onset of mensesb. within the first year post-partum in non-breastfeeding womenc. within the first year post-partum in women who are breastfeedingd. all of the abovee. none of the above
28. Implant capsules which have been inserted too deeply:
a. are easier to remove b. may move (migrate ) up the client's arm and into her body c. are less effective because the hormone is released more slowly from the `
capsuled. all of the abovee. none of the above
29. During client assessment, the history obtained from the client should include questions:
a. about menstruation, pregnancy and previous genital infection onlyb. that elicit a detailed history of past contraceptive usec. that are typically included in a general medical history, including current weight, and
the client's reproductive history d. the desired number of children (family size)e. all of the above.

187
R R30. Handling the Jadelle or Zarin capsules with sterile gloves which are powdered:
a. may not be harmful to the clientb. may cause the silastic capsules to become more reactive (i.e., cause
adhesions/fibrous reaction)c. may cause severe infections at the insertion sited. may result in expulsion of the capsulese. may delay healing of the insertion site
KEY
1. A2. B3. B4. C5. E6. D7. B 8. E9. C10.D11. D12.B13.B14.B15.D16.F 17.C18.C19.C20.E21.C22.C23.D24.C25.D26.B 27.E 28.E 29.E30.B

TRAINING PROGRAMME IN INTRAUTERINE CONTRACEPTIVE DEVICE (IUD) AND IMPLANT INSERTION AND REMOVAL TECHNIQUES
DAILY PARTICIPANTS' EVALUATION
Day of Training Programme: ……………
1. How would you describe today's activities, including the presentations?
(a) Very Useful (b) Useful (c) Indifferent (d) Not Useful
2. What sessions did you find very useful?
(a)
(b)
(c)
3. What sessions were not useful to you?(a)
(b)
(c)
4. Is there any topic discussed today that you think should be deleted from this programme?(a)
(b)
(c)
5. What suggestions do you have for the presenters and facilitators of today's activities?
188

TRAINING PROGRAMME IN INTRAUTERINE CONTRACEPTIVE DEVICE (IUD) AND IMPLANT INSERTION AND REMOVAL TECHNIQUES
END-OF-COURSE EVALUATION
Instruction: It will be very useful to us if you give us the information requested below.
SECTION A
Response Scale (For Questions 1 – 10 only)
1 = Very dissatisfied 2 = Dissatisfied, 3 = Indifferent
4 = Satisfied 5 = Very satisfied
Please circle the appropriate number for each question on the response scale:
1. Overall, how satisfied are you with the training? 1 2 3 4 5
2. Overall, how satisfied are you that the course achievedits stated objectives? 1 2 3 4 5
3. Overall, how satisfied are you with the trainers' abilityto explain the topics? 1 2 3 4 5
4. Overall, how satisfied are you with the trainers' abilityto clear up doubts expressed by the participants? 1 2 3 4 5
5. Overall, how satisfied are you with the trainers' abilityto respond to the training needs of the participants? 1 2 3 4 5
6. Overall, how satisfied are you with the amount of time spent on this course? 1 2 3 4 5
7. Overall, how satisfied are you with the organization ofthis training? 1 2 3 4 5
8. How satisfied are you with the facility used for this training? 1 2 3 4 5
9. How satisfied are you with the written materials supplied to you at this training? 1 2 3 4 5
10. How satisfied are you with the training aids used? 1 2 3 4 5
189

SECTION B
11. Are there any topics discussed at this training that you believe are irrelevant and should be deleted?
a.
b.
c.
d.
e.
12. In general, what can the facilitators do to improve on future training programmes?
a.
b.
c.
d.
e.
13. What other comments do you have with regards to this training?
190