INSTRUCTIONS for fire lamps 1-8 - OPITEC
16
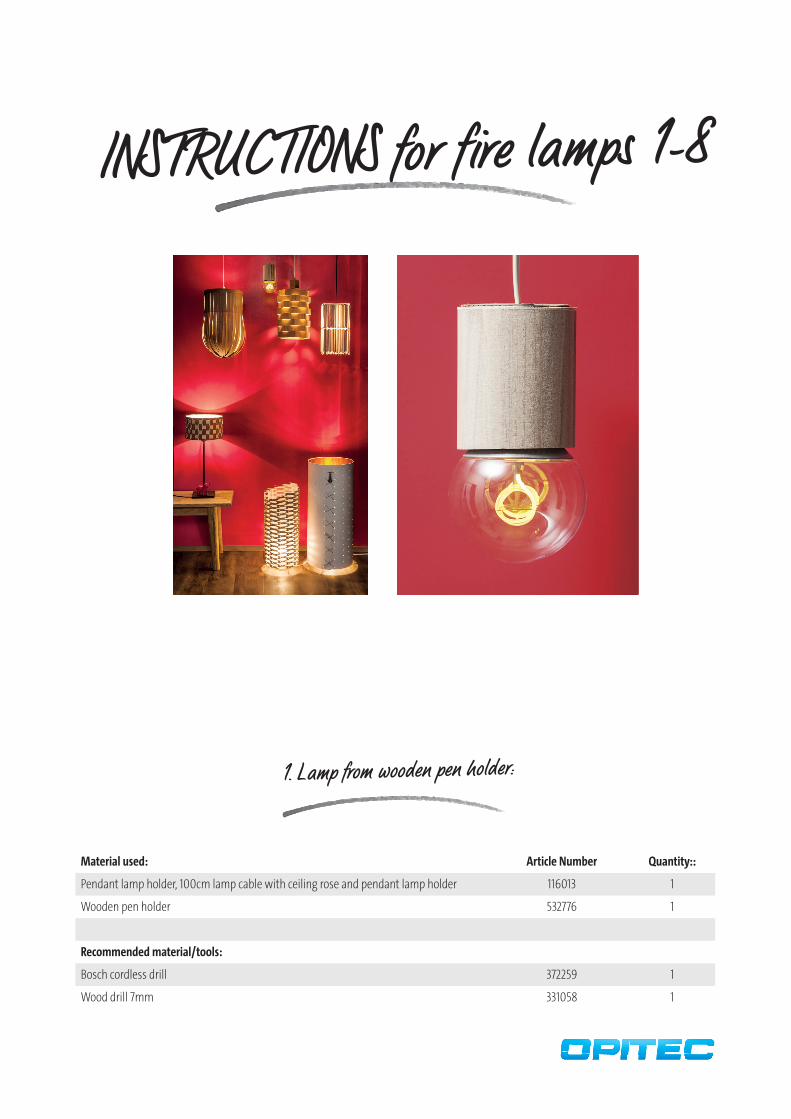
INSTRUCTIONS for fire lamps 1-8 Material used: Article Number Quantity:: Pendant lamp holder, 100cm lamp cable with ceiling rose and pendant lamp holder 116013 1 Wooden pen holder 532776 1 Recommended material/tools: Bosch cordless drill 372259 1 Wood drill 7mm 331058 1 1. Lamp from wooden pen holder:
-
Upload
khangminh22 -
Category
Documents
-
view
1 -
download
0
Transcript of INSTRUCTIONS for fire lamps 1-8 - OPITEC
INSTRUCTIONS for fire lamps 1-8
Material used: Article Number Quantity::
Pendant lamp holder, 100cm lamp cable with ceiling rose and pendant lamp holder 116013 1
Wooden pen holder 532776 1
Recommended material/tools:
Bosch cordless drill 372259 1
Wood drill 7mm 331058 1
1. Lamp from wooden pen holder:
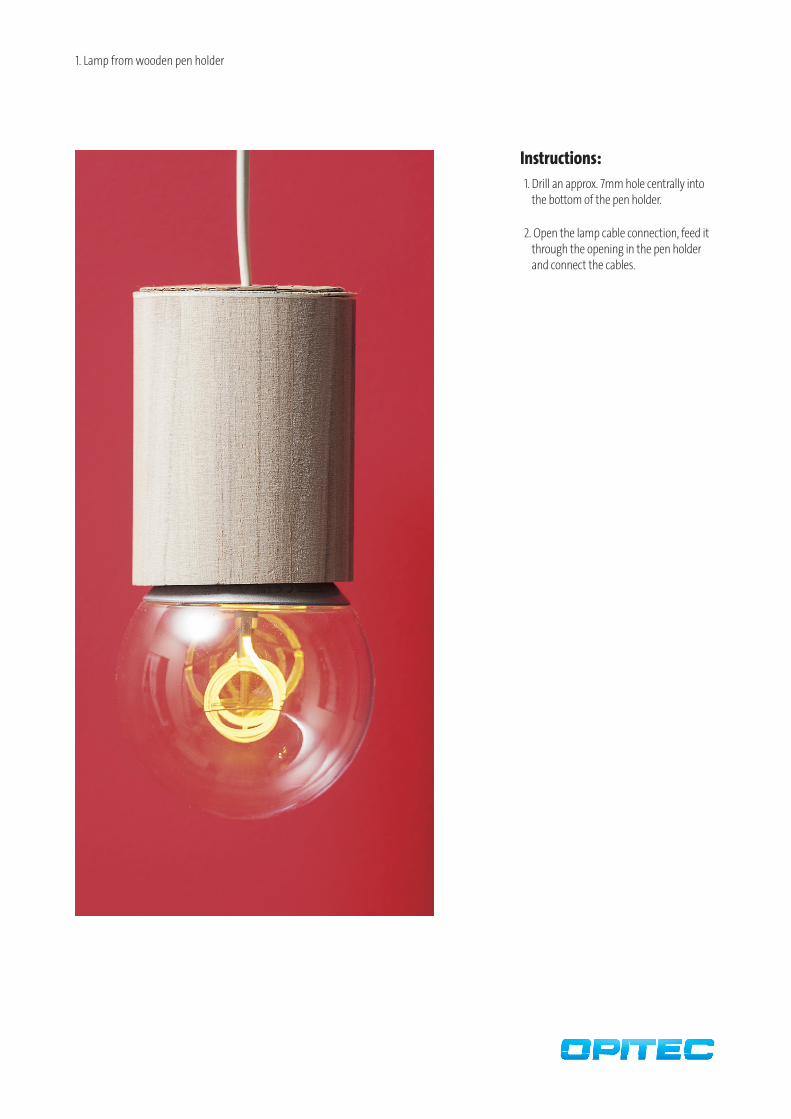
1. Lamp from wooden pen holder
Instructions:
2. Open the lamp cable connection, feed it through the opening in the pen holder and connect the cables.
1. Drill an approx. 7mm hole centrally into the bottom of the pen holder.

Lamp from corrugated cardboard:
Material used: Article Number Quantity::
Pendant lamp holder, 100cm lamp cable with ceiling rose and pendant lamp holder 116013 1
or
Pendant lamp holder, cable with switch, 1.5m 103524 1
Corrugated cardboard, approx. 50 x 70cm, natural, 10 sheets 420158 2 Bögen
Recommended material/tools:
Hot glue gun 301128 1
Try square 366522 1
Craft knife 360696 1
Ruler 366418 1
Cutting mat 375051 1
Lamp from corrugated cardboard:
1 2
3 4
5 6
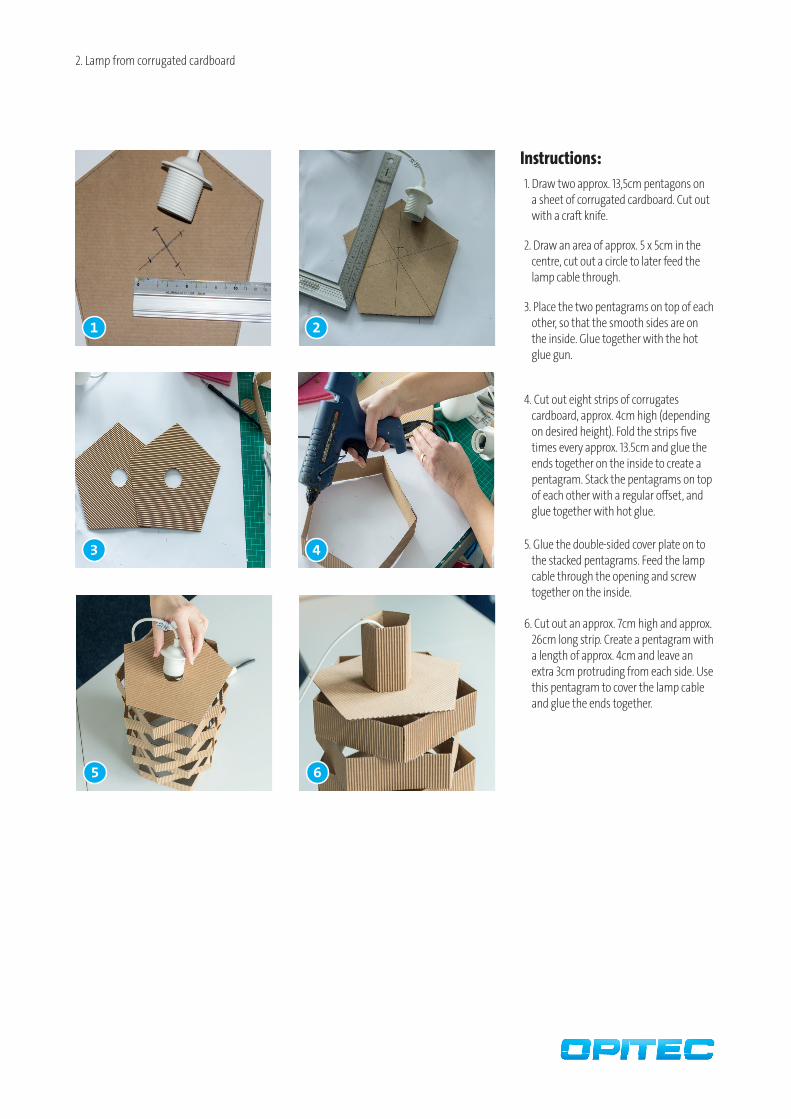
Instructions:
2. Draw an area of approx. 5 x 5cm in the centre, cut out a circle to later feed the lamp cable through.
1. Draw two approx. 13,5cm pentagons on a sheet of corrugated cardboard. Cut out with a craft knife.
3. Place the two pentagrams on top of each other, so that the smooth sides are on the inside. Glue together with the hot glue gun.
4. Cut out eight strips of corrugates cardboard, approx. 4cm high (depending on desired height). Fold the strips five times every approx. 13.5cm and glue the ends together on the inside to create a pentagram. Stack the pentagrams on top of each other with a regular offset, and glue together with hot glue.
5. Glue the double-sided cover plate on to the stacked pentagrams. Feed the lamp cable through the opening and screw together on the inside.
6. Cut out an approx. 7cm high and approx. 26cm long strip. Create a pentagram with a length of approx. 4cm and leave an extra 3cm protruding from each side. Use this pentagram to cover the lamp cable and glue the ends together.
2. Lamp from corrugated cardboard
3. Lamp from wooden spatulas:
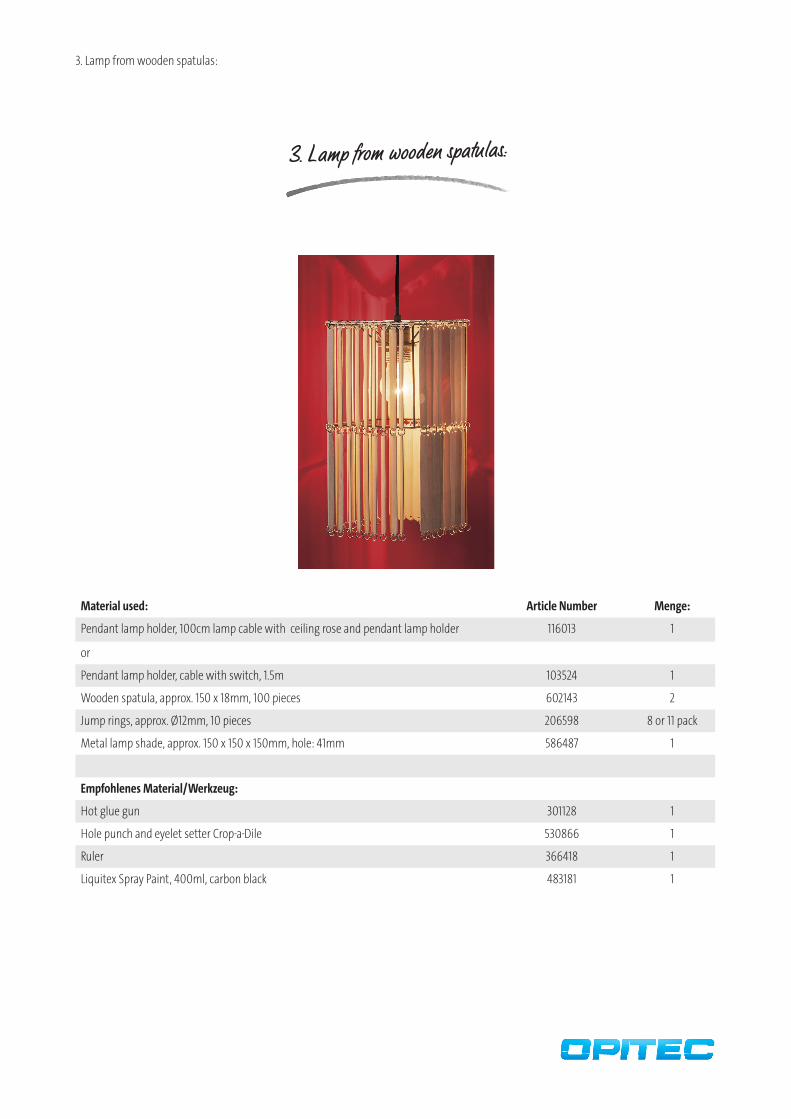
3. Lamp from wooden spatulas:
Material used: Article Number Menge:
Pendant lamp holder, 100cm lamp cable with ceiling rose and pendant lamp holder 116013 1
or
Pendant lamp holder, cable with switch, 1.5m 103524 1
Wooden spatula, approx. 150 x 18mm, 100 pieces 602143 2
Jump rings, approx. Ø12mm, 10 pieces 206598 8 or 11 pack
Metal lamp shade, approx. 150 x 150 x 150mm, hole: 41mm 586487 1
Empfohlenes Material/Werkzeug:
Hot glue gun 301128 1
Hole punch and eyelet setter Crop-a-Dile 530866 1
Ruler 366418 1
Liquitex Spray Paint, 400ml, carbon black 483181 1
1 2
3 4
Instructions:
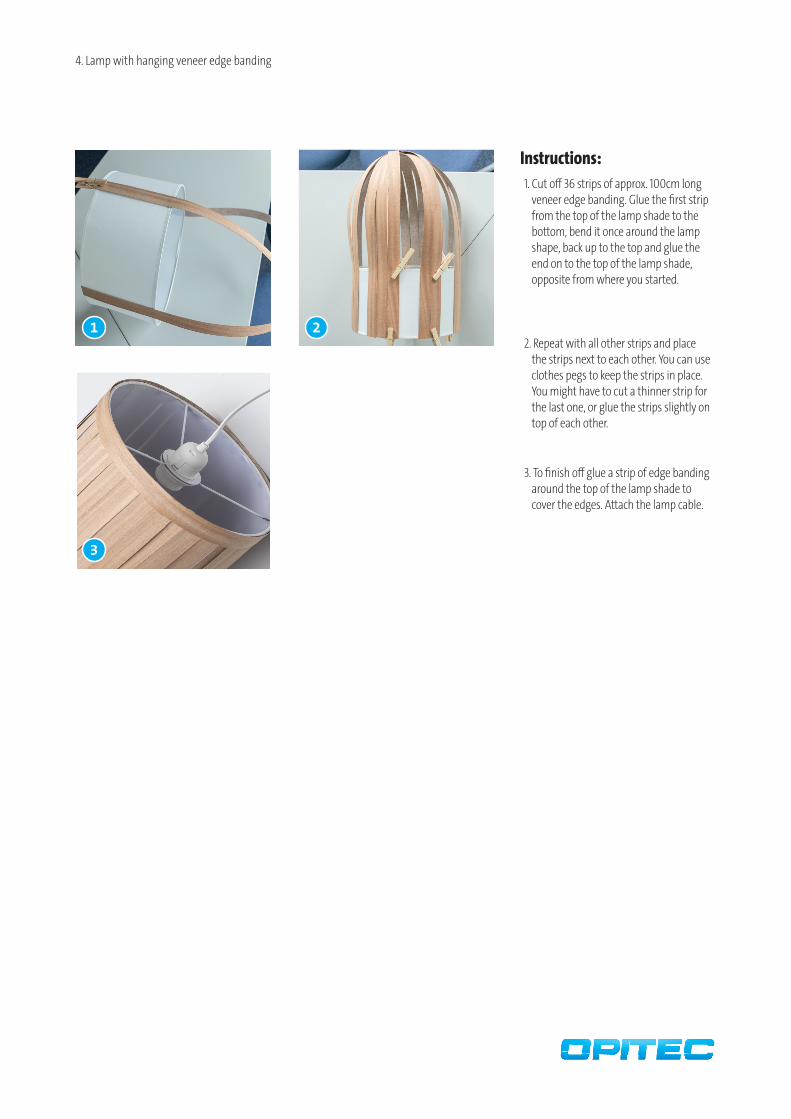
2. Punch nine holes at 1cm apart into four wooden spatulas. Feed a jump ring through each of the holes in the four spa-tulas and suspend one of the previously
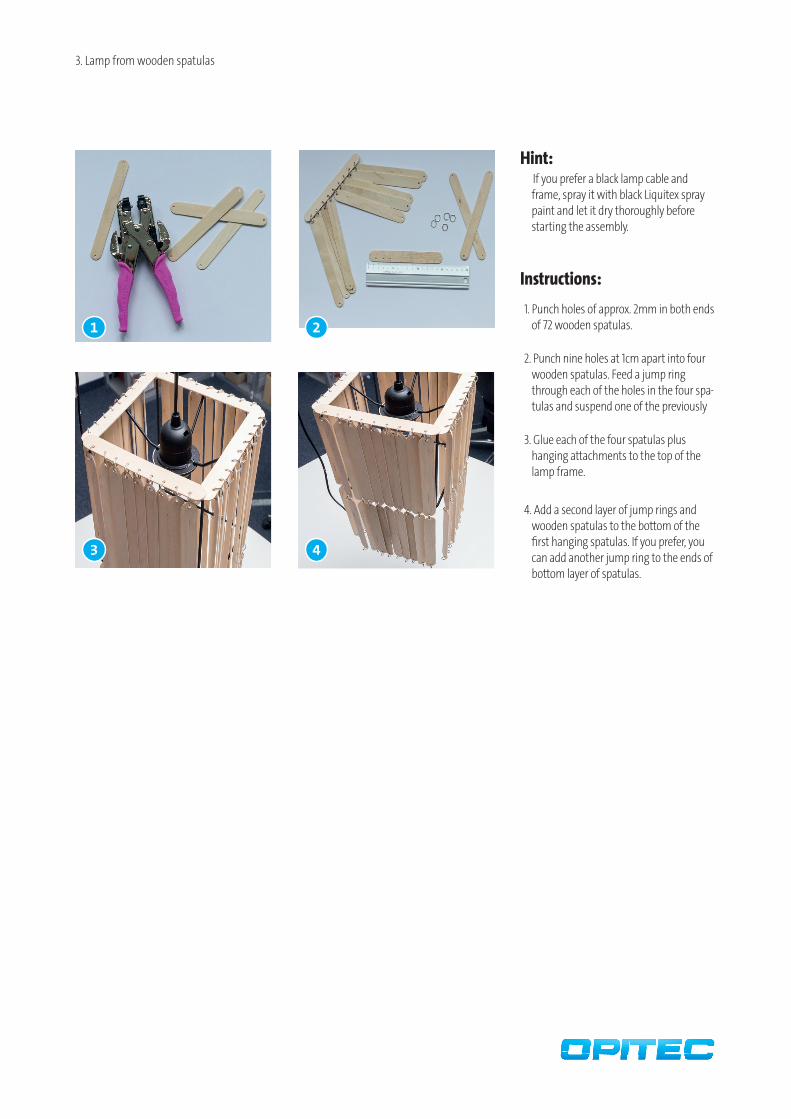
1. Punch holes of approx. 2mm in both ends of 72 wooden spatulas.
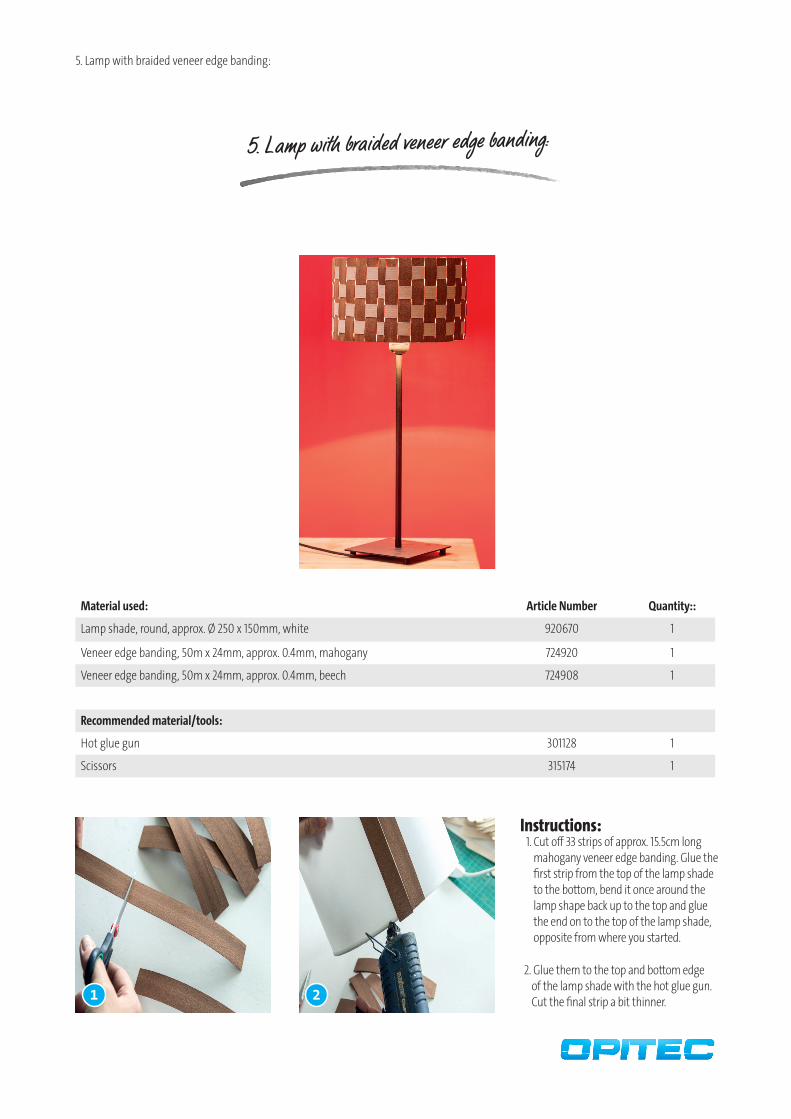
3. Glue each of the four spatulas plus hanging attachments to the top of the lamp frame.
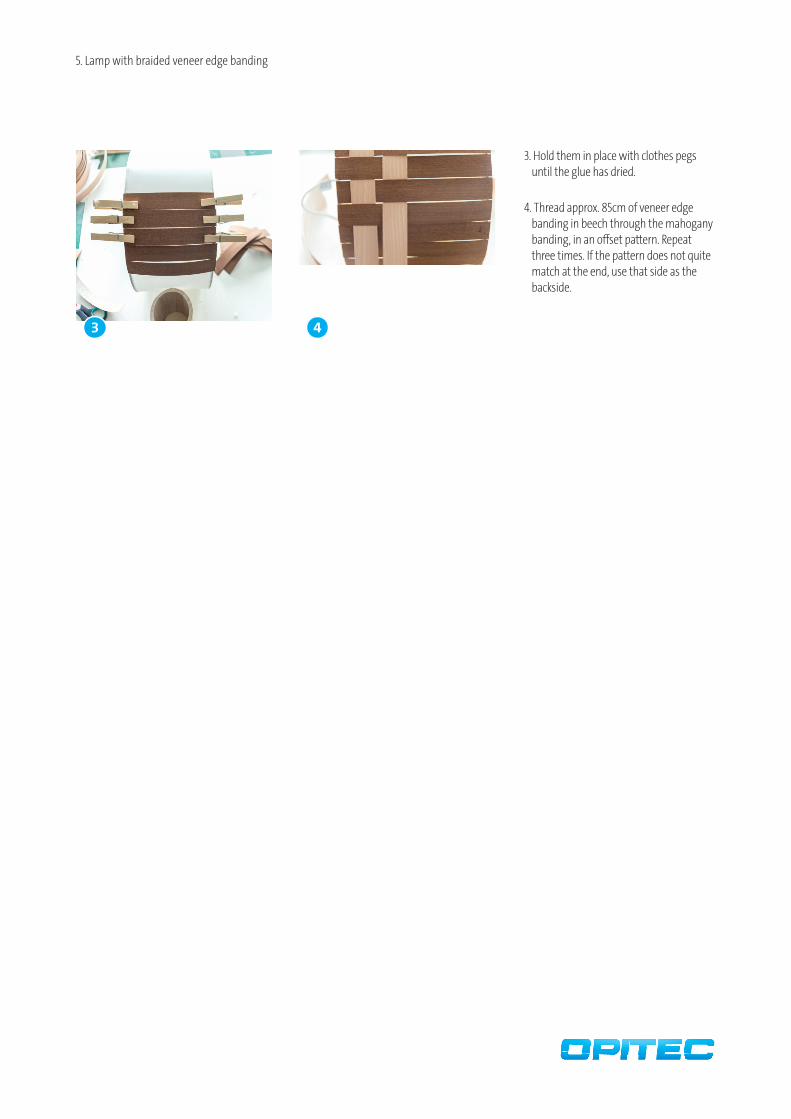
4. Add a second layer of jump rings and wooden spatulas to the bottom of the first hanging spatulas. If you prefer, you can add another jump ring to the ends of bottom layer of spatulas.
3. Lamp from wooden spatulas
Hint: If you prefer a black lamp cable and
frame, spray it with black Liquitex spray paint and let it dry thoroughly before starting the assembly.

4. Lamp with hanging veneer edge banding:
4. Lamp with hanging veneer edge banding:
Material used: Article Number Quantity:
Pendant lamp holder, 100cm lamp cable with ceiling rose and pendant lamp holder 116013 1
or
Pendant lamp holder, cable with switch, 1.5m 103524 1
Veneer edge banding, 50m x 24mm, approx. 0.4mm, beech 724908 1
Lamp shade, round, approx. Ø 250 x 150mm, white 920670 1
Recommended material/tools:
Hot glue gun 301128 1
1 2
3
Instructions:
2. Repeat with all other strips and place the strips next to each other. You can use clothes pegs to keep the strips in place. You might have to cut a thinner strip for the last one, or glue the strips slightly on top of each other.
1. Cut off 36 strips of approx. 100cm long veneer edge banding. Glue the first strip from the top of the lamp shade to the bottom, bend it once around the lamp shape, back up to the top and glue the end on to the top of the lamp shade, opposite from where you started.
4. Lamp with hanging veneer edge banding
3. To finish off glue a strip of edge banding around the top of the lamp shade to cover the edges. Attach the lamp cable.
1 2
5. Lamp with braided veneer edge banding:
5. Lamp with braided veneer edge banding:
Material used: Article Number Quantity::
Lamp shade, round, approx. Ø 250 x 150mm, white 920670 1
Veneer edge banding, 50m x 24mm, approx. 0.4mm, mahogany 724920 1
Veneer edge banding, 50m x 24mm, approx. 0.4mm, beech 724908 1
Recommended material/tools:
Hot glue gun 301128 1
Scissors 315174 1
Instructions:1. Cut off 33 strips of approx. 15.5cm long
mahogany veneer edge banding. Glue the first strip from the top of the lamp shade to the bottom, bend it once around the lamp shape back up to the top and glue the end on to the top of the lamp shade, opposite from where you started.
2. Glue them to the top and bottom edge of the lamp shade with the hot glue gun. Cut the final strip a bit thinner.
3 4
3. Hold them in place with clothes pegs until the glue has dried.
4. Thread approx. 85cm of veneer edge banding in beech through the mahogany banding, in an offset pattern. Repeat three times. If the pattern does not quite match at the end, use that side as the backside.
5. Lamp with braided veneer edge banding
6. Lamp with mirror card and Tyvek paper:
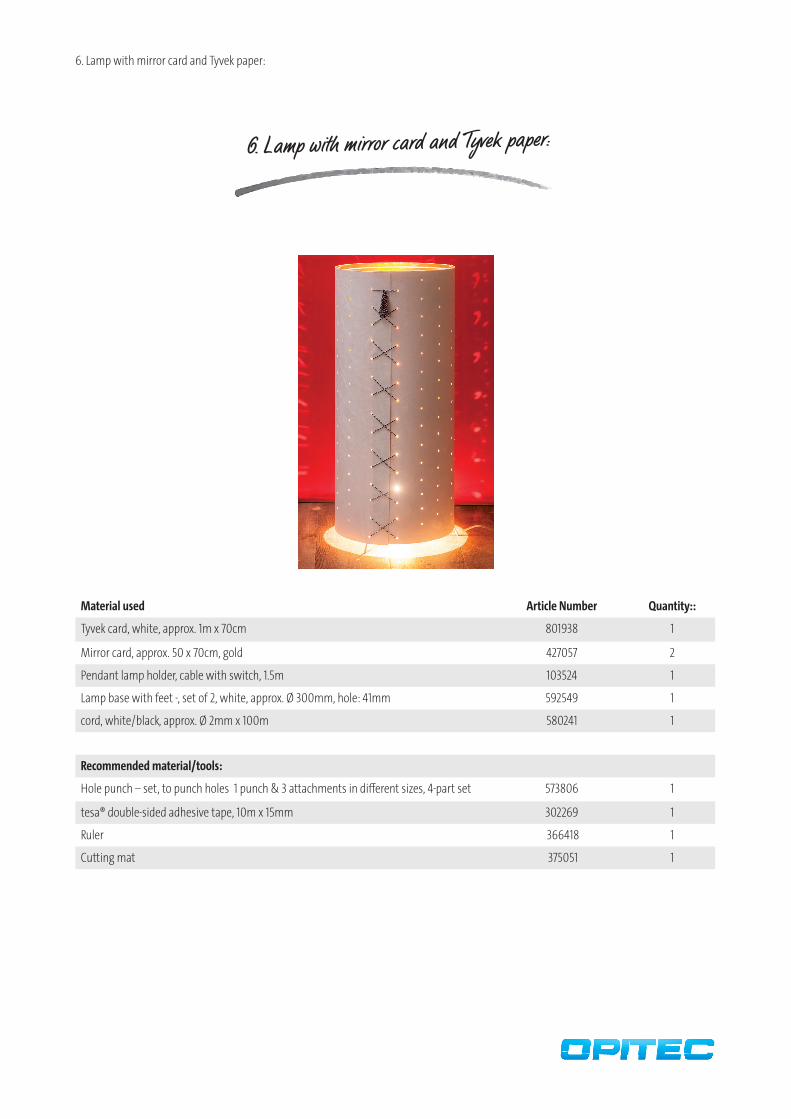
6. Lamp with mirror card and Tyvek paper:
Material used Article Number Quantity::
Tyvek card, white, approx. 1m x 70cm 801938 1
Mirror card, approx. 50 x 70cm, gold 427057 2
Pendant lamp holder, cable with switch, 1.5m 103524 1
Lamp base with feet -, set of 2, white, approx. Ø 300mm, hole: 41mm 592549 1
cord, white/black, approx. Ø 2mm x 100m 580241 1
Recommended material/tools:
Hole punch – set, to punch holes 1 punch & 3 attachments in different sizes, 4-part set 573806 1
tesa® double-sided adhesive tape, 10m x 15mm 302269 1
Ruler 366418 1
Cutting mat 375051 1
1 2
3 4
3
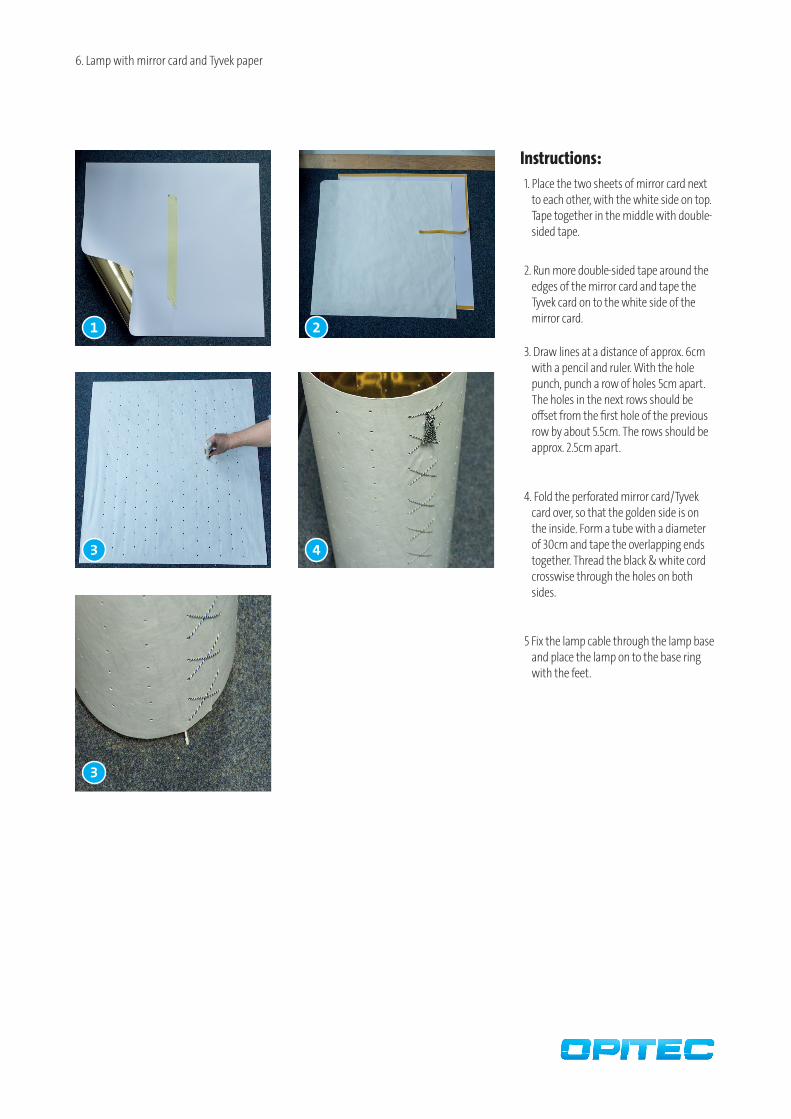
Instructions:
2. Run more double-sided tape around the edges of the mirror card and tape the Tyvek card on to the white side of the mirror card.
1. Place the two sheets of mirror card next to each other, with the white side on top. Tape together in the middle with double-sided tape.
3. Draw lines at a distance of approx. 6cm with a pencil and ruler. With the hole punch, punch a row of holes 5cm apart. The holes in the next rows should be offset from the first hole of the previous row by about 5.5cm. The rows should be approx. 2.5cm apart.
6. Lamp with mirror card and Tyvek paper
4. Fold the perforated mirror card/Tyvek card over, so that the golden side is on the inside. Form a tube with a diameter of 30cm and tape the overlapping ends together. Thread the black & white cord crosswise through the holes on both sides.
5 Fix the lamp cable through the lamp base and place the lamp on to the base ring with the feet.
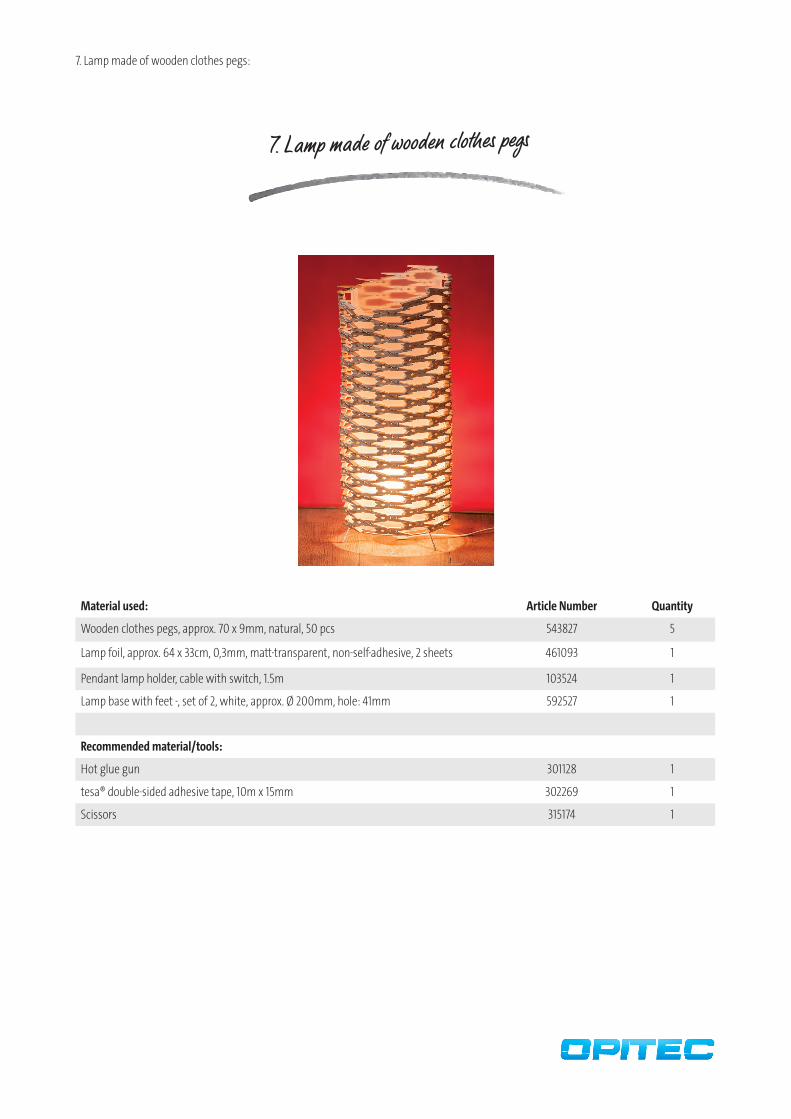
7. Lamp made of wooden clothes pegs:
Material used: Article Number Quantity
Wooden clothes pegs, approx. 70 x 9mm, natural, 50 pcs 543827 5
Lamp foil, approx. 64 x 33cm, 0,3mm, matt-transparent, non-self-adhesive, 2 sheets 461093 1
Pendant lamp holder, cable with switch, 1.5m 103524 1
Lamp base with feet -, set of 2, white, approx. Ø 200mm, hole: 41mm 592527 1
Recommended material/tools:
Hot glue gun 301128 1
tesa® double-sided adhesive tape, 10m x 15mm 302269 1
Scissors 315174 1
7. Lamp made of wooden clothes pegs
1 2
3 4
5 6
7. Lamp made of wooden clothes pegs
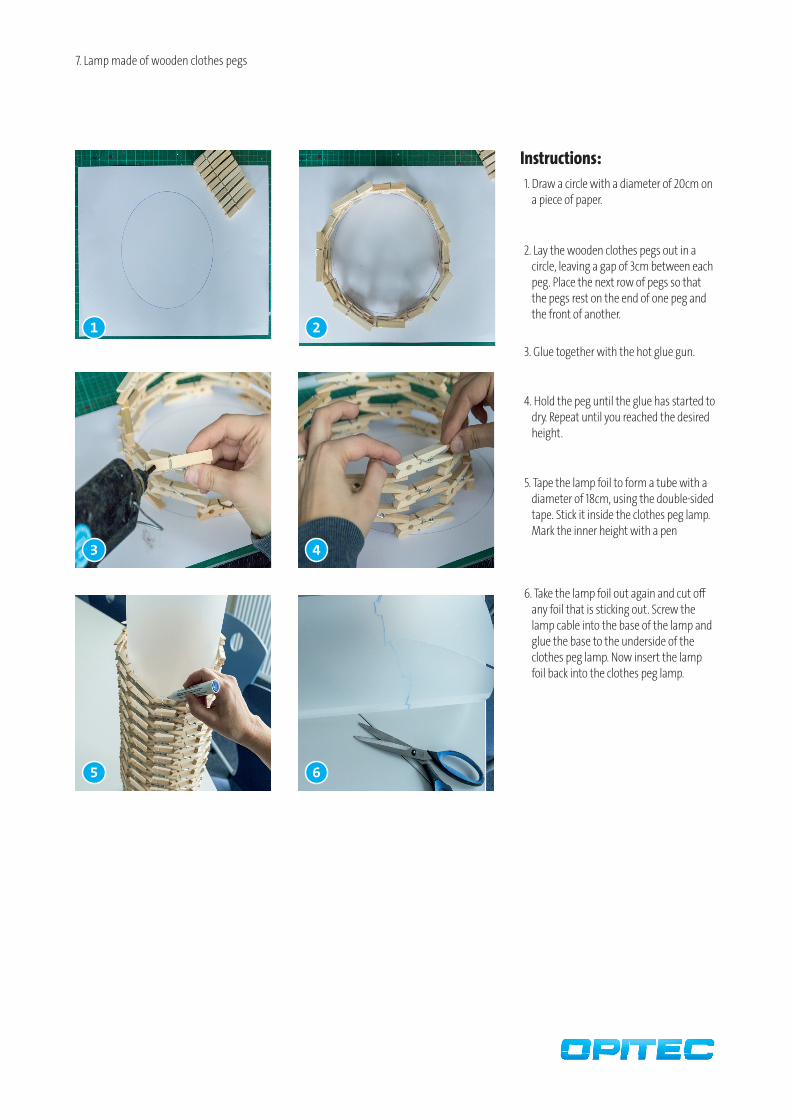
Instructions:
2. Lay the wooden clothes pegs out in a circle, leaving a gap of 3cm between each peg. Place the next row of pegs so that the pegs rest on the end of one peg and the front of another.
1. Draw a circle with a diameter of 20cm on a piece of paper.
3. Glue together with the hot glue gun.
4. Hold the peg until the glue has started to dry. Repeat until you reached the desired height.
5. Tape the lamp foil to form a tube with a diameter of 18cm, using the double-sided tape. Stick it inside the clothes peg lamp. Mark the inner height with a pen
6. Take the lamp foil out again and cut off any foil that is sticking out. Screw the lamp cable into the base of the lamp and glue the base to the underside of the clothes peg lamp. Now insert the lamp foil back into the clothes peg lamp.
8. Lamp with star vellum:
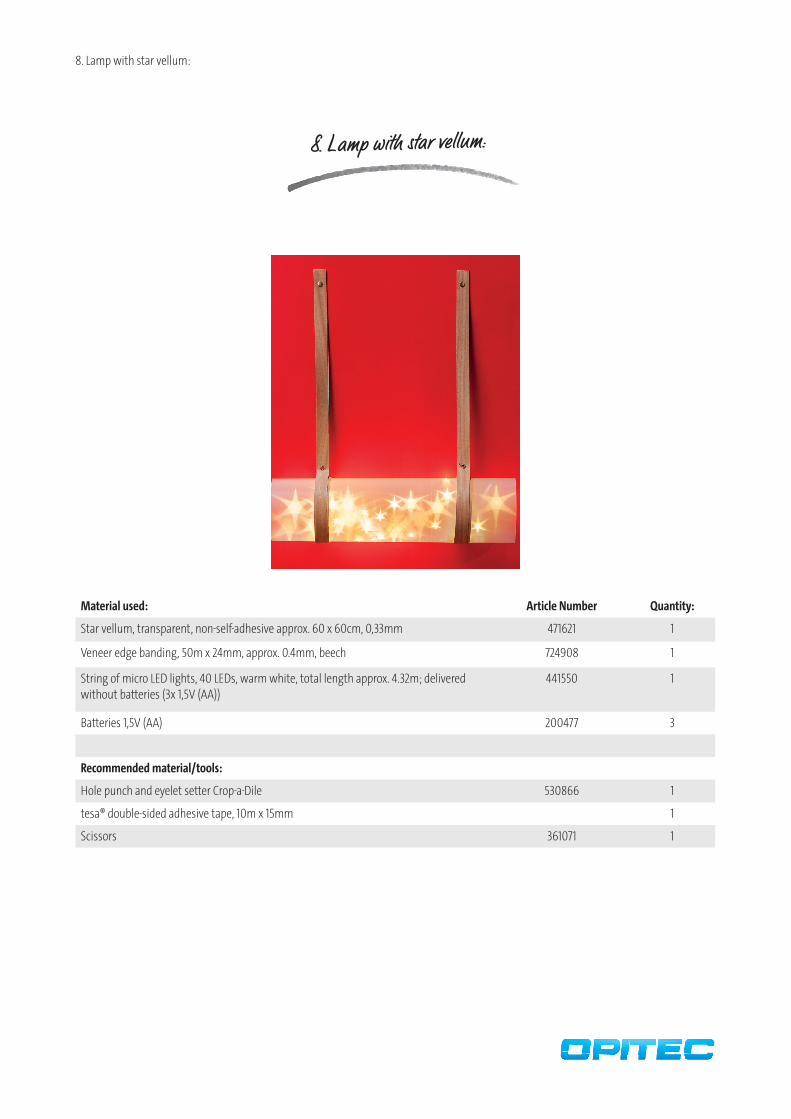
8. Lamp with star vellum:
Material used: Article Number Quantity:
Star vellum, transparent, non-self-adhesive approx. 60 x 60cm, 0,33mm 471621 1
Veneer edge banding, 50m x 24mm, approx. 0.4mm, beech 724908 1
String of micro LED lights, 40 LEDs, warm white, total length approx. 4.32m; delivered without batteries (3x 1,5V (AA))
441550 1
Batteries 1,5V (AA) 200477 3
Recommended material/tools:
Hole punch and eyelet setter Crop-a-Dile 530866 1
tesa® double-sided adhesive tape, 10m x 15mm 1
Scissors 361071 1
1 2
3 4
5
R017G001
Have fun! Your Opitec Creative Team
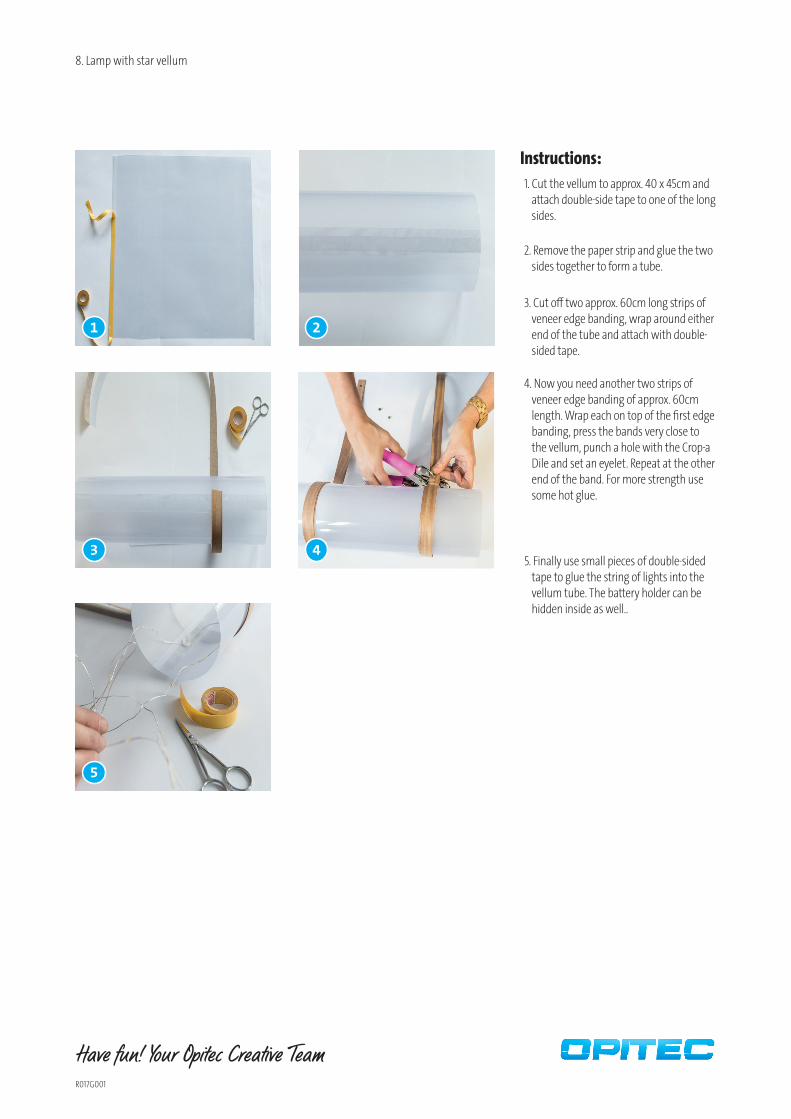
Instructions:
2. Remove the paper strip and glue the two sides together to form a tube.
1. Cut the vellum to approx. 40 x 45cm and attach double-side tape to one of the long sides.
3. Cut off two approx. 60cm long strips of veneer edge banding, wrap around either end of the tube and attach with double-sided tape.
4. Now you need another two strips of veneer edge banding of approx. 60cm length. Wrap each on top of the first edge banding, press the bands very close to the vellum, punch a hole with the Crop-a Dile and set an eyelet. Repeat at the other end of the band. For more strength use some hot glue.
5. Finally use small pieces of double-sided tape to glue the string of lights into the vellum tube. The battery holder can be hidden inside as well..
8. Lamp with star vellum