Operation, Installation and Service Manual 0.12 NAVIKNOT ...
Upload
khangminh22Category
view
0download
0
INSTALLATION ANDOPERATION MANUAL
EKEQFCBV3EKEQDCBV3
Option kit for combination of Daikincondensing units with field supplied air
handling units

L N R3 R4 R1
R3T
R2Y6Y5Y4Y3Y2Y1
Y6Y5Y4Y3Y2Y1
expansion valve gas liquid
NL R2T
R1T
air
R5 R6 P1 P2remocon outdoor
F1 F2 T1 T2ON/OFF
C1 C2FAN
L N R3 R4 R1 R2Y6Y5Y4Y3Y2Y1
Y6Y5Y4Y3Y2Y1
expansion valve gas liquid
NL
P1 P2 C5 C60-10 Vremocon outdoor
F1 F2 T1 T2ON/OFF error
C1 C2operation
C3 C4
0 +10
3 4
65
R3T
R2T
11 8
10
109 375 61 X24A2 4
34 5 12
1563
10 1311
7
9 8
42
1563
12 13
7
9 8
2
1 2
H1 H2 H4 H4
H1 H2 H3 H4 H4
H7
H6H1
H3
H2
H7
H4 H5 H6
5
H1
H3 H5
H4H2 H7H6 H8
X24A
F2F1
H5H8 H6
C9 C10defrost
H7 H7
C7 C8FAN
H3
F2F1
H5
12
1 2
EKEQDCBV3
3
4
5
6
EKEQFCBV3
EKEQFCBV3 EKEQFCBV3
EKEQDCBV3 EKEQDCBV3

Dai
kin
Eu
rop
e N
.V.
CE -
DECL
ARAT
ION-
OF-C
ONFO
RMIT
YCE
- KO
NFOR
MIT
ÄTSE
RKLÄ
RUNG
CE -
DECL
ARAT
ION-
DE-C
ONFO
RMIT
ECE
- CO
NFOR
MIT
EITS
VERK
LARI
NG
CE -
DECL
ARAC
ION-
DE-C
ONFO
RMID
ADCE
- DI
CHIA
RAZI
ONE-
DI-C
ONFO
RMIT
ACE
- ¢H
§ø™H
™YM
MOP
ºø™H
™
CE -
DECL
ARAÇ
ÃO-D
E-CO
NFOR
MID
ADE
СЕ -
ЗАЯВ
ЛЕНИ
Е-О
-СО
ОТВ
ЕТСТ
ВИИ
CE -
OPFY
LDEL
SESE
RKLÆ
RING
CE -
FÖRS
ÄKRA
N-OM
-ÖVE
RENS
TÄMM
ELSE
CE -
ERKL
ÆRI
NG O
M-S
AMSV
ARCE
- IL
MOI
TUS-
YHDE
NMUK
AISU
UDES
TACE
- PR
OHL
ÁŠEN
Í-O-S
HODĚ
CE -
IZJA
VA-O
-USK
LAĐE
NOST
ICE
- M
EGFE
LELŐ
SÉG
I-NYI
LATK
OZA
TCE
- DE
KLAR
ACJA
-ZG
ODN
OŚC
ICE
- DE
CLAR
AŢIE
-DE-
CONF
ORM
ITAT
E
CE -
IZJA
VA O
SKL
ADNO
STI
CE -
VAST
AVUS
DEKL
ARAT
SIO
ON
CE -
ДЕКЛ
АРАЦ
ИЯ-З
А-СЪ
ОТВЕ
ТСТВ
ИЕ
CE -
ATIT
IKTI
ES-D
EKLA
RACI
JACE
- AT
BILS
TĪBA
S-DE
KLAR
ĀCIJ
ACE
- VY
HLÁS
ENIE
-ZHO
DYCE
- UY
UMLU
LUK-
BİLD
İRİS
İ
01ar
e in
confo
rmity
with
the
follow
ing s
tand
ard(
s) o
r oth
er n
orm
ative
doc
umen
t(s),
prov
ided
that
thes
e ar
e us
ed in
acc
orda
nce
with
our
instru
ction
s:02
der/d
en fo
lgend
en N
orm
(en)
ode
r eine
m a
nder
en N
orm
doku
men
t ode
r -do
kum
ente
n en
tspric
ht/e
ntsp
rech
en, u
nter
der
Vor
auss
etzu
ng,
daß
sie g
emäß
uns
eren
Anw
eisun
gen
einge
setzt
wer
den:
03so
nt co
nform
es à
la/a
ux n
orm
e(s)
ou
autre
(s) d
ocum
ent(s
) nor
mat
if(s)
, pou
r aut
ant q
u'ils
soien
t utili
sés c
onfor
mém
ent à
nos
instr
uctio
ns:
04co
nform
de vo
lgend
e nor
m(e
n) of
één o
f mee
r and
ere b
inden
de do
cum
ente
n zijn
, op v
oorw
aard
e dat
ze w
orde
n geb
ruikt
over
eenk
omsti
gon
ze in
struc
ties:
05es
tán
en co
nform
idad
con
la(s)
sigu
iente
(s) n
orm
a(s)
u o
tro(s
) doc
umen
to(s
) nor
mat
ivo(s
), sie
mpr
e qu
e se
an u
tiliza
dos d
e ac
uerd
o co
nnu
estra
s ins
trucc
iones
:06
sono
con
form
i al(i)
seg
uent
e(i)
stand
ard(
s) o
altr
o(i)
docu
men
to(i)
a c
arat
tere
nor
mat
ivo, a
pat
to c
he v
enga
no u
sati
in co
nform
ità a
lleno
stre
istru
zioni:
07›ӷ
È Û‡
Ìʈӷ
ÌÂ
ÙÔ(·
) ·Î
fiÏÔ˘
ıÔ(·
) Ú
fiÙ˘
Ô(·)
‹ ¿
ÏÏÔ
¤ÁÁÚ
·ÊÔ(
·) Î
·ÓÔÓ
ÈÛÌÒ
Ó, ˘
fi Ù
ËÓ
ÚÔ¸
fiıÂÛ
Ë fiÙ
È ¯Ú
ËÛÈÌÔ
ÔÈÔ‡
ÓÙ·È
Û‡ÌÊ
ˆÓ·
ÌÂ
ÙȘ
Ô‰ËÁ
›Â˜
Ì·˜:
08es
tão
em c
onfor
mida
de c
om a
(s) s
eguin
te(s
) nor
ma(
s) o
u ou
tro(s
) doc
umen
to(s
) nor
mat
ivo(s
), de
sde
que
este
s se
jam u
tiliza
dos
deac
ordo
com
as n
ossa
s ins
truçõ
es:
09со
отве
тств
уют
след
ующи
м ст
анда
ртам
или
дру
гим
норм
атив
ным
доку
мент
ам, п
ри у
слов
ии и
х ис
поль
зова
ния
согл
асно
наш
имин
стру
кция
м:10
over
holde
r fø
lgend
e sta
ndar
d(er
) ell
er a
ndet
/and
re r
etnin
gsgiv
ende
dok
umen
t(er),
for
udsa
t at
diss
e an
vend
es i
henh
old t
il vo
reins
truks
er:
11re
spek
tive
utru
stning
är u
tförd
i öv
eren
sstä
mm
else
med
och
följe
r följ
ande
sta
ndar
d(er
) elle
r and
ra n
orm
givan
de d
okum
ent,
unde
rfö
rutsä
ttning
att
anvä
ndnin
g sk
er i ö
vere
nsstä
mm
else
med
våra
instr
uktio
ner:
12re
spek
tive
utsty
r er i
ove
rens
stem
mels
e m
ed fø
lgend
e sta
ndar
d(er
) elle
r and
re n
orm
given
de d
okum
ent(e
r), u
nder
foru
tsset
ning
av a
tdis
se b
ruke
s i h
enho
ld til
våre
instr
ukse
r:13
vasta
avat
seu
raav
ien s
tand
ardie
n ja
muid
en o
hjeell
isten
dok
umen
ttien
vaat
imuk
sia e
delly
ttäen
, et
tä n
iitä k
äyte
tään
ohje
idem
me
muka
isesti
:14
za p
ředp
oklad
u, že
jsou
využ
ívány
v so
uladu
s na
šimi p
okyn
y, o
dpov
ídají
nás
ledují
cím n
orm
ám n
ebo
norm
ativn
ím d
okum
entů
m:
15u
sklad
u sa
slije
dećim
stan
dard
om(im
a) ili
dru
gim n
orm
ativn
im d
okum
ento
m(im
a), u
z uvje
t da
se o
ni ko
riste
u sk
ladu
s naš
im u
puta
ma:
16m
egfe
lelne
k az a
lábbi
szab
vány
(ok)
nak v
agy e
gyéb
irán
yadó
dok
umen
tum
(ok)
nak,
ha a
zoka
t előí
rás s
zerin
t has
ználj
ák:
17sp
ełniaj
ą wy
mog
i nas
tępu
jącyc
h no
rm i
innyc
h do
kum
entó
w no
rmali
zacy
jnych
, pod
war
unkie
m ż
e uż
ywan
e są
zgo
dnie
z na
szym
iins
trukc
jami:
18su
nt în
conf
orm
itate
cu u
rmăt
orul
(urm
ătoa
rele)
stan
dard
(e) s
au a
lt(e)
doc
umen
t(e) n
orm
ativ(
e), c
u co
ndiţia
ca a
ceste
a să
fie u
tiliza
te în
conf
orm
itate
cu in
struc
ţiunil
e no
astre
19sk
ladni
z nas
lednji
mi s
tand
ardi
in dr
ugim
i nor
mat
ivi, p
od p
ogoje
m, d
a se
upo
rablj
ajo v
sklad
u z n
ašim
i nav
odili:
20on
vasta
vuse
s jär
gmis(
t)e st
anda
rdi(t
e)ga
või te
iste
norm
atiiv
sete
dok
umen
tideg
a, ku
i neid
kasu
tata
kse
vasta
valt m
eie ju
hend
itele:
21съ
отве
тств
ат н
а сл
едни
те с
танд
арти
или
дру
ги н
орма
тивн
и до
куме
нти,
при
усл
овие
, че
се
изпо
лзва
т съ
глас
но н
ашит
еин
стру
кции
:22
atitin
ka že
miau
nur
odytu
s sta
ndar
tus i
r (ar
ba) k
itus n
orm
inius
dok
umen
tus s
u są
lyga,
kad
yra
naud
ojam
i pag
al m
ūsų
nuro
dym
us:
23ta
d, ja
lieto
ti atb
ilsto
ši ra
žotā
ja no
rādī
jumiem
, atb
ilst s
ekojo
šiem
stan
darti
em u
n cit
iem n
orm
atīvi
em d
okum
entie
m:
24sú
v zh
ode
s nas
ledov
nou(
ými)
norm
ou(a
mi)
alebo
iným
(i) n
orm
atívn
ym(i)
dok
umen
tom
(am
i), za
pre
dpok
ladu,
že sa
pou
žívajú
v sú
lade
s naš
im n
ávod
om:
25ür
ünün
, tali
mat
larım
ıza g
öre
kulla
nılm
ası k
oşulu
yla a
şağı
daki
stand
artla
r ve
norm
beli
rten
belge
lerle
uyum
ludur
:
01Di
recti
ves,
as a
men
ded.
02Di
rekti
ven,
gem
äß Ä
nder
ung.
03Di
recti
ves,
telle
s que
mod
ifiées
.04
Rich
tlijne
n, zo
als g
eam
ende
erd.
05Di
recti
vas,
segú
n lo
enm
enda
do.
06Di
rettiv
e, co
me
da m
odific
a.07
√‰Ë
ÁÈÒv, fi
ˆ˜
¤¯Ô˘
Ó ÙÚ
ÔÔ
ÔÈËı
›.
08Di
recti
vas,
confo
rme
alter
ação
em
.09
Дире
ктив
со в
семи
поп
равк
ами.
10Di
rekti
ver,
med
sene
re æ
ndrin
ger.
11Di
rekti
v, m
ed fö
reta
gna
ändr
ingar
.12
Dire
ktive
r, m
ed fo
reta
tte e
ndrin
ger.
13Di
rektiiv
ejä, s
ellais
ina ku
in ne
ovat
muute
ttuina
.14
v plat
ném
zněn
í.15
Smjer
nice,
kako
je iz
mije
njeno
.16
irány
elv(e
k) és
mód
osítá
saik
rend
elkez
éseit
.17
z póź
niejsz
ymi p
opra
wkam
i.18
Dire
ctive
lor, c
u am
enda
men
tele
resp
ectiv
e.
19Di
rekti
ve z
vsem
i spr
emem
bam
i.20
Dire
ktiivi
d ko
os m
uuda
tuste
ga.
21Ди
рект
иви,
с те
хнит
е из
мене
ния.
22Di
rekty
vose
su p
apild
ymais
.23
Dire
ktīvā
s un
to p
apild
inājum
os.
24Sm
ernic
e, v
platn
om zn
ení.
25De
ğiştir
ilmiş
halle
riyle
Yöne
tmeli
kler.
01fol
lowing
the
prov
ision
s of:
02ge
mäß
den
Vors
chrif
ten
der:
03co
nform
émen
t aux
stipu
lation
s des
:04
over
eenk
omsti
g de
bep
aling
en va
n:05
siguie
ndo
las d
ispos
icion
es d
e:06
seco
ndo
le pr
escr
izion
i per
:07
ÌÂ Ù
‹ÚËÛ
Ë Ùˆ
v ‰È·Ù
¿Íˆ
v Ùˆ
v:
08de
aco
rdo
com
o p
revis
to e
m:
09в
соот
ветс
твии
с по
ложе
ниям
и:
10un
der i
agtta
gelse
af b
este
mm
elser
ne i:
11en
ligt v
illkor
en i:
12git
t i he
nhold
til b
este
mm
elsen
e i:
13no
udat
taen
mää
räyk
siä:
14za
dod
ržen
í usta
nove
ní p
ředp
isu:
15pr
ema
odre
dbam
a:16
köve
ti a(z
):17
zgod
nie z
posta
nowi
eniam
i Dyr
ektyw
:18
în u
rma
prev
eder
ilor:
19ob
upo
števa
nju d
oločb
:20
vasta
valt n
õuet
ele:
21сл
едва
йки
клау
зите
на:
22lai
kant
is nu
osta
tų, p
ateik
iamų:
23iev
ērojo
t pra
sības
, kas
not
eikta
s:24
održ
iavajú
c usta
nove
nia:
25bu
nun
koşu
lların
a uy
gun
olara
k:
01
Note
*as
set o
ut in
<A> a
nd ju
dged
posit
ively
by <B
> ac
cordi
ng to
the
Certi
ficate
<C>.
02
Hinw
eis *
wie i
n der
<A> a
ufgefü
hrt u
nd vo
n <B>
posit
iv be
urtei
lt gem
äß Ze
rtifik
at <C
>.03
Re
marq
ue *
tel qu
e défi
ni da
ns <A
> et é
valué
posit
iveme
nt pa
r <B
> con
formé
ment
au C
ertifi
cat <
C>.
04
Beme
rk *
zoals
verm
eld in
<A> e
n pos
itief b
eoord
eeld
door
<B> o
veree
nkom
stig C
ertifi
caat
<C>.
05
Nota
*co
mo se
estab
lece e
n <A>
y es
valor
ado
posit
ivame
nte po
r <B>
de ac
uerdo
con e
l Ce
rtific
ado <
C>.
06
Nota
*de
linea
to ne
l <A>
e giu
dicato
posit
ivame
nte
da <B
> sec
ondo
il Ce
rtific
ato <C
>.07
™Ë
Ì›ˆ
ÛË *
fiˆ˜
ηıÔ
Ú›˙Â
Ù·È Û
ÙÔ <
A> Î
·È Î
Ú›ÓÂ
Ù·È ı
ÂÙÈο
·fi
ÙÔ <
B> Û
‡Ìʈ
Ó· Ì
 ÙÔ
¶ÈÛÙ
ÔÔÈË
ÙÈÎfi
<C>.
08
Nota
*tal
como
estab
elecid
o em
<A> e
com
o pare
cer
posit
ivo de
<B> d
e aco
rdo co
m o C
ertifi
cado
<C>.
09
Прим
ечан
ие *
как у
каза
но в
<A>
и в со
отве
тств
ии с
поло
жите
льны
м ре
шени
ем <
B> со
глас
но
Свид
етел
ьств
у <C>
.10
Be
mærk
*so
m an
ført i
<A> o
g pos
itivt v
urdere
t af <
B> i
henh
old til
Cer
tifika
t <C>
.
11
Infor
matio
n *en
ligt <
A> oc
h god
känts
av <B
> enli
gt Ce
rtifik
atet <
C>.
12
Merk
*so
m de
t frem
komm
er i <
A> og
gjen
nom
posit
iv be
dømm
else a
v <B>
ifølge
Ser
tifika
t <C>
.13
Hu
om *
jotka
on es
itetty
asiak
irjass
a <A>
ja jo
tka <B
> on
hyvä
ksyn
yt Se
rtifik
aatin
<C> m
ukais
esti.
14
Pozn
ámka
*jak
bylo
uved
eno v
<A> a
pozit
ivně z
jištěn
o <B>
v so
uladu
s os
vědč
ením
<C>.
15
Napo
mena
*ka
ko je
izlož
eno u
<A> i
pozit
ivno o
cijen
jeno o
d str
ane <
B> pr
ema C
ertif
ikatu
<C>.
16
Megje
gyzé
s *a(
z) <A
> alap
ján, a
(z) <B
> iga
zolta
a me
gfelel
ést,
a(z)
<C> t
anús
ítván
y sze
rint.
17
Uwag
a *zg
odnie
z do
kume
ntacją
<A>,
pozy
tywną
opini
ą <B
> i Ś
wiad
ectw
em <C
>.18
No
tă *
aşa c
um es
te sta
bilit î
n <A>
şi ap
recia
t poz
itiv
de <B
> în c
onfor
mitat
e cu C
ertif
icatu
l <C>
.19
Op
omba
*ko
t je do
ločen
o v <A
> in o
dobr
eno s
stra
ni <B
> v
sklad
u s ce
rtifik
atom
<C>.
20
Märk
us *
nagu
on nä
idatud
doku
mend
is <A
> ja h
eaks
kii
detud
<B> j
ärgi
vasta
valt s
ertif
ikaad
ile <C
>.
21
Забе
лежк
а *ка
кто е
изло
жено
в <A
> и о
цене
но
поло
жите
лно о
т <B>
съгл
асно
Cе
ртиф
икат
а <C>
.22
Pa
staba
*ka
ip nu
statyt
a <A>
ir ka
ip tei
giama
i nus
pręs
ta <B
> pa
gal S
ertif
ikatą
<C>.
23
Piez
īmes
*kā
norā
dīts <
A> un
atbil
stoši
<B> p
ozitīv
ajam
vērtē
jumam
sask
aņā a
r ser
tifikā
tu <C
>.24
Po
znám
ka *
ako b
olo uv
eden
é v <A
> a po
zitívn
e zist
ené <
B> v
súlad
e s o
sved
čením
<C>.
25
Not *
<A>‘d
a be
lirtild
iği g
ibi v
e <C
> Se
rtifik
asın
agö
re
<B>
tara
fında
n olu
mlu
olara
kde
ğerle
ndiril
diği g
ibi.
<A>
DA
IKIN
.TC
F.02
4D12
/02-
2009
<B>
TÜ
V (
NB
1856
)
<C>
0510
2601
01
EN
6033
5-2-
40,
3PW26871-4E
Jiro
Tom
itaD
irect
or Q
ualit
y A
ssur
ance
Ost
end,
4th
of M
ay 2
009
Low
Vol
tage
200
6/95
/EC
Ele
ctro
mag
netic
Com
patib
ility
200
4/10
8/E
C*
EK
EQ
DC
BV
3*, E
KE
QF
CB
V3*
,* =
,
, 1,
2, 3
, ...,
9
01 a
dec
lares
unde
r its s
ole re
spon
sibilit
y tha
t the a
ir con
dition
ing eq
uipme
nt to
which
this
decla
ration
relat
es:
02 d
erkl
ärt a
uf se
ine al
leinig
e Vera
ntwor
tung d
ass d
ie Au
srüstu
ng de
r Klim
agerä
te für
die d
iese E
rklär
ung b
estim
mt is
t:03
f d
éclar
e sou
s sa s
eule
respo
nsab
ilité q
ue l'é
quipe
ment
d'air c
ondit
ionné
visé
s par
la pré
sente
décla
ration
:04
l ve
rklaa
rt hie
rbij o
p eige
n exc
lusiev
e vera
ntwoo
rdelijk
heid
dat d
e airc
ondit
ioning
appa
ratuu
r waa
rop de
ze ve
rklar
ing be
trekk
ing he
eft:
05 e
dec
lara b
ajo su
única
resp
onsa
bilida
d que
el eq
uipo d
e aire
acon
dicion
ado a
l que
hace
refer
encia
la de
clarac
ión:
06 i
dich
iara s
otto l
a prop
ria re
spon
sabil
ità ch
e gli a
ppare
cchi
di co
ndizi
onam
ento
a cui
è rife
rita qu
esta
dichia
razion
e:07
g ‰
ËÏÒÓÂ
È ÌÂ
·ÔÎ
ÏÂÈÛÙÈ΋
Ù˘
¢ı
‡ÓË
fiÙÈ Ô
ÂÍÔ
ÏÈÛÌfi
˜ Ùˆ
Ó ÎÏ
ÈÌ·Ù
ÈÛÙÈÎÒ
Ó Û˘
Û΢
ÒÓ
ÛÙ·
ÔÔ›·
·Ó·Ê
¤ÚÂÙ
·È Ë
·Ú
Ô‡Û·
‰‹Ï
ˆÛË
:
08 p
dec
lara s
ob su
a exc
lusiva
resp
onsa
bilida
de qu
e os e
quipa
mento
s de a
r con
dicion
ado a
que e
sta de
claraç
ão se
refer
e:
09 u
заяв
ляет,
искл
ючит
ельн
о под
свою
отве
тстве
ннос
ть, чт
о обо
рудов
ание
для к
онди
цион
иров
ания
возд
уха, к
кото
рому
отно
сится
насто
ящее
заяв
лени
е:10
q e
rklær
er un
der e
nean
svar,
at ud
styret
til kl
imare
guler
ing, s
om de
nne d
eklar
ation
vedrø
rer:
11 s
dek
larere
r i eg
ensk
ap av
huvu
dans
varig
, att l
uftko
nditio
nerin
gsutr
ustni
ngen
som
berör
s av d
enna
dekla
ration
inne
bär a
tt:12
n e
rklær
er et
fullst
endig
ansv
ar for
at de
t luftk
ondis
joner
ingsu
tstyr
som
berør
es av
denn
e dek
laras
jon, in
nebæ
rer at
:13
j ilm
oittaa
yksin
omaa
n oma
lla va
stuull
aan,
että t
ämän
ilmoit
ukse
n tar
koitta
mat il
masto
intila
itteet:
14 c
pro
hlašu
je ve
své p
lné od
pově
dnos
ti, že
klim
atiza
ční z
aříze
ní, k
nimž s
e toto
proh
lášen
í vzta
huje:
15 y
izjav
ljuje
pod i
sklju
čivo v
lastito
m od
govo
rnoš
ću da
opre
ma za
klim
atiza
ciju n
a koju
se ov
a izja
va od
nosi:
16 h
telje
s fele
lőssé
ge tu
datáb
an ki
jelen
ti, ho
gy a
klíma
bere
ndez
ések
, mely
ekre
e ny
ilatko
zat v
onatk
ozik:
17 m
dek
laruje
na w
łasną
i wyłą
czną
odpo
wied
zialno
ść, ż
e klim
atyza
tory,
któryc
h doty
czy n
iniejs
za de
klara
cja:
18 r
dec
lară p
e pro
prie
răsp
unde
re că
echip
amen
tele d
e aer
cond
iţiona
t la ca
re se
refer
ă ace
astă
decla
raţie
:19
o z
vso o
dgov
orno
stjo i
zjavlj
a, da
je op
rema
klim
atskih
napr
av, n
a kate
ro se
izjav
a nan
aša:
20 x
kinn
itab o
ma tä
ieliku
l vas
tutus
el, et
käes
oleva
dekla
ratsi
ooni
alla k
uuluv
kliim
asea
dmete
varu
stus:
21 b
дек
лари
ра на
своя
отго
ворн
ост,
че об
оруд
ване
то за
клим
атич
на ин
стал
ация
, за к
оето
се от
нася
тази
дек
лара
ция:
22 t
visi
ška s
avo a
tsako
mybe
skelb
ia, ka
d oro
kond
icion
avim
o įra
nga,
kuria
i taiko
ma ši
dekla
racij
a:23
v a
r piln
u atbi
ldību
aplie
cina,
ka tā
lāk uz
skait
ītās g
aisa k
ondic
ionēš
anas
iekā
rtas,
uz ku
riem
attiec
as šī
dekla
rācij
a:24
k v
yhlas
uje na
vlas
tnú zo
dpov
edno
sť, že
klim
atiza
čné z
ariad
enie,
na kt
oré s
a vzťa
huje
toto v
yhlás
enie:
25
w ta
mam
en ke
ndi s
orum
luluğ
unda
olm
ak ü
zere
bu
bildir
inin
ilgili
olduğ
u kli
ma
dona
nım
ının
aşa
ğıda
ki gib
i oldu
ğunu
bey
an e
der:
CONTENTS Page
Introduction ............................................................... 1
Installation ................................................................. 2Accessories....................................................................................... 2
Name and function of parts............................................................... 2
Before installation.............................................................................. 2
Selecting the installation site............................................................. 3
Valve kit installation ........................................................................... 4
Installation of the electrical control box ............................................. 5
Electric wiring work ........................................................................... 5
Installation of thermistors .................................................................. 8
Refrigerant piping work ..................................................................... 9
Test operation.................................................................................... 9
Operation and maintenance..................................... 9What to do before operation.............................................................. 9
Operation and display signals ......................................................... 11
Troubleshooting............................................................................... 11
Maintenance.................................................................................... 12
Disposal requirements .................................................................... 12
The English text is the original instruction. Other languages aretranslations of the original instructions.
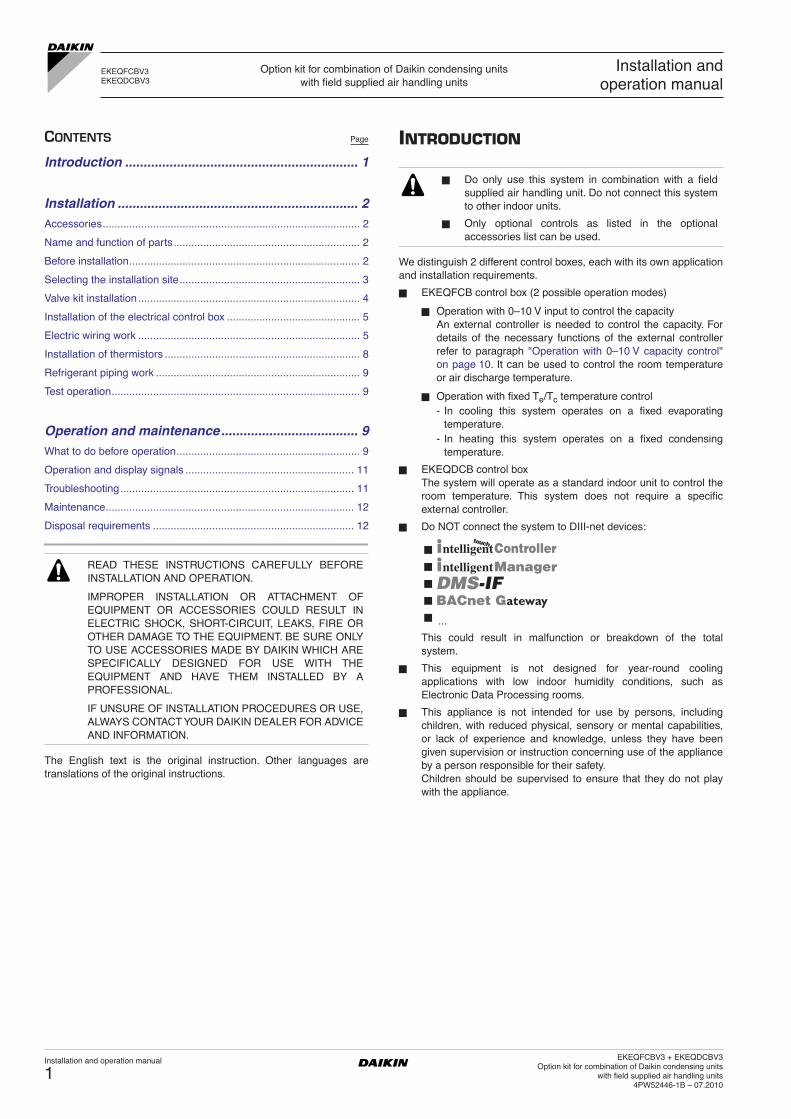
INTRODUCTION
We distinguish 2 different control boxes, each with its own applicationand installation requirements.
EKEQFCB control box (2 possible operation modes)
Operation with 0–10 V input to control the capacityAn external controller is needed to control the capacity. Fordetails of the necessary functions of the external controllerrefer to paragraph "Operation with 0–10 V capacity control"on page 10. It can be used to control the room temperatureor air discharge temperature.
Operation with fixed Te/Tc temperature control- In cooling this system operates on a fixed evaporating
temperature.- In heating this system operates on a fixed condensing
temperature.
EKEQDCB control boxThe system will operate as a standard indoor unit to control theroom temperature. This system does not require a specificexternal controller.
Do NOT connect the system to DIII-net devices:
This could result in malfunction or breakdown of the totalsystem.
This equipment is not designed for year-round coolingapplications with low indoor humidity conditions, such asElectronic Data Processing rooms.
This appliance is not intended for use by persons, includingchildren, with reduced physical, sensory or mental capabilities,or lack of experience and knowledge, unless they have beengiven supervision or instruction concerning use of the applianceby a person responsible for their safety.Children should be supervised to ensure that they do not playwith the appliance.
EKEQFCBV3EKEQDCBV3
Option kit for combination of Daikin condensing units with field supplied air handling units
Installation andoperation manual
READ THESE INSTRUCTIONS CAREFULLY BEFOREINSTALLATION AND OPERATION.
IMPROPER INSTALLATION OR ATTACHMENT OFEQUIPMENT OR ACCESSORIES COULD RESULT INELECTRIC SHOCK, SHORT-CIRCUIT, LEAKS, FIRE OROTHER DAMAGE TO THE EQUIPMENT. BE SURE ONLYTO USE ACCESSORIES MADE BY DAIKIN WHICH ARESPECIFICALLY DESIGNED FOR USE WITH THEEQUIPMENT AND HAVE THEM INSTALLED BY APROFESSIONAL.
IF UNSURE OF INSTALLATION PROCEDURES OR USE,ALWAYS CONTACT YOUR DAIKIN DEALER FOR ADVICEAND INFORMATION.
Do only use this system in combination with a fieldsupplied air handling unit. Do not connect this systemto other indoor units.
Only optional controls as listed in the optionalaccessories list can be used.
Installation and operation manual
1EKEQFCBV3 + EKEQDCBV3
Option kit for combination of Daikin condensing unitswith field supplied air handling units
4PW52446-1B – 07.2010

INSTALLATION
For installation of the air handling unit, refer to the air handlingunit installation manual.
Never operate the air conditioner with the discharge pipethermistor (R3T), suction pipe thermistor (R2T) and pressuresensors (S1NPH, S1NPL) removed. Such operation may burnout the compressor.
The equipment is not intended for use in a potentially explosiveatmosphere.
ACCESSORIES
Obligatory accessory
Refer to chapter "Valve kit installation" on page 4 for installationinstructions.
Optional accessories
NAME AND FUNCTION OF PARTS (See figure 1 andfigure 2)
BEFORE INSTALLATION
Cautions for selection of the air handling unit
See table below for applicable units.
Select the air handling unit (field supply) according to the technicaldata and limitations mentioned below.
The design pressure of the air handling unit is at least 40 bar.
Lifetime of the outdoor unit, operation range or operation reliabilitymay be influenced if you neglect these limitations.
Limits for outdoor unit (expansion valve kit)
Depending on the heat exchanger, a connectable EKEXV (expansionvalve kit) must be selected to these limitations.
1 Selecting the condensing unit
Depending on necessary capacity of the combination an outdoorunit needs to be selected (see "Engineering databook" forcapacity).
Each outdoor unit can be connected to a range of airhandling units.
The range is determined by the allowed expansion valve kits.
EKEQFCB EKEQDCB
Thermistor (R1T) — 1
Thermistor (R3T/R2T) (2.5 m cable) 2
Insulation sheet 2
Rubber sheet 2
Wire to wire splice 4 6
Installation and operation manual 1
Screw nut 7 8
Tie wrap 6
Capacity setting adaptor 7
Stopper (closing cup) 2 —
EKEQFCB EKEQDCB
Expansion valve kit EKEXV
EKEQFCB EKEQDCB
Remote controller 1(*)
(*) Not required for operation, only useful accessory tool for service and installation.
1
Parts and components
1 Outdoor unit
2 Control box (EKEQFCB / EKEQDCB)
3 Air handling unit (field supply)
4 Controller (field supply)
5 Field piping (field supply)
6 Expansion valve kit
Wiring connections
7 Outdoor unit power supply
8 Control box wiring(Power supply and communication between control box and outdoor unit)
9 Air handling unit thermistors
10 Communication between controller and control box
11 Power supply and control wiring for air handling unit and controller (power supply is separate from the outdoor unit)
12 Air thermistor control for air handling unit
13 Remote controller ( = for service only)
Outdoor unit (class) EKEXV kit
Outdoor unit (class) EKEXV kit
100 EKEXV63~125 200 EKEXV100~250
125 EKEXV63~140 250 EKEXV125~250
140 EKEXV80~140
EKEXV class
Allowed heat exchanger cooling capacity (kW)
Allowed heat exchanger heating capacity (kW)
Minimum Maximum Minimum Maximum
63 6.3 7.8 7.1 8.8
80 7.9 9.9 8.9 11.1
100 10.0 12.3 11.2 13.8
125 12.4 15.4 13.9 17.3
140 15.5 17.6 17.4 19.8
200 17.7 24.6 19.9 27.7
250 24.7 30.8 27.8 34.7
Cooling saturated suction temperature (SST) = 6°C
Heating saturated suction temperature (SST) = 46°C
Air temperature = 27°C DB/19°C WB
Air temperature = 20°C DB
Superheat (SH) = 5 K Subcool (SC) = 3 K
EKEQFCBV3 + EKEQDCBV3Option kit for combination of Daikin condensing unitswith field supplied air handling units4PW52446-1B – 07.2010
Installation and operation manual
2

2 Selecting the expansion valve
The corresponding expansion valve needs to be selected foryour air handling unit. Select the expansion valve according tothe above limitations.
3 Selecting the capacity setting adaptor (see accessories)
The corresponding capacity setting adaptor needs to beselected depending on the expansion valve.
Connect the correct selected capacity setting adaptor toX24A (A1P). (See figure 4 and figure 6)
For the following items, take special care during construction and check after installation is finished
SELECTING THE INSTALLATION SITE
This is a class A product. In a domestic environment this product maycause radio interference in which case the user may be required totake adequate measures.
Select an installation site where the following conditions are fulfilledand that meets your customer’s approval.
The option boxes (expansion valve and electrical control box)can be installed inside and outside).
Do not install the option boxes in or on the outdoor unit.
Do not put the option boxes in direct sunlight. Direct sunlight willincrease the temperature inside the option boxes and mayreduce its lifetime and influence its operation.
Choose a flat and strong mounting surface.
Operating temperature of the control box is between –10°C and40°C.
Keep the space in front of the boxes free for future maintenance.
Keep air handling unit, power supply wiring and transmissionwiring at least 1 m away from televisions and radios. This is toprevent image interference and noise in those electricalappliances. (Noise may be generated depending on theconditions under which the electric wave is generated, even if1 m is kept.)
Make sure the control box is installed horizontally. Screw nutsposition must be downwards.
Precautions
Do not install or operate the unit in rooms mentioned below.
Where mineral oil, like cutting oil is present.
Where the air contains high levels of salt such as air near theocean.
Where sulphurous gas is present such as that in areas of hotspring.
In vehicles or vessels.
Where voltage fluctuates a lot such as that in factories.
Where high concentration of vapor or spray are present.
Where machines generating electromagnetic waves are present.
Where acidic or alkaline vapor is present.
The option boxes must be installed with entrances downward.
NOTE The expansion valve is an electronic type, it iscontrolled by the thermistors that are added inthe circuit. Each expansion valve can control arange of air handling units sizes.
The selected air handling unit must bedesigned for R410A.
Extraneous substances (including mineral oilsor moisture) must be prevented from gettingmixed into the system.
SST: saturated suction temperature at exit ofair handling unit.
EKEXV kitCapacity setting adaptor label
(indication)
63 J71
80 J90
100 J112
125 J140
140 J160
200 J224
250 J280
Tick when
checked
Are the thermistors fixed firmly?Thermistor may come loose.
Is the freeze-up setting done correctly?The air handling unit may freeze up.
Is the control box fixed firmly?The unit may drop, vibrate or make noise.
Do electrical connections comply with specifications?The unit may malfunction or components may burn out.
Are wiring and piping correct?The unit may malfunction or components may burn out.
Is the unit safely grounded?Dangerous at electric leakage.
Installation and operation manual
3EKEQFCBV3 + EKEQDCBV3
Option kit for combination of Daikin condensing unitswith field supplied air handling units
4PW52446-1B – 07.2010

VALVE KIT INSTALLATION
Mechanical installation
1 Remove the valve kit box cover by unscrewing 4x M5.
2 Drill 4 holes on correct position (measurements as indicated infigure below) and fix the valve kit box securely with 4 screwsthrough the provided holes Ø9 mm.
Brazing work
For details, see manual of the outdoor unit.
3 Prepare the inlet/outlet field piping just in front of the connection(do not braze yet).
4 Remove the pipe fixing clamp (C) by unscrewing 2x M5.
5 Remove the upper and lower pipe insulations.
6 Braze the field piping.
7 After brazing, put the lower pipe insulation back in place andclose it with the upper insulation cover (after pealing off theliner).
8 Secure the pipe fixing clamp (C) in place again (2x M5).
9 Make sure that field pipes are fully insulated.
Field pipe insulation must reach up to the insulation you haveput back in place as per procedure step 7. Make sure that thereis no gap between both ends in order to avoid condensationdripping (finish the connection with tape eventually).
Cautions for brazing
Be sure to carry out a nitrogen blow when brazing.Brazing without carrying out nitrogen replacement or releasingnitrogen into the piping will create large quantities of oxidizedfilm on the inside of the pipes, adversely affecting valves andcompressors in the refrigerating system and preventing normaloperation.
When brazing while inserting nitrogen into the piping, nitrogenmust be set to 0.02 MPa with a pressure-reducing valve (=justenough so that it can be felt on the skin).
For details, see manual of the outdoor unit.
Electrical work
1 Open the electrical box cover (A).
2 Push out ONLY the second lower wire intake hole (B) frominside to outside. Do not damage the membrane.
3 Pass valve cable (with wires Y1 ... Y6) from the control boxthrough that membrane wire intake hole and connect the cablewires into the terminal connector (C) following instructions asdescribed in step 4. Route the cable out of the valve kit boxaccording to figure below and fix with the tie wrap (D). See"Electric wiring work" on page 5 for more details.
NOTE Make sure that the expansion valve is installedvertically.
Make sure there is enough free space for futuremaintenance.
A Inlet coming from the outdoor unit
B Outlet to air handling unit
C Pipe fixing clamp
Make sure to cool the filters and valve body witha wet cloth and make sure the body temperaturedoes not exceed 120°C during brazing.
Make sure that the other parts such as electricalbox, tie wraps and wires are protected from directbrazing flames during brazing.
192.5 mm
340m
m
C
B A
1 Refrigerant piping
2 Part to be brazed
3 Taping
4 Hands valve
5 Pressure-reducing valve
6 Nitrogen
1 2 3 4 5
66
A C
D
B
EKEQFCBV3 + EKEQDCBV3Option kit for combination of Daikin condensing unitswith field supplied air handling units4PW52446-1B – 07.2010
Installation and operation manual
4

4 Use a small screwdriver and follow indicated instructions forconnecting cable wires into the terminal connector according tothe wiring diagram.
5 Make sure that field wiring and insulation is not squeezed whenclosing the valve kit box cover.
6 Close the valve kit box cover (4x M5).
INSTALLATION OF THE ELECTRICAL CONTROL BOX (See figure 4 and figure 6)
Mechanical installation
1 Fix the control box with its hanger brackets to the mountingsurface.
Use 4 screws (for holes of Ø6 mm).
2 Open the lid of the control box.
3 For electrical wiring: refer to paragraph "Electric wiring work" onpage 5.
4 Install the screw nuts.
5 Close the unnecessary openings with stoppers (closing cups).
6 Close the lid securely after installation to ensure that the controlbox is watertight.
ELECTRIC WIRING WORK
All field supplied parts and materials and electric works must beconform to local codes.
Use copper wire only.
All wiring must be performed by an authorized electrician.
A main switch or other means for disconnection, having acontact separation in all poles, must be incorporated in the fixedwiring in accordance with relevant local and national legislation.
Refer to the installation manual attached to the outdoor unit forthe size of power supply electric wire connected to the outdoorunit, the capacity of the circuit breaker and switch, wiring andwiring instructions.
Attach the earth leakage circuit breaker and fuse to the powersupply line.
Connection of the wires inside the control box
1 For connection to outdoor unit and to controller (field supply):
Pull the wires inside through the screw nut and close the nutfirmly in order to ensure a good pull relieve and water protection.
2 The cables require an additional pull-relief. Strap the cable with the installedtie wrap.
Precautions
Thermistor cable and remote controller wire should be located atleast 50 mm away from power supply wires and from wires to thecontroller. Not following this guideline may result in malfunctiondue to electrical noise.
Use only specified wires, and tightly connect wires to theterminals. Keep wiring in neat order so that it does not obstructother equipment. Incomplete connections could result inoverheating, and in worse case electric shock or fire.
1 Control box
2 Hanger brackets
3 Main PCB
4 Transformer
5 Terminal
6 PCB (for voltage conversion)
7 PCB (power supply)
8 Magnetic relay (operation / compressor ON/OFF)
9 Magnetic relay (error status)
10 Magnetic relay (fan)
11 Magnetic relay (defrost)
12 Optional PCB (KRP4)
41
2
3
Installation and operation manual
5EKEQFCBV3 + EKEQDCBV3
Option kit for combination of Daikin condensing unitswith field supplied air handling units
4PW52446-1B – 07.2010

Connecting the wiring: EKEQFCBV3
Connect the wires to the terminal board according to the wiringdiagram in figure 3. See figure 4 for wiring intake in the controlbox. The wiring intake hole indication H1 refers to the H1 cableof the corresponding wiring diagram.
Connect cables according to specifications of the next table.
Table connection and application
Wiring diagram
A1P.....................Printed circuit board
A2P.....................Printed circuit board (for voltage conversion)
A3P.....................Printed circuit board (power supply)
F1U.....................Fuse (250 V, F5A)(A1P)
F2U.....................Fuse (250 V, T1A)(A3P)
F3U.....................Field fuse
HAP ....................Light emitting diode (service monitor-green)
K2R.....................Magnetic relay (error status)
K3R.....................Magnetic relay (operation / compressor ON/OFF)
K4R.....................Magnetic relay (fan)
K5R.....................Magnetic relay (defrost signal)
K1R,KAR,KPR....Magnetic relay
Q1DI ...................Earth leakage breaker
R2T.....................Thermistor (liquid)
R3T.....................Thermistor (gas)
R5.......................Resistance (120 Ω)
R6 .......................Capacity adaptor
T1R.....................Transformer (220 V/21.8 V)
X1M,X2M,X3M ...Terminal block
Y1E.....................Electronic expansion valve
X1M-C7/C8.........Output: fan ON/OFF
X1M-C9/C10.......Output: defrost signal
X1M-R1/R2.........Thermistor liquid
X1M-R3/R4.........Thermistor gas
X1M-Y1~6 ..........Expansion valve
X2M-C1/C2.........Output: error status
X2M-C3/C4........ Output: operation / compressor ON/OFF
X2M-C5/C6........ Input: 0-10 V DC capacity control
X2M-F1/F2......... Communication outdoor unit
X2M-P1/P2 ........ Communication remote controller
X2M-T1/T2......... Input: ON/OFF
........... Field wiring
L......................... Live
N ........................ Neutral
, ......... Connector
......................... Wire clamp
..................... Protective earth (screw)
............... Separate component
............... Optional accessory
BLK.................... Black
BLU.................... Blue
BRN ................... Brown
GRN................... Green
GRY ................... Gray
ORG .................. Orange
PNK ................... Pink
RED ................... Red
WHT .................. White
YLW ................... Yellow
Take special precaution for connection to the controller(field supply). Do not miswire the output signals nor theinput signal (ON/OFF). This mistake could damage theentire system.
Description Connect to Type of cableCross section
(mm2)(*)Maximum length
(m) Specifications
L, N, earth Power supply Power supply H05VV-F3G2.5 2.5 — Power supply 230 V 1~ 50 Hz
Y1~Y6 Expansion valve connection Expansion valve kit LIYCY3 x 2 x 0.75
0.75
20 Digital output 12 V DC
R1,R2 Thermistor R2T (liquid pipe)
—
H05VV-F2 x 0.75
Standard 2.5Maximum 20 Analog input 16 V DC
R3,R4 Thermistor R3T (gas pipe)
P1,P2 Remote controller (optional)
100 Communication line 16 V DC
F1,F2 Communication to outdoor unit Outdoor unit
T1,T2 ON/OFF
Controller field supply LIYCY4 x 2 x 0.75 (†)
Digital input 16 V DC
C1,C2 Error signal Digital output: voltage free. Maximum 230 V, maximum 0,5 AC3,C4 Operation signal(‡)
C5,C6 Capacity step(#) Analog input: 0–10 V
C7,C8 Fan signal Air handling unit fan field supply H05VV-F3G2.5 2.5 — Digital output: voltage free.
Maximum 230 V, maximum 2 A
C9,C10 Defrost signal Controller field supply LIYCY4 x 2 x 0.75 0.75 (†) Digital output: voltage free. Maximum 230 V, maximum 0,5 A
(*) Recommended size (all wiring must comply with local codes).(†) The maximum length depends on the external device that is connected (controller/relay,....)(‡) Operation signal: indicates compressor operation.(#) Only necessary for capacity controlled system.
EKEQFCBV3 + EKEQDCBV3Option kit for combination of Daikin condensing unitswith field supplied air handling units4PW52446-1B – 07.2010
Installation and operation manual
6

Connecting the wiring: EKEQDCBV3
Connect the wires to the terminal board according to the wiringdiagram in figure 5. See figure 6 for wiring intake in the controlbox. The wiring intake hole indication H1 refers to the H1 cableof the corresponding wiring diagram.
Connect cables according to specifications of the next table.
Table connection and application
Wiring diagram
A1P ....................Printed circuit board
A2P ....................Printed circuit board (option KRP4)
F1U ....................Fuse (250 V, F5A)(A1P)
F3U ....................Field fuse
HAP....................Light emitting diode (service monitor-green)
K1R ....................Magnetic relay
K4R ....................Magnetic relay (fan)
Q1DI...................Earth leakage breaker
R1T ....................Thermistor (air)
R2T ....................Thermistor (liquid)
R3T ....................Thermistor (gas)
R7.......................Capacity adaptor
T1R ....................Transformer (220 V/21.8 V)
X1M,X3M ...........Terminal block
Y1E ....................Electronic expansion valve
X1M-C1/C2 ........Output: fan ON/OFF
X1M-F1/F2 .........Communication outdoor unit
X1M-P1/P2.........Communication remote controller
X1M-R1/R2 ........Thermistor liquid
X1M-R3/R4 ........Thermistor gas
X1M-R5/R6 ........Thermistor air
X1M-T1/T2 ......... Input: ON/OFF
X1M-Y1~6 ..........Expansion valve
............Field wiring
L .........................Live
N.........................Neutral
, ..........Connector
.........................Wire clamp
......................Protective earth (screw)
...............Separate component
...............Optional accessory
BLK.....................Black
BLU ....................Blue
BRN....................Brown
GRN ...................Green
GRY....................Gray
ORG ...................Orange
PNK....................Pink
RED....................Red
WHT ...................White
YLW....................Yellow
Description Connect to Type of cableCross section
(mm2)(*)Maximum length
(m) Specifications
L, N, earth Power supply Power supply H05VV-F3G2.5 2.5 — Power supply 230 V 1~ 50 Hz
Y1~Y6 Expansion valve connection Expansion valve kit LIYCY3 x 2 x 0.75
0.75
20 Digital output 12 V DC
R1,R2 Thermistor R2T (liquid pipe)
—
H05VV-F2 x 0.75
Standard: 2.5Max.: 20 Analog input 16 V DCR3,R4 Thermistor R3T
(gas pipe)
R5,R6 Thermistor R1T (air)
P1,P2 Remote controller
100 Communication line 16 V DCF1,F2 Communication to
outdoor unit Outdoor unit
T1,T2 ON/OFF
Controller field supply
— Digital input 16 V DC
LIYCY4 x 2 x 0.75 Optional connection: when the function of the switch box needs to be extended: see KRP4A51 for details of settings and instructions.
— Capacity step
— Error signal
— Operation signal
C1,C2 Fan signal Air handling unit fan field supply H05VV-F3G2.5 2.5 — Digital output: voltage free.
Maximum 230 V, maximum 2 A
(*) Recommended size (all wiring must comply with local codes).
Installation and operation manual
7EKEQFCBV3 + EKEQDCBV3
Option kit for combination of Daikin condensing unitswith field supplied air handling units
4PW52446-1B – 07.2010

INSTALLATION OF THERMISTORS
Refrigerant thermistors
Location of the thermistor
A correct installation of the thermistors is required to ensure a goodoperation:
1. Liquid (R2T)Install the thermistor behind the distributor on the coldest passof the heat exchanger (contact your heat exchanger dealer).
2. Gas (R3T)Install the thermistor at the outlet of the heat exchanger as closeas possible to the heat exchanger.
Evaluation must be done to check if the air handling unit is protectedagainst freeze-up.
Execute test operation and check for freeze-up.
Installation of the thermistor cable
1 Put the thermistor cable in a separate protective tube.
2 Always add a pull-relief to the thermistor cable to avoid strain onthe thermistor cable and loosening of the thermistor. Strain onthe thermistor cable or loosening of the thermistor may result inbad contact and incorrect temperature measurement.
Fixation of the thermistor
1 Fix the thermistor with insulating aluminum tape (field supply) inorder to ensure a good heat transference.
2 Put the supplied piece of rubber around the thermistor(R2T/R3T) in order to avoid loosening of the thermistor aftersome years.
3 Fasten the thermistor with 2 tie wraps.
4 Insulate the thermistor with the supplied insulation sheet.
Air thermistor (only for EKEQDCB)
The air thermistor (R1T) can be installed either in the room thatneeds temperature control or in the suction area of the air handlingunit.
1 Liquid R2T
2 Gas R3T
1
2
1 2
45°
Put the thermistor wire slightly down to avoid wateraccumulation on top of the thermistor.
Make good contact between thermistor and airhandling unit. Put the top of the thermistors on the airhandling unit, this is the most sensitive point of thethermistor.
NOTE For room temperature control the delivered thermistor(R1T) can be replaced by an optional remote sensor kitKRCS01-1(A) (to be ordered separately).
21
45°
1 Most sensitive point of the thermistor
2 Maximize the contact
EKEQFCBV3 + EKEQDCBV3Option kit for combination of Daikin condensing unitswith field supplied air handling units4PW52446-1B – 07.2010
Installation and operation manual
8

Installation of longer thermistor cable (R1T/R2T/R3T)
The thermistor is supplied with a standard cable of 2.5 m. This cablecan be made longer to up to 20 m.
Install the longer thermistor cable with the delivered wire to wiresplices
1 Cut the wire or bundle the remainder of the thermistor cable.
Keep at least 1 m of the original thermistor cable.Do not bundle the cable inside the control box.
2 Strip the wire ±7 mm at both ends and insert these ends into thewire to wire splice.
3 Pinch the splice with the correct crimp tool (pliers).
4 After connection, heat up the shrink-insulation of the wire to wiresplice with a shrink-heater to make a water tight connection.
5 Wrap electrical insulation tape around the connection.
6 Put a pull-relief in front of and behind the connection.
REFRIGERANT PIPING WORK
For refrigerant piping of outdoor unit, refer to the installationmanual supplied with the outdoor unit.
Follow the outdoor unit specifications for additional charging,piping diameter and installation.
The maximum allowed piping length depends on the connectedoutdoor model.
TEST OPERATION
Before executing "test operation" as well as before operating the unit,you must check the following:
Refer to the section of "For the following items, take special careduring construction and check after installation is finished" onpage 3.
After finishing the construction of refrigerant piping, drain pipingand electric wiring, conduct test operation accordingly to protectthe unit.
Open the gas side stop valve.
Open the liquid side stop valve.
Executing the test operation
1 Close the contact T1/T2 (ON/OFF).
2 Confirm function of the unit according to the manual and check ifthe air handling unit has collected ice (freeze-up).
If the unit collects ice: see "Troubleshooting" on page 11.
3 Confirm that the fan of the air handling unit is ON.
OPERATION AND MAINTENANCE If T1/T2 is applicable:
Closing the T1/T2 signal starts operation of the air handling unit.
Opening the T1/T2 signal stops operation of the air handlingunit.
WHAT TO DO BEFORE OPERATION
Field settings for EKEQDCB
Refer to the installation and service manuals of both the outdoor unitand the remote controller.
Field settings for EKEQFCB
When changing the settings:
1 Make the required settings.
2 Turn power OFF.
3 Remove the remote controller after servicing and checking thesystem in cooling mode. Operating the remote controller maydisturb the normal operation of the system.
4 Do not change T1/T2 during power failure.
5 Put power of indoor and outdoor unit ON.
Setting the temperature control system
Te or SST = evaporating temperature or saturated suctiontemperature. Tc = condensing temperature.
The connection must be made on an accessiblelocation.
To make the connection waterproof, the connectioncan also be made in a switch box or connector box.
The thermistor cable should be located at least50 mm away from power supply wire. Not followingthis guideline may result in malfunction due toelectrical noise.
All field piping must be provided by a licensed refrigerationtechnician and must comply with the relevant local andnational codes.
In case of poor distribution in the air handling unit, 1 ormore passes of the air handling unit may freeze-up(collect ice) put the thermistor (R2T) on thisposition.
Depending on operation conditions (e.g.: outdoorambient temperature) it is possible that the settingsmust be changed after commissioning.
Before initiating operation, contact your dealer to getthe operation manual that corresponds to yoursystem.
Refer to the dedicated manual of the controller (fieldsupply) and air handling unit (field supply).
Make sure that the air handling unit fan is ON whenthe outdoor unit is in normal operation.
Mode No. Code No. Description of setting
13(23)–0
01 Operation with 0–10 V capacity control (= factory setting)
02 Operation with fixed Te/Tc temperature control
Installation and operation manual
9EKEQFCBV3 + EKEQDCBV3
Option kit for combination of Daikin condensing unitswith field supplied air handling units
4PW52446-1B – 07.2010

Operation with 0–10 V capacity control
The 0–10 V input is only used for this system of operation and is thebase of the capacity control.
This system needs a field supplied controller with a temperaturesensor. The temperature sensor can be used to control anytemperature:
Suction air of the air handling unit
Room air
Discharge air of the air handling unit
Program the field supplied controller to generate a 0–10 V signalwithin conditions as listed. Also refer to the graphic and further datain this paragraph for more details.
When target temperature is reached: 5 V
When lower refrigerant temperature is needed: 5–10 V
When higher refrigerant temperature is needed: 0–5 V
Operation with fixed Te/Tc temperature control
The evaporating temperature (Te)/condensing temperature (Tc) atwhich the application has to operate can be set by code numbers aslisted below.
Operation setting in case of power failure
A Controller voltage output to EKEQFCB
Temperature increase area
Temperature decrease area
Voltage output = linear function with ∆T
∆T = [actual measured temperature] – [target temperature]When ∆T=0, the target temperature is reached.
∆Tmax = maximum temperature variation as defined by installationRecommended value for ∆Tmax=[2°C~5°C].
Voltage output from controller (field supply) Cooling capacity Heating capacity
0 V strong decrease strong increase
2.5 V decrease increase
5 V constant constant
7.5 V increase decrease
10 V strong increase strong decrease
0–∆Tmax
+∆Tmax
∆T=0
5 10 V
°C
A
(too hot)
(too cold)
Mode No. Code No. Description of setting(*)
(*) Depending on the operating temperature condition or on selection of the air handling unit, operation or safety activation of the outdoor unit may take priority and actual Te/Tc will be different from the set Te/Tc .
13(23)–1
01 Te = 5°C
02 Te = 6°C
03 Te = 7°C
04 Te = 8°C (factory setting)
05 Te = 9°C
06 Te = 10°C
07 Te = 11°C
08 Te = 12°C
13(23)–2
01 Tc = 43°C
02 Tc = 44°C
03 Tc = 45°C
04 Tc = 46°C (factory setting)
05 Tc = 47°C
06 Tc = 48°C
07 Tc = 49°C
Measures must be taken to ensure that after power failure,T1/T2 is according to the setting of your preference.Neglecting this caution will result in improper operation.
Mode No. Code No. Description of setting
12(22)–5
01 T1/T2 must be open at power restore.(*)
(*) After power failure, T1/T2 must be changed to open (no cooling/heating requested).
02
After power failure, the status of T1/T2 must remain identical to the initial T1/T2 status prior to the power failure.
EKEQFCBV3 + EKEQDCBV3Option kit for combination of Daikin condensing unitswith field supplied air handling units4PW52446-1B – 07.2010
Installation and operation manual
10

OPERATION AND DISPLAY SIGNALS
TROUBLESHOOTING
To set up the system and make trouble shooting possible, it isrequired to connect the remote controller to the option kit.
Not a malfunction of the air conditioner
The system does not operate
The system does not restart immediately after the cooling/heating is requested.If the operation lamp lights, the system is in normal operatingcondition.It does not restart immediately because one of its safety devicesactuates to prevent the system from being overloaded. Thesystem will turn on again automatically after 3 minutes.
The system does not restart immediately after the power supplyis turned on.Wait 1 minute until the micro computer is prepared for operation.
Trouble shooting
If one of the following malfunctions occurs, take the measures shownbelow and contact your dealer.
The system must be repaired by a qualified service person.
If a safety device such as a fuse, a breaker, or an earth leakagebreaker frequently actuates, or ON/OFF switch does notproperly work.Turn off the main power switch.
If the display , the unit number and the operation lampflash and the malfunction code appears;Notify your dealer and report the malfunction code.
If the system does not operate properly, and none of the abovementioned malfunctions is evident, investigate the system accordingto the following procedures.
If the system does not operate at all
Check if there is a power failure.Wait until power is restored. If power failure occurs duringoperation, the system automatically restarts immediately afterthe power supply recovers.
Check if the fuse has blown or breaker has been tripped.Change the fuse or set the breaker.
If the system stops operating after operation is complete
Check if the air inlet or outlet of outdoor or air handling unit isblocked by obstacles.Remove the obstacle and make it well-ventilated.
Check if the air filter is clogged.Ask a qualified service person to clean the air filter.
The error signal is given and the system stops.If the error resets after 5-10 minutes, the unit safety device wasactivated but the unit restarted after evaluation time.If the error persists, contact your dealer.
If the system operates but it does not sufficiently cool/heat
Check if the air inlet or outlet of the air handling unit or theoutdoor unit is blocked with obstacles.Remove the obstacle and make it well-ventilated.
Check if the air filter is clogged.Ask a qualified service person to clean the air filter.
Check if the doors or the windows are open.Shut doors or windows to prevent wind from coming in.
Check if direct sunlight enters the room.Use curtains or blinds.
Check if there are too many inhabitants in the room.Cooling effect decreases if heat gain of the room is too large.
Check if the heat source of the room is excessive.Cooling effect decreases if heat gain of the room is too large.
The air handling unit is freezing up
The liquid thermistor (R2T) is not put on the coldest position andpart of the air handling unit is freezing up.Thermistor must be put on the coldest position.
The thermistor has come loose.The thermistor must be fixed.
The air handling unit fan is not operating continuously.When the outdoor unit stops operating, the air handling unit fanmust continue operation to melt the ice that was accumulatedduring outdoor unit operation.Ensure that the air handling unit fan keeps operating.
In these cases, contact your dealer.
For EKEQF only
Output
C1/C2 error signal
Error: Closed
Abnormal operation on condenser or control system
Power failure
No error: Open
Normal operation
T1/T2 is open: no error detection anymore
C3/C4 operation
signal
Closed Compressor not operating
Open Compressor operating
C7/C8 fan output
Open Fan off
Closed Fan on
C9/C10 defrost output
Open No defrost operation
Closed Defrost operation
Input
C5/C6: capacity step 0–10 V
Only necessary for field setting 13(23)–0 = 010–10 V capacity control(*)
(*) Refer to paragraph "Operation with 0–10 V capacity control" on page 10.
T1/T2(†)
(†) See field setting 12(22)–5.
Open No cooling/heating requested
Closed Cooling/heating requested
For EKEQD only
Output C1/C2 fan output
Open Fan off
Closed Fan on
Input T1/T2(*)
(*) See field setting 12(22)–5.
Open No cooling/heating requested
Closed Cooling/heating requested
The fan of the air handling unit must operate beforecooling operation is required to the outdoor unit.
When the operation signal is activated, the airhandling unit and fan must operate. Failure to this willcause a safety to operate or freezing up of the airhandling unit.
Installation and operation manual
11EKEQFCBV3 + EKEQDCBV3
Option kit for combination of Daikin condensing unitswith field supplied air handling units
4PW52446-1B – 07.2010

MAINTENANCE
DISPOSAL REQUIREMENTS
Dismantling of the unit, treatment of the refrigerant, of oil and of otherparts must be done in accordance with relevant local and nationallegislation.
NOTES
Only a qualified service person is allowed to performmaintenance.
Before obtaining access to terminal devices, all powersupply circuits must be interrupted.
Water or detergent may deteriorate the insulation ofelectronic components and result in burn-out of thesecomponents.
EKEQFCBV3 + EKEQDCBV3Option kit for combination of Daikin condensing unitswith field supplied air handling units4PW52446-1B – 07.2010
Installation and operation manual
12

4PW52446-1B 07.2010
Cop
yrig
ht 2
029
Dai
kin
Copyright © 2022 FDOKUMEN