
Chat setup - Creatio Academy
17
Chat setup Version 8.0
-
Upload
khangminh22 -
Category
Documents
-
view
4 -
download
0
Transcript of Chat setup - Creatio Academy

Chat setupVersion 8.0

This documentation is provided under restrictions on use and are protected by intellectual property laws. Except asexpressly permitted in your license agreement or allowed by law, you may not use, copy, reproduce, translate,broadcast, modify, license, transmit, distribute, exhibit, perform, publish or display any part, in any form, or by anymeans. Reverse engineering, disassembly, or decompilation of this documentation, unless required by law forinteroperability, is prohibited.
The information contained herein is subject to change without notice and is not warranted to be error-free. If youfind any errors, please report them to us in writing.
© 2022 Creatio. All rights reserved.
4
5
6
7
7
8
8
10
11
12
13
14
15
Table of Contents
Set up chat processing
Add a chat queue
Set up the chat actions
Restrict the number of active chats in the communication panel
Change the chat notification alert
Set up Facebook Messenger integration
Step 1. Add Facebook Messenger channel
Step 2. Set up third-party chatbot integration (optional)
Set up Telegram integration
Set up WhatsApp integration
Step 1. Set up a trial account (optional)
Step 2. Set up a business account
Step 3. Add a WhatsApp channel to Creatio
Table of Contents | 3
© 2022 Creatio. All rights reserved.

Set up chat processingSet up chats to let your company's contact center agents process messages from popular chat applications inCreatio. The general chat setup procedure is as follows:
Use the [ Chat settings ] section of the System Designer to set up Creatio chat and messenger integration. Chatsetup is performed by the system administrator or by a user with the “Access to "Chat settings" section”(“CanManageChats” code) operation permission.
Fig. 1 Setting up the chat
Add and set up a chat queue. Create a list of agents who will process chat messages, set up the messagerouting rules, and modify the chat completion timeout time on this step.
1.
Set up the chat actions. Set up a list of actions an agent can take after talking to the customer on thisstep. For example, create a case, issue an order, or send an email with more information.
2.
Limit the number of active chats. Specify the maximum number of active chats agents can see on thecommunication panel on this step.
3.
Change the notification alert for new chat messages (optional). Set up a new chat message alert agentscan easily recognize on this step.
4.
Add the chat channels. A chat channel displays a message feed from specific sources, e. g., a FacebookPage. The following chat integrations are available as channel sources in Creatio:
The channels with at least one chat in Creatio cannot be deleted. If the channel is no longer relevant,deactivate the channel.
5.
Facebook messenger
Telegram
Set up chat processing | 4
© 2022 Creatio. All rights reserved.

Add a chat queueTo process chat messages, you need to set up chat queues. A chat queue determines the team of agents thatwill be processing the chat. The number of queues does not depend on the number of channels. For example,set up a “Support service” chat queue to process messages coming from the brand page. Set up a “Salesassistants” chat queue to process online store requests. Use the [ Chat settings ] section of the System Designerto create queues for chat agents. To add a chat queue:
Click the button to open the System Designer.1.
Click [ Chat settings ].2.
Click the button in the [ Chat queues ] area.3.
Fill out the parameters of the new queue in the window that opens.4.
[ Name ] – specify a name that would imply the queue purpose and the target role. For example, “1st-linesupport.”
a.
[ Routing rule ] – determines the agent who will be processing the chat.b.
“To all agents” – the new chat will be available to all agents of the current queue.
“To an available agent” – automatically assign the chat to an available agent. The available agent is theone with the least number of chats in progress. If several agents have the same number of chats inprogress, the new chat will be assigned to the agent who has not taken any chats longer than others. Ifan agent does not take the chat within 5 minutes, the chat will be assigned to the next agent. Thecurrent agent will become “Inactive.” You can change this time using the “Omni chat operatoraccept chat timeout” (“OmniChatOperatorAcceptChatTimeout” code) system setting. The agentmust change their status to “Active” in the communication panel to continue processing chats.
[ Chat completion timeout, minutes ] – the maximum waiting time from the moment of the last outgoingchat message to automatic chat closure. When the specified time expires, the chat will close automatically.
e.
Set up chat processing | 5
© 2022 Creatio. All rights reserved.

Fig. 2 Setting up a chat queue
Set up the chat actionsChat actions streamline and automate message processing. A preconfigured “Create case” action (available forthe Service Creatio products) triggers the “Create case from chat” (CreateCaseFromChat) business process. Youcan set up a list of actions that will be available to the agent when processing the chat, e. g., “Issue an order,”“Notify a manager about invoice payment,” or “Notify the system administrator.” To implement this, create acorresponding process to run when working in the chat. Learn more about creating and setting up processes inthe Business process setup (BPMN) block of articles. When the process is ready, add a corresponding chataction:
When the chat closes due to timeout, the subsequent messages will be processed as new chats and will beredistributed to the active agents. If you do not specify any value in the field, the chat will not close.
Click the button in the [ Queue agents ] detail. Specify the users and roles that will be processing chatmessages. For example, you can use the “CC agents” organizational role. You can add several users orroles to the list of agents. Similarly, the same user can be added as an agent to several chat queues.
f.
Click the button to open the System Designer.1.
Click [ Chat settings ].2.
Click the button in the [ Chat actions ] area.3.
On the “Chat action” mini page, specify:4.
[ Caption ] – the action title the agent will see when working with the chat.a.
[ Queue ] – the action will be available to agents in this queue.b.
[ Process ] – select the process the chat action will trigger.c.
Click [ Apply ].d.
Set up chat processing | 6
© 2022 Creatio. All rights reserved.

Restrict the number of active chats in the communicationpanelYou can set up restrictions for the number of active chats that agents can process at a time. By default, thenumber of chats is restricted by 2. To change the active chat settings:
Change the chat notification alertYou can change the standard notification alert about new chat messages to help the agents easily recognizethem. To do so:
Fig. 3 Setting up a chat action
Note. The business process is connected to the current chat via the incoming “ChatId” and/or“ContactId” parameters that are passed to the process when running the chat action. Read more inthe Process parameters article.
Click the button to open the System Designer.1.
Click [ System settings ].2.
Open the “Simultaneous Chats” (“SimultaneousChats” code) system setting.3.
Specify the number of chats that the agent can process at a time in the [ Default value ] field. The number is 5by default. If an agent has a maximum number of chats in progress, they will not see any new chats until theyterminate at least one of their chats. This restriction is valid for all chat channels available to the agent.
4.
Click [ Save ].5.
Click the button to open the System Designer.1.
Click [ System settings ].2.
Open the “Omni chat notification sound” (“OmniChatNotificationSound” code) system setting.3.
Click [ Clear value ] to delete the standard alert.4.
Set up chat processing | 7
© 2022 Creatio. All rights reserved.
Set up Facebook Messenger integrationPRODUCTS: ALL CREATIO PRODUCTS
Set up Facebook Messenger integration to let contact center agents process messages sent via your FacebookPage chat in Creatio.
Step 1. Add Facebook Messenger channelAdd the channel to let Creatio send and receive messages on behalf of your Facebook Page. Perform the setup inthe [ Chat settings ] section of the System Designer.
Click [ Select file ] and upload a file from your computer.5.
Click [ Save ].6.
Set up chat processing in Creatio. Read more >>>1.
Add the Facebook Messenger channel. Read more >>>Before you start setting up the Facebook messenger channel, make sure the “Identity server Url”(“IdentityServerUrl” code), “Identity server client id” (“IdentityServerClientId” code), and “Identity server clientsecret” (“IdentityServerClientSecret” code) system settings are populated. If the values of these systemsettings are not populated, contact Creatio support.
2.
Set up a third-party chatbot for message processing (optional). Read more >>>3.
Click the button to open the System Designer.1.
Click [ Chat settings ].2.
Click the button in the [ Channels ] area. Select “Facebook messenger” in the pop-up menu. This will openthe Facebook login window.
3.
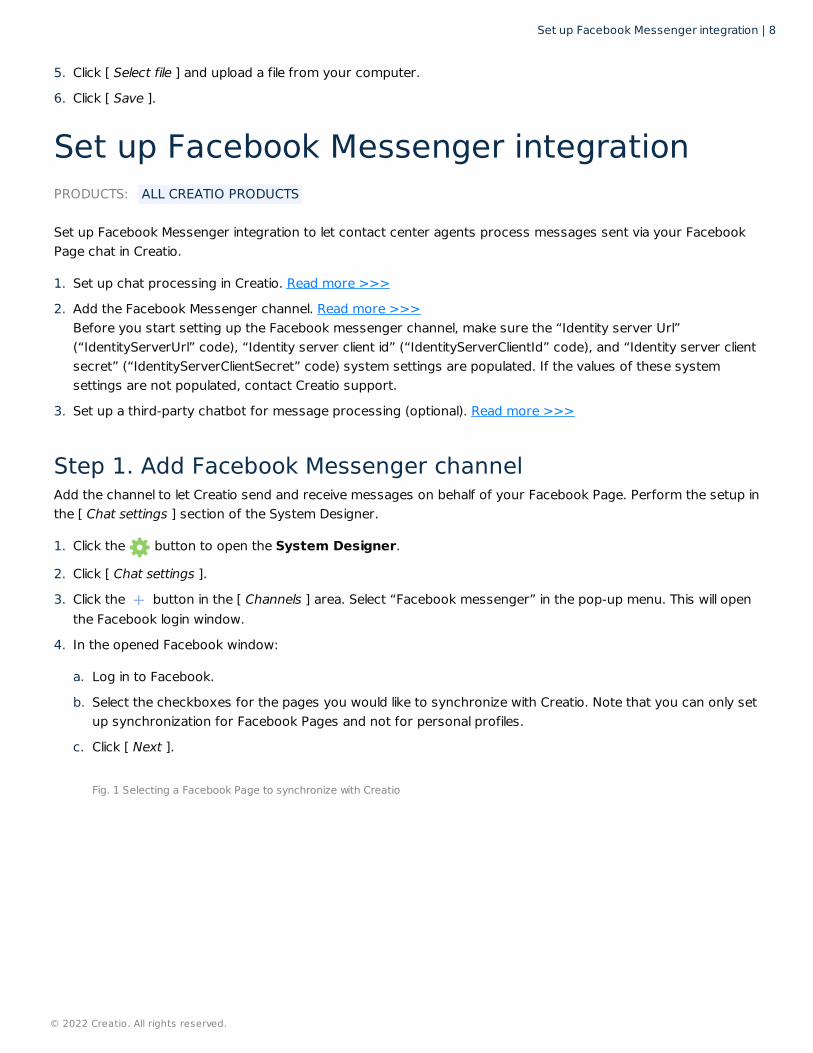
In the opened Facebook window:4.
Log in to Facebook.a.
Select the checkboxes for the pages you would like to synchronize with Creatio. Note that you can only setup synchronization for Facebook Pages and not for personal profiles.
b.
Click [ Next ].
Fig. 1 Selecting a Facebook Page to synchronize with Creatio
c.
Set up Facebook Messenger integration | 8
© 2022 Creatio. All rights reserved.

Allow Creatio to manage your Facebook Page. This will let Creatio send and receive messages using theFacebook Messenger channel on behalf of your brand. If you restrict Creatio from managing the page, thechat functionality may not work properly.
d.
Click [ Done ].
Creatio will add a separate channel for each of the selected pages. The channel name will match the nameof the corresponding Facebook page.
Fig. 2 Setting up access to page management
e.
Set up Facebook Messenger integration | 9
© 2022 Creatio. All rights reserved.

Note. Keep in mind that you can only connect a single Facebook page to a single Creatio application. If youadd the channel to several applications, e. g., development, testing, and production environments, only thelast integrated instance will receive messages.
Step 2. Set up third-party chatbot integration (optional)Creatio allows you to integrate third-party chatbots that will process common user requests, reducing the loadon the agents. This option is only available for Facebook Messenger chats. The chatbot setup and Facebook
To process messages from the new channel in the communication panel, activate the channel and link it to aqueue.
5.
Click the channel name in the [ Channels ] detail list.a.
In the mini page that opens:b.
Set the switch to “Active.”
Select the chat queue that will process the messages that come via this channel.
Select the expected channel message language. This will let the agents use quick reply templates in thecustomer language.
Click [ Apply ].
Repeat step 5 for all other channels if needed.6.
Set up Facebook Messenger integration | 10
© 2022 Creatio. All rights reserved.

integration procedure depend on the bot platform. These instructions are usually available in the bot platform'svendor documentation.
This functionality requires:
To integrate Creatio with the chatbot:
Set up Telegram integrationPRODUCTS: ALL CREATIO PRODUCTS
Set up Telegram integration to let contact center agents process messages sent to your Telegram chatbot inCreatio.
Create and set up a Telegram chatbot before configuring a Telegram channel in Creatio. Read more aboutcreating and setting up bots in Telegram documentation.
Note. Before you set up the integration, make sure that the format of Creatio URL in the “Website URL”(“SiteUrl” code) system setting is https://yoursite.domain.com/0.
If the system setting is empty, leave it as is. In this case, Creatio will populate it when you add the channel.
A Facebook Page.
A working Creatio Facebook Messenger channel.
A third-party bot platform that supports the Handover Protocol and is integrated with your Facebook Page.
Go to the “Settings” section of your Facebook page → “Advanced Messaging.”1.
Configure the “Messenger receiver” parameters in the “Connected Apps” block:
As a result, the chatbot will process messages sent to your Facebook Page. Creatio will display them in the[ Chats ] section. The [ Agent ] field will be left empty for bot-processed chats.
2.
Primary Receiver for Handover Protocol – your bot platform
Secondary Receiver for Handover Protocol – Creatio Social application
Fig. 3 Configuring the Messenger receiver
Set up Telegram integration | 11
© 2022 Creatio. All rights reserved.

Set up WhatsApp integrationPRODUCTS: ALL CREATIO PRODUCTS
WhatsApp is a Facebook product. Due to this, you need the following to integrate this messenger:
Click the button to open the System Designer.1.
Click [ Chat settings ].2.
Click the button in the [ Channels ] area. Select “Telegram” in the pop-up menu. This will open a mini pagewith channel parameters.
3.
Fill out the channel parameters:4.
Specify the token for your chatbot. The token is generated on Telegram's end.a.
Set the switch to “Active” to enable the chat message processing in the communication panel.b.
Select the chat queue that will process the messages that come via this channel.
Note. To ensure the correct channel operation, make sure your Telegram bot is only used in a singleresource. If you are not sure whether the bot is integrated with any other websites or applications,generate a new bot token before you set up the channel in Creatio.
c.
Select the expected channel message language. This will let the agents use quick reply templates in thecustomer language.
d.
Click [ Apply ].
Fig. 1 Setting up a Telegram channel
5.
Set up WhatsApp integration | 12
© 2022 Creatio. All rights reserved.

You can sign up for a trial account with limited functionality to get acquainted with the WhatsApp integrationfeatures. Verify your accounts to take full advantage of WhatsApp integration. This will help you secure yourand your customers' data. In general, the WhatsApp integration setup consists of the following steps:
File transfer in WhatsApp channel is restricted to:
Learn more about supported file formats in Twilio documentation.
Note. Twilio is partnered with telecom service providers in a limited number of countries. View the countrylist in Twilio documentation. Besides the specified countries, Twilio has no restrictions on US phonenumbers. If your number is not eligible, follow Twilio instructions.
Step 1. Set up a trial account (optional)You can set up a Twilio free trial account without verification and subscription to paid platform services. This willlet you test Creatio WhatsApp integration, including messaging and file transfer. To set up the test integration:
Set up a Twilio free trial account
A Facebook Business Manager account. If you have not signed up yet, follow the Facebook instructions.
Integration with a Facebook partner platform that provides access to WhatsApp Business API. You can useTwilio.
Set up a Twilio free trial account to get acquainted with the integration (optional). Read more >>>1.
Set up a Twilio business account. Read more >>>2.
Set up a WhatsApp chat channel in Creatio. Read more >>>3.
Images: *.jpg, *.jpeg, *.png.
Audio files: *.mp3, *.ogg, *.amr.
Documents: *.pdf.
Videos: *.mp4.
Files up to 16 Mb.
Set up a Twilio free trial account. Read more >>>1.
Set up a WhatsApp chat channel in Creatio Read more >>>2.
Sign up on https://www.twilio.com/try-twilio. You will be able to set up a test integration after the signup. Twiliowill grant you limited virtual funds to help you review the functionality.
Note. Should you decide to convert the account to a full-fledged business account, the trial featuresand virtual funds will become unavailable. We recommend using separate accounts for working andtesting purposes.
1.
Specify the endpoint URL for transferring chats to Creatio. To do this, navigate to the sandbox settings inTwilio:
2.
Set up WhatsApp integration | 13
© 2022 Creatio. All rights reserved.

Set up a test WhatsApp channel in CreatioBefore you start setting up the WhatsApp channel, make sure the “Identity server Url” (“IdentityServerUrl”code), “Identity server client id” (“IdentityServerClientId” code), and “Identity server client secret”(“IdentityServerClientSecret” code) system settings are populated. If the values of these system settings are notpopulated, contact Creatio support.
As a result, Creatio will connect a test WhatsApp channel. You will be able to receive and process test messagesand files.
Step 2. Set up a business account
Twilio Console → Programmable Messaging → Settings → WhatsApp Sandbox Settings → SandboxConfiguration and enter the “https://sm-receiver.creatio.com/api/webhook/LeadGen/whatsapp” value in the[ WHEN A MESSAGE COMES IN ] field.
Set up the Twilio sandbox: Twilio Console → Programmable Messaging → Try it out → Send a WhatsAppmessage.
3.
Twilio will generate a code. Send the code from your phone number to your trial account number usingWhatsApp. Twilio will notify you upon success. As a result, Twilio will add your number to SandboxParticipants.
4.
If you would like to use several test numbers, repeat step 3 for each of them. To review the test numbers inthe Sandbox Participants list, go to Twilio Console → Programmable Messaging → Settings → WhatsAppSandbox Settings → Sandbox Participants. After that your trial account number will be able to receivemessages from the numbers you added in the previous step.
5.
Click the button to open the System Designer.1.
Click [ Chat settings ].2.
Click button in the [ Channels ] area. Select “WhatsApp” in the pop-up menu. This will open a mini pagewith the channel parameters.
3.
Fill out the channel parameters:4.
[ Phone number ] – your Twilio free trial account phone number.a.
[ Verification phone number ] – a phone number included in the Sandbox Participants list in Twilio.b.
[ Application Id ] – the Twilio free trial account SID specified in the [ ACCOUNT SID ] field of the TwilioConsole.
c.
[ Token ] – the token Twilio generates for the trial account. Specified in the [ AUTH TOKEN ] field of theTwilio Console.
d.
Click [ Connect ].5.
Activate the chat channel. In the mini page that opens:6.
Set the switch to [ Active ].a.
Select the chat queue that will process the messages that come via this channel.b.
Click [ Apply ].c.
Set up WhatsApp integration | 14
© 2022 Creatio. All rights reserved.

Sign up for Twilio and complete the verification to take advantage of all Twilio business features. Learn more inTwilio documentation.
The general setup procedure is as follows:
As a result, you will be able to communicate with customers using WhatsApp via the registered number within 24hours after the verification.
Step 3. Add a WhatsApp channel to CreatioBefore you start setting up the WhatsApp channel, make sure the “Identity server Url” (“IdentityServerUrl”
Sign up for Facebook Business Manager.1.
If your company already has an account, proceed to step 2.a.
If your company does not have an account yet, follow the instructions in Facebook documentation.b.
Sign up for Twilio.2.
Specify the endpoint URL for transferring chats to Creatio. To do this, navigate to the sandbox settings inTwilio:
Twilio Console → Programmable Messaging → Settings → WhatsApp Sandbox Settings → SandboxConfiguration and enter the “https://sm-receiver.creatio.com/api/webhook/LeadGen/whatsapp” value in the[ WHEN A MESSAGE COMES IN ] field.
3.
Verify your Twilio number with WhatsApp.4.
Request WhatsApp to enable your Twilio number. Select “No” in the [ Are you working with an ISV, SI, orthird party ] field. After you send the request, Twilio will send an initial confirmation email describing yourfurther steps to the email address specified in the form.
a.
Add the phone number:
Go to Twilio Console → Programmable Messaging → Senders → WhatsApp Senders and click the [ NewWhatsApp Sender ] button.
You can use your own phone number or buy a Twilio number.
Note. Follow WhatsApp display name guidelines when filling out your profile.
b.
Allow Twilio to send messages on your behalf. To do so, go to Facebook Business Manager and approveTwilio's request to send messages on your company's behalf. To approve the request:
c.
Go to business.facebook.com → Settings → Business Settings → Requests
Follow the link in the initial phone number confirmation email
Verify the company with Facebook Business Manager. If you have already verified your company,proceed to the next step. To verify your company:
Go to Facebook Business Manager → Settings → Business Settings → Security Center and click the [ Startverification ] or [ Continue ] button in the [ Business Verification ] section.
Learn more about verifying the business in Facebook documentation.
f.
Follow the link in the email from Twilio to confirm the registration.g.
Set up WhatsApp integration | 15
© 2022 Creatio. All rights reserved.

code), “Identity server client id” (“IdentityServerClientId” code), and “Identity server client secret”(“IdentityServerClientSecret” code) system settings are populated. If the values of these system settings are notpopulated, contact Creatio support.
Click the button to open the System Designer.1.
Click [ Chat settings ].2.
Click the button in the [ Channels ] area. Select “WhatsApp” in the pop-up menu. This will open a mini pagewith channel parameters.
3.
Fill out the channel parameters:4.
[ Phone number ] – the phone number connected to and verified with Twilio.a.
[ Verification phone number ] – the phone number to which Creatio will send the channel verificationmessage.
b.
[ Application Id ] – the Twilio account SID specified in the [ ACCOUNT SID ] field of the Twilio Console.c.
[ Token ] – the token Twilio generated for your account. Specified in the [ AUTH TOKEN ] field of the TwilioConsole.
d.
Click [ Connect ].
Fig. 1 Setting up a WhatsApp channel
5.
If the channel is verified successfully, Creatio will open a channel edit mini-page. To process messages fromthe new channel in the communication panel, activate the channel and link it to a queue. To do so:
6.
Set the switch to [ Active ].a.
Select the chat queue that will process the messages that come via this channel.b.
Select the expected channel message language. This will let the agents use quick reply templates in theclient language.
c.
Click [ Apply ].d.
Set up WhatsApp integration | 16
© 2022 Creatio. All rights reserved.

This will connect a WhatsApp channel to Creatio. Contact center agents will be able to process messagesreceived via this channel in the communication panel and view the chat history in the [ Chats ] section.
Note. Keep in mind that you can only connect a single WhatsApp number to a single Creatio application. Ifyou add the number to several applications, e. g., development, testing, and production environments,only the last integrated instance will receive messages.
Set up WhatsApp integration | 17
© 2022 Creatio. All rights reserved.