WSIPC Guide to Grading Setup
45
WSIPC Guide to Grading Setup
-
Upload
khangminh22 -
Category
Documents
-
view
0 -
download
0
Transcript of WSIPC Guide to Grading Setup

WSIPC Guide to Grading Setup

TERMS OF USE The information contained herein is licensed, trade-secret and proprietary and may not be used, disclosed or reproduced without permission of the licensing authorities, WSIPC and/or Skyward, Inc. As a condition of use, the User agrees to protect and keep the information from disclosure or falling into the public domain. The failure to comply with this agreement may result in the immediate termination of the User’s right to access the information. COPYRIGHT © Copyright 2015 by WSIPC. All rights reserved. Reproduction of any part of this manual in any medium without the express and written permission of WSIPC is prohibited by law. This edition is printed in the United States of America. The contents may be corrected or modified by revisions without prior notice. Pages may be added, deleted, or changed as required. The WSIPC logo is a registered trademark of WSIPC. Skyward® is the registered trademark for Skyward, Inc. located in Stevens Point, Wisconsin.
What do you think about this guide? We’d like to hear from you! Your feedback helps us to improve our Guides and learning materials for you. To leave feedback, click here.

April 2015 i Version 05.15.02.00.02
Contents
Contents .................................................................................................................... i
About This Guide ..................................................................................................... 1 What You Should Know Before You Start ..............................................................1
Be Sure You’re Signed In .......................................................................................1 How to Use This Guide .............................................................................................1
Navigation Paths ....................................................................................................1 Getting Around ......................................................................................................2 Screen Shots ...........................................................................................................2 What’s in a WSIPC Guide .....................................................................................2
What’s New in This Edition .....................................................................................3
Part 1: Completing the Grading Setup Chart ........................................................... 4 Step 1: Write Course Length Descriptions and Week Span ...................................5 Step 2: Write the Name of Each Course Length’s Class Control Set ......................6 Step 3: Define Grading Periods.................................................................................7 Step 4: Identify the Number of Credit Grade Marks Your Entity Collects ...........7 Step 5: Define the Weeks your Entity Collects Credit Grade Marks .....................9 Step 6: Identify the Number of Progress Grade Marks Your Entity Collects ......10 Step 7: Define the Weeks Your Entity Collects Progress Grade Marks ...............11
Part 2: Transferring Grading Setup Chart Data to Student Management Grading 12 Step 1: Configure Maximum Semester, Term and Period Values ........................12 Step 2: Configure Term Definitions .......................................................................14 Step 3: Configure Maximum Semesters, Terms, and Grade Bucket Literals ........15 Step 4: Configure Grade Sets ..................................................................................21 Step 5: Configure Course Length Sets ....................................................................23
Part A: Create Course Length Sets ......................................................................24 Part B: Configuring Class Control Sets ...............................................................26
Step 6: Configure Grading Periods .........................................................................31 Step 7: Configure Grade Buckets ............................................................................36
Appendix A - Grading Setup Charts for Various Course Lengths.......................... 38
Appendix B - Class Control Sets Chart for Various Configurations ....................... 41

About This Guide
About This Guide
To use the Grading module, you must configure several areas that define what Course Lengths your Entity offers, how often (and when) your Entity collects grading information, and what kind of Grade Marks (progress, credit) your Entity collects. This Guide explains how to configure a Grading setup using a two-part process.
What You Should Know Before You Start You’ll find that this Guide is much more helpful if you are familiar with your school’s Grading policies.
Be Sure You’re Signed In This Guide is intended to be read while you are working in the Grading module, so be sure you are signed in. Many of the procedures and concepts discussed in the Guide are best understood if you practice as you read.
How to Use This Guide This section shows you how to follow navigation paths in a Guide, and how to navigate around the Guide using various features. This section also describes how and when screen shots are used in the Guide.
Navigation Paths The procedures in this Guide begin with navigation menu paths. Select the Display Navigation Menu Paths check box in User Preferences to ensure that you can follow these paths. The option is not available in User Preferences if it is already enabled for the entire district. To learn more about setting User Preferences, see the WSIPC Guide to Skyward’s School Management System.
April 2015 1 Version 05.15.02.00.02

About This Guide
Getting Around If you’re using this Guide electronically, you can click any text in blue font to move to the section of the Guide that the text refers to. Because the Guides are published in PDF format, you can also use the PDF navigation pane to quickly move from one section to another. If the pane is hidden, click the Bookmark
button in the menu bar on the left side of the screen.
Screen Shots You’ll find screen shots throughout the guide to help you learn how to use the software. The data entered in the screen shots in this Guide is an example of the data you might enter. These screen shots are updated with each edition to make sure what you see on your screen matches what you see in the Guide. To prevent the Guide from becoming a lengthy picture book, WSIPC Guides use screen shots only to help illustrate a key idea or when options on a screen are described. This allows WSIPC Guides to be effective and concise.
What’s in a WSIPC Guide WSIPC Guides are designed to provide readers with everything they need to know to safely and effectively use Skyward’s software. WSIPC strives to make Guides that address the diverse needs of these audiences. Therefore, this Guide doesn’t contain information customized for specific audiences, districts, or schools. If you need to create educational materials that address the specific needs of your Service Center or district, consider using this Guide as a starting point for developing your own customized materials.
April 2015 2 Version 05.15.02.00.02
About This Guide
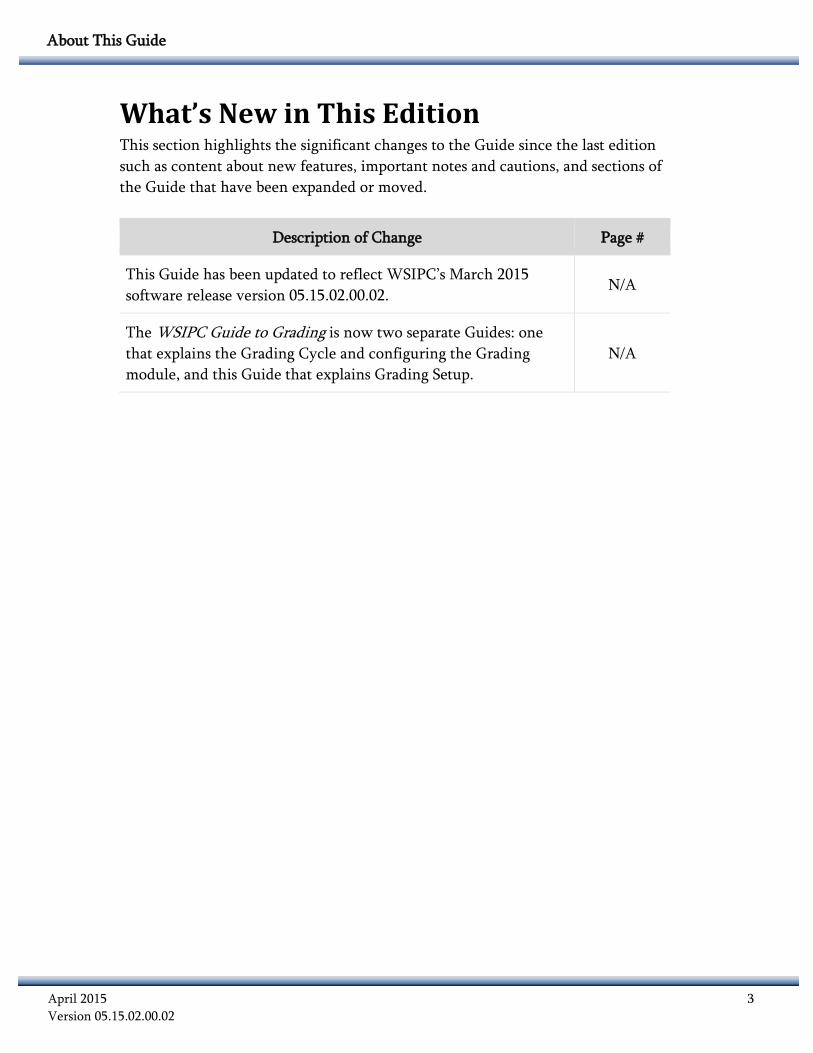
What’s New in This Edition This section highlights the significant changes to the Guide since the last edition such as content about new features, important notes and cautions, and sections of the Guide that have been expanded or moved.
Description of Change Page #
This Guide has been updated to reflect WSIPC’s March 2015 software release version 05.15.02.00.02.
N/A
The WSIPC Guide to Grading is now two separate Guides: one that explains the Grading Cycle and configuring the Grading module, and this Guide that explains Grading Setup.
N/A
April 2015 3 Version 05.15.02.00.02

Part 1: Completing the Grading Setup Chart
Part 1: Completing the Grading Setup Chart
A Grading Setup Chart helps you plan your Entity’s grading setup. The chart records each element of your Entity’s grading needs in a way that makes it easy to transfer that information into the Grading Setup areas. Figure 1 is an example of a blank Grading Setup Chart:
A B C D E F G
Course Length (week span)
Class Control Sets
Weeks when Entity Collects Grading Information
# Credit Grade Buckets
Weeks When Credit Grade Marks are Collected
# Progress Grade Buckets (non-credit earning)
Weeks When Progress Grade Marks are Collected
1 Semester 1
2 Semester 2
3 Trimester 1
4 Trimester 2
5 Trimester 3
6 Year-Semester (36) Year
7 Year-Trimester (36) Year
8 Term 1
9 Term 2
10 Term 3
11 Term 4
12 Term 5
13 Term 6
14 Quarter 1
15 Quarter 2
16 Quarter 3
17 Quarter 4
Term (6)
Quarter (9)
Semester (18)
Trimester (12)
Figure 1 - Grading Setup Chart with some Course Length and Class Control Sets information
Note This chart is available in SkyDoc online help. To download the chart and modify it as needed, see Web SkyDoc: WSIPC / Student Management / Grading / Guides / Grading Setup Chart.
April 2015 4 Version 05.15.02.00.02

Part 1: Completing the Grading Setup Chart
The following seven steps help you complete a Grading Setup Chart: Step 1: Write Course Length Descriptions and Week Span Step 2: Write the Name of Each Course Length’s Class Control Set Step 3: Define Grading Periods Step 4: Identify the Number of Credit Grade Marks Your Entity Collects Step 5: Define the Weeks your Entity Collects Credit Grade Marks Step 6: Identify the Number of Progress Grade Marks Your Entity Collects Step 7: Define the Weeks Your Entity Collects Progress Grade Marks
This section describes each step, and includes a scenario and a completed chart that demonstrates the scenario.
Note See “Appendix A - Grading Setup Charts for Various Course Lengths” (page 38) for a Grading Setup Chart that contains a variety of Course Lengths.
Step 1: Write Course Length Descriptions and Week Span A Course Length is the length of time that curriculum is taught for a course, such as the length of time a typical student must attend a class in order to earn credit for that class. To fill in Course Lengths on the chart: In the Course Length (week span) column of the chart, write the name of
each Course Length your Entity offers. Scenario: An Entity that offers semester (18 week) and trimester (12 week) Course Lengths will write this information in the Course Length (week span) column.
April 2015 5 Version 05.15.02.00.02

Part 1: Completing the Grading Setup Chart
A B C D E F G
Course Length (week span)
Class Control Sets
Weeks when Entity Collects Grading Information
# Credit Grade Buckets
Weeks When Credit Grade Marks are Collected
# Progress Grade Buckets (non-credit earning)
Weeks When Progress Grade Marks are Collected
12345
Semester (18)
Trimester (12)
Figure 2 - Grading Setup Chart for an Entity that offers Semester (18 week) and Trimester (12 week) Course Lengths
Step 2: Write the Name of Each Course Length’s Class Control Set A Class Control Set identifies the specific term, semester, or trimester a section is offered. To fill in Class Control Sets on the chart: In the Class Control Sets column of the chart, write the name of each Class
Control Set for each Course Length. Scenario: An Entity that offers two semester and three trimester Class Control Sets will write this information in the Class Control Sets column.
A B C D E F G
Course Length (week span)
Class Control Sets
Weeks when Entity Collects Grading Information
# Credit Grade Buckets
Weeks When Credit Grade Marks are Collected
# Progress Grade Buckets (non-credit earning)
Weeks When Progress Grade Marks are Collected
1 Semester 1
2 Semester 2
3 Trimester 1
4 Trimester 2
5 Trimester 3
Semester (18)
Trimester (12)
Figure 3 - Grading Setup Chart with Class Control Sets information for a semester and trimester Course Length
April 2015 6 Version 05.15.02.00.02

Part 1: Completing the Grading Setup Chart
Step 3: Define Grading Periods A Grading Period specifies which week of the school year your Entity collects grading information for each Course Length it offers. To define Grading Periods: In the Weeks when Entity Collects Grading Information column of the chart,
write the weeks in which your Entity collects grading information for each Course Length.
Scenario: An Entity that collects grading information every 9 weeks for a semester Course Length would write 9, 18, 27 and 36 in the column for that Course Length. An Entity that collects grading information every 6 weeks for a trimester Course Length would write 6, 12, 18, 24, 30 and 36 in the column for that Course Length.
A B C D E F G
Course Length (week span)
Class Control Sets
Weeks when Entity Collects Grading Information
# Credit Grade Buckets
Weeks When Credit Grade Marks are Collected
# Progress Grade Buckets (non-credit earning)
Weeks When Progress Grade Marks are Collected
1 Semester 1
2 Semester 2
3 Trimester 1
4 Trimester 2
5 Trimester 3
Semester (18)
Trimester (12)
9, 18, 27, 36
6, 12, 18, 24, 30, 36
Figure 4 - Grading Setup Chart with grading collection information for an Entity that offers semester and trimester Course Lengths
Step 4: Identify the Number of Credit Grade Marks Your Entity Collects A Credit Grade Mark is one for which a student typically earns credit. For example, when a student takes a semester length course, they earn credit only once, typically at the end of the semester. Whereas for a year-long course, they might earn credit twice, once at the end of each semester.
April 2015 7 Version 05.15.02.00.02

Part 1: Completing the Grading Setup Chart
To identify the number of Credit Grade Marks your Entity collects: In the # Credit Grade Buckets column of the chart, write how many Credit
Grade Marks your Entity collects for each Course Length’s Class Control Sets.
Scenario: An Entity collects Credit Grade Marks once for each semester Course Length’s Class Control Set and once for each trimester Course Length’s Class Control Set.
A B C D E F G
Course Length (week span)
Class Control Sets
Weeks when Entity Collects Grading Information
# Credit Grade Buckets
Weeks When Credit Grade Marks are Collected
# Progress Grade Buckets (non-credit earning)
Weeks When Progress Grade Marks are Collected
1 Semester 1 1
2 Semester 2 1
3 Trimester 1 1
4 Trimester 2 1
5 Trimester 3 1
Semester (18)
Trimester (12)
9, 18, 27, 36
6, 12, 18, 24, 30, 36
Figure 5 - A Grading Setup Chart with the quantity of Credit Grade Mark Buckets needed for an Entity that offers semester and trimester Course Lengths
Caution Any Course Length shorter than a semester (18 weeks) or trimester (12 weeks) must use a Progress Grade Bucket instead of a Credit Grade Bucket to earn credit. That means Course Lengths such as Term (6 weeks) and Quarter (9 weeks) earn credit in a Progress Grade Bucket, not a Credit Grade Bucket. This deviation is noted by the asterisks in Figure 6 below.
Course Length (week span)
Class Control
Sets
Weeks when Entity Collects Grading
Information
# Credit Grade
Buckets
Weeks When Credit Grade
Marks are Collected
# Progress Grade
Buckets (non-credit
earning)
Weeks When Progress Grade
Marks are CollectedQuarter 1 0* 1* N/AQuarter 2 0* 1* N/AQuarter 3 0* 1* N/AQuarter 4 0* 1* N/A
9, 18, 27, 36Quarter (9)
Figure 6 - A completed Grading Setup Chart showing asterisks indicating credits are earned in a Progress Grade Bucket instead of a Credit Grade Bucket
April 2015 8 Version 05.15.02.00.02

Part 1: Completing the Grading Setup Chart
Step 5: Define the Weeks your Entity Collects Credit Grade Marks A Credit Grade Mark is one for which a student typically earns credit, as stated in Step 4. Now you need to identify which weeks of the year you’ll collect those Credit Grade Marks. To define the Credit Grade Mark weeks: In the Weeks When Credit Grade Marks are Collected column, write the
weeks in which your Entity collects Credit Grade Marks for each Course Length’s Class Control Sets.
Scenario: An Entity collects Credit Grade Marks for a Semester 1 Class Control Set at 18 weeks and for a Semester 2 Class Control Set at 36 weeks. For the Trimester 1, Trimester 2 and Trimester 3 Class Control Sets it collects Credit Grade Marks at 12, 24 and 36 weeks, respectively.
A B C D E F G
Course Length (week span)
Class Control Sets
Weeks when Entity Collects Grading Information
# Credit Grade Buckets
Weeks When Credit Grade Marks are Collected
# Progress Grade Buckets (non-credit earning)
Weeks When Progress Grade Marks are Collected
1 Semester 1 1 18
2 Semester 2 1 36
3 Trimester 1 1 12
4 Trimester 2 1 24
5 Trimester 3 1 36
Semester (18)
Trimester (12)
9, 18, 27, 36
6, 12, 18, 24, 30, 36
Figure 7 - A Grading Setup Chart showing the weeks when Credit Grade Marks are collected for an Entity that offers semester and trimester Course Lengths
April 2015 9 Version 05.15.02.00.02

Part 1: Completing the Grading Setup Chart
Step 6: Identify the Number of Progress Grade Marks Your Entity Collects A Progress Grade Mark is one where grading information is collected, but a student does not earn credit. Every Grade Set must have the same number of Progress Grade Mark Buckets as there are terms defined for its associated Course-Length Set. For example, if your Entity is a two semester, four quarter Entity, your Entity must offer two Progress Grade Marks even if you want to collect only one progress Grade Mark. If you do not set your Progress Grade Mark Buckets correctly, you cannot do the following: Use Standards Gradebook Auto post Athletic Grades Run some Gradebook Reports using Reports for All Classes Use Drop Lowest Score in Secondary Gradebook Allow guardians to subscribe to Grading emails
To identify the number of Progress Grade Marks your Entity collects: In the # Progress Grade Buckets (non-credit earning) column of the chart,
write how many Progress Grade Marks your Entity collects for each Course Length’s Class Control Sets.
Scenario: An Entity collects Progress Grade Marks twice for each semester Course Length’s Class Control Set and twice for each trimester Course Length’s Class Control Set.
A B C D E F G
Course Length (week span)
Class Control Sets
Weeks when Entity Collects Grading Information
# Credit Grade Buckets
Weeks When Credit Grade Marks are Collected
# Progress Grade Buckets (non-credit earning)
Weeks When Progress Grade Marks are Collected
1 Semester 1 1 18 2
2 Semester 2 1 36 2
3 Trimester 1 1 12 2
4 Trimester 2 1 24 2
5 Trimester 3 1 36 2
Semester (18)
Trimester (12)
9, 18, 27, 36
6, 12, 18, 24, 30, 36
Figure 8 - A Grading Setup Chart with the quantity of Progress Grade Mark Buckets needed for an Entity that offers semester and trimester Course Lengths
April 2015 10 Version 05.15.02.00.02

Part 1: Completing the Grading Setup Chart
Step 7: Define the Weeks Your Entity Collects Progress Grade Marks A Progress Grade Mark is one where grading information is collected, but a student does not earn credit, as stated in Step 6. Now you need to identify which weeks of the year you’ll collect those Progress Grade Marks. To define the Progress Grade Mark weeks: In the Weeks When Progress Grade Marks are Collected column, write the
weeks in which your Entity collects Progress Grade Marks for each Course Length’s Class Control Sets.
Scenario: An Entity collects Progress Grade Marks for a Semester 1 Class Control Set at 9 and 18 weeks and for a Semester 2 Class Control Set at 27 and 36 weeks. For the Trimester 1, Trimester 2 and Trimester 3 Class Control Sets it collects Progress Grade Marks at 6 and 12 weeks, 18 and 24 weeks, and 30 and 36 weeks, respectively.
A B C D E F G
Course Length (week span)
Class Control Sets
Weeks when Entity Collects Grading Information
# Credit Grade Buckets
Weeks When Credit Grade Marks are Collected
# Progress Grade Buckets (non-credit earning)
Weeks When Progress Grade Marks are Collected
1 Semester 1 1 18 2 9, 18
2 Semester 2 1 36 2 27, 36
3 Trimester 1 1 12 2 6, 12
4 Trimester 2 1 24 2 18, 24
5 Trimester 3 1 36 2 30, 36
Semester (18)
Trimester (12)
9, 18, 27, 36
6, 12, 18, 24, 30, 36
Figure 9 - A Grading Setup Chart with the weeks when Progress Grade Marks are collected for an Entity that offers semester and trimester Course Lengths
April 2015 11 Version 05.15.02.00.02
Part 2: Transferring Grading Setup Chart Data to Student Management Grading
Part 2: Transferring Grading Setup Chart Data to Student Management Grading
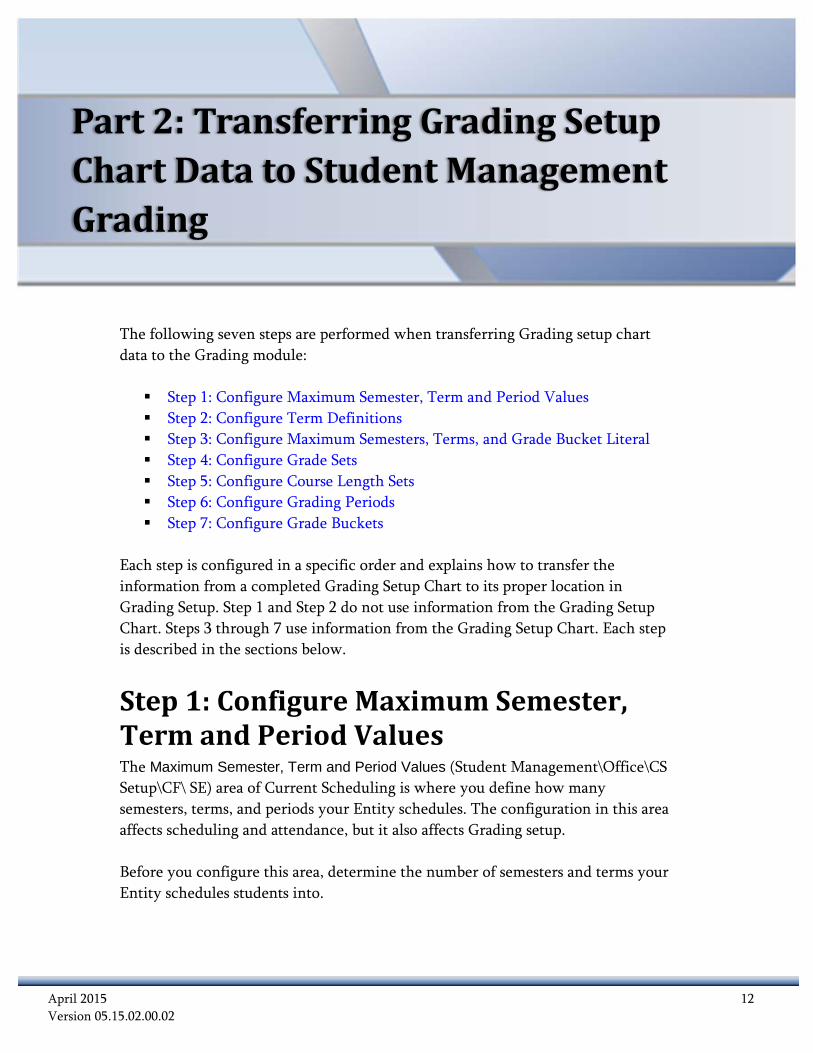
The following seven steps are performed when transferring Grading setup chart data to the Grading module: Step 1: Configure Maximum Semester, Term and Period Values Step 2: Configure Term Definitions Step 3: Configure Maximum Semesters, Terms, and Grade Bucket Literal Step 4: Configure Grade Sets Step 5: Configure Course Length Sets Step 6: Configure Grading Periods Step 7: Configure Grade Buckets
Each step is configured in a specific order and explains how to transfer the information from a completed Grading Setup Chart to its proper location in Grading Setup. Step 1 and Step 2 do not use information from the Grading Setup Chart. Steps 3 through 7 use information from the Grading Setup Chart. Each step is described in the sections below.
Step 1: Configure Maximum Semester, Term and Period Values The Maximum Semester, Term and Period Values (Student Management\Office\CS Setup\CF\ SE) area of Current Scheduling is where you define how many semesters, terms, and periods your Entity schedules. The configuration in this area affects scheduling and attendance, but it also affects Grading setup. Before you configure this area, determine the number of semesters and terms your Entity schedules students into.
April 2015 12 Version 05.15.02.00.02

Part 2: Transferring Grading Setup Chart Data to Student Management Grading
To configure the Maximum Semester, Term and Period Values area of Current Scheduling:
1. Go to Student Management\Office\CS Setup\CF\SE.
2. Expand the school year you’re configuring.
3. Click Edit Maximum Values next to the Maximum Semester, Term, and Period Values heading.
4. Under the Display column, in the Semesters box, enter the number of semesters (trimesters) your Entity offers. This could be 1, 2, 3 or 4. See Figure 10 for an example.
5. Under the Display, Scheduling, and Attendance columns, in the Terms boxes, enter the number of terms (quarters) your Entity offers. This could be up to 12 scheduling terms. See Figure 10 for an example.
6. Click Save.
Figure 10 - Configuration of Maximum Semester/Term/Period Values in Scheduling Entity Year Setup for an Entity that schedules based on trimester setup
April 2015 13 Version 05.15.02.00.02

Part 2: Transferring Grading Setup Chart Data to Student Management Grading
Step 2: Configure Term Definitions The Term Definitions area is where your Entity defines its semester and term information including the date ranges associated with each semester (or trimester) and term. Term Definitions define the date range that all other date-sensitive items must fall within, such as calendar and Control Sets. You must build terms within semesters (or trimesters) even if those terms won’t be used for scheduling or grading.
Note You must know the beginning and ending dates of your Entity’s semesters/trimesters and quarters/terms to complete the Term Definitions configuration. They can be updated at a later time if the exact dates are unknown.
To configure your Entity’s Term Definitions:
1. Go to Student Management\Office\CS Setup\CF\SE.
2. Expand the school year you are configuring.
3. Expand the Term Definition heading.
4. Do one of the following:
To create a Semester or Trimester Term Definition, click Add Semester Definition next to the Term Definition heading. If Add Semester Definition isn’t available, see the third bullet below.
To create a Term Definition, click Add Term Definition next to the
Term Definition heading. If Add Term Definition isn’t available, see the third bullet below.
If neither of the above links is available, expand the Term Definition
heading and then click Edit next to the Term Definition you’ll be updating/configuring.
5. In the Literal and Description boxes, enter the Literals and Descriptions for
the Term Definitions.
April 2015 14 Version 05.15.02.00.02

Part 2: Transferring Grading Setup Chart Data to Student Management Grading
6. In the Start Date and Stop Date boxes, enter the start and end date of each Term Definition.
7. Click Save.
8. Repeat steps 4 through 7 until all Term Definitions (semester and term)
have been created or updated.
Figure 11 - Term Definitions for a 2 Semester/4 Term (Quarter) Entity
Step 3: Configure Maximum Semesters, Terms, and Grade Bucket Literals In the Maximum Semesters, Terms and Grade Bucket Literal area, you define the following for your Entity: Grade Bucket literal identifiers (T1, T2, S1, S2, etc.)
Quantity and kind of Grade Buckets needed to collect Grade Marks for
every Course Length (semester, term, year, etc.) in your Entity Use the Grading Setup Chart to configure this area. Specifically, you will use the information you provide in the # Credit Grade Buckets and # Progress Grade Buckets columns to define the quantity of Semesters/Terms (Grade Buckets) your Entity needs. To configure the Semesters and Terms boxes of the Maximum Semesters, Terms and Grade Bucket Literal screen:
1. Go to Student Management\Office\GR Setup\CF\GS.
2. In the School Year box, choose the school year you are configuring.
3. Click Entity Setup.
April 2015 15 Version 05.15.02.00.02

Part 2: Transferring Grading Setup Chart Data to Student Management Grading
4. Click Edit.
5. On your Grading Setup Chart, add the values from the # Credit Grade Buckets column for each Course Length your Entity offers (Figure 12).
6. Compare each Course Length’s total from the # Credit Grade Buckets
column on the chart from Step 4. Write the highest value in the Semesters box in the Total Semesters/Terms area.
7. On your Grading Setup Chart, add the values from # Progress Grade
Buckets column for each Course Length your Entity offers (Figure 12).
8. Compare each Course Length’s summed values from the # Progress Grade Buckets column on the chart from Step 6. Write the highest value in the Terms box in the Total Semesters/Terms area from Step 6.
9. Use Figure 13 (page 18) and the information in Table 1 to complete the configuration of the Maximum Semesters, Terms and Grade Bucket Literal screen.
10. Click Save. Example: Below is the finished Grading Setup Chart from “Part 1: Completing the Grading Setup Chart” (page 4).
A B C D E F G
Course Length (week span)
Class Control Sets
Weeks when Entity Collects Grading Information
# Credit Grade Buckets
Weeks When Credit Grade Marks are Collected
# Progress Grade Buckets (non-credit earning)
Weeks When Progress Grade Marks are Collected
1 Semester 1 1 18 2 9, 18
2 Semester 2 1 36 2 27, 36
3 Trimester 1 1 12 2 6, 12
4 Trimester 2 1 24 2 18, 24
5 Trimester 3 1 36 2 30, 36
Semester (18)
Trimester (12)
9, 18, 27, 36
6, 12, 18, 24, 30, 36
Figure 12 - Grading Setup Chart from "Part 1: Completing the Grading Setup Chart" showing the sum of the number of Credit Grade Buckets and the sum of the number of Progress Grade Buckets for the semester and trimester Course Lengths.
= 2
= 3
= 4
= 6
April 2015 16 Version 05.15.02.00.02
Part 2: Transferring Grading Setup Chart Data to Student Management Grading
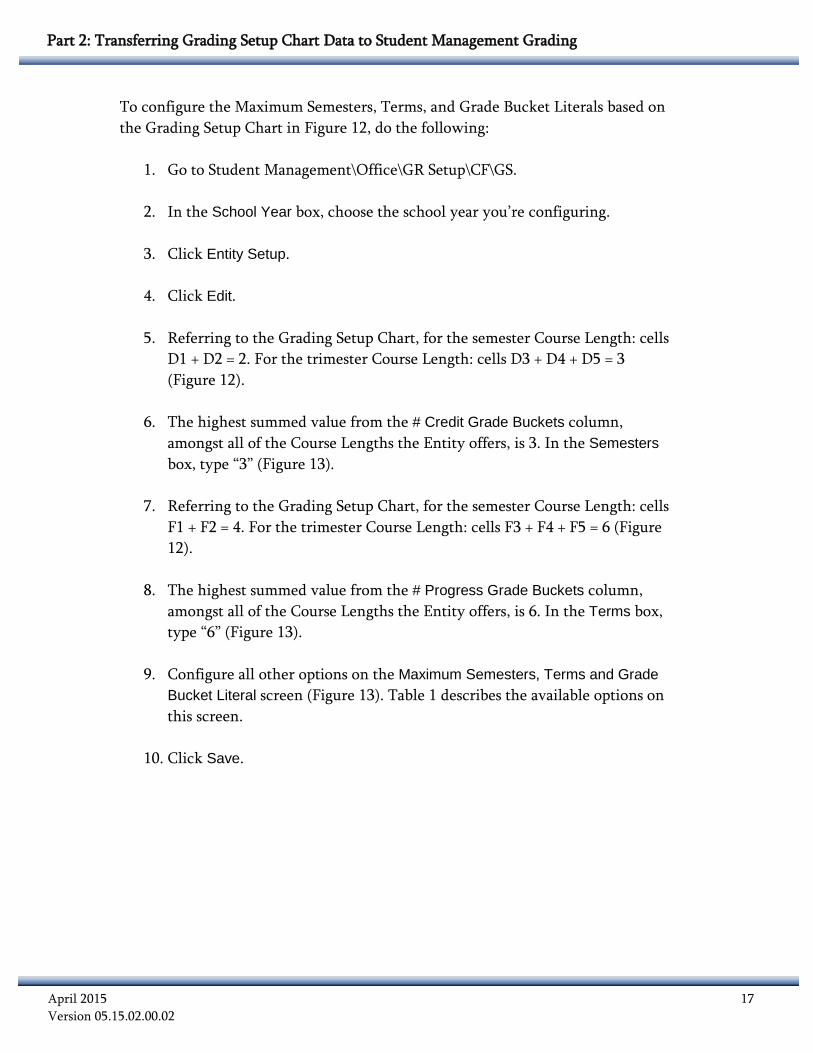
To configure the Maximum Semesters, Terms, and Grade Bucket Literals based on the Grading Setup Chart in Figure 12, do the following:
1. Go to Student Management\Office\GR Setup\CF\GS.
2. In the School Year box, choose the school year you’re configuring.
3. Click Entity Setup.
4. Click Edit.
5. Referring to the Grading Setup Chart, for the semester Course Length: cells D1 + D2 = 2. For the trimester Course Length: cells D3 + D4 + D5 = 3 (Figure 12).
6. The highest summed value from the # Credit Grade Buckets column,
amongst all of the Course Lengths the Entity offers, is 3. In the Semesters box, type “3” (Figure 13).
7. Referring to the Grading Setup Chart, for the semester Course Length: cells
F1 + F2 = 4. For the trimester Course Length: cells F3 + F4 + F5 = 6 (Figure 12).
8. The highest summed value from the # Progress Grade Buckets column,
amongst all of the Course Lengths the Entity offers, is 6. In the Terms box, type “6” (Figure 13).
9. Configure all other options on the Maximum Semesters, Terms and Grade Bucket Literal screen (Figure 13). Table 1 describes the available options on this screen.
10. Click Save.
April 2015 17 Version 05.15.02.00.02

Part 2: Transferring Grading Setup Chart Data to Student Management Grading
Figure 13 - Maximum Semesters, Terms, and Grade Bucket Literal screen. In this example, the Entity offers trimester Course Lengths, so a 3 is placed in the Semesters box and a 6 is placed in the Terms box.
Option Description
Semesters Terms
The values for the maximum number of semesters and terms for which your Entity collects grading information for all Course Lengths being scheduled.
Citizenship
Enables the Grade Buckets for collecting Citizenship grading information. You can have as many Citizenship Grade Buckets as Terms your Entity offers or as many as Midterms & Terms combined that your Entity offers. If your Entity does not collect midterm grading information, the Midterm & Term option is unavailable.
April 2015 18 Version 05.15.02.00.02

Part 2: Transferring Grading Setup Chart Data to Student Management Grading
Option Description
Midterm
Activates the Midterm Grade Buckets for collecting midterm grading information. The number of midterm Grade Buckets cannot exceed the number of term Grade Buckets. Use Midterm Literals automatically fills the Midterm Grade Bucket Literals boxes with M1, M2, M3, etc. Use Progress Report Literals automatically fills the Midterm Grade Bucket Literals boxes with P1, P2, P3, etc. User Defined Literals allows you to define the Grade Bucket Literals for the Midterm Grade Buckets.
Term
Activates the term Grade Buckets for collecting term grading information. The number of term boxes available here, comes from the value in the Terms box in the Total Semesters/Terms area of the screen. Use Term Literals automatically fills the term Grade Bucket Literals boxes with T1, T2, T3, etc. Use Quarter Literals automatically fills the term Grade Bucket Literals boxes with Q1, Q2, Q3, etc. User Defined Literals allows you to define the Grade Bucket Literals for the term Grade Buckets.
Sem Exam
Activates the Sem Exam Grade Bucket. You can have as many Sem Exam Grade Buckets as the number of Semesters your Entity offers. Use this Grade Bucket if your Entity collects enterprise-wide semester exam grading information for one or all Course Lengths students are scheduled into.
Semester
Activates the Semester Grade Buckets for collecting semester grading information. The number of semester boxes available here comes from the value in the Semesters box in the Total Semesters/Terms area of the screen.
April 2015 19 Version 05.15.02.00.02

Part 2: Transferring Grading Setup Chart Data to Student Management Grading
Option Description
Final Exam
Activates the Final Exam Grade Bucket. Use this Grade Bucket if your Entity collects enterprise-wide final exam grading information for one or all Course Lengths students are scheduled into.
Final
Activates the Final Grade Bucket. Use this Grade Bucket if your Entity collects enterprise-wide final grading information for one or all Course Lengths students are scheduled into.
Athletic
Activates an Athletic Grade Bucket. This bucket is typically used to collect Athletic grading information for determining student eligibility for participating in an athletic program.
Other Activates an Other Grade Bucket for any other instance where your Entity might want to collect grading information.
History
Causes the Grade Marks stored in the associated Grade Bucket to appear in the Grading History area for all students. Note: This affects the grades after year end. If History isn’t selected for a Grade Bucket, the grade is not visible after year end.
Table 1 - Options for Maximum Semesters, Terms, and Grade Bucket Literal screen
Note Only the Term, Semester, Athletic, and Final Grade Buckets are compatible with Standard Gradebook.
Note While you can use the History option for many different Grade
Buckets in the students’ Grade History area, typically you would only display those for which a student earns credit for completing a course. For example, if your Entity only offers semester Course Lengths but collects grading information for both term and semester Grade Buckets, you’d show history for only the semester Grade Buckets because that is the Grade Mark for which the student earns credit for completing the course.
April 2015 20 Version 05.15.02.00.02

Part 2: Transferring Grading Setup Chart Data to Student Management Grading
Step 4: Configure Grade Sets A Grade Set defines the number of each Grade Bucket Type for a Course Length and which Grade Buckets the Course Length needs, such as semester, term, and final. You must create a Grade Set for every Course Length your Entity offers. In your Grading Setup Chart, look at the Course Length (week span) column and create a Grade Set for each Course Length your Entity offers. The information you provide in the # Credit Grade Buckets and # Progress Grade Buckets columns of your Grading Setup Chart helps you configure the Grade Set for the Course Length. To configure a Grade Set:
1. Go to Student Management\Office\GR Setup\CF\GS.
2. In the School Year box, select the school year you are configuring.
3. Click Grade Sets.
4. Click Add.
5. In the Grade Set ID box, enter a Grade Set ID (such as SM, YR, TM, TR, or QT).
6. In the Description box, enter a description, such as Semester, Year, or
Term, for the Grade Set. It is good practice to name the Grade Set the same name as the Course Length.
7. In your Grading Setup Chart, look at the value(s) in the #Credit Grade Buckets column for the Course Length you are configuring. Determine which value is largest. Type that value in the Number of Graded Semesters in this Course Grade Set box and the # of Semester Grades box.
8. Look at the value(s) in the # Progress Grade Buckets column of your
Grading Setup Chart for the Course Length. Determine which value is largest. Type that value in the Number of Graded Terms in this Course Grade Set box and the # of Term Grades box.
April 2015 21 Version 05.15.02.00.02

Part 2: Transferring Grading Setup Chart Data to Student Management Grading
9. If your Entity collects Final Exam, Final, Athletic or Other grading information for the Course Length, select those check boxes.
10. If your Entity collects midterm grading information for the Course Length,
type the same value in the # of Midterm Grades box that you have in the # of Term Grades box.
11. If your Entity is collecting semester exam Grade Marks for the Course
Length, type the same value in the # of Sem. Exam Grades box that you have in the # of Semester Grades box.
12. If your Entity is collecting citizenship grading information for the Course
Length, type the number of citizenship Grade Marks it is collecting in the # of Citizenship Grades box. The value in this box cannot exceed the total sum of the values from the # of Midterm Grades plus the # of Term Grades boxes.
13. Click Save. Example: The completed Grading Setup Chart from “Part 1: Completing the Grading Setup Chart” (page 4) is shown below.
A B C D E F G
Course Length (week span)
Class Control Sets
Weeks when Entity Collects Grading Information
# Credit Grade Buckets
Weeks When Credit Grade Marks are Collected
# Progress Grade Buckets (non-credit earning)
Weeks When Progress Grade Marks are Collected
1 Semester 1 1 18 2 9, 18
2 Semester 2 1 36 2 27, 36
3 Trimester 1 1 12 2 6, 12
4 Trimester 2 1 24 2 18, 24
5 Trimester 3 1 36 2 30, 36
Semester (18)
Trimester (12)
9, 18, 27, 36
6, 12, 18, 24, 30, 36
Figure 14 - Grading Setup Chart from "Part 1: Completing the Grading Setup Chart" showing the largest value for the number of Credit Grade Buckets for the semester Course Length, and the largest value for the number of Progress Grade Buckets for the semester Course Length.
Figure 15 is the Grade Set Maintenance screen configured to reflect the Grading Setup Chart in Figure 14.
Largest value is 1
Largest value is 2
April 2015 22 Version 05.15.02.00.02

Part 2: Transferring Grading Setup Chart Data to Student Management Grading
Figure 15 - Semester Grade Set with 1 Graded Semester and 2 Graded Terms
Note If the largest value from the # Credit Grade Marks column is zero, enter a value of 1 in the Number of Graded Semesters in this Course Grade Set box. However, in the # of Semester Grades box enter a value of zero. If the largest value from the # Progress Grade Marks column is zero, enter a value of 1 in the Number of Graded Terms in this Course Grade Set box. However, in the # of Term Grades box enter a value of zero.
Repeat this Step of the process (“Step 4: Configure Grade Sets”) for every Course Length your Entity offers.
Step 5: Configure Course Length Sets The Course Length Sets area is where you do the following: Define your Course Length Set and link a Grade Set to it so the system
knows how many Grade Buckets your Entity will have for collecting Grade Marks for the Course Length
Create Class Control Sets for the Course Length Set and define which Grade Buckets (S1, T1, T2, etc.) your Entity will have for each Class Control Set
Configuration for the first item in the bulleted list is discussed in Part A of this section of the Guide. Configuration for the second item is discussed in Part B.
April 2015 23 Version 05.15.02.00.02

Part 2: Transferring Grading Setup Chart Data to Student Management Grading
Part A: Create Course Length Sets You must create a unique Course Length Set for every Course Length your Entity offers. Using your Grading Setup Chart, look at the Course Length (week span) column and create a Course Length Set for each Course Length your Entity offers. To create a Course Length Set:
1. Go to Student Management\Office\GR Setup\CF\GS.
2. In the School Year box, select the school year you are configuring.
3. Click Course Length.
4. Click Add.
5. Configure the Add Course Length screen (Figure 16). Table 2 describes the options on this screen.
6. Click Save.
Figure 16 - Course Length Details on the Add Course Length screen
April 2015 24 Version 05.15.02.00.02

Part 2: Transferring Grading Setup Chart Data to Student Management Grading
Option Description
Course Set Length ID Two-character identifier for the Course Length Set. (e.g. SM, TR, YR, TM, or QT.)
Short Description Long Description
Short (15 character) and long (30 character) description for the Course Length Set. (e.g. Semester, Trimester, Year, Term, or Quarter.)
Course Grade Set
Grade Set assigned to the Course Length Set. Typically this is a one-to-one link, and if you’ve configured your Grade Sets properly, you should be able to link a Semester Grade Set to a Semester Course Length Set, a Trimester Grade Set to a Trimester Course Length Set, and so on.
Default Earned Credits
Default earned credits that a student earns upon successful completion of the course. The value in this box automatically fills the Earned Credits box on a course in the Course Master (Student Management\Office\CS\BC\CM) for any course that is assigned to this Course Length Set. Typically a Semester Course Length Set has a default Earned Credit of “0.500.” A Trimester Course Length Set has a default Earned Credit of “0.330.” A Year Course Length Set has a default Earned Credit of “1.000,” and so on.
Default GPA Credits
Default GPA credits that a student earns upon successful completion of the course. The value in this box automatically fills the GPA Credits box on a course in the Course Master (Student Management\Office\CS\BC\CM) for any course that is assigned to this Course Length Set. The value in this box is rarely different from the value in the Default Earned Credits box.
April 2015 25 Version 05.15.02.00.02

Part 2: Transferring Grading Setup Chart Data to Student Management Grading
Option Description
Default Academic Minutes
Default value that automatically fills the Academic Minutes box on a course in the Course Master (Student Management\Office\ CS\BC\CM) for any course that is assigned to this Course Length Set.
Override Grading Period Dates With Control Set Dates in Gradebook
Allows the date range assigned to the Grading Period to be overridden, in the Gradebook module, with the date range assigned to the Control Set. To learn more about Grading Periods, see “Step 6: Identify the Number of Progress Grade Marks Your Entity Collects” (page 10). Skyward added this option to help districts manage Entities who use “combined” setups, such as an Entity that offers both trimester and semester Course Lengths, or an Entity that offers exploratory courses. Many of Skyward’s districts do not set up Grading Periods to accommodate each Course Length they offer. However, using this option instead of creating the necessary Grading Periods can limit the flexibility of the program. The instructions in this Guide demonstrate how to create “combined” setups without using this option.
Table 2 - Options for Course Length Details on the Add Course Length screen
Part B: Configuring Class Control Sets The most complex piece of the entire Grading Setup configuration is the Class Control Set screen. To simplify the setup of this screen, do the following: Follow the five procedures below Refer to the Class Control Set screen setup chart (Figure 17 on page 30) Refer to the Add Class Control Set screen (Figure 18 on page 30)
April 2015 26 Version 05.15.02.00.02

Part 2: Transferring Grading Setup Chart Data to Student Management Grading
Procedure 1: Match your Entity’s Maximum Semester and Term values with those in the Class Control Set screen setup chart.
1. Go to Student Management\Office\CS Setup\CF\SE.
2. Expand the school year you’re configuring.
3. Expand the Maximum Semester, Term, and Period Values heading.
4. Note the Display Semesters and Scheduling Terms values, such as 2 semester and 4 terms (2/4), or 3 semesters and 6 terms (3/6).
5. Looking at Figure 18 (page 30, compare these values with those in Entity
Configuration (Semesters/Terms) column of the Class Control Set screen setup chart. Circle those that match.
Procedure 2: Match your Entity’s Maximum Semester/Term Literals with those in the Class Control Set screen setup chart.
1. Go to Student Management\Office\GR Setup\CF\GS
2. In the School Year box, select the school year you’re configuring.
3. Click Entity Setup.
4. Note the Semesters and Terms values that appear such as 2 semester and 4 terms (2/4), or 3 semesters and 6 terms (3/6).
5. Looking at Figure 18 (page 30), compare these values with those in the
Maximum Semesters/Term Literals column in the Class Control Set screen setup chart. Circle the ones that match, but only for those items you circled in Step 1.
Procedure 3: Match the Grade Sets your Entity offers with those in the Class Control Set screen setup chart.
1. Go to Student Management\Office\GR Setup\CF\GS.
2. In the School Year box, select the school year you’re configuring.
April 2015 27 Version 05.15.02.00.02

Part 2: Transferring Grading Setup Chart Data to Student Management Grading
3. Click Grade Sets.
4. Looking at Figure 18, compare these Grade Sets with those in the Course Length column in the Class Control Set screen setup chart. Circle the ones that match, but only for those items you circled in Step 2.
Procedure 4: Match the values from the Number of Graded Semesters in this Course Grade Set and the Number of Graded Terms in this Course Grade Set, for every Grade Set in your configuration, with those in the Class Control Set screen setup chart.
1. Go to Student Management\Office\GR Setup\CF\GS.
2. In the School Year box, select the school year you’re configuring.
3. Click Grade Sets.
4. Look at the values in the #Semesters and #Terms columns on the Grade Sets screen.
5. Looking at Figure 18, compare each Grade Set’s combination
(“#Semesters/#Terms”) in the # Graded Semester/ # Graded Terms column in the Class Control Set screen setup chart, for those Grade Sets you circled in Step 3 of this process. If there’s a match, circle it.
Step 5: Use the information that appears in Columns E, F and G to create the Class Control Sets for each Course Length Set that you circled in Procedure 4 of this process.
1. Go to Student Management\Office\GR Setup\CF\GS.
2. In the School Year box, select the school year you are configuring.
3. Click Course Length.
4. Expand the Course Length Set you’re creating Class Control Sets for.
5. Click Add a Class Control Set next to the Class Control Sets heading.
April 2015 28 Version 05.15.02.00.02

Part 2: Transferring Grading Setup Chart Data to Student Management Grading
6. Use columns E, F and G from the Class Control Set screen setup chart (Figure 18) to fill in the corresponding values on the Add Class Control screen (Figure 18) for the Course Length Set.
Note If an “x” appears in a column of the table, that box should not appear on the Add Class Control screen.
7. Click Save.
8. Repeat steps 4 through 7 until you’ve created all Class Control Sets for each
item circled in the # Graded Semester/# Graded Terms column of the Class Control Set screen setup chart.
Note If your grading setup combination does not appear in the Class
Control Set screen setup chart (Figure 17), use the chart that appears in “Appendix B - Class Control Sets Chart for Various Configurations” (page 41).
April 2015 29 Version 05.15.02.00.02

Part 2: Transferring Grading Setup Chart Data to Student Management Grading
A B C D E
Entity Configuration
(Semesters/Terms)
Maximum Semesters/Term
LiteralsCourse Length
# Graded Semester/ # Graded
Terms
Class Control
SetStart Term
Stop Term T1 T2 T3 T4 T5 T6
S1 01 02 1 1 x xS2 03 04 2 2 x x
Year 2/4 YR 01 04 1 1 2 2 x xQ1 01 01 1 x xQ2 02 02 1 x xQ3 03 03 2 x xQ4 04 04 2 x xS1 01 02 1 x x x xS2 03 04 2 x x x x
Year 2/2 YR 01 04 1 2 x x x xR1 01 02 1 1R2 03 04 2 2R3 05 06 3 3
Year 3/6 YR 01 06 1 1 2 2 3 3T1 01 01 1T2 02 02 1T3 03 03 2T4 04 04 2T5 05 05 3T6 06 06 3S1 01 03 1S2 04 06 2R1 01 02 1 x x xR2 03 04 2 x x xR3 05 06 3 x x x
Year 3/3 YR 01 06 1 2 3 x x x
F G
Semester (2/4) 2/4
Semester 1/2
Quarter 1/1
Trimester (3/6) 3/3Trimester 1/1
Semester (2/4) 2/2Semester 1/1
Trimester (3/6) 3/6
Trimester 1/2
Term 1/1
Semester 1/1
Figure 17 - Class Control Set screen setup chart
Figure 18 - Add Class Control Set screen with associated column reference from Figure 17
April 2015 30 Version 05.15.02.00.02

Part 2: Transferring Grading Setup Chart Data to Student Management Grading
Step 6: Configure Grading Periods In the Grading Periods area, you define which weeks of the school year your Entity collects grading information for each Course Length it offers. This information is obtained from the Weeks when Entity Collects Grading Information column of the Grading Setup Chart. For every Course Length your Entity offers, you must create a Grading Period for collecting Grade Marks and grading information. Grading Periods are often named for the term and semester in which the grading information is collected. For example, “Term 1” or “Term2/Semester 1.” However, it may be more beneficial to name the descriptions of your Grading Periods for the weeks in which the grading information is collected, as shown in Figure 19.
Figure 19 - Grading Periods named for the weeks in which Grade Marks are collected
This is an especially good practice if your Entity offers different Course Lengths that collect grading information during the same week, because it minimizes the need to create separate Grading Periods for the same week, different Course Lengths. For instance, in our scenario from “Part 1: Completing the Grading Setup Chart” (page 4), both the semester and trimester Course Lengths collect Grade Marks during weeks 18 and 36.
April 2015 31 Version 05.15.02.00.02

Part 2: Transferring Grading Setup Chart Data to Student Management Grading
A B C D E F G
Course Length (week span)
Class Control Sets
Weeks when Entity Collects Grading Information
# Credit Grade Buckets
Weeks When Credit Grade Marks are Collected
# Progress Grade Buckets (non-credit earning)
Weeks When Progress Grade Marks are Collected
1 Semester 1 1 18 2 9, 18
2 Semester 2 1 36 2 27, 36
3 Trimester 1 1 12 2 6, 12
4 Trimester 2 1 24 2 18, 24
5 Trimester 3 1 36 2 30, 36
Semester (18)
Trimester (12)
9, 18, 27, 36
6, 12, 18, 24, 30, 36
Figure 20 - Grading Setup Chart from "Part 1: Completing the Grading Setup Chart" showing that both the semester and trimester Course Lengths collect grading information during weeks 18 and 36.
Instead of creating two Grading Periods for week 18 and two for week 36, you only create one for each week so that both Course Lengths collect grading information during that time. To configure a Grading Period:
1. Go to Student Management\Office\GR Setup\CF\GS.
2. In the School Year box, select the school year you’re configuring.
3. Click Grade Periods.
4. Click Add.
5. Configure the Grading Periods Maintenance screen (Figure 21). Table 3 describes the options on this screen.
6. Click Save.
7. Repeat steps 4 through 6 until all Grading Periods for all Course Lengths are created.
April 2015 32 Version 05.15.02.00.02

Part 2: Transferring Grading Setup Chart Data to Student Management Grading
Figure 21 - Grading Period Maintenance screen
Option Description
Grading Period # The order in which the Grading Period occurs. If it’s the first of the year, type “01.” If it’s the 4th, type “04.”
Description The name of the Grading Period.
Start Date End Date
The dates on which the Grading Period begins and ends. You can use the Prefill button to prefill this date range with dates from your Entity’s Term Definitions (Student Management\Office\CS Setup\CF\SE). This date range affects which Events and Assignments are included in a course’s grading information for Standards and Secondary Gradebook.
April 2015 33 Version 05.15.02.00.02

Part 2: Transferring Grading Setup Chart Data to Student Management Grading
Option Description
Display Start Term Display Stop Term
The beginning and ending terms of the Grading Period for display on reports. Typically the Display and Scheduling Start and Stop Terms are in agreement with each other and only span the last term in which the Grading Period occurs. For example, at 18 weeks your Entity collects grading information for Semester 1 classes which span Terms 1 to 2. In the Grading Period you would make the Start and Stop Terms “02 to 02,” the last term in which the Grading Period occurs.
Sched Start Term Sched Stop Term
The beginning and ending terms of the Grading Period in relation to the Start and Stop Terms for the Class Control Sets. Typically, the Display and Scheduling Start and Stop Terms agree with each other and only span the last term in which the Grading Period occurs. For example, at 18 weeks your Entity collects grading information for Semester 1 classes which span Terms 1 to 2. In the Grading Period, you would make the Start and Stop Terms “02 to 02,” the last term in which the Grading Period occurs.
April 2015 34 Version 05.15.02.00.02
Part 2: Transferring Grading Setup Chart Data to Student Management Grading
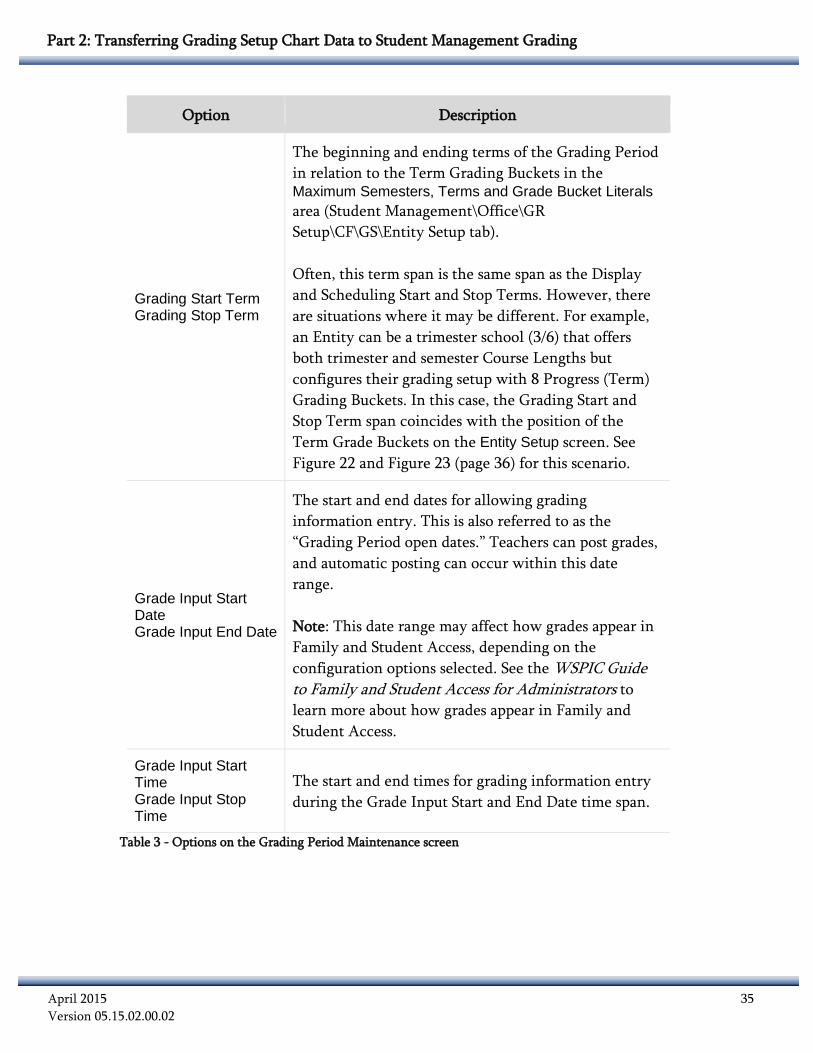
Option Description
Grading Start Term Grading Stop Term
The beginning and ending terms of the Grading Period in relation to the Term Grading Buckets in the Maximum Semesters, Terms and Grade Bucket Literals area (Student Management\Office\GR Setup\CF\GS\Entity Setup tab). Often, this term span is the same span as the Display and Scheduling Start and Stop Terms. However, there are situations where it may be different. For example, an Entity can be a trimester school (3/6) that offers both trimester and semester Course Lengths but configures their grading setup with 8 Progress (Term) Grading Buckets. In this case, the Grading Start and Stop Term span coincides with the position of the Term Grade Buckets on the Entity Setup screen. See Figure 22 and Figure 23 (page 36) for this scenario.
Grade Input Start Date Grade Input End Date
The start and end dates for allowing grading information entry. This is also referred to as the “Grading Period open dates.” Teachers can post grades, and automatic posting can occur within this date range. Note: This date range may affect how grades appear in Family and Student Access, depending on the configuration options selected. See the WSPIC Guide to Family and Student Access for Administrators to learn more about how grades appear in Family and Student Access.
Grade Input Start Time Grade Input Stop Time
The start and end times for grading information entry during the Grade Input Start and End Date time span.
Table 3 - Options on the Grading Period Maintenance screen
April 2015 35 Version 05.15.02.00.02

Part 2: Transferring Grading Setup Chart Data to Student Management Grading
Figure 22 - Term Grading Buckets for a trimester Entity that offers semester and trimester Course Lengths and collects Progress (Term) Grade Marks for these Course Lengths at 6, 9, 12, 18, 24, 27, 30 and 36 weeks, but does not want to re-use Term Grading Buckets.
Figure 23 - Grading Periods for a trimester Entity that offers semester and trimester Course Lengths and collects Progress (Term) Grade Marks for these Course Lengths at 6, 9, 12, 18, 24, 27, 30 and 36 weeks.
Step 7: Configure Grade Buckets In the Grade Buckets area, you link a Grade Bucket to a Grading Period for each Course Length your Entity offers. To configure Grade Buckets:
1. Go to Student Management\Office\GR Setup\CF\GS.
2. In the School Year box, select the school year you’re configuring.
3. Click Grade Buckets.
4. Expand the Course Length you’re assigning Grade Buckets to.
5. Next to any Grading Period that applies to this Course Length, click Edit.
Note It is possible that not all Grading Periods will apply to a Course Length. Ignore those Grading Periods that aren’t for the Course Length you’re configuring.
April 2015 36 Version 05.15.02.00.02

Part 2: Transferring Grading Setup Chart Data to Student Management Grading
6. On the Grade Buckets screen (Figure 24), click Add to move the Grade Buckets from the Available Grade Buckets list to the Selected Grade Buckets list for those Grade Buckets that apply to this Course Length for this Grading Period.
Note The labels for the Grade Buckets that appear in the lists
(e.g. Term 02, Semester 01) are system defaults that coincide with the Grade Bucket Literals. For example, Term 02 means the Grade Bucket that is in the second Term Literal position on the Maximum Semesters, Terms, And Grade Bucket Literals screen (Student Management\Office\GR Setup\CF\GS\Entity Setup tab).
7. Click Save.
8. Repeat steps 4 through 7 until you’ve linked all Grade Buckets for a Course
Length to its Grading Period.
Figure 24 - Grade Buckets screen
April 2015 37 Version 05.15.02.00.02

Appendix A – Grading Setup Charts for Various Course Lengths
Appendix A - Grading Setup Charts for Various Course Lengths
This section contains Grading Setup Charts for a variety of Course Lengths.
Course Length: Semester (18 weeks) This Entity offers semester Course Lengths, collects two Progress Grade Marks per semester, one at the middle of each semester and one at the end of each semester. It also collects Credit Grade Marks at the end of each semester. It collects these Grade Marks at weeks 9, 18, 27 and 36.
Course Length (week span)
Class Control
Sets
Weeks when Entity Collects Grading
Information
# Credit Grade
Buckets
Weeks When Credit Grade
Marks are Collected
# Progress Grade
Buckets (non-credit
earning)
Weeks When Progress Grade
Marks are CollectedSemester 1 1 18 2 9, 18Semester 2 1 36 2 27, 36
Semester (18) 9, 18, 27, 36
Course Length: Trimester (12 weeks) This Entity offers trimester Course Lengths, collects two Progress Grade Marks per trimester, one at the middle of each trimester and one at the end of each trimester. It also collects Credit Grade Marks at the end of each trimester. It collects these Grade Marks at weeks 6, 12, 18, 24, 30 and 36.
Course Length (week span)
Class Control
Sets
Weeks when Entity Collects Grading
Information
# Credit Grade
Buckets
Weeks When Credit Grade
Marks are Collected
# Progress Grade
Buckets (non-credit
earning)
Weeks When Progress Grade
Marks are CollectedTrimester 1 1 12 2 6, 12Trimester 2 1 24 2 18, 24Trimester 3 1 30 2 30, 36
Trimester (12) 6, 12, 18, 24, 30, 36
April 2015 38 Version 05.15.02.00.02

Appendix A – Grading Setup Charts for Various Course Lengths
Course Length: Year-Semester (36 weeks) This Entity offers year Course Lengths that it grades on a semester basis. It collects four Progress Grade Marks during the school year and two Credit Grade Marks. The Progress Grade Marks are collected half-way through each semester and at the end of each semester. The Credit Grade Marks are collected at the end of each semester. It collects these Grade Marks at weeks 9, 18, 27 and 36.
Course Length (week span)
Class Control
Sets
Weeks when Entity Collects Grading
Information
# Credit Grade
Buckets
Weeks When Credit Grade
Marks are Collected
# Progress Grade
Buckets (non-credit
earning)
Weeks When Progress Grade
Marks are CollectedYear-Semester (36) Year 9, 18, 27, 36 2 18, 36 4 9, 18, 27, 36
Course Length: Year-Trimester (36 weeks) This Entity offers year Course Lengths that it grades on a trimester basis. It collects six Progress Grade Marks during the school year and two Credit Grade Marks. The Progress Grade Marks are collected half-way through each trimester and at the end of each trimester. The Credit Grade Marks are collected at the end of each trimester. It collects these Grade Marks at weeks 6, 12, 18, 24, 30 and 36.
Course Length (week span)
Class Control
Sets
Weeks when Entity Collects Grading
Information
# Credit Grade
Buckets
Weeks When Credit Grade
Marks are Collected
# Progress Grade
Buckets (non-credit
earning)
Weeks When Progress Grade
Marks are CollectedYear-Trimester (36) Year 6, 12, 18, 24, 30, 36 3 12, 24, 36 6 6, 12, 18, 24, 30, 36
April 2015 39 Version 05.15.02.00.02

Appendix A – Grading Setup Charts for Various Course Lengths
Course Length: Term (6 weeks) This Entity offers term Course Lengths that it grades at the end of the term. It collects no Progress Grade Marks and one Credit Grade Mark at the end of each term. Since there are six terms (6 weeks) in the year it collects the Credit Grade Marks for each term at weeks 6, 12, 18, 24, 30 and 36 respectively.
Course Length (week span)
Class Control
Sets
Weeks when Entity Collects Grading
Information
# Credit Grade
Buckets
Weeks When Credit Grade
Marks are Collected
# Progress Grade
Buckets (non-credit
earning)
Weeks When Progress Grade
Marks are CollectedTerm 1 0* 6 1* N/ATerm 2 0* 12 1* N/ATerm 3 0* 18 1* N/ATerm 4 0* 24 1* N/ATerm 5 0* 30 1* N/ATerm 6 0* 36 1* N/A
Term (6) 6, 12, 18, 24, 30, 36
Course Length: Quarter (9 weeks) This Entity offers quarter Course Lengths that it grades at the end of the quarter. It collects no Progress Grade Marks and one Credit Grade Mark at the end of each quarter. Since there are four quarters (9 weeks) in the year it collects the Credit Grade Marks for each term at weeks 9, 18, 27 and 36 respectively.
Course Length (week span)
Class Control
Sets
Weeks when Entity Collects Grading
Information
# Credit Grade
Buckets
Weeks When Credit Grade
Marks are Collected
# Progress Grade
Buckets (non-credit
earning)
Weeks When Progress Grade
Marks are CollectedQuarter 1 0* 9 1* N/AQuarter 2 0* 18 1* N/AQuarter 3 0* 27 1* N/AQuarter 4 0* 36 1* N/A
9, 18, 27, 36Quarter (9)
Note Any Course Length shorter than a semester (18 weeks) or
trimester (12 weeks) must use a Progress Grade Bucket instead of a Credit Grade Bucket to earn credit. That means Course Lengths such as Term (6 weeks) and Quarter (9 weeks) earn credit in a Progress Grade Bucket, not a Credit Grade Bucket. This deviation is noted by the asterisks in this completed sample Grading Setup Chart.
April 2015 40 Version 05.15.02.00.02

Appendix B – Class Control Sets Chart for Various Configurations
Appendix B - Class Control Sets Chart for Various Configurations
The following chart is a sample Class Control Sets Chart for various Grading Setup Configurations. An “x” in a column means that the associated Grade Bucket doesn’t appear on the Class Control Sets screen.
April 2015 41 Version 05.15.02.00.02

Appendix B – Class Control Sets Chart for Various Configurations
A B C D E
Entity Configuration
(Semesters/Terms)
Maximum Semesters/Term
Literals Course Length
# Graded Semester/ #
Graded TermsClass Control
SetStart Term
Stop Term T1 T2 T3 T4 T5 T6 T7 T8
S1 01 02 1 1 x x x xS2 03 04 2 2 x x x x
Year 2/4 YR 01 04 1 1 2 2 x x x xQ1 01 01 1 x x x xQ2 02 02 1 x x x xQ3 03 03 2 x x x xQ4 04 04 2 x x x xS1 01 02 1 x x x x x xS2 03 04 2 x x x x x x
Year 2/2 YR 01 04 1 2 x x x x x xR1 01 02 1 1 x xR2 03 04 2 2 x xR3 05 06 3 3 x x
Year 3/6 YR 01 06 1 1 2 2 3 3 x xT1 01 01 1 x xT2 02 02 1 x xT3 03 03 2 x xT4 04 04 2 x xT5 05 05 3 x xT6 06 06 3 x xS1 01 03 1 x xS2 04 06 2 x xR1 01 02 1 x x x x xR2 03 04 2 x x x x xR3 05 06 3 x x x x x
Year 3/3 YR 01 06 1 2 3 x x x x xR1 01 02 1 1R2 03 04 2 2R3 05 06 3 3S1 01 03 1 1S2 04 06 2 2T1 01 01 1T2 02 02 1T3 03 03 2T4 04 04 2T5 05 05 3T6 06 06 3Q1 02 02 1Q2 03 03 1Q3 05 05 2Q4 06 06 2
Semester (2/4)
Semester (2/4)
2/4
2/2
3/6
G
1/2
1/1
1/1
1/2
F
Semester
Term
Quarter
Semester
Trimester
Semester
Quarter
Trimester (3/8)
Term 1/1
Semester 1/1
Trimester (3/6)Trimester
Trimester (3/6)
3/31/1
1/2
1/2
1/1
1/1
3/8
Trimester
Note If your Grading Setup combination is not shown in the Chart above, contact your Information Service Center coordinator for assistance in setting up your Entity’s Class Control Sets.
April 2015 42 Version 05.15.02.00.02