Bang Goes The Theory Teacher's pack - BBC
100
Teacher’s Pack
-
Upload
khangminh22 -
Category
Documents
-
view
3 -
download
0
Transcript of Bang Goes The Theory Teacher's pack - BBC

Teacher’s Pack

Bang Goes the Theory Teacher’s Pack
ContentsWelcome Page 2
Bang Goes the Theory Page 3
Purpose of the pack Page 3
How to use this pack Page 4
Health and safety Page 4
Lesson PlansRed cabbage indicator Page 5
Investigating friction Page 12
Pressure under water Page 15
Clever crystals and solubility Page 19
The speed and nature of sound Page 25
Is food a good fuel? Page 29
Forensic detectives Page 32
Forces in water rockets Page 41
Conservation of mass in chemical reactions Page 44
Sampling techniques Page 47
Metals: extraction, reactivity, properties and alloys Page 55
Lactic acid and power Page 63
DNA replication Page 66
Investigating geological processes Page 73
The electromagnetic spectrum Page 79
Gravity and centripetal force Page 82
Launching your own astronaut Page 86
Making a vortex cannon Page 91
Useful links Page 94
Acknowledgments Page 98
1
2
Putting science to the test is at the heart of everything we do at Bang Goes the Theory.
We want to inspire a new generation of young people to get hands-on with science and to
nurture a life-long curiosity for how the world works and how science shapes the world
around us.
We’ve created this pack to make it as easy as possible for you to use the best content from
the first two series of Bang Goes the Theory to deliver practical, engaging science lessons for
pupils. We hope you enjoy using it!
The Bang Team
Welcome to the Bang Goes the
Theory Teacher’s Pack

Bang Goes the Theory
Bang Goes the Theory is BBC One’s flagship science show for anyone who is
remotely curious about life, the universe and pretty much everything. We are
dedicated to finding out how science shapes the world around us by rolling up our
sleeves and getting stuck in.
This pack takes the best bits from the first two series of Bang Goes the Theory tobring science to life for 11–16 year olds. It features lesson plans created aroundthemes from the show, tailor-made classroom resources and includes specificcurriculum and learning links. All the clips you’ll need are included on theaccompanying DVD.
This resource has been designed by BBC Learning in collaboration with scienceeducation experts to:• make it easy for teachers to deliver practical and engaging science lessons themed
around the TV series; • inspire students to develop their interest in science further;• encourage students to discover how science shapes the world around us;• work across the different curriculums, syllabuses and exam boards in England,
Scotland, Wales and Northern Ireland.
If you would like further copies or a Welsh-language version of this pack, it isavailable to download from: bbc.co.uk/teachers/bang
The accompanying clips can also be streamed from the BBC Class Clips website:bbc.co.uk/learningzone/clips
Purpose of the pack
3
4
How to use this pack
We have designed the material in this pack to be as flexible and adaptable aspossible. There are 18 lesson plans that have been created to fit approximatelywithin 60-minute lessons. However, we understand that you will probably want toadapt the content to suit your learning priorities and the needs of your particularclass.
The lesson plans cover a range of topics relating to Biology, Chemistry and Physics.They are loosely ordered in increasing difficulty and each plan clearly states forwhich age group it is suitable. There are also some extension ideas at the end of thepack that are more involved and suitable for further study or for exploring as part ofa science club.
We have designed the lesson plans to enable you to pick and choose topics that fitwithin your own scheme of work. Each lesson can stand alone and does not need tobe taught in sequence, so you can use this resource according to your ownrequirements. The Learning Objectives for each lesson are deliberately wide to allowfor differences in curricular requirements across the UK.
Where relevant, we have produced worksheets that sit alongside the lesson plans.These are designed to be photocopied easily so that they can be distributed to thewhole class.
If you’d like even more ideas head to bbc.co.uk/bang which is jam-packed with filmsincluding highlights from the TV series, hands-on science, web exclusives and AskYan video answers.
Health and safety
Please be aware that some of the films included on the DVD contain behaviour
that could be imitated and is dangerous. Please always make it clear to your
students that they should not, under any circumstances, attempt to imitate any
of the experiments carried out by the presenters in the films unless told to do so
in class, with proper supervision.

Red cabbage indicator
5
Bunsen burner
Sticky Snails
Beaker
red cabbage
6
Red cabbage indicator
Suitable for: 11–14 years
Curriculum and learning links:• Acids and alkalis
Learning objectives:• Explain what an indicator is and what it does.• Investigate whether household substances are acids or alkalis.
© BBC
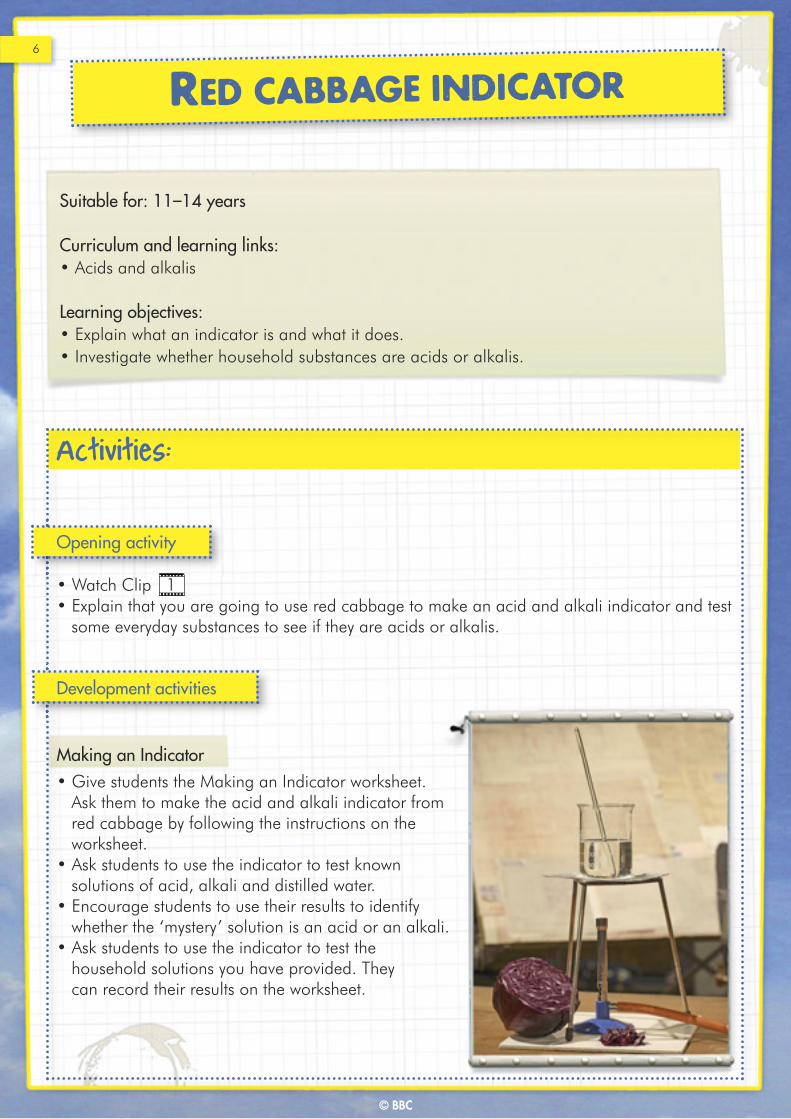
• Give students the Making an Indicator worksheet. Ask them to make the acid and alkali indicator from red cabbage by following the instructions on the worksheet.
• Ask students to use the indicator to test known solutions of acid, alkali and distilled water.
• Encourage students to use their results to identify whether the ‘mystery’ solution is an acid or an alkali.
• Ask students to use the indicator to test the household solutions you have provided. They can record their results on the worksheet.
Activities:
Opening activity
• Watch Clip 1• Explain that you are going to use red cabbage to make an acid and alkali indicator and test
some everyday substances to see if they are acids or alkalis.
Development activities
Making an Indicator
7Red cabbage indicator
Want to explore further?• This activity could be expanded to include an explanation of the pH scale and the fact
that different indicators give different colours.
• The exploration of acids and alkalis could also be extended by doing taste tests of safe acids and alkalis to determine if trends exist. Students could test the hypothesis that acids are commonly described as sour or sharp and alkalis as bitter.
Reflect and review
© BBC
• Watch Clip 2 • Discuss whether the students’ results agree with Dr Yan’s.• Ask students to complete the Household Acid or Alkali? card sort exercise by cutting up the
cards on the worksheet and separating them into acids and alkalis.• Discuss whether students think acids or alkalis are more dangerous. Was their opinion
changed by the testing of substances in this lesson?
You will need
• Clip 1 (2’23”)• Clip 2 (1’37”)• Making an Indicator worksheet• Household Acid or Alkali? cards• Red cabbages • Acid solution (0.1 mol/dm3 HCl) • Alkali solution (0.1 mol/dm3 NaOH) • Distilled water• Mystery solution • Household acids (e.g. vinegar
lemons, pickled onions, orange juice lemonade, tomato ketchup, cola)
• Test tubes
• Household alkalis (e.g. indigestion remedies, toothpaste, bleach, cleaning products, bicarbonate of soda, soap)
• Glass stirring rods• Beakers• Tripod stands• Heatproof mats• Bunsen burners• Scissors• Tap water• Gauzes• Pipettes• Test tube holders

© BBC
Health and safety• Normal laboratory guidelines apply for all activities (including eye protection).
• Students must not eat any foods unless instructed to do so by the teacher.
• Care must be taken when using scissors to cut the cabbage.
• The boiled solution must be left to cool and beakers must not be handled by students
until it is safe to do so.
• If foods are consumed within the laboratory, the teacher must ensure that there is no risk
of contamination. You might want to do the taste testing in a food technology room.
• Please ensure that students with specific allergies are taken into account when preparing
this lesson. • It is the responsibility of the teacher to ensure that an adequate risk assessment has
been completed.
Technician’s notes• Acids and alkalis at higher concentrations than those specified should not be used
without appropriate risk assessments and safety precautions. • The mystery solution should be made of either 0.1 mol/dm3 HCl or NaOH.• If doing taste tests, suitable acids for tasting include oranges, lemons, vinegar, acid
drops, sherbet and sour sweets. Appropriate alkalis include bicarbonate of soda and indigestion remedies.
Red Cabbage Indicator8

Making an Indicator
© BBC
Many acid and alkali indicators are made from plants. In this experiment you will makean indicator from red cabbage and test household acids and alkalis.
What to do
1. Fill the beaker to the 100cm3 level with water.
2. Cut the red cabbage into small pieces using scissors and place in the beaker.
3. Heat the beaker using the blue flame on your Bunsen burner.
4. Very carefully stir the cabbage and mash gently using the glass rod.
5. Once the water has turned dark purple, remove from the heat and leave the mixture to cool.
6. Use a pipette to take some of the cool, purple liquid and add it to 2 to 3cm3 of acid in a test tube. Record the colour seen on the back of this worksheet.
7. Add some to 2 to 3cm3 of distilled water in a test tube and record the colour.
8. Add some to 2 to 3cm3 of alkali in a test tube and record the colour.
9. Put 2 to 3cm3 of the mystery solution into a test tube and use the indicator to find out whether it is an acid or an alkali.
Test some household substances and work out if they are acids or alkalis. Use the table on the back of this worksheet to record your results.
You will need• Red cabbage• Pipette• Scissors • Bunsen burner• 250cm3 beaker• Heatproof mat
• Glass stirring rod • Gauze• 3 clean test tubes• Tripod stand• Tap water
• Test tube holder• Distilled water• Mystery solution• Acid solution• Alkali solution• Household substances
10.
9
Making an Indicator
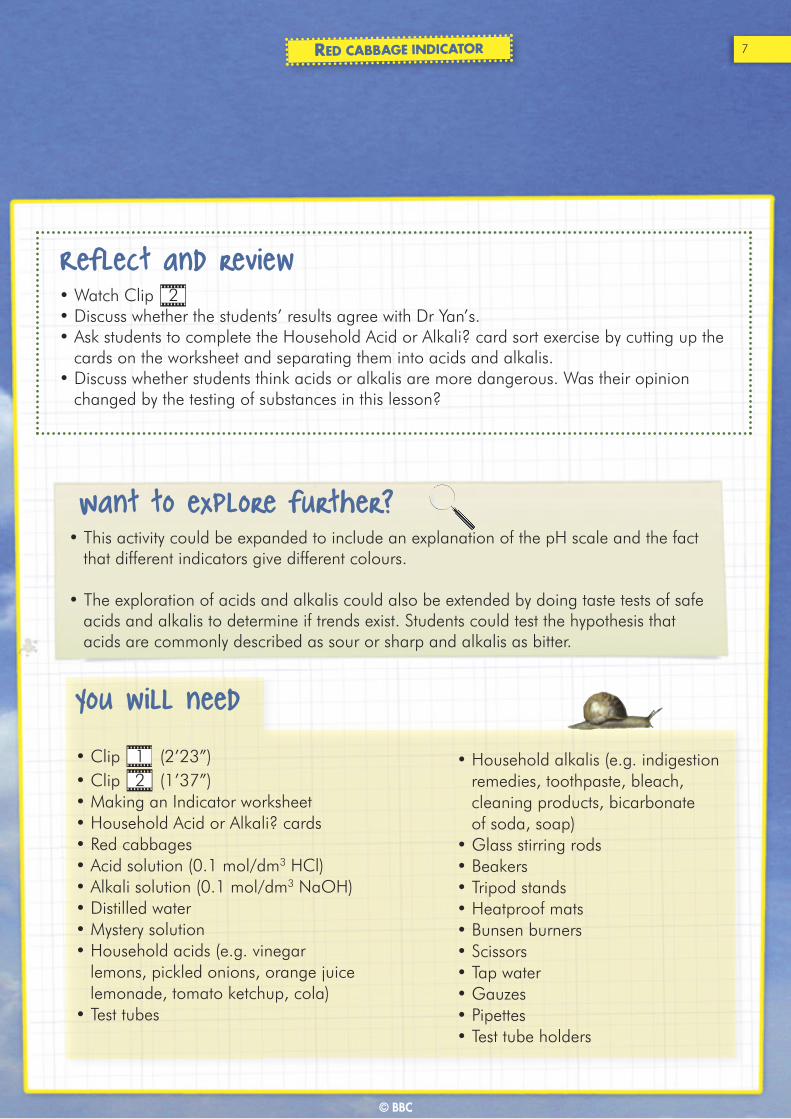
Testing household substances
Is the mystery solution acid or alkali?
Indicator added to:
Acid
Distilled water
Alkali
Mystery solution
Substance tested Colour seen Acid or Alkali?
Colour seen
10
© BBC
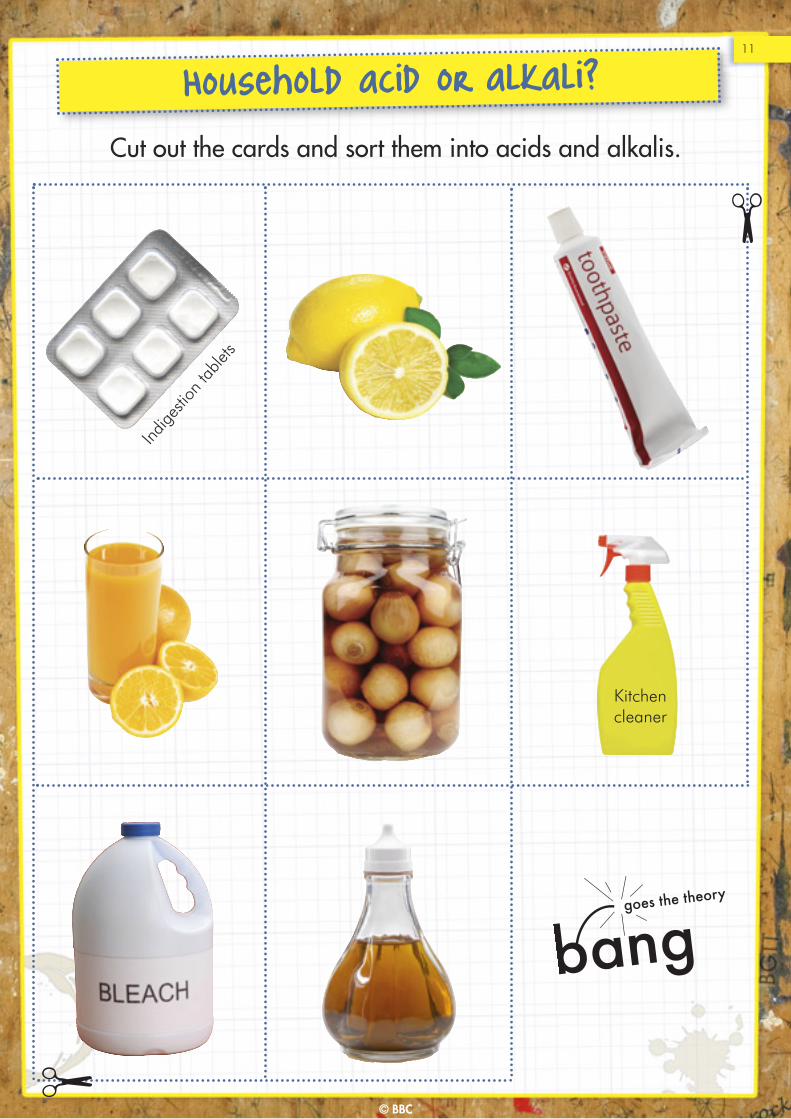
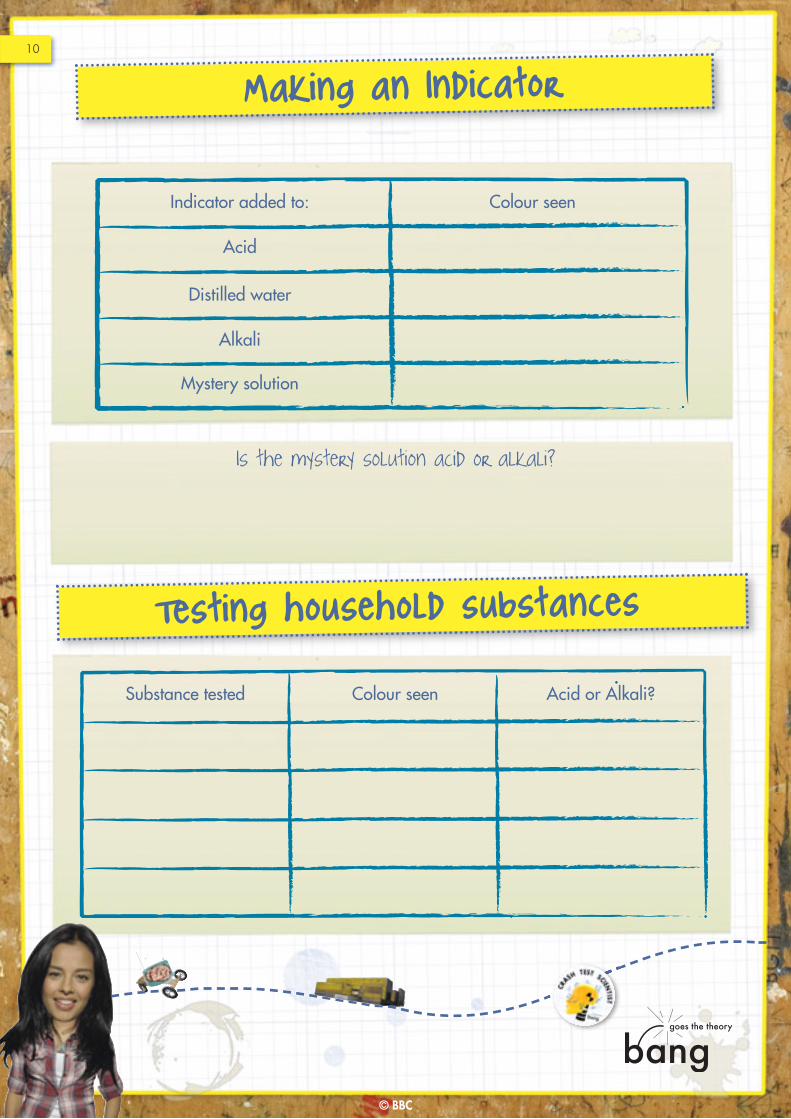
Household acid or alkali?
Cut out the cards and sort them into acids and alkalis.Ind
igesti
on ta
blets
Kitchencleaner
11
© BBC

Investigating friction
12
helicopter
brain training
Suitable for: 11–14 years
Curriculum and learning links:Forces, friction, energy transfer
Learning objectives:• Describe what friction is.• Plan and complete an investigation into friction.• Recognise friction in real world contexts.
© BBC
13
Activities:
Opening activity
• Ask students to rub their hands together as hard as possible and observe what happens. • Interlace the pages of two books and challenge students to pull them apart. • Watch Clip 3 to recap how friction acts upon objects moving across each other.
Development activities
Investigating Friction
• Ask students to plan and carry out an investigation into friction using ramps, different surfaces and masses. The dependent variable is the force needed to start the object moving down a ramp (measured by dragging the object down the ramp using a newton meter). Possible independent variables include the angle of the slope, the surface of the slope, the mass and the surface area of the object. Trainers can be a good object to test in this activity.
• Ask students to think of examples of friction at work in the real world. Discuss how students might separate these instances into ‘good’ and ‘bad’ types of friction. For example, ‘good’ friction can be seen in car brakes or tyres gripping on a road. A common example of ‘bad’ friction is the rubbing of parts in a car engine. Ask the students to think of ways in which they could increase or reduce the amount of friction present in some of their examples.
• Watch Clip 4 and explain to students that this is a real world example of the way in which friction can be useful. Ask students to summarise in their own words or in a diagram how friction helps skiers.
Investigating friction

Investigating friction
Health and safety• Normal laboratory guidelines apply for all activities.
• Care must be taken if using large masses.
• Students should be told not to try to repeat Jem’s vacuum cleaner climb.
• It is the responsibility of the teacher to ensure that an adequate risk
assessment has been completed.
Want to explore further?
Reflect and review
© BBC
• Ask students to discuss how they could use a vacuum cleaner to climb a building. • Watch Clip 5 to discover whether any of the students’ ideas are similar to Jem’s.
• You could investigate the effects of friction further by challenging students to lift a jar of long-grain rice using a knife and friction. To do this, ask students to fill an empty jar or bottle with rice and then insert a normal table knife into the top. Carefully push the knife in and out of the bottle so that the grains of rice realign themselves around it, thus increasing the surface area in contact between the rice and knife. As this happens, the amount of friction created increases to a point where the jar can be lifted using the knife handle. Full details and an explanation of how this works can be found with the Sticky Rice film at: bbc.co.uk/bang/handson
• You could investigate the way that friction is used in the natural world by thinking about avalanches. Watch Clip 6 and discuss with students how avalanches are caused by a reduction in friction between different layers of snow.
You will need
• Clip 3 (2’21”)
• Clip 4 (5’31”)
• Clip 5 (3’41”)
• Clip 6 (2’36”)• Two thick paperback books • Newton meters
• Ramps • Masses• A range of materials to use as ramp
surfaces (e.g. paper, plastic, wood, sandpaper)
Technician’s notes• Newton meters will need to be of the type that students hold, not stand on.
14
Pressure under water
15
Submarine
HQ
Sticky snails

Pressure under water
Suitable for: 11–16 years
Curriculum and learning links:Pressure, particles in liquids and gases
Learning objectives:• Describe the arrangement of particles in a liquid and a gas and explain the changes
caused by pressure.• Explain why there is greater water pressure at greater depths.• Describe the effect that pressure has on animals and how some are adapted to
different environments.• Describe how water pressure can be useful.
© BBC
Activities:Opening activity
• Watch Clip 7 • Ask students to discuss the effects that the increased water pressure had on Dallas as he
reached greater depths.
Development activities
Pressure Under Water
• Ask students to attach a small balloon to both ends of a short length of glass tubing and submerge one end of it in deep water – for example, a filled sink, a large bottle with the top cut off, or a large tank. Ask students to explain why the submerged balloon shrinks and the other one inflates.
Making a Cartesian Diver
• Watch Clip 8 • Give students the Making a Cartesian Diver worksheet and ask them to make a Cartesian
diver. Ask students to explain why the diver sinks when they squeeze the bottle. Full details of this activity can be found alongside the Straw Submarine film at: bbc.co.uk/bang/handson
Animal Adaptations
• Watch Clip 9 • Ask students to think of or research other animals that are adapted to live at great depths.
They might like to use the BBC Wildlife Finder which can be found at bbc.co.uk/wildlifefinder to help them with their research.
16
Pressure under water
Health and safety• Normal laboratory guidelines apply for all activities (including eye
protection).• For the first Want to explore further? activity, the bottle must be heated
gently in a pan of water, not directly or in a microwave.
• It is the responsibility of the teacher to ensure that an adequate risk
assessment has been completed.
Want to explore further?
Technician’s notes• For the first development activity, take a short length of glass tubing and
fit a rubber bung to each end to seal into the balloon. It is not recommended that students insert glass tubing through bungs.
• The Cartesian Diver experiment can be extended by placing the bottle in a warm water bath. As the water in the bottle warms, the pressure increases and the diver will sink. At this point the heat should be turned off or the bottle removed. Alternatively, you could repeat the experiment with salt water to allow students to investigate the effects of increased water density. Students will need to add more mass to the diver to make it the same density as the water.
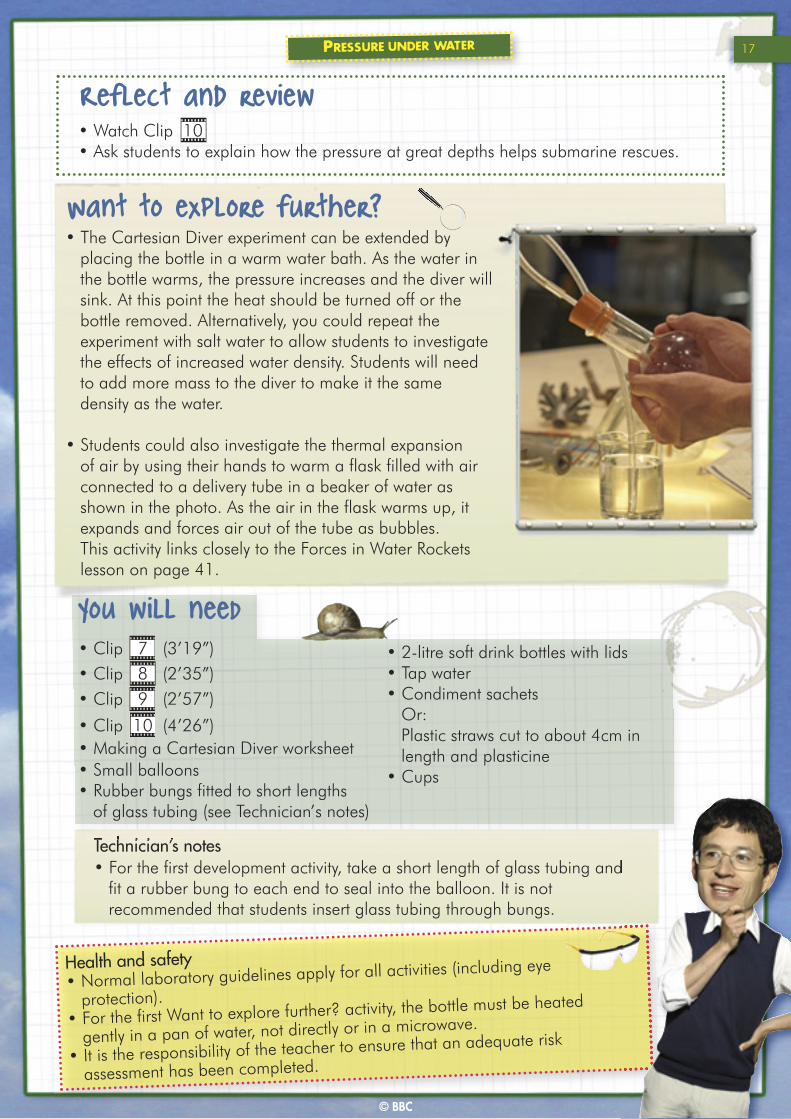
• Students could also investigate the thermal expansion of air by using their hands to warm a flask filled with air connected to a delivery tube in a beaker of water as shown in the photo. As the air in the flask warms up, it expands and forces air out of the tube as bubbles. This activity links closely to the Forces in Water Rockets lesson on page 41.
Reflect and review• Watch Clip 10 • Ask students to explain how the pressure at great depths helps submarine rescues.
17
You will need• Clip 7 (3’19”)• Clip 8 (2’35”)• Clip 9 (2’57”)
• Clip 10 (4’26”)• Making a Cartesian Diver worksheet• Small balloons • Rubber bungs fitted to short lengths
of glass tubing (see Technician’s notes)
• 2-litre soft drink bottles with lids• Tap water• Condiment sachets
Or:Plastic straws cut to about 4cm in length and plasticine
• Cups
© BBC

1. Place the condiment sachets in a cup of water. Choose one that floats with only a small amount showing above the water. Or:If you are using a length of plastic straw, attach a small amount of plasticine to seal each end and place it in a cup of water. Add or remove plasticine from the ends so that it floats just above the water.
This is now your diver.
2. Fill the bottle almost to the top with water.3. Put your diver into the bottle and fill the rest with water.4. Tightly screw on the lid of the bottle.5. Gently squeeze and release the sides of the bottle and observe what happens to the diver.
Making a Cartesian Diver
© BBC
What to do
You will need• 2-litre soft drink bottle with lid• Cup• Tap water
• Condiment sachets (e.g. ketchup)Or: Short piece of plastic straw (about 4cm long) and plasticine
18
Clever crystals and solubility
Bunsen Burner
Badge
car
19
Clever crystals and solubility
Suitable for: 11–14 years
Curriculum and learning links:States of matter, separating mixtures
Learning objectives:• State that dissolving and crystallisation can be accompanied by energy changes and
describe these as exothermic or endothermic. • Analyse data on how temperature can affect solubility.
Activities:
Opening activity
• Ask students if they have ever used a rechargeable handwarmer such as those which contain a colourless liquid which turns into a white solid when a metal disc is clicked. Demonstrate one and pass some around for students to feel.
• Demonstrate that the handwarmer can be ‘recharged’ by heating it in boiling water. • Challenge students to explain what is happening in this situation. You might also like to link
this activity to the energy changes in reversible processes.
Development activities
Stalagmites
• Watch Clip 11• Set up your own supersaturated solution so that you can repeat the stalagmite activity shown
in the film. To do this, you should place 125g sodium ethanoate-3-water (sodium acetate-3-water) into a very clean beaker and add 12.5cm3 distilled water. Heat gently and stir until dissolved.
• Ask the students if they know why so much solid can dissolve in so little liquid. Discuss the way that this is made possible by the water molecules that were trapped in the crystals being freed to act as a solvent.
• While the solution is still hot, pour it carefully into another very clean beaker. Place a cover slip or some cling film over the beaker and leave it to cool in the fridge until required for the demonstration.
Solubility Investigation
• Give students the Investigating Solubility worksheet and ask them to carry out an investigation into how temperature affects solubility.
• They can then use the Investigating Solubility – Data Analysis worksheet to carry out data analysis – either on the data they have collected, or on that provided on the worksheet.
20
© BBC

Clever crystals and solubility
Health and safety• Normal laboratory guidelines apply for all activities (including eye protection).
• It is the responsibility of the teacher to ensure that an adequate risk
assessment has been completed.
Technician’s notes• Sodium ethanoate can be reused by heating it up to redissolve it in its
water of crystallisation. However, it must be kept completely clean and uncontaminated. If it recrystallises prematurely, try adding a small amount of additional water.
• You could investigate the fact that not all compounds are more soluble in higher temperature solvents. For example, gases are usually less soluble at higher temperatures, which is why fizzy drinks go flat more quickly on a hot day.
• You could ask students to grow their own crystals from different salts by tying a seed crystal to a length of cotton thread or very fine fishing line and suspending it in a saturated solution. Good crystals can be obtained from aluminium potassium sulfate (alum), magnesium sulfate, and iron(II) sulfate.
• You could ask students to investigate whether their data are similar to those obtained by other scientists by carrying out some online research.
Want to Explore Further?
© BBC
• Ask students to discuss the data they have collected. What would happen if you were to saturate a solution of sodium chloride at 70oC and then cool it to 25oC?
• How far could they extrapolate the graph? Could it go beyond 100oC? • Demonstrate the sodium ethanoate stalagmite.
Reflect and Review
You will need• Clip 11 (2’25”)• Clip 12 (4’19”)• Investigating Solubility
worksheet• Investigating Solubility –
Data Analysis worksheet• Rechargeable handwarmers• Thermometers• Glass stirring rods• Top pan balances• Metal bucket
• 125g sodium ethanoate-3-water (sodium acetate-3-water)
• Sodium sulfate (sodium chloride could be used if this is not available)
• Sealed 500cm3 bottles of mineral water
• Ice• At least 750g salt• Graph paper• Beakers
• Spatulas• Distilled water• Fridge• Cover slips
Or:Cling film
• Bunsen burners• Tripod stands• Heatproof mats• Gauzes• Measuring cylinders• Tap Water
Development activities continued...
Supercooling• Ask students to think about the behaviour of crystals further by discussing how and why
water freezes.• Watch Clip 12• Either demonstrate the activity from the film for the class, or ask students to repeat it in groups.
Full details of this activity can be found alongside the Supercooling film at: bbc.co.uk/bang/handson
21

Depending on what temperature your teacherhas allocated to you, set up an ice bath orarrange the equipment as shown in thephotograph. Make sure that you don’t leaveyour stirring rod in your beaker because itmay make it unstable.
My temperature is __________ oC.
The empty beaker has a mass
of _______________ g.
What to do
1.
2.
3.
4.
5. Zero the balance with the beaker still on it andthen measure exactly 50.0g of sodium sulfateinto the beaker.
Use a measuring cylinder to measure 50cm3
water and pour it into your beaker.
Make the water the temperature allocated toyou by your teacher, either by warming itusing a Bunsen burner, or by cooling it in anice bath. Try to maintain this temperaturethroughout the experiment.
Record the mass of an empty, dry beaker byplacing it on the top pan balance.
Investigating Solubility
© BBC
Safety information
Wear eye protection throughout this experiment.
• Two beakers• Thermometer • Stirring rod• Spatula• Bunsen burner• Sodium sulfate
• Measuring cylinder• Ice bath• Top pan balance• Tap water
You will need
22
6.
7.
8.
9.
10.
11.
12.
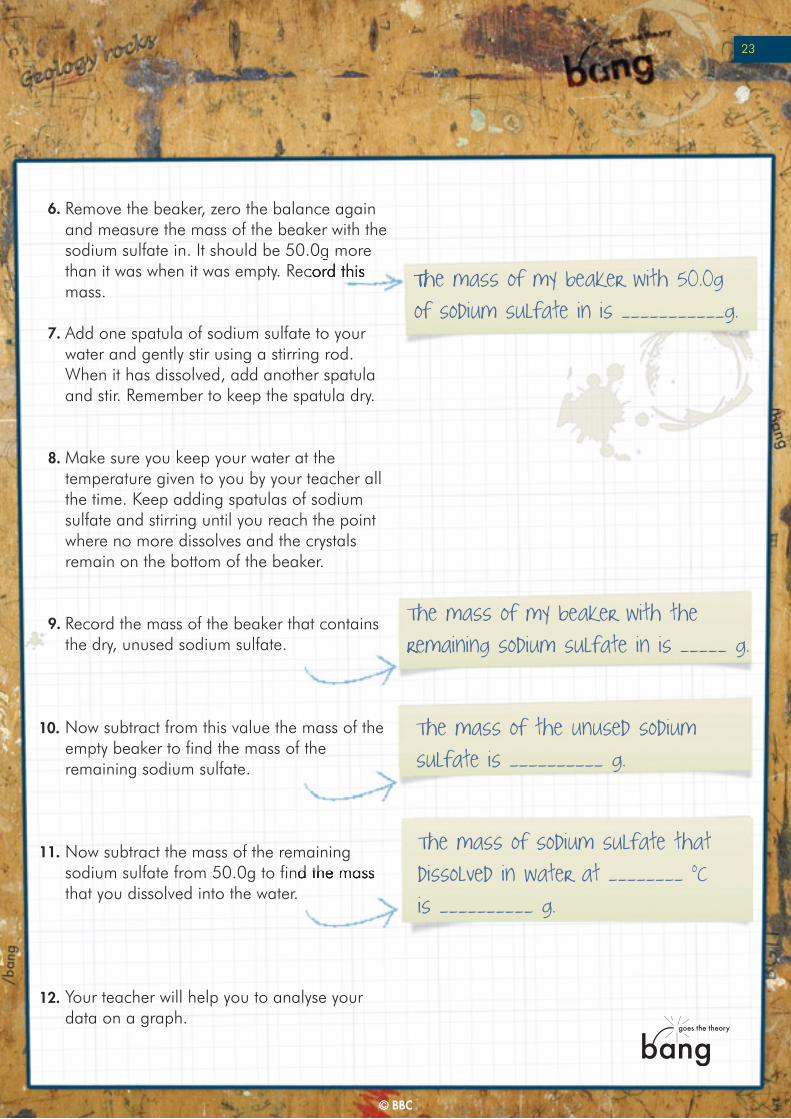
Remove the beaker, zero the balance againand measure the mass of the beaker with thesodium sulfate in. It should be 50.0g morethan it was when it was empty. Record thismass.
Add one spatula of sodium sulfate to yourwater and gently stir using a stirring rod.When it has dissolved, add another spatulaand stir. Remember to keep the spatula dry.
Make sure you keep your water at thetemperature given to you by your teacher allthe time. Keep adding spatulas of sodiumsulfate and stirring until you reach the pointwhere no more dissolves and the crystalsremain on the bottom of the beaker.
Record the mass of the beaker that containsthe dry, unused sodium sulfate.
Now subtract from this value the mass of the empty beaker to find the mass of theremaining sodium sulfate.
Now subtract the mass of the remainingsodium sulfate from 50.0g to find the massthat you dissolved into the water.
Your teacher will help you to analyse yourdata on a graph.
The mass of my beaker with 50.0g
of sodium sulfate in is ___________g.
The mass of my beaker with the
remaining sodium sulfate in is _____ g.
The mass of the unused sodium
sulfate is __________ g.
The mass of sodium sulfate that
dissolved in water at ________ oC
is __________ g.
23
© BBC

Different solutes were investigated to see how their solubility was affected by thetemperature of the solvent, which was water. Here are the data obtained.
Investigating Solubility - Data Analysis
On graph paper, plot these data, with‘Temperature (oC)’ as the independentvariable on the x axis and ‘Mass of solutedissolved in 50cm3 water (g)’ on the y axis.
Draw smooth lines of best fit through yourdata, ignoring any anomalous results. Yourlines of best fit do not need to be straightand they do not need to start at the origin.
Answer these questions:
Can you think ofany ways toimprove thisinvestigation?
1.
2.
4.
What mighthave causedthem?
Are there any unusual results?
Temperature(oC) NaCl Na2SO4 Ba(NO3)2
20 5 4
21 10 5
19 21 6
23 24 722 23 923 23 10
23 22 12
24 22 14
24
10
20
30
405060
70
80
90 21 16
Mass of solute dissolved in 50cm3 water (g)
Use the empty column of the table below to record the results of your class.
3.
Our results:
24
© BBC
The speed and nature of sound
Another time
evacuated bell jar
Bell
25
The speed and nature of sound
Suitable for: 11–14 years
Curriculum and learning links:Sound
Learning objectives:• Calculate the speed of sound and compare it with the speed of light.• Explain why sound cannot travel through a vacuum.• Explain why sound travels fastest in solids and slowest in gases.
Activities:
Opening activity
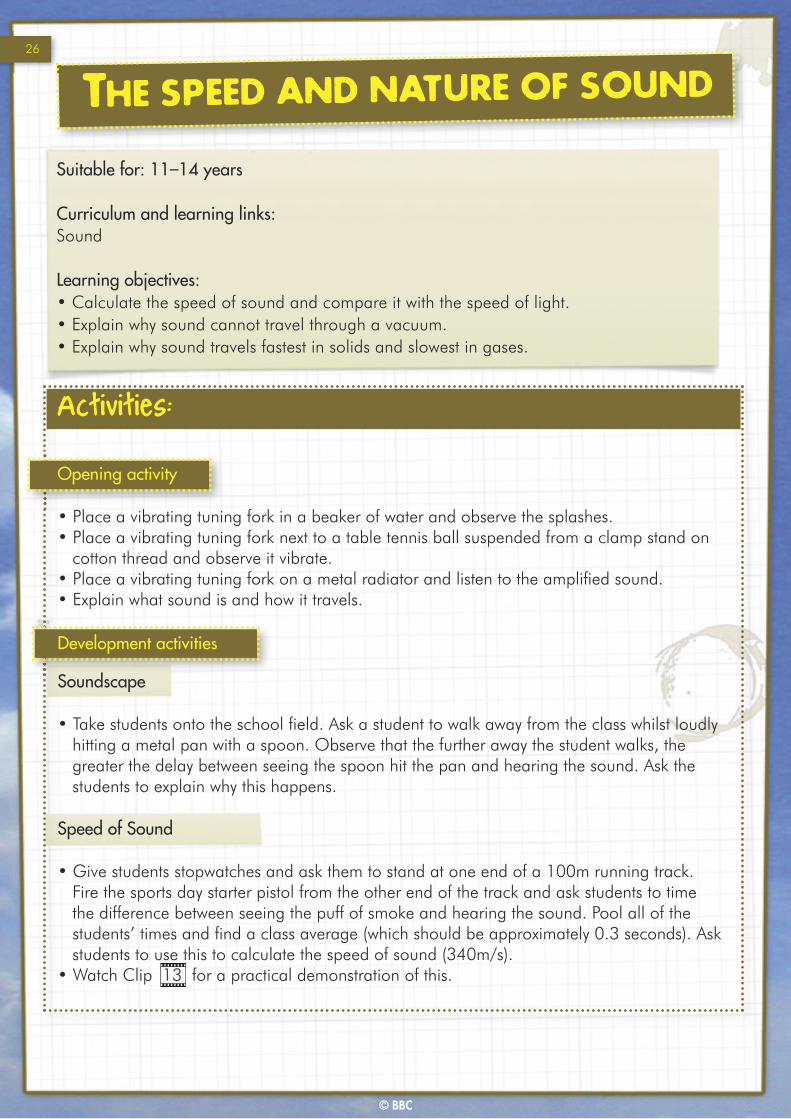
• Place a vibrating tuning fork in a beaker of water and observe the splashes. • Place a vibrating tuning fork next to a table tennis ball suspended from a clamp stand on
cotton thread and observe it vibrate. • Place a vibrating tuning fork on a metal radiator and listen to the amplified sound. • Explain what sound is and how it travels.
Development activities
Soundscape
• Take students onto the school field. Ask a student to walk away from the class whilst loudly hitting a metal pan with a spoon. Observe that the further away the student walks, the greater the delay between seeing the spoon hit the pan and hearing the sound. Ask the students to explain why this happens.
Speed of Sound
• Give students stopwatches and ask them to stand at one end of a 100m running track. Fire the sports day starter pistol from the other end of the track and ask students to time the difference between seeing the puff of smoke and hearing the sound. Pool all of the students’ times and find a class average (which should be approximately 0.3 seconds). Ask students to use this to calculate the speed of sound (340m/s).
• Watch Clip 13 for a practical demonstration of this.
26
© BBC

Reflect and review
Nature of Sound
• Ask students to work in pairs where one of them quietly scratches one end of a table and the other sits at the opposite end and listens (they should not be able to hear the scratching). Then ask them to repeat this exercise, but the student that is listening should place their ear on the table. Now that they can hear the scratching, explain that this means that sound travels better through solids than gases. Ask students to explain why this happens.
• Ask students to think about why whales can be heard from well over a mile away under water, but not through air. Explain that sound travels better through liquids than gases, but it still travels best through solids.
The speed and nature of sound
• To review the Speed of Sound activity, students can be asked to determine reasons for the differences between their calculated speed of sound and the actual value.
• To review the Nature of Sound activity, students can be asked to use the particle model and a range of diagrams to summarise what sound is and how it travels.
Development activities continued...
Vacuums
• Ask students why ‘in space no one can hear you scream’.
• Demonstrate that objects, such as a bell or alarm clock, sounding in an evacuated bell jar apparatus cannot be heard. Discuss with students why this is.
• Watch Clip 14 for a practical demonstration of this.
27
© BBC

© BBC
Health and safety• Normal laboratory guidelines apply for all activities.
• Only an appropriate adult should fire the starter pistol and suitable ear
protection should be worn.
• It is the responsibility of the teacher to ensure that an adequate risk
assessment has been completed.
Want to explore further?• You could demonstrate the string telephone activity in which two tin cans or plastic
cups are attached to the ends of a piece of string. A student speaks into one end, whilst a second student listens at the other. Ask students to explain why the telephone only works when the string is taut.
• You could also demonstrate the practical activity in Clip 15 to show how sound changes in hot drinks. Then, watch Clip 16 and ask students to summarise what they have found out about why Dr Yan’s voice sounds different with a lungful of helium and a lungful of sulfur hexafluoride. Remind students that they should not try to recreate this demonstration.
• You might also like to watch the Balloon bang film at: bbc.co.uk/bang/ask_yan
The speed and nature of sound
You will need
• Clip 13 (0’52”)• Clip 14 (1’49”)• Clip 15 (3’08”)• Clip 16 (2’30”)• Tuning fork• Table tennis ball• Clamp and stand• Cotton thread• Metal radiator
• Metal pan• Spoon• Starter pistol• Stopwatches• Bell or alarm clock• Evacuated bell jar apparatus• Tap water• Beaker
28

Is food a good fuel?
Another time
brain training
Badge
29

Is food a good fuel?
Suitable for: 11–14 years
Curriculum and learning links:Food, fuels, respiration, energy changes
Learning objectives:• Experimentally prove which food type has the most energy stored within it.• Evaluate the effectiveness of different fuels.
Good Fuels
This activity could be completed as a teacher demonstration or a student practical. • As a class, draw up a list of criteria that make something a ‘good fuel’ – for example,
something that is easy to store, light, that is cheap, readily available, that produces little or no smoke, gives a hot flame, burns for a long time.
• Burn the different fuels you have provided in turn in a metal dish on a heatproof mat.• Encourage students to make observations against the criteria you identified.
Activities:
Opening activity
• Show Clip 17 • Explain to the class that they will now investigate the amount of energy stored in different
foods and use this information to work out what makes a good fuel.
Development activities
Energy in Foods
• Check that no students have allergies to the food types you intend to use.
• Show students examples of the information panels on food packaging, drawing their attention to the energy section (for example, a typical packet of crisps has about 550kJ in it). Discuss what foods they think contain the most energy and why.
• Ask students to set up the equipment as shown in the photograph by securing their boiling tube to a clamp stand.
• Ask students to burn the different foods you have provided in turn and record the change in temperature of the water. The water should be replaced after each attempt. If students find it hard to hold the food on a mounted needle, they should burn it on a teaspoon.
• Ask the students to work out which food contains the most energy by looking at how much the temperature of the water changed in each test.
30
© BBC
Is food a good fuel?
Health and safety• Normal laboratory guidelines apply for both activities (including eye
protection).• Please ensure that students with specific food allergies are taken into account
when preparing this lesson.
• Students must be told not to eat any of the foods in the lab.
• Both experiments should be completed over a heatproof mat.
• Students must be told not to repeat these experiments at home.
• If burning ethanol, special care must be taken.
• It is the responsibility of the teacher to ensure that an adequate risk
assessment has been completed.
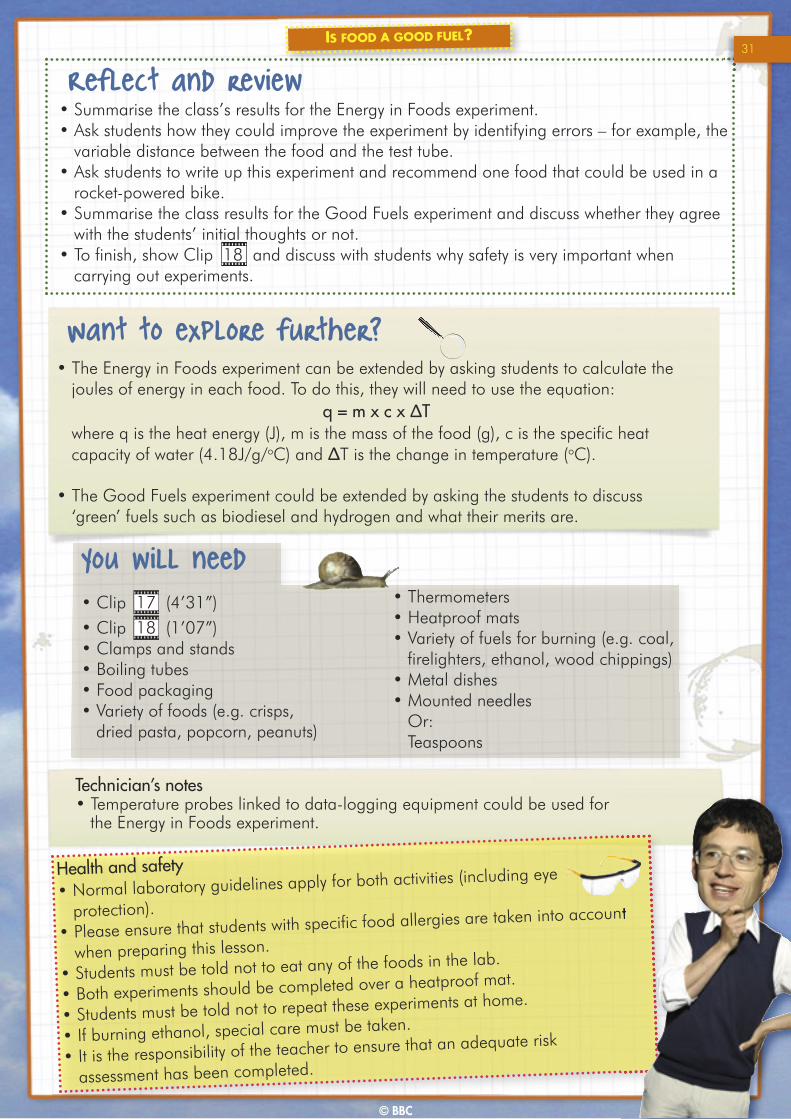
Want to explore further?
Technician’s notes• Temperature probes linked to data-logging equipment could be used for
the Energy in Foods experiment.
• The Energy in Foods experiment can be extended by asking students to calculate the joules of energy in each food. To do this, they will need to use the equation:
q = m x c x ΔT where q is the heat energy (J), m is the mass of the food (g), c is the specific heat capacity of water (4.18J/g/oC) and ΔT is the change in temperature (oC).
• The Good Fuels experiment could be extended by asking the students to discuss ‘green’ fuels such as biodiesel and hydrogen and what their merits are.
Reflect and review
© BBC
• Summarise the class’s results for the Energy in Foods experiment. • Ask students how they could improve the experiment by identifying errors – for example, the
variable distance between the food and the test tube. • Ask students to write up this experiment and recommend one food that could be used in a
rocket-powered bike. • Summarise the class results for the Good Fuels experiment and discuss whether they agree
with the students’ initial thoughts or not. • To finish, show Clip 18 and discuss with students why safety is very important when
carrying out experiments.
You will need• Clip 17 (4’31”)• Clip 18 (1’07”)• Clamps and stands• Boiling tubes• Food packaging • Variety of foods (e.g. crisps,
dried pasta, popcorn, peanuts)
• Thermometers• Heatproof mats• Variety of fuels for burning (e.g. coal,
firelighters, ethanol, wood chippings) • Metal dishes• Mounted needles
Or:Teaspoons
31

Forensic detectives
brain training
Badge
Foot printsmagnifying glass
32
Forensic detectives
Suitable for: 11–16 years
Curriculum and learning links:Separating mixtures, analytical and forensic techniques, human variation
Learning objectives:• Recognise variation in human fingerprints.• Describe how chromatography can be used to separate pigments.• Investigate the differences between synthetic and natural fibres.
© BBC
Activities:
Opening activity
• Watch Clip 19 • Show the class the ransom note and ‘Kidnapped’ poster with a photograph of your head
teacher attached. Set the context that your head teacher has been taken hostage and that the class will need to complete three activities to identify which of the three suspected teachers is the culprit.
• Tell students that the fingerprints and clothing fabric samples of each suspect have been taken as evidence, as well as the pens found in their pockets. They will compare these with fingerprints and fabrics found at the scene and the ink in the ransom note.
• Make sure that you have permission from any staff members that you choose to involve in this lesson before you start.
Development activities
The following three activities can be completed in any order or simultaneously in a circuit.Students can use the Crime Scene Investigation Log worksheet to track the progress of theirinvestigation throughout the lesson.
Fingerprinting
• Give students the Fingerprinting worksheet and ask them to identify the fingerprints at the bottom of the page.
• Explain to students that they will now investigate and classify their own fingerprints. Ask students to use soft pencils or charcoal to colour in their fingerprints and transfer them to the sticky side of sticky tape strips. These can be stuck onto the Crime Scene Investigation Log worksheet.
• Ask students to compare the fingerprints of the three suspected teachers with that of the kidnapper. Allow students to rule out one teacher for having the wrong type of fingerprint. They can record the results on the Crime Scene Investigation Log worksheet.
33

Forensic detectives
© BBC
Development activities continued...
Chromatography
• Watch Clip 20 • Show students the pre-prepared example of a
chromatogram with one type of black ink separated into components and explain that this was the ink used on the ransom note.
• Ask students to complete the chromatography test as shown in the video clip using a variety of black, water-soluble pens taken from the suspected teachers. Full details of this activity can be found with the Forensic Detective film at: bbc.co.uk/bang/handson
• Students can attach their finished chromatogram to the Crime Scene Investigation Log worksheet.
Microscopy of fabric samples
• Show students how to make microscope slides by putting fabric fibres onto a small drop of water underneath a cover slip.
• Explain to students how microscopes work and ask them to draw images of different natural and synthetic fibres (e.g. wool, cotton, nylon and silk) from what they see under the microscope. If you don’t have access to microscopes you could show students the microscopic images of fabric samples on page 40 of this pack.
• Encourage students to compare their samples with the fabric found at the crime scene to rule out one teacher.
Reflect and review• Students should bring the results of their three investigations
together to identify which teacher is the culprit. You could ask them to write this up in a forensic-style report or present their findings to the class by role-playing forensic officers giving evidence at a trial.
34

© BBC
Forensic detectives
Want to explore further?
01
23
cm4
Distance travelledby yellow pigment
Distance travelledby solvent
• Students could use aluminium powder to investigate shoe patterns as shown in Clip 19 If you don’t have aluminium powder, this activity could be completed using the soft pencils or charcoal used in the fingerprinting exercise.
• The Chromatography experiment could be extended by asking students to calculate Rf values or speed. Rf values are calculated by dividing the distance travelled by one of the pigments by the distance travelled by the solvent.
• The Microscopy experiment could be extended by asking students to look at different types of animal or human hair under the microscope.
35
Forensic detectives
Health and safety• Normal laboratory guidelines apply for all three activities.
• Students should wash their hands after the Fingerprinting activity.
• Care should be taken with glass slides and cover slips in the Microscopy experiment.
• It is the responsibility of the teacher to ensure that an adequate risk assessment has
been completed.
Technician’s notes• You will need to make up the ‘evidence’ in advance. This will include a ransom note,
a ‘Kidnapped’ poster with the head teacher’s photograph on it, a chromatogram from the suspect’s pen, fingerprints from three teachers and an extra sample from the ‘culprit’, and three fabric samples as well as the ‘culprit’s’ sample.
• Make sure that the pens you use for the chromatography are water-soluble.
© BBC
You will need• Clip 19 (7’13”)• Clip 20 (2’58”)• Fabrics Under the Microscope worksheet• Crime Scene Investigation Log worksheet• Fingerprinting worksheet• Sticky tape• Soft pencils or charcoal• A variety of water-soluble black pens or ink• Chromatography paper• A range of fabric samples (e.g. wool,
cotton, nylon, silk)
• Microscopes• Slides and cover slips• Pre-prepared fingerprints from three
willing teachers, including a ‘culprit’ fingerprint
• Pre-prepared fabric samples, including a ‘culprit’ sample
• Pre-prepared chromatography sample• A mock-up ransom note• ‘Kidnapped’ poster with a photo of your
head teacher• Tap water• Beakers
36

KIDNAPPED
PLEASE HELP
Subject last seen in Staff Room
Attach photo here
© BBC

FingerprintsTake your own fingerprints, stick them here and write down what type they are:
Now look at the kidnapper’s fingerprint.• What type is it?• Which suspect’s fingerprint matches this fingerprint type?
Fabric samples• Make sketches of what the different fibres look like under the microscope and write down
what fabric they are.
• Which suspect’s fabric matches most closely with the kidnapper’s?
I think the kidnapper is:
Crime Scene Investigation Log
© BBC
Chromatography• When your chromatogram
has dried, stick it here.• Which suspect’s pen
matches most closely with the kidnapper’s?
38

Fingerprinting
© BBC
Use this fingerprint guide to identify the fingerprints below. Can you see any similarities?
Plain Arch Radial Loop Ulnar LoopTented Arch
Plain WhorlCentral
Pocket Loop Double Loop Accidental
There is a variety of systems used to classify fingerprints. In this lesson, we will try toidentify eight types, as demonstrated by the diagrams below.
39
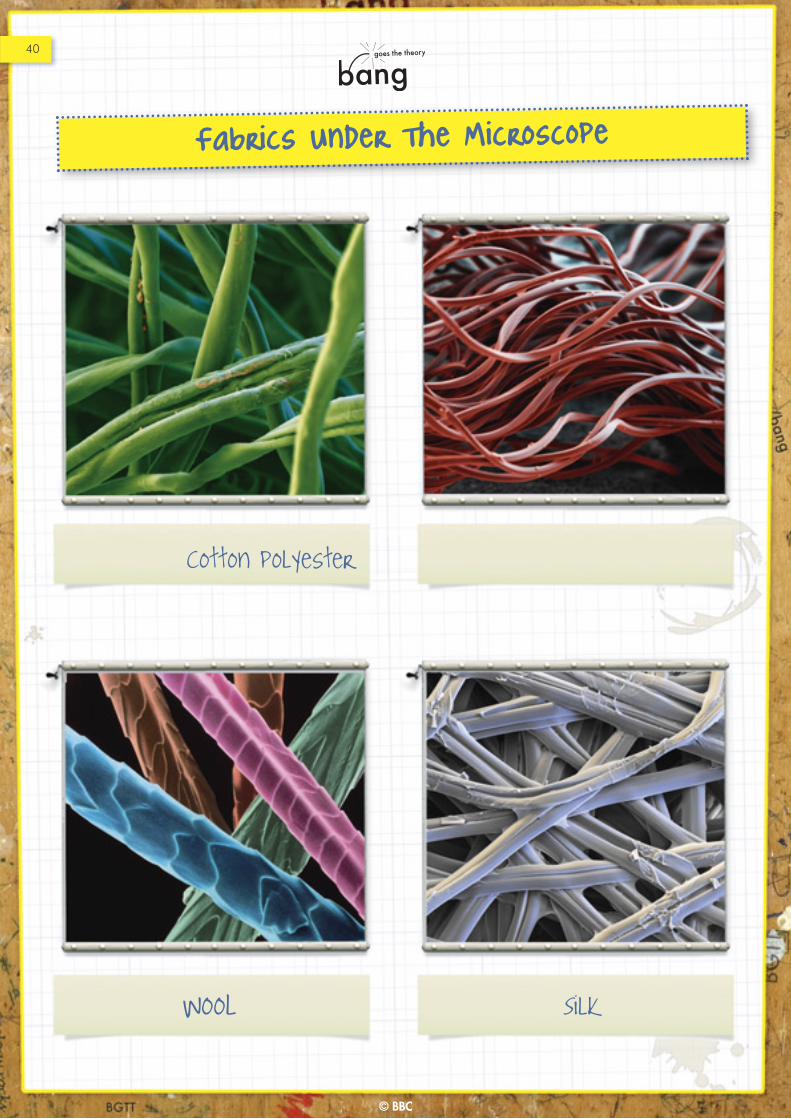
Fabrics Under The Microscope
Silk Wool
Cotton polyester
40
© BBC
Forces in water rockets
submarine
brain training Badge
41

Forces in water rockets
Suitable for: 11–16 years
Curriculum and learning links:Pressure, forces
Learning objectives:• Describe the forces involved in launching a water-powered rocket.• Use rockets to exemplify Newton’s Second and Third Laws of Motion.
© BBC
Activities:
Opening activity
• Watch Clip 21 • Challenge students to make the best film canister rocket that they can by experimenting with
varying quantities of water and effervescent tablet. An alternative to the tablets is to mix approximately equal quantities of citric acid and sodium hydrogencarbonate.
Development activities
• Watch Clip 22 • Discuss the problems that Jem faced, with a focus on the forces involved. Summarise the
discussion with diagrams and an exploration of balanced and unbalanced forces.• Use a pump, needle valve and rubber bung to demonstrate that a plastic bottle full of
compressed air can act like a rocket, but it does not travel very high because the air escapes quickly and has very little mass. To do this, insert the needle valve through the bung and insert it into the top of the bottle. Make sure it is a good, tight fit. Then attach the pump to the valve and pump air into the bottle.
• Discuss how filling the bottle with water can increase the acceleration of the rocket because the momentum of the water coming out of the bottle is identical to the momentum of the bottle as it travels upwards (Newton’s Third Law). Therefore, the more mass there is leaving the bottle, the greater the force accelerating the rocket.
• Show Clip 23 to demonstrate how this method works. • Challenge students to design their own rockets by attaching fins and nose cones to plastic
bottles. Then investigate the heights reached by their rockets by launching them outside with varying quantities of water.
42
Forces in water rockets
Want to explore further?• You could encourage students to investigate other methods of rocket propulsion, such
as solid fuel, liquid fuel and ion drive. Ask them to think about what the pros and cons of each one are for space exploration.
Reflect and review
© BBC
• Play Clip 24 and discuss the factors that allowed Jem’s latest jetpack to succeed.
Technician’s notes• The bottles for water rockets should be plastic and can be reused.• Kits are available to purchase containing fins that can be attached to the bottles.
Health and safety• Normal laboratory guidelines apply for all activities (including eye protection).
• Care must be taken when launching rockets to ensure that students are at
a safe distance and that the rockets are launched vertically.
• It is the responsibility of the teacher to ensure that an adequate risk
assessment has been completed.
You will need
• Clip 21 (2’00”)• Clip 22 (3’08”)• Clip 23 (2’43”)• Clip 24 (4’10”)• Plastic 35mm photographic film canisters
(usually available for free from photo processing counters)
• 1.5- or 2-litre soft drink bottles
• Effervescent tablets (e.g. stomach and headache remedies, or Vitamin C tablets)Or:Citric acid and sodium hydrogencarbonate (bicarbonate of soda)
• Rubber bung to fit the bottles with a needle valve inserted through it, connected to a foot pump or stirrup pump
• Tap water
43
Conservation of mass in chemical reactions
Bunsen Burnermagnesium ribbon
Badge
44

Conservation of mass in chemical reactions
Suitable for: 11–16 years
Curriculum and learning links:Mass changes in chemical reactions
Learning objectives:• State that combustion is an example of an oxidation reaction.• Explain why metals gain mass in oxidation reactions.• Suggest why some fuels appear to lose mass when combusted.
Activities:Opening activity
Development activities
Burning Magnesium
© BBC
• Demonstrate to the class some items burning – for example, a wooden splint, a piece of paper, a candle.
• Ask students to suggest what they think will happen to the mass of the wood, paper and candle when they are burnt.
• Ask them if this is always the case. Do they think that something could burn and get heavier?
• Ask students to burn varying lengths of magnesium ribbon in crucibles with lids on. This will prevent the loss of the product (magnesium oxide), but the lids should be lifted periodically using tongs to ensure an adequate supply of oxygen.
• Ask students to record the mass of the metal before and after burning. They should continue to heat until the contents of the crucible have stopped glowing white.
• If you don’t have access to crucibles, you can burn the magnesium on tin lids or metal bottle tops that have had the rubber seal removed. However, the data will be less accurate.
• Collect the data from all of the students together onto a central spreadsheet. This will allow a trend to be discussed as a class. You could create a graph electronically from these results, or ask students to draw their own by hand.
45

Conservation of mass in chemical reactions
Health and safety• Normal laboratory guidelines apply for all activities (including eye protection).
• The reaction between magnesium and oxygen is highly exothermic. Particular care
should be taken to avoid burns.
• Students must only move the crucibles using tongs, once they have cooled for a
few minutes.• Students should be discouraged from looking at the magnesium when it is burning as
the bright light can cause eye damage.
• The length of the strips of magnesium used by the students should be limited by the teacher.
• Metal bottle tops provide a very good way to heat small quantities of substances, but
the rubber seals will need to be removed first. Any residue can be burned off using a
hot Bunsen flame. • It is the responsibility of the teacher to ensure that an adequate risk assessment has
been completed.
Want to explore further?
Technician’s notes• The magnesium ribbon can be cut to approximate lengths before the lesson.
• Discuss with students the fact that (allowing for experimental errors) the data should follow a straight line of best fit, starting at the origin of the graph. This suggests that magnesium atoms and oxygen atoms combine in a fixed ratio.
• More advanced students could complete predicted and percentage yield calculations using relative atomic masses. Some students could explore early ideas about burning by researching the Phlogiston theory.
Reflect and review• Ask students what conclusions they can draw from the data. What happened to the mass
of the magnesium when it burned? • Watch Clip 25 and discuss what happened in Dr Yan’s experiment. • Challenge students to explain why wood, paper and all hydrocarbons and carbohydrates
appear to lose mass during combustion.
You will need
• Clip 25 (3’06”)• Wooden splint• Paper• Candle• Heatproof mats• Tripods• Gauzes
• Tongs• Bunsen burners• Top pan balances that measure to
0.1g or 0.01g• Magnesium ribbon• Porcelain crucibles with lids
Or:Metal bottle tops
46
© BBC

Sampling techniques
Counting cows
Sticky Snails
Badge
47

Sampling techniques
Suitable for: 11–16 years
Curriculum and learning links:Ecological sampling techniques, reliability
Learning objectives:• Describe how to collect data using a quadrat.• Explain why it is important to take repeat readings when collecting scientific data.
© BBC
Direction the cow is facing
North
Northeast
East
Tally of cows Total number of cows
Southeast
South
Southwest
West
Northwest
Activities:
Opening activity
• Watch Clip 26• Ask students how they could test the hypothesis that the presenters talk about in the film. • Watch Clip 27 to demonstrate the way in which Liz collects aerial data.
Development activities
Counting Cows
• Ask students to get into pairs. Give each pair one of the images of cows in a field on the Sampling worksheets.
• Ask the students to analyse the images in their pairs, without talking to any of the other pairs. Suggest that they might like to record their results on a tally chart like this:
48

Sampling techniques
Reflect and review
Development activities continued....
• Ask the students to discuss whether the data from their image support the hypothesis or not. Can they suggest any explanations for their data? Please note: some students will have images in which the cows are very much aligned, leading them to make a conclusion which will not be supported when the data are pooled from the whole class.
• Ask students to put their hands up if their image supports the hypothesis. Then pool the data from all of the images by completing one tally chart for the whole class across all of the different fields.
• Conclude that while it is often the case that cows align themselves in a certain direction in a certain field, there is no significant trend from the larger data set. Discuss the importance of using a large data set in scientific investigations to ensure adequate reliability.
• Introduce Clip 28 by asking the students if they want to see what the Bang team found out when they analysed their data.
Quadrats
• Explain how to use quadrats in a random way – for example, students could choose two numbers at random to determine the number of paces that they walk eastwards, then northwards from a pre-determined origin.
• Ask students to use this method to sample a particular plant (e.g. daisy) in a grassed area in the school grounds.
• During the sampling session, ask students to make a note of the unusual (anomalous) samples – for example, quadrats that had no daisies or a very large number of daisies.
• Ask students to estimate population size using the equation: Population size = (average number in one quadrat) x (number of quadrats needed to
cover area of field)
• Return to the idea of sampling data on cows. Ask students to suggest ways in which the investigation could be improved. Discuss whether snapshots really give us a reliable measurement of cow alignment.
• Ask students to think about what other factors they could investigate that might have an effect on cow alignment and then watch Clip 29 which shows what Liz and Jem investigated next.
49
© BBC
Sampling techniques
© BBC
Want to explore further?
Health and safety:• Students should be discouraged from throwing metal quadrats.
• It is the responsibility of the teacher to ensure that an adequate risk
assessment has been completed.
Technician’s notes:• Quadrats can be made by bending very stiff wire rods.
• Students could plan and carry out an extended investigation in which they collect data over a longer period of time to investigate any patterns that may arise. For example, they could do further quadrat sampling, or collect weather data. You could also watch Clip 30 for a more detailed explanation of the method that the Bang team used from Dr Yan.
You will need
• Clip 26 (0’40”)
• Clip 27 (2’11”)
• Clip 28 (0’38”)
• Clip 29 (2’38”)
• Clip 30 (5’14”)• Sufficient copies of the Sampling Worksheets so that each pair has one A5
field diagram. Please note: in larger classes some pairs of students will have the same image.
• Quadrats to use for the practical sampling session• Graph paper
50

© BBC
Sampling Worksheet: Field 1
Sampling Worksheet: Field 2
51

© BBC
Sampling Worksheet: Field 3
Sampling Worksheet: Field 4
52

Sampling Worksheet: Field 5
Sampling Worksheet: Field 6
53
© BBC

Sampling Worksheet: Field 7
Sampling Worksheet: Field 8
54
© BBC

Metals: extraction, reactivity,
properties and alloys
Silver cutlery
Old Iron
Zinc
55
Suitable for: 14 –16 years
Curriculum and learning links:Reactivity series, extraction of metals, alloys, properties of materials
Learning objectives:• Describe how different metals can be extracted using ideas about their reactivity.• Explain how an alloy’s properties can be different from its constituent elements.
© BBC
Activities:
Opening activity
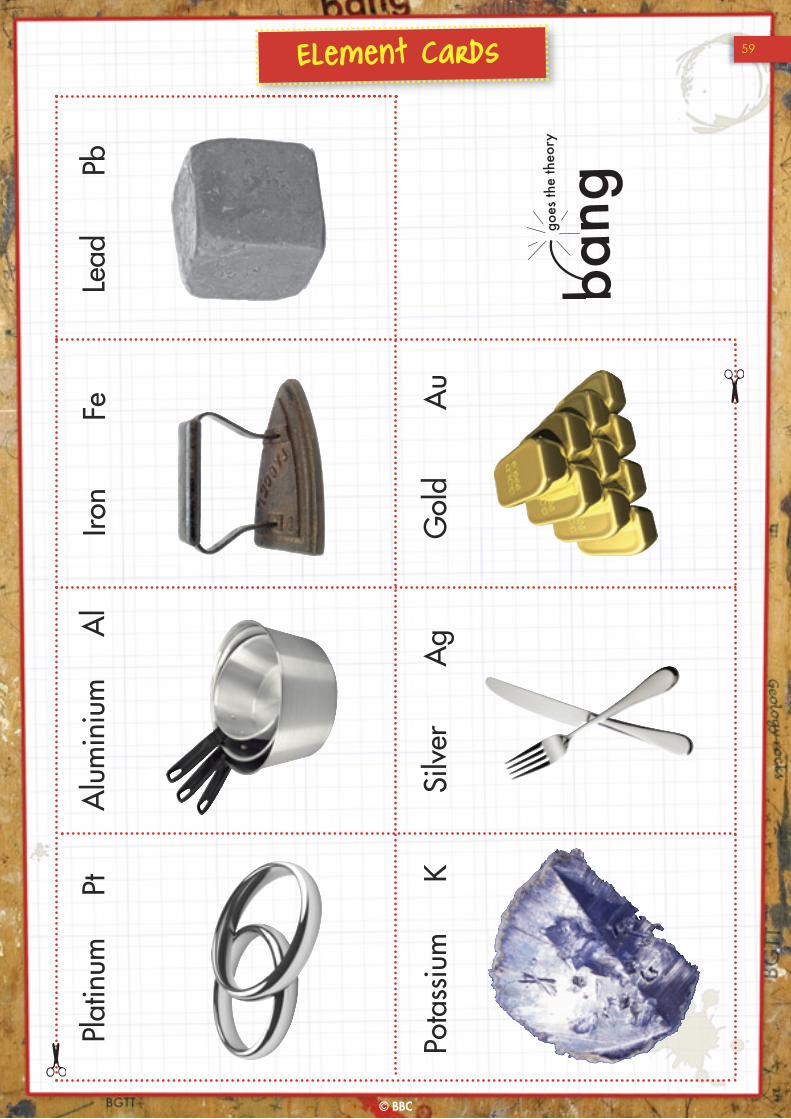
• Split the class into two halves. Give each group a set of Element Cards and challenge the students to see which group can arrange themselves into the correct order of reactivity first.
Extracting Metals
• Give students one of the Extracting Copper or Extracting Lead worksheets and ask them to either extract copper from copper oxide or lead from lead oxide using the method on the worksheet.
• Watch Clip 31 to find out more about metal extraction.
Changing Properties
• Ask students to investigate how combining substances can change their properties by adding small amounts of sand to plasticine.
• Ask students to observe how this affects its flexibility and link this to the way that adding carbon to iron to make steel makes it stiffer and stronger.
• Watch Clip 32 and then demonstrate one or more smart metals.
56
Metals: extraction, reactivity,
properties and alloys

Metals: extraction, reactivity, properties and alloys
Want to explore further?
Technician’s notes:• Metal bottle tops provide a very good way of heating small quantities of
powders, but the rubber seals will need to be removed first. Any residue can be burned off using a hot Bunsen flame.
• Extracting copper requires a very high temperature. It might be helpful if the teacher circulates with a butane-powered Brulée torch in addition to the students heating strongly with a Bunsen burner.
• Ask students to review the knowledge that they have acquired and the skills that they have developed during this lesson. How might they link this to their everyday life?
• You could challenge students to research the uses of smart metals and other smart materials. Inspired by their research, they could ‘design’ a smart material and describe what it could be used for as a result of its properties. Students could summarise this in a Bang Goes the Theory poster using the template provided on page 62, or by doing a presentation to the class. Possible prompts for their poster or presentation might include: Name of smart material: What is it made from?Unusual properties:Possible uses (remember to explain each one using ideas about properties):
Reflect and review
© BBC
Health and safety:• Normal laboratory guidelines apply for all activities (including eye protection).
• Lead oxide is toxic and copper oxide is harmful. See CLEAPSS Hazcards for
further information.• It is the responsibility of the teacher to ensure that an adequate risk
assessment has been completed.
You will need
• Clip 31 (5’37”)
• Clip 32 (2’10”)• Two sets of Element Cards• Extracting Copper from Copper
Oxide worksheetOr:Extracting Lead from Lead Oxide worksheet
• Bang Goes the Theory poster template• Carbon powder• Copper oxide
Or:Lead oxide
• Small tin lids or metal bottle tops• Plasticine• Sand• Smart metal alloys – for example a
two-way memory spring (available online)
• Bunsen burners• Tongs• Heatproof mats• Spatulas• Beakers• Tap water
57

© BBC
Sodi
um
N
aLi
thiu
m
L
i
Cal
cium
Ca
Mag
nesi
um
Mg
Zinc
Zn
Cop
per
C
uElement Cards
Car
bon
C
58
Alu
min
ium
A
lIro
n
F
e
Pota
ssiu
m
K
Silv
er
A
gG
old
Au
Element CardsLe
ad
P
b
59
Plat
inum
P
t
© BBC

© BBC
1. Set up the apparatus as shown in the photograph.
2. Add one small spatula of carbon powder to a bottle top and spread evenly to form a thin layer over the base.
3. Add a thin layer of copper oxide powder.
4. Add another thin layer of carbon.
5. Heat the bottle top strongly from below in the hottest part of the Bunsen flame. You may need to do this for up to ten minutes.
6. Allow to cool for a few minutes.
7. Using tongs, pour the contents of the bottle top onto a heatproof mat and see if you can see any red-brown copper metal.
8. Pour the powder into a beaker of cold water and try washing the carbon powder away using running water. You should be left with some copper metal.
Extracting Copper from Copper Oxide
What to do
Safety information• Eye protection should be worn at all times.
• Hot apparatus should be allowed to cool slowly, not placed in cold water.
• Copper compounds are harmful and toxic to aquatic organisms.
• The room should be well ventilated.
• Metal bottle top• Tongs• Bunsen burner• Copper oxide powder• Carbon powder
• Heatproof mat• Beaker• Cold water• Spatula
You will need
60

1. Set up the apparatus as shown in the photograph.
2. Add one small spatula of carbon powder to the bottle top and spread evenly to form a thin layer over the base.
3. Add a thin layer of lead oxide powder.
4. Add another thin layer of carbon.
5. Heat the bottle top strongly from below in the hottest part of the Bunsen flame. You may need to do this for up to ten minutes.
6. Allow to cool for a few minutes.
7. Using tongs, pour the contents of the bottle top onto a heatproof mat and see if you can see any silvery beads of lead metal.
What to do
Safety information• Eye protection should be worn at all times.
• Hot apparatus should be allowed to cool slowly, not placed in cold water.
• Lead compounds are toxic if you eat them or breathe in their dust, and toxic
to aquatic organisms.
• Pregnant women should not handle lead compounds.
• The room should be well ventilated.
• Metal bottle top• Bunsen burner• Carbon powder• Tongs
• Lead oxide powder• Heatproof mat• Spatula
What you need
61
Extracting Lead from Lead Oxide
© BBC

Lactic acid and power
Spirometer
car
Balloon
63

Suitable for: 11–16 years
Curriculum and learning links:Respiration, work done, power
Learning objectives:• Explain why lactic acid is produced.• Calculate the work done by, and power of, students running up stairs.
Activities:
Opening activity
• Ask students what they were doing the last time their muscles cramped or why footballers sometimes get cramp at the end of matches.
Development activities
Hand Clench
• Challenge students to clench and release their hands as many times as possible in two minutes. You might want to challenge them to see if they can beat you! Discuss what they experienced whilst doing this exercise and how lactic acid build-up is linked to cramp.
Work Done
• Ask students how much work they think they have done in the last few minutes.• Explain to students the equation for work done:
Work done (J) = force (N) x distance moved in the direction of the force (m)• Then ask students to calculate the work done by lifting a pile of books a certain height.
Power
• Show the students some images of cars and ask them which they think does the most work and which is the most powerful.
• Develop this discussion to explain the equation for power. Power (W) = work done (J) / time taken (s)You might like to compare large, slow cars (for example, a 4-wheel-drive) that do lots of work in a long time with smaller, faster cars which do less work but in a much shorter time (for example, a sports car). If both are travelling the same distance up a hill then thesmaller, faster car is likely to be more powerful.
• Ask students to think about how they could calculate which of their classmates is the most powerful. Explain that they will get into teams and measure the weight of one volunteer in their group, the height of a set of stairs and the time it takes the person to run up them.
• Ask students to use the data that they have collected to work out the power of their teammate.
© BBC
64
Lactic acid and power

Lactic acid and power
Want to explore further?• To extend the Hand Clench activity, ask
students to think about why they continue breathing heavily at the end of a race. Challenge them to work out how they could beat their original number of hand clenches in two minutes.
• A related physiological investigation could be completed to measure the volume of students’ lungs using a homemade spirometer like the one in the photograph.
• To extend the Power activity, students could research the horsepower that different cars have or find out more about powerful animals – thinking particularly about how powerful animals are in relation to their size.
Reflect and review
© BBC
• To review lactic acid, watch Clip 33 Compare the class’s results for how many hand clenches they could do in two minutes and crown a champion male and female student.
• To review power, watch Clip 34 to show how horsepower is calculated (care must be taken here as Jem uses a different equation). Use the clip to explain that if a 75kg student or teacher (exerting a force of 750N) travels up a metre of stairs in one second, they are exerting one horsepower. Compare the class’s results for power and crown a champion male and female student.
Technician’s notes:• Newton meters will need to be of the type that students can stand on. • Commercial spirometers can be linked to data-logging equipment to measure accurately
the volume of students’ lungs.
Health and safety:• Appropriate care must be taken when moving piles of books or running up stairs.
• The tube in the spirometer should be cleaned prior to students breathing into it.
• It is the responsibility of the teacher to ensure that an adequate risk assessment
has been completed.
You will need:• Clip 33 (4’36”)
• Clip 34 (3’21”)• Set of stairs
• Metre rulers• Newton meters• Stopwatches
65

DNA replication
T
C
A
G
Ethanol
Kiwi fruit
car
DNA
66

DNA replication
Suitable for: 14–16 years
Curriculum and learning links:Genetics
Learning objectives:• Describe the structure of DNA.• Explain the process of DNA replication.• Discuss the ethics of anti-ageing technology.
Activities:
Opening activity
• Watch Clip 35 • Review and discuss DNA replication.
Development activities
DNA Structure
• Give students either the Making DNA worksheet or the Making DNA from Sweets worksheet and ask them to investigate or review the structure of DNA by making one of the models.
DNA Replication
• Tell the students that they are going to recreate the DNA replication process as seen on the video clip.
• Give each student a base card from page 71 and a safety pin and ask them to attach it to their front. Ask half of the group to be the base pairs of the DNA strand and to arrange themselves into a DNA model where Adenine is paired with Thymine and Guanine with Cytosine. The remaining students are free bases. Ask the students that make up the DNA strand to separate and, as they do, ask those that are free bases to pair up correctly with both halves of the strand.
67
© BBC

DNA replication
Health and safety• Normal laboratory guidelines apply for all activities
(including eye protection if extracting DNA).
• Students must be told not to eat any of the sweets.
• Care must be taken with scissors when cutting the sweets.
• Care must be taken with knives when cutting the kiwi fruit.
• Ethanol is highly flammable.
• It is the responsibility of the teacher to ensure that an adequate risk
assessment has been completed.
Want to explore further?• Use the Extracting DNA from a Kiwi worksheet to extract some DNA. Please be aware
that other components of the cellular mixture will precipitate out together with the kiwi DNA.
• You could discuss the major scientific breakthrough that took place in May 2010 where the first synthetic self-replicating strand of DNA was created by US scientist, Dr Craig Venter.
Reflect and review
© BBC
• Watch Clip 36 • Discuss the scientific, ethical and religious issues surrounding research into artificially
extending life.
You will need• Clip 35 (3’27”)• Clip 36 (3’08”)• Making DNA from Sweets worksheet• Making DNA worksheet• Multiple sets of DNA Base Cards• Soft sweets (four colours)• Long cord sweets (two colours)
• Thin wire Or: A needle and thread
• Cocktail sticks• Safety pins• Scissors• Glue
68

You are going to make your own DNAmodel by matching up base pairs.
1. Cut out the template on the right-hand side of this page. This will form one half of your DNA strand.
2. Then cut out the individual pieces on the left. These are the free bases that you will line up opposite the template to form the other side of your DNA strand.
3. Bases in DNA always join up opposite each other in a specific way: Adenine (A) pairs with Thymine (T), and Cytosine (C) with Guanine (G).
4. Now pair up your spare bases with your template and stick your completed DNA strand into your book. Remember that DNA is not flat but twisted into a double helix.
What to do
You will need
• Scissors • Glue
C
C
C
A
A
A
G
G
T
TT
GC
AT
TG
AC
AT
CG
G
Making DNA69
© BBC

MaKing DNA From Sweets
© BBC
1. Cut the two different coloured long cord sweets into short lengths of approximately 2cm. These will represent the pentose sugar and phosphate molecules that form the sides of the DNA model.
2. Use the thin wire or a needle and thread to string alternate lengths of different colours of cord sweets together lengthwise. The more pieces you use, the longer your DNA will be.
3. Make two strands and line them up with the same colour of cord sweets opposite each other.
4. Assign a different colour of soft sweet to each of the DNA base pairs. Here, Adenine is green, Thymine is purple, Cytosine is white and Guanine is orange.
5. Thread two different coloured soft sweets onto each cocktail stick, making sure that your sweets pair as DNA does (i.e. Adenine with Thymine and Cytosine with Guanine).
6. Place one cocktail stick with sweets between each alternate length of cord sweet to join the two sides.
7. Carefully hold each end of the cord sweets and twist slightly to represent the DNA double helix.
What to do
Follow the instructions to make your own DNA model from sweets.
You will need:
• Soft sweets (four colours) • Long cord sweets (two colours)• Thin wire or a needle and thread• Cocktail sticks• Scissors
70

DNA Base cards
GGuanine
TThymine
CCytosine
AAdenine
71
© BBC

© BBC
Extracting DNA from a Kiwi
1. Carefully cut the kiwi into 1cm3 chunks using a knife and remove the skin.
2. Half fill a small beaker with hot tap water. Dissolve one teaspoon of salt in the water and add 5cm3 of washing-up liquid. Stir gently with a glass stirring rod.
3. Add the kiwi fruit and heat in a water bath at 60oC for five minutes. During this time, mash and stir the mixture gently with the stirring rod.
4. Transfer the mixture to the ice bath for five minutes. Continue to mash and stir it carefully.
5. Filter the mixture using filter paper and a funnel into a boiling tube.
6. Very carefully add the same amount of cold ethanol as kiwi filtrate to your boiling tube and wait a few minutes. It is very important that you keep the boiling tube still.
7. The DNA will appear as strands covered with small bubbles. Gently scoop it out using a glass rod and place it onto the black card to dry.
What to do
You will need• Kiwi fruit• Knife• Small beaker• Salt• Washing-up liquid• Water bath at 60oC• Ice bath (250cm3 beaker
full of ice and a little water)• Measuring cylinder
• Filter paper• Funnel• Cold ethanol• Glass stirring rod• Black card• Boiling tube• Hot tap water• Thermometer• Teaspoon
72
Investigating geological processes
helicopter
Sticky Snails
Badge
73

Investigating geological processes
Suitable for: 11–16 years
Curriculum and learning links:
Rock cycle, igneous rocks, heating and cooling
Learning objectives:• State that rapid heating and cooling can cause shattering and describe how this can
weather rocks.• State and explain the link between rate of cooling of an igneous rock and the size of
the crystals made.
© BBC
Activities:Opening activity
• Ask students if they recall the disruption to air travel that occurred in April and May 2010 due to the eruption of a volcano in Iceland.
• Watch Clip 37 to see what happened when the Bang team went to investigate.
Development activities
Investigating Cooling Rate and Crystal Size
• Watch Clip 38 in which Liz explains how the volcano produced very fine silica-based ash. • Using one of the Investigating the Link Between Cooling Rate and Crystal Size worksheets,
ask students to investigate how the speed of cooling affects crystals. They can either use molten salol on microscope slides or partially dissolve and re-crystallise lead iodide.
Shattering: Effect of rapid heating and cooling
• Ask students to suggest some reasons why aircraft were forbidden from flying through the ash cloud.
• Watch Clip 39 in which Jem demonstrates what might happen if the fine silica ash was heated in a jet engine and then cooled quickly.
• Demonstrate to students that rapid expansion and contraction can cause shattering in glass by heating a dry test tube in a Bunsen flame and then plunging it into a trough of cold water behind a safety screen.
• Link this to frost shattering as a type of weathering.
74
Investigating geological processes
Want to explore further?
Health and safety• Normal laboratory guidelines apply for all activities (including eye protection).
• The teacher should wear eye protection and protective gloves during the frost shattering
demonstration. • Lead iodide is toxic. It is recommended that the teacher distributes tiny amounts of lead iodide
into the students’ boiling tubes to prevent excessive use.
• Pregnant women should not be exposed to lead compounds.
• There is a significant risk of ‘bumping’ (aggressive boiling) when heating lead iodide and water
in a boiling tube. Students should be briefed on how to anticipate this and remove the boiling
tube from the heat for several seconds. Anti-bumping granules could be added to reduce
this risk. • Salol (phenyl salicylate) is an irritant and dangerous for the environment. Salol melts at 42oC
and, if heated in boiling water, there is a risk that an irritating vapour will be released.
• It is the responsibility of the teacher to ensure that an adequate risk assessment has
been completed.
Technician’s notes• The quantity of lead iodide needed in each boiling tube is tiny.
A micro-spatula might be more appropriate for the teacher to use when dispensing, rather than a standard school spatula.
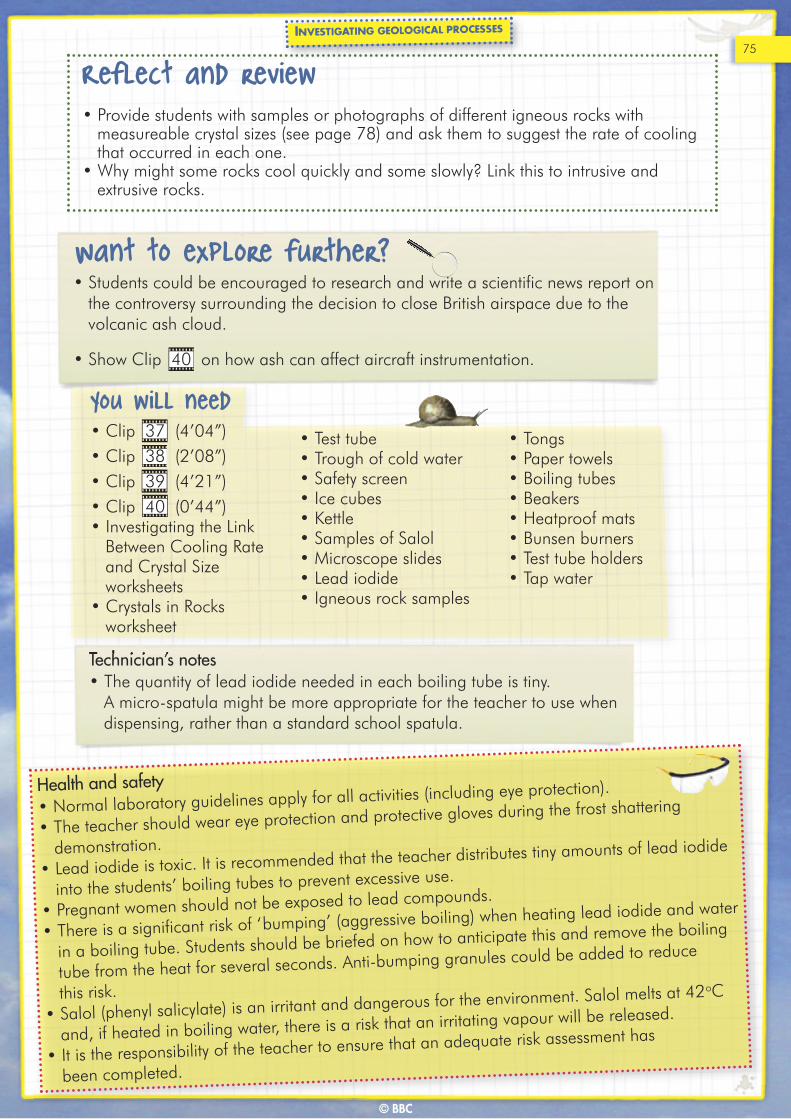
• Provide students with samples or photographs of different igneous rocks with measureable crystal sizes (see page 78) and ask them to suggest the rate of cooling that occurred in each one.
• Why might some rocks cool quickly and some slowly? Link this to intrusive and extrusive rocks.
Reflect and review
© BBC
• Students could be encouraged to research and write a scientific news report on the controversy surrounding the decision to close British airspace due to the volcanic ash cloud.
• Show Clip 40 on how ash can affect aircraft instrumentation.
You will need• Clip 37 (4’04”)• Clip 38 (2’08”)• Clip 39 (4’21”)• Clip 40 (0’44”)• Investigating the Link
Between Cooling Rate and Crystal Size worksheets
• Crystals in Rocks worksheet
• Test tube• Trough of cold water• Safety screen• Ice cubes• Kettle• Samples of Salol• Microscope slides• Lead iodide• Igneous rock samples
• Tongs• Paper towels• Boiling tubes• Beakers• Heatproof mats• Bunsen burners• Test tube holders• Tap water
75

Hazard information
• Salol (phenyl salicylate) is an irritant and is dangerous for the environment.
• You must wear eye protection throughout this experiment.
• The salol must not be heated in boiling water, only in a water bath no hotter than 60oC.
© BBC
What to do1. Place the test tube containing the salol into a beaker filled
with hot water from a kettle.2. Add two clean microscope slides to the same hot water bath.3. Place two clean microscope slides into a beaker containing
water and ice cubes.4. Leave the salol for a few minutes until it has melted.5. Remove all four slides from the beakers and quickly dry them
using a paper towel.6. Quickly pour a small amount of salol onto one of the cold,
dry slides and place the other cold slide on top. Gently squeeze them together, being careful to avoid them breaking.
7. Quickly pour a small amount of salol onto one of the hot, dry slides and place the other hot slide on top. Gently squeeze them together, being careful to avoid them breaking.
8. After a few minutes, crystals will start to form that are easily visible to the naked eye.
What can you conclude abouthow the rate of cooling affectscrystal size in igneous rocks?
What can you observeabout the size of thecrystals on the two slides?
What you need
• Two 100cm3 beakers• Four microscope slides• Hot water from a kettle • Ice cubes
• Cold water• Paper towel• Test tube containing some salol
76
Investigating the link between
cooling rate and crystal size: Salol

Hazard information• Lead iodide is toxic and dangerous for the environment.
• You must wear eye protection throughout this experiment.
• Your teacher will show you how to avoid the mixture in the boiling tube boiling over
during heating. • Always point the boiling tube away from yourself and other people when heating.
• Lead compounds should not be handled by pregnant women.
1. Collect two boiling tubes and two 250cm3 beakers to act as water baths.
2. Set up one beaker as an iced water bath containing an empty boiling tube. Leave the other beaker empty so that it can become your hot water bath later on.
3. Fill the second boiling tube one-third full with water. Ask your teacher to add a very small amount of lead iodide. You don’t need much because it is not very soluble in water.
4. Heat the second boiling tube carefully, quite high over a Bunsen flame, perhaps at half gas. When you feel (not see!) the liquid start to boil, remove it from the heat for several seconds until it cools down. If you see large bubbles forming in the boiling tube, remove it immediately due to the risk of it boiling over.
5. After you have heated the liquid for a few minutes to dissolve some of the lead iodide, quickly pour half of the liquid into the cold boiling tube in the ice bath. Fill the other beaker with hot water from a kettle and place the hot boiling tube into it.
6. Observe the size of the crystals formed in each boiling tube. It can be hard to distinguish between them by eye, but remember that the larger and heavier the crystals are, the more likely they are to settle out. Smaller, lighter crystals are more likely to remain suspended by the random motion of the water molecules.
7. Ask your teacher to tell you how to dispose of the lead iodide.
What to do
© BBC
• Two boiling tubes• Two 250cm3 beakers • Lead iodide• Ice cubes • Test tube holder
• Bunsen burner • Heatproof mat• Cold water• Boiling water from a kettle• Tongs
You will need
77Investigating the link between cooling
rate and crystal size: Lead Iodide
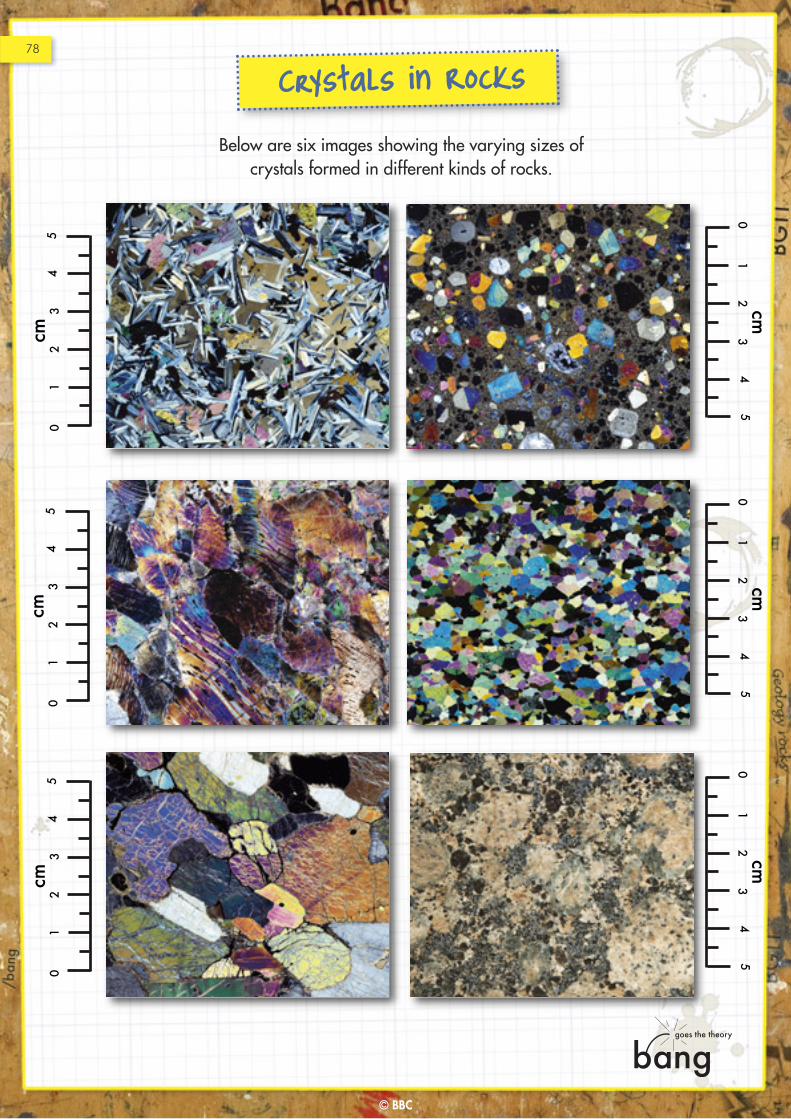
Crystals in Rocks0
12
34
cm5
01
23
4cm
50
12
34
cm5
01
23
4cm
50
12
34
cm5
01
23
4cm
5
Below are six images showing the varying sizes ofcrystals formed in different kinds of rocks.
78
© BBC

The electromagnetic spectrum
microwave
light bulb
Badge
79

The electromagnetic spectrum
Suitable for: 14–16 years
Curriculum and learning links:Waves, electromagnetic spectrum
Learning objectives:• State that all electromagnetic radiation travels through a vacuum at the speed of light,
which is 3 x 10⁸m/s.• Explain the differences between types of electromagnetic radiation and describe uses for them.
Activities:
Opening activity
• Show students images that are related to the electromagnetic spectrum and ask what they all have in common – for example, a light bulb, a rainbow, a radio, a microwave, and anX-ray image.
Development activities
Electromagnetic radiation
• Remind students of the key characteristics of electromagnetic waves and the full spectrum from radio waves to cosmic waves.
• Show students Clip 41 and repeat this demonstration to measure the speed of light using a microwave.
• Split students into small groups and allocate to each group a type of electromagnetic radiation for them to research. They should find out about the wavelength, frequency, sources and uses of their type of radiation.
• Each group should produce a poster using the generic Bang Goes the Theory poster template on page 62 which can be displayed in the lab along a giant spectrum line. Alternatively they could give a presentation on their findings.
80
© BBC

The electromagnetic spectrum
Want to explore further?
Reflect and review
Health and safety• Normal laboratory guidelines apply for all activities.
• Using microwaves for scientific experiments other than heating food and
water can be dangerous. Before doing any of these activities, it is essential
for the teacher to be confident that his or her students will not try to replicate
the demonstrations at home.
• It is the responsibility of the teacher to ensure that an adequate risk
assessment has been completed.
• Show students Clip 42 in which Jem shows how electromagnetic waves can be used to transmit energy.
• Show Clip 43 and discuss with students how infrared energy can be captured and used.
• Show students Clip 44 in which Dr Yan demonstrates that microwaves heat liquids much more effectively than solids by melting a glass bottle in a microwave.
• Encourage students to research some of the strange things that happen as something approaches the speed of light.
You will need• Clip 41 (3’55”)• Clip 42 (6’06”)• Clip 43 (3’14”)• Clip 44 (2’57”)• Bang Goes the Theory poster
template• Microwave oven
• Microwave-safe plate• Slices of bread• Margarine• Knife• A selection of images related to the
electromagnetic spectrum
81
© BBC

Gravity and centripetal force
HQ
Helicopter
Badge
82

Suitable for: 14–16 years
Curriculum and learning links:Forces, circular motion
Learning objectives:• Explain what happens when an object moves in a circular path.• Describe the forces that give objects a circular motion.• Investigate the force of gravity.
Activities:
Opening activity
• Swing a bucket of water around your head to show how the forces involved in circular motion keep the water in the bucket.
Development activities
Gravity and Centripetal Force
© BBC
• Watch Clip 45 where Dallas explains how gravity keeps stars from flying off into space. Ask students to explain what they have seen and come up with three occasions where centripetal force affects them (e.g. fairground rides, roundabouts, throwing a discus).
• Give students the Factors Affecting Circular Motion worksheet and ask them to complete the practical activity. The dependent variable is the force applied to the newton meter. The independent variables are the mass of the bungs, the radius of the circle and the velocity of the swing.
• Ask students to summarise their findings.
83
Gravity and centripetal force

Gravity and centripetal force
Want to explore further?
Reflect and review
© BBC
Health and safety• Normal laboratory guidelines apply (including eye protection).
• Care must be taken when swinging both the bucket of water and the rubber bungs.
• It is the responsibility of the teacher to ensure that an adequate risk assessment
has been completed.
• Watch Clip 47 which investigates g-force and how it can affect the human body. The practical activity seen in this clip which measures g-force using an apple and some kitchen scales could be recreated in a safe and controlled way.
• Students could investigate how animals are adapted to survive under large g-forces.
• You might also like to watch Clip 48 to see what happens to a candle flame at zero gravity and Clip 49 on killer falls.
Development activities continued...
Gravity and Air Resistance
• Swing the bucket of water around your head again, getting progressively slower. Ask students when they think the water will fall out (the point at which the force of gravity is greater than the centripetal force).
• Watch Clip 46 in which Dallas demonstrates the role of air resistance. • Ask students to investigate air resistance by dropping a large coin and a circle of card of
exactly the same size from the same height at the same time. Then place the card above the coin and drop them both. Explain that when air resistance is removed, objects of different mass will accelerate at the same rate due to gravity.
• If possible prove this by evacuating a large glass tube and dropping a feather and penny at the same time within it.
You will need
• Clip 45 (2’51”)• Clip 46 (2’10”)• Clip 47 (6’53”)• Clip 48 (4’50”)• Clip 49 (3’18”)• Factors Affecting Circular
Motion worksheet• Bucket of water• String
• Hollow cardboard or plastic tubes about 30cm long
• Rubber bungs with holes• Newton meters• Stopwatches• Metre rulers• Marker pen• Large coins
• Large glass tube (including bungs to fit to each end)
• Vacuum pump• Feather• Kitchen scales• Circles of cardboard• Apple• Penny
84
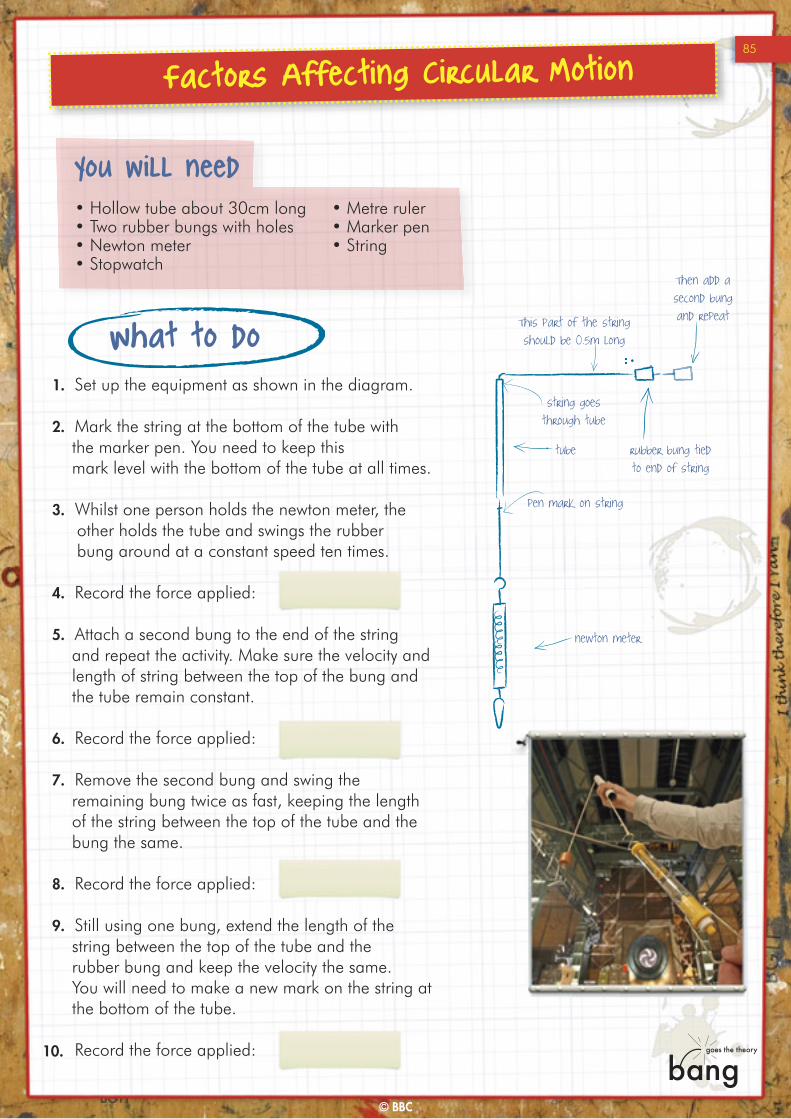
Factors Affecting Circular Motion
© BBC
1. Set up the equipment as shown in the diagram.
2. Mark the string at the bottom of the tube with the marker pen. You need to keep this mark level with the bottom of the tube at all times.
3. Whilst one person holds the newton meter, the other holds the tube and swings the rubber bung around at a constant speed ten times.
4. Record the force applied:
5. Attach a second bung to the end of the string and repeat the activity. Make sure the velocity and length of string between the top of the bung and the tube remain constant.
6. Record the force applied:
7. Remove the second bung and swing the remaining bung twice as fast, keeping the length of the string between the top of the tube and the bung the same.
8. Record the force applied:
9. Still using one bung, extend the length of the string between the top of the tube and the rubber bung and keep the velocity the same. You will need to make a new mark on the string at the bottom of the tube.
Record the force applied:
What to do
You will need• Hollow tube about 30cm long • Two rubber bungs with holes • Newton meter• Stopwatch
• Metre ruler• Marker pen• String
pen mark on string
rubber bung tied
to end of string
Then add a
second bung
and repeat
tube
string goes
through tube
This part of the string
should be 0.5m long
newton meter
85
10.
Launching your own astronaut
Another time
Model astronauts
86

Suitable for: 11–14 years
Curriculum and learning links:Space, forces, pressure, air resistance
Learning objectives:• Identify the forces on an astronaut lifted by a helium balloon and returning to
Earth by parachute.• Design and evaluate a method of safely launching a model astronaut.
© BBC
Activities:
Opening activity
• Watch Clip 50 about Joe Kittinger. Discuss the significance of his achievement.
Development activities
Astronaut Launch
• Ask students to work in groups to design a way of launching a model astronaut into the atmosphere using a helium balloon. They will need to incorporate a parachute into their design so that their astronaut can return to Earth safely when the balloon bursts.
• What issues and problems do they anticipate in their project? • Watch Clip 51• Explain to students that they will be tracking their astronauts by attaching an identification
label so that when it is discovered, it can be reported to Mission Control (the school).• Allow students to build their projects and attach a small model astronaut to it.• Hand out the Mission Control Identification Labels for students to complete and attach to
their balloon. You may want to waterproof the labels using a laminator or sticky-back plastic.
• The landing location of the astronaut can be reported by the finder contacting the school or posting the card back. Make sure you brief those responsible for the phone number, email and postal address you use.
• Watch Clip 52• Take students outside to fill up the balloons and launch them.• Set up a chart to record the distances travelled by the balloons as the Identification Labels
are gradually returned.
87
Launching your own astronaut

Launching your own astronaut
Health and safety:• Please ensure that students only use first names or initials on the
Identification Labels and that no personal details are included.
• Ensure that in the event of parachute failure, the payload is not heavy
enough to be dangerous when falling.
• It is the responsibility of the teacher to ensure that an adequate risk
assessment has been completed.
Want to explore further?• You could encourage students to find out more about Joe Kittinger and the early attempts at
space exploration.
• Discuss the forces that will be acting on the students’ balloons at various stages of their journeys. Are there any differences between these forces and those that mini-Dallas experienced?
• Ask students to complete The Great Space Race worksheet which requires them to identify the forces acting on mini-Dallas at various stages of his expedition, showing the relative sizes of the forces using appropriate arrows.
Reflect and review
You will need
• Clip 50 (1’07”)• Clip 51 (2’40”)• Clip 52 (4’37”)• Mission Control Identification Labels• The Great Space Race worksheet• Biodegradable balloons• Helium canister
• Light, strong thread (e.g. fishing line)• Material for making parachutes (e.g.
polythene bags)• Model astronauts• Sticky tape• Laminator and laminating pouches
Or: Sticky-back plastic
88
© BBC

Mission Control Identification label
This spacecraft was launched from
(School name)
on (Date)
by (First name only)
If you find it, please let us know because w
e are collecting data for an important
science experiment. D
on’t forget to tell us where you found it – as accurately as
possible please! You can contact us via one of the methods below
.
Thank you!
School phone no:
School email:
School postal address:
Fold Fold
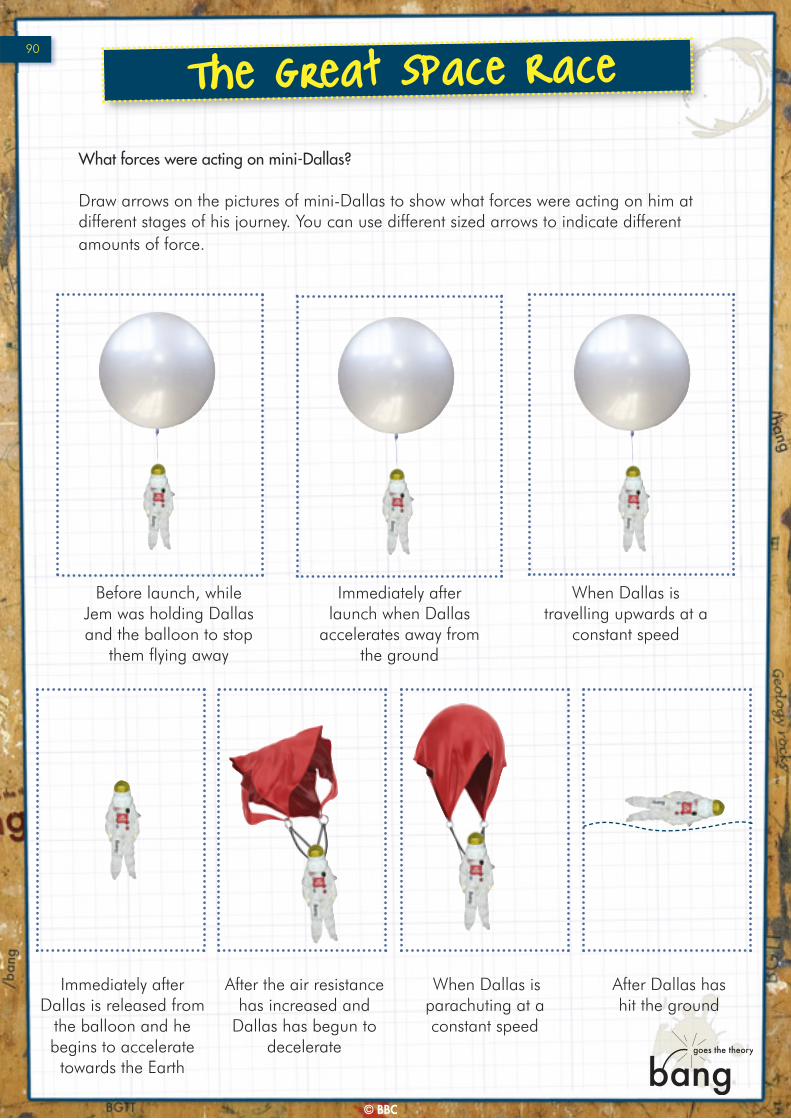
© BBC
What forces were acting on mini-Dallas?
Draw arrows on the pictures of mini-Dallas to show what forces were acting on him atdifferent stages of his journey. You can use different sized arrows to indicate differentamounts of force.
The Great Space Race
Before launch, whileJem was holding Dallasand the balloon to stop
them flying away
Immediately afterlaunch when Dallas
accelerates away fromthe ground
When Dallas istravelling upwards at a
constant speed
Immediately afterDallas is released from
the balloon and hebegins to accelerate
towards the Earth
After the air resistancehas increased and
Dallas has begun todecelerate
When Dallas isparachuting at a constant speed
After Dallas has hit the ground
90
Making a vortex cannon
HQ
Sticky Snail
Vortex Cannon
91

Suitable for: Science Club (11–16 years)
Curriculum and learning links:Extra-curricular study
Learning objectives:• Describe what turbulence is.• Describe how to make a vortex cannon.
© BBC
Activities:
Opening activity
• Ask students if they know what a vortex is and if they can give any examples. Explain that a plughole whirlpool is an everyday example and that they are going to make another type of vortex.
• Ask students how far away they could be in order to blow a piece of paper and make it move. Link this to turbulence in air preventing efficient energy transfer.
Development activities
Mini Vortex
• Watch Clip 53 • Challenge students to get into groups and make their own vortex cannon similar to the
one in the film. You may want to ask different groups to investigate using different diameter holes. The tubes can be carefully filled with smoke created using commercially available smoke matches or pellets.
Large Vortex
• Watch Clip 54• Challenge students to make the larger version of the vortex cannon using a balloon in a
bottle with a barrel. Alternatively, you could make a larger version of the first model from a large plastic dustbin.
• Watch Clip 55 to see how Jem got on with scaling up his prototypes to make the final vortex cannon.
Making a vortex cannon
92

Making a vortex cannon
Health and safety• If using a power-drill to cut holes in the cardboard tubes, carefully
consider whether students have the training and experience to operate
it themselves. • Repeating Jem’s experiments using fuel and oxygen (or fuel and air)
mixtures to initiate the vortex could be very dangerous.
• It is the responsibility of the teacher to ensure that an adequate risk
assessment has been completed.
Want to explore further?
• Ask students to suggest reasons why they used smoke to demonstrate the first model but there was no need for smoke in Jem’s final, full-sized cannon.
Reflect and review
© BBC
• Watch Clip 56 and encourage students to investigate which way a plughole vortex spins. Full details of this experiment can be found with the Plugholes film at: bbc.co.uk/bang/handson
• Ask students to investigate the limiting factors in the distance that a vortex can travel.
• Use Clip 57 to get students to think further about the theory, history and dangers of vortex cannons.
You will need• Clip 53 (0’59”)• Clip 54 (1’32”)• Clip 55 (4’50”)• Clip 56 (2’04”)• Clip 57 (2’47”)• Lots of cardboard tubes of suitable sizes
(e.g. the ones used to package crisps)• Sheets of polythene or latex
(e.g. plastic bags, cling film or large balloons)
• Material to make barrels (e.g. flexible plastic sheets or plastic piping)
• A safe way to cut smooth holes in the bottom of the tubes (e.g. a power-drill with flat drill bits of various sizes)
• A safe source of smoke or mist (e.g. commercially available smoke matches or pellets, available from a plumbing supplier)
• Balloons• Adhesive tape• Plastic bottles• Dustbin
93
Useful Links
Below are some key sources of information and links to other organisations that youmay find useful.
Please note: the BBC is not responsible for the content of external websites.
General Science Information Sources
• Bang Goes the Theory highlights, hands-on science, web exclusives and Ask Yan video answers: bbc.co.uk/bang
• Science programmes and content on the BBC: bbc.co.uk/science
• Science and Environment news from the BBC: bbc.co.uk/news/science_and_environment
• Weather and meteorology information: bbc.co.uk/weather
• Natural history content from the BBC: bbc.co.uk/wildlifefinder
Useful Science Organisations• Association for Science Education: www.ase.org.uk
UK’s largest science association dedicated to the teaching of science.
• British Science Association: www.britishscienceassociation.orgCharity that exists to advance the public understanding, accessibility and accountability of the sciences and engineering in the UK.
• CLEAPSS: www.cleapss.org.ukAdvisory service providing support in science and technology for a consortium of local authorities and their schools.
• Engineering UK: www.engineeringuk.comPromotes the vital contribution of engineers, engineering and technology.
• Institute of Physics: www.iop.orgProfessional body actively working to promote developments in physics. Includes support for teachers and classroom resources.
• National Endowment for Science, Technology and Arts: www.nesta.org.ukIndependent body with a mission to make the UK more innovative.
94

• New Outlooks in Science and Engineering (NOISE): www.noisemakers.org.ukAims to engage 14–19 year olds with science and engineering. Includes teacher’s information pack.
• The Royal Institution: www.rigb.orgIndependent charity dedicated to connecting people with the world of science. Includes free educational resources.
• The Royal Society: www.royalsociety.orgThe UK national academy of science.
• Royal Society of Chemistry: www.rsc.orgLargest organisation in Europe for advancing the chemical sciences. Produces a range of resources for teachers and students and delivers training.
• UK Association for Science and Discovery Centres: www.sciencecentres.org.ukAssociation representing over 50 science centres in the UK.
• Science Learning Centres: www.sciencelearningcentres.org.ukNational network for professional development in science teaching.
• Society of Biology: www.societyofbiology.orgProfessional body championing the study and development of biology.
• Science, Technology, Engineering and Mathematics Network: www.stemnet.org.ukSTEM resources for students and teachers.
• Wellcome Trust: www.wellcome.ac.ukCharity dedicated to improving human and animal health. Produces a range of resources to help engage young people with biomedical science.
Science Education Resources• BBC videos selected to work with the curriculum:
bbc.co.uk/learningzone/clips
• BBC science learning resources and online courses: bbc.co.uk/learning/subjects/science.shtml
• BBC science revision resources for KS3, GCSEs and Standard Grades: bbc.co.uk/schools/gcsebitesize/science
• BBC science resources for teachers: bbc.co.uk/schools/websites/11_16/site/science.shtml
95
Useful Links

Science Education Resources continued...
• Free online access to a growing range of interactive multimedia e-learning resources: www.curriculumbits.com/index.php
• KS3 and KS4 resources for science, along with study notes for GCSE Double Award Science: www.e2bn.skoool.co.uk
• Free revision resources for GCSE Physics: www.gcse.com/physics.htm
• Year-long programme of resources, activities, competitions and events designed to inspire young people about STEM: www.ietfaraday.org
• Online activities to help students investigate different science topics: www.micro.magnet.fsu.edu/optics/activities/students/index.html
• Short science films and resources: www.planet-scicast.com/films.cfm
• Free science resources for children, young people, teachers and parents: www.planet-science.com
• Activities for exploring the world of renewable materials: www.renewableworld.org.uk
• Information on historic collections, galleries and inspirational exhibitions: www.sciencemuseum.org.uk
• Easy-to-understand explanations of how the world works: www.science.howstuffworks.com
• Classroom resources regularly updated to be relevant to current science topics: www.upd8.org.uk
96
Useful Links
Regional Resources
Scotland
• Association for Science Education Scotland: www.asescotland.org.uk• BBC Scotland Learning: bbc.co.uk/scotland/learning• Curriculum for Excellence, Science Experiences and Outcomes:
www.ltscotland.org.uk/curriculumforexcellence/sciences• Learning and Teaching Scotland: www.LTScotland.org.uk• Scottish Schools Equipment Resource Centre: www.sserc.org.uk
Wales
• BBC Wales education: bbc.co.uk/wales/education/pages/secondary.shtml• Science Shops Wales: www.scienceshopswales.org.uk• Techniquest Cardiff: www.techniquest.org• Techniquest Glyndŵr: www.tqg.org.uk
Northern Ireland
• BBC Northern Ireland learning: bbc.co.uk/northernireland/learning• W5 Discovery Centre: www.w5online.co.uk• The Northern Ireland Planetarium: www.armaghplanet.com
The Open University
The Bang Goes the Theory TV series is a BBC/Open University co-production.This partnership delivers peak-time programmes with a broad appeal toencourage wider participation in learning. For more information, visit:www.open2.net/banggoesthetheory
The Open University's Young Applicants in Schools and Colleges Scheme (orYASS for short) enables academically gifted students in Years 12 and 13 to studya wide range of undergraduate modules at first-year level.Head to www.openuniversity.co.uk/bbcyass for more details.
Free science study units are also available. Find out more at:www.openuniversity.co.uk/bangteacherspack
97
Useful Links

Acknowledgements
© BBCPublished September 2010BBC Learning, Room MC4 A4, Media Centre, 201 Wood Lane, London W12 7TQ
Thanks to the Bang Goes the Theory Production Team and Presenters
BBC Learning Editorial Team: Natalie Hewit, David Sasse, Louise WordsworthConsultants and Authors: Neil Dixon and Nick DixonBang Goes the Theory Teacher’s Pack DVD edited by: Andrea PeckoverDesign: www.longarm.co.uk
Regional Consultants:Scotland – Claire O’GallagherWales – Non RichardsNorthern Ireland – Alastair WalkerPublishing Coordinator: Liz EnglishDistribution Coordinator: Ceri SaundersTranslator: Nia WynPhotography: Glenn Dearing, Neil Dixon, Nick DixonPrinter: APSDVD translations and subtitling: Red Bee MediaDVD authoring: Playback Media ServicesDVD reproduction: Golding Products LimitedResearch: Counterpoint Research
If you would like further copies or a Welsh-language version of this pack, it isavailable to download from: bbc.co.uk/teachers/bangThe accompanying clips can also be streamed from the BBC Class Clips website:bbc.co.uk/learningzone/clips
98
Special thanks to the Oasis Academies for their help with the development of this project. In particular, we’d like to thank:Rob Candy and Nathan Jones – Project Coordinators, Oasis Community LearningAndrew Green – Press and Media OfficerKaren Oliver – Assistant Principal, Oasis Academy Shirley ParkFiona Luna – Science Teacher, Oasis Academy Immingham

© BBCPublished September 2010
BBC Learning, Room MC4 A4, Media Centre, 201 Wood Lane, London W12 7TQ
bbc.co.uk/bang