UAD System Manual v7.4.2 - MusicMag
127
Universal Audio, Inc. 4585 Scotts Valley Drive Scotts Valley, CA 95066 www.uaudio.com Customer Support USA (toll-free): 1-877-698-2834 International: +1-831-440-1176 UAD SYSTEM MANUAL UAD POWERED PLUG-INS SOFTWARE VERSION 7.4.2 Manual Version 1140113
-
Upload
khangminh22 -
Category
Documents
-
view
0 -
download
0
Transcript of UAD System Manual v7.4.2 - MusicMag

Universal Audio, Inc.4585 Scotts Valley DriveScotts Valley, CA 95066www.uaudio.com
Customer Support USA (toll-free): 1-877-698-2834International: +1-831-440-1176
UAD S
YSTEM
M
ANUAL
UAD P
OWERED
P
LUG
-I
NS
S
OFTWARE
V
ERSION
7.4.2
Manual Version 1140113

N
OTICES
Disclaimer
This manual provides general information, preparation for use, installation and operating instructions for the Uni-versal Audio UAD Powered Plug-Ins. The information con-tained in this manual is subject to change without notice.
Universal Audio, Inc. makes no warranties of any kind with regard to this manual, or the product(s) it refers to, including, but not limited to, the implied warranties of merchantability and fitness for a particular purpose.
Universal Audio, Inc. shall not be liable for errors con-tained herein or direct, indirect, special, incidental, or consequential damages in connection with the furnish-ing, performance, or use of this material or the prod-uct(s).
Copyright
Copyright ©2014 Universal Audio, Inc. All rights reserved.
Trademarks
Universal Audio, the Universal Audio diamond logo, UAD, UAD Series, UAD-1, UAD-2, UAD-2 SOLO, UAD-2 DUO, UAD-2 QUAD, UAD-2 OCTO, Powered Plug-Ins, 1176LN, 1176SE, Teletronix, LA-2A, LA-3A, LA-610, LA-610MkII, 2-1176, 610, 2-610, 6176, 710 Twin-Finity, 2192, 4-710d, Cambridge EQ, DreamVerb, Plate 140, Precision Limiter, RealVerb Pro, Precision Buss Compres-sor, Precision De-Esser, Precision Maximizer, Satellite, Satellite DUO, Satellite QUAD, Apollo, Apollo DUO, Apollo QUAD, Apollo 16, Analog Ears | Digital Minds and Helios, are trademarks or registered trademarks of Universal Audio, Inc.
Other company and product names mentioned herein are trademarks of their respective owners.Universal Au-dio, Inc.
End User License Agreement
By installing the software, you confirmed your accep-tance of the Universal Audio End User License Agree-ment, as well as the Universal Audio terms of service and privacy policy, and any additional Third-Party Software terms, all of which can be found at:www.uaudio.com/eula

TABLE OF CONTENTS
Chapter 1. Introduction . . . . . . . . . . . . . . . . . . . . . . . . . . . . . . . . . . . . . . . . . . 6Welcome!. . . . . . . . . . . . . . . . . . . . . . . . . . . . . . . . . . . . . . . . . . . . . . . . . . . . . . . . . . . . . . . . . . . . . 6
Features . . . . . . . . . . . . . . . . . . . . . . . . . . . . . . . . . . . . . . . . . . . . . . . . . . . . . . . . . . . . . . . . . . . . . . 8
The UAD System . . . . . . . . . . . . . . . . . . . . . . . . . . . . . . . . . . . . . . . . . . . . . . . . . . . . . . . . . . . . . . . 9
Package Contents . . . . . . . . . . . . . . . . . . . . . . . . . . . . . . . . . . . . . . . . . . . . . . . . . . . . . . . . . . . . . . 9
UAD Documentation Overview . . . . . . . . . . . . . . . . . . . . . . . . . . . . . . . . . . . . . . . . . . . . . . . . . . . 9
Online Documentation . . . . . . . . . . . . . . . . . . . . . . . . . . . . . . . . . . . . . . . . . . . . . . . . . . . . . . . . . 11
Customer Support . . . . . . . . . . . . . . . . . . . . . . . . . . . . . . . . . . . . . . . . . . . . . . . . . . . . . . . . . . . . . 12
Chapter 2. UAD Installation . . . . . . . . . . . . . . . . . . . . . . . . . . . . . . . . . . . . . . 13
Overview . . . . . . . . . . . . . . . . . . . . . . . . . . . . . . . . . . . . . . . . . . . . . . . . . . . . . . . . . . . . . . . . . . . . 13
Install Videos . . . . . . . . . . . . . . . . . . . . . . . . . . . . . . . . . . . . . . . . . . . . . . . . . . . . . . . . . . . . . . . . . 13
System Requirements. . . . . . . . . . . . . . . . . . . . . . . . . . . . . . . . . . . . . . . . . . . . . . . . . . . . . . . . . . . 14
Qualified Hosts . . . . . . . . . . . . . . . . . . . . . . . . . . . . . . . . . . . . . . . . . . . . . . . . . . . . . . . . . . . . . . . 14
Latest Information & Software Updates . . . . . . . . . . . . . . . . . . . . . . . . . . . . . . . . . . . . . . . . . . . . 15
UAD Software Installation. . . . . . . . . . . . . . . . . . . . . . . . . . . . . . . . . . . . . . . . . . . . . . . . . . . . . . . 16
UAD Hardware Installation. . . . . . . . . . . . . . . . . . . . . . . . . . . . . . . . . . . . . . . . . . . . . . . . . . . . . . 18
Authorization . . . . . . . . . . . . . . . . . . . . . . . . . . . . . . . . . . . . . . . . . . . . . . . . . . . . . . . . . . . . . . . . . 20
Authorize Plug-Ins Procedure . . . . . . . . . . . . . . . . . . . . . . . . . . . . . . . . . . . . . . . . . . . . . . . . . . . . 21
Offline Authorization . . . . . . . . . . . . . . . . . . . . . . . . . . . . . . . . . . . . . . . . . . . . . . . . . . . . . . . . . . 22
Verifying Installation . . . . . . . . . . . . . . . . . . . . . . . . . . . . . . . . . . . . . . . . . . . . . . . . . . . . . . . . . . . 24
Software Removal . . . . . . . . . . . . . . . . . . . . . . . . . . . . . . . . . . . . . . . . . . . . . . . . . . . . . . . . . . . . . 25
Using Unlicensed Plug-Ins (Demo Mode). . . . . . . . . . . . . . . . . . . . . . . . . . . . . . . . . . . . . . . . . . . 25
Learn More . . . . . . . . . . . . . . . . . . . . . . . . . . . . . . . . . . . . . . . . . . . . . . . . . . . . . . . . . . . . . . . . . . 25
Chapter 3. UAD System Overview . . . . . . . . . . . . . . . . . . . . . . . . . . . . . . . . . 26
The UAD Environment . . . . . . . . . . . . . . . . . . . . . . . . . . . . . . . . . . . . . . . . . . . . . . . . . . . . . . . . . . 26
The UAD Hardware. . . . . . . . . . . . . . . . . . . . . . . . . . . . . . . . . . . . . . . . . . . . . . . . . . . . . . . . . . . . 26
The UAD Software. . . . . . . . . . . . . . . . . . . . . . . . . . . . . . . . . . . . . . . . . . . . . . . . . . . . . . . . . . . . . 29
The DAW Environment . . . . . . . . . . . . . . . . . . . . . . . . . . . . . . . . . . . . . . . . . . . . . . . . . . . . . . . . . 31
My.uaudio.com . . . . . . . . . . . . . . . . . . . . . . . . . . . . . . . . . . . . . . . . . . . . . . . . . . . . . . . . . . . . . . . 33
Authorization . . . . . . . . . . . . . . . . . . . . . . . . . . . . . . . . . . . . . . . . . . . . . . . . . . . . . . . . . . . . . . . . . 33
Chapter 4. My.uaudio.com. . . . . . . . . . . . . . . . . . . . . . . . . . . . . . . . . . . . . . . 34
Optional Plug-Ins. . . . . . . . . . . . . . . . . . . . . . . . . . . . . . . . . . . . . . . . . . . . . . . . . . . . . . . . . . . . . . 34
Authorization Overview . . . . . . . . . . . . . . . . . . . . . . . . . . . . . . . . . . . . . . . . . . . . . . . . . . . . . . . . 35
Demo Mode . . . . . . . . . . . . . . . . . . . . . . . . . . . . . . . . . . . . . . . . . . . . . . . . . . . . . . . . . . . . . . . . . . 38
UA Online Store . . . . . . . . . . . . . . . . . . . . . . . . . . . . . . . . . . . . . . . . . . . . . . . . . . . . . . . . . . . . . . 39
Buying Plug-Ins . . . . . . . . . . . . . . . . . . . . . . . . . . . . . . . . . . . . . . . . . . . . . . . . . . . . . . . . . . . . . . . 40
Transferring UAD devices and licenses . . . . . . . . . . . . . . . . . . . . . . . . . . . . . . . . . . . . . . . . . . . . 41
UAD System Manual - 3 - Table of Contents

TABLE OF CONTENTS
Chapter 5. Using Multiple UAD Devices. . . . . . . . . . . . . . . . . . . . . . . . . . . . . . 42
Overview . . . . . . . . . . . . . . . . . . . . . . . . . . . . . . . . . . . . . . . . . . . . . . . . . . . . . . . . . . . . . . . . . . . . 42
Plug-In License Policy . . . . . . . . . . . . . . . . . . . . . . . . . . . . . . . . . . . . . . . . . . . . . . . . . . . . . . . . . . 42
Authorizing Multiple Devices . . . . . . . . . . . . . . . . . . . . . . . . . . . . . . . . . . . . . . . . . . . . . . . . . . . . 42
Power Requirement . . . . . . . . . . . . . . . . . . . . . . . . . . . . . . . . . . . . . . . . . . . . . . . . . . . . . . . . . . . . 43
Multidevice DSP Loading . . . . . . . . . . . . . . . . . . . . . . . . . . . . . . . . . . . . . . . . . . . . . . . . . . . . . . . 44
Device Info Display . . . . . . . . . . . . . . . . . . . . . . . . . . . . . . . . . . . . . . . . . . . . . . . . . . . . . . . . . . . . 44
Disabling Devices . . . . . . . . . . . . . . . . . . . . . . . . . . . . . . . . . . . . . . . . . . . . . . . . . . . . . . . . . . . . . 44
Host CPU . . . . . . . . . . . . . . . . . . . . . . . . . . . . . . . . . . . . . . . . . . . . . . . . . . . . . . . . . . . . . . . . . . . . 45
Chapter 6. UAD Meter & Control Panel . . . . . . . . . . . . . . . . . . . . . . . . . . . . . . 46
Overview . . . . . . . . . . . . . . . . . . . . . . . . . . . . . . . . . . . . . . . . . . . . . . . . . . . . . . . . . . . . . . . . . . . . 46
Launching the UAD Meter & Control Panel Application. . . . . . . . . . . . . . . . . . . . . . . . . . . . . . . 47
Using the UAD Meter . . . . . . . . . . . . . . . . . . . . . . . . . . . . . . . . . . . . . . . . . . . . . . . . . . . . . . . . . . 47
UAD Meter Elements . . . . . . . . . . . . . . . . . . . . . . . . . . . . . . . . . . . . . . . . . . . . . . . . . . . . . . . . . . . 48
UAD Control Panel . . . . . . . . . . . . . . . . . . . . . . . . . . . . . . . . . . . . . . . . . . . . . . . . . . . . . . . . . . . . 49
System Information Panel . . . . . . . . . . . . . . . . . . . . . . . . . . . . . . . . . . . . . . . . . . . . . . . . . . . . . . . 50
Plug-Ins Panel . . . . . . . . . . . . . . . . . . . . . . . . . . . . . . . . . . . . . . . . . . . . . . . . . . . . . . . . . . . . . . . . 53
Configuration Panel . . . . . . . . . . . . . . . . . . . . . . . . . . . . . . . . . . . . . . . . . . . . . . . . . . . . . . . . . . . 56
FireWire Panel. . . . . . . . . . . . . . . . . . . . . . . . . . . . . . . . . . . . . . . . . . . . . . . . . . . . . . . . . . . . . . . . 61
Help & Support Panel . . . . . . . . . . . . . . . . . . . . . . . . . . . . . . . . . . . . . . . . . . . . . . . . . . . . . . . . . . 67
Chapter 7. Using UAD Powered Plug-Ins . . . . . . . . . . . . . . . . . . . . . . . . . . . . 68
Overview . . . . . . . . . . . . . . . . . . . . . . . . . . . . . . . . . . . . . . . . . . . . . . . . . . . . . . . . . . . . . . . . . . . . 68
Launching a UAD Powered Plug-In . . . . . . . . . . . . . . . . . . . . . . . . . . . . . . . . . . . . . . . . . . . . . . . 68
The UAD Plug-In Window . . . . . . . . . . . . . . . . . . . . . . . . . . . . . . . . . . . . . . . . . . . . . . . . . . . . . . 69
UAD Toolbar . . . . . . . . . . . . . . . . . . . . . . . . . . . . . . . . . . . . . . . . . . . . . . . . . . . . . . . . . . . . . . . . . 70
LiveTrack Mode . . . . . . . . . . . . . . . . . . . . . . . . . . . . . . . . . . . . . . . . . . . . . . . . . . . . . . . . . . . . . . . 72
Adjusting Parameters . . . . . . . . . . . . . . . . . . . . . . . . . . . . . . . . . . . . . . . . . . . . . . . . . . . . . . . . . . 74
Shortcuts. . . . . . . . . . . . . . . . . . . . . . . . . . . . . . . . . . . . . . . . . . . . . . . . . . . . . . . . . . . . . . . . . . . . . 75
DSP Loading Information . . . . . . . . . . . . . . . . . . . . . . . . . . . . . . . . . . . . . . . . . . . . . . . . . . . . . . . 76
Automation . . . . . . . . . . . . . . . . . . . . . . . . . . . . . . . . . . . . . . . . . . . . . . . . . . . . . . . . . . . . . . . . . . 77
External MIDI Control . . . . . . . . . . . . . . . . . . . . . . . . . . . . . . . . . . . . . . . . . . . . . . . . . . . . . . . . . . 78
Mono (m) UAD plug-ins . . . . . . . . . . . . . . . . . . . . . . . . . . . . . . . . . . . . . . . . . . . . . . . . . . . . . . . . 78
Operating Levels . . . . . . . . . . . . . . . . . . . . . . . . . . . . . . . . . . . . . . . . . . . . . . . . . . . . . . . . . . . . . . 79
Chapter 8. Tempo Sync . . . . . . . . . . . . . . . . . . . . . . . . . . . . . . . . . . . . . . . . . 80
Overview . . . . . . . . . . . . . . . . . . . . . . . . . . . . . . . . . . . . . . . . . . . . . . . . . . . . . . . . . . . . . . . . . . . . 80
Tempo Sync Plug-Ins . . . . . . . . . . . . . . . . . . . . . . . . . . . . . . . . . . . . . . . . . . . . . . . . . . . . . . . . . . . 80
Available Note Values . . . . . . . . . . . . . . . . . . . . . . . . . . . . . . . . . . . . . . . . . . . . . . . . . . . . . . . . . 81
UAD System Manual - 4 - Table of Contents

TABLE OF CONTENTS
Range Limits . . . . . . . . . . . . . . . . . . . . . . . . . . . . . . . . . . . . . . . . . . . . . . . . . . . . . . . . . . . . . . . . . . 82
Entering Values . . . . . . . . . . . . . . . . . . . . . . . . . . . . . . . . . . . . . . . . . . . . . . . . . . . . . . . . . . . . . . . 82
Out of range . . . . . . . . . . . . . . . . . . . . . . . . . . . . . . . . . . . . . . . . . . . . . . . . . . . . . . . . . . . . . . . . . 83
Modes with Tempo Sync . . . . . . . . . . . . . . . . . . . . . . . . . . . . . . . . . . . . . . . . . . . . . . . . . . . . . . . . 83
Roland RE-201 Sync . . . . . . . . . . . . . . . . . . . . . . . . . . . . . . . . . . . . . . . . . . . . . . . . . . . . . . . . . . . 83
Chapter 9. UAD Delay Compensation . . . . . . . . . . . . . . . . . . . . . . . . . . . . . . . 84
Latency & Delay Compensation . . . . . . . . . . . . . . . . . . . . . . . . . . . . . . . . . . . . . . . . . . . . . . . . . . 84
Upsampled Plug-Ins. . . . . . . . . . . . . . . . . . . . . . . . . . . . . . . . . . . . . . . . . . . . . . . . . . . . . . . . . . . . 85
Upsampling Values Table . . . . . . . . . . . . . . . . . . . . . . . . . . . . . . . . . . . . . . . . . . . . . . . . . . . . . . . 86
Live Processing. . . . . . . . . . . . . . . . . . . . . . . . . . . . . . . . . . . . . . . . . . . . . . . . . . . . . . . . . . . . . . . . 87
Chapter 10. UAD-2 SOLO/Laptop . . . . . . . . . . . . . . . . . . . . . . . . . . . . . . . . . . 88
Overview . . . . . . . . . . . . . . . . . . . . . . . . . . . . . . . . . . . . . . . . . . . . . . . . . . . . . . . . . . . . . . . . . . . . 88
UAD-2 SOLO/Laptop Details. . . . . . . . . . . . . . . . . . . . . . . . . . . . . . . . . . . . . . . . . . . . . . . . . . . . 90
Important SOLO/Laptop Notes . . . . . . . . . . . . . . . . . . . . . . . . . . . . . . . . . . . . . . . . . . . . . . . . . . 93
Chapter 11. UAD-2 Satellite . . . . . . . . . . . . . . . . . . . . . . . . . . . . . . . . . . . . . . 94
Overview . . . . . . . . . . . . . . . . . . . . . . . . . . . . . . . . . . . . . . . . . . . . . . . . . . . . . . . . . . . . . . . . . . . . 94
UAD-2 Satellite Details . . . . . . . . . . . . . . . . . . . . . . . . . . . . . . . . . . . . . . . . . . . . . . . . . . . . . . . . . 95
UAD-2 Satellite Installation . . . . . . . . . . . . . . . . . . . . . . . . . . . . . . . . . . . . . . . . . . . . . . . . . . . . . . 96
UAD-2 Satellite Operation . . . . . . . . . . . . . . . . . . . . . . . . . . . . . . . . . . . . . . . . . . . . . . . . . . . . . . 99
Important UAD-2 Satellite Notes . . . . . . . . . . . . . . . . . . . . . . . . . . . . . . . . . . . . . . . . . . . . . . . . 101
FireWire Basics . . . . . . . . . . . . . . . . . . . . . . . . . . . . . . . . . . . . . . . . . . . . . . . . . . . . . . . . . . . . . . 103
FireWire Bandwidth . . . . . . . . . . . . . . . . . . . . . . . . . . . . . . . . . . . . . . . . . . . . . . . . . . . . . . . . . . 107
FireWire Bandwidth vs. UAD DSP . . . . . . . . . . . . . . . . . . . . . . . . . . . . . . . . . . . . . . . . . . . . . . . 109
FireWire Bus Power. . . . . . . . . . . . . . . . . . . . . . . . . . . . . . . . . . . . . . . . . . . . . . . . . . . . . . . . . . . 110
Chapter 12. History . . . . . . . . . . . . . . . . . . . . . . . . . . . . . . . . . . . . . . . . . . . 112
Bill Putnam Sr. . . . . . . . . . . . . . . . . . . . . . . . . . . . . . . . . . . . . . . . . . . . . . . . . . . . . . . . . . . . . . . . 112
Classic Compressors . . . . . . . . . . . . . . . . . . . . . . . . . . . . . . . . . . . . . . . . . . . . . . . . . . . . . . . . . . 116
Pros Talk UA . . . . . . . . . . . . . . . . . . . . . . . . . . . . . . . . . . . . . . . . . . . . . . . . . . . . . . . . . . . . . . . . 119
Thank You . . . . . . . . . . . . . . . . . . . . . . . . . . . . . . . . . . . . . . . . . . . . . . . . . . . . . . . . . . . . . . . . . . 123
UAD System Manual - 5 - Table of Contents

CHAPTER 1
Introduction
Welcome!
Congratulations, and welcome to the UA Family! You now own the best sounding, most powerful sonic upgrade available for your DAW. The UAD-2 and version 7 software represents the culmination of a multi-year develop-ment effort delivering the latest in state-of-the-art audio processing technology and is the next evolution of the revolutionary, award-winning UAD Powered Plug-Ins & DSP Device Platform.
For many years our customers have been asking for a UAD with more power and the UAD-2 is all about putting more power in your hands – more power to track, mix and master. The UAD-2 OCTO offers, on average, an incredible 20 times the power of the UAD-1, while the UAD-2 Duo offers 5 times, and UAD-2 Solo offers 2.5 times the power. The UAD-2 Quad supports an awe-inspiring 128-channel Neve 88RS mixer at 44.1k. That’s a full console for the largest of professional mixes on ONE incredibly priced UAD-2 device!
Up to four UAD-2 devices can be mixed and matched to conveniently scale the DSP power you want at the price you can afford. Start with a Nevana 32 and instantly run a 32 channel Neve 88RS console. Then, simply add more devices for additional outboard FX or more mix channels as your needs grow. Pro power-users can now use up to four UAD-2 Quads for the most demand-ing applications with equivalent potency to 40 UAD-1 cards! Now inside-the-box mixing is as powerful as outside.
Once you’re settled in with your new UAD-2 select from our ever growing Powered Plug-Ins Collection to custom build your own virtual mixing console, mastering console, mix sidecar, or inboard dream-FX-rack. UA’s exclusive collection of revered studio gear includes classics from Neve®, Ro-land/BOSS®, Helios®, Fairchild, Pultec, SPL®, Moog®, Empirical Labs®, Manley Laboratories®, dbx®, Studer®, Ampex®, SSL®, Harmon/Lexicon®, and others, plus of course UA’s own 1176, LA-2A, and LA-3A compressors, and our critically acclaimed Precision Series lineup. Digital recreations of other seminal analog studio gems from other legendary analog manufactur-ers are always on the way.
UAD System Manual - 6 - Chapter 1: Introduction

The UAD-2 also includes version 6 of the UAD software, which has major driver enhancements and an all-new UAD Meter & Control Panel. Version 6 features multicore-aware drivers, LiveTrack™ for low-latency tracking and monitoring through UAD-2 plug-ins, and L.O.D.E.™ [Live Optimizing DSP En-gine], which dynamically balances the load on the UAD-2. The new UAD Meter & Control Panel offers improved status monitoring, easy Quick-Click Plug Purchasing, Help and Support resources, Software Updates, and im-proved rollover help. There’s also a new streamlined web shopping experi-ence via a completely re-designed UA website with integrated audio and video demo’s, tutorials, in-depth webzine articles, FAQ’s and enhanced sup-port so you can really get the most out of your UAD-2.
Developing the UAD-2 as well as Universal Audio’s entire line of quality au-dio products designed to meet the needs of the modern recording studio while retaining the character of classic vintage equipment—has been a very special experience for me and for all who have been involved. We hope that you will enjoy using your UAD-2 and Powered Plug-Ins as much as we do.
Thanks for your support of Universal Audio.
Sincerely,Bill Putnam, Jr.CEO, Owner
UAD System Manual - 7 - Chapter 1: Introduction

Features• High-bandwidth x1 PCI Express card (PCIe 2.0 compatible)
• UAD-2 SOLO: low-profile, half-height, short PCIe card
• UAD-2 DUO/QUAD/OCTO: full-height, short PCIe card
• UAD-2 Satellite: DUO or QUAD in FireWire enclosure w/power supply
• 1, 2, 4, or 8 Analog Devices SHARC floating-point processors
• Multi-device support for up to four UAD-2’s in one system
• Cross-platform for Mac and PC
• Supports VST, RTAS, AAX, and Audio Units plug-in formats
• 44.1, 48, 88.2, 96, 176.4, 192 kHz sample rate support for all plug-ins
• Drivers optimized for modern multi-thread and multi-processor architectures
• Real-time and faster than real-time processing for mix bounces
• LiveTrack™ low-latency mode for monitoring, tracking, and performance(PCIe devices only)
• L.O.D.E.™ (Live Optimizing DSP Engine) automatically balances DSP loads*
• LoadLock™ ensures resource availability on loaded plug-ins
• UAD Meter & Control Panel application
• UAD Toolbar for preset management
• Simple Registration/Authorization process via one button click
• World’s best plug-in library with premier titles from Neve®, Roland®, Moog®, SPL®, Manley®, Empirical Labs®, SSL®, Pultec, and more
• 14-day full function demo for all plug-ins; try before you buy
• UAD Powered Plug-Ins™ available at the my.uaudio.com online store
UAD System Manual - 8 - Chapter 1: Introduction

The UAD System
UAD Powered Plug-Ins is a hardware-plus-software system that consists of one or more UAD-2 DSP accelerator devices combined with the Powered Plug-Ins software. Various UAD-2 products are available to accommodate your par-ticular computer system, processing needs, and budget. For the complete product lineup, visit our website at:
• www.uaudio.com
For a detailed overview about the UAD Powered Plug-Ins system and how it operates, see Chapter 3, “UAD System Overview.”
Package Contents
Each UAD retail package includes:
• Printed Information Sheet
• UAD DSP hardware device
• UAD-2 Satellite has additional contents (see Chapter 11, “UAD-2 Satellite”)
UAD Documentation Overview
This section describes the various instructional and technical resources that are available for installing, using, and troubleshooting UAD Powered Plug-Ins. Documentation for the product line is available in written, video, and on-line formats.
ReadMe The ReadMe contains information that may not be available in other loca-tions. Please review all the information in the ReadMe before installing or us-ing UAD Powered Plug-Ins. The ReadMe.rtf file is presented for viewing dur-ing the software installation process, and it is installed to:
Windows • Start Menu>All Programs>UAD Powered Plug-Ins
Mac • /Applications/Universal Audio
UAD System Manual - 9 - Chapter 1: Introduction

Operation Manuals
Documentation for UAD-2 and Powered Plug-Ins are separated by areas of functionality, as described below. The user manuals are placed inside the Powered Plug-Ins Documentation folder on the hard drive during software in-stallation. All manuals are in PDF format. PDF files require a free PDF reader application such as Adobe Reader (Windows) or Preview (Mac)
UAD System Manual
The UAD System Manual is the operation manual for overall UAD functional-ity and applies to the entire UAD product line. It contains detailed information about installing and configuring UAD devices, the UAD Meter & Control Panel application, how to use UAD Powered Plug-Ins within a DAW, obtain-ing optional plug-in licenses at the UA online store, and more. It includes ev-erything about UAD except Apollo-specific information and individual UAD Powered Plug-In descriptions.
UAD Plug-Ins Manual
The features and functionality of all the individual UAD Powered Plug-Ins are detailed in the UAD Plug-Ins Manual. Refer to this document to learn about the operation, controls, and interface of each plug-in.
Direct Developers
UAD Powered Plug-Ins includes plug-ins from our Direct Developer partners. Documentation for these 3rd-party plug-ins are separate files that are written and provided by the plug-in developers themselves. The filenames for these plug-ins are the same as the plug-in names.
Installed Locations
The UAD and Direct Developer manual files are copied to the hard drive by the software installer to the following locations:
Windows • Start Menu>All Programs>UAD Powered Plug-Ins>Documentation
Mac • /Applications/Univeral Audio/Documentation
Manual Conventions
UAD Powered Plug-Ins is a cross-platform solution for both Windows and Mac computers. The UAD hardware device can be installed into either platform; it is the exact same hardware for both platforms. Operation of the plug-ins is practically identical regardless of the host system platform and application. However, certain platform-specific instructions will differ according to the host system you are using.
UAD System Manual - 10 - Chapter 1: Introduction

Platforms Instructions in this guide that are platform-specific are indicated with a head-ing in red letters. Instructions that are identical regardless of platform are not differentiated.
Windows Instructions specific to the Windows platform use this red Windows heading.
Mac Instructions specific to the Mac platform use this red Mac heading.
UAD Nomenclature
Unless specified otherwise, for descriptive purposes within this manual, “UAD-2” and “UAD” means all UAD-2 family products (SOLO, DUO, QUAD, OCTO, UAD-2 Satellite, and Apollo/Apollo Twin/Apollo 16 audio inter-faces).
Screen Shots Screenshots in this manual may be taken from the Windows and/or Mac ver-sion of the software, and are used interchangeably when the content and functionality of the screenshot is the same on both platforms. Slight variations in the appearance of a screenshot between operating systems are inevitable.
When the content of and function of the software represented in a screenshot is identical on both platforms, no differentiation is made in the screenshot title. If there is a significant difference between platforms, screenshots from both platforms are included.
Online Documentation
The technical support pages on our website offer a wealth of helpful informa-tion that is not included in the documentation contained within the software bundle. Please visit our support pages for important information including the latest software, release notes, updated technical news, and more. The main UAD Powered Plug-Ins support link is:
Support Website • www.uaudio.com/support
Videos Our website also contains many helpful videos that explain how to install UAD hardware and software, register and authorize the products, obtain op-tional plug-ins, and more:
• www.uaudio.com/videos
Blog Our blog is published regularly and contains lots of useful and interesting in-formation. How-to pages, artist/producer/engineer interviews, support Q & A, detailed scientific notes, and other fascinating articles make the our blog a great place to routinely visit:
• www.uaudio.com/blog
UAD System Manual - 11 - Chapter 1: Introduction

Users Forum The unofficial UAD Powered Plug-Ins users forum, for the exchange of tips and information, is on the world wide web at:
• www.uadforum.com
Customer Support
Customer support is provided by Universal Audio staff to all registered UAD Powered Plug-Ins users (see “Registration” on page 39 for details).
Support Hours Our support specialists are available to assist you via email and telephone during our normal business hours, which are from 9am to 5pm, Monday through Friday, Pacific Standard Time.
Phone Support Customer Service & Technical SupportUSA toll-free: +1-877-698-2834International: +1-831-440-1176
Online Support To request online support, please visit our support page, then click the blue “Submit Support Ticket” button in the right column to create a help ticket:
• www.uaudio.com/support
Factory Address Universal Audio, Inc.4585 Scotts Valley DriveScotts Valley, CA 95066USA
Main Website • www.uaudio.com
Feedback Your feedback on the performance and features of UAD Powered Plug-Ins is very important to us. Please send your comments and suggestions to us. Com-ments (not technical support issues) may be sent to:
UAD System Manual - 12 - Chapter 1: Introduction

CHAPTER 2
UAD Installation
OverviewUAD Powered Plug-Ins installation and configuration consists of four steps:
• UAD software installationDownload the latest installer from www.uaudio.com/download
• UAD hardware installationFollow the instructions in this chapter
• UAD device registrationAdd your device to your my.uaudio.com Account
• UAD plug-in authorizationDownload and apply UAD authorization file
These steps are detailed in this chapter. Your host computer must meet the hardware and software requirements to operate properly, and you need a qualified VST, RTAS, AAX, or Audio Units host application to run UAD Pow-ered Plug-Ins.
UAD-2 Satellite
This UAD product has its own set of hardware connection and operation in-structions. Refer to Chapter 11, “UAD-2 Satellite” for complete details.
UAD-2 SOLO/Laptop
This UAD product has its own set of hardware connection and operation in-structions. Refer to Chapter 10, “UAD-2 SOLO/Laptop” for complete details.
Install Videos
Our website contains many helpful support videos that explain how to install the hardware and software, register and authorize the product, obtain op-tional plug-ins, and more:
• www.uaudio.com/videos
UAD System Manual - 13 - Chapter 2: UAD Installation

System Requirements
UAD Powered Plug-Ins require the following hardware and software:
Windows
• Windows 7 64-Bit Edition
• Qualified PCIe-to-FireWire 800 adapter card
Mac
• OS X 10.7 Lion or 10.8 Mountain Lion
• Apollo Twin requires an available Thunderbolt port
All Platforms
• 2 gigabytes available disk space
• Available PCI Express (PCIe) slot for each UAD-2 card
• Available FireWire 800 port for UAD-2 Satellite or Apollo/Apollo 16
• 1024 x 800 minimum display resolution
• Internet connection to download software and authorize UAD plug-ins
• Compatible plug-in host application software
• For detailed compatibility information, visit www.uaudio.com/support
Qualified Hosts
UAD Powered Plug-Ins, when combined with a plug-in host application, is a technically complex system with many variables. Because the host application environment is integral to the system but is completely out of our control, we cannot claim compatibility with all hosts that may claim to support the use of VST, RTAS, AAX 64, and/or Audio Units plug-ins.
We qualify specific host applications for compatibility with UAD Powered Plug-Ins. We recommend the latest versions of these host applications for op-timum performance. Host applications that are not listed may work with UAD Powered Plug-ins, but compatibility with them cannot be guaranteed.
For the current list of qualified hosts, visit:• www.uaudio.com/support
For additional compatibility information about using UAD Powered Plug-Ins, please review the UAD compatibility pages:• www.uaudio.com/support/uad/compatibility
UAD System Manual - 14 - Chapter 2: UAD Installation

Latest Information & Software Updates
Technical Updates
Updated UAD technical information is regularly posted to the UA website. Please visit the UAD support pages for the latest bulletins:
• www.uaudio.com/support
Software Updates
The installer disk in the retail package may not contain the latest UAD soft-ware. Check our website for software updates:
• www.uaudio.com/downloads
If the UAD software is already installed, the UAD Meter & Control Panel ap-plication has a convenient button that checks for the most recent version (see “Check for Updates” on page 50).
UAD System Manual - 15 - Chapter 2: UAD Installation

UAD Software Installation
Install Software First
If you are installing UAD Powered Plug-Ins for the first time, install the software before installing the UAD device(s). This is particularly important on Windows systems for “plug-and-play” functionality. If you are updating to a newer ver-sion of the software or installing additional UAD devices, it is not necessary to remove the previous UAD software or hardware from the system, but you should still install the newer software before adding new devices.
Note: The UAD Powered Plug-Ins software installer is identical for UAD hard-ware (there are only two UAD installers, one each for Win & Mac), except Apollo Twin has its own installer.
Install Options The UAD software is comprised of many components, and the version of all the components must match for proper operation. When the UAD installer is run, all existing UAD components are deleted to avoid version mismatch. Therefore, it is necessary to select all the desired driver and plug-in format op-tions during each UAD installation. Partial installations are not possible.
Important: Select all desired options each time the UAD installer is run. Pre-viously installed components are deleted during installation.
Win & Mac Software installation and removal for Windows and Mac platforms have their own particular procedures; each are described below.
Important: Close all open files and applications before starting the instal-lation procedure. Specifically, make sure the UAD Meter & Control Panel and all UAD host applications are not running.
Windows Install Software Installation Procedure for Windows Systems
Important: Verify the computer system date and time are set correctly be-fore installing the software and/or launching the UAD Meter & Control Panel application for the first time.
1. Launch the software installer.
• Download the UAD Powered Plug-Ins software installer from:www.uaudio.com/downloads
• Double-click the downloaded software archive, which is an executable ap-plication. The installer will run automatically.
2. Setup will guide you through the installation procedure.
UAD System Manual - 16 - Chapter 2: UAD Installation

3. When installation has completed, power down your computer to install the UAD device(s) following the instructions on page 18. If the UAD device is already installed or you are updating, simply restart the system.
4. After restarting, the operating system will load the new drivers.
Software installation is now complete. Proceed to the Authorization section (page 20).
You can use the UAD Meter & Control Panel to verify installation (see “Verify-ing Installation” on page 24.)
Mac Install Software Installation Procedure for Mac Systems
Important: Verify the computer system date and time are set correctly be-fore installing the software and/or launching the UAD Meter & Control Panel application for the first time.
1. Launch the software installer.
• Download the UAD Powered Plug-Ins software installer from:www.uaudio.com/downloads
• First decompress the downloaded zip archive by double-clicking it. Then double-click the UAD Powered Plug-Ins Installer application.
2. The installer will guide you through the installation procedure.
3. Restart the computer after the software is installed.
Software installation is now complete. Proceed to hardware installation or if that is done already, proceed to the Authorization section (page 20).
Verify Install You can use the UAD Meter & Control Panel to verify installation (see “Verify-ing Installation” on page 24.)
Installed Locations
The UAD Meter & Control Panel application and UAD documentation is cop-ied to these locations on the hard drive during installation:
Windows • C:\Program Files\Universal Audio\Powered Plug-Ins
These can be access from the Windows Start Menu at:
• Start>All Programs>UAD Powered Plug-Ins
The VST plug-in files are installed to these locations during installation:
UAD System Manual - 17 - Chapter 2: UAD Installation

64-bit UAD plug-ins directory:
• C:\Program Files\Steinberg\VstPlugins\Powered Plugins\
32-bit UAD plug-ins directory:
• C:\Program Files (x86)\Steinberg\VstPlugins\Powered Plugins\
Note: To ensure access to the mono (m) plug-ins, set the host application to use the directories above.
Mac • /Applications/Universal Audio
The plug-in files are installed to the standardized OS X locations:
• VST: /Library/Audio/Plug-Ins/VST/Powered Plug-Ins
• Audio Units: /Library/Audio/Plug-Ins/Components
• RTAS: /Library/Application Support/Digidesign/Plug-Ins
• AAX 64: /Library/Application Support/Avid/Audio/Plug-Ins
UAD Hardware Installation
Important: The UAD software should be installed before installing the UAD DSP device(s). See the previous section for software installation instructions.
UAD-2 SOLO/Laptop
UAD-2 SOLO/Laptop is a UAD product designed for use with the Express-Card expansion slot typically found on notebook computers. It has its own set of hardware connection and operation instructions. Refer to Chapter 10, “UAD-2 SOLO/Laptop” for complete details.
UAD-2 Satellite The UAD-2 Satellite is a UAD product that is designed for use with the Firewire port. This product has its own set of hardware connection and operation in-structions. Refer to Chapter 11, “UAD-2 Satellite” for complete details.
About PCI and PCI Express
PCI and PCI-X should not be confused with PCI Express (also known as PCIe). PCIe is not compatible with PCI or PCI-X because PCIe uses a completely dif-ferent connector (see Figure 1 on page 19).
UAD-2 SOLO, DUO, QUAD, and OCTO cards are all PCIe cards. They will ONLY work in PCI Express (PCIe) slots. Be careful to only install the UAD-2 card into a PCIe slot.
UAD System Manual - 18 - Chapter 2: UAD Installation

UAD-2 PCIe Speed
UAD-2 cards are “x1” PCIe cards. Although these cards can be installed into any speed PCIe slot (x1/x4/x8/x16), putting a them in any PCIe slot faster than x1 will not improve UAD performance.
Installing the UAD Cards
After installing the UAD Powered Plug-Ins software, install the UAD DSP card(s). Hardware installation is the same for all platforms.
Note: If necessary, refer to the computer manufacturer’s documentation for instructions about installing PCIe cards.
To install the UAD DSP card(s):
1. Install the UAD software first (page 16).
2. Power down the computer system.
3. Open the computer case.
4. Remove the rear screw and cover of an available PCIe expansion slot.
5. Before handling the UAD card, discharge any static electricity by touching the metal casing of the power supply.
6. Remove the UAD card from its protective anti-static bag. Do not touch the gold edge connector contacts.
Figure 1. PCI and PCIe connectors are incompatible.
PCI/PCI-X
PCI Express (PCIe)
UAD System Manual - 19 - Chapter 2: UAD Installation

7. Hold the card gently by the top edges, and line up its connector with the slot inside the computer.
8. When the connector and slot are aligned, press the card into the slot with firm, even pressure. The card should “pop” into place. The top of the slot on the motherboard should be flush and parallel with the edge of the UAD card.
9. Secure the card with the previously removed screw.
10. Replace the computer case.
Hardware installation is now complete. Proceed to Authorization in the next section.
Authorization
Your UAD device must be registered at my.uaudio.com to download an au-thorization file, and you need a my.uaudio.com account to register the de-vice. These steps are detailed in the“Authorize Plug-Ins Procedure” on page 21.
Important: All UAD plug-ins must be authorized before they can be used (unauthorized plug-ins can be used in demo mode for 14 days without autho-rization). Authorization is accomplished by clicking the “Authorize Plug-Ins” button in the UAD Meter & Control Panel application. The procedure is in the next section.
Figure 2. UAD-2 card installation in PCIe slot.
UAD System Manual - 20 - Chapter 2: UAD Installation

Authorize Plug-Ins Procedure
This procedure provides only the step-by-step process for UAD authorization. A complete overview of UAD authorization, my.uaudio.com, and the UA on-line store is in Chapter 4, “My.uaudio.com.”
Note: The following procedure requires an internet connection on the UAD host computer. To authorize from a system that is not online, see “Offline Au-thorization” on page 22.
Online Authorization
To download and apply the UAD authorization file when connected to the internet:
1. Install the UAD Powered Plug-Ins software and the UAD hardware using the procedures detailed in this chapter (the system must be operating properly).
2. Launch the UAD Meter & Control Panel application (see page 47) and open the Plug-Ins panel (see page 49).
3. Click the “Authorize Plug-Ins” button (page 53). The my.uaudio.com online store opens in the default web browser.
• If you don’t already have a my.uaudio.com account, you are directed to cre-ate one. Follow the instructions online.
• If you already have a my.uaudio.com account, login with your email ad-dress and password. If your password is lost, the store can email it to you.
4. Your device will be automatically registered and added to your “My Sys-tems” computer group, and your authorization file is generated.
5. Click the “Download Authorization” button at the bottom of the registration page to download the “auth.uad2” file. The authorization file is down-loaded by the browser to the location specified in the browser preferences.
6. For optimum results, quit all open audio host applications (DAWs).
7. Double click the auth.uad2 file. The authorization is loaded onto the UAD device(s) and after a few seconds the “Authorizations Updated Success-fully” window appears (Figure 3).
Online UAD authorization is now complete, and UAD Powered Plug-Ins are ready for use.
UAD System Manual - 21 - Chapter 2: UAD Installation

Offline Authorization
Note: If the UAD computer is not connected to the internet, you will need to manually transfer the registration URL into the browser of a web-enabled com-puter.
To download and apply the UAD authorization file if not connected to the internet:
1. Install UAD Powered Plug-Ins software and the UAD hardware using the procedures detailed in this chapter (the system must be operating properly).
2. Launch the UAD Meter & Control Panel application (see page 47) and open the Plug-Ins panel (see page 49).
3. Click the “Authorize Plug-Ins” button (page 53). The default web browser opens with the registration URL in the address bar (and you may get an er-ror that the computer is not connected to the internet).
4. You must enter this URL into a web-connected computer, so either:a) Drag the URL icon to the Desktop to create a weblink shortcut (preferred, Figure 4 on page 23) then transfer the weblink shortcut to the internet com-puter via a storage device or network, ORb) Carefully write down the URL, EXACTLY as it appears.
5. Go to the URL using a web browser on an internet-connected computer. Double-click the transferred weblink shortcut, or enter the URL as noted.
Figure 3. The authorization successful window
UAD System Manual - 22 - Chapter 2: UAD Installation

•If you don’t already have a my.uaudio.com account, you are directed to create one. Follow the instructions online.
•If you already have a my.uaudio.com account, login with your email ad-dress and password. If your password is lost, the store can email it to you.
6. Your device will be automatically registered and added to your “My Sys-tems” Computer group, and your authorization file is generated.
7. The authorization file should begin downloading automatically. Click the “Download Authorization” link to download the auth file if not.
8. Transfer the authorization file to the UAD computer via a storage device or network.
9. For optimum results, quit all open audio host applications (DAWs).
10. Double-click the authorization file. The authorization is loaded onto the UAD device(s) and after a few seconds the “Authorizations Updated Suc-cessfully” window appears (Figure 3).
Online UAD authorization is now complete, and UAD Powered Plug-Ins are ready for use.
Figure 4. To authorize a system that is not connected to the internet, create a web location shortcut on the offline UAD system for easier transfer of the URL file to an online system.
1. Click + hold this URL icon in the browser’s address bar, then...
2. Drag the icon to the Desktop and release to create a weblink file for easier transfer.
UAD System Manual - 23 - Chapter 2: UAD Installation

Verifying Installation
The UAD Meter & Control Panel displays the current resource loads of the UAD DSP hardware device in realtime. It also contains the System Information panel, where UAD software and hardware installation can be verified to en-sure the system is working properly.
To confirm proper UAD installation and operation:
1. Launch the UAD Meter & Control Panel application (see page 47).
2. Open the System Information panel (see page 49).
3. When the UAD device is displayed in the Hardware area and its status is “OK” then the UAD driver is communicating with the UAD device and the system is operating properly.
UAD-2 LED The UAD-2 has an LED indicator. This LED provides certain indications about the operational state of the UAD-2. The location of the LED depends on the UAD-2 product. On UAD-2 PCIe cards, the LED is on the mounting bracket of the card. On SOLO/Laptop, the LED is next to the UA logo on the black hous-ing. On UAD-2 Satellite, the LED is on the rear panel.
Alternating red and green
When the LED alternates between solid red and solid green, the device is powered up properly but the UAD driver is not yet loaded or communicating with the device. This is the expected state if the device is installed but the soft-ware is not yet installed, or after booting the system and the UAD driver is not yet loaded. The driver loads when the UAD Meter & Control panel or host DAW application is launched.
Solid green
When the LED is solid green, the UAD driver is loaded and properly commu-nicating with the device. This is the normal state when using UAD Powered Plug-Ins.
Solid red or other blinking patterns
When the LED is producing any pattern other than the two conditions above, there is a problem with communication between the driver and the device. Try a cold reboot (complete power down) and/or reinstalling the UAD software before contacting customer support.
UAD System Manual - 24 - Chapter 2: UAD Installation

Software Removal
To remove all UAD software from the computer:
Windows 1. From the Windows Start Menu at, select:
• Start>All Programs>UAD Powered Plug-Ins>Remove UAD Powered Plug-Ins
2. The UAD software is removed.
Mac 1. Launch the “Uninstall Universal Audio Software” application located at:/Applications/Universal Audio
2. Click the “Uninstal UA Software” button in the application window.
3. The UAD software is removed.
UAD software removal is complete.
Important: Power down the computer before removing any UAD cards.
Using Unlicensed Plug-Ins (Demo Mode)
To run unlicensed UAD plug-ins after authorization, see “Demo Mode” on page 38. To redeem vouchers or coupons, or purchase additional UAD plug–in licenses, see “UA Online Store” on page 39.
Learn More
After installation, registration, and authorization, you’re ready to use UAD Powered Plug-Ins. We especially recommend reading chapters 3, 4, 6, and 7 in this manual to gain important insights about using the product.
Visit our support site for the latest technical information and additional infor-mation not included with the software, or to contact technical support about any technical difficulties:
• www.uaudio.com/support
Our website also contains many helpful videos that explain how to install the hardware and software, register, authorize, and use the product, obtain op-tional plug-ins, and more:
• www.uaudio.com/videos
UAD System Manual - 25 - Chapter 2: UAD Installation

CHAPTER 3
UAD System Overview
The UAD Environment
The complete UAD Powered Plug-Ins environment consists of many compo-nents. These components are:
• One or more UAD DSP hardware accelerator devices
• The UAD device drivers
• The UAD plug-ins
• The host computer system
• The plug-in host application software (DAW)
• An audio hardware input/output interface and its drivers
All these components operate together simultaneously within one computer to form the complete audio processing system.
The other UAD component is your account at my.uaudio.com (page 34) and the UA online store, where UAD devices are registered, UAD coupons are re-deemed, and UAD plug-in licenses and authorizations are obtained. Al-though my.uaudio.com is not required during normal system use, it is essen-tial for initializing the overall UAD system because authorization is required to use UAD-Powered Plug-Ins (see “Authorization Overview” on page 35).
The UAD Hardware
The UAD DSP (Digital Signal Processing) hardware accelerator devices pro-vide the “power” behind UAD Powered Plug-Ins. Most UAD plug-ins use ex-tremely complex algorithms to provide the quality sound and accurate mod-eling Universal Audio is famous for. The UAD processor engines are signifi-cantly more optimized to perform the complex DSP routines required for these algorithms than a standard desktop computer CPU can deliver.
All UAD-2 devices are Mac and Windows compatible unless stated other-wise; the hardware is identical for both OS platforms.
Note: Multiple UAD hardware types can be used concurrently in the same computer. For details, see Chapter 5, “Using Multiple UAD Devices.”
UAD System Manual - 26 - Chapter 3: UAD System Overview

UAD-2 Family UAD-2 is our second-generation UAD product line that offers many improvements over the original UAD-1; most notable is significantly increased DSP horsepower. Each UAD-2 DSP pro-vides approximately 2.5x the processing power of the UAD-1, therefore one UAD-2 OCTO offers approximately 20 times the processing power of UAD-1.
A variety of UAD-2 models are available to suit various processing and pro-tocol needs. Each model is defined by its number of DSP chips (1, 2, 4, or 8) and its connection protocol (PCIe or Firewire). Up to four UAD-2 devices can be run concurrently in one system.
Note: UAD-1 is a discontinued product.
SOLO/DUO/QUAD/OCTO
UAD-2 devices are designated as SOLO, DUO, QUAD, or OCTO which indicates the number of SHARC® DSP chips in each device. SOLO devices have one DSP, DUO devices have two DSPs, QUAD devices have four DSPs, and OCTO devices have eight DSPs.
UAD-2 PCIe Cards
UAD-2 PCI-Express (PCIe) cards are available in SOLO, DUO, QUAD, and OCTO configurations. All UAD-2 PCIe cards use the PCIe “x1” architec-ture, which offers plenty of data bandwidth for
even the most demanding audio processing requirements, such as four UAD-2 OCTOs (32 DSPs) in the same system.
UAD-2 SOLO/Laptop
The UAD-2 SOLO/Laptop is a self-contained UAD-2 Solo device housed entirely within an Express-Card/34 expansion card for use with notebook sys-tems. No external cables or power is required, for the ultimate in mobile DSP capability. UAD-2 SOLO/Lap-top has special instructions for installation, connectiv-ity, and use. See Chapter 10, “UAD-2 SOLO/Laptop” for complete details.
Note: UAD-2 SOLO/Laptop is a discontinued product.
UAD System Manual - 27 - Chapter 3: UAD System Overview

UAD-2 Satellite The UAD-2 Satellite is available in DUO and QUAD versions and is enclosed in an attractive housing that uses an external power supply. It connects via Firewire, enabling Powered Plug-Ins on Mac systems that don’t have PCIe or ExpressCard slots. See Chapter 11, “UAD-2 Satellite” for complete details.
Apollo Audio Interfaces
Apollo is UA’s line of high-resolution audio interfaces with class-leading sound quality, Realtime UAD Processing, FireWire/Thunderbolt connectivity, and elegant hardware design and workflow. Apollo devices include the orig-inal Apollo, Apollo Twin, and Apollo 16.
The UAD functionality of Apollo’s built-in UAD-2 processor is documented in this manual. However, functionality that is unique to Apollo is documented separately in the Apollo hardware and software manuals.
Note: Throughout this manual, all mentions of “Apollo” refers to Apollo, Apollo Twin, and Apollo 16 unless noted otherwise.
UAD-2 Products UAD-2 devices are available in a variety of retail configurations to best ac-commodate your budget and processing requirements. The products have various DSP counts (SOLO/DUO/QUAD/OCTO), form factors (PCIe, FireWire), and plug-in bundles. For complete details about all available prod-ucts, visit our website:
• www.uaudio.com
UAD System Manual - 28 - Chapter 3: UAD System Overview

The UAD Software
The UAD Powered Plug-Ins software consists of the UAD installer, the UAD plug-ins, the UAD Meter & Control Panel application, the UAD device drivers, and the user documentation.
Installer The UAD Powered Plug-Ins software installer contains all the UAD software components (plug-ins, drivers, and documen-tation) and copies them to disk during installation. There is one UAD software installer for each OS platform (Windows and Mac). The UAD software installer supports all variations of UAD hardware devices.
Powered Plug-Ins
Powered Plug-ins are the VST, RTAS, AAX 64, and Audio Units plug-in files that are loaded within the host applica-tion. The plug-ins are where the graphical user interface (GUI) is seen (Figure 18 on page 69) and where the various control parameters can be manipulated to achieve the de-sired result.
The UAD software installer always installs the complete suite of all available Powered Plug-Ins. However, all of the installed UAD plug-ins may not be li-censed. The included licenses depends on the retail package bundle (see “Bundled Plug-Ins” on page 34).
Optional Plug-Ins
Most UAD plug-ins require optional licenses to run without restrictions. Op-tional plug-in licenses are obtained at my.uaudio.com, the Universal Audio online store. Licenses can be purchased separately, or they can be purchased with coupons that are bundled in most retail packages.
Demo Mode
UAD plug-ins that are unlicensed can be run in Demo Mode in a 14-day trial period without any functional restrictions. See page 38 for details.
Bundled Licenses and Coupons
Your account at the my.uaudio.com online store is where bundled software and coupons are redeemed and where additional licenses can be purchased. See Chapter 4, “My.uaudio.com” for details.
UAD System Manual - 29 - Chapter 3: UAD System Overview

Note: When you purchase an optional license, you don’t download that in-dividual plug-in. Instead, you download a newer authorization, which en-ables the plug-in file that is already installed.
UAD Meter & Control Panel
The UAD Meter & Control Panel (page 46) is a utility ap-plication that is used to monitor and configure UAD de-vice resources. It has two main windows: the UAD Meter, and the UAD Control Panel.
The UAD Meter window (Figure 7 on page 46) displays the current DSP, program, and memory status of the UAD hardware in realtime. The UAD Control Panel window (page 49) has multiple panels that display and modify various system, plug-in, and global configuration param-eters.
UAD Drivers The UAD device drivers are the low-level system software files that instruct the host computer system on how to communicate with the UAD hardware de-vice(s). The UAD drivers are loaded during system startup so the UAD devices are ready to be used when the plug-in host application is launched.
In addition to instructing the OS on how to control the UAD hardware, the driver acts as a software “middleman” between the host application and the UAD hardware. The host application uses the driver to route UAD signals in the DAW.
Each UAD device family (UAD-2 or Apollo) has its own set of drivers. One or both are specified during UAD software installation, depending on which de-vice type(s) you intend to use.
UAD Buffers and Latency
The UAD drivers use “buffers” to shuttle audio signals to and from the device. This means the digital data is transferred in small batches instead of continu-ously. Buffering induces a very small audio latency (delay) that is inherent in most digital audio systems and can be detected in certain situations.
UAD latency is managed automatically by most host applications and can be reduced to undetectable levels in the UAD-2 (see “LiveTrack Mode” on page 72). Latency and buffers are discussed in greater detail in Chapter 9, “UAD Delay Compensation.”
UAD System Manual - 30 - Chapter 3: UAD System Overview

User Documentation
Various instructional and technical resources are available for in-stalling, using, and troubleshooting UAD Powered Plug-Ins. UAD documentation is available in written, video, and online formats. For details about user documentation, see “UAD Documentation Overview” on page 9.
The DAW Environment
The digital audio workstation (DAW) environment is a complete system where audio production takes place (either with or without UAD Powered Plug-Ins). The UAD system is an add-on to a com-puter-based DAW that can dra-matically improve the sonic qual-ity and performance of the DAW, while still working entirely from within the DAW.
A computer-based DAW consists of the host computer hardware and its op-erating system (OS) software, the plug-in host application (DAW software), and an audio input/output (I/O) interface and its drivers.
Host Computer The host computer is the system that the host DAW application software runs on and the UAD devices are installed into. The host computer must meet min-imum technical requirements and have one or more compatible expansion slots to use with UAD hardware. See “System Requirements” on page 14 for complete details.
Operating System
The host computer runs an operating system (e.g., Win-dows 7 or Mac OS X) that defines the OS “platform” of the system. UAD Powered Plug-Ins is a cross-platform product that is (for practical purposes) functionally identical on Windows and Mac systems (except as otherwise noted).
Host Application The plug-in host application is the software DAW environment where audio recording, playback, mixing, and other production functions are controlled. UAD plug-ins are accessed and operated from within the host software appli-cation.
UAD System Manual - 31 - Chapter 3: UAD System Overview

Each host application has a unique feature set and different methods of oper-ation, including how to use plug-ins. However, once UAD plug-ins are loaded, UAD plug-in operation is identical in all host applications.
Each host application has its own set of system requirements. In addition to the UAD-specific system requirements, the host computer must meet the host application system requirements.
Because the host application environment is integral to the UAD system but is completely out of our control, we cannot claim compatibility with all hosts that may support use of the UAD plug-in formats. See “Qualified Hosts” on page 14 for complete details.
Plug-In Formats UAD Powered Plug-Ins includes support for VST, RTAS, AAX, and Audio Units plug-in formats. These formats define the software protocols that the host ap-plication uses for plug-in processing.
UAD Powered Plug-Ins operations are (for practical purposes) functionally identical in all three plug-in formats. The format of the installed UAD plug-in files are specified during UAD software installation.
VST
The VST (“Virtual Studio Technology”) plug-in format is de-veloped by Steinberg and is supported by various Win-dows and Mac host applications.
RTAS
The RTAS (“Real-Time AudioSuite”) plug-in format is devel-oped by Avid and is supported by Pro Tools 10 (and lower) on Windows and Mac platforms.
AAX 64
The 64-bit AAX plug-in format is developed by Avid and is supported by Pro Tools 11 (and higher) on Windows and Mac platforms.
Audio Units
The Audio Units (“AU”) plug-in format protocol was developed by Apple and is supported by various host applications on the Mac platform only.
UAD System Manual - 32 - Chapter 3: UAD System Overview

Audio Interface The audio hardware input/output (“I/O”) interface is how audio signals get into and out of the host computer. An audio interface is a hardware+driver device that can have analog or digital I/O, or both. The interface is usually where the analog-to-digital (“A/D”) and digital-to-analog (“D/A”) audio con-versions take place. Universal Audio’s Apollo is an audio interface.
I/O Drivers
The audio interface is a hardware device that requires a software device driver for the host computer OS. In addition to instructing the OS on how to control the interface hardware, the driver acts as a software “middleman” be-tween the host application and the I/O ports. The host application uses the driver to access the I/O for signal routings.
I/O Buffers and Latency
Like the UAD device, audio interface driver also uses “buffers” to shuttle audio signals to and from the I/O (see “UAD Buffers and Latency” on page 30).
Smaller I/O buffer settings produce lower latencies which is useful when mon-itoring tracks while recording performances, but usually results in a higher host computer CPU load since the system has to work harder transferring data. Latency and buffers are discussed in greater detail in Chapter 9, “UAD Delay Compensation.”
My.uaudio.com
My.uaudio.com is the UA online store, where UAD devices are registered to your account and authorization files can be obtained. Bundled plug-ins and coupons are redeemed at the store and optional plug-in licenses can be pur-chased there as well. For complete details about my.uaudio.com, including accounts, registration, purchasing plug-ins at the online store, and more, see Chapter 4, “My.uaudio.com.”
Authorization
All UAD plug-ins must be authorized before they can be used. Authorization is accomplished by simply clicking the “Authorize Plug-Ins” button (page 53) in the UAD Meter & Control Panel. For complete details about the authoriza-tion system, see “Authorization Overview” on page 35.
UAD System Manual - 33 - Chapter 3: UAD System Overview

CHAPTER 4
My.uaudio.com
My.uaudio.com is the Universal Audio online store where UAD devices are registered to your account and UAD plug-in authorizations are obtained. Bun-dled plug-in coupons are redeemed at the store and optional plug-in licenses can be purchased at my.uaudio as well. This chapter provides details about UAD plug-in authorization and licensing, and the my.uaudio.com store.
Important: All UAD plug-ins must be authorized before they can be used. Authorization is accomplished by clicking the “Authorize Plug-Ins” button (page 53) in the UAD Meter & Control Panel. For instructions, see “Authorize Plug-Ins Procedure” on page 21. For complete details, see “Authorization Overview” on page 35.
Optional Plug-Ins
Most UAD Powered Plug-Ins require optional licenses to run without restric-tions. Optional plug-in licenses are obtained at my.uaudio.com, the Universal Audio online store. Licenses can be purchased separately (page 40), or they can be purchased with coupons that are bundled in most retail packages.
Bundled Plug-Ins UAD plug-ins that are bundled with the UAD device are automatically li-censed when the device is registered. After registration, the Authorization File must be loaded to enable the bundled plug-ins.
Figure 5. Accessing my.uaudio.com at www.uaudio.com
UAD System Manual - 34 - Chapter 4: My.uaudio.com

Note: UAD devices must be authorized to run bundled (included) plug-ins. See “Authorization Overview” on page 35 for details.
Coupons Coupons included in UAD retail packages have dollar values that are as “good as cash” for buying UAD plug-ins at my.uaudio.com. Coupons are ap-plied to your my.uaudio.com account automatically when you register your device by clicking the Authorize Plug-ins button. After registration, the coupon dollar amount is in your account as a credit, ready to be applied to your store purchase.
Coupons expire after a limited time period, and they can be used only once.
Tip: Coupons are a great reason to subscribe to promotional announce-ments. Email subscription preferences are specified on your “My Profile” page at my.uaudio.com (see “My Profile” on page 40).
Plug-Ins are already installed
The UAD software installer always installs the complete suite of available UAD plug-ins to the hard drive during installation. Therefore when you pur-chase an optional license, you don’t download that individual plug-in. In-stead, you download a newer authorization file, which activates the plug-in file that is already installed.
Important: Older versions of the UAD software may not include all the lat-est UAD plug-ins. To ensure all UAD plug-ins are installed, and for optimum performance, we recommend updating to the latest UAD version. See “Check for Updates” on page 50.
Authorization Overview
All UAD plug-ins must be authorized before they can be used. Authorization is accomplished by clicking the Authorize Plug-ins button in the UAD Meter & Control Panel, then loading the downloaded authorization file. For instruc-tions, see “Authorize Plug-Ins Procedure” on page 21.
Video Help Our support website contains many helpful videos that explain how to register and authorize the product, obtain optional plug-ins, and more:
• www.uaudio.com/blog/cat/videos
Procedure This section is a detailed overview of the entire UAD authorization system. For the step-by-step authorization instructions, see “Authorize Plug-Ins Procedure” on page 21 in Chapter 2, “UAD Installation.”
UAD System Manual - 35 - Chapter 4: My.uaudio.com

Note: Without authorization, UAD plug-ins can be enabled to run for 14 days without functional limitations in a timed demo mode (see “Demo Mode” on page 38).
Important: Your UAD device must be registered at my.uaudio.com to download an authorization file, and you need a my.uaudio.com account to register the device.
Authorize Plug-Ins
The registration/account/authorization process isn’t as complicated as it may seem. The entire routine in-volves simply clicking the “Authorize Plug-Ins” button (page 53) in the UAD Meter & Control Panel. Clicking this button automatically registers the in-stalled UAD devices, generates the authorization file, and downloads it to disk.
Just double-click the downloaded authorization file or drag onto any UAD Meter & Control Panel icon and you’re ready to use UAD Powered Plug-Ins. When authorizing, you’ll be prompted to log into your account if you aren’t already, and if you don’t already have an account, you’ll be prompted create one.
Authorization File
The “auth.uad2” authorization file, which is obtained by clicking the “Autho-rize Plug-Ins” button (page 53), contains the license key(s) that enable UAD plug-ins to run on associated UAD devices. The authorization file is generated at my.uaudio.com then downloaded to the local hard drive automatically.
Loading To load a downloaded authorization file, just double-click it, or drag-drop it onto any UAD Meter & Control Panel application icon/shortcut/alias (see Figure 3 on page 22).
My Systems The UAD devices and plug-ins that you own and can authorize can be found in your My Systems page at my.uaudio.com. My Systems keeps track of which UAD devices are in which computer, and the authorization status of each UAD plug-in. The current license state is also shown in the “Plug-Ins” panel in the UAD Meter &Control Panel application.
My Systems is managed automatically by my.uaudio.com and the UAD soft-ware. When “Authorize Plug-Ins” is clicked, devices in the host system are added to My Systems. When an authorization file is downloaded, it reflects the current state of My Systems.
UAD System Manual - 36 - Chapter 4: My.uaudio.com

System All the UAD devices installed in a single host computer system, and the UAD plug-in license status for those devices, is referred to as a “System” (formally known as “Group”) on the My Systems page at my.uaudio.com. When you click the “Authorize Plug-Ins” button, UAD devices in the host computer are automatically registered and added to a System.
The UAD hardware identification numbers for each UAD device in a single host computer are stored in the same System. Authorization files generated at my.uaudio.com are constrained to only authorize the licensed UAD plug-ins running on the UAD devices in the same System. The same authorization file authorizes all the devices and plug-ins in the host computer.
If you register a UAD device that is in a second host computer using the same my.uaudio account, a second System is automatically created at My Systems. In accordance with the “Plug-In License Policy” on page 42, you can’t have UAD devices from two separate computers in the same System. Each System generates a unique authorization file.
Authorization Notes
• UAD devices must be authorized to run bundled (included) plug-ins. See “Authorization Overview” on page 35 for details.
• Without authorization, UAD plug-ins can be enabled to run for 14 days without functional limitations in a timed demo mode (see “Demo Mode” on page 38).
• Older versions of the UAD software may not include all the latest UAD plug-ins. To ensure all UAD plug-ins are installed, and for optimum perfor-mance, we recommend updating to the latest UAD version. See “Check for Updates” on page 50.
• Optional plug-ins are contained within the UAD software installer, not the “auth.uad2” authorization file. Download and install the latest UAD soft-ware version to ensure the optional plug-ins that you are authorizing are in-stalled.
• The auth.uad2 authorization file contains plug-in license keys for the spe-cific UAD devices in each computer group at My Systems. The file will not authorize any other UAD devices.
• An authorization file is not associated to the host computer or the UAD in-staller in any way. Instead, it is associated with the UAD devices at My Sys-tems (it’s the UAD hardware that is authorized, not the UAD plug-ins or computer).
UAD System Manual - 37 - Chapter 4: My.uaudio.com

• During authorization, the UAD plug-in license state is stored on the UAD-2 device. If the UAD-2 is moved to another computer, it is not necessary to re-load an authorization file.
Demo Mode
All unlicensed UAD plug-ins include a free 14-day trial evaluation period. When the demonstration mode is activated, the plug-in will run without func-tional limitations for 14 days. Demo mode can be activated once only. After the demo trial period has expired, demo mode cannot be activated again on the same UAD device.
If an unlicensed plug-in is loaded and its demo has never been started, a di-alog appears with instructions to start the demo and the option to visit the on-line store to purchase the license. If you don’t start the demo or purchase a li-cense, the plug-in interface appears and can be manipulated, but audio is not processed by the plug-in.
Important: The 14 day demo period can only be activated once, and can-not be stopped or restarted during this period! We recommend you do not ac-tivate demo mode until you have the time to thoroughly check out its sound and functionality.
Demo Activation To activate demo mode:
1. Ensure UAD Powered Plug-Ins is already installed and configured properly (see Chapter 2, “UAD Installation”).
2. In the DAW host application (or Apollo’s Console application), open the UAD plug-in window of the plug-in you want to start the demo for.
3. Click the START DEMO button in the UAD Toolbar at the bottom of the plug-in window (see page 70). A confirmation window appears and the timed demo can be activated or demo activation can be cancelled.
The timed demo is activated for 14 days.
Note: Manipulating the computer’s system date and time will result in a de-creased demo period.
UAD System Manual - 38 - Chapter 4: My.uaudio.com

UA Online Store
The UA online store at my.uaudio.com (Figure 6) is where optional UAD plug-in licenses and other UA products can be purchased. Promotional cou-pons are also redeemed here. All UAD device registrations and plug-in au-thorizations are managed here as well.
My.uaudio.com can be accessed from most pages at www.uaudio.com by clicking the link in at the upper left of a webpage. The direct URL for the my.uaudio.com online store is: http://my.uaudio.com.
Registration Registration at my.uaudio.com is required for all UAD users to obtain UAD de-vice authorizations, redeem coupons, purchase optional UAD plug-in li-censes, get software updates, and receive customer support. It is also an op-portunity for you to inform us of your system details so we can serve you better, and for us to keep you informed about important updates and new product announcements.
Account A my.uaudio.com account is required to use UAD- Powered Plug-Ins, because UAD plug-ins must be authorized for use, and authorization can only occur af-ter the UAD device is registered to an account. UAD registration also entitles you to free UAD Customer Support and special promotional offers.
Creation
The first time you visit my.uaudio.com you are prompted to create your ac-count. Your email address is your account login. You’ll be prompted to enter your name, address, and password, and set your email notification prefer-ences.
Figure 6. Accessing the UA online store from www.uaudio.com
UAD System Manual - 39 - Chapter 4: My.uaudio.com

Login
When you revisit my.uaudio.com, you are prompted to login to your account. Your email address is your account login; the password was specified when the account was created. If you forget your password you can have the store email your password to you. You have the option to stay logged in (via a browser cookie) if desired so you don’t have to keep entering the credentials.
My Profile “My Profile” is where product registration details such as name and mailing address are stored and edited. Your email subscription preferences are also set here so you can choose whether or not to receive email announcements for our webzine and promotional offers.
Your email address is your my.uaudio.com account identifier and login. You can change the email address (and the my.uaudio.com login) on the My Pro-file page.
Buying Plug-Ins
To obtain optional UAD plug-in licenses, simply visit www.uaudio.com, browse the complete line of plug-ins at our secure online store, and complete your purchase with several payment options or use any coupon credit that was applied during device registration or promotional offers.
Lots of product information such as features, specifications, audio/video demos, and reviews are available on the plug-in product pages at the store to help you make your buying decisions.
Purchase Procedure
To purchase and authorize an optional UAD plug-in:
1. Visit the UA Online Store at www.uaudio.com (Figure 6 on page 39).
2. Add the items you whish to purchase to your shopping cart (you may need to login to your Account).
3. Click “View cart” or the Checkout button when ready to proceed to check-out. The payment page appears.
4. Select payment method and provide payment details. If applicable, apply any discount coupons.
5. Click the Continue button. The order confirmation page appears.
UAD System Manual - 40 - Chapter 4: My.uaudio.com

6. Verify the order on the confirmation page, then click Confirm Order once only. The transaction is processed, and the Checkout Success page ap-pears. Purchased UAD plug-in licenses are issued immediately to My Sys-tems. Any authorization file downloaded after this point contains the license for the newly purchased plug-in(s).
7. Download a new Authorization File by clicking the Download Authoriza-tions button. The auth.uad2 file is downloaded to the location specified in the web browser preferences.
8. Double-click the downloaded authorization file. The authorization is loaded onto the UAD device(s) and after a few seconds the “Authorizations Updated Successfully” window (page 22) appears.
The purchased UAD plug-in is now licensed and fully authorized.
Transferring UAD devices and licenses
Ownership of UAD devices and UAD plug-in licenses can be transferred from one my.uaudio.com account to another to accommodate the used equipment marketplace. Certain restrictions apply. Please visit the UAD transfer page for instructions, policies, and FAQ:• www.uaudio.com/support/uad/transfer-faq
Transfer Video Our Videos page has a video about UAD device transfers:• www.uaudio.com/videos
UAD System Manual - 41 - Chapter 4: My.uaudio.com

CHAPTER 5
Using Multiple UAD Devices
Overview
Multiple UAD-2 devices can be used in a single host computer system for in-creased DSP capacity. The UAD-2 devices in the multidevice system can be mixed and/or matched in any combination (see “The UAD Hardware” on page 26).
When multiple UAD-2 devices are installed in the host computer, the DSP and memory load of the devices are automatically balanced dynamically as UAD plug-ins are loaded and unloaded. With multiple devices, there is no major difference in operating procedures, except that more UAD Powered Plug-Ins can be loaded simultaneously in the session.
Mixed UAD System
The UAD drivers support up to four UAD-2 devices running in the same host computer system concurrently. The devices can be any combination within the UAD-2 family (PCIe, Satellite, SOLO/Laptop, Apollo).
Plug-In License Policy
The Universal Audio End-User License Agreement (“EULA”) you agreed to dur-ing software installation grants you the non-exclusive right to use UAD Pow-ered Plug-Ins on a single computer at a single location.
Since you can run up to four UAD-2 devices type in the same computer, each individual UAD plug-in license will authorize all the devices in one computer.
As an example, if you have four UAD-2 devices but run a dual-device system in two separate computers, you are required to purchase separate licenses for the second system.
Authorizing Multiple Devices
When you buy an optional plug-in, your purchased license is valid for all the UAD devices in the computer. The license is tied to the specific UAD devices in the System (see page 37) when the license was purchased. For example, if you have two devices when you purchase a plug-in, your authorization file will authorize both devices.
UAD System Manual - 42 - Chapter 5: Using Multiple UAD Devices

If you have one device during a plug-in purchase then later acquire another device(s) and add it to the same computer, simply download a new authori-zation file and it will authorize the additional device with your existing plug-in licenses. Your license(s) apply to all devices in the same computer system.
Each individual device must be authorized in order to run optional plug-ins, however multiple installed devices are authorized simultaneously. If one de-vice is authorized then another device is added without downloading a new authorization, the optional plug-in will only load on the previously authorized device. To obtain a new authorization file for additional devices, use the “Au-thorize Plug-ins” button (page 53) in the UAD Meter & Control Panel.
Power Requirement
Each UAD PCIe card draws power from the PCIe expansion slot that it is in-stalled in. The total power draw of all the installed cards must not exceed the power that can be adequately delivered by the host computer.
The UAD device power requirements are listed in Table 1 on page 43. These figures are measurements of the actual power draw for these devices when running at full DSP load.
Note: UAD-2 Satellite cannot be powered by the Firewire bus. It requires the included external power supply adapter for operation.
Important: If insufficient power is available to UAD devices, unpredictable behavior may result.
Table 1. UAD Power Requirements by Device Type
UAD Device Type Maximum Power Draw
UAD-2 SOLO (PCIe) 5 Watts
UAD-2 DUO (PCIe) 7 Watts
UAD-2 QUAD (PCIe) 10 Watts
UAD-2 OCTO (PCIe) 8 Watts
UAD-2 SOLO/Laptop 3.5 Watts
UAD-2 Satellite (DUO)* 4 Watts (*via external power supply)
UAD-2 Satellite (QUAD)* 7 Watts (*via external power supply)
UAD System Manual - 43 - Chapter 5: Using Multiple UAD Devices

Windows The PCI specification provides for up to 25W per device, however some host systems don't provide this much power. When designing a computer DAW system, a common rule of thumb is to provide an extra 50%–100% of head-room over the estimated maximum total power draw of all components in the system.
Note: Don’t skimp on the power supply unit. When building a custom sys-tem, a high quality sufficiently-rated PSU is critical for system stability.
IRQ Conflicts Under rare conditions running multiple UAD cards may cause an IRQ conflict which can cause system instability or freezes. If this occurs, try moving the UAD card(s) to different slots and/or contacting UA for technical assistance.
Multidevice DSP Loading
DSP loading in a multidevice system behaves the same as in a single UAD-2 DUO, QUAD, or OCTO system (these devices have multiple DSPs), and is managed automatically by the UAD software. See “DSP Loading Information” on page 76 for details.
Device Info Display
UAD DSP and mem-ory resources used for each installed device, and the abil-ity to enable/dis-able individual de-vices, is displayed in the System Infor-
mation window.
See “System Information Panel” on page 50 for complete details.
Disabling Devices
Individual UAD devices can be disabled using the Device Enabled function (see page 52). This can be useful, for example, if creating a session on a system with multiple devices that will be transferred to a system with fewer devices.
UAD System Manual - 44 - Chapter 5: Using Multiple UAD Devices

Devices are disabled only while the UAD Meter & Control Panel application is open. When the UAD Meter & Control Panel is quit, disabled devices are re-enabled.
Note: For optimum results, quit any applications using UAD plug-ins before disabling/enabling devices.
If a UAD Powered Plug-In is loaded on a device then that device is subse-quently disabled, an error message will be displayed. This occurs because a plug-in is assigned to a device when it is first instantiated. It stays assigned to the same device until it is de-instantiated (for example, removed from the in-sert slot).
Host CPU
Using more than one device can cause a slight increase in host CPU loads, so disabling unused devices can help you squeeze in a bit more host perfor-mance if you need it. Using additional devices on the PCIe bus requires host resources, so running 15 UAD plug-ins on three devices at five plug-ins per device may require more host CPU than running the same 15 UAD plug-ins on one device.
For example, if you are trying to minimize latency during tracking by using a smaller buffer size (which will increase host CPU loading, even on non-UAD systems) and need a bit more host CPU, disabling one or more UAD devices during tracking may give the extra pinch of host CPU you need. The buffer size can then be increased and the UAD device(s) re-enabled for mixing.
UAD System Manual - 45 - Chapter 5: Using Multiple UAD Devices

CHAPTER 6
UAD Meter & Control Panel
Overview
The UAD Meter & Control Panel application is used to monitor UAD device resources, confirm the UAD system is operating properly, and configure the global UAD Powered Plug-Ins system parameters.
The UAD Meter window displays the current DSP, pro-gram, and memory status of the UAD hardware in real-
time. Figure 7 shows how the UAD Meter appears on when UAD-2 devices are installed in the system.
The UAD Control Panel Window (page 49) has multiple panels that display and modify various system, plug-in, and configuration parameters.
Figure 7. The UAD Meter window
Quit Minimize Control Panel menu button
Disable currentDSP usage gauge Averaged loads
Program memory gauge
Memory gaugeplug-ins button
(Satellite/Apollo only)FireWire Bandwidth gauge
UAD System Manual - 46 - Chapter 6: UAD Meter & Control Panel

Note: The Quit, Minimize, and Menu button positions shown in Figure 4 are as they appear on Mac systems. The button positions are reversed on Win-dows systems, reflecting the conventions for each OS platform.
Launching the UAD Meter & Control Panel Application
Windows To launch the UAD Meter in Windows:
1. Double-click the UAD Meter & Control Panel shortcut that was optionally placed on the Desktop during installation. OR,
2. Access the application from:Start Menu>All Programs>UAD Powered Plug-Ins. OR,
3. Double-click the executable application on the hard drive located at:C:\Program Files (x86)\Universal Audio\Powered Plugins\UADPerfMon.exe
Mac To launch the UAD Meter in Mac OS X:
1. Single-click the UAD Meter & Control Panel alias that was placed in the Mac OS X Dock during installation. OR,
2. Double-click the UAD Meter & Control Panel application that was installed to /Applications/Universal Audio/ during installation.
Using the UAD MeterThe UAD Meter & Control Panel can be launched or quit at any time. It does not need to be open or active to use UAD Powered Plug-Ins. It is completely independent and does not require a host application. You can move the UAD Meter to a convenient location on your screen by dragging its window title bar.
Always On Top The UAD Meter window can be set to normal or “Always on top” view mode. In normal mode, the window can be covered by windows of the foreground application. When in Always on top mode, the Meter window always “floats” on top of other windows, even when other applications are in the foreground, so you can always see the meter and access the disable buttons (page 48). This setting is saved when the meter is quit.
To enable Always on top mode, click the control panel menu button in the Meter window title bar (Figure 8 on page 50) and select “Always on top” from the drop menu (or use the keyboard shortcut shown in the menu). The mode is active when a checkbox appears next to the item in the drop menu.
UAD System Manual - 47 - Chapter 6: UAD Meter & Control Panel

Note: If “No Devices Found” appears in the UAD Meter window instead of the expected buttons and gauges, then the UAD drivers are not communicat-ing with the UAD hardware. If this occurs, double-check hardware and soft-ware installations and/or contact customer support.
UAD Meter Elements
Refer to Figure 7 on page 46 for these element descriptions.
Title Bar The Title Bar (the strip across the top of the UAD Meter window) contains but-tons to quit the UAD Meter & Control panel application, minimize the UAD Meter window, and a drop menu to access the Control Panel window func-tions.
Disable Current The Disable Current button disables all UAD Powered Plug-Ins that are currently running. This enables you to add new UAD plug-ins for offline processing, or easily compare the sound of the processed and unprocessed audio.
When the button glows blue, UAD plug-ins are active. Click the button to disable the active plug-ins; the button changes to black with blue lettering. New UAD plug-ins can still be added; click the button again to re-activate all UAD plug-ins.
Note: Disable Current stays active only while the UAD Meter & Control Panel application is open. When the UAD Meter & Control Panel is quit, Disable Current is deactivated.
Resource Gauges
The UAD resource loads are displayed in the UAD Meter window, which are constantly updated in realtime even when the UAD Meter is not the fore-ground application. This allows you to monitor UAD loads as needed, for ex-ample when deciding which UAD plug-ins to load, based upon how much DSP is available.
The UAD resources are displayed as bar graphs and as percentages.
Averaged Loads
The load for each gauge represents the average for all UAD devices in use. For example, if one UAD-2 QUAD is installed, the UAD-2 DSP load is an av-erage of the four SHARC DSP processors on the QUAD. If two UAD-2 QUADs are installed, then the eight processors are averaged.
UAD System Manual - 48 - Chapter 6: UAD Meter & Control Panel

Individual Loads
The loads of individual devices in a multidevice setup (or the individual DSP loads in a multi-DSP UAD-2 device) can be viewed in the UAD System Infor-mation panel (see page 50).
DSP The DSP gauges display the amount of digital signal processing resources that are being used by the UAD Powered Plug-Ins algorithms. DSP is the primary hardware “juice” that powers the UAD Powered Plug-Ins algorithms.
When UAD plug-ins are disabled, DSP requirements are decreased.
Program This resource shows how much UAD-2 program memory is in use. Program memory is an on-chip memory that is specific to the UAD-2 DSP processor(s) and is used for certain UAD plug-in resources.
Each unique UAD-2 plug-in uses a bit of program memory. If many different UAD-2 plug-ins are loaded simultaneously, it is possible for this resource to run out before DSP overload occurs. This point is considered and factored in by the automatic UAD-2 load balancing routines.
Memory The Memory gauges indicate the percentage of UAD RAM that is currently in use. It indicates the total available UAD memory available, regardless of the number of DSP processors that are installed.
Memory is used for echo, delay lines, reverb, and similar spatial processing. When UAD plug-ins are disabled but not unloaded, memory requirements are not decreased. In this case, the memory remains loaded so that reverb tails and delay lines are not cut off when the plug-in is disabled (if supported by the host).
UAD Control Panel
The UAD Control Panel is where detailed system information is displayed and global UAD Powered Plug-Ins settings are modified. The UAD Control panel has four panels, organized into similar areas of functionality: System Informa-tion, Plug-Ins, Configuration, and Help & Support.
Accessing the Control Panels
The main UAD Control Panel window is accessed from the UAD Meter win-dow. To open the Control Panel, click the menu button in the UAD Meter win-dow Title Bar (Figure 8 on page 50). After clicking the menu button, the avail-able functions are listed in the drop menu.
UAD System Manual - 49 - Chapter 6: UAD Meter & Control Panel

Once the main UAD Control Panel window is open, the individual window panels are accessed by clicking the title buttons (Figure 9).
Note: The FireWire button is only displayed if UAD-2 Satellite or Apollo is connected. However, if Apollo is connected via Thunderbolt, the FireWire meters and settings are not displayed.
System Information Panel
The System Information panel (Figure 10 on page 51) displays detailed UAD software and hardware information and contains several useful buttons.
Software Section
Version String
The currently installed UAD Powered Plug-Ins software version is displayed.
Important: The UAD driver and plug-in versions must match. If they don’t, a “driver mismatch” error will occur when attempting to process audio. If this occurs, you must reinstall and reauthorize the UAD software.
Check for Updates
This button checks our web server to find out if a more recent version of the UAD software is available than is currently installed. We recommend running the latest version of UAD Powered Plug-Ins for maximum stability and the latest features, such as new plug-ins.
Figure 8. Click the Menu Button to access the UAD Control Panel drop menu
Figure 9. The Control Panel window panel buttons
UAD System Manual - 50 - Chapter 6: UAD Meter & Control Panel

Plug-In Latency Section
UAD plug-in latency is displayed here. The calculation is based on the audio I/O interface buffer size and the sample rate. The window uses this informa-tion to calculate and display the resulting latency in samples and milliseconds.
Note: Displayed latency does not reflect the actual lowered latency value when LiveTrack mode (page 72) is active.
The displayed latency is the audio I/O interface buffer size when Extra Buff-ering (page 58) is off. When Extra Buffering is on, the displayed latency is the audio I/O interface buffer size plus 64 samples.
Figure 10. The UAD System Information panel
UAD System Manual - 51 - Chapter 6: UAD Meter & Control Panel

Note: The displayed sample latency number does not include the extra sam-ples produced by upsampled UAD plug-ins. For more detailed information about the extra samples and latency, see Chapter 9, “UAD Delay Compen-sation.”
Hardware Section
Detailed information about each UAD device and its DSP is displayed in the Hardware area (Figure 10 on page 51). If you have several devices in-stalled, use the scrollbar to see the other devices.
Device Status For each installed device, a small picture of the hardware and its status is dis-played. When the device displays Status: OK the hardware is operating properly. The total number of UAD plug-ins loaded on each device is also dis-played here.
Device Enabled Individual UAD devices can be disabled using the Device Enabled but-ton. This can be useful, for example, if creating a session on a system with multiple devices that will be transferred to a system with fewer de-
vices or to streamline the performance of the host system when multiple de-vices are not needed.
Click the button to disable an individual device. The device is en-abled when the button is blue. For additional information regarding multidevice use, see Chapter 5, “Using Multiple UAD Devices.”
Devices remain disabled only while the UAD Meter & Control Panel applica-tion is open. When the UAD Meter & Control Panel is quit, disabled devices are re-enabled.
Note: Disabling devices does not disable plug-ins already running on the de-vice; it only prevents additional plug-ins from being loaded onto it.
Important: For optimum results, quit any host applications using UAD plug-ins before disabling/enabling devices.
DSP Load If more than one UAD DSP is installed, information for each of the processors is displayed. DSP, Program (“PGM”), and Memory (“MEM”) loads are dis-played as a percentage of total available load for that processor.
The number of UAD plug-ins (“PLG”) running on each individual processor is also displayed.
UAD System Manual - 52 - Chapter 6: UAD Meter & Control Panel

Save Detailed System Profile
Clicking this button will generate a detailed UAD system profile and prompt you for a location to save the text file to disk. This file contains an even greater level of detail than the System Information panel, which can be useful for trou-bleshooting or if UA Customer Support requests this document when provid-ing assistance.
The profile lists the version strings of the individual UAD software compo-nents, installed device type(s) with serial and hardware ID numbers, host com-puter information, and detailed authorization status for all UAD plug-ins.
Generate Log Clicking this button will generate a file named UADDriverLog.txt and place it on the desktop. The file contains low-level driver data that may be requested by UA Customer Support for troubleshooting purposes only; it does not affect UAD operation in any way. The level of detail in the log is determined by the Generate Log drop menu adjacent to the button (Low/Medium/High).
Plug-Ins Panel
The Plug-Ins panel (Figure 11 on page 55) displays the current authorization status of all UAD plug-ins. This is also where you can activate plug-in Demo Mode (“UA Online Store” on page 39) and configure UAD plug-ins to run on a specific device. Use the scrollbar to view plug-ins that are not visible in the list.
Authorize Plug-ins button
This important button links directly to your ac-count at the UA online store to automatically gen-erate and download an authorization file for
your UAD plug-ins. If you do not already have an account, you are redirected to the registration page to create one.
Important: UAD plug-ins require authorization before they can be used. For detailed information, see “Authorization Overview” on page 35. Without au-thorization, UAD plug-ins can be enabled to run for 14 days without func-tional limitations in a timed demo mode (see “Demo Mode” on page 38).
The complete procedure for UAD device authorization is detailed in Chapter 2, “UAD Installation.” See “Authorize Plug-Ins Procedure” on page 21 for complete step-by-step instructions. If the UAD computer is not connected to the internet, see “Offline Authorization” on page 22.
UAD System Manual - 53 - Chapter 6: UAD Meter & Control Panel

Plug-In Column All currently installed UAD Powered Plug-Ins are displayed in the Plug-In col-umn. Use the scrollbar to view the entire list if necessary.
Status Column The Status column reflects the current state of each UAD plug-in. After the au-thorization file is loaded (“Authorization Overview” on page 35), the status will show one of the following:
Authorized for devices
When the plug-in is fully licensed and authorized to run on all devices in the system “Authorized for all devices” is displayed here in white text.
When a plug-in is licensed but not all devices in a multi-device system are au-thorized with the license, the Status column indicates which of the devices is authorized (e.g., “Authorized for device 1 only”).
Start Demo
The demo period has not been started for the plug-in. Click the “START DEMO” button to begin the 14-day trial period.
UAD plug-in demo periods can also be initiated by the “START DEMO” button in the UAD Toolbar in the plug-in window. See “Demo Mode” on page 38 for detailed information.
Important: The 14-day demo period can only be activated once, and can-not be stopped or restarted during this period! We recommend you do not ac-tivate demo mode until you have the time to thoroughly check out its sound and functionality. See “Demo Mode” on page 38 for detailed information.
Demo Active (days remaining)
If the14-day trial period has been activated but is not yet expired, the number of days remaining is displayed here in green text.
Demo Expired
If the14-day trial period has ended, “Demo expired” is displayed here in red text.
Help Column Clicking the Help button (“?”) opens a link to the plug-in product page on the UA online store.
UAD System Manual - 54 - Chapter 6: UAD Meter & Control Panel

Buy Column Clicking the Buy button adds the plug-in to your shopping card at the UA online store. See “UA Online Store” on page 39 for purchasing details.
Tip: The BUY ($) button provides a quick visual reference to determine which plug-ins are authorized.
Figure 11. The UAD Plug-Ins panel
UAD System Manual - 55 - Chapter 6: UAD Meter & Control Panel

Configuration Panel
The UAD Configuration Panel is where most of the global UAD settings and preferences are specified for all UAD devices. Refer to Figure 12 on page 56 for the parameter descriptions.
The parameters that are displayed in the Configuration Panel are dependent upon the UAD hardware that is currently installed and the OS platform (Win-dows or Mac). For example, if you have only UAD-2 devices installed in a Windows system, you will not see Mac-specific parameters.
Note: All UAD-2 parameters apply to UAD-2 PCIe cards, UAD-2 SOLO/Lap-top, UAD-2 Satellite, and Apollo unless otherwise noted.
Figure 12. The UAD Configuration panel
UAD System Manual - 56 - Chapter 6: UAD Meter & Control Panel

DSP Load Limiting Overview
Without UAD Powered Plug-Ins installed, overloading the host system with na-tive (host based) plug-ins can cause dropouts and possibly system lockup. Steinberg hosts, for example, provide a switch that allows you to trade la-tency for stability when the system is overloaded. Similarly, the UAD DSP load cannot exceed 100% without unpredictable behavior.
With the Limit DSP Load feature, the UAD DSP can also be limited so the load cannot exceed 100%, thereby increasing overall system stability in high load situations. With very heavy UAD loads, DSP load limiting may also improve host CPU performance.
There are many variables that affect DSP load (sample rate, buffer size, pa-rameter values, mono/stereo, automation, host system, etc). Although these variables are taken into account, the resulting measurement cannot be abso-lutely accurate. This is due to variations in system configurations, specifically PCI/PCIe bus loading which is impossible to predict. Systems that are heavily loaded due to the presence of other devices or suboptimal configuration may cause additional DSP loading that cannot be predicted by the UAD plug-in load calculator. The DSP load limit should be reduced in this case.
It is possible for certain (non-typical) conditions to be met where another UAD plug-in can’t be added, even when the UAD Meter says you should have DSP available when compared to the DSP Load Limit value.
Note: When Limit DSP Load is enabled and the DSP load limit is exceeded when instantiating a new UAD plug-in, an overload message will appear and the plug-in toolbar will display “DISABLED.” Even though its interface will load, the plug-in will not process audio.
Limit DSP Load This setting determines the maximum UAD DSP load. If performance issues such as overloads, dropouts, stuttering,
and/or crackles persist, change the UAD DSP load value by clicking the tri-angles to the right of the percentage display.
UAD-2 DSP load limiting is always on. 100% (the default value) is the maxi-mum available setting.
UAD System Manual - 57 - Chapter 6: UAD Meter & Control Panel

DSP LoadLock DSP LoadLock reserves the maximum UAD-2 DSP load required by each plug-in, even if certain plug-in fea-tures are disabled. This ensures there will always be
enough DSP if those features are later enabled, or when automating param-eters that affect the DSP load.
Disabling LoadLock increases available UAD-2 DSP by turning off unused fea-tures in certain plug-ins, but may cause problems with previously saved ses-sions that had all plug-in features enabled, or when automating parameters that affect the DSP load.
Enabling DSP LoadLock is recommended for optimum performance. Disable LoadLock when you need to squeeze in that extra bit of DSP resources.
Note: Changes to this setting do not take effect until all open sessions con-taining UAD plug-ins are reloaded.
Extra Buffering Extra Buffering adds an additional 64 samples of buff-ering for increased host application compatibility. Ap-plications that are known to require Extra Buffering in-
clude Sony Vegas, Acid, and Soundforge, and Sonar Cakewalk.
In other hosts, you can disable this mode to reduce latency. If your application is incompatible with reduced latency when Extra Buffering is off, a dialog will be displayed indicating that Extra Buffering is required.
Note: Changes to this setting do not take effect until all open sessions con-taining UAD plug-ins are reloaded.
Host Compatibility
Windows Enable CPU Optimization
When this setting is enabled, host CPU usage is significantly reduced, partic-ularly when running larger numbers of plug-ins and/or small buffer sizes. In-cidents of host CPU overloads with high graphical activity are also signifi-cantly reduced.
The default value is ON. We recommend leaving this setting enabled on all Windows systems.
UAD System Manual - 58 - Chapter 6: UAD Meter & Control Panel

Important: If UAD-2 plug-ins are already loaded when the setting is changed, the host application must be restarted for the change to take effect.
Mac Release all DSP resources on Audio Unit bypass
Some Audio Unit hosts dynamically bypass plug-ins when they are not being used during playback, for example when no audio is present at the current playback position. During this dynamic bypassing, UAD plug-ins stay loaded on the device, which reduces glitches in playback.
This setting affects the Audio Units platform only. Checking the “Release all DSP resources on AudioUnit bypass” option will unload UAD plug-ins from the device during dynamic bypassing. When the option is checked, UAD DSP usage may be reduced during dynamic bypassing, but the possibility of glitching during playback is increased.
Note: Changes to this setting do not take effect until all open sessions con-taining UAD plug-ins are reloaded.
Mac Force Logic to use “live mode” for tracks with UAD plug-ins
When UAD plug-ins and Logic 7.2.1 (and higher) are used together and this setting is checked, all Logic tracks with UAD plug-ins are forced into Logic's “live mode” and latency is reduced. Reduced latency is useful for tracking when Logic's Software Monitoring feature is active.
Important: This setting should be enabled when using UAD-2 PCIe cards only. Do not enable this setting when using UAD-2 Satellite, or when Apollo or Apollo 16 is connected via FireWire.
Note: Logic's “live mode” is unrelated to UAD-2's LiveTrack Mode.
When this setting is active, UAD-2 latency is the same as the hardware I/O buffer. In Logic versions prior to 7.2.1 (and later versions when live mode is disabled), UAD latency is determined by the larger of the audio interface hardware I/O buffer size and the Process Buffer Range setting within Logic.
When Logic’s “live mode” is NOT active and this setting is NOT enabled, the minimum Process Buffer Range setting (“Small”) in Logic 7 corresponds to 512 samples, meaning the minimum possible UAD latency is 512 samples for UAD-2 (the current latency is displayed in the UAD Meter System Information panel). Latency can be further reduced by using LiveTrack Mode (UAD-2 only).
UAD System Manual - 59 - Chapter 6: UAD Meter & Control Panel

On multi-processor machines Live Mode forces all plug-ins on tracks with UAD plug-ins (and any aux/buses fed by those tracks) to run on one processor only. To allow host-based (native) plug-ins to run on all processors under these conditions, deactivate this setting.
Note: Changes to this setting do not take effect until all open sessions con-taining UAD plug-ins are reloaded.
User Interface Settings
Controls Mode
This setting determines how UAD Powered Plug-In parameter knobs respond to adjustment. Three control modes are offered: Circular, Relative Circular, and Linear. Select the desired mode from the drop menu.
Note: To increase resolution when in adjusting rotary controls in circular and relative circular modes, increase the radius of the mouse relative to the knob while dragging (i.e. move the mouse farther away from the knob while drag-ging in a circular motion).
Linear (slider)
In Linear mode, the knob is adjusted by dragging horizontally or vertically instead of by rotating. This behavior is similar to moving a physical fader.
Circular (jump)
In Circular mode, the software knobs behave similar to physical rotary knobs. Values are changed by clicking on the knob then rotating in a circular direc-tion. When the edge of the knob is clicked, the parameter value jumps to the mouse position.
Relative Circular (grab)
Relative Circular mode operates similar to Circular mode, but the knob value does not jump to the mouse position when clicked. Instead, the knob value is modified relative to its original value.
In this mode you can click anywhere on the knob to make an adjustment orig-inating at the original value. You don’t have to click on the current knob po-sition.
Use Host Mode
When Use Host Mode is checked, the control mode set within the host appli-cation preferences is used if this feature is supported by the host. This setting forces the host to override the control mode set in the UAD user interface set-tings.
UAD System Manual - 60 - Chapter 6: UAD Meter & Control Panel

Note: When Use Host Mode is checked, the UAD Meter user interface set-tings have no effect unless control mode is NOT supported by the host.
Mac Toggle initial value modifier
Holding the specified modifier key while clicking a parameter control will tog-gle between the value of the control when the editor was opened and its last edited value. This feature is not supported under Windows.
This parameter also affects the “select + click” modifier. For a complete list of keyboard shortcuts, see “Shortcuts” on page 75.
Info Display This area displays helpful text about parameters in the Configuration panel. Hover the mouse over a Configuration setting to view the informational text.
FireWire Panel
The UAD FireWire Panel (Figure 13 on page 62) is where settings specific to UAD-2 Satellite and Apollo are configured (FireWire settings do not apply to UAD PCI/PCIe devices). UAD-2 Satellite and Apollo are external UAD de-vices that connect via FireWire as opposed to PCI/PCIe or ExpressCard.
Note: The FireWire Panel is only displayed if UAD-2 Satellite and/or Apollo is connected.
FireWire System The FireWire System parameters pertain to the configuration of the FireWire bus. These settings affect UAD-2 Satellite and Apollo performance and can also affect external FireWire audio interface and hard drive performance if they are connected to the same FireWire bus.
The primary function of the FireWire System settings is to reduce the UAD-2 Satellite FireWire bandwidth allocation and/or link speed when other FireWire devices are on the same bus, or if other performance issues arise.
Note: The FireWire System settings cannot be changed when UAD plug-ins are loaded. Quit all UAD plug-in host software to make changes to these set-tings.
Important: FireWire device connection methods can affect the FireWire bus speed. See “FireWire Bandwidth” on page 107 for details.
UAD System Manual - 61 - Chapter 6: UAD Meter & Control Panel

For more information about FireWire and using it with UAD-2 Satellite and Apollo, see “FireWire Basics” on page 103, “FireWire Bandwidth vs. UAD DSP” on page 109, and “FireWire Bus Power” on page 110.
Current Link Speed
The current speed of the FireWire link between the host computer and UAD-2 Satellite and/or Apollo is displayed here. The active link speed can be changed with the Target Link Speed control if FW400 and FW800 are both supported by the host system.
Figure 13. The UAD FireWire panel
UAD System Manual - 62 - Chapter 6: UAD Meter & Control Panel

If the host computer has multiple FireWire buses (this is rare), up to two speeds will be displayed, with the values separated by a comma.
Note: If the host computer supports FireWire 800 and the Target Link Speed is set to 800, but the Current Link Speed still displays 400, check the bus or-dering of the FireWire devices. See “Mixing FireWire Speeds” on page 106 for information on how to properly combine FireWire 400 and FireWire 800 devices on the same bus.
Target Link Speed
The desired speed of the FireWire link between the host computer and the UAD-2 Satellite or Apollo is set here (the actual link speed is shown in the Cur-rent Link Speed display). To change the value, click the down arrow to display the drop menu, then select the desired value. The setting cannot be changed when UAD plug-ins are loaded.
Note: The Target Link Speed is fixed at FW800 on Windows systems.
Target Link Speed should be set to 800 when supported by the host computer. However, some FireWire devices may not always perform flawlessly. Chang-ing the Target Link Speed to 400 may actually improve performance and/or stability on systems not optimized for FireWire 800 operation.
Tip: Twice as many UAD-2 Satellite or Apollo plug-ins can be run at 800 ver-sus 400, so configure the FireWire system to run at 800 if supported by the computer.
Buffering The buffering mode adjusts overall FireWire performance. Normal is the de-fault value and has less latency than Safeguard mode. Set to Safeguard if host CPU spikes occur when using UAD plug-ins that have high DSP requirements.
UAD Bandwidth Allocation
This parameter determines how much of the total available FireWire bus bandwidth will be reserved for UAD-2 Satellite or Apollo plug-ins. Limiting the bandwidth used by UAD-2 Satellite or Apollo ensures that other FireWire de-vices on the same bus will have enough bandwidth to function properly.
To change the value, either a) click the increment/decrement arrows, b) click/hold the current target value to display a drop menu, or c) double-click the value for direct text entry. The maximum available value is 85%.
Note: The value cannot be changed when UAD plug-ins are active.
UAD System Manual - 63 - Chapter 6: UAD Meter & Control Panel
Although the amount of FireWire bandwidth reserved by UAD-2 Satellite or Apollo depends on the UAD Bandwidth Allocation setting, the amount of DSP used by any UAD plug-in does not affect FireWire bandwidth (UAD plug-ins that use very little DSP require the same FireWire bandwidth as DSP-intensive UAD plug-ins). See “FireWire Bandwidth vs. UAD DSP” on page 109 for de-tails.
It is important to note that all devices on the FireWire bus share the available data bandwidth of the bus, including hard drives and audio interfaces as well as UAD-2 Satellite and Apollo. Therefore all of the bandwidth cannot be al-located for UAD use if FireWire hard drives and/or audio interfaces are on the same bus. See “FireWire Bandwidth” on page 107 for additional infor-mation.
To determine the proper value for the UAD Bandwidth Allocation:
1. Connect and power up all the FireWire devices (host computer, audio in-terfaces, hard drives, UAD-2 Satellite) on the FireWire bus.
2. If running an audio interface on the FireWire bus, ensure the audio inter-face drivers are installed and configured correctly (specifically, all the au-dio inputs and outputs that will be used should be enabled).
3. Run the UAD host DAW software but DO NOT run any UAD plug-ins, at the HIGHEST SAMPLE RATE that will be used in the session (the sample rate may be reduced after UAD Bandwidth Allocation is set).
4. View FireWire Gauge in the “Bandwidth Metering” section of the FireWire Panel UAD-2 Satellite (page 65) when UAD plug-ins are NOT running. The value indicated in orange is the percentage of FireWire bandwidth that is used by audio interface I/O streams.
5. Subtract the “Used by other devices” percentage from 100% and enter the difference as the UAD Bandwidth Allocation.
6. If you are using FireWire hard drives for audio session data on the same bus, the UAD Bandwidth Allocation will need to be reduced to accommo-date the FireWire hard drive usage.
UAD Bandwidth Allocation Example
If all the FireWire devices on the bus except UAD-2 Satellite use 20% of the available FireWire bandwidth (from steps 1 through 4 above), enter 80% as the UAD Bandwidth Allocation (100% – 20% = 80%).
UAD System Manual - 64 - Chapter 6: UAD Meter & Control Panel

Tip: If FireWire performance issues occur, leave a bit of unused FireWire bandwidth (headroom), so the total usage for all devices is less than 100%. To leave 5% of the bandwidth available for headroom in the example above, you’d enter 75% for UAD Bandwidth Allocation (20% bandwidth without UAD-2 Satellite + 75% for UAD-2 Satellite = 95% total FireWire bandwidth). This is especially applicable if using FireWire hard drives on the same bus for audio session data.
Plug-In Calculator
The Plug-In Calculator displays the maximum number of stereo UAD plug-ins that can be run on UAD-2 Satellite and Apollo with the current FireWire Sys-tem settings at a given sample rate.
Note: The Plug-In Calculator is for informational purposes only; it does not actually affect UAD FireWire or DSP performance in any way.
Max Stereo Plug-Ins
The maximum number of stereo UAD plug-ins that can run on UAD-2 Satellite and Apollo, based upon the FireWire System settings and a given session sample rate, is displayed here. The number changes if/when session sample rate changes.
The UAD instantiation count at the current settings could exceed this number If used in true mono configurations. Note that some DAWs use stereo plug-in processing even when used on a mono audio file.
At the following sample rate
This parameter selects the sample rate used by the Plug-In Calculator. To change the value, click the down arrow to display the drop menu, then select the desired value.
When a UAD plug-in is loaded by the host software, the session sample rate is entered automatically. In this scenario, the parameter cannot be modified until the host is quit.
Note: The “At the following sample rate” parameter is only used by the Plug-in Calculator; it does not affect the actual sample rate of the UAD system or the host software.
Bandwidth Metering
Bandwidth Metering pertains to the FireWire bus that UAD-2 Satellite and Apollo are attached to. The items displayed in this area are for informational purposes only; there are no settings here that can be changed.
UAD System Manual - 65 - Chapter 6: UAD Meter & Control Panel

If the host computer has multiple FireWire buses (this is rare), up to two band-width gauges will be displayed, one for each bus.
Used by UAD This number displays the percentage of FireWire bus bandwidth that is used by UAD plug-ins running on UAD-2 Satellite and Apollo. The number cannot exceed the value set by the UAD Bandwidth Allocation parameter.
Used by other devices
This number displays the percentage of FireWire bus bandwidth that is used by all FireWire audio interface I/O devices connected to the bus (including Apollo). The number is used to help determine an optimum value for the UAD Bandwidth Allocation parameter.
FireWire Gauge The FireWire Gauge (Figure 14) reflects the FireWire bus bandwidth cur-rently used by UAD-2 Satellite, Apollo, and all other FireWire peripheral de-vices (e.g., audio interfaces and hard drives).
The gauge graphically displays the UAD Bandwidth Allocation (green), the bandwidth used by active UAD plug-ins (blue), bandwidth used by audio in-terface I/O streams (orange), and bandwidth available for FireWire hard drives (black).
The FireWire Gauge in the FireWire control panel is also displayed in the UAD Meter when UAD-2 Satellite, or Apollo via FireWire, is connected (see Figure 7 on page 46).
Important: FireWire bandwidth is unrelated to UAD DSP loads. See “FireWire Bandwidth vs. UAD DSP” on page 109 for details.
Figure 14. Elements of the UAD FireWire Gauge
Total available Firewire bus bandwidth
Available FW bandwidth (headroom)
Total allocatedbandwidth
(UAD + otherdevices)
Used byother devices
(orange)Used by
UAD (blue)
UAD Bandwidth Allocation(blue + green)
Available for UAD(green)
UAD System Manual - 66 - Chapter 6: UAD Meter & Control Panel

Info Display This area displays helpful text about parameters in the FireWire panel. Hover the mouse over a FireWire setting to view the informational text.
Help & Support Panel
The Help & Support panel (Figure 15) contains numerous helpful weblinks to help you get the most out your UAD Powered Plug-Ins experience.
The button names are self-explanatory. Click a button to launch the URL in your default web browser (you must be connected to the internet to launch the web pages). If the UAD computer isn’t online, much of the information is in the manual you’re reading now; find it in Table of Contents, Index, or search.
“View Documentation” is the only button that doesn’t link to the internet. In-stead, clicking this button opens the UAD Documentation folder containing all the PDF user manuals (see “UAD Documentation Overview” on page 9).
Figure 15. The UAD System Help & Support panel
UAD System Manual - 67 - Chapter 6: UAD Meter & Control Panel

CHAPTER 7
Using UAD Powered Plug-Ins
Overview
Once the UAD device(s) and Powered Plug-Ins have been properly installed, the UAD Powered Plug-Ins are accessed and used just like any host-based plug-in. All UAD Powered Plug-Ins can run concurrently with each other and with host-based plug-ins simultaneously, in any combination.
32-bit and 64-bit versions of UAD Powered Plug-Ins are installed and sample rates up to 192 kHz are supported. Resolution is limited only the by resolution of the host application. Note that UAD Powered Plug-Ins running at 96 kHz use twice as much UAD DSP resources than those used at 48kHz, and so forth.
Launching a UAD Powered Plug-In
Each host application has its own particular methods for instantiating (launch-ing) a plug-in. Consult the host application documentation for specific instruc-tions on loading and using plug-ins with the application.
Cubase &Nuendo
Figure 16. Launching a UAD Powered Plug-In in Steinberg Cubase and Nuendo
UAD System Manual - 68 - Chapter 7: Using UAD Powered Plug-Ins

Logic Pro
The UAD Plug-In Window
One typical UAD plug-in window is shown in Figure 18. The graphical user interface (GUI) typically contains several control parameters for modifying the behavior of the plug-in, and display elements such as meters, for visual feed-back. The UAD Toolbar (common to all UAD plug-ins) is also displayed.
Figure 17. Launching a UAD Powered Plug-In in Apple Logic Pro
Figure 18. Typical UAD plug-in window
Display-only element (not a control parameter)
UAD Toolbar (common to all UAD plug-ins)
Typical interactive control parameters
UAD System Manual - 69 - Chapter 7: Using UAD Powered Plug-Ins

Controls View Some host applications have an alternate plug-in display mode feature called Controls View, Parameter Mode, or similar terminology. This mode typically displays the control parameters as a list with simple sliders, switches, and menus (the appearance is controlled by the host), which some users prefer. Consult the host documentation for how to display this view.
UAD Toolbar
Below every UAD Powered Plug-In (when displayed in normal GUI view) is the UAD Toolbar (Figure 20). The Toolbar has several useful features that make using UAD plug-ins more convenient.
Figure 19. A UAD plug-in showing controls view
Figure 20. Anatomy of the UAD Toolbar
Device that plug-in
Settings drop-menu
LiveTrack button
Status indicator
Buy plug-in button
Help drop-menu
is running on
UAD System Manual - 70 - Chapter 7: Using UAD Powered Plug-Ins

Settings Menu The Settings menu provides a convenient way to manage your UAD plug-in parameter settings and access additional factory presets. To select the functions, click the folder icon in the Toolbar, then select an action from the drop-menu that appears.
The Settings load/save feature supports presets but not banks. To load and save banks, use the host’s bank management feature (if available).
Note: UAD plug-in settings are saved within a project session file by the host software, and settings are recalled when the project file is loaded. This occurs automatically without using the preset load/save feature.
Preset/Settings Compatibility
Load/save and copy/paste of parameter values between the same UAD plug-in type is supported. You can also load/save/copy/paste between “SE” and “full” plug-ins of the same type, for example between UAD Neve 33609 and UAD Neve 33609SE when you need to squeeze out a bit more DSP perfor-mance without losing your settings.
Preset Families
Functions in the menu are also supported between CS-1 “family” plug-ins. Pre-set load/save and settings copy/paste are all interchangeable within the UAD CS-1 family, which includes CS-1, DM-1, DM-1L, EX-1, and RS-1.
Load/Save Preset
When the Load Preset or Save Preset function is selected, the standard oper-ating system load/save file dialogs are presented. Preset files can then be loaded (if the plug-in is the same type), or saved to any disk location.
Default Preset Locations
When the load/save functions are used, the OS load/save file dialogs de-fault to the standard UAD preset location. Although UAD presets can be loaded from (and saved to) any disk location, using the default location is a convenient method to organize all your presets in one location.
When saving, the Presets folder is created if it doesn’t already exist. A sub-folder with the UAD plug-in name is also created, so presets for the same plug-in are all in the same folder. When loading presets, the open file dialog looks inside the subfolder for that plug-in.
UAD System Manual - 71 - Chapter 7: Using UAD Powered Plug-Ins

Windows The default preset location is inside the Presets folder, which is created within the folder specified during software installation. For example, if the default lo-cation was selected when running the installer, the location would be:
• C:\Program Files (x86)\Universal Audio\Powered Plugins\Presets
Mac On Mac OS X systems, the default preset location is:
• Startup Disk/Library/Application Support/Universal Audio/Presets
Copy/Paste Settings
Settings can copied and pasted directly between UAD plug-ins (within the compatibility guidelines) without using the interim step of creating a preset file.
To copy/paste settings between UAD plug-ins, select Copy Settings from the drop-menu of the source plug-in, then select Paste Settings from the drop-menu of the destination plug-in.
Note: If the menu displays “Cannot Paste Settings” then settings were not copied first, or the paste destination is an incompatible plug-in.
Additional Presets
Many UAD plug-ins include additional individual factory presets in addition to the factory bank that is accessed from within the host. The additional fac-tory presets are automatically installed to the default locations listed above. To access the additional presets, use the Load Preset function in the Settings menu within the UAD Toolbar.
LiveTrack Mode
Overview LiveTrack Mode reduces latency on an active UAD-2 plug-in to the lowest possible amount. This feature is highly useful for monitoring processed audio when recording live performances.
Reduced latency in LiveTrack Mode is accomplished by circumventing the standard buffering processes. Normally, UAD-2 signal data is buffered at the audio interface I/O sample buffer size (such as 128, 512, or 1024 samples) which results in a processing delay.
In LiveTrack Mode, UAD-2 signal data is transferred and processed “immedi-ately” instead of being buffered, resulting in reduced latency.
UAD System Manual - 72 - Chapter 7: Using UAD Powered Plug-Ins

Note: LiveTrack Mode is available exclusively with UAD-2 PCIe devices. When a UAD-2 FireWire device (UAD-2 Satellite or Apollo) are in use by the system, LiveTrack Mode cannot be used.
Increased Host Loading using LiveTrack
When LiveTrack is active, host CPU loading increases. The host load is di-rectly proportional to the DSP load of the UAD plug-in(s) in LiveTrack mode, however host CPU is never used for Powered Plug-in processing.
Extra Latency using LiveTrack
When Extra Buffering is enabled (page 58) or when upsampled UAD plug-ins (page 85) are used with LiveTrack, latency is increased. Extra buffering adds 64 samples, and each upsampled plug-in using LiveTrack adds the value from Table 6 on page 86.
Note: For more detailed information about latency and buffers, see Chapter 9, “UAD Delay Compensation”.
LiveTrack Activation
To activate LiveTrack Mode, click the microphone icon in the UAD-2 Toolbar. The mode is active when the mic icon is red.
LiveTrack Mode can be activated simultaneously on multiple UAD-2 plug-ins. However, host system CPU loads will increase with each LiveTrack Mode in-stance.
Status Indicator The Status indicator (see Figure 20 on page 70) displays information about the current state of the plug-in. Each state is described below.
Start Demo
When “START DEMO” is displayed, the 14-day trial period for the particular plug-in has never been activated. Clicking
this button will start the demonstration period (you can also start the demo in the Control Panel’s Plug-In Status column (page 54).
Demo Active
After starting the demo, and when the plug-in is still within the active 14-day trial period, the number of days remain-
ing in demo mode is displayed here.
UAD System Manual - 73 - Chapter 7: Using UAD Powered Plug-Ins

Important: The 14 day demo period can only be activated once, and can-not be stopped or restarted during this period! We recommend you do not ac-tivate demo mode until you have the opportunity to thoroughly check out its sound and functionality. See “Demo Mode” on page 38 for more informa-tion.
Disabled
When “DISABLED” is displayed in red, the plug-in will not pro-cess audio. This can occur in two situations; either the demo pe-riod has expired (click the Buy button!), or the UAD DSP is over-
loaded and there are not enough device resources to run the plug-in.
Status Blank
When no text is displayed in the Status area, the plug-in is fully authorized (li-censed) and operating normally. In this state, the Buy button is not displayed.
Buy Button When the plug-in is not fully licensed, the Buy button is displayed. If the computer is connected to the internet, clicking Buy links to the UA
online store so you can purchase the license. See “UA Online Store” on page 39 for purchasing details.
Help Menu The Help drop-menu contains a couple handy shortcuts for your convenience. To select the shortcuts, click the “question” icon in the Toolbar, then a shortcut from the drop-menu that appears.
Select “Manual” to open the UAD Plug-Ins Manual. Select “Web Info” to visit the product pages for the plug-in on our website (internet connection re-quired).
Adjusting Parameters
The parameter settings for each of the UAD Powered Plug-Ins can be adjusted to achieve a desired effect. Parameter values are easily modified by dragging sliders, rotating knobs, clicking switches and buttons, or by selecting values in a drop-menu. The functions of all parameters are detailed in later chapters.
The parameter adjustment style can be Circular, Relative Circular, or Linear. For more information, see “User Interface Settings” on page 60.
UAD System Manual - 74 - Chapter 7: Using UAD Powered Plug-Ins

Note: To increase resolution when adjusting rotary controls in circular and relative circular modes, increase the radius of the mouse relative to the knob while dragging (i.e. move the mouse farther away from the knob while drag-ging).
Text Entry Parameter values can be modified directly with text entry. To enter a param-eter value using text entry, single-click the parameter value text. The text value will highlight, indicating it is ready to receive a new value. Type in a new value, then press Return, Enter, or Tab, or click outside of the text box. Press Esc if you want to revert to the prior setting without entering the new value.
Values entered via text entry are rounded to the closest significant digit. If an entered value is out of range, it will be ignored.
To enter time values, the units must be specified. m =milliseconds, and s = sec-onds. Examples: 400 milliseconds = 0.400s or 400m; 1.5 seconds = 1.5s or 1500m.
Scroll Wheel If your mouse has a scroll wheel, it can be used to adjust knob and slider con-trols if the host application supports this functionality. Place the mouse cursor over any knob or slider control to increment or decrement the parameter value with the scroll wheel.
Keyboard Control(Mac)
If you control-click a control it selects that control for keyboard control. This is useful for when you're in circular mode, and you want to fine-adjust a control. Normally, clicking on a control in this mode makes the value jump to where you clicked. Control-clicking will select the control so that you can use the key-board to adjust it, without making its value jump first.
Shortcuts
Table 2 on page 76 lists the keyboard shortcuts that are available for modi-fying parameter values. When using keyboard shortcuts, the last edited con-trol will be modified (or, on Mac, you can use control-click to select a different control as the target for keyboard shortcuts without changing the control's value).
Note: Not all host applications support sending keystrokes to plug-ins.
UAD System Manual - 75 - Chapter 7: Using UAD Powered Plug-Ins

DSP Loading Information
The UAD devices feature either one (UAD-2 SOLO), two (UAD-2 DUO), four (UAD-2 Quad), or eight (UAD-2 OCTO) on-board SHARC DSP chips for pro-cessing UAD Powered Plug-Ins.
Multi-DSP UAD-2 systems use sophisticated load balancing routines. UAD-2 plug-ins are always allocated as efficiently as possible, which is not necessar-ily on the DSP with the lowest resource usage.
UAD FireWire Devices
Because Firewire has significantly less bandwidth than the PCIe protocol, if UAD-2 Satellite and/or Apollo is running with UAD-2 PCIe card(s) in a multi-device system, UAD plug-ins will load on the UAD-2 card(s) before the Firewire device in order to maximize Firewire bandwidth. See “FireWire Bandwidth vs. UAD DSP” on page 109 for more information.
Table 2. Keyboard shortcuts
Keyboard Action: Result:
Control + Click Parameter (Mac only) Select parameter for keyboard control(without changing its value)
Shift + Drag Fine Control
UpArrowRightArrowShift + PageUp
Increment Fine
DownArrowLeftArrowShift + PageDown
Decrement Fine
Shift + UpArrowShift + RightArrowPageUp
Increment Coarse
Shift + DownArrowShift + LeftArrowPageDown
Decrement Coarse
Control + Click parameter (Windows)Modifier* + Click parameter (Mac)(*Modifier key set in Configuration Window)
Toggle initial editor setting (the value when the editor window was last opened)
Control + Shift + Click parameter (Windows)Modifier* + Shift + Click parameter (Mac)(*Modifier key set in Configuration Window)
Revert to initial editor setting (the value when the editor window was last opened)
UAD System Manual - 76 - Chapter 7: Using UAD Powered Plug-Ins

More Loading Notes
• UAD DSP usage is proportional to the host application sample rate and sys-tem PCIe bus speed. Therefore, more plug-ins can be used simultaneously in a 44.1K session than in a 96K session, and likewise a higher speed bus will use less DSP load than a slower bus.
• Bypassing individual components will conserve DSP on some UAD plug-ins. For example, bypassing the compressor in the EX-1 when only the EQ is in use, and/or bypassing any of the unused bands of the EX-1 EQ will use less UAD DSP (unless DSP LoadLock is enabled).
• The UAD DSP resources required by each successive UAD Powered Plug-In instance will slightly decrease.
• A chart showing expected plug-in counts can be found on our website:uaudio.com/support/uad/compatibility/instance-chart.html
Host CPU Loads • The host system memory and CPU are never used for UAD Powered Plug-Ins processing. However, there will always be a small amount of load on the host CPU induced by data transfers and user interface operations. This is un-avoidable when using any DSP device.
• When LiveTrack Mode is active, host CPU load is increased. See “LiveTrack Mode” on page 72 for details.
Automation
Every UAD Powered Plug-In parameter can be automated if this feature is sup-ported by the host application. Each host application has its own particular methods for automation. Consult the host application documentation for spe-cific instructions on using automation with the application.
UAD Powered Plug-Ins reduce their DSP load when bypassed or disabled, but not their memory load. This feature allows for automatable load balancing of DSP power, and keeps the track delay constant to avoid on/off clicks.
Note: If there is not enough DSP available when automating, the plug-in may not turn on. When this occurs, “DISABLED” is displayed in the UAD Toolbar.
UAD System Manual - 77 - Chapter 7: Using UAD Powered Plug-Ins

External MIDI Control
UAD Powered Plug-In parameters can be controlled by an external MIDI con-troller, if this feature is supported by the host application. Each host applica-tion has its own particular methods for external MIDI control. Consult the host application documentation for specific instructions on using external MIDI control with the application.
Mono (m) UAD plug-ins
UAD VST plug-ins with (m) in the name are a monophonic versions of the plug-in.
The standard VST plug-ins (which support both stereo and mono configura-tions) do not consume additional UAD DSP on mono sources when loaded in DAWs that use true-mono processing (e.g., Apple Logic Pro, Avid Pro Tools, Steinberg Cubase/Nuendo).
Some DAWs (e.g., Ableton Live and Cakewalk Sonar) do not use true-mono processing on mono signals. Using the mono (m) versions may conserve UAD DSP in these hosts when used on mono sources.
UAD mono (m) plug-ins are not available in Audio Units, RTAS, or AAX for-mat. All qualified AU, RTAS, and AAX hosts (e.g., Apple Logic Pro, Avid Pro Tools) support true-mono processing.
Note: Some UAD plug-ins do not consume less DSP even when used in a true-mono configuration. For details about mono vs. stereo DSP usage, see the UAD Instance Count Chart.
UAD System Manual - 78 - Chapter 7: Using UAD Powered Plug-Ins

Operating Levels
Except as noted in Table 3 below, the internal operating level of most UAD Powered Plug-Ins is typically –18 dBFS. 0 dBFS is calibrated to +4 dBu with 18 dB of headroom, so 0 dBFS is the equivalent of +22 dBu in the analog do-main.
Table 3. UAD Powered Plug-In Internal Operating Levels
UAD Powered Plug-In Typical Internal Operating Level 0 dBFS Equivalent
Most –18 dBFS +22 dBu
Ampex ATR-102Teletronix LA-2A Limiter Collection
–12 dBFS +16 dBu
Manley Massive Passive –14 dBFS +18 dBu
Neve 33609 (selectable) –14 dBFS–18 dBFS–22 dBFS
+18 +dBu+22 +dBu+26 +dBu
Studer A800 –12 dBFS +16 dBu
UAD System Manual - 79 - Chapter 7: Using UAD Powered Plug-Ins

CHAPTER 8
Tempo Sync
Overview
The time-based parameters of several UAD Powered Plug-Ins can be synchro-nized to the tempo of the host application using the Tempo Sync feature.
When Tempo Sync is activated, the time-based parameters that are available for synchronization are changed to note duration values, and will sync to the tempo of the host application using the displayed note value.
Note: Not all host applications support Tempo Sync. In such hosts, the tempo sync features will not function.
Tempo Sync Plug-Ins
Tempo Sync is supported in the UAD plug-ins listed in Table 4.
Figure 21. The Tempo Sync feature within UAD DM-1L
Table 4. UAD Plug-Ins with Tempo Synchronization
UAD CS-1 UAD Moog Filter
UAD Cooper Time Cube UAD Moog Filter SE
UAD EP-34 UAD MXR Flanger/Doubler
UAD DM-1 UAD Roland RE-201
UAD DM-1L UAD RS-1
UAD System Manual - 80 - Chapter 8: Tempo Sync

Sync Activation To activate Tempo Sync, click the “Sync” button within the plug-in interface. The Sync button “LED” will illuminate and the time parameters will change from a time-based display to a note value (see Figure 21).
Note: When Tempo Sync is activated, the plug-in will automatically switch the time or rate parameter(s) to the nearest available note value(s) given the range of the parameter in question and the current tempo.
Available Note Values
The note values that are available for selection are listed in Table 5 on page 81. The values are listed in musical notation as a division of measures. For example 1/4 = one quarter note, 1/1 = one whole note, 4/1 = four whole notes, and so forth.
The available note values were chosen to allow syncing to tempo in odd time signatures as well the common 4/4 time signature.
LFO rate parameters have their note values listed from longest to shortest, since long note values correspond to slow LFO rates.
A quarter note is always a quarter note, independent of the time signature. In different time signatures a quarter note can represent different numbers of mu-sical beats (e.g. 6/8 ) or different fractions of a bar (e.g. 5/4). For example, say the time signature is 6/8 and the delay time tempo sync note value is 1/4. If a sound occurs on beat one of the measure then its delay will occur on beat 3, which is 1/4 note (i.e. two 8th notes) later.
Note: The “beat” value in a sequencer's BPM tempo setting always refers to a quarter note, independent of time signature.
Table 5. Tempo Sync available note values
1/64D*1/641/32T1/321/16T1/32D1/161/8T1/16D
1/85/32*1/4T1/8D1/45/161/2T1/4D1/2
5/81/1T1/2D1/15/41/1D7/42/13/1
4/15/16/18/19/112/116/1
D = Dotted
T= Triplet
* = RE-201 only
UAD System Manual - 81 - Chapter 8: Tempo Sync

Range Limits
Some parameters in Tempo Sync mode cannot access the entire note value range in Table 4, because their maximum values would always be out of range above certain note values (assuming a maximum usable tempo of 300 BPM; 250BPM for Roland RE-201). These parameter limits are:
• DM-1, RS-1 time – 300ms: maximum 1/4D
• DM-1L time – 2400ms: maximum 3/1
• Roland RE-201 Head 1 range: 5/32 – 1/64
• Roland RE-201 Head 2 range: 1/4 – 1/32
• Roland RE-201 Head 3 range: 1/2T – 1/32D
Entering Values
In addition to adjusting the parameter knob, the two following methods can be used for entering Tempo Sync values.
Arrow Keys
After clicking the parameter to select it, the arrow keys can be used to scroll through available note values.
Text Entry
Direct text entry is also available (see “Text Entry” on page 75). Any notation values can be entered (fraction or decimal), and the values are automatically converted to the nearest appropriate setting.
For example: If 3/4 or 6/8 is entered using text entry, 1/2D is displayed be-cause a dotted half note equals three quarter notes, which is the duration of one measure in a time signature of 3/4 or 6/8. If 12/8 is entered with text entry, 1/1D is displayed because a dotted whole note equals six quarter notes, which is the duration of one measure in a time signature of 12/8 (or two measures in a time signature of 3/4 or 6/8).
This means you can create a tempo sync duration of one measure for any time signature by simply typing in the time signature (assuming there is a match in the beat table).
Similarly, if 1/12 is entered with text entry, 1/8T is displayed because an eighth note triplet is equivalent to one-twelfth of a measure (if in 4/4 time).
UAD System Manual - 82 - Chapter 8: Tempo Sync

Out of range
When a parameter note value is out of range of the current tempo note value, the note value is displayed in parentheses on a red background (Figure 22).
Modes with Tempo Sync
The UAD DM-1 and UAD DM-1L plug-ins (and DM-1 within CS-1) have a Mode menu that switches the plug-in operation between delay, chorus, and flanger mode. In these plug-ins, when the Mode is set to DualDelay and Ping-Pong, the delay Time and modulation Rate parameters are simultaneously available for Tempo Sync.
However, when the plug-in is set to a Chorus or Flanger mode, only the Rate is available for Tempo Sync. This enables the more typical and musical cho-rus/flange effect by only syncing the modulation Rate to the tempo while the delay time remains constant.
Roland RE-201 Sync
When the RE-201is in Tempo Sync mode, note values can be imprecise due to the fixed tape head relation-
ships. Values that are imprecise approximations (but are within the available delay time range) are displayed with a “+” or “–” symbol. The leading head in the current mode is accurately synced; the other values are based on the fixed tape head relationship. Note that when a parameter note value is out of range of the current tempo note value, the note value flashes (instead of in pa-rentheses on a red background as in Figure 22).
Figure 22. Tempo Sync note value display
UAD System Manual - 83 - Chapter 8: Tempo Sync

CHAPTER 9
UAD Delay Compensation
Latency & Delay Compensation
When UAD Powered Plug-Ins are used, audio data to be processed by a Pow-ered Plug-In is sent by the host application to the UAD device. The audio is then processed by the UAD device and sent back to the host application. This back-and-forth shuffling of audio data is called “buffering” and it produces a latency (delay) in the audio signal being processed.
Latency is inherent in digital audio systems and it can be detected in certain situations. Latency time in a DAW is usually determined by the sample rate and audio I/O interface hardware buffer size settings.
If this latency is not compensated, the processed audio will not be perfectly aligned (synchronized) with unprocessed audio. Fortunately, modern audio plug-in host applications automatically compensate for this latency by simply enabling the delay compensation function in the preference settings. Most hosts provide full plug-in delay compensation throughout the entire signal path, including inserts, sends, groups/buses, and outputs
UAD latency and plug-in delay compensation is managed automatically by all modern DAWs using automatic plug-in delay compensation. Additionally, latency can be reduced to undetectable levels in the UAD-2 PCIe card by by-passing host buffering altogether (see “LiveTrack Mode” on page 72).
Note: Delay compensation is fully automatic and requires no user interven-tion when UAD Powered Plug-Ins are used in hosts that support latency delay compensation.
Host Application Settings
For optimum results, the delay compensation feature should be enabled in the host application. This will provide automatic compensation when UAD plug-ins are used. This option is usually found in the audio or plug-in preference set-tings window. The specific location of the setting for this option can be found in the host DAW documentation.
Latency compensation has various names depending on the host. It’s usually referred to as “Automatic Delay Compensation” (ADC), “Plug-In Delay Com-pensation” (PDC) or a similar related name.
UAD System Manual - 84 - Chapter 9: UAD Delay Compensation

Upsampled Plug-Ins
Some UAD plug-ins use an internal sample rate of 192 kHz to achieve sonic design goals. This upsampling results in a slightly larger latency than other UAD plug-ins (typcially 0 – 300 samples, depending on the plug-in and sam-ple rate). Therefore, they require more compensation to remain perfectly syn-chronized with other tracks.
Note: Compensating upsampled UAD plug-ins is performed automatically by the host application when latency compensation is enabled in the host.
Upsampled Compensation Notes
• Compensating for upsampled UAD plug-ins is not required when these plug-ins are used for program material on the output bus, where latency is not a consideration (because the entire mix is delayed by the same amount).
• The latency in Table 6 on page 86 is also produced when LiveTrack mode (page 72) is used with upsampled plug-ins.
• Upsampled plug-in latency cannot be displayed in the “Plug-In Latency Sec-tion” on page 51 due to technical limitations.
• The Precision Multiband (PMB) and Ampex ATR-102 plug-ins have a signif-icantly larger latency than other upsampled plug-ins because of their com-plex algorithms. Because manually compensating for these plug-ins in hosts that don’t support full plug-in delay compensation can be complicated, to avoid timing errors in these hosts we generally recommend using these plug-ins only on outputs, so no manual compensation is required.
Note: Use the Precision Multiband and Ampex ATR-102 only on outputs (as their design was intended), or only in hosts that have full plug-in delay com-pensation.
UAD System Manual - 85 - Chapter 9: UAD Delay Compensation

Upsampling Values Table
Table 6 lists the additional latency produced by upsampled UAD plug-ins.
*Note The EMT 250 and Lexicon 224 anti-aliasing filters for their A/D and D/A con-version are not linear-phase filters; therefore the emulations do not have a la-tency that is the same at all frequencies. Thus, we cannot report to the delay compensation engines a delay that is correct for all frequencies. The reported values are good at low frequencies, but become off at high frequencies.
Table 6. Upsampled UAD plug-ins with additional latencies
Sample Rate (kHz)
Upsampled Plug-In 44.1 48 88.2 96 176.4 192
Precision Limiter 64 69 129 140 259 281
API 550AAPI Vision Console Channel StripNeve 33609Fairchild Tube Limiter CollectionFATSO Jr./Sr.Massive PassiveMoog FilterPultec EQP-1APultec MEQ-5Studer A800UA 1176 Limiter CollectionUA 610-B Tube Preamp
55 55 55 55 88 88
Precision Maximizer 67 67 67 67 42 42
API 560Teletronix LA-2A Leveler Collection
56 56 56 56 89 89
Helios Type 69Harrison 32CNeve 1073, 1081, 31102Precision EQPultiec EQP-1A LegacyPultec-Pro LegacyPultec HLF-3CSSL E Channel StripTrident A-Range
31 31 13 13 0 0
Precision Multiband 15,360 16,896 30,720 33,792 61,440 66,048
Little Labs IBP 32 32 14 14 1 1
Lexicon 224* (see note) 84 79 90 97 107 116
EMT 250* (see note) 75 11 85 24 107 50
Ampex ATR-102 2262 2455 4408 4798 8818 9598
MXR Flanger/Doubler 31 31 0 0 0 0
UAD System Manual - 86 - Chapter 9: UAD Delay Compensation

For example, when the plug-in is in Delay program mode and set with zero delay time and predelay values, the plug-in output will not be completely can-celled when mixing with flipped phase against an unprocessed track; high frequencies will leak through. However, the latency through the dry side of the wet/dry mix, and the latency when the plugin is bypassed via the EMT 250 Power switch, do not have this issue and will be fully compensated by the DAW.
Live Processing
The previous discussions of delay compensation applies primarily to play-back and mixing of existing tracks. During recording (tracking), the primary concern usually centers around getting the absolute lowest possible latency out of your hardware and software combination. The lower the latency is, the closer you can get to a realtime, “ears match the fingers” performance situa-tion in the digital environment where some latency is unavoidable.
Realtime latency is displayed in the System Information panel (page 50) within the UAD Meter & Control Panel application.
Live processing latency is determined by the audio interface I/O buffer size setting. The lower the buffer size, the lower the latency.
UAD-2 PCIe LiveTrack Mode
UAD-2 PCIe devices use an advanced buffering architecture that delivers no additional latency when tracking by using LiveTrack Mode. See “LiveTrack Mode” on page 72 for details.
UAD System Manual - 87 - Chapter 9: UAD Delay Compensation

CHAPTER 10
UAD-2 SOLO/Laptop
Overview
ExpressCard™ is a computer expansion slot typically used in notebook com-puters. Utilizing a 2.5Gbps differential serial link, ExpressCard conveniently leaves slower USB and Firewire connections free for dongles, Audio I/O, and hard drives, while operating at full PCI Express bandwidth.
UAD-2 SOLO/Laptop is a compact ExpressCard version of the UAD-2 SOLO card. The UAD-2 SOLO/Laptop brings all the power of the UAD-2 to portable digital audio workstation users. The UAD-2 SOLO/Laptop enables large, pro-fessional mixes on notebook DAWs without the need for external cabling or a power supply. See “UAD-2 SOLO/Laptop Details” on page 90.
Once installed and configured, it is functionally identical to its UAD card counterparts (see “The UAD Hardware” on page 26 for a UAD hardware overview).
Note: UAD-2 SOLO/Laptop is a discontinued product.
Documentation UAD SOLO/Laptop is a hardware system designed for use with UAD Pow-ered Plug-Ins, which is the companion software package that includes the drivers, plug-ins, and software documentation.
Instructions in this chapter are specific to UAD-2 SOLO/Laptop only, and ap-ply in addition to the other chapters. To get the most from this product, please review the following additional information:
Important Information
Important user information is presented on a printed document within the UAD ExpressCard product retail package. It provides details that may not be in-cluded in this manual. Please review the information carefully.
Technical Updates
Updated UAD technical information is regularly posted to the UA website. Please visit the UAD support pages for the latest bulletins:
• uaudio.com/support/uad/
UAD System Manual - 88 - Chapter 10: UAD-2 SOLO/Laptop

ExpressCard Videos
Our support website contains many helpful videos that explain how to install the hardware and software, register and authorize the product, obtain op-tional plug-ins, and more:
• http://www.uaudio.com/support/uad/videos.html
UAD-2 SOLO/Laptop Instructions
All instructions that apply specifically to UAD-2 SOLO/Laptop are in the “UAD-2 SOLO/Laptop Details” section, beginning on page 90.
UAD System Manual - 89 - Chapter 10: UAD-2 SOLO/Laptop

UAD-2 SOLO/Laptop Details
Features • UAD-2 Solo in a self-contained, compact ExpressCard/34 package(can be used in ExpressCard/54 slots with included adapter)
• 44.1-192k DSP Audio Accelerator for notebook computers
• Ultra-fast (2.5Gbps) ExpressCard/34 interface
• No external cables or power supply necessary
• Same potent DSP power as UAD-2 Solo
Package Contents
The UAD-2 SOLO/Laptop package should contain the following items:
• UAD-2 SOLO/Laptop ExpressCard
• ExpressCard/34 to ExpressCard/54 Adapter
• UAD DSP Family Quickstart Guide DVD
• UAD Powered Plug-Ins software CD-ROM
• Important Information Sheet
• Universal Audio Full Line Catalog
SOLO/Laptop System Requirements
To use the UAD-2 SOLO/Laptop, your system must meet the minimum system requirements for UAD Powered Plug-Ins (see “System Requirements” on page 14) in addition to the UAD ExpressCard product-specific requirements.
UAD-2 SOLO/Laptop requires the following hardware and software:
• UAD Powered Plug-ins software v5.3.1 or higher (included)
• Available ExpressCard/34 or ExpressCard/54 expansion slot
• UAD version 5.5.0 or higher is recommended for best performance
Software Installation
Install Software First
Software installation for UAD ExpressCard products is the exact same proce-dure as those for UAD cards. Install the software before the hardware. Please refer to “UAD Software Installation” on page 16 for detailed procedures.
Software Updates
The CD-ROM in the retail package may not contain the latest UAD software. Please check our website for software updates:
UAD System Manual - 90 - Chapter 10: UAD-2 SOLO/Laptop

• http://www.uaudio.com/support/uad/downloads/
• If the UAD software is already installed, the UAD Meter & Control Panel has a convenient button that links to the updates page (“Check for Updates” on page 50).
ExpressCard/34 to ExpressCard/54 Adapter
The UAD-2 SOLO/Laptop device uses the Express-Card/34 form factor. When the device is installed in systems with the wider ExpressCard/54 slot, the en-closed ExpressCard/34 to ExpressCard/54 adapter should be used for the most reliable connection.
The adapter has two tabs on the bottom and one in the middle that snap into place on the SOLO/Laptop de-vice.
To install the ExpressCard/34 to ExpressCard/54 Adapter:
1. Line up the bottom two tabs on the adapter with the corresponding holes on the SOLO/Laptop device. The wide end of the adapter aligns with the non-con-nector end of the ExpressCard.
2. Snap in the middle tab and the adapter will click into place. Done!
To remove the adapter, snap it off by holding the SOLO/Laptop device and gently bending the adapter down.
Inserting the SOLO/Laptop
Note: The UAD-2 SOLO/Laptop device may be inserted before or after the system is booted.
Important: Install the UAD software before inserting the device.
To install the UAD-2 SOLO/Laptop device:
1. Ensure that UAD v5.3.1 (or higher) software is already installed and that the system was restarted after software installation.
2. Ensure that all audio plug-in host software is quit.
3. Slide the UAD-2 SOLO/Laptop ExpressCard fully into the host computer’s ExpressCard/34 expansion slot (or ExpressCard/54 expansion slot with the adapter) until it is firmly seated.
UAD System Manual - 91 - Chapter 10: UAD-2 SOLO/Laptop

4. The LED on the SOLO/Laptop will initially flash red/green, indicating the hardware is powered by the computer but the UAD drivers are not yet loaded. Within a few seconds of inserting the device (or after startup is complete, if inserted when powered down), the LED should glow steady green, indicating the UAD drivers are loaded.
UAD-2 SOLO/Laptop is ready for use.
Removing the SOLO/Laptop
Important: The proper sequence must be followed before removing the UAD-2 SOLO/Laptop device from the computer to avoid system instability and/or data loss.
Note: The UAD-2 SOLO/Laptop device may be removed when the system is active, as long as the steps below are followed.
To remove the UAD-2 SOLO/Laptop device:
1. Save your sessions and quit all UAD host software (audio applications and the UAD Meter & Control Panel).
2. Remove the UAD ExpressCard from the expansion slot. Done!
Note: It is not necessary to power down the device in software using the “Power Off Card” function (Mac Menu Bar) or “Safely Remove Hardware” (Windows Task Bar) before removing the device.
SOLO/Laptop Authorization
After initial installation, the UAD-2 SOLO/Laptop should be registered and authorized (it can run in demo mode for 14 days without authorization). See “Authorization” on page 20 for full explanation and procedures.
Existing UAD Licenses
If you already have UAD device(s) in a desktop system, you can share those UAD licenses with UAD-2 SOLO/Laptop. This option is presented during ini-tial device registration; please consider your options carefully when register-ing.
UAD System Manual - 92 - Chapter 10: UAD-2 SOLO/Laptop

Important SOLO/Laptop Notes
For maximum system stability and reduced possibility of data loss, please ob-serve these operational requirements when operating UAD-2 SOLO/Laptop:
Sleep Important: Close sessions and remove UAD-2 SOLO/Laptop before sleep!
Before putting the computer into system sleep/hibernate/standby mode, quit all UAD host software and remove the UAD-2 SOLO/Laptop device. Other-wise, unpredictable behavior and/or loss of session data could occur.
“Hot” Removal Important: Do not remove UAD-2 SOLO/Laptop while UAD plug-ins are loaded!
Removing the device when it is active could cause the system to crash. Quit all UAD hosts before removing the device.
ExpressCard/54 adapter(Windows)
Use the ExpressCard/34 to ExpressCard/54 adapter with ExpressCard/54 slots
The UAD-2 SOLO/Laptop device uses the ExpressCard/34 form factor. When the device is installed in systems with the wider ExpressCard/54 slot, the enclosed ExpressCard/34 to ExpressCard/54 adapter should be used for the most reliable connection. See“ExpressCard/34 to ExpressCard/54 Adapter” on page 91 for details.
Red/Green LED(Windows)
Reinsert the UAD-2 SOLO/Laptop if the LED flashes red/green.
Occasionally the LED on the UAD-2 SOLO/Laptop device may flash red and green after booting is complete and/or when inserting the device after boot. If this occurs, simply remove then reinsert the device, which should cause the LED to remain steady green.
UAD System Manual - 93 - Chapter 10: UAD-2 SOLO/Laptop

CHAPTER 11
UAD-2 Satellite
Overview
UAD Powered Plug-Ins via FireWire
UAD-2 Satellite is a UAD-2 DSP accelerator that connects to the host computer via FireWire 800 or FireWire 400 and hosts UAD-2 Powered Plug-Ins on Mac OS X and Windows 7 systems. Unlike previous UAD-2 PCIe products, UAD-2 Satellite is a completely external unit with power supply that does not require a PCIe or ExpressCard interface. This freedom from PCIe requirements en-ables the full UAD-2 Powered Plug-Ins library and DSP acceleration for qual-ified FireWire-equipped computers.
Once installed and configured, UAD-2 Satellite is functionally similar to its UAD-2 PCIe card counterparts. The main difference between UAD-2 Satellite and UAD-2 PCIe cards is differing architectures (FireWire versus PCIe). See “The UAD Hardware” on page 26 and “UAD-2 Family” on page 27 for UAD hardware overviews.
Note: “LiveTrack Mode” is unavailable when UAD-2 Satellite is connected.
Duo and Quad Versions
UAD-2 Satellite is available in two versions: DUO and QUAD. The only dif-ference between these two models is the number of processors inside the de-vice (and therefore the available DSP horsepower). The DUO or QUAD des-ignator is silk-screened on the bottom of the Satellite housing.
Documentation UAD-2 Satellite is designed for use with UAD Powered Plug-ins, the compan-ion software package that includes the drivers, plug-ins, and documentation.
Instructions in this chapter are specific to UAD-2 Satellite operations only, and apply in addition to the other chapters. To get the most from your UAD-2 Sat-ellite, please review the following additional information:
Important Information
Important user information is presented on a printed document within the UAD-2 Satellite retail package. This sheet provides late-breaking details that are not included in this manual. Please review the information carefully.
UAD System Manual - 94 - Chapter 11: UAD-2 Satellite

Technical Updates
Updated technical information and the latest UAD software is regularly posted to the UA website. Please visit the UAD support pages for the latest UAD-2 Satellite support bulletins:
• www.uaudio.com/support/satellite
UAD-2 Satellite Instructions
All instructions that apply specifically to UAD-2 Satellite are in the “UAD-2 Sat-ellite Installation” section beginning on page 96.
About FireWire
This chapter contains information about the FireWire protocol and how to use it with UAD-2 Satellite. For details, see “FireWire Basics” on page 103, “FireWire Bandwidth” on page 107, “FireWire Bandwidth vs. UAD DSP” on page 109, and “FireWire Bus Power” on page 110.
UAD-2 Satellite Details
Important: The information in these sections apply to UAD-2 Satellite ONLY. For UAD-2 SOLO/Laptop, see Chapter 10, “UAD-2 SOLO/Laptop”.
Features • UAD-2 DUO or QUAD in an external housing chassis
• 44.1 – 192 kHz DSP Audio Accelerator for FireWire computers
• FireWire 800 & 400 interface
• Same potent DSP power as UAD-2 PCIe DUO or QUAD
• Kensington Security Slot for anti-theft cables
Package Contents
The UAD-2 Satellite retail package should contain the following items:
• UAD-2 Satellite unit (DUO or QUAD version)
• External power supply with international AC plug adapters
• FireWire 800 (9-pin) cable
• UAD Powered Plug-Ins software installer disk
• Important Information Sheet
• Universal Audio Full Line Catalog
UAD System Manual - 95 - Chapter 11: UAD-2 Satellite

Satellite System Requirements
To use UAD-2 Satellite, your system must meet the minimum “System Require-ments” on page 14.
UAD-2 Satellite Installation
Install Software First
The software installation procedure for UAD-2 Satellite is the exact same pro-cedure as those for UAD cards. Install the software before the hardware un-less you are updating a previous installation. Refer to “UAD Software Instal-lation” on page 16 for detailed procedures.
Software Updates
The install disk in the retail package may not contain the latest UAD software. Please check our website for software updates:
• www.uaudio.com/downloads
If the UAD software is already installed, the UAD Meter & Control Panel has a convenient button that links to the updates page (“Check for Updates” on page 50).
Satellite Install Location
When selecting a location to position UAD-2 Satellite during installation and use, consider these points:
• The unit should be positioned on a secure, stable surface and not moved during operation. This will help prevent the disruption of signals from cables and/or connectors if they are accidentally bumped (or worse).
• For proper ventilation to prevent overheating, place UAD-2 Satellite on a hard, flat surface and do not cover the unit. Allow air to circulate under-neath the chassis. Two UAD-2 Satellite units may be safely stacked.
• High levels of radio-frequency radiation could interfere with proper opera-tion. If possible, avoid placement near unshielded monitors, radio transmit-ters, and similar equipment.
Security Slot The Kensington Security Slot is on the rear panel. This feature helps prevent theft when used with an optional locking cable such as the Kensington MicroSaver Security Cable. Refer to the instructions that come with the optional cable.
UAD System Manual - 96 - Chapter 11: UAD-2 Satellite

External Power Supply
UAD-2 Satellite includes an external international DC power supply with changeable AC connectors to match the AC socket in various countries (Figure 23).
To change the AC connector:
1. Press and hold the button on the AC connector marked “PUSH.”
2. Rotate the AC prongs counter-clockwise to remove the connector.
3. Insert the desired connector and rotate clockwise until it snaps into place.
Note: The removable connectors are keyed so they cannot be inserted incor-rectly.
Figure 23. UAD-2 Satellite external DC power supply and changeable AC connectors
Figure 24. Changing the AC connector
UAD System Manual - 97 - Chapter 11: UAD-2 Satellite

Connecting UAD-2 Satellite
Important: Install the UAD software before connecting UAD-2 Satellite (see “UAD Software Installation” on page 16). UAD-2 Satellite may be connected before or after the system is booted.
To connect UAD-2 Satellite:
1. Ensure that the UAD Powered Plug-Ins software is already installed and that the system was powered down after software installation (Mac systems can be hot-plugged after restarting). See “UAD Software Installation” on page 16 for specific instructions.
2. Ensure that all UAD plug-in host software is quit.
3. Select a suitable location for the UAD-2 Satellite chassis (see “Satellite In-stall Location” on page 96).
4. Connect the AC end of the External Power Supply to an AC outlet. If you need a different AC connector for your country, see page 97.
5. Connect external power supply output cable to the DC input on the rear panel of the UAD-2 Satellite chassis.
6. Connect one end of the FireWire cable to the FireWire port on the host computer.
7. Connect the other end of the FireWire cable to the UAD-2 Satellite chassis.
8. Turn on UAD-2 Satellite using the power switch on the rear panel. The unit may be powered on before connecting without consequence.
9. Start the computer system.
UAD-2 Satellite connections are complete.
UAD-2 Satellite is ready for use. See “UAD-2 Satellite Operation” on page 99. Additional connection methods are detailed later in this chapter.
Disconnecting UAD-2 Satellite
Important: The proper sequence must be followed before disconnecting UAD-2 Satellite from the computer to avoid unpredictable behavior and/or data loss.
To disconnect UAD-2 Satellite:
1. Save your sessions and quit all UAD host software (audio applications and the UAD Meter & Control Panel).
2. Disconnect UAD-2 Satellite from the FireWire port. Done!
Note: UAD-2 Satellite may be disconnected when it and/or the computer is powered, as long as the steps above are followed.
UAD System Manual - 98 - Chapter 11: UAD-2 Satellite

UAD-2 Satellite Operation
After the UAD Powered Plug-Ins software is installed (page 16) and UAD-2 Satellite is properly connected to the computer via FireWire (page 96), the system is ready for use. Refer to other chapters in this manual for software op-erating instructions.
All UAD-2 Satellite operations (except for hardware setup) are similar to the operation of other UAD-2 devices. See “Important UAD-2 Satellite Notes” on page 101 for exceptions specific to UAD-2 Satellite.
About FireWire For general information about FireWire and how it is used with UAD-2 Satel-lite and other FireWire devices, see “FireWire Basics” on page 103 and “FireWire Bandwidth” on page 107.
It is important to note that available FireWire bandwidth is unrelated to UAD DSP loads. See “FireWire Bandwidth vs. UAD DSP” on page 109 for details.
Power Indicator When power is applied to UAD-2 Satellite via the rear switch, the UA logo on the front panel glows. This power indicator does not represent the state of the UAD drivers or their link to UAD-2 Satellite (the Rear Panel LED indicates the operational state).
Rear Panel LED UAD-2 Satellite has a UAD link indicator on the rear panel. This LED provides information about the operational state of the device and its drivers. For more details, see “UAD-2 LED” on page 24.
UAD-2 Satellite Authorization
After initial setup and before first use, UAD-2 Satellite should be registered and authorized (it can run in demo mode for 14 days without authorization). See “Authorization” on page 20 for full explanation and procedures.
Figure 25. UAD-2 Satellite Power Indicator
Figure 26. UAD-2 LED on Satellite rear panel
UAD System Manual - 99 - Chapter 11: UAD-2 Satellite

Existing UAD Licenses
If you already have another UAD device, you can share those UAD licenses with UAD-2 Satellite. UAD-2 Satellite is automatically added to your existing system at my.uaudio.com. If you already have four other UAD devices in your my.uaudio.com system, a new system group is created in compliance with the UAD software agreement (licenses can only be shared between up to four UAD devices).
Hot Plugging(Mac only)
Note: FireWire hot-plugging may work on Windows systems but these oper-ations are not tested.
Hot plugging refers to the ability to disconnect UAD-2 Satellite while the host computer is active or sleeping, and reconnect it at a later time without reboo-ting. UAD-2 Satellite supports hot plugging (hot plugging is part of the FireWire specification) on Mac systems.
As long as the UAD drivers are properly installed, if UAD-2 Satellite is hot-plugged into an active FireWire bus, the UAD drivers will load automati-cally and be ready for use.
However, disconnecting UAD-2 Satellite when UAD plug-ins are loaded could cause session data loss and/or unpredictable behavior. Quit all UAD hosts and the UAD Meter & Control Panel before disconnecting the device.
Disconnect
UAD-2 Satellite can be disconnected when it and/or the host computer is ac-tive or sleeping as long as no UAD host applications (including UAD Meter & Control Panel) are running.
Important: Do not disconnect UAD-2 Satellite while UAD plug-ins are loaded.
Reconnect
UAD-2 Satellite can be reconnected when the device and/or the host com-puter is powered up. The device will be detected and the UAD drivers will au-tomatically load upon connection.
Adding a device to the active bus
Connecting or disconnecting a FireWire device to an active FireWire bus causes a “bus reset” (as specified by the FireWire protocol). When a FireWire bus reset occurs, all active UAD plug-ins are disabled. The session must be reloaded to reactivate UAD plug-ins.
Note: Connect all FireWire devices to the bus before activating UAD plug-ins.
UAD System Manual - 100 - Chapter 11: UAD-2 Satellite

System Sleep System sleep while UAD-2 Satellite is active is not supported. Before sleeping the system, quit all plug-in host applications (including the UAD Meter & Con-trol Panel) and disconnect UAD-2 Satellite. After wake, UAD-2 Satellite may be reconnected.
Important: Quit all hosts and disconnect UAD-2 Satellite before system sleep.
Important UAD-2 Satellite Notes
For maximum system stability and reduced possibility of data loss, please ob-serve the requirements below when operating UAD-2 Satellite:
Note: On Windows systems, only FW800 connections are qualified.
• Due to differing architectures, “LiveTrack Mode” on page 72 is unavailable when UAD-2 Satellite is connected. LiveTrack Mode is also unavailable with UAD-2 PCIe cards when UAD-2 Satellite is connected to the same system as the card(s).
• UAD-2 Satellite has a minimum hardware buffer requirement of 512 sam-ples. The hardware I/O buffer setting for the host and audio interface can be adjusted to a value lower than 512 samples when UAD-2 Satellite is con-nected, and the UAD-2 Satellite drivers dynamically adjust to allow for the lower buffer setting while still maintaining UAD-2 Satellite's minimum buffer requirement of 512 samples.
Note: For the lowest latency while tracking, disable any plug-ins currently running on UAD-2 Satellite from the input tracks and the monitoring and/or master output paths.
• All devices on the FireWire bus share the available data bandwidth of the bus, including external hard drives and audio interfaces as well as UAD plug-ins. The amount of UAD DSP that is available for UAD plug-in process-ing can exceed the available FireWire bandwidth. For these reasons, the value of the “UAD Bandwidth Allocation” on page 63 setting is critical. See “FireWire Bandwidth” on page 107 and “FireWire Bandwidth vs. UAD DSP” on page 109 for more details.
• All three FireWire ports on UAD-2 Satellite may be used concurrently as a FireWire hub, however FireWire bus power is not supplied to downstream devices. See “Bus Power” on page 103 for details.
UAD System Manual - 101 - Chapter 11: UAD-2 Satellite

• See “Mixing FireWire Speeds” on page 106 for important information about using FireWire 800 and FireWire 400 devices on the same bus.
• Although “Hot Plugging (Mac only)” on page 100 is supported on Mac sys-tems, disconnecting UAD-2 Satellite when UAD plug-ins are running could cause unpredictable behavior. Quit all UAD hosts and the UAD Meter & Control Panel before disconnecting or powering down UAD-2 Satellite.
Important: Do not disconnect UAD-2 Satellite while UAD plug-ins are loaded.
• Once the host software is quit, you may connect or disconnect the unit even if the host computer and/or UAD-2 Satellite is powered on (see “Hot Plug-ging (Mac only)” on page 100).
• Connect all FireWire devices to the bus before activating UAD plug-ins. See “Adding a device to the active bus” on page 100 for details.
• Two UAD FireWire devices can be used together in a single system. See Chapter 5, “Using Multiple UAD Devices” for additional information.
• Select a suitable location for the unit. See “Satellite Install Location” on page 96. UAD-2 Satellite units may be safely stacked.
• Do not bend sharp angles into or otherwise kink the FireWire cable. The ca-ble can be damaged by improper handling.
• UAD-2 Satellite contains no user serviceable parts. Opening the unit will void the warranty. Note the card inside is different than UAD-2 PCIe cards.
Power Supply • UAD-2 Satellite requires external DC power. It ships with an external power supply adapter that converts AC power to 12VDC @ 1.25A. AC input into the adapter can be 100V–240V at 50–60 Hz; several AC plug adapters are provided for international use.
• The power supply DC output connector is ring=ground/negative and tip=hot/positive. UAD-2 Satellite is diode-protected; the unit will not be damaged if the wrong DC polarity (or AC input) is connected.
• The QUAD Satellite draws a maximum of 7 watts; the DUO draws 4 watts.
• The acceptable range of power input for UAD-2 Satellite is 9VDC – 15VDC @ 1A (9 Watts minimum).
Note: UAD-2 Satellite requires the external power supply. It cannot be powered by the FireWire bus, nor can it supply bus power to other FireWire devices.
UAD System Manual - 102 - Chapter 11: UAD-2 Satellite

FireWire Basics
FireWire (also known as “IEEE 1394” and “i.Link”) is a high-speed serial data interconnection protocol that is used to transfer digital information between devices. FireWire is commonly used to interconnect computer systems to hard drives, audio interfaces, and digital camcorders.
A complete discussion of FireWire is beyond the scope of this manual, but some of the main points and how they apply to UAD-2 Satellite are covered below.
FireWire vs. USB FireWire is considered superior to USB for audio purposes because it does not rely on the host processor to manage low-level data housekeeping (among other reasons). FireWire typically outperforms USB at the same rated speeds.
FireWire Bus FireWire devices are connected to a FireWire “bus” which is comprised of all devices in the serial data stream (Figure 28, Figure 29, and Figure 30 on page 105). The FireWire specification supports up to 63 peripherals per FireWire bus.
Many FireWire devices and host computers have more than one FireWire connector, but these connectors almost always attach to the same FireWire bus (most computers do not have more than one FireWire bus). It is possible to add another FireWire bus to a computer, typically by adding a PCIe-to-FireWire or ExpressCard-to-FireWire adapter card.
Bus Power Some FireWire devices can be “bus powered” which means the device de-rives its operating electricity from the FireWire bus itself without a power sup-ply of its own. See “FireWire Bus Power” on page 110 for details.
Important: UAD-2 Satellite cannot be bus powered and it does not supply bus power from its FireWire ports to other devices.
FireWire 400 vs. 800
The most common FireWire devices are available in two speeds: FireWire 400 (IEEE 1394a), which supports transfer speeds up to 400 megabits per second, and FireWire 800 (IEEE 1394b), which supports up to 800 megabits per second. It’s usually possible to determine the speed of the FireWire device by the type of FireWire connector it uses (see “FireWire Connectors” below).
UAD System Manual - 103 - Chapter 11: UAD-2 Satellite

Note: UAD-2 Satellite is a FireWire 800 device. See “Mixing FireWire Speeds” on page 106 for more information about using FW800 and FW400 devices on the same FireWire bus.
FireWire Connectors
FireWire 400 and FireWire 800 devices use different connectors (Figure 27 below). The connectors are not interchangeable; this helps to differentiate be-tween the two device speeds.
FireWire 400 connectors
FireWire 400 devices typically have two types of connector: 4-pin and 6-pin. The small 4-pin FireWire 400 connector is common on digital camcorders and Windows notebook computers. The 6-pin connector is more common with hard drives and audio devices; the two extra pins allow the device to be bus powered (UAD-2 Satellite cannot be powered by the FireWire bus).
UAD-2 Satellite has one 6-pin FireWire 400 port.
FireWire 800 connector
FireWire 800 devices use a 9-pin connector. 9-pin to 6-pin FireWire adapter cables are available to connect FireWire 800 devices to a FireWire 400 bus (with reduced bandwidth). See “Mixing FireWire Speeds” on page 106 for more information.
UAD-2 Satellite has two FireWire 800 ports to facilitate easy daisy-chaining with other FireWire devices.
Hubs and Chains FireWire devices can be connected to a central hub, such as a computer with multiple FireWire ports or a peripheral FireWire hub (Figure 28 on page 105), connected to each other serially in a “daisy-chain” (Figure 29 on page 105), or any combination of the two in a “tree-chain” topology (Figure 30 on page 105). Note the diagrams in these figures are only exam-ples; devices may be connected in any order (see “Mixing FireWire Speeds” on page 106 for exceptions).
Figure 27. FireWire 800 and FireWire 400 (6-pin and 4-pin) connector types
FW 400 (6-pin) FW 400 (4-pin)FW 800 (9-pin)
UAD System Manual - 104 - Chapter 11: UAD-2 Satellite

Additionally, UAD-2 Satellite can function as a FireWire hub, by using the un-used ports on the unit to connect other FireWire devices as in Figure 31. Note that UAD-2 Satellite does not supply FireWire bus power to downstream de-vices; see “FireWire Bus Power” on page 110 for details.
Figure 28. FireWire bus connections via a hub
Figure 29. FireWire bus connection via daisy chain
Figure 30. FireWire bus connections via hub and daisy chain
Figure 31. FireWire bus connections using UAD-2 Satellite as a hub
Computer
FW Audio Interface
External HD UAD-2 Satellite
FW Hub
Computer
FW Audio InterfaceExternal HDUAD-2 Satellite
Computer
FW Audio Interface
External HD
UAD-2 Satellite
FW Hub
External HD
External HD
Computer
FW Audio Interface
External HD
UAD-2 Satellite External HD
UAD System Manual - 105 - Chapter 11: UAD-2 Satellite

Connections The ability to connect and disconnect FireWire devices while power is ap-plied (or not) is part of the FireWire specification. UAD-2 Satellite supports “hot plugging” on Mac systems only.
Note: See “Hot Plugging (Mac only)” on page 100 for detailed information.
Mixing FireWire Speeds
Although FireWire 400 and FireWire 800 devices can be connected to the same FireWire bus via a hub or daisy-chain, special precautions must be ob-served to maximize bandwidth in these situations.
Note: See Figure 34 on page 107 for the recommended configuration when mixing FireWire bus speeds.
FireWire 800 devices on a FireWire 400 bus
FireWire 800 devices are backwards-compatible and can be connected to a FireWire 400 bus (using a 6-pin to 9-pin FireWire cable or adapter). How-ever in this scenario (Figure 32) any 800 megabit-capable device on the bus (including UAD-2 Satellite) will operate at a maximum of 400 megabits be-cause FireWire bandwidth cannot exceed the maximum bus speed of the host computer.
FireWire 400 devices on a FireWire 800 bus
FireWire 400 devices can be connected to a FireWire 800 bus (using a 6-pin to 9-pin FireWire cable or adapter). In Figure 33, all FireWire devices will operate at a maximum of 400 megabits because the FW800 device is lo-cated after the FW400 device in the daisy chain (the FW400 device forces all subsequent devices to run at FW400 speeds).
Figure 32. FireWire 400 bus – all devices run at 400 megabits
Figure 33. FireWire 800 bus – all devices run at 400 megabits (not a recommended setup)
FW400 Computer
FW800 Audio InterfaceFW800 HDFW800 UAD-2 Satellite
This FireWire bus runs @ 400 MB because the host computer is FW400.
FW400 Audio Interface FW800 HD FW800 UAD-2 Satellite
This FireWire bus runs @ 400 MB because first device in chain is FW400.
FW800 Computer
UAD System Manual - 106 - Chapter 11: UAD-2 Satellite

It is possible to configure a FireWire bus to run at both FW400 and FW800 speeds simultaneously if the host computer bus is FW800, supporting maxi-mum throughput for a mix of FW400+FW800 devices. This is accomplished by putting any/all FW400 devices AFTER any/all FW800 devices in a daisy chain (see Figure 34 on page 107).
Daisy-chain FireWire 400 devices AFTER the FireWire 800 devices in a FW800 bus
If (and only if) FireWire 400 devices are attached to a FireWire 800 bus after the end of all FireWire 800 devices in a daisy-chain (Figure 34), the FireWire 800 devices will operate at 800 megabits while the FireWire 400 device op-erates at 400 megabits.
Important: This is the recommended configuration when UAD-2 Satellite is sharing a FireWire 800 bus with FireWire 400 devices.
FireWire Bandwidth
All devices on a FireWire bus must share the available data bandwidth of the bus, including hard drives and audio interfaces as well as UAD-2 Satellite. If there is not enough FireWire bandwidth to handle all the data traffic on the bus, performance issues (such as audio clicks/pops/dropouts or UAD over-loads) could occur.
Bandwidth Guage
When UAD-2 Satellite is connected, the UAD Meter window displays the FireWire Bandwidth gauge (Figure 35 on page 108), showing the amount of FireWire bandwidth being used by UAD-2 Satellite and other FireWire de-vices on the bus. Figure 36 on page 108 details all of the elements in the gauge.
Figure 34. FireWire 800 bus – devices running at 800 and 400 megabits (recommended setup)
FW800 Computer
FW400 Audio InterfaceFW400 HDFW800 UAD-2 Satellite
This FireWire bus runs at both 800 and 400 because the FW400
FW bus@800 FW bus@400
devices are located AFTER the FW800 device in the daisy chain.
UAD System Manual - 107 - Chapter 11: UAD-2 Satellite

Important: FireWire bandwidth is unrelated to UAD DSP loads. See “FireWire Bandwidth vs. UAD DSP” on page 109 for details.
Sharing Bandwidth
If UAD-2 Satellite is the only device on the FireWire bus, UAD processing traf-fic can use the entire bandwidth of the bus. However, if other FireWire de-vices are on the bus, the amount of bandwidth used for UAD traffic must be reduced so those devices will have enough bandwidth for their processes as well.
Bandwidth Control
The FireWire bandwidth used for UAD traffic is controlled using the “UAD Bandwidth Allocation” on page 63. By using the “FireWire Gauge” on page 66, it’s easy to determine how much bandwidth is being used by the non-UAD devices, so appropriate choices can be made when setting the UAD Bandwidth Allocation.
These settings, and all other UAD-2 Satellite FireWire parameters (Figure 37 on page 109), are made in the UAD Meter & Control Panel. See “FireWire Panel” on page 61 for detailed descriptions of the FireWire controls.
Figure 35. The UAD Meter with UAD-2 Satellite
Figure 36. Elements of the UAD FireWire Gauge
Total available Firewire bus bandwidth
Available FW bandwidth (headroom)
Total allocatedbandwidth
(UAD + otherdevices)
Used byother devices
(orange)Used by
UAD (blue)
UAD Bandwidth Allocation(blue + green)
Available for UAD(green)
UAD System Manual - 108 - Chapter 11: UAD-2 Satellite

FireWire Bandwidth vs. UAD DSP
The amount of FireWire bandwidth used by UAD-2 Satellite depends on the number (the quantity) of UAD plug-ins that are loaded on the device; the amount of DSP used by a UAD plug-in (the quality) does not affect FireWire bandwidth at all.
In other words, each UAD-2 Satellite plug-in instance uses a fixed amount of FireWire bandwidth, regardless of how much DSP a given UAD plug-in uses. It is the audio data stream to and from a UAD plug-in that uses the FireWire bandwidth. The amount of digital signal processing occurring on the UAD de-vice itself is unrelated to the FireWire traffic in and out of the device.
Therefore, with UAD-2 Satellite it is possible to run out of available FireWire bandwidth before running out of available UAD DSP. For example, running ten lightweight plug-ins such as UAD EX-1 on UAD-2 Satellite will use the same FireWire bandwidth as running ten DSP-intensive plug-ins such as UAD Moog Multi-Mode Filter. However, the EX-1s will use a fraction of the UAD DSP that UAD Moog Filter would require for the same instance count.
See “DSP Loading Information” on page 76 for additional notes.
Important: FireWire bandwidth is unrelated to UAD DSP loads.
Figure 37. The UAD FireWire panel (control descriptions are in Chapter 6)
UAD System Manual - 109 - Chapter 11: UAD-2 Satellite

FireWire vs. PCIe
The maximum possible data throughput even at FireWire 800 speeds is only a fraction of what is possible with PCIe. Therefore, if very high UAD plug-in counts are required, UAD-2 PCIe cards provide an alternate solution.
FireWire Bus Power
Some FireWire devices can be “bus powered” which means the device de-rives its operating electricity from the FireWire bus itself without a power sup-ply of its own. This operating current, when available, is supplied via two con-ductors in FireWire cables and ports (4-pin FireWire 400 cables and ports cannot supply bus power).
Although bus powering is part of the FireWire specification, it is an optional feature. Not all FireWire devices are designed to use it nor are all devices de-signed to supply it, for a variety of reasons. For example, a device may re-quire more current than can be supplied by bus power, or a device may be unable to provide enough current to its FireWire ports.
UAD-2 Satellite cannot be bus powered nor does it supply bus power from its FireWire ports to other devices. Therefore, when using a FireWire device that requires bus power, it is important to connect that device directly to a FireWire port that supplies bus power (such as the computer itself or an exter-nally powered FireWire repeater that is specifically designed to supply bus power).
Important: UAD-2 Satellite cannot be bus powered and it does not supply bus power from its FireWire ports to other devices.
Bus Powering Example
Figure 38 on page 111 illustrates the proper method of connecting bus pow-ered FireWire devices with UAD-2 Satellite. An externally powered FireWire repeater or hub that is specifically designed to provide bus power to con-nected devices must be used in this case.
UAD System Manual - 110 - Chapter 11: UAD-2 Satellite

This example uses the Apogee Duet, a popular audio interface with one FireWire port that can only be bus powered. If the Duet was connected di-rectly to UAD-2 Satellite, it would not have power to operate because UAD-2 Satellite does not supply bus power. Therefore, the Duet must be connected to the externally powered FireWire repeater or hub that provides bus powering.
In this example, UAD-2 Satellite operates at FireWire 800 speeds because it is connected directly to a FireWire 800 computer. If external HD #1 is a FireWire 800 device and it is connected a FireWire 800 port on UAD-2 Sat-ellite, it will also operate at FireWire 800 speeds. Because the FireWire re-peater is a FireWire 400 device, all devices connected to it operate at FireWire 400 speeds. See “Mixing FireWire Speeds” on page 106 for more about connecting devices of various speeds on the same FireWire bus.
Caveats The quality and compatibility of powered FireWire repeaters and hubs can vary widely. Just because a FireWire repeater or hub is externally powered doesn’t necessarily mean it provides bus power or that it is compatible with UAD-2 Satellite and other FireWire devices. For the latest compatibility infor-mation and specific repeater and hub recommendations, please visit the UAD-2 Satellite support page:
• www.uaudio.com/support
Figure 38. Proper connection of bus powered FireWire devices
External HD 2
FW800 Computer
UAD-2 Satellite
The externally powered FireWire repeater must supply bus power!
PoweredFW400 repeater
Apogee Duet(bus powered)
(bus powered)
External HD 1(externally powered)
(externally powered)
UAD System Manual - 111 - Chapter 11: UAD-2 Satellite

CHAPTER 12
History
Bill Putnam Sr.
The name M.T. “Bill” Putnam retains a unique status in the audio industry hall of fame- it's leg-endary even among those who are considered to be legends themselves. Called the “father of modern recording” by no less a luminary than Bruce Swedien, and a “visionary, responsible for motivating new thinking,” by respected studio engineer Tom Hidley, Putnam was a true renais-sance man in the world of sound and music. As a record producer, engineer, inventor, writer, singer, technician, studio owner and businessman, he excelled at combining his talents in a cre-ative way. A pioneer in recording studio acoustics, Putnam is acknowledged to be the first per-son to use artificial reverberation for commercial recordings. He also developed the first multi-band equalizers, and with his company Universal Audio, was responsible for the development of classic equipment like the 1176LN and UREI® Time Align monitors. He was involved in the early development of stereophonic recording, and founded studios in Chicago, Hollywood and San Francisco whose legacy still lives on today.
Early Interests Born in 1920 in Danville, Illinois, he was influenced by his father, a businessman who also put on radio programs, including a number one country music show. Young Putnam's interests surfaced early; in Boy Scouts he earned a merit badge in wireless, building a crystal set and a one-tube radio. By 15 he was taking the ham radio operator's exam and constructing his own equipment. In high school both his artistic and technical sides emerged full on. He worked repairing radios and renting out P.A. systems, while also singing on weekends with dance bands (for five dollars a night, which included the P.A. rental!), developing his interest in the music business, and realizing, as he has said, that “musicians were my favorite people.”
Universal Recording Corp. Opens in Chicago Technical college followed, then work at radio stations, and radio engineering work for the Army during World War II. In 1946 Putnam started his own recording studio, Universal Re-cording Corp., in Evanston Illinois. His goals at the time, besides having a successful business, were the development of new recording tech-niques and specialized equipment for recording studios.
To that end the manufacturing company Univer-sal Audio, which later became UREI®, was formed. Most of the equipment, including the console, for Universal Recording was built by
UAD System Manual - 112 - Chapter 12: History

Universal Audio. It wasn't long before the company relocated to Chicago, and it was there, in 1947, that Putnam recorded what is generally accepted to be the first “pop” record to use ar-tificial reverberation. The founder of the group The Harmonicats, Jerry Murad, wanted to record using an echo chamber like he'd heard on effects in spooky radio mysteries. Putnam not only financed the record for a piece of the profits, he came up with the idea of using the tiled men's room at Universal Recording to create that echo. The Harmonicats song “Peg-O-My-Heart,” be-came the first million seller smash with more than 1,400,000 copies sold, and the rest was, well, history.
Landmark Recordings Bruce Swedien, a teenager at the time, recalls that the sound on “Peg-O-My-Heart” was a seminal influence on him. “It was the first pop music recording where artifi-cially controlled reverb was used for artistic effect,” he explains. “Many of the recordings that were done prior to that had reverb, but it was part of the acoustics of the recording environ-ment. Bill's contribution to the art was that he literally came up with the design of the way the echo or reverb sound is sent from the recording desk and the way it's returned to the mix so that it can be used in a variable amount.
“I was a youngster in Minneapolis in the early 50s when I first heard “Peg-O-My-Heart,” Swed-ien continues, “And I can remember it like it was yesterday. It had an extraordinary effect on me. I didn't understand how the techniques were done, but I knew it had tremendous artistic im-pact.”
Putnam's engineering credits grew quickly; at that time he worked with artists such as Patti Page, Vic Damone and Dinah Washington, and had a million selling record on his own Uni-versal Records label with “Jealous Heart” by Al Morgan. A number of firsts occurred at Univer-sal: the first use of tape repeat, the first vocal booth, the first multiple voice recording, the first 8-track recording trials and experiments with half speed disc mastering.
Universal was becoming famous, doing recordings for the Chicago based labels VeeJay, Mer-cury and Chess. It was a hub for rhythm and blues recordings including cuts for Muddy Wa-ters, Willie Dixon, Bo Diddley, Little Walter, and Chuck Berry. Jazz artists recorded by Put-nam included Stan Kenton, Tommy Dorsey, Count Basie, Dizzy Gillespie, Ella Fitzgerald, Sarah Vaughn, Nat King Cole, and the mas-ter, Duke Ellington. Putnam was also produc-ing records for Decca, as well as writing songs and lyrics.
UAD System Manual - 113 - Chapter 12: History

With all this success, Universal Recording went through several incarnations, with the dream version completed in 1955. At that time it was the most advanced and largest independent re-cording facility in the country attracting top producers like Nelson Riddle, Mitch Miller and Quincy Jones. It was also at that time that Bruce Swedien went to work for the studio.
“It's absolutely true,” he states. “Bill Putnam was the father of recording as we know it today. The processes and designs which we take for granted — the design of modern recording desks, the way components are laid out and the way they function, console design, cue sends, echo returns, multitrack switching — they all originated in Bill's imagination.”
Murray Allen, who purchased Chicago's Universal Recording from Putnam in 1972 elaborates. “Bill was a brilliant person, highly talented, with a great set of ears,” he says. “He was Duke Ellington's favorite engineer, among many, and at one time he had more singles in the top 40 than anybody else. At the time, if you needed something in sound, he was the guy. He designed systems for the Sands and other big showrooms in Las Vegas; John Kennedy flew him out to ar-range the sound for the broadcast of his inauguration. He did it all.”
Moving West- United Recording Corp. With his Chicago studio so successful, Putnam's clients began urging him to open a facility on the West Coast, and finally he was convinced. In 1957 he sold his interest in Universal Recording, started a new company called United Recording Corp. and moved to Hollywood, taking over a building at 6050 Sunset and starting construc-tion on new studios. Stereo was taking off, and Putnam was determined to incorporate as many technological innovations into the complex as possible.
In 1958, Studio B was completed along with two reverb chambers. The facility soon grew to three studios, a mixdown room, three mastering rooms including one with stereo, and a small manufacturing plant, all in 15,000 square feet. The studios were busy around the clock, with projects from Ricky Nelson to voice-overs for Hanna Barbera cartoons like the Flintstones.
In the early 60s Western Recorders, one block away at 6000 Sunset, was acquired and re-modeled. The studio was renamed United West-ern, and business continued to grow. The talent behind and in front of the glass in those days reads like a who's who of classic recording: Bones Howe, Wally Heider and Lee Hirschberg were on staff. During the 60s and 70s the studios were jumping 24 hours a day, seven days a week with artists like Frank Sinatra, Bing Crosby, Dean Martin, Sammy Davis, Nat King Cole, Johnny Mercer and Ray Charles. Charles classic
UAD System Manual - 114 - Chapter 12: History

“I Can't Stop Loving You” was recorded there, as well as Sinatra's “It Was A Very Good Year,” and The Mamas and The Papas' “California Dreamin'”. The United Western studios, still in ex-istence today as both Cello Studios and Allen Sides' Ocean Way Recording, are still consid-ered to be some of the best sounding rooms ever built.
Universal Audio and UREI Meanwhile, upstairs in the 6050 Sunset building Universal Audio was thriving, and changing names. Now called UREI®, the company had acquired the patent rights to the LA-2A leveling amplifier, and also to National Intertel, which became the Teletronix division of UREI®. It was a unique situation; Putnam was always searching for better ways to do things and the combination of studios and manufacturing led readily to new product ideas. Out of this synergy came the 1176LN leveling amplifier, the 1108 FET preamp and, in con-junction with Ed Long, the 813 family of speakers.
Mentor and Innovator Allen Sides, currently owner of Ocean Way Recording, whose studios to-day encompass almost unchanged what was part of United Western, calls Putnam “my best friend.” “When Bill started designing control rooms they were about eight feet by six feet and they were calling them booths,” he says. “He built the first of what we now call conventional control rooms, with speakers above the windows. The whole control room concept we think of today was Bill's. The first console that had equalizers in every channel was Bill's, the feedback equalizer was Bill's creation, he built all his own limiters, his own consoles, he could tune his own pianos; he basically did the whole deal.
“Around 1962 he was doing half speed cutting, to get the high frequencies on the discs,” re-calls Sides. “He'd designed his own mastering systems, because you couldn't do it any other way. He was recording on custom made 30ips machines and he was doing all the super hi fi stuff, like the Mercury Living Presence series.”
Sides, who is renowned for both his golden ears and his abilities in the 'art of the deal,' ap-preciated Putnam on many levels. “He was an exceptional businessman, with a tremendous un-derstanding of things,” he says. “If I had a complex deal and I couldn't quite figure out how to approach it, I'd sit down with Bill and he'd reason it out in the most amazing way.
“There's a great story about when stereo was coming on. The record companies really weren't that interested — everyone was cost conscious. They didn't want to spend any more money and
UAD System Manual - 115 - Chapter 12: History

they were saying that stereo was a waste of time. But Bill could see the potential, and around 1959 he started recording everything with feeds to two control rooms, one for a stereo mix, one for a mono mix. In late '58, '59 and '60 everything Bill did was re-corded in both stereo and mono.
“When stereo hit big around '61, none of the record companies had any catalog. But Bill did — he had two and one half years worth. It was a lot of material — understand at that period of time he was doing about $200,000 a month in the United Western Complex — which is like a million dollars a month now.
“So the record companies came to Bill and said, 'We'll pay you for the tape.' And he said, 'No, you can't pay for the tape, but if you repay me all the studio time that was used in the last two and a half years you have a deal.' And they did. They wrote him a check for the whole thing.”
It’s recollections like these that bring home Putnam's visionary and entrepreneurial style. An un-disputed leader in music recording and in recording technology, with innumerable accolades to his credit, it's his son, Bill Putnam, who perhaps sums it up best, in a way Bill Sr. himself might like. Bill Jr. says, simply, “He was a guy who built equipment to solve problems in the studio.”
“There's a whole school of what I'd call Bill Putnam engineers out there,” concludes Murray Allen. “People like Allen Sides and Bruce Swedien who worked with him and who really un-derstood what recording sound should be about. They've carried on his tradition, and I think we all agree that it's very important for people to know what he contributed.”
Classic Compressors
The LA-2A and 1176 compressor/limiters long ago achieved classic status. They're a given in almost any studio in the world — relied upon daily by engineers whose styles range from rock to rap, classical to country and everything in between. With so many newer products on the market to choose from, it's worth looking at the reasons why these classics remain a necessary part of any professional studio's outboard equipment collection.
UAD System Manual - 116 - Chapter 12: History

The basic concept of a compressor/limiter, is of course, relatively simple. It's a device in which the gain of a circuit is automatically adjusted using a predetermined ratio that acts in response to the input signal level. A compressor/limiter “rides gain” like a recording engineer does by hand with the fader of a console: it keeps the volume up during softer sections and brings it down when the signal gets louder. The dynamic processing that occurs at ratios below 10 or 12 to one is generally referred to as compression; above that it's known as limiting.
Modern day compressors offer a great degree of programmability and flexibility – older de-vices such as the 1176 and the LA-2A are more straightforward in their design. Perhaps it is this fact that has contributed to their appealing sound and the longevity of their popularity.
LA-2A
The LA-2A leveling amplifier, a tube unit with hand wired components and three simple con-trols, was introduced in the mid-1960s. It utilized a system of electro-luminescent optical gain control that was quite revolutionary. Gain reduction was controlled by applying the audio volt-age to a luminescent driver amplifier, with a second matched photoconductive cell used to con-trol the metering section. With its 0 to 40 dB of gain limiting, a balanced stereo interconnec-tion, flat frequency response of 0.1 dB from 30-15,000 Hz and a low noise level (better than 70 dB below plus 10 dBm output), the LA-2A quickly became a studio standard. Originally pat-ented by Jim Lawrence, it was produced by Teletronix in Pasadena, California, which became a division of Babcock Electronics Corporation in 1965. In 1967 Babcock's broadcast division was acquired by the legendary Bill Putnam's company, Studio Electronics Corporation shortly before he changed the company’s name to UREI®. Three different versions of the LA-2A were produced under the auspices of these different companies before production was discontinued around 1969.
1176LN
It was Bill Putnam himself who, in 1966, was responsible for the initial design of the 1176. Its circuit was rooted in the 1108 preamplifier which was also designed by Putnam. As is evident from entries and schematics in his design notebook, he experi-mented with the recently developed Field Effect Transistor (F.E.T.) in various configurations to control the gain reduction in the cir-cuit. He began using F.E.T.s as voltage variable resistors, in which the resistance between the drain and the source terminals is con-trolled by a voltage applied to the gate. His greatest challenge was to ensure that distortion was minimized by operating the F.E.T.s within a linear region of operation.
UAD System Manual - 117 - Chapter 12: History

After several unsuccessful attempts at using F.E.T.s in gain reduction circuits, Putnam settled upon the straightforward approach of using the F.E.T. as the bottom leg in a voltage divider cir-cuit, which is placed ahead of a preamp stage.
The output stage of the 1176 is a carefully crafted class A line level amplifier, designed to work with the (then) standard load of 600 ohms. The heart of this stage is the output transformer, whose design and performance is critical. Its primary function is to convert the unbalanced na-ture of the 1176 circuit to a balanced line output, and to provide the proper impedance match-ing to drive the line impedance of 600 ohms. These two jobs are accomplished by the primary and secondary windings whose turns' ratio defines the impedance ratio.
This transformer is critical due to the fact that it uses several additional sets of windings to pro-vide feedback, which makes it an integral component in the operation of the output amplifier. Putnam spent a great deal of time perfecting the design of this tricky transformer and carefully qualified the few vendors capable of producing it.
The first major modification to the 1176 circuit was designed by Brad Plunkett in an effort to re-duce noise--hence the birth of the 1176LN, whose LN stands for low noise. Numerous design improvements followed, resulting in at least 13 revisions of the 1176. Legend has it that the D and E blackface revisions sound the most “authentic”.
The original Universal Audio 1176LN designed by Bill Putnam was a major breakthrough in limiter technology – the first true peak limiter with all transistor circuitry offering superior perfor-mance and a signature sound. Evolved from the popular Universal Audio 175 and 176 vacuum tube limiters, the 1176LN retained the proven qualities of these industry leaders, and set the standard for all limiters to follow.
UAD System Manual - 118 - Chapter 12: History

Pros Talk UA
Both the 1176 and the LA-2A remain in daily use. Busy engineers and producers’ comments about both the 1176 and the LA-2A demonstrate their impact on the industry:
Mike Shipley:
Mike Shipley (Def Leppard, Shania Twain, Blondie): “I grew up using 1176s – in England they were the compressor of choice. They're especially good for vocals, which is also what I prima-rily use the LA-2 for. Most anything else I can do without, but I can't be without at least a pair of 1176s and an LA-2A. For example, on the Enrique Iglesias project I'm currently mixing, I'm using both an 1176 and an LA2 on his voice, which is not unusual for me.
“The 1176 absolutely adds a bright character to a sound, and you can set the attack so it's got a nice bite to it. I usually use them on four to one, with quite a lot of gain reduction. I like how variable the attack and release is; there's a sound on the attack and release which I don't think you can get with any other compressor. I listen for how it affects the vocal, and depending on the song I set the attack or release – faster attack if I want a bit more bite. My preference is for the black face model, the 4000 series – I think the top end is especially clean.
“The LA-2A is not as versatile, but it also has a sound that I really like. On certain voices you can crank it heavily, to where you almost want to put a piece of tape over the meter because there's so much gain reduction that you don't want anyone else to see it! I'm not particularly into overcompression, but when you use it that way there's something about it that just sounds really great. It does depend how it's set on the back, where there's a flat control that can be set to roll off certain frequencies when you reduce more gain. If you have a singer with an intensely pierc-ing voice I find that compressor a good one, incredibly useful. It makes things warmer, espe-cially when you crank it, and for thinner voices that can be just the ticket.”
Allen Sides
Allen Sides has always been known for having golden ears when it comes to the sound of equipment. The owner of Ocean Way Studios in Los An-geles and Nashville, he's also a speaker designer and engi-neer who is especially re-spected for his work with live
UAD System Manual - 119 - Chapter 12: History

musicians, including orchestra and string dates. Among his recent credits are work with the Goo Goo Dolls, Alanis Morissette and Green Day. Sides brings his different perspectives into play when he talks about using the 1176.
“The 1176 is standard equipment for my sessions. I just used them last night, as a matter of fact, on a project for singer Lisa Bonet that Rob Cavallo was producing at Ocean Way. We were recording drums and I used them on the left/right overheads as effects limiters. It's something I learned from (engineer) Don Landy, who worked with Randy Newman a lot. I mult the left and right overheads and bring them back on the console, then insert a pair of 1176s into a pair of the mults. Push in 20 to one and four to one simultaneously and it puts the unit into overdrive creating a very impressive sound.”
Murray Allen
Murray Allen is a veteran engineer and Director of Post Production for the San Francisco Bay Area company Electronic Arts. He has a fascination for gear both old and new and he explains why he thinks the 1176 has been so popular for so long. “It has a unique sound to it that people like, it's very easy to operate, and it does a great job. You have just two controls relative to the ratio of compression. You have input and output and you have attack and release. That's all there is. It's still my favorite limiter for Fender basses and string basses, because you don't know it's working. It doesn't change the way the bass sounds, it just keeps the level at a more con-trollable place.
Ken Kessie
Mixer Ken Kessie (En Vogue, Tony! Toni! Tone!, Ce-line Dion) is known for being experimental. “Seems like everybody knows the basic tricks for the 1176,” he says, “But here are two that might be lesser known. If you turn the attack knob fully counterclockwise until it clicks, the 1176 ceases to be a compressor and acts only as an amplifier. Sometimes this is the perfect sound for a vocal. And of course the unit can be over-driven, adding another flavor of distortion in case your plug-ins are maxed out!
“Then, for that hard-to-tame lead vocalist (the one that backs up from the mic to whisper and leans in for the big ending chorus), try an 1176 followed by a DBX 165. Use the 1176 as a compressor, and the DBX as a peak limiter...it's guaranteed to be smooth as silk.”
UAD System Manual - 120 - Chapter 12: History

Jim Scott
Jim Scott shared a Grammy for Best Engineered Album for Tom Petty's Wildflowers. He's also known for his work with Red Hot Chili Peppers, Natalie Merchant and Wilco. “I use 1176s real conservatively and they still do amazing things,” he comments. “I'm always on the four to one button, and the Dr. Pepper – you know, 10 o'clock, 2 o'clock, and it does everything I need.
“I always use them on vocals. I use them on room mics, on acoustic guitars- – sometimes in mix-ing I'll sneak a little on a snare drum or a separated channel of a snare drum. I'm not one of those guys who leaves it on everything, but I'd have to say I've used an1176 on everything at one time or another.
“They have an equalizer kind of effect, adding a coloration that's bright and clear. Not only do they give you a little more impact from the compression, they also sort of clear things up; maybe a little bottom end gets squeezed out or maybe they are just sort of excitingly solid state or what-ever they are. The big thing for me is the clarity, and the improvement in the top end.
“The 1176 has that same kind of phenomenon, where, when you patch something through a Neve equalizer and you don't even engage the EQ, it sounds better. It's just a combination of the amps.
“I also use LA-2As all the time. I use them on bass, and it's one of the compressors I use for re-verb. Often I'll send a bunch of things to one LA2A and bring it back into the console like a re-turn – it's great for drums, great for kick drum especially.
“LA-2As warm things up. They're the opposite of the 1176--they EQ all the warmth and low mids and bass. When you put bass and drums in them they get fatter and bigger. And unless you hit them way hard and make the tubes sizzle they don't really distort. Of course, you can get them to sound like an AC30 if you want to, just turn them all the way up. They are very loud, powerful amplifiers.
“I've also used both the 1176 and the LA-2A for ste-reo buss compressors – you just have to be a little bit careful that your mixes don't go one sided. Tom's [Petty’s] records have often been mixed through 1176s. I've also done that with LA-2As – they are of course, more inconsistent piece to piece than the 1176s, because of the tubes and the difference in fa-tigue of the tubes.
UAD System Manual - 121 - Chapter 12: History
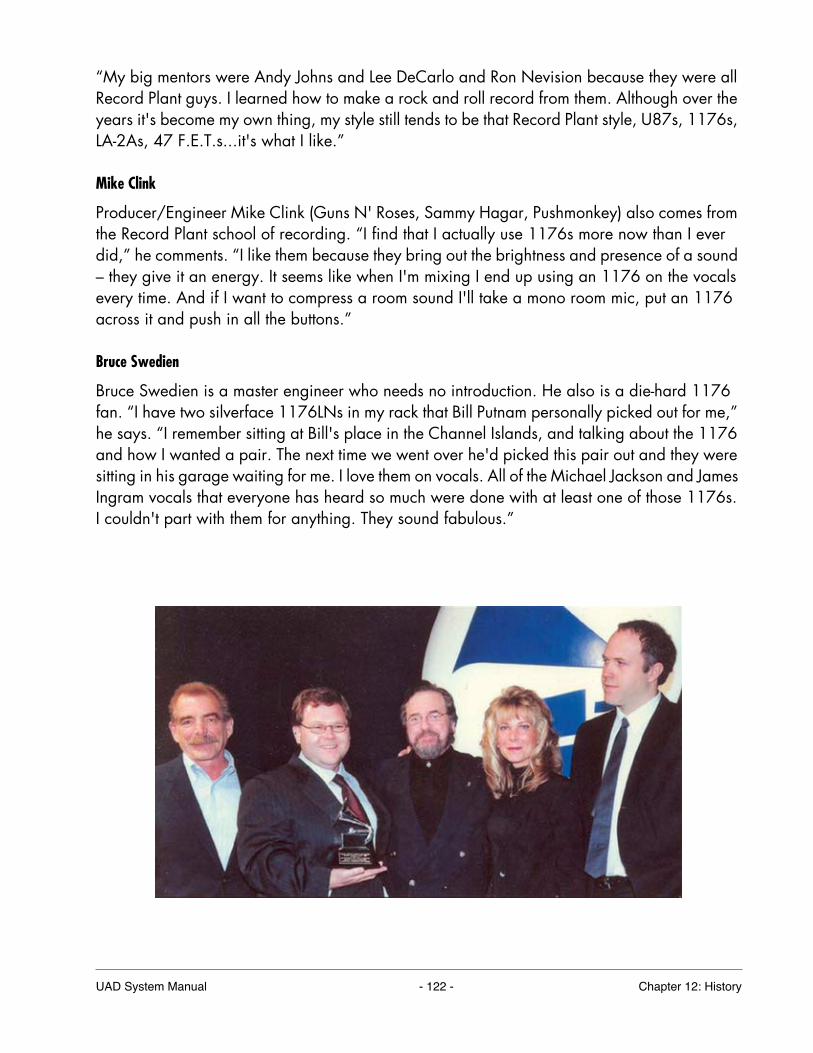
“My big mentors were Andy Johns and Lee DeCarlo and Ron Nevision because they were all Record Plant guys. I learned how to make a rock and roll record from them. Although over the years it's become my own thing, my style still tends to be that Record Plant style, U87s, 1176s, LA-2As, 47 F.E.T.s...it's what I like.”
Mike Clink
Producer/Engineer Mike Clink (Guns N' Roses, Sammy Hagar, Pushmonkey) also comes from the Record Plant school of recording. “I find that I actually use 1176s more now than I ever did,” he comments. “I like them because they bring out the brightness and presence of a sound – they give it an energy. It seems like when I'm mixing I end up using an 1176 on the vocals every time. And if I want to compress a room sound I'll take a mono room mic, put an 1176 across it and push in all the buttons.”
Bruce Swedien
Bruce Swedien is a master engineer who needs no introduction. He also is a die-hard 1176 fan. “I have two silverface 1176LNs in my rack that Bill Putnam personally picked out for me,” he says. “I remember sitting at Bill's place in the Channel Islands, and talking about the 1176 and how I wanted a pair. The next time we went over he'd picked this pair out and they were sitting in his garage waiting for me. I love them on vocals. All of the Michael Jackson and James Ingram vocals that everyone has heard so much were done with at least one of those 1176s. I couldn't part with them for anything. They sound fabulous.”
UAD System Manual - 122 - Chapter 12: History

Thank You
We would like to thank you again for becoming a Universal Audio customer. We urge you sub-scribe to our email lists so we can keep you informed about UA product developments and pro-motions. Email preferences are set in your registration profile (see “My Profile” on page 40).
We always like to hear from our customers and welcome your comments and suggestions. If you have any questions you can email us at:
In case your audio toolbox needs might include hardware such our UA Classics series please be sure to have a look at our web site for more information about the entire UA family of prod-ucts:
• www.uaudio.com
The Universal Audio Team
UAD System Manual - 123 - Chapter 12: History

INDEX
Numerics1176LN 117
AAccessing Meter Functions 48Account 39Adjusting Parameters 70, 74Always On Top 47Audio Interface 33Authorization 20, 33Authorization File 36Authorization Notes 37Authorization Overview 35Authorize Plug-Ins 36Authorize Plug-ins button 53Authorize Plug-Ins Procedure 21Authorizing Multiple Cards 42Automation 77automation 77
BBuy Button 55, 74Buying Plug-Ins 40
CCard Info Display 44Card Status 52Circular (jump) 60Configuration Panel 56Control Panel 49Controls View 70Copy/Paste Settings 72Current Link Speed 62Customer Support 12
DDAW Environment 31Default Preset Location 71Default Preset Locations 71Delay Compensation 84
Demo Activation 38Demo Mode 38Desktop 47Detailed System Profile 53Disable Current 48Disabling Cards 44Disconnect 100Documentation Overview 9DSP 49DSP Load 52DSP Load Limiting Overview 57DSP Loading Information 76DSP LoadLock 58DSP Settings 67
EExternal MIDI Control 78
FFeatures 8Feedback 12FIrewire Bandwidth 107Firewire Bandwidth vs. UAD DSP 109Firewire Basics 103Firewire Bus Power 110Firewire Panel 61Firewire System 61
HHardware Installation 18Help & Support Panel 67Help Menu 74High Resolution 77History 112Host Application 31Host Application Settings 84Host Compatibility 58Host Computer 31Host CPU 45Host CPU Loads 77
UAD System Manual - 124 - Index

INDEX
Hot Disconnect 100Hot Swapping 100
II/O Buffers and Latency 33Info Display 61, 67Install Software First 15, 91, 96Installation 13Installer 29Installing the UAD Hardware 19Introduction 6
LLA-2A 116Latency 51latency 84Latency & Delay Compensation 84Latency Calculator 67Latest Information 14Launching a Powered Plug-In 68Launching a UAD Powered Plug-In 68Launching the Meter
Windows 47Launching the UAD Meter & Control Panel 47Limit CPU Load 57Limit DSP Load 57Linear (slider) 60Live Processing 87LiveTrack Mode 72Load Authorization File 36Load/Save Preset 71Logic Audio 69Logic Pro 69
MMac OS 11Manual Conventions 10Memory 49Meter Elements 48Meter On/Off Button 49
MIDI Control 78Misc Settings 67Mixed UAD System 42Multicard DSP Loading 44Multiple UAD Cards 42My Profile 40My Systems 36My.uaudio.com 33, 34
NNote Values 81Nuendo 68
OOffline Authorization 22Online 11Online Documentation 11Optional Plug-Ins 29, 34
PPackage Contents 9, 90, 95parameter 74Platforms 11Plug-In Formats 32Plug-In License Policy 42Plug-Ins Panel 53Power Requirement 43Powered Plug-Ins 29Preset/Settings Compatibility 71Pro Tools Configuration Window 67Program 49Purchase Procedure 40Purchasing Plug-Ins 40
RReadMe 9Reconnect 100Registration 39Relative Circular (grab) 60Release all DSP resources on Audio Unit bypass 59
UAD System Manual - 125 - Index

INDEX
Release all DSP resources on AudioUnit bypass 59Resource Gauges 48resources 68
SSatellite 94Satellite System Sleep 101Screen Shots 11Scroll Wheel 75Settings Menu 71Shortcuts 75Software Installation 16Software Removal 25Software Updates 15Support Website 11System 37System Information Panel 50System Overview 26System Requirements 14, 90, 96
TTarget Link Speed 63Tempo Sync 80Tempo Sync Modes 83Tempo Sync Plugins 80Text Entry 75Thank You 123The UAD System 9Toggle initial value modifier 61Toolbar 70Transfer Video 41Transferring UAD cards and licenses 41
UUA Online Store 39UAD 90, 95UAD Bandwidth Allocation 63UAD Control Panel 49UAD Drivers 30UAD Environment 26
UAD ExpressCard Products 88UAD Hardware 19, 26UAD Meter & Control Panel 30, 46UAD Nomenclature 11UAD Plug-In Window 69UAD Software 29UAD Software Installation 16UAD Toolbar 70UAD-2 Family 27UAD-2 LED 24UAD-2 Satellite 94UAD-2 Satellite Notes 101UAD-2 Satellite Operation 99UAD-2 SOLO/Laptop 90, 95UAD-2 SOLO/Laptop Important Notes 93UAD-Xpander 27UAD-Xtenda 27, 28Unlicensed Plug-Ins 25Upsampled Plug-Ins 85Upsampling Values Table 86Use Host Mode 60User Documentation 31User Interface Settings 60Users Forum 12Using Powered Plug-Ins 46, 68, 84, 99Using the Meter 47Using the UAD Meter 47Using UAD Powered Plug-Ins 68
VVerifying Installation 24Video Documentation 11
WWelcome 6Windows 11www 11, 12
UAD System Manual - 126 - Index

INDEX
UAD System Manual - 127 - Index