MANUAL B6 PLASTIC WELDING SYSTEM
8
40100 Plastic welder MANUAL B6 PLASTIC WELDING SYSTEM
-
Upload
khangminh22 -
Category
Documents
-
view
1 -
download
0
Transcript of MANUAL B6 PLASTIC WELDING SYSTEM
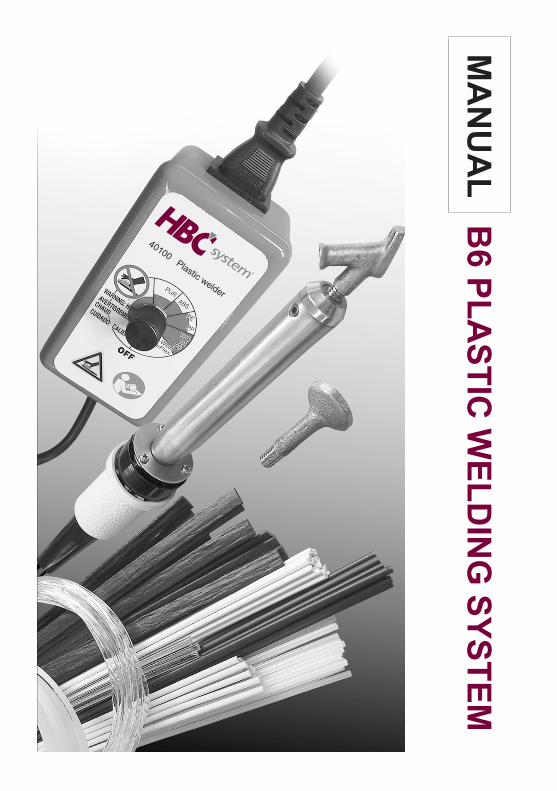
40100 Plastic welder
MA
NU
AL B
6 PLASTIC
WELD
ING
SYSTEM

Using the 5600HT Airless Plastic Welder:
WARNING: Portable electric heating devices of the plastic weld-ing type present certain inherent hazards.
The temperatures necessary for their normal use are high enough to cause fire if they are left in contact with or near combustible materials.
During normal operation the heating element, welding tip and plastic materials are hot enough to cause severe burns even at the lowest pos-sible temperature setting.
Never use near flammable liquids or vapors.
Electric shock hazard: Do not use in or near water. Do not immerse in water. Do not use if wet.
Do not use if cord, switch, or heating element are damaged. Never attempt servicing the welder while plugged in.
During operation, use in a well ventilated area. Use a properly fitted organic vapors respirator to prevent inhalation of vapors.WARNING: This tool must be placed on its stand when not in use.
Before you begin: Place “L” shaped metal welder stand on work bench with the “V” notch up. Lay heating element in the stand so the element does not touch any surrounding surface. Plug power cord into the control unit. Make sure switch is in the off position, turning the knob counter-clockwise until it stops. Plug unit into a power supply that matches the voltage ratings of your welder. Turn the welder to the maximum temperature setting. The heating element may smoke at this initial start-up as it burns off the preservative oils on the elements components. It may take several minutes for all the oils to burn off. This is normal. Turn the temperature setting to the desired range for the material you are welding. You are now ready to weld!
Changing the Welding Tip:While cold, unscrew the existing tip out of the heating element. Screw desired tip into the threaded end of the unit until snug. Do not over tighten! Over tightening will make tip removal difficult or impossible. Do not retighten tip while hot, unless it is excessively loose. Tightening while hot will make removing the tip difficult or impossible.
If tip becomes fused into the element and the element is equipped with a removable adapter, the adapter can be removed by loosening the set-screw on the side of the element barrel. Additional adapters are available if desired. Note: if your element does not have a set screw, it has a non-removable threaded insert.
Cleaning the Welding Tip: Immediately after welding, use the wire brush to remove as much plastic from the tip as possible. Keeping the tip clean will ensure cleaner welds and help reduce the amount of smoke produced after the welding process is complete.
For technical assistance in the USA call:(800) 633-3047 or go to
www.urethanesupply.com
Introduction:
2
Using the B6 PLASTIC WELDING SYSTEM
2
introduction B6 plastic w
elding system

Table of Contents: Introduction ...........................................................2Plastic Welding Repair Method Chart .................3Plastic Identification Reference Chart ................4Thermoset Urethane Repair ................................5Thermoplastic Fusion Weld Repair ....................6FiberFlex Repair ...................................................7
Urethane Supply Companyhas what you need!
Since 1981, Urethane Supply Company has been at the forefront of automotive plastic repair technology. We introduced the industry’s first and most popular airless plastic welder back in 1983. Since then, our list of plastic repair innovations has continued to grow. In 1999, we developed FiberFlex; a universal rod that eliminates the need to identify plastic while being very strong with its fiber reinforcement. In 2000, we introduced the PlastiFix Rigid Plastic Repair Kit, a revolutionary method for repairing rigid plastics like ABS and Polycarbonate. In 2002 we introduced the revolutionary Bumper and Cladding Coat paint and in 2004 the world’s first catalyzed waterborne primer, Black Cat. Our latest ground breaking introduction is Prime Time, a catalyzed waterborne primer for pre-primed OEM bumpers that doesn’t require sanding at any step! As a result of our total commitment to serving the needs of the plastic repair market, we have developed a complete line of products that makes all plastic repair fast and easy.
plastic welding quick reference chart
Repair Method
A B C
Thermoset Polyurethane
(PUR)
ABS, PE, PA, PC, PP
PP, TPO, TEO, TPE, PE, or
other
Clean part with soap & water and Super Clean Plastic Cleaner
Grind, then apply filler that matches the hardness of the substrate
Prime with a recommended UrethaneSupply Company primer.
Thermoset Urethane Weld
Thermoplastic Fusion Weld FiberFlex
Identify Plastic
Clean
Repair
Fill
Prime
1Page 5 Page 6 Page 7Repair Step
2
3
4
Page 4
Page 5-7
53
Using the B6 PLASTIC WELDING SYSTEM
3
plastic welding quick reference chart

Ther
mop
last
icTh
erm
oset
PUR, RIM, RRIM Thermoset
Polyurethane
Usually flexible, may be yellow or gray, bubbles &
smokes when melted.
Flexible bumper covers, filler panels, rocker panel covers, snowmobile cowls.
A or C
SMC, UP, FRP Fiberglass
ABS Acrylonitrile Butadi-
ene Styrene
PSPolystyrene(Styrofoam)
PAPolyamide (Nylon)
PC + ABSPulse, PC + PBT Xenoy, (Polycar-
bonate blend)
HDPEPolyethylene
PPPolypropylene
PPO + PANoryl GTX
(Nylon blend)
PVCPolyvinyl chloride
TPEThermoplastic
Elastomer
TPO, TEO, PP/EPDM, TSOP
Thermoplastic Olefin
TPU, TPUR Thermoplastic Polyurethane
Rigid, polyester matrix reinforced with glass fibers, sands finely.
Rigid, often white but may be molded in any
color, sands finely.
Semi-flexible, usually expanded into foam
Semi-rigid or rigid, sands finely.
Rigid, sands finely, usually dark in color.
Semi-rigid, sands finely, usually off-white in color.
Rigid, sands finely. Usually white or gray but can be made any color
Semi-flexible, usually black or gray, melts & smears when grinding.
Semi-flexible, usually black or gray, melts & smears when grinding.
Flexible, sands finely.
Rigid body panels, fenders, hoods, deck lids, header panels,
spoilers.
Auto interior panels, grilles, street bike fair-ings, canoes, aircraft
interiors and wing tips.Packaging material,
insulation, food containers, light switch
platesRadiator tanks, head lamp bezels, exterior
trim parts, mirrors, plastic engine parts.
Door skins, instrument panels, street bike fairings, bumper
coversAll types of tanks, inner fenders, ATV fenders, kayaks canoes, picnic
tables, lumber
Bumper covers, inner fenders, radiator
shrouds, gas tanks, battery cases, pallets
Fenders, exterior trim.
Pipe, siding, window frames, decking,
gutters, speed bumps
Bumper covers, filler panels, underhood
parts.
Bumper covers, air dams, grilles, interior
parts, snowmobile cowls.
Bumper covers, soft filler panels, gravel deflectors, rocker
panel covers.
NAAdhesives
Only
B
NAAdhesives
Only
B
B
B
B or C
C
C or B
B
B
B or C
Sym
bol &
Typ
e
How
to Id
entif
y
Typi
cal
App
licat
ions
Rep
air
Met
hod
PE/LDPEPolyethylene
Semi-flexible, melts & smears when grinding,
usually semi-translucent, waxy or greasy feel.
B
All types of tanks, inner fender panels,
ATV fenders, kayaks, canoes, trash cans
PETE, PET Polyethylene Terephthalate
Flexible, strongdoes not weld well
Soda bottles, various yarn fibers, headlin-ers, fuse boxes, door
panels B
Rec
yclin
g S
ymbo
l
XPE, XLPE, PE-Xb, PEX, Crosslinked
Polyethylene
Usually semi-translucent, waxy or greasy feel,
softens when heated but does not melt.
CGas tanks, kayaks, canoes, trash cans,
use is declining
Semi-flexible, melts & smears when grinding,
usually semi-translucent, waxy or greasy feel.
Semi-flexible, melts & smears when grinding,
waxy or greasy feel, usu-ally a bit stiffer than PEs.
Plastic Identification Reference ChartThe easiest way to identify the type of plastic you’re working with is to look for the plastic ID symbol on the backside of the part. Simply match the symbol on the part with the table below and look at the suggested repair method, listed in order of preference. See “The Book of Plastic Repair” for tips when you can’t identify the plastic based on this chart or find the plastic ID symbol.
4
4
plastic identification reference chart

V-Groove Damaged Area• Line up the outer surface of the tear with 6481 Aluminum Body
Tape. • Using a die grinder, V-groove halfway
through the backside of the part with a 6121-T Teardrop Cutter Bit or equivalent.
• Sand the v-groove with coarse sandpaper (80 grit or coarser) to put some extra “tooth” in the plastic. Also remove the paint in the area surrounding the v-groove and radius into the v-groove for extra strength.
V-Groove and Weld Opposite Side• After the weld on the backside cools, repeat the v-grooving and
welding process on the opposite side.
Melt the Rod into the V-Groove• Set the temperature setting of your airless plastic welder to the
“clear” or “R1” rod setting. Using the 5003R1 Polyurethane welding rod, the rod should come out of the bottom of the welder’s shoe completely melted and clear, not discolored or bubbling.
• Holding the welder’s tip off the surface of the plastic, melt the rod into the v-groove. Don’t overheat the base material, simply melt the rod onto the surface. Again, you are NOT trying to melt the rod and the bumper together; the bumper material is NOT meltable!
• Lay down no more than 2 inches of welding rod into the v-groove at a time. Remove the rod from the welder tip, and before the melted rod has time to cool down, go back over it with the hot welder tip and smooth out the weld. Don’t overheat the base material.
Grind Weld to a Smooth Contour• Using coarse sandpaper, grind weld
to a smooth contour. The urethane welding rod will not feather very well, so it will need to be covered with 2000 Flex-Filler 2 epoxy filler to refinish completely. Grind the weld slightly flush so that filler can cover the welded area completely.
Repair Method A: Thermoset UrethanesAutomotive urethane, or PUR, is a “thermoset” material. Like epoxy type plastics, thermoset urethane is formed when two liquid chemicals come together to form a solid. Therefore, you cannot melt urethane
bumpers with the welder. The easiest way to identify thermoset urethane is to press the heated tip of the welder into the plastic. If it is thermoset urethane, it will liquefy, bubble and smoke (note: welder must be extremely hot for this to happen). Upon cooling, the “melted area” will remain tacky.
55
Repair m
ethod A - Therm
oset Urethanes
40900 Aluminum Backing
40800 Garbide grinding tip
40208
V-Groove Damaged Area• Line up the outer surface of the tear with 6481 Aluminum Body
Tape. • Using a die grinder, V-groove halfway
through the backside of the part with a 6121-T Teardrop Cutter Bit or equivalent.
• Sand the v-groove with coarse sandpaper (80 grit or coarser) to put some extra “tooth” in the plastic. Also remove the paint in the area surrounding the v-groove and radius into the v-groove for extra strength.
V-Groove and Weld Opposite Side• After the weld on the backside cools, repeat the v-grooving and
welding process on the opposite side.
Melt the Rod into the V-Groove• Set the temperature setting of your airless plastic welder to the
“clear” or “R1” rod setting. Using the 5003R1 Polyurethane welding rod, the rod should come out of the bottom of the welder’s shoe completely melted and clear, not discolored or bubbling.
• Holding the welder’s tip off the surface of the plastic, melt the rod into the v-groove. Don’t overheat the base material, simply melt the rod onto the surface. Again, you are NOT trying to melt the rod and the bumper together; the bumper material is NOT meltable!
• Lay down no more than 2 inches of welding rod into the v-groove at a time. Remove the rod from the welder tip, and before the melted rod has time to cool down, go back over it with the hot welder tip and smooth out the weld. Don’t overheat the base material.
Grind Weld to a Smooth Contour• Using coarse sandpaper, grind weld
to a smooth contour. The urethane welding rod will not feather very well, so it will need to be covered with 2000 Flex-Filler 2 epoxy filler to refinish completely. Grind the weld slightly flush so that filler can cover the welded area completely.
Repair Method A: Thermoset UrethanesAutomotive urethane, or PUR, is a “thermoset” material. Like epoxy type plastics, thermoset urethane is formed when two liquid chemicals come together to form a solid. Therefore, you cannot melt urethane
bumpers with the welder. The easiest way to identify thermoset urethane is to press the heated tip of the welder into the plastic. If it is thermoset urethane, it will liquefy, bubble and smoke (note: welder must be extremely hot for this to happen). Upon cooling, the “melted area” will remain tacky.
5

Grind Weld to a Smooth Contour• If you need to refinish the plastic, grind
weld to a smooth contour with coarse sandpaper. Grind the weld slightly flush so that filler can cover the welded area completely.
Repair Method B: Fusion Welding
V-Groove and Weld Opposite Side• After the weld on the backside cools, repeat
the v-grooving and welding process on the opposite side.
Outside of urethane, all other bumpers, and most other plastics on automobiles, are made from thermoplastic materials. This means they can be melted with the application of heat. Thermoplastic parts are made by melting pellets of plastic and squirting the melted material into a mold, where it cools and resolidifies. This means that thermoplastic parts can be melted. Thermoplastic
Melt the Rod Together with the Base Material• Set the temperature setting of your airless plastic welder to the
setting that’s appropriate for the welding rod you selected in the identification process. In most cases, the welding rod should melt cleanly and not be discolored (the only exception would be nylon, where the rod should turn a light brown).
• Lay the welder tip on the surface of the plastic and slowly melt the rod into the v-groove. Pull the welder toward you so you can see the welding rod fill the v-groove as you make your pass.
• Lay down no more than 2 inches (5 cm) of welding rod into the v-groove at a time. Remove the rod from the welder tip, and before the melted rod has time to cool down, go back over it with the hot welder tip and thoroughly melt the rod together with the base material. It helps to press into the plastic with the edge of the welder tip to mix the materials, then go back and smooth it out. Keep the heat on it until you have a good mix between the rod and base.
6
V-Groove Damaged Area• Line up the outer surface of the tear with 6481 Aluminum Body
Tape.• Using a die grinder, V-groove halfway
through the backside of the part with a 6121-T Teardrop Cutter Bit or equivalent.
• Remove the paint in the area surrounding the v-groove and radius into the v-groove with coarse sandpaper.
6
Repair m
ethod B - Fusion W
elding
40900 Aluminum Backing
40800 Garbide grinding tip
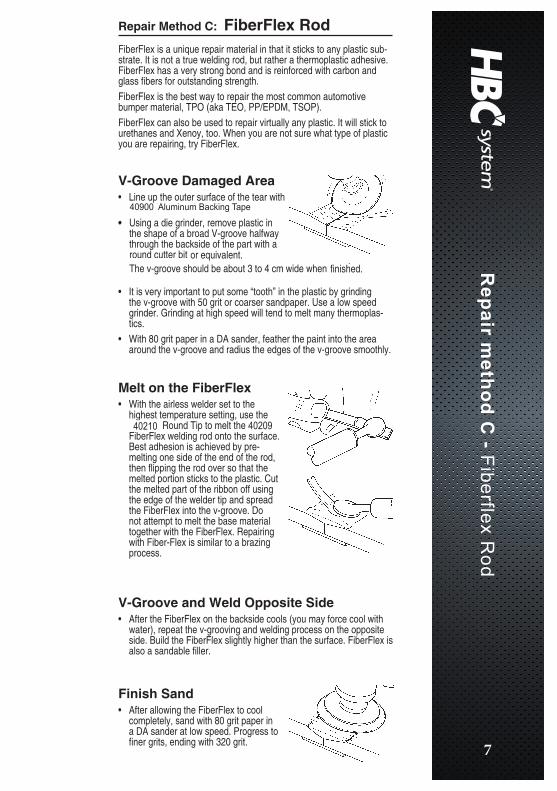
Repair Method C: FiberFlex RodFiberFlex is a unique repair material in that it sticks to any plastic sub-strate. It is not a true welding rod, but rather a thermoplastic adhesive. FiberFlex has a very strong bond and is reinforced with carbon and glass fibers for outstanding strength. FiberFlex is the best way to repair the most common automotive bumper material, TPO (aka TEO, PP/EPDM, TSOP). FiberFlex can also be used to repair virtually any plastic. It will stick to urethanes and Xenoy, too. When you are not sure what type of plastic you are repairing, try FiberFlex.
V-Groove and Weld Opposite Side• After the FiberFlex on the backside cools (you may force cool with
water), repeat the v-grooving and welding process on the opposite side. Build the FiberFlex slightly higher than the surface. FiberFlex is also a sandable filler.
Finish Sand• After allowing the FiberFlex to cool
completely, sand with 80 grit paper in a DA sander at low speed. Progress to finer grits, ending with 320 grit.
V-Groove Damaged Area• Line up the outer surface of the tear with
6481 Aluminum Body Tape.• Using a die grinder, remove plastic in
the shape of a broad V-groove halfway through the backside of the part with a 6122, 6122NF, 6134-R round cutter bit or equivalent. The v-groove should be about 3 to 4 cm wide when finished.
• It is very important to put some “tooth” in the plastic by grinding the v-groove with 50 grit or coarser sandpaper. Use a low speed grinder. Grinding at high speed will tend to melt many thermoplas-tics.
• With 80 grit paper in a DA sander, feather the paint into the area around the v-groove and radius the edges of the v-groove smoothly.
Melt on the FiberFlex• With the airless welder set to the
highest temperature setting, use the 6028RT Round Tip to melt the 5003R10 FiberFlex welding rod onto the surface. Best adhesion is achieved by pre-melting one side of the end of the rod, then flipping the rod over so that the melted portion sticks to the plastic. Cut the melted part of the ribbon off using the edge of the welder tip and spread the FiberFlex into the v-groove. Do not attempt to melt the base material together with the FiberFlex. Repairing with Fiber-Flex is similar to a brazing process.
77
Repair m
ethod C - Fiberflex R
od
40900 Aluminum Backing Tape
Repair Method C: FiberFlex RodFiberFlex is a unique repair material in that it sticks to any plastic sub-strate. It is not a true welding rod, but rather a thermoplastic adhesive. FiberFlex has a very strong bond and is reinforced with carbon and glass fibers for outstanding strength. FiberFlex is the best way to repair the most common automotive bumper material, TPO (aka TEO, PP/EPDM, TSOP). FiberFlex can also be used to repair virtually any plastic. It will stick to urethanes and Xenoy, too. When you are not sure what type of plastic you are repairing, try FiberFlex.
V-Groove and Weld Opposite Side• After the FiberFlex on the backside cools (you may force cool with
water), repeat the v-grooving and welding process on the opposite side. Build the FiberFlex slightly higher than the surface. FiberFlex is also a sandable filler.
Finish Sand• After allowing the FiberFlex to cool
completely, sand with 80 grit paper in a DA sander at low speed. Progress to finer grits, ending with 320 grit.
V-Groove Damaged Area• Line up the outer surface of the tear with
6481 Aluminum Body Tape.• Using a die grinder, remove plastic in
the shape of a broad V-groove halfway through the backside of the part with a 6122, 6122NF, 6134-R round cutter bit or equivalent. The v-groove should be about 3 to 4 cm wide when finished.
• It is very important to put some “tooth” in the plastic by grinding the v-groove with 50 grit or coarser sandpaper. Use a low speed grinder. Grinding at high speed will tend to melt many thermoplas-tics.
• With 80 grit paper in a DA sander, feather the paint into the area around the v-groove and radius the edges of the v-groove smoothly.
Melt on the FiberFlex• With the airless welder set to the
highest temperature setting, use the 6028RT Round Tip to melt the 5003R10 FiberFlex welding rod onto the surface. Best adhesion is achieved by pre-melting one side of the end of the rod, then flipping the rod over so that the melted portion sticks to the plastic. Cut the melted part of the ribbon off using the edge of the welder tip and spread the FiberFlex into the v-groove. Do not attempt to melt the base material together with the FiberFlex. Repairing with Fiber-Flex is similar to a brazing process.
7
40210 40209

http://www.facebook.com/hbcsystems
http://www.youtube.com/user/henrikligenu
http://www.hbc-system.comhttp://www.hbc-system.dkhttp://www.smartrepairtools.comhttp://www.smartreparatursystem.dehttp://www.dassmartreparatur.de
the perfect start -to an excellent finish
SMART by HBC
HBC system and social media:
Smart Repair Bloghttp://www.hbc-system.blogspot.com
HBC SYSTEMHobrovej 963dk9530 Stovring - DenmarkTel. +45 7022 7070 Fax +45 7022 7272 e-mail [email protected] www.hbc-system.com