SAP Event Stream Processor: Installation Guide for Windows
96
PUBLIC SAP Event Stream Processor 5.1 SP 12 Document Version: 1.0.1 – 2019-09-23 SAP Event Stream Processor: Installation Guide for Windows © 2019 SAP SE or an SAP affiliate company. All rights reserved. THE BEST RUN
-
Upload
khangminh22 -
Category
Documents
-
view
0 -
download
0
Transcript of SAP Event Stream Processor: Installation Guide for Windows
PUBLICSAP Event Stream Processor 5.1 SP 12Document Version: 1.0.1 – 2019-09-23
SAP Event Stream Processor: Installation Guide for Windows
© 2
019
SAP
SE o
r an
SAP affi
liate
com
pany
. All
right
s re
serv
ed.
THE BEST RUN
Content
1 Planning Your Installation. . . . . . . . . . . . . . . . . . . . . . . . . . . . . . . . . . . . . . . . . . . . . . . . . . . . . 41.1 Download Requirements for Separately Licensed Adapters. . . . . . . . . . . . . . . . . . . . . . . . . . . . . . . .51.2 Obtaining a License. . . . . . . . . . . . . . . . . . . . . . . . . . . . . . . . . . . . . . . . . . . . . . . . . . . . . . . . . . . 5
Available Licenses. . . . . . . . . . . . . . . . . . . . . . . . . . . . . . . . . . . . . . . . . . . . . . . . . . . . . . . . . . 71.3 Updating Your License. . . . . . . . . . . . . . . . . . . . . . . . . . . . . . . . . . . . . . . . . . . . . . . . . . . . . . . . . 81.4 Supported Operating Systems. . . . . . . . . . . . . . . . . . . . . . . . . . . . . . . . . . . . . . . . . . . . . . . . . . . .91.5 Supported Compilers. . . . . . . . . . . . . . . . . . . . . . . . . . . . . . . . . . . . . . . . . . . . . . . . . . . . . . . . . 121.6 Virtual Machines. . . . . . . . . . . . . . . . . . . . . . . . . . . . . . . . . . . . . . . . . . . . . . . . . . . . . . . . . . . . . 121.7 Disk Space and Memory Requirements. . . . . . . . . . . . . . . . . . . . . . . . . . . . . . . . . . . . . . . . . . . . . 131.8 Installed Directory Structure. . . . . . . . . . . . . . . . . . . . . . . . . . . . . . . . . . . . . . . . . . . . . . . . . . . . 141.9 Before You Reinstall. . . . . . . . . . . . . . . . . . . . . . . . . . . . . . . . . . . . . . . . . . . . . . . . . . . . . . . . . . . 171.10 Automatic Backups. . . . . . . . . . . . . . . . . . . . . . . . . . . . . . . . . . . . . . . . . . . . . . . . . . . . . . . . . . . 18
2 Installation Scenarios. . . . . . . . . . . . . . . . . . . . . . . . . . . . . . . . . . . . . . . . . . . . . . . . . . . . . . . 202.1 Role of the Installer in Cluster Configuration. . . . . . . . . . . . . . . . . . . . . . . . . . . . . . . . . . . . . . . . . 222.2 Performing a Typical Installation. . . . . . . . . . . . . . . . . . . . . . . . . . . . . . . . . . . . . . . . . . . . . . . . . .23
Performing a Typical Installation in GUI Mode. . . . . . . . . . . . . . . . . . . . . . . . . . . . . . . . . . . . . . 24Performing a Typical Installation in Console Mode. . . . . . . . . . . . . . . . . . . . . . . . . . . . . . . . . . . 27
2.3 Performing a Custom Installation. . . . . . . . . . . . . . . . . . . . . . . . . . . . . . . . . . . . . . . . . . . . . . . . . 30Performing a Custom Installation in GUI Mode. . . . . . . . . . . . . . . . . . . . . . . . . . . . . . . . . . . . . 31Performing a Custom Installation in Console Mode. . . . . . . . . . . . . . . . . . . . . . . . . . . . . . . . . . 37
2.4 Running a Silent Installation. . . . . . . . . . . . . . . . . . . . . . . . . . . . . . . . . . . . . . . . . . . . . . . . . . . . .43Creating a Response File. . . . . . . . . . . . . . . . . . . . . . . . . . . . . . . . . . . . . . . . . . . . . . . . . . . . 44Using a Response File. . . . . . . . . . . . . . . . . . . . . . . . . . . . . . . . . . . . . . . . . . . . . . . . . . . . . . 46
2.5 Install the Streaming Plugin for SAP HANA Studio. . . . . . . . . . . . . . . . . . . . . . . . . . . . . . . . . . . . . 47
3 Post-Installation. . . . . . . . . . . . . . . . . . . . . . . . . . . . . . . . . . . . . . . . . . . . . . . . . . . . . . . . . . . .493.1 Register an ODBC Driver to Connect to Event Stream Processor on Windows. . . . . . . . . . . . . . . . . . 503.2 Setting Environment Variables. . . . . . . . . . . . . . . . . . . . . . . . . . . . . . . . . . . . . . . . . . . . . . . . . . . 513.3 Enabling SAP BI Authentication. . . . . . . . . . . . . . . . . . . . . . . . . . . . . . . . . . . . . . . . . . . . . . . . . . 523.4 Installing the SDK on Other Machines. . . . . . . . . . . . . . . . . . . . . . . . . . . . . . . . . . . . . . . . . . . . . . 523.5 Installing the Adapter Toolkit on Other Machines. . . . . . . . . . . . . . . . . . . . . . . . . . . . . . . . . . . . . . 563.6 Deploying and Starting a Cluster. . . . . . . . . . . . . . . . . . . . . . . . . . . . . . . . . . . . . . . . . . . . . . . . . 573.7 Changing Studio Local Cluster Credentials for External Access. . . . . . . . . . . . . . . . . . . . . . . . . . . . 58
4 SAP Event Stream Processor Cockpit. . . . . . . . . . . . . . . . . . . . . . . . . . . . . . . . . . . . . . . . . . . . 594.1 Configuring SAP ESP Cockpit. . . . . . . . . . . . . . . . . . . . . . . . . . . . . . . . . . . . . . . . . . . . . . . . . . . 59
Starting the Cluster Database and an ESP Node. . . . . . . . . . . . . . . . . . . . . . . . . . . . . . . . . . . . 60
2 P U B L I CSAP Event Stream Processor: Installation Guide for Windows
Content
Granting Permissions. . . . . . . . . . . . . . . . . . . . . . . . . . . . . . . . . . . . . . . . . . . . . . . . . . . . . . .60Starting SAP ESP Cockpit. . . . . . . . . . . . . . . . . . . . . . . . . . . . . . . . . . . . . . . . . . . . . . . . . . . .62Logging in to SAP ESP Cockpit. . . . . . . . . . . . . . . . . . . . . . . . . . . . . . . . . . . . . . . . . . . . . . . . 63Creating Authenticators Using SAP ESP Cockpit. . . . . . . . . . . . . . . . . . . . . . . . . . . . . . . . . . . .64
5 Updating from a Previous Version of Event Stream Processor. . . . . . . . . . . . . . . . . . . . . . . . . 655.1 Updating from Version 5.0. . . . . . . . . . . . . . . . . . . . . . . . . . . . . . . . . . . . . . . . . . . . . . . . . . . . . . 65
Preparing for the Log Store Format Change. . . . . . . . . . . . . . . . . . . . . . . . . . . . . . . . . . . . . . . 67Installation Location. . . . . . . . . . . . . . . . . . . . . . . . . . . . . . . . . . . . . . . . . . . . . . . . . . . . . . . .68Clearing the PATH Variable. . . . . . . . . . . . . . . . . . . . . . . . . . . . . . . . . . . . . . . . . . . . . . . . . . . 68Migrating Your Project Files. . . . . . . . . . . . . . . . . . . . . . . . . . . . . . . . . . . . . . . . . . . . . . . . . . 68
5.2 Updating from 5.1 Versions SP04 and Prior. . . . . . . . . . . . . . . . . . . . . . . . . . . . . . . . . . . . . . . . . . 69Migrating Configuration and Persistence Information. . . . . . . . . . . . . . . . . . . . . . . . . . . . . . . . 72Migrating from Sybase Control Center to SAP ESP Cockpit. . . . . . . . . . . . . . . . . . . . . . . . . . . . 78
5.3 Updating from Version 5.1 SP 08. . . . . . . . . . . . . . . . . . . . . . . . . . . . . . . . . . . . . . . . . . . . . . . . . 795.4 Updating from Version 5.1 SP 09, SP 10, or SP 11. . . . . . . . . . . . . . . . . . . . . . . . . . . . . . . . . . . . . . 825.5 Updating a Multinode Cluster. . . . . . . . . . . . . . . . . . . . . . . . . . . . . . . . . . . . . . . . . . . . . . . . . . . .83
6 Downloading Product Updates. . . . . . . . . . . . . . . . . . . . . . . . . . . . . . . . . . . . . . . . . . . . . . . . . 84
7 Uninstalling using the Graphic Uninstaller. . . . . . . . . . . . . . . . . . . . . . . . . . . . . . . . . . . . . . . . 85
8 Uninstalling using the Console. . . . . . . . . . . . . . . . . . . . . . . . . . . . . . . . . . . . . . . . . . . . . . . . . 87
9 Troubleshooting. . . . . . . . . . . . . . . . . . . . . . . . . . . . . . . . . . . . . . . . . . . . . . . . . . . . . . . . . . . . 899.1 SySAM Logging. . . . . . . . . . . . . . . . . . . . . . . . . . . . . . . . . . . . . . . . . . . . . . . . . . . . . . . . . . . . . 899.2 Application Startup Issues. . . . . . . . . . . . . . . . . . . . . . . . . . . . . . . . . . . . . . . . . . . . . . . . . . . . . 909.3 Microsoft Excel Add-in. . . . . . . . . . . . . . . . . . . . . . . . . . . . . . . . . . . . . . . . . . . . . . . . . . . . . . . . 909.4 Installer Issues. . . . . . . . . . . . . . . . . . . . . . . . . . . . . . . . . . . . . . . . . . . . . . . . . . . . . . . . . . . . . . 909.5 Cannot Start Cluster Node. . . . . . . . . . . . . . . . . . . . . . . . . . . . . . . . . . . . . . . . . . . . . . . . . . . . . . 919.6 DNS Resolution. . . . . . . . . . . . . . . . . . . . . . . . . . . . . . . . . . . . . . . . . . . . . . . . . . . . . . . . . . . . . 929.7 Installation Log Files. . . . . . . . . . . . . . . . . . . . . . . . . . . . . . . . . . . . . . . . . . . . . . . . . . . . . . . . . . 92
SAP Event Stream Processor: Installation Guide for WindowsContent P U B L I C 3
1 Planning Your Installation
Before you install or upgrade, ensure your system meets all requirements.
In this section:
Download Requirements for Separately Licensed Adapters [page 5]When you order separately licensed adapters in addition to Event Stream Processor, download only one copy of the Event Stream Processor CD image per platform.
Obtaining a License [page 5]Before installing your product, choose a SySAM license model, determine license server information, and obtain license files.
Updating Your License [page 8]SAP Event Stream Processor requires a valid license. If your evaluation license expires, update your license.
Supported Operating Systems [page 9]SAP Event Stream Processor runs on specific platforms and operating systems.
Supported Compilers [page 12]For creating clients that communicate with Event Stream Processor servers using the SDK, these compilers are supported.
Virtual Machines [page 12]SAP recommends using VMware ESX Server version 3.5 or later to run ESP on virtual machines.
Disk Space and Memory Requirements [page 13]To ensure optimal performance, install Event Stream Processor on a server machine that meets or exceeds the minimum disk space and memory requirements.
Installed Directory Structure [page 14]The installer creates a number of directories containing important files. These files and directories exist in the install directory you selected or created during installation.
Before You Reinstall [page 17]This information pertains to reinstalling the current version of Event Stream Processor over the same version. There are various things to be aware of before reinstalling, such as the need to back up important information to prevent it from being overwritten or deleted.
Automatic Backups [page 18]During the reinstall, upgrade, and uninstall processes, ESP automatically creates backups of critical files and directories.
4 P U B L I CSAP Event Stream Processor: Installation Guide for Windows
Planning Your Installation
1.1 Download Requirements for Separately Licensed Adapters
When you order separately licensed adapters in addition to Event Stream Processor, download only one copy of the Event Stream Processor CD image per platform.
For convenience, the SAP Service Marketplace (SMP) and the Sybase Product Download Center (SPDC) make the Event Stream Processor CD image available on its own and with each separately licensed adapter. However, when you order separately licensed adapters with Event Stream Processor, you only require one instance of the CD image for each platform you are using. If you are using a single platform, download a single copy of the CD image.
Ensure you download a separate license for each adapter in addition to the license for Event Stream Processor.
1.2 Obtaining a License
Before installing your product, choose a SySAM license model, determine license server information, and obtain license files.
Context
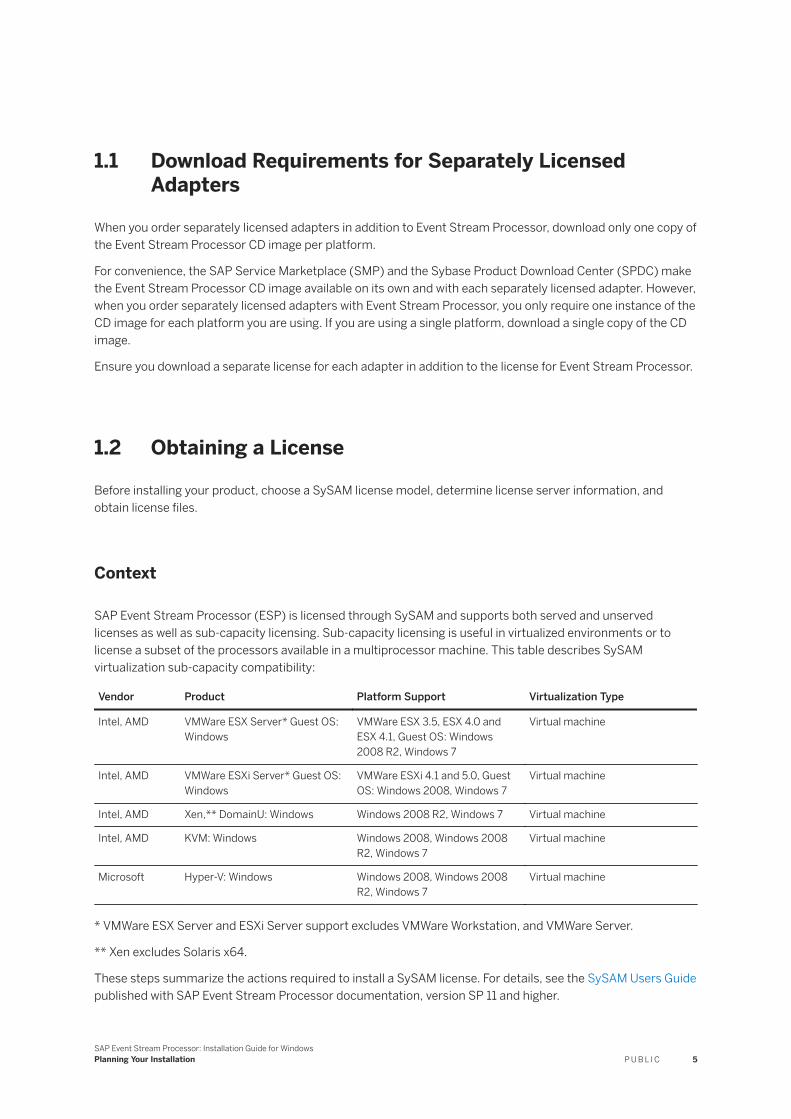
SAP Event Stream Processor (ESP) is licensed through SySAM and supports both served and unserved licenses as well as sub-capacity licensing. Sub-capacity licensing is useful in virtualized environments or to license a subset of the processors available in a multiprocessor machine. This table describes SySAM virtualization sub-capacity compatibility:
Vendor Product Platform Support Virtualization Type
Intel, AMD VMWare ESX Server* Guest OS: Windows
VMWare ESX 3.5, ESX 4.0 and ESX 4.1, Guest OS: Windows 2008 R2, Windows 7
Virtual machine
Intel, AMD VMWare ESXi Server* Guest OS: Windows
VMWare ESXi 4.1 and 5.0, Guest OS: Windows 2008, Windows 7
Virtual machine
Intel, AMD Xen,** DomainU: Windows Windows 2008 R2, Windows 7 Virtual machine
Intel, AMD KVM: Windows Windows 2008, Windows 2008 R2, Windows 7
Virtual machine
Microsoft Hyper-V: Windows Windows 2008, Windows 2008 R2, Windows 7
Virtual machine
* VMWare ESX Server and ESXi Server support excludes VMWare Workstation, and VMWare Server.
** Xen excludes Solaris x64.
These steps summarize the actions required to install a SySAM license. For details, see the SySAM Users Guide published with SAP Event Stream Processor documentation, version SP 11 and higher.
SAP Event Stream Processor: Installation Guide for WindowsPlanning Your Installation P U B L I C 5
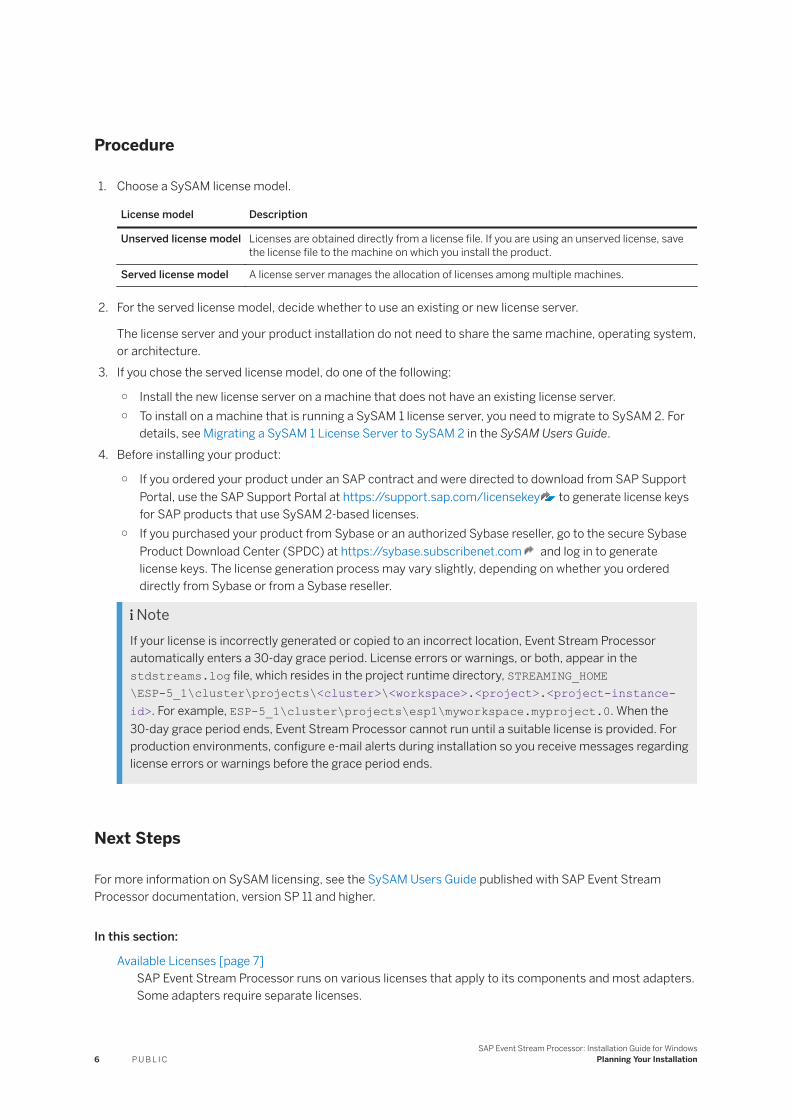
Procedure
1. Choose a SySAM license model.
License model Description
Unserved license model Licenses are obtained directly from a license file. If you are using an unserved license, save the license file to the machine on which you install the product.
Served license model A license server manages the allocation of licenses among multiple machines.
2. For the served license model, decide whether to use an existing or new license server.
The license server and your product installation do not need to share the same machine, operating system, or architecture.
3. If you chose the served license model, do one of the following:
○ Install the new license server on a machine that does not have an existing license server.○ To install on a machine that is running a SySAM 1 license server, you need to migrate to SySAM 2. For
details, see Migrating a SySAM 1 License Server to SySAM 2 in the SySAM Users Guide.4. Before installing your product:
○ If you ordered your product under an SAP contract and were directed to download from SAP Support Portal, use the SAP Support Portal at https://support.sap.com/licensekey to generate license keys for SAP products that use SySAM 2-based licenses.
○ If you purchased your product from Sybase or an authorized Sybase reseller, go to the secure Sybase Product Download Center (SPDC) at https://sybase.subscribenet.com and log in to generate license keys. The license generation process may vary slightly, depending on whether you ordered directly from Sybase or from a Sybase reseller.
NoteIf your license is incorrectly generated or copied to an incorrect location, Event Stream Processor automatically enters a 30-day grace period. License errors or warnings, or both, appear in the stdstreams.log file, which resides in the project runtime directory, STREAMING_HOME\ESP-5_1\cluster\projects\<cluster>\<workspace>.<project>.<project-instance-id>. For example, ESP-5_1\cluster\projects\esp1\myworkspace.myproject.0. When the 30-day grace period ends, Event Stream Processor cannot run until a suitable license is provided. For production environments, configure e-mail alerts during installation so you receive messages regarding license errors or warnings before the grace period ends.
Next Steps
For more information on SySAM licensing, see the SySAM Users Guide published with SAP Event Stream Processor documentation, version SP 11 and higher.
In this section:
Available Licenses [page 7]SAP Event Stream Processor runs on various licenses that apply to its components and most adapters. Some adapters require separate licenses.
6 P U B L I CSAP Event Stream Processor: Installation Guide for Windows
Planning Your Installation
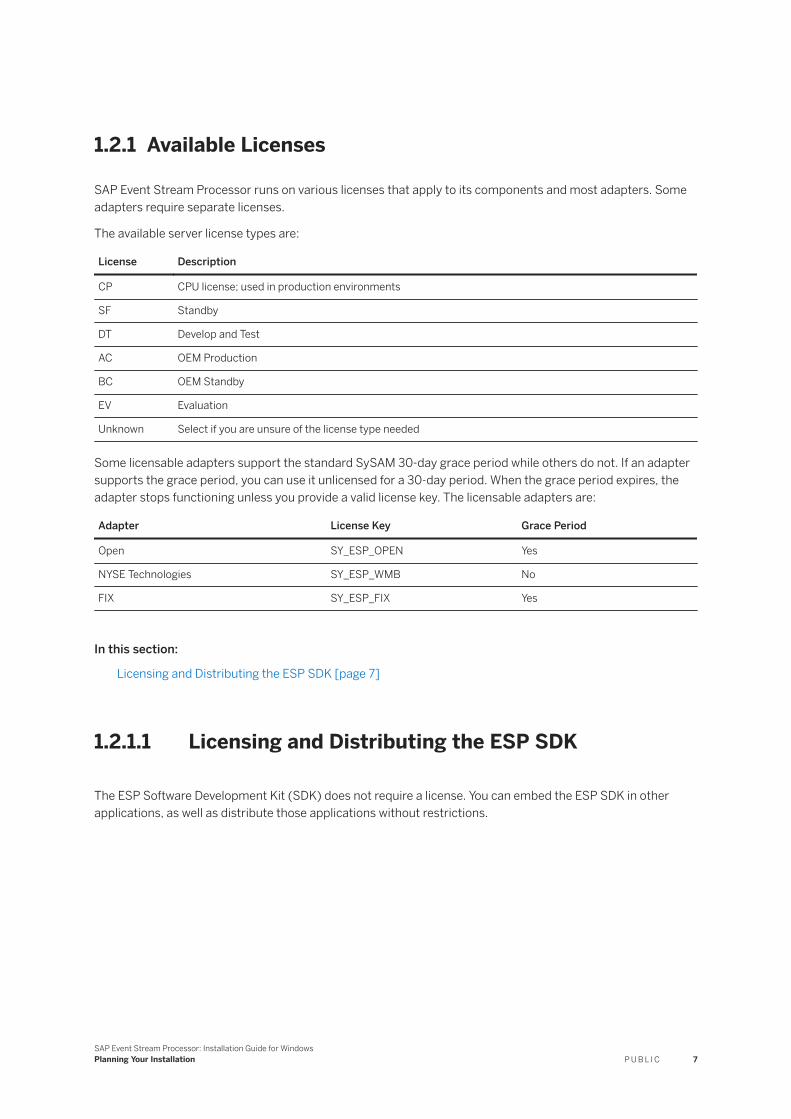
1.2.1 Available Licenses
SAP Event Stream Processor runs on various licenses that apply to its components and most adapters. Some adapters require separate licenses.
The available server license types are:
License Description
CP CPU license; used in production environments
SF Standby
DT Develop and Test
AC OEM Production
BC OEM Standby
EV Evaluation
Unknown Select if you are unsure of the license type needed
Some licensable adapters support the standard SySAM 30-day grace period while others do not. If an adapter supports the grace period, you can use it unlicensed for a 30-day period. When the grace period expires, the adapter stops functioning unless you provide a valid license key. The licensable adapters are:
Adapter License Key Grace Period
Open SY_ESP_OPEN Yes
NYSE Technologies SY_ESP_WMB No
FIX SY_ESP_FIX Yes
In this section:
Licensing and Distributing the ESP SDK [page 7]
1.2.1.1 Licensing and Distributing the ESP SDK
The ESP Software Development Kit (SDK) does not require a license. You can embed the ESP SDK in other applications, as well as distribute those applications without restrictions.
SAP Event Stream Processor: Installation Guide for WindowsPlanning Your Installation P U B L I C 7

1.3 Updating Your License
SAP Event Stream Processor requires a valid license. If your evaluation license expires, update your license.
Context
When you install Event Stream Processor, you are prompted to provide a license type. The installer, based on your selection, copies the license file to the appropriate location and generates an esp_license.prop file under %STREAMING_HOME%\sysam.
If you installed using an evaluation license, or have since purchased a different license type, perform the following procedure to update your license.
Procedure
1. Populate the <Install-Dir>/SYSAM-2_0/licenses directory.
○ For an unserved license, copy the unserved .lic file to <Install-Dir>/SYSAM-2_0/licenses.○ For a served license, create a token .lic file and add it to the <Install-Dir>/SYSAM-2_0/
licenses directory to link to the license server. If, for example, the license server is called my_license_server, create the text file <Install-Dir>/SYSAM-2_0/licenses/my_license_server.lic and add the following content:
SERVER my_license_server ANY
USE_SERVER2. Edit the license type (LT) parameter for the esp_license.prop file by navigating to %STREAMING_HOME%
\sysam and opening esp_license.prop with a text editor.
3. Change the LT parameter to reflect the value present in your SySAM license file or server. Available license types are:
Option Description
CP CPU license; used in production environments
SF Standby
DT Develop and Test
AC OEM Production
BC OEM Standby
EV Evaluation
Unknown Select if you are unsure of the license type needed
4. Save and close the file to finish updating your license.
8 P U B L I CSAP Event Stream Processor: Installation Guide for Windows
Planning Your Installation
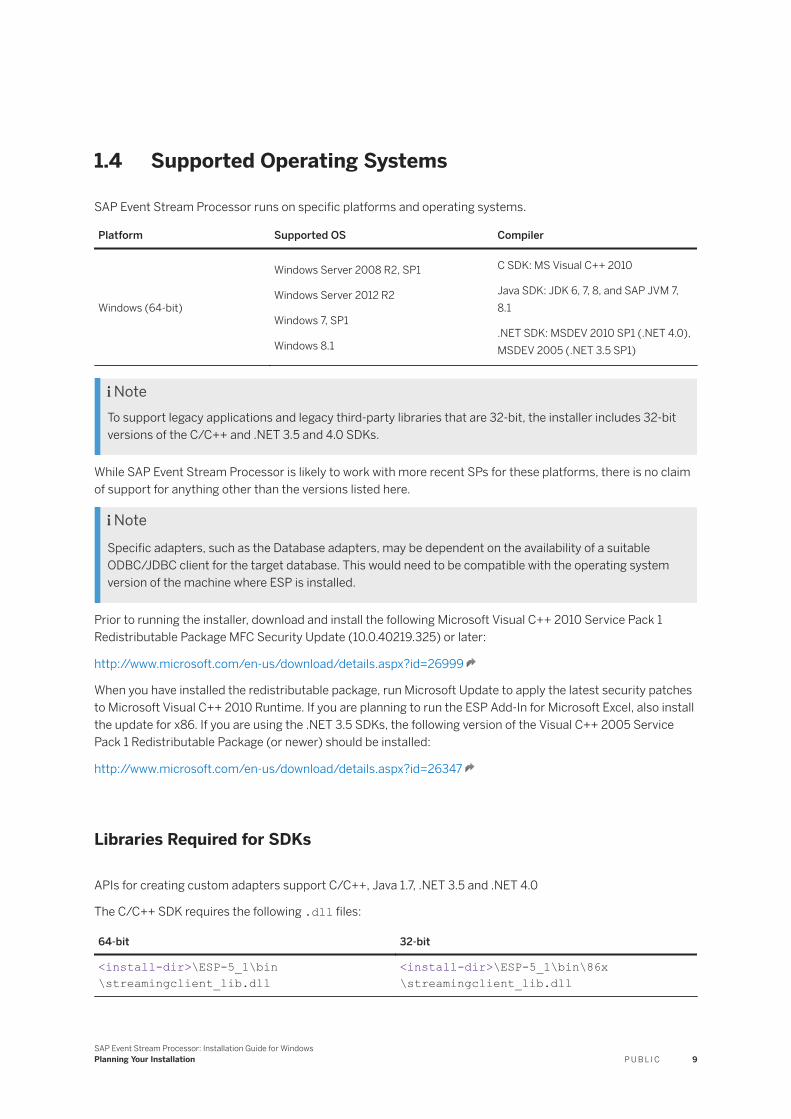
1.4 Supported Operating Systems
SAP Event Stream Processor runs on specific platforms and operating systems.
Platform Supported OS Compiler
Windows (64-bit)
Windows Server 2008 R2, SP1
Windows Server 2012 R2
Windows 7, SP1
Windows 8.1
C SDK: MS Visual C++ 2010
Java SDK: JDK 6, 7, 8, and SAP JVM 7, 8.1
.NET SDK: MSDEV 2010 SP1 (.NET 4.0), MSDEV 2005 (.NET 3.5 SP1)
NoteTo support legacy applications and legacy third-party libraries that are 32-bit, the installer includes 32-bit versions of the C/C++ and .NET 3.5 and 4.0 SDKs.
While SAP Event Stream Processor is likely to work with more recent SPs for these platforms, there is no claim of support for anything other than the versions listed here.
NoteSpecific adapters, such as the Database adapters, may be dependent on the availability of a suitable ODBC/JDBC client for the target database. This would need to be compatible with the operating system version of the machine where ESP is installed.
Prior to running the installer, download and install the following Microsoft Visual C++ 2010 Service Pack 1 Redistributable Package MFC Security Update (10.0.40219.325) or later:
http://www.microsoft.com/en-us/download/details.aspx?id=26999
When you have installed the redistributable package, run Microsoft Update to apply the latest security patches to Microsoft Visual C++ 2010 Runtime. If you are planning to run the ESP Add-In for Microsoft Excel, also install the update for x86. If you are using the .NET 3.5 SDKs, the following version of the Visual C++ 2005 Service Pack 1 Redistributable Package (or newer) should be installed:
http://www.microsoft.com/en-us/download/details.aspx?id=26347
Libraries Required for SDKs
APIs for creating custom adapters support C/C++, Java 1.7, .NET 3.5 and .NET 4.0
The C/C++ SDK requires the following .dll files:
64-bit 32-bit
<install-dir>\ESP-5_1\bin\streamingclient_lib.dll
<install-dir>\ESP-5_1\bin\86x\streamingclient_lib.dll
SAP Event Stream Processor: Installation Guide for WindowsPlanning Your Installation P U B L I C 9
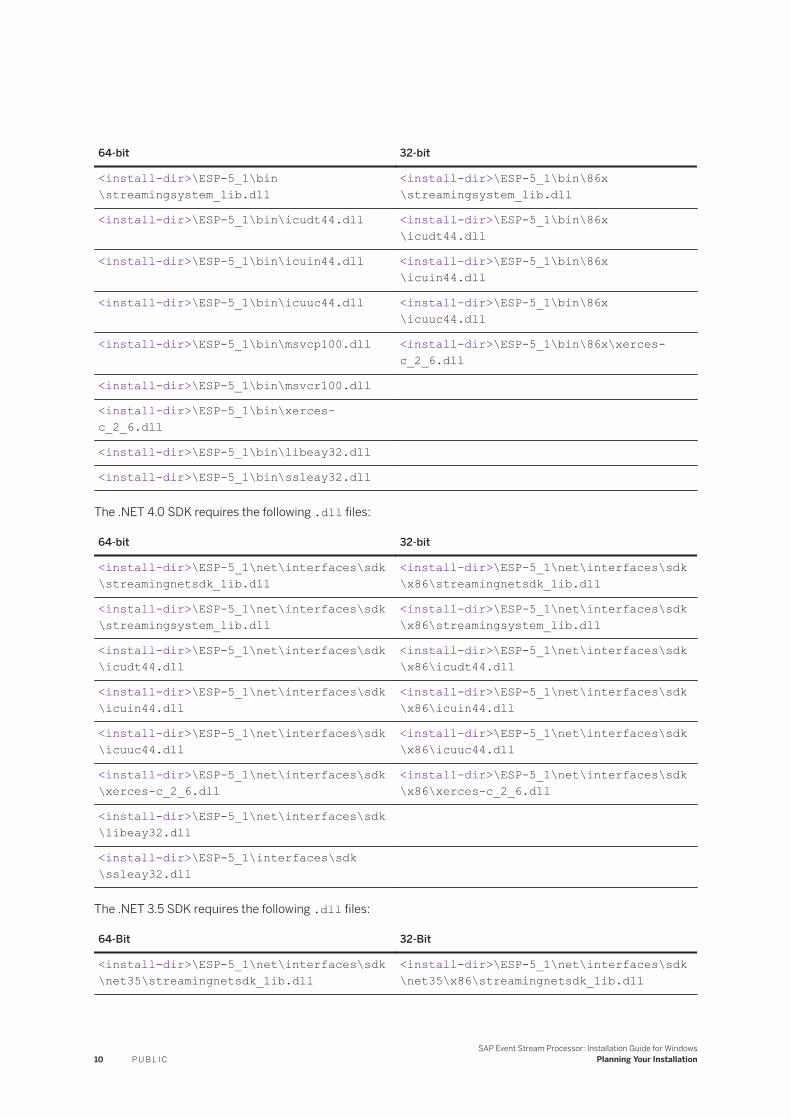
64-bit 32-bit
<install-dir>\ESP-5_1\bin\streamingsystem_lib.dll
<install-dir>\ESP-5_1\bin\86x\streamingsystem_lib.dll
<install-dir>\ESP-5_1\bin\icudt44.dll <install-dir>\ESP-5_1\bin\86x\icudt44.dll
<install-dir>\ESP-5_1\bin\icuin44.dll <install-dir>\ESP-5_1\bin\86x\icuin44.dll
<install-dir>\ESP-5_1\bin\icuuc44.dll <install-dir>\ESP-5_1\bin\86x\icuuc44.dll
<install-dir>\ESP-5_1\bin\msvcp100.dll <install-dir>\ESP-5_1\bin\86x\xerces-c_2_6.dll
<install-dir>\ESP-5_1\bin\msvcr100.dll
<install-dir>\ESP-5_1\bin\xerces-c_2_6.dll
<install-dir>\ESP-5_1\bin\libeay32.dll
<install-dir>\ESP-5_1\bin\ssleay32.dll
The .NET 4.0 SDK requires the following .dll files:
64-bit 32-bit
<install-dir>\ESP-5_1\net\interfaces\sdk\streamingnetsdk_lib.dll
<install-dir>\ESP-5_1\net\interfaces\sdk\x86\streamingnetsdk_lib.dll
<install-dir>\ESP-5_1\net\interfaces\sdk\streamingsystem_lib.dll
<install-dir>\ESP-5_1\net\interfaces\sdk\x86\streamingsystem_lib.dll
<install-dir>\ESP-5_1\net\interfaces\sdk\icudt44.dll
<install-dir>\ESP-5_1\net\interfaces\sdk\x86\icudt44.dll
<install-dir>\ESP-5_1\net\interfaces\sdk\icuin44.dll
<install-dir>\ESP-5_1\net\interfaces\sdk\x86\icuin44.dll
<install-dir>\ESP-5_1\net\interfaces\sdk\icuuc44.dll
<install-dir>\ESP-5_1\net\interfaces\sdk\x86\icuuc44.dll
<install-dir>\ESP-5_1\net\interfaces\sdk\xerces-c_2_6.dll
<install-dir>\ESP-5_1\net\interfaces\sdk\x86\xerces-c_2_6.dll
<install-dir>\ESP-5_1\net\interfaces\sdk\libeay32.dll
<install-dir>\ESP-5_1\interfaces\sdk\ssleay32.dll
The .NET 3.5 SDK requires the following .dll files:
64-Bit 32-Bit
<install-dir>\ESP-5_1\net\interfaces\sdk\net35\streamingnetsdk_lib.dll
<install-dir>\ESP-5_1\net\interfaces\sdk\net35\x86\streamingnetsdk_lib.dll
10 P U B L I CSAP Event Stream Processor: Installation Guide for Windows
Planning Your Installation
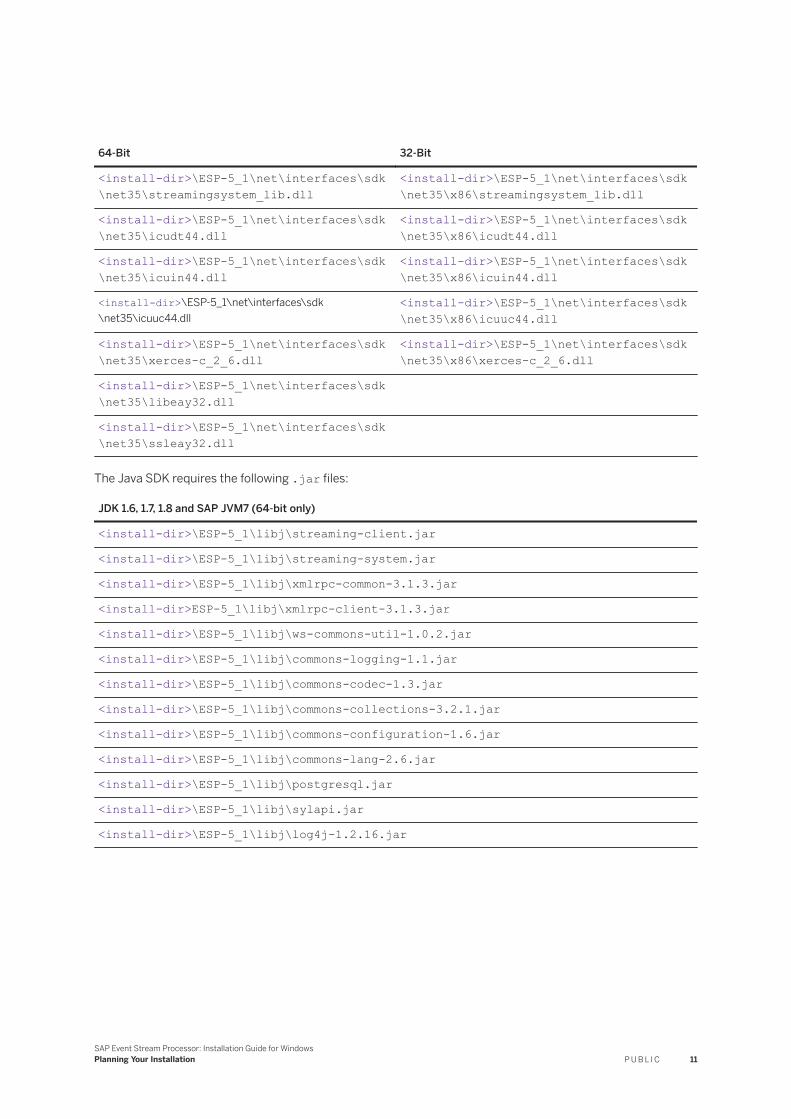
64-Bit 32-Bit
<install-dir>\ESP-5_1\net\interfaces\sdk\net35\streamingsystem_lib.dll
<install-dir>\ESP-5_1\net\interfaces\sdk\net35\x86\streamingsystem_lib.dll
<install-dir>\ESP-5_1\net\interfaces\sdk\net35\icudt44.dll
<install-dir>\ESP-5_1\net\interfaces\sdk\net35\x86\icudt44.dll
<install-dir>\ESP-5_1\net\interfaces\sdk\net35\icuin44.dll
<install-dir>\ESP-5_1\net\interfaces\sdk\net35\x86\icuin44.dll
<install-dir>\ESP-5_1\net\interfaces\sdk\net35\icuuc44.dll
<install-dir>\ESP-5_1\net\interfaces\sdk\net35\x86\icuuc44.dll
<install-dir>\ESP-5_1\net\interfaces\sdk\net35\xerces-c_2_6.dll
<install-dir>\ESP-5_1\net\interfaces\sdk\net35\x86\xerces-c_2_6.dll
<install-dir>\ESP-5_1\net\interfaces\sdk\net35\libeay32.dll
<install-dir>\ESP-5_1\net\interfaces\sdk\net35\ssleay32.dll
The Java SDK requires the following .jar files:
JDK 1.6, 1.7, 1.8 and SAP JVM7 (64-bit only)
<install-dir>\ESP-5_1\libj\streaming-client.jar
<install-dir>\ESP-5_1\libj\streaming-system.jar
<install-dir>\ESP-5_1\libj\xmlrpc-common-3.1.3.jar
<install-dir>ESP-5_1\libj\xmlrpc-client-3.1.3.jar
<install-dir>\ESP-5_1\libj\ws-commons-util-1.0.2.jar
<install-dir>\ESP-5_1\libj\commons-logging-1.1.jar
<install-dir>\ESP-5_1\libj\commons-codec-1.3.jar
<install-dir>\ESP-5_1\libj\commons-collections-3.2.1.jar
<install-dir>\ESP-5_1\libj\commons-configuration-1.6.jar
<install-dir>\ESP-5_1\libj\commons-lang-2.6.jar
<install-dir>\ESP-5_1\libj\postgresql.jar
<install-dir>\ESP-5_1\libj\sylapi.jar
<install-dir>\ESP-5_1\libj\log4j-1.2.16.jar
SAP Event Stream Processor: Installation Guide for WindowsPlanning Your Installation P U B L I C 11

1.5 Supported Compilers
For creating clients that communicate with Event Stream Processor servers using the SDK, these compilers are supported.
Platform Supported C SDK Compiler Versions
Windows (32-bit) MS Visual C++ 2010
Windows (64-bit) MS Visual C++ 2010
Platform Supported Java SDK Compiler Versions
Windows (32-bit) JDK 6, 7, or 8
Windows (64-bit) JDK 6, 7, or 8
Platform .NET Version Compiler Versions
Windows (32-bit) .NET 4.0 MSDEV 2010 SP1
Windows (32-bit) .NET 3.5 SP1 MSDEV 2005 SP1 or higher
Windows (64-bit) .NET 4.0 MSDEV 2010 SP1
Windows (64-bit) .NET 3.5 SP1 MSDEV 2005 SP1 or higher
1.6 Virtual Machines
SAP recommends using VMware ESX Server version 3.5 or later to run ESP on virtual machines.
When running an application that involves multiple machines, you want to ensure that timekeeping is synchronized across all of them. For physical hardware, one machine is typically set up to synchronize its system clock with a Network Time Protocol (NTP) server, and the other machines are set up to synchronize their clocks with that machine.
Similarly, when running on multiple virtual machines, using VMware ESX Server version 3.5 or later, you can set the ESX server to synchronize with a time provider such as an NTP server. The ESX Server then synchronizes the time on each vCPU. This timekeeping mechanism minimizes the time difference between different projects. But, it is possible that there will be a slightly larger deviation from true time on VM guests.
Intel and AMD x64 CPU hardware use a time stamp counter (TSC), which runs off the CPU clock oscillator, for timekeeping. For virtual guest systems, each vCPU has its own TSC, and the ESX host synchronizes all of the vCPUs to the same time.
Because the VM host synchronizes all vCPUs to the same time, the time difference between different projects is insignificant unless it is under too heavy a load. When running ESP on virtual machines, it is important to have sufficient resources.
12 P U B L I CSAP Event Stream Processor: Installation Guide for Windows
Planning Your Installation
Supported Operating System VersionAdditional Kernel Parameters Required
Windows Server 2012 No
7 No
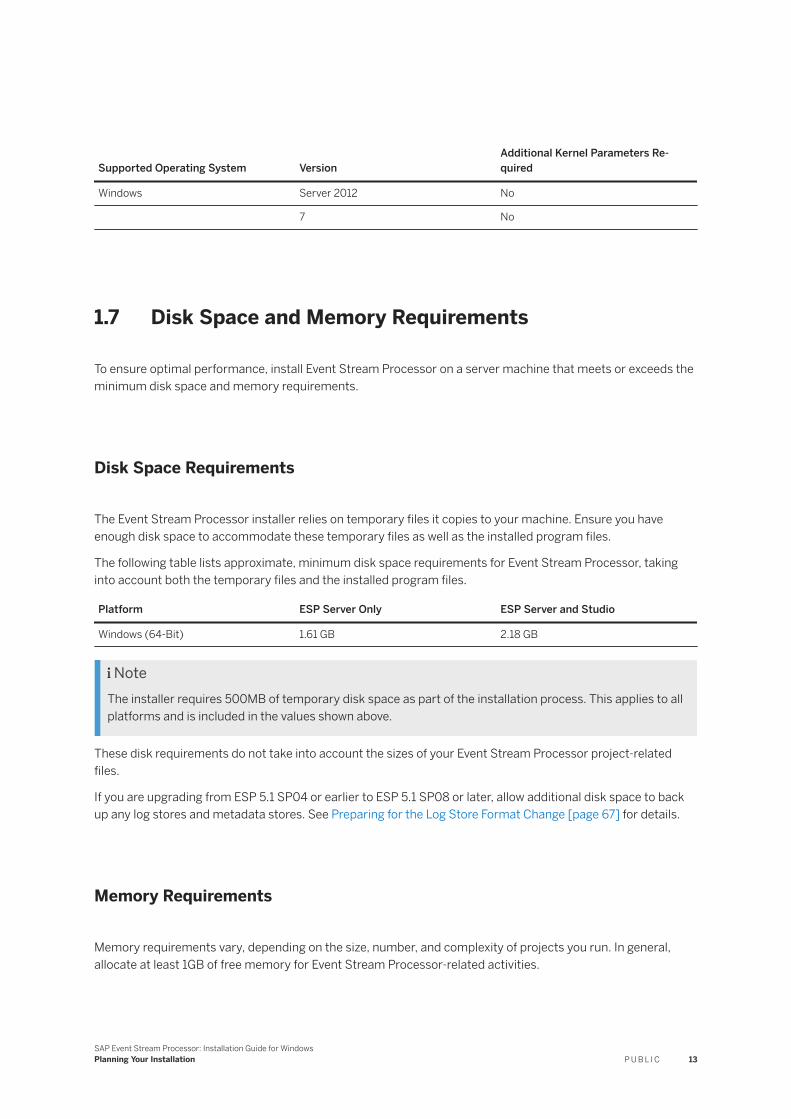
1.7 Disk Space and Memory Requirements
To ensure optimal performance, install Event Stream Processor on a server machine that meets or exceeds the minimum disk space and memory requirements.
Disk Space Requirements
The Event Stream Processor installer relies on temporary files it copies to your machine. Ensure you have enough disk space to accommodate these temporary files as well as the installed program files.
The following table lists approximate, minimum disk space requirements for Event Stream Processor, taking into account both the temporary files and the installed program files.
Platform ESP Server Only ESP Server and Studio
Windows (64-Bit) 1.61 GB 2.18 GB
NoteThe installer requires 500MB of temporary disk space as part of the installation process. This applies to all platforms and is included in the values shown above.
These disk requirements do not take into account the sizes of your Event Stream Processor project-related files.
If you are upgrading from ESP 5.1 SP04 or earlier to ESP 5.1 SP08 or later, allow additional disk space to back up any log stores and metadata stores. See Preparing for the Log Store Format Change [page 67] for details.
Memory Requirements
Memory requirements vary, depending on the size, number, and complexity of projects you run. In general, allocate at least 1GB of free memory for Event Stream Processor-related activities.
SAP Event Stream Processor: Installation Guide for WindowsPlanning Your Installation P U B L I C 13
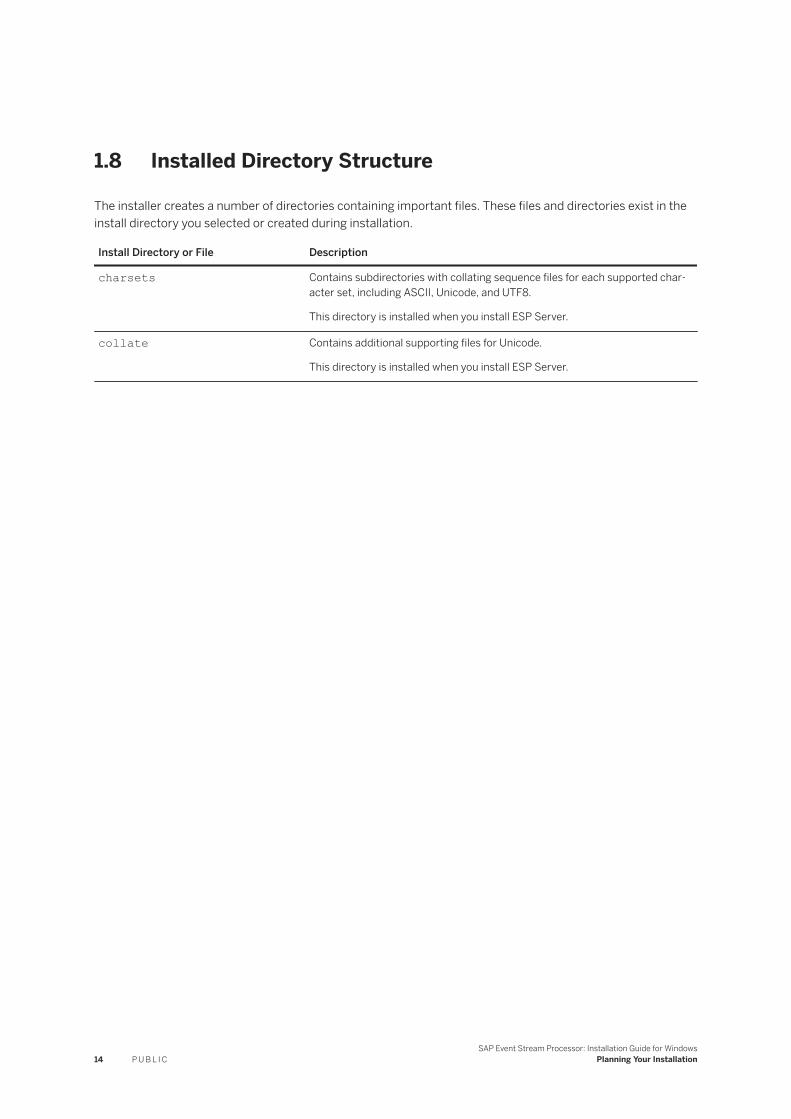
1.8 Installed Directory Structure
The installer creates a number of directories containing important files. These files and directories exist in the install directory you selected or created during installation.
Install Directory or File Description
charsets Contains subdirectories with collating sequence files for each supported character set, including ASCII, Unicode, and UTF8.
This directory is installed when you install ESP Server.
collate Contains additional supporting files for Unicode.
This directory is installed when you install ESP Server.
14 P U B L I CSAP Event Stream Processor: Installation Guide for Windows
Planning Your Installation
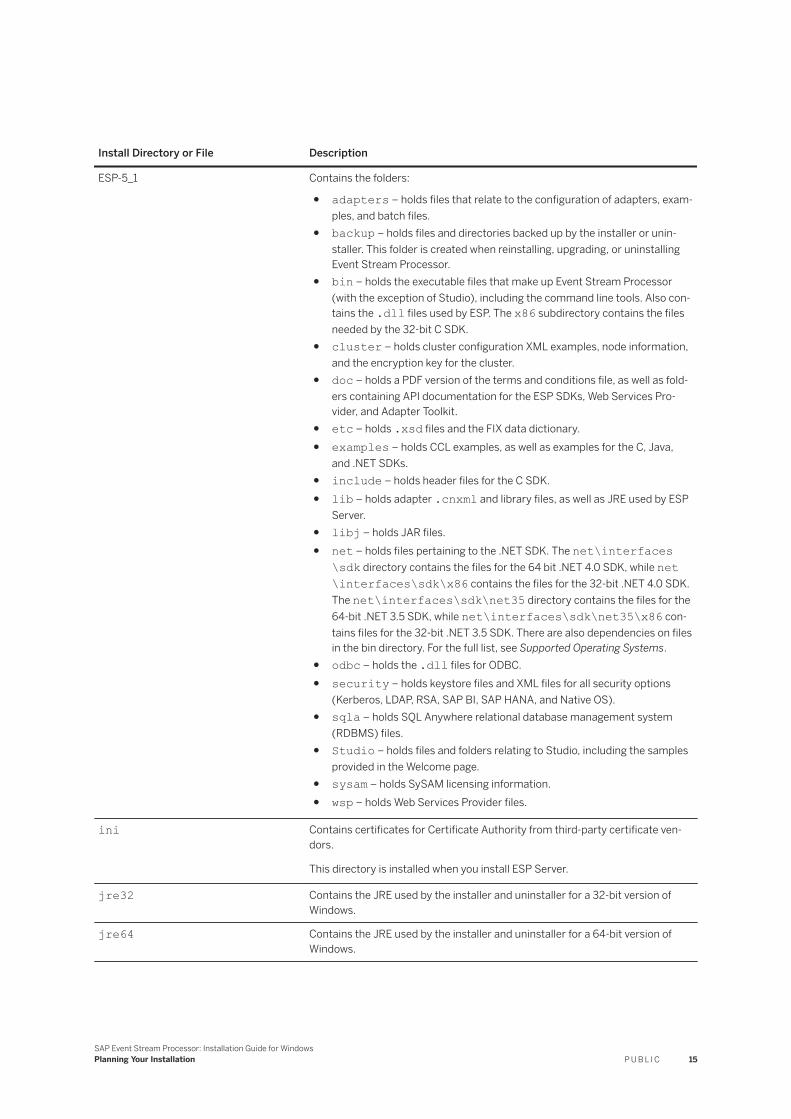
Install Directory or File Description
ESP-5_1 Contains the folders:
● adapters – holds files that relate to the configuration of adapters, examples, and batch files.
● backup – holds files and directories backed up by the installer or uninstaller. This folder is created when reinstalling, upgrading, or uninstalling Event Stream Processor.
● bin – holds the executable files that make up Event Stream Processor (with the exception of Studio), including the command line tools. Also contains the .dll files used by ESP. The x86 subdirectory contains the files needed by the 32-bit C SDK.
● cluster – holds cluster configuration XML examples, node information, and the encryption key for the cluster.
● doc – holds a PDF version of the terms and conditions file, as well as folders containing API documentation for the ESP SDKs, Web Services Provider, and Adapter Toolkit.
● etc – holds .xsd files and the FIX data dictionary.● examples – holds CCL examples, as well as examples for the C, Java,
and .NET SDKs.● include – holds header files for the C SDK.● lib – holds adapter .cnxml and library files, as well as JRE used by ESP
Server.● libj – holds JAR files.● net – holds files pertaining to the .NET SDK. The net\interfaces
\sdk directory contains the files for the 64 bit .NET 4.0 SDK, while net\interfaces\sdk\x86 contains the files for the 32-bit .NET 4.0 SDK. The net\interfaces\sdk\net35 directory contains the files for the 64-bit .NET 3.5 SDK, while net\interfaces\sdk\net35\x86 contains files for the 32-bit .NET 3.5 SDK. There are also dependencies on files in the bin directory. For the full list, see Supported Operating Systems.
● odbc – holds the .dll files for ODBC.● security – holds keystore files and XML files for all security options
(Kerberos, LDAP, RSA, SAP BI, SAP HANA, and Native OS).● sqla – holds SQL Anywhere relational database management system
(RDBMS) files.● Studio – holds files and folders relating to Studio, including the samples
provided in the Welcome page.● sysam – holds SySAM licensing information.● wsp – holds Web Services Provider files.
ini Contains certificates for Certificate Authority from third-party certificate vendors.
This directory is installed when you install ESP Server.
jre32 Contains the JRE used by the installer and uninstaller for a 32-bit version of Windows.
jre64 Contains the JRE used by the installer and uninstaller for a 64-bit version of Windows.
SAP Event Stream Processor: Installation Guide for WindowsPlanning Your Installation P U B L I C 15
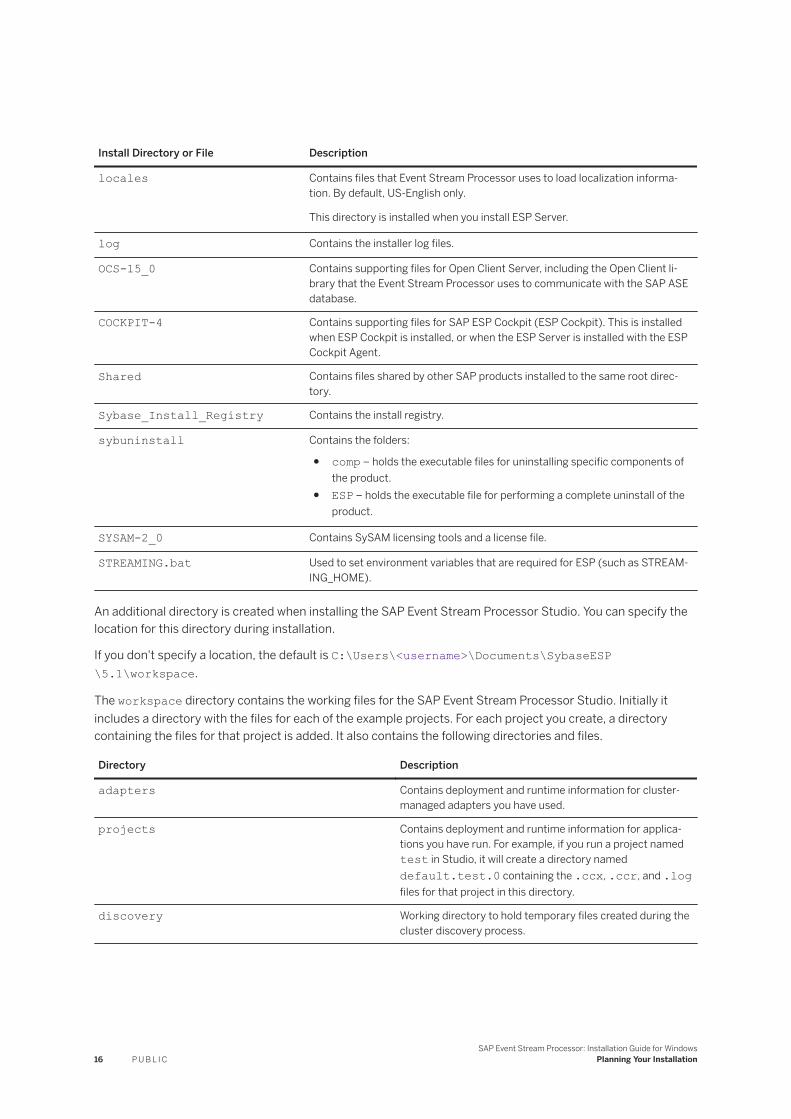
Install Directory or File Description
locales Contains files that Event Stream Processor uses to load localization information. By default, US-English only.
This directory is installed when you install ESP Server.
log Contains the installer log files.
OCS-15_0 Contains supporting files for Open Client Server, including the Open Client library that the Event Stream Processor uses to communicate with the SAP ASE database.
COCKPIT-4 Contains supporting files for SAP ESP Cockpit (ESP Cockpit). This is installed when ESP Cockpit is installed, or when the ESP Server is installed with the ESP Cockpit Agent.
Shared Contains files shared by other SAP products installed to the same root directory.
Sybase_Install_Registry Contains the install registry.
sybuninstall Contains the folders:
● comp – holds the executable files for uninstalling specific components of the product.
● ESP – holds the executable file for performing a complete uninstall of the product.
SYSAM-2_0 Contains SySAM licensing tools and a license file.
STREAMING.bat Used to set environment variables that are required for ESP (such as STREAMING_HOME).
An additional directory is created when installing the SAP Event Stream Processor Studio. You can specify the location for this directory during installation.
If you don't specify a location, the default is C:\Users\<username>\Documents\SybaseESP\5.1\workspace.
The workspace directory contains the working files for the SAP Event Stream Processor Studio. Initially it includes a directory with the files for each of the example projects. For each project you create, a directory containing the files for that project is added. It also contains the following directories and files.
Directory Description
adapters Contains deployment and runtime information for cluster-managed adapters you have used.
projects Contains deployment and runtime information for applications you have run. For example, if you run a project named test in Studio, it will create a directory named default.test.0 containing the .ccx, .ccr, and .log files for that project in this directory.
discovery Working directory to hold temporary files created during the cluster discovery process.
16 P U B L I CSAP Event Stream Processor: Installation Guide for Windows
Planning Your Installation
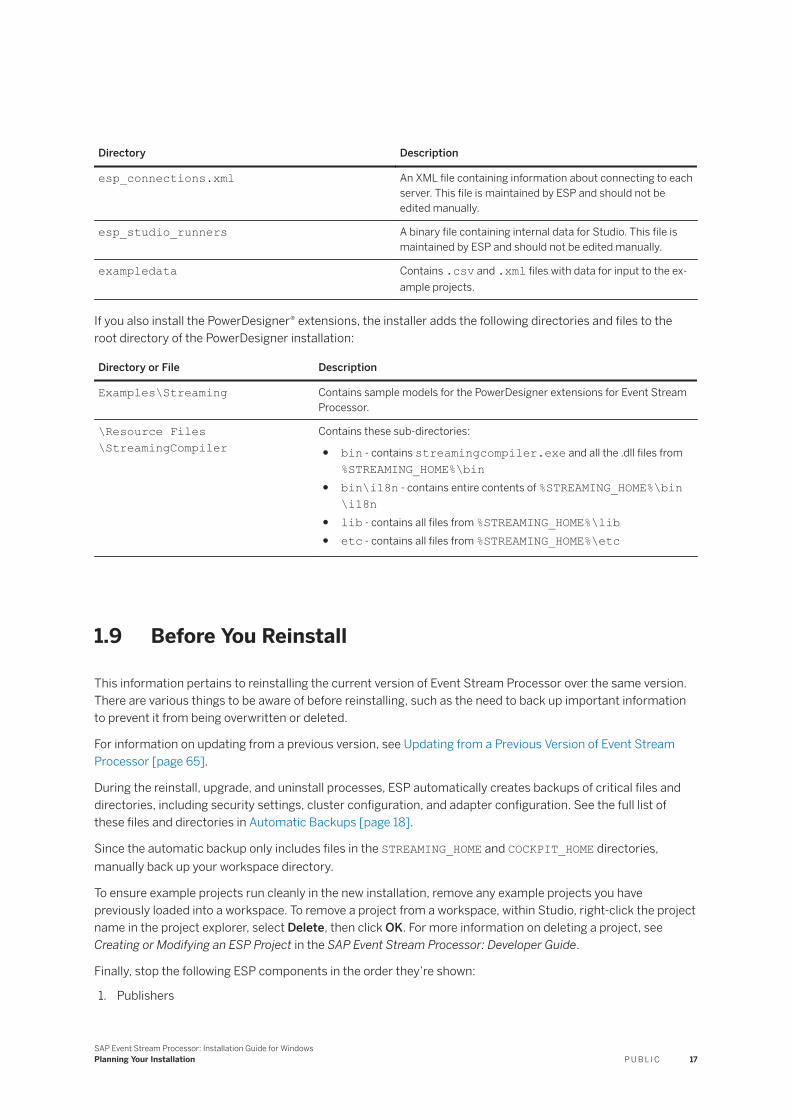
Directory Description
esp_connections.xml An XML file containing information about connecting to each server. This file is maintained by ESP and should not be edited manually.
esp_studio_runners A binary file containing internal data for Studio. This file is maintained by ESP and should not be edited manually.
exampledata Contains .csv and .xml files with data for input to the example projects.
If you also install the PowerDesigner® extensions, the installer adds the following directories and files to the root directory of the PowerDesigner installation:
Directory or File Description
Examples\Streaming Contains sample models for the PowerDesigner extensions for Event Stream Processor.
\Resource Files\StreamingCompiler
Contains these sub-directories:
● bin - contains streamingcompiler.exe and all the .dll files from %STREAMING_HOME%\bin
● bin\i18n - contains entire contents of %STREAMING_HOME%\bin\i18n
● lib - contains all files from %STREAMING_HOME%\lib● etc - contains all files from %STREAMING_HOME%\etc
1.9 Before You Reinstall
This information pertains to reinstalling the current version of Event Stream Processor over the same version. There are various things to be aware of before reinstalling, such as the need to back up important information to prevent it from being overwritten or deleted.
For information on updating from a previous version, see Updating from a Previous Version of Event Stream Processor [page 65].
During the reinstall, upgrade, and uninstall processes, ESP automatically creates backups of critical files and directories, including security settings, cluster configuration, and adapter configuration. See the full list of these files and directories in Automatic Backups [page 18].
Since the automatic backup only includes files in the STREAMING_HOME and COCKPIT_HOME directories, manually back up your workspace directory.
To ensure example projects run cleanly in the new installation, remove any example projects you have previously loaded into a workspace. To remove a project from a workspace, within Studio, right-click the project name in the project explorer, select Delete, then click OK. For more information on deleting a project, see Creating or Modifying an ESP Project in the SAP Event Stream Processor: Developer Guide.
Finally, stop the following ESP components in the order they’re shown:
1. Publishers
SAP Event Stream Processor: Installation Guide for WindowsPlanning Your Installation P U B L I C 17
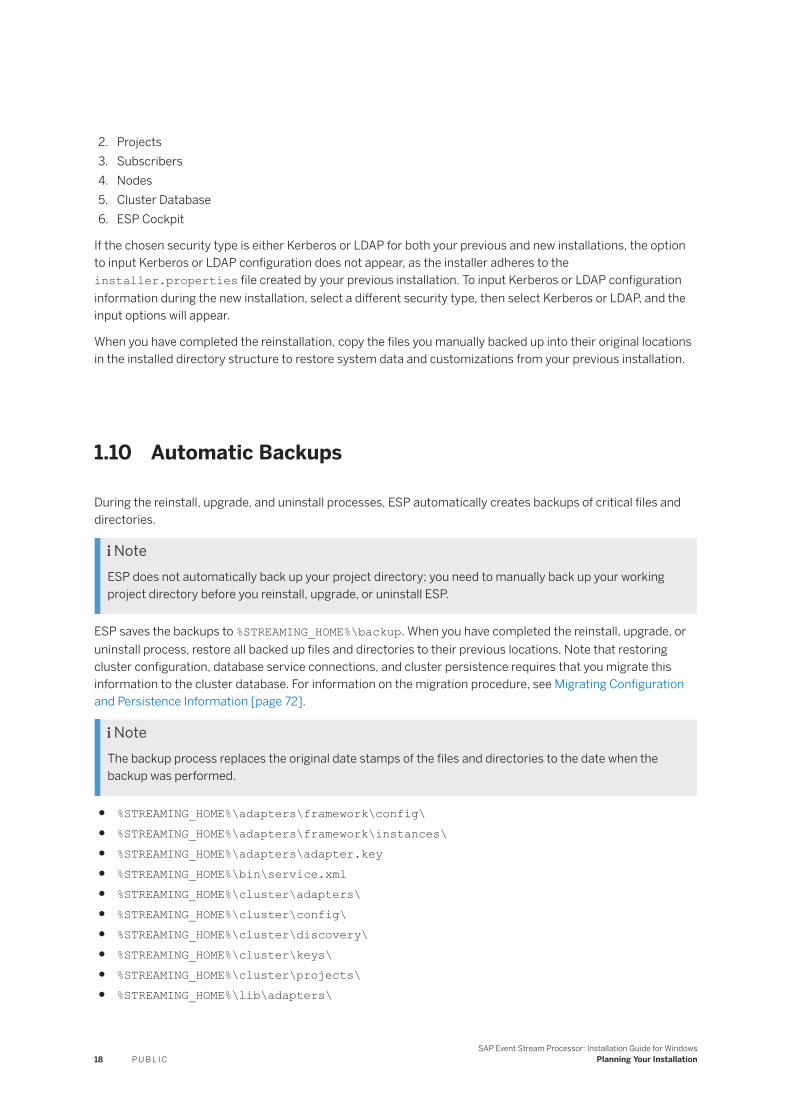
2. Projects3. Subscribers4. Nodes5. Cluster Database6. ESP Cockpit
If the chosen security type is either Kerberos or LDAP for both your previous and new installations, the option to input Kerberos or LDAP configuration does not appear, as the installer adheres to the installer.properties file created by your previous installation. To input Kerberos or LDAP configuration information during the new installation, select a different security type, then select Kerberos or LDAP, and the input options will appear.
When you have completed the reinstallation, copy the files you manually backed up into their original locations in the installed directory structure to restore system data and customizations from your previous installation.
1.10 Automatic Backups
During the reinstall, upgrade, and uninstall processes, ESP automatically creates backups of critical files and directories.
NoteESP does not automatically back up your project directory; you need to manually back up your working project directory before you reinstall, upgrade, or uninstall ESP.
ESP saves the backups to %STREAMING_HOME%\backup. When you have completed the reinstall, upgrade, or uninstall process, restore all backed up files and directories to their previous locations. Note that restoring cluster configuration, database service connections, and cluster persistence requires that you migrate this information to the cluster database. For information on the migration procedure, see Migrating Configuration and Persistence Information [page 72].
NoteThe backup process replaces the original date stamps of the files and directories to the date when the backup was performed.
● %STREAMING_HOME%\adapters\framework\config\● %STREAMING_HOME%\adapters\framework\instances\● %STREAMING_HOME%\adapters\adapter.key● %STREAMING_HOME%\bin\service.xml● %STREAMING_HOME%\cluster\adapters\● %STREAMING_HOME%\cluster\config\● %STREAMING_HOME%\cluster\discovery\ ● %STREAMING_HOME%\cluster\keys\● %STREAMING_HOME%\cluster\projects\● %STREAMING_HOME%\lib\adapters\
18 P U B L I CSAP Event Stream Processor: Installation Guide for Windows
Planning Your Installation
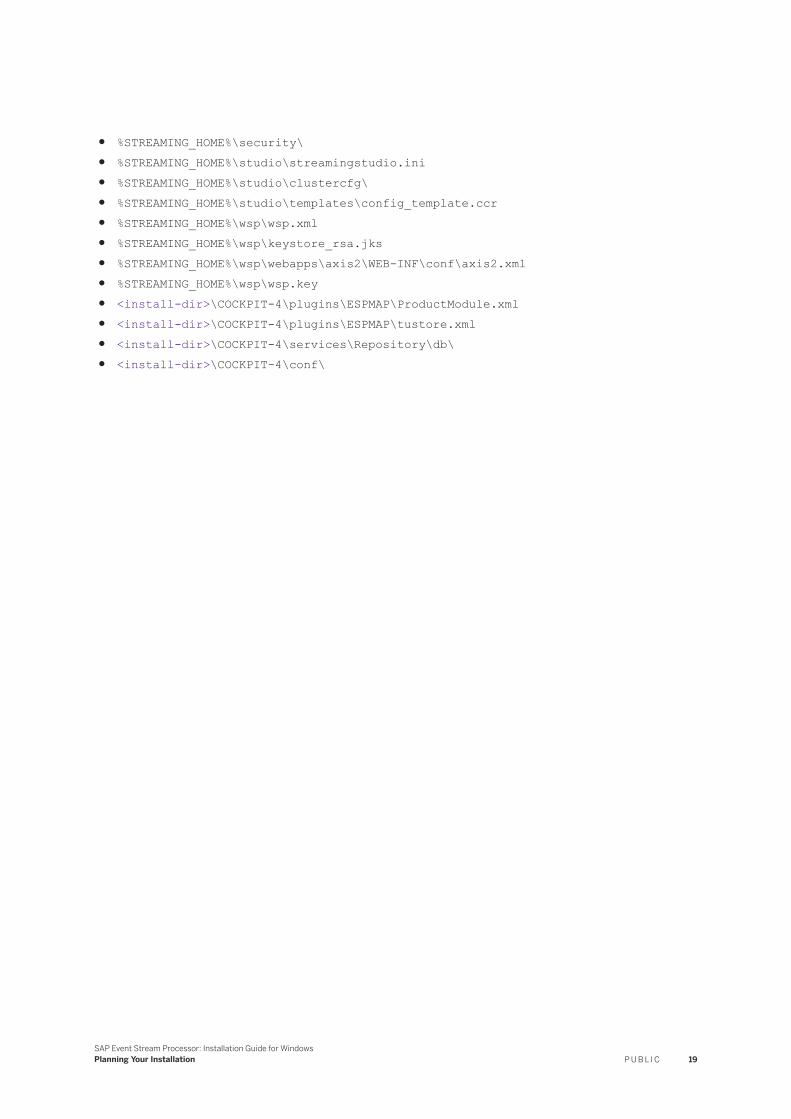
● %STREAMING_HOME%\security\● %STREAMING_HOME%\studio\streamingstudio.ini● %STREAMING_HOME%\studio\clustercfg\● %STREAMING_HOME%\studio\templates\config_template.ccr● %STREAMING_HOME%\wsp\wsp.xml● %STREAMING_HOME%\wsp\keystore_rsa.jks ● %STREAMING_HOME%\wsp\webapps\axis2\WEB-INF\conf\axis2.xml● %STREAMING_HOME%\wsp\wsp.key● <install-dir>\COCKPIT-4\plugins\ESPMAP\ProductModule.xml● <install-dir>\COCKPIT-4\plugins\ESPMAP\tustore.xml● <install-dir>\COCKPIT-4\services\Repository\db\● <install-dir>\COCKPIT-4\conf\
SAP Event Stream Processor: Installation Guide for WindowsPlanning Your Installation P U B L I C 19
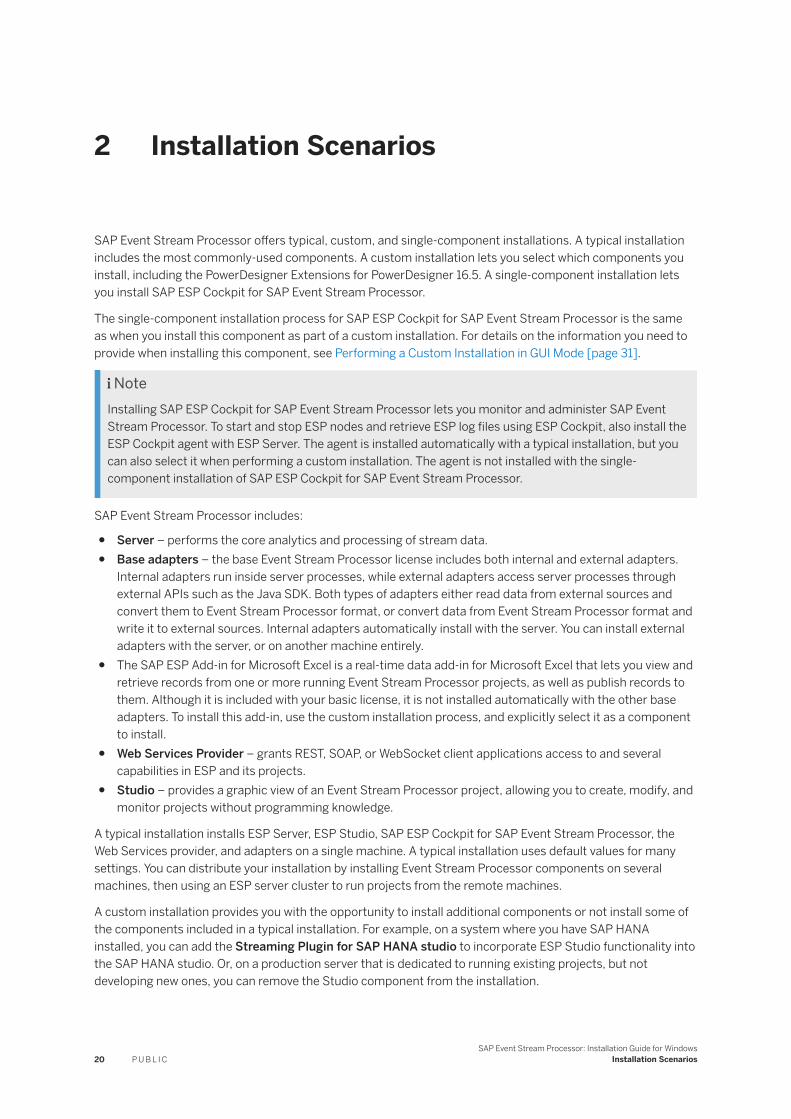
2 Installation Scenarios
SAP Event Stream Processor offers typical, custom, and single-component installations. A typical installation includes the most commonly-used components. A custom installation lets you select which components you install, including the PowerDesigner Extensions for PowerDesigner 16.5. A single-component installation lets you install SAP ESP Cockpit for SAP Event Stream Processor.
The single-component installation process for SAP ESP Cockpit for SAP Event Stream Processor is the same as when you install this component as part of a custom installation. For details on the information you need to provide when installing this component, see Performing a Custom Installation in GUI Mode [page 31].
NoteInstalling SAP ESP Cockpit for SAP Event Stream Processor lets you monitor and administer SAP Event Stream Processor. To start and stop ESP nodes and retrieve ESP log files using ESP Cockpit, also install the ESP Cockpit agent with ESP Server. The agent is installed automatically with a typical installation, but you can also select it when performing a custom installation. The agent is not installed with the single-component installation of SAP ESP Cockpit for SAP Event Stream Processor.
SAP Event Stream Processor includes:
● Server – performs the core analytics and processing of stream data.● Base adapters – the base Event Stream Processor license includes both internal and external adapters.
Internal adapters run inside server processes, while external adapters access server processes through external APIs such as the Java SDK. Both types of adapters either read data from external sources and convert them to Event Stream Processor format, or convert data from Event Stream Processor format and write it to external sources. Internal adapters automatically install with the server. You can install external adapters with the server, or on another machine entirely.
● The SAP ESP Add-in for Microsoft Excel is a real-time data add-in for Microsoft Excel that lets you view and retrieve records from one or more running Event Stream Processor projects, as well as publish records to them. Although it is included with your basic license, it is not installed automatically with the other base adapters. To install this add-in, use the custom installation process, and explicitly select it as a component to install.
● Web Services Provider – grants REST, SOAP, or WebSocket client applications access to and several capabilities in ESP and its projects.
● Studio – provides a graphic view of an Event Stream Processor project, allowing you to create, modify, and monitor projects without programming knowledge.
A typical installation installs ESP Server, ESP Studio, SAP ESP Cockpit for SAP Event Stream Processor, the Web Services provider, and adapters on a single machine. A typical installation uses default values for many settings. You can distribute your installation by installing Event Stream Processor components on several machines, then using an ESP server cluster to run projects from the remote machines.
A custom installation provides you with the opportunity to install additional components or not install some of the components included in a typical installation. For example, on a system where you have SAP HANA installed, you can add the Streaming Plugin for SAP HANA studio to incorporate ESP Studio functionality into the SAP HANA studio. Or, on a production server that is dedicated to running existing projects, but not developing new ones, you can remove the Studio component from the installation.
20 P U B L I CSAP Event Stream Processor: Installation Guide for Windows
Installation Scenarios
NoteYou cannot use different versions of the ESP Server and Studio together. For example, an SP04 version of the ESP Server is incompatible with an SP08 version of Studio.
Adapters
In addition to base adapters, you can purchase separately licensed enterprise adapters.
● Open adapter● NYSE Technologies adapter● FIX adapter
The NYSE Technologies enterprise adapter is provided with its own installation media when you purchase a license for it. The Open and FIX adapters are provided on the installation media for Event Stream Processor (accessed through the Custom install option), but require an additional license to run. You can install enterprise adapters on any machine that has network access to the machine hosting the server.
The Cluster and Cluster Nodes
When you perform a typical installation, the installer configures a single node cluster and sets up the Native OS authentication method for the node. When you perform a custom installation, you can configure a cluster node for a new or existing cluster and assign it the name and authentication method you choose. Adding nodes to a cluster improves performance when running multiple projects simultaneously (in the cluster), provides failover, and lets you configure centralized security for your system. Your network infrastructure, geographic setup, and overall event processing needs determine the cluster configuration that is best for you.
During any type of installation, ESP randomly generates an encryption key for the default cluster, a separate encryption key for the Web Services Provider (WSP), and a third for ESP Studio. Using these keys, the installer encrypts Secure Sockets Layer (SSL) files, passwords in cluster node configuration, the keystore password in the WSP configuration file, and Studio passwords. The key files are only available to the user that runs the installer. After installation, you can use these keys to encrypt or re-encrypt values and files using the streamingencrypt tool.
If the encryption keys for an installation of ESP are ever lost or deleted, generate new keys and re-encrypt values in the cluster node and WSP configuration files using the streamingencrypt tool.
You can use either the GUI installer or the console (command line) installer for both typical and custom installations.
You can also use the silent installer to install multiple instances of the ESP Server and Studio using the same installation parameters.
In this section:
Role of the Installer in Cluster Configuration [page 22]
SAP Event Stream Processor: Installation Guide for WindowsInstallation Scenarios P U B L I C 21

ESP uses a database-based cluster configuration, rather than a file-based cluster configuration. This database hosts configuration information for the cluster and is known as the cluster database. Several necessary components for the database-based configuration are installed during installation.
Performing a Typical Installation [page 23]A typical installation installs the base adapters, ESP Server, ESP Studio, and SAP ESP Cockpit (including the ESP Cockpit agent) on a single machine. This type of installation is generally used during development.
Performing a Custom Installation [page 30]Use a custom installation to install certain features of Event Stream Processor, or to install Event Stream Processor components to different machines. You can install ESP Server only, Studio only, or any combination of external and enterprise adapters with or without ESP Server or Studio. Use a custom installation when setting up a production environment.
Running a Silent Installation [page 43]A silent installation installs SAP Event Stream Processor Studio and SAP ESP Server without the conventional prompts used in a standard installation.
Install the Streaming Plugin for SAP HANA Studio [page 47]The streaming plugin allows you to access the ESP Studio perspectives from within SAP HANA studio.
2.1 Role of the Installer in Cluster Configuration
ESP uses a database-based cluster configuration, rather than a file-based cluster configuration. This database hosts configuration information for the cluster and is known as the cluster database. Several necessary components for the database-based configuration are installed during installation.
Cluster Database
● When the ESP server is installed, the installer creates the cluster database.● The installer also deploys an initial cluster configuration consisting of a single node.
Passwords
● The installer prompts you for the cluster database user name and password. The credentials you define here need not belong to an actual user, but are required for administrative-level access to this database.
● The installer prompts you for the cluster password – this is also used as the password for the SYS_STREAMING user, which is used for logging into ESP Cockpit immediately after installing ESP .
22 P U B L I CSAP Event Stream Processor: Installation Guide for Windows
Installation Scenarios
File and Script Updates
● The installer updates settings in the cluster bootstrap file (cluster.cfg).● The installer updates the script used to start the cluster database.● The installer updates the script used to start the initial node.
2.2 Performing a Typical Installation
A typical installation installs the base adapters, ESP Server, ESP Studio, and SAP ESP Cockpit (including the ESP Cockpit agent) on a single machine. This type of installation is generally used during development.
Context
SAP recommends a typical installation only for evaluating Event Stream Processor or testing your implementation.
The SAP ESP Add-in for Microsoft Excel is a real-time data add-in for Microsoft Excel that lets you view and retrieve records from one or more running Event Stream Processor projects, as well as publish records to them. Although it is included with your basic license, it is not installed automatically with the other base adapters. To install this add-in, use the custom installation process, and explicitly select it as a component to install.
To install enterprise adapters in a typical installation, run the standalone installer for your adapters or, in the case of the FIX or Open adapters, re-run the Event Stream Processor installer in custom mode to access the adapter-only installation process.
NoteIf your license is incorrectly generated or copied to an incorrect location, Event Stream Processor automatically enters a 30-day grace period. License errors or warnings, or both, appear in the stdstreams.log file, which resides in the project runtime directory, STREAMING_HOME\ESP-5_1\cluster\projects\<cluster>\<workspace>.<project>.<project-instance-id>. For example, ESP-5_1\cluster\projects\esp1\myworkspace.myproject.0. When the 30-day grace period ends, Event Stream Processor cannot run until a suitable license is provided. For production environments, configure e-mail alerts during installation so you receive messages regarding license errors or warnings before the grace period ends.
In this section:
Performing a Typical Installation in GUI Mode [page 24]Install the Event Stream Processor base adapters, the Server, the Studio, and SAP ESP Cockpit (including the ESP Cockpit agent) in a single process on a single machine.
Performing a Typical Installation in Console Mode [page 27]Install the Event Stream Processor base adapters, the Server, the SAP Event Stream Processor Studio, and SAP ESP Cockpit (including the ESP Cockpit agent) in a single process on a single machine.
SAP Event Stream Processor: Installation Guide for WindowsInstallation Scenarios P U B L I C 23
2.2.1 Performing a Typical Installation in GUI Mode
Install the Event Stream Processor base adapters, the Server, the Studio, and SAP ESP Cockpit (including the ESP Cockpit agent) in a single process on a single machine.
Prerequisites
● Ensure that you have administrator privileges. Then, run the installer for ESP as administrator.● If you are installing on Windows 7 and using a sub-capacity license, set the <SYBASE_SAM_CAPACITY>
environment variable in Control Panel System Advanced Environment Variable . Click New for System Variables and enter SYBASE_SAM_CAPACITY as the variable name and PARTITION as the environment value.
● Ensure that port 19110 is available during installation; if this port is unavailable, the installer fails to create the cluster database.
Procedure
1. Run the installer file, setup.exe. On the Introduction screen, click Next.
2. Select an installation folder. Change the default folder by typing the filepath to the desired folder or by clicking Choose and selecting a folder. When finished, Click Next.If the selected folder does not exist, select what directory you want to file the new folder under, then select Make New Folder and rename the installation folder as desired. If the folder already exists, you see a warning that any software in the folder will be replaced. Click Next to proceed with the installation in the existing folder.
NoteEnsure that the filepath to the installation folder (including the folder name itself) does not contain periods.
3. Choose the Typical install set, which installs the Event Stream Processor Server, the Event Stream Processor Studio, the base adapters, the SAP ESP Cockpit Server, and the SAP ESP Cockpit Agent. Click Next.
4. Select to install either a licensed copy or an evaluation version.
NoteIf you install the evaluation version, the software will be active for a 30-day grace period, after which you are prompted for a valid license key. During this grace period, there is no restriction on the number of cores ESP can use.
Proceed to step 7 [page 25].
5. If you selected to install a licensed version, select one of these license types:
24 P U B L I CSAP Event Stream Processor: Installation Guide for Windows
Installation Scenarios
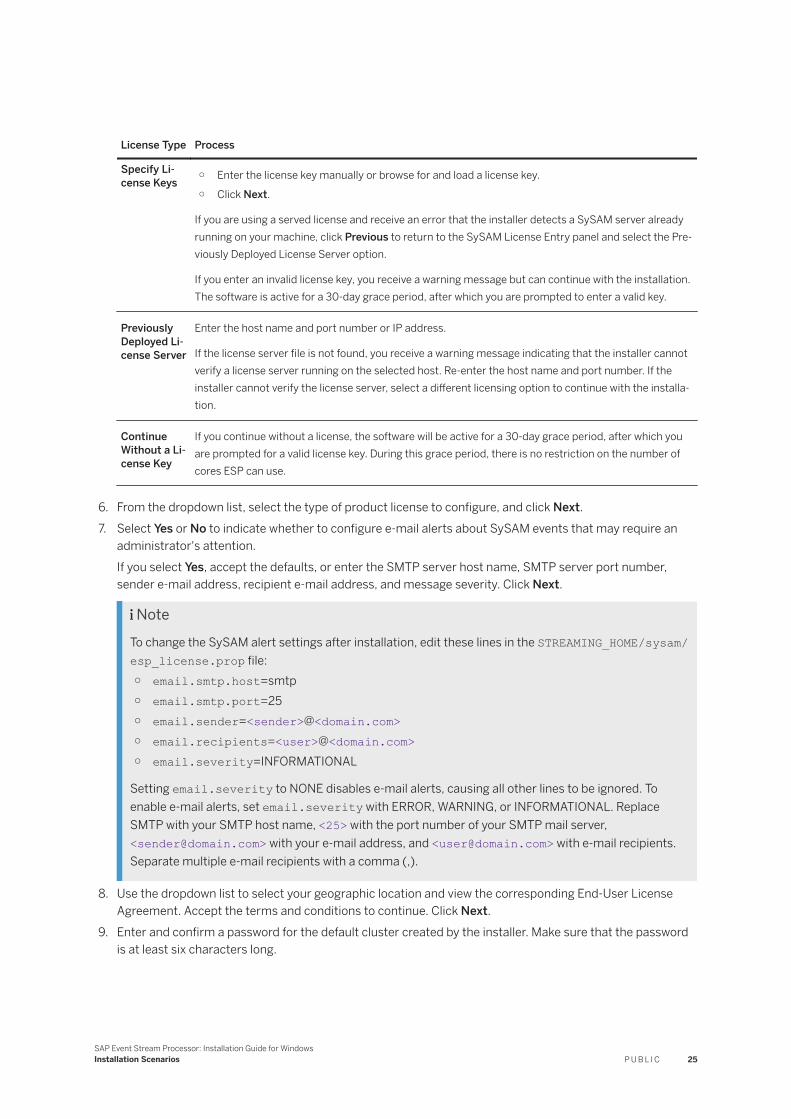
License Type Process
Specify License Keys ○ Enter the license key manually or browse for and load a license key.
○ Click Next.
If you are using a served license and receive an error that the installer detects a SySAM server already running on your machine, click Previous to return to the SySAM License Entry panel and select the Previously Deployed License Server option.
If you enter an invalid license key, you receive a warning message but can continue with the installation. The software is active for a 30-day grace period, after which you are prompted to enter a valid key.
Previously Deployed License Server
Enter the host name and port number or IP address.
If the license server file is not found, you receive a warning message indicating that the installer cannot verify a license server running on the selected host. Re-enter the host name and port number. If the installer cannot verify the license server, select a different licensing option to continue with the installation.
Continue Without a License Key
If you continue without a license, the software will be active for a 30-day grace period, after which you are prompted for a valid license key. During this grace period, there is no restriction on the number of cores ESP can use.
6. From the dropdown list, select the type of product license to configure, and click Next.7. Select Yes or No to indicate whether to configure e-mail alerts about SySAM events that may require an
administrator's attention.If you select Yes, accept the defaults, or enter the SMTP server host name, SMTP server port number, sender e-mail address, recipient e-mail address, and message severity. Click Next.
NoteTo change the SySAM alert settings after installation, edit these lines in the STREAMING_HOME/sysam/esp_license.prop file:○ email.smtp.host=smtp○ email.smtp.port=25○ email.sender=<sender>@<domain.com>○ email.recipients=<user>@<domain.com>○ email.severity=INFORMATIONAL
Setting email.severity to NONE disables e-mail alerts, causing all other lines to be ignored. To enable e-mail alerts, set email.severity with ERROR, WARNING, or INFORMATIONAL. Replace SMTP with your SMTP host name, <25> with the port number of your SMTP mail server, <[email protected]> with your e-mail address, and <[email protected]> with e-mail recipients. Separate multiple e-mail recipients with a comma (,).
8. Use the dropdown list to select your geographic location and view the corresponding End-User License Agreement. Accept the terms and conditions to continue. Click Next.
9. Enter and confirm a password for the default cluster created by the installer. Make sure that the password is at least six characters long.
SAP Event Stream Processor: Installation Guide for WindowsInstallation Scenarios P U B L I C 25
This is the password for the SYS_STREAMING user (system-created) which you will use to access SAP ESP Cockpit for the first time to set authenticators for your users. As this user, you will also run the streamingclusteradmin utility to administer roles and privileges for your users.
Click Next to continue.10. Provide a username and password for the cluster database administrator. Make sure that your password is
at least six characters long.
The installer creates the cluster database, which stores configuration information for your cluster. Without this database, you cannot run projects in a cluster or log in to ESP Cockpit.
Click Next to continue.11. Select a workspace folder where Studio will store projects. Change the default folder by typing the filepath
to the desired folder or by clicking Choose and selecting a folder. When finished, click Next.
NoteIf you are upgrading from a previous version of Event Stream Processor and want your old projects to remain in the active workspace, enter the path to your existing Studio workspace.
12. Review installation information before continuing. Click Previous to go back and make changes. Click Install to proceed with the installation.
13. If you are installing the ESP Cockpit agent, enter and confirm a password for the ESP Cockpit agent administrator.
The default username for the cockpit agent administrator is sccadmin. The password you create here is encrypted and written to the ESP Cockpit csi_config file. Use these credentials when you need administrative access to the ESP Cockpit. For example, you will need this kind of administrative access if you are registering more than one node to a cluster, so that your users can access all nodes from the same Cockpit.
14. A message indicates Event Stream Processor was successfully installed into the location of your choice, and to restart the system to complete the installation. Click Done to exit the installer.
Next Steps
To view a summary of installation results, open <install-dir>\log\esp_suite.log.
26 P U B L I CSAP Event Stream Processor: Installation Guide for Windows
Installation Scenarios
2.2.2 Performing a Typical Installation in Console Mode
Install the Event Stream Processor base adapters, the Server, the SAP Event Stream Processor Studio, and SAP ESP Cockpit (including the ESP Cockpit agent) in a single process on a single machine.
Prerequisites
● Ensure that you have administrator privileges. Then, run the installer for ESP as administrator.● If you are installing on Windows 7 and using a sub-capacity license, set the <SYBASE_SAM_CAPACITY>
environment variable in Control Panel System Advanced Environment Variable . Click New for System Variables and enter SYBASE_SAM_CAPACITY as the variable name and PARTITION as the environment value.
● Ensure that port 19110 is available during installation; if this port is unavailable, the installer fails to create the cluster database.
Procedure
1. From the command line, navigate to the directory where the installation file (setupConsole.exe) resides.
2. Type setupConsole.exe -i console and press Enter.3. When prompted, press Enter to continue.4. Select the installation location. To accept the default location, press Enter. To specify a custom location:
a. Enter an absolute path to the location. Select a file path that does not contain any spaces or periods.b. Press Enter.c. Type Y or N to indicate whether the location is correct.
NoteThe console accepts both Y and y as affirmative, and everything else as a negative response.
d. If the directory you specified does not exist, the installer asks if you want to create it. Press Y. If the directory already exists, the installer warns you that any software in the folder will be replaced.In either case, press Enter to continue.
5. Enter 1 to select a typical installation, which installs the base adapters, Event Stream Processor Server, the Event Stream Processor Studio, the SAP ESP Cockpit Server, and the SAP ESP Cockpit Agent. Press Enter.If you have a previous version installed in the selected location, you can either uninstall the previous version or overwrite it. Enter your selection and press Enter.
6. Indicate whether to install a licensed version or an evaluation version and press Enter.
NoteIf you install the evaluation version, the software will be active for a 30-day grace period, after which you are prompted for a valid license key. During this grace period, there is no restriction on the number of cores ESP can use.
SAP Event Stream Processor: Installation Guide for WindowsInstallation Scenarios P U B L I C 27
Proceed to step 9 [page 28].
7. If you are installing a licensed version, indicate the licensing model you want to use:
License Type Process
Specify License Keys
○ Type 1 and press Enter.○ Specify the absolute path to the license file and press Enter, or press Enter to accept the default.
If you are using a served license and receive an error that the installer detects a SySAM server already running on your machine, click Previous to return to the SySAM License Entry panel and select the Previously Deployed License Server option.
If you enter an invalid key, you are prompted by a warning message. You cannot proceed until you enter a valid key or select a different licensing option.
Previously Deployed License Server
○ Type 2 and press Enter.○ Press Enter to accept the default host name, or enter the Host Name and Port Number.
If the license server file is not found, you receive a warning message indicating that the installer cannot verify a license server running on the selected host. When prompted, enter Y to reenter the license server or N to select a different licensing option.
Continue Without a License Key
Type 3 and press Enter. At the prompt asking if you want to continue, press Enter.
If you continue without a license, the software will be active for a 30-day grace period, after which you are prompted for a valid license key. During this grace period, there is no restriction on the number of cores ESP can use.
8. Enter the number corresponding to the license type you want to configure. Press Enter.9. Indicate whether to configure alerts about SySAM events that may require an administrator's attention. To
configure alerts, enter Y to indicate that you want to configure alerts, then enter the following:○ The SMTP server host that handles your e-mail messages.○ The SMTP server port.○ The default e-mail address of the person or group from which e-mail messages are sent.○ The e-mail addresses of the default recipients.○ The default severity level (informational, warning, or error) for e-mail messages.
NoteTo change the SySAM alert settings after installation, edit these lines in the STREAMING_HOME/sysam/esp_license.prop file:○ email.smtp.host=smtp○ email.smtp.port=25○ email.sender=<sender>@<domain.com>○ email.recipients=<user>@<domain.com>○ email.severity=INFORMATIONAL
Setting email.severity to NONE disables e-mail alerts, causing all other lines to be ignored. To enable e-mail alerts, set email.severity with ERROR, WARNING, or INFORMATIONAL. Replace <smtp> with your SMTP host name, <25> with the port number of your SMTP mail server,
28 P U B L I CSAP Event Stream Processor: Installation Guide for Windows
Installation Scenarios
<[email protected]> with your e-mail address, and <[email protected]> with e-mail recipients. Separate multiple e-mail recipients with a comma.
10. Enter the number corresponding to your geographic location and press Enter.11. Read through the license agreement. Press Enter as necessary to move through the text. Stop reading the
text at any point by typing back and pressing Enter.
12. Indicate that you agree to the license terms and press Enter.13. Enter and confirm a password for the default cluster created by the installer. Make sure that your password
is at least six characters long.
This is the password for the SYS_STREAMING user (system-created) which you will use to access SAP ESP Cockpit for the first time to set authenticators for your users. As this user, you will also run the streamingclusteradmin utility to administer roles and privileges for your users.
Click Next to continue.14. Provide a username and password for the cluster database administrator. Make sure your password is at
least six characters long.
The installer creates the cluster database, which stores configuration information for your cluster. Without this database, you cannot run projects in a cluster or log in to ESP Cockpit.
Press Enter to continue.15. Enter an absolute path to the workspace location for SAP Event Stream Processor Studio projects, or press
Enter to accept the default location.
NoteIf you are upgrading from a previous version of Event Stream Processor and want your old projects to remain in the active workspace, enter the path to your existing Studio workspace.
16. At the preinstallation summary, confirm that you have enough disk space for the installation. Press Enter to continue.
17. Press Enter to install the files.18. Enter and confirm a password for the ESP Cockpit agent administrator that is at least six characters and
press Enter.
The default username for the cockpit agent administrator is sccadmin. The password you create here is encrypted and written to the ESP Cockpit csi_config file. Use these credentials when you need administrative access to the ESP Cockpit. For example, you will need this kind of administrative access if you are registering more than one node to a cluster, so that your users can access all nodes from the same Cockpit.
19. When installation is complete, press Enter.
Next Steps
To view a summary of installation results, open <install-dir>\log\esp_suite.log.
SAP Event Stream Processor: Installation Guide for WindowsInstallation Scenarios P U B L I C 29

2.3 Performing a Custom Installation
Use a custom installation to install certain features of Event Stream Processor, or to install Event Stream Processor components to different machines. You can install ESP Server only, Studio only, or any combination of external and enterprise adapters with or without ESP Server or Studio. Use a custom installation when setting up a production environment.
Context
NoteAlways install the SySAM License Utilities unless they have already been installed on the target machine. If the machine hosts other SAP products, you may have already installed the SySAM License Utilities.
Internal adapters are always installed with the ESP Server, whereas external and enterprise adapters can reside on any machine that has network access to an instance of the Event Stream Processor Server.
SAP recommends custom installations for production environments. The architecture of your installation—the number and location of Studio and ESP Server instances, the number of enterprise adapters, and so on—depends on your specific needs.
The steps involved in a custom installation are largely the same as those in a typical installation. However, in a custom installation, you select only the components you want to install.
NoteIf your license is incorrectly generated or copied to an incorrect location, Event Stream Processor automatically enters a 30-day grace period. License errors or warnings, or both, appear in the stdstreams.log file, which resides in the project runtime directory, STREAMING_HOME\ESP-5_1\cluster\projects\<cluster>\<workspace>.<project>.<project-instance-id>. For example, ESP-5_1\cluster\projects\esp1\myworkspace.myproject.0. When the 30-day grace period ends, Event Stream Processor cannot run until a suitable license is provided. For production environments, configure e-mail alerts during installation so you receive messages regarding license errors or warnings before the grace period ends.
In a custom installation, you may also select additional components that are not included in a typical installation:
● FIX Adapter for SAP Event Stream Processor● Open Adapter for SAP Event Stream Processor● SAP Event Stream Processor Add-in for Microsoft Excel● PowerDesigner Extensions for SAP Event Stream Processor● ESP Plugin for SAP HANA studio
In this section:
Performing a Custom Installation in GUI Mode [page 31]
30 P U B L I CSAP Event Stream Processor: Installation Guide for Windows
Installation Scenarios
Install the SAP ESP Server, SAP ESP Studio, SAP ESP Cockpit, PowerDesigner Extensions, and any combination of external and enterprise adapters on various machines within your network.
Performing a Custom Installation in Console Mode [page 37]Install the SAP ESP Server, SAP ESP Studio, SAP ESP Cockpit, PowerDesigner Extensions, and any combination of external and enterprise adapters on various machines within your network.
2.3.1 Performing a Custom Installation in GUI Mode
Install the SAP ESP Server, SAP ESP Studio, SAP ESP Cockpit, PowerDesigner Extensions, and any combination of external and enterprise adapters on various machines within your network.
Prerequisites
● Ensure that you have administrator privileges. Then, run the installer for ESP as administrator.● If you are installing on Windows 7 and using a sub-capacity license, set the <SYBASE_SAM_CAPACITY>
environment variable in Control Panel System Advanced Environment Variable . Click New for System Variables and enter SYBASE_SAM_CAPACITY as the variable name and PARTITION as the environment value.
● To install the streaming studio plugin for SAP HANA Studio, you must have installed SAP HANA Studio, version SP11 or higher.
● If you are installing the ESP Add-In for Microsoft Excel, ensure you have installed Microsoft .NET Framework version 4.0 or higher.
● Ensure that port 19110 is available during installation if you are installing SAP Event Stream Processor Server; if this port is unavailable, the installer fails to create the cluster database.
Context
The following instructions provide a basic workflow based on selecting most of the available options, including the ESP Server. Therefore, some of the steps outlined here may not be applicable to your custom installation.
Procedure
1. Run the installer file, setup.exe and click Next on the Introduction screen.
2. Select an installation folder. Change the default folder by typing the filepath to the desired folder or by clicking Choose and selecting a folder. When finished, click Next.If the selected folder does not exist, click Yes when prompted to create the folder. If the folder already exists, you receive a warning that any software in the folder will be replaced. Click Next to proceed with the installation in the existing folder.
SAP Event Stream Processor: Installation Guide for WindowsInstallation Scenarios P U B L I C 31
NoteEnsure that the filepath to the installation folder (including the folder name itself) does not contain periods.
3. Choose the Custom installation set. Click Next.The installer displays a list of components, with the check boxes for components that are included in a typical installation checked.
4. Select any additional components you want to install, and clear the check boxes for any components you do not want to install.
If you have SAP HANA installed on your system and want to use ESP Studio functionality within the SAP HANA studio, check the box next to ESP Plugin for SAP HANA studio.
If the target installation machine hosts other SAP products, you may have already installed the SySAM License Utilities.
5. Click Next.If you previously selected external adapters only (i.e. you have not selected FIX Adapter for SAP Event Stream Processor, Open Adapter for SAP Event Stream Processor, SAP Event Stream Processor Server, or SAP Cockpit Agent for SAP Event Stream Processor), the installer summarizes your installation preferences and prompts you to install. Click Install to complete the installation.
Otherwise, continue to the next step.6. Select to install either a licensed copy or an evaluation version.
NoteIf you install the evaluation version, the software will be active for a 30-day grace period, after which you are prompted for a valid license key. During this grace period, there is no restriction on the number of cores ESP can use.
Proceed to the next step.
a. If you are installing a licensed version, select one of these options:
32 P U B L I CSAP Event Stream Processor: Installation Guide for Windows
Installation Scenarios
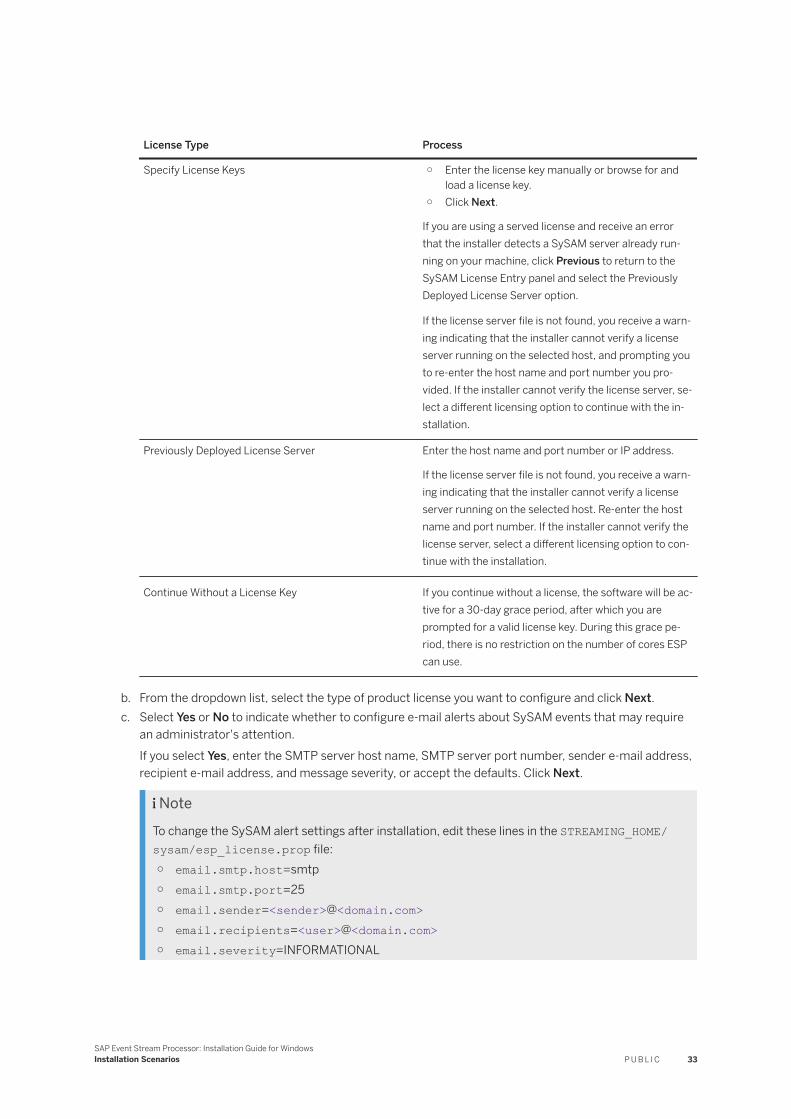
License Type Process
Specify License Keys ○ Enter the license key manually or browse for and load a license key.
○ Click Next.
If you are using a served license and receive an error that the installer detects a SySAM server already running on your machine, click Previous to return to the SySAM License Entry panel and select the Previously Deployed License Server option.
If the license server file is not found, you receive a warning indicating that the installer cannot verify a license server running on the selected host, and prompting you to re-enter the host name and port number you provided. If the installer cannot verify the license server, select a different licensing option to continue with the installation.
Previously Deployed License Server Enter the host name and port number or IP address.
If the license server file is not found, you receive a warning indicating that the installer cannot verify a license server running on the selected host. Re-enter the host name and port number. If the installer cannot verify the license server, select a different licensing option to continue with the installation.
Continue Without a License Key If you continue without a license, the software will be active for a 30-day grace period, after which you are prompted for a valid license key. During this grace period, there is no restriction on the number of cores ESP can use.
b. From the dropdown list, select the type of product license you want to configure and click Next.c. Select Yes or No to indicate whether to configure e-mail alerts about SySAM events that may require
an administrator's attention.If you select Yes, enter the SMTP server host name, SMTP server port number, sender e-mail address, recipient e-mail address, and message severity, or accept the defaults. Click Next.
NoteTo change the SySAM alert settings after installation, edit these lines in the STREAMING_HOME/sysam/esp_license.prop file:○ email.smtp.host=smtp○ email.smtp.port=25○ email.sender=<sender>@<domain.com>○ email.recipients=<user>@<domain.com>○ email.severity=INFORMATIONAL
SAP Event Stream Processor: Installation Guide for WindowsInstallation Scenarios P U B L I C 33
Setting email.severity to NONE disables e-mail alerts, causing all other lines to be ignored. To enable e-mail alerts, set email.severity with ERROR, WARNING, or INFORMATIONAL. Replace <smtp> with your SMTP host name, <25> with the port number of your SMTP mail server, <[email protected]> with your e-mail address, and <[email protected]> with e-mail recipients. Separate multiple e-mail recipients with a comma (,).
7. Use the dropdown list to select your geographic location and to view the corresponding End-User License Agreement. Accept the terms and conditions to continue. Click Next.
NoteIf you are installing enterprise adapters only, repeat the licensing steps for each enterprise adapter you are installing.
8. Configure cluster information. (The installer also uses this information to configure the Web Services Provider):a. Create a name for your new cluster, or enter the name of an existing cluster.b. Create a name for the new node. If the node will be part of an existing multi-node cluster, all node
names in the cluster must be unique. Node names should only consist of letters, numbers, and underscores.
c. Enter the cache port for the node. The cluster cache is an internal cache for sharing cluster state and configuration information. It is for internal use only.
d. By default, the installer sets the actual host name of the machine hosting this cluster node. If it cannot determine the actual host name, it sets "localhost" as the default value. Use the default "localhost" name only if this is a single node cluster that will only be accessed from within the machine you are installing on.
e. Enter the RPC port for the cluster node. The Studio, SDKs and various other product tools use this port to access the cluster.
f. (Optional) To specify a separate admin port, change the port number from the default. Doing so allows you to distinguish between administrative and non-administrative users, and limit network access to specific administrative actions, which may be advantageous when you have firewalls in place.
g. Indicate whether the RPC port supports connections through Secure Sockets Layer (SSL). When you enable SSL, connections to the cluster use HTTPS rather than HTTP. If you are creating a new cluster, you can decide whether to use SSL. If you are connecting to an existing cluster, ensure this selection matches the configuration of the existing cluster.
h. Click Next.
NoteAfter installation, you can modify your Event Stream Processor environment to add nodes, clusters, and so on. For information, see the SAP Event Stream Processor: Configuration and Administration Guide. To change authentication types post-installation, see the SAP Event Stream Processor: Cockpit Guide.
i. Enter and confirm a password for the cluster that is at least six characters long.
All nodes within a cluster have the same cluster password. If you are connecting to an existing cluster, use the password defined for that cluster.
Click Next to continue.
34 P U B L I CSAP Event Stream Processor: Installation Guide for Windows
Installation Scenarios
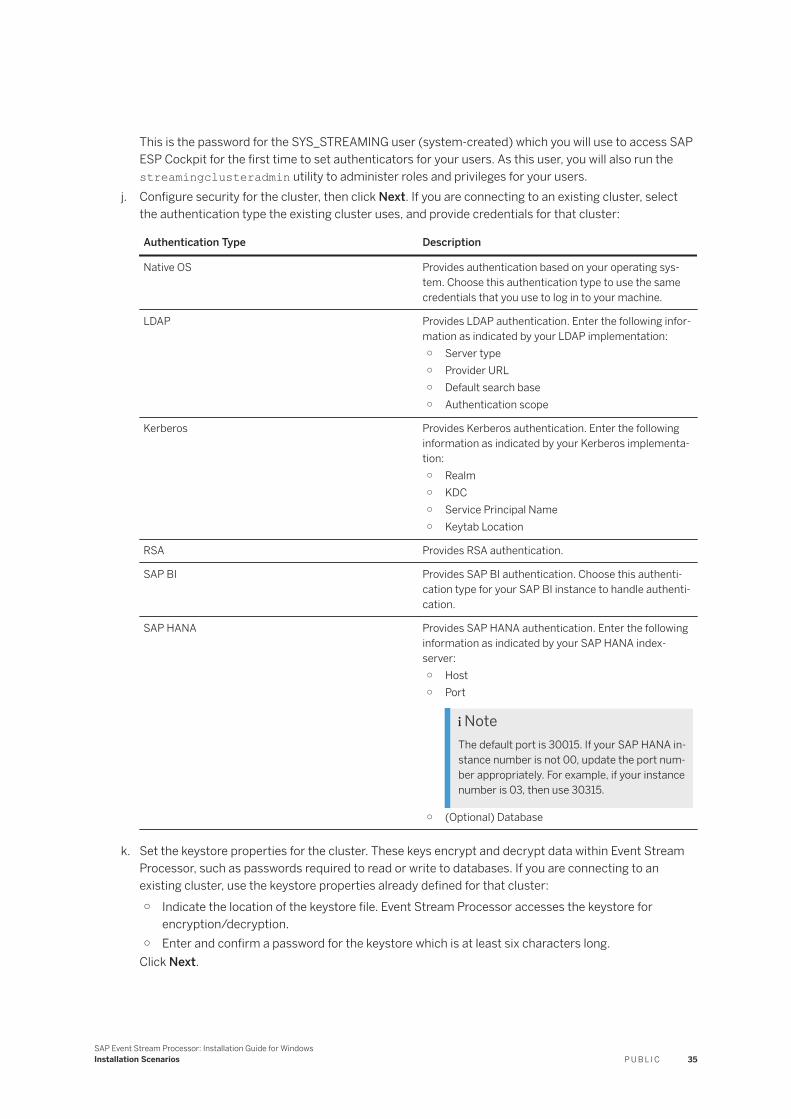
This is the password for the SYS_STREAMING user (system-created) which you will use to access SAP ESP Cockpit for the first time to set authenticators for your users. As this user, you will also run the streamingclusteradmin utility to administer roles and privileges for your users.
j. Configure security for the cluster, then click Next. If you are connecting to an existing cluster, select the authentication type the existing cluster uses, and provide credentials for that cluster:
Authentication Type Description
Native OS Provides authentication based on your operating system. Choose this authentication type to use the same credentials that you use to log in to your machine.
LDAP Provides LDAP authentication. Enter the following information as indicated by your LDAP implementation:○ Server type○ Provider URL○ Default search base○ Authentication scope
Kerberos Provides Kerberos authentication. Enter the following information as indicated by your Kerberos implementation:○ Realm○ KDC○ Service Principal Name○ Keytab Location
RSA Provides RSA authentication.
SAP BI Provides SAP BI authentication. Choose this authentication type for your SAP BI instance to handle authentication.
SAP HANA Provides SAP HANA authentication. Enter the following information as indicated by your SAP HANA indexserver:○ Host○ Port
NoteThe default port is 30015. If your SAP HANA instance number is not 00, update the port number appropriately. For example, if your instance number is 03, then use 30315.
○ (Optional) Database
k. Set the keystore properties for the cluster. These keys encrypt and decrypt data within Event Stream Processor, such as passwords required to read or write to databases. If you are connecting to an existing cluster, use the keystore properties already defined for that cluster:○ Indicate the location of the keystore file. Event Stream Processor accesses the keystore for
encryption/decryption.○ Enter and confirm a password for the keystore which is at least six characters long.
Click Next.
SAP Event Stream Processor: Installation Guide for WindowsInstallation Scenarios P U B L I C 35
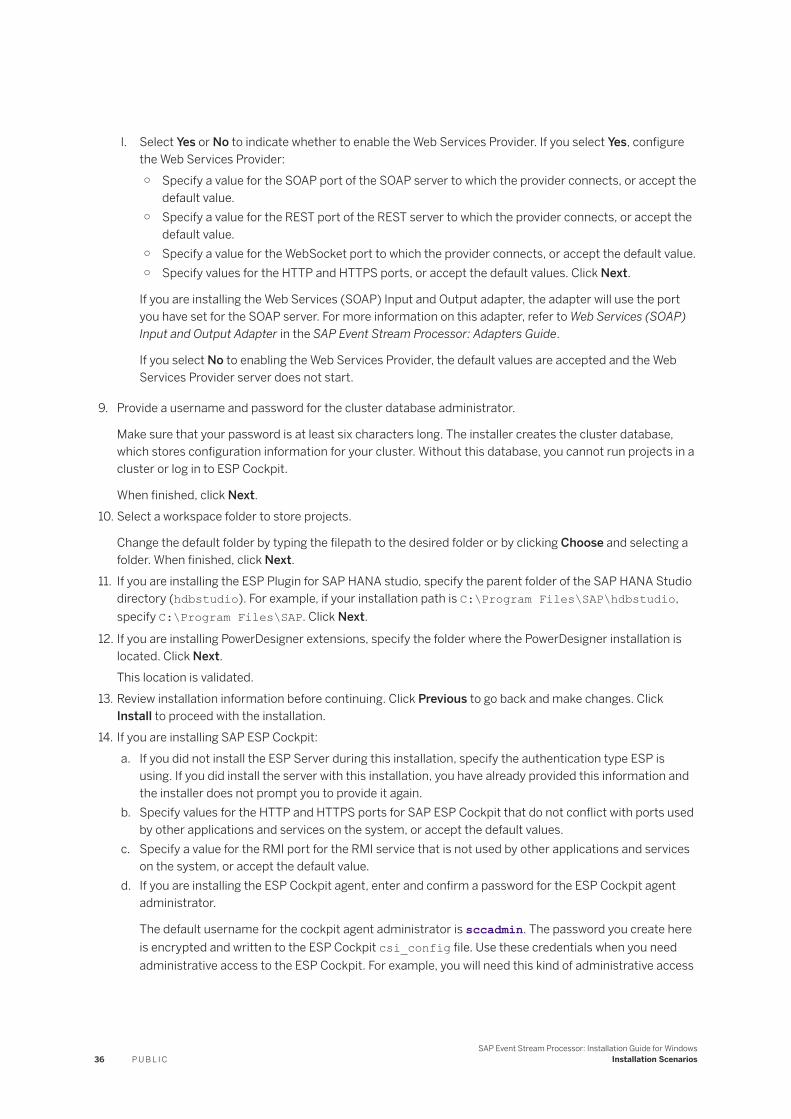
l. Select Yes or No to indicate whether to enable the Web Services Provider. If you select Yes, configure the Web Services Provider:○ Specify a value for the SOAP port of the SOAP server to which the provider connects, or accept the
default value.○ Specify a value for the REST port of the REST server to which the provider connects, or accept the
default value.○ Specify a value for the WebSocket port to which the provider connects, or accept the default value.○ Specify values for the HTTP and HTTPS ports, or accept the default values. Click Next.
If you are installing the Web Services (SOAP) Input and Output adapter, the adapter will use the port you have set for the SOAP server. For more information on this adapter, refer to Web Services (SOAP) Input and Output Adapter in the SAP Event Stream Processor: Adapters Guide.
If you select No to enabling the Web Services Provider, the default values are accepted and the Web Services Provider server does not start.
9. Provide a username and password for the cluster database administrator.
Make sure that your password is at least six characters long. The installer creates the cluster database, which stores configuration information for your cluster. Without this database, you cannot run projects in a cluster or log in to ESP Cockpit.
When finished, click Next.10. Select a workspace folder to store projects.
Change the default folder by typing the filepath to the desired folder or by clicking Choose and selecting a folder. When finished, click Next.
11. If you are installing the ESP Plugin for SAP HANA studio, specify the parent folder of the SAP HANA Studio directory (hdbstudio). For example, if your installation path is C:\Program Files\SAP\hdbstudio, specify C:\Program Files\SAP. Click Next.
12. If you are installing PowerDesigner extensions, specify the folder where the PowerDesigner installation is located. Click Next.This location is validated.
13. Review installation information before continuing. Click Previous to go back and make changes. Click Install to proceed with the installation.
14. If you are installing SAP ESP Cockpit:a. If you did not install the ESP Server during this installation, specify the authentication type ESP is
using. If you did install the server with this installation, you have already provided this information and the installer does not prompt you to provide it again.
b. Specify values for the HTTP and HTTPS ports for SAP ESP Cockpit that do not conflict with ports used by other applications and services on the system, or accept the default values.
c. Specify a value for the RMI port for the RMI service that is not used by other applications and services on the system, or accept the default value.
d. If you are installing the ESP Cockpit agent, enter and confirm a password for the ESP Cockpit agent administrator.
The default username for the cockpit agent administrator is sccadmin. The password you create here is encrypted and written to the ESP Cockpit csi_config file. Use these credentials when you need administrative access to the ESP Cockpit. For example, you will need this kind of administrative access
36 P U B L I CSAP Event Stream Processor: Installation Guide for Windows
Installation Scenarios
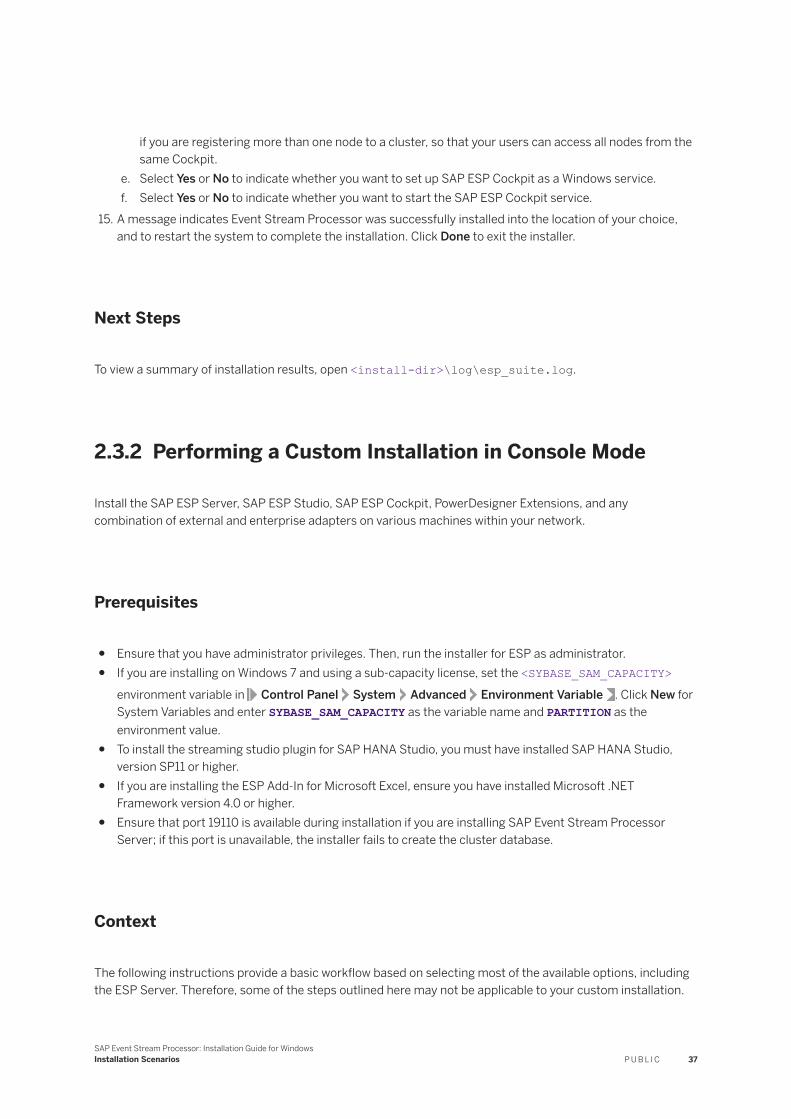
if you are registering more than one node to a cluster, so that your users can access all nodes from the same Cockpit.
e. Select Yes or No to indicate whether you want to set up SAP ESP Cockpit as a Windows service.f. Select Yes or No to indicate whether you want to start the SAP ESP Cockpit service.
15. A message indicates Event Stream Processor was successfully installed into the location of your choice, and to restart the system to complete the installation. Click Done to exit the installer.
Next Steps
To view a summary of installation results, open <install-dir>\log\esp_suite.log.
2.3.2 Performing a Custom Installation in Console Mode
Install the SAP ESP Server, SAP ESP Studio, SAP ESP Cockpit, PowerDesigner Extensions, and any combination of external and enterprise adapters on various machines within your network.
Prerequisites
● Ensure that you have administrator privileges. Then, run the installer for ESP as administrator.● If you are installing on Windows 7 and using a sub-capacity license, set the <SYBASE_SAM_CAPACITY>
environment variable in Control Panel System Advanced Environment Variable . Click New for System Variables and enter SYBASE_SAM_CAPACITY as the variable name and PARTITION as the environment value.
● To install the streaming studio plugin for SAP HANA Studio, you must have installed SAP HANA Studio, version SP11 or higher.
● If you are installing the ESP Add-In for Microsoft Excel, ensure you have installed Microsoft .NET Framework version 4.0 or higher.
● Ensure that port 19110 is available during installation if you are installing SAP Event Stream Processor Server; if this port is unavailable, the installer fails to create the cluster database.
Context
The following instructions provide a basic workflow based on selecting most of the available options, including the ESP Server. Therefore, some of the steps outlined here may not be applicable to your custom installation.
SAP Event Stream Processor: Installation Guide for WindowsInstallation Scenarios P U B L I C 37

Procedure
1. From the command line, navigate to the directory where the installation file (setupConsole.exe) resides.
2. Type setupConsole.exe -i console and press Enter.3. When prompted, press Enter to continue.4. Select the installation location. To accept the default location, press Enter. To specify a custom location:
a. Enter an absolute path to the location. Select a file path that does not contain any spaces or periods.b. Press Enter.c. Type Y or N to indicate whether the location is correct.
NoteThe console accepts both Y and y as affirmative, and everything else as a negative response.
d. If the directory you specified does not exist, the installer asks if you want to create it. Press Y. If the directory already exists, the installer warns you that any software in the folder will be replaced.In either case, press Enter to continue.
5. Enter 3 to select the Custom install set. Press Enter.6. Enter the numbers corresponding to the features you want to select or deselect for installation, separated
by a comma with no space.The installer selects specific components by default. Selected components are indicated by an X, deselected components are indicated by a blank. Enter the number of a component to toggle the current selection. When finished, press Enter.
NoteIf the target installation machine hosts other SAP products, you may have already installed the SySAM License Utilities. You need not install them again.
7. If you selected external adapters only (no enterprise adapters, ESP Studio, or ESP Server), the installer summarizes your installation preferences and prompts you to install. Click Enter to continue, then Enter again to complete the installation. Otherwise, continue to the next step.
8. If you have a previous version installed to the selected location, a message indicates that you can uninstall the previous version, or overwrite it. Enter your selection and press Enter.
9. Indicate whether to install a licensed version or an evaluation version and press Enter.
NoteIf you install the evaluation version, the software will be active for a 30-day grace period, after which you are prompted for a valid license key. During this grace period, there is no restriction on the number of cores ESP can use.
Proceed to the next step.
a. If you are installing a licensed version, select one of these options:
38 P U B L I CSAP Event Stream Processor: Installation Guide for Windows
Installation Scenarios
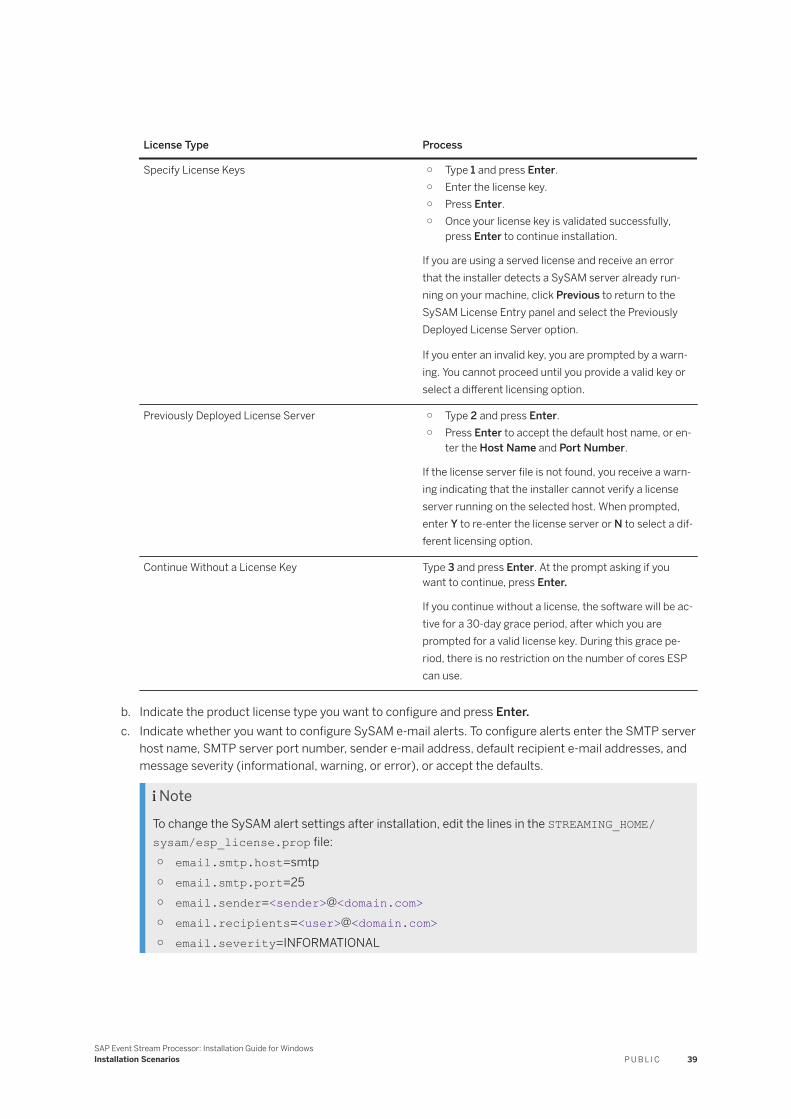
License Type Process
Specify License Keys ○ Type 1 and press Enter.○ Enter the license key.○ Press Enter.○ Once your license key is validated successfully,
press Enter to continue installation.
If you are using a served license and receive an error that the installer detects a SySAM server already running on your machine, click Previous to return to the SySAM License Entry panel and select the Previously Deployed License Server option.
If you enter an invalid key, you are prompted by a warning. You cannot proceed until you provide a valid key or select a different licensing option.
Previously Deployed License Server ○ Type 2 and press Enter.○ Press Enter to accept the default host name, or en
ter the Host Name and Port Number.
If the license server file is not found, you receive a warning indicating that the installer cannot verify a license server running on the selected host. When prompted, enter Y to re-enter the license server or N to select a different licensing option.
Continue Without a License Key Type 3 and press Enter. At the prompt asking if you want to continue, press Enter.
If you continue without a license, the software will be active for a 30-day grace period, after which you are prompted for a valid license key. During this grace period, there is no restriction on the number of cores ESP can use.
b. Indicate the product license type you want to configure and press Enter.c. Indicate whether you want to configure SySAM e-mail alerts. To configure alerts enter the SMTP server
host name, SMTP server port number, sender e-mail address, default recipient e-mail addresses, and message severity (informational, warning, or error), or accept the defaults.
NoteTo change the SySAM alert settings after installation, edit the lines in the STREAMING_HOME/sysam/esp_license.prop file:○ email.smtp.host=smtp○ email.smtp.port=25○ email.sender=<sender>@<domain.com>○ email.recipients=<user>@<domain.com>○ email.severity=INFORMATIONAL
SAP Event Stream Processor: Installation Guide for WindowsInstallation Scenarios P U B L I C 39
Setting email.severity to NONE disables e-mail alerts, causing all other lines to be ignored. To enable e-mail alerts, set email.severity with ERROR, WARNING, or INFORMATIONAL. Replace <smtp> with your SMTP host name, <25> with the port number of your SMTP mail server, <[email protected]> with your e-mail address, and <[email protected]> with e-mail recipients. Separate multiple e-mail recipients with a comma (,).
d. Enter the number corresponding to your geographic location and press Enter.e. Read through the license agreement. Press Enter as necessary to move through the text. Stop reading
the text at any point by typing back and pressing Enter.f. Indicate that you agree to the license terms and press Enter.
NoteIf you are installing enterprise adapters only, repeat the licensing steps for each enterprise adapter you are installing.
10. Configure cluster information. When available, default values are either represented with an arrow on a numbered list item, or printed in parentheses. Press Enter to accept a default value if one is provided. (The installer also uses cluster settings from this step to configure the web services providers.)a. Create a name for the new node. If the node will be part of an existing multi-node cluster, all node
names in the cluster must be unique and consist only of letters, numbers, and underscores.b. By default, the installer sets the actual host name of the machine hosting this cluster node. If it cannot
determine the actual host name, it sets localhost as the default value. Use the default localhost name only if this is a single-node cluster that will only be accessed from within the machine you are installing on.
c. Enter the RPC port for the cluster node. The Studio, SDKs, and various other product tools, use this port to access the cluster.
d. Indicate whether the RPC port supports connections through Secure Sockets Layer (SSL) or not. When you enable SSL, connections to the cluster use HTTPS rather than HTTP. If you are creating a new cluster, decide whether to use SSL. If you are connecting to an existing cluster, ensure this selection matches the configuration of the existing cluster.
e. Enter the cache port for the node. The cluster cache is an internal cache for sharing cluster state and configuration information. It is for internal use only.
f. Create a name for your new cluster, or enter the name of an existing cluster.g. (Optional) If you want to specify a separate admin port, change the port number from the default.
Doing so allows you to distinguish between administrative and non-administrative users, and limit network access to specific administrative actions, which may be advantageous when you have firewalls in place.
h. Enter and confirm a password for the cluster that is at least six characters long.
All nodes within a cluster have the same cluster password. If you are connecting to an existing cluster, use the password defined for that cluster.
Click Next to continue.
This is the password for the SYS_STREAMING user (system-created) which you will use to access SAP ESP Cockpit for the first time to set authenticators for your users. As this user, you will also run the streamingclusteradmin utility to administer roles and privileges for your users.
40 P U B L I CSAP Event Stream Processor: Installation Guide for Windows
Installation Scenarios
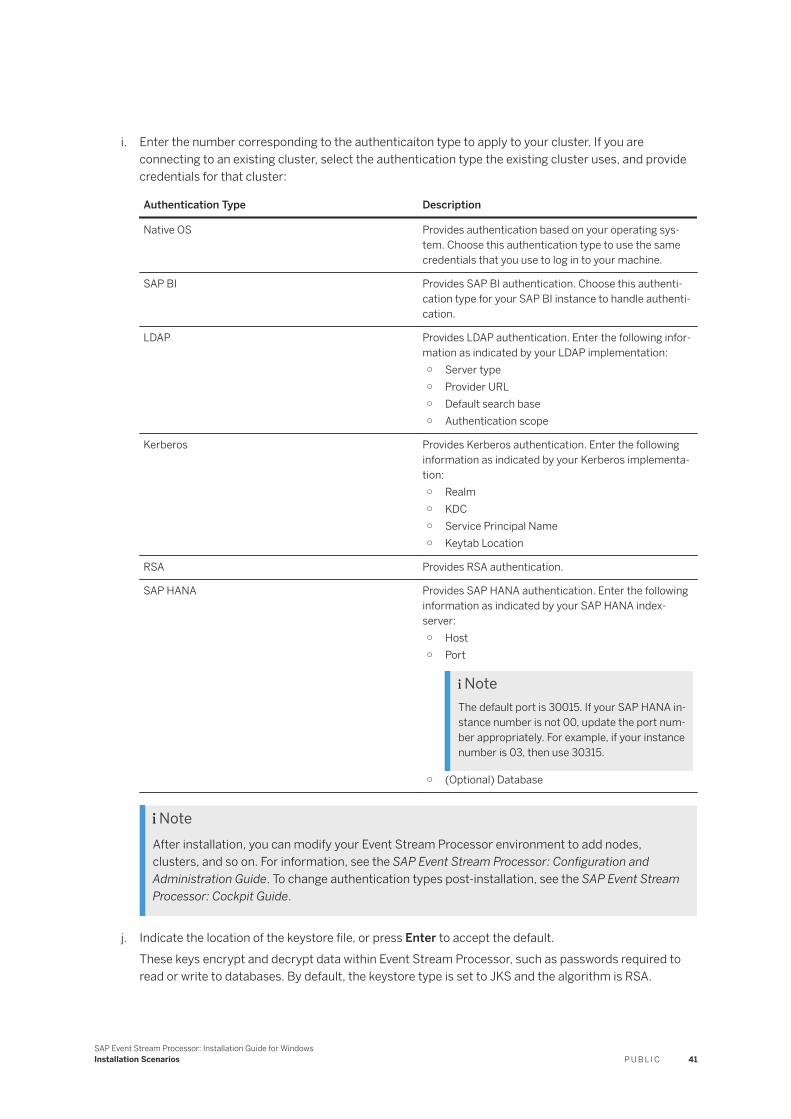
i. Enter the number corresponding to the authenticaiton type to apply to your cluster. If you are connecting to an existing cluster, select the authentication type the existing cluster uses, and provide credentials for that cluster:
Authentication Type Description
Native OS Provides authentication based on your operating system. Choose this authentication type to use the same credentials that you use to log in to your machine.
SAP BI Provides SAP BI authentication. Choose this authentication type for your SAP BI instance to handle authentication.
LDAP Provides LDAP authentication. Enter the following information as indicated by your LDAP implementation:○ Server type○ Provider URL○ Default search base○ Authentication scope
Kerberos Provides Kerberos authentication. Enter the following information as indicated by your Kerberos implementation:○ Realm○ KDC○ Service Principal Name○ Keytab Location
RSA Provides RSA authentication.
SAP HANA Provides SAP HANA authentication. Enter the following information as indicated by your SAP HANA indexserver:○ Host○ Port
NoteThe default port is 30015. If your SAP HANA instance number is not 00, update the port number appropriately. For example, if your instance number is 03, then use 30315.
○ (Optional) Database
NoteAfter installation, you can modify your Event Stream Processor environment to add nodes, clusters, and so on. For information, see the SAP Event Stream Processor: Configuration and Administration Guide. To change authentication types post-installation, see the SAP Event Stream Processor: Cockpit Guide.
j. Indicate the location of the keystore file, or press Enter to accept the default.These keys encrypt and decrypt data within Event Stream Processor, such as passwords required to read or write to databases. By default, the keystore type is set to JKS and the algorithm is RSA.
SAP Event Stream Processor: Installation Guide for WindowsInstallation Scenarios P U B L I C 41

k. Enter and confirm a password for the keystore, at least six characters long. If you are connecting to an existing cluster, use the keystore password already defined for that cluster.
l. Select Yes or No to indicate whether to enable the Web Services Provider. If you select Yes, configure the Web Services Provider:○ Specify a value for the SOAP Port of the SOAP server to which the provider connects, or press
Enter to accept the default value.○ Specify a value for the REST Port of the REST server to which the provider connects, or press
Enter to accept the default value.○ Specify a value for the WebSocket port to which the provider connects, or press Enter to accept
the default value.○ Specify values for the HTTP Port and HTTPS Port, or press Enter to accept the default values and
to continue.
If you are installing the Web Services (SOAP) Input and Output adapter, the adapter will use the port you have set for the SOAP server. For more information on this adapter, refer to Web Services (SOAP) Input and Output Adapter in the SAP Event Stream Processor: Adapters Guide.
If you select No to enabling the Web Services Provider, the default values are accepted and the Web Services Provider server does not start.
m. Provide a username and password for the cluster database administrator. Your password must be at least six characters long.The installer creates the cluster database, which stores configuration information for your cluster. Without this database, you cannot run projects in a cluster or log in to ESP Cockpit.
11. Enter an absolute path to the workspace location for Studio projects, or press Enter to accept the default location.
12. If you are installing the streaming studio plugin for SAP HANA Studio, specify the parent folder of the SAP HANA Studio directory (hdbstudio). For example, if your installation path is C:\Program Files\SAP\hdbstudio, specify C:\Program Files\SAP. Click Next.
13. If you are installing PowerDesigner Extensions, enter an absolute path to the location of your PowerDesigner installation or press Enter to accept the suggested location.
14. At the pre-installation summary, confirm that you have enough disk space for the installation. Press Enter to continue.
15. Press Enter to install the files.16. If you are installing SAP ESP Cockpit:
a. If you did not install the ESP Server during this installation, specify the number for the authentication type ESP is using and press Enter. If you did install the server with this installation, you have already provided this information and the console does not prompt you to provide it again.
b. Specify a value for the HTTP Port for SAP ESP Cockpit that does not conflict with ports used by other applications and services on the system, or press Enter to accept the default values.
c. Specify a value for the HTTPS Port for SAP ESP Cockpit that does not conflict with ports used by other applications and services on the system, or press Enter to accept the default values.
d. Specify a value for the RMI Port for the RMI Service that is not used by other applications and services on the system, or press Enter to accept the default value.
e. If you are installing the ESP Cockpit agent, enter and confirm a password for the ESP Cockpit agent administrator. Make sure that the password is at least six characters long.The default username for the cockpit agent administrator is sccadmin. The password you create here is encrypted and written to the ESP Cockpit csi_config file. Use these credentials when you need
42 P U B L I CSAP Event Stream Processor: Installation Guide for Windows
Installation Scenarios
administrative access to the ESP Cockpit. For example, use these credentials if you are registering more than one node to a cluster, so that you can access all nodes from the same Cockpit.
f. Enter and confirm a password for the ESP Cockpit agent administrator.
The default username for the cockpit agent administrator is sccadmin. Use these credentials when you need administrative access to the ESP Cockpit. For example, you will need this kind of administrative access if you are registering more than one node to a cluster, so that your users can access all nodes from the same Cockpit.
g. Select Yes or No to indicate whether to set up SAP ESP Cockpit as a Windows service.h. Select Yes or No to indicate whether you want to start the SAP ESP Cockpit service.
17. When prompted, press Enter to finish the installation process.
Next Steps
To view a summary of installation results, open <install-dir>\log\esp_suite.log.
2.4 Running a Silent Installation
A silent installation installs SAP Event Stream Processor Studio and SAP ESP Server without the conventional prompts used in a standard installation.
Perform a silent installation to install multiple identical or near-identical copies of ESP Server and Studio. You can silently install components individually or together. For example:
● ESP Server, internal adapters, and ESP Studio● ESP Server and internal adapters only● One or more external or enterprise adapters (either by themselves or with any server installation)
Once you have created a silent installation response file, you can run it as many times as necessary to install multiple copies of the software.
In this section:
Creating a Response File [page 44]Generate a response file by running a GUI mode custom installation, using all the settings that you want to use in your silent installation. Then use the response file to reproduce your installation preferences when installing on other machines.
Using a Response File [page 46]Use the silent installation response file to install SAP Event Stream Processor on multiple computers.
SAP Event Stream Processor: Installation Guide for WindowsInstallation Scenarios P U B L I C 43
2.4.1 Creating a Response File
Generate a response file by running a GUI mode custom installation, using all the settings that you want to use in your silent installation. Then use the response file to reproduce your installation preferences when installing on other machines.
Context
When creating a response file, save it in the same directory as the installer, and name it installer.properties. For multiple different installations, name each response file installer_<name>.properties, where <name> is a user-defined identifier that distinguishes different installation settings.
You can enter your installation preferences directly into the response file, or you can run the GUI custom installer.
NoteFor security reasons, passwords, such as the cluster and keystore passwords, are not saved to the response file. To run a silent installation with user-defined cluster, cluster database, and keystore passwords, manually add the passwords to the file, or specify them in the command line.
Procedure
1. From a command line, navigate to the directory where the installation file (setup.exe) resides.
2. At the command line, run: setup.exe –r <response-file>./setup.bin -r <response-file> where <response-file> is the name of the response file. The specified file name should be an absolute path.This command launches the GUI custom installer and creates a response file. All of the selections you make while installing with the GUI custom installer are saved to the response file and used to complete your silent installations.
3. (Optional) Modify the response file to correct any errors made during installation.
NoteIf you manually add password parameters to the response file, either delete the response file, or delete the password parameters from the response file after the silent installation is complete.
Use the following response file sample as a reference for manually modifying or creating your own response file. This file was created using a custom installation with the following options selected:○ ESP Server○ SAP Cockpit Agent○ ESP Studio○ SySAM License Utilities
44 P U B L I CSAP Event Stream Processor: Installation Guide for Windows
Installation Scenarios
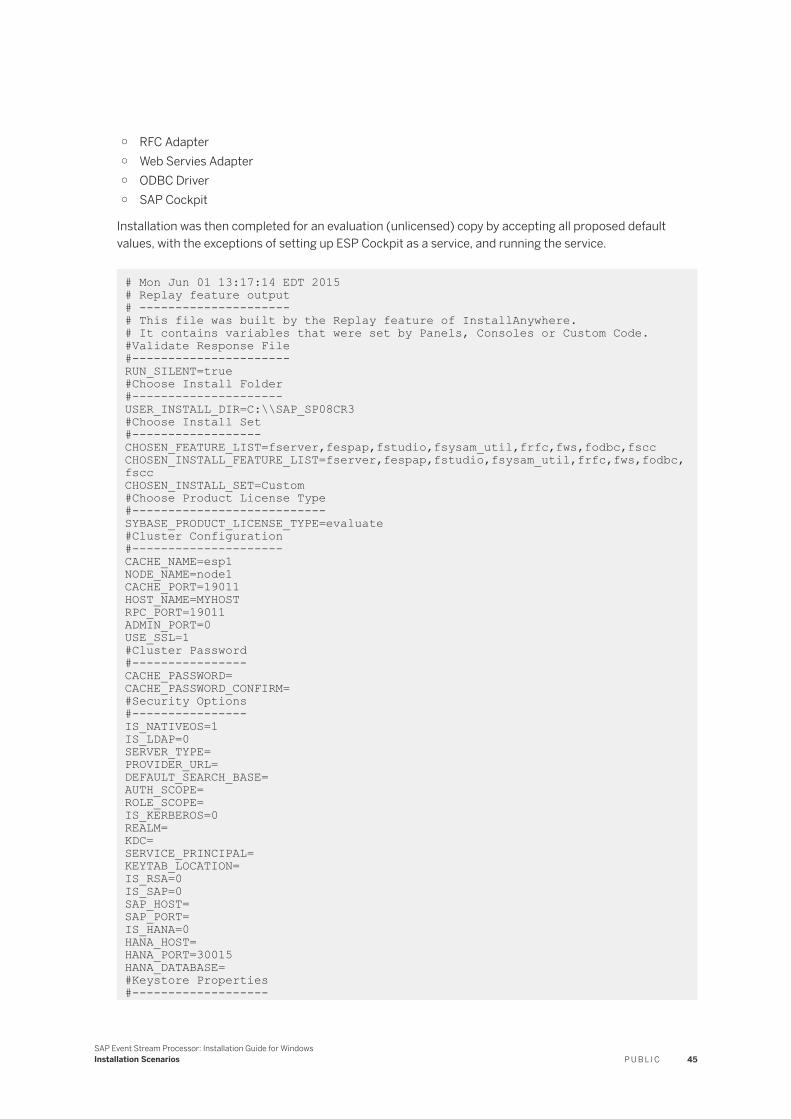
○ RFC Adapter○ Web Servies Adapter○ ODBC Driver○ SAP Cockpit
Installation was then completed for an evaluation (unlicensed) copy by accepting all proposed default values, with the exceptions of setting up ESP Cockpit as a service, and running the service.
# Mon Jun 01 13:17:14 EDT 2015 # Replay feature output# ---------------------# This file was built by the Replay feature of InstallAnywhere.# It contains variables that were set by Panels, Consoles or Custom Code.#Validate Response File#----------------------RUN_SILENT=true#Choose Install Folder#---------------------USER_INSTALL_DIR=C:\\SAP_SP08CR3#Choose Install Set#------------------CHOSEN_FEATURE_LIST=fserver,fespap,fstudio,fsysam_util,frfc,fws,fodbc,fsccCHOSEN_INSTALL_FEATURE_LIST=fserver,fespap,fstudio,fsysam_util,frfc,fws,fodbc,fsccCHOSEN_INSTALL_SET=Custom#Choose Product License Type#---------------------------SYBASE_PRODUCT_LICENSE_TYPE=evaluate#Cluster Configuration#---------------------CACHE_NAME=esp1NODE_NAME=node1 CACHE_PORT=19011 HOST_NAME=MYHOSTRPC_PORT=19011ADMIN_PORT=0USE_SSL=1#Cluster Password#----------------CACHE_PASSWORD=CACHE_PASSWORD_CONFIRM=#Security Options#----------------IS_NATIVEOS=1IS_LDAP=0SERVER_TYPE=PROVIDER_URL=DEFAULT_SEARCH_BASE=AUTH_SCOPE=ROLE_SCOPE=IS_KERBEROS=0REALM=KDC=SERVICE_PRINCIPAL=KEYTAB_LOCATION=IS_RSA=0IS_SAP=0SAP_HOST=SAP_PORT=IS_HANA=0HANA_HOST=HANA_PORT=30015HANA_DATABASE=#Keystore Properties#-------------------
SAP Event Stream Processor: Installation Guide for WindowsInstallation Scenarios P U B L I C 45
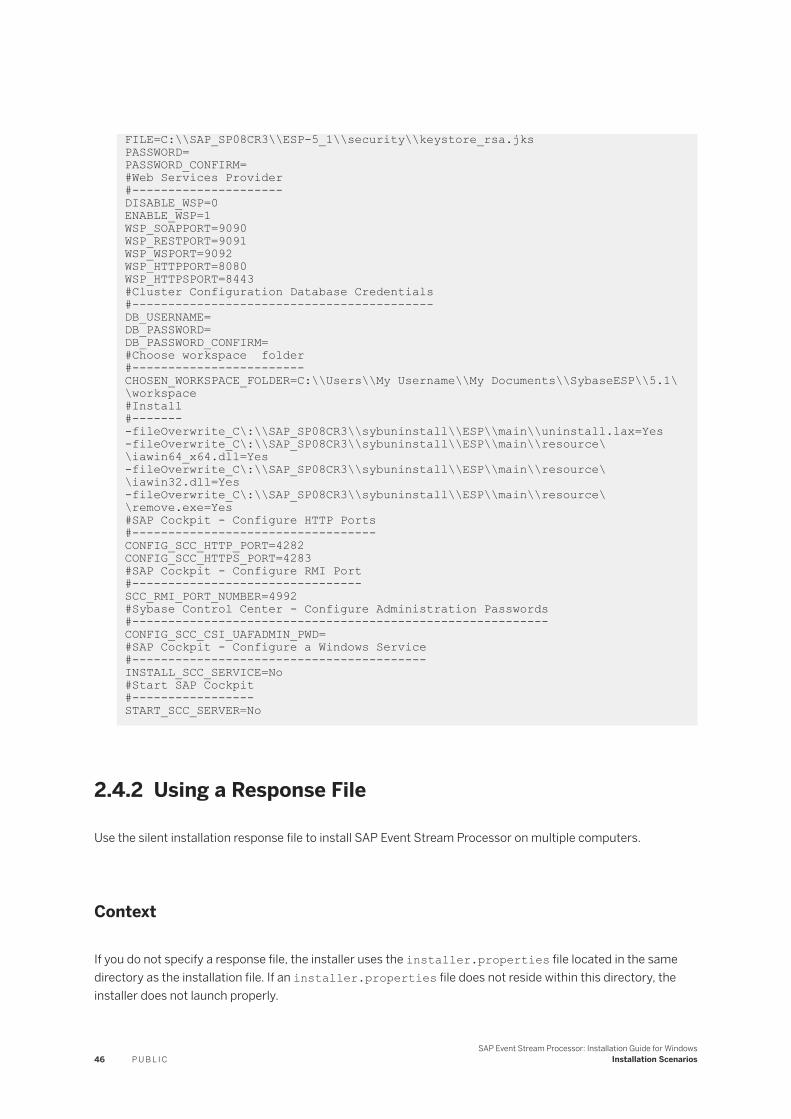
FILE=C:\\SAP_SP08CR3\\ESP-5_1\\security\\keystore_rsa.jksPASSWORD=PASSWORD_CONFIRM=#Web Services Provider#---------------------DISABLE_WSP=0ENABLE_WSP=1WSP_SOAPPORT=9090WSP_RESTPORT=9091WSP_WSPORT=9092WSP_HTTPPORT=8080WSP_HTTPSPORT=8443#Cluster Configuration Database Credentials#------------------------------------------DB_USERNAME=DB_PASSWORD=DB_PASSWORD_CONFIRM=#Choose workspace folder#------------------------CHOSEN_WORKSPACE_FOLDER=C:\\Users\\My Username\\My Documents\\SybaseESP\\5.1\\workspace#Install#--------fileOverwrite_C\:\\SAP_SP08CR3\\sybuninstall\\ESP\\main\\uninstall.lax=Yes-fileOverwrite_C\:\\SAP_SP08CR3\\sybuninstall\\ESP\\main\\resource\\iawin64_x64.dll=Yes-fileOverwrite_C\:\\SAP_SP08CR3\\sybuninstall\\ESP\\main\\resource\\iawin32.dll=Yes-fileOverwrite_C\:\\SAP_SP08CR3\\sybuninstall\\ESP\\main\\resource\\remove.exe=Yes#SAP Cockpit - Configure HTTP Ports#----------------------------------CONFIG_SCC_HTTP_PORT=4282CONFIG_SCC_HTTPS_PORT=4283#SAP Cockpit - Configure RMI Port#--------------------------------SCC_RMI_PORT_NUMBER=4992#Sybase Control Center - Configure Administration Passwords#----------------------------------------------------------CONFIG_SCC_CSI_UAFADMIN_PWD=#SAP Cockpit - Configure a Windows Service#-----------------------------------------INSTALL_SCC_SERVICE=No#Start SAP Cockpit#-----------------START_SCC_SERVER=No
2.4.2 Using a Response File
Use the silent installation response file to install SAP Event Stream Processor on multiple computers.
Context
If you do not specify a response file, the installer uses the installer.properties file located in the same directory as the installation file. If an installer.properties file does not reside within this directory, the installer does not launch properly.
46 P U B L I CSAP Event Stream Processor: Installation Guide for Windows
Installation Scenarios

Run a response file as often as necessary to install the SAP Event Stream Processor on the required number of machines.
Procedure
On the target machine, for each installation, enter the following command at the command line, where <response-file> is the input response file:setupConsole.exe -i silent -f <response-file> -DRUN_SILENT=<true> -DAGREE_TO_SYBASE_LICENSE=<true>
The specified file name must be an absolute path.
For security reasons, passwords and the user name for the database administrative user are not saved to the response file. To run a silent installation with the DBA user name and user-defined passwords, manually add these parameters to the response file or at the command line.
Response file parameters are:
○ CACHE_PASSWORD is for the cluster password○ PASSWORD is for the keystore password○ DB_USERNAME is the user name used to create the database administrative user○ DB_PASSWORD is the password for the DBA user○ CONFIG_SCC_CSI_UAFADMIN_PWD is for the ESP Cockpit agent password
To set the password parameters from the command line, use:
setupConsole.exe -i silent -f <response-file> -DRUN_SILENT=<true> -DAGREE_TO_SYBASE_LICENSE=<true> -DCACHE_PASSWORD=<cluster-password> -DPASSWORD=<keystore-password> -DDB_USERNAME=<DBA-Username> -DDB_PASSWORD=<DBA-Password>-DCONFIG_SCC_CSI_UAFADMIN_PWD=<ESP-Cockpit-agent-password>
For security reasons, either delete the response file, or delete the password parameters from the response file after the silent installation is complete.
TipIf Studio does not start, try manually deleting the .metadata folder within the workspace directory.
2.5 Install the Streaming Plugin for SAP HANA Studio
The streaming plugin allows you to access the ESP Studio perspectives from within SAP HANA studio.
NoteThe streaming plugin for SAP HANA studio cannot start and run a local ESP cluster. To run an ESP project from the SAP HANA studio, connect to an ESP remote cluster.
SAP Event Stream Processor: Installation Guide for WindowsInstallation Scenarios P U B L I C 47

To install the streaming plugin into SAP HANA studio, first install SAP HANA studio, version SPS 10 or higher. When installing ESP, select the Custom installation option, then indicate that you want to install the Streaming Plugin for SAP HANA studio. When prompted, provide the location of your SAP HANA studio installation. The ESP installer automatically installs the streaming plugin as part of the installation process.
48 P U B L I CSAP Event Stream Processor: Installation Guide for Windows
Installation Scenarios

3 Post-Installation
When you have successfully installed SAP Event Stream Processor, complete post-installation tasks as necessary for the components you want to use.
The post-installation tasks provided here are not mandatory to run ESP itself, but they do influence whether specific features are available in your implementation.
In this section:
Register an ODBC Driver to Connect to Event Stream Processor on Windows [page 50]To connect to ESP via ODBC from a machine where ESP is not installed, register the ODBC driver.
Setting Environment Variables [page 51]The Event Stream Processor installation updates the PATH environment variable on your system. Run STREAMING.bat to set additional environment variables required to run ESP. Do this for every command window you open and before running any utility in Event Stream Processor.
Enabling SAP BI Authentication [page 52]To enable SAP BI as the authentication provider for Event Stream Processor, copy some files from SBOP PI 4.1 to ESP. If you are upgrading from a previous version of Event Stream Processor, you need not complete this process again.
Installing the SDK on Other Machines [page 52]Set up an external machine to link and compile clients that will use the SDK to communicate with a server running ESP.
Installing the Adapter Toolkit on Other Machines [page 56]SAP Event Stream Processor provides an adapter toolkit to build custom adapters. You can install the adapter toolkit to other machines where you can develop and test your custom adapters.
Deploying and Starting a Cluster [page 57]Event Stream Processor uses a database-based cluster configuration, so you start a cluster by starting the cluster database and a manager node. Starting a cluster is a prerequisite for running projects and logging into ESP Cockpit, but is an optional post-installation step.
Changing Studio Local Cluster Credentials for External Access [page 58]Before connecting to the SAP Event Stream Processor Studio local cluster with a component from outside of Studio (such as command line tools, external adapters, or custom applications), you will first have to change the system-generated local cluster password.
SAP Event Stream Processor: Installation Guide for WindowsPost-Installation P U B L I C 49
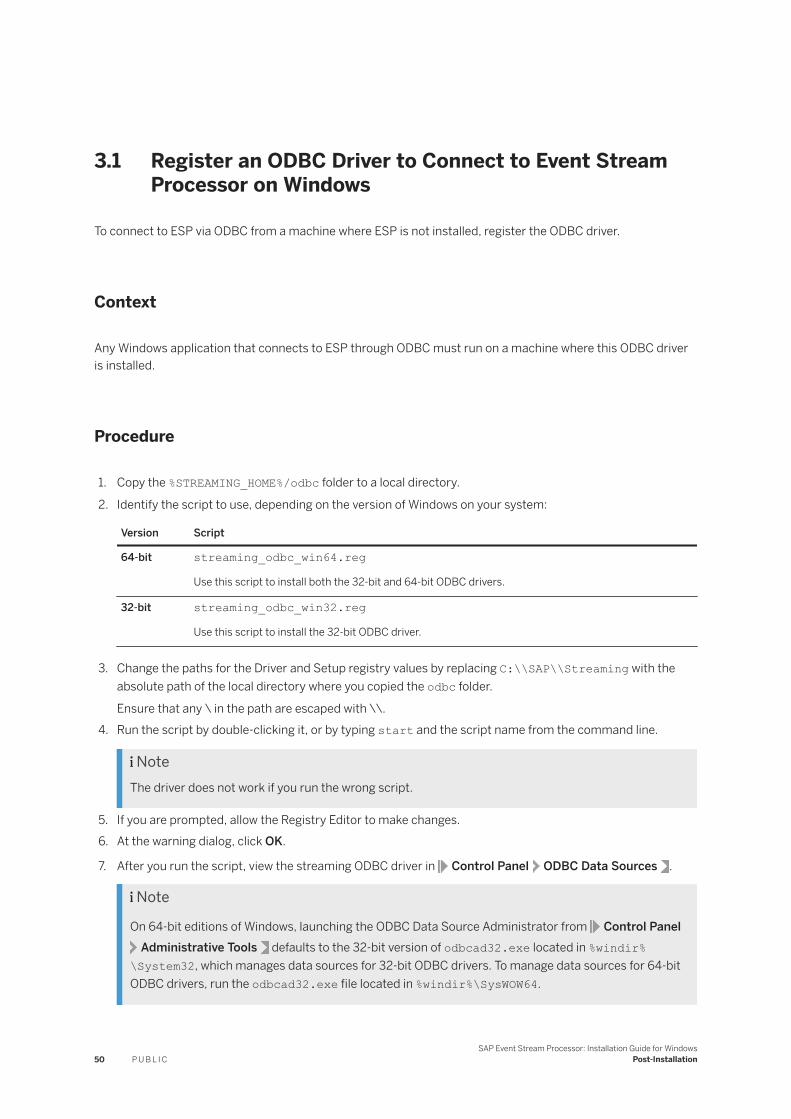
3.1 Register an ODBC Driver to Connect to Event Stream Processor on Windows
To connect to ESP via ODBC from a machine where ESP is not installed, register the ODBC driver.
Context
Any Windows application that connects to ESP through ODBC must run on a machine where this ODBC driver is installed.
Procedure
1. Copy the %STREAMING_HOME%/odbc folder to a local directory.
2. Identify the script to use, depending on the version of Windows on your system:
Version Script
64-bit streaming_odbc_win64.regUse this script to install both the 32-bit and 64-bit ODBC drivers.
32-bit streaming_odbc_win32.regUse this script to install the 32-bit ODBC driver.
3. Change the paths for the Driver and Setup registry values by replacing C:\\SAP\\Streaming with the absolute path of the local directory where you copied the odbc folder.
Ensure that any \ in the path are escaped with \\.4. Run the script by double-clicking it, or by typing start and the script name from the command line.
NoteThe driver does not work if you run the wrong script.
5. If you are prompted, allow the Registry Editor to make changes.6. At the warning dialog, click OK.
7. After you run the script, view the streaming ODBC driver in Control Panel ODBC Data Sources .
Note
On 64-bit editions of Windows, launching the ODBC Data Source Administrator from Control PanelAdministrative Tools defaults to the 32-bit version of odbcad32.exe located in %windir%
\System32, which manages data sources for 32-bit ODBC drivers. To manage data sources for 64-bit ODBC drivers, run the odbcad32.exe file located in %windir%\SysWOW64.
50 P U B L I CSAP Event Stream Processor: Installation Guide for Windows
Post-Installation
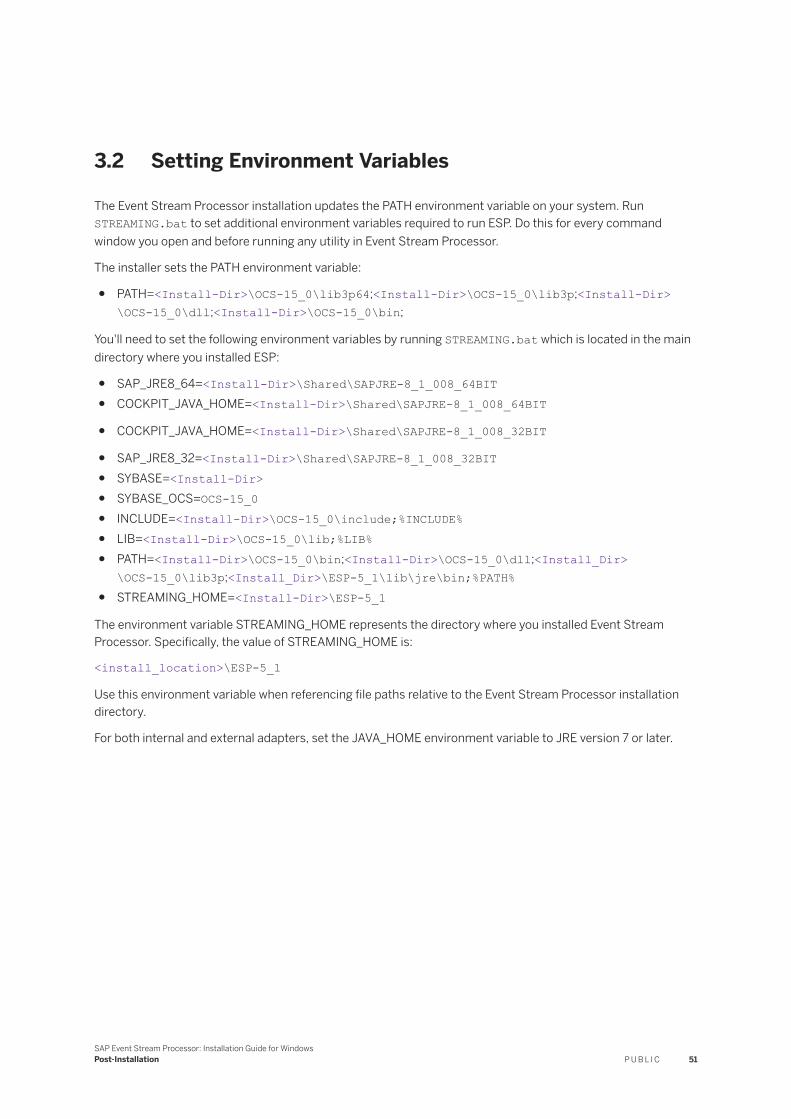
3.2 Setting Environment Variables
The Event Stream Processor installation updates the PATH environment variable on your system. Run STREAMING.bat to set additional environment variables required to run ESP. Do this for every command window you open and before running any utility in Event Stream Processor.
The installer sets the PATH environment variable:
● PATH=<Install-Dir>\OCS-15_0\lib3p64;<Install-Dir>\OCS-15_0\lib3p;<Install-Dir>\OCS-15_0\dll;<Install-Dir>\OCS-15_0\bin;
You'll need to set the following environment variables by running STREAMING.bat which is located in the main directory where you installed ESP:
● SAP_JRE8_64=<Install-Dir>\Shared\SAPJRE-8_1_008_64BIT● COCKPIT_JAVA_HOME=<Install-Dir>\Shared\SAPJRE-8_1_008_64BIT
● COCKPIT_JAVA_HOME=<Install-Dir>\Shared\SAPJRE-8_1_008_32BIT
● SAP_JRE8_32=<Install-Dir>\Shared\SAPJRE-8_1_008_32BIT● SYBASE=<Install-Dir>● SYBASE_OCS=OCS-15_0● INCLUDE=<Install-Dir>\OCS-15_0\include;%INCLUDE%● LIB=<Install-Dir>\OCS-15_0\lib;%LIB%● PATH=<Install-Dir>\OCS-15_0\bin;<Install-Dir>\OCS-15_0\dll;<Install_Dir>
\OCS-15_0\lib3p;<Install_Dir>\ESP-5_1\lib\jre\bin;%PATH%● STREAMING_HOME=<Install-Dir>\ESP-5_1
The environment variable STREAMING_HOME represents the directory where you installed Event Stream Processor. Specifically, the value of STREAMING_HOME is:
<install_location>\ESP-5_1
Use this environment variable when referencing file paths relative to the Event Stream Processor installation directory.
For both internal and external adapters, set the JAVA_HOME environment variable to JRE version 7 or later.
SAP Event Stream Processor: Installation Guide for WindowsPost-Installation P U B L I C 51
3.3 Enabling SAP BI Authentication
To enable SAP BI as the authentication provider for Event Stream Processor, copy some files from SBOP PI 4.1 to ESP. If you are upgrading from a previous version of Event Stream Processor, you need not complete this process again.
Prerequisites
You have authorization to download software from the SAP Support Portal.
Procedure
1. Navigate to %STREAMING_HOME%\libj and create a boe subdirectory.
2. If you do not already have SBOP BI 4.1 SP1 installed, download it.
a. Point your browser to https://support.sap.com/swdcThe system displays the SAP Software Download Center window.
b. In the right pane, click Search for Software.The system displays the Search for Software Downloads window.
c. Enter SBOP BI 4.1 in the Search Term field and click the Search button.d. Scroll down and click SBOP BI Platform 4.1 SP1 Client Tools Windows (32B) .e. Select or create a folder, and extract the contents of the zip file to that folder.
3. Go to the folder where you have SBOP PI 4.1 SP1 installed. Navigate to java\lib and copy all of the contents of that directory, including the external subdirectory to %STREAMING_HOME%\libj\boe.
4. Delete all instances of xercesImpl.jar from the %STREAMING_HOME%\libj\boe\* directories. The DocumentBuilder class included with BusinessObjects is of an earlier version than that used with ESP.
5. Start the ESP Cluster Manager using start_node.bat node1.
3.4 Installing the SDK on Other Machines
Set up an external machine to link and compile clients that will use the SDK to communicate with a server running ESP.
Prerequisites
You have a supported compiler for the SDK you plan to use. See Supported Compilers [page 12].
52 P U B L I CSAP Event Stream Processor: Installation Guide for Windows
Post-Installation
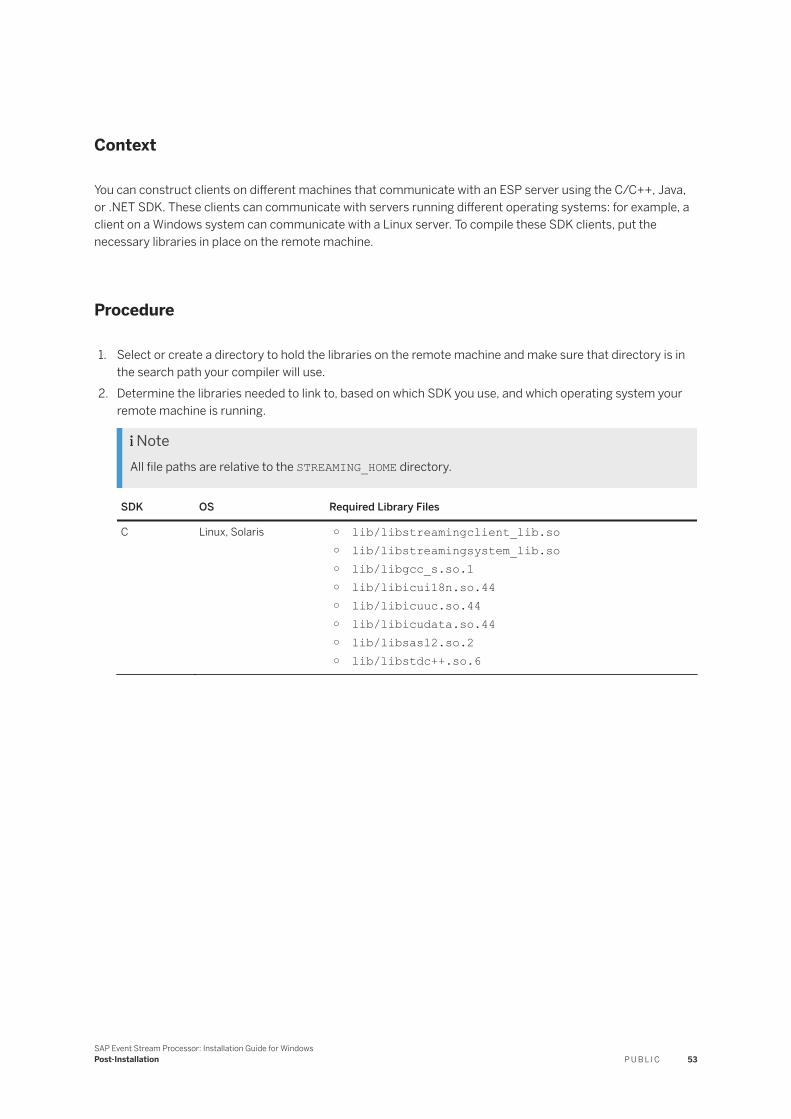
Context
You can construct clients on different machines that communicate with an ESP server using the C/C++, Java, or .NET SDK. These clients can communicate with servers running different operating systems: for example, a client on a Windows system can communicate with a Linux server. To compile these SDK clients, put the necessary libraries in place on the remote machine.
Procedure
1. Select or create a directory to hold the libraries on the remote machine and make sure that directory is in the search path your compiler will use.
2. Determine the libraries needed to link to, based on which SDK you use, and which operating system your remote machine is running.
NoteAll file paths are relative to the STREAMING_HOME directory.
SDK OS Required Library Files
C Linux, Solaris ○ lib/libstreamingclient_lib.so○ lib/libstreamingsystem_lib.so○ lib/libgcc_s.so.1○ lib/libicui18n.so.44○ lib/libicuuc.so.44○ lib/libicudata.so.44○ lib/libsasl2.so.2○ lib/libstdc++.so.6
SAP Event Stream Processor: Installation Guide for WindowsPost-Installation P U B L I C 53
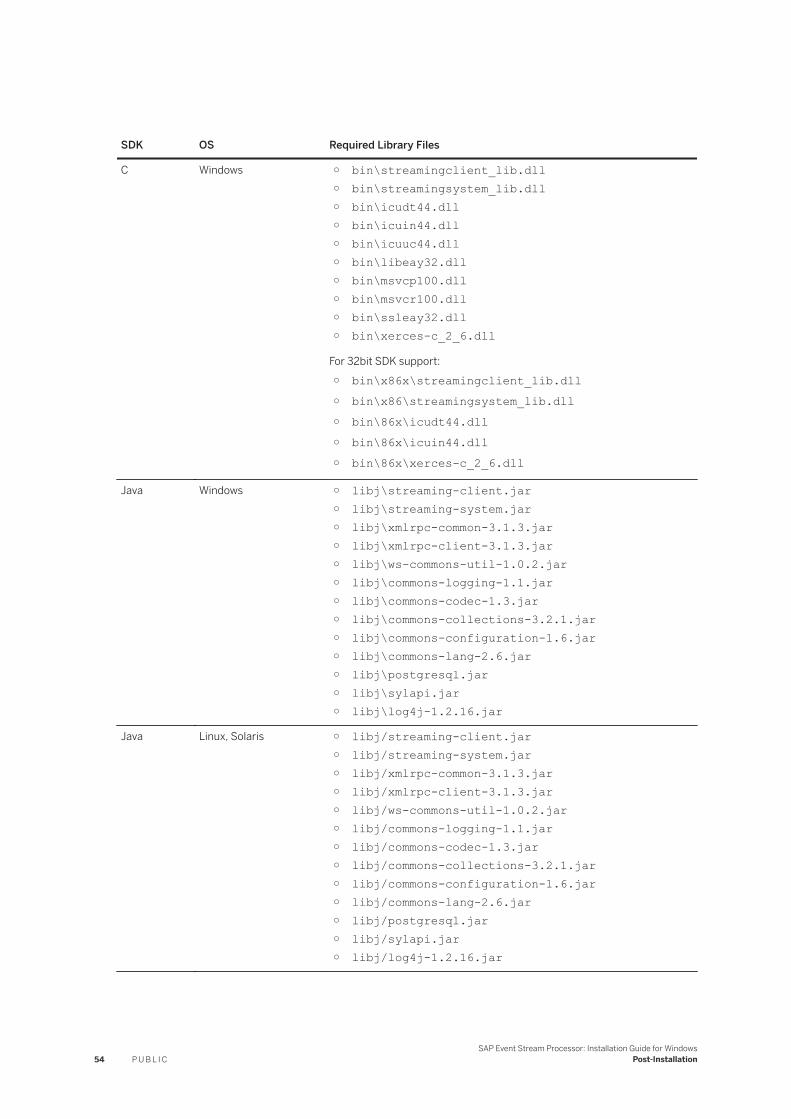
SDK OS Required Library Files
C Windows ○ bin\streamingclient_lib.dll○ bin\streamingsystem_lib.dll○ bin\icudt44.dll○ bin\icuin44.dll○ bin\icuuc44.dll○ bin\libeay32.dll○ bin\msvcp100.dll○ bin\msvcr100.dll○ bin\ssleay32.dll○ bin\xerces-c_2_6.dll
For 32bit SDK support:
○ bin\x86x\streamingclient_lib.dll○ bin\x86\streamingsystem_lib.dll○ bin\86x\icudt44.dll○ bin\86x\icuin44.dll○ bin\86x\xerces-c_2_6.dll
Java Windows ○ libj\streaming-client.jar○ libj\streaming-system.jar○ libj\xmlrpc-common-3.1.3.jar○ libj\xmlrpc-client-3.1.3.jar○ libj\ws-commons-util-1.0.2.jar○ libj\commons-logging-1.1.jar○ libj\commons-codec-1.3.jar○ libj\commons-collections-3.2.1.jar○ libj\commons-configuration-1.6.jar○ libj\commons-lang-2.6.jar○ libj\postgresql.jar○ libj\sylapi.jar○ libj\log4j-1.2.16.jar
Java Linux, Solaris ○ libj/streaming-client.jar○ libj/streaming-system.jar○ libj/xmlrpc-common-3.1.3.jar○ libj/xmlrpc-client-3.1.3.jar○ libj/ws-commons-util-1.0.2.jar○ libj/commons-logging-1.1.jar○ libj/commons-codec-1.3.jar○ libj/commons-collections-3.2.1.jar○ libj/commons-configuration-1.6.jar○ libj/commons-lang-2.6.jar○ libj/postgresql.jar○ libj/sylapi.jar○ libj/log4j-1.2.16.jar
54 P U B L I CSAP Event Stream Processor: Installation Guide for Windows
Post-Installation
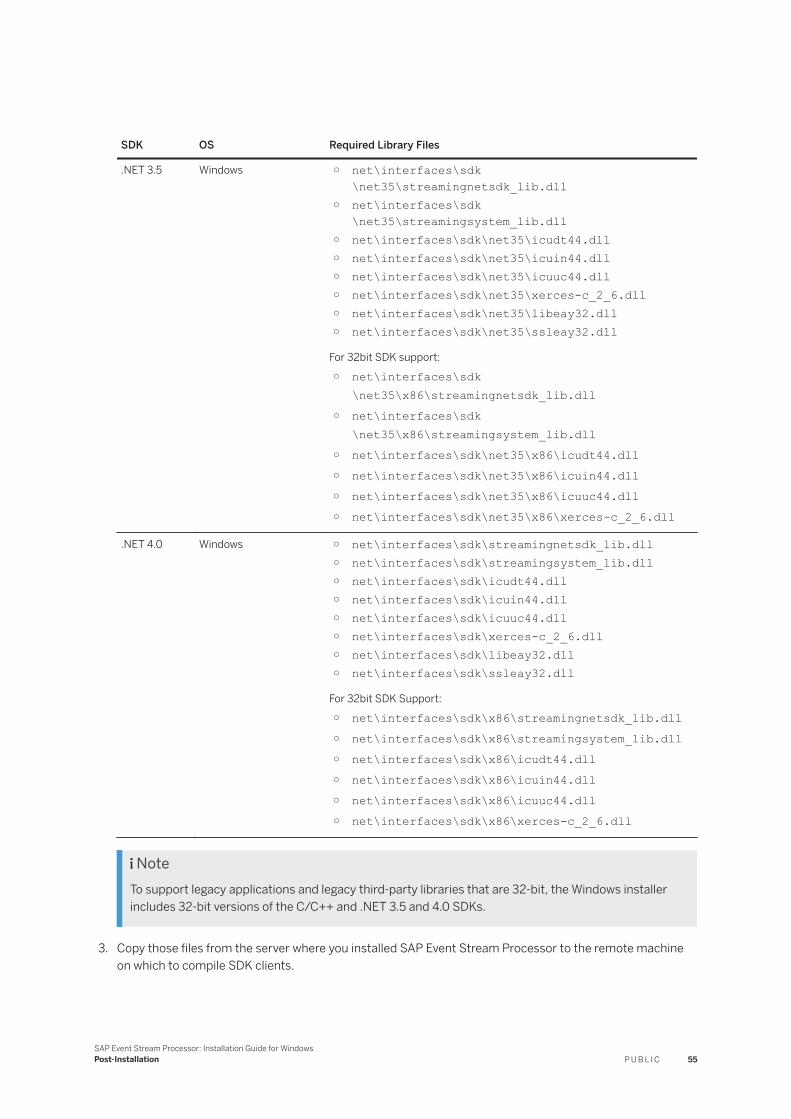
SDK OS Required Library Files
.NET 3.5 Windows ○ net\interfaces\sdk\net35\streamingnetsdk_lib.dll
○ net\interfaces\sdk\net35\streamingsystem_lib.dll
○ net\interfaces\sdk\net35\icudt44.dll○ net\interfaces\sdk\net35\icuin44.dll○ net\interfaces\sdk\net35\icuuc44.dll○ net\interfaces\sdk\net35\xerces-c_2_6.dll○ net\interfaces\sdk\net35\libeay32.dll○ net\interfaces\sdk\net35\ssleay32.dll
For 32bit SDK support:
○ net\interfaces\sdk\net35\x86\streamingnetsdk_lib.dll
○ net\interfaces\sdk\net35\x86\streamingsystem_lib.dll
○ net\interfaces\sdk\net35\x86\icudt44.dll○ net\interfaces\sdk\net35\x86\icuin44.dll○ net\interfaces\sdk\net35\x86\icuuc44.dll○ net\interfaces\sdk\net35\x86\xerces-c_2_6.dll
.NET 4.0 Windows ○ net\interfaces\sdk\streamingnetsdk_lib.dll○ net\interfaces\sdk\streamingsystem_lib.dll○ net\interfaces\sdk\icudt44.dll○ net\interfaces\sdk\icuin44.dll○ net\interfaces\sdk\icuuc44.dll○ net\interfaces\sdk\xerces-c_2_6.dll○ net\interfaces\sdk\libeay32.dll○ net\interfaces\sdk\ssleay32.dll
For 32bit SDK Support:
○ net\interfaces\sdk\x86\streamingnetsdk_lib.dll○ net\interfaces\sdk\x86\streamingsystem_lib.dll○ net\interfaces\sdk\x86\icudt44.dll○ net\interfaces\sdk\x86\icuin44.dll○ net\interfaces\sdk\x86\icuuc44.dll○ net\interfaces\sdk\x86\xerces-c_2_6.dll
NoteTo support legacy applications and legacy third-party libraries that are 32-bit, the Windows installer includes 32-bit versions of the C/C++ and .NET 3.5 and 4.0 SDKs.
3. Copy those files from the server where you installed SAP Event Stream Processor to the remote machine on which to compile SDK clients.
SAP Event Stream Processor: Installation Guide for WindowsPost-Installation P U B L I C 55

3.5 Installing the Adapter Toolkit on Other Machines
SAP Event Stream Processor provides an adapter toolkit to build custom adapters. You can install the adapter toolkit to other machines where you can develop and test your custom adapters.
Prerequisites
Install SAP Event Stream Processor with any of the following components:
● ESP Server● Web Services adapter● RFC adapter
Context
The adapter toolkit runs on all standard platforms for Event Stream Processor, and requires JRE version 6 or higher. The toolkit is installed automatically with the ESP Server, the Web Services adapter, and the RFC adapter and is therefore available to copy to other machines only when you have installed at least one of these components.
Procedure
1. Copy the contents of %STREAMING_HOME%\adapters\framework from the ESP machine to the external machine.
2. (Optional) Copy the API documentation in %STREAMING_HOME%\doc\adaptertoolkit from the ESP machine to the external machine.When you have finished copying the toolkit to the external machine, it is ready to use. You can build, test, and run custom adapters from the external machine. Adapters running on a machine external to ESP can only run in unmanaged mode, meaning they start and stop independently of the ESP Server and ESP projects. For information on managed and unmanaged adapters, and on building custom adapters in general, see the SAP Event Stream Processor: Building Custom Adapters.
56 P U B L I CSAP Event Stream Processor: Installation Guide for Windows
Post-Installation

3.6 Deploying and Starting a Cluster
Event Stream Processor uses a database-based cluster configuration, so you start a cluster by starting the cluster database and a manager node. Starting a cluster is a prerequisite for running projects and logging into ESP Cockpit, but is an optional post-installation step.
Prerequisites
Ensure that port 19111 is available to the cluster database. To use a different port, change the value in the following locations:
● In %STREAMING_HOME%\cluster\config\<cluster-name>\cluster.cfg , edit the value in <jdbc-url> using the format jdbc:sqlanywhere:<hostname>:<port-number>.
● In %STREAMING_HOME%\cluster\config\<cluster-name>\start_db.bat, edit the <ESP_CLUSTER_DB_PORT> value.
Context
During installation, the installer creates a cluster database and a single node cluster. This procedure is for starting that default, single-node cluster. If you performed a typical installation, accepting the defaults, this cluster is named esp1 with one node, named node1. If you specified different names during a custom installation, substitute them for esp1 node1 in the commands shown. Node names should only contain letters, numbers, and underscores.
NoteIf you have not already configured the cluster using the ESP Cockpit or streamingclusteradmin utility, there are additional configuration tasks you perform before the cluster is usable. For details on configuring the cluster, see the ESP Cockpit help, or Configuring SAP ESP Cockpit [page 59].
In a test system, where you are running projects only on the Studio local cluster, you need not start a cluster manually.
To start a custom cluster or cluster database, see Starting a Cluster Database in the SAP Event Stream Processor: Configuration and Administration Guide.
Procedure
1. Set the ESP environment variables.At the command prompt, enter:
STREAMING.bat
SAP Event Stream Processor: Installation Guide for WindowsPost-Installation P U B L I C 57
2. Start the cluster database.At the command prompt, enter:
%STREAMING_HOME%\cluster\config\start_db.bat
3. Start the initial node.At the command prompt, enter:
%STREAMING_HOME%\cluster\config\esp1\start_node.bat node1
or, to start the node in the background, enter:
start /b %STREAMING_HOME%\cluster\config\esp1\start_node.bat node1
NoteThe command shell must remain open for the program to continue running.
If you have already configured the cluster, it is ready to use. Otherwise, use the streamingclusteradmin utility, or refer to Granting Permissions [page 60] for your next steps.
3.7 Changing Studio Local Cluster Credentials for External Access
Before connecting to the SAP Event Stream Processor Studio local cluster with a component from outside of Studio (such as command line tools, external adapters, or custom applications), you will first have to change the system-generated local cluster password.
Procedure
1. In Studio, open the SAP ESP Run-Test perspective.2. In the Server view, stop any projects running in the local cluster.3. Right-click the local cluster, and select Disconnect and Stop Local Server.4. Right-click the local cluster, and select Change Password.5. Enter the new values for the local cluster password.
Ensure that you make note of the new values as you will be prompted to enter them every time you connect to the local cluster with a component from outside of Studio.
6. Right-click the local cluster, and select Connect Server.
58 P U B L I CSAP Event Stream Processor: Installation Guide for Windows
Post-Installation
4 SAP Event Stream Processor Cockpit
SAP ESP Cockpit is a Web-based tool for managing and monitoring ESP cluster nodes, projects, adapters, and other components.
SAP ESP Cockpit provides overview and detailed information on overall system health for the nodes within a specific cluster. SAP ESP Cockpit lets you configure alerts and set thresholds for the key performance areas of availability, performance, and capacity, providing up-to-date, relevant information about the overall health of your system.
Use SAP ESP Cockpit to track a variety of performance metrics to give you powerful insights into patterns of use. You can display collected data as tables and graphs. Plotting results lets you both focus on the particulars and see the big picture. Understanding how your Event Stream Processor environment performed in the past helps you ensure it meets your needs in the future.
In this section:
Configuring SAP ESP Cockpit [page 59]SAP ESP Cockpit is a Web-based tool for managing and monitoring ESP cluster nodes, projects, adapters, and other components in the Event Stream Processor environment.
4.1 Configuring SAP ESP Cockpit
SAP ESP Cockpit is a Web-based tool for managing and monitoring ESP cluster nodes, projects, adapters, and other components in the Event Stream Processor environment.
Perform these tasks in sequential order.
NoteTo edit ESP Cockpit settings or the cluster configuration before granting permissions to users or roles, log on to ESP Cockpit using the SYS_STREAMING credentials.
In this section:
Starting the Cluster Database and an ESP Node [page 60]Use a script to start the cluster database and a node. Do this before performing any tasks in Event Stream Processor.
Granting Permissions [page 60]Use the streamingclusteradmin utility to create roles and grant permissions to roles or users. To monitor Event Stream Processor, grant view permissions to your users and roles. To administer ESP, grant users and roles view and admin (or all) permissions. To edit SAP ESP Cockpit settings and configure alerts, grant users and roles admin (or all) permissions on the ESP Cockpit system.
Starting SAP ESP Cockpit [page 62]
SAP Event Stream Processor: Installation Guide for WindowsSAP Event Stream Processor Cockpit P U B L I C 59
Use a script to start SAP ESP Cockpit.
Logging in to SAP ESP Cockpit [page 63]Connect to the SAP ESP Cockpit console using a Web browser.
Creating Authenticators Using SAP ESP Cockpit [page 64](Perform this task only if you are using RSA or Kerberos authentication for your ESP environment.) SAP ESP Cockpit only supports authenticating through username-password credentials, therefore if you use RSA or Kerberos authentication for ESP, create a username and password authenticator for your ESP Cockpit users.
4.1.1 Starting the Cluster Database and an ESP Node
Use a script to start the cluster database and a node. Do this before performing any tasks in Event Stream Processor.
Procedure
1. Run STREAMING.bat. Do this once for each command window you open.
2. Start the cluster database STREAMING_HOME/cluster/config/<cluster-name>/start_db.bat.
3. Start the node STREAMING_HOME/cluster/config/<cluster-name>/start_node.bat <node-name>.
4.1.2 Granting Permissions
Use the streamingclusteradmin utility to create roles and grant permissions to roles or users. To monitor Event Stream Processor, grant view permissions to your users and roles. To administer ESP, grant users and roles view and admin (or all) permissions. To edit SAP ESP Cockpit settings and configure alerts, grant users and roles admin (or all) permissions on the ESP Cockpit system.
Procedure
1. Use the streamingclusteradmin utility to log on to the cluster as the SYS_STREAMING user:
$STREAMING_HOME/bin/streamingclusteradmin --uri=<uri> --username=SYS_STREAMING --password=<password>
NoteFor <uri>, specify the fully qualified domain name (FQDN) in the form esp[s]://<host>.<domain>:19011 (use esps when SSL is enabled). For <password>, use the cluster password you specified during installation.
60 P U B L I CSAP Event Stream Processor: Installation Guide for Windows
SAP Event Stream Processor Cockpit

2. Grant view permissions to users to monitor ESP. Execute either of the following:
○ Create a new role, grant it view permissions, and assign users. For example, if the role is called projectmonitor:
add role projectmonitorrole grant perm view on all to role projectmonitorrole grant role projectmonitorrole to user <user>
○ Grant view permissions directly to a user:
grant perm view on all to user <user>
NoteWhen granting permissions to a Windows user, you must append a domain to the user name omitting top-level domain extensions such as .com or .net—for example, fred@sap, not [email protected]. When no domain is appended to the user name, an @null domain is generated by default. For example, fred@null. If using the @null default domain, permissions must be granted to username@null.
3. Grant view and admin permissions to users to administer Event Stream Processor. Execute either of the following:
○ Create a new role, grant it view and admin permissions, and assign users. For example, if the role is called projectadminrole:
add role projectadminrole grant perm view on all to role projectadminrolegrant perm admin on all to role projectadminrole grant role projectadminrole to user <user>
○ Grant view and admin permissions directly to a user:
grant perm view on all to user <user> grant perm admin on all to user <user>
4. Grant permissions to users to edit the ESP cluster configuration:
grant perm write on all to user <user> grant perm read on all to user <user> 5. Grant permissions directly to users to start, stop, add, or remove ESP projects or adapters:
grant perm start on all to user <user> grant perm stop on all to user <user> grant perm add on all to user <user> grant perm remove on all to user <user>
6. Grant admin or all permissions to users or roles to edit SAP ESP Cockpit settings and configure alerts. Execute either of the following:
○ Grant admin or all permissions to a role:
grant perm admin on system cockpit to role <role>
grant perm all on system cockpit to role <role>
SAP Event Stream Processor: Installation Guide for WindowsSAP Event Stream Processor Cockpit P U B L I C 61

○ Grant admin or all permissions directly to a user:
grant perm admin on system cockpit to user <user>
grant perm all on system cockpit to user <user>
4.1.3 Starting SAP ESP Cockpit
Use a script to start SAP ESP Cockpit.
Prerequisites
At least one ESP node is running.
Context
To change the ports ESP Cockpit services runs on, see Configuring Ports in the SAP Event Stream Processor: Cockpit Guide.
When starting the ESP Cockpit server in Windows 2008 and Windows 7, use the Run as administrator setting to launch ESP Cockpit even if you already have administrative privileges.
Procedure
1. (Perform this step only if you are starting ESP Cockpit for the first time) From the command prompt, navigate to your Event Stream Processor base installation directory and run STREAMING.bat or STREAMING.sh.This sets the necessary environment variables.
2. Start SAP ESP Cockpit:%SYBASE%\COCKPIT-4\bin\cockpit.bat
When the command finishes executing, the ESP Cockpit URL and prompt appear. For example:
Cockpit Web Console: https://<host>:<port>/cockpit Type help for more options cockpit>
3. (Optional) To confirm that ESP Cockpit is running successfully, enter the status command at the cockpit prompt:
cockpit> status
62 P U B L I CSAP Event Stream Processor: Installation Guide for Windows
SAP Event Stream Processor Cockpit
Confirm that the status is RUNNING, that services are running, and that plugins are loaded.
4.1.4 Logging in to SAP ESP Cockpit
Connect to the SAP ESP Cockpit console using a Web browser.
Prerequisites
● Adobe Flash Player is installed in the browser.● SAP ESP Cockpit is running.
Procedure
1. Open a Web browser and enter https://<hostname>:4283/cockpit.
2. At the login prompt:
○ Select the system to manage and enter a valid user name and password for Event Stream Processor.
NoteEnsure that the login credentials you specify have been granted the required permissions depending for the tasks to be performed.
If you use a Windows account to log in to SAP ESP Cockpit, enter your user name in the format username@domain. Omit top-level domain extensions such as .com or .net—for example, enter fred@sap, not [email protected]. If you do not include the domain, the defaultDomain option must be specified in the authenticator section of cluster configuration. If you use a Windows account to log in, you must also grant permissions to the user name in the format username@domain.
○ (If you are using RSA/Kerberos authentication) At the login prompt, select the system to manage and enter the SYS_STREAMING username and password.
NoteThe password for SYS_STREAMING is the cluster password you specified during installation.
After logging in, SAP ESP Cockpit automatically detects and registers the ESP nodes present on your machine. If you add additional ESP nodes while logged on, they are automatically detected and added.
SAP Event Stream Processor: Installation Guide for WindowsSAP Event Stream Processor Cockpit P U B L I C 63
Next Steps
Once you have completed these tasks, see the Get Started with SAP ESP Cockpit and Configure SAP ESP Cockpit sections in the SAP Event Stream Processor: Cockpit Guide for additional information on configuring SAP ESP Cockpit.
4.1.5 Creating Authenticators Using SAP ESP Cockpit
(Perform this task only if you are using RSA or Kerberos authentication for your ESP environment.) SAP ESP Cockpit only supports authenticating through username-password credentials, therefore if you use RSA or Kerberos authentication for ESP, create a username and password authenticator for your ESP Cockpit users.
Prerequisites
● Start the ESP cluster database and node. See Deploying and Starting a Cluster [page 57].● Start SAP ESP Cockpit. See Starting SAP ESP Cockpit [page 62].● Log into SAP ESP Cockpit using SYS_STREAMING credentials (the password is the cluster password
specified during installation). See Logging in to SAP ESP Cockpit [page 63].
Procedure
1. Select the EXPLORE tab, then select Actions Configure Cluster .2. Expand the Security folder and then the Authenticators folder.3. To add a new authenticator:
a. Click Add Authenticator...b. Select an authenticator type and click Done.c. Select the new username/password authenticator and enter the credentials provided by the
authentication mechanism you are adding. Use the encode <clear-text> from the streamingclusteradmin utility to encrypt the password.
64 P U B L I CSAP Event Stream Processor: Installation Guide for Windows
SAP Event Stream Processor Cockpit
5 Updating from a Previous Version of Event Stream Processor
Performing a proper update and migration helps to maintain backwards compatibility with previous versions so you can continue using older projects in your new environment. Although the procedure for updating from an older version of SAP Event Stream Processor differs depending on whether you are updating from 5.0 or from a previous 5.1 release, there are also tasks common to both update scenarios.
In this section:
Updating from Version 5.0 [page 65]To update from the initial ESP 5.0 version, install version 5.1 Support Package (SP) 12 on top of your current version. Performing a proper update requires both updating your installation and migrating critical information including cluster configuration, database service connections, and cluster persistence data to the cluster database introduced in version 5.1 SP 08.
Updating from 5.1 Versions SP04 and Prior [page 69]To update from the initial ESP 5.1 version, or from 5.1 SP 04 and earlier, install version 5.1 SP 12 on top of your current version. To preserve existing configuration settings and projects, perform a backup on critical files before installing.
Updating from Version 5.1 SP 08 [page 79]Ensure that you have the correct JDK version installed, and migrate your existing project CCL files before attempting to run them in the new environment.
Updating from Version 5.1 SP 09, SP 10, or SP 11 [page 82]Install ESP 5.1 SP 12 on top of your existing 5.1 SP 09, SP 10, or SP 11 installation. To preserve existing configuration settings and projects, perform a backup on critical files before installing.
Updating a Multinode Cluster [page 83]To update a multinode cluster, stop all components and update each node.
5.1 Updating from Version 5.0
To update from the initial ESP 5.0 version, install version 5.1 Support Package (SP) 12 on top of your current version. Performing a proper update requires both updating your installation and migrating critical information including cluster configuration, database service connections, and cluster persistence data to the cluster database introduced in version 5.1 SP 08.
NoteBefore updating your installation:
● Remove all example projects from the workspace. This ensures that you have the latest version of the examples once you upgrade. To remove a project from a workspace, within Studio, right-click the project name in the project explorer, select Delete, then click OK.
SAP Event Stream Processor: Installation Guide for WindowsUpdating from a Previous Version of Event Stream Processor P U B L I C 65

● Manually backup your project directory.
To update your installation, perform these steps:
1. Preparing for the Log Store Format Change [page 67]2. Installation Location [page 68]3. Clearing the PATH Variable [page 68]4. Migrating Your Project Files [page 68]5. Migrating Configuration and Persistence Information [page 72]
Also see Updating Your License [page 8].
After completing these steps, complete the tasks in the Post Installation [page 49] section.
When you have successfully updated and migrated your installation, note that:
● Projects written for the previous version will run on the current version and produce the same results without having to be recompiled. Use the Studio interface to open or import existing projects.
● With the following exceptions, adapters and client programs written with the previous SDK are compatible with the current release without having to be recompiled with the latest SDK:○ Java client code compiled against the 5.0 Java SDK must run using JRE 7 under Event Stream
Processor version 5.1.○ In the .NET SDK, the signature for the set_binary method within the NetEspRelativeRowWriter
class has changed. Therefore, update existing applications that use the 5.0 version of the .NET SDK and call on NetEspRelativeRowWriter.set_binary to use the new method signature. See the API reference documentation for more information. Access this documentation in your installation directory under ESP-5_1\doc\sdk\net.
○ For the Custom Adapter Framework, the return type for the following functions has changed from int to int64_t: getNumberOfGoodRows, getNumberOfBadRows, getTotalRowsProcessed. If your application written in 5.0 uses any of these functions, rewrite the application for 5.1.
○ For security reasons, Event Stream Processor no longer supports the no authentication option.○ Kerberos authentication is now ticket-based. Update existing adapters and clients to use Kerberos
ticket-based authentication and setter methods.● Deployment scripts work the same way in the current version as they did in the previous version without
any changes.● During the install and uninstall processes, ESP automatically creates backups of critical files and
directories, including security settings, cluster configuration, and adapter configuration. To see a list of these files and directories, see Automatic Backups [page 18].
In this section:
Preparing for the Log Store Format Change [page 67]If you use log stores or metadata stores, save backup copies in a safe location before installing the newest version of SAP Event Stream Processor.
Installation Location [page 68]When installing the current version of Event Stream Processor, you can either install to a new directory, or to the same directory as your previous version (or to the same directory as any installed SAP product).
Clearing the PATH Variable [page 68]
66 P U B L I CSAP Event Stream Processor: Installation Guide for Windows
Updating from a Previous Version of Event Stream Processor
When you update your installation, ensure that the previous setting for the PATH system variable is cleaned up.
Migrating Your Project Files [page 68]Two primary datatypes, Date and Timestamp, have been renamed to SecondDate and MsDate, respectively. All CCL language components, commands, and adapter properties that use these datatypes have been updated to use the new names. Projects developed in and prior to SP 08 must have their .ccl files updated to use these names accordingly. Not updating your command projects results in a runtime error.
5.1.1 Preparing for the Log Store Format Change
If you use log stores or metadata stores, save backup copies in a safe location before installing the newest version of SAP Event Stream Processor.
Context
As of ESP version 5.1 SP 08, the format of log store and metadata store files changed. When you start ESP version 5.1 SP 08 or higher, the log stores and metadata stores are automatically converted to the new format.
You cannot use log stores with the old format after this conversion. If the conversion produces unexpected results, revert to your previous version of ESP to use the backups.
Procedure
1. Determine the size and location of each log store used by projects in your cluster.You can find a log store’s location in the properties compartment of the store shape in Studio.
2. Determine the size and location of each metadata store used by projects in your cluster.You can find a metadata store’s location in the Project Deployment Details under Meta Store Directory. In the CCR Project configuration editor, select the Advanced tab and a project deployment node. The default location is ESP_HOME/cluster/projects/<cluster-name>/<workspace-name>.<project-name>.<instance-number>/esp_metadata.
3. Ensure that you have enough disk space to create the backups. You need free space equal to the combined sizes of all your existing log stores and metadata stores.For example, if you have a 10 MB log store, a 100 MB log store, and a 64 MB meta store, add 174 MB to the free disk space you are allowing for installation of the new version of ESP.
4. Make backup copies of the log stores and metadata stores for all the projects in your cluster.
SAP Event Stream Processor: Installation Guide for WindowsUpdating from a Previous Version of Event Stream Processor P U B L I C 67
Next Steps
Complete the installation and test the new version. Once you have ensured that the reformatted log stores and metadata stores are working properly, delete the backups.
5.1.2 Installation Location
When installing the current version of Event Stream Processor, you can either install to a new directory, or to the same directory as your previous version (or to the same directory as any installed SAP product).
The installation process creates a version-based subdirectory under the base installation directory. If, for example, you are installing version 5.1 to a base installation directory called Sybase, the installer creates a subdirectory called ESP-5_1. This naming scheme allows more than one version of Event Stream Processor to coexist in the same base installation directory.
NoteThe installer updates the STREAMING_HOME environment variable to point to the current version. Therefore, to run the previous version of Event Stream Processor after updating to the current version, manually modify the STREAMING_HOME environment variable to point to the previous installation sub-directory.
If you install the current version to a new base installation directory, you do not have to manually modify the STREAMING_HOME variable to run the previous version. However, each time you want to switch between versions, prior to starting Event Stream Processor, run the STREAMING.bat file from the base installation directory of the version you want to run. This ensures all environment variables point to the correct installation.
5.1.3 Clearing the PATH Variable
When you update your installation, ensure that the previous setting for the PATH system variable is cleaned up.
After installing your update, check your system PATH variable. If this variable includes <install-location>\ESP\lib\jre\bin, remove it prior to running version 5.1. To subsequently run version 5.0, add it back.
5.1.4 Migrating Your Project Files
Two primary datatypes, Date and Timestamp, have been renamed to SecondDate and MsDate, respectively. All CCL language components, commands, and adapter properties that use these datatypes have been updated to use the new names. Projects developed in and prior to SP 08 must have their .ccl files updated to use these names accordingly. Not updating your command projects results in a runtime error.
68 P U B L I CSAP Event Stream Processor: Installation Guide for Windows
Updating from a Previous Version of Event Stream Processor
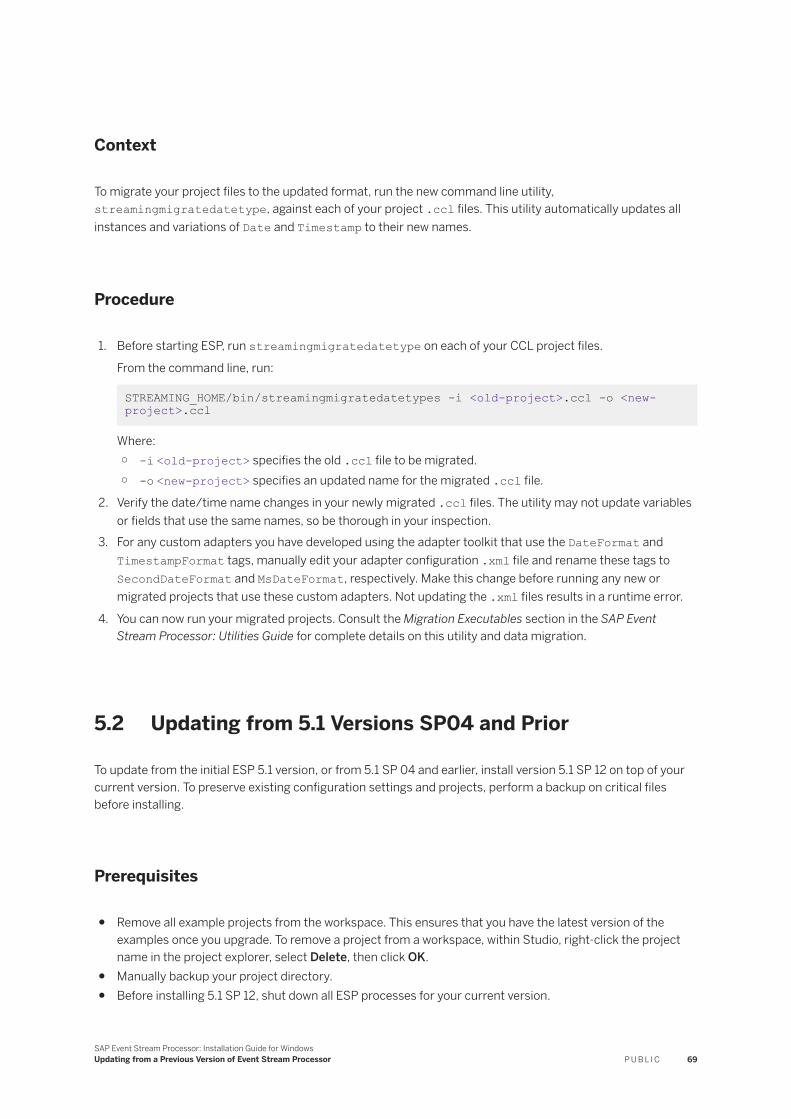
Context
To migrate your project files to the updated format, run the new command line utility, streamingmigratedatetype, against each of your project .ccl files. This utility automatically updates all instances and variations of Date and Timestamp to their new names.
Procedure
1. Before starting ESP, run streamingmigratedatetype on each of your CCL project files.
From the command line, run:
STREAMING_HOME/bin/streamingmigratedatetypes -i <old-project>.ccl -o <new-project>.ccl
Where:○ -i <old-project> specifies the old .ccl file to be migrated.○ -o <new-project> specifies an updated name for the migrated .ccl file.
2. Verify the date/time name changes in your newly migrated .ccl files. The utility may not update variables or fields that use the same names, so be thorough in your inspection.
3. For any custom adapters you have developed using the adapter toolkit that use the DateFormat and TimestampFormat tags, manually edit your adapter configuration .xml file and rename these tags to SecondDateFormat and MsDateFormat, respectively. Make this change before running any new or migrated projects that use these custom adapters. Not updating the .xml files results in a runtime error.
4. You can now run your migrated projects. Consult the Migration Executables section in the SAP Event Stream Processor: Utilities Guide for complete details on this utility and data migration.
5.2 Updating from 5.1 Versions SP04 and Prior
To update from the initial ESP 5.1 version, or from 5.1 SP 04 and earlier, install version 5.1 SP 12 on top of your current version. To preserve existing configuration settings and projects, perform a backup on critical files before installing.
Prerequisites
● Remove all example projects from the workspace. This ensures that you have the latest version of the examples once you upgrade. To remove a project from a workspace, within Studio, right-click the project name in the project explorer, select Delete, then click OK.
● Manually backup your project directory.● Before installing 5.1 SP 12, shut down all ESP processes for your current version.
SAP Event Stream Processor: Installation Guide for WindowsUpdating from a Previous Version of Event Stream Processor P U B L I C 69
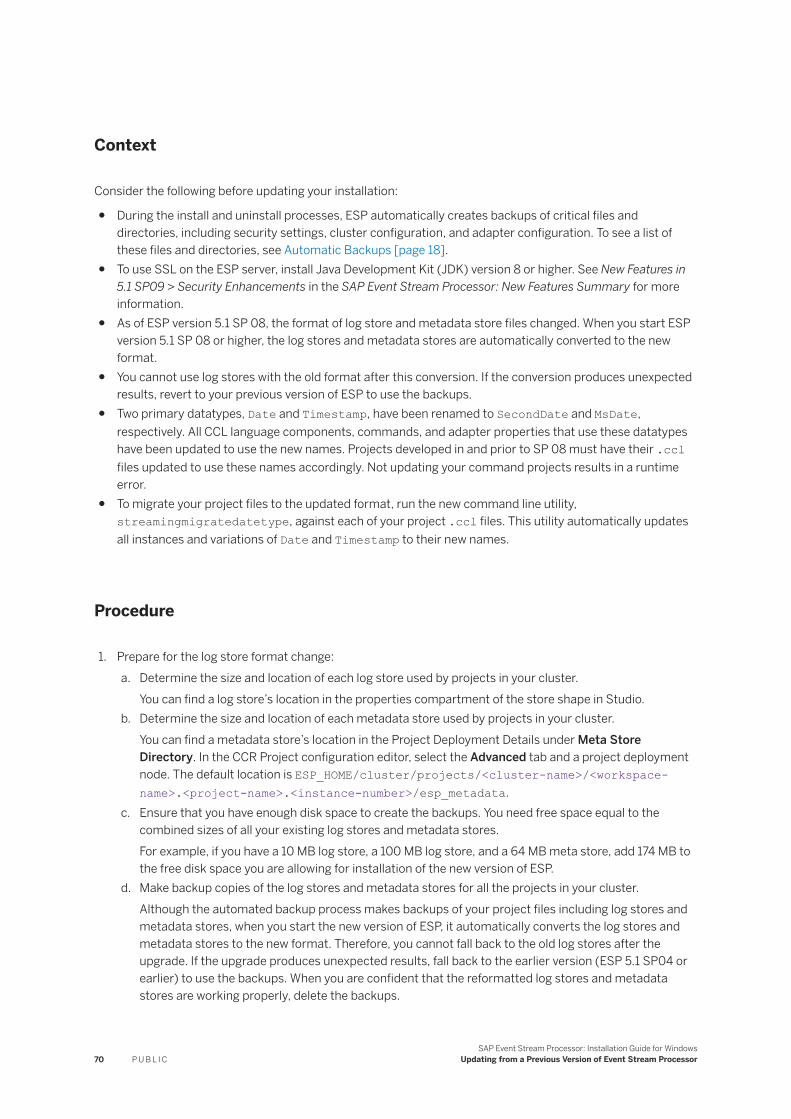
Context
Consider the following before updating your installation:
● During the install and uninstall processes, ESP automatically creates backups of critical files and directories, including security settings, cluster configuration, and adapter configuration. To see a list of these files and directories, see Automatic Backups [page 18].
● To use SSL on the ESP server, install Java Development Kit (JDK) version 8 or higher. See New Features in 5.1 SP09 > Security Enhancements in the SAP Event Stream Processor: New Features Summary for more information.
● As of ESP version 5.1 SP 08, the format of log store and metadata store files changed. When you start ESP version 5.1 SP 08 or higher, the log stores and metadata stores are automatically converted to the new format.
● You cannot use log stores with the old format after this conversion. If the conversion produces unexpected results, revert to your previous version of ESP to use the backups.
● Two primary datatypes, Date and Timestamp, have been renamed to SecondDate and MsDate, respectively. All CCL language components, commands, and adapter properties that use these datatypes have been updated to use the new names. Projects developed in and prior to SP 08 must have their .ccl files updated to use these names accordingly. Not updating your command projects results in a runtime error.
● To migrate your project files to the updated format, run the new command line utility, streamingmigratedatetype, against each of your project .ccl files. This utility automatically updates all instances and variations of Date and Timestamp to their new names.
Procedure
1. Prepare for the log store format change:a. Determine the size and location of each log store used by projects in your cluster.
You can find a log store’s location in the properties compartment of the store shape in Studio.b. Determine the size and location of each metadata store used by projects in your cluster.
You can find a metadata store’s location in the Project Deployment Details under Meta Store Directory. In the CCR Project configuration editor, select the Advanced tab and a project deployment node. The default location is ESP_HOME/cluster/projects/<cluster-name>/<workspace-name>.<project-name>.<instance-number>/esp_metadata.
c. Ensure that you have enough disk space to create the backups. You need free space equal to the combined sizes of all your existing log stores and metadata stores.For example, if you have a 10 MB log store, a 100 MB log store, and a 64 MB meta store, add 174 MB to the free disk space you are allowing for installation of the new version of ESP.
d. Make backup copies of the log stores and metadata stores for all the projects in your cluster.Although the automated backup process makes backups of your project files including log stores and metadata stores, when you start the new version of ESP, it automatically converts the log stores and metadata stores to the new format. Therefore, you cannot fall back to the old log stores after the upgrade. If the upgrade produces unexpected results, fall back to the earlier version (ESP 5.1 SP04 or earlier) to use the backups. When you are confident that the reformatted log stores and metadata stores are working properly, delete the backups.
70 P U B L I CSAP Event Stream Processor: Installation Guide for Windows
Updating from a Previous Version of Event Stream Processor
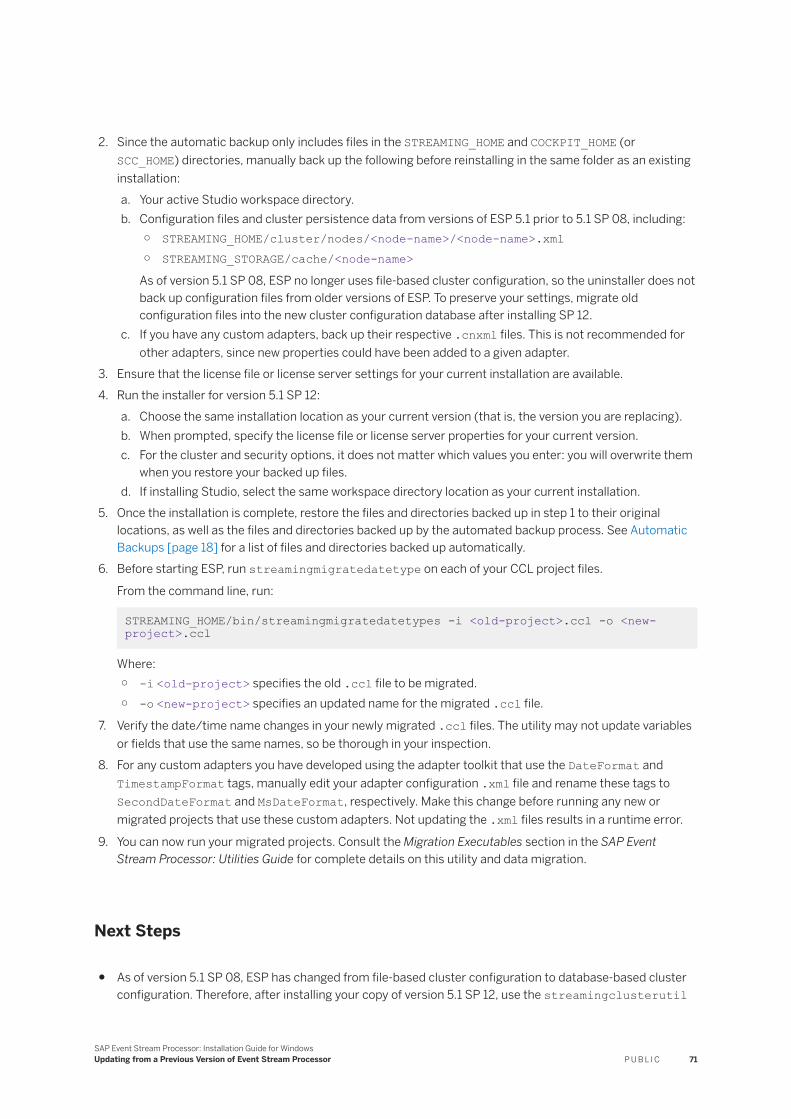
2. Since the automatic backup only includes files in the STREAMING_HOME and COCKPIT_HOME (or SCC_HOME) directories, manually back up the following before reinstalling in the same folder as an existing installation: a. Your active Studio workspace directory.b. Configuration files and cluster persistence data from versions of ESP 5.1 prior to 5.1 SP 08, including:
○ STREAMING_HOME/cluster/nodes/<node-name>/<node-name>.xml ○ STREAMING_STORAGE/cache/<node-name>
As of version 5.1 SP 08, ESP no longer uses file-based cluster configuration, so the uninstaller does not back up configuration files from older versions of ESP. To preserve your settings, migrate old configuration files into the new cluster configuration database after installing SP 12.
c. If you have any custom adapters, back up their respective .cnxml files. This is not recommended for other adapters, since new properties could have been added to a given adapter.
3. Ensure that the license file or license server settings for your current installation are available.4. Run the installer for version 5.1 SP 12:
a. Choose the same installation location as your current version (that is, the version you are replacing).b. When prompted, specify the license file or license server properties for your current version.c. For the cluster and security options, it does not matter which values you enter: you will overwrite them
when you restore your backed up files.d. If installing Studio, select the same workspace directory location as your current installation.
5. Once the installation is complete, restore the files and directories backed up in step 1 to their original locations, as well as the files and directories backed up by the automated backup process. See Automatic Backups [page 18] for a list of files and directories backed up automatically.
6. Before starting ESP, run streamingmigratedatetype on each of your CCL project files.
From the command line, run:
STREAMING_HOME/bin/streamingmigratedatetypes -i <old-project>.ccl -o <new-project>.ccl
Where:○ -i <old-project> specifies the old .ccl file to be migrated.○ -o <new-project> specifies an updated name for the migrated .ccl file.
7. Verify the date/time name changes in your newly migrated .ccl files. The utility may not update variables or fields that use the same names, so be thorough in your inspection.
8. For any custom adapters you have developed using the adapter toolkit that use the DateFormat and TimestampFormat tags, manually edit your adapter configuration .xml file and rename these tags to SecondDateFormat and MsDateFormat, respectively. Make this change before running any new or migrated projects that use these custom adapters. Not updating the .xml files results in a runtime error.
9. You can now run your migrated projects. Consult the Migration Executables section in the SAP Event Stream Processor: Utilities Guide for complete details on this utility and data migration.
Next Steps
● As of version 5.1 SP 08, ESP has changed from file-based cluster configuration to database-based cluster configuration. Therefore, after installing your copy of version 5.1 SP 12, use the streamingclusterutil
SAP Event Stream Processor: Installation Guide for WindowsUpdating from a Previous Version of Event Stream Processor P U B L I C 71
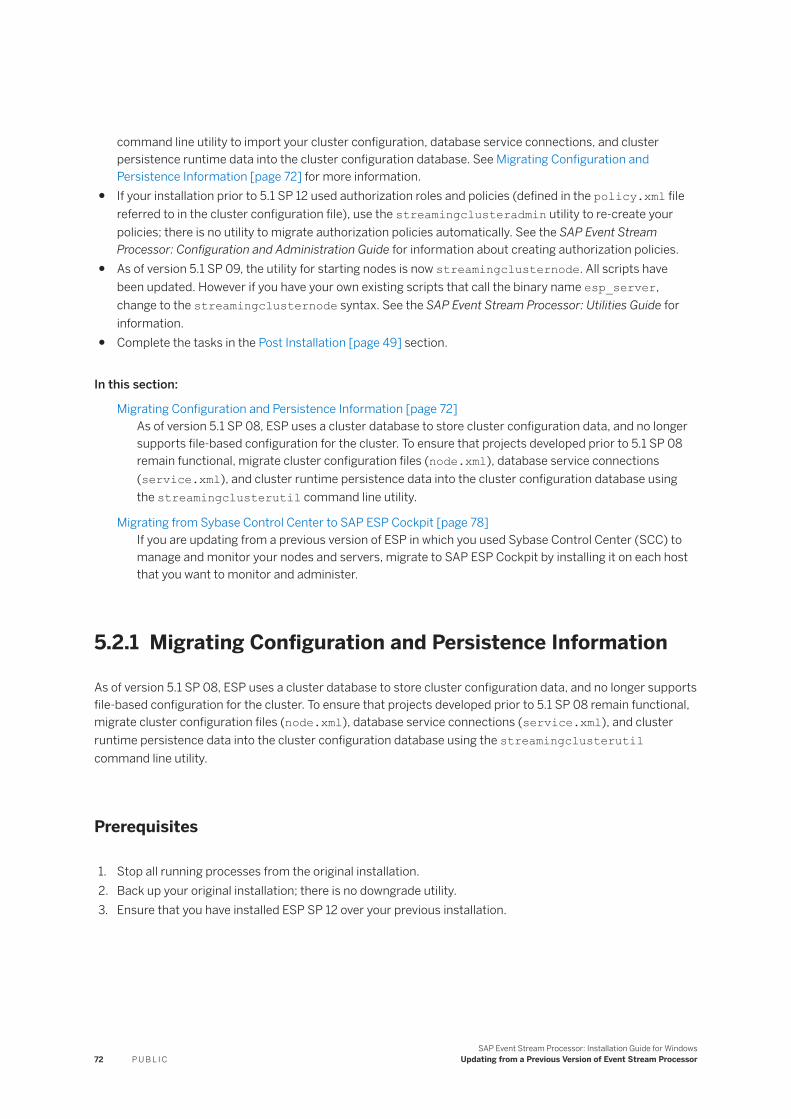
command line utility to import your cluster configuration, database service connections, and cluster persistence runtime data into the cluster configuration database. See Migrating Configuration and Persistence Information [page 72] for more information.
● If your installation prior to 5.1 SP 12 used authorization roles and policies (defined in the policy.xml file referred to in the cluster configuration file), use the streamingclusteradmin utility to re-create your policies; there is no utility to migrate authorization policies automatically. See the SAP Event Stream Processor: Configuration and Administration Guide for information about creating authorization policies.
● As of version 5.1 SP 09, the utility for starting nodes is now streamingclusternode. All scripts have been updated. However if you have your own existing scripts that call the binary name esp_server, change to the streamingclusternode syntax. See the SAP Event Stream Processor: Utilities Guide for information.
● Complete the tasks in the Post Installation [page 49] section.
In this section:
Migrating Configuration and Persistence Information [page 72]As of version 5.1 SP 08, ESP uses a cluster database to store cluster configuration data, and no longer supports file-based configuration for the cluster. To ensure that projects developed prior to 5.1 SP 08 remain functional, migrate cluster configuration files (node.xml), database service connections (service.xml), and cluster runtime persistence data into the cluster configuration database using the streamingclusterutil command line utility.
Migrating from Sybase Control Center to SAP ESP Cockpit [page 78]If you are updating from a previous version of ESP in which you used Sybase Control Center (SCC) to manage and monitor your nodes and servers, migrate to SAP ESP Cockpit by installing it on each host that you want to monitor and administer.
5.2.1 Migrating Configuration and Persistence Information
As of version 5.1 SP 08, ESP uses a cluster database to store cluster configuration data, and no longer supports file-based configuration for the cluster. To ensure that projects developed prior to 5.1 SP 08 remain functional, migrate cluster configuration files (node.xml), database service connections (service.xml), and cluster runtime persistence data into the cluster configuration database using the streamingclusterutil command line utility.
Prerequisites
1. Stop all running processes from the original installation.2. Back up your original installation; there is no downgrade utility.3. Ensure that you have installed ESP SP 12 over your previous installation.
72 P U B L I CSAP Event Stream Processor: Installation Guide for Windows
Updating from a Previous Version of Event Stream Processor

Context
Migrating an existing cluster requires the use of the original cluster's cipher key and keystore. The installer backs up these files in the following locations:
● %STREAMING_HOME%\backup\ESP-5_1\security\keystore_rsa.jks● %STREAMING_HOME%\backup\ESP-5_1\cluster\keys\test-name-1\cluster.key
NoteIf you had defined authorization roles and policies in the policy.xml file referred to in your original cluster configuration file, use the streamingclusteradmin utility to re-create your policies; there is no utility to migrate authorization policies automatically. For information about creating authorization policies, see the SAP Event Stream Processor: Configuration and Administration Guide.
Procedure
1. Restore the keystore and cipher key from your previous installation:a. Copy %STREAMING_HOME%\backup\ESP-5_1\security\keystore_rsa.jks to
%STREAMING_HOME%\security\keystore_rsa.jks.b. Create a subdirectory, new_cluster, under %STREAMING_HOME%\cluster\keys.c. Copy all files in %STREAMING_HOME%\backup\ESP-5_1\cluster\keys\test-name-1 to
%STREAMING_HOME%\cluster\keys\new_cluster.
2. Create a new cluster configuration directory called new_cluster by recursively copying all the files from %STREAMING_HOME%\cluster\config\esp1 to %STREAMING_HOME%\cluster\config\new_cluster.
3. In the new directory, %STREAMING_HOME%\cluster\config\new_cluster, remove unnecessary files, or files that need to be re-created during the migration:a. Remove all auth*.xml files. These are artifacts left over from the installer and are not required.b. Remove the cluster.xml file. The migration procedure creates a new one.c. Remove esp_cluster.* files to remove the cluster database created by the installer. During the
migration process, you will create a new one.4. The encrypted passwords in the new cluster.cfg file were generated with a different cipher key than the
one used to encrypt passwords in the old cluster configuration file (node1.xml). Configure encryption for passwords in the new cluster.cfg file as necessary:
○ If you do not require password encryption in the bootstrap cluster.cfg file, set the following parameters to false and use plain text passwords for their associated parameters in the cluster.cfg file:○ jdbc-password-is-encrypted=false○ cluster-password-is-encrypted=false
○ If you require password encryption, regenerate the encrypted passwords in the cluster.cfg file using the cipher key from your previous installation, which you copied into your 5.1 SP 12 installation in step 1. Only one cipher key can be used during the migration at a time for the encrypted passwords in
SAP Event Stream Processor: Installation Guide for WindowsUpdating from a Previous Version of Event Stream Processor P U B L I C 73
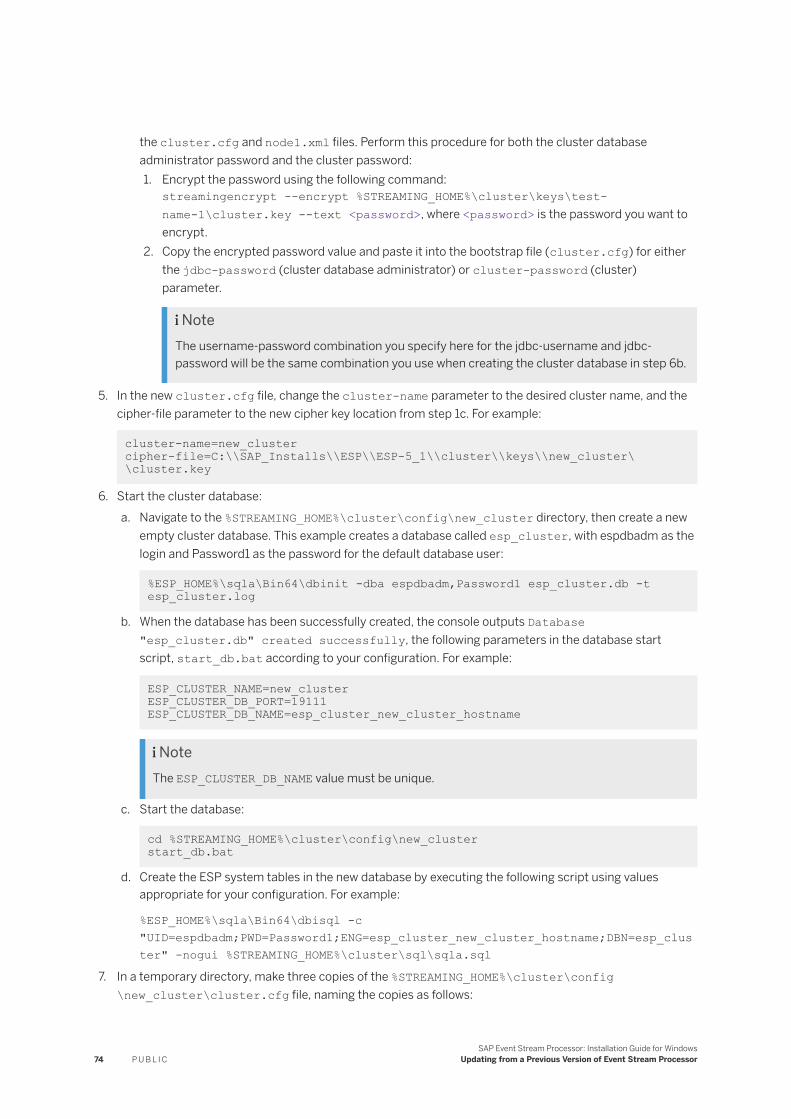
the cluster.cfg and node1.xml files. Perform this procedure for both the cluster database administrator password and the cluster password:1. Encrypt the password using the following command:
streamingencrypt --encrypt %STREAMING_HOME%\cluster\keys\test-name-1\cluster.key --text <password>, where <password> is the password you want to encrypt.
2. Copy the encrypted password value and paste it into the bootstrap file (cluster.cfg) for either the jdbc-password (cluster database administrator) or cluster-password (cluster) parameter.
NoteThe username-password combination you specify here for the jdbc-username and jdbc-password will be the same combination you use when creating the cluster database in step 6b.
5. In the new cluster.cfg file, change the cluster-name parameter to the desired cluster name, and the cipher-file parameter to the new cipher key location from step 1c. For example:
cluster-name=new_cluster cipher-file=C:\\SAP_Installs\\ESP\\ESP-5_1\\cluster\\keys\\new_cluster\\cluster.key
6. Start the cluster database:a. Navigate to the %STREAMING_HOME%\cluster\config\new_cluster directory, then create a new
empty cluster database. This example creates a database called esp_cluster, with espdbadm as the login and Password1 as the password for the default database user:
%ESP_HOME%\sqla\Bin64\dbinit -dba espdbadm,Password1 esp_cluster.db -t esp_cluster.log
b. When the database has been successfully created, the console outputs Database "esp_cluster.db" created successfully, the following parameters in the database start script, start_db.bat according to your configuration. For example:
ESP_CLUSTER_NAME=new_cluster ESP_CLUSTER_DB_PORT=19111 ESP_CLUSTER_DB_NAME=esp_cluster_new_cluster_hostname
NoteThe ESP_CLUSTER_DB_NAME value must be unique.
c. Start the database:
cd %STREAMING_HOME%\cluster\config\new_cluster start_db.bat
d. Create the ESP system tables in the new database by executing the following script using values appropriate for your configuration. For example:
%ESP_HOME%\sqla\Bin64\dbisql -c "UID=espdbadm;PWD=Password1;ENG=esp_cluster_new_cluster_hostname;DBN=esp_cluster" -nogui %STREAMING_HOME%\cluster\sql\sqla.sql
7. In a temporary directory, make three copies of the %STREAMING_HOME%\cluster\config\new_cluster\cluster.cfg file, naming the copies as follows:
74 P U B L I CSAP Event Stream Processor: Installation Guide for Windows
Updating from a Previous Version of Event Stream Processor
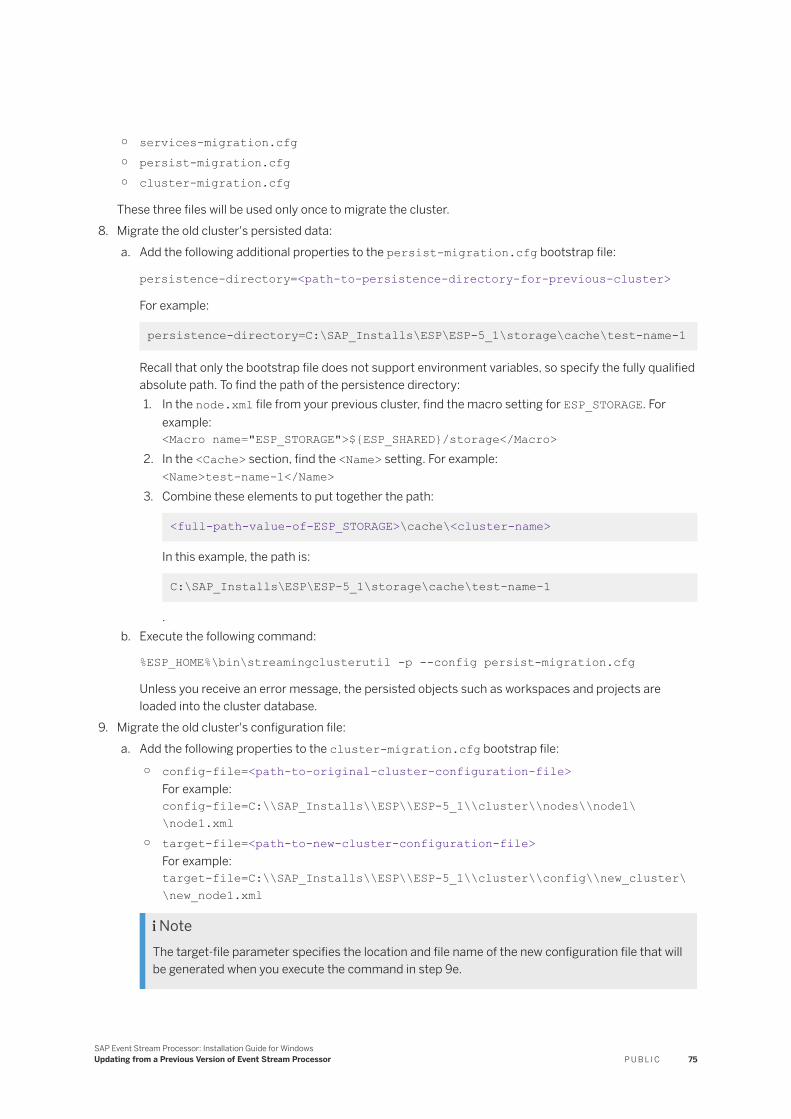
○ services-migration.cfg○ persist-migration.cfg○ cluster-migration.cfg
These three files will be used only once to migrate the cluster.8. Migrate the old cluster's persisted data:
a. Add the following additional properties to the persist-migration.cfg bootstrap file:
persistence-directory=<path-to-persistence-directory-for-previous-cluster>
For example:
persistence-directory=C:\SAP_Installs\ESP\ESP-5_1\storage\cache\test-name-1
Recall that only the bootstrap file does not support environment variables, so specify the fully qualified absolute path. To find the path of the persistence directory:1. In the node.xml file from your previous cluster, find the macro setting for ESP_STORAGE. For
example:<Macro name="ESP_STORAGE">${ESP_SHARED}/storage</Macro>
2. In the <Cache> section, find the <Name> setting. For example:<Name>test-name-1</Name>
3. Combine these elements to put together the path:
<full-path-value-of-ESP_STORAGE>\cache\<cluster-name>
In this example, the path is:
C:\SAP_Installs\ESP\ESP-5_1\storage\cache\test-name-1
.b. Execute the following command:
%ESP_HOME%\bin\streamingclusterutil -p --config persist-migration.cfg
Unless you receive an error message, the persisted objects such as workspaces and projects are loaded into the cluster database.
9. Migrate the old cluster's configuration file:a. Add the following properties to the cluster-migration.cfg bootstrap file:
○ config-file=<path-to-original-cluster-configuration-file>For example:config-file=C:\\SAP_Installs\\ESP\\ESP-5_1\\cluster\\nodes\\node1\\node1.xml
○ target-file=<path-to-new-cluster-configuration-file>For example:target-file=C:\\SAP_Installs\\ESP\\ESP-5_1\\cluster\\config\\new_cluster\\new_node1.xml
NoteThe target-file parameter specifies the location and file name of the new configuration file that will be generated when you execute the command in step 9e.
SAP Event Stream Processor: Installation Guide for WindowsUpdating from a Previous Version of Event Stream Processor P U B L I C 75
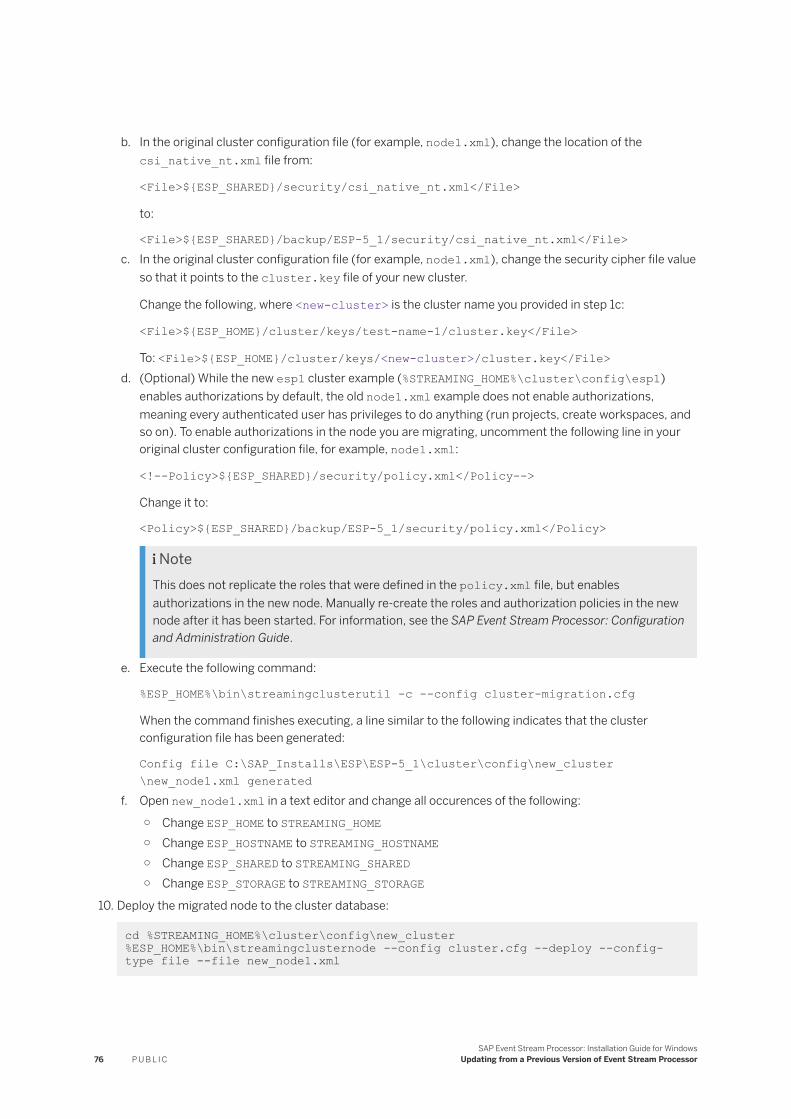
b. In the original cluster configuration file (for example, node1.xml), change the location of the csi_native_nt.xml file from:
<File>${ESP_SHARED}/security/csi_native_nt.xml</File>
to:
<File>${ESP_SHARED}/backup/ESP-5_1/security/csi_native_nt.xml</File>c. In the original cluster configuration file (for example, node1.xml), change the security cipher file value
so that it points to the cluster.key file of your new cluster.
Change the following, where <new-cluster> is the cluster name you provided in step 1c:
<File>${ESP_HOME}/cluster/keys/test-name-1/cluster.key</File>
To: <File>${ESP_HOME}/cluster/keys/<new-cluster>/cluster.key</File>d. (Optional) While the new esp1 cluster example (%STREAMING_HOME%\cluster\config\esp1)
enables authorizations by default, the old node1.xml example does not enable authorizations, meaning every authenticated user has privileges to do anything (run projects, create workspaces, and so on). To enable authorizations in the node you are migrating, uncomment the following line in your original cluster configuration file, for example, node1.xml:
<!--Policy>${ESP_SHARED}/security/policy.xml</Policy-->
Change it to:
<Policy>${ESP_SHARED}/backup/ESP-5_1/security/policy.xml</Policy>
NoteThis does not replicate the roles that were defined in the policy.xml file, but enables authorizations in the new node. Manually re-create the roles and authorization policies in the new node after it has been started. For information, see the SAP Event Stream Processor: Configuration and Administration Guide.
e. Execute the following command:
%ESP_HOME%\bin\streamingclusterutil -c --config cluster-migration.cfg
When the command finishes executing, a line similar to the following indicates that the cluster configuration file has been generated:
Config file C:\SAP_Installs\ESP\ESP-5_1\cluster\config\new_cluster\new_node1.xml generated
f. Open new_node1.xml in a text editor and change all occurences of the following:
○ Change ESP_HOME to STREAMING_HOME○ Change ESP_HOSTNAME to STREAMING_HOSTNAME○ Change ESP_SHARED to STREAMING_SHARED○ Change ESP_STORAGE to STREAMING_STORAGE
10. Deploy the migrated node to the cluster database:
cd %STREAMING_HOME%\cluster\config\new_cluster %ESP_HOME%\bin\streamingclusternode --config cluster.cfg --deploy --config-type file --file new_node1.xml
76 P U B L I CSAP Event Stream Processor: Installation Guide for Windows
Updating from a Previous Version of Event Stream Processor
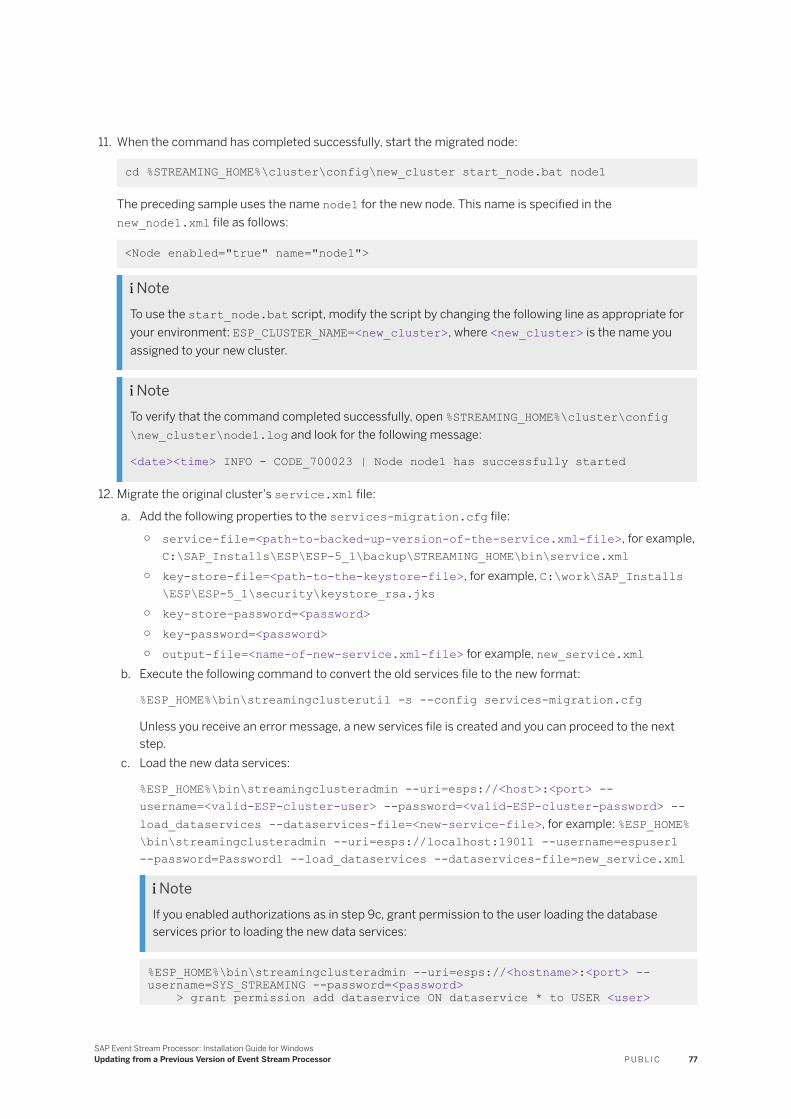
11. When the command has completed successfully, start the migrated node:
cd %STREAMING_HOME%\cluster\config\new_cluster start_node.bat node1
The preceding sample uses the name node1 for the new node. This name is specified in the new_node1.xml file as follows:
<Node enabled="true" name="node1">
NoteTo use the start_node.bat script, modify the script by changing the following line as appropriate for your environment: ESP_CLUSTER_NAME=<new_cluster>, where <new_cluster> is the name you assigned to your new cluster.
NoteTo verify that the command completed successfully, open %STREAMING_HOME%\cluster\config\new_cluster\node1.log and look for the following message:
<date><time> INFO - CODE_700023 | Node node1 has successfully started
12. Migrate the original cluster's service.xml file:
a. Add the following properties to the services-migration.cfg file:
○ service-file=<path-to-backed-up-version-of-the-service.xml-file>, for example, C:\SAP_Installs\ESP\ESP-5_1\backup\STREAMING_HOME\bin\service.xml
○ key-store-file=<path-to-the-keystore-file>, for example, C:\work\SAP_Installs\ESP\ESP-5_1\security\keystore_rsa.jks
○ key-store-password=<password>○ key-password=<password>○ output-file=<name-of-new-service.xml-file> for example, new_service.xml
b. Execute the following command to convert the old services file to the new format:
%ESP_HOME%\bin\streamingclusterutil -s --config services-migration.cfg
Unless you receive an error message, a new services file is created and you can proceed to the next step.
c. Load the new data services:
%ESP_HOME%\bin\streamingclusteradmin --uri=esps://<host>:<port> --username=<valid-ESP-cluster-user> --password=<valid-ESP-cluster-password> --load_dataservices --dataservices-file=<new-service-file>, for example: %ESP_HOME%\bin\streamingclusteradmin --uri=esps://localhost:19011 --username=espuser1 --password=Password1 --load_dataservices --dataservices-file=new_service.xml
NoteIf you enabled authorizations as in step 9c, grant permission to the user loading the database services prior to loading the new data services:
%ESP_HOME%\bin\streamingclusteradmin --uri=esps://<hostname>:<port> --username=SYS_STREAMING --password=<password> > grant permission add dataservice ON dataservice * to USER <user>
SAP Event Stream Processor: Installation Guide for WindowsUpdating from a Previous Version of Event Stream Processor P U B L I C 77
> quit
13. If you had defined authorizations or roles in your old cluster, manually re-create them using the streamingclusteradmin command. For information about creating authorization policies, see the SAP Event Stream Processor: Configuration and Administration Guide.You can now restart your projects. To start projects in ESP 5.1 SP 12, you must first start the cluster database, then the cluster. For information, see Deploying and Starting a Cluster [page 57].
5.2.2 Migrating from Sybase Control Center to SAP ESP Cockpit
If you are updating from a previous version of ESP in which you used Sybase Control Center (SCC) to manage and monitor your nodes and servers, migrate to SAP ESP Cockpit by installing it on each host that you want to monitor and administer.
Before migrating to ESP Cockpit, shut down all existing SCC servers and agents on each host that you wish to migrate to SAP ESP Cockpit and SAP Cockpit agents. Also, ensure that Adobe Flash Player is installed in the browser you wish to use for SAP ESP Cockpit.
Install SAP ESP Cockpit on each host that has a manager node. Also, install an SAP Cockpit agent on each host that has a manager node, controller node, or both. The ESP installer gives you the option to install just the SAP ESP Server and an SAP Cockpit agent.
NoteDo not install SAP ESP Cockpit or an SAP Cockpit agent on a machine that does not have an ESP node installed. SAP ESP Cockpit only manages ESP servers that are running on the machine on which ESP Cockpit is installed.
Migrating to SAP ESP Cockpit is essentially the same process as setting up SAP ESP Cockpit for first-time use. Once you have installed SAP ESP Cockpit, follow the tasks outlined in the Configuring SAP ESP Cockpit [page 59] section.
NoteExisting alerts from SCC do not migrate over to SAP ESP Cockpit. New alerts run by default and are created automatically during system registration using predefined thresholds. To configure alerts, you need admin permissions on the ESP Cockpit system. For details on configuring alerts, see Alerts in SAP ESP Cockpit in the SAP Event Stream Processor Cockpit guide on the SAP Help Portal.
78 P U B L I CSAP Event Stream Processor: Installation Guide for Windows
Updating from a Previous Version of Event Stream Processor
5.3 Updating from Version 5.1 SP 08
Ensure that you have the correct JDK version installed, and migrate your existing project CCL files before attempting to run them in the new environment.
Prerequisites
● Remove all example projects from the workspace. Do this to ensure you have the latest version of the examples once you upgrade. To remove a project from a workspace, within Studio, right-click the project name in the project explorer, select Delete, then click OK.
● Manually back up your project directory.
Context
Consider the following before updating your installation:
● To use SSL on the ESP server, install Java Development Kit (JDK) version 8 or higher. See New Features in 5.1 SP09 > Security Enhancements in the SAP Event Stream Processor: New Features Summary for more information.
● Two primary datatypes, Date and Timestamp, have been renamed to SecondDate and MsDate, respectively. All CCL language components, commands, and adapter properties that use these datatypes have been updated to use the new names. Projects developed in and prior to SP 08 must have their .ccl files updated to use these names accordingly. Not updating your command projects results in a runtime error.
For a comprehensive summary of changes and enhancements introduced in 5.1 SP 09, SP 10, SP 11, and SP 12, see the SAP Event Stream Processor: New Features Summary.
To migrate your project files to the updated format, run the new command line utility, streamingmigratedatetype, against each of your project .ccl files. This utility automatically updates all instances and variations of Date and Timestamp to their new names.
Procedure
1. Install SAP Event Stream Processor 5.1 SP 12.
During the installation process, ESP automatically creates a backup of critical files and directories. This may take several minutes. This backup is created in the %STREAMING_HOME%/backup folder.
2. Before starting ESP, run streamingmigratedatetype on each of your CCL project files.
From the command line, run:
STREAMING_HOME/bin/streamingmigratedatetypes -i <old-project>.ccl -o <new-project>.ccl
SAP Event Stream Processor: Installation Guide for WindowsUpdating from a Previous Version of Event Stream Processor P U B L I C 79
Where:○ -i <old-project> specifies the old .ccl file to be migrated.○ -o <new-project> specifies an updated name for the migrated .ccl file.
3. Verify the date/time name changes in your newly migrated .ccl files. The utility may not update variables or fields that use the same names, so be thorough in your inspection.
4. For any custom adapters you have developed using the adapter toolkit that use the DateFormat and TimestampFormat tags, manually edit your adapter configuration .xml file and rename these tags to SecondDateFormat and MsDateFormat, respectively. Make this change before running any new or migrated projects that use these custom adapters. Not updating the .xml files results in a runtime error.
5. Migrate the existing cluster configuration:a. Obtain the current cluster configuration by running the following:
cd %STREAMING_HOME%\cluster\config\esp1 streamingclusternode --config cluster.cfg --show > new_node1.xml
b. Open new_node1.xml in a text editor and change all occurrences of the following:
○ Change ESP_HOME to STREAMING_HOME○ Change ESP_HOSTNAME to STREAMING_HOSTNAME○ Change ESP_SHARED to STREAMING_SHARED○ Change ESP_STORAGE to STREAMING_STORAGE
c. Deploy the updated configuration by running the following command:
streamingclusternode --config cluster.cfg --deploy --config-type file --file new_node1.xml
6. You can now run your migrated projects. Consult the Migration Executables section in the SAP Event Stream Processor: Utilities Guide for complete details on this utility and data migration.
Next Steps
Complete the tasks in the Post Installation [page 49] section.
For your reference, the following tables provide a comprehensive list of name changes for datatypes, CCL Functions and Adapter Properties:
Previous Datatype Name New Name as of 5.1 SP 09
date seconddate
timestamp msdate
Previous CCL Function Name New Name as of 5.1 SP 09
dateint seconddateint
dateInt seconddateInt
intdate intseconddate
intDate intSeconddate
80 P U B L I CSAP Event Stream Processor: Installation Guide for Windows
Updating from a Previous Version of Event Stream Processor
Previous CCL Function Name New Name as of 5.1 SP 09
sysdate sysdeconddate
to_date to_seconddate
undate unseconddate
getdatecolumnbyindex getseconddatecolumnbyindex
getdatecolumnbyname getseconddatecolumnbyname
systimestamp sysmsdate
to_timestamp to_msdate
untimestamp unmsdate
gettimestampcolumnbyindex getmsdatecolumnbyindex
gettimestampcolumnbyname getmsdatecolumnbyname
Previous Adapter Property Name New Name as of 5.1 SP 09
csvDateFormat csvSecondDateFormat
csvTimestampFormat csvMsDateFormat
jsonDateFormat jsonSecondDateFormat
jsonTimestamp jsonMsDateFormat
mapDateFormat mapSecondDateFormat
mapTimestampFormat mapMsDateFormat
objectlistDateFormat objectlistSecondDateFormat
objectlistTimestampFormat objectlistMsDateFormat
xmllistDateFormat xmllistSecondDateFormat
xmllistTimestampFormat xmllistMsDateFormat
xmldocDateFormat xmldocSecondDateFormat
xmldocTimestampFormat xmldocMsDateFormat
DateColumnFormat SecondDateColumnFormat
dateFormat seconddateFormat
DateFormat SecondDateFormat
TimestampColumnFormat MsDateColumnFormat
timestampColumnName msdateColumnName
timestampFormat msdateFormat
TimestampFormat MsDateFormat
timestampSequenceColumn msdateSequenceColumn
timestampSequenceInitValue msdateSequenceInitValue
SAP Event Stream Processor: Installation Guide for WindowsUpdating from a Previous Version of Event Stream Processor P U B L I C 81
5.4 Updating from Version 5.1 SP 09, SP 10, or SP 11
Install ESP 5.1 SP 12 on top of your existing 5.1 SP 09, SP 10, or SP 11 installation. To preserve existing configuration settings and projects, perform a backup on critical files before installing.
Prerequisites
● Remove all example projects from the workspace. This ensures that you have the latest version of the examples once you upgrade. To remove a project from a workspace, within Studio, right-click the project name in the project explorer, select Delete, then click OK.
● Manually back your project directory.
Context
To use SSL on the ESP server, install Java Development Kit (JDK) version 8 or higher. See New Features in 5.1 SP09 > Security Enhancements in the SAP Event Stream Processor: New Features Summary for more information.
Procedure
● Install SAP Event Stream Processor 5.1 SP 12.
During the installation process, ESP automatically creates a backup of critical files and directories. This may take several minutes. This backup is created in the %STREAMING_HOME%/backup folder.
Next Steps
Complete the tasks in the Post Installation [page 49] section.
82 P U B L I CSAP Event Stream Processor: Installation Guide for Windows
Updating from a Previous Version of Event Stream Processor

5.5 Updating a Multinode Cluster
To update a multinode cluster, stop all components and update each node.
Context
Before updating, decide which nodes to update first to minimize downtime. Starting with a node that has both the manager and controller roles allows you to to redeploy projects after a single node update. If your cluster does not have a node with both roles, update a manager node first, then a controller node.
If you have projects with controller affinities, or projects configured for high availability, prioritize the nodes that these projects require.
Procedure
1. Stop all SAP Event Stream Processor components in the following order:1. Publishers2. Projects3. Subscribers4. Nodes
2. Update a node that has both the manager and controller roles first, if the cluster has any. If not, update a manager node.For complete steps to update from a specific previous version of SAP Event Stream Processor, see the other topics in this section.
3. Start the updated node.4. Update and start the remaining nodes. To minimize downtime, update a node with the controller role so
you can begin restarting projects.
SAP Event Stream Processor: Installation Guide for WindowsUpdating from a Previous Version of Event Stream Processor P U B L I C 83
6 Downloading Product Updates
Get maintenance, support packages and patches, and related information.
Procedure
1. Go to https://support.sap.com/patches and log in if prompted.2. Select Software Downloads.3. Use the search bar or navigation options to go to the SAP Event Stream Processor product page.4. Select SAP EVENT STREAM PROCESSOR 5.1.5. Select your operating system from the drop-down menu.6. Choose the support pack or maintenance release you want to download.
Each support pack contains a full installation of SAP Event Stream Processor.
84 P U B L I CSAP Event Stream Processor: Installation Guide for Windows
Downloading Product Updates
7 Uninstalling using the Graphic Uninstaller
Uninstall Event Stream Processor from a test or production environment to ensure all components are fully removed.
Prerequisites
During the reinstall, upgrade, and uninstall processes, ESP automatically creates backups of critical files and directories, including security settings, cluster configuration, and adapter configuration. To see a full list of these files and directories, refer to Planning Your Installation > Automatic Backups.
Since the automatic backup only includes files in the STREAMING_HOME and COCKPIT_HOME directories, manually back up the following:
● Log store files in <base-directory>/<workspace-name>.<project-name>.<instance-number>.● Your Studio workspace.
Procedure
1. Navigate to <install_directory>\sybuninstall\ESP\main and run uninstall.exe to start the uninstaller.
2. To start uninstalling, click Next.3. Choose either:
Type Description
Complete Uninstall Removes all installed features and components of SAP Event Stream Processor.
Uninstall Specific Features Select specific features of SAP Event Stream Processor to uninstall.
4. If you are uninstalling specific features, select the features to remove and click Next.
NoteIf you are performing a complete uninstallation, proceed to step 5.
5. A summary screen lists the components selected for uninstallation. To uninstall the files, click Next.6. (Optional) During a complete uninstall, a Delete User File screen lists all user files and folders created
within the STREAMING_HOME directory since installation. To uninstall these files, select Delete all of these files. Click Next.
7. Click Done.
NoteIf you reinstall SAP Event Stream Processor, copy all backup files into your new installation location.
SAP Event Stream Processor: Installation Guide for WindowsUninstalling using the Graphic Uninstaller P U B L I C 85

8. (Optional) If your installation of Event Stream Processor included SAP ESP Cockpit (ESP Cockpit), some ESP Cockpit components may not uninstall. If this occurs, run the uninstaller under <install_directory>\sybuninstall\comp\<COCKPIT comp> , where <COCKPIT comp> is:
○ COCKPIT-4.CFW○ COCKPIT-4.ESPCMAP○ SAPJRE81
9. (Optional) Manually delete all files, folders, and subdirectories that remain after uninstalling if you no longer need them. When deleting files, ensure that they are not needed by another SAP product installed on your machine.
86 P U B L I CSAP Event Stream Processor: Installation Guide for Windows
Uninstalling using the Graphic Uninstaller
8 Uninstalling using the Console
Uninstall Event Stream Processor from a test or production environment to ensure all components are fully removed.
Prerequisites
During the reinstall, upgrade, and uninstall processes, ESP automatically creates backups of critical files and directories, including security settings, cluster configuration, and adapter configuration. To see a full list of these files and directories, refer to Planning Your Installation > Automatic Backups.
Since the automatic backup only includes files in the STREAMING_HOME and COCKPIT_HOME directories, manually back up the following:
● Log store files in <base-directory>/<workspace-name>.<project-name>.<instance-number>.● Your Studio workspace.
Procedure
1. From the command-line, navigate to <install_directory>\sybuninstall\ESP\main.
2. Type uninstall.exe -i console and press Enter.
3. A new window opens. Press Enter to continue.4. Select an uninstall option by entering 1 (complete uninstall) or 2 (custom uninstall). Press Enter.
If you select a complete uninstall, the uninstaller summarizes the components to be removed. To revert to a custom uninstall, type back and press Enter to make your selection again.
NoteIf you select a complete uninstall, proceed to step 6.
5. If you select a custom uninstall, enter the number of the component to select or deselect for uninstallation. Selected components are indicated by an X; unselected components are indicated by a blank. Enter the number of the component to toggle its status as selected or unselected, then press Enter.
6. Review the pre-uninstall summary. To uninstall the files, press Enter.7. After uninstalling all files created by the installer, a prompt appears to delete remaining user files that were
created outside of the installer. Select Y or N. Press Enter to complete the uninstallation.
NoteIf you reinstall SAP Event Stream Processor, copy all backup files into your new installation location.
SAP Event Stream Processor: Installation Guide for WindowsUninstalling using the Console P U B L I C 87

8. (Optional) If your installation of Event Stream Processor included SAP ESP Cockpit (ESP Cockpit), some ESP Cockpit components may not uninstall. If this occurs, run the uninstaller under <install_directory>\sybuninstall\comp\<COCKPIT-comp> , where <COCKPIT-comp> is:
○ COCKPIT-4.CFW○ COCKPIT-4.ESPCMAP○ SAPJRE81
9. (Optional) Manually delete all files, folders, and subdirectories that remain after uninstalling if you no longer need them. When deleting files, ensure that they are not needed by another SAP product installed on your machine.
88 P U B L I CSAP Event Stream Processor: Installation Guide for Windows
Uninstalling using the Console
9 Troubleshooting
Common techniques for troubleshooting issues you may encounter.
In this section:
SySAM Logging [page 89]When you are using a served license, by default, all license server status and error messages are written to the SYBASE.log debug log file in the log directory.
Application Startup Issues [page 90]Troubleshooting guidance for solving startup issues.
Microsoft Excel Add-in [page 90]Issue: The SAP Event Stream Processor Add-in for Microsoft Excel is not installed during typical installations.
Installer Issues [page 90]Issue: The installer and installation does not progress.
Cannot Start Cluster Node [page 91]After installation, the default cluster database installed with ESP fails to initialize, and the cluster node cannot start.
DNS Resolution [page 92]Troubleshooting guidance for DNS resolution.
Installation Log Files [page 92]ESP logs installation results, errors, and warnings from various components in different log files. Review these logs to help troubleshoot issues. If you require technical support, your representative may request that you send information from one or more of these logs.
9.1 SySAM Logging
When you are using a served license, by default, all license server status and error messages are written to the SYBASE.log debug log file in the log directory.
For information on messages written to this log file, see FLEXnet Licensing End User Guide > The Debug Log File here http://infocenter.sybase.com/help/topic/com.sybase.infocenter.help.3pv.flexnet.10.8/html/title.htm .
Over time, the debug log can become large and the value of older messages decreases. SAP recommends that you periodically truncate the debug log file.
1. On the license server machine, enter:
lmutil lmswitch -c <license-directory-location> SYBASE tmp.log
2. Delete or archive SYBASE.log.
SAP Event Stream Processor: Installation Guide for WindowsTroubleshooting P U B L I C 89
3. To return to using SYBASE.log, enter:
lmutil lmswitch -c <license-directory-location> SYBASE SYBASE.log
4. Delete the temporary file tmp.log.
For more information on SySAM logging, see SySAM Users Guide > Troubleshooting SySAM Errors published with SAP Event Stream Processor documentation, version SP 11 and higher, here http://help.sap.com/event-stream-processor.
9.2 Application Startup Issues
Troubleshooting guidance for solving startup issues.
Issue: When starting the application, you see either of these messages:
● The application has failed to start because its side-by-side configuration is incorrect. Please see the application event log for more detail.
● The application failed to initialize properly (0xc0150002). Click OK to terminate the application.
Solution: Download and install the Microsoft Visual C++ 2005 Service Pack1 Redistributable Package for MFC Security Update (8.0.50727.6195) or later at:
http://www.microsoft.com/en-us/download/details.aspx?id=26347
Install the update for the platform that you are installing ESP on – either x86 (32-bit) or x64 (64-bit). If you are planning to run the ESP Add-In for Microsoft Excel on Windows 64-bit, install the update for both x86 and x64.
When you have installed the redistributable package, run Microsoft Update to apply the latest security patches to Microsoft Visual C++ 2005 Runtime.
9.3 Microsoft Excel Add-in
Issue: The SAP Event Stream Processor Add-in for Microsoft Excel is not installed during typical installations.
Solution: Re-run the installer using the custom install process and select the add-in for Microsoft Excel.
9.4 Installer Issues
Issue: The installer and installation does not progress.
Solutions:
● Ensure your machine meets disk space and temporary memory requirements.● Remove all temporary files related to previous install processes.
90 P U B L I CSAP Event Stream Processor: Installation Guide for Windows
Troubleshooting
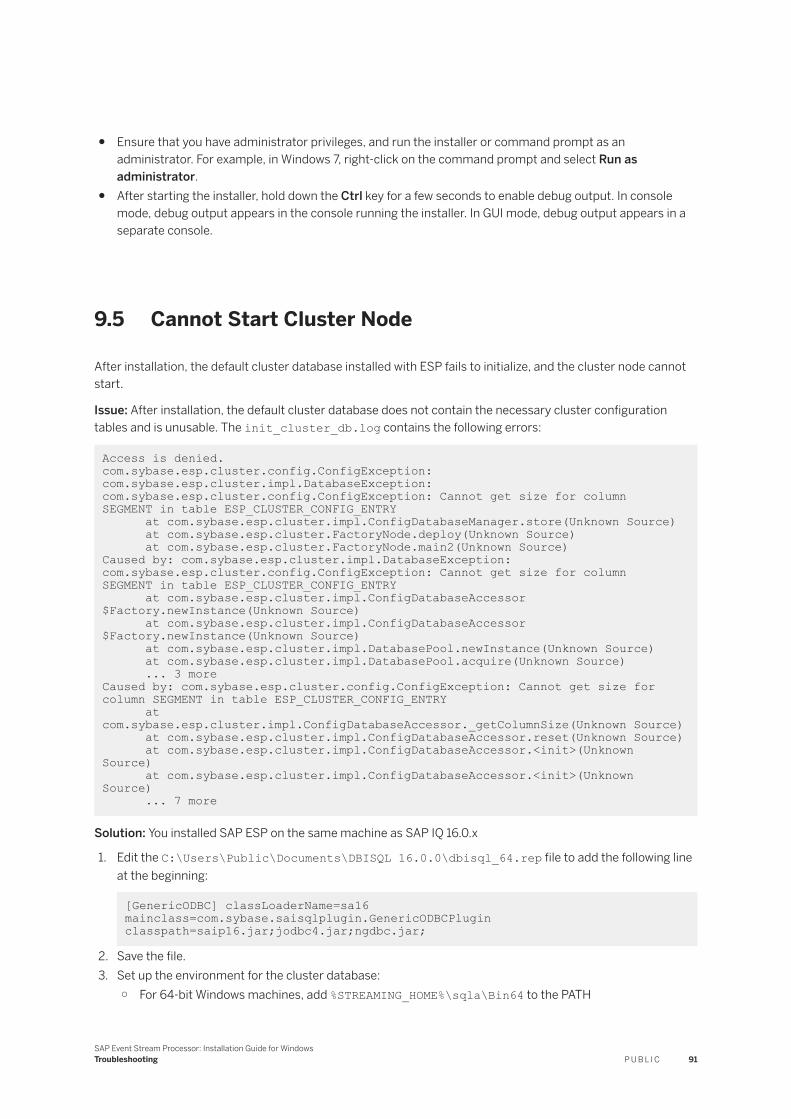
● Ensure that you have administrator privileges, and run the installer or command prompt as an administrator. For example, in Windows 7, right-click on the command prompt and select Run as administrator.
● After starting the installer, hold down the Ctrl key for a few seconds to enable debug output. In console mode, debug output appears in the console running the installer. In GUI mode, debug output appears in a separate console.
9.5 Cannot Start Cluster Node
After installation, the default cluster database installed with ESP fails to initialize, and the cluster node cannot start.
Issue: After installation, the default cluster database does not contain the necessary cluster configuration tables and is unusable. The init_cluster_db.log contains the following errors:
Access is denied. com.sybase.esp.cluster.config.ConfigException: com.sybase.esp.cluster.impl.DatabaseException: com.sybase.esp.cluster.config.ConfigException: Cannot get size for column SEGMENT in table ESP_CLUSTER_CONFIG_ENTRY at com.sybase.esp.cluster.impl.ConfigDatabaseManager.store(Unknown Source) at com.sybase.esp.cluster.FactoryNode.deploy(Unknown Source) at com.sybase.esp.cluster.FactoryNode.main2(Unknown Source)Caused by: com.sybase.esp.cluster.impl.DatabaseException: com.sybase.esp.cluster.config.ConfigException: Cannot get size for column SEGMENT in table ESP_CLUSTER_CONFIG_ENTRY at com.sybase.esp.cluster.impl.ConfigDatabaseAccessor$Factory.newInstance(Unknown Source) at com.sybase.esp.cluster.impl.ConfigDatabaseAccessor$Factory.newInstance(Unknown Source) at com.sybase.esp.cluster.impl.DatabasePool.newInstance(Unknown Source) at com.sybase.esp.cluster.impl.DatabasePool.acquire(Unknown Source) ... 3 moreCaused by: com.sybase.esp.cluster.config.ConfigException: Cannot get size for column SEGMENT in table ESP_CLUSTER_CONFIG_ENTRY at com.sybase.esp.cluster.impl.ConfigDatabaseAccessor._getColumnSize(Unknown Source) at com.sybase.esp.cluster.impl.ConfigDatabaseAccessor.reset(Unknown Source) at com.sybase.esp.cluster.impl.ConfigDatabaseAccessor.<init>(Unknown Source) at com.sybase.esp.cluster.impl.ConfigDatabaseAccessor.<init>(Unknown Source) ... 7 more
Solution: You installed SAP ESP on the same machine as SAP IQ 16.0.x
1. Edit the C:\Users\Public\Documents\DBISQL 16.0.0\dbisql_64.rep file to add the following line at the beginning:
[GenericODBC] classLoaderName=sa16 mainclass=com.sybase.saisqlplugin.GenericODBCPlugin classpath=saip16.jar;jodbc4.jar;ngdbc.jar;
2. Save the file.3. Set up the environment for the cluster database:
○ For 64-bit Windows machines, add %STREAMING_HOME%\sqla\Bin64 to the PATH
SAP Event Stream Processor: Installation Guide for WindowsTroubleshooting P U B L I C 91

○ For 32-bit Windows machines, add %STREAMING_HOME%\sqla\Bin32 to the PATH4. From a command line window, navigate to %STREAMING_HOME%\cluster\config\<cluster-name>.5. Run start_db.bat to start the cluster database.6. Execute the following script using the username and password you specified for the database
administrator during installation, and the default database name, <esp_cluster>.
dbisql.exe -c "UID=<espdbadm>;PWD=<Password>;DBN=<esp-cluster>" -nogui %STREAMING_HOME%\cluster\sql\sqla.sql
where <esp_cluster> is the same value as the environment variable ESP_CLUSTER_DB_NAME defined in the %STREAMING_HOME%\cluster\<cluster-name>\start_db.bat file.
7. Load the default cluster node into the cluster database tables:
%STREAMING_HOME%\bin\esp_cluster_node --config %STREAMING_HOME%\cluster\<cluster-name>\cluster.cfg --deploy --config-type file --file cluster.xml
8. Start the cluster node.
9.6 DNS Resolution
Troubleshooting guidance for DNS resolution.
Issue: DNS resolution does not work.
Solution:
1. Start ESP Cockpit and log in. Select the EXPLORE tab, then select Actions Configure Cluster to locate the cluster configuration files.
2. Navigate to the adapter configuration files in the installation directory:○ %STREAMING_HOME%\adapters\framework\instances\<adapter>\adapter_config.xml
3. For each file, manually insert an IP address in place of the host name.
9.7 Installation Log Files
ESP logs installation results, errors, and warnings from various components in different log files. Review these logs to help troubleshoot issues. If you require technical support, your representative may request that you send information from one or more of these logs.
When troubleshooting your ESP installation, start with the esp_suite.log file to determine which component produced an error. This file contains a summary of the ESP installation results.
The esp_suite.log and all other files shown below are located at <install-dir>\log:
92 P U B L I CSAP Event Stream Processor: Installation Guide for Windows
Troubleshooting

Filename Component
esp_suite.log SAP Event Stream Processor; includes a summary of installation results
conn_lang.log Open Client connectivity language modules
dbilib.log Open Client DB-Library
esp_excel_install.log SAP Event Stream Processor Add-In for Microsoft Excel
esp_flex_install.log Flex Adapter
esp_framework_install.log Adapter Toolkit
esp_http_install.log HTTP Output Adapter
esp_logfile_input_install.log Logfile Input Adapter
esp_odbc_install.log ODBC Driver
esp_pde_install.log PowerDesigner Extensions for SAP Event Stream Processor
esp_repserver_install.log Replication Server Adapter
esp_rfc_install.log SAP RFC Adapter
esp_rtview_install.log RTView Adapter
esp_server_install.log ESP server
esp_studio_install.log ESP Studio
esp_tibco_rv_install.log TIBCO Rendezvous Adapter
esp_ws_install.log Web Services Adapter
espcmap.log Management User Interface
jre7.log SAP Java Runtime Environment
lang.log Open Client language modules
open_client.log Open Client (OCS)
scc_cfw.log SAP ESP Cockpit
sysam_util.log SySAM License Utilities
SAP Event Stream Processor: Installation Guide for WindowsTroubleshooting P U B L I C 93
Important Disclaimers and Legal Information
HyperlinksSome links are classified by an icon and/or a mouseover text. These links provide additional information.About the icons:
● Links with the icon : You are entering a Web site that is not hosted by SAP. By using such links, you agree (unless expressly stated otherwise in your agreements with SAP) to this:
● The content of the linked-to site is not SAP documentation. You may not infer any product claims against SAP based on this information.● SAP does not agree or disagree with the content on the linked-to site, nor does SAP warrant the availability and correctness. SAP shall not be liable for any
damages caused by the use of such content unless damages have been caused by SAP's gross negligence or willful misconduct.
● Links with the icon : You are leaving the documentation for that particular SAP product or service and are entering a SAP-hosted Web site. By using such links, you agree that (unless expressly stated otherwise in your agreements with SAP) you may not infer any product claims against SAP based on this information.
Beta and Other Experimental FeaturesExperimental features are not part of the officially delivered scope that SAP guarantees for future releases. This means that experimental features may be changed by SAP at any time for any reason without notice. Experimental features are not for productive use. You may not demonstrate, test, examine, evaluate or otherwise use the experimental features in a live operating environment or with data that has not been sufficiently backed up.The purpose of experimental features is to get feedback early on, allowing customers and partners to influence the future product accordingly. By providing your feedback (e.g. in the SAP Community), you accept that intellectual property rights of the contributions or derivative works shall remain the exclusive property of SAP.
Example CodeAny software coding and/or code snippets are examples. They are not for productive use. The example code is only intended to better explain and visualize the syntax and phrasing rules. SAP does not warrant the correctness and completeness of the example code. SAP shall not be liable for errors or damages caused by the use of example code unless damages have been caused by SAP's gross negligence or willful misconduct.
Gender-Related LanguageWe try not to use gender-specific word forms and formulations. As appropriate for context and readability, SAP may use masculine word forms to refer to all genders.
94 P U B L I CSAP Event Stream Processor: Installation Guide for Windows
Important Disclaimers and Legal Information

SAP Event Stream Processor: Installation Guide for WindowsImportant Disclaimers and Legal Information P U B L I C 95
www.sap.com/contactsap
© 2019 SAP SE or an SAP affiliate company. All rights reserved.
No part of this publication may be reproduced or transmitted in any form or for any purpose without the express permission of SAP SE or an SAP affiliate company. The information contained herein may be changed without prior notice.
Some software products marketed by SAP SE and its distributors contain proprietary software components of other software vendors. National product specifications may vary.
These materials are provided by SAP SE or an SAP affiliate company for informational purposes only, without representation or warranty of any kind, and SAP or its affiliated companies shall not be liable for errors or omissions with respect to the materials. The only warranties for SAP or SAP affiliate company products and services are those that are set forth in the express warranty statements accompanying such products and services, if any. Nothing herein should be construed as constituting an additional warranty.
SAP and other SAP products and services mentioned herein as well as their respective logos are trademarks or registered trademarks of SAP SE (or an SAP affiliate company) in Germany and other countries. All other product and service names mentioned are the trademarks of their respective companies.
Please see https://www.sap.com/about/legal/trademark.html for additional trademark information and notices.
THE BEST RUN