PROVISIONAL PROSTHODONTIC THEORY - SOL*R |
185
PROVISIONAL PROSTHODONTIC THEORY Course Study Guide 2 nd Edition
-
Upload
khangminh22 -
Category
Documents
-
view
1 -
download
0
Transcript of PROVISIONAL PROSTHODONTIC THEORY - SOL*R |

PROVISIONAL PROSTHODONTIC
THEORY
Course Study Guide 2nd Edition
Provisional Prosthodontic
Theory
Course Study Guide
2nd Edition

Contributors Fern Hubbard (Course writer, 1997) Margaret Dennett (Course writer/Consultant, 1997) Catherine Baranow (Course writer, 2013)
First edition published by Open College for the Province of British Columbia Ministry of Education, Skills and Training and the Centre for Curriculum, Transfer and Technology, 1997. Second edition revisions by Catherine Baranow, Okanagan College, 2013.
Copyright ©2018, Province of British Columbia
This material is owned by the Government of British Columbia and is licensed under a Creative Commons Attribution--‐Share Alike 4.0 International license.
Contents

Course Overview ............................................................................................................. 1
Unit 1 - Self-Assessment Review .................................................................................... 3
Introduction .................................................................................................................. 3
Self-Assessment Review Questions ............................................................................ 4
Conclusion ................................................................................................................... 7
Unit 2 - Single-Unit Crown ............................................................................................... 9
Introduction .................................................................................................................. 9
Unit Objectives .......................................................................................................... 10
Readings ................................................................................................................... 11
Principles of Fixed Prosthodontics for Single-Unit Crowns ............................................ 12
Readings ................................................................................................................... 12
Pretreatment Procedures for a Single-Unit Crown ........................................................ 15
Case Study: Introduction ........................................................................................... 15
Direct Fabrication of a Matrix for a Provisional Restoration ....................................... 17
Practice Exercise ....................................................................................................... 19
Clinical Procedures for a Single-Unit Crown ................................................................. 21
Direct Fabrication of a Provisional Crown ..................................................................... 26
Requirements of Provisionals .................................................................................... 26
External Surface Forms (ESFs) and Tissue Surface Forms (TSFs) .......................... 28
Fabrication Methods .................................................................................................. 29
Provisional Resins ..................................................................................................... 33
Case Study: Fabricating and Provisional ....................................................................... 38
Case Study: Fabricating the Provisional Using a Preformed ESF Crown...................... 45
Cementing Procedure ................................................................................................... 49
Tooth Treatment Prior to Cementing the Provisional ................................................. 49
Removal of Excess Provisional Cement .................................................................... 52
Removal of Provisional Crown and Residual Cement from the Preparation .............. 57
Conclusion ................................................................................................................. 59
Unit 2 Self-Test ............................................................................................................. 60
Unit 3 - Three-Unit Fixed Partial Denture ...................................................................... 67
Unit Objectives .......................................................................................................... 68
Prosthodontic Principles of Fixed Partial Dentures ....................................................... 69
Sequencing of Procedures for Fixed Partial Dentures .................................................. 73
Pretreatment .............................................................................................................. 73
Treatment Plan and Consultation Appointment ......................................................... 75
Custom Tray .............................................................................................................. 75
The ESF Matrix .......................................................................................................... 76
Scheduling the Tooth Preparation Appointment ........................................................ 76
Shading ..................................................................................................................... 76
Tooth Preparation and Final Impression .................................................................... 77
The Provisional TSF .................................................................................................. 78
Cementing the Provisional ......................................................................................... 79
Home Care Instructions ............................................................................................. 80
Lab Package .............................................................................................................. 81
Removing the Provisional FPD .................................................................................. 81
Cementing the Permanent FPD ................................................................................. 82
Fabrication of a Pressform Matrix for a Provisional FPD ............................................... 83
Fabrication of Provisional FPDs (Indirect-Direct Method) .............................................. 86
Removal of Provisional FPDs .................................................................................... 92
Fabrication of Provisional FPDs (The Indirect Method) ................................................. 94
Endodontic Provisionals ............................................................................................ 97
Altering and Adapting Provisional FPDs ........................................................................ 98
Margins ...................................................................................................................... 98
Bead-Brush Technique .............................................................................................. 98
Custom Shading ........................................................................................................ 99
Conclusion ............................................................................................................... 100
Unit 3 Self-Test ........................................................................................................... 101
Unit 4 - Intra Coronal Direct Restoration ..................................................................... 107
Introduction .............................................................................................................. 107
Unit Objectives ........................................................................................................ 107
Prosthodontic Principles of Intra-coronal Restorations ................................................ 109
Sequencing of Procedures for Intra-coronal Restorations ....................................... 110
Pretreatment Procedures for an Intra-coronal Restoration ................................... 110
Direct Fabrication of a Matrix for a Provisional Intra-Coronal Restoration ............ 110
Practice Exercise ................................................................................................. 111
Clinical Procedures for an Intra-Coronal Restoration. .......................................... 112
Direct Fabrication of an Intra-Coronal Provisional ....................................................... 119
Cementation Procedure .............................................................................................. 120

Removal of Excess Provisional Cement .................................................................. 120
Removal of Intra-coronal Provisional and Residual Cement from the Preparation ...... 122
Implant Provisionals ................................................................................................. 124
Practice Exercise ..................................................................................................... 127
Conclusion ............................................................................................................... 127
Unit 4 - Self-Test ...................................................................................................... 129
Appendix 1: Procedural Guidelines ............................................................................. 134
Direct Fabrication of a Single-Unit Provisional Crown Using an Alginate Matrix ...... 134
Procedural Steps ..................................................................................................... 135
Direct Fabrication of a Single-Unit Provisional Crown Using a Preformed Shell ......... 138
Procedural Steps ..................................................................................................... 139
Indirect-Direct Fabrication of a Three-Unit Provisional FPD ........................................ 141
Procedural Steps ..................................................................................................... 142
Direct Fabrication of an Intra-coronal Provisional Onlay Using a Final Impression Material for the Matrix ............................................................................................................... 145
Procedural Steps ..................................................................................................... 146
Cementation of a Provisional Restoration ................................................................... 149
Procedural Steps ..................................................................................................... 150
Removal of Provisional Cement .................................................................................. 151
Procedural Steps ..................................................................................................... 151
Removal of a Provisional Restoration ......................................................................... 152
Procedural Steps ..................................................................................................... 152
Answers to Self-Assessment Review Questions ......................................................... 154
Answers to Unit 2 Self-Test ......................................................................................... 171
Answers to Unit 3 Self-Test ......................................................................................... 175
Answers to Unit 4 Self-Test ......................................................................................... 178

Provisional Prosthodontic Theory Course Study Guide
1
Course Overview
As a certified dental assistant or registered and licensed dental hygienist, you are
probably eager to learn new skills in the area of provisional prosthodontics. You have
enrolled in Provisional Prosthodontics Theory because you want to be licensed to
practice the following delegated prosthodontics procedures in a professional, ethical, and
legal manner:
• Fabricating and trying-in provisional restorations intra-orally, including
intra-coronal direct provisionals, and adjusting occlusion extra-orally, followed by
assessment by a dentist before cementation;
• Temporary cementation of provisional restorations and removal of temporary
cement followed by assessment by a dentist;
• Performing non-surgical gingival retraction techniques excluding the use of
epinephrine;
• Removing temporary and permanent cements using an appropriate hand
instrument and excluding the use of dental handpieces;
• Removing provisional restorations.
This study guide contains four course units. The units guide you through the learning
materials, providing commentary and information and directing you to readings in the
textbook, review questions, practice exercises, self-tests, and finally the assignment.
In Unit 1, you begin by reviewing prosthodontics information that you previously learned
or may have acquired during your career. This is foundational knowledge that the course
starts from and builds on. Unit 2 is written in the format of a case study. You follow a
dental team and patient through the procedures required for a single-unit crown and learn
the theory that supports each step of the procedure. In Unit 3, you study the placing of a
three-unit fixed partial denture (FPD). In Unit 4 you will study the placement of an
intra-coronal preparation and the subsequent creation of a direct provisional. Delegated
prosthodontics services for fabricating and cementing provisional restorations are
emphasized in each of the units. Throughout this course on prosthodontics theory,

Provisional Prosthodontic Theory Course Study Guide
2
remember that you are learning information so that you can perform the prosthodontics
skills safely, competently, and professionally for the patient.
Working with your sponsoring dentist is most critical and important to your success in this
course. You must be proactive in voicing your needs and look for opportunities to learn
and ask questions. The practice exercises throughout Units 2, 3 and 4 give you the
opportunity to integrate the theory with practice as far as you are legally able to do before
attending the clinical course.
Once you have successfully completed this theory course, remember that within one year
you must attend and successfully complete the clinical course and receive a designation
on your certificate before you can perform any of the delegated prosthodontics services.
If you have not already done so, read the Course Manual. It provides you with all the
information on how the course is structured and what you need to do to successfully
complete the course.
If you have already read the Course Manual, start now with Unit 1.

Provisional Prosthodontic Theory Course Study Guide
3
Unit 1 - Self-Assessment Review
Introduction
This review is designed as a way for you to assess your knowledge of prosthodontics
fundamentals, procedures, and materials that you learned in your formal dental assisting
education program. Answer all the questions in a notebook or on exercise paper, and
then check your responses with the answers at the end of this Study Guide. Depending
on your present work situation and length of time since graduation, you may need to refer
to the course textbook, Contemporary Fixed Prosthodontics, to review some subject
areas. Some topics, such as dental anatomy and tooth morphology, are not covered in
the textbook; to review these subjects you will need to refer to other sources such as
Modern Dental Assisting by Torres, Ehrlich, Bird, and Dietz or specific dental anatomy
texts. Ensure that you look at a current edition of the textbook. If you have trouble locating
a text, try a recent dental assisting graduate or a college in your area that offers a dental
assisting program.
The purpose of the self-assessment review is to give all learners taking the course a
similar level of basic prosthodontics knowledge. Don’t worry if you have forgotten some
areas of your previous prosthodontics education. Other students will be in the same
situation, and it won’t take long for you to relearn the material.
Depending on how current your knowledge of prosthodontics topics is, you should plan to
spend somewhere in the range of 3 to 10 hours on the self-assessment review. Take the
review seriously: you should write out answers, not just read the questions thinking you
know what is required.
Good Luck!

Provisional Prosthodontic Theory Course Study Guide
4
Self-Assessment Review Questions
1. List parts of the anatomical and clinical crown.
2. List the tissues of the tooth and describe their composition.
3. List the structures of the periodontium and describe the functions
4. Describe the crown and root morphology of all permanent teeth.
5. Define “prosthodontics.”
6. Describe the differences between a fixed prosthesis and removable prostheses.
7. List the benefits of a fixed prosthesis.
8. Describe the following types of cast restorations:
• Crowns
• Inlays and onlays
• Fixed partial dentures (fixed bridges)
9. What pretreatment records are obtained for prosthodontic treatment?
10. List the procedural steps for a full gold crown preparation on tooth #4.6.
11. What patient management techniques help to alleviate some of the stress associated
with long prosthodontic appointments?
12. Why are diagnostic models for prosthodontic restorations mounted on an articulator?
What relationships can be studied?

Provisional Prosthodontic Theory Course Study Guide
5
13. Describe how to mount diagnostic models on an articulator.
14. State the purpose of final impression materials, and list two of the most common
categories of these materials.
15. Describe elastomeric impression materials and list types that are commonly used
today in dental offices.
16. What forms of elastomeric impression materials are available?
17. What precautions should be taken when using elastomeric impression materials?
18. Describe reversible hydrocolloid impression materials. How are they prepared?
19. What are the advantages and disadvantages of reversible hydrocolloid impression
materials?
20. Discuss general infection control procedures when taking and handling impressions.
21. Describe the different types of impression trays that are used for elastomeric
impressions.
22. What are the indications for use of a custom tray?
23. List four different custom-tray materials.
24. Give the criteria for a properly fabricated custom tray.
25. What is the purpose of gingival retraction? Describe 3 ways gingival retraction can
be accomplished.

Provisional Prosthodontic Theory Course Study Guide
6
26. Describe retraction cord.
27. What precautions must be followed when using retraction cord?
28. When is retraction cord removed?
29. Describe how to remove retraction cord.
30. What precautions must be followed when removing retraction cord?
31. What are provisional cements? What is the function of a provisional cement?
32. How can the retentive properties of provisional cements be altered?
33. What factors are considered by the dentist when choosing a provisional cement?
34. Describe the procedure for cementing a provisional restoration.
35. What oral self-care instructions and information would you provide to a prosthodontic
patient with a:
• Single-unit, porcelain fused to metal (PFM) crown on tooth #1.1?
• Three-unit, PFM fixed-partial denture from tooth #2.3 to #2.1?
• Full gold crown on took #3.6?
• MODB gold onlay on tooth #4.7
• DO ceramic inlay on tooth 2.4
Provisional Prosthodontic Theory Course Study Guide
7
Conclusion
Now that you have completed the self-assessment and are confident with your general
prosthodontic knowledge, you will go on to learn about the fabrication, cementation, and
removal of provisional restorations from the operator’s perspective. This new area of
dental study will build on the basic knowledge in this review.

Provisional Prosthodontic Theory Course Study Guide
8
Provisional Prosthodontic Theory Course Study Guide
9
Unit 2 - Single-Unit Crown
Introduction
One of the very satisfying moments in dentistry is seeing a patient smile a little wider and
a bit brighter after having a badly damaged or fractured tooth restored with an attractive,
functional crown. Before and after photographs of prosthodontic dentistry can show
dramatic differences. Prosthodontic dentistry requires precision and focus, and the
prosthodontic assistant is a valued and important member of the dental team. The term
“prosthodontic assistant” is used in this course to refer to a person assisting for a
prosthodontic dental procedure. Some of the procedures performed by prosthodontic
assistants are learned in certified dental assisting programs. Our use of “prosthodontic
assistant” does not intend to exclude CDAs from performing procedures learned in their
formal education program, only from the delegated duties that a
prosthodontic-designated CDA may perform.
In this unit, you will review the procedures required for the fabrication of a single-unit, full
gold crown. General principles of fixed prosthodontics are discussed, including factors
that the dentist considers during treatment planning. You will then be introduced to our
case study patient and dental team. Richard, a regular patient of Dr. Adams’s practice,
has fractured tooth #2.7. He was in the office a few weeks ago for a consultation and has
agreed to proceed with a full gold crown. You are given a chairside seat in the operatory
to watch Dr. Adams and Jasmin, the prosthodontic assistant, take the alginate impression
or matrix that will be used to fabricate the provisional crown, prepare the tooth, take a final
impression, fabricate the provisional restoration, cement the provisional crown, and
remove the excess provisional cement. Ten days later, Richard returns, and Dr. Adams
and Jasmin remove the provisional crown in preparation for cementing the permanent
restoration. As you go through the case study, you might find it helpful to put yourself in
Jasmin’s shoes and imagine that it is you carrying out the prosthodontic duties.

Provisional Prosthodontic Theory Course Study Guide
10
In addition to learning the clinical procedures, you are provided with the theoretical
background that supports each step.
To supplement the information provided here, you are frequently asked to refer to your
textbook. Make sure that you turn to the textbook at these times.
Practice exercises are included in the unit, allowing you to gain clinical experience and
gather information about the procedures being discussed. Your sponsoring dentist needs
to review with you and sign the exercises, showing that you have satisfactorily completed
them. The signed practice exercises are sent to your instructor at the end of this course,
before you proceed with the clinical course.
A self-test is provided at the conclusion of this unit, designed to test your understanding of
the information in the unit. The questions are similar in format to those that will be on the
final examination. Answers to the self-test are found at the end of this Study Guide.
Unit Objectives
1. Explain the principles of fixed prosthodontics for single-unit crowns.
2. Describe pretreatment procedures for a single-unit crown.
3. Describe non-surgical gingival retraction.
4. Explain the direct fabrication of a matrix for a provisional crown.
5. Describe clinical procedures for a single-unit crown.
6. Explain the direct fabrication of a provisional crown.
7. Discuss the treatment of a tooth prior to cementing a provisional.
8. Discuss cementing procedures.
9. Explain the removal of excess provisional cement.
10. Explain the removal of a provisional crown and the removal of residual cement from
the preparation.
Provisional Prosthodontic Theory Course Study Guide
11
Readings
The following readings from the textbook Contemporary Fixed Prosthodontics are
assigned for this unit:
• Chapter 7, whole chapter, page 209
• Chapter 14, whole chapter, page 431
• Chapter 15, whole chapter, page 466
Look through these pages now to get a general idea of the topics, then later in the unit
section where you are referred to specific pages, tables, and figures, study the material
more closely.

Provisional Prosthodontic Theory Course Study Guide
12
Principles of Fixed Prosthodontics for Single-Unit Crowns
Readings Chapter 7, pages 209-257
During your dental career you have no doubt seen many crowns. Do you know why
crowns are placed? The three main reasons for placing crowns are to:
• Preserve teeth
• Restore function
• Restore aesthetics
A tooth or restoration that is fractured and out of occlusion does not function as it did
originally. By placing a crown on the tooth, the dentist is able to restore the original
anatomy of the crown and return the tooth to masticatory function. In addition, the crown
will prevent drifting and tipping of adjacent teeth and over-eruption of the opposing tooth.
Crowns may also be placed to improve the appearance of intrinsically stained teeth or
teeth that are heavily restored and are breaking down. The desire to preserve teeth or to
correct poor function are factors encouraging patients to request a crown. However, often
the motivating force is aesthetics – a tooth doesn’t look good, and the patient wants to
improve his or her appearance. Patients are delighted with the aesthetic shaded ceramic
or porcelain crowns.
A properly prepared tooth is critical for the success of any prosthodontic restoration. From
the readings, you have learned about the three factors that a dentist must consider during
tooth preparation.
What are the three factors involved in tooth preparation?
___________________________________________________________________
___________________________________________________________________

Provisional Prosthodontic Theory Course Study Guide
13
Biologic, mechanical, and aesthetic factors must be carefully considered during the tooth
preparation. Biologic factors affect the compatibility of the crown in the oral environment.
The dentist plans the tooth preparation to try to prevent any present or future damage to
the adjacent teeth, periodontium, or pulp of the tooth, and to ensure correct occlusion.
Mechanical factors affect the retention of the crown in the mouth and the pressures that
will be transmitted to the prepared tooth through the crown. Aesthetic factors relate to the
appearance of the restoration. Often the dentist has to compromise slightly on one factor
in order to satisfy the stronger requirements of another. Optimally, the dentist achieves a
balance among the factors and produces a well-fitting, functional, attractive, and durable
crown.
The many aspects of the biologic, mechanical, and aesthetic factors of tooth preparation
and their interrelationships are thoroughly discussed in Chapter 7 of your textbook
Contemporary Fixed Prosthodontics, page 209. It is important that you understand these
determinants as they form the basis for the principles of tooth preparation. The factors are
summarized below:
Biologic considerations:
• Prevention of damage during tooth preparation
• Conservation of tooth structure
• Considerations affecting future dental and oral health
Mechanical considerations:
• Retention form
• Resistance form
Aesthetic considerations:
• Partial-coverage restoration
• Metal-ceramic restoration
• All-ceramic restoration
Provisional Prosthodontic Theory Course Study Guide
14
A number of different crown margin designs are discussed in Chapter 7 under the section
on page 215 titled “Considerations affecting future dental health.”
The dentist determines the margin design that is most appropriate for the tooth, patient
and restorative material. You, the prosthodontic assistant, need to have a basic
understanding of margin design in order to effectively assist the dentist and to be able to
fabricate and trim a provisional crown so that it fits the prepared tooth snugly. Properly
fitting margins are critical for provisional restorations. Table 7-2 on page 220 lists the
advantages and disadvantages of different margin designs.
The dentist considers all these factors during treatment planning. Before any tooth
preparation begins, the dentist has determined the crown design, margin design,
instrumentation required, type of impression material, provisional crown and provisional
luting agent that will be used. You will need to ask your dentist about these details of the
prosthodontic work to be done if they are not recorded on the treatment plan.
Preparing a tooth for a crown is an exacting, time-consuming task. An understanding of
some of the principles of fixed prosthodontics will make you a more effective and efficient
prosthodontic assistant, helping you to better perform the delegated duties of fabricating
and placing provisional restorations.
We will now meet the characters in our case study demonstrating the procedures for a
single-unit crown. The dental team in the case study starts with pretreatment procedures
for a crown preparation on tooth #2.7, and then continues with matrix fabrication, clinical
procedures, provisional fabrication, cementing a provisional, and finally removing a
provisional.
The armamentarium and procedural steps for each clinical competency are given in
Appendix I: Procedural Guidelines at the back of this Study Guide. This information forms
the basis for the clinical course, which you will attend once you have successfully
completed this theory course.

Provisional Prosthodontic Theory Course Study Guide
15
Pretreatment Procedures for a Single-Unit Crown
Case Study: Introduction
Dr. Adams Dr. Adams has practiced in this
west coast town for twelve years.
She is one of six dentists in the
town and has developed a
medium-sized, steady practice.
About twenty percent of her work
is prosthodontics, and she likes
the challenges that this exacting
dentistry provides. Dr. Adams
enjoys the friendliness of the
small town and knows many of
her patients well.
Richard Richard has been a patient of Dr.
Adams’s practice for a number of
years. He is a pleasant man and
is comfortable in the dental chair.
He has required a variety of
dental procedures over the
years, including two posterior
crowns.
Richard is a truck driver for a
large produce company, and he
appreciates the benefits of the
dental plan that his company
contract provides.
Jasmin Jasmin started working with Dr.
Adams five years ago after
graduating from a certified dental
assisting program in a nearby
city. She likes the variety of
procedures that Dr. Adams
performs in the office and
particularly enjoys assisting for
prosthodontics. After completing
a prosthodontic course just over
a year ago, Jasmin was licensed
as a prosthodontic assistant and
has become proficient at the
prosthodontic skills legally
delegated to her. She works well
with Dr. Adams, and Dr. Adams
relies on the smooth teamwork
they have developed.
Provisional Prosthodontic Theory Course Study Guide
16
Dr. Adams performs pretreatment procedures for Richard two weeks prior to the tooth
preparation appointment.
Do you remember from the self-assessment review in Unit 1 what procedures are
performed pretreatment?
__________________________________________________________________
__________________________________________________________________
__________________________________________________________________
__________________________________________________________
Pretreatment procedures for prosthodontics include a medical/dental history review,
vital signs, a hard and soft tissue examination, an aesthetic assessment, radiographs of
the selected area, and study models.
Richard’s health history has been reviewed regularly over the years. He has a tendency
toward high blood pressure, which he controls through diet and exercise. On the day of
his examination, his blood pressure reading is within normal range and all other vital
signs are normal.
Richard practices regular oral self-care and follows the preventive recommendations of
the dental team. He uses a floss holder daily and has healthy periodontium. Richard
would eventually like to have all his posterior amalgam restorations replaced with gold
crowns. Bruxism is a problem for Richard, and he has some wear facets on his
posterior teeth. However, in the last few years the bruxism has become less pronounced
with stress reduction through exercise. Richard fractured the large, old amalgam
restoration on tooth #2.7 while eating popcorn at the movies. Although the amalgam is
fractured, the cusps are still intact. Radiographs show no pulpal or periodontal pathology
on this tooth.
Because Dr. Adams does not have a current set of study models on file for Richard,
Jasmin takes impressions for the models. Dr. Adams and Richard determine that
aesthetics are not a prime consideration for tooth #2.7 because the tooth is not visible

Provisional Prosthodontic Theory Course Study Guide
17
when Richard smiles. A full gold crown is considered the best option for restoring the
tooth.
Dr. Adams determines the most appropriate design for the gold crown, discusses the
length of the appointment and the procedures that would be done, and explains
Richard’s portion of the cost that supplements his 50% dental insurance coverage for
prosthodontics. Details about the crown design, types of impression material to be used,
and the type of provisional crown required are added to the treatment plan. Richard
agrees to proceed with the crown and signs the treatment plan. He pays a deposit to the
receptionist and books his crown preparation appointment. With pretreatment
procedures completed, Richard can now leave and return in two weeks for the
preparation appointment.
After making the chart entry, Jasmin rinses and disinfects the impressions, using a
disinfectant compatible with the impression material. She uses air to lightly dry the
impression, then pours, trims, and labels the study models, which are set aside for the
preparation appointment when Dr. Adams will prepare the tooth for the crown.
Direct Fabrication of a Matrix for a Provisional Restoration
Richard’s crown preparation appointment is this morning at 8:30. As the prosthodontic
assistant, it is Jasmin’s responsibility to prepare the operatory. By checking the
treatment plan, Jasmin is able to select the appropriate materials and trays and be
completely ready for all aspects of the crown preparation appointment. As part of her
responsibilities, Jasmin checks the manufacturer’s directions if she feels unsure about
manipulation instructions for the dental materials being used or is uncertain about the
names of disinfectants that are compatible with the material used for the final impression.
As you know, dentists have particular instruments, burs, and items that they prefer for
certain dental procedures. The prosthodontic setup that Jasmin prepares for Dr. Adams
is similar to the armamentarium listed in the textbook on pages 481 and 482.

Provisional Prosthodontic Theory Course Study Guide
18
Practice Exercise Complete Practice Exercise 1 to familiarize yourself with the prosthodontic tray set-up of
your sponsoring dentist. You will find the practice exercises in the course component
titled Practice Exercises and Assignments.
Jasmin greets Richard and escorts him into the operatory. He is relaxed and cheerful
today as usual. After Richard is settled comfortably in the dental chair, Jasmin takes his
blood pressure and confirms that it is within normal range. Richard puts on safety glasses.
Dr. Adams greets Richard as she enters the operatory. She and Jasmin glove, mask, and
put on safety glasses, and Dr. Adams administers the local anesthetic while Jasmin
assists. Since they are placing a gold grown, shade selection is not a concern. However,
if aesthetic considerations were important, a shade for the permanent restoration would
be taken at this point. A shade for the provisional restoration is taken during pretreatment.
Do you remember from your dental assisting or dental hygiene education why the shade
is taken early in the appointment? Teeth become desiccated from the dental light and
exposure to air. A shade taken when the teeth are very dry will be lighter than normal;
thus, the prosthetic tooth will appear too white. Also remember that shades should be
selected under natural light.
The matrix for the provisional restoration is made prior to any tooth preparation. In this
Study Guide, the term “matrix” is used to describe a mould used to shape the provisional
restoration. Your textbook uses the term “form” to describe the receptacle that shapes the
provisional. In other textbooks, the mould is referred to as the “framework”. Various
materials may be used for a matrix. An alginate impression matrix is commonly used
when making a custom provisional directly in the mouth, but matrices are also made from
putty, wax, and plastic press forms.
In Dr. Adams’s treatment plan, Richard’s provisional restoration will be directly fabricated
using an alginate matrix. While waiting for profound anesthesia, Jasmin gets ready to
take the impression using a single-quadrant tray.

Provisional Prosthodontic Theory Course Study Guide
19
You should already be familiar with the properties and characteristics of alginate,
including precautions for mixing and handling it. Alginate is discussed in your textbook on
pages 43-45, and you may want to refer to this section if you need review.
Jasmin takes the upper-quadrant impression, being careful to properly seat the loaded
tray and letting the material set for the appropriate time. After giving Richard some water
for rinsing and a tissue, she inspects the impression to ensure that it meets specific
criteria.
What are the criteria for an acceptable alginate impression?
__________________________________________________________________
__________________________________________________________________
__________________________________________________________________
__________________________________________________________________
An alginate impression should have the following characteristics:
• All areas of the crowns are well-defined in alginate; the tray is not over-seated with
the cusp tips exposing the metal tray.
• The mix is smooth and homogeneous, without air bubbles.
• The impression is intact, without tears.
• All necessary anatomy is present.
For a single-crown alginate matrix, it is also important to ensure that:
• The quadrant tray is centred over the tooth preparation area, giving an accurate
representation of a least one tooth on each side of the tooth being prepared.
Practice Exercise
Complete Practice Exercise 2 to practice making and evaluating an alginate matrix. The
exercise is in the component Practice Exercises and Assignments.

Provisional Prosthodontic Theory Course Study Guide
20
Jasmin is satisfied that the alginate matrix for tooth #2.7 meets the criteria. Richard
doesn’t have #2.8, but Jasmin has good representation of the tissue. Although the
amalgam on the tooth is fractured, the tooth is intact, and she obtains an accurate
impression. Jasmin then rinses the impression, wraps it in moist paper towel, and sets it
aside until later in the appointment when it is needed – after the tooth preparation and
final impression, when it is time to fabricate the custom provisional.
Provisional Prosthodontic Theory Course Study Guide
21
Clinical Procedures for a Single-Unit Crown
Readings Chapter 8, page 258
Some dentists like to use a dental dam for the initial steps of tooth preparation. Dr. Adams
asks Jasmin to place a dental dam for tooth #2.7, and she isolates from tooth #1.3 to #2.7
using a dental dam retainer with a distal extension.
What are the advantages of a dental dam for initial tooth preparation?
___________________________________________________________________
___________________________________________________________________
___________________________________________________________________
___________________________________________________________ ______ _
The dental dam prevents debris from falling into the patient’s mouth and allows the
prosthodontic assistant to contain the debris and vapor more easily. Also, the contrast of
the tooth against the darker background of the dam increases tooth visibility for the
dentist. A dental dam also provides moisture control for bonding core build-ups.
Once anesthesia is confirmed and the dam is in place, Dr. Adams begins the tooth
preparation. Most dentists will begin with a diamond bur and change burs as needed to
remove all fractured areas of the tooth, unsupported enamel and dentin, as well as any
caries. If this initial step results in too much of the tooth’s structure being removed, the
dentist may choose to “buildup” the tooth with a restorative material such as amalgam,
glass ionomer, or composite. A crown build-up reduces the thickness of the final crown,
which will help prevent sensitivity caused by the transference of hot and cold sensations
through the metal of the crown. The build-up also assists with retention of the restoration.
In our case, Richard does not require a crown build-up.
Provisional Prosthodontic Theory Course Study Guide
22
The dental dam is removed once the majority of the tooth preparation is complete. With
the dam removed, Dr. Adams has better access to the marginal areas, some of which are
subgingival. At this stage, a dam would interfere with access and visibility of the tooth. Dr.
Adams is meticulous with this final tooth preparation step. She must ensure that the
preparation meets as many of the biologic, mechanical and aesthetic requirements as
possible.
Once the tooth preparation is complete, Jasmin prepares the retraction cord by cutting
an appropriate length, moistening it in astringent solution, and squeezing out the excess.
Dr. Adams places the retraction cord in preparation for the final impression, but this duty
could be delegated to a competent CDA like Jasmin. The cord is packed firmly but gently
with a cord-packing instrument against the tooth into the sulcus. Dr. Adams is careful to
pack against the side of the tooth and roll the cord in. Depending on the position of the
margins, the cord may enable Dr. Adams to see the margins even more clearly, allowing
for a final check and additional refinement of the tooth, if required. Note that although this
retraction cord was placed after preparation, some operators prefer to place the cord
during preparation.
A variety of materials may be used to obtain Richard’s final impression. You previously
studied final impression materials in your dental education program, and you may want to
review this information if your knowledge is not current. Dr. Adams has selected an
addition silicone impression material for Richard’s impression. Jasmin mixes the
light-body material and fills the syringe. Dr. Adams delivers the material with the syringe
while gently removing the retraction cord. Jasmin begins to mix the heavy-body material
for the impression tray.
Note that in some jurisdictions such as BC, placing (only with prosthodontic delegation)
and removing retraction cord is a duty that is legally delegated to allied dental personnel.
If this is the case in your jurisdiction, you have the professional responsibility to ensure
that you have the knowledge and skills required to safely and competently place and
remove the cord, excluding the use of epinephrine. Retraction cord is absorbent, and it

Provisional Prosthodontic Theory Course Study Guide
23
adheres to the epithelial attachment and adjacent gingival tissues. If it is removed too
quickly, the tissues can be traumatized, causing discomfort to the patient when the
anesthetic dissipates. If you have any doubts about your ability to correctly and
competently place and remove the cord, please consult with your dentist. The patient’s
safety should be kept in mind at all times.
Once the light-body impression material is in place, Jasmin passes the heavy-body
material that she has loaded in the three-in-one tray, and Dr. Adams seats the final
impression which will be used by the lab for fabricating the crown. This unique type of tray
enables the dentist to obtain an impression of the prepared tooth, the opposing teeth, and
the occlusal pattern all at the same time. If you have not seen a three-in-one tray, check
your office’s prosthodontic armamentarium, or ask your dentist if one is available. If not,
perhaps ask your dental supply representative to show you a three-in-one tray or a picture
of one in a supply catalogue.
The impression is now seated, and Dr. Adams asks Jasmin to hold the tray in place during
the set. Jasmin knows that it is critical to monitor the impression because movement
during set can distort it, which would result in a poorly fitting crown. Jasmin periodically
keeps Richard informed of the remaining time for the impression to set.
Once the material has set, Jasmin removes the final impression. Jasmin thoroughly
rinses and suctions Richard’s mouth. Dr. Adams inspects the final impression carefully.
If there are any air bubbles, tears, distortions, or breaks in the integrity of the margins, the
impression needs to be discarded and retaken. In this case, Dr. Adams is satisfied with
the impression. The critical points for the dentist’s evaluation of an impression are listed
on page 431 and 461 of the text. Also see the criteria for an alginate impression given
earlier in this unit.
Jasmin puts the dental chair into an upright position. This is a good time for Richard to
take a break, and Jasmin suggests that he stand up or walk around for a few minutes.

Provisional Prosthodontic Theory Course Study Guide
24
While Dr. Adams writes out the lab prescription, Jasmin prepares the final impression for
the dental laboratory. As you know, disinfection of impressions is necessary to protect
dental laboratory personnel.
List the essential steps for disinfecting impressions.
___________________________________________________________________
___________________________________________________________________
___________________________________________________________________
___________________________________ ______________________________ _
The process of disinfecting impressions is described in your textbook on pages 460 and
461. To disinfect an impression:
• Gently rinse the impression under tap water at room temperature to clean off any
saliva or blood.
• Use an air syringe to remove excess water from the impression.
• Depending on the impression material and the manufacturer’s instructions,
disinfect the impression with a suitable disinfectant, either by spray or by
immersion.
Using the information in Table 14-4 on page 461 of your textbook, give the disinfectant
recommended for Richard’s impression:
___________________________________________________________________
___________________________________________________________________
___________________________________________________________________
____________________ _____________________________________________ _
To disinfect an addition silicone impression, immersion in 2% glutaraldehyde is
recommended. Always be sure to check the manufacturer’s directions for the correct
procedure, for example, instructions on how long to immerse the impression.

Provisional Prosthodontic Theory Course Study Guide
25
With the impression prepared for the laboratory, Jasmin is ready to fabricate the
provisional crown for Richard using the direct method, that is, directly on the prepared
tooth in the mouth. This method is distinguished from the indirect method where the
provisional is made outside the mouth on a stone cast.
Chapter 14 in your textbook, pages 431-440, discusses placement of retraction cord and
impression taking and includes a section on final impression materials. In Table 14-3 on
page 442, impression materials are compared. You should review this information if your
knowledge in this area is not current.
Provisional Prosthodontic Theory Course Study Guide
26
Direct Fabrication of a Provisional Crown
Readings Chapter 15, pages 466-504
Before you learn how to fabricate a provisional crown, you need to know more about
provisionals – their requirements, parts, and what they are made of. All these topics are
covered in detail in Chapter 15 of the textbook, pages 466-504, and you should read
these pages now.
The term “provisional restoration” or “interim fixed restoration” is relatively new. You may
be more familiar with the older term, “temporary restoration.” Do you understand from
your reading why the new term has evolved? The difference between the terms is subtle,
but the intent is clear. A provisional/interim may be in place for varying lengths of time,
and may not be “temporary” at all. Even if the provisional is only in place for a week or two,
it is important to the patient to have a functioning restoration that is capable of maintaining
oral health and is aesthetically acceptable. Long-term provisionals may be planned for
patients undergoing major prosthodontic reconstruction, where the progress of
prosthodontic treatment is affected by the need for other specialty care such as
orthodontics, periodontics, oral surgery, endodontics or implantology.
Requirements of Provisionals
Just as tooth preparations need to meet biologic, mechanical, and aesthetic
requirements, so do provisional restorations. Provisional standards or criteria are outlined
in Figure 15.1 on page 467 of your textbook.
List the four biologic requirements of provisional restorations and give the rationale for
each.
___________________________________________________________________
___________________________________________________________________

Provisional Prosthodontic Theory Course Study Guide
27
Unless a tooth already has a large build-up of restorative material, a crown preparation
can cause pulpal irritation because of the sensitivity of newly cut dentin. Therefore, the
first requirement of a provisional is that the dentinal tubules must be covered and
protected from oral fluids by a well-fitting provisional crown.
The periodontal health of a tooth with a provisional crown depends on the fit, contour, and
texture of the crown. A poorly designed provisional restoration can cause bleeding tissue
and, worse, can result in long-term recession. Provisional design should contribute to
healthy tissue, which is critical for keeping the provisional in place and for eventual secure
cementation of the final crown.
The provisional crown must have proper contact with adjacent and opposing teeth to
prevent horizontal or vertical movement of the teeth. In effect, the provisional should be
similar in fit, size, and basic shape as the permanent restoration, within the limitations of
the material from which the provisional is made. With this requirement, the permanent
crown, when it is placed, will be properly positioned and have good occlusion.
The fourth requirement is that the provisional restoration must protect the structure of the
prepared tooth from fracture.
Describe the three mechanical requirements of a provisional crown.
___________________________________________________________________
___________________________________________________________________
___________________________________________________________________
_________________________________ ________________________________ _
A provisional restoration is much weaker than the permanent restoration that will take its
place, but the provisional must be strong enough to resist fracture during chewing that
could damage the prepared tooth.
Provisional Prosthodontic Theory Course Study Guide
28
In addition, the provisional should be strong enough to withstand removal and be reused,
if necessary.
As you know, provisional luting cements are weaker than permanent cements, and it is
not uncommon for provisionals to loosen. A loose or lost provisional should be
recemented or refabricated as soon as possible to avoid trauma to the prepared tooth and
periodontium. Because of the limited adhesive strength of provisional cements, it is
important that provisional restorations have a close-fitting internal structure to keep them
in place.
Aesthetic requirements are more important for anterior provisional restorations than for
posterior ones. Tooth contour, color, translucency, and texture all need to be considered
when fabricating an anterior provisional.
External Surface Forms (ESFs) and Tissue Surface Forms (TSFs)
A provisional crown has two main parts, as identified in Figure 1. The external surface form (referred to as the ESF in your text) replaces the tooth anatomy lost during
preparation, and the internal surface form, or tissue surface form (TSF), fits the
prepared tooth. As with many dental terms, the term “ESF” can have two meanings. As
we have just said, it refers to the external surface of the provisional, but it can also refer to
the mould or matrix that is used to form the ESF of the restoration. For example, in your
textbook, a thermoplastic form and an impression are called ESFs, but they are in effect
matrices that are used to shape the actual ESF of the provisional restoration, and then are
discarded. The same duality of meaning occurs with the term “TSF.” In addition to
meaning the internal surface of the provisional, it can also refer to the prepared tooth
surface in the mouth (or casting of it) on which the TSF is formed.

Provisional Prosthodontic Theory Course Study Guide
29
The external surface form may be custom made by the dental team for the patient, or the
dentist may choose a commercial preformed provisional crown. Custom-formed provisionals generally fit better than commercial crown forms, and they can be shaded
to match the patient’s adjacent teeth. The ESF matrix in which a custom provisional is
formed can be made directly in the patient’s mouth prior to tooth preparation or indirectly
from a study cast. Both methods ensure that the patient’s original tooth anatomy is
reproduced in the custom provisional crown. As already mentioned, various materials are
commonly used for the ESF matrix such as irreversible hydrocolloid, elastomeric
impression materials, mouldable putty materials, thermoplastic materials, and baseplate
wax.
Commercial provisional crown forms are manufactured in a variety of shapes, sizes,
and shades from a variety of dental materials including polycarbonate, cellulose acetate,
aluminum and tin-silver, and nickel-chromium. Note that in this list, the cellulose acetate
is an ESF matrix that is separated from the resin, which sets inside it and is discarded,
whereas all the other crown forms become the actual ESF of the restoration in the mouth.
Preformed crowns are described in your textbook on pages 470 to 477.
Complete Practice Exercise 3 in Practice Exercises and Assignments to help you become
familiar with the commercial preformed provisional crowns in your office.
Fabrication Methods
As we have said, provisionals can be fabricated directly on the prepared tooth or indirectly
on a model of the prepared tooth. They can also be made by an indirect-direct procedure
that is a combination of the two methods. Thus, there are three methods for fabricating
provisionals:
1. Indirect method
2. Direct method
3. Indirect-direct method
Provisional Prosthodontic Theory Course Study Guide
30
All three of these methods are discussed on pages 475-477 in your textbook.
In this course you learn about fabricating provisional crowns using the direct method to
fabricate a single provisional crown for our patient Richard, and the indirect-direct method
to fabricate a three-unit provisional in Unit 3 and a direct intra-coronal provisional in
Unit 4.
In the indirect method for making custom provisionals, both the ESF and the TSF are
fabricated outside the mouth. To make the ESF for the provisional, you first make an ESF
matrix from study casts of the original anatomy. The ESF matrix can be, for example, a
polypropylene shell, an alginate impression, or a putty impression. Note that if there is
damage to the original anatomy such as a missing cusp, the cast can be built up to
approximate the original tooth structure prior to making the matrix.
To make the TSF in the indirect method you first have to make the model on which you
will work. This is done by taking an impression of the prepared tooth in the mouth, then
pouring quick-setting gypsum or stone into the impression, resulting in a stone casting.
This casting duplicates the prepared tooth in the mouth. Acrylic resin or other provisional
material is mixed and placed in the ESF matrix that you previously made from the study
casts. The resin-filled matrix is seated on the stone cast and allowed to set, forming the
TSF for the provisional and at the same time the rough ESF. The matrix is removed,
leaving the restoration on the stone cast. Trimming and contouring of the provisional ESF
may then be done. Note that this indirect procedure for making a TSF that we have just
described using a custom ESF matrix could also be done using a commercial preformed
crown such as appears in Figure 15-16 on page 474 of the text. Provisional material
would be placed in the preformed crown and seated on the stone cast.
According to your text, the indirect procedure has many advantages over the direct
procedure. List the advantages of the indirect method.
___________________________________________________________________
___________________________________________________________________

Provisional Prosthodontic Theory Course Study Guide
31
___________________________________________________________________
___________________________________________________________________
___________________________________________________________________
___________________________________________________________________
___________________________________________________________________
___________________________________________________________________
___________________________________________________________________
The following points are advantages of the indirect method of making provisional:
• Tissue does not come in contact with monomer, a component of the resin used to
fabricate the provisional. Monomer is irritating to soft tissue.
• Teeth are not exposed to the potentially damaging exothermic heat reaction of the
setting resin.
• You avoid the marginal distortion that can occur when setting resin is eased and
removed from the preparation too soon, as is done to decrease the tooth’s
exposure to heat.
• You have a model of the tooth preparation that may be reused to fabricate a
replacement provisional crown for the patient.
• Because the prosthodontic assistant fabricates the provisional crown outside the
mouth after the tooth has been prepared, this gives the patient a chance to rest
during the long crown preparation appointment.
• If the acrylic is pressurized during curing in a pressure unit, the resulting resin has
increased strength and more stable color.
Many offices use a dental lab to fabricate indirect provisionals.
With the direct method, as you will observe in Richard’s case, both the ESF and the TSF
are fabricated directly in the patient’s mouth.
What are the main advantages and disadvantages of the direct method?
Provisional Prosthodontic Theory Course Study Guide
32
___________________________________________________________________
___________________________________________________________________
___________________________________________________________________
____________ _____________________________________________________ _
Many dental offices prefer the direct method for the fabrication of provisionals because it
is relatively fast and simple. Fabrication of the provisional restoration is done completely
at chairside. The ESF matrix is formed in the patient’s mouth prior to preparing the tooth.
Once the tooth preparation is done and the final impression taken for the lab, the ESF
matrix is filled with provisional material and seated on the actual tooth preparation to form
the provisional. This direct method is convenient and time-saving – always important
factors in a dental practice.
The disadvantages of the direct method are the same as the advantages of the indirect
method that we just discussed. The main disadvantage is exothermic heat production if
using an acrylic resin, which can damage the pulp. However, the damaging heat effect
can be reduced by using specific resins and proper fabrication technique. Note: Most
Bisacryl materials do not have an exothermic reaction.
So far, we have discussed the indirect method and the direct method for fabricating
provisionals. We now turn to a combination of the methods called the indirect-direct method. With this method, an ESF matrix or a custom preformed ESF shell is fabricated
indirectly outside the patient’s mouth before the patient arrives for the crown preparation
appointment, and the TSF is formed directly on the patient’s tooth preparation.
One method for the indirect part of the procedure can be done fairly simply by making an
ESF matrix on a diagnostic cast using a polypropylene sheet or an impression material.
This indirectly obtained matrix is later filled with provisional material and is set directly on
the patient’s tooth preparation.
Provisional Prosthodontic Theory Course Study Guide
33
A second, more involved procedure for the indirect part of the indirect-direct method is
discussed in your textbook on pages 485-489 for a three-unit fixed partial denture. The
central task of this method is to make ahead of time a preformed provisional similar to a
stock preformed polycarbonate ESF. In this procedure, an ESF matrix is formed from the
diagnostic cast. Then preparation work is done on the cast (Figure 15-37, page 487),
cutting margins that create enough space so that when the ESF matrix filled with resin is
placed on the cast, a resin shell will be formed. Since the actual preparation on the real
tooth will remove more of the tooth, this resin ESF shell will fit over the tooth preparation
with enough room for placing additional resin to form the TSF. The resin shell is trimmed,
contoured, and polished, and ready for try-in at the appointment after the tooth has been
prepared.
An advantage of the second indirect-direct method over the indirect method is that it
saves chairside time; the ESF matrix or the custom preformed shell is made beforehand,
ready when the patient arrives for the appointment. In the case of the custom preformed
shell, an advantage of the indirect-direct method over the direct method is that the custom
shell uses less resin to form the TSF than does an ESF matrix, so there is less damaging
heat generated on the teeth.
The first indirect-direct method of fabrication is discussed more thoroughly in Unit 3.
Provisional Resins
A discussion of dental materials used to fabricate provisional restorations will help you
understand the manipulation requirements of the materials and the precautions for
handling them. Refer to pages 478-481 in your textbook.
The many resin-based materials that are used for fabricating provisional restorations all
have similar deficiencies.
What are the two main problems with provisional resin materials?

Provisional Prosthodontic Theory Course Study Guide
34
___________________________________________________________________
___________________________________________________________________
___________________________________________________________________
__________________ _______________________________________________ _
Shrinkage, which results in marginal discrepancy, can be a serious problem because the
margins of a provisional need to fit snugly. The heat produced during the exothermic
setting reaction of most resin materials can also be a major problem, capable of causing
pulpal damage. This is potentially a very serious issue because thermal trauma may
further irritate a tooth that is already sensitive from cut dentinal tubules.
Another property of some provisional materials that you will quickly notice is their strong
odor. It is important to know that many of these materials are hazardous to breathe.
Check the manufacturer’s directions for specific requirements for venting during mixing.
On page 477-478 of the textbook, the ideal properties of provisional restorative materials
are listed. As research in dental materials progresses, perhaps a new material will be
developed which has all these properties. In the meantime, we will have to work within the
limitations of the materials we have.
There are four main groups of provisional materials (sample trade names are in brackets):
1. Methyl methacrylate (e.g.: Jet, Duralay)
2. R-methacrylate. Also called ethyl methacrylate or isobutyl methacrylate
(e.g.: Trim, Snap)
3. Microfilled composite. Also called Bisacryls (e.g.: Integrity, Protemp)
4. Light-cured resins (e.g.: Unifast LC, Triad)
All the resin groups have similar components and setting reactions. Components include
pigments, monomers, fillers, and an initiator. All components contribute to a material’s
characteristics, but the monomer is the most influential. Through the polymerization
reaction, the monomer is converted to a polymer. As the monomer is polymerizing, it goes

Provisional Prosthodontic Theory Course Study Guide
35
through a chemical change before it reaches the inert form of a polymer. This chemical
reaction is what produces the harmful effects, the most serious being heat and shrinkage.
It is important that the polymerizing process occurs correctly; if the process is incorrectly
initiated or the material is disrupted before it reaches final set, the characteristics of the
final polymerized material can be affected.
The polymerization process is well-detailed in the textbook on pages 479-480. You need
to understand the main points of the reaction, as summarized below:
1. Activation. Activation starts the reaction. Activation may be triggered by heat,
chemical, or visible light activators. Chemically-activated and light-activated
materials are most commonly used today.
2. Initiator. In chemically-activated material, the initiator is usually benzoyl peroxide.
In light-activated material, the initiator is generally camphoroquinone.
3. Propagation. Propagation is the phase in the polymerization process that
develops the final properties of the material. The setting material increases in
density, undergoes an exothermic reaction, and develops strength. A disruption in
the propagation process can greatly affect the strength and hardness of the final
material.
It is during the propagation stage that we realize some of the limitations of the resin
materials. Small-molecule monomers produce more heat during polymerization
than large-molecule monomers. However, small-molecule monomers provide
greater strength than the large-molecule monomers.
Methyl methacrylate is a small-particle monomer, whereas ethyl methacrylate is a
large-molecule monomer. Thus methyl methacrylate might be the material of
choice for a long-span FPD where strength is a factor, whereas ethyl methacrylate

Provisional Prosthodontic Theory Course Study Guide
36
might be the choice for a provisional requiring less strength. Selection of materials
is made depending on the individual case.
4. Termination. Termination of the polymerization process ideally occurs when all
the monomer has converted to polymer. Unwanted reaction of the monomer with
substances such as eugenol can cause early termination, resulting in resin that
does not reach its potential for hardness or strength.
You now know about the initiator and monomer components of provisional resins. The
two remaining components are filler and pigments. The purpose of filler is to increase the
strength of the material and to counteract some of the negative properties of the
monomer. Filler helps to decrease the level of exothermic reaction and the degree of
shrinkage that the material undergoes while polymerizing. However, too much filler
affects the handling and increases porosity. With chemically-activated materials, fillers
are added during the mixing, but for pre-mixed, light-activated provisional materials, the
fillers are included by the manufacturer.
Pigments give color to the provisional material to match the shade of the natural
dentition. Multiple shades of provisional materials are available so that the operator can
match the various ranges of shades that natural dentition presents.
In Table 15-3 on page 480 you can see a comparison of the characteristics of several
common provisional materials. Your dentist will choose the provisional material that best
suits the patient’s restorative requirements and the method of fabrication.
Referring to Table 15-3, can you determine the two most desirable materials for an
anterior provisional restoration (aesthetics are a concern) on a patient who has many
contact allergies and a sensitivity to strong odors?
___________________________________________________________________
___________________________________________________________________
___________________________________________________________________
Provisional Prosthodontic Theory Course Study Guide
37
___________________________________________________________________
___________________________________________________________________
______________________________________________________ ___________ _
You should have chosen Integrity, Protemp and Triad materials.
Complete Practice Exercise 4 to investigate the types of provisional materials available in
your dental office and observe the heat and shrinkage associated with setting acrylic
resins.

Provisional Prosthodontic Theory Course Study Guide
38
Case Study: Fabricating and Provisional
Let’s now go back to our patient Richard and watch while Jasmin fabricates his
provisional crown.
Since Jasmin completed her prosthodontic course over a year ago, she has fabricated
many provisional crowns, intra-coronal restorations and fixed partial dentures. Dr. Adams
worked with Jasmin to adapt the basic skills that she learned in the course to Dr. Adams’s
method of practice. Jasmin’s speed and proficiency have increased, and she now feels
comfortable with all the duties legally delegated to a prosthodontic assistant.
However, during the past year there were times when Jasmin encountered situations in
which she requested the professional judgment of Dr. Adams. One time, Jasmin had a
problem with the resin material. Another time, the tooth was too sensitive to work on
because the anesthetic began to dissipate. On another occasion, she had difficulty with
the fit of the provisional at the margins. As a prosthodontic assistant, it is important to
learn to self-evaluate your work and problem-solve difficulties. Nevertheless, it is equally
important for you to know your limitations and when to ask the dentist for assistance.
It is also a critical and provisional requirement to have the dentist check your work prior to
cementation and before the patient leaves the operatory. You have learned about the
biologic, mechanical, and aesthetic requirements of a provisional crown, and you know
how important it is for the oral health of the patient that the provisional fit well and be
functional. Your education also gives you an appreciation for proper form and function.
However, the dentist’s greater knowledge and experience is needed to ensure that your
prosthodontic procedures have been done correctly and safely for the patient.
Various direct procedures for provisionals are described in your textbook from pages
489-496: a custom preformed three-unit provisional, an onlay/inlay provisional, a
laminate veneer provisional, a polycarbonate crown form, and an aluminum crown form.

Provisional Prosthodontic Theory Course Study Guide
39
For now, it is important that you have a general understanding of the principles involved in
the fabrication of a single-unit provisional crown.
Do you remember the single-quadrant alginate matrix that Jasmin obtained at the
beginning of Richard’s appointment, prior to any tooth preparation? She will use it as a
custom ESF matrix for the single-unit provisional.
After Jasmin checks that her armamentarium is complete, Richard is resettled in the
dental chair. Jasmin shakes out any droplets of water that have collected in the
impression and gently dries it with air. She checks the alginate impression and, using a
blunt instrument, refines any areas of the impression that are unclear. She then rinses,
isolates, and dries the prepared tooth, and using a cotton pellet, coats the preparation,
adjacent teeth, and gingival tissues with a petroleum jelly lubricant. Do you know why this
is needed? If the area is not well lubricated, the resin will adhere to the tissues, making
removal difficult. In addition, the lubricant helps to dissipate heat produced during the
exothermic reaction. Jasmin then places pieces of moist cotton rolls in the #2.6 and #2.8
areas of the matrix impression to help contain the material in #2.7 and prevent excess
flow.
Which resin group is most appropriate for the direct method?
___________________________________________________________________
The most appropriate material for direct fabrication of a provisional restoration is the
R-methacrylate group (e.g., Trim, Snap) because it produces the least amount of heat
during setting. You may know materials in this group as ethyl methacrylate or isobutyl
methacrylate. Jasmin dispenses and mixes the material in a dappen dish, following the
manufacturer’s directions. Once it has lost its surface shine, she pours the resin up to the
margin of the correct tooth impression of the alginate matrix (Figure 2). Jasmin removes
the cotton roll pieces from the matrix and from Richard’s mouth and carefully reinserts the
alginate matrix into Richard’s mouth, pressing firmly to seat the matrix. In Figure 15-43, D
on page 488 of the textbook, you can see the resin material oozing over the margins of

Provisional Prosthodontic Theory Course Study Guide
40
the custom-preformed external surface form. You can’t see this happening with the
alginate matrix, but the same process is occurring. The excess resin is squeezing out
around the prepared tooth onto adjacent lubricated surfaces.
Note that in this process, Jasmin is making both the ESF and the TSF of the provisional at
the same time, and the provisional will be made of solid resin. This is different from a
preformed custom provisional or a stock crown form where the shell becomes the ESF in
the mouth and the resin placed inside it forms the TSF.
The resin material begins to set quickly, and within about two minutes the material
reaches initial set, a rubbery stage where it can be moved with minimal distortion. In the
clinical course, you will gain experience judging when this initial set or rubbery stage
occurs.
Richard isn’t experiencing any sensitivity during this initial set, although some patients do,
especially if the anesthetic is beginning to dissipate. Jasmin begins to gently ease the
alginate matrix minutely up and down, in a coronal/apical direction, and she continues this
for the next few minutes as the resin sets further. The easing motion helps to dissipate the
heat, yet keeps the resin in close enough contact with the preparation so that an accurate
TSF is formed.
What do you think would be the result if Jasmin used too much motion, particularly in a
buccolingual direction, while easing the setting resin?
___________________________________________________________________
___________________________________________________________________
The resin could be distorted and the resulting provisional would fit poorly.
After a few more minutes, Jasmin removes the matrix from Richard’s mouth and places it
in a bowl of warm water to hasten the final set. Note that the acceleration of the set due to
the warm water may increase shrinkage, but the shrinkage can be counteracted by TSF

Provisional Prosthodontic Theory Course Study Guide
41
relief using a round bur and, when necessary, by relining the margins with a bead brush.
These techniques will be discussed later. Jasmin must be careful not to leave the matrix
on the tooth too long because heat production increases during setting, and if left until
completely set, the resin could become locked onto the preparation. Jasmin rinses
Richard’s mouth and returns the dental chair to an upright position. Richard has some
time to relax now while Jasmin completes the fabrication of the provisional crown and
makes any adjustments that are necessary before the crown is cemented in the mouth.
Jasmin prepares the burs and disks she needs to trim the provisional while it is reaching
final set in the water bath. After a few minutes (your text recommends 3 to 5 minutes), the
matrix is removed from the water. Jasmin carefully separates the resin from the alginate
and thoroughly dries the rough provisional form.
Inspecting the rough provisional, Jasmin can see that the TSF is an accurate
reproduction of the tooth preparation. If the alginate matrix was fully seated, the rough
provisional will also have a fairly accurate ESF, though the excess resin may make this
difficult to see. If the alginate matrix was not fully seated, the ESF may appear to be
accurate, but once seated, the provisional will have a high occlusal surface. Depending
on how high it is, the provisional may or may not be usable.
Using a sharp pencil, Jasmin marks the contacts and outlines the margins of the
preparation on the internal surface of the crown, as shown on page 489 of your textbook
in Figure 15-44 A. This defines the margins of the TSF that must be left intact during
trimming. Jasmin prefers to use coarse sandpaper disks on a straight mandrel for quick
reduction of the gross excess resin. Other devices such as an acrylic bur may also be
successfully used to remove the bulk of the resin. She holds the disk parallel to the
surface she is creating, as shown in Figure 15-44.
These shaping techniques will be fully demonstrated during your clinical course and you
will have the opportunity to work on them yourself until you are comfortable with the

Provisional Prosthodontic Theory Course Study Guide
42
process. Make sure that you closely observe trimming procedures, including how to hold
the slow speed handpiece, in your sponsoring dentist’s office.
Once the gross excess is removed, Jasmin changes to medium and fine grit disks for finer
reduction. At all times, she avoids trimming her pencil marks at the crown margins to help
ensure that the margins fit the preparation as tightly as possible. If the pencil marks rub off
during handling, they must be remarked.
Holding a single-unit provisional crown while it is being trimmed is more difficult than
holding a larger fixed partial denture. You must be very careful to keep your gloved fingers
away from the disc. You need to fulcrum for the handpiece during trimming and, like
Jasmin (Figure 3), you will probably fulcrum off a finger on your opposite hand.
In Figure 15-44, B and C on Page 489 of the text, you can see how the operator fulcrums
while trimming a provisional fixed partial denture. Richard’s provisional crown is only
one-third the size.
After Jasmin has trimmed the provisional to a shape that is close to being completed, she
prepares to do a try-in. Outside of the mouth, Jasmin positions the crown in her fingers so
that she has direct access to the prepared tooth. She has already positioned the dental
chair and Richard’s head so that if the crown was dropped, it would land on his tongue.
Cotton pliers are readily available for emergency retrieval as part of the tray set-up. In
addition, Jasmin keeps one finger on the occlusal/incisal surface of the provisional as she
inserts or removes it from the mouth. Swallowing the crown would be most distressing for
Richard! Not to mention the time it would take to refabricate the provisional.
Once the provisional is placed on the prepared tooth, Jasmin checks the margins
carefully with an explorer and uses floss to check the contacts. The contacts should be
tight enough to ensure that mesial/distal tooth movement cannot occur, yet not so tight
that the teeth cannot be flossed. The crown is carefully removed and trimmed further, as
needed.

Provisional Prosthodontic Theory Course Study Guide
43
When Jasmin is satisfied with the fit, she wipes the occlusal surface of the provisional and
the opposing arch dry and uses articulating paper to check for occlusal harmony. Jasmin
removes the provisional and holds it firmly while she uses a large acrylic or round bur and
a secure fulcrum to adjust the occlusal surface. Any excess is trimmed outside the mouth,
and the crown is refitted and adjusted until the marks left by the articulating paper are
even and light.
Jasmin is finally satisfied with the fit, and she self-evaluates the provisional by confirming
that the following criteria have been met:
1. Marginal fit is accurate and smooth.
Close marginal fit of a provisional is required to meet biologic and mechanical
requirements. A poorly fitting provisional will cause trauma to the tissue. If the
provisional leaves exposed more than 0.5 mm of cut dentin, the patient will likely
experience sensitivity. If the provisional impinges on the marginal tissues, which is
indicated by tissue blanching or an overextended ledge, the tissue could become
necrotic and slough, possibly causing recession. Smooth, polished margins
encourage tissue health and enhance oral hygiene efforts. Jasmin hasn’t yet polished
the crown; this is done shortly, as a last step after the dentist checks the provisional.
2. The crown has correct contour; it is neither over-contoured nor under-contoured.
Proper contour (the curved shape of the tooth) is needed to meet biological
requirements. Over-contouring will contribute to plaque accumulation below the
height of contour (bulge or widest part of the facial and lingual contour), leading to
tissue inflammation. Under-contouring may cause food impaction and tissue trauma.
3. Occlusion is compatible and the provisional is in contact with adjacent teeth.

Provisional Prosthodontic Theory Course Study Guide
44
The occlusal load must be distributed evenly so that the tooth is not traumatized while
the provisional is in place. This is a biological consideration. The provisional must also
establish or maintain proper contact with the adjacent and opposing teeth to ensure
no vertical or horizontal movement, which could affect the fit of the permanent crown.
Occlusion adjustment is a skill that requires practice. The following are guidelines to
help you achieve proper occlusal contacts. You may want to discuss these concepts
with your sponsoring dentist.
Posterior Occlusion a) Ask the patient to close his or her teeth with the provisional not in the mouth.
Explain that this is the feel he or she should have with the provisional in place.
b) Use articulating ribbon to mark the existing contacts. Adjust the provisional so that
the working cusps (buccal of the lower and lingual of the upper) touch the opposing
fossa or marginal ridge.
c) Insure the incline contacts are eliminated in the occlusion centric.
d) Make sure, as the patient moves in lateral excursions, that the inclines of the
triangular ridge do not touch.
e) Adjust until contact is evident on the provisional and adjacent teeth, and the patient
feels no difference when the provisional is in or out of the mouth.
Anterior Occlusion a) Ask the patient to close her or his teeth with the provisional not in the mouth.
b) Contour the lingual surfaces to simulate the adjacent teeth.
c) In protrusive movement, the pressure of the provisional should be equal to the
adjacent teeth.
d) If the provisional is a cuspid, lateral guidance should provide acceptable cuspid or
canine guidance.
e) The anterior tooth contact in the centric should not feel excessive in force to the
posterior occlusion (the back teeth should feel like they are touching).

Provisional Prosthodontic Theory Course Study Guide
45
4. Aesthetics are acceptable.
The shade and shape of the provisional restoration should blend with the adjoining
dentition. Some dentists use provisionals as models for the final restoration,
attempting to represent in the provisional the shade of the permanent restoration as
closely as possible. Even when this is not the case, as with Richard’s posterior crown,
the provisional should be visually acceptable to the patient.
At this point in the procedure, Jasmin asks Dr. Adams to perform the final check of the
provisional. Dr. Adams carefully checks the margins, the contacts, and the occlusion,
making any adjustment necessary. She asks Jasmin to polish the provisional and then to
cement it in place. Jasmin uses pumice and a rag wheel for polishing and is careful to
avoid the margins of the provisional. She is also careful to hold the crown firmly so that the
wheel does not pull if from her hands. Wheel polishing is illustrated on page 483 of the
textbook in Figure 15-26 D. Once polished, the provisional is put aside while Jasmin
checks and treats the preparation prior to cementation.
Complete Practice Exercise 5 to gain experience trimming and polishing a block of
acrylic.
Many dentists prefer to use preformed ESF provisional crowns, or stock forms as they are
commonly called. Previously, you were referred to a discussion of the different types on
pages 473-475. The step-by-step procedure for selecting a stock crown form, fitting the
ESF, filling the form with resin to shape the TSF, and trimming and polishing both
polycarbonate and aluminum provisionals is fully described on pages 491-496 in your
textbook. The illustrations in this section are an excellent supplement to the discussion.
Case Study: Fabricating the Provisional Using a Preformed ESF Crown
In Practice Exercise 3, you were asked to look at a variety of preformed ESF crowns or
stock crowns. These forms are used by many operators for convenience because
Provisional Prosthodontic Theory Course Study Guide
46
pretreatment matrices are not required and the trimming and fitting is minimal. It is
recommended that stock crowns be relined with one of the provisional materials, even if
the crown closely matches the size and shape of the required provisional. This ensures
that marginal fit is accurate, maintaining healthy tissues.
If an alginate matrix was not used for Richard’s procedure, an aluminum crown form could
be used. Let us assume that Jasmin has determined that in Richard’s case, an aluminum
shell would be appropriate.
Dr. Adams has completed the crown preparation. The final impression and other records
have been taken and Jasmin is to fabricate the provisional. She first insures that she has
the correct armamentarium:
• Crown forms
• Dividers
• Crown and bridge, also known as crown and collar scissors
• Contouring pliers
• Green stone cylindrical shaped and a straight slowspeed handpiece and/or
crimping pliers
• Disks for trimming
With the dividers, Jasmin measures the mesiodistal width of the crown space (Figures
15-55 and 15-56, page 494-495). She needs to select a shell that is as close as possible
to this measurement. Now Jasmin must check the occlusion cervical height and trim any
excess. She would like the shell to extend about 1 mm coronal to the cavosurface margin.
If the shell is longer than this, it could impinge on the soft tissue, causing tissue trauma.
She can check the length by trying the crown on the preparation. Any area of tissue
blanching indicates an excess of metal. The metal of the crown form is soft enough that
this trimming can be done with curved crown and bridge scissors (Figure 15-57, page
495).

Provisional Prosthodontic Theory Course Study Guide
47
The margin of the shell should not touch the prepared tooth margin. When the acrylic
reline is completed, this area of fit will be refined.
To determine the occlusal adjustment, Jasmin asks Richard to close on the positioned
shell until his bite feels normal. If this cannot be done without tissue blanching, then the
length of the shell must be trimmed. Establishing good occlusion here means there will be
less need for adjustment later. (Figure 15-58, page 495).
The final part of fitting the metal shell is the contacts. Richard’s dentition includes both
#4.7 and #4.5, and Jasmin uses a small bur to cut holes through the mesial and distal of
the shell. This will allow acrylic to escape through the holes and engage the proximal
teeth. Another method of establishing contacts is to bead brush them on after the initial
relining of the shell (Figure 15-62, page 497).
Once the shell is fitted, Jasmin begins relining it for a proper fit. First she roughens the
interior and marginal areas. She may coat the shell with an adhesive to assist the
retention of the acrylic. The next steps are similar to the alginate matrix procedure for a
single crown, except instead of filling an impression with acrylic, the metal form is filled.
Jasmin lubricates the prepared tooth and the proximal walls of the adjacent teeth. She
mixes the acrylic according to the manufacturer’s directions and fills the shell. When the
acrylic loses its shiny appearance, she places the shell on the preparation and puts
pressure on it until it is in approximate occlusion. Jasmin then directs Richard to close
until the bite feels right.
As Richard closes on the shell, excess acrylic squeezes out. Jasmin uses a plastic
instrument to remove excess acrylic from the proximal spaces to avoid locking the acrylic.
After about two minutes in the mouth, when the acrylic reaches the rubbery stage, Jasmin
loosens the shell and eases it up and down, making sure not to distort the margins. When
the material has almost set, Jasmin removes the shell and places it in warm water. The
area is rinsed and Richard is given a break while the trimming is completed.

Provisional Prosthodontic Theory Course Study Guide
48
The form is now ready for trimming. Jasmin marks the contacts and margins and uses a
variety of disks to trim the excess. Once the margins are fitted, the occlusion is checked.
Any high spots are adjusted using a 7404 or other bur of operator’s choice. The last step
is polishing.
When satisfied that the provisional fits properly, Jasmin calls Dr. Adams to check her
work. Dr. Adams then instructs Jasmin to cement the provisional, indicating to Richard
that she will perform a final check in just a few minutes.
The procedure for relining metal crown forms is similar to the relining of polycarbonate
crown forms shown in the textbook on pages 491-493. We again recommend that both of
these forms be relined with a provisional resin to establish a proper marginal seal and fit.
During your clinical session, you will have an opportunity to practice both the impression
matrix technique and the stock crown technique.

Provisional Prosthodontic Theory Course Study Guide
49
Cementing Procedure
Readings Chapter 15, pages 498-500
Tooth Treatment Prior to Cementing the Provisional
Richard is once again settled in the dental chair for this final portion of his crown
preparation appointment. First, Jasmin checks the tooth preparation. For the provisional
cement to be as effective as possible, the preparation must be free from debris, saliva,
and blood; contaminants and moisture will reduce the effectiveness of the provisional
cements. Jasmin rinses and gently dries the preparation, careful not to over-dry, as this
can increase postoperative sensitivity in the tooth. While she is examining the cleanliness
of the tooth, Jasmin also checks that all pieces of retraction cord have been removed. If
Dr. Adams had used the two-cord technique, leaving the initial cord still in place during the
final impression, Jasmin would have checked by this point that she had removed that first
retraction cord.
Some dentists direct their prosthodontic assistants to treat the tooth with a desensitizing agent or a disinfectant agent prior to cementing the provisional. In our case, Dr. Adams
doesn’t make this request; if she did, Jasmin would carefully follow the manufacturer’s
directions in applying the agent.
Do you recall information about provisional cements from your dental education
program?
What is the purpose of a provisional luting agent?
___________________________________________________________________
___________________________________________________________________
___________________________________________________________________
_________________________________________________________________ _

Provisional Prosthodontic Theory Course Study Guide
50
Because the cement is meant to be provisional and not permanent, it has low strength.
Your text on page 498 states that a provisional luting agent should seal the margin,
preventing leakage and pulpal irritation.
The text also lists ideal characteristics of a provisional luting agent. Because you have
studied this information previously in your formal education program, it won’t be
discussed here, but you should have a good understanding of the meaning of each
characteristic. Several commercial materials are available that meet the requirements of
a provisional cement, and one of the most popular is zinc oxide-eugenol (ZOE). Your text
gives several properties of ZOE that make it a provisional cement of choice for many
dentists.
List the advantages of ZOE.
___________________________________________________________________
___________________________________________________________________
___________________________________________________________________
_________________________________________________________________ _
The advantages of ZOE as a luting agent are that it:
• Provides for easy removal, allowing the restoration to be reused if necessary.
• Has a soothing effect on pulp.
• Has acceptable sealing properties.
Unfortunately, ZOE has one adverse characteristic that is important to be aware of – it
can react with provisional resin materials. When ZOE is mixed, free or unreacted eugenol can result. This free eugenol can soften the TSF resin surface, reducing its
strength. Furthermore, if resin has been in contact with eugenol, any new resin added to
the contaminated resin (for example, to make a repair) will soften and have reduced
strength. The R-methacrylates are most affected by free eugenol, next the methyl and
methacrylates, and then the composites. The presence of free eugenol can be reduced

Provisional Prosthodontic Theory Course Study Guide
51
by accurate measurement of the material prior to mixing. Eugenol-free zinc oxide is also
available.
Complete Practice Exercise 6 to observe the incompatibility problem of eugenol reacting
with acrylic resin.
Dr. Adam’s treatment plan calls for the use of ZOE. Jasmin is familiar with the
manufacturer’s mixing instructions and has the material and armamentarium ready. An
armamentarium list is given in the text on page 499 and is shown in Figure 15-67.
The cementing procedure is described in your textbook on pages 498 and 499. Figure
15-68 clearly illustrates each step.
In order to allow for cement space, Jasmin slightly relieves the TSF of the provisional with
a round bur. She then dries and isolates the prepared teeth. She also dries the TSF of the
provisional. She lubricates the ESF of the provisional crown with petroleum jelly, limiting
the provisional cement’s ability to adhere to it and aiding with removal of excess cement
once it has set. The crown must be handled with extra caution now that it is slippery.
Jasmin quickly mixes the ZOE and places a small amount of the cement in a ring around
the inside of the crown, as illustrated in Figure 15-68 B, page 499. Placing the cement at
the margin helps achieve marginal seal and reduces the amount of excess cement. Filling
the whole provisional crown with cement should be avoided because the gross amount of
excess may be forced into the sulcus where it could cause potential periodontal damage.
Also, there would be much more hardened excess cement to remove.
Jasmin seats the crown with firm finger pressure on the prepared tooth as shown in
Figure 4, and uses a mirror and explorer to check the seating. When she is satisfied that it
is seated, she inserts a cotton roll for Richard to bite on. The cement is allowed to set.

Provisional Prosthodontic Theory Course Study Guide
52
Removal of Excess Provisional Cement
In Figures 15-68 D and E on page 499 of your textbook, you can see the excess set
cement being removed with an explorer. It is very important that all the cement be
removed from the sulcus as residual cement has the potential to cause severe
inflammation of the periodontal tissues. The cement can act as a physical irritant and
contribute to plaque retention. Bacteria that make up plaque produce toxic by-products
that are extremely irritating to the periodontal tissues, which may already be traumatized
by crown preparation procedures. Tissues react to the presence of cement with a typical
inflammatory response: swelling, redness, and bleeding. If the excess cement is left in
place for a long period of time, as it could be with a provisional restoration, the
inflammation could extend to the supporting tissues of the tooth, the periodontal ligament,
and the alveolar bone. The result could be pocket formation and bone loss. Recall that
one of the biological requirements for a provisional restoration is to protect the tooth from
present or future harm. Accordingly, all cement must be removed from the sulcus.
One of the keys to safe cement removal is establishing a secure fulcrum close to the tooth
on which you are working. The explorer or a bladed instrument is held securely but lightly
to increase tactile sense. ZOE is slightly plastic when set, not hard and brittle like
permanent cement, and thus you do not need to use very much pressure to remove it
from the tooth’s surface. Care must always be taken when using bladed instruments at
the gingival margin. Techniques for fulcrums, exploratory strokes, and working strokes
will be demonstrated at the clinical course, and you will have opportunities to practice in a
simulated clinical environment on a student partner prior to working with a patient in your
office.
Jasmin uses a half Hollenback to start the removal of excess ZOE cement from Richard’s
tooth. She sits in a comfortable ergonomically correct operating position with good access
and light, and establishes a secure fulcrum just anterior of tooth #2.7. She retracts the
cheek with her mouth mirror and begins to remove the larger pieces of cement on the
facial surface, using the side of the instrument in a distal/mesial motion as shown with an
Provisional Prosthodontic Theory Course Study Guide
53
explorer in Figure 15-68 and E, page 499. Jasmin cleans cement from the instrument on a
piece of gauze. When the surface is free of large pieces of cement, she changes
instruments. For removal of the finer pieces, she uses an explorer. She slides the tip of
the explorer under the gingival margin, making sure that the side of the tip is always in
contact with the surface of the provisional crown or the preparation so as not to perforate
the epithelial attachment. The explorer is carefully moved in a mesial-distal direction to
remove the cement. This is illustrated in Figures 15-68 D and E, page 499. When the
facial surface is free of cement, Jasmin moves to the lingual surface, repositioning the
mirror and repeating the steps as illustrated in Figure 5.
Cement on the proximal surfaces is most effectively removed with dental floss. Making a
knot in the floss can aid in removing cement interproximally. Jasmin seesaws the flow
carefully through the contact areas (Figure 6) using a fulcrum. If the contacts are sealed
with cement they will be very tight. Accidentally snapping the floss through onto the tissue
will further traumatize it. Jasmin is also careful to remove the floss by pulling it through the
embrasure space rather than removing it coronally.
Do you know why she pulls the floss through the embrasure space?
___________________________________________________________________
___________________________________________________________________
___________________________________________________________________
_________________________________________________________________ _
Jasmin pulls the floss out of the embrasure so that she doesn’t catch a margin of the
provisional crown and accidentally pull it off the tooth.
Complete Practice Exercise 7 to gain experience removing excess ZOE from a dentoform
with an appropriate hand instrument, explorer and dental floss.

Provisional Prosthodontic Theory Course Study Guide
54
Once all the cement is removed, Jasmin rinses the area well, suctioning the water from
Richard’s mouth. She then self-evaluates her task of removing excess cement based on
the following criteria:
• Visible cement is removed.
• Margins are smooth indicating no excess cement remains.
• Proximal embrasures are free from cement.
• Contacts and subgingival proximal areas can be flossed.
After a final inspection, she asks Dr. Adams to check for remaining cement and for the
final position.
Jasmin is confident in her ability to remove cement at, or just below, the gingival margin,
but she sees that some excess cement still remains deeper in the sulcus and asks Dr.
Adams to remove it. Jasmin’s caution is certainly preferred to her damaging the
attachment by over-confidant use of the explorer, and Dr. Adams agrees with the
professionalism Jasmin shows in not working beyond her level of comfort.
Dr. Adams is responsible for Jasmin’s work and the patient’s well-being and thus takes
this final check of the provisional restoration very seriously. All residual cement is
removed, and Dr. Adams rechecks the occlusion of the cemented provisional. Richard
has history of bruxism, and Dr. Adams needs to ensure that the provisional crown is in
occlusal harmony so as not to stimulate bruxing.
Richard receives a final rinse, and he is returned to an upright position.
At this point, Jasmin gives Richard instructions for caring for his provisional crown.

Provisional Prosthodontic Theory Course Study Guide
55
What self-care instructions would you give Richard?
___________________________________________________________________
___________________________________________________________________
___________________________________________________________________
___________________________________________________________________
___________________________________________________________________
___________________________________________________________________
___________________________________________________________________
First, you need to ensure that Richard knows which tooth was prepared for the crown.
Many patients are unaware of the specific tooth that was worked on, and they have
difficulty identifying the provisional restoration. Some information should be included
about the possibility of postoperative tooth and tissue sensitivity and how to contact Dr.
Adams if the tooth is painful or throbbing, or if the provisional becomes loose or is lost.
Richard has well-established good oral hygiene practices, and he should be encouraged
to maintain his current level of care. Did you remember that Richard uses a floss holder?
You will need to demonstrate and have him practice flossing with his fingers. You will also
need to ensure that Richard knows how to pull the floss through the embrasures, and
understands the reasons for doing this. You also need to mention that the ZOE cement is
water soluble, and thus he should brush very gently but thoroughly around the margins of
the crown. You could also demonstrate finger massage of the area to help the irritated
tissues heal.
The anesthetic may be dissipating already, but if not, Richard should be cautioned to be
careful with hot foods or liquids until the anesthetic wears off. He should also avoid
chewing hard or sticky foods with the provisional. He may find it more comfortable to chew
on the other side of his mouth. After answering any questions Richard may have, you
escort him to the reception desk to confirm his next appointment and say good-bye.
Provisional Prosthodontic Theory Course Study Guide
56
Before cleaning the operatory, Jasmin completes the chart entry. As well as the usual
entries, she would include abbreviations to indicate:
• The shade, if one had been selected
• All materials used
• Method used to fabricate the provisional or the identification number of the stock
crown form chosen
• Lab instructions
• Patient instructions
• Date/time of the appointment for placing the permanent crown
Jasmin recorded the following chart entry for Richard:
Health Hx review, BP; 135/88, 1 carp. Lido 1:100,000, algin matrix for dir prov, crown prep
#2.7, addition silicone final imp, ethyl methacrylate resin, ZOE, FGC Pacific Labs, (due
date - 8 days), post-op instructs. Nxt appt: (date -10 days).
To help you become familiar with chart entries, you should look at some entries in your
sponsoring dentist’s office to see the method and abbreviations used.
After cleaning the operatory, Jasmin’s final responsibility is to telephone the dental
laboratory and ask their driver to pick up Richard’s disinfected and bagged final
impression, along with Dr. Adams’s lab prescription and other patient records.
Provisional Prosthodontic Theory Course Study Guide
57
Removal of Provisional Crown and Residual Cement from the Preparation
Readings Chapter 15, page 499 and 500
Richard returns to the office ten days later for the placement of his permanent gold crown.
It was returned to the office from Pacific Labs two days earlier, as requested. Richard is
seated and Dr. Adams inspects the provisional crown area. She is pleased to hear that
Richard has experienced very little sensitivity in the tooth. The tissues are pink and
healthy, and Dr. Adams asks Jasmin to remove the provisional.
Provisionals must be removed very carefully to protect the prepared tooth, the soft
tissues, and the provisional crown. You know from your readings that the tooth is
prepared with “draw”, or tapered parallelism. This design prevents undercuts that could
make removal more difficult. The prepared tooth is much smaller and weaker than a
full-sized tooth and could be fractured by excessive lateral force. Also, the provisional
restoration needs to be removed undamaged as it may need to be reused. If for some
reason the permanent restoration needs to be returned to the laboratory for adjustment,
the provisional will be recemented. It should fit as well as it did originally.
Jasmin uses forceps similar to those shown in Figure 15-69 on page 500 to remove the
provisional crown. She positions the tips of the forceps at the buccal and lingual margins
of the provisional and supports the tips with the fingers of her other hand. She uses a
slight buccolingual movement to loosen the cement, and then gently pulls coronally on
the forceps following the draw line (Figure 7), which is parallel to the long axis of the tooth.
As the crown loosens, Jasmin grasps it with the fingers of her other hand and carefully
removes if from the mouth. She places the provisional on Richard’s tray. Jasmin gently
removes any cement remaining on the tooth preparation using a half Hollenback or other
appropriate hand instrument and a moist cotton pellet. If the tooth is sensitive, a round

Provisional Prosthodontic Theory Course Study Guide
58
toothpick in a perio-aid can also be used. Next, Dr. Adams begins fitting the permanent
crown.
In the event that Dr. Adams determines the provisional needs to be recemented, Jasmin
will remove the cement from the inner surface of the crown with a spoon excavator, a
sand blaster, or a provisional cement removal solution and then check the fit of the
provisional. Damaged margins of the provisional will need to be repaired prior to
recementation, and Dr. Adams would follow a procedure similar to that illustrated in
Figure 15-70 on page 500 of the textbook. Jasmin would assist by mixing more of the
resin material originally used. Do you remember the discussion earlier about problems
associated with new resin being placed over eugenol-contaminated resin? The new resin
may soften in the presence of unreacted eugenol, resulting in reduced retentive
properties. To prevent this problem, Dr. Adams would slightly reduce the contaminated
resin with an acrylic bur and ask Jasmin to paint the old resin surface with a monomer.
The new resin could then be placed to repair the provisional crown, and the crown would
be recemented following the procedures described in the previous section.
In this case, there is no need to recement the provisional. Dr. Adams checks the fit and
function of the permanent crown and, when satisfied, asks Jasmin to mix the permanent cement. Jasmin assists Dr. Adams through the remainder of the appointment, giving
self-care instructions and completing the chart entry as she normally would do. But if it
had been delegated, Jasmin could have removed the excess permanent cement herself
with Dr. Adams returning for a final check.
As we leave the dental team in the operatory, Richard smiles broadly and thanks Dr.
Adams and Jasmin for his new crown.

Provisional Prosthodontic Theory Course Study Guide
59
Conclusion
By following this case study, you have learned about the prosthodontic duties delegated
to assistants after successful completion of the provisional prosthodontic courses. You
will work with a case study format again when you do the written assignment at the end of
Unit 4.
You should now have an understanding of the principles of fixed prosthodontics, the
procedures performed during pretreatment and tooth preparation appointments for a
single-unit crown, and how prosthodontic assistants work independently yet
collaboratively with their dentists while performing the designated procedures for
provisionals. You should also be aware of precautions that must be taken with the
procedures and materials when working with provisionals.
Before doing the self-test, make sure that you have answered all the in-text questions and
the study questions. In addition, practice exercises 1-7 should be completed before
attempting the self-test. Discuss any difficulties with your dentist so that you fully
understand each practice exercise. Please note that you need to have your sponsoring
dentist check and sign the practice exercises before submitting them to your instructor,
prior to writing the final examination.
The self-test that follows is intended to check your understanding of the material
presented in Unit 2, including the readings, and to give you practice answering the types
of questions that will be on the final examination. You should turn to the self-test now if
you feel ready. Answers are given at the end of this guide. After marking your own
self-test, restudy any areas with which you had difficulty or made mistakes. Make sure
you thoroughly understand these problem areas before writing the final examination at
the end of the course.
Good luck on the self-test!

Provisional Prosthodontic Theory Course Study Guide
60
Unit 2 Self-Test
A. True and False
Circle T for true or F for false at the end of each of the following statements:
1. The preservation of tooth structure to protect the pulp is a biologic factor that the
dentist considers during tooth preparation. T F
2. A shade taken after the patient has been in the dental chair for an hour will likely be too
light because the dental light has bleached the tooth. T F
3. Saliva is present in the sulcus around a subgingival tooth preparation. A final
impression taken with polysulfide impression material could result in a void.
T F
4. Once disinfected, a condensation silicone final impression is best stored in loosely
wrapped absorbent paper toweling. T F
5. The setting of polyether impression material may be inhibited if the patient’s tissues
were touched by some brands of latex gloves just before the impression was taken.
T F
6. Commercial preformed crowns are easily adapted for fixed partial denture
provisionals by joining them with acrylic. T F
7. The main advantage of the direct method for fabrication of a provisional is
convenience and time saving. T F
8. With the indirect-direct method for the fabrication of provisionals, the ESF is fabricated
indirectly prior to the tooth preparation appointment. T F
Provisional Prosthodontic Theory Course Study Guide
61
9. Ethyl methacrylate is a type of R-methacrylate resin material. T F
10. During trimming, the mandrel and handpiece are positioned so that the sandpaper
disk is perpendicular to the surface being trimmed. T F
11. When repairing an acrylic resin provisional restoration prior to recementation, it is
important to know if the luting agent contained eugenol because any new resin added
to the contaminated resin will have increased hardness and shrinkage. T F
12. When removing cement with an explorer, it is important to keep the side of the tip in
contact with the tooth in order to prevent perforation of the epithelial attachment.
T F
13. Patients are taught to floss provisional restorations in the same manner that they floss
natural teeth. T F
14. The path for removing a provisional restoration is parallel to the long axis of the tooth.
T F
15. Prior to the placement of provisional resin material during direct fabrication, the tooth
preparation and adjacent tissues are coated with a petroleum based lubricant to
facilitate removal of the polymerized material. T F
16. When adjusting posterior occlusion, the working cusps should not touch the opposing
fossa or marginal ridge. T F
17. In protrusive movement, an anterior provisional should have the pressure equal to that
of the adjacent teeth. T F
18. The patient’s teeth should feel the same whether the provisional is in position or not.
T F

Provisional Prosthodontic Theory Course Study Guide
62
B. Multiple Choice
Circle the letter that best answers the question posed in the statement, or best completes
the sentence.
1. A margin design that is not recommended because it does not provide sufficient bulk
is a:
a) Bevel.
b) Shoulder.
c) Chamfer.
d) Featheredge.
2. Removing retraction cord too quickly may cause tissue trauma because the:
a) Cord may have adhered to the epithelial attachment and adjacent tissues.
b) Surface of a braided cord is abrasive.
c) Tissues may bleed profusely.
d) Periodontal ligament fibres may be lacerated.
3. Biologic requirements of provisional restorations include which of the following points:
1. Cut dentinal tubules must be covered and protected from oral fluids.
2. Fit, contour, and texture should contribute to healthy tissues.
3. The material used for the provisional must be strong enough to resist fracture.
4. Color and translucency must be compatible with adjacent teeth.
5. There should be good occlusion and contact with adjacent teeth.
a) 2 only
b) 1 and 3
c) 4 and 5
d) 1, 2, and 5

Provisional Prosthodontic Theory Course Study Guide
63
4. A commercial provisional crown form that has the most natural appearance is made
from:
a) Polycarbonate.
b) Cellulose acetate.
c) Aluminum and tin-silver.
d) Nickel-chromium.
5. The two main problems associated with acrylic provisional materials are:
a) Fracture and porosity.
b) Shrinkage and heat production.
c) Surface roughness and tissue irritation.
d) Incomplete setting and dissolution in oral fluids.
6. The order of steps for fitting a preformed metal crown is to establish:
1. Contacts.
2. Width of form.
3. Occlusion.
4. Height.
a) 1, 2, 3, 4
b) 2, 3, 1, 4
c) 2, 4, 3, 1
d) 1, 3, 4, 2
7. The micro-filled composite most appropriate for the direct fabrication of provisionals is:
a) Methyl methacrylate.
b) Bis-Acryls.
c) R-methacrylate.
d) Light-cured resins.

Provisional Prosthodontic Theory Course Study Guide
64
8. Prosthodontic procedures performed by a prosthodontic assistant must be checked
by the dentist prior to the patient leaving the operatory in order to meet:
a) Legal requirements.
b) Financial obligations.
c) Jurisprudence mandates.
d) Professional responsibilities.
9. Setting resin can be moved with minimal distortion after approximately:
a) 30 seconds.
b) 1 minute.
c) 2 minutes.
d) 4 minutes.
10. Before cementation, a trimmed and fitted provisional is polished with:
a) Pumice.
b) Jeweler’s rouge.
c) Tin oxide.
d) Silicone resin powder.
11. During fitting of an anterior polycarbonate commercial crown form, the first dimension
to be trimmed is the:
a) Incisalcervical height.
b) Labiolingual thickness.
c) Buccolingual width.
d) Incisal edge thickness.
12. A desensitizing agent applied to the prepared tooth prior to cementation would be
applied for:
a) 15 seconds.
b) 30 seconds.
c) 1 minute.
d) The length of time recommended by the manufacturer.
Provisional Prosthodontic Theory Course Study Guide
65
C. Short Answer
Answer these questions in point form on a separate sheet of paper.
1. An alginate impression is obtained with a quadrant tray. It will be used to directly
fabricate a provisional restoration for a single posterior crown. How many teeth on
either side of the prepared tooth should the impression include?
2. Why does a crown build-up help to prevent sensitivity of the permanent metal
restoration?
3. A three-in-one tray takes impressions of what three structures?
4. State the basic difference between directly and indirectly fabricated provisionals.
5. When fabricating a provisional indirectly, how can you recreate a fractured cusp?
6. List four disadvantages of the direct fabrication of a provisional.
7. Pieces of cotton roll are placed in the ESF matrix, in the indentations of the teeth
adjacent to the prepared tooth or teeth, prior to the acrylic resin being mixed and
placed in the matrix for direct fabrication.
a) What is the purpose of doing this?
b) When are they removed?
8. Prior to trimming a rough provisional restoration, pencil marks are made on the
internal surface of the restoration.
a) What landmarks or structures are marked?
b) What are the consequences of over trimming and accidentally removing the
marked resin?

Provisional Prosthodontic Theory Course Study Guide
66
9. List safety precautions that should be followed while taking a provisional restoration in
and out of the mouth during fitting and cementation.
10. List self-evaluation criteria for a trimmed and fitted provisional.
11. State two reasons why provisional cement is placed in a ring, just inside the margins of
a provisional restoration.
12. State four possible consequences of leaving residual cement in the sulcus.
13. List items that are prepared and sent to the dental laboratory to assist with fabrication
of the permanent prosthodontic restoration.
14. How is a previously cemented provisional restoration prepared for repair and
re-cementation?

Provisional Prosthodontic Theory Course Study Guide
67
Unit 3 - Three-Unit Fixed Partial Denture
Introduction
In Unit 2, you learned to fabricate a single-unit provisional restoration using the direct
method. An alginate impression is taken at the beginning of the appointment prior to any
tooth preparation and is used as a matrix to form the provisional. After the tooth is
prepared, acrylic resin is mixed and poured into the matrix, and the matrix is placed on the
prepared tooth. The acrylic in direct contact with the alginate matrix forms the external
surface form (ESF), and the acrylic in contact with the tooth preparation shapes the tissue
surface form (TSF). You now know that the direct method for fabricating provisionals is
convenient and quick. The main drawbacks are the exothermic reaction of the setting
acrylic that can irritate the pulp of the tooth and the soft tissues, and the chemical irritation
caused by the monomer in the acrylic.
In this unit, you learn another method for fabricating provisionals: the indirect-direct
method. Prior to the preparation appointment, a custom-formed shell for a three-unit
anterior fixed partial denture (FPD) is fabricated outside the mouth on study casts. This
ESF custom preform is later filled with provisional material and placed on the prepared
teeth in the mouth to form the TSF of the provisional.
The information presented in this unit builds on knowledge and skills discussed in Unit 2
and on material learned in your dental education program. Principles of fixed partial
dentures are given, in addition to a sequential overview of the procedures involved in
placing a ceramic-metal anterior FPD. You are introduced to the pressform matrix as one
type of matrix that is used for the indirect fabrication of provisional restorations. The
central procedures for the unit are fabricating, cementing, and removing a three-unit
anterior provisional FPD. Unit 3 concludes with a discussion of the indirect method of
fabricating provisional restorations which occurs completely outside the mouth, and with
information about provisionals for endodontically treated teeth and adapting and altering
provisional FPDs, including the bead-brush technique and custom shading.
Provisional Prosthodontic Theory Course Study Guide
68
As in Unit 2, there are practice exercises that must be signed by your sponsoring dentist
and submitted to your instructor at the end of the course. There is also a self-test.
Unit Objectives
1. Explain the principles of fixed prosthodontics for fixed partial dentures.
2. Describe the sequencing of procedures for fixed partial dentures.
3. Explain the indirect fabrication of an ESF matrix for provisional restorations.
4. Explain the indirect-direct method of fabricating provisional for fixed partial dentures.
5. Explain the removal of provisional fixed partial dentures.
6. Explain the indirect method for fabricating provisional fixed partial dentures.
7. Explain the adapting and altering of provisional fixed partial dentures.
Readings
The following readings from the textbook Contemporary Fixed Prosthodontics are
assigned for this unit:
Chapter 1, pages 21-41
Chapter 2, pages 42-81
Chapter 3, pages 82-100
Chapter 4, pages 110-135
Chapter 14, pages 444-451
Chapter 15, whole chapter, page 466
Chapter 20, pages 616-640
Chapter 23, pages 709-725
Look through these pages now to get a general idea of the topics, then later in the unit
sections where you are referred to specific pages, tables, and figures, study the material
more closely. Note that some of the readings are also covered in Unit 2; however, in this
unit these readings will have a different focus – a three-unit fixed partial denture as
opposed to a single-unit crown in Unit 2.

Provisional Prosthodontic Theory Course Study Guide
69
Prosthodontic Principles of Fixed Partial Dentures
Readings Chapter 3, pages 83-87
Chapter 2, pages 51-60
Referring to a partial denture as “fixed” is a new concept to many of us in dentistry. We are
more familiar with partial dentures being “removable” and with three-unit or multiple-unit
“bridges.” However, the new terminology has been in use in dental education programs
for some time. The advantage of the term “fixed partial denture” is that it implies a
permanently cemented restoration that replaces missing teeth, rather than one that
bridges a gap in the dentition. A fixed partial denture is commonly referred to as an FPD.
Do remember from your dental education program why missing teeth are replaced?
___________________________________________________________________
___________________________________________________________________
___________________________________________________________________
___________________________________________________ ______________ _
Missing teeth are replaced in order to:
• Prevent drifting of the adjacent teeth.
• Prevent overeruption of the opposing tooth.
• Improve function, including mastication and speech.
• Improve aesthetics.
Refer to Figure 3-14 on page 89 of your textbook. The long-term consequences of not
replacing a lost mandibular first molar are shown.
What are the advantages of a fixed partial denture versus a removable partial denture?
___________________________________________________________________
___________________________________________________________________

Provisional Prosthodontic Theory Course Study Guide
70
Advantages of a fixed partial denture include:
• Better patient tolerance.
• Better aesthetics, more natural.
• Assurance of intraoral retention.
• No irritation to the residual alveolar ridge.
• Better accommodation by the patient’s oral musculature.
• Close similarity to the original dentition.
• More convenient, less trouble for the patient.
• Frequently, improved self-image for patient.
Can you think of any disadvantages or contraindictions of fixed partial dentures compared
to removable partial dentures?
___________________________________________________________________
___________________________________________________________________
___________________________________________________________________
____________________________________________________ _____________ _
Disadvantages or contraindications for fixed partial dentures include:
• Greater cost than removable partial dentures.
• Longer, more involved appointments.
• More tooth reduction.
• More difficult to clean and maintain.
• May not be placed unless a distal abutment tooth is present.
Most patients who have had a removable partial denture replaced with a fixed partial
denture are very happy with the results. A fixed restoration restores the patient’s dentition
to the appearance, function, and feel of the natural teeth - a great improvement.

Provisional Prosthodontic Theory Course Study Guide
71
You are probably familiar with the terminology used to discuss components of an FPD. As
a review, complete the questions below on a three-unit FPD.
1. What is the name of the component of the FPD that replaces the missing tooth?
2. What are the names of the components of the FPD that are attached to the component
names in questions 1?
3. What is the name used to describe the two teeth that are prepared for the components
named in question 2?
4. What is the name of the join between the components identified in questions 1 and 2?
Did you answer the terminology questions correctly? If you need to review types of
pontics or retainers and fixed prosthodontic materials, refer to the reading on pages 83-87
in Chapter 3 of your textbook.
When the dentist is preparing teeth for an FPD, the same biologic, mechanical, and
aesthetic factors need to be considered as for single-unit permanent crowns. These were
discussed in Unit 2 and in your textbook. These readings provide information about
factors the dentist considers when selecting abutment teeth.
Because the FPD discussed in this unit is anterior, extending from tooth #1.1 to #1.3,
all-ceramic retainers or metal-ceramic retainers are used. Margin design chosen by the
dentist must suit the ceramic material.
Referring to Table 7-2 on page 220, can you determine the type of margins best suited to
metal-ceramic or all-ceramic restorations?
___________________________________________________________________
___________________________________________________________________
___________________________________________________________________
_______________________________________________ __________________ _

Provisional Prosthodontic Theory Course Study Guide
72
The dentist’s preferred margin designs are shoulder, sloped shoulder, and beveled
shoulder. These designs are clearly illustrated in Figure 7-17 on page 219, and Figure
7-19 on page 221. As the prosthodontic assistant, you need to know about margin
designs so that you can locate them on the prepared teeth when fabricating provisionals.
Complete Practice Exercise 8 in Practice Exercises and Assignments to help you become
familiar with various types of margin designs.

Provisional Prosthodontic Theory Course Study Guide
73
Sequencing of Procedures for Fixed Partial Dentures
Readings Chapter 1, pages 3-41
Chapter 14, pages 444-452
Chapter 23, pages 709-725
This section is intended to give you a sense of the general flow of all procedures relating
to a fixed partial denture. We will look at the following procedures:
• Pretreatment
• Treatment plan and consultation appointment
• Custom tray
• The ESF matrix
• The ESF custom preform
• Scheduling the tooth preparation appointment
• Shading
• Tooth preparation and final impression
• The provisional TSF
• Cementing the provisional
• Home care instructions
• Lab package
• Removing the provisional FPD
• Cementing the permanent FPD
Note: the detailed procedures for provisional restorations delegated to the prosthodontic
assistant are given in the later sections.
Pretreatment Pretreatment assessment procedures for a metal-ceramic FPD extending from tooth #1.1
to #1.3 are similar to those performed for a single-unit crown. Do you remember from Unit

Provisional Prosthodontic Theory Course Study Guide
74
2 the procedures that are performed for a pretreatment prosthodontic assessment? Refer
to this information if you are unsure. Only additional pretreatment assessment
procedures for FPDs are discussed here.
In order to check the edentulous areas for retained root tips, pathology in the bone, or
impacted or unerupted teeth, the dentist requires either a panoramic radiograph or
periapical radiographs of the area.
For an anterior FPD, a critical aesthetic assessment is done to ensure that the patient’s
expectations are attainable and realistic. At this time, the shades for the provisional
restoration are selected, and the shades may also be taken for the permanent restoration.
Frequently, the dentist will ask the certified dental assistant to take facebow transfer records, or to assist the dentist in obtaining these records. As you know, study models
mounted on an adjustable articulator enable the dentist to analyze movements of the
patient’s mandible in relation to the fixed maxilla. Measurements taken during facebow
transfer are used to set the articulator. The assigned reading on articulated diagnostic
casts in Chapter 2, pages 49-74, provides detailed information about facebow transfer
records and their use. This information will complement that presented in your formal
education program.
One other assessment record that many dentists prefer to have is photographs. Before,
during, and after photographs provide valuable information about pre-existing oral
conditions, tooth conditions at various steps of the procedure, and the final restoration. As
well, they can be a valuable tool for the laboratory technician to help determine tooth
shape and characterizations. Photographs may also be used by the dentist to explain
similar treatment to other patients and for educational purposes with dental colleagues.
Assessment of the patient’s oral hygiene abilities and motivation to care for an FPD are
important considerations prior to the placement of an FPD. Skill and patience are required

Provisional Prosthodontic Theory Course Study Guide
75
to clean under a pontic with a floss threader. A patient who is not willing or able to
routinely clean an FPD is likely a poor candidate for a fixed partial denture.
The life of the FPD and abutment teeth would be shortened due to caries or periodontal
disease, and the patient would be making a poor financial investment.
Treatment Plan and Consultation Appointment
Using all assessment data, the dentist develops a treatment plan for the patient’s FPD
and “waxes up” a study model of the proposed three-unit FPD from tooth #1.1 to #1.3.
This process enables the dentist to identify any difficulties that could arise. Study model wax-ups can be done in a variety of ways. A denture tooth and wax may be used, or wax
alone, or putty, or acrylic resin. The wax-up is duplicated using irreversible hydrocolloid
impression material (alginate) and a new model is created. Once trimmed, the new model
is mounted on the articulator, using facebow records to adjust the articulator. This
articulated model of the proposed FPD is used during case presentation to the patient
and, important for our purposes here, for the fabrication of the custom tray and ESF
matrix.
The articulated models are presented to the patient during the consultation appointment
along with details of the treatment plan and an estimate of cost. The models allow the
patient to clearly see the form and function of the proposed FPD. Once treatment is
accepted and a deposit made, appointments may be scheduled. Or, if the patient has
dental insurance, the dentist may be required to submit the proposed treatment plan and
cost estimate to the dental insurance company for preauthorization. In this case,
appointments are scheduled after the dentist receives authorization to proceed.
Custom Tray
Prior to the tooth preparation appointment, the prosthodontic assistant fabricates on the
diagnostic study model a custom tray that will be used for the final impression. You
learned custom tray fabrication in your formal dental education program. For review, you
Provisional Prosthodontic Theory Course Study Guide
76
may want to refer to pages 446-452 in your textbook. The figures are excellent, clearly
illustrating the steps for fabricating a custom tray with custom-tray resin.
The ESF Matrix
The prosthodontic assistant indirectly fabricates a matrix using the study model of the
waxed-up FPD. We are using the pressform method to make the matrix, which is
discussed in detail in the next section. There are, however, many ways of indirectly
fabricating the matrix. The matrix is fabricated, trimmed, and set aside.
Scheduling the Tooth Preparation Appointment
Some patients find the tooth preparation appointment for a three-unit anterior FPD tiring.
Two abutment teeth are prepared, a final impression is taken, the tissue surface form of a
three-unit provisional restoration is fabricated, and the FPD provisional is fitted and
cemented. To aid patient comfort, breaks are incorporated into the appointment
whenever possible.
How long an appointment would your office schedule for this procedure? Would all
patients be scheduled for the same length of time? What factors are taken into
consideration when scheduling the appointment?
___________________________________________________________________
___________________________________________________________________
___________________________________________________________________
___________________________________ ______________________________ _
Shading
If the shade for the permanent ceramic-metal restoration was not taken at pretreatment,
this will be done at the beginning of the tooth preparation appointment. Do you remember
why the shade is selected early in the appointment? Teeth become lighter when they are

Provisional Prosthodontic Theory Course Study Guide
77
dry, and a shade selected at the beginning of the appointment will more closely match the
natural teeth. The reading in Chapter 23 of the textbook discusses shade selection. It is
important for the prosthodontic assistant to understand how shades are selected and to
know what factors affect a good match with the patient’s natural teeth. The prosthodontic
assistant, the dentist, and the patient often select the ceramic shade together, or the
patient may go directly to the dental lab for shade selection.
Several shades are usually taken for a three-unit FPD extending from #1.1 to #1.3. The
central is a lighter shade than the cuspid and must closely match tooth #2.1. The cuspid
should match the opposite cuspid #2.3 and blend with the #1.4. All three teeth in the
restoration, two retainers and the pontic, will likely have several specified shades: for
each incisal edge, for the body of each tooth, and for the neck of gingival margins of each
restoration (Figure 9). In addition, the permanent restoration may need to include
customized spot shading to match shade peculiarities on the patient’s adjacent teeth. A
talented technician is able to create customized ceramic restorations that are almost
indistinguishable from the adjacent natural teeth. Custom shading is an art.
Complete Practice Exercise 9 in Practice Exercises and Assignments to work on shade
selection.
Tooth Preparation and Final Impression
The abutment teeth, #1.1 and #1.3, are prepared in a similar manner as the preparation
for the single-unit crown. Once preparation is complete, retraction cord is placed and the
final impression is taken using the custom tray. Also, bite registration records are
obtained and, if not already taken, an impression is made of the opposing teeth.

Provisional Prosthodontic Theory Course Study Guide
78
The Provisional TSF
The prosthodontic assistant will use the ESF matrix that was fabricated prior to the tooth
preparation appointment, fill it with acrylic resin, and place it directly onto the lubricated
tooth preparation in the mouth to obtain the TSF for the provisional restoration. This direct
process is identical to that described in the previous unit. The prosthodontic assistant
dries and isolates the prepared teeth, then lubricates the preparations and adjacent teeth.
Acrylic resin is mixed and placed inside the matrix. It is then placed on the prepared teeth
and allowed to polymerize to the initial rubbery stage. Depending on the manufacturer’s
instructions, after about two minutes the provisional is carefully removed from the teeth
and placed in warm water to hasten the set.
Do you remember why the acrylic is not usually left on the tooth preparations for the entire
setting time?
___________________________________________________________________
___________________________________________________________________
___________________________________________________________________
___________________________________ ______________________________ _
The exothermic reaction of the setting resin produces heat that can irritate pulp and soft
tissue. Also, if the material is left in place too long, it may become stuck onto the
preparation due to shrinkage of the resin. Note that some operators flush water
underneath the acrylic to help dissipate the heat so that they can leave the acrylic in place
longer.
The acrylic resin reaches final set after 3 to 5 minutes in the water bath.
After the acrylic is trimmed from the margins and the contours are established, the
provisional FPD is tried on then removed and trimmed further until the fit and occlusion
are satisfactory. Finally, the provisional is checked by the dentist.

Provisional Prosthodontic Theory Course Study Guide
79
Cementing the Provisional
While checking the provisional, the dentist may recommend that the preparation be
treated with a desensitizing agent prior to provisional cementation. In preparation for the
cementation, both the preparation and the inside of the provisional are dried and the
external surface form of the provisional is lubricated so that the provisional cement
doesn’t bond to it.
Cementation principles and techniques are identical to those discussed for the
single-provisional restoration. Removal of retraction cord should always be checked
before cementing a provisional. Provisional luting cement, often ZOE, is mixed and
placed in a ring at the marginal third of the two retainers. The FPD is seated firmly on the
prepared teeth using finger pressure on the retainers, two cotton rolls are inserted over
the abutment teeth, and the patient is asked to close firmly. The assistant then checks the
seating with an explorer. Once the cement has been allowed to set for the time
recommended by the manufacturer, the cotton rolls are taken out and the prosthodontic
assistant removes the excess cement using a half Hollenback or other hand instrument,
an explorer, dental floss, and a floss threader.
What instruments and items does your dentist use to remove provisional cement from a
three-unit FPD?
___________________________________________________________________
___________________________________________________________________
___________________________________________________________________
___________________________________________________________________
_________________________________________________________________ _
Self-evaluation criteria for provisional cement removal are identical to those discussed for
the single-unit crown, with the addition of ensuring that all cement is removed from the
gingival surface of the pontic. You may want to review the criteria in Unit 2. The dentist

Provisional Prosthodontic Theory Course Study Guide
80
does a final check to make certain that all cement is removed and that the provisional
FPD is in occlusal harmony.
Home Care Instructions
After a final rinse and home care information and instructions, the patient leaves the
operatory and confirms the appointment for final cementation of the permanent FPD
restoration. The prosthodontic assistant completes the chart entry in a similar manner as
the single-unit crown tooth preparation appointment.
What home care information and instructions would you give this patient?
___________________________________________________________________
___________________________________________________________________
___________________________________________________________________
_______________________________________ __________________________ _
You should have answered any questions the patient has and provided information
about:
• Where the provisional has been placed in the mouth.
• The possibility of postoperative teeth and tissue sensitivity.
• How to contact the dentist if the teeth are painful.
• What to do if the provisional becomes loose, damaged, or is lost.
• Brushing gently but thoroughly around the provisional.
• Flossing techniques.
• Finger massage.
• Precautions about eating and drinking while the teeth and tissues are still
anesthetized.
• Precautions against eating sticky foods or biting particularly hard foods.
Provisional Prosthodontic Theory Course Study Guide
81
Lab Package
The final impression is disinfected, bagged, and sent to the dental laboratory together
with the dentist’s lab prescription and other laboratory records such as photographs, an
opposing model, and bite registration records.
Removing the Provisional FPD
Removal of the provisional FPD at the permanent cementation appointment is
accomplished in a manner similar to removing the single-unit provisional. Care must be
taken to gently loosen both retainers, moving back and forth between the two, and to
remove the FPD in one piece along the path of withdrawal. Removal of an FPD
provisional is discussed in more detail later in this unit.
A three-unit provisional is larger than a single crown but still may be swallowed by the
patient if dropped in the mouth during placement or removal. The same precautions need
to be taken as for single-unit crowns.
Do you remember the precautions discussed for single-unit crowns?
___________________________________________________________________
___________________________________________________________________
___________________________________________________________________
__________________________________________________ _______________ _
These precautions must be followed when placing or removing a provisional restoration:
• Position the dental chair and the patient’s head so that if the restoration is
accidentally dropped, it will land on the patient’s tongue.
• As part of the tray set-up, have cotton forceps available for emergency retrieval.
• Orient the provisional for seating before taking it to the mouth.
• Loop floss around the pontic for easy retrieval.

Provisional Prosthodontic Theory Course Study Guide
82
• Keep one finger on the occlusal/incisal surface of any provisional or permanent
restoration that is inserted or removed from the mouth.
All provisional luting cement needs to be removed from the tooth preparations prior to
cementation of the permanent FPD or before recementation of the provisional FPD. The
tooth may not be anesthetized, and you must be very careful using an instrument on
potentially sensitive cut dentin surfaces. Some dentists may suggest using a cotton pellet
moistened with water or a commercial cavity cleansing agent. Make sure you have a
stable fulcrum and use only light pressure.
Cementing the Permanent FPD
The dentist checks the margins, contacts, contour, and shade of the permanent FPD and
also examines the occlusion. After making any final adjustments, the dentist asks the
assistant to mix the permanent luting agent, and the FPD is cemented into place. The
dentist removes any excess permanent cement and checks the FPD one final time.
You now have an idea of the sequencing of procedures for a fixed partial denture (see
also Appendix 1: Procedural Guidelines) and, as you have seen, many of the procedures
are similar to those for the single-unit crown discussed in Unit 2. In the next sections, you
are given a more detailed examination of the duties performed by the prosthodontic
assistant:
• Fabricating a pressform matrix for a provisional FPD.
• Fabricating the TSF of the provisional FPD (direct portion of the indirect-direct
method).
• Cementing a provisional FPD.
• Removing a provisional FPD.
• Removing provisional cement after a provisional is removed.

Provisional Prosthodontic Theory Course Study Guide
83
Fabrication of a Pressform Matrix for a Provisional FPD
Readings Chapter 15, pages 465-489
In this section you will learn the specific procedures for making a pressform matrix, the
first step in the indirect-direct method of fabricating a provisional FPD for teeth #1.1 to
#1.3.
Provisional restorations must meet the same requirements as permanent restorations, or
come as close as possible. The biologic, mechanical, and aesthetic requirements of
provisional restorations are summarized in Figure 15-1 on page 467 of the text. Pages
465-470 were assigned in Unit 2, but you might want to review them here.
In Unit 2, the aesthetic requirements for Richard’s posterior single unit provisional were
not as great a concern as the biologic and mechanical requirements. However, in the
case of our anterior FPD, good aesthetics are as critical as meeting the biologic and
mechanical requirements.
In the indirect-direct method, the ESF matrix for a provisional FPD is fabricated outside
the mouth after the initial assessment appointment, but before the tooth preparation
appointment. An ESF matrix can be fabricated in several ways, but it is always done on
either a stone duplicate of the waxed-up model created by the dentist or the laboratory
technician, or on the original waxed-up model itself.
Why do you think it is important to fabricate the ESF matrix on the waxed-up model or a
duplicate rather than on the patient’s diagnostic study model?
___________________________________________________________________
___________________________________________________________________
___________________________________________________________________
__________________________________________________________ _______ _

Provisional Prosthodontic Theory Course Study Guide
84
The matrix must be fabricated to accommodate a pontic as well as the abutment teeth so
that the external surface form of the provisional is similar in contour and appearance to
the final restoration. If the original study model was used, the matrix would conform to the
edentulous space. A provisional FPD fabricated from a matrix of this model would result in
an FPD with no pontic. Aesthetic requirements would definitely not be met. Therefore, you
must use the waxed-up model or a duplicate.
Complete Practice Exercise 10 in Practice Exercises and Assignments to gain
experience waxing up a model in preparation for fabricating a matrix.
Two common methods for indirectly fabricating the ESF matrix are using heated
polypropylene or acetate sheets with either a pressform system or a vacuum former system and forming the matrix to the stone duplicate of the waxed-up model. With the
pressform system, the heated sheet is pressed onto the model, and with the vacuum
former, the heated sheet is vacuum moulded to the model. Other common indirect
methods for making an ESF matrix include moulding a variety of materials such as putty
or wax onto the stone model. In this unit, we discuss fabricating a matrix using a
pressform.
What would happen if a heated polyropylene sheet was moulded to a waxed-up model?
___________________________________________________________________
___________________________________________________________________
___________________________________________________________________
__________________________________________ _______________________ _
The wax would melt, distorting the contour of the proposed FPD.
Have you used a pressform system or vacuum former? Perhaps to fabricate a mouth
guard for a patient or a custom tray? In Figure 15-10 C on page 471 of your textbook,
there is a photograph of a vacuum-formed acetate matrix in position in the patient’s
mouth. This acetate matrix will be used as the ESF framework for fabricating the
Provisional Prosthodontic Theory Course Study Guide
85
provisional restoration. Other examples of acetate matrices can be seen in Figure 15-36
on page 486 and Figure 15-39 on page 487. As actual fabrication techniques depend on
the manufacturer’s directions, details on use of a pressform machine or vacuum former
are not included here or in the textbook. Indirect fabrication of a matrix using a pressform
machine or vacuum former will be demonstrated and practiced in the Provisional
Prosthodontic Clinical course.
Once the matrix is formed, it is trimmed using a sharp pair of scissors. The hard and soft
tissue anatomy will be clearly defined in the shaped plastic. Acetate on the buccal and
lingual surfaces is trimmed to approximately 4-5 mm from the gingival margins, and
acetate beyond one to one-and-a-half teeth on either side of the abutment teeth is
removed. Any rough edges are trimmed with scissors so that the matrix will be
comfortable in the mouth. Pieces of moist cotton roll are placed in the tooth depressions
on either side of the abutment teeth and the ESF matrix is set aside, ready for use.

Provisional Prosthodontic Theory Course Study Guide
86
Fabrication of Provisional FPDs (Indirect-Direct Method)
Readings Chapter 15, page 466
Chapter 20, page 616
Chapter 4, page 110
The vacuum form can be used as a matrix for the indirect-direct method of fabricating
provisionals. There are many different indirect-direct techniques. The one given in your
textbook on page 482 describes the fabrication of a custom indirect FPD prosthesis. The
ESF and an approximate TSF are formed prior to when the preparations have been
completed on the patient’s teeth, and only a slight reline of acrylic is necessary to refine
the fit of the shell. This reduces the amount of acrylic used directly in the patient’s mouth
and decreases the time necessary to complete chairside trimming.
Another indirect-direct method that is commonly used is similar to the technique
discussed in Unit 2. Instead of using the alginate matrix, the vacuum form matrix is filled
with acrylic and placed over the prepared teeth. This method has the advantage of saving
time, but the disadvantage of exposing the patient to the exothermic reaction of the
acrylic. Our discussion here focuses on this second method, which involves more of the
newly delegated intraoral duties.
The abutment teeth for the FPD are prepared to accept the retainers, and the dentist
instructs the prosthodontic assistant to proceed with fabricating the provisional. The
preparations are isolated with cotton rolls and gently dried. A lubricant is used to coat the
teeth and the soft tissue where the pontic rests. The lubrication allows the acrylic to flow
and adapt well with the anatomy.
The ends of the matrix are blocked off with moistened pieces of cotton rolls, and the
assistant proceeds to mix and place the acrylic.

Provisional Prosthodontic Theory Course Study Guide
87
Because an anterior FPD must aesthetically blend in with the other dentition, correct
shade selection is critical. At the beginning of the appointment, the appropriate shades
were recorded on the patient’s chart, and at this time the assistant can vary the shades to
make a lifelike provisional. The bead-brush technique can be used to first “paint” on some
incisal coloration or layer the acrylic into the matrix to simulate the layers of color in the
natural teeth.
With the clear vacuum-form matrix, it is easy for the assistant to see if bubbles or voids
have formed in the acrylic as it is placed into the matrix. These flaws can be corrected
before placing the filled matrix onto the preparations. When the acrylic-filled matrix is
seated over the preparations, pressure should be placed over the abutment teeth, rather
than the pontic areas, to avoid distortion. The patient is sometimes instructed to gently
close onto the matrix, which helps the occlusal orientation.
As the acrylic flows over the edges of the matrix, the excess can be removed with a
cement instrument or half Hollenback. A small sample of the acrylic mix can be kept to
help monitor the acrylic set.
The amount of acrylic required for an FPD is greater than that required for a single crown.
Since this increase in acrylic increases the thermal activity, precaution must be taken. As
the material reaches its initial set, the acrylic form may be eased on and off the teeth in a
coronal direction, and water can be flushed between the teeth and the acrylic. These
procedures help dissipate the heat. When the acrylic has almost reached full set, the form
is removed. The prosthodontic assistant uses forceps and a gentle buccolingual rocking
motion to loosen both retainers. After the form is placed in a bowl of warm water, the
preparation area is rinsed thoroughly and the patient is given a rest break.
The acrylic form is now ready for trimming. A variety of disks and burs can be used for this
task, and as skill and knowledge increase, the prosthodontic assistant will learn which
instruments work best. First, the form is thoroughly dried, and the contacts, pontic area
and margins are marked with a pencil. Bulk acrylic is removed using a course garnet disk,
Provisional Prosthodontic Theory Course Study Guide
88
and the pressform matrix is eased off. Use the garnet disk to remove the excess material,
eventually switching to a final disk as you get closer to the margins. Avoid trimming the
margins beyond the pencil marks so that the fit remains accurate. If you do accidentally
overtrim, use the bead-brush technique to add resin. Various diamond disks assist in
shaping the interproximal and pontic areas.
The pontic is trimmed to conform to proper pontic design. Refer now to the reading in
Chapter 20, pages 616-640. As you can see in Figure 20-2 on page 617, biologic,
mechanical, and aesthetic factors must be considered for the design of the pontic. The
key biologic consideration is to create a cleansable pontic that is conducive to easy
plaque removal. The pontic must also be rigid, strong, and aesthetically acceptable.
Figure 20-33 on page 635 shows examples of aesthetic failures of permanent FPDs:
photograph A illustrates pontics that are too long and photograph C pontics that are too
short. The same principles apply to provisional FPDs.
As you go through the reading in Chapter 20, you will gain an understanding of proper
pontic design. During the clinical section of the course, you will be able to closely study
examples of good and poor provisional FPD design. Ask your sponsoring dentist to show
you both provisional and permanent FPD designs - The more examples you see, the
better you will be able to design and craft provisional FPDs.
Complete Practice Exercise 11, which gives you an opportunity to practice trimming
acrylic resin into the shape of a pontic without worrying about fit or function.
Care must be taken to shape the contours so that the provisional appears lifelike and
does not impinge upon the tissue. The prosthodontic assistant repositions the patient for
an initial try-in. Marginal fit is assessed with an explorer, and contacts are checked with
dental floss. The provisional is then removed and trimming is continued until the fit and
contour are satisfactory.

Provisional Prosthodontic Theory Course Study Guide
89
It is also important for the prosthodontic assistant to check the occlusion carefully.
Principles of occlusion are discussed in Chapter 4 of the textbook, beginning on page
110; pages 115-125 are assigned reading for this section. Even though a provisional FPD
may not be in place for a long period, occlusal disharmony can cause significant damage
or distress for the patient. Occlusal disharmony can result in mobile teeth or wear facets
and can contribute to periodontal breakdown. A patient who is bruxing and clenching
could develop facial muscular pain or clicking and popping in their TMJ. Occlusal
disharmony can also cause sensitivity to temperature and chewing. In addition, the
provisional could fracture.
To check occlusal harmony, the teeth in both arches are dried, articulation paper is
inserted between the occlusal surfaces, and the patient is asked to bite up and down in a
normal habitual bite and to grind the teeth lightly from side to side. Marks that are darker
than the surrounding articulating paper marks indicate areas of high contact. The high
spots are usually reduced with a round bur. Remember, the provisional restoration must
be removed from the mouth for all occlusal adjustments. Every time adjustments are
made, the provisional FPD is reseated so that the occlusion can be rechecked. The
dentist will make any final occlusal adjustments intraorally after cementation, when
examining the provisional before the patient leaves the office. A fully adjusted provisional
FPD is shown in Figure 15-46 on page 490.
Any deficiencies or defects in the margins or lack of occlusal contact can be corrected by
using the bead-brush technique. This technique is illustrated and described in Figure
15-70 on page 500, and Practice Exercise 12 gives you practice with a bead-brush. In
addition to these biologic and mechanical considerations, aesthetic adjustment of a
provisional by custom shading may also be required, as is discussed in the last section of
this unit.
Complete Practice Exercise 12, which gives you an opportunity to practice the
bead-brush technique.

Provisional Prosthodontic Theory Course Study Guide
90
After giving the provisional FPD a final polish with pumice on a rag wheel, the
prosthodontic assistant seats the provisional restoration on the tooth preparations and
does a self-assessment of it.
Write down the criteria that you think would be used to judge a three-unit provisional FPD
extending from teeth #1.1 to #1.3.
___________________________________________________________________
___________________________________________________________________
___________________________________________________________________
_________________________________ ________________________________ _
Assessment of a completed three-unit provisional should be based on the following
criteria (Figure 10):
1. The marginal fit of both retainers is accurate and smooth.
2. The retainers and pontic are neither over nor under contoured.
3. The contact of the pontic to the tissue is present but pressure free.
4. The pontic has good connection with both retainers.
5. The retainers have proximal contact with adjacent teeth.
6. Occlusion is compatible.
7. Aesthetics are acceptable; the provisional looks realistic.
8. The surface of the provisional is smooth and polished.
If directed by the dentist, the prosthodontic assistant will treat the abutment teeth with a
desensitizing agent prior to cementation.
The process for cementing the provisional in place will not be discussed here as it is
identical to that discussed in Unit 2. You may want to reread that section now to review
the procedure. Cement removal is also identical except that a floss threader or superfloss
is threaded under the pontic to remove residual cement on the gingival surface of the
pontic, and dental floss is used on the sides of the abutment teeth. The patient needs to
be shown how to clean under the pontic when home care instructions are given.

Provisional Prosthodontic Theory Course Study Guide
91
After a final inspection of the provisional by the dentist, the patient is escorted from the
operatory. The prosthodontic assistant completes the chart entry and prepares for the
dental laboratory a package containing the final impression, the patient’s lab records, and
the prescription for the permanent FPD.
Provisional Prosthodontic Theory Course Study Guide
92
Removal of Provisional FPDs To remove a provisional FPD prior to cementation of the permanent restoration, forceps
are applied first to one retainer, then the other. It is important to loosen the retainers only
a little at a time so that unnecessary force is not applied to either preparation. As you
know from the discussion in Unit 2, since prepared teeth are smaller, they are not as
strong as full-sized teeth. The preparation could be chipped or fractured by excessive
force during removal.
Observe your sponsoring dentist removing provisional FPDs. What precautions does he
or she take?
___________________________________________________________________
___________________________________________________________________
___________________________________________________________________
______________________ ___________________________________________ _
Do you remember the discussion about draw line in the Unit 2 section on removal of the
provisional crown? “Draw” is the tapered parallelism of the preparation that prevents
undercuts. Ideally, it coincides with the long axis of the tooth. Insertion and removal of the
FPD can only occur along this path. The illustrations in Figure 4-15 on page 120 of your
textbook demonstrate the greater amount of tooth structure that needs to be removed
from tipped teeth versus straight teeth in order to create a path or line of withdrawal.
As the prosthodontic assistant, you need to be very aware of the path of withdrawal when
removing the provisional three-unit restoration. Any attempt to remove the FPD other
than along this path could result in fracture of the preparation or breaking of the
provisional restoration. An indication that you are not on the path is that the provisional
binds as you try to remove it.

Provisional Prosthodontic Theory Course Study Guide
93
There is always the possibility that the provisional FPD may need to be recemented. If,
during removal, the tips of the forceps damage the margins of the provisional, they may
be repaired using the bead-brush technique.
Some of the old acrylic resin will have to be ground from the TSF of the provisional. Do
you remember why?
___________________________________________________________________
___________________________________________________________________
___________________________________________________________________
_______________________________________ __________________________ _
The old resin may be contaminated with eugenol from the provisional luting agent.
Because new resin can soften in the presence of unreacted eugenol, the inside surface
layer of acrylic needs to be removed and lined with monomer. New resin is mixed, placed
in the retainers of the provisional, and seated on the preparations to form a new TSF.

Provisional Prosthodontic Theory Course Study Guide
94
Fabrication of Provisional FPDs (The Indirect Method)
Readings Chapter 15, pages 483-485
Chapter 15, pages 496-498
In this unit, we have discussed the combined indirect-direct method of fabricating an FPD
where the ESF is fabricated outside the mouth and the TSF inside the mouth. With the
indirect method for fabricating provisional, all procedures take place outside the mouth.
This method causes minimal irritation to the patient’s hard and soft tissues. Because of
this advantage, some dentists think the indirect method of fabricating provisionals is best,
even though more laboratory time is required.
The indirect method of fabrication is well described in your text on pages 482-485. Note
that the procedures assume that a pressform ESF matrix has been made prior to the
preparation appointment.
Prior to the tooth preparation appointment, a pressform ESF matrix is made on a
duplicate of a waxed-up study model. Using this matrix, both the ESF and the TSF are
formed at the same time during the tooth preparation appointment on a model of the
actual tooth preparations. To compare, with the indirect method an ESF matrix is made
before the tooth preparation appointment, and the complete provisional is made during
the appointment, whereas in the indirect-direct method a custom ESF preform is made
beforehand and the TSF is made during the appointment. See the chart on the next page.
Once the teeth are prepared, a quadrant impression of the area is taken, usually in
irreversible hydrocolloid material such as alginate. The impression is poured in quick-set
plaster and trimmed. This new model provides the surface on which the TSF for the
provisional will be made. As shown in the textbook in Figure 15-28 A on page 486, the
pressform ESF matrix is tried on the model of the tooth preparations. Removing the
matrix, the stone model is coated with a separating medium or lubricant and allowed to

Provisional Prosthodontic Theory Course Study Guide
95
dry. Acrylic resin is then mixed and poured or syringed into the ESF matrix, which is then
seated firmly on the model and held securely during polymerization. Once separated from
the pressform matrix, the acrylic resin is trimmed to fit the model of the prepared teeth,
and then polished. In the indirect method, the provisional is repeatedly tried on the model
of the prepared teeth instead of intraorally, as is done in the indirect-direct method.
Trimming is illustrated in Figure 15-32 on page 486.
Provisional Fabrication Method
Procedures Main Advantages/ Disadvantages
Direct method • EST and TSF made
directly on tooth.
• Time savings – no lab work
prior to tooth prep. appt.
• Most irritation to hard and
soft tissues.
Indirect-direct method #1 • Custom ESF perform
fabricated prior to tooth
prep. appt. On model.
• TSF relined at tooth
prep. appt. on teeth.
• Reduced irritation to hard
and soft tissues.
• Requires significant lab
time prior to prep. appt.
Indirect-direct method #2 • Custom ESF matrix
made on model prior to
appt.
• Complete TSF made
directly on tooth.
• Requires less lab time than
method #1.
• More irritation to hard and
soft tissues.
Indirect method • ESF and TSF made
completely on model.
• ESF and TSF are made
on a model of the preps
that is poured in quick
setting stone.
• Little or no tissue irritation.
• Requires extensive lab
time.
Table 1. Comparison of provisional fabrication methods.
Provisional Prosthodontic Theory Course Study Guide
96
Final adjustment and assessment of the provisional occurs intraorally. The
prosthodontic assistant tries the provisional on the prepared teeth and, extraorally, makes
any final adjustments to the contact areas, margins, and occlusion (Figure 11). Surface
and contour deficiencies can be corrected using the bead-brush method. Once the fit is
acceptable, the prosthodontic assistant cements the provisional.
What advantages do you see to the indirect method of fabricating FPDs?
___________________________________________________________________
___________________________________________________________________
___________________________________________________________________
_____________________________ ____________________________________ _
There is minimal tissue irritation because the acrylic material is not in direct contact with
the prepared teeth or soft tissues during polymerization. This reduces the potential for
sensitivity due to the exothermic reaction of the curing resin. It is also advantageous for
patients with allergies to acrylic.
The indirect method gives the patient a chance to rest because there is less intraoral
seating and removal of the provisional restoration during trimming.
Marginal fit may be better in the indirect method because the resin is allowed to set
undisturbed on the stone cast and not taken off the tooth after initial set while the resin is
still rubbery. This advantage assumes that the stone cast accurately reproduces the
prepared teeth.
If the provisional is lost or damaged, it is convenient to make another one and have it
ready for try-in when the patient arrives.
Some individuals assisting for prosthodontic dentistry may already be fabricating
provisionals. What they will gain from the provisional prosthodontic course is the legal
right to complete the provisional procedure by doing the final intraoral fitting and extraoral

Provisional Prosthodontic Theory Course Study Guide
97
adjustments, cementing the provisional, and removing it during the appointment for
cementation of the permanent restoration. In addition, they will acquire an appreciation
for and understanding of other methods and techniques for fabricating provisionals.
What do you think are disadvantages to the indirect method of fabricating FPDs?
___________________________________________________________________
___________________________________________________________________
___________________________________________________________________
In the indirect method, there is more chairside lab time than the other methods. An
impression is taken of the prepared teeth, then poured up and trimmed before the actual
fabrication of the provisional can begin. Thus the preparation appointment needs to be
longer.
There is a chance for error with the indirect procedure because the impression and
subsequent pouring of the impression may cause distortion, creating a stone model that
may not be a perfect reproduction of the prepared teeth.
Endodontic Provisionals
After endodontic treatment, teeth may become brittle and susceptible to fracture. For this
reason, coverage of these teeth is often recommended. The provisional crowns or
retainers that are fabricated have the additional component of a post. The post may be
selected from commercial stock posts or custom cast in the laboratory using an
impression. If the post is custom made, the provisional must be adapted – you will find a
description of the adaptation for a post-and-core provisional restoration on pages
496-498 in your textbook.
Complete Practice Exercise 13 to learn about your sponsoring dentist’s procedure for
endodontic provisionals.
Provisional Prosthodontic Theory Course Study Guide
98
Altering and Adapting Provisional FPDs
Readings Chapter 15, pages 500-502
Margins
The discussion in this unit has focused on the procedures for a ceramic-metal anterior
fixed partial denture. As you know, posterior FPDs are usually fabricated from cast metals. The properties of metals require the dentist to select a different margin design
than is used for ceramic-metal restorations.
Using Table 7-2 on page 220 of your textbook, determine the most common types of
margins for cast-metal restorations.
___________________________________________________________________
___________________________________________________________________
___________________________________________________________________
_____________________________ ____________________________________ _
For subgingival margins, a chamfer margin is most commonly selected. This type of
margin is shown in Figure 7-21 on page 222 of the textbook. For supragingival margins,
particularly for the facial surface of maxillary half or three-quarter restorations, a bevel
margin is often chosen. The prosthodontic assistant needs to be aware of the different
margin designs that are selected for various restorations and materials. Being able to
identify margins is necessary to accurately fabricate provisionals. Ask your sponsoring
dentist to show you various margin designs on models.
Bead-Brush Technique
The margins can be damaged during removal and trimming of a provisional restoration. If
the provisional needs to be placed back in the mouth, the damaged areas must be
Provisional Prosthodontic Theory Course Study Guide
99
repaired. The bead-brush method of repair was discussed earlier and is described in
Chapter 15 of your textbook. Practice Exercise 12 gave you a chance to practice the
bead-brush technique in adding new acrylic to acrylic teeth, simulating the additions that
are made to the margins, occlusal surfaces, and contact areas of provisional restorations.
Biologic and mechanical requirements dictate that a provisional restoration fits well, has
good contour, contacts the adjacent teeth, and is in occlusal harmony. Proficiency with
the bead-brush technique allows the prosthodontic assistant to fabricate biologically and
mechanically correct provisionals.
Custom Shading
Provisional aesthetic requirements include acceptable shade matching and tooth
characterizations that allow the provisional to blend with the adjacent teeth. Even though
shades for provisionals are chosen and combined carefully, once seated on the
preparations, the shade may require enhancement. Custom shading can artfully create
any blemish, crack, or stain. A paint-on stain kit is illustrated and discussed on page 501,
Figure 15-71 of the text. Stains are painted on the provisionals quickly, without excess
brushing. Once dried, a glaze is painted over the applied stains to create a moist, shiny
appearance. Does your office use a stain kit? If so, spend some time looking through the
kit to familiarize yourself with the components. Read the manufacturer’s directions, too. If
you don’t have a stain kit available, perhaps ask a dental supply representative for
literature on kits, or ask if a sample kit is available for viewing. At least one example of a
stain kit will be available at the clinical portion of the course, and you will have an
opportunity to practice custom shading. However, the more experience you get prior to
the clinical, the better.
Provisional Prosthodontic Theory Course Study Guide
100
Conclusion
You have now completed the study materials for Unit 3. You should have an overall
understanding of the dental procedures for a fixed partial denture. You should also have
detailed knowledge of the indirect-direct method for fabricating a provisional anterior fixed
partial denture, with specific emphasis on the procedures that are delegated to a
prosthodontic assistant.
Before doing the self-test, make sure that you have answered all the in-text questions.
Discuss any difficulties with your dentist so that you fully understand each practice
exercise. Please note that you need to have your sponsoring dentist check and sign the
practice exercises before submitting them to your instructor.
The self-test that follows is intended to check your understanding of the material
presented in Unit 3, including the readings, and to give you practice answering the types
of questions that will be on final examination. You should turn to the self-test now if you
feel ready. Answers are given at the end of this guide. After marking the self-test, restudy
any areas with which you have difficulty or make mistakes. Be sure you thoroughly
understand any problem areas before writing the assignment and the final examination.
Good luck on the self-test!
Provisional Prosthodontic Theory Course Study Guide
101
Unit 3 Self-Test
A. True and False
Circle T for true or F for false at the end of each of the following statements.
1. A three-unit FPD is composed of a pontic and two abutments, joined by connectors.
T F
2. The first intraoral step for obtaining facebow records is to obtain an impression of the
maxillary cusp tips in compound, using a facebow fork. T F
3. Intraoral photographs are essential to the laboratory technician to determine the
precise size and shape of the pontic. T F
4. One of the most important criteria for a well-fabricated custom tray is rigidity.
T F
5. The laboratory technician uses information from the patient’s shade distribution chart
to create custom ceramic characterizations. T F
6. To fabricate the ESF matrix with a vacuum-forming machine, the heated
polypropylene sheets are vacuum moulded to the stone duplicate model of the
waxed-up model of an FPD. T F
7. Ceramic shades are usually lightest along the gingival margin area. T F
8. The biggest disadvantage to hygienic pontic design for posterior FPDs is aesthetics.
T F
9. A “saddle” pontic design should be avoided. T F

Provisional Prosthodontic Theory Course Study Guide
102
10. The anterior retainer is always loosened first when removing a provisionally cemented
three-unit FPD. T F
11. Provisional restorations may be fabricated using the indirect method by currently
registered and licensed certified dental assistants and dental hygienists, without a
requirement for further prosthodontic education. T F
12. Painted-on colorants for aesthetic enhancement of anterior provisional restorations
have a high resistance to abrasion. T F
B. Multiple Choice
Circle the letter that best answers the question posed in the statement, or best completes
the sentence.
1. Possible consequences of not replacing an extracted tooth include:
1. Overeruption of the opposing tooth or teeth.
2. Drifting or tilting of adjacent teeth.
3. Loss of proximal contact, resulting in reduced periodontal health and occlusal
disharmony.
4. Reduced function.
5. Less acceptable aesthetics.
a) 1 and 2
b) 3 and 4
c) 1, 3, and 5
d) All of the above
Provisional Prosthodontic Theory Course Study Guide
103
2. A removable partial denture is usually recommended over a fixed partial denture for
replacement of three adjacent teeth because:
a) Excessive flex in the span often causes loosening of the FPD and failure.
b) Good aesthetics are difficult to achieve.
c) Patients have difficulty maintaining the periodontal health of a five-unit FPD.
d) Line of draw cannot be established.
3. With the indirect-direct method of provisional fabrication, the model of the waxed-up
FPD is used to fabricate the:
a) ESF and the TSF of the provisional.
b) ESF alginate matrix and the TSF of the provisional.
c) ESF pressform matrix.
4. Custom tray stops for an FPD on teeth #1.1 to #1.3 should be placed:
a) On the #1.6 and #2.6, on distal cusps.
b) In a tripodal arrangement on teeth not being prepared for the FPD.
c) On three evenly spaced posterior teeth, on lingual cusps.
d) On the cingula of the #1.1 and #1.3.
5. It is important to have a stable fulcrum and use light pressure when removing residual
provisional cement from a prepared tooth during the final cementation appointment
because:
1. The residual cement makes the tooth slippery.
2. The tooth could be sensitive and the patient may move suddenly.
3. An instrument may penetrate to the pulp.
4. A fulcrum provides a balance point for the working strokes.
5. Heavy pressure may remove the dentin smear layer.
a) 5 only
b) 1 and 4
c) 2 and 4
d) 2, 3 and 5
Provisional Prosthodontic Theory Course Study Guide
104
6. For fabrication of a four-unit FPD provisional, a vacuum formed acetate matrix is
trimmed on either side of the abutment teeth, removing excess acetate beyond:
a) One-half of a tooth.
b) 1.5 mm.
c) 4 mm.
d) One to one-and-a-half teeth.
7. Lubricant is applied to the:
a) Stone model with the rough tooth preparations prior to the acrylic resin being
applied to form the ESF.
b) Original study model prior to wax-up procedures.
c) Waxed-up model prior to pressform matrix fabrication.
d) All of the above.
8. The provisional FPD should be fabricated so that contact between the pontic and the
underlying soft tissues is:
a) Very firm, resisting the easy passage of floss.
b) Firm, just passable with floss.
c) Present, but pressure free.
d) Not present, by at least 1.5mm.
9. A maxillary pontic should contact the alveolar ridge along the:
a) Facial-cervical and lingual-cervical line angles.
b) Facial-lingual mid-cervical ridge.
c) Mesial-distal mid-cervical ridge.
d) Facial-cervical line angle.

Provisional Prosthodontic Theory Course Study Guide
105
10. Arrange the following steps of the bead-brush technique in the correct order:
1. The tip of the brush is touched to the repair site, and the bead is rolled off the
brush.
2. The brush is dipped in monomer.
3. Monomer is painted on the repair surface.
4. The brush is touched to resin powder.
5. The unset resin beads are painted with monomer until hard.
a) 3, 2, 4, 1, 5
b) 3, 4, 2, 1, 5
c) 2, 3, 5, 4, 1
d) 5, 3, 4, 1, 2
C. Short Answer
Answer the following questions in point form.
1. State five general principles of shade selection for ceramic and porcelain fixed
restorations.
________________________________________________________________
________________________________________________________________
________________________________________________________________
________________________________________________________________
2. List instruments and items that are commonly used to remove provisional cement from
an FPD after provisional cementation.
________________________________________________________________
________________________________________________________________
________________________________________________________________
________________________________________________________________
________________________________________________________________
Provisional Prosthodontic Theory Course Study Guide
106
3. State signs and symptoms of pathologic occlusion.
________________________________________________________________
________________________________________________________________
________________________________________________________________
________________________________________________________________
________________________________________________________________
4. List self-assessment criteria for a provisional three-unit anterior FPD.
________________________________________________________________
________________________________________________________________
________________________________________________________________
________________________________________________________________
________________________________________________________________

Provisional Prosthodontic Theory Course Study Guide
107
Unit 4 - Intra Coronal Direct Restoration
Introduction
In Unit 3, you learned to fabricate a three unit fixed partial denture provisional restoration
using the indirect-direct method. A stay-vac matrix was formed using the study model of
the waxed-up FPD model and trimmed in preparation to form the provisional at the
appointment. Once the preparation was complete a provisional material was placed into
the matrix, and the matrix was then placed on the prepared teeth to form the TSF of the
provisional.
In this unit, you will continue with the skills you have already learned to follow the direct
method for fabricating provisionals. At the preparation appointment, an impression will be
taken and used as a matrix to form the provisional.
The information presented in this unit builds on knowledge and skills discussed in the
previous units and on material learned in your dental education program. Principles of
intra coronal direct restorations are given, in addition to the sequential overview of the
procedures involved in placing an onlay. The main procedures for the unit are fabricating,
cementing and removing a MODL onlay. In addition, there will be information around
fabricating an inlay.
There are practice exercises that must be signed by your sponsoring dentist and
submitted to your instructor at the end of the course. There is also a self-test.
Unit Objectives
1. Explain the principles of fixed prosthodontics for intra-coronal restorations.
2. Describe the sequencing of a procedure for an intra-coronal restoration.
3. Explain the direct fabrication of an ESF matrix for intra-coronal provisional
restorations.

Provisional Prosthodontic Theory Course Study Guide
108
4. Explain the direct method of fabricating provisionals for intra-coronal provisional
restorations.
5. Explain the removal of an intra-coronal provisional.
6. Describe an intra-coronal provisional for an inlay preparation.
Readings
The following readings from the textbook Contemporary Fixed Prosthodontics are
assigned for this unit:
Chapter 10, pages 286-321
Chapter 14, pages 434-445
Chapter 15, pages 490-491
Look through these pages now to get a general idea of the topics; then later in the unit
sections where you are referred to specific pages, tables, and figures, study the material
more closely.

Provisional Prosthodontic Theory Course Study Guide
109
Prosthodontic Principles of Intra-coronal Restorations
Readings Chapter 10, pages 308-313
Referring to an inlay or onlay as an intra-coronal restoration may be a new concept to
many of us in dentistry. Choosing to do an inlay instead of another type of restoration is
dependent on the needs of the patient and the condition of the tooth. An onlay may be a
choice that can conservatively restore a tooth with severely worn dentition. Your dentist
will use all of the diagnostic tools at his or her disposal to determine the best treatment for
that patient.
Can you think of a contraindication for an inlay or onlay?
__________________________________________________________________
__________________________________________________________________
__________________________________________________________________
__________________________________________________________
There may be insufficient tooth structure to provide resistance and retention to the outline
form.
In order to achieve a suitable preparation without undercuts and to have accessibility for
an impression, creating an inlay may have a disadvantage.
Can you determine why that would be?
__________________________________________________________________
__________________________________________________________________
__________________________________________________________________
__________________________________________________________
It is not very conservative of tooth structure, so another treatment plan may be selected.

Provisional Prosthodontic Theory Course Study Guide
110
Margin design includes the term bevel. Read page 313 in your textbook and discuss with
your dentist the factors to consider when designing an inlay or onlay.
Sequencing of Procedures for Intra-coronal Restorations
Pretreatment Procedures for an Intra-coronal Restoration
Dr. Adams has developed a treatment plan that includes a MODL onlay for tooth number
2.6. After reviewing Richard’s previous pretreatment records and performing the
medical/dental history review, vital signs, a hard and soft tissue examination, an aesthetic
assessment, radiographs of the area and study models, a consultation appointment was
appointment was scheduled.
Do you recall what would be discussed at a consultation appointment?
__________________________________________________________________
__________________________________________________________________
__________________________________________________________________
__________________________________________________________
Dr. Adams would discuss the type of design and materials used for the intra-coronal
restoration. She would also relate the details of the appointment, including the length of
time it would take and the procedures that would be done. An explanation of the costs
associated with the procedure would be discussed and an informed consent signed by
Richard. The intra-coronal restoration appointment can now be booked.
Direct Fabrication of a Matrix for a Provisional Intra-Coronal Restoration
Richard’s preparation appointment is this morning at 9:00. As the prosthodontic assistant,
it is Jasmin’s responsibility to prepare the operatory and select the appropriate
instruments, burs, material, and trays and be completely ready for all aspects of the crown

Provisional Prosthodontic Theory Course Study Guide
111
preparation appointment. The prosthodontic set-up that Jasmin prepares for Dr. Adams is
similar to the armamentarium listed in the textbook on page 309.
Practice Exercise
Review Practice Exercises 1, 2 and 9. You will find these practices exercises in the
course component titled Practice Exercises and Assignments.
Jasmin greets Richard and escorts him into the operatory. He is relaxed and happy today,
as usual. After Richard is settled comfortably in the dental chair, Jasmin takes his blood
pressure and confirms that it is within normal range (less than 120/80). She then takes a
shade for the permanent restoration. Richard puts on safety glasses before greeting Dr.
Adams as she enters the operatory. Dr. Adams and Jasmin place their PPE.
What is the PPE?
__________________________________________________________________
__________________________________________________________________
__________________________________________________________________
__________________________________________________________
Personal Protective Equipment consisting of safety glasses, mask and gloves. Dr. Adams
then does an oral examination and checks occlusion before administering the local
anesthetic.
When working with a needle, what safe recapping methods are there?
__________________________________________________________________
__________________________________________________________________
__________________________________________________________________
__________________________________________________________

Provisional Prosthodontic Theory Course Study Guide
112
The methods are: scoop technique, needle guard, needle capping device, and use of a
safety needle.
While waiting for profound anesthesia, Jasmin gets ready to take the putty impression
using a single-quadrant tray. You should be familiar with the properties and
characteristics of all types of elastomeric impression material, including precautions for
mixing and handling. Jasmin may have chosen to do a closed-mouth impression using a
dual-arch or triple tray. Please refer to Chapter 14 in your textbook for a review of
elastomeric impression materials and techniques.
Jasmin takes the upper-quadrant impression, being careful to properly seat the loaded
tray and let the material set for the appropriate time. After giving Richard a tissue along
with some water for rinsing, she inspects the impression to ensure that it meets specific
criteria. Please refer to Unit 2 for criteria for an acceptable impression. To review these
criteria, look at Practice Exercise 2 found in the component Practice Exercises and
Assignments.
Clinical Procedures for an Intra-Coronal Restoration. Isolation can consist of the use of cotton products or dental dam. Jasmin knows that Dr.
Adams prefers to use dental dam, so she isolates the teeth from #2.7 to #1.3. Part of
correct dam placement is inverting the dam around each tooth.
Why is inversion necessary?
__________________________________________________________________
__________________________________________________________________
__________________________________________________________________
__________________________________________________________
Inversion of the dental dam material creates a seal and prevents crevicular seepage. With
anesthesia confirmed and the dam in place, Dr. Adams begins the tooth preparation.

Provisional Prosthodontic Theory Course Study Guide
113
She begins using a 170 tapered FG, but some dentists may prefer diamond or other types
of burs. Dr. Adams creates a butt joint on the gingival walls then changes to a 7406
football finishing bur to create a heavier chamfer margin on the lingual wall and then a
7901 tapered pointed finishing bur to place a slight bevel on the facial. Refer to Practice
Exercise 8 in the component Practice Exercises and Assignments to see if you have
identified any of these types of margins.
Dr. Adams asks her assistant to do a thorough cavity debridement of the prep. In
preparation of the final resin cement that will be used to cement the onlay, Dr. Adams
asks Jasmin to mix a resin modified glass ionomer cement for protection of the pulp.
From your education, what can you recall about the characteristics of resin cement that
would make Dr. Adams chose this additional procedure?
__________________________________________________________________
__________________________________________________________________
__________________________________________________________________
__________________________________________________________
Resin cements are insoluble in oral fluids but are irritating to the pulp.
After Jasmin mixes the Vitrebond to the correct luting consistency, a thin ½ mm. layer is
placed and light cured.
The next step is tissue management. Dr. Adams has asked Jasmin to perform the
retraction using a single cord dipped in aluminum chloride solution.
Do you know why ferric sulfate solution is not recommended for non-metal restorations?
__________________________________________________________________
__________________________________________________________________
__________________________________________________________________
__________________________________________________________

Provisional Prosthodontic Theory Course Study Guide
114
The outcome is a darker reaction with the gingival tissues, leaving an undesirable
aesthetic appearance.
Jasmin prepares the retraction cord after determining the length.
How is the size of retraction cord determined?
__________________________________________________________________
__________________________________________________________________
__________________________________________________________________
___________________________________________________________
The sulcus is a ‘v’ shaped crevice which dictates the size of the cord(s) to use. The
objective is to place the cord halfway into the sulcus, usually 1 – 3 mm. If the cord is too
shallow, the space is inadequate to allow an accurate reproduction of the margin. If
placed too deep, the sulcus opens horizontally at the bottom but is narrow at the top,
restricting the flow of the impression material. This restriction could result in the material
tearing near the edge of the preparation upon removal. Over-packing should be avoided
because it can also cause irreversible gingival recession.
In this case, Jasmin has placed the cord in an astringent solution, but an astringent does
not have to be used. If it is not used, the cord will mechanically displace the tissue.
Can you recall how long this process would take?
__________________________________________________________________
__________________________________________________________________
__________________________________________________________________
___________________________________ _______________________
It would take 10 – 15 minutes to mechanically displace the tissue instead of the 5 minutes
using chemical retraction.
Provisional Prosthodontic Theory Course Study Guide
115
If an epinephrine impregnated cord was chosen for this procedure, the prosthodontic
CDA could not be delegated to perform this service.
Why would a Dentist choose epinephrine impregnated cord?
__________________________________________________________________
__________________________________________________________________
__________________________________________________________________
__________________________________________________________
Epinephrine impregnated cord acts as both an astringent and a vasoconstrictor, so it
constricts the blood vessels and provides hemostasis and ischemia (tissue shrinkage).
What medical conditions are contra-indicated for epinephrine impregnated cord?
__________________________________________________________________
__________________________________________________________________
__________________________________________________________________
__________________________________________________________
Epinephrine is contra-indicated for a patient with heart disease, hyperthyroidism or
diabetes, or when taking certain drugs. The latter two are because patients with these
diseases often present with hypertension. Always review the patient’s medical history
prior to treatment.
Jasmin sits in the operator chair and removes the cord from the dappen dish, placing it on
a 2X2 to absorb any excess liquid. She then makes a loop and holds it over the
preparation, leaving the closed loop on the lingual and the tails towards the buccal. Using
a gingival cord packer, she gently packs the cord vertically in order to horizontally retract
the gingiva and expose the inter-proximal gingival margins. The area is then gently rinsed
and left for 5 minutes.

Provisional Prosthodontic Theory Course Study Guide
116
Jasmin uses this time to prepare the impression materials and the sideless triple tray Dr.
Adams has requested for this procedure.
Out of the available categories of final impression materials, can you recall which ones
are hydrophilic?
__________________________________________________________________
__________________________________________________________________
__________________________________________________________________
__________________________________________________________
The most hydrophilic elastomeric impression material is reversible hydrocolloid. Next are
the polyethers, and finally, some addition silicones also known as vinyl poly siloxanes or
VPS.
After five minutes, Jasmin sits back in the operator chair and calls the other CDA Jodi into
the operatory to assist with the final impression. She takes a look at the site to determine
the presence or absence of fluids and whether or not the gingiva appears displaced.
Everything appears correct, so she begins to remove the cord first by gently grabbing the
tail with a cotton plier and then by making sure to pull the cord across the tooth and not
outwards towards the gingiva. She slowly removes the cord, noting if it is intact, and then
places it on a 2X2.
If the site had not looked as described above and there were fluids present or the margins
were not clearly visible, what would the assistant have done?
__________________________________________________________________
__________________________________________________________________
__________________________________________________________________
__________________________________________________________
The assistant could have called the dentist to come back in and additional methods of
retraction could have been indicated. This could have been accomplished by injecting

Provisional Prosthodontic Theory Course Study Guide
117
local anesthetic into the tissue or using a cotton ball dipped in astringent and then
dabbing it onto the site. If adequate retraction did not occur, a surgical retraction may
have been another alternative approach.
Can you recall from your dental education two types of surgical retraction?
__________________________________________________________________
__________________________________________________________________
__________________________________________________________________
__________________________________________________________
Surgical retraction can be accomplished by using a surgical knife or by performing
electrosurgery. With the surgical knife, the dentist excises the tissue to expose the margin
of the preparation. Electrosurgery removes the tissue using a high-frequency current
with a small electrode that passes through the tissue. Electrosurgery is not used with
patients who are receiving radiation therapy, have cardiac pacemakers, or have any
diseases that slow healing.
But in this case it all went well, so the second CDA assistant prepares and passes the
light body impression material to Jasmin, who injects it around the preparation. The
loaded triple tray is then passed to Jasmin. Once Jasmin places the tray into the mouth
and asks patient to close, a light tap on the underside of the chin is used to obtain
maximum inter-digitation. After the recommended time has passed, Jasmin asks the
patient to open and release the impression. Jodi rinses the patient’s mouth while Jasmin
rinses and inspects the impression. She looks to see if a representation of all the occlusal
cusps in both arches has been obtained, as well as the margins of the preparations.
Jasmin makes sure the tray has not touched the sides and that the area distal to the last
molar and the cuspid is represented. The impression is then rinsed, gently dried and
disinfected using a compatible disinfecting agent. She asks Jodi to take the final
disinfected impression and report to the dentist.

Provisional Prosthodontic Theory Course Study Guide
118
In the meantime, Jasmin gets ready to make the provisional using the impression she
took at the beginning of the appointment. This preparation is an area of low strength so
she has chosen a bisacryl material.
If the interim direct provisional was to be in place for a longer time or required a higher
strength, which provisional material would have been indicated?
__________________________________________________________________
__________________________________________________________________
An ethyl or methyl methacrylate would have been indicated.
With this type of provisional material, a cement is needed to keep it in place; however, if a
small preparation inlay had been done, what changes to the provisional may have
occurred?
__________________________________________________________________
__________________________________________________________________
__________________________________________________________________
__________________________________________________________
For an inlay, a modified microfilled provisional material such as Fermit N by Ivoclar
Vivadent may have been used, using a matrix and wedge technique. This would require
no cement.
Jodi returns, having shown Dr. Adams the final impression, and gives Jasmin the
go-ahead for the provisional to be made. Jodi then prepares the final impression for the
dental laboratory.

Provisional Prosthodontic Theory Course Study Guide
119
Direct Fabrication of an Intra-Coronal Provisional
Readings Chapter 15, pages 490-491
Jasmin checks that she has all of her armamentarium and gets Richard re-settled in the
chair. She unwraps the impression and shakes out any droplets of water and gently dries
it with air. After checking the impression, she rinses, isolates and dries the prepared tooth.
Jasmin mixes and loads the bisacryl material into the matrix and seats it over the prepped
tooth. After 2-3 minutes, she removes it from the mouth allowing it to cure outside of the
mouth for an additional 5 minutes. Because of the type of material used, there is little to no
shrinkage, so the next step is to place a long shank acrylic bur into the straight slow
handpiece in preparation for trimming it. She uses a pencil to mark the margins and trims
the excess. After trying it in the mouth and checking the margins, contacts, occlusion and
aesthetics, Jasmin is satisfied and calls Dr. Adams for a check. After receiving Dr.
Adams’s approval, Jasmin polishes the provisional with a long shank rag wheel and flour
of pumice, right at chairside, before rinsing it clean.

Provisional Prosthodontic Theory Course Study Guide
120
Cementation Procedure
Readings Chapter 15, pages 498-499
Jasmin checks the tooth preparation to make sure that it is free from debris, saliva, and
blood; contaminants and moisture will reduce the effectiveness of the provisional cement.
Jasmine then checks that the cord has been removed before she rinses and gently dries
the preparations, careful not to over dry as this could cause post-operative sensitivity. A
cotton roll is placed in the vestibule before Jasmin mixes the non-eugenol provisional
cement, placing a small amount on the TSF of the provisional. She then seats the
intra-coronal provisional with finger pressure on the prepared tooth and uses a mirror and
explorer to check that it is properly seated. When she is satisfied that it is seated, Jasmin
inserts a cotton roll for Richard to bite on. The cement is allowed to set for the
manufacturer’s recommended time.
Removal of Excess Provisional Cement
It is important that all cement be removed as it can act as a physical irritant and contribute
to plaque retention. This can cause an adverse tissue reaction, so Jasmin takes the time
to carefully remove the excess using an explorer, appropriate hand instrument, floss and
air before rinsing the area thoroughly. After Jasmin does a final self-evaluation of the
cement removal, she asks Dr. Adams to check for remaining cement and for the final
position. Dr. Adams is responsible for Jasmin’s work, so she takes the time for this final
check. Afterwards, Richard receives a final rinse and he is returned to an upright position.
At this point in the appointment, Jasmin gives Richard the post-operative instructions.
She escorts Richard to the front desk and confirms his next appointment before saying
good-bye.
In the operatory, Jasmin completes the chart entry. After cleaning the operatory, Jasmin’s
final responsibility is to prepare the lab slip and have Dr. Adams sign it before calling the
Provisional Prosthodontic Theory Course Study Guide
121
dental laboratory to ask their driver to pick up Richard’s disinfected and bagged final
impression, along with Dr. Adam’s lab prescription and any other patient records. When
Jasmin is writing out the prescription, she makes sure to include the shade of the Polymer
material that will be used to create the onlay.
Why would the onlay not be made of ceramic?
__________________________________________________________________
__________________________________________________________________
__________________________________________________________________
__________________________________________________________
Operator preference. Polymers have a good record of use and can polish to a high lustre.
Jasmin has Dr. Adams review the lab prescription and sign it, and then takes everything
to the front desk, ready for pick up.

Provisional Prosthodontic Theory Course Study Guide
122
Removal of Intra-coronal Provisional and Residual Cement from the Preparation
Readings Chapter 15, page 500
Richard returns to the office later for placement of his permanent onlay. After seating,
Richard is asked how the tooth felt over the last two weeks. With no complaints, Jasmin
prepares to remove the provisional.
She does not use the backhaus forceps or a curved hemostat for this task. Can you
answer why?
__________________________________________________________________
__________________________________________________________________
__________________________________________________________________
__________________________________________________________
The use of the forceps or hemostat could compromise the margins.
Jasmin uses a sharp instrument to break the seal. She immediately inspects the TSF to
see if the cement is stuck to the provisional and not left on the tooth, which would mean
the tooth was adequately protected. This is accomplished by not over-drying the tooth
prior to cementation. Jasmin uses a perioaid with a rounded tooth pick to gently remove
any residual cement from the tooth surface. She then places a wet 2X2 over the tooth to
keep it from drying out while she waits for Dr. Adams to come in and fit the prosthesis.
Dr. Adams checks the margins with an explorer. She asks Jasmin to place and hold a PFI
instrument on the occlusal surface to hold the onlay in place as she flosses. Dr. Adams is
happy with the tight, broad flat contacts. Jasmin then transfers a dry 2X2 and articulating
paper so that Dr. Adams can check the occlusion, which appears accurate. The shade
appears correct, so they are ready for final cementation.
Provisional Prosthodontic Theory Course Study Guide
123
Dr. Adams takes off the onlay and picks up the high speed handpiece with a coarse
diamond friction grip bur attached to roughen the TSF and enhance the mechanical
retention. She then leaves to go to the lab to sandblast the TSF, making sure to avoid the
margins. This procedure will enhance the mechanical retention and also clean the TSF.
Dr. Adams has asked Jasmin to prepare resin cement. From your education you know
that resin cements do not adhere to metal/ceramic or polymer material.
In addition to the mechanical retention, Dr. Adams may also do what to prepare the tooth?
__________________________________________________________________
__________________________________________________________________
__________________________________________________________________
__________________________________________________________
The TSF must be treated with a silane coupling agent to produce a chemical bond
between the resin cement and the onlay restoration.
While Dr. Adams is out of the operatory, Jasmin uses a soft ribbed cup, flour of pumice
and water to further clean and prepare the tooth. She then places a cotton roll in the
vestibule to isolate tooth #2.6. Dr. Adams returns and asks Jasmin to mix dual curing
hybrid resin cement. The brand chosen has a separate self-etching primer that is
microbrushed onto the prep for a prescribed time.
What does a self-etching primer do?
__________________________________________________________________
__________________________________________________________________
__________________________________________________________________
__________________________________________________________
It occludes the dentinal tubules which in turn diminish post-operative sensitivity.

Provisional Prosthodontic Theory Course Study Guide
124
Jasmin transfers the microbrush and then, using the air water syringe, carefully blows air
for one second, aiming the stream of air down the long axis of the tooth. Dr. Adams
applies the primer to the surfaces and it is allowed to sit for the prescribed time before
Jasmin again blows down the long axis of the tooth.
The intra-coronal restoration is seated with 2 mm. of resin cement placed onto the TSF. It
is rocked buccal-lingual with finger pressure, holding it on the occlusal surface. A curing
light is used to tack the cement on the facial and lingual. The excess cement is picked off
using an appropriate hand instrument. This is done to insure the preparation is seated
properly at the margins. Proper seating prevents future marginal leakage. After the
excess cement is removed, the restoration is cured facially and lingually for the
appropriate manufacturer time.
The next step is to use a disc on a mandrel to smooth the margins. The interproximal
areas are checked with a finishing strip and then flossed. Finally, Dr. Adams polishes
using a product of her choice, such as Caulk Prisma Gloss.
A final check of the intra-coronal onlay is done before showing Richard. Both Dr. Adams
and Richard are pleased with the final outcome. Jasmin follows up with a review of
post-operative care, completes the chart entry, and escorts Richard to the front to finish
the business portion of the appointment and set up his next re-care appointment.
Implant Provisionals
So far we have discussed how, when a tooth is badly broken down or lost, we can restore
it through a crown, intra-coronal restoration or a fixed partial denture. There is another
option: implants. There are three major subgroups of dental implants: subperiosteal,
transosteal and endosteal. The focus of this text will be around the endosteal implant.
Endosteal dental implants are surgically placed into alveolar bone either singly or in
multiples.
Provisional Prosthodontic Theory Course Study Guide
125
An implant becomes a fixed artificial root through what process?
__________________________________________________________________
__________________________________________________________________
__________________________________________________________________
The implant fuses with the bone tissue through a biologic bonding process called
osseointegration.
Dental implants sometimes come in “systems” that include a variety of styles and sizes of
implant and the armamentarium needed to perform the treatment. Technology is
constantly changing but the surgery is usually done as a one-stage or two-stage
procedure.
Final impressions as we know them can be replaced by digital planning software
programs that utilize an intra-oral wand which scans an image of the prepared
tooth/teeth, the adjacent teeth and the opposing arch onto the computer. A CAD/CAM
restorative system uses optical impressions and software that receives the impression
data and then designs the inlays, onlays, veneers and crowns right at chairside in a single
appointment. The restoration that was designed is transferred to a milling chamber and
within minutes, the restoration is milled. Another option for the dentist is the CAD/CAM
system that takes digital impressions in the office, but then sends them electronically to a
dental lab that has shared software. Because the dental lab technician sees the
impression immediately, the dentist can then discuss details of the case before the
patient leaves the office. This technique requires two appointments to complete the
procedure, just like the traditional procedure, but eliminates the need for in-office
impressions and results in shorter treatment times.
This option eliminates what for the dentist?
___________________________________________________________________
___________________________________________________________________
___________________________________________________________________

Provisional Prosthodontic Theory Course Study Guide
126
The financial investment for the equipment and the time investment to integrate the first
system into the office are considerable. As well, additional training of dentist and staff to
become competent with using the software and hardware is required.
Conventional endosteal implants require the usual preliminary procedures as well as
intra-oral and extra-oral radiographic images to evaluate and determine the height, width,
and quality of bone in the area for the implant, as well as to determine the exact
positioning of the implant.
Can you recall examples of extra-oral imaging?
__________________________________________________________________
__________________________________________________________________
__________________________________________________________________
__________________________________________________________
Examples of extra-oral imaging are panoramic, cephalometric and tomographic views.
Computed tomography (CT) scanning has been used for a long time in dental radiology.
More recently, Cone Beam Computed Tomography (CBCT), a three-dimensional dental
imaging system, has been utilized in private dental offices.
Once an endosteal implant is placed, there may be a need for an interim abutment before
insertion of the prosthesis. The custom or preform provisional is then made on the interim
abutment. The provisional may be retained in one of two ways.
Can you think of these two ways?
__________________________________________________________________
__________________________________________________________________
__________________________________________________________________
__________________________________________________________
The provisional may be either cement retained or screw retained.
Provisional Prosthodontic Theory Course Study Guide
127
Practice Exercise
Complete Practice Exercise 14 to learn about your sponsoring dentist’s procedure for
implants.
Conclusion You have now completed the study materials for Unit 4. You should feel comfortable with
the dental procedures for an intra-coronal restoration. Before completing the self-test,
ensure that you have answered all the in-text questions. In addition, all 14 practice
exercises should be completed before attempting the self-test. Discuss any difficulties
with your dentist so that you fully understand the procedures.
The self-test that follows is intended to check your understanding of the material
presented in Unit 4, including the readings, and to give you practice answering the types
of questions that will be on final examination. You should turn to the self-test now if you
feel ready. Answers are given at the end of this guide. After marking the self-test, restudy
any areas with which you have difficulty or have made mistakes. Be sure you thoroughly
understand any problem areas before writing the assignment and the final examination.
Good luck on the self-test!
After completing and checking the self-test for Unit 4, you are ready to complete the
assignment for this course; the assignment is marked by your instructor and is worth 40%
of your final grade.

Provisional Prosthodontic Theory Course Study Guide
128

Provisional Prosthodontic Theory Course Study Guide
129
Unit 4 - Self-Test
A. True and False
Circle T for true and F for false at the end of each of the following statements.
1. Gingival retraction is done to ensure that an impression with clear margins can be
obtained. T F
2. When using mechanical retraction, transient ischemia occurs. T F
3. A retraction cord impregnated with epinephrine provides hemostasis. T F
4. Electrosurgery uses a low frequency current with a small electrode to pass over the
gingival tissues. T F
5. Resin cements are insoluble in oral fluids but are irritating to the pulp. T F
6. Silane has a liquid organic coupler used to mechanically bind ceramics to resin
cement. T F
7. The length of cord needed is determined by the circumference of the prepared tooth.
T F
8. Usually, the ends of the cord are toward the lingual surface of the tooth. T F
9. Inlays and onlays are contra-indicated if there is not sufficient tooth structure to
provide resistance and retention. T F
10. Gold, like amalgam, can lead to tooth discoloration. T F
Provisional Prosthodontic Theory Course Study Guide
130
11. An inlay can support cusps, reducing the risk of tooth fracture. T F
12. Indirect inlays require more divergent walls than are needed with direct restorations.
T F
13. Class 2 inlays are indicated in cases of a small carious lesion in a person with low
caries rate. T F
14. A contra-indication for a ceramic inlay or onlay is a demand for aesthetics. T F
B. Multiple Choice Circle the letter that best answers the question posed in the statement, or best completes
the sentence.
1. Of the three major subgroups of dental implants, which one is most commonly used
for treatment of partially edentulous patients?
a) Subperiosteal.
b) Transosteal.
c) Endosteal.
2. Once a tooth is lost in the dentition resorption occurs, how can keeping the bone be
accomplished?
a) Placement of a fixed titanium implant.
b) Placement of an inappropriate size and shape of implant.
c) Initial instability of the implant.
d) Excessive occlusal forces.

Provisional Prosthodontic Theory Course Study Guide
131
3. One possible component of an endosteal implant is a healing screw which can best be
described as:
a) A fixture.
b) The superior part of a multiple layer prosthesis.
c) A metallic cap used to position a die in an impression.
d) An interim seal threaded into the internal section.
4. An example of an intra-coronal restoration is:
a) Partial veneer crown.
b) Onlay or inlay.
c) Extra coronal metal restoration.
d) Partial-coverage restoration.
5. Cast inlays and onlays can prove to be extremely long-lasting because
a) Low creep.
b) Low corrosion.
c) Good mechanical properties.
d) a and b.
e) All of the above.
6. What particles does an air abrasion unit use to mico-etch the TSF of a prosthesis?
a) Sodium bicarbonate.
b) Silica.
c) Aluminum oxide.
d) Pumice.
7. A surgical stent does what?
a) Is the rotary instrument used to prepare the alveolus to receive the implant.
b) Acts as a guide during surgery to place implants in their proper position.
c) Is used to hold the patient’s mouth open during the surgical procedure.
d) Fits under the crown and over the implant.
Provisional Prosthodontic Theory Course Study Guide
132
C. Short Answer
Answer the following questions in point form.
1. Discuss what happens if the retraction cord is placed too deep in the sulcus.
________________________________________________________________
________________________________________________________________
________________________________________________________________
________________________________________________________________
________________________________________________________________
2. Discuss what happens if the retraction cord is placed too shallow in the sulcus.
________________________________________________________________
________________________________________________________________
________________________________________________________________
________________________________________________________________
________________________________________________________________
3. Discuss which size cord would be chosen for retraction.
________________________________________________________________
________________________________________________________________
________________________________________________________________
________________________________________________________________
________________________________________________________________
4. Can you recall the three main ingredients of self-etching primers?
________________________________________________________________
________________________________________________________________
________________________________________________________________
________________________________________________________________
________________________________________________________________

Provisional Prosthodontic Theory Course Study Guide
133
5. When taking a final impression of an inlay preparation, what precaution must you take
before having the patient bite down in the closed mouth technique?
________________________________________________________________
________________________________________________________________
________________________________________________________________
________________________________________________________________
________________________________________________________________

Provisional Prosthodontic Theory Course Study Guide
134
Appendix 1: Procedural Guidelines
Direct Fabrication of a Single-Unit Provisional Crown Using an Alginate Matrix
Armamentarium
• Quadrant alginate impression
o Alginate powder
o Alginate powder measure
o Water measure and water
o Mixing bowl and spatula
o Quadrant impression tray
• Acrylic: monomer and polymer
• Mixing containers and spatula
• Lubricant/separating medium
• Variety of trimming sandpaper disks and round acrylic burs
• Handpiece and mandrels
• Hemostat pliers
• Articulating paper
• Pencil
• Cotton rolls and pellets, cotton pliers, and scissors
• Spoon excavator, discoid cleoid
• Explorer, mouth mirror
• Floss
• Lathe, rag wheel, and flour of pumice
• Bowl or water bath
• Shade guide
Note: when practicing in a lab situation with models, the models should be soaked in
water prior to taking impressions.

Provisional Prosthodontic Theory Course Study Guide
135
Procedural Steps
1. Take the alginate impression. Rinse and gently dry the impression.
2. Trim excess alginate to assist with the reseating of the impression when the
restoration is fabricated.
3. Set out the acrylic, ready for use. Select the shade and put out the polymer and
monomer with the appropriate measurers and manufacturers’ directions.
4. Isolate the prepared tooth in the impression by placing a piece of moistened cotton roll
on either side of the prepared tooth depression.
The dentist has prepared the tooth for a full gold crown, and the prosthodontic assistant
now fabricates the provisional crown.
5. Isolate the prepared tooth with cotton rolls and thoroughly dry the area.
6. Lubricate the prepared tooth and teeth adjacent to the preparation. Use a cotton pellet
to ensure that the proximal areas are covered.
7. Explain to the patient what you are about to do, mentioning the taste and odor that she
or he might notice.
8. Mix the acrylic according to the manufacturer’s directions and, when the acrylic has
lost its shine, pour it into the matrix, filling the depression of the prepared tooth.
Remove the pieces of cotton roll.
9. Seat the acrylic-filled impression in the patient’s mouth.

Provisional Prosthodontic Theory Course Study Guide
136
10. Time the set according to the manufacturer’s directions. When the set is in the rubbery
stage, gently work the impression up and down to loosen the acrylic form.
11. Prior to the acrylic reaching complete set, remove the impression. The provisional
may stay on the preparation, or it may come out with the impression. Using a spoon
excavator or hemostat pliers, gently remove the acrylic provisional from the tooth or
the impression.
12. Place the provisional in a bowl of warm water to continue the set.
13. Thoroughly rinse the patient’s mouth. The patient may wish to rinse with mouthwash
to clear the strong taste. Place the patient in an upright position and allow him or her to
take a break.
14. Once the acrylic has totally set, remove the provisional from the water and dry it
thoroughly.
15. Using a pencil, mark the contact points and the margin on the provisional.
16. Starting with a coarse disk, trim the bulk of the acrylic away from the margin.
17. Switch to finer disks as the trimming gets closer to the marginal area. Avoid trimming
the contact points.
18. When the trimming of the margins is complete, slightly relieve the tissue surface side
with a large round acrylic bur.
19. Tip the patient back again and dry and isolate the preparation.
20. Try the trimmed provisional in the mouth.

Provisional Prosthodontic Theory Course Study Guide
137
21. Check the marginal fit using the explorer and then adjust the provisional as necessary.
22. Check the contacts by passing floss through them, and adjust as necessary.
23. Using articulating ribbon, check the occlusal contacts and adjust as necessary.
Note: any adjustments to the marginal fit or the occlusal contact must be done outside the
mouth.
24. Once satisfied with the fit, shape and function of the provisional, have the dentist
check the provisional before removing it for polishing.
25. Using a rag wheel and pumice, polish the provisional. Avoid the margins and the
contact areas.
26. Disinfect the provisional if required.
The provisional crown is now ready for cementation.

Provisional Prosthodontic Theory Course Study Guide
138
Direct Fabrication of a Single-Unit Provisional Crown Using a Preformed Shell
Armamentarium:
• Selection of ESF preformed shells
o Anterior: polycarbonate
o Posterior: aluminum or stainless steel
• Dividers or manufacturer-provided measuring device
• Crown and collar scissors
• Contouring pliers
• Green stone cylindrical shaped and/or crimping pliers
• Slow-speed handpiece
• Bur for establishing contacts
• Assorted disks and mandrel
• Pencil
• Acrylic: monomer and polymer
• Spatula
• Dappen dishes or mixing container
• Hemostat pliers
• Cotton rolls and pellets, cotton pliers and scissors
• Mouth mirror, explorer, spoon excavator, discoid cleoid, half Hollenback
• Floss
• Rubber wheel for polishing
• Bowl or heated water batch
• Shade guide
Provisional Prosthodontic Theory Course Study Guide
139
Procedural Steps
The dentist has prepared the tooth for a full gold crown, and the prosthodontic assistant
now fabricates the provisional crown.
1. Select the appropriate size preformed ESF shell by observing the tooth preparation. If
necessary, use dividers to measure the mesiodistal width of the crown space.
2. Check the occlusal-cervical height, and using crown and collar scissors, trim any
excess. After trimming with scissors, use the crimping pliers to smooth off any sharp
edges.
3. Try in the shell again and have the patient gently close. This will help adjust the
occlusion. Check for tissue blanching after the patient has closed. More trimming may
be required if blanching occurs. With the patient in occlusion, ask the patient if the bite
feels normal. Are the teeth on the other side touching?
4. Remove the shell and use a bur to puncture holes in it to establish mesial and distal
contacts as necessary.
5. Dry and roughen the interior of the shell with a bur.
6. Isolate and lubricate the teeth.
7. Mix the acrylic in a dappen dish. Allow the material to lose its shine and then place it in
the shell.
8. Allow the material to set approximately one minute more before placing it on the
preparation.

Provisional Prosthodontic Theory Course Study Guide
140
9. Firmly place the shell on the preparation and ask the patient to slowly close into
occlusion.
10. Use an instrument such as a half Hollenback to remove excess acrylic from proximal
undercuts.
11. Allow the material to reach the rubbery stage and ease the form slightly on and off the
tooth, taking care not to distort the marginal area. Continue this motion until the
material has almost reached its set.
12. Remove and place the crown form in warm water.
13. Rinse the preparation and sit the patient up for a break.
14. Dry the crown form.
15. Using a pencil, mark the marginal and contact areas.
16. Starting with a fine garnet disc, trim to just before the margins. Switch to a finer disk as
you get close to the line. Use a round bur to relieve the TSF of the provisional.
17. Reposition the patient and try in the crown. Check the margins with an explorer. If any
area is short, repair using the bead-brush technique.
18. Using articulating ribbon, check the occlusion and adjust as necessary.
Note: any adjustments must be made outside the patient’s mouth.
After the dentist checks the fit, the provisional is ready for cementation.

Provisional Prosthodontic Theory Course Study Guide
141
Indirect-Direct Fabrication of a Three-Unit Provisional FPD
Armamentarium
• Duplicate of model with wax-up (pontic area restored)
• Vacuum former
• Vacuum former coping material
• Scissors
• Scalpel
• Acrylic: monomer and polymer in selected shades
• Mixing container and spatula
• Sable brush for bead-brush technique
• Separating medium
• Variety of trimming sandpaper disks, assorted carbide burs, and double-sided
diamond discs. Following are suggestions:
o Coarse garnet 78-060
o Fine garnet H257EF
o Brasseler 911HF H295EF
o Double-sided 365-220 7404
• Hemostat pliers
• Articulating ribbon and holder
• Pencil
• Cotton rolls, cotton pellets, cotton pliers
• Spoon excavator, discoid cleoid, half Hollenback
• Explorer, mouth mirror
• Floss and floss threader
• Lathe, rag wheel, flour of pumice
• Robinson brush for lathe or handpiece
• Acrylic resin polishing medium
• Bowl or heated water bath
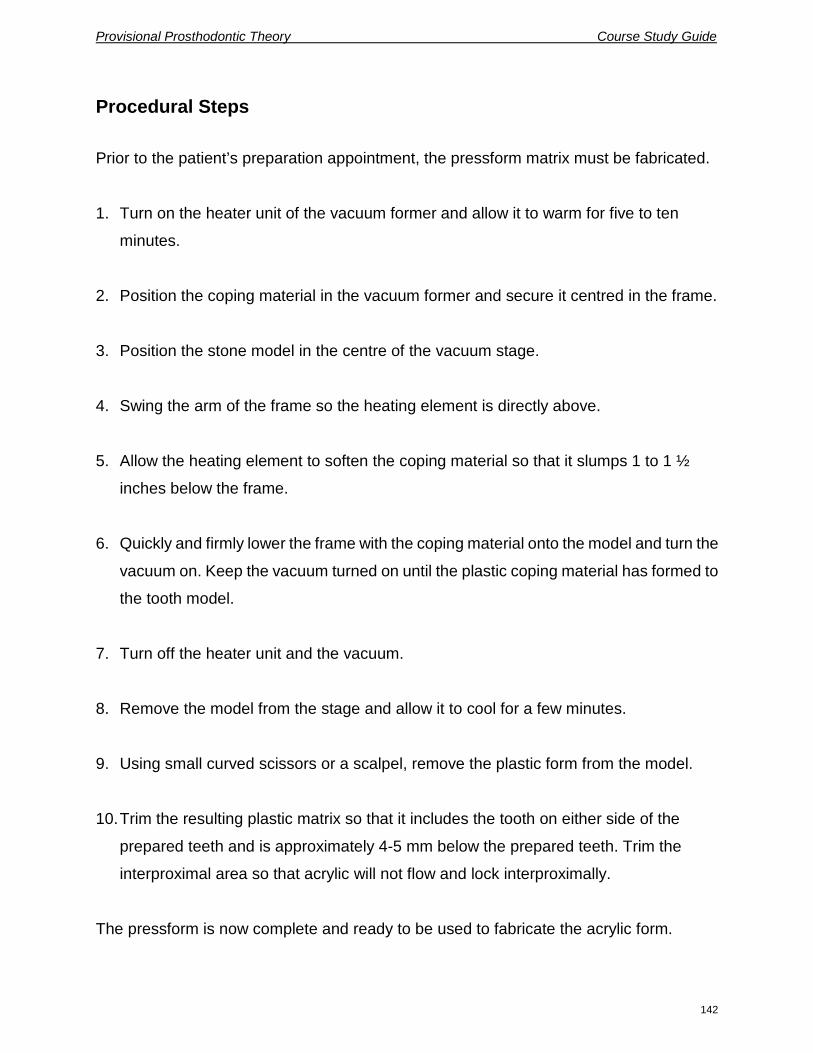
Provisional Prosthodontic Theory Course Study Guide
142
Procedural Steps
Prior to the patient’s preparation appointment, the pressform matrix must be fabricated.
1. Turn on the heater unit of the vacuum former and allow it to warm for five to ten
minutes.
2. Position the coping material in the vacuum former and secure it centred in the frame.
3. Position the stone model in the centre of the vacuum stage.
4. Swing the arm of the frame so the heating element is directly above.
5. Allow the heating element to soften the coping material so that it slumps 1 to 1 ½
inches below the frame.
6. Quickly and firmly lower the frame with the coping material onto the model and turn the
vacuum on. Keep the vacuum turned on until the plastic coping material has formed to
the tooth model.
7. Turn off the heater unit and the vacuum.
8. Remove the model from the stage and allow it to cool for a few minutes.
9. Using small curved scissors or a scalpel, remove the plastic form from the model.
10. Trim the resulting plastic matrix so that it includes the tooth on either side of the
prepared teeth and is approximately 4-5 mm below the prepared teeth. Trim the
interproximal area so that acrylic will not flow and lock interproximally.
The pressform is now complete and ready to be used to fabricate the acrylic form.

Provisional Prosthodontic Theory Course Study Guide
143
The dentist has completed preparation of the teeth, and the prosthodontic assistant now
fabricates the tissue surface form (TSF) of the provisional FPD.
1. Position the patient in the chair.
2. Check for removal of the retraction cord.
3. Try in the plastic matrix. If any areas are impinging on the tissues, these should be
trimmed.
4. Place pieces of moistened cotton roll in the tooth depressions of the pressform matrix
beside the abutment teeth.
5. Isolate and lubricate the prepared teeth.
6. Layer the appropriate acrylic shades into the matrix. For anterior FPDs,
characterization of shade can be done using the bead-brush technique.
7. Fill the matrix with acrylic to the margins.
8. Seat the filled matrix on the prepared abutment teeth. When seating the matrix, apply
pressure over the abutment area rather than the pontic area.
9. Following the manufacturer’s directions, time the set and ease the form slightly on and
off until it reaches the rubbery stage. Flush with water to control the exothermic
reaction.
10. Just prior to setting, remove the acrylic form from the patient’s mouth.
11. Place the acrylic form in a bowl of warm water to complete the set.
Provisional Prosthodontic Theory Course Study Guide
144
12. Thoroughly rinse the patient’s mouth. The patient may wish to rinse with a mouthwash
to clear the strong taste. Sit the patient up and allow the patient to take a break.
13. Using a pencil, mark the contact points, margins and pontic where it contacts the
tissue.
14. Starting with a coarse disk, trim the bulk away so that the coping material can be
removed. Trim to the marked margins using finer disks as you get closer to the marked
line.
15. Use the diamond disks to open up the interproximal areas and create the pontic.
16. Reposition the patient and try in the trimmed provisional. Prior to try-in, the TSF may
be relieved with a round bur.
17. Check the marginal fit using the explorer and adjust as necessary.
18. Check the contacts with floss and adjust as necessary.
19. Using articulating ribbon, check the occlusal contacts and adjust as necessary.
Note: any adjustments must be done outside the mouth.
20. Once satisfied with the fit, shape and function of the provisional, have the dentist
check it.
21. Using a rag wheel and pumice, polish the provisional. Avoid the margins and the
contact areas. For a high lustre, using a rag wheel with an acrylic resin polishing
medium like Hi-Shine.
22. Disinfect if required.
The provisional FPD is now ready for cementation.

Provisional Prosthodontic Theory Course Study Guide
145
Direct Fabrication of an Intra-coronal Provisional Onlay Using a Final Impression Material for the Matrix
Armamentarium
• Quadrant impression
o Cartridge of impression material
o Extruder gun, mixing tip
o Quadrant impression tray
• Bis-acryl material
• Mixing containers and spatula
• Lubricant/separating medium
• Variety of trimming sandpaper disks and round acrylic burs
• Handpiece and mandrels
• Articulating paper
• Pencil
• Cotton rolls and pellets, cotton pliers, and scissors
• Spoon excavator, discoid cleoid
• Explorer, mouth mirror
• Floss
• Lathe, rag wheel, and flour of pumice
• Bowl or water bath
• Shade guide
Note: when practicing in a lab situation with models, the models should be soaked in
water prior to taking impressions.

Provisional Prosthodontic Theory Course Study Guide
146
Procedural Steps
1. Take the impression. Rinse and gently dry the impression.
2. Trim excess material to assist with the reseating of the impression when the
restoration is fabricated.
3. Set out the provisional material ready for use along with the manufacturer’s
directions. Select and record the shade.
4. Isolate the prepared tooth in the impression by placing a piece of moistened cotton roll
on either side of the prepared tooth depression.
The dentist has prepared the tooth for a MODL onlay, and the prosthodontic assistant
now fabricates the provisional.
5. Isolate the prepared tooth with cotton rolls and thoroughly dry the area.
6. Lubricate the prepared tooth and teeth adjacent to the preparation. Use a cotton pellet
to ensure that the proximal areas are covered.
7. Explain to the patient what you are about to do, mentioning the taste and odor that she
or he might notice.
8. Mix the provisional material according to the manufacturer’s directions and pour it into
the matrix, filling the depression of the prepared tooth. Remove the pieces of cotton
roll.
9. Seat the acrylic-filled impression in the patient’s mouth.
9. Time the set according to the manufacturer’s directions.

Provisional Prosthodontic Theory Course Study Guide
147
10. After the recommended time has passed, remove the impression. The provisional
may stay on the preparation, or it may come out with the impression. Using a spoon
excavator or other hand instrument, gently remove the provisional from the tooth or
the impression.
11. Place the provisional in a bowl of warm water to continue the set.
12. Thoroughly rinse the patient’s mouth. Place the patient in an upright position and allow
him or her to take a break.
13. Once the provisional material has totally set, remove the provisional from the water
and dry it thoroughly.
14. Using a pencil, mark the contact points and the margin on the provisional.
15. Starting with a disk, trim any excess away from the margin.
16. Switch to finer disks as the trimming gets closer to the marginal area. Avoid trimming
the contact points.
17. Tip the patient back again and dry and isolate the preparation.
18. Try the trimmed provisional in the mouth.
19. Check the marginal fit using the explorer and then adjust the provisional as necessary.
20. Check the contacts by passing floss through them, and adjust as necessary.
21. Using articulating ribbon, check the occlusal contacts and adjust as necessary.
Provisional Prosthodontic Theory Course Study Guide
148
Note: any adjustments to the marginal fit or the occlusal contact must be done outside the
mouth.
22. Once satisfied with the fit, shape and function of the provisional, have the dentist
check the provisional before removing it for polishing.
23. Using a rag wheel and pumice, polish the provisional. Avoid the margins and the
contact areas.
24. Disinfect the provisional if required.
The provisional crown is now ready for cementation.

Provisional Prosthodontic Theory Course Study Guide
149
Cementation of a Provisional Restoration
Armamentarium
• Completed provisional
• Petroleum jelly
• Provisional cement, mixing surface, and spatula
• Desensitizing agent or disinfectant agent
• Cement application instrument
• Cotton rolls and pellets, cotton pliers
• Half Hollenback
• Explorer, mouth mirror
• Dental floss

Provisional Prosthodontic Theory Course Study Guide
150
Procedural Steps
1. Using petroleum jelly, lubricate the external surface form of the provisional restoration.
2. Prepare the provisional cement according to the manufacturer’s directions.
3. Isolate the prepared tooth or teeth using cotton rolls.
4. Check for removal of the retraction cord.
5. If directed by the dentist, place a desensitizing agent or disinfectant agent on the
tooth.
6. Gently dry the preparation and the tissue surface form of the provisional. Ask the
patient to stay open.
7. Mix the provisional cement and apply it to the marginal one third of the provisional.
8. Place the provisional on the preparation.
9. Firmly seat the provisional with your fingers; then have the patient bite on a cotton roll.
10. Check the marginal fit with an explorer.
11. Instruct the patient to remain closed on the cotton roll until the cement is set.

Provisional Prosthodontic Theory Course Study Guide
151
Removal of Provisional Cement
Armamentarium
• Mouth mirror
• Explorer
• Half Hollenback
• Floss
• Air-water syringe
Procedural Steps
1. Ensure that the cement has set by testing it with the half Hollenback.
2. Keeping finger pressure on the provisional, gently flick the set cement off the
provisional. Be sure to work away from the gingiva and always us a fulcrum.
3. Remove the bulk of the provisional cement with the half Hollenback.
4. Using the explorer, very gently remove the remaining cement. Always keep finger
pressure on the provisional and maintain a fulcrum.
5. Use gentle puffs of air directed into the sulcus to determine if there is any cement
remaining.
6. Floss the proximal contacts. Once you have passed the floss through the contact, do
not attempt to pull it back up. Instead, pull the floss through the proximal space toward
the lingual or labial. Note: you may tie a knot in the floss to assist with removing the
cement interproximally.
7. Have the dentist perform a final check.
Provisional Prosthodontic Theory Course Study Guide
152
Removal of a Provisional Restoration
Armamentarium
• Mouth mirror
• Explorer
• Half Hollenback, spoon excavator, discoid cleoid
• Floss
• Cotton pellets
• Cotton forceps
• Hemostat pliers or other type of forceps
• Prophy angle and prophy cup
• Pumice
Procedural Steps
The patient may or may not be anesthetized, so it is important that extra care be taken
with this procedure.
1. Position the patient for safety.
2. Have cotton pliers ready in case the provisional should slip off unexpectedly.
3. Gently grasp the provisional lingual, facially with Hemostat pliers. If removing an
intra-coronal provisional restoration, use a sharp instrument to break the seal.
4. With a gentle rocking motion, loosen the provisional.
5. Ease off the provisional in the direction of the draw of the preparation. For multi-unit
provisionals, following the draw of the preparations, ease off the retainers a little at a
time, going back and forth from one to the other.

Provisional Prosthodontic Theory Course Study Guide
153
6. Inspect the preparation for residual provisional cement.
7. If the patient can tolerate it, rinse the preparation with warm water.
8. If necessary, use a hand instrument to gently remove any small particles of provisional
cement.
9. If the patient is anesthetized, use the prophy cup and fine pumice to thoroughly clean
the preparation.
10. If directed by the dentist, place a desensitizing agent or disinfectant agent on the
tooth.

Provisional Prosthodontic Theory Course Study Guide
154
Answers to Self-Assessment Review Questions
Your answers should be similar in content to the sample responses given here. These
answers are meant as a guide to help you validate your prior learning.
1. List parts of the anatomical and clinical crown.
You should be familiar with all parts of the anatomical and clinical crowns of all
permanent teeth and be able to identify the parts on a simple diagram. Refer to a
dental anatomy textbook for review, if needed.
2. List the tissues of the tooth and describe their composition.
You should be familiar with the tissues of the tooth (enamel, dentin, cementum, and
pulp), including their function and composition, and be able to identify the tissues on a
diagram. Refer to a basic dental assisting or dental hygiene textbook for review, if
needed.
3. List the structures of the periodontium and describe their function.
You should be familiar with the structure and function of the tissues of the
periodontium. Refer to your basic dental assisting or dental hygiene textbook for
review, if needed. You should be able to identify these structures on a simple diagram.
4. Describe the crown and root morphology of all permanent teeth.
You should be familiar with the variances in tooth shape and design of all permanent
teeth. This includes the number and position of cusps, root anatomy, and
interdigitation patterns. You should be able to identify specific human or manikin teeth
and be able to differentiate between classes of occlusion.
Provisional Prosthodontic Theory Course Study Guide
155
5. Define “prosthodontics.”
Prosthodontics is the area of dentistry concerned with the replacement and
restoration of natural teeth and missing teeth to maintain or improve function and
aesthetics of the oral cavity.
6. Describe the differences between a fixed prosthesis and a removable prosthesis.
Fixed prostheses are permanently fixed or retained in the patient’s mouth. Retention
is by cements or bonding materials.
Removable prostheses may be removed by the patient for cleaning. They are retained
by clasps, keyways, or precision attachments.
7. List the benefits of a fixed prosthesis.
Fixed prostheses replace missing or damaged teeth. They:
• Prevent tooth movement such as extrusion, or drifting.
• Provide support to the remaining dentition.
• Improve function of the dentition, enabling the patient to masticate properly.
• Improve the overall aesthetics of the mouth.
• Feel like the patient’s natural teeth because they are cemented in place.
8. Describe the following types of cast restorations:
• Crowns
• Inlays and onlays
• Fixed partial dentures (fixed bridges)
Crowns: A crown covers the coronal portion of the tooth and restores the tooth to its
original (or better-than-original) appearance and function. Types include a full crown,
seven-eighths crown, and three-quarters crown. For aesthetic reasons, cast crowns
Provisional Prosthodontic Theory Course Study Guide
156
made from gold or a non-precious alloy may have a porcelain tooth-colored veneer
bonded to the metal.
Crowns can also be fabricated from porcelain or specialized glass, which produces a
very aesthetic, life-like restoration.
Inlays and onlays: These cast restorations are designed to cover only part of the
crown. An inlay covers a portion of the occlusal and proximal surfaces; an onlay
includes one or more cusps and usually covers the proximal surfaces and most or all
of the occlusal surface.
Fixed partial dentures (FPDs): Commonly referred to as bridges, these prostheses are
used to replace one or more teeth. The FPD is composed of one or more retainers that
support at least one pontic. All units of the FPD are fabricated from similar materials.
You should know the components of an FPD and be able to identify them on a simple
diagram. There are several types of FPDs, such as conventional, cantilever,
Maryland, etc., and you should be familiar with a variety of these.
All of the above-mentioned cast restorations are cemented or bonded into the
patient`s mouth. They may not be removed by the patient, and they require special
oral self-care to be maintained in optimal condition.
9. What pretreatment records are obtained for prosthodontic treatment?
In addition to the records required for all dental treatment, such as medical dental
history, pretreatment records for prosthodontic work include:
• Radiographs
• Photographs
• Computer imaging
• Periodontal assessment
• Study models

Provisional Prosthodontic Theory Course Study Guide
157
Radiographs enable the dentist to determine the condition of teeth and to assess their
suitability as a foundation for a prosthetic restoration. Radiographs help answer
questions such as: Is the dentition healthy enough to support a cast restoration? Do
teeth require a build-up to increase retention (you should be familiar with build-up
materials from your formal dental assisting or dental hygiene education program)? Do
teeth require endodontic or orthodontic treatment prior to the preparation
appointment? Radiographs may also need to be forwarded to insurance companies
for authorization of the work to be done.
A periodontal examination or assessment enables the dentist to determine the health
of the periodontal tissue. The examination record would answer questions such as:
Is there enough bone support to retain the planned restoration? Are the gingival
tissues healthy? Is the patient able to perform self-care procedures well enough to
care for a prosthetic restoration? Is any periodontal treatment required before the
preparation appointment? What are the aesthetics considerations?
Photographs: Some dentists take photographs as a component of their pretreatment
assessment. These pictures may be taken using a conventional camera with lip and
cheek retractors for intraoral views. Extraoral views may also be taken.
An intraoral camera enables an operator to tour the patient’s mouth with close-up
detail, and these cameras are now being used in many dental offices. This mini
camera on a small wand about the size of a mouth mirror is directed around inside the
patient’s mouth, showing all angles and areas of the dentition and tissue. It is a great
educational tool for the patient.
Computer imaging. This software computer technology enables the dentist to take a
digitized photograph of the patient and then manipulate the computer image
according to the proposed teeth changes. The new image of the patient’s teeth can be
viewed on the computer screen or may be printed for the patient and for inclusion in
Provisional Prosthodontic Theory Course Study Guide
158
the patient’s chart. This method allows patients to see before and after views prior to
any work being done.
Study models are taken prior to pretreatment for case evaluation. They are used for
case evaluation, treatment planning, and for the fabrication of items such as
provisional matrices and custom impression trays. These models are usually left intact
and are kept as a record of the patient’s possible changes in their dentition or bite. A
second set of models may be mounted on an articulator and used during treatment
planning and case presentation. The dentist may alter or adjust the models to
demonstrate to patients possible changes to their bite.
10. List the procedural steps for a full gold crown preparation on tooth 4.6.
a. Pretreatment:
• Examination: medical / dental history review, vital signs, dental / periodontal /
occlusal assessments
• Radiographs
• Study models / diagnostic casts
• Aesthetic assessment / discussion
b. Treatment plan:
• Type of crown
• Choice to improve function
• Choice to improve aesthetics
• Crown design
• Materials
• Cost
• Treatment details: type of impression, type of provisional, etc.
• Patient oral care considerations and responsibilities
• Timeline and appointment planning

Provisional Prosthodontic Theory Course Study Guide
159
c. Presentation and acceptance of the treatment plan by the patient. The signed
informed consent is placed in the chart as part of the permanent record.
d. Pretreatment preparation.
Check what type of impression will be taken and what type of provisional created.
This information allows you to select a tray, impression material, and matrix.
Note: For a single-unit crown, many operators use three-in-one trays and an
impression provisional matrix, eliminating the need for some of the pretreatment
preparation. This assumes 4.6 is intact, requiring no modifications such as a
fractured cusp.
e. Anesthetic.
f. Shade selection for provisional and final restoration, if required.
g. Single quadrant alginate impression or putty for provisional matrix. If modification
of the tooth is required, the alginate impression should be immediately poured in
stone and alterations made to the stone cast prior to the matrix being from the cast.
Alternatively, the matrix can be made on an original diagnostic cast if available.
h. Dental dam application, if required.
i. Tooth preparation.
j. Placement of retraction cord.
k. Margin refinement, if necessary.
Provisional Prosthodontic Theory Course Study Guide
160
l. Final impression using a three-in-one tray (this type of tray allows the opposing
model, bite registration, and final impression to be taken all at the same time) or a
full-arch impression.
m. Fabrication of provisional:
• Rinse, dry, and lubricate preparation.
• Prepare matrix by isolating prepared teeth.
• Mix provisional material according to manufacturer’s directions.
• Pour material into prepared matrix.
• Reinsert filled matrix into the patient’s mouth.
• Allow material to partially set.
• If using acrylic resin ease matrix on and off as setting reaction continues.
• Remove matrix from patient’s mouth and place in warm water.
• Rinse operating site and allow the patient to relax.
n. Trim provisional, keeping in mind margins, contacts, contour, function, aesthetics,
and retention.
o. Try in and check occlusion, adjusting as necessary.
p. Finish and polish provisional.
q. Check for removal of all retraction cord.
r. Select and prepare provisional cement.
s. Dry then lubricate the ESF of the provisional.
t. Mix cement and place it around the margins of the provisional crown.
u. Dry prepared tooth and cement the crown.

Provisional Prosthodontic Theory Course Study Guide
161
v. Remove excess provisional cement.
w. Make appropriate chart entry.
The final impression and any additional records including the lab prescription are then
prepared and sent to the dental lab for crown fabrication. At a later appointment, the
provisional is removed, and the permanent crown is cemented with permanent
cement.
11. What patient management techniques help to alleviate some of the stress associated
with long prosthodontic appointments?
• Pretreatment medication.
• Careful, clear explanation of the procedure.
• Suggestion that patients bring along their favorite music to listen to in the office.
• Divide the appointments into shorter segments if the patient prefers.
• Plan breaks in a long appointment.
12. Why are diagnostic models for prosthodontic restorations mounted on an articulator?
What relationships can be studied?
When mounted correctly, diagnostic models represent the mandible and maxilla in
relation to the temporomandibular joint (TMJ). Some articulators can simulate the
movements of the TMJ, enabling the dentist to thoroughly study the occlusal harmony
of new restorations.
13. How to mount diagnostic models on a articulator:
In order to mount models accurately on an articulator, a facebow record must be
obtained. You should be familiar with the facebow procedure, articulators, and the
mounting of models. For additional information and a review of these procedures,
please refer to your course textbook, Contemporary Fixed Prosthodontics.

Provisional Prosthodontic Theory Course Study Guide
162
14. State the purpose of final impression materials and list two of the most common
categories of these materials.
These materials must create an exact, detailed reproduction of the prepared tooth or
teeth. A well-fitting prosthesis can only be created from a highly accurate final
impression, which requires specialized impression materials.
Two common categories of impression materials are elastomeric materials and
reversible hydrocolloid materials.
15. Describe elastomeric impression materials and list types that are commonly used
today in dental offices.
Elastomeric impression materials are commonly known as “rubber base” because,
once set, they have a rubbery consistency. However, not all elastomerics are actual
rubber-based materials. The materials that are used are polysulphide, polyether,
condensation silicone, and addition silicone. For additional information, refer to the
textbook, Contemporary Fixed Prosthodontics.
16. What forms of elastomeric impression materials are available?
• Light body or syringe body
• Regular
• Heavy body or tray body
• Putty
These consistencies of elastomeric materials are supplied in tubes for hand mixing or
in cartridges for use with extruder guns.
17. What precautions should be taken when using elastomeric impression materials?
• Follow manufacturer’s directions.
Provisional Prosthodontic Theory Course Study Guide
163
• Do not mix tubes of material from different packages. Use the base and catalyst as
packaged by the manufacturer. Keep tubes from different packages separate.
• Do not interchange caps on the base and catalyst tubes. Keep them separate.
• Cover the patient’s clothing well because these materials stain.
Follow all cautionary procedures for taking impressions to ensure patient comfort and
to prevent gagging.
18. Describe reversible hydrocolloid impression materials. How are they prepared?
Reversible hydrocolloid is a thermoplastic material, a hard substance that is softened
in warm water baths prior to use. The tubes are heated in water until the material is of
a flowing consistency. The material is then placed in a specialized tray designed for
water cooling. Reduction in temperature causes the material to gel or set.
19. What are the advantages and disadvantages of reversible hydrocolloid impression
materials?
Advantages
An advantage of reversible hydrocolloid material is that once the specialized
equipment is purchased, the material itself is relatively inexpensive. The material has
a relatively long working time.
Disadvantages
Reversible hydrocolloid materials require specialized water baths to prepare the
material and specialized trays to take the impression. If the impressions are not
poured within twenty minutes, the accuracy is reduced. The material has low tear
resistance.
20. Discuss general infection control procedures when taking and handling impressions.
Provisional Prosthodontic Theory Course Study Guide
164
All impressions should be rinsed, cleaned, and disinfected before storage or transport.
All patients must be treated as potential carriers of disease, and therefore impressions
must be carefully handled to prevent disease transmission.
The College of Dental Surgeons of BC, in its publication Infection Prevention and
Control Guidelines, recommends that all impressions be disinfected to the degree
required to kill tuberculosis (TB) spores. Immersion disinfectants are recommended
as this ensures that all the surfaces are covered. However, extreme care must be
taken with this procedure because some of the impression materials distort when
immersed in disinfectant. Check the manufacturer’s directions before immersing or
spraying impressions. See your textbook for the types of disinfection that are
commonly used with different impression materials.
21. Describe the different types of impression trays that are used for elastomeric
impressions.
Impression trays for elastomeric impressions may cover the full arch, a section of the
arch such as the anterior, or a single quadrant. Trays are available for dentulous and
edentulous mouths.
Another type of tray, the three-in-one tray, produces three impressions that are used
for the working model, the opposing model, and bite registration. These trays are
made of soft plastic or metal with a paper or paper-like insert for bite registration.
Impression trays may be stock or custom made. Stock trays can be reusable metal
trays or disposable plastic trays. Custom trays are fabricated to fit a specific
individual’s mouth; they are usually made using a current study model. Custom trays
are used most often in situations where multiple-unit restorations are prepared.

Provisional Prosthodontic Theory Course Study Guide
165
22. What are the indications for use of a custom tray?
• Operator preference.
• Accuracy: using a custom tray increases the likelihood of obtaining accurate
impressions.
• Patient requirements: the patient’s mouth and dental anatomy will not
accommodate a stock tray. The tray will not fit the mouth properly or allow
adequate space for the impression material.
• Minimize materials: a custom tray requires less impression material than a stock
tray.
• Patient comfort: a custom tray is much more comfortable for the patient.
Note: Situations where you would use a stock tray over a custom tray are when
there is an emergency and you haven’t time to make a custom tray, and when you
can adapt (i.e., customize) a stock tray using silicone putty.
23. List four different custom-tray materials.
• Self-curing acrylic resin
• Light-cured resin
• Thermoplastic materials and vacuum former
• Beads of thermoplastic materials and a water bath
24. Give the criteria for a properly fabricated custom tray.
A custom tray must fit the patient comfortably. Undercuts (a recessed or indented area
on the model) can create extensions on the tray that may be painful for the patient.
They must be filled in so that the custom tray material does not become locked in the
undercut.
A custom tray must have stops to prevent the tray from seating too deeply in the
patient’s mouth. These stops should be situated away from the tooth preparation area.

Provisional Prosthodontic Theory Course Study Guide
166
The edges of the tray must extend over the attached gingiva to 4-5 mm beyond the
gingival margins ( remember to relieve the frenums) and 2-3 mm distal to the most
posterior tooth. A spacer must be used during tray fabrication to create room for the
impression material in the finished tray.
Tray adhesive appropriate for the impression material should be painted on the tray
prior to use, the time in advance depending on the manufacturer. This aids in retention
of the impression material. Tray adhesives are used for both stock and custom trays.
Be sure that the adhesion material is compatible with the specific impression material.
25. What is the purpose of gingival retraction?
One of the key areas of fit for any restoration is the junction of the restoration and the
tooth structure. This marginal area is often slightly subgingival. In order to obtain and
accurate impression of this area, the gingiva must be reflected away from the tooth.
Retraction cord is vertically placed in the gingival sulcus to temporarily widen the area
horizontally so that the impression material will flow easily to the critical margin.
Describe three ways gingival retraction can be accomplished?
Chemical, mechanical and surgical.
26. Describe retraction cord.
Retraction cord is a cotton, string-like cord. It is available in twisted, untwisted, or
braided forms. Retraction cord may or may not be impregnated with an astringent
vasoconstrictor, such as epinephrine, to assist with hemorrhage control. If the cord
being used is impregnated with epinephrine, the prosthodontic CDA cannot be
delegated to perform this task. Only non-surgical retraction excluding the use of
epinephrine may be done by a prosthodontic CDA. Retraction cord comes in a variety
of sizes. Cord size selection is determined by the ‘v’ shaped crevice. The cord is
Provisional Prosthodontic Theory Course Study Guide
167
placed halfway between the junctional epithelium and the margin, approximately 1-3
mm. If it is placed too shallow, the space will be inadequate to allow an accurate
reproduction of the margin. If it is placed too deep, the sulcus opens at the bottom
but is narrow at the top. The operator may have difficulty getting the impression
material into the sulcus and it may tear near the edge of the preparation.
In addition to cord, a gingival retraction system may be used where a silicone material
is injected into the sulcus, left for 1-2 minutes, and rinsed out to remove it.
27. What precautions must be followed when using retraction cord?
Health histories must be carefully reviewed before using impregnated cord to ensure
that there are no contraindications to the use of the vasoconstrictor.
When removing retraction cord, make sure that it is all taken out and that it is intact.
Placing the cord(s) on a 2X2 after removal and inspecting them may be necessary.
28. When is retraction cord removed?
The retraction cord is removed just prior to the injection of the impression material
around the tooth. The dentist may remove the cord as the assistant is preparing the
syringe material. When the two-cord technique is used, several different techniques
may be used. The second cord is removed by the dentist just prior to the injection of
impression material around the tooth, and then the first cord either comes out in the
final impression or is removed by the assistant after the form for the provisional is
completed. In the chemical retraction cord method, the cord is usually left in for 5 to 10
minutes. In the mechanical retraction cord method the cord is usually left in for 15
minutes.
29. Describe how to remove retraction cord.

Provisional Prosthodontic Theory Course Study Guide
168
The end of the cord is grasped with cotton pliers and is removed in the opposite
direction from which the cord was placed. The removal should be done in a slow,
smooth, gentle motion, making sure to keep the cord close to the tooth at all times. If
the tail of the cord is subgingival, an explorer tip may be used to gently ease it out of
the sulcus with a secure fulcrum, keeping the tip of the explorer in contact with the
enamel.
30. What precautions must be followed when removing retraction cord?
The operator must ensure that all of the cord has been removed. Any piece remaining
in the sulcus may cause permanent gingival damage or infection.
Before and during removal of the cord, the operator must note the presence or
absence of fluid in the area. If the area is dry, the cord may adhere to the tissue, and
the operator must be very careful not to cause trauma by stripping the epithelium. If
the area is wet, it may be difficult to obtain an accurate impression. The cord may have
to be replaced by the dentist or the area dried thoroughly with a cotton pellet.
Additional vasoconstrictor may be used to decrease hemorrhaging.
31. What are provisional cements? What is the function of a provisional cement?
Provisional cements, or temporary luting agents, are found in the family of dental
materials known as cements. These relatively weak cements have been developed to
hold temporary or provisional restorations in place for a limited length of time.
32. How can the retentive properties of provisional cements be altered?
A number of factors contribute to the retentiveness of the provisional restoration, for
example, the quantity of cement, the shape of the preparation, and the fit of the
provisional restoration. Some cements are manufactured with modifiers that allow the
operator to vary the tentative properties of the material. Other cement manufacturers

Provisional Prosthodontic Theory Course Study Guide
169
suggest the addition of petroleum jelly to reduce the strength. Altering the strength of
provisional cement is necessary because of the varying retentive strength required by
different provisional restorations.
Note: Always follow the manufacturer’s directions when preparing dental materials.
33. What factors are considered by the dentist when choosing a provisional cement?
Provisional cements can have palliative qualities that soothe the prepared tooth. Zinc
oxide-eugenol (ZOE) type 1 is an example of a soothing provisional cement. Several
manufacturers make a ZOE cement.
The eugenol in ZOE cement reacts unfavorably with a number of dental materials.
Some provisional cements are manufactured without eugenol to avoid this
complication. These are classed as eugenol-free cements.
Cements may be in a combination of a powder and a liquid or be in tubes of base and
catalyst. When mixing any dental materials, the manufacturer’s directions must be
carefully followed.
The manipulation and application of cements in conjunction with fixed prosthodontic
restorations is discussed further in Unit 2 “Single-Unit Crown.”
34. Describe the procedure for cementing a provisional restoration.
Refer to a basic dental assisting textbook.
35. What oral self-care instructions and information would you provide to a prosthodontic
patient with a:
• Single-unit, PFM crown on tooth #1.1?
• Three-unit, PFM fixed-partial denture from tooth #2.3 to #2.1?

Provisional Prosthodontic Theory Course Study Guide
170
• Full gold crown on tooth #3.6?
• MODB gold onlay on tooth #4.7
• DO ceramic inlay on tooth #2.4
Instruction throughout the treatment process should include information on the care of
both the provisional restoration and the permanent restoration.
A prosthesis is a foreign object that is permanently placed in the patient’s mouth. For
this reason, scrupulous care must be taken with the restored area. Refer to a dental
assisting or dental hygiene textbook for information regarding oral health care
accessories and methods for these restorations.
Your review should include information on single-crown maintenance, both posteriors
and anteriors, and FPDs (fixed partial dentures) as well as intra-coronal restorations.
You should be familiar with the use and application of a variety of self-care products.

Provisional Prosthodontic Theory Course Study Guide
171
Answers to Unit 2 Self-Test
A. True and False 1. T
2. F
3. T
4. F
5. F
6. F
7. T
8. T
9. T
10. F
11. F
12. T
13. F
14. T
15. T
16. F
17. T
18. T
B. Multiple Choice
1. d
2. a
3. d
4. a
5. b
6. c
7. b
8. d
9. c
10. a
11. a
12. d
Provisional Prosthodontic Theory Course Study Guide
172
C. Short Answer
1. At least one tooth on either side of the prepared tooth should be included in a quadrant
impression for a single posterior crown.
2. A crown build-up increases the bulk of the tooth preparation, thereby reducing the
amount of metal required to fabricate the permanent restoration. Metal conducts heat
and cold, which can cause tooth sensitivity.
3. A three-in-one tray takes impressions of the prepared tooth, the opposing tooth, and
the occlusal pattern.
4. For directly fabricated provisions, the external surface form (ESF) and tissue surface
form (TSF) are formed and fitted in the mouth; the ESF and TSF of indirectly
fabricated provisionals are formed and fitted outside the mouth.
5. A fractured cusp may be waxed up on the diagnostic cast.
6. Disadvantages of directly fabricating provisional restorations include:
• Tissues may be irritated by contact with the monomer.
• Teeth are exposed to an exothermic setting reaction.
• Marginal distortion can occur when the setting resin is eased and removed from
the preparation too soon.
• The process must be repeated if a second provisional is required.
• The resin is less strong than resin cured in a pressure unit during indirect
fabrication.
7. a) The purpose of the cotton roll pieces is to contain the resin material in the
prepared tooth or teeth depressions in order to reduce the amount of excess
trimming required.
b) The cotton roll pieces are removed just prior to placing the ESF matrix.

Provisional Prosthodontic Theory Course Study Guide
173
8. a) Pencil marks on the internal side of a rough provisional outline the margin of the
restoration and the contact points.
b) Accidental removal of the pencil marks will likely result in over-trimming. The
margins may need to be repaired with a bead-brush prior to cementation.
9. Safety precautions when fitting a crown intraorally include:
• Positioning the dental chair and the patient’s head so that, if the restoration is
dropped, it will land on the patient’s tongue.
• Positioning the restoration prior to insertion so that it is correctly oriented to the
prepared tooth or teeth.
• Having cotton pliers available for emergency retrieval.
• Keeping one finger on the occlusal/incisal surface of the provisional as it is
inserted or removed from the mouth.
10. A trimmed and fitted provisional meets the following criteria:
• Smooth and accurate marginal fit
• Correct contour
• Compatible occlusion and contact with adjacent teeth
• Acceptable aesthetics
11. Provisional cement is placed in a ring, just inside the margins of the provisional
restoration to:
• Help achieve marginal seal
• Reduce the amount of excess cement
12. Four possible consequences of leaving residual cement in the sulcus are:
• Gingival inflammation due to the physical irritant
• Plaque retention and inflammation due to bacterial toxins
• Pocket formation
• Bone loss
Provisional Prosthodontic Theory Course Study Guide
174
13. Items sent to the dental laboratory for fabrication of the permanent restoration include:
• The disinfected and bagged final impression
• The lab prescription
• Occlusal records
• Any other pertinent patient records such as photographs, articulated models, etc.
14. An acrylic bur is used to reduce the contaminated resin surface of a previously
cemented provisional restoration. The surface is then painted with monomer prior to
the addition of new resin.

Provisional Prosthodontic Theory Course Study Guide
175
Answers to Unit 3 Self-Test
A. True or False 1. F
2. T
3. F
4. T
5. T
6. T
7. F
8. F
9. T
10. F
11. T
12. F
B. Multiple Choice 1. d
2. a
3. c
4. b
5. c
6. d
7. a
8. c
9. d
10. a

Provisional Prosthodontic Theory Course Study Guide
176
C. Short Answer
1. General principles of shade selection for ceramic and porcelain fixed restorations are:
• View the patient at eye level.
• View selected shades in varying light conditions.
• Conform shades in natural light.
• Teeth should be clean, without stain.
• Select shades at the beginning of the appointment, before the teeth become dry
and before the operator experiences eye fatigue.
• Surrounding bright color should be avoided (e.g.: drape the patient, remove
lipstick, avoid bright operatory wall color).
• Shade comparisons should be made quickly with the shade guides held under the
patient’s lip next to the tooth being matched.
• Focus the eyes on a grey-blue surface before a comparison to rest the eyes.
2. Instruments and items that are commonly used to remove provisional cement from an
FPD include:
• A half Hollenback or other appropriate hand instrument (also a round wooden
toothpick in a perio-aid if sensitivity is an issue)
• An explorer
• Dental floss
• A floss threader
3. Signs and symptoms of pathologic occlusion include:
• Hypermobile teeth
• Open contacts
• Abnormal wear facets
• Cusp fracture, chipping
• Widened periodontal ligament space, contributing to periodontal breakdown
• Acute or chronic facial muscular pain
• Pain, clicking, popping in the TMJ
Provisional Prosthodontic Theory Course Study Guide
177
4. Self-assessment criteria for a provisional three-unit anterior FPD include:
• Appropriate proximal contacts
• Appropriate pontic tissue contacts and embrasure form
• Smooth, polished surface
• Good pontic design and connection with retainers
• Marginal fit of both retainers is accurate and smooth
• Retainers and pontic are not over- or under-contoured
• Functional occlusion
• Aesthetically pleasing with shade contour
• Patient should be able to easily maintain and clean the FPD

Provisional Prosthodontic Theory Course Study Guide
178
Answers to Unit 4 Self-Test
A. True or False
1. T
2. F
3. T
4. F
5. T
6. F
7. T
8. F
9. T
10. F
11. F
12. T
13. T
14. F
B. Multiple Choice
1. c
2. a
3. d
4. b
5. e
6. c
7. b
C. Short Answer
1. If the cord is placed too deep, the sulcus opens at the bottom but is narrow at the top.
The operator may be able to get the injection type material to flow into the sulcus, but
the material may tear near the edge of the preparation.

Provisional Prosthodontic Theory Course Study Guide
179
2. If the retraction cord is placed too shallow in the sulcus, the space is inadequate to
allow an accurate reproduction of the margin.
3. The sulcus is a ‘v’ shape crevice and this dictates the size of the cord to use.
4. The three main ingredients include a resin, BISGMA, a wetting agent,
hydroxyethlymethacrylate, and an acid, polyacrylic acid.
5. If taking an inlay impression using a closed-mouth impression technique, place a
piece of gauze on opposite arch prior to having patient bite.