Perspective Drawing – Page 2 Activity 2 - All about me Doodling
26
Art Activity 1 - Perspective Drawing – Page 2 Activity 2 - All about me Doodling – Page 18
-
Upload
khangminh22 -
Category
Documents
-
view
4 -
download
0
Transcript of Perspective Drawing – Page 2 Activity 2 - All about me Doodling

Art
Activity 1 - Perspective Drawing – Page 2
Activity 2 - All about me Doodling – Page 18
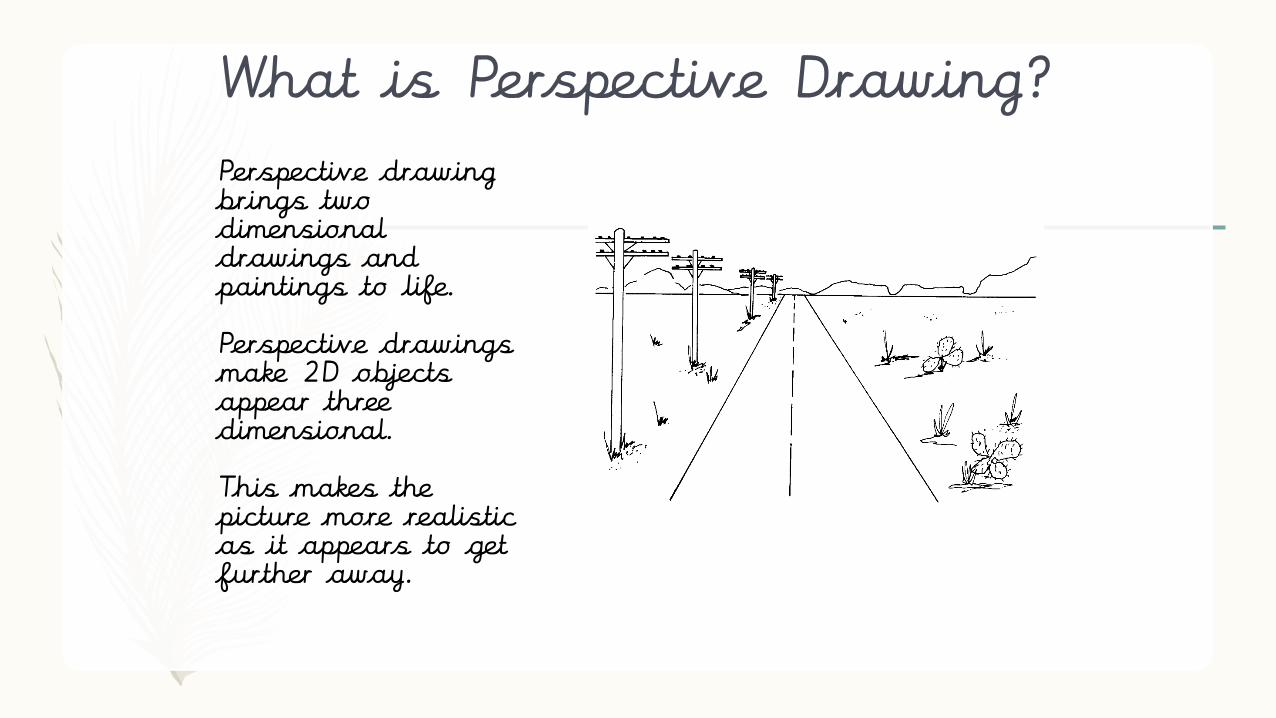
What is Perspective Drawing?
Perspective drawing brings two dimensional drawings and paintings to life.
Perspective drawings make 2D objects appear three dimensional.
This makes the picture more realistic as it appears to get further away.

One-Point PerspectiveA one-point perspective drawing means that the lines of perspective will eventually meet at one point.
This is usually directly in front of the viewers eye.
One-point perspective is often used to draw street scenes, roads and rail tracks.
This point is called the vanishing point.

The Horizon LineThe horizon line represents where the sky meets the land or sea in a picture.
This line is important to remember as the vanishing point will often sit on the horizon line.
Typically it is in line with the viewers eye level.

I am going to show you how to draw a perspective picture of park. Use this to draw your own park perspective picture. You could use the photographs as inspiration to draw a different perspective picture e.g. a street or a railway track
Handy tips• Use a ruler to draw faint guidelines to show the vanishing point, horizon line and lines of perspective.
• Look carefully at the photograph and only draw what you see!• Begin by sketching the biggest object. Then draw the rest in proportion to this.

Step 1
Decide whether you would like your paper horizontal or vertical.Place your ruler near the middle of the paper and lightly drag your pencil across to create the horizon line.

Step 2
On your horizon line draw a dot for your vanishing point. (This will be the point where all your lines meet and all your objects seem to disappear.)

Step 3
To begin the park scene, draw a large tree on the left-hand side of your paper. This can be any type of tree that you like. I like to draw two lines for a trunk, and a could-shape treetop.
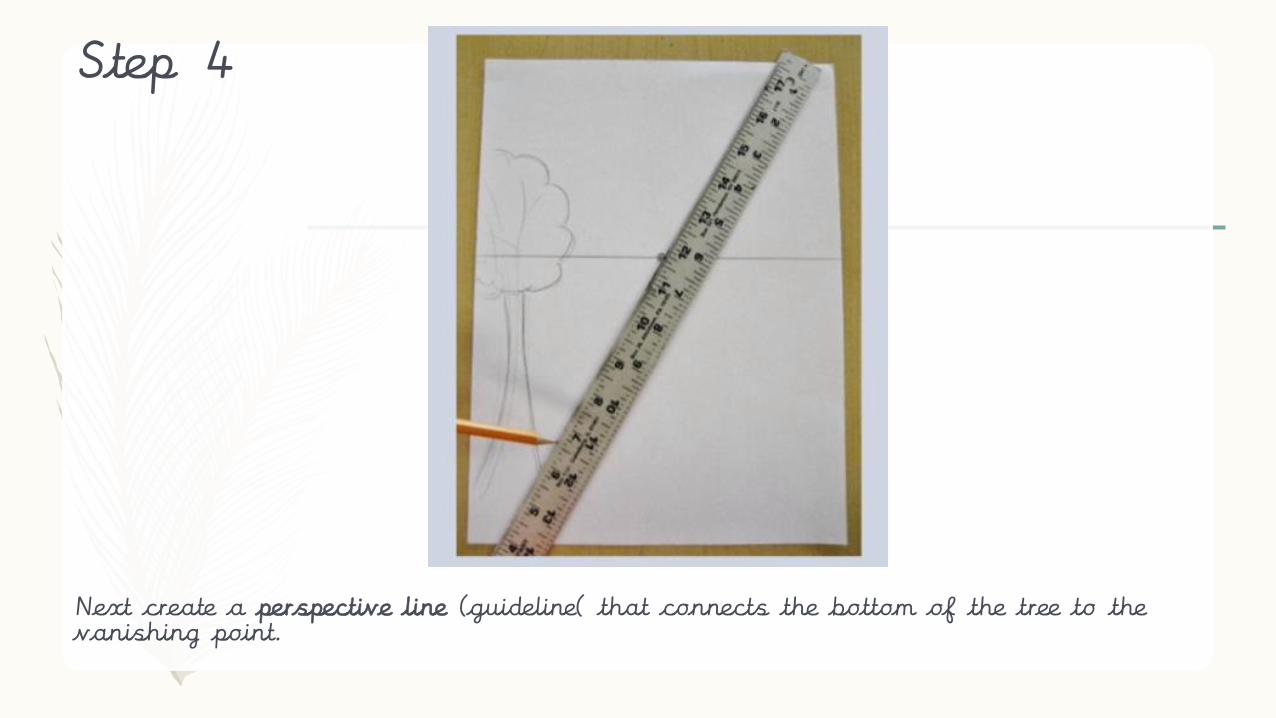
Step 4
Next create a perspective line (guideline( that connects the bottom of the tree to the vanishing point.

Step 5
Repeat step 4 for the top of the trees. These can be rubbed out so don’t press too hard.

Step 6
Draw trees between the guidelines you created. You can overlap to fit more trees in. Make sure the touch the top on bottom guidelines. Keep the trunks straight or they will look like they are falling over.

Optional Challenge Step
You could add more objects to your scene. Follow the same rules as you did for drawing the tree

Step 7
Repeat these steps on the right.

Optional Challenge Step
You can leave your park pathway grass or dirt by colouring it the correct colours and adding texture. For a challenge you could make a bricked path. First divide the beginning of your path by making marks for how wide you would like your bricks to be. Then connect each line to the vanishing point.

Optional Challenge Step
Draw horizontal line across to make bricks. Make sure your lines get closer together nearer the vanishing point.

Finally, colour it in!

Create your own perspective drawing. (Look at the Art InsirationDocument for more ideas)
Handy tips• Use a ruler to draw faint guidelines to show the vanishing point, horizon line and lines of perspective.
• Look carefully at the photograph and only draw what you see!• Begin by sketching the biggest object. Then draw the rest in proportion to this.

Art
Activity 2
All About Me
Doodling

Task 1 - Time to think about you!
There is only one of you. You have many positive qualities.
Make some notes about your positive qualities.
Think about- Positive adjectives to describe you- Your hobbies and interests- Things you like- Your strengths

Why do we doodle?
• we are talking on the phone;• listening to music;• watching TV;• doing homework.
What is doodling?
Doodling is something we do when we are not really thinking.We might doodle when:
Think about it…?

One thought is that doodling actually helps us to concentrate. Often, pupils doodle at school while thinking rather than being distracted.
The Importance of Doodling
Doodling is thought to have a lot of different meanings.

The Art of Doodling
Mindfulness patterns are created using doodles. Each section of the picture have different patters or doodles in them

You are going to create a ‘Mindful Spiral’ about yourself.
Take your time with this as the process is more important than the end product. Creating a mindfulness pattern is
creative and relaxing.

Step 1 - Drawing the Swirl
Get a piece of paper. Find the middle point by loosely folding the paper in half and then in quarters.
Open out the paper and mark a dot in the centre.From the centre point, draw four curved lines to each of the corners. Then, draw eight more evenly-spaced curved lined between the four lines.
It should look like the picture

Step 2 - Word Styles
Now, using your choice of font, write your name in one of the sections.
Miss a section and then write five words from your notes about your interests and personality.
Remember to write the words only in alternate sections.

Step 3 - DoodleNext, fill in the blank spaces with patterns.
You might choose one pattern or doodle for all the swirls or you might choose to use different patterns or doodles in each swirl.
Colour in your artwork using felt-tip pens or coloured pencils.
This is a time to let your mind wander while creating something unique and beautiful.Colour in the different patterns only when the whole sheet is covered.
Remember, small patterns will take longerto colour in.
Celebrate your
positives with the people in
your house.