Object-Oriented ActionScript for Flash 8
562
* If you liked the Ebook visit GetPedia.com to support my Cat MEME. * More than 500,000 Interesting Articles are waiting for you . * The Ebook starts from the next page : Enjoy !
-
Upload
khangminh22 -
Category
Documents
-
view
0 -
download
0
Transcript of Object-Oriented ActionScript for Flash 8

* If you liked the Ebook visit GetPedia.com to support my Cat MEME.
* More than 500,000 Interesting Articles are waiting for you .
* The Ebook starts from the next page : Enjoy !


Object-OrientedActionScript for Flash 8
Peter Elst and Todd Yardwith Sas Jacobs and William Drol
6196FM.qxd 1/18/06 12:41 PM Page i

Object-Oriented ActionScript for Flash 8Copyright © 2006 by Peter Elst, Todd Yard, Sas Jacobs, and William Drol
All rights reserved. No part of this work may be reproduced or transmitted in any form or by any means,electronic or mechanical, including photocopying, recording, or by any information storage or retrieval
system, without the prior written permission of the copyright owner and the publisher.
ISBN-13 (pbk): 978-1-59059-619-7
ISBN-10 (pbk): 1-59059-619-6
Printed and bound in the United States of America 9 8 7 6 5 4 3 2 1
Trademarked names may appear in this book. Rather than use a trademark symbol with every occurrenceof a trademarked name, we use the names only in an editorial fashion and to the benefit of the
trademark owner, with no intention of infringement of the trademark.
Distributed to the book trade worldwide by Springer-Verlag New York, Inc., 233 Spring Street, 6th Floor,New York, NY 10013. Phone 1-800-SPRINGER, fax 201-348-4505, e-mail [email protected],
or visit www.springeronline.com.
For information on translations, please contact Apress directly at 2560 Ninth Street, Suite 219, Berkeley, CA 94710. Phone 510-549-5930, fax 510-549-5939, e-mail [email protected], or visit www.apress.com.
The information in this book is distributed on an “as is” basis, without warranty. Although every precautionhas been taken in the preparation of this work, neither the author(s) nor Apress shall have any liability to
any person or entity with respect to any loss or damage caused or alleged to be caused directly orindirectly by the information contained in this work.
The source code for this book is freely available to readers at www.friendsofed.com in the Downloads section.
Credits
Lead EditorChris Mills
Technical ReviewersJared Tarbell,
Stephen Downs
Editorial BoardSteve Anglin, Dan Appleman,
Ewan Buckingham, Gary Cornell, Jason Gilmore, Jonathan Hassell,
James Huddleston, Chris Mills, Matthew Moodie, Dominic Shakeshaft,
Jim Sumser, Matt Wade
Project ManagerSofia Marchant
Copy Edit ManagerNicole LeClerc
Copy EditorAmi Knox
Assistant Production DirectorKari Brooks-Copony
Production EditorKatie Stence
CompositorDina Quan
ProofreaderApril Eddy
IndexerMichael Brinkman
ArtistApril Milne
Interior and Cover DesignerKurt Krames
Manufacturing DirectorTom Debolski
6196FM.qxd 1/18/06 12:41 PM Page ii

Dedicated to everyone at Macromedia, now Adobe, for their years of unceasing commitment to the Flash community.
—Peter Elst
Dedicated to my wife, Lydian, who loves me despite the fact that after all the hours I spent on this book she only gets this sentence.
—Todd Yard
6196FM.qxd 1/18/06 12:41 PM Page iii

CONTENTS AT A GLANCE
Foreword . . . . . . . . . . . . . . . . . . . . . . . . . . . . . . . . . . . . . . . . . . . . . . xv
About the Authors . . . . . . . . . . . . . . . . . . . . . . . . . . . . . . . . . . . . . . . . xvi
About the Technical Reviewer . . . . . . . . . . . . . . . . . . . . . . . . . . . . . . . . xvii
Acknowledgments . . . . . . . . . . . . . . . . . . . . . . . . . . . . . . . . . . . . . . . xviii
PART ONE: OOP AND ACTIONSCRIPT . . . . . . . . . . . . . . . . . . . . . . . . . . . . xx
Chapter 1: Introduction to OOP . . . . . . . . . . . . . . . . . . . . . . . . . . . . . . . . 1
Chapter 2: Programming Concepts . . . . . . . . . . . . . . . . . . . . . . . . . . . . . 11
Chapter 3: ActionScript 2.0 Programming . . . . . . . . . . . . . . . . . . . . . . . . . 19
PART TWO: FLASH OOP GUIDELINES. . . . . . . . . . . . . . . . . . . . . . . . . . . . . 32
Chapter 4: Planning . . . . . . . . . . . . . . . . . . . . . . . . . . . . . . . . . . . . . . . 33
Chapter 5: Project Workflow . . . . . . . . . . . . . . . . . . . . . . . . . . . . . . . . . 49
Chapter 6: Best Practices . . . . . . . . . . . . . . . . . . . . . . . . . . . . . . . . . . . . 65
PART THREE: CORE OOP CONCEPTS . . . . . . . . . . . . . . . . . . . . . . . . . . . . . 82
Chapter 7: Encapsulation . . . . . . . . . . . . . . . . . . . . . . . . . . . . . . . . . . . . 83
Chapter 8: Classes . . . . . . . . . . . . . . . . . . . . . . . . . . . . . . . . . . . . . . . . 103
iv
6196FM.qxd 1/18/06 12:41 PM Page iv
Chapter 9: Inheritance . . . . . . . . . . . . . . . . . . . . . . . . . . . . . . . . . . . . . 121
Chapter 10: Polymorphism . . . . . . . . . . . . . . . . . . . . . . . . . . . . . . . . . . 135
Chapter 11: Interfaces . . . . . . . . . . . . . . . . . . . . . . . . . . . . . . . . . . . . . 145
Chapter 12: Design Patterns . . . . . . . . . . . . . . . . . . . . . . . . . . . . . . . . . 157
Chapter 13: Case Study: An OOP Media Player . . . . . . . . . . . . . . . . . . . . . 201
PART FOUR: BUILDING AND EXTENDING A DYNAMIC FRAMEWORK . . . . . . 240
Chapter 14: Framework Overview . . . . . . . . . . . . . . . . . . . . . . . . . . . . . 241
Chapter 15: Manager Classes . . . . . . . . . . . . . . . . . . . . . . . . . . . . . . . . 259
Chapter 16: UI Widgets . . . . . . . . . . . . . . . . . . . . . . . . . . . . . . . . . . . . 279
Chapter 17: OOP Animation and Effects . . . . . . . . . . . . . . . . . . . . . . . . . 333
PART FIVE: DATA INTEGRATION . . . . . . . . . . . . . . . . . . . . . . . . . . . . . . . 382
Chapter 18: Interrelationships and Interactions Between Components . . . . 383
Chapter 19: Communication Between Flash and the Browser . . . . . . . . . . . 417
Chapter 20: Server Communication (XML and Web Services) . . . . . . . . . . . 439
Chapter 21: Case Study: Time Sheet Application . . . . . . . . . . . . . . . . . . . 483
Index . . . . . . . . . . . . . . . . . . . . . . . . . . . . . . . . . . . . . . . . . . . . . . . . 521
v
6196FM.qxd 1/18/06 12:41 PM Page v
CONTENTS
Foreword . . . . . . . . . . . . . . . . . . . . . . . . . . . . . . . . . . . . . . . . . . . . . xv
About the Authors . . . . . . . . . . . . . . . . . . . . . . . . . . . . . . . . . . . . . xvi
About the Technical Reviewer . . . . . . . . . . . . . . . . . . . . . . . . . . . xvii
Acknowledgments . . . . . . . . . . . . . . . . . . . . . . . . . . . . . . . . . . . . xviii
PART ONE: OOP AND ACTIONSCRIPT . . . . . . . . . . . . . . . . . . . . . . xx
Chapter 1: Introduction to OOP . . . . . . . . . . . . . . . . . . . . . . . . . . . 1
The scoop with OOP? . . . . . . . . . . . . . . . . . . . . . . . . . . . . . . . . . . . . . . . 2Understanding the object-oriented approach . . . . . . . . . . . . . . . . . . . . . . . . . . 2
Classes and objects . . . . . . . . . . . . . . . . . . . . . . . . . . . . . . . . . . . . . . 3Properties . . . . . . . . . . . . . . . . . . . . . . . . . . . . . . . . . . . . . . . . . . . . 3Encapsulation: Hiding the details . . . . . . . . . . . . . . . . . . . . . . . . . . . . . . . 4Polymorphism: Exhibiting similar features . . . . . . . . . . . . . . . . . . . . . . . . . . 7Inheritance: Avoid rebuilding the wheel . . . . . . . . . . . . . . . . . . . . . . . . . . . 8
What’s next? . . . . . . . . . . . . . . . . . . . . . . . . . . . . . . . . . . . . . . . . . . . . 9
Chapter 2: Programming Concepts . . . . . . . . . . . . . . . . . . . . . . . . 11
About programming slang . . . . . . . . . . . . . . . . . . . . . . . . . . . . . . . . . . . . 12Building blocks of programming . . . . . . . . . . . . . . . . . . . . . . . . . . . . . . . . 13
Variables . . . . . . . . . . . . . . . . . . . . . . . . . . . . . . . . . . . . . . . . . . . . 13About variable data . . . . . . . . . . . . . . . . . . . . . . . . . . . . . . . . . . . 14
Arrays . . . . . . . . . . . . . . . . . . . . . . . . . . . . . . . . . . . . . . . . . . . . . 14
6196FM.qxd 1/18/06 12:41 PM Page vi

Functions . . . . . . . . . . . . . . . . . . . . . . . . . . . . . . . . . . . . . . . . . . . 15About calling functions . . . . . . . . . . . . . . . . . . . . . . . . . . . . . . . . . 15About function parameters . . . . . . . . . . . . . . . . . . . . . . . . . . . . . . . 15
Loops . . . . . . . . . . . . . . . . . . . . . . . . . . . . . . . . . . . . . . . . . . . . . 16Conditionals . . . . . . . . . . . . . . . . . . . . . . . . . . . . . . . . . . . . . . . . . . 16
OOP concepts . . . . . . . . . . . . . . . . . . . . . . . . . . . . . . . . . . . . . . . . . . . 16What’s next? . . . . . . . . . . . . . . . . . . . . . . . . . . . . . . . . . . . . . . . . . . . . 17
Chapter 3: ActionScript 2.0 Programming . . . . . . . . . . . . . . . . . . 19
ActionScript 1.0 vs. ActionScript 2.0 . . . . . . . . . . . . . . . . . . . . . . . . . . . . . . 20Declaring variables . . . . . . . . . . . . . . . . . . . . . . . . . . . . . . . . . . . . . . 20Classes vs. prototypes . . . . . . . . . . . . . . . . . . . . . . . . . . . . . . . . . . . . 21Public and private scope . . . . . . . . . . . . . . . . . . . . . . . . . . . . . . . . . . . 25
Strong typing and code hints . . . . . . . . . . . . . . . . . . . . . . . . . . . . . . . . . . 27ActionScript trouble spots . . . . . . . . . . . . . . . . . . . . . . . . . . . . . . . . . . . . 29
Case sensitivity . . . . . . . . . . . . . . . . . . . . . . . . . . . . . . . . . . . . . . . . 29Declaring variables . . . . . . . . . . . . . . . . . . . . . . . . . . . . . . . . . . . . . . 30Use of the this keyword . . . . . . . . . . . . . . . . . . . . . . . . . . . . . . . . . . . 30
What’s next? . . . . . . . . . . . . . . . . . . . . . . . . . . . . . . . . . . . . . . . . . . . . 31
PART TWO: FLASH OOP GUIDELINES . . . . . . . . . . . . . . . . . . . . . . . 32
Chapter 4: Planning . . . . . . . . . . . . . . . . . . . . . . . . . . . . . . . . . . . . 33
The importance of planning . . . . . . . . . . . . . . . . . . . . . . . . . . . . . . . . . . . 34Initial phase: Planning reusability! . . . . . . . . . . . . . . . . . . . . . . . . . . . . . . 35Planning encapsulation . . . . . . . . . . . . . . . . . . . . . . . . . . . . . . . . . . . 35Planning inheritance . . . . . . . . . . . . . . . . . . . . . . . . . . . . . . . . . . . . . 36
vii
6196FM.qxd 1/18/06 12:41 PM Page vii

Analyzing a Flash ActionScript project . . . . . . . . . . . . . . . . . . . . . . . . . . . . . 39Flash files run on the client . . . . . . . . . . . . . . . . . . . . . . . . . . . . . . . . . 39Securing data sent to the server . . . . . . . . . . . . . . . . . . . . . . . . . . . . . . 39Parsing data in Flash . . . . . . . . . . . . . . . . . . . . . . . . . . . . . . . . . . . . . 40
Introduction to UML modeling . . . . . . . . . . . . . . . . . . . . . . . . . . . . . . . . . 40Why use UML? . . . . . . . . . . . . . . . . . . . . . . . . . . . . . . . . . . . . . . . . 41
UML offers standardized notation and has a language-neutral syntax . . . . . . . 41UML can be used to model anything . . . . . . . . . . . . . . . . . . . . . . . . . 42
Class diagram . . . . . . . . . . . . . . . . . . . . . . . . . . . . . . . . . . . . . . . . . 42Association and generalization . . . . . . . . . . . . . . . . . . . . . . . . . . . . . . . 43Aggregation and composition . . . . . . . . . . . . . . . . . . . . . . . . . . . . . . . . 44
What’s next? . . . . . . . . . . . . . . . . . . . . . . . . . . . . . . . . . . . . . . . . . . . . 46
Chapter 5: Project Workflow . . . . . . . . . . . . . . . . . . . . . . . . . . . . . 49
Introducing version control . . . . . . . . . . . . . . . . . . . . . . . . . . . . . . . . . . . 50About Concurrent Versions System . . . . . . . . . . . . . . . . . . . . . . . . . . . . . 50Using TortoiseCVS . . . . . . . . . . . . . . . . . . . . . . . . . . . . . . . . . . . . . . 52
Approaches to programming . . . . . . . . . . . . . . . . . . . . . . . . . . . . . . . . . . 58Rapid Application Development . . . . . . . . . . . . . . . . . . . . . . . . . . . . . . 59Extreme Programming . . . . . . . . . . . . . . . . . . . . . . . . . . . . . . . . . . . . 60
Usability testing . . . . . . . . . . . . . . . . . . . . . . . . . . . . . . . . . . . . . . . . . . 62What’s next? . . . . . . . . . . . . . . . . . . . . . . . . . . . . . . . . . . . . . . . . . . . . 63
Chapter 6: Best Practices . . . . . . . . . . . . . . . . . . . . . . . . . . . . . . . . 65
External ActionScript . . . . . . . . . . . . . . . . . . . . . . . . . . . . . . . . . . . . . . . 66About commenting . . . . . . . . . . . . . . . . . . . . . . . . . . . . . . . . . . . . . . . . 68Naming conventions . . . . . . . . . . . . . . . . . . . . . . . . . . . . . . . . . . . . . . . 70
Variables . . . . . . . . . . . . . . . . . . . . . . . . . . . . . . . . . . . . . . . . . . . . 70Constants . . . . . . . . . . . . . . . . . . . . . . . . . . . . . . . . . . . . . . . . . . . 71Functions . . . . . . . . . . . . . . . . . . . . . . . . . . . . . . . . . . . . . . . . . . . 71Classes . . . . . . . . . . . . . . . . . . . . . . . . . . . . . . . . . . . . . . . . . . . . . 71Methods . . . . . . . . . . . . . . . . . . . . . . . . . . . . . . . . . . . . . . . . . . . . 72Properties . . . . . . . . . . . . . . . . . . . . . . . . . . . . . . . . . . . . . . . . . . . 72Packages . . . . . . . . . . . . . . . . . . . . . . . . . . . . . . . . . . . . . . . . . . . . 72
Programming styles . . . . . . . . . . . . . . . . . . . . . . . . . . . . . . . . . . . . . . . . 73Alternative programming styles . . . . . . . . . . . . . . . . . . . . . . . . . . . . . . . . . 77
Coding practices: Todd Yard . . . . . . . . . . . . . . . . . . . . . . . . . . . . . . . . . 77Coding practices: Sas Jacobs . . . . . . . . . . . . . . . . . . . . . . . . . . . . . . . . . 79
Commenting code . . . . . . . . . . . . . . . . . . . . . . . . . . . . . . . . . . . . 79Naming conventions . . . . . . . . . . . . . . . . . . . . . . . . . . . . . . . . . . . 80
What’s next? . . . . . . . . . . . . . . . . . . . . . . . . . . . . . . . . . . . . . . . . . . . . 81
CONTENTS
viii
6196FM.qxd 1/18/06 12:41 PM Page viii

PART THREE: CORE OOP CONCEPTS . . . . . . . . . . . . . . . . . . . . . . . 82
Chapter 7: Encapsulation . . . . . . . . . . . . . . . . . . . . . . . . . . . . . . . . 83
Setting up encapsulation . . . . . . . . . . . . . . . . . . . . . . . . . . . . . . . . . . . . . 84Creating new layers . . . . . . . . . . . . . . . . . . . . . . . . . . . . . . . . . . . . . 85Drawing a background . . . . . . . . . . . . . . . . . . . . . . . . . . . . . . . . . . . . 87Aligning and locking the background . . . . . . . . . . . . . . . . . . . . . . . . . . . 87Drawing a ball . . . . . . . . . . . . . . . . . . . . . . . . . . . . . . . . . . . . . . . . 88Converting the ball into a Library symbol . . . . . . . . . . . . . . . . . . . . . . . . . 89Content summary . . . . . . . . . . . . . . . . . . . . . . . . . . . . . . . . . . . . . . 90
Writing the code . . . . . . . . . . . . . . . . . . . . . . . . . . . . . . . . . . . . . . . . . 91Creating an event handler . . . . . . . . . . . . . . . . . . . . . . . . . . . . . . . . . . 91What about encapsulation? . . . . . . . . . . . . . . . . . . . . . . . . . . . . . . . . . 93Testing the event handler . . . . . . . . . . . . . . . . . . . . . . . . . . . . . . . . . . 94Updating the Ball . . . . . . . . . . . . . . . . . . . . . . . . . . . . . . . . . . . . . . . 95
Improving the code . . . . . . . . . . . . . . . . . . . . . . . . . . . . . . . . . . . . . . . . 96Enhancing behavior with properties . . . . . . . . . . . . . . . . . . . . . . . . . . . . 96Narrowing the focus with functions . . . . . . . . . . . . . . . . . . . . . . . . . . . . 97
Encapsulation summary . . . . . . . . . . . . . . . . . . . . . . . . . . . . . . . . . . . . . 99What’s next? . . . . . . . . . . . . . . . . . . . . . . . . . . . . . . . . . . . . . . . . . . . 101
Chapter 8: Classes . . . . . . . . . . . . . . . . . . . . . . . . . . . . . . . . . . . . . 103
Classes vs. prototypes . . . . . . . . . . . . . . . . . . . . . . . . . . . . . . . . . . . . . . 104Constructors . . . . . . . . . . . . . . . . . . . . . . . . . . . . . . . . . . . . . . . . . 106About this . . . . . . . . . . . . . . . . . . . . . . . . . . . . . . . . . . . . . . . . . . 109Methods . . . . . . . . . . . . . . . . . . . . . . . . . . . . . . . . . . . . . . . . . . . 112Anonymous functions . . . . . . . . . . . . . . . . . . . . . . . . . . . . . . . . . . . 113
Implementing a class . . . . . . . . . . . . . . . . . . . . . . . . . . . . . . . . . . . . . . 116The Mover class . . . . . . . . . . . . . . . . . . . . . . . . . . . . . . . . . . . . . . . 116
What’s next? . . . . . . . . . . . . . . . . . . . . . . . . . . . . . . . . . . . . . . . . . . . 118
Chapter 9: Inheritance . . . . . . . . . . . . . . . . . . . . . . . . . . . . . . . . . 121
About class hierarchy . . . . . . . . . . . . . . . . . . . . . . . . . . . . . . . . . . . . . . 122A quick inheritance test . . . . . . . . . . . . . . . . . . . . . . . . . . . . . . . . . . . . . 122
About inheritance syntax . . . . . . . . . . . . . . . . . . . . . . . . . . . . . . . . . . 125The Bouncer class . . . . . . . . . . . . . . . . . . . . . . . . . . . . . . . . . . . . . . . . 126The Gravity class . . . . . . . . . . . . . . . . . . . . . . . . . . . . . . . . . . . . . . . . . 129Inheritance summary . . . . . . . . . . . . . . . . . . . . . . . . . . . . . . . . . . . . . . 133What’s next? . . . . . . . . . . . . . . . . . . . . . . . . . . . . . . . . . . . . . . . . . . . 133
CONTENTS
ix
6196FM.qxd 1/18/06 12:41 PM Page ix

Chapter 10: Polymorphism . . . . . . . . . . . . . . . . . . . . . . . . . . . . . . 135
Building a polymorphism example . . . . . . . . . . . . . . . . . . . . . . . . . . . . . . . 136Implementing polymorphism for application reuse . . . . . . . . . . . . . . . . . . . . . 138
Basic concept of polymorphism . . . . . . . . . . . . . . . . . . . . . . . . . . . . . . 138Functional polymorphism at work . . . . . . . . . . . . . . . . . . . . . . . . . . . . . 139
What’s next? . . . . . . . . . . . . . . . . . . . . . . . . . . . . . . . . . . . . . . . . . . . 142
Chapter 11: Interfaces . . . . . . . . . . . . . . . . . . . . . . . . . . . . . . . . . 145
Interfaces overview . . . . . . . . . . . . . . . . . . . . . . . . . . . . . . . . . . . . . . . 146Interface use-cases . . . . . . . . . . . . . . . . . . . . . . . . . . . . . . . . . . . . . 147What an interface looks like . . . . . . . . . . . . . . . . . . . . . . . . . . . . . . . . 147
Implementing an interface . . . . . . . . . . . . . . . . . . . . . . . . . . . . . . . . . . . 148What’s next? . . . . . . . . . . . . . . . . . . . . . . . . . . . . . . . . . . . . . . . . . . . 155
Chapter 12: Design Patterns . . . . . . . . . . . . . . . . . . . . . . . . . . . . . 157
Understanding design patterns . . . . . . . . . . . . . . . . . . . . . . . . . . . . . . . . . 158Implementing design patterns . . . . . . . . . . . . . . . . . . . . . . . . . . . . . . . . . 160
Observer pattern . . . . . . . . . . . . . . . . . . . . . . . . . . . . . . . . . . . . . . 160Basic implementation . . . . . . . . . . . . . . . . . . . . . . . . . . . . . . . . . 160Practical implementation . . . . . . . . . . . . . . . . . . . . . . . . . . . . . . . 167Extending the practical implementation . . . . . . . . . . . . . . . . . . . . . . . 169
Singleton pattern . . . . . . . . . . . . . . . . . . . . . . . . . . . . . . . . . . . . . . 171Basic implementation . . . . . . . . . . . . . . . . . . . . . . . . . . . . . . . . . 172Practical implementation . . . . . . . . . . . . . . . . . . . . . . . . . . . . . . . 177Building an interface . . . . . . . . . . . . . . . . . . . . . . . . . . . . . . . . . . 181
Decorator pattern . . . . . . . . . . . . . . . . . . . . . . . . . . . . . . . . . . . . . . 183Basic implementation . . . . . . . . . . . . . . . . . . . . . . . . . . . . . . . . . 183Practical implementation . . . . . . . . . . . . . . . . . . . . . . . . . . . . . . . 184Applying the Decorator pattern . . . . . . . . . . . . . . . . . . . . . . . . . . . . 186
Model-View-Controller pattern . . . . . . . . . . . . . . . . . . . . . . . . . . . . . . 191Basic implementation . . . . . . . . . . . . . . . . . . . . . . . . . . . . . . . . . 192Practical implementation . . . . . . . . . . . . . . . . . . . . . . . . . . . . . . . 193Bringing together the Model, View, and Controller . . . . . . . . . . . . . . . . . 196
Design patterns summary . . . . . . . . . . . . . . . . . . . . . . . . . . . . . . . . . . . . 197What’s next? . . . . . . . . . . . . . . . . . . . . . . . . . . . . . . . . . . . . . . . . . . . 198
Chapter 13: Case Study: An OOP Media Player . . . . . . . . . . . . . . 201
Planning the player . . . . . . . . . . . . . . . . . . . . . . . . . . . . . . . . . . . . . . . 202Picking a pattern . . . . . . . . . . . . . . . . . . . . . . . . . . . . . . . . . . . . . . 202Guaranteeing methods and datatypes with an interface . . . . . . . . . . . . . . . . 203Examining class structure . . . . . . . . . . . . . . . . . . . . . . . . . . . . . . . . . . 204
CONTENTS
x
6196FM.qxd 1/18/06 12:41 PM Page x
0e197eab08414336a67d4228a6088055
Building the media player . . . . . . . . . . . . . . . . . . . . . . . . . . . . . . . . . . . 206IntervalManager . . . . . . . . . . . . . . . . . . . . . . . . . . . . . . . . . . . . . . . 207Defining the interfaces . . . . . . . . . . . . . . . . . . . . . . . . . . . . . . . . . . . 209Dispatching events . . . . . . . . . . . . . . . . . . . . . . . . . . . . . . . . . . . . . 209
Media interfaces . . . . . . . . . . . . . . . . . . . . . . . . . . . . . . . . . . . . 214Controlling media . . . . . . . . . . . . . . . . . . . . . . . . . . . . . . . . . . . . . . 215
Defining properties . . . . . . . . . . . . . . . . . . . . . . . . . . . . . . . . . . . 215Private methods . . . . . . . . . . . . . . . . . . . . . . . . . . . . . . . . . . . . 216Public methods . . . . . . . . . . . . . . . . . . . . . . . . . . . . . . . . . . . . . 218
Controlling FLVs . . . . . . . . . . . . . . . . . . . . . . . . . . . . . . . . . . . . . . . 222Building a video view . . . . . . . . . . . . . . . . . . . . . . . . . . . . . . . . . . . . 228Controlling SWFs . . . . . . . . . . . . . . . . . . . . . . . . . . . . . . . . . . . . . . 229Building a SWF view . . . . . . . . . . . . . . . . . . . . . . . . . . . . . . . . . . . . 236Controlling MP3s . . . . . . . . . . . . . . . . . . . . . . . . . . . . . . . . . . . . . . 238
Summary . . . . . . . . . . . . . . . . . . . . . . . . . . . . . . . . . . . . . . . . . . . . . 239What’s next? . . . . . . . . . . . . . . . . . . . . . . . . . . . . . . . . . . . . . . . . . . . 239
PART FOUR: BUILDING AND EXTENDING A DYNAMIC FRAMEWORK . . . . . . . . . . . . . . . . . . . . . . . . . . . . . . . . 240
Chapter 14: Framework Overview . . . . . . . . . . . . . . . . . . . . . . . . 241
Introducing the framework . . . . . . . . . . . . . . . . . . . . . . . . . . . . . . . . . . . 242Understanding the MovieClip class . . . . . . . . . . . . . . . . . . . . . . . . . . . . . . 246Understanding the UIObject class (mx.core.UIObject) . . . . . . . . . . . . . . . . . . . . 253Understanding the UIComponent class (mx.core.UIComponent) . . . . . . . . . . . . . . 255Understanding the View class (mx.core.View) . . . . . . . . . . . . . . . . . . . . . . . . 256Framework summary . . . . . . . . . . . . . . . . . . . . . . . . . . . . . . . . . . . . . . 257What’s next? . . . . . . . . . . . . . . . . . . . . . . . . . . . . . . . . . . . . . . . . . . . 257
Chapter 15: Manager Classes . . . . . . . . . . . . . . . . . . . . . . . . . . . . 259
Planning the framework . . . . . . . . . . . . . . . . . . . . . . . . . . . . . . . . . . . . 260What to manage . . . . . . . . . . . . . . . . . . . . . . . . . . . . . . . . . . . . . . 260Diagramming the classes . . . . . . . . . . . . . . . . . . . . . . . . . . . . . . . . . . 261
Building managers . . . . . . . . . . . . . . . . . . . . . . . . . . . . . . . . . . . . . . . . 263StyleFormat . . . . . . . . . . . . . . . . . . . . . . . . . . . . . . . . . . . . . . . . . 263StyleManager . . . . . . . . . . . . . . . . . . . . . . . . . . . . . . . . . . . . . . . . 266Adding style . . . . . . . . . . . . . . . . . . . . . . . . . . . . . . . . . . . . . . . . . 269SoundManager . . . . . . . . . . . . . . . . . . . . . . . . . . . . . . . . . . . . . . . 272Sounding off . . . . . . . . . . . . . . . . . . . . . . . . . . . . . . . . . . . . . . . . . 275
Summary . . . . . . . . . . . . . . . . . . . . . . . . . . . . . . . . . . . . . . . . . . . . . 277What’s next? . . . . . . . . . . . . . . . . . . . . . . . . . . . . . . . . . . . . . . . . . . . 277
CONTENTS
xi
6196FM.qxd 1/18/06 12:41 PM Page xi
Chapter 16: UI Widgets . . . . . . . . . . . . . . . . . . . . . . . . . . . . . . . . 279
Diagramming the classes . . . . . . . . . . . . . . . . . . . . . . . . . . . . . . . . . . . . 280UIObject . . . . . . . . . . . . . . . . . . . . . . . . . . . . . . . . . . . . . . . . . . . 280Block . . . . . . . . . . . . . . . . . . . . . . . . . . . . . . . . . . . . . . . . . . . . . 283SimpleButton . . . . . . . . . . . . . . . . . . . . . . . . . . . . . . . . . . . . . . . . 284
Making the foundation . . . . . . . . . . . . . . . . . . . . . . . . . . . . . . . . . . . . . 285Basic building block . . . . . . . . . . . . . . . . . . . . . . . . . . . . . . . . . . . . . . . 292Building a component . . . . . . . . . . . . . . . . . . . . . . . . . . . . . . . . . . . . . . 294Skinning a widget . . . . . . . . . . . . . . . . . . . . . . . . . . . . . . . . . . . . . . . . 303Changing state . . . . . . . . . . . . . . . . . . . . . . . . . . . . . . . . . . . . . . . . . . 307Adding some style . . . . . . . . . . . . . . . . . . . . . . . . . . . . . . . . . . . . . . . . 308More ways to skin a cat . . . . . . . . . . . . . . . . . . . . . . . . . . . . . . . . . . . . . 313Attaching from scratch . . . . . . . . . . . . . . . . . . . . . . . . . . . . . . . . . . . . . 316Tying in events . . . . . . . . . . . . . . . . . . . . . . . . . . . . . . . . . . . . . . . . . . 320Pulling it all together . . . . . . . . . . . . . . . . . . . . . . . . . . . . . . . . . . . . . . 325Summary . . . . . . . . . . . . . . . . . . . . . . . . . . . . . . . . . . . . . . . . . . . . . 329What’s next? . . . . . . . . . . . . . . . . . . . . . . . . . . . . . . . . . . . . . . . . . . . 330
Chapter 17: OOP Animation and Effects . . . . . . . . . . . . . . . . . . . 333
Preparing for animation . . . . . . . . . . . . . . . . . . . . . . . . . . . . . . . . . . . . 334Animator . . . . . . . . . . . . . . . . . . . . . . . . . . . . . . . . . . . . . . . . . . . 335
Tweening properties and values . . . . . . . . . . . . . . . . . . . . . . . . . . . . . . . . 336Tweener . . . . . . . . . . . . . . . . . . . . . . . . . . . . . . . . . . . . . . . . . . . 336Easer . . . . . . . . . . . . . . . . . . . . . . . . . . . . . . . . . . . . . . . . . . . . . 341Testing the Tweener . . . . . . . . . . . . . . . . . . . . . . . . . . . . . . . . . . . . . 344Enhancing Tweener . . . . . . . . . . . . . . . . . . . . . . . . . . . . . . . . . . . . . 347Mover . . . . . . . . . . . . . . . . . . . . . . . . . . . . . . . . . . . . . . . . . . . . 354Motion blur . . . . . . . . . . . . . . . . . . . . . . . . . . . . . . . . . . . . . . . . . 357
Transitioning views . . . . . . . . . . . . . . . . . . . . . . . . . . . . . . . . . . . . . . . 360Transition . . . . . . . . . . . . . . . . . . . . . . . . . . . . . . . . . . . . . . . . . . 360FadeTransition . . . . . . . . . . . . . . . . . . . . . . . . . . . . . . . . . . . . . . . . 363Testing transitions . . . . . . . . . . . . . . . . . . . . . . . . . . . . . . . . . . . . . . 364ColorTransition . . . . . . . . . . . . . . . . . . . . . . . . . . . . . . . . . . . . . . . 369BlurTransition . . . . . . . . . . . . . . . . . . . . . . . . . . . . . . . . . . . . . . . . 371NoiseTransition . . . . . . . . . . . . . . . . . . . . . . . . . . . . . . . . . . . . . . . 374DissolveTransition and WaterTransition . . . . . . . . . . . . . . . . . . . . . . . . . . 376
Summary . . . . . . . . . . . . . . . . . . . . . . . . . . . . . . . . . . . . . . . . . . . . . 381What’s next? . . . . . . . . . . . . . . . . . . . . . . . . . . . . . . . . . . . . . . . . . . . 381
CONTENTS
xii
6196FM.qxd 1/18/06 12:41 PM Page xii

PART FIVE: DATA INTEGRATION . . . . . . . . . . . . . . . . . . . . . . . . . . 382
Chapter 18: Interrelationships and InteractionsBetween Components . . . . . . . . . . . . . . . . . . . . . . . . . . . . . . . . . . 383
Data binding . . . . . . . . . . . . . . . . . . . . . . . . . . . . . . . . . . . . . . . . . . . 384The mx.data.binding package . . . . . . . . . . . . . . . . . . . . . . . . . . . . . . . 385Creating a simple binding . . . . . . . . . . . . . . . . . . . . . . . . . . . . . . . . . 386
Creating EndPoints . . . . . . . . . . . . . . . . . . . . . . . . . . . . . . . . . . . 386Specifying a location . . . . . . . . . . . . . . . . . . . . . . . . . . . . . . . . . . 387Creating the binding . . . . . . . . . . . . . . . . . . . . . . . . . . . . . . . . . . 388Using the execute method . . . . . . . . . . . . . . . . . . . . . . . . . . . . . . . 388
Working through a simple binding example . . . . . . . . . . . . . . . . . . . . . . . . . 389Using formatters . . . . . . . . . . . . . . . . . . . . . . . . . . . . . . . . . . . . . . . . . 395
Using built-in formatters . . . . . . . . . . . . . . . . . . . . . . . . . . . . . . . . . . 396Using the Boolean formatter . . . . . . . . . . . . . . . . . . . . . . . . . . . . . 396Using the Compose String formatter . . . . . . . . . . . . . . . . . . . . . . . . . 396Using the Date formatter . . . . . . . . . . . . . . . . . . . . . . . . . . . . . . . 397Using the Rearrange Fields formatter . . . . . . . . . . . . . . . . . . . . . . . . . 397Using the Number formatter . . . . . . . . . . . . . . . . . . . . . . . . . . . . . 397
Working through a simple formatting example . . . . . . . . . . . . . . . . . . . . . 398Understanding custom formatters . . . . . . . . . . . . . . . . . . . . . . . . . . . . 404
Including validators . . . . . . . . . . . . . . . . . . . . . . . . . . . . . . . . . . . . . . . 406Working with built-in validators . . . . . . . . . . . . . . . . . . . . . . . . . . . . . . 407Working with a custom validator . . . . . . . . . . . . . . . . . . . . . . . . . . . . . 413
Summary . . . . . . . . . . . . . . . . . . . . . . . . . . . . . . . . . . . . . . . . . . . . . 415What's next? . . . . . . . . . . . . . . . . . . . . . . . . . . . . . . . . . . . . . . . . . . . 415
Chapter 19: Communication Between Flash and the Browser . . . . . . . . . . . . . . . . . . . . . . . . . . . . . . . . . . . . . . . . . . 417
Communication with Flash Player 7 and below . . . . . . . . . . . . . . . . . . . . . . . . 419Sending variables into Flash . . . . . . . . . . . . . . . . . . . . . . . . . . . . . . . . 419Calling JavaScript from Flash . . . . . . . . . . . . . . . . . . . . . . . . . . . . . . . . 419Using the Flash/JS Integration Kit . . . . . . . . . . . . . . . . . . . . . . . . . . . . . 421
Understanding the ExternalInterface class . . . . . . . . . . . . . . . . . . . . . . . . . . 423Understanding Flash Player 8 security . . . . . . . . . . . . . . . . . . . . . . . . . . . 424Using the call method . . . . . . . . . . . . . . . . . . . . . . . . . . . . . . . . . . . 424Using the addCallback method . . . . . . . . . . . . . . . . . . . . . . . . . . . . . . 429ActionScript communication with other languages . . . . . . . . . . . . . . . . . . . 434
Calling a non-JavaScript method . . . . . . . . . . . . . . . . . . . . . . . . . . . 434Calling an ActionScript method from an application . . . . . . . . . . . . . . . . 435
Summary . . . . . . . . . . . . . . . . . . . . . . . . . . . . . . . . . . . . . . . . . . . . . 435What’s next? . . . . . . . . . . . . . . . . . . . . . . . . . . . . . . . . . . . . . . . . . . . 436
CONTENTS
xiii
6196FM.qxd 1/18/06 12:41 PM Page xiii

Chapter 20: Server Communication (XML and Web Services) . . . . . . . . . . . . . . . . . . . . . . . . . . . . . . . 439
Understanding XML . . . . . . . . . . . . . . . . . . . . . . . . . . . . . . . . . . . . . . . 440XML declarations . . . . . . . . . . . . . . . . . . . . . . . . . . . . . . . . . . . . . . 442
Using XML in Flash . . . . . . . . . . . . . . . . . . . . . . . . . . . . . . . . . . . . . . . 443XMLConnector component . . . . . . . . . . . . . . . . . . . . . . . . . . . . . . . . 443XML class . . . . . . . . . . . . . . . . . . . . . . . . . . . . . . . . . . . . . . . . . . 447
What are web services? . . . . . . . . . . . . . . . . . . . . . . . . . . . . . . . . . . . . . 454Understanding SOAP . . . . . . . . . . . . . . . . . . . . . . . . . . . . . . . . . . . . . . 454Talking to web services . . . . . . . . . . . . . . . . . . . . . . . . . . . . . . . . . . . . . 456
WebServiceConnector component . . . . . . . . . . . . . . . . . . . . . . . . . . . . 456WebService class . . . . . . . . . . . . . . . . . . . . . . . . . . . . . . . . . . . . . . 464
Flash Player security sandbox . . . . . . . . . . . . . . . . . . . . . . . . . . . . . . . . . 478System.security.allow.Domain() . . . . . . . . . . . . . . . . . . . . . . . . . . . . . . 478Cross-domain policy files . . . . . . . . . . . . . . . . . . . . . . . . . . . . . . . . . . 478Using a server-side proxy script . . . . . . . . . . . . . . . . . . . . . . . . . . . . . . 480
Summary . . . . . . . . . . . . . . . . . . . . . . . . . . . . . . . . . . . . . . . . . . . . . 480What’s next? . . . . . . . . . . . . . . . . . . . . . . . . . . . . . . . . . . . . . . . . . . . 481
Chapter 21: Case Study: Time Sheet Application . . . . . . . . . . . . 483Planning the application . . . . . . . . . . . . . . . . . . . . . . . . . . . . . . . . . . . . 484Structuring the application . . . . . . . . . . . . . . . . . . . . . . . . . . . . . . . . . . . 485Writing stub code . . . . . . . . . . . . . . . . . . . . . . . . . . . . . . . . . . . . . . . . 487
Model-View-Controller classes . . . . . . . . . . . . . . . . . . . . . . . . . . . . . . . 487TimeSheetModel class (Model) . . . . . . . . . . . . . . . . . . . . . . . . . . . . 487TimeSheetView class (View) . . . . . . . . . . . . . . . . . . . . . . . . . . . . . . 488TimeSheetController class (Controller) . . . . . . . . . . . . . . . . . . . . . . . . 490
Project and Task classes . . . . . . . . . . . . . . . . . . . . . . . . . . . . . . . . . . 491Project class . . . . . . . . . . . . . . . . . . . . . . . . . . . . . . . . . . . . . . . 491Task class . . . . . . . . . . . . . . . . . . . . . . . . . . . . . . . . . . . . . . . . 492
Bringing it all together . . . . . . . . . . . . . . . . . . . . . . . . . . . . . . . . . . . 493Initializing the layout . . . . . . . . . . . . . . . . . . . . . . . . . . . . . . . . . . . . 493Adding a project . . . . . . . . . . . . . . . . . . . . . . . . . . . . . . . . . . . . . . 495Displaying projects . . . . . . . . . . . . . . . . . . . . . . . . . . . . . . . . . . . . . 498Adding a task . . . . . . . . . . . . . . . . . . . . . . . . . . . . . . . . . . . . . . . . 501Project and task details . . . . . . . . . . . . . . . . . . . . . . . . . . . . . . . . . . . 506Running a task timer . . . . . . . . . . . . . . . . . . . . . . . . . . . . . . . . . . . . 510Persisting time sheet data . . . . . . . . . . . . . . . . . . . . . . . . . . . . . . . . . 512Summary . . . . . . . . . . . . . . . . . . . . . . . . . . . . . . . . . . . . . . . . . . . 517Conclusion . . . . . . . . . . . . . . . . . . . . . . . . . . . . . . . . . . . . . . . . . . 518
Index . . . . . . . . . . . . . . . . . . . . . . . . . . . . . . . . . . . . . . . . . . . . . . . 521
CONTENTS
xiv
6196FM.qxd 1/18/06 12:41 PM Page xiv

FOREWORD
If there’s one thing I’ve learned as a developer, it’s this: Complexity happens; simplicity, youhave to consistently strive for. Nowhere is this truer than in education. Our role as teachers,by definition, is to simplify subjects so that they can be easily understood. A good teacherdispels trepidation with anecdote, abstraction with analogy, superstition and magic withknowledge.
Simplicity, however, is not easily attained. In order to simplify, you must first gain an encom-passing understanding of the complex. It is a rare person who can simultaneously exist inboth the simple and complex plains of a problem domain and communicate effectively atboth levels. It is, however, these rare people who make the best teachers.
Object-oriented programming (OOP) is a subject that many Flash developers do not approachdue to a widespread erroneous perception of its enormous scope and complexity. Nothingcould be further from the truth.
The core concepts behind OOP are simple enough for a primary school student with a par-ticularly nasty case of Hynerian flu to understand in a single sitting.
It must be because OOP is essentially such a simple concept that we sometimes feel the needto protect ourselves with important-sounding words the length of major rivers in order toexplain it. Because, hey, if we said that OOP involves the interaction of objects, each of whichis an instance of a certain blueprint and has certain traits and behaviors—well, that wouldjust be too simple. Who’d respect our geeky prowess then? Instead, we lock ourselves in ourivory towers, hiding behind unscalable walls of inheritance, composition, polymorphism, andencapsulation, and hope that the FlashKit masses will tend to their tweens and leave us tomeditate on the path to programming nirvana.
Unfortunately, OOP is so often presented in such pretentious prose so as to be illegible to allbut a handful of PhDs. If grandiose, self-important passages of academic rambling are whatyou’re after, then you should put this book down and walk away now. I’m sure you’ll find an800-page hardback elsewhere to satisfy your thirst for confusion. If, however, you are look-ing for a pragmatic guide to OOP and ActionScript 2 (AS2) that is simply written and easy tounderstand, you could do far worse than to look through these pages more closely.
Aral Balkan2 January 2006
Famagusta, Cyprus
xv
6196FM.qxd 1/18/06 12:41 PM Page xv

ABOUT THE AUTHORS
Peter Elst is a Flash-certified professional and former Team Macromedia volunteer, and heruns his own company, named MindStudio, doing mostly freelance Flash and Flex consul-tancy, development, and training. As a valued contributor to the online Flash community,Peter has presented at numerous international events and conferences and has had his workpublished in leading magazines and websites.
Over the years, the focus of his work changed from interactive animations to multimediaapplications, e-learning, and content management systems. Peter is user group manager forthe MMUG Belgium and blogs on his personal website: www.peterelst.com.
Sas Jacobs is a web developer who loves working with Flash. She set up her business,Anything Is Possible, in 1994, working in the areas of web development, IT training, and tech-nical writing. The business works with large and small clients building web applications withASP.NET, Flash, XML, and databases.
Sas has spoken at such conferences as Flash Forward, MXDU, and FlashKit on topics relatingto XML and dynamic content in Flash. In her spare time, Sas is passionate about traveling, pho-tography, running, and enjoying life. You can find out more about her at www.sasjacobs.com.
Todd Yard is currently a Flash developer at Brightcove in Cambridge, Massachusetts, wherehe moved early in 2005 in the middle of a blizzard. Previously, he was in New York City,where he initially moved in 1996 in the middle of a blizzard, working with EGO7 on theirFlash content management system and community software while freelancing with agenciesdeveloping web applications for clients such as GE and IBM. Todd originally hails fromPhoenix, where there are no blizzards, and has written for a number of friends of ED books,of which his favorites are Flash MX Studio and Flash MX Application and Interface Design,though he feels Extending Flash MX 2004: Complete Guide and Reference to JavaScript Flashis probably the most useful. His personal site, which he used to update all the time, he fondlyremembers, is www.27Bobs.com.
William Drol entered Macromedia Flash development with a varied background in object-oriented programming and graphic design. His first experience with Macromedia was theadmittedly quirky but OOP-based Macromedia Director and Lingo. Today, there are manyreasons to be excited about Flash MX and the hugely improved ActionScript. Drol looksforward to integrating Flash MX with web services, and he pursues other technologiessuch as XML, XSLT, and his current favorite, Microsoft C#. Learn more about the author athttp://www.billdrol.com.
xvi
6196FM.qxd 1/18/06 12:41 PM Page xvi

ABOUT THE TECHNICAL REVIEWERS
Tink, a.k.a. Stephen Downs, has been a freelance Flash designer/developer for the past fouryears, and he has a background in art, design, and photography. Based in London, England,he works on a wide range of projects, both for other companies and his own clients.
He has worked on projects with various agencies for brands such as MTV, Xbox, AMD Athlon,PG Tips, AGCO, Interflora, Motorola, Shockwave.com, UK Government, French Music Bureau,and many more. The growth in his workload has recently lead to the startup of Tink LTD.
His primary focus is user interaction and interactive motion, integrating design, and develop-ment using best practice methodologies.
www.tink.wswww.tink.ws/blog
Jared Tarbell was born in 1973 to William and Suzon Davis Tarbell in the high-altitude desertcity of Albuquerque, New Mexico. First introduced to personal computers in 1987, Jared’sinterest in computation has grown in direct proportion to the processing power of thesemachines. Jared holds a Bachelor of Science degree in Computer Science from New MexicoState University. He sits on the Board of the Austin Museum of Digital Art where he helpspromote and encourage appreciation of the arts within the global community. Jared is mostinterested in the visualization of large data sets, and the emergent, life-like properties ofcomplex computational systems. Jared has recently returned to Albuquerque to work closerto friends and family while enjoying the unique aspects of desert living.
Additional work from Jared Tarbell can be found at levitated.net and complexification.net.
xvii
6196FM.qxd 1/18/06 12:41 PM Page xvii

ACKNOWLEDGMENTS
Special thanks to Jared Tarbell and Tink for their thorough technical review; to Chris, Sofia,and the rest of the friends of ED/Apress team for their help and patience in getting this bookwritten; and to coauthors Todd and Sas for their excellent chapters!
Peter Elst
xviii
6196FM.qxd 1/18/06 12:41 PM Page xviii

6196FM.qxd 1/18/06 12:41 PM Page xix

PART ONE OOP AND ACTIONSCRIPT
6196CH01.qxd 1/18/06 10:47 AM Page xx

1 INTRODUCTION TO OOP
6196CH01.qxd 1/18/06 10:47 AM Page 1

Object-oriented programming (OOP) sounds much scarier than it actually is. EssentiallyOOP is nothing more than a way of looking at a particular problem and breaking it downinto smaller pieces called objects. These objects form the building blocks of object-oriented applications, and when designed properly they help form a solid framework onwhich to build your project.
The scoop with OOP?Before OOP became commonplace, we had something called procedural programming,which often required developers to write very complex and highly interdependent code.A minor change to any part of the code could spell disaster for the entire application.Debugging that type of application was a terribly painful and time-consuming task thatoften resulted in the need to completely rebuild large pieces of code.
When more and more user interaction got introduced in applications, it became apparentthat procedural programming wouldn’t cut it. Object-oriented programming was born asan attempt to solve these very problems. Although it certainly isn’t the be-all and end-allof successful programming, OOP does give developers a great tool for handling anykind of application development.
The wonderful thing about object-oriented thinking is that you can look at practically anyitem in terms of a collection of objects. Let’s look at a car for example. To the average Joe,a car is simply a vehicle (or object) that gets you places. If you ask a mechanic about a car,he’ll most likely tell you about the engine, the exhaust, and all sorts of other parts. Allthese car parts can also be thought of as individual objects that work together to form alarger object, “the car.” None of these parts actually know the inner workings of the otherparts, and yet they work (or should work) together seamlessly.
Understanding the object-oriented approach
When studying OOP you’ll come across a plethora of big words like encapsulation,polymorphism, and inheritance. Truth be told the ideas behind them are often quitesimple, and there’s no real need to memorize those terms unless you’d like to use themfor showing off at your next family get-together.
“‘See that bird?’ he says. ‘It’s a Spencer’s warbler. (I knew he didn’t know the realname.) Well, in Italian, it’s a Chutto Lapittida. In Portuguese, it’s a Bom daPeida. In Chinese, it’s a Chung-long-tah, and in Japanese, it’s a Katano Tekeda.You can know the name of that bird in all the languages of the world, but whenyou’re finished, you’ll know absolutely nothing whatever about the bird. You’llonly know about humans in different places, and what they call the bird. So let’slook at the bird and see what it’s doing, that’s what counts.’”
—Richard Feynman
OBJECT-ORIENTED ACTIONSCRIPT FOR FLASH 8
2
6196CH01.qxd 1/18/06 10:47 AM Page 2

Knowing the theory behind this terminology is, however, essential, and that’s just whatwe’ll be discussing next.
Classes and objects
When studying OOP, you cannot ignore classes and objects, as those are the fundamentalbuilding blocks of any project. A good understanding of what classes and objects are andthe roles they play will help you get on track to understanding OOP.
There’s a subtle difference between a class and an object. A class is a self-containeddescription for a set of related services and data. Classes list the services they providewithout revealing how they work internally. Classes aren’t generally able to work on theirown; they need to instantiate at least one object that is then able to act on the servicesand data described in the class.
Suppose you want to build a house. Unless you build it yourself, you need an architect anda builder. The architect drafts a blueprint, and the builder uses it to construct your house.Software developers are architects, and classes are their blueprints. You cannot use a classdirectly, any more than you could move your family into a blueprint. Classes only describethe final product. To actually do something you need an object.
If a class is a blueprint, then an object is a house. Builders create houses from blueprints;OOP creates objects from classes. OOP is efficient. You write the class once and create asmany objects as needed.
Because classes can be used to create multiple objects, objects are often referred to asclass instances.
Properties
Properties give individual objects unique qualities. Without properties, each house (fromthe previous example) would remain identical to its neighbors (all constructed from thesame blueprint). With properties, each house is unique, from its exterior color to the styleof its windows.
Let’s look at a Ball class for example. From that one class you can create multiple ballinstances; however, not all balls look identical to one another. By providing your Ball class
INTRODUCTION TO OOP
3
1
6196CH01.qxd 1/18/06 10:47 AM Page 3

with properties such as color, weight, and shape, you can create instances that describeballs as diverse as a basketball, bowling ball, or rugby ball just by assigning different valuesto properties in each instance of the class.
In OOP, you write classes to offer predefined behaviors and maybe hold some data. Next,you create one or more objects from a class. Finally, you endow objects with their ownindividual property values. The progression from classes to objects to objects with uniqueproperties is the essence of OOP.
Encapsulation: Hiding the details
Analogies like the preceding car example are very useful to explain concepts such asencapsulation, but it is no doubt more appealing to take an in-depth look at potential real-world scenarios like, for example, an accounting office.
Accountants love details (all the numbers, receipts, and invoices). The accountant’s boss,however, is interested in the bottom line. If the bottom line is zero, the company is debt-free. If the bottom line is positive, the company is profitable. She is happy to ignore all the
When you get into your car, you turn the key, thecar starts, and off you go. You don’t need tounderstand how the car parts work to find your-self in rush-hour traffic. The car starts when youturn the key. Car designers hide the messy inter-nal details so you can concentrate on importantthings like finding another radio station. OOPcalls this concept encapsulation.
OBJECT-ORIENTED ACTIONSCRIPT FOR FLASH 8
4
6196CH01.qxd 1/18/06 10:47 AM Page 4

messy details and focus on other things. Encapsulation is about ignoring or hiding internaldetails. In business, this is delegation. Without it, the boss may need to deal with account-ing, tax law, and international trading at a level beyond her ability.
OOP loves encapsulation. With encapsulation, classes hide their own internal details. Usersof a class (yourself, other developers, or other applications) are not required to know orcare why it works. Class users just need the available service names and what to provide touse them. Building classes is an abstraction process; you start with a complex problem, andthen reduce it down (abstracting it) to a list of related services. Encapsulation simplifiessoftware development and increases the potential for code reuse.
To demonstrate, I’ll present some pseudo-code (false code). You can’t enter pseudo-codeinto a computer, but it’s great for previewing ideas. First, you need an Accounting class:
Start Of Accounting ClassEnd Of Accounting Class
Everything between the start and end line is the Accounting class. A useless class so far,because it’s empty. Let’s give the Accounting class something to do:
Start Of Accounting ClassStart Of Bottom Line Service
(Internal Details Of Bottom Line Service)End Of Bottom Line Service
End Of Accounting Class
Now the Accounting class has a Bottom Line service. How does that service work? Well, Iknow (because I wrote the code), but you (as a user of my class) have no idea. That’sexactly how it should be. You don’t know or care how my class works. You just use theBottom Line service to see if the company is profitable. As long as my class is accurate anddependable, you can go about your business. You want to see the details anyway? Okay,here they are:
Start Of Accounting ClassStart Of Bottom Line Service
Do Invoice ServiceDo Display Answer Service
End Of Bottom Line ServiceEnd Of Accounting Class
Where did the Invoice and Display Answer services come from? They’re part of the classtoo, but encapsulation is hiding them. Here they are:
Start Of Accounting ClassStart Of Bottom Line Service
Do Invoice ServiceDo Display Answer Service
End Of Bottom Line Service
INTRODUCTION TO OOP
5
1
6196CH01.qxd 1/18/06 10:47 AM Page 5

Start Of Invoice Service(Internal Details Of Invoice Service)
End Of Invoice Service
Start Of Display Answer Service(Internal Details Of Display Answer Service)
End Of Display Answer ServiceEnd Of Accounting Class
The Bottom Line service has no idea how the Invoice service works, nor does it care. Youdon’t know the details, and neither does the Bottom Line service. This type of simplifica-tion is the primary benefit of encapsulation. Finally, how do you request an answer fromthe Bottom Line service? Easy, just do this:
Do Bottom Line Service
That’s all. You’re happy, because you only need to deal with a single line of code. TheBottom Line service (and encapsulation) handles the details for you.
When I speak of hiding code details, I’m speaking conceptually. I don’t mean tomislead you. This is just a mental tool to help you understand the importance ofabstracting the details. With encapsulation, you’re not actually hiding code(physically). If you were to view the full Accounting class, you’d see the samecode that I see.
Start Of Accounting ClassStart Of Bottom Line Service
Do Invoice ServiceDo Display Answer Service
End Of Bottom Line Service
Start Of Invoice ServiceGather InvoicesReturn Sum
End Of Invoice Service
Start Of Display Answer ServiceDisplay Sum
End Of Display Answer ServiceEnd Of Accounting Class
If you’re wondering why some of the lines are indented, this is standard practice(that is not followed often enough). It shows, at a glance, the natural hierarchyof the code (of what belongs to what). Please adopt this practice when you writecomputer code.
OBJECT-ORIENTED ACTIONSCRIPT FOR FLASH 8
6
6196CH01.qxd 1/18/06 10:47 AM Page 6

Polymorphism: Exhibiting similar features
Much like cars need fuel to run, I take my daily dose of vitamins by drinking a glass oforange juice at breakfast. This incidentally brings me to a great example showing the con-cept of polymorphism.
Oranges have pulp. Lemons have pulp. Grapefruits have pulp. Cut any of these fruit open,I dare you, and try to scoop out the fruit with a spoon. Chances are, you’ll get a squirt ofcitrus juice in your eye. Citrus fruits know exactly where your eye is, but you don’t have tospoon them out to know they share this talent (they’re all acid-based juice-squirters). Lookat the following Citrus class:
Start Of Citrus ClassStart Of Taste Service
(Internal Details Of Taste Service)End Of Taste Service
Start Of Squirt Service(Internal Details Of Squirt Service)
End Of Squirt ServiceEnd Of Citrus Class
You can use the Citrus class as a base to define other classes:
Start Of Orange ClassUsing Citrus ClassProperty Named Juice
End Of Orange Class
Start Of Lemon ClassUsing Citrus ClassProperty Named Juice
End Of Lemon Class
Are you old enough to remember fuel stationsbefore the self-service era? You could drive intothese places and somebody else would fill upyour tank. The station attendant knew aboutOOP long before you did. He put the fuel nozzleinto the tank (any tank) and pumped the fuel! Itdidn’t matter if you drove a Ford, a Chrysler, or aDatsun. All cars have fuel tanks, so this behavioris easy to repeat for any car. OOP calls this con-cept polymorphism.
INTRODUCTION TO OOP
7
1
6196CH01.qxd 1/18/06 10:47 AM Page 7

Start Of Grapefruit ClassUsing Citrus ClassProperty Named Juice
End Of Grapefruit Class
Besides demonstrating inheritance again, the Orange, Lemon, and Grapefruit classes alsoexhibit similar behaviors. This is polymorphism. You know that the Orange, Lemon, andGrapefruit classes have the ability to squirt (inherited from the Citrus class), but each classhas a Juice property. So the orange can squirt orange juice, the lemon can squirt lemonjuice, and the grapefruit can squirt grapefruit juice. You don’t have to know in advancewhich type of fruit, because they all squirt. In fact, you could taste the juice (inheritedfrom the Citrus class) to know which fruit you’re dealing with. That’s polymorphism:multiple objects exhibiting similar features in different ways.
Inheritance: Avoid rebuilding the wheel
Inheritance in OOP is a real timesaver. You don’t need to modify your neighbor’s wheel.You only need to tell the computer, “Build a replica of my neighbor’s wheel, and then addthis, and this, and this.” The result is a custom wheel, but you didn’t modify the original.Now you have two wheels, each unique. To clarify, here’s some more pseudo-code:
Start Of Wheel ClassStart Of Roll Service
(Internal Details Of Roll Service)End Of Roll Service
End Of Wheel Class
The Wheel class provides a single service named Roll. That’s a good start, but what if youwant to make a tire? Do you build a new Tire class from scratch? No, you just use inheri-tance to build a Tire class, like this:
Start Of Tire ClassUsing Wheel Class
End Of Tire Class
Grog roll wheel. Wheel good. Grog doesn’t likerebuilding wheels. They’re heavy, made of stone,and tend to crush feet when they fall over. Groglikes the wheel that his stone-age neighbor builtlast week. Sneaky Grog. Maybe he’ll carve someholes into the wheel to store rocks, twigs, or a tastysnack. If Grog does this, he’ll have added somethingnew to the existing wheel (demonstrating inheri-tance long before the existence of computers).
OBJECT-ORIENTED ACTIONSCRIPT FOR FLASH 8
8
6196CH01.qxd 1/18/06 10:47 AM Page 8

By using the Wheel class as a starting point, the Tire class already knows how to roll (thetire is a type of wheel). Here’s the next logical step:
Start Of Tire ClassUsing Wheel ClassProperty Named Size
End Of Tire Class
Now the Tire class has a property named size. That means you could create many uniqueTire objects. All of the tires can roll (behavior inherited from the Wheel class), but eachtire has its own unique size. You could add other properties to the Tire class too. With verylittle work, you could have small car tires that roll, big truck tires that roll, and bigger bustires that roll.
What’s next?Now that wasn’t too difficult, was it? In this chapter I covered the basic idea of OOP as wellas an introduction so some of its key features including encapsulation, polymorphism, andinheritance. I’ll explain those ideas in much greater detail in Part Three of this book.
Coming up next, I will focus on the general programming concepts common to modernhigh-level computer languages.
INTRODUCTION TO OOP
9
1
6196CH01.qxd 1/18/06 10:47 AM Page 9

6196CH02.qxd 1/18/06 10:49 AM Page 10

2 PROGRAMMING CONCEPTS
6196CH02.qxd 1/18/06 10:49 AM Page 11

In this chapter, I’ll introduce you to some common programming concepts you’ll want toknow about before starting to program with ActionScript 2.0.
When working closely with computer programmers, you no doubt get slapped round thehead with acronyms and techno-babble at regular intervals. If you are new to the game,don’t fear, I’ll soon have you joining in with this typical bonding ritual, thus affirming yournewly acquired position in the office tribe.
In all seriousness, though, learning some basic terminology is really very useful. You’ll comeacross many of the terms discussed in this chapter when reading articles, tutorials, or talk-ing to fellow developers. Let’s get started by looking at common programming slang.
About programming slang
Slang Meaning
IDE Integrated Development Environment, the software inwhich you develop an application
The code The entire body of source code found in a computerapplication
Writing code The process of creating the computer program(entering the code)
Run, running Starting, using, or testing an application or self-containedpiece of code
Runtime When the application runs, and the things that occurduring the run
Execution The process of running a certain piece of code duringruntime
Compile, compilation The process of assembling code into a format usable forexecuting the code
Design time When the application is developed (writing the codeand so on)
In general, application development shifts continuously between design time and runtime(between creating and testing) until the computer application is “finished.” Some com-puter languages (such as ActionScript) may require compilation before the code can bepreviewed, run, or deployed to another machine.
OBJECT-ORIENTED ACTIONSCRIPT FOR FLASH 8
12
6196CH02.qxd 1/18/06 10:49 AM Page 12

Building blocks of programmingComputer languages consist of certain building blocks that store data and determine theway an application needs to run. These building blocks are very similar across differentlanguages, but the way in which they are implemented may differ. Certain languages arebetter equipped to deal with certain tasks, but there’s no single one that’s perfect for alltypes of applications. The following table lists the major building blocks of programming:
Building Block Purpose
Variables For storing temporary data
Arrays For storing lists of temporary data
Functions For grouping and reusing instructions
Loops For repeating instructions
Conditionals For making decisions
Let’s consider variables first.
Variables
When you write down what a typical application needs to do, you immediately think ofstoring and retrieving data. The role of data in an application is temporary; you need tohave a placeholder for information you get from the keyboard and mouse, a database, theWeb, on a network drive, etc.
These placeholders in your application are called variables. For every single piece of datayou’ll want to work with in your application, you’ll declare a variable, give it a name, andassign a value to it. Any time you want to retrieve, modify, or delete a variable, you’ll justuse that very name you gave it. To write this in English, I might use the following:
The number of paper clips in the box is 500.
To write this in ActionScript 2.0, I might use this:
var paperClipsPerBox:Number = 500;
The name of the variable is paperClipsPerBox. It holds numeric data, specifically 500.Variables can hold many kinds of data (more than just numbers). The different values thatcan be assigned to a variable are called data types, and we’ll discuss those next.
PROGRAMMING CONCEPTS
13
2
6196CH02.qxd 1/18/06 10:49 AM Page 13

About variable dataWhat kind of data may variables hold? It depends upon the computer language, but inpractice, most languages accommodate a similar set of data types (numbers, text,true/false values, and more). Some computer languages handle variables with a strict setof rules, while others do not. The strict languages demand that a single variable stores onetype of data, so numeric variables can store numbers, but nothing else.
The not-so-strict languages (such as ActionScript 1.0) allow variables to hold any type ofdata, even to the point that a single variable may hold a number first and then maybe asentence of text later. If you think this is good, think again. When the developer makesa mistake, the computer has far less power to help spot the error.
Luckily, with ActionScript 2.0 you can use strong typing, which greatly increases the ease ofdebugging Flash applications. You are however still free to choose if you like to use thatstrict approach to programming. Even when using the latest ActionScript version you canchoose to code in a way that does not enforce a particular data type for each variable—the power is in your hands. You’ll learn all about programming ActionScript 2.0 in the nextchapter.
Arrays
Arrays are like variables, but they’re a little different. Other variables store a single piece ofdata per variable, like a number in this case:
var paperClipsPerBox:Number = 500;
The variable paperClipsPerBox can only hold one value at a given time; that value maychange while the application is running, but at no point will you be able to assign twovalues to that single variable.
Arrays on the other hand allow you to store multiple values in a single instance. This isgreat for storing related items, such as a list of personal phone numbers. To write this inEnglish, I might use the following:
1. Jenny (555) 867-53092. Pauly (555) 422-42813. Ricky (555) 383-9287...25. Benny (555) 954-2921
To write this in ActionScript 2.0, I might use this:
myPhoneList[0] = "Jenny (555) 867-5309";myPhoneList[1] = "Pauly (555) 422-4281";myPhoneList[2] = "Ricky (555) 383-9287";...myPhoneList[24] = "Benny (555) 954-2921";
OBJECT-ORIENTED ACTIONSCRIPT FOR FLASH 8
14
6196CH02.qxd 1/18/06 10:49 AM Page 14

With arrays, you have a single variable named myPhoneList and you access the data bynumber. If you need the third phone number in the list, you ask for myPhoneList[2] andthe computer answers
Ricky (555) 383-9287
Arrays combine the convenience of simple variables with the power to access data in anordered list. Arrays are dynamic objects in most computer languages, which means youcan insert or remove array items as often as needed. It is even possible to add arrays insidearrays to create more complex data structures called multidimensional arrays. Building onthe previous example, we could, instead of simply storing a phone number, create an arrayfor each item in myPhoneList that holds their additional information such as e-mailaddress, location, date of birth, etc.
Functions
Functions provide a means to call a specific set of instructions that achieve a single, spe-cific task in your application. When first starting to program you might be tempted to puttoo much into a function. Just remember: one (and only one) task per function. The func-tion may include 10, 20, 30, or more separate instructions to achieve its task. That’s fine, aslong as the whole group maintains a single and focused purpose. While this practice is byno means enforced by OOP, it is strongly recommended, and I believe it will help you buildreusable and more effective code.
About calling functionsCalling a function means using a function. Once you declare a function, you may call itsname from elsewhere in the application. Once called, the application carries out theinstructions defined by the function. You declare a function once, but call it as needed.
Suppose you have an application to convert distances. You don’t have to retype theconversion instructions every time you need them. Instead, you can create a singlefunction named milesToKilometers and call it from elsewhere in the application. ThemilesToKilometer function returns the resulting data once it has finished its calculation.The resulting data from a function is typically stored in a variable that you can use later onin your application.
About function parametersFunctions can accept additional (agreed upon) information called function parameters.Using function parameters, the milesToKilometers function can accept a variable formiles. That way, the function can calculate an answer for 15 miles, 500 miles, 600 miles,and so on. Function parameters make functions reusable and flexible.
As with variables, in some computer languages these function parameters are assigned aparticular data type and only allow that particular type of value to be used when a func-tion is called.
PROGRAMMING CONCEPTS
15
2
6196CH02.qxd 1/18/06 10:49 AM Page 15
Loops
Loops repeat a specific set of instructions. The number of times a loop may repeat dependson the situation. The loop may repeat a fixed number of times, or perhaps a conditiondetermines when it expires.
A good example of where you’d use a loop is when working with arrays. Doing this allowsyou to easily go through each and every item stored in the array and retrieve those valuesfor use in your application.
Conditionals
Conditionals are a major building block of any type of programming. Conditional instruc-tions let applications make decisions; they’re the actual logic and control the flow of yourcode.
Think of the last time you used a vending machine. You put some money in and chooseyour particular flavor of soft drink. The machine then uses some programming logic todetermine if you put in an exact amount, too little, or too much cash. If you use exactchange the vending machine will immediately give you your soft drink, if you put in toolittle, it won’t give you the drink and will wait for you to put more money in or press therefund button. Finally, if you put in too much money (and the machine detects that it hasenough spare change), you’ll get the drink and the remaining money.
Computer languages call this conditional structure an if-then-else statement. You can readit like this: “if a condition is met, then do this, otherwise (else) do this instead.” You’ll findif-then-else logic in every piece of software you can imagine.
OOP conceptsOOP really is a methodology, a way of using the building blocks of programming to createdynamic, flexible, and reusable applications. Here’s a brief review of what I discussed:
Classes. From a code-centric view, a class is a collection of functions and variables work-ing together to support a common goal. When you get to the heart of it, though, classeshandle custom data. The variables in a class store the data and functions manipulate thedata. Classes provide a powerful and self-contained way of organizing and processingevery type of custom data you can possibly think of.
Objects. Classes cannot do any real work themselves—for that they need to be instanti-ated as objects. Classes are merely templates that provide a blueprint for multiple objects.Every object automatically contains the data (variables) and behaviors (functions)described by the class. Just remember: one class can have very many objects.
OBJECT-ORIENTED ACTIONSCRIPT FOR FLASH 8
16
6196CH02.qxd 1/18/06 10:49 AM Page 16

Properties. Properties allow objects to be customized. Suppose you use a class namedHouse to build 25 House objects. All houses based on the House class will look identicalbecause they are built from the same master plan. However, House objects can individuallychange their own properties they got from the House class and make themselves uniquefrom their neighbors.
What’s next?Now that we’ve covered the basic programming concepts, let’s get started with the realwork. I will discuss ActionScript 2.0, the latest incarnation of the Flash scripting language,and run you through its new class-based syntax. Before you know it, you’ll be coding yourown very first object-oriented projects.
PROGRAMMING CONCEPTS
17
2
6196CH02.qxd 1/18/06 10:49 AM Page 17

6196CH03.qxd 1/18/06 10:54 AM Page 18

3 ACTIONSCRIPT 2.0 PROGRAMMING
6196CH03.qxd 1/18/06 10:54 AM Page 19

In this chapter I’ll introduce you to programming with ActionScript 2.0, the latest versionof the language that comes with Flash 8.
If you were already familiar with programming in ActionScript prior to this release, it’s worthnoting that the syntax used in previous versions of Flash is now dubbed ActionScript 1.0.Don’t worry, you won’t have to start from scratch. Much of the ActionScript 1.0 syntax hasremained the same in version 2.0; the bulk of the learning curve will be learning about thenew features and how to apply those to your code.
Let’s get started by looking at the key differences between ActionScript 1.0 and Action-Script 2.0 and familiarize ourselves with some new concepts.
ActionScript 1.0 vs. ActionScript 2.0You’ve probably been wondering how ActionScript 1.0 differs from ActionScript 2.0 andwhether you should really be bothering to learn it. I always answer that this latest releaseof ActionScript is a great tool to have if you’re building any type of application in Flash,and learning it is well worth the effort.
The biggest problem usually is that developers (not in the least including myself) are inher-ently lazy: we don’t like to type longer code, we don’t like to comment every function—heck, we don’t even like to get out of our chairs to get a cup of coffee. Important torealize is that the process of building an application often consists of about 20% writingcode, 10% tweaking that code, and 70% debugging. By using ActionScript 2.0 you cangreatly reduce that time needed for debugging because of a concept called strong typing,which helps you signal type mismatch bugs and gives you far more descriptive error mes-sages (more about this later on in this chapter).
Another thing to note is that ActionScript 2.0 compiles down to ActionScript 1.0 syntax.This is a great feature that makes your project compatible with both the Flash 6 andFlash 7 player. There is an exception to this rule when using Flash 7 specific-code such aswhen using the new try-catch-finally feature, which can’t be made available for the Flash 6player.
Not every project will need to make use of ActionScript 2.0, so don’t feel you must buildeverything in the new syntax. If you’re on a strict deadline and need to put a simple Flash-based form online, don’t waste your time writing an ActionScript 2.0 class for handlingyour data. If, however, you’re building any type of application or some code that will likelyneed some further tweaking or additional features added later on, spend that extra hourgetting your code strongly typed and set up as ActionScript 2.0—it will save you some seri-ous headaches down the line.
Declaring variables
If you were already using ActionScript 1.0, you know that declaring a variable was veryeasy indeed, and it’s not that much different from this latest version.
OBJECT-ORIENTED ACTIONSCRIPT FOR FLASH 8
20
6196CH03.qxd 1/18/06 10:54 AM Page 20

foo = "Object Oriented Flash 8"; // ActionScript 1.0
The only time you’d use a var keyword was when you wanted to declare a variable to beof a local scope inside a function, which ensured it was removed from memory after thefunction had finished its task. Scope is the range of visibility for a particular variable; notall variables are available throughout an entire project. You’ll learn more about this lateron in this chapter. When declaring a variable using ActionScript 2.0, however, you’ll alwayswant to use that var keyword.
var foo = "Object Oriented Flash 8"; // ActionScript 2.0
The preceding example shows you how a basic variable is declared in ActionScript 2.0.Good to know is that this variable is not strongly typed. Just like in ActionScript 1.0 you canassign any data type to it without an error being thrown:
var foo = true; // ActionScript 2.0
Important to know is that you only use the var keyword the first time you declare yourvariable; from then on you just assign values to it by referring to its name.
foo = "ActionScript 2.0"; // ActionScript 2.0
ActionScript 2.0 now automatically handles assigning the correct scope to a variable. If youdeclare a new variable inside a function, it will automatically be given a local scope; other-wise it will be given a timeline scope.
Classes vs. prototypes
ActionScript, like several other languages (including JavaScript), is based on ECMA-scriptstandards. These standards are taken very seriously as is pointed out by the companybecoming a member of the ECMA consortium.
ActionScript 1.0 made use of a prototype-based syntax for building classes. Using a so-called prototype chain, you could modify or extend classes as well as simulate a form ofinheritance that is a crucial aspect of OOP. There was no clear-cut way to see if you weredealing with a simple function or an actual class apart from the this keyword and theprototype keyword.
function Ball(color, weight, shape) {this.color = color;this.size = size;this.weight = weight;
}basketBall = new Ball("orange","light","round");bowlingBall = new Ball("blue","heavy","round");rugbyBall = new Ball("brown","light","oval");
ActionScript 1.0
ACTIONSCRIPT 2 .0 PROGRAMMING
21
3
6196CH03.qxd 1/18/06 10:54 AM Page 21

Extending built-in classes using a prototype object became very popular in ActionScript 1.0;you can find an example of this in the following code:
MovieClip.prototype.setPosition = function(x,y) {this._x = x;this._y = y;
}
The preceding code extends the blueprint of the MovieClip class, which makes thesetPosition function available to all instances of MovieClip in your project. The setPositionfunction allows you to set both the x and y position of a movie clip on stage using a singlefunction call. Let’s say you’ve got two movie clips in your project with instance names mc1 andmc2; you could use the following function calls to position them:
mc1.setPosition(10,50);mc2.setPosition(50,70);
Now let’s look at building classes in ActionScript 2.0. The most obvious new requirementis that you need to use external files for each of your classes. If you build a class namedBall, you are required to save that in a file named Ball.as. You can save that file in eitherthe folder where the Flash FLA sourcefile is stored or in the First Run/Classes directoryof your Flash 8 installation.
ActionScript 2.0 also supports something called packages, which are a way to call classesby their folder structure. Let’s say you save the Ball.as file in a subfolder called sports;you can instantiate that Ball class by using its fully qualified classpath: sport.Ball. Usingclass packages has a number of advantages; first, it prevents any possible name conflictsand also allows for easy importing of a series of classes. The import keyword can be usedto include all classes in the sports package for use in your project:
import sports.*;
If you had more classes than just Ball placed in that directory, you’d have those all includedfor use inside your project.
By default Flash 8 looks for classes in the install directory, and if not found there moves onto the folder in which you saved the FLA. If you want, you can also add your own locationsfor Flash to look for classes. This could be handy if you’d like to store your ActionScriptclasses in a central custom location.
To add a custom classpath location, you go to Edit ➤ Preferences, select the ActionScripttab, and click the ActionScript 2.0 Settings button in the Flash IDE.
When the ActionScript Settings dialog box pops up (see Figure 3-1), you can use theplus button to manually add a new location, the minus button to remove one, or the tar-get button to browse for a location. The up and down arrow buttons can be used to setthe priority for each of the locations, the topmost being the first place Flash looks.
OBJECT-ORIENTED ACTIONSCRIPT FOR FLASH 8
22
6196CH03.qxd 1/18/06 10:54 AM Page 22

Ball.as
class sports.Ball {function Ball(color,size,weight) {trace("Ball created");color = color;size = size;weight = weight;
}}
The preceding code should be saved as a file called Ball.as and in a subfolder calledsports. (Note that both the class filename and package name are case sensitive!) In thatsame folder where you created the subfolder, you save a new FLA that contains the fol-lowing lines of code on Frame 1 of the main timeline:
basketBall = new sports.Ball("orange","light","round");bowlingBall = new sports.Ball("blue","heavy","round");rugbyBall = new sports.Ball("brown","light","oval");
The preceding example declares class instances by referring to the full classpath. Anotherapproach is shown here:
import sports.Ball;basketBall = new Ball("orange","light","round");bowlingBall = new Ball("blue","heavy","round");rugbyBall = new Ball("brown","light","oval");
By using the import keyword, we can simply instantiate the class by using its class nameand not giving its full path. Both examples do exactly the same thing, and if you test theproject you’ll see “Ball created” listed three times in the output panel.
ActionScript 2.0
Figure 3-1.ActionScript 2.0 Settings
ACTIONSCRIPT 2 .0 PROGRAMMING
23
3
6196CH03.qxd 1/18/06 10:54 AM Page 23

Just like I showed you with ActionScript 1.0, this version of ActionScript allows you to addyour own custom functionality to a class. Instead of using prototype, we now use theextends keyword in an external class .as file named CustomMovieClip.as.
class CustomMovieClip extends MovieClip {function setPosition(x,y) {_x = x;_y = y;
}}
Now, unlike we saw before with ActionScript 1.0, the setPosition function is not automati-cally available to all instances of MovieClip because we didn’t actually change anything tothe MovieClip class itself.
What we did was create our own subclass that inherits all functionality from the MovieClipclass and adds its own. To have this all work, we need to associate a movie clip with ournew ActionScript 2.0 class. The way you handle that in Flash 8 is quite easy. In the Librarypanel of the Flash IDE, you choose the movie clip object you’d like to associate this classwith. You then right-click that particular movie clip and choose Linkage, which pops up adialog box (see Figure 3-2).
Figure 3-2. Linkage Properties dialog box
In this dialog box you check the Export for ActionScript checkbox and type CustomMovieClipin the AS 2.0 Class text field. The other options in the dialog box are not important to us in thiscase, so you can leave those set to the defaults for now.
When you click OK to close the dialog box, you’ve just associated that MovieClip objectwith the custom class. You can now start using the setPosition function with all instancesof that object. Drag two instances of the MovieClip on stage and name them mc1 and mc2.Just like with the ActionScript 1.0 example, you can now use the following code:
mc1.setPosition(10,50);mc2.setPosition(50,70);
OBJECT-ORIENTED ACTIONSCRIPT FOR FLASH 8
24
6196CH03.qxd 1/18/06 10:54 AM Page 24

Those of you familiar with component development in ActionScript 1.0 might rememberObject.registerClass, which was used to associate an object with a class just like we didin this dialog box.
Public and private scope
ActionScript 1.0 had no real means of enforcing private scope, that is to say, all functionsof a class could be called outside the scope of that class. What would usually happen isthat developers used either the $ or _ sign to prefix a private class function so as to indi-cate that it is not supposed to be used as a publicly available function.
function CountSheep(maxSheep) {this.currentSheep = 0;this.maxSheep = maxSheep;
}CountSheep.prototype.startCounting = function() {this.countInterval = setInterval(this,"$incrementSheep",1000);
}CountSheep.prototype.$incrementSheep = function() {if(this.currentSheep < this.maxSheep) {this.currentSheep++;trace(this.currentSheep+" sheep counted");
} else {trace("Sleeping ...");clearInterval(this.countInterval);
}}mySleep = new CountSheep(5);mySleep.startCounting();
In the preceding example, you can see a simple ActionScript 1.0 class that helps you countsheep to fall asleep. The constructor takes one parameter, which is the amount of sheepyou want to count. I personally am an easy sleeper, so I’ve just specified to count fivesheep.
If you look at the way the code is structured, you’ll notice that there really is only onefunction that you’ll want to have called outside the scope of this class and that isstartCounting. The incrementSheep function is only useful inside the class and would bea good candidate to give a private scope. Having the function called outside the classscope might in fact even break our code. You can see I prefixed the code with a $ sign toindicate that it shouldn’t be considered a public function. As I explained before, noenforcement occurs there whatsoever. In ActionScript 1.0, you can only indicate privatescope by naming convention.
ActionScript 1.0
ACTIONSCRIPT 2 .0 PROGRAMMING
25
3
6196CH03.qxd 1/18/06 10:54 AM Page 25

CountSheep.as
class CountSheep {var currentSheep;var maxSheep;var countInterval;function CountSheep(maxSheep) {this.currentSheep = 0;this.maxSheep = maxSheep;
}public function startCounting() {countInterval = setInterval(this,"incrementSheep",1000);
}private function incrementSheep() {if(this.currentSheep < this.maxSheep) {this.currentSheep++;trace(this.currentSheep+" sheep counted");
} else {trace("Sleeping ...");clearInterval(this.countInterval);
}}
}
As you can see, this is largely the same as any other ActionScript 2.0 class, with the onlydifference that we’ve got a public and private keyword in front of the class functions.It’s pretty obvious what those keywords will do for you, so you’d expect the following codeto work in an FLA that you’ve saved in the same location as this class:
var mySleep = new CountSheep(5);mySleep.startCounting();
Hoorah, it works! But wait a minute, let’s see if our private function really is private:
var mySleep = new CountSheep(5);mySleep.incrementSheep();
Oh dear, one of the few times you’d want the compiler to spit out an error and it doesn’t.The private function is called and behaves just like a public function would. That’s notwhat we want, is it?
The key to this problem is that the variable we used for our countSheep class instance isn’ttyped as countSheep. When you want ActionScript 2.0 to enforce private scope, you’llneed to use the following code:
ActionScript 2.0
OBJECT-ORIENTED ACTIONSCRIPT FOR FLASH 8
26
6196CH03.qxd 1/18/06 10:54 AM Page 26

var mySleep:countSheep = new CountSheep(5);mySleep.incrementSheep();
If you test these lines of code we get the long awaited error message:
**Error** Scene=Scene 1, layer=Layer 1, frame=1:Line 2:The member is private and cannot be accessed.
mySleep.incrementSheep();
Total ActionScript Errors: 1 Reported Errors: 1
This about wraps up my comparison between ActionScript 1.0 and ActionScript 2.0. Importantto note is that all examples in this section until now have not used any form of strong typing.I’ll soon set that right and discuss strong typing and its benefits in ActionScript 2.0 next.
Strong typing and code hintsStrong typing is a very useful feature and not that difficult to implement. I discusseddeclaring variables in ActionScript 2.0 earlier in this chapter; the only difference when itcomes to strong typing is you add a colon and then type the class you want it to be aninstance of.
Flash 8 automatically pops up a list of all available built-in classes as soon as you type acolon when declaring a variable (see Figure 3-3).
In this example we’ll declare our variable as a String type and give it the value "Object-Oriented Flash 8".
var foo:String = "Object-Oriented Flash 8";
Now any time we use this particular variable, we automatically get context-sensitive codehints listing all available functions for variables of that type. In this example, we get allfunctions available for the String data type (see Figure 3-4).
Figure 3-3.Class code hints
ACTIONSCRIPT 2 .0 PROGRAMMING
27
3
6196CH03.qxd 1/18/06 10:54 AM Page 27
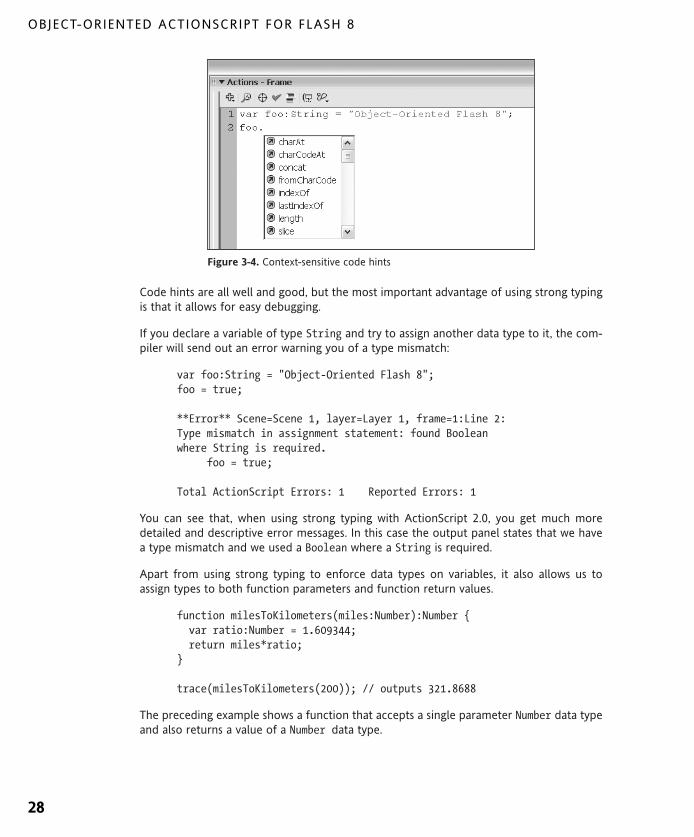
Figure 3-4. Context-sensitive code hints
Code hints are all well and good, but the most important advantage of using strong typingis that it allows for easy debugging.
If you declare a variable of type String and try to assign another data type to it, the com-piler will send out an error warning you of a type mismatch:
var foo:String = "Object-Oriented Flash 8";foo = true;
**Error** Scene=Scene 1, layer=Layer 1, frame=1:Line 2:Type mismatch in assignment statement: found Booleanwhere String is required.
foo = true;
Total ActionScript Errors: 1 Reported Errors: 1
You can see that, when using strong typing with ActionScript 2.0, you get much moredetailed and descriptive error messages. In this case the output panel states that we havea type mismatch and we used a Boolean where a String is required.
Apart from using strong typing to enforce data types on variables, it also allows us toassign types to both function parameters and function return values.
function milesToKilometers(miles:Number):Number {var ratio:Number = 1.609344;return miles*ratio;
}
trace(milesToKilometers(200)); // outputs 321.8688
The preceding example shows a function that accepts a single parameter Number data typeand also returns a value of a Number data type.
OBJECT-ORIENTED ACTIONSCRIPT FOR FLASH 8
28
6196CH03.qxd 1/18/06 10:54 AM Page 28

Just as you would expect, calling the function as follows will have the compiler throw anerror:
trace(milesToKilometers("Flash"));
**Error** Scene=Scene 1, layer=Layer 1, frame=1:Line 7: Type mismatch.trace(milesToKilometers("Flash"));
Total ActionScript Errors: 1 Reported Errors: 1
Equally changing the function return type to String results in an error because the valuethe function returns is of a Number type:
function milesToKilometers(miles:Number):String {var ratio:Number = 1.609344;return miles*ratio;
}trace(milesToKilometers(200));
**Error** Scene=Scene 1, layer=Layer 1, frame=1:Line 3:The expression returned must match the function's returntype.
return miles*ratio;
Total ActionScript Errors: 1 Reported Errors: 1
As you can see, strong typing and code hints are very useful features when you want to doany application development in Flash 8 and ActionScript 2.0. In the end it is well worth theeffort of applying it to your variables, function parameters, and return types. This smalladditional effort will help you out when it comes to debugging the application in thelong run.
ActionScript trouble spotsActionScript 2.0 does have some weaknesses and things you will want to watch out for. Inthis section I’ll discuss some common trouble spots.
Case sensitivity
Unlike in the previous release, ActionScript 2.0 is case sensitive as the following exampleshows:
var myVariable:String = "Object-Oriented Flash 8";trace(myvariable); // outputs undefinedtrace(myVariable); // outputs Object-Oriented Flash 8
ACTIONSCRIPT 2 .0 PROGRAMMING
29
3
6196CH03.qxd 1/18/06 10:54 AM Page 29

Declaring variables
When you initially declare a variable, you use the var keyword. You do need to watch outyou don’t use that keyword later on in the application when referring to the variable.Doing that would overwrite any data type that you applied to it using strong typing.
var myVariable:String = "Object-Oriented Flash 8";var myVariable = true;
If you use a var keyword on that second line that assigns a Boolean true value to the vari-able, you don’t get a type mismatch error message when compiling.
Use of the this keyword
When building classes in ActionScript 2.0, there is no need to use the this keyword torefer to variables of the class scope.
class MyClass {var myString:String;function MyClass(param:String):Void {myString = param;outputString();
}function outputString() {trace(myString);
}}
As you can see in the preceding example, there is a variable named myString that is of aclass scope, and we can refer to it without use of the this keyword. The same thing can beseen when the outputString function is called.
Although you can safely remove the this keyword, I would advise you to keep using it tomake the distinction between variables of a class scope (myString) and a local scope(param). The same code with the this keyword looks like this:
class MyClass {var myString:String;function MyClass(param:String):Void {this.myString = param;this.outputString();
}function outputString() {trace(this.myString);
}}
OBJECT-ORIENTED ACTIONSCRIPT FOR FLASH 8
30
6196CH03.qxd 1/18/06 10:54 AM Page 30

What’s next?I covered a great deal of information in this chapter, and you’ll have learned the differencesbetween ActionScript 1.0 and ActionScript 2.0 and the benefits of using strong typing.
This chapter closes Part One of this book. We now move on to discuss OOP guidelines,best practices, and planning. Even if you are already familiar with programming concepts,I’d highly recommend that you read the following chapters to start off on the right footbefore we get to the in-depth OOP concepts and put theory into practice.
ACTIONSCRIPT 2 .0 PROGRAMMING
31
3
6196CH03.qxd 1/18/06 10:54 AM Page 31

PART TWO FLASH OOP GUIDELINES
6196CH04.qxd 1/18/06 10:55 AM Page 32

4 PLANNING
6196CH04.qxd 1/18/06 10:55 AM Page 33

Ah, the magic word “planning,” where would we all be without it? Most likely out of a job,that’s for sure!
When you think of it, planning is nothing more than an object-oriented way of schedulinga project. You divide the project up into tasks, look at the task dependencies, and try toget those pieces to fit together within a predefined deadline.
Your initial impulse might be to skip this chapter and go right for the information on in-depth OOP, but I’d like to convince you to do otherwise. In this chapter I’ll discuss theimportance of planning as an integral part of object-oriented projects and run youthrough the process of analyzing and modeling your application.
The importance of planningIf you’ve ever been in a situation where your entire project lacks any form of planning,you’re working in a team with both remote and local developers, and the client keepscalling you every 10 minutes with an ever increasingly loud voice warning you that thedeadline is coming ever closer—you’ll soon know what you’re missing.
Of course, not all projects are like the one just described, and there are numerous situa-tions in which you could think the planning stage is obsolete. Let’s look at some of thesepossible scenarios and see why it is not:
We don’t have time for planning (deadline is next month).
The time you’ll spend planning a project will greatly decrease development time and timeneeded for debugging. In that sense, you’ll notice that the planning stage will help youbetter manage projects with a tight deadline.
We don’t have a budget for planning (we need to begin today).
Planning will enable you to save money on development costs. At the end of the day,what’s the cost of a few pieces of paper compared to possibly rebuilding your applicationfrom scratch because nobody thought of taking that one critical parameter into consider-ation?
We don’t need planning (this is just a quick little project).
Planning is useful for any type of application. What if a few months down the line theclient figures out that the application doesn’t quite fit in with their existing data infra-structure? Wouldn’t you be frustrated to rebuild from scratch what a few simple notescould have avoided?
The preceding situations are some of the most common reasons why people tend to thinkthat planning is not necessary. These examples show that even in these circumstancesplanning is a very important part of the development process.
As I briefly discussed in the introduction to this chapter, you can look at planning as anobject-oriented process. The different sections of your planning can be handled just like
OBJECT-ORIENTED ACTIONSCRIPT FOR FLASH 8
34
6196CH04.qxd 1/18/06 10:55 AM Page 34

objects in OOP, and each have their own particular role to play in the bigger whole. Thetasks of the project can be considered as self-contained objects, project dependencies arecomparable to interaction between classes, etc.—in that sense planning should not behandled much differently than writing actual code. This object-oriented nature of planningmakes it very suitable to be written down in a structural model, which is what we’ll do lateron in this chapter. Next, I’ll discuss the various steps involved with the process of planningand walk you through various examples.
Initial phase: Planning reusability!
Long-term reusability for your applications doesn’t just happen by accident; it needs to becarefully planned. A first step in this planning process is getting the various tasks of yourapplication down on paper.
Doing initial planning on paper is usually best because it allows you to focus on the issuesat hand without getting distracted by details like what font and color scheme to use, whichline style to use, etc. It’s often a good thing to turn off your computer at this stage as ithelps you to stay focused on the bigger scheme of things rather than get involved withexactly how you want the presentation and layout to look like.
The first question you’ll need to ask yourself is what the application needs to do, not howit does it. We’ll look at the ways in which the necessary tasks will be achieved at a laterstage, but to start with you need to be clear on what exactly it is you need.
Suppose you need to build a car. In itself that is a rather generic term; you could come upwith various solutions that cover the load. You could build something resembling a carwith a whole bunch of clay. You could build a car from a kit. If you have way too muchmoney, you could commission BMW to build a prototype car for you. As you can see, justknowing a car is what you want to build isn’t really enough information to know enoughabout what you need.
In the initial phases of planning, you repeatedly ask what until it is extremely clear whatthe final product should be (but you can still leave most of the difficult, technical how-toquestions for later).
Planning encapsulation
After reading through Chapter 1, you know that encapsulation is a key feature in OOP andserves to hide the internal workings of a class. I’ll run you through planning encapsulationfor your project with the following example:
Let’s say we’re faced with a ball and want to have it bounce. If we abstract this in object-oriented terms, we come up with a Ball class and a Bounce or, in more general terms,Mover class.
If you’re not that familiar with OO concepts, you might not have considered creating thatMover class, instead adding the functionality directly to the Ball class. Think about it, whatwould be the benefit of making it a separate class? The answer is quite simple: you want toavoid duplicate code and increase reusability.
PLANNING
35
4
6196CH04.qxd 1/18/06 10:55 AM Page 35

Now, how does this work in Flash? If you’ve worked with ActionScript before, you knowthat there are quite a few events that the built-in objects broadcast. One very importantevent is onEnterFrame, which runs once every frame. Let’s say we’ve got a frame rate of30 frames per second that would have the onEnterFrame event, and thus the event handlerwe attached to that event, broadcast 30 times every second. You can see that using thisevent you can quite easily simulate movement using ActionScript.
An event handler is a function that you apply to an event; how exactly that event handlercode looks is not important in this example—we’ll just focus on how it is set up.
Figure 4-1 shows the class diagram for Mover.
The Ball class calls the startMoving function in theMover class. This startMoving function then sets theonEnterFrame event that calls the updatePositionfunction. The internal details of the Mover class andthe updatePosition function aren’t important fromthe event handler’s point of view (encapsulation).
That completes the circle any time the onEnterFrame event is broadcast and theupdatePosition function is executed, which results in the simulated motion we wanted.
Planning inheritance
Let’s expand on that encapsulation plan; without knowing exactly how the Mover classworks, we want to add additional functionality. To achieve just that we’ll be using inheri-tance.
Inheritance allows you to extend or enhance classes that already exist, without alteringexisting behavior. Inheritance allows new classes to inherit the services of some otherexisting class. When you use the new class, you get the features of the existing class too(as if they were both merged into a single bigger class).
Inheritance is more than simply an organized way to add new features—it also preventsyou from breaking applications that already use existing classes (because you’re not mod-ifying the existing classes one single bit).
Let’s build on our example. This time I’m adding another new class named Bouncer. TheBouncer class will inherit from the Mover class, and will consequently be able to do every-thing the Mover class can do, but add its own additional functionality. In particular, I wantthe class to bounce the ball whenever it hits a border.
Just like before, we’re not concerned with the details of how the ball will bounce or howthe borders are determined. Right now, I only need to invent the proper function namesto cover the behavior I want to provide.
The Ball class is a special case in our example; it is in fact a movie clip instanceof the MovieClip class. No need to worry about this just now, it’ll be explained inmore detail in Chapters 7 through 10.
OBJECT-ORIENTED ACTIONSCRIPT FOR FLASH 8
36
Figure 4-1.Mover class diagram
6196CH04.qxd 1/18/06 10:55 AM Page 36

Figure 4-2 shows the class diagram for Bouncer.
1. The startMoving function in the Bouncer class sets the onEnterFrame event han-dler that calls the updatePosition function in the Mover class. The internal detailsof the Bouncer class aren’t important from the event handler’s point of view(encapsulation).
2. The Mover class doesn’t know it, but the Bouncer class has an additional behavior(the bounceAtBorder function). The Bouncer class can use this behavior withoutrevealing it to the Mover class.
3. The Ball class doesn’t know it, but the Bouncer class has inherited the Mover class.Indeed, the Ball class has no idea that the Mover class even exists. The Bouncerclass initiated the request to inherit; it doesn’t need permission from the Ball classto do so. The Ball class has no idea that any of this is happening, and that’s just theway it should be. The Bouncer class can do anything the Mover class can do, plus itcontains a bounceAtBorder function.
This completes another code sequence that somehow (we haven’t looked at a single lineof code yet) moves the ball instance and bounces it back any time it hits a border.
While we’re at it, let’s go one step further and add a class that simulates friction and grav-ity to give our ball some more natural movement. I’ll name this class Gravity and have itinherit from the Bouncer class so it can use all functionality that is already defined inthere.
Remember, the Bouncer class itself inherits from the Mover class so we’ve really got agreat inheritance chain going on here. One thing to note is that a class can inherit func-tions from many classes down but can only interact directly with its parent class (for theGravity class that is the Bouncer class).
We’re still not bothered about the workings of our new Gravity class but simply add twofunctions called applyFriction and applyGravity. Let’s look at the setup of this newclass. Figure 4-3 shows the class diagram for Gravity.
Figure 4-3. Gravity class diagram
Figure 4-2.Bouncer class diagram
PLANNING
37
4
6196CH04.qxd 1/18/06 10:55 AM Page 37

1. The startMoving function in the Gravity class sets the onEnterFrame event handlerthat calls the updatePosition function in the Bouncer class (which in turn calls theupdatePosition function in the Mover class). The internal details of the Gravityclass aren’t important from the event handler’s point of view (encapsulation).
2. The Ball class doesn’t know it, but the Gravity class has inherited from the Bouncerclass. The Gravity class can do anything that the Bouncer class can do, plus it pro-vides its own unique functions named applyFriction and applyGravity.
3. The Bouncer class inherits from the Mover class. This implies that the Gravity classhas also inherited (be it indirectly) the functionality of the Mover class (without iteven knowing that the Mover class exists).
This wraps up another sequence that is still just triggered by the Ball class calling thestartMoving function. The entire series of events that we added from the Mover class,through the Bouncer class, down to the Gravity class is executed every time theonEnterFrame event triggers the updatePosition function and any additional functionsthe class provides.
I’ve covered a lot of information in this example that will have helped you get an idea ofhow to model your project with encapsulation and inheritance in place. You might nothave noticed, but we’ve also implemented the concept of polymorphism by using thesame startMoving function in all our classes. We’re not bothered what particular class isused to move the ball (Mover, Bouncer, or Gravity) because we just need to trigger thatsame startMoving function to have it start moving.
If you’ve lost your way in the class setup, take a look at Figure 4-4.
Figure 4-4. Mover class inheritance diagram
OBJECT-ORIENTED ACTIONSCRIPT FOR FLASH 8
38
6196CH04.qxd 1/18/06 10:55 AM Page 38

Next, I’ll walk you through the specifics of applying the planning techniques we just dis-cussed on a Flash ActionScript project.
Analyzing a Flash ActionScript projectFor a long time serious developers have shied away from using Flash and ActionScript, notbecause they weren’t impressed by its functionality but mostly because of its unconven-tional timeline metaphor and cluttered coding practices. Up until quite recently, Flash wasmainly classified as a tool for the creative and the odd few experimental developers. Luckilythis is all changing rapidly; they are putting their money on building a framework thatallows the creation of Rich Internet Applications (RIA) and more and more developers areventuring into this field.
When analyzing projects that are to be built in Flash and ActionScript, it is important totake certain things into consideration. I’ll discuss some of these trouble spots here andoffer you some ideas on how to approach those when planning your application.
Flash files run on the client
When you deploy your Flash file on the web, the SWF file is not run on the server but iscached and displayed in the browser using the Flash player plug-in. This brings up certainrisks with what you include in your project file. There are several SWF decompilers avail-able on the Web these days, and it is very easy for anyone to decompile your file andextract sensitive information (password information, high score submission URL, etc.).
There is no foolproof way of protecting your SWF content, but one thing you shouldalways do is move all your database connection details, SQL queries, and anything else thatyou don’t want to be public knowledge on the server.
Securing data sent to the server
Building on the previous point, you wouldn’t do password verification on the client sidebut rather send it to a server-side script that checks this for you and returns whether ornot the user was validated.
There are a couple of difficulties with doing something like that, the first one being thatthe login information sent from Flash to the server is not encrypted in any way. Anyoneusing a packet sniffer could pick up the login information and use it to get access illegally.
How this is typically handled is the data entered into Flash is concatenated to the user’s IPand encrypted using an ActionScript implementation of either MD5 or SHA1, which arealgorithms that allow you to create an irreversibly encrypted string from whatever datayou pass to it. This encrypted password data is then sent to the server along with the user-name and a randomly generated string in plain text. The server-side script now doesexactly the same as our ActionScript did. It detects the user’s IP and encrypts that with thepassword in the database associated with the login that was sent. Finally, it returns a trueor false value along with the same randomly generated string to Flash.
PLANNING
39
4
6196CH04.qxd 1/18/06 10:55 AM Page 39

You can see that this is a useful way to secure login information but doesn’t really help youout with data you can’t compare on the server. Other types of data transfer are harder tosecure with Flash; in most cases the best bet there is to use a Secure Socket Layer (SSL)connection.
Parsing data in Flash
Despite some serious increases in Flash player performance with parsing XML and textdata, it isn’t equipped to handle large data loads very well. The key is to organize your datatransfers as efficiently as possible; you want to avoid long waits when the application ini-tializes and don’t want to trigger too many calls to the server to make the user experienceas fluent as possible.
Let’s take a train schedule for example. If you were to write a Flash application that allowsusers to look up train schedule information, you obviously wouldn’t load all the departuretimes, trains, and platform number information in at the same time. Yet at the same timejust loading information for one particular train might not be the best thing to do. Youcould predict that a user might want to know about the previous and next train andreturning this information from your call to the server makes the whole experience muchmore enjoyable. Balancing out data load with task workflow is what you’ll have to bearin mind.
For applications like the one discussed previously, you might want to consider using FlashRemoting technology, which uses binary AMF files to communicate directly with Flash fromthe server. Using this technology allows your server-side data to keep its datatype intactwhen loaded into Flash so that it doesn’t require any further parsing (see Chapter 18 formore information).
As you’ll have noticed, most concerns you’ll have to deal with when planning a Flash proj-ect are related to data security and performance issues. Now, how does this affect theplanning process?
From my own experience I’ve seen that back-end development and Flash applications areoften designed and modeled as totally different processes. The consequence there is thatit brings all the stress of your application to the middle scripting layer, which is forced todo extensive data manipulation to get it molded into shape for use with the Flash appli-cation. It’s not easy to have a square peg fit into a round hole.
Ideally the scripting layer should simply act as a gateway for presenting the back-end datato the Flash client. To achieve that it is important to look at the data flow between theserver and the client and model in a way that allows for easy integration.
Introduction to UML modelingThe Unified Modeling Language (UML) is an incredibly useful for tool for modelingapplications. The language was first introduced in 1997 as a way to visually representobject-oriented projects and has become the de facto means to visually represent object-oriented structures and processes.
OBJECT-ORIENTED ACTIONSCRIPT FOR FLASH 8
40
6196CH04.qxd 1/18/06 10:55 AM Page 40

When building a model of your application, you typically have multiple views that aremapped in diagrams. UML supports nine different diagrams that can be applied to createdifferent views: class, object, use case, sequence, collaboration, statechart, activity, com-ponent, and deployment diagrams. You can find a short overview with a description of thedifferent diagrams in the following table:
Diagram Description
Class Describes the static class structure of an application
Object Describes the static structure of class instances at a certain pointin time
Use case Describes application functionality using actors and use cases
Sequence Describes data interaction between individual classes
Collaboration Describes class interaction in the application as a whole
Statechart Describes class behavior in response to external data
Activity Describes the flow between different tasks of the application
Component Describes dependencies between components of the application
Deployment Describes physical resources used for deploying the application
In the scope of this book, I’m not able to provide you a full and in-depth reference forUML modeling but will introduce you to the concepts that will help you get started mod-eling Flash ActionScript projects.
I’ll first run you through the reasons for choosing UML and then move on to discussingbuilding a class diagram, which is without doubt the most essential diagram to have froma code-centric point of view.
Why use UML?
Why would you use UML to model your application? There are several reasons why UML isthe way to go and I’ll discuss a couple of those right now.
UML offers standardized notation and has a language-neutral syntaxStandards are very important when modeling an application; you want to have somethingthat everyone can understand. If you model an application using UML and a differentdeveloper is assigned to its development, that developer should easily be able to take overthe project.
PLANNING
41
4
6196CH04.qxd 1/18/06 10:55 AM Page 41

UML can be used to model anythingYou can model anything from a business process down to a software class structure. Thevarious diagrams that are supported by UML allow you to visually represent just aboutanything you might need.
Aside from the advantages discussed previously, you’ll soon notice that using UML helpsyou out tremendously in the planning process. Being able to visualize concepts and appli-cation structure helps you to easily point out any possible weaknesses or imperfectionsunlike any other method you might have used before. I personally find that using UML inthe planning process improves the overall development workflow and decreases theamount of time you’ll need to spend on debugging and tweaking the application.
Class diagram
The UML class diagram is without doubt the most important diagram you’ll be using whenplanning your Flash ActionScript project. Class diagrams describe the static structure ofyour application, the classes with their attributes and methods and relationships betweenthem.
Let’s look at some basic notation you’ll need when creating a class diagram. The first thingyou’ll notice is that classes are shown as a rectangle that contains its name. Note that theBall class I’ll use as an example in Figure 4-5 is not related to the Ball class discussed earlierin this chapter when looking at planning your project.
Figure 4-5. UML class notation
All classes in your project will be shown in such a rectangle; this is the minimal state inwhich they need to appear in the class diagram. More often though you’ll want to have theattributes (variables) and methods (functions) of that class showing as well. To do thisthe UML notation extends the class rectangle symbol with two other areas: the top-most isused for attributes and the bottom one for methods (see Figure 4-6).
You might have noticed that the attributes and methods in the Ball class have plus orminus signs before their names. Those signs indicate whether the attribute or method is ofa public (+) or private (-) scope. Attribute and method scopes aren’t always provided whendrawing a UML class diagram, but I find it very useful to do so as it helps with visualizingclass interaction.
Any ActionScript developer wanting to get involved with UML for Action-Script 2.0 will do well to give Grant Skinner’s free gModeler tool a try(www.gskinner.com/gmodeler/). Not only does this award-winning Flash appli-cation allow you to build UML models of your ActionScript project, it alsoexports ActionScript 2.0 stub code, which is a real time-saver!
OBJECT-ORIENTED ACTIONSCRIPT FOR FLASH 8
42
6196CH04.qxd 1/18/06 10:55 AM Page 42

Figure 4-6. UML class attributes and methods
In the preceding example we see three public attributes: shape, weight, and color, whichmeans those values are available outside the class. There also is a bounceCount attributethat is set to private; it cannot be accessed outside the class, but if you look closely there isa public getBounceCount method that returns this value. I’ll discuss getter and setter meth-ods in greater detail in later chapters, but its important to note how this helps you achieveencapsulation and prevent attributes from being altered outside the class, which couldcause problems with the internal workings. You can also notice that the attributes andmethods are followed by a datatype written after their names; this shows you the particulardatatype of the attribute, or in the case of methods the datatype of the value it returns.
When you’ve drawn all classes for your project, you’re all set to define their relationshipsto each other. I’ll discuss the most important relationships you’ll be needing when workingon a Flash ActionScript project next.
Association and generalization
Association is the simplest link you can have between two classes; it describes two classesworking together on a conceptual level (see Figure 4-7).
Figure 4-7. UML association relationship
At the time of writing this chapter, the gModeler tool does not support public orprivate scope using the + and - characters when exporting to ActionScript 2.0stub code. This is, however, easy enough to manually tweak and it will likely besupported in the not-too-distant future.
PLANNING
43
4
6196CH04.qxd 1/18/06 10:55 AM Page 43
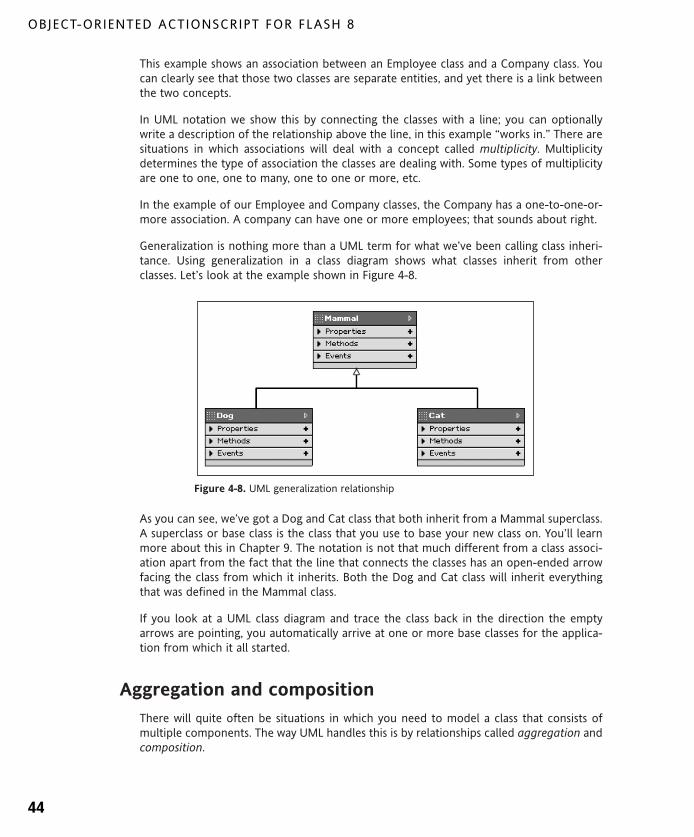
This example shows an association between an Employee class and a Company class. Youcan clearly see that those two classes are separate entities, and yet there is a link betweenthe two concepts.
In UML notation we show this by connecting the classes with a line; you can optionallywrite a description of the relationship above the line, in this example “works in.” There aresituations in which associations will deal with a concept called multiplicity. Multiplicitydetermines the type of association the classes are dealing with. Some types of multiplicityare one to one, one to many, one to one or more, etc.
In the example of our Employee and Company classes, the Company has a one-to-one-or-more association. A company can have one or more employees; that sounds about right.
Generalization is nothing more than a UML term for what we’ve been calling class inheri-tance. Using generalization in a class diagram shows what classes inherit from otherclasses. Let’s look at the example shown in Figure 4-8.
Figure 4-8. UML generalization relationship
As you can see, we’ve got a Dog and Cat class that both inherit from a Mammal superclass.A superclass or base class is the class that you use to base your new class on. You’ll learnmore about this in Chapter 9. The notation is not that much different from a class associ-ation apart from the fact that the line that connects the classes has an open-ended arrowfacing the class from which it inherits. Both the Dog and Cat class will inherit everythingthat was defined in the Mammal class.
If you look at a UML class diagram and trace the class back in the direction the emptyarrows are pointing, you automatically arrive at one or more base classes for the applica-tion from which it all started.
Aggregation and composition
There will quite often be situations in which you need to model a class that consists ofmultiple components. The way UML handles this is by relationships called aggregation andcomposition.
OBJECT-ORIENTED ACTIONSCRIPT FOR FLASH 8
44
6196CH04.qxd 1/18/06 10:55 AM Page 44

Let’s take a PC for example. As shown in Figure 4-9, the way you would visualize that is bycreating class elements for each of the components and a class that represents the whole.The components are connected to the whole with a solid line, and an empty diamondshape is added at the end to represent an aggregation-type relationship.
The model shown in Figure 4-9 is a limited representation of a PC that consists of compo-nents like a monitor, keyboard, mouse, etc. Now, what exactly is the difference betweenaggregation and composition? It’s not always an easy distinction to make but a good ruleof thumb is the following:
A good example of composition is a human being. If the human dies, its parts die with it.If we look at our PC aggregation example, while the PC might not continue working, themonitor, keyboard, and mouse components will all remain functional as stand-alone partsand can be used in another PC.
UML notation for composition is very similar to that of aggregation except for the fact thatit uses a filled diamond shape at the connection between the component and the whole,as you can see in Figure 4-10.
In aggregation the whole cannot exist without its components, while in acomposition the components cannot exist without the whole.
PLANNING
45
4
Figure 4-9. UML aggregation relationship
Figure 4-10. UML composition relationship
6196CH04.qxd 1/18/06 10:55 AM Page 45

The difference between aggregation and composition is mostly conceptual for FlashActionScript projects; it just shows you whether or not the components need to bedestroyed when the whole is destroyed.
This concludes my short introduction to UML. This is by no means a complete overviewbut has taught you some basic skills that will enable you to start modeling most FlashActionScript applications. For more information on the topic, you might want to look atthe book Fast Track UML 2.0 by Kendall Scott (Apress, 2004), which is dedicated to thesubject and goes far beyond just the class diagram.
What’s next?Be sure not to underestimate the importance of this chapter; I’ve covered some essentialinformation here that will help you work more efficiently and productively. The introduc-tion to UML is a must-read if you’re interested in pursuing application development inFlash ActionScript.
Coming up in the next chapter, I’ll discuss project workflow, versioning control, and usabil-ity testing, which are all very important topics to read up on before embarking on actualapplication development.
OBJECT-ORIENTED ACTIONSCRIPT FOR FLASH 8
46
6196CH04.qxd 1/18/06 10:55 AM Page 46

6196CH04.qxd 1/18/06 10:55 AM Page 47

6196CH05.qxd 1/18/06 10:56 AM Page 48

5 PROJECT WORKFLOW
6196CH05.qxd 1/18/06 10:56 AM Page 49

We’ve certainly covered quite a number of topics by now; you’ve learned about program-ming concepts, using ActionScript 2.0, and how to plan and model your applications. Nowit’s time to look at how you can take all those things and integrate them in your projectworkflow.
Project workflow describes the process by which you most efficiently handle applicationsfrom start to finish. In Chapter 6 I’ll discuss best practices for coding in ActionScript 2.0,but first I want to introduce you to some topics that are essential to painlessly completingyour projects. One of those topics is version control, which has no doubt saved manydevelopers from chronic insanity. Be sure to read up on this, if you’re not already using it!
After covering the basics of version control, I’ll move on to discussing some importantapproaches to programming that will help you be more productive in the way you work.
Introducing version controlVersion control is a system that allows you to keep track of multiple versions of sourcecode. It provides you with a history of your development process and supports someadvanced features that simple backup files just can’t match.
You might think that it is all well and good to track the history of your code, but wouldn’tthat take an enormous amount of disk space storing all those copies of the project? No itwon’t; version control is smart enough to store only the actual changes that were made tofiles, not the entire files themselves. Which is, when you think about it, much more effi-cient than the way we usually back up our code.
Whether you’re working in a team or as a single developer, it is imperative that you use aform of version control to prevent any loss of code or wasted hours of coding trying torevert to a version you might have created days earlier. Not using version control is prob-ably the single biggest risk you can take when developing an application.
I’ll be discussing the benefits of using a version control system as well as running youthrough the basics of setting up and managing a local Concurrent Versions System reposi-tory for your project in the following few sections of this chapter.
About Concurrent Versions System
Concurrent Versions System (CVS) is without doubt the most well-known open sourceimplementation of version control. Using CVS, your source code gets maintained in a coderepository where it generates a branched tree structure based on the different versions ofa file you (or colleagues) submitted. The reason why CVS uses a tree structure is becausethat allows developers not just to work in a linear sequence, but also build out differentbranches of code based on a particular revision of a file.
The application uses a client/server model that hosts your code repositories. It also uses anonexclusive process whereby multiple developers can simultaneously work on the samefile without breaking each others’ code—isn’t that just brilliant!
OBJECT-ORIENTED ACTIONSCRIPT FOR FLASH 8
50
6196CH05.qxd 1/18/06 10:56 AM Page 50

Those days are luckily in the past. Using CVS, you can now have developers working on thesame file by checking out that file from the code repository and committing changes backto repository when they’ve finished. If another developer made changes to the file andcommitted it to the repository before you did, you’ll be asked to update your file, whichautomatically merges your changes with the latest copy from the repository. If by anychance multiple developers were working on the same line of code, CVS will not be ableto merge the files, and you’ll be prompted to manually correct that line before it getsmerged.
Getting confused? You shouldn’t be; let’s recapitulate and look at some basic CVS termi-nology in the following table:
Repository Directory in which all CVS files are stored.
Module Files in the repository are grouped in modules.
Add Add a local file to a module in the CVS repository.
Remove Remove a file from a module in the CVS repository.
Check out Get a local copy of a file from the CVS repository.
Update Merge the latest version of the file in the CVS repository with yourlocal copy.
Commit Add or merge the local copy of a file with the CVS repository.
Release Remove the local copy of a file retrieved from the CVS repository.
Revision Number indicating the version of particular file.
Tag Give a common version name to all files in a module.
Diff Retrieve the difference between a local file and the one in the CVSrepository.
History Retrieve the revision history for a file in the CVS repository.
When I look back at my early web developer days, there were many a occasionswhen there needed to be some very last-minute changes made to a websitebefore it could be pushed live. This resulted in the entire team (often projectmanager included) frantically typing code to get all the tweaks done on time.About half an hour before deadline, we usually managed to get it all finished uponly to realize that some of us were working on the very same page and hadoverwritten each others’ work, resulting in a lot of shouting, finger pointing, andeven more frantic typing.
PROJECT WORKFLOW
51
5
6196CH05.qxd 1/18/06 10:56 AM Page 51

The commands as listed in the preceding table are those you’ll most commonly use. Thisby no means attempts to be a full and comprehensive list, but it should give you a goodidea of what to expect.
The way you would usually work with CVS is walk through the following steps for each fileyou want to make changes to:
1. Check out a file from the CVS repository.
2. Make the necessary changes to that file.
3. Execute an update command on that file.
4. Commit your changes to that file back to the CVS repository.
Now what does that mean in plain English? Well, it’s not very difficult: you get a file fromthe CVS server, make changes to it, and before submitting your changes back to the CVSserver, you check whether there is a more recent version available on the server (someonemight have submitted a newer version while you were working). If there is a newer versionavailable on the CVS server, it will merge with your file, which you can then safely submitback to the server.
All those goodies do come at a price. A CVS server can be quite hard to install and config-ure and has a small but relatively steep learning curve. Luckily for us, there is software outthere that makes this all much easier for us. My personal favorite is the TortoiseCVS client,which actually gives you CVS control at the click of a mouse right from within WindowsExplorer.
Using TortoiseCVS
TortoiseCVS is an easy-to-use CVS client that supports common CVS tasks. It allows you tocheck out, update, and commit files right from within your familiar Windows Explorerinterface. More importantly, it won’t cost you a cent; the client software is open sourceand available as a free download at www.tortoiseCVS.org.
One of the key benefits of TortoiseCVS is that it supports local repositories, which is per-fect if you’re a single developer working on a project and don’t want to go to the troubleof installing a CVS server. It’s complete enough for most enterprise projects and basicenough for your basic programming needs.
Charlie Vernon Smythe (CVS for short) is the lovable mascot for TortoiseCVS (see Figure 5-1)and, despite the reputation of its species, will have your local repository set up by the time
TortoiseCVS is unfortunately not available for Mac. The following section dis-cusses how the software can be used on the PC platform. There is, however, agreat open source Mac CVS client available called MacCVS, which is based onthe WinCVS client, the source code which in turn TortoiseCVS was originallybased on. You can find more information about this on www.wincvs.org.
OBJECT-ORIENTED ACTIONSCRIPT FOR FLASH 8
52
6196CH05.qxd 1/18/06 10:56 AM Page 52

you’re back from the bathroom. OK, well that’s not entirely true . . . you will have to do someactual work yourself. Not to worry, though, I’ll walk you through it in a couple of easy steps.
First, the obvious: you download a copy of TortoiseCVS from the website (www.tortoiseCVS)and install it on your PC. You’ll be prompted to restart your system; be sure to do that tomake sure the icons in Windows Explorer will work properly.
The next thing you’ll want to do is create a repository for your code. Open up WindowsExplorer and browse to the folder you’d like to have act as your repository. You right-clickthat folder and choose CVS ➤ Make New Module, which brings up the dialog box shownin Figure 5-2.
Figure 5-2.Make New Module dialog box
Figure 5-1.Charlie the TortoiseCVS mascot
PROJECT WORKFLOW
53
5
6196CH05.qxd 1/18/06 10:56 AM Page 53

In this dialog box you set the protocol to Locally Mounted Folder and specify the full pathto the folder (including the folder name itself) in the Repository folder field. Next, youclick the OK button, which brings up the import dialog box. Wait for another dialog box topop up telling you no repository was found and asking you whether or not you want to ini-tialize one (see Figure 5-3). You select that checkbox and again click OK to continue.
Figure 5-3. TortoiseCVS initialize repository dialog box
Now that the repository is initialized, wait for the module dialog box to finish and click OKto close it (see Figure 5-4).
Figure 5-4. Finished make new module dialog box
That’s not bad, is it? It probably took you longer to read this than to actually do it. Wellthis is it, you’ve got yourself a local CVS repository and module to work in. You’ll noticethat the folder now has a green overlay indicating that it is controlled by CVS.
Now, let’s go one step further and add some actual source code to this local repository.Create a new file in that folder and name it SomeClass.as. As soon as you’ve created thatfile, you’ll notice that you see a big question mark sign on top of the normal icon associated
OBJECT-ORIENTED ACTIONSCRIPT FOR FLASH 8
54
6196CH05.qxd 1/18/06 10:56 AM Page 54

with an ActionScript file. The question mark shows you that the file is not yet added to therepository; to do this you right-click the file and choose CVS add, which brings up the dia-log box you see in Figure 5-5.
You notice that the dialog box shows your SomeClass.as file but isn’t able to determine thefiletype format. You just right-click the file and choose Text/ASCII. Good to note is thatTortoiseCVS also supports binary files, which allows you to keep a version history for imagesor even your FLA source files. When you click the OK button, you get a dialog box con-firming that your file has been added to the module in your repository (see Figure 5-6). Theoverlay icon for the file now changes from a question mark to a red mesh.
Figure 5-6. TortoiseCVS Finished add dialog box
Now that your file is added to the repository, you can add some initial code to it. Open upSomeClass.as and insert the following code:
class SomeClass {function SomeClass() {}
}
You’ve just added a basic class structure to the file and can now save it. What you do nowis commit the file to the local repository. Because you are working in a local repository, youonly deal with one developer and do not have to worry about updating your code first.Back in Windows Explorer, right-click the file SomeClass.as and choose CVS commit,which brings up the dialog box in Figure 5-7.
Figure 5-5.TortoiseCVS Add dialog box
PROJECT WORKFLOW
55
5
6196CH05.qxd 1/18/06 10:56 AM Page 55

In the Commit dialog box you notice a Comment field; I’d advise you always to includesomething in this field. Doing so allows you to easily see what particular review you made;a time and date doesn’t do as much to refresh your memory. Add "initial class structure" asthe comment for your first SomeClass.as revision. After clicking the OK button, a dialogbox pops up telling you that the file has been committed to the repository (see Figure 5-8).
After you close the Finished commit dialog box the overlay icon for SomeClass.as willchange from a red to a green mesh, confirming that the revision has been posted to therepository.
Let’s do one more basic revision to the file to show you how the version history works andhow to revert to an earlier version. Make the following changes to SomeClass.as:
class SomeClass {function SomeClass() {trace("constructor called");
}
Figure 5-8.TortoiseCVS Finished commitdialog box
Figure 5-7.TortoiseCVS Commit dialog box
OBJECT-ORIENTED ACTIONSCRIPT FOR FLASH 8
56
6196CH05.qxd 1/18/06 10:56 AM Page 56

function someMethod() {}
}
In a real-world situation, you would obviously not commit a file back to the repository forsuch a minor revision. Save the file and again right-click the file in Windows Explorer,choose CVS commit, follow the steps as described earlier, and set the comment field to"added someMethod method". You will have noticed that once you saved your changes,the icon overlay changed back from green to red, indicating that there were changes thathave not yet been committed to the repository.
Now that you’ve got two revisions to your file, you can look at the version history. To dothis you right-click SomeClass.as and choose CVS ➤ History, which brings up a dialog boxshowing you all revisions (see Figure 5-9).
Figure 5-9. TortoiseCVS History dialog box
You’ll notice that the History dialog box shows you the revision number, date and time,and author for that specific file. It also shows you how many lines of code were added andhow many removed. In this case it shows you that three lines of code were addedand none removed between revision 1.1 and 1.2 and the comments you added for thoserevisions.
To revert to an earlier version of a file, you just right-click that revision in the History dia-log box and choose Get this revision (sticky). When you close the History panel, that par-ticular revision will be saved back to your local file. Don’t worry about losing any changes
PROJECT WORKFLOW
57
5
6196CH05.qxd 1/18/06 10:56 AM Page 57

you made later on, those are still tracked in the History panel and you can always get thatrevision should you need it.
Another very nice feature in TortoiseCVS is the ability to get a graph showing your revisions.You do this by right-clicking the file and choosing CVS ➤ Revision graph (see Figure 5-10).
Figure 5-10. TortoiseCVS revision graph
The revision graph gives you a nice overview of the history of a file. By clicking any of therevisions, you’ll be presented with information about the author, changes made, and com-ments. This is a very handy feature to use if you want to look back at the developmentpath of your files.
This concludes my brief introduction to the TortoiseCVS client. I’m sure it has shown yousome powerful features that will undoubtedly make life a lot easier for you when doingobject-oriented programming with ActionScript 2.0.
Approaches to programmingOver the last few years we’ve heard a lot about various approaches to programming. No,these aren’t just buzzwords for cunning marketeers. Both the client and yourself can actu-ally benefit from choosing an effective and complementary way to work on a particularproject.
OBJECT-ORIENTED ACTIONSCRIPT FOR FLASH 8
58
6196CH05.qxd 1/18/06 10:56 AM Page 58

Whatever acronym you decide to call it is of little importance, but more importantly youneed to have the rules for your way of working clearly outlined and consistently used. I’llbriefly be discussing two programming concepts that have become quite popular recently,especially for projects that use Flash and ActionScript: Rapid Application Development andExtreme Programming.
Rapid Application Development
Rapid Application Development (RAD) is a popular programming methodology that allowsapplications to be built under a tight deadline and often limited budget. It lends itself wellto applications that don’t have very specific requirements to start with providing you’reable to get good user feedback throughout the development cycle.
To achieve this, there often needs to be some compromises made, which is highlighted inone of the key principles of RAD, the 80-20 rule:
In certain situations, a usable 80% solution can be produced in 20% of the time thatwould be required to produce a total solution.
In a nutshell, the RAD process includes the following steps:
1. Brainstorm initial specifications.
2. Prototype system and have client review.
3. Update application.
4. Conduct user reviews (repeat step 3 as necessary).
5. Create project analysis (optional).
6. Finalize application.
Now this, of course, sounds very compelling, but is that really possible? Bringing RAD intopractice requires quite some discipline on the part of the developer, specifically in regardsto scheduling reviewing user comments. To best achieve this, you should work with mile-stones for your project. After an initial brainstorm session with the client, provisionalspecifications are outlined and implemented in a prototype system.
You can’t expect a nontechnical client to give you feedback on source code, so you needto have a basic working prototype version of the application (be it limited in functionality)for them to play around with and give feedback on. This prototype system is the firstmilestone of your project and is typically just reviewed by the client to finalize the require-ments and feature set and start the actual application development.
At this stage scheduling becomes increasingly important, and you need to bring out appli-cation updates at a regular interval for users to review. The development cycle is driven byfeedback so it is very important that you can get timely and complete feedback from yourusers. The cycle of update and review is repeated as long as is deemed necessary and fea-sible given the deadline. Ideally, reviewing the application would not happen by the clientor yourself but by the actual user the application is targeting, which always gives you themost useful feedback on the flow of the application.
PROJECT WORKFLOW
59
5
6196CH05.qxd 1/18/06 10:56 AM Page 59

Once the development cycle is closed, you can move on to an optional analysis stage.Analysis of the project gives your client the opportunity for a final review. While the analy-sis stage is not a requirement in RAD, it certainly is recommended practice when theproject relies on tight integration with another application or a degree of security needs tobe implemented.
After the development cycle or project analysis, the code is finalized and prepared fordeployment. If no analysis was done before this final stage, it is important that no furtherchanges to the source code are made; if there was an analysis stage, changes to the codeshould be limited to any problems that came up.
RAD is a very useful programming methodology that you’ll no doubt be using quite a lotfor typical ActionScript 2.0 projects. The concept of Flash components fits in well with thisprocess, so be sure to read more about v2 component development in Chapter 15. If youthink about it, Flash is really a great tool for doing RAD. It allows you to do quick proto-typing, design and code are managed using the same IDE, it has a relatively low learningcurve, and it is a highly portable, which helps tremendously with the testing and reviewingprocess.
Extreme Programming
Extreme Programming (XP) is another interesting programming methodology and is, farmore so than RAD, applicable when working with a team of developers.
Breaking down the XP development process into steps is not as straightforward as withRAD, but roughly translates into the following sequence:
1. Define an initial release plan.
2. Put together an iteration plan based on user stories.
3. Use pair programming to develop an iteration.
4. Run acceptance tests on the completed iteration (repeat step 3 as necessary).
5. Project is finished when the code has passed all acceptance tests.
Throughout XP there are a number of practices that all rely on principles of simplicity andcommunication. One of the most obvious differences the XP methodology introduces isthe way it handles a team. The client is actually part of the team and works with the devel-opers on a daily basis helping to steer everything in the right direction, defining prioritiesand further outlining the requirements for the project.
There are no strict roles in the team but rather personal expertise; everyone can con-tribute to the project within their area of expertise. A team can consist of anywhere from2 to 15 people, though this methodology generally works better with small teams. As youcan well imagine, this type of setup can be prone to a mild form of anarchy when notfocused properly, and it is therefore often advisable to have a person designated to coor-dinate the process.
Another major part of XP is planning. There are two types of planning that XP uses, releaseplanning and iteration planning. The release planning outlines the schedule for the overall
OBJECT-ORIENTED ACTIONSCRIPT FOR FLASH 8
60
6196CH05.qxd 1/18/06 10:56 AM Page 60

project, while iteration planning uses this release plan for scheduling individual iterationsof the project during the development process. The way release plans are created is byevaluating user stories that the client in the team supplies.
Each user story is basically a short description of a task that the application needs to per-form. Those user stories are basic nontechnical and user-centric descriptions of a task thatwill need to be reviewed by developers in the team to ascertain how much developmenttime it would need. As an alternative to a long requirement document, these user storiesare used to make up iterations and plans that fall within the constraints of the release plan.
User stories are used to compile an iteration and to base acceptance tests on. Acceptancetests are scenarios outlined by the client and are used to verify whether the applicationreturns the expected result based on the input. If these acceptance tests are passed, theuser story is considered complete; if not, the issue will need to be addressed in the fol-lowing iteration. If an iteration becomes too heavy to handle (usually due to failed accept-ance tests in earlier iterations), you can meet with the client and reschedule the userstories in following iterations.
The way development works in a XP environment is using pair development. Two develop-ers sit side by side at the same machine and work. The idea behind this is that you get bet-ter code because it is continuously monitored by a second developer. Recent studies havealso confirmed that 1 + 1 > 2 when it comes to programming. Pair development takes awhile to get used to and requires the developers in question to work well together; if thatis not the case, this technique can cause accelerated production of gray hair.
Refactoring, another concept that XP strongly supports, involves breaking down code tothe simplest level possible, only keeping the necessary functionality in there. Doing thisavoids bloated and difficultly managed code down the line. Repeating the refactoringprocess might look very harsh, but it will definitely pay off in the end.
So far, so good. You’ll notice that with XP the team setup is open and dynamic, while theproject itself is scheduled and monitored very strictly. This certainly helps keep the projecton track along with automated unit testing. Automated tests are very important in XP; theyhelp monitor your code and run objective tests independent of anyone in the team. Basedon the results of the automated tests, the development process is tweaked until all userstories are addressed and application is considered final.
XP goes beyond simply being a programming methodology in that it requires you to notonly follow a certain project workflow, but also actually organize practical aspects of yourbusiness to have them fit in with an XP development environment.
Throughout these various steps, members in the team might take on various roles andcontribute in a variety of ways. Communication and planning are very important to havethis work properly and should not be ignored at any stage of the development process.
Applying XP techniques to your programming workflow is certainly a good idea. While youmight not be able to go for the full package, individual techniques like pair programmingor unit testing are certainly worth considering!
I myself recently started using a remote form of pair programming for a number ofActionScript projects. While it may not be as effective as physically sitting at the same
PROJECT WORKFLOW
61
5
6196CH05.qxd 1/18/06 10:56 AM Page 61

computer with a co-developer, I’ve had great experiences with getting specific code issuesworked out.
One instance I can remember was when writing a Flash application that handles sharedcalendars. There were some problems getting recurring events validated for all users sub-scribed to the same group calendar. Myself and another developer were initially workingseparately on finding a solution for this and just compared notes. Unfortunately, thatdidn’t really resolve the issue until we started to do a couple of shared coding sessions.
Using Flash Communication Server we set up a little application through which we could inturn work on the same piece of ActionScript code while the other one checked syntax andcomments on the approach. After just a couple of those sessions, and what could not havebeen more than half a day’s work, we found the key to solving the problem on what hadearlier took us several days to work on individually. It’s quite amazing how effective pairprogramming can be in some instances, even with your fellow developer located all theway across the ocean.
Usability testingUsability testing is an often underestimated process that allows you to get real-worldinformation about the way a target user handles your application.
What do you attempt to find out with usability tests? That is a valid question—not allinformation you can get from users is relevant for evaluating a project. One thing you doknow is that you want to make sure users are able to independently perform the tasks thatthe application was built for. Building on that information, you can find out how easy itwas for a user to navigate through the application and complete various required steps.
Often usability tests are thought of as a means of evaluating a project near the end of itsdevelopment cycle. Nothing is further from the truth. Usability tests can (or dare I sayshould) be used throughout the entire project workflow. All too often this step is neg-lected, resulting in bad user experience which in turn influences return on investment forthe project.
Usability tests during the development cycle don’t have to be very elaborate, but they dodiffer from simple reviews of your application. Remember, the tests serve to get feedbackfrom actual users; it would be bad practice for yourself or the client to take part. Whenworking with multiple user tests, make sure not all people participating in the test havetaken part in one or an earlier version. It is important to have users test an applicationwithout any prior knowledge, so while it may be interesting to see how previous testershandle the new version, the information you need to act upon is always that of the newpeople in the test group.
So how do you put together a usability test? First, make sure you have clearly defined thetarget audience and try to represent that as closely as possible in your test group. Usersare each representative for a significant number of people. While you might think thatan application that reaches 1,000 users will need more usability testers than one for100 people, this doesn’t appear to be the case. In fact, statistics indicate that groups of just
OBJECT-ORIENTED ACTIONSCRIPT FOR FLASH 8
62
6196CH05.qxd 1/18/06 10:56 AM Page 62

five people give the best overall results. What that means in practical terms is that it’smore effective to invest in multiple limited usability tests than a couple of large ones.
When you’ve got your user test group together, you need to address the questions that youwant answered with the usability test. Tests can include questions based on informationusers can get from the application; you can also ask about their experience of using theapplication or have them perform tasks with the application to time how efficiently theycan get to the desired information.
Let’s say we’ve got a car configurator application that we’re running a usability test on. Theapplication lets users choose a model car and customize it to their liking with any acces-sories, finally to be presented with the total price of their ideal car. Questions and tasks forthis type of project might be
What colors can you get the latest model of a BMW in?
How much does it cost to include a GPS system with the car?
What model car would you first look at when searching for a family vehicle?
Would you be more likely to buy a particular model car after trying the car config-urator?
Locate the car dealer closest to your home.
Find all car models that come with built-in air conditioning.
Important with asking these questions is that you don’t guide users through it. Try not tosuggest an answer with the way you ask your question, and before having users take thetest simply explain what the application is without discussing how to use it. Monitor usersobjectively and compare statistics between different releases. Doing that gives you a goodindication of how far the changes you made based on prior feedback have been successful.
When handled properly, usability tests are an invaluable tool to make sure your applica-tions do what you want them to do and increase user experience. In the end, that’s whatit’s all about. An application is not just a collection of features, but a way for you to pre-sent data in a format that is most efficient and enjoyable for the end user.
What’s next?This chapter discussed aspects of the project workflow that will help you organize andhandle your projects most effectively. In the next chapter I’ll discuss some more practicalconsiderations when working with ActionScript 2.0, such as commenting, naming conven-tions, and other best practices.
PROJECT WORKFLOW
63
5
6196CH05.qxd 1/18/06 10:56 AM Page 63

6196CH06.qxd 1/18/06 10:58 AM Page 64

6 BEST PRACTICES
6196CH06.qxd 1/18/06 10:58 AM Page 65

In the previous chapter we looked at some important aspects of managing a project work-flow. Now we’ll specifically explore best practices for working with ActionScript. Bestpractices aim to make your programming experience as comfortable as possible and out-line some standardized methods to structuring and managing code.
The coding practices and naming conventions that will be discussed here are in no waylegally binding (I promise I won’t sue—unless of course you forget to comment your code!),but I can’t stress enough the importance of writing consistent and readable code. Whatyou’ll find here can be thought of as the common denominator of best programming prac-tices; be sure to read through these best practices and apply them as much as possible toyour project.
External ActionScriptAs you know after reading Chapter 3 on ActionScript 2.0 programming, all ActionScriptclasses you code must be placed in external .as files. You might think of this as a bit of anannoyance, but it actually does have a number of advantages such as the ability to workwith class packages.
Class packages allow you to organize classes in a folder structure and organize by the spe-cific tasks they perform. One of the main reasons you use class packages is to help avoidnaming conflicts; by “packaging” classes in a unique folder structure, you can be sure thatyou don’t accidentally use a class with the same name in the classpath.
Let’s say you’ve written a bunch of classes that deal with user management. Putting thoseclasses in the same folder with classes that handle date functions would not be the mostefficient approach. Rather than doing that, you would make two class packages and struc-ture those as follows:
com.friendsofed.userscom.friendsofed.date
We’ll look more into this package naming convention in more detail later on in this chap-ter, but for now it is good to see that you organized your classes in a folder with a namethat best corresponds with the task they perform. In the case of your user managementclasses, those are put in the folder named users and the classes dealing with dates are putin a date folder. Those two folders are themselves subfolders of the friendsofed packagethat is a package of com. This again might look a bit convoluted but it makes good sense,as Figure 6-1 illustrates.
Figure 6-1. Package folder structure
OBJECT-ORIENTED ACTIONSCRIPT FOR FLASH 8
66
6196CH06.qxd 1/18/06 10:58 AM Page 66

ActionScript 2.0 features an import keyword that can use a wildcard character (*) to loadan entire class package in with a single statement. The com.friendsofed.users packagemight contain 20 different classes but a single line of code will do all that work for you:
import com.friendsofed.users.*
Now, let’s not get too excited—there are a couple of “buts” that you should take into con-sideration. Let’s say you wanted to import both the com.friendsofed.users and com.friendsofed.date packages. Trying to avoid RSI, my inherent developer instinct wouldtell me to make that into one import statement:
import com.friendsofed.*
No such luck, however; that statement will load all classes in the com.friendsofed pack-age but no classes that are located in a folder below that. If you need both packages, youwill need to use
import com.friendsofed.users.*import com.friendsofed.date.*
Another point to make is that import statements only make temporary references to thepackage in question. If you have an import statement on Frame 1 of your timeline, andyou wanted to use it again in the next frame, it would not work. To achieve that, you’dneed to use the import statement again.
That’s all well and good, but keeping in mind the limitations, is it really necessary to useclass packages? The answer there is a definite YES! Working with class packages in itself isperfect when doing OOP because it helps you work in a more organized and structuredway. Should you use import statements is a different question altogether. My personaltake on this is that you only need them when using more than one or two instances of theclass in your frame and you’re working with long package names. In other situations,import statements don’t serve that much of a purpose, and it’s just as easy to instantiateclasses by their fully qualified class package name. We’ll compare the two options next:
Using the import statement:
import com.friendsofed.users.*var userInfo:UserProfile = new UserProfile();
Using the full package name:
var userInfo:UserProfile = new com.friendsofed.users.UserProfile();
The preceding examples assume we have a class called UserProfile in the com.friendsofed.users package and clearly show that when you’re not extensively instantiat-ing classes, there is no real use to the import statement (in fact, in this case it will give youslightly more code to write). Of course, there will be situations where you’re dealing withmore complex scripts that will require you to make lots more class instances, and in thosecases you could certainly consider using the import keyword.
BEST PRACTICES
67
6
6196CH06.qxd 1/18/06 10:58 AM Page 67

I would, however, recommend always using import when coding your ActionScript 2.0classes; adding the import statement on top of your .as file will allow you to find all classdependencies at a single glance as soon as you open up the file.
Let’s move on to another very important subject that is often underestimated and happilyignored: commenting your code.
About commentingComments are notes that programmers insert into their code to clarify important aspectsof the application. With all the new technology these days, comments seldom get theattention they deserve. Many trainers assume that if you can write a simple program, youmust know how to write comments. Not true. I want to bring comments back to the fore-ground and tell you the correct way to use them.
Some programmers don’t write comments. Ever. Others write so many comments, it’snearly impossible to read their code. There’s a better way, with neither too few nor toomany comments. To maintain the middle course, just remember the word why.
Ideally, comments should answer the question why (not what). The code already demon-strates what it is doing, but it may not be clear why. When you need to explain why in yourcode, consider including a comment.
Comments in ActionScript are ignored when your project is compiled down to a .swf file,so you definitely don’t need to worry about bloating file size of the finished application.There are two ways by which you can add comments to your ActionScript code. The firstone is used for small notes that take no more than one single line.
// This is a single-line comment
When you need multiple lines of comments, it’s best to use a comment block by using acombination of the /* and */ characters.
/*This is a comment block.Everything in here is a comment.
*/
Some programmers write comments that restate (in their spoken language)what the code already demonstrates. If your code reads n = 10, there’s no needto write a comment that reads “Setting the variable named n equal to 10.” Thereal comment should be “n represents the number of seconds until the rocketlaunches.” Ultimately, strive to write naturally self-descriptive code. If you writecode such as secondsToLaunch = 10, then you don’t need to include a commentin the first place.
OBJECT-ORIENTED ACTIONSCRIPT FOR FLASH 8
68
6196CH06.qxd 1/18/06 10:58 AM Page 68

Now that you know how to add comments to your code, let’s consider when you shouldadd them. I personally use the following commenting style when writing classes:
/*UserProfileAuthor: Peter ElstRevision: 1.2Description: The UserProfile class manages personal user informationTo-do: add method for deleting a profile property*/
The preceding example shows what I add on top of all my classes: the class name, author,revision number, and description. The to-do information is optional and helps you remem-ber what functionality you planned on adding. If you’re faced with a nasty bug, you mightalso want to flag that up in this comment block.
There is no need to go overboard with commenting; not every method in a class needsadditional info. This is certainly the case if you make use of the naming conventions thatI’ll discuss later on. In theory, your code should be fairly legible with that in place as wellas keeping to the advice that I gave in the introduction to OOP where you strictly have onetask for one method.
Classes do usually have a couple of methods that are worth commenting. Those are typi-cally the ones where a lot of the data processing happens or those that rely on very specificinformation to be passed to them. In those instances, I use another short comment blockthat describes a method’s specific task.
/*buildProfile builds an XML document from the user profileinformation stored the userData object*/
I generally don’t like adding inline comments (comments within functions) because thoseclutter the code. The only times I use them is when flagging bug locations or developmentnotes.
function buildProfile() {// Note: for-in loops through object in reverse orderfor(var i in userProfile) {...
}}
Development notes are just small single-line comments that I put in as reminders when Iknow I’ll be tweaking a specific method. They usually pertain to a very specific part of codeand are better placed inline than above the method. The next time I open up the class, I’llfind what functions need my attention in the to-do list comment block at the top of thefile, and when I move down to that function there will likely be some notes there that helpme get started.
BEST PRACTICES
69
6
6196CH06.qxd 1/18/06 10:58 AM Page 69

The commenting styles I use are not based on any particular guideline but have grownfrom my own experience with coding ActionScript 2.0 classes. You might well want to usea slightly different approach and of course you’re free to do so. There are a few bench-marks you can use to check how effective your commenting style is:
1. Do your comments increase readability of the code?
2. Is your commenting style consistent throughout all classes?
3. Do your comments help you be more productive when revising a class?
Those are three very basic questions that will help your determine the quality of yourcomments. If one or more answers to these questions is “no,” then you should really con-sider changing the way you document your code. If they’re all a big fat “yes,” then sit backand relax—you’ve just earned yourself a cup of coffee.
Comments are finally getting the recognition they deserve. Over the last few years severalinitiatives have been set up that have given commenting best practices a new lease of life.One such initiative is JavaDoc, a tool developed by Sun Microsystems for automaticallygenerating HTML documentation by extracting comments from class source files. This typeof commenting has gained ground with many Flash developers since the release ofActionScript 2.0. To read more about this be sure to visit http://java.sun.com/j2se/javadoc/.
Naming conventionsI remember following a discussion on naming conventions when ActionScript 2.0 firstcame out. Many people were wondering if strong typing and context-sensitive code hintswould now make naming conventions obsolete. Definitely not! If anything, naming con-ventions have become more important with the introduction of things like private andpublic scope.
Imagine being faced with a property called “foo” in a class with several hundred lines of codewith no idea what type it is (unless you cheat and try to use code hints on it), if it is a publicor private property, etc. I’ve had to deal with classes like that before and let me tell you, it’snot a pretty sight. If there’s one way to get a fellow developer lose his nerve, this is it.
After a while reading ActionScript code becomes like a second language. Naming conven-tions play a big part in this; they provide the developer with a lot of background informa-tion on properties and method names that allow him or her to work in a much moreconvenient and productive way.
Enough promotion, let’s get to it! The naming conventions discussed here are very commonthroughout most programming languages and are ideal for working with ActionScript 2.0.
Variables
Variables are namespaces to which you can assign a particular datatype and assign values.Names for variables can contain letters, numbers, the dollar sign ($), or an underscore (_).
OBJECT-ORIENTED ACTIONSCRIPT FOR FLASH 8
70
6196CH06.qxd 1/18/06 10:58 AM Page 70

Things to consider are that variable names cannot start with a number, and there are anumber of reserved words such as class and import that are also not allowed.
In general, variable names consisting of more than one word are written in camel case,starting with a lowercase letter and using an uppercase letter for every new word like so:thisIsMyVariable. This is by far the most common practice, and I would certainly recom-mend using this.
An example of a variable declaration is var countSheep:Number = 500;.
Constants
Constants are variables whose value does not change after they have been initialized. Anexample of a built-in constant in the Math object is Math.PI.
The naming convention for constants is using all uppercase and separating words withunderscores. An example of a constant declaration is var MAX_SHEEP:Number = 500;.
Functions
Functions are reusable containers for code; they can be used throughout an applicationand usually return a value based on one or more parameters that is passed to them.
Function names follow the same convention as variables do. Names for functions usuallyconsist of two parts; the first is a verb that describes the task it performs, and the secondis a noun that defines the object it applies that task to. That sounds much more difficultthan it actually is; here are a couple of examples:
getProfile();validateEmail();parseFeed();
Classes
Classes are essential building blocks for doing object-oriented programming. They providea collection of variables and functions (respectively called properties and methods in thiscontext) from which multiple independent instances can be created.
The naming convention for classes is camel case, but with an initial uppercase letter.Usually names for classes just consist of a single nonplural noun. It is important to keepyour class names as descriptive as possible; try to avoid too generic terms.
Some example of class names are
BallSheepUserProfile
BEST PRACTICES
71
6
6196CH06.qxd 1/18/06 10:58 AM Page 71

Methods
Methods are essentially functions defined inside a class, and as such they use largely thesame naming convention. The difference with methods is that they can have a public orprivate scope, and some developers like to prefix the name with a dollar or underscoresign to designate it as private. This naming convention is not essential, but it can makeyour classes more readable, which is always a good thing.
Some examples of method names are
buildTable()$processData()_parseFeed ();
Properties
Properties are variables defined inside a class, and as such use the same naming conven-tion. Just like methods, properties can be assigned a public or private scope. To show whatproperties are private, you can use the dollar or underscore sign.
Some examples of property names are
$profileID_indexCounter
I personally choose to use the dollar sign for private methods and the underscore sign forprivate properties. Feel free to make your own choice; the two are widely in use withActionScript developers.
Packages
Packages, as discussed earlier in this chapter, are folder namespaces that you can storeclasses in to give them a unique identifier, and you can use them to sort classes by func-tion and make importing classes easier.
There is a very common naming convention with packages that originally came from lan-guages such as Java. The first part of a package name is com, which is taken from Internetjargon. You could certainly use org or net for this if either is more suitable. Next in thepackage name is either your company name or the name of the project the classes areused for. These two namespaces form the basis of your package name, and in most casesthis corresponds to the domain name of your organization or project.
Example: com.friendsofed
It is recommended by the software vendor that you use an mx prefix or com.macromedia,which I personally dislike because it can blur the distinction between your work and classesthat come with Flash. Once you’ve got this basis for your package name, you can go on andadd your own folders and extend the package name as far as you find necessary.
OBJECT-ORIENTED ACTIONSCRIPT FOR FLASH 8
72
6196CH06.qxd 1/18/06 10:58 AM Page 72

Some examples of package names are
com.friendsofed.sportscom.friendsofed.animalscom.friendsofed.users
As discussed earlier, class names are written in camel case and start with an uppercaseletter, which might result in the following class import statements:
import com.friendsofed.sports.Ball;import com.friendsofed.animals.Sheep;import com.friendsofed.users.UserProfile;
Applying naming conventions should, just like commenting your code, become an essen-tial part of your ActionScript 2.0 programming practice. I’m sure you’ll have noticed howconsistent names for the different elements in your application make a huge difference inunderstanding what they represent and are used for. We’ll explore some further aspects ofgood coding practices next by discussing good programming styles.
Programming stylesThere’s more to writing code than typing instructions from this (or any other) computerbook. There’s also programming style, which is really essential as you’ll notice from anexample of sloppy programming that follows.
Start of ApplicationVariableVariable
VariableStart of Function
InstructionInstructionInstruction
End of Function
Sloppy pseudo-code
I’ve mentioned earlier that it is important to remember that it’s likely at somestage other developers will be using your code. Being faced with unreadableand/or badly written code is not very pleasant and will only result in frustration.Just a few tweaks and good coding practice will make life easier for everyoneinvolved.
BEST PRACTICES
73
6
6196CH06.qxd 1/18/06 10:58 AM Page 73

Start of FunctionInstructionInstruction
InstructionEnd of FunctionEnd of Application
Cleaning up the preceding example is not that difficult; the things to keep in mind areconsistency and spacing. Just take a look at the improvement when this very same code isspaced consistently in the following example. I put at least one blank line between so-called paragraphs of code (groups of related code). I use consistent indentation to illustratethe code’s natural hierarchy (what belongs to what).
Start of Application
VariableVariableVariable
Start of FunctionInstructionInstructionInstruction
End of Function
Start of FunctionInstructionInstructionInstruction
End of Function
End of Application
The code just discussed is a very generic overview of how to structure an application. Let’sbring this into perspective for use with ActionScript 2.0 classes.
class myClass {function myClass() {var TextColor:Color = 0x003366;
trace("Constructor");}
var userName:String = "Peter";var maxcount = 5;
Sloppy ActionScript 2.0 class
Cleaned-up pseudo-code
OBJECT-ORIENTED ACTIONSCRIPT FOR FLASH 8
74
6196CH06.qxd 1/18/06 10:58 AM Page 74

var base_url:String = "http://www.friendsofed.com";private function reverseString(str):String {
var tmp = str.split("").reverse();return tmp.join("");
}function set URL(url:String) {base_url = url;}
function loadSite(){getURL(base_url,"_blank");
}private var _foundNumber:Boolean;
function $isEvenNumber(num:Number) {return (num % 2 == 0);}private var _countIndex;function countLoop(){for(var i=1; i<=maxcount; i++) {trace("Loop "+i+" of "+maxcount);
}}function get URL():String {
return base_url;}}
The preceding example is rather extreme, but you can see how inconsistent code and lackof spacing and indentation can cause a lot of issues with readability. Now, how difficult isit really to clean that up? Just take a look for yourself; this very same class is listed next,and just a few tweaks have made a huge difference.
class MyClass {
// Constantsvar MAX_COUNT:Number = 5;var BASE_URL:String = "http://www.friendsofed.com";
// public propertiesvar textColor:Number = 0x003366;var userName:String = "Peter";
// private propertiesprivate var _countIndex:Number;private var _foundNumber:Boolean;
Cleaned-up ActionScript 2.0 class
BEST PRACTICES
75
6
6196CH06.qxd 1/18/06 10:58 AM Page 75

// constructorfunction MyClass() {trace("Constructor called");
}
// public methodsfunction loadSite():Void {getURL(BASE_URL,"_blank");
}function countLoop():Void {for(var i=1; i<=MAX_COUNT; i++) {trace("Loop "+i+" of "+MAX_COUNT);
}}
// private methodsprivate function $reverseString(str:String):String {var tmp = str.split("").reverse();return tmp.join("");
}function $isEvenNumber(num:Number):Boolean {return (num % 2 == 0);
}
// getter/setter methodsfunction get URL():String {return BASE_URL;
}function set URL(url:String):Void {BASE_URL = url;
}
}
If you look at the preceding code, you’ll notice something very important to a clean pro-gramming style, which is grouping. By grouping properties and methods according to theirscope and function within the class, you can quickly find whatever you’re looking for, andthis increases the overall readability of your code. Just like with our pseudo-code earlier, acouple of blank lines between these various sections of code make it even easier to navi-gate through. The example shown previously is the way I usually structure my ActionScript2.0 classes; it is not set in stone, and you can certainly tweak it to your own style and pref-erence.
OBJECT-ORIENTED ACTIONSCRIPT FOR FLASH 8
76
6196CH06.qxd 1/18/06 10:58 AM Page 76

Alternative programming stylesPeter: As mentioned earlier, developers often have their own distinctive guidelines andbest practices for writing their code and defend those with their life. There’s nothingwrong with that and thinking about how to best structure code can only lead to a moreefficient development process.
When in the process of writing this book, we discovered that myself, Todd, and Sas haveslightly different code styles and best practices for coding ActionScript 2.0. Rather thanforce each other to adhere to a style we don’t particularly agree or feel comfortable with,we opted to each outline our best practices and code style and explain why we use those.
You’ve read about my practices for ActionScript 2.0 development earlier on in this chap-ter, so I’ll leave it up to Todd and Sas to show you theirs here. This should hopefully sparksome ideas of your own on how you want to structure application code.
Coding practices: Todd Yard
I would first start off by saying that there is a difference in my mind between good codingtechniques and code formatting. I believe it is in the latter issue where many, or evenmost, developers disagree. For instance, a debate could continue on for years on howcode should best be indented or whether a space should appear between a for or if key-word and its following parenthesis, but this does not really affect the quality of the code.One developer may use the following format for a function:
function myFunction(){}
while another developer uses the following:
function myFunction() {}
Neither in my opinion is more correct than the other. As long as the intention of thecode is clear and it is done in a way that balances both optimal performance and read-ability, then it is good code. Everything that Peter has laid out for good practices in thischapter does just that. What is left then is differing opinion on naming conventions andformatting.
The key to successful programming is often hidden in the details. You can teachany old monkey OOP (well, at least smart, genetically modified monkeys), butthat does not guarantee good and readable code. Never underestimate whatthings like comments, naming conventions, and good programming styles cando for you.
BEST PRACTICES
77
6
6196CH06.qxd 1/18/06 10:58 AM Page 77

In the code I present later in this book, I use the following conventions that might at timesdiffer from those of either Peter or Sas:
1. Private properties have a double underscore prefix. No distinction is made for aprivate property defined in a child class versus a super class (e.g., if I defineda Shape class with the property __fillColor, a Rectangle class that inherited fromShape would access __fillColor and not use some distinction to note that theproperty was defined in the super class).
2. Local variables use descriptive words written in camel case. The lack of a doubleunderscore distinguishes these from private properties.
3. I do not normally use public properties in a class and instead expose private prop-erties through getter/setter methods. Because of this, no distinction usually needsto be made for the naming of public properties.
4. On a similar note, I use getter/setter methods more often than get__() andset__() methods since the former allows for easier integration into the compo-nents inspector.
5. I do not use the keyword this in a class file. This is done mostly for readability’ssake, as a color-coded file peppered with this distracts from the unique codearound it. For instance, of the following two lines, I feel the second one is mucheasier to digest when perusing code:
this.__area = this.__width * this.__height;
__area = __width * __height;
With the double underscore denoting private properties, I feel the this becomesredundant.
6. Most classes I write are structured with the properties declared at the top, followedby the constructor, the private methods, and then the public methods, separatedby comment blocks.
7. Personally, I’m not a big fan of comments and, when not writing for a book, I mustadmit I don’t use them all that often. This probably stems from the fact that toooften, comments are overused and distract from the actual code, which, if writtenwith descriptive methods, properties, class, and instance names in a clear andstraightforward manner, should be fairly readable without the extra comments.Whenever it is NOT possible to accomplish this with the code, for instance, in linesof complex mathematical calculations, or where there is some backwards logic thatneeds to be applied for a case not readily apparent, then comments become use-ful or even necessary. However, I do like to use comments to break of up blocks ofcode, whether it be for separating private from public methods, or grouping logicalaspects of an application. I also take advantage of comments to make notes tomyself or other developers for future development or refinement.
8. I do not use super() in my constructor unless it is necessary to pass variables tothe super class’s constructor, since the line is already implied. If there is a questionabout whether a class inherits from another, I need only look to the class definitiona few lines above, which gives better information as to what the super class is.
OBJECT-ORIENTED ACTIONSCRIPT FOR FLASH 8
78
6196CH06.qxd 1/18/06 10:58 AM Page 78

9. I usually choose to shorthand the creation of Object and Array instances, using thesyntax more often for the first of the following two lines:
var myArray:Array = [];
var myArray:Array = new Array();
Again, I feel if the code is readable and clear in intent and accomplishes its pur-pose, then it is hard to argue with. There is nothing confusing about the intent ofthat first line, even if it uses the shortcut.
All of these points, though, are completely subjective, and alternative viewpoints and argu-ments may be equally valid (or even more so in the mind of the person with the alterna-tive viewpoint!).
Coding practices: Sas Jacobs
I follow many of the coding best practices that Peter outlines in this chapter. Like Peter, Iprefer to use import statements so that I can avoid using fully qualified class packagenames. I think it makes my code much easier to read. I always locate the statementstogether at the top of the class file so I can easily find them again later. I am also very par-ticular about writing properly indented code blocks because I think it makes the linesmuch easier to read.
I have a couple of different coding styles from Peter. These differences are in my com-menting and naming conventions.
Commenting codeI also like to comment blocks of code and, unlike Peter, I’m happy to use inline comments.In fact, I’ll often write the class structure and pseudo-code using comments. Then, when Iwrite the code, it is already commented by my pseudo-code lines. For example, I mightstart my class file by writing the following:
class ClassName {
//declare private properties
..//constructorfunction ClassName() {
}
//public methods://init//create components//size components//position on stage
BEST PRACTICES
79
6
6196CH06.qxd 1/18/06 10:58 AM Page 79

//loadFile//create LoadVars//parse and assign to arrays
....//loop through arrays and populate components
//private methods//format date – returns a long date string from a date object
}
I’d then start writing the code under the comments, testing as I go. For me, this providesme with a roadmap when I’m writing code. The comments serve as markers to specificblocks of code and they help to refresh my memory when I come back to a project that Ihaven’t seen for months.
From the preceding code, you can see that I also like to organize my class file into sections.I start by declaring my private variables, then write the constructor function and publicmethods, and finish with private methods.
Naming conventionsI use the following naming conventions because they make my code easier to understand:
1. Private properties start with a double underscore, e.g., __parentContainer_mc.I don’t preface these variables with this because I think it makes the variablenames harder to read (e.g., this.__parentContainer_mc).
2. Variable names are descriptive, start with a lowercase letter, and use camel case(e.g., var returnValue:Number).
3. When referring to components, I usually use a name that indicates the componenttype (e.g., product_txt or __item_lbl).
4. Function names use a verb and noun (e.g., createBinding, loadProduct).
5. Class names are descriptive, start with an uppercase letter, and use camel case(e.g., FeaturedProduct).
6. Package names start with com, include the company name, and use a descriptivename (e.g., com.aip.products).
Looking through my conventions, I realize that I don’t have a standard for distinguishingbetween public and private method names. I guess that shows that even experiencedcoders are inconsistent at times!
OBJECT-ORIENTED ACTIONSCRIPT FOR FLASH 8
80
6196CH06.qxd 1/18/06 10:58 AM Page 80

What’s next?This chapter concludes Part Two of the book, which covered object-oriented programmingguidelines. You’ve learned how to plan, model, and manage projects. I covered an intro-duction to version control, some common programming methodologies, usability testing,and best practices for ActionScript 2.0.
In Part Three of the book, you’ll get a more in-depth insight into the various aspects of OOPI outlined in Chapter 1 of the book. First up is encapsulation. I’ll discuss what it exactly is,when to use it, and how to apply it in ActionScript 2.0.
BEST PRACTICES
81
6
6196CH06.qxd 1/18/06 10:58 AM Page 81

PART THREE CORE OOP CONCEPTS
6196CH07.qxd 1/18/06 10:59 AM Page 82

7 ENCAPSULATION
6196CH07.qxd 1/18/06 10:59 AM Page 83

In this chapter, I create an example to demonstrate encapsulation in Flash. This is the firstof four chapters that demonstrate encapsulation, classes, inheritance, and polymorphismusing step-by-step instructions.
If you haven’t read the introduction to encapsulation in Chapter 1, I would advise you to doso now before we get into the practicalities of applying the concept to an ActionScript 2.0project. Just to recap, encapsulation helps you to hide the details of your object-orientedcode. You just provide the methods that do the job and don’t require any other classes toknow the internal workings of your code.
I’ll show you an example of encapsulation in action next, and start off by setting up thegraphics.
Setting up encapsulationThis section describes the manual work—drawing the shapes and parts needed in theencapsulation example. Let’s start with a blank FLA:
1. Launch Flash.
2. Choose Flash Document from the Create New menu on the Start Page (see Figure 7-1).
Figure 7-1. Flash 8 Start Page
3. Save the blank document as Encapsulation.fla.
OBJECT-ORIENTED ACTIONSCRIPT FOR FLASH 8
84
6196CH07.qxd 1/18/06 10:59 AM Page 84

If you have the Start Page in Flash 8 disabled you should—depending on your settings—bepresented with either a new blank FLA, last edited FLAs, or nothing at all when you launchthe application. If it gives you a blank FLA, simply follow step 3 and save it asEncapsulation.fla; in the other cases you create a new blank FLA by going to File ➤ Newand choosing Flash Document from the General tab. The source files for this example arealso available from the friends of ED website (www.friendsofed.com) if you don’t feel likesetting it up yourself.
Creating new layers
In previous chapters I often referred to the idea of a bouncing ball. Let’s now put this intopractice and start by drawing a ball and a simple background. First, create two new layersin the timeline to hold them:
1. Display the timeline (select Window ➤ Timeline) if it isn’t visible.
2. Double-click Layer 1 and rename it Background.
3. Create a new layer in the timeline (select Insert ➤ Timeline ➤ Layer), as shown inFigure 7-2.
Figure 7-2. Create layer in Timeline panel
4. Double-click Layer 2 and rename it Ball.
5. Create a new layer in the timeline (select Insert ➤ Timeline ➤ Layer).
6. Double-click Layer 3 and rename it ActionScript (see Figure 7-3).
Figure 7-3. Rename layer in Timeline panel
7. Select Frame 1 of the ActionScript layer.
8. Open the Actions panel (select Window ➤ Development Panels ➤ Actions).
ENCAPSULATION
85
7
6196CH07.qxd 1/18/06 10:59 AM Page 85

9. Add the following ActionScript code in the Actions panel (see Figure 7-4):
stop();
Figure 7-4. ActionScript panel
10. Open the Document Properties panel (select Modify ➤ Document).
11. Set Frame rate to 30 (see Figure 7-5).
Figure 7-5. Timeline frame rate setting
12. Click OK.
You’ll now have three layers in your timeline. From top to bottom, the layers should readActionScript, Ball, Background (see Figure 7-6).
Figure 7-6. After creating and organizing layers in the timeline
OBJECT-ORIENTED ACTIONSCRIPT FOR FLASH 8
86
6196CH07.qxd 1/18/06 10:59 AM Page 86

Drawing a background
Let’s put a filled rectangle into the Background layer:
1. In the Tools panel (select Window ➤ Tools), click the Rectangle tool (see Figure 7-7).
2. In the Properties panel (select Window ➤ Properties), select hairline for the LineStyle, select black for the Line Color, and select the black-to-white radial fill for theFill Color (see Figure 7-7).
Figure 7-7. Anatomy of a filled rectangle
3. In the timeline, click Frame 1 of the Background layer.
4. Draw a rectangle somewhere on the stage. When you release the mouse button, afilled rectangle appears. Your stage should look something like the one in Figure 7-8.
Figure 7-8. After drawing a filled rectangle on the Background layer
Aligning and locking the background
Here’s an easy way to make the rectangle fill the stage perfectly:
1. In the timeline, click Frame 1 of the Background layer (this selects the rectangle youjust drew).
ENCAPSULATION
87
7
6196CH07.qxd 1/18/06 10:59 AM Page 87

2. In the Align panel (select Window ➤ Align) click the To Stage button (see Figure 7-9). This is a toggle button. Clicking it once presses it down. Clicking it againreleases it. It appears white when it is pressed down and gray when it is released. Itmust be pressed down for the next step.
3. In the Align panel, click three buttons: the match width and height button (the thirdbutton under Match size), and the align left and align top buttons (the first andfourth buttons under Align).
4. Lock the Background layer to protect it while you draw on other layers. Click theBackground layer’s lock column (see Figure 7-10). When the padlock icon is visible,the layer is locked (clicking the lock column repeatedly locks and unlocks a layer).
Figure 7-10. Locking the Background layer
Drawing a ball
Let’s draw a filled circle to represent the ball. The steps are just like those you performedto draw the background, except you’ll use the Oval tool instead of the Rectangle tool:
1. In the timeline, click Frame 1 of the Ball layer.
2. In the Tools panel, click the Oval tool (located immediately to the left of theRectangle tool).
3. In the Properties panel, select hairline for the Line Style, select black for the LineColor, and select the black-to-green radial fill for the Fill Color.
4. While you hold down the SHIFT key on your keyboard, draw an oval in the center ofthe stage (the SHIFT key yields a perfect circle). Try to match the size shown inFigure 7-11.
Figure 7-9.The Align panel
OBJECT-ORIENTED ACTIONSCRIPT FOR FLASH 8
88
6196CH07.qxd 1/18/06 10:59 AM Page 88

Figure 7-11. After drawing a filled circle (black to green) on the Ball layer
Converting the ball into a Library symbol
Symbols are reusable content stored in the Library (every Flash document has its owninternal Library for storage). Let’s convert the ball into a symbol:
1. In the timeline, click Frame 1 of the Ball layer (this selects the circle). Anotheroption is to double-click the ball shape on the stage.
2. Convert the circle into a symbol (select Modify ➤ Convert To Symbol).
3. In the Name field, type the word Ball (see Figure 7-12).
Figure 7-12. The Convert to Symbol dialog box
4. For Behavior, select Movie Clip (see Figure 7-12).
5. Ensure the black registration mark is in the center (see Figure 7-12).
6. Click OK.
Symbols are reusable. You can use multiple copies (instances) of any symbol inthe Library, without increasing the size of the final published document.
ENCAPSULATION
89
7
6196CH07.qxd 1/18/06 10:59 AM Page 89

7. Confirm that the Ball symbol is stored in the Library (select Window ➤ Library), asshown in Figure 7-13.
8. Save the document (select File ➤ Save).
Content summary
There are three layers in the timeline. The following table summarizes the existing content.
Timeline Layer Name Content Description
Actions This is the top layer in the timeline. It containsActionScript code to prevent the timeline from advancingto the next frame.
Ball This is the middle layer in the timeline. It contains aninstance (an on-screen copy) of the Ball movie clip(the Ball movie clip is a symbol stored in the Library).
Background This is the bottom layer in the timeline. It containsa simple filled rectangle that acts as a decorativebackground.
That completes the manual work for Encapsulation.fla. Next, you’ll write ActionScriptcode to control the ball.
Figure 7-13.The Ball symbol
OBJECT-ORIENTED ACTIONSCRIPT FOR FLASH 8
90
6196CH07.qxd 1/18/06 10:59 AM Page 90

Writing the codeThe Ball is a movie clip symbol stored in the Library (you chose Movie Clip for the Ball’sbehavior when you converted it to a symbol). For all practical purposes, movie clips areindependent little Flash movies. Every movie clip has its own timeline and plays independ-ently no matter what happens on the document’s timeline.
Movie clips are object oriented; they have their own dedicated properties and functions.Suppose a movie clip named George is located at 100, 200 (stage coordinates), and anothernamed John is at 300, 400. You could type the following ActionScript code:
trace("George is located at "+ George._x +", "+ George._y);trace("John is located at "+ John._x +", "+ John._y);
The output would be as shown in Figure 7-14.
Figure 7-14. Output panel
All movie clips contain the built-in properties _x and _y. The _x property is the horizontalstage location of the movie clip, and _y is the vertical stage location. Movie clips containother properties too; you’ll see more of them later.
Creating an event handler
You were briefly introduced to event handlers in Chapter 4. We’ll now be using an event han-dler to control the Ball. In this document, Flash will attempt to broadcast 30 enterFramemessages per second (because the document’s frame rate is 30). If the Ball listens forenterFrame messages, you can create the illusion of movement by changing its position eachtime it receives a message.
Setting the document’s frame rate to 30 doesn’t guarantee 30 frames per sec-ond (if that were true, you could just set the frame rate to 8,000 and write afancy 3D game). It really depends on the computer’s performance and howmany actions run concurrently.
ENCAPSULATION
91
7
6196CH07.qxd 1/18/06 10:59 AM Page 91

Let’s put an event handler into the Ball. Notice that the layers in the timeline are currentlyBackground, Ball, and ActionScript. When you edit the Ball symbol in just a moment, thetimeline will appear to change:
1. In the Library panel, click the Ball to select it.
2. Edit the Ball (select Edit ➤ Edit Symbols).
Now the timeline contains a single layer named Layer 1. That’s because you’re viewing theBall’s timeline (not the document’s timeline). The Ball is a movie clip with its own inde-pendent timeline. Let’s prepare it for the event handler:
1. In the timeline, click Layer 1 to select it.
2. Rename Layer 1 to Circle.
3. Create a new layer (select Insert ➤ Layer).
4. Rename the new layer ActionScript (select Modify ➤ Layer).
5. The Ball’s timeline should match the one shown in Figure 7-15.
Figure 7-15. The Ball’s timeline
Now you’re ready to create the event handler:
1. Click Frame 1 of the ActionScript layer.
2. Display the Actions panel (select Window ➤ Development Panels ➤ Actions) if itisn’t visible.
3. Type the following code into the Actions panel:
stop();
var onEnterFrame:Function = doSomething;
function doSomething():Void {trace("Hello from doSomething");
}
4. Save the document (select File ➤ Save).
The Actions panel should match the one shown in Figure 7-16.
OBJECT-ORIENTED ACTIONSCRIPT FOR FLASH 8
92
6196CH07.qxd 1/18/06 10:59 AM Page 92

Figure 7-16. The Ball’s event handler
What about encapsulation?
If you’re wondering what happened to the main topic of this chapter (a fair question), it’sright in front of you in the code listing of step 3 in the preceding example. Conceptually,encapsulation is shielding (hiding) the internal details of the doSomething function fromthe Ball’s event handler. Here are the details:
01 stop();0203 var onEnterFrame:Function = doSomething;0405 function doSomething():Void {06 trace("Hello from doSomething");07 }
Line 01 calls the stop function (stop is a built-in function—you don’t have to define it, youjust use it), line 03 defines the event handler, and lines 05 through 07 define thedoSomething function.
The stop function at line 01 prevents the timeline from advancing to the next frame (youdon’t want it to advance because there’s no content after Frame 1). The stop functiondoes not stop the application, nor does it prevent the code in Frame 1 from finishing (allthe code in Frame 1 runs, no matter where you put the stop function).
The preceding code is used to easily illustrate a simple event handler in action;it is not the way you would typically handle objects in your applications. Oncethe code gets more complex, you’d start looking at writing ActionScript 2.0classes and associating that to your movie clip.
ENCAPSULATION
93
7
6196CH07.qxd 1/18/06 10:59 AM Page 93

The event handler begins and ends at line 03. To create a movie clip event handler in Flash,you can use the following syntax (as line 03 demonstrates, but this is one of several ways):
var FlashMovieClipEvent:Function = myFunctionName;
All movie clips support the onEnterFrame event; to use it, you need to provide your ownfunction name. The net result: every time this movie clip receives an enterFrame messagefrom Flash, the onEnterFrame event handler calls the doSomething function.
The doSomething function at line 05 is simple enough—it displays Hello from doSomething.It doesn’t matter how simple or complex the doSomething function is. That’s the point ofencapsulation! The event handler calls doSomething whenever it receives an enterFramemessage. What the doSomething function actually does (from the event handler’s point ofview) is immaterial. The doSomething function could call 50 other functions, and the eventhandler would never know it.
This type of encapsulation is very narrow (existing only at the function level). Encapsulationalso exists at wider levels (in a single class or multiple classes, sometimes called services orcomponents). The concept, however, is identical: The internal behavior of a function, class,or service is hidden (encapsulated) from the caller. The caller is only responsible for know-ing which functions, classes, or services are available, not how they operate internally.
Testing the event handler
Test the movie by selecting Control ➤ Test Movie. The output is an endless stream ofHello from doSomething messages (see Figure 7-17). Each Hello from doSomething repre-sents a call to the doSomething function (so the event handler is calling the doSomethingfunction properly).
Figure 7-17. Testing the event handler
When you’ve seen enough doSomething messages, close the test file (select File ➤ Close)to return to Flash.
Whenever you test a movie, you’re actually viewing a published file. You mustclose it to return to Flash.
OBJECT-ORIENTED ACTIONSCRIPT FOR FLASH 8
94
6196CH07.qxd 1/18/06 10:59 AM Page 94
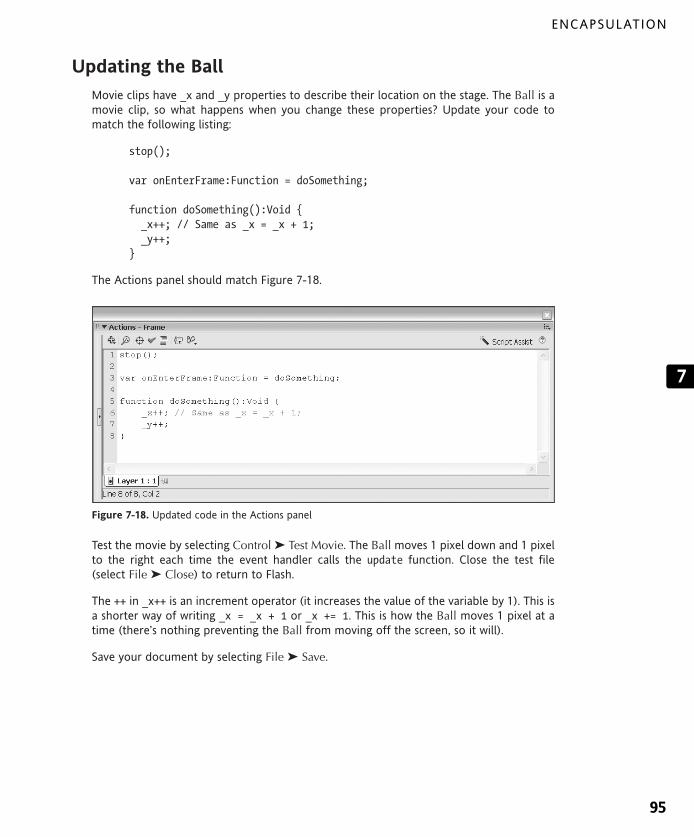
Updating the Ball
Movie clips have _x and _y properties to describe their location on the stage. The Ball is amovie clip, so what happens when you change these properties? Update your code tomatch the following listing:
stop();
var onEnterFrame:Function = doSomething;
function doSomething():Void {_x++; // Same as _x = _x + 1;_y++;
}
The Actions panel should match Figure 7-18.
Figure 7-18. Updated code in the Actions panel
Test the movie by selecting Control ➤ Test Movie. The Ball moves 1 pixel down and 1 pixelto the right each time the event handler calls the update function. Close the test file(select File ➤ Close) to return to Flash.
The ++ in _x++ is an increment operator (it increases the value of the variable by 1). This isa shorter way of writing _x = _x + 1 or _x += 1. This is how the Ball moves 1 pixel at atime (there’s nothing preventing the Ball from moving off the screen, so it will).
Save your document by selecting File ➤ Save.
ENCAPSULATION
95
7
6196CH07.qxd 1/18/06 10:59 AM Page 95

Improving the codeThe Ball has a working event handler. That’s a good start, but you can get the code closerto the plans from the last chapter. First, rename the doSomething function to update(make sure you change the event handler and the function) like this:
stop();
var onEnterFrame:Function = update;
function update():Void {_x++;_y++;
}
The Actions panel should match Figure 7-19.
Figure 7-19. After renaming doSomething to update
Enhancing behavior with properties
All movie clips have properties (you’ve seen _x and _y so far). Properties are variables ded-icated to a specific instance of a given object. Currently, there’s one instance of the Ball,but what if there were 50? Doesn’t matter. Every instance has its own independent copy of_x and _y. You aren’t limited, however, to the built-in movie clip properties—you caninvent your own. Please modify your code to match the following listing:
stop();
var onEnterFrame:Function = update;
var xv:Number = 1; // Initial x velocity.var yv:Number = 1; // Initial y velocity.
OBJECT-ORIENTED ACTIONSCRIPT FOR FLASH 8
96
6196CH07.qxd 1/18/06 10:59 AM Page 96

function update():Void {_x += xv; // Same as _x = _x + xv;_y += yv;
}
The Actions panel should match Figure 7-20.
Figure 7-20. Using custom properties
Test the movie by selecting Control ➤ Test Movie. It behaves exactly as it did before.Instead of hard-coding the velocity directly inside the move function, you can store it in aproperty. This may not seem like an advantage right now, but trust me. Close the test file(select File ➤ Close) to return to Flash.
Narrowing the focus with functions
The golden rule of functions is this: one task per function. Right now, the update functionis rather vague. What does it update? To clarify, update your code to match the followinglisting:
stop();
var onEnterFrame:Function = update;
var xv:Number = 1; // Initial x velocity.var yv:Number = 1; // initial y velocity.
Portability is another advantage of encapsulation. Remember, the event handlerdoesn’t care what the update function does or how it works (as long as there’san update function to call, it’s happy). This will become even more apparentwhen I introduce classes in the next chapter.
ENCAPSULATION
97
7
6196CH07.qxd 1/18/06 10:59 AM Page 97

function update():Void {updatePosition();
}
function updatePosition():Void {_x += xv;_y += yv;
}
The Actions panel should match Figure 7-21.
Figure 7-21. Narrowing the focus with functions
Save the document (select File ➤ Save) and test the movie (select Control ➤ Test Movie).The behavior is the same as before, but you’ve introduced a more descriptive functionnamed updatePosition. Close the test file (select File ➤ Close) to return to Flash.
The name updatePosition is more descriptive than update. The code is now more self-descriptive than before, but was it worth creating another new function? Shouldn’t youjust rename the update function to updatePosition (and be done with it)?
In OOP, a group of simple functions is better than a single complex function. Think of theupdate function as an umbrella function. You could write a series of simple functions(updatePosition, updateVelocity, updateFriction). Each function handles one (and onlyone) task. Eventually, you could have this kind of update function:
function update() {updatePosition();updateVelocity();updateFriction();
}
OBJECT-ORIENTED ACTIONSCRIPT FOR FLASH 8
98
6196CH07.qxd 1/18/06 10:59 AM Page 98

Now you know what the update function does, but you don’t need to know how thedetails work. It’s a nice overview and you don’t even need to see the rest of the code.Encapsulation simplifies development and makes the code naturally self-descriptive. Thebyproduct is easy-to-read code.
Encapsulation summaryEncapsulation is all about simplification, hiding the details, and distributing the workload.Abstraction is another way to describe encapsulation. You can take a complex set ofbehaviors and abstract them into a series of simple functions. For example:
var onEnterFrame:Function = update;
function update():Void {updatePosition();updateVelocity();updateFriction();
}
function updatePosition() {// internal details of updatePosition
}
function updateVelocity() {// internal details of updateVelocity
}
function updateFriction() {// internal details of updateFriction
}
In this case, the event handler depends only on a function named update. Beyond that, theevent handler doesn’t know or care what the details are. It has no idea how the updatefunction works or how many other function calls may be involved. That’s encapsulation.
In generic terms, encapsulation involves the abstraction of various tasks into one entity.Functions are an example of this as they can contain a series of instructions that you neednot know anything about to use it.
Consistency is another great benefit of encapsulation. All objects using theupdate function will either succeed or fail in exactly the same way. If there’s abug in the application, I can fix it in exactly one place. With encapsulation, theapplication behaves consistently—bugs or not.
ENCAPSULATION
99
7
6196CH07.qxd 1/18/06 10:59 AM Page 99

Just like in the real world, simple actions can be much more difficult than you’d expect.Let’s take opening a door for example.
function openDoor() {approachDoor();grabDoorKnob();twistDoorKnob();pushDoorOpen();
}function approachDoor() {// internal details of approachDoor
}function grabDoorKnob() {// internal details of grabDoorKnob
}function twistDoorKnob() {// internal details of twistDoorKnob
}function pushDoorOpen() {// internal details of pushDoorOpen
}
We’ve all been conditioned to see the task of opening the door as one simple action,though as you can clearly see from this example it is not. This is a form of abstraction andencapsulation we use in our daily lives; the same applies to object-oriented programming.
When communicating between different blocks of code or classes, as we’ll see in the nextchapters, you try to keep the message very straightforward. In this case you just want thedoor to be opened, which is why there is a generic openDoor function. Your code shouldnot be required to know what actions are needed to open the door, or care how this isdone. For all you know the door is opened by using a key, swiping an electronic badge,performing some silly little magic dance, or forcing it with a crowbar. All that matters toyour code is that the door is “somehow” opened.
Encapsulation may look like a very simple concept, but it is tremendously powerful whendoing object-oriented programming to create clean and easily reusable code. The aim withencapsulation is to provide an interface through which other classes can communicatewithout them needing to know anything else about the internal workings; for example, aCar class could have the method startEngine, a NuclearPlant class could have the methodgenerateElectricity, and so on.
Thank heavens for that. This same encapsulation allows me to use complex Math classeswithout having to wreck my brain figuring out how to get the required result. I don’t knowabout you, but anything that helps me to focus on the actual tasks rather than the intricatedetails when writing code gets my stamp of approval!
OBJECT-ORIENTED ACTIONSCRIPT FOR FLASH 8
100
6196CH07.qxd 1/18/06 10:59 AM Page 100

What’s next?There’s nothing wrong with the current version of this document, but before I add morefunctionality, you should understand classes. Next, I introduce ActionScript 2.0 classes andupgrade the encapsulation example at the same time. Please save your document if youhaven’t already.
ENCAPSULATION
101
7
6196CH07.qxd 1/18/06 10:59 AM Page 101

6196CH08.qxd 1/18/06 11:16 AM Page 102

8 CLASSES
6196CH08.qxd 1/18/06 11:16 AM Page 103

I want to update the encapsulation example from the last chapter, so this is the perfecttime to introduce ActionScript 2.0 classes. Classes were briefly discussed in Chapter 3 incomparison with the prototype-based approach of ActionScript 1.0. We’ll look at that dif-ference again, but focus here on the differences in syntax. Just like languages such as C#or Java, ActionScript 2.0 now supports a class-based approach that makes it much moreconsistent with other languages that typically use OOP techniques.
Classes vs. prototypesPrior to the 2.0 release of ActionScript, the language used a prototype-based syntax thatwas able to simulate classes but didn’t have the formal syntax to show this. In many waysthis method was a bit of a fraud; you would manipulate the prototype object to do inher-itance, there was no support for public and private scope, etc. This is not to say that itwasn’t effective. In many ways the prototype-based approach was a good way to quicklyand easily extend built-in and custom classes.
Let’s see how a Motion class would look in a prototype-based language such as Action-Script 1.0:
function Motion() {}Motion.prototype.updatePosition = function() {this._x++;this._y++;
}
You can see that by adding the prototype keyword before setting the function name, youactually add it to every instance that is instantiated from the Motion prototype classthrough the new keyword (see the following code).
ballMotion = new Motion();onEnterFrame = ballMotion.updatePosition;
Now, how does ActionScript 2.0 handle classes? Take a look at the following syntax:
class Motion extends MovieClip {function Motion() {}function updatePosition():Void {this._x++;this._y++;
}function onEnterFrame():Void {this.updatePosition();
}}
OBJECT-ORIENTED ACTIONSCRIPT FOR FLASH 8
104
6196CH08.qxd 1/18/06 11:16 AM Page 104

Nice. You can immediately see that this ActionScript 2.0 class looks quite a bit differentfrom the ActionScript 1.0 prototype version. Don’t worry, I’ll walk you through it. First ofall, the code for our Motion class shown previously should be saved as the file Motion.as.
The most important difference is that we now have a formal class keyword, which is veryuseful as it shows you what exactly is part of your class. Everything that you’ll find betweenthe curly braces of the class statement is part of that class.
Because our Motion class is going to make use of some properties (_x and _y) and anevent handler (onEnterFrame) of the built-in MovieClip class, we need to use the extendskeyword which allows us—yes, you’ve guessed it!—to extend the MovieClip class. Thisbehavior is called inheritance, and I’ll discuss it in greater detail in the next chapter.
You’ll notice an empty function in our class called Motion (notice it uses the same name asour class). This is the constructor for our class (more about this later on in this chapter).
The next function we defined in the Motion class is updatePosition. Just like in the pro-totype example, we just increment the built-in _x and _y properties that position themovie clip on the stage.
Finally, we define the onEnterFrame function and call updatePosition from there. Remember,the onEnterFrame event handler was inherited from the MovieClip class, so it will still be calledonce every frame.
OK, so far so good—you’ll have noticed that the ActionScript 2.0 class does exactly whatour prototype class did. Now we only need to instantiate it. For this, you need to associatea movie clip with a class. From reading Chapter 3 you probably know how this is done, butI’ll recap and run you through it again.
1. Launch Flash.
2. Choose Flash Document from the Create New menu on the Start Page (or selectFile ➤ New and click Flash Document if the Start Page is disabled).
3. Save the blank document as Motion.fla in the folder where you saved Motion.as.
4. Rename Layer 1 to Shape.
5. Draw any shape you want on the Shape layer.
6. Convert your shape on the Shape layer to a movie clip (Modify ➤ Convert to Symbol).
7. Set the Behavior to Movieclip and give it the name MotionShape.
8. If the Linkage area isn’t visible in the Convert to Symbol panel, click the Advancedbutton.
9. Select the check box Export for ActionScript.
10. Set the AS 2.0 class for this movie clip to Motion.
11. Click OK.
12. Test the Flash movie (Control ➤ Test Movie).
CLASSES
105
8
6196CH08.qxd 1/18/06 11:16 AM Page 105

If all went well, you should now see your shape moving across the screen. Now, that wasn’ttoo difficult, was it? In a nutshell, what you did was simply associate a movie clip with aclass. The settings for the symbol we created should look like Figure 8-1.
Figure 8-1. Convert to Symbol panel
Now that we’ve seen that ActionScript 2.0 supports a class-based syntax, there are a coupleof concepts you’ll need to learn about to write your own custom classes: constructors,methods, and events. That is exactly what I’ll be discussing next.
Constructors
A constructor is a function just like any other with the exception that it is called automat-ically when a class instance is instantiated. Let’s look at an example:
var myPhoneList:Array = new Array();
The class is Array. The instance of the Array class is myPhoneList. The constructor functionis Array(). If you could look at the source code for the built-in classes, you would find anArray class constructor function similar to this:
class Array {function Array() {// Internal details of Array class constructor.
}}
OBJECT-ORIENTED ACTIONSCRIPT FOR FLASH 8
106
6196CH08.qxd 1/18/06 11:16 AM Page 106

As you can see, there’s nothing to discern a constructor function from any other function.There’s not a special keyword to mark the start of a constructor function. The only giveawayis that the class name (Array in this case) has the exact same name as the constructor func-tion. So, if you’d look at the constructor for the built-in Date class, you would also see afunction called Date. Also worth mentioning is that, although ActionScript 2.0 does notenforce this, the constructor is generally the first function in a class.
Let me put this into context. The following code shows a Motion class.
01 class Motion extends MovieClip {02 function Motion() {03 trace("Motion class instantiated");04 }05 function updatePosition():Void {06 this._x++;07 this._y++;08 }09 function onEnterFrame():Void {10 this.updatePosition();11 }12 }
To show that the constructor function gets called automatically any time that particularclass is instantiated, I added a trace statement. Now let’s make a couple of instances andsee what that does.
var spaceship:Motion = new Motion();var rocket:Motion = new Motion();
If we test this movie with the Motion class in place in the same directory, the items shownin Figure 8-2 get displayed in the Output panel.
Figure 8-2. Motion class Output panel
We created two instances of the Motion class, and the constructor was called once foreach instance. That makes sense, but where does the third line come from? Easy, becausewe have a movie clip on the stage associated with the Motion class that itself is also aninstance of the class that gets instantiated. Now, of course, the class doesn’t do anythingbecause we didn’t associate it with a movie clip, but it does show you what we were after.
CLASSES
107
8
6196CH08.qxd 1/18/06 11:16 AM Page 107

The class is Motion. The objects are spaceship and rocket. The constructor function isMotion(). All Motion objects have an _x property and a _y property and an onEnterFrameevent handler that they’ve inherited from the MovieClip class that it extends.
Constructors are functions, so you’d think there would be nothing stopping you fromadding parameters to the constructor. Unfortunately, when using classes that are associatedwith movie clips, you cannot pass anything to the constructor. The way you would bypassthis is by adding an init method that handles this as the following example shows you:
class Motion extends MovieClip {function Motion() {}function init(x:Number,y:Number) {this._x = x;this._y = y;
}function updatePosition():Void {this._x++;this._y++;
}function onEnterFrame():Void {this.updatePosition();
}}
You’ll notice that the only thing I did was add a function, init, that sets the _x and _y prop-erties of the movie clip to the x and y parameters that are passed to it. What you’ll have todo next is give the movie clip you associated with the Motion class the instance namemotionShape in the Properties panel (select Window ➤ Properties) after which you can addthe following code to the main timeline of your document to call the init function:
motionShape.init(100,50);
What this code does is call the init method for the motionShape instance of the Motionclass and pass x and y parameters that determine the initial position our movie clip startsmoving from.
Classes that are not associated to movie clips can have parameters passed to the con-structor. I’ll show a quick example of this here:
class MultiplyNumbers {function MultiplyNumbers(num1:Number,num2:Number) {trace(num1*num2);
}}
The preceding class should be saved in a file called MultiplyNumbers.as, and in a blankFLA in the same directory you could add the following code:
var myMaths:MultiplyNumbers = new MultiplyNumbers(5,4);
OBJECT-ORIENTED ACTIONSCRIPT FOR FLASH 8
108
6196CH08.qxd 1/18/06 11:16 AM Page 108

When you test this movie, the output will show 20.
So far so good—you’ve just learned about constructors. Before we move on to discussingother class methods, it’s good to know something more about the use of the this key-word in ActionScript 2.0.
About this
The this keyword in ActionScript 1.0 was one of the few things that would indicatewhether you were dealing with a normal function or a class. In ActionScript 2.0, the use ofthe this keyword has become optional—more about this later—but it is nonethelessimportant to know what it represents and why it is used.
When dealing with classes in OOP, you know that there can be multiple instances of thatclass at one time in your project. Let’s take the Motion class; for example, we could have acircle movie clip and a rectangle movie clip both subscribing to our class. If we use theinit method discussed earlier and give those movie clips an initial _x and _y position, theycan be completely different for both instances.
circle.init(10,10);rectangle.init(50,50);
Now, that’s interesting—how does our class know the difference between the circle’s _x property and the rectangle’s _x property? The class doesn’t know . . . this does.
When you run the application, this points to different physical locations inside the com-puter’s memory. It’s really not much more than a reference to the current instance of aclass. Therefore, the circle’s version of this points to one location in memory, but the rec-tangle’s version of this points to another. That’s why the circle’s this._x is 10, but therectangle’s this._x is 50. That’s powerful! With this, class properties require zero man-agement (it’s completely automatic).
As I mentioned earlier, ActionScript 2.0 does not force you to use the this keyword.I would, however, strongly recommend you keep using it for a number of reasons—themost important being it prevents you from confusing local variables (for example in a for-in loop) with class properties.
Important to note is that ActionScript 2.0 supports the use of static class prop-erties. Static properties are shared between all instances of a class. When usingthis on a static property, this will not refer to the instance but rather to theclass. More about this later on in the chapter when I introduce class scope.
CLASSES
109
8
6196CH08.qxd 1/18/06 11:16 AM Page 109

class Confusion {
var currentNumber:Number = 50;
function Confusion() {trace("this.currentNumber = "+this.currentNumber);trace("currentNumber = "+currentNumber);countToTen();
}
function countToTen() {for(var i=0; i<10; i++) {currentNumber = i+1;trace(currentNumber);
}trace("currentNumber outside the loop: "+currentNumber);delete currentNumber;trace("local currentNumber deleted: "+currentNumber);
}}
The preceding code needs to be saved as the file Confusion.as, and you can instantiatethe class by using the following code in an FLA in the same folder:
myConfusion = new Confusion();
Now what does that code do? First, a currentNumber variable is initialized of type Numberand given a value 50. In the constructor method I’ve added a trace command that willshow you that both this.currentNumber and currentNumber will output the same value.
Next in the constructor the method countToTen is called, which loops through the num-bers 0 to 9. In that loop, a local variable is initialized with the name currentNumber thatincrements this by one, thus giving us the numbers 1 through 10 as an output.
After that loop has finished, we trace out the value of currentNumber, delete it, and thentrace out the value of currentNumber again. If you run this code, you’ll see the resultsshown in Figure 8-3 in the Output panel.
Now that’s what I call confusing! Of course, the first point to make here is that you shouldnever give a local variable a name that is already taken by a class property. It does showyou why it can be important to use the this keyword; it explicitly states which of the twoyou are targeting. The problem with this code is not just limited to the use of the this key-word, but also involves not making a local variable in the function scope for thecurrentNumber class property. Let’s clean up this code and look at what that gives us:
Confusion.as
OBJECT-ORIENTED ACTIONSCRIPT FOR FLASH 8
110
6196CH08.qxd 1/18/06 11:16 AM Page 110

Figure 8-3. Confusion class Output panel
class Clarity {
var currentNumber:Number = 50;
function Clarity() {trace("this.currentNumber = "+this.currentNumber);trace("currentNumber = "+currentNumber);countToTen();
}
function countToTen() {for(var i=0; i<10; i++) {var currentNumber = i+1;trace("local variable: "+currentNumber);trace("class property: "+this.currentNumber);
}}
}
The preceding code needs to be saved as the file Clarity.as, and you can instantiate theclass by using the following code in an FLA in the same folder:
myClarity = new Clarity();
If we run this code, we would now have the output shown in Figure 8-4.
Clarity.as
CLASSES
111
8
6196CH08.qxd 1/18/06 11:16 AM Page 111

Figure 8-4. Clarity class Output panel
Now isn’t that much better? Using this for your class properties and declaring your localvariables with the var keyword, you’ll never run into variable scope problems. It alsoincreases the overall readability of your code, which is an absolute must when doing anyOOP project. Next up we’ll be looking at class methods, without which a class wouldn’t domuch at all.
Methods
A class is more than a template for potential data; it’s also a template for potential datahandling. You’ve seen class properties (they describe the data). To provide data handling,you need to attach functions to the class. That is where the class methods come in. Here’sthe syntax:
class Car {function intendedFunctionName() {// Function instructions go here.
}}
Suppose you want to attach a crash function to a Car class. Here’s how:
class Car {function crash() {trace(“Boom!”);
}}
The code that follows shows a complete example:
OBJECT-ORIENTED ACTIONSCRIPT FOR FLASH 8
112
6196CH08.qxd 1/18/06 11:16 AM Page 112

class Car {var speed:Number;var direction:String;
function Car(speed,direction) {this.speed = speed;this.direction = direction;
}
function showVelocity() {trace("The car's velocity is "+this.speed+" KPH "+this.direction);
}}
The preceding code needs to be saved as Car.as and can be instantiated by using the codethat follows in an FLA located in the same folder:
var yugo = new Car(10, "North");yugo.showVelocity();
If you run the preceding code, the output shown in Figure 8-5 is generated.
Figure 8-5. Car class Output panel
Aside from these normal class methods, you can actually have something called anony-mous functions, which are mostly used for event handlers. We’ll look at these next.
Anonymous functions
An anonymous function is a temporary function without a name. Wait. How can there bea function without a name? How would you call it? You can’t . . . at least not directly. Take alook at this simple example:
onEnterFrame = function() {trace("This is called every frame");
}
Car.as
CLASSES
113
8
6196CH08.qxd 1/18/06 11:16 AM Page 113

If you think about it, in the preceding example what we really assign to onEnterFrame isthe following code:
function() {trace("This is called every frame");
}
The function we assign to onEnterFrame has no reference by which we can call it; if wewere to write the same code with a named function, it would look like this:
function callOnEnterFrame() {trace("This is called every frame");
}onEnterFrame = callOnEnterFrame;
Now, what is the difference between the two? When you overwrite onEnterFrame whenusing anonymous functions, that previous function is lost forever; there is no way you canretrieve it because there is no reference by which to call it. Using that last approach, youcan still use callOnEnterFrame as a separate function or reassign it to onEnterFramewhenever you want.
Anonymous functions are often used for assigning functions to event handlers. They alsoprovide a quick and easy way to add events to a class.
class Car {var speed:Number;var direction:String;var onSpeedChange:Function;var onDirectionChange:Function;
function Car(speed,direction) {this.speed = speed;this.direction = direction;
}
function increaseSpeed() {this.speed += 10;this.onSpeedChange();
}
function setDirection(direction) {this.direction = direction;this.onDirectionChange();
}}
The preceding code needs to be saved as Car.as, and the following code needs to be usedin an FLA in the same folder:
Car.as
OBJECT-ORIENTED ACTIONSCRIPT FOR FLASH 8
114
6196CH08.qxd 1/18/06 11:16 AM Page 114

var ferrari = new Car(50, "West");ferrari.onSpeedChange = function() {
trace("The car now has a speed of "+this.speed+" KMH");}ferrari.onDirectionChange = function() {
trace("Now driving in the following direction: "+this.direction);}ferrari.increaseSpeed();ferrari.setDirection("East");
If you run this code, you’ll see the output shown in Figure 8-6.
Figure 8-6. Car class Output panel
The code in our Car class is very interesting in that we initialize two variables of a Functiontype (onSpeedChange, onDirectionChange) but don’t specify them as being a method inour class. Instead, we define anonymous functions in the FLA for these function refer-ences:
function() {trace("The car now has a speed of "+this.speed+" KMH");
}
and
function() {trace("Now driving in the following direction: "+this.direction);
}
By triggering the onSpeedChange and onDirectionChange references in the class, we’reactually running the code that we associate with it from outside the class.
That completes the initial tour of classes. Right now, let’s use classes to update the encap-sulation example from the last chapter.
The method discussed previously is an easy way to simulate events, thoughthere are certainly more flexible and generally accepted methods of handlingevents through the latest ActionScript 2.0 class framework as I’ll show inChapter 15.
CLASSES
115
8
6196CH08.qxd 1/18/06 11:16 AM Page 115

Implementing a classWhen you think about the Motion class we discussed at the beginning of this chapter,there are a couple of difficulties with applying it to movie clips. For example, the classneeds to be associated with a particular movie clip, and there is no easy way to start orstop the movement.
The way around this is to make a more abstract class that can handle this by passingparameters to its constructor method. I’ll show how to handle this next by introducing theMover class.
The Mover class
Every class needs a constructor. Since you’re creating a Mover class, you need to have aconstructor function named Mover.
class Mover extends MovieClip {
var targetMC:MovieClip;
function Mover(targetMC:MovieClip) {this.targetMC = targetMC;
}
function updatePosition() {this._x++;this._y++;
}
function startMoving() {this.targetMC.onEnterFrame = this.updatePosition;
}
function stopMoving() {this.targetMC.onEnterFrame = null;
}}
The preceding code needs to be saved as Mover.as and the following steps need to bedone to see the class in action:
1. Launch Flash.
2. Choose Flash Document from the Create New menu on the Start Page (or selectFile ➤ New and click Flash Document if the Start Page is disabled).
3. Save the blank document as Mover.fla in the folder where you saved Mover.as.
4. Set Frame rate to 30.
OBJECT-ORIENTED ACTIONSCRIPT FOR FLASH 8
116
6196CH08.qxd 1/18/06 11:16 AM Page 116

5. Draw a circle on stage and convert it to a symbol (Modify ➤ Convert to Symbol).
6. Select Movie clip as the behavior and give it a name of circle.
7. Draw a rectangle on stage and convert it to a symbol (Modify ➤ Convert toSymbol).
8. Give the circle instance on stage the instance name “circle”.
9. Give the rectangle instance on stage the instance name “rectangle”.
10. Rename Layer 1 to Stage.
11. Add a new layer to the timeline and rename it to ActionScript.
12. Add the following code to Frame 1 of the ActionScript layer:
var myMover:Mover = new Mover(circle);myMover.startMoving();
If you run Test Movie (Control ➤ Test Movie), you’ll see the circle movie clip movingacross the screen. The beauty about this version of our class is that we can start and stopthe movement at any time by using the startMoving and stopMoving methods.
Now we can easily apply our class to any movie clip without having to associate it in theFlash IDE. It’s just as easy to apply it to our rectangle as it was to the circle as you’ll seefrom the following code:
var myMover:Mover = new Mover(rectangle);myMover.startMoving();
If you run Test Movie now (Control ➤ Test Movie), you’ll see the rectangle movie clip mov-ing across the screen instead. Of course, it’s also possible to use multiple instances of thisMover class to apply it to multiple movie clips at the same time. You’ll find an example ofthis here:
var circleMover:Mover = new Mover(circle);var rectangleMover:Mover = new Mover(rectangle);circleMover.startMoving();rectangleMover.startMoving();
Running the preceding code, we’ve got both movie clips on stage moving at the sametime. Enough examples of the class in action—let’s look at how it handles this movement.
The constructor of our Mover class accepts a single parameter that references a movieclip. The movie clip reference is stored in a class parameter called targetMC. Next up we’vegot our updatePosition method that handles the actual movie clip positioning by usingthe _x and _y properties.
Notice that this function uses this._x and this._y and yet it targets our targetMC movie clip.You might be wondering why this isn’t written as this.targetMC._x and this.targetMC._y.The answer to the question is scope, which is a subject that will be discussed in great detail inthe following chapters.
CLASSES
117
8
6196CH08.qxd 1/18/06 11:16 AM Page 117

Now we have two functions (startMoving and stopMoving) that respectively add andremove our updatePosition method from the targetMC movie clip onEnterFrame handler.
By calling the startMoving method, we assign updatePosition to the target movie cliponEnterFrame, which consequently starts moving; by calling the stopMoving method, weoverwrite the target movie clip onEnterFrame, which makes it stop moving.
What’s next?Now you know the basics of encapsulation and classes. Next, I cover class inheritance.Using inheritance, you can add new capabilities and extend the current code without eventouching the Mover class.
This class is still a work in progress and could do with another couple ofupdates. That is exactly what I’ll be doing throughout the following chapters.For example, it’s generally not considered very good practice to overwrite theonEnterFrame event of a target movie clip because that may already be runningsome code.
OBJECT-ORIENTED ACTIONSCRIPT FOR FLASH 8
118
6196CH08.qxd 1/18/06 11:16 AM Page 118

6196CH08.qxd 1/18/06 11:16 AM Page 119

6196CH09.qxd 1/18/06 11:17 AM Page 120

9 INHERITANCE
6196CH09.qxd 1/18/06 11:17 AM Page 121

In this chapter, I’ll walk you through an example to demonstrate inheritance inActionScript 2.0. Whenever you write a new class to extend or enhance an existing class(without actually altering the existing class), you’re using inheritance. Inheritance canintroduce new capabilities without the fear of breaking existing applications.
About class hierarchyInheritance groups two or more classes together into a hierarchy (much like the folderstructure on your computer). The first class in the hierarchy is the base class (like a top-level folder). The next class is a subclass (like a subfolder). Each subsequent class inheritsfrom the previous one, so every subclass has a definite parent.
Look at the following class hierarchy:
Animal Class (this is the base class, it has no parent, its child is Mammal)
Mammal Class (this is a subclass, its parent is Animal, its child is Whale)
Whale Class (this is a subclass, its parent is Mammal, it has no children)
Classes range from general to specific. The base class is the most general; subclasses aremore specific (for example, a whale is a specific mammal). Class hierarchies can be simpleor complex. Here’s another example:
Life Class
Plant Class Animal Class
Tropical Class Desert Class Insect Class Mammal Class
Banana Class Cactus Class Ant Class Whale Class
Life is the base class (the most general); everything else is a subclass (more specific). TheAnt class inherits from the Insect class. The Whale class inherits from the Mammal class.The Ant and Whale classes inherit (indirectly) from the Animal class, but they don’t evenknow it! The Ant class only communicates with the Insect class, and the Whale class onlycommunicates with the Mammal class.
A quick inheritance testLet’s do a quick inheritance test. Using the Mover class we built in the previous chapter,let’s now extend it to include some bounce behavior. Just to remind ourselves, this is thecode for the Mover class:
This is natural inherited behavior in OOP—a class may only communicatewith its parent (not its grandparent). ActionScript 2.0 provides a specialkeyword, super, to establish child-to-parent communications.
OBJECT-ORIENTED ACTIONSCRIPT FOR FLASH 8
122
6196CH09.qxd 1/18/06 11:17 AM Page 122

class Mover extends MovieClip {
var targetMC:MovieClip;
function Mover(targetMC:MovieClip) {this.targetMC = targetMC;
}function updatePosition() {this._x++;this._y++;
}function startMoving() {this.targetMC.onEnterFrame = this.updatePosition;
}function stopMoving() {this.targetMC.onEnterFrame = null;
}}
Before we move any further, it is important to add a little functionality that allows ourMover class to do something more than just move at the same speed both horizontallyand vertically. To do this, we’ll add three properties: xVel and yVel, which store thevelocity at which our targetMC moves in any given direction; and objectRef, which acts asa reference to our class.
var xVel:Number;var yVel:Number;var objectRef:Object;
Next, we add two additional parameters to the constructor method:
function Mover(targetMC:MovieClip, xVel:Number, yVel:Number) {this.targetMC = targetMC;this.objectRef = this;this.xVel = xVel;this.yVel = yVel;
}
Finally, the updatePosition method needs to be tweaked to read as follows:
function updatePosition() {this._x += this.objectRef.xVel;this._y += this.objectRef.yVel;
}
The reason why we’re using this objectRef property is because the updatePositionmethod is called from the scope of our targetMC, when we use this.xVel in that func-tion, it looks for a property called xVel inside the movie clip. Using this.objectRef.xVel,things are different; this.objectRef is a reference to our class, and as a result it looks forthe property xVel in the Mover class scope, which is exactly what we need.
INHERITANCE
123
9
6196CH09.qxd 1/18/06 11:17 AM Page 123
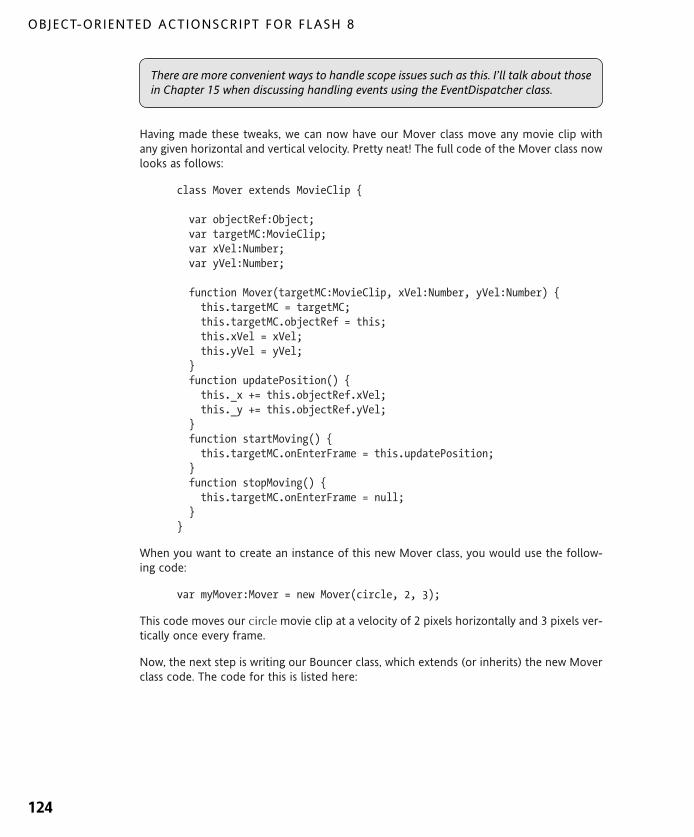
Having made these tweaks, we can now have our Mover class move any movie clip withany given horizontal and vertical velocity. Pretty neat! The full code of the Mover class nowlooks as follows:
class Mover extends MovieClip {
var objectRef:Object;var targetMC:MovieClip;var xVel:Number;var yVel:Number;
function Mover(targetMC:MovieClip, xVel:Number, yVel:Number) {this.targetMC = targetMC;this.targetMC.objectRef = this;this.xVel = xVel;this.yVel = yVel;
}function updatePosition() {this._x += this.objectRef.xVel;this._y += this.objectRef.yVel;
}function startMoving() {this.targetMC.onEnterFrame = this.updatePosition;
}function stopMoving() {this.targetMC.onEnterFrame = null;
}}
When you want to create an instance of this new Mover class, you would use the follow-ing code:
var myMover:Mover = new Mover(circle, 2, 3);
This code moves our circle movie clip at a velocity of 2 pixels horizontally and 3 pixels ver-tically once every frame.
Now, the next step is writing our Bouncer class, which extends (or inherits) the new Moverclass code. The code for this is listed here:
There are more convenient ways to handle scope issues such as this. I’ll talk about thosein Chapter 15 when discussing handling events using the EventDispatcher class.
OBJECT-ORIENTED ACTIONSCRIPT FOR FLASH 8
124
6196CH09.qxd 1/18/06 11:17 AM Page 124

class Bouncer extends Mover {function Bouncer(targetMC:MovieClip) {super(targetMC,xVel,yVel);
}}
The preceding code needs to be saved in a file called Bouncer.as in the same folder asMover.as.
What you’ll need to do next is get a copy of Mover.fla and save it as Inheritance.fla inthe folder where Bouncer.as and Mover.as are located. Open up Inheritance.fla andon Frame 1 of the ActionScript layer change the code to
var myBouncer:Bouncer = new Bouncer(circle, 2, 3);myBouncer.startMoving();
Feel free to delete the rectangle movie clip from the stage, as we’ll not be using this justnow. Test the movie (select Control ➤ Test Movie) and you’ll see that the circle on stage isnow moving, just as was the case with the Mover class. Nothing spectacular, you say? Well,remember, you’re now instantiating the Bouncer class, which shows you that it has inher-ited the functionality of the Mover class by its ability to use the startMoving method andthe targetMC property. Inheritance in action, what an awe-inspiring sight!
About inheritance syntax
Let’s look at what syntax we used to initiate class inheritance in ActionScript 2.0. First ofall, you’ll need to have the extends keyword when defining the class.
class Bouncer extends Mover {...
}
After the extends keyword, you define what class it inherits from, in this case Mover.Important to note is that a class can extend only one class at a time, and this class needsto be specified by its full package name.
As soon as this extends syntax is added to the class statement, all methods and propertiesof that inherited class are available in the current class. This brings up an important point:what if we define a method or property with the same name in the Bouncer class? It’s easyenough to give this a try—add the following code to the Bouncer class:
function startMoving() {trace("startMoving function called in Bouncer class");
}
Bouncer.as
INHERITANCE
125
9
6196CH09.qxd 1/18/06 11:17 AM Page 125

If we use Test Movie now, we get the following line in the Output panel, but our circlemovie clip does not move at all:
startMoving function called in Bouncer class
That’s not good at all. We also want to have access to the startMoving method that wasdefined in the Mover class. This is where the super keyword comes in; it specifically tells aclass to look for a method or property in its parent class, our superclass. Using this key-word, we can tweak the startMoving method in the Bouncer class to read as follows:
function startMoving() {trace("startMoving function called in Bouncer class");super.startMoving();
}
Testing our movie now gives us a much better response: we get both the trace statementin the Output panel and our circle is moving on the stage. It’s getting more and moreinteresting by the minute—we’ve just extended a method and in the process used animportant concept in OOP called polymorphism (more about this in the next chapter).
When you look at the code of our Bouncer class, you’ll notice that the constructor alsouses the super keyword but actually calls it as you would with any other method. It passesthe targetMC, xVel, and yVel parameters we got in the Bouncer class down to the con-structor of the Mover class.
In other words, a call to super() calls the superclass constructor; in this case, it wasneeded because Mover required a targetMC property to be passed to its constructor.
The Bouncer classUsing inheritance, you can safely extend existing classes with new or alternative behaviorwithout breaking existing applications. Existing applications continue to work because theydo not interact with (or even know about) the newer classes (they use the existing classesas always).
Currently, the Bouncer class behaves just like the Mover class. Next, we’ll add new behav-ior to the Bouncer class. This new behavior will consist of a bounceAtBorder method thatbounces our movie clip when it hits the end of the stage.
function bounceAtBorder() {if (this._x > Stage.width-(this._width/2)) {trace("Bounce at right edge");this._x = Stage.width-(this._width/2);this.objectRef.xVel *= -1;
}if (this._y > Stage.height-(this._height/2)) {trace("Bounce at bottom edge");this._y = Stage.height-(this._height/2);this.objectRef.yVel *= -1;
OBJECT-ORIENTED ACTIONSCRIPT FOR FLASH 8
126
6196CH09.qxd 1/18/06 11:17 AM Page 126

}if (this._x < this._width/2) {trace("Bounce at left edge");this._x = this._width/2;this.objectRef.xVel *= -1;
}if (this._y < this._height/2) {trace("Bounce at top edge");this._y = this._height/2;this.objectRef.yVel *= -1;
}}
When you look at the bounceAtBorder method, you’ll find that it has four if statements,one for each edge of the screen. Each of the if statements checks the _x or _y position oftargetMC against the minimum or maximum width and height. To do this, we use the built-in Stage.width and Stage.height methods that return the available width and height ofthe stage. Because the registration point of our movie clip is in the center, we need toaccommodate the maximum and minimum width with the targetMC’s _width and _heightproperties. Take a look at the following table to see how these minimum and maximumpositions are calculated:
Right edge Width of the stage minus half the width of the targetMC movie clip
Bottom edge Height of the stage minus half the height of the targetMC movie clip
Left edge Half the width of the targetMC movie clip
Top edge Half the height of the targetMC movie clip
The only thing that’s left for us to do now is tweak the startMoving method; instead of justcalling updatePosition in the onEnterFrame event, we want to call both updatePositionand bounceAtBorder. The revised code for startMoving in the Bouncer class is as follows:
function startMoving() {this.targetMC.updatePosition = this.updatePosition;this.targetMC.bounceAtBorder = this.bounceAtBorder;this.targetMC.onEnterFrame = function() {this.updatePosition();this.bounceAtBorder();
};}
The preceding code makes local references in the targetMC movie clip to theupdatePosition method (inherited from the Mover class) and bounceAtBorder method(from the Bouncer class) in our class. After that, we can call the updatePosition andbounceAtBorder methods as local in the targetMC onEnterFrame handler using this.updatePosition and this.bounceAtBorder.
INHERITANCE
127
9
6196CH09.qxd 1/18/06 11:17 AM Page 127

The complete code for our Bouncer class now looks as follows:
class Bouncer extends Mover {
function Bouncer(targetMC:MovieClip, xVel:Number, yVel:Number) {super(targetMC, xVel, yVel);
}function startMoving() {this.targetMC.updatePosition = this.updatePosition;this.targetMC.bounceAtBorder = this.bounceAtBorder;this.targetMC.onEnterFrame = function() {this.updatePosition();this.bounceAtBorder();
};}function bounceAtBorder() {if (this._x>Stage.width-(this._width/2)) {trace("Bounce at right edge");this._x = Stage.width-(this._width/2);this.objectRef.xVel *= -1;
}if (this._y>Stage.height-(this._height/2)) {trace("Bounce at bottom edge");this._y = Stage.height-(this._height/2);this.objectRef.yVel *= -1;
}if (this._x<this._width/2) {trace("Bounce at left edge");this._x = this._width/2;this.objectRef.xVel *= -1;
}if (this._y<this._height/2) {trace("Bounce at top edge");this._y = this._height/2;this.objectRef.yVel *= -1;
}}
}
You can now save Bouncer.as and take a look at Inheritance.fla. Make sure Frame 1 ofthe ActionScript layer reads as follows:
var myBouncer:Bouncer = new Bouncer(circle,2,3);myBouncer.startMoving();
Save Inheritance.fla and run Test Movie, and you should now see the circle movie clipmoving across the screen with a horizontal velocity of 2 pixels per frame and 3 pixels perframe vertically. As soon as the movie clip hits an edge, a trace statement is executedshowing that in the Output panel, and it bounces off in the opposite direction.
OBJECT-ORIENTED ACTIONSCRIPT FOR FLASH 8
128
6196CH09.qxd 1/18/06 11:17 AM Page 128

Great work—we’ve just seen inheritance in action and built our very own Bouncer class byextending the Mover class!
The Gravity classLet’s create a Gravity class to help the Ball move in a natural manner. You’ll use inheritanceagain, but this time you’ll extend the Bouncer class.
Create a new file called Gravity.as and save it in the same folder as the Bouncer andMover classes. We’ll start off with the basic code as follows:
class Gravity extends Bouncer {var strength: Number;function Gravity(targetMC:MovieClip, xVel:Number, yVel:Number,
strength) {super(targetMC, xVel, yVel);this.strength = strength || 1;
}}
The Gravity class constructor takes the three parameters we know are needed for theBouncer class as well as a strength parameter that defines the strength of the gravita-tional pull. We pass the first three parameters to the superclass, and the third is assignedto our class scope using the following syntax:
this.strength = strength || 1;
You might be wondering what’s happening there. This is just shorthand syntax for writingthe following statement:
if(strength == undefined) {this.strength = 1;
} else {this.strength = strength;
}
It essentially sets a default value of 1 in case no strength parameter gets passed to theGravity class. The next thing we’ll do is add the startMoving method to the Gravity class,which will now include two new methods, applyGravity and applyFriction (we’ll bewriting those in a minute), in the targetMC onEnterFrame handler. You can see how thatstartMoving method now looks:
function startMoving() {this.targetMC.updatePosition = this.updatePosition;this.targetMC.bounceAtBorder = this.bounceAtBorder;this.targetMC.applyGravity = this.applyGravity;
Gravity.as
INHERITANCE
129
9
6196CH09.qxd 1/18/06 11:17 AM Page 129

this.targetMC.applyFriction = this.applyFriction;this.targetMC.onEnterFrame = function() {this.updatePosition();this.bounceAtBorder();this.applyGravity();this.applyFriction();
};}
Just like we did in the Bouncer class, we’re making a local reference to the applyGravityand applyFriction methods in targetMC and calling those in onEnterFrame.
Now that we’ve got that sorted, let’s focus on these two new methods. The first one we’lllook at is applyGravity:
function applyGravity() {this.objectRef.yVel += this.objectRef.strength;
}
Doesn’t that look easy? That code adds more pull to the vertical movement of ourtargetMC movie clip. You’ll remember that objectRef property from the Mover class weupdated; it’s nothing more than a reference to the class scope. As you’ll see, theapplyFriction method will not be much more difficult:
function applyFriction() {this.objectRef.xVel *= 0.98;this.objectRef.yVel *= 0.98;
}
In this method, we’re adding friction to both the horizontal and vertical velocity bydecreasing the velocity slightly every frame. We’re using 0.98 here because it gives us thebest effect. You could add this friction factor as an additional parameter for your Gravityclass. Whatever the number is you’ll use for this, it should be below 1; otherwise, it wouldin fact increase velocity.
Save the Gravity class and turn your attention to Inheritance.fla. Make sure the code inFrame 1 of the ActionScript layer looks as follows:
var myGravity:Gravity = new Gravity(circle, 2, 3, 5);myGravity.startMoving();
It’s nice to think about the friction coefficient as a percentage of theprevious velocity. For example, with a coefficient of 0.98, our Movermoves only 98% the speed it did the frame before. Eventually, frictionwill slow the movement to nothing, just as in the physical world.
OBJECT-ORIENTED ACTIONSCRIPT FOR FLASH 8
130
6196CH09.qxd 1/18/06 11:17 AM Page 130

If you save the document and run Test Movie, you’ll see the circle movie clip, moving witha horizontal velocity of 2 pixels and a vertical velocity of 3 pixels per frame, bounce off theedges of the stage and slow down as if gravity were pulling it to the ground, and eventu-ally the targetMC will rest on the bottom of the stage. In this case, the amount of gravitywe applied is 5 pixels per frame.
One thing you will notice is that even when the movie clip has come to a standstill at thebottom of the stage, the onEnterFrame event continuously keeps firing the “Bounce atbottom edge” trace statement to the Output panel. To optimize our code and stop thisfrom happening, we’ll add a method that monitors the yVel property, and if that is zero,the onEnterFrame event on our targetMC movie clip gets cleared. This method, which we’llcall checkForStop, needs the following code:
function checkForStop() {if (this._y == Stage.height-(this._height/2)) {if (Math.round(this._x) == this.objectRef.lastPosX
&& Math.round(this._y) == this.objectRef.lastPosY) {this.onEnterFrame = null;
}}this.objectRef.lastPosX = Math.round(this._x);this.objectRef.lastPosY = Math.round(this._y);
}
That’s quite a bit of code just to check whether our targetMC is still moving or not, butyou’ll see what it does in a minute. The first if statement in the checkForStop methodchecks whether the movie clip is on the bottom edge of the stage. If that is the case, itmoves on to an if statement that checks the current _x and _y position of the targetMCagainst the last position. To do this, two new class properties are introduced: lastPosX andlastPosY, which hold the latest _x and _y position of targetMC. If the current _x and _yposition is the same as the last _x and _y position, and the targetMC is on the bottomedge, we can be sure that our movie clip has stopped moving. In that case, we set theonEnterFrame event for the targetMC to null, essentially clearing it out.
That’s it—we’ve just completed the Gravity class! Be sure to save Gravity.as and run TestMovie on Inheritance.fla. You’ll see that the previous problem with the onEnterFrameevent not stopping after the movie clip finished moving is now solved. The following is thefull code of the Gravity class:
class Gravity extends Bouncer {
var strength:Number;var lastPosX:Number;var lastPosY:Number;
Gravity.as
INHERITANCE
131
9
6196CH09.qxd 1/18/06 11:17 AM Page 131

function Gravity(targetMC:MovieClip, xVel:Number, yVel:Number, ➥ strength) {super(targetMC, xVel, yVel);this.strength = strength;
}function startMoving() {this.targetMC.updatePosition = this.updatePosition;this.targetMC.bounceAtBorder = this.bounceAtBorder;this.targetMC.applyGravity = this.applyGravity;this.targetMC.applyFriction = this.applyFriction;this.targetMC.checkForStop = this.checkForStop;this.targetMC.onEnterFrame = function() {this.updatePosition();this.bounceAtBorder();this.applyGravity();this.applyFriction();this.checkForStop();
};}function applyGravity() {this.objectRef.yVel += this.objectRef.strength;
}function applyFriction() {this.objectRef.xVel *= 0.98;this.objectRef.yVel *= 0.98;
}function checkForStop() {if (this._y == Stage.height-(this._height/2)) {if (Math.round(this._x) == this.objectRef.lastPosX
&& Math.round(this._y) == this.objectRef.lastPosY) {this.onEnterFrame = null;
}}this.objectRef.lastPosX = Math.round(this._x);this.objectRef.lastPosY = Math.round(this._y);
}}
You might remember that we hard-coded the value of 0.98 in the applyFrictionmethod of the Gravity class. As an exercise, try updating the code so people can specifythe amount of friction when instantiating the class. Be sure to have a default value forfriction. (Hint: study the strength property in the constructor of the Gravity class.)
OBJECT-ORIENTED ACTIONSCRIPT FOR FLASH 8
132
6196CH09.qxd 1/18/06 11:17 AM Page 132

Inheritance summaryInheritance extends existing classes with new and alternative behaviors without breakingexisting applications. Existing applications continue to work because they do not interactwith (or even know about) the newer classes. Inheritance adds capability without breakingcompatibility. Look at this sample code:
Animal.as
class Animal {function Animal() {}function speak = function(sound) {trace(sound);
}}
Cat.as
class Cat extends Animal {function Cat() {}function cryBaby = function() {for(i = 0; i < 100; i++) {
super.speak("Meow! Meow! Meow!");}
}}
var suki:Cat = new Cat();suki.cryBaby();
With just one statement
class Cat extends Animal {...
}
the Cat class inherits from the Animal class. The Cat class has all the capabilities and char-acteristics of the Animal class, plus its own unique capabilities. The super keyword enableschild classes (such as Cat) to talk to parent classes (such as Animal). If you try the previouscode, you’ll find out that you can use ActionScript 2.0 to code a very noisy cat.
What’s next?This chapter introduced the major features and benefits of class inheritance. Next, we’lllook at the final building block of OOP: polymorphism.
INHERITANCE
133
9
6196CH09.qxd 1/18/06 11:17 AM Page 133

6196CH10.qxd 1/18/06 11:18 AM Page 134

10 POLYMORPHISM
6196CH10.qxd 1/18/06 11:18 AM Page 135

The concept of polymorphism implies having certain functionality appear in multipleforms throughout your application, but having a unified way to call it. Doing this allowsdifferent classes throughout the project to be easily interchangeable.
In this chapter, we’ll create some examples to demonstrate polymorphism in ActionScript 2.0.In a visual environment such as Flash, polymorphism is best observed when multipleobjects exhibit similar behavior. Behind the scenes, this usually means multiple classesimplementing functions of the same name.
I didn’t mention this in detail in the previous chapters, but things like the startMovingmethod in the Mover, Bouncer, and Gravity classes are excellent examples of polymorphicdesign. You could create many different objects from these classes and know that any ofthem could fulfill the startMoving request (because they’re all based on classes thatimplement that same method). At random, you could request any of them to start moving.With polymorphism, you don’t care how things happen, just that they happen. (That surereminds me of some project managers I’ve worked with in the past!)
Building a polymorphism exampleThis section presents a brief, visual demonstration of polymorphism. We’re not going tospend a great deal of time creating this example right now, because you’ll update this verysame example in a later chapter.
To start off, make a copy of Inheritance.fla and name it Polymorphism.fla. Double-click Polymorphism.fla to launch Flash.
The next thing we’ll do is populate the stage so we have some movie clips to work with:
1. Delete all items on the stage.
2. Display the Library panel (select Window ➤ Library).
3. Drag three instances of the circle movie clip to the stage.
4. Give the circle movie clips on the stage the following instance names: circle1,circle2, and circle3.
5. Change the code in Frame 1 of the ActionScript layer to read as follows:
var myMover:Mover = new Mover(circle1, 2, 3);var myBouncer:Bouncer = new Bouncer(circle2, 2, 3);var myGravity:Gravity = new Gravity(circle3, 2, 3, 5);
function startClassMoving(className) {className.startMoving();
}
The preceding code does not differ much from the code used for instantiating the Mover,Bouncer, and Gravity classes in the previous chapters. The one thing I added is a function,startClassMoving, that accepts a parameter, className. The function itself tries to call astartMoving function on whatever object is passed to it.
OBJECT-ORIENTED ACTIONSCRIPT FOR FLASH 8
136
6196CH10.qxd 1/18/06 11:18 AM Page 136

To make the difference between all the circle instances more obvious, let’s make each adifferent color. First select the circle1 instance on the stage by clicking it and opening upthe Properties panel (Window ➤ Properties). In the Properties panel, select Tint from theColor drop-down menu and choose red with the color picker tool (see Figure 10-1).
Figure 10-1. Setting the tint color in the Properties panel
Repeat the same for the circle2 and circle3 instances, giving them a blue and green colortint, respectively. When you’ve finished, Polymorphism.fla’s stage should look somethinglike Figure 10-2.
Figure 10-2. The circle instances on the stage
You’ve probably guessed by now what you’ll be doing: passing the names of our classinstances to this function should start them moving. Add the following line of code beforetesting this movie:
startClassMoving(myMover);
Save the document and use Test Movie (Control ➤ Test Movie) to see this code in action.If all went well, you should now see the circle1 instance moving across the stage. Whenyou change that last line of code to read as follows, you get a different result:
startClassMoving(myBouncer);
If you run Test Movie now, you’ll see circle2 bouncing across the stage. Of course, thesame goes for the Gravity class—using the following code, you’ll have circle3 bouncingwith gravity and friction effect on the stage:
startClassMoving(myGravity);
POLYMORPHISM
137
10
6196CH10.qxd 1/18/06 11:18 AM Page 137

There is nothing stopping you from using all three at once; as there are three classinstances, they can operate completely independently. Try the following code to see allcircle instances on stage moving at the same time:
startClassMoving(myMover);startClassMoving(myBouncer);startClassMoving(myGravity);
As you’ve probably discovered by now, polymorphism is a very easy principle, but applyingit in object-oriented projects does wonders for creating reusable code. Polymorphismallows you to write simple code, even though there might be very complex underlyingclass interaction. You shouldn’t have to know or care about that if you use polymorphicdesign throughout a project—you could even use classes written by another developerwithout even opening them once.
Implementing polymorphism forapplication reuse
With encapsulation, inheritance, and polymorphism, you have the tools to make softwarereuse a reality. The sections that follow present examples demonstrating this concept.
Basic concept of polymorphism
Functional polymorphism occurs when multiple classes implement consistent functions.For example, consider the following classes.
class Bored {function Border() {}function doSomething() {trace("I'm bored, let's do something!");
}}
Bored.as
Bear in mind that applying this technique is useful only if you use the same namefor functions that perform more or less the same task. There is a danger of goingoverboard with polymorphism and using very generic function names such as“update”, “run”, and so forth. Doing so isn’t good for code readability, and it mighteven result in more confusion than clarity. Be sure to refer to Chapter 6, whichcovers best practices, if you’re in doubt about how to handle naming conventions.
OBJECT-ORIENTED ACTIONSCRIPT FOR FLASH 8
138
6196CH10.qxd 1/18/06 11:18 AM Page 138

class Tired {function Tired() {}function doSomething() {this.doNothing();
}function doNothing() {trace("I'm tired, I don't want to do anything.");
}}
class Hungry {function Hungry() {}function doSomething() {this.doLunch();
}function doLunch() {trace("I'm hungry, let's get lunch!");
}}
All of these classes implement the doSomething function, so you could write the followingin an FLA document located in the same folder:
var bob:Tired = new Tired();var jill:Bored = new Bored();var janet:Hungry = new Hungry();
bob.doSomething(); // Output: I'm tired, I don't want to do anything.jill.doSomething(); // Output: I'm bored, let's do something!janet.doSomething(); // Output: I'm hungry, let's get lunch!
This is a simple example, and you had to create the objects manually, but what if you couldcreate the objects dynamically? Polymorphism allows you to control dynamic objects with-out knowing ahead of time which objects you’re dealing with.
Functional polymorphism at work
Now let’s look at a slightly more useful example of polymorphism. If you were to build aFlash-based tool for a human resources department, a good place to start would be anEmployee class, as follows. This base class then holds all properties and methods that areshared by all types of employees the company might have.
Hungry.as
Tired.as
POLYMORPHISM
139
10
6196CH10.qxd 1/18/06 11:18 AM Page 139

class Employee {
var baseSalary:Number = 1000;
function receivePayment():Number {return baseSalary;
}
}
The preceding code shows an Employee class with just one property that contains the basesalary of an employee, and a receivePayment method, because that’s what we care aboutmost, no?
With this base class in place, you have a starting point to create any number of employeetypes. Each employee type is a class that inherits from the Employee class and implementsits own receivePayment method. For example, the following class defines an Engineeremployee type.
class Engineer extends Employee {
function receivePayment():Number {return baseSalary*2;
}
}
The Engineer type has its own receivePayment method, but it is still able to use thebaseSalary property it inherited from the Employee class. In a real-world situation, calcu-lating the payment for an individual employee isn't as easy as multiplying the base salaryby a given number, but you can see the value of this type of approach for calculating end-of-year bonuses, paid leave, and so forth.
The wonderful thing about polymorphism, as you know by now, is that your code doesn’tneed to know about all employee types that you create. Because they all implement thesame set of properties and methods (either overwritten or inherited from the base class),your project remains flexible and you can easily add new types of employees withoutneeding to restructure your application.
To illustrate this, let’s create some more employee type classes, as follows.
Engineer.as
Employee.as
OBJECT-ORIENTED ACTIONSCRIPT FOR FLASH 8
140
6196CH10.qxd 1/18/06 11:18 AM Page 140

class UnpaidIntern extends Employee {
function receivePayment():Number {return 0;
}
}
Unpaid interns—a vastly underrated asset for any office when it comes to shifting theblame for missed deadlines—are not surprisingly paid nothing.
class Manager extends Employee {
function receivePayment():Number {return baseSalary*3;
}
}
Managers in our wonderful company, on the other hand, are paid triple the base salary fortheir hard work hiring unpaid interns. Again, these classes just represent a specificemployee type and implement their own receivePayment method to overwrite the default.
Those classes are all nice to have, but how do you take advantage of this polymorphicdesign when implementing them in the application? Let’s look at a bit of code that youcould use to bring together the different employee classes.
Create a new FLA file and save it in the same folder where you have the Employee.as,UnpaidIntern.as, and Manager.as classes stored.
With the FLA open, on the first keyframe of Layer 1 type the following code:
function payEmployee(employeeType) {return new employeeType().receivePayment();
}
trace(payEmployee(UnpaidIntern)); // outputs 0trace(payEmployee(Engineer)); // outputs 2000trace(payEmployee(Manager)); // outputs 3000
What is interesting about the preceding code snippet is that the payEmployee functionactually takes a reference to an employee class as its argument, after which it instantiatesthe class, runs the receivePayment method on it, and returns that value.
Manager.as
UnpaidIntern.as
POLYMORPHISM
141
10
6196CH10.qxd 1/18/06 11:18 AM Page 141

As a side note, because the instantiated employee type class was not assigned to a refer-ence, it will not remain. It is immediately flushed from Flash Player’s memory as soon asthat statement has ended.
To test this payEmployee function, we create three calls to it, each passing a differentemployee type class, and have them trace out the values to the Output panel. When yourun this code, you’ll see the Flash Output panel holds the values 0, 2,000, and 3,000 for theinstance of the unpaid intern, engineer, and manager, respectively.
What’s next?The examples in this chapter have given you a glimpse of how polymorphism can be aninvaluable tool for your applications. I’m sure you’ll be even more convinced of polymor-phism’s worth when we look at more advanced examples later on in this book.
Encapsulation, inheritance, and polymorphism are the basic building blocks of OOP.Additionally, ActionScript 2.0 supports interfaces, which help implement those buildingblocks. I’ll cover that feature in detail in the next chapter.
OBJECT-ORIENTED ACTIONSCRIPT FOR FLASH 8
142
6196CH10.qxd 1/18/06 11:18 AM Page 142

6196CH10.qxd 1/18/06 11:18 AM Page 143

6196CH11.qxd 1/18/06 11:20 AM Page 144

11 INTERFACES
6196CH11.qxd 1/18/06 11:20 AM Page 145

In the last few chapters we looked at what might be considered the pillars of OOP: encap-sulation, inheritance, and polymorphism. With interfaces, the topic of this chapter, you’reable to bring together those OOP pillars and draw up a template of what your class shouldlook like.
This chapter focuses on what interfaces are, why you should use them, and how to applythem to the code you’ve written in prior chapters. We’ll start by looking at the concept ofinterfaces and how they’re implemented in ActionScript 2.0.
Interfaces overviewThink back to the house-building analogy I used in the first chapter of this book. If youcompare a class to an architect’s blueprint, class objects are the houses built from thatblueprint, and an interface is the contract you sign with the architect.
Despite what you may expect, interfaces do not contain any code at all. Their purpose is toprovide a set of methods with corresponding typed parameters and a return datatype thata class must minimally implement to be considered valid. If a class does not conform withthe interface(s) it implements, a compile error will be thrown. Interfaces do not, however,support defining properties or private class methods.
Interfaces define the following information for your class:
The scope of a method (only public is allowed)
The method name
The method parameters and their corresponding datatypes
The method return type
Interfaces do not specify the following:
Class properties
Private or static methods
Any code inside methods
Interfaces help you check if your classes contain all the methods you need them to haveavailable. They are used by the compiler to validate your code and provide you with ameans to plan method implementations and APIs at the planning stage of your project.
Typically, interfaces have the most impact when used in projects that use a lot of classes orrely on many different developers to work according to a predefined class structure.Interfaces also help with enforcing polymorphism in all classes that implement it, makingyour code interchangeable and interoperable.
OBJECT-ORIENTED ACTIONSCRIPT FOR FLASH 8
146
6196CH11.qxd 1/18/06 11:20 AM Page 146
To quickly familiarize you with interfaces, I’ll cover some uses for interfaces and look at asimple example of an interface in the sections that follow.
Interface use-cases
Now, why the heck would you want to use interfaces? At first glance, interfaces seem likea lot of extra work for little in return, but once you start looking at the bigger picture,you’ll find situations where you’ll want to have interfaces in place.
For example, the previous chapter on polymorphism showed that because the Mover,Bouncer, and Gravity classes all implement the same startMoving method, they are largelyinterchangeable. You can start movement on any of those classes by calling the samemethod, and you even used a function on the main timeline to call this for you on theclass instance that we passed as a parameter. In that type of situation, you want to be surethe class instance you pass to the function actually has that startMoving method in place,rather than just going forward on good faith. By having these classes implement an inter-face that defines the startMoving method, you can be sure that all classes have thatstartMoving method in place, and your code will function.
Other uses for interfaces are when you’re designing an API for a class. Oftentimes in largeprojects, applications are separated into different code modules, and they all need to providea specific set of methods to communicate with one another. This is where interfaces come in.
In such situations, interfaces can be used as a virtual checklist to ensure all methods are inplace and have the correct datatypes and return values applied. Typically in this setup, youwould define interfaces during the project planning process and give them to the team asa template to work with.
What an interface looks like
By now you’re probably wondering what an interface looks like. You already know itdoesn’t define any code and that it simply acts as a template of what a class that imple-ments it should look like. Let’s examine a sample interface.
Although you can find many situations in which you can use interfaces—andin which interface usage might even be the recommended practice—most ofyour of everyday ActionScript OOP will likely not require you to go to thelength of creating interfaces. If your code is part of a larger context and will beextended upon in future, or if you’re working with a strict method structure foryour classes, then interfaces are definitely the way to go.
INTERFACES
147
11
6196CH11.qxd 1/18/06 11:20 AM Page 147

First, just as with ActionScript classes, an interface is saved in its own file with an .asextension, and it should be called by the name you assign to the interface, for example:
interface MyInterface {public function myFirstMethod(myProperty:String):Void;public function mySecondMethod(mySecondProperty:Number):Number;
}
The preceding example interface is very simple. You’ll notice that it’s similar in structure toa class. One of the first noticeable differences is the keyword interface where classwould appear. Inside the interface are two public method declarations: myFirstMethod,which accepts a parameter of datatype String named myProperty and has a return typeVoid, and mySecondMethod, which accepts a Number parameter called mySecondPropertyand returns a Number type.
Notice that we aren’t using curly braces after the method declaration—it is followed byjust a semicolon because, as I stated earlier, interfaces do not need or in fact allow you tospecify any code in the method body.
Now that you know what interface are used for and look like, let’s build some for theclasses discussed in the earlier chapters and cover how they’re implemented.
Implementing an interfaceIn the previous chapters, we built a number of classes to control the movement of a movieclip. We started out by a creating a simple Mover class, which moves the target movie clipwith a certain horizontal and vertical velocity.
The key functionality of that class consisted of the startMoving and stopMoving methods,without which our class wouldn’t be able to function. With this and the fact that we’replanning to extend the class in mind, the Mover class is a good candidate for applying aninterface to. Here’s what an interface for the Mover class should look like:
interface IMoveable {public function startMoving():Void;public function stopMoving():Void;
}
Doesn’t look very difficult, does it? We create a file called IMoveable.as (more about thatnaming convention later on), define an interface with that same IMoveable name, and addtwo lines that show the implementation of startMoving and stopMoving as public methodswith a return type of Void.
IMoveable.as
MyInterface.as
OBJECT-ORIENTED ACTIONSCRIPT FOR FLASH 8
148
6196CH11.qxd 1/18/06 11:20 AM Page 148

The only thing left to do is add the implements keyword to the Mover class, as shown inthe following code:
class Mover extends MovieClip implements IMoveable {
private var objectRef:Object;private var targetMC:MovieClip;private var xVel:Number;private var yVel:Number;
function Mover(targetMC:MovieClip, xVel:Number, yVel:Number) {this.targetMC = targetMC;this.targetMC.objectRef = this;this.xVel = xVel;this.yVel = yVel;
}
public function startMoving():Void {this.targetMC.onEnterFrame = this.updatePosition;
}
public function stopMoving():Void {this.targetMC.onEnterFrame = null;
}
private function updatePosition():Void {this._x += this.objectRef.xVel;this._y += this.objectRef.yVel;
}
}
Just adding implements IMoveable makes sure the class checks that it is compliant withthe interface we implemented.
Let’s do a quick test to see if our interface does its job. Copy the file Polymorphism.flafrom the previous chapter, rename it to Interface.fla, and put it in a folder along withthe files Mover.as and IMoveable.as. Double-click Interface.fla to launch Flash.
1. Delete all but one circle movie clip on the stage.
2. Give the remaining circle movie clip the instance name ball.
3. Change the code in Frame 1 of the ActionScript layer as follows:
var myMover:Mover = new Mover(ball, 2, 3);myMover.startMoving();
Mover.a
INTERFACES
149
11
6196CH11.qxd 1/18/06 11:20 AM Page 149

If you test the movie, you should see the circle movie clip moving across the stage asnormal. That’s a good thing—you now know that the class is valid for the interface that itimplements. You might be wondering what happens if the class doesn’t implement all theinterface methods. Well, let’s find out!
Open the file IMoveable.as and add another method so it looks like this:
interface IMoveable {public function startMoving():Void;public function stopMoving():Void;public function getPosition():Object;
}
You’ll notice that you just added a nonexistent method of getPosition with a return typeObject to the interface. You do not have that method in the Mover class, so it would beinteresting to see what that gives you. Run Test Movie again and you should see the errormessage shown in Figure 11-1 pop up.
Figure 11-1. Error message for an unimplemented interface method
Don’t you just love those descriptive error messages? The class must implement method‘getPosition’ from interface ‘IMoveable’. This is the type of error you can expect when yourclasses don’t comply with the methods outlined in the interface(s) they implement. Withthat in mind, you can see that interfaces are used by the compiler only to help you assessif your classes have in place everything that should be there. In fact, interfaces don’t getcompiled into the SWF whatsoever—they are all checked and converted to bytecodewhen the project is compiled by using Test Movie or by exporting it.
Let’s remove that extra method from the IMoveable interface and look at the next classwe worked on. The Bouncer class extends the Mover class and adds a bounceAtBordermethod. This method is of a private scope, which means we can’t include it in our inter-face. This is interesting because in a real-world scenario you probably wouldn’t go to thetrouble of creating an empty interface, but it gives me the chance to outline two practicalsolutions for implementing interfaces. Here’s the first solution:
IMoveable.as
OBJECT-ORIENTED ACTIONSCRIPT FOR FLASH 8
150
6196CH11.qxd 1/18/06 11:20 AM Page 150

interface IBounceable extends IMoveable {}
This isn’t much different from the IMoveable interface. We just created an IBounceableinterface in the file IBounceable.as. The interface doesn’t implement any methods, butthe one thing you’ll want to notice is the extends keyword. Just like classes, interfaces canextend other interfaces (not classes, mind you), which gives them access to all methodsoutlined in the superinterface (the interface equivalent of a superclass).
Essentially, we now have a duplicate of the IMoveable interface with the nameIBounceable. The next step is to implement it in the Bouncer class.
class Bouncer extends Mover implements IBounceable {
function Bouncer(targetMC:MovieClip, xVel:Number, yVel:Number) {super(targetMC, xVel, yVel);
}
public function startMoving():Void {this.targetMC.updatePosition = this.updatePosition;this.targetMC.bounceAtBorder = this.bounceAtBorder;this.targetMC.onEnterFrame = function() {this.updatePosition();this.bounceAtBorder();
};}
private function bounceAtBorder() {if (this._x>Stage.width-(this._width/2)) {trace("Bounce at right edge");this._x = Stage.width-(this._width/2);this.objectRef.xVel *= -1;
}if (this._y>Stage.height-(this._height/2)) {trace("Bounce at bottom edge");this._y = Stage.height-(this._height/2);this.objectRef.yVel *= -1;
}if (this._x<this._width/2) {trace("Bounce at left edge");this._x = this._width/2;
Bouncer.as
IBounceable.as
INTERFACES
151
11
6196CH11.qxd 1/18/06 11:20 AM Page 151

this.objectRef.xVel *= -1;}if (this._y<this._height/2) {trace("Bounce at top edge");this._y = this._height/2;this.objectRef.yVel *= -1;
}}
}
Again, just adding implements IBounceable makes sure our class has all the necessarymethods implemented when it is compiled. Change the ActionScript on Frame 1 of theActionScript layer as follows:
var myBouncer:Bouncer = new Bouncer(ball, 2, 3);myBouncer.startMoving();
If you run Test Movie, you’ll see the Bouncer class functioning as you’d expect it to andbouncing off the edge of the stage. Now, hang on—let’s look at that Bouncer class again!We had a stopMoving method defined in the IMoveable interface. Why doesn’t ourBouncer.as have this implemented?
It’s important to remember that, just like our IBounceable interface, the Bouncer classinherits from the Mover class, which does specify the stopMoving method. This shows youthat interfaces don’t look at just what methods a specific class has implemented, but alsothose that it may have inherited from other classes.
Great, we’re making progress! I talked about another approach for applying an interface toour Bouncer class. Unlike the extends keyword, classes can implement multiple interfaces,and they just need to be separated by a comma. Let’s see how that looks:
class Bouncer extends Mover implements IMoveable, IBounceable {
function Bouncer(targetMC:MovieClip, xVel:Number, yVel:Number) {super(targetMC, xVel, yVel);
}
public function startMoving():Void {this.targetMC.updatePosition = this.updatePosition;this.targetMC.bounceAtBorder = this.bounceAtBorder;this.targetMC.onEnterFrame = function() {this.updatePosition();this.bounceAtBorder();
};}
Bouncer.as
OBJECT-ORIENTED ACTIONSCRIPT FOR FLASH 8
152
6196CH11.qxd 1/18/06 11:20 AM Page 152

private function bounceAtBorder() {if (this._x>Stage.width-(this._width/2)) {trace("Bounce at right edge");this._x = Stage.width-(this._width/2);this.objectRef.xVel *= -1;
}if (this._y>Stage.height-(this._height/2)) {trace("Bounce at bottom edge");this._y = Stage.height-(this._height/2);this.objectRef.yVel *= -1;
}if (this._x<this._width/2) {trace("Bounce at left edge");this._x = this._width/2;this.objectRef.xVel *= -1;
}if (this._y<this._height/2) {trace("Bounce at top edge");this._y = this._height/2;this.objectRef.yVel *= -1;
}}
}
Instead of just adding implements IBounceable, we used implements IMoveable,IBounceable. We also need to make sure the IBounceable interface does not extendIMoveable, so we’ll update that code as follows:
interface IBounceable {}
If you run Test Movie with those changes in place, everything should still function asexpected. Now, when should you use what method? Implementing multiple interfaces isgenerally done when they are not related. For example, say that the Bouncer class, apartfrom moving, should be able to have some methods to track its position. In such a situa-tion, you might feasibly have an interface called ITrackable that defines certain methodsthat the class needs to implement.
In the current situation, however, you’re extending functionality, so the best practice herewould no doubt be to implement one interface that itself extends the other interface.With that in mind, change the code for Bouncer.as and IBounceable.as back to theiroriginal forms and let’s look at the Gravity class.
The Gravity class is faced with a similar situation as the Bouncer class. Even though it imple-ments several additional methods (applyFriction, applyMethod, and checkForStop), noneof those is a public method and therefore can’t be added to an interface. We’ll neverthelessgo ahead and create an empty IGravity interface for the Gravity class to implement.
IBounceable.as
INTERFACES
153
11
6196CH11.qxd 1/18/06 11:20 AM Page 153

interface IGravity extends IBounceable {}
As you can see, the IGravity interface extends the IBounceable interface, which in turnextends the IMoveable interface. You might be thinking that this looks like some very con-voluted code for essentially just having one interface with a startMoving and stopMovingmethod, and you’re not wrong about that. From a simply functional standpoint, the Mover,Bouncer, and Gravity classes could all have implemented the IMoveable interface.
The current approach does have its merits, as we now have a corresponding interface foreach of our classes, and should we decide to add some essential methods to the Bouncerclass, for example, we can put the method implementation in the corresponding IBounceableinterface.
The final step to add interfaces to our classes involves implementing the IGravity interfacein the Gravity class as follows:
class Gravity extends Bouncer implements IGravity {
var strength:Number;
function Gravity(targetMC:MovieClip, xVel:Number, yVel:Number,strength) {
super(targetMC, xVel, yVel);this.strength = strength;
}
public function startMoving():Void {this.targetMC.updatePosition = this.updatePosition;this.targetMC.bounceAtBorder = this.bounceAtBorder;this.targetMC.applyGravity = this.applyGravity;this.targetMC.applyFriction = this.applyFriction;this.targetMC.checkForStop = this.checkForStop;this.targetMC.onEnterFrame = function() {this.updatePosition();this.bounceAtBorder();this.applyGravity();this.applyFriction();this.checkForStop();
};}
Gravity.as
IGravity.as
OBJECT-ORIENTED ACTIONSCRIPT FOR FLASH 8
154
6196CH11.qxd 1/18/06 11:20 AM Page 154

private function applyGravity() {this.objectRef.yVel += this.objectRef.strength;
}
private function applyFriction() {this.objectRef.xVel *= 0.98;this.objectRef.yVel *= 0.98;
}
private function checkForStop() {if (this._y == Stage.height-(this._height/2)) {if (Math.round(this._x) == this.objectRef.lastPosX ➥ && Math.round(this._y) == this.objectRef.lastPosY) {this.onEnterFrame = null;}
}this.objectRef.lastPosX = Math.round(this._x);this.objectRef.lastPosY = Math.round(this._y);}
}
What’s next?Don’t underestimate the power of interfaces once you start extending existing projects.They can help you code more consistently and will save you time you would otherwise spendon debugging applications because you forgot to add a particular method to one of yourclasses. Interfaces are quick and easy to build, and will prove to be an essential part ofyour development workflow once you start developing your own extensive ActionScript 2.0frameworks.
This chapter concludes a series of chapters in which you learned the core topics of OOP.Before moving on to present more examples of ActionScript 2.0 code, I’m going to intro-duce you to design patterns, which are practical programmatic approaches to solvingspecific problems and which will help you understand the reasoning behind the way codeis structured in upcoming chapters.
A note on the naming convention of interfaces: most developers like to have inter-face names start with a capital “I” followed by the either the name of the class+able (IMoveable) if it is a verb or simply the class name if it is a noun (IGravity).Whatever naming convention you choose for your interfaces, it’s a good idea tomake sure those interface names are distinguishable from normal class namesand that the names are descriptive of the types of methods defined.
INTERFACES
155
11
6196CH11.qxd 1/18/06 11:20 AM Page 155

6196CH12.qxd 1/18/06 11:21 AM Page 156

12 DESIGN PATTERNS
6196CH12.qxd 1/18/06 11:21 AM Page 157

Now that you’ve read about OOP concepts and best practices, and you’ve seen OOPapplied within some ActionScript 2.0 examples, it’s time to get more involved and look attroubleshooting your code and making it more efficient. This is where design patternscome in.
Design patterns provide you with a means to structure your application and streamlinecommunication between classes to effectively deal with common code problems. Thatbeing said, there is almost a cult following of developers passionate about the importanceand superiority of a very particular implementation of a design pattern. Following thetopic of design patterns is actually good entertainment—browse the Web for an afternoonand you’ll find endless heated debates on even the most minor and insignificant details.I take a much more pragmatic approach to design patterns, and feel they help developershandle specific code problems in an efficient and OO-friendly way. Whether you call itapples or pears is not what’s important; it just needs to do the job. This is also theapproach I’ll take when I introduce design patterns for OOP with ActionScript 2.0 in thischapter. Rather than focusing on the technicalities and underlying theory, I’ll show yousome practical implementations of common patterns.
This chapter covers the Observer, Singleton, Decorator, and Model-View-Controller (MVC)patterns that are among the most useful when building ActionScript 2.0 projects. I adviseyou to read through each example of a design pattern in full in this chapter, and then sitdown and try to apply it to one of your projects. By doing so, you’ll soon grasp the conceptsand better understand the benefits of using certain design patterns in specific situations.
Understanding design patternsWhen I first started looking into design patterns for OOP with ActionScript, I must admitthat I had some serious difficulties getting my head wrapped around the topic and itsimplementation in ActionScript. I’m sure the same thing was happening to a lot of otherActionScript developers who don’t have a background in low-level OOP languages (as wasthe case with me).
There’s no reason to panic, though; progress has been made since the ActionScript 1.0days, and the new object-oriented syntax makes it much easier to “borrow” some imple-mentations of design patterns in Java and port them to ActionScript 2.0. That does notmean that you should get carried away with this—ActionScript 2.0 is not Java, and justbecause something works well in Java does not mean it will automatically be a good thingto do in ActionScript 2.0. While design patterns can help your project, you have to find thebalance between what you need and what you can do with them. Failing that, you’re stuck
When talking about design patterns, it’s almost impossible to ignore one of the mostauthoritative books on the subject, Design Patterns: Elements of Reusable Object-Oriented Software by Erich Gamma, Richard Helm, Ralph Johnson, and John Vlissides,who are affectionately called the Gang of Four (GoF). This book first hit the shelves backin 1995 and has contributed tremendously in evangelizing this topic.
OBJECT-ORIENTED ACTIONSCRIPT FOR FLASH 8
158
6196CH12.qxd 1/18/06 11:21 AM Page 158

with some convoluted and highly restrictive code that hinders your workflow more than ithelps with sorting out programming problems. The best way to learn this balance is throughunderstanding design patterns and the role they play in your application.
Design patterns take an abstract description of a situation and talk about the way to handlethis in OOP. Now, the interesting thing is that design patterns don’t give you ready-madesolutions; rather, they simply discuss the different segments of a pattern and how theyrelate to each other. It’s up to you to find an implementation for the pattern and get itembedded in your project. This is really what many people have difficulty with when start-ing out with design patterns. It is absolutely essential that you have a complete overview ofyour project and can visualize the relationships of classes and how they communicate witheach other. If you’re familiar with UML diagrams, they can help tremendously, but in somemore complex projects, I recommend using a method that’s a bit unorthodox.
In such situations, I suggest taking pieces of paper, each of which represents a class, andspreading them out on a table. On each piece of paper, you then write the class name, adescription of its function, and any important methods it implements, and you start walk-ing through the application. You look at a task that the classes need to perform, and keeptrack of the different steps and roles that your classes play.
When you do that, you’ll probably come across some situations where your code isn’t asefficient or straightforward as you’d like it to be. You can label those as possible structuralfailures in your application design and look at how they can be remodeled to behave better.
You’ll likely find that many of those instances of potential failures are good candidates forhaving a design pattern implemented. You can then focus on those specific trouble spotsand see what type of situation you’re dealing with. Here are some examples of situationsin which you might use the design patterns that we’ll discuss in this chapter:
Observer pattern: Multiple classes that all depend on the state of a specific classcan subscribe to that class and get automatically notified when its state changes.This pattern can be used to keep various elements that use the same data in aproject in sync with each other.
Singleton pattern: Classes require only one instance to be available for your entireapplication. This pattern allows you to have a single centralized point where allinformation is managed for a project.
Decorator pattern: A class takes in another class instance and adds functionality.This pattern can be used as an alternative to class inheritance.
MVC pattern: Classes are defined as the Model, View, and Controller of your appli-cation, which allows you to separate data, programming logic, and presentation.Using this pattern, you can easily make changes to the View, for example, withoutit affecting the rest of the application.
Once you’ve found a suitable design pattern that addresses the trouble spot in your appli-cation design, you can start to look at a way to implement it. That’s exactly what we’ll donext. I’ll introduce you to each of the design patterns just listed and help you work out agood ActionScript 2.0 implementation for it.
DESIGN PATTERNS
159
12
6196CH12.qxd 1/18/06 11:21 AM Page 159

Implementing design patternsThere’s more than one way to implement design patterns. Finding the best implementa-tion is not just having it adhere to the specifications of the pattern, but also looking at howit best fits in with your project. Even the most useful pattern can become your worstenemy if you’re too strict in the way you fit it in. Design patterns shouldn’t be looked at asseparate from your application, but rather as an integral part of your project model.
In the following sections, we’ll look at the design patterns listed earlier and walk throughhow to apply them to an ActionScript 2.0 project.
Observer pattern
The Observer design pattern is one of the most common patterns you’ll find in OOP withActionScript 2.0 and most other programming languages, for that matter. The theorybehind it is simple: class instances can subscribe to a class that uses this Observer patternand automatically be notified of any changes that occurred. What gives this design patternits real power is the ability to centralize notifications. Rather than having all classes thatrely on a property of a different class continually check for changes, the information ispushed to every subscribing class if and when changes have occurred. This makes theObserver pattern a very efficient way to handle data changes and synchronize eventsbetween different classes.
Basic implementationA basic implementation of the Observer pattern is relatively easy to build. You need anArray class property that keeps track of the class instances that subscribed, methods toadd and remove subscribers, and a method that sends out the notifications.
The following Observer class is saved in a file called Observer.as and shows this basicimplementation of the Observer pattern.
class Observer {
private var subscribers:Array;
function Observer() {subscribers = new Array();
}
public function addSubscriber(classInstance:Object):Void {this.subscribers.push(classInstance);
}
Observer.as
OBJECT-ORIENTED ACTIONSCRIPT FOR FLASH 8
160
6196CH12.qxd 1/18/06 11:21 AM Page 160

public function removeSubscriber(classInstance:Object):Void {for(var i=0; i<this.subscribers.length; i++) {if(this.subscribers[i] == classInstance) {this.subscribers.splice(i,1);
break;}
}}
public function notifyChanges():Void {for(var i in this.subscribers) this.subscribers[i].update();
}
}
You’ll notice that there is a private variable of an Array type named subscribers, a methodcalled addSubscriber that adds subscribers to the subscribers Array, a removeSubscribermethod that removes subscribers from the subscribers Array, and a method callednotifyChanges that loops through the subscribers array and calls an update function onall of the instances that subscribed for notifications.
Let’s give this class a try and see if it does the trick:
1. Launch Flash.
2. Choose Flash Document from the Create New menu on the start page.
3. Save the blank document in the same folder as Observer.as with the filenameObserver.fla.
4. Rename Layer 1 in the Timeline to ActionScript.
5. Open to Actions panel (select Window ➤ Development Panels ➤ Actions).
6. Add the following code to Frame 1 of the ActionScript layer:
var myObserver:Observer = new Observer();var myFirstSubscriber:Object = new Object();var mySecondSubscriber:Object = new Object();
myFirstSubscriber.update = function() {trace("myFirstSubscriber notified by Observer class");
}mySecondSubscriber.update = function() {trace("mySecondSubscriber notified by Observer class");
}
myObserver.addSubscriber(myFirstSubscriber);myObserver.addSubscriber(mySecondSubscriber);myObserver.notifyChanges();
7. Save the document (select File ➤ Save).
DESIGN PATTERNS
161
12
6196CH12.qxd 1/18/06 11:21 AM Page 161

By following these steps, you create a new instance of the Observer class namedmyObserver and two objects named myFirstSubscriber and mySecondSubscriber thateach have an update function that traces out a message when called. Then those twoobject instances are added as subscribers to the Observer class using the addSubscribermethod, and finally the myObserver instance calls the notifyChanges method.
If you run Test Movie (Control ➤ Test Movie) now, you should now see both themyFirstSubscriber and mySecondSubscriber instance having their update function called.Congratulations! You’ve just applied the Observer pattern to some ActionScript 2.0 code(see Figure 12-1).
Figure 12-1. Output panel showing the Observer design pattern example
That’s all well and good, but it doesn’t look very practical just yet. We’ll get to a more prac-tical implementation of the Observer pattern soon, but let’s first look at some little tweaksthat are required.
The addSubscriber method used in this Observer class doesn’t check for duplicate entries.Having the same class instance subscribed multiple times is not very efficient and can eas-ily be avoided. What you’ll do is check if the class instance is already added, and if that isthe case you’ll return a false value; otherwise, you’ll add it to the subscribers array andreturn true. By returning this Boolean true/false value, you also have confirmation ofwhether or not the class instance was added to the subscribers array.
public function addSubscriber(classInstance:Object):Boolean {for(var i=0; i<this.subscribers.length; i++) {if(this.subscribers[i] == classInstance) {return false;
}}this.subscribers.push(classInstance);return true;
}
When working with the Observer pattern, it’s important to note that a classinstance is not automatically removed when it gets deleted. If you delete aclass instance and don’t remove it as a subscriber, Flash will still attempt tocall it every time it sends out a notification. For this reason, be sure to unsub-scribe a class instance before you delete it to keep your code optimized.
OBJECT-ORIENTED ACTIONSCRIPT FOR FLASH 8
162
6196CH12.qxd 1/18/06 11:21 AM Page 162

If you changed the code in Observer.as to have the addSubscriber method look likethe preceding code, give it a test in Flash. Make sure you change the code in Frame 1 of theActionScript layer to read as follows:
var myObserver:Observer = new Observer();var myFirstSubscriber:Object = new Object();var mySecondSubscriber:Object = new Object();
myFirstSubscriber.update = function() {trace("myFirstSubscriber notified by Observer class");
}mySecondSubscriber.update = function() {trace("mySecondSubscriber notified by Observer class");
}
trace(myObserver.addSubscriber(myFirstSubscriber));trace(myObserver.addSubscriber(mySecondSubscriber));trace(myObserver.addSubscriber(myFirstSubscriber));
myObserver.notifyChanges();
Here, you’ve added another call to addSubscriber, again passing myFirstSubscriber as aparameter. With the changes you just made to the Observer class, the addSubscribermethod now returns a true or false statement indicating whether or not the instance wasadded to the subscribers array. This was done to avoid duplicate entries. By using thetrace statement with these addSubscriber calls, you get the return values traced out tothe Output panel when running Test Movie. Let’s do just that and check whether thatworks (see Figure 12-2).
Figure 12-2. Output panel showing the Observer design pattern notification
Great, that seems to work just fine! The first two lines in the Output panel read true, whichindicates that myFirstSubscriber and mySecondSubscriber were successfully added tothe subscribers array in the Observer class. However, the next line reads false, and if youlook at the corresponding line in Frame 1 of the ActionScript layer, that is the result of try-ing to add myFirstSubscriber to the Observer class again. Finally, you have the last twolines, which you also had last time around, that show that the subscribing instances werenotified by the Observer class.
DESIGN PATTERNS
163
12
6196CH12.qxd 1/18/06 11:21 AM Page 163

While we’re at it, we might as well do the same for the removeSubscriber method. In itscurrent form, this method does not return any value when called. Having it return aBoolean type would be very handy to know if a subscriber was effectively removed fromthe subscribers array in the Observer class. The code for this looks as follows:
public function removeSubscriber(classInstance:Object):Boolean {for(var i=0; i<this.subscribers.length; i++) {if(this.subscribers[i] == classInstance) {this.subscribers.splice(i,1);return true;
}}return false;
}
Make sure you save Observer.as after applying these changes, and you might want to giveit a try in your project. Change the code on Frame 1 of the ActionScript layer to read asfollows:
var myObserver:Observer = new Observer();var myFirstSubscriber:Object = new Object();var mySecondSubscriber:Object = new Object();
myFirstSubscriber.update = function() {trace("myFirstSubscriber notified by Observer class");
}mySecondSubscriber.update = function() {trace("mySecondSubscriber notified by Observer class");
}
trace(myObserver.addSubscriber(myFirstSubscriber));trace(myObserver.addSubscriber(mySecondSubscriber));trace(myObserver.removeSubscriber(myFirstSubscriber));trace(myObserver.removeSubscriber(myElephant));
myObserver.notifyChanges();
The code now has a call to the addSubscriber method for the myFirstSubscriber andmySecondSubscriber instances, and a call to the removeSubscriber method, passingmyFirstSubscriber as the instance to be removed from the subscribers array in theObserver class. Finally, you’ve also added a line that tries to remove a nonexistentmyElephant instance as an observer.
If you run Test Movie with this code in place, you’ll see the lines shown in Figure 12-3 inthe Output panel.
OBJECT-ORIENTED ACTIONSCRIPT FOR FLASH 8
164
6196CH12.qxd 1/18/06 11:21 AM Page 164

Figure 12-3. Output panel showing addSubscriber and removeSubscriberin action
The first two lines in the Output panel read true, as they correspond with themyFirstSubscriber and mySecondSubscriber instance being added as subscribers to theObserver class. The third line also reads true, which means that the myFirstSubscriberinstance was successfully removed from the observers array in the Observer class. Thenext line reads false because the instance myElephant wasn’t found in the subscribersarray. Now, this is fun! The final line shows you that mySecondSubscriber was notified bythe Observer class. Note that the myFirstSubscriber update method was not called,which also confirms that it was removed from the observers array in the Observer class.
One other minor detail that you might have noticed when first testing the Observer classis that the subscribing instances are called in reverse order. If you look at Figure 12-1,you’ll see that mySecondSubscriber was called before myFirstSubscriber, even though itwas added after myFirstSubscriber. For most projects, this won’t matter too much—atmost, the difference between those calls is a couple of milliseconds. If, however, sub-scriber class instances themselves communicate with each other, the order in which theyare notified by the Observer class can be important to ensure they are in sync. Lucky forus, this fix is easily done: the for-in loop iterates in the reverse order as items were added,so adding a simple this.observers.reverse() call before starting this loop should fixthings.
public function notifyChanges():Void {this.subscribers.reverse();for(var i in this.subscribers) this.subscribers[i].update();
}
If you save the changes to Observer.as, you can go ahead and have the code in Frame 1of the ActionScript layer read as follows:
var myObserver:Observer = new Observer();var myFirstSubscriber:Object = new Object();var mySecondSubscriber:Object = new Object();
myFirstSubscriber.update = function() {trace("myFirstSubscriber notified by Observer class");
}mySecondSubscriber.update = function() {trace("mySecondSubscriber notified by Observer class");
}
DESIGN PATTERNS
165
12
6196CH12.qxd 1/18/06 11:21 AM Page 165

myObserver.addSubscriber(myFirstSubscriber);myObserver.addSubscriber(mySecondSubscriber);
myObserver.notifyChanges();
If you run Test Movie (Control ➤ Test Movie) now, you get the lines shown in Figure 12-4in the Output panel.
Figure 12-4. Output panel showing notification in the correct order
As you can see, the subscribers are now called in the same order as they were added. Thefirst line shows the myFirstSubscriber and the second line shows the mySecondSubscriberupdate function being called. If you compare this to Figure 12-1, you will see that thissequencing has now corrected the problem.
So far, so good. With all these tweaks in place, the Observer class now looks as follows:
class Observer {
private var subscribers:Array;
function Observer() {subscribers = new Array();
}
public function addSubscriber(classInstance:Object):Boolean {for(var i=0; i<this.subscribers.length; i++) {if(this.subscribers[i] == classInstance) {return false;
}}this.subscribers.push(classInstance);return true;
}
public function removeSubscriber(classInstance:Object):Boolean {for(var i=0; i<this.subscribers.length; i++) {if(this.subscribers[i] == classInstance) {this.subscribers.splice(i,1);return true;
}}
OBJECT-ORIENTED ACTIONSCRIPT FOR FLASH 8
166
6196CH12.qxd 1/18/06 11:21 AM Page 166

return false;}
public function notifyChanges():Void {this.subscribers.reverse();for(var i in this.subscribers) this.subscribers[i].update();
}
}
Practical implementationAs mentioned earlier, the Observer class isn’t very practical as it is used now. For one thing,it needs to have the addSubscriber, removeSubscriber, and notifyChanges functions inplace with every class that we want to apply the Observer design pattern to.
By extending the Observer class, we can avoid having to manually add the functions andhave a reusable class for our ActionScript 2.0 projects. Next, we’ll create an Attendeesclass that shows how this is done in a typical project.
class Attendees extends Observer {
private var attendeesList:Array;
function Attendees() {attendeesList = new Array();
}
public function addAttendee(name:String):Boolean {for(var i=0; i<this.attendeesList.length; i++) {if(this.attendeesList[i] == name) {return false;
}}this.attendeesList.push(name);super.notifyChanges();return true;
}
public function removeAttendee(name:String):Boolean {for(var i=0; i<this.attendeesList.length; i++) {if(this.attendeesList[i] == name) {this.attendeesList.splice(i,1);super.notifyChanges();return true;
}}
Attendees.as
DESIGN PATTERNS
167
12
6196CH12.qxd 1/18/06 11:21 AM Page 167

return false;}
public function getAttendees():Array {return attendeesList;
}
}
The Attendees class keeps track of attendees in an Array class property namedattendeesList and provides methods to add, remove, and retrieve all attendees. TheaddAttendee and removeAttendee methods work in much the same way as the Observerclass, and because the Attendees class extends this Observer class, it can call thenotifyChanges method to send out notifications to subscribing class instances.
Let’s see this in action. Save the class in the preceding listing as Attendees.as in the samefolder as the Observer class (or get a copy from the downloadable source files on the friendsof ED website at www.friendsofed.com) and create a blank FLA called Attendees.fla. Withthat new blank FLA open, perform the following steps:
1. Rename Layer 1 to ActionScript.
2. Select Frame 1 of the ActionScript layer.
3. Open the Actions panel and add the following code:
var myAttendees:Attendees = new Attendees();var attendeeMonitor:Object = new Object();
attendeeMonitor.update = function() {trace("myAttendees sent notification!");
}
myAttendees.addSubscriber(attendeeMonitor);
myAttendees.addAttendee("John Doe");myAttendees.removeAttendee("John Doe");
If you run Test Movie with this code in place, you’ll get the lines in the Output panel shownin Figure 12-5.
Figure 12-5. Output panel showing the Attendee example using the Observer pattern
OBJECT-ORIENTED ACTIONSCRIPT FOR FLASH 8
168
6196CH12.qxd 1/18/06 11:21 AM Page 168

Great, we’ve just managed to get our custom Attendees class to use the Observer class toimplement the Observer design pattern! There’s just one problem, though: whenever theupdate function of attendeeMonitor is called, we don’t know whether it was caused bythe addition or removal of an attendee. More complex implementations of the Observerdesign pattern have ways of dealing with this, but in this situation we’ll use the getAttendeesmethod to get the latest version of the attendeeList array any time it is triggered.
Extending the practical implementationTo do so, we’ll make things a bit more interactive and add some controls that allow us toadd and remove attendees and show this in a ListBox component. Perform the followingsteps:
1. Insert a new layer in the Timeline panel (select Insert ➤ Timeline ➤ Layer).
2. Rename Layer 2 to Interface.
3. Open the Components panel (select Window ➤ Development Panels ➤ Components).
4. Drag two instances of the Button component on the stage in the Interface layer.
5. Drag an instance of the List component on the stage in the Interface layer.
6. Drag an instance of the TextInput component on the stage in the Interface layer.
7. Position the components on the stage (see Figure 12-6).
Figure 12-6. Component layout on the stage
8. Open the Properties panel (select Window ➤ Properties).
9. Select the List component and give it the instance name attendees_list.
10. Select the TextInput component and give it the instance name attendee_txt.
11. Select the first Button component and give it the instance name add_btn.
12. Select the second Button component and give it the instance name remove_btn.
13. With the first Button selected, set the Label property in the Properties panel to Add.
DESIGN PATTERNS
169
12
6196CH12.qxd 1/18/06 11:21 AM Page 169

14. With the second Button selected, set the Label property in the Properties panel toRemove. (See Figure 12-7.)
Figure 12-7. Properties panel for the Button component
15. Change the code in Frame 1 of the ActionScript layer to read as follows:
var myAttendees:Attendees = new Attendees();var attendeeMonitor:Object = new Object();
attendeeMonitor.update = function() {attendees_list.dataProvider = myAttendees.getAttendees();
}
addPerson = function() {myAttendees.addAttendee(attendee_txt.text);
}removePerson = function() {myAttendees.removeAttendee(attendee_txt.text);
}
add_btn.addEventListener("click",addPerson);remove_btn.addEventListener("click",removePerson);
myAttendees.addSubscriber(attendeeMonitor);
The code we now have in place on the first frame of the ActionScript layer does a numberof things. First, it creates an instance of the Attendees class (remember, this class extendsthe Observer class) and creates an Object instance named attendeeMonitor.
This attendeeMonitor object has an update function called by the Attendees class anytime an attendee is added or removed from the array. This function sets the dataProviderfor attendee_list (the List component on stage) to the array returned by thegetAttendees method of the Attendees class. By doing this, we can always be sure thatour list on the stage is up to date with the array in the myAttendees instance of theAttendees class.
OBJECT-ORIENTED ACTIONSCRIPT FOR FLASH 8
170
6196CH12.qxd 1/18/06 11:21 AM Page 170

The next two functions, addPerson and removePerson, call the addAttendee andremoveAttendee methods of the myAttendees instance. Those functions are triggeredwhen the Add or Remove button is clicked. To achieve this, we actually use an implemen-tation of the Observer pattern that comes with Flash 8 (more about this in Chapter 15).
When you run Test Movie (Control ➤ Test Movie) with all this in place, you get to interacta little with the Attendees class. To demonstrate, type a name into the TextInput compo-nent and click the Add button. You’ll see that the List component on the stage getsupdated. If you click the Remove button with a name in the TextInput component, thatname is removed from the List if it was listed there.
We’ve sure come a long way! Let’s see what actually happens when adding an attendee:
1. When the Add button is clicked, the addPerson function gets called.
2. The addPerson function calls the addAttendee method in the myAttendees instanceof the Attendees class and passes it the value of the TextInput component.
3. The addAttendee method in the Attendees class adds the attendee to theattendeesList array, if it is not a duplicate, and calls the notifyChanges methodof its superclass, Observer.
4. The attendeeMonitor object has subscribed to notifications of myAttendees and soits update function gets called when notifyChanges is triggered.
5. The update function in the attendeeMonitor object updates the dataProvider ofthe List component with the latest version of the attendeesList array from theAttendees class by calling the getAttendees method.
Whew—that’s quite a few steps for simply updating a List component on the stage! Ofcourse, the same goes for removing an attendee from the Attendees class. Now, you mightbe wondering if it’s worth the trouble to code all that to simply generate a list of atten-dees. If you are thinking that, you do have a point.
There’s no use in applying the Observer pattern when there’s just one instance subscribingto the notifications. Imagine the possibilities with the Attendees class, though—withoutmuch hassle, you can have a counter that automatically updates the number of attendeesevery time it receives a notification. You might even have a visual representation of ameeting hall and show the number of seats that are left. That’s when things become inter-esting with the Observer pattern.
As an exercise to try on your own, you might want to add a Label component that auto-matically shows the number of attendees by subscribing to the Attendees class. You’ll findthe solution for this exercise in this book’s downloadable source files, which you canobtain from the friends of ED website (www.friendsofed.com).
Singleton pattern
The Singleton pattern is used for projects where you want to create classes that can onlyever have one instance. “How is that useful?” you may be asking. Well, there are situationsin your ActionScript 2.0 projects where you want to have one and only one instance of aclass available.
DESIGN PATTERNS
171
12
6196CH12.qxd 1/18/06 11:21 AM Page 171

Typically, this pattern will be used for manager-type classes that hold data for your entireproject. These classes provide you with a centralized, single point of access that you canreach from anywhere in your project. In that sense, classes that implement the Singletonpattern are often simply used as repositories for holding data or references to other classinstances.
Basic implementationSo, how exactly do you create a class with the Singleton pattern implemented? First of all,you need to find a way to limit the number of instances a class can create to one. Theobvious approach would be to have a property that keeps track of the number of instancesa class has. Doing that, you’ll soon come across a practical problem: how can you keepcount of the number of instances a class has, when class properties are defined on theclass instance and not shared throughout the class? Attentive readers will probably havepicked up on a possible solution I briefly mentioned in Chapter 8.
Defining a class property as static makes sure it is shared throughout all instances (in thiscase, just one instance). Knowing that, we can define a static class property of a Numbertype and in the class constructor (remember, the constructor always gets called immedi-ately when a class is instantiated) increment it. Let’s see how that would work.
class Singleton {
static var instanceCount:Number = 0;
function Singleton() {instanceCount++;if(instanceCount == 1) {trace("First Singleton class instance");
} else {trace("Singleton class allows only one instance");
}}
}
Save the preceding file as Singleton.as and create a blank FLA named Singleton.fla inthe same folder. Double-click Singleton.fla to open up Flash and perform the followingsteps:
1. Rename Layer 1 in the Timeline to ActionScript.
2. Select Frame 1 of the ActionScript layer.
3. Open the Actions panel (select Window ➤ Development Panels ➤ Actions).
4. Add the following ActionScript to the Actions panel:
var myFirstSingleton:Singleton = new Singleton();var mySecondSingleton:Singleton = new Singleton();
Singleton.as
OBJECT-ORIENTED ACTIONSCRIPT FOR FLASH 8
172
6196CH12.qxd 1/18/06 11:21 AM Page 172

With this code in place, save the FLA and run Test Movie (Control ➤ Test Movie). Youshould see the result shown in Figure 12-8 in the Output panel.
Figure 12-8. Output panel showing the Singleton pattern example
As you can see, the first line of the Output panel reads First Singleton class instance andthe second line reads Singleton class allows only one instance. Great, that looks as thoughyou’ve managed to keep track of the number of classes the Singleton class has. There area couple of problems with this approach, though.
If you want to add functionality to this Singleton class, you’ll need to have a conditionalstatement that checks the instanceCount property in each and every method. That’s notexactly user-friendly, as shown in this example:
class Singleton {
static var instanceCount:Number = 0;
function Singleton() {instanceCount++;if(instanceCount == 1) {trace("First Singleton class instance");
} else {trace("Singleton class allows only one instance");
}}
public function doSomething(){if(instanceCount == 1) {// do something;
} else {// do nothing
}}
}
Singleton.as
DESIGN PATTERNS
173
12
6196CH12.qxd 1/18/06 11:21 AM Page 173

Notice that we have exactly the same conditional as in the class constructor in thedoSomething method. That’s not exactly a great way to handle the Singleton pattern, andreally what the design pattern says is to prevent creating more than one instance. With thisimplementation, we can create as many instances of the class as we want; it’s just themethods that prevent the code from executing by checking that the number of instanceshasn’t exceeded one.
Let’s try something else. If we were to assign a private scope to the constructor method,that would essentially disable us from creating class instances.
class Singleton {
private function Singleton() {}
}
Save the preceding class as Singleton.as, and in the Singleton.fla file open up theActions panel for Frame 1 of the ActionScript layer and change the code to read as follows:
var mySingleton:Singleton = new Singleton();
If you run Test Movie (Control ➤ Test Movie) on this code, you’ll get what you mightexpect: an error message in the Output panel (see Figure 12-9).
Figure 12-9. Output panel showing the Singleton error message
So how exactly does that code help us with the Singleton pattern? The first attempt allowedmultiple instances to be created, and now we can’t have any. Not to worry, with a littletweak to that code, we can have a public method in the class control the instantiation ofthe class.
Singleton.as
OBJECT-ORIENTED ACTIONSCRIPT FOR FLASH 8
174
6196CH12.qxd 1/18/06 11:21 AM Page 174

class Singleton {
private function Singleton() {}
public static function getInstance():Singleton {return new Singleton();
}
public function doSomething():Void {trace("doing something");
}
}
The preceding code uses a public method named getInstance to return a new instance ofthe Singleton class. Because it is called from within the class itself, the instantiation isn’tblocked by the private scope attribute of the class. Now, you might be wondering howwe’ll be able to trigger that getInstance method, as we can’t create any new instance ofthe class to call it on. That’s where the static keyword comes in again. Any methods thatare defined as static can be called by simply using the class name, in this case Singleton.getInstance().
Let’s see if this code does what we want it to. Open up Singleton.fla again and changethe code in Frame 1 of the ActionScript layer to read as follows:
var mySingleton:Singleton = Singleton.getInstance();mySingleton.doSomething();
If you run Test Movie (Control ➤ Test Movie) using the preceding code, you’ll see theresults Output panel shown in Figure 12-10.
Figure 12-10. Output panel showing the Singleton class in action
We’ve been able to get an instance of the Singleton class created, and we’ve called thedoSomething method on that instance, which traced out doing something. The only thingthat’s left to do is add a conditional statement that restricts the number of instances the
Singleton.as
DESIGN PATTERNS
175
12
6196CH12.qxd 1/18/06 11:21 AM Page 175

getInstance method returns to one. This time we’ll use a slightly different approach.Rather than keeping track of the number of instances that were created, we’ll just store areference to the Singleton class in the property.
class Singleton {
private static var instance:Singleton = undefined;
private function Singleton() {}
public static function getInstance():Singleton {if(instance == undefined) {trace("Singleton instance created");instance = new Singleton();
} else {trace("Singleton instance already exists");
}return instance;
}
public function doSomething():Void {trace("do something");
}
}
What the preceding code does differently relates to the class property. We’ve given it aprivate scope and static property, so it can’t be manipulated from outside the class, andgiven it a value of undefined. In the getInstance method, we then go on to check ifthis class property is undefined and, if so, we create a new Singleton instance. If theinstance class property is not undefined, an instance of Singleton was already created andthe existing instance simply gets returned. I added two trace statements to help you seewhat’s going on. Let’s try this out in the Singleton.fla Flash file.
Change the ActionScript code on Frame 1 of the ActionScript layer to read as follows:
var myFirstSingleton:Singleton = Singleton.getInstance();var mySecondSingleton:Singleton = Singleton.getInstance();
If you run Test Movie (Control ➤ Test Movie) with this code in place, you’ll get the resultin the Output panel shown in Figure 12-11.
Singleton.as
OBJECT-ORIENTED ACTIONSCRIPT FOR FLASH 8
176
6196CH12.qxd 1/18/06 11:21 AM Page 176

Figure 12-11. Output panel showing the Singleton class’s inner workings
The first line of the Output panel reads Singleton instance created, while the second linesays Singleton instance already exists. This effectively means that your code to limit thenumber of instances created using the getInstance method is working properly. If noinstance existed, it creates one for you, and if one was already present, it returns areference to that Singleton instances. Doing that allows you to only ever have one classinstance instantiated, and have that instance accessible from anywhere in your application.
Practical implementationThat wasn’t too difficult, was it? Now that we’ve found a good implementation of theSingleton pattern, let’s apply it to an ActionScript 2.0 project. Building on the Attendeesclass we had for the Observer pattern, we’ll now work on a MeetingRoomManager classusing the Singleton pattern. This class will hold references to MeetingRoom class instancesthat in turn keep track of the attendees.
The first thing we’ll do is use the Singleton class implementation just created as a templatefor the MeetingRoomManager class.
class MeetingRoomManager {
private static var instance:MeetingRoomManager = undefined;
private function MeetingRoomManager() {}
public static function getInstance():MeetingRoomManager {if(instance == undefined) {trace("MeetingRoomManager instance created");instance = new MeetingRoomManager();
} else {trace("MeetingRoomMananger instance already exists");
}return instance;
}
}
MeetingRoomManager.as
DESIGN PATTERNS
177
12
6196CH12.qxd 1/18/06 11:21 AM Page 177

Next, we’ll add some methods for us to be able to add, remove, and retrieve meeting roomsfrom the MeetingRoomManager class. The methods we’ll be using are addMeetingRoom,removeMeetingRoom, and getMeetingRoom. To keep track of the meeting rooms in theMeetingRoomManager class, we have the meetingRooms class property that has a datatypeof Array.
class MeetingRoomManager {
public static var meetingRooms:Array = new Array();private static var instance:MeetingRoomManager = undefined;
private function MeetingRoomManager() {}
public static function getInstance():MeetingRoomManager {if(instance == undefined) {trace("MeetingRoomManager instance created");instance = new MeetingRoomManager();
} else {trace("MeetingRoomMananger instance already
exists");}return instance;
}
public function addMeetingRoom(meetingRoomName:String):Void {meetingRooms.push({name:meetingRoomName, ➥ instance:new MeetingRoom()});
}
public function removeMeetingRoom(meetingRoomName:String):Void {for(var i=0; i<meetingRooms.length; i++) {if(meetingRooms[i].name == meetingRoomName) {meetingRooms.splice(i,1);
}}
}
public function getMeetingRoom(meetingRoomName:String):MeetingRoom {for(var i=0; i<meetingRooms.length; i++) {if(meetingRooms[i].name == meetingRoomName) {return meetingRooms[i].instance;
}}
}
}
MeetingRoomManager.as
OBJECT-ORIENTED ACTIONSCRIPT FOR FLASH 8
178
6196CH12.qxd 1/18/06 11:21 AM Page 178

That’s an interesting piece of code. As you’ll notice in the addMeetingRoom method, weaccept a parameter that specifies the name of our meeting room. That name, as well as anew anonymous instance of the MeetingRoom class, form the name and instance proper-ties of an object (note the curly brackets shorthand notation) that gets pushed to themeetingRooms array.
The removeMeetingRoom method also takes this meetingRoomName parameter and uses thatto loop through the meetingRooms array, looking for an entry where the name attribute isequal to the parameter. If that is the case, it removes that meeting room from the array.That same approach goes for the getMeetingRoom method, but you’ll notice that methodhas a return type of MeetingRoom. It loops through the meetingRooms array looking for ameeting room where the name is equal to the meetingRoomName parameter and, if found,returns the MeetingRoom instance that was created for that entry in the array.
Before you can do any testing on this, you’ll have to create a MeetingRoom class. This classwill simply extend the Attendees class (which in turn extends the Observer class), so youhave access to the addAttendee and removeAttendee functions and can have instancessubscribe when the attendees list is updated for that particular MeetingRoom instance.
class MeetingRoom extends Attendees {
function MeetingRoom() {}
}
That’s really all that you have to do! Make sure the files MeetingRoomManager.as,MeetingRoom.as, Attendees.as, and Observer.as are in the same folder as Singleton.fla,and let’s look at the class in action. When you have the file Singleton.fla open, changethe code in Frame 1 of the ActionScript layer to read as follows:
// Get an instance of MeetingRoomManagervar myMeetingRoomManager:MeetingRoomManager = ➥ MeetingRoomManager.getInstance();
// Add meeting rooms to MeetingRoomManagermyMeetingRoomManager.addMeetingRoom("boardroom");myMeetingRoomManager.addMeetingRoom("ballroom");
// Set up listeners for the meeting roomsboardroomListener = new Object();boardroomListener.update = function() {trace("boardroom attendees: "+
➥ myMeetingRoomManager.getMeetingRoom("boardroom")➥ .getAttendees());}
MeetingRoom.as
DESIGN PATTERNS
179
12
6196CH12.qxd 1/18/06 11:21 AM Page 179

ballroomListener = new Object();ballroomListener.update = function() {trace("ballroom attendees: "+
➥ myMeetingRoomManager.getMeetingRoom("ballroom")➥ .getAttendees());}
// Subscribe to updates from MeetingRoom instancesmyMeetingRoomManager.getMeetingRoom("boardroom").addSubscriber(boardroomListener);myMeetingRoomManager.getMeetingRoom("ballroom").addSubscriber(ballroomListener);
// Add attendees to MeetingRoom instancesmyMeetingRoomManager.getMeetingRoom("boardroom").addAttendee("John Doe");myMeetingRoomManager.getMeetingRoom("ballroom").addAttendee("Jane Doe");
The preceding code looks pretty complex, but you’ll soon see that it’s not. The first line ofcode stores the instance of the MeetingRoomManager class in a variable calledmyMeetingRoomManager. Remember, the MeetingRoomManager class has the Singletonpattern implemented, so it can have only one instance. Next, we add two meeting rooms(boardroom and ballroom) to the MeetingRoomManager class using the addMeetingRoommethod.
Following that, we define two object instances that will act as listeners for the meetingrooms we created. For this to work with our implementation of the Observer pattern, theinstances need to have an update function defined, which is called when attendees areadded or removed. With those two objects in place, we can now subscribe them to theMeetingRoom instances. This is done through the addSubscriber method.
Finally, we add an attendee for both of the MeetingRoom instances. When you saveSingleton.fla with these changes in place, or if you grabbed a copy of the source filesavailable from the friends of ED website, you can run Test Movie (Control ➤ Test Movie)and watch the results in the Output panel (see Figure 12-12).
Figure 12-12. Output panel showing the MeetingRoomManager Singleton example
The first line in the Output panel reads MeetingRoomManager instance created, whichindicates that there was no earlier instance of the MeetingRoomManager class. The next line,boardroom attendees: John Doe, is the result of notification sent to the boardroomListener
OBJECT-ORIENTED ACTIONSCRIPT FOR FLASH 8
180
6196CH12.qxd 1/18/06 11:21 AM Page 180

update function. The final line in the Output panel, ballroom attendees: Jane Doe, comesfrom the ballroomListener.
Now, be honest—isn’t that some incredibly cool code? One last thing we’ll do is build our-selves an interface around this class to add some user interaction.
Building an interfaceGet a copy of the file Attendees.fla that was created earlier and rename itto MeetingRoomManager.fla in the folder where all your classes are stored. WithMeetingRoomManager.fla open in Flash, perform the following steps:
1. Open the Components panel (select Window ➤ Development Panels ➤ Components).
2. Drag an instance of the ComboBox component to the Interface layer.
3. Give the ComboBox component the instance name meetingrooms_cb (seeFigure 12-13).
Figure 12-13. Properties panel showing the ComboBox component
4. Change the code in Frame 1 of the ActionScript layer to read as follows:
var myMeetingRoomManager:MeetingRoomManager =MeetingRoomManager.getInstance();
myMeetingRoomManager.addMeetingRoom("boardroom");myMeetingRoomManager.addMeetingRoom("ballroom");
meetingrooms_cb.dataProvider = myMeetingRoomManager.getMeetingRoomList();
attendeeMonitor = new Object();attendeeMonitor.update = function() {attendees_list.dataProvider =myMeetingRoomManager.
DESIGN PATTERNS
181
12
6196CH12.qxd 1/18/06 11:21 AM Page 181

getMeetingRoom(meetingrooms_cb.text).getAttendees();}
addPerson = function() {myMeetingRoomManager.
getMeetingRoom(meetingrooms_cb.text).addAttendee(attendee_txt.text);}removePerson = function() {myMeetingRoomManager.
getMeetingRoom(meetingrooms_cb.text).removeAttendee(attendee_txt.text);}
changeRoom = function() {attendeeMonitor.update();
}
myMeetingRoomManager.getMeetingRoom("boardroom").addSubscriber(attendeeMonitor);myMeetingRoomManager.getMeetingRoom("ballroom").addSubscriber(attendeeMonitor);
add_btn.addEventListener("click",addPerson);remove_btn.addEventListener("click",removePerson);meetingrooms_cb.addEventListener("change",changeRoom);
5. Add the following method to the MeetingRoomManager class in MeetingRoom➥
Manager.as:
public function getMeetingRoomList() {var tmp:Array = new Array();for(var i=0; i<meetingRooms.length; i++) {tmp.push(meetingRooms[i].name);
}return tmp;
}
Once you’ve completed these steps, save your files and run Test Movie (Control ➤ TestMovie). As with the Observer pattern, you’ll now have an interface where you can add andremove attendees. You’ve just added support for multiple meeting rooms.
The ComboBox component gets filled with the available meeting rooms by assigning thearray it gets from the new getMeetingRoomList method you added to its dataProvider.By using the built-in addEventListener method, you can update the List component withattendees as soon as the meeting room in the ComboBox component is changed. TheaddPerson and removePerson functions that get called when the corresponding Buttoncomponents are clicked have now been changed to store the attendees in the correctmeeting room in the MeetingRoomManager class.
OBJECT-ORIENTED ACTIONSCRIPT FOR FLASH 8
182
6196CH12.qxd 1/18/06 11:21 AM Page 182

Feel free to play around with this example, just as with the Observer example. You maywant to try and add another listener that displays the number of attendees for theselected meeting room. You’ll find the solution to this exercise in the downloadablesource files that you can obtain from the friends of ED website (www.friendsofed.com).
Decorator pattern
The Decorator pattern is one of my favorite design patterns because it’s very flexible anda quick-and-easy alternative to subclassing your code. This pattern adds functionality to anexisting class by accepting a class instance as an argument in its constructor.
It’s not very difficult to get this pattern to work, so let’s start with the basic class structure.
Basic implementationThe following code creates a Decorator that accepts an object instance as an argumentand stores that in a private variable named decorateInstance.
class Decorator {
private var decorateInstance:Object;
function Decorator(decorateObj:Object) {this.decorateInstance = decorateObj;
}
}
If you were to extend the Attendees class, the code on the timeline in Flash would looksomething like this:
var myAttendees:Attendees = new Attendees();var myDecorator:Decorator = new Decorator(myAttendees);
Or if you don’t need to have a reference to the Attendees instance and just want to workwith the Decorator class, an anonymous instance would also work:
var myDecorator:Decorator = new Decorator(new Attendees);
The way the Decorator pattern works is it defines all additional methods it wants to add tothe existing functionality of the decorateInstance object and overrides any methods itwants changed. All other method calls to the Decorator class should just be relayed to thedecorateInstance object. Let’s take the Attendees class as an example again and see howthat would look.
Decorator.as
DESIGN PATTERNS
183
12
6196CH12.qxd 1/18/06 11:21 AM Page 183

class Decorator {
private var decorateInstance:Object;
function Decorator(decorateObj:Object) {this.decorateInstance = decorateObj;
}
public function addAttendee(name:String) {this.decorateInstance.addAttendee(name);
}
public function removeAttendee(name:String) {this.decorateInstance.removeAttendee(name)
}
public function getAttendees() {this.decorateInstance.getAttendeeList();
}
public function clearAttendees() {this.decorateInstance.attendeesList = new Array();
}
}
As you can see from the preceding code, the Decorator class implements all methods thatthe decorateInstance object has and relays the methods through to that class instance. Inthis example, we also added a clearAttendees method that resets that attendees array.By doing this, we can now use the Decorator class and have all functionality of theAttendees class, as well as being able to use the clearAttendees method. The code onthe Timeline in Flash to work with this class would look something like this:
var myDecorator = new Decorator(new Attendees());myDecorator.addAttendee("John Doe");myDecorator.clearAttendees();
Practical implementation“Hang on a minute,” you may be thinking. “You said this pattern was quick and easy, andhow can you possibly call this flexible?” You’re absolutely right—even though the preced-ing code works well, it’s not the most convenient way to implement the Decorator pattern.Luckily, ActionScript comes to the rescue and provides us with an invaluable feature: the__resolve method.
If you define a function named __resolve in your class (note the double underscore char-acter), any methods that were not found in the class will be captured by that method. This
Decorator.as
OBJECT-ORIENTED ACTIONSCRIPT FOR FLASH 8
184
6196CH12.qxd 1/18/06 11:21 AM Page 184

__resolve method also has a parameter of datatype String that gives you the name ofthe method that wasn’t found. Now that is interesting!
class Decorator {
private var decorateInstance:Object;
function Decorator(decorateObj:Object) {decorateInstance = decorateObj;
}
public function __resolve(methodName:String) {if(decorateInstance[methodName]) {decorateInstance[methodName]();
} else {trace(methodName+" method does not exist!");
}}
}
This is more like it! Create a blank FLA and save it in the same folder as Decorator.as andAttendees.as. With this file open in Flash, rename Layer 1 in the Timeline to ActionScriptand add the following code to Frame 1:
var myDecorator:Decorator = new Decorator(new Attendees());myDecorator.paintPinkElephant();
Seeing that neither the Decorator or the Attendees class has a paintPinkElephantmethod implemented, the __resolve method should catch this and trace out the messagepaintPinkElephant method does not exist!. Let’s give this a try by running Test Movie(Control ➤ Test Movie).
Oh dear, running that code seems to bring up an error in the Output panel (see Figure 12-14).
Figure 12-14. Output panel showing an error with the Decorator example
Decorator.as
DESIGN PATTERNS
185
12
6196CH12.qxd 1/18/06 11:21 AM Page 185
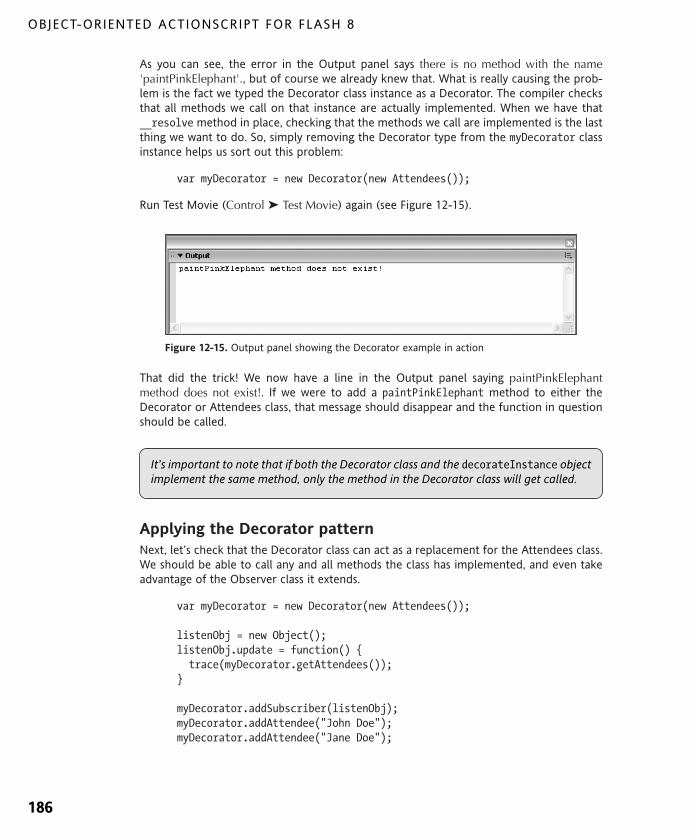
As you can see, the error in the Output panel says there is no method with the name'paintPinkElephant'., but of course we already knew that. What is really causing the prob-lem is the fact we typed the Decorator class instance as a Decorator. The compiler checksthat all methods we call on that instance are actually implemented. When we have that__resolve method in place, checking that the methods we call are implemented is the lastthing we want to do. So, simply removing the Decorator type from the myDecorator classinstance helps us sort out this problem:
var myDecorator = new Decorator(new Attendees());
Run Test Movie (Control ➤ Test Movie) again (see Figure 12-15).
Figure 12-15. Output panel showing the Decorator example in action
That did the trick! We now have a line in the Output panel saying paintPinkElephantmethod does not exist!. If we were to add a paintPinkElephant method to either theDecorator or Attendees class, that message should disappear and the function in questionshould be called.
Applying the Decorator patternNext, let’s check that the Decorator class can act as a replacement for the Attendees class.We should be able to call any and all methods the class has implemented, and even takeadvantage of the Observer class it extends.
var myDecorator = new Decorator(new Attendees());
listenObj = new Object();listenObj.update = function() {trace(myDecorator.getAttendees());
}
myDecorator.addSubscriber(listenObj);myDecorator.addAttendee("John Doe");myDecorator.addAttendee("Jane Doe");
It’s important to note that if both the Decorator class and the decorateInstance objectimplement the same method, only the method in the Decorator class will get called.
OBJECT-ORIENTED ACTIONSCRIPT FOR FLASH 8
186
6196CH12.qxd 1/18/06 11:21 AM Page 186

If you run Test Movie (Control ➤ Test Movie) with this code in place, you’d expect this towork as the Attendees class and have the listenObj trace out the list of Attendees.Unfortunately, nothing happens when you run this code. The reason for that is thatthe Decorator class does not pass any arguments to the methods it forwards using the__resolve method.
To fix that problem, we’ll use another great piece of ActionScript code. The apply methodcan be used to call another method, and it accepts two arguments. The first argumentdefines the object to which it is applied; the second argument accepts an array with argu-ments that you want passed to the method it calls.
class Decorator {
private var decorateInstance:Object;
function Decorator(decorateObj:Object) {decorateInstance = decorateObj;
}
public function __resolve(methodName:String) {if(decorateInstance[methodName]) {return function() {return decorateInstance[methodName].
apply(decorateInstance,arguments);}
} else {trace(methodName+" method does not exist!");
}}
}
As you can see, the only tweaks done to the preceding code relate to the __resolvemethod. Remember, if a particular method isn’t found in the Decorator class, it calls the__resolve method with that method name as an argument. What we do in the __resolvemethod is check if this method exists in the decorateInstance object and, if not, we tracean error message.
If the method exists in the decorateInstance object, we return a function that calls themethod on the decorateInstance object using the apply method just discussed. The firstargument of this apply method is decorateInstance, which essentially means we wantto run the method on the decorateInstance object. The second argument refers to thearguments object. Each and every method or function in ActionScript has an argumentsobject defined in its local scope.
Decorator.as
DESIGN PATTERNS
187
12
6196CH12.qxd 1/18/06 11:21 AM Page 187

That arguments object is an array with all the arguments that were passed to the function.For example, arguments[0] would be the first argument passed to a function. Thearguments object also has a number of properties: caller (a reference to the functionthat called the current function), callee (a reference to the current function), and length(the number of arguments passed to the function).
By using this arguments object as the second argument in the apply method, we pass onall arguments that were applied to the method called through __resolve back to thedecorateInstance object.
Save the file Decorator.as and with the following code in Frame 1 of the ActionScriptlayer, try to run Test Movie (Control ➤ Test Movie) again (see Figure 12-16 for the results):
var myDecorator = new Decorator(new Attendees());
listenObj = new Object();listenObj.update = function() {trace(myDecorator.getAttendees());
}
myDecorator.addSubscriber(listenObj);myDecorator.addAttendee("John Doe");myDecorator.addAttendee("Jane Doe");
Figure 12-16. Output panel for the Decorator pattern example
That’s now running like a train: the listenObj is now subscribed to the myDecoratorinstance, and its update function gets called any time we run addAttendee. With thisDecorator implementation in place, we can now have a working copy of the Attendeesclass and add additional functionality.
So, why exactly is the Decorator pattern more flexible than subclassing? Well, the mostimportant reason is you can extend functionality of a class at runtime by assigning a classinstance as an argument for the Decorator class constructor. But be aware that there is adownside to using this technique: it doesn’t work on class properties. To decorate classproperties, you’ll need to create methods that set and retrieve this property. I personallydon’t have a problem with this, as I quite like to use methods for getting and setting classproperties rather than directly manipulating the properties themselves.
Let’s apply the Decorator pattern to something useful in ActionScript 2.0. For example, saywe want to add some functionality to the Array class.
OBJECT-ORIENTED ACTIONSCRIPT FOR FLASH 8
188
6196CH12.qxd 1/18/06 11:21 AM Page 188

class Array2 {
private var decorateInstance:Object;
function Array2(decorateObj:Object) {decorateInstance = decorateObj;
}
public function __resolve(methodName:String) {if(decorateInstance[methodName]) {return function() {return decorateInstance[methodName].apply ➥ (decorateInstance,arguments);
}} else {trace(methodName+" method does not exist!");
}}
public function checkDuplicate(name:String):Boolean {var count:Number = 0;for(var i=0; i<decorateInstance.length; i++) {if(decorateInstance[i] == name) {count++;
}}if(count > 1) {return true;
} else {return false;
}}
public function removeDuplicate(name:String):Void {var count:Number = 0;for(var i=0; i<decorateInstance.length; i++) {trace(decorateInstance[i]);if(decorateInstance[i] == name) {count++;if(count > 1) {decorateInstance.splice(i,1);
}}
}}
}
Array2.as
DESIGN PATTERNS
189
12
6196CH12.qxd 1/18/06 11:21 AM Page 189

As you can see in the preceding code, the same Decorator template created earlier is used,and the class name and constructor method are simply changed to Array2. Next, we addtwo new methods, checkDuplicate and removeDuplicate, that loop through the Arrayinstance to which a reference is stored in the decorateInstance class property.
Both methods take an argument that defines what entry they look for in the Array andhave a local count variable that keeps track of the number of times it encounters thatentry. The checkDuplicate method returns a Boolean value indicating whether or not anentry has duplicates in the Array. The removeDuplicate method removes any duplicateentries that occur in the Array after the first occurrence.
Create a new blank FLA in the same folder where you saved Array2.as and name itArray2.fla. With Array2.fla open in Flash, perform the following steps:
1. Rename Layer 1 in the Timeline to ActionScript.
2. Select Frame 1 of the ActionScript layer.
3. Open the Actions panel (select Window ➤ Development Panels ➤ Actions).
4. Add the following ActionScript to the Actions panel:
var myArrayDecorator = new Array2(new Array());
myArrayDecorator.push("Jane Doe");myArrayDecorator.push("John Doe");myArrayDecorator.push("Jane Doe");
trace("John Doe: "+myArrayDecorator.checkDuplicate("John Doe"));trace("Jane Doe: "+myArrayDecorator.checkDuplicate("Jane Doe"));
trace("Remove Jane Doe duplicates");myArrayDecorator.removeDuplicate("Jane Doe");
trace("John Doe: "+myArrayDecorator.checkDuplicate("John Doe"));trace("Jane Doe: "+myArrayDecorator.checkDuplicate("Jane Doe"));
If you save Array2.fla and run Test Movie (Control ➤ Test Movie), you’ll get the resultshown in Figure 12-17.
Figure 12-17. Output panel for the Decorator pattern example
OBJECT-ORIENTED ACTIONSCRIPT FOR FLASH 8
190
6196CH12.qxd 1/18/06 11:21 AM Page 190

The code we use adds three items to the Array: one “John Doe” entry and two “Jane Doe”entries. Using the checkDuplicate method, we check for duplicates of “John Doe” and“Jane Doe” in the Array, and the results of this are traced out in the first two lines of theOutput panel. For John Doe, the result of this is false and for Jane Doe it’s true.
Next, we use the removeDuplicate method to remove all duplicates of “Jane Doe” in theArray. We add a trace statement saying Remove Jane Doe duplicates.
Finally, we run the checkDuplicate method again for “John Doe” and “Jane Doe,” andwatch the result in the Output panel. This time, the checkDuplicate method returns falsefor both entries, which means there are no more duplicate entries.
That’s it! You’ve just created a working implementation of the Decorator pattern andextended an Array object. Now, have some fun and try adding a couple more methods tothe Array2 class. For example, you could have a method that uses the checkDuplicate andremoveDuplicate methods to automatically remove all duplicates from the array. You canfind the solution to this exercise in the downloadable source files for this chapter on thefriends of ED site.
Model-View-Controller pattern
The MVC pattern is, technically speaking, not really a design pattern; rather, it’s a collec-tion of various patterns that form an architectural framework. That distinction is not allthat important for us at the moment, as we’re more interested in what the pattern doesand how we can apply it to ActionScript 2.0 code.
Using the MVC pattern, we are able to separate the Model (the class that holds the data ofthe application), the View (the visual presentation of the application), and the Controller(the class that handles user interaction).
Of course, separating a project into these three entities does not help us all that much.What is important is the way the Model, View, and Controller interact.
The MVC pattern specifies the way the different classes can communicate with each otheras follows:
Model: Implements the Observer pattern and sends notifications to the View whenthere are changes to the data it holds.
View: Holds a reference to the Model and the Controller, and is only allowed toconnect to the Model to retrieve information when it receives notification from theModel. When user interaction occurs, the View calls the appropriate method onthe Controller.
Controller: Holds a reference to the Model and updates that Model through themethods that are called from the View.
DESIGN PATTERNS
191
12
6196CH12.qxd 1/18/06 11:21 AM Page 191

Basic implementationKnowing these specifications, we can create a class template for the Model, View, andController, as follows:
class Model extends Observer {
function Model() {}
public function registerView(view:Object):Void {super.addSubscriber(view);
}
}
The Model class extends our Observer class, so it can add, remove, and notify subscriberswhen changes occur in the data it holds. Our Model class template also holds a methodcalled registerView, which subscribes that View instance to receive notifications.
class View {
private var model:Object;private var controller:Object;
function View(model:Object,controller:Object) {this.model = model;this.controller = controller;this.model.registerView(this);
}
function update() {}
}
The View class accepts two arguments in its constructor. Those arguments are an instanceof the Model class and an instance of the Controller class. A reference to the Model andController instances are stored in private class properties called model and controller.Using the model class property, we register this instance of the View class with the Modelinstance so it subscribes to updates. We defined an empty update function that will beused to respond to notifications sent from the Model.
View.as
Model.as
OBJECT-ORIENTED ACTIONSCRIPT FOR FLASH 8
192
6196CH12.qxd 1/18/06 11:21 AM Page 192

class Controller {
private var model:Object;
function Controller(model:Object) {this.model = model;
}
}
The Controller class accepts one argument in its constructor: a reference to the Modelinstance it can modify. A reference to this Model class instance is stored in a private classproperty called model.
With those classes in place, we can use the following code on the Timeline in Flash:
var myModel:Model = new Model();var myController:Controller = new Controller(myModel);var myView:View = new View(myModel,myController);
The easiest way to see the MVC pattern in action is to apply it to the example we’ve beenworking with for the Observer and Singleton patterns.
Practical implementationWe’ll be using the Attendees class as our Model, and we’ll write new classes to manage theView (the components on the stage) and the Controller (the user interaction that updatesthe Model). Let’s see what the Attendees class looks like and how we’ll be applying ourModel class template to it:
class Attendees extends Observer {
public var attendeesList:Array;
function Attendees() {attendeesList = new Array();
}
public function addAttendee(name:String):Boolean {for(var i=0; i<this.attendeesList.length; i++) {if(this.attendeesList[i] == name) {return false;
}}this.attendeesList.push(name);super.notifyChanges();return true;
}
Controller.as
DESIGN PATTERNS
193
12
6196CH12.qxd 1/18/06 11:21 AM Page 193

public function removeAttendee(name:String):Boolean {for(var i=0; i<this.attendeesList.length; i++) {if(this.attendeesList[i] == name) {this.attendeesList.splice(i,1);super.notifyChanges();return true;
}}return false;
}
public function getAttendees():Array {return attendeesList;
}
}
To make the code a little more readable, let’s rename the class to AttendeeModel andmake the necessary changes to make it fit in with our Model class template.
class AttendeeModel extends Observer {
public var attendeesList:Array;
function AttendeeModel() {attendeesList = new Array();
}
public function registerView(view:Object) {super.addSubscriber(view);
}
public function addAttendee(name:String):Boolean {for(var i=0; i<this.attendeesList.length; i++) {if(this.attendeesList[i] == name) {return false;
}}this.attendeesList.push(name);super.notifyChanges();return true;
}
public function removeAttendee(name:String):Boolean {for(var i=0; i<this.attendeesList.length; i++) {if(this.attendeesList[i] == name) {
AttendeeModel.as
OBJECT-ORIENTED ACTIONSCRIPT FOR FLASH 8
194
6196CH12.qxd 1/18/06 11:21 AM Page 194

this.attendeesList.splice(i,1);super.notifyChanges();return true;
}}return false;
}
public function getAttendees():Array {return attendeesList;
}
}
All code that appears in bold shows you changes or additions made to the class. The tweakswe made to this class now make it conform with the MVC Model class specifications.
For the View, we’ll need to create a new class, as we didn’t previously use a class to workwith the components. Sticking to the same naming convention, we’ll call this classAttendeeView.
import mx.utils.Delegate;
class AttendeeView {
private var model:Object;private var controller:Object;
function AttendeeView(model:Object,controller:Object) {this.model = model;this.controller = controller;this.model.registerView(this);_root.add_btn.addEventListener("click",Delegate.create(this,addPerson));_root.remove_btn.addEventListener("click",Delegate.create(this,removePerson));
}
public function update() {_root.attendees_list.dataProvider =this.model.getAttendees();
}
public function addPerson():Void {this.controller.addPerson(_root.attendee_txt.text);
AttendeeView.as
DESIGN PATTERNS
195
12
6196CH12.qxd 1/18/06 11:21 AM Page 195

_root.attendee_txt.text = "";}
public function removePerson():Void {this.controller.removePerson(_root.attendee_txt.text);_root.attendee_txt.text = "";
}
}
The preceding class makes use of the Delegate class, which we’ll discuss in the comingchapters. It allows us to call functions in a different scope than the one it is defined in. Inthe AttendeeView constructor we use addEventListener to listen for the click event ofadd_btn and remove_btn. The update function receives notifications from the Model whendata has changed, and this then assigns that new data to the attendees_list data provider.The addPerson and removePerson methods forward the method to the Controller instanceand clear the attendee_txt TextInput component.
class AttendeeController {
private var model:Object;
function AttendeeController(model:Object) {this.model = model;
}
public function addPerson(name:String):Void {this.model.addAttendee(name);
}
public function removePerson(name:Object):Void {this.model.removeAttendee(name);
}
}
The AttendeeController class basically just holds a reference to the Model instance thatwas passed as an argument to its constructor and calls the necessary methods on theModel through the methods that get called by AttendeeViewer.
Bringing together the Model, View, and ControllerOK, so now we have the three necessary classes ready: AttendeeModel, AttendeeView, andAttendeeController. All that’s left for us to do is prepare the Flash file. Place the filesAttendeeModel.as, AttendeeView.as, AttendeeController.as, and Observer.as in thesame folder, and get a copy of the file Attendees.fla you created when building the ear-lier example of the Observer pattern.
AttendeeController.as
OBJECT-ORIENTED ACTIONSCRIPT FOR FLASH 8
196
6196CH12.qxd 1/18/06 11:21 AM Page 196

Rename Attendees.fla to AttendeesMVC.fla, open it up in Flash, and make the followingchanges to Frame 1 of the ActionScript layer:
var myAttendeeModel:AttendeeModel = new AttendeeModel();var myAttendeeController:AttendeeController = new AttendeeController(myAttendeeModel);var myAttendeeView:AttendeeView = new AttendeeView(myAttendeeModel,myAttendeeController);
Save AttendeesMVC.fla and run Test Movie (Control ➤ Test Movie) to see the MVC exam-ple in action (see Figure 12-18).
Figure 12-18. Attendee Model-View-Controller pattern example
We’ve now applied the MVC pattern to our Attendees example. One of the key benefits ofthis pattern is you can easily assign a different Model to a View, or swap the Controllerclass to deal with user interaction in a different way.
As an exercise, you might want to try to make the MeetingRoomManager class we createdwhen discussing the Singleton pattern a Model for the AttendeeView can subscribe to.You’ll also need to update the Controller class to have this work properly. You can find thesolution to this exercise in the downloadable source files for this chapter on the friends ofED site.
Design patterns summaryThis chapter introduced you to the concept of design patterns and how to apply them toActionScript 2.0 projects. The Observer, Singleton, Decorator, and MVC patterns wediscussed will certainly help you to write better code and make your projects moremanageable.
The important thing to remember when applying any of these design patterns is that theyneed to become an integral part of your application, and stricter implementations of a
DESIGN PATTERNS
197
12
6196CH12.qxd 1/18/06 11:21 AM Page 197

pattern don’t necessarily mean better implementations. Although design patterns are veryuseful in making your project more efficient, there is no amount of pattern implementa-tion that can save a badly planned application.
Using design patterns in projects once again boils down to best practices and good plan-ning. If you’re looking to implement design patterns in your OOP projects withActionScript 2.0, read up on best practices and project planning, and with that little extratime you invest I’m sure you’ll be pleased with the results.
What’s next?This chapter concludes Part 3 of this book. We’ve now covered OOP concepts in depth.The next chapters will look at the built-in ActionScript 2.0 class framework, which will leadup to Chapter 15 when component development is discussed.
The following chapter will introduce you to the ActionScript 2.0 framework and its func-tionality. It’s essential that you read this chapter to understand how the class structureworks and to have the necessary background information to start doing component devel-opment.
OBJECT-ORIENTED ACTIONSCRIPT FOR FLASH 8
198
6196CH12.qxd 1/18/06 11:21 AM Page 198

6196CH12.qxd 1/18/06 11:21 AM Page 199

6196CH13.qxd 1/18/06 11:22 AM Page 200

13 CASE STUDY: AN OOPMEDIA PLAYER
6196CH13.qxd 1/18/06 11:22 AM Page 201

In the previous chapters, we explored many important OOP concepts including encapsula-tion, classes, inheritance, polymorphism, interfaces, and design patterns. Conceptualizationcan only go so far, though, so it’s important we solidify these ideas by implementing themin the Flash environment. Many of the previous examples of these concepts have beencompletely virtual, as is often the case when discussing programming ideas. Since Flash issuch a visual tool, however, we’ll work through this chapter on a more visual implementa-tion of OOP techniques, namely the building of a class to handle displaying media that canbe loaded into Flash, including SWFs, FLVs, and MP3s (all right, the last is hardly visual, butit fits in nicely with the others and, as they say, “two out of three...”). As we progressthrough this chapter, we’ll touch on each of the topics discussed in the preceding section,beginning, of course, at the planning stage.
Planning the playerYou’ve learned better than to jump right in and start coding (as tempting as that may seemat the outset!). The best way to begin a project with any scope is to spend a little timeplanning how to approach it.
Picking a pattern
The media player we’ll build in this chapter will utilize a form of the Model-View-Controller framework discussed in Chapter 12, as illustrated in Figure 13-1. In this case, themodel will be the media itself that is loaded into Flash. A controller class will be built tomanipulate this media, by telling it to play, stop, seek a position, set volume, etc., when it’sprompted to do so by the view. The view, for the purposes of this tutorial, will be the Flashtimeline, which will display the media as it changes and call methods in the controller classto affect the media. As the media changes, the view is updated.
OBJECT-ORIENTED ACTIONSCRIPT FOR FLASH 8
202
6196CH13.qxd 1/18/06 11:22 AM Page 202

Figure 13-1. The Model-View-Controller interaction for the media player
Guaranteeing methods and datatypes with an interface
Because we wish all three media types to respond to the same methods, it makes sense tocreate some simple interfaces to define those methods. That way, even though inActionScript you tell an MP3 to play with start() and an FLV or a SWF to play with play(),we can trust (and guarantee to those using our classes) that calling a single specifiedmethod will play each of the media types the same way. To guarantee this, our media con-trollers will implement two interfaces: IPlayable for controlling playback of media andIAudible for controlling audio properties.
CASE STUDY: AN OOP MEDIA PLAYER
203
13
6196CH13.qxd 1/18/06 11:22 AM Page 203

Examining class structure
There will be a number of classes combining to form the finished media player. Oneimportant class that falls outside of the scope of the media classes themselves is a baseclass to control the dispatching of events, which of course is necessary for the Observerpattern utilized by the controller media classes. This class, Broadcaster, which implementsIEventDispatcher (an interface to define how to build a class that will broadcast events),will be useful as a separate class, since it’s one that may be used often and may act as thebase class for any other class that will need to broadcast events. We have built a similarclass in previous chapters, and will build a modular variation here.
Broadcaster will act as the base class for MediaController, which will define the commonmethods and properties for all three of the separate media type controllers. These threecontrollers, SWFPlayer, VideoPlayer, and MP3Player, will inherit from MediaControllerthese common methods and properties, but implement the media controller methods(specified in IPlayable) in ways appropriate to their media type, acting as a nice example ofpolymorphism. A developer calling playMedia() on any of these three classes can expectthat the appropriate media type will play, despite the different ways Flash plays media. Theclasses will hide the implementation of these methods through encapsulation.
Finally, there will be a unique static class, IntervalManager, which will help manage allintervals called by our classes. This demonstrates an implementation of the Singleton pat-tern as presented in Chapter 12, but here, instead of creating an instance as in the previ-ous chapter, we’ll simply make the class methods static so that they must be accessedthrough the class itself. A class handling all interval function calls becomes useful in largerprojects where clips are attached and removed with any significant frequency. By keepingreferences to interval calls stored in a central object as opposed to in the instances them-selves, we prevent “orphaned intervals” from occurring. An interval may be orphanedwhen a reference to the interval call is stored on an object that is then deleted orremoved. There is then no way to stop that interval call, which can cause issues if the samesetInterval() method is called again.
That’s the basic breakdown of the classes we’ll be building throughout the rest of thechapter. For a better understanding of how it all fits together, be sure to look at the UMLdiagram in Figure 13-2 detailing the model for the media player. Once you are confidentwith the structure, open up Flash and prepare to code!
OBJECT-ORIENTED ACTIONSCRIPT FOR FLASH 8
204
6196CH13.qxd 1/18/06 11:22 AM Page 204

Figure 13-2. The UML diagram for the media player classes
CASE STUDY: AN OOP MEDIA PLAYER
205
13
6196CH13.qxd 1/18/06 11:22 AM Page 205

Building the media playerWe’ll begin this project with the IntervalManager, which will hold reference for everysetInterval() call. This is a class that will prove useful for further development through-out the rest of this book. Before we can do this, however, we need to define the packagefor our classes.
Find the configuration directory for your Flash installation on your machine. On aWindows system, this is located at C:\Documents and Settings\user\Local Settings\Application Data\Macromedia\Flash MX 2004\language\Configuration\. If you areusing a Mac, the directory can be found at Hard Disk/Users/user/Library/ApplicationSupport/Macromedia/Flash 8/language/Configuration/. Select the Classes folderwithin this directory and create a new folder named com. Within com, create another foldernamed oop, and within oop create three folders named core, managers, and media, respec-tively. See Figure 13-3 for the result. com.oop will be the package for all of the classes wecreate throughout the rest of the book. We’ll create classes within the core, managers, andmedia packages in this tutorial.
Figure 13-3. A new directory has been added to the Flash Classes directory
OBJECT-ORIENTED ACTIONSCRIPT FOR FLASH 8
206
6196CH13.qxd 1/18/06 11:22 AM Page 206

IntervalManager
Create a new ActionScript file in Flash. Save it into the managers folder as IntervalManager.as.Add the following lines of code:
class com.oop.managers.IntervalManager{
static private var __listeners:Object = {};static private var __intervalID:Number = 0;
function IntervalManager() {};
}
This is the beginning of the IntervalManager class to hold references to all intervals beingrun. As you can see, it begins with the class keyword and the fully qualified class name.
Within the class definition, we create two static private properties (we’ll use the doubleunderscore to denote private properties in our code—notice that it’s two underscores, notone). The first, __listeners, will hold references to all objects that have called setInterval.The second, __intervalID, will increment for any non-MovieClip instance callingsetInterval (more on that in a moment). The constructor function follows, but doesn’trequire any code within its block.
Now add the following lines in bold to the IntervalManager class:
class com.oop.managers.IntervalManager{
static private var __listeners:Object = {};static private var __intervalID:Number = 0;
function IntervalManager() {};
static public function setInterval(connection:Object,intName:String,path:Object,func:String,time:Number
):Void {clearInterval(connection, intName);if (connection instanceof MovieClip) {if (__listeners[connection] == undefined) {__listeners[connection] = {};
}__listeners[connection][intName] =
➥ _global.setInterval(path, func, time, arguments[5],➥ arguments[6], arguments[7], arguments[8],➥ arguments[9], arguments[10]);
CASE STUDY: AN OOP MEDIA PLAYER
207
13
6196CH13.qxd 1/18/06 11:22 AM Page 207

} else {if (connection.intervalID == undefined) {connection.intervalID = "int" + (__intervalID++);
}__listeners[connection.intervalID] = {};__listeners[connection.intervalID][intName] =
➥ _global.setInterval(path, func, time, arguments[5],➥ arguments[6], arguments[7], arguments[8],➥ arguments[9], arguments[10]);
}}
}
Although setInterval normally requires three arguments, our special manager class willrequire two more. The first argument, connection, will indicate how the interval callwill be stored. This will be a reference to a MovieClip instance or to another class instance(one that doesn’t inherit from MovieClip) that is calling the function. intName is a stringname for the interval, which again controls how the interval call will be stored. path indi-cates the path to the function that is to be called, func is the name of the function to becalled on that path, and time is the number of milliseconds between each call.
The first thing that occurs within this function is that any interval that might currently bestored at the same location is cleared (using clearInterval(), a function to be writtennext). This saves the developer from having to clear an interval before setting it (an oftennecessary task for an interval that is called repeatedly but not consistently). The condi-tional statement that follows checks to see whether the connection argument is aMovieClip instance or not. If it is, then a reference to that instance is saved into the static__listeners object if it doesn’t already exist. This is possible with a MovieClip instance,but not a non-MovieClip class instance. The _global.setInterval function is then calledand the reference to the call is stored in the __listeners object under the connectionand intName arguments. This prevents the orphaned intervals mentioned earlier. Noticethat six additional arguments are also passed to the setInterval() function, allowing thecoder to send additional information along in the interval call.
If the connection argument isn’t a MovieClip instance, then an ID needs to be generated.This is set using the __intervalID property. Then setInterval() is called just as it was fora MovieClip instance.
The final step for our manager class is to add a clearInterval method. Add the followinglines after the setInterval method, which clears any interval saved using theIntervalManager.
static public function clearInterval(connection:Object,intName:String
):Void {if (connection instanceof MovieClip) {_global.clearInterval(__listeners[connection][intName]);
OBJECT-ORIENTED ACTIONSCRIPT FOR FLASH 8
208
6196CH13.qxd 1/18/06 11:22 AM Page 208

} else {_global.clearInterval(
➥ __listeners[connection.intervalID][intName]);}
}
Now, to implement the IntervalManager, you would use code similar to the following:
import com.oop.managers.IntervalManager;
IntervalManager.setInterval(this, "test", this, "testInterval", 1000);
function testInterval():Void{trace("one second passed");IntervalManager.clearInterval(this, "test");
}
This will prove invaluable as we build more complex applications.
Defining the interfaces
There will be three interfaces used by the classes in this tutorial. The first, IEventDispatcher,will define methods to be used by any class that will need to broadcast events. The othertwo interfaces, IPlayable and IAudible, will define how media is to be controlled. Let’s startwith IEventDispatcher.
Dispatching events
We’ll start here building our own code library by creating a class to dispatch events. I’llnote that, like many of the classes we will code through this and later chapters, you canfind fully implemented and working classes with similar functionality either in the com-ponent library (EventDispatcher in this case) or through commercially available or free-ware components available online. Why code your own? Greater control, greaterunderstanding, and, when something doesn’t work the way you wish, greater ease in get-ting what you want. The best way to learn OOP is to go in from the ground up. With thatsaid, create a new ActionScript document and save it into the com/oop/core directory asIEventDispatcher.as. Enter the following lines of code:
interface com.oop.core.IEventDispatcher {
public function dispatchEvent(evnt:String,params:Object
):Void;
CASE STUDY: AN OOP MEDIA PLAYER
209
13
6196CH13.qxd 1/18/06 11:22 AM Page 209

public function addEventListener(evnt:String,lstnr:Object,mappedTo:String
):Boolean;
public function removeEventListener(evnt:String,lstnr:Object
):Boolean;
}
Here you can see that the interface defines three methods for classes implementing theinterface. addEventListener() will allow objects to register to hear events from a class,removeEventListener() will remove objects registered to hear events from a class, anddispatchEvent() will be fired to send event notifications to objects registered to hearsuch events.
Before moving on to the media interface, let’s see how such an interface would be imple-mented by creating a Broadcaster class. Create a new ActionScript file namedBroadcaster.as in the com/oop/core directory. Enter the following lines into the file:
class com.oop.core.Broadcaster implements➥ com.oop.core.IEventDispatcher {
private var __listeners:Array;
function Broadcaster(){init();
}
// PRIVATE// ________________________________________________
private function init():Void{__listeners = [];
}
// PUBLIC// ________________________________________________
}
You can see, the first line of code specifies that this class will implement the IEventDispatcherinterface. A private property named __listeners is then defined to hold references toobjects registered to hear events from instances of this class. The constructor follows
OBJECT-ORIENTED ACTIONSCRIPT FOR FLASH 8
210
6196CH13.qxd 1/18/06 11:22 AM Page 210

and simply calls the private init() method. In the init(), the __listeners property isassigned an empty array. The IEventDispatcher methods will be public and will be definednext.
Add the following bold lines to the Broadcaster code:
// PUBLIC// ________________________________________________
public function addEventListener(evnt:String,lstnr:Object,mappedTo:String
):Boolean {var ev:String;var li:Object;for (var i in __listeners) {ev = __listeners[i].event;li = __listeners[i].listener;if (ev == evnt && li == lstnr) return false;
}__listeners.push({event:evnt,listener:lstnr,mappedTo:mappedTo}
);return true;
}
public function removeEventListener(evnt:String,lstnr:Object
):Boolean {var ev:String;var li:Object;for (var i = 0; i < __listeners.length; i++) {ev = __listeners[i].event;li = __listeners[i].listener;if (ev == evnt && li == lstnr) {__listeners.splice(i, 1);return true;
}}return false;
}
}
CASE STUDY: AN OOP MEDIA PLAYER
211
13
6196CH13.qxd 1/18/06 11:22 AM Page 211

Now we get to it! These are two of the three necessary functions to implementIEventDispatcher. addEventListener() is sent an event to register for, the object to beregistered, and the function to call upon notification of that event. The instance ofBroadcaster then runs through its current listeners to see whether the object sent isalready registered for the specified event (we wouldn’t want the same object listed twiceto receive notification of a single event), and if so, exits the function. Otherwise, the threearguments are pushed into the __listeners array.
removeEventListener() works in a similar fashion, but in reverse. __listeners is loopedthrough and the specified object is removed if it exists in the array.
Now that objects can be added and removed as listeners, it’s time to define the methodthat will inform these listeners when the appropriate event has fired. Add the followingbold lines to the Broadcaster file:
public function removeEventListener(evnt:String,lstnr:Object
):Boolean {var ev:String;var li:Object;for (var i = 0; i < __listeners.length; i++) {ev = __listeners[i].event;li = __listeners[i].listener;if (ev == evnt && li == lstnr) {__listeners.splice(i, 1);return true;
}}return false;
}
public function dispatchEvent(evnt:String,params:Object
):Void {var evtObj = {type:evnt, parameters:params};for (var i:String in __listeners) {if (__listeners[i].event == evnt) {__listeners[i].listener[evnt](evtObj);__listeners[i].listener[__listeners[i].mappedTo](evtObj);
}}this[evnt + "Handler"](evtObj);
}
}
OBJECT-ORIENTED ACTIONSCRIPT FOR FLASH 8
212
6196CH13.qxd 1/18/06 11:22 AM Page 212

dispatchEvent() will be fired to inform listeners when an event has occurred. The nameof the event and any additional parameters are sent to the function. The __listeners arethen looped through to find objects registered to hear that event. Instances of Broadcasterwill allow listeners two different ways to hear events. One is to have a method with thesame name as the event, so that an object listening for a release event from a button canhave a release method defined. However, sometimes it may be useful to have the eventfire off a specific method in the listener. In these cases, where a separate function isdefined to receive notification of the event, the function stored in mappedTo is fired.
Once all of the listeners have been notified, the Broadcaster instance will call its ownmethod for that event, defined as the name of the event with “Handler” appended. Thismight not always be used, but is useful to have defined when necessary.
To test this new Broadcaster class, create a new Flash document and put the followinglines in Frame 1:
import com.oop.core.Broadcaster;
var testBroadcaster:Broadcaster = new Broadcaster();
var listener1:Object = {};listener1.notify = function(infoObj:Object):Void {trace("listener1 notified");
}
var listener2:Object = {};listener2.hearEvent = function(infoObj:Object):Void {trace("listener2 notified");
}
testBroadcaster.addEventListener("notify", listener1);testBroadcaster.addEventListener("notify", listener2, "hearEvent");
testBroadcaster.dispatchEvent("notify");
First, the Broadcaster class is imported so that we can reference it by just using its classname, then a new instance of Broadcaster is created. Next, two new objects are created,listener1 and listener2, the former with a notify() function and the latter with ahearEvent() function. Both objects are added as listeners for testBroadcaster’s notifyevent, but with listener2, the notification will be mapped to hearEvent() since that isspecified as the third argument. The final line tells testBroadcaster to dispatch its notifyevent. If you test this, the Output panel should showthe results of both listener1 and listener2’s tracecalls, as shown in Figure 13-4.
CASE STUDY: AN OOP MEDIA PLAYER
213
13
Figure 13-4. The event listeners tested and working
6196CH13.qxd 1/18/06 11:22 AM Page 213
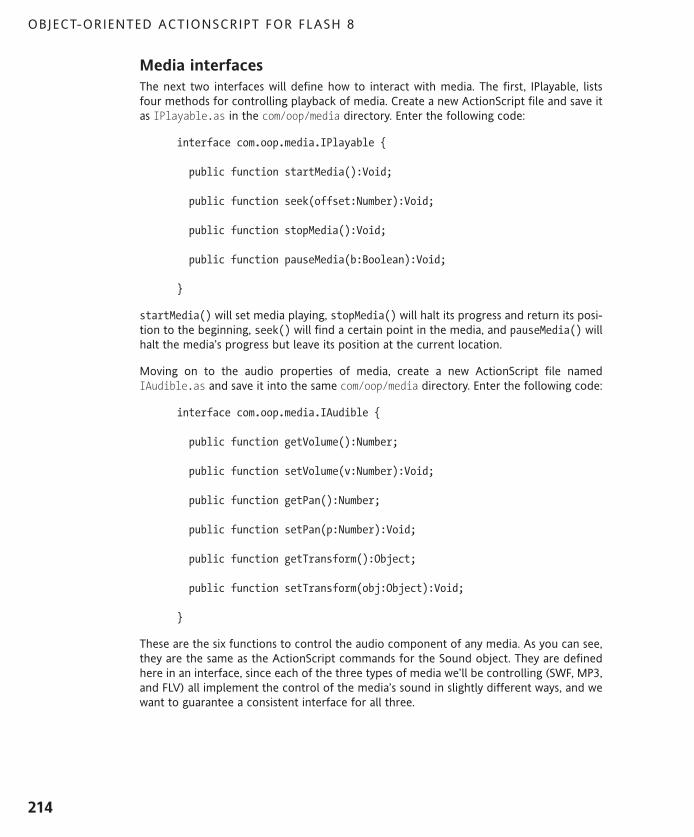
Media interfacesThe next two interfaces will define how to interact with media. The first, IPlayable, listsfour methods for controlling playback of media. Create a new ActionScript file and save itas IPlayable.as in the com/oop/media directory. Enter the following code:
interface com.oop.media.IPlayable {
public function startMedia():Void;
public function seek(offset:Number):Void;
public function stopMedia():Void;
public function pauseMedia(b:Boolean):Void;
}
startMedia() will set media playing, stopMedia() will halt its progress and return its posi-tion to the beginning, seek() will find a certain point in the media, and pauseMedia() willhalt the media’s progress but leave its position at the current location.
Moving on to the audio properties of media, create a new ActionScript file namedIAudible.as and save it into the same com/oop/media directory. Enter the following code:
interface com.oop.media.IAudible {
public function getVolume():Number;
public function setVolume(v:Number):Void;
public function getPan():Number;
public function setPan(p:Number):Void;
public function getTransform():Object;
public function setTransform(obj:Object):Void;
}
These are the six functions to control the audio component of any media. As you can see,they are the same as the ActionScript commands for the Sound object. They are definedhere in an interface, since each of the three types of media we’ll be controlling (SWF, MP3,and FLV) all implement the control of the media’s sound in slightly different ways, and wewant to guarantee a consistent interface for all three.
OBJECT-ORIENTED ACTIONSCRIPT FOR FLASH 8
214
6196CH13.qxd 1/18/06 11:22 AM Page 214

Controlling media
With all of the interfaces and event dispatching taken care of, we can finally begin the cod-ing of the media classes to control the playback of media loaded into Flash. MediaControllerwill act as a base class for all the media type controllers and contain the common methodsand properties for all.
Defining propertiesCreate a new ActionScript file and save it as MediaController.as into the com/oop/mediadirectory. Enter the following code:
import com.oop.core.Broadcaster;import com.oop.media.IAudible;import com.oop.media.IPlayable;import com.oop.managers.IntervalManager;;
class com.oop.media.MediaController extends Broadcaster ➥ implements IAudible, IPlayable {
private var __mediaFile:String;private var __mediaClip:Object;private var __mediaDuration:Number;private var __playing:Boolean;private var __paused:Boolean;private var __sound:Sound;private var __volume:Number;private var __pan:Number;private var __loop:Boolean;private var __currentLoop:Number;private var __numLoops:Number;private var __startOnLoad:Boolean;
static private var __interval:Number = 40;
private function MediaController() {}
// PRIVATE// ________________________________________________
// PUBLIC// ________________________________________________
}
The first three lines of code import the Broadcaster and IntervalManager classes and theIPlayable and IAudible interfaces so that we may reference them in the code by justthe name of each. We then define the MediaController class, which inherits from theBroadcaster event dispatching class and implements the two media control interfaces.
CASE STUDY: AN OOP MEDIA PLAYER
215
13
6196CH13.qxd 1/18/06 11:22 AM Page 215

What follows is a list of private properties utilized in the class. With decent naming ofproperties, it should be evident what each is for.
__mediaFile holds the name of the file to be loaded.
__mediaClip is the view through which to display the media.
__mediaDuration is the total time for the media loaded.
__playing and __paused define the current status of the media.
__volume and __pan hold values for the sound properties.
__sound holds a reference to the Sound object controlling the __volume and __panproperties.
__loop is a flag to determine whether the media should loop.
__currentLoop is just that, the current number in a series of loops.
__numLoops is the total number of times to loop the media.
__startOnLoad is a flag to determine whether the media should play as soon as it’sloaded into the Flash player, or if a further startMedia() command needs to becalled.
__interval, the static property that follows the main list, is a property that resideson the MediaController class itself (not an instance) and holds the length ofmilliseconds for repeated interval calls.
After the properties are defined, the constructor appears, but doesn’t require any codewithin the block. Remember that the MediaController class inherits from Broadcaster,which calls the init() method for that class. Because of this, we don’t need any codewithin the MediaController constructor in order to call an init() method there.
Notice as well that the constructor is given the private modifier. This will ensure that aninstance of this class cannot be instantiated by code and must instead be extended to anew public class. We do this because the MediaController class in itself won’t function onits own—its code merely contains common methods and properties of the distinct mediatype controller classes.
Private methodsAdd the following code in bold to the MediaController class:
function MediaController() {}
// PRIVATE// ________________________________________________
private function initController(obj:Object
):Void {__volume = 100;__pan = 0;__paused = false;__playing = false;
OBJECT-ORIENTED ACTIONSCRIPT FOR FLASH 8
216
6196CH13.qxd 1/18/06 11:22 AM Page 216

__mediaClip = obj;__startOnLoad = true;
}
private function createSound(m:MovieClip
):Void {__sound = new Sound(m);
}
private function startTrackProgress(b:Boolean
):Void {if (b) {dispatchEvent("mediaStart");__IntervalManager.setInterval(this,"trackInterval",this,"trackProgress",__interval);
} else {dispatchEvent("mediaStop");__IntervalManager.clearInterval(this, "trackInterval");
}}
private function trackProgress():Void{dispatchEvent("progress");
}
// PUBLIC// ________________________________________________
Here are the three private methods for MediaController. init() will need to be calledfrom any subclass when an instance is created. In the function, the properties holding thestatus of the media are assigned the default values. Notice that the initController()method is sent an Object instance as an argument. This will be a reference to the viewwhere the media will be displayed (or, in the case of MP3s, the movie clip instance inwhich to load the file).
createSound() is a simple method that creates an internal Sound object instance to con-trol the sound of the media loaded.
startTrackProgress() is sent a true or false value depending on whether the media isbeing started or stopped. If the media is being started, a new interval is created in thestatic IntervalManager. The method trackProgress will be called every 40 milliseconds(the value for __interval). If the media is being stopped, the interval is cleared.
CASE STUDY: AN OOP MEDIA PLAYER
217
13
6196CH13.qxd 1/18/06 11:22 AM Page 217

The final private method, trackProgress(), simply dispatches an event to any listenersthat wish to know that the media is playing and act accordingly (imagine that this might beused by a playhead progressing, or perhaps a running collection of subtitles that need tobe updated as the media progresses).
Public methodsThe private methods defined previously will only be used internally by this class and anyclass that extends MediaController. This next set of methods can be called from any objectand will be used to control the properties of the media. Add the following bold code tothe MediaController class:
// PUBLIC// ________________________________________________
public function loadMedia(file:String
):Void {__currentLoop = 1;__mediaFile = file;setVolume(__volume);setPan(__pan);__paused = false;
}
public function startMedia():Void{__playing = true;startTrackProgress(true);
}
public function seek(offset:Number
):Void {dispatchEvent("progress", {position:offset});
}
public function stopMedia():Void{__playing = false;startTrackProgress(false);
}
public function pauseMedia(b:Boolean
):Void {__playing = !b;__paused = b;startTrackProgress(!b);
}
}
OBJECT-ORIENTED ACTIONSCRIPT FOR FLASH 8
218
6196CH13.qxd 1/18/06 11:22 AM Page 218

The first method listed, loadMedia(), will be called to load an external media file forthe controller to play. Since the three types of media are all loaded in separate ways, theactual loading will have to take place in the classes we write to handle those media types.Here in this base class, the file name is saved, the __currentLoop property is reset, and thesound is set to the current values for __pan and __volume.
The next four methods are necessary when implementing the IPlayable interface. Again,since the control of different media types is implemented differently, the classes extend-ing MediaController will take care of the brunt of the work. Here, the values for __playing and __paused are set when appropriate, and events are broadcast (usingBroadcaster’s dispatchEvent()) to let registered listeners know the status of the mediahas changed.
Add these next several methods to the public methods defined earlier (that’s between thepauseMedia() method and the class’s closing brace):
public function get mediaFile():String{return __mediaFile;
}
public function get mediaClip():Object{return __mediaClip;
}
public function get mediaPosition():Number{return 0;
}
public function get mediaDuration():Number{return __mediaDuration;
}
public function get paused():Boolean{return __paused;
}
public function get playing():Boolean{return __playing;
}
These methods we’ve just added are simply getter methods for other objects to retrievevalues for the MediaController instance’s properties. A getter method allows an object tocall the method as if it was a property. This simply means that instead of using
var isPlaying:Boolean = mediaController.playing();
CASE STUDY: AN OOP MEDIA PLAYER
219
13
6196CH13.qxd 1/18/06 11:22 AM Page 219

to retrieve the value of the __playing property, the following must be used instead:
var isPlaying:Boolean = mediaController.playing;
Getter methods don’t accept any arguments and must return a value. Notice for each ofthe preceding getters, the private property value is simply returned. However, formediaPosition, the value of 0 is returned. This is because the value will be constantlychanging, and the classes extending MediaController will simply return the current posi-tion of the media as opposed to storing a value in a property.
The next set of public methods will allow objects to set and retrieve values for the soundproperties of the media. Enter the following code below the getter methods we justdefined, but before the class’s closing brace:
public function getVolume():Number{return __sound.getVolume();
}
public function setVolume(v:Number
):Void {__sound.setVolume(v);__volume = v;
}
public function getPan():Number{return __sound.getPan();
}
public function setPan(p:Number
):Void {__sound.setPan(p);__pan = p;
}
public function getTransform():Object{return __sound.getTransform();
}
public function setTransform(obj:Object
):Void {__sound.setTransform(obj);
}
OBJECT-ORIENTED ACTIONSCRIPT FOR FLASH 8
220
6196CH13.qxd 1/18/06 11:22 AM Page 220

These are the necessary methods for classes implementing the IAudible interface. Eachsets or retrieves the values for the internal __sound object. To go with these methods, we’llalso define some getter and setter methods for easier access to these properties. Sincegetters and setters cannot be defined in an interface, we are unable to make them a partof IAudible, but we can add them here. Add the following below the methods definedearlier (after setTransform() but before the class’s closing brace):
public function get volume():Number{return getVolume();
}
public function set volume(v:Number
):Void {setVolume(v);
}
public function get pan():Number{return getPan();
}
public function set pan(p:Number
):Void {setPan(p);
}
So now the developer can use the methods defined in IAudible or these getter/settermethods to control the audio. Setters work similarly to getters, but must receive a valueand cannot return anything. A developer would access a setter with
mediaController.volume = 50;
The final batch of public functions includes the getter/setter methods for the remainingproperties. Add these lines below the code entered previously:
public function get loop():Boolean{return __loop;
}
public function set loop(b:Boolean
):Void {__loop = b;
}
CASE STUDY: AN OOP MEDIA PLAYER
221
13
6196CH13.qxd 1/18/06 11:22 AM Page 221

public function get numLoops():Number{return __numLoops;
}
public function set numLoops(n:Number
):Void {__numLoops = n;
}
public function get startOnLoad():Boolean{return __startOnLoad;
}
public function set startOnLoad(b:Boolean
):Void {__startOnLoad = b;
}
The private properties __loop, __numLoops, and __startOnLoad can be set and retrievedusing the preceding methods.
This completes the code for our base MediaController class. Since it was presented in bits,be sure to check your file against the MediaController.as file included with the down-load files for this chapter.
Controlling FLVs
The first class we’ll create to control a specific media type is VideoPlayer. Create a newActionScript file and save it as VideoPlayer.as into the com/oop/media directory. Add thefollowing code to the file:
import com.oop.media.MediaController;import com.oop.managers.IntervalManager;
class com.oop.media.VideoPlayer extends MediaController {
private var __stream_ns:Object; // NetStreamprivate var __connection_nc:NetConnection;private var __mediaWidth:Number;private var __mediaHeight:Number;private var __sound_mc:MovieClip;private var __videoEnded:Boolean;
OBJECT-ORIENTED ACTIONSCRIPT FOR FLASH 8
222
6196CH13.qxd 1/18/06 11:22 AM Page 222

public function VideoPlayer(v:Video
) {initController(v);
}
// PRIVATE// ________________________________________________
// PUBLIC// ________________________________________________
}
The first few lines should be familiar to you after the previous classes we have created. TheVideoPlayer will extend the MediaController class and so inherit all of its methods. The listof properties that follows applies specifically to video clips. __stream_ns holds a referenceto a NetStream object. (The reason that NetStream isn’t used for the datatype is that we’llbe utilizing a method that isn’t included in the NetStream’s definition. Therefore, if wedefined the datatype as NetStream, Flash would report an error.) __connection_nc holdsa reference to a NetConnection object. Both NetStream and NetConnection instances arenecessary to stream in FLV files.
The __mediaWidth and __mediaHeight properties hold values for the dimensions of themedia being loaded in, which is stored as metadata in an FLV. __sound_mc holds a movieclip reference for creating the Sound instance to control the FLV’s audio properties.__videoEnded is a Boolean flag to determine whether the end of the FLV has beenreached.
Finally, the constructor is defined. As you can see, a video instance is passed to the con-structor, and this is sent to the initController() method. If you look back at theMediaController class, you’ll note that the initController() method accepts an objectinstance (and Video inherits from Object), and that instance is stored in the __mediaClipproperty.
There will only be one private method for the VideoPlayer class. Add the following boldlines:
// PRIVATE// ________________________________________________
private function trackProgress():Void{if (mediaPosition == mediaDuration || __videoEnded) {__videoEnded = false;if (__loop && __currentLoop < __numLoops) {startMedia();
} else {super.stopMedia();__stream_ns.pause(true);
CASE STUDY: AN OOP MEDIA PLAYER
223
13
6196CH13.qxd 1/18/06 11:22 AM Page 223

}dispatchEvent("mediaComplete",
➥{type:"swf", loop:__currentLoop});__currentLoop++;
}super.trackProgress();
}
// PUBLIC// ________________________________________________
As a video file plays, trackProgress() will be called (this was handled in MediaController’sstartTrackProgress() method). If the position of the media equals the length of themedia, then a loop has completed (note that the two getter functions for mediaPositionand mediaDuration are used). If a loop has completed, we check whether the file is sup-posed to loop (the __loop Boolean flag) and, if so, whether the current loop isn’t equal tothe total number of loops. If another loop is supposed to occur, startmedia() is called.Otherwise, stopMedia() is called. An event is broadcast to listeners informing them thatthe media is complete (whether it’s looping or not). Finally, super.trackProgress() iscalled to take care of any code that needs to be run in the super object, which takes careof broadcasting a progress event.
The public methods for this as well as the other media type controllers are where most ofthe code lies. Add the bold lines of code to the public block of the VideoPlayer.
// PUBLIC// ________________________________________________
public function loadMedia(file:String
):Void {super.loadMedia(file);__connection_nc = new NetConnection();__connection_nc.connect(null);__stream_ns = new NetStream(__connection_nc);__mediaClip.attachVideo(__stream_ns);__sound_mc.attachAudio(__stream_ns);var videoPlayer = this;__stream_ns.onMetaData = function(data) {videoPlayer.__mediaDuration = data.duration;videoPlayer.__mediaWidth = data.width;videoPlayer.__mediaHeight = data.height;
};__stream_ns.onStatus = function(data) {if (data.level == "error") {videoPlayer.dispatchEvent("loadError",
➥{message:"file not found"});} else if (data.code == "NetStream.Play.Stop") {videoPlayer.__videoEnded = true;
}
OBJECT-ORIENTED ACTIONSCRIPT FOR FLASH 8
224
6196CH13.qxd 1/18/06 11:22 AM Page 224

};startMedia();if (!__startOnLoad) __IntervalManager.setInterval(
➥this, "pauseInterval", this, "pauseMedia", 200);}
The loadMedia() function will be called to load an FLV and play using a VideoPlayerinstance. The file location as a string is sent as an argument. The super.loadMedia() isinvoked, then a new NetConnection is created and its connect() method is passed null,which is necessary for streaming in FLV files. A new NetStream instance is created with the__connection_nc passed in the constructor. Whatever Video instance is stored in__mediaClip and whatever MovieClip instance is stored in __sound_mc are passed a refer-ence to the NetStream object. Now whatever is streamed in will be connected to thoseinstances.
The next several lines look to two handlers that are fired by a NetStream instance.onMetaData() is fired when an FLV is loaded and the file’s metadata is received. Thiscontains info on the FLV’s total time, its width, and its height. These are stored in theappropriate properties of the VideoPlayer instance (which is available in the scope ofthe two handlers since it was defined above them as a local variable). onStatus() is firedwhen the status of the NetStream instance changes, such as when it’s closed or if there isan error in loading. It’s in this latter instance that an event is broadcast informing regis-tered listeners of the error.
After the two handlers are defined, startMedia() is called to load in the video.startMedia(), which will be defined in a moment, will invoke the proper NetStream meth-ods to load the video and start it playing. However, if the __startOnLoad property is set tofalse, an interval is created to pause the media almost immediately. Unfortunately, thiscannot be called immediately, so a 200-millisecond delay is set.
The loadMedia() method is a good example of polymorphism and encapsulation at work.The developer using the VideoPlayer class doesn’t need to know how this method is imple-mented, nor how the implementation differs from loading a SWF or an MP3. All that adeveloper needs to know is that loadMedia() will load the specified media file.
The next lines of code are another example of polymorphism at work with our mediaclasses. These are the methods defined in IPlayable for controlling playback of the media.Add the lines after the loadMedia() method.
public function startMedia():Void{__videoEnded = false;__IntervalManager.clearInterval(this, "pauseInterval");if (__paused) {__stream_ns.pause();
} else {__stream_ns.play(__mediaFile);
}super.startMedia();
}
CASE STUDY: AN OOP MEDIA PLAYER
225
13
6196CH13.qxd 1/18/06 11:22 AM Page 225

public function seek(offset:Number
):Void {__videoEnded = false;var t:Number = Math.round(offset*1000)/1000;__stream_ns.seek(t);super.seek(t);
}
public function stopMedia():Void {__stream_ns.seek(0);__stream_ns.pause(true);super.stopMedia();
}
public function pauseMedia(b:Boolean
):Void {__IntervalManager.clearInterval(this, "pauseInterval");super.pauseMedia(b);__stream_ns.pause(b);
}
startMedia() first clears any pause interval that might be running (set in the precedingloadMedia() method). It then checks whether the video is currently paused. If so, itunpauses it by calling the NetStream’s pause() method, which acts as a pause/unpausetoggle. Otherwise, it simply tells the NetStream instance to play the current media file.
seek() takes a number that indicates the position to find specified in number of seconds.It rounds this to the thousandths, then invokes the seek() method of the NetStreaminstance. We set the __videoEnded Boolean property to false as a flag so that we know anystopping of the video that occurs here is due to the seek and not because the end of thestream has been reached.
stopMedia() sends the video back to the beginning and pauses it, while pauseMedia()simply invokes the pause() method of the NetStream instance.
The final public methods are the getter/setters for the unique VideoPlayer properties. Thefollowing lines should come after the other public methods, but precede the class’s closingbrace:
public function set mediaClip(v:Video
):Void {__mediaClip.attachVideo(null);__mediaClip = v;__mediaClip.attachVideo(__stream_ns);
}
OBJECT-ORIENTED ACTIONSCRIPT FOR FLASH 8
226
6196CH13.qxd 1/18/06 11:22 AM Page 226

public function set mediaPosition(n:Number
):Void {seek(n);
}
public function get mediaPosition():Number{return __stream_ns.time;
}
public function get mediaWidth():Number{return __mediaWidth;
}
public function set mediaWidth(w:Number):Void{__mediaClip._width = w;__mediaWidth = w;
}
public function get mediaHeight():Number{return __mediaHeight;
}
public function set mediaHeight(h:Number
):Void{__mediaClip._height = h;__mediaHeight = h;
}
public function get soundClip():MovieClip{return __sound_mc;
}
public function set soundClip(m:MovieClip
):Void {__sound_mc = m;createSound(m);
}
Be sure to check your completed VideoPlayer file with the VideoPlayer.as file includedwith the download files for this chapter.
CASE STUDY: AN OOP MEDIA PLAYER
227
13
6196CH13.qxd 1/18/06 11:22 AM Page 227

So now that all the code is complete for VideoPlayer, how does it all work in Flash? Let’stry it out and see!
Building a video view
So much coding, and yet we have notuntil this point been able to see a visualdemonstration of the media controllers.All the planning and preparation will payoff now, however, as it becomes clearhow easy it now is to load and controlplayback of an FLV.
Create a new Flash document and saveit as videoTest.fla. In the Library, usethe menu at the top right to create a newVideo symbol, as shown in Figure 13-5.Drag the symbol to the stage and namethe instance video in the Propertiespanel. Make its dimensions 320✕240.
Figure 13-5. Adding a new Video symbolinstance to the Library
Name the layer with the video instance video, then create a layer above it named code.Select Frame 1, then open the ActionScript editor and enter the following code:
import com.oop.media.VideoPlayer
var videoPlayer:VideoPlayer = new VideoPlayer(video);videoPlayer.addEventListener("mediaComplete", this);videoPlayer.loop = true;videoPlayer.numLoops = 2;videoPlayer.loadMedia("cyber_minotaur.flv");
function mediaComplete() {trace("video complete");
}
function onMouseDown() {videoPlayer.pauseMedia(!videoPlayer.paused);
}
OBJECT-ORIENTED ACTIONSCRIPT FOR FLASH 8
228
6196CH13.qxd 1/18/06 11:22 AM Page 228

After importing the VideoPlayer class so that we can use it without typing the full packageeach time, a new VideoPlayer instance is created, and the video instance on the stage issent as an argument. The main timeline is added as a listener to the controller for themediaComplete event, which is fired when a loop is completed. The loop Boolean flag isset to true, enabling the video to be looped, and the number of total loops is set to 2(twice through). The file cyber_minotaur.flv is passed as the file to load.
When the video completes a loop, the mediaComplete() function will be called and thetrace result will appear in the Output panel. Whenever the mouse is clicked in the movie,the video will toggle its pause state.
cyber_minotaur.flv is available in the code download for this book, accessible fromwww.friendsofed.com. Copy it to the same directory as videoTest.fla. Test the movie tosee the video being loaded and controlled by our media classes. The result should appearas in Figure 13-6.
Figure 13-6. The media controller playing back an FLV
Controlling SWFs
Surprisingly, controlling SWF files is actually a little more involved than controlling FLVs.This is because we’ll add some functionality for rescaling the loaded SWF files to fit withina movie clip while maintaining the same proportions.
CASE STUDY: AN OOP MEDIA PLAYER
229
13
6196CH13.qxd 1/18/06 11:22 AM Page 229

Create a new ActionScript file and save it into the com/oop/media directory as SWFPlayer.as.Add the following code:
import com.oop.media.MediaController;import com.oop.managers.IntervalManager;
class com.oop.media.SWFPlayer extends MediaController {
private var __holderWidth:Number;private var __holderHeight:Number;private var __mediaWidth:Number;private var __mediaHeight:Number;private var __outerSWFHolder_mc:MovieClip;private var __SWFHolder_mc:MovieClip;private var __stream:Boolean;private var __scaleToClip:Boolean;
public function SWFPlayer(m:MovieClip
) {initController(m);
}
// PRIVATE// ________________________________________________
// PUBLIC// ________________________________________________
Nothing should come as a surprise at this point. The SWFPlayer will extend theMediaController class as VideoPlayer did. The width and height of the clip in which to loadthe SWF will be stored, as well as the width and height of the SWF being loaded. Both__outerSWFHolder_mc and __SWFHolder_mc will be used for loading and resizing the SWF.__stream is a Boolean flag to determine whether to play the SWF before it’s fully loaded.__scaleToClip is another Boolean flag to determine whether to rescale the loaded SWF tofit the movie clip it’s being loaded into.
After that, the constructor is defined. A MovieClip instance is passed, which is in turnpassed to the initController() method defined in MediaController.
Add the following private methods in bold to the code:
// PRIVATE// ________________________________________________
private function onLoadInit(target:MovieClip
):Void {
OBJECT-ORIENTED ACTIONSCRIPT FOR FLASH 8
230
6196CH13.qxd 1/18/06 11:22 AM Page 230

__mediaDuration = __SWFHolder_mc._totalframes;if (__startOnLoad) {startMedia();
} else {__SWFHolder_mc.gotoAndStop(1);
}if (__scaleToClip) {__outerSWFHolder_mc._visible = false;__IntervalManager.setInterval(this, "scaleInterval",
➥this, "scaleMedia", 50);scaleMedia();
} else if (__stream) {__outerSWFHolder._visible = true;
}dispatchEvent("loadInit");
}
private function onLoadComplete(target:MovieClip
):Void {if (!__stream) __outerSWFHolder_mc._visible = true;dispatchEvent("loadComplete");
}
private function onLoadError(target:MovieClip,errorCode:String
):Void {dispatchEvent("loadError", {errorCode:errorCode});
}
private function onLoadStart(target:MovieClip
):Void {dispatchEvent("loadStart");
}
private function onLoadProgress(target:MovieClip,loadedBytes:Number,totalBytes:Number
):Void {dispatchEvent("loadProgress",
➥{loadedBytes:loadedBytes, totalBytes:totalBytes});}
// PUBLIC// ________________________________________________
CASE STUDY: AN OOP MEDIA PLAYER
231
13
6196CH13.qxd 1/18/06 11:22 AM Page 231

These methods will be called by the MovieClipLoader instance used to load the SWF. Thelast four methods simply pass on the event to any registered listeners. onLoadInit(),which is fired after the first frame of the SWF is fully loaded, stores the number of framesin the SWF, then, depending on the value of __startOnLoad, either stops or starts the SWFplaying. If the SWF is to be rescaled, the scaleMedia() method is called and an interval isset up to call the scaleMedia() method in another 50 milliseconds. This is necessary sincethere are times that a clip is supposedly fully loaded, yet its width and height are still unde-termined values, which makes it impossible to rescale. The interval is merely a failsafe.
Let’s take a look at the scaleMedia() method. Add the following lines to the block of pri-vate methods:
private function scaleMedia():Void{if (mediaWidth == undefined || mediaWidth < 1) return;__IntervalManager.clearInterval(this, "scaleInterval");if (__stream) __outerSWFHolder_mc._visible = true;var mw:Number = mediaWidth;var mh:Number = mediaHeight;var sw:Number = __holderWidth;var sh:Number = __holderHeight;var ch:Number;if (sw > sh) {ch = sh/mh;if (mh < mw) {ch = ((mw*ch < sw) ? ch : sw/mw);
}} else {ch = sw/mw;if (mw < mh) {ch = ((mh*ch < sh) ? ch : sh/mh);
}}__SWFHolder_mc._width *= ch;__SWFHolder_mc._height *= ch;__SWFHolder_mc._x = (sw - __SWFHolder_mc._width)/2;__SWFHolder_mc._y = (sh - __SWFHolder_mc._height)/2;
}
In the first line of the function, we check to see whether mediaWidth is still an undefinedvalue. If so, this method cannot yet run and is exited. However, if this value exists, weuse some math to compare the width and height of the loaded media and the widthand height of the clip it’s loaded into. Using some comparisons, we rescale the__SWFHolder_mc movieclip (the instance holding the loaded SWF) to match the holdermovie clip. In addition, the _x and _y are set to center the loaded SWF in the holder.
The final private functions take care of tracking progress of a playing SWF. Add the fol-lowing lines below scaleMedia():
OBJECT-ORIENTED ACTIONSCRIPT FOR FLASH 8
232
6196CH13.qxd 1/18/06 11:22 AM Page 232

private function startTrackProgress(b:Boolean
):Void {if (b) {dispatchEvent("mediaStart");var controller = this;__SWFHolder_mc.onEnterFrame = function() {controller.trackProgress();
};} else {dispatchEvent("mediaStop");__SWFHolder_mc.onEnterFrame = null;
}}
private function trackProgress():Void{if (mediaPosition == mediaDuration) {if (__loop && __currentLoop < __numLoops) {startMedia();
} else {stopMedia();__SWFHolder_mc.gotoAndStop(mediaDuration);
}dispatchEvent("mediaComplete",
➥{type:"swf", loop:__currentLoop});__currentLoop++;
}super.trackProgress();
}
startTrackProgress() needs to be different here than its implementation in the superclass, since SWFs use frames instead of time. We need to use an onEnterFrame function todetermine progress instead of an interval, so we override the method here in SWFPlayer.As you can see, when a SWF begins to play, an onEnterFrame handler is used to calltrackProgress() in the SWFPlayer instance. When the SWF stops, the handler is deleted.
trackProgress() is similar to VideoPlayer’s implementation. If the current positionmatches the total duration, it’s determined whether a loop needs to occur and the mediais stopped or started accordingly.
The public functions are similar to VideoPlayer as well, though of course their implemen-tation differs slightly due to the different media type. Add the following lines in bold:
// PUBLIC// ________________________________________________
public function loadMedia(file:String
):Void {
CASE STUDY: AN OOP MEDIA PLAYER
233
13
6196CH13.qxd 1/18/06 11:22 AM Page 233

super.loadMedia(file);__holderWidth = __mediaClip._width;__holderHeight = __mediaClip._height;if (__mediaClip.__SWFHolder_mc == undefined) {__outerSWFHolder_mc =
➥__mediaClip.createEmptyMovieClip("__SWFHolder_mc ", ➥__mediaClip.getNextHighestDepth());
__SWFHolder_mc = ➥__outerSWFHolder_mc.createEmptyMovieClip("__SWFHolder_mc ", 0);
}createSound(MovieClip(__mediaClip));__outerSWFHolder_mc._visible = false;var loader_mcl:MovieClipLoader = new MovieClipLoader();loader_mcl.addListener(this);loader_mcl.loadClip(file, __SWFHolder_mc);
}
loadMedia() is sent the path of the SWF file to load. The width and height of the holderclip are saved to be used for resizing of the loaded file. A new MovieClip instance iscreated, then another is created nested inside. This is done so that the outer clip can bemade invisible as the inner clip loads the file. createSound() is then called to create a newSound instance on the __mediaClip’s timeline. Remember that createSound() is amethod defined in the super class, MediaController, so we can access it from here sinceSWFPlayer inherits from MediaController. Finally, a new MovieClipLoader is created tohandle the loading of the file.
Next we have the IPlayable methods to control the playback of the SWF. Add these linesbelow loadMedia():
public function startMedia():Void{
super.startMedia();__SWFHolder_mc.play();
}
public function seek(offset:Number
):Void {offset = Math.round(offset);if (__playing) {__SWFHolder_mc.gotoAndPlay(offset-1);
} else {__SWFHolder_mc.gotoAndStop(offset);
}super.seek(offset);
}
OBJECT-ORIENTED ACTIONSCRIPT FOR FLASH 8
234
6196CH13.qxd 1/18/06 11:22 AM Page 234

public function stopMedia():Void{__SWFHolder_mc.gotoAndStop(1);super.stopMedia();
}
public function pauseMedia(b:Boolean
):Void {super.pauseMedia(b);if (__paused) {super.stopMedia();__SWFHolder_mc.stop();
} else {startMedia();
}startTrackProgress(!__paused);
}
As you can see, these control the playhead of the SWF using the standard ActionScriptcommands for movie clip timelines. The final methods for SWFPlayer are the getter/settersfor its unique properties. Add these to the end of the public methods, but before theclass’s closing brace:
public function set mediaClip(m:MovieClip
):Void {__SWFHolder.removeMovieClip();__mediaClip = m;
}
public function get mediaPosition():Number{return __SWFHolder._currentframe;
}
public function set mediaPosition(n:Number
):Void {seek(n);
}
public function get mediaWidth():Number{return __SWFHolder._width;
}
CASE STUDY: AN OOP MEDIA PLAYER
235
13
6196CH13.qxd 1/18/06 11:22 AM Page 235

public function set mediaWidth(w:Number
):Void {__SWFHolder._width = w;
}
public function get mediaHeight():Number{return __SWFHolder._height;
}
public function set mediaHeight(h:Number
):Void {__SWFHolder._height = h;
}
public function get scaleToClip():Boolean{return __scaleToClip;
}
public function set scaleToClip(b:Boolean
):Void {__scaleToClip = b;if (b) scaleMedia();
}
public function get stream():Boolean{return __stream;
}
public function set stream(b:Boolean
):Void {__stream = b;
}
That finishes up all the code for the SWFPlayer class. Once again, you can check your filesagainst the SWFPlayer.as file included with this chapter’s download files. With inheritancedoing a lot of the heavy lifting for us, that wasn’t so bad, now was it?
Building a SWF view
Once again, we get to the fun part of seeing the fruits of all this labor. Let’s build the visualcomponent so we can see what we’ve accomplished!
OBJECT-ORIENTED ACTIONSCRIPT FOR FLASH 8
236
6196CH13.qxd 1/18/06 11:22 AM Page 236

Create a new Flash document and save it as swfTest.fla. Give the movie a 30 fps framerate. Rename the default layer mc, then draw a black rectangle on the stage and size it320✕280. Convert this rectangle into a movie clip symbol named SWF screen with its reg-istration point in the upper-left corner, as demonstrated in Figure 13-7. Name the SWFscreen instance on stage swf in the Properties panel.
Figure 13-7. The stage and symbol set up for the SWF controller
Now create a new layer above mc and name it code. Select its first frame and type the fol-lowing code:
import com.oop.media.SWFPlayer;
var swfPlayer:SWFPlayer = new SWFPlayer(swf);swfPlayer.scaleToClip = true;swfPlayer.stream = true;swfPlayer.loop = true;swfPlayer.numLoops = 3;swfPlayer.addEventListener("mediaComplete", this);swfPlayer.loadMedia("bookworm.swf");
function mediaComplete() {trace("swf complete");
}
function onMouseDown() {swfPlayer.pauseMedia(!swfPlayer.paused);
}
CASE STUDY: AN OOP MEDIA PLAYER
237
13
6196CH13.qxd 1/18/06 11:22 AM Page 237

As with the code in videoTest.fla, we create a new media controller instance and passthe clip through which to view the media to the constructor. scaleToClip is set, which willresize the media to fit the movie clip holder. stream will start the playing of the SWFimmediately. loop is set to true, and the number of loops is set to 3. The main timeline isadded as a listener for the mediaComplete event, then the SWF file is loaded.
When the SWF has completed each loop, the mediaComplete function will be called andtrace a message to the Output window. If you click the screen as the SWF is playing, thepause state for the SWF will be toggled.
Make sure that bookworm.swf is saved into the same directory as this file. Test your movieand see the result! It should resemble what you see in Figure 13-8.
Figure 13-8. The media controller loading and playing back a SWF
Controlling MP3s
There is of course one last media type, but as you have already been through two, I thinkyou’ve probably typed enough! The MP3Player.as can be found in the code download (inthe com/oop/media folder). I would encourage you to open it up and peruse its code.There is actually less code than either SWFPlayer and VideoPlayer, and its implementationof the same methods is so similar that it should be nothing you can’t handle.
OBJECT-ORIENTED ACTIONSCRIPT FOR FLASH 8
238
6196CH13.qxd 1/18/06 11:22 AM Page 238

The methods used in Flash to load and play MP3 files are slightly different from what wehave used so far with SWFs and FLVs (both of which were different from the other). WithMP3s, the Sound object’s loadSound() is used to bring the file into the player. start(),stop(), and seek() are used to control playback, and position and duration are used tonote time. When a sound has completed playing, an onSoundComplete() handler is called.
What this means is that when dealing with sounds, these would be the methods usedbehind the scenes. However, to anyone using MP3Player, the same methods used forVideoPlayer and SWFPlayer (startMedia(), stopMedia, loadMedia(), etc.) would beimplemented. This is the beauty of polymorphism. With it, we can hide the implementa-tion of different methods while exposing the same API.
SummaryAfter all of the concepts of the previous section, it’s helpful to see a practical and visualdemonstration of what you’ve learned. This case study has walked through the planningand building of classes to control a very important aspect in Flash development—exter-nally loaded media. Interfaces were defined to guarantee that methods to control mediawould not change from type to type. A base class was built to hold common functionalityfor all three media type controllers. These controllers then used inheritance to extend thefunctionality of the base class. All of the methods to load and control the media wereencapsulated in these controller classes, classes that demonstrated polymorphism byimplementing the methods defined by the IPlayable interface in different ways. And thatis some Flash OOP at work!
What’s next?Now that the general OOP concepts have been discussed, the next part of this book willdelve into more Flash-centric ideas on implementing OOP in development, from buildingcomponents to interacting with live data and Web servers. The next chapter looks at com-ponent architecture by exploring the version 2 component framework. Be prepared forsome exciting possibilities!
CASE STUDY: AN OOP MEDIA PLAYER
239
13
6196CH13.qxd 1/18/06 11:22 AM Page 239

PART FOUR BUILDING ANDEXTENDING A DYNAMIC FRAMEWORK
6196CH14.qxd 1/18/06 11:23 AM Page 240

14 FRAMEWORK OVERVIEW
6196CH14.qxd 1/18/06 11:23 AM Page 241

The next logical step after learning the OOP and design patterns basics is to look at frame-works and how they fit into effective ActionScript programming practices. Before weinvestigate this more closely, I think it’s important to know that lately the term “frame-work” has become something of an overly used—perhaps even abused—buzzword. Whatexactly defines a framework and how does it differ from just any old collection of classes?
In the context of this chapter, I describe a framework as a set of logically related classesthat provide a solid structure through an API that promotes encapsulation, and consists ofone or more base classes that you extend to build your application code on. As such,frameworks often, if not always, use practical design patterns to link together the variousclasses to create an optimized structure for specific code problems.
When you think about ActionScript 2.0 frameworks in Flash 8, the first candidate thatcomes to mind is the v2 component architecture that the built-in components use and youcan extend to create your own components (more about this in Chapter 16). The v2framework makes use of a number of base classes that implement core functionality, as wewill discuss later on in this chapter.
Let’s take this v2 component architecture as an example and walk through its functionalityto get started with the concept of frameworks, before we move on to develop our ownframework in later chapters.
Introducing the frameworkLooking at the hierarchy chart in Figure 14-1, you can see that all UI components that comewith Flash 8 essentially derive from four base classes: MovieClip, UIObject, UIComponent,and View.
OBJECT-ORIENTED ACTIONSCRIPT FOR FLASH 8
242
6196CH14.qxd 1/18/06 11:23 AM Page 242

Figu
re 1
4-1.
v2
com
pone
nt a
rchi
tect
ure
clas
s hi
erar
chy
Imag
e co
urte
sy o
f M
acro
med
ia. U
sed w
ith
perm
issi
on.
FRAMEWORK OVERVIEW
243
14
6196CH14.qxd 1/18/06 11:23 AM Page 243

Those four classes extend each other, with MovieClip as the topmost class and View as themost specialized, as you can see from the tree structure shown in Figure 14-2.
When you study Figure 14-1 more closely, you’ll notice that the component classes extendonly the base classes from UIObject onward; there isn’t a single component that directlyextends MovieClip. Although that would certainly be possible, the MovieClip class is themost basic building block available in Flash 8 and as such doesn’t provide any additionalinformation for the component to make use of.
Anyone that has had the Flash IDE open for more than 15 minutes will have come acrossthe concept of movie clips. The MovieClip class is nothing more than its representation incode form. Having said that, you’re probably already eagerly browsing your hard disk tofind this MovieClip class. Look no further. You’ll find it in the First Run/Classes folder inyour installation directory.
If you open up MovieClip.as, you’ll notice something strange in the class definition:intrinsic. You may be thinking, “Now what the heck is that and why didn’t you tell meabout this earlier?” The answer is simple: it isn’t really a class in the way we know it; rather,it’s a file that defines datatype information for enforcing strict typing for built-in classes(or, in fact, ActionScript 1.0 classes that, as you know, don’t support datatyping). By creat-ing such an intrinsic class, the compiler knows what datatype it should expect for eachproperty and method, and can give us more meaningful error messages should somethinggo wrong when we try to compile a Flash project.
What this tells us about the MovieClip class is that it is built into Flash Player and not com-piled into the SWF at authoring time. This, of course, makes perfect sense, as movie clipsare so common in all Flash projects.
Figure 14-2.V2 framework base classes hierarchy
OBJECT-ORIENTED ACTIONSCRIPT FOR FLASH 8
244
6196CH14.qxd 1/18/06 11:23 AM Page 244

Intrinsic classes aren’t something you’ll use all that often unless you’d like to add strict typ-ing functionality for ActionScript 1.0 classes. Doing that is very easy indeed, so I’ll just giveyou a quick example:
intrinsic class WordUtils {function getLetters(word:String):Array;function reverseWord(word:String):String;
}
var WordUtils = function() {}WordUtils.prototype.getLetters = function(word) {return word.split("");
}WordUtils.prototype.reverseWord = function(word) {return this.getLetters(word).reverse().join("");
}
var myWord:String = "Intrinsic class";var myWordUtils:WordUtils = new WordUtils();trace(myWordUtils.reverseWord(myWord)); trace(myWordUtils.getLetters(50)); // type error
With the WordUtils class in the same folder as an FLA with the ActionScript 1.0 WordUtilsclass on the main timeline, try running Test Movie and see what happens. As expected, thecall to getLetters gives a type mismatch error when trying to compile (see Figure 14-3).
Figure 14-3. Type mismatch error in the Output panel
Flash timeline
WordUtils.as
FRAMEWORK OVERVIEW
245
14
6196CH14.qxd 1/18/06 11:23 AM Page 245

If you comment out the line of code that calls getLetters and try to compile again, every-thing runs just fine, the reverseWord result is returned for the myWord string ssalc cisnirtnI(see Figure 14-4).
Figure 14-4. The Output panel showing the result of running reverseWord
That’s pretty cool. Without having to rework all your ActionScript 1.0 classes toActionScript 2.0, you can now take advantage of intrinsic classes to add strict typingsupport.
Next up, we’ll walk through the various base classes of the v2 component architecture,look at specific uses for the classes, and obtain a reference to its API.
Understanding the MovieClip classAs discussed earlier, the MovieClip class is really at the core of all Flash application devel-opment. If you’ve ever done Flash development, try to imagine what it would be like tonot have access to movie clips. Every time you create a new movie clip symbol, you’reessentially instantiating a new instance of the MovieClip class. In fact, it is common to usethe terms “movie clip” and “movie clip instance” interchangeably, as I do throughoutthis book.
Earlier on in this book, you learned that classes can be linked to movie clips—without thisfeature, many of the examples featured here would simply not work. The same goes forbuilding visual components, which we’ll discuss in Chapter 16. They require you to use amovie clip to assign your class to and serve as a container for your graphical elements.
By now I hope I’ve managed to convince you (if you weren’t already) that movie clips area very important aspect of Flash development. Knowing that the MovieClip class is builtinto Flash Player, we can’t get access to the actual code, but we are able to look up itsmethods, properties, and events by looking at its intrinsic class (if you like to show off yourgeeky skills) or look at the ActionScript Reference panel if you’re a mere mortal.
Tables 14-1, 14-2, and 14-3 provide a reference of the methods, properties, and eventsthat the MovieClip class has available for us to use.
OBJECT-ORIENTED ACTIONSCRIPT FOR FLASH 8
246
6196CH14.qxd 1/18/06 11:23 AM Page 246

Table 14-1. Overview of the methods of the MovieClip class
Method Description
attachMovie(id:String,name:String, Attach a movie clip with the depth:Number,initObject:Object) specified linkage ID.
beginFill(rgb:Number,alpha:Number) Begin filling a shape drawn using thedrawing API.
beginGradientFill(fillType:String, Begin gradient fill for a shape drawn colors:Array,alphas:Array, with the drawing API.ratios:Array,matrix:Object)
clear() Remove everything drawn using thedrawing API within the movie clip.
createEmptyMovieClip(name:String, Create a new, empty movie clip at depth:Number) runtime.
createTextField(instanceName:String, Create a new text field at runtime.depth:Number,x:Number,y:Number,width:Number,height:Number)
curveTo(controlX:Number, Draw a curve using the drawing API.controlY:Number,anchorX:Number,anchorY:Number)
duplicateMovieClip(name:String, Duplicate a movie clip that is located depth:Number,initObject:Object) on the stage.
endFill() End a fill for a shape drawn usingthe drawing API.
getBounds(bounds:Object) Get the minimum and maximum xand y positions of the movie clip.
getBytesLoaded() Get the number of bytes loaded intoa movie clip when executing a loadrequest.
getBytesTotal() Get the total number of bytes thatneed to be loaded into a movie clipto complete the load request.
getDepth() Get the depth of the movie clip.
getInstanceAtDepth(depth:Number) Get the reference to an instancelocated at a specified depth.
(Continued)
FRAMEWORK OVERVIEW
247
14
6196CH14.qxd 1/18/06 11:23 AM Page 247

Table 14-1. Overview of the methods of the MovieClip class (Continued)
Method Description
getNextHighestDepth() Get a depth higher than the highestused depth for an instance on thestage.
getSWFVersion() Get the version of the SWF that isloaded into a movie clip instance.
getTextSnapshot() Get a TextSnapshot object of allstatic text in the movie clip instance.
getURL(url:String,window:String, Direct the browser to a specified method:String) URL.
globalToLocal(pt:Object) Convert coordinates from the stageto be relative to the movie clipinstance.
gotoAndPlay(frame:Object) Move the playhead to a framenumber or label and start playing.
gotoAndStop(frame:Object) Move the playhead to a framenumber or label and stop playback.
hitTest() Check if another movie clip orcoordinate overlaps with the movieclip instance.
lineStyle(thickness:Number, Set the style of lines that are drawn rgb:Number,alpha:Number) with the drawing API.
lineTo(x:Number,y:Number) Draw a line using the drawing API.
loadMovie(url:String,method:String) Load an external SWF or JPEG into amovie clip.
loadVariables(url:String,method:String) Load an external text file inname/value pair format into a movieclip.
localToGlobal(pt:Object) Convert coordinates from the movieclip to be relative to the stage.
moveTo(x:Number,y:Number) Set the x and y coordinates fromwhere to start drawing using thedrawing API.
OBJECT-ORIENTED ACTIONSCRIPT FOR FLASH 8
248
6196CH14.qxd 1/18/06 11:23 AM Page 248

Method Description
nextFrame() Move the playhead to the nextframe on the timeline of the movieclip.
play() Start playback for the timeline of themovie clip instance.
prevFrame() Move the playhead to the previousframe on the timeline of the movieclip.
removeMovieClip() Remove the movie clip instancefrom the stage and from memory.
setMask(mc:Object) Set the specified movie clip instanceas a mask for the movie clip instancecalling the method.
startDrag(lockCenter:Boolean, Start dragging the movie clip left:Number,top:Number,right:Number, instance.bottom:Number)
stop() Stop playback for the timeline of themovie clip instance.
stopDrag() Stop dragging a movie clip instance.
swapDepths(mc:Object) Swap the depth of the current movieclip instance with the depth of thespecified movie clip instance (or adepth level if a number is insteadprovided in the argument).
unloadMovie() Unload content loaded into themovie clip instance.
Table 14-2. Overview of the properties of the MovieClip class
Property Description
_alpha:Number Get or set the opacity of the movie clip instance.
_currentframe:Number Get the current frame the playhead is located on in thetimeline of the movie clip instance (read-only).
(Continued)
FRAMEWORK OVERVIEW
249
14
6196CH14.qxd 1/18/06 11:23 AM Page 249

Table 14-2. Overview of the properties of the MovieClip class (Continued)
Property Description
_droptarget:String Get a reference to the path of the movie clip instancethe current movie was dropped on (read-only; usesslash syntax).
_focusrect:Boolean Specify whether yellow focus rectangles are shownwhen tabbing between buttons or movie clips (thissetting is global and applies to the entire Flash movie).
_framesloaded:Number Get the number of frames loaded in the timeline of themovie clip instance (read-only).
_height:Number Get the height of the movie clip instance.
_lockroot:Boolean Set the movie clip scope to be the _root for all codeincluded in the movie clip or any nested movie clips.
_name:String Get or set the instance name of the movie clip.
_parent:MovieClip Get a reference to the parent timeline (movie clip) ofthe movie clip.
_quality:String Get or set the quality setting for the movie clip.
_rotation:Number Get or set the rotation for the movie clip.
_soundbuftime:Number Get or set the number of seconds the audio buffers forSWFs or MP3s loaded in globally.
_target:String Return the path of the movie clip instance (read-only;uses slash syntax).
_totalframes:Number Get the total number of frames in the timeline of themovie clip (read-only).
_url:String Get the URL for the content that was loaded into themovie clip (read-only).
_visible:Boolean Get or set the visibility of the movie clip instance.
_width:Number Get or set the width of the movie clip instance.
_x:Number Get or set the horizontal position of the movie clipinstance.
_xmouse:Number Get the horizontal mouse position relative to the movieclip (read-only).
_xscale:Number Get or set the horizontal scale for the movie clip.
OBJECT-ORIENTED ACTIONSCRIPT FOR FLASH 8
250
6196CH14.qxd 1/18/06 11:23 AM Page 250

Property Description
_y:Number Get or set the vertical position of the movie clip.
_ymouse:Number Get the vertical mouse position relative to the movieclip (read-only) .
_yscale:Number Get or set the vertical scale for the movie clip.
enabled:Boolean Set the movie clip to click events to be enabled ordisabled, or retrieve its current value.
focusEnabled:Boolean Allow or disallow a movie clip to get focus.
hitArea:Object Set another movie clip instance to be the hit area forthe current movie clip for any button events.
tabChildren:Boolean Enable or disable nested movie clips to be part of theautomatic tab ordering.
tabEnabled:Boolean Enable or disable the movie clip to be part of theautomatic tab ordering.
tabIndex:Number Get or set the index for the sequence in which the tabordering should occur.
trackAsMenu:Boolean Enable or disable mouse release events for the movieclip.
useHandCursor:Boolean Enable or disable the hand cursor when rolling overthe movie clip.
Table 14-3. Overview of the events of the MovieClip class
Event Description
onData Triggered when data is loading into a movie clip
onDragOut Triggered when the mouse is dragged outside the bounds ofthe movie clip while pressed
onDragOver Triggered when the mouse is dragged over the movie clipinstance while pressed
onEnterFrame Triggered once every frame
(Continued)
FRAMEWORK OVERVIEW
251
14
6196CH14.qxd 1/18/06 11:23 AM Page 251

Table 14-3. Overview of the events of the MovieClip class (Continued)
Event Description
onKeyDown Triggered when a key is pressed (requires instance beingadded as listener to static Key object, so it is not really aMovieClip event, though it is listed as one)
onKeyUp Triggered when a key is released (requires instance beingadded as listener to static Key object, so it is not really aMovieClip event, though it is listed as one)
onKillFocus Triggered when the movie clip loses focus
onLoad Triggered when data has finished loading into a movie clip
onMouseDown Triggered when the mouse button is clicked
onMouseMove Triggered when the mouse is moved
onMouseUp Triggered when the mouse button is released
onPress Triggered when the mouse button is clicked over themovie clip
onRelease Triggered when the mouse button is pressed and thenreleased over the movie clip
onReleaseOutside Triggered when the mouse button is clicked over the movieclip but released outside it
onRollOut Triggered when the mouse position rolls out of the bounds ofthe movie clip
onRollOver Triggered when the mouse rolls over the movie clip instance
onSetFocus Triggered when the movie clip is given focus
onUnload Triggered when the movie clip contents are unloaded
You can find a more detailed overview of the MovieClip class in the Flash 8 help files(ActionScript 2.0 Language Reference ➤ ActionScript classes ➤ MovieClip class).
Having looked at the role the MovieClip class plays in ActionScript 2.0 and Flash develop-ment in general, its uses, and the available API, let’s now examine the next class in the v2framework hierarchy: UIObject.
OBJECT-ORIENTED ACTIONSCRIPT FOR FLASH 8
252
6196CH14.qxd 1/18/06 11:23 AM Page 252

Understanding the UIObject class(mx.core.UIObject)
From the UIObject class onward, things start getting interesting in terms of componentdevelopment with the v2 framework. The UIObject class extends MovieClip and providesadditional functionality for things like resizing and applying styles. The class also broad-casts a number of common events that make your life easier by not requiring you to writecode to check if your component was moved or resized, or its visibility was changed.
As you’ll see when looking at Figure 14-1, the built-in UI components in Flash 8 thatextend the UIObject class are Label and ProgressBar.
Tables 14-4, 14-5, and 14-6 provide a reference of all the methods, properties, and eventsthat the UIObject makes available to all classes that extend it, in addition to those inher-ited from the MovieClip class.
Table 14-4. Overview of the methods of the UIObject class
Method Description
createClassObject() Attach an object with a specified classto the stage.
createObject(linkageName:String, Attach an object to the stage.instanceName:String, depth:Number, initObj:Object)
destroyObject Delete the object instance.
doLater(obj:Object,function:String) Postpone a function call to a nextframe iteration.
getStyle(property:String) Get the value of the specified style.
invalidate() Postpone a redraw of the object tothe next frame to increaseperformance.
move(x:Number,y:Number) Move the object to a new x and yposition.
redraw() Force the object to be redrawn in thecurrent frame.
setSize(width:Number,height:Number) Resize the object to a new width andheight.
setSkin(tag:Number,linkageName:String, Assign a movie clip linkage ID to a initObj:Object) specified skin.
setStyle(prop:String,value:Variant) Assign a value to a specified style.
FRAMEWORK OVERVIEW
253
14
6196CH14.qxd 1/18/06 11:23 AM Page 253

Table 14-5. Overview of the properties of the UIObject class
Property Description
bottom:Number Available space from the object to the bottom of the stage(read-only)
height:Number Height of the object (read-only)
left:Number Available space from the object to the left of the stage (read-only)
right:Number Available space from the object to the right of the stage (read-only)
scaleX:Number Horizontal scale percentage of the object
scaleY:Number Vertical scale percentage of the object
top:Number Available space from the object to the top of the stage (read-only)
visible:Number Visibility of the object
width:Number Width of the object (read-only)
x:Number X position of the object on the stage (read-only)
y:Number Y position of the object on the stage (read-only)
Table 14-6. Overview of the events of the UIObject class
Event Description
draw Broadcast when the object is about to draw its graphics.
hide Broadcast when the object is set as invisible.
load Broadcast when the object is loaded.
move Broadcast when the object is moved.
resize Broadcast when the object is resized.
reveal Broadcast when the object is set as visible.
unload Broadcast when the object is unloaded.
OBJECT-ORIENTED ACTIONSCRIPT FOR FLASH 8
254
6196CH14.qxd 1/18/06 11:23 AM Page 254

You can find a more detailed overview of the UIObject class in the Flash 8 help files(Components Language Reference ➤ UIObject class).
The UIObject class brings us into the realm of v2 component development. The next classin the hierarchy is UIComponent and, as the name implies, it is just the thing for workingon full-fledged component classes.
Understanding the UIComponent class(mx.core.UIComponent)
When extending the UIComponent class, you start getting down to business. Apart from allthe functionality UIComponent inherits from UIObject and indirectly from MovieClip, itadds methods, properties, and events for keyboard input, focus management, enabledand disabled states for the component, and more advanced resizing.
Built-in UI components that directly extend UIComponent are DateChooser, TextInput,MenuBar, and NumericStepper. There are also two base classes that extend UIComponent,SimpleButton and ComboBase, which in turn serve as base classes for the Button,ComboBox, and DateField UI components.
Tables 14-7, 14-8, and 14-9 provide a reference of all the methods, properties, and eventsthat the UIComponent class offers to classes that extend it.
Table 14-7. Overview of the methods of the UIComponent class
Method Description
getFocus() Get the object currently in focus.
setFocus() Set focus to the object.
Table 14-8. Overview of the properties of the UIComponent class
Property Description
enabled:Boolean Set the object state to enabled or disabled.
tabIndex:Number Get or set the tabbing order index for the object.
FRAMEWORK OVERVIEW
255
14
6196CH14.qxd 1/18/06 11:23 AM Page 255

Table 14-9. Overview of the events of the UIComponent class
Event Description
focusIn Broadcast when the object receives focus.
focusOut Broadcast when the object loses focus.
keyDown Broadcast when a key is pressed.
keyUp Broadcast when a key is released.
You can find a more detailed overview of the UIComponent class in the Flash 8 help files(Components Language Reference ➤ UIComponent class).
You can see from the preceding tables that the UIComponent class will serve you well as afoundation for building full-fledged components. There is yet another class that extendson this functionality and is particularly useful for components that act as containers forother assets: the View class.
Understanding the View class (mx.core.View)The View class is the final class in our v2 component base class hierarchy, and is specificallyused for creating, destroying, and managing child objects. Child objects can be either othermovie clips in the SWF that are attached or external content that is loaded in at runtime.
Built-in UI components that directly extend the View class are Accordion and Loader.Another class that extends View is ScrollView, which acts as a base class for the Window,TextArea, and ScrollPane components.
Tables 14-10 and 14-11 present the methods and properties that the View class exposes toall classes that extend it (the class does not provide any additional events). Remember, asthe last class in this base class hierarchy, the View class inherits from UIComponent, whichin turn inherits from UIObject and MovieClip.
Table 14-10. Overview of the methods of the View class
Method Description
createChild(className, instanceName:String, Add a new child object.initProps:Object)
destroyChildAt(childIndex:Number) Destroy a child object at thespecified index.
getChildAt(index:Number) Get a child object with thespecified index.
OBJECT-ORIENTED ACTIONSCRIPT FOR FLASH 8
256
6196CH14.qxd 1/18/06 11:23 AM Page 256
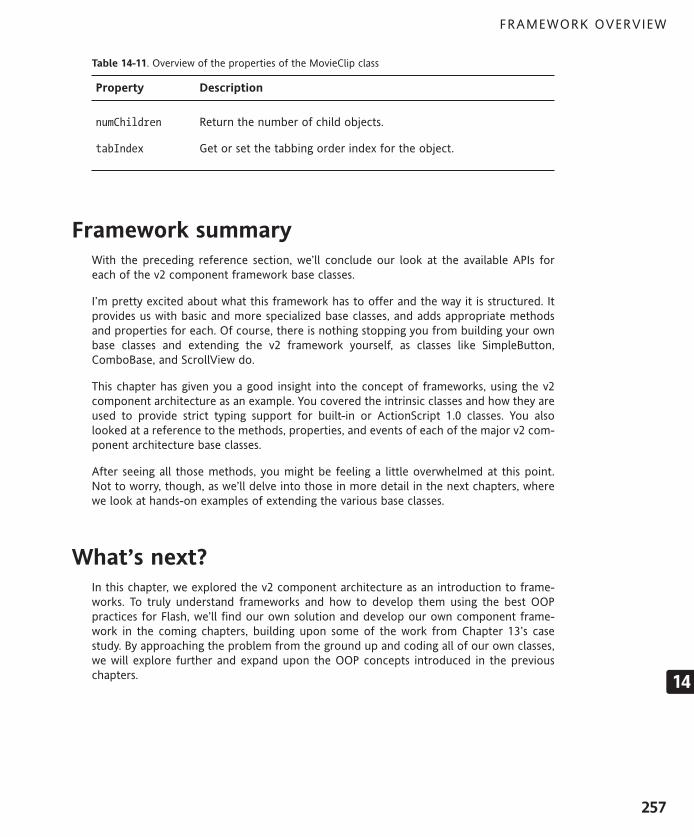
Table 14-11. Overview of the properties of the MovieClip class
Property Description
numChildren Return the number of child objects.
tabIndex Get or set the tabbing order index for the object.
Framework summaryWith the preceding reference section, we’ll conclude our look at the available APIs foreach of the v2 component framework base classes.
I’m pretty excited about what this framework has to offer and the way it is structured. Itprovides us with basic and more specialized base classes, and adds appropriate methodsand properties for each. Of course, there is nothing stopping you from building your ownbase classes and extending the v2 framework yourself, as classes like SimpleButton,ComboBase, and ScrollView do.
This chapter has given you a good insight into the concept of frameworks, using the v2component architecture as an example. You covered the intrinsic classes and how they areused to provide strict typing support for built-in or ActionScript 1.0 classes. You alsolooked at a reference to the methods, properties, and events of each of the major v2 com-ponent architecture base classes.
After seeing all those methods, you might be feeling a little overwhelmed at this point.Not to worry, though, as we’ll delve into those in more detail in the next chapters, wherewe look at hands-on examples of extending the various base classes.
What’s next?In this chapter, we explored the v2 component architecture as an introduction to frame-works. To truly understand frameworks and how to develop them using the best OOPpractices for Flash, we’ll find our own solution and develop our own component frame-work in the coming chapters, building upon some of the work from Chapter 13’s casestudy. By approaching the problem from the ground up and coding all of our own classes,we will explore further and expand upon the OOP concepts introduced in the previouschapters.
FRAMEWORK OVERVIEW
257
14
6196CH14.qxd 1/18/06 11:23 AM Page 257

6196CH15.qxd 1/18/06 11:29 AM Page 258

15 MANAGER CLASSES
6196CH15.qxd 1/18/06 11:29 AM Page 259
The last chapter explored the foundation of the v2 component framework. Developers canchoose to use the components and classes that utilize this framework and build newclasses to fit within the framework, or developers can create a unique framework from theground up on which to build their components. The benefits of using the componentframework is obvious: the code is already written and the components are ready to dragand drop into your interface. If you need a quick solution, this is a great way to go, asinterface prototypes can be rapidly developed and demonstrated. However, the greatestbenefit of developing your own components from scratch is that you have a deep under-standing of what each component can do and how to extend it with new functionality. Thisis obviously possible with these components, but not without a lot of work scrutinizingothers’ code. If work is to be invested, why not work to build something you have com-plete control over and can more easily extend and modify? This and the next two chapterswill show you how to begin.
Planning the frameworkWhat exactly is needed to build a working framework? Although we could jump right inand start building buttons, which is arguably the simplest Flash widget to create, if weinstead plan a solid course of action for an entire component set, we’ll save time in furtherdevelopment of more complex components (and save ourselves from inevitably having torework that same simple button).
The framework we’ll build in this book will consist broadly of widgets (the UI controls vis-ible on the stage), manager classes (classes to control specific overall functionality of widg-ets or the interface), and utilities (helper classes to be used by both manager classes andwidgets for common functions). The next chapter concentrates on interface widgets andthe one that follows that on utility classes. This chapter will focus on the classes to managean entire collection of widgets in an interface or application.
What to manage
When considering manager classes, imagine the tasks that you’ll need performed through-out the interface or for the entirety of the interface where having a single class instance oreven a static class will ease development and/or allow for centralized modifications. InChapter 13’s case study, we already created an IntervalManager class to handle storinginterval identifiers in order to prevent orphaned interval calls. It wouldn’t make sense tohave multiple instances of an IntervalManager. What additional classes could we createto centralize other tasks?
OBJECT-ORIENTED ACTIONSCRIPT FOR FLASH 8
260
6196CH15.qxd 1/18/06 11:29 AM Page 260
One great candidate for a manager class is a StyleManager. Multiple interfaces utilizingcomponents will require different styles (colors for widget elements for different states),and having a centralized class to handle styles for all components will only speed laterdevelopment as components are appropriated in new interfaces. In addition, if ever stylesshould be defined by values from a database, having the styles stored within a single classor instance will allow for smoother integration with the back-end.
For similar reasons, a SoundManager is a good candidate for a manager class as well. Manywidgets can be enhanced by sounds (a button click would be the most obvious example),and instead of coding event listeners to play sounds for every instance, we can build intoour components an interface with a global SoundManager. Within this SoundManagerwould be the definitions for all component event sounds and the Sound objects to createthose sounds.
Additional managers that would fit nicely within a component framework for buildinginterfaces in Flash are a FocusManager to handle tab navigation within views, perhapsa ContextMenuManager to handle creating right-click context-sensitive menus, and aToolTipManager for creating pop-up tooltips for components. As applications grow andbecome more complex, a DragManager to handle drag-and-drop functionality and aDialogManager to handle the creation of pop-up dialog boxes would be great develop-ment aids. In each of these manager class examples, it’s cleaner to have a centralized classwith visual definitions, behavior, and functionality reside where individual componentsor timelines could call. This will keep the individual component code slimmer and moremanageable.
Diagramming the classes
As always, it’s helpful to map out classes before beginning to code. We’ve discussed UMLdiagrams and used them to describe classes in earlier chapters, so you should be startingto feel more comfortable taking in such a diagram and referring to it as a blueprint. PeruseFigure 15-1 for the classes we’ll explore in this chapter and look back to it for reference aswe begin to code.
MANAGER CLASSES
261
15
6196CH15.qxd 1/18/06 11:29 AM Page 261

We’ll continue to build within the package structure we created in Chapter 13’s case study.As you can see in the diagram, we’ll be adding two classes to the com.oop.managers pack-age, StyleManager and SoundManager. The StyleManager itself will be managing multipleinstances of style formats, so we create a StyleFormat class for this purpose within a newcom.oop.graphic package.
OBJECT-ORIENTED ACTIONSCRIPT FOR FLASH 8
262
Figure 15-1. UML diagrams for manager classes
6196CH15.qxd 1/18/06 11:29 AM Page 262

Once you’re comfortable with the structure proposed in the class diagram, fire up Flashand get ready for some framework coding!
Building managersIndividual component widgets are all well and good, but it’s the centralized means of con-trolling the look and feel of those widgets that can make working with components abreeze (as well as speed up the creation of new and unique interfaces!). These next twomanager classes and the StyleFormat class will go a long way in making our componentsreusable from interface to interface without making everything appear the same.
StyleFormat
The first class we’ll create to manage the look of our components is StyleFormat. Instancesof this class will hold values for a number of visual properties for components and will beused to assign a style to a component instance, a whole class, or the entire set of compo-nents.
To begin, create a new ActionScript file and save it into the com/oop/graphic class direc-tory (you’ll need to create the new graphic folder) as StyleFormat.as. Enter the follow-ing code into the Script pane:
dynamic class com.oop.graphic.StyleFormat {
public var name:String;public var background:Number;public var face:Number;public var border:Number;public var highlight:Number;public var shadow:Number;public var selected:Number;public var textFormat:TextFormat;private var __listeners:Array = [];
public function StyleFormat(name:String) {init(name);
}
}
Notice the use of the dynamic modifier for the class. This will allow developers using theStyleFormat class to add new properties to the instances when needed without Flashthrowing a compile error. The properties that we do define are the most common and willhave default values assigned to them in the next step. As you may see, the constructor getspassed a string for the format name, which is in turn passed to the init() method. Let’sadd that next.
MANAGER CLASSES
263
15
6196CH15.qxd 1/18/06 11:29 AM Page 263

dynamic class com.oop.graphic.StyleFormat {
public var name:String;public var background:Number;public var face:Number;public var border:Number;public var highlight:Number;public var shadow:Number;public var selected:Number;public var textFormat:TextFormat;private var __listeners:Array = [];
function StyleFormat(name:String) {init(name);
}
// PRIVATE// ________________________________________________
private function init(nm:String):Void {name = nm;background = 0x454545;face = 0x999999;border = 0x000000;highlight = 0xFFFFFF;shadow = 0x666666;selected = 0xCCCCCC;textFormat = new TextFormat("Arial", 10);
}
}
The bold code in the preceding code is the only private method for this class, an initializa-tion method that assigns default gray color values to the properties. An instance of thisclass will default to these unless new values (and thus a new look) are assigned. The powerof this class will come when component instances register themselves with a StyleFormatinstance and update their graphical look to match its style values. This functionality isadded with the public methods for the class, added next.
// PRIVATE// ________________________________________________
private function init(nm:String):Void {name = nm;background = 0x454545;face = 0x999999;border = 0x000000;highlight = 0xFFFFFF;shadow = 0x666666;
OBJECT-ORIENTED ACTIONSCRIPT FOR FLASH 8
264
6196CH15.qxd 1/18/06 11:29 AM Page 264

selected = 0xCCCCCC;textFormat = new TextFormat("Arial", 10);
}
// PUBLIC// ________________________________________________
public function addListener(obj:Object):Void {obj.styleFormat.removeListener(obj);obj.styleFormat = this;for (var i in __listeners) {if (__listeners[i] == obj) return;
}__listeners.push(obj);
}
public function removeListener(obj:Object):Void {var len:Number = __listeners.length;for (var i:Number = 0; i < len; i++) {if (__listeners[i] == obj) {__listeners.splice(i, 1);break;
}}delete obj.styleFormat;
}
public function updateStyles():Void {for (var i:String in __listeners) {__listeners[i].updateStyles();
}}
}
The public methods include an addListener() and removeListener() method, which sim-ply add or remove a component instance to a list of listeners stored in a StyleFormat classinstance. The methods also add or remove a new property, styleFormat, to the listenerobject. This property holds a reference to the StyleFormat instance.
updateStyles() is where the true power lies as all of the listeners can be easily updatedwith changes to the StyleFormat instance. Using this class alone, you could assign styles toany object that implements an updateStyles() method (Hmmm, does that sound like agood use for an interface, perhaps?) and control the look of multiple clips. However, it willrequire using addListener() for every single instance you want to assign a format to. Thatmeans if there are 20 buttons in your interface and you want them all to look the same,you’ll need to add 20 addListener() calls. What would help immensely is a class thatmanages this process for all the components. Which brings us nicely to the next topic . . .
MANAGER CLASSES
265
15
6196CH15.qxd 1/18/06 11:29 AM Page 265

StyleManager
The StyleManager will handle the registering and format assignment for all components inour framework. The concept is that a single StyleManager instance will hold references toall the StyleFormat instances in a movie. Component instances that we create will auto-matically “check in” with the StyleManager to see which format they should apply. Let’sstep through the code to see how to create this.
Create a new ActionScript file in the com/oop/managers directory and name it StyleManager.as.Add the following code:
import com.oop.graphic.StyleFormat;
class com.oop.managers.StyleManager {
private var __styles:Object = {};private var __listeners:Object = {};
public function StyleManager(defaultFormat:StyleFormat) {if (_global.StyleManager) return;_global.StyleManager = this;init(defaultFormat);
}
}
These lines set up the StyleManager class. There are two private properties, __styles and__listeners, to hold references to StyleFormat instances and components, respectively.Next, in the constructor method, we first check to ensure a StyleManager doesn’t alreadyexist. If it doesn’t, we set a global property to hold a reference to this instance and send thedefault StyleFormat sent in the constructor to the init() method, which we’ll add next.
This is an example of one way to use the Singleton pattern for a global manager class. Withthis class, there can only ever be one instance present and used. If the constructor isattempted a second time, it’s exited out of. Placing the newly created instance in the_global object allows access to it from any timeline.
Additional ways a Singleton manager could be accomplished are having the class consist ofstatic methods where no instance is created at all, or perhaps having a static method thatreturned an instance of the class, something like getManager(), which would only createan instance the first time the method was called and would return that same instance forany additional calls. All three of these methods have their pros and cons, but what we’vedone here is perhaps the easiest to implement for our examples.
OBJECT-ORIENTED ACTIONSCRIPT FOR FLASH 8
266
6196CH15.qxd 1/18/06 11:29 AM Page 266

import com.oop.graphic.StyleFormat;
class com.oop.managers.StyleManager {
private var __styles:Object = {};private var __listeners:Object = {};
public function StyleManager(defaultFormat:StyleFormat) {if (_global.StyleManager) return;_global.StyleManager = this;init(defaultFormat);
}
// PRIVATE// ________________________________________________
private function init(defaultFormat:StyleFormat):Void {if (defaultFormat == undefined)var defaultFormat:StyleFormat = new StyleFormat();
addStyle("default", defaultFormat);}
// PUBLIC// ________________________________________________
public function addStyle(name:String, format:StyleFormat):Void {__styles[name] = format;format.styleReference = name;
}
public function removeStyle(name:String):Void {delete __styles[name];
}
}
init() calls the addStyle() method and passes the default StyleFormat, which is the for-mat that will apply to all components unless others are assigned. If no default was passedin, a new StyleFormat instance is created for this purpose.
In the addStyle() method, the format passed in is placed in the __styles object propertyunder the name of the format for easy reference. It also stores the reference asstyleReference in the format itself so that the instance may know how it is stored in theStyleManager. removeStyle() simply deletes this value for the object.
MANAGER CLASSES
267
15
6196CH15.qxd 1/18/06 11:29 AM Page 267

The final two methods take care of assigning StyleFormat instances to individual compo-nents.
// PUBLIC// ________________________________________________
public function addStyle(name:String, format:StyleFormat):Void {__styles[name] = format;
}
public function removeStyle(name:String):Void {delete __styles[name];
}
public function style(obj:Object):Void {getStyle(obj).addListener(obj);obj.updateStyles();
}
public function getStyle(obj:Object):StyleFormat {if (obj.styleFormatName != undefined) {if (__styles[obj.styleFormatName] != undefined)return __styles[obj.styleFormatName];
}var classes:Array = obj.classes;for (var i:Number = classes.length-1; i > -1; i--) {if (__styles[classes[i]] != undefined) {return __styles[classes[i]];
}}return __styles["default"];
}
style() will be called by every component internally. style() in turn calls getStyle(),which determines which of the StyleFormat instances should be applied to the objectpassed in. The way this is determined is broken down into the following steps:
1. If the object has a specific styleFormatName value and that refers to a StyleFormatinstance stored in the StyleManager, use that style.
2. Otherwise, if the object belongs to a class and that class has an associatedStyleFormat instance stored in the StyleManager, use that style.
3. If neither of the previous cases is true, use the default StyleFormat instance.
OBJECT-ORIENTED ACTIONSCRIPT FOR FLASH 8
268
6196CH15.qxd 1/18/06 11:29 AM Page 268

When we build component classes in the next chapter, we’ll plug them into theStyleManager and StyleFormat to better illustrate how the style hierarchy works. However,we can test out the concept without having to create full component classes. The nextsection demonstrates how.
Adding style
To try out the two classes explored in the last section, create a new movie and save it asstyleTest.fla. Rename the default layer graphics and add a second layer above it namedcode, as shown in Figure 15-2.
Figure 15-2. The timeline and stage for the test movie
MANAGER CLASSES
269
15
6196CH15.qxd 1/18/06 11:29 AM Page 269

On the graphics layer, draw a gray circle with a 4-point black stroke. Convert the fill to amovie clip symbol named fill and the stroke to a movie clip symbol named stroke (if youdo it in that order, the stroke will remain above the fill, which is what we want for ourexample). Name the two instances on stage stroke and fill, respectively, as well. Now selectboth the stroke and fill instances together and convert them into a single movie clip sym-bol named circle (“square” just didn’t make sense). Duplicate this instance on stage threemore times and name the four instances c0, c1, c2, and c3, respectively, as shown inFigure 15-3.
Figure 15-3. Four circle instances all in a row
We’re now going to add code inside our symbol, a practice not normally encouraged dueto the troubles that can arise from having code spread out into multiple timelinesthroughout a movie. However, there is nothing wrong with doing it when testing function-ality as we’re doing here. Next chapter, we’ll implement what we’re testing here insideexternal class files. But before we do that, we should ensure this small piece works!
Enter symbol editing mode for the circle symbol. Rename the default layer graphics andcreate a layer above this and name it code. On the code layer, add the following lines toyour ActionScript editor:
StyleManager.style(this);
function updateStyles() {(new Color(fill)).setRGB(styleFormat.face);(new Color(stroke)).setRGB(styleFormat.border);
}
OBJECT-ORIENTED ACTIONSCRIPT FOR FLASH 8
270
6196CH15.qxd 1/18/06 11:29 AM Page 270

Remember how I mentioned that objects looking to use StyleFormat instances needed toimplement an updateStyles() method? Well, here it is. In the method, we define how theinternal movie clips will use the style properties to color the clips. The first line in the codeblock calls the style() method in the global StyleManager (if one exists) to assign theproper StyleFormat instance to this object.
Now return to the main timeline and select Keyframe 1 in the code layer. Add the follow-ing code to your ActionScript editor:
import com.oop.graphic.StyleFormat;
defaultFormat = new StyleFormat("defaultFormat");defaultFormat.face = 0xFF0000;defaultFormat.border = 0x0000FF;
new com.oop.managers.StyleManager(defaultFormat);
Here we create a new StyleFormat instance with a face and border value. We then instan-tiate a new StyleManager and pass this default format. Test your movie to see all fourcircles take this color format, as shown in Figure 15-4.
Figure 15-4. The circle instances with StyleFormats applied (though grayscale doesn’t do it justice)
Imagine if these circles represented button instances. In a few simple lines of code, wecould recolor every single instance. But what if we wished one instance to be colored dif-ferently? With the manager we’ve set up, we only need to add a few extra lines, and it’s alltaken care of for us behind the scenes.
import com.oop.graphic.StyleFormat;
defaultFormat = new StyleFormat("defaultFormat");defaultFormat.face = 0xFF0000;defaultFormat.border = 0x0000FF;
reverseFormat = new StyleFormat("reverseFormat");reverseFormat.face = 0x000FF;reverseFormat.border = 0xFF0000;
new com.oop.managers.StyleManager(defaultFormat);StyleManager.addStyle("reversed", reverseFormat);c2.styleFormatName = "reversed";
MANAGER CLASSES
271
15
6196CH15.qxd 1/18/06 11:29 AM Page 271

If you test the movie again you’ll see that the c2 circle has now taken a format differentfrom its companions, as shown in Figure 15-5, though all four are instances of the samesymbol with the same code. What we’ve created is a centralized means of managing thestyles for all aspects of an interface, which is a powerful demonstration of the usefulnessof a global managing class.
Figure 15-5. Individual StyleFormats can easily be set.
SoundManager
With the appearance of widgets being controlled by a centralized manager class, our nextstep will be to create a similar manager for sounds in the interface. In much the same waythat the StyleManager holds references to style formats, the SoundManager will hold ref-erences to Sound object instances. Individual objects can then request a sound to play fora certain event. Using this concept, we’ll be able to limit the number of Sound objectinstances—if all buttons should produce the same click when pressed, why create multipleSound object instances when one will suffice? All that’s necessary is a way to manage thisfor an entire interface, which is where the SoundManager comes in.
Create a new ActionScript file and save it into the com/oop/managers directory asSoundManager.as. Enter the following code into the Script pane:
class com.oop.managers.SoundManager {
private var __sounds:Object = {};private var __listeners:Object = {};private var __soundLevel:MovieClip;
public function SoundManager(level:MovieClip, depth:Number) {if (_global.SoundManager) return;_global.SoundManager = this;init(level, depth);
}
// PRIVATE// ________________________________________________
private function init(level:MovieClip, depth:Number):Void {__soundLevel = level.createEmptyMovieClip("__soundLevel", depth);
}
}
OBJECT-ORIENTED ACTIONSCRIPT FOR FLASH 8
272
6196CH15.qxd 1/18/06 11:29 AM Page 272

In the initial lines for the class, we create three private properties to hold references to theSound object instances (__sounds) and the objects listening for sounds (__listeners) aswell as a movie clip in which we’ll create individual movie clips to hold the paths for theSound object instances (more on the reasoning for that when we create these instances).In the constructor, we first check to see whether a SoundManager already exists, and if soexit. Otherwise, we send the level and depth values passed in the constructor to theinit() method.
The init() method itself merely creates a new movie clip in the level and at the depthspecified. Why do we need this? All will be explained with the next block of code!
// PRIVATE// ________________________________________________
private function init(level:MovieClip, depth:Number):Void {__soundLevel = level.createEmptyMovieClip("__soundLevel", depth);
}
// PUBLIC// ________________________________________________
public function addSound(soundName:String, soundPath:String):Void {__sounds[soundName] = soundPath;
}
public function registerForSound(listener:Object,soundName:String,event:String,volume:Number
):Void {var depth:Number = __soundLevel.getNextHighestDepth();var clip:MovieClip =
➥__soundLevel.createEmptyMovieClip("s" + depth, depth);var sound:Sound = new Sound(clip);if (volume == undefined) var volume:Number = 100;var path:String = __sounds[soundName];if (path.substr(0, 5) == "file:") {sound.loadSound(path.substr(5));
} else {sound.attachSound(path);
}sound.setVolume(volume);if (__listeners[listener] == undefined) __listeners[listener] = {};__listeners[listener][event] = sound;
}
}
MANAGER CLASSES
273
15
6196CH15.qxd 1/18/06 11:29 AM Page 273

The addSound() method is what will be used to add sounds to the list to be managed. Thissimply stores the name of the path to the sound (we’ll make it so you can use a sound inthe library or in an external MP3 file) by the name used to reference the sound.
registerSound() is the workhorse of this class. For arguments it takes the name of theobject listening for the sound, the name of the sound to receive, the event for which toreceive the sound, and the volume at which the sound should be played. A new movie clipis then created in the __soundLevel movie clip at the next highest depth. The clip is usedas the target for the sound. This allows us to have volume control for every single soundthat is registered.
Next in the method, if no volume has been passed in, the volume for this sound is savedat 100. The following conditional block checks to see whether the path passed in beginswith “file:”, which will indicate the sound is located in an external file. If so, loadSound() iscalled. Otherwise, attachSound() attaches the sound from the movie’s library.
The last lines in the method check to see whether the listener has already been added tothe __listeners object to hear a sound for another event. If this is the first sound for thelistener, a new object is created for the listener in the __listeners array, then the Soundobject instance is saved into that new object to be referenced by the event name. This willallow a single object to register for sounds for different events, such as both rollOver andpress events.
One final bit of code left before we can test our new manager. Add the following lines tothe class between the registerForSOund method and closing class brace:
public function getSound(listener:Object, event:String):Sound {if (__listeners[listener] != undefined) {if (__listeners[listener][event] != undefined)return __listeners[listener][event];
}var classes:Array = listener.classes;var clss:String;for (var i:Number = classes.length-1; i > -1; i--) {clss = classes[i];if (__listeners[clss] != undefined) {if (__listeners[clss][event] != undefined)return __listeners[clss][event];
}}return;
}
This last method is what will be called by all of the object instances (such as components)when they wish to play a sound. The method will be sent a reference to the listener as wellas the event for the sound. Using these parameters, and in a similar way to how theStyleManager returned style formats to objects, the SoundManager first checks to seewhether there is a sound for that event specifically stored for the instance calling, and if soreturns the Sound object instance. If, however, no sound exists for that listener and thatevent, the listener’s classes are checked to see whether there are sounds registered for
OBJECT-ORIENTED ACTIONSCRIPT FOR FLASH 8
274
6196CH15.qxd 1/18/06 11:29 AM Page 274

those particular classes. In this way, we can assign a single sound to all button clicks, allwindow pop-ups, all check box toggles, etc. Let’s see how that works by returning to ourearlier test file.
Sounding off
Open styleTest.fla and resave it as soundTest.fla. Drop the sound file CLICK2.mp3 intothe same directory. Next, within the Flash file, import the sound file CLICK8.mp3 into thelibrary. Right-click it in the library and choose to export it for ActionScript as CLICK8.mp3as well, as shown in Figure 15-6.
Figure 15-6. Exporting the sound symbol from the Library
Now enter symbol editing mode for the circle symbol and add the following bold lines tothe code layer:
classes = ["Button"];StyleManager.style(this);
function updateStyles() {(new Color(fill)).setRGB(styleFormat.face);(new Color(stroke)).setRGB(styleFormat.border);
}
function onPress() {SoundManager.getSound(this, "press").start();
}
MANAGER CLASSES
275
15
6196CH15.qxd 1/18/06 11:29 AM Page 275

Nothing too extreme here. We’ve simply created a new array to hold the names of theclasses for this symbol (this will be built into the components we make and is used here tosimulate it). Next, we add an onPress() handler to give the symbol button events. All wedo in the handler is ask the global SoundManager for the relevant sound for this object’spress event.
Now let’s jump back to the main timeline to instantiate our new SoundManager. Add thebold lines to the code layer on the main timeline:
import com.oop.graphic.StyleFormat;
defaultFormat = new StyleFormat("defaultFormat");defaultFormat.face = 0xFF0000;defaultFormat.border = 0x0000FF;
reverseFormat = new StyleFormat("reverseFormat");reverseFormat.face = 0x000FF;reverseFormat.border = 0xFF0000;
new com.oop.managers.StyleManager(defaultFormat);StyleManager.addStyle("reversed", reverseFormat);c2.styleFormatName = "reversed";
new com.oop.managers.SoundManager(_level0, 16001);
SoundManager.addSound("kiss", "file:CLICK2.mp3");SoundManager.addSound("click", "CLICK8.mp3");
SoundManager.registerForSound("Button", "kiss", "press", 50);SoundManager.registerForSound(c2, "click", "press", 80);
After creating the SoundManager instance (and telling it to create its sound holder movieclip at depth 16001 on _level0) we add two sounds, "kiss" found in an external file and"click" found in the library. We then register the "kiss" sound to be played for all"Button" instances when they call with a "press" event. However, for the c2 movie clip,we register the "click" sound to be played on the "press" event. Test your movie out tosee, or rather hear, the result. Let’s hear it for the SoundManager!
It’s important to note that by explicitly setting the SoundManager’s depth to16001, any subsequent calls to getNextHighestDepth() for _level0 will resultin depths above this, despite the fact that no clips are currently at depths 0 to16000. If you use getNextHighestDepth()frequently, you would perhaps wantto put the SoundManager at a lower depth or consider not having movie clipsplaced directly on the _root timeline. For instance, you could create a singlemovie clip on the _root to act as a graphic container and add all subsequentclips to that, allowing use of getNextHighestDepth() without consideration ofwhere the SoundManager was placed.
OBJECT-ORIENTED ACTIONSCRIPT FOR FLASH 8
276
6196CH15.qxd 1/18/06 11:29 AM Page 276

SummaryI hope that this chapter has demonstrated how useful a centralized manager class can bewhen handling multiple movie clips. This will become even more apparent as we buildactual drag-and-drop components and use them in an interface. By having the functional-ity common to all widgets stored within and referenced in a single class, we have muchmore control of the overall look and feel of an interface. Altering that functionality orchanging an interface’s appearance then becomes a cinch, as updating the managerinstance propagates changes throughout the entire component set.
What’s next?This chapter explored manager classes for a Flash component framework. The next chap-ter examines how to build visual components to handle standard UI functionality, leverag-ing the work done here on the manager classes. Unlike the classes created in this chapter,these new components will exist in the Library and plug into the Components andProperties panels in the IDE, yet still take advantage of the framework we have begun inthis chapter. To paraphrase Al Jolson, you ain’t seen nothin’ yet!
MANAGER CLASSES
277
15
6196CH15.qxd 1/18/06 11:29 AM Page 277

6196CH16.qxd 1/18/06 11:30 AM Page 278

16 UI WIDGETS
6196CH16.qxd 1/18/06 11:30 AM Page 279

When it comes to a user interface, the most obvious components are the visual widgetsthat allow the user to interact with the application. These include, to name but a few in theirsimplest form, buttons, sliders, and input fields. Individually, each can be created rathereasily and quickly using the built-in tools in Flash, but how do you create a set of thesewidgets that can seamlessly work within and integrate into the architecture of an entireapplication? To do this requires some OOP forethought and the creation of classes thatstandardize how widgets may be interacted with, through inheritance and polymorphism.
In this chapter, I’ll show you what it takes to lay down the foundation for a framework con-taining UI widgets and how OOP can help create a structure that allows for common codeinterfaces with these widgets. Together, we’ll build upon the work begun in the previouschapters with our event broadcasters and Singleton manager classes to start a componentlibrary that could be used for a multitude of applications. In doing this, you’ll learn theprocess of creating custom components in Flash and hooking into the Component Inspector.
Diagramming the classesAs always, we’ll begin by mapping out the classes we’ll be building before we start in onthe code. This gives us an idea of what is necessary, brings to light initial problems we mustaddress, and gives us a clear goal for what we are trying to accomplish. A few extramoments at the start will save a world of frustration later down the line!
UIObject
Let’s consider some of the properties and methods that will be important for all visual UIelements. We can place this common functionality into a super class from which all of ourwidgets will inherit, UIObject.
It should be noted once more that there already exists a number of components andcomponent frameworks, including the component framework that comes bundledwith Flash. We are building from the ground up instead of using a prebuilt set for anumber of reasons. First, it’ll allow you to more easily go in and add or modify thecode to do exactly what you need without having to wade through others’ code tosee what is possible. Second, you can ensure the functionality is exactly what youneed in your own projects and optimize the code for that purpose. For instance, somefind the components bundled with Flash difficult to reskin, and if this is somethingyou feel you’ll need to do often, it makes good sense to develop a framework thatallows you to do so more easily. Third, if bugs arise, it’s far easier to go in and fix yourown code than that of others, where changing functionality might have more of aripple effect than you may suspect. Finally, this is a book about learning and usingOOP in your own Flash projects. There is no better way to learn than to get in andcode the object-oriented interaction from scratch.
OBJECT-ORIENTED ACTIONSCRIPT FOR FLASH 8
280
6196CH16.qxd 1/18/06 11:30 AM Page 280

The purpose is, at this phase, not to envision every possible method and property thatwould ever be needed and lock it down, but to come up with a plan on how to approachcoding a base class for all UI widgets. Our goal here is to break down the problem into itssmallest blocks and solve those blocks. We want to code a class that can be used for visualUI widgets, so what issues will be common to all visual user interaction elements?
Obviously, position and scale come near the top of the list. For position, the _x and _yproperties of MovieClip (from which all visual elements, and thus our super class, willinherit) will work, but we can add the useful properties top, left, right, and bottom,which will make easier the placement of other elements in relation to a widget. In addi-tion, we can take advantage of the new Point object for setting a widget’s position in asingle property, perhaps named position. This would allow for one element to be placedat the coordinates of another by using elementA.position = elementB.position. As forscale, unfortunately the built-in _xscale, _yscale, _width, and _height properties can beproblematic for resizing since they can cause distortion and don’t allow for reflow of inter-nal graphics in a widget. We’ll overcome this by giving each widget a setSize() method tobe used for resizing and then providing width and height properties for retrieving sizeinformation. It would also be a good idea to include initialWidth and initialHeightproperties to allow a component to be sized correctly upon initialization when beingattached without requiring an additional setSize() call (more on this when we actuallyimplement it).
That takes care of positioning and scale. What other useful methods and properties mightapply to all UI widgets? Since what we are laying the foundation for here are more com-plex components and applications, it follows that a widget will often have to attach sub-components to its timeline (e.g., a text input field may attach a scrollbar, which in itself ismade up of multiple buttons). It will quickly become important to have a good way toattach, remove, and manage these internal components. For this purpose, a childrenarray property would come in handy, which would hold references to all movie clips thatwere created or attached. This array could be populated by using two special methods:createObject(), which takes care of attaching a movie clip and pushing it into the chil-dren array, and createClassObject(), which would create an instance of a specific classand push it into the children array. We could also add a createEmptyObject(), whichwould act as createEmptyMovieClip() does, but would instead create an empty UIObjectinstance and push it into the children array. The counter to these would be removeChild(),and a remove() method could go through and remove all internal children, as well asremove the component itself, which would make for good housekeeping. Finally,getChild() would be handy in order to retrieve any child of a component without havingto access the component’s timeline.
We’ll eventually need a way for our widgets to broadcast events, since the whole point isresponding to user interaction. The Broadcaster created in the Chapter 13 case study andused in the last chapter as well will do nicely. UIObject can create a Broadcaster instanceand use that to dispatch all events, implementing the IEventDispatcher interface withaddEventListener(), removeEventListener(), and dispatchEvent() all going throughthe internal Broadcaster instance. An alternative would be to have Broadcaster serve asthe super class of UIObject, but that would require Broadcaster to inherit from MovieClip,which isn’t ideal since there will be many event broadcasting classes that don’t need theMovieClip properties and methods (as you saw with the StyleManager and SoundManagerlast chapter).
UI WIDGETS
281
16
6196CH16.qxd 1/18/06 11:30 AM Page 281

The final methods that will be useful at the base level of our component architecture aregetEnabled() and setEnabled(). The built-in enabled property in itself will enable anddisable a component, but using these new methods will allow us to program visual feed-back when a widget is disabled.
Of course, additional properties and methods will come to light as we program (incorpo-rating styles immediately comes to mind as something that will need addressing), and thisclass may continue to grow as it’s used and built upon. The functionality we’ve addressedhere is a good starting place, though, so let’s start with our diagram, shown in Figure 16-1.
Figure 16-1. The class diagram for UIObject
OBJECT-ORIENTED ACTIONSCRIPT FOR FLASH 8
282
6196CH16.qxd 1/18/06 11:30 AM Page 282

Block
Once our base class, UIObject, is created, we can easily extend it to other classes. The firstand most useful class will be the simplest graphic form used by all other widgets. We cancall this Block, and it’ll serve as the graphic aspect of all other components. For instance, abutton would attach a single Block instance to serve as its graphic. A slider might attacha Block instance for its slider well and another for its slider button. As long as we programa way for a Block instance to take different skins, it could be used anywhere a graphic isrequired. Putting all the graphic-attaching code into a single class will make managing stylesand skins so much easier when we come to it, since it’ll all be handled within a single class.
So what methods might Block have in addition to those of UIObject? attachGraphics() isa fine candidate, since that is Block’s main purpose. This method will attach another movieclip to serve as the Block’s skin, making reskinning possible and easy to implement. Hand-in-hand with this will be the property __blockGraphic, which will be the linkage identifierfor the movie clip to be attached as a skin. Finally, it would help if Block could handle mul-tiple states, like _Up, _Down, and _Over. Otherwise, widgets like buttons would requiremultiple Block instances for different states. It would be better to have one Block instancethat could change its appearance based on its state. Figure 16-2 shows what our diagramof this would look like.
Figure 16-2. The class diagram for Block
Not too bad, is it? With UIObject taking on so much useful functionality, child classesbecome much more easy to write.
UI WIDGETS
283
16
6196CH16.qxd 1/18/06 11:30 AM Page 283

SimpleButton
The final class we’ll be looking at for our component foundation is for the simplest userinteraction widget, the button. That said, a button can actually be fairly complex, with tog-gling capability and label and icon placement, so we’ll create a simpler button namedSimpleButton that will handle changing visual states based on user interaction and broad-casting events when this interactivity occurs. A Button class can handle the bells and whis-tles such as toggling, labels, and icons.
For SimpleButton, the actual button events offButton(), overButton(), pressButton(),and releaseButton() will be the most important methods. Add to thatattachGraphics(), which will attach a Block instance for the button’s graphic, and theproperty __blockGraphic, which will hold the name of the identifier used for the button’sskin. We also have two Boolean properties to keep track of certain button states,__overButton and __pressedButton. Since SimpleButton will have states and a singlegraphic, we could have it inherit from Block, but it was a personal choice to have Block actas the single class that attaches skins, and having SimpleButton inherit from that wouldcause some muddiness in this clear intention.
The diagram is shown in Figure 16-3.
Figure 16-3. The class diagram for SimpleButton
OBJECT-ORIENTED ACTIONSCRIPT FOR FLASH 8
284
6196CH16.qxd 1/18/06 11:30 AM Page 284

Making the foundationWith all the initial classes diagrammed, we can now get into theActionScript needed to code our component foundation. The firstthing we need to do to our class library created in the previouschapters is add the appropriate directories to our file system.Navigate to your classes directory, first created in Chapter 13, andadd a new folder named com/oop/ui. Inside ui, add the folderbuttons. The UIObject and Block classes will be in the com.oop.uipackage and SimpleButton will be in com.oop.ui.buttons. Theclasses directory structure should look like Figure 16-4.
Figure 16-4. The classes directory for the component framework
Open Flash, create a new ActionScript file named UIObject.as, and save it into thecom/oop/ui directory. Add the following code, which creates the blueprint of our base class:
import com.oop.core.IEventDispatcher;
class com.oop.ui.UIObject extends MovieClip➥ implements IEventDispatcher {
function UIObject() {init();
}
// PRIVATE// ________________________________________________
private function init():Void {}
// PUBLIC// ________________________________________________
public function dispatchEvent(evnt:String, params:Object):Void {}
public function addEventListener(evnt:String,lstnr:Object,mappedTo:String
):Boolean {}
public function removeEventListener(evnt:String,lstnr:Object
):Boolean {}
UI WIDGETS
285
16
6196CH16.qxd 1/18/06 11:30 AM Page 285

As you can see from the class definition, the UIObject will inherit from the MovieClip class,which means it’ll have all of the properties and methods belonging to MovieClip. It alsomeans that it’ll need to be connected with a symbol in the Library in order to be instanti-ated. We’ll look at this more closely when we get to Block.
Also note that UIObject implements the IEventDispatcher interface, and you’ll see at thebottom of the preceding code block that the three methods required by the interface areincluded (though they don’t yet do anything). The only other piece is the constructor,which calls a private init() method.
Now, before we get into the initialization, let’s declare the member properties for theUIObject. Once again, we’ll use the double underscore for private properties.
import com.oop.core.IEventDispatcher;import com.oop.core.Broadcaster;
class com.oop.ui.UIObject extends MovieClip➥ implements IEventDispatcher {
private var __enabled:Boolean;private var __width:Number;private var __height:Number;private var __initialWidth:Number;private var __initialHeight:Number;private var __children:Array;private var __dispatcher:Broadcaster;
function UIObject() {init();
}
At the top before the constructor we declare and type all of the properties we dia-grammed earlier. With the properties declared, we can now begin the initializationmethods for the class. Add the following lines to the init() method:
private function init():Void {__children = [];__dispatcher = new Broadcaster();__enabled = true;tabEnabled = false;focusEnabled = false;tabChildren = true;_focusrect = false;useHandCursor = false;__width = __initialWidth || _width;__height = __initialHeight || _height;_xscale = _yscale = 100;
}
OBJECT-ORIENTED ACTIONSCRIPT FOR FLASH 8
286
6196CH16.qxd 1/18/06 11:30 AM Page 286

Here we initialize the __children array, create a new Broadcaster instance to handle theevent dispatching, and set the __enabled property to true. The remaining lines set defaultvalues for a number of built-in properties for movie clips. The settings for tab and focusproperties prevent automatic focusing and tabbing to UIObject instances. Ideally, wewould want control over how our applications are navigated, and so we are preventing thedefault yellow bounding box being drawn about a widget. As this framework is developedfurther, a FocusManager would be a necessary addition to handle this now-disabled func-tionality.
The last three lines of the function set the __width and __height properties based oneither the __initialWidth and __initialHeight passed in, or, if these values are unde-fined, the _width and _height of the movie clip itself. In these two lines, the || (OR) oper-ator is used as a shortcut to set the property on the left with the first variable on the rightthat has a defined value. The way that this works, in the instance of the first line, is that__initialWidth || _width will evaluate to __initialWidth if that is defined, OR _widthif it isn’t. This value will then be assigned to __width. After these values are set, we set the_xscale and _yscale of our component to 100% to prevent any distortion. This is neces-sary for clips that are placed and resized on the stage in the IDE. After recording the__width and __height that the clip has been sized to, we can set its scaling back to 100%.
The next step is to fill in the event dispatching methods. Mostly these will simply pass onthe arguments to the __dispatcher we created in the init() method.
public function dispatchEvent(evnt:String, params:Object):Void {var info:Object = params || {};info.target = this;__dispatcher.dispatchEvent(evnt, info);
}
public function addEventListener(evnt:String,lstnr:Object,mappedTo:String
):Boolean {return __dispatcher.addEventListener(evnt, lstnr, mappedTo);
}
public function removeEventListener(evnt:String,lstnr:Object
):Boolean {return __dispatcher.removeEventListener(evnt, lstnr);
}
As you can see, the addEventListener() and removeEventListener() methods merelyneed to pass on their arguments to the dispatcher. The dispatchEvent() does the same,but after first adding a target property to the params object. Objects subscribing to hearevents should be informed which object is firing the event, and in this case we’ll put
UI WIDGETS
287
16
6196CH16.qxd 1/18/06 11:30 AM Page 287

UIObject instances into a target property of the params object. The first line indispatchEvent is a shortcut that assigns the params argument to info if it doesn’t equalnull/undefined, in which case it assigns a new Object instance.
Moving on through our class, the next methods that were listed in our diagram are fairlystraightforward in implementation.
public function setEnabled(bool:Boolean):Void {__enabled = enabled = bool;
}
public function getEnabled():Boolean {return __enabled;
}
public function setSize(w:Number, h:Number):Void {__width = w;__height = h;_xscale = _yscale = 100;dispatchEvent("resize");
}
public function get width():Number {return __width;
}
public function get height():Number {return __height;
}
getEnabled() and setEnabled() merely need to get and set the __enabled (and built-inenabled) property. Classes that inherit from UIObject will perhaps redraw when disabledor enabled, but the UIObject itself doesn’t need to do anything since it doesn’t contain anyvisual elements.
The setSize() method sets the private __width and __height properties, as well asensures the scaling of the component remains 100% (preventing distortion if you resize thecomponent in the IDE). Again, it’ll be up to the classes that inherit from UIObject toredraw themselves when setSize() is called. You’ll see this implemented in both Blockand SimpleButton. Notice that we also dispatch an event here since it’s an event that otherobjects might need to be aware of for repositioning, for example.
The final two methods are getter methods that return the current __width and __heightvalues. There are no corresponding setter methods, as the setSize() takes care of bothproperties in a single call. Otherwise, if you required each property be set individually,there is the possibility that a component would have to redraw itself twice and wasteprocesses.
Speaking of wasted processes, we include a few additional properties to prevent just that,__initialWidth and __initialHeight. Without these properties, when a component is
OBJECT-ORIENTED ACTIONSCRIPT FOR FLASH 8
288
6196CH16.qxd 1/18/06 11:30 AM Page 288

attached to the stage through code, it first sizes itself based on its default size in theLibrary, then must be resized through the setSize() method. This is fine with smallercomponents, but when a lot of calculations exist in setSize(), which perhaps calls othermethods, this can mean a lot of unnecessary work for Flash. These properties will allowcomponents to be attached with the desired size passed in the initObj parameter ofattachMovie(). No second resizing will then be required, and we’ll have saved Flash somecycles. Here are those methods, which are straight setters:
public function set initialWidth(n:Number):Void {__initialWidth = n;
}
public function set initialHeight(n:Number):Void {__initialHeight = n;
}
The next methods all correspond to the positioning of the component.
public function get position():Point {return new Point(_x, _y);
}
public function set position(pos:Point):Void {_x = pos.x;_y = pos.y;
}
public function get top():Number {return _y;
}
public function get bottom():Number {return _y + __height;
}
public function get right():Number {return _x + __width;
}
public function get left():Number {return _x;
}
Have a look through these positioning methods. Nothing too surprising here. The first twouse the new Point object, which holds an x and y property, conveniently. For this to work,you’ll either need to list the full package or import the class at the top of the code:
import flash.geom.Point;
UI WIDGETS
289
16
6196CH16.qxd 1/18/06 11:30 AM Page 289

I haven’t included corresponding setter methods for left, top, right, and bottom, as I feelhaving a single coordinate position to set is simpler in the long run. Feel free to add theseif you feel they would be useful.
The final methods that we mapped out in the diagram are those to handle the adding,removing, and managing of child clips for a component. The first set we’ll look at are thosefor adding child objects.
public function createObject(linkageID:String,name:String,depth:Number,initObj:Object
):MovieClip {if (depth == null) var depth:Number = getNextHighestDepth();var p:MovieClip = attachMovie(linkageID, name, depth, initObj);__children.push(p);return p;
}
public function createClassObject(theClass:Function,name:String,depth:Number,initObj:Object
):UIObject {var linkageID:String = "empty class";Object.registerClass(linkageID, theClass);var p:UIObject = UIObject(createObject(linkageID, name, depth, initObj)
);return p;
}
public function createEmptyObject(name:String,depth:Number
):UIObject {return createClassObject(UIObject, name, depth);
}
createObject() is the heart of these three methods. This simply uses MovieClip’s built-inattachMovie() method, first grabbing the next depth if no depth is defined. It thenpushes the new movie clip instance into the __children array.
createClassObject() offers a little more complexity, as it allows you to instantiate a spe-cific class that inherits from UIObject. This is a powerful method because it provides themeans to create many UI widgets without requiring the individual symbols in the Library.Instead, all it requires is a single symbol in the Library exported with the unique identifier
OBJECT-ORIENTED ACTIONSCRIPT FOR FLASH 8
290
6196CH16.qxd 1/18/06 11:30 AM Page 290

empty class. How is this done? By using Object.registerClass(), we can associate anyclass with a certain symbol in the Library. empty class has been hard coded as that symbol.When this method is called, it associates the specified class with the “empty class” symbolin the Library, then calls createObject(), which attaches the symbol. We cast the returnedmovie clip instance as a UIObject and return it out of the function.
The last method listed is createEmptyObject(), which acts as a replacement forcreateEmptyMovieClip(). This attaches an empty clip as well, but one that is a UIObjectand not just a MovieClip, giving us the additional UIObject properties and methods.
With all the attaching methods added, we can look to the counterparts that remove clips.
public function remove():Void {var children:Number = __children.length;var child:MovieClip;for (var i:Number = children-1; i > -1; i--) {child = __children[i];if (!UIObject(child)) {child.removeMovieClip();child.unloadMovie();
} else {child.remove();
}}_parent.removeChild(this);this.removeMovieClip();this.unloadMovie();
}
public function removeChild(child:MovieClip):Boolean {var children:Number = __children.length;for (var i:Number = 0; i < children; i++) {if (child == __children[i]) {__children.splice(i, 1);return true;
}}return false;
}
remove() can be called in the place of removeMovieClip() and relied upon to do bettercleanup after a movie clip has left the building, so to speak. As you can see, it runs throughthe __children array and, in the case of MovieClip instances, simply removes them andunloads them from memory, and in the case of UIObjects calls the child’s own remove()method (which will in turn call its children’s remove() methods, etc., working its way downthrough nested clips). The method then calls the removeChild() method on the parenttimeline and removes and unloads the clip. removeChild() goes through the __childrenarray and removes the reference from the array. For actually removing the clip, theremove() method should instead be called.
UI WIDGETS
291
16
6196CH16.qxd 1/18/06 11:30 AM Page 291

The only method we listed in the diagram earlier that we haven’t yet added is getChild(),which would return a reference to the child object. This is easily accomplished with thefollowing code:
public function getChild(name:String):MovieClip {return this[name];
}
Why provide this method at all instead of simply requiring direct access of a movie clipthrough the component’s timeline? Well, right now there is nothing stopping the directaccess (e.g., componentInstance.childObject), but encapsulating this functionality withinthis method would allow us at a later point, if it became necessary, to use different namesinternally for the attached movie clips without having to change any code that was access-ing those clips externally. Perhaps an ID will have to be appended to all clips, or we mightwant to allow for case insensitivity. Thinking ahead to these situations will save us many aheadache later on, and so in general we would want to avoid in our classes having anyproperties (including attached movie clips) directly accessed by external objects.
Since the UIObject code was pieced together as we went along, be sure to take a look at thefinished class available in this chapter’s download files and check it against your own code.
Basic building blockThe previous section had plenty of code, but we as of yet haven’t been able to see anyresult. This is because we don’t have any visual component for the UIObject, which onlyserves as a super class for all the visual widgets, but doesn’t have any visual elements itself(which makes sense, seeing as how all visual elements will require different graphicaspects). In this section we’ll look at Block, which will serve as the graphic building blockfor all widgets. With one class handling skins, making components skinnable will be easierlater on (in this chapter!). The best part about this point onwards is that the majority ofour code is common and so housed in the UIObject class. Block, by comparison, will bearound a quarter of the number of lines. That’s the beauty of inheritance!
We’ll start out with the class declaration and the constructor. We’ll include declaring theproperties we know about and setting up the init() method, which we know is called inthe super class’s constructor.
import com.oop.ui.UIObject;
class com.oop.ui.Block extends UIObject {
private var __graphic_mc:MovieClip;private var __blockGraphic:String;private var __state:String;
function Block() {}
OBJECT-ORIENTED ACTIONSCRIPT FOR FLASH 8
292
6196CH16.qxd 1/18/06 11:30 AM Page 292

// PRIVATE// ________________________________________________
private function init():Void {super.init();attachGraphics();
}
private function attachGraphics():Void {}
// PUBLIC// ________________________________________________
}
There’s nothing too surprising yet. We start with the class declaration which, as you can see,has Block inheriting from UIObject. Several properties are then declared. __graphic_mc willbe the movie clip symbol attached as a skin. We’ll need some way to give Block the linkageidentifier for that symbol, and for this we have __blockGraphic. Finally, to allow a Blockinstance to have multiple states, __state will keep track of the current state.
We’ve already called attachGraphics(), which will attach the symbol to the timeline ofthe component, so we’ll fill that in next.
private function attachGraphics():Void {var initObj:Object ={width:__width,height:__height,state:__state,component:this};
createObject(__blockGraphic, "__graphic_mc", 0, initObj);}
Here we use the createObject() method we defined in UIObject to attach a movie clipsymbol from the Library to the component’s timeline. The linkage identifier is found in the__blockGraphic property. Note that we pass to the attached clip the width, height, state,and a reference to the component itself. This can be used by the attached symbol to sizeand draw itself, which we’ll look at when we go about skinning the component.
Would you believe that’s already half of the necessary code for our Block class? In fact,let’s just look at the rest of it all in one batch.
public function setSize(w:Number, h:Number):Void {super.setSize(w, h);__graphic_mc.setSize(__width, __height);
}
UI WIDGETS
293
16
6196CH16.qxd 1/18/06 11:30 AM Page 293

public function get graphic():String {return __blockGraphic;
}
public function set graphic(str:String):Void {__blockGraphic = str;attachGraphics();
}
public function get state():String {return __state;
}
public function set state(s:String):Void {__state = s;__graphic_mc.changeState(__state);
}
The setSize() method first calls the super class’s setSize(), which sets the __width and__height properties, then calls the setSize() method on the attached graphic (so it’simportant to note that an attached skin needs a setSize() method).
The remaining methods are all getter/setters for the __graphic and __state properties.Setting _graphic calls attachGraphics() once again to replace the current __graphic_mcwith a new one. Setting __state calls changeState() on the attached clip (so we see weneed this method to be included in an attached skin as well).
That’s the class, folks! It’s nice seeing that once you have laid the foundation properly andthen take advantage of inheritance, creating new classes really can be quick and painless.Here we’ve created a new graphic class that can be used within any visual component, andwe kept it around 50 lines of code (with some comments and lots of spaces!). So let’s testit out.
Building a componentCreate a new Flash document named Block_test.fla. Create a new movie clip symbolnamed Block and export it for ActionScript as Block as well. The important bit is associat-ing a class with this symbol, and you do that in the AS 2.0 class text field. Enter the valuecom.oop.ui.Block, since we want any instance of this symbol to be an instance of Block.Your dialog box should look like Figure 16-5.
Once you click OK to create the symbol, you’ll be placed in symbol editing mode for theBlock symbol. In Frame 1 of its default layer, draw a 25✕25 pixel gray rectangle with nostroke, placing its top-left corner on the symbol’s registration point. This will be thebounding box for our symbol, which we can use to size the component when we place iton the stage (if it had no internal graphics, we could not give it a width and height in theIDE). In fact, make the rectangle into a movie clip symbol named bounding box and namethe instance on stage boundingBox_mc. The resulting timeline should look like Figure 16-6.
OBJECT-ORIENTED ACTIONSCRIPT FOR FLASH 8
294
6196CH16.qxd 1/18/06 11:30 AM Page 294

Figure 16-5. Associating a class with a symbol
Figure 16-6. The Block symbol’s timeline with its bounding box
UI WIDGETS
295
16
6196CH16.qxd 1/18/06 11:30 AM Page 295

Return to the main timeline and drag three instances of Block from the Library onto thestage. Size each of them to a different dimension. If you test your movie now, you shouldsee three gray rectangles, each sized at 100%, as shown in Figure 16-7. We have to do a fewthings more to our Block and UIObject first before they display their usefulness.
Figure 16-7. Three Block instances at runtime
First, we need to allow for a way to specify a skin to be loaded for a Block instance. We cando this by placing special metatags in our class file that plug into the Component Inspectorin Flash. Head back to the Block.as file and enter the following bold lines:
[Inspectable(type="String", defaultValue="")]public function set graphic(str:String):Void {__blockGraphic = str;attachGraphics();
}
public function get state():String {return __state;
}
[Inspectable(type="String", defaultValue="")]public function set state(s:String):Void {__state = s;__graphic_mc.changeState(__state);
}
OBJECT-ORIENTED ACTIONSCRIPT FOR FLASH 8
296
6196CH16.qxd 1/18/06 11:30 AM Page 296

By placing these tags before our setter functions, we tell Flash to display these propertiesin the IDE (placing them before the getters works just as well, but logically it makes moresense to me to group these with setter functions, since that is their purpose as well).Within the brackets and Inspectable keyword, we define the parameters type as a Stringand set its default value to be an empty string. In addition to String, you could specify thetype as Number, Boolean, Object, or Array.
Now go back to Block_test.fla and right-click the Block symbol in the Library. SelectComponent Definition and in the AS 2.0 Class field enter com.oop.ui.Block. Also be sureto select the Display in Components panel option at the bottom of the dialog box (entera tooltip if you desire, but it’s not necessary). The dialog box should look like Figure 16-8.
Figure 16-8. Associating a class in the Component Definition dialog box
UI WIDGETS
297
16
6196CH16.qxd 1/18/06 11:30 AM Page 297

Click OK to exit the dialog box, and you’ll notice that the symbol in the Library now has anew icon to denote that it is a component. What does that mean? Select one of the Blockinstances you already placed on stage and open the Component Inspector (ALT+F7) andyou’ll see that graphic and state are now configurable options, as shown in Figure 16-9.
Figure 16-9. The Block symbol with a component icon and an instance selected with itsconfigurable properties shown in the Component Inspector
OBJECT-ORIENTED ACTIONSCRIPT FOR FLASH 8
298
6196CH16.qxd 1/18/06 11:30 AM Page 298

For all of the Block instances, set the graphic property to circleSkin. Now create a newmovie clip symbol named and exported for ActionScript as circleSkin. Draw a 50✕50 redcircle with the top left of its bounding box at the symbol’s registration point. Convert thiscircle into a movie clip symbol named circle with its registration at the top-left corner.Name the instance inside circleSkin circle_mc, as shown in Figure 16-10.
Figure 16-10. The circleSkin symbol’s timeline with a circle instance named circle_mc
UI WIDGETS
299
16
6196CH16.qxd 1/18/06 11:30 AM Page 299

Test your movie and you’ll see that the circle has been attached for all clips, but there aretwo issues, as is obvious from Figure 16-11. First, the bounding box for Block is still visibledespite the new skin, and second, the circles don’t resize to match the dimensions of theBlock instances. Let’s look at these problems in order of complexity.
Figure 16-11. The circleSkin is attached to the Block instances, with undesirable results
We need the bounding box in Block in order to size the component correctly in the IDE,but once the component is initialized and the _width and _height are stored, we nolonger need the box. Return to UIObject.as and add a new property with the other prop-erty declarations.
class com.oop.ui.UIObject extends MovieClip implements IEventDispatcher{
private var boundingBox_mc:MovieClip;private var __enabled:Boolean;private var __width:Number;
At the end of the init() function, once the dimensions of the clip have been stored, wecan remove the bounding box.
private function init():Void {__children = [];__dispatcher = new Broadcaster();__enabled = true;tabEnabled = false;focusEnabled = false;tabChildren = true;_focusrect = false;
OBJECT-ORIENTED ACTIONSCRIPT FOR FLASH 8
300
6196CH16.qxd 1/18/06 11:30 AM Page 300

useHandCursor = false;__width = __initialWidth || _width;__height = __initialHeight || _height;_xscale = _yscale = 100;boundingBox_mc.unloadMovie();
}
Test your movie again and you’ll see the bounding boxes have been removed.
As for the sizing of the skin, we saw that in Block.as, we call a setSize() and achangeState() method in the attached skin. We can use the former to resize any internalgraphics. This can be as complex or as simple as a skin requires. For our purposes here, wecan simply set the height and width of the skin to match the Block instance’s own __widthand __height.
Enter symbol editing mode for circleSkin and create a new layer named code. On thislayer, still in the first and only frame, enter the following script:
setSize(width, height);
function setSize(w:Number, h:Number):Void {circle_mc._width = w;circle_mc._height = h;
}
The setSize() function receives a width and height, and we use those to size thecircle_mc movie clip. When the skin is attached, though, the setSize() isn’t called (thisonly occurs when the Block’s setSize() method is called at runtime), so we call it here soit’ll run upon initialization. If you test your movie now, you might be surprised by theresult, shown in Figure 16-12.
Figure 16-12. The circleSkin is attached, but is sized incorrectly.
UI WIDGETS
301
16
6196CH16.qxd 1/18/06 11:30 AM Page 301

Although resizing is definitely occurring, the sizes of the circles are way off. The reason forthis lies in the following code:
[Inspectable(type="String", defaultValue="")]public function set graphic(str:String):Void {__blockGraphic = str;attachGraphics();
}
attachGraphics() is called whenever the graphic property is set. Because we’ve set thegraphic property to be Inspectable, this method is invoked before the initialization of theobject (that’s just the way it works—it sets the property so that it’s available with its newvalue upon the initialization of the object). We need a way for attachGraphics() to becalled only if the component has completed its initialization (and thus called throughcode, not from the Component Inspector). We can accomplish this by making a new vari-able flag, __initialized, that is set to true at the end of the UIObject’s init() method.
Return to UIObject.as and add the __initialized property to the declarations.
private var __children:Array;private var __dispatcher:Broadcaster;private var __initialized:Boolean;
function UIObject () {init();
}
Now at the end of the init() method, set the flag to true.
_xscale = _yscale = 100;boundingBox_mc.unloadMovie();__initialized = true;
}
Finally, back in Block.as, add the following check to the graphic setter:
[Inspectable(type="String", defaultValue="")]public function set graphic(str:String):Void {__blockGraphic = str;if (__initialized) attachGraphics();
}
Test your movie again to see the skins sized correctly, as in Figure 16-13.
OBJECT-ORIENTED ACTIONSCRIPT FOR FLASH 8
302
6196CH16.qxd 1/18/06 11:30 AM Page 302

Figure 16-13. The circleSkins attached and sized to match the Block instances
Skinning a widgetRight now, we have all three Block instances set to use the circleSkin graphic, and to dothat we had to set the graphic property on all three instances. If we had 50 blocks on thestage, having to set each one would become a frustration we could easily do without.Since all Block instances come from the same class, there should be a way to let them allknow to use a certain graphic. Then, only when needed, we could set an individualinstance separately, which would override the default graphic for that instance.
The simplest solution for this is to have a static property on the Block class that will holdthe name of the default graphic. We’ll set this after the other property declarations inBlock.as.
static private var sClass:String = "Block";private var __graphic_mc:MovieClip;private var __blockGraphic:String;private var __state:String;
static public var globalGraphic:String = "Block graphic";
function Block() {}
We’ve assigned this static property the value Block graphic, which means we’ll want tohave this clip available in the Library for when it’s needed. First, though, we’ll look at howa Block instance will determine whether to use this default graphic or not. Return toBlock.as and change the attachGraphics() method to the following:
private function attachGraphics():Void {var initObj:Object ={width:__width,height:__height,state:__state,
UI WIDGETS
303
16
6196CH16.qxd 1/18/06 11:30 AM Page 303

component:this};
var g:String = getGraphic("__blockGraphic");createObject(g, "__graphic_mc", 0, initObj);
}
Instead of automatically using the value in __blockGraphic, we now call another methodthat will determine the name of the symbol to attach. This new method, getGraphic(), towhich we pass the name of the graphic property to check, will reside in UIObject. We’ll putthis method there since it’s one that all visual components will utilize to determine theirgraphics. This is the reason we pass the name of the graphic property as well. AlthoughBlock only has one graphic, other components might have many.
Go to UIObject.as and add this new getGraphic() method below the init() method.We also create a stub method, resolveGraphic(), which will need to be defined in eachchild class.
private function resolveGraphic(graphic:String):Void {}
private function getGraphic(graphic:String):String {var g:String = this[graphic];return (g != undefined && g != "") ? g : resolveGraphic(graphic);
}
getGraphic() first checks the property on the instance itself (so it’ll look at this__blockGraphic for each Block instance). If this value exists, then it’ll return this value asthe identifier to use to attach a skin. This value can be unique to the component instance.If this value doesn’t exist, however, then resolveGraphic() is called and passed the nameof the property to check for. Since different components will have many different graphicproperties, we’ll leave this method to be overridden by each child class, as we’ll do nowwith Block.
Returning to Block.as, add the following method below attachGraphics():
private function resolveGraphic(s:String):String {return Block.globalGraphic;
}
Since Block only has one static graphic property, we know that this function will only becalled for that, so we can return it directly.
Now, how do these functions translate? Basically, when a Block instance is initialized, it’llcall its attachGraphics() method. In this method, it calls getGraphic() to determine thename of the symbol this particular instance should attach as its skin. If the instance has avalue stored in __blockGraphic, it’ll use this. If not, then getGraphic() callsresolveGraphic(), which for Block simply returns the value of the static globalGraphicproperty, Block graphic.
Obviously, this means we need to create a movie clip symbol exported as Block graphic.Return to Block_test.fla and create a new movie clip symbol named and exported forActionScript as Block graphic. On the default layer, first frame, place the following code:
OBJECT-ORIENTED ACTIONSCRIPT FOR FLASH 8
304
6196CH16.qxd 1/18/06 11:30 AM Page 304

setSize(width, height);
function setSize(w:Number, h:Number):Void {width = w;height = h;drawRect();
}
function drawRect():Void {var color:Number = 0xFF0000;clear();beginFill(color, 100);lineTo(width, 0);lineTo(width, height);lineTo(0, height);lineTo(0, 0);endFill();
}
This code begins like our circleSkin did, but instead of resizing a predrawn graphic, thisskin draws it dynamically using the Drawing API. When setSize() is called, the width andheight are set and drawRect is called to draw a rectangle of the desired dimensions. If youtest your movie now, you’ll see no difference, since each instance has its graphic propertyset to use circleSkin. However, if you delete the value in the graphic property for eachBlock instance using the Component Inspector and test the movie again, you’ll see that allinstances use the Block graphic skin and draw a red rectangle, as demonstrated inFigure 16-14.
Figure 16-14. The default Block graphic drawn for all Block instances
UI WIDGETS
305
16
6196CH16.qxd 1/18/06 11:30 AM Page 305

So we know the default works, but how would you override this on a global level? (Youalready have seen that you can override this on individual instances by setting the graphicproperty.) We only need to set the value of Block’s globalGraphic property to a newvalue. Create a new layer on the main timeline named code and add the following line:
com.oop.ui.Block.globalGraphic = "circleSkin";
However, if you test your movie now, you’ll see no difference. The Block graphic rectangleis still attached. The reason for this is that the components’ code is run before the code onthe main timeline, so the globalGraphic property isn’t set until after the Block instanceshave finished their initialization. To fix this, we could call some sort of update functionafter setting the new skin, but this would mean that the instances would initialize and runthrough all their code, attaching their default skin, then have to run through all of thegraphic code a second time to attach a new skin. It’s best to keep the processes limited, soa better solution is simply to move the component instances to the second frame andplace a stop(); action there, as shown in Figure 16-15. That way, the skin value is set inthe first frame, then the playhead reaches the second frame, where it stops as the compo-nent instances initialize with the new globalGraphic property. Try this to see the Blockinstances using the circleSkin graphic.
Figure 16-15. A two-frame movie set up with initialization code in the first frame and components in the second
OBJECT-ORIENTED ACTIONSCRIPT FOR FLASH 8
306
6196CH16.qxd 1/18/06 11:30 AM Page 306

Another possible solution is to have all the components internally wait until the nextframe to draw themselves. Using this method would allow you to keep the main timelineone frame long and simply shift the two-frame concept to the ActionScript, where com-ponents would initialize but would not render themselves until the following frame, atwhich point all of the styles and skins would be set. One issue with this, however, is thatthere would be a delay between instantiation and rendering that could have unwantedeffects when components are instantiated through ActionScript as opposed to using theIDE. It also creates a number of intervals within the components themselves, eitherenterFrame handlers or setInterval calls, which is easier and less buggy not to have tomanage.
Changing stateYou might have noticed that we’ve had a state property for a while but have yet to use it.This property can be used by skins to alter their appearance based on the value. We’ll usethe Block graphic default skin to demonstrate this.
First, it’s important that you delete or comment out the line in the first frame of the moviethat sets the globalGraphic static property for Block. We want all instances to take thedefault so you may see how the state property works.
The next step is to go inside the Block graphic movie clip symbol and add to the code.
function changeState(s:String):Void {state = s;drawRect();
}
function drawRect():Void {var color:Number;switch (state) {case "_Over":color = 0xFF9999;break;
case "_Down":color = 0x660000;break;
default:color = 0xFF0000;
}clear();beginFill(color, 100);lineTo(width, 0);lineTo(width, height);lineTo(0, height);lineTo(0, 0);endFill();
}
UI WIDGETS
307
16
6196CH16.qxd 1/18/06 11:30 AM Page 307

We know that Block calls changeState() in the skin whenever it changes state, so we usethis to set a state property, then call drawRect(). Inside drawRect(), instead of using a sin-gle color, we determine a color based on the state.
Go back to the main timeline and for one of your Block instances, use the ComponentInspector to set its state to _Over. For another instance, set its state to _Down. Test yourmovie now to see how the graphic renders its different states. The result should look sim-ilar to Figure 16-16.
Figure 16-16. The Block graphic uses the state property to draw different tones.
Adding some styleIn the last chapter, we created a StyleManager class to handle the styling of multiple com-ponents. It’s now time to take advantage of our previous work and use the StyleManagerto style our Block instances.
On the first frame of the main timeline (while the components still reside in the secondframe, since the same issues we saw with the skins will apply to styles as well), place thefollowing code:
import com.oop.graphic.StyleFormat;
blueFormat = new StyleFormat("blueFormat");blueFormat.face = 0x7F9BE8;blueFormat.highlight = 0xB4CBFE;blueFormat.selected = 0x596BA3;
OBJECT-ORIENTED ACTIONSCRIPT FOR FLASH 8
308
6196CH16.qxd 1/18/06 11:30 AM Page 308
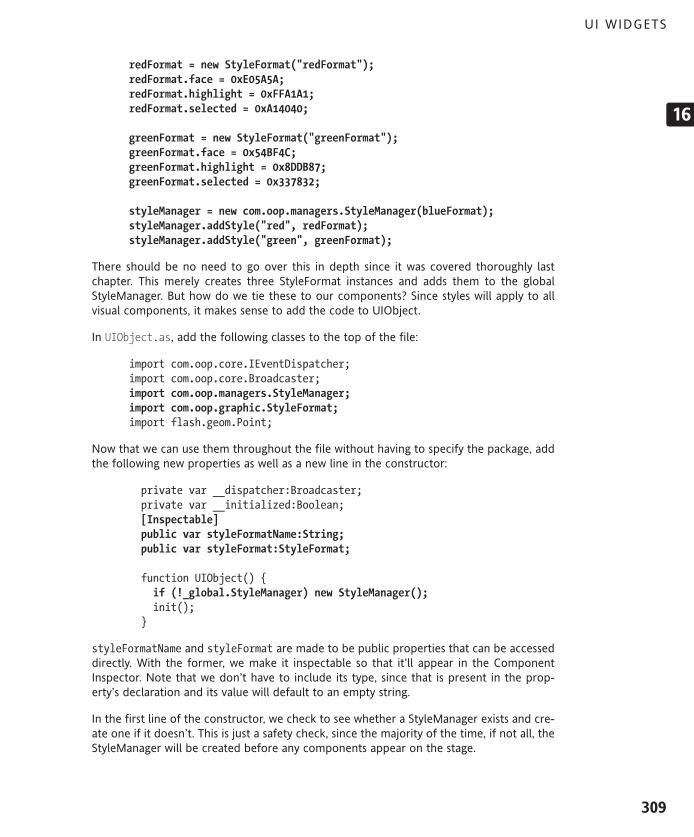
redFormat = new StyleFormat("redFormat");redFormat.face = 0xE05A5A;redFormat.highlight = 0xFFA1A1;redFormat.selected = 0xA14040;
greenFormat = new StyleFormat("greenFormat");greenFormat.face = 0x54BF4C;greenFormat.highlight = 0x8DDB87;greenFormat.selected = 0x337832;
styleManager = new com.oop.managers.StyleManager(blueFormat);styleManager.addStyle("red", redFormat);styleManager.addStyle("green", greenFormat);
There should be no need to go over this in depth since it was covered thoroughly lastchapter. This merely creates three StyleFormat instances and adds them to the globalStyleManager. But how do we tie these to our components? Since styles will apply to allvisual components, it makes sense to add the code to UIObject.
In UIObject.as, add the following classes to the top of the file:
import com.oop.core.IEventDispatcher;import com.oop.core.Broadcaster;import com.oop.managers.StyleManager;import com.oop.graphic.StyleFormat;import flash.geom.Point;
Now that we can use them throughout the file without having to specify the package, addthe following new properties as well as a new line in the constructor:
private var __dispatcher:Broadcaster;private var __initialized:Boolean;[Inspectable]public var styleFormatName:String;public var styleFormat:StyleFormat;
function UIObject() {if (!_global.StyleManager) new StyleManager();init();
}
styleFormatName and styleFormat are made to be public properties that can be accesseddirectly. With the former, we make it inspectable so that it’ll appear in the ComponentInspector. Note that we don’t have to include its type, since that is present in the prop-erty’s declaration and its value will default to an empty string.
In the first line of the constructor, we check to see whether a StyleManager exists and cre-ate one if it doesn’t. This is just a safety check, since the majority of the time, if not all, theStyleManager will be created before any components appear on the stage.
UI WIDGETS
309
16
6196CH16.qxd 1/18/06 11:30 AM Page 309

If you recall from last chapter, or flip back to take a look, the StyleManager determines theappropriate StyleFormat for a component based on whether it has a styleFormatName onthe instance, or else on its classes. For instance, for a Block instance, the StyleManager willfirst check to see whether the instance has a styleFormatName defined and use theStyleFormat saved by that name if it does. If the instance doesn’t have a styleFormatName,then StyleManager runs through the component’s classes, working up the hierarchy chainuntil it finds a StyleFormat for that class. For a Block instance, the StyleManager will firstcheck to see whether a StyleFormat has specifically been assigned for Block. If it hasn’t, it’llthen look to see whether a StyleFormat instance has been assigned to UIObject. If it hasn’t,then the default StyleFormat is returned. Here’s the relevant code from last chapter:
public function getStyle(obj:Object):StyleFormat {if (obj.styleFormatName != undefined) {if (__styles[obj.styleFormatName] != undefined)return __styles[obj.styleFormatName];
}var classes:Array = obj.classes;for (var i:Number = classes.length-1; i > -1; i--) {if (__styles[classes[i]] != undefined) return
➥__styles[classes[i]];}return __styles["default"];
}
To use this with our components, we need to have all the component’s classes stored in aclasses property that the StyleManager can access. Let’s look to see how we can accom-plish this.
Still in UIObject, add the following new static properties to the declarations:
class com.oop.ui.UIObject extends MovieClip➥ implements IEventDispatcher {
private static var sClass:String = "UIObject";private var boundingBox_mc:MovieClip;private var __Class:Array;private var __enabled:Boolean;
__Class will hold all of the classes for a component. This will be populated using the staticsClass property stored on each class. This will be populated in the init() method of eachclass, as we see here with the additional line in UIObject’s init() method:
private function init():Void {__Class = [UIObject.sClass];__children = [];
So the first index in the __Class array for UIObjects will always be the string UIObject. Thenext step is to add similar code to Block. Jump back to Block.as and add the followingnew line in the properties declarations:
OBJECT-ORIENTED ACTIONSCRIPT FOR FLASH 8
310
6196CH16.qxd 1/18/06 11:30 AM Page 310

class com.oop.ui.Block extends UIObject {
static private var sClass:String = "Block";private var __graphic_mc:MovieClip;private var __blockGraphic:String;private var __state:String;
We then need to push this value into the __Class array. This needs to occur after thesuper’s init() method is called, since that is what initializes the array, and this class nameshould follow the super’s class name.
private function init():Void {super.init();__Class.push(Block.sClass);_global.StyleManager.style(this);attachGraphics();
}
After pushing the class name into the __Class array, we call StyleManager’s style()method, which will determine the appropriate StyleFormat for this instance. Rememberthough that the StyleManager was looking for an array named classes. We need to createa getter function in UIObject for this array. Jump back to UIObject.as and add the follow-ing new methods to work with the StyleManager:
public function get classes():Array {var a = [];for (var i:Number = 0; i < __Class.length; i++) {a.push(__Class[i]);
}return a;
}
public function updateStyles(sf:StyleFormat):Void {if (sf != undefined) {if (sf != styleFormat) sf.addListener(this);
}dispatchEvent("restyle");
}
When StyleManager accesses classes, it’ll get returned a copy of the __Class array (it’salways a good idea to return copies of arrays unless you want to allow manipulation of thearrays to external objects). updateStyles() is a method that can be called by a StyleFormatin order to update its listeners when its values have changed (also from last chapter). Thismethod can also be used for UIObjects to change their StyleFormat. This way, you canswap StyleFormats for a component at runtime. For example, an input field might have adefault StyleFormat upon initialization, but a StyleFormat with red color values might beswapped in if the field had an error for the user to correct.
UI WIDGETS
311
16
6196CH16.qxd 1/18/06 11:30 AM Page 311

The next step, as we near completion of styles, is to program our skin to look at styleswhen rendering itself. Return to Block_test.fla and enter symbol editing mode. In thedrawRect() function, change the following bold lines:
function drawRect():Void {var color:Number;switch (state) {case "_Over":color = component.styleFormat.highlight;break;
case "_Down":color = component.styleFormat.selected;break;
default:color = component.styleFormat.face;
}clear();beginFill(color, 100);lineTo(width, 0);lineTo(width, height);lineTo(0, height);lineTo(0, 0);endFill();
}
Now instead of hard coding color values into the skin, it looks to the component instance’sstyleFormat property. If you test your movie out now, you’ll see that the Block instancesare colored blue hues since that is the default StyleFormat instance for the StyleManager.If we don’t want the default format for Block instances, we can tell the StyleManager tostyle them differently. On the main timeline of the Block_test.fla, add the followingbold line to the code in the first frame:
styleManager = new com.oop.managers.StyleManager(blueFormat);styleManager.addStyle("red", redFormat);styleManager.addStyle("green", greenFormat);styleManager.addStyle("Block", greenFormat);
This tells the StyleManager to style all Block instances with greenFormat unless an instancehas a specific styleFormatName. If you test the movie now, you’ll see all Block instancestake a green hue.
The final test is to give a Block instance an individual styleFormatName. On Frame 2, selecta Block instance and look at the Component Inspector. The new styleFormatName prop-erty has appeared below graphic and state. Set this value to red and test the movie.Although all other Block instances are taking greenFormat for their style, this one instanceshould be taking redFormat, as shown in Figure 16-17. That’s some fine control!
OBJECT-ORIENTED ACTIONSCRIPT FOR FLASH 8
312
6196CH16.qxd 1/18/06 11:30 AM Page 312

Figure 16-17. The Block graphic skins using StyleFormat instances to color themselves, with all Blocks using a single format unless overridden on the instance level
More ways to skin a catWhat more could we do for our base component structure? One area we might improveupon is the way we are currently skinning the components. Any time we can get away fromhaving code nested within clips, the easier it’ll be to maintain and manage. For skins, wecan when possible have the drawing code and/or resizing code in an external class file.This makes even more sense when we consider that the Block class requires a couple ofmethods of skins in order to work with them. When one class expects a certain API withanother class, this is a good candidate for an interface to enforce implementation of thosemethods.
Create a new ActionScript file and save it as ISkinnable.as into a new directorycom/oop/graphic/skins/ in your file system. This interface will be short and sweet.
interface com.oop.graphic.skins.ISkinnable {
public function setSize(w:Number, h:Number):Voidpublic function changeState(s:String):Void
}
We already know that these are the methods required by Block, so this interface is easilydefined. The next step is to build a Skin class that implements this interface and can serveas the super class for any skin that is drawn through code.
UI WIDGETS
313
16
6196CH16.qxd 1/18/06 11:30 AM Page 313

Create another new ActionScript file and save it into the same com/oop/graphic/skins/directory as Skin.as. Enter the following code into the file:
import com.oop.ui.UIObject;import com.oop.graphic.skins.ISkinnable;
class com.oop.graphic.skins.Skin extends MovieClip➥ implements ISkinnable {
private var __width:Number;private var __height:Number;private var __state:String;private var __component:UIObject;
function Skin() {init();
}
private function init():Void {__component.addEventListener("restyle", this, "drawRect");setSize(__width, __height);
}
function draw():Void {}
public function setSize(w:Number, h:Number):Void {__width = w;__height = h;draw();
}
public function changeState(s:String):Void {__state = s;draw();
}
public function set width(n:Number):Void { __width = n; }public function set height(n:Number):Void { __height = n; }public function set state(s:String):Void { __state = s; }public function set component(c:UIObject):Void { __component = c; }
}
OBJECT-ORIENTED ACTIONSCRIPT FOR FLASH 8
314
6196CH16.qxd 1/18/06 11:30 AM Page 314

Notice that the class extends MovieClip and implements the new ISkinnable interface. Inthe init() method we call addEventListener() on the component attaching this skin.If you look at UIObject’s updateStyles() method, it dispatches a restyle event. When thisis fired, a Skin instance’s draw method will be called automatically.
At this point, setSize() and changeState() call a draw() method that here is merely astub intended to be overridden. Ideally, any class that inherits from Skin need simplydefine a single draw() method and nothing else. We can try that by creating a SimpleRectskin.
Create another new ActionScript file and save it into the same com/oop/graphic/skins/directory as SimpleRect.as. Add the following code:
import com.oop.graphic.skins.Skin;
class com.oop.graphic.skins.SimpleRect extends Skin {
function SimpleRect() {}
public function draw():Void {var color:Number;switch (__state) {case "_Over":color = __component.styleFormat.highlight;break;
case "_Down":color = __component.styleFormat.selected;break;
default:color = __component.styleFormat.face;
}clear();beginFill(color, 100);lineTo(__width, 0);lineTo(__width, __height);lineTo(0, __height);lineTo(0, 0);endFill();
}
}
Look familiar? It should, as it’s almost exactly the same code we had inside the Blockgraphic’s drawRect() method. Now it’s simply in an external class, but doing the samething.
UI WIDGETS
315
16
6196CH16.qxd 1/18/06 11:30 AM Page 315

To get this to work in the Block_test.fla, go into the Block graphic and either delete orcomment out all of the code. Next, right-click the symbol in the Library and select Linkage.In the AS 2.0 class field, type com.oop.graphic.skins.SimpleRect, as shown in Figure 16-18.Now whenever this symbol is attached to the stage, it’ll be an instance of the SimpleRectclass. If you test your movie now, you’ll see the same result as before, but now the skin isbeing defined by an external class as opposed to a symbol with nested code.
Figure 16-18. The Block graphic associated with the SimpleRect class instead of having code on its timeline
The last tweak we should make for our new skins is to change the type for __graphic_mcin the Block class. Right now, it’s typed as a movie clip, and although this works, we’ve nowcreated an interface that all attached skins should adhere to. It would be better to typethis now as ISkinnable so that it may be enforced within Block. To do this, go back toBlock.as and add or change the following bold lines:
import com.oop.ui.UIObject;import com.oop.graphic.skins.ISkinnable;
class com.oop.ui.Block extends UIObject {
static private var sClass:String = "Block";private var __graphic_mc:ISkinnable;private var __blockGraphic:String;private var __state:String;
With Block now completed, be sure to check your code against the class included in thedownloadable files for this chapter.
Attaching from scratchUp until this point, we’ve been attaching our components to the stage in the IDE. This hasthe disadvantage of having to place components in the second frame after skin and styleinitialization, but offers two great advantages to note. First, we can see exactly how theinstances are placed and sized in relation to each other. Second, we can plug into theComponent Inspector in order to set parameters. There are a number of additional
OBJECT-ORIENTED ACTIONSCRIPT FOR FLASH 8
316
6196CH16.qxd 1/18/06 11:30 AM Page 316

features that we haven’t even touched on, such as Live Preview and Custom UIs, as well astwo other tabs in the Component Inspector, Bindings and Schema. We’ll look at bindingsand schema in a later chapter.
As for Live Preview, this allows you to see what your component may look like at runtime.I say “may,” since a Live Preview generally can’t take into account custom skins or fonts. Italso has the disadvantage of requiring you to either precompile your component (whichyou don’t want to do unless you are certain of never needing to update the component’scode) or build an external SWF. It can also, with more complex components, slow downyour IDE, at which point you can disable the Live Previews altogether. For development,I’ve generally found that it’s better to keep components as we have the Block now—asymbol that isn’t compiled and merely has a bounding box for visually resizing whenneeded. If you are distributing your components to others, compiling them into SWCs,which automatically generates a Live Preview, is a great way to go.
Custom UIs are a fantastically neat feature to explore, but one out of the scope of thisbook. If you have components that have too many parameters to comfortably be set in theComponent Inspector, or if you need to provide a more complex interface to configureyour component, a Custom UI can come in extremely handy. Back a few versions ago, Ideveloped a 3D modeling component that allowed the developer to add points, lines, andplanes in 3D space, texture the planes, and animate the simple models. That’s not reallysomething that can be done in the Component Inspector!
The point of this is that components offer and can do a multitude of things, but for ourpurposes we are creating components that can work within a framework for developinginterfaces and applications. As such, it’ll often be the case that we don’t use the timelineto place and arrange graphic components, but instead attach and place through code.When we work in this manner, we can keep code in external text files, which can be moreeasily managed, and we can use the FLAs merely to hold our embedded fonts and graphicskins.
To see how easy it is to use the Block component we’ve created in such an environment,create a new ActionScript file and save it into a new directory, com/oop/ui/interfaces/,as InterfaceTest.as. The full listing of the class is shown here:
import com.oop.ui.UIObject;import com.oop.ui.Block;import com.oop.graphic.StyleFormat;
class com.oop.ui.interfaces.InterfaceTest extends UIObject {
function InterfaceTest() {}
private function init():Void {super.init();createStyles();attachGraphics();
}
UI WIDGETS
317
16
6196CH16.qxd 1/18/06 11:30 AM Page 317

private function createStyles():Void {var blueFormat:StyleFormat = new StyleFormat("blueFormat");blueFormat.face = 0x7F9BE8;blueFormat.highlight = 0xB4CBFE;blueFormat.selected = 0x596BA3;var redFormat:StyleFormat = new StyleFormat("redFormat");redFormat.face = 0xE05A5A;redFormat.highlight = 0xFFA1A1;redFormat.selected = 0xA14040;var greenFormat:StyleFormat = new StyleFormat("greenFormat");greenFormat.face = 0x54BF4C;greenFormat.highlight = 0x8DDB87;greenFormat.selected = 0x337832;_global.StyleManager.addStyle("Block", blueFormat);_global.StyleManager.addStyle("red", redFormat);_global.StyleManager.addStyle("green", greenFormat);
}
private function attachGraphics():Void {createClassObject(Block, "block0", 0,{initialWidth:100,initialHeight:100}
);createClassObject(Block, "block1", 1,{initialWidth:100,initialHeight:100,_x:150,styleFormatName:"red"}
);createClassObject(Block, "block2", 2,{initialWidth:100,initialHeight:100,_x:300,styleFormatName:"green"}
);}
}
OBJECT-ORIENTED ACTIONSCRIPT FOR FLASH 8
318
6196CH16.qxd 1/18/06 11:30 AM Page 318

In this class, which inherits from UIObject, we are simply creating a layout for components.The init() method calls createStyles() and attachGraphics(). createStyles() is thesame style code that we used in Block_test.fla. attachGraphics() usescreateClassObject(), defined in UIObject, to attach three Block instances to the stage.To each it passes an initObj with initialWidth and initialHeight parameters and posi-tions. For the latter two Block instances, it assigns a specific styleFormatName.
To see how this code runs, create a new Flash document and save it as InterfaceTest.fla.Create a new movie clip symbol named and exported as empty class. After that, create asecond movie clip symbol, this one named and exported as Block graphic, with its AS 2.0class text field set as com.oop.graphic.skins.SimpleRect. This makes two symbols in theLibrary, neither with any graphics, shown in Figure 16-19.
Figure 16-19. The InterfaceTest library with two empty and exported movie clip symbols
Return to the main timeline and in the first frame on the default layer, place the followingcode:
Object.registerClass("empty class",➥ com.oop.ui.interfaces.InterfaceTest);attachMovie("empty class", "blocks", 0, {_x:75, _y:150});
That’s it. We register the empty class symbol in the Library with our InterfaceTest class andthen attach the symbol. Once attached, the InterfaceTest class initializes, sets styles, andattaches Block instances, using the same empty class clip in the Library. Implementation isclean and sweet, with everything contained in our external class files. Test the movie to seethe result, shown in Figure 16-20.
UI WIDGETS
319
16
6196CH16.qxd 1/18/06 11:30 AM Page 319

Figure 16-20. The InterfaceTest movie generated by the InterfaceTest class
Tying in eventsAs we wind down this chapter on UI widgets, it would serve us well to have a componentthat the user could actually interact with. To this end, we’ll extend our UIObject class tocreate a SimpleButton, using a Block instance inside for the graphic. We mapped out thediagram earlier, so we can begin filling in the class. Create a new ActionScript file and saveit as SimpleButton.as into the com/oop/ui/buttons/ directory. Enter the following code:
import com.oop.ui.Block;import com.oop.ui.UIObject;
class com.oop.ui.buttons.SimpleButton extends UIObject {
static public var sClass:String = "SimpleButton";private var __blockGraphic:String;private var __overButton:Boolean;private var __pressedButton:Boolean;private var __graphic_bk:Block;
static public var globalGraphic:String;
function SimpleButton() {}
// PRIVATE// ________________________________________________
OBJECT-ORIENTED ACTIONSCRIPT FOR FLASH 8
320
6196CH16.qxd 1/18/06 11:30 AM Page 320

private function init():Void {super.init();__Class.push(SimpleButton.sClass);_global.StyleManager.style(this);attachGraphics();setEvents();
}
}
This class starts off similarly to Block. After importing the necessary classes and the classdeclaration, we define properties, including the static sClass property to hold the nameof the class and the globalGraphic property to hold the identifier for the skin, if any, usedfor all SimpleButton instances. Following the constructor, the init() method calls thesuper’s init() method, then pushes its class name into the __Class array. Next, it hasthe StyleManager assign the appropriate StyleFormat (up to this point, virtually allUIObject components will use similar code), then calls two new methods, attachGraphics()and setEvents().
Add the attachMethods() and resolveGraphic() methods below the init().
private function attachGraphics():Void {createClassObject(Block, "__graphic_bk", 0,{initialWidth: __width,initialHeight: __height,graphic: getGraphic("__blockGraphic"),styleFormatName: styleFormat.styleReference}
);}
private function resolveGraphic(s:String):String {return SimpleButton.globalGraphic;
}
attachGraphics() uses createClassObject() to attach a Block instance. It usesgetGraphic(), defined in UIObject, which in turn calls resolveGraphic(), to determinewhether a skin should be passed into the Block’s graphic property (this was covered withBlock’s code). Also notice how the styleFormatName is set by whatever the styleReferenceis for this SimpleButton reference. This is important since we want the Block instanceinside SimpleButton to use the SimpleButton instance’s StyleFormat, not Block’s.Otherwise, we could never style SimpleButton specifically.
The next set of methods all have to do with the user interaction with the SimpleButton,using the built-in mouse events to create button functionality.
UI WIDGETS
321
16
6196CH16.qxd 1/18/06 11:30 AM Page 321

private function setEvents():Void {onRollOver = overButton;onRollOut = onReleaseOutside = offButton;onPress = pressButton;onRelease = releaseButton;
}
private function offButton():Void {__graphic_bk.state = "_Up";__overButton = false;dispatchEvent("rollOut");
}
private function overButton():Void {__graphic_bk.state = "_Over";__overButton = true;dispatchEvent("rollOver");
}
private function pressButton(noCallback:Boolean) {__graphic_bk.state = "_Down";__pressedButton = true;dispatchEvent("press");
}
private function releaseButton(noCallback:Boolean) {__pressedButton = false;offButton();dispatchEvent("release");if (__enabled) overButton();
}
setEvents(), which was called in the init() method, simply assigns different handlers forthe button events. The next four methods are those handlers. In each handler, we dispatchan event that external objects can subscribe to in order to be notified when the eventsoccur. We also set the Block instance’s state based on the event. This will allow our skinsto respond to the different mouse events.
The final methods are ones we’ve already seen in Block and UIObject.
// PUBLIC// ________________________________________________
public function setEnabled(b:Boolean):Void {super.setEnabled(b);__overButton = false;__graphic_bk.state = "_Disabled";
}
OBJECT-ORIENTED ACTIONSCRIPT FOR FLASH 8
322
6196CH16.qxd 1/18/06 11:30 AM Page 322
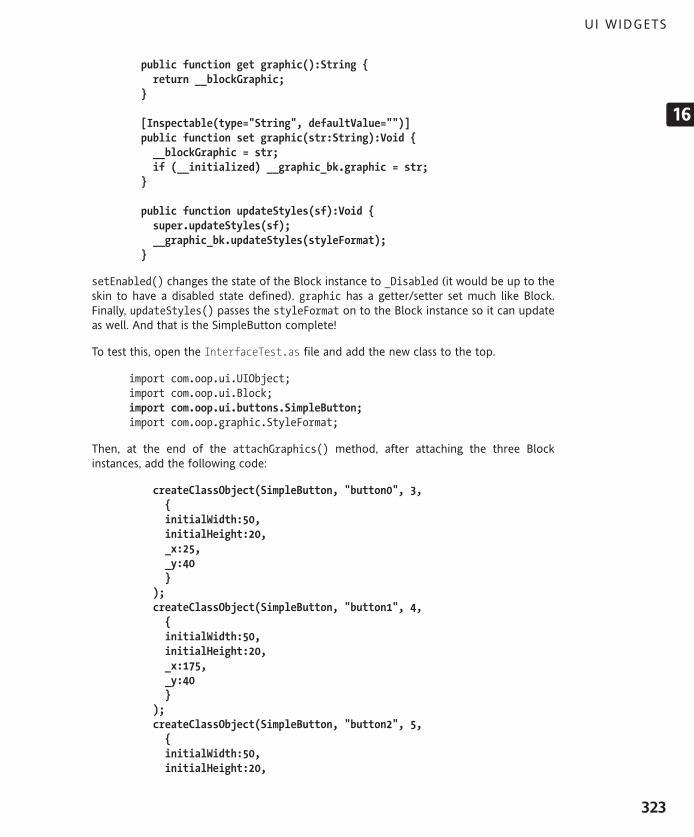
public function get graphic():String {return __blockGraphic;
}
[Inspectable(type="String", defaultValue="")]public function set graphic(str:String):Void {__blockGraphic = str;if (__initialized) __graphic_bk.graphic = str;
}
public function updateStyles(sf):Void {super.updateStyles(sf);__graphic_bk.updateStyles(styleFormat);
}
setEnabled() changes the state of the Block instance to _Disabled (it would be up to theskin to have a disabled state defined). graphic has a getter/setter set much like Block.Finally, updateStyles() passes the styleFormat on to the Block instance so it can updateas well. And that is the SimpleButton complete!
To test this, open the InterfaceTest.as file and add the new class to the top.
import com.oop.ui.UIObject;import com.oop.ui.Block;import com.oop.ui.buttons.SimpleButton;import com.oop.graphic.StyleFormat;
Then, at the end of the attachGraphics() method, after attaching the three Blockinstances, add the following code:
createClassObject(SimpleButton, "button0", 3,{initialWidth:50,initialHeight:20,_x:25,_y:40}
);createClassObject(SimpleButton, "button1", 4,{initialWidth:50,initialHeight:20,_x:175,_y:40}
);createClassObject(SimpleButton, "button2", 5,{initialWidth:50,initialHeight:20,
UI WIDGETS
323
16
6196CH16.qxd 1/18/06 11:30 AM Page 323

_x:325,_y:40}
);getChild("button0").addEventListener("release", this,
➥ "onButtonRelease");getChild("button1").addEventListener("release", this,
➥ "onButtonRelease");getChild("button2").addEventListener("release", this,
➥ "onButtonRelease");
Here, three SimpleButton instances are attached, each being given dimensions and coor-dinates. The final three lines add the InterfaceTest instance as a listener to all three but-tons’ release event. Now we just need to define the onButtonRelease() handler wespecified.
Add the following new method after attachGraphics():
private function onButtonRelease(infoObj:Object):Void {trace(infoObj.parameters.target._name + " released");
}
This would obviously contain more useful code in an actual interface, but here we simplytrace the name of the button that has been released so we may ensure that it’s workingproperly. Test the movie now to see it in action; the result should look like Figure 16-21.We now have components that are responding to and firing off events.
Figure 16-21. InterfaceTest using instances of SimpleButton
OBJECT-ORIENTED ACTIONSCRIPT FOR FLASH 8
324
6196CH16.qxd 1/18/06 11:30 AM Page 324

Pulling it all togetherThroughout this and the previous chapter, I’ve covered quite a few aspects of a compo-nent framework, laying the groundwork for a more complex system. At this point we havea class defining a layout and styling of components and an FLA that instantiates that classand has a Library containing attachable, but empty, clips. We’ve looked at how we maystyle and skin different classes and instances of components. Let’s bring it all together bycreating a new skin and style for the newly attached buttons, and add in the feature ofsounds that we explored last chapter with the SoundManager.
The first thing we’ll do is create a new skin for the buttons. This will allow for gradientcolors and a border to be drawn within a rectangle, as opposed to just the solid fill thatSimpleRect offers. To make this skin, create a new ActionScript file and save it asGradientBorderRect.as into the com/opp/graphic/skins/ directory. The following codeis the entire listing:
import com.oop.graphic.skins.Skin;import flash.geom.Matrix;
class com.oop.graphic.skins.GradientBorderRect extends Skin {
function GradientBorderRect() {}
public function draw():Void {var property:String;switch (__state) {case "_Over":property = "highlight";break;
case "_Down":property = "selected";break;
default:property = "face";
}var colors:Array = [];for (var i:Number = 0; i < 4; i++) {colors.push(__component.styleFormat[property + i]);
}clear();var alphas:Array = [100, 100, 100, 100];var ratios:Array = [0, 120, 135, 255];var matrix:Matrix = new Matrix();matrix.createGradientBox(__width, __height, Math.PI/2, 0, 0);lineStyle(0, __component.styleFormat.border, 100);beginGradientFill("linear", colors, alphas, ratios, matrix);lineTo(__width, 0);lineTo(__width, __height);lineTo(0, __height);
UI WIDGETS
325
16
6196CH16.qxd 1/18/06 11:30 AM Page 325

lineTo(0, 0);endFill();
}
}
Just like SimpleRect, this class inherits from Skin and only requires a draw() method. Inthis method, we place four color values into a colors array depending upon the __stateproperty. The for loop is a shortcut for us to put, for example, face0, face1, face2, andface3 into the colors array. Remember that since the StyleFormat class is dynamic, we canadd whatever properties we require for the skins.
The rest of the code draws a gradient box with a border. It does utilize the new Matrixclass and its built-in createGradientBox() method to create the matrix to pass to thebeginGradientFill() method, but the rest is all standard Drawing API.
The next step is to export a clip from the InterfaceTest.fla’s Library for this new skin.Return to InterfaceTest.fla and create a new movie clip symbol named and exported asGradientBorderRect. Make sure its AS 2.0 class is set as com.oop.graphic.skins.GradientBorderRect, as shown in Figure 16-22.
Figure 16-22. The GradientBorderRect symbol associated with an external class
OBJECT-ORIENTED ACTIONSCRIPT FOR FLASH 8
326
6196CH16.qxd 1/18/06 11:30 AM Page 326

With the skin defined in the Library, we need to assign it to all SimpleButton instances. Wecan do this upon the initialization of InterfaceTest. In the InterfaceTest.as file, add thefollowing bold lines:
private function init():Void {super.init();createStyles();assignSkins();attachGraphics();
}
private function assignSkins():Void {SimpleButton.globalGraphic = "GradientBorderRect";
}
Pretty straightforward, no? We simply assign the linkage identifier for our new symbol tothe globalGraphic property of SimpleButton, which will apply it to all instances.
The last step is to create the new StyleFormat required by the new skin. Add the new linesto the createStyles() method of InterfaceTest.
var greenFormat:StyleFormat = new StyleFormat("greenFormat");greenFormat.face = 0x54BF4C;greenFormat.highlight = 0x8DDB87;greenFormat.selected = 0x337832;var chromeFormat:StyleFormat = new StyleFormat("chromeFormat");chromeFormat.border = 0x333333;chromeFormat.face0 = 0xB0DFDE;chromeFormat.face1 = 0xDAF0F0;chromeFormat.face2 = 0xEDE9E0;chromeFormat.face3 = 0xCCBEAA;chromeFormat.highlight0 = 0xCEAEDE;chromeFormat.highlight1 = 0xE9DAF0;chromeFormat.highlight2 = 0xE0E3ED;chromeFormat.highlight3 = 0xABB2CC;chromeFormat.selected0 = 0x897394;chromeFormat.selected1 = 0xB2A7B8;chromeFormat.selected2 = 0x9FA1A8;chromeFormat.selected3 = 0x787B8F;_global.StyleManager.addStyle("SimpleButton", chromeFormat);_global.StyleManager.addStyle("Block", blueFormat);_global.StyleManager.addStyle("red", redFormat);_global.StyleManager.addStyle("green", greenFormat);
There are certainly more properties, but there is nothing new in this code. The last newline adds the StyleFormat to the StyleManager using the reference SimpleButton. AllSimpleButton instances will get assigned that style (unless they have a styleFormatNameassigned on the instance level).
UI WIDGETS
327
16
6196CH16.qxd 1/18/06 11:30 AM Page 327

Test your movie to see the new skin and style applied. The result should look like Figure 16-23.
Figure 16-23. The GradientBorderRect skin applied to the SimpleButton instances
As for sounds, there are only two things we need to add to get them to work with ourcomponents. First, though, we need the sounds themselves. Included with this chapter’sfiles are CLICK2.mp3 and CLICK8.mp3. Make sure the files are in the same directory asInterfaceTest.fla.
Once the sounds are in place, we need to load and assign them to our components inInterfaceTest.as. We can do this, just like the styles and skins, at initialization. Add thefollowing bold lines to InterfaceTest.as:
private function init():Void {super.init();createStyles();assignSkins();assignSounds();attachGraphics();
}
private function assignSounds():Void {var soundManager = new com.oop.managers.SoundManager(this, 16001);soundManager.addSound("kiss", "file:CLICK2.mp3");soundManager.addSound("click", "file:CLICK8.mp3");soundManager.registerForSound("SimpleButton", "kiss",
➥ "press", 80);soundManager.registerForSound("SimpleButton", "click",
➥ "release", 80);}
OBJECT-ORIENTED ACTIONSCRIPT FOR FLASH 8
328
6196CH16.qxd 1/18/06 11:30 AM Page 328

In the assignSounds() method, we use almost identical code to that used last chapter.After instantiating the SoundManager, we add two sounds, pointing to the relative filesand assigning the files names for reference. The last two lines register SimpleButton toreceive sounds on press and release events.
But how exactly does SimpleButton get these sounds? Since we are tying sounds to events,it makes sense to place the relevant code in the one place where we know all UIObjectevents go through, namely UIObject’s dispatchEvent() method.
Return to UIObject.as and add the following bold line to dispatchEvent():
public function dispatchEvent(evnt:String, params:Object):Void {_global.SoundManager.getSound(this, evnt).start();var info:Object = params || {};info.target = this;__dispatcher.dispatchEvent(evnt, info);
}
That’s all it takes, after the work from last chapter, to enable sounds in our components.Since the SoundManager handles all the loading and managing of sounds, instances ask itwhenever an event is fired whether a sound needs to play. The SoundManager then checksto see whether that object has registered for a sound at that event, and if it does, it sendsthe Sound object instance back, at the right volume, to be played.
SummaryWell, that was a pretty full chapter! I’ve covered developing UI components from a hum-ble diagram through to a skinnable, stylable, configurable, broadcasting (both events andsound!), fully fledged widget. We’ve explored how to plug a component into theComponent Inspector to be manipulated in the IDE as well as being attachable throughActionScript with nothing in the Library but empty clips. Building on the knowledge fromthroughout this book, we’ve applied practical OOP to create a basic framework for devel-oping an entire component library, separating function from the visuals as much as possi-ble. Although in the end a simple button might seem a small prize at the completion of somuch work, realize that the simple button merely demonstrates the process now by whichall other visual widgets may be developed. With all of the hard work creating skinning andstyling methods, creating an event broadcasting framework and sound management,building visual widgets of any complexity is made that much easier. Abstract where youcan (does a button need to know how it’s colored or what sounds it makes?) and the workcan be broken up into smaller pieces, much more easier to deal with than the whole.
UI WIDGETS
329
16
6196CH16.qxd 1/18/06 11:30 AM Page 329

What’s next?We spent this chapter developing components using movie clip symbols from the Librarysince we needed visual representation on the stage. In the next chapter, we explore classesthat don’t have a visual component, but instead alter the visuals of our movie clips usingmany of the new effects and image manipulation ActionScript available in Flash 8. Thereare so many new graphic capabilities, and we’ll use OOP to help organize and managethese capabilities so we may more easily apply them to great effect (and great fun!).
OBJECT-ORIENTED ACTIONSCRIPT FOR FLASH 8
330
6196CH16.qxd 1/18/06 11:30 AM Page 330

6196CH16.qxd 1/18/06 11:30 AM Page 331

6196CH17.qxd 1/18/06 11:31 AM Page 332

17 OOP ANIMATION AND EFFECTS
6196CH17.qxd 1/18/06 11:31 AM Page 333

The original purpose of Flash was animation. Using the timelines, animators either drewframe-by-frame graphics to simulate motion or used Flash’s tweening capabilities to createanimation between keyframes. With the addition of ActionScript, animation did not go outthe window. In fact, ActionScript proved to be just another tool, like the timeline, thatdevelopers could use to create animation. By altering visual properties of movie clipsthrough code, fluid and complex animation could be created without timelines. But howexactly can we apply OOP to this process of animation in order to make it easier and moremanageable?
The first thing to consider is that in the case of animation classes, most likely these classeswon’t themselves be visible, but will instead handle the animation of other visual objects.For instance, a movie clip class that can tween its position would be extremely useful, butmore useful would be a class outside of that movie clip class that handles the tweeninganimation. This tweening class could then be applied to other objects as well, not just thesingle movie clip class. If we think of these animation classes as handling animation asopposed to visually animating themselves, we can focus in on the useful pieces that wouldcomprise such classes.
Events being fired when an animation begins, is occurring, or ends would be the mostimportant feature, and this can be handled using the Broadcaster class created in Chapter 13,with perhaps a little enhancement. This could serve as the base class for all of our anima-tion classes. Generally, if we have a class that can broadcast when it’s animating and wecan pass that class a reference to a clip that we wish to animate, we have the basis for anyanimation class. How the class handles the animation of the clip through some loopingmechanism (perhaps an interval using our centralized IntervalManager) would be up toeach animation class individually.
In this chapter, we’ll explore a number of different classes to control the animation ofmovie clips in an object-oriented manner, playing a bit with the functionality of filters andbitmap manipulation new to Flash 8. Making a break from the process of previous chap-ters, we’ll dive right into the code without spending too much time in the planning stages.Sometimes, especially when creating code for animation and effects, a lot of experimenta-tion happens to get what is wanted, and creating too rigid of a box to work in makes it dif-ficult to break out of. After the structure and discipline applied in the previous chapters(and now that you are comfortable with when and how to create UML diagrams to helpwith the planning), let’s give ourselves a little freedom to have some fun in this chapter.
Preparing for animationThe base class of the animators we create will use Broadcaster (from the classes wecreated in Chapters 13, 15, and 16) in order to dispatch events to listeners detailing whenan animation begins, is occurring, and ends. As we won’t know any additional informationabout the type of animation in this superclass, there won’t be too much code we needto add.
OBJECT-ORIENTED ACTIONSCRIPT FOR FLASH 8
334
6196CH17.qxd 1/18/06 11:31 AM Page 334

Animator
The first thing we need to do is create a new package for our animation classes; do this inthe class directory that you first created in Chapter 13 (this could be in the Flash configu-ration directory, in the same directory of whatever FLA you are currently working on, or insome directory you have specified in the Flash IDE). Add a new folder/directory namedanimation in the com/oop directory, as shown in Figure 17-1. We’ll save our animationclasses here.
Create a new ActionScript file in Flash and add these lines:
class com.oop.animation.Animator extends com.oop.core.Broadcaster {
function Animator() {}
// PUBLIC// ________________________________________________
public function dispatchEvent(evnt:String, params:Object):Void {if (params == undefined) var params:Object = {};params.animator = this;super.dispatchEvent(evnt, params);
}
}
Save this completed file as Animator.as into the com/oop/animation directory. As I said,there’s not much to add to this class on top of the Broadcaster functionality. You can seefrom the code that it simply inherits from Broadcaster and then overrides thedispatchEvent(). In Animator’s dispatchEvent(), it adds a new property to the paramsobject, animator, which stores a reference to the Animator instance itself (note that the
Figure 17-1. The path to the new animation package
OOP ANIMATION AND EFFECTS
335
17
6196CH17.qxd 1/18/06 11:31 AM Page 335

first line first checks to see whether a params object was sent to the method and, if not,creates one). The superclass, Broadcaster, then gets its dispatchEvent() method invokedwith the altered params object passed in.
It actually makes a lot of sense to add similar functionality to Broadcaster itself, an over-sight from its initial coding. In fact, if Broadcaster itself added its reference to all events itdispatched, it would remove the necessity for Animator. However, we’ll leave the Animatorclass for two reasons. First, any animation classes we create can now inherit fromAnimator instead of Broadcaster, which not only makes more sense in the code, but alsogives us the freedom down the line to add additional functionality to all animation classes(and not all broadcasting classes). Second, the property we have added to the paramsobject, animator, will be descriptive and helpful, as we are coding listeners to animatorobjects. The generic term that we would have to add to Broadcaster (“target” or “broad-caster”, perhaps) would not read as clearly in the code.
Tweening properties and valuesWith the base class coded, it’s time to get into some actual animation. The first thing we’lllook at is how to tween simple movie clip properties in order to create movement. We cancontain this functionality in a single class, named Tweener, which will handle taking anobject and changing a specific value for that object over the course of time.
Tweener
Create a new ActionScript file and save it as Tweener.as into the com/oop/animationdirectory. Let’s begin with its basic blueprint.
import com.oop.animation.Animator;import com.oop.managers.IntervalManager;
class com.oop.animation.Tweener extends Animator {
function Tweener() {}
// PRIVATE// ________________________________________________
private function runTween():Void {}
// PUBLIC// ________________________________________________
public function haltTween() {}
OBJECT-ORIENTED ACTIONSCRIPT FOR FLASH 8
336
6196CH17.qxd 1/18/06 11:31 AM Page 336

public function tween():Void {}
public function tweenTo():Void {}
}
At the top of the class, we import the two classes we know will be used, Animator (thesuperclass) and IntervalManager (to handle the interval calls). The four methods definedare the four that are immediately apparent. tween() and tweenTo() would initiate anima-tion, haltTween() would end an animation, and runTween() would handle altering valuesto create that animation. The next step would be to decide what you would need to passin order to start an animation.
public function tween(clip:Object,prop:String,startValue:Number,destValue:Number,time:Number
):Void {}
To create a tween for an object’s property, we would need to know the object, the prop-erty to tween, the values to tween, and the time in which that animation should occur.With these values passed in, we can start the process of animation by creating an intervalthat will be called to change the property over the course of time.
public function tween(clip:Object,prop:String,startValue:Number,destValue:Number,time:Number
):Void {clip[prop] = startValue;var intName:String = clip._name + "_" + prop;if (__intervals[intName] == undefined) __intervals[intName] = {};var intObj:Object = __intervals[intName];intObj.count = 1;intObj.totalInts = Math.floor(time/Tweener.intervalTime);intObj.startProp = startValue;intObj.endProp = destValue;intObj.changeProp = intObj.endProp - intObj.startProp;intObj.clip = clip;intObj.prop = prop;intObj.tweener = this;
OOP ANIMATION AND EFFECTS
337
17
6196CH17.qxd 1/18/06 11:31 AM Page 337

IntervalManager.setInterval(intObj, "interval",➥ this, "runTween", Tweener.intervalTime, intObj);
runTween(intObj);dispatchEvent("startTween", {clip:clip, prop:prop});
}
The first thing that is done in this method is the clip passed in immediately gets its prop-erty set to the start value passed in. Next, we need a way for Tweener to store the intervalthat will be passed to the IntervalManager. This is necessary since it’s possible that Tweenermight handle animating multiple properties or multiple objects, so an individual andunique object will need to be passed to the IntervalManager for each interval that needsto be called. This interval object will be stored in a new property, __intervals, which we’lldeclare in a moment.
The name of the interval object will be determined by the name of the clip passed in, plusan underscore, plus the name of the property to be tweened. Thus, if a movie clip named“ball” was passed in and the property to tween was its _rotation, then the interval objectwould be stored in Tweener’s __intervals as “ball__rotation”.
Once the interval object has been declared as a new object (if it hasn’t already beendefined), then all of the arguments passed in are stored in that object to be used to cal-culate and perform the animation. These include the clip, start, and end values of thetween and the property to animate. In addition, we calculate the amount the propertymust change over the course of the animation and determine exactly how many intervalsmust be called in order to perform the animation over the course of the specified time,stored in the property totalInts.
How is this totalInts calculated exactly? First, you’ll see that it uses a static property ofTweener, intervalTime. Let’s go ahead and declare this, along with __intervals, at thetop so we can see how the calculation works.
class com.oop.animation.Tweener extends Animator {
private var __intervals:Object;static var intervalTime:Number = 40;
function Tweener() {__intervals = {};
}
intervalTime will dictate the frequency with which the IntervalManager calls the interval,in this case every 40 milliseconds. With that in mind, we can see that if a time of 2 seconds,or 2000 milliseconds, is passed to the tween() method, then the total number of intervalswill be 50 (i.e., 2000/40). That means that the runTween() function should be called a totalof 50 times in order to complete the animation. We’ll keep track of the current intervalthrough the interval object property count.
Finally, after storing a reference to the Tweener instance in the interval object, we call theIntervalManager’s IntervalManager () method and pass in the interval object, instructingthe IntervalManager to call runTween() on the Tweener instance (this) every 40 millisec-onds (Tweener.intervalTime).
OBJECT-ORIENTED ACTIONSCRIPT FOR FLASH 8
338
6196CH17.qxd 1/18/06 11:31 AM Page 338

With all that work laid down, the tweenTo() method is considerably easier to pull off:
public function tweenTo(clip:Object,prop:String,destValue:Number,time:Number
):Void {tween(clip, prop, clip[prop], destValue, time);
}
tweenTo() will handle animating a clip from its current state to a new state. As such, a startvalue doesn’t have to be passed in. However, after that point, the functionality behind thescenes is exactly that of tween(), so all we do is pass the values on to tween() withthe clip’s current property value being passed as the start value.
Before we get to actually performing the tween, let’s add the ability to stop the tween, ifneeded. This is simply done by calling clearInterval() on the IntervalManager. Since theinterval object being used is stored in our Tweener instance using the clip’s name andproperty, that is all we need passed in to halt the interval.
public function haltTween(clip:Object, prop:String) {IntervalManager.clearInterval(
➥ __intervals[clip._name + "_" + prop], "interval");}
All that’s left now is to determine how the tween will be performed in runTween(). To startoff easily, we’ll perform a linear tween, meaning that the value of the clip’s property willchange an equal amount each interval. Let’s add this to the runTween() method and seehow it works.
private function runTween(intObj:Object):Void {var startProp:Number = intObj.startProp;var changeProp:Number = intObj.changeProp;var count:Number = intObj.count;var total:Number = intObj.totalInts;intObj.clip[intObj.prop] = startProp + ((changeProp/total)*count);var eventName:String = "tween";if (intObj.count++ >= intObj.totalInts) {intObj.clip[intObj.prop] = intObj.endProp;IntervalManager.clearInterval(intObj, "interval");eventName = "endTween";
}dispatchEvent(eventName, {clip:intObj.clip, prop:intObj.prop});
}
For better readability, the first four lines simply store the properties of the interval objectused to calculate the new property value. This calculation is performed on the fifth line ofthe function where the clip’s property (accessed using bracket notation) is given a newvalue determined by the current count. This formula works by taking the amount the
OOP ANIMATION AND EFFECTS
339
17
6196CH17.qxd 1/18/06 11:31 AM Page 339
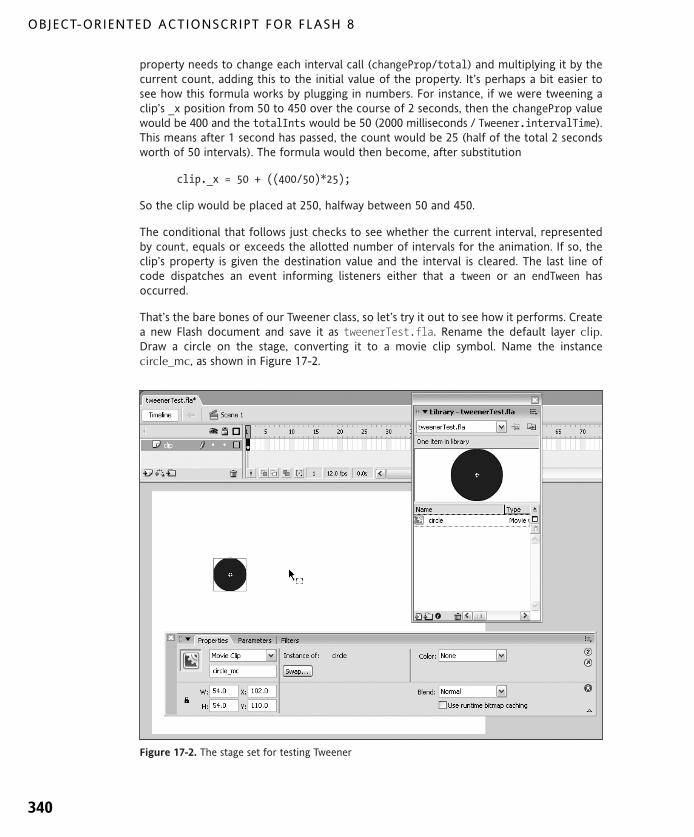
property needs to change each interval call (changeProp/total) and multiplying it by thecurrent count, adding this to the initial value of the property. It’s perhaps a bit easier tosee how this formula works by plugging in numbers. For instance, if we were tweening aclip’s _x position from 50 to 450 over the course of 2 seconds, then the changeProp valuewould be 400 and the totalInts would be 50 (2000 milliseconds / Tweener.intervalTime).This means after 1 second has passed, the count would be 25 (half of the total 2 secondsworth of 50 intervals). The formula would then become, after substitution
clip._x = 50 + ((400/50)*25);
So the clip would be placed at 250, halfway between 50 and 450.
The conditional that follows just checks to see whether the current interval, representedby count, equals or exceeds the allotted number of intervals for the animation. If so, theclip’s property is given the destination value and the interval is cleared. The last line ofcode dispatches an event informing listeners either that a tween or an endTween hasoccurred.
That’s the bare bones of our Tweener class, so let’s try it out to see how it performs. Createa new Flash document and save it as tweenerTest.fla. Rename the default layer clip.Draw a circle on the stage, converting it to a movie clip symbol. Name the instancecircle_mc, as shown in Figure 17-2.
Figure 17-2. The stage set for testing Tweener
OBJECT-ORIENTED ACTIONSCRIPT FOR FLASH 8
340
6196CH17.qxd 1/18/06 11:31 AM Page 340
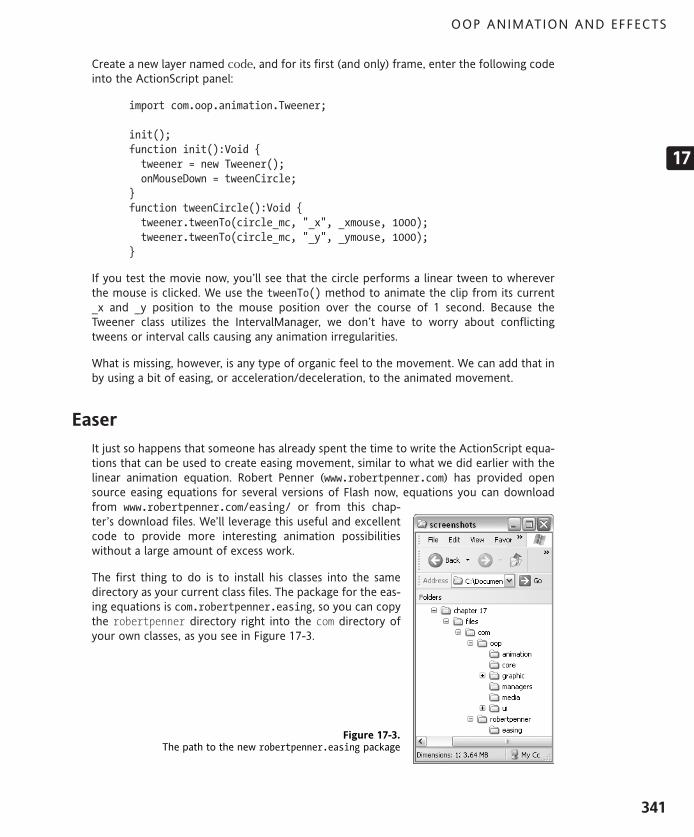
Create a new layer named code, and for its first (and only) frame, enter the following codeinto the ActionScript panel:
import com.oop.animation.Tweener;
init();function init():Void {tweener = new Tweener();onMouseDown = tweenCircle;
}function tweenCircle():Void {tweener.tweenTo(circle_mc, "_x", _xmouse, 1000);tweener.tweenTo(circle_mc, "_y", _ymouse, 1000);
}
If you test the movie now, you’ll see that the circle performs a linear tween to whereverthe mouse is clicked. We use the tweenTo() method to animate the clip from its current_x and _y position to the mouse position over the course of 1 second. Because theTweener class utilizes the IntervalManager, we don’t have to worry about conflictingtweens or interval calls causing any animation irregularities.
What is missing, however, is any type of organic feel to the movement. We can add that inby using a bit of easing, or acceleration/deceleration, to the animated movement.
Easer
It just so happens that someone has already spent the time to write the ActionScript equa-tions that can be used to create easing movement, similar to what we did earlier with thelinear animation equation. Robert Penner (www.robertpenner.com) has provided opensource easing equations for several versions of Flash now, equations you can downloadfrom www.robertpenner.com/easing/ or from this chap-ter’s download files. We’ll leverage this useful and excellentcode to provide more interesting animation possibilitieswithout a large amount of excess work.
The first thing to do is to install his classes into the samedirectory as your current class files. The package for the eas-ing equations is com.robertpenner.easing, so you can copythe robertpenner directory right into the com directory ofyour own classes, as you see in Figure 17-3.
OOP ANIMATION AND EFFECTS
341
17
Figure 17-3. The path to the new robertpenner.easing package
6196CH17.qxd 1/18/06 11:31 AM Page 341

Let’s take a look at one of his easing classes, Cubic, reproduced here with kind permissionfrom Mr. Penner.
class com.robertpenner.easing.Cubic {static function easeIn (t:Number, b:Number,
➥ c:Number, d:Number):Number {return c*(t/=d)*t*t + b;
}static function easeOut (t:Number, b:Number,
➥ c:Number, d:Number):Number {return c*((t=t/d-1)*t*t + 1) + b;
}static function easeInOut (t:Number, b:Number,
➥ c:Number, d:Number):Number {if ((t/=d/2) < 1) return c/2*t*t*t + b;return c/2*((t-=2)*t*t + 2) + b;
}}
Here you can see that a single easing equation type (Cubic) has three different staticmethods, easeIn(), easeOut(), and easeInOut(). Let’s make some modification to ourTweener class so that we may use these equations in our animations.
Go back to the Tweener.as file and add the following bold lines:
public function tween(clip:Object,prop:String,startValue:Number,destValue:Number,time:Number,easeFunction:Function
):Void {clip[prop] = startValue;var intName:String = clip._name + "_" + prop;if (__intervals[intName] == undefined) __intervals[intName] = {};var intObj:Object = __intervals[intName];intObj.count = 1;intObj.totalInts = Math.floor(time/TweenerTest.intervalTime);intObj.startProp = startValue;intObj.endProp = destValue;intObj.changeProp = intObj.endProp - intObj.startProp;intObj.clip = clip;intObj.prop = prop;intObj.easeFunction = (easeFunction == undefined) ?
➥ com.robertpenner.easing.Linear.easeNone : easeFunction;intObj.tweener = this;IntervalManager.setInterval(intObj, "interval",
➥ this, "runTween", TweenerTest.intervalTime, intObj);runTween(intObj);
}
OBJECT-ORIENTED ACTIONSCRIPT FOR FLASH 8
342
6196CH17.qxd 1/18/06 11:31 AM Page 342

public function tweenTo(clip:Object,prop:String,destValue:Number,time:Number,easeFunction:Function
):Void {tween(clip, prop, clip[prop], destValue, time, easeFunction);
}
Here you can see that we now accept another parameter into both the tween() andtweenTo() methods, a function for the ease. We might wish in the future to modify theeasing equations to inherit from a single Ease class so that we could type this argumentaccordingly, but for now we’ll type it as Function. In the tween() method, we check to seewhether a function has been passed in and, if not, we use the Linear.easeNone method,which you’ll notice if you look at that particular method is the linear equation we originallycoded ourselves.
Finally, we need to change the way we calculate the clip’s property each interval in therunTween() method. Instead of using our single equation, it should use the functionpassed in.
private function runTween(intObj:Object):Void {var startProp:Number = intObj.startProp;var changeProp:Number = intObj.changeProp;var count:Number = intObj.count;var total:Number = intObj.totalInts;intObj.clip[intObj.prop] =
➥ intObj.easeFunction(count, startProp, changeProp, total);if (intObj.count++ >= intObj.totalInts) {intObj.clip[intObj.prop] = intObj.endProp;IntervalManager.clearInterval(intObj, "interval");dispatchEvent("endTween", {clip:intObj.clip, prop:intObj.prop});
}}
Go back to your tweenerTest.fla file and pass in an easing function to see how it works.This particular combination produces a nice effect.
import com.oop.animation.Tweener;import com.robertpenner.easing.*;
init();function init():Void {tweener = new Tweener();onMouseDown = tweenCircle;
}function tweenCircle():Void {tweener.tweenTo(circle_mc, "_x", _xmouse, 1000, Cubic.easeOut);tweener.tweenTo(circle_mc, "_y", _ymouse, 1000, Cubic.easeIn);
}
OOP ANIMATION AND EFFECTS
343
17
6196CH17.qxd 1/18/06 11:31 AM Page 343

Testing the Tweener
Let’s set up a little bit more of a structured environment through which to test. This willprove useful as we create more animation classes. Create a new ActionScript file and saveit into the same directory as tweenerTest.fla. This class won’t be within our class struc-ture, as we’ll simply be using it to test some of our code. Add the following lines, which isthe entirety of the class:
import com.oop.ui.UIObject;import com.oop.ui.Block;
class AnimationTest extends UIObject {
private var __blockHolder:UIObject;
function AnimationTest() {}
private function init():Void {super.init();attachGraphics();
}
private function attachGraphics():Void {__blockHolder = createEmptyObject("__block", 0);__blockHolder.position =
➥ new flash.geom.Point(Stage.width/2, Stage.height/2);__blockHolder.createClassObject(Block, "__block", 0,{initialWidth:50,initialHeight:50,_x:-25,_y:-25}
);}
}
Here we have a class that will draw an initial graphic, a Block instance, onto the stage sothat we may animate it. In the attachGraphics() method, we create an empty UIObjectnamed __blockHolder, and within this we create a Block instance named __block. Thereason this is done is so that we may center the Block instance within __blockHolder (itsdefault registration point is at the top left). This will be important if we were to test scalingand rotation animation, since the graphic would then transform from its center asopposed to the top-left corner.
Now create a new Flash document and save it into the same directory as tweenerTest_2.fla.In this file, create an empty movie clip symbol named empty class and export it as empty
OBJECT-ORIENTED ACTIONSCRIPT FOR FLASH 8
344
6196CH17.qxd 1/18/06 11:31 AM Page 344

class as well, and another movie clip symbol named and exported as Block graphic with itsAS 2.0 class set as com.oop.graphic.skins.SimpleRect, as shown in Figure 17-4.
Figure 17-4. The two symbols needed for the animation test
In the only frame on the main timeline, add the following code:
Object.registerClass("empty class", AnimationTest);attachMovie("empty class", "animationTest", 0);
If you test your movie now, you’ll see a 50✕50 gray box drawn onto the middle of thestage. Now let’s try animating it!
Create a new ActionScript file and save it as TweenerTest.as into the same directory asAnimationTest.as. Add the following lines of code, which show the class in its entirety:
import com.oop.animation.Tweener;import com.robertpenner.easing.*;
class TweenerTest extends AnimationTest {
private var __tweener:Tweener;private var __positions:Array;private var __tweenCount:Number;
OOP ANIMATION AND EFFECTS
345
17
6196CH17.qxd 1/18/06 11:31 AM Page 345

function TweenerTest() {}
private function init():Void {super.init();__tweener = new Tweener();__tweener.addEventListener("endTween", this, "startNextTween");__positions =[{x:100, y:100},{x:Stage.width-100, y:100},{x:Stage.width-100, y:Stage.height-100},{x:100, y:Stage.height-100}];
__tweenCount = 0;startNextTween();
}
private function startNextTween():Void {var pos:Object = __positions[__tweenCount];__tweener.tween(__blockHolder, "_rotation",
➥ 0, 90, 500, Quad.easeInOut);__tweener.tweenTo(__blockHolder, "_x", pos.x, 500, Quad.easeIn);__tweener.tweenTo(__blockHolder, "_y", pos.y, 500, Quad.easeOut);if (++__tweenCount >= __positions.length) __tweenCount = 0;
}
}
We are extending AnimationTest here so that we start off with the Block on the stage. Inthis class’s init() method, we create a new Tweener instance and add this TweenerTestinstance as a listener to the endTween event, which will call startNextTween() wheneverit’s fired. We then set four positions in the __positions object that we’ll use in our tweens.At the end of the init(), we set the current tween to 0 (__tweenCount) and callstartNextTween(), which should start everything rolling.
In startNextTween(), we determine the next position to tween to and store that in thelocal variable pos. We then set up three tweens, one for rotation and two for position. Therotation tween will go from 0 degrees to 90 degrees each tween, which will look fine con-sidering we are simply rotating a plain gray rectangle. For the two coordinate positions, weuse the current values stored in pos. To each of these three tweens, we pass a differenteasing equation.
The last line of startNextTween() increments __tweenCount. Once the value exceeds thenumber of positions, the count is set back to 0. In this way, the Block instance will contin-uously loop through the four positions.
Return to tweenerTest_2.fla and change the lines of code to read as follows:
Object.registerClass("empty class", TweenerTest);attachMovie("empty class", "tweenerTest", 0);
OBJECT-ORIENTED ACTIONSCRIPT FOR FLASH 8
346
6196CH17.qxd 1/18/06 11:31 AM Page 346

Test the movie once more to see the Block performing a number of complex tweens aboutthe stage, all managed by our animation classes. We’ll continue to use this setup in ourlater animation experiments.
Enhancing Tweener
A common need for animation in Flash is tweening the position of clips on the stage,which obviously involves changing not one, but two variables over the course of the ani-mation. To accomplish this, the Tweener class could be used (as we did in the previousexercise), but it would be helpful to have a class that handled specifically the tweening ofposition. We’ll do this in a moment with a new Mover class.
In order to create the Mover class, we’ll first add a little enhancement to the Tweenerclass in order to make it more powerful and useful under more circumstances. Right now,the Tweener is limited to altering one property per call, and that is all done within thescope of the Tweener instance itself. When more complex properties need to be changed,like a Color object or even a multidimensional structure, the Tweener would fail. What weneed then is a way to have the Tweener handle multiple and diverse values over the courseof an animation. We’ll accomplish this with a few new methods whose collective purposeis merely to calculate easing values for any type of object passed in, and then pass thesevalues over the course of an animation to a user-defined method outside of the scope ofthe Tweener instance. In this way, we’ll open up endless possible uses for the Tweenerclass, from tweening a movie clip’s position to altering advanced Color transforms to evenperforming 3D transformations.
Open up the Tweener class, and add a new callTween() method to the public functions.This will be the method we would call to initiate this new type of interval call.
public function callTween(clip:Object,method:String,startParams:Object,destParams:Object,time:Number,easeFunction:Function
):Void {var intName:String = clip._name + "_" + prop;if (__intervals[intName] == undefined) __intervals[intName] = {};var intObj:Object = __intervals[intName]; intObj.count = 0;intObj.totalInts = Math.floor(time/Tweener.intervalTime);intObj.startParams = startParams;intObj.endParams = destParams;intObj.changeParams = {};for (var i:String in startParams) {intObj.changeParams[i] = destParams[i] - startParams[i];
}intObj.easeFunction = (easeFunction == undefined) ?
➥ com.robertpenner.easing.Linear.easeNone : easeFunction;intObj.clip = clip;
OOP ANIMATION AND EFFECTS
347
17
6196CH17.qxd 1/18/06 11:31 AM Page 347

intObj.method = method;IntervalManager.setInterval(intObj, "interval",
➥ this, "runTweenCall", Tweener.intervalTime, intObj);dispatchEvent("startTween", {clip:clip, method:method});runTweenCall(intObj);
}
The arguments passed to this function will be very similar to those passed to tween(). Thechanges to note are that instead of a property passed in to alter, a method is passed in thatthe Tweener instance will call every interval. Also, startParams and destParams are objectsas opposed to scalar values.
The body of the function is also very similar to that of tween(). A new interval object iscreated and given all the arguments to store. The changeParams are calculated by runningthrough them all in a loop and finding the differences. You may note that in this case thecount is initialized at 0 instead of 1. We do this because in this method we have no way ofknowing what to do with the start values of the tween, as they could apply to object prop-erties or something more abstract. However, the Tweener instance doesn’t need to knowthis since the external method that will be called should be set to handle all the numbersand know what to do with them. Instead, the Tweener instance simply sets the count to 0and immediately calls the runTweenCall() method (the last line of the function) so thatthe external method might be invoked to handle the animation at the 0 count, whichwould be the tween’s starting values.
Since this function and the tween() function both create the interval object in the exactsame way, let’s move that functionality into a separate method to clean things up. Add thefollowing to the private methods:
private function getInterval(clip:Object, prop:String):Object {var intName:String = clip._name + "_" + prop;if (__intervals[intName] == undefined) __intervals[intName] = {};return __intervals[intName];
}
With this functionality now removed from the tween() and callTween() methods, we canreplace the lines in those two places with a call to this method.
public function tween(clip:Object,prop:String,startValue:Number,destValue:Number,time:Number,easeFunction:Function
):Void {clip[prop] = startValue;var intObj:Object = getInterval(clip, prop);intObj.count = 1;intObj.totalInts = Math.floor(time/Tweener.intervalTime);...etc.
OBJECT-ORIENTED ACTIONSCRIPT FOR FLASH 8
348
6196CH17.qxd 1/18/06 11:31 AM Page 348

public function callTween(clip:Object,method:String,startParams:Object,destParams:Object,time:Number,easeFunction:Function
):Void {var intObj:Object = getInterval(clip, method);intObj.count = 0;intObj.totalInts = Math.floor(time/Tweener.intervalTime);...etc.
Now that the getInterval() is separate, its flaws may become apparent. For instance, themethod assumes that the object passed in for the creation of the interval object will havea _name property. However, unless the Tweener always deals with movie clips, this won’t bethe case. A good example is the new Mover class we’ll create, which, like the Tweener, willbe an abstract object that doesn’t exist on the stage and won’t have a _name property likea movie clip. In such a circumstance, we need the Tweener class to be able to have a wayto store intervals for these abstract objects. We’ll do this by assigning a unique ID to anyobject that doesn’t have a _name and using this value when creating an interval object.
The first thing we need is to create a way to assign these unique IDs for a Tweenerinstance. This will be accomplished with a new __tweenID property and a getTweenID()method.
class com.oop.animation.Tweener extends Animator {
private var __intervals:Object;private var __tweenID:Number = 0static var intervalTime:Number = 40;
function Tweener() {__intervals = {};
}
// PRIVATE// ________________________________________________
private function getTweenID():String {return String(++__tweenID);
}
Each ID requested will increment the __tweenID count by one. We also return the ID as astring since the interval object names are stored as strings and not numbers.
The next step would be to alter the getInterval() method to handle objects with no_name and instead assign a tweenID.
OOP ANIMATION AND EFFECTS
349
17
6196CH17.qxd 1/18/06 11:31 AM Page 349

private function getInterval(clip:Object, prop:String):Object {var clipName:String = clip._name || clip._$tweenID;if (clipName == undefined) {clipName = clip._$tweenID = getTweenID();
}var intName:String = clipName + "_" + prop;if (__intervals[intName] == undefined) __intervals[intName] = {};return __intervals[intName];
}
So now instead of immediately assuming a _name exists, the first line assigns the clip._nameto a local variable clipName or a special property named _$tweenID if the clip._name doesn’texist. On the second line, if clipName is undefined, we know that the clip doesn’t have a_name property and hasn’t yet been assigned a special _$tweenID. In this case, we callgetTweenID() and assign its return value to both the clipName variable and theclip._$tweenID property, which can then be accessed the next time this object creates atween. In the third line, the clipName variable is then used to create the name of the inter-val object.
Of course, with this change in how the interval is stored, we need to alter the haltTween()call as well. Make the following bold changes:
public function haltTween(clip:Object, prop:String) {IntervalManager.clearInterval(getInterval(clip, prop), "interval");
}
The final step to add our more robust functionality to Tweener is to write therunTweenCall() method present in the callTween() code. This is the method that will becalled every interval when the callTween() method begins a tween. In this method, themultiple values passed in to callTween() will have their new values calculated, andthe external method will be called with these new values passed.
private function runTweenCall(intObj:Object):Void {var startParams:Number = intObj.startParams;var changeParams:Number = intObj.changeParams;var count:Number = intObj.count;var total:Number = intObj.totalInts;var p:Object = {};for (var i:String in changeParams) {p[i] = intObj.easeFunction(count,
➥ startParams[i], changeParams[i], total);}if (intObj.count++ > intObj.totalInts) {intObj.clip[intObj.method](intObj.endParams);IntervalManager.clearInterval(intObj, "interval");dispatchEvent("endTween",
➥ {clip:intObj.clip, method:intObj.method});} else {
OBJECT-ORIENTED ACTIONSCRIPT FOR FLASH 8
350
6196CH17.qxd 1/18/06 11:31 AM Page 350

intObj.clip[intObj.method](p);dispatchEvent("tween", {clip:intObj.clip, method:intObj.method});
}}
Much like callTween() was very similar to tween(), runTweenCall() has much in com-mon with runTween(). Within the method, the values within changeParams are runthrough, and the easing equation is used to calculate their new values. Once that is com-plete, we determine whether the number of intervals allotted for the tween is up, and ifso, the endParams are passed to the external method. If not, then the changed params forthis time in the interval are passed to the external method.
With Tweener as complete as we need it for these exercises (you could certainly add morefunctionality such as the ability to loop or create random fluctuations in motion), here isthe entire listing to check your code against:
import com.oop.animation.Animator;import com.oop.managers.IntervalManager;
class com.oop.animation.Tweener extends Animator {
private var __intervals:Object;private var __tweenID:Number = 0static var intervalTime:Number = 40;
function Tweener() {__intervals = {};
}
// PRIVATE// ________________________________________________
private function getTweenID():String {return String(++__tweenID);
}
private function runTween(intObj:Object):Void {var startProp:Number = intObj.startProp;var changeProp:Number = intObj.changeProp;var count:Number = intObj.count;var total:Number = intObj.totalInts;intObj.clip[intObj.prop] =
➥ intObj.easeFunction(count, startProp, changeProp, total);var eventName:String = "tween";if (intObj.count++ >= intObj.totalInts) {intObj.clip[intObj.prop] = intObj.endProp;IntervalManager.clearInterval(intObj, "interval");eventName = "endTween";
OOP ANIMATION AND EFFECTS
351
17
6196CH17.qxd 1/18/06 11:31 AM Page 351

}dispatchEvent(eventName, {clip:intObj.clip, prop:intObj.prop});
}
private function runTweenCall(intObj:Object):Void {var startParams:Number = intObj.startParams;var changeParams:Number = intObj.changeParams;var count:Number = intObj.count;var total:Number = intObj.totalInts;var p:Object = {};for (var i:String in changeParams) {p[i] = intObj.easeFunction(count,
➥ startParams[i], changeParams[i], total);}if (intObj.count++ >= intObj.totalInts) {intObj.clip[intObj.method](intObj.endParams);IntervalManager.clearInterval(intObj, "interval");dispatchEvent("endTween",
➥ {clip:intObj.clip, method:intObj.method});} else {intObj.clip[intObj.method](p);dispatchEvent("tween", {clip:intObj.clip, method:intObj.method});
}}
private function getInterval(clip:Object, prop:String):Object {var clipName:String = clip._name || clip._$tweenID;if (clipName == undefined) {clipName = clip._$tweenID = getTweenID();
}var intName:String = clipName + "_" + prop;if (__intervals[intName] == undefined) __intervals[intName] = {};return __intervals[intName];
}
// PUBLIC// ________________________________________________
public function haltTween(clip:Object, prop:String) {IntervalManager.clearInterval(getInterval(clip, prop), "interval");
}
public function tween(clip:Object,prop:String,startValue:Number,destValue:Number,time:Number,easeFunction:Function
OBJECT-ORIENTED ACTIONSCRIPT FOR FLASH 8
352
6196CH17.qxd 1/18/06 11:31 AM Page 352

):Void {clip[prop] = startValue;var intObj:Object = getInterval(clip, prop);intObj.count = 1;intObj.totalInts = Math.floor(time/Tweener.intervalTime);intObj.startProp = startValue;intObj.endProp = destValue;intObj.changeProp = intObj.endProp - intObj.startProp;intObj.clip = clip;intObj.prop = prop;intObj.easeFunction = (easeFunction == undefined) ?
➥ com.robertpenner.easing.Linear.easeNone : easeFunction;IntervalManager.setInterval(intObj, "interval",
➥ this, "runTween", Tweener.intervalTime, intObj);runTween(intObj);dispatchEvent("startTween", {clip:clip, prop:prop});
}
public function tweenTo(clip:Object,prop:String,destValue:Number,time:Number,easeFunction:Function
):Void {tween(clip, prop, clip[prop], destValue, time, easeFunction);
}
public function callTween(clip:Object,method:String,startParams:Object,destParams:Object,time:Number,easeFunction:Function
):Void {var intObj:Object = getInterval(clip, method);intObj.count = 0;intObj.totalInts = Math.floor(time/Tweener.intervalTime);intObj.startParams = startParams;intObj.endParams = destParams;intObj.changeParams = {};for (var i:String in startParams) {intObj.changeParams[i] = destParams[i] - startParams[i];
}intObj.easeFunction = (easeFunction == undefined) ?
➥ com.robertpenner.easing.Linear.easeNone : easeFunction;intObj.clip = clip;intObj.method = method;
OOP ANIMATION AND EFFECTS
353
17
6196CH17.qxd 1/18/06 11:31 AM Page 353

IntervalManager.setInterval(intObj, "interval",➥ this, "runTweenCall", Tweener.intervalTime, intObj);
dispatchEvent("startTween", {clip:clip, method:method});runTweenCall(intObj);
}
}
Mover
Now that we have added the extra functionality to Tweener, creating unique animatorsthat can handle complex objects is pretty simple. Take for instance the Mover class dis-cussed at the beginning of the last section. Let’s look at the code necessary to create sucha class using our Tweener.
Create a new ActionScript file and save it as Mover.as into the com/oop/animation direc-tory where Tweener resides. Add the following lines of code, which is the framework of asimple Mover class:
import com.oop.animation.Animator;import com.oop.animation.Tweener;
class com.oop.animation.Mover extends Animator {
private var __tweener:Tweener;private var __clip:MovieClip;
function Mover() {__tweener = new Tweener();
}
// PRIVATE// ________________________________________________
private function runMoveTween(intObj:Object):Void {}
// PUBLIC// ________________________________________________
public function haltTween(clip:Object) {}
public function tween(clip:MovieClip,startParams:Object,endParams:Object,time:Number,easeFunction:Function
OBJECT-ORIENTED ACTIONSCRIPT FOR FLASH 8
354
6196CH17.qxd 1/18/06 11:31 AM Page 354

):Void {}
public function tweenTo(clip:MovieClip,endParams:Object,time:Number,easeFunction:Function
):Void {}
}
As you can see, Mover isn’t a Tweener itself, but instead has a Tweener instance that it willuse to calculate all of the changed values. tween() and tweenTo() will initiate a tween,runMoveTween() will be the external method called by the Tweener instance, andhaltTween() will end the tween when requested. Of course, the methods won’t yet doanything, so let’s fill them in.
public function tween(clip:MovieClip,startParams:Object,endParams:Object,time:Number,easeFunction:Function
):Void {__tweener.addEventListener("endTween", this);__clip = clip;dispatchEvent("startTween", {clip:clip});__tweener.callTween(this, "runMoveTween",
➥ startParams, endParams, time, easeFunction);}
public function tweenTo(clip:MovieClip,endParams:Object,time:Number,easeFunction:Function
):Void {tween(clip, {x:clip._x, y:clip._y}, endParams, time, easeFunction);
}
With the Tweener instance providing most of the functionality, setting up a tween of mul-tiple properties is relatively easy. Note that in the tween() method, we add the Moverinstance as a listener to the Tweener instance. This means that we’ll need to define anendTween() method that will be called when the endTween event is dispatched. Theremaining lines in the method save a reference to the clip being tweened, dispatchthe startTween event, and set up __tweener to call runMoveTween() at every tween inter-val. The Tweener instance will handle calculating what values should be sent to thismethod by using the startParams, the endParams, and the easing function passed in.
OOP ANIMATION AND EFFECTS
355
17
6196CH17.qxd 1/18/06 11:31 AM Page 355

As before, tweenTo() merely needs to call tween() with the startParams passed in.
Next, let’s flesh out the final two methods we defined earlier while adding the newendTween() method that will be called when __tweener completes a tween.
// PRIVATE// ________________________________________________
private function endTween(infoObj:Object):Void {__tweener.removeEventListener("endTween", this);dispatchEvent("endTween", {clip:__clip});
}
private function runMoveTween(intObj:Object):Void {__clip._x = intObj.x;__clip._y = intObj.y;dispatchEvent("tween");
}
// PUBLIC// ________________________________________________
public function haltTween(clip:Object) {__tweener.haltTween(this, "runMoveTween");
}
endTween() merely needs to remove the Mover instance as a listener for the endTweenevent from __tweener. runMoveTween(), which receives values calculated by __tweener,sets the clip’s _x and _y properties to the current tween values. Finally, haltTween() callsthe haltTween() method on __tweener.
The simple Mover class is complete, so let’s try it out. Create a new ActionScript file andsave it into the same directory as AnimationTest and TweenerTest from the first section’sexercise. Add the following code:
import com.oop.animation.Mover;import com.robertpenner.easing.*;
class MoverTest extends AnimationTest {
private var __mover:Mover;
function MoverTest() {}
private function init():Void {super.init();__mover = new Mover();onMouseDown = moveToMouse;
}
OBJECT-ORIENTED ACTIONSCRIPT FOR FLASH 8
356
6196CH17.qxd 1/18/06 11:31 AM Page 356

private function moveToMouse():Void {__mover.tweenTo(__blockHolder,
➥ {x:_xmouse, y:_ymouse}, 600, Circ.easeInOut);}
}
Since AnimationTest, if you recall, draws a Block instance on the stage, MoverTest simplyhas to decide how to move it about. In the init() method, a new Mover instance iscreated and moveToMouse() is assigned to the onMouseDown handler. moveToMouse() calls atweenTo() on the Mover instance, animating __blockHolder to the current mouse posi-tion using the Circ.easeInOut easing equation.
To test this out, duplicate the tweenerTest.fla file from the first section’s exercise andsave it as moverTest.fla. This file has an empty clip in the library and the Block graphicskin. Change the Frame 1 code on the main timeline to the following:
Object.registerClass("empty class", MoverTest);attachMovie("empty class", "moverTest", 0);
Test the movie and click the stage to see the Block tween to the clicked position. Not bad!What would be great now is if we could add a little dynamic blur to the fast-moving objectin order to create a little more realistic movement. Turns out that in Flash 8, we can!
Motion blur
With the new BlurFilter available in Flash 8, we can add a bit of motion blur to our objectsas they move across the stage, a cool little effect with minimal additional work. This won’tbe a true directional motion blur, but a close approximation. When things are moving fastacross the screen in a blur, it will be hard to tell the difference anyway!
What we’ll do is calculate the distance an object has traveled since the last interval call anduse the distance on each axis to set the blur on each axis, properties of the BlurFilter.Therefore, if an object moves more vertically than horizontally, the blur on the y axis willbe greater than the blur on the x axis.
The first thing we’ll add to our Mover.as file is the code to import the BlurFilter class andset its default values for Mover.
import com.oop.animation.Animator;import com.oop.animation.Tweener;import flash.filters.BlurFilter;
class com.oop.animation.Mover extends Animator {
private var __tweener:Tweener;private var __clip:MovieClip;public var blur:Boolean = false;public var blurFactor:Number = 1;public var blurQuality:Number = 1;
OOP ANIMATION AND EFFECTS
357
17
6196CH17.qxd 1/18/06 11:31 AM Page 357

function Mover() {__tweener = new Tweener();
}
blur will determine whether the Mover uses the BlurFilter on its tweened clip, turned offby default. blurFactor will be used to help determine the blurX and blurY values for theBlurFilter (higher values will produce more blur), and blurQuality will be passed tothe BlurFilter as its quality property, controlling how many blur calculations are performedon the object. Higher quality obviously produces better results, but at the cost of moreprocessing cycles.
I have decided to leave these properties public for ease of demonstration here. Feel freeto create getter/setter methods for private variables if you so wish. Also, there is the pos-sibility of adding blur values for each individual tween as opposed to for every tweenperformed by a single Mover instance. That, again, is up to you.
The next step is to add a BlurFilter to the tweened clip when a tween starts (and whenblur is set to true). Add these lines to the tween() method:
public function tween(clip:MovieClip,startParams:Object,endParams:Object,time:Number,easeFunction:Function
):Void {__tweener.addEventListener("endTween", this);__clip = clip;if (blur) {var f:Array = __clip.filters || [];if (f[f.length-1] instanceof BlurFilter) f = f.slice(0, -1);f.push(new BlurFilter(0, 0, blurQuality))__clip.filters = f;
}dispatchEvent("startTween", {clip:clip});__tweener.callTween(this, "runMoveTween",
➥ startParams, endParams, time, easeFunction);}
If blur is set to true, we grab either the filters array currently assigned to the object or,if it doesn’t yet exist, create a new array. Then, if the last filter in this array is already aBlurFilter instance, we remove it. This assumes that clips passed to the Mover that shouldbe blurred should not already have a BlurFilter instance applied. Finally, we push a newBlurFilter instance into the filters array with no blur yet applied (0 values for both theblurX and blurY) and reassign this modified array back as the clip’s filters. We are nowready to tween!
Now that the BlurFilter is prepared on the tweened clip, we can alter its values each frameto create the motion blur. This will all occur in the runMoveTween() method.
OBJECT-ORIENTED ACTIONSCRIPT FOR FLASH 8
358
6196CH17.qxd 1/18/06 11:31 AM Page 358

private function runMoveTween(intObj:Object):Void {__clip._x = intObj.x;__clip._y = intObj.y;if (blur) {if (__clip._$moverLastX != undefined) {var f:Array = __clip.filters;var bf:BlurFilter = f[f.length-1];var factor:Number = blurFactor/10;bf.blurX = Math.abs((intObj.x - __clip._$moverLastX)*factor);bf.blurY = Math.abs((intObj.y - __clip._$moverLastY)*factor);__clip.filters = f;
}__clip._$moverLastX = intObj.x;__clip._$moverLastY = intObj.y;
}dispatchEvent("tween");
}
Here is the logic applied to create our blur. Each frame, the Mover modifies two specialvalues on the tweened clip, _$moverLastX and _$moverLastY, so named to hopefully pre-vent any conflict with values already on the clip. These variables will hold the last screenposition of the clip on each axis. The first time this method is called, these values don’texist, but every subsequent time we can check the difference of these values and the cur-rent position of the clip and use this to calculate the blur. How exactly is that calculated?A factor variable is determined based on the blurFactor property of Mover. The move-ment on each axis is multiplied by this factor to determine the blur amount, so the largerthe factor and the greater the movement, the larger the blur. By default, blurFactor is setto 1, which makes factor resolve to 0.1. Therefore, with these settings, a movement of50 pixels on the x axis will set the BlurFilter’s blurX value to 5. This calculation occursevery time this method is called during a tween to create a dynamic blur.
The last step would be to remove the blur upon completion of the tween. This is takencare of in the haltTween() method.
public function haltTween(clip:Object) {if (blur) {delete __clip._$moverLastX;delete __clip._$moverLastY;__clip.filters = __clip.filters.slice(0, -1);
}__tweener.haltTween(this, "runMoveTween");
}
Once the tween is complete, the special variables used for the tween are deleted, and theBlurFilter, last in the list of filters for the clip, is removed.
To test this in action, return to the MoverTest.as file and set the Mover instance’s blurproperty to true.
OOP ANIMATION AND EFFECTS
359
17
6196CH17.qxd 1/18/06 11:31 AM Page 359

private function init():Void {super.init();__mover = new Mover();__mover.blur = true;onMouseDown = moveToMouse;
}
Test your movie, and you should see a subtle blur as you click the stage and tween the clip.To get a more distinct blur (less distinct?), try raising the blur factor.
private function init():Void {super.init();__mover = new Mover();__mover.blur = true;__mover.blurFactor = 3;onMouseDown = moveToMouse;
}
With just a little bit of code encapsulated in an animation class, we’ve now enabled theability to tween the position of any movie clip object in our movies and have a motion blurapplied!
Transitioning viewsThis next group of classes, we’ll explore the transitioning of visual objects from one stateto another. By abstracting these transition classes out from the objects themselves, theymay be reused over and over from one project to another with little to no additional work.For instance, if you were developing an image slideshow and you wanted a simple fadein/out of all the images, you might consider making a function that uses an onEnterFrameor an interval to change the alpha of one image till it disappeared, then tweens up theopacity of another image to bring it into view. This sort of transition is fairly easy toaccomplish and might even be something that you have already copied and pasted fromone project to another. How much easier would it be, even for this simple function, to cre-ate a transition instance, pass it the clip to be transitioned, and just tell it to start. Oncecompleted, an event would be broadcast so you could have another transition tween inthe new image. It becomes more obviously useful when dealing with more complex tran-sitions, as we’ll create through the rest of this chapter, using some of the bitmap manipu-lation available in Flash 8. By separating the transition code from the graphic objectsthemselves, these classes can be reused in any project with little fuss.
Transition
All transitions will have similar needs, so it makes sense to have a class from which all tran-sitions will inherit. This class will establish the common properties and the start and endevents for transitions.
OBJECT-ORIENTED ACTIONSCRIPT FOR FLASH 8
360
6196CH17.qxd 1/18/06 11:31 AM Page 360
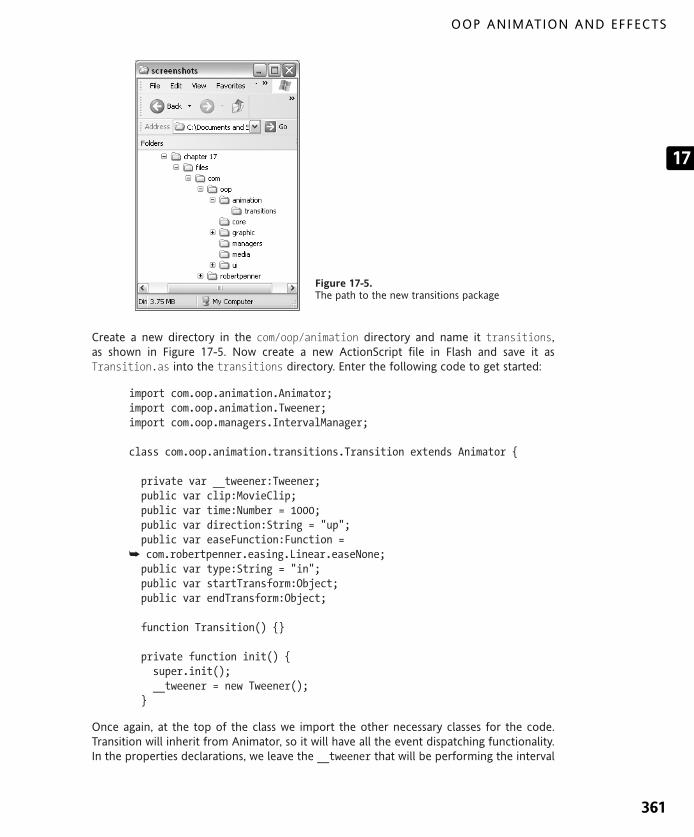
Create a new directory in the com/oop/animation directory and name it transitions,as shown in Figure 17-5. Now create a new ActionScript file in Flash and save it asTransition.as into the transitions directory. Enter the following code to get started:
import com.oop.animation.Animator;import com.oop.animation.Tweener;import com.oop.managers.IntervalManager;
class com.oop.animation.transitions.Transition extends Animator {
private var __tweener:Tweener;public var clip:MovieClip;public var time:Number = 1000;public var direction:String = "up";public var easeFunction:Function =
➥ com.robertpenner.easing.Linear.easeNone;public var type:String = "in";public var startTransform:Object;public var endTransform:Object;
function Transition() {}
private function init() {super.init();__tweener = new Tweener();
}
Once again, at the top of the class we import the other necessary classes for the code.Transition will inherit from Animator, so it will have all the event dispatching functionality.In the properties declarations, we leave the __tweener that will be performing the interval
Figure 17-5. The path to the new transitions package
OOP ANIMATION AND EFFECTS
361
17
6196CH17.qxd 1/18/06 11:31 AM Page 361

calculations private, as it will never have to be accessed externally. The other propertiesare all configurable, and could be made to be private with getter/setter methods, but havebeen made public here again for simplicity’s sake.
What will these properties determine? clip will be the movie clip instance to transition.time will be the length of time in milliseconds in which to perform the transition. directionwill be useful for those transitions that have an obvious direction, like the standard wipe,which could occur left, right, up, down, etc. The easeFunction, discussed much earlier thischapter, can be passed to the Tweener instance to provide different forms of numeric cal-culations for the transformations. type will determine whether a clip is transitioning in toview, or out of it. Finally, startTransform and endTransform are open-ended and can holdvalues necessary for each end of a transition (for instance, a color transition might storecolor values here, whereas a transition using a filter might store filter-specific variables).
After the constructor, the init() method invokes the super method and then instantiatesa Tweener instance that will perform the transition calculations when we come to it.
To finish off the Transition class, we need to define the standard methods that a developerwould call on any transition. The full listing of the Transition class, with the new linesadded in bold, is as follows:
import com.oop.animation.Animator;import com.oop.animation.Tweener;import com.oop.managers.IntervalManager;
class com.oop.animation.transitions.Transition extends Animator {
private var __tweener:Tweener;public var clip:MovieClip;public var time:Number = 1000;public var direction:String = "up";public var easeFunction:Function =
➥ com.robertpenner.easing.Linear.easeNone;public var type:String = "in";public var startTransform:Object;public var endTransform:Object;
function Transition() {}
private function init() {super.init();__tweener = new Tweener();
}
public function start():Void {__tweener.addEventListener("endTween", this, "halt");
}
OBJECT-ORIENTED ACTIONSCRIPT FOR FLASH 8
362
6196CH17.qxd 1/18/06 11:31 AM Page 362

public function halt():Void {__tweener.removeEventListener("endTween", this);dispatchEvent("endTransition", {clip:clip});
}
}
When the transition’s start() method is called, the transition is added as a listener to the__tweener’s endTween event. When the tween completes, the halt() method will becalled, removing the listener and dispatching an endTransition event. The classes inherit-ing from Transition will have to determine the best way for each to halt the transition ani-mation itself—polymorphism at work again.
This class in and of itself won’t do anything. Next, we’ll build a class that extends Transitionin order to perform a visual effect.
FadeTransition
Now that we have the base class functionality, each transition that builds off it merelyneeds to concern itself with code specific to performing its unique transition. We’ll startwith one of the easiest examples, an alpha fading transition.
Create a new ActionScript document and save it into the com/oop/animation/transitions directory as FadeTransition.as. The following is the entire class listing, withexplanation to follow.
import com.oop.animation.transitions.Transition;
class com.oop.animation.transitions.FadeTransition extends Transition {
public var startAlpha:Number;
function FadeTransition() {}
public function start():Void {super.start();if (type == "in") {var a:Number = startAlpha;if (a == undefined) a = 0;__tweener.tween(clip, "_alpha", a, 100, time, easeFunction);
} else {var a:Number = startAlpha;if (a == undefined) a = clip._alpha;__tweener.tween(clip, "_alpha", a, 0, time, easeFunction);
}}
OOP ANIMATION AND EFFECTS
363
17
6196CH17.qxd 1/18/06 11:31 AM Page 363

public function halt():Void {__tweener.haltTween(clip, "_alpha");clip._alpha = ((type == "in") ? 100 : 0);super.halt();
}
public function removeTransitionEffects():Void {clip._alpha = 100;
}
}
When a new FadeTransition is created and its start() method is called, it calls thetween() method on its Tweener instance, tweening the _alpha property of the clip passedin. Whether the tween goes from full opacity to 0, or 0 to full, depends on the type oftransition, in or out. You can also see that a startAlpha property was added so that thealpha tween could start at an arbitrary value. This would be useful if you had a clip thatwas already at 80% opacity and this transition was used to tween it out.
In the halt() method, the __tweener’s haltTween() method is called to stop the anima-tion and the clip’s _alpha is set to 0 or 100 based on the type of transition. Finally,the super’s halt() method is called, where the Tweener listener is removed and theendTransition event is dispatched.
While coding this class, it became apparent that a useful function would be one where anyeffects placed on a clip by a transition could be removed, hence the original-namedmethod removeTransitionEffects(). Whatever actions a transition has performed on aclip, be they alpha fades or the application of filters, need to be easily removable bythe developer, without the developer needing to know what those actions were. In theFadeTransition’s case, the clip’s _alpha should be restored to its full value.
Since this a method that all transitions should support, let’s put it into the base class to beoverridden by each subclass. Go back to Transition.as and add the new line in bold:
public function halt():Void {__tweener.removeEventListener("endTween", this);dispatchEvent("endTransition", {clip:clip});
}
public function removeTransitionEffects():Void {};
The removeTransitionEffects() is empty here, but at least any code accessing aTransition instance can expect this method to exist without any compile errors beingthrown.
Testing transitions
We now have a super Transition class and a FadeTransition inheriting from it, so it’s time tosee the fruits of our labors and watch a transition! Of course, what that means is we need
OBJECT-ORIENTED ACTIONSCRIPT FOR FLASH 8
364
6196CH17.qxd 1/18/06 11:31 AM Page 364

to prepare a file with a movie clip in it on which to perform the transitions. This file willrun through all transitions that we store in an array.
Create a new Flash document and save it as transitionTest.fla into the same directorywhere you placed the earlier tweenerTest.fla and moverTest.fla files. In the document,create a new movie clip symbol named and exported as empty clip. Finally, import into thelibrary an image that will fit on the stage (the smaller the image, the faster the transitionscan perform). You may use the file included in this chapter’s download files, Audrey.jpg,or any of your own choosing. Once it’s in the library, right-click the symbol and in itsLinkage dialog box set the symbol’s Identifier to something descriptive (I used Audrey, asyou see in Figure 17-6).
Figure 17-6. The library set up to test transitions
Now create a new ActionScript file and save it into the same directory as thistransitionTest.fla. Save this new file as TransitionTest.as. Enter the following code:
import com.oop.ui.UIObject;import com.oop.animation.transitions.*;import flash.display.BitmapData;import flash.geom.*;
OOP ANIMATION AND EFFECTS
365
17
6196CH17.qxd 1/18/06 11:31 AM Page 365

class TransitionTest extends UIObject {
private var __imageHolder:UIObject;private var __transition:Transition;private var __transitionList:Array;private var __transitionCount:Number;private var __transitioning:Boolean;
function TransitionTest() {}
private function init():Void {super.init();__transitionList =[FadeTransition];
__transitionCount = 0;var image:BitmapData = BitmapData.loadBitmap("Audrey");__imageHolder = createEmptyObject("__imageHolder", 0);__imageHolder.createEmptyObject("innerClip", 0);__imageHolder.getChild("innerClip").attachBitmap(image, 0);__imageHolder.position = new Point((Stage.width-image.width)/2,
➥ (Stage.height-image.height)/2);__imageHolder.filters = [
➥ new flash.filters.DropShadowFilter(10, 45, 0x000000,➥ 40, 5, 5, .7, 1)];
onMouseDown = transitionImageOut;transitionImageIn();
}}
This is the first half of the class to test the transitions. After the class imports and propertydeclarations, which will be explained in the actual methods, we begin with the init()method. In this, we create a new array named __transitionList, which will hold all tran-sitions to test. Right now, there is only one, FadeTransition. The current transition (the onethat will occur next) has its index stored in the __transitionCount variable. The next sev-eral lines use the new BitmapData object to attach the JPEG from the library (isn’t itfantastic we can do that now?). Be sure to change the name of the bitmap to attach towhatever you named your bitmap symbol in transitionTest.fla. This image is placedinside a UIObject instance named innerClip that is created within the UIObject__imageHolder. The reason for this nesting is so we can center innerClip within__imageHolder, effectively creating a center registration point.
Once the image is attached to innerClip and centered within __imageHolder, we add anice DropShadow filter to it for a little effect. We then set transitionImageOut() to becalled onMouseDown and immediately call transitionImageIn(), which will start the firsttransition.
These next functions, completing TransitionTest, define the transition functions. Add thesebelow the init() within the class definition.
OBJECT-ORIENTED ACTIONSCRIPT FOR FLASH 8
366
6196CH17.qxd 1/18/06 11:31 AM Page 366

private function transitionImageIn():Void {__transitioning = true;__transition.removeEventListener("endTransition", this);__transition = Transition(
➥ new __transitionList[__transitionCount]());__transition.addEventListener("endTransition", this);__transition.clip = __imageHolder;__transition.start();
}
private function transitionImageOut():Void {if (__transitioning) return;__transitioning = true;__transition.addEventListener("endTransition", this);__transition.type = "out";__transition.start();if (++__transitionCount >= __transitionList.length) {__transitionCount = 0;
}}
private function endTransition():Void {if (__transition.type == "out") {__transition.removeTransitionEffects();transitionImageIn();
} else {__transitioning = false;
}}
When transitionImageIn() is called, we set a Boolean flag to true so that another tran-sition may not be called until the transition is complete. Then, after removing this instanceas a listener to the previous transition, whatever that may have been, we create a newtransition instance, using the current __transitionCount to access a function from the__transitionList array. This instance is cast to Transition, as that class holds allthe common methods and properties for all transitions. Next, we add this class as alistener to the new transition, pass in a reference to the _imageHolder movie clip, and tellthe transition to start().
When the transition is complete, it will call the endTransition() method. At that time, ifthe current transition was going out, we remove any transition artifacts from the clip andcall transitionImageIn() to transition the image in using the next transition. However, ifthe transition was coming in, then we simply set the transitioning flag to false, meaningthat clicking the mouse will start the next transition.
That logic is defined in the transitionImageOut() method, which you’ll recall was theonMouseDown handler. This changes the current transition’s type to out and starts it up.__transitionCount is then incremented to move on to the next transitions. If the maxtransitions has been reached, then the count is set back to 0.
OOP ANIMATION AND EFFECTS
367
17
6196CH17.qxd 1/18/06 11:31 AM Page 367

Time to test the code! Return to transitionTest.fla and add the following lines of codeto the single frame:
Object.registerClass("empty class", TransitionTest);attachMovie("empty class", "transitionTest", 0);
Figure 17-7. The transition test base image between each transition
Figure 17-8. The FadeTransition applied to the image
OBJECT-ORIENTED ACTIONSCRIPT FOR FLASH 8
368
6196CH17.qxd 1/18/06 11:31 AM Page 368

Test your movie and the image should begin transitioning in immediately, as you see inFigures 17-7 and 17-8. Once the transition is complete, click with your mouse to see theimage fade out, then fade back in. This will continue to loop as long as you keep clickingyour mouse. Although this end result might seem paltry after all that code, the beauty ofit is that the transition itself now can be accomplished with three little lines of code:
var ft:FadeTransition = new FadeTransition();ft.clip = myMovieClip;ft.start();
This small snippet can be used in any project, and you can expect it to work the same. Plus,since you can configure the time, type, and easing function, you have a number of pos-sible transitions at your disposal.
ColorTransition
The next transition we code will also offer many different ways it can be configured. Withthe ColorTransition, any advanced Color transform can be used to transform in and out ofthe view of a clip. This means that an image might transition in from white or black or hotpink. It also means that different color effects might be transitioned through, like a trans-form from a negative of the image to a positive. The transition can change completelybased on whatever is passed in as the startTransform and endTransform. Let’s take a lookat the code, represented next in its entirety.
import com.oop.animation.transitions.Transition;import flash.geom.*;
class com.oop.animation.transitions.ColorTransition➥ extends Transition {
private var __transform:Transform;
function ColorTransition() {startTransform = {ra:0, rb:0, ga:0, gb:0, ba:0, bb:0, aa:1, ab:0};endTransform = {ra:1, rb:0, ga:1, gb:0, ba:1, bb:0, aa:1, ab:0};
}
private function setTransform(ct:Object):Void {__transform.colorTransform = new ColorTransform(ct.ra,ct.ga,ct.ba,ct.aa,ct.rb,ct.gb,ct.bb,ct.ab
);}
OOP ANIMATION AND EFFECTS
369
17
6196CH17.qxd 1/18/06 11:31 AM Page 369

public function start():Void {super.start();__transform = new Transform(clip);if (type == "in") {setTransform(startTransform);__tweener.callTween(this, "setTransform",
➥ startTransform, endTransform, time, easeFunction);} else {setTransform(endTransform);__tweener.callTween(this, "setTransform",
➥ endTransform, startTransform, time, easeFunction);}
}
public function halt():Void {setTransform(type == "in" ? endTransform : startTransform);__tweener.haltTween(this, "setTransform");super.halt();
}
public function removeTransitionEffects():Void {setTransform({ra:1, rb:0, ga:1, gb:0, ba:1, bb:0, aa:1, ab:0});
}
}
The ColorTransition tweens the color properties stored in the two transforms, either enddetermined by the type of transition, in or out. When start() is called, a Transforminstance (new to Flash 8) is created to handle the color transforms of the clip. Then the__tweener’s callTween() is used to call the ColorTransition instance’s setTransform()each interval call, swapping the Transform’s colorTransform, effectively coloring the clip.
The halt() function colors the clip with the proper transform depending on the transitiontype, and then halts the tween of the ColorTransition.
Finally, the removeTransitionEffects() method sets the clip’s color transform back tothe default with no tinting.
That’s a pretty simple implementation for tweening colors (considering we can even useeasing functions to make it more interesting)! This is because we have spent the timelaying the groundwork elsewhere in the Transition and Tweener classes. We are now get-ting to the fun part of implementing new effects with very little elbow grease.
To see how this works, add the ColorTransition to your TransitionTest class.
OBJECT-ORIENTED ACTIONSCRIPT FOR FLASH 8
370
6196CH17.qxd 1/18/06 11:31 AM Page 370
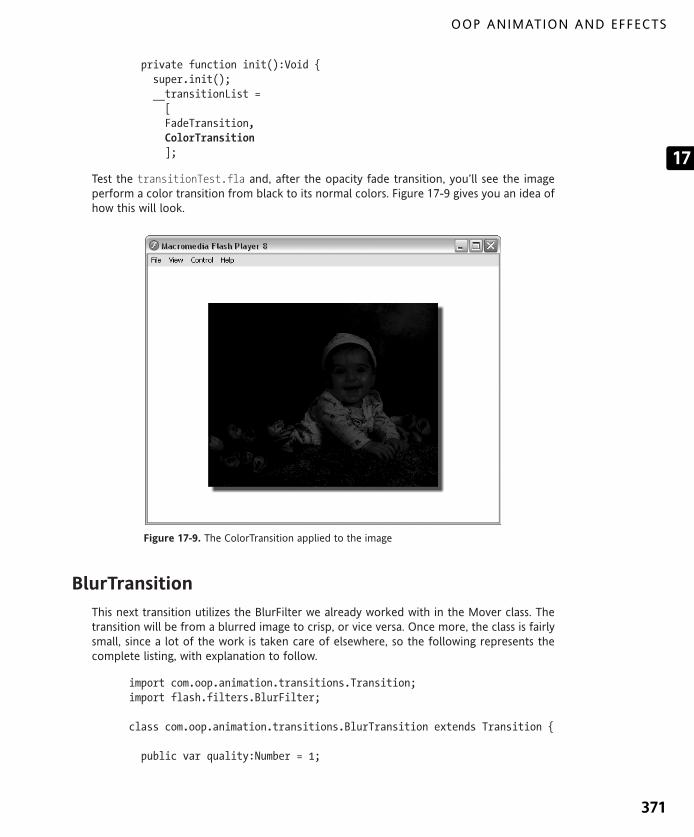
private function init():Void {super.init();__transitionList =[FadeTransition,ColorTransition];
Test the transitionTest.fla and, after the opacity fade transition, you’ll see the imageperform a color transition from black to its normal colors. Figure 17-9 gives you an idea ofhow this will look.
Figure 17-9. The ColorTransition applied to the image
BlurTransition
This next transition utilizes the BlurFilter we already worked with in the Mover class. Thetransition will be from a blurred image to crisp, or vice versa. Once more, the class is fairlysmall, since a lot of the work is taken care of elsewhere, so the following represents thecomplete listing, with explanation to follow.
import com.oop.animation.transitions.Transition;import flash.filters.BlurFilter;
class com.oop.animation.transitions.BlurTransition extends Transition {
public var quality:Number = 1;
OOP ANIMATION AND EFFECTS
371
17
6196CH17.qxd 1/18/06 11:31 AM Page 371

function BlurTransition() {startTransform = {blurX:25, blurY:25};endTransform = {blurX:0, blurY:0};
}
private function applyBlur(blur:BlurFilter):Void {var f:Array = clip.filters.slice(0, -1);clip.filters = f.concat(blur);
}
private function runTransition(transform:Object):Void {applyBlur(new BlurFilter(
➥ transform.blurX, transform.blurY, quality));}
public function start():Void {super.start();var f:Array = clip.filters || [];if (f[f.length-1] instanceof BlurFilter) f = f.slice(0, -1);f.push(new BlurFilter(0, 0, quality));clip.filters = f;if (type == "in") {__tweener.callTween(this, "runTransition",
➥ startTransform, endTransform, time, easeFunction);} else {__tweener.callTween(this, "runTransition",
➥ endTransform, startTransform, time, easeFunction);}
}
public function halt():Void {if (type == "in") {applyBlur(new BlurFilter(
➥ endTransform.blurX, endTransform.blurY, quality));} else {applyBlur(new BlurFilter(
➥ startTransform.blurX, startTransform.blurY, quality));}__tweener.haltTween(this, "runTransition");super.halt();
}
public function removeTransitionEffects():Void {clip.filters = clip.filters.slice(0, -1);
}
}
OBJECT-ORIENTED ACTIONSCRIPT FOR FLASH 8
372
6196CH17.qxd 1/18/06 11:31 AM Page 372

Much of this bears a striking resemblance to what we already coded in the Mover class.When the start() method is called, a new BlurFilter instance is pushed into the clip’sfilters array (after ensuring that the last filter applied is NOT a BlurFilter instance). Then,depending on the type of transition, the __tweener.callTween() is used to tween fromthe startParams to the endParams, or vice versa.
The runTransition(), which is called by __tweener every interval with new values, simplycalls applyBlur(), a method that removes the last filter in the clip’s filters array andadds the BlurFilter instance passed to the method, reapplying this modified array tothe clip.
halt() in this transition applies either the start or end blur to the clip and halts the tween.removeTransitionEffects() removes the BlurFilter that was added.
To test, once again return to TransitionTest.as and add the BlurTransition to the__transitionList.
private function init():Void {super.init();__transitionList =[FadeTransition,ColorTransition,BlurTransition];
Figure 17-10. The BlurTransition applied to the image
OOP ANIMATION AND EFFECTS
373
17
6196CH17.qxd 1/18/06 11:31 AM Page 373

Test the transitionTest.fla with these changes and see all three transition types playingtogether (Figure 17-10 shows what the BlurTransition looks like). That’s three completetransition effects, each between 30 to 50 lines of code, demonstrating the powers ofabstraction, inheritance, and polymorphism. But we can still do more!
NoiseTransition
The NoiseTransition takes advantage of the new BitmapData object and its noise()method, which fills an image with pixel noise. We’ll use this to create a sort of TV snoweffect, as if a television channel is coming into focus (you know, from the days we still hadknobs on our TVs). The code is once again less than 50 lines, so here is the full listing, withits explanation to follow.
import com.oop.managers.IntervalManager;import com.oop.animation.transitions.Transition;import com.oop.animation.transitions.FadeTransition;import flash.display.BitmapData;import flash.geom.*;
class com.oop.animation.transitions.NoiseTransition➥ extends Transition {
private var __noiseImage:BitmapData;
function NoiseTransition() {}
private function runTransition():Void {__noiseImage.noise(getTimer(), 0, 255, 7, true);
}
public function start():Void {super.start();__noiseImage = new BitmapData(
➥ clip._width, clip._height, true, 0x00FFFFFF);if (clip.noise_mc) clip.noise_mc.removeMovieClip();clip.createEmptyMovieClip("noise_mc", clip.getNextHighestDepth());clip.noise_mc.attachBitmap(__noiseImage, 0);var t:FadeTransition = new FadeTransition();t.clip = clip.noise_mc;t.type = ((type == "in") ? "out" : "in");t.easeFunction = easeFunction;t.time = time;t.addEventListener("endTransition", this, "halt");t.start();IntervalManager.setInterval(
➥ this, "interval", this, "runTransition", 40);}
OBJECT-ORIENTED ACTIONSCRIPT FOR FLASH 8
374
6196CH17.qxd 1/18/06 11:31 AM Page 374

public function halt():Void {IntervalManager.clearInterval(this, "interval");if (type == "in") removeTransitionEffects();super.halt();
}
public function removeTransitionEffects():Void {clip.noise_mc.removeMovieClip();__noiseImage.dispose();
}
}
When the transition’s start() is called, a new transparent BitmapData object is created tomatch the clip’s dimensions. Then, a new movie clip is created on the clip at its next high-est depth, and the bitmap is attached to this clip. To have the noise fade in or out, we’llreuse the FadeTransition we created earlier (see how it all fits together nicely now?), pass-ing the noise_mc as its clip to transition. The type will be the opposite of NoiseTransition’stype—for instance, if the NoiseTransition is to transition in, then we want the noise itselfto fade out. When the FadeTransition instance completes its transition, we specify that itshould call the halt() method on this NoiseTransition instance. The last line inthe start() method sets up an interval call so that we can animate the noise in therunTransition() method while the noise_mc is fading in or out.
If you look to runTransition(), it’s a single line, but with a method new to Flash 8. Thenoise() method of BitmapFilter simply applies noise to the image. By passing in a differ-ent seed value each time (the first parameter—getTimer() ensures that this will never bethe same value), the noise is changed each frame, creating the snow animation.
When the FadeTransition instance completes its transition, halt() is called, which clearsthe animation interval. If the transition type is in, then removeTransitionEffects() iscalled, which disposes of the __noiseImage BitmapData instance and removes the clip wecreated to display it.
Return to TransitionTest and add the NoiseTransition into the list of transitions to test.
private function init():Void {super.init();__transitionList =[FadeTransition,ColorTransition,BlurTransition,NoiseTransition];
OOP ANIMATION AND EFFECTS
375
17
6196CH17.qxd 1/18/06 11:31 AM Page 375

Figure 17-11. The NoiseTransition applied to the image
Test the movie to see all the transitions in action! Figure 17-11 shows how the NoiseTransitionappears.
DissolveTransition and WaterTransition
Included to further inspire you are two more transitions that are a bit more complex, usingFlash 8 bitmap manipulation features. You can copy these files, available with this chap-ter’s download files, into your class directory and test them in the same TransitionTestclass.
The DissolveTransition uses the pixelDissolve() method of the BitmapData class to dis-solve an image from a solid image, breaking it down into smaller clumps of pixels, and viceversa. The WaterTransition uses the powerful DisplacementMapFilter and the perlinNoise()method of the BitmapData class to create a water-like effect, rippling the image into astatic position. The complete listing of both of these classes follows for your perusal andfurther discovery. Although they are certainly more complex than the earlier transitions,they are still less than 90 lines of code apiece.
// +++++++++++++++++++++++++++++++++++++++++++++++++++// DISSOLVE TRANSITION
import com.oop.managers.IntervalManager;import com.oop.animation.transitions.Transition;import com.oop.animation.Tweener;import flash.display.BitmapData;import flash.geom.*
OBJECT-ORIENTED ACTIONSCRIPT FOR FLASH 8
376
6196CH17.qxd 1/18/06 11:31 AM Page 376

class com.oop.animation.transitions.DissolveTransition➥ extends Transition {
private var __dissolveImage:BitmapData;private var __originalImage:BitmapData;public var rate:Number = 5;
function DissolveTransition() {}
private function runTransition(intObj:Object):Void {__dissolveImage.draw(clip.dissolve_mc, new Matrix());intObj.seed = Number(__dissolveImage.pixelDissolve(
➥ __originalImage, intObj.rect, intObj.point,➥ intObj.seed, intObj.pixels));
if ((intObj.currentPixels += intObj.pixels) ➥ >= intObj.totalPixels) halt();}
public function start():Void {super.start();var w:Number = clip._width;var h:Number = clip._height;__dissolveImage = new BitmapData(w, h, true, 0x00FFFFFF);__originalImage = new BitmapData(w, h, true, 0x00FFFFFF);if (type == "in") {__originalImage.draw(clip.innerClip, new Matrix());
} else {__dissolveImage.draw(clip.innerClip, new Matrix());
}clip.innerClip._visible = false;clip.createEmptyMovieClip("dissolve_mc",
➥ clip.getNextHighestDepth())var holder_mc:MovieClip =
➥ clip.createEmptyMovieClip("holder_mc", clip.getNextHighestDepth());holder_mc.attachBitmap(__dissolveImage, 0);var intObj:Object = {};intObj.totalPixels = w*h;;intObj.pixels = ((w*h)/100)*rate;intObj.currentPixels = 0;intObj.rect = new Rectangle(0, 0, w, h);intObj.point = new Point(0, 0);intObj.seed = Number(new Date());IntervalManager.setInterval(this, "interval",
➥ this, "runTransition", Tweener.intervalTime, intObj);}
public function halt():Void {IntervalManager.clearInterval(this, "interval");clip.innerClip._visible = (type == "in");
OOP ANIMATION AND EFFECTS
377
17
6196CH17.qxd 1/18/06 11:31 AM Page 377
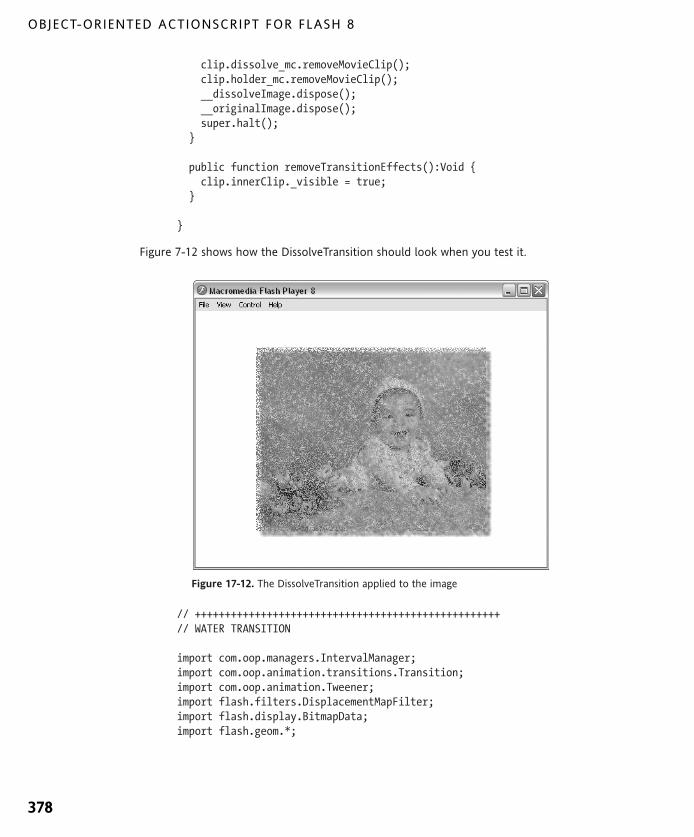
clip.dissolve_mc.removeMovieClip();clip.holder_mc.removeMovieClip();__dissolveImage.dispose();__originalImage.dispose();super.halt();
}
public function removeTransitionEffects():Void {clip.innerClip._visible = true;
}
}
Figure 7-12 shows how the DissolveTransition should look when you test it.
Figure 17-12. The DissolveTransition applied to the image
// +++++++++++++++++++++++++++++++++++++++++++++++++++// WATER TRANSITION
import com.oop.managers.IntervalManager;import com.oop.animation.transitions.Transition;import com.oop.animation.Tweener;import flash.filters.DisplacementMapFilter;import flash.display.BitmapData;import flash.geom.*;
OBJECT-ORIENTED ACTIONSCRIPT FOR FLASH 8
378
6196CH17.qxd 1/18/06 11:31 AM Page 378

class com.oop.animation.transitions.WaterTransition➥ extends Transition {
private var __waterImage:BitmapData;private var __noiseImage:BitmapData;private var __seed:Number;private var __offsets:Array;private var __displaceFactor:Number;public var rate:Number = 15;public var maxDisplace:Number = 200;
function WaterTransition() {__offsets = [new Point(), new Point()];__seed = Number(new Date());
}
private function runTransition(intObj:Object):Void {for(var i:Number=0;i<2;++i){__offsets[i].x+=rate;__offsets[i].y-=rate;
}__noiseImage.perlinNoise(100,100,1,
➥ __seed,false,true,1,false,__offsets);var dMap:DisplacementMapFilter=
➥ new DisplacementMapFilter(__noiseImage,➥ new Point(),1,1,__displaceFactor,__displaceFactor,"clamp");
var mc:MovieClip=clip.water_mc;mc.filters=[dMap];if (type=="in") {if (intObj.alpha<100)mc._alpha=(intObj.alpha+=10);if(__displaceFactor<=0){halt();
} else {__displaceFactor-=intObj.displaceRate;
}} else {if (intObj.alpha>0)mc._alpha=(intObj.alpha-=intObj.alphaRate);if(__displaceFactor>=maxDisplace){halt();
} else {__displaceFactor+=intObj.displaceRate;
}}
}
OOP ANIMATION AND EFFECTS
379
17
6196CH17.qxd 1/18/06 11:31 AM Page 379

public function start():Void {super.start();__displaceFactor = (type == "in") ? maxDisplace : 0;var w:Number = clip._width;var h:Number = clip._height;__noiseImage = new BitmapData(w*1.2, h*1.2, false, 0xFFFFFFFF);__waterImage = new BitmapData(w*1.2, h*1.2, true, 0x00FFFFFF);var tempImage:BitmapData = new BitmapData(w, h, true, 0x00FFFFFF);clip.innerClip._visible = true;tempImage.draw(clip, new Matrix());__waterImage.copyPixels(tempImage,
➥ new Rectangle(0, 0, w, h), new Point(w/10, h/10));var mc:MovieClip =
➥ clip.createEmptyMovieClip("water_mc", clip.getNextHighestDepth());mc.attachBitmap(__waterImage, 0);mc._x = -w/10;mc._y = -h/10;tempImage.dispose();var intObj:Object = {};mc._alpha = intObj.alpha = ((type == "in") ? 0 : 100);clip.innerClip._visible = false;var numInts:Number = time/Tweener.intervalTime;intObj.displaceRate = maxDisplace/numInts;intObj.alphaRate = 100/numInts;IntervalManager.setInterval(this, "interval",
➥ this, "runTransition", Tweener.intervalTime, intObj);runTransition(intObj);
}
public function halt():Void {IntervalManager.clearInterval(this, "interval");clip.water_mc.removeMovieClip();clip.innerClip._visible = (type == "in");__waterImage.dispose();super.halt();
}
public function removeTransitionEffects():Void {clip.innerClip._visible = true;
}
}
The WaterTransition should appear as shown in Figure 17-13 when you test it.
OBJECT-ORIENTED ACTIONSCRIPT FOR FLASH 8
380
6196CH17.qxd 1/18/06 11:31 AM Page 380

Figure 17-13. The WaterTransition applied to the image
SummaryThat’s another hefty chapter behind you with a lot of good practice creating classes inan OOP manner, utilizing encapsulation to house functionality within the tweening andtransition classes that can now be reused in many projects, inheritance to extend baseclasses to allow for more specific functionality (Broadcaster to Animator to Transition toFadeTransition), and polymorphism to enable multiple transitions to respond to the samemethod calls in their own unique ways, with the implementation hidden from the user.You developed several animation classes that abstracted the animation from the objects tobe animated, making for a powerful and robust animation code library with a multitude ofapplications.
What’s next?The next chapter starts our exploration of data integration by delving into data binding asa means of sharing content between components. We’ll work through several examplesthat demonstrate how to create both scripted and visual bindings, exploring related topicssuch as formatters and validators along the way.
OOP ANIMATION AND EFFECTS
381
17
6196CH17.qxd 1/18/06 11:31 AM Page 381

PART FIVE DATA INTEGRATION
6196CH18.qxd 1/18/06 11:32 AM Page 382

18 INTERRELATIONSHIPS ANDINTERACTIONS BETWEEN
COMPONENTS
6196CH18.qxd 1/18/06 11:32 AM Page 383

In this chapter, you’ll learn how components interact with each other. Specifically, you’llsee how you can share data between components using data binding. Within data binding,a property from one component is bound to the property of another. The source compo-nent shares the property with the target.
You can bind data between UI components and also between UI and data components orbetween data components. For example, you can bind two TextInput components so thattheir text properties are always synchronized. You could also share the results propertyfrom an XMLConnector component with a DataSet component or with a TextInput orTextArea component. Throughout this chapter, I’ll focus on binding XML data from anXMLConnector component to UI components.
The main advantage of data binding is that you don’t have to write ActionScript to createthe data associations. In the case of complicated data structures, without data binding youwould have to write much more code to achieve the same result. Data binding is a moreefficient process, both from a coding and workflow perspective. It also allows you to applyformatters and validators as part of the process.
During the binding process, you can apply a formatter to transform your content. Forexample, you can use this technique to alter the display of data to add a specific numberof decimal places. Several built-in formatters are available, and you can specify your owncustom formatter. You can also work with a validator to check that the data meets valida-tion criteria. For example, you could specify a minimum or maximum text length or a rangefor numeric data.
You can create component bindings visually, using the Bindings tab in the ComponentInspector panel. You can also use ActionScript to generate the bindings. Within this chapter,we’ll focus on using ActionScript to create component bindings. However, we’ll also have abrief look at visual binding. We’ll start with an overview of the data binding process.
Data bindingData binding allows you to associate a bindable property from one component with abindable property in another component. When the source component property changes,the bound component property changes in response.
The process of data binding involves two components—the source and destination pointsfor the binding. By default, bindings are one-way—one component affects another, butchanges in the second don’t affect the first component. It is also possible to specify two-way bindings—both components can change each other so that their bound propertiesremain synchronized.
In order to set up a binding, you need to specify a bindable property from each compo-nent. For example, you could specify the results property of an XMLConnector or thetext property of a TextArea. You can also specify a path within a property and the eventthat triggers the binding between the components.
OBJECT-ORIENTED ACTIONSCRIPT FOR FLASH 8
384
6196CH18.qxd 1/18/06 11:32 AM Page 384

You can implement data binding either though the Bindings tab of the ComponentInspector or entirely through ActionScript using the classes in the mx.data.binding pack-age. If you’re writing ActionScript to configure your bindings, you’ll need to make surethat the data binding classes are available at runtime by including them within your library.Note that the classes are included automatically if you add a binding through the Bindingstab of the Component Inspector.
To include the data binding classes, choose Window ➤ Common Libraries ➤ Classes anddrag the DataBindingClasses clip to your Library. You can also drag the clip to the stage,but be aware that it has a visual appearance within Flash movies.
You will also want to import the relevant classes from the mx.data.binding package sothat you don’t have to refer to them with their fully qualified names in your code:
import mx.data.binding.*;
The mx.data.binding package
The mx.data.binding package in Flash Professional includes the following classes:
EndPoint
Binding
ComponentMixins
CustomFormatter
CustomValidator
DataType
TypedValue
The EndPoint class creates the source and destination points for a binding. These objectsspecify which components to use and how to bind the data, and they can refer to a com-ponent property or a constant value. You need to specify two EndPoints—one for thesource of the binding and one for the destination. You can also create a two-way bindingbetween the EndPoints. Once you’ve specified these points, the Binding class creates thebinding.
The ComponentMixins class defines the properties and methods that are automaticallyadded to any of the points in the binding.
The CustomFormatter class is the base class that you can use to create custom formatterclasses. Custom formatters change the presentation of data during the binding process.We’ll look at how to apply them during binding a little later in this chapter in the section“Understanding custom formatters.”
The CustomValidator class is the base class for creating custom validator classes. You usecustom validators to create your own validation routines for the bindable propertieswithin a component. We’ll explore how you can use validation later in the chapter in thesection “Including validators.”
INTERRELATIONSHIPS AND INTERACTIONS BETWEEN COMPONENTS
385
18
6196CH18.qxd 1/18/06 11:32 AM Page 385

The DataType class provides read and write access to the data fields of a component prop-erty while the TypedValue class provides information used for type conversion withinDataType objects. This chapter won’t examine these classes, as they’re used in more com-plicated bindings.
We’ll start by looking at the ActionScript needed to create a simple binding.
Creating a simple binding
A simple binding uses a source and a destination EndPoint. Simple bindings are one-way—from the source to the destination. The bindable property of the source component setsthe bindable property in the destination component. More complicated bindings occur inboth directions—from the source to the destination and back again.
You need to create the two EndPoints before creating the binding. In the code that follows,I’ve assumed that the mx.data.binding package has already been imported.
Creating EndPointsYou can create EndPoint objects using the following EndPoint constructors:
var sourcePoint:EndPoint = new EndPoint();var destinationPoint:EndPoint = new EndPoint();
Each EndPoint object has two properties: a component and a bound property. The sourceEndPoint also has an event property and an optional location property. Instead of usinga bound property, you can also specify a constant value.
The component property is the instance name of the component to be used in the binding:
EndPoint.component = componentName;
The property is a string that specifies which property is involved in the binding:
EndPoint.property = "componentProperty";
For example, in a TextArea component, you would set the property to text, as there areno other bindable properties. If you were binding an XMLConnector component, youwould use the results property, which contains the XML tree.
You can use the location property of the EndPoint to access specific data within the bind-able property. This might be useful to pinpoint a specific element within an XML tree, andI’ll cover this property in the next section.
The event property for the source component specifies which event will trigger the binding.If you set a single event, the property requires a string value:
EndPoint.event = "eventName";
The binding can also listen for multiple events by passing an array of strings to this property:
EndPoint.event = ["eventName1", "eventName2"];
OBJECT-ORIENTED ACTIONSCRIPT FOR FLASH 8
386
6196CH18.qxd 1/18/06 11:32 AM Page 386
If you want to use a constant value in a source EndPoint, you can use
EndPoint.constant = constantValue;
Setting this property overrides the other properties set by ActionScript.
You can use objects to pass the data binding settings, rather than setting the EndPointproperties individually:
var source:Object = {component: componentName, property:➥"componentProperty", event: "eventName"};var destination:Object = {component: componentName, property:➥"componentProperty"};
You can also assign a formatter that transforms the source data before it reaches the des-tination component property. You’ll see that a little later in this chapter in the “Usingformatters” section.
Specifying a locationYou may need to specify a location within the source data for the binding where you’reworking with a complex bound property such as the results from an XMLConnector com-ponent. You can use the location property to specify the location of the data field in oneof four ways:
1. Use an XPath expression.
2. Write an ActionScript path.
3. Use an array of strings.
4. Create an object.
You can only use the first option—an XPath expression—where you’re working with datathat is provided as an XML object, for example, from the results property of anXMLConnector. XPath is a means of navigating an XML tree. Covering XPath is beyond thescope of this book, but you’ll see some examples of XPath expressions a little later inthe chapter when we work through the examples.
Where the data is provided within an XML or ActionScript object, you can use a string thatcontains an ActionScript path to specify the data for binding. The path contains the fieldnames separated by dots:
"object.field1.field2";
A similar approach is to specify the path using an array of strings:
["object","field1","field2"];
Again, this approach is appropriate for either an ActionScript object or XML data.
You can’t use the final option, specifying an object as the location, with XML data. To usethis approach, the object must specify two properties—path and indices.
INTERRELATIONSHIPS AND INTERACTIONS BETWEEN COMPONENTS
387
18
6196CH18.qxd 1/18/06 11:32 AM Page 387

{path: ["[n]","field1","[n]","field2"], indices: [{constant:0},➥{constant:0}]};
The path is an array of strings as listed in the previous option. You can use "[n]" to referto multiple occurrences of data. Each time you use "[n]", you must specify a correspon-ding index in the indices property.
Once you’ve created the source and destination EndPoints for the binding, it’s time tocreate the Binding itself.
Creating the bindingTo create the binding, you’ll need to call the constructor for a Binding object:
new Binding(source, destination, format, isTwoWay);
The last two parameters, format and isTwoWay, are optional. The format parameter speci-fies formatting information, while the isTwoWay argument is a Boolean value that deter-mines whether the binding is two-way. If you omit this argument, the default value is false.
As an alternative, you can pass all parameters at the same time that you create thebinding:
new Binding({component: componentName, property: "componentProperty",➥event: "eventName"}, {component:comonentName, property:➥"componentProperty"});
To my mind, it is much harder to read this code block compared with creating theEndPoint objects separately in code.
Sometimes, you’ll need to trigger the binding in response to an event within an unrelatedcomponent. For example, the binding might need to respond to a data component receiv-ing results by recognizing the result event. In this case, you can use the execute methodinstead of assigning an event property to the source EndPoint.
Using the execute methodInstead of configuring the event property for the EndPoint of the binding, an alternativeapproach is to create the binding and call the execute method at a later stage. Theexecute method takes a Boolean parameter, reverse, that indicates whether to apply thebinding in both directions. If the binding executes successfully, it returns null. Otherwise,the method returns an array of error message strings containing errors.
var bindingResults:Array = newBinding.execute(reverse);
The code that we’ve discussed so far will probably make more sense when you see itwithin an example. During the remainder of the chapter, we’ll focus on creating bindingsbetween an XMLConnector component and other UI components. The XMLConnector willload external data and display it in components such as a TextArea, TextInput, or Label.
OBJECT-ORIENTED ACTIONSCRIPT FOR FLASH 8
388
6196CH18.qxd 1/18/06 11:32 AM Page 388

Working through a simple binding exampleHere we’ll create a simple binding example that binds XML content to a TextArea compo-nent. We’ll do this using an XMLConnector component to load an external XML document.When the XMLConnector component triggers, the XML document will appear within aTextArea component. Because we’re working with the data components, you’ll need to useFlash Professional to complete the example.
The example uses a direct binding between the two components. If we were dealing with amore complicated XML data structure, we could bind the XMLConnector to a DataHolderor DataSet component first and then bind from that component to one or more UI com-ponents. This would require us to specify a schema for the DataSet component, and we’dneed to include other bindings if we wanted the user to be able to update the XML data.
We’ll use the following XML document, which contains information about a featured prod-uct. The XML document includes details about the product name, description, price, andcontact details of the salesperson. You can create this XML document yourself and save itwith the name featuredProduct.xml or use the file from within the resource folder 18-1,available for download from www.friendsofed.com.
<?xml version="1.0" encoding="UTF-8"?><FeaturedProduct><product><productName>Shirt</productName><description>Light weight cotton shirt</description><price>25.7</price><salesFirst>Sas</salesFirst><salesLast>Jacobs</salesLast><salesContact>[email protected]</salesContact>
</product></FeaturedProduct>
Start by creating a new ActionScript file and save it as FeaturedProduct.as. Create a Flashdocument and save it as featuredProduct.fla in the same directory. Include thefeaturedProduct.xml file within the same folder.
The FeaturedProduct class will allow a user to pass in a container movie clip and display aTextArea component within that clip that displays the contents of an external XML docu-ment. The class will load the XML document using an XMLConnector component, and theuser will be able to pass in the filename of the XML document as well as the position andsize for the TextArea component.
Enter the following code in the FeaturedProduct.as file:
import mx.controls.TextArea;import mx.data.binding.*;import mx.data.components.XMLConnector;
INTERRELATIONSHIPS AND INTERACTIONS BETWEEN COMPONENTS
389
18
6196CH18.qxd 1/18/06 11:32 AM Page 389

class FeaturedProduct {private var __parentContainer_mc:MovieClip;private var __productContainer_mc:MovieClip;private var __product_txt:TextArea;private var __XMLContent:XMLConnector;
}
The code imports the classes that we’ll need and declares the FeaturedProduct class.Because the class resides in the same folder as the Flash movie, we don’t need to use afully qualified class name.
Within the class declaration, we have declared the private properties that the class will usewith two underscore characters at the start of each name. The first property,__parentContainer_mc, keeps track of the parent movie clip that is passed to the class.This allows the Flash file to create the featured product details within any movie clip. Thesecond property, __productContainer_mc, keeps track of the movie clip within__parentContainer_mc that contains the TextArea component. We’ll create this movie clipwhen we initialize the class.
The __product_txt property provides a reference to the TextArea component itself, whilethe __XMLContent variable refers to the XMLConnector that we’ll use to load the externalXML data.
Add the class constructor with the following code, shown in bold:
import mx.controls.TextArea;import mx.data.binding.*;import mx.data.components.XMLConnector;
class FeaturedProduct {private var __parentContainer_mc:MovieClip;private var __productContainer_mc:MovieClip;private var __product_txt:TextArea;private var __XMLContent:XMLConnector;
function FeaturedProduct (parent_mc:MovieClip) {__parentContainer_mc = parent_mc;__productContainer_mc = __parentContainer_mc.createEmptyMovieClip
➥ ("product_mc", parent_mc.getNextHighestDepth());}
}
The constructor function takes the parent movie clip as an argument and sets the private vari-able __parentContainer_mc as a reference to this clip. It creates an empty movie clip insidethe parent to hold the TextArea component and uses the variable __productContainer_mc asa reference.
After the user creates a FeaturedProduct object, they’ll initialize it, passing through thewidth, height, x, and y positions. I could have included these options within the class con-structor, but I chose to add them within a separate function, in case we wanted todetermine the parameters dynamically at a later stage.
OBJECT-ORIENTED ACTIONSCRIPT FOR FLASH 8
390
6196CH18.qxd 1/18/06 11:32 AM Page 390

Add the following public function to the class file, before the closing brace:
public function init(width:Number, height: Number, xPos:Number,➥yPos:Number):Void {__product_txt = __productContainer_mc.createClassObject(TextArea,
➥ "product_txt", __productContainer_mc.getNextHighestDepth(),➥ {wordWrap: true});__product_txt.setSize(width, height);__product_txt.move(xPos, yPos);
}
The init function creates a TextArea component using the createClassObject method.This method takes four arguments:
createClassObject(className, instanceName, depth, initObject)
In the example, we’ve created the TextArea component within __productContainer_mc.I haven’t used the fully qualified name for the class, as I included an import statementearlier. The component has the instance name product_txt and is placed at the next high-est depth available. An initialization object sets the wordWrap property of the componentto true. To use the createClassObject method, the TextArea component will need to beincluded within the library of the Flash document using this class.
We’ll use the variable __product_txt to refer to the TextArea component. We also set thesize and position of the component, using the arguments passed into the function andthe setSize and move methods of the component.
The last code block that we’ll include creates the public function that connects to the XMLdocument and binds the contents to the TextArea component. The Flash file will call thisfunction and pass the URL of the XML document as an argument.
Add the following public method, loadProduct, within the class declaration.
public function loadProduct(XMLFileName:String):Void {if (XMLFileName.length > 0) {__XMLContent = new XMLConnector();__XMLContent.URL = XMLFileName;__XMLContent.direction = "receive";__XMLContent.ignoreWhite = true;__XMLContent.multipleSimultaneousAllowed = true;__XMLContent.suppressInvalidCalls = true;
var sourcePoint:EndPoint = new EndPoint();var destinationPoint:EndPoint = new EndPoint();sourcePoint.component = __XMLContent;sourcePoint.property = "results";sourcePoint.location = "/FeaturedProduct";sourcePoint.event = "result";destinationPoint.component = __product_txt;destinationPoint.property = "text";new Binding(sourcePoint, destinationPoint);
INTERRELATIONSHIPS AND INTERACTIONS BETWEEN COMPONENTS
391
18
6196CH18.qxd 1/18/06 11:32 AM Page 391

__XMLContent.trigger();}
}
In this code block, we receive the XML file name as an argument to the function. If thelength is greater than 0, we proceed. We’re not limiting the input to files that end in .xml,as the user could pass in either an XML file name or the path to a server-side file that cre-ates the XML content.
First, we create the XMLConnector called __XMLContent and set the relevant properties.Note that we can only create this component if it is already present inside the Flash filethat will call this method.
The XMLFileName parameter is assigned to the URL property. We set the direction toreceive and the ignoreWhite property to true so that Flash ignores any white space inthe XML document. We also set the multipleSimultaneousCalls property to true toallow more than one call to the connector at a time and the supressInvalidCalls prop-erty to true so that the call is suppressed if the parameters are invalid.
Next, we define the two EndPoints for the binding—sourcePoint and destinationPoint.This will be a one-way binding so that the results property from the XMLConnector isbound to the text property of the TextArea component. In other words, we’ll display thecontents from the XML document within the TextArea component.
The sourcePoint EndPoint uses the __XMLContent component, the results from thecomponent as the bindable property, and the result event to trigger the binding. Be care-ful not to confuse the result event with the results property, as they appear very similar.
I’ve also specified a location property to the root node of the XML document by usingsourcePoint.location = "/FeaturedProduct". This value uses XPath notation to refer tothe root node of the XML document—<FeaturedProduct>. The path starts with a forwardslash to indicate that we start at the top of the XML tree. The destinationPoint EndPointspecifies the __product_txt component reference and the text property.
Finally, the code creates the binding and triggers the XMLConnector.
The following code lists the complete class file:
import mx.controls.TextArea;import mx.data.binding.*;import mx.data.components.XMLConnector;
class FeaturedProduct {private var __parentContainer_mc:MovieClip;private var __productContainer_mc:MovieClip;private var __product_txt:TextArea;private var __XMLContent:XMLConnector;
OBJECT-ORIENTED ACTIONSCRIPT FOR FLASH 8
392
6196CH18.qxd 1/18/06 11:32 AM Page 392
function FeaturedProduct (parent_mc:MovieClip) {__parentContainer_mc = parent_mc;__productContainer_mc = __parentContainer_mc.createEmptyMovieClip
➥ ("product_mc", parent_mc.getNextHighestDepth());}
public function init(width:Number, height: Number, xPos:Number,➥yPos:Number):Void {__product_txt = __productContainer_mc.createClassObject(TextArea,
➥ "product_txt", __productContainer_mc.getNextHighestDepth(),➥ {wordWrap: true});__product_txt.setSize(width, height);__product_txt.move(xPos, yPos);}
public function loadProduct(XMLFileName:String):Void {if (XMLFileName.length > 0) {__XMLContent = new XMLConnector();__XMLContent.URL = XMLFileName;__XMLContent.direction = "receive";__XMLContent.ignoreWhite = true;__XMLContent.multipleSimultaneousAllowed = true;__XMLContent.suppressInvalidCalls = true;
var sourcePoint:EndPoint = new EndPoint();var destinationPoint:EndPoint = new EndPoint();sourcePoint.component = __XMLContent;sourcePoint.property = "results";sourcePoint.location = "/FeaturedProduct";sourcePoint.event = "result";destinationPoint.component = __news_txt;destinationPoint.property = "text";new Binding(sourcePoint, destinationPoint);__XMLContent.trigger();
}}
}
To create an object from this class, we’ll need to switch to our Flash file, FeaturedProduct.fla.We’ll have to start by adding the relevant component and data binding classes to theLibrary of the Flash file.
Choose Window ➤ Common Libraries ➤ Classes and drag the DataBindingClasses clip toyour Library. Drag an XMLConnector and a TextArea to the Library. If you’re using Flash MX2004, you’ll have to drag these components to the stage and delete them to add them tothe Library.
INTERRELATIONSHIPS AND INTERACTIONS BETWEEN COMPONENTS
393
18
6196CH18.qxd 1/18/06 11:32 AM Page 393

You can create a FeaturedProduct object by adding the following code to Frame 1 of theonly layer in the Flash movie:
var myProduct:FeaturedProduct= new FeaturedProduct(this);
The code creates a FeaturedProduct object called myProduct on the main timeline. We canthen initialize the object and load the featuredProduct.xml file with the following lines:
myProduct.init(300, 100, 10, 10);myProduct.loadProduct("featuredProduct.xml");
We’ve called the methods init and loadProduct, passing in the relevant arguments. TheTextArea is 300✕100 in size and is placed at 10, 10 on the stage. In this example, we’veloaded an XML document, but we could also load a server-side file resulting in an XMLdocument. If so, we’d need to include the full http:// path to the server-side file in theloadProduct method.
Test the Flash file and you should see the TextArea component populated with the XMLcontent from the external document. You can see a screenshot of the finished example inFigure 18-1. The completed files are also available in the resource folder 18-1.
Figure 18-1. The output resulting from the simple binding exercise
If the example doesn’t work as expected, it can be a little difficult to find out what’s gonewrong. To assist, we can find out a little more about what’s happening behind the scenesby turning on the logger. Add the following line at the top of your Flash file:
_global.__dataLogger=new mx.data.binding.Log();
This line sets up logging and if you test your Flash movie again, you’ll see something simi-lar to the screen shot shown in Figure 18-2.
The first line creates the binding from results:/FeaturedProduct to product_mc.product_txt:text. The XMLConnector is then triggered and the results propertychanges. The binding executes and the new value is assigned to the text property of theTextArea component. Note that the entire XML string from the root node displays inthe TextArea component.
OBJECT-ORIENTED ACTIONSCRIPT FOR FLASH 8
394
6196CH18.qxd 1/18/06 11:32 AM Page 394

Figure 18-2. Output from the logger
The display within the TextArea is not very useful as it contains both the data and tagsfrom the XML document. We can improve the readability by using formatters to alter theappearance of the source data. We can also display different elements from the XML doc-ument within different components by specifying a location within the source EndPointof the binding.
Using formattersFormatters change the appearance of bound data by adding formatting. Formatters applytheir changes after data is sent from the source component but before it is received by thetarget component. This means that formatted data appears in the target component. Aswith data binding, you can apply a formatter either through the Component Inspectorpanel or by writing ActionScript. We’ll look at applying formatters through ActionScript.
Flash Professional ships with several preset formatters that you can use with your bindings.You can also create a custom formatter to handle more complex data. When we examinedthe Binding class earlier in the chapter, you saw that you could pass an optional parameterspecifying a formatter class and settings.
new Binding(source, destination, format, isTwoWay);
The format parameter requires an object containing the formatter class and a settingsobject. The settings object contains settings that are specific to the chosen formatter class.
{cls: mx.data.formatters.formatterName, settings: {specific settings}};
INTERRELATIONSHIPS AND INTERACTIONS BETWEEN COMPONENTS
395
18
6196CH18.qxd 1/18/06 11:32 AM Page 395

You can see examples of the settings for each of the formatters in the next section. We’llstart by looking at the built-in AS2.0 formatters.
Using built-in formatters
Flash includes the following AS2.0 formatters:
Boolean: Formats a Boolean value as a string
Compose String: Converts one or more data objects to a string using a template
Custom Formatter: Specifies a custom formatter using a class name
Date: Applies a date template to create a string from a date
Rearrange Fields: Creates a new array of objects based on the original array
Number Formatter: Specifies the number of decimal places that appear in anumber
Each of the formatters has different settings, and we’ll look at them in a little more detail.I’ll cover creating a custom formatter a little later in the chapter.
Using the Boolean formatterThe Boolean formatter converts between Boolean and string data. It takes Boolean datafrom the source component and creates a string representation using a different string fortrue and false values. For example, you could display the Boolean value true as affirma-tive or ready to go.
You must use the following settings for the Boolean formatter:
{cls: mx.data.formatters.Bool, settings: {falseString:"Value is➥false", trueString:"Value is true"}};
This formatter works well using the Component Inspector panel. However, its implementa-tion in ActionScript is problematic because working in code accesses the raw value of dataitems within bindings. In the case of an XML object, Flash accesses the values of true andfalse as strings, so you can’t bind directly from the XMLConnector to another componentusing the Boolean formatter.
A solution to this problem would be to bind the XMLConnector to a DataSet componentfirst, and create a schema for the datatypes. This would allow you to specify a Booleandatatype before binding the content from the DataSet to a UI component. You could theninclude a Boolean formatter in the second binding.
Using the Compose String formatterThe Compose String formatter specifies a template for creating string output for the tar-get component. You can specify multiple input fields as well as including fixed text in thetemplate. For example, you might use a Compose Strings formatter to create a full namefrom a first and last name.
OBJECT-ORIENTED ACTIONSCRIPT FOR FLASH 8
396
6196CH18.qxd 1/18/06 11:32 AM Page 396

The following code shows how you could use the Compose String formatter in ActionScript:
{cls: mx.data.formatters.ComposeString, settings: {template: "My name➥is <firstName> <lastName>."}};
When using this formatter, you need to specify a template containing both fixed text andfield references. You can refer to a data field using <fieldName> or you can use dot nota-tion to drill down into the fields <fieldName.childFieldName>. You can also use <.> toindicate the entire data object. You’ll see an example of the Compose String formatter alittle later in this section.
Using the Date formatterThe Date formatter allows you to specify a date format using a string such asMM/DD/YYYY. This might be useful if you were passing a value that included a time andyou only wanted to include the date portion.
The code that follows shows the use of this formatter:
{cls: mx.data.formatters.Dte, settings: {format: "MM/DD/YYYY"}};
Be careful when using this formatter in ActionScript, as Flash accesses raw data duringbinding. In this case, Flash interprets the date as a string. If you bind directly from the rawdata to a UI component, you won’t be able to use this formatter. As with the Boolean for-matter, you’d need to bind to a DataSet component first and include a schema that speci-fies the correct datatype. Then you’d be able to use the Date formatter in a secondbinding.
Using the Rearrange Fields formatterThe Rearrange Fields formatter only applies to array fields and transforms one array intoanother using a string template in the following format:
outputfield1=inputfield1;outputfield2=inputfield2;
You can also specify a template for the input field in the same way as with a ComposeString formatter.
A common use for this formatter is to transform an array to assign label and data prop-erties for use in a ComboBox or List component. The following code shows how this canbe achieved:
{cls: mx.data.formatters.RearrangeFields, settings: {fields: "label=➥productName, data=productID"}};
Using the Number formatterThe Number formatter allows you to choose the precision for decimal places within anumber. This might be useful where you are displaying currency values with less than twodecimal points and want to display the cents correctly.
{cls: mx.data.formatters.NumberFormatter, settings: {precision:"2"}};
INTERRELATIONSHIPS AND INTERACTIONS BETWEEN COMPONENTS
397
18
6196CH18.qxd 1/18/06 11:32 AM Page 397

We’ll examine the Compose String and Number formatters by changing the display of datafrom the previous example.
Working through a simple formatting example
Start by opening the FeaturedProduct.as and featuredProduct.fla files from the previ-ous example. You can also open the resource files from the 18-1 folder. We’ll modify theclass file to display the content from the XML file in separate components. We’ll use for-matters to alter the display of the data but leave the TextArea component in place so youcan compare the data.
In the FeaturedProduct.as file, we’ll add some more bindings to display specific elementsin Label components. We’ll show the product name and description in Label componentsand display all of the contact details in a single Label using a Compose String formatter.Finally, the price will display in a Label to two decimal places.
Because we’ll create Label components dynamically, we’ll import the relevant class at thetop of the FeaturedProduct.as file. We’ll also import the formatters package so we canrefer to the formatters without their fully qualified names.
The complete list of import statements that should appear in the class file follows:
import mx.controls.TextArea;import mx.controls.Label;import mx.data.binding.*;import mx.data.formatters.*;import mx.data.components.XMLConnector;
The next step is to add the private variables that will refer to the components that we’regoing to include in the interface. The following code shows the complete list of privatevariables with the new items highlighted in bold:
private var __parentContainer_mc:MovieClip;private var __productContainer_mc:MovieClip;private var __product_txt:TextArea;private var __item_lbl:Label;private var __description_lbl:Label;private var __contact_lbl:Label;private var __price_lbl:Label;private var __XMLContent:XMLConnector;
The __item_lbl Label component will display the product name, while __description_lblwill display the description. The contact details will appear in the __contact_lbl Labelcomponent and the price in __price_lbl.
The initialization function for the interface will need to change. We’ll have to create sev-eral Label components to display the data from the XML document. To simplify things,we’ll add a private function to handle the component creation process. Add the followingcode:
OBJECT-ORIENTED ACTIONSCRIPT FOR FLASH 8
398
6196CH18.qxd 1/18/06 11:32 AM Page 398

private function createComponent(compType:Object, instanceName:String,➥ initObj:Object) {return __productContainer_mc.createClassObject(compType,
➥ instanceName, __productContainer_mc.getNextHighestDepth(), initObj);}
This function returns a component created within __productContainer_mc.
We’ll need to change the code within the init function to the following:
public function init(width:Number, height: Number, xPos:Number,➥yPos:Number):Void {var compPlacer:Number = yPos + height;
__product_txt = createComponent(TextArea, "product_txt",➥ {wordWrap: true});__item_lbl = createComponent(Label, "item_lbl");__description_lbl = createComponent(Label, "description_lbl");__contact_lbl = createComponent(Label, "contact_lbl");__price_lbl = createComponent(Label, "price_lbl");
__product_txt.setSize(width, height);__item_lbl.setSize(width, 20);__description_lbl.setSize(width, 20);__contact_lbl.setSize(width, 20);__price_lbl.setSize(50, 20);
__product_txt.move(xPos, yPos);__item_lbl.move(xPos, compPlacer);__description_lbl.move(xPos, compPlacer+20);__contact_lbl.move(xPos, compPlacer+40);__price_lbl.move(xPos, compPlacer+60);
}
The code starts by creating a numeric variable that we’ll use to set the y position of thecomponents. Then we call the createComponent function five times, passing the compo-nent type, instance name, and optional initialization object. This re-creates the originalTextArea component and four additional Label components.
The second code block sets the size for each of the components with the setSize method.The final block positions the components within the parent movie clip.
Because I’m going to create multiple bindings, I’ll change the loadProduct method tocall a private function that creates the bindings. All bindings will come from the samecomponent—the XMLConnector—and be triggered by the same event—result. The onlything that will change for each binding will be the location property within the resultsand the target component. Because I’ll want to add a formatter to some of the bindings,I’ll need to pass in an object containing those details.
INTERRELATIONSHIPS AND INTERACTIONS BETWEEN COMPONENTS
399
18
6196CH18.qxd 1/18/06 11:32 AM Page 399

Add the following private function to the class file:
private function createBinding(loc:String, desComp:Object,➥format:Object):Void{var src:Object = {component: __XMLContent, property: "results",
➥ location:loc, event: "result"};var des:Object = {component: desComp, property: "text"};new Binding(src, des, format);
}
This function takes arguments for the location within the XML results (loc), the destina-tion component (desComp), and an object containing the formatting details (format). Wedeclare two EndPoint objects—src and des. Each object contains the relevant propertiesfor the binding. Finally, the function creates the binding from the src and des objects andapplies the format object.
We’ll call this method from within the loadProduct function so you’ll need to modify it asshown. The changed lines appear in bold.
public function loadProduct(XMLFileName:String):Void {if (XMLFileName.length > 0) {__XMLContent = new XMLConnector();__XMLContent.URL = XMLFileName;__XMLContent.direction = "receive";__XMLContent.ignoreWhite = true;__XMLContent.multipleSimultaneousAllowed = true;__XMLContent.suppressInvalidCalls = true;
var contactFormat:Object = {cls: ComposeString, settings:➥ {template:"Contact: <salesFirst> <salesLast>, <salesContact>"}};
var priceFormat:Object = {cls: NumberFormatter, settings:➥ {precision:"2"}};
createBinding("/FeaturedProduct", __product_txt);createBinding("/FeaturedProduct/product/productName", __item_lbl);createBinding("/FeaturedProduct/product/description",
➥ __description_lbl);createBinding("/FeaturedProduct/product", __contact_lbl,
➥ contactFormat);createBinding("/FeaturedProduct/product/price", __price_lbl,
➥ priceFormat);
__XMLContent.trigger();}
}
The first block of changed lines creates the formatter objects—contactFormat andpriceFormat. contactFormat is a Compose String formatter that creates a template forthe contact details. The template that we use is
Contact: <salesFirst> <salesLast>, <salesContact>
OBJECT-ORIENTED ACTIONSCRIPT FOR FLASH 8
400
6196CH18.qxd 1/18/06 11:32 AM Page 400

and it will create output similar to the following:
Contact: Sas Jacobs, [email protected]
The second object, priceFormat, creates a Number formatter that formats to two decimalplaces.
{cls: NumberFormatter, settings: {precision:"2"}}
In the second block of modified code, we call the createBinding function five times tocreate each of the bindings. As the bindings come from different locations in the results ofthe XMLConnector, we pass this to the function along with the target component instanceand, optionally, a formatter object.
Each of the location parameters uses an XPath statement to find a point within the XMLtree. For example, reading the path /FeaturedProduct/product/description from rightto left describes the <description> element within the <product> element within the rootnode <FeaturedProduct>.
The only surprise here is the choice of /FeaturedProduct/product within the contactbinding. We need to choose the parent node of the child nodes that we’ll refer to in theCompose String template. The <salesFirst>, <salesLast>, and <salesContact> nodes allappear within the <product> node in the XML document.
The complete FeaturedProduct class follows. I’ve added comments to describe each blockof code.
import mx.controls.TextArea;import mx.controls.Label;import mx.data.binding.*;import mx.data.formatters.*;import mx.data.components.XMLConnector;
class FeaturedProduct {//private propertiesprivate var __parentContainer_mc:MovieClip;private var __productContainer_mc:MovieClip;private var __product_txt:TextArea;private var __item_lbl:Label;private var __description_lbl:Label;private var __contact_lbl:Label;private var __price_lbl:Label;private var __XMLContent:XMLConnector;
// constructorfunction FeaturedProduct(parent_mc:MovieClip) {__parentContainer_mc = parent_mc;__productContainer_mc = __parentContainer_mc.createEmptyMovieClip
➥ ("product_mc", parent_mc.getNextHighestDepth());}
INTERRELATIONSHIPS AND INTERACTIONS BETWEEN COMPONENTS
401
18
6196CH18.qxd 1/18/06 11:32 AM Page 401

//public methodspublic function init(width:Number, height: Number, xPos:Number,
➥ yPos:Number):Void {var compPlacer:Number = yPos + height;
// create components__product_txt = createComponent(TextArea, "product_txt",
➥ {wordWrap: true});__item_lbl = createComponent(Label, "item_lbl");__description_lbl = createComponent(Label, "description_lbl");__contact_lbl = createComponent(Label, "contact_lbl");__price_lbl = createComponent(Label, "price_lbl");
//size components__product_txt.setSize(width, height);__item_lbl.setSize(width, 20);__description_lbl.setSize(width, 20);__contact_lbl.setSize(width, 20);__price_lbl.setSize(50, 20);
//place components on the stage__product_txt.move(xPos, yPos);__item_lbl.move(xPos, compPlacer);__description_lbl.move(xPos, compPlacer+20);__contact_lbl.move(xPos, compPlacer+40);__price_lbl.move(xPos, compPlacer+60);
}
public function loadProduct(XMLFileName:String):Void {if (XMLFileName.length > 0) {//create XML object__XMLContent = new XMLConnector();__XMLContent.URL = XMLFileName;__XMLContent.direction = "receive";__XMLContent.ignoreWhite = true;__XMLContent.multipleSimultaneousAllowed = true;__XMLContent.suppressInvalidCalls = true;
//create formatter objectsvar contactFormat:Object = {cls: ComposeString, settings:
➥ {template:"Contact: <salesFirst> <salesLast>, <salesContact>"}};var priceFormat:Object = {cls: NumberFormatter, settings:
➥ {precision:"2"}};
//create bindingscreateBinding("/FeaturedProduct", __product_txt);createBinding("/FeaturedProduct/product/productName",
➥ __item_lbl);createBinding("/FeaturedProduct/product/description",
➥ __description_lbl);
OBJECT-ORIENTED ACTIONSCRIPT FOR FLASH 8
402
6196CH18.qxd 1/18/06 11:32 AM Page 402

createBinding("/FeaturedProduct/product", __contact_lbl,➥ contactFormat);
createBinding("/FeaturedProduct/product/price", __price_lbl,➥ priceFormat);
__XMLContent.trigger();}
}
//private methodsprivate function createComponent(compType:Object, instanceName:
➥ String, initObj:Object) {return __productContainer_mc.createClassObject(compType,
➥ instanceName, __productContainer_mc.getNextHighestDepth(), initObj)}
private function createBinding(loc:String, desComp:Object, format::➥ Object):Void{
var src:Object = {component: __XMLContent, property: "results",➥ location:loc, event: "result"};
var des:Object = {component: desComp, property: "text"};new Binding(src, des, format);
}}
Switch to the Flash file and add a Label component to the Library. This is necessary as we’llbe adding this component dynamically using the createClassObject method. Test themovie and the logger will display something similar to the image shown in Figure 18-3.
Figure 18-3. Logger output from the multiple binding example
INTERRELATIONSHIPS AND INTERACTIONS BETWEEN COMPONENTS
403
18
6196CH18.qxd 1/18/06 11:32 AM Page 403

This time, you can see that we’ve accessed the data using different locations within theresults property. The preceding image shows the value of Contact: Sas Jacobs,[email protected] in the contact_lbl component, created by applying the Compose Stringformatter.
If you close the Output panel, you should see something similar to the image shown inFigure 18-4. You can find the completed Flash and class files in the resource folder 18-2,in the code download.
Figure 18-4. The output resulting from the binding including formatters
In this example, we used two of the built-in formatters to change the display of data duringthe binding process. The Compose String formatter created a string of contact informationfrom a template, while the Number formatter displayed the price to two decimal places.
If you need to specify a different or more complicated type of formatting, you’ll need towrite your own custom formatter. Custom formatters extend the CustomFormatter class,which provides format and unformat methods. You can use these methods to transformand remove transformation from data values.
Understanding custom formatters
Custom formatters are classes that extend the CustomFormatter class. They must containtwo functions—format and unformat, as follows:
class MyFormat extends mx.data.binding.CustomFormatter {function format(rawData:rawType):returnType {//do some formattingreturn returnValue;
}
OBJECT-ORIENTED ACTIONSCRIPT FOR FLASH 8
404
6196CH18.qxd 1/18/06 11:32 AM Page 404

function unformat(processedData:processedType):returnType {//do some unformattingreturn returnValue;
}}
To use a custom formatter, you’ll have to include it within a binding, similar to the way thatyou used the built-in formatters. You need to specify the class as well as the settings. Forcustom formatters, the settings include the classname and classname_class.
{cls:mx.data.formatters.Custom, settings:{classname: "MyFormat",➥classname_class: MyFormat}})
Let’s modify the previous example to include a custom formatter that adds a currencysymbol to the price and rounds up to the nearest whole number.
Create a new ActionScript file called CurrencyFormat.as and save it in the same locationas the FeaturedProduct.as file. Add the following code to the file:
class CurrencyFormat extends mx.data.binding.CustomFormatter {public function format(rawData:Number):String{var returnValue:String;returnValue = "$" + Math.ceil(rawData);return returnValue;
}Public function unformat(processedData:String):Number{var returnValue:Number;returnValue = Number(processedData.substring(1));return returnValue;
}}
The class file contains two methods—format and unformat. These methods convert andunconvert the data between a number and string. In addition, the format method roundsup to the nearest whole number. Obviously, the unformat method can’t retrieve the origi-nal number with cents, so it removes the currency symbol and displays the numeric sec-tion of the rounded number.
Switch to the FeaturedProduct.as file and change the priceFormat object as shown:
var priceFormat:Object = {cls: Custom, settings: {classname:➥"CurrencyFormat", classname_class: CurrencyFormat}};
The line uses the Custom formatter and specifies the CurrencyFormat class for the for-matting.
INTERRELATIONSHIPS AND INTERACTIONS BETWEEN COMPONENTS
405
18
6196CH18.qxd 1/18/06 11:32 AM Page 405

Test the Flash file, and you should see something similar to the screen shot shown inFigure 18-5. The price label now displays the value $26 instead of 25.70 as in the previousexample.
You can find the files used in this example in the resource folder 18-3.
Figure 18-5. The result of applying a custom formatter to the price field
In this case, the custom formatter rounded the price upwards to the nearest whole num-ber and added a dollar sign. As with all formatters, the transformation took place beforethe data from the source component was bound to the target component.
You can also include validators that allow you to test bound properties against specifiedcriteria. Normally, you add validators to check user content entered into UI components,but you can also validate external data after it’s loaded. In this section, I’ll examine valida-tors in more detail and show you how to include them within bindings using the featuredproduct XML document. I’ll also introduce you to some of the features in the ComponentInspector panel so you can see alternatives to scripted binding.
Including validatorsValidators are available to any property that is the destination of a binding. They allowFlash to check the content of a component to make sure that it meets validation criteria.You normally apply validators through the Schema tab of the Component Inspector panelbecause they relate to the schema properties specified for the component. FlashProfessional includes several built-in validators, depending on the datatype of the item.You can also specify a custom validator using an ActionScript class.
OBJECT-ORIENTED ACTIONSCRIPT FOR FLASH 8
406
6196CH18.qxd 1/18/06 11:32 AM Page 406

When you work with visual bindings, the Schema tab of the Component Inspector speci-fies the bindable component properties. This tab also lists the datatype of each of thebindable properties and allows you to change these where necessary.
When using UI components, the schema is predefined by the component. In the case of anXMLConnector or WebServiceConnector component, you can import a schema from anexternal XML document or WSDL file. When using the DataSet component, you wouldnormally define the schema yourself.
Flash recognizes the following datatypes: Array, Attribute, Boolean, Custom,DataProvider, Date, DeltaPacket, Integer, Number, Object, PhoneNumber, RecordSet,SocialSecurity, String, XML, and ZipCode.
You can use validation for the Custom, Integer, Number, String, and XML datatypes. ForString datatypes, validation consists of specifying a minimum and maximum length forthe string. Validation of the numeric types Integer and Number involves specifying theminimum and maximum values. If you set the datatype to custom, you can work with cus-tom validators.
Validation occurs after executing the binding. Flash generates an event to show the out-come of the validation. In the case of a successful validation, Flash generates the validevent. Where the validation fails, the invalid event is generated. You can writeActionScript that deals with these two events.
We’ll start by adding a built-in validator to visual bindings. We’ll check that data from anexternal XML document matches our criteria and display a message in a TextArea compo-nent.
Working with built-in validators
In this example, we’ll use an XMLConnector component to include data from an externalXML document within a Flash movie. This time, we’ll use the Component Inspector toapply the settings and add built-in validators. We’ll use the same XML document that weused in the previous examples.
Start by creating a new Flash file and save it as featuredProductVisual.fla to distinguish itfrom your earlier Flash document. Save it in the same folder as the file featuredProduct.xml.
Drag an XMLConnector component to the left of the stage and give it the instance nameproduct_xc. Data components have no visual appearance so it doesn’t matter where youplace the component.
INTERRELATIONSHIPS AND INTERACTIONS BETWEEN COMPONENTS
407
18
6196CH18.qxd 1/18/06 11:32 AM Page 407

Display the Component Inspector panel and enter the settings shown in Figure 18-6 in theParameters tab. These settings load the featuredProduct.xml document into the prod-uct_xc component.
We’ll import a schema from the external XML document. This will allow us to work withthe data from the XML document more easily.
Switch to the Schema tab of the Component Inspector and select the results property.Click the import schema button (the one with the arrow), at the right of the panel.Navigate to the file featuredProduct.xml and click Open. Figure 18-7 shows the populatedSchema tab.
You can see the elements of the XML file within the Schema tab. Note that theFeaturedProduct and product elements are objects, while the other elements are eitherstrings or numbers.
We’ll display the product name, cost, and e-mail address in TextInput components. We’lladd built-in validators to the name and cost fields. A little later, we’ll create a custom val-idator for the e-mail address.
Drag three TextInput components to the stage and name them name_txt, price_txt, andemail_txt, respectively. Drag a TextArea component to the right of the TextInput compo-nents and name it msg_txt. We’ll use this to display validation messages, so change thewidth to 200 and the height to 100.
Figure 18-7.The Schema tab after importinga schema
Figure 18-6.Settings for the XMLConnectorcomponent
OBJECT-ORIENTED ACTIONSCRIPT FOR FLASH 8
408
6196CH18.qxd 1/18/06 11:32 AM Page 408
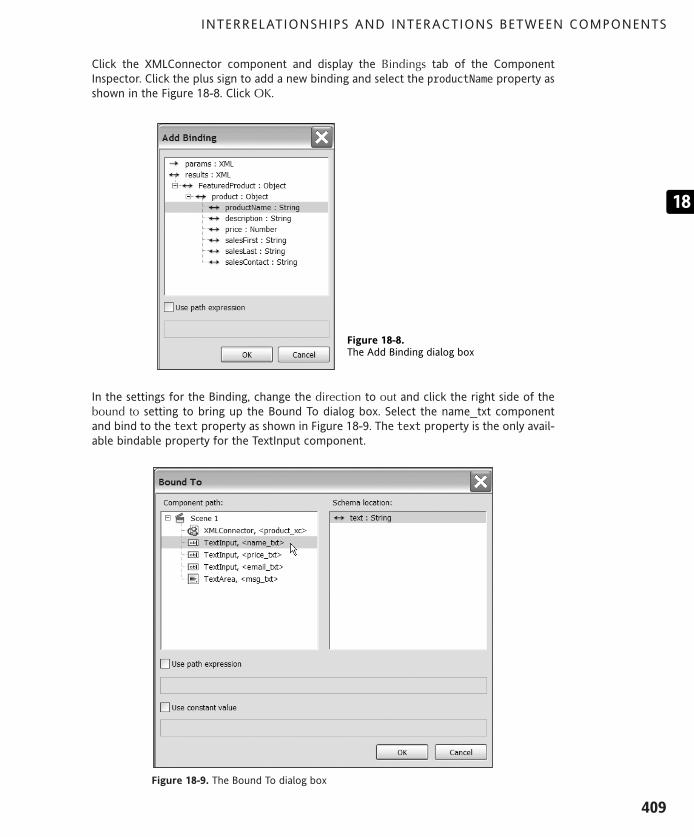
INTERRELATIONSHIPS AND INTERACTIONS BETWEEN COMPONENTS
409
Click the XMLConnector component and display the Bindings tab of the ComponentInspector. Click the plus sign to add a new binding and select the productName property asshown in the Figure 18-8. Click OK.
In the settings for the Binding, change the direction to out and click the right side of thebound to setting to bring up the Bound To dialog box. Select the name_txt componentand bind to the text property as shown in Figure 18-9. The text property is the only avail-able bindable property for the TextInput component.
Figure 18-9. The Bound To dialog box
Figure 18-8.The Add Binding dialog box
18
6196CH18.qxd 1/18/06 11:32 AM Page 409

You have created a one-way binding from the productName element to the text propertyof the name_txt component. Repeat the process to bind the price element to theprice_txt component and the salesContact element to email_txt.
Before we can check if the binding has worked, we’ll need to trigger the XMLConnectorcomponent. Add a new layer to the Flash file called actions and add the following code totrigger the component:
product_xc.trigger();
The XMLConnector will trigger as soon as the movie runs. Test the file and you should seethe TextInput components populated from the XMLConnector component as shown inFigure 18-10.
Figure 18-10. The TextInput components displaying bound data from the XMLConnector component
Earlier in the chapter, we scripted formatters. As an alternative, we’ll add one visually soyou can see the process. Select the name_txt component on the stage and click the textproperty in the Bindings tab of the Component Inspector. Choose a Compose String for-matter and enter Product: <.> in the formatter options section. This will display the wordProduct before the name from the XML file. Notice that we’ve used <.> to refer to the cur-rent XML node.
Test the file again. Figure 18-11 shows the effect of the formatter.
Figure 18-11. The TextInput component with a Compose String formatter
We’ll add built-in validators to the two of the TextInput components to check for thelength of the product name and the price of the product. I’m going to require that thename be at least 20 characters in length and that the product price is greater than 5.Although they might not be realistic examples, they’ll give you some idea about theprocess of using built-in validation.
OBJECT-ORIENTED ACTIONSCRIPT FOR FLASH 8
410
6196CH18.qxd 1/18/06 11:32 AM Page 410

Select the name_txt component on the stage and display the Schema tab in theComponent Inspector. Select the text property and click in the validation options settingto bring up the String Validation Settings dialog box as shown in Figure 18-12. Enter avalue of 20 to specify that the name has to be at least 20 characters long.
Select the price_txt component and change the datatype in the Schema tab to Number.Enter a minimum value of 5 in the Number Validation Settings dialog box.
We’ll create a class to deal with the validation of the two TextInput components. The classwill need to deal with valid and invalid events raised by component after the bindingprocess. The user will be able to specify the validation error message to display.
Create a new ActionScript file and save it as Validator.as in the same folder as the Flashfile. Start by importing the classes that we’ll need.
import mx.controls.TextInput;import mx.controls.TextArea;import mx.utils.Delegate;
We’ll be referring to the TextInput and TextArea components, so we’ll import the classes sowe can avoid using the fully qualified names. We’ll need the Delegate class to respond toevents in the correct scope.
Create the class and constructor as well as the functions that respond to the events. Addthe following code to the ActionScript file:
class Validator {private var __msg:String;private var __displayComp:TextArea;
function Validator (compToValidate:TextInput, msg:String,➥ compToDisplay:TextArea){
__msg = msg;__displayComp = compToDisplay;compToValidate.addEventListener("valid", Delegate.create(
➥ this, dataIsValid));compToValidate.addEventListener("invalid", Delegate.create(
➥ this, dataIsInvalid));}
Figure 18-12.The String Validation Settingsdialog box
INTERRELATIONSHIPS AND INTERACTIONS BETWEEN COMPONENTS
411
18
6196CH18.qxd 1/18/06 11:32 AM Page 411

private function dataIsValid(evt:Object):Void {__displayComp.text += "Data in " + evt.target._name + " is
➥ valid\n";}private function dataIsInvalid(evt:Object):Void {__displayComp.text += "Data in " + evt.target._name + " is
➥ invalid. " + __msg;}
}
We start by declaring the class and two private variables. The__msg variable will store theuser message relating to the validation error, while __displayComp refers to the compo-nent that will display the error message.
The constructor takes three parameters: the component that is to be validated(compToValidate), the error message to display in the case of invalid data (msg), and thecomponent in which to display the error message (compToDisplay).
The constructor function assigns values to the private variables and then adds event lis-teners to the component being validated. It uses the Delegate class so that the event iscalled in the scope of the class.
Finally, the class declares two private functions that respond to the valid and invalidevents—dataIsValid and dataIsInvalid. In real life, you may not want to respond tovalid data, but it’s included here as an illustration.
Switch back to the Flash file and add the following lines of code underneath the triggermethod:
var nameValidator:Validator= new Validator(name_txt, "The name is➥not long enough", msg_txt);var priceValidator:Validator= new Validator(price_txt, "Price must be➥at least 5", msg_txt);
The lines create two Validator objects to validate the TextInput components. Each objecthas its own error message and displays the results of the validation in the msg_txtcomponent. Test the file and you should see something similar to the screenshot shown inFigure 18-13.
Figure 18-13. The movie after validating the XML content
You can find the files used in this exercise in the resource folder 18-4.
OBJECT-ORIENTED ACTIONSCRIPT FOR FLASH 8
412
6196CH18.qxd 1/18/06 11:32 AM Page 412

We’ll extend the example to create a custom validator. In the next example, we’ll checkthat the e-mail address is valid.
Working with a custom validator
Custom validators allow you to specify your own validation for components so that youcan capture errors in data. This is likely to be particularly useful where you need to checkchanges made by users. You can catch errors in the entry before sending data to externalpages for processing. However, in this example, we’ll use a custom validator to validate thee-mail address within the XML document.
In order to use a custom validator, you need to set the datatype of the item that you wishto check to Custom. You can then specify the name of a class file to use for the validation.The class file must extend the CustomValidator class and include a method calledvalidate.
Let’s work through an example so you can see how this might work. We’ll use the filesfrom the previous exercise and add validation for the e-mail address TextInput. You canalso use the files from the resource folder 18-4.
Select the email_txt component and display the Schema tab in the Component Inspector.Change the datatype setting to Custom and enter EmailValidator in the validation optionssetting. This tells Flash to use the class EmailValidator to validate the email_txt compo-nent. Now we’ll need to create this class.
Create a new ActionScript file called EmailValidator.as and save it in the same folder asthe Flash file. Start by importing the binding classes.
import mx.data.binding.*;
Our class will use a very simplistic check for the e-mail address—checking whether there isan @ sign and at least one dot. This is not terribly robust, but it illustrates custom valida-tion.
Enter the following code in the class file:
class EmailValidator extends CustomValidator {public function validate(emailAddress:String) {var isValid:Boolean = true;var atPos:Number = emailAddress.indexOf("@");if (atPos == -1) {isValid = false;
}var dotPos:Number = emailAddress.indexOf(".");if (dotPos == -1) {isValid = false;
}
INTERRELATIONSHIPS AND INTERACTIONS BETWEEN COMPONENTS
413
18
6196CH18.qxd 1/18/06 11:32 AM Page 413

if (!isValid) {this.validationError ("Email address doesn't contain either an
➥ @ sign or .");return;
}}
}
The class extends the CustomValidator class. It creates a public method called validatethat checks for the existence of an @ sign or a dot. If an error is found, the validation errorEmail address doesn't contain either an @ sign or . is returned.
We’ll modify the Validator class so that we display the error message raised by the valida-tion process rather than our own error message. We’ll also stop it from displaying mes-sages for valid elements.
Change the Validator class to the following:
import mx.controls.TextInput;import mx.controls.TextArea;import mx.utils.Delegate;
class Validator {private var __displayComp:TextArea;
function Validator(compToValidate:TextInput, compToDisplay:➥ TextArea){
__displayComp = compToDisplay;compToValidate.addEventListener("invalid", Delegate.create(this,
➥ dataIsInvalid));}
private function dataIsInvalid(evt:Object):Void {__displayComp.text += "Error in " + evt.target._name + ". ";__displayComp.text += evt.messages + "\n";
}}
We’ve removed the event listener and function responding to valid data. We’ve used themessages property of the evt object to refer to messages generated by the validationprocess. If Flash detects the invalid event, the relevant error message will display, includ-ing the validationError from the custom validator.
We’ll need to change the method calls within the Flash file and add another call to validatethe e-mail address. Change the code in the Flash file as shown:
var nameValidator:Validator= new Validator(name_txt, msg_txt);var priceValidator:Validator= new Validator(price_txt, msg_txt);var emailValidator:Validator= new Validator (email_txt, msg_txt);
OBJECT-ORIENTED ACTIONSCRIPT FOR FLASH 8
414
6196CH18.qxd 1/18/06 11:32 AM Page 414

Change the e-mail address in the featuredProduct.xml file to introduce an error. Test theFlash movie and you should see something similar to the screenshot shown in Figure 18-14.
Figure 18-14. The movie showing error messages
In the previous two examples, we used built-in and custom validators to validate bounddata from an external XML file. The examples used visual bindings in the ComponentInspector panel. The final example checked the validity of an e-mail address, and you canfind the finished files in the resource folder 18-5 with the code download.
SummaryIn this chapter, we used data binding to share content between components. We workedthrough five examples that bound XML content from an XMLConnector component to UIcomponents such as a TextArea, Label, and TextInput. The first three examples usedscripted bindings, while the last two used visual bindings through the ComponentInspector panel.
When working with scripted bindings, I showed you how to set EndPoints to create a sim-ple binding between components. We used XPath expressions to target specific datawithin the results XML object. I covered the use of formatters to change the display ofdata, including the built-in Compose Strings and Number formatters. We also used a cus-tom formatter to display a rounded number with a currency sign. Finally, I covered valida-tors, and we used string and numeric built-in validators as well as creating a customvalidator for an e-mail address.
This chapter only touches the surface of scripted data binding. Within a single chapter, it’snot possible to cover the range of situations that you might encounter. For example, youcan work with more complicated bindings that involve arrays of data and that use aDataSet or DataHolder component. Hopefully you’ve seen enough in this chapter to getyou started, and what you’ve read will encourage you to experiment further.
What’s next?In the next chapter, we'll look at how Flash movies communicate with their container. Youmay have come across this already when calling JavaScript functions from Flash. If you'vetried to use fscommand, you'll know how cumbersome this type of communication can be!Flash Player 8 introduces a new type of communication, available through the External API.It offers many advantages and expands the range of communications that are possible toinclude other languages and applications other than a web browser.
INTERRELATIONSHIPS AND INTERACTIONS BETWEEN COMPONENTS
415
18
6196CH18.qxd 1/18/06 11:32 AM Page 415

6196CH19.qxd 1/18/06 11:34 AM Page 416

19 COMMUNICATION BETWEENFLASH AND THE BROWSER
6196CH19.qxd 1/18/06 11:34 AM Page 417

A common requirement for developers is allowing Flash movies to communicate with thehosting web page. Perhaps the Flash movie needs to send values to an HTML form orreceive information from a JavaScript function. The Flash movie may need to redirect thebrowser to a different website or receive authentication information from the hosting page.
There are different ways that developers can achieve this communication, depending onthe version of the Flash Player being targeted. For Flash Player 7 and below, developerscan use FlashVars or JavaScript to send content into Flash. A Flash movie can also callJavaScript functions with getURL or fscommand, optionally sending variables from Flash intothe function. These approaches are available to all developers and, as you’ll see shortly,they can be a little cumbersome to use. Flash Player 8 introduces another alternative—theExternalInterface class, or External API.
The ExternalInterface class allows Flash to communicate with the Flash Player containerhosting the movie—usually a web page. It is a static class that provides similar functional-ity to the ActionScript fscommand or FlashVars. The communication can occur in eitherdirection—from the container to Flash or from Flash back to the container. However,unlike other methods, the calls are synchronous—they can wait for and receive a response.The External API is also a little easier to implement than earlier approaches.
Flash movies aren’t limited to browser communication using JavaScript. They can commu-nicate with any container containing Flash Player 8. This means that you can use a lan-guage like C#, VB .NET, or Python to communicate with ActionScript. However, as browsercommunication is likely to be the most common use for developers, we’ll focus onActionScript and JavaScript in this chapter.
The ExternalInterface class requires a browser that supports either ActiveX or theNPRuntime API. You can find out more about this API at www.mozilla.org/projects/plugins/npruntime.html. At the time of writing, the ExternalInterface class can be usedwith all major web browsers including the following:
Internet Explorer 5.0 and above for Windows
Firefox 1.0 and above for both Windows and Macintosh
Mozilla 1.7.5 and above for both Windows and Macintosh
Netscape 8 and above for both Windows and Macintosh
Safari 1.3 and above for Macintosh
Note that you can’t use the External API with web pages hosted in Opera, as Opera doesn’tsupport the NPRuntime API. You also need to be aware that Flash Player 8 includes secu-rity features that stop you from using the ExternalInterface class unless the container andSWF are both running through a web server.
In this chapter, we’ll look at the various ways that Flash can communicate with both FlashPlayers 7 and 8. We’ll start by looking at the different methods for Flash/JavaScript com-munication with Flash Players earlier than version 8. After that, we’ll focus on using theExternal API for ActionScript/JavaScript communication.
OBJECT-ORIENTED ACTIONSCRIPT FOR FLASH 8
418
6196CH19.qxd 1/18/06 11:34 AM Page 418

Communication with Flash Player 7and below
Developers targeting a Flash Player before version 8 can use JavaScript and FlashVars sothat an HTML page can send values into a Flash movie. With these methods, communica-tion consists of setting the value of ActionScript variables within the Flash movie. The com-munication is one way—the Flash movie can’t send a response back to the HTML page.
Developers targeting Flash Player 7 and below can also call JavaScript functions fromwithin a Flash movie using the getURL action or the fscommand. The movie can pass anActionScript variable to a JavaScript function but again, it can’t wait for a response fromthe HTML page. Let’s look at the different types of communication for Flash Player 7 andbelow in more detail.
Sending variables into Flash
FlashVars allows developers to add variables to a Flash movie when it is first loaded, andyou can use this approach with Flash Player 6 or later. The variables are added as a param-eter in the <object> tag or an attribute in the <embed> tag using variable pairs:
<param name=FlashVars value="var1=value1" /><embed FlashVars="var1=value1" ... />
You can achieve the same result by adding variable pairs to the end of the name of the.swf file in either tag:
<param name="movie" value="FlashName.swf?var1=value1&var2=value2" /><embed src=" FlashName.swf?var1=value1&var2=value2" ... />
Developers can also use the SetVariable JavaScript method to set variables in Flash:
window.document.FlashMovieNameOrID.SetVariable("var1", "value1");
JavaScript targets the Flash movie using the ID or name attribute within the <object> or<embed> tag, respectively.
Whichever approach you use, Flash receives the variables from the HTML page when themovie first loads. Bear in mind that it’s not possible to determine when the variablesbecome available to Flash. A further drawback is that if the value of the variable changes,the web browser will need to reload the Flash movie.
Calling JavaScript from Flash
Developers can use fscommand and getURL to communicate from the Flash movie back tothe HTML page. Of these two methods, the getURL method is probably the more widelysupported, and it’s certainly simpler to use:
getURL("javascript: JSFunction(parameters)";
COMMUNICATION BETWEEN FLASH AND THE BROWSER
419
19
6196CH19.qxd 1/18/06 11:34 AM Page 419

The fscommand action also allows Flash to call a JavaScript function on the HTML pagehosting the Flash movie. However, this command is a little harder to implement than thegetURL approach. It requires a single, specially named JavaScript function that responds toall fscommand actions from Flash. The JavaScript function can optionally receive parame-ters from the Flash movie. If the host browser is Internet Explorer, the HTML page has toinclude a VBScript function as well.
Within Flash, the fscommand action takes two arguments—the name of the command toexecute and the parameters to be sent to the JavaScript function:
fscommand("CommandToExecute", "Parameters");
It’s possible for Flash to include multiple fscommand actions, sending different parameterseach time. By sending through a command name, the receiving JavaScript function can dis-tinguish between each action.
The JavaScript function is named using the ID (<object> tag) or the name (<embed> tag) ofthe Flash movie. The suffix _DoFSCommand is added to the function name as shown:
<script language ="JavaScript">function FlashMovieNameOrID_DoFSCommand(command, args) {//do something;
}</SCRIPT>
As there can only be a single JavaScript function within the web page, Flash can specifywhich command to execute:
fscommand("Command1", "Parameters1");fscommand("Command2", "Parameters2");fscommand("Command3", "Parameters3");
The JavaScript function can then act according to the command name:
< script language ="JavaScript">function FlashMovieNameOrID_DoFSCommand (command, args) {if(command == "Command1"){//do something;
}..else if(command == "Command2"){
//do something else}else if(command == "Command3"){//do something else
}}</SCRIPT>
OBJECT-ORIENTED ACTIONSCRIPT FOR FLASH 8
420
6196CH19.qxd 1/18/06 11:34 AM Page 420

Internet Explorer also requires some VBScript in addition to the JavaScript function. TheVBScript subroutine is named in a similar way to the JavaScript function, appending_FSCommand to the name. It then calls the JavaScript function, passing in the argumentsfrom Flash:
<script language ="VBScript">Sub FlashMovieNameOrID_FSCommand(ByVal command, ByVal args)call FlashMovieNameOrID_DoFSCommand(command, args)
end sub</SCRIPT>
The only other requirement to enable this communication is that the <embed> tag requiresthe attribute swLiveConnect to be set to true:
<embed swLiveConnect="true"... />
As you can see, it’s more complicated to use fscommand to call a JavaScript function com-pared with getURL. Whichever of the two approaches you choose, Flash doesn’t receive aresponse informing it of the outcome of the function call, so it’s possible for the commu-nication to fail silently.
An alternative approach is to use the Flash/JavaScript Integration Kit developed byMacromedia.
Using the Flash/JS Integration Kit
Macromedia released the Flash/JavaScript Integration Kit to assist with integrationbetween ActionScript and JavaScript. The Kit makes communication easier by encapsulat-ing the functionality using AS2.0 classes. The Kit allows for the transfer of more compli-cated datatypes between Flash and JavaScript. These types are Object, Array, String,Number, Date, Boolean, and null. Even though the Kit makes implementation easier thanthe code shown previously, the Kit uses the same technologies to handle communication,so it suffers from the same limitations.
At the time of writing, the Flash/JavaScript Integration Kit works in the following browsers:
IE 6.0 for Windows
Firefox 1.0 for Windows and Macintosh
Opera 8.0 for Windows and Macintosh
Safari 1.2.4 and above for Macintosh
Firefox 1.1 for Linux
You can find out more and download the Kit at http://weblogs.macromedia.com/flashjavascript/. At the time of writing, the zip file was less than 40KB.
COMMUNICATION BETWEEN FLASH AND THE BROWSER
421
19
6196CH19.qxd 1/18/06 11:34 AM Page 421

To use the Kit, download the FlashJavascriptGateway.zip file from the preceding URLand unpack it anywhere on your computer. You’ll need to add FlashJavascriptGateway\installation\JavaScriptFlashGateway.js and FlashJavascriptGateway\installation\JavaScriptFlashGateway.swf to the folder that contains your Flash movie. You’ll alsoneed to copy the com folder to the same location.
The JavaScriptProxy class handles the communication within Flash. You can create aninstance of the class with the following code:
import com.macromedia.javascript.JavaScriptProxy;var myProxy:JavaScriptProxy = new JavaScriptProxy(FVID, obj);
The object requires two arguments—an identifier that will be passed into Flash fromJavaScript using FlashVars and a reference to the object receiving calls from JavaScript.If you’re working on the main timeline, you can use the keyword this or _level0.
When we want to call a JavaScript function from within Flash, we can use
myProxy.call("JSFunctionName", params);
The method specifies the name of the JavaScript function as a string as well as any param-eters to be sent to the function.
In the HTML page, we need to include the JavaScriptFlashGateway.js file in the <head> sec-tion of the page:
<script type="text/javascript" src="JavaScriptFlashGateway.js" />
Flash requires a unique identifier for the communication. Creating a JavaScript variablethat contains a date time stamp is often a good approach:
var FVID = new Date();
You also have to create a FlashProxy object. It takes the unique identifier as a parameter aswell as the name of the JavaScriptFlashGateway.swf file.
var myFlashProxy = new FlashProxy(FVID, "JavaScriptFlashGateway.swf");
We can then use the call method in JavaScript to call an ActionScript function:
myFlashProxy.call("addItem", params);
You can use the FlashTag class to generate the <object> and <embed> tags within yourHTML page. When you call the constructor function, you’ll pass in the name of the .swffile, and the width and height of the movie.
var myFlash = new FlashTag("sample.swf", 200, 200);
You’ll also need to use the setFlashvars method to pass in the unique identifier youcreated earlier:
myFlash.setFlashvars("FVID =" + FVID);
OBJECT-ORIENTED ACTIONSCRIPT FOR FLASH 8
422
6196CH19.qxd 1/18/06 11:34 AM Page 422

You can then use the write method to write the correct tags to the document.
myFlash.write(document);
Using the Flash/JavaScript Integration Kit simplifies the process of communication andextends the functionality so that you can pass more complicated variable types betweenthe two languages. However, as mentioned earlier, it still uses the same approach, and youcan’t create synchronous calls.
If you’re targeting a Flash Player prior to version 8, you’ll need to use one of the methodslisted in this section to allow ActionScript and JavaScript to communicate with each other.However, you can take advantage of the External API if you’re targeting Flash Player 8 orabove. The advantage here is that you can create synchronous function calls. Let’s explorethe new approach in more detail.
Understanding the ExternalInterface classThe ExternalInterface class is a static class available within the External package that allowsyou to communicate with the container hosting the Flash Player. Because it’s a static class,you don’t need to instantiate it first before you can start calling methods. The class hastwo methods and one property that we’ll explore further in the remainder of this chapter.
The ExternalInterface class offers several advantages over other methods of communica-tion with JavaScript:
The class creates synchronous calls so you can receive an immediate response fromthe function that is called.
You can call any JavaScript function from within a Flash movie. When using thefscommand, you can only call a single function.
There are no limits to the number of arguments that you can send to a JavaScriptfunction. With the fscommand, you must send the command and parametersarguments.
You can preserve datatypes such as Boolean, Number, and String during functioncalls.
In order to avoid using the fully qualified name in your code, you can import theExternalInterface class into your Flash movie using
import flash.external.ExternalInterface;
You can only use the ExternalInterface class if you’re targeting Flash Player 8 and in themajority of cases, you’ll probably use this class for JavaScript communication. The webbrowser that hosts the Flash Player must support either ActiveX or the NPRuntime API, andyou can make sure that the class is available for use by checking the available property:
ExternalInterface.available;
COMMUNICATION BETWEEN FLASH AND THE BROWSER
423
19
6196CH19.qxd 1/18/06 11:34 AM Page 423

This property returns a Boolean value. If you receive a false value, you’ll have to use analternative method of communicating with the container or let the user know that somefunctionality is unavailable with their current Flash Player.
The ExternalInterface class has two methods, call and addCallback. The addCallbackmethod allows JavaScript to communicate with Flash, while the call method allows Flashto call a JavaScript function. We’ll start by looking at the call method, but it’s importantto be aware of some of the changes to Flash Player 8 security before proceeding.
Understanding Flash Player 8 security
Flash Player 8 implements a new security model that affects the way that JavaScript andActionScript communicate. The HTML parameter allowScriptAccess determines whetherActionScript can communicate with JavaScript. Be aware that it does not determine theconverse—whether the container can communicate with ActionScript.
The allowScriptAccess parameter has three possible values:
always: Always allow ActionScript to communicate with JavaScript.
sameDomain: Allow ActionScript to communicate with JavaScript when both theSWF and HTML files come from the same domain.
never: Don’t allow ActionScript to communicate with JavaScript.
You can set this parameter explicitly. In the case of the <object> tag, you can use
<param name="allowScriptAccess" value="sameDomain" />
The <embed> tag would use
<embed allowScriptAccess="sameDomain" ... />
If you don’t specify this parameter in Flash Player 8, version 8 movies use the valuesameDomain. This is a change from earlier version movies, which used the defaultvalue always.
Using the call method
The call method allows Flash to call a function in the container, for example, a JavaScriptfunction. You can optionally pass parameters to this function as shown:
call(methodName:String, [parameter1:Object, parameter2:Object]);
The method returns an object—either the value returned by the container function, ornull if the container function is not available. In the case of JavaScript communication, themethod looks for a function in the script tag:
<script language="JavaScript">
OBJECT-ORIENTED ACTIONSCRIPT FOR FLASH 8
424
6196CH19.qxd 1/18/06 11:34 AM Page 424

If you are using some other type of container for the Flash movie, the call method broad-casts an event named with the methodName parameter to the container for processing.
Let’s work through an example to see how Flash can call a JavaScript function. We’ll useFlash to enter text and send it through to a JavaScript function. The JavaScript function willdisplay the entered text in an alert and send a response back to Flash. We’ll display theresponse within the Flash movie. It’s a fairly abstract example, but hopefully it will demon-strate how the communication works.
Before you start, you’ll need to run this example through a web server. I have InternetInformation Services (IIS) installed with my Windows XP Professional operating system.You could use this or any other local web server, such as Apache for a Macintosh. You canalso upload the files to an external service provider to test them.
If you have IIS installed on a PC, you’ll need to move your files to a folder within Inetpub➤ wwwroot on your hard drive before testing them. If you’re working externally, use anFTP program to upload the files. You’ll need to test the files through a web browser byentering a full http path. When working locally, this is normally http://localhost/folderName/.
I like to work in a folder outside of the web server and then move the files to the webserver for testing. I’ve called my web server folder FOE so the location of the testing fileson my computer under IIS is C:\Inetpub\wwwroot\FOE. I’ll need to visit http://localhost/FOE/ within my web browser to test the files.
Start by creating a new Flash movie and size it to 250✕100 pixels. Add a TextInput andButton component to the Library and save the file as SimpleForm.fla.
Create a new ActionScript file and save it as SimpleForm.as. We’ll use this for our newclass, SimpleForm. The class will create a user interface with a TextInput and Buttoncomponent.
Start by adding the following code to the SimpleForm.as file:
import flash.external.ExternalInterface;import mx.controls.TextInput;import mx.controls.Button;import mx.utils.Delegate;
class SimpleForm {private var __container:MovieClip;private var __tiContainer:MovieClip;private var __ti:TextInput;private var __button:Button;private var __enteredText:String;private var __response:Object;
}
The import statements import the classes that we’ll need. This includes the ExternalInterfaceclass as well as the two component classes. I’ve also imported the Delegate class. I’ll use thiswhen registering my event listener so that I can refer to variables in the correct scope.
COMMUNICATION BETWEEN FLASH AND THE BROWSER
425
19
6196CH19.qxd 1/18/06 11:34 AM Page 425

Importing these classes will save me from having to use their fully qualified names inActionScript. I’ve also declared the class SimpleForm and added some private variabledeclarations.
The __container variable refers to the container movie clip for the form, and this will bepassed into the constructor function. The __tiContainer variable refers to the movie clipthat holds the UI components. The components that I’ll use in the form are stored withinthe __ti and __button variables. The __enteredText variable references the text propertyof the TextInput component, while the __response object will contain the JavaScriptresponse.
Add the following class constructor below the variable declarations:
function SimpleForm(container:MovieClip) {__container = container;var TIInitObj:Object = {_x: 20, _y: 20, _width: 200, _height:20};var BtnInitObj:Object = {_x: 20, _y:50, label: "Click me!"};__tiContainer = __container.createEmptyMovieClip("container_mc",
➥ __container.getNextHighestDepth());__ti = __tiContainer.createClassObject(TextInput, "text_txt",
➥ __tiContainer.getNextHighestDepth(),TIInitObj);__button = __tiContainer.createClassObject(Button, "click_btn",
➥ __tiContainer.getNextHighestDepth(), BtnInitObj);__button.addEventListener("click", Delegate.create(this, sendToJS));
}
The class constructor method takes a single parameter, container. This is the movie clipthat will hold the form. The first line in the constructor function assigns this value to theprivate variable __container. The following two lines declare initialization objects forthe two components that we’ll add to the form. The first, TIInitObj, refers to theTextInput, while BtnInitObj contains the initialization values for the Button component.These objects set the properties for the components when they’re created.
The function creates an empty movie clip called container_mc to store the components.The private variable __tiContainer references this movie clip. The code then creates aTextInput and Button component dynamically using the createClassObject method. Notethat these components must exist in the Library of the Flash file before we can use theSimpleForm class.
The last line within the function registers an event listener that listens for the click eventof the button. We’ve used the Delegate class so that the function can reference variablesin the scope of the SimpleForm class.
To complete the class, we’ll need to add the sendToJS function referred to in the last lineof the function. Add the following private function before the closing brace:
OBJECT-ORIENTED ACTIONSCRIPT FOR FLASH 8
426
6196CH19.qxd 1/18/06 11:34 AM Page 426

private function sendToJS(evtObj:Object):Void {__enteredText = __ti.text;if (__enteredText.length > 0 && ExternalInterface.available) {__response = ExternalInterface.call("showString", __enteredText);__ti.text = String(__response);
}}
This function creates the call to the JavaScript function. It starts by assigning the text prop-erty of the TextInput component to the variable __enteredText. Then, it tests that text hasbeen added and that the ExternalInterface class is available using the available property.Because the External API is a static class, you don’t need to instantiate it first.
The ExernalInterface.call method calls the JavaScript function showString, passing thetext from the TextInput as a parameter. The JavaScript function returns a response, whichis stored in the __response object. Finally, this is cast as a String and displayed within theTextInput component.
Switch back to the SimpleForm.fla file. Rename Layer 1 as actions and add the followingcode:
var theSF:SimpleForm = new SimpleForm(this);
This line instantiates a new SimpleForm object, passing the main timeline as a parameter.We won’t be able to test this Flash file yet. Instead, we’ll need to publish the SWF andHTML pages and add the showString JavaScript function to the HTML page. Once we’vefinished, we can only test these pages through a web browser, running them through aweb server.
Publish a SWF and an HTML page from the Flash file. Open the HTML file and add the fol-lowing JavaScript function to the <head> section of the page:
<script language="JavaScript"><!--function showString(theString) {alert(theString);return "Thanks for the text";
}-->
</script>
The function showString accepts a parameter called theString. It creates an alert box todisplay the parameter and returns Thanks for the text.
Close the HTML file. Move the SWF and HTML files to your web server. This may be run-ning locally or at a service provider. As I mentioned earlier, my web server is local so Icopied my files to C:\Inetpub\wwwroot\FOE.
COMMUNICATION BETWEEN FLASH AND THE BROWSER
427
19
6196CH19.qxd 1/18/06 11:34 AM Page 427

Open a web browser and enter the URL to the SimpleForm.html page. In my case, it’shttp://localhost/FOE/SimpleForm.html. You should see something similar to the screenshot shown in Figure 19-1.
Figure 19-1. The SimpleForm.html page
Enter some text and click the button. You should see a JavaScript alert as shown inFigure 19-2. When you click the OK button in the alert box, the TextInput componentshould display Thanks for the text.
Figure 19-2. The SimpleForm.html page after clicking the Flash movie button
In this example, you saw how the Flash movie could call a JavaScript function and receivea response synchronously. The example was a simple one, but hopefully it illustrated howeasy it is to facilitate this type of communication. You can find the files associated with theexample in the resource folder 19-1.
OBJECT-ORIENTED ACTIONSCRIPT FOR FLASH 8
428
6196CH19.qxd 1/18/06 11:34 AM Page 428

The other type of communication that we’ll examine in this chapter is where the FlashPlayer container communicates with the Flash movie. We’ll look at how you can call anActionScript function from within JavaScript using the addCallback method of theExternal API.
Using the addCallback method
The addCallback method makes a Flash function available to the container. For example,you could use this method so that a JavaScript function in an HTML page can call anActionScript function. The JavaScript function needs to know the id (in the case of the<object> tag) or name (in the case of the <embed> tag) of the Flash movie.
The addCallback ActionScript method takes the following arguments:
addCallback (methodName:String, instance:Object, method:Function);
The methodName parameter is the JavaScript reference to the ActionScript function beingcalled. The method argument refers to the ActionScript function that you want to register.Both of these arguments refer to the name of the ActionScript function. However, the firstargument is the name that is used by JavaScript when calling the ActionScript function.You don’t need to use the same name for both arguments, but you’ll probably find iteasier to understand your code if you do.
The instance is an object or a movieclip that contains the function. It is equivalent tousing the keyword this in the ActionScript function. Most of the time, you’ll use this ornull for the parameter.
The addCallback method returns a Boolean value indicating whether the callback has suc-ceeded. A return value of false may indicate that there are security restrictions that pre-vent the callback from executing.
You use the addCallback method in the following way:
var result:Boolean = ExternalInterface.addCallback("methodName",➥ this, method);
You can test the value of the result variable and take appropriate action if theaddCallback method fails.
Again, you’d probably want to make sure that the External API is available before register-ing the callback.
if (ExternalInterface.available) {var result:Boolean = ExternalInterface.addCallback("methodName",
➥ this, method);}
After registering the callback in Flash, you can then call the ActionScript function fromwithin the container for the Flash movie. Most developers will do this using JavaScript onan HTML page.
COMMUNICATION BETWEEN FLASH AND THE BROWSER
429
19
6196CH19.qxd 1/18/06 11:34 AM Page 429

In JavaScript, the first step is to find the id of the Flash movie in the <object> tag or thename from the <embed> tag on the HTML page. The Flash help files recommend that youavoid using the document.getElementById("pluginName") or document.all.pluginNameJavaScript methods of accessing the Flash movie id or name because the methods don’twork reliably across all web browsers.
To access the id or name correctly, you can use the following JavaScript function. This istaken from the Flash help file:
function thisMovie(movieName) {var isIE = navigator.appName.indexOf("Microsoft") != -1;return (isIE) ? window[movieName] : document[movieName];}
The code does a browser test and references the Flash movie appropriately using eitherwindow[flashMovieName] or document[flashMovieName].
You can use this reference to call the ActionScript function. In the following code, theFlash function with the name functionName is called within the movie whose name or id isflashMovieID. The argument params is sent into the ActionScript function.
function callFlash() {thisMovie("flashMovieID").functionName(params);
}
Let’s work through a simple example where we use JavaScript to play specific frames ina Flash movie. We’ll select a frame label from a drop-down list on an HTML page. ATextInput component in Flash will display the frame label, and the playhead will move tothat location in the movie.
You can find the resource files within the folder 19-2. I’ve set up a Flash file calledplayMe.fla that I’ll use for the example. You can also set up your own playMe.fla file. Itneeds to contain three keyframes labeled start, middle, and end. Each keyframe containsa stop action and some appropriate content. My playMe.fla file is 250✕100 in size.
As with the previous example, you’ll need to test these files on a web server so you’lleither need to create a location on your local web server or upload them to your serviceprovider. This is explained in detail earlier in the chapter.
Start by creating a new ActionScript file and save it as SimpleControl.as. We’ll use this tocreate the SimpleControl class. Add the following ActionScript:
import flash.external.ExternalInterface;import mx.controls.TextInput;
class SimpleControl{private var __container:MovieClip;private var __TI:TextInput;
OBJECT-ORIENTED ACTIONSCRIPT FOR FLASH 8
430
6196CH19.qxd 1/18/06 11:34 AM Page 430

public function SimpleControl(container:MovieClip) {__container = container;var __TIInitObj:Object = {_x:20, _y: 20, _width:200, _height:20};if (ExternalInterface.available) {__TI = __container.createClassObject(TextInput, "in_txt",
➥ __container.getNextHighestDepth(), __TIInitObj);ExternalInterface.addCallback("controlMovie", this,
➥ controlMovie);}
}}
The file starts by importing the classes that we’ll need. This includes the ExternalInterfaceclass and the TextInput class. We then declare the SimpleControl class and two privatevariables. The variable __container references the container movie clip for the TextInputcomponent within the Flash file, whereas the __TI variable refers to the TextInput itself.
The constructor function takes the container movie clip as a parameter. This tells us whichtimeline we’re working on. The function then assigns the argument to the __containervariable. The next line declares an initialization object for the TextInput component settingthe position and size for the component.
If the External API is available, we create a TextInput component with the createClassObjectmethod, passing in the initialization object. We then add the callback. If we wanted ourscripting to be a little more robust, we could assign a Boolean variable and add some errorhandling. I haven’t done that in this case for simplicity.
Notice that I’ve used the same function name for both the JavaScript call and theActionScript method in my addCallback method. This isn’t a requirement, but it maymake my code easier to follow.
The last thing that we need to do is to add the controlMovie function to the class file. Thisfunction will receive information from the JavaScript function of the same name. Add thefollowing code before the closing brace in the class file:
public function controlMovie(frameLabel:String):Void {__TI.text = frameLabel;__container.gotoAndStop(frameLabel);
}
The function receives an argument, frameLabel, from the JavaScript function. It sets thisvalue as the text property for the TextInput component __TI and uses the gotoAndStopaction to move the playhead to that frame label in the Flash movie.
Switch to the playMe.fla file. If you’ve created your own copy of this file, add a TextInputcomponent to the Library. This is necessary so we can add the component dynamicallyusing the createClassObject action.
COMMUNICATION BETWEEN FLASH AND THE BROWSER
431
19
6196CH19.qxd 1/18/06 11:34 AM Page 431

Add a new layer to the file and call it actions. Enter the following code on Frame 1:
var theSC:SimpleControl = new SimpleControl(this);
This line creates a new SimpleControl object called theSC that references the maintimeline.
Publish the Flash file, making sure that you publish both a SWF and an HTML file. You’llneed to add some JavaScript and a form to the HTML file. Start by adding the followingHTML after the <body> tag:
<form name="frmFlash" action="JavaScript:controlMovie();"method="POST"><select name="selFrame"><option selected="selected">start</option><option>middle</option><option>end</option>
</select> <input type="submit" value="Control Flash">
</form>
The lines create a form called frmFlash that contains a select box and a button with thelabel Control Flash. The select box contains the three frame labels from the Flash movie.When the form submits, it calls the JavaScript function controlMovie.
We’ll also need to create the relevant JavaScript functions. Add the following lines to the<head> section of the HTML page:
<script language="JavaScript"><!--function thisMovie(movieName) {var isIE = navigator.appName.indexOf("Microsoft") != -1;return (isIE) ? window[movieName] : document[movieName];
}
function controlMovie() {var n = document.frmFlash.selFrame.selectedIndex;var frameLabel = document.frmFlash.selFrame[n].text;thisMovie("playMe").controlMovie(frameLabel);}
--></script>
The first function, thisMovie, returns the correct reference to the Flash movie, dependingon the browser type. As mentioned earlier, this is taken from the Flash help files.
The controlMovie function finds the text associated with the select control and stores it inthe variable frameLabel. It then uses the thisMovie function to return the correct refer-ence to the Flash movie called playMe and calls the controlMovie function, passing in the
OBJECT-ORIENTED ACTIONSCRIPT FOR FLASH 8
432
6196CH19.qxd 1/18/06 11:34 AM Page 432

value of the frameLabel variable. In other words, when we click the button, the JavaScriptfunction will pass the text from the drop-down box to the TextInput in the Flash file andmove the playhead to the appropriate frame. Close the HTML file.
Copy the SWF and HTML files to your web server. My web server is running locally so Icopied my files to C:\Inetpub\wwwroot\FOE.
Open a web browser and enter the URL to the playMe.html page. In my case, it’s http://localhost/FOE/playMe.html. You should see something similar to the image shown inFigure 19-3.
Figure 19-3. The playMe.html page
Select a different option from the drop-down list and click the Control Flash button. Youshould see the selected frame label appear in the TextInput component and the Flash filemove to a different frame as shown in Figure 19-4.
Figure 19-4. The playMe.html page after selecting a different frame label
COMMUNICATION BETWEEN FLASH AND THE BROWSER
433
19
6196CH19.qxd 1/18/06 11:34 AM Page 433

In this example, we saw how you could call an ActionScript function using JavaScript. Weused an HTML select box to control the position of the playhead within a Flash movie.The process involved registering the ActionScript function for a callback and creating theappropriate JavaScript to call this function. The example is a little abstract, but hopefullyit demonstrates how you can control Flash with JavaScript. If you want to see a furtherexample of communication, you can find more in the resource folder 19-3.
We’ve seen two examples of communication between ActionScript and JavaScript. This islikely to be the most common use for the External API. However, it’s also possible forActionScript to communicate with other languages.
ActionScript communication with other languages
In the previous section, we saw how ActionScript can call a JavaScript function. As I men-tioned earlier, the External API can also communicate with other languages in applicationsthat host the Flash Player. Although it is beyond the scope of this chapter to explore thearea in detail, it’s worth mentioning how non-JavaScript communication takes place.
Calling a non-JavaScript methodYou may wish to use Flash to communicate with a different type of Flash application, per-haps a desktop application that contains the Flash Player ActiveX control. When you call anon-JavaScript method, the call is captured in a FlashCall event, which sends the eventrequest to the application as an XML string.
The XML string contains the element <invoke> and sets the ActionScript method name asan attribute. It also contains the arguments, sent through in relevant tags:
<invoke name="MethodName" returntype="xml"><arguments><string>String parameter</string><number>1234</number>
</arguments></invoke>
As the preceding arguments are of the string and number types, the XML string containsthe tags <string> and <number>.
If you send array datatypes, the XML string contains something similar to the following:
<array><property id='0'><string>First</string>
</property><property id='1'><string>Second</string>
</property></array>
OBJECT-ORIENTED ACTIONSCRIPT FOR FLASH 8
434
6196CH19.qxd 1/18/06 11:34 AM Page 434

Your container application can then call the method referred to in the name attribute andoptionally return data to Flash. Any data is returned to Flash in an XML string:
<string>This is a sample string being returned</string>
The container application needs to call the SetReturnValue method, passing the XMLstring:
flashMovie.SetReturnValue("XML string")
Flash blocks until the return value is set or until the event handler finishes executing.
Calling an ActionScript method from an applicationCalling an ActionScript method from an application container works in a similar way. First,Flash has to add a callback as shown earlier.
addCallback("DesktopFunctionName", this, FlashFunctionName);
As previously mentioned, the name of the ActionScript function and the desktop functiondon’t have to be the same, but it may make your code easier to follow if you give them thesame names.
Then the container has to call the ActionScript function using the CallFunction method.You can use the same XML structure to pass arguments.
<invoke name="FunctionName" returntype="xml"><arguments><string>From desktop</string>
</arguments></invoke>
When Flash receives the function call, it triggers the Flash function referred to in the call-back.
It is beyond the scope of this chapter to explore this topic in detail, but hopefully this sec-tion will give you enough information to get started.
SummaryIn this chapter, you’ve seen how a Flash movie can communicate with the Flash Player con-tainer. We spent the majority of the chapter looking at ActionScript and JavaScript com-munication as that is likely to be the focus of most developers’ work. We examined howyou can call a JavaScript function from within Flash and how you can use JavaScript toaccess an ActionScript function. You also saw that it’s possible for Flash Player 8 to workwith other container languages such as C#, VB .NET, and Python.
Within the chapter, we covered several different approaches, according to which FlashPlayer was being targeted. The bulk of the chapter focused on the External API, which is
COMMUNICATION BETWEEN FLASH AND THE BROWSER
435
19
6196CH19.qxd 1/18/06 11:34 AM Page 435

available to Flash Player 8. One of the key advantages of this approach is the ability tomake synchronous function calls. This isn’t possible where you’re targeting earlier FlashPlayers.
Hopefully, you’ll have seen that the External API offers a more streamlined and functionalapproach to ActionScript communication with the Flash Player. If you’re not able to takeadvantage of these new features, you may find that using the Flash/JS Integration Kit pro-vides an acceptable alternative.
What’s next?In the next chapter, we’ll explore how Flash communicates with data sources across serverconnections. Specifically, we’ll focus on two efficient means of undertaking server com-munication in Flash: XML and Web Services. Of course, you’ll also want to ensure your dataexchanges are secure, and the next chapter shows you how.
OBJECT-ORIENTED ACTIONSCRIPT FOR FLASH 8
436
6196CH19.qxd 1/18/06 11:34 AM Page 436

6196CH19.qxd 1/18/06 11:34 AM Page 437

6196CH20.qxd 1/18/06 11:35 AM Page 438

20 SERVER COMMUNICATION (XML AND WEB SERVICES)
6196CH20.qxd 1/18/06 11:35 AM Page 439

Over the years, Flash has gained respect as a development tool through its support for var-ious methods of loading in external data and communicating with the server. Imagine howlimited you’d be developing anything in Flash without the possibility to read in or send outdata.
Luckily, the Flash 3 days are well and truly behind us, and we now have numerous ways tocommunicate with a data source. Two of the most popular and efficient ways to do so areXML and web services, and we’ll discuss these in detail in this chapter.
Understanding XMLIn many ways XML, or eXtensible Markup Language, defines the web as we know it today.It allows you to store data in a structured way, which is pretty much the Holy Grail fordevelopers, because it enables them to have a representation of the state of an object atany time.
When I first started looking at XML some years ago, I just couldn’t figure out what it wasall about. I was proficient in developing HTML and assumed that all tags used in an XMLdocument must have some specific purpose and actually “do” something. It wasn’t until Iunderstood that the keyword with XML is not “do” but “describe” that I started to see thetremendous power in it. In other words, XML abstracts data one step further: rather thanspecifying a visual design, it describes the design of your data structure.
XML is a text format that uses tags, or nodes as they’re called in XML jargon, to define ahierarchical tree structure. One of the rules in writing a valid XML document is that itshould start with a single root node, for example, book.
<book></book>
In that root node, you have multiple other nodes that further describe what is containedwithin the book, like a title and some different chapters.
<book><title>Object-Oriented ActionScript for Flash 8</title><chapter>1</chapter><chapter>2</chapter>
</book>
This chapter provides a valuable summary of using Flash and XML together. However, ifthis topic really piques your interest, and you want to go deeper into the subject, thenfriends of ED has another fantastic book available, written by Sas Jacobs (one of theauthors of this book), called Foundation XML for Flash (2005, ISBN: 1-59059-543-2).
OBJECT-ORIENTED ACTIONSCRIPT FOR FLASH 8
440
6196CH20.qxd 1/18/06 11:35 AM Page 440
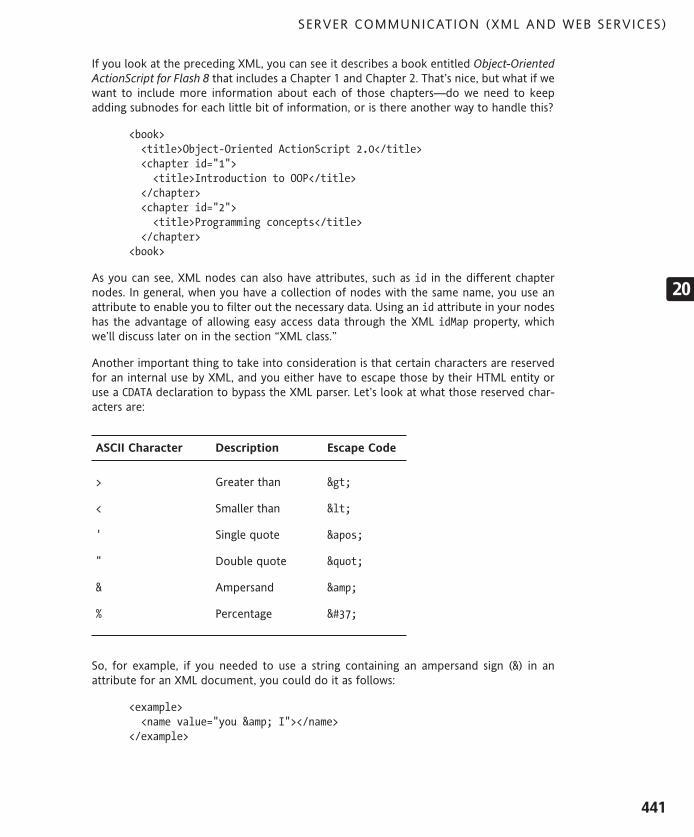
If you look at the preceding XML, you can see it describes a book entitled Object-OrientedActionScript for Flash 8 that includes a Chapter 1 and Chapter 2. That’s nice, but what if wewant to include more information about each of those chapters—do we need to keepadding subnodes for each little bit of information, or is there another way to handle this?
<book><title>Object-Oriented ActionScript 2.0</title><chapter id="1"><title>Introduction to OOP</title>
</chapter><chapter id="2"><title>Programming concepts</title>
</chapter><book>
As you can see, XML nodes can also have attributes, such as id in the different chapternodes. In general, when you have a collection of nodes with the same name, you use anattribute to enable you to filter out the necessary data. Using an id attribute in your nodeshas the advantage of allowing easy access data through the XML idMap property, whichwe’ll discuss later on in the section “XML class.”
Another important thing to take into consideration is that certain characters are reservedfor an internal use by XML, and you either have to escape those by their HTML entity oruse a CDATA declaration to bypass the XML parser. Let’s look at what those reserved char-acters are:
ASCII Character Description Escape Code
> Greater than >
< Smaller than <
' Single quote '
" Double quote "
& Ampersand &
% Percentage %
So, for example, if you needed to use a string containing an ampersand sign (&) in anattribute for an XML document, you could do it as follows:
<example><name value="you & I"></name>
</example>
SERVER COMMUNICATION (XML AND WEB SERVICES)
441
20
6196CH20.qxd 1/18/06 11:35 AM Page 441

You could use the same approach for a node value, just escaping the reserved character:
<example><name>you & I</name>
</example>
Or, as mentioned earlier, use a CDATA declaration to tell the XML parser to ignore what-ever is contained within it:
<example><name><![CDATA[you & I]]></name>
</example>
This CDATA declaration starts with <![CDATA[ and ends with ]]>, and everything writtenbetween those values is free from all laws that govern XML, including reserved characters.What happens when parsing the XML document is that as soon as a CDATA declaration isencountered, the parser just ignores whatever is in there.
Lucky for us, using CDATA not only ignores whatever you use within it, but also treats it asplain text without any syntactical meaning. If, for example, you use some HTML tags inside,it will not parse those tags as XML nodes as you might have expected it to do.
<example><name><![CDATA[<strong>bold text</strong>]]></name>
</example>
Important to note is that the CDATA declaration is only available for node values, not foruse in node attributes. The following example would NOT be parsed as valid XML:
<example><name value="<![CDATA[you & I]]>"></name>
</example>
XML declarations
Now to finish up, let’s talk about XML declarations. Any other tutorial on XML would havecovered this first, but because we like to do things our own way (and because Flash doesn’tparticularly care if you use it or not), let’s discuss it now.
Any XML document normally starts with an XML declaration at the very top. That line tellsthe parser that it is in fact an XML document, what version of the XML format it is using,optionally the character encoding it is using, and whether it is a standalone file or it usesany external document type declaration (DTD). Document type declarations are some-what beyond the scope of this chapter, but if you want to read up on them, I can stronglyrecommend to check out Foundation XML for Flash published by friends of ED.
The most basic XML declaration you’ll encounter will look something like this:
<?xml version="1.0" ?>
OBJECT-ORIENTED ACTIONSCRIPT FOR FLASH 8
442
6196CH20.qxd 1/18/06 11:35 AM Page 442

All that line does is tell the parser it’s an XML document that uses XML version 1.0 syntax.If you’re using any foreign languages in the XML file, chances are you’d want to save it inUnicode, and you can tell the parser about this by adding the encoding attribute.
<?xml version="1.0" encoding="UTF-8" ?>
This is the exact same XML declaration as before, only with the character encoding set toUTF-8 for Unicode.
<?xml version="1.0" encoding="UTF-8" standalone="yes" ?>
Finally, we see the standalone attribute, which determines whether or not an externalDTD is associated with the XML. This is completely optional, and if you’re just using theXML file as a data source for Flash, its value will always be "yes".
Somewhat surprisingly, the order of the attributes in an XML declaration is fixed; first youhave the version attribute, followed by the optional encoding and standalone attributes,respectively.
Now, although ActionScript allows you to retrieve this XML declaration using the xmlDeclproperty of the XML object, it’s not an absolute prerequisite to use it in your file. Theparser in Flash doesn’t do anything with the information. In general, however, it is alwaysgood practice to add that line and make your file a valid XML document, mainly becauseit will allow compatibility with other technology and allow easy debugging. Most modernbrowsers will parse XML for you and report any syntax errors you might have made.
Its not really my goal to give you a comprehensive guide on XML in this chapter, but armedwith the information covered so far, let’s look at the different methods of implementingXML data into Flash projects.
Using XML in FlashLoading XML into Flash is actually a relatively painless process. Using just a few lines ofcode, you can load data in and start using it in applications.
The most common ways to get hold of XML data in Flash is using the XMLConnector com-ponent or creating an instance of the XML class, both of which we’ll discuss in the next fewpages.
XMLConnector component
Since Flash MX 2004 (at least in the professional edition), there are a number of usefuldata connector components that ship with the product. One of these is the XMLConnectorcomponent, which is arguably the easiest way to load XML data in your Flash application.
Let’s take a closer look at how you actually use this component. For this example, create anew FLA and save it as xmlconnector.fla in a local folder of your choice.
SERVER COMMUNICATION (XML AND WEB SERVICES)
443
20
6196CH20.qxd 1/18/06 11:35 AM Page 443

Obviously, before we are able to load in some XML data, we need an actual XML file. We’lluse the example from earlier on—save the code that follows as book.xml in the samefolder where the FLA was saved.
<book><title>Object-Oriented ActionScript 2.0</title><chapter id="1"><title>Introduction to OOP</title>
</chapter><chapter id="2"><title>Programming concepts</title>
</chapter><book>
Now we’re all set for some component magic! With the FLA open, open up theComponents panel (Windows ➤ Components)—you’ll find the XMLConnector compo-nent in the data folder. Drag this component to the stage of the blank FLA to create aninstance of it, as shown in Figure 20-1.
Figure 20-1. XMLConnector component on the stage
Clicking the component instance on stage will likely bring up the Parameter panel, whichyou see in Figure 20-2. If it doesn’t, choose Windows ➤ Properties ➤ Parameters to makethe component’s Parameters panel appear.
Figure 20-2. Component’s Parameters panel
You could also download the files for this example fromwww.friendsofed.com and use them instead.
OBJECT-ORIENTED ACTIONSCRIPT FOR FLASH 8
444
6196CH20.qxd 1/18/06 11:35 AM Page 444

With the Parameters panel open, and the component instance selected, set the instancename as book_xmlconn. Your screen should resemble Figure 20-3.
Figure 20-3. Assigning an instance name to the XMLConnector component
Keep the component selected; next we’ll specify the URL for the XML file it needs to load.As the XML file is located in the same folder as our FLA, just type book.xml as the URL, asshown in Figure 20-4.
Figure 20-4. Setting the URL parameter for the XMLConnector component
The last thing we need to set is the direction of the XMLConnector—set this to receivebecause we only want to receive the XML data and not send anything back to the server.For now, you don’t need to bother with the other optional component parameters. Next,we’ll write a couple of lines of ActionScript code to trigger the XMLConnector componentto load the file and output the results.
Create a new layer in the timeline and rename it to actionscript, as shown in Figure 20-5.Click the first frame of that layer in the timeline and open up the Actions panel (Window➤ Actions).
Figure 20-5. actionscript layer on the timeline
SERVER COMMUNICATION (XML AND WEB SERVICES)
445
20
6196CH20.qxd 1/18/06 11:35 AM Page 445

With the Actions panel open, select the first frame of the default layer, and enter the fol-lowing code:
import mx.utils.Delegate;
function traceXML(evt:Object):Void {trace(evt.target.results);
}
this.book_xmlconn.addEventListener("result",Delegate.create(this,➥ traceXML));this.book_xmlconn.trigger();
This code we’ve just written is pretty straightforward. We add an event listener tobook_xmlconn (the instance name for the XMLConnector component), which tells itto call the traceXML() function when a result event occurs. Using the mx.utils.Delegateclass, we set the scope of the traceXML() function to the container of the XMLConnectorcomponent rather than using the component scope. This is particularly useful if this codewas used in a class. The result event in the XMLConnector component is invoked whendata has successfully been loaded in.
In the traceXML() function, you’ll notice that there is one argument called evt (this is acommon abbreviation of event). The event listener gets this argument passed throughwhen the result event it subscribed to is triggered. This event object is structured asfollows:
type: A string that holds a reference to the event that was triggered, in this case"result"
target: A reference to the instance that broadcasted the event, in this casebook_xmlconn
To get hold of the results loaded in, we just need to use the results property on the tar-get that is specified in the event object. The reason why we use evt.target.results inthe preceding code snippet rather than book_xmlconn is another one of those best prac-tices: you always want to make sure as little code as possible has any actual hard-codedreferences to instance names so your application can still be flexible and not require majorrewrites when something changes.
So, as you’ve now seen, the traceXML() function will trace out the XML data that wasloaded in. Finally, what we still need to do is call the trigger method on book_xmlconn tohave it initiate the load request.
If you now test the FLA (Control ➤ Test Movie), you’ll see the code in action and the con-tents of the book.xml file will appear in the Output panel, as shown in Figure 20-6.
OBJECT-ORIENTED ACTIONSCRIPT FOR FLASH 8
446
6196CH20.qxd 1/18/06 11:35 AM Page 446

Figure 20-6. Output panel showing contents of XML document
Now that you know how to load XML data in using the XMLConnector component, let’ssee how to put it to use in your application. One of the most significant advantages ofusing the XMLConnector component (or data components in general) is it lets you easilyuse data binding, as discussed in Chapter 17. While it is very powerful, there are occasionswhere you just want to get a little more control over things and handle the XML dataparsing yourself. Of course, Flash allows you to do just that, and we’ll discuss how to usethe XML object next.
XML class
We’ve just looked at the easy way to hook up XML in your Flash project, but let’s see howto do it without relying on a component to do the dirty work for us. One major advantageof using the XML class rather than the XMLConnector component is that it doesn’t havethe overhead of using the v2 component framework and results in a smaller file sizefor the exported SWF.
First we instantiate a new XML instance; you can compare this to dragging an instance ofthe XMLConnector component on stage.
var book_xml:XML = new XML();
You now have an instance of the XML class called book_xml. Next, we’ll tell this XMLinstance to load in a file, but before that, there is one other thing we need to take care of.The way an XML document gets parsed in Flash results in Flash considering whitespace inthe file to be text nodes. To bypass this problem, we can use the ignoreWhite propertyand set it to true.
this.book_xml.ignoreWhite = true;
With that line in place, now we’re ready to load in the file using the load method on thebook_xml XML class instance.
this.book_xml.load("book.xml");
This line of code triggers the load request for the XML instance and starts loading in thebook.xml file. To capture whatever comes in the XML class requires a number of callback
SERVER COMMUNICATION (XML AND WEB SERVICES)
447
20
6196CH20.qxd 1/18/06 11:35 AM Page 447

functions. You can consider this an alternative to the event listener system that theXMLConnector component uses. It takes advantage of some specific behavior ofActionScript that allows it to execute a function you dynamically assign to it.
As a little side note, let’s look at the following example, CallBack.as, which illustrates theprinciple of callbacks:
class CallBack {
var onCallBack:function;
function trigger():Void {this.onCallBack();
}
}
CallBack.fla
var myCallBack:CallBack = new CallBack();this.myCallBack.onCallBack = function() {trace("Please call me back!");
}this.myCallBack.trigger();
You can see from the preceding example that you can just assign any function to the callbackproperty and it will execute that function by simply adding opening and closing parentheses.
Similar to this example, the XML class has three such properties that serve as callbacks:
onHTTPStatus(): Called if an HTTP error occurs when loading the file (e.g., 404 notfound), only available when publishing for Flash Player 8.
onData(): Called when the data has finished loading, or an error occurred whenloading the data from the server—it passes the raw text data.
onLoad(): Called when the loaded data has finished parsing to an XML object;passes a Boolean value that specifies whether or not it was successful parsing thedata to XML.
These three properties allow you to control what happens with the data at any stage dur-ing the load process. The callback you’ll most commonly use is onLoad() because thathappens when the XML class has finished its job and parsed the data to an object you canuse in Flash.
this.book_xml.onLoad = function(success:Boolean):Void {if(success) {trace(this);
} else {trace("Error loading XML file");
}}
OBJECT-ORIENTED ACTIONSCRIPT FOR FLASH 8
448
6196CH20.qxd 1/18/06 11:35 AM Page 448

Using the onLoad() callback, we now create a function that does exactly the same thing asthe traceXML function did in the XMLConnector component example earlier in this chapter:just output the XML data from the file it has loaded in.
The one additional thing we do in this function is use the Boolean that is passed to deter-mine whether the XML file has been parsed successfully. If it wasn’t successful, we willinstead write an error message to the Output panel, as shown in Figure 20-7.
You can check this works by simply changing the line of code that loads the XML file tosome nonexistent file.
this.book_xml.load("non-existent.xml");
Figure 20-7. Error message in the Output panel
OK, now that we’ve captured the parsed XML data using onLoad(), we can start the realfun. The XML class has a number of properties that allow you to walk through the XMLstructure and retrieve any element you need:
firstChild: Returns a reference to the first child element of the node
lastChild: Returns a reference to the last child element of the node
nextSibling: Returns a reference to the next sibling in the parent node
previousSibling: Returns a reference to the previous sibling in the parent node
parentNode: Returns a reference to the parent node
childNodes: Returns an array with references to the child elements of the node
attributes: Returns an object containing all attributes and corresponding valuesof the node
nodeValue: Returns the text value of the node
nodeName: Returns the name of the node
Let’s give these properties a try on our actual XML file and see what they do by using themin an example.
First, let’s look at our XML file, book.xml:
<?xml version="1.0" ?><book><title>Object-Oriented ActionScript 2.0</title><chapter id="1">
SERVER COMMUNICATION (XML AND WEB SERVICES)
449
20
6196CH20.qxd 1/18/06 11:35 AM Page 449

<title>Introduction to OOP</title></chapter><chapter id="2"><title>Programming concepts</title>
</chapter><book>
Next we see the xml-properties.fla file, which uses a number of the XML class proper-ties to get hold of specific data from the XML file that was loaded in and parsed.
import mx.utils.Delegate;
var book_xml:XML = new XML();this.book_xml.ignoreWhite = true;
this.book_xml.onLoad = Delegate.create(this,function(success:Boolean):➥ Void {if(success) {
trace("root node: "+➥ this.book_xml.firstChild.nodeName);// outputs "book"
trace("first child of root node: "+➥ this.book_xml.firstChild.firstChild.nodeName);// outputs "title"
trace("next sibling of title node: "+➥ this.book_xml.firstChild.firstChild.nextSibling.nodeName);// outputs "chapter"
trace("first chapter id: "+➥ this.book_xml.firstChild.firstChild.nextSibling.➥ attributes["id"]);// outputs "1"
} else {trace("Error loading XML file");
}});
this.book_xml.load("book.xml");
As you can see in this example, it’s easy to combine these XML object properties to gethold of the specific information you need out of the XML document. For example, the firststatement takes the first child node of the XML data and gets its nodeName. In our XML file,this is the book root node so you’ll get the string "book" returned.
OBJECT-ORIENTED ACTIONSCRIPT FOR FLASH 8
450
6196CH20.qxd 1/18/06 11:35 AM Page 450

The second statement looks for the name of the first child node of the book root node;this returns the string "title". You can see that we just walked down the XML structure.
The other two statements respectively get the node name and the id attribute of the nextsibling of the title node. A sibling is a node that is on the same level down the structureof the XML file. In our XML file, the title node and chapter nodes are siblings.
In this example, I also used the mx.utils.Delegate class to set the scope for the onLoad call-back to its container rather than the XML class instance. We’ll do that throughout thechapter as a good practice for callbacks.
Now for something more practical: let’s get a list of all chapter titles in our XML docu-ment. Create a new FLA document, save it in the same folder where the book.xml file islocated, and add the following code to a layer on the timeline:
import mx.utils.Delegate;
var book_xml:XML = new XML();this.book_xml.ignoreWhite = true;this.book_xml.load("book.xml");
this.book_xml.onLoad = Delegate.create(this,function(success:Boolean):➥ Void {if(success) {
var title_array:Array = new Array();var book_root:Array = this.book_xml.firstChild;var book_children:Array = book_root.childNodes;
for(var i=0; i<book_children.length; i++) {if(book_children[i].nodeName == "chapter") {var chapter_children:Array = book_children[i].childNodes;for(var j=0; j<chapter_children.length; j++) {if(chapter_children[j].nodeName == "title") {title_array.push(chapter_children[j].firstChild.nodeValue);break;
}}
}}
trace(title_array);
} else {trace("Error loading XML file");
}});
SERVER COMMUNICATION (XML AND WEB SERVICES)
451
20
6196CH20.qxd 1/18/06 11:35 AM Page 451

This example looks more complicated than it actually is; in fact, the whole thing couldprobably be coded in about half as many lines if you hard coded the references to the titlechild nodes. What makes the bulk of the code here is using the childNodes property toloop through the XML object looking for the correct node.
Looping through the XML document is usually the best approach for doing something likethis, as you don’t have your code rely on the XML nodes always remaining at the samelocation in the file.
What the code here does is grab a reference to the child nodes of the root node when theonLoad() function is triggered, and then loop through those looking for nodes calledchapter. When it encounters one of those nodes, it grabs a reference to the child nodes ofthat chapter node and loops through them looking for a title node. Finally, when it findsthat title node, it adds the title to the title_array variable we created earlier.
Now that the title_array variable contains the chapter titles from the book.xml file, let’shook them up to a List component. Simply open up the Components panel (Window ➤Components) and drag an instance of the List component on stage, giving it the instancename chapters_list. Now it’s as simple as setting the dataProvider of the List componentto reference our title_array where we previously had the trace statement.
this.chapters_list.dataProvider = title_array;
If you test this movie, you’ll see the chapters from the XML document nicely displayed inthe List component, as shown in Figure 20-8. However many chapter nodes you add to theXML document later on, they will all be displayed in the component when the data hasloaded in.
Figure 20-8. List component showing chapter titles from XML file
As an exercise, you might want to create a description node for each chapter in the XMLfile and update the code to have it display the description for the chapter currently selectedin the List component.
OBJECT-ORIENTED ACTIONSCRIPT FOR FLASH 8
452
6196CH20.qxd 1/18/06 11:35 AM Page 452

Earlier on, I briefly mentioned the XML class having a property called idMap, which wasintroduced in Flash Player 8. It allows you to access nodes that have an id attribute usingarray notation, which is incredibly handy. Let’s take our book.xml file as an example:
<?xml version="1.0" ?><book><title>Object-Oriented ActionScript 2.0</title><chapter id="1"><title>Introduction to OOP</title>
</chapter><chapter id="2"><title>Programming concepts</title>
</chapter><book>
You’ll notice that each chapter node has an id attribute with a unique value. Now, afterloading in the XML document, you can use the idMap property and reference to that idattribute to get the correct node returned.
import mx.utils.Delegate;
var book_xml:XML = new XML();this.book_xml.ignoreWhite = true;
this.book_xml.onLoad = Delegate.create(this,function(success:Boolean):➥Void {if(success) {
// output the second chapter nodetrace(this.book_xml.idMap["2"]);
} else {trace("Error loading XML file");
}});
this.book_xml.load("book.xml");
The example here references the id with value 2, which returns the second chapter nodein the XML file. What the idMap feature is incredibly useful for is creating shortcuts whenyou have complex XML documents. Rather than referencing all the way down the XMLtree using the XML class properties, you can just use idMap to immediately get to thenodes you need.
There are more exciting times ahead for using XML in Flash projects; the next version ofthe Flash Player will reportedly support the E4X standard, which makes XML a nativedatatype in ActionScript and will allow for much easier data searching and filtering.
SERVER COMMUNICATION (XML AND WEB SERVICES)
453
20
6196CH20.qxd 1/18/06 11:35 AM Page 453

For now, if you’re a Flash developer looking into XML, I can recommend you look at theXPath classes for ActionScript 2.0 created by Neeld Tanksley of XFactorStudio. XPath is aW3C standard for querying XML data sources and will make your life a lot easier whenworking with complex XML documents. These ActionScript 2.0 classes are available for freeunder an Apache-style license at www.xfactorstudio.com/ActionScript/AS2/XPath/.
This concludes our look at using XML in Flash projects. If you’re planning to work withXML files for your Flash applications across different domains, you will also want to readup on the Flash Player security sandbox later on in this chapter. But first we’ll have a lookat communicating with web services in Flash 8.
What are web services?Web services have really been hyped over the last few years as the must-have technologyfor businesses, and there is definitely some truth in that. A web service allows you to com-municate with a remote server (it could technically also be your own), call certain methodson the service, and get results sent back.
To achieve this, web services use a protocol called Simple Object Access Protocol (SOAP),which uses an XML format to send calls back and forward between the different servers.Messages are usually sent over the HTTP or HTTPS protocol on port 80, which means itshouldn’t have any problems passing through firewalls. Also, because the communicationbetween servers happens in an XML text format, it is completely cross-platform compatible.
Let’s take a closer look at this SOAP protocol and the role it plays in communicating withweb services.
Understanding SOAPAs mentioned earlier, SOAP messages are sent in an XML format. The structure of a SOAPmessage is relatively basic—it consists of an envelope that contains a header and a body.The header part is optional, but could contain information such as authentication for theweb service and other information about the service call.
<?xml version="1.0" ?><Envelope xmlns="http://schemas.xmlsoap.org/soap/envelope/">
<Body><getEmployeeDetails xmlns="http://www.yourdomain.com/"><employeeID>108</employeeID>
</getEmployeeDetails></Body>
</Envelope>
This is about the most basic SOAP call you could imagine—it’s just the envelope and thebody where it states that a method called getEmployeeDetails() needs to be called, andit passes an argument called employeeID with value 108 to the method.
OBJECT-ORIENTED ACTIONSCRIPT FOR FLASH 8
454
6196CH20.qxd 1/18/06 11:35 AM Page 454

One thing you’ll notice here is that SOAP messages use XML namespaces—we didn’t dis-cuss this earlier as Flash doesn’t handle those, but they’re very important for the SOAPprotocol. The XML namespace we use in the envelope node refers to the XML schema forthe SOAP protocol, and the namespace we use on the getEmployeeDetails node is thereto indicate that part of the XML is not defined in the SOAP schema and refers to thedomain where the web service is deployed.
When SOAP has sent across this message, the web service receives it, processes therequest by calling the method and passing any arguments that were defined, and thensends back another SOAP message with the results the method returned.
<?xml version="1.0" ?><Envelope xmlns="http://schemas.xmlsoap.org/soap/envelope/">
<Body><getEmployeeDetailsResponse➥ xmlns="http://www.yourdomain.com/"><getEmployeeDetailsResult>
<employeeID>108</employeeID><employeeName>John Doe</employeeName><employeeDepartment>Marketing</employeeDepartment>
</getEmployeeDetailsResult></getEmployeeDetailsResponse>
</Body></Envelope>
The result message isn’t much more complicated—what simply happened is that themethod name we called was used with Response appended to indicate it is a SOAPresponse. In getEmployeeDetailsResponse there is another node that contains the results,in this case the method name with “Result” appended. Inside getEmployeeDetailsResult()is every property that the method returned after it was called.
Now, of course, something could’ve gone wrong with our SOAP request. Let’s say thegetEmployeeDetails() method didn’t pass the employeeID parameter. In this case,the web service would send back a SOAP message with information about the fault thatoccurred.
<?xml version="1.0" ?><Envelope xmlns="http://schemas.xmlsoap.org/soap/envelope/"><Body><Fault><faultcode>Client</faultcode><faultstring>employeeID parameter is missing</faultstring>
</Fault></Body>
</Envelope>
That’s pretty neat! If something goes wrong, the SOAP message sends us back the faultcode and a description of what went wrong.
SERVER COMMUNICATION (XML AND WEB SERVICES)
455
20
6196CH20.qxd 1/18/06 11:35 AM Page 455

These are obviously very basic examples, and SOAP is a complex and extensive topic todiscuss, but before you start to worry, bear in mind that you won’t need to generate thoseXML documents yourself or parse the XML from the SOAP messages that get returnedyourself. Flash has made this a whole lot easier for us by providing a WebServiceConnectorcomponent and access to the WebService class in Flash MX 2004 Professional and FlashProfessional 8 for communicating with web services from your Flash application.
Talking to web servicesAs mentioned earlier, the web services that you consume are generally located on aremote server because XML data is rather verbose and not the most optimized way to con-nect to local data.
All examples I’ll be discussing here use the Macromedia XML News Aggregator (MXNA)web service. MXNA is a web-based news aggregator for weblogs that report news on Flashand a variety of other technologies. The MXNA web service offers a whole range of methods,such as retrieving the latest posts in a particular category, lists of all aggregated feeds, mostpopular postings, etc., which makes it a very interesting web service to experiment with.
If you’re interested in trying out some other web services, www.xmethods.net is an inter-esting site that lists a great number of web services you can use freely.
Now, without further ado, let’s look at using the WebServiceConnector component toconnect to a web service.
WebServiceConnector component
The WebServiceConnector component is available in the Components panel (Window ➤Components), listed in the Data category. Like the XMLConnector component, this com-ponent allows you to easily connect to a data source (in this case the MXNA web service)and load data into your Flash application.
As always, create a new FLA; save it as webserviceconnector.fla in a local folder. Withthat FLA open, drag an instance of the WebServiceConnector component to the stage, soyour screen resembles Figure 20-9.
Figure 20-9. WebServiceConnector component on stage
OBJECT-ORIENTED ACTIONSCRIPT FOR FLASH 8
456
6196CH20.qxd 1/18/06 11:35 AM Page 456

With the component instance selected, open up the component’s Parameters panel andgive it an instance name of mxna_wsconn, as shown in Figure 20-10.
Figure 20-10. Assigning an instance name to the WebServiceConnector component
In the component’s Parameters panel, set the WSDLURL parameter to the following URL:http://weblogs.macromedia.com/mxna/webservices/mxna2.cfc?wsdl, as shown below inFigure 20-11.
Figure 20-11. Setting the WSDLURL parameter for the WebServiceConnector component
If you now click the down arrow for the operation parameter, you’ll notice that Flash hasautomagically filled that with all available methods for the MXNA web service. For thisexample, we’ll choose the getCategories() method as the operation, as shown inFigure 20-12.
Figure 20-12. Selecting an operation parameter for the WebServiceConnector component
SERVER COMMUNICATION (XML AND WEB SERVICES)
457
20
6196CH20.qxd 1/18/06 11:35 AM Page 457

You can leave the other component parameters to their default value. Next, add a newlayer to the main timeline of the FLA and rename it actionscript. With Frame 1 of theactionscript layer selected, add the following lines of code to the Actions panel:
import mx.utils.Delegate;
onGetCategories = function(evt:Object):Void {trace(evt.target.results);
}
this.mxna_wsconn.addEventListener("result",Delegate.create(this,➥ onGetCategories));mxna_wsconn.trigger();
This code does set up an event listener that calls the onGetCategories() function when itreceives the results back from the web service. The onGetCategories() function outputsthe results by referencing the target in the event object that gets passed. Finally, we invokethe WebServiceConnector component trigger method to connect to the web service.
If you test this FLA (Control ➤ Test Movie) you’ll notice that, after a second or two, awhole lot of objects are traced out to the Output panel, as you see in Figure 20-13.
Figure 20-13. Output panel showing results from the web service
That’s actually what we’d expect to see; if you look at the documentation for the MXNAweb service at the following URL, you’ll see that the getCategories() method returns aseries of objects, each of which has a categoryID and categoryName property.
http://weblogs.macromedia.com/mxna/webservices/mxna2.html
To get the actual names of the MXNA categories, we change our code to read as follows:
import mx.utils.Delegate;
onGetCategories = function(evt:Object):Void {var categories:Array = evt.target.results;for(var i=0; i<categories.length; i++) {trace(categories[i].categoryName);
}}
OBJECT-ORIENTED ACTIONSCRIPT FOR FLASH 8
458
6196CH20.qxd 1/18/06 11:35 AM Page 458

this.mxna_wsconn.addEventListener("result",Delegate.create(this,➥ onGetCategories));this.mxna_wsconn.trigger();
Not too difficult, is it? What the code now does is hold the array with results from the webservice in a variable called categories, after which we use a for loop to iterate throughthe array and trace out the categoryName property of each object.
Test this updated code (Control ➤ Test Movie) and the Output panel will now look some-thing like what you see in Figure 20-14.
Figure 20-14. Output panel showing category names received from the web service
You’ve probably guessed what’s coming next—yes, we’ll hook it up to a List component todisplay the categories. The easiest way to do this might be to use the data binding feature,but we’ll just do it the old-fashioned way for this example.
Drag an instance of the List component to the stage and give it the instance name cate-gories_list, as shown in Figure 20-15.
Figure 20-15. List component on stage
SERVER COMMUNICATION (XML AND WEB SERVICES)
459
20
6196CH20.qxd 1/18/06 11:35 AM Page 459

Now for the actual code to add the web service results to the List component. Change theexisting ongetCategories code to read as follows:
import mx.utils.Delegate;
onGetCategories = function(evt:Object):Void {var categories:Array = evt.target.results;for(var i=0; i<categories.length; i++) {this.categories_list.addItem(categories[i].categoryName,➥ categories[i].categoryId);
}}
this.mxna_wsconn.addEventListener("result",Delegate.create(this,➥ onGetCategories));this.mxna_wsconn.trigger();
The updated code now uses the addItem() method on the categories_list List componentinstance to add each of the categories as an item in the List. Additionally we set thecategoryId property that the web service passes with each category object on the datafield of each of the list items.
If you test this movie (Control ➤ Test Movie), you’ll see the List component with all cate-gories that the MXNA web service returned, as shown in Figure 20-16.
Figure 20-16. List component showing categories received from a web service
You might be wondering why we added the categoryId to the data field of each list item.Well, the MXNA web service has another interesting method called getFeedsByCategory()that returns the list of all aggregated weblogs and needs the categoryId as an argument.
Doing this type of project with the WebServiceConnector component shows why it is notalways very practical to use. Basically, there are two ways to handle this—either create anew instance of the component on stage or overwrite the component parameters usingActionScript for each call.
OBJECT-ORIENTED ACTIONSCRIPT FOR FLASH 8
460
6196CH20.qxd 1/18/06 11:35 AM Page 460

For this example, I’ll opt to use multiple instances of the WebServiceConnector compo-nent, as it separates out the different web service calls more nicely; if you overwrite thecomponent parameters, you’ll probably have as much work to do as you’d have usingthe WebService class.
Drag a second instance of the WebServiceConnector component to the stage and give itthe instance name feeds_wsconn, as shown in Figure 20-17.
Figure 20-17. Assigning an instance name to the second WebServiceConnector component
Set the WSDLURL component parameter for feeds_wsconn to the same MXNA web serviceURL, http://weblogs.macromedia.com/mxna/webservices/mxna2.cfc?wsdl, and set theoperation to getFeedsByCategory(), as shown in Figure 20-18.
Figure 20-18. Setting the parameters for the second WebServiceConnector component
Drag another instance of the List component to the stage, give it the instance namefeeds_list, and resize both instances of the component as needed to accommodate thecategories and feed information (see Figure 20-19).
Figure 20-19. Components layed out on stage
SERVER COMMUNICATION (XML AND WEB SERVICES)
461
20
6196CH20.qxd 1/18/06 11:35 AM Page 461

Now the only thing left to do is update the code to trigger the web service and pass thecategoryId to the getFeedsByCategory() method when the categories_list selectionchanges.
import mx.util.Delegate;
onGetCategories = function(evt:Object):Void {var categories:Array = evt.target.results;for(var i=0; i<categories.length; i++) {this.categories_list.addItem(categories[i].categoryName ,➥ categories[i].categoryId);
}}
onGetFeeds = function(evt:Object):Void {this.feeds_list.removeAll();var feeds:Array = evt.target.results;for(var i=0; i<feeds.length; i++) {this.feeds_list.addItem(feeds[i].feedName,feeds[i].siteUrl);
}}
onCategoryChange = function():Void {this.feeds_wsconn.params = [categories_list.selectedItem.data];this.feeds_wsconn.trigger();
}
this.mxna_wsconn.addEventListener("result",Delegate.create(this,➥ this.onGetCategories));this.feeds_wsconn.addEventListener("result",Delegate.create(this,➥ onGetFeeds));this.categories_list.addEventListener("change",Delegate.create(this,➥ onCategoryChange));
this.mxna_wsconn.trigger();
What this code does is first add an additional event listener for the categories_list thatlistens for a change in the selection. If that happens, the onCategoryChange() functiongets invoked, which sets the parameter for the web service call to the data value of theselected value of the currently selected category and triggers the web service.
The feeds_wsconn instance now also has an event listener that listens for the result event,and when that occurs, calls the onGetFeeds() function. The onGetFeeds() function doesthe work to populate the second List component. It clears all items that might be in there,assigns the result to a feeds array, loops through it, and adds all items to the feeds_listinstance with the feedName for the label and the feedUrl as the data value, as you see inFigure 20-20.
OBJECT-ORIENTED ACTIONSCRIPT FOR FLASH 8
462
6196CH20.qxd 1/18/06 11:35 AM Page 462

Figure 20-20. List component populated with feeds received from the web service
We’ll just add one last thing to our example to complete it, which will allow you to go tothe website of the selected feed. Drag an instance of the Button component on stage, giveit the instance name feed_btn, and set its label to Visit website.
To point the URL of the selected feed, we need to add the following code to the existingcode in the FLA:
onButtonClick = function():Void {if(this.feeds_list.selectedItem.data != undefined) {getURL(this.feeds_list.selectedItem.data,"_blank");
}}
this.feed_btn.addEventListener("click",Delegate.create(this,onButtonClick));
This code adds an event listener to the button component for the click event, and whenthat happens, invokes the onButtonClick() function. The onButtonClick() functionchecks whether the URL for the selected feed is defined, and if so opens it up in a newbrowser window (see Figure 20-21).
A great application programmed in around 30 lines of code, using the MXNA web service.
SERVER COMMUNICATION (XML AND WEB SERVICES)
463
20
6196CH20.qxd 1/18/06 11:35 AM Page 463

Figure 20-21. Finished web service example running
Next up, we’ll look at using the WebService class rather than a data component to connectto web services.
WebService class
Flash 8 has a WebService class that allows you to script your own communication with aweb service rather than use the WebServiceConnector component. There are some caseswhere it is more convenient not to work with component instances and using code is moreflexible. One reason, as with the XMLConnector component, is that the components makeuse of the v2 component framework, which adds significantly to the file size of theexported SWF.
As before, we’ll be using the MXNA web service to build an example demonstrating theWebService class. Create yourself a new FLA, and add the following code to a layer on themain timeline. The first thing we’ll obviously need to do is create an instance of the class.
import mx.services.WebService;var WS_URL:String =➥ "http://weblogs.macromedia.com/mxna/➥ webservices/mxna2.cfc?wsdl";var mxna_ws:WebService = new WebService(this.WS_URL);
This code imports the mx.services.WebService class (which is the complete classpath to theWebService class), and then sets up a string variable called WS_URL that holds the URL forthe MXNA web service. Finally, we create a new instance of the WebService class, passingthe WS_URL as its target.
OBJECT-ORIENTED ACTIONSCRIPT FOR FLASH 8
464
6196CH20.qxd 1/18/06 11:35 AM Page 464

The cool thing about the WebService class is that once you have an instance set up, youcan call any method as if it was a native method in the WebService instance. For example,we could simply trigger the following methods on the MXNA service as such:
this.mxna_ws.getCategories();this.mxna_ws.getFeedsByCategory(1);
There is, however, one caveat: web service calls are asynchronous. Asynchronous callsmean that the Flash Player won’t wait for the result of the web service call before execut-ing the next lines of code.
To work around this problem, Flash doesn’t actually return results when calling thesemethods on the web service, but rather returns an instance of the mx.services.PendingCall class. This PendingCall class now handles the web service call and has twocallback functions we can use: onResult() and onFault().
import mx.services.WebService;import mx.services.PendingCall;
var WS_URL:String = "➥ "http://weblogs.macromedia.com/mxna/webservices/ "➥ mxna2.cfc?wsdl";
var mxna_ws:WebService = new WebService(this.WS_URL);var categories_pc:PendingCall = this.mxna_ws.getCategories();
this.categories_pc.onResult = function(result_obj:Object):Void {trace(result_obj);
}
In the preceding code, we call the getCategories() method on the mxna_wsmx.services.WebService class instance we created earlier, which returns an instance ofPendingCall to the categories_pc variable. The categories_pc PendingCall instance alsohas the onResult function defined, which traces out the argument it receives.
Test this movie (Control ➤ Test Movie) and you’ll see results shown in Figure 20-22 appearin the Output panel.
Figure 20-22. Output panel showing results received from the web service
SERVER COMMUNICATION (XML AND WEB SERVICES)
465
20
6196CH20.qxd 1/18/06 11:35 AM Page 465

Does this look familiar? The MXNA getCategories() method returns a list of objects thateach contain the categoryName and categoryId properties.
Let’s double-check by looping through the results and tracing each category name out tothe Output panel. Change the code in the FLA to read as follows:
import mx.services.WebService;import mx.services.PendingCall;
var WS_URL:String = ➥ "http://weblogs.macromedia.com/mxna/webservices/➥ "mxna2.cfc?wsdl";
var mxna_ws:WebService = new WebService(this.WS_URL);var categories_pc:PendingCall = mxna_ws.getCategories();
this.categories_pc.onResult = function(result_obj:Object):Void {var categories:Object = result_obj;for(var i=0; i<categories.length; i++) {trace(categories[i].categoryName);
}}
Its always a good idea to make sure you handle any errors should they come up, so we’llgo ahead and implement the onFault() callback on the PendingCall instance, so updatethe code as follows:
import mx.services.WebService;import mx.services.PendingCall;
var WS_URL:String = ➥ "http://weblogs.macromedia.com/mxna/webservices/ ➥ mxna2.cfc?wsdl";
var mxna_ws:WebService = new WebService(this.WS_URL);var categories_pc:PendingCall = mxna_ws.getCategories();
this.categories_pc.onResult = function(result_obj:Object):Void {var categories:Object = result_obj;for(var i=0; i<categories.length; i++) {trace(categories[i].categoryName);
}}
this.categories_pc.onFault = function(fault_obj:Object):Void {trace("The following error occurred: ");trace("Fault code: "+fault_obj.faultcode);trace("Fault description: "+fault_obj.faultstring);
}
OBJECT-ORIENTED ACTIONSCRIPT FOR FLASH 8
466
6196CH20.qxd 1/18/06 11:35 AM Page 466

You’ll notice that this looks very similar to the onResult() callback; it gets passed anobject that contains a faultcode and faultstring property. If you read the introductionto SOAP earlier on in this chapter, those should also be familiar to you.
Now if we only had an error to test that code! It’s not too difficult to cause an error—justrename the web service method call to one that doesn’t exist.
var categories_pc:PendingCall = mxna_ws.getCategorieeeees();
Let’s try this and keep our fingers crossed that an error gets triggered when we test ourmovie (Control ➤ Test Movie). You should get a message like the one shown in Figure 20-23.
Figure 20-23. Output panel showing error message
Yes, we’ve got ourselves an error! I really like the way these errors are thrown and theamount of information you get. In this case, we get a faultcode with the valueClient.NoSuchMethod, which is pretty descriptive in itself, and the faultstring makes iteven more obvious: “Couldn’t find method ‘getCategorieeeees’ in service!”
Now that we’ve covered the basics of the WebService class, we can put it to good use bybuilding our own little MXNA application in Flash. But before we get started on that, I’llshow you another great little feature in the Flash IDE that will help you when working withweb services.
If you go to Window ➤ Other Panels you’ll notice that there is something called the WebServices panel. If you open it up, your screen will look something like Figure 20-24.
Figure 20-24. Web Services panel
SERVER COMMUNICATION (XML AND WEB SERVICES)
467
20
6196CH20.qxd 1/18/06 11:35 AM Page 467
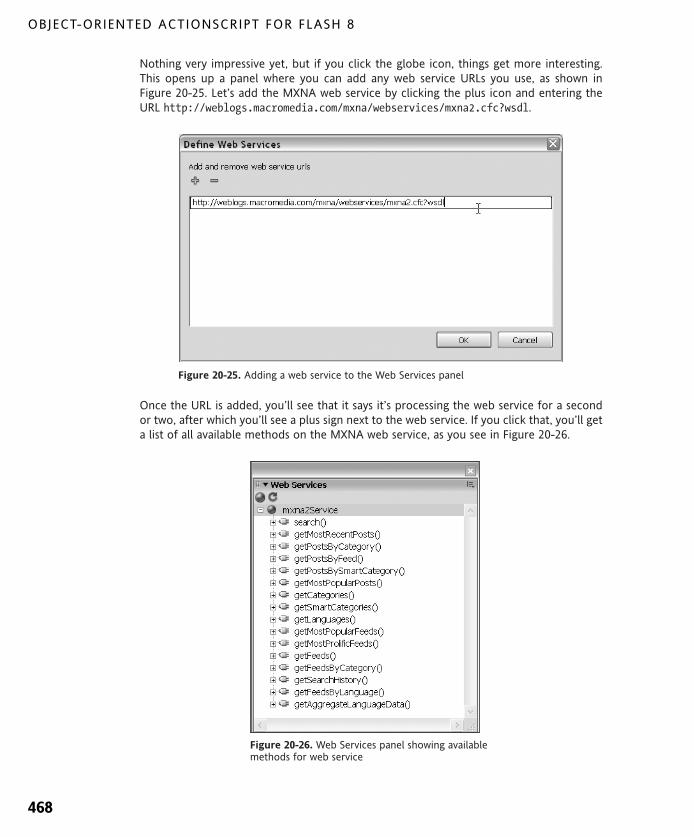
Nothing very impressive yet, but if you click the globe icon, things get more interesting.This opens up a panel where you can add any web service URLs you use, as shown inFigure 20-25. Let’s add the MXNA web service by clicking the plus icon and entering theURL http://weblogs.macromedia.com/mxna/webservices/mxna2.cfc?wsdl.
Figure 20-25. Adding a web service to the Web Services panel
Once the URL is added, you’ll see that it says it’s processing the web service for a secondor two, after which you’ll see a plus sign next to the web service. If you click that, you’ll geta list of all available methods on the MXNA web service, as you see in Figure 20-26.
Figure 20-26. Web Services panel showing available methods for web service
OBJECT-ORIENTED ACTIONSCRIPT FOR FLASH 8
468
6196CH20.qxd 1/18/06 11:35 AM Page 468

That’s nothing—we’ve seen something similar with theWebServiceConnector component. But this is where thepanel gets really useful; if you open up the methods,you’ll also get to see the parameters and results for eachmethod and its datatype, as shown in Figure 20-27.
Figure 20-27.Web Services panel showing params and
results for each web service method
Isn’t that cool? This panel is really an invaluable tool when using web services in Flash,especially if you don’t have detailed documentation on what methods it exposes, theparameters it needs, and what results it sends back.
Enough playing around, let’s get back to the business of creating that aggregator applicationwith the MXNA web service. Let’s start by creating a new FLA called mxna_aggregator.fla.With that file open, we’ll start out by creating the user interface for our application.
Drag an instance of the ComboBox component, two instances of the List component, aLabel component, a TextArea component, and a Button component to the stage. Next,resize and position them to look approximately like what you see in Figure 20-28.
Figure 20-28. Components laid out on stage
SERVER COMMUNICATION (XML AND WEB SERVICES)
469
20
6196CH20.qxd 1/18/06 11:35 AM Page 469

The first thing we’ll handle is the ComboBox component, which will hold our aggregatorcategories. Give it the instance name categories_cb. Create a new layer in the main time-line and rename it to actionscript. With the first frame of the actionscript layer selected,open up the Actions panel (Window ➤ Actions) and enter the following code:
import mx.services.WebService;import mx.services.PendingCall;import mx.utils.Delegate;
var WS_URL:String =➥ "http://weblogs.macromedia.com/mxna/webservices/➥ mxna2.cfc?wsdl";var mxna_ws:WebService = new WebService(this.WS_URL);
var categories_pc:PendingCall = this.mxna_ws.getCategories();
this.categories_pc.onResult = Delegate.create(this,function(result_obj:Object):Void {this.categories_cb.addItem("Select a category");var categories:Object = result_obj;for(var i=0; i<categories.length; i++) {this.categories_cb.addItem(categories[i].categoryName,➥ categories[i].categoryId);
}});
this.categories_pc.onFault = function(fault_obj:Object):Void {trace("The following error occurred: ");trace("Fault code: "+fault_obj.faultcode);trace("Fault description: "+fault_obj.faultstring);
}
You should almost be able to code this blindly by now if you’ve followed along with theprevious examples. The only changes are to the onResult() function for the categories_pcPendingCall instance.
What we do here is add an item to the ComboBox that tells the user to select a category,after which we loop through the categories we received and add the categoryName prop-erty to the label field of the ComboBox component, and the categoryId as its data.
If you test this code (Control ➤ Test Movie) you’ll see that it populates the ComboBoxcomponent as expected with the initial value “Select a category”, followed by the cate-gories we get back from the getCategories() web service call (see Figure 20-29).
OBJECT-ORIENTED ACTIONSCRIPT FOR FLASH 8
470
6196CH20.qxd 1/18/06 11:35 AM Page 470

Figure 20-29. ComboBox component showing categories received from the web service
When a category has been selected, we want to do two things—populate the first Listcomponent with all feeds that are aggregated in that category, and fill the secondList component with the latest posts to that category, including all aggregated feeds.
Start by giving the List component on the left the instance name feeds_list and the otherList component posts_list. Next we need to listen for a change event on the categories_cbcomponent to trigger the web service calls. Add the following code under the code youalready have:
genericFault = function(fault_obj:Object):Void {trace("The following error occurred: ");trace("Fault code: "+fault_obj.faultcode);trace("Fault description: "+fault_obj.faultstring);
}
categories_pc.onFault = Delegate.create(this,genericFault);
this.onCategoryChange = function():Void {var catSelected = this.categories_cb.selectedItem.data;if(catSelected != undefined) {var feeds_pc:PendingCall =➥ this.mxna_ws.getFeedsByCategory(catSelected);feeds_pc.onResult = Delegate.create(this,function(result_obj:Object):Void {this.feeds_list.removeAll();
SERVER COMMUNICATION (XML AND WEB SERVICES)
471
20
6196CH20.qxd 1/18/06 11:35 AM Page 471

var feeds:Object = result_obj;for(var i=0; i<feeds.length; i++) {this.feeds_list.addItem(feeds[i].feedName, feeds[i].feedId);
}});feeds_pc.onFault = this.genericFault;
}}
this.categories_cb.addEventListener("change",Delegate.create(this,➥ onCategoryChange));
What we did here was add an event listener for the categories_cb ComboBox componentand have it reference the onCategoryChange() function. The onCategoryChange() func-tion then checks whether the selected value in categories_cb is not undefined. If theselected data value is undefined, this would indicate that either the “Select a category”value was selected (which doesn’t have a data value) or something went wrong with theweb service result and it didn’t return a categoryId; in either case the next web servicecall doesn’t need to happen.
If a categoryId is defined in the data field of the selected item in categories_cb, it goesahead and calls the getFeedsByCategory() method of the MXNA web service, passing thecategoryId value as its parameter. The web service call returns a PendingCall instance toour feeds_pc variable, and we use the onResult callback to handle the results that getsent back.
The getFeedsByCategory() method returns a list of objects with a whole lot of informa-tion about each feed (feedId, feedName, feedDescription, feedCategories, feedUrl,languageId, lastUpdated, siteName, siteUrl, and siteDescription). We only need feedNameand feedId for this example—they are assigned to the label and data field of the feeds_listList component instance, respectively.
To make life easier, I added a genericFault() function, which we can use to catch allPendingCall faults. Since we don’t need to handle faults differently for each web servicecall, this saves us a lot of typing and redundant code. Both instances of the PendingCallclass use genericFault() as their callback function onFault().
If you test the code thus far (Control ➤ Test Movie), you’ll see that you can now switchbetween the categories in categories_cb, and it will update the feeds_list accordingly.Now we’ll add that second call we wanted to add when the category selection changes.
onCategoryChange = function():Void {var catSelected = this.categories_cb.selectedItem.data;if(catSelected != undefined) {var feeds_pc:PendingCall =➥ this.mxna_ws.getFeedsByCategory(catSelected);feeds_pc.onResult = Delegate.create(this,function(result_obj:Object):Void {var feeds:Object = result_obj;for(var i=0; i<feeds.length; i++) {
OBJECT-ORIENTED ACTIONSCRIPT FOR FLASH 8
472
6196CH20.qxd 1/18/06 11:35 AM Page 472
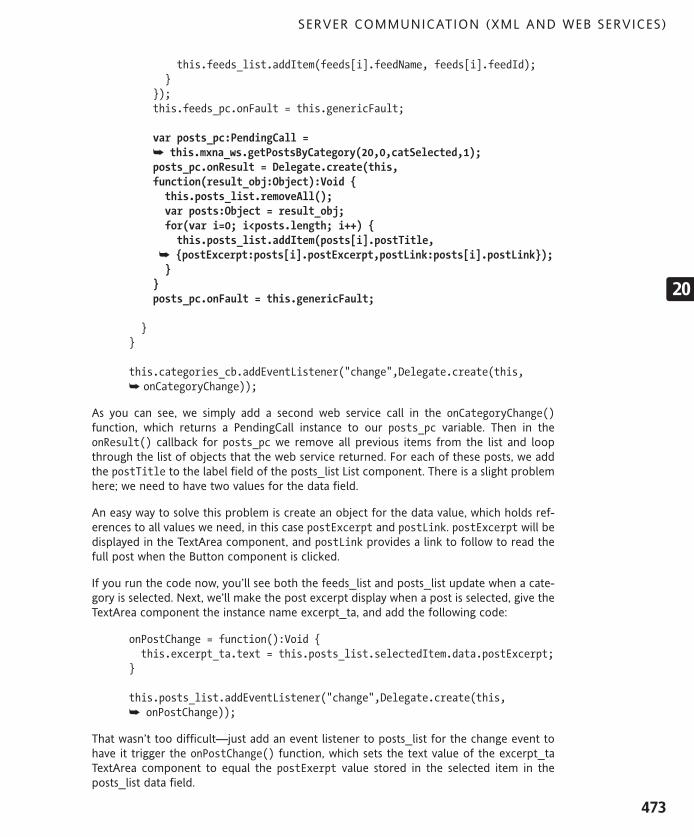
this.feeds_list.addItem(feeds[i].feedName, feeds[i].feedId);}
});this.feeds_pc.onFault = this.genericFault;
var posts_pc:PendingCall =➥ this.mxna_ws.getPostsByCategory(20,0,catSelected,1);posts_pc.onResult = Delegate.create(this,function(result_obj:Object):Void {this.posts_list.removeAll();var posts:Object = result_obj;for(var i=0; i<posts.length; i++) {this.posts_list.addItem(posts[i].postTitle,
➥ {postExcerpt:posts[i].postExcerpt,postLink:posts[i].postLink});}
}posts_pc.onFault = this.genericFault;
}}
this.categories_cb.addEventListener("change",Delegate.create(this,➥ onCategoryChange));
As you can see, we simply add a second web service call in the onCategoryChange()function, which returns a PendingCall instance to our posts_pc variable. Then in theonResult() callback for posts_pc we remove all previous items from the list and loopthrough the list of objects that the web service returned. For each of these posts, we addthe postTitle to the label field of the posts_list List component. There is a slight problemhere; we need to have two values for the data field.
An easy way to solve this problem is create an object for the data value, which holds ref-erences to all values we need, in this case postExcerpt and postLink. postExcerpt will bedisplayed in the TextArea component, and postLink provides a link to follow to read thefull post when the Button component is clicked.
If you run the code now, you’ll see both the feeds_list and posts_list update when a cate-gory is selected. Next, we’ll make the post excerpt display when a post is selected, give theTextArea component the instance name excerpt_ta, and add the following code:
onPostChange = function():Void {this.excerpt_ta.text = this.posts_list.selectedItem.data.postExcerpt;
}
this.posts_list.addEventListener("change",Delegate.create(this,➥ onPostChange));
That wasn’t too difficult—just add an event listener to posts_list for the change event tohave it trigger the onPostChange() function, which sets the text value of the excerpt_taTextArea component to equal the postExerpt value stored in the selected item in theposts_list data field.
SERVER COMMUNICATION (XML AND WEB SERVICES)
473
20
6196CH20.qxd 1/18/06 11:35 AM Page 473

Next we’ll add some code to make the button open up the URL of the selected post whenclicked. To do this, we need to add an event listener for the click event on the Buttoncomponent. Give the Button component the instance name postlink_btn, set its label toread “Read full post”, and add the following code under the existing code in the maintimeline:
onButtonClick = function():Void {var link:String = this.posts_list.selectedItem.data.postLink;if(link != undefined) {getURL(link,"_blank");
}}this.postlink_btn.addEventListener("click",Delegate.create(this,➥ onButtonClick));
If you now test the application (Control ➤ Test Movie) you’ll see the excerpt displayedwhen a post is selected. When the button is clicked, the URL to the full post is launched ina new browser window.
We’re almost there; just a few things left to do. When a feed is selected in feeds_list, wewant to have posts_list only display posts from that particular feed. To do this, we need tolisten for the change event on feeds_list to trigger another call to the MXNA web service.
onFeedChange = function():Void {var feedSelected = this.feeds_list.selectedItem.data;trace(feedSelected);if(feedSelected != undefined) {var feedposts_pc:PendingCall =➥ this.mxna_ws.getPostsByFeed(20,0,feedSelected);➥ feedposts_pc.onResult = Delegate.create(this,function(result_obj:Object):Void {this.posts_list.removeAll();var posts:Object = result_obj;for(var i=0; i<posts.length; i++) {this.posts_list.addItem(posts[i].postTitle,
➥ {postExcerpt:posts[i].postExcerpt,postLink:posts[i].postLink});}
}feedposts_pc.onFault = this.genericFault;
}}
this.feeds_list.addEventListener("change",Delegate.create(this,➥ onFeedChange);
This code adds a listener for the change event to feeds_list and has it call theonFeedChange() function. The onFeedChange() function is almost an identical copy ofonCategoryChange() with the exception that here we call getPostsByFeed() insteadof getPostsByCategory().
OBJECT-ORIENTED ACTIONSCRIPT FOR FLASH 8
474
6196CH20.qxd 1/18/06 11:35 AM Page 474

The getPostsByFeed() method needs three parameters. The first one defines how manyposts you want to have returned. The second parameter allows you to set the post offset;in our case, we want to start at 0 to get the most recent posts. If you want to get pagedresults, you could use this parameter to get the next batch of posts, starting at a certainoffset position. The final parameter is feedId, which we already have stored in the datafield of the feeds_list component.
The web service call returns a PendingCall instance that we store in feedposts_pc; whenthe onResult callback is triggered, we populate the posts_list List component with thevalues received. Again, as we did in the onCategoryChange() function, we set an objectwith the postExcerpt and postLink values as the data value of posts_list to have the nec-essary information stored away in each post item for the excerpt and button to use later on.
There’s only one thing left to do now—have the Label component give the user someinformation about what is happening. As you might have noticed, when using web services,there is always a slight delay between the call and getting information into the Player. Ifyou think about everything that needs to happen behind the scenes, its actually surpris-ingly fast, but nonetheless something that is best to address.
Here is the full code for the application, including those code changes for the label com-ponent, which we’ll give an instance name of status_label:
import mx.services.WebService;import mx.services.PendingCall;import mx.utils.Delegate;
var WS_URL:String =➥ "http://weblogs.macromedia.com/mxna/webservices/➥ mxna2.cfc?wsdl";var mxna_ws:WebService = new WebService(WS_URL);
var categories_pc:PendingCall = mxna_ws.getCategories();
this.status_label.text = "Loading MXNA categories ...";
categories_pc.onResult = function(result_obj:Object):Void {this.categories_cb.addItem("Select a category");var categories:Object = result_obj;for(var i=0; i<categories.length; i++) {this.categories_cb.addItem(categories[i].categoryName,➥ categories[i].categoryId);
}this.status_label.text = "";
}
genericFault = function(fault_obj:Object):Void {trace("The following error occurred:");trace("Fault code: "+fault_obj.faultcode);trace("Fault description: "+fault_obj.faultstring);
}
SERVER COMMUNICATION (XML AND WEB SERVICES)
475
20
6196CH20.qxd 1/18/06 11:35 AM Page 475

categories_pc.onFault = this.genericFault;
onCategoryChange = function():Void {var catSelected = this.categories_cb.selectedItem.data;if(catSelected != undefined) {var feeds_pc:PendingCall =➥ this.mxna_ws.getFeedsByCategory(catSelected);this.status_label.text = "Loading "+➥ this.categories_cb.selectedItem.label+" category ...";feeds_pc.onResult = Delegate.create(this,➥ function(result_obj:Object):Void {this.status_label.text = "Showing "+➥ this.categories_cb.selectedItem.label+" category";this.feeds_list.removeAll();var feeds:Object = result_obj;for(var i=0; i<feeds.length; i++) {feeds_list.addItem(feeds[i].feedName, feeds[i].feedId);
}}feeds_pc.onFault = this.genericFault;
var posts_pc:PendingCall =➥ this.mxna_ws.getPostsByCategory(20,0,catSelected,1);posts_pc.onResult = Delegate.create(this,function(result_obj:Object):Void {this.posts_list.removeAll();var posts:Object = result_obj;for(var i=0; i<posts.length; i++) {
this.posts_list.addItem(posts[i].postTitle,➥ {postExcerpt:posts[i].postExcerpt,postLink:posts[i].postLink});}
}posts_pc.onFault = this.genericFault;
}}
onPostChange = function() {this.excerpt_ta.text = this.post_list.selectedItem.data.postExcerpt;
}
onButtonClick = function():Void {var link:String = this.post_list.selectedItem.data.postLink;if(link != undefined) {getURL(link,"_blank");
}}
OBJECT-ORIENTED ACTIONSCRIPT FOR FLASH 8
476
6196CH20.qxd 1/18/06 11:35 AM Page 476

onFeedChange = function():Void {var feedSelected = this.feeds_list.selectedItem.data;if(feedSelected != undefined) {var feedposts_pc:PendingCall =➥ this.mxna_ws.getPostsByFeed(20,0,feedSelected);this.status_label.text = "Loading "+➥ this.feeds_list.selectedItem.label+" posts ...";feedposts_pc.onResult = Delegate.create(this,➥ function(result_obj:Object):Void {this.status_label.text = "Showing "+➥ this.feeds_list.selectedItem.label+" posts";this.posts_list.removeAll();var posts:Object = result_obj;for(var i=0; i<posts.length; i++) {this.posts_list.addItem(posts[i].postTitle,
➥ {postExcerpt:posts[i].postExcerpt,postLink:posts[i].postLink});}
});feedposts_pc.onFault = this.genericFault;
}}
this.feeds_list.addEventListener("change",Delegate.create(this,➥ onFeedChange));this.postlink_btn.addEventListener("click",Delegate.create(this,➥ onButtonClick));this.posts_lists.addEventListener("change",Delegate.create(this,➥ onPostChange));this.categories_cb.addEventListener("change",Delegate.create(this,➥ onCategoryChange));
The few extra lines of code we have added to the final listing utilize the status_label com-ponent to display information about what is happening (loading categories, loading posts,etc.). Altogether this entire application is well under 100 lines of code and forms a fullyfunctional Flash aggregator based on the MXNA web service.
Something you might want to try as an exercise is to add functionality to search throughposts by using the search method that the MXNA web service implements.
This concludes our look at using web services for your Flash applications. If you’ll be usingweb services across different servers you’ll be interested to read the following section onthe Flash Player security sandbox, which outlines some of the security measures the FlashPlayer has implemented to protect data from being loaded in without proper permissions.
SERVER COMMUNICATION (XML AND WEB SERVICES)
477
20
6196CH20.qxd 1/18/06 11:35 AM Page 477

Flash Player security sandboxSince the Flash Player 6 release, there has been a movement towards getting securitymeasures in place in what is called the Flash Player security sandbox.
This sandbox is defined as the environment wherein your Flash content runs, and any dataoutside of the sandbox is bound by certain rules. By default, there are no issues withdata you load in from the same domain, but as soon as you need to access content fromanother server, you need to have explicit permissions to do that. This applies to SWF con-tent from a different domain for which you want scripting access, but also for XML filesand any other data you want to load into the Flash Player at runtime.
There are a few ways to grant permissions for content to be loaded in, as you’ll see now.
System.security.allow.Domain()
The first is for SWF content, for which you can use the System.security.allowDomain()method to set all domains that are granted access.
Let’s say we have a file called abc.swf hosted on www.mydomain.com, and a file called xyz.swfhosted on www.myotherdomain.com that contains a doSomething() function. If the fileabc.swf loads in the file xyz.swf, by default it has no access to this doSomething() func-tion. To grant permission to abc.swf to load in xyz.swf and call the doSomething()function, xyz.swf needs to have System.security.allowDomain("www.mydomain.com") inplace.
Now that isn’t too bad, but the downside with this method is that it requires you to recom-pile your Flash project any time you need to grant another domain access to the SWF.
Cross-domain policy files
The second way to grant permission for your files to be loaded in from a different domainis using a cross-domain policy file. A cross-domain policy file is simply an XML file locatedin the root of the server that hosts the files you want to load in and defines what domainsare allowed.
<?xml version="1.0"?><!DOCTYPE cross-domain-policy SYSTEM➥ "http://www.macromedia.com/xml/dtds/cross-domain-policy.dtd"><cross-domain-policy>
<allow-access-from domain="www.mydomain.com" /></cross-domain-policy>
This XML file would be saved as crossdomain.xml on the domain that hosts the file, in ourcase http://www.myotherdomain.com/crossdomain.xml. Obviously, XML files and otherdata formats don’t have the option of using a System.security.allowDomain() method,so to use them you will need to use the cross-domain policy file.
OBJECT-ORIENTED ACTIONSCRIPT FOR FLASH 8
478
6196CH20.qxd 1/18/06 11:35 AM Page 478

When you have a load request to a server other than the one the file is hosted on, theFlash Player checks whether that cross-domain file is present, and if so, whether yourdomain is granted access to it. If the file is not there, it checks the SWF file for theSystem.security.allowDomain() settings. If none of these are available, access will bedenied.
An important thing to know is that the policy slightly changed between Flash Player 6 andFlash Player 7 and upwards. In Flash Player 6, subdomains were allowed to access all fileson the domain, so for example mysite.mydomain.com could load in and access contentfrom yoursite.mydomain.com. Since Flash Player 7 this is no longer the case, and subdo-mains also need to be explicitly granted permission, which also means that cases likewww.mydomain.com and mydomain.com are not allowed to load data from each other.
With that in mind, it might be best to use the following cross-domain policy:
<?xml version="1.0"?><!DOCTYPE cross-domain-policy SYSTEM➥ "http://www.macromedia.com/xml/dtds/cross-domain-policy.dtd"><cross-domain-policy>
<allow-access-from domain="*.mydomain.com" /></cross-domain-policy>
This example uses the wildcard character to allow all subdomains for mydomain.comto load in and access data from the server. If you want to limit the access to onlywww.mydomain.com and mydomain.com, the file would look as follows:
<?xml version="1.0"?><!DOCTYPE cross-domain-policy SYSTEM ➥ "http://www.macromedia.com/xml/dtds/cross-domain-policy.dtd"><cross-domain-policy>
<allow-access-from domain="mydomain.com" /><allow-access-from domain="www.mydomain.com" />
</cross-domain-policy>
If you want to load in data like XML from a remote server and no cross-domain policy is inplace, the warning shown in Figure 20-30 will pop up in the Player to notify the user thatthe site is trying to load in data from a different domain and gives him or her the choicewhether or not to allow this.
Figure 20-30. Flash Player cross-domain warning
SERVER COMMUNICATION (XML AND WEB SERVICES)
479
20
6196CH20.qxd 1/18/06 11:35 AM Page 479

Using a server-side proxy script
Finally, there is one other method to “trick” the user to load in the external data, which isby using a server-side script to proxy the file. Let’s say there’s an XML file onmyotherdomain.com you want to load in, but you aren’t able to get a cross-domain policyup on that server.
By using a scripting language such as PHP, you can load in that external data, and the FlashPlayer will consider that to be a local file. For things like a basic XML file, this is easyenough to do:
<?phpfpassthru($_POST["proxy_url"]);
?>
Let’s say you save this PHP code as proxy.php on your local server and callproxy.php?proxy_url=http://www.myotherdomain.com/myfile.xml when loading in theXML. Since the Flash Player doesn’t know where the script gets its data from, it just loadsit in as if it is local data, and no security measures apply.
Now it isn’t quite as easy for a web service because it relies on going back and forwardwith SOAP messages, but it could technically be done as well (providing there is no addi-tional authentication in the web service logic).
You might have been wondering why this didn’t cause a problem when we were using theMXNA web service. There are two reasons. The first is that the people running the webservice have a cross-domain policy in place and the second is that you were only runningthe code from within the Flash 8 IDE which, luckily for us, doesn’t require the permissionsto be in place. Only when you deploy the SWF to a server do these security settings comeinto play.
These additional security settings can be quite annoying, but all things considered, it’s agood thing to have some means to protect your content and have the Flash Player protectitself from loading in any malicious code.
SummaryIn this chapter, we looked at two of the most common ways of using external data in yourFlash projects. XML and web services are very convenient ways of communicating with aserver, each with its own typical use case. Web services are most commonly used for com-municating with remote servers because of the overhead of sending and receiving SOAPmessages, while XML can be a perfect format for hooking up your Flash application to datafrom a database or other back-end system. We briefly looked at Flash Player security set-tings, which you need to take into consideration when deploying your applications andcommunicating between different domains.
OBJECT-ORIENTED ACTIONSCRIPT FOR FLASH 8
480
6196CH20.qxd 1/18/06 11:35 AM Page 480

Most applications will rely on connecting up to some sort of external data source, so it’s atopic you should get well acquainted with. I'd encourage you to start experimenting withthe various available data formats Flash can communicate with and methods of loading itin. One technology we didn't discuss because it’s beyond the scope this book is FlashRemoting, which allows for very optimized binary communication between a back end andFlash; this is available both as commercial solutions and as open source implementationssuch as AMFPHP (www.amfphp.org) for PHP or OpenAMF (www.openamf.org) for Java.Whatever technique or technology you use, be sure to take data security into considera-tion any time you send sensitive information to or from the server.
What’s next?We’ve covered so much information in the chapters so far you’re probably already feelingdizzy. Sit back and relax with a cup of coffee because in the final chapter, we will put it alltogether in a complete real-world case study to get you inspired to create your ownobject-oriented ActionScript applications. A great way to recap everything we’ve discussedso far!
SERVER COMMUNICATION (XML AND WEB SERVICES)
481
20
6196CH20.qxd 1/18/06 11:35 AM Page 481

6196CH21.qxd 1/18/06 11:36 AM Page 482

21 CASE STUDY: TIME SHEETAPPLICATION
6196CH21.qxd 1/18/06 11:36 AM Page 483

If you’re anything like me in that you always have half a dozen different projects going onat the same time, a good application to help keep track of the time you spent on each taskis absolutely invaluable. There are numerous great time-tracking desktop and web-basedapplications available, but I thought it might be good to “eat my own dog food” and builda basic time sheet application in Flash using ActionScript 2.0.
In this chapter, I’ll deconstruct the application, and by doing so recap many different topicswe’ve discussed in the last 20 chapters. If you’ve read through the book sequentially, mostof these will be very familiar to you, and the following application will serve as an exampleof how you might start using object-oriented ActionScript 2.0 in your own projects.
Of course, before we deconstruct the application together, I first need to show you theend product. If you’ve downloaded the source files from the friends of ED website, openup timesheet.swf in the timesheet folder to see it in action, or look at Figure 21-1 to geta feel for what the application does.
Figure 21-1. Finished time sheet application
Planning the applicationLike any project, this application also started with a planning stage. You ask yourself somebasic questions that help determine what features will be included and how you’ll struc-ture the application.
OBJECT-ORIENTED ACTIONSCRIPT FOR FLASH 8
484
6196CH21.qxd 1/18/06 11:36 AM Page 484

I’ve found a good way to do this is to start by writing down keywords that describe whatI’m trying to do. For some reason, it seems to work best if this is done with pen and paper.In the case of this time sheet application, I came up with the following:
Projects
Tasks
Time keeping
Overview
Individually, these keywords don’t mean a great deal, but when they’re put together, youcan see they represent an actual thought process and give you a down-to-basics definitionof what you’re trying to do with the application. Condensed in a more meaningful form,you could say the application’s goal is to create an overview of time spent on your variousprojects and tasks.
Now you might think that having a few keywords means your application will be relativelybasic, but that is not necessarily the case. I would generally recommend not to use toomany keywords, as it makes it much more difficult to narrow down the focus to what itactually is you’re trying to build. If you find that it is not possible to use all your keywordsto clearly describe your application in a single phrase, this is often a sign that it is best tobreak the application up into different modules; you can then treat each module as if itwere a separate application. At a later stage, you would then integrate these various mod-ules into a single working application.
Structuring the applicationOnce you’ve got the scope of the application defined, you need to start looking at howyou’re going to structure it. In the case of the time sheet application, I went back to theoriginal list of keywords and started looking at any relationships between them.
Application contains projects.
Projects contain tasks.
Time can be tracked for tasks.
These relationships between the various elements of an application are incredibly usefulto isolate different processes that will need to be handled.
With this basic list of all core functionality we’ve now got, we can finally start moving fromplanning to implementing. From now on each of the concepts will be represented by anActionScript 2.0 class.
I often use a UML class diagram to model classes during the implementation stage of plan-ning of an application. When you look at the class diagram I made for this application
CASE STUDY: TIME SHEET APPLICATION
485
21
6196CH21.qxd 1/18/06 11:36 AM Page 485

(see Figure 21-2), you’ll see that this is a prime example of composition. Remember fromChapter 4 the following rule of thumb for recognizing the difference between aggregationand composition:
This sounds rather philosophical, but it is definitely good to keep this in the back of yourmind when you model your application in UML. Using this rule, we can deduce that thetime sheet application is an example of composition as, for example, a task cannot existwithout a project, while a project can exist without any tasks.
Another thing you’ll find on the UML class diagram is the multiplicity notation for eachclass; from this you can find out how many class instances can be related to one instanceof its related class.
Classes that have a one-to-one relationship are usually good candidates for implementingthe Singleton design pattern, which enforces this multiplicity relationship by only allowinga single instance of that class to exist in the application scope.
For this project, I chose to implement the MVC pattern (see Figure 21-3) and control thedata flow of the application by splitting the logic up into three classes: TimeSheetModel,TimeSheetView, and TimeSheetController.
Figure 21-2.UML class diagram for the time sheet application
In aggregation, the whole cannot exist without its components, whilein a composition, the components cannot exist without the whole.
OBJECT-ORIENTED ACTIONSCRIPT FOR FLASH 8
486
6196CH21.qxd 1/18/06 11:36 AM Page 486

Figure 21-3. Model-View-Controller diagram for the time sheet application
Writing stub codeWith all the information we have gathered in the planning stage and when structuring theapplication, we are now ready to start building some stub code for our ActionScript 2.0classes. We’ll put these classes in the com.friendsofed.timesheet package to avoid anypossible conflicts with classes with similar names in the classpath.
Stub code is a good way to start out a project because it gives you a general overview ofthe complete application structure, and you won’t be as tempted to cram all functionalityin a single class.
Model-View-Controller classes
The first classes that get built are those that form the MVC pattern: TimeSheetModel,TimeSheetView, and TimeSheetController.
TimeSheetModel class (Model)The TimeSheetModel class extends the Observer class we discussed in Chapter 12, whichprovides functionality for adding and removing subscribers and sending notification. Byusing a separate registerView method to have the View class subscribe to its notification,we have the possibility of adding any number of views to the data model. This is somethingwe don’t particularly need for the application as it is set up right now, but it is neverthe-less good to leave it in as such to keep the application structure as flexible as possible.
import com.friendsofed.timesheet.Project;import com.friendsofed.timesheet.Task;
class com.friendsofed.timesheet.TimeSheetModelextends com.friendsofed.timesheet.Observer {
CASE STUDY: TIME SHEET APPLICATION
487
21
6196CH21.qxd 1/18/06 11:36 AM Page 487

private var __projects:Array;private var __tasks:Array;
function TimeSheetModel() {}
public function registerView(view:Object):Void {super.addSubscriber(view);
}
public function addProject(project_obj:Project):Void {super.notifyChanges({operation:"addProject"});
}
public function removeProject(project_name:String):Void {super.notifyChanges({operation:"removeProject"});
}
public function addTask(task_obj:Task):Void {super.notifyChanges({operation:"addTask"});
}
public function removeTask(project_name:String,➥ task_obj:Task):Void {super.notifyChanges({operation:"removeTask"});
}
public function startTaskTimer(task_obj:Task):Void {}
public function stopTaskTimer(task_obj:Task):Void {}
}
You’ll notice that this stub code already contains all method calls for the TimeSheetModelclass to update and retrieve data. The references to Project and Task class instances will bestored in the private __projects and __tasks properties.
Later on in the development process, this class will have some additional helper methodsto retrieve and filter out specific project or class instances, but for now this gives us a goodidea of what the Model class looks like.
TimeSheetView class (View)The TimeSheetView class can hold references to both the Model and the Controller class.If any user interaction occurs, the View class passes this on to the Controller, which in turnmight trigger the Model to update. If the Model changes, it sends notification to the Viewclass, and the View class can connect to the Model to get the appropriate data.
OBJECT-ORIENTED ACTIONSCRIPT FOR FLASH 8
488
6196CH21.qxd 1/18/06 11:36 AM Page 488

import com.friendsofed.timesheet.TimeSheetModel;import com.friendsofed.timesheet.TimeSheetController;import com.friendsofed.timesheet.Project;import com.friendsofed.timesheet.Task;
class com.friendsofed.timesheet.TimeSheetView {
private var __model:Object;private var __controller:Object;private var __scope:MovieClip;
function TimeSheetView(scope:MovieClip,model:Object,➥ controller:Object) {this.__scope = target;this.__model = model;this.__controller = controller;this.__model.registerView(this);this.initializeLayout();
}
public function initializeLayout() {// create the layout elements ...
}
public function update() {// handle notification from TimeSheetModel
}
}
I’ve strayed from the typical implementation of a View class with this TimeSheetView class.Besides accepting a reference to the Model and Controller, the constructor has a thirdparameter, which I can use to pass the scope where the interface elements are located. Isometimes prefer this approach rather than having the View class extend MovieClip,because it gives some further abstraction and adds some additional flexibility by allowingyou to switch the application scope at runtime. Again, not something we would likely usein this project, but something that is good to consider.
You’ll notice that the TimeSheetView constructor takes these three arguments and storesthem in private __model, __controller, and __scope properties; it also references the Modelto subscribe the View class for notification, and finally calls the initializeLayout()method.
This layout code is not yet implemented in this stub code, but the initializeLayout()method will be used for setting some component instance properties and adding someessential event listeners.
CASE STUDY: TIME SHEET APPLICATION
489
21
6196CH21.qxd 1/18/06 11:36 AM Page 489

TimeSheetController class (Controller)The TimeSheetController class holds a reference to the Model and gets calls from the Viewwhen any user interaction has occurred. The Controller class connects to the Model whenany data needs to be changed. This class acts in many ways as a mediator between theView and the Model.
import com.friendsofed.timesheet.TimeSheetModel;import com.friendsofed.timesheet.Project;import com.friendsofed.timesheet.Task;
class com.friendsofed.timesheet.TimeSheetController {
private var __model:Object;
function TimeSheetController(model:Object) {this.__model = model;
}
public function addProject(project_name:String,➥ project_description:String):Void {var newProject:Project = new Project(project_name,➥ project_description);this.__model.addProject(newProject);
}
public function removeProject(project_name:String):Void {this.__model.removeProject(project_name);
}
public function addTask(project_name:String,task_name:String, task_description:String):Void {➥ var newTask:Task = new Task(project_name, task_name,➥ task_description);this.__model.addTask(newTask);
}
public function removeTask(project_name:String,➥ task_obj:Task):Void {this.__model.removeTask(project_name,task_obj);
}
}
This TimeSheetController class is very basic if you look at it a bit closer: it forwards methodcalls directly to the Model except for addProject() and addTask(), where it first createsan instance of the Project or Task class with the arguments it gets passed.
OBJECT-ORIENTED ACTIONSCRIPT FOR FLASH 8
490
6196CH21.qxd 1/18/06 11:36 AM Page 490

The TimeSheetController constructor just stores the reference to the Model in a privateproperty called __model and is used by the method calls throughout the Controller classlater on.
Now that you’ve seen the stub code for the Model, View, and Controller classes, there aretwo other important classes for the application that we still need to look at: Project and Task.
Project and Task classes
The Project and Task classes are, for all events and purposes, just value objects that getcreated and destroyed as needed throughout the application lifespan. Both classes areessentially the same and contain a title and description property and a correspondingmethod to return them. The Task class, however, has two additional properties: the first,__project, holds a reference to the name of the project that it is part of, and the otherone, __timer, keeps hold of the amount of time you’ve worked on this particular task.
Project classYou can hardly think of a class that is more basic than this—two private properties thathold a title and description. These properties get set by using the arguments that arepassed through the constructor method. Finally, we have two methods for retrieving theseproperties, getTitle() and getDescription().
class com.friendsofed.timesheet.Project {
private var __title:String;private var __description:String;
function Project(title:String,description:String) {this.__title = title;this.__description = description;
}
public function getTitle():String {return this.__title;
}
public function getDescription():String {return this.__description;
}
}
While at this stage it’s only supposed to be stub code, this is all there is to the Project class.We won’t need to add anything to this later on.
CASE STUDY: TIME SHEET APPLICATION
491
21
6196CH21.qxd 1/18/06 11:36 AM Page 491

Task classThe Task class isn’t much larger than the Project class, and is basically the same, except forthe additional __project and __timer properties and corresponding methods.
class com.friendsofed.timesheet.Task {
private var __project:String;private var __title:String;private var __description:String;private var __timer:Number;
function Task(project_name:String,task_name:String,➥ task_description:String) {this.__project = project_name;this.__title = task_name;this.__description = task_description;this.__timer = 0;
}
public function getProject():String {return this.__project;
}
public function getTitle():String {return this.__title;
}
public function getDescription():String {return this.__description;
}
public function setTaskTimer(time:Number):Void {this.__timer = time;
}
public function getTaskTimer():Number {return this.__timer;
}
}
This Task class will have some minor additions later on for keeping track of the current sta-tus of the task, but apart from that this class is also ready for use in the application.
OBJECT-ORIENTED ACTIONSCRIPT FOR FLASH 8
492
6196CH21.qxd 1/18/06 11:36 AM Page 492
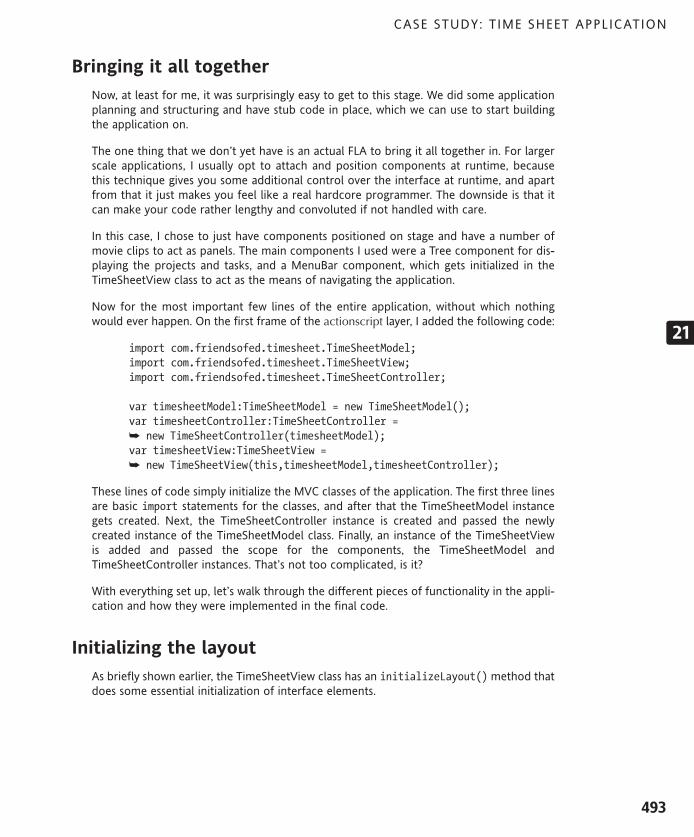
Bringing it all together
Now, at least for me, it was surprisingly easy to get to this stage. We did some applicationplanning and structuring and have stub code in place, which we can use to start buildingthe application on.
The one thing that we don’t yet have is an actual FLA to bring it all together in. For largerscale applications, I usually opt to attach and position components at runtime, becausethis technique gives you some additional control over the interface at runtime, and apartfrom that it just makes you feel like a real hardcore programmer. The downside is that itcan make your code rather lengthy and convoluted if not handled with care.
In this case, I chose to just have components positioned on stage and have a number ofmovie clips to act as panels. The main components I used were a Tree component for dis-playing the projects and tasks, and a MenuBar component, which gets initialized in theTimeSheetView class to act as the means of navigating the application.
Now for the most important few lines of the entire application, without which nothingwould ever happen. On the first frame of the actionscript layer, I added the following code:
import com.friendsofed.timesheet.TimeSheetModel;import com.friendsofed.timesheet.TimeSheetView;import com.friendsofed.timesheet.TimeSheetController;
var timesheetModel:TimeSheetModel = new TimeSheetModel();var timesheetController:TimeSheetController =➥ new TimeSheetController(timesheetModel);var timesheetView:TimeSheetView =➥ new TimeSheetView(this,timesheetModel,timesheetController);
These lines of code simply initialize the MVC classes of the application. The first three linesare basic import statements for the classes, and after that the TimeSheetModel instancegets created. Next, the TimeSheetController instance is created and passed the newlycreated instance of the TimeSheetModel class. Finally, an instance of the TimeSheetViewis added and passed the scope for the components, the TimeSheetModel andTimeSheetController instances. That’s not too complicated, is it?
With everything set up, let’s walk through the different pieces of functionality in the appli-cation and how they were implemented in the final code.
Initializing the layout
As briefly shown earlier, the TimeSheetView class has an initializeLayout() method thatdoes some essential initialization of interface elements.
CASE STUDY: TIME SHEET APPLICATION
493
21
6196CH21.qxd 1/18/06 11:36 AM Page 493
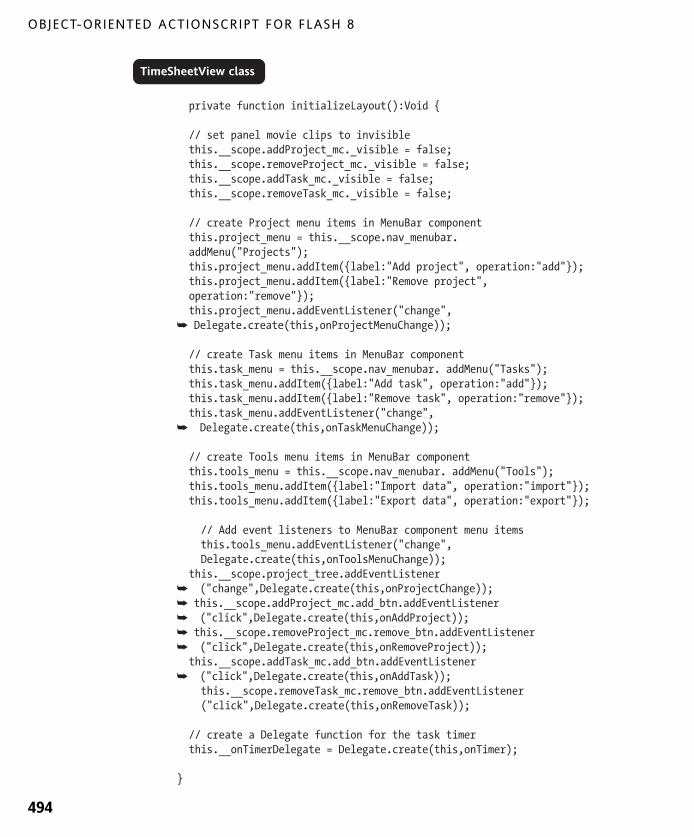
private function initializeLayout():Void {
// set panel movie clips to invisiblethis.__scope.addProject_mc._visible = false;this.__scope.removeProject_mc._visible = false;this.__scope.addTask_mc._visible = false;this.__scope.removeTask_mc._visible = false;
// create Project menu items in MenuBar componentthis.project_menu = this.__scope.nav_menubar.addMenu("Projects");this.project_menu.addItem({label:"Add project", operation:"add"});this.project_menu.addItem({label:"Remove project",operation:"remove"});this.project_menu.addEventListener("change",
➥ Delegate.create(this,onProjectMenuChange));
// create Task menu items in MenuBar componentthis.task_menu = this.__scope.nav_menubar. addMenu("Tasks");this.task_menu.addItem({label:"Add task", operation:"add"});this.task_menu.addItem({label:"Remove task", operation:"remove"});this.task_menu.addEventListener("change",
➥ Delegate.create(this,onTaskMenuChange));
// create Tools menu items in MenuBar componentthis.tools_menu = this.__scope.nav_menubar. addMenu("Tools");this.tools_menu.addItem({label:"Import data", operation:"import"});this.tools_menu.addItem({label:"Export data", operation:"export"});
// Add event listeners to MenuBar component menu itemsthis.tools_menu.addEventListener("change",Delegate.create(this,onToolsMenuChange));
this.__scope.project_tree.addEventListener➥ ("change",Delegate.create(this,onProjectChange));➥ this.__scope.addProject_mc.add_btn.addEventListener➥ ("click",Delegate.create(this,onAddProject));➥ this.__scope.removeProject_mc.remove_btn.addEventListener➥ ("click",Delegate.create(this,onRemoveProject));this.__scope.addTask_mc.add_btn.addEventListener
➥ ("click",Delegate.create(this,onAddTask));this.__scope.removeTask_mc.remove_btn.addEventListener("click",Delegate.create(this,onRemoveTask));
// create a Delegate function for the task timerthis.__onTimerDelegate = Delegate.create(this,onTimer);
}
TimeSheetView class
OBJECT-ORIENTED ACTIONSCRIPT FOR FLASH 8
494
6196CH21.qxd 1/18/06 11:36 AM Page 494
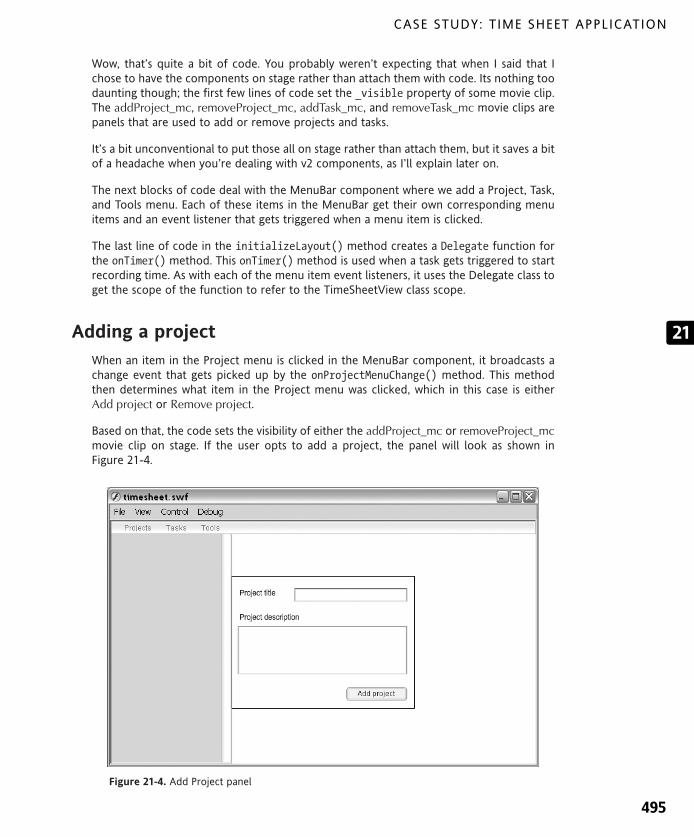
Wow, that’s quite a bit of code. You probably weren’t expecting that when I said that Ichose to have the components on stage rather than attach them with code. Its nothing toodaunting though; the first few lines of code set the _visible property of some movie clip.The addProject_mc, removeProject_mc, addTask_mc, and removeTask_mc movie clips arepanels that are used to add or remove projects and tasks.
It’s a bit unconventional to put those all on stage rather than attach them, but it saves a bitof a headache when you’re dealing with v2 components, as I’ll explain later on.
The next blocks of code deal with the MenuBar component where we add a Project, Task,and Tools menu. Each of these items in the MenuBar get their own corresponding menuitems and an event listener that gets triggered when a menu item is clicked.
The last line of code in the initializeLayout() method creates a Delegate function forthe onTimer() method. This onTimer() method is used when a task gets triggered to startrecording time. As with each of the menu item event listeners, it uses the Delegate class toget the scope of the function to refer to the TimeSheetView class scope.
Adding a project
When an item in the Project menu is clicked in the MenuBar component, it broadcasts achange event that gets picked up by the onProjectMenuChange() method. This methodthen determines what item in the Project menu was clicked, which in this case is eitherAdd project or Remove project.
Based on that, the code sets the visibility of either the addProject_mc or removeProject_mcmovie clip on stage. If the user opts to add a project, the panel will look as shown inFigure 21-4.
Figure 21-4. Add Project panel
CASE STUDY: TIME SHEET APPLICATION
495
21
6196CH21.qxd 1/18/06 11:36 AM Page 495

Let’s take a closer look to see how the onProjectMenuChange() method handles this.
private function onProjectMenuChange(evt:Object):Void {switch(evt.menuItem.operation) {
// when "Add project" was clickedcase "add":this.interfaceEnabled(false);this.__scope.addProject_mc._visible = true;
break;
// when "Remove project" was clickedcase "remove":var projectList:Array = this.__controller.getProjects();
// check if there are projects to removeif(projectList.length > 0) {
this.interfaceEnabled(false);this.__scope.removeProject_mc._visible = true;this.__scope.removeProject_mc.project_cb.removeAll();
for(var i=0; i<projectList.length; i++) {this.__scope.removeProject_mc.project_cb.addItem➥ (projectList[i].getTitle());}
} else {
Alert.show("There are no projects to remove",➥ "Remove project",Alert.OK);
}break;
}}
When the change event gets dispatched to onProjectMenuChange(), it sends an eventobject with it. This event object contains some information about who triggered the eventto broadcast as well as some other data in relation to the event. In this case, I added anoperation property to each menu item that describes its task. As you can see in theinitializeLayout() method, the Add project menu item has an operation of "add"assigned to it while the Remove project menu item has "remove".
TimeSheetView class
OBJECT-ORIENTED ACTIONSCRIPT FOR FLASH 8
496
6196CH21.qxd 1/18/06 11:36 AM Page 496

By doing a simple switch statement on the operation property that gets sent along withthe event object, the code can now determine whether the user wants to add or remove aproject.
You saw what gets displayed when a user chooses to add a project, and from the code youcan see that it isn’t too exciting. All it does is set the _visible property of theaddProject_mc movie clip and call a method named interfaceEnabled() that disables theTree and MenuBar components so you can’t interact with these components as long as thepanel is visible.
Now, the Remove Project panel is slightly more interesting. Here I add an additional checkto see whether there are actually any projects that can be removed. There’s no sense inbringing up the panel if there isn’t a project the user can delete.
The way this is handled is by going through the TimeSheetController class as a mediatorand getting hold of all projects that are stored in the TimeSheetModel class instance. If thearray that gets returned has a length that is higher than zero, there obviously are projectsstored in the model that can be deleted; otherwise we’ll display an alert box that notifiesthe user that no projects are available, as shown in Figure 21-5.
Figure 21-5. Alert box when no projects are available
This alert box is an instance of the Alert component, which we have in the Library panel,that gets called by using the static show() method.
CASE STUDY: TIME SHEET APPLICATION
497
21
6196CH21.qxd 1/18/06 11:36 AM Page 497

If there are projects available, removeProject_mc will get its _visible property turned on,and you’ll be able to select a project instance that you want to delete, as shown inFigure 21-6.
Figure 21-6. Remove Project panel
Displaying projects
All projects that get added to the application are displayed in the Tree component asbranches. When the user has added a new project using the addProject_mc movie clip, itgets forwarded to the addProject() method in the TimeSheetController class, whichcreates a Project instance out of it and passes it on to TimeSheetModel for storage.
Once TimeSheetModel has added this new Project instance, it will broadcast a notificationmessage, which gets picked up by the update() method in the TimeSheetView class.
Since all notifications are handled through this update() method, we need to determineexactly what the notification pertains to. This is done by looking at the data that gets sentalong with the notification. In this case, the TimeSheetModel sends an operation propertywith its notification that has either the value addProject or removeProject.
Both these event notifications will be handled in the same way: when they are received by theupdate() method, it calls a method in the TimeSheetView class named buildProjectTree().This method then gets hold of all projects stored in TimeSheetModel by going through theTimeSheetController class and adds those to the Tree component (see Figure 21-7).
OBJECT-ORIENTED ACTIONSCRIPT FOR FLASH 8
498
6196CH21.qxd 1/18/06 11:36 AM Page 498

Figure 21-7. Projects listed in the Tree component
If you expect to have a high number of items in the Tree component or items will changevery often, rebuilding it every time an item gets added or removed wouldn’t be the way togo. But having said that, it’s always important to be pragmatic in the way you structureyour application, and this approach fits in best with what we are trying to accomplish.
public function addProject(project_name:String,project_description:String):Void {var project = new Project(project_name,project_description);this.__model.addProject(project);
}
public function addProject(project_obj:Project) {this.__projects.push(project_obj);super.notifyChanges({operation:"addProject"});
}
TimeSheetModel class
TimeSheetController class
CASE STUDY: TIME SHEET APPLICATION
499
21
6196CH21.qxd 1/18/06 11:36 AM Page 499
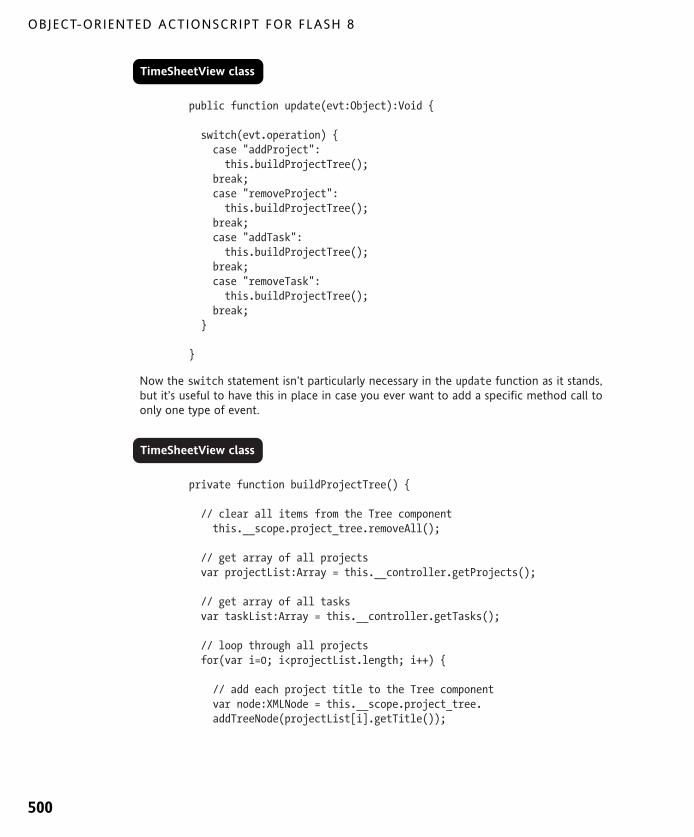
public function update(evt:Object):Void {
switch(evt.operation) {case "addProject":this.buildProjectTree();
break;case "removeProject":this.buildProjectTree();
break;case "addTask":this.buildProjectTree();
break;case "removeTask":this.buildProjectTree();
break;}
}
Now the switch statement isn’t particularly necessary in the update function as it stands,but it’s useful to have this in place in case you ever want to add a specific method call toonly one type of event.
private function buildProjectTree() {
// clear all items from the Tree componentthis.__scope.project_tree.removeAll();
// get array of all projectsvar projectList:Array = this.__controller.getProjects();
// get array of all tasksvar taskList:Array = this.__controller.getTasks();
// loop through all projectsfor(var i=0; i<projectList.length; i++) {
// add each project title to the Tree componentvar node:XMLNode = this.__scope.project_tree.addTreeNode(projectList[i].getTitle());
TimeSheetView class
TimeSheetView class
OBJECT-ORIENTED ACTIONSCRIPT FOR FLASH 8
500
6196CH21.qxd 1/18/06 11:36 AM Page 500

// make each project a branch in the Tree componentthis.__scope.project_tree.setIsBranch(node,true);
// loop through all tasksfor(var j=0; j<taskList.length; j++) {
// if task belongs to the projectif(taskList[j].getProject() ==➥ node.attributes.label) {
// get the project branchvar branch:XMLNode =➥ this.__scope.project_tree.getTreeNodeAt(i);
// add task to the projectbranch.addTreeNode(taskList[j].getTitle());
// open the project branch to show taskthis.__scope.project_tree.setIsOpen(branch,true);}
}
}
// show the project information panelthis.__scope.infoPanel_mc.gotoAndStop(1);
}
What you might have gathered from looking at the code and I didn’t mention before isthat buildProjectTree() also loops through all Task instances and adds those to the cor-responding Project instance in the Tree component.
The final statement in the buildProjectTree() method tells the infoPanel_mc movie clipon stage to display Frame 1, which is an empty frame. This infoPanel_mc movie clip is usedto display information about the selected project or task in the Tree component. Whenthe Tree component is rebuilt, we also reset the movie clip to an empty frame to makesure it doesn’t still display information about a project that has already been removed.
Adding a task
The way adding and removing tasks is handled will look familiar to you, as it’s exactly thesame way for projects. Instead of onProjectMenuChange(), the MenuBar component willbroadcast a change event to onTaskMenuChange() when an item from the Task menu isselected.
CASE STUDY: TIME SHEET APPLICATION
501
21
6196CH21.qxd 1/18/06 11:36 AM Page 501

What happens next is that the onTaskMenuChange() method determines whether the userintends to add or remove a task. If a task needs to be added, the addTask_mc movie clip’s_visible property is set to true (see Figure 21-8); when a task needs to be removed, theremoveTask_mc movie clip’s _visible property is set to true.
Figure 21-8. Add Task panel
As with a project, when the user chooses to delete a task, the code first checks whetherthere are any tasks stored in the TimeSheetModel, and if not alerts the user of this insteadof displaying the panel. Additionally, it checks that there are in fact any projects defined,as a task can’t be added without having a project for it to belong to.
private function onTaskMenuChange(evt:Object):Void {
switch(evt.menuItem.operation) {
// if "Add task" was clickedcase "add":
// get list of all projectsvar projectList:Array =➥ this.__controller.getProjects();
TimeSheetView class
OBJECT-ORIENTED ACTIONSCRIPT FOR FLASH 8
502
6196CH21.qxd 1/18/06 11:36 AM Page 502

// if there are projectsif(projectList.length > 0) {
this.interfaceEnabled(false);this.__scope.addTask_mc._visible = true;
this.__scope.addTask_mc.project_cb.removeAll();
// loop through projectsfor(var i=0; i<projectList.length; i++) {
// add projects to combo box in panelthis.__scope.addTask_mc.project_cb.addItem(projectList[i].getTitle());
}
} else {
// warn user that no projects are availableAlert.show("There are no projects to add a➥ task to","Add task",Alert.OK);
}
break;
// if "Remove task" was clickedcase "remove":
// get list of all tasksvar taskList:Array = this.__controller.getTasks();
// if there are tasks availableif(taskList.length > 0) {
// get list of projectsvar projectList:Array =➥ this.__controller.getProjects();
this.interfaceEnabled(false);this.__scope.removeTask_mc._visible = true;
this.__scope.removeTask_mc.project_cb.➥ removeAll();this.__scope.removeTask_mc.task_cb.removeAll();
CASE STUDY: TIME SHEET APPLICATION
503
21
6196CH21.qxd 1/18/06 11:36 AM Page 503

// loop through projectsfor(var i=0; i<projectList.length; i++) {
// get tasks for specific projectvar projectTasks:Array = this.__controller.➥ getTasksByProject(projectList[i].getTitle());
// if there are tasks for the projectif(projectTasks.length > 0) {
// add task to ComboBox componentthis.__scope.removeTask_mc.project_cb.➥ addItem(projectList[i].getTitle());
}
}
// add event listener to project ComboBoxthis.__scope.removeTask_mc.project_cb.➥ addEventListener("change",➥ Delegate.create(this,removeTask));
// call removeTask to initialize task ComboBoxthis.removeTask();
} else {
// if no tasks are available warn userAlert.show("There are no tasks to remove",➥ "Remove task",Alert.OK);
}
break;
}}
When the user chooses to remove a task and the code finds that there is at least one taskavailable, it will show the panel presented in Figure 21-9.
OBJECT-ORIENTED ACTIONSCRIPT FOR FLASH 8
504
6196CH21.qxd 1/18/06 11:36 AM Page 504

Figure 21-9. Remove Task panel
What is special about this panel is that it uses two ComboBox components, and the onedisplaying the list of tasks is context-sensitive to the project that is selected in the othercomponent. To achieve this, an event listener was added that listens for change events onthe project combo box. If the selected item in the project combo box is changed,the getTasksByProject() method gets called on the controller, which queries theTimeSheetModel for all Task instances related to a specific project. In this way, the taskcombo box always gets filled with the tasks corresponding with the selected project.
When a task gets added or removed, this happens via the TimeSheetController again,which passes the arguments along to TimeSheetModel, which in turn updates its data andbroadcasts a notification to the TimeSheetView class. This completes the circle, and we’reback at the update() method in the TimeSheetView class, which calls buildProjectTree()to update the Tree component.
OK, we’ve covered a great deal of ground now. You’ve seen how the layout is initialized,how the code handles the adding and removing of Projects and Task class instances, andhow the view gets updated when this happens. What we will look at next is how to getinformation from Project and Task instances and present it to the user.
CASE STUDY: TIME SHEET APPLICATION
505
21
6196CH21.qxd 1/18/06 11:36 AM Page 505

Project and task details
To present information about the currently selected project or task in the Tree compo-nent, a movie clip with the instance name infoPanel_mc is located on the stage. This movieclip has a number of frames representing its different states.
In the initializeLayout() method of the TimeSheetView class, the Tree component wasassigned an event listener called onProjectChange(). This method detects whether theselected node in the Tree component is a project or a task and has the infoPanel_mcmovie clip display the correct state.
Next, we’ve got a good example of what I was talking about at the beginning of the chap-ter when I said attaching components is a bit of a pain. When v2 components get renderedto the screen, they need a one-frame waiting period before everything is initialized andyou can start using them. The same thing happens here, and there are a number of waysaround it. What I used in this case was a simple onEnterFrame function; because this func-tion gets triggered every frame, it is the most straightforward way to wait one framebefore setting the component properties. When the onEnterFrame function gets called,one frame has passed, and we can set reset it to null. One other way around the problemis using an undocumented feature in Flash 8 called setTimeout().
The setTimeout() method is identical to what you probably already know assetInterval(), which calls a given function at a certain interval. There is one major dif-ference between these two methods: setTimeout() only calls the function once. This is avery useful thing to have; in the past when you wanted to have a function called only onceat an interval, you needed to store a reference to the interval and use clearInterval() inthe function that gets called to make sure it doesn’t repeat. Not only is setTimeout() anundocumented feature, the compiler won’t let you use it without complaining. The wayaround this problem is to use the _global scope to call it or use array notation, i.e.,this["setTimeout"]().
If you’re extending the mx.core.UIObject class, which is most likely what you will do whendeveloping v2 components, there is also a method called doLater that does about thesame thing as we do with the onEnterFrame method. The onEnterFrame and doLatermethods use a frame-based approach, while setTimeout() and setInterval() use atimed interval. Given that we only need to wait one frame, the first two are probablybetter suited for this situation.
Using the onEnterFrame workaround, I have either the showProjectDetails() orshowTaskDetails() method called in the TimeSheetView class. These methods handlepopulating the components in infoPanel_mc with the necessary data, for projects this isthe project title, description, list of all tasks, and the corresponding time for each taskalong with a total amount of time spent on all tasks related to the project. TheshowTaskDetails() method just shows the title, description, and total amount of timespent working on that particular task.
OBJECT-ORIENTED ACTIONSCRIPT FOR FLASH 8
506
6196CH21.qxd 1/18/06 11:36 AM Page 506

private function onProjectChange(evt:Object):Void {
// if the selected node is a projectif(this.__scope.project_tree.getIsBranch➥ (this.__scope.project_tree.selectedNode)) {
// show the project information➥ this.__scope.infoPanel_mc.gotoAndStop(2);
// call showProjectsDetails method after 1 framethis.__scope.onEnterFrame = Delegate.create(this,function() {this.showProjectDetails();this.__scope.onEnterFrame = null;
});
} else {
// show the task informationthis.__scope.infoPanel_mc.gotoAndStop(3);
// call showTaskDetails method after 1 framethis.__scope.onEnterFrame = Delegate.create(this,function() {this.showTaskDetails();this.__scope.onEnterFrame = null;
});
}
}
private function showProjectDetails() {
// show project titlethis.__scope.infoPanel_mc.title_txt.text =➥ "Project details - "+this.__scope.project_tree.➥ selectedNode.attributes.label;
// show project descriptionthis.__scope.infoPanel_mc.description_txt.text =➥ this.__controller.getProjectByName(this.__scope.➥ project_tree.selectedNode.attributes.label).➥ GetDescription();
TimeSheetView class
CASE STUDY: TIME SHEET APPLICATION
507
21
6196CH21.qxd 1/18/06 11:36 AM Page 507

this.__scope.infoPanel_mc.task_list.removeAll();
// get list of all project tasksvar projectTasks:Array = this.__controller.
➥ getTasksByProject(this.__scope.project_tree.➥ selectedNode.attributes.label);
// keep track of the total time spent on the projectvar totalProjectTime:Number = 0;
// loop through project tasks listfor(var i=0; i<projectTasks.length; i++) {
// add task to List component with timer valuethis.__scope.infoPanel_mc.task_list.addItem➥ (projectTasks[i].getTitle()+➥ " ("+TimerUtils.format(projectTasks[i].➥ getTaskTimer())+")");
// add task timer to total time spent on projecttotalProjectTime += projectTasks[i].getTaskTimer();
}
// format the timer into hours and minutesthis.__scope.infoPanel_mc.total_txt.text =➥ TimerUtils.format(totalProjectTime);
}
private function showTaskDetails() {
// get task objectvar taskDetails:Task = this.__controller.getTaskByName➥ (this.__scope.project_tree.selectedNode.parentNode.➥ attributes.label,this.__scope.project_tree.selectedNode.➥ attributes.label);
// if task is currently running a timerif(taskDetails.getIsActive()) {
// set the timer button label to "Stop timer"this.__scope.infoPanel_mc.timer_btn.label =➥ "Stop timer";
} else {
OBJECT-ORIENTED ACTIONSCRIPT FOR FLASH 8
508
6196CH21.qxd 1/18/06 11:36 AM Page 508

// set the timer button label to "Start timer"this.__scope.infoPanel_mc.timer_btn.label =➥ "Start timer";
}
// remove the event listener to avoid duplicate callsthis.__scope.infoPanel_mc.timer_btn.removeEventListener➥ ("click",this.__onTimerDelegate);
// set title for task detailsthis.__scope.infoPanel_mc.title_txt.text =➥ "Task details - "+this.__scope.project_tree.selectedNode.➥ attributes.label;
// show task descriptionthis.__scope.infoPanel_mc.description_txt.text =➥ taskDetails.getDescription();
// show current formatted timer value for taskthis.__scope.infoPanel_mc.total_txt.text =➥ TimerUtils.format(taskDetails.getTaskTimer());
// add click event listener to timer buttonthis.__scope.infoPanel_mc.timer_btn.addEventListener➥ ("click",this.__onTimerDelegate);
}
In the showProjectDetails() and showTaskDetails() methods, you’ll notice a few refer-ences to TimerUtils.format(). This TimerUtils is a little static helper class that at this timeonly contains one method called format(). The format() method takes the timer valuefrom the Task instance (which is in seconds) as an argument and converts it to hours andminutes.
class com.friendsofed.timesheet.TimerUtils {
static function format(timer:Number) {
// divide time in seconds by 3600 for hoursvar hours:Number = Math.floor(timer/3600);var hours_msg:String = "hours";
// if hours is equal to one make singularif(hours == 1) {hours_msg = "hour";
TimerUtils class
CASE STUDY: TIME SHEET APPLICATION
509
21
6196CH21.qxd 1/18/06 11:36 AM Page 509

}// divide remaining time by 60 for minutesvar minutes:Number = Math.floor((timer/60)-(hours*60));var minutes_msg:String = "minutes";
// if minutes is equal to one make singularif(minutes == 1) {minutes_msg = "minute";
}
// if time is an hour or moreif(hours > 0) {
// return string with hour and minutesreturn hours+" "+hours_msg+", "+minutes+" "+minutes_msg;
} else {// return string with minutesreturn minutes+" "+minutes_msg;
}
}
}
One of the last things we still need to cover is how timers are handled for tasks; if you’velooked closely at the Task class, you might already have figured it out by now.
Running a task timer
The time sheet application assumes that you can do only one task at a time and as suchsupports only one task timer running at a time. If you start a timer on a task while a timeris still running on a different task, that old timer will be stopped.
In TimeSheetModel, a private property called __activeTask keeps track of the Taskinstance that is currently being tracked, and the __taskStartTime property holds a time-stamp when the task started running a timer. When the timer is stopped, what happens isthat the current timestamp gets subtracted by __tastStartTime to determine how long ithad been running. This value in seconds is then added on to the __timer value of theactive Task class instance.
Using the getTaskTimer() method on the Task instance, we can get hold of the totalamount of time this task has been running, and the TimerUtils class discussed earlier canthen assist in converting that into a more useful format than seconds.
OBJECT-ORIENTED ACTIONSCRIPT FOR FLASH 8
510
6196CH21.qxd 1/18/06 11:36 AM Page 510

public function startTaskTimer(task_obj:Task):Void {
// if there is already a timer runningif(this.__activeTask != null) {
// stop that timerthis.stopTaskTimer(this.__activeTask);
// set the task to inactivethis.__activeTask.setIsActive(false);
}
// set the new task as activethis.__activeTask = task_obj;
// get a starting timestamp for the timerthis.__taskStartTime = getTimer();
}
public function stopTaskTimer(task_obj:Task):Void {
// add the timer value in seconds to the task instancetask_obj.setTaskTimer(task_obj.getTaskTimer()+➥ ((getTimer()-this.__taskStartTime)/1000));
// set the task as inactivetask.setIsActive(false);
// erase the starting timestampthis.__taskStartTime = null;
// erase the active task referencethis.__activeTask = null;
}
These two methods on TimeSheetModel get invoked when the timer button on the taskinformation movie clip is clicked, again using the TimeSheetController class to proxythe call.
TimeSheetModel class
CASE STUDY: TIME SHEET APPLICATION
511
21
6196CH21.qxd 1/18/06 11:36 AM Page 511

Persisting time sheet data
At this point, we’ve got the project running perfectly, adding and removing projects andtasks and keeping track of the time spent on each task. There’s only one practical concernwith using the application: there is no way to persist data between sessions. This wouldmean that every time you want to keep track of your projects and tasks, you need to addthem again, and you’ve lost the timer values for all your tasks.
Luckily, this was anticipated when I built the application, and this involves an import andexport feature that you can find in the Tools menu of the MenuBar component. What theexport feature does is create an XML structure containing all your projects, tasks, and cur-rent timer settings, which you can then copy and save to a file. The import feature allowsyou to paste in that XML document and restore your project, task, and timer settings tocontinue where you left off. When an item from the Tools menu gets clicked, it broadcastsan event to the onToolsChange() method, which determines whether import or exportwas selected. Based on this, the function shows the correct form in the infoPanel_mcmovie clip.
private function onToolsMenuChange(evt:Object) {
// check whether user clicked import or exportswitch(evt.menuItem.operation) {
// if import was clickedcase "import":
// show the import panelthis.__scope.infoPanel_mc.gotoAndStop(4);
// trigger the importXML method after 1 framethis.__scope.onEnterFrame = Delegate.create(this,function() {this.importXML();this.__scope.onEnterFrame = null;});
break;
// if export was clickedcase "export":
// show the export panelthis.__scope.infoPanel_mc.gotoAndStop(5);
// trigger the writeXML method after 1 frame
TimeSheetView class
OBJECT-ORIENTED ACTIONSCRIPT FOR FLASH 8
512
6196CH21.qxd 1/18/06 11:36 AM Page 512

this.__scope.onEnterFrame = Delegate.create(this,function() {this.writeXML();this.__scope.onEnterFrame = null;
});
break;
}
}
What you would typically do is call the TimeSheetController class to have it handle thewriteXML() method, but I opted to handle it in the TimeSheetView itself in this case andnot make the round trip to avoid unnecessarily complicating the code.
private function writeXML():Void {
// copy the XML to the clipboard when button clickedthis.__scope.infoPanel_mc.copy_btn.➥ addEventListener("click",Delegate.create(this,function() {System.setClipboard(this.__scope.➥ infoPanel_mc.xml_txt.text);
}));
// get list of projectsvar projectList:Array = this.__controller.getProjects();// get list of tasksvar taskList:Array = this.__controller.getTasks();
// start writing XML to TextArea componentthis.__scope.infoPanel_mc.xml_txt.text =➥ "<?xml version=\"1.0\" ?>\n";
this.__scope.infoPanel_mc.xml_txt.text += "<timesheet>\n";
// loop through projectsfor(var i=0; i<projectList.length; i++) {
this.__scope.infoPanel_mc.xml_txt.text +=➥ " <project>\n";this.__scope.infoPanel_mc.xml_txt.text +=➥ " <title>";this.__scope.infoPanel_mc.xml_txt.text +=➥ "<![CDATA["+projectList[i].getTitle()+"]]>";
this.__scope.infoPanel_mc.xml_txt.text +=➥ "</title>\n";
TimeSheetView class
CASE STUDY: TIME SHEET APPLICATION
513
21
6196CH21.qxd 1/18/06 11:36 AM Page 513

this.__scope.infoPanel_mc.xml_txt.text +=➥ " <description>";this.__scope.infoPanel_mc.xml_txt.text +=➥ "<![CDATA["+projectList[i].getDescription()+"]]>";this.__scope.infoPanel_mc.xml_txt.text +=➥ "</description>\n";
// loop through tasksfor(var j=0; j<taskList.length; j++) {
if(taskList[j].getProject() ==
projectList[i].getTitle()) {
this.__scope.infoPanel_mc.xml_txt.text +=➥ " <task>\n";this.__scope.infoPanel_mc.xml_txt.text +=➥ " <title>";this.__scope.infoPanel_mc.xml_txt.text +=➥ "<![CDATA["+taskList[j].getTitle()+"]]>";this.__scope.infoPanel_mc.xml_txt.text +=➥ "</title>\n";this.__scope.infoPanel_mc.xml_txt.text +=
➥ " <description>";this.__scope.infoPanel_mc.xml_txt.text +=➥ "<![CDATA["+taskList[j].getDescription()+"]]>";this.__scope.infoPanel_mc.xml_txt.text +=➥ "</description>\n";this.__scope.infoPanel_mc.xml_txt.text +=➥ " <timer>";this.__scope.infoPanel_mc.xml_txt.text +=➥ "<![CDATA["+taskList[j].getTaskTimer()+"]]>";this.__scope.infoPanel_mc.xml_txt.text +=➥ "</timer>\n";this.__scope.infoPanel_mc.xml_txt.text +=➥ " </task>\n";
}
}
this.__scope.infoPanel_mc.xml_txt.text +=➥ " </project>\n";
}
this.__scope.infoPanel_mc.xml_txt.text += "</timesheet>";}
OBJECT-ORIENTED ACTIONSCRIPT FOR FLASH 8
514
6196CH21.qxd 1/18/06 11:36 AM Page 514

The writeXML() method is rather lengthy, but this is mainly because I split it up into mul-tiple lines for readability. What the method does is very basic: it gets an array of all proj-ects and tasks and loops through them, building an XML structure that you can then copyto the clipboard and paste into a file for importing again later on.
The XML document that gets exported looks something like this:
<?xml version="1.0" ?><timesheet><project><title><![CDATA[My Flash Project]]></title><description><![CDATA[Build a cool Flash application]]></description><task><title><![CDATA[Planning]]></title><description><![CDATA[Plan out the application]]>
</description><timer><![CDATA[60]]></timer>
</task></project>
</timesheet>
This XML structure shows a project with a title node value of “My Flash Application” thathas one task called with a title node value of “Planning”; both the project and task have adescription, and the task has a timer value of 60, which means the user has already spentone minute working on that task. By adding this export feature, users can now export aschedule of projects and tasks, save it to a file, and load it back in at a later stage.
The importXML() method takes the XML data that the user has pasted in, parses that asXML, and walks through it, updating the TimeSheetModel class.
private function importXML():Void {
// when the import button is clickedthis.__scope.infoPanel_mc.import_btn.➥ addEventListener("click", Delegate.create(this,➥ function() {
// clear the model projects and tasksthis.__controller.resetModel();
// parse the XML data in the TextArea componentvar xml_data:XML = new XML(this.__scope.➥ infoPanel_mc.xml_txt.text);
TimeSheetView class
CASE STUDY: TIME SHEET APPLICATION
515
21
6196CH21.qxd 1/18/06 11:36 AM Page 515

// loop through XML nodesfor(var i=0; i<xml_data.childNodes[1].childNodes.length;➥ i++) {
var project_node:XMLNode = xml_data.childNodes[1].➥ childNodes[i];
// if a project node is encounteredif(project_node.nodeName == "project") {
var tasks:Array = new Array();
// loop through project nodesfor(var j=0; j<project_node.childNodes.length;➥ j++) {
if(project_node.childNodes[j].nodeName == "title") {var project_title:String = project_node.childNodes[j].firstChild.nodeValue;}
if(project_node.childNodes[j].nodeName ==➥ "description") {
var project_description:String =➥ project_node.childNodes[j].firstChild.➥ nodeValue;
}
if(project_node.childNodes[j].nodeName ==➥ "task") {
var task_nodes:XMLNode = project_node.➥ childNodes[j];
for(var k=0; k<task_nodes.childNodes.➥ length; k++) {if(task_nodes.childNodes[k].nodeName == "title") {
var task_title = task_nodes.childNodes[k].➥ firstChild.nodeValue;
}if(task_nodes.childNodes[k].nodeName➥ =="description") {var task_description = task_nodes.childNodes[k].firstChild.nodeValue;
}if(task_nodes.childNodes[k].nodeName == "timer") {
OBJECT-ORIENTED ACTIONSCRIPT FOR FLASH 8
516
6196CH21.qxd 1/18/06 11:36 AM Page 516

var task_timer = task_nodes.childNodes[k].firstChild.nodeValue;
}}tasks.push({title:task_title,
description:task_description,➥ timer:task_timer});
}}
// add the projectthis.__controller.addProject(project_title,➥ project_description);
// loop through tasksfor(var i=0; i<tasks.length; i++) {
// add the taskvar task:Task = this.__controller.addTask➥ (project_title,tasks[i].title,tasks[i].➥ description);task.setTaskTimer(Number(tasks[i].timer));
}
}}
}));}
Summary
That’s it—with the import and export features in place, the application is ready for use!This time sheet project gives you a good idea of what typical Flash applications could looklike and how to handle them.
There is definitely room for improvement. In particular, the TimeSheetView class is a bot-tleneck right now; you could rework the code to have the class attach movie clips at run-time that are associated with separate view classes for projects, tasks, etc., and as suchdelegate some of the work.
Another thing you might want to try is hooking the application up to a backend. Right nowit is designed to run standalone either as a desktop or web application, but it would be rel-atively easy to set up some server-side scripts that take the XML format the applicationwrites out and store it in a database.
CASE STUDY: TIME SHEET APPLICATION
517
21
6196CH21.qxd 1/18/06 11:36 AM Page 517

Conclusion
This book has aimed to bring together a whole spectrum of topics relating to object-oriented programming with ActionScript 2.0. From discussing the concepts of object-orienteddesign, to best practices, project planning, frameworks, and data binding, down to com-plete example applications (such as the one found in this chapter), I’ve covered invaluableinformation for you to get started with developing object-oriented ActionScript 2.0projects.
I’ve given you an idea of the tools that are available for you to use; I strongly encouragethat, after reading this book, you get started on building your own object-orientedFlash/ActionScript applications, and experiment, experiment, experiment, to find whatworks best for you.
OBJECT-ORIENTED ACTIONSCRIPT FOR FLASH 8
518
6196CH21.qxd 1/18/06 11:36 AM Page 518

6196CH21.qxd 1/18/06 11:36 AM Page 519

6196Index.qxd 1/18/06 11:46 AM Page 520

INDEX
6196Index.qxd 1/18/06 11:46 AM Page 521

Symbols< smaller than 441> greater than 441" double quote 441% percentage 441& ampersand 441' single quote 441(*) wildcard character
import statement 67.as files 66.swf files
commenting, ignored in 68
Aabstraction 99acceptance tests 61ActionScript
built-in formatters 396calling a JavaScript function 424–427, 429, 431–432, 434communication with other languages 434
calling ActionScript from an application 435calling non-JavaScript method 434–435
creating simple binding 386creating EndPoints 386–387creating the binding 388example 389–395specifying a location 387–388using execute method 388
specifying location of data 387using formatters 395validators 407
built-in validators 407–408, 410–413custom validators 413–415
ActionScript 2.0classes compared to prototypes 104compared to version 1.0 20
classes compared to prototypes 21–25declaring variables 20–21public and private scope 25–27
strong typing 27–29trouble spots 29–30
ActionScript classes.as files 66anonymous functions 113constructors 106implementing 116
Mover class 116methods 112packages 66static properties 109syntax 104
INDEX
522
ActionScript Settings dialog boxadding custom classpath location 22
__activeTask propertyTimeSheetModel class 510
Activity UML diagram 41Add Binding dialog box 409addCallback method
ExternalInterface class 424, 429–433addEventListener method
IEventDispatcher interface 210, 212List component 182UIObject class 287, 315
addListener methodStyleFormat class 265
addProject methodTimeSheetController class 490, 498
addSound methodSoundManager class 274
addStyle methodStyleManager class 267
addTask methodTimeSheetController class 490
aggregationcompared to composition 486relationships 44
Alert component 497all.pluginName
document object 430allowScriptAccess parameter
values 424_alpha property
MovieClip class 249always value
allowScriptAccess parameter 424animation and effects 334
preparation 334Animator class 335–336
transitioning views 360BlurTransition class 371, 373–374ColorTransition class 369–370DissolveTransition class 376, 380FadeTransition 363–364NoiseTransition class 374–376testing transitions 365–367, 369Transition class 361–363WaterTransition class 376, 380
tweening properties and events 336easer 341–343enhancing Tweener 347–349, 351, 354motion blur 357–360Mover class 354–357testing Tweener 344–346Tweener class 336–339, 341
6196Index.qxd 1/18/06 11:46 AM Page 522

Animator classdispatchEvent method 335importing into Tweener class 337
anonymous functions 113applyBlur method
BlurTransition class 373array of strings
specifying location of data 387arrays, description 14assignSounds method
soundManager class 329association relationship 43attachGraphics method
InterfaceTest class 319SimpleButton class 284, 321, 323UIBlock class 283, 293, 302–304UIObject class 344
attachGraphics propertyUIBlock class 294
attachMethods methodSimpleButton class 321
attachMovie methodMovieClip class 247, 289–290
attachSound methodSoundManager class 274
attributes, nodes 441attributes property
XML class 449available property
ExternalInterface class 423
Bbase class 122beginFill method
MovieClip class 247beginGradientFill method
MovieClip class 247, 326best practices
commenting 68external ActionScript 66naming conventions 70
classess 71constants 71functions 71methods 72packages 72properties 72variables 70
programming styles 73Binding class
execute method 388mx.data, description 385mx.data.binding package 385
INDEX
523
Bindings tabComponent Inspector 410
BitmapData objectnoise method 374–375perlinNoise method 376pixelDissolve method 376
Block classdiagramming 283
Block graphic symbolchangeState function 307creating 304
__blockGraphic propertySimpleButton class 284UIBlock class 283, 293, 304
__blockHolder class 344blur property
Mover class 359BlurFilter class
importing 357–360BlurTransition class
creating 371, 373–374Boolean formatter 396
using 396bottom property
UIObject class 254, 281Bouncer class
applying interface to 150–153inheritance 126–128testing inheritance 124–125
Bound To dialog box 410Broadcaster class
Animator class inherits from 335base class for MediaController 204creating 210–213dispatchEvent method 335implementing IEventDispatcher interface 281
browser communication with FlashActionScript communication with other languages 434
calling ActionScript from an application 435calling non-JavaScript method 434–435
ExternalInterface class 423–424addCallback method 429–433call method 424–428Flash Player 8 security 424
Flash 7 and below 419calling JavaScript from Flash 419–421sending variables into Flash 419using Flash/JS integration kit 421–422
introduction 418buildProjectTree method
TimeSheetView class 498, 501Button component 463, 469Button UI component
base classes 255
6196Index.qxd 1/18/06 11:46 AM Page 523

CCall method
ExternalInterface class 424–428callbacks
good practice for 451CallFunction method 435calling functions 15callTween method
Tweener class 347, 350case sensitivity
ActionScript 2.0 trouble spot 29case studies
OOP Media Player 202–239time sheet application 484–520
CDATA declarations 442changeState function
Block graphic symbol 307changeState method
UIBlock class 301UIObject class 315
changeState propertyUIBlock class 294
childNodes propertyXML class 449, 452
__children arrayUIObject class 291
__Class arrayUIObject class 310
class hierarchy 122class keyword 105, 148, 207Class UML diagram 41classes
anonymous functions 113as architect’s blueprint 146building in ActionScript 2.0 22constructors 106description 16implementing
Mover class 116multiple interfaces 152–153
methods 112naming conventions 71OOP introduction 3static properties 109syntax 104
classes propertyUIObject class 310
clear methodMovieClip class 247
clearInterval methodIntervalManager class 208, 339
clip propertyTransition class 362
INDEX
524
code, definition 12Collaboration UML diagram 41ColorTransition class
creating 369–370ComboBase class
extends UIComponent class 255ComboBox component 182, 469
base classes 255commenting
benchmarks 70classes, and 69ignored in .swf files 68reasons for use 68
communication between browser and Flash. See browsercommunication with Flash
compilation, definition 12Component Inspector
Bindings tab 410Schema tab 407–408, 411, 413setting parameters 316
component propertyEndPoint class 386
Component UML diagram 41ComponentMixins class
description 385mx.data.binding package 385
componentsinterrelationships and interactions between 384
data binding 384–395including validators 406–415using formatters 395–406
Compose String formatter 396simple example 400using 396
composition compared to aggregation 486composition relationship 44
Concurrent Versions System. See CVSconditionals, description 16connect method
NetConnection class 225__connection_nc property
VideoPlayer controller 223constants, naming conventions 71constructors 106__controller property
TimeSheetView class 489controlMovie function 432createChild method
View class 256createClassObject method
InterfaceTest class 319UIObject class 253, 290, 319
6196Index.qxd 1/18/06 11:46 AM Page 524

createEmptyMovieClip methodMovieClip class 247, 281, 291
createEmptyObject methodUIObject class 281, 291
createGradientBox methodMatrix class 326
createObject methodUIBlock class 293UIObject class 253, 281, 290
createSound methodMediaController class 217SWFPlayer class 234
createStyles methodInterfaceTest class 319, 327
createTextField methodMovieClip class 247
Cubic classeasing class 342methods 342
_currentframe propertyMovieClip class 249
__currentLoop propertyMediaController class 216
curveTo methodMovieClip class 247
custom componentsbenefits 260possible candidates for manager classes 260–261
custom formatters 404–406CustomFormatter class 396
custom formatters extend 404description 385mx.data.binding package 385
CustomValidator classdescription 385extending 413mx.data.binding package 385
CVS (Concurrent Versions System) 50See also TortoiseCVS; MacCVS; WinCVS clientmaking changes to files 52terminology 51
Ddata binding
creating EndPoints 386–387creating simple binding 386creating the binding 388formatters 395–406introduction 384–385mx.data.binding package 385–386sharing data between components 384simple example 389–395specifying a location 387–388
INDEX
525
using the execute method 388validators 406–415
data flow, planning time sheet application 486data transfer 40DataSet component
schema 407DataType class
description 386mx.data.binding package 385
Date formatter 396using 397
DateChooser componentextends UIComponent class 255
DateField UI componentbase classes 255
debuggingstrong typing and 20
Decorator pattern 159, 183applying pattern 186–188, 190–191basic implementation 183–184practical implementation 184–186
Delegate class 411, 446importing 425setting scope for onLoad callback 451
Deployment UML diagram 41design patterns 158
implementing 160Decorator pattern 183–191MVC pattern 191–197Observer pattern 160–171Singleton pattern 171–183
understanding 158–159Design Patterns - Elements of Reusable Object-Oriented
SoftwareGang of Four (GoF) 158
design time, definition 12destroyChildAt method
View class 256destroyObject method
UIObject class 253dispatchEvent method
Animator class 335Broadcaster class 219, 335IEventDispatcher interface 210, 281UIObject class 329
dispatchListener methodIEventDispatcher interface 213
DissolveTransition classcreating 376–380
document objectall.pluginName 430getElementById 430
_DoFSCommand suffixaddinging to function name 420
6196Index.qxd 1/18/06 11:46 AM Page 525

doLater methodUIObject class 253, 506
draw eventUIObject class 254, 315
drawRect methodBlock graphic 316UIObject class 312
_droptarget propertyMovieClip class 250
duplicateMovieClip methodMovieClip class 247
duration propertyMP3Player class 239
EeaseFunction function
Transition class 362easeIn method
Cubic class 342easeInOut method
Cubic class 342easeNone method
Linear class 343easeOut method
Cubic class 342easing class 342easing equations
Penner, Robert 341effects. See animation and effects<embed> tag
generating with FlashTag class 422name attribute 419–420, 429sending variables into Flash 419setting allowScriptAccess parameter 424swLiveConnect attribute 421
enabled propertyMovieClip class 251UIComponent class 255UIObject class 282, 288
encapsulation, planning for 35encapsulation example
code 91event handler 91hiding internal details of function 93testing event handler 94updating ball properties 95
code improvementsfunctions 97properties 96
setting up 84aligning and locking background 87converting ball into Library symbol 89creating layers 85
INDEX
526
drawing a ball 88drawing background 87
updating 104encoding attribute
XML declarations 443endFill method
MovieClip class 247EndPoint class
creating 386–387, 392description 385event property 388location property 387, 399mx.data.binding package 385
endTransform methodTransition class 362
endTransition eventFadeTransition class 364Transition class 363
endTransition methodTransitionTest class 367
escape codesreserved characters 441
esolveGraphic methodUIBlock class 304
event dispatching methodsUIObject class 287
event handler, creating 91event property
EndPoint class 386, 388execute method
Binding class 388execution, definition 12extends keyword 24, 105, 125, 152external ActionScript 66ExternalInterface class
addCallback method 429–433available property 423call method 424–428communication between container and Flash 418Flash Player 8 security 424requirements and support 418understanding 423–424
FFadeTransition class
creating 363–364firstChild property
XML class 449Flash communication with browsers. See browser
communication with FlashFlash 8
setTimeout method 506
6196Index.qxd 1/18/06 11:46 AM Page 526

Flash ActionScript project analysis 39Flash files run on client 39securing data sent to server 39
Flash Player 7communication with browser 418
Flash Player 8security model 424
Flash Player security sandbox 478cross-domain policy file 478–479System.security.allowDomain() method 478using a server-side script to proxy the file 480
Flash/JavaScript Integration Kitusing 421–422
FlashCall eventcommunication with other languages 434–435
FlashProxy objectcreating 422
FlashTag classgenerating object and embed tags 422
FlashVarscommunication between browser and Flash 418
FLVs, controlling 222–227focusEnabled property
MovieClip class 251focusIn event
UIComponent class 256focusOut event
UIComponent class 256_focusrect property
MovieClip class 250for-in loop 165format method
TimerUtils class 509–510formatters
Boolean formatter 396built-in formatters 396Compose String formatter 396custom formatters 404–406Date formatter 397Number formatter 397Rearrange Fields formatter 397simple example 398–401, 403–404using 395
Foundation XML for FlashJacobs, Sas 440
_framesloaded propertyMovieClip class 250
framework 242See also v2framework introduction 242, 244–246MovieClip class 246–252summary 257UIComponent class 255–256
INDEX
527
UIObject class 253–255View class 256–257
fscommand function 418–419compared to benefits of using ExternalInterface class
423_FSCommand suffix
addinging to function name 421functions
calling functions 15description 15function parameters 15naming conventions 71narrowing focus with 97simple functions compared to complex function 98
GGamma, Erich. See Gang of FourGang of Four (GoF)
Design Patterns - Elements of Reusable Object-OrientedSoftware 158
generalization relationship 44genericFault method
PendingCall class 472getBounds method
MovieClip class 247getBytesLoaded method
MovieClip class 247getBytesTotal method
MovieClip class 247getCategories method 466
MXNA web service 457–458WebService class 465
getChild methodUIObject class 281
getChildAt methodView class 256
getDepth methodMovieClip class 247
getDescription methodProject class 491
getElementByIddocument object 430
getEnabled methodUIObject class 282, 288
getFeedsByCategory method 472MXNA web service 460
getFocus methodUIComponent class 255
getGraphic methodUIBlock class 304UIObject class 321
getInstanceAtDepth methodMovieClip class 247
6196Index.qxd 1/18/06 11:46 AM Page 527

getInterval methodTweener class 349
getNextHighestDepth methodMovieClip class 248
getStyle methodUIObject class 253
getSWFVersion methodMovieClip class 248
getTasksByProject methodTimeSheetController class 505
getTaskTimer methodTimeSheetModel class 510
getTextSnapshot methodMovieClip class 248
getTitle methodProject class 491
getTweenID methodTweener class 349–350
getURL function 418–419getURL method
MovieClip class 248globalGraphic property
UIBlock class 304, 306–307globalToLocal method
MovieClip class 248GoF (Gang of Four)
Design Patterns - Elements of Reusable Object-OrientedSoftware 158
gotoAndPlay methodMovieClip class 248
gotoAndStop methodMovieClip class 248
GradientBorderRect classcreating 325–327
__graphic propertyUIBlock class 294, 302
__graphic_mc propertyUIBlock class 293
Gravity classimplementing empty interface 153–155inheritance 129–132
Hhalt method
FadeTransition class 364Transition class 363
haltTween methodTweener class 337, 350
_height propertyMovieClip class 250UIObject class 254, 287
Helm, Richard. See Gang of Four
INDEX
528
hide eventUIObject class 254
hitArea propertyMovieClip class 251
hitTest methodMovieClip class 248
IIAudible interface
creating 214ID attribute
<object> tag 419–420, 429IDE, definition 12idMap property
XML class 441, 453IEventDispatcher
defining 209–213IEventDispatcher interface
addEventListener method 281implemented by Broadcaster class 204, 281implemented by UIObject class 286
if-then-else statement 16ignoreWhite property
XML class 447implements keyword
adding to Mover class 149import statements 22
(*) wildcard character 67frames, and 67instantiating classes 23
importXML methodTimeSheetView class 515
inheritance 105, 122Bouncer class 126–128class hierarchy 122Gravity class 129–132OOP introduction 8planning for 36summary 133syntax 125–126testing 122–125
init methodMediaController class 217UIObject class 286
initController methodMediaController class 217, 223, 230
__initialHeight propertyUIObject class 287
__initialized propertyUIObject class 302
initializeLayout methodTimeSheetView class 489, 493, 495–496, 506
6196Index.qxd 1/18/06 11:46 AM Page 528

__initialWidth propertyUIObject class 287–288
inline comments 69interface keyword 148interfaces 146
implementing 148–155overview 146sample interface 147use-cases 147
InterfaceTest classcreateStyles method 327creating 317, 323–324
interrelationships between components 384data binding 384–395including validators 406–415using formatters 395–406
_interval propertyMediaController class 216
__intervalID propertyIntervalManager class 207–208
IntervalManager classbuilding 207–209clearInterval method 339importing into Tweener class 337IntervalManager method 338manages intervals called by classes 204
IntervalManager methodIntervalManager class 338
__intervals propertyTweener class 338
intervalTime propertyTweener class 338
intrinsic classes 244example 245
invalidate methodUIObject class 253
IPlayable interfacecreating 214media controller methods 204methods to control playback of SWFPlayer class 234startMedia method 225
ispatchEvent methodUIObject class 287
iteration planning 60
JJacobs, Sas
Foundation XML for Flash 440Johnson, Ralph. See Gang of Four
INDEX
529
KKey object 252keyDown event
UIComponent class 256keyUp event
UIComponent class 256keywords
planning time sheet application 485structuring time sheet application 485
LLabel component 469
extends UIObject class 253lastChild property
XML class 449left property
UIObject class 254, 281Library symbols
converting ball into 89Linear class
easeNone method 343lineStyle method
MovieClip class 248lineTo method
MovieClip class 248Linkage Properties dialog box 24List component 459, 469
addEventListener method 182__listeners property
IntervalManager class 207SoundManager class 273StyleManager class 266
load eventUIObject class 254
loadMedia methodMediaController class 219SWFPlayer class 234VideoPlayer class 225
loadMovie methodMovieClip class 248
loadSound methodSound class 239SoundManager class 274
loadVariables methodMovieClip class 248
localToGlobal methodMovieClip class 248
location propertyEndPoint class 386–387, 399
6196Index.qxd 1/18/06 11:46 AM Page 529

_lockroot propertyMovieClip class 250
__loop propertyMediaController class 216, 222
loops, description 16
MMacCVS 52Macromedia XML News Aggregator. See MXNAMake New Module dialog box 54manager classes 260
building managers 263adding style 269–272SoundManager class 272–274StyleFormat class 263–265StyleManager class 266, 268–269testing 275–276
planning the framework 260candidates for manager classes 260–261diagramming the classes 261
Matrix classcreateGradientBox method 326
Media Player case studybuilding 206
controlling FLVs 222–226, 228controlling media 215–222controlling SWFs 229–230, 232–236IEventDispatcher interface 209–213IntervalManager class 207–209media interfaces 214MP3Player class 238SWF view 236, 238video view 228–229
defining interfaces 209planning 202
class structure 204interface 203MVC model 202
__mediaClip propertyMediaController class 216, 223
MediaController classdefining common methods and properties for media
controllers 204defining properties 215–216initController method 230, 232private methods 216–217public methods 218–222
__mediaDuration propertyMediaController class 216
__mediaFile propertyMediaController class 216
INDEX
530
__mediaHeight propertyVideoPlayer controller 223
__mediaWidth propertyVideoPlayer controller 223
MenuBar componentextends UIComponent class 255navigating application 493onProjectMenuChange method 495Project menu 495
methods, naming conventions 72__model property
TimeSheetController class 491TimeSheetView class 489
Model, View, and Controller pattern. See MVC pattenmodules, planning time sheet application 485move method
UIObject class 253, 254Mover class
applying interface to 148–150blur property 359creating 354–357implementing 116startMoving method 126, 136, 147testing inheritance 122–125
moveTo methodMovieClip class 248
MovieClip classaccessing 244attachMovie method 289–290beginGradientFill method 326createEmptyMovieClip method 281events 251–252methods 247–249properties 249–251UI components derive from 242understanding 246_x property 281_y property 281
MovieClipLoader classloading SWFs 232
MP3Player classbuildling 238properties and methods inherited from MediaPlayer 204
multiple valuesstoring in arrays 14
MVC pattern 159, 191basic implementation 192–193planning time sheet application 486practical implementation 193–196putting it all together 196–197TimeSheetController class as controller 490TimeSheetModel class as model 487TimeSheetView class as view 488utilizing for OOP Media Player 202
6196Index.qxd 1/18/06 11:46 AM Page 530

mx.data.binding packageclasses 385–386
MXNA web service 456getCategories method 457–458, 466getFeedsByCategory method 460, 472
Nname attribute
<embed> tag 419–420, 429_name property
MovieClip class 250naming conventions
classes 71constants 71functions 71methods 72packages 72properties 72variables 70
NetStream class 225onMetaData method 225onStatus method 225pause method 226seek method 226
never valueallowScriptAccess parameter 424
new keyword 104nextFrame method
MovieClip class 249nextSibling property
XML class 449nodeName property
XML class 449nodes
attributes 441understanding XML 440
nodeValue propertyXML class 449
noise methodBitmapData object 374–375
NoiseTransition classcreating 374–376
Number formatterusing 397
Number Formatter formatter 396numChildren property
View class 257NumericStepper component
extends UIComponent class 255__numLoops property
MediaController class 216, 222
INDEX
531
OObject class
registerClass method 290Object Oriented Programming. See OOP<object> tag
generating with FlashTag class 422ID attribute 419–420, 429sending variables into Flash 419setting allowScriptAccess parameter 424
Object UML diagram 41objects
as houses built from blueprint 146description 16OOP introduction 3specifying location of data 387
Observer classTimeSheetModel class extends 487
Observer pattern 159–160basic implementation 160–166practical implementation 167–169
extending 169–171utilizing for controller media classes 204
offButton eventSimpleButton class 284
onButtonClick function 463onButtonRelease handler
SimpleButton class 324onCategoryChange function 472onData event
MovieClip class 251onData property
XML class 448onDragOut event
MovieClip class 251onDragOver event
MovieClip class 251one-to-one relationships
Singleton design pattern 486onEnterFrame event
MovieClip class 251onEnterFrame function 233, 360, 506onFault function
PendingCall class 465–466onGetCategories() function 458onHTTPStatus property
XML class 448onKeyDown event
MovieClip class 252onKeyUp event
MovieClip class 252onKillFocus event
MovieClip class 252
6196Index.qxd 1/18/06 11:46 AM Page 531

onLoad eventMovieClip class 252
onLoad propertyXML class 448, 452
onLoadInit methodSWFPlayer class 232
onMetaData methodNetStream class 225
onMouseDown eventMovieClip class 252
onMouseMove eventMovieClip class 252
onMouseUp eventMovieClip class 252
onPress eventMovieClip class 252
onProjectChange methodTree component 506
onProjectMenuChange methodTimeSheetView class 495–496
onRelease eventMovieClip class 252
onReleaseOutside eventMovieClip class 252
onResult functionPendingCall class 465
onRollOut eventMovieClip class 252
onRollOver eventMovieClip class 252
onSetFocus eventMovieClip class 252
onStatus methodNetStream class 225
onTaskMenuChange methodTimeSheetView class 502
onToolsChange methodTools menu 512
onToolsMenuChange methodTimeSheetView class 512
onUnload eventMovieClip class 252
OOP (Object-Oriented Programming)introduction 2
classes and objects 3inheritance 8polymorphism 7properties 3
OOP concepts 16encapsulation 84
OOP guidelinesanalyzing Flash ActionScript project 39planning 34UML modeling 40
INDEX
532
OOP Media Player. See Media Playeroperation property
TimeSheetModel class 498__outerSWFHolder_mc property
SWFPlayer class 230outputString function 30__overButton property
SimpleButton class 284
Ppackages 22
ActionScript classes 66naming conventions 72
pair development 61__pan property
MediaController class 216parameters
for functions 15_parent property
MovieClip class 250parentNode property
XML class 449parsing data 40pause method
NetStream class 226__paused property
MediaController class 216, 219pauseMedia method
IPlayable interface 214MediaController class 219VideoPlayer class 226
PendingCall class 473callback functions 465genericFault method 472onFault function 466
Penner, Roberteasing equations 341
perlinNoise methodBitmapData object 376
pixelDissolve methodBitmapData object 376
planning 34encapsulation 35importance 34inheritance 36reusability 35
play methodMovieClip class 249
__playing propertyMediaController class 216, 219
Point objectposition property 281
6196Index.qxd 1/18/06 11:46 AM Page 532

polymorphism 136basic concept of polymorphism 138–139example 136–138function names 138functional polymorphism at work 139–142implementing for application reuse 138OOP introduction 7
position propertyMP3Player class 239Point object 281UIObject class 281
pressButton eventSimpleButton class 284
__pressedButton propertySimpleButton class 284
prevFrame methodMovieClip class 249
previousSibling propertyXML class 449
private scope 25procedural programming 2programming approaches 58
RAD methodology 59usability testing 62XP methodology 60
programming concepts 12building blocks 13–16definitions 12OOP concepts 16
programming styles 73consistency and spacing 74grouping 76
ProgressBar componentextends UIObject class 253
Project classintroduction 491
Project menuMenuBar component 495
__project propertyTask class 491, 492
project workflow 50version control 50
__projects propertyTimeSheetModel class 488
propertiesdescription 17enhancing behavior with 96naming conventions 72OOP introduction 3
property propertyEndPoint class 386
prototype keyword 104prototype systems 59prototypes 21
INDEX
533
Q_quality property
MovieClip class 250
RRAD (Rapid Application Development)
as programing approach 59steps 59
Rearrange Fields formatter 396using 397
redraw methodUIObject class 253
refactoring 61registerClass method
Object class 290registerForSound method
SoundManager class 274registerSound method
SoundManager class 274registerView method
TimeSheetModel class 487relationships between keywords
structuring time sheet application 485release planning 60remove method
UIObject class 291Remove Project panel 497–498removeChild method
UIObject class 291removeEventListener method
IEventDispatcher interface 210, 212, 281UIObject class 287
removeListener methodStyleFormat class 265
removeMovieClip methodMovieClip class 249, 291
removeStyle methodStyleManager class 267
removeTransitionEffects methodFadeTransition class 364
repositorymaintaining CVS source code 50TortoiseCVS and setting up local repository 52
resize eventUIObject class 254
resolveGraphic methodSimpleButton class 321UIBlock class 304
results propertytarget class 446XMLConnector class 384, 386–387, 399, 408
reusability, planning for 35
6196Index.qxd 1/18/06 11:46 AM Page 533

reveal eventUIObject class 254
right propertyUIObject class 254, 281
root nodesunderstanding XML 440
_rotation propertyMovieClip class 250
runtime, definition 12runTween method
Tweener class 337–339, 343runTweenCall method
Tweener class 348, 350–351
SsameDomain value
allowScriptAccess parameter 424scale properties
UIObject class 281scaleMedia method
SWFPlayer class 232__scaleToClip property
SWFPlayer class 230scaleX property
UIObject class 254scaleY property
UIObject class 254Schema tab
Component Inspector 407–408, 411, 413scope
definition 21public and private 25
__scope propertyTimeSheetView class 489
Secure Socket Layerdata transfer 40
seek methodIPlayable interface 214MP3Player class 239NetStream class 226
Sequence UML diagram 41server communication 440
web services 456WebService class 464–475, 477WebServiceConnector component 456, 458–463
XML 443declarations 442–443understanding 440–442XMLConnector component 443–445, 448–453
setEnabled methodSimpleButton class 323UIObject class 282, 288
INDEX
534
setEvents methodSimpleButton class 321–322
setFocus methodUIComponent class 255
setInterval methodcompared to setTimeout method 506IntervalManager class 204, 207–208
setMask methodMovieClip class 249
setPosition function 22, 24setSize method
UIBlock class 294, 301UIObject class 253, 281, 288–289, 315
setSkin methodUIObject class 253
setStyle methodUIObject class 253
setTimeout methodundocumented feature in Flash 8 506
setTransform methodColorTransition class 370MediaController class 221
SetVariable functionsetting variables into Flash 419
showProjectDetails methodTimeSheetView class 506
showTaskDetails methodTimeSheetView class 506
SimpleButton classassigning style to 327creating 320–324diagramming 284extends UIComponent class 255
SimpleRect skincreating 315
Singleton design patternone-to-one relationships 486
Singleton pattern 159, 171basic implementation 172–177building an interface 181–182practical implementation 177–180using for global manager class 266utilizing for IntervalManager class 204
SOAP, introduction 454–456software reuse
encapsulation, inheritance and polymorphism 138Sound class
methods 239__sound property
MediaController class 216__sounds property
SoundManager class 273_soundbuftime property
MovieClip class 250
6196Index.qxd 1/18/06 11:46 AM Page 534

SoundManager classas candidate for manager class 261
soundManager classassignSounds method 329
SoundManager classbuilding 272–274instantiating 276UML diagram 262
SSL (Secure Socket Layer)data transfer 40
standalone attributeXML declarations 443
start methodFadeTransition class 364MP3Player class 239Transition class 363
startAlpha propertyFadeTransition class 364
startDrag methodMovieClip class 249
startMedia methodIPlayable interface 214, 224–225VideoPlayer class 226
startMoving methodMover class 126, 136, 147
_startOnLoad propertyMediaController class 216
__startOnLoad propertyMediaController class 222SWFPlayer class 232VideoPlayer class 225
startTrackProgress methodMediaController class 217SWFPlayer class 233VideoPlayer class 224
startTransform methodTransition class 362
__state propertyUIBlock class 294
Statechart UML diagram 41static properties 109static property
UIBlock class 303stop method
MovieClip class 249MP3Player class 239
stopDrag methodMovieClip class 249
stopMedia methodIPlayable interface 214, 224VideoPlayer class 226
__stream propertySWFPlayer class 230
INDEX
535
__stream_ns propertyVideoPlayer controller 223
strong typingand code hints 27debugging and 20description 14
style methodStyleManager class 268
StyleFormat classbuilding 263–265dynamic 326updateStyles method 311
styleFormat propertyBlock instance 309
styleFormatName propertyBlock instance 310, 312
StyleManager classadding StyleFormat to 327as candidate for manager class 261building 266, 268–269styling Block instances 308–312UML diagram 262
__styles propertyStyleManager class 266
subclass 122super keyword 133swapDepths method
MovieClip class 249SWF files
commenting, ignored in 68controlling 229–230, 232–236
SWF viewbuildling 236, 238
__SWFHolder_mc propertySWFPlayer class 230
SWFPlayer classcreating 229–230, 232–236
SWFPlayer controllerproperties and methods inherited from MediaPlayer 204
swLiveConnect attribute<embed> tag 421
TtabChildren property
MovieClip class 251tabEnabled property
MovieClip class 251tabIndex property
MovieClip class 251UIComponent class 255View class 257
target classresults property 446
6196Index.qxd 1/18/06 11:46 AM Page 535

_target propertyMovieClip class 250
Task classadditional properties 491introduction 492
__tasks propertyTimeSheetModel class 488
__taskStartTime propertyTimeSheetModel class 510
testing transitions 365–367, 369text property
TextArea class 384, 386TextInput component 409
TextArea class 469importing 411text property 384, 386
TextInput classextends UIComponent class 255importing 411, 431text property 409validating 411
TextSnapshot object 248this keyword 109
ActionScript 2.0 trouble spot 30introduction 109
time propertyTransition class 362
time sheet application case study 484adding a project 495–498adding a task 501, 504–505building application 493displaying projects 498–501finished application 484initializing the layout 493, 495MVC classes 487
Project class 491TimeSheetController class 490–491TimeSheetModel class 487TimeSheetView class 488–489
persisting time sheet data 512–513, 515planning application 484project and task details 506, 509–510running a task timer 510–511structuring application 485Task class 492writing stub code 487
__timer propertyTask class 491, 492
TimerUtils classformat method 509–510
TimeSheetController class 497addProject method 498creating 493getTasksByProject method 505
INDEX
536
planning time sheet application 486writing 490
TimeSheetModel class 497__activeTask property 510creating 493getTaskTimer method 510operation property 498planning time sheet application 486__taskStartTime property 510writing 487
TimeSheetView classbuildProjectTree method 498, 501coding 500creating 493importXML method 515initializeLayout method 493, 495–496, 506onProjectMenuChange method 495–496onTaskMenuChange method 502onToolsMenuChange method 512planning time sheet application 486showProjectDetails method 506showTaskDetails method 506update method 498, 505writeXML method 513, 515writing 488–489
Tools menuonToolsChange method 512
top propertyUIObject class 254, 281
TortoiseCVS 52setting up local repository 52version history 57
TortoiseCVS Add dialog box 55TortoiseCVS Commit dialog box
Comment field 56TortoiseCVS History dialog box
version history 57TortoiseCVS initialize repository dialog box 54TortoiseCVS revision graph 58_totalframes property
MovieClip class 250trace statement 107, 110, 163traceXML() function 446trackAsMenu property
MovieClip class 251trackProgress method
MediaController class 218SWFPlayer class 233VideoPlayer controller 224
Transition classcreating 361–363
transitionImageIn functionTransitionTest class 366
6196Index.qxd 1/18/06 11:46 AM Page 536

transitionImageOut functionTransitionTest class 366
transitioning views 360BlurTransition class 371, 373–374ColorTransition class 369–370DissolveTransition class 376, 380FadeTransition class 363–364NoiseTransition class 374–376testing transitions 365–367, 369Transition class 361–363WaterTransition class 376, 380
TransitionTest classcreating 365–367, 369
Tree componentdisplaying the projects and tasks 493onProjectChange method 506projects listed 498
tween methodTweener class 337–339, 343
Tweener classcallTween method 347, 350creating 336–339, 341–343enhancing 347–349, 351, 354getInterval method 349getTweenID method 349–350haltTween method 350__intervals property 338intervalTime property 338methods 337runTween method 338–339, 343runTweenCall method 348, 350–351testing 344–346tween method 338–339, 343__tweenID property 349tweenTo method 339, 341, 343
__tweenID propertyTweener class 349
tweenTo methodTweener class 337, 339, 341, 343
type propertyTransition class 362
TypedValue classdescription 386mx.data.binding package 385
UUI components
base classes derived from 242UI widgets 280
adding style 308–312attaching from scratch 316–317, 319–320basic building block 292–294building a component 294, 296–298, 300–301, 303
INDEX
537
changing state 307–308creating foundation 285–292diagramming classes 280
Block 283SimpleButton 284UIObject 280–281
events 320–324pulliing it all together 325–328skinning a widget 303–304, 306–307skinning components 313–314, 316
UIBlock classchangeState method 301creating 292, 294, 303–304globalGraphic property 307setSize method 301static property 303
UIComponent classevents 256methods 255properties 255UI components derive from 242understanding 255
UIObject classadding new property 300assigning StyleFormat instance to 310attachGraphics method 344__Class array 310classes property 310createClassObject method 319creating 285–292declaring properties 286diagramming 280–281dispatchEvent method 329drawRect method 312event dispatching methods 287events 254extending 506implements IEventDispatcher interface 286initialization methods 286__initialized property 302methods 253properties 254restyle event 315UI components derive from 242understanding 253updateStyles method 315
UML class attributes and methods 42UML class diagram 42UML class notation 42UML modeling 40
aggregation relationship 44association relationship 43composition relationship 44generalization relationship 44
6196Index.qxd 1/18/06 11:46 AM Page 537

overview of different diagrams 41planning time sheet application 485reasons for using 41UML class attributes and methods 42UML class diagram 42UML class notation 42
Unified Modeling Language. See UMLunit testing 61unload event
UIObject class 254unloadMovie method
MovieClip class 249update method
TimeSheetView class 498, 505updateStyles
SimpleButton class 323updateStyles method
StyleFormat class 265, 311UIObject class 315
_url propertyMovieClip class 250
usability testing 62Use case UML diagram 41useHandCursor property
MovieClip class 251
Vv2 framework 242
benefits 260component architecture class hierarchy 244
validatorsbuilt-in validators 407–408, 410–413custom validators 413–415introduction 406–407
var keyword 21variable data 14variables
ActionScript 2.0 trouble spot 30arrays 13conditionals 13declaring 20definition 13description 13functions 13loops 13naming conventions 70variable data 14
version control 50CVS 50
video viewbuilding 228–229
__videoEndedVideoPlayer class 226
INDEX
538
VideoPlayer controllercreating 222–226, 228properties and methods inherited from MediaPlayer 204
View classmethods 256properties 257UI components derive from 242understanding 256
_visible propertyMovieClip class 250
visible propertyUIObject class 254
Vlissides, John. See Gang of Four__volume property
MediaController class 216
WWaterTransition class
creating 376–380web services
introduction 454talking to 456WebService class 464–475, 477WebServiceConnector component 456, 458–463
WebService class 464–475, 477getCategories method 465importing 464
WebServiceConnector component 456, 458–463schema 407WSDLURL parameter 457
_width propertyMovieClip class 250
width property UIObject class 254
WinCVS client 52writeXML method
TimeSheetView class 513, 515WSDLURL parameter
WebServiceConnector component 457
X_x property
MovieClip class 250, 281x property
UIObject class 254XML
understanding 440–442CDATA declarations 442declarations 442–443reserved characters 441
6196Index.qxd 1/18/06 11:46 AM Page 538
using in Flash 443XML class 448–453XMLConnector component 443–445
XML classchildNodes property 452idMap property 441, 453ignoreWhite property 447onLoad property 452properties 449–453properties that srerve as callbacks 448using XML in Flash 447–449xmlDecl property 443
XMLConnector classbinding XML data to UI components 384results property 384, 386–387, 399, 408schema 407
XMLConnector componentusing XML in Flash 443, 445–447
xmlDecl propertyXML class 443
_xmouse propertyMovieClip class 250
XPath expressionspecifying location of data 387
_xscale propertyMovieClip class 250
Y_y property
MovieClip class 251, 281y property
UIObject class 254_ymouse property
MovieClip class 251_yscale property
MovieClip class 251
INDEX
539
6196Index.qxd 1/18/06 11:46 AM Page 539

1-59059-543-2 $39.99 [US]
1-59059-304-9 $49.99 [US]
1-59059-224-7 $39.99 [US]
1-59059-231-X $39.99 [US]
1-59059-518-1 $49.99 [US]
1-59059-221-2 $39.99 [US]
1-59059-408-8 $34.99 [US]
1-59059-533-5 $34.99 [US]
1-59059-236-0 $39.99 [US]
1-59059-306-5 $34.99 [US]
1-59059-355-3 $39.99 [US]
1-59059-517-3 $39.99 [US]
1-59059-554-8 $xx.99 [US]
1-59059-372-3 $39.99 [US]
1-59059-238-7 $24.99 [US]
1-59059-381-2 $29.99 [US]
1-59059-542-4 $36.99 [US]
1-59059-262-X $49.99 [US]
1-59059-149-6 $24.99 [US]
1-59059-409-6 $39.99 [US]
EXPERIENCE THEDESIGNER TO DESIGNER™
DIFFERENCE
1-59059-314-6 $59.99 [US] 1-59059-315-4 $59.99 [US]
1-59059-428-2 $39.99 [US]
FOEGalleryBOB_CMYK.qxd 11/14/05 5:14 PM Page 1