
MTP SS ICT SECONDARY 4 TEACHERS GUIDE COVER FINAL
90
-
Upload
khangminh22 -
Category
Documents
-
view
2 -
download
0
Transcript of MTP SS ICT SECONDARY 4 TEACHERS GUIDE COVER FINAL


How to take care of your books. Do’s
Please cover with plastic or paper. (old newspaper or magazines)1.
Please make sure you have clean hands before you use your book.2.
Always use a book marker do not fold the pages.3.
If the book is damaged please repair it as quickly as possible.4.
Be careful who you lend your schoolbook to.5.
Please keep the book in a dry place.6.
When you lose your book please report it immediately to your teacher.7.
Don’ts
Do not write on the book cover or inside pages.1.
Do not cut pictures out of the book.2.
Do not tear pages out of the book.3.
Do not leave the book open and face down.4.
Do not use pens, pencils or something thick as a book mark.5.
Do not force your book into your schoolbag when it is full.6.
Do not use your book as an umbrella for the sun or rain.7.
Do not use your book as a seat. 8.
Sudan Maths PB1.cover.indd 2 3/18/12 3:56:28 PM

ICT
Teacher’s Guide
South Sudan SECONDARY
4
This Book is the Property of the Ministry of
General Education and Instruction
THIS BOOK IS NOT FOR SALE
Funded By:
©2018, THE REPUBLIC OF SOUTH SUDAN, MINISTRY OF GENERAL EDUCATION AND INSTRUCTION.
All rights reserved. No part of this book may be reproduced by any means graphic, electronic, mechanical,
photocopying, taping, storage and retrieval system without prior written permission of the Copyright
Holder. Pictures, illustrations and links to third party websites are provided in good faith, for information
and education purposes only.


The learners should learn about databases using Microsoft Access. They should know how
data is organized (bits, bytes, fields and records).
Individually they should learn using Microsoft Access how to design and create data
tables/relations, forms and reports.
They should be able to view and edit data in data tables/databases. They should learn how
to query, select, sort and summarize specific records.
They should understand database management systems (DBMS), recognize the importance
of DBMS and know how to create interface menus in Microsoft Access.
1. What is a database and database management system?
2. What is Microsoft Access?
3. What is the importance of databases?
4. How are data tables created in Microsoft Access?
5. How are data relations joined in a database?
6. How is data queried, sorted and summarized to generate reports?
7. How are books managed in a school library? (a small library
information system)

Understand databases and know how to manage
data using database software, e.g. Microsoft
Access
Be able to use Microsoft Access
Construct multi-relation database
Be able to query, sort and summarize data
Perform database housekeeping activities
(editing and updating)
Create user interface menus
Appreciate the value of DBMS to
organizations and society
1. Critical and creative thinking: in
data management and processing
2. Communication: in reporting and
information presentation
3. Co-operation: in working groups
1. Mathematics: Formulas and function
2. All subjects: Information systems
Note: all practical examples given in the learners’ books are activities that the
learners should carry out on their own or in small groups with their computers.

Equal opportunities for all three forms of assessment are indicated for each of the
activities:
In this unit, learners should learn about databases using Microsoft Access and
understand databases and know how to manage data. They should be able to apply
their understanding of database and be able to apply in their own locality and to the
rest of South Sudan. Learners should work in pairs and groups and should discuss
database and database management systems. They should be allowed time to
develop their own explanations and to deliver these to their group and class. They
should not be discouraged from their own lines of thought, nor told that there is only
one right answer. However, their explanations and use of evidence can be gently
challenged, to help develop their thought processes.
Observation/application
Conversation
Mastery of skills
This unit presents many opportunities for critical and creative thinking: interpreting
data, applying factors to real situations, giving explanations for data management,
processing, reporting and information presentation. Learners are asked to work in
pairs and groups, so there are continuous opportunities for co-operation and
teamwork. In their discussions and presentations, there are opportunities to develop
communication skills in groups, pairs and with a whole class. The subject matter and
application of this unit in day to day activity will also deepen their understanding of
South Sudan culture and identity.
This unit contributes significantly to environment and sustainability and to Peace
Education by enabling learners to develop their understanding of databases are used
to store and organize data for various companies and organizations. Through the
development of a greater appreciation for database as a backbone for data
management and processing.
You should take the advantage of multimedia sound, text and animation, simulating
the process and effects of the database and motivating the learners. Thus increasing
the amount of knowledge and Information to improve teaching efficiency and
teaching quality. The use of these teaching methods, Learners not only actively
participate in teaching activities, but also fosterer strong interest in educational
technology, which will promote the initiative and awareness of learning knowledge
and promote the overall quality of the learners.
You can use "project-driven approach" in the teaching on the basis of constructivist
learning theory, with the establishment of project-driven "assimilation and
accommodation" of the learning conditions, with the first re-circulation of the
"scenario", the second re-circulation of "collaboration", the third re-circulation of
the "conversations" having a "construction of meaning" of the teaching.

The reason for choosing such a system is that learners are more familiar with the system operation, so they can concentrate on the main course of study on the database.
Database is a very practical course. The teacher can attach the importance to basic
knowledge, engineering discipline for database and application, strengthening the
teaching of experimental procedures in the exercises, to enhance learners’
awareness of team spirit and team training.
Combining the theory with practice and integration of learning book knowledge
and practical test will not only help learners master the basic theoretical
knowledge, but also enable learners to master the knowledge of ICT and foster the
self-learning ability and motivate.
Appraisal is an effective way to test the effect of teaching and an important guideline
for learners and teachers. Traditionally, the scores of the end of the theory tests
are the main factors to evaluate the learners, resulting that most of the
learners had to pass the exam and the school does not focus on improving
their own capacity. It is not conducive to stimulating the learners. Written
examination cannot effectively reflect the teaching of the loopholes, the teacher can
ask the learners to turn in their research and development assignment as the content
of the exam, as long as the learners can solve the problems on their own. In this
way, the learners’ practical skills can be effectively cultivated. A practical score
standard will enable learners get good command of key concepts and principles
and understanding.
Learners can examine the integrated use of knowledge to solve practical
problems and create thinking skills. In order to avoid inactive participation,
learners Can be randomly drawn to assess group's performance, which will
promote mutual supervision, mutual learning within the group and increase the
enthusiasm and sense of achievement.

Introduce the unit by asking the learners to read the key inquiry questions.
1. What is a database and database management system?
2. What is Microsoft Access?
3. What is the importance of databases?
4. How are data tables created in Microsoft Access?
5. How are data relations joined in a database?
6. How is data queried, sorted and summarized to generate reports?
7. How are books managed in a school library?
Interactive activity
Ask the class for their ideas before starting the unit. What do they already know?
What would they like to explore more in detail?
Database technology is one of the fastest growing areas in computer. Since 1960’s,
database has developed from the beginning of the first generation of network
databases, hierarchical databases, to
the Second-generation relational
database, then to a new generation
of object-oriented database systems,
distributed database systems,
parallel Mobile database system,
database systems and data
warehouses.
The contents of the courses should
also be continuously adjusted,
keeping the pace of development of
database technology, meanwhile
work closely with market demands.

Observation: Observe the pairs discussing the first set of question. Do they have a
general understanding of data organization, or how data is stored in a computer?
Conversation: Talk to the learners whilst they are discussing answers. Can they
come up convincing explanations?
(The learners don’t have to be the “right” ones at this stage – encouraging critical
thinking here)
Product: Read the answers that they have written.
Why should you organize your data?
The organizational structure of your data can help you easily locate files when
revisiting a past project and can help secondary users find, identify, select, and
obtain the data they require.

How do you organize your data?
For best results, data structure should be fully modeled top-to-bottom/beginning-
to-end in the planning phase of a project.
You'll want to devise ways to express the following:
The context of data collection: project history, aim, objectives, and hypothesis
Data collection methods: sampling, data collection process, instruments used,
hardware and software used, scale and resolution, temporal and geographic
coverage, and secondary data sources used
Dataset structure of data files, study cases, and relationships between files
Data validation, checking, proofing, cleaning, and quality assurance procedure
carried out
Changes made to data over time since their original creation and identification
of different versions of data files
Information on access and use conditions or data confidentiality
Why does data format matter?
To maximize the share-ability and re-usability of your data, you will want to
carefully consider the format in which your data is saved. Careful selection of data
format can also help you down the road by limiting the chances of your data
becoming obsolete when a proprietary format is no longer supported.
What format should you use?
Formats which are more than likely to be accessible in the long-term are:
Open format (or free file formats), non-proprietary.
Commonly used within your field or discipline.
Have a standard encoding (ASCII, Unicode).
Not encrypted or compressed.
Learners should present their report on the above discussion. Encourage diversity
thinking, it is better to come up with a summative correct answers later. Learner’s
presentations are essential in discursive class teaching. Presentations teach students
an important skill that they will need in their working lives.

When sufficient opportunities exist for learners to practice and receive feedback on
their presentations. Presentations in class can be an academic exercise. Typically,
students answer a discursive question, integrating core readings into their answer
and setting up the class discussion. As such, student presentations serve as a similar
vehicle for academic analysis and argument as a formative essay.
Observation: Observe the pairs discussing the answers. Do they understand file
naming and structure?
Conversation: Talk to the learners whilst they are discussing answers. Can they
explain the importance of file naming and how files should be structured?
Product: Read the answers that they have written. Guide where necessary the
correct approach on the acceptable answer.

Why is file naming important?
Think of a file name as a unique identifier for each of your files. Following a naming
convention allows you to simplify the organization of your files and locate your files
with ease, as well as making it easier for others to understand and reuse your data.
This is particularly important when you are working on a collaborative project.
How should you name your file?
Here are some recommended best practices for naming your files:
Use names that are brief but descriptive.
Avoid spaces and special characters (ex: *, #, %, etc.).
Come up with a naming convention adhered to by everyone using the files.
Identify versions of files using dates and version numbering in file name.
Use three letter file extensions to ensure backwards compatibility (ex: .doc,
.tif, .txt).
Do not use letter case to identify different files (ex: datasetA.txt vs.
dataseta.txt).
How should files be structured?
Folder structure for your files can assist in the unique identification of the files
contained within them. Consider the structure of the folders containing your data
files before you begin to collect your data. Ideas for how to organize your folders
include:
Data type (text, images, models, etc.).
Time (year, month, session, etc.).
Subject characteristic (species, age grouping, etc.).
Research activity (interview, survey, experiment, etc.).
Consider these examples:
File naming: File001.txt vs. 201206blood_ID0234.txt
Folder structure: My Documents\Research\Sample12.jpg vs.
C:\\NEHGrant01234\WWI\Images\Juba_001.jpg
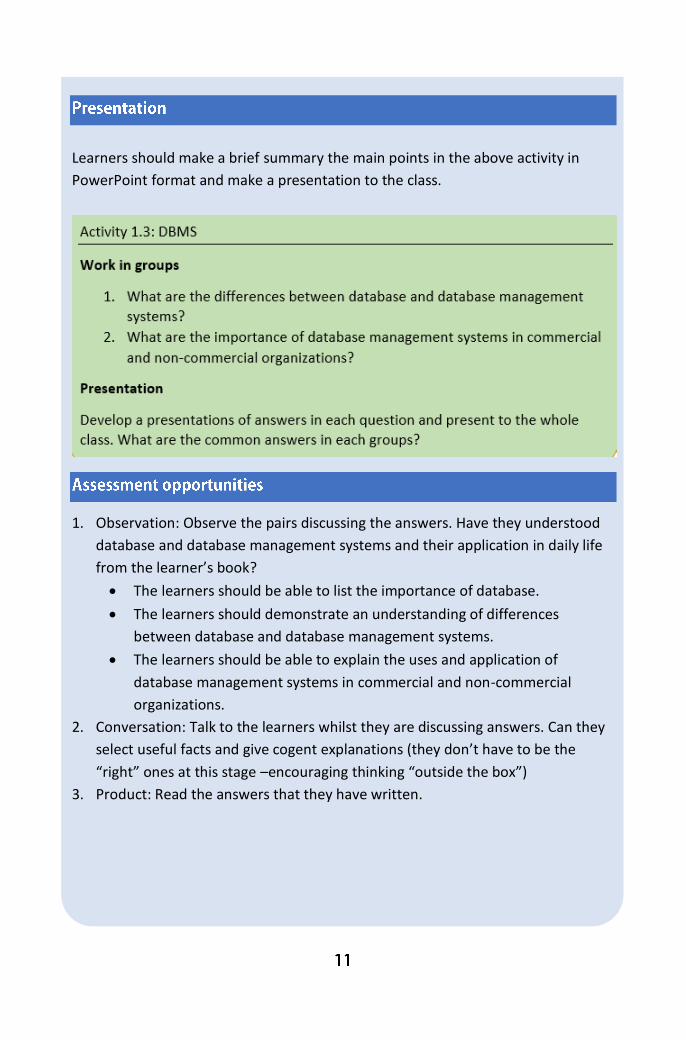
Learners should make a brief summary the main points in the above activity in
PowerPoint format and make a presentation to the class.
1. Observation: Observe the pairs discussing the answers. Have they understood
database and database management systems and their application in daily life
from the learner’s book?
The learners should be able to list the importance of database.
The learners should demonstrate an understanding of differences
between database and database management systems.
The learners should be able to explain the uses and application of
database management systems in commercial and non-commercial
organizations.
2. Conversation: Talk to the learners whilst they are discussing answers. Can they
select useful facts and give cogent explanations (they don’t have to be the
“right” ones at this stage –encouraging thinking “outside the box”)
3. Product: Read the answers that they have written.

Give learners time to work on a presentation. The learners should be able to
Develop a PowerPoint presentations of answers in each question and present to
the whole class. The learners should make note of the common answers of each
presentation.
Exercise
The learners should be able to answer the questions individually.
1. List the features of each popular types of databases.
2. What are the uses of popular types of databases?
1. Observation: observe the learners drawing the tools of MS access page. Are
they experiencing difficulties? Are they familiar with the tools?
2. Conversation: talk to learners about the page interface, tools icons as they
draw. Can they tell the difference with other MS windows applications software
like MS excel?
3. Product: The learners should be able to draw an illustration of page layout in
MS access and include the tools bar. Show what they have drawn and let them
interact freely.
The learners should Compare and contrast their illustration with that of their
partners and discuss the results.

A local medical practice have asked you to help design a simple database to track
the costs of treating patients. Their paper based system means that it takes a long
time to work out how much they are spending.
What do we need to be able to do?
Record exact costs of treatments against each person.
Record name, description, and cost of a range of treatment types.
Track costs by treatment type.
Track costs by age and sex.
Track costs by post code.
Tasks
1. Decide what the main table names should be.
2. Note down the fields that belong to each table.
3. Choose an appropriate data type for each field.
Using the same technique as used to build the Patients table, create the
Treatments table.
Tasks
1. Create a new table in Design view (CREATE > Table Design).
2. Enter the fields as in the table below.
3. Nominate the ID field as primary key.
4. Add a validation rule to the currency field so that values must be greater than
or equal to zero.
5. Add some validation text to the effect that “Treatments costs cannot be below
zero.
6. Save the table and call it Treatments.

Field Name Data Type
ID AutoNumber
Treatment Short Text
Description Long Text
Cost Currency
Using the same technique as used to create the lookup for the Patient field, create
the lookup for the Treatments field table.
Tasks
1. Change the data type of the Treatments field to Lookup Wizard.
2. Step through the wizard making sure you choose the Treatments table as the
data source.
3. Add the ID, Treatment Name, and Cost fields.
4. Sort the lookup by Treatment Name, then Cost fields.
5. Enable Data Integrity and Restrict Deletes.
6. Save the changes when prompted.
Using the same technique as used to import the Patients.xlsx workbook, import the
data from Treatments.xlsx into the Treatments table
Tasks
1. Launch the import from Excel wizard (EXTERNAL DATA > Import & Link > Excel)
2. Browse for and select the Treatments.xlsx workbook
3. Choose to append a copy of the records to the Treatments table
4. Step through each prompt on the wizard as there won’t be any changes needed
5. Finish and close the wizard
6. Open the Treatments table to confirm that the records imported correctly.
7. Repeat the process for the Patient Treatments.xlsx workbook to import the data
into the Patient Treatments table

Using any combination of criteria or techniques work out the following
Tasks
1. Find out how many men are in the Patients table who are less than 35 years
old
2. Find out how many treatments have been given to people from the EN56 post
code
3. Calculate the total cost of treating all patients
4. Calculate the cost of treating patients by post code
5. Count the number of treatments for each sex
6. How many surnames start with the letters ‘We’ (any number of letters can
follow)
7. How many surnames contain the letters ‘an’ at any part of the name
8. How many first names end with ‘er’ (any number of letters can precede)
Build some forms.
Tasks
1. Create a single item form based on the Patients table, save it as “Patients
form”
2. Create a multiple items form based on the Patients table, save it as “Patient
List”
3. Modify the Patient List form by removing the Address Line 1 and Post Code
fields
4. Resize the fields by reducing the height so that you can see a more people on
the screen.
5. Save your changes

Build a report using the wizard!
Tasks
1. Build a report based on the Patients table that includes the ID, Surname, First
Name, Date of Birth, and Sex fields
2. Group the report by sex
3. Sort by date of birth in descending order
4. Use the Block layout and portrait orientation
5. Save the report as “Grouped patient list”
6. Switch to layout or design view and resize any fields whose boxes are too
narrow.
The learners should be able to use the model above to apply to the following
exercise.
The learners should create a database file, which will require them to create one
table, one query, one form, and one report.
1. Create table: CUSTOMERS: The learners should Create the field names
and their properties because they need them to store specific data for
customers. they will have at least five customers with their information
included in their customer table.
CUSTOMERS Table Field Names:
Customer ID (Primary Key: CID)
First Name (FNAME)
Last Name (LNAME)
City (CITY)
State (STATE)
Number of Purchases (PNUMBER)
Total Amount of Purchases (PTOTAL)
Date of Last of Purchase (PLAST)

2. Create query: The learners should create a query that displays only the MSA
customers sorted by last name in ascending order.
3. Create report: The learners should create a report from the MSA Customers
query.
4. Create form: The learners to create a form for the Customers table. They
should include all fields in the form and Use the Form Wizard to create a
form. Using the New Customers form, they should enter two additional
customers:
Mathieu Alfa Birir NRB 3 $150.00 March 12, 2010
Jennifer Cherbich MSA 2 $250.00 March 17, 2010
Note: using this model you should create more supplementary exercises based on
the learners’ level of understanding of database.
Summing up the unit: Guide the learner to read about the glossary of this unit. Can
they understand the terms and how they have been applied in the book?

1. Explain how you can import data from other sources into Access database?
To import data into Access data-base:
In the main menu, click on EXTERNAL DATA, in the Import and Link group
Choose the type of the file you want to import
To know which type of file can be import or link Access database, follow the
instruction in the Get External Data wizard.
2. Between different data’s what are the types of relationship can be formed?
The table contains your data can build three types of relationship:
One-to-one relationships: A single data in one table is linked with a single data
in another table.
One-to-many relationship: A single data in a table is linked to several data’s in
another table.
Many-to-many relationship: Where several data’s in one table is related to
several other data’s in another table.
3. Explain how you can build a relationship between the different databases in
Access?
When you establish a relationship between two data, the first table for your data is
referred as the primary key while the new field in another data is called a foreign
key.
4. Name some of the file extension for MS Access?
Some of the file extension for MS Access are:
Access database.accdb
Access project.adp
Access project.mdw
Access blank project template.adn
Access workgroup.mdw
Protected access database.accde

5. What are queries in database?
Queries are the medium of manipulating the data to display in the form or
report. Queries can join tables, update data, delete data, sort, calculate, filter, etc.
6. Explain what joins are and how you can open the database in Access?
Joins determines the relationship between tables in Access by stating the details of
the relationship between two tables. You can create joins on the database tools
tab or by opening a query in design view.
7. Mention how you can create a simple query in Access 2013?
Open your database.
Go to -> create tab.
Click on the query wizard icon.
Select a query type.
From the pull-down menu choose the appropriate table.
Select the field you want in the query results.
To add information from additional tables, repeat steps 5 and 6.
Click on next.
Choose the type of results that you would like to produce.
Give your query a title.
Click on finish.
8. Explain how you can export data in Excel format?
From the toolbar click on the External Data tab.
Click Excel on the Export group.
It will open the export excel spreadsheet dialog box.
Specify the destination of the file name and format.
When you click OK, it will export the data to Excel spreadsheet.
9. Explain how you can create a form in Microsoft Access 2013?
Forms allow to insert data across multiple tables. There are different methods for
creating forms but with Form Wizard method, you can always modify the form later
using Design View. To create a form:
From the main menu, click on CREATE and then choose the FORM option.
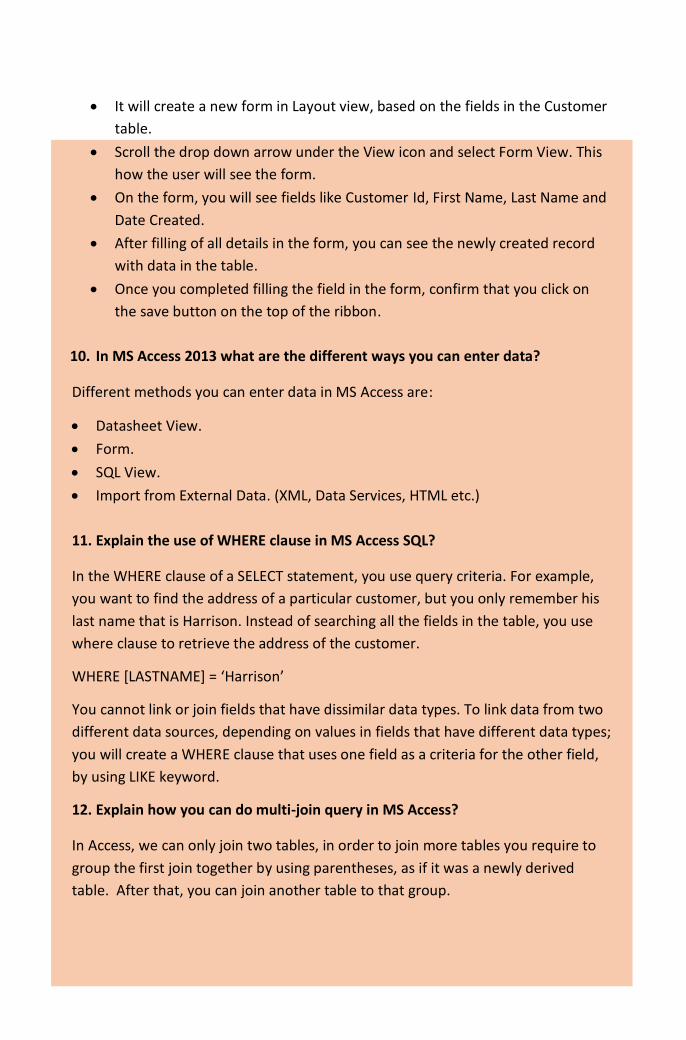
It will create a new form in Layout view, based on the fields in the Customer
table.
Scroll the drop down arrow under the View icon and select Form View. This
how the user will see the form.
On the form, you will see fields like Customer Id, First Name, Last Name and
Date Created.
After filling of all details in the form, you can see the newly created record
with data in the table.
Once you completed filling the field in the form, confirm that you click on
the save button on the top of the ribbon.
10. In MS Access 2013 what are the different ways you can enter data?
Different methods you can enter data in MS Access are:
Datasheet View.
Form.
SQL View.
Import from External Data. (XML, Data Services, HTML etc.)
11. Explain the use of WHERE clause in MS Access SQL?
In the WHERE clause of a SELECT statement, you use query criteria. For example,
you want to find the address of a particular customer, but you only remember his
last name that is Harrison. Instead of searching all the fields in the table, you use
where clause to retrieve the address of the customer.
WHERE [LASTNAME] = ‘Harrison’
You cannot link or join fields that have dissimilar data types. To link data from two
different data sources, depending on values in fields that have different data types;
you will create a WHERE clause that uses one field as a criteria for the other field,
by using LIKE keyword.
12. Explain how you can do multi-join query in MS Access?
In Access, we can only join two tables, in order to join more tables you require to
group the first join together by using parentheses, as if it was a newly derived
table. After that, you can join another table to that group.

Select
*
from
((Table 1
LEFT JOIN Table 2…
)
LEFT JOIN Table3…
)
LEFT JOIN Table4…
13. Explain how MS Access is better than MS SQL Server?
With a small number of users, MS Access is easy to handle and suited for
desktop use.
Easy compatibility and sharing compare to MS SQL Server.
SQL server is, usually, used by developers and in a bigger organization.
MS Access is cheaper than MS SQL.
MS Access requires less database administration.
14. What things to be taken in consideration for lookup fields?
Look up fields: Ensure that you relate tables, links, etc. if you want to show look up
values and not look up ids. For the display of lookup values, related table should be
linked to the destination field.

Learners should discuss prior learning about text editing and formatting in
Microsoft Word and PowerPoint.
Individually, they should learn about and understand advanced features in
Microsoft Word and PowerPoint, such as the functions and macros, how to
customize computer applications for automation and efficiency.
They should be able to use and apply advance features of:
Microsoft Word such as compiling a table of contents, controlling text flow,
creating new styles, tracking changes, creating templates, passwords and
editing restrictions, mail merging;
Microsoft PowerPoint such as working with multimedia, applying
presentation styles, and finalizing a presentation.
1. What is advanced formatting?
2. What are functions and macros and how are they used?
3. How are templates created and used?
4. How is a table of contents for a document created?
5. How are diagrams, tables, and images included in documents?
6. How are hyperlinks incorporated into documents?
7. How are multimedia products produced?
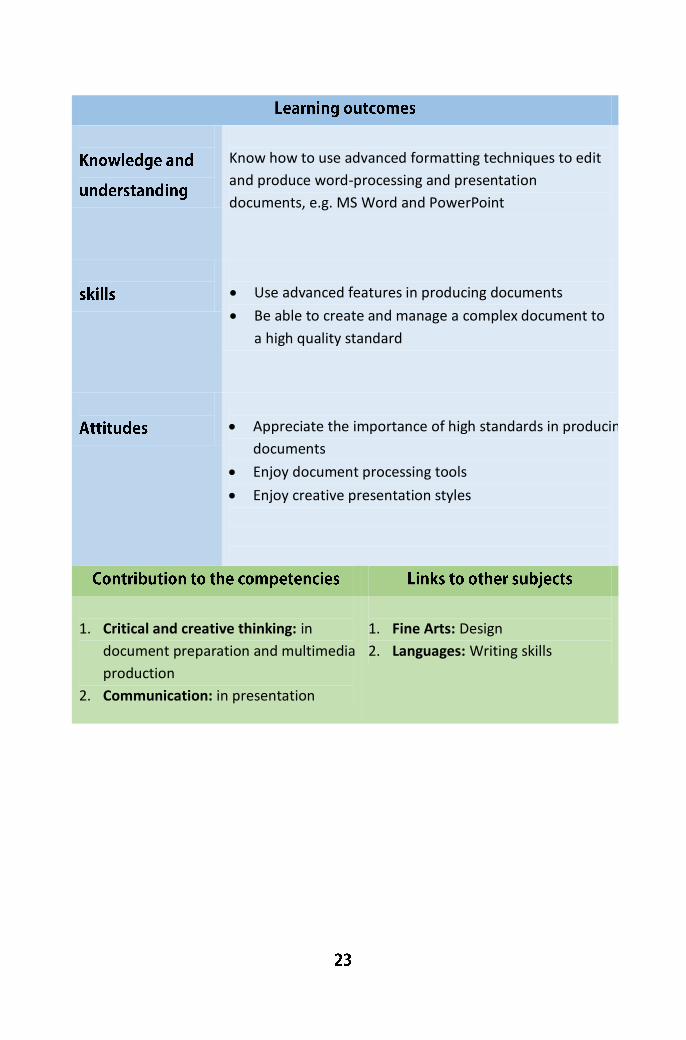
Know how to use advanced formatting techniques to edit
and produce word-processing and presentation
documents, e.g. MS Word and PowerPoint
Use advanced features in producing documents
Be able to create and manage a complex document to
a high quality standard
Appreciate the importance of high standards in producing
documents
Enjoy document processing tools
Enjoy creative presentation styles
1. Critical and creative thinking: in
document preparation and multimedia
production
2. Communication: in presentation
1. Fine Arts: Design
2. Languages: Writing skills

This unit is designed to familiarize students with terminology, screen components
and the most commonly used functions offered by Microsoft Word and PowerPoint.
Emphasis should be placed on proper document formatting techniques and file
naming and file management conventions.
It is important that you give the learners extra practical activities that will use the
skills and knowledge they gain from text editing and formatting in Microsoft word or
MS PowerPoint.
Due to the nature of this unit it is advisable for each learner to have computer so
that he/she can master the skills through regular practice. During class lesson
learners can share if there is a shortage of computer access. The assessment strategy
can be criterion based on learner accomplishment and not compared to other
learners.
Introduce this unit by asking the about learner’s expectations... i.e.: “What do you
hope to learn today or in this unit?
MS Word allows the users to type and save documents, similar to other word
processors; it has helpful tools to make documents. Microsoft word, carries with it
a lot of benefits. It is the most popular word processing program in the world.
1. Availability. Almost all windows users install Microsoft suit in their
computer system. It is available and used on all common computers.
Microsoft word is used to save documents. The documents can be copied
to flash drive which serves as an external memory for your computer. This
allows you to use the saved documents conveniently taking with you
anywhere.
The learners should learn how to make different formats in accordance with the
needs and importance. In addition to allowing the learners to create simple
documents for business correspondence, it helps greatly to create and design
business cards, brochures, new letters and many more items that are needed.

Besides, the use of fonts, shapes, clip art or smart art, charts has its own
importance and value.
2. There are times when learners need to integrate Microsoft Word with
other programs as well, such as, using Excel tables, rows and columns or
calculations. For example, if the learners have created a spreadsheet in
Microsoft Excel and they may want to display a required document for a
particular reason. They can do this easily by pasting the saved work sheet
on the document. Similarly, PowerPoint can also be integrated with
Microsoft Word for specific purposes. When working in slide sorter view of
PowerPoint, miniature versions of the slides called thumbnails are shown.
A thumbnail is the term used to describe a miniature version of a slide or
picture. In this way, converting a PowerPoint presentation to a word
document will be easy. This allows the learners to provide handouts of the
presentations to the audience.
Although it may seem as the word cannot help the learners to fix all grammatical
errors, there are still things to be considered based on grammar and syntax, still it
is worth using in terms of checking the spellings and focusing on punctuation.
Spelling check feature in Microsoft word helps to correct the spellings in
documents. In addition, the learners can fix the punctuation errors as well. At this
stage, it is important to mention to learners that sometimes it is suggested
differently from what grammatical structure you want to add in your document. It
is therefore important to consider appropriately before accepting the suggested
structure or punctuation in the document.
3. An extremely important feature of Microsoft word which is very useful for
various purposes is that it has Navigation pane at the top. It is a visual
representation of many functions. Learners can select different functions
depending on their needs and make use of it conveniently.
Nearly every profession in the world should have some use of Microsoft word.
People who use advanced formatting techniques in Microsoft Word tend to have
an easier time than those who lack this useful skill. It helps in all the professional
requirements relating to business correspondence by reducing the time and efforts
and energy of the users to a great extent.

Observation:
Observe how the each learner is navigating through, are there challenges or
difficulties incurred? Encourage learners to stop if they have any questions.
While different versions have different appearances, they all have most of the same
features. If you know what to call it, you should be able to find it in other versions.
Conversation:
Talk to the learners whilst they are working (encouraging thinking “outside the box”)
Product:
Show the class how to complete the task in the above activity.
The aim of this activity is to introduce the learner with STATE & DISPLAY of MS
word. Objectives are as follows:
Identify the main components of the user interface.
Identify the purpose of the commands on the menu bar.
Explain the difference between copy and cut.
Copy, cut and paste text.

Work with the buttons on the toolbar.
Work with the pointer in a program.
Work with text and characters in a program.
Explain the use of primary keyboard shortcuts and key combinations.
Perform basic tasks by using a word processor.
Edit and format text.
Work with pictures.
Work with language tools (spell check, dictionary and thesaurus).
Identify the various benefits of using word processing software.
This can be a comprehensive activity for learners to demonstrate that they have
mastered the skills required in text editing and formatting using MS word.
Observation:
Observe how learners in pairs communicate and interact with each other about the
skills they have mastered in this unit. Do they exhibit confidence in their
understanding about the capabilities of MS word?
In observing, watch for frustration (the learner in pairs is unable to do the work
independently, without cooperation) and boredom (the learner is not challenged by
the content).

When the content is higher than the learner's level, then you must adapt whole-group
activities so that all learners can participate and gain something from the lesson.
These learners must also be pulled out for small-group lessons based on needs.
Make sure all learners are fairly expanding on what they already know about the MS
word. With boredom, small groups based on needs may be the answer here. Have
something meaningful and appropriately challenging prepared for pairs who finish
independent work early i.e. they could start working on MS PowerPoint.
Conversation:
Talk to the learners whilst they are working (encouraging thinking “outside the box”).
Getting learners to address each other (rather than you) opens up the debate and
can help prevent big characters dominating the discussion even in pairs. When they
have contributed, ask for feedback and the class to explain whether or not they agree
with what was said.
Product:
Come up with a summary of important features used to demonstrate text editing
and formatting capabilities of MS word. Give examples.

Templates in MS Word are pre-defined professional designs for users. In which all
the page layout, fonts, colors, graphics, outline, text boxes etc. word processor user
get by default.
Figure 1.0 Microsoft Word templates window
To insert template you need to go File Menu -> New then you can see available
templates and office.com template. MS word application contains so many
templates such as business cards, educational layouts and graphics, event planner
document and event management templates, flyers, invoices templates, invitations
templates, many types of forms, resume templates etc. This is a most beneficial
feature of Microsoft Word Application. Because of even less Microsoft word literate
users can use Microsoft word without the knowledge of other menus and functions.

The benefit of Templates in MS word technically that any learner and professional
only need to replace the existed text and their document is ready to print. If learners
wants to create resume but don’t know how to do it then they have to go into file
menu->new->template they only need to search for resume under office.com
template option. But to access these all features of MS word template it is required
for users that they’re already connected to the Internet.
If they want to send invitation card but they don’t know how to create it in MS
word then again they need to search invitation card template in MS word, select
the design and edit the pre-defined text.
This is the easiest way to use Microsoft Word and it may save lots of time for the
learners. This is how Microsoft Word use can be productive if learners uses it
smartly.
Observation:
Observe the pairs discussing and creating a resume. Have they understood how to
create a resume? The learners should create and be ready to explain their
answers.

Microsoft word home menu contains all the basic standard formatting options such
as font settings, paragraphs, styles, and editing. Home menu is very important to
practice for MS Word processor learners.
Figure 1.1 Microsoft Word Home menu features
Clipboard: – In Microsoft Word Home Menu Clipboard is the first category
menu which is used to store copied material temporarily. Such as text and
picture or any object in Microsoft Word. The uses of clipboard function are
that user can copy, replace, place the text from one section to another
section of the page. Also, the uses can be extended to this function such as
copied texts remain saved temporarily until not deleted. You can see your
copied text and image in Clipboard when you click on the bottom right
corner (little arrow sign in box). And if you want to Copy then use CTRL+C
and for paste use CTRL+V
Font: – In which user can set font style according to the nature of the
document. For example, if someone is writing application or resume then
font can be Calibri or any professional font. If anyone is writing fancy
paragraph or poem then font can be Freestyle Script. You can also type in
Hindi, Punjabi in Microsoft Word by downloading Hindi or Punjabi fonts then
installing those fonts. Such as AGRA, Kruti Deve, Kundli etc. Hindi fonts are
common in use.MS word provides more advantages for users other than any
word processor. In MS word home menu user can set and change font size
easily. They can fill color background behind the text, users can set text
transformation to uppercase, lowercase and in Title case etc. any line can be
underlined and italic based on the document style. If you want to use all font
options from one place then press Ctrl+Shift+F on the keyboard. This is a
shortcut key to open Font options.
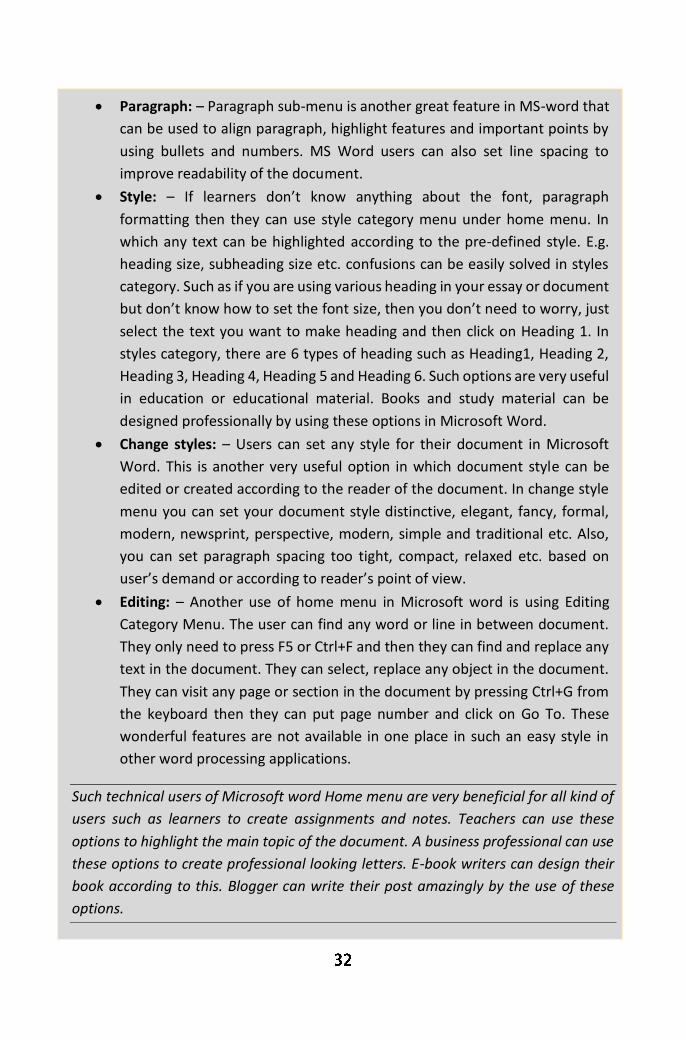
Paragraph: – Paragraph sub-menu is another great feature in MS-word that
can be used to align paragraph, highlight features and important points by
using bullets and numbers. MS Word users can also set line spacing to
improve readability of the document.
Style: – If learners don’t know anything about the font, paragraph
formatting then they can use style category menu under home menu. In
which any text can be highlighted according to the pre-defined style. E.g.
heading size, subheading size etc. confusions can be easily solved in styles
category. Such as if you are using various heading in your essay or document
but don’t know how to set the font size, then you don’t need to worry, just
select the text you want to make heading and then click on Heading 1. In
styles category, there are 6 types of heading such as Heading1, Heading 2,
Heading 3, Heading 4, Heading 5 and Heading 6. Such options are very useful
in education or educational material. Books and study material can be
designed professionally by using these options in Microsoft Word.
Change styles: – Users can set any style for their document in Microsoft
Word. This is another very useful option in which document style can be
edited or created according to the reader of the document. In change style
menu you can set your document style distinctive, elegant, fancy, formal,
modern, newsprint, perspective, modern, simple and traditional etc. Also,
you can set paragraph spacing too tight, compact, relaxed etc. based on
user’s demand or according to reader’s point of view.
Editing: – Another use of home menu in Microsoft word is using Editing
Category Menu. The user can find any word or line in between document.
They only need to press F5 or Ctrl+F and then they can find and replace any
text in the document. They can select, replace any object in the document.
They can visit any page or section in the document by pressing Ctrl+G from
the keyboard then they can put page number and click on Go To. These
wonderful features are not available in one place in such an easy style in
other word processing applications.
Such technical users of Microsoft word Home menu are very beneficial for all kind of
users such as learners to create assignments and notes. Teachers can use these
options to highlight the main topic of the document. A business professional can use
these options to create professional looking letters. E-book writers can design their
book according to this. Blogger can write their post amazingly by the use of these
options.

3. Insert Menu Features in Microsoft Word and Uses
Figure 1.2 insert menu features in Microsoft word
Insert mean in MS Word to insert something from outside into the page. Such
as pages (cover pages, blank pages, and page break), Table, picture, clip art,
shapes, smart art, hyperlink, header and footer, text boxes symbols etc.) All are
great features of Insert menu in Microsoft Word. These functions provide
exceptional uses for the word user. Let’s understand these features and uses
below:
Pages (Cover Page, Blank Page, and Page Break): – In MS-Word, Page sub-
menu contains three main features.
Cover page feature can be utilized in the start of the document or it will be used
on the first page of the document. Such as learners, teachers, professional,
writers can insert cover page in stories, assignments, notes and articles etc. to
highlight the title for the written story, notes, description and author name.
There are so many pre-defined cover page templates that can be used to get
attentions of readers while they will receive your printed or pdf copy. Also if
you are not satisfied with these templates then there is another option called
more cover pages from office.com. According to Google translator cover is a
thing that lies on, around something and conceals etc. Magazine front page is
also cover page it can be edited photographs or designed text. Books front
page, greeting cards first page etc. are the examples of the cover page. I think
you got this.
Blank page option provides the user for inserting any blank page after cursor.
For example, if you want blank page after writing the first paragraph on one
page then you can click on this option. You can also use Ctrl + Enter for to insert
a blank page after the cursor.

The use of blank page function is mostly found outs on book publishing or
eBook designing. People also can use in their notes and documents. The
benefits of using this function that it will consume less memory of a computer
or it will help to create less .docx (extension of MS word file) file word or
.pdf(Portable document file extension) file.
Page break is similar to blank page option (You can use same key: Ctrl+Enter)
but it will start a new page after the click. But the difference between a blank
page and page feature is that you can insert the blank page at the cursor
position, where page break starts the next page at the current position. No big
difference.
Tables Menu uses in Microsoft Word: – The use of table menu is that you can
insert or draw a table in the document. You can insert a table, draw the table,
convert text into a table, and insert a quick table (pre-designed tables). This is
the most important function in the Insert menu that is mostly used to design or
draw calendars, reports, and invoices and used in while creating forms, labels,
newsletters etc.
Illustrations: – Illustrations menu is used to insert the picture, clip art, shapes,
smart art, chart and screen shots etc. The uses of illustrations menu in
Microsoft word that it will help users to visualize the documents view to
readers. Such as by inserting image, adding clips, smart art etc. The purpose of
using these visual appealing options is to explore the creativity in readers mind
while reading printed word file or pdf document.
Picture menu is used to insert a picture from your computer hard drives or from
desktop to the current position of your cursor. You can also insert picture
anywhere in the text box, word art and in smart art etc. Whenever you have to
insert the image inside any object in Microsoft word then click on Picture
Option under Illustration Menu.
Clip Art uses in MS word to insert Art clips such as drawings, movie clips, sounds
that illustrate the concept written in the document. These features help
learners to understand the concept by seeing clips. Also good to use in all kind
of educational and study materials.
Shapes feature is used to insert rectangular, circle, arrows, charts, lines,
symbols based on the demand of the document. For example, while giving
examples of something such as water consumption or electricity
consummations in a document then we can use these shapes in MS word. You
can also highlight, colorize, decorate or insert text and images inside the

shapes. This is also a great feature to present reports in meaningful and
professional methods.
Smart Art The uses of this option are great especially while educating. You can
visually communicate information by using process diagrams, hierarchy
diagrams, list diagrams, relationship diagrams etc. such diagrams is very
important in which we can use to display organizational structure, processes
such as (Input->Processor->Output).
SmartArt is easy to understand and teach any complex problem. The option
is also available in Microsoft PowerPoint.
Charts is used to illustrate and compare data in MS word by using Bar, Pie, Line,
Area, and surface etc. mostly used charts in MS word. We can insert excel chart
into MS word. When you click on the chart it will open Microsoft Excel
spreadsheet which we can use to write figures.
The uses of a chart are very beneficial to display data comparison and data
analytics. You can find such option mostly on math or economics books and
newspaper economic page. In which publishers are using such kind of charts
to display the facts and figures.
Screenshot is the great option in MS word and it is used to take a screenshot of
opened programs or applications on the computer and on the internet. You can
insert the same captured clip in MS word document in real time. It is like a web
camera in MS word. The uses illustrations options for teachers and learners in
Microsoft word are great. Learners and teachers can use these options to
explain data organization, story maps, cause and effects, topic building, clocks
to teach about time etc. Also, entrepreneurs or manager can use these options
to highlight decision trees, pros, and cons, brainstorming exercises. English
tutor can use these options to enhance learner’s English vocabulary etc. There
are so many uses but tough to share in one post. But I hope you got the ideas
about the uses of Illustrations in Microsoft Word.
Links: –Insert menu category contains a hyperlink, bookmark, and cross-
reference function. In which users use to link any internal or external file,
picture, the web page from the document. Also, the bookmark can be inserted
on anywhere in the page and then we can create the hyperlink to visit that
position on the same document without scrolling.

Hyperlink is used to create the link from text to any file, picture, videos, website
etc. For example, if you want your reader to find more information about
certain cause or solution then you can link that source from using hyperlink
option. Such as when you search on Google for something then all the list of
search results are also hyperlinked.
Cross-reference is similar to Hyperlink option that is used to refer the user to
headings, tables etc. you find such option in E-books in which table of content
of eBook is connected to the pages and figures. To insert a hyperlink on the
selected document text from keyword press Ctrl+K on the keyboard.
Header & Footer: – Microsoft Word users can use header and footer option to
insert text, image, and symbol that is important to appear at the top and
bottom of each printed page. After adding content such as graphics, page
number, author of the book, title of book, date and time etc. Microsoft word
automatically inserts the same text with correct page number and other
graphics on next pages or on the each printed page. Such as if you want to
highlight or want to print page number on each page you are writing you can
insert and align page number on the right or left or center in the document and
after adding the page numbers, it will automatically appear on the next pages
with number 2, 3,4. Word process users can also use pre-designed header and
footer and can edit too. If you want to insert only page number then just click
on the page number and select desired position.
Text: – Text category in Microsoft word under home menu is used to insert Text
Boxes, Quick Parts, Word Art, Drop Cap, Date &Time and any kind of object.
Uses of Text are very great for book writer, learners and for teachers to insert
preformatted text boxes anywhere in the document to highlight important
words, sayings or main points of written paragraphs. The user can also draw
text boxes from their own on anywhere in the document such as forms, books,
invitation cards and on invoices. Also if they don’t know how to format text
boxes, then they can download more per-formatted text boxes from
office.com.
Quick parts are used to insert a reusable piece of content including field,
document properties such as author name, the title of a document, comments,
company name etc. such options are mostly used by news editors, books, and
magazine editors.
WordArt is good option to create and decorate slogan, quotes in the
documents in Microsoft Word. To use this you only need to select the piece of
text then select the appropriate color style or decorative text. WordArt is also

useful to insert decorative text in invitation cards, happy birthday greetings and
other kinds of funny or less professional documents.
Drop Cap is used in books, letters, notes and new stories or newsletter to
display first letter larger at the beginning of the paragraph.
Signature line: – The signature link uses are mostly related to legalities of the
document. Such as in government notification PDF files and legal notices signed
with a stamp at the end of the page. This is similar to Microsoft Word that
government notification letters can use a signature line or they can add a digital
signature at the spot.
Also, any word user can insert a signature line at the end of document or
paragraph which specifies the individual who must sign or signed. Also, digital
signature used in mostly Income tax return, company audit and company
registration numbers and can be used in related legal documents.
Date & Time: The date and time are easy to use features that can be inserted
in anywhere in the document. In Microsoft Word, there are so many dates and
time formats (such as Saturday, December 31, 2016, or 31-Dec-16) are two
different formats that can be used according to nature of the document.
Object: – Object is an advanced feature of Microsoft word that is used to insert
any object into the document and also by creating in real time. Such as you can
insert paint program functionality by creating bitmap image in real time, excel
spreadsheet, videos, and power point presentations etc. mean you can insert
embedded object.
Symbols: – In this option, you can insert mathematical equations and can do
plus, minus by using a table. Also, there is symbol option that is used to insert
special character or symbol that is not commonly available on the keyboard.
For example, you can insert trademark symbol (™), copyright (©) and Unicode
characters etc. to display the ownership or authentication of the document that
other people cannot use without permission. This option in Microsoft word
mostly used in legal, marketing, and promotional documents. Also, you can find
such symbols in company’s logo, websites footer and in Wikipedia contents
footer.

4. Features and uses of Page Layout Menu in Microsoft Word
Figure 1.3 features and uses of page layout menu in Microsoft Word
Page layout menu in Microsoft word gives various uses for the user to set
themes, page setup, page background, paragraph and arrangement in the
document. Page layout features in Microsoft word is very useful for eBook
publisher and document printing business and also for common word users.
Themes: – In Microsoft word, a theme is a set of pre-designed document
designs fonts, headings, effects etc. By the use of theme option in Microsoft
word, the user can change the overall design of the page such as fonts,
effects, and colors etc.
Page Setup: – Page setup is the most important option and the users start
after creating a new document. I always recommend to all my learners that
before writing, creating, designing or doing anything in Microsoft you should
first do the page setup. Why because all the page margins, page orientation
and size etc. creating problems later when you print the document or do the
arrangement of objects.
Margins option is used to set blank spaces from edges towards inside from
outside. Margins are page edges that are outside main content of the
document. The margin will help us to define paragraph starting point and
ending point. By doing click on margin option there are various pre-defined
margins such as narrow in which margins are 0.5 from the top, bottom, left
and right. Where normal is 1” from all four sides. If the physical paper is the
A4 size it mean its width is 8.27” and height is 11.69” then you can set 0.5”
margin from all corners recommended. Because the fewer margins on the
edges will use less paper for your document. Else if you set 1” then it will use
more printouts for your same document.
Orientation used is to set page layout from Vertical to Horizontal or Portrait
to Horizontal. A simple way to understand the uses of orientation in
Microsoft Word is that it will allow the users to switch the page layout
according to text writing flow. Portrait mean layout style is from left to right
and landscape mean right to left. This will be best uses example, if you are
printing your document on the A4 size and your text in the document going

outside the page from the right and using less space towards the bottom then
you can set landscape.
For example Exam Date Sheet, Marriage card, Diploma certificates etc. are
printed in the Landscape layout. Where mark sheet, admission forms are
printed in portrait. The best way to switch to one option then see the
document samples that you want to print or check if the page sizes or margins
are not meeting with your designing criteria.
Mostly portrait layout is used in page setup. So, if you find your document
text is not getting proper arrangement on printed page then you can do the
experiment to switch portrait layout to landscape in Page setup option in
Microsoft Word.
Page size this depends on the kind of document you are printing. If you are
printing your document on A4 paper size that you purchased in the market
then set A4. Because you cannot set A5 in this condition because then some
text will not be printed in the document. You can vary the page sizes
according to the section. In Microsoft word there are Letter sizes for letter
document, Tabloid, executive size and envelope sizes are available. But if you
want to become an expert in Microsoft Word or want to be proficient in
printing document then I will suggest you that print the same text in various
page sizes on the A4 paper. It will give you practical knowledge about page
setup settings and others things too.
Columns option in Page Setup is used to split the text into two or more
columns. Generally, this option is a classical text formatting style that is very
beneficial in news printing, newsletter and nobles etc. For example, see the
newspaper in which they adjusted text in small line width and paragraph and
in the same time they converted the long paragraph into columns. So it will
increase readership interest for particular news. Else you can see English and
Hindi or another language in which in one page is divided into columns.
Page Background: – The uses of page background in Microsoft word is to give
extra effects or protection effects to the document such as the watermark,
page color, page borders etc.
Watermark is used to insert ghosted text behind the text in the middle of the
document. This is a very beneficial option that indicates that document is
confidential, urgent and need to be treated carefully. Watermarks are used

in a text document, images, PDF files etc. You can see the example in Google
images or stock image which is protected by website or company watermark
that no one can reuse the images. Also, you find watermarks in legal
documents, letterheads, and bank passbooks or in checks etc.
There is pre-defined watermark in Microsoft Word such as Confidential,
urgent etc. you can change these into your company name, personal name
or related to document, you can also insert your company logo, school logo
or any kind of another image that will indicate reader or finder that this
document is important.
Page Color option is used in Microsoft word to set the color background of
the page. Microsoft word document default color is white with black text
color. So, official documents with page background colors you cannot see
often. But it is used mostly in eBook or PDF files. Also, it depends on the
document goal. You can also use fill effects option in which you can set
gradient colors, textures, patterns and picture background to your page.
Setting page color will not print a document in colors it is just for visual
appealing.
Page Borders feature is very beneficial to add the border styles with colors
and art around the page. Also, it is used to add text color background by using
shading option that will come in printout too.
Paragraph option in page layout is used to set left, right text indents. This is
used to set paragraph beginning and ending points. Similar as I discussed
above in Home Menu. This option is also in the home menu but the difference
is that you can set left indent by using figures.
For example, if want to give more space to a paragraph from left in the current cursor
positions then type 1.22” in the box and hit enter. This will move your paragraph
towards the right. The use of this feature is to design the document style in which
reader will find it interesting or information is easy to read.
Also, there is the spacing option used for spaces between paragraphs. You can also
use TAB key on the keyboard to use Indent or paragraph margin functionality in
Microsoft Word to set indents and spacing.
Arrange: – The uses of an arrange feature in Microsoft Word is to arrange
document text professionally and efficiently. The most important option is

Wrap Text. I saw many learners learning computer find it difficult to arrange
the image or text objects correctly.
Wrap text is used to align inserted images, word Art correctly with text. For
that, if you want to insert text around the inserted image then you can
select a square option in Wrap Text. Also, you can set your image in Front of
Text or Behind the Text. You can also drag and adjust the object over text to
align it.
But by default when you insert image it will not move because it is “In Line with
Text” by default then right click or double click on the image and choose Wrap Text
and select square or in front of text option then you can adjust the image according
to your style by the use of the mouse.
You can find such text arrangement skills in Newspaper, magazine and books style
layouts. There are other options too which can work similarly to arrange the
document such as position, bring forward, send backward etc. But you can also use
the option by doing a right click on the object. You can also use drag and drop style
to arrange a different kind of objects in the document to teach to the learners but
the best way to learn Microsoft word is to use these options or click on these
features after selected text and let the learners find the result practically that are
learnable.
5. Features of Reference Menu in Microsoft Word and It is Uses
Figure 1.4 Features of Reference Menu in Microsoft Word and its uses
Reference menu and options mean mentioning, or referring the source of
information. In this I will define Footnotes feature:
Footnote: – Footnote in Microsoft Word is used to add the special text or
written text reference in the document at the end of the page. This is not the
footer, this will come before the footer. For example, if you are writing in the
document, book page any figure or fact that is published on newspaper then
you can mention in the footnote about the source of information that it is
published on abcd newspaper.
But endnote is different and but the output is similar. Endnote will come at
the end of the paragraph. Endnote is used after the paragraph but the

footnote is used at the end of the document. The font size of the endnote
and footnote is small than other written text.
Tell the learners to look for further footnote and EndNote examples in the dictionary
bottom page, old English literate books and in English nobles and magazines.
6. Microsoft Word Mailings Menu Features and It is Uses
Figure 1.5 Microsoft Word mailings Menu Features an its uses
In Microsoft Word Mailings Menu Mail Merge is the most powerful feature that is
used to send bulk emails and printouts letters, document for thousands of people or
print out thousands of copies with a different name, address, and email fields but
with the same subject or company name.
This option is very beneficial to send a newsletter, reports, notifications, updates etc.
to team members by Manger, to customer from banks to reader, from blogger and
to learners from Teachers. Also, mail merge is used by the printing press to print
envelopes with the same subject line but with a different name on each printed page.
7. Microsoft Word Review Menu Features and Uses
Figure 1.6 Microsoft Word Review Menu Features and Uses
Review functions and features uses are to examine, testing and for proofing of
the written document in Microsoft Word. You can compare the two documents
and also you can add a comment to certain lines or word.
Proofing: – Uses of proofing feature is to check the spelling and
grammatically mistakes in the document. You can also research any word and
there meaning, word thesaurus etc. For example, you can check spelling
mistakes, count the total written words, paragraphs in the document.
If you want to check your spelling mistakes then you can press short key F7
then it will automatically highlight spacing mistakes with green color and
spelling error with Red color.
Comments: – Comments option output is similar to Tool Tip. For example
when you move your mouse to “Window Button” it notify the user with the
text “Start Button” this is similar to comments. If you want to add more
expression or more thoughts behind any used word in the document you can
use comment option.
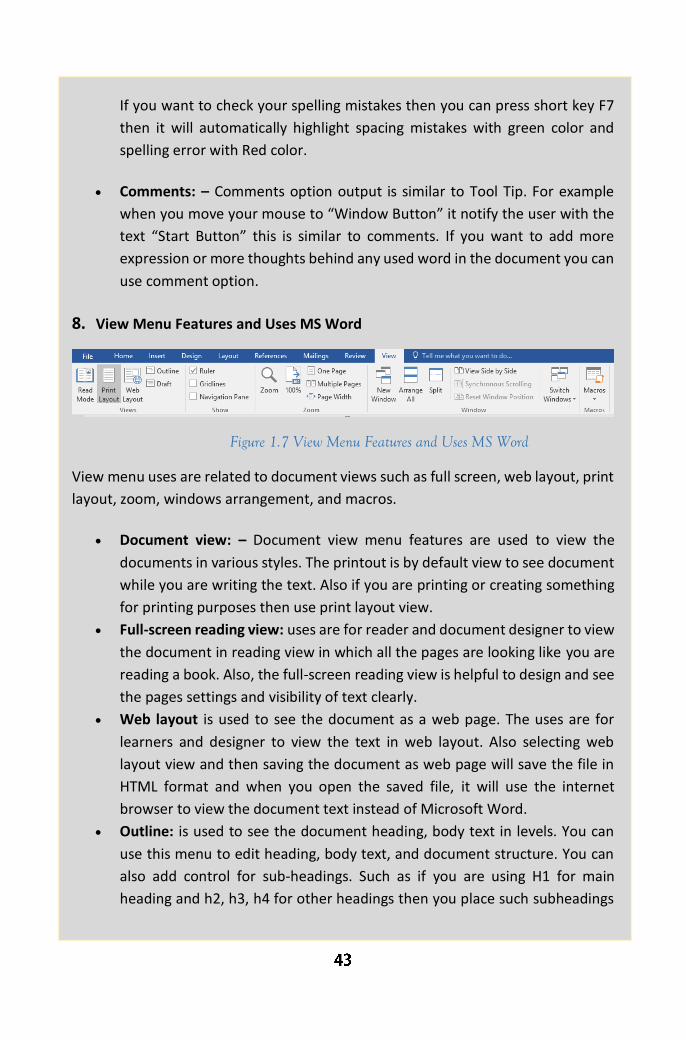
8. View Menu Features and Uses MS Word
Figure 1.7 View Menu Features and Uses MS Word
View menu uses are related to document views such as full screen, web layout, print
layout, zoom, windows arrangement, and macros.
Document view: – Document view menu features are used to view the
documents in various styles. The printout is by default view to see document
while you are writing the text. Also if you are printing or creating something
for printing purposes then use print layout view.
Full-screen reading view: uses are for reader and document designer to view
the document in reading view in which all the pages are looking like you are
reading a book. Also, the full-screen reading view is helpful to design and see
the pages settings and visibility of text clearly.
Web layout is used to see the document as a web page. The uses are for
learners and designer to view the text in web layout. Also selecting web
layout view and then saving the document as web page will save the file in
HTML format and when you open the saved file, it will use the internet
browser to view the document text instead of Microsoft Word.
Outline: is used to see the document heading, body text in levels. You can
use this menu to edit heading, body text, and document structure. You can
also add control for sub-headings. Such as if you are using H1 for main
heading and h2, h3, h4 for other headings then you place such subheadings
under H1 heading. Mostly this option is used in tutorials, support pages, and
application or software documentations.
Draft: is used to edit the text quickly.
Show feature is used to show grid lines to see the document text spacing,
word spacing.
Navigation is useful for eBook and you can see such option by default in
Google docs. Navigation option is used to view the document by heading
when you check mark on navigation pane it will highlight the heading in the
left sidebar in Microsoft word after that you can navigate the document by
heading instead of scrolling down.
Ruler or Ruler Bar is most useful and very important for document margins.
Indents are important to align correctly by the use of ruler bar.
The ruler option in MS word is similar to scale that we used for drawing in
schools etc. You can see first line indent, hanging indent or left indent in ruler
bar. You can also use rule bar to set left, center tab position by a click on ruler
bar in Microsoft Word. This is beneficial to view the document correctly and
align paragraphs spacing correctly.
Window: – Window feature uses are to create the new document in New
Window. For example, if you are current file name is Microsoft Word
project then the new windows file name will be Microsoft Word project 2.
Split feature is used to split the page with ruler bar in between the text. Not
that much common to use. Just a feature users are while you are creating
the document in which spacing or margin detail is important.
Arrange all will arrange multiple application windows in current view. Such
as we can shrink the window size towards left and then we can arrange
another application window in the right side.
Switch window switch window is used to switch between two application
windows. But you can also use Alt + Tab to switch between more than 2-3
applications without using switch window option.
Macros use in Microsoft Word is to automate repeated task such as font
size, color size or series of commands and instructions in a group. You can
run macros that will automate the formatting of other text in the
document.

9. Format Menu Features and Uses MS Word
Figure 1.8 Format menu features and uses in MS word
Format menu is used to edit font size, color and to present object appearance with
extra effects. Such as when you insert an image on the document format option
will be a highlight on the Menu Bar. Which indicate the user that they can adjust
color, brightness, border style and other image effects such as picture shadow,
cropping, wrapping etc. in Microsoft Word?
Format feature is also visible when you insert shapes or text box in the document.
You can edit shapes outline, background color, text styles etc. from format menu.
After getting the basic knowledge of or Microsoft Word uses written in this article
now it is really important that you can do as much as possible practical exercises.
Such above discussed features of Microsoft Word are very important for every word
processor users. School learners should learn such features so they can create
professional looking notes. Professional or people working in a government office
and doing documenting related works in their daily life can learn such features.

Observation:
Observe the groups discussing the answers. Have they understood how MS word
can be used in various sector of the society? The learners should Write answers
and be ready to explain their answers and discuss in group to find the similarities of
their answers.
Conversation:
Talk to the learners whilst they are discussing answers. Can they select useful facts
and give comprehensive answers with confidence? Can they think beyond the
confinement of their surroundings?
Read the answers that they have written.
1. Business and workplace use of Microsoft Word: – You can create all types of
official documents in Microsoft Word. You can use template function in
Microsoft to download letterhead sample, bills, and cash memo, joining letter,
receipts, letterhead and all various types of accounts management related
work.
You can send an email by using mail merge that helps you to send one
document to thousands of people with name and address.
The use of Microsoft Word in official works is really easy and productive other
than any other word processing software. After installing and working on MS
word you don’t need to find anything on the search engine. It is because if you
don’t know something, you can even search inside the Microsoft Word when it
is connected to the internet.
2. MS word uses in Education: – Microsoft word is best teaching tools for
teachers. You can create lecture script by using text, word art, shapes, colors,
and images. That will explore creativity in learners. They will watch slide or
printed document more interestingly.

Other than that you can type and edit question paper in Microsoft Word. You
can write application, letter that is helpful in the certain situation. Microsoft
Word is used to create various educational materials. It is helpful to create
error-free documents.
3. Home based uses of Microsoft Word: – You can create a birthday card,
invitation card in Microsoft Word by using pre-defined templates or using
insert menu and format menus functions. You can also type a letter to
municipal party on MS-Word.
Microsoft word is like a diary for personal use, in which you can write your day
to day actives. Such as you can type and print the shopping list in the paper.

1. How you can insert video in Microsoft Word 2013?
To insert video into the word document you have to go to INSERT a Online Video
Media Enter the keyword or video you are looking for Press enter click on the video
you want to add it to add or download video, click Insert.
The video will appear on word as an image when the download is completed, click
on play button to play your video.
2. How you can collapse or expand parts of a document?
To make readers read or see only the part they are interested in, this function is
very useful. To do this you have to first give heading to your topic as heading 1,
heading 2 ….from Home Menu. Once this done a small icon will appear on the
corner of the heading, on clicking on this icon it will merge the content and on re-
clicking on it, it will expand the content back to its normal place.
3. How to edit PDF document in 2013?
To edit PDF document in 2013,
a) Click the file menu.
b) Click on Open icon.
c) Select the PDF file from your local disk.
d) Select the file and click Open.
e) When word displays the informational dialog, click ok.
f) If word display, the protected view bar at the top of the document, click
enable editing.
g) You can edit PDF file now with word, once file is edited you can save it as
PDF or in Word format.
4. How to add foot-node & end note in word?
To add foot node, bring the cursor at the end of page where you want to add the
foot node than go to main menu click on Reference Option click on Insert
Footnotes. Likewise you can add end note by clicking on “Insert endnote”.

5. What is the shortcut keys for creating hyperlink?
Create a hyperlink Ctrl +K
6. In MS word 2013 how you can create a user entry forms?
A user entry form can help you to create a document with check box, drop down
list, combo box and any other content control.
Go to File tab Selection Options Click on Customize Ribbon click on check
box for ‘Developer’.
This will add the developer tab to your ribbon.
To create entry form, let say you want a form that include basic
information like@
a) Name.
b) Gender.
c) Marital Status.
d) Occupation.
e) E-mail.
f) Date of birth.
And for that you might need drop down list, check box or combo box. To
add this.
Go to Developer option in Main menu Select your tag, Click on drop down
list click on control properties Add information in control properties Click
OK.
You can do same for rest of entries for occupation, gender and for date of
birth there is a different properties available in developer ribbon ‘Date
Picker Content Control’.
7. In word 2013 how you can insert a column break?
To insert a column break, first of all bring cursor where you want to break the
column then.
Go to page layout option Select column break from column break down option and
select your option (2, 3, 4).
8. How to delete a break in column?
To delete a break in column that you no longer need. Click the show/ hide button
on the Home tab in the paragraph section to display non-printing characters. Click

in the section break Press delete button from keyboard, it will remove break from
column.
9. How you can take a screen shot in word 2013?
Go to INSERT option In Illustrations option, click on icon with camera click on
screen clipping option and choose the portion you which you want a screenshot.
10. How to insert caption in your image?
Select your image right click you will see an option “INSERT CAPTION”. And
you can enter the details or Select your image or table then, Click on
“REFERENCE” menu under reference menu, click on option “Insert
Caption”.
A caption box will appear, where you can select caption for figure, table or
equation.
11. What is the use of XML mapping panel in MS word 2013?
If you have added “DEVELOPER” TAB in your main menu, then under this tab you
have an option “XML Mapping Panel”. This option helps to map xml contents into
word document.
12. How to create a Macro in word 2013?
On the View tab choose macros Record macro and give macro a name in
the record macro dialog box.
Click the keyboard button to assign a keyboard shortcut to the macro.
Type a keyboard shortcut combinations Ctrl+R and then click the assign
button.
Click the close button.
To stop recording choose macros Stop recording.
13. How to create cross referencing in word 2013?
Open your word document and bring cursor where you want to insert
cross-referencing.
Click on the “Reference tab”.
Now in captions group, click on “Cross reference”.
A window will pop up asking for “Reference Type” like – Heading, Figure,
and Foot Note.
Select any option from “Reference Type” and then click insert.

After bringing cursor where newly reference link is created, on pressing
“Ctrl+ left Click” will direct to the reference object.
14. How you can restrict editing for someone in word 2013?
To restrict editing, follow the menu as mention below
Go to review tab, click on Restrict Editing.
Pop up window appears on right side of your document.
In pop up window, go to “editing restriction”, select the drop down for
which you want to put restriction for like only comment, track changes,
filling in the form, or read only.
At end you will be asked to set a password for the document to keep
access limited to you.
15. How you can insert an online picture in your word document in word 2013?
To insert picture that is online, like you have picture on Facebook or Flickr
and you want to insert it in word document you can use this feature.
Bring the cursor where you want to insert the image.
Under INSERT tab, click the online picture button in the illustrations section.
Insert dialog box opens.
Type a phrase that describes the image you want in the office.com or
SkyDrive.
Click on the image you want to use to select it.
Click the Insert button to insert the image.
16. How you can customize the indent amount?
To customize the indent amount, you have to select the text which you want
indent. After that under “Page Layout” in paragraph section, you can set the indent
left or right.
17. What is the short cut to move the insertion point to the beginning of the
document?
To move the insertion point to the beginning of the document the short cut key
used to <Ctrl> + <Home>
18. What is the correct procedure for creating a hanging indent?

You can create a hanging indent by Opening the paragraph dialog box Select
“Special” list Select hanging specify an amount in “By” box.
19. How you can create a custom watermark?
To create your own Watermark, Got to Page Layout tab in the Page Background
group click Watermark and select Custom Watermark. Select the Picture
Watermark or text watermark option and make changes accordingly.
20. What is the short cut key to insert a page break?
The short cut key to insert a page break is press <Ctrl> + <Enter>
21. What is the easiest way to save a chart so you can use it another document?
You can save a chart as a chart template, this will allow you to change the data but
reuse the chart’s formatting and styles.
22. What can you add to label the values of individual chart elements?
Add “data labels” to label the values of individual chart elements.
23. In what ways you can see the difference between two similar documents?
To see the difference between two similar documents click the compare buttons
and select compare from the review tab in the compare group in the Ribbon.
24. How you can accept or reject track changes in word 2013?
To accept or reject track changes in word 2013, Select the track changes made in
the document. From the review tab, click the Accept or Reject command, the mark-
up will disappear and word will automatically jump to the next change.

Teaching advanced formatting in MS PowerPoint to learners provides them with a
skill set to display their ideas with confidence in an outline form when they give
reports and presentations in school. This can be used for book reports, science fairs,
class presentations, and speeches. Teaching the PowerPoint concepts in a simple and
concise way enables the learners to retain the learned skills and apply them to a later
project.
After the learners have mastered the skills of preparing a basic PowerPoint
presentation, they can develop the ability to format those presentations so that they
display information in an interesting and visual way.
The learners should learn how to create and modify text boxes, tables, and chart
elements to make their presentation more attractive and interesting. Using Quick
Styles and SmartArt diagrams they can also help add variety to their presentations
and to highlight important information.
The learners should learn about PowerPoint as a presentation software that is one
of the most widely used office programs, it has applications for personal use,
academics and business.
Learners should be able to customize and be able to edit PowerPoint presentations
to be as personal or professional as required. PowerPoint is a complete presentation
graphics package that will give the learners everything they need to produce a
professional-looking presentation. PowerPoint offers word processing, outlining,
drawing, graphing, and presentation management tools- all designed to be easy to
use and learn.

1. Design: The learner should learn the design features of PowerPoint that will
allow them to customize the appearance and format slides. PowerPoint typically
comes with a set of preloaded themes. These can range from simple color
changes to complete format layouts with accompanying font text. Learners can
use themes to apply through the whole presentation or a single slide. By using
the page setup, the learners will be able to optimize the presentation for the
display size; for instance, they should use a larger screen ratio when displaying
on a projector compared to a computer screen.
2. Animation: PowerPoint animation is divided between slide transitions and
element animation. Learners can Use slide transition to add an effect when
switching slides during a slide show. They can edit the transition effect and
timing, as well as opt for an on-click or automatic transition between slides.
Element animation adds movement and sounds to the objects within the slide.
For example, if they are constructing a photo gallery as a slide show, they can
choose which pictures enter the slide first, how they enter and add a sound as
they enter.
3. Presentation: The presentation function of PowerPoint is largely designed to
accommodate public speaking. PowerPoint comes with a built-in notes function;
when printing out presentation slides, learners can add presenter notes beside
each slide as accompanying content. This is useful to clarify points in the slide
without sacrificing the slide's readability. As of the 2007 version of PowerPoint,
you can pre-record narration for a presentation. PowerPoint also has a rehearsal
function as well, allowing learners or learners in groups to practice timing and
monitor the length of their presentation.
4. Integration: learners should learn the compatibility of PowerPoint with all other
software in the Microsoft Office suite; learners can export slides into Word
documents or use Excel charts within their presentation. In addition to image
and audio support, PowerPoint 2007 also has video-integration functionality;
they can embed videos within a presentation for easy playback without exiting
the program. They can also export presentation files to an online interface for
multi-user remote editing and presentation practice.

The teacher can use the available version of MS PowerPoint teach the steps below.
1. How you can set password in PowerPoint 2013?
The learners should learn how to set a password in power point
Go to File > Click on Info.
Click on protect presentation.
Under which there is an option, “Encrypt with Password”, click on it.
Hit “OK” once you enter the password.
Now it will again ask to Re-enter the password hit “OK” Exit.
2. How can you show your presentation online in PowerPoint 2013?
To present your online presentation in PowerPoint.
Click on File > Share > Present Online.
Select the option enable remote viewers to download the presentation
check box Click Present Online.
Send your meeting invitation to attendees by copying link or send in email.
To get out of the Slide Show press ESC and click on End Online Presentation
to end the presentation.
3. What is the short cut key for last action performed and to move the mouse
insertion point to the next panel in PowerPoint 2013?
Short cut key for last action performed: F4.
Short cut key to move the mouse insertion point to the next panel: F6.
4. How you can record a slide show in PowerPoint 2013?
To record a slide show in power point.
Click the slide show tab, then locate the Set Up group.
Click the Record Slide Show drop down arrow. Select either “Start
recording from current slide” or “Start recording from Beginning”.
A dialog box will appear, select the desired options “Select and animation
timings” and second option is “Narration and laser pointer” and then click
on “Start Recording” option.

Soon you click on “Start Recording” your presentation will open on a full
screen.
Perform your slide show, when you are ready to move to the next slide,
click “Next” button represented with an arrow mark on the “Recording
Toolbar”.
5. How you can create a video in PowerPoint 2013?
Select the file tab.
Select Export and then click Create a Video, video export option will appear
on the right.
Click the drop down arrow next to Computer and HD Displays for the size
and quality of your video.
Select the option according whether you want to record narration or not.
Click Create Video and then save the video PowerPoint.
6. How can you play music for the duration of your slide show in PowerPoint
2013?
Download or store music to your PC hard drive and from there upload it to
PowerPoint.
In the main menu on the “Insert” tab, click “Audio” and then click on
“Audio on my PC”.
Locate and double click the music file, Click on “Play in Background” under
“Playback” tab.
7. How you can use and Eyedropper Tool in PowerPoint 2013?
To match the text color match with the slide, Eyedropper function can be useful.
Click inside an already created text box, with in “home tab”, select the font color
icon in the navigation bar. In the drop down menu, click the “Eyedropper” at the
bottom.
Select the Eyedropper option over the part of the image you want to colour and
click on it. The font color will change.

8. How to merge shapes in PowerPoint 2013?
To merge two shapes in PowerPoint 2013,
Go to insert tab.
You will see the “Shapes” button, click on it.
Select the shape you want.
Repeat the same step again to add second shape to the slide.
Select the two shapes.
Go to a Format tab.
Click on the small icons available and choose your options, like Union,
Combine, etc. Here we use option Combine to merge shapes.
9. How you can copy slide master from one presentation to another in
PowerPoint 2013?
Open both the presentation which you want to copy and where you want
to copy.
In the presentation that contains the slide master that you want to copy on
the view tab and click Slide Master.
In the slide thumbnail panel, right click the slide master and then click
Copy.
On the View tab, click Slide Master.
In the thumbnail panel, right click the slide master and then do one.
Click Close Master View on the Slider Master tab once done.
10. Can we make PowerPoint slides into PDF files in PowerPoint 2013?
To convert PowerPoint slides into PDF files select.
File Export a Create PDF/XPS document. Click the create PDF/XPS button.
11. How someone can check compatibility check when you share PowerPoint
2013 slide to previous or older version?
When you share or send PowerPoint slide 2013 to an older version and want to
check compatibility test, go to File Info Check for issues Check Compatibility. The
tool tells you which new features are not compatible with older versions.

12. How you can add services in PowerPoint 2013?
To add services in PowerPoint 2013,
Select Account option from the file menu.
Account window will open and you will find a Connected Services section.
You will see in this section that the list of services is added for PowerPoint.
With-in Add a service drop down menu, you will find options like Images &
Videos (Flickr, YouTube), Storage (365 SharePoint, OneDrive) and Sharing
(Facebook, Twitter).
Once you click the Connect button, it will ask for your mail address and
once connected to service click on done button.
13. How you can convert text to shapes in PowerPoint 2013?
To convert text into shapes on your slide insert a text box and type some
text.
Select the text box on a slide.
Insert a shape that overlaps your text box in a way that covers it
completely.
Once the rectangle shape is placed, re-order the rectangle shape by sending
it behind the existing text box.
Select the text box first and then select the rectangle shape, after that
access the Drawing Tools Format and click the Merge Shapes button.
Under Merge Shapes drop down gallery, click on Intersect option it will
convert text into shapes.
To ensure the text is converted into shape, right click on the text and a
context menu will appear, you will see the edit point option.
If no edit point’s option is available, it means your text has not been
converted into a shape when you click on Edit Points option, you will see all
the edit points on text.
14. How to use PowerPoint 2013 Slide Zoom Feature?
To use PowerPoint 2013 Slide Zoom
Beneath the main slide, click on the magnifying glass icon in Presenter
View.
Hover around the area of the slide you want to magnify.
Click and drag the hand tool over the slide to move the slide around while
still zoomed in.
To zoom back out click the magnifying glass icon.

15. How to customize your slide PowerPoint 2013?
To customize your slide, first open a new PowerPoint slide.
Choose a theme from Design menu, once you have selected the slide theme
then you can change the look of a slide by clicking on variant.
To change the color of slide you can use customize option, this option gives
various option to customize slide to your liking.
You can also customize the text box by clicking on the text and it will give
text customization option.
16. How you can use Document Inspector and what is the role of it in PowerPoint
presentation?
The Document Inspector function can be used to remove certain personal
information which may be added to the file automatically.
Click on File tab under Backstage View.
From the Info panel, click Check for Issues, then select Inspect Document
from the drop down menu.
The Document Inspector will appear. Check or uncheck the boxes,
depending upon the content you want to review, then click Inspect.
For any potentially sensitive data the inspection result will show
exclamation mark and a Remove All button to remove the sensitive data.
17. How you can protect your presentation in PowerPoint 2013?
To protect your presentation in PowerPoint 2013,
Click the File to Backstage View.
In Info panel, click the Protect Presentation command.
In drop down menu, choose the option that best suits your needs.
Let say if you mark it as final a pop up box will appear asking you to save
document as final.
When you click OK another pop up box appear confirming the document is
saved as final.

18. How you can insert online video in PowerPoint 2013?
To insert online video in PowerPoint,
Go to Insert.
At the end of Insert menu, you see an option video, click on it.
Click on online Video, and you can upload video.
You can upload video from Facebook account, by clicking on the Facebook
icon.
19. How you can trim video in PowerPoint 2013?
To work on specific part of video or to delete some part of video, PowerPoint gives
trim option, the playback tab has several options which you can use to edit your
video.
Select the video you want to trim and click the Playback tab on the ribbon.
Click the command Trim Video.
A dialog box will appear, to set the start time use the green handle and to
set the end time use the red handle.
To preview the video, click the Play button.
When you are done trimming the video, click OK.
20. How you can add bookmark to the video in PowerPoint 2013?
To add bookmark to the video,
To locate the desired part of the videos click on the timeline.
Click the Add Bookmark command from the playback tab.
On timeline, Bookmark will appear, click the bookmark to jump to that
location.
21. How you can customize slide layout?
To customize slide layout
Navigate to Slide Master View.

Locate and select the desired layout in the left navigation panel. Over each
layout you can hover the mouse to see which slides are currently using that
layout in presentation.
The backgrounds graphics may be hidden in some layouts, to show this
graphic uncheck the box next to Hide Background Graphics.
You can also add, remove or delete any objects as desired.
When you finish click on Close Master View command on the Slide Master
tab.
22. How you can rehearse the slide show timing in PowerPoint 2013?
To set or rehearse the slide show
Select the Slide Show tab and then locate the Set Up group.
Click the Rehearse Timing icon on ribbon and it will take you to the full
screen of your presentation.
You can start rehearsing your PowerPoint presentation, and your
presentation timing will be noted down by rehearsing time.
Click on next arrow on the Recording Toolbar to move to the next slide.
At the end of your presentation, PowerPoint will close the full screen view
and give the total timing for the presentation at the end.
23. How to change effect’s start option?
To change the effect’s start option,
From the animation pane, select an effect. A drop down arrow will appear
next to the effect.
Click the drop down arrow, there will be three option that will appear.
Start on Click: It will start the effect when mouse is clicked.
Start with Previous: It will start the effect at the same time as the previous.
Start after Previous: It will start the effect when the previous effects ends.
24. How you can embed a chart from Excel to PowerPoint?
To embed a chart from excel to PowerPoint,
Go to Insert tab.
In the Text group click the Object command.
A dialog box will pop up, select Create from file and then click on Browse.
Select your Excel file and then click on Insert.

Check the box next to Link to file if you would like to link the data to the
Excel chart. This will update your chart automatically whenever the
changes are made to the excel chart.
Click OK and the chart will appear in presentation.
25. How you can record a slide show?
Record a slide show option is similar to rehearse time function but more
comprehensive, you can include narration for your presentation by using record a
slide show
In main menu, click the Slide Show tab and locate the Set Up group.
Click the Record Slide Show from the drop down.
Now can select either of the option Start recording from beginning or Start
recording from current slide.
A checkbox will appear asking “slide and animation timing” and “Narration
and laser points”. If you have checkbox the option click on Start Recording.
When you finish recording first slide you can move to record next slide by
clicking on next button on the Recording Toolbar in the top left corner or
use the right arrow key.

The learners should discuss in small groups their previous knowledge about
blogs and websites. They should discuss the different basic software used to
design, manage and update a website. In small groups they should have hands-
on experience about how to design and manage a website using basic
software, such as Adobe Dreamweaver.
They should learn to practically develop a website for a real or fictional school
that contain things such as the school name, logo, class levels, subjects and
teacher’s names and pictures, and school various activities such as sports,
cultural events, and field visits. They should create a gallery to show the school
photos and records. They should also learn about website management and
updating. Individually they should be able to state the different basic software
for website design and explain how management and content updating is
carried out.
1. What is a website?
2. What basic software can be used for website design?
3. How websites are designed, hosted, managed and updated?
4. What is website content?
5. What are the security issues to be considered when setting up a website and why
are they important?

Know the principles of and the techniques of design,
management and updating of a website using basic
website development software tools
Use appropriate basic software for website design
Carryout website management and updating
Appreciate the role of a website in provision of round
the clock services.
1. Critical and creative thinking: in
website design and in the use of a
website as platform for service
provision
2. Communication: in group work and
dissemination of information
3. Co-operation: in team work and
sharing of resources
1. Fine Arts: Design
2. Languages: Writing skills
3. All subjects: Information sharing

The teacher should balance group work activities and individual learning activities
in most of the areas in the unit that require more practical opportunities.
You should guide the learner in the following lists of key areas in this unit using
practical activities and engaging the learners in theoretical work as well.
1. Setting project requirements
2. Planning site design and page layout
3. Understanding the Adobe Dreamweaver interface
4. Adding content by using Dreamweaver
5. Organizing content by using Dreamweaver
6. Evaluating and maintaining site by using Dreamweaver
The Key objectives of website design using Dreamweaver should divide the
objective into classwork and group work activities.
1. The learners should identify the purpose, audience, and audience needs for
a website.
2. The learners should identify web page content that is relevant to the
website purpose and appropriate for the target audience.
3. The learners should demonstrate knowledge of standard copyright rules
(related terms, obtaining permission, and citing copyrighted material).
4. The learners should demonstrate knowledge of website accessibility
standards that address the needs of people with visual and motor
impairments.
5. The learners should Make website development decisions based on their/
teachers analysis and interpretation of design specifications.
6. The learners should understand project management tasks and
responsibilities.

1. The learners should demonstrate general and Dreamweaver-specific
knowledge of best practices for designing a website, such as maintaining
consistency, separating content from design, using standard fonts, and
utilizing a visual hierarchy.
2. The learners should Produce website designs that work equally well on
various operating systems, browser versions/configurations, and devices.
3. The learners should demonstrate knowledge of page layout design concepts
and principles.
4. The learners should identify basic principles of website usability, readability,
and accessibility.
5. The learners should demonstrate knowledge of flowcharts, storyboards,
wireframes, and design comps to create web pages and a site map (site
index) that maintain the planned website hierarchy.
6. The learners should communicate with others (such as peers and clients)
about design plans.
The learners should identify elements of the Dreamweaver interface.
The learners should Use the Insert panel.
The learners should use the Property Inspector.
The learners should use the Assets panel.
The learners should Use the Files panel.
The learners should customize the workspace Domain
The learners should:
1. Demonstrate knowledge of Hypertext Markup Language.
2. Define a Dreamweaver site.
3. Create, title, name, and save a web page.
4. Add text to a web page.
5. Insert images and apply alternative text on a web page.
6. Link web content, using hyperlinks, e-mail links, and named anchors.
7. Include video and sound in a web page.
8. Insert animation and interactivity to content.

9. Insert navigation bars, rollover images, and buttons created in a drawing
program on a web page.
10. 0Import tabular data to a web page.
11. Import and display a Microsoft Word or Microsoft Excel document to a web
page.
12. Create forms.
The learners should:
1. Set and modify document properties.
2. Organize web page layout with relative and absolutely-positioned div tags
and CSS styles.
3. Modify text and text properties.
4. Modify images and image properties.
5. Create web page templates.
6. Use basic HTML tags to set up an HTML document, format text, add links,
create tables, and build ordered and unordered lists.
7. Add head content to make a web page visible to search engines.
8. Use CSS to implement a reusable design.
The learners should
1. Conduct technical tests.
2. Identify techniques for basic usability tests.
3. Identify methods for collecting site feedback.
4. Manage assets, links, and files for a site.
5. Publish and update site files to a remote server.

Many talented Web designers and developers find teaching beginners to be tedious
and difficult. Part of the problem is that a high-level developer knows so much
information without realizing it. When was the last time a professional seriously had
to think about syntax, file management, the order of styles in a style sheet, the
correct markup for a page and so forth? Professionals encounter these issues many
times per day, but they are all new to the beginning learner.
Provide an overview. Fit the topic of interest in the larger Web universe. For
example, what is HTML? What does the acronym stand for? Where was it
developed? Can HTML stand on its own as a Web page? Who needs to know
HTML? How does CSS fit with HTML? Don’t spend long on this overview. The
idea is to orient learners, giving the big picture. The details will get filled in as
they work with the language. This material can be presented via slides or a
whiteboard. As always, involve learners in the discussion, and watch out for
confusion. Make sure they understand the overview before moving on to
code, or else the code will make no sense.
Write code with the class. In an in-person teaching environment, the teacher
may open a text editor and project the code overhead, with learners
following along with their computers. This keeps them engaged. Some
learners find that they don’t type along with the teacher well, whether
because they have a different learning style or poor typing skill. In these
cases, encourage them to pay close attention, while some others will write
notes and code snippets with pen and paper. Provide your files to all learners,
so that they can see your work. Comment frequently in your own code so
that they understand your notes and examples.
Write code a little at a time, slowly making the examples more complex.
Don’t introduce too many items at once. For example, as you introduce CSS,
start by writing styles for HTML tags. Show how styling the body tag can
control the entire Web page, including background color, font, size, etc.
Write one attribute at a time, saving the change and displaying it in the
browser every time, so that learners see exactly which line of CSS controls
which element on the page.
Ask questions along the way. Ask learners to come up with solutions to
challenges one might encounter when building a page, before confirming
how to do it. If they can explain the idea conceptually, then the code becomes

easy. For example, if you’ve styled the body of a Web page with blue text, ask
how you would make the main heading red. If the learners can explain that
you’d need to somehow change the text in the h1 tag to be red, then they
are doing very well. Then, you’d simply need to show them how to write that
as code.
It is hard to keep things simple, and easy to make them complicated.
Learners will ask complex questions along the way. For example, they might
notice along the way that red can be written as #ff0000, red or rgb (255,
0, 0) and will ask what the differences are between them! Try to avoid a
scenario such as this early on. Present a single way to write colors (I suggest
#ff0000), and don’t revisit the issue until learners have mastered this
method. Perhaps later in the course, the learners will notice rgb (255, 0,
0) in someone’s sample code; at that point, explaining the differences will be
fast and easy. But in the beginning, when little makes sense and there is much
to remember, too much information can be overwhelming.
Syntax may be challenging. Beginning learners forget to close tags, forget
semicolons, make up tags entirely and make many other mistakes. Finding
those mistakes is sometimes easy and other times challenging. I like to
introduce the topic of validation fairly early in the process, so that learners
have an easy way to check their work. In the beginning, you might need to
point out missing, extra or unclosed syntax, but teaching them robust
debugging techniques from the beginning will help them significantly.
Managing files is a challenge. For most learners in introductory HTML and
CSS courses, file management is a constant problem. Some will have trouble
differentiating between saving information on a hard drive versus saving on
a thumb drive, and some might not know the difference between a file and a
folder. You might need to explain the fundamentals before teaching how to
manage files on a website. Try to keep all of project’s files in a single folder
on the desktop to start, because learners can generally find the desktop, and
a single folder leaves little room for confusion. All HTML, images and CSS are
then saved in that single folder. It is manageable at first, because learners will
require only a handful of assets for their first few websites. By the time
learners feel like one folder is getting cluttered and they’d like some more
organization, they will have mastered how to link two files, insert an image
and so on. They will know how the code is supposed to look and work; so, if
some code isn’t working, they will reasonably assume that the culprit is a
malformed path.

Remember that you are not designing for a client. A common mistake
among talented instructors is to make their in-class sample Web pages
beautiful, tweaked to perfection and cross-browser compatible from the very
beginning. Unfortunately, that’s not the point. Learners can easily discover
beautiful designs by surfing the Web. Also, the teacher is the instructor there
is no need to prove your competence in this way. The job is to show them
clearly what each line of code does and how it affects the Web page, both in
appearance and functionality. When writing code with learners, insert a lot
of hideous background colors and borders in the CSS to demonstrate the
concepts. Encourage learners to use this same method to debug CSS. Don’t
give away too much CSS too quickly. The learners will push to make things
prettier themselves, unsurprisingly — many of the learners will be graphic
design enthusiast and will hate how ugly their early Web pages are. However,
when learners see progress in their designs, from the first HTML page with
no styling to a few basic CSS styles and finally to a full layout, they will be
patient. If the learner explain that a particular question is complicated or
premature at this point.
You are laying the foundation for their career. Graphic design, adobe
Dreamweaver, HTML and CSS are critical skills that professional designers
work with every single day. Writing clean, efficient code, understanding how
to debug problems, researching better ways to address problems, resolving
cross-browser compatibility issues — these are foundational concepts in the
life of a front-end developer. Learners suffer greatly from bad introductory
instructors the teachers job is incredibly important; so, go slowly with new
material, and make sure learners have a solid understanding of it before
moving on to the next topic.

The learners should learn about accessing Adobe Dreamweaver tools, commands,
and features by using menus or by selecting options from one of the Insert panels or
other Dreamweaver panels. Most commonly used areas of the Dreamweaver
workspace are the Document window, the Insert panel, the Properties panel, and
the other panels.
Figure 1.9 Adobe Dreamweaver window
The learners should also learn about Document window which displays the current
document as you create and edit it. The Insert panel which contains buttons for
creating and inserting objects such as images, tables, layers, and frames which they
might want to add to their web pages. And also Properties inspector which displays
properties for the selected object or text and be enable to modify those properties.

Observation:
Observe the pairs discussing the possible answers. Do the learner demonstrate a
general understanding of website design and how website are made?
Conversation:
Talk to the learners about their progress on the activity. Encourage diversity of
thoughts on techniques of designing websites.
Product:
The learners should Read the answers that are similar and relevant to website
design whilst expressing their understanding of website design freely.
1. What are the software used to design, manage and update a website?
2. What are the main differences between a blog and a corporate website?
3. What are the principles of website management and updating?

Observation:
Observe how each member is contributing to the task above. Make sure each
individual has a contribution to make.
Conversation:
All learners to converse freely about the activity. Talk to the learners and ensure no
group is being left behind.
Product:
The learners should Read the answers that are similar and relevant to website
design whilst expressing their understanding of website design freely.

Observation: watch how learners come up with creative suggestions of what a
school should include in the website;
For example.
Header (include banner logo)
Footer (copyright information)
Horizontal navigation(for internal reference, i.e. home, about us, contact us)
Vertical navigation(links to product and services)
Main content(one column, with a chance of two or more)
Discuss in groups
The learners should individually write a brief content of what would entail what on
each section of the website and compare and contrast with their group members.
The teacher should compile the best content to the class.
When discussing the design plans for an e-commerce site with a retailer moving
online, which goal would address the target audience?
While the answer may vary from:
Increase brand/name recognition
Include tracking so traffic can be analyzed
Receive online feedback from customers. A variety of correct feedback should
be Focus on a specific market for online sales.

Duration: 10 to 15 minutes.
In this exercise, the learners should create and view a simple web page.
a) Create a new HTML page using any of the methods described above. b) Place the cursor on the page and type "Hello world!”
c) Save the page (File > Save) as hello-world.html in your Class Files/Dreamweaver/Exercises folder.
d) When you are done, your page should look something like this:
Solution:
1. Select New... from the File menu.
2. In the New Document dialog that pops up, click Create. 3. Type "Hello world!" in the document. 4. Save the document as hello-world.html in your Class
Files/Dreamweaver/Exercises folder.
Duration: 5 to 10 minutes.
In this exercise, the learners should modify Preview in Browser settings and
preview a page in different browsers.
a) Open Class Files/Dreamweaver/Exercises/hello-world.html in Dreamweaver if it is not already open.

b) Preview the page in Live View. c) Preview the page in one or more browsers. d) Make some small modification to the page and preview again.
Observation:
Observe how each students understands how links work. Study the spontaneous
behavior of learners to gauge their understanding.

Conversation:
Because learners became the instructors through helping each other, the teacher’s
role is just to facilitate their individual conversations as needed. All learners to
converse freely about the activity and ensure no group is being left behind.
Product:
The learners should be able make a webpage with functioning links. You can sample
out some few correct example from the learners to explain the correct procedure.
Observation:
Observe the pairs discussing how to add content. Can they demonstrate how pages
are linked to a specific location?

Conversation:
Talk to the learners. Can they apply what they have learnt about anchors?
Product:
Sample out some of the correct methods.
In groups
The highlight of this unit should be on developing a website for Rumbek secondary
school. The website should include;
School name (Rumbek secondary school),
Logo,
Levels of classes,
Subject and teacher names and pictures.
Picture gallery of activities such as sports, cultural event and field visits.
Pdf document for school performance in the national exam.
The groups should present complete project to the class. The website should have
all the links functioning and be of acceptable standard.

You can select the best website based on;
1. ‘Useful’ homepage – the visitors can go to that next click, quickly and cleanly
without a lot of scrolling and manoeuvring. A good homepage should look great
and be appealing.
Keep it simple – Often the best design is simple design. One of the
common mistakes many schools make is trying to cram too much content
on their homepage. The best homepages are easy to read, quickly guiding
you to relevant information.
Quick links – Does your site lead users to the most frequently requested
features? Quick links can cut through the clutter, saving readers’ time by
getting them where they want to go, fast. Park Ridge Niles School District,
an 8-school district in Illinois, uses quick links and a slider (see below) for a
clean look.
News and Calendar of Events pages – The school calendar is the workhorse
of school communications, so make sure it is prominent and always
current. School and district/local news should be fresh. If visitors see stale
news, they won’t come back.
Images – Rotating images (also called a slider) are a nice visual way to keep
parents updated on new, important school events. But don’t allow the
slider to dominate your homepage.
2. Well-organized navigation - Intuitive, organized navigation is well-designed
navigation. It is key to a school website’s usability. It is recommended to use
the 7-Link rule in website organization. Organize navigation and sub-navigation
with seven links. Studies show people are most likely to make a decision when
they have seven links or fewer to choose from. Anything more can be
overwhelming.
3. Streamlined popular pages - these content areas are the top pages on any
school website.
Calendar – Make sure your school calendar is readily accessible, contains
accurate, current info, and is easy-to-use.

Contact directory – Make it easy for anyone to find contact information for
everyone at your school. A contact directory buried in the website is a
common, easily remedied frustration on many school websites.
Make sure it is current too. (If staff members leave or assume new
responsibilities, update it.)
School pages – Make it simple for parents and learners to easily get to their
individual school page. This can be accomplished through some high-level
navigation.
Teacher pages – Parents and learners shouldn’t have to struggle to find
their teacher pages. A link to teacher pages should prominently be
displayed on the navigation and home page.
4. Responsive design - Responsive design (i.e., mobile friendly) is a crucial
element of modern school website design. It means the website can be
accessed by a wide variety of mobile devices. Good responsive design assures
each web page is readable and usable on a desktop computer, a laptop, a
tablet or a smartphone. It automatically resizes and reformats your pages to
eliminate that annoying and time-consuming zooming and dragging that serve
as barriers to the viewer.

1. To reopen the Manage Sites dialog, select Manage Sites... from the Site menu.
2. Select "dw-class" from the site list and click the pencil icon.
3. Click Servers on the left, and then click the plus symbol as shown below.

The options will change depending on how you connect to your website (e.g.,
FTP, Local/Network, WebDAV, and RDS) Your Web master or host provider
will advise you if a special version of FTP is required, such as SFTP for secure
file transfer. Local/Network is used if you connect without using FTP over a
network that and WebDav and RDS are beyond the scope of this unit.
In addition to the features and functions described in the learner’s book,
Dreamweaver has a number of advanced features that you may wish to consider.
One such feature is the option to set up a testing server. Testing servers are servers,
or reserved folders on a regular server, that are not “open to the public.” When you
are working on a new Web site, or a new feature for an existing site, you may wish
to test it live on the Web, but not in a place that is accessible to the public. This
location is a testing server. Dreamweaver allows you to set up a testing server in
addition to the regular “public” server. Files can be uploaded to either server
depending on the need. This means that a new page can be tested to find and resolve
problems without it being open to regular view. Then once it is ready to go the page
can be put to the regular live Web server for general viewing.
Another useful feature in the Dreamweaver site management collection of options
is the ability to set up check-in/check-put procedures. Check-in/checkout is
particularly important where Web sites are edited by more than one person. Users
with editing privileges are specified in the Site Management areas and can be listed
during site setup.
Any page that is being worked on is “checked out” and cannot be edited by another
user until it is “checked in.” The check-in/check-out feature is especially handy
when sites are managed by a Webmaster using Dreamweaver but edited by others
with Contribute.
Observation:
Observe the pairs discussing the answers. Do they understand website security and
the importance?
Conversation:
Learners should draw on their prior learning about online security. Talk to the
learners whilst they are discussing answers. Can they select or recall useful facts
and give logical explanations.
Product:
Read the answers that they have written.

1. What three questions should you ask before starting any web design
project?
What is the purpose of the website? Who is the customer? How did they
get here? These questions, and their answers, are essential in helping you
develop the design, content, and strategy of your site.
2. What is the purpose of using thumbnails and wireframes?
Thumbnails and wireframes are quick techniques for roughing out the
design and structure of your site without having to waste lots of time
coding sample pages.
3. What is the advantage of inserting the banner as a background image?
By inserting the banner or other large graphics as a background image, you
leave the container free for other content.
4. How can you insert the cursor before or after an element without using
Code view?
Select an element using its tag selector, and press the Left Arrow or Right
Arrow key to move the cursor before or after the selected element.
5. How does the Code Navigator assist in designing your website layout?
The Code Navigator serves the role of a CSS detective. It allows you to
investigate what CSS rules are formatting a selected element and how they
are applied.
6. Which element or idea would you use to improve website usability?
Which element or idea would you use to improve website usability? Site
maps, Use of tables for complex data, Consistent navigation.
7. Based on best practices, which three site elements should remain consistent
throughout when designing a website?
Based on best practices, which three site elements should remain
consistent throughout when designing a website? Page layout, Font
formatting, Navigation buttons.
8. Which three items might appear on the project plan when discussing an
upcoming website with a design team?
Which three items might appear on the project plan when discussing an
upcoming website with a design team? Due dates, Planning and Analysis,
Development timeline.