MNRD LAN-WAN Based Information System (MNRDIS ...
43
MNRD LAN-WAN BASED INFORMATION SYSTEM (MNRDIS) ADMINISTRATOR’S MANUAL 20 October 1999 Ministry of Natural Resources Development PO Box 64, Bairiki, Republic of Kiribati Tel: +686 21099 Fax: +686 21120 Email: [email protected] Leslie Allinson Information Technology Manager SOPAC Tel: +679 381377 Fax: +679 370040 Email: [email protected] SOPAC Miscellaneous Report 368
-
Upload
khangminh22 -
Category
Documents
-
view
1 -
download
0
Transcript of MNRD LAN-WAN Based Information System (MNRDIS ...

MNRD LAN-WAN BASEDINFORMATION SYSTEM (MNRDIS)ADMINISTRATOR’S MANUAL
20 October 1999
Ministry of Natural Resources DevelopmentPO Box 64, Bairiki, Republic of Kiribati
Tel: +686 21099 Fax: +686 21120 Email: [email protected]
Leslie AllinsonInformation Technology ManagerSOPACTel: +679 381377 Fax: +679 370040 Email: [email protected]
SOPAC Miscellaneous Report 368

i
CONTENTS
1. INTRODUCTION........................................................................................................................ 1
2. IMPORTANT NOTES................................................................................................................. 1
3. NETWORK................................................................................................................................. 1
4. USERS AND GROUPS .............................................................................................................. 1
5. DRIVES, FOLDERS AND SHARING.......................................................................................... 2
5.1 CLIENTS................................................................................................................................... 25.2 SERVER ................................................................................................................................... 35.3 PRINTERS ................................................................................................................................ 3
6. SERVER INSTALLATION.......................................................................................................... 4
6.1 EQUIPMENT LIST....................................................................................................................... 46.1.1 Equipment purchased by MNRD ..................................................................................... 46.1.2 Equipment purchased by SOPAC pre visit....................................................................... 46.1.3 Equipment purchased by SOPAC post arrival.................................................................. 5
6.2 HARDWARE SETUP .................................................................................................................... 56.2.1 Compaq Tape Drive ........................................................................................................ 56.2.2 Digi AccelePort ............................................................................................................... 66.2.3 UPS................................................................................................................................ 6
6.3 WINDOWS NT 4.0 SERVER ........................................................................................................ 66.3.1 WINS Manager ............................................................................................................... 86.3.2 DHCP Manager............................................................................................................... 86.3.3 DNS Manager ................................................................................................................. 8
6.4 MIGRATION .............................................................................................................................. 96.4.1 Logon Script.................................................................................................................. 10
6.5 REMOTE ACCESS SERVER ....................................................................................................... 116.6 MICROSOFT PROXY SERVER 2.0 .............................................................................................. 126.7 EXCHANGE SERVER 5.5 .......................................................................................................... 16
6.7.1 Pre-Installation Check ................................................................................................... 166.7.2 Pre-Installation Activities ............................................................................................... 166.7.3 Installation..................................................................................................................... 166.7.4 Licenses ....................................................................................................................... 186.7.5 Connecting to the Internet ............................................................................................. 19
6.8 MNRD WEB ......................................................................................................................... 196.9 BACKUP ................................................................................................................................. 19
6.9.1 Install ARCserve product............................................................................................... 196.9.2 Install Backup Agent for Exchange ................................................................................ 196.9.3 Test backup .................................................................................................................. 20
6.10 OLD SERVER ...................................................................................................................... 20
7. CLIENT INSTALLATION.......................................................................................................... 21
7.1 INSTALL WIN9X....................................................................................................................... 217.2 FIRST STEPS .......................................................................................................................... 217.3 NETWORKING ......................................................................................................................... 227.4 NETWORK ASSOCIATES MCAFEE VIRUSSCAN............................................................................ 23
7.4.1 New install .................................................................................................................... 237.4.2 Updating the Datfiles..................................................................................................... 247.4.3 Upgrading the Datfiles and engine................................................................................. 247.4.4 Downloading New McAfee SuperDat and Datfiles ......................................................... 25
7.5 PRINTERS .............................................................................................................................. 257.6 MICROSOFT OFFICE 97 ........................................................................................................... 267.7 OUTLOOK 98.......................................................................................................................... 267.8 INTERNET EXPLORER .............................................................................................................. 277.9 ADOBE ACROBAT READER 3.02................................................................................................ 287.10 ADOBE ACROBAT 3.0........................................................................................................... 287.11 MAPINFO PROFESSIONAL 5.5 ............................................................................................... 28

ii
7.12 MAPBASIC 5.5 .................................................................................................................... 297.13 VERTICAL MAPPER 2.5 ........................................................................................................ 297.14 UTILITIES............................................................................................................................ 297.15 FMIS................................................................................................................................. 29
7.15.1 Problems................................................................................................................... 29
8. OPERATIONS.......................................................................................................................... 30
8.1 MAINTAINING USERS AND GROUPS ........................................................................................... 308.2 MAINTAINING EXCHANGE SERVER............................................................................................. 308.3 BACKUP ................................................................................................................................. 308.4 MAINTENANCE OF MANUALS..................................................................................................... 30
9. TROUBLESHOOTING ............................................................................................................. 31
9.1 PORTS................................................................................................................................... 319.2 CLIENTS................................................................................................................................. 319.3 CLIENTS AND SERVER.............................................................................................................. 319.4 SERVER ONLY......................................................................................................................... 32
9.4.1 ipconfig ......................................................................................................................... 329.4.2 nslookup ....................................................................................................................... 32
10. OUTSTANDING ................................................................................................................... 32
11. MANAGEMENT ................................................................................................................... 33
12. CONTACTS ......................................................................................................................... 33
ATTACHMENT A – MNRD LAN-WAN DIAGRAM
ATTACHMENT B – COMPUTERS BY GROUP
ATTACHMENT C – USERS BY GROUP
ATTACHMENT D – TSKL
ATTACHMENT E – 10/100 BASE-T CABLING

1
1. INTRODUCTIONThis document describes the Local Area Network – Wide Area Network (LAN-WAN) basedInformation System that is being developed within the Ministry of Natural ResourcesDevelopment where the hub is located at the Headquarters in Bairiki, Tarawa. It is a livingdocument and should be regularly updated by the System Administrator to reflect changes.The MNRD LAN-WAN Diagram is included as Attachment A.
The audience is the System Administrator of the Information System named MNRDIS wherethe overall goal is to provide connectivity to all departments, divisions and units.
This document first addresses Important Notes and then describes the Network, Users andGroups as well as Drives, Folders and Printers. The next section details the ServerInstallation followed by Client Installation. The last sections cover Operations andTroubleshooting with a final list of Outstanding Tasks.
2. IMPORTANT NOTES
• Always apply Service Pack 4 CD before a reboot after applying NT 4.0 CD.• Do not install IE 5 on a server running Exchange Server as this may damage Exchange
Server.• The server, INGIMEA, can only be accessed by the Administrator, Account Operator and
Backup Operator. The server should not be used as a workstation even by these users.• Ensure that passwords are not divulged to anyone in the organisation and especially to
anyone outside MNRD as with the introduction of Wide Area Networking, passwords area typical security loophole.
• Ensure that users do not leave their computers logged at vend of their session. Leavingan unattended computer logged on, potentially compromises a group’s and user’ssecurity.
• Enable automatic password ageing.• Ensure that McAfee VirusScan update and upgrade files are regularly downloaded
weekly and stored in the correct location and format and that all clients are set toautomatically update and upgrade (see Operations section)
3. NETWORKA computer named INGIMEA, running Microsoft NT 4.0 Server, provides file, print andcommunications services for computers connected via a network of both 10 Base-T (UTP orunshielded twisted pair cables) and 10 Base-2 (ThinLan or 50-ohm coax cables). A 10 Base–2 network becomes unreliable when it grows past ten computers and in addition, the 10Base-2 standard is obsolete and has been replaced by 10 or 100 Base-T standard. Thenetwork cabling is currently being upgraded to 10/100 Base-T. The 10 and 100 are thetheoretical speed of the network in Mbps (megabits per second).
The server named INGIMEA and the networked computers and printers in MNRDHeadquarters are a domain named MNRDNET.
The networked computers are also named with a unique name that identifies the group towhich they belong and are appended with sequential numbers. Example: FLEU-5.
The list of computers by group when preparing this report is included as Attachment B.
4. USERS AND GROUPSThe username follows the convention of first name followed by last name initial where ausername must be unique within a domain. There are several exceptions to this namingconvention: Administrator who has full control over the entire system; Postmaster - the userwho receives all mail sent from outside the domain when the sender is does not knowindividual users; Webmaster – the user who receives mail regarding the MNRD web site.

2
Both Postmaster and Webmaster are delegation accounts where any mail sent to these“users” is forwarded to specific staffs who are currently JohnnyK, NaomiB, and RimetaT. Inaddition, there is a user for each group named TempXXXX where XXXX is the acronym forthe group as detailed later. This user is for temporary attachments to the units.
It should be noted that the username convention is applied to the e-mail name where everyuser in the MNRDNET domain has a mailbox on the Exchange Server that provides mailwithin the Ministry and an interface to Internet e-mail. The e-mail name of Johnny Kirata istherefore [email protected]. Internet domains are read right to left where the countrydomain for Kiribati is the ISO 2 character code ki, the class of domain is government or govand mnrd that defines the ministry. The mnrd.gov.ki domain was registered in mid 1990’sand is currently managed by Connect.com in Australia.
Each user in a domain must belong to one or more groups where the groups are defined tobest fit the units or sections in the organisation.
In MNRD Headquarters, the following units exist and their corresponding local groups havebeen defined with four character acronyms:
Accounts ACCTAdministration ADMNFisheries Division Tanaea FISHFisheries Licensing and Enforcement FLEUIT Development Unit ITDUMinerals MINUPlanning PLAN
These acronyms will also be used for creating mailing distribution lists for members of eachgroup.
Additional groups include Domain Admins to which Administrator belongs, Domain Users towhich all users except external users belong, Account, Backup and Exchange Operators towhich JohnnyK, NaomiB and RimetaT belong.
The list of users by group when preparing this report is included as Attachment C.
5. DRIVES, FOLDERS AND SHARINGComputers whether they are servers, desktops or notebooks have drives and optionallyfolders and subfolders (formerly called directories and subdirectories). Usual drives are:
A: 3.5” or 1.44MB floppy driveB: 5.25” or 1.2MB floppy drive (obsolete)C: First hard or fixed driveD: CD-ROM drive or second hard or fixed driveE: CD-ROM drive if a second hard drive present
From here on, networked computers that are not servers shall be referred to as CLIENTS.
5.1 Clients
Folders have usually been created on all clients as follows:
C:\Temp Temporary filesC:\Users Individual users - example: C:\Users\MaryT
To enable C:\Temp to be used as a common temporary folder rather than C:\Windows\Tempthat tends to be overlooked and grows without user knowledge, the command lineTEMP=C:\TEMP is required in AUTOEXEC.BAT.
To facilitate multiple users sharing a client computer, there should be a subfolder underC:\Users for every user who regularly users the computer. In addition, the operating system
3
should be set to allow multiple users to share the computer. For Win9x see Start > Settings >Control Panel > Passwords > User Profiles.
In addition, user profiles have been enabled (Start > Control Panel > Passwords > UserProfiles) so that multiple users can logon and use mail though Outlook.
5.2 Server
The server INGIMEA has three physical 9.1GB hard drives connected to an array controllerthat provides a “striped set” or RAID 5 array where if any one drive fails it’s contents arecontained within the remaining operational drives. In the unlikely failure of a single drive inthe array, a spare that has been provided can be installed in place of the failed unit and thenew drive will be automatically be rebuilt from the other two drives. It should be noted thatthe minimum number of drives required for a RAID 5 array is three and the effective totalcapacity of an array of N drives with the capacity of every drive as DGB is (N-1)*D or in thiscase 18.2GB.
The array of physical drives appears as a single logical drive to the operating system anddue to the requirements of NT 4.0 this single logical drive is partitioned into two further logicaldrives as follows:
C: 4GB Operating system and applicationsD: 14GB Users folders
On the D: drive, shared folders have been setup as follows:
DriveMapping
ShareName
Purpose User Permissions
S: Share Shared folders for each group Full Control by groupT: Temp Common folder for temporary storage Full ControlU: Users Folder for each individual user Full Control per userV: App Applications Read onlyW: Data Corporate Data Read only
SHARE is for the sharing of data within each group through a subfolder named as the groupthat is only visible by the members of that group with full control (read, write, create, delete)permissions.
TEMP is set for full control by all users of the domain. It should, as the name implies, beused for temporary storage only as any user can delete the entire contents and theAdministrator will delete the entire contents as regular housekeeping.
USERS includes a folder for each user, named with that user’s name and visible to only thatuser who has full control within that folder.
APP is read only with subfolders containing applications or products that can be installed ona client. The Administrator controls the contents of this share.
DATA is read only with subfolders containing Ministry or corporate or reference data. TheAdministrator controls the contents of this share.
It should be noted that the server drives are not visible to the clients, only the shared folders.
5.3 Printers
Printers connected to a client can be shared and optionally restricted to specified usersand/or groups. Printers with a network port can be connected anywhere on the network andshared as above where a networked printer appears connected to the server when viewedthrough Network Neighbourhood.
The current range of printers available on the network is as follows.

4
Printer Connected to Seen as Win 9x Driver
HP LaserJet 5Si Ingimea \\ingimea\hplj5d HP Laserjet 4SiHP LaserJet 4 Plus Ingimea \\ingimea\hplj4 HP Laserjet 4HP LaserJet 5P ADMIN-5 \\Admin-5\hplj5p HP Laserjet 5P
The HP Laserjet 5Si is a full duplex printer and duplex printing can be enabled by selectingProperties from the Print window before pressing the OK button.
Printers can be deleted and installed by users from Start > Settings > Printers. If problemsare experienced in printing to a shared printer, first check that the printer is powered on,connected to the network or client that is itself powered on and that the network isoperational. A simple test to determine if the network is operational is to copy a file to T: anddelete it.
6. SERVER INSTALLATIONThis section details setup of hardware and installation of the server software.
6.1 Equipment List
The equipment purchased by MNRD, SOPAC pre visit and SOPAC post arrival is detailed asfollows.
6.1.1 Equipment purchased by MNRD
MNRD purchased equipment to setup LAN – WAN as follows:
1 only Compaq Proliant 800 server with 64MB RAM installedCompaq SmartStart and Support CD 4.10Compaq Management CD 4.10
1 only 4.3GB Wide Ultra2 SCSI drive1 only 1KVA UPS1 only 15” monitor1 only Additional 64MB RAM module1 only DDS-2 DAT internal tape drive1 only USR 56k external modem2 only Box of 5 DDS-2 120 metre tape cartridges (4/8GB)1 only Windows NT Server 4.0 (includes Service Pack 4.0 and Option Pack)1 only Exchange Server 5.5 (includes Outlook 97 and Visual Interdev)1 only Proxy Server 2.01 only ARCserve 6.5 Enterprise Edition for Windows NT1 only ARCserve Backup Agent 2.0 for Microsoft Exchange Server
6.1.2 Equipment purchased by SOPAC pre visit
Additional equipment was needed to deploy a functional server and was purchased bySOPAC with MNRD endorsement:
1 only Smart Array 221 ControllerCompaq SmartStart and Support CD 4.23
4 only 9.1GB Wide Ultra2 SCSI drive1 only Digiboard 4 port PCI card and cables.8 only USR 56k external modems2 only Power board with spike suppression
In addition the following CDs were cut.1 only Compaq SmartStart and Support CD 4.23 *1 only Compaq Management 4.23
5
1 only Windows NT Service Pack 4.0 *1 only Windows NT Option Pack *1 pnly Exchange Server 5.5 *1 only Exchange Server 5.5 Service Pack 21 only MapInfo Professional 5.51 only MapBasic 5.51 only Vertical Mapper 2.5 + Surfer 6.01 only Adobe Exchange, Reader, NT PDF Writer1 only KI Utilities #11 only KI Utilities #2
* not left at MNRD as originals already available.
6.1.3 Equipment purchased by SOPAC post arrival
After arrival it was found that additional equipment was needed to provide a functionalserver:
1 only 8 port 10-BaseT hub with 10-Base2 connector1 only SCSI ribbon cable with 78pin connectors4 only DDS-2 120 metre tape cartridges (4/8GB)1 only DDS tape cleaner
6.2 Hardware setup
The Compaq Proliant 800 was unpacked and tested by power on. The extra 64MB RAMmodule installed together with Smart Array 221 Controller and three of the four 9.1GB harddrives. The drives were installed in the three leftmost bays (as viewed from front) of the fourvertical bays at the base of the server box. The IDs were set as 0, 1 and 2 from left to right.The fourth 9.1GB drive is a spare.
This provides a RAID 5 or striped disk set where if one drive fails, the other three willcontinue operation until the failed unit is replaced. The effective capacity therefore of three9.1GB drives in a RAID 5 array is approximately 18GB.
The 4.3GB drive was not used as it has inadequate capacity to participate in an array.
It was noted that there was only one SCSI internal cable that had to be removed from theintegrated SCSI controller and fitted to the Smart Array 221 Controller card. The only deviceson this card can be drives whether they are internal or external where an additional boxwould be required in the case of external drives being added.
The internal SCSI DAT drive could not be fitted, as there was only one internal cable and anadditional cable had to be obtained from SOPAC.
The server was connected to the network using cables supplied by SOPAC and a 8 port hubborrowed from Ministry of Finance.
6.2.1 Compaq Tape Drive
The SCSI cable from the upper integrated SCSI bus connector was removed for connectionto the Smart Array Controller.
The terminator on the lower integrated SCSI bus connector was moved to the upperconnector.
The tape drive was inspected and it was noted that the ID had been set to 6. The drive wasinstalled and connected to lower integrated SCSI bus connector.
The unit was powered up and the tape drive discovered at ID 6.
At Control Panel Tape Drives was selected and tape drive detected by NT as HP C1532A.
NT 4.0 CD inserted and D\i386 folder changed to E:\i386.

6
Driver loaded and CD removed.
Service Pack 4.0 CD inserted and applied from left pane.
Reboot and test Programs > Administrative Tools > Backup
6.2.2 Digi AccelePort
The Digi AccelePort 4r 920 PCI board was installed and cables connected.
Power up and insert Digi CD.
Follow instructions that require Control Panel > Network > Adapter > Add > Have Disk.
Point to e:\Win_NT\i386 and select correct model.
COM3, 4, 5, 6 installed.
To inspect Control Panel > Network > Adapter > Digi 4r 920 (PCI) Adapter > Properties
6.2.3 UPS
1 KVA UPS connected to server and monitor.
Compaq Management Release 4.23 CD inserted.
Compaq Insight Manager selected
Select both Compaq Insight Manager 4.23 and Microsoft Systems Management ServerLaunch Support
Could not locate SMS files as SMS not installed. SMS needs Microsoft SQL Server.
Compaq Insight Manager needed before Power Management Software 1.2B installed fromCD.
Automated shutdown therefore not available.
6.3 Windows NT 4.0 Server
Insert Compaq Mangement CD 4.23. This CD was cut by SOPAC as it is a later version than4.10 that shipped with the server purchased by MNRD approximately one year ago.
The server was booted from this CD and the auto configuration checked all hardware andwrote to BIOS.
Insert Compaq SmartStart and Support CD 4.23. This CD was cut by SOPAC as it is a laterversion than 4.10 that shipped with the server purchased by MNRD approximately one yearago.
The server was booted from this CD and the boot partition set as 4GB max, NTFS. Note thatthe C: drive will be used for operating system and product software while the D: partition willbe used for MNRD data.
Licensing mode set as per server with 500 users.
Set as BDC (Backup Domain Controller). The existing server BAKOA was connected to thenetwork an operational and set as PDC (Primary Domain Controller).
Insight Management Agents installed. SNMP disabled.
Profile written to floppy.
Auto reboot.
Create and format partition as FAT 4GB and install drivers.
Insert Compaq Insight Management CD and copy files to partition.
Insert Compaq SmartStart and Support CD and copy files to partition.
7
Insert NT Server 4.0 CD.
Auto reboot into NT Build 1381 SP 1.
NT unpacks.
Auto reboot into NT Build 1381 SP 1.
Chkdsk runs and partition converted to NTFS.
Auto reboot into NT Build 1381 SP 1.
Windows NT Setup
Name: MNRD
Organisation: Government of the Republic of Kiribati
Enter CD key
Computer Name: INGIMEA
Wired to network: Yes
IIS: Yes
Search adapters:
found Compaq Netelligent 10/100 TX Embedded UTP/AUI Port 1.
Select TCP/IP and NetBEUI
Select Services:
Microsoft DHCP Server
Microsoft DNS Server
Network Monitor Tools and Agent
Remote Access Server (RAS)
Windows Internet Name Service (WINS)
DHCP Client? NO!
SNMP
Contact: [email protected]
IP Internal Address 192.168.0.1
Mask: 255.255.255.0
No default gateway
DNS host name: INGIMEA
Domain: mnrd.gov.ki
Search: 192.168.0.1
Suffix: mnrd.gov.ki
WINS Primary 192.168.0.1
WINS Secondary 192.168.0.1
Enable DNS: Yes
Enable LMHOSTS: Yes
DHCP Relay: Routing Disable
Reboot as BDC.
Computer Name: INGIMEA

8
Domain: MNRD
Administrator name: Administrator with Password as used for BAKOA
This allows BDC to be created only by users who know password of PDC.
First real reboot.
Install SP4
Start > Programs > Administrative Tools (Common) > Disk Administrator
Set Drive D as NTFS and remainder of logical space or 13.3GB
Start > Settings > Control Panel
Date/Time
Date & Time: ensure correct
Time Zone: Fiji, Kamchatka, Marshall Is.
Regional SettingsRegional Settings: English (Australian}Date > Short date style: m/d/yyyy
6.3.1 WINS Manager
Resolves computer names to IP Addresses. Used by TCP/IP to add computer names todomain name.
Start > Programs > Administrative Tools (Common) > WINS Manager
Add server 192.168.0.1
6.3.2 DHCP Manager
Provides Dynamic IP Addresses.
Start > Programs > Administrative Tools (Common) > DHCP Manager
Add Server 192.168.0.1
Create scope 192.160.0.1 --- 192.168.0.254
Set Option Configuration:
003 Router --- 192.168.0.1006 DNS Servers --- 192.168.0.1015 Domain Name --- mnrd.gov.ki044 WINS/NBNS Servers --- 192.168.0.1046 WINS/NBT Node Type --- 0x8
Set range of excluded addresses:
192.168.0.1192.168.0.100 – 192.168.0.110
Set Reservation:
192.168.0.111 – HP LaserJet 5 Duplex – MAC address 0060b04575a1
6.3.3 DNS Manager
Start > Programs > Administrative Tools (Common) > DNS Manager
New Server 192.168.0.1New Zone mnrd.gov.kiDNS > Update data filesView > RefreshThe following information displayed in right pane:

9
mnrd.gov.ki NS ingimea.mnrd.gov.ki.mnrd.gov.ki SOA ingimea.mnrd.gov.ki., administrator.mnrd.gov.ki.ingimea A 192.168.0.1
Right click on mnrd.gov.ki in left pane and select add two CNAME recordsAdd www and mail to be aliases of ingimea.mnrd.gov.ki.Note trailing periods.
Click on server and add new zone.Select PrimaryEnter 0.168.192.in-addr.arpa in Zone nameThis will be duplicated in Zone file field with .dns appended.Press NextShould see following information in right pane:0.168.192.in-addr.arpa NS ingimea.mnrd.gov.ki.0.168.192.in-addr.arpa SOA ingimea.mnrd.gov.ki., administrator.mnrd.gov.ki.
Add PTR record in the format:192.168.0.1 PTR ingimea.mnrd.gov.ki.
Again note trailing period in records.
DNS window for each zone as follows:
6.4 Migration
Network working perfectly.
Setup a client and check that it can see both BAKOA and INGIMEA.

10
Problems were discovered where INGIMEA and BAKOA were not properly synchronising asBDC and PDC correctly due to incompatibility between NT 4.0 Server and NT 3.5 Server.This would not be the case if NT 3.5 had been upgraded to 3.51.
Shutting down bother servers and powering up, INGIMEA first should have resulted inINGIMEA promoting itself to PDC and BAKOA demoting itself to BDC. However, BAKOAwho not demote itself.
The accounts database was on INGIMEA and INGIMEA could see BAKOA so all data fromBAKOA C: and D: drive was copied to INGIMEA D: drive under folder Bakoa, a total of963MB.
BAKOA was then shut down permanently as a server and disconnected from the network.
The accounts database was then rationalised as in USERS AND GROUPS.
The shared folders have been setup as follows:
DriveMapping
ShareName
Purpose User Permissions
S: Share Shared folders for each group Full Control by groupT: Temp Common folder for temporary storage Full ControlU: Users Folder for each individual user Full Control per userV: App Applications Read onlyW: Data Corporate Data Read onlySHARE is set as Sharing Permissions for Domain Admins and Domain Users to Full Control.At Security Permissions the settings are Domain Admins with Full Control and Domain Userswith Read. There is a subfolder under SHARE for each group where Security Permissionshave Domain Admins and the group with Full Control. Therefore the only users, other thanmembers of Domain Admins, who can access these subfolders are the members of thegroup.
TEMP is set as Sharing Permissions for Domain Admins and Domain Users to Full Control.At Security Permissions the settings are Domain Admins with Full Control and Domain Userswith Full Control.
USERS is set as Sharing Permissions for Domain Admins and Domain Users to Full Control.At Security Permissions the settings are Domain Admins with Full Control and Domain Userswith List. Each user has a folder under USERS that has Security Permissions set as FullControl for both Domain Admins and the individual user.
APP is set as Sharing Permissions for Domain Admins and Domain Users to Full Control. AtSecurity Permissions the settings are Domain Admins with Full Control and Domain Userswith Read.
DATA is set as Sharing Permissions for Domain Admins and Domain Users to Full Control.At Security Permissions the settings are Domain Admins with Full Control and Domain Userswith Read.
6.4.1 Logon Script
Logon script(s) should be stored in the folder C:\WINNT\system32\repl\import\scripts andControl Panel > Server > Replication ran to replicate Logon scripts across servers.
There is a common logon script for MNRDNET as follows:
@echo offrem *******************************************************rem * Name : mnrdnet.batrem * Function: connection script to MNRDNET Domainrem * Author : Information Technology Unitrem * Date : 3 Oct 1999
11
rem * Mods :rem *rem *******************************************************
echo establish drive connectionsecho -Share (S:\)net use s: \\ingimea\shareecho -Temp (T:\)net use t: \\ingimea\tempecho -Users (U:\)net use u: /homeecho -App (V:\)net use v: \\ingimea\appecho -Data (W:\)net use w: \\ingimea\dataecho drive connections established
rem delete McAfee temp foldersif exist c:\progra~1\networ~1\mcafee~1\temp\nul deltree /y
c:\progra~1\networ~1\mcafee~1\temp
echo MNRDNET Time Synchronisation...net time \\ingimea /set /yes > nul
echo Thank you
6.5 Remote Access Server
Provides dial-out and dial-in service.
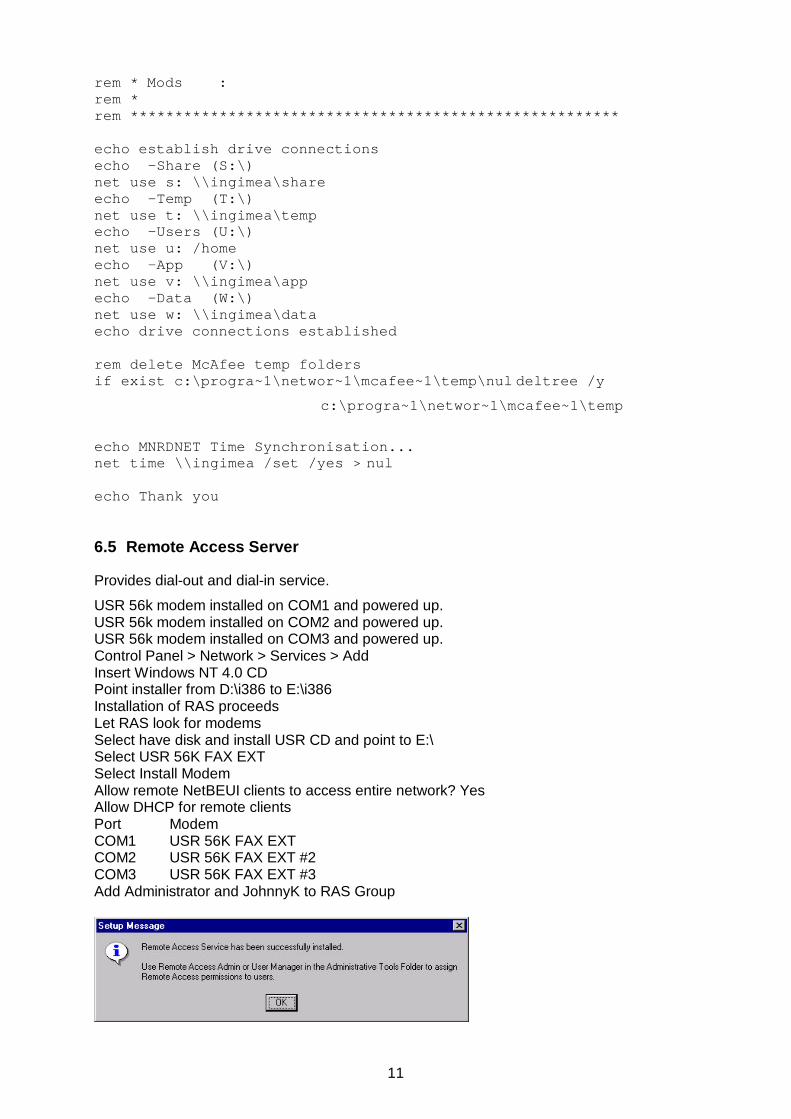
USR 56k modem installed on COM1 and powered up.USR 56k modem installed on COM2 and powered up.USR 56k modem installed on COM3 and powered up.Control Panel > Network > Services > AddInsert Windows NT 4.0 CDPoint installer from D:\i386 to E:\i386Installation of RAS proceedsLet RAS look for modemsSelect have disk and install USR CD and point to E:\Select USR 56K FAX EXTSelect Install ModemAllow remote NetBEUI clients to access entire network? YesAllow DHCP for remote clientsPort ModemCOM1 USR 56K FAX EXTCOM2 USR 56K FAX EXT #2COM3 USR 56K FAX EXT #3Add Administrator and JohnnyK to RAS Group
12
Install Service Pack 4.0 (left pane of install screen) before reboot
Start > Control Panel > Modems
Port ModemCOM1 USR 56K FAX EXTCOM2 USR 56K FAX EXT #2COM3 USR 56K FAX EXT #3
Further setupControl Panel > Network > Services > Remote Access Service
ConfigureDial out and Receive Calls
NetworkEnable NetBEUI and TCP/IPConfigure NetBEU
Allow remote NetBEUI clients to access entire networkConfigure TCP/IP
Allow remote TCP/IP clients to access entire networkUse DHCP to assign remote client TCP/IP addressesAllow remote clients to request a predetermined IP address
6.6 Microsoft Proxy Server 2.0
Install from CDAllow installation folder as C:\MspInstall default optionsInstallation stops WWW servicesSet caching from 100MB on C: to 200MB on DLocal Address Table Configuration. Set internal address range.
From 192.168.0.1 to 192.168.0.254
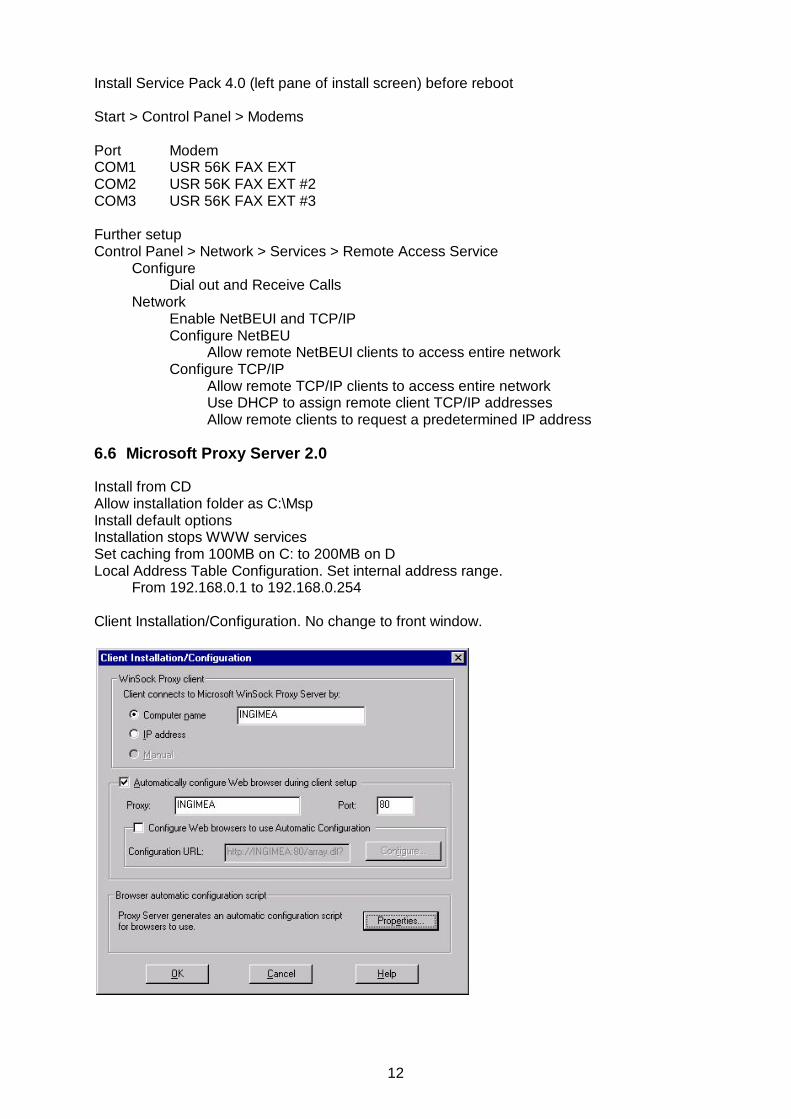
Client Installation/Configuration. No change to front window.

13
Advanced Client Configuration. Only change to add mnrd.gov.ki
Access Control. Disable both Access Controls. Can be enabled later.
Successful completion. Microsoft Proxy Server is now listed under Start > Programs.Cache stored under D:\urlcache while the proxy clients under C:\Msp\Clients with Clientswith share name Mspclnt.
Run Microsoft Proxy Server > Microsoft Internet Service Manager.

14
From User Manager for Domains add local group named Web Users and add users fromDomain Admins.
Socks Proxy Service PropertiesService
No changesPermissions
No changesLogging
No changes
WinSock Proxy Service PropertiesService
No changesProtocols
No changesPermissions
No changes (later enable?)Logging
No changes
Web Proxy Service PropertiesService
Auto DialConfiguration
Enable allDialing Hours unrestricted
CredentialsEntry Name: TSKLUser Name: testPassword: test
PermissionsEnable Access ControlProtocol: Grant Access to:FTP Read Web UsersGopherSecure Web UsersWWW Web Users
CachingNo changes
RoutingUse this Http Via header alias for the local router: INGIMEACheck Use Direct Connection
PublishingEnable Web publishingSent to the local web server
LoggingLimit number of log files to 500
WWW Service PropertiesService
No changesDirectories
No changesLogging
No changesAdvanced

15
No changes
Gopher Service PropertiesService
No changesDirectories
No changesLogging
No changesAdvanced
No changes
FTP Service PropertiesService
No changesMessages
No changesDirectories
No changesLogging
No changesAdvanced
No changes
To set up a client computer by using a Web browser1. From a Web browser on the client computer, connect to the installation page on the
server by typing http://Ingimea/Msproxy.2. After the client installation Web page is loaded, follow the on-screen instructions to
run Setup and install client components
To access WWW the following conditions are necessary:
• The user is a member of the group Web Users• The computer has Microsoft Proxy Client installed (see Control Panel)
Web AccessInternet Service Manager
WWW Service PropertiesSet password for IUSR_INGIMEA as iusr_ingimea
User Manager for DomainsAdd user IUSR_INGIMEAPassword same as in Internet Service ManagerPolicies > User Rights > Right: Log on locally > add IUSR_INGIMEA
Test Auto DialOn client
IE5 > Internet Properties > Connections > LAN Settings >Check Use a proxy serverAddress: http://192.168.0.1 port 80Advanced: Use same proxy server for all protocolsExceptions: mnrd.gov.ki
Connect to http://www.tskl.net.ki
The modem should auto dial, connect to tskl and the web page displayed on client.

16
On server check Dial-Up Networking
6.7 Exchange Server 5.5
6.7.1 Pre-Installation Check
1. NT Server 4.0 with Service Pack 3.0 or later Yes2. TCP/IP for Windows NT Yes3. IIS 3.0 + ASP Yes4. Adequate Hardware Yes
6.7.2 Pre-Installation Activities
Create Service Account while logged in as a Domain Admin.Username SVRExchPassword postmaster2000Check User cannot change password and Password never expires
6.7.3 Installation
Load CDSetup Server and ComponentsMicrosoft Exchanger Server 5.5TypicalEnter CD KeyOrganisation and Site
Create a New SiteOrganisation Name: MNRDSite: HQ
Site Services AccountBrowse to SVRExchEnter password

17
Installation takes several minutes. Run optimiser
Insert Exchange Service Pack 2.0 CDNavigate to \Server\Eng\Server\Setup\i386 and run Update.exeInstallation is complete.
Programs > Microsoft Exchange > Microsoft Exchange AdministratorConnect to Ingimea
Select Connections > File > New Other > Internet Mail ServiceUse WizardSee slides
Configuration > Servers > Ingimea > Private Information Store > PropertiesIssue Warning 60MProhibit Sent 75M
Internet Mail ServiceAddressing
Type: SMTPAddress: *Cost: 1Scope: Organisation

18
Connected SitesOrganisation: MNRDSite: FisheriesRouting address: SMTP:fisheries.mnrd.gov.kiCost: 1
ConnectionsInbound and outboundForward all messages to host 203.41.41.194Dial Using TSKLE-mail Domain
E-mail Domain: fisheries.mnrd.gov.kiDeliver Using: 192.168.0.100Queue messages using ETRN
Delivery RestrictionsNo changes
Diagnostics LoggingMinimum
Dial Up ConnectionsMail Retrieval
Enable Receive mail using ETRNEnable Send ETRN to specified host instead of outbound mail hostETRN Host 194.168.0.35
Dial Every 4 hrsGeneral
Computer Name: IngimeaMessage Size - Max: 1M
Internet MailAdministrators Mailbox: AdministratorsAdvanced Options
Uncheck Disable out of office replyUncheck Disable Automatic Replies
Email Domain..Empty
RoutingReroute incoming SMTPRoute
mnrd.gov.ki inboundQueues
No change
Control Panel > Services > Stop and Start Internet Mail
Add users and link to their Primary NT AccountAdministrator added by defaultJohhny KirataNaomi B Atauea
Add Distribution listMNRD Postmaster alias postmaster
Add Johnny KirataAdd Naomi Atauea
6.7.4 Licenses
Start > Control Panel > Licensing
Set Per Server 500 concurrent connections

19
6.7.5 Connecting to the Internet
Exchange Server has been set to dial-up TSKL every 4 hours (see Exchange Server >Connections Internet Mail Service > Dial-up connections) using the TSKL RAS PhonebookEntry. This triggers TSKL entry, account and password in Proxy Server > Internet ServiceManager > Properties of WWW Proxy Service > Service > Auto Dial > Credentials.Additionally, an Internet dial-up connection is attempted by Proxy Server whenever a requestis received from a client for an object from Web Proxy, WinSock Proxy or Socks Proxyservices.
6.8 MNRD WEB
FrontPage 97 installed on Ingimea, Front Page Extensions added
Tools > Permissions > add usersSet permissions by users
6.9 Backup
6.9.1 Install ARCserve product
Insert ARCserve CD in drive.
Install and select Complete Installation.
Name: MNRD, Organisation: Government of the Republic of Kiribati
Enter CD Key ICKTL-L14EM-XK9LC-R7CYE
Leave Home directories on C:
Standard ARCserve Database
Leave Username as Administrator
Set ARCserve services to start automatically after restart
ARCserve services now start
Successful completion message
Install Unicentre TNG Framework: Yes
6.9.2 Install Backup Agent for Exchange
The Agent allows backup of:
Directory database
Information Store database
Individual Mailboxes
Public Folders

20
Prepare Exchange Server for the Backup Agent
See Backup Agent User Guide
Account and mailbox Name: SVREXDB
Password: postmaster2000
Insert Backup Agent CD in drive.
CD Key: ICWTL-L14XM-XK9IM-R7ECG
During Authentication using Account/Mailbox/Password/Domain names received failuremessage EC1314
Solution was to logon to server as SVREXDB and Authentication worked
6.9.3 Test backup
Insert tape in drive and wait until initialised.
Launch ARCserver Manager.
Select Backup Wizard and Classic Quick Access
Select Server as INGIMEA
Select Source as My Computer with Exchange
Select Source and right click on media
Format and name media FULL TAPE1 and repeat until TAPE 5
Reinsert TAPE 1
Check Compression enabled
Select Run Schedule Button and OK
Backup now starts
6.10 Old Server
The data and accounts on BAKOA were fully transferred to INGIMEA and it was confirmedthat BAKOA could not participate in MNRDNET domain as it could not be demoted to a BDCdue to incompatibly of the software as Windows NT 4.0 is compatible with 3.51 but not 3.5.In addition, the processor was inadequate at 486/66, the memory was marginal at 32MB andthe storage was inadequate with two hard drives of 440MB and 1.0GB that were connectedto a slow Adaptec 1740 SCSI controller. There was also no CD-ROM installed.
The first step was to investigate whether Windows NT 4.0 Server could be installed afterfitting a Panasonic CD-ROM drive connected to the ISA port. Windows NT 4.0 Server couldnot find that CD-ROM and it was decided to abandon the installation.
The next step was to change the SCSI drives to enable the computer to boot from the Fujitsu1.0GB SCSI. It was simple to set the Fujitsu as ID 0 but there were 10 jumper pins on the HP(Seagate?) SCSI drive with two jumpers and no logical combination of setting would enablethe HP drive to be seen as ID 1, 2, etc. The 440MB SCSI was removed and the 1GBformatted as FAT16.
An attempt was made to install Win98 by copying CD image to C:\Win98 via cable usingFastLynx but this operating system refused to install on processor earlier than Pentium.Win95 was then copied to the hard drive and successfully installed. The CD-ROM was againnot recognised and therefore removed. Win95 could not change settings on the videoadapter that will require replacing with a low cost ISA adapter if resolutions greater that 640 x480 are needed.

21
7. CLIENT INSTALLATION
A client is a desktop or notebook computer that will be connected to a domain with one ormore NT Servers.
Software can be installed from disks, CD, local drive and server.
• Some software will only install from local disk. Ex: MapInfo 3.0
• Some software Windows 9x should be installed or components added from either localdrive, CD of server. In the case where the operating system was installed from the localdrive the installation program will automatically find components. Ex: C:\Win95, C:\Win98or C:\Windpws\Options\Cabs. There is also a CD image of the Win95 and Win98 foldersunder V:\System\Win95 and Win98.
• The majority of software products that will be used in MNRD can be installed from theserver where the products are usually stored as CD images.
• Any software stored as a CD image on the sever that requires a serial number during theinstallation process will have a file named Serial.txt in the root directory of the product onthe server.
If Windows 95 or 98 already installed and operational you can bypass next section but youshould check Control Panel settings in First Steps.
7.1 Install Win9x
It is assumed that the computer has a DOS operating system and may be able to read alocal CD drive.
Create and load the C:\Win9x (x = 5 or 8) folder from the CD or from another computer viacable where both are running FastLynx. FastLynx is stored under V:\Utl\Fx20 and can becopied to and run from a floppy disk.
Create a bootable floppy from a computer with the target operating system (ex: Win95 or Win98). Copy C:\Windows\Command\Sys.exe to floppy.
Boot the computer with the floppy disk and transfer correct DOS operating system to thatcomputer by running SYS (Ex: A:\>SYS C)
Navigate to C:\Win9x and run Setup.exe
Choose custom installation and during instalation ensure region/language set to EnglishAustralian.
If you subsequently delete C:\Win9x folder as may be the case for a computer withinadequate disk space then you will need to either connect to V:\System\Win9x folder orreload C:\Win9x if you cannot access the network.
7.2 First steps
Start > Settings > Control Panel
Date/Time
Date & Time: ensure correct
Time Zone: Fiji, Kamchatka, Marshall Is.
Passwords
User Profiles
Select Users can customise their preferences …
UNCHECK BOTH OPTIONS UNDER USER PROFILE SETTINGS

22
The above necessary to allow multiple users to use computer with Outlook
But it is important that users do not transfer their desktop settings, etc..
from computer to computer
Regional SettingsRegional Settings: English (Australian}Date > Short date style: m/d/yyyy
Enable a common location for temporary files by creating C:\Temp
Run SysEdit or any text editor of your choice.
Add the command line in Autoexec.bat
SET TEMP=C:\TEMP
Navigate to C:\Windows\Temporary Files folder and delete all files
Delete any temp files in root directory.
Create folder C:\Users and folder(s) for each user. Ex: C:\Users\MaryT
If My Documents icon exists on Desktop edit properties and update Target to C:\Users
If Microsoft Office products already installed, set relevant products to point to C:\Users folderas location for user’s files. See section Microsoft Office 97.
Navigate to C:\Windows\SendTo and create shortcut to Notepad
7.3 Networking
Install network interface card. Either an ISA or PCI card in a desktop (NIC) or an Ethernet PCCard in a notebook. These PC Cards were formerly referred to as PCMCIA cards.
Power on computer and allow Windows 9x to discover card.
Note that the Intel EtherExpress 16 ISA cards require an installation floppy disk where thereis the source file under \\Ingimea\App\System\Drivers\NIC\Intel EtherExpress 16. In additionthe command NET START is required in Autoexec.bat file.
Start > Control Panel > NetworkingIdentification
Computer name: <group name>-<number>Example: FLEU-3Note that this must be unique
Workgroup: MNRDNETDescription: <make or model – OS – User>
Example: Compaq PIII500 – NT4 – MaryTNote that this information visible in Network Neighbourhood
View > DetailsConfiguration
Add Client for Microsoft NetworksAdd NetBEUIAdd TCP/IPRemove IPX/SPXAdd File and Print Sharing if user needs to share folders or printer
Client for Microsoft NetworksCheck Logon to Windows NT domainWindows NT domain: MNRDNETSelect Logon and restore network connections
NetBEUI for NIC or PC CardAdvanced
23
Check Set the protocol to be the default protocoltTCP/IP for NIC or PC Card
AdvancedSet Protocol as default should be unchecked
BindingsClient for Microsoft Network should be checked
DNS ConfigurationSelect Enable DNSHost: Computer name from IdentificationDomain: mnrd.gov.kiDomain Suffix Search Order: mnrd.gov.ki
GatewayNo entry
IP AddressSelect Obtain IP address automatically
WINS ConfigurationUse DHCP for WINS Resolution should be selected
Access ControlSelect Share-level access control
To give all users connected to network access to local resourcesSelect User-level access control
To give users/groups connected to domain access to local resources
The computer should be rebooted and a login screen will appear briefly.
7.4 Network Associates McAfee VirusScan
There is an estimated 300 to 500 new viruses created and released every month where theintroduction of Internet in the pacific region has resulted in new viruses arriving as rapidly asin the developed countries.
This requires that System Administrators must be especially vigilant in preventativemeasures that require deploying recognised anti-virus software as well keeping that softwareup to date. This is particularly true where an organisation is networked and one or more ofthe computers has access to the Internet.
Typical anti-virus software is released as an application or engine that is upgraded severaltimes a year and data, reference or signature files that is updated several times per month. Incertain cases when a particularly damaging virus is discovered special patch files arereleased with hours of detection and analysis.
Network Associates McAfee VirusScan is no exception and releases versions for Windowand Mac where the Windows versions are for NT, Win9x and Win3x. The Windows versionsare released as an engine that is updated several times a year, updated Datfiles that arereleased usually weekly together with SuperDat that include Datfile and updates to enginethat is called an upgrade. The engines are peculiar to the type of operating system while forWindows, the datfiles are common.
This document is restricted to Win9x as Win3x is considered obsolete and WinNTWorkstation has not yet been deployed.
As previously noted, the engine is upgraded while the Datfiles are updated. The mostfundamental step is to determine what engine and Datfile are installed. Right click on theMcAfee VShield icon in the system tray and left click about. It you do not see this icon thenMcAfee VirusScan may not have been installed.
McAfee VirusScan ships with a Console that allows for automatic upgrade and update andthese have both been tested and deployed.
7.4.1 New install

24
A new installation is carried out on a system where McAfee VirusScan has never beeninstalled or has been removed. The steps are as follows.
• Navigate to \\Ingimea\App\Utl\McAfee• Navigate to latest engine. In this case the Win9x latest folder.• Launch Setup.exe - the Setup program is launched.• Use Next to progress through installation.• Select Typical• The application will be installed and a virus check runs on critical areas.• The user will be prompted to create an emergency repair disk. This should be cancelled
and this operation run later as only one Emergency Repair Disk is required for each unit.• Allow the installer to reboot.• Check the version of engine and datfile as previously described from McAfee VShield
icon in the system tray. Note that a new engine does not usually ship with the latestdatfile so an update is needed.
7.4.2 Updating the Datfiles
This procedure schedules the computer to check daily except Saturday and Sunday at 12noon plus or minus 30 minutes for a new version and if a newer version is found to performan automatic update after which the user will be advised to reboot.
• Open McAfee VirusScan Scheduler in system tray• Open AutoUpdate• Open Configure• Edit Update site Network Associates• Change Site Name to MNRDNET• Check Copy from local network computer• Open Browse• Navigate to \\Ingimea\App\Utl\McAfee\Datfiles\Latest\Zip• Press Ok and Ok• Select Schedule tab• Check Enable, Check Daily, Uncheck Saturday and Sunday, Set time to 12:00, Check
Randomise within an hour• Apply• Select Program tab• Test by Run Now• The AutoUpdate window will open and the datfiles will update if newer.• Allow a reboot
7.4.3 Upgrading the Datfiles and engine
This procedure schedules the computer to check daily except Saturday and Sunday at 12noon plus or minus 30 minutes for a new version and if a newer version is found to performan automatic upgrade after which the user will be advised to reboot.
• Open McAfee VirusScan Scheduler in system tray• Open AutoUgrade• Open Configure• Add site Network Associates• Change Site Name to MNRDNET• Check Copy from local network computer• Open Browse• Navigate to \\Ingimea\App\Utl\McAfee\Datfiles\SuperDAT• Press Ok and Ok• Select Schedule tab

25
• Check Enable, Check Daily, Uncheck Saturday and Sunday, Set time to 12:00, CheckRandomise within an hour
• Apply• Select Program tab• Test by Run Now• The AutoUgrade window will open and the datfiles will update if newer.• Allow a reboot
7.4.4 Downloading New McAfee SuperDat and Datfiles
It is responsibility of the Administrator to regularly download latest updates and upgrades andstore these in the correct and consistent location to enable updates and upgrades to behandled automatically for the clients where those clients have been configured correctly. Theupdates and upgrades can be downloaded from www.nai.com, www.mcafee.com wherethese are the same site or from http://www.nai.com/asp_set/download/dats/find.asp.
A user can carry this out on the server or a client where the use has write permissions in\\Ingimea\App. The only user is currently Administrator so the downloads should be carriedout on the server for security.
Datfiles• Launch Internet Explorer• Navigate to the download area for Datfiles that is currently
http://www.nai.com/asp_set/download/dats/mcafee_4x.asp• Select Datfiles that are of the format dat-4046 and select site as USA West Coast.• From browser File Download windows select save to disk.• Use location as folder \\Ingimea\App\Utl\McAfee\Datfiles\4xxx\Zip that is created at
download time where xxx is sequential number as above.• Unzip to \\Ingimea\App\McAfee\Datfiles\4xxx and if unzip successful delete contents of
\\Ingimea\App\McAfee\Datfiles\Latest and copy entire contents of ..\4xxx to that folder.• AutoUpdate should now perform required action at next scheduled time.
SuperDat files• Launch Internet Explorer• Navigate to the download area for SuperDat files that is currently
http://www.nai.com/asp_set/download/dats/superdat.asp• Select SuperDat files that are of the format sdat4046.exe and select site as USA West
Coast.• From browser File Download windows select save to disk.• Use location as folder \\Ingimea\App\Utl\McAfee\Datfiles\SuperDAT.• When download complete delete old SuperDat and Setup.exe file and make copy of new
SuperDat.exe as Setup.exe.• Do not delete any of the other files in this folder as they are required by AutoUpgrade.• AutoUpgrade should now perform required action at next scheduled time.
7.5 Printers
There are both local and networked printers.
Start > Settings > PrintersAdd local or relevant network printers where network printers include:
Actual Printer Host Use driverHP Laserjet 4 Plus INGIMEA HP Laserjet 4HP Laserjet 5Si (Duplex) INGIMEA HP Laserjet 4SiHP Laserjet 5P PLAN-1 HP Laserjet 5P
Set relevant printer as default.

26
Note it is necessary to install at least one printer before installing Microsoft Office to enableproducts to understand page size.
7.6 Microsoft Office 97
The core application suite that includes Word, Excel, PowerPoint, Access and Outlook.Install from server.
Navigate to V:\Microsoft Office\Office 97 ProOpen serial.txt for CD KeyRun Setup.exeEnter CD keySelect Custom InstallationUnselect Microsoft BinderIn Tools select Equation Editor and Photo EditorWhen prompted for language select Australian A4
Further customisation.
Word 97Tools > Options
General > 9 entries and measurement CentimetresFile Locations > Documents C:\Users
Customise by copying Normal.dot from V:\New Client to C:\Program Files\MicrosoftOffice\Templates.
If you elect to customise your Normal.dot manually, close all Word documents and openNormal.dot from folder above. These are recommended settings only.
Page Setup:Paper Size A4Margins
Top/Bottom 2.5 cmLeft/Right 3 cmHeader/Footer 1 cm
Format > Tabs > Clear All, Stops 1 cmFormat > Style > Normal > Modify
Format > Font > Arial Regular 11Format > Paragraph > JustifiedFormat > Language > English (United Kingdom)
Save Template
Excel 97Tools > Options > General > Default file location: C:\Users
PowerPoint 97Tools > Options > Advanced > Default file location: C:\Users
7.7 Outlook 98
Client for Exchange Server having the flexibility to connect to different servers by directconnect (LAN) or dial-up (WAN) and to have several independent users.
Note that all folders (Inbox, Sent Mail, etc) are stored in Exchange Server on the server.
However, if a computer is used both locally and remotely, as in the case of a notebook withmodem, Outlook can be set to keep a local copy of folders on the server that can beaccessed offline. All or selected offline folders can be synchronised both locally and remotely

27
where it is recommended that synchronisation be carried out locally before a user removes anotebook from the network for performance considerations.
Navigate to V:\Microsoft Office\Outlook 98\EN\OL98Launch Setup.exeUser Information
User name: MaryTOrganisation: MNRD
Installation Option: Standard InstallationE-mail Upgrade Option: Microsoft ExchangeComputer restarts after installation
Create shortcut in task bar to right of Start button if this area available
Right click on Outlook in desktop and select PropertiesCopy base profile to user name (ex: MaryT)Set user name as startup profileDelete base profile (Microsoft Outlook)Select user name propertiesDelete Personal FoldersAdd Microsoft Exchange Server and Outlook Address BookSelect properties Microsoft Exchange Server
GeneralMicrosoft Exchange server: IngimeaMailbox: user name (ex: MaryT)Press Check Name. If operation successful server name will be upper case and underlined while mailbox will show display name (ex: Mary Thomas)If computer will be used for both local and remote connection Select Manually control connection state Select Choose the connection type when starting Select Default as Connect with the network
AdvancedIf computer will be used for both local and remote connection Enable Offline use
Dial-Up NetworkingIf computer will be used for both local and remote connection Select Do not dial use existing connection
Remote MailIf computer will be used for both local and remote connection Uncheck Disconnect after connection is finished
Start Outlook for first timeSet as default for mail when promptedIf Office Assistant appears uncheck Show these choices at startupView > Select Folder ListTools > Options
Mail Services > Select Prompt for profile to be used if more than one user sharescomputer
Mail Format > Send in this message format: Microsoft Outlook Rich TextOther > Select Empty the Deleted Items folder up exiting
7.8 Internet Explorer
For access Internet and Intranet.Use IE 4.01 or IE 5.0 where latter preferred for Pentium and above computers.Install IE 4.01 or IE 5.0 from V:\Utl\Internet\Browsers\IE401 or IE500
IE 5.0Navigate to V:\Utl\Internet\Browsers\IE500

28
Run ie.exeSelect CustomisableSelect MinimalAdd Web FoldersAdd NetMeeting, Outlook Express and Chat 2.5 for notebook computersInternet Options
General Home Page > Address www.tskl.net.ki(replace with www.mnrd,gov.ki when created)
ConnectionsLAN Settings
Proxy ServerSelect Use a proxy serverAddress: http://192.168.0.1Select Bypass proxy server for local addressAdvanced
Select Use same proxy server for all protocolsDo not use proxy for www.mnrd.gov.net; siw.mnrd.gov.ki
7.9 Adobe Acrobat Reader 3.02
The essential product for reading PDF (PostScript Document Format) files.Navigate to V:\Adobe\Templates
7.10 Adobe Acrobat 3.0
The essential product for creating PDF (PostScript Document Format) files.
A family of PDF (PostScript Document Format) file tools that include• Acrobat Exchange 3.0• Acrobat Capture and Scan Plug-ins• Acrobat Distiller 3.0• Acrobat PDFWriter 3.0• Acrobat Catalog 3.0
The most used is Acrobat PDFWriter that allows the creation of PDF files through a printerdriver. Users can therefore create secure PDF files from Word, Excel etc..
7.11 MapInfo Professional 5.5
Recommended GIS or Desktop Mapping product.Navigate to V:\Mapping\MapInfo 5.5Run Setup32.exeSelect MapInfo ProfessionalEnter period for Serial number
Optionally install free dataTutorial Maps for Australia 1.8M *Tutorial Maps for Australia 10M *Australia Maps 2.6MCanada Maps 0.7MChina Maps 2M
* InstalledNeed to point Installer to V:\Mapping\MapInfo 5.5\mapinfo\data folder
Online reference includes the MapInfo Reference Manual in PDF format. The Mi_ref.pdf filecan be copied from V:\Mapping\MapInfo 5.5\pdf_docs to C:\Program
29
Files\MapInfo\PDF_docs folder. A shortcut to this PDF file can be saved in MapInfo ProgramGroup.
7.12 MapBasic 5.5
Recommended product for creating customised MapInfo based applications.Navigate to V:\Mapping\MapBasic 5.5\disk 1Run Setup.exeEnter period for Serial number
7.13 Vertical Mapper 2.5
Companion product for MapinfoNavigate to V:\Mapping\Vertical Mapper 5.5
7.14 Utilities
Utilities are added to assist users as well as support personnel.
LapLink 95Transfer files with long file names between computers via direct cable, LAN or WAN
FastLynx 2.0Transfer files with 8.3 file names only between computers via direct cable.Store in C:\Tools\FastLynx
7.15 FMIS
FMIS is a Fisheries Management Information System written in FoxPro and run from a clientwith FoxPro 2.5 against programs and data stored on a server.
FMIS was copied again under D:\SHARE\FLEU and the folder FMIS was shared to FLEUgroup to mimic drive mapping required by the program as well as the need to print to aLaserJet printer as “lpt3”. A simple batch file FMIS.BAT was created as follows and storedunder C:\BAT on FLEU-1 client. This batch file also copied underS:\FLEU\FMIS\SYSTEM\FMIS
net use f: \\ingimea\fmisnet use lpt3 \\ingimea\hplj4c:\foxpro25\foxpro.exe f:\system\fmis\mainx.prg -tnet use f: /deletenet use lpt3 /deleteexit
7.15.1 Problems
The exchange rate database (EXCHRATE.DBF and EXCHRATE.CDX index file) couldnot be opened by the program.
The database was damaged and imported into Microsoft Access on a client and exported inFoxpro 2.5 format fixed the error.
Monthly catch data could not be accessed.
The files MCPX.PRG, MCPX.FXP and MCP(x?).DBF files were missing. This is a knownproblem.
30
Logsheet data could not be accessed.
The file LOGS.PRG, LOGS.FXP and associated database could not be found. This is aknown problem.
8. OPERATIONS
8.1 Maintaining Users and Groups
The task of maintaining users and groups can be performed by members of the AccountOperators local group.
The current members are JohnnyK, NaoimiB and RemetaT.
Start > Programs > Administrative Tools (Common) > User Manager for Domains
Old users should be removed that will automatically delete their Exchange mailbox.
New users should by added by copying a appropriate member of the group.
8.2 Maintaining Exchange Server
The task of maintaining Exchange Server can be performed by members of the ExchangeOperators global group.
The current members are JohnnyK, NaoimiB and RemetaT.
Start > Programs > Microsoft Exchange > Microsoft Exchange Administrator
When adding a new user in User Manager for Domains, the Exchange mailbox will be addedduring the process.
8.3 Backup
Read ARCserver for Windows NT manual and perform following:
• Create media pool• Create jobs to be scheduled as follows:
Sunday OffMonday IncrementalTuesday IncrementalWednesday IncrementalThursday IncrementalFriday FullSaturday OffDo not use GFS scheme
8.4 Maintenance of Manuals
There are currently two manuals that are maintained by the System Administrator where thesource of these is stored in U:\Administrator\Manuals in Word 97, Excel 97 and VisioProfessional 5.0 format. They are available under W:\Doc\\Manuals as PDF files that arecreated by installing Adobe Acrobat 3.0 on a Win9x computer or Adobe Printer for NT on aNT computer.

31
9. TroubleshootingThe most common problem is inability to connect to the network where the server fails to runthe logon script after a user enters a valid name and password with the domain asMNRDNET. Note that only the password is case sensitive.
The usual causes of this problem are network cable not connected, network cable improperlyconnected, network cable not connected to hub (UTP cable) or network backbone faulty(coax cable). Note that the network backbone in the case of Thinlan or coax cable must havea 50 ohm terminator at either end of the cable and this can be tested by measuring 25 ohmand any tee connector.
To determine if a computer is connected to the network and the server open WindowsExplorer and the mapped network drives should be visible. Copy a file to the shared Tempfolder and delete that file.
Winipcfg can be used to determine if and what IP address has been allocated by the server.Start > Run and click scroll menu and select or if not found type winipcfg and press OK. Inthe case of a computer that can connected to both a local network and a remote dial-upnetwork (LAN/WAN) where this would usually be a notebook computer, the correct adapterneeds to be selected.
Running Telnet in a similar manner to Winipcfg can test Exchange Server. Connect to theserver on IP address 192.168.0.1 and port 25 to test sending mail via SMPT and port 110 forreading mail via POP3. In both cases the server should respond with a SMTP or POP3message and the user should exit with the quit command.
In MS-DOS Prompt window, ping <ip address>, tracert. route print and arp can be used totest the configuration of the network
The address 127.0.0.0 is the default for any computer and note that the IP address is for thenetwork interface or modem and not the computer itself.
9.1 Ports
The following shows important ports where it is necessary to know these ports for sometests.
Port Number Process Name Description20 FTP-DATA File Transfer Protocol - Data21 FTP File Transfer Protocol - Command23 TELNET Telnet25 SMTP Simple Mail Transfer Protocol80 WWW World Wide Web110 POP3 Post Office Protocol v3
9.2 Clients
On Win9x run Winipcfg to determine IP addresses by adapter. This will show what addressDHCP has allocated to the network adapter. Note that the adapter may need to be selected ifa dial-up network session is being conducted from a computer that is networked to a LAN.
9.3 Clients and server
In Command Window ping <ip address>, tracert and route print assist in diagnosing faults.
The address 127.0.0.0 is the default for any computer and note that the IP address is for thenetwork interface or modem and not the computer itself.
32
Telnet that can be used to connect to the postoffice via SMTP on port 25 for testing sendingof mail and via POP on port 110 for reading mail.
Send a mail with Telnet using TSKL mail server.
Telnet to 203.41.41.194 on port 25
Helo mail server should acknowledgemail from: who you are. Ex: [email protected] to: [email protected] type in data end with Enter period Enterquit
9.4 Server only
9.4.1 ipconfig
U:\Administrator>ipconfig /?Windows NT IP Configuration
usage: ipconfig [/? | /all | /release [adapter] | /renew [adapter]]
/? Display this help message. /all Display full configuration information. /release Release the IP address for the specified adapter. /renew Renew the IP address for the specified adapter.
The default is to display only the IP address, subnet mask and default gatewayfor each adapter bound to TCP/IP.
For Release and Renew, if no adapter name is specified, then the IP addressleases for all adapters bound to TCP/IP will be released or renewed.
ipconfig /all | more
9.4.2 nslookup
The nslookup is an interactive or command line tool for diagnosing the DNS service.The general syntax is:
nslookup [hostname | IP_address]
10. OUTSTANDINGThe following tasks are outstanding and were not carried out either due to time constraints,not possible due to missing hardware or software, or were not necessary at the time ofwriting this manual.
1. Implement password ageing. Recommend every two months.
2. Change passwords for all TempXXXX accounts.
3. Delete folder Bakoa and all subfolders.
4. Installation UPS software and cable to allow graceful shutdown of server in event ofpower failure in excess of useful battery life of UPS. This may require addition of SMSand SQL Server.
5. Web site needs further work that should be carried out before full time connectionestablished.

33
11. MANAGEMENTThere should be a staff member responsible for each particular computer and there shouldbe one staff member, the System Administrator, responsible for the overall management ofthe network.
The staff member responsible for a particular computer should ensure that the equipment isserviceable and clean, the software is operational and up to date and other users shouldacknowledge this responsibility.
The System Administrator should ensure that the network is operational, resource and datasharing is operational and that all-peripheral equipment is accounted for and stored in asecure place. All other staff members should acknowledge this responsibility.
Other staff will be appointed as Accounts Operators and Backup Operators where the formercan add, modify and delete the user’s accounts and set relevant permissions while the lattercan operate the tape backup system.
12. CONTACTSCONNECT.COM Tel: +61 3 9251 3686Melbourne Fax: +61 3 9251 3649Australia E-mail: [email protected] Vasko Stojanovski E-mail: [email protected]
Ian Henderson Tel: +61 8 9241 2414Fax: +61 8 9241 2411E-mail: [email protected]
New Zealand High Commission Tel: +686 21400 John Mills, High Commissioner
Telecom Tuvalu CorporationTuvalu Franck Martin Tel: +688 20009, 20813, 20004, 20001
Telecom Services Kiribati Limited (TSKL) Chris Hamilton, CEO Anetoka, EO Engineering Internet Services Tel: +686 21772 Pinto Katia E-mail: [email protected] Dan Morton E-mail: [email protected]


ATTACHMENT A – MNRD LAN-WAN DIAGRAM
ATTACHMENT B – COMPUTERS BY GROUP
MNRD HQ COMPUTERS
ACCT-1 HP PII350 W95 ACCT all users l l 4.0.3 4045 l l 97 98 l
ADMN-1 Octek P133 W95 EmileS l 4.0.4 4047 l l 97 98 l
ADMN-2 Toshiba 2545CDS W98 KaburoroR l 4.0.3 4045 l l 97 98ADMN-3 Toshiba 420CDT W95 TukabuT l++ 4.0.4 4047 l l 97 98 l
ADMN-4 Compaq 486/66 W95 UtiniaT l l 4.0.3 4047 l l 97 97 l
ADMIN-5 HP PII350 W95 NorahT l l 4.0.3 4045 l l 97 98FLEU-1 HP 5/100 W95 FLEU all users l l l l l 97 98 l
FLEU-2 HP 386/16 W311 TaremonK l+ 4.0FLEU-3 Compaq 486/66 W95 ? l l 97FLEU-4 HP 486/66 W95 TeruruaiA l l 4.0.3 4047 l l l 97 97 l
FLEU-5 HP 486/66 (Bakoa) W95 RimetaT l l 4.0.3 4047 l l l 97 97 l
MINU-1 HP PII350 W95 NaomiB l 4.0.3 4045 l l 97 98MINU-2 Toshiba 4000CDS W98 NaomiB l l 4.0.3 4045 l l 97 98 l
PLAN-1 HP 5/66 W95 BetarimR l l 4.0.3 4045 l l 97 98 l
PLAN-2 HP 486 W95 TempPLAN l l 4.0.3 4046 l l 97 97 lPLAN-3 Compaq P133 W95 TetoaitiT l l 4.0.3 4046 l l 97 98 l
NOTES+ Peer-to-peer only
++ Waiting on tail for Xircom Ethernet PC Card 10 Base-T

ATTACHMENT C – USERS BY GROUP
MNRD HQ ACCOUNTS
Username Full Name Description Login Script Home Folder
Erank Eran Kaitara ACCT - Accounts Clerk mnrdnet.bat \\Ingimea\Users l
TanteaB Tantea Baram ACCT - Accounts Clerk mnrdnet.bat \\Ingimea\Users l
RoobeT Roobe Tekinaiti ACCT - Assistant Accountant mnrdnet.bat \\Ingimea\Users l
TaraiT Tarai Tiare ACCT - Senior Accountant mnrdnet.bat \\Ingimea\Users l
TeaoT Teao Teod ACCT - Senior Accounts Clerk mnrdnet.bat \\Ingimea\Users l
TempACCT TempACCT ACCT - Temp User mnrdnet.bat \\Ingimea\Users l
UtiniaT Utinia Teunroko ADMN - Assistant Secretary mnrdnet.bat \\Ingimea\Users lTukabuT Tukabu Teroroko ADMN - Deputy Secretary mnrdnet.bat \\Ingimea\Users l
EmileS Emile Schutz ADMN - Minister mnrdnet.bat \\Ingimea\Users l
KaburoroR Kaburoro Ruaia ADMN - Permanent Secretary mnrdnet.bat \\Ingimea\Users lnoraht Norah Talanga ADMN - Personal Assistant mnrdnet.bat \\Ingimea\Users l
TempADMN TempADMN ADMN - Temp User mnrdnet.bat \\Ingimea\Users l
BwanonoT Bwanono Toawea ADMN - Typist mnrdnet.bat \\Ingimea\Users lAdministrator O Great One Built-in account for administering the computer/domain none \\Ingimea\Users l
Guest Guest Built-in account for guest access to the computer/domain noneJamesU James Uan FISH - Fisheries Training Officer mnrdnet.bat \\Ingimea\UsersRibA Ribanatake Awira FISH - Fisheries Assessment Officer mnrdnet.bat \\Ingimea\UsersTempFISH TempFISH FISH - Temp User mnrdnet.bat \\Ingimea\UsersTootiT Tooti Tekinaiti FISH - Senior Fisheries Officer mnrdnet.bat \\Ingimea\Usersmbweneat Mbwenea Teioki FLEU - Fisheries Assistant mnrdnet.bat \\Ingimea\Usersmwabwar Mwabwa Raurenti FLEU - Fisheries Assistant mnrdnet.bat \\Ingimea\Userstamuerat Tamuera Tebao FLEU - Fisheries Assistant mnrdnet.bat \\Ingimea\Usersionebat Ioneba Temoai FLEU - Fisheries Enforcement Assistant mnrdnet.bat \\Ingimea\Usersrimetat Rimeta Tinga FLEU - Fisheries Officer mnrdnet.bat \\Ingimea\Users ltaremonk Taremon Korere FLEU - Fisheries Revenue Assistant mnrdnet.bat \\Ingimea\Usersteruruaia Teruruai Abee FLEU - Marine Officer mnrdnet.bat \\Ingimea\UsersJohnnyK Johnny Kirata FLEU - Senior Fisheries Officer mnrdnet.bat \\Ingimea\Users lTempFLEU TempFLEU FLEU - Temp User mnrdnet.bat \\Ingimea\Userskabweneat Kabwenea Tangiraoi FLEU - Temporary Data Technician mnrdnet.bat \\Ingimea\Usersnaomib Naomi B. Atauea MINU - Minerals Officer mnrdnet.bat \\Ingimea\Users l
TempMINU TempMINU MINU - Temp User mnrdnet.bat \\Ingimea\Userstetoaitit Tetoaiti Tabokai PLAN - Project Economist mnrdnet.bat \\Ingimea\Usersbetarimr Betarim Rimon PLAN - Project Manager mnrdnet.bat \\Ingimea\UsersTempPLAN TempPLAN PLAN - Temp User mnrdnet.bat \\Ingimea\Users
ATTACHMENT D – TSKLTelecom Services Kiribati Limited (TSKL) is 49% owned by Telstra (the major telco inAustralia) and 49% by the government.
An Australian company installed the ISP and it appears that they did not leave manuals orprovide adequate training in operations. They have a service contract with TSKL whereanswering questions has a cost. This is normal but not providing manuals for the equipmentand not providing training is unprofessional and in the case of manuals not being providedmay be illegal.
IP Address Name Description203.41.41.1 tskfw.tskl.net.ki Firewall203.41.41.2 tsks1.tskl.net.ki Shiva #1203.41.41.3 tsks2.tskl.net.ki Shiva #2
203.41.41.11 tsks1-1.tskl.net.ki Shiva #1 – pool 1203.41.41.12 tsks1-2.tskl.net.ki Shiva #1 – pool 2203.41.41.13 tsks1-3.tskl.net.ki Shiva #1 – pool 3203.41.41.14 tsks1-4.tskl.net.ki Shiva #1 – pool 4203.41.41.15 tsks1-5.tskl.net.ki Shiva #1 – pool 5203.41.41.16 tsks1-6.tskl.net.ki Shiva #1 – pool 6203.41.41.17 tsks1-7.tskl.net.ki Shiva #1 – pool 7203.41.41.18 tsks1-8.tskl.net.ki Shiva #1 – pool 8203.41.41.19 tsks2-1.tskl.net.ki Shiva #2 – pool 1203.41.41.20 tsks2-2.tskl.net.ki Shiva #2 – pool 2203.41.41.21 tsks2-3.tskl.net.ki Shiva #2 – pool 3203.41.41.22 tsks2-4.tskl.net.ki Shiva #2 – pool 4203.41.41.23 tsks2-5.tskl.net.ki Shiva #2 – pool 5203.41.41.24 tsks2-6.tskl.net.ki Shiva #2 – pool 6203.41.41.25 tsks2-7.tskl.net.ki Shiva #2 – pool 7203.41.41.26 tsks2-8.tskl.net.ki Shiva #2 – pool 8
203.41.41.129 tskfw.tskl.net.ki Firewall203.41.41.194 ftp.tskl.net.ki
mail.tskl.net.kiwww.tskl.net.ki
FTP serverMail serverWeb server
203.41.41.209 tskfw.tskl.net.ki Firewall203.41.41.210 Ki1005-e0.tsk.net.ki Cisco 1005
MNRD has a dial-up account with a single mailbox:Name: mnrdPassword: new!dayTel: 21780
21780 is the pilot where other numbers are
21781, 21782, 21783, 21784, 21785, 21786, 21788, 21789,21790, 21791, 21792, 21794, 21796, 21797, 21798, 21799
These numbers are dedicated to individual ports on the two Shiva LANRovers buteach Shiva has an IP pool that it assigns randomly to a port when a connection isauthenticated.

TSKL has provided a dedicated IP address for Exchange to work.
Two test accountsName Password IP AddressTest test 203.41.41.35Test1 test1 203.41.41.35
An external E-mail account at yahoo.com was created to test e-mail.ID: mnrd2000Password: mtkQuestion: city of birth? Answer BairikiRegistered in Johnny Kirata’s name and date of birth

ATTACHMENT E – 10/100 BASE-T CABLINGThe wiring for 100 Base-T is shown in Figure 1 where pin 1 is the leftmost on a RJ-45 crimpconnector when viewed from the gold plated pin side with the cable entry side at the top.
Pin Colour1 BN2 W/BN3 O4 W/BL5 BL6 W/O7 G8 W/G