LP GAS COOKER
20
OWNER’S MANUAL For Questions and Information call us at: 1-800-864-6194 • Monday - Friday 7:30am - 4:30pm CST KEEP THIS MANUAL FOR FUTURE REFERENCE NOT FOR COMMERCIAL USE Barbour International, Inc. • 101 Cypress Way •˚Brandon, MS 39042 • www.thebayou.com This manual is for Barbour International "Bayou Classic" products only. If you are using another manufacturer’s product, refer to the manual supplied with that product. READ MANUAL BEFORE USE SAFETY ALERTS, ASSEMBLY & OPERATING INSTRUCTIONS GENERAL MAINTENANCE & STORAGE This Instruction Manual contains important information necessary for the proper assembly and safe use of this appliance. You must carefully read and follow all warnings and instructions in this manual before assembling and using this appliance. MODEL #KDS-144 LP GAS COOKER
-
Upload
khangminh22 -
Category
Documents
-
view
0 -
download
0
Transcript of LP GAS COOKER

OWNER’S MANUAL
For Questions and Information call us at:1-800-864-6194 • Monday - Friday 7:30am - 4:30pm CST
KEEP THIS MANUAL FOR FUTURE REFERENCE
NOT FOR COMMERCIAL USE
Barbour International, Inc. • 101 Cypress Way • Brandon, MS 39042 • www.thebayou.com
This manual is for Barbour International "Bayou Classic" products only. If you are usinganother manufacturer’s product, refer to the manual supplied with that product.
READ MANUALBEFORE USE
SAFETY ALERTS, ASSEMBLY & OPERATING INSTRUCTIONSGENERAL MAINTENANCE & STORAGE
This Instruction Manual contains important information necessary for the properassembly and safe use of this appliance. You must carefully read and follow all warnings and
instructions in this manual before assembling and using this appliance.
MODEL#KDS-144
LP GAS COOKER

LIMITED WARRANTYBarbour International, Inc. ("Vendor") warrants to the original retail purchaser of this gas cooker and no other person, that if this gas cooker is assembledand operated in accordance with the printed instructions accompanying it, then for a period of one (1) year from the date of purchase, all parts in such gasfryer/cooker shall be free from defects in material and workmanship. Vendor may require reasonable proof of your date of purchase from an authorizedretailer or distributor. Therefore, you should retain your sales slip or invoice. This Limited Warranty shall be limited to the repair or replacement of parts,which prove defective under normal use and service and which Vendor shall determine in its reasonable discretion upon examination to be defective. Beforereturning any parts, you should contact Vendor's Customer Service Department using the contact information listed below. If Vendor confirms, after examination,a defect covered by this Limited Warranty in any returned part, and if Vendor approves the claim, Vendor will replace such defective part without charge.If you return defective parts, transportation charges must be prepaid by you. Vendor will return replacement parts to the original retail purchaser, freight orpostage prepaid.
This Limited Warranty does not cover any failures or operating difficulties due to accident, abuse, misuse, alteration, misapplication, improper installationor improper maintenance or service by you or any third party, or failure to perform normal and routine maintenance on the gas cooker, as set out in thisowner's manual. In addition, the Limited Warranty does not cover damage to the finish, such as scratches, surface chips and cracks, discoloration, rust orother weather damage, after purchase.
This Limited Warranty is in lieu of all other express warranties. Vendor disclaims all warranties for products that are purchased from sellers other that authorizedretailers or distributors. AFTER THE PERIOD OF THE ONE (1)-YEAR EXPRESS WARRANTY, VENDOR DISCLAIMS ANY AND ALL IMPLIED WARRANTIES,INCLUDING WITHOUT LIMITATION THE IMPLIED WARRANTIES OF MERCHANTABILITY AND FITNESS FOR A PARTICULAR PURPOSE. FURTHER, VENDORSHALL HAVE NO LIABILITY WHATSOEVER TO PURCHASER OR ANY THIRD PARTY FOR ANY SPECIAL, INDIRECT, PUNITIVE, INCIDENTAL, OR CONSEQUENTIALDAMAGES. Vendor assumes no responsibility for any defects caused by third parties. This Limited Warranty gives the purchaser specific legal rights; apurchaser may have other rights depending upon where he or she lives. Some jurisdictions do not allow the exclusion or limitation of special, incidental orconsequential damages, or limitations on how long a warranty lasts, so the above exclusion and limitations may apply to you.
Vendor does not authorize any person or company to assume for it any other obligation or liability in connection with the sale, installation, use, removal,return, or replacement of its equipment, and no such representations are binding on Vendor.
If you have a missing or damaged part, please do not returnthis item to the store.
Call Barbour International, Inc. for assistance:
1-800-864-6194Monday-Friday 7:30am - 4:30pm CST
THE PURPOSE OF THIS SAFETY ALERT SYMBOL IS TO ATTRACT YOUR ATTENTION TO POSSIBLEHAZARDS AS YOU ASSEMBLE AND USE THIS PRODUCT.
THE PURPOSE OF THIS SAFETY ALERT SYMBOL INDICATES FAILURE TO FOLLOW WARNINGS COULDRESULT IN FIRE OR EXPLOSION. PAY CLOSE ATTENTION TO THE INFORMATION WHICH FOLLOWS!
SAFETY SYMBOLSThe symbols and boxes shown below explain what each heading means. Read and follow all of the safetywarnings and instructions contained in this manual and on the cooker.
Carefully read and follow all WARNINGS, SAFETY PRECAUTIONS and OPERATING INSTRUCTIONScontained in this manual and on the cooker.DO NOT skip any of the warnings and instructions! SAVE THIS MANUAL FOR FUTURE REFERENCE.
Indicates an imminently hazardous situation which, if not avoided,will result in death or serious injury.
Hazard or unsafe practices which could result in minor personalinjury, product, or property damages.
Hazard or unsafe practices which could result in severe propertydamages, personal injury, or death.

IF YOU SMELL GAS:1. Shut off gas to the appliance.2. Extinguish any open flame.3. If odor continues, keep away from the appliance and immediately call your fire department.
LEAKING GAS MAY CAUSE A FIRE OR EXPLOSION WHICH COULD CAUSE PROPERTY DAMAGE,PERSONAL INJURY OR DEATH.
DANGER
NOTE TO CONSUMERThis LP Gas Cooker is a specialized high pressure gas appliance having greater heat output than traditionalkitchen stoves. It is referred to as cooker and appliance in this manual and on warning tags. Same asa kitchen stove, this cooker does not have automatic thermostat controls so must be attended and monitoredat all times during use.This LP Gas Cooker is for OUTDOOR USE ONLY!This cooker provides multiple cooking options in addition to brewing beer. You can use this applianceto cook soups, stews and gumbo; boil shrimp, crawfish, and crabs; and steam vegetables.As with any cooking appliance, care must be taken to follow all Safety Precautions and Instructions inorder to achieve safe and satisfactory cooking results.Restrict the use of this appliance to adults who can read, understand and follow the warnings andinstructions in this manual, and on the cooker. Safety Alerts alone cannot eliminate the hazardsthat they signal. Strict compliance with these instructions, plus common sense operation, are primaryaccident prevention measures.
1
WARNING FOR YOUR SAFETY:For Outdoor Use Only (outside any enclosure)1. Improper installation, adjustment, alteration, service or maintenance can cause injury
or property damage.2. Read the installation, operation, and maintenance instructions thoroughly before installing
or servicing this equipment.3. Failure to follow these instructions could result in fire or explosion, which could cause
property damage, personal injury, or death.
WARNING• Do not store spare LP cylinder within 10 feet (3 m) of this appliance.• Do not store or use gasoline or other flammable liquids or vapors within 25 feet (8 m) of this appliance.• When cooking with oil/grease, do not allow the oil/grease to get hotter than 350˚F (177˚C).• Do not leave oil/grease unattended.
If having any doubts or concerns about your ability to use this product call 800-864-6194.Should you still have concerns about operating this product, then do not use. Contact your dealer forreturn and refund. The warnings and safety instructions in this manual MUST be followed to providereasonable safety and efficiency in using the appliance.
Remember; Think Safety and Use Common Sense!

2
Outdoor gas appliances do not have automatic thermostat controlsso must be attended and monitored at all times during use.
Safety Precautions & Warnings
Remember: Think Safety and Use Common Sense!
Failure to follow these instructions could result in fire or explosionwhich could cause property damage, personal injury or death!
WARNING FIRE HAZARD READ MANUALBEFORE USE
NEVER LEAVEUNATTENDED
KEEP AWAY FROMFLAMMABLE
OBJECTS
10-FT
NEVER USE ONFLAMMABLESURFACES
KEEP FLAMMABLEMATERIALS AWAY
25-FT
NEVER LEANOVER BURNER
KEEP FIREEXTINGUISHER
NEARBY
USE THERMOMETERWHEN FRYING
NO LID ON POTWHEN FRYING
TRIP HAZARDWATCH YOUR STEP
HOT DURING ANDAFTER USE!
INSURE PROPERPOSITIONING
20-IN
WINDDIRECTION
NO BARE FEET
ALWAYS PERFORMGAS LEAK TEST
OUTDOOR USEONLY
NEVER USE UNDERFLAMMABLEOVERHANG
KEEP CHILDRENAND PETS AWAYFROM COOKER
DO NOT FRYTURKEYS
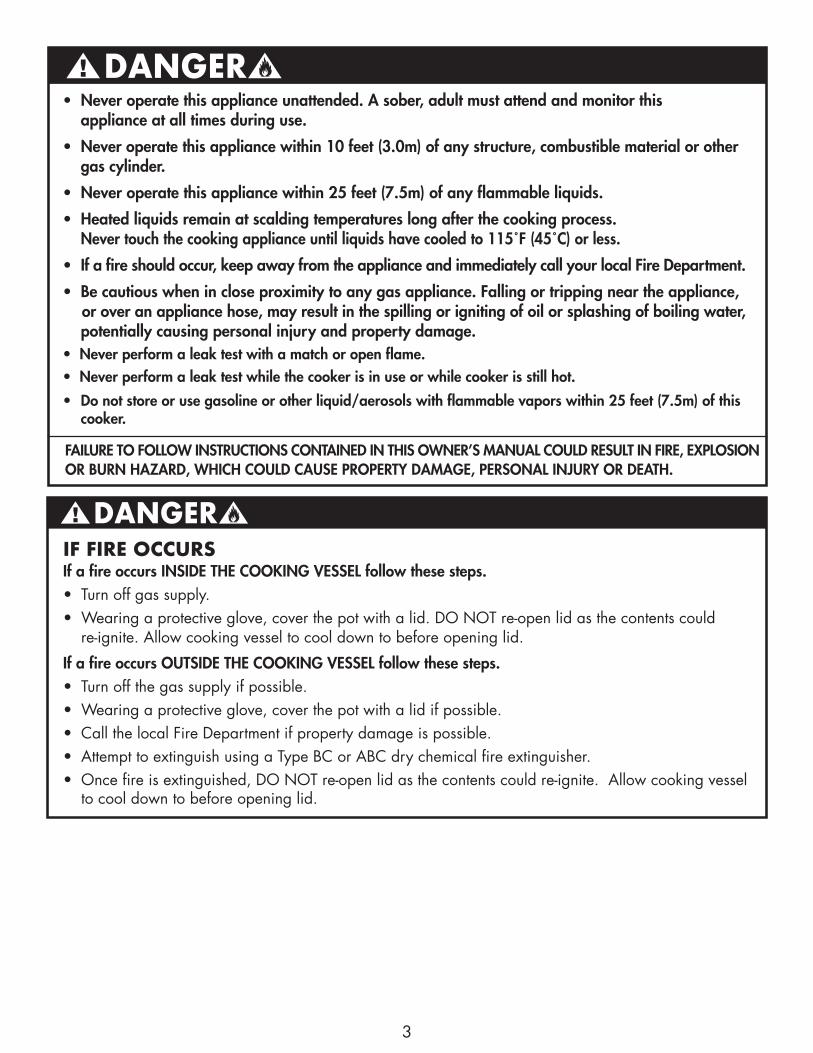
• Never operate this appliance unattended. A sober, adult must attend and monitor thisappliance at all times during use.
• Never operate this appliance within 10 feet (3.0m) of any structure, combustible material or othergas cylinder.
• Never operate this appliance within 25 feet (7.5m) of any flammable liquids.
• Heated liquids remain at scalding temperatures long after the cooking process.Never touch the cooking appliance until liquids have cooled to 115˚F (45˚C) or less.
• If a fire should occur, keep away from the appliance and immediately call your local Fire Department.
• Be cautious when in close proximity to any gas appliance. Falling or tripping near the appliance,or over an appliance hose, may result in the spilling or igniting of oil or splashing of boiling water,potentially causing personal injury and property damage.
• Never perform a leak test with a match or open flame.• Never perform a leak test while the cooker is in use or while cooker is still hot.
• Do not store or use gasoline or other liquid/aerosols with flammable vapors within 25 feet (7.5m) of thiscooker.
FAILURE TO FOLLOW INSTRUCTIONS CONTAINED IN THIS OWNER’S MANUAL COULD RESULT IN FIRE, EXPLOSIONOR BURN HAZARD, WHICH COULD CAUSE PROPERTY DAMAGE, PERSONAL INJURY OR DEATH.
DANGER
3
DANGERIF FIRE OCCURSIf a fire occurs INSIDE THE COOKING VESSEL follow these steps.• Turn off gas supply.• Wearing a protective glove, cover the pot with a lid. DO NOT re-open lid as the contents could
re-ignite. Allow cooking vessel to cool down to before opening lid.
If a fire occurs OUTSIDE THE COOKING VESSEL follow these steps.• Turn off the gas supply if possible.• Wearing a protective glove, cover the pot with a lid if possible.• Call the local Fire Department if property damage is possible.• Attempt to extinguish using a Type BC or ABC dry chemical fire extinguisher.• Once fire is extinguished, DO NOT re-open lid as the contents could re-ignite. Allow cooking vessel
to cool down to before opening lid.

4
GENERAL WARNING• This cooker shall be used OUTDOORS ONLY. DO NOT use in a building, home, garage, balcony, porch,
tent or any other enclosed area. Gas cookers shall not be used on or under apartment, condominiumbalcony or deck. DO NOT install or use in or on recreational vehicles or boats.
• This is a portable appliance and is not designed to be installed in cabinetry or enclosed in any manner.• This is appliance is not designed for frying.• This appliance does not have automatic thermostat controls so must be attended and monitored at all times
during use.• This appliance has an open flame. In sunlight or other bright light, the flame may be almost invisible.
Use extreme caution keeping hands, hair and clothing away from the cooker. Do not lean over the cookerwhen lighting burner. Long hair and loose clothing can catch fire during lighting and operation.
• DO NOT leave this appliance unattended. Heated liquid above 115˚F: 45˚C can remain at scaldingtemperatures long after cooking has ended.
• Keep children and pets away from the cooking area at all times. Carefully monitor all activity around cookerto avoid burns or other injuries.
• Use insulated oven mitts or gloves for protection from hot surfaces or splatter from cooking liquids.Always wear closed toe shoes while cooking with this appliance.
• Do not walk between cooker and propane tank as this creates a trip hazard. Tripping over the hose couldoverturn the cooker causing severe burns.
• Avoid bumping of or impact with the appliance to prevent spillage or splashing of hot cooking liquid whichcan cause severe burns.
• DO NOT move the appliance when in use. Allow cooking vessel to cool down to 115˚F (45˚C) beforemoving, cleaning or storing.
• Should the burner flame go out during use, turn all gas valves off. Wait 5 minutes for gas to evacuate fromthe burner before re-lighting. See instructions in this manual for correct lighting procedures.
• Never overfill the pot with liquid or food. Overfilled cooking vessels can boil over and cause a fire.Follow instructions in this manual for establishing proper water level.
• After a period of storage or nonuse, check this appliance for gas leaks and burner obstructions before use.See instructions in this manual for correct procedures.
• DO NOT place an empty cooking vessel on the cooker while in operation as it could melt or warp.• Use caution when placing anything in a cooking vessel while the appliance is in operation.• When cooking, have a Type BC or ABC fire extinguisher readily accessible.• This appliance is not intended for and should never be used as a heater.• Do not use this cooker for other than its intended purpose.• Combustion by-products from the use of this product contain chemicals known to the State of California to
cause cancer, birth defects, or other reproductive harm.• This product contains a chemical(s) known to the State of California to cause cancer, birth defects
or other reproductive harm.• Never use glassware, plastic, or ceramic cookware on this appliance.• Only use replacement/accessory parts manufactured by Barbour International, Inc.
Repairs should be performed by Barbour International, Inc.
WARNING

5
2
2
3
1
4
ASSEMBLY INSTRUCTIONSREAD ALL SAFETY WARNINGS & ASSEMBLY INSTRUCTIONS CAREFULLY BEFORE ASSEMBLING OR OPERATINGYOUR COOKER. Inspect contents in the box to ensure all parts are included and undamaged.FOR MISSING PARTS OR ASSISTANCE, PLEASE CALL 1-800-864-6194 M-F 7:30am - 4:30pm CST.Proof of purchase will be required.
TOOLS REQUIRED:
Adjustable Wrench
PARTS INCLUDED:
Model #KDS-144
Phillips HeadScrewdriver
1- Round Frame 3- Legs 3 - Long Bolts
7 - Locking Nuts
1 - Heat Shield
4 - Short Bolts
1. Remove components from the box andpacking. Turn round frame upside downas shown. Assemble cooker while in thisupside down position.
2. Mount Burner Support Bar - Line up holesin support bar to the holes in the frame asshown. Attach bolts and nuts as shown.Wrench tighten.
3. Attach Burner and Heat Shield toSupport Bar -A Remove locking nut from bottom of burner.B. Turn burner upside down and position
as shown.C. Insert the burner bolt through the burner
support bar.D. Place heat shield over bolt.E. Attach locking nut and wrench tighten.
4. Attach Legs to Base Frame - Slide legs onframe to match holes. Insert and hand tighten all bolts and nuts.NOTE: You will wrench tighten leg boltsat a later stage.
COOKER ASSEMBLY
1- 10 PSI RegulatorHose Assembly
1- Stockpotwith Lid
1- Perforated Basket
1 - BG10 Burnerwith Locking Nut
1- Air Shutterwith Screws
1 - Burner Support Bar
Hex Wrench,provided

6
5. Attach Regulator Hose Assembly to Burner -Insert brass male end of hose into the threadedhole at the end of the cast iron burner. Usean adjustable wrench to tighten the hose tothe burner. Do not over tighten brass hoseconnector to burner, the air control shuttermust be able to easily turn for adjustment offlame quality. If you have over tightened thebrass hose connector to the burner and theshutter cannot turn, then unscrew the brasshose connector until the shutter can be easilyturned... Very Important!
6. Return frame to upright position andwrench tighten all leg bolts.
7. Connect Regulator Hose Assembly toLP Gas Cylinder.
Turn CLOCKWISEWrench Tighten
Turn Air Control Shutter toadjust flame quality
Screws may need tighteningDO NOT over tighten!
5
6
Turn Coupling NutCLOCKWISEto AttachHand Tighten!
Turn Brass ValveCLOCKWISEto OFF position
Uprightposition
A. Check that cylinder is upright and the valve is closed by turningthe knob clockwise.
B. Remove the protective safety cap from the cylinder valve and theType-1 Coupling Nut on the regulator
C. Insert the nipple of the large coupling nut into cylinder valve outlet.Insure that the coupling nut is centered properly.
D. Turn the large coupling nut clockwise by hand and tightento a full stop. Take care not to cross thread the coupling nutonto the cylinder valve. Do not use tools to tighten connection.
E. Leak check all fittings before lighting cooker. See section on"Gas Leak Test Instructions".
C
AB
D
Always turn Regulator Control Knob/Valve and Tank Knob to OFFposition after every use! Propane Tanks, and this Cooker, come equipped witha safety device that restricts the flow of gas should the hose be cut or severed. Whilethe safety device protects the operator, it can sometimes impair lighting the cooker.To reduce trouble lighting the cooker, always turn the regulator control knob/valve tothe OFF position after every use.
CAUTION
7

OPD Handwheel(Cylinder Valve)
Protective Cap
Type1Outlet
Safety ReliefValve
7
Check your local codes regarding the use of this appliance. To find these codes, see your local LP gas dealer ornatural gas company. When purchasing or exchanging a cylinder for your gas cooker, it must be constructed andmarked in accordance with the specifications for LP gas cylinders by the U.S. Department of Transportation (DOT)or the National Standard of Canada, CAN/CSA-B339, Cylinders, Spheres and Tubes for the Transportation ofDangerous Goods as applicable with a listed over-filling device (OPD).
The cylinder must also be equipped with:• A shut-off valve terminating in a Type-1 gas cylinder valve outlet.• A Type-1 valve that prevents gas flow until a positive seal is obtained.• An arrangement for vapor withdrawal.• A collar to protect the cylinder shut-off valve.• A safety relief device having direct communication with the vapor space of the cylinder.• A listed Over-filling Prevention Device (OPD).• A protective cap on cylinder Type-1 Outlet.
LP GAS CYLINDER INFORMATION NOT SUPPLIED WITH THIS COOKER
DANGER• Never store spare LP gas cylinder near your cooker. This could cause excess pressure to be expelled
through the vapor relief valve resulting in fire, explosion, or severe personal injury, including death.
NOTE: PROPANE GAS IS HEAVIER THAT AIR AND WILL COLLECT IN LOW AREAS. PROPER VENTILATION ISEXTREMELY IMPORTANT
• LP (propane) gas is colorless, tasteless, heavier than air, and is both flammable and explosive. DO NOTexpose LP gas cylinders to excessive heat or ignition sources.
• Keep the ventilation opening(s) of the LP gas cylinder enclosure free and clear from obstruction and debris.• DO NOT insert any foreign objects into the valve outlet. Damage to the back-check could result.
A damaged back-check can cause a leak, possibly resulting in explosion, fire, severe personalinjury, bodily harm or death.
• DO NOT connect this cooker to a natural gas supply line.
DANGERCombustion of propane consumes oxygen and produces carbon monoxide,
an odorless poisonous gas. Using it in an enclosed space can kill you.
Never use this appliance in an enclosed space such as a camper, tent,boat, car or home.
CARBON MONOXIDE HAZARD
The LP (Liquid Propane) gas cylinder specifically designed to be used with this cooker must have a 20 lb (9.1 kg)capacity incorporating a Type-1 cylinder valve, an over-filling protection device (OPD), and a protective collar.The Type-1 valve can be identified with the large external threads on the valve outlet.

Store withProtective CapCLOSEDUse and store cylinder
in upright position
8
WARNINGFILLING THE LP GAS CYLINDER:• Allow only qualified LP gas dealers to properly fill or repair your LP gas cylinder.• New tanks should be purged prior to filling; inform LP gas dealer if you are using a new tank.• DO NOT allow the cylinder to be filled beyond 80% capacity. Over-filled tanks can create a dangerous
condition. Over-filled tanks can build up pressure and cause the relief valve to expel propane gas vapors.The vapor is combustible and if it comes in contact with a spark source or flame; an explosion causing severeburns, bodily harm, or death could occur.
• If you exchange a cylinder with a qualified exchange program, be sure the cylinder has a Type-1 valve andan over-filling prevention device (OPD).
LP GAS CYLINDER• Read and follow all warnings/instructions that are on the cylinder and that accompany this product.
• DO NOT connect to a cylinder that uses any other type of valve connection device, including #510 POLcylinder valve with Left Hand Threads.
• Never use a gas cylinder if it shows signs of dents, gouges, bulges, fire damage, erosion, leakage,excessive rust, or other forms of visible external damage. The cylinder may be hazardous and should bechecked by a qualified liquid propane supplier.
• Never attach a gas cylinder, move or alter fittings while cooker is in operation.
• Do not attempt to disconnect the regulator hose assembly while cooker is in operation.
• When cooker use is complete, always turn the LP cylinder valve OFF first, then turn the regulator controlvalve OFF. Turning the cylinder OFF first allows remaining gas to flow out of the regulator hose assemblybefore the regulator control valve is turned OFF.
• Storage of this appliance indoors is permissible only if the cylinder is disconnected and removed from theappliance and left outdoors. Cylinders must be stored outdoors out of the reach of children and must notbe stored in a building, garage or any other enclosed area.
• The installation of this appliance must conform with local codes or, in the absence of local codes, with theNational Fuel Gas Code, ANSI Z223.1/NFPA 54, Storage and Handling of Liquefied Petroleum Gases,ANSI/NFPA 58, Natural Gas and Propane Installation Code, CSA B149.1, Propane Storage and Handling,CSA B149.2, or the Standard for Recreational Vehciles, ANSI A119.2/NFPA 1192 and the RecreationalVehicle Code, CSA z240 RV Series.
• Always use a protective cylinder cap when cookeris not connected to cylinder.
• Turn off the cylinder valve when your cooker is not in use.
• Handle the LP gas cylinder with care.
• Always secure the LP gas cylinder in an upright position.
• Never connect an unregulated LP gas cylinderto your cooker.
WARNING

9
The pressure regulator and hose assembly supplied with your gas cooker is only designed to work with anLP gas supply cylinder.
• DO NOT attempt to connect it to any other fuel supply source such as a natural gas line.
• DO NOT use any other pressure regulator/hose assembly than the one supplied with your cooker.
• DO NOT attempt to adjust or repair the regulator. Contact Bayou Classic customer service for areplacement hose.
• Never use your cooker without leak testing all gas connections, regulator hose assembly and weld seams on propane tank. See the section on "Gas Leak Testing" in this manual for proper procedures.
Your cooker is equipped with a Type-1 connection devicewith the following features:1. The system will not allow gas flow from the cylinder until a
positive connection to the cylinder valve has been made.NOTE: The cylinder valve must be turned off clockwise before anyconnection is made or removed.
2. A GAS FLOW LIMITING DEVICE, when activated, restricts theflow of gas to 10 cubic feet per hour.
NOTE: the flow limiting device is a safety feature that can be activatedwhen attempting to light cooker. If this occurs, refer to Trouble Shootingon pages 16 - 17 for proper remedy.
3. After cooking is finished and cylinder valve is turned off; turn theRegulator Control Knob counter-clockwise to the OFF position.This will reduce possibility of activating the Gas Flow Limiting Device the next time you light the cooker.
DANGER
REGULATOR HOSE ASSEMBLY• Use only the regulator hose assembly that is supplied with this appliance.
Inspect the hose before each use of the cooker. If there is evidence of abrasion,wear, cuts or leaks, the hose must be replaced prior to the cooker being put intooperation. Replace regulator hose assembly at least every two years.This part can be purchased by contacting www.thebayou.com.
• Refer to instructions for connecting regulator hose assembly to LP gas cylinder and burner in this manual.
• The valve on regulator hose assembly controls flame intensity only. It is not an ON/OFF valve. Use LP Cylinder Valveto turn gas ON and OFF.
TYPE-1Connector
Coupling Nut
RegulatorValve
For connection toLP Gas Cylinder
Brass OrificeConnector
For connectionto Burner

10
WARNINGWHEN TO PERFORM A LEAK TEST:• After assembling your cooker and before lighting for the first time, even if purchased fully assembled.• Every time the LP gas cylinder is refilled or if any of the gas components are replaced.• Any time your cooker has been moved.• At least once per year or if your cooker has not been used for more than 60 days.
GAS SUPPLY HOSE
Watch for Bubbles
GAS LEAK TEST INSTRUCTIONSNote: The gas leak test must be performed in an area that has adequate lightingin order to see if bubbles are developing. DO NOT use a flashlightto check for bubbbles.1. Create a mixture of 50% water and 50% liquid dishwashing soap.2. Turn the gas cylinder valve to the OFF position (clockwise).
Then turn regulator valve to OFF position (clockwise).3. To turn ON the fuel supply, turn the cylinder valve
knob one turn counter-clockwise. Gas will flow throughand stop at the closed regulator valve.
4. Using a clean brush, apply the soap water mixture to the following:
Cylinder Valve to Cylinder
Connection Nut to Cylinder Valve
Back side of Connection Nut to Brass Nipple
Brass Valve next to Regulator
Regulator connection to Gas Supply Hose
LP Cylinder Welds
Full length of Gas Supply Hose
Gas Supply Hose connection to Burner
5. Check each place A - F for growing bubbles which indicates a leak.6. Next, turn ON regulator valve (counter-clockwise) to permit gas to pass
through the hose. Apply soap water mixture to full length of gas supply hoseand connection to burner assembly. Check each place for growing bubbles,G & H, which indicates a leak.
7. Turn OFF gas supply valve (clockwise) on LP Gas Cylinder.8. Turn regulator valve to OFF position (clockwise).9. Tighten any leaking connections.10. Repeat soap water mixture test until no leaks are detected.
DO NOT use cooker if gas leaks cannot be stopped.
11. After you are certain there are no leaks, turn tank valve and regulator valveto OFF position. Wait 5 minutes for any gas fumes to evacuate beforelighting the burner.
To prevent fire or explosion hazard:• DO NOT smoke or permit ignition sources in the area while
conducting a leak test.• Perform test OUTDOORS only in a well ventilated area.
DANGER

11
POSITIONING THE COOKER1. Position cooker prior to lighting the burner.2. Never operate an outdoor cooker appliance inside a building or confined area where ventilation may be
restricted. Make sure the LP cylinder and the cooker are placed in an open area. DO NOT obstruct the flowof combustion and ventilation air.
3. Check wind direction.4. Position cooker DOWNWIND from the nearest structure. DO NOT operate this Gas Cooker closer than
10 feet (3m) from any combustible materials including walls or railing, or under overhead construction andtree branches as these materials could ignite.
5. Position cooker DOWNWIND from the LP Gas Cylinder keeping a minimum distance of 20" apart so the heatof the cooker does not reach cylinder.
6. Position cooker on a level, stable, noncombustible surface such as brick, concrete or dirt; a safe distance fromcombustible materials, rails, buildings, overhangs or tree branches. DO NOT position cooker on wood, asphaltor plastic which may burn, blister or melt.
7. Check that gas supply hose does not contact surfaces that may become hot during use.
LIGHTING INSTRUCTIONS
Follow these instructions exactly. Read and follow all warnings and instructions in this manual before using yourcooker.1. Make sure regulator valve and cylinder valve are in the OFF position.2. Turn ON the fuel supply by S-L-O-W-L-Y rotating the cylinder valve counter-clockwise one full turn.
HINT: Turning the cylinder valve quickly causes a sudden rush of gas that sometimes activates theGas Flow Limiting Device. To prevent this, always rotate cylinder valve S-L-O-W-L-Y.
3. Place fire place match or long lighter over the burner, then S-L-O-W-L-Y turn regulator valve counter-clockwiseuntil you hear gas HISSING to the burner. Then light the burner, keeping hands and face away from the topof the cooker.
4. Adjust air control shutter on burner for a blue flame. In direct sunlight, flame may appear clear.5. Adjust the regulator valve for desired flame height.6. After lighting, rotate cylinder valve to full open.7. Adjust flame height using regulator valve. Rotate air control shutter to achieve mostly blue flame.
WARNINGDO NOT stand with head, body or arms over the cooker when lighting. Loose clothing and hair can catch fire.
Hose is a trip hazard. Do not walk between cooker and cylinder.
Wind Direction10 ft.
Clearance 20 in.Minimum
10 ft.Clearance
Make sure overhead is clear of combustible materials!

12
BURNER FLAME CHECKAdjust flame height using regulator valve. Rotate air controlshutter to achieve mostly blue flame. The air control shuttermounted on the front of burner helps to control the amount ofair that mixes with the LP gas. A blue flame with little or noyellow flame indicates a proper air/gas mixture and providesthe best heat. Adjust the air control shutter until the desiredflame is achieved.
BURNERFLAME
BLUEORANGE
CORRECT INCORRECT
ON
- CO U NT ER-CLOCK
WIS
EON
-C
OUNT ER-CLOCKW
ISE
ADJUST Regulator Valvefor Flame Height5
NOTE: The brass valve onregulator hose assemblycontrols flame intensityonly. It is not anON/OFF valve.
DO NOT light burnerat air intake
After lighting Burner, OPENLP Cylinder Valve FULLY
6COUNTER-CLOCKWISE COUNTER-CLOCKWISE
O
FF - CLO CK WIS
E
Make sure LP Cylinder is OFF
1
BEFORE LIGHTING
OFF - CLOCKW
ISE
S-L-O-W-L-Y TurnLP Cylinder Valve One Full Turn
2Gas will flowto and stopat closedregulator
ON
- C O U NTER-CLOCK
WIS
E
Make sure Regulator Valve is OFFCLOCKWISE
COUNTER-CLOCKWISECLOCKWISE
ON
-C
OUNTER-CLO CK W
ISE
S-L-O-W-L-YTurn Regulator Valve ON
LIGHTBURNERHERE!
Place lit Match over Burner
3
LIGHTINGADJUST Air Control Shutter
for Blue Flame4
Position handbelow burner
COUNTER-CLOCKWISE
7
13
PRE-COOKING CHECK LIST AND OPERATING INSTRUCTIONS
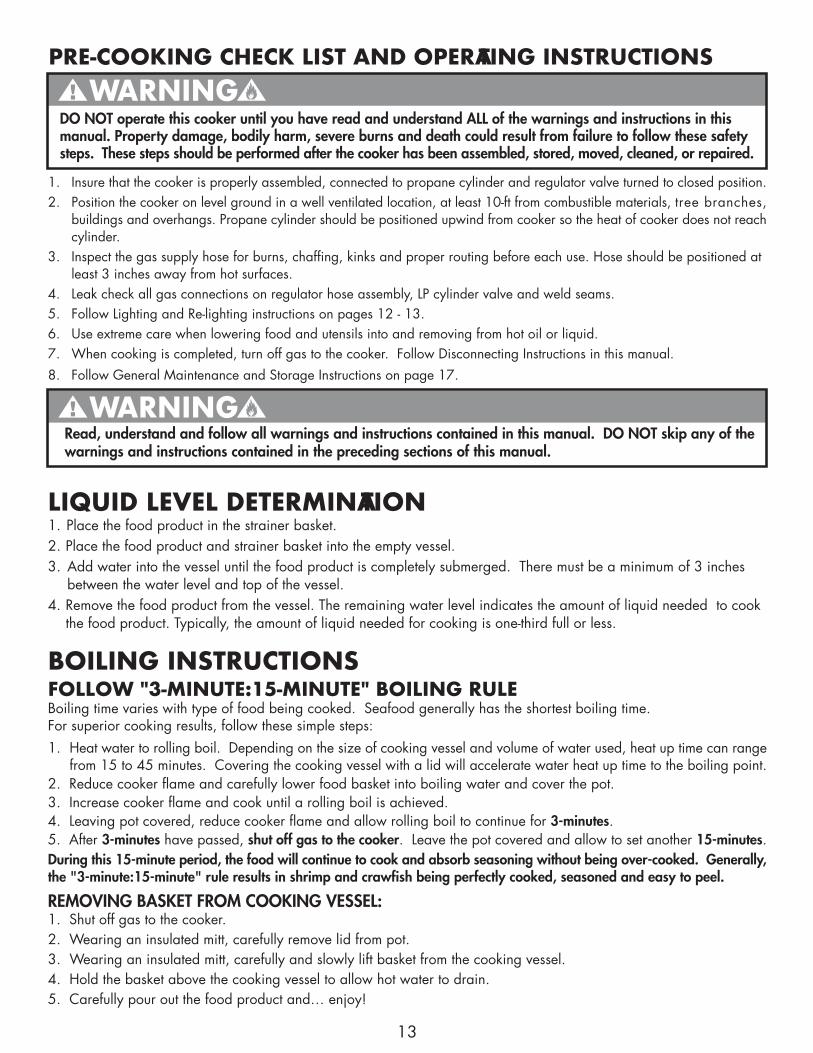
1. Insure that the cooker is properly assembled, connected to propane cylinder and regulator valve turned to closed position.2. Position the cooker on level ground in a well ventilated location, at least 10-ft from combustible materials, tree branches,
buildings and overhangs. Propane cylinder should be positioned upwind from cooker so the heat of cooker does not reachcylinder.
3. Inspect the gas supply hose for burns, chaffing, kinks and proper routing before each use. Hose should be positioned at least 3 inches away from hot surfaces.
4. Leak check all gas connections on regulator hose assembly, LP cylinder valve and weld seams.5. Follow Lighting and Re-lighting instructions on pages 12 - 13.6. Use extreme care when lowering food and utensils into and removing from hot oil or liquid.7. When cooking is completed, turn off gas to the cooker. Follow Disconnecting Instructions in this manual.8. Follow General Maintenance and Storage Instructions on page 17.
WARNINGDO NOT operate this cooker until you have read and understand ALL of the warnings and instructions in thismanual. Property damage, bodily harm, severe burns and death could result from failure to follow these safetysteps. These steps should be performed after the cooker has been assembled, stored, moved, cleaned, or repaired.
WARNINGRead, understand and follow all warnings and instructions contained in this manual. DO NOT skip any of thewarnings and instructions contained in the preceding sections of this manual.
LIQUID LEVEL DETERMINATION1. Place the food product in the strainer basket.2. Place the food product and strainer basket into the empty vessel.3. Add water into the vessel until the food product is completely submerged. There must be a minimum of 3 inches
between the water level and top of the vessel.4. Remove the food product from the vessel. The remaining water level indicates the amount of liquid needed to cook
the food product. Typically, the amount of liquid needed for cooking is one-third full or less.
FOLLOW "3-MINUTE:15-MINUTE" BOILING RULEBoiling time varies with type of food being cooked. Seafood generally has the shortest boiling time.For superior cooking results, follow these simple steps:1. Heat water to rolling boil. Depending on the size of cooking vessel and volume of water used, heat up time can range
from 15 to 45 minutes. Covering the cooking vessel with a lid will accelerate water heat up time to the boiling point.2. Reduce cooker flame and carefully lower food basket into boiling water and cover the pot.3. Increase cooker flame and cook until a rolling boil is achieved.4. Leaving pot covered, reduce cooker flame and allow rolling boil to continue for 3-minutes.5. After 3-minutes have passed, shut off gas to the cooker. Leave the pot covered and allow to set another 15-minutes.During this 15-minute period, the food will continue to cook and absorb seasoning without being over-cooked. Generally,the "3-minute:15-minute" rule results in shrimp and crawfish being perfectly cooked, seasoned and easy to peel.
REMOVING BASKET FROM COOKING VESSEL:1. Shut off gas to the cooker.2. Wearing an insulated mitt, carefully remove lid from pot.3. Wearing an insulated mitt, carefully and slowly lift basket from the cooking vessel.4. Hold the basket above the cooking vessel to allow hot water to drain.5. Carefully pour out the food product and… enjoy!
BOILING INSTRUCTIONS

14
STEAMING INSTRUCTIONSUse Bayou Classic® stockpots having baskets elevated above the bottom of the vessel.• Typically 2 to 3 inches of water is used for steaming. Heat up time will be fast so be certain to first have food
in the basket.• Once boiling is achieved, reduce cooker flame to the lowest setting.• Using an insulated mitt, carefully lower food basket into the cooking vessel, then cover with lid. (Be certain food
is not touching the water.)• Leave the cooker flame set low during cooking to maintain a steady boil. Hint: Cooked seafood turns from
translucent to opaque when done.• When steaming is done, turn off gas to the cooker. Wearing an insulated mitt, carefully lift the lid and remove
food basket from the cooking vessel.• Use an insulated mitt when lifting stockpot lid when steaming. Steam escaping through the lid vent under pressure
is invisible and can cause severe burns. Use extreme caution when removing stockpot lid when steaming or boiling.• Do not allow water to evaporate completely during steaming. The bottom of stockpots will quickly warp if all
water evaporates; even under a low flame. If steaming for a long period of time you will need to occasionallyadd water to the stockpot.
BREWING INSTRUCTIONS:There are several different recipes and methods to brew all kinds of beer at home:
A. Malt-Extract/Extract-Only Brewing - recommended for Beginning brewersB. Specialty Grains - Intermediate levelC. Partial Mash - Intermediate levelD. All Grain Sparge - Advanced levelE. Brew-In-A-Bag - Advanced level
This boiling kit was specially designed with home brewing in mind.Here are few general steps to brewing beer at home:1. Always read through your brew recipe and the required steps for brewing before you begin.
2. Gather all of the necessary supplies and ingredients.
3. Clean your equipment thoroughly using an unscented cleaner. Any leftover food or old brew ingredients can spoil a new batch of beer, and previously sanitizing your equipment doesn’t always remove every contaminant. NOTE: Most brewers do not use their pots for both cooking food and brewing beer. This can cause contamination and cross-flavoring. Therefore, it is not recommended that this pot be used for both boiling food and brewing beer (because no one likes the taste of crab beer!).
4. Follow the specific steps required in your brewing recipe. Trial and error will eventually dictate ultimate temperature settings and steps to achieve your desired flavor.
5. Always remember to sanitize your equipment after you use it.
FOR MORE INFORMATION ON BREWING PROCESSES AND OTHER HELPFUL HINTS, TALK TO YOUR LOCALHOMEBREW STORE OR VISIT: www.homebrewersassociation.org

15
CARE & MAINTENANCEIntense heat from the cooker will burn away paint from parts of the frame, windscreen flashing, and flame spreader.This is normal and will cause a slight 'odor' for a few minutes during the initial use. The exposed steel will rust.Occasional care must be taken to prolong the life of your cooker.1. Store cooker in a dry place. Do not store outside exposed to weather. Storage of a gas cooker appliance
indoors is permissible only if the cylinder is disconnected. If storing cooker indoors, detach and leave LP cylinderoutdoors. LP cylinders must be stored outdoors out of the reach of children and must NOT be stored in abuilding, garage or any other enclosed area.
2. For long term storage, cover cast iron burner and regulator hose assembly with a plastic bag.
3. Spiders and small insects have been known to spin webs inside the burner tube. Obstructions in the burnertube interfere with the flow and mixture of air and gas through the burner. A clogged burner tube may resultin a fire beneath the appliance. If this happens, clean the burner tube with a stiff, bent wire.
4. Check and tighten any loose hardware before each use.
5. Inspect entire cooker including regulator hose assembly and burner assembly before each use. Replace anydamaged or worn parts. Use only parts specified by Barbour International, Inc.
6. Before using for the first time, wash the pot and basket with hot soapy water. Dry immediately to prevent waterspots.
7. To prevent scratches, avoid using sharp utensils when cooking.
8. Discoloration of stainless steel cookware will result if the pieces are allowed to overheat excessively. For hardto-clean stains or discoloration of the stainless steel, use a nonabrasive stainless steel cleaner. Follow thedirections on the container using a clean, damp sponge or cloth. Do Not scrub finish with a soap-filled steelwool pad or harsh abrasive cleanser as scratching will occur.
9. Overheating may cause food to scorch and stick to cookware.
10.Boiling with large quantities of salt is very corrosive and can cause pits in all forms of cookware. To reducethe chance of this occurring, add salt after water begins to boil. Do not allow salted or seasoned water toremain in stainless cookware for a long period of time as pits can form once it’s cooled. Cookware shouldbe thoroughly cleaned after each use.
11.Do not store this product, or any of its components, in a corrosive environment. A corrosive environment canbe a highly damp area, or a saltwater spray/marine environment. Stainless steel is an iron-based alloy thatcontains a minimum of 11% chromium to make it resist rust, or stain "less" than other steels. Please note thename is not "stain-never", but stainless and that is precisely what it will do. It will stain less. Bayou Classic®
uses Type 201 grade stainless steel. It is a low-nickel, non-magnetic, austenitic stainless steel. It is 16 - 18%chrome, 3.5 - 5.5% nickel, and 5.5 - 7.5% manganese. The manganese provides corrosion resistance andreplaces the nickel in a 2:1 ratio.
WARNINGNever attempt to lift a brew kettle pot filled with water, even cold water. Lifting a pot filled with liquid can resultin serious back and bodily injuries; or splashing of hot liquids can result in serious burns. The handles aredesigned for carrying empty pots.
Although handles are welded to the pot, the attachment could be weakened over time due to bumping duringshipment or movement from storage. Use a pump or gravity siphon to transfer liquids from one pot to the other.Never attempt pouring hot liquid from one pot to the other. Failure to follow this instruction could result inserious burns and bodily injury.

16
High PressureWater
TROUBLE SHOOTING TIPSSometimes the burner does not light or has a only a meager match flame. Other times, the flame blowsout, burns yellow, or there is a flame inside the burner tube. These symptoms are common and easy toremedy. The following Trouble Shooting Tips cover most questions and problems associated with outdoorgas cooker appliances. Save this manual for future reference.
SYMPTOM #1:Burner lights but the flame remains very small and will not increase for heat-up and cooking.CAUSE:Both LP cylinder and regulator couplings contain an EXCESS FLOW safety device that shuts off 90 percentof gas flow should the hose be cut ot severed. Sometimes this safety device can be activated when lightingthe burner. Opening the cylinder valve too quickly can create the rapid flow of gas that activates theexcess flow safety device.POSSIBLE SOLUTION:Repeat Lighting Instructions steps 1 through 4 onon page 17. Follow lighting instructions and be certainto S-L-O-W-L-Y open cylinder valve one full turn,then S-L-O-W-L-Y open regulator control knobwhen lighting.
SYMPTOM #2:Burner will not light.CAUSE:Blockage in burner from insects, spider webs, dirt dobber or wasp nests and debris.This is a frequent problem in the Deep South.POSSIBLE SOLUTION:Clean burner to remove spiders, insect nests and other debris.1. Turn gas OFF at LP cylinder valve and at regulator control knob.2. Disconnect regulator hose assembly from burner and remove air control shutter.3. Turn cooker frame upside down. Disconnect retaining nut from burner support bar, then remove
burner from frame.4. Loosen and disconnect central bolt from burner
and remove flame spreader from burner cup.NOTE: Wear eye protection when cleaning burner.5. Use a narrow bottle brush or a stiff wire bent into a small hook
to run through the burner tube. Push the bottle brush or bent wire back and forth through the burner tube.
6. Hold the burner with the tube facing down and spray water from a garden hose into the opening in the burner cup.
7. It may be necessary to repeat steps 5 & 6 until water flows freely out of the burner tube.8. Wire brush entire surface of burner to remove food residue and dirt.9. Wire brush bottom of flame spreader and side ports to be certain all grooves are free of debris.10. Re-assemble flame spreader and air shutter on burner. Reinstall burner, heat shield and locking nut
on support bar inside cooker stand. Re-connect hose to burner.11. If burner is damaged, a replacement burner can be purchased.
S-L-O-W-L-Y TurnRegulator ON
S-L-O-W-L-Y TurnLP Cylinder Valve
One Full Turn
Remove bolt andflame spreader
46
Stiff Wirewith Hook
BG10Burner

17
TROUBLE SHOOTING GUIDESYMPTOM
Burner will not lightand burner tube is clean
Not enough gas flow frompropane tank
Open cylinder valve all theway
CAUSE POSSIBLE SOLUTION
Low gas level in propane tank,or tank is empty
Check gas level in propane tank,re-fill or exchange tank
Damaged burner Contact 1-800-864-6194; Model BG10
Hissing or gurgling soundscoming through gas trainfrom tank to burner
Water in burner Check burner for moisture, makesure burner is dry
Damaged hose Perform soapy water test to checkfor cracks in hose.See page 12; Model M5HPR1
Gas leak Perform soapy water test to checkall connections - See page 12
Yellow, sooty, irregular flame Air shutter not adjusted correctlycausing too much gas in mixture
Adjust air shutter on the burneruntil flame is blue - See page 14
Blockage in burner Clean and check burner forspiders, insect nests and debris
Flame has gone out Low gas level in propane tank,or tank is empty
Check gas level in propane tank
Too much wind Check wind direction and setcooker away from windy areas
Blockage in burner Clean and check burner forspiders, insect nests and debris
Water in burner Check burner for moisture, makesure burner is dry
Burner lights but the flameremains very smallRepeated from page 14
Rapid gas flow from propanetank activates EXCESS FLOWsafety device because regulatorcontrol valve is not in OFFposition
Burner will not lightRepeated from page 14
Blockage in burner from spider webs,insects, dirt dobbers and debris
Disconnect hose from burner. Cleanand check burner for spiders, insectnests and debris
Damaged burner
Too much air and not enoughgas
Turn air shutter to almost closedposition, then re-light the burner
Contact 1-800-864-6194;Model BG10
Do not use this appliance if gasleaks cannot be stopped andcorrected.
Repeat lighting instructions and be certainto S-L-O-W-L-Y open cylinder valve one fullturn, then S-L-O-W-L-Y open regulator valveto light burner. It may be necessary todisconnect, then reconnect the regulator tothe cylinder in order to reset the gas flowsystem. After doing this, make certainregulator control valve is turnedcounter-clockwise to OFF position.
NOTE: Replacement Parts can be purchased at www.thebayou.com or call 1-800-864-6194.Model M5HPR1 Regulator Hose Assembly, Model BG10 Cast Iron Burner
Model BG10

30
Stainless SteelEconomy Brew Kettle
20, 30 & 40-Qt.
www.thebayou.com
Barbour International, Inc. • 101 Cypress Way • Brandon, MS 39042
Stainless Steel6-PC. Brew Kettle Set
8, 10 & 16-GallonStainless Steel
Stockpots with Spigot36-Qt. & 44-Qt.
800-77212" Brew Thermometer
KAB6Bayou® Cooker
with Hose Guard
800-775Brew Spigot
with Bulkhead Fittingsfor a water tight seal
1047Stainless Steel
2-PC. Spoon Set
M791010-FT. Stainless Braided Hose
1/4" MNPT x 3/8"Flare Swivel Brass Connectors
350 PSI Maximum Use
M5HPR-148" Stainless Braided Hose
10 PSI Preset RegulatorBrass Control Valve
3/8" Flare Swivel Fitting
SS84Bayou® Brew Cooker
BCA000140-000
1051Stainless Steel
24" Brew Paddle


![_P8LPI]P ;LP;LP;LP 5ZL1F DF8[ - WordPress.com](https://static.fdokumen.com/doc/165x107/631d1be4b8a98572c10d3520/p8lpip-lplplp-5zl1f-df8-wordpresscom.jpg)