11in1 Mini Rice Cooker - Groupe SEB DAM portal
63
EN ZH MS TH KO 11in1 Mini Rice Cooker
-
Upload
khangminh22 -
Category
Documents
-
view
3 -
download
0
Transcript of 11in1 Mini Rice Cooker - Groupe SEB DAM portal

EN
ZH
MS
TH
KO
11in1 Mini Rice Cooker

15
6
7
9
11
12
15
17
2
3
4
8
16
10
Fig.1 Fig.2 Fig.3a Fig.3b
Fig.4 Fig.5 Fig.6 Fig.7
Fig.12 Fig.13 Fig.14 Fig.15
Fig.19Fig.16 Fig.17 Fig.18
Fig.8 Fig.9 Fig.10 Fig.11
ab
MAX.10cups
10cupsMAX.
ab

15
6
7
9
11
12
15
17
2
3
4
8
16
10
Fig.1 Fig.2 Fig.3a Fig.3b
Fig.4 Fig.5 Fig.6 Fig.7
Fig.12 Fig.13 Fig.14 Fig.15
Fig.19Fig.16 Fig.17 Fig.18
Fig.8 Fig.9 Fig.10 Fig.11
ab
MAX.10cups
10cupsMAX.
ab
1
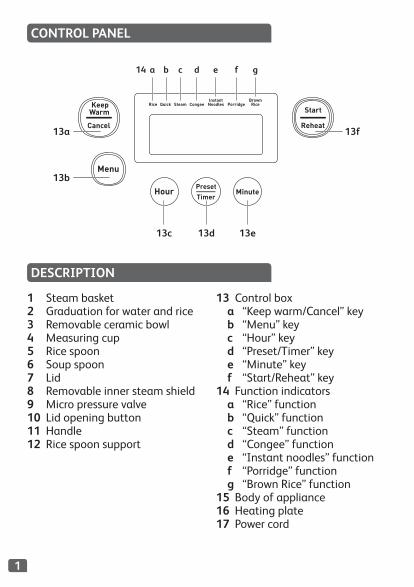
CONTROL PANEL
DESCRiPTiON
1 Steam basket2 Graduation for water and rice 3 Removable ceramic bowl4 Measuring cup5 Rice spoon6 Soup spoon 7 Lid8 Removable inner steam shield9 Micro pressure valve10 Lid opening button11 Handle 12 Rice spoon support
13 Control boxa “Keep warm/Cancel” keyb “Menu” keyc “Hour” keyd “Preset/Timer” keye “Minute” keyf “Start/Reheat” key
14 Function indicatorsa “Rice” functionb “Quick” functionc “Steam” functiond “Congee” functione “Instant noodles” functionf “Porridge” functiong “Brown Rice” function
15 Body of appliance16 Heating plate17 Power cord
13a 13f
13b
13c
a b c d fe g
13d 13e
14

2
EN
THE APPLiANCE
• This rice cooker is equipped with 11 multi-functions: Rice, Quick, Steam, Congee, Instant Noodles, Porridge, Brown Rice, Reheat, Keep Warm, Adjustable Timer and Preset.•When the power cord is installed into the power outlet and into the
socket on the cooker base, the appliance will ring a long sound «Bi». Then the screen display shows «SUP», and the “Start” light flickers orange. You can select the menu functions as you wish by pushing the Menu key.• At the end of the cooking period, the appliance will automatically
switch over to keep warm which will last up to 24h.•Using dishwashing machine is not recommended except the steam
basket.• Do not touch the heating element when the product is plugged or after
cooking.• Do not carry the product in use or just after cooking.• This appliance is only intended for indoor use.
BEfORE THE fiRST uSE
unpack the appliance• Remove the appliance from the packaging and unpack all the
accessories and printed documents.• Open the lid by pushing the opening button located on the housing – fig. 1.Read the instructions and carefully follow the operating method.
Clean the appliance• Remove the ceramic bowl – fig. 2, the steam shield and the pressure
valve – fig. 3a and 3b.• Clean the bowl, the valve and the steam shield with a sponge and
washing up liquid.•Wipe the outside of the appliance and the lid with a damp cloth.• Dry off carefully.• Put all the elements back in their original position. Install the steam
shield in the right positions on the top lid of machine. Then, put the steam shield behind the 2 ribs and push it down until it’s fixed. Install the detachable cord into the socket on the cooker base.• Insert the spoon support on the right side of the handle – fig. 4
3
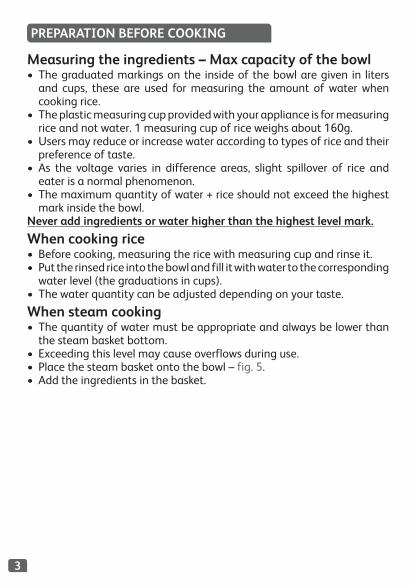
PREPARATiON BEfORE COOKiNG
Measuring the ingredients – Max capacity of the bowl• The graduated markings on the inside of the bowl are given in liters
and cups, these are used for measuring the amount of water when cooking rice.• The plastic measuring cup provided with your appliance is for measuring
rice and not water. 1 measuring cup of rice weighs about 160g.•Users may reduce or increase water according to types of rice and their
preference of taste.• As the voltage varies in difference areas, slight spillover of rice and
eater is a normal phenomenon.• The maximum quantity of water + rice should not exceed the highest
mark inside the bowl.Never add ingredients or water higher than the highest level mark.
When cooking rice• Before cooking, measuring the rice with measuring cup and rinse it.• Put the rinsed rice into the bowl and fill it with water to the corresponding
water level (the graduations in cups).• The water quantity can be adjusted depending on your taste.
When steam cooking• The quantity of water must be appropriate and always be lower than
the steam basket bottom.• Exceeding this level may cause overflows during use.• Place the steam basket onto the bowl – fig. 5.• Add the ingredients in the basket.

4
ENfOR ALL fuNCTiONS
COOKiNG RiCE TABLES
• Carefully wipe the outside of the bowl (especially the bottom). Make sure that there are no foreign residues or liquid underneath the bowl and on the heating element – fig. 6.• Place the bowl into the appliance, making sure that it is correctly
positioned – fig. 7.•Make sure that the steam shield is correctly in position.• Close the lid in place with a sound of “click”.• Plug the power cord into the socket on the base and then plug another
end of power cord into power outlet.• Do not switch on the appliance until all the above stages have been
completed.
Never place your hand on the steam vent during cooking, as there is a danger of burns – fig. 11. if you wish to change the selected cooking menu because of an error, press <KEEP WARM/CANCEL> key and re-choose the menu you want.Only use the inner pot provided with the appliance.Do not pour water or put ingredients in the appliance without the bowl inside.
• The table below give a guide to cook different types of rice. For best results, we recommend using ordinary rice rather than ‘easy cook’ type of the rice which tends to give a stickier rice and may adhere to the bowl.• To cook 1 cup of white rice (serves 2 small or 1 large portion), use 1
measuring cup of white rice and then add one and a half measuring cup of water. With some types of rice it is normal for a little rice to stick on the base when cooking 1 cup of rice. To cook other quantity of white rice, refer to cooking guide below.• The maximum quantity of water + rice should not exceed the highest
mark inside the bowl – fig. 8. Depending on the type of rice, quantities of water may need adjustment. See the table below:

5
COOKiNG GuiDE fOR WHiTE RiCE – 4 CuPS
Measuring cups
Weight of rice
Water level in the bowl (+ rice) Serves Approximate
cooking time
2 300 g 2 cups mark 3pers.–4pers. 40 – 45 min
4 600 g 4 cups mark 5pers.–6pers. 50 – 55 min
COOKiNG GuiDE fOR BROWN RiCE – 4 CuPS
Measuring cups
Weight of rice
Water level in the bowl (+ rice) Serves Approximate
cooking time
2 300 g 2 cups mark 3pers.–4pers. 60 – 65 min
4 600 g 4 cups mark 5pers.–6pers. 75 – 80 min
functionTime set
PresetDefault Range Every
Rice Automatic
0-24 h
Quick Automatic
Steam 40 mins 30 mins - 2h1min for
“minute” key 1h for
“hour” key
Congee 1h10 1h - 1h30
Instant noodles 1h30 1h - 3h
Porridge 2h 1h30 - 2h30
Brown rice Automatic
SOME RECOMMENDATiONS fOR BEST RESuLTS WHEN COOKiNG RiCE
•Measure the rice and rinse it thoroughly under running water in sieve for a long time except for risotto rice which should not be rinsed. Then place the rice in the bowl together with the corresponding quantity of water.•Make sure that the rice is well distributed around the whole surface of
the bowl, in order to allow even cooking.

6
EN•Water may be substituted to stock. If using stock, there is the risk of rice browning a bit in the bottom.• Do not open the lid during cooking a steam will escape and this will
affect the cooking time and the taste.•When the rice is ready, the “Keep Warm” indicator lights on, stir the rice
and then leave it in the rice cooker for a few minutes longer in order to get perfect rice with separate grains.
«RiCE» fuNCTiON
«QuiCK» fuNCTiON
• Place the appliance on a flat, stable, heat-resistant work surface away from water splashes and any other sources of heat.• Pour the required quantity of rice into the bowl using the measuring
cup provided – fig.9. Then fill with cold water up to the corresponding “CUP” mark printed in the bowl – fig.10. • Close the lid.Note: Always add the rice first otherwise you will have too much water.• Press «Menu» key to select function «Rice». The screen displays « »,
the light of «Start» flickers red, then press «Start» key. The rice cooker enters into «Rice» cooking status, the light of «Start» lights up, the LCD screen flickers « ».•When the water boiled dry, the rice cooker will beep twice and will start
to simmer. The screen will count down the simmering time: 14 minutes.• After simmering, the buzzer will ring five “bip”, the rice cooker will enter
keep warm status with the “Keep Warm” indicator turning on and the screen will display “00:00”.
• Press «Menu» key to select function «Quick». The screen displays « », the light of «Start» flickers red, then press «Start» key. The rice cooker enters into «Quick» cooking status, the light of «Start» lights up, the LCD screen flickers « ».•When the water boiled dry, the rice cooker will beep twice and will start
to simmer. The screen will count down the simmering time: 10 minutes.• After simmering, the buzzer will ring five “bip”, the rice cooker will enter
keep warm status with the “Keep Warm” indicator turning on and the screen will display “00:00”.
7
«STEAM» fuNCTiON
«CONGEE» fuNCTiON
«iNSTANT NOODLES» fuNCTiON
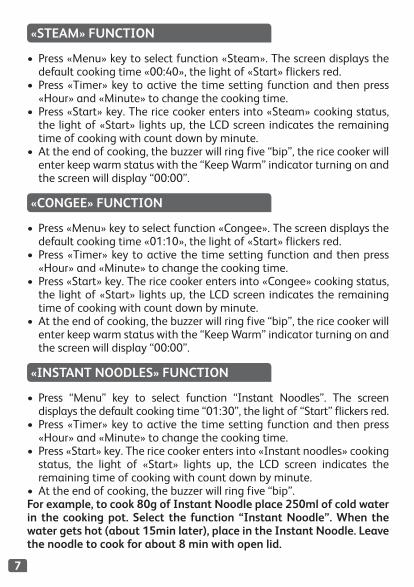
• Press «Menu» key to select function «Steam». The screen displays the default cooking time «00:40», the light of «Start» flickers red.• Press «Timer» key to active the time setting function and then press
«Hour» and «Minute» to change the cooking time.• Press «Start» key. The rice cooker enters into «Steam» cooking status,
the light of «Start» lights up, the LCD screen indicates the remaining time of cooking with count down by minute.• At the end of cooking, the buzzer will ring five “bip”, the rice cooker will
enter keep warm status with the “Keep Warm” indicator turning on and the screen will display “00:00”.
• Press «Menu» key to select function «Congee». The screen displays the default cooking time «01:10», the light of «Start» flickers red.• Press «Timer» key to active the time setting function and then press
«Hour» and «Minute» to change the cooking time.• Press «Start» key. The rice cooker enters into «Congee» cooking status,
the light of «Start» lights up, the LCD screen indicates the remaining time of cooking with count down by minute.• At the end of cooking, the buzzer will ring five “bip”, the rice cooker will
enter keep warm status with the “Keep Warm” indicator turning on and the screen will display “00:00”.
• Press “Menu” key to select function “Instant Noodles”. The screen displays the default cooking time “01:30”, the light of “Start” flickers red.• Press «Timer» key to active the time setting function and then press
«Hour» and «Minute» to change the cooking time.• Press «Start» key. The rice cooker enters into «Instant noodles» cooking
status, the light of «Start» lights up, the LCD screen indicates the remaining time of cooking with count down by minute.• At the end of cooking, the buzzer will ring five “bip”.for example, to cook 80g of instant Noodle place 250ml of cold water in the cooking pot. Select the function “instant Noodle”. When the water gets hot (about 15min later), place in the instant Noodle. Leave the noodle to cook for about 8 min with open lid.
8
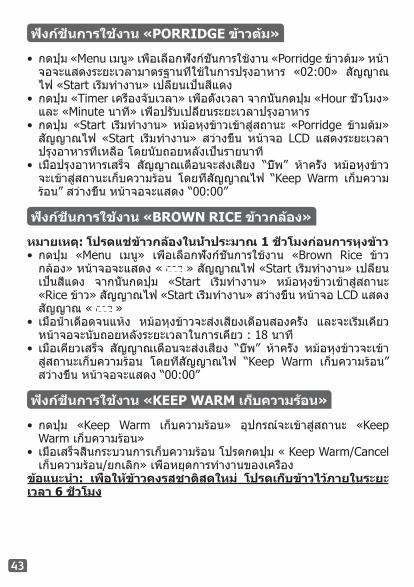
EN«PORRiDGE» fuNCTiON
«BROWN RiCE» fuNCTiON
«KEEP WARM» fuNCTiON
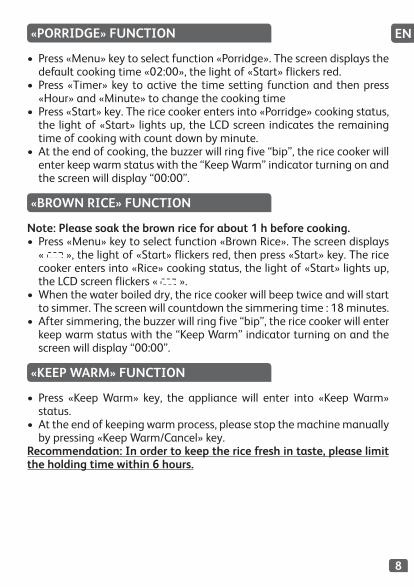
• Press «Menu» key to select function «Porridge». The screen displays the default cooking time «02:00», the light of «Start» flickers red.• Press «Timer» key to active the time setting function and then press
«Hour» and «Minute» to change the cooking time• Press «Start» key. The rice cooker enters into «Porridge» cooking status,
the light of «Start» lights up, the LCD screen indicates the remaining time of cooking with count down by minute.• At the end of cooking, the buzzer will ring five “bip”, the rice cooker will
enter keep warm status with the “Keep Warm” indicator turning on and the screen will display “00:00”.
Note: Please soak the brown rice for about 1 h before cooking.• Press «Menu» key to select function «Brown Rice». The screen displays
« », the light of «Start» flickers red, then press «Start» key. The rice cooker enters into «Rice» cooking status, the light of «Start» lights up, the LCD screen flickers « ».•When the water boiled dry, the rice cooker will beep twice and will start
to simmer. The screen will countdown the simmering time : 18 minutes.• After simmering, the buzzer will ring five “bip”, the rice cooker will enter
keep warm status with the “Keep Warm” indicator turning on and the screen will display “00:00”.
• Press «Keep Warm» key, the appliance will enter into «Keep Warm» status.• At the end of keeping warm process, please stop the machine manually
by pressing «Keep Warm/Cancel» key.Recommendation: in order to keep the rice fresh in taste, please limit the holding time within 6 hours.

9
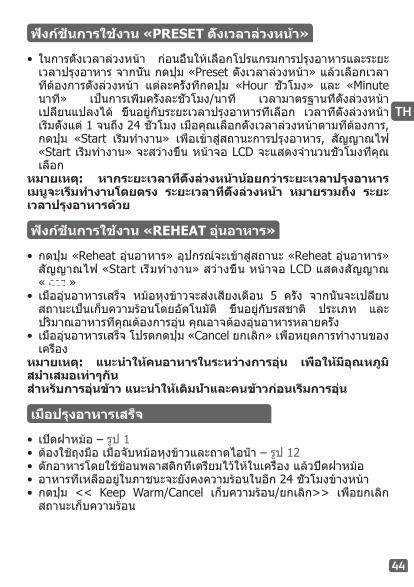
«PRESET» fuNCTiON
«REHEAT» fuNCTiON
ON COMPLETiON Of COOKiNG
• To use the preset function, choose a cooking program and the cooking time first. Then, press the key «Preset» and choose the preset time. Each press of «Hour» and «Minute» key can increase or decrease one hour/minute. The default preset time will change depending on the selected cooking time. The Range of preset is from 1 up to 24 hours. When you have chosen the required preset time, press the «Start» key to enter cooking status, the «Start» indicator will remain on and LCD screen will display the number of hours you have chosen.
Note: if the chosen preset time is lower than the time of cooking, the menu starts directly. The preset time includes the cooking time.
• Press «Reheat» key, the appliance will enter into «Reheat» status. The light of “Start” lights up and the LCD screen flickers « ».• At the end of Reheat the rice cooker will bip 5 times then the product
turns to keep warm automatically. Depending on your taste, the type and and the quantity of food that you want to reheat, it may necessary to do the Reheat function several times.• At the end of reheating process, please stop the machine manually by
pressing «Cancel» key.Note: it is recommended to stir the food during Reheat function in order to have better temperature homogeneity.for rice reheating, it is recommended to add water and stir before starting to reheat.
• Open the lid – fig 1.• Glove must be used when manipulating the cooking bowl and steam
tray – fig. 12.• Serve the food using the plastic spoon provided with your appliance
and reclose the lid.• The food remaining in the container will keep warm for any second
serving in the coming 24 hours.• Press << Keep Warm/Cancel>> key to finish keep warm status.

10
ENCLEANiNG AND MAiNTENANCE
• To ensure the rice cooker is unplugged and complete cooled down before cleaning and maintenance.• It is strongly advised to clean the appliance after each use with a
sponge – fig. 13.
Bowl, steam basket (fig.14)•Use hot water liquid soap and a sponge to clean the bowl, the steam
basket. Scoring powders and metal sponges are not recommended.• If food has stuck to be bottom, you may put water in the bowl to soak
for a while before washing.• Dry the bowl carefully.• It is possible to clean the steam basket in the dishwasher machine but
not the bowl.
Taking care of the bowlFor the bowl, carefully follow the instructions below:• To ensure the maintenance of bowl quality, it is recommended not to
cut food in it.•Make sure you put the bowl back into the rice cooker.•Use the plastic spoon provided or a wooden spoon and not a metal
type so as to avoid damaging the bowl surface – fig. 15.• To avoid any risk of corrosion, do not pour vinegar into the bowl.• The color of the bowl surface may change after using for the first time or
after longer use. This change in color is due to the action of steam and eater and does not have any effect on the use of the rice cooker, nor is it dangerous for your health, It is perfectly safe to continue using it.
Cleaning the micro pressure valve•When cleaning the micro pressure valve, please remove it from the lid
– fig.16 and open it by rotating in the direction of “open” – fig.17a and 17b. After cleaning it, please wipe dry it and rotate it in the direction of “close”, then put it back to the lid of the rice cooker – fig. 18a and 18b.
Cleaning and care of the other parts of the appliance•Unplug the appliance before cleaning.• Clean the outside of the rice cooker – fig. 19. the inside of the lid – fig.14
and the cord with a damp cloth and wipe dry. Do not use abrasive products.• Do not use water to clean the interior of the appliance body as it could
damage the heat sensor.
11
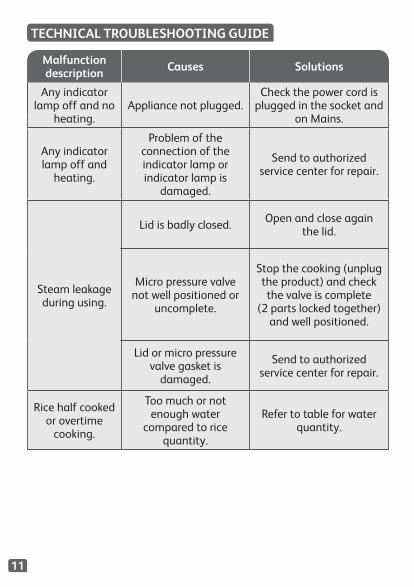
Malfunction description Causes Solutions
Any indicator lamp off and no
heating.Appliance not plugged.
Check the power cord is plugged in the socket and
on Mains.
Any indicator lamp off and
heating.
Problem of the connection of the indicator lamp or indicator lamp is
damaged.
Send to authorized service center for repair.
Steam leakage during using.
Lid is badly closed. Open and close again the lid.
Micro pressure valve not well positioned or
uncomplete.
Stop the cooking (unplug the product) and check the valve is complete
(2 parts locked together) and well positioned.
Lid or micro pressure valve gasket is
damaged.
Send to authorized service center for repair.
Rice half cooked or overtime
cooking.
Too much or not enough water
compared to rice quantity.
Refer to table for water quantity.
TECHNiCAL TROuBLESHOOTiNG GuiDE
12
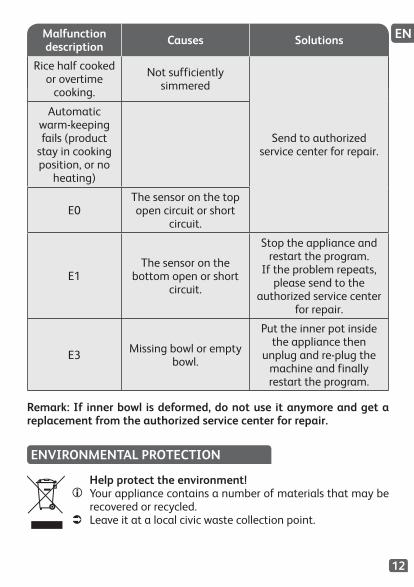
ENMalfunction description Causes Solutions
Rice half cooked or overtime
cooking.
Not sufficiently simmered
Send to authorized service center for repair.
Automatic warm-keeping fails (product
stay in cooking position, or no
heating)
E0The sensor on the top open circuit or short
circuit.
E1The sensor on the
bottom open or short circuit.
Stop the appliance and restart the program.
If the problem repeats, please send to the
authorized service center for repair.
E3 Missing bowl or empty bowl.
Put the inner pot inside the appliance then
unplug and re-plug the machine and finally restart the program.
Remark: if inner bowl is deformed, do not use it anymore and get a replacement from the authorized service center for repair.
ENViRONMENTAL PROTECTiON
Help protect the environment!Your appliance contains a number of materials that may be recovered or recycled.Leave it at a local civic waste collection point.

13
控制版面
描述
1 蒸盤2 水量和米量刻度3 可拆式陶晶內鍋4 量杯5 飯勺6 湯勺 7 蓋8 可拆式內蓋9 微壓閥10 開蓋按鈕11 把手12 飯勺架13 控制面板
a 「Keep warm/Cancel」 (保溫/取消)鍵
b 「Menu」(選單)鍵c 「Hour」(小時)鍵
d 「Preset/Timer」 (預設時間/計時器)鍵
e 「Minute」(分鐘)鍵f 「Start/Reheat」
(開始/翻熱)鍵14 功能指示燈
a 「Rice」(煮飯)功能b 「Quick」(快煮)功能c 「Steam」(蒸煮)功能d 「Congee」(煲粥)功能e 「Instant noodles」
(即食麵)功能f 「Porridge」(稀飯)功能g 「Brown Rice」(糙米)功能
15 電飯煲機身16 發熱板17 電源線
13a 13f
13b
13c
a b c d fe g
13d 13e
14

14
ZH
電飯煲功能
煮食前的準備
• 本電飯煲有十一項功能:煮飯、快煮、蒸煮、煲粥、即食麵、稀飯、糙米、翻熱、保溫、可調式計時、預設時間。
• 當電源線插入電飯煲底部插座時,電飯煲會發出一聲長「嗶」。然後螢幕會顯示「SUP」,燈色「Start」(開始)燈號會閃爍。你可以按選單鍵選擇所需功能。
• 烹調完成後,電飯煲會自動調至保溫模式,最長維持24小時。• 除蒸盤部分以外,本產品不適宜以洗碗碟機清洗。• 插上電源或烹調完成後,請勿觸摸電飯煲發熱元件。• 烹調進行期間或剛好結束時請勿拿起電飯煲。• 本產品只適合室內使用。
量度食材份量 - 內鍋最大容量• 內鍋內的刻度以公升及量杯數作單位,方便用家煮飯時量度水量。• 隨機附送的膠製量杯只適宜量米,不適宜量水。1量杯的米約重
160克。• 用家可按照米的品種以及個人口味增減水量。• 由於各地區電壓有別,米飯及食材有少量溢出乃正常現象。• 水連同米的最大容量不應超過內鍋內最高刻度。食材或水切勿超過最高刻度。
初次使用前
拆開包裝• 拆開包裝,取出電飯煲,並取出所有配件及印刷品。• 按下煲外的開蓋按鈕,打開煲蓋 – 圖1。小心閱讀以下指引,並按照所示方法操作。清洗電飯煲• 取出陶晶內鍋 – 圖2、內蓋、微壓閥– 圖3a 及 圖3b。• 用海綿及硯液清洗內鍋、微壓閥、內蓋。• 用濕布擦拭機身表面及蓋。• 小心擦乾。• 將所有組件放回原位。將內蓋裝在電飯煲頂蓋正確的位置。然後將
內蓋放在兩個勾位後,向下按直至固定為止。將可拆式電線插入電飯煲底座插頭。
• 將飯勺架插進電飯煲把手右邊 – 圖4
15
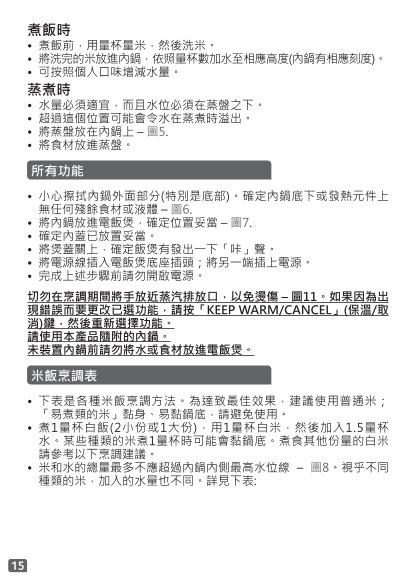
煮飯時• 煮飯前,用量杯量米,然後洗米。• 將洗完的米放進內鍋,依照量杯數加水至相應高度(內鍋有相應刻度)。• 可按照個人口味增減水量。蒸煮時• 水量必須適宜,而且水位必須在蒸盤之下。• 超過這個位置可能會令水在蒸煮時溢出。• 將蒸盤放在內鍋上 – 圖5.• 將食材放進蒸盤。
所有功能
米飯烹調表
• 小心擦拭內鍋外面部分(特別是底部)。確定內鍋底下或發熱元件上無任何殘餘食材或液體 – 圖6.
• 將內鍋放進電飯煲,確定位置妥當 – 圖7.• 確定內蓋已放置妥當。• 將煲蓋關上,確定飯煲有發出一下「咔」聲。• 將電源線插入電飯煲底座插頭;將另一端插上電源。• 完成上述步驟前請勿開啟電源。
切勿在烹調期間將手放近蒸汽排放口,以免燙傷 – 圖11。如果因為出現錯誤而要更改已選功能,請按「KEEP WARM/CANCEL」(保溫/取消)鍵,然後重新選擇功能。請使用本產品隨附的內鍋。未裝置內鍋前請勿將水或食材放進電飯煲。
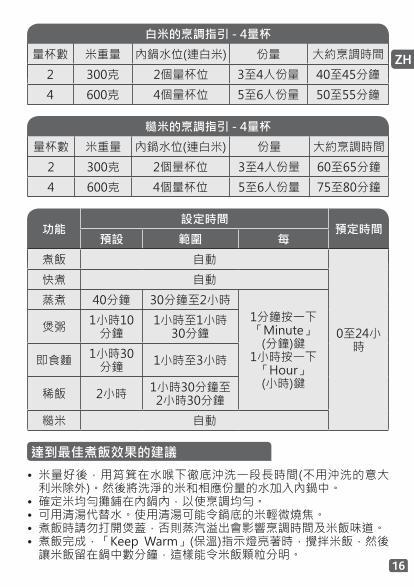
• 下表是各種米飯烹調方法。為達致最佳效果,建議使用普通米; 「易煮類的米」黏身、易黏鍋底,請避免使用。
• 煮1量杯白飯(2小份或1大份),用1量杯白米,然後加入1.5量杯水。某些種類的米煮1量杯時可能會黏鍋底。煮食其他份量的白米請參考以下烹調建議。
• 米和水的總量最多不應超過內鍋內側最高水位線 – 圖8。視乎不同種類的米,加入的水量也不同。詳見下表:
16
ZH
白米的烹調指引 - 4量杯
量杯數 米重量 內鍋水位(連白米) 份量 大約烹調時間
2 300克 2個量杯位 3至4人份量 40至45分鐘
4 600克 4個量杯位 5至6人份量 50至55分鐘
糙米的烹調指引 - 4量杯
量杯數 米重量 內鍋水位(連白米) 份量 大約烹調時間
2 300克 2個量杯位 3至4人份量 60至65分鐘
4 600克 4個量杯位 5至6人份量 75至80分鐘
功能設定時間
預定時間預設 範圍 每
煮飯 自動
0至24小時
快煮 自動
蒸煮 40分鐘 30分鐘至2小時1分鐘按一下「Minute」
(分鐘)鍵 1小時按一下
「Hour」 (小時)鍵
煲粥 1小時10分鐘
1小時至1小時30分鐘
即食麵 1小時30分鐘 1小時至3小時
稀飯 2小時 1小時30分鐘至2小時30分鐘
糙米 自動
達到最佳煮飯效果的建議
• 米量好後,用筲箕在水喉下徹底沖洗一段長時間(不用沖洗的意大利米除外)。然後將洗淨的米和相應份量的水加入內鍋中。
• 確定米均勻攤鋪在內鍋內,以使烹調均勻。• 可用清湯代替水。使用清湯可能令鍋底的米輕微燒焦。• 煮飯時請勿打開煲蓋,否則蒸汽溢出會影響烹調時間及米飯味道。• 煮飯完成,「Keep Warm」(保溫)指示燈亮著時,攪拌米飯,然後
讓米飯留在鍋中數分鐘,這樣能令米飯顆粒分明。
17
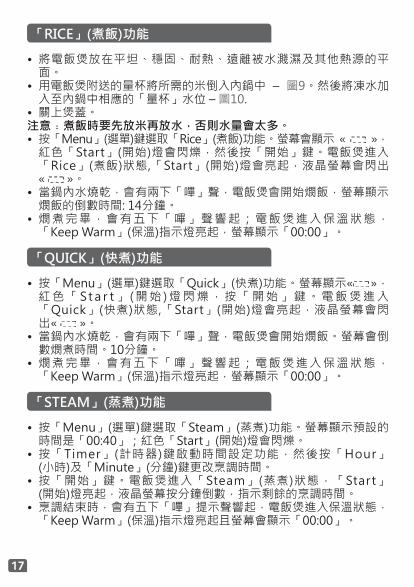
「RICE」(煮飯)功能
「QUICK」(快煮)功能
• 將電飯煲放在平坦、穩固、耐熱、遠離被水濺濕及其他熱源的平面。
• 用電飯煲附送的量杯將所需的米倒入內鍋中 – 圖9。然後將凍水加入至內鍋中相應的「量杯」水位 – 圖10.
• 關上煲蓋。注意﹕煮飯時要先放米再放水,否則水量會太多。• 按「Menu」(選單)鍵選取「Rice」(煮飯)功能。螢幕會顯示 « »,
紅色「Start」(開始)燈會閃爍,然後按「開始」鍵。電飯煲進入「Rice」(煮飯)狀態,「Start」(開始)燈會亮起,液晶螢幕會閃出 « »。
• 當鍋內水燒乾,會有兩下「嗶」聲,電飯煲會開始燘飯,螢幕顯示燘飯的倒數時間: 14分鐘。
• 燘 煮 完 畢 , 會 有 五 下 「 嗶 」 聲 響 起 ; 電 飯 煲 進 入 保 溫 狀 態 ,「Keep Warm」(保溫)指示燈亮起,螢幕顯示「00:00」。
• 按「Menu」(選單)鍵選取「Quick」(快煮)功能。螢幕顯示« », 紅 色 「 St a r t 」 ( 開 始 ) 燈 閃 爍 , 按 「 開 始 」 鍵 。 電 飯 煲 進 入「Quick」(快煮)狀態,「Start」(開始)燈會亮起,液晶螢幕會閃出« »。
• 當鍋內水燒乾,會有兩下「嗶」聲,電飯煲會開始燘飯。螢幕會倒數燘煮時間。10分鐘。
• 燘 煮 完 畢 , 會 有 五 下 「 嗶 」 聲 響 起 ; 電 飯 煲 進 入 保 溫 狀 態 ,「Keep Warm」(保溫)指示燈亮起,螢幕顯示「00:00」。
「STEAM」(蒸煮)功能
• 按「Menu」(選單)鍵選取「Steam」(蒸煮)功能。螢幕顯示預設的時間是「00:40」;紅色「Start」(開始)燈會閃爍。
• 按「Timer」(計時器)鍵啟動時間設定功能,然後按「Hour」 (小時)及「Minute」(分鐘)鍵更改烹調時間。
• 按「開始」鍵。電飯煲進入「Steam」(蒸煮)狀態,「Start」 (開始)燈亮起,液晶螢幕按分鐘倒數,指示剩餘的烹調時間。
• 烹調結束時,會有五下「嗶」提示聲響起,電飯煲進入保溫狀態,「Keep Warm」(保溫)指示燈亮起且螢幕會顯示「00:00」。

18
ZH
「CONGEE」(煲粥)功能
「INSTANT NOODLES」(即食麵)功能
• 按「Menu」(選單)鍵選取「Congee」(煲粥)功能。螢幕顯示預設烹調時間「01:10」,紅色「Start」(開始)燈閃爍。
• 按「Timer」(計時器)鍵啟動時間設定功能,然後按「Hour」(小時)及「Minute」(分鐘)更改烹調時間。
• 按「開始」鍵。電飯煲進入「Congee」(煲粥)狀態,「Start」(開始)燈會亮起,液晶螢幕按分鐘倒數,指示剩餘的烹調時間。
• 烹 調 完 畢 , 會 有 五 下 「 嗶 」 聲 響 起 ; 電 飯 煲 進 入 保 溫 狀 態 ,「Keep Warm」(保溫)指示燈亮起,螢幕顯示「00:00」。
• 按「Menu」(選單)鍵選取「即食麵」功能。螢幕顯示預設烹調時間「01:30」,紅色「Start」(開始)燈閃爍。
• 按「Timer」(計時器)鍵啟動時間設定功能,然後按「Hour」(小時)及「Minute」(分鐘)更改烹調時間。
• 按「開始」鍵。電飯煲進入「即食麵」狀態,「Start」(開始)燈會亮起,液晶螢幕按分鐘倒數,指示剩餘的烹調時間。
• 烹調完畢,會有五下「嗶」聲響起。例如,煮80克即食麵需放250毫升凍水。選取「即食麵」功能。當水熱時(約15分鐘後),放入即食麵。開蓋煮大約8分鐘。
「PORRIDGE」(稀飯)功能
「BROWN RICE」(糙米)功能
• 按「Menu」(選單)鍵選取「Porridge」(稀飯)功能。螢幕顯示預設烹調時間「2:00」,紅色「Start」(開始)燈閃爍。
• 按「Timer」(計時器)鍵啟動時間設定功能,然後按「Hour」(小時)及「Minute」(分鐘)鍵更改烹調時間。
• 按「開始」鍵。電飯煲進入「Porridge」(稀飯)狀態,「Start」(開始)燈會亮起,液晶螢幕按分鐘倒數,指示剩餘的烹調時間。
• 烹 調 完 畢 , 會 有 五 下 「 嗶 」 聲 響 起 ; 電 飯 煲 進 入 保 溫 狀 態 ,「Keep Warm」(保溫)指示燈亮起,螢幕顯示「00:00」。
注意:烹調糙米前請將米浸水大約1小時。• 按「Menu」(選單)鍵選取「Brown Rice」(糙米)功能。螢幕顯示
« »,紅色「Start」(開始)燈閃爍,然後按「開始」鍵。電飯煲
19
「KEEP WARM」(保溫)功能
• 按「Keep Warm」(保溫)鍵,使電飯煲進入「Keep Warm」(保溫)狀態。
• 保溫程序結束後,請自行按「Keep warm/Cancel」(保溫/取消)鍵將電飯煲停止。
建議﹕為保持米飯新鮮可口,請將保溫時間控制在六個小時以內。
「PRESET」(預設時間)功能
• 使用前,先選擇烹調程式以及烹調時間。然後按「Preset」 (預設時間)鍵選取預定的時間。每按一下「Hour」(小時)及「Minute」(分鐘)鍵可增加或減少一小時/分鐘。預設的預定時間會因應所選的烹調時間而改變。預設時間的範圍是由1到24小時。當你已選取所需的預定時間後,按「開始」鍵進入烹調狀態,「開始」指示燈會保持亮著;液晶螢幕會顯示你所選的時間。
注意:如果所選的預設時間少於烹調時間,選單會直接開始。預設時間包括烹調時間。
「REHEAT」(翻熱)功能
• 按「Reheat」(翻熱)鍵,電飯煲會進入「Reheat」(翻熱)狀態。「Start」(開始)燈亮起,液晶螢幕會閃出« »。
• 翻熱完成後電飯煲會有五下「嗶」聲,然後自動進入保溫狀態。你可以按自己的口味翻熱不同類型和份量的食物,這樣或有需要使用數次翻熱功能。
• 翻熱完成後,請按「Cancel」(取消)鍵自行停止電飯煲運作。注意:建議在翻熱期間攪拌食物,讓熱力平均分佈。翻熱米飯時,建議開始前先加水再攪拌。
進入「Brown Rice」(糙米)狀態,「Start」(開始)燈會亮起,液晶螢幕會閃出« »。
• 當鍋內水燒乾,會有兩下「嗶」聲,電飯煲會開始燘飯。螢幕會倒數燘煮時間:18分鐘。
• 燘 煮 完 畢 , 會 有 五 下 「 嗶 」 聲 響 起 ; 電 飯 煲 進 入 保 溫 狀 態 ,「Keep Warm」(保溫)指示燈亮起,螢幕顯示「00:00」。
20
ZH
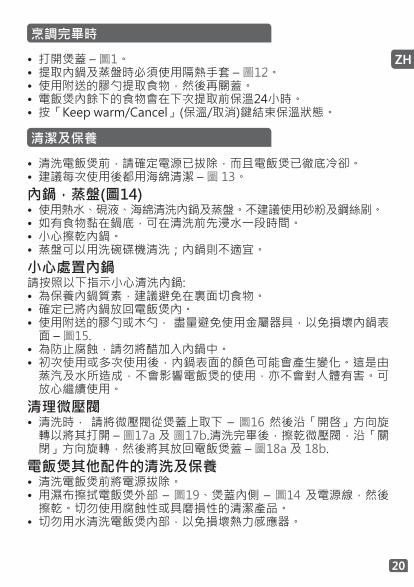
烹調完畢時
• 打開煲蓋 – 圖1。• 提取內鍋及蒸盤時必須使用隔熱手套 – 圖12。• 使用附送的膠勺提取食物,然後再關蓋。• 電飯煲內餘下的食物會在下次提取前保溫24小時。• 按「Keep warm/Cancel」(保溫/取消)鍵結束保溫狀態。
清潔及保養
• 清洗電飯煲前,請確定電源已拔除,而且電飯煲已徹底冷卻。• 建議每次使用後都用海綿清潔 – 圖 13。內鍋,蒸盤(圖14)• 使用熱水、硯液、海綿清洗內鍋及蒸盤。不建議使用砂粉及鋼絲刷。• 如有食物黏在鍋底,可在清洗前先浸水一段時間。• 小心擦乾內鍋。• 蒸盤可以用洗碗碟機清洗;內鍋則不適宜。小心處置內鍋請按照以下指示小心清洗內鍋:• 為保養內鍋質素,建議避免在裏面切食物。• 確定已將內鍋放回電飯煲內。• 使用附送的膠勺或木勺, 盡量避免使用金屬器具,以免損壞內鍋表
面 – 圖15.• 為防止腐蝕,請勿將醋加入內鍋中。• 初次使用或多次使用後,內鍋表面的顏色可能會產生變化。這是由
蒸汽及水所造成,不會影響電飯煲的使用,亦不會對人體有害。可放心繼續使用。
清理微壓閥• 清洗時, 請將微壓閥從煲蓋上取下 – 圖16 然後沿「開啓」方向旋
轉以將其打開 – 圖17a 及 圖17b.清洗完畢後,擦乾微壓閥,沿「關閉」方向旋轉,然後將其放回電飯煲蓋 – 圖18a 及 18b.
電飯煲其他配件的清洗及保養• 清洗電飯煲前將電源拔除。• 用濕布擦拭電飯煲外部 – 圖19、煲蓋內側 – 圖14 及電源線,然後
擦乾。切勿使用腐蝕性或具磨損性的清潔產品。• 切勿用水清洗電飯煲內部,以免損壞熱力感應器。

21
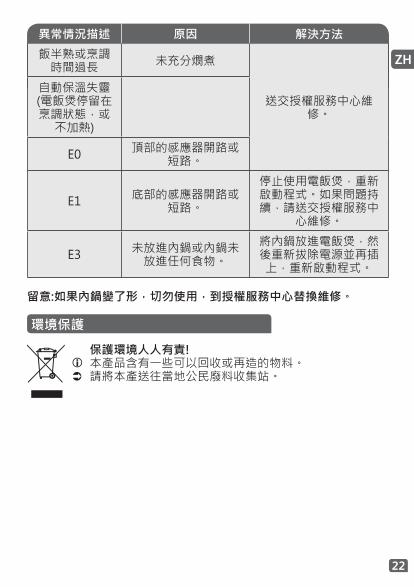
異常情況描述 原因 解決方法
任何指示燈未亮而且不加
熱。電飯煲未插上電源。
檢查電飯煲電源線是否已插上底座插頭以及電
源。
任何指示燈未亮但加熱。
顯示燈有連接問題或顯示燈損壞。
送交授權服務中心維修。
使用時洩漏蒸汽。
未妥善關蓋。 打開蓋再蓋上。
微壓閥未放好或不完整。
停止烹調(拔掉電源線)並檢查閥是否完整(兩部分互相緊鎖)和安放妥當。
蓋或微壓閥墊片損壞 送交授權服務中心維修。
飯半熟或烹調時間過長
相對於米量放水太多或太少 參閱使用水量表。
技術疑難排解
22
ZH
異常情況描述 原因 解決方法
飯半熟或烹調時間過長 未充分燘煮
送交授權服務中心維修。
自動保溫失靈 (電飯煲停留在烹調狀態,或
不加熱)
E0 頂部的感應器開路或短路。
E1 底部的感應器開路或短路。
停止使用電飯煲,重新啟動程式。如果問題持續,請送交授權服務中
心維修。
E3 未放進內鍋或內鍋未放進任何食物。
將內鍋放進電飯煲,然後重新拔除電源並再插上,重新啟動程式。
留意:如果內鍋變了形,切勿使用,到授權服務中心替換維修。
環境保護
保護環境人人有責!本產品含有一些可以回收或再造的物料。請將本產送往當地公民廢料收集站。

23
PANEL KAWALAN
KETERANGAN
1 Bakul stim2 Penanda untuk air dan nasi 3 Mangkuk seramik mudah alih4 Cawan penyukat5 Senduk nasi6 Senduk sup 7 Tudung8 Penahan dalaman kukus
mudah alih9 Injap tekanan mikro10 Butang pembuka tudung11 Pemegang 12 Sokongan senduk nasi13 Panel Kontrol
a Butang “Keep warm (Kekal Panas)/Cancel (Batal)"
b Butang "Menu"c Butang “Hour (Jam)”
d Butang "Preset (Praset)/Timer (Pemasa)"
e Butang “Minute (Minit)”f Butang “Start (Mula)/Reheat
(Panas Semula)”14 Penunjuk fungsi
a Fungsi “Rice (Nasi)”b Fungsi “Quick (Cepat)”c Fungsi “Steam (Kukus)”d Fungsi “Congee (Bubur Nasi)”e Fungsi “Instant noodles
(Mi Segera)”f Fungsi “Porridge (Bubur)”g Fungsi “Brown Rice (Beras
Perang)”15 Badan Perkakasan16 Plat pemanasan17 Kord kuasa
13a 13f
13b
13c
a b c d fe g
13d 13e
14
24
MS
PERKAKASAN
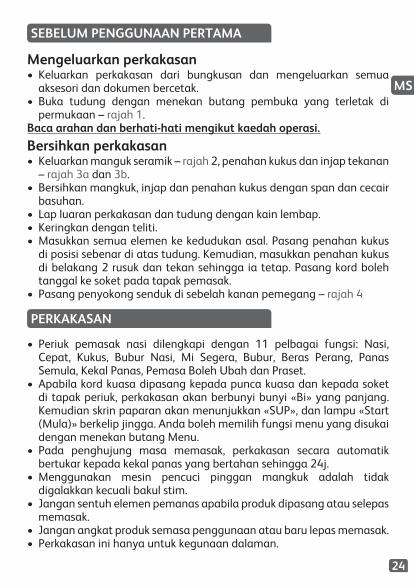
• Periuk pemasak nasi dilengkapi dengan 11 pelbagai fungsi: Nasi, Cepat, Kukus, Bubur Nasi, Mi Segera, Bubur, Beras Perang, Panas Semula, Kekal Panas, Pemasa Boleh Ubah dan Praset.• Apabila kord kuasa dipasang kepada punca kuasa dan kepada soket
di tapak periuk, perkakasan akan berbunyi bunyi «Bi» yang panjang. Kemudian skrin paparan akan menunjukkan «SUP», dan lampu «Start (Mula)» berkelip jingga. Anda boleh memilih fungsi menu yang disukai dengan menekan butang Menu.• Pada penghujung masa memasak, perkakasan secara automatik
bertukar kepada kekal panas yang bertahan sehingga 24j.•Menggunakan mesin pencuci pinggan mangkuk adalah tidak
digalakkan kecuali bakul stim.• Jangan sentuh elemen pemanas apabila produk dipasang atau selepas
memasak.• Jangan angkat produk semasa penggunaan atau baru lepas memasak.• Perkakasan ini hanya untuk kegunaan dalaman.
SEBELuM PENGGuNAAN PERTAMA
Mengeluarkan perkakasan• Keluarkan perkakasan dari bungkusan dan mengeluarkan semua
aksesori dan dokumen bercetak.• Buka tudung dengan menekan butang pembuka yang terletak di
permukaan – rajah 1.Baca arahan dan berhati-hati mengikut kaedah operasi.
Bersihkan perkakasan• Keluarkan manguk seramik – rajah 2, penahan kukus dan injap tekanan
– rajah 3a dan 3b.• Bersihkan mangkuk, injap dan penahan kukus dengan span dan cecair
basuhan.• Lap luaran perkakasan dan tudung dengan kain lembap.• Keringkan dengan teliti.•Masukkan semua elemen ke kedudukan asal. Pasang penahan kukus
di posisi sebenar di atas tudung. Kemudian, masukkan penahan kukus di belakang 2 rusuk dan tekan sehingga ia tetap. Pasang kord boleh tanggal ke soket pada tapak pemasak.• Pasang penyokong senduk di sebelah kanan pemegang – rajah 4
25
PERSEDiAAN SEBELuM MEMASAK
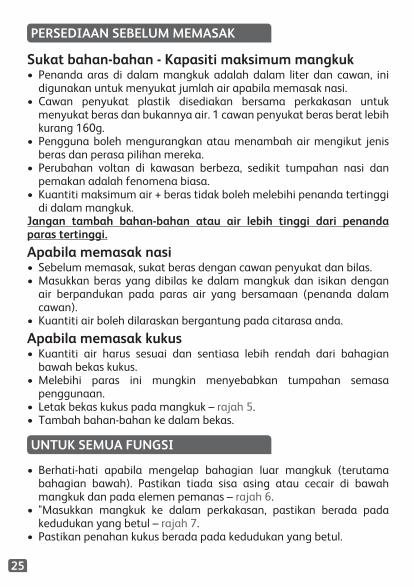
Sukat bahan-bahan - Kapasiti maksimum mangkuk• Penanda aras di dalam mangkuk adalah dalam liter dan cawan, ini
digunakan untuk menyukat jumlah air apabila memasak nasi.• Cawan penyukat plastik disediakan bersama perkakasan untuk
menyukat beras dan bukannya air. 1 cawan penyukat beras berat lebih kurang 160g.• Pengguna boleh mengurangkan atau menambah air mengikut jenis
beras dan perasa pilihan mereka.• Perubahan voltan di kawasan berbeza, sedikit tumpahan nasi dan
pemakan adalah fenomena biasa.• Kuantiti maksimum air + beras tidak boleh melebihi penanda tertinggi
di dalam mangkuk.Jangan tambah bahan-bahan atau air lebih tinggi dari penanda paras tertinggi.
Apabila memasak nasi• Sebelum memasak, sukat beras dengan cawan penyukat dan bilas.•Masukkan beras yang dibilas ke dalam mangkuk dan isikan dengan
air berpandukan pada paras air yang bersamaan (penanda dalam cawan).• Kuantiti air boleh dilaraskan bergantung pada citarasa anda.
Apabila memasak kukus• Kuantiti air harus sesuai dan sentiasa lebih rendah dari bahagian
bawah bekas kukus.•Melebihi paras ini mungkin menyebabkan tumpahan semasa
penggunaan.• Letak bekas kukus pada mangkuk – rajah 5.• Tambah bahan-bahan ke dalam bekas.
uNTuK SEMuA fuNGSi
• Berhati-hati apabila mengelap bahagian luar mangkuk (terutama bahagian bawah). Pastikan tiada sisa asing atau cecair di bawah mangkuk dan pada elemen pemanas – rajah 6.• "Masukkan mangkuk ke dalam perkakasan, pastikan berada pada
kedudukan yang betul – rajah 7.• Pastikan penahan kukus berada pada kedudukan yang betul.

26
MS
PANDuAN MEMASAK uNTuK NASi PuTiH - 4 CAWAN
Cawan penyukat
Berat beras
Paras air dalam mangkuk (+ beras) Hidangan Anggaran masa
memasak
2 300 g Penanda 2 cawan 3orang–4orang 40 – 45 min
4 600 g Penanda 4 cawan 5orang–6orang 50 – 55 min
JADuAL MEMASAK NASi
• Jadual di bawah memberikan panduan untuk memasak pelbagai jenis beras. Untuk keputusan terbaik, kami mencadangkan untuk menggunakan beras biasa dari beras jenis 'mudah masak' yang kerap memberi nasi yang melekit dan boleh melekat pada mangkuk.•Untuk memasak 1 cawan beras putih (hidangan 2 kecil atau 1 bahagian
besar), guna 1 cawan sukatan beras putih dan tambah satu setengah cawan sukatan air. Dengan beberapa jenis beras ia adalah biasa bagi sedikit nasi melekat pada bahagian tapak semasa memasak 1 cawan beras. Untuk memasak kuantiti beras putih yang lain, rujuk pada jadual memasak di bawah.• Kuantiti maksimum air + beras seharusnya tidak melebihi penanda
tertinggi di dalam mangkuk – rajah 8. Bergantung pada jenis beras, kuantiti air perlu disesuaikan. Lihat jadual di bawah:
• Tutup tudung di tempatnya dengan bunyi "klik".• Pasang kord kuasa ke soket pada tapak dan kemudian pasang
bahagian hujung kord kuasa kepada punca kuasa.• Jangan hidupkan perkakasan sehingga semua peringkat telah selesai.
Jangan letakkan tangan anda pada lubang kukus semasa memasak, bahaya terbakar – rajah 11. Jika anda hendak menukar pilihan menu masakan kerana terdapat kesilapan, tekan butang <KEEP WARM (KEKAL PANAS)/CANCEL (BATAL)> dan pilih-semula menu yang dikehendaki.Hanya gunakan bekas yang disediakan dengan perkakasan.Jangan tuang air atau masukkan bahan-bahan ke dalam perkakasan tanpa mangkuk dimasukkan.

27
PANDuAN MEMASAK uNTuK BERAS PERANG - 4 CAWAN
Cawan penyukat
Berat beras
Paras air dalam mangkuk (+ beras) Hidangan Anggaran masa
memasak
2 300 g Penanda 2 cawan 3orang–4orang 60 – 65 min
4 600 g Penanda 4 cawan 5orang–6orang 75 – 80 min
fungsiWaktu ditetapkan
PrasetLalai Jarak Setiap
Beras Automatik
0-24 j
Segera Automatik
Kukus 40 minit 30 minit - 2j 1min untuk butang "minute (minit)" 1j untuk
butang "hour (jam)"
Bubur nasi 1j10 1j - 1j30
Mi segera 1j30 1j - 3j
Bubur 2j 1j30 - 2j30
Beras perang Automatik
BEBERAPA CADANGAN uNTuK HASiLAN TERBAiK SEMASA MEMASAK NASi
• Sukat beras dan membilasnya dengan air yang mengalir dalam penapis untuk masa yang lama kecuali untuk beras risoto yang tidak boleh dicuci. Kemudian masukkan beras ke dalam mangkuk bersama dengan kuantiti air yang sepadan.• Pastikan beras diratakan pada seluruh permukaan mangkuk, untuk
membolehkan masak yang sekata. • Air boleh ditukar dengan stok. Jika menggunakan stok, terdapat risiko
nasi keperangan sedikit di bawah.
28
MS
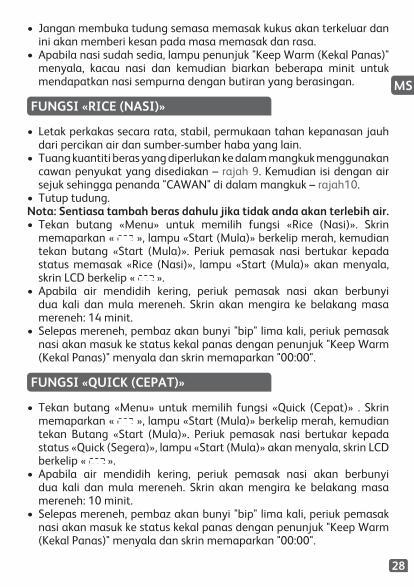
• Jangan membuka tudung semasa memasak kukus akan terkeluar dan ini akan memberi kesan pada masa memasak dan rasa.• Apabila nasi sudah sedia, lampu penunjuk "Keep Warm (Kekal Panas)"
menyala, kacau nasi dan kemudian biarkan beberapa minit untuk mendapatkan nasi sempurna dengan butiran yang berasingan.
fuNGSi «RiCE (NASi)»
fuNGSi «QuiCK (CEPAT)»
• Letak perkakas secara rata, stabil, permukaan tahan kepanasan jauh dari percikan air dan sumber-sumber haba yang lain.• Tuang kuantiti beras yang diperlukan ke dalam mangkuk menggunakan
cawan penyukat yang disediakan – rajah 9. Kemudian isi dengan air sejuk sehingga penanda "CAWAN" di dalam mangkuk – rajah10. • Tutup tudung.Nota: Sentiasa tambah beras dahulu jika tidak anda akan terlebih air.• Tekan butang «Menu» untuk memilih fungsi «Rice (Nasi)». Skrin
memaparkan « », lampu «Start (Mula)» berkelip merah, kemudian tekan butang «Start (Mula)». Periuk pemasak nasi bertukar kepada status memasak «Rice (Nasi)», lampu «Start (Mula)» akan menyala, skrin LCD berkelip « ».• Apabila air mendidih kering, periuk pemasak nasi akan berbunyi
dua kali dan mula mereneh. Skrin akan mengira ke belakang masa mereneh: 14 minit.• Selepas mereneh, pembaz akan bunyi "bip" lima kali, periuk pemasak
nasi akan masuk ke status kekal panas dengan penunjuk "Keep Warm (Kekal Panas)" menyala dan skrin memaparkan "00:00".
• Tekan butang «Menu» untuk memilih fungsi «Quick (Cepat)» . Skrin memaparkan « », lampu «Start (Mula)» berkelip merah, kemudian tekan Butang «Start (Mula)». Periuk pemasak nasi bertukar kepada status «Quick (Segera)», lampu «Start (Mula)» akan menyala, skrin LCD berkelip « ».• Apabila air mendidih kering, periuk pemasak nasi akan berbunyi
dua kali dan mula mereneh. Skrin akan mengira ke belakang masa mereneh: 10 minit.• Selepas mereneh, pembaz akan bunyi "bip" lima kali, periuk pemasak
nasi akan masuk ke status kekal panas dengan penunjuk "Keep Warm (Kekal Panas)" menyala dan skrin memaparkan "00:00".
29
fuNGSi «STEAM (KuKuS)»
fuNGSi «CONGEE (BuBuR NASi)»
fuNGSi «iNSTANT NOODLES (Mi SEGERA)»
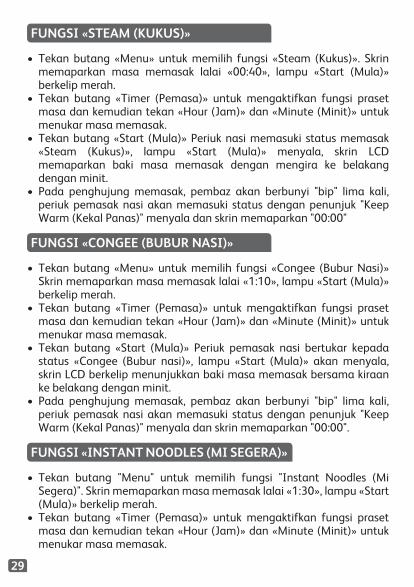
• Tekan butang «Menu» untuk memilih fungsi «Steam (Kukus)». Skrin memaparkan masa memasak lalai «00:40», lampu «Start (Mula)» berkelip merah.• Tekan butang «Timer (Pemasa)» untuk mengaktifkan fungsi praset
masa dan kemudian tekan «Hour (Jam)» dan «Minute (Minit)» untuk menukar masa memasak.• Tekan butang «Start (Mula)» Periuk nasi memasuki status memasak
«Steam (Kukus)», lampu «Start (Mula)» menyala, skrin LCD memaparkan baki masa memasak dengan mengira ke belakang dengan minit.• Pada penghujung memasak, pembaz akan berbunyi "bip" lima kali,
periuk pemasak nasi akan memasuki status dengan penunjuk "Keep Warm (Kekal Panas)" menyala dan skrin memaparkan "00:00"
• Tekan butang «Menu» untuk memilih fungsi «Congee (Bubur Nasi)» Skrin memaparkan masa memasak lalai «1:10», lampu «Start (Mula)» berkelip merah.• Tekan butang «Timer (Pemasa)» untuk mengaktifkan fungsi praset
masa dan kemudian tekan «Hour (Jam)» dan «Minute (Minit)» untuk menukar masa memasak.• Tekan butang «Start (Mula)» Periuk pemasak nasi bertukar kepada
status «Congee (Bubur nasi)», lampu «Start (Mula)» akan menyala, skrin LCD berkelip menunjukkan baki masa memasak bersama kiraan ke belakang dengan minit.• Pada penghujung memasak, pembaz akan berbunyi "bip" lima kali,
periuk pemasak nasi akan memasuki status dengan penunjuk "Keep Warm (Kekal Panas)" menyala dan skrin memaparkan "00:00".
• Tekan butang "Menu" untuk memilih fungsi "Instant Noodles (Mi Segera)". Skrin memaparkan masa memasak lalai «1:30», lampu «Start (Mula)» berkelip merah.• Tekan butang «Timer (Pemasa)» untuk mengaktifkan fungsi praset
masa dan kemudian tekan «Hour (Jam)» dan «Minute (Minit)» untuk menukar masa memasak.

30
MS
fuNGSi «PORRiDGE (BuBuR)»
fuNGSi «BROWN RiCE (BERAS PERANG)»
• Tekan butang «Menu» untuk memilih fungsi «Porridge (Bubur)» . Skrin memaparkan masa memasak lalai «2:00», lampu «Start (Mula)» berkelip merah.• Tekan butang «Pemasa» untuk mengaktifkan fungsi praset masa dan
kemudian tekan «Hour (Jam)» dan «Minute (Minit)» untuk menukar masa memasak.• Tekan butang «Start (Mula)» Periuk pemasak nasi bertukar kepada
status «Porridge (Bubur)», lampu «Start (Mula)» akan menyala, skrin LCD berkelip menunjukkan baki masa memasak bersama kiraan ke belakang dengan minit.• Pada penghujung memasak, pembaz akan berbunyi "bip" lima kali,
periuk pemasak nasi akan memasuki status dengan penunjuk "Keep Warm (Kekal Panas)" menyala dan skrin memaparkan "00:00"
Nota: Rendam beras perang selama kira-kira 1 j sebelum memasak.• Tekan butang «Menu» untuk memilih fungsi «Brown Rice (Beras
Perang)». Skrin memaparkan « », lampu «Start (Mula)» berkelip merah, kemudian tekan butang «Start (Mula)». Periuk pemasak nasi bertukar kepada status memasak «Rice (Nasi)», lampu «Start (Mula)» akan menyala, skrin LCD berkelip « ».• Apabila air mendidih kering, periuk pemasak nasi akan berbunyi
dua kali dan mula mereneh. Skrin akan mengira ke belakang masa mereneh: 18 minit.• Selepas mereneh, pembaz akan bunyi "bip" lima kali, periuk pemasak
nasi akan masuk ke status kekal panas dengan penunjuk "Keep Warm (Kekal Panas)" menyala dan skrin memaparkan "00:00".
• Tekan butang «Start (Mula)» Periuk pemasak nasi bertukar kepada status «Instant Noodles (Mi segera)», lampu «Start (Mula)» akan menyala, skrin LCD berkelip menunjukkan baki masa memasak bersama kiraan ke belakang dengan minit.• Pada penghujung memasak, pembaz akan berbunyi "bip" lima kali.Sebagai contoh, untuk memasak 80g Mi Segera masukkan 250ml air sejuk ke dalam periuk memasak. Pilih fungsi "instant Noodles (Mi Segera)". Apabila air mula panas (lebih kurang 15minit kemudian), masukkan Mi Segera. Biarkan mi untuk masak lebih kurang 8 minit dengan tudung terbuka.

31
fuNGSi «PRESET (PRASET)»
fuNGSi «REHEAT (PANAS SEMuLA)»
•Untuk menggunakan fungsi praset, pilih program dan masa memasak dahulu. Kemudian, tekan butang «Preset (Praset)» dan pilih masa praset. Setiap tekanan butang «Hour (Jam)» dan «Minute (Minit)» boleh menambah atau mengurang satu jam/minit. Masa praset lalai akan bertukar bergantung pada pilihan masa memasak. Jarak praset ialah dari 1 sehingga ke 24 jam. Apabila anda memilih masa praset yang dikehendaki, tekan butang «Start (Mula)» untuk memasuki status memasak, penunjuk «Start (Mula)» akan tetap hidup dan skrin LCD akan memaparkan nombor jam yang dipilih.
Nota: Jika masa praset pilihan rendah dari masa memasak, menu akan terus bermula. Masa praset termasuk masa memasak.
• Tekan butang "Reheat (Panas Semula)", perkakasan akan memasuki status "Reheat (Panas Semula)". Lampu «Start (Mula)» akan menyala, skrin LCD berkelip « ».• Pada penghujung Reheat (Panas Semula), periuk pemasak nasi akan
berbunyi bip lima kali kemudian produk bertukar ke kekal panas secara automatik. Bergantung pada rasa anda, jenis dan kuantiti makanan yang anda mahu panaskan semula, ia mungkin perlu melakukan fungsi Reheat (Panas Semula) beberapa kali.• Pada penghujung proses panas semula, sila matikan mesin secara
manual dengan menekan butang «Cancel (Batal)».Nota: Dicadangkan untuk mengacau makanan semasa fungsi Reheat (Panas Semula) untuk mendapatkan suhu keseragaman yang lebih baik.untuk pemanasan semula nasi, dicadangkan untuk menambah air dan kacau sebelum mula memanas semula.
fuNGSi «KEEP WARM (KEKAL PANAS»
• Tekan butang «Keep Warm (Kekal Panas)», perkakasan akan memasuki status «Keep Warm (Kekal Panas)».• Pada penghujung proses terus menghangat, sila matikan mesin secara
manual dengan menekan butang «Keep Warm (Kekal Panas)/ Cancel (Batal)».
Cadangan: untuk mendapatkan rasa nasi yang segar, sila hadkan masa menyimpan dalam tempoh 6 jam.
32
MS
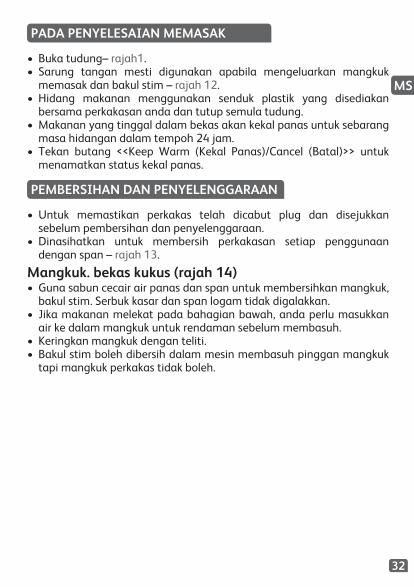
PEMBERSiHAN DAN PENYELENGGARAAN
•Untuk memastikan perkakas telah dicabut plug dan disejukkan sebelum pembersihan dan penyelenggaraan.• Dinasihatkan untuk membersih perkakasan setiap penggunaan
dengan span – rajah 13.
Mangkuk. bekas kukus (rajah 14)• Guna sabun cecair air panas dan span untuk membersihkan mangkuk,
bakul stim. Serbuk kasar dan span logam tidak digalakkan.• Jika makanan melekat pada bahagian bawah, anda perlu masukkan
air ke dalam mangkuk untuk rendaman sebelum membasuh.• Keringkan mangkuk dengan teliti.• Bakul stim boleh dibersih dalam mesin membasuh pinggan mangkuk
tapi mangkuk perkakas tidak boleh.
PADA PENYELESAiAN MEMASAK
• Buka tudung– rajah1.• Sarung tangan mesti digunakan apabila mengeluarkan mangkuk
memasak dan bakul stim – rajah 12.• Hidang makanan menggunakan senduk plastik yang disediakan
bersama perkakasan anda dan tutup semula tudung.•Makanan yang tinggal dalam bekas akan kekal panas untuk sebarang
masa hidangan dalam tempoh 24 jam.• Tekan butang <<Keep Warm (Kekal Panas)/Cancel (Batal)>> untuk
menamatkan status kekal panas.

33
Menjaga mangkukUntuk mangkuk, berhati-hati mengikut arahan berikut:•Untuk memastikan penyelenggaraan kualiti mangkuk, dicadangkan
tidak memotong makanan di dalamnya.• Pastikan anda memasukkan kembali mangkuk ke dalam perkakas.• Guna senduk plastik yang disediakan atau senduk kayu dan bukan
jenis logam untuk mengelakkan kerosakan pada permukaan mangkuk – rajah 15.•Untuk mengelakkan risiko hakisan, jangan tuang cuka ke dalam
mangkuk.•Warna permukaan mangkuk mungkin bertukar selepas menggunakan
kali pertama atau selepas penggunaan lama. Pertukaran warna ini disebabkan tindakan wap dan pemakan dan tidak memberi kesan ke atas penggunaan pemasak pelbagai, juga tidak membahayakan kesihatan, selamat untuk terus digunakan.
Pembersihan injap tekanan mikro• Apabila membersih injap tekanan mikro, sila tanggalkannya dari
tudung – rajah16 dan bukanya dengan memutar pada arah "buka" – rajah 17a dan 17b. Selepas membersih, sila lap kering dan putar pada arah "tutup", kemudian letak kembali pada tudung di pemasak pelbagai – rajah 18a dan 18b.
Pembersihan dan penjagaan bahagian lain perkakasan• Tanggalkan palam perkakasan sebelum membersih.• Bersihkan luaran pemasak pelbagai– rajah 19, di dalam tudung –
rajah14 dan kord dengan kain lembap dan lap kering. Jangan guna produk yang kasar.• Jangan guna air untuk membersih dalaman badan perkakasan kerana
boleh merosakkan sensor pemanas.
34
MS
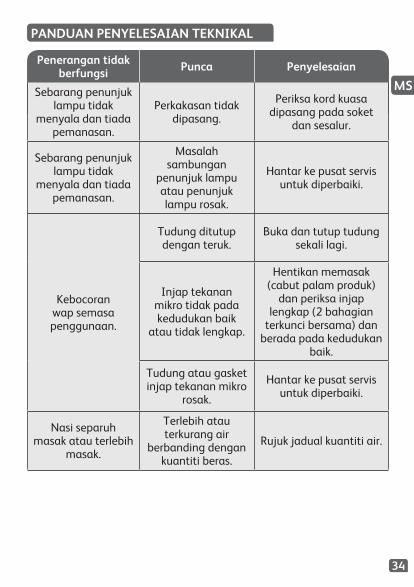
Penerangan tidak berfungsi Punca Penyelesaian
Sebarang penunjuk lampu tidak
menyala dan tiada pemanasan.
Perkakasan tidak dipasang.
Periksa kord kuasa dipasang pada soket
dan sesalur.
Sebarang penunjuk lampu tidak
menyala dan tiada pemanasan.
Masalah sambungan
penunjuk lampu atau penunjuk lampu rosak.
Hantar ke pusat servis untuk diperbaiki.
Kebocoran wap semasa penggunaan.
Tudung ditutup dengan teruk.
Buka dan tutup tudung sekali lagi.
Injap tekanan mikro tidak pada kedudukan baik
atau tidak lengkap.
Hentikan memasak (cabut palam produk)
dan periksa injap lengkap (2 bahagian
terkunci bersama) dan berada pada kedudukan
baik.
Tudung atau gasket injap tekanan mikro
rosak.
Hantar ke pusat servis untuk diperbaiki.
Nasi separuh masak atau terlebih
masak.
Terlebih atau terkurang air
berbanding dengan kuantiti beras.
Rujuk jadual kuantiti air.
PANDuAN PENYELESAiAN TEKNiKAL

35
Penerangan tidak berfungsi Punca Penyelesaian
Nasi separuh masak atau terlebih
masak.Tidak cukup direneh.
Hantar ke pusat servis untuk diperbaiki.
Kegagalan automatik terus
menghangat (produk terus
dalam kedudukan memasak, atau tidak memanas)
E0Sensor di bahagian atas litar terbuka atau litar pintas
E1
Sensor pada bahagian bawah terbuka atau litar
pintas.
Hentikan perkakasan dan mulakan program. Jika masalah berulang,
sila hantar ke pusat servis yang dibenarkan
untuk diperbaiki.
E3Kehilangan
mangkuk atau mangkuk kosong.
Masukkan mangkuk dalaman ke dalam
perkakasan kemudian cabut dan pasang
semula palam mesin dan akhir sekali mulakan
semula program.
Catatan: Jika mangkuk dalaman cacat, jangan guna dan dapatkan penggantian dari pusat servis yang dibenarkan untuk diperbaiki.
PERLiNDuNGAN ALAM SEKiTAR
Membantu melindungi alam sekitar!Perkakasan anda mengandungi beberapa bahan yang mungkin boleh diperoleh semula dan dikitar semula.Hantar ke pusat pengumpulan sisa buangan.
36
TH
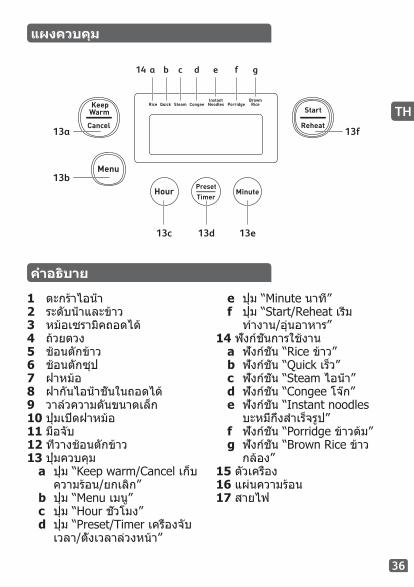
แผงควบคม
คำ�อธบ�ย
1 ตะกราไอนำา2 ระดบนำาและขาว 3 หมอเซรามคถอดได4 ถวยตวง5 ชอนตกขาว6 ชอนตกซป 7 ฝาหมอ8 ฝากนไอนำาชนในถอดได9 วาลวความดนขนาดเลก10 ปมเปดฝาหมอ11 มอจบ 12 ทวางชอนตกขาว13 ปมควบคม
a ปม “Keep warm/Cancel เกบความรอน/ยกเลก”
b ปม “Menu เมน”c ปม “Hour ชวโมง”d ปม “Preset/Timer เครองจบ
เวลา/ตงเวลาลวงหนา”
e ปม “Minute นาท”f ปม “Start/Reheat เรม
ทำางาน/อนอาหาร”14 ฟงกชนการใชงาน
a ฟงกชน “Rice ขาว” b ฟงกชน “Quick เรว”c ฟงกชน “Steam ไอนำา”d ฟงกชน “Congee โจก”e ฟงกชน “Instant noodles
บะหมกงสำาเรจรป”f ฟงกชน “Porridge ขาวตม”g ฟงกชน “Brown Rice ขาว
กลอง”15 ตวเครอง16 แผนความรอน17 สายไฟ
13a 13f
13b
13c
a b c d fe g
13d 13e
14
37
อปกรณ
• หมอหงขาวนมฟงกชนการใชงานหลากหลายถง 11 ประเภท: ขาว, เรว, ไอนำา, โจก, บะหมกงสำาเรจรป, ขาวตม, ขาวกลอง, อนอาหาร, เกบความรอน, เครองจบเวลา/ตงเวลาลวงหนาซงสามารถปรบได
• เมอสายไฟตดตงอยในชองจายไฟและในเตารบบนฐานหมอหงขาว อปกรณจะสงเสยงดงยาว «Bi บ» จากนน หนาจอจะแสดงสญญาณ «SUP», และไฟ “Start เรมทำางาน” เปลยนเปนสสม คณสามารถเลอกฟงกชนการใชงานไดตามตองการ โดยกดปมเมน
• ในชวงทายของการปรงอาหาร อปกรณจะเปลยนเปนฟงกชนเกบความรอนโดยอตโนมต ซงสามารถเกบความรอนไดถง 24 ชวโมง
• ไมแนะนำาใหใชเครองลางจาน ยกเวนตะกราไอนำา• หามสมผสชดทำาความรอนเมอยงเสยบปลกอย หรอภายหลงการใชงาน• หามถออปกรณในระหวางการใชงาน หรอภายหลงการใชงาน• อปกรณนมไวเพอใชงานภายในเทานน
กอนก�รใชง�นครงแรก
แกะอปกรณออกจ�กบรรจภณฑ • นำาอปกรณออกจากบรรจภณฑ ตลอดจนอปกรณเสรมและเอกสารสงพมพ
ทงหมด• เปดฝาหมอ โดยกดปมเปดบนตวเครอง – รป 1อ�นขอแนะนำ� และปฏบตต�มวธใชง�นเครองดวยคว�มรอบคอบทำ�คว�มสะอ�ดอปกรณ• นำาหมอเซรามคออกจากตวเครอง – รป 2 ฝากนไอนำา และวาลวความดน
– รป 3a และ 3b• ทำาความสะอาดหมอ วาลว และฝากนไอนำา ดวยฟองนำาและนำายาทำาความ
สะอาด• เชดดานนอกเครองและฝาหมอ ดวยผาชบนำาหมาด• เชดใหแหงดวยความระมดระวง• นำาสวนประกอบทงหมดใสกลบเขาไปในตำาแหนงเดม ตดตงฝากนไอนำาใน
ตำาแหนงทถกตอง บนฝาของตวเครอง จากนน ใสฝากนไอนำาหลงโครงทง 2 ขาง แลวกดลงจนกวาจะเขาท ตดตงสายไฟทถอดไดในเตารบ บนฐานหมอหงขาว
• ใสทวางชอนตกขาวบนฝงขวาของมอจบ – รป 4

38
TH
ก�รเตรยมก�รกอนปรงอ�ห�ร
ตวงสวนผสม – คว�มจสงสดของหมอ• ขดแบงระดบภายในหมอมหนวยเปนลตรและถวย ใชในการตวงปรมาณนำา
เมอหงขาว• ถวยตวงพลาสตกทเตรยมไวใหในเครอง มไวเพอตวงขาว ไมใชตวงนำา
ขาว 1 ถวยตวง มนำาหนกประมาณ 160 กรม• ผใชอาจลดหรอเพมปรมาณนำาไดตามชนดของขาวและตามความชอบ• เนองจากแรงดนไฟฟามความแตกตางกนในแตละพนท การหกลนเลกนอย
ของขาวและนำาถอเปนเหตการณปกต• ปรมาณสงสดของขาวและนำาไมควรเกนกวาขดแบงระดบสงสดภายในหมอห�มเตมสวนผสมหรอนำ�สงเกนกว�ขดแบงระดบสงสด เมอหงข�ว• กอนการหงขาว ตวงขาวดวยถวยตวง แลวนำาไปลางดวยนำา• นำาขาวทลางนำาแลวใสลงในหมอ แลวเตมนำาลงไปจนถงระดบนำาตามสวน
(ขดแบงระดบในถวยตวง)• ปรมาณนำาสามารถปรบเปลยนไดตามความชอบของคณเมอปรงอ�ห�รโดยใชไอนำ�• ปรมาณนำาตองอยในระดบทเหมาะสม และตองตำากวาฐานตะกราไอนำาเสมอ• นำาทอยเหนอระดบนอาจเกดการไหลลน ในระหวางใชงาน• วางตะกราไอนำาลงบนหมอ – รป 5• เตมสวนผสมลงในตะกราไอนำา
สำ�หรบทกฟงกชนก�รใชง�น
• เชดดานนอกหมอดวยความระมดระวง (โดยเฉพาะสวนฐาน) ตรวจสอบใหแนใจวา ไมมสงแปลกปลอมหรอของเหลวอยขางใตหมอและบนชดทำาความรอน- – รป 6
• วางหมอลงในตวเครอง ตรวจสอบใหแนใจวาหมอวางอยในตำาแหนงทถกตอง – รป 7
• ตรวจสอบใหแนใจวา ฝากนไอนำาอยในตำาแหนงทถกตอง• ปดฝาหมอใหเขาท โดยจะมเสยง “คลก”• เสยบสายไฟในเตารบบนฐานเครอง จากนนเสยบสายไฟอกขางหนงใน
ชองจายไฟ • หามเปดใชงานอปกรณ จนกวาจะดำาเนนขนตอนทกลาวขางตนทงหมดให
เสรจเรยบรอย

39
คมอปรงอ�ห�รสำ�หรบข�วข�ว – 4 ถวย
ถวยตวง นำาหนกขาว ระดบนำาในหมอ (+ ขาว) สำาหรบ
ระยะเวลาปรงอาหารโดยประมาณ
2 300 กรม ขดแบงระดบ 2 ถวย 3 คน – 4 คน 40 – 45 นาท
4 600 กรม ขดแบงระดบ 4 ถวย 5 คน – 6 คน 50 – 55 นาท
คมอปรงอ�ห�รสำ�หรบข�วกลอง – 4 ถวย
ถวยตวง นำาหนกขาว ระดบนำาในหมอ (+ ขาว) สำาหรบ
ระยะเวลาปรงอาหารโดยประมาณ
2 300 กรม ขดแบงระดบ 2 ถวย 3 คน – 4 คน 60 – 65 นาท
4 600 กรม ขดแบงระดบ 4 ถวย 5 คน – 6 คน 75 – 80 นาท
ต�ร�งแสดงประเภทของข�วทตองก�รหง
• ตารางดานลางนแสดงขอแนะนำาในการหงขาวประเภทตางๆ เพอผลลพธทดทสด เราแนะนำาใหใชขาวธรรมดา แทนการใชขาวประเภทท ‘หงงาย’ ซงมกจะทำาใหขาวมความเหนยวมากขน และอาจเหนยวตดหมอได
• ในการหงขาวขาว 1 ถวย (สำาหรบ 2 ทเลก หรอ 1 ทใหญ), ใชขาวขาว 1 ถวยตวง จากนนเตมนำาหนงถวยครง สำาหรบขาวบางประเภท เปนเรองธรรมดาทจะมขาวเลกนอยตดกนหมอ เมอหงขาว 1 ถวย ในการหงขาวขาวปรมาณอน ใหอางองคมอหงขาวดานลางน
• ปรมาณสงสดของนำา + ขาวไมควรเกนกวาขดแบงระดบสงสดภายในหมอ – รป 8 ปรมาณนำาอาจมการเปลยนแปลง ขนอยกบชนดของขาว ดตารางดานลาง:
ห�มว�งมอลงบนชองระบ�ยไอนำ�ในระหว�งก�รปรงอ�ห�ร เพร�ะอ�จเกดอนตร�ยจ�กก�รเผ�ไหม – รป 11 ห�กคณตองก�รเปลยนเมนปรงอ�ห�รทไดเลอกไวเนองจ�กเกดคว�มผดพล�ด ใหกดปม < KEEP WARM/CANCEL เกบคว�มรอน/ยกเลก> และเลอกเมนใหมต�มตองก�ร ใชเฉพ�ะหมอชนในทจดเตรยมไวใหภ�ยในอปกรณห�มเทนำ�หรอใสสวนผสมลงในอปกรณ โดยไมมช�มอยด�นใน
40
TH
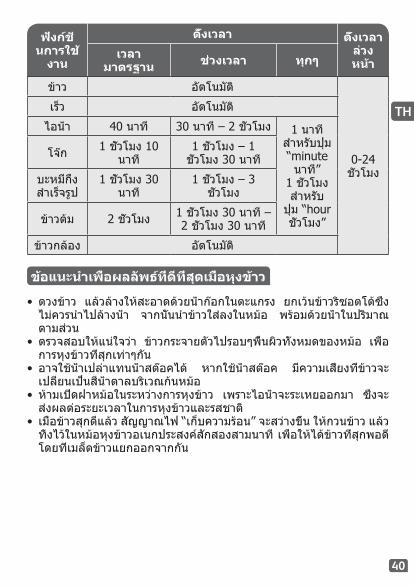
ฟงกชนก�รใช
ง�น
ตงเวล� ตงเวล�ลวงหน�
เวล�ม�ตรฐ�น ชวงเวล� ทกๆ
ขาว อตโนมต
0-24 ชวโมง
เรว อตโนมต
ไอนำา 40 นาท 30 นาท – 2 ชวโมง 1 นาท สำาหรบปม “minute นาท”
1 ชวโมง สำาหรบ
ปม “hour ชวโมง”
โจก 1 ชวโมง 10 นาท
1 ชวโมง – 1 ชวโมง 30 นาท
บะหมกงสำาเรจรป
1 ชวโมง 30 นาท
1 ชวโมง – 3 ชวโมง
ขาวตม 2 ชวโมง 1 ชวโมง 30 นาท – 2 ชวโมง 30 นาท
ขาวกลอง อตโนมต
ขอแนะนำ�เพอผลลพธทดทสดเมอหงข�ว
• ตวงขาว แลวลางใหสะอาดดวยนำากอกในตะแกรง ยกเวนขาวรซอตโตซงไมควรนำาไปลางนำา จากนนนำาขาวใสลงในหมอ พรอมดวยนำาในปรมาณตามสวน
• ตรวจสอบใหแนใจวา ขาวกระจายตวไปรอบๆพนผวทงหมดของหมอ เพอการหงขาวทสกเทาๆกน
• อาจใชนำาเปลาแทนนำาสตอคได หากใชนำาสตอค มความเสยงทขาวจะเปลยนเปนสนำาตาลบรเวณกนหมอ
• หามเปดฝาหมอในระหวางการหงขาว เพราะไอนำาจะระเหยออกมา ซงจะสงผลตอระยะเวลาในการหงขาวและรสชาต
• เมอขาวสกดแลว สญญาณไฟ “เกบความรอน” จะสวางขน ใหกวนขาว แลวทงไวในหมอหงขาวอเนกประสงคสกสองสามนาท เพอใหไดขาวทสกพอด โดยทเมลดขาวแยกออกจากกน
41
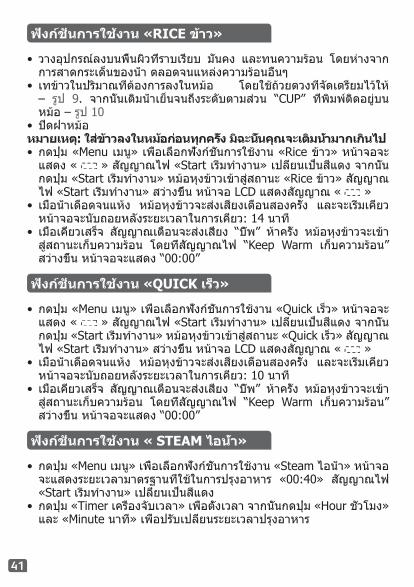
ฟงกชนก�รใชง�น « STEAM ไอนำ�»
• กดปม «Menu เมน» เพอเลอกฟงกชนการใชงาน «Steam ไอนำา» หนาจอจะแสดงระยะเวลามาตรฐานทใชในการปรงอาหาร «00:40» สญญาณไฟ «Start เรมทำางาน» เปลยนเปนสแดง
• กดปม «Timer เครองจบเวลา» เพอตงเวลา จากนนกดปม «Hour ชวโมง» และ «Minute นาท» เพอปรบเปลยนระยะเวลาปรงอาหาร
ฟงกชนก�รใชง�น «RICE ข�ว»
ฟงกชนก�รใชง�น «QUICK เรว»
• วางอปกรณลงบนพนผวทราบเรยบ มนคง และทนความรอน โดยหางจากการสาดกระเดนของนำา ตลอดจนแหลงความรอนอนๆ
• เทขาวในปรมาณทตองการลงในหมอ โดยใชถวยตวงทจดเตรยมไวให – รป 9. จากนนเตมนำาเยนจนถงระดบตามสวน “CUP” ทพมพตดอยบนหมอ – รป 10
• ปดฝาหมอหม�ยเหต: ใสข�วลงในหมอกอนทกครง มฉะนนคณจะเตมนำ�ม�กเกนไป• กดปม «Menu เมน» เพอเลอกฟงกชนการใชงาน «Rice ขาว» หนาจอจะ
แสดง « » สญญาณไฟ «Start เรมทำางาน» เปลยนเปนสแดง จากนนกดปม «Start เรมทำางาน» หมอหงขาวเขาสสถานะ «Rice ขาว» สญญาณไฟ «Start เรมทำางาน» สวางขน หนาจอ LCD แสดงสญญาณ « »
• เมอนำาเดอดจนแหง หมอหงขาวจะสงเสยงเตอนสองครง และจะเรมเคยว หนาจอจะนบถอยหลงระยะเวลาในการเคยว: 14 นาท
• เมอเคยวเสรจ สญญาณเตอนจะสงเสยง “บพ” หาครง หมอหงขาวจะเขาสสถานะเกบความรอน โดยทสญญาณไฟ “Keep Warm เกบความรอน” สวางขน หนาจอจะแสดง “00:00”
• กดปม «Menu เมน» เพอเลอกฟงกชนการใชงาน «Quick เรว» หนาจอจะแสดง « » สญญาณไฟ «Start เรมทำางาน» เปลยนเปนสแดง จากนนกดปม «Start เรมทำางาน» หมอหงขาวเขาสสถานะ «Quick เรว» สญญาณไฟ «Start เรมทำางาน» สวางขน หนาจอ LCD แสดงสญญาณ « »
• เมอนำาเดอดจนแหง หมอหงขาวจะสงเสยงเตอนสองครง และจะเรมเคยว หนาจอจะนบถอยหลงระยะเวลาในการเคยว: 10 นาท
• เมอเคยวเสรจ สญญาณเตอนจะสงเสยง “บพ” หาครง หมอหงขาวจะเขาสสถานะเกบความรอน โดยทสญญาณไฟ “Keep Warm เกบความรอน” สวางขน หนาจอจะแสดง “00:00”

42
THฟงกชนก�รใชง�น «CONGEE โจก»
ฟงกชนก�รใชง�น «INSTANT NOODLES บะหมกงสำ�เรจรป»
• กดปม «Menu เมน» เพอเลอกฟงกชนการใชงาน «Congee โจก» หนาจอจะแสดงระยะเวลามาตรฐานทใชในการปรงอาหาร «01:10» สญญาณไฟ «Start เรมทำางาน» เปลยนเปนสแดง
• กดปม «Timer เครองจบเวลา» เพอตงเวลา จากนนกดปม «Hour ชวโมง» และ «Minute นาท» เพอปรบเปลยนระยะเวลาปรงอาหาร
• กดปม «Start เรมทำางาน» หมอหงขาวเขาสสถานะ «Congee โจก» สญญาณไฟ «Start เรมทำางาน» สวางขน หนาจอ LCD แสดงระยะเวลาปรงอาหารทเหลอ โดยนบถอยหลงเปนรายนาท
• เมอปรงอาหารเสรจ สญญาณเตอนจะสงเสยง “บพ” หาครง หมอหงขาวจะเขาสสถานะเกบความรอน โดยทสญญาณไฟ “Keep Warm เกบความรอน” สวางขน หนาจอจะแสดง “00:00”
• กดปม «Menu เมน» เพอเลอกฟงกชนการใชงาน “Instant Noodles บะหมกงสำาเรจรป” หนาจอจะแสดงระยะเวลามาตรฐานทใชในการปรงอาหาร «01:30» สญญาณไฟ «Start เรมทำางาน» เปลยนเปนสแดง
• กดปม «Timer เครองจบเวลา» เพอตงเวลา จากนนกดปม «Hour ชวโมง» และ «Minute นาท» เพอปรบเปลยนระยะเวลาปรงอาหาร
• กดปม «Start เรมทำางาน» หมอหงขาวเขาสสถานะ «Instant noodles บะหมกงสำาเรจรป» สญญาณไฟ «Start เรมทำางาน» สวางขน หนาจอ LCD แสดงระยะเวลาปรงอาหารทเหลอ โดยนบถอยหลงเปนรายนาท
• เมอปรงอาหารเสรจ สญญาณเตอนจะสงเสยง “บพ” หาครง ตวอย�งเชน ในก�รปรงบะหมกงสำ�เรจรปนำ�หนก 80 กรม เตมนำ�เยน 250 มล. ลงในหมอ เลอกฟงกชนก�รใชง�น “Instant Noodle บะหมกงสำ�เรจรป” เมอนำ�รอน (ประม�ณ 15 น�ทตอม�), นำ�บะหมกงสำ�เรจรปม�ใส ปลอยเสนบะหมทงไวประม�ณ 8 น�ท โดยเปดฝ�
• กดปม «Start เรมทำางาน» หมอหงขาวเขาสสถานะ «Steam ไอนำา» สญญาณไฟ «Start เรมทำางาน» สวางขน หนาจอ LCD แสดงระยะเวลาปรงอาหารทเหลอ โดยนบถอยหลงเปนรายนาท
• เมอปรงอาหารเสรจ สญญาณเตอนจะสงเสยง “บพ” หาครง หมอหงขาวจะเขาสสถานะเกบความรอน โดยทสญญาณไฟ “Keep Warm เกบความรอน” สวางขน หนาจอจะแสดง “00:00”
43
ฟงกชนก�รใชง�น «PORRIDGE ข�วตม»
ฟงกชนก�รใชง�น «BROWN RICE ข�วกลอง»
ฟงกชนก�รใชง�น «KEEP WARM เกบคว�มรอน»
• กดปม «Menu เมน» เพอเลอกฟงกชนการใชงาน «Porridge ขาวตม» หนาจอจะแสดงระยะเวลามาตรฐานทใชในการปรงอาหาร «02:00» สญญาณไฟ «Start เรมทำางาน» เปลยนเปนสแดง
• กดปม «Timer เครองจบเวลา» เพอตงเวลา จากนนกดปม «Hour ชวโมง» และ «Minute นาท» เพอปรบเปลยนระยะเวลาปรงอาหาร
• กดปม «Start เรมทำางาน» หมอหงขาวเขาสสถานะ «Porridge ขามตม» สญญาณไฟ «Start เรมทำางาน» สวางขน หนาจอ LCD แสดงระยะเวลาปรงอาหารทเหลอ โดยนบถอยหลงเปนรายนาท
• เมอปรงอาหารเสรจ สญญาณเตอนจะสงเสยง “บพ” หาครง หมอหงขาวจะเขาสสถานะเกบความรอน โดยทสญญาณไฟ “Keep Warm เกบความรอน” สวางขน หนาจอจะแสดง “00:00”
หม�ยเหต: โปรดแชข�วกลองในนำ�ประม�ณ 1 ชวโมงกอนก�รหงข�ว• กดปม «Menu เมน» เพอเลอกฟงกชนการใชงาน «Brown Rice ขาว
กลอง» หนาจอจะแสดง « » สญญาณไฟ «Start เรมทำางาน» เปลยนเปนสแดง จากนนกดปม «Start เรมทำางาน» หมอหงขาวเขาสสถานะ «Rice ขาว» สญญาณไฟ «Start เรมทำางาน» สวางขน หนาจอ LCD แสดงสญญาณ « »
• เมอนำาเดอดจนแหง หมอหงขาวจะสงเสยงเตอนสองครง และจะเรมเคยว หนาจอจะนบถอยหลงระยะเวลาในการเคยว : 18 นาท
• เมอเคยวเสรจ สญญาณเตอนจะสงเสยง “บพ” หาครง หมอหงขาวจะเขาสสถานะเกบความรอน โดยทสญญาณไฟ “Keep Warm เกบความรอน” สวางขน หนาจอจะแสดง “00:00”
• กดปม «Keep Warm เกบความรอน» อปกรณจะเขาสสถานะ «Keep Warm เกบความรอน»
• เมอเสรจสนกระบวนการเกบความรอน โปรดกดปม « Keep Warm/Cancel เกบความรอน/ยกเลก» เพอหยดการทำางานของเครอง
ขอแนะนำ�: เพอใหข�วคงรสช�ตสดใหม โปรดเกบข�วไวภ�ยในระยะเวล� 6 ชวโมง
44
TH
ฟงกชนก�รใชง�น «PRESET ตงเวล�ลวงหน�»
ฟงกชนก�รใชง�น «REhEAT อนอ�ห�ร»
เมอปรงอ�ห�รเสรจ
• ในการตงเวลาลวงหนา กอนอนใหเลอกโปรแกรมการปรงอาหารและระยะเวลาปรงอาหาร จากนน กดปม «Preset ตงเวลาลวงหนา» แลวเลอกเวลาทตองการตงลวงหนา แตละครงทกดปม «Hour ชวโมง» และ «Minute นาท» เปนการเพมครงละชวโมง/นาท เวลามาตรฐานทตงลวงหนาเปลยนแปลงได ขนอยกบระยะเวลาปรงอาหารทเลอก เวลาทตงลวงหนาเรมตงแต 1 จนถง 24 ชวโมง เมอคณเลอกตงเวลาลวงหนาตามทตองการ, กดปม «Start เรมทำางาน» เพอเขาสสถานะการปรงอาหาร, สญญาณไฟ «Start เรมทำางาน» จะสวางขน หนาจอ LCD จะแสดงจำานวนชวโมงทคณเลอก
หม�ยเหต: ห�กระยะเวล�ทตงลวงหน�นอยกว�ระยะเวล�ปรงอ�ห�ร เมนจะเรมทำ�ง�นโดยตรง ระยะเวล�ทตงลวงหน� หม�ยรวมถง ระยะเวล�ปรงอ�ห�รดวย
• กดปม «Reheat อนอาหาร» อปกรณจะเขาสสถานะ «Reheat อนอาหาร» สญญาณไฟ «Start เรมทำางาน» สวางขน หนาจอ LCD แสดงสญญาณ « »
• เมออนอาหารเสรจ หมอหงขาวจะสงเสยงเตอน 5 ครง จากนนจะเปลยนสถานะเปนเกบความรอนโดยอตโนมต ขนอยกบรสชาต ประเภท และปรมาณอาหารทคณตองการอน คณอาจตองอนอาหารหลายครง
• เมออนอาหารเสรจ โปรดกดปม «Cancel ยกเลก» เพอหยดการทำางานของเครอง
หม�ยเหต: แนะนำ�ใหคนอ�ห�รในระหว�งก�รอน เพอใหมอณหภมสมำ�เสมอเท�ๆกนสำ�หรบก�รอนข�ว แนะนำ�ใหเตมนำ�และคนข�วกอนเรมก�รอน
• เปดฝาหมอ – รป 1• ตองใชถงมอ เมอจบหมอหงขาวและถาดไอนำา – รป 12• ตกอาหารโดยใชชอนพลาสตกทเตรยมไวใหในเครอง แลวปดฝาหมอ• อาหารทเหลออยในภาชนะจะยงคงความรอนในอก 24 ชวโมงขางหนา• กดปม << Keep Warm/Cancel เกบความรอน/ยกเลก>> เพอยกเลก
สถานะเกบความรอน

45
ก�รทำ�คว�มสะอ�ด และ ก�รบำ�รงรกษ�
• ตรวจสอบใหแนใจวา หมอหงขาวถอดปลกออกและเยนตวลงแลวอยางสมบรณ กอนการทำาความสะอาดและบำารงรกษา
• แนะนำาใหทำาความสะอาดอปกรณหลงการใชงานในแตละครงดวยฟองนำา – รป 13หมอและตะกร�ไอนำ� (รป 14)• ใชนำารอน สบเหลว และฟองนำา เพอทำาความสะอาดหมอและตะกราไอนำา
ไมแนะนำาใหใชผงขดและฟองนำาทเปนโลหะ• หากมอาหารตดอยทกนหมอ คณอาจเตมนำาลงในหมอ แลวแชทงไวสกพก
กอนลางทำาความสะอาด• เชดหมอใหแหงดวยความระมดระวง• คณสามารถทำาความสะอาดตะกราไอนำาในเครองลางจานได แตไมใชตวหมอก�รดแลรกษ�หมอปฏบตตามขอแนะนำาตอไปนเพอการดแลรกษาหมอ:• เพอการบำารงรกษาคณภาพของหมอ ไมแนะนำาใหหนอาหารในหมอ• ตรวจสอบใหแนใจวา คณไดวางหมอกลบเขาไปในหมอหงขาวอเนกประสงค• ใชชอนพลาสตกทเตรยมไวให หรอชอนไม ทไมใชชอนโลหะ เพอหลก
เลยงความเสยหายตอพนผวหมอ – รป 15• เพอหลกเลยงความเสยงของการผกรอน หามเทนำาสมสายชลงในหมอ• สของพนผวหมออาจเปลยนไป ภายหลงการใชงานครงแรกหรอภาย
หลงการใชงานมายาวนาน การเปลยนแปลงของสบนพนผวหมอเกดจากปฏกรยาของไอนำาและนำา ซงไมมผลตอการใชหมอหงขาวอเนกประสงคแตอยางใด และไมเปนอนตรายตอสขภาพของคณ มนปลอดภยอยางแนนอนในการใชงานหมอตอไป
ก�รทำ�คว�มสะอ�ดว�ลวคว�มดนขน�ดเลก• เมอทำาความสะอาดวาลวความดนขนาดเลก โปรดถอดออกจากฝาหมอ
– รป 16 และเปดวาลวโดยหมนไปในทศทาง “เปด” – รป 17a และ 17b หลงจากทำาความสะอาดแลว โปรดเชดใหแหง แลวหมนวาลวไปในทศทาง “ปด” จากนนนำากลบไปใสบนฝาหมอหงขาวอเนกประสงค – รป 18a และ 18b
ก�รทำ�คว�มสะอ�ด และ ก�รดแลรกษ�สวนประกอบอนๆของอปกรณ• ถอดปลกอปกรณกอนทำาความสะอาด• ทำาความสะอาดดานนอกหมอหงขาวอเนกประสงค – รป 19 ดานในของฝา
หมอ – รป 14 และสายไฟ ดวยผาชบนำาหมาด แลวเชดใหแหง หามใชสารขดส
• หามใชนำาเพอทำาความสะอาดภายในตวเครอง เพราะอาจทำาใหตวตรวจจบความรอนเกดความเสยหาย
46
TH
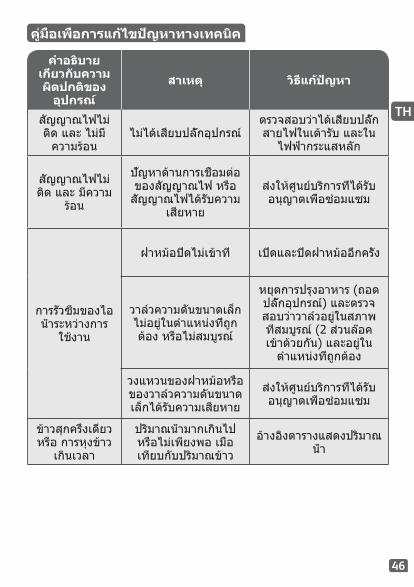
คำ�อธบ�ยเกยวกบคว�มผดปกตของ
อปกรณ
ส�เหต วธแกปญห�
สญญาณไฟไมตด และ ไมม
ความรอนไมไดเสยบปลกอปกรณ
ตรวจสอบวาไดเสยบปลกสายไฟในเตารบ และใน
ไฟฟากระแสหลก
สญญาณไฟไมตด และ มความ
รอน
ปญหาดานการเชอมตอของสญญาณไฟ หรอ
สญญาณไฟไดรบความเสยหาย
สงใหศนยบรการทไดรบอนญาตเพอซอมแซม
การรวซมของไอนำาระหวางการ
ใชงาน
ฝาหมอปดไมเขาท เปดและปดฝาหมออกครง
วาลวความดนขนาดเลกไมอยในตำาแหนงทถกตอง หรอไมสมบรณ
หยดการปรงอาหาร (ถอดปลกอปกรณ) และตรวจสอบวาวาลวอยในสภาพทสมบรณ (2 สวนลอคเขาดวยกน) และอยใน
ตำาแหนงทถกตอง
วงแหวนของฝาหมอหรอของวาลวความดนขนาดเลกไดรบความเสยหาย
สงใหศนยบรการทไดรบอนญาตเพอซอมแซม
ขาวสกครงเดยว หรอ การหงขาว
เกนเวลา
ปรมาณนำามากเกนไปหรอไมเพยงพอ เมอเทยบกบปรมาณขาว
อางองตารางแสดงปรมาณนำา
คมอเพอก�รแกไขปญห�ท�งเทคนค

47
คำ�อธบ�ยเกยวกบคว�มผดปกตของ
อปกรณ
ส�เหต วธแกปญห�
ขาวสกครงเดยว หรอ การหงขาว
เกนเวลาเคยวไมนานพอ
สงใหศนยบรการทไดรบอนญาตเพอซอมแซม
ฟงกชนเกบความรอนอตโนมตไดรบความเสยหาย (อปกรณอยใน
สถานะปรงอาหาร หรอไมมความรอนเกดขน)
E0ตวตรวจจบความรอน
ทสวนบนวงจรเปดหรอลดวงจร
E1ตวตรวจจบความรอนบนสวนฐานวงจรเปดหรอ
ลดวงจร
ปดอปกรณ แลวเรมเปดโปรแกรมใหมอกครง หากเกดปญหาเดมซำา โปรดสงใหศนยบรการทไดรบอนญาตเพอซอมแซม
E3 หมอขาดหายไป หรอ หมอวาง
ใสหมอชนในลงในตวเครอง จากนนถอดปลก
เสยบปลกอกครง แลวเรมเปดโปรแกรมใหม
หม�ยเหต: ห�กหมอชนในบดเบยวผดรปร�ง ห�มใชหมอนนอกตอไป แลวนำ�หมอนนไปเปลยนทศนยบรก�รทไดรบอนญ�ตเพอซอมแซม
ก�รคมครองสงแวดลอม
ชวยกนคมครองสงแวดลอม! อปกรณนประกอบดวยวสดหลายชนซงอาจนำาไปฟนคนสภาพหรอนำากลบมาใชใหมไดทงอปกรณนไวทจดรวบรวมขยะในทองถนของคณ
48
KO
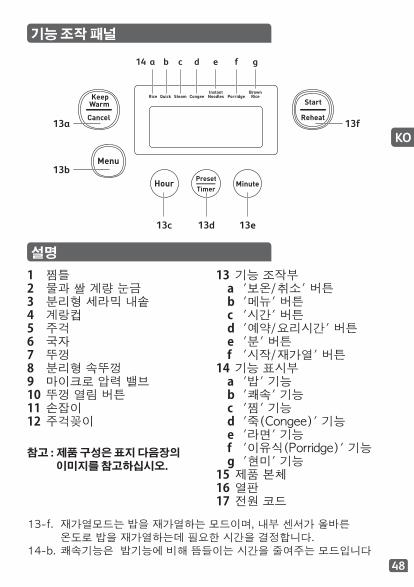
기능 조작 패널
설명
13a 13f
13b
13c
a b c d fe g
13d 13e
14
참고 : 제품 구성은 표지 다음장의 이미지를 참고하십시오.
13-f. 재가열모드는밥을재가열하는모드이며,내부센서가올바른 온도로밥을재가열하는데필요한시간을결정합니다.14-b.쾌속기능은밥기능에비해뜸들이는시간을줄여주는모드입니다
1 찜틀2 물과쌀계량눈금3 분리형세라믹내솥4 계랑컵5 주걱6 국자7 뚜껑8 분리형속뚜껑9 마이크로압력밸브10 뚜껑열림버튼11 손잡이12 주걱꽂이
13 기능조작부a '보온/취소'버튼b '메뉴'버튼c '시간'버튼d '예약/요리시간'버튼e '분'버튼f '시작/재가열'버튼
14 기능표시부a '밥'기능b '쾌속'기능c '찜'기능d '죽(Congee)'기능e '라면'기능f '이유식(Porridge)'기능g '현미'기능
15 제품본체16 열판17 전원코드

49
제품
•본밥솥은11가지멀티기능이내장되어있습니다:밥,쾌속,찜,죽,라면,이유식,현미,재가열,보온,예약/요리시간.
•전원코드가전기콘센트와제품바닥의소켓에연결되어있을때,제품에서'삐'소리가길게납니다.그리고디스플레이화면에'SUP'이라고표시되며, '시작'버튼에주황색불이깜빡입니다.메뉴버튼을눌러원하는메뉴기능을선택할수있습니다.
•조리가끝난후,밥솥은자동으로보온기능을시작하고24시간동안보온을지속합니다.
•식기세척기의 사용은 권장하지 않습니다. 예외로 찜틀은식기세척기를사용해세척할수있습니다.
•다치거나 화상 위험이 있으니 제품이 전원에 연결되어 있거나조리가끝난후에는열이가해지는부분(뚜껑과몸체)을만지지마십시오.
•작동 중이거나 조리를 끝낸 직후에는 제품을 들고 이동하지마십시오.
•본제품은오직실내에서만사용할수있습니다.
제품을 처음 사용하기 전에
제품 포장 제거•제품을포장에서꺼내고동봉된부속품일체와인쇄물을꺼냅니다.•본체에있는열림버튼을눌러뚜껑을엽니다.–그림.1참조사용 설명서를 주의 깊게 읽고 사용법에 따라 정확하게 사용하여 주십시오.제품 세척•그림2를참조하여세라믹내솥을꺼낸후,그림3a를참조하여분리형속 뚜껑을분리하고그림 3b를 참조하여뚜껑구멍에손가락을넣어마이크로압력밸브를분리합니다.
•스폰지와주방용세제를사용해내솥,밸브,속뚜껑을세척합니다.•젖은천으로제품표면과뚜껑을닦아줍니다.•물기가없도록잘건조시켜주십시오.•모든부품을제자리에끼워넣습니다.분리형속뚜껑의윗면을먼저뚜껑에고정시킨후분리형속뚜껑에있는2개의고정장치를뚜껑에 밀어 넣어 부착 합니다. 분리형 코드를 조리기 밑판의소켓에연결합니다.
•주걱꽂이를손잡이의오른쪽에삽입합니다–그림.4참조

50
KO
조리 전 준비 사항
재료 계량 - 내솥의 최대 용량•내솥 안쪽의 눈금은 리터와 컵을 기준으로 합니다. 이 눈금을사용해밥을지을때필요한물의양을계량할수있습니다.
•제품과함께제공되는플라스틱계량컵은물이아니라쌀을계량할때사용합니다.쌀1컵의무게는약160g입니다.
•사용자는 조리에 사용하는 쌀의 종류와 사용자의 입맛에 따라물의양을기준보다적거나많게조절할수있습니다.
•사용자거주지역의전압에따라조리시쌀과물이살짝넘칠수있으며이는자연스러운현상입니다.
•물양을포함한재료의양은내솥안쪽에표시된용량표시선의최대선을넘지않아야합니다.
재료나 물을 눈금의 최고치 이상으로 넣지 마십시오.올바른 측량을 위해 컵단위, L는 내솥 안쪽면과 컵에 표기된 측량기준을 참고하십시오.
밥 조리 시•조리를시작하기전,계량컵을사용해쌀의양을계량하고쌀을씻어주십시오.내솥에서쌀을씻고조리하셔도코팅에문제되지않습니다.
•씻은쌀을내솥안에넣고쌀의양에맞는물을부어줍니다(눈금은컵기준으로계량합니다).
•물의양은입맛에따라조절할수있습니다.찜 기능 사용 시•물의양은반드시정해진기준에따라야하며물높이는찜틀바닥을넘지말아야합니다.
•물을찜틀바닥에넘치게넣으면조리시넘쳐흐를수있습니다.•내솥위에찜틀을놓습니다.•찜틀안에재료를넣습니다.
기능 사용 시 공통 주의사항
•내솥표면을잘닦습니다(용기바닥부분도깨끗이닦습니다).내솥바닥과열선위에이물질이나물기가없는지확인합니다–그림.6참조.
•제품 안에 내솥을 넣습니다. 내솥을 제자리에 정확히위치시키십시오–그림.7참조.
•속뚜껑이제위치에고정되어있는지확인하십시오.•뚜껑을 닫습니다. '딸깍' 소리가 들리면 뚜껑이 완전히 닫힌것입니다.
51
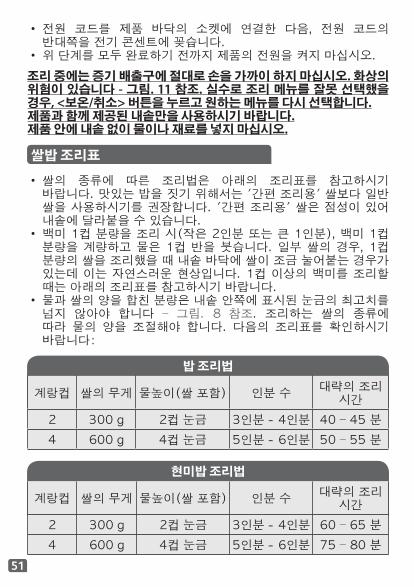
밥 조리법
계랑컵 쌀의무게 물높이(쌀포함) 인분수 대략의조리시간
2 300g 2컵눈금 3인분-4인분 40–45분4 600g 4컵눈금 5인분-6인분 50–55분
현미밥 조리법
계랑컵 쌀의무게 물높이(쌀포함) 인분수 대략의조리시간
2 300g 2컵눈금 3인분-4인분 60–65분4 600g 4컵눈금 5인분-6인분 75–80분
쌀밥 조리표
•쌀의 종류에 따른 조리법은 아래의 조리표를 참고하시기바랍니다.맛있는밥을짓기위해서는'간편조리용'쌀보다일반쌀을사용하시기를권장합니다.'간편조리용'쌀은점성이있어내솥에달라붙을수있습니다.
•백미1컵분량을조리시(작은2인분또는큰1인분),백미1컵분량을계량하고물은1컵반을붓습니다.일부쌀의경우,1컵분량의쌀을조리했을때내솥바닥에쌀이조금눌어붙는경우가있는데이는자연스러운현상입니다.1컵이상의백미를조리할때는아래의조리표를참고하시기바랍니다.
•물과쌀의양을합친분량은내솥안쪽에표시된눈금의최고치를넘지 않아야 합니다 – 그림. 8 참조. 조리하는 쌀의 종류에따라물의양을조절해야합니다.다음의조리표를확인하시기바랍니다:
•전원 코드를 제품 바닥의 소켓에 연결한 다음, 전원 코드의반대쪽을전기콘센트에꽂습니다.
•위단계를모두완료하기전까지제품의전원을켜지마십시오.조리 중에는 증기 배출구에 절대로 손을 가까이 하지 마십시오. 화상의 위험이 있습니다 - 그림. 11 참조. 실수로 조리 메뉴를 잘못 선택했을 경우, <보온/취소> 버튼을 누르고 원하는 메뉴를 다시 선택합니다.제품과 함께 제공된 내솥만을 사용하시기 바랍니다.제품 안에 내솥 없이 물이나 재료를 넣지 마십시오.
52
KO
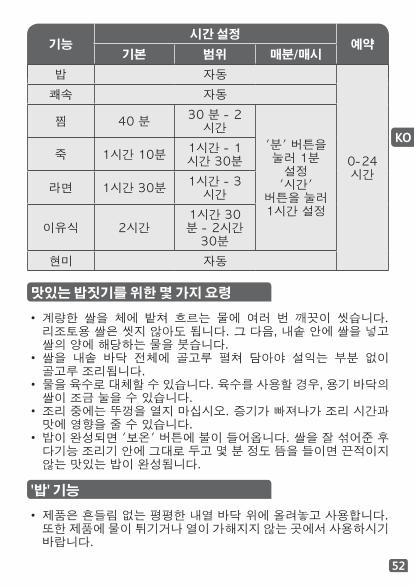
기능시간 설정
예약기본 범위 매분/매시
밥 자동
0-24시간
쾌속 자동
찜 40분 30분-2시간
'분'버튼을눌러1분설정'시간'
버튼을눌러1시간설정
죽 1시간10분 1시간-1시간30분
라면 1시간30분 1시간-3시간
이유식 2시간1시간30분-2시간30분
현미 자동
맛있는 밥짓기를 위한 몇 가지 요령
•계량한쌀을체에밭쳐흐르는물에여러번깨끗이씻습니다.리조토용쌀은씻지않아도됩니다.그다음,내솥안에쌀을넣고쌀의양에해당하는물을붓습니다.
•쌀을내솥바닥전체에골고루펼쳐담아야설익는부분없이골고루조리됩니다.
•물을육수로대체할수있습니다.육수를사용할경우,용기바닥의쌀이조금눌을수있습니다.
•조리중에는뚜껑을열지마십시오.증기가빠져나가조리시간과맛에영향을줄수있습니다.
•밥이완성되면'보온'버튼에불이들어옵니다.쌀을잘섞어준후다기능조리기안에그대로두고몇분정도뜸을들이면끈적이지않는맛있는밥이완성됩니다.
'밥' 기능
•제품은흔들림없는평평한내열바닥위에올려놓고사용합니다.또한제품에물이튀기거나열이가해지지않는곳에서사용하시기바랍니다.
53
'찜' 기능
•'메뉴'버튼을눌러'찜'기능을선택합니다.디스플레이화면에는기본조리시간으로'00:40'이표시됩니다.'시작'버튼에빨간색불이깜빡입니다. (찜: 2컵의물을내솥에넣고찜틀에야채를놓은후요리시작)
'쾌속' 기능
•'메뉴'버튼을눌러'쾌속'기능을선택합니다.디스플레이화면에' '이(가) 표시되고 '시작' 버튼에 빨간색 불이 깜빡이면 '시작'버튼을눌러주시기바랍니다.밥솥은'쾌속'조리상태로넘어갑니다.'시작'버튼에불이들어오고LCD화면에는' '이(가)깜빡입니다.
•물이 다 끓으면 밥솥은 두 번의 삐 소리를 내고 뜸들이기를시작합니다.화면에는남은뜸들이는시간이표시됩니다.:10분.
•뜸들이기가끝나면 '삐'소리가다섯번울리고밥솥은보온을시작합니다.이때'보온'버튼에불이들어오고화면에는'00:00'이표시됩니다.
•제품과함께제공되는계량컵을사용해조리에필요한쌀을내솥안에붓습니다–그림.9참조.다음,쌀의양에맞는차가운물을내솥안에부어줍니다.이때눈금은'컵'을기준으로맞춥니다–그림.10참조.
•뚜껑을닫습니다.참고: 항상 쌀을 먼저 용기에 부어 줍니다. 그렇지 않으면 물의 양이 너무 많아지게 됩니다.
•'메뉴'버튼을눌러'밥'기능을선택합니다.디스플레이화면에' '이(가) 표시되고 '시작' 버튼에 빨간색 불이 깜빡이면 '시작' 버튼을눌러주시기바랍니다. 밥솥은 '밥' 조리상태로넘어갑니다.'시작'버튼에불이들어오고LCD화면에는' '이(가)깜빡입니다.
•물이 다 끓으면 밥솥은 두 번의 삐 소리를 내고 뜸들이기를시작합니다.화면에는남은뜸들이는시간이표시됩니다.:14분.
•뜸들이기가끝나면 '삐'소리가다섯번울리고밥솥은보온을시작합니다.이때'보온'버튼에불이들어오고화면에는'00:00'이표시됩니다.

54
KO'죽' 기능
'라면' 기능
•'메뉴'버튼을눌러‘죽’기능을선택합니다.디스플레이화면에는기본조리시간으로'01:10'이표시됩니다.'시작'버튼에빨간색불이깜빡입니다.(죽:계량컵1컵,물6컵)
•‘예약/요리시간’버튼을눌러시간설정기능을활성화시킨후,'시'와'분'버튼을눌러조리시간을변경합니다.
•'시작'버튼을누릅니다.밥솥은'죽'조리상태로넘어갑니다.'시작'버튼에불이들어오고LCD화면에는남은조리시간을보여줍니다.
•조리가 끝나면 '삐' 소리가 다섯 번 울리고 밥솥은 보온을시작합니다.이때'보온'버튼에불이들어오고화면에는'00:00'이표시됩니다.
•'메뉴' 버튼을 눌러 '라면' 기능을 선택합니다. 디스플레이화면에는 기본 조리 시간으로 '01:30'이 표시됩니다. '시작'버튼에빨간색불이깜빡입니다.
•‘예약/요리시간’버튼을눌러시간설정기능을활성화시킨후,'시'와'분'버튼을눌러조리시간을변경합니다.
•'시작'버튼을누릅니다.밥솥은'라면'조리상태로넘어갑니다.'시작'버튼에불이들어오고LCD화면에는남은조리시간을보여줍니다.
•조리가끝나면'삐'소리가다섯번울립니다.예를 들어 80g의 라면을 조리할 경우, 내솥 안에 250ml의 찬물을 부어주시기 바랍니다. '라면' 기능을 선택하십시오. 물이 뜨거워지면(약 15분 후) 솥 안에 라면을 넣으십시오. 뚜껑을 열어 놓은 채로 약 8분 정도 라면이 익기를 기다립니다.국물이 넘칠 수 있으니 면을 넣으신 후에는 뚜껑을 열고 조리해 주시기 바랍니다
•‘예약/요리시간’버튼을눌러시간설정기능을활성화시킨후,'시'와'분'버튼을눌러조리시간을변경합니다.
•'시작'버튼을누릅니다.밥솥은'찜'조리상태로넘어갑니다.'시작'버튼에불이들어오고LCD화면에는남은조리시간을보여줍니다.
•조리가 끝나면 '삐' 소리가 다섯 번 울리고 밥솥은 보온을시작합니다.이때'보온'버튼에불이들어오고화면에는'00:00'이표시됩니다.

55
'이유식' 기능
'현미밥' 기능
'보온' 기능
•'메뉴' 버튼을 눌러 ‘이유식’기능을 선택합니다. 디스플레이화면에는 기본 조리 시간으로 '02:00'이 표시됩니다. '시작'버튼에빨간색불이깜빡입니다.(이유식:계량컵1컵,물8컵)
•‘예약/요리시간’버튼을눌러시간설정기능을활성화시킨후,'시'와'분'버튼을눌러조리시간을변경합니다.
•'시작'버튼을누릅니다.밥솥은‘이유식’조리상태로넘어갑니다.'시작'버튼에불이들어오고 LCD화면에는남은조리시간을보여줍니다.
•조리가 끝나면 '삐' 소리가 다섯 번 울리고 밥솥은 보온을시작합니다.이때'보온'버튼에불이들어오고화면에는'00:00'이표시됩니다.
참고: 현미쌀은 조리 전 1시간 정도 불려 주시기 바랍니다.•'메뉴' 버튼을 눌러 '현미밥' 기능을 선택합니다. 디스플레이화면에' '이(가)표시되고'시작'버튼에빨간색불이깜빡이면'시작'버튼을눌러주시기바랍니다.밥솥은'현미밥'조리상태로넘어갑니다.'시작'버튼에불이들어오고LCD화면에는' '이(가)깜빡입니다.
•물이다끓으면밥솥은두번의삐소리를내고뭉근하게끓이기를시작합니다.화면에는뭉근하게끓이기남는시간을표시합니다:18분.
•뭉근하게끓이기가끝나면 '삐'소리가다섯번울리고밥솥은보온을시작합니다.이때'보온'버튼에불이들어오고화면에는'00:00'이표시됩니다.
•'보온'버튼을누르면기기는'보온'을시작합니다.•보온이끝나면'보온/취소'버튼을눌러제품의작동을수동으로중지시킵니다.
권장 사항: 밥맛을 최상으로 유지하려면 보온은 6시간 이내로 하는 것이 좋습니다.

56
KO
'예약' 기능
'재가열' 기능
조리 완료 시
•예약 기능을 사용하시려면조리 프로그램과조리 시간을 먼저선택해 주시기 바랍니다. 그 다음, '예약' 버튼을 누르고 예약시간을설정합니다.'시'와'분'버튼을누를때마다시간/분이1시간/1분단위로증가또는감소합니다.기본예약시간은선택한조리시간에따라달라질수있습니다.가능한예약시간범위는1시간에서24시간입니다.필요한예약시간을설정한후,'시작'버튼을누르면제품은조리를시작합니다. 이때 '시작' 버튼의불은계속켜져있으며 LCD화면에는사용자가설정한시간이표시됩니다.
참고 : 1)예약 시간은 설정 된 조리 시간을 포함하고 있습니다. 만약 예약 시간을 설정한 조리 시간 보다 짧게 하시고 시작 버튼을 누르시면 조리가 바로 시작 됩니다.2) 찜, 죽, 라면, 이유식은 예약 버튼을 연속 2회 누르셔야 좌측에 시계 표시가 나타나며 예약 기능으로 전환됩니다.
•'재가열'버튼을누르면제품은 '재가열'을시작합니다. '시작'버튼에불이들어오고LCD화면에는' '이(가)깜빡입니다.
•재가열이끝나면 '삐'소리가다섯번울리고밥솥은자동으로보온을시작합니다.입맛과재가열을하는음식의종류및양에따라재가열기능을여러번사용해야할수도있습니다.
•재가열과정후에는'취소'버튼을눌러제품의작동을수동으로중지시킵니다.
참고: 재가열 기능을 사용 중, 음식을 잘 저어 균일한 온도를 유지할 수 있도록 합니다.쌀밥을 재가열 할 때에는 재가열 시작 전에 물을 붓고 잘 섞어 줍니다.
•뚜껑을엽니다–그림1참조.•조리가 끝난 내솥과 찜솥은 뜨거워서 화상의 위험이 있으므로반드시조리장갑을착용후만져주십시오.–그림.12참조.
•제품과 함께 제공된 플라스틱 주걱이나 국자를 사용해 음식을덜어내고뚜껑을다시닫습니다.
•내솥안에남아있는음식은24시간동안보온이됩니다.•보온을종료하려면‘보온/취소’버튼을누르시기바랍니다.보온을종료한후플러그를콘센트에서분리해주십시오.

57
세척 및 관리
•세척및보관을하기전다기능조리기의전원코드선을몸체에서분리하고열기를완전히식힙니다.
•제품 사용 후 매번 물기가 있는 스펀지로 이물질을 제거 해주십시오–그림.13참조.
내솥, 찜틀 (그림.14)•뜨거운 물과 주방용 세제, 스폰지를 사용해 내솥과 찜틀을세척합니다. 분말 타입 연마제와 금속 스폰지를 사용하지마십시오.
•음식이내솥바닥에눌어붙어있는경우,세척전내솥에물을받아불립니다.
•내솥의물기를잘제거합니다.•찜틀은식기세척기에서세척이가능하나내솥은식기세척기를사용할수없습니다.
내솥 관리아래의지시사항에따라내솥을관리하시기바랍니다:•내솥의상태를최상으로유지하기위해내솥안에서재료를자르지마십시오.
•다기능조리기에내솥을항상넣어놓습니다.•내솥 표면이 긁히지 않도록 제품과 함께 제공되는 플라스틱주걱이나 나무 주걱을 사용하십시오. 금속성 도구는 사용하지마십시오.–그림.15참조.
•내솥의부식을막기위해식초를용기에붓지마십시오.•내솥표면의색은제품을사용함에따라변할수있습니다.색상변화는 증기와 물에 의해 발생하는 것으로, 다기능 조리기의사용에는아무런영향을주지않으며인체에무해합니다.계속안전하게제품을사용하실수있습니다.
마이크로 압력 밸브 세척•마이크로 압력 밸브를 세척하려면 먼저 밸브를 뚜껑에서떼어냅니다–그림.16참조.그다음'열기'방향으로밸브를돌려열어줍니다–그림.17a및17b참조.세척후,물기를제거하고'닫기'방향으로돌려밸브를닫아줍니다.그리고다기능조리기의뚜껑에다시끼워넣습니다–그림.18a및18b참조.
제품의 기타 부속품 세척 및 관리•세척전전원코드선을몸체에서분리합니다.

58
KO오작동 설명 원인 해결 방법
표시등에불이들어오지않고제품에열이
가해지지않을때.
기기가전원에연결되어있지않습니다.
전원코드가소켓과전기플러그에모두연결되어있는지확인해주십시오.
표시등에불이들어오지않지만제품에열은가해질때.
표시등접속에문제가있거나표시등이고장난경우입니다.
공인서비스수리센터에연락하시기
바랍니다.
사용중증기가새어나올때.
뚜껑이제대로닫혀있지않습니다.
뚜껑을열고다시닫아주시기바랍니다.
마이크로압력밸브가제자리에놓여있지않거나제대로장착되지않았습니다.
조리를멈추고(제품을전원에서분리)
밸브가제자리에잘장착되어있는지확인합니다(2개의고정장치가잘잠겨있어야합니다).
뚜껑또는마이크로압력밸브개스킷이손상되었습니다.
공인서비스수리센터에연락하시기
바랍니다.쌀이설익거나설정조리시간을
초과할때.
쌀의양에비해물의양이적거나너무
많습니다.도표를확인하여물의양을조절하십시오.
문제 발생 시 조치 사항
•다기능조리기의표면을닦습니다–그림.19참조.뚜껑안쪽–그림.14참조및전원코드를물기가있는천으로닦은후남은물기를잘제거합니다.연마제는사용하지마십시오.
•열센서에손상이갈수있으니제품몸체의내부는물세척하지마십시오.

59
오작동 설명 원인 해결 방법
밥이설익거나설정조리시간을
초과할때
뜸들이기가충분히진행되지않았습니다.
공인서비스수리센터에연락하시기
바랍니다.
자동보온기능이작동하지않을때(제품이조리
상태에멈춰있거나열이들어오지않을때).
E0센서가열린회로또는단락회로상태에있습니다.
E1센서가열린회로또는단락회로상태에있습니다.
기기를멈추고프로그램을다시시작하십시오.
문제가지속되면공인서비스수리센터에연락하시기바랍니다.
E3 내솥이없거나비어있는내솥
제품안에내솥을넣습니다.그리고전원을뽑은후
제품을다시전원에연결하여프로그램을처음부터완전히다시
시작합니다.참고: 모양이 변형된 내솥은 사용하지 마십시오. 공인 서비스 수리 센터를 통해 새로운 내솥으로 교체하십시오.
환경 보호환경을 보호해 주세요!본제품은회수및재활용이가능한소재를포함합니다.해당지역분리수거함에배출하시기바랍니다.

NC00130658
EN p. 1 – 12
ZH p. 13 – 22
MS p. 23 – 35
TH p. 36 – 47
KO p. 48 – 59
EN
ZH
MS
TH
KO