Jitsi Meet Video Conferencing - High Court of Madhya Pradesh
27
HIGH COURT OF MADHYA PRADESH JABALPUR Jitsi Meet Video Conferencing For Advocates
-
Upload
khangminh22 -
Category
Documents
-
view
0 -
download
0
Transcript of Jitsi Meet Video Conferencing - High Court of Madhya Pradesh

HIGH COURT OF
MADHYA PRADESH JABALPUR
Jitsi Meet Video Conferencing
For Advocates

1 | P a g e
Index
1. Introduction…………………………………………………………………… 2
2. Requirements………………………………………………………………… 2
3. Procedure
a) For Laptop/Desktop.…………………………………………….3-11
b) For Android Smartphone……………………………………… 12-26

2 | P a g e
Jitsi Meet: Instant Video Conference
For Advocates / end-users
Introduction:
Jitsi Meet application is used for video conferencing. We need to connect with
video conference room by entering name of room that is created by the host and
shared starting the conference.
The manual is divided in two parts, first is the requirement to connect and start
the video conference and second showswhole process.
1. Requirement:
a) For Laptop/Desktop :-
I. Web camera enabled desktop computer / laptop computer
II. Internet connection
III. Web browser
b) For Andriod Smartphones :-
I. Android Smartphone with version 5.0 and above
II. Mobile Data / Wi-Fi should be ON
III. Jitsi Meet App (Download from Google Play Store)
3 | P a g e
2. Procedure:
The procedure will cover the complete process to connect and commence the
video conference through Jitsi Meet application. The procedure to connect
and start the conference is different for different platform like laptop/desktop
and smartphones. The detailed procedure will cover the complete set of steps
to perform the video conference in an easy manner for both of the platforms.
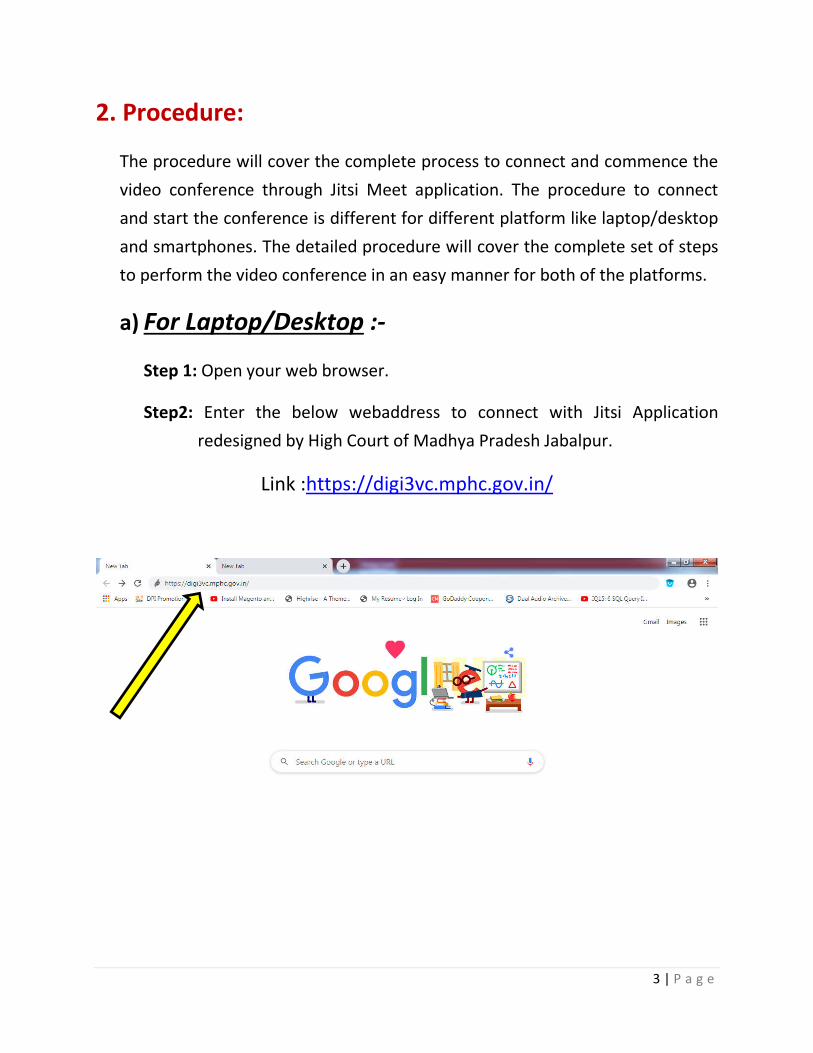
a) For Laptop/Desktop :-
Step 1: Open your web browser.
Step2: Enter the below webaddress to connect with Jitsi Application
redesigned by High Court of Madhya Pradesh Jabalpur.
Link :https://digi3vc.mphc.gov.in/

4 | P a g e
Step-3: Open the address by pressing the Enter key, then the below screen will
appear:-
Step4: To connect with the VC meeting, to enter the name of the meetingand
press “GO” button. The name of the meeting would have been shared
with you before start of the video conference. In this case as aexample
the VC room is “MPHC” :-.

5 | P a g e
Step-5: Now you are connected in the “MPHC” meeting room [name of the
meeting will be shared accordingly]
In here you can toggle in different views provided in Jitsi Meet application as
shown below.

6 | P a g e
Click on “Toggle the view” as shown above the view will be changed and it is now
look like the screenshot attached below for your reference.
Step-6:In this step you have to enter your name so that you will be identified
easily in case of multiple person connecting the same meeting (video
conferencing). To add your name please follow the process same as
described in the below screenshots.
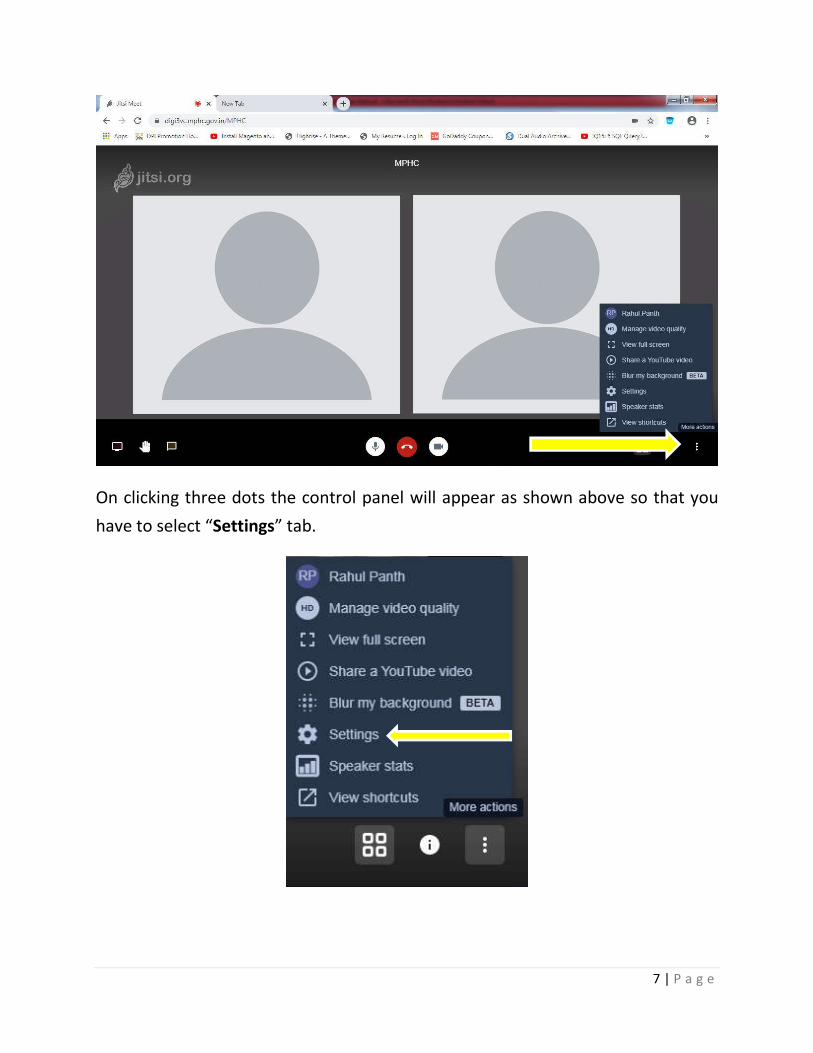
First click on the three dots appeared in the bottom right of your
laptop/desktop screen as shown below.
7 | P a g e
On clicking three dots the control panel will appear as shown above so that you
have to select “Settings” tab.
8 | P a g e
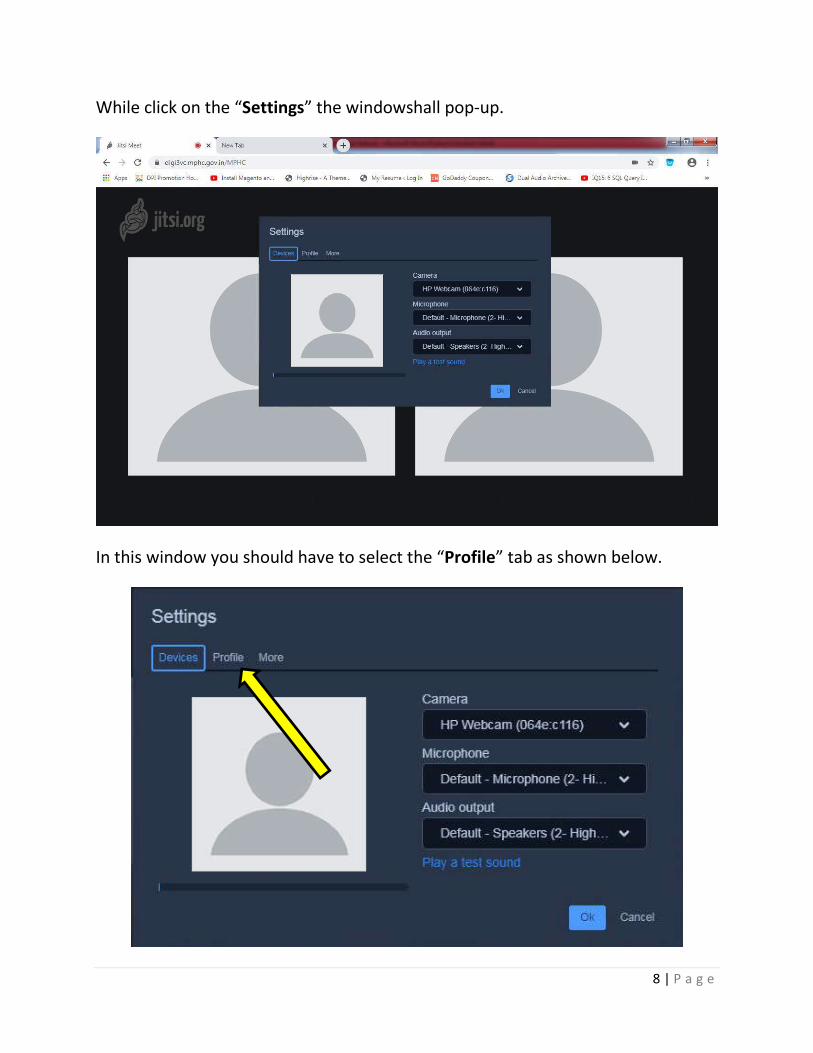
While click on the “Settings” the windowshall pop-up.
In this window you should have to select the “Profile” tab as shown below.

9 | P a g e
On selecting the “Profile” tab the below screen will be shown so that you would
have to Enter your nameand click “OK”.
Doing this your name will be set and you are ready to start video conferencing.
Step-7:you can turn On/Off the camera on clicking “Start/Stop camera” as shown
in the below screenshot as per your requirement.
10 | P a g e
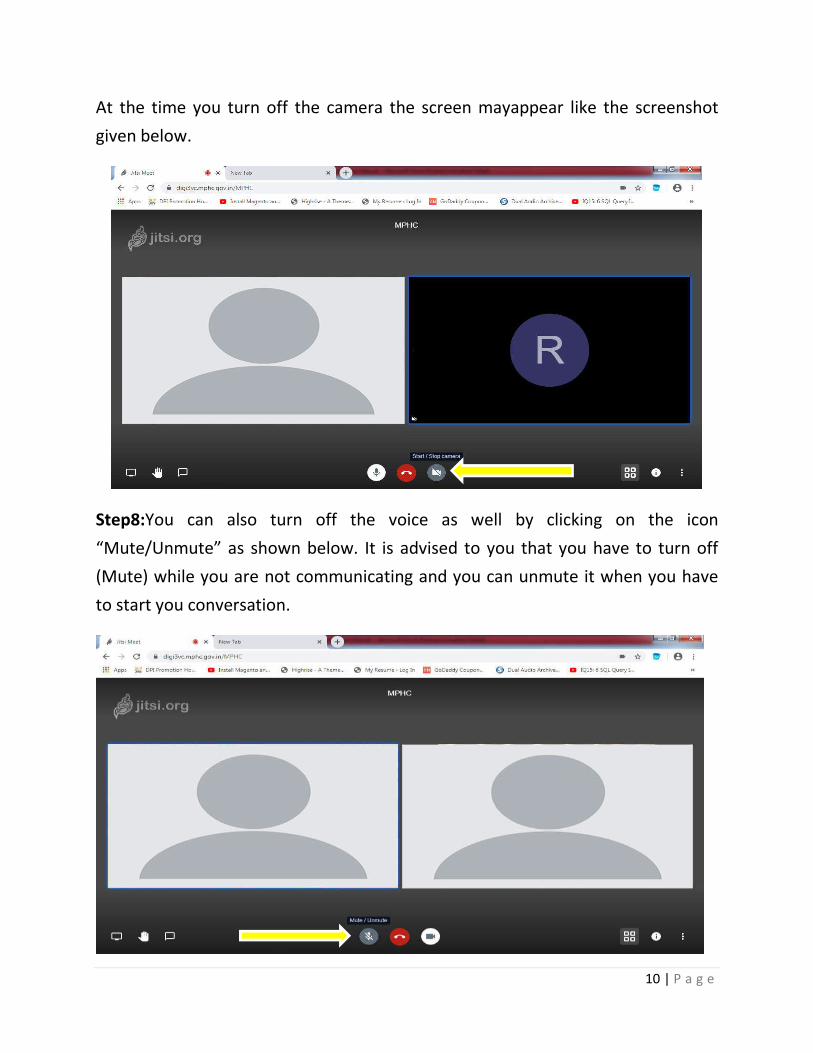
At the time you turn off the camera the screen mayappear like the screenshot
given below.
Step8:You can also turn off the voice as well by clicking on the icon
“Mute/Unmute” as shown below. It is advised to you that you have to turn off
(Mute) while you are not communicating and you can unmute it when you have
to start you conversation.

11 | P a g e
Step-9: End the meeting (video conference), you can end the video conference on
click the end button as shown below.
.
12 | P a g e
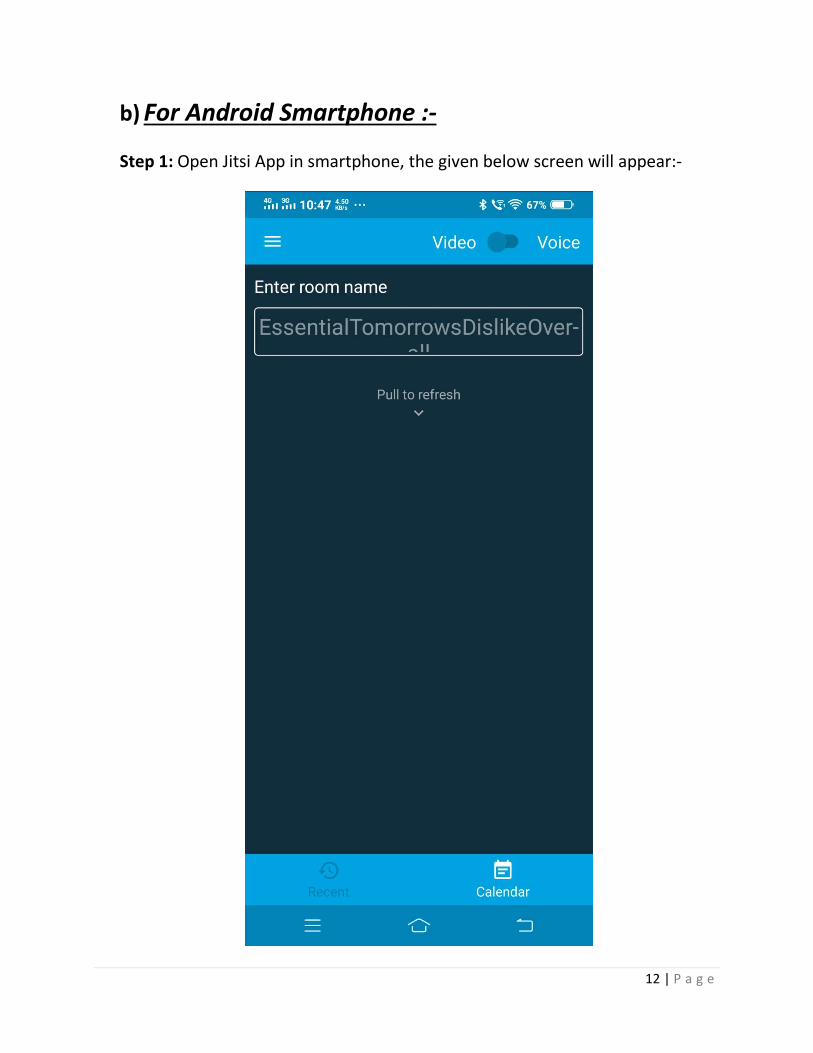
b) For Android Smartphone :-
Step 1: Open Jitsi App in smartphone, the given below screen will appear:-

13 | P a g e
Step2: Now click on three horizontal lines as shown below:-

14 | P a g e
On clicking the below panel will open and then you would have to go to
“Settings” tab:-

15 | P a g e
On clicking the “Settings” tab the below screen will appear.

16 | P a g e
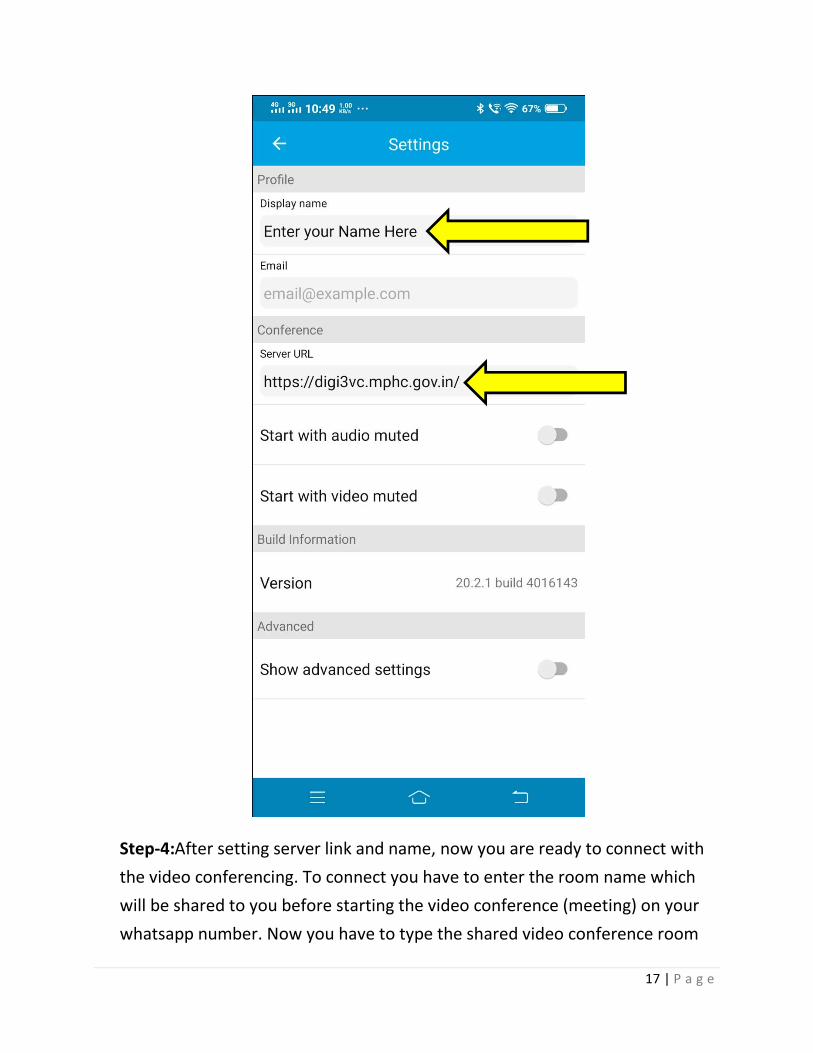
Step-3:In this step you have to set your name for the video conference along
the server details, for which you have to enter your name in “Display
Name” and the link :https://digi3vc.mphc.gov.in/ in the “Server link ”
field as shown below. Server link will be same as described with NO
change.
17 | P a g e
Step-4:After setting server link and name, now you are ready to connect with
the video conferencing. To connect you have to enter the room name which
will be shared to you before starting the video conference (meeting) on your
whatsapp number. Now you have to type the shared video conference room

18 | P a g e
name in the “Enter room name” space provided as shown below. In here we
took “MPHC” as an example for your reference only.
Now click on “CREATE/JOIN” button to connect with the video conferencing.
Step-5:In this step you have to set some permission to the application to perform
the smooth functionality of video conferencing.
First you have to “Allow” the Audio functionality as shown below:-

19 | P a g e
After that you have to “Allow” for pictures and videos.
20 | P a g e
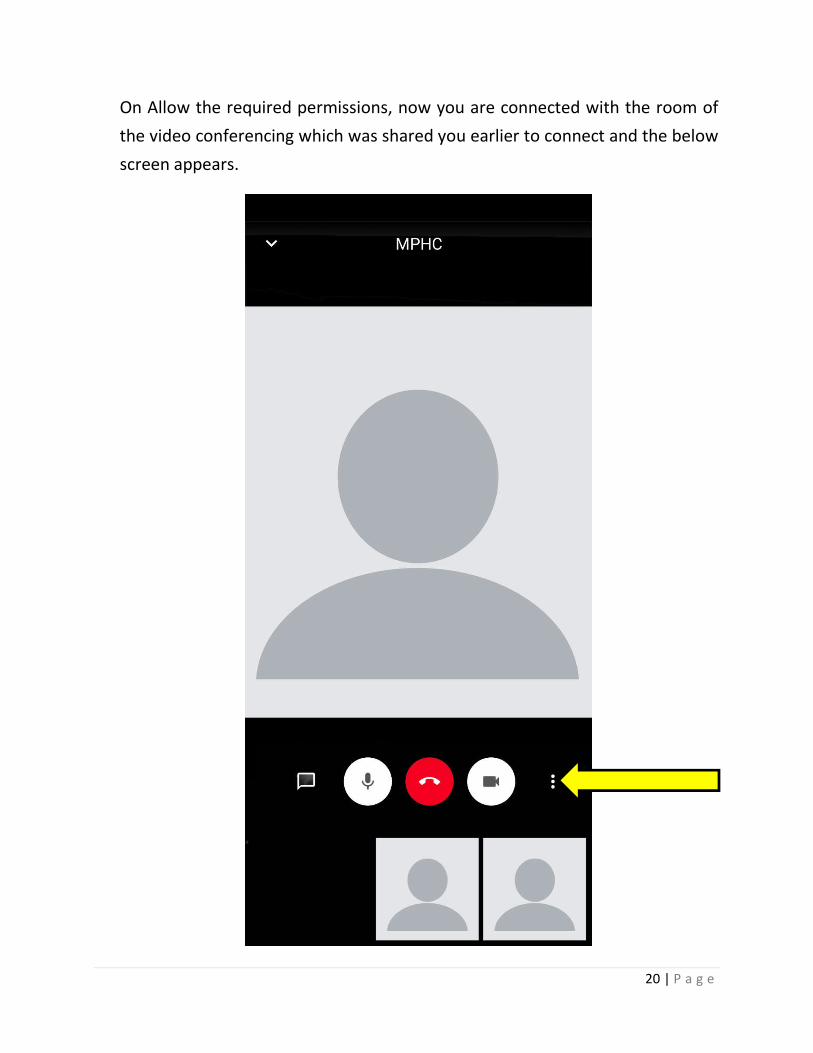
On Allow the required permissions, now you are connected with the room of
the video conferencing which was shared you earlier to connect and the below
screen appears.

21 | P a g e
Ste-6:-In this step you may be able to change the view as per. For this you have to
click on the three dots appears in the right bottom of your Jitsi app as
shown above and on clicking the dots, thegiven below screen may
appears:-
Now click on “More options” as shown above ,so that the below screen may
appear:-

22 | P a g e
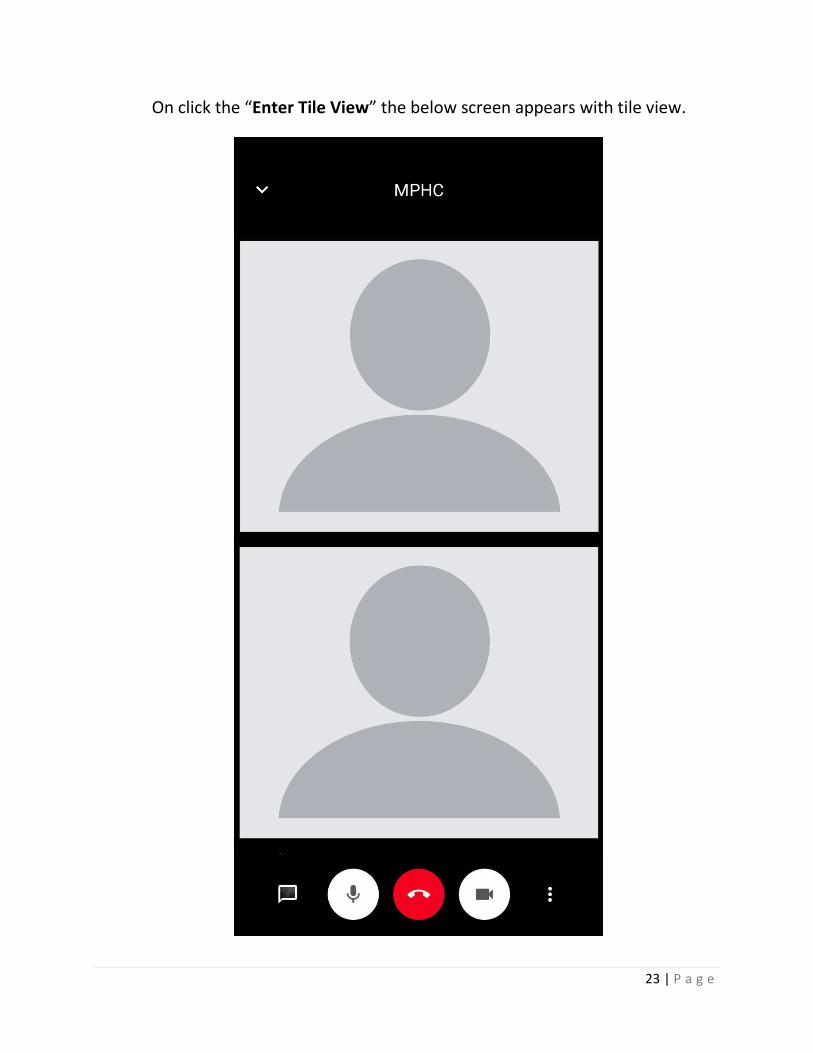
Now click on “Enter Tile View” to change the view as per your requirements as
shown below.
23 | P a g e
On click the “Enter Tile View” the below screen appears with tile view.
24 | P a g e
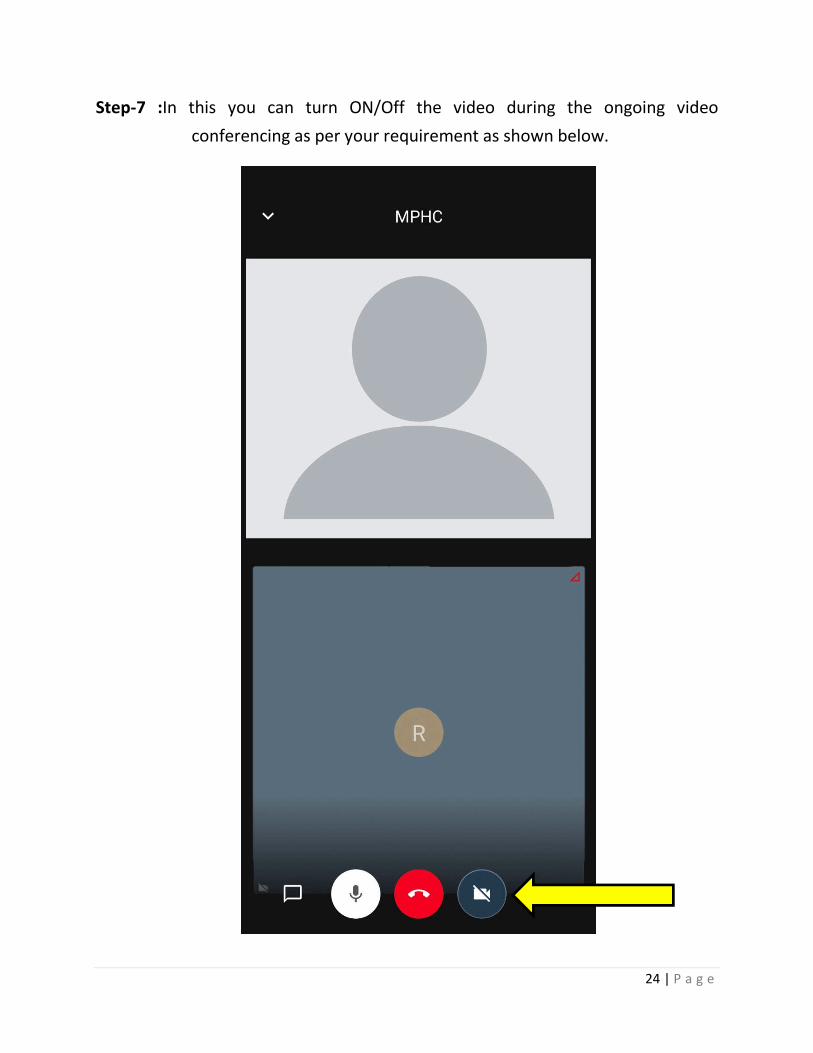
Step-7 :In this you can turn ON/Off the video during the ongoing video
conferencing as per your requirement as shown below.

25 | P a g e
Also, you can Mute/Unmute the voice during the video conference as shown
below:-

26 | P a g e
Step-8:To end the video conference, please click on the Red middle icon to
disconnect the video conferencing, the given below screen will
appear at last to close the Jitsi Application.:-