Home Care and Maintenance Manual - Habitat for Humanity of ...
95
Home Care and Maintenance Manual
-
Upload
khangminh22 -
Category
Documents
-
view
0 -
download
0
Transcript of Home Care and Maintenance Manual - Habitat for Humanity of ...

Home Care and Maintenance Manual

HOME CARE AND MAINTENANCE MANUAL Habitat for Humanity of Flathead Valley
2
Customization notes This template was designed to be adapted for your affiliate’s needs. By following the steps below, you will be able to put this document to use in your operations.
1. UPDATE THE COVER WITH YOUR LOGO Before you use this document, you must replace the global Habitat logo on the cover with your affiliate logo by following these steps:
• In Microsoft Word, right-click (or use CTRL+click) on the logo to select the picture box. • In the drop-down menu that appears, select “Change picture.” • Find the image file of your affiliate logo in white (PNG files work best for this application), and click “insert.” • Your logo should replace the global Habitat logo.
2. REVIEW AND UPDATE ALL OF THE CONTENT Each section of this manual is a sample collected from an affiliate submission.
Each and every topic should be reviewed for applicability and accuracy and adapted to your affiliate’s operations and individual home construction. Some recommendations are “universal” best practices, while others may be directly contrary to what your construction program produces. Consult manufacturers’ specifications for all home components, including use and maintenance requirements and recommendations. Consult with trusted trade contractors to use their experience with common defects, warranty issues and any component failures resulting from homeowner action or inaction.
The topical sections are just examples of the kind of content that is most useful to homeowners.
None of these sections should be adopted as is without review and editing. Each affiliate using this manual must research the requirements and best practices for use, care and maintenance for all topics included in its manual.
All references to warranty coverage are samples. They are provided to show the kind of warranty-specific content that is most useful to homeowners in these sections. These warranty callouts are not recommendations for warranty coverage or exclusions. Ensure that these warranty callouts match the information in your warranty agreements, and that any provided examples of coverage or exclusions match your standard implementation of these agreements. When in doubt, consult your legal counsel with specific questions.
3. INSERT INFORMATION IN ALL BRACKETED FIELDS There are a few instances where you must insert information specific to your affiliate into the template. These areas are all surrounded by square brackets. You can quickly find them by searching for the “[“ character in Word. (To search, go to the “Edit” drop-down menu and select “Find.”) Delete the brackets once you have entered your information.
4. REMOVE THE CUSTOMIZATION INSTRUCTIONS FROM THE DOCUMENT. Once you are finished customizing the document, select all the text on this page except for the “Online Version” and “Revision/Review History” sections, and delete it. Each time you update the document, add a row to the “Revision/Review History” table to keep track of your updates and assist with version control.
Online version Access the online version of this manual, including links to additional resources, at [insert web address].
REVISION/REVIEW HISTORY
DATE EXPLANATION
[Insert date] [Insert explanation of latest update. Add a row to the table for each new update.]

HOME CARE AND MAINTENANCE MANUAL Habitat for Humanity of Flathead Valley
3
Table of contents General information ..................................................................................................................................................... 8
Purpose ..................................................................................................................................................................... 8 Limitations of this manual .......................................................................................................................................... 8 Habitat information and contact info .......................................................................................................................... 8
Emergency, health and safety information ................................................................................................................ 9 Emergency contact information ................................................................................................................................. 9 Warning signs of dangerous conditions ................................................................................................................... 10 Service shut-off locations and information ............................................................................................................... 11 Home safety ............................................................................................................................................................ 12 Emergency readiness .............................................................................................................................................. 12
Home health and indoor air quality .......................................................................................................................... 13 Humidity in the home............................................................................................................................................... 16
Understanding your warranty ................................................................................................................................... 18 Warranty coverage .................................................................................................................................................. 18 Warranty obligations................................................................................................................................................ 18 Homeowner maintenance obligations ..................................................................................................................... 19 Coverage limitations ................................................................................................................................................ 19 Warranty exclusions ................................................................................................................................................ 19 Warranty claim submission process ........................................................................................................................ 20 Manufacturer warranty ........................................................................................................................................... 20
Appliances .................................................................................................................................................................. 23 Clothes washer ....................................................................................................................................................... 23 Clothes dryer ........................................................................................................................................................... 23 Dishwasher (if applicable) ....................................................................................................................................... 23 Electric stove ........................................................................................................................................................... 23 Garbage disposal (if applicable) .............................................................................................................................. 23 Range hood and exhaust fan .................................................................................................................................. 24 Refrigerator ............................................................................................................................................................. 25 Water heater ........................................................................................................................................................... 25
Attic ............................................................................................................................................................................. 26 Attic access ............................................................................................................................................................. 26 Attic ventilation ........................................................................................................................................................ 26 Passive ventilation................................................................................................................................................... 26 Active/mechanical ventilation .................................................................................................................................. 26 Soffit baffles ............................................................................................................................................................ 26
Cabinets ...................................................................................................................................................................... 27 Caulking ...................................................................................................................................................................... 28
Silicone caulk .......................................................................................................................................................... 28 Latex caulk .............................................................................................................................................................. 28 Exterior caulking (for Hardie Board and LP SmartSide siding) ................................................................................ 28
Concrete (flatwork/steps) .......................................................................................................................................... 29 Driveway and sidewalk ............................................................................................................................................ 29 Cracks ..................................................................................................................................................................... 29 Expansion joints ...................................................................................................................................................... 30

HOME CARE AND MAINTENANCE MANUAL Habitat for Humanity of Flathead Valley
4
Ice, snow and chemicals ......................................................................................................................................... 30 Cleaning .................................................................................................................................................................. 30 Heavy vehicles ........................................................................................................................................................ 30
Countertops ................................................................................................................................................................ 31 Caulking .................................................................................................................................................................. 31
Crawl space ................................................................................................................................................................ 32 Use and care ........................................................................................................................................................... 32 Crawl space floor/slab ............................................................................................................................................. 32 Fan .......................................................................................................................................................................... 32
Door locks/knobs ....................................................................................................................................................... 33 Interior doors ........................................................................................................................................................... 33 Exterior doors .......................................................................................................................................................... 34
Drywall ........................................................................................................................................................................ 35 Drywall fasteners ..................................................................................................................................................... 36
Electrical ..................................................................................................................................................................... 37 General ................................................................................................................................................................... 37 Electrical panel (also called “breaker box” or “circuit breaker panel”) ...................................................................... 37 Breakers .................................................................................................................................................................. 38 Breaker tripping ....................................................................................................................................................... 38 Outlets ..................................................................................................................................................................... 38 GFCI (ground fault circuit interrupter) outlets .......................................................................................................... 39 Lighting .................................................................................................................................................................... 39 Outdoor lighting ....................................................................................................................................................... 39 Fluorescent lighting ................................................................................................................................................. 40 Ceiling fans ............................................................................................................................................................. 40 Bathroom exhaust fans ........................................................................................................................................... 40 Underground cables ................................................................................................................................................ 40 Modifications ........................................................................................................................................................... 40
Energy efficiency and features ................................................................................................................................. 41 Building envelope .................................................................................................................................................... 41 Insulation ................................................................................................................................................................. 41 Air sealing ............................................................................................................................................................... 42 Maximizing efficiency .............................................................................................................................................. 42 Expansion and contraction ...................................................................................................................................... 43
Foundation.................................................................................................................................................................. 44 Foundation waterproofing ........................................................................................................................................ 44
Flooring ....................................................................................................................................................................... 45 General ................................................................................................................................................................... 45 Carpet ..................................................................................................................................................................... 45 Luxury vinyl tile (LVT) and luxury vinyl plank (LVP) ................................................................................................ 45 Floor squeaks .......................................................................................................................................................... 45 Level floors .............................................................................................................................................................. 45
Framing ....................................................................................................................................................................... 46 Advanced framing for optimized efficiency .............................................................................................................. 46
Hose bib/garden hose ................................................................................................................................................ 46

HOME CARE AND MAINTENANCE MANUAL Habitat for Humanity of Flathead Valley
5
Garage overhead door (on applicable homes) ........................................................................................................ 47 Sag .......................................................................................................................................................................... 47 Light visible/water penetration ................................................................................................................................. 47
Grading and drainage ................................................................................................................................................ 48 Positive drainage ..................................................................................................................................................... 48 Grading and pest problems ..................................................................................................................................... 48
Gutters and downspouts ........................................................................................................................................... 49 Overflow .................................................................................................................................................................. 49 Downspouts and extensions ................................................................................................................................... 49
HVAC system.............................................................................................................................................................. 50 Heat pump/air handler ............................................................................................................................................. 50 Furnace (indoor unit) ............................................................................................................................................... 50 Furnace condensate pump and line ........................................................................................................................ 51 Furnace hazards ..................................................................................................................................................... 51 Air conditioner (outdoor unit) ................................................................................................................................... 51 Air conditioner condensate line ............................................................................................................................... 51 Air conditioner cooling coils ..................................................................................................................................... 51 Thermostat .............................................................................................................................................................. 52 Return air filter ......................................................................................................................................................... 52 Fresh air filter .......................................................................................................................................................... 53 Emergency overflow drain ....................................................................................................................................... 53 Adjusting air vents ................................................................................................................................................... 53 Passive air vents ..................................................................................................................................................... 53 Seasonal trial run .................................................................................................................................................... 53 Temperature ............................................................................................................................................................ 54 Overheating ............................................................................................................................................................. 54 Odor ........................................................................................................................................................................ 54 Gas (in gas appliance homes) ................................................................................................................................. 54 Ductwork ................................................................................................................................................................. 54 Ductless heat pump (mini split) refrigerant lines ...................................................................................................... 54
Insulation/air sealing ................................................................................................................................................. 55 Internet/cable/phone jacks ........................................................................................................................................ 55 Landscaping ............................................................................................................................................................... 55
Grass seed .............................................................................................................................................................. 55 Shrubs and trees ..................................................................................................................................................... 55 Drainage .................................................................................................................................................................. 55
Mirrors ......................................................................................................................................................................... 55 Paint and stain ............................................................................................................................................................ 56
Touch-ups ............................................................................................................................................................... 56 Exterior .................................................................................................................................................................... 56 Maintenance ............................................................................................................................................................ 56 Severe weather ....................................................................................................................................................... 56
Plumbing ..................................................................................................................................................................... 57 Shut-off valves ........................................................................................................................................................ 57 Freezing pipes ......................................................................................................................................................... 57 Debris in supply lines .............................................................................................................................................. 57

HOME CARE AND MAINTENANCE MANUAL Habitat for Humanity of Flathead Valley
6
Care and cleaning ................................................................................................................................................... 57 Sewer cleanouts ...................................................................................................................................................... 58 Fixtures ................................................................................................................................................................... 58 Toilet ....................................................................................................................................................................... 58 Outside faucets/hose bibs ....................................................................................................................................... 59 Noise ....................................................................................................................................................................... 59 Tub/shower fixture ................................................................................................................................................... 60 Sink P-traps ............................................................................................................................................................. 60 Water heater ........................................................................................................................................................... 61
Roof ............................................................................................................................................................................. 62 Maintenance ............................................................................................................................................................ 62 Severe weather ....................................................................................................................................................... 62 Leaks ....................................................................................................................................................................... 62
Siding .......................................................................................................................................................................... 62 Vinyl ........................................................................................................................................................................ 62 Hardie board (if applicable) ..................................................................................................................................... 62 General exterior ...................................................................................................................................................... 63
Smoke detectors ........................................................................................................................................................ 63 Sprinkler systems/fire suppression ......................................................................................................................... 64 Stairs ........................................................................................................................................................................... 64 Sump pit and pump .................................................................................................................................................... 64
Sump pit .................................................................................................................................................................. 64 Sump pump ............................................................................................................................................................. 64 Sump cover ............................................................................................................................................................. 64 Interior flooding ....................................................................................................................................................... 64
Towel bars/toilet paper holders ................................................................................................................................ 65 Windows and screens ............................................................................................................................................... 65
Cleaning .................................................................................................................................................................. 65 Ventilation ............................................................................................................................................................... 65 Condensation .......................................................................................................................................................... 66 Screens ................................................................................................................................................................... 66 Sticking windows ..................................................................................................................................................... 66 Window locks .......................................................................................................................................................... 66 Broken glass ........................................................................................................................................................... 66 Tinting or solar coatings .......................................................................................................................................... 67
Regular maintenance ................................................................................................................................................. 68 Sample checklist: Regular maintenance ................................................................................................................. 68 Systems maintenance ............................................................................................................................................. 69 Special maintenance ............................................................................................................................................... 69
Troubleshooting guide .............................................................................................................................................. 70 Electrical .................................................................................................................................................................. 70 HVAC ...................................................................................................................................................................... 70 Plumbing ................................................................................................................................................................. 72
Appendix I: Your home schematics and details ...................................................................................................... 73 Appendix II: Before your closing .............................................................................................................................. 74
Preclosing walk-through .......................................................................................................................................... 74

HOME CARE AND MAINTENANCE MANUAL Habitat for Humanity of Flathead Valley
7
Verification of punch list completion ........................................................................................................................ 74 Appendix III: Repairs and improvements ................................................................................................................. 75
Plan for repairs ........................................................................................................................................................ 75 Home repair assistance ........................................................................................................................................... 75 Getting professional assistance .............................................................................................................................. 76
Template document appendix................................................................................................................................... 80 Preclosing walk-through checklist: Habitat for Humanity of the Charlotte Region ................................................... 80 Preclosing walk-through checklist: Habitat for Humanity of Metro Denver .............................................................. 83 Home maintenance checklists: Trinity Habitat for Humanity ................................................................................... 89 Home maintenance checklists: Habitat for Humanity Greater Fresno Area ............................................................ 94

HOME CARE AND MAINTENANCE MANUAL Habitat for Humanity of Flathead Valley
8
General information Purpose This manual will help you maintain the safety, comfort, efficiency and overall health of your home by providing guidance on the careful use, regular maintenance and occasional repairs that are necessary parts of homeownership. Inside you will find the essential steps you should take to help prevent issues, troubleshoot problems and safely address emergencies.
Each section of this manual covers one of the major components of your home and includes callouts for these critical actions:
• Careful use: Habitat for Humanity builds and rehabilitates homes to be healthy and safe, decent and comfortable, and affordable for the long term. In design and construction, we prioritize accessibility, efficiency and durability, but your home and all of its systems are not indestructible. The efficiency of your home’s systems relies on how you use them. Certain actions make them more efficient, others less efficient. The durability of your home also depends on how you use it. Certain actions will stress and degrade systems no matter how well they are built. Each topic includes guidance for using your home’s components so that the home remains safe, healthy, decent, comfortable, and affordable for the long term.
• Preventive maintenance: These are regular chores that keep your house looking nice and working properly, and that prevent damage that is expensive to fix. Buying a home is the largest investment in most of our lives, and it requires continual small investments to protect its value and our safety. Small issues can quickly turn into dangerous, costly concerns; preventive maintenance helps to catch them while they’re small and fix them while they’re affordable.
• Repair and replacement: Careful use and regular maintenance prevent a lot of home repairs, but your home is made from components that can’t last forever. Some repairs are inevitable, and most of them are your responsibility as the homeowner. Many of the topics in this manual include guidance on common repairs and replacements to help prepare you for that future task.
• Warranty: [Affiliate name] includes a home warranty for this house, and certain components within the house are covered by manufacturer or installer warranties. However, no warranty is a blanket promise to repair or replace components. Some things are covered, and others are not, and the difference often depends on how and when the damage occurred. The entire warranty document is included in its own section, and individual components that may or may not be included in its coverage are called out in each topical section, as applicable. These callouts are more accessible guidance, but you should always refer to the full warranty agreement for your home for the most accurate details.
• Additional resources: This manual also includes many links to external resources — guidance that is not created or maintained by [affiliate name]. This includes links to Habitat for Humanity of the Charlotte Region’s maintenance and warranty videos, which provide additional context on general home maintenance and warranty topics.
Limitations of this manual This manual is a guide, not a guarantee. It provides recommendations for home use and care, along with information and recommendations intended to improve home health and safety, but the use, care and maintenance of a home — and the health and safety of that home — are ultimately the responsibilities of the homeowner. This manual also provides recommendations for use habits and maintenance tasks that can improve the long-term affordability of utility and repair costs, but it makes no guarantees about the realization of these benefits, which are the sole responsibility of the homeowner.
Habitat information and contact info [Insert affiliate contact information.]
[Recommended information:
• Office location and main number • Main affiliate website • Direct line/email address for homeowner support/services • Warranty call number or website (as applicable) • Habitat ReStore locations, contact numbers and websites]

HOME CARE AND MAINTENANCE MANUAL Habitat for Humanity of Flathead Valley
9
Emergency, health and safety information Emergency contact information WHAT TO DO IF YOU EXPERIENCE THE FOLLOWING EMERGENCIES
Gas leak • Action: Leave your house immediately and then contact your utility company. • Contact: [insert natural gas/propane provider company name and contact
information]
Total loss of heat • Action: Review the troubleshooting guide. If these recommendations do not
restore heat, call the company that installed your equipment. • Contact: [insert company name/contact info or location of this information within
home]
Total loss of electricity • Note: This means all power to the entire house. For power failure to one room or
outlet, see the troubleshooting guide. • Action: Call the utility company or check its website for a widespread service
outage. If no other outages are reported, call an electrician. • Contact: Utility provider: [insert electrical provider company name and contact
information] Electrician: [insert company name/contact info or location of this information
within the home]
Major plumbing leak • Note: This means a major leak that could cause significant damage to the home or
a leak that you can’t find the source of. For minor leaks, including leaks at plumbing fixtures such as a sink or toilet, see the troubleshooting guide first, then contact a plumber if necessary.
• Action: Turn off the home’s water supply at the water main shut-off valve, then call a plumber.
• Contact: [insert company name/contact info or location of this information within home]
Total loss of water • Action: Call the water department or check its website for a widespread service
outage. If no other outages are reported, call a plumber. • Contact: Water provider: [insert water provider company name and contact information] Plumber: [insert company name/contact info or location of this information
within home]

HOME CARE AND MAINTENANCE MANUAL Habitat for Humanity of Flathead Valley
10
Warning signs of dangerous conditions
CARBON MONOXIDE EXPOSURE • Warning signs: The most common symptoms of carbon monoxide poisoning are
headache, dizziness, weakness, upset stomach, vomiting, chest pain and confusion. Carbon monoxide exposure symptoms are often described as “flu-like.” If you breathe in a lot of carbon monoxide, it can make you pass out or kill you. People who are sleeping can die from CO poisoning before they have symptoms.
• Solution: If your carbon monoxide alarm goes off or any odors are present around any combustion appliances, leave the home and call emergency services.
• For more information: Center for Disease Control — Carbon Monoxide
MOLD • Warning signs: You might notice these health-related indicators: coughing,
sneezing, sore or itchy throat, congestion, runny nose, sinus headaches, wheezing, difficulty breathing, itchy or watery eyes, and irritated or itchy skin. Your home may show these visible signs: discolored walls, stains on hard or soft surfaces, and black spots or streaks.
• To diagnose: Purchase a viable mold test kit (available at most hardware stores) and follow its instructions for collecting samples.
• Solution: Not all mold is toxic and poses a risk to your health, but all mold is an indication of a larger moisture control issue. For toxic mold, contact a professional remediator. For non-toxic mold, identify the source of moisture that feeds the mold and address it through leak troubleshooting or indoor air and humidity control measures.
GAS LEAK • Warning signs: The smell of sulfur or rotten eggs, a hissing or whistling sound
near a gas line, a white cloud or dust cloud near a gas line, a damaged gas pipe, dead houseplants, or unusual increases in gas bills.
• To diagnose: If you suspect a gas leak, leave the home immediately. Do not attempt to diagnose the problem while in the home.
• Solution: Leave the home immediately and contact your gas provider. If this contact number is not easily accessible, contact emergency services (911).
WATER LEAK (MAIN) • Warning signs: Unexplained water in your yard, water in the street, damp or wet
spots around plumbing lines where they enter the home, unexpectedly high water bills, reduced water pressure, or odors.
• To diagnose: Inspect the water main by the house and by the street for soggy or wet areas where water may be leaking from the pipes underground. Turn off the main supply line in the house and turn on the taps to reduce pressure in the interior lines. If water continues to leak, the issue is not between the main supply line and the fixture; it is between the main supply line and the water meter or even in the city delivery line.
• Solution: Call your utility company or a plumber to shut off the main service and determine a long-term solution. If service pipes (the underground pipes that deliver water from the meter to your house) are broken, those repairs are your responsibility. If the issue is at the water meter or in the main delivery lines (the
Related video: What to Watch For

HOME CARE AND MAINTENANCE MANUAL Habitat for Humanity of Flathead Valley
11
lines that connect water meters to the city supply, often under the street), those repairs are the utility company’s responsibility.
[Include any local or regional emergency conditions, such as warnings for climatic or geologic disasters (hurricanes, tornadoes, floods, fires, earthquakes, blizzards, etc.) or construction-specific conditions.]
Service shut-off locations and information In an emergency (whether severe weather, fire or a water leak), you might need to turn off critical services to your home to prevent further risk or damage. Be familiar with these locations before an emergency:
[Best practice: Include photos of service/access equipment. Even if you can’t provide individualized photos of each location, help homeowners quickly identify the equipment they are looking for.]
ELECTRICAL • The main electrical panel is located [insert description of location]. Electricity to
your home [can / cannot] be turned off at this location. • The electrical meter is located [insert description of location]. Electricity to your
home [can / cannot] be turned off at this location.
NATURAL GAS/PROPANE The main gas pipe shut-off valve is located [insert description of location]. If you suspect a gas leak, leave the home immediately. Turn off the supply pipe only if it is safe to do so. To shut off gas flow, turn the handle so that it is perpendicular to the pipe it is attached to. When the handle is turned so that it is back in line with the pipe, gas will flow.
WATER • The main water shut-off valve is located [insert description of location]. Turn the
handle so that it is perpendicular to the pipe it is attached to. When the handle is turned so that it is back in line with the pipe, water will flow.
• The water meter is located in your front yard, near the street. It is underground and has a green or cast metal cover. Turning off water service at the meter stops all flow of water to the home and is generally done only if there is a leak between the main service line (in the street) and your home’s more accessible indoor water shut-off valve. It is impossible to turn off the water manually without a special tool. If you or a service provider needs to turn off water, lift the cover and turn the valve so that it is perpendicular to the pipe it is attached to. When the valve is turned so that it is back in line with the pipe, water will flow.
SEWER/WASTEWATER Your sewer cleanouts are located [insert description of location]. There is no way to “disconnect” wastewater flow, but these cleanouts can be used to troubleshoot blockages in wastewater lines between the main service in the street and the individual fixtures in your home.

HOME CARE AND MAINTENANCE MANUAL Habitat for Humanity of Flathead Valley
12
Home safety The following components are included in your home specifically to address safety concerns. See each dedicated section to learn more about their use, limitations, and maintenance.
• Fire alarms. • Carbon monoxide alarms.
There are also dedicated safety mechanisms within most of your electrical appliances and systems and within all combustion appliances. These are called out in each section.
The following common safety components are recommended to address specific concerns you might have, but are not provided as part of [affiliate name]’s standard construction process:
• Fire extinguishers. • Motion detector lights. • Home security systems.
Emergency readiness • [Insert relevant information and/or resources for Disaster Risk Reduction and
Response.] • Recommended class: Developing Your Emergency Plan
Related video: What to Watch For
Related class: [Link to your resource]

HOME CARE AND MAINTENANCE MANUAL Habitat for Humanity of Flathead Valley
13
Home health and indoor air quality The quality of your indoor air is just as important as the temperature when it comes to comfort, and it can have serious and direct impacts on your health and safety. Cleaner air can limit your exposure to certain viruses and to particles that cause asthma and allergies. Temperature, humidity, selection of home materials, and how you use your home all impact indoor air quality. Consider these key components and recommendations for maintaining healthy indoor air quality.
ALLERGY AND ASTHMA TRIGGERS Maintaining good air quality in your home is important for the health of your entire family. All of the particles in your air are potential triggers for asthma and allergy attacks. Dust, smoke and bacteria are often 0.3 microns or less. At that size, allergens can get deep into your lungs because they aren’t filtered well by your nose and throat. The most common indoor and outdoor allergy triggers are pollen, mold spores, dust mites and pet dander.
Follow these tips to manage allergy and asthma triggers in your home: • Control dust mites: Use anti-dust mite covers and wash your sheets in hot water.
A washing machine water temperature of 130 degrees Fahrenheit or hotter is recommended, along with drying the bedding on a hot cycle to kill dust mites.
• Avoid pet dander: Clean pet-accessible areas frequently, paying special attention to furniture, carpets and any pet beds.
• Close doors and windows during pollen-heavy periods: Keeping windows and doors shut helps reduce the amount of outdoor pollens, allergens and irritants inside your home. Most weather apps and sites include information on pollen counts.
• Change HVAC filters regularly (every 30 days). • Dust and vacuum surfaces and floors at least once a week. Use a HEPA-quality
vacuum cleaner frequently on rugs, carpets, furniture and pet bedding. • A deep cleaning helps reduce the levels of pollutants inside your home to help
prevent asthma and allergy attacks from triggers including dust, smoke, pet dander and more.
• Prevent unnecessary buildup of dirt, sand and other outdoor residue from coming inside by leaving a doormat at your main entryway.
• Carefully follow directions on consumer products, such as cleaning agents, paints and glues.
• Restrict smoking to outdoor areas. • Purchase building materials and wood furniture that do not emit formaldehyde. • Use candles and incense sparingly, if at all. • Use the exhaust fans near pollutant sources (such as the range hood fan above
the stove while cooking). • Consider upgrading the filter in your central conditioning system to at least
MERV 13 (check your system requirements first to be sure it can operate with this style of filter).
SIGNS YOU SHOULD TEST YOUR AIR QUALITY If you have chronic allergies and asthma, frequent headaches, bronchitis or colds that last an unusually long time, your body may be feeling the effects of pollutants in your home. Those airborne irritants could be anything from gas fumes to pet dander to mold that you can’t even see.
HOME CARE AND MAINTENANCE MANUAL Habitat for Humanity of Flathead Valley
14
Sometimes the contaminants are more extreme — like hazardous chemicals and asbestos. If you notice severe symptoms such as dizziness, nausea, rash, fever, chills, fatigue, vomiting or shortness of breath, first consult a doctor, and then have your air quality tested.
COMMON AIR QUALITY TESTS
Carbon monoxide Carbon monoxide is an odorless gas that comes from the fumes of gas appliances such as stoves, ovens, grills, fireplaces, furnaces and water heaters. When carbon monoxide leaks and builds up, it can poison the people and animals breathing it in your home. Carbon monoxide poisoning causes flu-like symptoms that can make you pass out and even kill you. Fortunately, installing carbon monoxide detectors to measure the levels in your home and alert you of problems is an easy way to protect yourself and your family.
• [Affiliate: Fill in whether stand-alone or combination carbon monoxide detectors are installed.]
• For more information, see the Kidde Carbon Monoxide Poisoning FAQs.
Radon Radon is the second leading cause of lung cancer, so testing your home for this contaminant is a smart move. It’s a radioactive gas that naturally occurs as uranium breaks down in the soil, and it can seep into your home and silently poison you. The good news is that if you find high radon levels from testing, you can do some simple home renovations to seal and caulk foundation cracks and reduce radon exposure.
You can purchase at-home radon tests at most home improvement stores, or you can get discounted kits from the National Radon Program Services at Kansas State University. Tests typically use a charcoal reading that is collected in your home over a specific period. You then mail the testing materials to a lab to get your results.
• [Affiliate: Fill in any active or passive radon mitigation measures included in home.] • For more information, see the EPA National radon map.
Allergens and other indoor pollutants There is an entire industry dedicated to monitoring indoor air quality for pollutants. Most air quality monitors specifically call out:
• TVOC (total volatile organic chemicals; toxins and airborne chemicals). • PM2.5 (particulate matter smaller than 2.5 microns; fine dust). • HCHO (formaldehyde, a common but toxic construction material). • AQI (overall air quality index, as measured by the EPA).
If you’re worried about indoor air quality but aren’t sure what the contaminants might be, purchasing an air quality monitor is a sensible first step. Many reviews and comparisons are available to help you choose the best monitor for your use.
WHEN TO CALL A PROFESSIONAL If you are experiencing health symptoms that may be related to bad air or you just want to play it extra safe, call a professional to test your home’s air quality. They’ll be able to run several tests at once, and they know exactly what to look for when inspecting your home for potential danger zones. They can also help you figure out a game plan to improve the air quality in your home.
Here are some of the contaminants a pro can test for:

HOME CARE AND MAINTENANCE MANUAL Habitat for Humanity of Flathead Valley
15
• Indoor mold. • Lead-based paint. • Dust particles and other allergens. • Smoke-related air pollution. • Air fresheners, candles and incense. • Household cleaners. • Combustion particles or gases.
WHAT TO CONSIDER WHEN SHOPPING FOR AN AIR PURIFIER There are several factors to consider when you’re looking for the ideal air purifier for your home. We recommend you check out product labels to better understand the device’s specifications and read air purifier reviews to find out how the unit rated with testers. Here’s an overview of what to look for:
Size Make sure the air purifier you’re interested in works for your room size. The device’s clean air delivery rate, or CADR, should give you an indication of whether it can handle your space. CADR measures the cubic feet per minute of clean air delivered. The higher the value, the cleaner the air. If you’re trying to improve air quality in large rooms, look for a higher CADR.
Noise Top-quality air purifiers have a series of filters that capture particles and return clean air back into the room, which inevitably creates some level of noise. Depending on the model and setting of your unit, sounds can range from a quiet hum to a loud whoosh. If noise is an issue for you, try getting a larger unit. It will be effective, efficient and quieter at a lower speed.
Filter When you’re thinking about air filters for allergies and asthma, ask these questions:
• What type of filter is it? • How easy is it to change the filter? • How often do you have to change it? • How much do the filters cost?
Many manufacturers include helpful videos to show how filters should be replaced. You can look up reviews of products before purchase and can also price replacement filters and see if local stores carry them or how to order them online.
Cost Consider the price of the device and the cost for the electricity to run it. A good air purifier can be pricey — ranging from $50 to $1,000. If you need multiple devices to clean the air in several rooms, it can get expensive. The more units you have, the more energy you’ll use.
Before you buy, do a little math to estimate how the unit will impact your electric bill. For example, most HEPA purifiers use 30-250 watts per hour. If you use the purifier 24 hours a day for a year, you’ll pay roughly $39 to $328 annually, using a baseline rate of 15 cents per kilowatt-hour.
• Start with ENERGY STAR-certified room air cleaners for a listing of more efficient appliances.

HOME CARE AND MAINTENANCE MANUAL Habitat for Humanity of Flathead Valley
16
Ozone output Be aware that some air purifiers output ozone, which can make asthma and other breathing conditions worse. It’s important to read the product information and look for no or low ozone specifications. Some air purifiers, called ozone generators, are advertised as using ozone to render certain viruses, bacteria, mold and other biological contaminants inactive, but the level of ozone necessary to do this also is detrimental to our health.
• For more information, consult the California Air Resources Board’s page on Hazardous Ozone-Generating Air Purifiers.
AHAM Verification You may not have heard of the Association of Home Appliance Manufacturers, or AHAM, but it has been keeping an eye on appliance standards since 1967. It verifies air cleaners based on the unit’s recommended room size and the CADR rates listed on the product packaging. Before you shop, definitely check out the list of AHAM-approved air cleaners.
Air purifiers can be helpful solutions to indoor air contaminants, but remember that the most effective and efficient way to reduce indoor air contaminants is through prevention. Revisit the tips above to reduce contaminants at their source, and then use a purifier to catch those contaminants that otherwise can’t be reduced.
Humidity in the home Having the optimum amount of humidity in your indoor air can impact your health. Either too much or too little humidity can lead to the rise of unhealthy airborne particulates. The EPA recommends keeping relative humidity inside between 30% and 50%. You can check the levels in your home with a digital humidity meter, or hygrometer, which you can find at most hardware stores. Having the appropriate humidity level in your home will help increase your comfort while protecting your belongings and your family’s health.
Habitat homes are built to be airtight, energy-efficient and space-efficient. This means the potential for internal moisture is much greater than in traditional “code-built” homes, which tend to be larger and less efficient. Most consumer products are targeted to these kinds of homes. The most common humidity-related problem in Habitat homes is too much moisture in the air, and that can lead to mold, mildew and even structural issues within the walls at extreme levels.
To reduce indoor humidity, follow these tips: • Always use point-source ventilation to remove moisture where it is most heavily
generated, such as in bathrooms, kitchens and laundry rooms. Use your range hood fan when cooking and especially when boiling water. Use your bathroom fan whenever using the shower or bathtub, and leave the fan running for 15 minutes after you’re done running water. Use your laundry room fan whenever you use the washer.
• Frequently clean (and dry) textiles in these areas, including curtains but especially rugs. Fabrics can trap moisture and allow mold and mildew to build up.
• Consider using a dehumidifier to actively remove moisture from the air (see below). • Note: An air conditioner removes some moisture from air as it works, but that is not
its primary purpose. Relying solely on air conditioning to reduce home humidity is rarely adequate.
• Reduce moisturizing houseplants. Most plants respirate water as part of their function, releasing moisture into the air through their leaves in order to pull more up through their

HOME CARE AND MAINTENANCE MANUAL Habitat for Humanity of Flathead Valley
17
roots. Instead, prioritize dehumidifying houseplant species such as peace lilies, aloe, ferns, cacti, and bromeliads—these remove moisture from the air.
• For comfort and for energy efficiency, lower humidity is generally preferable in the cooling season.
HOME DEHUMIDIFICATION There are two common kinds of dehumidifiers for home use: portable appliances and whole-home integrated systems.
A dehumidifier’s drying capacity is measured by how many pints of water it can remove from the air within 24 hours. A small portable unit for a single bathroom may be rated at 4 pints; a large one to control moisture in a basement could be rated at 70 pints. A whole-home integrated dehumidification system may be rated between 70 and 100 pints, depending on the size of the home.
• Learn more about dehumidifier capacity, placement and other considerations with the ENERGY STAR Guide to Dehumidifier Basics.
Portable dehumidifiers • Use a portable dehumidification appliance for periodic or seasonal
dehumidification. These are better for small spaces, but they produce more heat and use more energy than whole-home systems.
• Portable, single-room dehumidifiers are either self-draining with a drain hose or have a tank that will need to be emptied manually when full. Self-draining units will need to be placed in an area where the hose can empty water, such as a laundry room sink or a floor drain. Dehumidifiers with large tubs or drip pans can hold more and will need to be emptied less often.
Whole-home integrated dehumidifiers • If your home humidity is persistently high (above 55% for more than half of the
year), consider adding an integrated dehumidification system to your central HVAC system. Whole-home integrated systems are better for persistent moisture problems. Like comparing a central air conditioner versus window units, a whole home system is more expensive to purchase and install but more affordable to operate over time compared with multiple portable units.
• Consult your HVAC technician for service like this, and research product comparisons before committing to a purchase. Integrated systems must be installed by a professional.
WHAT HAPPENS IF YOU DON’T HAVE ENOUGH INDOOR HUMIDITY? As the outside temperature drops, so does the relative humidity inside your home, which means less moisture and drier air. In drier climates, humidity levels are also much lower, and humidifiers are sometimes needed to maintain a healthy balance.
In drier climates or during dry seasons, add humidity through a whole-home evaporative or steam humidifier. It ties into the HVAC ductwork system and adds the appropriate amount of moisture to maintain ideal humidity levels throughout the entire home.
If you are actively adding moisture to the home’s indoor air, be sure to use a digital humidity meter and carefully monitor total home humidity to keep it within the recommended 30%-50% range.

HOME CARE AND MAINTENANCE MANUAL Habitat for Humanity of Flathead Valley
18
Understanding your warranty • [Insert affiliate name] warranty program • [Insert affiliate name] warranty obligations • Homeowner maintenance obligations • Coverage limitations • Warranty exclusions • Warranty claim submission process • Manufacturer warranties • Contractor/labor warranties • What to do if something is not covered
[The following is sample text only. Replace with language from your affiliate warranty policy]
Warranty coverage Coverage under [Insert affiliate name] warranty is limited to defects that occur during the warranty period.
FOR NEW CONSTRUCTION HOMES New construction homes are covered under a one-year warranty for construction defects. This includes but is not limited to the roof, siding, drywall, flooring, cabinets, sinks, tubs and fixtures.
FOR EXISTING HOMES Existing homes purchased or resold by [Insert affiliate name] are covered under a two-year warranty for construction defects. This includes but is not limited to the roof, siding, drywall, flooring, cabinets, sinks, tubs and fixtures.
This warranty coverage does not include repairs on new appliance or items that are covered under a subcontractor’s warranty. The warranty information for new appliance repair and subcontractor warranty repair is covered in the dedicated warranty section of this homeowner maintenance manual.
Warranty obligations [Insert affiliate name]’s staff will respond in a timely manner upon receipt of a warranty request alleging a construction defect during the warranty period. Habitat staff members or hired contractors will use discretion for each warranty request and will inspect and/or test the condition of the alleged construction defect. If it is determined by the Habitat staff that a construction defect exists, we (or third parties hired by Habitat) will do either of the following:
1. Repair or replace the construction defect. 2. Pay the homeowner the amount it would cost to repair or replace the construction
defect (NOT retail value).
This warranty is subject to the coverage limitations described on the next page. The decision to repair or replace or to make a payment in lieu of repair or replacement is at our sole discretion. The listed remedies are Habitat’s only obligation under this warranty.
Related video: Understanding Your Warranty

HOME CARE AND MAINTENANCE MANUAL Habitat for Humanity of Flathead Valley
19
STANDARDS FOR DETERMINING THE EXISTENCE OF A CONSTRUCTION DEFECT The following factors will be considered when determining whether a condition constitutes a construction defect:
1. Consideration as to whether the condition:
A. Materially affects the structural integrity of the home. B. Has an obvious and material negative impact on the appearance of the home. C. Jeopardizes the life or safety of the occupants of the home. D. Results in the inability of the home to provide the functions that can be
reasonably expected in such a home.
2. Consideration as to whether the condition is the result of normal wear and tear. Conditions that result from normal wear and tear are not construction defects.
3. Considerations as to whether the condition was caused by or in any way resulted from the failure of the homeowner to perform normal or routine maintenance. Any condition that is determined to be a homeowner maintenance issue, or any condition that results from improper or inadequate homeowner maintenance, is not a construction defect.
4. Consideration as to whether the homeowner can reasonably complete the repair (including painting and patching) if Habitat provides the necessary tools.
Homeowner maintenance obligations Maintenance of your home is the homeowner’s responsibility. All homes require periodic maintenance to prevent premature deterioration and water intrusion, and to ensure adequate performance of the systems. This Home Care and Maintenance Manual provides guidance on routine annual and seasonal maintenance of your home.
Coverage limitations Surfaces, finishes and coverings in the home that require repairs because of damage caused by a construction defect in the course of our repair of Habitat’s construction defect shall be repaired and restored to approximately the same condition as existed before the construction defect, but not necessarily to a like-new condition. During repairs or replacement of surfaces, finishes and coverings, the repair or replacement will attempt to achieve as close a match with the original surrounding areas as is reasonably possible, but an exact match cannot be guaranteed because of such factors as fading, aging and lack of availability of the same materials.
Warranty exclusions This warranty does not cover any loss or damage resulting, either directly or indirectly, from the following causes, or occurring in the following situations:
• Fire (unless caused by a construction defect). • Lightning. • Explosion (unless caused by construction defect). • Theft, riot or civil commotion (windows broken, doors kicked in). • Smoke (unless caused by a construction defect). • Hail. • Aircraft. • Falling objects. • Vehicles. • Floods.

HOME CARE AND MAINTENANCE MANUAL Habitat for Humanity of Flathead Valley
20
• Earthquake. • Wind (including hurricanes, gale storm winds, tropical storms, tornadoes, and rain
or water intrusion from any wind force). • Insects, animals or vermin (except any instances proven to have occurred before
closing). • Changes, additions or alterations made to the home any time after the warranty
period begins, except those made by Habitat or its agents. • Improper maintenance, negligence or improper use of the home by the homeowner
or anyone other than Habitat that results in rot, dry rot, moisture, mildew or any other damage.
• Dampness or condensation due to homeowner’s failure to maintain adequate ventilation.
• Damage due to home furnishings. • Normal wear and tear. • Any consequential or incidental damage. • Any damage reported after the allotted time required under this warranty.
Warranty claim submission process NOTIFICATION You must notify us as soon as possible after you become aware of a condition that you believe may constitute a construction defect, but in no event may your notice be received by us later than 30 days after the warranty has expired. The extended period of providing notice of a construction defect shall not operate to extend the warranty period.
WARRANTY PROCEDURES Homeowners will call [Insert appropriate contact at affiliate, e.g., the homeowner support coordinator] at [(XXX) XXX-XXXX] for any warranty submission for a construction defect (actual home structure, flooring, cabinets, bathroom and kitchen fixtures) or existing appliances. [Insert appropriate contact at affiliate] will complete a warranty request form and submit the request to our warranty team.
The warranty request will be completed up to 90 days after initial contact. Urgent situations will take highest priority. For nonconstruction defects (new appliances, electrical, plumbing, heating and air), call the number to the specific subcontractor for the issue:
• [Plumbing: _________________________________________________________ • Heating and air: ____________________________________________________ • Electrical: _________________________________________________________ • New appliances: ___________________________________________________]
Manufacturer warranty All new appliances in the home are covered under a one-year manufacturer’s warranty, whether the home is new or existing.
Any appliances that malfunction will be covered under the warranty of the appliance. Habitat will not repair or perform maintenance to any appliances in the home. Manufacturer warranties follow the manufacturer’s schedule. Please contact the manufacturer for their repair completion times. To activate the warranty, you must complete and mail in the appliance warranty cards — one for each appliance. You also may register your appliances online. See warranty information for details. Read and follow

HOME CARE AND MAINTENANCE MANUAL Habitat for Humanity of Flathead Valley
21
the manufacturer’s instructions for each appliance. Appliance manufacturers have websites that will also give you detailed information about maintenance and appropriate usage. Keep a written record of the model and serial number of each appliance.
GENERAL CONDITIONS As a homeowner, you agree to:
• Conduct regular inspection on the home, including the roof, attic and HVAC system, to check for any condition that may not be normal wear and tear and to correct normal wear defects that may result in an unsafe condition.
• Try every reasonable measure to correct the defect before completing a warranty request.
• Contact the correct representative for your warranty request. Failure to contact the correct representative will significantly delay your request.
• Follow the warranty timeline. A construction representative will contact you within 30 days of your submitted request and has 90 days to complete the submitted request. Manufacturer warranties follow the manufacturer’s schedule. Please contact the manufacturer for the repair completion times.
GENERAL USE AND CARE Each of the homes [affiliate name] builds is constructed with quality materials and the labor of experienced craftsmen. Before construction, all materials must meet our specifications for quality and durability. All work is performed under the staff’s supervision to attain the best possible results.
Although quality materials and workmanship have been used in your home, this does not mean that it will be free from care and maintenance. A home, like an automobile, requires care and attention from day one. General homeowner maintenance is essential to providing a lasting, quality home.
[Affiliate name] is proud of the product we build in partnership with you, and our aim is to create lasting value. This cannot be achieved unless the homeowner properly maintains the home and all of its components. Regular maintenance is necessary because of a number of factors, such as normal wear and tear, climatic conditions, the inherent characteristics of various materials used in your home (such as wood), and normal service required by the mechanical systems.
Many times, a minor adjustment or repair done immediately by the homeowner saves time and costly repairs later. Note that negligence of routine maintenance can void applicable limited warranty coverage on all or part of your home.
In this manual, we discuss three main categories of ongoing work on your home:
• Careful use: The efficiency of your home’s systems rely on how you use them. Certain actions make them more efficient, others less efficient. The durability of your home and its components depends on how you use them. Certain actions will stress and degrade systems no matter how well-built they are. Each topic includes guidance for how to use your home’s components so that your home remains safe and healthy, decent and comfortable, and affordable over the long term.
• Preventive maintenance: These are regular chores that keep your house looking nice and working properly, and that prevent damage that is expensive to fix. Buying a home is the largest investment in most of our lives, and it requires continual small investments to protect its value and our safety. Small issues can quickly turn into dangerous, costly concerns; preventive maintenance helps to catch them while
HOME CARE AND MAINTENANCE MANUAL Habitat for Humanity of Flathead Valley
22
they’re small and fix them while they’re affordable. Recommended preventive maintenance is outlined within most topics in this section. Seasonal and annual maintenance checklists are also provided in the dedicated Maintenance section to help you organize these important tasks.
• Repairs and replacements: Careful use and regular maintenance prevent a lot of home repairs, but your home is made from components that can’t last forever. Some repairs are inevitable, and most of them are your responsibility as the homeowner. Guidance on common repairs and replacements is included in many of the topics in this manual to help prepare you for that future task.
We recognize that it is impossible to describe every aspect of care and maintenance that may be needed for good home care, but we have covered many important details. The subjects covered include major components of our homes, listed in alphabetical order. Each topic includes suggestions for use and care. Not all components listed are included in every Habitat home.

HOME CARE AND MAINTENANCE MANUAL Habitat for Humanity of Flathead Valley
23
Appliances Read and follow all manufacturer requirements for each appliance in your home. Additional recommendations include:
Clothes washer Use: Your top-loading washing machine requires special detergents because of its high-efficiency design. Carefully follow the manufacturer’s directions for using it. The shut-off valves are located behind the washing machine.
Note: The condensation drain line from your HVAC unit runs from your mechanical equipment (located in the attic space) to the same drain that your washing machine uses. Under standard operation of your air conditioning unit, water will drain down this line. This might sound like water leaking behind your washing machine, but it is completely normal.
Clothes dryer Use: Always clean the dryer’s lint filter after every load; not doing so could result in a fire. This will also help your clothes to dry much faster, and the dryer will use less energy and last longer. Do not push the dryer back and compress or kink the dryer vent.
Maintenance: Remove accumulated lint from the flexible exhaust duct running between the back of your dryer and the in-wall dryer vent once a year.
Dishwasher (if applicable) In order to operate your dishwasher, the corresponding power switch on the wall must be turned “on.” Make sure to use only dishwasher-rated dish detergents, never regular dish soap or hand soap, as this will cause a foamy mess to explode out of the dishwasher. For best results, rinse dishes before loading them into the dishwasher. If any issues arise with your dishwasher, call [manufacturer’s name] directly at [(XXX) XXX-XXXX].
Electric stove Turn off burners and oven when not in use. Never use the oven in place of the furnace to heat your home. A clean stove and oven will work more efficiently and give you many years of carefree performance. Turn off the breaker before replacing switches or heating elements. If any issues arise with your electric range, call [manufacturer’s name] directly at [(XXX) XXX-XXXX].
Garbage disposal (if applicable) Use the disposal ONLY to grind soft kitchen scraps. Never pour grease down the sink, as it will solidify and cause a blockage. The unit is attached to the underside of the sink at one of the drain openings and is plugged into an electrical outlet under the sink. Always run water down the sink while the disposal is in use. The food disposal unit in the kitchen helps make cooking and cleaning easier.
USE THE DISPOSAL CORRECTLY TO PRESERVE ITS FUNCTION AND PROTECT YOUR SAFETY
• Run the cold water, and then turn the disposal on before depositing food into it. Don’t deposit foods into an inactive disposal and then turn the unit on.
• Run cold water while the disposal is running.
WARRANTY: APPLIANCES All appliances included in your home are covered only by their manufacturer’s warranty. Refer to individual appliance warranty documents for information on coverage and how to submit a claim.
Items covered by Habitat: • Defects in
installation/ connection only (such as plumbing lines leading to a washer).
Items not covered by Habitat: • Any faults with the
appliance itself. Contact the manufacturer, not Habitat.
Items not covered by the manufacturer or Habitat: • Damage that occurs
after move-in.
Note: Most appliances must be registered before use in order to activate the warranty. If you don’t register your appliances, no warranty applies.
Related video: Use and Care: Appliances

HOME CARE AND MAINTENANCE MANUAL Habitat for Humanity of Flathead Valley
24
• Insert food loosely into the disposal. If you pack in too much at once, you can jam the disposal.
• Keep the disposal running for at least 15 seconds after the noise of grinding has stopped to flush all food particles through the drain line.
• Don’t grind large bones or fibrous materials, such as corn husks or artichokes. • Don’t pour grease or fat down the disposal. Pour liquid fat into a jar or can, and
then solidify it in the refrigerator. Dispose of the jar or can in the trash.
PREVENTIVE MAINTENANCE • Periodically clean the inside of the disposal. Disposals may emit odors when food
particles and grease collect in the grind chamber and on the baffle. • Never put your hands inside the disposal. If you drop something down the disposal
unit, use long-handled tongs to retrieve it.
REPAIR/TROUBLESHOOTING: Occasionally, your disposal may become stuck and emit a humming noise when turned on.
• First, ensure the disposal is switched off at the breaker panel before servicing.
• Check for obstructions in the sink. • This issue can usually be fixed by using the appropriately
sized (and provided) hex key—insert it into the hole in the bottom of the disposal and gently turn the disposal blades around until no resistance is felt. This should work to loosen any jammed materials or free up seized blades.
If this does not resolve your issue, you can also try resetting the small red button on the underside of the disposal (overload protection switch). If the overload protection has tripped, the button will extend about ¼-inch.
Range hood and exhaust fan Your range hood exhaust fan vents directly to the exterior of your home specifically to help remove moisture and cooking-related airborne elements. Use the fan whenever you boil water on the stove to remove steam and excess airborne moisture. Use the fan whenever you’re frying with grease or oil or otherwise when the stove is generating airborne particles.
Clean the filter regularly (at least annually) to remove grease, dust and other materials. Check to see if any of these materials have passed through the filter by wiping down the surfaces behind or above it. If materials have passed through, clean the filter more frequently.
TO REPLACE THE LIGHT BULB • Squeeze the plastic cover to unhook the tabs that hold it in place. • The bulb is a standard bulb (not a special appliance size). Pay attention to the
wattage of the bulb you remove. You will typically want to replace a bulb with one of the same wattage. Do not exceed the maximum wattage written on the vent hood or it will melt the cover.

HOME CARE AND MAINTENANCE MANUAL Habitat for Humanity of Flathead Valley
25
Refrigerator To help maintain efficient operation, vacuum/dust the evaporator coil located behind or underneath the fridge at least once a year. If any issues arise with your refrigerator, [manufacturer’s name] directly at [(XXX) XXX-XXXX].
Water heater This appliance is responsible for generating warm water in your home. Our plumbers set the default temperature to be 120 degrees when you move in your home. Increasing this temperature can be dangerous and result in severe burns. There is an electrical disconnect breaker located in the water heater closet. This switch is used to disconnect power while the heater is being serviced by professionals. There is also a hot water shut-off valve on the water heater. Turning this valve to the off position (with the handle perpendicular to the pipe) stops the flow of all hot water. Be sure to know the difference between the hot water shut-off and the main water shut-off valve in case of a plumbing emergency.
See additional information on water heaters in the Plumbing section.
On position Off
position

HOME CARE AND MAINTENANCE MANUAL Habitat for Humanity of Flathead Valley
26
Attic The attic space is not intended for storage. Access is provided for purposes of maintaining mechanical equipment that is located in the attic. Do not adapt the attic for storage use; the trusses are not designed to support additional weight in this way. Your trusses are designed to support weight on the top chords (weight on the roof), not weight on the bottom chords (attic space). Modifying trusses (including adding to them to use the attic for storage) will void all associated warranties.
When performing any needed task in the attic, step only on the wood members of the trusses and bracing. Stepping off of these wood members and onto insulation and drywall can cause serious injury or damage to the ceiling below.
Attic access The attic access hatch is insulated and sealed against air transfer. Do not remove or modify these efficiency measures. Your attic hatch should remain secure using the two hook-and-eye fasteners provided. These are not a security measure; they are for energy efficiency. Differences in pressure among the interior air, exterior air and attic air can cause this hatch to lift and allow air to pass. These fasteners simply prevent this.
Attic ventilation Your attic space is not conditioned; it needs to “breathe.” Attic ventilation is critical for preventing moisture buildup, increasing energy efficiency, and preserving the life span of your roofing materials.
SAMPLE 1: PASSIVE VENTILATION Your attic relies on passive ventilation. No electricity is required for it to function. This ventilation is provided by both ventilated soffit at the bottom and ridge vents at the top. Hot air rises and leaves the attic through the ridge vent, drawing cooler air up through the soffits for continuous, passive ventilation. Do not alter this ventilation, do not allow the vents to become blocked, and periodically check for damage.
SAMPLE 2: ACTIVE/MECHANICAL VENTILATION Your attic relies on active, or mechanical, ventilation. This dedicated vent fan system pushes hot air out of the attic space, which then draws cooler air in through the soffits. Make sure the mechanical ventilation system in your attic is turned on and functioning correctly to draw the moisture out of your attic space.
Soffit baffles Foam baffles are installed at the edges of the attic to keep the blown attic insulation where it belongs. These keep this insulation from spilling over the soffits and blocking air flow, and they keep the airflow from pushing this insulation away from the soffits and leaving the edges of the attic space uninsulated. Check these baffles for damage or displacement after any extreme wind events.
Related video: Use and Care: Attic

HOME CARE AND MAINTENANCE MANUAL Habitat for Humanity of Flathead Valley
27
Cabinets Products such as lemon oil, Liquid Gold and Old English Furniture Polish and Scratch Cover are suggested for caring for wood finish cabinets. Follow the directions on the container. Do not use these products more than once a month to protect against excessive buildup. Avoid paraffin-based spray or washing cabinets with water, as both will damage the luster of the finish.
If hinges catch or drawer glides become sluggish, a small amount of lubricant, such as WD-40, will improve their action. Door height can be adjusted by loosening the screws that attach the hinge to the door, and then tightening the screws once the desired position is achieved. Cabinet exteriors are assembled on site. If the cabinet skins appear to be coming loose, a small bead of adhesive or silicone will reattach the panel side.
Do not overload your wall cabinets. Your wall cabinets are assembled wood components fastened to the walls and each other with screws. These screws are all that hold them up. They are not heavy-duty storage cabinets; overloading them can result in serious damage and potential injury. Your base cabinets bear directly on the floor – they are designed and intended for storage of heavier items such as pots and pans and canned goods.
Related video: Troubleshooting: Cabinets

HOME CARE AND MAINTENANCE MANUAL Habitat for Humanity of Flathead Valley
28
Caulking Time and weather will shrink caulking and dry it out so that it no longer provides a good seal against moisture and air infiltration. As a matter of routine maintenance, it is wise to check the caulking and make repairs as needed. Caulking compounds and dispenser guns are available at most hardware stores. Read the label to make sure the product that you are buying suits the purpose that you hope to use it for.
Silicone caulk Caulking that contains silicone will not accept paint but works well where water is present (for example, where the tub meets the wall or where the sink meets the countertop). This kind of caulk can’t be easily cleaned up with water. Don’t use latex or acrylic caulking over silicone caulking and vice versa. These types of caulking do not bond properly with each other.
Latex caulk Latex caulking is appropriate for an area that requires painting (along the windowsill or where trim meets the wall). This kind of caulk can be easily be cleaned up with water.
Exterior caulking (for Hardie Board and LP SmartSide siding) Exterior caulk is the elastic sealer around window and door frames that helps seal air leaks and prevent water entry around these openings. The caulk will separate and deteriorate over the life of the home. If you don’t check the caulking and remove and reapply it on a regular basis, moisture can work its way behind wood trim or siding and may cause serious rotting.
PREVENTIVE MAINTENANCE • Check for separated and deteriorated caulk around the exterior of your home one
to two times a year. The following are typical places that need caulk:
Around windows and door frames. Around any object protruding from an exterior wall, such as vents, outlets,
pipes and faucets. Around any object protruding from the roof, such as vents. At the corners and angles between siding material.
• To apply exterior caulk:
Remove the old caulk with a putty knife, scraper or painter’s tool. Clean and dry the area that needs recaulking. Caulk won’t adhere correctly to a
damp or dirty surface. Apply the new caulk. Hold the caulking tube at a 45-degree angle from the
surface and push, rather than pull, the tube to drive the caulk into the gap. Pushing helps to fill the gap completely without trapping any air bubbles.
Twist the caulking tube and pull it back to break the caulk bead. Run your finger along the joint to push the caulk into the crack or corner, and to
smooth and compress it. A damp rag also works very well for this purpose. Wipe away excess caulk.
If you are using latex caulk, repaint after you replace the caulking. Latex caulk fails quickly when exposed to the sun and weather, so the paint is a critical weather-proofing layer. Ensure adequate drying time between caulking and painting.
WARRANTY: CAULKING All caulking is the homebuyer’s responsibility after moving in. This includes exterior caulking on siding, interior caulking on trim, and caulk sealant on tubs and toilets and other plumbing fixtures. All caulking is the homebuyer’s responsibility to maintain and replace.
Related video: How to: Caulk

HOME CARE AND MAINTENANCE MANUAL Habitat for Humanity of Flathead Valley
29
Concrete (flatwork/steps) Driveway and sidewalk In most cases, concrete is a durable, long-lasting product without much needed maintenance. To properly care for your exterior flatwork concrete (i.e., sidewalks and driveways), do not use salt or chemical ice melts. Cracks in concrete are normal and also unavoidable; they do not necessarily indicate driveway or sidewalk damage. If cracks do occur, be sure to fill them in with a concrete caulking or equivalent concrete patch to prevent further cracking.
MAINTENANCE • Consider applying a concrete sealant to further protect flat surfaces and make
them easier to clean. • Clean oil and chemical spills from flatwork immediately; chemicals can damage the
surface bond and lead to cracking and degradation. • Repair driveway or sidewalk cracks in a timely fashion with a waterproof concrete
caulk. • Avoid having vehicles weighing more than 6,000 pounds on your driveway.
Anything heavier may crack your concrete. Do not drive any vehicles over sidewalks.
• Maintain the grading and drainage around all flatwork to direct water away from it and away from the foundation.
Cracks Some cracking in concrete occurs in almost all homes, especially on flatwork. The warranty does not cover aesthetic concrete cracks. Concrete will not be replaced because of cracking. Maintenance of drainage away from all concrete slabs will minimize cracking and other forms of movement. Cracks in slabs should be sealed with a waterproof concrete caulk to prevent moisture from penetrating to the soil beneath.
Cracking in the concrete flatwork is often caused by extreme cold. During the summer, moisture finds its way under the concrete along the edges, or through cracks in the surface. In winter, this moisture forms frost that can lift the concrete, increasing or causing more cracking.
REPAIR • To repair small cracks (narrower than ½-inch) in concrete flatwork, follow these
steps:
Roughen any edges of the crack that are smooth using a tool such as a wire brush or cold chisel.
Clean out any dirt, organic matter or concrete chips from the crack using a tool such as a masonry brush, heavy paintbrush or shop vacuum.
Measure the depth of the crack. If it is deeper than ½-inch, fill the crack with sand to within ¼-inch of the surface. If the crack isn’t deeper than ½-inch, just move on to the next step.
Fill the crack with a concrete sealer available at any home care center, following the manufacturer’s instructions. Overfill the crack slightly to allow for shrinkage.
WARRANTY: FLATWORK Your exterior flatwork (porches, sidewalks, driveways) is covered under a two-year warranty that starts on the day you move into your house.
Items covered: • Damage due to
excessive settling around the foundation within the warranty period.
Items not covered: • Aesthetic cracking,
damage sustained after move-in, damage sustained because of drainage not being maintained (outside of the warranty period).
To submit a claim: • Call [(XXX) XXX-
XXXX] to schedule an evaluation and/or repair.
Related video: Use and Care: Concrete

HOME CARE AND MAINTENANCE MANUAL Habitat for Humanity of Flathead Valley
30
• For larger cracks (½-inch or larger), settling or upheave, call a professional to make repairs.
Expansion joints Expansion joints looks like thick strips of felt and go between two surfaces of concrete. The purpose is to help control the expansion of the concrete material itself. Concrete is also susceptible to shrinking. If the concrete shrinks, moisture can penetrate under the concrete and lift the expansion joint. If this occurs, you can fill the gap with a concrete caulk.
Ice, snow and chemicals Remove ice and snow from concrete flatwork as promptly as possible after snowstorms. Protect concrete from abuse by chemical agents such as pet urine, fertilizers, automotive fluids, repeated washing, or deicing agents such as road salt that can drip from vehicles. All of these items can harm the surface of the concrete. If you want to put something down to help with slippery, icy conditions, use sand.
Cleaning Do not wash patios, porches, driveways, etc., with cold water from an outside faucet when temperatures are extremely high and the hot sun has been shining on the concrete. The abrupt change in temperature can damage the surface bond of the concrete. Sweeping is the recommended method of keeping exterior concrete clean. If washing is necessary, do this when temperatures are moderate.
Heavy vehicles Do not permit heavy vehicles such as moving vans or concrete trucks to drive on your concrete. This concrete is not intended to bear the weight of this type of vehicle.
Foundation See the dedicated Foundation section.

HOME CARE AND MAINTENANCE MANUAL Habitat for Humanity of Flathead Valley
31
Countertops Your countertops are built from press board, not solid wood. Persistent exposure to moisture will degrade the adhesives and make this underlying material swell and eventually separate from the surface. This is called delaminating, and the damage can’t be reversed. The surface is a durable laminate, but it is not indestructible. This means certain measures must be taken to keep the countertops in good condition. Always use a cutting board when cutting, chopping, etc. Protect the counter from heat and hot pans; if the pot is too hot to touch, avoid placing it on the counter. Never place heat- or moisture-generating appliances (like crock pots or coffee pots) on the corner joints of the countertop – this will cause the seam to delaminate. Do not let water pool on corner seams or around the edges of the sink; wipe these surfaces after use to keep them dry.
Do not use abrasive cleaners, tools or razor blades on countertops, since they will cause certain damage to the surface. Be sure to clean pools of water as soon as they are discovered, avoid placing wet dishes on the countertop to dry out, occasionally inspect the caulking around the countertop to ensure it is intact, and use a mild spray cleaner to wipe the countertop clean after use. If your kitchen is equipped with a dishwasher, it is wise to apply a penetrating sealer, such as Minwax Polycrilic, to the underside of the countertop just above the dishwasher in order to prevent moisture issues.
Caulking The caulking around the edge of your countertops and between the countertops and the sink may shrink, leaving a slight gap. This can cause serious issues if the caulking is not resealed. Watch for “bloating” of the pressboard to indicate moisture is penetrating the laminate around the sink insert. Best practice is to use clear silicone caulking to reseal. Refer to the Caulking section for additional tips.
WARRANTY: COUNTERTOP Your countertop is covered under a one-year warranty that starts on the day you move into your house.
Items covered: • Defects in
materials and workmanship (installation), including visible (protruding) fasteners, loose attachment, or material failure of surface laminate.
Items not covered: • Damage sustained
after move-in, including pressboard bloating or surface delamination due to improper use or negligence.
To submit a claim: • Call [(XXX) XXX-
XXXX] to schedule an evaluation and/or repair.
[Affiliate name] reserves the right to make the final determination whether the requested work is covered under warranty or is the homebuyer’s responsibility.

HOME CARE AND MAINTENANCE MANUAL Habitat for Humanity of Flathead Valley
32
Crawl space
SAMPLE 1: The crawl space is not intended for storage. There is a thin layer of plastic on the floor of the crawl space. This plastic works as a vapor barrier to prevent moisture from rising through the ground into your home. It is important to occasionally inspect this plastic layer for damage. Removing or tearing it could cause mold and mildew issues. Slight dampness may be experienced in the crawl space. Pools of standing water should be reported to Habitat for inspection.
SAMPLE 2:
Use and care The crawl space is not intended for storage. Slight dampness may be experienced in the crawl space. Standing water should be reported to Habitat for inspection.
Crawl space floor/slab The concrete crawl space floors are expected to crack. They are not structural; this cracking does not affect the foundation walls or the ability of water to enter your crawlspace. The purpose of the concrete is to protect the plastic sheathing underneath, which is critical for waterproofing and for the radon mitigation system. Crawl space floors are not warrantied against cracking. Movement of the floor will be minimized by close adherence to Habitat landscaping recommendations, including maintaining positive drainage away from the foundation, the object of which is to prevent moisture from reaching soils around and under the home.
Fan There is a fan in your crawl space that should be kept running at all times. It vents the crawl space and provides fresh air to the house. Do not adjust the power level for the fan; this setting is established by installation technicians and is necessary for air intake to support other air handling systems.
WARRANTY: CRAWLSPACE The concrete slab of your crawlspace is not a structural component, and it is not included in the foundation warranty. Cracks in this slab are not covered under your warranty.
Items not covered: • Damage sustained
to any possessions stored in the crawlspace for any reason.
• Damage to crawlspace systems caused by owner action or inaction (such as a burst pipe caused by freezing).

HOME CARE AND MAINTENANCE MANUAL Habitat for Humanity of Flathead Valley
33
Door locks/knobs The doors installed in your home are subject to the natural characteristics of wood, such as shrinkage and warpage. Because of humidity changes and the use of your heating system, showers, dishwasher, etc., interior doors may require minor adjustments. Putty, filler or latex caulk can be used to fill any minor separations that may develop at mitered joints in the door trim.
Interior doors Your interior doors are not solid wood; they are hollow-core panels. This means they have a wood frame (all edges and around the handles) and are wrapped in a thin wood panel, but the inside is more like corrugated cardboard than wood. They are not meant to have anything installed on them – such as mirrors, pet doors or decorative shelves. Installing anything on these doors will void their warranty.
STICKING The most common cause of a sticking door is the natural expansion of lumber caused by changes in humidity. When sticking is due to swelling during a damp season, do not make any changes or adjustments to the door unless it continues to stick after the weather changes. Use sandpaper to smooth the door. Be certain to repaint the area of the door where it was sanded to reseal against moisture. Before cutting a door because of sticking, there are two steps to try. First, apply either a paste wax, light coat of paraffin or candle wax to the sticking surface. Second, tighten the screws that hold the doorjamb or doorframe.
HINGES Removing the hinge pin and rubbing a lead pencil or dry lubricant (such as graphite) on it can remedy a squeaky door hinge. Do not use oil (such as WD-40); it can collect dust and gum up.
FAILURE TO LATCH If a door will not latch because of minor settling, you can make a new opening in the jamb for the latch plate and raise or lower the plate accordingly. A chisel or a sharp utility blade works well for this application. If you move the latch plate slightly, you might need to fill in the old screw holes in order for the new screw placement to hold. One contractor trick is to cut the tip off of a chopstick and tap this small piece into the hole to fill it.
Hanging on the doorknob can work the hardware loose and cause the door to sag. Do not hang on doors or doorknobs, and do not hang materials (such as shoe organizers) from them. Damage from hard use or storage caddies will not be covered under your warranty.
BIFOLD DOORS Interior bifold doors will sometimes stick or warp because of weather conditions. Applying a silicone lubricant to the tracks can minimize this inconvenience.
SLAMMING Slamming doors can damage both doors and jambs — and can even cause cracking in walls. Do not slam doors or allow them to slam. Pay special attention when windows are open to prevent strong winds from slamming doors. Use doorstops to hold doors open (or at least slow their closing).
WARRANTY: INTERIOR DOORS Your exterior doors are covered under a one-year warranty that starts on the day you move into your house.
Items covered: • Defects in
materials and workmanship (installation), including sagging due to normal house settling.
Items not covered: • Damage sustained
after move-in, including sagging due to over-door storage; aesthetic defects (paint).
To submit a claim: • Call [(XXX) XXX-
XXXX] to schedule an evaluation and/or repair.
[Affiliate name] reserves the right to make the final determination if the work requested is covered under warranty or is the homebuyer’s responsibility.
Related video: Troubleshooting: Doors and Locks

HOME CARE AND MAINTENANCE MANUAL Habitat for Humanity of Flathead Valley
34
RATTLING We pay special attention to air-sealing homes as part of our energy efficiency measures. This means that sometimes when you open or close a door in one part of the house, that air movement can push or pull on others, causing them to bump or rattle against the jambs. The transfer grilles allow air movement between rooms and help alleviate this, but that doesn’t account for all of it – including closet doors. To reduce this noise, you can place small felt stickers on the side of the jamb where the door touches. Do not place anything larger in this gap (such as washcloths).
INTERIOR LOCKS Bedroom and bathroom doors with privacy locks have the ability to be unlocked from the outside in the event someone has locked themselves inside. A special “emergency door key” is placed on the top edge of the door casing or inside of the kitchen drawers during construction. To open a locked door, simply insert the emergency key into the pin hole on the doorknob and push straight in.
Exterior doors Your exterior doors are completely different from the interior doors. The exterior doors have wooden frames and metal facing, and they are insulated with foam. Their frames include weatherstripping and raised thresholds to prevent air and water intrusion.
EXTERIOR LOCKS Lubricate exterior door locks with graphite or another waterproof lubricant specifically labelled for use in door handle and lock hardware. Avoid oil, as it will collect dust and debris and cause the inner mechanisms to gum up. Use care when inserting and turning keys in locks; rough use can cause damage to both keys and the lock’s inner mechanisms. Avoid cheap copies of keys, and do not use copies that do not work easily. Forcing a key can damage the lock and cause metal shavings to build up inside it.
EXTERIOR DOOR FINISH To ensure longer life for your exterior doors, it is recommended that you repaint them periodically with a white or light-colored exterior-rated paint. The darker the color of paint, the more heat it will absorb in direct sunlight, which can lead to eventual warping. This is especially true on south-facing doors or if a storm door is installed. The glass of a storm door acts as a magnifier and insulator, trapping extreme heat in the door cavity that can lead to real material damage. Best practice is to leave a storm door window slightly open in hot weather to allow heat to escape. This is a lower risk where the door is shaded by an awning or porch roof, out of direct sunlight.
EXTERIOR DOOR WEATHER STRIP Weather stripping and/or any threshold supplied with exterior doors will occasionally require adjustment or replacement. Inspect stripping for damage (such as pet damage or cuts from moving furniture in) and replace it if damaged. These replacements are available at most big box home improvement stores.
WARRANTY: EXTERIOR DOORS Your exterior doors are covered under a one-year warranty that starts on the day you move into your house.
Items covered: • Defects in
materials and workmanship (installation).
Items not covered: • Damage sustained
after move-in; aesthetic defects (paint).
To submit a claim: • Call [(XXX) XXX-
XXXX] to schedule an evaluation and/or repair.
[Affiliate name] reserves the right to make the final determination if the work requested is covered under warranty or is the homebuyer’s responsibility.

HOME CARE AND MAINTENANCE MANUAL Habitat for Humanity of Flathead Valley
35
Drywall Slight cracking, nail “pops” and/or seams may become visible in walls and ceilings. These occurrences are caused by the shrinkage of the wood and normal deflection of rafters to which the drywall is attached. Occasional cracks or nail pops in drywall do not signify structural damage and are not covered under the warranty. However, watch for these incidences in high-moisture areas such as the kitchen, bathrooms, or laundry room. If you notice nail pops in these rooms but not in the rest of the house, it can be an indicator that excess moisture is building up in the air — enough to “bloat” the drywall or the wood behind it.
PREVENTIVE MAINTENANCE • Keep your walls clean by washing them periodically with a non-abrasive cleaner. • Typically, interior walls need to be repainted every four to five years. Always repair
drywall damage before repainting, and always prime drywall patches before painting. • The caulk around your electrical outlets and light switches may occasionally need
to be replaced. • Do not overload your closet shelves. They are meant for clothes and linens, not
weights and heavy books. • Do not overtighten any screws you use to anchor future installations/upgrades to
the walls (for example, tip prevention brackets on bookshelves). This can cause screw pops in the surrounding area.
REPAIRS/REPLACEMENT Most minor drywall damage can be easily repaired by the homeowner.
• Hairline cracks: Very narrow cracks can be repaired with a coat of paint. Slightly larger cracks, or those that reappear after one repainting, can be filled with paintable caulk and then repainted. Do not use spackle in cracks. (Remember: caulk a crack.)
• Nail/screw pops (also dents caused by sharp objects and holes smaller than a dime):
Reset the nail with a hammer or screw with a screwdriver. Cover it with spackle (available at paint and hardware stores). Apply two or
three thin coats, allowing them to dry in between applications. When completely dry, sand the surface with fine grain sandpaper or sanding
sponge before painting.
• Half-inch to inch holes (holes no wider than the width of drywall repair tape): Place drywall repair tape over the hole. Cover the tape with spackle using a putty knife. Sand. Prime and paint.
• 1-inch to 6-inch holes: Use a drywall patch “kit,” including a rigid reinforcement (usually metal or plastic mesh). Drywall repair kits may be purchased at hardware or home improvement stores. Follow the instructions provided by the manufacturer, which most commonly include these steps:
Spread a thin layer of drywall patch (“mud”) over the surrounding area. Then place the reinforcing patch on the area to be repaired, and then apply a few thin coats of patch mud over top of the patch, allowing each layer to dry completely before adding more.
WARRANTY: DRYWALL Your drywall is covered under the home’s one-year warranty that starts on the day you move into your house.
Items covered: • Defects in
materials and workmanship (installation).
Items not covered: • Damage sustained
after move-in. Nail pops or cracks due to normal settling or interior moisture build-up.
To submit a claim: • Call [(XXX) XXX-
XXXX] to schedule an evaluation and/or repair.
[Affiliate name] reserves the right to make the final determination if the work requested is covered under warranty or is the homebuyer’s responsibility.
Related video: Troubleshooting: Drywall

HOME CARE AND MAINTENANCE MANUAL Habitat for Humanity of Flathead Valley
36
When dry, sand the surface with fine grain sandpaper or a sanding sponge. Be sure to “feather” the patch into the existing drywall surface to avoid an obviously thicker section of drywall.
Always prime drywall patches before painting.
• Holes larger than 6 inches Make a “clean” hole to patch by cutting a square or rectangle out around the
hole. Then measure the dimensions of this hole. Go to any location that sells drywall and ask to purchase a piece of broken
drywall to insert as a patch for the hole you squared off. Most places will probably give you a broken piece of drywall for free.
Cut the drywall into a patch the size of the hole. Measure the diagonal distance between opposite corners of the hole you cut.
For example, measure from the bottom left corner to the top right corner. Then, take a piece of wood – any small, flat trim will do — and cut a length that is slightly longer than that diagonal distance.
Place the trim inside the wall and screw it tight to the back side of the hole, using drywall screws that you insert into the drywall from the front side. These will go through the drywall and screw into the wood at each corner. The idea is to put a backing in the hole, inside the wall, so that the drywall patch won’t fall to the floor when you place it in the hole.
Place your drywall patch into the hole you cut in the wall — dark side in, light side out — and screw it to the wood trim behind the hole. Use at least two screws.
Patch the edges around the inserted patch by using drywall repair tape on all four sides (the same as if you were patching a small hole in the wall.)
Apply drywall patch mud, allow to dry, then sand smooth. Apply primer and finally paint.
Drywall fasteners A variety of drywall fasteners are available for securing or hanging items to your walls. Some have specific purposes, and some are better suited than others. Always refer to hardware weight ratings and follow manufacturer installation instructions.
• Plastic anchor: The plastic anchor fastener does an adequate job of supporting light loads and often comes with purchases of lightweight shelving. Although it’s free, this fastener is a bad option to sustain loads in drywall. It’s designed for use in concrete or brick. If you choose to use it, you will need a drill and a screwdriver to install it.
• Toggle bolt: The toggle bolt or butterfly anchor can withstand a much heavier load than the plastic anchor variety, but it makes a very large hole in the wall, and installation is a bit more difficult. You will need a drill and a screwdriver to install it. Your hardware (e.g., the hook to hang your picture) must be attached to the fastener before you drill it in.
• Hammer-drive hollow wall: The hammer-drive anchor is also very strong. The fastener stays in the wall and is easy to cover with a quick coat of spackle and paint if you ever move your hanging. You will need a hammer and a screwdriver to install it. It is a bit more expensive than the other fasteners. (It costs about a dollar.)
• Auger anchor: This anchor is strong enough to hold anything you should be hanging in drywall. You can leave it in the wall and paint over it when redecorating. And you only need a screwdriver to install it.

HOME CARE AND MAINTENANCE MANUAL Habitat for Humanity of Flathead Valley
37
Electrical General We owe most of our modern conveniences, comforts and even safety features to electricity, but we must always remember that the electrical components in our home can be a source of danger if not used appropriately, maintained and repaired. All electrical components carry a risk of fire and electrocution if not taken care of.
PREVENTIVE MAINTENANCE • Keep all trees and shrubs clear of overhead electrical lines leading to your home. • Protect sensitive electrical appliances from surges by using a surge protector.
REPAIRS • Before digging in your yard, contact the Utility Protection Center at 811. They will
come to your property and mark the area where utilities are buried underground to prevent damage to the cables.
• Never let anyone other than a licensed electrician repair or alter the wiring or electrical system in your home.
• Make sure to turn off the electricity whenever electrical work is performed, such as replacing switches or outlets.
Electrical panel (also called “breaker box” or “circuit breaker panel”) Your circuit breakers control the flow of electricity throughout the house. Each breaker controls a different area of the house. They automatically “trip” or cut off the electricity to a particular area if too much electricity is running at once in that area. Using too much electricity in one area presents a danger of overloading your circuits (which can blow your circuits entirely and cause a fire). Circuit breakers function as GCFI outlets, but on a larger scale. The main electrical panel also includes a main shutoff that controls all the electrical power to the home. Be certain you are familiar with the location of this control panel. This should be the first place you go to troubleshoot when an electrical issue occurs. If you overload an electrical circuit, the circuit breaker will trip. Pay attention to the number of devices you plug into any one circuit.
TROUBLESHOOTING
How to identify a tripped circuit breaker If a circuit breaker has tripped, the switch will be stuck in the middle, halfway between “on” and “off.” If this happens, follow these steps:
• See the legend (located on the inside of the door to the panel box) to identify what room the breaker controls. You have too much electricity being used at the same time in that area or there is a short circuit.
• Unplug all the appliances in that room. • Turn the circuit breaker off and then back on. (It won’t go straight to “on”; you have
to turn it off first.) • If the circuit breaker keeps tripping, try to isolate the problem. Unplug everything
that gets power from the breaker that is tripping. Plug in each item one at a time, using the same outlet each time. If the circuit trips, then the item you have just plugged in might not be functioning properly. If none of the items makes the circuit
WARRANTY: ELECTRICAL The electrician who worked on your house guarantees their work for two years from the date you move into your home.
Items covered: • Faulty wiring, faulty
fixtures.
Items not covered: • Light bulbs. • Any breakage after
move-in.
To submit a claim: • Call [(XXX) XXX-
XXXX] to schedule an evaluation and/or repair.
Make sure to check your breaker box, reset all GFCI outlets and replace light bulbs before calling the electrician for service. You must pay all non-warranty-related service calls.

HOME CARE AND MAINTENANCE MANUAL Habitat for Humanity of Flathead Valley
38
trip, then check each plug with the same item to see if the plug has gone bad. If the circuit still won’t trip, you have too many things plugged in at the same time.
• If you have just one appliance plugged in and your breaker is tripping, that appliance or that outlet may have gone bad. Try a different appliance at the same outlet to test if it’s the appliance or the outlet that’s bad.
• If the tripped circuit is the air conditioner, check your air filter. It might need to be replaced.
• If you can’t get the circuit breaker to stop tripping using these steps, call an electrician. Before you call, remember to check your electrical box for any orange windows that indicate that a breaker may be tripped. Going through these steps before calling an electrician will help narrow in on the problem and save money on your service bill.
Contact information for the electrician who wired your house is listed on the subcontractor information sticker, which is located in your kitchen cabinets.
PREVENTIVE MAINTENANCE • Once a year, inspect your main electrical panel for signs of damage. If any damage
is noted, call a professional electrician. • Don’t plant anything that would prevent access to the box. If there is ever a fire in
your house, the first thing you or the fire department will need to do is turn off your power. It is better not to lock the box so it stays accessible.
Breakers Circuit breakers have three positions: on, off and tripped. When a circuit breaker trips, it must be turned off before it can be turned on. Switching the breaker directly from tripped to “on” will not restore service. You must first turn the switch off and then turn it on to operate the circuit breaker properly.
Breaker tripping Breakers will often trip because the circuit was overloaded with too many appliances plugged into it, a worn cord or defective item was plugged in, or an appliance with too high a power requirement was operating. Starting an electric motor also can trip a breaker.
If any circuit trips repeatedly, unplug all items connected to it and reset the breaker. If it trips when nothing is connected to it, you need an electrician, and the problem should be reported. If the circuit remains on, one of the items you unplugged is defective and requires repair or replacement.
Outlets If an outlet is not working, check first to see if it is controlled by a GFCI receptacle (see below). Next, check the breaker.
Interior outlets are tamper-resistant, meaning that they will not operate without a two-pronged or three-pronged plug. This is a safety mechanism designed to prevent small objects that may be inserted into the outlet from becoming electrically charged. If the circuit is overloaded, it will need to be reset at the breaker box. Exterior outlets are tamper-resistant and weather-resistant.
If there are small children in the home, install safety plugs to cover unused outlets. Teach children never to touch electrical outlets, sockets or fixtures.

HOME CARE AND MAINTENANCE MANUAL Habitat for Humanity of Flathead Valley
39
GFCI (ground fault circuit interrupter) outlets GFCI receptacles have a built-in element that senses fluctuations in power. Quite simply, the GFCI is an indoor circuit breaker. Installation of these receptacles is required by building codes in the bathroom, kitchen and outside — areas where an individual can come into contact with water while holding an electric appliance or tool. Heavy appliances such as freezers or power tools will trip the GFCI breaker. Do not plug a refrigerator or food freezer into a GFCI-controlled outlet; the likelihood of the contents being ruined is very high, and this damage is NOT covered by the limited warranty.
If a GFCI breaker trips during normal use, it might indicate a faulty appliance, so some investigation is in order. Remember that one GFCI breaker can control up to three or four outlets. (If a receptacle isn’t working, check to see if one of the nearby GFCIs is tripped.)
PREVENTIVE MAINTENANCE Each GFCI receptacle has “test” and “reset” buttons. The “test” button should be pressed once each month. This will trip the circuit. To return service, press the “reset” button. If this function does not work, reset the circuit at the breaker and test/reset again. If it still does not function, call an electrician.
Lighting Your home is equipped with high-efficiency lighting fixtures and/or bulbs. Some fixtures require traditional screw-in bulbs; others have LEDs hardwired to the fixture.
REPAIR/REPLACEMENT: • Whenever you replace standard screw-base light bulbs in your house, consider
replacing them with LED bulbs. They are available with the screw base. Even though they are slightly more expensive, they save money because they last much longer and use less energy than incandescent bulbs.
• Compact fluorescent light, or CFL, bulbs are also more energy-efficient than traditional incandescent bulbs, but they contain harmful chemicals and require special disposal measures.
• If an LED fixture stops working (after you have completed troubleshooting the electrical circuit and determined that the fixture is in fact failed), the entire fixture should be replaced. These fixtures are rarely worth repairing and often affordable to replace. The replacement of a fixture requires rewiring, which includes specific safety hazards for those not trained. Consider hiring an electrician or attending a class before attempting to replace the fixture yourself, and always turn off the electricity to the entire circuit before attempting a repair or replacement.
Outdoor lighting Your home is equipped with high-efficiency floodlights intended to illuminate main entrances and walkways.
REPAIR/REPLACEMENT: • Make sure you use only light bulbs that are rated for exterior use. Interior bulbs are
not built for outdoor use and can explode if they get wet. Replace bulbs with high-efficiency LED bulbs when possible.
RESET button TEST
button

HOME CARE AND MAINTENANCE MANUAL Habitat for Humanity of Flathead Valley
40
• To adjust the position of outdoor lights, you will need a stepladder or extension ladder to reach the lights, pliers to adjust the shoulder, and a flat-blade screwdriver to adjust the elbow.
Fluorescent lighting Fluorescent fixtures operate through transformer action, which sometimes causes a buzzing sound. This is normal, but if the buzzing gets louder, use the manufacturer’s recommended troubleshooting guide to determine if the transformer is going bad. It is often more affordable to replace an entire light fixture than to repair it by replacing a bad transformer.
Ceiling fans Ceiling fans are double-switched so that one switch controls the light and another controls the fan. There are also pull chains attached to the fan itself. Once you have set your fan speed, you are encouraged to use the switches to control the fixture rather than the chains.
A ceiling fan may begin to wobble. This is a result of the fan blades being hit and knocked off balance, or by serious accumulation of dust or debris. This is not covered by your warranty, so clean fan blades regularly and encourage children to keep their toys away from the fans, especially while they are in motion.
Set the ceiling fan to run counterclockwise in the summer to help create a downdraft or cooling breeze. Set the fan to run clockwise in the winter to create an updraft and circulate warm air around the room.
Bathroom exhaust fans The bathroom exhaust fans are used to remove moisture and unpleasant odors from a room. They are located on the bathroom ceilings and are controlled by a time-controlled wall switch. During and after showering or bathing, be sure to run the fan for a full 30 minutes to remove excess moisture from the bathroom. Newer fans are often barely audible, so check closely before calling for service. Always use your bathroom exhaust fans when showering so that the moisture can be exhausted to the exterior of your house. If you do not use the fans, serious moisture-related damage can occur to drywall and even framing components behind it. This moisture can also lead to unhealthy mold and mildew.
Sometimes condensation can collect in the duct work and drip back down. This is not a roof leak; but may lead to damage of the electrical components of the fan.
Underground cables Check the location of buried service leads as required by law, by calling the local utility locating service before digging or moving large amounts of sod. Care should be taken to keep soil around the foundation from settling to protect this service; avoid large amounts of water at this point as well.
• Call before you dig: 811 or (800) 632-4949.
Modifications Do not tamper with or add to your electrical system. For any modification, contact a licensed electrician.

HOME CARE AND MAINTENANCE MANUAL Habitat for Humanity of Flathead Valley
41
Energy efficiency and features This section covers general background, use and maintenance information for components of your home that affect energy efficiency. For more specific and detailed information on the energy efficiency program used in the construction of your home, including test results and final certification information, see Appendix I: Your Home Schematics and Details.
Building envelope The building envelope refers to the exterior “skin” of the house. It is the surface that divides the conditioned space from the outside air. Conditioned space is the part of your home that is heated in the winter and cooled in the summer. [Affiliate name] has taken several steps to ensure that your home’s building envelope is well-sealed, allowing only controlled air exchange in order to increase the engineered performance (energy efficiency) of your home. You probably helped with air sealing measures during construction, such as installing continuous exterior insulation (“blue board”), caulking the bottom plate along the foundation, caulking electrical or plumbing penetrations in framing, and using house wrap and windowsill pans. Older homes depended on leaky walls to bring air into the house, but this air was far from “fresh;” it passed through the wall systems and all the construction materials and debris. Your home has been carefully sealed against leaks and equipped with an engineered heating, ventilation and air-conditioning, or HVAC, system to ensure that your fresh air is fresh, that bad air is removed, that pollutants are filtered out, and that everything operates as efficiently as possible.
Insulation Insulation also affects energy efficiency. Your house is insulated in several ways:
WALLS [INSERT SPECIFIC INSULATION MEASURES, SUCH AS THESE SAMPLES:] • The exterior walls have R-13 spray foam insulation between the studs. • The walls are filled with R-19 fiberglass batt insulation between studs, and the
exterior of the house is wrapped in 1-inch-thick Styrofoam insulation.
CEILING [INSERT SPECIFIC INSULATION MEASURES, SUCH AS THESE SAMPLES:]
• The ceilings are insulated with R-30 spray foam insulation. • The attic has R-30 blown cellulose insulation overtop of ceiling drywall. The
effectiveness of blown insulation (in the attic) is diminished if it is compressed or uneven. The last step in any work done in your attic should be to check that the insulation is “fluffed” and that it lays smoothly and evenly. Again, remember that the attic is not intended for storage. Blown insulation that is wet actually conducts energy rather than insulating against its movement – and wet insulation traps moisture and leads to mold and structural damage. If attic insulation becomes wet, immediately remove it, use a fan to dry the surrounding area, and replace it with new blown insulation to match the original material and depth. Wet attic insulation is an indication of a larger problem – most commonly a failure in the roofing that allows rainwater in, or a poorly insulated exhaust duct collecting condensation. Always address the root of the moisture issue before replacing insulation.

HOME CARE AND MAINTENANCE MANUAL Habitat for Humanity of Flathead Valley
42
BASEMENT/CRAWLSPACE/FOUNDATION [INSERT SPECIFIC INSULATION MEASURES, SUCH AS THESE SAMPLES:]
• The crawlspace walls have R-19 fiberglass blanket insulation with vinyl facing and R-30 batt insulation between floor joists.
• The basement walls have 2 inches of Styrofoam insulation on the exterior. • The foundation is a frost-protected slab with 2 inches of Styrofoam insulation on
the exterior of the slab and 2 inches of Styrofoam in an underground apron surrounding the slab.
• If you notice moisture on basement/crawlspace insulation, find the source of the leak or other water intrusion immediately. Not only will the efficiency of the insulation be compromised, but this also can be an indication of a more serious problem. Damp insulation leads to moisture retention and the growth of mold and mildew.
Air sealing To determine whether there is air infiltration (air leakage into or out of your house or ductwork), a third party performs a blower door test and a duct pressurization test on your home. The tighter the building envelope, the more energy efficient your house will be. When your home passes both tests, it means that little air seeps out of your home or ductwork. This saves wear and tear on your furnace and air conditioner, reduces energy consumption, and saves you money.
When the home is used and maintained appropriately, a well-sealed building envelope also helps improve indoor air quality by controlling how pollutants can enter and how they are filtered out. When not used and maintained appropriately, a tightly sealed home can trap pollutants and lead to health and safety issues. See the Home Health and Indoor Air Quality section for more information. In general:
• Use point-source ventilation (exhaust fans in kitchen, bathrooms and laundry room) to remove moisture and pollutants generated in the home.
• Reduce indoor pollutant generation through behaviors (good cleaning habits, no smoking indoors, good pet maintenance, etc.)
• Use and do not damage air quality systems (programmable thermostat, radon mitigation, air filtration, attic ventilation, whole-house fan, active bathroom fans, etc.)
• Monitor air quality and immediately address issues.
Maximizing efficiency Your home is built to be efficient, but much of that depends on how you use it. Follow these tips for heating and cooling seasons to maximize the efficiency of your home and its systems.
TIPS FOR MAXIMIZING EFFICIENCY IN HEATING SEASON • Schedule seasonal HVAC maintenance before the heating season beings to make
sure your system is running smoothly. • Optimize your thermostat setting (see the Thermostat section). • Lower the thermostat when hosting a large number of guests. • Open curtains on south-facing windows during the day to capture the warmth and
natural heat of the sun. • Lock your windows to ensure they are fully closed and to reduce the warm air
escaping from your home. • Make sure all heating vents are open and clear of obstruction. • Check and replace your HVAC filters once a month to avoid restricting airflow.

HOME CARE AND MAINTENANCE MANUAL Habitat for Humanity of Flathead Valley
43
TIPS FOR MAXIMIZING EFFICIENCY IN COOLING SEASON • Schedule seasonal HVAC maintenance before the cooling season begins to make
sure your system is running smoothly. • Optimize your thermostat setting (see the Thermostat section). • Install heavier curtains to keep the sun out of the house, especially over east- and
west-facing windows. • Add exterior window covers and awnings to reduce heat gain. • Draw blinds or drapes to block the sunlight during the hottest part of the day. • Set your ceiling fans to rotate counterclockwise. • Check and replace your HVAC filters once a month to avoid restricting airflow. • Seek out and seal air leaks around windows and doors (see the Caulking section;
do not seal the gap directly under windows; this allows moisture to escape). • Make sure your attic remains properly ventilated. • Clear your outdoor HVAC unit of any surrounding weeds or vegetation.
Expansion and contraction All building materials are subject to expansion and contraction caused by changes in temperature and humidity. Dissimilar materials expand or contract at different rates. This results in separation between materials, particularly dissimilar ones. The effects can be seen in small cracks in drywall and in paint, especially where moldings meet drywall, at mitered corners, etc.
This can be alarming to a new homeowner, but it is normal and not an indication of underlying structural issues. Shrinkage of the wood members of your home is inevitable. This will occur in your home. It will be most noticeable during the first year but may continue beyond that time. In most cases, paint and caulking are all that you will need to conceal this minor evidence of a natural phenomenon. Properly installed caulking will shrink and must be maintained by the homeowner.
See the Drywall and Caulking sections.

HOME CARE AND MAINTENANCE MANUAL Habitat for Humanity of Flathead Valley
44
Foundation The foundation of your home is poured concrete with steel reinforcing rods. The exteriors of these concrete walls are coated with a water-proof sealant. Even though the foundation has been approved by a code enforcement inspector and constructed in accordance with engineering requirements, cracks can still develop in the wall. Cracks in concrete are normal and also unavoidable; they do not necessarily indicate foundation damage. Should you find a crack, it can be sealed with a concrete sealer, such as DAP Concrete Sealant.
All concrete structures crack slightly as they expand and contract and settle. Some minor cracking in concrete occurs in almost all homes. The warranty does not cover minor “hairline” cracks, which are less than 1/8-inch wide. These cracks do not threaten the structural integrity of your home. The sealant applied to the exterior of your home (see the subsection on waterproofing, below) is flexible and should stretch to cover any hairline cracks on the exterior. Periodically check any visible hairline cracks for moisture and monitor to see if they grow. If water is entering the home through a crack or the crack begins to grow, this is a sign of a larger issue, and you should call a professional.
All foundations rely on good drainage to prevent water from pooling at the foundation walls and causing settling under the foundation, excessive pressure against the walls, and possible water intrusion. By maintaining good drainage away from your home, you are protecting your home’s foundation.
Foundation waterproofing Your exterior crawl space foundation walls have been coated with a sprayed-on asphalt waterproofing material. A French drain has been installed below the footer, and a sump pit and pump have been installed in the crawlspace. While every effort has been made to eliminate any seepage, some dampness may be noticed during times of excessive moisture. Over time, natural compaction of soils in the backfill areas will usually eliminate this. Careful maintenance of positive drainage will also protect your crawl space from this condition. Persistent dampness in the crawlspace should be mitigated with a dehumidifier. For more information, see the Indoor Air Quality insert and the Home Humidity section.
Any actual flowing water entering the crawl space should be addressed immediately. If your home is still within the warranty period, contact Habitat. Otherwise, contact a foundation specialist.
WARRANTY: FOUNDATION Your foundation is covered under a 10-year warranty that starts on the day you move into your house.
Items covered: • Defects in materials
and workmanship (installation).
Items not covered: • Hairline cracks (up
to 1/8-inch wide). • Flatwork (driveway,
sidewalks). • Damage caused by
homeowner action (such as a home addition) or inaction (such as failure to maintain drainage).
To submit a claim: • Call [(XXX) XXX-
XXXX] to schedule an evaluation and/or repair.
[Affiliate name] reserves the right to make the final determination if the work requested is covered under warranty or is the homebuyer’s responsibility.

HOME CARE AND MAINTENANCE MANUAL Habitat for Humanity of Flathead Valley
45
Flooring General Pushing or dragging furniture or appliances across any flooring may cause excessive stretching, tearing or gouging of flooring. It is important to lift furniture and other heavy items to move them across the room. Lightweight items can be placed on furniture sliders or even a cardboard box to prevent gouging, but heavy items can cause stretching even if these sliders are used. For heavy furniture, either lift and carry or use moving dollies. Always refer to the manufacturer’s instructions for cleaning and care of your specific flooring products.
Carpet After the initial installation, your carpet may shed. This is normal and will stop after repeated vacuuming.
Vacuuming high-traffic areas daily will not only keep them clean but also will help to maintain the upright position of the nap (individual fibers). Spills should be wiped up and stains should be spot-cleaned immediately. Always dab at the stain, never rub it. Stain removers should be tested first on an out-of-the-way area of the carpet, such as in a closet, to check for any undesirable effects. Professional or steam cleaning should be performed regularly, usually annually.
Luxury vinyl tile (LVT) and luxury vinyl plank (LVP) The type and frequency of foot traffic on your vinyl floors will determine the frequency of maintenance needed. In general, you should remove dirt and grit by sweeping or dust mopping daily, wiping up spills as quickly as possible, using protective pads for furniture and appliances to prevent scratching, and avoiding exposure to direct sunlight for prolonged periods. The flooring manufacturer does not recommend that you use vinegar as a cleaner for your vinyl floors. Although vinegar makes a great cleaner for household dirt, it can damage your floors over time because it is not pH-balanced. Please do not use steam to clean your floors. The extreme temperatures can cause expansion of the vinyl, which could lead to wrinkles and glue bond issues.
Raised nail heads, or nail “pops,” may become noticeable through vinyl flooring. Place a block of wood over the nail head and hit the wood with a hammer to reset the nail.
Floor squeaks Some floor squeaks are unavoidable. Although Habitat does not warranty against floor squeaks, a reasonable effort will be made to correct them. Floors will deflect when walked on; this is a natural effect of the floor joist system used and not an indication of structural deficiency. This will be more noticeable next to hutches, bookcases, chairs and other heavy objects. This is not a structural deficiency, and Habitat will take no action for this occurrence.
Level floors Floors will be level to within ¼-inch within any 32-foot distance in new home construction. Walls that are out of plumb more than ½-inch in an 8-foot distance will be corrected by Habitat within the one-year warranty period.
WARRANTY: FLOORING Your flooring is covered under the home’s one-year warranty that starts on the day you move into your house.
Items covered: • Defects in materials
and workmanship (installation).
Items not covered: • Damage sustained
after move-in, including from dollies, casters, toys, skates, bikes, etc.
• Modifications or replacement products installed after move-in.
To submit a claim: • Call [(XXX) XXX-
XXXX] to schedule an evaluation and/or repair.
[Affiliate name] reserves the right to make the final determination if the work requested is covered under warranty or is the homebuyer’s responsibility.
Related video: Troubleshooting: Flooring

HOME CARE AND MAINTENANCE MANUAL Habitat for Humanity of Flathead Valley
46
Framing Advanced framing for optimized efficiency A number of framing techniques used in your home reduce the use of unnecessary lumber and allow more effective insulation of the walls. Examples include insulated exterior door and window headers, and special T-wall framing at intersecting walls. Always use a stud finder to find solid framing for attachment of shelves, TVs, grab-bars, mirrors or anything heavier than a picture frame. The studs might not be where you expect them to be based on “traditional” framing.
Hose bib/garden hose
Your hose bib is called “freeze-proof,” but that really means “freeze-protected in certain situations.” The water coming from inside your house will be stopped before it passes into freezing temperatures.
Your freeze-proof hose bib can’t stop water inside a connected garden hose from flowing back into the spigot as it freezes. A freeze-proof bib protects it from inside water, not from outside water.
Note: If the insulation around this freeze-proof bib is damaged or removed, the freeze-proof bib is not protected at all – the water stops in the pipe before it gets outside, but it may be just as cold inside the home at this point and could still freeze and burst.
SEASONAL MAINTENANCE: Disconnect your garden hose when it’s cold outside (temperatures below 32 degrees). If you fail to disconnect it, water from the hose can back up into the spigot, ruin your hose bib, and potentially lead to damaging interior flooding if a line bursts.
WARRANTY: HOSE BIB The hose bib is covered under the plumbing warranty for two years from the date you move into your home.
Items covered: • Defects in materials
and workmanship (installation).
Items not covered: • Damage to hose bib,
surrounding pipes, or any materials and possessions due to freezing or burst pipes.
• See also: Plumbing section, freezing pipes.

HOME CARE AND MAINTENANCE MANUAL Habitat for Humanity of Flathead Valley
47
Garage overhead door (on applicable homes) Safety is important when anyone is operating the garage door. To keep you and your family safe, it’s critical to make sure the door can open properly. The garage door operates with the help of a spring under high tension; do not attempt to adjust this spring. To provide safe, trouble-free operations, it’s important to maintain and test the garage door periodically.
USE AND CARE • Do not allow anyone except the operator near the door when it is in motion. Keep
hands and fingers away from all parts of the door except the handle. Do not allow children to play with or around the door.
• For your safety, after the one-year warranty expires, have any adjustments made by a qualified specialist. The door springs are under considerable amount of tension and require special tools and knowledge for accurate and safe servicing.
• Have the door inspected by a professional garage door technician after any significant impact to the door.
PREVENTIVE MAINTENANCE • Check cables, rollers and hinges for signs of wear every three months. Tighten any
loose hinge screws. • Every six months, a graphite or silicone lubricant should be applied to all moving
parts: track, rollers, hinges, pulleys and springs. Check to see that all hardware is tight and operating as intended without binding or scraping. Paraffin wax, rubbed on the side jambs, will help the door operate smoothly.
• If the lock becomes stiff, a graphite lubricant will make it work more easily. Do not use oil on a lock, as it will stiffen in winter and make the lock difficult to operate.
Sag It is normal for the garage door to sag somewhat because of weight and span. This will stabilize after the panels have dried.
Light visible/water penetration Garage overhead doors cannot be completely airtight or watertight, and it is typical for some light to be visible around the edges and across the top of the door. Severe weather conditions may result in some precipitation entering around the door. This is in the nature of this style of garage door and cannot be completely prevented. To reduce the risk of water damage, do not store materials close to the door.
WARRANTY: GARAGE DOOR The company that installed your overhead door guarantees its work for two years from the date you move into your home.
Items covered: • Defects in materials
and workmanship (installation).
Items not covered: • Damage sustained
after move-in, including sagging or water penetration.
To submit a claim: • Call [(XXX) XXX-
XXXX] to schedule an evaluation and/or repair.
Review the overhead door manufacturer recommendations and installer warranty before calling for a repair; you must pay all non-warranty-related service calls.

HOME CARE AND MAINTENANCE MANUAL Habitat for Humanity of Flathead Valley
48
Grading and drainage The final soil level around your home has been inspected and approved for proper drainage of your lot. For any lots located near a watershed area or flood-prone area, our surveyors complete an elevation certificate, which certifies that the lowest portion of your home will be safe in the event of a predictable flood event. Our construction staff inspects your lot both before acquisition and throughout construction to ensure it has adequate drainage. Typically, the grade around your home should slope 1 inch in the first 10 feet away from your home, tapering to a 2% slope.
Positive drainage It is critical that you maintain the slopes around your home to permit the water to drain away from the home as rapidly as possible. Failure to do so can result in major structural damage and will void your warranty.
During construction, it is necessary to excavate an area larger than the foundation of your home. In addition, some trenching is necessary for installation of utility lines. Although the soil is replaced and re-compacted, it does not return to its original density. Some settling will occur, especially after prolonged heavy rainfall or melting of considerable amounts of snow. This can continue to occur for the first few years you are in your home, depending on the amount of precipitation that occurs and other factors. This is a natural part of a home settling, and it is the responsibility of the homeowner to monitor the grading and adjust it if necessary to prevent water pooling at the foundation.
If you are adjusting the landscaping of your home (such as installing sprinklers, adding raised beds, tilling a garden, or planting new trees or bushes), do not alter the overall drainage of the lot. Water needs to drain away from your foundation, away from your flatwork, and into its approved drainage line. Do not direct stormwater onto neighboring lots.
Grading and pest problems The grade is designed to provide proper drainage away from your home while maintaining at least a 6-inch space between the top of the soil next to your foundation and the bottom of any wood or siding. This helps prevent these materials from “wicking” moisture from the ground and reduces the amount of splashed rainwater that can keep these materials wet after rainfall.
This also reduces the risk of termites and other pest infestation. Subterranean termites usually live in the soil below homes. When there isn’t direct contact between wood framing and the soil, termites build tubes and tunnels to travel from one to the other. They often won’t build more than a few inches, and if they do you should be able to easily see this evidence on your foundation and call a professional to treat the issue. Always maintain a 6-inch minimum vertical space between the earth and any siding. If you don’t, water can enter the joint between the foundation and the wall material to allow these bugs to enter and destroy the material.
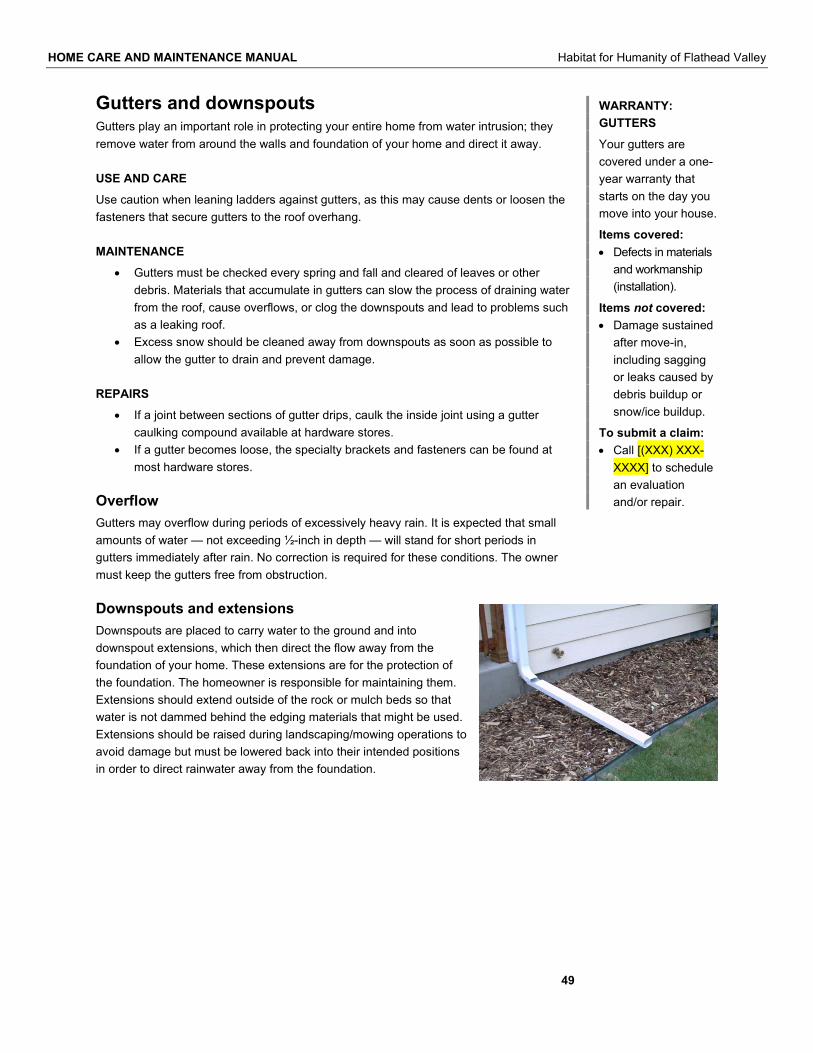
HOME CARE AND MAINTENANCE MANUAL Habitat for Humanity of Flathead Valley
49
Gutters and downspouts Gutters play an important role in protecting your entire home from water intrusion; they remove water from around the walls and foundation of your home and direct it away.
USE AND CARE Use caution when leaning ladders against gutters, as this may cause dents or loosen the fasteners that secure gutters to the roof overhang.
MAINTENANCE • Gutters must be checked every spring and fall and cleared of leaves or other
debris. Materials that accumulate in gutters can slow the process of draining water from the roof, cause overflows, or clog the downspouts and lead to problems such as a leaking roof.
• Excess snow should be cleaned away from downspouts as soon as possible to allow the gutter to drain and prevent damage.
REPAIRS • If a joint between sections of gutter drips, caulk the inside joint using a gutter
caulking compound available at hardware stores. • If a gutter becomes loose, the specialty brackets and fasteners can be found at
most hardware stores.
Overflow Gutters may overflow during periods of excessively heavy rain. It is expected that small amounts of water — not exceeding ½-inch in depth — will stand for short periods in gutters immediately after rain. No correction is required for these conditions. The owner must keep the gutters free from obstruction.
Downspouts and extensions Downspouts are placed to carry water to the ground and into downspout extensions, which then direct the flow away from the foundation of your home. These extensions are for the protection of the foundation. The homeowner is responsible for maintaining them. Extensions should extend outside of the rock or mulch beds so that water is not dammed behind the edging materials that might be used. Extensions should be raised during landscaping/mowing operations to avoid damage but must be lowered back into their intended positions in order to direct rainwater away from the foundation.
WARRANTY: GUTTERS Your gutters are covered under a one-year warranty that starts on the day you move into your house.
Items covered: • Defects in materials
and workmanship (installation).
Items not covered: • Damage sustained
after move-in, including sagging or leaks caused by debris buildup or snow/ice buildup.
To submit a claim: • Call [(XXX) XXX-
XXXX] to schedule an evaluation and/or repair.

HOME CARE AND MAINTENANCE MANUAL Habitat for Humanity of Flathead Valley
50
HVAC system The HVAC system refers to all heating, ventilation, air conditioning, and other air handling equipment. These components all need to work together as a system and as they were designed to work, which includes regular maintenance and some specific use requirements.
[Reminder: customize this entire section to accurately describe the systems you install and the manufacturer’s recommended use, care and maintenance information. Delete all components that do not apply; these are just starting points.]
SAMPLE 1: Heat pump/air handler Your HVAC system has two parts: an inside unit and an outside unit. A heat pump paired with an air handler is most popular in warm, humid areas of the country.
INDOOR AIR HANDLER Matched in capacity and efficiency rating with the heat pump, air handlers circulate conditioned air throughout your home. An air handler contains an inside coil and a blower fan, with the additional possibility of an auxiliary electric strip heater.
OUTDOOR HEAT PUMP Your heat pump provides both heating and cooling. The most common type of heat pump is an air-source heat pump, which transfers heat between your home and the outdoor air. It provides cooling by removing heat from your home and transferring it to the outdoors, which is similar to the way an air conditioning system works. It provides heating by removing heat from the outdoors and transferring it to your home. In other words, heat pumps move heat, rather than generating heat – like traditional furnaces do. Heat pumps also don’t burn fuel for this process; they simply use electricity to move heat from one place to another.
A heat pump doesn’t just work differently from a traditional furnace – it can feel different, too. When a heat pump heats your home, the air coming from the register might not feel as hot as you think it should. If the heat pump runs and then turns off, it is still heating the house to the temperature set on the thermostat; it is just a more gradual process compared with how traditional forced-air furnaces heat a home. This is one reason using your programmable thermostat is so important for both efficiency and comfort.
SAMPLE 2: Furnace (indoor unit) The furnace installed in your home is rated [XX]% AFUE (Annual Fuel Utilization Efficiency).
MAINTENANCE Review and follow the manufacturer’s instructions to get the most efficient and long-term use from your furnace. Some of these instructions include:
• Change the filters in the system once a month. For forced-air furnaces that include active fan ventilation, you still need to change this filter even in non-heating months. The fan is still circulating air, so the filter is still collecting dust and debris – and allowing it to build up will make the system work harder to move air and prematurely wear it out. Damage and failure caused by this deferred maintenance will not be covered by the warranty.
• After your first year, have your heating system serviced by a professional every year. • Keep registers clear of obstruction. Vacuum and dust registers.
WARRANTY: HVAC The HVAC company that installed your system guarantees the work for two years from the date you move into your home.
Items covered: • Defects in materials
and workmanship (installation), including loss of heat due to mechanical failure.
Items not covered: • Defects caused by
deferred maintenance (such as not changing filters).
To submit a claim: • Call [(XXX) XXX-
XXXX] to schedule an evaluation and/or repair.
Make sure to check your breaker box, reset all GFCI outlets and replace light bulbs before calling the electrician for service. You must pay all non-warranty-related service calls.
Related video: Use and Care: HVAC Systems

HOME CARE AND MAINTENANCE MANUAL Habitat for Humanity of Flathead Valley
51
Furnace condensate pump and line A pump is used to remove water that is produced by the furnace and is plugged into a GFCI outlet next to the furnace. Check monthly to be sure its internal circuit breaker hasn’t tripped. If the pump fails to come on, the furnace will not operate. Usually if the pump fails, you will see water on the crawl space floor under your furnace. Check the GFCI at the pump if the furnace isn’t working. If the condensate line becomes blocked (such as with dust, debris or mold), the condensate pump will stop working, which will then force the furnace to stop working.
Furnace hazards Never store flammable or combustible materials near your furnace (or water heater); this can result in a fire hazard. Never alter or modify your furnace. Do not perform any repairs yourself; always contact a professional.
Air conditioner (outdoor unit) The air conditioner installed in your home is rated [XX] SEER (Seasonal Energy Efficiency Ratio).
MAINTENANCE Review and follow the manufacturer’s instructions to get the most efficient and long-term use from your air conditioner. Some of these instructions include:
• After your first year, have your heating system serviced by a professional every year. • Keep registers clear of obstruction. Vacuum and dust registers. • Keep the air conditioning compressor free of vegetation and other obstruction. • Prevent certain types of mold and mildew by running your air conditioner during hot
summer months even if at a high temperature.
Air conditioner condensate line Normal operation of the air conditioner pulls moisture from the air it conditions; this water has to go somewhere. The line that drains condensed moisture away from your heating and/or cooling unit needs periodic maintenance. When algae or debris block this line, water will back up into the drain line. Once this line is full, it can overflow, causing potential water damage to your home. The primary drain line runs through an interior wall to the outdoors.
MAINTENANCE • Check occasionally for debris in the outdoor condenser unit:
First, turn off the air conditioner. Then check the outdoor unit for shrubbery, leaves, grass or dirt impeding the
flow of air from the unit. Use a water hose with an adjustable spray nozzle to remove obstructions.
• Keep the landscape trimmed back from the outdoor condenser unit and condensation lines at all times.
Air conditioner cooling coils For additional information on air conditioner coils, specifically common problems and solutions, see the dedicated HVAC Troubleshooting section.
Related video: Troubleshooting: HVAC

HOME CARE AND MAINTENANCE MANUAL Habitat for Humanity of Flathead Valley
52
Thermostat A programmable thermostat was chosen for your home to help maintain a comfortable temperature and reduce heating and cooling bills. It can be set to automatically adjust to your specific comfort requirements and even work and sleep schedules. Please refer to the operation manual that came with your thermostat for programming and features. To maximize energy efficiency while maintaining comfort, we recommend programming your thermostat to reflect your common schedules. For example, if everyone in your household is in school or at work during the day all week, you can program your thermostat to use less heating and cooling while no one is there.
Only adjust your thermostat a degree or two at a time. A heat pump is not designed to heat or cool your house rapidly. It is designed to gently keep your house comfortable using very little energy. Adjusting the temperature well above your desired temperature will not make it heat up faster.
Set your thermostat to comfortable temperatures for you and your family. Recommended thermostat settings are 70 degrees for heating and 78 degrees for cooling. Use the programmable feature to maintain comfortable temperatures and manage efficiency based on your routines. Do not rely on frequent manual temperature changes, which are less energy efficient and can put more stress on your home’s systems.
Overheating your home, especially in the first year, can cause excessive shrinkage in framing lumber, causing cosmetic damage inside the home.
Except in cases of emergency, don’t turn your system off. Your home’s comfort and durability relies on active air movement that your HVAC system provides, even if it’s just the fan. Even if no one will be home for an extended period, the home itself needs to stay in a certain temperature range to protect its materials and systems. If the outside temperature exceeds 95 degrees, it should be at least 15 degrees cooler indoors than it is outdoors. If the temperature outside drops below 32, it should be at least 50 degrees indoors to avoid freezing pipes and significant water damage.
Return air filter Remember to clean or replace [identify which is the manufacturer recommended action] the return air filter monthly during the heating and cooling seasons. A clogged filter can slow airflow and cause serious long-term damage to your HVAC system. Although it takes only a few minutes to clean or replace the filter, this is one of the most overlooked details of normal HVAC system care. A dirty filter can increase energy costs by 5% to 25% and can result in hundreds of dollars of repair to your equipment. If you do replace your washable air filter with a disposable type, it is important to replace the air filter with the exact same kind of filter that came with your unit. Using a more restrictive filter will cause your unit to work harder to blow the same amount of air throughout your home, possibly leading to damage. If you’re not sure about what kind of filter to install, consult the manual provided by your installer. If you cannot find the information, contact your local equipment dealer with questions.
ADDITIONAL DETAILS • Filter washing instructions can be found here:
http://www.webproducts.com/cleaning-web-plus-air-filters.

HOME CARE AND MAINTENANCE MANUAL Habitat for Humanity of Flathead Valley
53
Fresh air filter Your fresh air filter is located behind and to the side of your return air filter. This filter is designed to clean the outside air that is drawn in each time an electronic damper opens to allow fresh air inside the home. This is a reusable filter that can be cleaned with mild soap and water, and then replaced once it’s completely dry. You should plan to periodically inspect and clean this filter as needed.
If you need to replace the filter and are not sure about what kind of filter to install, first consult the manual provided by your installer. If you cannot find the information, contact your local equipment dealer with questions.
Emergency overflow drain During warmer months, heat pumps work to remove warm, damp air. As a result of this, they remove moisture from the air in your home, and this removed water drains into the same area where your clothes washer drains (see clothes washer and dryer). In addition, there is a plastic PVC emergency overflow drain (normally located outside of your house in the soffit) that extends from your mechanical equipment in the attic to the outside. The purpose of this drain is to prevent condensation from your unit from overflowing into the attic in the event that your primary condensation drain becomes clogged or fails. If you see water coming from the emergency overflow drain, turn your unit off immediately and call the HVAC repair technician listed on the sub call list.
Adjusting air vents Your home’s conditioning systems are designed for optimum performance and efficiency. If you experience hot or cold spots in a home, you can adjust the supply registers to reduce air coming from the conditioning systems. For example, if during a heating season one bedroom is warmer than the rest of the house, you can partially close the supply register in that room to reduce the flow of hot air from the register into the room. If during a heating season you experience a cold spot in a room, do not adjust the other registers in the home to compensate – contact your system installer.
Never adjust or close return air registers – these are the ones that do not blow hot or cold air. Return registers deliver air from each room back to the conditioning systems for circulation. Your system could be negatively impacted by closing supply registers, as it restricts airflow and makes the system work harder. Never close passive air vents (see below).
Do not place furniture over any vents in a way that prevents air flow. You might consider using register attachments to help direct air flow, especially if furniture such as beds or dressers need to be placed over the top of registers.
Passive air vents Not all registers deliver conditioned air. Some allow air to pass freely between rooms or floors. This is intentional and critical for fresh air, comfort, and the reduction of indoor air moisture. Do not block these registers, even if they appear to “go nowhere” or don’t connect to any ducts; they are allowing necessary passive air movement.
Seasonal trial run Test your systems early, before you need them and before contractors are overloaded with seasonal service calls. Have a trial run early in the fall to test the heat pump and late
HOME CARE AND MAINTENANCE MANUAL Habitat for Humanity of Flathead Valley
54
in the spring to test your air conditioner. If service is needed, it is much better to discover this before the in-demand season.
PREPARING FOR SERVICE • Clean any dirt, leaves and debris from around any outdoor unit. • Cut vegetation back to at least 18 inches from each side of any outdoor unit. • Inspect the base pan for blocked drain openings and check the overflow drain. • Listen for any abnormal noises from your indoor unit.
Temperature Normal temperature variations from floor to floor (depending on the style of home) can be as much as 5 degrees or more on extremely hot or cold days. Room-to-room temperatures may vary because of sun exposure, insulation, window coverings, appliance use and other factors.
Use ceiling fans to make room-by-room adjustments to temperature.
Overheating Your new home should not be heated too quickly. Overheating can cause excessive shrinkage in framing lumber and may damage the home.
Odor It is normal for the heating and cooling systems to emit odors for a few minutes when first turned on after an extended period of not being used. This is caused by dust that has settled in the system and should pass very quickly. To reduce this and otherwise improve indoor air quality, remove floor register covers and vacuum the accessible ducts at least annually. Do not attempt to remove dust from within air handlers or other components.
Gas (in gas appliance homes) If you smell gas in the house, have everyone leave immediately and meet at a predetermined place outside the home. Do not use matches or any type of open flame in an attempt to relight any appliance; this may cause an explosion. Once everyone is outside the home, call the gas company. Turn off the gas meter at the shut-off valve only if you can do so safely.
Ductwork The heating and cooling system is a sealed system, and the ductwork should remain attached, securely fastened, and sealed at all times. Do not attempt to alter, modify or repair ductwork. Call a technician.
Ductless heat pump (mini split) refrigerant lines Mini split systems do not use ductwork to deliver conditioned air, but they do have refrigerant lines that allow the heat transfer. Do not attempt to alter, modify or repair these lines. Call a technician.
ADDITIONAL INFORMATION • HVAC Troubleshooting section

HOME CARE AND MAINTENANCE MANUAL Habitat for Humanity of Flathead Valley
55
Insulation/air sealing See the Energy Efficiency and Features section for general details on home components, and Appendix I: Your Home Schematics and Details for specifics regarding the energy program applied to your home.
Internet/cable/phone jacks Each home is equipped with cable/internet jacks (wired boxes set in walls, similar to outlet boxes) to simplify optional future connection. Initiating service, including arranging for the home to be physically connected to an external service, is the homeowner’s responsibility. These jacks are located in common cable/internet connection points; any extension or modification is the homeowner’s responsibility and is not included in initial construction or covered under warranty.
Landscaping Grass seed When grass seed is sowed, it needs a lot of water every day until the grass roots get established (about four to six weeks). Habitat staff members or volunteers will help educate you as to how much and how often to water. Stay off the lawn as much as possible during this time. After the grass starts to grow, begin a regular schedule of cutting and fertilizing. Carefully follow manufacturers’ directions for fertilizing and spraying. Do not remove more than one-third of the grass height with each mowing. Cutting more than this may harm your lawn. Homeowners are responsible for getting grass to take once seeds have been planted.
Shrubs and trees The plants around your home will need regularly scheduled fertilizing, watering and pruning. Check the tags on the plants for more information. If you are thinking about adding new plants or shrubs to your lot, make sure to consider the adult size of the species you are planting, as root damage and tree limb damage can occur years down the road. Do not plant any trees or shrubs within 4 feet of your foundation to avoid future foundation issues and to reduce pest intrusion. Do not plant trees within 10 feet of sewer lines to prevent future root damage to lines.
Remember: Always call before you dig to avoid getting too close to underground utilities.
Drainage The necessary grades have been established by Habitat to ensure proper drainage away from the house (see the Grading and Drainage section). Standing water should not remain for extended periods in the immediate area of the house after a rain shower (generally, no more than 24 hours) except in swales that drain other areas. In these areas, a longer period can be anticipated (generally, no more than 48 hours). The homeowner should anticipate the possibility of standing water after an unusually heavy rainfall.
Mirrors Do not use ammonia-based glass cleaners on mirrors, which can cause “de-silvering” at the edges.

HOME CARE AND MAINTENANCE MANUAL Habitat for Humanity of Flathead Valley
56
Paint and stain The interior woodwork and the bathrooms and kitchen walls have been painted with low-VOC latex paint. These areas may be wiped down with a soft sponge and soapy water. Spackle may be used to cover any small defects before touching up the paint.
Touch-ups Homeowners will receive a sample of the interior and exterior paint used on their homes. This paint should be stored so as not to be affected by extreme temperatures. When doing touch-up painting, use a small brush, applying paint only to the damaged spot. The paint might not match the surrounding area exactly, even if the same paint mix is used. When it is time to repaint a room, prepare the wall surfaces first by cleaning with a mild soap-and-water mixture or a cleaning product that is recommended by the manufacturer.
Exterior Regular painting and repair will preserve the beauty of your home and add to its value. Check the painted or stained surfaces of your home’s exterior annually. If you repaint before there is much chipping or wearing away of the original finish, you will save the cost of extensive surface preparation. It is a wise maintenance policy to plan on refinishing the exterior surface of your home approximately every three years. The aging of the exterior is governed by the climatic conditions. Over time, the finish will fade and dull a bit. When repainting the exterior of your home, use exterior-rated paint, as this will help protect the paint from harmful UV rays. Be sure to paint porch trim, columns, railings, etc., as needed to prevent weather damage.
Maintenance When you wish to repaint or stain the exterior of your home, popped nails should be reset, and the blistered or peeling portions should be wire-brushed or scraped with a putty knife, then sanded and spotted with primer. Then the entire area can be painted or stained. Be certain to apply a top-quality exterior paint that has been formulated for local climate conditions. Do not allow water to spray on the exterior walls of your home. This will cause blistering, peeling, splintering and other damage to the home. Trim painted white or light colors will more readily show grain and cracks and therefore will require additional maintenance.
Severe weather Hail and wind can cause a great deal of damage in a severe storm, and the house should be inspected after such weather. Damage caused by severe weather should be reported to your insurance company promptly.

HOME CARE AND MAINTENANCE MANUAL Habitat for Humanity of Flathead Valley
57
Plumbing Your plumbing system includes many components, including supply lines, wastewater lines, waste vent lines, appliances and fixtures.
Shut-off valves Shut-off valves prevent flooding and water damage when water-using fixtures and appliances overflow or leak. Water shut-off valves work just like their name implies: They allow you to shut off water to particular areas of your home to prevent flooding if a fixture or appliance fails. Your main water shut-off is near your water heater in the closet or in the laundry area. It is important to know and remember the location of the shut-off for emergencies, such as a water line freeze or break. These fixtures and appliances all have easily accessible dedicated shutoffs:
• Sinks • Water heater • Toilets • Washing machine
Other fixtures, like bathtubs, do not have easily accessible shutoffs. If you suspect a leak around these fixtures, turn off the main water shut-off.
Freezing pipes Preventing pipes from freezing is the homeowner’s responsibility at all times. Keeping the home heated to a normal temperature and ensuring all insulation and other safeguards are in place will accomplish this. Never leave a home unconditioned in the heating season. If you will be away for an extended period, leave the thermostat set at 55 degrees. If you do leave for an extended time, it is best to drain your water supply lines first. This is done by shutting off the main supply line and opening the faucets to relieve the pressure in the lines.
This can be done in addition to keeping the thermostat at 55 degrees; draining the lines is not an alternative method and will not protect against all freezing risks on its own. Draining the lines is a good practice for extended absence even outside of freezing risk; it helps protect against leaks and burst lines for any other reason. See also specific information on your hose bibs and risk of freezing.
Debris in supply lines Even though your plumbing supply lines have been flushed out to remove dirt and foreign matter, small amounts of minerals will usually enter the line. Aerators on the faucets strain much of this from your water, but debris caught in these aerators may cause the faucets to drip because rubber washers wear more rapidly when they come in contact with foreign matter.
Care and cleaning Follow manufacturers’ directions for cleaning fixtures. Abrasive cleansers will remove the smooth finish, leaving behind a porous surface that is difficult to maintain and may rust. A non-abrasive cleaner or liquid detergent is usually recommended.
Do not use chemical drain cleaners except as a last resort; they will degrade the waste lines. Use prevention to avoid clogged drains. For example, do not pour oil or grease down the drain. As they cool, these substances will stick to the waste pipes and collect other debris. Periodically pouring boiling water and baking soda down the drain can
WARRANTY: PLUMBING The electrician who worked on your house guarantees their work for two years from the date you move into your home.
Items covered: • Defects in materials
and workmanship (installation), including sagging due to normal house settling.
Items not covered: • Damage caused by
deferred maintenance, improper use, user action or negligence, or freezing.
To submit a claim: • Call [(XXX) XXX-
XXXX] to schedule an evaluation and/or repair.
Make sure to run through leak troubleshooting before calling the plumber for service. Do not wait for a plumber to turn off water lines if you have a leak. You must pay for all non-warranty-related service calls.
Related video: Troubleshooting: Plumbing

HOME CARE AND MAINTENANCE MANUAL Habitat for Humanity of Flathead Valley
58
prevent small amounts of debris from turning into large blockages (see Cleaning the P-Trap).
Sewer cleanouts Waste from your home travels from your house to the street where it connects with the city’s waste infrastructure. If your plumbing system becomes clogged, there are a couple of sewer drain cleanout locations that a qualified plumber can remove debris from. Be sure to know the location of these cleanouts and keep them visible in the yard. Carefully avoid damage to the plastic PVC pipe/cap, and do not allow heavy equipment or vehicles to drive over the top of these cleanouts.
Fixtures Your bathroom sinks, showerheads and toilets are low-flow fixtures – they use less water to perform their function compared with traditional fixtures. Clean plumbing fixtures with a soft sponge and soapy water, then polish with a dry cloth. Drying with a soft cloth or towel will prevent water spots.
Toilet There are two control valves in a toilet: An inlet valve and a flush (or outlet) valve. The flush valve has a rubber flapper and a valve seat. When you press the handle to flush the toilet, it pulls a chain that lifts the rubber flapper out of its seat and allows water to drain into the toilet bowl. As the tank empties, the flapper falls back into its seat, plugging the outlet, and the float drops. The float dropping opens the water supply line to allow water to refill the tank and bowl. When the float has reached the top of the tank, its position closes the inlet valve and stops the water flow.
Do not flush any wipes, even if they claim to be “flushable.” Most wipes are marketed as “flushable,” but this only means they are likely to get past the toilet itself — not through the pipes past that point. Do not flush sanitary products or anything other than waste and toilet paper.
DEALING WITH A CLOGGED TOILET • Using a plunger: A plunger may be your best choice when there is a complete clog.
Place the plunger snugly over the drain opening in the bottom of the bowl. Be sure there is enough water to cover the plunger cap. (The plunger should
seal against the bowl.) Rapidly pump the plunger, making sure not to break the suction seal. Repeat until the clog is cleared.
• Using a closet auger (snake): If the plunger doesn’t work, try a closet auger. This is another example of where an online DIY video can be very helpful — just be sure you find one that features your kind of toilet and auger. Don’t be intimated by this tool; the steps are easy:
Place the auger bend in the bottom of the toilet drain. Turn it clockwise to get the cable around the trap. Once you’ve hit the clog, move the auger in and out to try to break it up. Once the auger has secured the blockage, pull carefully to remove it.

HOME CARE AND MAINTENANCE MANUAL Habitat for Humanity of Flathead Valley
59
TANK CARE Avoid exposing the toilet to strikes from sharp or heavy objects; this can cause chipping or cracking. Avoid abnormal pressures against the sides of the tank. It is possible to crack the tank at the points where it is attached to the bowl.
RUNNING TOILET After some years, your toilet flapper or fill valve may deteriorate to the point where water slowly drains from the tank into the bowl. Like many plumbing leaks, an unexpectedly high water bill may be an indication that you have a problem.
Your toilet will also run if the flapper is not sealing in its seat. This often happens because the chain attached to the flapper is kinked or has come unhooked. You can jiggle the handle or stick your hand right in there and undo the kink. (Don’t worry; the water in the tank is clean.)
Sometimes the flapper doesn’t seal because mineral deposits have built up in the seat. Drain the tank and check by shutting off the water valve and flushing the toilet until the tank empties. If there is white buildup in the tank, you can scour the flapper seat with steel wool or rinse it with vinegar. If the problem does not seem to be the chain or the seat, you might need a new flapper.
If water leaks into the bowl, first check the overflow tube. While holding the float, bend the rod closer to the bottom of the tank. Flush the toilet. If water continues to leak into the bowl, you might need to replace the washer on the inlet valve.
If water leaks into the bowl but isn’t coming through the overflow tube, it’s probably coming from the flush valve. Align the rods between the flush valve and the flushing handle so that the flush valve float drops straight down when the toilet is flushed. If water leaks into the bowl from the tank, it could be caused by a warped flapper in the toilet tank. Check the flapper and replace it if necessary.
If your toilet does begin to “run,” the parts are easily acquired at almost all hardware stores. Most basic toilet troubleshooting techniques can be found on online tutorial videos. Be sure to find one for your specific model, as parts and techniques will vary among types and brands. Only minor tools and supplies are required. Pro tip: Take the old flapper with you to the hardware store to get an exact match. Be sure to buy parts manufactured for your brand of toilet rather than those marked “fits all.” (You can find the brand name inside the tank of the toilet or by the toilet seat hinges.)
Outside faucets/hose bibs Turn the faucet off until water drains out the back of the spigot. This feature keeps this faucet from freezing. Remove any hoses as soon as the outside temperature falls below 35 degrees. The water left in a hose can freeze and expand back into the pipe, causing a break in the line. Repairs to a broken line to an exterior faucet are not covered by your warranty. See the Hose Bibs section.
Noise Changes in temperature or the flow of the water itself will cause some noise in the pipes. This is normal and requires no repair. Temperature variations can be expected if water is being used in more than one location in the home.

HOME CARE AND MAINTENANCE MANUAL Habitat for Humanity of Flathead Valley
60
Tub/shower fixture Do not put weight on the tub spout or showerhead. Using either for balance or hanging “shower caddies” or other items from them will cause damage to the fixture that can lead to a leak and further damage to the room.
ANTI-SCALD Your tub/shower is equipped with an anti-scald device that prevents accidental scalding; it automatically mixes cold water with the hot at the hottest setting. You do not need to adjust the temperature setting on the water heater to prevent scalding.
Sink P-traps Underneath all sinks you will find a curved pipe called the P-trap. This curve in the pipe stays filled with water to prevent sewer gas from backing up into the home. When you pour something down the drain, this pushes the water along and leaves some in the P-trap. If you notice odors coming from a sink drain you don’t use frequently, simply run some water to flush out the old liquid.
If your sink is draining slowly, you might want to clean out your P-trap, because there is probably some solid food, grease, hair or soap scum that has gotten caught. If you drop something down your drain that you want to retrieve, it will likely end up in the P-trap. It’s easy to remove the P-trap, but a little messy.
Plug the drain quickly after you realize you’ve lost a piece of jewelry down the drain so that nothing pushes it out of the P-trap and into the sewer system where it will be lost for good.
CLEANING THE P-TRAP • Before you remove the P-trap to clear a clog, try pouring boiling water down the
sink (rather than chemical drain cleaners). • If you can’t clean it out with boiling water, try pouring about a ¼-cup of baking soda
down the drain and letting it sit for 10-15 minutes. Then pour a bit of vinegar down the drain and seal the drain with a rag while the vinegar does its work. Flush that out with boiling water.
• If that doesn’t work, you’ll have to take it apart.
REMOVING THE P-TRAP TO CLEAN IT OR RETRIEVE ITEMS • Put a bucket or pan under the trap to catch the water stored in it. • Unscrew both big plastic nuts. (You should not need a tool for plastic connections;
these are made to be unscrewed by hand. Using a large pipe wrench could damage them.)
• Remove the trap. • Clean it with soap and water. • Replace and tighten the nuts (by hand) to reattach your clean P-trap. • Tighten metal connections with a wrench and a plastic connection by hand. • Empty the bucket of water but replace it under the P-trap in case there is a leak. • Check the P-trap a day later to make sure water is not leaking. (If you do have
water leaking, you probably just need to tighten the nuts.) If not, remove the bucket – you’re done!

HOME CARE AND MAINTENANCE MANUAL Habitat for Humanity of Flathead Valley
61
Water heater [Reminder: This is sample content. Look up relevant safety, use and maintenance information on the specific model you install in homes and include critical details here. The following is an example of some critical information and how it can be presented.]
SAMPLE 1: Your home is equipped with a tankless on-demand water heater to reduce energy costs and water waste. Leave the temperature setting at the manufacturer-recommended level.
SAMPLE 2: Your water heater is sized to be able to provide the amount of heated water you’ll need during peak usage time. Leave the temperature setting at the manufacturer-recommended level.
PRESSURE-RELIEF VALVE The pressure-relief valve releases water and steam when the water in the tank gets too hot or boils. If the water overheats, the valve switch will automatically flip straight up and release the pressure. The steam flows out of the water heater and is released either under your porch or under the roof eave. If steam is coming from either of these locations, check the pressure-relief valve. If it’s pointing up, the water temperature is either set too high or it is broken.
PURGING THE TANK Minerals will build up in the water heater and need to be cleaned out. To keep your water heater in peak form, you should drain the tank once a year. To purge the water heater tank:
• Attach one end of the hose to the hose valve (or hose bib) at the bottom of the tank. Take the other end of the hose outside the house.
• Turn the thermostat to “Vacation” mode. • Turn on the hose valve with a flat blade screwdriver and keep it on until the water
runs clear. • Turn off the valve and let the tank refill. (This should take five to 10 minutes.) • Drain the tank entirely a second time. • Remove the hose. • Reset your thermostat to the desired setting.
If you leave your home for an extended period, turn off your water heater at the electrical breaker panel; this will protect the heating element and reduce your use of electricity while you are away.
THERMOSTAT/TEMPERATURE The thermostat on an electric water heater sets the temperature of the water. The manufacturer’s recommendation is a setting of no more than 125 degrees. Higher settings may lead to severe burns and scalding. The bath/shower fixture includes anti-scald measures, but setting the thermostat temperature above this recommendation creates a risk of scalding from other fixtures.
If water is not hot, check the breaker box for a tripped circuit. If it is tripped, reset the breaker to restore power to the water tank. If this does not fix the problem, contact your plumber.
Related video: Use and Care: Water Heater

HOME CARE AND MAINTENANCE MANUAL Habitat for Humanity of Flathead Valley
62
Roof The shingles on your roof do not require any treatment or sealer. It is normal for some flashing to be visible. Never attempt to walk on the roof of your home, as you can easily damage the shingles, which can in turn result in leakage. If you need to walk on the roof for any reason, take great care to avoid falls, coming in contact with overhead power lines, or damaging the shingles, flashing, vent stacks, flues or ventilators. The shingles on your home should not need to be replaced for roughly 30 years. However, depending on weather events and conditions, your shingles might need to be replaced before this. The vents on top of your house are tied into the shingles using a rubber boot. These boots eventually crack and need to be replaced. If you happen to notice water or brown spots on your ceiling, call a roofing company.
Maintenance • Periodically inspect your roof for loose shingles, gaps in caulking, or damaged
flashing. Pay special attention to your roof after a storm. • Keep the roof, roof valleys and rain diverters clear of leaves and other debris. • If your home has gutters, make sure to clean them out twice a year, keep them
securely fastened to your home, and paint or clean them as necessary to keep them looking attractive.
• Overhanging tree branches can scratch your shingles and can fall and damage your roof structure.
Note: Foot traffic on your roof may cause damage to the shingles and flashing — especially in hot weather. If you find it necessary to have someone on the roof, make sure they are a professional.
Severe weather After severe storms, a visual inspection of the roof for damage is called for. Notify your homeowner’s insurance company if damage is noted.
Leaks When a leak is noticed, try to detect the exact location; this will greatly simplify locating the area that requires repair when the roof is dry. Roof leaks need to be addressed immediately; water intrusion can cause significant damage in a short time. Most roof leaks are minor, affordable repairs if addressed immediately, but they can lead to extremely expensive, intrusive renovations if left untreated.
Siding Vinyl [Affiliate name] uses D5 “Dutch Lap” vinyl siding on most of our new homes. Vinyl is easily installed and repaired, and easy to clean. We recommend cleaning your siding with a scrub brush and a mild detergent such as Dawn soap. Avoid using power washers to clean siding, as the extreme force can crack siding and create small holes.
Hardie board (if applicable) Hardie board siding is made from reinforced concrete and wood fibers. Hardie siding looks great (when maintained) and adds value to your home. However, it must be painted every few years to combat the sun’s fading effects. If left unpainted, Hardie siding can become
WARRANTY: ROOF The roofing contractor who worked on your house guarantees their work for two years from the date you move into your home.
Items covered: • Faulty materials
and workmanship (installation), such as leaks at flashing or vents.
Items not covered: • Damage caused by
storms or homeowners/other contractors after move-in (such as shingles damaged by foot traffic or leaks at a satellite dish).
To submit a claim: • Call [(XXX) XXX-
XXXX] to schedule an evaluation and/or repair.
Consult your homeowner’s insurance policy for potential insurance claim coverage. You must pay all non-warranty, non-insurance-covered service calls.
Related video: Troubleshooting: Roofing and Siding

HOME CARE AND MAINTENANCE MANUAL Habitat for Humanity of Flathead Valley
63
dull in color or blotchy, and it will not repel water as well as freshly painted siding. Be sure to use an appropriately rated paint.
General exterior PREVENTIVE MAINTENANCE
• Inspect your exterior finishes annually. • Clean all types of siding with clear water from a garden hose and a soft-bristled,
long-handled car brush. Don’t scrub too hard. • Make sure there’s at least a 6-inch vertical space between the bottom of your
siding and the ground or ground cover. This space prevents siding from absorbing water from the ground.
• Your siding will last longer if you keep it painted. Inspect it annually and refinish it as needed.
• Keep vines and other plants from growing against your siding or wood structures. The moisture from the plants can cause damage and rot. Certain plants, like English ivy, produce chemicals than can damage siding and even brick.
• Maintain caulking between pieces of siding and between the siding and the doors/windows/soffits to prevent moisture from penetrating the wood.
Smoke detectors You should have a smoke alarm in your kitchen/living room area and in every bedroom. Each smoke detector is permanently wired to the house electrical system and has backup batteries to operate the unit in case of electrical power failure. Read the manual from the manufacturer for information on the care of smoke detectors. For your safety, it is important that these devices be kept clean and in good operating condition.
PREVENTIVE MAINTENANCE • Once every three months, smoke alarms should be cleaned (vacuumed) to prevent
a false alarm or lack of response in a fire. • After cleaning, push the button to test; the alarm should sound. • Batteries should be changed every year. Be sure to use only new, unused
batteries of the same type as originally installed. After installing the new battery, push the button to test; the alarm should sound.
TROUBLESHOOTING • The smoke alarms will start chirping if any battery is getting low. This means it’s
time to replace all the batteries in your smoke alarms. Replace the batteries and then reset the system by holding down one of the buttons on one of the smoke alarms. All of the smoke alarms will start beeping together (five to six beeps), which means they are reset.
• When changing the 9-volt batteries in your smoke detectors, make certain that the batteries are installed properly, with the large prong to positive and the small one to negative. If the battery is not installed properly, the smoke detectors will continue to chirp.
Related videos: Use and Care: Siding

HOME CARE AND MAINTENANCE MANUAL Habitat for Humanity of Flathead Valley
64
Sprinkler systems/fire suppression [If applicable, include all relevant safety, installation, use and maintenance information here. Refer directly to manufacturers’ recommendations and the expertise of your installer.]
Stairs Your stairs are securely fastened and supported at the top and bear directly on structural components at the bottom. They are safe and secure. They will vibrate, bounce and flex when in use; this is normal, not an indication of a structural or safety issue. They may squeak, which is not covered by the warranty.
Often there will be a slight shrinkage where the stairs meet the wall. When this occurs, a thin bead of latex caulk can be applied and when dry, painted to match the wall. See the Caulking section.
Sump pit and pump Sump pit The sump pit is in the crawl space and is connected to the underground foundation drains. If there is too much groundwater (from rain, for example) for the ground to absorb, it will travel down to the drain and into the sump pit. This pit is meant to temporarily hold excess water until it can be dispersed back into the ground. Some water in the sump pit is not necessarily cause for alarm, this is its normal function.
MAINTENANCE Do not allow dirt or debris to collect in the pit; it will clog the pump and could lead to pit overflow and interior flooding.
Sump pump When enough water collects in the pit, the sump pump will automatically activate to mechanically remove water from the pit and pump it to the exterior of the home. The sump pump operates on a dedicated circuit and is an appliance plugged into a dedicated, GFCI-protected outlet box. Do not plug anything else into this outlet box.
MAINTENANCE Test and reset the GFCI outlet once a year to ensure operation. If the outlet is not working, try resetting the breaker. If this does not work, immediately have the connection repaired.
Sump cover There is an insulated, airtight cover on top of the pit. This cover will not support weight; do not stand on or store anything on top of the cover. Its purpose is to air-seal the pit against radon gas entering the living space. See the radon section within the Home Health and Indoor Air Quality section for more information on the health hazards. Do not remove this cover or allow it to become damaged.
Interior flooding The purpose of the sump pit and pump is primarily to protect against interior flooding caused by groundwater. If a major leak occurs in the home and water begins to fill the crawlspace from this interior source, you will need to remove the sump cover in order for the sump pump to remove this water.

HOME CARE AND MAINTENANCE MANUAL Habitat for Humanity of Flathead Valley
65
Towel bars/toilet paper holders These bathroom accessories are light-duty and should be used only for their intended purpose: hanging towels and toilet paper rolls. Do not hang on them, use them for balance aids, or suspend heavier items from them.
REPAIR • If the accessory connections become loose or disconnected, use a micro
screwdriver to tighten the inset screws connecting the pieces. • If the accessory’s connection to the wall becomes loose, first remove the
accessory from its mounting plates by loosening the inset screws with a micro screwdriver. Do not completely remove these screws. If the mounting plate is affixed to studs or blocking within the wall, retighten the attachment screws.
• If the mounting plate is affixed using a drywall fastener, you will likely need to remove and replace the drywall fastener. See the Drywall section for more on types of fasteners.
UPGRADE/REPLACEMENT • If a member of your household would benefit from a wall-mounted balance aid
such as a grab bar, consider replacing the standard towel bar or toilet paper holder with a weight-rated combination accessory.
• These balance aids must be mounted according to manufacturers’ specifications (i.e., not just into drywall).
Windows and screens Water may collect in the bottom channel of window frames during heavy rains. Weep holes are provided to allow excess water to escape to the outside. Keep the bottom window channels and weep holes free of dirt and debris for proper operation.
PREVENTIVE MAINTENANCE • Inspect, clean and lubricate your windows, frames and window hardware annually. • Check all hardware on the window. Check the opening and closing mechanism,
jambs, and sliders. Make sure screws are tight and that the rest of the hardware, such as locks, operates smoothly.
• Inspect the weather stripping to make sure it’s effective. • Check the condition of the gaskets holding the glass. • Wash the window frame with only a mild, nonabrasive cleaner and water. • If the seal around the window frame breaks, call a professional for repair.
Cleaning Once a month, or as needed, clean aluminum and vinyl surfaces with warm, clear water. Windows will tilt out at the lower sash to allow for easier cleaning and screen removal. Do not use any powdered cleaner. After each cleaning, apply a silicone lubricant.
Ventilation Proper ventilation will prevent excessive moisture from forming on the inside of the windows. This helps reduce cleaning chores considerably.
Related video: Use and Care: Windows and Screens

HOME CARE AND MAINTENANCE MANUAL Habitat for Humanity of Flathead Valley
66
Condensation Condensation on interior surfaces of the window and frame is the result of high humidity within the home and low outside temperatures — not a fault in the window itself. The humidity level within the home is largely influenced and controlled by your family’s lifestyle. To reduce condensation on the inside of windows, reduce the interior moisture level in your home. For more information, see the Home Health and Indoor Air Quality section.
Condensation at operable window edges is most common, as this is the weakest point in the energy seal of the window. If the windows aren’t closed tightly and locked, cold air is more likely to leak in and cause condensation.
Screens Screens, which consist of woven mesh stretched across a frame, allow the outdoor air in while helping to prevent insects from entering your home.
MAINTENANCE • Keep the screens clean to prevent indoor air pollutants from entering the home and
to help keep dirt from being transferred to the exterior siding. Gently wash and hose the screens about once a year.
• The screens will never need paint or other preservatives.
REPAIR/REPLACEMENT • If the mesh screen becomes torn or otherwise damaged, you can replace the mesh
without replacing the entire frame. You can purchase replacement screen, rope and a simple rope installation tool at most hardware stores. Follow the included instructions for replacement.
• If the frame becomes damaged, you can buy replacement frame kits and follow instructions to size and reconstruct the frame.
Many homeowners prefer to remove and store screens for the winter to allow more light into the home. Use caution when removing screens. They are easily perforated, and the frames bend if they are not handled with care.
Sticking windows Most sliding windows (both vertical and horizontal) are designed for a 10-pound pull. If sticking occurs or excessive pressure is required to open or close the window, a silicone lubricant should be applied. This is available at hardware stores. Do not use a petroleum-based material.
Window locks Acquaint yourself with the operation of the window hardware for maximum security and safety in the event of a fire.
Broken glass If any panes of glass become broken, you should immediately contact a glass company for reglazing. Glass is very difficult to install without special tools. Habitat is not responsible for broken windows after occupancy unless they were noted on the walk-through list.

HOME CARE AND MAINTENANCE MANUAL Habitat for Humanity of Flathead Valley
67
Tinting or solar coatings Installation of these films will void the window glass warranty because they increase the heat buildup in the thermo-pane space. Homeowners should request a glass warranty from the company installing the film if they chose to do so.

HOME CARE AND MAINTENANCE MANUAL Habitat for Humanity of Flathead Valley
68
Regular maintenance Performing a few regular maintenance tasks on your home can prevent costly repairs down the road. These recommended tasks are DIY-friendly and require little cost and only a few household tools.
[The following section on maintenance is one sample of how a recommended maintenance checklist can be incorporated into the manual. Additional organizational frameworks and maintenance recommendations submitted by affiliates from several regions are included in the template document appendix. Do not use these checklists without updating to the most relevant maintenance needs for the homes you build. Select a framework from the following samples, update the content, replace this text with your final version, and delete all others.]
• [Recommended class: Home maintenance]
Sample checklist: Regular maintenance
MONTHLY MAINTENANCE Clean/replace HVAC filter.
Test/reset GFCIs.
ANNUAL MAINTENANCE
Test smoke and carbon monoxide detectors. The CDC suggests you test your smoke and carbon monoxide detectors monthly. In addition to a monthly test, homeowners should change the batteries every six months.
Inspect grout and caulking. Annually touch up any voids and cracks in tubs and shower surrounds. This helps avoid seeping water damage.
Look for leaks around toilets and sinks. Even small signs of water can be an indication of a potential costly issue in the future.
Clean garbage disposal.
Unclog drains.
SEASONAL MAINTENANCE
Spring Wash outside windows and siding.
Clean gutters and downspouts.
Inspect roof and chimney for any damage or leaks.
Service air conditioning system.
Reseal the deck or fence, if applicable.
Inspect driveway and other exterior concrete pathways.
Inspect your sprinkler heads and test the irrigation system.
Spray for pests and insects.
Repair damaged screen doors and windows.
Related videos: Seasonal Maintenance
Annual Maintenance
Related class: [Link to your resource]

HOME CARE AND MAINTENANCE MANUAL Habitat for Humanity of Flathead Valley
69
Summer Mulch garden beds.
Exterior paint touch-ups.
Inspect and clean dryer vent.
Clean bathroom vent fans.
Test your home alarm.
Fertilize the lawn.
Check site drainage and water pooling.
Fall Service heating system.
Seal cracks on windows and doors.
Turn off outdoor water.
Winterize sprinkler system.
Clean gutters and downspouts.
Overseed and aerate the lawn.
Ensure pipes are well-insulated.
Check attic vents.
Winter Check insulation and add to areas that need more.
Protect your AC unit.
Insulate hot water tank.
Secure steps and handrails.
Install storm windows and doors.
Systems maintenance • HVAC (some topics may be repeated from above). • Sprinkler (if applicable). • Photovoltaic (if applicable).
Special maintenance • [Include any “special” components or appliances here, along with homeowners’
association or historical society requirements or restrictions.]
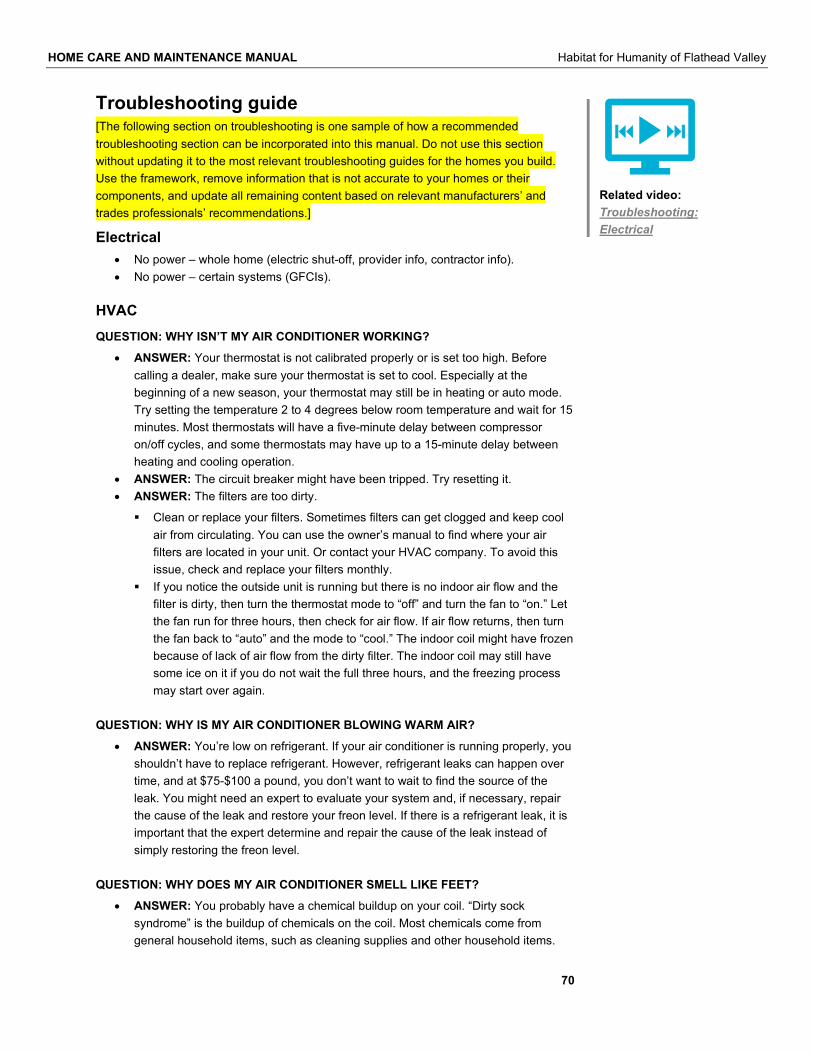
HOME CARE AND MAINTENANCE MANUAL Habitat for Humanity of Flathead Valley
70
Troubleshooting guide [The following section on troubleshooting is one sample of how a recommended troubleshooting section can be incorporated into this manual. Do not use this section without updating it to the most relevant troubleshooting guides for the homes you build. Use the framework, remove information that is not accurate to your homes or their components, and update all remaining content based on relevant manufacturers’ and trades professionals’ recommendations.]
Electrical • No power – whole home (electric shut-off, provider info, contractor info). • No power – certain systems (GFCIs).
HVAC QUESTION: WHY ISN’T MY AIR CONDITIONER WORKING?
• ANSWER: Your thermostat is not calibrated properly or is set too high. Before calling a dealer, make sure your thermostat is set to cool. Especially at the beginning of a new season, your thermostat may still be in heating or auto mode. Try setting the temperature 2 to 4 degrees below room temperature and wait for 15 minutes. Most thermostats will have a five-minute delay between compressor on/off cycles, and some thermostats may have up to a 15-minute delay between heating and cooling operation.
• ANSWER: The circuit breaker might have been tripped. Try resetting it. • ANSWER: The filters are too dirty.
Clean or replace your filters. Sometimes filters can get clogged and keep cool air from circulating. You can use the owner’s manual to find where your air filters are located in your unit. Or contact your HVAC company. To avoid this issue, check and replace your filters monthly.
If you notice the outside unit is running but there is no indoor air flow and the filter is dirty, then turn the thermostat mode to “off” and turn the fan to “on.” Let the fan run for three hours, then check for air flow. If air flow returns, then turn the fan back to “auto” and the mode to “cool.” The indoor coil might have frozen because of lack of air flow from the dirty filter. The indoor coil may still have some ice on it if you do not wait the full three hours, and the freezing process may start over again.
QUESTION: WHY IS MY AIR CONDITIONER BLOWING WARM AIR? • ANSWER: You’re low on refrigerant. If your air conditioner is running properly, you
shouldn’t have to replace refrigerant. However, refrigerant leaks can happen over time, and at $75-$100 a pound, you don’t want to wait to find the source of the leak. You might need an expert to evaluate your system and, if necessary, repair the cause of the leak and restore your freon level. If there is a refrigerant leak, it is important that the expert determine and repair the cause of the leak instead of simply restoring the freon level.
QUESTION: WHY DOES MY AIR CONDITIONER SMELL LIKE FEET? • ANSWER: You probably have a chemical buildup on your coil. “Dirty sock
syndrome” is the buildup of chemicals on the coil. Most chemicals come from general household items, such as cleaning supplies and other household items.
Related video: Troubleshooting: Electrical

HOME CARE AND MAINTENANCE MANUAL Habitat for Humanity of Flathead Valley
71
These aerosols can stick to the coil when the coil is dry and cause an odor when the coil becomes wet. The odor is caused by the transient conditions of the wet and dry coil and is most often noticed when you first turn on the air conditioning system in the spring. You also might notice it during defrost cycles in the winter. If the smell lingers for a couple of days, we recommend having your evaporator coil cleaned by a professional.
QUESTION: WHY IS IT HOT UPSTAIRS AND COLD DOWNSTAIRS? • ANSWER: Your air conditioner can’t keep up. Contact your dealer to evaluate duct
modifications, the creation of climate zones, or the addition of a ductless system.
QUESTION: WHY IS THE AIR FLOW SO LOW? • ANSWER: The filters are too dirty. Clean or replace your filters. Over time, dust
and dirt will collect on the filter screen. There also could be a blockage in your air ducts, or a dirty coil that needs to be cleaned. If this is the case, you’ll need your local dealer to inspect the ductwork blower and coil.
QUESTION: WHY IS MY UTILITY BILL SO HIGH? • ANSWER: Your system is running too much. If you have your thermostat set to a
temperature drastically higher or lower than the outside air temperature, your system has to work harder to maintain that temperature. This can result in a higher than normal utility bill. Try adjusting your thermostat to a more moderate temperature.
• ANSWER: Your air conditioner is not energy efficient. If your air conditioner is over 10 years old or has a SEER rating of 10 or less, you’re probably spending more than you should each month in energy costs. Today’s energy-efficient air conditioners have energy-saving features that allow them to cool your home while running on less energy, which can save you money each month.
• ANSWER: Your utilities company might have raised its rates. Contact your utility company and compare the rates on your current bill with those from previous months.
• ANSWER: Your air conditioner is not running efficiently. Have a technician check your system to ensure it is clean, has proper air flow and proper refrigerant charge.
QUESTION: WHY DON’T I HAVE HEATING? • ANSWER: Your gas may be shut off to your furnace. Check the furnace shut-off
valve located on the supply gas piping coming into the furnace. Make sure it wasn’t accidentally switched off.
• ANSWER: Your thermostat controls may be set incorrectly. Try turning the thermostat off and then on again. Reset to the desired temperature and see if that helps.
• ANSWER: The circuit breaker might have been tripped. Try resetting your home’s circuit breaker.
• ANSWER: The service switch may have been turned off. This is a safety switch for technicians to use while working on a unit. Ensure it wasn’t switched off intentionally for a safety reason, and then turn it back on.
• ANSWER: The condensate pump might not be working.
If the pump stops working, the furnace automatically turns off to avoid creating water damage.
The pump may have become clogged. Check the condensate line and clear any blockages.

HOME CARE AND MAINTENANCE MANUAL Habitat for Humanity of Flathead Valley
72
The pump may have lost power. Check that it is plugged in and that the GFCI is not tripped. Test and reset the GFCI. Check the circuit breaker.
QUESTION: WHY IS THE INTERIOR AIR CONDITIONER DRAIN PAN OVERFLOWING?
• ANSWER: The drain pan below your interior AC unit might not be moving condensation to the nearby drainage pipe.
Your electric pump, which moves the water to the nearby drainage pipe, might have come unplugged. Check to be sure.
Also check to see if there are any observable kinks or blocks in the drainage line.
If these troubleshooting tips do not solve your HVAC issues, contact the technician who installed it or the local dealer. They’ll be able to diagnose your current system and provide an estimated repair cost. If significant work is necessary to repair the system, you might need to consider replacing it. Be prepared to make an informed decision by considering the following:
• How old is your system? Heat pumps can have a lifespan of 10-12 years. Furnaces usually last 15-20 years.
• Are your energy bills too high? Older systems are usually less efficient than today’s models. Replacing your current heating system with a more efficient system can lower your energy bills, saving you money over time.
• Are you ready to make an investment? A new heating system isn’t cheap. There are considerable upfront costs compared with a repair. However, financing options are available that can make the investment more manageable.
• If you are still unsure, talk to your dealer for a detailed evaluation and recommendation for what heating and cooling solution is right for you.
Plumbing To confirm a leak: Turn off the main water line inside the home and record the reading on your water meter. Wait a few hours, then recheck the water meter reading. If the reading has changed, you have a leak somewhere between the meter and your fixtures. To further narrow down the location, turn off the water flow to all fixtures, then turn on the main water line again. Turn each fixture line back on and wait to see if the leak reappears.

HOME CARE AND MAINTENANCE MANUAL Habitat for Humanity of Flathead Valley
73
Appendix I: Your home schematics and details [This section will vary based on your capacity to individually add this information to each manual. We recommend including at least these topics and resources:
• Copy of full floor plans (miniature versions, but including MEP details)
Ensure property lines and any utility setbacks or easements are clearly marked. Best practice: Include relevant “before drywall” photos.
o Affiliate best practice: Ensure homeowners take pictures throughout the construction process for more detailed “behind the walls” information without adding that task to staff members or volunteers.
• Basic details of home construction Energy certifications (including copies of testing results, certificates, etc.). Indoor air quality: List specific materials used during construction that might
affect indoor air quality.
• Applicable codes, ordinances, restrictions, etc. Details on any applicable homeowner association agreements or covenants. Links to information on any zoning restrictions, code enforcement areas, local
ordinances, etc.]

HOME CARE AND MAINTENANCE MANUAL Habitat for Humanity of Flathead Valley
74
Appendix II: Before your closing
Preclosing walk-through • [Insert your affiliate’s process for preclosing inspection and final education.] • [See the Template Document Appendix for sample checklists]
Verification of punch list completion • [Insert your affiliate’s process for verifying, documenting and communicating the
completion of all preclosing punch list items.] • [Include the completed punch list for each home in the final manual provided to
homeowners.]
Related video: Preclosing Walk-Through Inspection

HOME CARE AND MAINTENANCE MANUAL Habitat for Humanity of Flathead Valley
75
Appendix III: Repairs and improvements Guidance and resources in this section:
• Plan for repairs. • Home repair assistance and community resources. • Do-it-yourself resources. • Getting professional assistance.
[The following is an example of the kinds of resources you may be able to collect and offer; inclusion as an example does not constitute endorsement by Habitat for Humanity International.]
Plan for repairs When you move into a new home, it is hard to imagine that your home won’t always stay just as it is. Over time, your home will require major home maintenance projects. The timing of the repairs depends on many factors, including how the items are used and how well they are maintained. Financial planning for these projects is important, because the repairs are usually relatively expensive. Don’t let a dying furnace or a leaking roof catch you by surprise. Begin planning and saving today!
Include specific long-term maintenance items in your financial goals at the beginning of each year. Save money every month to make it happen! These resources and community partners can help you plan and prepare:
• [Include any financial management information your affiliate includes in homebuyer education, or any resources/services available through community partners.]
Home repair assistance Many organizations have funds to help with home repair for veterans, senior citizens and families with modest incomes. For the most up-to-date information, reach out to these community organizations:
[Include available community-based resources here.]
DO IT YOURSELF You can easily do many repair jobs on your own, saving yourself costly repair bills.
ONLINE RESOURCES • Visit the [affiliate name] site for how-to videos on plumbing and exterior
maintenance at include-address.org. • The Home Depot How-To Center: The Home Depot offers free how-to home
improvement and repair courses for the general public on plumbing, painting, cabinet installation, tile installation, landscaping and more. Call your local Home Depot for details or visit the store’s website.
• Lowe’s How-To Projects: Lowe’s offers free how-to home improvement and repair classes both in your local store and online. Call your closest store for details or go to the website and look under “Creative Ideas” and “How-To Projects.”
• Use the internet! YouTube has millions of step-by-step instructions for many home repair and maintenance tasks. Just remember to do your homework and use reliable sources. Anyone can post on YouTube, so you want to make sure you are using a good source for information.

HOME CARE AND MAINTENANCE MANUAL Habitat for Humanity of Flathead Valley
76
• Other do-it-yourself websites include:
diynet.com doityourself.com hometips.com/diy.html thisoldhouse.com bobvila.com howstuffworks.com (This site includes easy-to-read explanations of how all
sorts of stuff in your home — and outside your home — works.)
WHEN DO YOU NEED A PERMIT? Even if you choose to perform a task yourself, you might need to get a permit to legally perform it. Always check [include relevant links to information pages on your building department’s website] to verify whether you should pull a permit for your planned project! Examples of common projects that require permits include:
• Fencing installation and repair. • Porch/deck installation and repair. • Plumbing work. • Electrical work. • HVAC work. • Structural changes. • Additions and remodeling projects (including sheds and garages).
Failure to obtain permits — even if you hire a contractor — can stall your project or complicate the sale of your home. If your building office discovers you are conducting work that requires a permit and you did not pull one, you might be forced to stop work, and you are likely to be assessed a fine that is much more than the cost of the permit.
Getting professional assistance If you cannot perform the required repairs, call for professional help. Different kinds of professional help are available for different jobs, and there are best practices for vetting potential service providers and protecting yourself while conducting business. Here are some tips that might help:
HANDYMEN There are two definitions for a handyman: the practical one for homeowners and the legal one for businesses. Every state and some jurisdictions have their own rules about the legal definition, including what a handyman can do and whether they need to be licensed, insured, etc., to perform the work. In general, a handyman can do small repairs on a wide variety of specialties and works by the hour. Most handymen are not certified or licensed, and so they require some checking to ensure the quality and safety of their work and the honesty of their business practices. The best way to find a good general handyman is to ask around. Ask your neighbors, friends and family members. You also could get in touch with large real estate companies that are often in need of individuals to do a variety of repairs on a home before they can sell it. These companies have often developed relationships with handymen who do high-quality work.
LICENSED AND INSURED You will not want to have anyone work on your house without first asking for at least three professional references, and ideally you should not have anyone work on your home who

HOME CARE AND MAINTENANCE MANUAL Habitat for Humanity of Flathead Valley
77
is not licensed and insured. Being licensed and insured generally shows more knowledge on specific subjects, as the licensing process often includes some kind of testing. Being licensed and insured helps protect you if something goes wrong.
Keep a list of plumbing, electrical and HVAC contractors you trust for future reference.
INDEPENDENT CONTRACTORS Where handymen tend to be generalists — fairly good at most things — contractors are very good at specific tasks and have proved their capability in some fashion to be licensed.
Online resources for finding independent contractors These are some examples of online resources you might find useful when looking for a handyman or contractor:
• yelp.com
Pros: No membership fee; provides many customer reviews; businesses often provide service coupons for Yelp customers.
Cons: The site is entirely run by those posting reviews, so there are no background checks on service providers. Service providers can also create multiple accounts to boost their own ratings.
• homeadvisor.com
Pros: No membership fee; provides three to four quotes from local service professionals, which makes it a good resource for one-time service needs; allows for some price comparison; provides many customer reviews. Home Advisor does criminal and financial background checks on all providers and has a 24/7 emergency homeowner support line. The site also provides a cost guide and other home maintenance resources for you to research estimated costs and considerations ahead of time.
Cons: Information is limited to the three or four providers that the site provides, so the number of options you are able to review and compare is limited.
• angieslist.com
Pros: Offers information about all kinds of service professionals; website is very structured and organized; extensive customer service is available, including search help and conflict resolution in the event that issues arise with the service provider; discounts are available for members from many service providers. This site is good for people who anticipate many service needs.
Cons: Although the basic membership is free, additional support is available for a fee. Depending on geographic location and type of service desired, there might not be many existing reviews available.
HIRING A CONTRACTOR Where to start? Whether you are hiring a general contractor for a large project or looking for a good plumber to repair several leaks, you should follow some basic guidelines:
• Ask your neighbors, neighborhood association, friends and family for recommendations.
• Deal only with licensed contractors. Ask for proof of liability and worker’s compensation insurance coverage.

HOME CARE AND MAINTENANCE MANUAL Habitat for Humanity of Flathead Valley
78
• Interview potential contractors and inspect some of their recently completed projects.
• Visit The National Alliance Against Home Repair Fraud website at naahrf.org for tips about hiring a contractor and avoiding becoming a victim of contractor fraud.
[Fill in any state/municipal information that could be helpful here. The following is an example:]
Texas requires some types of contractors to be licensed, such as electricians, plumbers, and heating and air specialists. Other types of contractors, such as painters, brick masons and roofers, do not have to be licensed.
The Greater Fort Worth Builder’s Association heavily screens its members and maintains an invaluable referral list. They can be contacted at (817) 284-3566, or a list of members can be found at gfwbatx.com.
Questions to ask when vetting contractors • Are estimates free? • Is there a minimum charge or trip fee? • Can I have a copy of your business license or registration and see a current form
of personal identification (like a driver’s license)? • How long has the company been in business? • Can I have a copy of your current liability and worker’s compensation insurance
coverage?
Selecting a contractor • Cost isn’t everything when selecting a bid; the lowest bid might be low for a reason.
The contractor might not perform quality work. They might be lowballing the bid in hopes of charging you more later. They might not have adequate experience either with the trade work or with business management.
• Do the extra work before selecting a contractor. It is much easier and less stressful than all the work necessary to clean up after a bad one makes a mess. Get references, look at previous jobs, check a contractor’s insurance coverage, and check them out through the Better Business Bureau.
Negotiating a contract • Always have a written contract, and ensure that all relevant details are included
within it. Once more: Always have a written contract. If a contractor doesn’t want to do business based on a written contract, you don’t want to do business with them.
• Comparing costs before you make a financial commitment toward any repair or improvement project is extremely important. Begin by soliciting at least three bids from prospective contractors, based on the same building specifications, materials and labor needed to complete the project. Each bid should include a write-up and specifications that describe all of the work to be done, the approximate time it will take to complete, and the cost of the project.
• It is important that the contractors specify which type, brand and grade of materials they will be using so that you get and pay for the quality requested. The write-up should include cost ceilings, not just estimates (cost ceilings limit the total cost the contractor may charge you).
• Ensure that the timetable for the work and the timetable for payments are included.

HOME CARE AND MAINTENANCE MANUAL Habitat for Humanity of Flathead Valley
79
• Finally, it is important that a bid also include the amount of time that the house or portions thereof may be uninhabitable.
• Ensure that all of this information (at minimum) is included in the written contract before you sign.
Signing a contract • Require a written contract with the contractor’s license number on it, and DO NOT
SIGN IT until you understand all terms. Contracts can be extremely complicated. The contract should include the following:
Requirements of a written contract • A complete description of all work to be completed. • A complete list of all materials to be used. • A timeline for the project. Start and completion dates, penalties, and allowances. • The maximum cost of the entire project. • A payment schedule. • How to handle changes in the work. • A detailed description of the contractor’s responsibilities. • A detailed description of the owner’s responsibilities. • How to handle unavoidable delays. • Conditions and circumstances under which payment can be withheld. • Insurance requirements. • Conditions under which the contract may be terminated.
Making payments • During the job, do not pay money up front and never pay until the work is complete.
NEVER PAY IN CASH! Pay by check or money order so that you can prove that you have made your payments. Follow the payment schedule you have worked out, and do not let your payments get ahead of (or behind) the work completed.
After the job • Keep a list of the individuals and companies you employed and if you were
satisfied with their work. Reward good work with good reviews; your good opinion can help them stay in business and help the next homeowner find a good contractor!

HOME CARE AND MAINTENANCE MANUAL [INSERT AFFILIATE NAME]
80
Template document appendix Preclosing walk-through checklist: Habitat for Humanity of the Charlotte Region WALK-THROUGHS WITH SITE SUPERVISORS The day of move-in, Habitat of the Charlotte Region’s site supervisors will schedule a walk-through with the homeowner. The walk-through will consist of a full guided tour of your home with the opportunity to discuss potential issues that need to be addressed before a new tenant will close on their new home. In this maintenance manual, we have provided a breakdown of Habitat of the Charlotte Region’s walk-through checklist.
Below is a look at the walk-through template.

HOME CARE AND MAINTENANCE MANUAL [INSERT AFFILIATE NAME]
81

HOME CARE AND MAINTENANCE MANUAL [INSERT AFFILIATE NAME]
82

HOME CARE AND MAINTENANCE MANUAL [INSERT AFFILIATE NAME]
83
Preclosing walk-through checklist: Habitat for Humanity of Metro Denver

HOME CARE AND MAINTENANCE MANUAL [INSERT AFFILIATE NAME]
84

HOME CARE AND MAINTENANCE MANUAL [INSERT AFFILIATE NAME]
85

HOME CARE AND MAINTENANCE MANUAL [INSERT AFFILIATE NAME]
86

HOME CARE AND MAINTENANCE MANUAL [INSERT AFFILIATE NAME]
87

HOME CARE AND MAINTENANCE MANUAL [INSERT AFFILIATE NAME]
88

HOME CARE AND MAINTENANCE MANUAL [INSERT AFFILIATE NAME]
89
Home maintenance checklists: Trinity Habitat for Humanity GOOD HABITS AND GOOD RECORDS Many people find it helpful to keep a record book of completed home maintenance and improvements. It is surprisingly easy to lose track of these things. The record book also can be a good place to store information such as paint colors you have used, where the paint was purchased, and the names and phone numbers of contractors or handymen. You can use these checklist forms to start.
CHECKLIST FOR MAINTAINING YOUR HOME Implement a regular home maintenance inspection program to help prevent major repairs and protect your home’s value. Remember to disconnect the power source of any electrical system before inspecting, cleaning or repairing it.
Use the following schedule to help during an inspection:
Home maintenance schedule
January to March Date last completed
Plumbing
Drains Clean drains with boiling water and baking soda. Faucets and showerheads Check interior and exterior faucets for leaks. Check
for proper flow of water. If the flow is reduced, clean the aerator screens and showerheads. Replace washers as necessary.
Kitchen and bathroom cabinets Check under and around cabinets for leaks. Pipes Inspect visible pipes for leaks. Toilets Check for stability and leaks. Water heater Check area around water heater for leaks. Flush
hot water tank to remove accumulated sediment.
Interior
Countertops Inspect for separations at sinks and backsplash. Remove old caulk, and recaulk where required.
Fire extinguishers Check and have recharged as necessary. HVAC and bathroom vents Vacuum all grills. Window and door tracks Check to see if weep holes are open. Clean out dirt
and dust.
Wood cabinets and trim Apply a wood protectant. Electrical and appliances
GFCI and other electrical outlets Test for proper operation. Heating and cooling systems Replace filters monthly. Remove debris and trim
shrubbery around outdoor units. Service air conditioner every three years.

HOME CARE AND MAINTENANCE MANUAL [INSERT AFFILIATE NAME]
90
Kitchen exhaust fan Remove and clean the filter. Clean accumulated grease deposits from the fan housing and cabinet above the discharge vent.
Refrigerator Dust the top. Clean refrigerator drain pan. Clean and defrost freezer as necessary. Check for tight seal.
Smoke detector Test for proper operation and replace batteries if necessary. Vacuum dust.
Wiring, electrical cords and plugs Check for wear or damage. Replace if necessary. Exterior
Foundation Inspect visible areas and vents for cracks, leaks or blockages.
Garden beds Mulch and amend soil as needed. Landscaping Check that water runs away from the house. Lawn In late winter, apply pre-emergent weed killer and
reseed grass if necessary. Fertilize as soon as spring growth appears.
April to June Date last completed
Plumbing
Outside faucets Reconnect outside hoses.
Interior
Attic Examine for evidence of any roof leaks. Check insulation and add as necessary. Check for evidence of birds, squirrels, raccoons, etc. Check for proper ventilation.
Carpets and rugs Clean.
Tub enclosures Inspect caulking and remove old caulk to re-caulk if necessary.
Walls Deep clean. Inspect for chips or peeling. Touch up paint as needed.
Weather stripping Check weather stripping and caulking around windows and doors. Check window and door screens. Adjust or replace if necessary.
Electrical and appliances
Circuit breakers Turn all breakers on and off. Inspect electrical service lines for secure attachment to the house.
Heating and cooling systems Replace filters monthly.
Humidifiers and dehumidifiers If applicable, turn off and clean the furnace humidifier. Turn on the dehumidifier if applicable.

HOME CARE AND MAINTENANCE MANUAL [INSERT AFFILIATE NAME]
91
Kitchen exhaust fan Remove and clean the filter. Clean accumulated grease deposits from the fan housing and cabinet above the discharge vent.
Exterior
Landscaping Trim shrubbery around walls. Remove tree limbs (before leaves appear), branches or debris that can attract insects (no wood or shrubbery should be closer than 3 inches to your house). Maintain grading.
Porches, ramps and railings Check security and repair
Roof Clean. Check for leaks. Check for damaged, loose or missing shingles. Check vents and louvers for birds, nests, squirrels and insects. Check flashing around roof stacks and vents for leaks.
Windows Clean. Check and repair window and door screens.
July to September Date last completed
Plumbing
Drains Clean drains with boiling water and baking soda.
Faucets and showerheads Check interior and exterior faucets for leaks. Check for proper flow of water. If the flow is reduced, clean the aerator screens and showerheads. Replace washers if necessary.
Kitchen and bathroom cabinets Check under and around cabinets for leaks.
Pipes Inspect visible pipes for leaks.
Plumbing and shut-off valves Inspect for proper operation and leaks.
Toilets Check for stability and leaks.
Water heater Check area around water heater for leaks. If you have hard water, drain 1-2 gallons of water.
Interior
HVAC and bathroom vents Vacuum all grills.
Interior doors Lubricate hinges and tighten hinge screws.
Window and door tracks Check to see if weep holes are open. Clean out dirt and dust.
Wood cabinets and trim Apply a wood protectant.
Electrical and appliances
Dryer Clean the duct.
GFCI and other electrical outlets Test for proper operation.

HOME CARE AND MAINTENANCE MANUAL [INSERT AFFILIATE NAME]
92
Heating and cooling systems Replace filters monthly. General furnace inspection: Look for rust and scaling on heat exchanger, note odd sounds, and check condition of venting. Service the heating system and heat pump annually.
Refrigerator Dust the top. Clean the refrigerator drain pan. Clean and defrost the freezer if necessary. Check for a tight seal.
Smoke detector Test for proper operation and replace batteries if necessary. Vacuum dust.
Wiring, electrical cords and plugs Check for wear or damage. Replace if necessary.
Exterior
Concrete and asphalt Check for cracks or deterioration. Clean oil and grease. Repair and reseal if necessary.
Exterior walls Check siding for damage or rot. Check painted surfaces for flaking. Power wash the entire home exterior. Touch up paint as needed. Seal off any holes to prevent entry of small pests.
Foundation Inspect visible areas and vents for cracks, leaks or blockages.
Landscaping Check that water runs away from the house.
October to December Date last completed
Plumbing
Outside faucets Drain outside hoses. Disconnect and store hoses.
Interior
Attic Examine for evidence of any roof leaks. Check insulation and remove or add if necessary. Check for evidence of birds, squirrels, raccoons, etc. Check for proper ventilation.
Locks and burglar bars Check operation and lubricate or fix as necessary.
Tub enclosures Inspect caulking and remove old caulk to recaulk if necessary.
Weather stripping Check weather stripping and caulking around windows and doors (inside and outside). Adjust or replace if necessary.
Windows Check for condensation and recaulk or reglaze/replace.
Electrical and appliances
Appliances Inspect and service if necessary.
Cooling system Clean outside units with a garden hose.
Heating and cooling systems Replace filters as necessary.

HOME CARE AND MAINTENANCE MANUAL [INSERT AFFILIATE NAME]
93
Heating system General furnace inspection: Look for rust and scaling on the heat exchanger, note odd sounds, and check condition of venting. Service heating system and heat pump annually.
Exterior
Garden beds Prepare for spring planting. Plant bulbs and winter plants.
Gardening tools Clean and sharpen.
Landscaping Trim shrubbery around walls and outdoor HVAC units. Remove dead wood tree limbs or branches, or debris that can attract insects (no wood or shrubbery should be closer than 3 inches to your house). Maintain grading. Mulch beds and trees.
Lawn Remove leaves from grass areas.
Lawn and patio furniture Clean and store or cover with weatherproof material.
Lighting Check bulbs and replace if necessary.
Roof Check for leaks. Check for damaged, loose or missing shingles. Check vents and louvers for birds, nests, squirrels and insects. Check flashing around roof stacks and vents for leaks.

HOME CARE AND MAINTENANCE MANUAL [INSERT AFFILIATE NAME]
94
Home maintenance checklists: Habitat for Humanity Greater Fresno Area [This abbreviated checklist was developed to help owner-occupied repairs with general maintenance best practices. This example is included to highlight its format and the benefit of including the “costs/ benefits/implementation” information, which is a practical, highly useful perspective for homeowners.]

HOME CARE AND MAINTENANCE MANUAL [INSERT AFFILIATE NAME]
95
Template modification checklist Do not share this document with your homeowners unless you have done all of the following:
Replaced the global Habitat for Humanity logo on the cover with your affiliate logo.
Reviewed and adapted every section of the document to ensure the content matches the components in the homes you build or rehabilitate.
Reviewed and adapted all warranty information to ensure it is applicable and correct.
Ensured that any legal information in the document complies with all laws and codes in your state and municipality.
Filled in all highlighted and bracketed fields with the appropriate information.
Replaced the appendices with the appropriate documents for your affiliate.
Deleted the customization instructions on Page 2 and filled in the revision/review table.
Deleted this checklist once all items have been completed and verified.
If you are having the document professionally printed, added “Notes” pages to reach the necessary page count for printing (e.g., pages in multiples of 4) and to give homeowners a place to jot down helpful information within the manual.
21-79107/PDF-DOC/USC/02-2021