Automated Terrestrial EMI Emitter Detection, Classification ...
Upload
khangminh22Category
view
0download
0
Structural Design Guidefor the developing world

Structural Design Guide
1
1 Introduction
Welcome! Whether you are an EMI trip volunteer, intern or staff member, we are so
thankful you have chosen to use your skills to serve God’s people. We pray that your
involvement will glorify Him and be a source of joy to you and those you come across
during your EMI journey.
We hope this design guide will be a valuable resource as you apply structural
engineering principles to serve ministries and communities around the developing
world. This guide will not be a comprehensive resource – rather, it will reinforce
fundamentals, point out available resources, draw from the experience of EMI
volunteers and staff, and lay out a road map for discovering good structural design.
ASSUMPTIONS AND LIMITATIONS
This guide is not a substitute for engineering judgement. That judgement, exercised
by a trained and experienced professional (or by a young engineer working under the
supervision of one), is the most valuable skill any engineer can offer – more than
calculations, drafting or soft skills.
The second most valuable skill an engineer has to offer is to know our own limits. No
engineer can reasonably be competent in all subjects, even within structural
engineering. No part of the body can do everything by itself. This guide is meant to
provide a starting point for engineers across EMI to grow in knowledge and ability.

Structural Design Guide
2
However, that does not remove the ethical need to practice engineering within our
competence. If part of a design is outside that competence, reach out to your project
leader, office director, or an experienced volunteer for guidance and support.
This guide was written primarily from the author’s background with US codes and
practices, leveraging lessons learned from EMI’s history applied to designs across the
developing world. Some of the concepts and details referenced will be connected to
ideas in the US codes (ACI, ASCE, MSJC, etc.,) – which may not be applicable or
appropriate in your design context. It is likely that each office of EMI has additional
guidance that will specifically apply to their region. Some of that information is
attached to this document in regional annexes. I also encourage you to reach out to
any local design professionals on your team to understand what will make a “good
design” in that part of the world.
While EMI does sometimes serve our ministry partners by designing non-building
structures (bridges & culverts, retaining walls, etc.), these are less common projects,
and not directly addressed in this design guide.
CONTRIBUTORS
Developed by: Ian Ebersole, PE, SE (EMI Cambodia)
Editorial review by: Adam Gordon, CEng, MIStructE (EMI Uganda)
Dan Slegh, PE (EMI India)
David Wright, CEng, MIStructE (EMI Senegal)
Phil Iekel, EIT (EMI Nicaragua)
EDITION
First Edition released January 2021

Structural Design Guide
3
Contents
1 Introduction ...................................................................................................1
Global Guide ..................................................................................................... 6
2 Design in the Developing World .................................................................7
2.1 When is a Structural Engineer needed? .........................................7
2.2 Appropriate Design for the Developing World ..............................8
2.3 Typical EMI Structures in the Developing World ........................ 10
3 Design Process ........................................................................................... 11
3.1 Problem Seeking ............................................................................. 11
3.2 Field Observations.......................................................................... 11
3.3 Design Parameters ......................................................................... 12
3.4 Seismic Hazard and Design Categories ....................................... 12
3.5 Structural System Selection .......................................................... 13
3.6 Foundation Selection ..................................................................... 14
3.7 Structural Grid ................................................................................ 14
3.8 Load Tabulation and Analysis ....................................................... 14
3.9 Member Sizing ................................................................................ 15
3.10 Drafting ............................................................................................ 16
3.11 Detailing ........................................................................................... 16
3.12 Structural Review ............................................................................ 17
3.13 Quality Control Review .................................................................. 17
3.14 Closeout ........................................................................................... 18
4 Limit States ................................................................................................. 19
4.1 Design Philosophies – ASD vs LRFD, SLS and ULS ...................... 19
4.2 Strength Limits ................................................................................ 19
4.3 Deflection and Drift ........................................................................ 19
4.4 Limit States and Design in the Developing World ...................... 20
5 Loading ....................................................................................................... 22
5.1 Dead Load ....................................................................................... 22
5.2 Live Load .......................................................................................... 22
5.3 Live Roof Load ................................................................................ 23
5.4 Wind Load ....................................................................................... 24
5.5 Seismic Load ................................................................................... 26
5.6 Other Loads .................................................................................... 27
5.7 Load Combinations ........................................................................ 27
6 Analysis ....................................................................................................... 28

Structural Design Guide
4
6.1 Objectives of Structural Analysis .................................................. 28
6.2 FEA Methods ................................................................................... 28
6.3 Approximate Methods ................................................................... 31
7 Light-Frame Roofs ..................................................................................... 35
7.1 Wind Loads and Directions ........................................................... 35
7.2 Compression Chord Bracing ......................................................... 36
7.3 Basics of Truss Design ................................................................... 37
8 Cold Formed Steel Design ........................................................................ 38
8.1 What is Cold-Formed Steel? .......................................................... 38
8.2 Local Effects .................................................................................... 39
8.3 Connections .................................................................................... 39
8.4 Torsion ............................................................................................. 39
8.5 Durability and Corrosion ............................................................... 40
8.6 Sheet Metal Roofing & Siding ....................................................... 40
9 Reinforced Concrete Design ..................................................................... 41
9.1 Steel Percentages by Element ...................................................... 41
9.2 Reinforced Concrete Beam Design .............................................. 42
9.3 RC Slab Design ................................................................................ 43
9.4 RC Column Design .......................................................................... 45
9.5 RC Joint/Connection Design .......................................................... 47
9.6 RC Slab-on-Grade Design .............................................................. 50
10 Masonry Design ......................................................................................... 55
10.1 Confined Masonry vs Masonry Infill ............................................ 55
10.2 Masonry Unit Strength .................................................................. 56
10.3 When can Masonry be Reinforced? ............................................. 56
10.4 Unreinforced Masonry (URM) Design .......................................... 56
11 Foundation Design .................................................................................... 59
11.1 Site Soils Investigation ................................................................... 59
11.2 Shallow versus Deep ...................................................................... 61
11.3 Settlement ....................................................................................... 61
Bibliography ................................................................................................... 63
R1 Bibliography & Resources ............................................................. 64
R1.2 Design in the Developing World ................................................... 64
R1.3 Design Process ................................................................................ 64
R1.6 Analysis ............................................................................................ 64
R1.8 Cold Formed Steel Design ............................................................. 64
R1.9 Reinforced Concrete Design ......................................................... 64
R1.10 Masonry Design .............................................................................. 64
R1.11 Foundation Design ......................................................................... 65

Structural Design Guide
5
Cambodia Regional Annex ............................................................................ 66
KH1 Engineering Practice: ................................................................................. 67
KH2 Loading: ...................................................................................................... 67
KH3 Common Structural Systems: .................................................................. 67
KH4 Common Foundation Systems: ................................................................ 67
KH5 Soil Properties: ........................................................................................... 67
KH6 Materials: .................................................................................................... 68

Structural Design Guide
6
Global Guide

Structural Design Guide
7
2 Design in the Developing World
2.1 WHEN IS A STRUCTURAL ENGINEER NEEDED? Structural engineering includes a broad base of knowledge, but a niche set of skills.
Most developed countries have very specific sets of regulations that spell out when
and how a licensed civil or structural engineer are required to use those skills for
different types of construction.
In the developing world, those laws are sometimes less comprehensive, or
sometimes not in effect. Furthermore, in countries all around the world, certain types
of projects are successful with no (formal) engineering input at all. When structural
engineers are not involved, experienced architects or builders are in many cases
capable of completing buildings based only on local practice and history.
Respecting the governments in authority over us and our ministry clients, EMI always
endeavors to uphold the law of the land in our projects, whether found in
construction permit requirements or building codes. This includes advising ministry
clients of statutory requirements, even when “that’s not how it is usually done”. When
the involvement of locally registered design professionals is required, EMI is often
able to connect the ministry with engineers from our network, or coordinate with and
support a local design professional.
Historically, EMI has a strong focus on conceptual, big-picture engineering and
architectural design. When detailed design is needed for construction, EMI has
sometimes performed that design internally, and often provided the concept design
to a local design professional for completion and permitting.
Whether performing conceptual design for planning and fundraising or detailed
design for construction, there are certain factors that would increase the value of
input from a structural engineer. Some factors relate to life-safety issues; others
indicate that the structural design can have significant impact on project cost – a
concern for many EMI projects. Following is a partial list of those factors:

Structural Design Guide
8
Structure characteristics: Site location: Buildings more than G+1 stories Seismic risk (PGA >0.15g)
Buildings taller than least width Hurricane, typhoon or tornado
potential
Irregular or skewed column grids Coastal sites (5km or less)
Irregular perimeter or shape Existing slopes greater than 20°
Columns not aligned vertically Property setbacks less than 1m
Clear spans more than 4m
(including roofs) Geotechnical:
Balconies, awnings or overhangs
more than 1m
Reclaimed and backfilled land
(except engineered backfills)
Public assembly spaces above
ground floor
Poorly drained land or organic soils
Slab openings, including internal
stairs
Soils prone to liquefaction, shrink-
swell or freeze-thaw conditions
Roofs with less than 15° slope Adjacent excavations or below-grade
structures (e.g. basements)
Elevated liquid storage tanks
more than 2000L Construction:
Open or soft stories (e.g. a story
has fewer walls )
Significantly varies from local practices
Built by volunteer or unskilled labor
Vertically phased construction
(e.g. adding a story)
Uncommon or variable materials
(e.g. bamboo, earth blocks)
Table 1: Factors for Involvement of a Structural Engineer
2.2 APPROPRIATE DESIGN FOR THE DEVELOPING WORLD The differences between structural engineering in the developing world and in the
developed world can be significant. In the developed world, structural engineering is
typically driven by comprehensive building codes (growing more comprehensive with
each edition), contractual agreements and legal definitions of ‘standard of care’, and
enforced by a litigation system that incurs financial and professional penalties in the

Structural Design Guide
9
case of mishaps. Construction is governed by further contracts, defined quality
standards, and backed by a series of third-party inspections.
In the developing world, those systems may be in development, may be present on
paper but not in practice, or may not exist at all. (Out of necessity, we are speaking in
generalizations. In a few countries, they do exist, with requirements and penalties
even more severe than the developed world!)
This gap poses a challenge to the EMI designer.
How should we design in a way that meets the
legal standards of the area, which follows good
engineering practices, which values the
importance of people through life safety and
reflects excellence, but which is also culturally
and economically appropriate for the ministry?
In EMI's experience, providing a design that
meets the requirements of a developed world
building code does not always result in good
outcomes for the ministries we serve. A design
which does not take into account the cultural,
material, and economic differences of
construction in the developing world will often
be seen as "too expensive" (even if that
difference is less than it would appear). This will make fundraising and contractor
selection difficult. Worse, when presented with a complex and foreign set of building
plans, some contractors will instead choose to build according to their local
experience and context. If not addressed through construction inspections, this
potentially creates a dangerous mix-and-match of structural designs and details.
Rather, EMI's practice (when local building codes are less stringent or not in effect) is
to provide a design which aims to take the client and contractor one or two steps
further toward good engineering practice (sometimes called "one or two steps up the
ladder") rather than full compliance with developed world building codes (Crawford
2020). Those steps should include a rational design, reasonable live loads, continuous
load paths, and especially some resistance to lateral forces. A good lateral force
resisting system is often the most difficult and important improvement, because
parts of the world are not accustomed to the level of detail required. However, failure
of a building lateral system can often be sudden and life threatening.
(Also see discussion in Section 4.4: Limit States and Design in the Developing World)

Structural Design Guide
10
2.3 TYPICAL EMI STRUCTURES IN THE DEVELOPING WORLD EMI projects have been incredibly diverse over thirty plus years of operation – nearly
as diverse as the ministries and the regions that we have served. However, there are
some similarities commonly repeated between projects.
EMI often supports ministries looking to build ministry centers or campuses to serve
their community. This means that our building structures often include churches and
community spaces, kitchens and dining areas, classrooms, medical wards, and
dormitory spaces. Most structures are one or two stories tall, although some taller
structures have been built. Especially for churches, community spaces and
classrooms, longer clear spans are valued to maintain unobstructed lines of sight.
In most developing countries, economic factors make materials expensive, and
manual labor relatively inexpensive (opposite of developed countries). Timber,
masonry, reinforced concrete, and cold-formed (light gage) steel are often more
available and economical than heavy hot-rolled steel. Reinforcing bars are often of
small diameter. In Cambodia and India, many contractors prefer to use 12mm and
16mm main bars (#4/#5 US), as larger bars are difficult to bend and place manually.
Shear and slab steel may be smooth mild bar of 6mm or 8mm diameter. Arc welding
is ubiquitous, but high-strength bolts and CJP welds are uncommon. On the other
hand, labor-intensive elements such as fabricated trusses and built-up sections are
relatively affordable.
Two building systems dominate the developing
world: masonry infill (of an RC moment frame)
and confined masonry (which results in a
masonry shear wall or hybrid shear wall and
moment frame system). Refer the EMI Tech
article “Same Materials, Different Buildings”
(Hoye 2018), as well as the masonry section of
this reference, for details and differences
between the two. Braced frames and concrete
shear wall systems are relatively less common.
A shared characteristic of most EMI projects is
a very limited budget. Many of the ministries
and organizations that we partner with rely on
fundraising and donations. The cost of a
building project may greatly exceed their typical
operating costs and funds. Both out of a sense of financial responsibility and the
logistic challenges of fundraising large amounts, our clients often try to make the
most impact of a fixed budget. Many of the assumptions in this design guide will stem
from this same perspective. While it is important that our structures are able to serve
the program needs of the space, every dollar saved is a dollar that can be redirected
into that ministry activity.

Structural Design Guide
11
3 Design Process
3.1 PROBLEM SEEKING Before we begin “problem solving”, we must first undergo “problem seeking” –
defining clearly which problem needs to be solved. During a project trip, this role
often falls first to the architects, but it is no less important for structural engineers.
Understanding not only the request that a ministry makes, but the values which drive
that request informs our decisions on material selection, scale and quality of
construction, or even structural systems.
Note that in cross-cultural contexts, problems tend to camouflage themselves in the
clothing of our previous experience. A client may ask how much material they will
need for a project, which may appear to be a request for a detailed quantity takeoff.
Instead, the client may be concerned with a fundraising goal, the logistics of obtaining
enough bricks to continue construction when the rainy season makes roads
impassable, or how to manage the relationship with a cousin who sells cement. Keep
an open mind and ask questions continuously.
3.2 FIELD OBSERVATIONS Observing common construction practices can
pay huge dividends in developing a culturally
suitable and constructible project. In addition to
observing materials, spans and structural
systems in use, keep an eye on some details.
Stairwells can sometimes give a window to
observe floor slab thicknesses. Are columns and
beams usually formed to be the same width, or
is one typically wider? How are cantilever edges
supported? Can you observe signs of grade
beams, tie beams, or strip footings at ground
level?
The grand prize on any project trip is to find a
nearby building under construction, before the
details are hidden behind facades and tile.
Observation is not without its weaknesses. While a building may have stood
successfully for years, that alone is not necessarily enough to approve the design.
Some elements will not be visible (e.g. most concrete reinforcing), there may be an
unknown retrofit or repair history, materials and workmanship may have changed,
or site conditions may not apply. Previous construction also may not meet the local
codes and requirements currently in effect. As such, use observation as an initial
guide, and then back up your observations with engineering principles.

Structural Design Guide
12
3.3 DESIGN PARAMETERS Even before a project trip, it can be valuable to define some of the design parameters
for the region. Researching questions such as the following can narrow down design
alternatives and save valuable time when everyone is together during the trip:
What are standard construction practices in the area?
Are there applicable building or design codes?
Which materials are produced locally? Which are not?
Does the region have seismic potential?
What is the design wind speed for the region?
Do peak winds prevail from any one direction or fluctuate?
Is the region prone to flooding or typhoons?
Does the region have history of other hazards (landslide, liquefaction, etc.)?
What type of soil do you expect at the site, and could this pose a problem?
Will the design documents be in imperial or metric units?
3.4 SEISMIC HAZARD AND DESIGN CATEGORIES If the site has significant seismic potential, it will be valuable to determine the level of
seismic hazard through a seismic design category. Many design codes will prescribe
requirements for geotechnical investigation, structural systems, and permitting
review based on an applicable design category. When these requirements are defined
for the project site, the designer should incorporate those limits. In the case where
the applicable design code does not include explicit requirements based on seismic
risk, defining a seismic design category can be useful to determine baseline standards
of practice elsewhere in the world.
If the ASCE 7 seismic design category methodology is used, it can be challenging to
determine corresponding design accelerations for locations outside the United
States. A few potential sources of information are:
Local design standards and building codes
UFC 3-301-01 Appendix F and UBC 1997 provide design values for selected
locations around the world.
Values can be estimated from seismic hazard maps, such as GEM or GSHAP.
Note that as with most design parameters, when mixing sources of information, it is
important to ensure that the methodology and assumptions of the two sources
match (or to calibrate one to the other). For instance, ASCE 7-10 uses spectral
accelerations based on a 2% probability of exceedance in 50 years, (aka a 2475 year
return). Other design standards may report accelerations based on entirely different
methods and measurements. Many seismic hazard maps publish peak ground
acceleration (PGA), typically defined as a 10% probability of exceedance in 50 years

Structural Design Guide
13
(475 year return). Traditionally, short-period and 1s spectral accelerations can be
approximated as 2.5*PGA and 1.0*PGA, respectively. 2% in 50 year design
accelerations are often approximately 2x higher than 10% in 50 year accelerations.
As such, total conversion factors of 5.0*PGA and 2.0*PGA can
be used as preliminary approximations of Ss and S1.
3.5 STRUCTURAL SYSTEM SELECTION Early in the project, it is important to select the structural systems that will be used.
These systems define the load path for both vertical and lateral load. The choice of
systems will also be shaped by or define the limiting parameters of the design. For
instance, a moment frame system will require larger columns than a shear wall
system. However, placing shear walls unobtrusively or effectively may be challenging
in some floor plans.
In most cases the system selected should be one of the systems most common in the
region. You may even identify it as soon as you leave the airport or train station.
Systems which are already generally familiar to builders, and are based on common
materials, will typically be the most cost-effective (even if we propose a few
modifications and improvements to standard local practices).
In seismic regions, many building codes will limit the use or maximum height of
structural systems depending on the severity of the seismic risk. Even if a building
code is not directly applicable to your project, you might check to see whether your
building would be allowed under other codes—this may not directly change your
decision on what configuration is most suitable, however it will at least help inform
you of potential risks or “blind spots”.

Structural Design Guide
14
Take special care when combining structural systems in different directions or levels
of a structure. Drift compatibility between lateral force resisting systems or deflection
limits between different materials may require additional material or special
detailing.
3.6 FOUNDATION SELECTION Foundation selection is typically driven by the soil profile. For some regions and sites,
you may be able to gather generic subsurface information from an internet search.
(Of course, this should be treated with caution and verified on-site as much as
possible). For some projects, we may perform shallow borings or ask the ministry to
hire a local geotechnical engineer for a soils investigation. Whatever method is used,
make sure your level of precision and safety factors used are matched to the method
used to obtain the information!
Some building types are better suited for different types of foundations. One-story
buildings where wall weight is significant may be a good candidate for shallow strip
foundations. Buildings sensitive to differential settlement or slender buildings may
benefit from deep foundations. Buildings with large lateral reactions at the
foundations (e.g. long-span moment frames) or in seismic areas may require
foundations connected through tie beams.
Deep foundations, when indicated, will also require mobilizing large construction
equipment. In some cases, lack of access or available equipment may limit the type
or size of building possible—such constructability concerns are often overlooked, but
can be critical to successful completion of a project.
3.7 STRUCTURAL GRID Working with architects and other engineers, the structural engineer will develop a
structural grid early in the project. The primary goal of the grid is to develop a realistic
load path to the building foundations while identifying or mitigating any structural
elements that will clash with the other disciplines.
An EMI conceptual design structural grid is typically focused on the locations and sizes
of columns. Columns will influence the locations of walls and foundations, and are
the primary concern of architects as they develop floorplans and layouts. Preliminary
column sizes and spacing will be influenced by your selection of structural and
foundation systems, as well as your field observations.
3.8 LOAD TABULATION AND ANALYSIS The level of detail for load tabulation and analysis will depend on EMI's scope of work
for the project. Conceptual design projects will often suffice with basic hand
calculations to approximate the applied loads and load effects on the most critical
elements of the structure. Detailed design projects will often end with finite element
Structural Design Guide
15
models and load tabulation spreadsheets. It is important to keep the end goal of your
project in mind.
A few general points to keep in mind:
Because structures eventually transmit all of the applied forces and loads
into the ground, analysis should begin at the top of the structure. The “load
path” is a term to describe how each applied force will make its way from the
point of application through the supporting slabs, beams, columns and
foundations until it reaches the soils. Starting from the top will allow you to
account for these loads as they accumulate through the structure, and make
sure that each element is sufficient to carry the loads applied by the
elements above.
Ensure that your analysis method and model match the material and
structural system chosen. Do not design a reinforced concrete moment
frame building with end releases (pinned ends) or a timber roof truss with
fully fixed connections.
During load tabulation and analysis, structural engineers need to think like
accountants. Make sure the applied loads match the building forces and
reactions. Know where all the loads go (even if in a more general sense
during a conceptual design project).
Consider the effects of concurrent loads, pattern loading, and phased loads
to determine the worst load effects.
3.9 MEMBER SIZING Once an analysis has been performed for your structure (whether preliminary or
detailed), members can be sized to resist their load effects. A few points to keep in
mind:
Match the level of precision of your results to the precision of your analysis.
Match the precision of your analysis to the precision of construction.
For indeterminate (e.g. most real-life) structures, member sizes different
from what was assumed in analysis will change the analysis results and
require iteration. Differences in member stiffness under 10% may be
acceptable.
Design repetitive members when the analysis results allow. While this may
cost some money in excess material, it can save labor cost, formwork cost,
and reduce the risk of mistakes during construction.
Make sure to design structural members for the full range of load effects
they might see – this is often called the “design envelope”.

Structural Design Guide
16
Do not forget to check member sizes for deflection and serviceability criteria.
Make sure to consider the end connections of each member when
developing sizes. For many materials, it is possible to design the members
very efficiently, resulting in a member size which requires an expensive
connection at the end to transfer forces in or out. The lightest beam or
building is often not the most affordable.
3.10 DRAFTING It is rare that anyone else will read structural
engineering calculations or look at models, so
drafting is critical to communicate the intention
of our design. (Some EMI projects include
reports, but it can be challenging to
communicate a structural design well in text,
especially across language and cultural
differences). Doing your own drafting will allow
you to develop a sense for the constructability
of your design, spot clashes or issues early on,
and ensure that important information is
communicated.
If you are not personally doing the drafting,
make sure you review and comment on
(“redline”) the drawings at multiple points
during the process. It is also good to check that changes were either correctly
implemented or reasonably disregarded. A thorough review will catch many
constructability and clarity issues.
One method for detailed drawing review is to grab a highlighter and go over every
line and letter on each sheet asking the following questions:
Is this correct?
Is it consistent with good practice and the rest of these drawings?
Will it be interpreted correctly by the reader?
Is there enough information available to convey what is to be constructed?
Are there any potential constructability issues?
3.11 DETAILING For projects which include construction drawings, structural engineers will next detail
their design. Detailing is a hybrid activity between calculation and drafting and is often
focused on the connections and constructability of your design. Depending on the
material, detailing may focus on reinforcing bar development, welded or bolted

Structural Design Guide
17
connection design, locations of material splices & overlaps, deflection compatibility,
or other considerations.
3.12 STRUCTURAL REVIEW Once the calculations are completed, the design drafted and detailed, it is time for
structural review. Ideally, have another experienced structural engineer review the
design – by this time, you will have been working on the project for quite a while, and
fresh eyes will often spot a missing note or error that the original designer will have
overlooked.
Whether or not another engineer is available, it is good to ask yourself at least the
following questions:
Does this design match the client's goals and values?
Is the design appropriate for the culture?
Is the design appropriate for the contractor?
What assumptions were made in this design? Are those good assumptions?
Are all elements of the design within my area of competence?
Will the design be clearly communicated to the user?
Does the design match the design criteria and relevant design codes?
3.13 QUALITY CONTROL REVIEW Before any report or set of drawings is finished, it should also undergo a quality
control (QC) review. This review is not focused on the technical details of the design
but is focused on providing a complete and excellent product to the client.
A QC review may consider similar questions to those above but will often particularly
focus on good communication, application of CAD standards, coordination between
the different engineers and architects, and whether the final design meets what was
promised to the client.

Structural Design Guide
18
3.14 CLOSEOUT Before a project is finished, it is important to check that your work has been
documented well. Many EMI projects will be ongoing for years to come, with multiple
phases of construction and sometimes multiple design teams involved. Being able to
reference a written record of conversations, notes, decisions, and assumptions once
memory has faded can save significant rework for future team members. Saving
these documents in a future-proof format (such as PDF) is a good practice.
For project trip volunteers, a copy of all recommendations and observations should
be documented and turned over to the project leader before the end of the trip.
Finally, if project work continues after a project trip has ended, please keep track of
that time and report it to your project leader. This helps EMI to demonstrate the value
of our design efforts.

Structural Design Guide
19
4 Limit States
4.1 DESIGN PHILOSOPHIES – ASD VS LRFD, SLS AND ULS Depending on the material, system, region and engineer, structural design is
completed using different philosophies and methods. Two major philosophies are
outlined briefly below.
Allowable Stress Design compares expected material stresses to limits which have a
factor of safety applied. Allowable Strength Design is very similar, but compares
design actions (moment, shear, axial force, etc.,) to the allowable strength of the
member. Both of these philosophies operate at a service level state (SLS), where the
loads considered are reasonably expected to occur during the life of the structure,
and the factor of safety is applied to capacity. Deflection and geotechnical capacity
checks also usually are performed using SLS methods. Many manufactured products
also have capacities listed for SLS loads.
Alternately, Load and Resistance Factor Design (also Load Factor Design) operate at
an ultimate limit state (ULS). In these philosophies, the expected loads are increased
with load factors as the primary factor of safety (although LRFD will also consider
reduction factors on material strength), and the capacities considered are reasonable
expectations of real strength. In some cases, ULS methods are considered to give a
more precise representation of material behavior (reinforced concrete design) or
geometric behavior (plastic design). The value of that precision will vary by project.
4.2 STRENGTH LIMITS The first set of calculations that come to mind when structural design is mentioned
are checks of the strength limits. How much shear, bending, bearing or axial capacity
does a given part of the structure have before exceeding its design limit? Strength
limits, if exceeded, often have the potential to directly impact life safety.
However, it can be useful to think more about the failure mode being designed
against. How a failure mode originates, its amplifying or mitigating factors, and how
it progresses can inform our response as designers. We treat brittle, less predictable
failure modes (e.g. deep beam shear) with additional caution compared to elastic,
ductile modes (beam lateral-torsional buckling).
4.3 DEFLECTION AND DRIFT Deflection and drift limits also serve an important role in the design process. In many
cases, good design for deflection and drift control will improve the quality of spaces
during their design life. Cracking walls, popping tiles, water infiltration issues and
more can all originate from an overly flexible structure, and can burden a ministry
with ongoing maintenance and repair costs over the life of a building.

Structural Design Guide
20
Deflection and drift limits can also impact strength limits and life safety issues,
particularly when a multi-story building with second-order effects is concerned.
When considering deflection and drift states, do be careful to include the effects of
material behavior (shrinkage and creep), effective and cracked section properties,
and load duration as appropriate. And remember that deflection checks are typically
performed using "service-level" load combinations, not the "ultimate-level"
combinations you may use for the strength limit states.
4.4 LIMIT STATES AND DESIGN IN THE DEVELOPING WORLD As EMI seeks to bring clients and contractors "one step up the ladder", hard decisions
are often made around the reliability, factor of safety, and philosophy of designs
compared to what would be required to meet code in a developed country.
Many ministries have limited funding for their construction projects. Cost overruns
often come directly out of funds intended for ministry activities. As a part of the team
who can have significant impacts on the cost of construction, it is important that we
honor the work our ministry partners do, and work diligently to design effective and
economic spaces that will amplify their ministry efforts, not hinder them.
As Christian design professionals, we are committed to the following:
Honoring the value God places on human life by mitigating life safety risks in
an appropriate way.
Not hindering the spread of the gospel in any way. Take on an attitude of
service and humility.
Being good stewards of the gifts and resources God has given us, both
immediate and long-term.

Structural Design Guide
21
Encouraging one another toward growth and good deeds.
Working with excellence and expressing God's plan of redemption through
our daily work.
How our values will affect structural engineering will vary from case to case. Some
clients will see minor settlement cracking or uncomfortable floor vibrations as
inconsequential, part of every-day life, and better than not being able to afford the
structure and do ministry at all. Other ministries will be very interested to maximize
the quality of construction at the beginning (when a large fundraising campaign is
underway) in order to minimize maintenance and operational costs later. Still other
ministries will view their project as part of their witness of God's goodness in their
community and want a flagship design.
Our goal is to find a solution which fulfills the ministry's values and goals without
going against our personal and professional values. If that solution is proving difficult,
this is a great topic to discuss with your project trip leader or office director.

Structural Design Guide
22
5 Loading
5.1 DEAD LOAD Dead load (DL) is the most basic type of load. It represents the weight of materials
and elements present on a structure, typically on a permanent basis. Dead loads can
be computed from "takeoff calculations” or “load tabulation” – quantity surveying
based on the density or unit weights of materials. ASCE 7 includes a listing of typical
weights of construction materials in commentary table C3-1.
5.1.1 COLLATERAL LOAD
In some cases, it can be helpful to define loads as collateral (DC). These would be
loads similar to dead load, except that they may or may not be present at a given time
during the structure's life. Examples may be MEP equipment, solar panels, or future
additions.
By defining collateral loads separately, the engineer can more easily account for
conditions when including these loads may be unconservative, such as phased
construction, uplift loading, or global stability.
5.2 LIVE LOAD Live loads (LL) are the forces imparted by the occupants and usage of the building. As
such, the load prescribed by building codes varies by the intended use of the building.
This may include people, equipment, furniture, etc.
Most commonly, live load is a uniform vertical load applied across each floor. Some
representative values include:
Private Residences 1.4 to 1.9 kPa 30 to 40 psf
Office spaces 2.4 kPa 50 psf
Public and assembly spaces 4.8 kPa 100 psf
Manufacturing & Warehouses 6.0 to 12 kPa 125 to 250 psf
Table 2: Representative Live Loads (ASCE 7/IBC)

Structural Design Guide
23
Figure 1: Representative Live Loads
Because live load is generated by the occupancy and use of the building, it may not
be present or only partially present at any given time. Live loads may need to be
omitted or applied as pattern loading to determine the most severe set of design
actions on a structural element. This is of particular importance when designing
cantilevered and continuous structural elements.
Other sources of live load may include horizontal loads on handrails, overhead cranes
in warehouses, vehicular loads, or moving equipment such as elevators.
5.3 LIVE ROOF LOAD Live roof load (Lr) is often defined separately from live load on other structural
elements. It is typically intended to describe infrequent construction and
maintenance access to a roof, rather than regular access by the public.
On a sloped roof, live roof load is applied to the horizontal projection of the roof area.
While many factors modify live roof load, some common values are shown below.
US (ASCE 7) 0.96 kPa 20 psf
Eurocodes 0.4 to 1.0 kPa 8 to 20 psf
(usually 0.6 kPa) (usually 12 psf)
Australia 0.25 to 1.0 kPa 5 to 20 psf
Table 3: Representative Live Roof Loads
Additionally, most codes specify a minimum concentrated load that roof elements
must be able to resist (not concurrent with the uniform live roof load). This is most
often the weight of one to two maintenance workers with tools – 0.9 kN to 1.5 kN.

Structural Design Guide
24
Live roof load allowances are not meant to include water tanks, solar panels,
suspended ceilings, or access walkways – all of which should be considered separately
(i.e. as DC load) and added as a part of appropriate load combinations.
5.4 WIND LOAD
5.4.1 WHAT LANGUAGE DOES THE WIND SPEAK?
There are lots of different "languages" to describe wind speeds used around the
world. It is important to make sure that your source of information and your design
method align to produce a design that performs as intended.
5.4.2 RETURN PERIODS (OR SERVICE VS ULTIMATE-LEVEL)
Wind speeds are often reported on a "service" level basis – a wind that is statistically
expected to occur during the lifespan of the structure. This lifespan is usually
considered to be around 50 years for most structures in the developed world. When
combined with an LRFD or LFD design methodology, these loads are factored upward
(factor > 1.0) for strength limit state checks.
More recently, some structural design codes (ASCE 7-10, AS 1170.2, among others)
have begun presenting wind speed on an "ultimate" or "factored" basis, similarly to
how earthquake accelerations are considered. (In many cases, the equivalent return
period is 500-700 years, or a 7-10% chance of occurring for any given structure over
50 years.) This represents the maximum considered wind that the code writers
believe structures should be designed to safely withstand. When used with an LRFD
design methodology, these loads carry a factor of 1.0, but when used for deflection
or ASD checks, a factor < 1.0 would be applied.
5.4.3 DURATION
Wind speed is a constantly changing measurement. Because of this, reported wind
speeds are always an average measurement over some time interval. In North
America, wind speed is typically reported as an average over 3 seconds (a "gust"
speed). In European practice, a 10-minute average speed is common. Older codes
sometimes reference a "fastest mile" duration, and meteorological records use a
variety of durations (2 minute, 5 minute, etc.).
Wind speeds reported over a shorter averaging period will have a higher magnitude,
while wind speeds over a longer period will be smaller. Conversions can be made
between wind speeds of different durations using correlations like the Durst curve
below:

Structural Design Guide
25
Figure 2: Durst Curve for Wind Duration Effects (ASCE 7)
5.4.4 OTHER FACTORS
Other factors that may come into play, particularly if evaluating wind speed records
originally intended for other purposes (such as airports or weather data) are the
height of the measuring instrument, surface roughness and exposure, topographical
information, seasonality of extreme storm events, reliability of the recordings, and
more. Generally, while wind speed information can be statistically derived from other
sources, caution should be used.
5.4.5 GLOBAL AND LOCAL LOADS (MWFRS VS C&C)
Once a wind speed has been selected, that is then converted into design wind
pressures depending on a number of factors. In many design methodologies, two
levels of wind pressure are considered – one applied on a local level to "Component
& Cladding" (C&C) members, and another applied to the structure as a whole, to be
resisted by the "Main Wind Force Resisting System" (MWFRS).
The philosophy implied is that small elements of a building, such as a window or part
of a roof, may see a locally higher wind pressure, and need to be able to resist that
load without blowing out or blowing away. However, it is statistically unlikely that this
higher pressure would occur over the entire building at one time – so a lower, general
"MWFRS" pressure is applied to the main structural elements when determining
global strength and stability.

Structural Design Guide
26
5.5 SEISMIC LOAD The details of developing seismic loading would justify its own design guide and will
not be addressed here.
If a seismic design code is not in effect for your region, consider the approximate
measures in the previous "Seismic Hazard" section under the "Design Process"
heading.
Seismic loading applied to a structure is heavily dependent on the system chosen
(particularly ductility), more so than other types of loading. "Special" or "intermediate"
structural systems with ductile detailing will decrease the seismic effects experienced
by a building and reduce the required size of structural elements. However, these will
require additional consideration during design and especially during construction. In
some regions of the world, EMI has found that only the most experienced contractors
and clients will successfully implement an "intermediate" structural system. In that
case, it may be that designing for the provisions of "ordinary" structural systems (and
limiting the building size accordingly) is appropriate.

Structural Design Guide
27
5.6 OTHER LOADS Other sources of loads are less common but may occur. Before beginning any
structural design, it is important to ensure that all of the applicable design loads have
been considered. Some examples of these considerations are included below:
Bridges and some building structures may need to support vehicle loading.
For large structures (plan dimensions in excess of 70m) thermal effects may
control the design of some elements (or the designer will need to allow
thermal movement via expansion joints).
Colder climates will require consideration of snow and ice loading.
Buildings with flat roofs should be designed for ponding of rain load
(assuming the primary drainage is clogged).
Projects near a body of water or prone to flooding may justify design for
hydraulic loads.
Retaining structures will need to resist earth pressures.
Phased construction may require consideration of shrinkage or staged
loading.
5.7 LOAD COMBINATIONS During analysis, we combine different sources of loading to consider their
simultaneous effects on the structure being designed. These "load combinations" are
weighted by factors which have been derived statistically or through decades of
experience and practice and have been found to result in reasonable levels of design
when applied correctly.
Similar to wind loading, different sets of load combinations have been used and
proposed over time. It is important to understand what load input is intended to be
combined with a given set of factors. The load combinations used will also depend on
the limit state being considered, as discussed in the next section.
While a small set of load combinations may govern the design of most or all of the
building, the engineer’s responsibility is to ensure that each part of the building is
adequate under each of the relevant load combinations. Engineering judgement to
eliminate certain combinations as ‘not governing’ should be used with caution.
Structural Design Guide
28
6 Analysis
6.1 OBJECTIVES OF STRUCTURAL ANALYSIS Structural analysis and calculations are a large part of the design process. However,
analysis can also be an intimidating arena of interlinked decisions which are hard to
escape. Many young engineers find themselves suffering "paralysis by analysis",
where the path forward is unclear and solving one issue only raises three others.
It can be helpful to keep the objective of structural analysis in mind. Our calculations
allow us to approximately understand the behavior of structures, which will be built
using varying materials and construction tolerances, subject to forces that we cannot
fully quantify.
Rather than let yourself be overwhelmed by the possibilities, spend some time to
think about the strengths and weaknesses of the tools you have available, and what
output you are looking to gain from the use of that tool.
Then, as you progress in analysis, list your assumptions and process clearly, as if you
were telling a story with your calculations. Explain the judgments you make, the order
you proceed in, where you are finding information, and which parts you will return to
later in the design. This will help your design process, help your check engineer, and
help the most when questions come up during construction 9 months later!
6.2 FEA METHODS Finite element analysis (FEA) methods are a fantastic tool for structural engineers.
They allow us to push the limits of structural design to increasingly complex
structures. When used properly, FEA allows us to determine a much more precise
distribution of forces in indeterminate structures.
However, FEA methods do have limitations. It can be easy for input errors to be buried
among lengthy and detailed output files. The level of precision reported can give us
high levels of certainty when designing for uncertain conditions. Basic assumptions
may be hidden within software settings. Recent structural failures at the FIU
pedestrian bridge and the Hard Rock Hotel (both in the US under strict regulations
and licensure laws), can be traced to bad FEA modeling.
Remember, it is always better to be approximately right than precisely wrong. Never
take “because the model says so” as a definitive answer.
6.2.1 DEFLECTED SHAPES
Whenever modeling a structure with a finite element program, the most important
verification is to check the deflected shape. It can be difficult to intuitively know
whether a shear or moment diagram is correct, but simpler to view a deflected shape
and understand whether that result fits the applied load and structure. In addition,

Structural Design Guide
29
many finite element software packages will report results whether the structure
solves as expected, or with errors that make nodes and elements “fly off” to infinite
displacements. Checking the deflected shape is a simple way to identify and
troubleshoot most model input errors.
6.2.2 CRACKED VS UNCRACKED STIFFNESS
When modeling reinforced concrete elements, it is important to consider whether
your structure is behaving in a cracked or uncracked manner.
Most reinforced concrete structures are intended to experience flexural cracking. This
cracking of the concrete is needed to develop yield strain in the reinforcing steel.
Especially at the ultimate design limit state, this cracking (up to approximately 0.4mm
width) is considered acceptable. However, it also significantly affects the bending
stiffness of that element. Because the compressive forces in columns tend to reduce
cracking in those elements, columns take a smaller reduction in stiffness and attract
additional load in a cracked analysis compared to adjacent beams. This can
significantly affect analysis results. Some approximations can be found following.

Structural Design Guide
30
Table 4: Cracked Stiffness of Reinforced Concrete Elements (Wong 2017)
Structural Design Guide
31
6.2.3 IDEALIZED SUPPORT CONDITIONS
In structural analysis, we often idealize boundary conditions or connections as “fixed”
(resisting moment rigidly with no joint rotation) or “pinned” (offering no moment
resistance and rotating freely). Other boundary conditions such as rollers are also
used to simplify analysis.
As with all simplifying assumptions, these need to be used wisely. An experienced
engineer will recognize that real-world conditions are often somewhere between
fixed and pinned. Slotted bolt holes or a beam seat may allow some movement as a
“roller” before stopping. Furthermore, the assumption relies on relative stiffnesses. A
spread foundation that acts as a pin support for a large concrete column may offer
enough rotational stiffness to effectively fix the end of a small steel post.
Note that “pinned” conditions or “moment releases” within
concrete structures can require unusual (and often complex)
rebar detailing. Take caution if using these in analysis.
6.2.4 ARTIFICIAL RESTRAINTS
When a model is failing to run or converge (especially 2nd order analysis with P-delta
effects), it can be helpful for troubleshooting purposes to introduce artificial restraints
through temporary boundary conditions. By eliminating potential sources of
instability, we can identify the root cause of the problem.
However, it is very important that the final model not use any boundary conditions
that are not physically present in the end design! "Dummy" braces or fixed restraints
that should be pins can lead to highly incorrect designs, whether it is an unstable
physical structure, or excessive deflections and drifts.
6.3 APPROXIMATE METHODS Despite the availability of finite element solutions, approximate analysis methods are
invaluable for structural engineers. In the very least, they should be used as a second
check to verify computer results. At times, computer models, licenses or electricity
will not be available. And in some cases, an approximate hand analysis will be faster
than building a finite element model.
6.3.1 BEAM TABLES
The first tool in any structural engineer’s toolbox should be published solutions for
beams in various support and loading configurations. Through use of superposition
or envelope solutions (see below), many structural elements can be designed
relatively quickly by hand. For the ambitious, fixed-end moments from beam tables
are also a starting point for some of the more complex hand analysis methods.
Among other sources, the AISC Steel Manual and AWC Design Aid 6 (American Wood
Council 2007) include beam tables.

Structural Design Guide
32
6.3.2 FRAME SOLUTIONS
Solutions for single-bay frames under a variety of support and loading conditions
have also been published; and can be combined through superposition to account
for the relative stiffness of beams and columns. Although they are more difficult to
combine for multi-story or multi-bay configurations, single-bay solutions can be a
useful starting point for the effects of loads on buildings of most configurations.
Figure 3: A moment frame solution for lateral load
6.3.3 ENVELOPE SOLUTIONS
When considering the effects of multiple loads and load combinations, one tool that
engineers use is to consider the "envelope" of effects. In this case, the highest and
lowest structural demands are defined, either through careful use of engineering
judgement or using a computer program to calculate the different combinations.
Rather than designing each element for each individual case, the element is
conservatively designed to be adequate for those highest and lowest demands. This
can also be used to simplify the analysis results of multiple structural members which
will be designed as repetitive members. Note that when envelope solutions are used
excessively, they can result in very conservative (and less economical) designs.

Structural Design Guide
33
6.3.4 PORTAL METHOD
For multi-bay moment frames under lateral loading, the portal frame method is often
applicable, and simple to solve. Assuming inflection points (usually at the mid-length
of beams and columns) and base shear distributions reduces the indeterminate
structure to a set of easily solved free-body diagrams – and can either be solved at
length, or skipping to only the most critical elements.
Figure 4: Portal Frame Method (Erochko 2020)

Structural Design Guide
34
6.3.5 MOMENT DISTRIBUTION METHOD (HARDY CROSS)
An ambitious engineer may take on the challenge of solving indeterminate structures
by hand using a method like the Moment Distribution Method (aka MDM or “Hardy
Cross”). Although requiring some iteration, and much simpler when prepared with a
ready-built worksheet or spreadsheet, the MDM is a robust solution method that can
be used in almost any situation to high levels of accuracy. Prior to the advent of Finite
Element Analysis, moment distribution was a staple of structural engineering and
allowed significant advances in analysis of complex structures.
Figure 5: Moment Distribution Method (Erochko 2020)

Structural Design Guide
35
7 Light-Frame Roofs
Light-frame roofs are common in many developing countries. With a lightweight
sheet-metal or composite roof sheeting and framing made from timber or light steel
members below, they provide economical and easily constructed shelter from the
elements. While susceptible to high winds, they naturally perform very well in seismic
events due to the light weight. Light-frame roofs are common elements in many EMI
projects.
7.1 WIND LOADS AND DIRECTIONS Wind analysis and design varies significantly from code to code. One constant is that
wind will need to be considered to originate from any horizontal direction. Depending
on the structure geometry, scaled combinations of effects due to wind in two
orthogonal directions is usually sufficient to consider wind striking the structure from
an angle, but that combination should not be overlooked. In the ASCE 7 methodology,
this combination is described in Figure 27.4-8 (2010 edition).
7.1.1 WILL UPLIFT GOVERN?
For shallow slope and lightweight roofs, uplift forces due to wind on a building may
govern the design of that roof structure. This will require additional attention to
bracing requirements, hold-down or tie-down detailing, and may limit the attainable
length of roof overhangs.
When uplift is proving problematic, it can be addressed through additional
(permanent) roof weight, increased roof slopes, reduced overhangs, or methods to
reduce the internal pressures that can develop in a building.
7.1.2 C&C VS MWFRS
As discussed in the wind loading section, many design codes specify separate levels
of loading for cladding elements and main structural elements. For a typical light-
frame roof, the roof sheets and purlins (as well as their respective connections) are
typically considered cladding elements subject to a higher level of loading. Rafters
and trusses are more commonly considered MWFRS members, although exceptions
may apply.

Structural Design Guide
36
7.2 COMPRESSION CHORD BRACING For roof designs which experience uplift forces or are continuous over interior
supports, moment reversals can lead to the case where the compression flange of a
truss, rafter or purlin is the bottom flange. While the top flange can often be
considered braced by a roof sheeting diaphragm (detailed accordingly) or by specific
bracing in the plane of the roof, bottom flanges are often more complicated to brace
and may have significant clear spans. Connecting the bottom chord to the roof
diaphragm using purlin stays is a common method, although it may not be fully
effective for very long spans. In these cases, additional attention and detailing is
warranted.

Structural Design Guide
37
7.3 BASICS OF TRUSS DESIGN Many light-frame roof designs utilize trusses to allow for large clear spans. In
developing world EMI projects, these trusses are often constructed with nailed
timbers or small field-welded steel members.
When beginning the design of a light-frame truss, preliminary sizing can be obtained
by analyzing the truss as a representative beam, where the top and bottom beam
flanges represent the truss chords to carry bending moment as a pair of axial forces,
and the beam web represents vertical and diagonal truss members to carry shears.
The method of sections allows for internal forces of the truss members to be obtained
relatively quickly.
When sizing a truss, connection geometry is critical for an efficient and constructible
design. Truss connections in timber and light-gage steel will require sufficient weld
length or nailing area to transfer the truss forces between members, particularly
reactions and shears at truss supports. It is also important to provide sufficient depth
at the eave of the truss ("heel depth") to accommodate details like gutters, hold-
downs, and the truss connections. Proportion your truss generously in these areas to
prevent design issues and costly details later. Research which types of truss members
are often used together in your region; the design of a truss system can be very
dependent on the shapes and cross-sections used.

Structural Design Guide
38
8 Cold Formed Steel Design
8.1 WHAT IS COLD-FORMED STEEL? Cold formed steel, or CFS, is a type of structural steel section made by bending thin
steel sheets into various shapes. (By comparison, hot rolled steel, which is most
commonly studied in university, is formed from billet steel material and processed at
high temperatures). Some of the possible configurations are shown below:
Figure 6: Cold Formed Steel Shapes
Note that while most CFS cross sections are "open". "Closed" sections such as tubes
and rounds are also produced with the seam welded. As in some of the examples
above, two open shapes can also be connected to create closed sections when
additional stability is required.
Because of their light weight, CFS sections are popular in many parts of the
developing world. Being lighter means that they are easier to import and transport (if
the region does not produce steel), easy to handle with manual labor, and are well
suited to many common styles of construction. CFS can usually be connected with
self-tapping metal screws, although heavier CFS may require pre-drilling. Welding is
also simpler, as it does not require preheating the base material.
In many ways, CFS design is similar to the steel design (hot rolled) that most civil
engineers study in university. However, there are a few key differences to keep in
mind. The direct application of typical hot-rolled steel methods and design codes
(such as AISC) to cold-formed steel can be notably unconservative.
CFS is often produced with lower material strengths compared to hot rolled steel.

Structural Design Guide
39
8.2 LOCAL EFFECTS The cold forming process, combined with the thin nature of the sections, can produce
localized strengthening. However, the thin sections are prone to local buckling. For
these reasons, many cold-formed sections are produced with stiffening lips or bends
in the cross section, providing both material and geometric reinforcement.
These improvements are typically empirical to each manufacturer, developed with
significant testing. Without that manufacturer testing and data, the effects of these
improvements are difficult to quantify analytically, although computerized
procedures are available.
Whether or not the effect of any these stiffening lips or bends is quantified, local
buckling and slenderness must be accounted for in the design process.
8.3 CONNECTIONS Similar to wood, CFS design is often controlled
by the connections. As such, the geometry of the
structure, especially for trusses, is important for
good design. In some cases, connection
geometry can be simplified by using gusset
plates. If using this method, check that the
gusset plate material is available and
economical – sometimes, a small gusset costs
more than the truss members!
For most CFS (thinner than 2.5mm) fillet weld
strength is governed by the base material
thickness. For thicker material, it becomes
important to also check the capacity of the weld
throat itself.
Bearing stiffeners are typically not feasible for CFS sections, and the thin webs make
web buckling failure modes prominent. For longer members under uniform load, the
allowable end bearing reaction may control the design span.
8.4 TORSION Because of the thin and mostly open cross-sections, CFS is particularly sensitive to
torsion. Torsion can originate from the geometry of the loading or the support (in
either case being not aligned with the shear center). In most cases, CFS members will
not be able to carry significant torsion – structures should be detailed to eliminate it
whenever possible.

Structural Design Guide
40
8.5 DURABILITY AND CORROSION Because of the thin material, CFS is prone to suffer the effects of corrosion,
particularly in humid environments. Good detailing to minimize water infiltration or
retention can lengthen a structure's lifespan.
CFS is often available galvanized (or "white"), which provides a good level of protection
against common corrosion. Note that cuts, connections, and welding will damage the
galvanizing and create a weak point where corrosion can start. These locations can
be touched up with a zinc-based paint, restoring some (but not all) of the original
protection.
While costly, some projects will justify having the ends of closed sections (like tubes)
capped with welded steel plates in order to reduce moisture and corrosion inside the
section. (This should be done as the last welding on that section).
8.6 SHEET METAL ROOFING & SIDING While not always strictly steel, sheet metal roofing and siding are often paired with
cold-formed steel structures. Similarly, the sheet metal profiles are often empirical
and proprietary. Some testing of common profiles is available in the EMI structural
resource library.
Sheet metal can sometimes function as a light-duty diaphragm in a structural system.
This capacity is typically governed by connection detailing. Special attention should
be paid (by the designer and contractor) if diaphragm action is utilized in a design.
Dissimilar metals (i.e. the roof sheeting and the truss metal) may cause galvanic
corrosion. Remember to check whether any special details will be needed to isolate
the two metals. Also, note that some metals may not have the correct metallurgic
properties to allow welding to structural steel.

Structural Design Guide
41
9 Reinforced Concrete Design
9.1 STEEL PERCENTAGES BY ELEMENT In design, it is often best to “start with the end in mind.” In structural engineering, this
requires having a sense of what results will be reasonable, economical and
constructible. This sense is developed through experience with similar designs –
which can create a “chicken and egg” situation for young engineers, or when
attempting a design different from previous experiences.
Rules of thumb and code limits can provide a starting point for this process:
Columns: Code limit on main reinforcement between 1-8% of gross area.
Most practical columns have between 1-3% reinforcement. Note that even for
columns with 2-3% reinforcement, congestion at joints between beams and
columns can be an issue. More heavily reinforced columns may require
mechanical bar couplers instead of lap splices.
Beams: Code limits between 0.13-2.0% of gross area for tensile face steel
(different than total steel in tension).
Many beams have a reinforcement ratio between 0.8 and 1.5% of gross area.
Older codes and design processes limited reinforcement to some amount less
than the “balanced ratio”, the arrangement in which steel first yields in tension
at the same point that the concrete at the compression fiber crushes (based
on strain). However, this approach had limitations for flanged sections,
sections with multiple layers of reinforcing or compression steel (among
others).
More recently, ACI limits the depth of the flexural compression block (and the
steel tensile strain) such that the steel will reliably yield in tension before
concrete crushes. This yielding produces a ductile failure mode and is
expected to give building occupants warning before any collapse.
Structural one-way slabs: typically 0.3-1% of gross area in spanning direction,
plus 0.2% in the transverse direction.
Structural two-way slabs: typically 0.2-0.8% of gross area in each direction.
Slabs need to be tension-controlled, just like beams. As such, an upper limit
on reinforcing also applies.
Slabs-on-grade: 0.2-0.5% in each direction.
A typical slab will use approximately 0.2% reinforcement (to resist shrinkage)
with control joints regularly spaced. If control joints should have larger spacing
or be eliminated entirely, designs near 0.5% (along with other details) are used.

Structural Design Guide
42
Note that in many parts of the developing world (especially where steel is imported),
the preference is to use larger cross sections and lighter percentages of reinforcing,
skewing toward the bottom end of these ranges.
9.2 REINFORCED CONCRETE BEAM DESIGN
9.2.1 APPROXIMATE BEAM SIZES
One rule of thumb to ensure a beam has adequate size for flexural load is to compare
240*Mu [kN*m] to bd2, where b is the beam width (cm), and d is the depth of
reinforcement from the compression face (cm). In the lightly reinforced members
common in the developing world, beam dimensions equivalent to 400-500*Mu are
generally most economical.
9.2.2 BEAM DEPTH FOR DEFLECTION
For beams and one-way slabs subject to uniform loading and not sensitive to
deflection, ACI publishes limits of beam height that allow for further deflection
calculations (accounting for shrinkage and creep) to be skipped. Even if the beam
considered does have large point loads or deflection-critical finishes, these limits can
still be a great starting point to determine beam size.
Table 5: Thickness for Concrete Beams and One-Way Slabs (Kamara 2011)
9.2.3 TORSION
When torsion is present in beams (such as cantilever balconies, beams at the
perimeter of slabs, etc.), the torsional resistance of the beam can often dictate the
beam dimensions. Concrete beams can be designed to resist torsion through
concrete shear around the beam perimeter, or though specific closed stirrup steel
reinforcement. (Unlike shear, these behaviors are not combined to develop the total
resistance). In most cases, it will be most economical to design the beam with
sufficient size to resist torsion by concrete shear.
If steel stirrups are required to resist torsion, ACI also requires that longitudinal steel
be added (adjacent to moment bars) in order to resist torsional warping stresses.

Structural Design Guide
43
9.2.4 DEEP BEAMS
Traditional reinforced concrete beam design principles apply to elements with a span-
depth ratio greater than 4. Shorter span beams, including cantilever elements like
corbels and some balconies, do not follow the behavior of euler-bernoulli beam
theory, and are called “deep beams”. These elements may require analysis by strut-
and-tie methods, additional reinforcing and detailing, or may be entirely prohibited
in some cases.
9.3 RC SLAB DESIGN
9.3.1 ONE-WAY AND TWO-WAY SLABS
Slabs are defined as spanning "one-way" and "two-way" depending on their support
condition. If supports are provided on two opposite sides of a rectangular slab, that
slab will span in one direction. If supports are provided on four sides of the slab, the
slab will tend to span in both directions, at least until the ratio of long to short side
lengths reaches 2:1. For slabs exceeding this ratio, one-way behavior returns. The
requirements and design methods vary between the two; one-way slabs are mostly
similar to beams, while two-way slabs require additional analysis.
9.3.2 SLAB THICKNESS FOR DEFLECTION
In many cases, the allowable deflection (especially considering long-term deflection
accounting for concrete shrinkage and steel creep) will govern the thickness of
uniformly loaded concrete slabs. As thickness is also the starting point of a slab design
(and a bad initial guess can lead to lots of iteration), using the rule-of-thumb limits for
deflection is often a great choice to start. (One-way slabs shown above).

Structural Design Guide
44
Table 6: Thickness for Concrete Two-Way Slabs (Kamara 2011)
Note that for two-way slabs with beams supporting each edge, the alpha factors
shown here practically are nearly always greater than 1, and most often greater than
2 for spans of 4-5m.
9.3.3 DIRECT DESIGN METHOD
In certain cases, ACI allows for two-way slabs to be designed using the Direct Design
Method (DDM) which divides gravity load effects among the "column strip", "middle
strip" and beam (when present). These allocations are made by stiffness factors
described in ACI, and are somewhat complex at first, but efficient once understood
and automated. In this method, no finite element or frame analysis is required.
Note that when designing a moment frame structure with monolithic slabs by the
DDM, the effects of lateral forces on your slab will need to be determined separately
and combined with the DDM results.
9.3.4 EQUIVALENT FRAME METHOD
When the Direct Design Method does not apply, ACI 318-11 contains guidance for an
alternate method called the equivalent frame method. While more complex (requires
frame analysis), this method is applicable to all structure geometries and
configurations.

Structural Design Guide
45
9.4 RC COLUMN DESIGN Columns are typically the most critical feedback given to the architects on an EMI
conceptual design project, but they are also farther down the load path, and farther
along the order of calculations. Below are a few rules-of-thumb which may provide
guidance and simplify your design process.
9.4.1 PRELIMINARY SIZING BY BEAM BAR DEVELOPMENT
One limiting factor for columns, particularly those around the building perimeter (or
other locations where beams end) is the need to develop the beam bars for negative
moment flexure. Beams are designed to develop their negative moment strength at
the face of the column, which means that in most cases the bars need to be fully
developed between that face and the cover concrete on the opposite side of the
column. This is most often accomplished with a hooked bar. Depending on the code
philosophy, that hooked bar will have geometric requirements, and that geometry
may require a minimum column width.
This can make for a useful tool to estimate column sizes early in a project. If the beam
span and loads can be determined to make a reasonable estimate on beam bar sizes,
this bar size can be converted to a hook development length (following ACI practice).
Adding the column cover distance and 10-20mm extra to allow for congestion and
construction tolerances can establish a minimum column size threshold.

Structural Design Guide
46
In many cases, design codes allow hook development length to be reduced for
additional confinement provided by the column concrete or reinforcement. In some
cases, additional reductions for excess steel may be applied (although seismic
detailing may prohibit this).
9.4.2 PRELIMINARY SIZING BY FLEXURAL STRENGTH
In general, structural engineers prefer to design using the "strong column, weak
beam" philosophy. This means generally designing columns to be stronger than
beams, so that if any issue were to occur with the structure, the beam (supporting a
small part of the building) would be damaged before the column (which supports a
larger part of the building).
In many seismic design codes, this philosophy is mandated, with differing
requirements. Often, the code requires that the moment strength of the column
framing into a beam-column joint (across the top and bottom faces) exceeds the
moment strength of the beams framing into that joint. This philosophy allows for
more of the ultimate strength of the structure to develop (more plastic hinges
forming) before a collapse mechanism forms (too many columns and beams hinge or
hinges rotate to rupture), resulting in a more ductile structure.
As such, if the beam moment strengths can be obtained, an approximate column size
can be determined which will exceed that lower capacity threshold.
9.4.3 PRELIMINARY SIZING BY DRIFT & DEFLECTION
Particularly for reinforced concrete moment frames, which are "soft" lateral force
resisting systems, the column size may be limited by the need to control building
drifts and deflections. Because drift and deflection are mostly a function of the
concrete dimensions and not reinforcing steel present, this can be checked fairly
quickly to help define column sizes.
9.4.4 OTHER FACTORS
Column sizes are often dictated by the size of commonly available formwork and
adjacent walls, desired beam width, or architectural considerations.
9.4.5 SECOND-ORDER EFFECTS
Especially when designing concrete moment frame structures, be sure to consider
second-order effects on column bending moments. In ACI, this can be addressed
through the moment magnification (beta) procedure or by a robust second-order
finite element solution. In many cases, the moment magnification procedure will
result in significantly higher second-order effects compared to a FEA solution.

Structural Design Guide
47
9.5 RC JOINT/CONNECTION DESIGN The location where concrete beams and columns meet is sometimes called the joint.
While this is rarely addressed in university classes, proper joint design can be very
important in certain situations.
9.5.1 REINFORCEMENT CONGESTION
While mostly dictated by the size of columns
and beams meeting at the joint, joints are a
primary location for rebar congestion, clashes,
or issues with concrete consolidation. During
the design process, when you are considering
adding just one more bar, or reducing a
dimension by just a few centimeters, make sure
to check that the reinforcing can come together
properly at the joints!
9.5.2 JOINT SIZE AND REINFORCEMENT
Particularly in high-seismic applications, it is
also important that the joint itself has enough
reinforcement and is proportioned well to
remain ductile in a seismic event. This is one of
the differences between "ordinary" "intermediate" and "special" moment frame
design. While we may be cautious to require intermediate or special moment frames
in some regions where EMI works, this is another area where small improvements
can take the client "a step up the design ladder".
9.5.3 DEVELOPING JOINT REINFORCEMENT
When detailing reinforcement in joints, it is important to ensure that the
reinforcement is anchored and developed properly into the joint, particularly for end
joints when forces and moments are being transferred around corners (e.g. from the
end of a beam into an exterior column).
One basic principle of joint detailing can be illustrated by the “three-bar corner”,
shown below.

Structural Design Guide
48
Figure 7: Three-bar corner reinforcing detail
(and unsatisfactory alternate) In this diagram, the blue and green bars are extended to the far face of the concrete
element, allowing for development of tensile forces (blue) in those bars. These tensile
forces are resisted by compressive struts (red) in the concrete within the joint. If the
green and blue bars did not cross the corner, as on the right, the compressive strut is
not restrained by the reinforcing bars, and the inside corner of the joint is likely to
spall away.
As an aside, by providing the corner bars shown above as separate pieces which are
lapped to the main bars, they can be easily bent and placed with the correct
orientation.
9.5.4 OPENING AND CLOSING JOINTS
When designing concrete moment joints, the difference between "opening" and
"closing" joints can make a significant difference to how that joint behaves. The
following diagrams by Dr. Gilbert illustrate the difference.

Structural Design Guide
49
Figure 8: Opening and Closing Joints (Gilbert 2012)
The connection under closing moment results in a well-restrained compression strut across the diagonal of the joint, which is a
beneficial situation. Tension reinforcing in the outside face can be developed within the joint, and additional joint reinforcement
can be provided for additional ductility and confinement in seismic regions.
For the joint with opening moment, a tensile zone develops in the joint, which can lead to early cracking and loss of confinement
in the joint region. Research shows that between 70% and 100% of the joint capacity can be developed by detail (b), but that
performance will decrease under cyclic loading. When ductility is needed, additional reinforcement may be advisable.

Structural Design Guide
50
9.6 RC SLAB-ON-GRADE DESIGN Slab-on-Grade (SOG) design lives in a grey area between disciplines. In many ways, it
is similar to other "flatwork" concrete and pavements that may be present on a site –
sidewalks, roads, and parking. As such, it would fall in many cases to a site civil
engineer. In other ways, SOGs are often inside the building envelope, and use the
same materials as the structure. So, while structural engineers may not claim sole
ownership of SOG design, it will often be our responsibility.
Good SOG design results in a floor surface meeting the client's needs – which may
include flatness, smoothness, or aesthetics, but usually means avoiding cracking.
There are multiple ways to obtain a good SOG result, which can make the design more
of an art than a science.
SOGs typically crack for two reasons: inadequate capacity to spread an applied load
(especially a point or wheel load) over weak subgrade soils, or shrinkage cracks due
to restraint during curing.
Load-induced cracking is countered by good subgrade materials (including bringing
in good material when the native soils are poor), subgrade preparation through
compaction and moisture conditioning, and thickness of the SOG concrete. In heavy
duty slabs, steel reinforcement may be used to increase capacity – however, for most
slabs, the steel serves other purposes.
Shrinkage cracking is countered by subgrade preparation (smoothness, and
potentially the addition of a low-friction moisture barrier or damp-proof membrane),
minimizing changes in SOG thickness, concrete mix design (large aggregate and low
water content promote less shrinkage during curing), concrete curing practices
(slower evaporation will reduce shrinkage), steel reinforcement, and slab joint design.
9.6.1 LOADING
As mentioned above, loading is an important factor for slab-on-grade design,
particularly slab thickness. While many methods of analysis exist (per the Portland
Cement Association, Wire Reinforcing Institute, etc., as listed below), some are only
applicable to certain types of loading:

Structural Design Guide
51
Table 7: Slab-on-Grade analysis methods (Ringo 1996)
Typically, uniform loads are directly resisted by the soil beneath the slab-on-grade.
Except in cases of poor subgrade preparation, or voids and utilities beneath the slab,
uniform loads will not drive the design.
Line loads (such as walls) require some attention. The slab can be designed with
enough capacity to resist line loads everywhere or can be locally thickened in the
critical location. Alternatively, wall loads may be supported by other foundation
elements, and isolated from the slab-on-grade.
Point loads (due to small columns, storage racks, etc.) or wheel loads (due to forklifts
or construction & maintenance equipment) can be problematic, especially if allowed
near the edge or corner of a slab.
As mentioned above, reinforcing is typically only added for strength in very heavily
loaded slabs. More frequently, all loading is resisted by the slab concrete thickness.

Structural Design Guide
52
9.6.2 JOINT DESIGN
There are three major types of joints used in slab-on-grade design.
Figure 9: Typical slab joint layout (ACI 224)
Figure 10 : Slab on Grade joint types: control (left),
construction (right), and isolation (below)
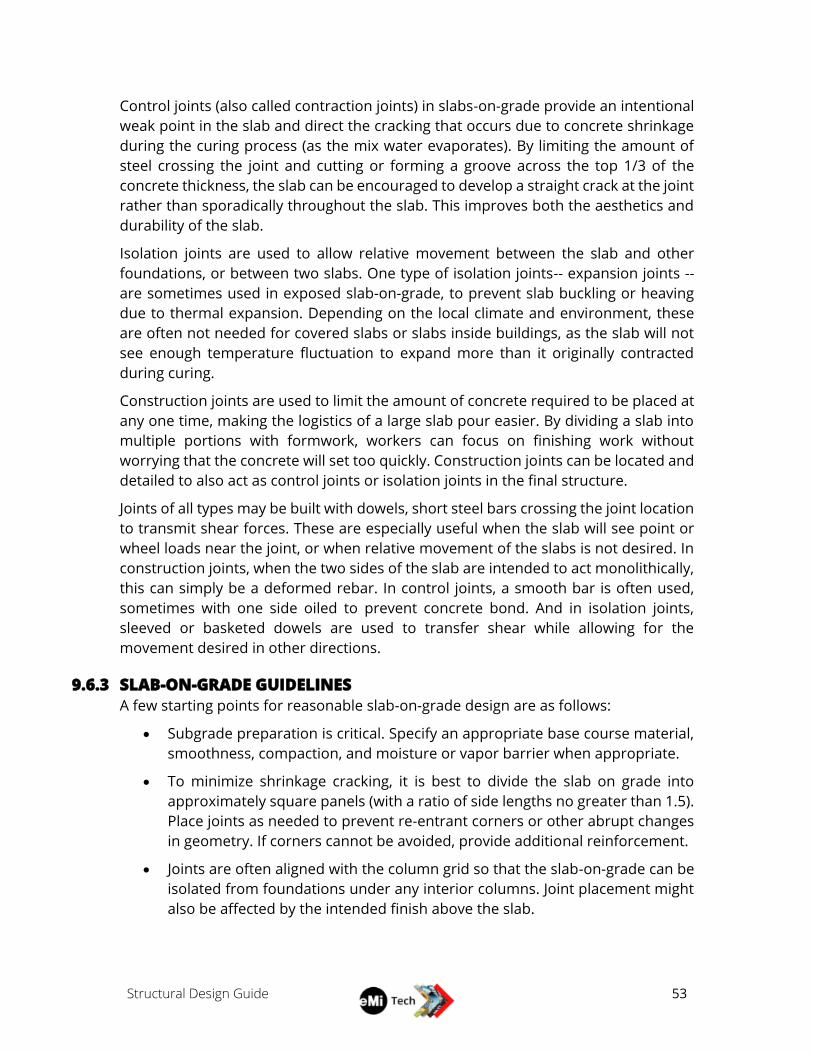
Structural Design Guide
53
Control joints (also called contraction joints) in slabs-on-grade provide an intentional
weak point in the slab and direct the cracking that occurs due to concrete shrinkage
during the curing process (as the mix water evaporates). By limiting the amount of
steel crossing the joint and cutting or forming a groove across the top 1/3 of the
concrete thickness, the slab can be encouraged to develop a straight crack at the joint
rather than sporadically throughout the slab. This improves both the aesthetics and
durability of the slab.
Isolation joints are used to allow relative movement between the slab and other
foundations, or between two slabs. One type of isolation joints-- expansion joints --
are sometimes used in exposed slab-on-grade, to prevent slab buckling or heaving
due to thermal expansion. Depending on the local climate and environment, these
are often not needed for covered slabs or slabs inside buildings, as the slab will not
see enough temperature fluctuation to expand more than it originally contracted
during curing.
Construction joints are used to limit the amount of concrete required to be placed at
any one time, making the logistics of a large slab pour easier. By dividing a slab into
multiple portions with formwork, workers can focus on finishing work without
worrying that the concrete will set too quickly. Construction joints can be located and
detailed to also act as control joints or isolation joints in the final structure.
Joints of all types may be built with dowels, short steel bars crossing the joint location
to transmit shear forces. These are especially useful when the slab will see point or
wheel loads near the joint, or when relative movement of the slabs is not desired. In
construction joints, when the two sides of the slab are intended to act monolithically,
this can simply be a deformed rebar. In control joints, a smooth bar is often used,
sometimes with one side oiled to prevent concrete bond. And in isolation joints,
sleeved or basketed dowels are used to transfer shear while allowing for the
movement desired in other directions.
9.6.3 SLAB-ON-GRADE GUIDELINES
A few starting points for reasonable slab-on-grade design are as follows:
Subgrade preparation is critical. Specify an appropriate base course material,
smoothness, compaction, and moisture or vapor barrier when appropriate.
To minimize shrinkage cracking, it is best to divide the slab on grade into
approximately square panels (with a ratio of side lengths no greater than 1.5).
Place joints as needed to prevent re-entrant corners or other abrupt changes
in geometry. If corners cannot be avoided, provide additional reinforcement.
Joints are often aligned with the column grid so that the slab-on-grade can be
isolated from foundations under any interior columns. Joint placement might
also be affected by the intended finish above the slab.

Structural Design Guide
54
Joint spacing is affected by many factors, but spacing of 4-6m (or 30-40x
thickness) is common unless additional design and detailing are provided.
Sawcut joints should be made as soon as possible.
The concrete mix can significantly affect slab-on-grade performance.
Properties that most benefit the slab are low slump (low water content), large
aggregate, and various admixtures (where available).
When reinforced, slabs often contain 0.2-0.5% steel in either direction. To
minimize visible cracking, this reinforcement should be distributed evenly near
the top of the slab, no deeper than half-depth.

Structural Design Guide
55
10 Masonry Design
Masonry is built and behaves very differently around the world. Many university
graduates will have had some exposure to masonry design, if only one or two
lectures. However, those classroom examples may be different from the types of
masonry you see during an EMI project.
10.1 CONFINED MASONRY VS MASONRY INFILL As mentioned previously, two types of masonry wall construction are common across
the developing world: confined masonry and masonry infill.
The difference is largely defined by the order of construction. In confined masonry
construction, the wall panel is built first. Concrete columns and head beams are
poured later, using the already constructed masonry units as part of their formwork.
This both is an economical building method and can promote good bond between
the concrete and masonry. This bond can transmit forces effectively and allow for the
masonry to act as part of the structural system (for better or worse). As such, confined
masonry walls are sensitive to the location and sizes of openings.
In contrast, masonry infill wall panels are constructed once the concrete columns and
beams have been formed, poured, and forms removed. While this simplifies
construction, it can be more challenging to develop connections between the two
elements. For this reason, masonry infill panels in the developing world are often
considered to not be part of the larger building structural system.
For more information about confined masonry, masonry infill, good detailing and
performance in seismic events, please refer to the several excellent EMI conference
presentations or EMI Tech article (Hoye 2018) on this topic.

Structural Design Guide
56
10.2 MASONRY UNIT STRENGTH EMI's experience on several projects has been that obtaining masonry units which
meet specifications written for developed countries is challenging. Whether due to
material differences, or different techniques and manufacturing processes, masonry
unit quality is worth verifying before beginning your design. (In Cambodia, clay
masonry is assumed to have a unit strength of only 4.5kPa (650psi).)
10.3 WHEN CAN MASONRY BE REINFORCED? Another significant difference between university lectures and practice may be the
type of reinforcement in the masonry unit. Many parts of the world have adopted
hollow masonry units, grouting techniques and design methods that result in
masonry walls not entirely different from reinforced concrete walls, at least in theory.
In many parts of the developing world, solid or irregular masonry units and less
reliable grouting techniques prohibit the addition of vertical reinforcement,
horizontal reinforcement (except small-diameter bed reinforcement), or both. As
such, the first question to be asked about any masonry structure will be what type of
reinforcement is possible and in common practice for the region.
It is worth noting that without vertical reinforcing, the design of masonry shear walls
becomes challenging or prohibitive in most circumstances. Other lateral force
resisting systems may be required.
10.4 UNREINFORCED MASONRY (URM) DESIGN While it has fallen out of favor in many developed countries and building codes over
recent decades, much of the developing world still uses unreinforced masonry
construction, particularly in low-seismic regions.
When presented with the possibility of using unreinforced masonry, first consider
whether it is a culturally appropriate solution, and whether its use will reflect the
values of the ministry partner or client. In some cases, the move from unreinforced
masonry design to a masonry design with some simple reinforcing details is a great
"step up the ladder" to promote with a client and contractor.
If unreinforced masonry is selected as a building material, it can be hard to find design
guidance (since many current codes prohibit its use). Most commonly, the design of
unreinforced masonry was empirical, based primarily on the slenderness ratio of wall
panels between supports. Some rule-of-thumb guidance is provided below:

Structural Design Guide
57
Figure 11: Prescriptive Limits for Unreinforced Masonry (NCMA) (Presented here for concrete masonry units, clay masonry follows similar guidance)
10.4.1 URM WALLS FOR IN-PLANE LOADING (SHEAR WALLS)
The Masonry Standards Joint Committee (MSJC) Appendix B has several sections
addressing the design of participating masonry walls infilling a reinforced concrete
moment frame, including the equivalent strut stiffness of the shear wall for a hybrid
structural system, and the ultimate capacity of the masonry panel.
In the common case where masonry panels are built tight against a concrete moment
frame column (e.g. without a specific isolation detail), the masonry panel can act as a
shear wall whether that is the intended behavior or not. This can increase the shear
demand at the base of the column prior to the wall beginning to crack and soften. It
is advisable to consider this additional shear load during column design.
10.4.2 URM WALLS FOR OUT-OF-PLANE (LATERAL) LOADING
Out-of-plane lateral stability of URM walls may pose safety concerns if not properly
considered, especially when in high seismic zones or where the wall must resist earth
pressure. If the panel is built tightly against a confining frame of columns and/or
beams, out-of-plane loads can be resisted by arching and membrane action.
(However, the panel will also participate for in-plane lateral loads, which may not be
desired). If the panel is isolated from the confining elements, connection detailing will
be required.

Structural Design Guide
58
The first step to determine suitability will be to compare the wall geometry to
prescriptive limits on wall geometry (such as the limits above). If a more detailed
analysis is needed, capacity can be calculated per the methods of MSJC Appendix B.
For infill construction, it is typically difficult for the masonry to be built tightly against
the beam above. More commonly, the infill panel is designed to span between
adjacent columns, and any arching action between the beams is neglected.

Structural Design Guide
59
11 Foundation Design
11.1 SITE SOILS INVESTIGATION Whenever possible, a project site visit should include investigation of the soils.
Depending on the project, this investigation will often be a precursor to a more
detailed site investigation by a local geotechnical testing company prior to
construction, but it may be sufficient for the project needs.
The most important element of the soil investigation for structural engineers is the
soil profile, including classification of each strata. An approximate method of soil
classification by feel is shown following. The use of tools like a pocket penetrometer,
pocket torvane tester, or even carefully probing with a rod can provide additional
information to classify the relative density and strength of materials. It is also
particularly important to identify any soil strata which may have high organic content,
may be prone to liquefaction, be expansive or subject to freeze-thaw effects.
The soil investigation must be carried out to a depth appropriate for the intended
use. For sites with shallow foundations, that might mean digging test pits or auguring
test holes to depths of 2-5m (based on the zone of influence for a strip or isolated
footing). For sites with deep foundations, a drill rig or CPT will be required to reach
deeper. In all cases, the depth of investigation should be deeper than the expected
influence depth of the foundation, both to check for weak soil layers and allow for
flexibility later in the design process.
Determining the depth of the water table is also useful during the soil investigation.
Be aware of the local climate, if visiting a site during the dry season, the water table
may reach substantially higher at other times of year.
The question of how many test pits or borings are required is challenging. Because of
the potential variability of site soils, multiple borings should be logged for even the
smallest projects. When investigating a large area (e.g. a master plan project), boring
spacing of 50-150m may be appropriate. When building locations are known, two to

Structural Design Guide
60
three borings should be made for each building or building cluster, at a spacing of 15-
30m. Highly variable or unsuitable soils may require additional investigation.
Civil and Agricultural engineers may also be interested in the soil composition and
classification for their uses and can sometimes be recruited to help dig test pits.
Figure 12 : Soil classification by feel (Thien 1979)

Structural Design Guide
61
11.2 SHALLOW VERSUS DEEP The choice of shallow or deep foundations will depend mostly on the site soil and
groundwater profile. However, it can also be affected by the type of structure and
structural system selected. Short, spread buildings will have lower foundation loads,
and be more suitable for shallow foundation options than tall, slender buildings. For
many low-rise buildings, a simple strip foundation or grade beam around the building
perimeter (to support the exterior wall) will provide most of the needed support.
Braced frame buildings will potentially result in concentrated uplift forces which are
more easily resisted by deep foundations.
Ideally, we will seek out the input of a local geotechnical engineer or volunteer as part
of the design process, particularly for detailed design projects. In lieu of that
expertise, for conceptual design, you may be able to infer the preferred foundation
style for the area by observation. Without geotechnical input, be careful not to
suggest more certainty about the foundation design than intended, as changes can
be quite costly and significantly disrupt a ministry’s construction budget later.
11.3 SETTLEMENT In many cases, the foundation capacity will be limited by the allowable absolute and
relative settlements for that building. While settlement is of particular concern for
shallow foundations and non-granular soils, it can also affect buildings with deeper
foundations or on loose granular soils.
In most cases, relative settlements are of primary concern. As one part of the building
settles relative to another, the building distorts and rotates. This distortion can
potentially lead to cracks in building finishes, difficulty with machinery, doors and
windows, or can be visually disturbing. Some suggested limits are given below.

Structural Design Guide
62
Figure 13 : Allowable angular distortion (Skempton 1956)
Relative settlements are another point in favor of a strip foundation or grade beam
between foundations, as a continuous reinforced element can reduce the distortions
and rotations experienced by the structure above.

Structural Design Guide
63
Bibliography

Structural Design Guide
64
R1 BIBLIOGRAPHY & RESOURCES
R1.2 DESIGN IN THE DEVELOPING WORLD Crawford, Brad. 2020. Structural Engineering in the Majority World. October.
Hoye, Jesse. 2018. "Same Materials, Different Buildings." EMI Tech, September.
Lammers, Matt. 2017. “Construction Informs Design.” EMI Tech, July.
R1.3 DESIGN PROCESS Global Earthquake Model (GEM). 2018. “Global Earthquake Hazard Map”.
US Dept. of Defense. 2019. UFC 3-301-01 Structural Engineering.
R1.6 ANALYSIS American Wood Council. 2007. Design Aid 6.
Erochko, Jeffrey. 2020. Learn About Structures. “Portal Method”.
Wong, et. al. 2017. "Effective Stiffness for Modeling Reinforced Concrete Structures."
Structure Magazine, January.
R1.8 COLD FORMED STEEL DESIGN American Iron and Steel Institute. 2020. AISI S100-16, North American Specification
for the Design of Cold-Formed Steel Structural Members.
R1.9 REINFORCED CONCRETE DESIGN
R1.9.1 GENERAL RESOURCES
Gilbert. 2012. Detailing of Reinforcement in Concrete Structures.
Kamara, M.E., Novak, L.C. 2011. Simplified Design of Reinforced Concrete Buildings.
Portland Cement Association.
Structure Point. Date Varies. “Design Examples.”
R1.9.2 SLAB-ON-GRADE DESIGN
American Concrete Institute. 2001. ACI 224 Control of Cracking in Concrete
Structures.
Ringo, Boyd., Anderson, Robert. 1996. Designing Floor Slabs on Grade. Hanley Wood.
US Dept. of Defense. 2005. UFC 3-320-06A Concrete Floor Slabs On Grade Subjected
To Heavy Loads.
R1.10 MASONRY DESIGN Hoye, Jesse. 2018. "Same Materials, Different Buildings." EMI Tech, September.
National Concrete Masonry Association. n.d. "Empirical Design of Concrete Masonry
Walls (TEK 14-08B)." NCMA TEK.

Structural Design Guide
65
R1.11 FOUNDATION DESIGN Thien, S.J. 1979. "A flow diagram for teaching texture by feel analysis." Journal of
Agronomic Education.
US Dept. of Defense. 2012. UFC 3-220-01 Geotechnical Engineering (NAVFAC Design
Manuals).
Skempton, A.W., MacDonald, D.H. 1956. "The Allowable Settlements of Buildings."
Proceedings of the Institution of Civil Engineers 727-768.

Structural Design Guide
66
CAMBODIA-SPECIFIC GUIDELINES
Cambodia Regional Annex

Structural Design Guide
67
CAMBODIA-SPECIFIC GUIDELINES
KH1 Engineering Practice:
KH1.1.1 GOVERNING CODES & LAWS: KH1.1.2 CONSTRUCTION DOCUMENTS:
Cambodian Law on Construction, 02 Nov 2019 Language: Khmer or English
Technical building code and standards not yet enacted. Units: Metric
License req’d: All construction documents
KH2 Loading:
KH2.1.1 LATERAL LOADS: KH2.1.2 OTHER HAZARDS AND LOADS:
Seismic hazard: Low to none Heavy rainfall and flooding events common.
Wind design speed: 30-45 m/s (service level 3s gust) Some tropical storms near Gulf of Thailand.
KH3 Common Structural Systems:
Reinforced concrete ordinary moment frames are used for most construction. Floor systems are
typically two-way slabs with beams, some flat slab floors with post-tensioning for large structures.
Light-frame roofs with sheet metal or clay tile cladding are most common, sometimes with
reinforced concrete slab underneath for weatherproofing and thermal mass properties.
Steel framed buildings are growing more popular, particularly for foreign investment projects.
KH4 Common Foundation Systems:
Low-rise buildings: Shallow isolated footings with grade beams. Often supplemented with small
timber and precast concrete piles as a hybrid foundation.
Medium-rise buildings: Driven precast concrete piles or cast-in-place drilled shafts
KH5 Soil Properties:
Central plain: Often 8m+ of soft alluvial clays and silts, underlain by medium-stiff sandy clay layers.
Moderate water table but high likelihood of saturated conditions during rainy season.

Structural Design Guide
68
CAMBODIA-SPECIFIC GUIDELINES
KH6 Materials:
KH6.1.1 KH6.1.2 AVAILABILITY & USE: KH6.1.3 PROPERTIES:
Reinforced Concrete: Common & affordable f’c = 25MPa (drum mixer)
= 30MPa+ (batch plant)
Reinforcing Steel: Mostly imported from China/Vietnam
Stirrups: 6mm or 8mm smooth bar
Main bars: 10 to 16mm (local builder)
or to 25mm (large contractor)
fy = 295MPa (smooth bars)
= 390MPa (deformed bars)
Clay Masonry: Common & affordable (80x80x180mm units)
Horizontal cores prevent reinforcement.
f’m = 4.5kPa
typically non-structural
Concrete Masonry: Uncommon but available. Grouting for
reinforced CMU is not a common practice
and would require special attention.
Varies
Hot-rolled Steel: Imported only
typically to CN/JIS/AS standards
Varies
most grades available
Cold-formed Steel: Imported but common.
Typically 1.0-1.5mm thick, up to 2.5mm
available
fy = 227MPa
fu = 310MPa
Timber: Available but expensive – best avoided Unknown
Copyright © 2022 FDOKUMEN