Dell EMC OpenManage Enterprise Version 3.2.1 User's Guide
145
Dell EMC OpenManage Enterprise Version 3.2.1 User's Guide
-
Upload
khangminh22 -
Category
Documents
-
view
0 -
download
0
Transcript of Dell EMC OpenManage Enterprise Version 3.2.1 User's Guide

Dell EMC OpenManage Enterprise Version 3.2.1 User's Guide

Notes, cautions, and warnings
NOTE: A NOTE indicates important information that helps you make better use of your product.
CAUTION: A CAUTION indicates either potential damage to hardware or loss of data and tells you how to avoid the problem.
WARNING: A WARNING indicates a potential for property damage, personal injury, or death.
© 2019 Dell Inc. or its subsidiaries. All rights reserved. Dell, EMC, and other trademarks are trademarks of Dell Inc. or its subsidiaries. Other trademarks may be trademarks of their respective owners.
2019 - 08
Rev. A00

Contents
1 About Dell EMC OpenManage Enterprise.......................................................................................................9New in this release........................................................................................................................................................... 10Other information you may need..................................................................................................................................... 11Contacting Dell EMC.........................................................................................................................................................11OpenManage Enterprise Advanced license................................................................................................................... 11
OpenManage Enterprise Advanced license—Supported servers........................................................................ 12Purchase OpenManage Enterprise Advanced license........................................................................................... 12Verify license information...........................................................................................................................................12License-based features in OpenManage Enterprise.............................................................................................. 12
2 Security features in OpenManage Enterprise............................................................................................... 13Role-based OpenManage Enterprise user privileges................................................................................................... 13OpenManage Enterprise user role types....................................................................................................................... 14
3 Deploy and manage OpenManage Enterprise............................................................................................... 16Installation prerequisites and minimum requirements...................................................................................................16
Minimum recommended hardware........................................................................................................................... 16Minimum system requirements for deploying OpenManange Enterprise............................................................ 17
Deploy OpenManage Enterprise on VMware vSphere................................................................................................ 17Deploy OpenManage Enterprise on Hyper-V 2012 R2 and earlier host..................................................................... 18Deploy OpenManage Enterprise on Hyper-V 2016 host.............................................................................................. 18Deploy OpenManage Enterprise on Hyper-V 2019 host.............................................................................................. 19Deploy OpenManage Enterprise by using Kernel-based Virtual Machine.................................................................20Deploy OpenManage Enterprise programmatically......................................................................................................20
4 Get started with OpenManage Enterprise....................................................................................................22Log in to OpenManage Enterprise................................................................................................................................. 22Configure OpenManage Enterprise by using Text User Interface............................................................................. 22Configure OpenManage Enterprise............................................................................................................................... 24Recommended scalability and performance settings for optimal usage of OpenManage Enterprise...................24Supported protocols and ports in OpenManage Enterprise.......................................................................................25
Supported protocols and ports on management stations.................................................................................... 25Supported protocols and ports on managed nodes.............................................................................................. 26
Use case links for the supported protocols and ports in OpenManage Enterprise..................................................27
5 OpenManage Enterprise Graphical User Interface overview........................................................................ 28
6 OpenManage Enterprise Home portal..........................................................................................................30Monitor devices by using the OpenManage Enterprise dashboard...........................................................................30
Manage firmware baseline by using the OpenManage Enterprise dashboard....................................................31Manage device warranty by using the OpenManage Enterprise dashboard...................................................... 31Manage the device compliance baseline by using the OpenManage Enterprise dashboard............................32
Contents 3

Organize devices into groups......................................................................................................................................... 32Donut chart.......................................................................................................................................................................33Device health statuses.................................................................................................................................................... 34
7 Managing devices ....................................................................................................................................... 35Organize devices into groups......................................................................................................................................... 36
Create or delete a Static device group.................................................................................................................... 37Create or edit a Query device group....................................................................................................................... 38Adding or editing devices in a Static child group................................................................................................... 39Rename child groups of Static or Query Dynamic groups.................................................................................... 39Clone a Static or Query group..................................................................................................................................40Add devices to a new group..................................................................................................................................... 40Add devices to existing group.................................................................................................................................. 40Delete devices from OpenManage Enterprise........................................................................................................ 41Exclude devices from OpenManage Enterprise......................................................................................................41Upgrade or downgrade device firmware by using the firmware baseline............................................................41Select Firmware Source............................................................................................................................................ 42Roll back an individual device firmware version..................................................................................................... 43Refresh the device inventory .................................................................................................................................. 44Refresh the device status ........................................................................................................................................44Export the single device inventory...........................................................................................................................44Devices list..................................................................................................................................................................45Performing more actions on chassis and servers.................................................................................................. 45Hardware information displayed for MX7000 chassis ..........................................................................................46Export all or selected data........................................................................................................................................ 46
Viewing and configuring devices....................................................................................................................................46Device Overview........................................................................................................................................................ 47Device hardware information....................................................................................................................................47Run and download Diagnostic reports.....................................................................................................................48Extract and download SupportAssist reports........................................................................................................ 48Managing individual device hardware logs..............................................................................................................49Run remote–RACADM and IPMI–commands on individual devices................................................................... 49
Start Management application iDRAC of a device...................................................................................................... 49Start the Virtual Console................................................................................................................................................ 50
8 Manage the device firmware........................................................................................................................ 51Manage firmware Catalogs.............................................................................................................................................52
Create a firmware catalog by using Dell.com......................................................................................................... 52Create a firmware catalog by using local network.................................................................................................53SSL Certificate Information...................................................................................................................................... 54Update a firmware catalog........................................................................................................................................54Edit a firmware catalog............................................................................................................................................. 54Delete a firmware catalog......................................................................................................................................... 55
Create a firmware baseline............................................................................................................................................. 55Delete a firmware baseline..............................................................................................................................................56Check the compliance of a device firmware against its baseline...............................................................................56
4 Contents

View the device firmware compliance report.........................................................................................................56Update the device firmware version by using the baseline compliance report.................................................. 57
Edit a firmware baseline.................................................................................................................................................. 58Delete a firmware baseline..............................................................................................................................................58
9 Manage device configuration templates.......................................................................................................59Create a template from a reference device.................................................................................................................. 59Create template by importing a template file............................................................................................................... 60View a template information...........................................................................................................................................60Edit a server template......................................................................................................................................................61Edit a chassis template....................................................................................................................................................62Edit IOA template.............................................................................................................................................................62Edit network properties...................................................................................................................................................62Deploy device templates................................................................................................................................................. 62Deploy IOA templates...................................................................................................................................................... 63Clone templates............................................................................................................................................................... 64Auto deployment of configuration on yet-to-be-discovered servers or chassis......................................................64Create auto deployment targets ................................................................................................................................... 64Delete auto deployment targets ....................................................................................................................................65Export auto deployment target details to different formats.......................................................................................65Manage identity pools—Stateless deployment........................................................................................................... 65Overview of stateless deployment................................................................................................................................ 66Create Identity Pool - Pool Information.........................................................................................................................66
Actions........................................................................................................................................................................ 66Identity pools.............................................................................................................................................................. 67Create identity pools..................................................................................................................................................67Create Identity Pool - Fibre Channel....................................................................................................................... 68Create Identity Pool - iSCSI......................................................................................................................................68Create Identity Pool - Fibre channel over Ethernet............................................................................................... 70Create Identity Pool - Ethernet................................................................................................................................ 70View definitions of identity pools ............................................................................................................................. 71Edit identity pools....................................................................................................................................................... 71
Define networks................................................................................................................................................................71Network types............................................................................................................................................................72
Edit or delete a configured network.............................................................................................................................. 72Stateless deployment...................................................................................................................................................... 72Delete identity pools........................................................................................................................................................ 73Reclaim assigned virtual identities..................................................................................................................................73Migrate device profile...................................................................................................................................................... 74
10 Managing the device configuration compliance.......................................................................................... 75Manage compliance baseline templates........................................................................................................................76
Create a compliance baseline template from deployment template.................................................................... 76Create a compliance baseline template from reference device............................................................................ 77Create a compliance baseline by importing from a file.......................................................................................... 77Clone a compliance baseline template.....................................................................................................................77
Contents 5

Edit a baseline compliance template........................................................................................................................ 77Create a configuration compliance baseline..................................................................................................................78Edit a configuration compliance baseline...................................................................................................................... 79Remediate noncompliant devices ................................................................................................................................. 79Remove a configuration compliance baseline...............................................................................................................79
11 Monitoring device alerts.............................................................................................................................. 81View the alert logs............................................................................................................................................................ 81Acknowledge alerts..........................................................................................................................................................82Unacknowledge alerts..................................................................................................................................................... 82Ignore alerts...................................................................................................................................................................... 82Delete alerts......................................................................................................................................................................82View archived alerts.........................................................................................................................................................83Download archived alerts................................................................................................................................................83Alert policies......................................................................................................................................................................83
Create alert policies................................................................................................................................................... 85Enable alert policies................................................................................................................................................... 88Edit alert policies........................................................................................................................................................ 88Disable alert policies...................................................................................................................................................89Delete alert policies....................................................................................................................................................89
Alert definitions................................................................................................................................................................ 89
12 Manage audit logs.......................................................................................................................................91Forward audit logs to remote Syslog servers............................................................................................................... 92
13 Using jobs for device control...................................................................................................................... 93View the jobs list.............................................................................................................................................................. 93View an individual job information..................................................................................................................................94Create a job to blink device LEDs.................................................................................................................................. 95Create a job for managing power devices.................................................................................................................... 95Create a Remote command job for managing devices............................................................................................... 95Create a job to change the virtual console plugin type...............................................................................................96Select target devices and device groups......................................................................................................................96
14 Discovering devices for monitoring or management....................................................................................97Create a device discovery job.........................................................................................................................................98
Onboarding devices................................................................................................................................................... 99Protocol support matrix for discovering devices........................................................................................................100View device discovery job details..................................................................................................................................101Edit a device discovery job.............................................................................................................................................101Run a device discovery job.............................................................................................................................................101Stop a device discovery job........................................................................................................................................... 101Specify multiple devices by importing data from the .csv file.................................................................................. 102Globally excluding devices............................................................................................................................................. 102Specify discovery mode for creating a server discovery job.................................................................................... 103Create customized device discovery job protocol for servers –Additional settings for discovery protocols......103
6 Contents

Specify discovery mode for creating a chassis discovery job...................................................................................104Create customized device discovery job protocol for Chassis – Additional settings for discovery protocols.... 104Specify discovery mode for creating a Dell storage discovery job...........................................................................105Specify discovery mode for creating a network switch discovery job.................................................................... 105Create customized device discovery job protocol HTTPS storage devices –Additional settings for discovery protocols........................................................................................................................................................ 106Create customized device discovery job protocol for SNMP devices.....................................................................106Specify discovery mode for creating a MULTIPLE protocol discovery job............................................................. 106Delete a device discovery job........................................................................................................................................106
15 Managing device inventory....................................................................................................................... 108Create an inventory job..................................................................................................................................................108Run an inventory job now..............................................................................................................................................109Stop an inventory job..................................................................................................................................................... 109Delete an inventory job.................................................................................................................................................. 109Edit an inventory schedule job...................................................................................................................................... 109
16 Manage the device warranty..................................................................................................................... 110View and renew device warranty.................................................................................................................................. 110
17 Reports......................................................................................................................................................112Run reports...................................................................................................................................................................... 113Run and email reports..................................................................................................................................................... 113Edit reports...................................................................................................................................................................... 114Copy reports.................................................................................................................................................................... 114Delete reports.................................................................................................................................................................. 114Creating reports...............................................................................................................................................................114
Select a query criteria...............................................................................................................................................115Export selected reports.................................................................................................................................................. 116
18 Managing MIB files.................................................................................................................................... 117Import MIB files............................................................................................................................................................... 117Edit MIB traps..................................................................................................................................................................118Remove MIB files............................................................................................................................................................ 119Resolve MIB types.......................................................................................................................................................... 119Download an OpenManage Enterprise MIB file.......................................................................................................... 119
19 Managing OpenManage Enterprise appliance settings.............................................................................. 120Configure OpenManage Enterprise network settings................................................................................................ 121Manage OpenManage Enterprise users....................................................................................................................... 121Enable OpenManage Enterprise users.........................................................................................................................122Disable OpenManage Enterprise users........................................................................................................................ 122Delete OpenManage Enterprise users......................................................................................................................... 123Delete Directory services...............................................................................................................................................123Ending user sessions...................................................................................................................................................... 123Role-based OpenManage Enterprise user privileges................................................................................................. 123
Contents 7

Add and edit OpenManage Enterprise users.............................................................................................................. 124Edit OpenManage Enterprise user properties.............................................................................................................125Import AD and LDAP groups.........................................................................................................................................125Directory services integration in OpenManage Enterprise........................................................................................ 126
Add or edit Active Directory groups to be used with Directory Services.......................................................... 126Add or edit Lightweight Directory Access Protocol groups to be used with Directory Services....................127
Set the login security properties...................................................................................................................................128Security Certificates.......................................................................................................................................................128
Generate and download the certificate signing request......................................................................................129Manage Console preferences....................................................................................................................................... 129Customize the alert display........................................................................................................................................... 130Manage incoming alerts..................................................................................................................................................131Set SNMP Credentials....................................................................................................................................................131Manage warranty settings.............................................................................................................................................132Check and update the version of the OpenManage Enterprise and the available extensions..............................132
Updating the OpenManage Enterprise version.................................................................................................... 132Update from Dell.com.............................................................................................................................................. 133Update from an internal network share................................................................................................................. 134Install an Extension................................................................................................................................................... 134Disable an extension.................................................................................................................................................135Uninstall an extension.............................................................................................................................................. 135Enable Extension...................................................................................................................................................... 135
Execute remote commands and scripts...................................................................................................................... 136OpenManage Mobile settings....................................................................................................................................... 136
Enable or disable alert notifications for OpenManage Mobile.............................................................................137Enable or disable OpenManage Mobile subscribers............................................................................................. 137Delete an OpenManage Mobile subscriber........................................................................................................... 138View the alert notification service status.............................................................................................................. 138Notification service status.......................................................................................................................................138View information about OpenManage Mobile subscribers..................................................................................139OpenManage Mobile subscriber information........................................................................................................ 139Troubleshooting OpenManage Mobile................................................................................................................... 140
20 Other references and field descriptions.................................................................................................... 142Schedule Reference....................................................................................................................................................... 142Firmware baseline field definitions................................................................................................................................142Schedule job field definitions.........................................................................................................................................142Token substitution in remote scripts and alert policy................................................................................................. 143Field service debug workflow....................................................................................................................................... 143Unblock the FSD capability........................................................................................................................................... 143Install or grant a signed FSD DAT.ini file.......................................................................................................................144Invoke FSD...................................................................................................................................................................... 144Disable FSD..................................................................................................................................................................... 144Catalog Management field definitions......................................................................................................................... 145
8 Contents
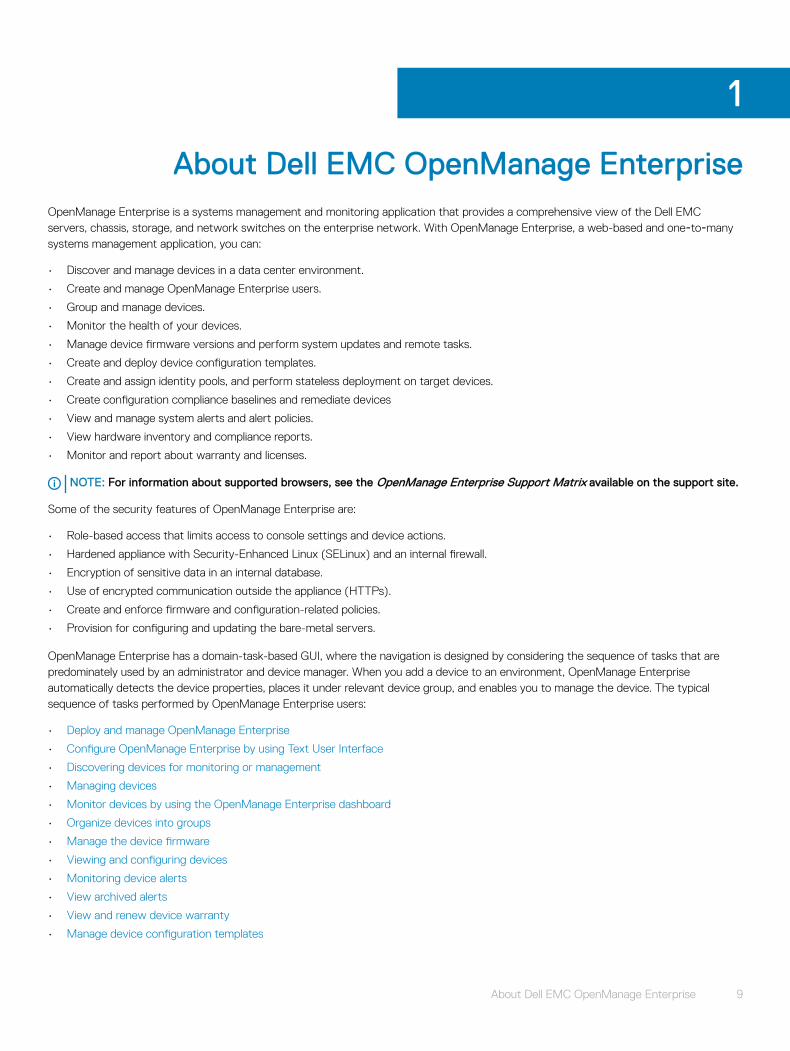
About Dell EMC OpenManage EnterpriseOpenManage Enterprise is a systems management and monitoring application that provides a comprehensive view of the Dell EMC servers, chassis, storage, and network switches on the enterprise network. With OpenManage Enterprise, a web-based and one‑to‑many systems management application, you can:
• Discover and manage devices in a data center environment.
• Create and manage OpenManage Enterprise users.
• Group and manage devices.
• Monitor the health of your devices.
• Manage device firmware versions and perform system updates and remote tasks.
• Create and deploy device configuration templates.
• Create and assign identity pools, and perform stateless deployment on target devices.
• Create configuration compliance baselines and remediate devices
• View and manage system alerts and alert policies.
• View hardware inventory and compliance reports.
• Monitor and report about warranty and licenses.
NOTE: For information about supported browsers, see the OpenManage Enterprise Support Matrix available on the support site.
Some of the security features of OpenManage Enterprise are:
• Role-based access that limits access to console settings and device actions.
• Hardened appliance with Security-Enhanced Linux (SELinux) and an internal firewall.
• Encryption of sensitive data in an internal database.
• Use of encrypted communication outside the appliance (HTTPs).
• Create and enforce firmware and configuration-related policies.
• Provision for configuring and updating the bare-metal servers.
OpenManage Enterprise has a domain-task-based GUI, where the navigation is designed by considering the sequence of tasks that are predominately used by an administrator and device manager. When you add a device to an environment, OpenManage Enterprise automatically detects the device properties, places it under relevant device group, and enables you to manage the device. The typical sequence of tasks performed by OpenManage Enterprise users:
• Deploy and manage OpenManage Enterprise
• Configure OpenManage Enterprise by using Text User Interface
• Discovering devices for monitoring or management
• Managing devices
• Monitor devices by using the OpenManage Enterprise dashboard
• Organize devices into groups
• Manage the device firmware
• Viewing and configuring devices
• Monitoring device alerts
• View archived alerts
• View and renew device warranty
• Manage device configuration templates
1
About Dell EMC OpenManage Enterprise 9

• Managing the device configuration compliance
• Manage compliance baseline templates
• Manage audit logs
• Managing OpenManage Enterprise appliance settings
• Run an inventory job now
• Manage the device warranty
• Reports
• Managing MIB files
• Role-based OpenManage Enterprise user privileges
• Directory services integration in OpenManage Enterprise
Topics:
• New in this release
• Other information you may need
• Contacting Dell EMC
• OpenManage Enterprise Advanced license
New in this release• Support for additional extensions (plug-ins) such as the Power Manager extension to enhance the functionality of the appliance.
• Discovery and monitoring of PowerVault MD3, PowerVault ME4 devices
• In-band discovery of Windows servers and hypervisors using the OpenSSH protocol
• Support for the latest versions of KVM, ESXi, and Hyper-V
• Support for deployment of IOA template
• Programmatic appliance deployment for VMware ESXi (OVF form factor only) version 6.5 or later
• Faster login with AD accounts
• Support for Autodeployment: Ability to designate an existing template to configure servers and chassis that are yet to be discovered
• Onboarding servers and MX7000 chassis enables both alert reception and sets the community string
• Support for multiple device management URLs (if available)
• Option to support firmware catalog updates automatically or manually
• Availability of the Test Connection option in firmware catalog wizards where external share details are required
• Ability to configure the appliance's session inactivity logout
• Option to hide the previously acknowledged alerts in the console using the alert display settings
• Enhancements:
– Reduced upgrade process time as the user can login without waiting for the completion of the background refresh discover task.
– Improved error messages for all features and functions, to help troubleshoot failure and error conditions
– Improved filter functionality for better sorting of records on various grids
– Select-all works across pages for grids with the Across all pages checkbox
– Ability to edit chassis templates
– Ability to track users who acknowledge alerts
– Custom report builder enhanced to better handle field selections, reordering, and display
– Enhanced remote script execution to run up to 100 individual RACADM/IPMI, or SSH commands in a batch
– Improvements to Warranty - settings are uniformly reflected in home widget, warranty report, and scoreboard
– Ability to schedule automatic updating of the firmware catalogs
– Firmware compliance report shows only components that have updates in critical or warning status
– Improved robustness and scaling for firmware updates
10 About Dell EMC OpenManage Enterprise

– Firmware update improvements to included mitigation options
– Descriptive error messages on SMB versions misalignment
– The appliance tracks user-acknowledged alerts enabling a better filtering of the alert log
Other information you may needIn addition to this guide, you can access the following documents that provide more information about OpenManage Enterprise and other related products.
Table 1. Other information you may need
Document Description Availability
Dell EMC OpenManage Enterprise Support Matrix
Lists the devices that are supported by OpenManage Enterprise.
1 Go to Dell.com/OpenManageManuals.
2 Click Dell OpenManage Enterprise and select the required version of OpenManage Enterprise.
3 Click Manuals & documents to access these documents.
Dell EMC OpenManage Enterprise Release Notes
Provides information about known issues and workarounds in OpenManage Enterprise.
Dell EMC OpenManage Mobile User’s Guide
Provides information about installing and using the OpenManage Mobile application.
Dell EMC Repository Manager User's Guide
Provides information about using the Repository Manager to manage system updates.
Dell EMC OpenManage Enterprise and OpenManage Enterprise - Modular Edition RESTful API Guide
Provides information about integrating OpenManage Enterprise by using Representational State Transfer (REST) APIs and also includes examples of using REST APIs to perform common tasks.
Dell EMC SupportAssist Enterprise User's Guide
Provides information about installing, configuring, using, and troubleshooting SupportAssist Enterprise.
Dell.com/ServiceabilityTools
Contacting Dell EMCNOTE: If you do not have an active internet connection, you can find contact information on your purchase invoice, packing slip, bill, or Dell EMC product catalog.
Dell EMC provides several online and telephone-based support and service options. Availability varies by country and product, and some services may not be available in your area. To contact Dell EMC for sales, technical support, or customer service issues:
1 Go to Dell.com/support.
2 Select your support category.
3 Verify your country or region in the Choose a Country/Region drop-down list at the bottom of the page.
4 Select the appropriate service or support link based on your need.
OpenManage Enterprise Advanced licenseNOTE: Installing and using OpenManage Enterprise does not require the OpenManage Enterprise Advanced license. Only the server configuration management feature—deploying device configurations and verifying configuration compliance on servers, requires that the OpenManage Enterprise Advanced license is installed on target servers. This license is not required for creating device configuration template from a server.
The OpenManage Enterprise Advanced license is a perpetual license that is valid for the life of a server, and can be bound to the Service Tag of only one server at a time. OpenManage Enterprise provides a built-in report to view the list of devices and their licenses. Select OpenManage Enterprise > Monitor > Reports > License Report, and then click Run. See Run reports.
About Dell EMC OpenManage Enterprise 11

NOTE: Enabling the server configuration management feature in OpenManage Enterprise does not require any separate license. If the OpenManage Enterprise Advanced license is installed on a target server, you can use the server configuration management feature on that server.
OpenManage Enterprise Advanced license—Supported serversYou can deploy the OpenManage Enterprise Advanced license on the following PowerEdge servers:
• 13th generation (13G) servers having the iDRAC8 2.50.50.50 or later firmware versions. The 13G firmware versions are backward compatible and are installable on 12G hardware.
• 14th generation (14G) servers having the iDRAC9 3.10.10.10 or later firmware versions.
Purchase OpenManage Enterprise Advanced licenseYou can purchase the OpenManage Enterprise Advanced license when you purchase a server or by contacting your sales representative. You can download the purchased license from the Software License Management Portal at Dell.com/support/retail/lkm.
Verify license informationOpenManage Enterprise provides a built-in report to view the list of devices monitored by OpenManage Enterprise, and their licenses. Click OpenManage Enterprise > Monitor > Reports > License Report. Click Run. See Run reports.
You can verify if the OpenManage Enterprise Advanced license is installed on a server by:
• On all pages of OpenManage Enterprise, in the upper-right corner, click the i symbol, and then click Licenses.
• In the Licenses dialog box, read through the message and click appropriate links to view and download OpenManage Enterprise related open-source files, or other open-source licenses.
License-based features in OpenManage EnterpriseThe OpenManage Enterprise Advanced license is required to use the following features of OpenManage Enterprise:
• Server configuration deployment.
• Server configuration compliance baseline creation and remediation.
• Boot to ISO.
• Activate the available plugins, such as the Power Manager, to extend the capability of the appliance.
NOTE: To access features of the OpenManage Enterprise such as the Virtual Console Support function, which depends on the iDRAC, you would need the iDRAC enterprise license. For more details, see the iDRAC documentation available on the support site.
12 About Dell EMC OpenManage Enterprise

Security features in OpenManage EnterpriseSome of the security features of OpenManage Enterprise are:
• User roles (Administrator, Device Manager, Viewer) with differing device management functionality.
• Hardened appliance with Security-Enhanced Linux (SELinux) and an internal firewall.
• Encryption of sensitive data in an internal database.
• Use of encrypted communication outside the appliance (HTTPS).
WARNING: Unauthorized users can obtain OS-level access to the OpenManage Enterprise appliance bypassing Dell EMC's security restrictions. One possibility is to attach the VMDK in another Linux VM as a secondary drive, and thus getting OS partition access, whereby OS-level login credentials can possibly be altered. Dell EMC recommends that customers encrypt the drive (image file) to make unauthorized access difficult. Customers must also ensure that for any encryption mechanism used, they can decrypt files later. Else, the device would not be bootable.
NOTE:
• AD and LDAP directory users can be imported and assigned one of the OpenManage Enterprise roles (Admin, DeviceManager, or Viewer).
• Executing device management actions requires an account with appropriate privileges on the device.
Topics:
• Role-based OpenManage Enterprise user privileges
• OpenManage Enterprise user role types
Related link
Deploy and manage OpenManage Enterprise
Role-based OpenManage Enterprise user privilegesUsers are assigned roles which determine their level of access to the appliance settings and device management features. This feature is termed as Role-Based Access Control (RBAC). The console enforces one role per account. For more information about managing users on OpenManage Enterprise, see Manage OpenManage Enterprise users.
This table lists the various privileges that are enabled for each role.
Table 2. Role-based user privileges in OpenManage Enterprise
OpenManage Enterprise features
User levels for accessing OpenManage Enterprise
Admin Device Manager Viewer
Run reports Y Y Y
View Y Y Y
Manage templates Y Y N
Manage baseline Y Y N
Configure device Y Y N
2
Security features in OpenManage Enterprise 13

OpenManage Enterprise features
User levels for accessing OpenManage Enterprise
Admin Device Manager Viewer
Update device Y Y N
Manage jobs Y Y N
Create monitoring policies Y Y N
Deploy operating system Y Y N
Power control Y Y N
Manage reports Y Y N
Refresh inventory Y Y N
Set up the OpenManage Enterprise appliance
Y N N
Manage discovery Y N N
Manage groups Y N N
Set up security Y N N
Manage traps Y N N
Select targets for autodeployment
Y N N
Related links
OpenManage Enterprise user role types
Deploy and manage OpenManage Enterprise
OpenManage Enterprise user role typesNOTE:
• AD and LDAP directory users can be imported and assigned one of the OpenManage Enterprise roles (Admin, DeviceManager, or Viewer).
• Actions run on the devices require a privileged account on the device.
Table 3. OpenManage Enterprise User role types
User with this role... Has the following user privileges
Administrator Has full access to all the tasks that can be performed on the console.
• Full access (by using GUI and REST) to read, view, create, edit, delete, export, and remove information related to devices and groups monitored by OpenManage Enterprise.
• Can create local, Microsoft Active Directory (AD), and LDAP users and assign suitable roles
• Enable and disable users
• Modify the roles of existing users
• Delete the users
• Change the user password
Device Manager (DM) • Run tasks, policies, and other actions on the devices assigned by the administrator.
14 Security features in OpenManage Enterprise

User with this role... Has the following user privileges
• Cannot delete or modify any groups.
NOTE: Users with Device Manager (DM) privileges cannot be assigned groups.
Viewer • Can only view information displayed on OpenManage Enterprise and run reports.
• By default, has read-only access to the console and all groups.
• Cannot run tasks or create and manage policies.
NOTE:
• If a Viewer or DM is changed to an Administrator, they get the full Administrator privileges. If a Viewer is changed to a DM, the Viewer gets the privileges of a DM.
• A change in the user role will not affect a logged-in user. The changes become effective only after the next user login.
• An audit log is recorded when:
– A group is assigned or access permission is changed.
– User role is modified.
Related links
Deploy and manage OpenManage Enterprise
Role-based OpenManage Enterprise user privileges
Security features in OpenManage Enterprise 15

Deploy and manage OpenManage EnterpriseDell EMC OpenManage Enterprise is provided as an appliance that you can deploy on a hypervisor and manage resources to minimize downtime. The virtual appliance can be configured from the application web console after initial network provisioning in the Text User Interface (TUI). For steps to view and update the console version, see Check and update the version of the OpenManage Enterprise and the available extensions. This chapter describes the installation prerequisites and minimum requirements.
NOTE: For information about supported browsers, see the OpenManage Enterprise Support Matrix available on the support site.
Topics:
• Installation prerequisites and minimum requirements
• Deploy OpenManage Enterprise on VMware vSphere
• Deploy OpenManage Enterprise on Hyper-V 2012 R2 and earlier host
• Deploy OpenManage Enterprise on Hyper-V 2016 host
• Deploy OpenManage Enterprise on Hyper-V 2019 host
• Deploy OpenManage Enterprise by using Kernel-based Virtual Machine
• Deploy OpenManage Enterprise programmatically
Related links
OpenManage Enterprise user role types
Role-based OpenManage Enterprise user privileges
OpenManage Enterprise Graphical User Interface overview
Security features in OpenManage Enterprise
Installation prerequisites and minimum requirementsFor a list of supported platforms, operating systems, and browsers, see the Dell EMC OpenManage Enterprise Support Matrix on the support site and Dell TechCenter.
To install OpenManage Enterprise, you require local system administrator rights and the system you are using must meet the criteria mentioned in the Minimum recommended hardware and Minimum system requirements for installing OpenManange Enterprise.
Minimum recommended hardware
Table 4. Minimum recommended hardware
Minimum recommended hardware Large deployments Small deployments
Number of devices that can be managed by the appliance
Up to 8000 1000
RAM 16 GB 16 GB
Processors 8 cores total 4 cores total
Hard drive 250 GB 50 GB
3
16 Deploy and manage OpenManage Enterprise

Minimum system requirements for deploying OpenManange Enterprise
Table 5. Minimum requirements
Particulars Minimum requirements
Supported hypervisors• VMware vSphere versions:
– vSphere ESXi 6.7
– vSphere ESXi 6.5
– vSphere ESXi 6.0
– vSphere ESXi 5.5
• Microsoft Hyper-V supported on:
– Windows Server 2019
– Windows Server 2016
– Windows Server 2012 R2
• KVM supported on:
– Red Hat Enterprise Linux 7.2
– Red Hat Enterprise Linux 7.0
– Red Hat Enterprise Linux 6.5
Network Available virtual NIC which has access to the management networks of all the devices which is managed from OpenManage Enterprise.
Supported browsers• Internet Explorer (64-bit) 11 and later
• Mozilla Firefox 52 and later
• Google Chrome 58 and later
User interface HTML 5, JS based
NOTE: For the latest update about the minimum requirements for OpenManage Enterprise, see the Dell EMC OpenManage Enterprise Support Matrix on the support site.
Deploy OpenManage Enterprise on VMware vSphereNOTE: To perform any tasks on OpenManage Enterprise, you must have necessary user privileges. See Role-based OpenManage Enterprise user privileges.
1 Download the openmanage_enterprise_ovf_format.zip file from the support site and extract the file to a location accessible by VMware vSphere Client. It is recommended to use a local drive or CD/DVD, because installing from a network location can take up to 30 minutes.
2 In vSphere Client, select File > Deploy OVF Template.
The Deploy OVF Template wizard is displayed.
3 On the Source page, click Browse, and then select the OVF package. Click Next.
4 On the OVF Template Details page, review the information that is displayed. Click Next.
5 On the End User License Agreement page, read the license agreement and click Accept. To continue, click Next.
6 On the Name and Location page, enter a name with up to 80 characters, and then select an inventory location where the template will be stored. Click Next.
Deploy and manage OpenManage Enterprise 17

7 Depending on the vCenter configuration, one of the following options is displayed:
• If resource pools are configured — On the Resource Pool page, select the pool of virtual servers to deploy the appliance VM.
• If resource pools are NOT configured — On the Hosts/Clusters page, select the host or cluster on which you want to deploy the appliance VM.
8 If there are more than one datastores available on the host, the Datastore page displays such datastores. Select the location to store virtual machine (VM) files, and then click Next.
9 On the Disk Format page, click Thick provision to pre-allocate physical storage space to VMs at the time a drive is created.
10 On the Ready to Complete page, review the options you selected on previous pages and click Finish to run the deployment job.
A completion status window displays where you can track job progress.
Deploy OpenManage Enterprise on Hyper-V 2012 R2 and earlier host1 Download the openmanage_enterprise_vhd_format.zip file from the support site. Extract the file and then move or copy
the enclosed VHD file into an appropriate location on your system where you want to store the OpenManage Enterprise virtual drive.
2 Start the Hyper-V Manager in the Windows Server 2012 R2 or an earlier version. The Windows Hyper-V should be displayed under the Hyper-V Manager. If not, right-click Hyper-V Manager, and then select Connect to Server.
3 Click Actions > New > Virtual Machine to start the New Virtual Machine Wizard.
4 Click Next on the initial Before You Begin page.
5 On the Specify Name and Location page
• provide the Virtual machine name.
• (Optional) Select the Store the virtual machine in a different location check box to activate the Location field, and then browse and navigate to capture a folder location where the VM would be stored.
NOTE: If the check box is not selected, the VM is stored in the default folder.
6 Click Next
7 On the Specify Generation page, select Generation 1 and click Next.
NOTE: OpenManage Enterprise does not support Generation 2.
8 On the Assign Memory page, enter the startup memory in the Startup memory field and click Next.
NOTE: Ensure that a minimum of 16,000 MB (16 GB) is assigned.
9 On the Configure Networking page, select the network adapter in the Connection drop-down list. Ensure that the virtual switch is connected to the network. Click Next.
NOTE: If set to 'Not Connected', OME will not function properly during the first reboot, and requires redeployment if this situation recurs.
10 On the Connect Virtual Hard Disk page, select Use an existing virtual disk drive, and then browse to the location where the VHD file is copied as mentioned in step 1. Click Next.
11 Complete the on-screen instructions.
NOTE: Make sure to have a minimum storage size of 20 GB
12 Open the Settings of the newly created VM and power on the VM.
13 On the TUI screen, accept the EULA and when prompted, change the password of the appliance and set network parameters to the IP of the appliance.
Deploy OpenManage Enterprise on Hyper-V 2016 host1 Download the openmanage_enterprise_vhd_format.zip file from the support site. Extract the file and then move or copy the
enclosed VHD file into an appropriate location on your system where you want to store the OpenManage Enterprise virtual drive.
2 Start the Hyper-V Manager in the Windows server 2016. The Windows Hyper-V should be displayed under the Hyper-V Manager. If not, right-click Hyper-V Manager, and then select Connect to Server.
18 Deploy and manage OpenManage Enterprise

3 Click Actions > New > Virtual Machine to start the New Virtual Machine Wizard.
4 Click Next on the initial Before You Begin page.
5 On the Specify Name and Location page
• provide the Virtual machine name.
• (Optional) Select the Store the virtual machine in a different location check box to activate the Location field, and then browse and navigate to capture a folder location where the VM would be stored.
NOTE: If the check box is not selected, the VM is stored in the default folder.
6 Click Next
7 On the Specify Generation page, select Generation 1 and click Next.
NOTE: OpenManage Enterprise does not support Generation 2.
8 On the Assign Memory page, enter the startup memory in the Startup memory field and click Next.
NOTE: Ensure that a minimum of 16,000 MB (16 GB) is assigned.
9 On the Configure Networking page, select the network adapter in the Connection drop-down list. Ensure that the virtual switch is connected to the network. Click Next.
NOTE: If set to 'Not Connected', OME will not function properly during the first reboot, and requires redeployment if this situation recurs.
10 On the Connect Virtual Hard Disk page, select Use an existing virtual disk drive, and then browse to the location where the VHD file is copied as mentioned in step 1. Click Next.
11 Complete the on-screen instructions.
NOTE: Make sure to have a minimum storage size of 20 GB
12 Open the Settings of the newly created VM and power on the VM.
13 On the TUI screen, accept the EULA and when prompted, change the password of the appliance and set network parameters to the IP of the appliance.
Deploy OpenManage Enterprise on Hyper-V 2019 host1 Download the openmanage_enterprise_vhd_format.zip file from the support site. Extract the file and then move or copy the
enclosed VHD file into an appropriate location on your system where you want to store the OpenManage Enterprise virtual drive.
2 Start the Hyper-V Manager in the Windows Server 2019. The Windows Hyper-V should be displayed under the Hyper-V Manager. If not, right-click Hyper-V Manager, and then select Connect to Server.
3 Click Actions > New > Virtual Machine to start the New Virtual Machine Wizard.
4 Click Next on the initial Before You Begin page.
5 On the Specify Name and Location page
• provide the Virtual machine name.
• (Optional) Select the Store the virtual machine in a different location check box to activate the Location field, and then browse and navigate to capture a folder location where the VM would be stored.
NOTE: If the check box is not selected, the VM is stored in the default folder.
6 Click Next
7 On the Specify Generation page, select Generation 1 and click Next.
NOTE: OpenManage Enterprise does not support Generation 2.
8 On the Assign Memory page, enter the startup memory in the Startup memory field and click Next.
NOTE: Ensure that a minimum of 16,000 MB (16 GB) is assigned.
9 On the Configure Networking page, select the network adapter in the Connection drop-down list. Ensure that the virtual switch is connected to the network. Click Next.
Deploy and manage OpenManage Enterprise 19

NOTE: If set to 'Not Connected', OME will not function properly during the first reboot, and requires redeployment if this situation recurs.
10 On the Connect Virtual Hard Disk page, select Use an existing virtual disk drive, and then browse to the location where the VHD file is copied as mentioned in step 1. Click Next.
11 Complete the on-screen instructions.
NOTE: Make sure to have a minimum storage size of 20 GB
12 Open the Settings of the newly created VM and power on the VM.
13 On the TUI screen, accept the EULA and when prompted, change the password of the appliance and set network parameters to the IP of the appliance.
Deploy OpenManage Enterprise by using Kernel-based Virtual Machine1 Install the required virtualization packages while installing the operating system.
2 Download the openmanage_enterprise_kvm_format.zip file from the support site. Extract the file to an appropriate location on your system where you want to store the OpenManage Enterprise virtual drive.
3 Start the virtual manager and select File > Properties.
4 On the Network Interfaces page, click Add.
5 Select Bridge as the interface type and click Forward.
6 Set the start mode to onboot and select the Activate now check box.
7 Select the interface to bridge from the list and ensure the properties match with the host device, and then click Finish.
A virtual interface is now created, and you can configure the firewall settings by using the terminal.
8 On the Virtual Machine Manager, click File > New.
9 Enter a name for the VM and select the Import existing disk image option, and then click Forward.
10 Navigate the file system and select the QCOW2 file that is downloaded in step 1, and then click Forward.
11 Assign 16 GB as the memory and select two processor cores, and then click Forward.
12 Assign the required disk space for the VM and click Forward.
13 Under Advanced options, ensure that the bridged host device network is selected and KVM is selected as the Virt Type.
14 Click Finish.
OpenManage Enterprise appliance is now deployed by using the KVM. To get started with OpenManage Enterprise, see Log in to OpenManage Enterprise.
Deploy OpenManage Enterprise programmaticallyOpenManage Enterprise can be deployed programmatically (using a script) on VMWare ESXi version 6.5 or later.
NOTE: You must use the latest versions of OVF Tool and Python 3.0 or later for the programmatic deployment.
To programmatically deploy OpenManage Enterprise, do the following:
1 Download and extract the openmanage_enterprise_ovf_format.zip file or download the following OVF files individually from the support site:
• openmanage_enterprise.x86_64-0.0.1-disk1.vmdk• openmanage_enterprise.x86_64-0.0.1.mf• openmanage_enterprise.x86_64-0.0.1.ovf• openmanage_enterprise.x86_64-0.0.1.vmx• ovf_properties.config• update_ovf_property.py
2 Open the ovf_properties.config and set the following parameters:
20 Deploy and manage OpenManage Enterprise

Table 6. Parameters used in ovf_properties.configParameter Accepted Values Description
bEULATxt true or false By setting this value to true, you agree to the terms and conditions in the End-User License Agreement (EULA). The EULA is available at the bottom of the ovf_properties.config file.
adminPassword Must contain at least one character in: uppercase, lowercase, digit, and special character. For example, Dell123$
Type a new administrator password for the OpenManage Enterprise.
bEnableDHCP true or false Set to true if you want the appliance to enable IPv4 DHCP and to ignore the static IPv4.
bEnableIpv6AutoConfig true or false Set to true if you want the appliance to enable IPv6 auto configuration and to ignore the static IPv6.
staticIP static IP in CIDR format Can be IPv4 or IPv6. (You cannot set both the IPv4 and IPv6 types at a time.)
gateway IPv4 or IPv6 You cannot set static Gateway as IPv4 and IPv6 types at a time.
3 Run the update_ovf_property.py script.
This script modifies the openmanage_enterprise.x86_64-0.0.1.ovf file for deployment in accordance with the values set
in the ovf_properties.config file. When the script finishes execution, a sample ovftool command is displayed. It contains tags such as <DATASTORE>, <user>, <password>, <IP address>, and so on, that you must replace as per your deployment
environment. These settings define the resources that are used on the target ESXi system and also the credentials and IP address of the target system.
NOTE: Remember to replace the entire tag including the < and > symbols.
4 Run the modified ovftool command from the previous step.
NOTE: The ovftool command must be run with the --X:injectOvfEnv and --powerOn flags because they are required for programmatic deployment.
After the ovftool command is run, the manifest validates and the deployment begins.
Deploy and manage OpenManage Enterprise 21

Get started with OpenManage Enterprise
Topics:
• Log in to OpenManage Enterprise
• Configure OpenManage Enterprise by using Text User Interface
• Configure OpenManage Enterprise
• Recommended scalability and performance settings for optimal usage of OpenManage Enterprise
• Supported protocols and ports in OpenManage Enterprise
• Use case links for the supported protocols and ports in OpenManage Enterprise
Log in to OpenManage EnterpriseWhen you boot the system for the first time from the Text User Interface (TUI), you are prompted to accept the EULA, and then change the administrator password. If you are logging in to OpenManage Enterprise for the first time, you must set the user credentials through the TUI. See Configure OpenManage Enterprise by using Text User Interface.
CAUTION: If you forget the administrator password, it cannot be recovered from the OpenManage Enterprise appliance.
1 Start the supported browser.
2 In the Address box, enter the OpenManage Enterprise appliance IP address.
3 On the login page, type the login credentials, and then click Log in.
NOTE: The default user name is admin.
If you are logging in to OpenManage Enterprise for the first time, the Welcome to OpenManage Enterprise page is displayed. Click Initial Settings, and complete the basic configuration setup. See Configure OpenManage Enterprise. To discover the devices, click Discover Devices.
NOTE: If incorrect OpenManage Enterprise login credentials are entered, your OpenManage Enterprise account is locked and you will not be able to log in until completing the lockdown period. By default, the lockdown duration is 900 seconds. To change this duration, see Set the login security properties.
Configure OpenManage Enterprise by using Text User InterfaceThe Text User Interface (TUI) tool provides you a text interface to change the admin password, view appliance status and network configuration, configure networking parameters, and enable field service debug request.
NOTE: On the TUI interface, use the arrow keys or press Tab to go to the next option on the TUI, and press Shift + Tab to go back to the previous options. Press Enter to select an option. The Space bar switch the status of a check box.
1 Before logging into the TUI, accept EULA when prompted. In the next Choose keyboard layout screen, change the keyboard layout if needed.
a On the Change admin password screen, enter the new password and confirm the password.
NOTE: For the first time, you must change the password by using the TUI screen.
b Use the arrow keys or press Tab to select Apply.
4
22 Get started with OpenManage Enterprise

c When prompted for confirmation, select Yes, and then press Enter.
Now you can configure OpenManage Enterprise by using the TUI. On the TUI screen, you can view the following options:
• Change the Admin Password
• Display Current Appliance Status
• Display Current Network Configuration
• Set Networking Parameters
• Enable Field Service Debug (FSD) Mode
• Reboot the Appliance
NOTE: Possibly after running a command to restart the services, it may be observed that the TUI displays the following message: NMI watchdog: BUG: soft lockup - CPU#0 stuck for 36s! [java:14439]. This soft lockup issue likely occurs as a result of the hypervisor being overloaded. In such situations, it is recommended to have at least 16 GB of RAM and CPU of 8000 MHz reserved to the OpenManage Enterprise appliance. It is also recommended that the OpenManage Enterprise appliance be restarted when this message is displayed.
• Setup Debug Logging
– Enable Debug Logs
– Disable Debug Logs
– Enable SCP Retention
– Disable SCP Retention
• Restart Services
2 To confirm the current appliance administrator password, select Change the Admin Password, and then enter the password. Press Tab and select Continue.
3 On the TUI screen:
a To view appliance status and the IPv4 and IPv6 statuses and addresses, select Current Appliance Status.b To configure network interface, select Set Networking Parameters.
On the Configure Network Interface screen, to enable IPv4, or IPv6, or both, press Enter. Select Apply.
NOTE:
• To change the DNS Domain Name, ensure Dynamic DNS registration is enabled on the DNS server. Also, for appliance to be registered on the DNS server, select the Nonsecure and secure option under Dynamic updates.
• If the OpenManage Enterprise appliance fails to acquire a IPv6 address, check if the environment is configured for router advertisements to have the managed bit (M) turned on. Network Manager from current Linux distributions causes a link failure when this bit is on, but DHCPv6 is not available. Ensure that DHCPv6 is enabled on the network or disable the managed flag for router advertisements.
• To perform any write operations on TUI, ensure that you type the admin password, and then configure IPv4 or IPv6.
• To configure IPv6, ensure that it is already configured by a vCenter server.
• In an IPv6 environment, when a Router Advertisement is configured for stateless configuration of multiple IPv6 IPs on a port, iDRAC supports a maximum of 16 IPs addresses. In such a case, OpenManage Enterprise displays only the last discovered IP and uses that IP as the out-of-band interface to iDRAC.
• By default, the last discovered IP of a device is used by OpenManage Enterprise for performing all operations. To make any IP change effective, you must rediscover the device.
c To enable console debug, select Enable Field Service Debug (FSD) Mode. See Field service debug workflow.d To collect the debug logs of the application, monitoring tasks, events, and task execution history, select Setup Debug Logging .
In addition, to collect the template .XML files, select the Enable SCP retention option under Setup Debug Logging . You can download the debug logs by clicking Monitor > Audit Logs > Export > Export Console Logs in OpenManage Enterprise.
e To restart OpenManage Enterprise, select Reboot the Appliance.
Get started with OpenManage Enterprise 23

Configure OpenManage EnterpriseIf you are logging in to OpenManage Enterprise for the first time, the Welcome to OpenManage Enterprise page is displayed, which allows setting of time (either manually or using NTP time synchronization) and proxy configurations.
1 To configure the time manually do the following in the Time Configuration section:
• Use the Timezone drop down menu to select an appropriate Timezone.
• In the Date box, enter or select a date.
• In the Time box, fill the time.
• Click Apply to save the settings.
2 If you want to use the NTP Server for time synchronization, do the following in the Time Configuration section:
NOTE: When the NTP Server settings are updated, the currently logged in users are automatically logged out from their OpenManage Enterprise sessions.
• Select the Use NTP check box.
• Enter the IP address or hostname in Primary NTP Server Address and Secondary NTP Server Address (optional) for time synchronization
3 If you want to set proxy server for external communication, In the Proxy Configuration section do the following:
• Select the Enable HTTP Proxy Settings check box.
• Enter the Proxy Address.
• Enter the Port number for the proxy server.
• If the proxy server requires credentials to log in, select theEnable Proxy Authentication check box and enter the user name and password.
4 Click Apply to save the settings.
NOTE: For information about supported browsers, see the OpenManage Enterprise Support Matrix available on the support site.
Recommended scalability and performance settings for optimal usage of OpenManage EnterpriseThe following table lists the performance parameters of the supported features in OpenManage Enterprise. To ensure an optimal performance of OpenManage Enterprise, Dell EMC recommends to run the tasks at the specified frequency on the maximum number of devices that are recommended per task.
Table 7. Scalability and performance considerations of OpenManage Enterprise
Tasks Recommended frequency of running the tasks
Tasks whether precanned? Maximum devices that are recommended per task.
Discovery Once a day for environment with frequent network changes.
No 10,000/task
Inventory OpenManage Enterprise provides a precanned task that automatically refreshes inventory once a day.
Yes. You can disable this feature. Devices that are monitored by OpenManage Enterprise.
Warranty OpenManage Enterprise provides a precanned task that automatically refreshes warranty once a day.
Yes. You can disable this feature. Devices that are monitored by OpenManage Enterprise.
Health poll Every one hour Yes. You can change the frequency.
Not applicable
Firmware update Need-basis 100/task
24 Get started with OpenManage Enterprise

Tasks Recommended frequency of running the tasks
Tasks whether precanned? Maximum devices that are recommended per task.
Configuration inventory Need-basis 50/baseline
Supported protocols and ports in OpenManage Enterprise
Supported protocols and ports on management stations
Table 8. OpenManage Enterprise supported protocols and ports on the management stations
Port Number Protocol Port Type Maximum Encryption Level
Source Direction Destination Usage
22 SSH TCP 256-bit Management station
In OpenManage Enterprise appliance
Required for incoming only if FSD is used. OpenManage Enterprise administrator must enable only if interacting with the Dell EMC support staff.
25 SMTP TCP None OpenManage Enterprise appliance
Out Management station
To receive email alerts from OpenManage Enterprise.
53 DNS UDP/TCP None OpenManage Enterprise appliance
Out Management station
For DNS queries.
68 / 546 (IPv6)
DHCP UDP/TCP None OpenManage Enterprise appliance
Out Management station
Network configuration.
80 HTTP TCP None Management station
In OpenManage Enterprise appliance
The Web GUI landing page. Will redirect a user to HTTPS.
123 NTP TCP None OpenManage Enterprise appliance
Out NTP Server Time synchronization (if enabled).
137, 138, 139, 445
CIFS UDP/TCP None iDRAC/ CMC In OpenManage Enterprise appliance
To upload or download device configuration templates, to upload TSR and diagnostic logs, and to download firmware DUPs.
OpenManage Enterprise appliance
Out CIFS share To import firmware catalogs from CIFS share.
162* SNMP UDP None Management station
In/Out OpenManage Enterprise appliance
Event reception through SNMP. The direction is 'outgoing'
Get started with OpenManage Enterprise 25

Port Number Protocol Port Type Maximum Encryption Level
Source Direction Destination Usage
only if using the Trap forward policy.
443 (default) HTTPS TCP 128-bit SSL Management station
In/Out OpenManage Enterprise appliance
Web GUI. To download updates and warranty information from dell.com. 256-bit encryption is allowed when communicating with the OpenManage Enterprise by using HTTPS for the web GUI.
514 Syslog TCP None OpenManage Enterprise appliance
Out Syslog server To send alert and audit log information to Syslog server.
3269 LDAPS TCP None OpenManage Enterprise appliance
Out Management station
AD/ LDAP login for Global Catalog.
636 LDAPS TCP None OpenManage Enterprise appliance
Out Management station
AD/ LDAP login for Domain Controller.
* Port can be configured up to 499 excluding the port numbers that are already allocated.
Supported protocols and ports on managed nodes
Table 9. OpenManage Enterprise supported protocols and ports on the managed nodes
Port Number Protocol Port Type Maximum Encryption Level
Source Direction Destination Usage
22 SSH TCP 256-bit OpenManage Enterprise appliance
Out Managed node For the Linux OS, Windows, and Hyper-V discovery.
161 SNMP UDP None OpenManage Enterprise appliance
Out Managed node For SNMP queries.
162* SNMP UDP None OpenManage Enterprise appliance
In/ Out Managed node Send and receive SNMP traps.
443 Proprietary/ WS-Man/Redfish
TCP 256-bit OpenManage Enterprise appliance
Out Managed node Discovery and inventory of iDRAC7 and later versions, and for the CMC management.
623 IPMI/ RMCP
UDP None OpenManage Enterprise appliance
Out Managed node IPMI access through LAN.
69 TFTP UDP None CMC In Management station
For updating CMC firmware
26 Get started with OpenManage Enterprise

* Port can be configured up to 499 excluding the port numbers that are already allocated.
NOTE: In an IPv6 environment, you must enable IPv6 and disable IPv4 in the OpenManage Enterprise appliance to ensure all the features work as expected.
Use case links for the supported protocols and ports in OpenManage Enterprise
Table 10. Use case links for the supported protocols and ports in OpenManage Enterprise
Use case URL
Upgrade OpenManage Enterprise appliance. https://downloads.dell.com/openmanage_enterprise/
Access device warranty. https://api.dell.com/support/assetinfo/v4/getassetwarranty/
Update firmware catalogs. https://downloads.dell.com/catalog/
Push new alert notifications using the OpenManage Mobile application.
https://openmanagecloud.dell.com
Get started with OpenManage Enterprise 27

OpenManage Enterprise Graphical User Interface overview
On the OpenManage Enterprise Graphical User Interface (GUI), you can use menu items, links, buttons, panes, dialog boxes, lists, tabs, filter boxes, and pages to navigate between pages and complete device management tasks. Features such as devices list, Donut charts, audit logs, OpenManage Enterprise settings, system alerts, and firmware update are displayed at more than one place. It is recommended that you familiarize yourself with the GUI elements for easily and effectively using OpenManage Enterprise to manage your data center devices.
• A—The OpenManage Enterprise menu, on all the pages of OpenManage Enterprise, provides links to features that enable administrators view the dashboard (Home), manage devices (Devices), manage firmware baselines, templates, and configuration compliance baselines (Configuration), create and store alerts (Alerts), and then run jobs, discover, collect inventory data, and generate reports (Monitor). You can also customize different properties of your OpenManage Enterprise (Application Settings). Click the pin symbol in the upper-right corner to pin the menu items so they appear on all the OpenManage Enterprise pages. To unpin, click the pin symbol again.
• B—The Dashboard symbol. Click to open the dashboard page from any page of OpenManage Enterprise. Alternately, click Home. See Dashboard.
• C—The Donut chart gives a snapshot of health status of all the devices monitored by OpenManage Enterprise. Enables you to quickly act upon the devices that are in critical state. Each color in the chart represents a group of devices having a particular health state. Click respective color bands to view respective devices in the devices list. Click the device name or IP address to view the device properties page. See Viewing and configuring devices.
• D—The symbols used to indicate the device health state. See Device health statuses.
• E—In the Search Everything box, enter about anything that is monitored and displayed by OpenManage Enterprise to view the results such as device IP, job name, group name, firmware baseline, and warranty data. You cannot sort or export data that is retrieved by using the Search Everything feature. On individual pages or dialog boxes, enter or select from the Advance Filters section to refine your search results.
5
28 OpenManage Enterprise Graphical User Interface overview

– The following operators are not supported: +, -, and ".
• F—Number of OpenManage Enterprise jobs currently in the queue. Jobs that are related to discovery, inventory, warranty, firmware update, and so on. Click to view the status of jobs run under Health, Inventory, and the Report category on the Job Details page. To view all the events, click All Jobs. See Using jobs for device control. Click to refresh.
• G—The number of events generated in the alerts log. Also, based on your settings to whether or not view the unacknowledged alerts, the number of alerts in this section varies. By default, only the unacknowledged alerts are displayed. To hide or unhide the acknowledged alerts, see Customize the alert display. Deleting the alerts reduces the count. For information about symbols that are used to indicate severity statuses, see Device health statuses. Click a severity symbol to view all events in that severity category on the Alerts page. To view all the events, click All events. See Managing device alerts.
• H—Total number of device warranties in Critical (expired) and in Warning (expiring soon) statuses. See Managing device warranty.
• I—Username of the user who is currently logged in. Pause the pointer over the username to view the roles that are assigned to the user. For more information about the role-based users, see Role-based OpenManage Enterprise user privileges. Click to log out, and then log in as a different user.
• J—Currently, the context-sensitive help file is displayed only for the page you are on, and not the Home portal pages. Click to view task-based instructions to effectively use links, buttons, dialog boxes, wizards, and pages in OpenManage Enterprise.
• K—Click to view the current version of OpenManage Enterprise installed on the system. Click Licenses to read through the message. Click appropriate links to view and download OpenManage Enterprise-related open-source files, or other open-source licenses.
• L—Click the symbol to pin or unpin the menu items. When unpinned, to pin the menu items, expand the OpenManage Enterprise menu and click the pin symbol.
Data about items that are listed in a table can be comprehensively viewed, exported in total, or based on selected items. See Export all or selected data. When displayed in blue text, in-depth information about items in a table can be viewed and updated, which either opens in the same window or on a separate page. Tabulated data can be filtered by using the Advanced Filters feature. The filters vary based on the content you view. Enter or select data from the fields. Incomplete text or numbers will not display the expected output. Data matching the filter criteria is displayed in the list. To remove filters, click Clear All Filters.
To sort data in a table, click the column title. You cannot sort or export data that is retrieved by using the Search Everything feature.
Symbols are used to identify major main items, dashboard, status of device health, alert category, firmware compliance status, connection state, power status, and others. Click the forward and backward buttons of the browser to navigate between pages on OpenManage Enterprise. For information about supported browsers, see the Dell EMC OpenManage Enterprise Support Matrix available on the support site.
Where appropriate, the page is split into left, working, and right panes to simplify the task of device management. Where necessary, online instructions and tool-tips are displayed when the pointer is paused over a GUI element.
Preview about a device, job, inventory, firmware baseline, management application, virtual console, and so on, are displayed in the right pane. Select an item in the working pane and click View Details in the right pane to view in-depth information about that item.
When logged in, all pages are automatically refreshed. After deploying the appliance, during subsequent login, if an updated version of OpenManage Enterprise is available, you are alerted to update the version immediately by clicking Update Now. Users with all the OpenManage Enterprise privileges (Administrator, Device Manager, and Viewer) can view the message, but only an Administrator can update the version. An Administrator can choose to get reminded later or dismiss the message. For more information about updating the OpenManage Enterprise version, see Check and update the version of the OpenManage Enterprise and the available extensions.
For all the job-based actions by OpenManage Enterprise, when a job is created or started to run, the lower-right corner displays an appropriate message. Details about the job can be viewed on the Job Details page. See View the jobs list.
Related link
Deploy and manage OpenManage Enterprise
OpenManage Enterprise Graphical User Interface overview 29

OpenManage Enterprise Home portalBy clicking OpenManage Enterprise > Home, the Home page of OpenManage Enterprise is displayed. On the Home page:
• View the Dashboard to get a live snapshot about the health statuses of devices, and then take actions, where necessary. See Dashboard.
• View alerts under the critical and warning categories and resolve those. See Managing device alerts.
• The Widgets section lists the rollup warranty, firmware compliance, and configuration compliance statuses of all devices.
For more information about the features under Widgets, see Monitor devices by using the OpenManage Enterprise dashboard. The right pane lists the recent alerts and tasks generated by OpenManage Enterprise. To view more information about an alert or task, click the alert or task title. See Monitoring device alerts and Using jobs for device control.
• If an updated version of OpenManage Enterprise is available, you are immediately alerted when an update is available. To update, click Update Now. For more information about updating the OpenManage Enterprise version, see Check and update the version of the OpenManage Enterprise and the available extensions.
• The Recent Alerts section lists the most recent alerts generated by devices that are monitored by OpenManage Enterprise. Click the alert title to view in-depth information about the alert. See Managing device alerts.
• The Recent Tasks section lists the most recent tasks (jobs) created and run. Click the task title to view in-depth information about the job. See View the jobs list.
Topics:
• Monitor devices by using the OpenManage Enterprise dashboard
• Organize devices into groups
• Donut chart
• Device health statuses
Monitor devices by using the OpenManage Enterprise dashboard
NOTE: To perform any tasks on OpenManage Enterprise, you must have necessary user privileges. See Role-based OpenManage Enterprise user privileges.
Apart from the first-time login, Dashboard is the first page you see after every subsequent login to OpenManage Enterprise. To open the Dashboard page from any page of OpenManage Enterprise, click the dashboard symbol in the upper-left corner. Alternately, click Home. Using the real-time monitoring data, the dashboard displays the device health, firmware compliance, warranty, alerts, and other aspects of devices and device groups in your data center environment. Any available console updates are also displayed on the Dashboard. You can upgrade the OpenManage Enterprise version immediately, or set OpenManage Enterprise to remind you later. By default, when you start the application the first time, the Dashboard page appears empty. Add devices to OpenManage Enterprise so that they can be monitored and displayed on the dashboard. To add devices, see Discovering devices for monitoring or management and Organize devices into groups.
• Manage the device firmware
• Managing device alerts
• Discovering devices
• Creating reports
• Managing OpenManage Enterprise appliance settings
By default, the Hardware Health section displays a Donut chart that indicates the current health of all the devices monitored by OpenManage Enterprise. Click sections of the Donut chart to view information about devices with respective health statuses.
6
30 OpenManage Enterprise Home portal

A Donut in the Alerts section lists the alerts received by devices in the selected device groups. See Monitoring device alerts. The total number of alerts in the Donut chart varies based on the setting to whether or not view the unacknowledged alerts. By default, only the unacknowledged alerts are displayed. See Customize the alert display. To view alerts under each category, click the respective color bands. In the Alerts dialog box, the Critical section lists the alerts in critical status. To view all the generated alerts, click All. The SOURCE NAME column indicates the device that generated the alert. Click the name to view and configure device properties. See Viewing and configuring devices. To filter data, click Advanced Filters. Export data into Excel, CSV, HTML, or PDF format. See Export all or selected data.
For more information about a Donut chart, see Donut chart and Device health statuses. To view the summary of devices in a different device group monitored by OpenManage Enterprise, select from the Device Groups drop-down menu. To view the list of devices that belong to a health state, you can either click the color band associated with a health category, or click the respective health status symbol next to a Donut chart.
NOTE: In the Devices list, click the device name or IP address to view device configuration data, and then edit. See Viewing and configuring devices.
The Widgets section provides a summary of some of the key features of OpenManage Enterprise. To view summary under each category, click the Widget title.
• Warranty: Displays the number of devices whose warranty is about to expire. This is based on the Warranty Settings. If the user opts for expire warranty notification, then the number of devices whose warranty is expired is shown. Otherwise, the number of expiring soon or the active warranty count is shown. Click to view more information in the Warranty dialog box. See Manage device warranty by using the OpenManage Enterprise dashboard. For information about managing device warranty, see Manage the device warranty. Pause the pointer over the Warranty section to read definitions about the symbols used in the section.
• Firmware: Displays the rolledup status of firmware compliance baselines created on OpenManage Enterprise. If available, the Critical and Warning firmware baselines are listed in this section.
– For more information about Rollup Health status, see the MANAGING THE ROLLUP HEALTH STATUS BY USING IDRAC ON THE DELL EMC 14TH GENERATION AND LATER POWEREDGE SERVERS technical white paper on the Dell TechCenter.
– Click to view more information in the Firmware dialog box.
– See Manage firmware baseline by using the OpenManage Enterprise dashboard.
– For information about updating a firmware, creating firmware catalog, creating firmware baseline, and generating baseline compliance report, see Manage the device firmware.
• Configuration: Displays the rolledup status of configuration compliance baselines created on OpenManage Enterprise. If available, the Critical and Warning configuration baselines are listed. See Manage compliance baseline templates.
Manage firmware baseline by using the OpenManage Enterprise dashboardOn the OpenManage Enterprise dashboard page, in the Widgets section, the Firmware section displays the number of firmware baselines that have one or more devices in critical health status. See Device health statuses. For more information about firmware management, see Manage the device firmware.
To view a list of baselines, click Firmware. For definitions about fields in the Firmware dialog box, see Firmware baseline field definitions.
Manage device warranty by using the OpenManage Enterprise dashboardOn the OpenManage Enterprise dashboard page, the Warranty widget in the Widgets section displays the number of devices whose warranty is about to expire or has already expired. The data displayed in the Warranty widget can be customized using Warranty Settings. See Manage warranty settings. Also, for more information about device warranty, see Manage the device warranty.
To view a list of warranties that are about to expire, click Warranty. On the Warranty page, the following information is displayed:
• State, Service Tag, model name, and type of devices.
OpenManage Enterprise Home portal 31

• WARRANTY TYPE:
– INITIAL: The warranty is still valid by using the Warranty provided when OpenManage Enterprise was first purchased.
– EXTENDED: The warranty is extended because the Warranty duration provided when OpenManage Enterprise was first purchased is expired.
• SERVICE LEVEL DESCRIPTION: Indicates the Service Level Agreement (SLA) associated with the device warranty.
• DAYS REMAINING: Number of days left for the Warranty to expire. You can set the days before which you get an alert. See Manage warranty settings.
Manage the device compliance baseline by using the OpenManage Enterprise dashboardOn the OpenManage Enterprise dashboard page, in the Widgets section, the Configuration section displays the number of configuration compliance baselines that do not comply with the properties of the template it is compared against.
To view a list of configuration compliance baselines that drift from the template properties, click Configuration. On the Compliance page:
• COMPLIANCE indicates the level to which the configuration compliance baseline drifts.
• NAME indicates the name of the configuration compliance baseline.
• TEMPLATE NAME indicates the compliance baseline template against which the baseline is compared.
See Managing the device configuration compliance. You can create baseline templates by using the deployment template, reference device, importing from a file. See Manage compliance baseline templates.
Organize devices into groupsIn a data center, for effective and quick device management, you can:
• Group the devices. For example, you can group devices based on functions, OSs, user profiles, location, jobs run, and then run queries to manage devices.
• Filter the device-related data while managing devices, updating firmware, discovering devices, and managing alert policies and reports.
• You can manage the properties of a device in a group. See Viewing and configuring devices.
OpenManage Enterprise provides a built-in report to get an overview of the OpenManage Enterprise monitored devices. Click OpenManage Enterprise > Monitor > Reports > Devices Overview Report. Click Run. See Run reports.
NOTE: To perform any tasks on OpenManage Enterprise, you must have necessary user privileges. See Role-based OpenManage Enterprise user privileges.
To view Dashboard data pertaining to selected devices or groups, select from the Device Groups drop-down menu.
NOTE: The health status of a device or group is indicated by appropriate symbols. The health status of a group is the health of a device in a group that has the most critical health status. For example, among many devices in a group, if the health of a server is Warning then the group health is also 'Warning'. The rollup status is equal to the status of the device that has high severity. For more information about Rollup Health status, see the MANAGING THE ROLLUP HEALTH STATUS BY USING IDRAC ON THE DELL EMC 14TH GENERATION AND LATER POWEREDGE SERVERS technical white paper on the Dell TechCenter.
Groups can have a parent and child group. A group cannot have its parent groups as its own child group. By default, OpenManage Enterprise is supplied with the following built-in groups.
System Groups: Default groups created by OpenManage Enterprise. You cannot edit or delete a System Group, but can view based on user privileges. Examples of System Groups:
• HCI Appliances: Hyper-converged devices such as VxRAIL and Dell EMC XC series devices
• Hypervisor Systems: Hyper-V servers and VMware ESXi servers
32 OpenManage Enterprise Home portal

• Modular Systems: PowerEdge Chassis, PowerEdge FX2, PowerEdge 1000e chassis, PowerEdge MX7000 chassis and PowerEdge VRTX chassis.
NOTE: An MX7000 chassis can be a lead, stand-alone, or member chassis. If an MX7000 chassis is a lead chassis and has a member chassis, the latter is discovered by using the IP of its lead chassis. An MX7000 chassis is identified by using one of the following syntaxes:
– MCM group—Indicates the Multi-Chassis Management (MCM) group that has more than one chassis identified by the following syntax: Group_<MCM group name>_<Lead_Chassis_Svctag> where:
◦ <MCM group name>: Name of the MCM group
◦ <Lead_Chassis_Svctag>: The Service Tag of the lead chassis. The chassis, sleds, and network IOMs form this group.
– Stand-alone Chassis group—Identified by using the <Chassis_Svctag> syntax. The chassis, sleds, and network IOMs form this group.
• Network Devices: Dell Force10 networking switches and Fibre Channel switches
• Servers: Dell iDRAC servers, Linux servers, Non-Dell servers, OEM servers, and Windows servers
• Storage Devices: Dell Compellent storage Arrays, PowerVault MD storage arrays, and PowerVault ME storage arrays
• Discovery Groups: Groups that map to the range of a discovery task. Cannot be edited or deleted because the group is controlled by the discovery job where the include/exclude condition is applied. See Discovering devices for monitoring or management.
NOTE: To expand all the subgroups in a group, right-click the group, and then click Expand All.
Custom Groups: Created by the user for specific requirements. For example, servers that host email services are grouped. Users can view, edit, and delete based on user privileges and group types.
• Static Groups: Manually created by the user by adding specific devices to a group. These groups change only when a user manually changes the devices in the group or a sub-group. The items in the group remain static until the parent group is edited or the child device is deleted.
• Query Group: Groups that are dynamically defined by matching user-specified criteria. Devices in the group change based on the result of devices that are discovered by using criteria. For example, a query is run to discover servers that are assigned to the Finance department. However, the Query Groups have a flat structure without any hierarchy.
NOTE: Static and Query groups:
• Cannot have more than one parent group. Meaning, a group cannot be added as a sub-group under its parent group.
NOTE: Creating more number of Custom (Query) groups in the device group hierarchy impacts the overall performance of OpenManage Enterprise. For optimized performance, OpenManage Enterprise captures the health-rollup status after every 10 seconds—having more number of Dynamic groups affects this performance.
On the All Devices page, in the left pane, you can create child groups under the parent Static and Query group. See Create or delete a Static device group and Create or edit a Query device group.
NOTE: To perform any tasks on OpenManage Enterprise, you must have necessary user privileges. See Role-based OpenManage Enterprise user privileges.
To delete the child group of a Static or Query group:
1 Right-click the Static or Query group, and then click Delete.
2 When prompted, click YES. The group is deleted, and the list under the group is updated.
Related links
Delete devices from OpenManage Enterprise
Refresh the device inventory
Refresh the device status
Donut chartYou can view a Donut chart in different sections of your OpenManage Enterprise. The output displayed by the Donut chart is based on the items you select in a table. A Donut chart indicates multiple statuses in OpenManage Enterprise:
OpenManage Enterprise Home portal 33

• The health status of devices: Displayed on the Dashboard page. Colors in the Donut chart split the ring proportionally to indicate the health of devices monitored by OpenManage Enterprise. Every device status is indicated by a color symbol. See Device health statuses. If the Donut chart indicates the health status of 279 devices in the group, in which 131=critical, 50=warning, and 95=ok, the circle is formed by using color bands proportionately representing these numbers.
NOTE: The Donut chart of a single device is formed by a thick circle by using only one color that indicates the device status. For example, for a device in Warning state, a yellow color circle is displayed.
• The alert statuses of devices: Indicates the total alerts generated for the devices monitored by OpenManage Enterprise. See Monitoring device alerts.
NOTE: The total number of alerts in the Donut chart varies based on the setting to whether or not view the unacknowledged alerts. By default, only the unacknowledged alerts are displayed. See Customize the alert display.
• The firmware version compliance of a device against the version on the catalog: See Manage the device firmware.
• The configuration compliance baseline of devices and device groups: See Managing the device configuration compliance.
NOTE: The compliance level of the selected device in indicated by a Donut chart. When more than one device is associated with a baseline, the status of a device with the least compliance level to the baseline is indicated as the compliance level of that baseline. For example, if many devices are associated to a firmware baseline, and the compliance level of few devices is Healthy
or Downgrade , but if the compliance of one device in the group is Upgrade , the compliance level of the firmware baseline is indicated as Upgrade. The rollup status is equal to the status of the device that has high severity. For more information about Rollup Health status, see the MANAGING THE ROLLUP HEALTH STATUS BY USING IDRAC ON THE DELL EMC 14TH GENERATION AND LATER POWEREDGE SERVERS technical white paper on the Dell TechCenter.
NOTE: The Donut chart of a single device is formed by a thick circle by using only one color that indicates the device firmware compliance level. For example, for a device in Critical state, a red color circle is displayed indicating that the device firmware must be updated.
Device health statuses
Table 11. Device health statuses in OpenManage Enterprise
Health status Definition
Critical Indicates an occurrence of a failure of an important aspect of the device or environment.
Warning The device is about to fail. Indicates that some aspects of the device or environment are not normal. Requires immediate attention.
Ok The device is fully functional.
Unknown The device status is unknown.
NOTE: The data displayed on the dashboard depends on the privileges you have for using OpenManage Enterprise. For more information about users, see Managing users.
34 OpenManage Enterprise Home portal

Managing devices By clicking OpenManage Enterprise > Devices you can view the devices and device groups managed by OpenManage Enterprise. The System groups are default groups created by OpenManage Enterprise when shipped, and Custom groups are created by users such as administrators and device managers. You can create child groups under these two parent groups. For information about the parent-child rules, see Device Groups. In the working pane, a Donut chart graphically displays the health and number of devices in the group selected in the left pane. For more information about Donut chart, see Donut chart.
The table after the Donut chart lists the properties of device(s) selected in the left pane. To view properties of a device and edit the configuration, click the device name or IP address in the list. For more information about the device list, see Device list.
NOTE: After you upgrade OpenManage Enterprise to the latest version, the devices list will be updated after the discovery jobs are rerun.
NOTE: In the Devices list, click the device name to view device configuration data, and then edit. To log in to the management application installed on the device (say, iDRAC), click the IP address. See Viewing and configuring devices.
NOTE: Some of the device-related tasks that you can perform on the All Devices page—such as firmware update, inventory refreshing, status refreshing, server control actions—can also be performed on the Devices <device name> page.
NOTE: To perform any tasks on OpenManage Enterprise, you must have necessary user privileges. See Role-based OpenManage Enterprise user privileges.
You can select a maximum of 25 devices per page and navigate the pages to select more devices and perform tasks. You can perform the following device-related tasks:
• Create new group and add devices. See Adding devices to new group and Adding devices to existing group.
• Delete a device from OpenManage Enterprise. See Delete devices from OpenManage Enterprise.
• Exclude a device from OpenManage Enterprise monitoring. See Exclude devices from OpenManage Enterprise.
• Update the firmware version of a device. See Updating the device firmware version.
• Update the hardware and software inventory of selected devices. See Refreshing device inventory.
• Collect the latest working status of selected device(s).
• Onboard devices. See Onboarding devices.
• Export the items in a device group list to PDF, HTML, and CSV format. See Exporting device group inventory.
• Export data about selected or all devices from the More Actions tab. See Exporting data.
• View complete information and manage a device. See Viewing and configuring devices.
• Start the iDRAC with Lifecycle Controller management application. See Starting Management application (iDRAC) of a device.
• Start the virtual console. See Start the Virtual Console.
For device group-related tasks, see Organize devices into groups.
In the upper-right corner, in the QUICK LINKS section, use the quick links to the following features of OpenManage Enterprise:
• Discovering devices
• Running inventory schedule job now
• Globally excluding device(s) from discovery results
When you select a device in the list, the right pane displays the preview about the selected devices. When multiple devices are selected, the preview about the last selected device is displayed. Under Quick Actions, the management links that are correlated to the respective device are listed. To clear selections, click Clear Selection.
7
Managing devices 35
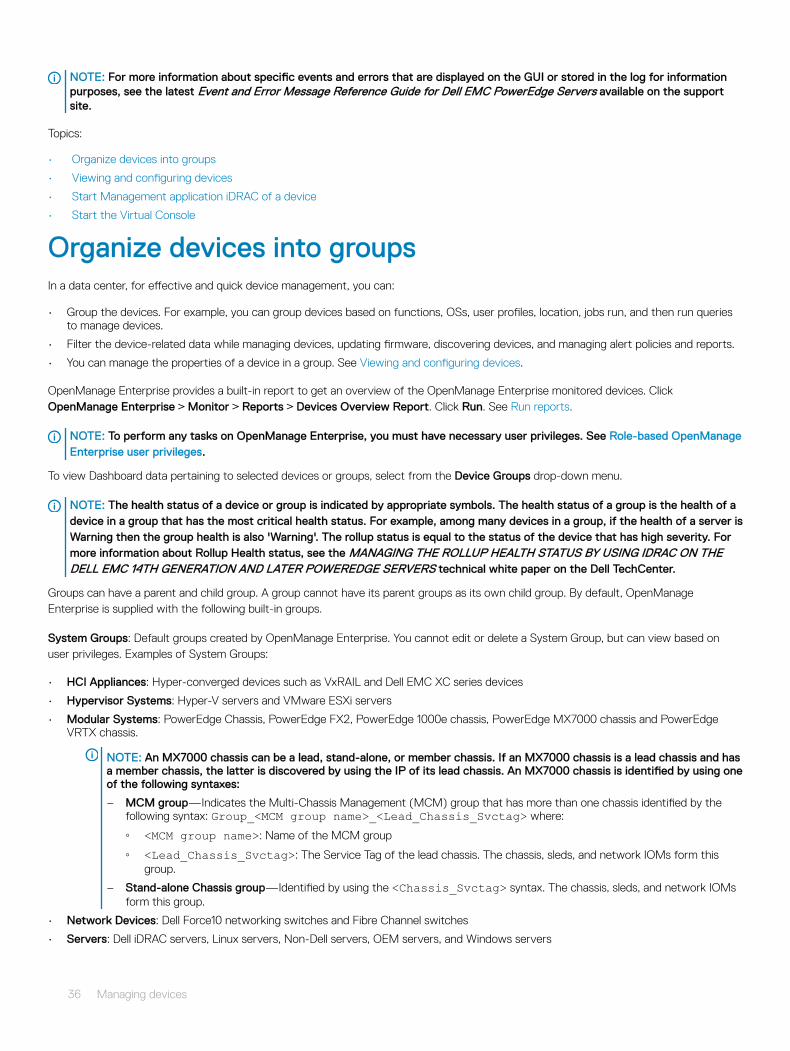
NOTE: For more information about specific events and errors that are displayed on the GUI or stored in the log for information purposes, see the latest Event and Error Message Reference Guide for Dell EMC PowerEdge Servers available on the support site.
Topics:
• Organize devices into groups
• Viewing and configuring devices
• Start Management application iDRAC of a device
• Start the Virtual Console
Organize devices into groupsIn a data center, for effective and quick device management, you can:
• Group the devices. For example, you can group devices based on functions, OSs, user profiles, location, jobs run, and then run queries to manage devices.
• Filter the device-related data while managing devices, updating firmware, discovering devices, and managing alert policies and reports.
• You can manage the properties of a device in a group. See Viewing and configuring devices.
OpenManage Enterprise provides a built-in report to get an overview of the OpenManage Enterprise monitored devices. Click OpenManage Enterprise > Monitor > Reports > Devices Overview Report. Click Run. See Run reports.
NOTE: To perform any tasks on OpenManage Enterprise, you must have necessary user privileges. See Role-based OpenManage Enterprise user privileges.
To view Dashboard data pertaining to selected devices or groups, select from the Device Groups drop-down menu.
NOTE: The health status of a device or group is indicated by appropriate symbols. The health status of a group is the health of a device in a group that has the most critical health status. For example, among many devices in a group, if the health of a server is Warning then the group health is also 'Warning'. The rollup status is equal to the status of the device that has high severity. For more information about Rollup Health status, see the MANAGING THE ROLLUP HEALTH STATUS BY USING IDRAC ON THE DELL EMC 14TH GENERATION AND LATER POWEREDGE SERVERS technical white paper on the Dell TechCenter.
Groups can have a parent and child group. A group cannot have its parent groups as its own child group. By default, OpenManage Enterprise is supplied with the following built-in groups.
System Groups: Default groups created by OpenManage Enterprise. You cannot edit or delete a System Group, but can view based on user privileges. Examples of System Groups:
• HCI Appliances: Hyper-converged devices such as VxRAIL and Dell EMC XC series devices
• Hypervisor Systems: Hyper-V servers and VMware ESXi servers
• Modular Systems: PowerEdge Chassis, PowerEdge FX2, PowerEdge 1000e chassis, PowerEdge MX7000 chassis and PowerEdge VRTX chassis.
NOTE: An MX7000 chassis can be a lead, stand-alone, or member chassis. If an MX7000 chassis is a lead chassis and has a member chassis, the latter is discovered by using the IP of its lead chassis. An MX7000 chassis is identified by using one of the following syntaxes:
– MCM group—Indicates the Multi-Chassis Management (MCM) group that has more than one chassis identified by the following syntax: Group_<MCM group name>_<Lead_Chassis_Svctag> where:
◦ <MCM group name>: Name of the MCM group
◦ <Lead_Chassis_Svctag>: The Service Tag of the lead chassis. The chassis, sleds, and network IOMs form this group.
– Stand-alone Chassis group—Identified by using the <Chassis_Svctag> syntax. The chassis, sleds, and network IOMs form this group.
• Network Devices: Dell Force10 networking switches and Fibre Channel switches
• Servers: Dell iDRAC servers, Linux servers, Non-Dell servers, OEM servers, and Windows servers
36 Managing devices

• Storage Devices: Dell Compellent storage Arrays, PowerVault MD storage arrays, and PowerVault ME storage arrays
• Discovery Groups: Groups that map to the range of a discovery task. Cannot be edited or deleted because the group is controlled by the discovery job where the include/exclude condition is applied. See Discovering devices for monitoring or management.
NOTE: To expand all the subgroups in a group, right-click the group, and then click Expand All.
Custom Groups: Created by the user for specific requirements. For example, servers that host email services are grouped. Users can view, edit, and delete based on user privileges and group types.
• Static Groups: Manually created by the user by adding specific devices to a group. These groups change only when a user manually changes the devices in the group or a sub-group. The items in the group remain static until the parent group is edited or the child device is deleted.
• Query Group: Groups that are dynamically defined by matching user-specified criteria. Devices in the group change based on the result of devices that are discovered by using criteria. For example, a query is run to discover servers that are assigned to the Finance department. However, the Query Groups have a flat structure without any hierarchy.
NOTE: Static and Query groups:
• Cannot have more than one parent group. Meaning, a group cannot be added as a sub-group under its parent group.
NOTE: Creating more number of Custom (Query) groups in the device group hierarchy impacts the overall performance of OpenManage Enterprise. For optimized performance, OpenManage Enterprise captures the health-rollup status after every 10 seconds—having more number of Dynamic groups affects this performance.
On the All Devices page, in the left pane, you can create child groups under the parent Static and Query group. See Create or delete a Static device group and Create or edit a Query device group.
NOTE: To perform any tasks on OpenManage Enterprise, you must have necessary user privileges. See Role-based OpenManage Enterprise user privileges.
To delete the child group of a Static or Query group:
1 Right-click the Static or Query group, and then click Delete.
2 When prompted, click YES. The group is deleted, and the list under the group is updated.
Related linksDelete devices from OpenManage EnterpriseRefresh the device inventoryRefresh the device status
Create or delete a Static device group
On the All Devices page, you can create or edit child groups under the parent Static group. To perform these tasks, you must have appropriate user privileges. See Role-based OpenManage Enterprise user privileges.
1 Right-click Static Groups, and then click Create New Static Group.
2 In the Create Static Group Wizard dialog box, enter a name and description for the group, and then select a parent group under which the new Static group must be created.
NOTE: The static or dynamic group names and server configuration related names in OpenManage Enterprise must be unique (not case-sensitive). For example, name1 and Name1 cannot be used at the same time.
3 Click Finish.
The group is created and listed under the parent group in the left pane. The child groups are indented from its parent group.
NOTE: You cannot add devices directly under Static Groups. You must create child Static groups, and then add devices under the child groups.
To delete the child group of a Static group:
Managing devices 37

1 Right-click the Static group, and then click Delete.
2 When prompted, click YES. The group is deleted and the list under group is updated.
Create or edit a Query device group
NOTE: To perform any tasks on OpenManage Enterprise, you must have necessary user privileges. See Role-based OpenManage Enterprise user privileges.
1 Right-click Query Groups, and then click Create New Query Group.
For definitions about Static or Query (Dynamic) groups, see Organize devices into groups.
2 In the Create Query Group Wizard dialog box, enter a name and description for the group.
3 Click Next.
4 In the Query Criteria Selection dialog box, from the Select existing query to copy drop-down menu, select a query, and then select the other filter criteria. See Select a query criteria.
5 Click Finish.
The query group is created and listed in line with the parent group in the left pane.
NOTE: You cannot add devices directly under Query Groups. You must create child Query groups, and then add devices under the child groups.
To edit a Query group:
a In the left pane, right-click the child Query group and click Edit.
b Alternately, click the child Query group in the left pane. The list of devices in the group is listed in the working pane. Click the Edit link in the gray band that appears on top of the Devices list. The Create Query Group Wizard dialog box is displayed.
c In the Create Query Group Wizard dialog box, enter or select data as described earlier in this section.
To delete the child group of a Query group:
a Right-click the Query group, and then click Delete.
b When prompted, click YES. The group is deleted and the list under group is updated.
Select a query criteria
Define filters while creating query criteria for:
• Generating customized reports. See Creating reports.
• Creating Query-based device groups under the CUSTOM GROUPS. See Create or edit a Query device group.
Define the query criteria by using two options:
• Select existing query to copy: By default, OpenManage Enterprise provides a list of built-in query templates that you can copy and build your own query criteria. The number of filters predefined for every existing query varies based on the query type. For example, the query for Hypervisor Systems has 6 predefined filters, while the query for Networking Switches has only three. A maximum of 20 criteria (filters) can be defined while defining a query. To add filters, you must select from the Select Type drop-down menu.
• Select type: Build a query criteria from scratch by using attributes listed in this drop-down menu. Items in the menu depend on the devices monitored by OpenManage Enterprise. When a query type is selected, only appropriate operators such as =, >, <, and null are displayed based on the query type. This method is recommended for defining query criteria in building customized reports.
NOTE: When evaluating a query with multiple conditions, the order of evaluation is same as SQL. To specify a particular order for the evaluation of the conditions, add or remove parenthesis when defining the query.
38 Managing devices

NOTE: When selected, the filters of an existing query criteria is copied only virtually to build a new query criteria. The default filters associated with an existing query criteria is not changed. The definition (filters) of a built-in query criteria is used as a starting point for building a customized query criteria. For example:
1 Query1 is a built-in query criteria that has the following predefined filter: Task Enabled=Yes.
2 Copy the filter properties of Query1, create Query2, and then customize the query criteria by adding another filter: Task Enabled=Yes AND (Task Type=Discovery).
3 Later, open Query1. Its filter criteria still remains as Task Enabled=Yes.
1 In the Query Criteria Selection dialog box, select from the drop-down menu based on whether you want to create a query criteria for Query groups or for report generation.
2 Add or remove a filter by clicking the plus or dustbin symbol respectively.
3 Click Finish.
A query criteria is generated and saved in the list of existing queries. An audit log entry is made and displayed in the Audit logs list. See Manage audit logs.
Related links
Managing the device configuration compliance
Edit a configuration compliance baseline
Remove a configuration compliance baseline
Adding or editing devices in a Static child groupBy using the Static child groups, you can classify your servers based on their use, configuration, department of use, customers, and so on. You can add or remove devices to the child groups, and then edit, remove, delete, and clone such groups.
NOTE: To perform any tasks on OpenManage Enterprise, you must have necessary user privileges. See Role-based OpenManage Enterprise user privileges.
1 Right-click the Static child group, and then click Add Devices. For definitions about Static groups, see Organize devices into groups.
2 In the Add Devices to New Group Wizard dialog box, select the check boxes of devices that must be added to the group. The selected devices are displayed under the All Selected Devices tab.
3 Click Finish.
The devices are added to the selected Static child group and displayed in the right pane.
To edit the properties of the Static child group, or remove devices from the Static child group:
1 Right-click the Static group, and then click Edit.
2 In the Edit Devices to Group <name> dialog box, edit the group properties, and then click Next.
3 In the Group Member Selection dialog box, select or clear the check boxes of devices that must be added or removed from the group. The selected devices are displayed under the All Selected Devices tab.
4 Click Finish. The devices are added to or removed from the selected Static child group.
NOTE: This procedure is applicable only for modifying the device properties in a group. To remove a device from OpenManage Enterprise or globally exclude a device, see Delete devices from OpenManage Enterprise and Globally excluding devices.
Rename child groups of Static or Query Dynamic groups
1 Right-click the Static or Query group, and then click Rename.
For definitions about Static or Query (Dynamic) groups, see Organize devices into groups.
2 In the Rename Group dialog box, enter a new name for the group, and then click Finish.
The updated name is listed in the left pane.
Managing devices 39
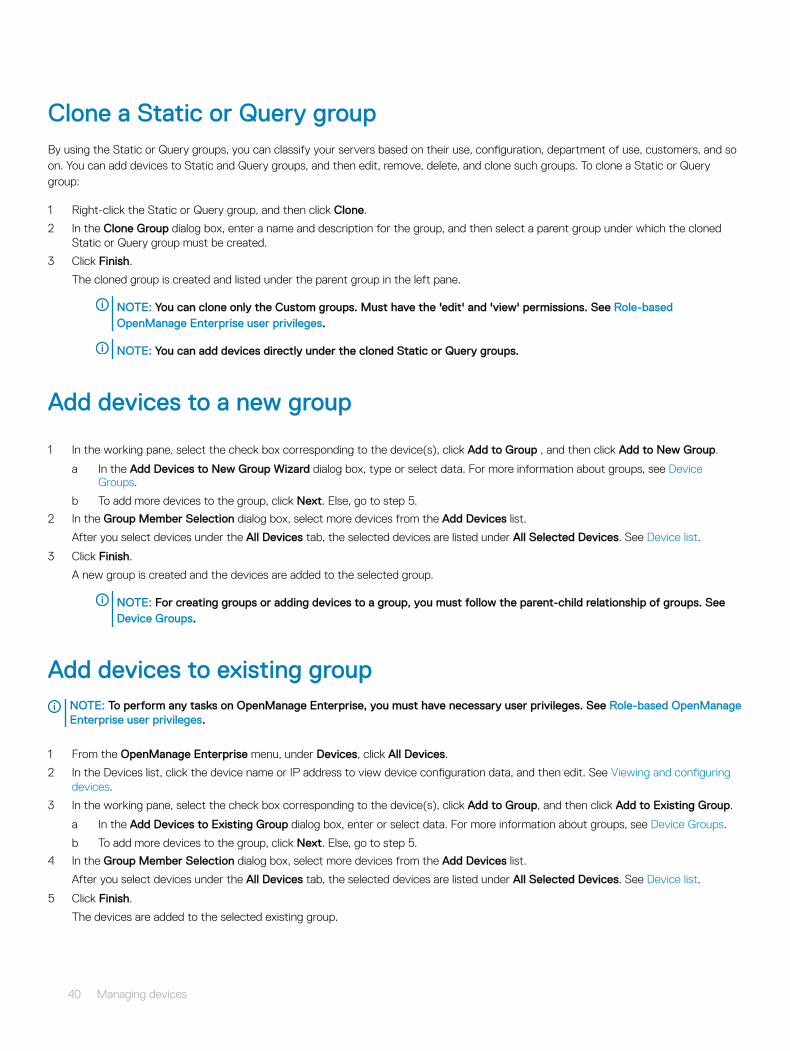
Clone a Static or Query groupBy using the Static or Query groups, you can classify your servers based on their use, configuration, department of use, customers, and so on. You can add devices to Static and Query groups, and then edit, remove, delete, and clone such groups. To clone a Static or Query group:
1 Right-click the Static or Query group, and then click Clone.
2 In the Clone Group dialog box, enter a name and description for the group, and then select a parent group under which the cloned Static or Query group must be created.
3 Click Finish.
The cloned group is created and listed under the parent group in the left pane.
NOTE: You can clone only the Custom groups. Must have the 'edit' and 'view' permissions. See Role-based OpenManage Enterprise user privileges.
NOTE: You can add devices directly under the cloned Static or Query groups.
Add devices to a new group
1 In the working pane, select the check box corresponding to the device(s), click Add to Group , and then click Add to New Group.
a In the Add Devices to New Group Wizard dialog box, type or select data. For more information about groups, see Device Groups.
b To add more devices to the group, click Next. Else, go to step 5.
2 In the Group Member Selection dialog box, select more devices from the Add Devices list.
After you select devices under the All Devices tab, the selected devices are listed under All Selected Devices. See Device list.
3 Click Finish.
A new group is created and the devices are added to the selected group.
NOTE: For creating groups or adding devices to a group, you must follow the parent-child relationship of groups. See Device Groups.
Add devices to existing groupNOTE: To perform any tasks on OpenManage Enterprise, you must have necessary user privileges. See Role-based OpenManage Enterprise user privileges.
1 From the OpenManage Enterprise menu, under Devices, click All Devices.
2 In the Devices list, click the device name or IP address to view device configuration data, and then edit. See Viewing and configuring devices.
3 In the working pane, select the check box corresponding to the device(s), click Add to Group, and then click Add to Existing Group.
a In the Add Devices to Existing Group dialog box, enter or select data. For more information about groups, see Device Groups.
b To add more devices to the group, click Next. Else, go to step 5.
4 In the Group Member Selection dialog box, select more devices from the Add Devices list.
After you select devices under the All Devices tab, the selected devices are listed under All Selected Devices. See Device list.
5 Click Finish.
The devices are added to the selected existing group.
40 Managing devices

NOTE: For creating groups or adding devices to a group, you must follow the parent-child relationship of groups. See Device Groups.
Delete devices from OpenManage Enterprise1 In the left pane, select the device(s).
2 In the devices list, select the check box corresponding to the device(s), and then click Delete.
3 When prompted indicating that the device(s) will be globally excluded, click YES.
The device is deleted and not anymore monitored by OpenManage Enterprise.
After device deletion, all onboarding information corresponding to the deleted devices is removed. The user credential information is automatically deleted if it is not shared with other devices. If OpenManage Enterprise was set as a trap destination on a remote device that has been deleted, you can remove OpenManage Enterprise from the remote device.
NOTE: A device can be deleted even when tasks are running on it. Task initiated on a device fails if the device is deleted before the completion.
Related link
Organize devices into groups
Exclude devices from OpenManage EnterpriseNOTE: To perform any tasks on OpenManage Enterprise, you must have necessary user privileges. See Role-based OpenManage Enterprise user privileges.
Devices are grouped for efficient handling of repeated tasks such as firmware update, discovery, and inventory generation. However, you can exclude a device so that the excluded device does not participate in any of these activities because it is not monitored by OpenManage Enterprise. This task is similar to the global exclusion. See Globally excluding device(s) from discovery results.
1 In the left pane, select the System group or Custom group whose device must be excluded.
2 In the devices list, select the check box corresponding to the device(s), and then click Exclude.
3 When prompted whether or not to exclude the selected device(s), click YES.
The devices are excluded, added to the global exclusion list, and not anymore monitored by OpenManage Enterprise.
4 To remove the global exclusion and make OpenManage Enterprise monitor the device again, delete it from the global exclusion range, and then rediscover.
Upgrade or downgrade device firmware by using the firmware baseline
NOTE: To perform any tasks on OpenManage Enterprise, you must have necessary user privileges. See Role-based OpenManage Enterprise user privileges.
You can upgrade or downgrade the firmware version of device(s) on the:
• All Devices page: Recommended for updating firmware of multiple devices. From the Devices menu, select Devices. Select the devices, click More Actions > Update Firmware.
• All Devices page: Recommended for updating firmware of a single device. From the Devices menu, select Devices. Select the device, click View Details > Firmware.
• Configuration-Firmware page: From the Configuration menu, select Firmware. Select the devices, click Check Compliance > View Report.
Managing devices 41

NOTE: When a device is connected, the firmware version, if earlier than baseline version, is not automatically updated. You must update the firmware version. It is recommended to update device firmware during maintenance windows to prevent the devices or environment going offline during business hours.
1 In the left pane, select the group to which belongs to. Devices that are associated with the group are listed. See Device list.
NOTE: When you select device(s), ensure that they are associated with one or more firmware baselines. Else, the devices are not displayed in the compliance report, and therefore cannot be updated.
2 In the devices list, select the check box corresponding to the device(s).
3 Click More Actions > Update Firmware.
4 In the Update Firmware dialog box:
a In the Select Firmware Source section:
• From the Baseline drop-down menu, select the baseline that must be used for comparing and upgrading or rolling back the device firmware. A list of devices that are associated with the selected firmware baseline is displayed. The compliance level of each device is displayed in the COMPLIANCE column. Based on the compliance level, you can upgrade or downgrade the firmware version. For information about the field description on this page, see Viewing device firmware compliance report. However, when you are checking the compliance of an individual device on the View Details page, you can upgrade or roll back the firmware version. See Roll back an individual device firmware version.
a Select the check boxes corresponding to the devices that must be updated.
b Click Next.
• You can upgrade or downgrade by using individual update package also. Click Individual Package, and then complete the on-screen instructions. Click Next.
b In the Prerequisites section, prerequisites if any, for the device are displayed. Click Next.
c In the Schedule section, select:
• Update Now: The firmware version is updated and matched to the version available in the associated catalog. To make the update become effective during the next device restart, select the Stage for next server reboot check box.
• Reset iDRAC: Select to initiate a normal reboot operation on the iDRAC before the firmware update is initiated.
• Clear Job Queue: Select to clear all jobs (scheduled, completed, and failed) before the firmware update is initiated.
• Schedule Later: Select to specify a date and time when the firmware version must be updated. You can run the job later.
5 Click Finish. A firmware update job is created and listed in the Jobs list. See Using jobs for device control.
NOTE: If the device is not associated with any baseline, the Baseline drop-down menu is not populated. To associate a device to a baseline, see Creating the firmware baseline.
NOTE: If you select multiple devices, only the devices that are associated with the selected baseline are listed in the table.
Select Firmware SourceIn the Select Firmware Source tab, you can select the required baseline or individual update package to update the firmware.
Baseline Select this option to update the baseline version of the firmware which you want to update. Select the required baseline version from the drop-down.
COMPLIANCE Indicates the significance of the firmware update, based on the compliance status of the individual component. The possible options are:
• OK—The current firmware version of the device or component matches the baseline defined in the catalog file.
• Critical—The current firmware version of the component or device is older than the baseline defined in the catalog file. The update is essential for the proper functioning of the device or component.
• Downgrade—The current firmware version of the component or device is newer than the baseline defined in the catalog file.
42 Managing devices
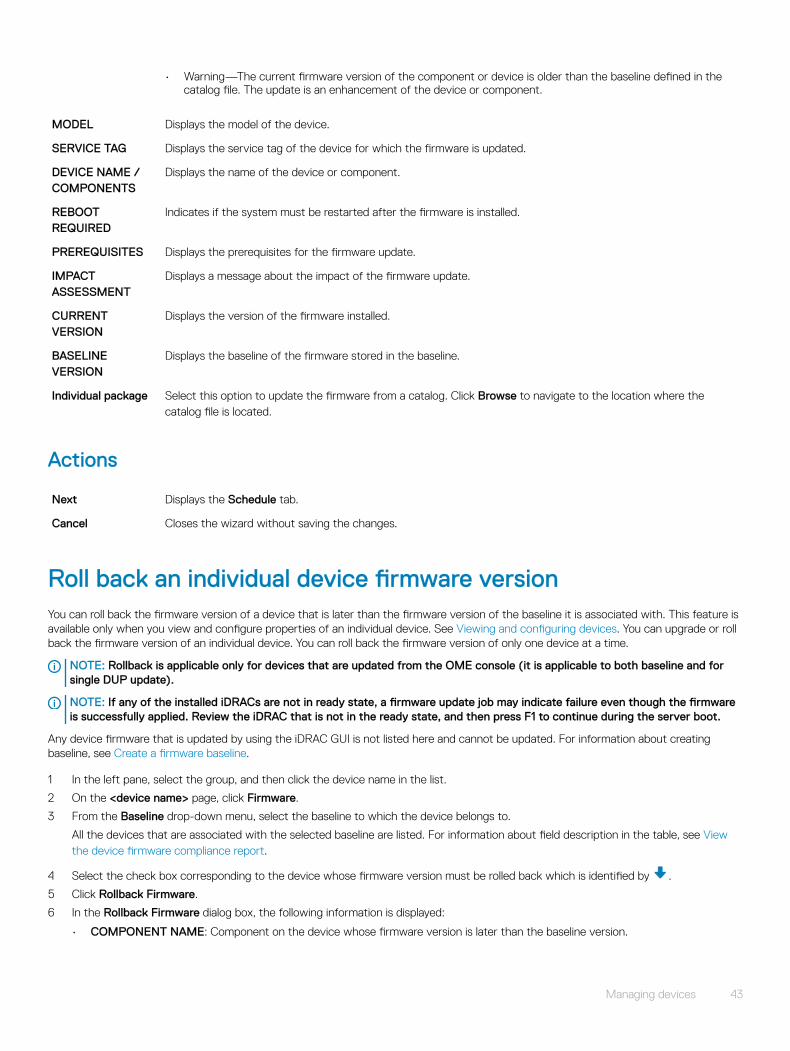
• Warning—The current firmware version of the component or device is older than the baseline defined in the catalog file. The update is an enhancement of the device or component.
MODEL Displays the model of the device.
SERVICE TAG Displays the service tag of the device for which the firmware is updated.
DEVICE NAME / COMPONENTS
Displays the name of the device or component.
REBOOT REQUIRED
Indicates if the system must be restarted after the firmware is installed.
PREREQUISITES Displays the prerequisites for the firmware update.
IMPACT ASSESSMENT
Displays a message about the impact of the firmware update.
CURRENT VERSION
Displays the version of the firmware installed.
BASELINE VERSION
Displays the baseline of the firmware stored in the baseline.
Individual package Select this option to update the firmware from a catalog. Click Browse to navigate to the location where the catalog file is located.
Actions
Next Displays the Schedule tab.
Cancel Closes the wizard without saving the changes.
Roll back an individual device firmware versionYou can roll back the firmware version of a device that is later than the firmware version of the baseline it is associated with. This feature is available only when you view and configure properties of an individual device. See Viewing and configuring devices. You can upgrade or roll back the firmware version of an individual device. You can roll back the firmware version of only one device at a time.
NOTE: Rollback is applicable only for devices that are updated from the OME console (it is applicable to both baseline and for single DUP update).
NOTE: If any of the installed iDRACs are not in ready state, a firmware update job may indicate failure even though the firmware is successfully applied. Review the iDRAC that is not in the ready state, and then press F1 to continue during the server boot.
Any device firmware that is updated by using the iDRAC GUI is not listed here and cannot be updated. For information about creating baseline, see Create a firmware baseline.
1 In the left pane, select the group, and then click the device name in the list.
2 On the <device name> page, click Firmware.
3 From the Baseline drop-down menu, select the baseline to which the device belongs to.
All the devices that are associated with the selected baseline are listed. For information about field description in the table, see View the device firmware compliance report.
4 Select the check box corresponding to the device whose firmware version must be rolled back which is identified by .
5 Click Rollback Firmware.
6 In the Rollback Firmware dialog box, the following information is displayed:
• COMPONENT NAME: Component on the device whose firmware version is later than the baseline version.
Managing devices 43
• CURRENT VERSION: Current version of the component.
• ROLLBACK VERSION: Suggested firmware version to which the component can be downgraded.
• ROLLBACK SOURCE: Click Browse to select a source from where the firmware version can be downloaded.
7 Click Finish. The firmware version is rolled back.
NOTE: Currently, the Rollback feature tracks only the version number from which the firmware is rolled back. Rollback does not consider the firmware version that is installed by using the Rollback feature (by rolling back the version).
Refresh the device inventory By default, the inventory of software and hardware components in devices or device groups is automatically collected after every 24 hours (say, 12:00 a.m. everyday). However, to collect the inventory report of a device or group at any moment:
1 In the left pane, select the group to which the device belongs to. Devices associated to the group are listed in the Devices list.
2 Select the check box corresponding to the device, and then click Refresh Inventory. The job is created and listed in the Jobs list and identified as New in the JOB STATUS column.
The inventory of selected device(s) is collected and stored for future retrieval and analysis. For more information about viewing the refreshed inventory data, see Viewing and configuring devices. To download a device inventory, see Export the single device inventory.
Related link
Organize devices into groups
Refresh the device status 1 In the left pane, select the group to which the device belongs to.
Devices associated to the group are listed.
2 Select the check box corresponding to the device, and then click Refresh Status.
A job is created and listed in the Jobs list and identified as New in the JOB STATUS column.
The latest working status of selected device(s) is collected and displayed on the Dashboard and other relevant sections of OpenManage Enterprise. To download a device inventory, see Export the single device inventory.Related link
Organize devices into groups
Export the single device inventoryYou can export inventory data of only one device at a time to only the .csv format.
1 In the left pane, select the device group. A list of devices in the group is displayed in the Devices list.
A Donut chart indicates the device status in the working pane. See Donut chart. A table lists the properties of devices selected. See Device list.
2 In the devices list, select the check box corresponding to the device, and then click Export Inventory.
3 In the Save As dialog box, save to a known location.
NOTE: When exported to .csv format, some of the data displayed on the GUI is not enumerated with a descriptive string.
44 Managing devices

Devices listThe list of devices displays the device properties such as IP address and Service Tag. You can select a maximum of 25 devices per page and navigate the pages to select more devices and perform tasks. For more information about the tasks you can perform on the All Devices page, see Managing devices .
NOTE: By default, the Devices list displays all the devices considered while forming the Donut chart. To view a list of devices that belong to a specific health status, click the corresponding color band in the Donut chart, or click the health status symbol. Devices that belong only to the selected category are listed.
• Health State indicates the working state of the device. The health statuses—OK, critical, and warning—are identified by respective color symbols. See Device health statuses.
• Power State indicates if the device is turned on or off.
• Connection State indicates whether or not the device is connected to OpenManage Enterprise.
• Name indicates device name.
• TYPE indicates the type of device—Server, Chassis, Dell Storage, and Networking switch.
• IP address indicates the IP address of the iDRAC installed on the device.
• ONBOARDING STATE column indicates whether or not the device is onboarded. See Onboarding devices.
To filter data in the table, click Advanced Filters or the Filter symbol. To export data to HTML, CSV, or PDF file format, click the Export symbol in the upper-right corner.
NOTE: In the Devices list, click the device name or IP address to view device configuration data, and then edit. See Viewing and configuring devices.
NOTE: The working pane displays the Donut chart of the selected device group. By using the Donut chart, you can view the list of devices that belongs to other health statuses in that group. To view devices of other health status, click the corresponding color band on the Donut chart. The data in the table changes. For more information about using the Donut chart, see Donut chart.
Performing more actions on chassis and serversBy using the More Actions drop-down menu, you can perform the following actions on the All Devices page. Select the device(s) and click any one of the following:
• Turn LED On: Turn on the LED of the device to identify the device among a group of devices in a data center.
• Turn LED Off: Turn off the LED of the device.
• Power On: Turn on the device(s).
• Power Off: Turn off the device (s).
• Graceful Shutdown: Click to shut down the target system.
• Power Cycle System (Cold Boot): Click to power off and then restart the system.
• System Reset (Warm Boot): Click to shut down and then reboot the operating system by forcefully turning off the target system.
• Proxied: Displayed only for the MX7000 chassis. Indicates that the device is discovered through an MX7000 lead chassis in case of Multi-Chassis Management (MCM).
• IPMI CLI: Click to run an IMPI command. See Create a Remote command job for managing devices.
• RACADM CLI: Click to run a RACADM command. See Create a Remote command job for managing devices.
• Update Firmware: See Upgrade or downgrade device firmware by using the firmware baseline.
• Onboarding: See Onboarding devices.
• Export All and Exported Selected: See Export all or selected data.
Managing devices 45

Hardware information displayed for MX7000 chassis • Chassis Power Supplies—Information about the Power Supply Units (PSUs) used in the sleds and other components.
• Chassis Slots—Information about the slots available in the chassis and components, if any, installed in slots.
• Chassis Controller—The Chassis Management Controller (CMC) and its version.
• Fans—Information about the fans used in the chassis and its working status.
• Temperature—Temperature status and threshold values of chassis.
• FRU—Components or Field Replacable Units (FRUs) that can are installed in the chassis.
Export all or selected dataYou can export data:
• About the devices you view in a device group and perform strategic and statistical analysis.
• About a maximum of 1000 devices.
• Related to system alerts, reports, audit logs, group inventory, device list, warranty information, Support Assist, and so on.
• Into the following file formats: HTML, CSV, and PDF.
NOTE: However, a single device inventory can be exported only into a .csv format. See Export the single device inventory.
NOTE: Only in case of reports, you can export only selected reports at a time and not all the reports. See Export selected reports.
1 To export data, select Export All or Export Selected.
A job is created and the data is exported to the selected location.
2 Download the data and perform strategic and statistical analysis, if necessary.
The data is opened or saved successfully based on your selection.
NOTE: If you export data in the .csv format, you must have the administrator-level credentials to open the file.
Viewing and configuring devicesNOTE: In the Device list, click the device name or IP address to view device configuration data, and then edit device configuration as described in this section.
By clicking OpenManage Enterprise > Devices > selecting a device in the device list > View Details, you can:
• View information about the health and power status, device IP, and Service Tag.
• View general information about the device and perform device control and troubleshooting tasks.
• View device information such as RAID, PSU, OS, NIC, memory, processor, and storage enclosure. OpenManage Enterprise provides a built-in report to get an overview about the NIC, BIOS, Physical Disk and Virtual Disk used on the devices monitored by OpenManage Enterprise. Click OpenManage Enterprise > Monitor > Reports.
• Update or roll back firmware versions of components in a device that are associated with a firmware baseline. See Manage the device firmware.
• Acknowledge, export, delete, or ignore the alerts pertaining to a device. See Managing device alerts.
• View and export hardware log data of a device. See Managing individual device hardware logs.
• View and manage the configuration inventory of the device for the purposes of configuration compliance. A compliance comparison is initiated when the configuration inventory is run against the devices.
• View the compliance level of a device against the configuration compliance baseline it is associated with. See Managing the device configuration compliance.
46 Managing devices

Device Overview• On the <device name> page, under Overview, the health, power status, and Service Tag of the device is displayed. Click the IP
address to open the iDRAC login page. See the iDRAC User's Guide available on the Dell support site.
– Information: Device information such as Service Tag, DIMM slots, iDRAC DNS name, processors, chassis, operating system, and data center name. Multiple management IP addresses correlated to the device are listed and can be clicked to activate the respective interfaces.
– Recent Alerts: The recent alerts generated for the device.
– Recent Activity: A list of recent jobs run on the device. Click View All to view all the jobs. See Using jobs for device control.
– Remote Console: Click Launch iDRAC to start the iDRAC application. Click Launch Virtual Console to start the virtual console. Click the Refresh Preview symbol to refresh the Overview page.
– Server Subsystem: Displays health status of other components of the device such as PSU, fan, CPU, and battery.
NOTE: The Last Updated section indicates the last time when the device inventory status was updated. Click the Refresh button to update the status. An Inventory job is started and the status is updated on the page.
• By using Power Control, turn on, turn off, power cycle, and gracefully shut down a device.
• By using Troubleshoot:
– Run and download the Diagnostics report. See Run and download Diagnostic reports.
– Reset iDRAC.
– Extract and download the SupportAssist report. See Extract and download SupportAssist reports.
• Refresh the device status.
• Refresh the device inventory.
• Export the device inventory that is collected by clicking Refresh Inventory. See Export all or selected data.
• Run a remote RACADM, and IPMI command on the device. See Run remote–RACADM and IPMI–commands on individual devices.
OpenManage Enterprise provides a built-in report to get an overview of devices monitored by OpenManage Enterprise. Click OpenManage Enterprise > Monitor > Reports > Devices Overview Report. Click Run. See Run reports.
Device hardware informationOpenManage Enterprise provides a built-in report about the components and their compliance with the firmware compliance baseline. Click OpenManage Enterprise > Monitor > Reports > Firmware Compliance per Component Report. Click Run. See Run reports.
• Device Card Information—Information about cards used in the device.
• Installed Software—List of firmware and software installed on different components in the device.
• Processor—Processor information such as sockets, family, speed, cores, and model.
• RAID Controller Information—PERC and RAID controller used on the storage devices. The rollup status is equal to the status of the RAID that has high severity. For more information about Rollup Health status, see the MANAGING THE ROLLUP HEALTH STATUS BY USING IDRAC ON THE DELL EMC 14TH GENERATION AND LATER POWEREDGE SERVERS white paper on the Dell TechCenter.
• NIC Information—Information about NICs used in the device.
• Memory Information—Data about DIMMs used in the device.
• Array Disk: Information about the drives installed on the device. OpenManage Enterprise provides a built-in report about the HDDs or virtual drives available on the devices monitored by OpenManage Enterprise. Click OpenManage Enterprise > Monitor > Reports > Physical Disk Report. Click Run. See Run reports.
• Storage Controller : Storage controller installed on the device. Click the plus symbol to view individual controller data.
• Power Supply Information: Information about the PSUs installed on the device.
• Operating System—OS installed on the device.
• Licenses—Health status of different licenses installed on the device.
Managing devices 47

• Storage Enclosure—Storage enclosure status and EMM version.
• Virtual Flash—List of virtual flash drives and its technical specification.
• FRU—List of Field Replaceable Units (FRUs) that can be handled and repaired only by the field technicians. OpenManage Enterprise provides a built-in report about the Field Replacable Units (FRUs) installed on the devices monitored by OpenManage Enterprise. Click OpenManage Enterprise > Monitor > Reports > FRU Report. Click Run. See Run reports.
• Device Management Info—IP address information of the iDRAC installed only in case of a server device.
• Guest Information—Displays the guest devices monitored by OpenManage Enterprise. UUID is the Universally Unique Identifier of the device. The GUEST STATE column indicates the working status of the guest device.
Run and download Diagnostic reportsNOTE: To perform any tasks on OpenManage Enterprise, you must have necessary user privileges. SeeRole-based OpenManage Enterprise user privileges
NOTE: Ensure to enable SMBv1 in the SMB Settings before you begin any firmware tasks which need communication with any chassis or the PowerEdge 12G and 13G servers that have iDRAC version 2.50.50.50 and earlier. See Manage Console preferences
1 On the <Device name> page, from the Troubleshoot drop-down menu, select Run Diagnostics.
2 In the RemoteDiagnostic Type dialog box, from the Remote Diagnostic Type drop-down menu, select one of the following to generate a report.
• Express: In the least possible time.
• Extended: At nominal speed.
• Long Run: At a slow pace.
NOTE: See the Remotely Running Automated Diagnostics Using WS-Man and RACADM Commands technical white paper at https://en.community.dell.com/techcenter/extras/m/white_papers/20438187.
3 To generate the Diagnostics report now, select Run Now.
4 Click OK. When prompted, click YES.
WARNING: Running a Diagnostics report automatically restarts the server.
A job is created and displayed on the Jobs page. To view information about the job, click View Details in the right pane. See View the jobs list. The job status is also displayed in the Recent Activity section. After the job is successfully run, the status of the job is indicated as Diagnostic Completed, and the Download link is displayed in the Recent Activity section.
5 To download the report, click the Download link, and then download the <Servicetag-jobid>.TXT Diagnostics report file.
• Else, click Troubleshoot > Download Diagnostics Report, and then download the file.
6 In the Download RemoteDiagnostics Files dialog box, click the .TXT file link, and then download the report.
7 Click OK.
Extract and download SupportAssist reportsNOTE: To perform any tasks on OpenManage Enterprise, you must have necessary user privileges. See Role-based OpenManage Enterprise user privileges
NOTE: Ensure to enable SMBv1 in the SMB Settings before you begin any firmware tasks which need communication with any chassis or the PowerEdge 12G and 13G servers that have iDRAC version 2.50.50.50 and earlier. See Manage Console preferences
1 On the <Device name> page, from the Troubleshoot drop-down menu, select Extract SupportAssist Report.
2 In the Extract SupportAssist Report dialog box:
a Enter the file name where the SupportAssist report must be saved.b Select the check boxes corresponding to the log types whose SupportAssist report must be extracted.
3 Click OK.
48 Managing devices

A job is created and displayed on the Jobs page. To view information about the job, click View Details in the right pane. See View the jobs list. The job status is also displayed in the Recent Activity section. After the job is successfully run, the status of the job is indicated as Diagnostic Completed, and the Download link is displayed in the Recent Activity section.
4 To download the report, click the Download link, and then download the <Service Tag>.<Time>.TXT SupportAssist report file.
• Else, click Troubleshoot > Download SupportAssist Report.
5 In the Download SupportAssist Files dialog box, click the .TXT file link, and then download the report. Each link represents the log type you selected.
6 Click OK.
Managing individual device hardware logsNOTE: The hardware logs are available for 14G servers, MX7000 chassis and sleds.
• On the <Device name> page, click Hardware logs. All the event and error messages generated for the device is listed. For field descriptions, see Manage audit logs.
• For a chassis, the real-time data about the hardware logs are retrieved from the chassis.
• To add a comment, click Add Comment.
• In the dialog box, type the comment, and then click Save. The comment is saved and identified by a symbol in the COMMENT column.
• To export selected log data to a .CSV file, select the corresponding check boxes, and then click Export > Export Selected.
• To export all logs on a page, click Export > Export Current Page.
Run remote–RACADM and IPMI–commands on individual devices
1 Select the check box corresponding to the device and click View Details.
2 On the <device name> page, click Remote Command Line, and then select RACADM CLI or IPMI CLI.
NOTE: The RACADM CLI tab is not displayed for the following servers because the corresponding task is not available in the device pack — MX740c, MX840c, and MX5016S.
3 In the Send Remote Command dialog box, type the command. Upto 100 commands can be entered with each command required to be on a new line. To display the results in the same dialog box, select the Open results after sending check box.
NOTE: Enter an IPMI command in the following syntax: -I lanplus <command>4 Click Send.
A job is created and displayed in the dialog box. The job is also listed on the Job Details. See View the jobs list.
5 Click Finish.
The Recent Alerts section displays the job completion status.
Start Management application iDRAC of a device1 Select the check box corresponding to the device.
The device working status, name, type, IP, and Service Tag are displayed.
2 In the right pane, click Launch Management Application.
The iDRAC login page is displayed. Log in by using the iDRAC credentials.
For more information about using iDRAC, visit Dell.com/idracmanuals.
NOTE: You can also start the management application by clicking the IP address in the Device list. See Devices list.
Managing devices 49

Start the Virtual ConsoleThe Virtual Console link works on the iDRAC Enterprise license of 14G servers. On the 12G and 13G servers, the link works on the 2.52.52.52 and later versions of iDRAC Enterprise license. If the link is clicked when the current plugin type for virtual console is Active X, a message indicates prompting you to update the console to HTML 5 for better user experience. See Create a job to change the virtual console plugin type.
1 Select the check box corresponding to the device.
The device working status, name, type, IP, and Service Tag are displayed.
2 In the right pane, click Launch Virtual Console.
The remote console page on the server is displayed.
50 Managing devices

Manage the device firmwareBy clicking OpenManage Enterprise > Configuration, and selecting:
• Firmware Compliance: Manage the firmware of devices by using firmware baselines.
• Deploy: Create templates to define configuration compliance baseline and manage such templates.
• Configuration Compliance: Create device or device group configuration compliance baseline and manage device configuration. To get a quick overview of baselines that drift from the templates it is associated with, see Manage the device compliance baseline by using the OpenManage Enterprise dashboard.
NOTE: When a device is connected, the firmware version, if earlier than baseline version, is not automatically updated. You must update the firmware version. It is recommended to update device firmware during maintenance windows to prevent the devices or environment going offline during business hours.
NOTE: To perform any tasks on OpenManage Enterprise, you must have necessary user privileges. See Role-based OpenManage Enterprise user privileges. To manage these settings, you must have the OpenManage Enterprise administrator level credentials.
• By using the Firmware feature, you can:
– Create a firmware catalog by using catalogs available on Dell.com, or on the network path. See Create a firmware catalog by using Dell.com or Creating a firmware catalog by using local network. The customized firmware catalog is used for creating firmware baselines that act as a local benchmark to quickly compare the firmware version on the devices against the version in the catalog,
– Create a firmware baseline by using the available firmware catalogs. See Creating the firmware baseline. You can view the firmware baseline report on the Dashboard also. See Manage firmware baseline by using the OpenManage Enterprise dashboard.
– Run a compliance report to check if the devices associated with the firmware baseline comply to the baseline versions. See Checking firmware compliance. The COMPLIANCE column displays:
◦ OK — if the target device(s) version is same as the firmware baseline.
◦ Upgrade — if the target device(s) has one or more versions earlier than the firmware baseline .See Updating the device firmware version.
• Critical — if the device(s) firmware is not in compliance with the firmware baseline, and indicates that it is a critical upgrade and the device(s) firmware must be upgraded to ensure proper functionality.
• Warning — if the device(s) firmware is not in compliance with the firmware baseline, and the device(s) firmware can be upgraded to enhance the functionality.
◦ Downgrade — if the device firmware is later than the baseline version.
– Export the compliance report for statistical and analytical purposes.
– Update device firmware version by using the firmware baseline. See Upgrade or downgrade device firmware by using the firmware baseline.
NOTE: The compliance level of devices in all the available baselines is indicated by a Donut chart. When more than one device is associated with a baseline, the status of a device with the least compliance level to the baseline is indicated as the compliance level of that baseline. For example, if many devices are associated to a firmware baseline, and the compliance level of many devices is OK and Downgrade, but if the compliance of one device in the group is Upgrade, the compliance level of the baseline is indicated as Upgrade.
You can update firmware version of a device also on the:
• All Devices page. See Updating the device firmware version.
8
Manage the device firmware 51

• Device Details page. In the Devices List, click the device name or IP address to view device configuration data, and then edit. See Viewing and configuring devices.
The summary of all the baselines is displayed in the working pane, and the compliance of a selected baseline is displayed in the right pane by using a Donut chart. A Donut chart and list of items in the baseline changes based on the Baseline you select from the Baseline list. See Donut chart.
Topics:
• Manage firmware Catalogs
• Create a firmware baseline
• Delete a firmware baseline
• Check the compliance of a device firmware against its baseline
• Edit a firmware baseline
• Delete a firmware baseline
Related link
Delete a firmware baseline
Manage firmware CatalogsCatalogs are bundles of firmware based on device types. All the available catalogs (update packages) are validated and posted to Dell.com. You can create firmware baselines which downloads these catalogs and act as a local repository for your devices. This reduces the extra effort of administrators and device managers to frequently access Dell.com, and also reduces the overall updating and maintenance time. For field definitions on the Catalog Management page, see Catalog Management field definitions. The sources of catalog that you can currently access are:
• Latest component firmware versions on Dell.com: Lists the latest firmware versions of devices. For example, iDRAC, BIOS, PSU, and HDDs that are rigorously tested and released and posted to Dell.com. See Creating a firmware catalog by using Dell.com.
• Network Path: Location where firmware catalogs are downloaded by the Dell Repository Manager (DRM) and saved on a network share. See Creating a firmware catalog by using local network.
Create a firmware catalog by using Dell.comNOTE: To perform any tasks on OpenManage Enterprise, you must have necessary user privileges. See Role-based OpenManage Enterprise user privileges.
NOTE: Ensure to enable SMBv1 in the SMB Settings before you begin any firmware tasks which need communication with any chassis or the PowerEdge 12G and 13G servers that have iDRAC version 2.50.50.50 and earlier. See Manage Console preferences
1 On the Catalog Management page, click Add.
2 In the Add Firmware Catalog dialog box:
a In the Name box, enter a firmware catalog name.b For the Catalog Source, select the option Latest component firmware versions on Dell.com.c In the Update Catalog box, select either Manually or Automatically.d If Automatically is selected in the Update Catalog box, Update Frequency need to be selected as either Daily or Weekly
followed by time in the 12-hour format with AM/PM.e Click Finish.
The Finish button appears only after you have entered all the fields in the dialog box
A new firmware catalog is created and listed in the Catalog table on the Catalog Management page.
3 To go back to the Firmware page, click Back to Firmware.
52 Manage the device firmware

Create a firmware catalog by using local network1 On the Catalog Management page, click Add.
2 In the Add Firmware Catalog dialog box:
a In the Name box, enter a firmware catalog name.b For the Catalog Source, select the option Network Path.
The Share Type drop-down menu is displayed.
c Select one of the following:
NOTE: Ensure to enable SMBv1 in the SMB Settings before you begin any firmware tasks which need communication with any chassis or the PowerEdge 12G and 13G servers that have iDRAC version 2.50.50.50 and earlier. See Manage Console preferences
• NFS
a In the Share Address box, enter the IP address of the system where the firmware catalog is stored on the network.
b In the Catalog File Path box, enter the full file path of the catalog file location. Example path: nfsshare\catalog.xml
• CIFS
a In the Share Address box, enter the IP address of the system where the firmware catalog is stored on the network.
b In the Catalog File Path box, enter the full file path of the catalog file location. Example path: Firmware\m630sa\catalog.xml
c In the Domain box, enter the domain name of the device.
d In the User Name box, enter the user name of the device where the catalog is stored.
e In the Password box, enter the password of the device to access the share. Type the username and password of the shared folder where the catalog.xml file is stored.
• HTTP
a In the Share Address box, enter the IP address of the system where the firmware catalog is stored on the network.
b In the Catalog File Path box, enter the full file path of the catalog file location. Example path: compute/catalog.xml.
• HTTPS
a In the Share Address box, enter the IP address of the system where the firmware catalog is stored on the network.
b In the Catalog File Path box, enter the full file path of the catalog file location. Example path: compute/catalog.xml.
c In the User Name box, enter the user name of the device where the catalog is stored.
d In the Password box, enter the password of the device where the catalog is stored.
e Select the Certificate Check check box.
The authenticity of the device where the catalog file is stored is validated and a Security Certificate is generated and displayed in the Certificate Information dialog box.
d After you have entered the Share Address and the Catalog File Path, the Test now link is displayed. To validate a connection to the catalog click Test now. If the connection to the catalog is established, a Connection Successful message is displayed. If connection to the share address or the catalog file path is not established, Connection to path failed error message is displayed. This is an optional step.
e In the Update Catalog box, select either Manually or Automatically.
If the Update Catalog is selected as Automatically, select either Daily or Weekly as the update frequency and enter time in the 12-hour format.
3 Click Finish. The Finish button appears only after you have entered all the fields in the dialog box.
A new firmware catalog is created and listed in the Catalog table on the Catalog Management page.
4 To go back to the Firmware page, click Return to Firmware.
Manage the device firmware 53

Related link
Delete a firmware catalog
SSL Certificate InformationThe catalog files for firmware updates can be downloaded from the Dell support site, Dell EMC Repository Manager (Repository Manager), or a web site within your organization network.
If you choose to download the catalog file from the web site within your organization network, you can accept or decline the SSL certificate. You can view details of the SSL certificate in the Certificate Information window. The information comprises the validity period, issuing authority and the name of the entity to which the certificate is issued.
NOTE: The Certificate Information window is displayed only if you create the catalog from the Create Baseline wizard.
Actions
Accept Accepts the SSL certificate and allows you to access the web site.
Cancel Closes the Certificate Information window without accepting the SSL certificate.
Update a firmware catalogThe existing firmware catalogs can be updated from the Dell.com site or the Dell Update Packages (DUPs) located in the network share.To update a firmware catalog:
1 On the Catalog Management page, select a catalog.
2 Click the Check for update button that is located in the right pane of the Catalog Management page.
3 Click YES.
If the selected catalog was an online firmware catalog, it is replaced by the most up-to-date version that is maintained at the Dell.com site. For the local network firmware catalogs, all the latest firmware available in the shared location are considered for computing the baseline compliance.
Edit a firmware catalog
1 On the Catalog Management page, select the check box corresponding to the catalog.
The firmware catalog details are displayed in the <catalog name> right pane.
2 Click Edit in the right pane.
3 In the Edit Firmware Catalog dialog box, edit the properties.
The properties that you cannot edit are grayed-out. For field definitions, see Create a firmware catalog by using Dell.com and Create a firmware catalog by using local network.
4 Enter the Share Address and the Catalog File Path, the Test now link is displayed. To validate a connection to the catalog click Test now. If the connection to the catalog is established, a Connection Successful message is displayed. If connection to the share address or the catalog file path is not established, Connection to path failed error message is displayed. This is an optional step.
5 In the Update Catalog box, select either Manually or Automatically.
If the Update Catalog is selected as Automatically, select either Daily or Weekly as the update frequency and enter time in the 12-hour format.
6 Click Finish.
54 Manage the device firmware

A job is created and run immediately. The job status is indicated in the REPOSITORY LOCATION column of the Catalog Management page.
Delete a firmware catalog
1 On the Catalog Management page, select the check box corresponding to the catalog, and then click Delete.
The catalog file is deleted from the list.
2 To go back to the Firmware page, click Back to Firmware.
NOTE: Catalogs cannot be deleted if linked to a firmware baseline.
Related link
Create a firmware catalog by using local network
Create a firmware baselineNOTE: To perform any tasks on OpenManage Enterprise, you must have necessary user privileges. See Role-based OpenManage Enterprise user privileges.
NOTE: When a device is connected, the firmware version, if earlier than baseline version, is not automatically updated. You must update the firmware version. It is recommended to update device firmware during maintenance windows to prevent the devices or environment going offline during business hours.
Baseline is a customized and locally-stored set of firmware versions that are easy to access and apply. A baseline can be applied on the basis of one baseline-to-many device, many baselines-to-one device, and many baselines-to-many devices. For example, the baseline you create for a BIOS version can be applied to many servers running the same BIOS. Similarly, you can apply two baselines to one device—say, one for the firmware version and the other for BIOS. To create a firmware baseline:
1 Under Firmware, click Create Baseline.
2 In the Create Firmware Baseline dialog box:
a In the Baseline Information section:
1 From the Catalog drop-down menu, select a catalog.
2 To add a catalog to this list, click Add. See Managing firmware Catalogs.
3 In the Baseline Name box, enter a name for the baseline, and then enter the baseline description.
4 Click Next.b In the Select Devices section:
• To select the target device(s):
a Select Select Devices, and then click the Select Devices button.
b In the Select Devices dialog box, all the devices monitored by OpenManage Enterprise, IOMs, and devices under static or query group are displayed in respective groups.
c In the left pane, click the category name. Devices in that category are displayed in the working pane.
d Select the check box corresponding to the device(s). The selected devices are listed under the Selected Devices tab.
• To select the target device group(s):
a Select Select Groups, and then click the Select Groups button.
b In the Select Groups dialog box, all the devices monitored by OpenManage Enterprise, IOMs, and devices under static or query group are displayed in respective categories.
c In the left pane, click the category name. Devices in that category are displayed in the working pane.
d Select the check box corresponding to the group(s). The selected groups are listed under the Selected Groups tab.
3 Click Finish.
A message is displayed that a job is created for creating the baseline.
In the Baseline table, data about the device and baseline job is displayed. For field definitions, see Firmware baseline field definitions.
Manage the device firmware 55

Delete a firmware baselineUnder Firmware, a list of available firmware baselines is displayed. Select the check box corresponding to the baseline and click Delete. The firmware baseline is deleted and removed from the baseline list.
Check the compliance of a device firmware against its baseline
NOTE: To perform any tasks on OpenManage Enterprise, you must have necessary user privileges. See Role-based OpenManage Enterprise user privileges.
NOTE: When a device is connected, the firmware version, if earlier than baseline version, is not automatically updated. You must update the firmware version. It is recommended to update device firmware during maintenance windows to prevent the devices or environment going offline during business hours.
NOTE: You can view the firmware baseline report on the Dashboard also. See Manage firmware baseline by using the OpenManage Enterprise dashboard.
After you create firmware baseline, you can periodically check the compliance of firmware version of components of a device against the baseline version defined by using a catalog. To check the firmware version compliance of a device:
1 Select the check box corresponding to the baseline, and click Check Compliance.
The firmware baseline compliance job is rerun.
NOTE: If the devices are not associated to a catalog, the compliance is not verified. A job is created only for the devices that are associated and listed in the Compliance table. To associate a device to a catalog, see Creating the firmware baseline.
In the Baseline table, data about the device and baseline job is displayed. For field definitions, see Firmware baseline field definitions.
2 To view the compliance report and upgrade or downgrade the firmware version of device(s), click View Report in the right pane.
See Viewing device firmware compliance report.
View the device firmware compliance report
The compliance level of devices in all the available baselines is indicated by a Donut chart on the Firmware page. When more than one device is associated with a baseline, the status of a device with the least compliance level to the baseline is indicated as the compliance level of that baseline. For example, if many devices are associated to a firmware baseline, and the compliance level of many devices is OK
and Downgrade , but if the compliance of one device in the group is Critical , the compliance level of the baseline is indicated as Critical.
However, you can view the firmware compliance of individual devices associated with a firmware baseline to either upgrade or downgrade the firmware version on that device. To view the device firmware compliance report:
• Select the check box corresponding to the baseline and click View Report in the right pane.
On the Compliance Report page the list of devices associated with the baseline and their compliance level is displayed. By default, the devices in Critical and Warning statuses are displayed.
NOTE: If each device has its own status, the highest severity status is considered as the status of the group. For more information about Rollup Health status, see the MANAGING THE ROLLUP HEALTH STATUS BY USING IDRAC ON THE DELL EMC 14TH GENERATION AND LATER POWEREDGE SERVERS white paper on the Dell TechCenter.
• COMPLIANCE: Indicates the compliance level of a device to the baseline. For more information about symbols used for device firmware compliance levels, see Manage the device firmware.
56 Manage the device firmware

• TYPE: Type of device for which the compliance report is generated.
• DEVICE NAME/COMPONENTS: By default, the Service Tag of the device is displayed.
a To view information about components in the device, click the > symbol.
A list of components and their compliance to the firmware baseline is displayed.
NOTE: For all the devices (except the MX7000 chassis) which are fully in compliance with the associate firmware baseline, the > symbol is not displayed.
b Select the check box(es) corresponding to the devices whose firmware compliance status is Critical and requires an update.
c Click Update Firmware. See Updating the device firmware version.
• SERVICE TAG: Click to view complete information about the device on the <device name> page. For more information about tasks you can complete on this page, see Viewing and configuring devices.
• REBOOT REQ: Indicates if the device must be restarted after updating the firmware.
• Info : Symbol corresponding to every device component is linked to the support site page from where the firmware can be updated. Click to open the corresponding Driver Details page on the support site.
• CURRENT VERSION: Indicates the current firmware version of the device.
• BASELINE VERSION: Indicates the corresponding version of the device available in the firmware baseline.
• To export the compliance report to an Excel file, select the check boxes corresponding to the device, and then select from Export.
• To go back to the Firmware page, click Return to Firmware.
• To sort data based on a column, click the column title.
• To search for a device in the table, click Advanced Filters, and select or enter data in the filter boxes. See Advanced Filters in OpenManage Enterprise Graphical User Interface overview.
Update the device firmware version by using the baseline compliance report
NOTE: To perform any tasks on OpenManage Enterprise, you must have necessary user privileges. See Role-based OpenManage Enterprise user privileges.
NOTE: When a device is connected, the firmware version, if earlier than baseline version, is not automatically updated. You must update the firmware version. It is recommended to update device firmware during maintenance windows to prevent the devices or environment going offline during business hours.
After you run a firmware compliance report, if the firmware version on the device is earlier than the version on the catalog, the Compliance
Report page indicates the device firmware status as Upgrade ( or ). To update a device firmware by using the baseline compliance report:
1 Select the check box corresponding to the baseline to which the device is attached, and then click View Report in the right pane.
On the Compliance Report page the list of devices associated with the baseline and their compliance level is displayed. For field descriptions, see Viewing device firmware compliance report.
2 Select the check box corresponding to the device whose firmware must be updated. You can select more than one device with similar properties.
3 Click Update Firmware.
4 In the Update Firmware dialog box, select:
• Update Now: The firmware version is updated and matched to the version available on the associated catalog. To make the update effective during the next device restart, select the Stage for next server reboot check box.
• Clear Jobs: Select to delete all jobs (scheduled, completed, and failed) on the target device, before the firmware update job is initiated.
• iDRAC Reset: Select to initiate a reboot of the iDRAC before the firmware update job is initiated.
• Schedule Later: Select to specify a date and time when the firmware version must be updated. This mode is recommended if you do not want to disturb your current tasks.
Manage the device firmware 57
5 Click Update.
NOTE: To update a device, you must associate the device and catalog to each other.
Edit a firmware baseline1 Select the check box corresponding to the baseline, and then click Edit in the right pane.
2 Modify data as described in Creating the firmware baseline.
The updated information is displayed in the Baseline list.
3 To go back to the Firmware Compliance page, click Return to Firmware Compliance.
Delete a firmware baselineSelect the check box corresponding to the baseline, and then click Delete. The firmware baseline is deleted and the updated information is displayed in the Baseline list.
Related link
Manage the device firmware
58 Manage the device firmware
Manage device configuration templatesFrom the OpenManage Enterprise menu, by clicking Configuration > Deploy, you can set the configuration properties such as network properties, and BIOS versions of servers, and chassis by using device configuration templates—predefined templates or custom templates. Templates enable you to optimize your data center resources, Subject Matter Expert (SME) bandwidth, and reduce the cycle time in creating clones and deployments. Templates enhance your business-critical operations in converged infrastructure that uses software-defined infrastructures.
Topics:
• Create a template from a reference device
• Create template by importing a template file
• View a template information
• Edit a server template
• Edit a chassis template
• Edit IOA template
• Edit network properties
• Deploy device templates
• Deploy IOA templates
• Clone templates
• Auto deployment of configuration on yet-to-be-discovered servers or chassis
• Create auto deployment targets
• Delete auto deployment targets
• Export auto deployment target details to different formats
• Manage identity pools—Stateless deployment
• Overview of stateless deployment
• Create Identity Pool - Pool Information
• Define networks
• Edit or delete a configured network
• Stateless deployment
• Delete identity pools
• Reclaim assigned virtual identities
• Migrate device profile
Create a template from a reference deviceNOTE: To perform any tasks on OpenManage Enterprise, you must have necessary user privileges. See Role-based OpenManage Enterprise user privileges.
NOTE: Ensure to enable SMBv1 in the SMB Settings before you begin any firmware tasks which need communication with any chassis or the PowerEdge 12G and 13G servers that have iDRAC version 2.50.50.50 and earlier. See Manage Console preferences
You can create or edit a template by using a reference device or by importing from an existing template. To create by using a reference device:
1 From the OpenManage Enterprise menu, click Configuration > Deploy > Create Template, and then select From Reference Device.
2 In the Create Template dialog box:
9
Manage device configuration templates 59

a In the Template Information section, enter a name for the device configuration template and description for the template.b Select the template type:
• Clone Reference Server: Enables you to clone the configuration of an existing server.
• Clone Reference Chassis: Enables you to clone the configuration of an existing chassis.
• Clone Reference IOA: Enables you to clone the configuration of an existing M I/O aggregator.
NOTE: The attributes in the IOA template are uneditable. Only the name and description of an IOA template can be edited.
c Click Next.d In the Reference Device section, click Select Device to select the device whose configuration properties must be used for
creating the new template. For more information about selecting devices, see Selecting target devices and device groups.
NOTE: You can select only one device as a reference device.
NOTE: Only the IOA templates that were extracted at the time of chassis discovery are available for cloning . See Create customized device discovery job protocol for servers –Additional settings for discovery protocols
e In the Configuration Elements section, select the check boxes corresponding to the device elements that must be cloned. For creating template by using server as the device, you can select to clone the server properties such as iDRAC, BIOS, Lifecycle Controller, and Event Filters. For example, iDRAC and RAID. By default, all elements are selected.
f Click Finish.
After successful creation, the job is displayed in the list. A template creation job is started and the status is displayed in the STATUS column.
The job information is also displayed on the Monitor > Jobs page. To view additional details of the job, select the job and click View Details in the working pane. On the Job Details page, the execution details of the job are displayed. In the Results pane, click View Details to view detailed information of the job execution.
Create template by importing a template fileNOTE: Ensure to enable SMBv1 in the SMB Settings before you begin any firmware tasks which need communication with any chassis or the PowerEdge 12G and 13G servers that have iDRAC version 2.50.50.50 and earlier. See Manage Console preferences
1 From the OpenManage Enterprise menu, click Configuration > Deploy > Create Template, and then select Import from File.
2 In the Import Template dialog box:
a Enter a name for the new template.b Click Select a File, and then select a template file.c Select either Server, Chassis, or IOAto indicate the template type.
3 Click Finish.
The properties of an existing template file is imported and a new template is created.
• To view information about a template, select the check box, and then click View Details in the right pane. On the Template Details page, you can deploy or edit a template. See Deploy device templates and Create a template from a reference device.
• To edit a template:
a Select the corresponding check box, and then click Edit.
b In the Edit Template dialog box, edit the template name, and then click Finish. Updated information is displayed in the list of templates.
View a template informationA list of predefined, user-created, or cloned device configuration templates is displayed under Configuration > Deploy.
1 In the list of templates, select the check box corresponding to the required device template.
2 In the working pane, click View Details.
On the Template Details page, the template name, description, the reference device from which the configuration template was created, and the last updated date by the OpenManage Enterprise user information is displayed.
60 Manage device configuration templates
3 Right-click an element to expand all or collapse all the child elements in the Configuration Details section to display all the attributes that are used for creating the template. You can also expand individual child elements specific to a parent element. For example, if you selected that iDRAC and BIOS elements must be used for cloning on the target device, attributes related only to such elements are displayed.
Edit a server templateBuilt-in templates cannot be edited. Only user-created templates that are identified as ‘Custom’ can be edited. You can edit the attributes of template irrespective of whether you created it by using a reference template file or a reference device.
• The Guided view enables you to edit the attributes such as BIOS, boot sequence, and networking. If the configuration elements are not set while creating the template, they will not be displayed during the edit mode.
• The Advanced mode enables you to edit all the available server configuration settings.
1 Select the required custom template check box, and then click Edit.
2 In the Edit Template dialog box:
a In the Template Information section, edit the template name and description. The template type cannot be edited.b Click Next.c In the Edit Components section, the template attributes are displayed in:
• Guided view—Lists the BIOS, boot, and network settings of the selected template.
• Advanced view—Lists all the properties of the selected template.
1 In the BIOS Settings section, select any one of the following:
• Manually: Enables you to manually define the following BIOS properties:
– System profile: From the drop-down menu, select to specify the type of performance optimization to be achieved in the system profile.
– User accessible USB ports: From the drop-down menu, select to specify the ports that the user can access.
– By default, the use of logical processor and in-band manageability are enabled.
• Optimize based on workload: From the Select workload profile drop-down menu, select to specify the type of workload performance optimization you want achieve on the profile.
2 Click Boot and define the boot mode:
• If you select BIOS as the boot mode, do the following:
– To retry the boot sequence, select the Enabled check box.
– Drag the items to set the boot sequence and hard drive sequence.
• If you select UEFI as the boot mode, drag the items to set the UEFI boot sequence. If required, select the check box to enable the Secureboot feature.
3 Click Networking. All the networks associated with the template are displayed under Network Interfaces.
• To associate an optional identity pool to the template, select from the Identity pool drop-down menu. The networks associated with the selected identity pool is displayed. If the template is edited in the Advanced view, the Identity pool selection is disabled for this template.
– To view the network properties, expand the network.
– To edit the properties, click the corresponding pen symbol.
◦ Select the protocol to be used for booting. Select only if the protocol is supported by your network.
◦ Select the Untagged and Tagged network to be associated to the network
◦ The partition, max, and min bandwidth are displayed from the template (profile) we created earlier.
– Click Finish. The network settings of the template is saved.
3 Click Next.
In the Summary section, the attributes you edited by using the guided and advanced mode are displayed.
4 This section is read-only. Read through the settings and click Finish.
The updated template attributes are saved to the template.
Manage device configuration templates 61

Edit a chassis templateEditing chassis templates is possible with OpenManage Enterprise.
NOTE:
• To edit chassis templates you must have the privileges of an Administrator or a Device manager. For more details, See Role-based OpenManage Enterprise user privileges .
• Only user-created chassis templates identified as 'Custom' can be edited.
To edit a chassis template:
1 Select OpenManage Enterprise > Configuration > Deploy to get a list of templates.
2 Select the check box corresponding to the required chassis template, and click Edit. Ensure that the template is identified as 'Custom'.
3 Edit the Template Name and Description in the Template Information section. You cannot edit the Template Type.
4 Click Next.
5 In the Edit Components section under Advanced View, you can select or unselect the attributes to include or exclude in the template. For example, Miscellaneous Attributes, CMC, Event Filters, and so on.
6 Click Next .
7 You can review the changes to the attributes under Summary. A circle appears next to the changed attributes.
8 Click Finish to save the changes to the chassis template.
Edit IOA templateThe attributes in the IOA template are uneditable. Only the name and description of an IOA template can be edited.
Edit network propertiesYou can edit the network configuration of any template that contains applicable NIC attributes. The NIC serial number, NIC identifier, port number, and partition fields are read-only.
1 Edit the following as appropriate:
• Minimum Bandwidth (%): The minimum bandwidth of the partition.
• Maximum Bandwidth (%): The maximum bandwidth of the partition.
• Untagged Network and Tagged Network: Applicable only for the templates created by using modular servers, select the tagged and untagged networks.
2 Click Finish.
The updated network properties are saved.
Deploy device templatesYou can deploy a template that includes a set of configuration attributes to specific devices. Deploying a device configuration template on the devices ensures that the devices are uniformly configured.
NOTE: To perform any tasks on OpenManage Enterprise, you must have necessary user privileges. See Role-based OpenManage Enterprise user privileges.
Before you begin deploying a device deployment template, ensure that:
• You have either created a device deployment template or cloned a sample template. See Create a template from a reference device.
• The target devices meet the requirements that are specified in Minimum system requirements for deploying OpenManange Enterprise.
• The OpenManage Enterprise Advanced license is installed on the target devices.
CAUTION: Ensure that only the appropriate devices are selected for deployment. After deploying a configuration template on a repurpose and bare-metal device, it might not be possible to revert the device to its original configuration.
62 Manage device configuration templates

NOTE: During deployment of an MX7000 chassis template:
• The target device can only be the lead MX7000 chassis.
• If an MX7000 chassis is removed from group, it has to be rediscovered in OpenManage Enterprise.
• Users on the MX7000 chassis are replaced by the users who are configured in the template.
• Imported Active Directory settings are replaced with the values in chassis profile.
1 From the list of templates on the Configuration > Deploy page, select the check box corresponding to the template you want to deploy, and then click Deploy Template.
2 In the Deploy Template: <template_name> dialog box, under Target:
a Click Select, and then select device(s) in the Job Target dialog box. See Selecting target devices and device groups.b During deployment of the device template, the configuration changes might require a forceful reboot of the server. If you do not
wish to reboot the server, select the Do not forcefully reboot the host OS option.
A graceful reboot of the server is attempted when the Do not forcefully reboot the host OS option is selected. If the reboot fails, you must rerun the template deployment task.
c Click Next.
3 If the target device is a server, in the Boot to Network ISO section:
a Select the Boot to Network ISO check box.b Select either CIFS or NFS as the share type, and then enter information in the fields such as ISO image file path and share
location where the ISO image file is stored.c Click Next.
4 In the Schedule section, run the job immediately or schedule for a later time. See Schedule job field definitions.
5 Click Finish. Review the Warning message and click YES.
A Device Configuration job is created under Jobs. See Using jobs for device control.
Deploy IOA templatesNOTE: To perform any tasks on OpenManage Enterprise, you must have necessary user privileges. See Role-based OpenManage Enterprise user privileges.
Before you begin deploying an IOA template, ensure that:
• You have created an IOA deployment template for deployment. See Create a template from a reference device.
• The target devices meet the requirements that are specified in Minimum system requirements for deploying OpenManange Enterprise.
• Firmware version of the target device is the same as the IOA template.
• Only the following cross template deployments are supported:
Table 12. Supported cross template deployments
IOA Deployment template mode Supported IOA template modes of target
Standalone Standalone, PMUX
PMUX (Programmable MUX) PMUX, Standalone
VLT VLT
CAUTION: Ensure that only the appropriate devices are selected for deployment. After deploying a configuration template on a repurpose and bare-metal device, it might not be possible to revert the device to its original configuration.
1 From the list of templates on the Configuration > Deploy page, select the check box corresponding to the IOA template you want to deploy, and click Deploy Template.
2 In the Deploy Template: <template_name> dialog box, under Target:
a Click Select, and then select device(s) in the Job Target dialog box. See Selecting target devices and device groups.b Click OK.
3 In the Host Names dialog box, you can change the Host name of the target IOA device. Click Next.
4 In the Advanced Options dialog box, select Preview Mode to simulate the deployment or select Continue On Warning to deploy the template and ignore the warnings encountered. Click Next.
Manage device configuration templates 63

5 In the Schedule section, run the job immediately or schedule for a later time. See Schedule job field definitions.
6 Click Finish. Review the Warning message and click YES.
A Device Configuration job is created under Jobs. See Using jobs for device control.
Clone templates
1 From the OpenManage Enterprise menu, under Configuration, click Deploy.
A list of available templates is displayed.
2 Select the check box corresponding to the template you want to clone.
3 Click Clone.
4 Enter the name of new template, and then click Finish.
The cloned template is created and displayed in the list of templates.
Auto deployment of configuration on yet-to-be-discovered servers or chassisExisting configuration templates in the OpenManage Enterprise can be assigned to the servers and chassis which are awaiting discovery. These configuration templates are automatically deployed on the respective devices when they are discovered and onboarded.
To access the Auto Deploy page, click OpenManage Enterprise > Configuration > Auto Deploy.
The auto deploy targets and their respective Identifier (service tag or node IDs), template name, template type, status, and Boot to Network ISO status (for servers) are displayed.
The Auto Deploy target list can be customized using the Advanced Filters fields available on the top of the list.
Section on the right side of the Auto Deploy page shows the Created On and Created By details of the selected auto deployment target. When multiple items are selected, details of the last selected item is displayed in the section.
The following actions can be performed on the Auto Deploy page:
• Create templates for auto deployment. See Create auto deployment targets
• Delete templates that are not needed. SeeDelete auto deployment targets
• Export the auto deployment templates to different formats. See Export auto deployment target details to different formats
Create auto deployment targets NOTE: To perform any tasks on OpenManage Enterprise, you must have necessary user privileges. See Role-based OpenManage Enterprise user privileges
To create auto deployment targets :
1 Click OpenManage Enterprise > Configuration > Auto Deploy > Create
The Auto Deploy Template wizard is displayed.
2 On the Template Information page, select the template type (Server or Chassis).
3 From the Select Template drop-down menu, select an appropriate template. If the selected template has identity attributes which are not associated with any virtual identity pool, the following message is displayed: The selected template has identity attributes, but it has not been associated with a virtual identity pool. Deploying this template will not change virtual network addresses on the target devices.
4 Click Next.
The Target Information page is displayed.
5 On the Target Information page, target devices can be selected in one of the following methods:
64 Manage device configuration templates

• Enter Manually : Enter the Service Tag or node IDs to identify the target devices. The identifiers can be entered in any order, however, identifiers must be comma separated. Click Validate to verify the accuracy of the values. It is mandatory to validate the identifiers.
• Import CSV: Click Import CSV to browse the folders and select the respective .csv file with the target device details.
The entries in the .csv file must have the following format: The identifiers must be listed in the first column, one per row, starting from the second row.
6 Click Next.
7 On the Target Group information page, specify a subgroup under the Static group if available. For more information about grouping of devices, see Organize devices into groups. The target devices would be placed under the specified target group on their discovery
8 Click Next.
9 If the target device is a server, on the Boot to Network ISO page :• Select the Boot to Network ISO check box.• Select CIFS or NFS.• Enter the ISO Path of location where the ISO image file is stored.• Enter Share IP Address, Workgroup, Username, and password.• Click Next.
10 On the Virtual Identities page, click Reserve identities.
The assigned virtual identities of the NIC cards of the selected target device are displayed. To view all the assigned identities of the identity pool of the selected target device, click View all NIC details.
11 Click Finish.
An alert message Deploying a template can cause data loss and can cause a restart of the device. Are you sure you want to deploy the template? is displayed.
12 Click Yes.
A new Auto Deploy target is created and listed on the Auto Deploy page.
Delete auto deployment targets NOTE: To perform any tasks on OpenManage Enterprise, you must have necessary user privileges. See Role-based OpenManage Enterprise user privileges
NOTE: If a template that is associated with auto deployment targets is deleted from the OpenManage Enterprise > Configuration > Deploy page, the associated auto deploy entries would also get deleted irrespective of their current state.
To remove the auto deployment targets from the Auto Deploy list.
1 Go to the Auto Deploy page by clicking OpenManage Enterprise > Configuration > Auto Deploy.
2 Select the auto deploy targets from the list.
3 Delete, and then click Yes to confirm.
The auto deploy targets that are selected for deletion are removed from the Auto Deploy page.
Export auto deployment target details to different formats1 Go to the Auto Deploy page by clicking OpenManage Enterprise > Configuration > Auto Deploy .
2 Select the auto deploy target from the list and click Export.
3 In the Export All dialog box, select format as either HTML, or CSV, or PDF. Click Finish.
A job is created and the auto deploy target data is exported in the selected format.
Manage identity pools—Stateless deploymentThe I/O interfaces of a server, such as NICs or HBAs, have unique identity attributes that are assigned by the manufacturer of the interfaces. These unique identity attributes are collectively known as the I/O identity of a server. The I/O identities uniquely identify a
Manage device configuration templates 65

server on a network and also determine how the server communicates with a network resource using a specific protocol. Using OpenManage Enterprise, you can automatically generate and assign virtual identity attributes to the I/O interfaces of a server.
Servers deployed by using a device configuration template that contains virtual I/O identities are known as stateless. Stateless deployments enable you to create a server environment that is dynamic and flexible. For example, deploying a server with virtual I/O identities in a boot-from-SAN environment enables you to quickly do the following:
• Replace a failing or failed server by moving the I/O identity of the server to another spare server.
• Deploy additional servers to increase the computing capability during high workload.
The Identity Pools tab allows you to create, edit, delete, or export virtual I/O pools.
Overview of stateless deploymentTo deploy a device configuration template with virtual identity attributes on target devices, do the following:
1 Create a device template—Click Create Template task under the Deploy tab to create a device template. You can select to create the template from either a configuration file or a reference device.
2 Create an identity pool—Click the Create task under the Identity Pools tab to create a pool of one or more virtual identity types.
3 Assign virtual identities to a device template—Select a device template from the Templates pane, and click Edit Network to assign an identity pool to the device template. You can also select the Tagged and Untagged network, and assign the minimum and maximum bandwidth to the ports.
4 Deploy the device template on target devices—Use the Deploy Template task under the Deploy tab to deploy the device template and virtual identities on the target devices.
Create Identity Pool - Pool InformationIdentity pools are used for template-based deployment on servers to virtualize the network identity for the following:
• Ethernet
• iSCSI
• Fibre Channel over Ethernet (FCoE)
• Fibre Channel (FC)
You can create a maximum of 5000 identity pools in each of these categories.
The server deployment process fetches the next available identity from the pool and uses while providing a server from the template description. You can then migrate the profile from one server to another without losing access to the network or storage resources in your environment.
You can edit the number of entries in the pool. However, you cannot reduce the number of entries less than those assigned or reserved. You can also delete the entries that are not assigned or reserved.
Pool Name Enter a name of the identity pool. The pool name can have a maximum length of 255 characters.
Description Enter a description for the identity pool. The maximum length of the description is 255 characters.
Actions
Next Displays the Ethernet tab.
Finish Saves the changes and displays the Identity Pools page.
66 Manage device configuration templates
Cancel Closes the Create Identity Pool wizard without saving the changes.
Identity poolsAn identity pool is a collection of one or more virtual identity types that are required for network communication. An identity pool can contain a combination of any of the following virtual identity types:
• Ethernet identities
The Identities which are defined by the Media Access Control (MAC) address. MAC addresses are required for Ethernet (LAN) communications.
• iSCSI identities
The Identities which are defined by the iSCSI Qualified Name (IQN). IQN identities are required to support boot-from-SAN by using the iSCSI protocol.
• Fibre Channel (FC) identities
The Identities which are defined by the World Wide Node Name (WWNN) and World Wide Port Name (WWPN). A WWNN identity is assigned to a node (device) in an FC fabric and may be shared by some or all ports of a device. A WWPN identity is assigned to each port in an FC fabric and is unique to each port. WWNN and WWPN identities are required to support boot-from-SAN and for data access using FC and Fibre Channel over Ethernet (FCoE) protocols.
• Fibre Channel over Ethernet (FCoE) identities
Identities that provide a unique virtual identity for FCoE operations. These identities are defined by both MAC address and the FC addresses (that is WWNN and WWPN). WWNN and WWPN identities are required to support boot-from-SAN and for data access using FC and Fibre Channel over Ethernet (FCoE) protocols.
OpenManage Enterprise uses the identity pools to automatically assign virtual identities to the device template that is used for deploying a server.
Create identity poolsYou can create an identity pool that contains one or more virtual identity types.To create a pool of virtual identity types:
1 On the Configuration page, click Identity Pools.
2 Click Create.
3 In the Create Identity Pool dialog box, under Pool Information:
a Enter a unique name for the identity pool and an appropriate description.b Click Next.
4 In the Ethernet section:
a Select the Include ethernet virtual MAC addresses check box to include the MAC addresses.b Enter a starting MAC address and specify the number of virtual MAC identities to be created.
5 In the iSCSI section:
a Select the Include iSCSI MAC addresses check box to include iSCSI MAC addresses.b Enter the starting MAC address and specify the number of iSCSI MAC addresses to be created.c Select Configure iSCSI Initiator, and then enter the IQN prefix.d Select Enable iSCSI Initiator IP Pool, and then enter the network details.
NOTE: The iSCSI Initiator IP Pool does not support IPv6 addresses.
6 In the FCoE section:
a Select the Include FCoE Identity check box to include FCoE identities.b Enter the starting MAC address and specify the number of FCoE identities to be created.
Manage device configuration templates 67

NOTE: The WWPN and WWNN addresses are generated by prefixing 0x2001 and 0x2000 respectively to the MAC addresses.
7 In the Fibre Channel section:
a Select the Include FC Identity check box to include FC identities.b Enter the postfix octets (six octets) and the number of WWPN and WWNN addresses to be created.
NOTE: The WWPN and WWNN addresses are generated by prefixing the provided postfix with 0x2001 and 0x2000 respectively.
The identity pool is created and is listed under the Identity Pools tab.
Create Identity Pool - Fibre ChannelYou can add Fibre Channel (FC) addresses to the identity pool. The FC comprises of WWPN/WWNN addresses.
Include FC Identity Select the check box to add FC addresses to the identity pool.
Postfix (6 octets) Enter the postfix in one of the following formats:
• AA:BB:CC:DD:EE:FF• AA-BB-CC-DD-EE-FF• AABB.CCDD.EEFF
The length of the postfix can be a maximum of 50 characters. This option is displayed only if the Include FC Identity check box is selected.
Number of WWPN/WWNN Addresses
Select the number of WWPN or WWNN address. The address can be between 1 and 5000.
This option is displayed only if the Include FC Identity check box is selected.
Actions
Previous Displays the FCoE tab.
Finish Saves the changes and displays the Configuration page.
Cancel Closes the Create Identity Pool wizard without saving the changes.
Create Identity Pool - iSCSIYou can configure the required number of iSCSI MAC addresses in the iSCSI tab.
NOTE: The iSCSI attributes are applied only when the DHCP option for iSCSI Initiator is disabled in the source template.
Include iSCSI MAC Addresses
Select the check box to add the iSCSI MAC addresses to the identity pool.
Starting MAC Address
Enter the starting MAC address of the identity pool in one of the following formats:
• AA:BB:CC:DD:EE:FF
68 Manage device configuration templates

• AA-BB-CC-DD-EE-FF• AABB.CCDD.EEFF
The maximum length of a MAC address is 50 characters. This option is displayed only if the Include iSCSI MAC Addresses check box is selected.
Number of iSCSI MAC addresses
Enter the number of iSCSI MAC addresses. The MAC address can be between 1 and 5000. This option is displayed only if the Include iSCSI MAC Addresses check box is selected.
Configure iSCSI Initiator
Select the check box to configure the iSCSI initiator. This option is displayed only if the Include iSCSI MAC Addresses check box is selected.
IQN Prefix Enter the IQN prefix of iSCSI identity pool. The length of the IQN prefix is a maximum of 200 characters. The system generates the pool of IQN addresses automatically by appending the generated number to the prefix. For example: <IQN Prefix>.<number>This option is displayed only if the Configure iSCSI Initiator check box is selected.
NOTE: The IQN configured with identity pools is not deployed on the target system if the boot mode is "BIOS".
NOTE: If the iSCSI initiator name is displayed in a separate line in the Identity Pools > Usage > iSCSI IQN field, then, it indicates that the iSCSI IQN is enabled only on that NIC partition.
Enable iSCSI Initiator IP Pool
Select the check box to configure a pool of iSCSI initiator identities. This option is displayed only if the Include iSCSI MAC Addresses check box is selected.
IP Address Range Enter the IP address range for the iSCSI initiator pool in one of the following formats:
• A.B.C.D - W.X.Y.Z• A.B.C.D/E
Subnet mask Select the subnet mask address of the iSCSI pool from the drop-down.
Gateway Enter the gateway address of the iSCSI pool.
Primary DNS Server
Enter the primary DNS server address.
Secondary DNS Server
Enter the secondary DNS server address.
NOTE: The IP Address Range, Gateway, Primary DNS Server, and Secondary DNS Server must be valid IPv4 addresses.
Actions
Previous Displays the Ethernet tab.
Next Displays the FCoE tab.
Finish Saves the changes and displays the Configuration page.
Cancel Closes the Create Identity Pool wizard without saving the changes.
Manage device configuration templates 69

Create Identity Pool - Fibre channel over EthernetYou can add the required number of Fibre Channel over Ethernet (FCoE) Initialization Protocol (FIP) MAC addresses to the identity pool. The World Wide Port Name (WWPN)/World Wide Node Name (WWNN) values are generated from these MAC addresses.
Include FCoE Identity
Select the check box to include the FCoE MAC addresses to the identity pool.
FIP MAC Address Enter the starting FCoE Initialization Protocol (FIP) MAC address of the identity pool in one of the following formats:
• AA:BB:CC:DD:EE:FF• AA-BB-CC-DD-EE-FF• AABB.CCDD.EEFF
The maximum length of a MAC address is 50 characters. This option is displayed only if the Include FCoE Identity check box is selected.
The WWPN/WWNN values are generated from the MAC address.
Number of FCoE Identities
Select the required number of FCoE identities. The identities can be between 1 and 5000.
Actions
Previous Displays the iSCSI tab.
Next Displays the Fibre Channel tab.
Finish Saves the changes and displays the Identity Pools page.
Cancel Closes the Create Identity Pool wizard without saving the changes.
Create Identity Pool - EthernetIn the Ethernet tab, you can add the required number of MAC addresses to the identity pool.
Include ethernet virtual MAC addresses
Select the check box to add the virtual MAC addresses to the identity pool.
Starting MAC Address
Enter the starting MAC address in one of the following formats:
• AA:BB:CC:DD:EE:FF• AA-BB-CC-DD-EE-FF• AABB.CCDD.EEFF
The maximum length of a MAC address is 50 characters. This option is displayed only if the Include ethernet virtual MAC addresses check box is selected.
70 Manage device configuration templates

Number of Virtual MAC Identities
Select the number of virtual MAC identities. The identities can be 1-50. This option is displayed only if the Include ethernet virtual MAC addresses check box is selected.
Actions
Previous Displays the Pool Information tab.
Next Displays the iSCSI tab.
Finish Saves the changes and displays the Identity Pools page.
Cancel Closes the Create Identity Pool wizard without saving the changes.
View definitions of identity pools To view the definitions of an identity pool:
1 On the Configuration page, click Identity Pools.
2 Select an identity pool, and then click Summary.
The various identity definitions of the identity pool are listed.
3 To view the usage of these identity definitions, click the Usage tab and select the View By filter option.
Edit identity poolsYou can edit an identity pool to add ranges that you had not specified earlier, add an identity type, or delete identity type ranges.To edit the definitions of an identity pool:
1 On the Configuration page, click Identity Pools.
2 Select the identity pool, and then click Edit.
The Edit Identity Pool dialog box is displayed.
3 Make the changes to the definitions in the appropriate sections, and then click Finish.
The identity pool is now modified.
Define networks1 Select Configuration > Networks > Define.
2 In the Define Network dialog box, enter a name and an appropriate description.
3 Enter the VLAN ID, and then select the network type.
You can select a network type only for MX7000 chassis. For more information about the network types, see Network types.
4 Click Finish.
The network currently configured in your environment is now defined and resources can access the network. You can also export the list of networks as a .csv file by clicking the Export button.
Manage device configuration templates 71

Network typesNOTE: You can select a network type for MX7000 chassis only.
Table 13. Network types
Network types Description
Bronze General Purpose Used for low priority data traffic.
Gold General Purpose Used for high priority data traffic
Silver General Purpose Used for standard or default priority data traffic
Platinum General Purpose Used for extremely high priority data traffic
Cluster Interconnect Used for cluster heartbeat VLANs
Hypervisor Management Used for hypervisor management connections such as the ESXi management VLAN
iSCSI Storage Used for iSCSI VLANs
FCoE Storage Used for FCoE VLANs
Data Replication Storage Used for VLANs supporting storage data replication such as for VMware Virtual Storage Area Network (VSAN)
VM Migration Used for VLANs supporting vMotion and similar technologies
VMWare FT Logging Used for VLANs supporting VMware Fault Tolerance
Edit or delete a configured network1 On the Configuration page, click Networks.
2 Select a network from the list, and then click Edit in the right pane to change the name, description, VLAN ID, or the network type.
NOTE: VLAN configuration on M1000e and FX2 chassis is not supported in an IPv6 infra, as the IPv6 addressing is not supported by M I/O Aggregator (IOA) and FN I/O modules.
NOTE: The changed VLAN name and IDs are not updated on the target MX7000 chassis after a stateless deployment task is run.
3 To delete the network, select the network and click Delete.
4 Click Yes.
Stateless deploymentNOTE: To perform any tasks on OpenManage Enterprise, you must have necessary user privileges. See Role-based OpenManage Enterprise user privileges.
Before you perform a stateless deployment, ensure that:
• You have either created a device deployment template or cloned a sample template. See Create a template from a reference device.
72 Manage device configuration templates

• You have created and configured an identity pool. See Create identity pools.
• The target devices meet the requirements specified in Minimum system requirements for deploying OpenManange Enterprise.
• The OpenManage Enterprise license is installed on all the target devices.
NOTE: Identity pools cannot be associated to templates created in earlier versions of OpenManage Enterprise.
1 From the list of templates, select the check box corresponding to the device whose template must be deployed.
2 Click Edit Network.
3 In the Edit Network dialog box, select the identity pool, and the Tagged and Untagged network.
4 Enter the maximum and minimum bandwidth and click Finish.
5 On the Template Details page, click Deploy Template.
6 In the Deploy Template: <template name> dialog box, under Target:
a Click Select, and then select device(s) in the Job Target dialog box and click Ok. See Selecting target devices and device groups.
b Click Next.
7 In the Boot to Network ISO section:
a Select the Boot to Network ISO check box. This check box is displayed only if the target device is a server.b Select either CIFS or NFS, and then enter information in the fields such as an .ISO image file path and share location where
the .ISO image file is stored.c Click Next.
8 In the iDRAC Management IP section, change the target device IP settings, if required, and then click Next.
NOTE: If the IP setting is not configured on the discovered MX7000 sled, the Boot to Network ISO operation is not run during the template deployment.
9 In the Virtual Identities section, click Reserve Identities.
10 The assigned virtual identities of the NIC cards are displayed. To view all the assigned identities of the identity pool, click View all NIC details, and then click Next.
11 In the Schedule section, run the job immediately or schedule for a later point of time. See Schedule job field definitions.
12 Click Finish. Review the message and click YES.
A Device Configuration job is created under Jobs. See Using jobs for device control.
Delete identity poolsYou cannot delete an identity pool if the identities are reserved or assigned to a configuration template.To delete an identity pool:
1 On the Configuration page, click Identity Pools.
2 Select the identity pool, and then click Delete.
3 Click Yes.
The identity pool is deleted and the reserved identities associated with one or more templates are removed.
Reclaim assigned virtual identitiesYou can reclaim the assigned virtual identities from a device based on your preference.To reclaim the assigned virtual identities:
1 On the device name page, under Overview, click Configuration Profile > Reclaim identities.
The Reclaim Identites page is displayed.
2 If you want to continue reclaiming the assigned virtual identities of the device, click Yes.
NOTE: During the reclaim process, the identities which are not deployed from OpenManage Enterprise are not reclaimed and the System Configuration job fails. To reclaim these identities, you must use the 'Force reclaim identities if removal fails' option.
Manage device configuration templates 73

After the identities are reclaimed, they can be associated to a different configuration template for stateless deployment tasks.
Migrate device profileYou can migrate the attributes of a device configuration template and the virtual identities of the source device to target devices. The target devices must have identical Lifecycle Controller system, iDRAC, BIOS, RAID, NIC for servers, and CMC for chassis configuration settings as that of the source device.To migrate the profile:
1 On the device name page, under Overview, click Configuration Profile > Migrate Profile.
2 Select the target device with identical hardware configuration as the source device.
NOTE: During the migration process, the identities which are not deployed from OpenManage Enterprise are not migrated and the System Configuration job fails. To migrate these identities, you must use the 'Force migration if the profile removal fails' option.
CAUTION: When using the 'Force migration if the profile removal fails' option, there is a possibility of identities being duplicated if the source device is turned on.
3 Click Migrate Profile.
The virtual identities are now reclaimed from the source device and assigned to the target device.
74 Manage device configuration templates

Managing the device configuration complianceBy selecting OpenManage Enterprise > Configuration > Configuration Compliance, you can create configuration baselines by using the built-in or user-created compliance templates. You can create a configuration compliance template from an existing deploy template, reference device, or by importing from a file. To use this feature, you must have the Enterprise level license of OpenManage Enterprise and iDRAC for servers. For Chassis Management Controller, no license is required. User's only with certain privileges are permitted to use this feature. See Role-based OpenManage Enterprise user privileges. Also see Manage the device compliance baseline by using the OpenManage Enterprise dashboard.
NOTE: After a configuration baseline is created by using a template, the summary of compliance level of each baseline is listed in a table. Each device has its own status, the highest severity status is considered as the status of the baseline. For more information about Rollup Health status, see the MANAGING THE ROLLUP HEALTH STATUS BY USING IDRAC ON THE DELL EMC 14TH GENERATION AND LATER POWEREDGE SERVERS white paper on the support site.
NOTE: You can create configuration baseline of only the lead MX7000 chassis.
On the Compliance page, you can:
• Create configuration compliance baseline. See Create a configuration compliance baseline.
• Check compliance of devices or device groups against configuration compliance baseline.
• Manage compliance templates. See Manage compliance baseline templates.
Use configuration compliance baseline data to set alert policies that alert you if a baseline policy is deviated. The alert is generated based on a compliance baseline that can be viewed on the dashboard page of OpenManage Enterprise. For more information about setting the alert policies, see Monitoring device alerts.
The Overall Compliance Summary report displays the following fields:
• COMPLIANCE: The Rollup compliance level of devices attached to a configuration compliance baseline. The status of the device with least compliance (say, critical) is indicated as the status of the whole baseline.
• NAME: Name of the configuration compliance baseline.
• TEMPLATE: The name of the compliance template used by the baseline.
To view the configuration compliance report of a baseline, select the corresponding check box, and then click View Report in the right pane.
Use the query builder feature to generate device level compliance to the selected baseline. See Select a query criteria.
OpenManage Enterprise provides a built-in report to view the list of monitored devices and their compliance to the configuration compliance baseline. Select OpenManage Enterprise > Monitor > Reports > Devices per Template Compliance Baseline, and then click Run. See Run reports.
Topics:
• Manage compliance baseline templates
• Create a configuration compliance baseline
• Edit a configuration compliance baseline
• Remediate noncompliant devices
• Remove a configuration compliance baseline
10
Managing the device configuration compliance 75

Related links
Create a configuration compliance baseline
Edit a configuration compliance baseline
Remove a configuration compliance baseline
Manage compliance baseline templates
Select a query criteria
Manage compliance baseline templatesUse compliance template to create compliance baselines and then periodically check the configuration compliance status of devices that are associated with the baseline. See Managing the device configuration compliance. You can create baseline templates by using deployment template, reference device, importing from a file. See Manage compliance baseline templates.
By selecting Configuration > Configuration Compliance > Template Management, you can view the list of compliance templates. On this page:
• You can create compliance template by:
– Using a deployment template. See Create a compliance baseline template from deployment template.
– Using a reference device. See Create a compliance baseline template from reference device.
– Importing from a template file. See Create a compliance baseline by importing from a file.
• Edit a compliance template. See Edit a baseline compliance template.
• Clone a compliance template. See Clone a compliance baseline template.
• Export report about a compliance template. On the Compliance Templates page, select the corresponding check box, and then click Export. See Export all or selected data.
• Delete a compliance template. On the Compliance Templates page, select the corresponding check box, and then click Delete.
Related links
Managing the device configuration compliance
Edit a configuration compliance baseline
Remove a configuration compliance baseline
Create a compliance baseline template from deployment template
Edit a baseline compliance template
Create a compliance baseline template from deployment template
1 Click Configuration > Configuration Compliance > Template Management > Create > From Deploy Template.
2 In the Clone Deployment Template dialog box, from the Template drop-down menu, select a template that must be used as the baseline for the new template.
3 Enter a name and description for the baseline compliance template.
4 Click Finish.
A compliance template is created and listed in the list of configuration compliance baselines.
Related links
Manage compliance baseline templates
Clone a compliance baseline template
76 Managing the device configuration compliance
Create a compliance baseline template from reference device
To use the configuration properties of a device as a template for creating configuration baseline, the device must be already onboarded. See Onboarding devices.
1 Click Configuration > Configuration Compliance > Template Management > Create > From Reference Device.
2 In the Create Compliance Template dialog box, enter a name and description for the baseline compliance template.
3 Select the options to create the template by cloning properties of either a server or chassis.
4 Click Next.
5 In the Reference Device section, select the device that must be used as the master for creating the template. See Select target devices and device groups.
a If you select 'server' as the master, also select the server configuration properties that must be cloned.
6 Click Finish.
A template creation job is created and run. The newly created compliance baseline template is listed on the Compliance Templates page.
Create a compliance baseline by importing from a file
1 Click Configuration > Configuration Compliance > Template Management > Create > Import from File.
2 In the Import Compliance Template dialog box, enter a name for the baseline compliance template.
3 Select either the server or chassis template type, and then click Select a file to browse through to the file and select.
4 Click Finish.
The configuration compliance baseline is created and listed.
Clone a compliance baseline template
1 Click Configuration > Configuration Compliance > Template Management.
2 Select the compliance template to be cloned, and then click Clone.
3 In the Clone Template dialog box, enter the name of new template.
4 Click Finish.
The new template is created and listed under Compliance Templates.
Related links
Create a compliance baseline template from deployment template
Edit a baseline compliance template
Edit a baseline compliance templateWhen you want to edit the configuration baseline properties, you can edit the properties of the template linked to it.
Managing the device configuration compliance 77

CAUTION: If a template used for a baseline is already associated with another baseline, editing the template properties changes the baseline compliance levels of devices already associated. Read through the Error and Event message displayed and act accordingly. For more information about error and event messages, see the Error and Event Message Reference Guide available on the support site.
1 On the Compliance Templates page, select the corresponding check box, and then click Edit.
2 On the Template Details page, the configuration properties of the template is listed.
3 Expand the property you want to edit, and then enter or select data in the fields.
a To enable the property, select the check box, if not already enabled.
4 Click Finish.
The template is edited and the updated information is saved.
Related links
Manage compliance baseline templates
Clone a compliance baseline template
Create a configuration compliance baselineOpenManage Enterprise can assign 10 baselines to a single device and check the compliance level of maximum 500 devices at a time. To view the list of baselines, click OpenManage Enterprise > Configuration > Configuration Compliance.
You can create a configuration compliance baseline by:
• Using an existing deployment template. See Managing the device configuration compliance.
• Using a template captured from a support device. See Create a compliance baseline template from reference device.
• Using a template imported from a file. See Create a compliance baseline by importing from a file.
When you select a template for creating a baseline, the attributes associated with the templates are also selected. However, you can edit the baseline properties. See Edit a configuration compliance baseline.
CAUTION: If a template used for a baseline is already associated with another baseline, editing the template properties changes the baseline compliance levels of devices already associated. Read through the Error and Event message displayed and act accordingly. For more information about error and event messages, see the Error and Event Message Reference Guide available on the support site.
NOTE: Before creating configuration compliance baseline, ensure that you have created the appropriate compliance template.
1 Select Configuration > Configuration Compliance > Create Baseline.
2 In the Create Compliance Baseline dialog box:
• In the Baseline Information section:
a From the Template drop-down menu, select a compliance template. For more information about templates, see Managing the device configuration compliance.
b Enter a compliance baseline name and description.c Click Next.
• In the Target section:
a Select devices or device groups. Only compatible devices are displayed. See Select target devices and device groups.
NOTE: Only compatible devices are listed. If you select a group, the devices that are not compatible with the baseline template, or the devices that do not support the configuration compliance baseline feature, are exclusively identified to help you select effectively.
3 Click Finish.
A compliance baseline is created and listed. A compliance comparison is initiated when the baseline is created or updated. The overall compliance level of the baseline is indicated in the COMPLIANCE column. For information about the fields in the list, see Managing the device configuration compliance.
78 Managing the device configuration compliance

Related links
Managing the device configuration compliance
Remove a configuration compliance baseline
Edit a configuration compliance baselineYou can edit the devices, name, and other properties associated with a configuration baseline. For field descriptions displayed in the list, see Managing the device configuration compliance.
CAUTION: If a template used for a baseline is already associated with another baseline, editing the template properties changes the baseline compliance levels of devices already associated. See Edit a baseline compliance template. Read through the Error and Event message displayed and act accordingly. For more information about error and event messages, see the Error and Event Message Reference Guide available on the support site.
1 Select Configuration > Configuration Compliance.
2 From the list of configuration compliance baselines, select the corresponding check box, and then click Edit.
3 In the Edit Compliance Baseline dialog box, update the information. See Create a configuration compliance baseline.
Related links
Managing the device configuration compliance
Manage compliance baseline templates
Select a query criteria
Remove a configuration compliance baseline
Remediate noncompliant devices You can remediate the devices which are not conforming to the associated baseline by changing the attribute values to match with the associated baseline attributes. To view the drifted attributes, from the device compliance report, click View Report. The Compliance Report table lists the attribute names with the expected and current values of the attributes.To remediate one or more noncompliant devices:
1 Select Configuration > Configuration Compliance.
2 From the list of configuration compliance baselines, select the corresponding check box, and then click View Report.
3 From the list of noncompliant devices, select one or more devices, and then click Make Compliant.
4 Schedule the configuration changes to run immediately or later, and then click Finish.
To apply the configuration changes after the next server reboot, you can select the Stage configuration changes to device(s) on next reboot option.
A new configuration inventory task is run, and the compliance status of the baseline is updated on the Compliance page.
Remove a configuration compliance baselineYou can remove the configuration compliance level of devices associated with a configuration baseline. For field descriptions displayed in the list, see Managing the device configuration compliance.
CAUTION: When you delete a compliance baseline, or delete device(s) from a compliance baseline:
• The compliance data of the baseline and/or device(s) is deleted from the OpenManage Enterprise data.
• If a device is removed, its configuration inventory is no longer retrieved, and the already retrieved information is also deleted, unless the inventory is associated with an Inventory job.
Managing the device configuration compliance 79

A template used as a compliance baseline cannot be deleted if associated with a device. Appropriate messages are displayed in such cases. Read through the error and event message displayed and act accordingly. For more information about error and event messages, see the Error and Event Message Reference Guide available on the support site.
1 Click Configuration > Configuration Compliance.
2 From the list of configuration compliance baselines, select the corresponding check box, and then click Delete.
3 When prompted whether or not you want to delete, click YES.
The compliance baseline is deleted and the Overall Compliance Summary table of baselines is updated.
Related links
Managing the device configuration compliance
Create a configuration compliance baseline
Select a query criteria
Manage compliance baseline templates
Edit a configuration compliance baseline
80 Managing the device configuration compliance

Monitoring device alertsBy clicking the OpenManage Enterprise menu, and selecting items under Alerts, you can:
• Monitor alerts by:
– Acknowledge alerts
– Ignore alerts
– View archived alerts and Download archived alerts
• Create and manage alert policies. See Alert policies.
• View alert definitions. See Alert definitions.
• Hide and display acknowledged alerts. See Customize the alert display.
• Export all or selected alert data. See Export all or selected data.
NOTE: Currently, only the SNMPv1 and SNMPv2 alerts are received by OpenManage Enterprise from the following PowerEdge servers— MX840c and MX5016s.
NOTE: To manage these settings, you must have the OpenManage Enterprise administrator level credentials. See Role-based OpenManage Enterprise user privileges.
OpenManage Enterprise provides a built-in report to view the list of devices monitored by OpenManage Enterprise and the alerts generated for each device. Click OpenManage Enterprise > Monitor > Reports > Alert Counts per Device Report. Click Run. See Run reports.
Topics:
• View the alert logs
• Acknowledge alerts
• Unacknowledge alerts
• Ignore alerts
• Delete alerts
• View archived alerts
• Download archived alerts
• Alert policies
• Alert definitions
Related links
View the alert logs
Delete alerts
View the alert logsClick OpenManage Enterprise > Alerts > Alert Log. A list of alerts is displayed. The severity of alerts, time when generated, source device that generated the alert, alert category, and alert message are displayed.
NOTE: By default only the unacknowledged alerts are displayed.
You can customize the list of the alerts using either the Advanced Filters, located on the top left hand side of the alert list, or by changing the Alert Display Settings in the Application Settings page. See Customize the alert display
11
Monitoring device alerts 81

NOTE: OpenManage Enterprise version 3.2 and above tracks the Last Updated By data point, however, in the previous versions this was not tracked. Therefore, be aware that if the Alert log is refined using the User advanced filter field, the acknowledged alerts from the previous versions will not be displayed.
• SEVERITY indicates the severity of an alert.
• ACKNOWLEDGE displays a tick mark when an alert is viewed and acknowledged. The total number of alerts generated is also displayed in the header of OpenManage Enterprise. See OpenManage Enterprise Graphical User Interface overview.
• Click the hyper-linked device name under SOURCE NAME to view and configure device properties that generated the alert. See Viewing and configuring devices.
NOTE: Alerts cannot be filtered based on the IP address (source name) if the alert is generated from an undiscovered device or in case of an internal alert.
• CATEGORY indicates the alert category. For example, system health and audit.
The ACKNOWLEDGE column corresponding to an alert displays a tick mark when the alert is viewed and acknowledged.
On this page, you can acknowledge, unacknowledge, ignore, export, delete, and archive alert data. For more information about archiving alerts, see View archived alerts.
Related links
Delete alerts
Monitoring device alerts
Acknowledge alertsAfter you view an alert and understand its contents, you can acknowledge that you have read through the alert message.To acknowledge an alert:
Select the check box corresponding to the alert, and then click Acknowledge
A tick mark is displayed in the ACKNOWLEDGE column. Once an alert is acknowledged, the Last Updated By field, located in the alert-detail section, is populated.
Unacknowledge alertsYou can unacknowledge alerts if the alerts were mistakenly acknowledged.To unacknowledge alerts:
Select the check box corresponding to the alerts, and then click the Unacknowledge button. Else, you can click the tick mark corresponding to each alert to unacknowledge.
NOTE: The Last Updated By field in the alert-detail section would retain the username of the user who had last acknowledged the alert.
Ignore alertsIgnoring an alert creates an alert policy, which is enabled, and discards all future occurrences of that alert. Select the check box corresponding to the alert, and then click Ignore. A message is displayed that a job is being created to ignore the selected alert. The total number of alerts displayed in the header row of OpenManage Enterprise is decremented.
Delete alertsYou can delete an alert to permanently remove that occurrence of the alert from the console. To prevent future occurrences of the alert from being displayed on OpenManage Enterprise, ignore the alert. See Ignore alerts.
1 Select the check box corresponding to the alert, and then click Delete.
82 Monitoring device alerts

A message is displayed prompting you to confirm the deletion process.
2 Click YES.
The alert is deleted.
The total number of alerts displayed in the header row of OpenManage Enterprise is decremented.Related links
View the alert logs
Monitoring device alerts
View archived alertsAt a time, a maximum of 50,000 alerts can be generated and viewed by using OpenManage Enterprise. When 95% of the 50,000 limit (47,500) is reached, OpenManage Enterprise generates an internal message indicating that, when the count reaches 50,000, OpenManage Enterprise will automatically purge 10% (5000) of the archived alerts. The table lists different scenarios involving the alert purging.
Table 14. Alert purging
Workflow Description Result
Purge Task Runs after every 30 minutes on the console. If the alerts have reached its maximum capacity (that is, 50,000), check and generate the purge archives.
Purge Alert Warning Generates an internal purge alert warning. If the alerts have exceeded more than 95% (that is, 475000), generates an internal purge alert to purge 10% of the alerts .
Purge Alerts Alerts purged from the alert log. If the number of alerts have exceeded more than 100% then 10% of the old alerts are purged to return to 90% (that is 45,000).
Download Purge Alerts Download the purged alerts. Archives of the recent five purged alerts can be downloaded from the Archive Alerts. See Download archived alerts.
Download archived alertsArchived alerts are the oldest 10% of the alerts (5000 nos) that are purged when the alerts exceed 50,000 in number. These oldest 5000 alerts are removed from the table and stored in a .CSV file, and then archived. To download the archived alert file:
1 Click Archived Alerts.
In the Archived Alerts dialog box, the last five purged archived alerts are displayed. File size, name, and archived date are indicated.
2 Select the check box corresponding to the alert file and click Finish.
The .CSV file is downloaded to the location you selected.
NOTE: Note: To download archived alerts, you must have necessary privileges. See Role-based OpenManage Enterprise user privileges.
Alert policiesBy clicking OpenManage Enterprise > Alerts > Alert Policies, you can:
• Automatically trigger actions based on the input from an alert.
• Send your alerts to email address, phone, SNMP traps, and perform device power control actions such as turning on or turning off a device when an alert of a predefined category is generated.
• Create, edit, enable, disable, and delete the alert policies.
Monitoring device alerts 83

A tick mark corresponding to an alert policy indicates that the alert policy is enabled. When an alert is received that meets the policy criteria, you can configure the policy to perform actions such as sending email message and enabling SNMP trap forwarding. After prior setting, you can do the following:
• Send an email message:
a Click the EMAIL cell corresponding to the alert policy.
b In the Alert Actions: Email dialog box, type information about the message to be sent. Use the sample message pattern indicated in the text boxes.
c Click Finish. A tick mark is displayed in the cell. Email message is sent when an alert is received that meets the set policy criteria.
• Forward an SNMP trap:
a Click the SNMP TRAP cell corresponding to the alert policy.
b When prompted, click YES.
c Under Alerts, expand SNMP Configuration.
d Complete the tasks in Configure SMTP, SNMP, and Syslog alerts. A tick mark is displayed in the cell. An SNMP trap is activated when an alert is received that meets the set policy criteria.
• Ignore the alert policy:
a Click the IGNORE cell corresponding to the alert policy.
b When prompted that all actions associated with the policy will be removed, click YES. A tick mark is displayed in the cell. Any alert received that meets the policy criteria will be ignored.
• Send notification to a mobile device. You must set up OpenManage Enterprise and mobile phone for sending push notifications. See OpenManage Mobile settings.
a Click the MOBILE cell corresponding to the alert policy. If enabled, the policy is disabled and the tick mark disappears. Vice-versa if disabled.
• Send an SMS message:
a Click the SMS cell corresponding to the alert policy.
b In the Alert Actions: SMS dialog box, type phone number.
c Click Finish. A tick mark is displayed in the cell. SMS message is sent when an alert is received that meets the set policy criteria.
NOTE: An SMS is sent to only the US-based cell phones.
• Perform a power control action on the device:
a Click the Power Control cell corresponding to the alert policy.
b In the Alert Actions: Power Control dialog box, select to indicate if you want power cycle, turn off, or turn on a device.
c Click Finish. A tick mark is displayed in the cell. SMS message is sent when an alert is received that meets the set policy criteria.
• Run a remote script:
a Click the Remote Script Execution cell corresponding to the alert policy.
NOTE: Because the remote script feature is supported only on the Linux servers, the SSH commands can be run only on the Linux servers but not on the Windows servers.
b When prompted, click YES.
c On the Script Execution tab, under Remote Command Setting, complete the tasks in Create a Remote command job for managing devices. A tick mark is displayed in the cell. The specified command is run when an alert is received that meets the set policy criteria.
84 Monitoring device alerts
Related links
Delete alert policies
Disable alert policies
Enable alert policies
Edit alert policies
Create alert policies
Create alert policiesNOTE: To perform any tasks on OpenManage Enterprise, you must have necessary user privileges. See Role-based OpenManage Enterprise user privileges.
1 Click Alert Policies > Create.
2 In the Create Alert Policy dialog box, in the Name and Description section, enter the name and description of the alert policy.
a To enable an alert policy by default, select the Enable Policy check box.b Click Next.
3 In the Category section, select the All check box to apply the alert policy to all the available categories. By default, the following categories are displayed, but not applied. To view sub-categories under each category, expand the category:
a Click Next.
4 In the Target section, add devices or groups. See Select target devices and device groups.
• To specify an undiscovered device (third-party device), select Specific Undiscovered Devices, and then type the IP address or host name.
• To specify any undiscovered device, select Any Undiscovered Devices.
NOTE: The Remote Script Execution and Power Action tasks cannot be performed on the undiscovered devices.
NOTE: Alerts from such foreign and undiscovered devices can be ignored.
NOTE: Alerts of SNMPv1, SNMPv2, and SNMPv3 protocols sent by such undiscovered (foreign) devices are recognized by OpenManage Enterprise.
• Click Next.
5 (Optional) By default, the alert policies are always active. To limit activity, in the Date and Time section, select the from and to dates, and then select the time frame.
a Select the check boxes corresponding to the days on which the alert policies must be run.b Click Next.
6 In the Severity section, select the severity level of the alert for which this policy must be activated.
a To select all the severity categories, select the All check box.b Click Next.
7 In the Actions section, select one or more check boxes to initiate the following actions when the policy is run:
• Send email to a designated recipient by selecting the Email check box, and specifying data in the fields. Tokens can be used in the Subject and Message fields. See Token substitution in remote scripts and alert policy
• Configure SNMP alerts by clicking Enable next to the SNMP Trap Forwarding check box. In the SNMP Configuration dialog box, enter or select data. See Configure SMTP, SNMP, and Syslog alerts.
• Configuring Syslog properties.
• Select the Ignore check box to ignore the alert message and not activate the alert policy.
• Send SMS to a telephone number by entering a phone number in To.
• Control the power of the device by power cycling, turning on, or turn off the device. To shut down an OS before performing power control actions, select the Shut down OS First check box.
• Run a remote command by clicking Enable next to Remote Script Execution:
– In the Remote Command Setting dialog box, type or select information to set up the remote commands you want to run. See Execute remote commands and scripts.
Monitoring device alerts 85

– From the drop-down menu, select the script you want to run when this alert policy is run. You can set up running the remote command also as described in Managing OpenManage Enterprise appliance settings.
• Mobile: Send notifications to the mobile phone(s) registered with this OpenManage Enterprise version. See OpenManage Mobile settings.
8 Click Next.
9 In the Summary section, details of the alert policy you defined is displayed. Carefully read through the information.
10 Click Finish.
The alert policy is successfully created and listed in the Alert Policies section.
Related links
Alert policies
Forward audit logs to remote Syslog servers
Forward audit logs to remote Syslog servers
To monitor all the audit logs of OpenManage Enterprise from Syslog servers, you can create an alert policy. All the audit logs such as user login attempts, creation of alert policies, and running different jobs can be forwarded to Syslog servers.
To create an alert policy to forward audit logs to Syslog servers:
1 Select Alerts > Alert Policies > Create.
2 In the Create Alert Policy dialog box, in the Name and Description section, enter a name and description of the alert policy.
a The Enable Policy check box is selected by default to indicate that the alert policy will be enabled once it is created. To disable the alert policy, clear the check box. For more information about enabling alert policies at a later time, see Enable alert policies.
b Click Next.
3 In the Category section, expand Application and select the categories and subcategories of the appliance logs. Click Next.
4 In the Target section, the Select Devices option is selected by default. Click Select Devices and select devices from the left pane. Click Next.
NOTE: Selecting target devices or groups is not applicable while forwarding the audit logs to the Syslog server.
5 (Optional) By default, the alert policies are always active. To limit activity, in the Date and Time section, select the 'from' and 'to' dates, and then select the time frame.
a Select the check boxes corresponding to the days on which the alert policies must be run.b Click Next.
6 In the Severity section, select the severity level of the alerts for which this policy must be activated.
a To select all the severity categories, select the All check box.b Click Next.
7 In the Actions section, select Syslog.
If Syslog servers are not configured in OpenManage Enterprise, click Enable and enter the destination IP address or the hostname of Syslog servers. For more information about configuring Syslog servers, see Configure SMTP, SNMP, and Syslog alerts.
8 Click Next.
9 In the Summary section, details of the alert policy you defined are displayed. Carefully read through the information.
10 Click Finish.
The alert policy is successfully created and listed in the Alert Policies section.Related links
Delete alert policies
Disable alert policies
Enable alert policies
Edit alert policies
Create alert policies
Manage audit logs
86 Monitoring device alerts

Configure SMTP, SNMP, and Syslog alerts
By clicking OpenManage Enterprise > Application Settings > Alerts, you can configure the email (SMTP) address that receives system alerts, SNMP destinations, and Syslog properties. To manage these settings, you must have the OpenManage Enterprise administrator level credentials.
To configure and authenticate the SMTP server that manages the email communication between the users and OpenManage Enterprise:
1 Expand Email Configuration.
2 Enter the SMTP server network address that sends email messages.
3 To authenticate the SMTP server, select the Enable Authentication check box, and then enter the username and password.
4 By default, the SMTP port number to be accessed is 25. Edit if necessary.
5 Select the Use SSL check box to secure your SMTP transaction.
6 Click Apply.
7 To reset the settings to default attributes, click Discard.
To configure the SNMP trap forwarding:
1 Expand SNMP Configuration.
2 Select the ENABLED check box to enable the respective SNMP traps to send alerts in case of predefined events.
3 In the DESTINATION ADDRESS box, enter the IP address of the destination device that must receive the alert.
4 Select the SNMP version type from the SNMP VERSION drop-down menu. Currently, only SNMP1 and SNMP2 versions are supported.
5 In the COMMUNITY STRING box, enter the SNMP community string of the device that must receive the alert.
6 Default port number for SNMP traps=162. Edit if necessary. See Supported protocols and ports in OpenManage Enterprise.
7 To test an SNMP message, click the Send button of the corresponding trap.
8 Click Apply. To reset the settings to default attributes, click Discard.
To configure the Syslog messages:
1 Expand Syslog Configuration.
2 Select the check box to enable the Syslog feature on the respective server in the SERVER column.
3 In the DESTINATION ADDRESS/HOST NAME box, enter the IP address of the device that receives the Syslog messages.
4 Default port number by using UDP=514. Edit if necessary by entering or selecting from the box. See Supported protocols and ports in OpenManage Enterprise.
5 Click Apply.
6 To reset the settings to default attributes, click Discard.
Execute remote commands and scripts
When you get an SNMP trap, you can run a script on OpenManage Enterprise. This sets up a policy that opens a ticket on your third party ticketing system for alert management. You can create and store only up to four remote commands.
1 Click Application Settings > Script Execution.
2 In the Remote Command Setting section, do the following:
a To add a remote command, click Create.b In the Command Name box, enter the command name.c Select any one of the following command type:
1 Script
2 RACADM
Monitoring device alerts 87

3 IPMI Toold If you select Script, do the following:
1 In the IP Address box, enter the IP address.
2 Select the authentication method: Password or SSH Key.
3 Enter the user name and password or the SSH Key.
4 In the Command box, type the commands.
• Up to 100 commands can be typed with each command required to be on a new line.
• Token substitution in scripts is possible. See Token substitution in remote scripts and alert policy
5 Click Finish. e If you select RACADM, do the following:
1 In the Command Name box, enter the command name.
2 In the Command box, type the commands. Up to 100 commands can be typed with each command required to be on a new line.
3 Click Finishf If you select IPMI Tool, do the following:
1 In the Command Name box, enter the command name.
2 In the Command box, type the commands. Up to 100 commands can be typed with each command required to be on a new line.
3 Click Finish
3 To edit a remote command setting, select the command, and then click Edit.
4 To delete a remote command setting, select the command, and then click Delete.
Enable alert policiesYou can enable an alert policy, only if disabled. Enable an alert policy while creating an alert policy by selecting the Enable Policy check box in the Name and Description section. See Create alert policies.
To enable an alert policy, select the check box corresponding to the alert policy and click Enable. The alert policy is enabled and the tick mark indicating that the alert policy is enabled (the ENABLED column) is displayed.
NOTE: You can enable multiple alert policies at a time by selecting the respective check boxes. To select or clear all the check boxes, select the check box in the header row next to ENABLED.
NOTE: The Enable button of an alert policy that is already enabled appears grayed-out.
Related links
Alert policies
Forward audit logs to remote Syslog servers
Edit alert policies1 Select the check box corresponding to the alert policy and click Edit.
2 In the Create Alert Policy dialog box, edit the properties of the alert policy.
For navigating through different sections in the dialog box, see Create alert policies.
Related links
Alert policies
Forward audit logs to remote Syslog servers
88 Monitoring device alerts

Disable alert policiesYou can disable an alert policy, only if enabled. You disable an alert policy while creating an alert policy by clearing the Enable Policy check box in the Name and Description section. See Create alert policies.
To disable an alert policy, select the check box corresponding to the alert policy and click Disable. The alert policy is disabled and the tick mark indicating that the alert policy is enabled (the ENABLED column) is removed.
NOTE: You can disable multiple alert policies at a time by selecting the respective check boxes. To select or clear all the check boxes, select the check box in the header row next to ENABLED. However, an alert policy must have at least one action associated to it.
NOTE: The Disable button of an alert policy that is already disabled appears grayed-out.
Related links
Alert policies
Forward audit logs to remote Syslog servers
Delete alert policiesTo delete an alert policy, select the check box corresponding to the alert policy and click Delete. The alert policy is deleted and removed from the Alert Policies table.
NOTE: You can delete multiple alert policies at a time by selecting the respective check boxes. To select or clear all the check boxes, select the check box in the header row next to ENABLED.
Related links
Alert policies
Forward audit logs to remote Syslog servers
Alert definitionsBy clicking OpenManage Enterprise > Alerts > Alert Definitions, you can view alerts that are generated for errors or informational purposes. These messages are:
• Called as Event and Error messages.
• Displayed on the Graphical User Interface (GUI), and Command Line Interface (CLI) for RACADM and WS-Man.
• Saved in the log files for information purpose only.
• Numbered and clearly defined to enable you implement corrective and preventive actions effectively.
An Error and Event message has:
• MESSAGE ID: Messages are classified based on components such as BIOS, power source (PSU), storage (STR), log data (LOG), and Chassis Management Controller (CMC).
• MESSAGE: The actual cause of an event. Events are triggered for information purpose only, or when there is an error in performing tasks.
• CATEGORY: Class to which the error message belongs to. For information about categories, see the Event and Error Message Reference Guide for Dell EMC PowerEdge Servers available on the support site.
• Recommended Action: Resolution to the error by using GUI, RACADM, or WS-Man commands. Where necessary, you are recommended to refer to documents on the support site or TechCenter for more information.
• Detailed Description: More information about an issue for easy and fast resolution.
Monitoring device alerts 89

You can view more information about an alert by using filters such as message ID, message text, category, and Subcategory. To view the alert definitions:
1 From the OpenManage Enterprise menu, under Alerts, click Alert Definitions.
Under Alert Definitions, a list of all the standard alert messages is displayed.
2 To quickly search for an error message, click Advanced Filters.
The right pane displays Error and Event Message information of the message ID you selected in the table.
90 Monitoring device alerts

Manage audit logsAudit logs lists the actions that were performed on the devices monitored by OpenManage Enterprise. Log data help you or Dell EMC Support teams in troubleshooting and analysis. The audit log files can be exported to the .CSV file format. See Export all or selected data.
NOTE: To perform any tasks on OpenManage Enterprise, you must have necessary user privileges. See Role-based OpenManage Enterprise user privileges.
By clicking OpenManage Enterprise and selecting the items under Monitor, you can:
• Create jobs to control status of device power and device LEDs. See Using jobs for device control.
• Discover and manage devices. See Discovering devices.
• Schedule jobs to generate device inventory. See Managing device inventory.
• Create and receive alerts about device warranty. See Managing device warranty.
• Create reports about device components. See Reporting device performance.
• Manage MIBs. See Managing MIBs.
NOTE: An audit log is recorded when:
• A group is assigned or access permission is changed.
• User role is modified.
1 Select Monitor > Audit Logs.
The audit logs that OpenManage Enterprise stores and displays about the tasks performed by using the appliance are displayed. For example, user login attempts, creation of alert policies, and running different jobs.
2 To sort data in any of the columns, click the column title.
3 To quickly search for information about an audit log, click Advanced Filters.
The following fields are displayed that act as filters to quickly search for data.
4 Enter or select data in the following fields:
• Severity: Select the severity level of a log data.
• Start Time and End Time: Select the approximate start and end time when the task was performed.
• User: Enter the OpenManage Enterprise user who performed the task.
• Source Address: Enter the IP address of the system.
• Category: Select a category to which the task belongs. All messages in that category are displayed.
• Description Contains: Enter the text or phrase contained in the log data that you are searching for. All logs with the selected text are displayed. For example, if you enter warningSizeLimit, all the logs with this text are displayed.
• Message ID: Enter the message ID. If the search criteria matches, only the items with the matching message ID are displayed.
5 To remove the filter, click Clear All Filters.
6 To export an audit log or all the audit logs, select Export > Export Selected, or Export > Export All respectively. For more information about exporting the audit logs, see Export all or selected data.
7 To export the console logs as a .ZIP file, click Export > Export Console Logs.
NOTE: Currently, for any M1000e chassis discovered with chassis firmware version of 5.1x and earlier, the date in the TIMESTAMP column under Hardware Logs is displayed as JAN 12, 2013 in the . However, for all chassis versions of VRTX and FX2 chassis, the correct date is displayed.
Related link
Forward audit logs to remote Syslog servers
12
Manage audit logs 91

Forward audit logs to remote Syslog serversTo monitor all the audit logs of OpenManage Enterprise from Syslog servers, you can create an alert policy. All the audit logs such as user login attempts, creation of alert policies, and running different jobs can be forwarded to Syslog servers.
To create an alert policy to forward audit logs to Syslog servers:
1 Select Alerts > Alert Policies > Create.
2 In the Create Alert Policy dialog box, in the Name and Description section, enter a name and description of the alert policy.
a The Enable Policy check box is selected by default to indicate that the alert policy will be enabled once it is created. To disable the alert policy, clear the check box. For more information about enabling alert policies at a later time, see Enable alert policies.
b Click Next.
3 In the Category section, expand Application and select the categories and subcategories of the appliance logs. Click Next.
4 In the Target section, the Select Devices option is selected by default. Click Select Devices and select devices from the left pane. Click Next.
NOTE: Selecting target devices or groups is not applicable while forwarding the audit logs to the Syslog server.
5 (Optional) By default, the alert policies are always active. To limit activity, in the Date and Time section, select the 'from' and 'to' dates, and then select the time frame.
a Select the check boxes corresponding to the days on which the alert policies must be run.b Click Next.
6 In the Severity section, select the severity level of the alerts for which this policy must be activated.
a To select all the severity categories, select the All check box.b Click Next.
7 In the Actions section, select Syslog.
If Syslog servers are not configured in OpenManage Enterprise, click Enable and enter the destination IP address or the hostname of Syslog servers. For more information about configuring Syslog servers, see Configure SMTP, SNMP, and Syslog alerts.
8 Click Next.
9 In the Summary section, details of the alert policy you defined are displayed. Carefully read through the information.
10 Click Finish.
The alert policy is successfully created and listed in the Alert Policies section.Related links
Delete alert policies
Disable alert policies
Enable alert policies
Edit alert policies
Create alert policies
Manage audit logs
92 Manage audit logs

Using jobs for device controlNOTE: To perform any tasks on OpenManage Enterprise, you must have necessary user privileges. See Role-based OpenManage Enterprise user privileges.
NOTE: Each job type is limited to devices that:
• The user has permissions to access.
• Have the ability to complete the required action.
This rule is applicable to all tasks such as blink, power control, managing firmware baselines, and managing configuration compliance baseline, where the device selection task is involved.
By clicking OpenManage Enterprise > Monitor > Jobs, you can:
• View list of jobs currently running, failed, and successfully completed.
• Create jobs to blink device LEDs, control the device power, and run remote command on devices. See Create a Remote command job for managing devices, Creating jobs for managing power devices, and Creating job to blink device LEDs. You can perform similar actions on a server on the device details page. See Viewing and configuring devices.
• Run job by selecting the check box corresponding to a job and clicking Run Now.
• Stop job by selecting the check box corresponding to a job and clicking Stop.
• Enable job by selecting the check box corresponding to a job and clicking Enable.
• Disable job by selecting the check box corresponding to a job and clicking Disable.
• Delete job by selecting the check box corresponding to a job and clicking Delete.
To view more information about a job, select the check box corresponding to a job, and then click View Details in the right pane. See Viewing job information.
Topics:
• View the jobs list
• View an individual job information
• Create a job to blink device LEDs
• Create a job for managing power devices
• Create a Remote command job for managing devices
• Create a job to change the virtual console plugin type
• Select target devices and device groups
View the jobs listClick OpenManage Enterprise > Monitor > Jobs, to view the list of existing jobs. Information such as job status, job type, and date-time are displayed. To view more information about a job, select a job and click View Details in the right pane. See View an individual job information.
13
Using jobs for device control 93

Table 15. Job status and description
Job Status Description
New Job is created but not run.
Running Job is triggered using Run Now
Scheduled Job is scheduled for run at a later date or time.
Completed Job has run.
Completed with errors Job run was partially successful and was completed with errors.
Failed Job run was unsuccessful.
Stopped Job run was interrupted by the user.
A job can belong to any one of the following types:
Table 16. Job Types and description
Job Type Description
Health Checks the health status of the devices. See Device health statuses.
Inventory Creates inventory report of the devices. See Managing device inventory.
Device Config Creates device configuration compliance baseline. See Managing the device configuration compliance.
Report_Task Creates reports about devices by using built-in or customized data fields. See Reports.
Warranty Generate data about devices' warranty status. See Manage the device warranty.
Onboarding_Task Onboards the discovered devices. See Onboarding devices.
Discovery Discovers devices. See Discovering devices for monitoring or management.
Console Update Execution Task Update console versions
OpenManage Enterprise provides a built-in report to view the list of scheduled jobs. Click OpenManage Enterprise > Monitor > Reports > Scheduled Jobs Report. Click Run. See Run reports.
NOTE: On the Discovery and Inventory Schedules pages, the status of a scheduled job is identified by Queued in the STATUS column. However, the same status is indicated as Scheduled on the Jobs page.
NOTE: By default, only the Create tab is enabled to create new jobs. However, if you select a job from the list, the tabs to run, delete, enable, stop, and disable a job are enabled.
View an individual job information1 On the Jobs page, select the check box corresponding to the job.
2 In the right pane, click View Details.
On the Job Details page, the job information is displayed.
3 Click Restart Job if the status of a job is any one of the following: Stopped, Failed, or New.
A message indicates that the job has started running.
The Execution History section lists the information about when the job was successfully run. The Execution Details section lists the devices on which the job was run and the time taken to run a job.
NOTE: If a configuration remediation task is stopped, the overall task status is indicated as 'Stopped', but the task continues to run. However, the status is indicating as Running in the Execution History section.
4 To export data to an Excel file, select the corresponding or all check boxes, and then click Export. See Export all or selected data.
94 Using jobs for device control

Create a job to blink device LEDs
1 Click Create, and then select Blink Devices.
2 In the Blink Devices Wizard dialog box:
a In the Options section:
1 In the Job Name box, enter a job name.
2 From the Blink LED Duration drop-down menu, select options to blink the LED for a set duration, turn on, or to turn off.
3 Click Next.b In the Target section, select the target devices and click Next. See Select target devices and device groups.c In the Schedule section, run the job immediately or schedule for a later point of time. See Schedule job field definitions.
3 Click Finish.
The job is created and listed in the Jobs list and identified by an appropriate status in the JOB STATUS column.
4 If the job is scheduled for a later point of time, but you want to run the job immediately:
• On the Jobs page, select the check box corresponding to the Scheduled job.
• Click Run Now. The job is run and the status is updated.
• To view job data, click View Details in the right pane. See View an individual job information.
Create a job for managing power devices
1 Click Create, and then select Power Control Devices.
2 In the Power Control Devices Wizard dialog box:
a In the Options section:
1 Enter the job name in Job Name.
2 From the Power Options drop-down menu, select any one of the tasks: Power on, Power off, or Power cycle.
3 Click Next.b In the Target section, select the target devices and click Next. See Select target devices and device groups.c In the Schedule section, run the job immediately or schedule for a later point of time. See Schedule job field definitions.
3 Click Finish.
The job is created and listed in the Jobs list and identified by an appropriate status in the JOB STATUS column.
4 If the job is scheduled for a later point of time, but you want to run the job immediately:
• On the Jobs page, select the check box corresponding to the Scheduled job.
• Click Run Now. The job is run and the status is updated.
• To view the job data, click View Details in the right pane. See View an individual job information.
Create a Remote command job for managing devices
1 Click Create, and then select Remote Command on Devices.
2 In the Command Line Job Wizard dialog box, in the Options section:
a Enter the job name in Job Name.b From the Interface drop-down menu, select any one of the interfaces: IPMI CLI, RACADM CLI, or SSH CLI.c In the Arguments box, enter the command. Up to 100 commands can be typed with each command required to be on a new
line.d Click Next.
A green tick mark next to Options indicates that the necessary data is provided.
3 In the Target section, select the target devices and click Next. See Select target devices and device groups.
4 In the Schedule section, run the job immediately or schedule for a later time. See Schedule job field definitions.
Using jobs for device control 95

5 Click Finish.
The job is created and listed in the Jobs list and identified by an appropriate status in the JOB STATUS column.
6 If the job is scheduled for a later point, but you want to run the job immediately:
• On the Jobs page, select the check box corresponding to the Scheduled job.
• Click Run Now. The job is run and the status is updated.
• To view the job data, click View Details in the right pane. See View an individual job information.
Create a job to change the virtual console plugin typeYou can change the virtual console plugin type to HTML5 on multiple devices. Updating to HTML5 can lead to a better browser experience. To update do the following:
1 Click OpenManage Enterprise > Monitor > Jobs
2 Click Create, and then select Change Virtual Console Plugin on Devices.
3 In the Change Virtual Console Plugin Wizard dialog box, in the Options section:
a Enter the job name in Job Name. By default, the plugin type is displayed as HTML5.b Click Next.
4 In the Job Target section, select the target devices and click Next. See Select target devices and device groups.
a Click Next.
5 In the Schedule section, run the job immediately or schedule for a later point of time. See Schedule job field definitions.
6 Click Finish.
The job is created and listed in the Jobs list and identified by an appropriate status in the JOB STATUS column.
7 If the job is scheduled for a later point of time, but you want to run the job immediately:
• On the Jobs page, select the check box corresponding to the Scheduled job.
• Click Run Now. The job is run and the status is updated.
• To view the job data, click View Details in the right pane. See View an individual job information.
Select target devices and device groups
By default, Select Devices is selected to indicate that the job can be run on the devices. You can run a job on device groups also by selecting Select Groups.
1 Click Select Devices.
In the Job Target dialog box, the left pane lists the devices monitored by OpenManage Enterprise. In the working pane, list of devices associated with each group, and device details are displayed. For field descriptions, see Devices list. For information about device groups, see Organize devices into groups.
2 Select the check box corresponding to a device and click OK.
The selected devices are displayed in the All Selected Devices section of the selected group.
96 Using jobs for device control

Discovering devices for monitoring or management
NOTE: To perform any tasks on OpenManage Enterprise, you must have necessary user privileges. See Role-based OpenManage Enterprise user privileges.
By clicking OpenManage Enterprise > Monitor > Discovery, you can discover devices in your data center environment to manage them, improve their usability, and improve resource availability for your business-critical operations. The Discovery page displays the number of devices discovered in task and information about the status of discovery job for that device. The job statuses are Queued, Completed, and Stopped. The right pane displays information about the task such as the total possible devices, device discovered with Device Types and their respective count, next run time if scheduled, and last discovered time. View Details in the right pane displays individual discovery job details.
NOTE: In order to support discovery with domain credentials, OpenManage Enterprise version 3.2 and later uses the OpenSSH protocol instead of the WSMAN protocol used in the previous versions. Hence, all the Windows and Hyper-V devices discovered prior to updating the appliance have to be deleted and re-discovered using their OpenSSH credentials. Refer the Microsoft documentation to enable OpenSSH on Windows and Hyper-V.
NOTE: On the Discovery and Inventory Schedules pages, the status of a scheduled job is indicated as Queued in the STATUS column. However, the same status is indicated as Scheduled on the Jobs page.
NOTE: By default, the last discovered IP of a device is used by OpenManage Enterprise for performing all operations. To make any IP change effective, you must rediscover the device.
By using the Discovery feature, you can:
• View, add, and remove devices from the global exclusion list. See Globally excluding devices.
• Create, run, edit, delete, and stop the device discovery jobs.
Topics:
• Create a device discovery job
• Protocol support matrix for discovering devices
• View device discovery job details
• Edit a device discovery job
• Run a device discovery job
• Stop a device discovery job
• Specify multiple devices by importing data from the .csv file
• Globally excluding devices
• Specify discovery mode for creating a server discovery job
• Create customized device discovery job protocol for servers –Additional settings for discovery protocols
• Specify discovery mode for creating a chassis discovery job
• Create customized device discovery job protocol for Chassis – Additional settings for discovery protocols
• Specify discovery mode for creating a Dell storage discovery job
• Specify discovery mode for creating a network switch discovery job
• Create customized device discovery job protocol HTTPS storage devices –Additional settings for discovery protocols
• Create customized device discovery job protocol for SNMP devices
• Specify discovery mode for creating a MULTIPLE protocol discovery job
14
Discovering devices for monitoring or management 97

• Delete a device discovery job
Related links
Delete a device discovery job
View device discovery job details
Stop a device discovery job
Run a device discovery job
Specify discovery mode for creating a server discovery job
Create customized device discovery job protocol for servers –Additional settings for discovery protocols
Specify discovery mode for creating a Dell storage discovery job
Create customized device discovery job protocol for SNMP devices
Specify discovery mode for creating a MULTIPLE protocol discovery job
Edit a device discovery job
Create a device discovery jobNOTE: To perform any tasks on OpenManage Enterprise, you must have necessary user privileges. See Role-based OpenManage Enterprise user privileges.
To discover a device:
1 Click Monitor > Discovery > Create.
2 In the Create Discovery Job dialog box, a default job name is populated. To change it, enter the discovery job name.
By default, the dialog box enables you to define properties of similar devices at a time.
• To include more devices or ranges to the current discovery job, click Add. Another set of the following fields is displayed where you can specify the device properties: Type, IP/Hostname/Range, and Settings.
WARNING: Do not specify large networks that have devices more than the maximum number of devices supported by OpenManage Enterprise. It may cause the system to abruptly stop responding.
NOTE: If you are discovering more than 8,000 devices at a time, it is recommended that you discover them in less number of discovery jobs by entering an IP range. and thus avoid creating multiple jobs. Entering individual IP address is not recommended for discovering large number of devices.
• To discover devices by importing ranges from the .csv file. See Specify multiple devices by importing data from the .csv file.
• To exclude certain devices, remove devices from being excluded, or to view the list of devices excluded from being discovered, see Globally excluding device(s) from discovery results.
3 From the Device Type drop-down menu, to discover:
• A server, select SERVER. See Specifying discovery mode for creating a server discovery job.
• A chassis, select CHASSIS. See Specifying discovery mode for creating a chassis discovery job.
• A Dell EMC storage device, or network switch, select DELL STORAGE, or NETWORKING SWITCH. See Specifying discovery mode for creating a storage, Dell storage, and network switch discovery job.
• To discover devices by using multiple protocols, select MULTIPLE. See Specify discovery mode for creating a MULTIPLE protocol discovery job.
4 In the IP/Hostname/Range box, enter the IP address, host name, or the range of IP address to be discovered or included. For more information about the data you can enter in this field, click the i symbol.
5 In the Settings section, enter the username and password of the protocol that is used for discovering the ranges.
6 Click Additional Settings, to select a different protocol, and change the settings.
7 In the Scheduling Discovery Job section, run the job immediately or schedule for a later point of time. See Schedule job field definitions.
8 Select Enable trap reception from discovered iDRAC servers and MX7000 chassis to enable the OpenManage Enterprise receive the incoming traps from the discovered servers and MX7000 chassis.
9 Select Set Community String for trap destination from Application Settings. This option is available only for the discovered iDRAC servers and MX7000 chassis.
10 Select the Email when complete check box, and then enter the email address that must receive notification about the discovery job status. If the email is not configured, the Go to SMTP Settings link is displayed. Click the link, and configure the SMTP settings. See
98 Discovering devices for monitoring or management

Configure SMTP, SNMP, and Syslog alerts. If you select this but do not configure SMTP, the Finish button is not displayed to continue the task.
11 Click Finish. The Finish button is not displayed if the fields are incorrectly or incompletely filled.
A discovery job is created and run. The status is displayed on the Job Details page.
During device discovery, the user account that is specified for the discovery range is verified against all available privileges that are enabled on a remote device. If the user authentication passes, the device is automatically onboarded or the device can be onboarded later with different user credentials. See Onboarding devices.
NOTE: During CMC discovery, the servers, and IOM and storage modules (configured with IP and SNMP set to "public" as community string), residing on CMC are also discovered and are onboarded. If you enable trap reception during CMC discovery, the OpenManage Enterprise is set as the trap destination on all the servers and not on the chassis.
NOTE: During CMC discovery, FN I/O Aggregators in Programmable MUX (PMUX) mode are not discovered.
Onboarding devicesOnboarding enables servers to be managed, rather than just be monitored.
• If administrator-level credentials are provided during discovery, the servers are onboarded (the device status is displayed as "managed" in the All Devices view).
• If lower privileged credentials are provided during discovery, the servers are not onboarded (the status is displayed as "monitored" in the All Devices view).
• If the console is also set as a trap receiver on the servers then their Onboarding status is indicated as "managed with alerts".
• Error: Indicates an issue in onboarding the device.
• Proxied: Available only for MX7000 chassis. Indicates that the device is discovered through an MX7000 chassis and not directly.
If you want to onboard devices with a different user account apart from the account specified for discovery, or re-attempt onboarding because of a failure in onboarding during discovery, do the following:
NOTE: All devices that have been onboarded through this wizard remain onboarded through this user account and is not substituted by the discovery user account during future discoveries against these devices.
NOTE: To perform any tasks on OpenManage Enterprise, you must have necessary user privileges. See Role-based OpenManage Enterprise user privileges.
1 From the OpenManage Enterprise menu, under Devices, click All Devices.
A Donut chart indicates status of all devices in the working pane. See the Donut chart. The table lists the properties of devices selected along with their following onboarding status:
• Error: Device cannot be onboarded. Try by logging in by using the recommended privileges. See Role-based OpenManage Enterprise user privileges.
• Managed: Device successfully onboarded, and can be managed by the OpenManage Enterprise console.
• Monitored: Device does not have management option (such as the one discovered by using SNMP).
• Managed with alerts: Device is sucessfully onboarded, and the OpenManage Enterprise console is registered with the device as an alert receiver.
2 In the working pane, select a check box corresponding to the device(s), click More Actions > Onboarding.
Ensure that you select only the device types from the All Devices page that are supported for onboarding. You can search for suitable devices in the table by clicking Advanced Filters, and then select or enter onboarding status data in the filter box.
NOTE: All devices that are discovered are not supported for onboarding and only iDRAC and CMC are supported. Ensure that you select onboarding option for the supported device type.
3 In the Onboarding dialog box, enter the WS-Man credentials—username and password.
4 In the Connection Settings section:
a In the Retries box, enter the number of repeated attempts that must be made to discover a server.
Discovering devices for monitoring or management 99

b In the Timeout box, enter the time after which a job must stop running.
NOTE: If the timeout value entered is greater than the current session expiry time, you are automatically logged out of OpenManage Enterprise. However, if the value is within the current session expiration timeout window, the session is continued and not logged out.
c In the Port box, enter the port number that the job must use to discover.
d Optional field. Select Enable Common Name (CN) check.
e Optional field. Select Enable Certificate Authority (CA) check and browse to the certificate file.
5 Click Finish.
NOTE: The Enable trap reception from discovered check box is effective only for servers discovered by using their iDRAC interface. Selection is ineffective for other servers—such as those devices discovered by using OS discovery.
Protocol support matrix for discovering devicesThe following table provides information about the supported protocols for discovering devices.
NOTE: The functionality of the supported protocols to discover, monitor, and manage the PowerEdge 11G servers with iDRAC6 is limited.
Table 17. Protocol support matrix for discovery
Device/ Operating System
Protocols
Web Services-Management (WS-Man)
Redfish
Simple Network Management Protocol (SNMP)
Secure Shell (SSH)
Intelligent Platform Management Interface (IPMI)
ESXi (VMWare) HTTPS
iDRAC6 and later
Supported Supported Not supported Not supported Not supported Not supported Not supported
PowerEdge C* Supported Supported Not supported Not supported Not supported Not supported Not supported
PowerEdge chassis (CMC)
Supported Not supported Not supported Not supported Not supported Not supported Not supported
PowerEdge MX7000 chassis
Not supported Supported Not supported Not supported Not supported Not supported Not supported
Storage devices
Not supported Not supported Supported Not supported Not supported Not supported Not supported
Ethernet switches
Not supported Not supported Supported Not supported Not supported Not supported Not supported
ESXi Not supported Not supported Not supported Not supported Not supported Supported Not supported
Linux Not supported Not supported Not supported Supported Not supported Not supported Not supported
Windows Not Supported Not supported Not supported supported Not supported Not supported Not supported
Hyper-V Not Supported Not supported Not supported supported Not supported Not supported Not supported
Non-Dell servers
Not supported Not supported Not supported Not supported Supported Not supported Not supported
PowerVault ME
Not supported Not supported Not supported Not supported Supported Not supported Supported
100 Discovering devices for monitoring or management

View device discovery job details
1 Click Monitor > Discovery.
2 Select the row corresponding to the discovery job name, and then click View Details in the right pane.
The Job Details page displays the respective discovery job information.
3 For more information about managing jobs, see Using jobs for device control.
Related link
Discovering devices for monitoring or management
Edit a device discovery jobYou can edit only one device discovery job at a time.
1 Select the check box corresponding to the discovery job you want to edit, and then click Edit.
2 In the Create Discovery Job dialog box, edit the properties.
For information about the tasks to be performed in this dialog box, see Creating device discovery job.
Related link
Discovering devices for monitoring or management
Run a device discovery jobNOTE: You cannot rerun a job that is already running.
To run a device discovery job:
1 In the list of existing device discovery jobs, select the check box corresponding to the job you want to run now.
2 Click Run.
The job starts immediately and a message is displayed in the lower-right corner.
Related link
Discovering devices for monitoring or management
Stop a device discovery jobYou can stop the job only if running. Discovery jobs that are completed or failed cannot be stopped. To stop a job:
1 In the list of existing discovery jobs, select the check box corresponding to the job you want to stop.
NOTE: Multiple jobs cannot be stopped at a time.
2 Click Stop.
The job is stopped and a message is displayed in the lower-right corner.
Related link
Discovering devices for monitoring or management
Discovering devices for monitoring or management 101

Specify multiple devices by importing data from the .csv file
1 In the Create Discovery Job dialog box, by default, a discovery job name is populated in Discovery Job Name. To change it, type a discovery job name.
2 Click Import.
NOTE: Download the sample .CSV file, if necessary.
3 In the Import dialog box, click Import, browse through to the .CSV file which contains a list of valid ranges, and then click OK.
NOTE: An error message is displayed if the .CSV file contains invalid ranges, and duplicate ranges are excluded during the import operation.
Globally excluding devicesNOTE: To perform any tasks on OpenManage Enterprise, you must have necessary user privileges. See Role-based OpenManage Enterprise user privileges.
NOTE: Currently, you cannot exclude a device by using its hostname, but exclude only by using its IP address or FQDN.
When discovering device(s) from all the available devices, you can exclude certain device(s) from getting monitored by OpenManage Enterprise by doing the following:
1 In the Global Exclusion of Ranges dialog box:
a In the Description of Exclude Range box, enter the information about the range that is being excluded.b In the Enter Ranges to Exclude box, enter address(es) or range of devices to be excluded. The box can take up to 1000 address
entries at a time, but separated by a line break. Meaning, every exclusion range must be entered in different lines inside the box.
The range that can be excluded is same as the supported ranges that are applicable while discovering a device. See Create a device discovery job.
2 Click Add.
3 When prompted, click YES.
The IP address or the range is globally excluded, and then displayed in the list of excluded ranges. Such devices are globally excluded which implies that they do not take part in any activity performed by OpenManage Enterprise.
NOTE: The device that is globally excluded is clearly identified as 'Globally excluded' on the Job Details page.
You can view the list of globally excluded devices by clicking:
• Devices > Global Exclude. The Global Exclusion of Ranges dialog box displays the list of excluded devices.
• Monitor > Discovery > Create > Global Exclude. The Global Exclusion of Ranges dialog box displays the list of excluded devices.
• Monitor > Discovery > Global Exclusion List. The Global Exclusion of Ranges dialog box displays the list of excluded devices.
To remove a device from the global exclusion list:
a Select the check box and click Remove from Exclusion.
b When prompted, click YES. The device is removed from the global exclusion list. However, a device removed from the global exclusion list is not automatically monitored by OpenManage Enterprise. You must discover the device so that OpenManage Enterprise starts monitoring.
NOTE: Adding devices that are already known to the console (meaning, already discovered by the console) to the Global Exclusion List will remove the device(s) from OpenManage Enterprise.
102 Discovering devices for monitoring or management
NOTE: Devices listed in the Global Exclusion List are excluded from all tasks in the console. If the IP of a device is in the Global Exclusion List and a discovery task is created where the range for discovery includes that IP, that device is not discovered. However, there will be no error indication on the console when the discovery task is being created. If you expect that a device must be discovered and it is not, you must check the Global Exclusion List to see if the device has been included in the Global Exclusion List.
Specify discovery mode for creating a server discovery job
1 From the Device Type drop-down menu, select SERVER.
2 When prompted, select:
• Dell iDRAC: To discover by using iDRAC.
• Host OS: To discover by using an VMware ESXi, Microsoft Windows Hyper-V, or Linux operating system.
• Non-Dell Servers (via OOB): To discover third party servers by using IPMI.
3 Click OK.
Based on your selection, the fields change under Settings.
4 Enter the IP address, host name, or IP range associated with the protocol in IP/Hostname/Range.
5 Under Settings, enter the username and password of the server to be discovered.
6 To customize discovery protocols by clicking Additional Settings, see Creating customized device discovery job template for servers.
7 Schedule the discovery job. See Schedule job field definitions.
8 Click Finish.
A discovery job is created and displayed in the list of discovery jobs.
Related link
Discovering devices for monitoring or management
Create customized device discovery job protocol for servers –Additional settings for discovery protocolsIn the Additional Settings dialog box:
1 Select the Discover using WS-Man/Redfish (iDRAC, Server, and/or Chassis) check box to discover servers.
2 Enter username and password of the server to be detected.
3 In the Connection Settings section:
a In the Retries box, enter the number of repeated attempts that must be made to discover a server.b In the Timeout box, enter the time after which a job must stop running.c Enter in the Port box to edit the port number. By default, 443 is used to connect to the device. For supported port numbers, see
Supported protocols and ports in OpenManage Enterprise.
• Generate Trusted key: Disabled by default. Select to generate a trusted device key for communicating with devices.
NOTE: First time, a user must generate the trust key by using the REST API, only after which this option can be used. This key is generated per device and enables a trust relationship with the managed device.
d Select the Enable Common Name (CN) check check box if the common name of device is same as the host name used to access the OpenManage Enterprise.
e Select the Enable Certificate Authority (CA) check check box.
4 Select one of the following check boxes to enable discovering by using these protocols. Enter the corresponding device credentials:
• Enable SNMP: For discovering SNMP-compatible devices.
• Enable RedFish: For discovering servers.
• Enable IPMI: For discovering servers.
Discovering devices for monitoring or management 103

• Discover using WS-Man/Redfish (iDRAC, Server, and/or Chassis) check box to discover servers.
• Enable SSH: For discovering servers based on Linux, Windows, and Hyper-V.
• Enable VMware: For discovering the ESXi hosts.
5 Click Finish.
6 Complete the tasks in Create a device discovery job.
Related link
Discovering devices for monitoring or management
Specify discovery mode for creating a chassis discovery job1 From the Device Type drop-down menu, select CHASSIS.
Based on your selection, the fields change under Settings.
2 Enter the IP address, host name, or IP range in IP/Hostname/Range.
3 Under Settings, enter the username and password of the server to be detected.
4 Type the community type.
5 To create customized discovery template by clicking Additional Settings, see Create customized device discovery job protocol for Chassis – Additional settings for discovery protocols.
NOTE: Currently, for any M1000e chassis that is discovered, the date in the TIMESTAMP column under Hardware Logs is displayed as JAN 12, 2013 in the CMC 5.1x and earlier versions. However, for all versions of CMC VRTX and FX2 chassis, correct date is displayed.
NOTE: When a server in a chassis is separately discovered, slot information about the server is not displayed in the Chassis Information section. However, when discovered through a chassis, the slot information is displayed. For example, an MX740c server in an MX7000 chassis.
Create customized device discovery job protocol for Chassis – Additional settings for discovery protocolsIn the Additional Settings dialog box:
1 Select the Discover using WS-Man/Redfish (iDRAC, Server, and/or Chassis) .
NOTE: For chassis, the Discover using WS-Man/Redfish check box is selected by default. Implies that the chassis can be discovered by using either of these two protocols. The M1000e, CMC VRTX, and FX2 chassis support the WS-Man commands. The MX7000 chassis supports Redfish protocol.
2 Enter username and password of the chassis to be detected.
3 In the Connection Settings section:
a In the Retries box, enter the number of repeated attempts that must be made to discover a server.b In the Timeout box, enter the time after which a job must stop running.c Enter in the Port box to edit the port number. By default, 443 is used to connect to the device. For supported port numbers, see
Supported protocols and ports in OpenManage Enterprise.
• Generate Trusted key: Disabled by default. Select to generate a trusted device key for communicating with devices.
NOTE: First time, a user must generate the trust key by using the REST API, only after which this option can be used. This key is generated per device and enables a trust relationship with the managed device.
d Select the Enable Common Name (CN) check check box if the common name of device is same as the host name used to access the OpenManage Enterprise.
e Select the Enable Certificate Authority (CA) check check box.
4 To discover IO modules, select the Discover IO Modules with chassis check box.
104 Discovering devices for monitoring or management

NOTE: Applicable only for the CMC VRTX, M1000e, and FX2 chassis (models FN2210S, FN410T and FN410S). For the MX7000 chassis, the IO modules are automatically detected.
NOTE: Only the IO Modules with Standalone, PMUX (Programmable MUX), VLT (Virtual Link Trunking) Modes are discoverable. Full switch and Stacked Modes will not be discovered.
a Select Use chassis credentials if the M I/O Aggregator user credentials are the same as that of the chassis.b Select Use different credentials if the M I/O Aggregator user credentials are different from the chassis credentials and do the
following:
• Enter the User Name and Password.
• Change the default values for Retries, Timeout, and Port if required.
• Select Verify known Host key, to verify the remote host identity.
• Select Use SUDO Option if needed.
5 Click Finish.
6 Complete the tasks in Create a device discovery job.
Specify discovery mode for creating a Dell storage discovery job1 From the Device Type drop-down menu, select DELL STORAGE.
2 When prompted, select:
• PowerVault ME: To discover the storage devices using the HTTPS protocol like the PowerVault ME.
• Others: To discover storage devices which use SNMP protocol.
Based on your selection, the fields change under Settings.
3 Enter the IP address, host name, or IP range in IP/Hostname/Range.
4 Under Settings, depending on your initial selection — enter the User Name and Password for Storage HTTPS or enter the SNMP version and the community type of the device to be detected.
5 Click Additional Settings to customize the respective discover protocol. See Creating customized device discovery job template for SNMP devices or see Create customized device discovery job protocol HTTPS storage devices –Additional settings for discovery protocols.
6 Complete the tasks in Create a device discovery job.
Related link
Discovering devices for monitoring or management
Specify discovery mode for creating a network switch discovery job1 From the Device Type drop-down menu, select NETWORK SWITCH.
2 Enter the IP address, host name, or IP range in IP/Hostname/Range.
3 Under Settings enter the SNMP version and the community type of the device to be detected.
4 Click Additional Settings to customize the respective discover protocol. See Creating customized device discovery job template for SNMP devices
5 Complete the tasks in Create a device discovery job.
Discovering devices for monitoring or management 105
Create customized device discovery job protocol HTTPS storage devices –Additional settings for discovery protocolsIn the Additional Settings dialog box:
1 Enter username and password of the PowerVault ME to be detected.
2 In the Connection Settings section:
a In the Retries box, enter the number of repeated attempts that must be made to discover a server.b In the Timeout box, enter the time after which a job must stop running.c Enter in the Port box to edit the port number. By default, 443 is used to connect to the device. For supported port numbers, see
Supported protocols and ports in OpenManage Enterprise.d Select the Enable Common Name (CN) check check box if the common name of device is same as the host name used to
access the OpenManage Enterprise.e Select the Enable Certificate Authority (CA) check check box.
3 Click Finish.
4 Complete the tasks in Create a device discovery job.
Create customized device discovery job protocol for SNMP devicesBy default, the Discover using SNMP check box is selected to enable you detect the storage, networking, or other SNMP devices.
1 Under Credentials, select the SNMP version, and then enter the community type.
2 In the Connection Settings section:
a In the Retries box, enter the number of repeated attempts that must be made to discover a server.b In the Timeout box, enter the time after which a job must stop running.c In the Port box, enter the port number that the job must use to discover.
3 Click Finish.
4 Complete the tasks in Create a device discovery job.
Related link
Discovering devices for monitoring or management
Specify discovery mode for creating a MULTIPLE protocol discovery job1 From the Type drop-down menu, select MULTIPLE to discover devices using multiple protocols.
2 Enter the IP address, host name, or IP range in IP/Hostname/Range.
3 To create customized discovery template by clicking Additional Settings, see Create customized device discovery job protocol for servers –Additional settings for discovery protocols.
Related link
Discovering devices for monitoring or management
Delete a device discovery jobNOTE: A device can be deleted even when tasks are running on it. Task initiated on a device fails if the device is deleted before the completion.
106 Discovering devices for monitoring or management

To delete a device discovery job:
1 Select the check box corresponding to the discovery job you want to delete, and then click Delete.
2 When prompted indicating if the job must be deleted, click YES.
The discovery jobs are deleted and a message is displayed in the lower-right corner of the screen.
NOTE: If you delete a discovery job, the devices associated with the job are not deleted. If you want the devices discovered by a discovery task to be removed from the console then delete them from the All Devices page.
NOTE: A device discovery job cannot be deleted from the Jobs page.
Related link
Discovering devices for monitoring or management
Discovering devices for monitoring or management 107

Managing device inventoryNOTE: To perform any tasks on OpenManage Enterprise, you must have necessary user privileges. See Role-based OpenManage Enterprise user privileges.
By clicking OpenManage Enterprise > Monitor > Inventory, you can generate a device inventory report to better manage your data center, reduce maintenance, maintain minimum stock, and reduce operational costs. By using the Inventory Schedules feature in OpenManage Enterprise, you can schedule jobs to run at predefined time, and then generate reports. You can schedule inventory jobs on the 12th generation and later PowerEdge servers, networking devices, PowerEdge chassis, EqualLogic arrays, Compellent Arrays, and PowerVault devices.
On this page, you can create, edit, run, stop, or delete inventory schedules. A list of existing inventory schedule jobs is displayed.
• NAME: The inventory schedule name.
• SCHEDULE: Indicates if the job is scheduled to run now or later.
• LAST RUN: Indicates the time the job was last run.
• STATUS: Indicates if the job is running, completed, or failed.
NOTE: On the Discovery and Inventory Schedules pages, the status of a scheduled job is identified by Queued in the STATUS column. However, the same status is indicated as Scheduled on the Jobs page.
To preview a job information, click the row corresponding to the job. The right pane displays the job data and the target groups associated with the inventory task. To view information about the job, click View Details. The Job Details page displays more information. See View an individual job information.
Topics:
• Create an inventory job
• Run an inventory job now
• Stop an inventory job
• Delete an inventory job
• Edit an inventory schedule job
Related links
Run an inventory job now
Stop an inventory job
Delete an inventory job
Create an inventory job
Create an inventory jobNOTE: To perform any tasks on OpenManage Enterprise, you must have necessary user privileges. See Role-based OpenManage Enterprise user privileges.
1 Click Create.
2 In the Inventory dialog box, a default inventory job name is populated in Inventory Job Name. To change, enter an inventory job name.
3 From the Select Groups drop-down menu, select the device groups on which the inventory must be run.
For information about device groups, see Organize devices into groups.
15
108 Managing device inventory
4 In the Scheduling section, run the job immediately or schedule for a later point of time.
See Schedule job field definitions.
5 To generate an inventory of the configuration compliance baseline, select the Additionally run configuration inventory check box.
For information about configuration compliance baselines, see Managing the device configuration compliance.
6 Click Finish.
7 The job is created and listed in the queue.
An inventory job is created displayed in the list of inventory jobs. The SCHEDULE column specifies whether the job is Scheduled or Not Scheduled. See Run an inventory job now.
Related link
Managing device inventory
Run an inventory job nowNOTE: You cannot rerun a job that is already running.
1 In the list of existing inventory schedule jobs, select the check box corresponding to the inventory job you want to run immediately.
2 Click Run Now.
The job starts immediately and a message is displayed in the lower-right corner.
Related link
Managing device inventory
Stop an inventory jobYou can stop the job only if running. Inventory jobs that are completed or failed cannot be stopped. To stop a job:
1 In the list of existing inventory schedule jobs, select the check box corresponding to the inventory schedule job you want to stop.
2 Click Stop.
The job is stopped and a message is displayed in the lower-right corner.
Related link
Managing device inventory
Delete an inventory jobNOTE: You cannot delete a job if it is running.
1 In the list of existing inventory schedule jobs, select the check box corresponding to the inventory job you want to delete.
2 Click Delete.
The job is deleted and a message is displayed in the lower-right corner.
Related link
Managing device inventory
Edit an inventory schedule job1 Click Edit.
2 In the Inventory Schedule dialog box, edit the inventory job name in Inventory Job Name. See Create an inventory job.
The inventory schedule job is updated and displayed in the table.
Managing device inventory 109

Manage the device warrantyNOTE: To perform any tasks on OpenManage Enterprise, you must have necessary user privileges. See Role-based OpenManage Enterprise user privileges.
By clicking OpenManage Enterprise > Monitor > Warranty, you can view the warranty statuses of all the devices that are monitored by OpenManage Enterprise.
You can also export selected or all data to an Excel sheet for the statistical and analytical purposes. The Warranty page displays the following details:
• STATUS of the warranty
NOTE: Warranty status is determined by the settings that the Administrator selects. See Manage warranty settings
– means critical, indicating the warranty has expired.
– means warning, indicating the warranty is approaching expiration.
– means normal, indicating the warranty is active.
• SERVICE TAG
• DEVICE MODEL
• DEVICE TYPE
• WARRANTY TYPE:
– Initial: The warranty provided with the purchase of OpenManage Enterprise.
– Extended: The warranty is extended because the initial warranty duration is expired.
• SERVICE LEVEL DESCRIPTION: Indicates the Service Level Agreement (SLA) associated with the device warranty.
• DAYS REMAINING: Number of days left for the warranty to expire. You can set the days before which you get an alert. See Manage warranty settings.
OpenManage Enterprise provides a built-in report about the warranties that expire in the next 30 days. Click OpenManage Enterprise > Monitor > Reports > Warranties Expiring in Next 30 days. Click Run. See Run reports.
To filter data displayed in the table, click Advanced Filters. See about advanced filters section in OpenManage Enterprise Graphical User Interface overview.
To update data in the table, click Refresh Warranty in the upper-right corner.
To export all or selected warranty data, click Export. See Export all or selected data.
Related linkView and renew device warranty
View and renew device warrantyClick OpenManage Enterprise > Monitor > Warranty to get a list of warranty statuses of all the devices monitored by OpenManage Enterprise, along with their Service Tag, model name, device type, associated warranty, and service level information. For field descriptions, see Manage the device warranty.
To view the warranty information and to renew the warranty of a device:
16
110 Manage the device warranty

• Select the check box corresponding to the device. In the right pane, warranty status and other important details of the device such as the service level code, service provider, the warranty start date, the warranty end date, and so on are displayed.
• Expired warranties can be renewed by clicking Dell Warranty Renewal for Device, which redirects you to the Dell EMC support site allowing you to manage your device warranty.
• Click Refresh Warranty in the upper right-hand corner to refresh the Warranty table. Warranty statuses automatically change from
critical to normal for all the devices whose warranties are renewed. A new Device Warranty alert log, with the total number of expired warranties in the console, is generated each time Refresh Warranty is clicked. For information on Alert logs, see View the alert logs
• To sort data in the table based on a column, click the column title.
• Click on the Advanced Filters button to customize.
Related link
Manage the device warranty
Manage the device warranty 111

ReportsBy clicking OpenManage Enterprise > Monitor > Reports, you can build customized reports to view device details at depth. Reports enables you to view data about the devices, jobs, alerts, and other elements of your data center. Reports are built-in, and user-defined. You can edit or delete only the user-defined reports. Definitions and criteria used for a built-in report cannot be edited or deleted. A preview about the report you select from the Reports list is displayed in the right pane.
NOTE: To perform any tasks on OpenManage Enterprise, you must have necessary user privileges. See Role-based OpenManage Enterprise user privileges.
Advantages of the Reports feature:
• Build a report criteria by using up to 20 filters
• You can filter data and arrange by column names of your choice
• Reports can be viewed, downloaded, and sent in an email message
• Send reports to up to 20-30 recipients at a time
• If you feel that report generation is taking time, you can stop the process
• The reports generated are automatically translated to the language which is set while installing OpenManage Enterprise
• An audit log entry is made whenever you generate, edit, delete, or copy a report definition
NOTE: The data displayed to you in a report depends on the privileges you have on OpenManage Enterprise. For example, when you generate a report, if you do not have permission to view a certain device group, the data about that group is not displayed to you.
Table 18. The role-based access privileges for managing reports on OpenManage Enterprise
User Role... Report tasks permitted...
Administrators and Device Managers Run, create, edit, copy, email, download, and export
Viewers Run, email, export, view, and download
Currently, the following built-in reports can be generated to extract information about the following:
• Device category: Asset, FRU, firmware, firmware compliance, scheduled jobs, Alert summary, hard drive, modular enclosure, NIC, virtual drive, warranty, and license.
• Alerts category: Weekly alerts
Topics:
• Run reports
• Run and email reports
• Edit reports
• Copy reports
• Delete reports
• Creating reports
• Export selected reports
17
112 Reports

Related links
Run reports
Run and email reports
Edit reports
Delete reports
Run reportsNOTE: To perform any tasks on OpenManage Enterprise, you must have necessary user privileges. See Role-based OpenManage Enterprise user privileges.
When you run a report, the first 20 rows are displayed and paginated results can be paged through. To view all the rows at one time, download the report. To edit this value, see Export all or selected data. Data displayed in the output cannot be sorted because it is defined in the query used to build a report. To sort data, edit the report query or export it to an Excel sheet. It is recommended to not run more than five (5) reports at a time because reporting consumes system resources. However, this value of five reports depends on the devices discovered, fields used, and number of tables joined to generate report. A Reports job is created and run when a report generation is requested. For role-based privileges to generate reports, see Creating reports.
NOTE: It is not recommended to frequently run a report because it consumes processing and data resources.
To run a report, select the report and click Run. On the <report name> Reports page, the report is tabulated by using the fields that are defined for creating the report.
NOTE: For a report whose category is 'Device', the first columns by default are Device name, Device model, and Device Service Tag. You may exclude columns while customizing your report.
To download a report:
1 Click Download.
2 In the Download Report dialog box, select the output file type, and click Finish. The selected output file is displayed. Currently, you can export a report to XML, PDF, Excel, and CSV file formats. An audit log entry is made whenever you generate, edit, delete, or copy a report definition.
To email a report:
1 Click Email.
2 In the Email Report dialog box, select the file format, type the receiver's email address, and then click Finish. The report is emailed. You can email reports to 20-30 recipients at a time.
3 If the email address is not configured, click Go to SMTP Settings. For more information about setting SMTP properties, see Set SNMP Credentials.
NOTE: If you are downloading or running a report that is already generated, and another user tries to delete that report at the same time, both the tasks are successfully completed.
Related link
Reports
Run and email reports
1 Select the report and click Run and Email.
2 In the Email Report dialog box:
a From the Format drop-down menu, select one of the file format in which the report must be generated — HTML, CSV, PDF, or MS-Excel.
b In the To box, enter the email address of the recipient. You can email reports to 20-30 recipients at a time. If the email address is not configured, click Go to SMTP Settings. For more information about setting SMTP properties, see Set SNMP Credentials.
c Click Finish.
Reports 113

The report is emailed and recorded in the Audit logs.
Related link
Reports
Edit reportsOnly user-created reports can be edited.
1 Select the report and click Edit.
2 In the Report Definition dialog box, edit the settings. See Creating reports.
3 Click Save.
The updated information is saved. An audit log entry is made whenever you generate, edit, delete, or copy a report definition.
NOTE: While editing a customized-report, if the category is changed, the associated fields are also removed.
Related link
Reports
Copy reportsOnly user-created reports can be copied.
1 Select the report, click More Actions, and then click Copy.
2 In the Copy Report Definition dialog box, enter a new name for the copied report.
3 Click Save.
The updated information is saved. An audit log entry is made whenever you generate, edit, delete, or copy a report definition.
Delete reportsOnly user-created reports can be deleted. If a report definition is deleted, the associated report history is deleted, and any running report using that report definition is also stopped.
1 From the OpenManage Enterprise menu, under Monitor, select Reports.
A list of devices available reports is displayed.
2 Select the report, click More Actions, and then click Delete.
NOTE: If you are downloading or running a report that is already generated, and another user tries to delete that report at the same time, both the tasks are successfully completed.
3 In the Delete Report Definition dialog box, when prompted whether or not the report must be deleted, click Yes.
The report is deleted from the list of reports and the table is updated. An audit log entry is made whenever you generate, edit, delete, or copy a report definition.
Related link
Reports
Creating reportsNOTE: To perform any tasks on OpenManage Enterprise, you must have necessary user privileges. See Role-based OpenManage Enterprise user privileges.
114 Reports
NOTE: Some tables contain device-type-specific data which will effectively lock the report to that device type. Mixing columns from multiple device specific tables of different types (for example servers and chassis) will result in an invalid report with no results.
While built-in reports have default definitions (filter criteria) for generating reports, you can customize the criteria to create your own definitions, and then generate customized reports. The fields or columns that you want to display in your report depends on the category you select. You can select only one category at a time. The arrangement of columns in a report can be altered by dragging and placing. Also:
• Report names must be unique
• Report definition must have at least one field and one category
• For reports having Device and Alert as categories, device name or device group must be one of the mandatory fields
By default, Devices is selected as the category, and device name, device Service Tag, and device model columns are displayed in the working pane. If you select any other category while editing a report criteria, a message is displayed indicating that the default fields will be removed. Every category has predefined properties that can be used as column titles where the data is filtered by using the criteria you define. Example category types:
• Jobs: Task name, task type, task status, and task internal.
• Groups: Group status, group description, group membership type, group name, and group type.
• Alerts: Alert status, alert severity, catalog name, alert type, alert sub-category, and device information.
• Devices: Alert, alert catalog, chassis fan, device software, and so on. These criteria have further classification based on which data can be filtered and reports generated.
Table 19. The role-based access privileges for generating reports on OpenManage Enterprise
User Role... Report tasks permitted...
Administrators and Device Managers Run, create, edit, copy, email, download, and export
Viewers Run, email, export, view, and download
1 Click Reports > Create.
2 In the Report Definition dialog box:
a Type the name and description of the new report to be defined.b Click Next.
3 In the Report Builder section:
a From the Category drop-down menu, select the report category.
• If you select Device as the category, select the device group also.
• If necessary, edit the filter criteria. See Select a query criteria.b Under the Select Columns section, select the check boxes of the fields that must appear as the report columns.
Selected field names are displayed in the Column Order section.
c You can customize the report by
• Using the Sort by and Direction boxes.
• Dragging the fields either up or down in the Column Order section.
4 Click Finish.
The report is generated and listed in the list of reports. You can export report for analytical purposes. See Export all or selected data. An audit log entry is made whenever you generate, edit, delete, or copy a report definition.
Select a query criteriaDefine filters while creating query criteria for:
Reports 115

• Generating customized reports. See Creating reports.
• Creating Query-based device groups under the CUSTOM GROUPS. See Create or edit a Query device group.
Define the query criteria by using two options:
• Select existing query to copy: By default, OpenManage Enterprise provides a list of built-in query templates that you can copy and build your own query criteria. The number of filters predefined for every existing query varies based on the query type. For example, the query for Hypervisor Systems has 6 predefined filters, while the query for Networking Switches has only three. A maximum of 20 criteria (filters) can be defined while defining a query. To add filters, you must select from the Select Type drop-down menu.
• Select type: Build a query criteria from scratch by using attributes listed in this drop-down menu. Items in the menu depend on the devices monitored by OpenManage Enterprise. When a query type is selected, only appropriate operators such as =, >, <, and null are displayed based on the query type. This method is recommended for defining query criteria in building customized reports.
NOTE: When evaluating a query with multiple conditions, the order of evaluation is same as SQL. To specify a particular order for the evaluation of the conditions, add or remove parenthesis when defining the query.
NOTE: When selected, the filters of an existing query criteria is copied only virtually to build a new query criteria. The default filters associated with an existing query criteria is not changed. The definition (filters) of a built-in query criteria is used as a starting point for building a customized query criteria. For example:
1 Query1 is a built-in query criteria that has the following predefined filter: Task Enabled=Yes.
2 Copy the filter properties of Query1, create Query2, and then customize the query criteria by adding another filter: Task Enabled=Yes AND (Task Type=Discovery).
3 Later, open Query1. Its filter criteria still remains as Task Enabled=Yes.
1 In the Query Criteria Selection dialog box, select from the drop-down menu based on whether you want to create a query criteria for Query groups or for report generation.
2 Add or remove a filter by clicking the plus or dustbin symbol respectively.
3 Click Finish.
A query criteria is generated and saved in the list of existing queries. An audit log entry is made and displayed in the Audit logs list. See Manage audit logs.
Related links
Managing the device configuration compliance
Edit a configuration compliance baseline
Remove a configuration compliance baseline
Export selected reports
1 Select the check boxes corresponding to the reports to be exported, click More Actions, and then click Export Selected.
Currently, you cannot export all the reports at a time.
2 In the Export Selected Reports dialog box, select any one of the following file formats in which the report must be exported — HTML, CSV, or PDF.
3 Click Finish.
In the dialog box, open or save the file to a known location for analysis and statistical purposes.
116 Reports

Managing MIB filesNOTE: To perform any tasks on OpenManage Enterprise, you must have necessary user privileges. See Role-based OpenManage Enterprise user privileges.
Third party tools in your data center may generate alerts that are vital for your operations. Such alerts are stored in the Management Information Base (MIB) files defined and understood by respective vendor tools. However, OpenManage Enterprise enables you to manage such MIBs also so that the non-Dell EMC MIBs can imported, parsed, and used by OpenManage Enterprise for device management. OpenManage Enterprise supports SMI1 and SMI2. OpenManage Enterprise provides built-in MIB files that can be used for Dell EMC devices. These are read-only MIBs and cannot be edited.
NOTE: Only valid MIBs with traps are handled by OpenManage Enterprise.
You manage MIBs by:
• Import MIB files
• Remove MIB files
• Resolve MIB types
By clicking OpenManage Enterprise > Monitor > MIB, you can manage the MIB files that are used by OpenManage Enterprise and other System Management tools in the data center. A table lists the available MIB files with the following properties. Click the column heading to sort data.
Table 20. Role-based access for MIB files in OpenManage Enterprise
OpenManage Enterprise features
Role-based access control for MIB files
Admin Device Manager Viewer
View traps or MIBs Y Y Y
Import MIB. Edit traps. Y N N
Remove MIB Y N N
Edit traps Y N N
To download the built-in MIB files from OpenManage Enterprise, click Download MIB. The files are saved to the specified folder.
Topics:
• Import MIB files
• Edit MIB traps
• Remove MIB files
• Resolve MIB types
• Download an OpenManage Enterprise MIB file
Import MIB filesIdeal process flow of MIB import: User uploads the MIBs to OpenManage Enterprise > OpenManage Enterprise parses the MIBs > OpenManage Enterprise searches the database for any already available similar traps > OpenManage Enterprise displays MIB file
18
Managing MIB files 117

data. The maximum file size of MIB that can be imported is 3 MB. The OpenManage Enterprise Audit log history records every import and removal of MIBs.
NOTE: To perform any tasks on OpenManage Enterprise, you must have necessary user privileges. See Role-based OpenManage Enterprise user privileges.
1 Click MIB > Import MIB.
2 In the Import MIB dialog box, in the Upload MIB Files section, click Choose File to select a MIB file.
If the MIB has import statements that are resolved by external MIBs, a message is displayed.
a Click Resolve Types. Resolve the MIB types. See Remove MIB files.b Click Finish. If the MIB file is Dell EMC owned, a message indicates that the MIB is shipped with the product and cannot be
modified.
3 Click Next.
4 In the View Traps section, a list of MIB files is displayed with the following information:
• Alert category of the trap. You can edit the category to align with the OpenManage Enterprise category definitions. See Edit MIB traps.
• Trap name is read-only. Defined by the third-party device.
• Severity levels of an alert: Critical, Warning, Information, and Normal.
• Alert message associated with an alert.
• Trap OID is read-only and unique.
• 'New' indicates that the trap is imported for the first time by OpenManage Enterprise. Already imported traps are indicated as 'Imported'. 'Overwrite' indicates the traps whose definition is rewritten because of an import operation.
To edit the default alert categories or severity level of a MIB file, see Edit MIB traps. To delete MIB files, select the corresponding check boxes, and then click Delete Trap. The MIB files are deleted and the list of MIB files is updated.
5 Click Finish. The MIB files are parsed, imported to OpenManage Enterprise, and then listed under the MIN tab.
NOTE: If you import a MIB, and then import it again, the MIB status is shown as IMPORTED. However, if you re-import a MIB file that is deleted, the trap status is indicated as NEW.
NOTE: Traps that are already imported to OpenManage Enterprise cannot be imported.
NOTE: MIB files shipped by default with OpenManage Enterprise cannot be imported.
NOTE: Events that are generated after the trap is imported will be formatted and displayed according to the new definition.
Edit MIB traps
1 Select the report and click Edit.
2 In the Edit MIB Traps dialog box:
a Select or type data in the fields:
• Select the new alert category to be assigned to the alert. By default, OpenManage Enterprise displays few built-in alert categories.
• Type the alert component.
• The trap name is read-only because it is generated by the third-party tool.
• Select the severity to be assigned to the alert. By default, OpenManage Enterprise displays few built-in alert categories.
• A message that describes the alert.b Click Finish.
The trap is edited and the updated trap list is displayed.
NOTE: You cannot edit more than one alert at a time. The traps imported to OpenManage Enterprise cannot be edited.
118 Managing MIB files

3 In the Report Definition dialog box, edit the settings. See Creating reports.
4 Click Save.
The updated information is saved.
Remove MIB filesNOTE: You cannot remove a MIB file that has trap definitions used by any of the alert policies. See Alert policies.
NOTE: Events that are received before removing a MIB will not be affected by the associated MIB removal. However, events generated after the removal will have unformatted traps.
1 In the MIB FILENAME column, expand the folder, and select the MIB files.
2 Click Remove MIB.
3 In the Remove MIB dialog box, select the check boxes of the MIBs to be removed.
4 Click Remove.
The MIB files are removed and the MIB table is updated.
Resolve MIB types
1 Import the MIB files. See Import MIB files.
If the MIB type is unresolved, the Unresolved Types dialog box lists MIB type(s) indicating that the MIB type(s) will be imported only if resolved.
2 Click Resolve Types.
3 In the Resolve Types dialog box, click Select Files, and then select the missing file(s).
4 In the Import MIB dialog box, click Next. If there are still missing MIB types, the Unresolved Types dialog box again lists the missing MIB types. Repeat steps 1-3.
5 After all the unresolved MIB types are resolved, click Finish. Complete the importing process. See Import MIB files.
Download an OpenManage Enterprise MIB file1 On the Monitor page, click MIB.
2 Expand and select an OpenManage Enterprise MIB file, and then click Download MIB.
NOTE: You can download only the OpenManage Enterprise-related MIB files.
Managing MIB files 119

Managing OpenManage Enterprise appliance settings
NOTE: To perform any tasks on OpenManage Enterprise, you must have necessary user privileges. See Role-based OpenManage Enterprise user privileges.
NOTE: For information about supported browsers, see the OpenManage Enterprise Support Matrix available on the support site.
By clicking OpenManage Enterprise > Application Settings, you can:
• Configure and manage the OpenManage Enterprise network settings such as IPv4, IPv6, time, and proxy settings. See Configuring network settings.
• Add, enable, edit, and delete users. See Managing users.
• Set the device health and dashboard monitoring properties. See Managing Console preferences.
• Manage user login and lockout policies. See Setting login security properties.
• View current SSL certificate, and then generate a CSR request. See Generate and download the certificate signing request.
• Configure emails, SNMP, and Syslog properties for alert management. See Configure SMTP, SNMP, and Syslog alerts.
• Set the SNMP listener and Trap Forward settings. See Managing incoming alerts.
• Set the credentials and time to receive notification about warranty expiry. See Managing warranty settings.
• Set the properties to check for availability of updated version and then update the OpenManage Enterprise version. See Check and update the version of the OpenManage Enterprise and the available extensions.
• Set the user credentials to run remote command by using RACADM, and IPMI. See Executing remote commands & scripts.
• Set and receive alert notifications on your mobile phone. See OpenManage Mobile settings.
Topics:
• Configure OpenManage Enterprise network settings
• Manage OpenManage Enterprise users
• Enable OpenManage Enterprise users
• Disable OpenManage Enterprise users
• Delete OpenManage Enterprise users
• Delete Directory services
• Ending user sessions
• Role-based OpenManage Enterprise user privileges
• Add and edit OpenManage Enterprise users
• Edit OpenManage Enterprise user properties
• Import AD and LDAP groups
• Directory services integration in OpenManage Enterprise
• Set the login security properties
• Security Certificates
• Manage Console preferences
• Customize the alert display
• Manage incoming alerts
19
120 Managing OpenManage Enterprise appliance settings

• Set SNMP Credentials
• Manage warranty settings
• Check and update the version of the OpenManage Enterprise and the available extensions
• Execute remote commands and scripts
• OpenManage Mobile settings
Related link
Delete Directory services
Configure OpenManage Enterprise network settingsNOTE: To perform any tasks on OpenManage Enterprise, you must have necessary user privileges. See Role-based OpenManage Enterprise user privileges.
1 To only view the current network settings of OpenManage Enterprise such as DNS domain name, FQDN, and IPv4 and IPv6 settings, expand Current Settings.
2 To configure the session timeouts and the maximum number of sessions for the OpenManage Enterprise API and web interface users, expand Session Inactivity Timeout Configuration and do the following:
• Select the Enable check box to activate the Universal Timeout and enter the Inactivity timeout (1-1440) value. Inactivity timeout value can be set between 1 minute to 1440 minutes (24 hours). By default the Universal timeout is grayed out. Enabling the Universal timeout disables the API and Web Interface fields.
• Change the API Inactivity timeout (1-1440) and the Maximum number of sessions (1-100) values. These attributes are by default set as 30 minutes and 100 respectively.
• Change the Web Interface Inactivity timeout (1-1440) and the Maximum number of sessions (1-100) values. These attributes are by default set as 30 minutes and 100 respectively.
• Click Apply to save the settings or click Discard to retain the default values.
3 The current system time and the source—local time zone or NTP server IP are displayed. To configure the system time zone, date, time, and NTP server synchronization, expand Time Configuration.
a Select the time zone from the drop-down list.b Enter the date or click the Calendar icon to select the date.c Enter the time in hh:mm:ss format.d To synchronize with an NTP server, select the Use NTP check box, and enter the server address of the primary NTP server.
You can configure up to three NTP servers in OpenManage Enterprise.
NOTE: The Date and Time options are not available when the Use NTP option is selected.
e Click Apply.f To reset the settings to default attributes, click Discard.
4 To configure the OpenManage Enterprise proxy settings, expand Proxy Configuration.
a Select the Enable HTTP Proxy Settings check box to configure the HTTP proxy, and then enter HTTP proxy address and HTTP port number.
b Select the Enable Proxy Authentication check box to enable proxy credentials, and then enter the username and password.c Click Apply.d To reset the settings to default attributes, click Discard.
To understand all the tasks that you can perform by using the Application Settings feature, see Managing OpenManage Enterprise appliance settings.
Manage OpenManage Enterprise usersNOTE: To perform any tasks on OpenManage Enterprise, you must have the necessary user privileges. See Role-based OpenManage Enterprise user privileges.
NOTE: AD and LDAP directory users can be imported and assigned one of the OpenManage Enterprise roles (Admin, DeviceManager, or Viewer).
Managing OpenManage Enterprise appliance settings 121

By clicking OpenManage Enterprise > Application Settings > Users, you can:
• View, add, enable, edit, or delete the OpenManage Enterprise users.
NOTE: You cannot enable, disable, or delete the admin/system/root users. You can change the password by clicking Edit in the right pane.
• View details about the logged-in users, and then end (terminate) a user session.
• Manage Directory Services.
• Import and manage users from Active Directory.
By default, the list of users is displayed under Users. The right pane displays the properties of a user name that you select in the working pane.
• USERNAME: Along with the users you created, OpenManage Enterprise displays the following default user roles that cannot be edited or deleted: admin, system, and root. However, you can edit the login credentials by selecting the default username and clicking Edit. See Enable OpenManage Enterprise users. The recommended characters for user names are as follows:
– 0–9
– A–Z
– a–z
– - ! # $ % & ( ) * / ; ? @ [ \ ] ^ _ ` { | } ~ + < = >
– The recommended characters for passwords are as follows:
◦ 0–9
◦ A–Z
◦ a–z
◦ ' - ! " # $ % & ( ) * , . / : ; ? @ [ \ ] ^ _ ` { | } ~ + < = >
• USER TYPE: Indicates if the user logged in locally or remotely.
• ENABLED: Indicates with a tick mark when the user is enabled to perform OpenManage Enterprise management tasks. See Enable OpenManage Enterprise users and Disable OpenManage Enterprise users.
• ROLE: Indicates the user role in using OpenManage Enterprise. For example, OpenManage Enterprise administrator and Device Manager. See OpenManage Enterprise user role types.
Related links
Disable OpenManage Enterprise users
Enable OpenManage Enterprise users
Delete Directory services
Delete OpenManage Enterprise users
Ending user sessions
Enable OpenManage Enterprise usersSelect the check box corresponding to the username and click Enable. The user is enabled and a tick mark is displayed in the corresponding cell of the ENABLED column. If the user is already enabled while creating the username, the Enable button appears grayed-out.Related links
Delete Directory services
Delete OpenManage Enterprise users
Ending user sessions
Manage OpenManage Enterprise users
Disable OpenManage Enterprise usersSelect the check box corresponding to the user name and click Disable. The user is disabled and a tick mark disappears in the corresponding cell of the ENABLED column. If the user is disabled while creating the username, the Disable button appears grayed-out.
122 Managing OpenManage Enterprise appliance settings

Related links
Delete Directory services
Delete OpenManage Enterprise users
Ending user sessions
Manage OpenManage Enterprise users
Delete OpenManage Enterprise users
1 Select the check box corresponding to the username and click Delete.
2 When prompted, click YES.
Related links
Disable OpenManage Enterprise users
Enable OpenManage Enterprise users
Manage OpenManage Enterprise users
Delete Directory services
Select the check box corresponding to the Directory Services to be deleted, and then click Delete.
Related links
Managing OpenManage Enterprise appliance settings
Disable OpenManage Enterprise users
Enable OpenManage Enterprise users
Manage OpenManage Enterprise users
Ending user sessions1 Select the check box corresponding to the username, and then click Terminate.
2 When prompted to confirm, click YES.
The selected user session is ended and the user is logged out.
Related links
Disable OpenManage Enterprise users
Enable OpenManage Enterprise users
Manage OpenManage Enterprise users
Role-based OpenManage Enterprise user privilegesUsers are assigned roles which determine their level of access to the appliance settings and device management features. This feature is termed as Role-Based Access Control (RBAC). The console enforces one role per account. For more information about managing users on OpenManage Enterprise, see Manage OpenManage Enterprise users.
This table lists the various privileges that are enabled for each role.
Managing OpenManage Enterprise appliance settings 123

Table 21. Role-based user privileges in OpenManage Enterprise
OpenManage Enterprise features
User levels for accessing OpenManage Enterprise
Admin Device Manager Viewer
Run reports Y Y Y
View Y Y Y
Manage templates Y Y N
Manage baseline Y Y N
Configure device Y Y N
Update device Y Y N
Manage jobs Y Y N
Create monitoring policies Y Y N
Deploy operating system Y Y N
Power control Y Y N
Manage reports Y Y N
Refresh inventory Y Y N
Set up the OpenManage Enterprise appliance
Y N N
Manage discovery Y N N
Manage groups Y N N
Set up security Y N N
Manage traps Y N N
Select targets for autodeployment
Y N N
Related links
OpenManage Enterprise user role types
Deploy and manage OpenManage Enterprise
Add and edit OpenManage Enterprise usersNOTE: To perform any tasks on OpenManage Enterprise, you must have necessary user privileges. See Role-based OpenManage Enterprise user privileges.
NOTE: AD and LDAP directory users can be imported and assigned one of the OpenManage Enterprise roles (Admin, DeviceManager, or Viewer). The Single-Sign-On (SSO) feature stops at login to the console. Actions run on the devices require a privileged account on the device.
This procedure is specific to only adding and editing the local users. While editing local users, you can edit all the user properties. However, for directory users, only the role and device groups (in the case of a Device Manager) can be edited. For adding Directory users, see Add or edit Active Directory groups to be used with Directory Services.
1 Select Application Settings > Users > Add.
2 In the Add New User dialog box:
a Enter the user credentials.
124 Managing OpenManage Enterprise appliance settings
The username must contain only alphanumeric characters (but underscore is allowed) and the password must contain at least one character in: uppercase, lowercase, digit, and special character.
b From the User Role drop-down menu, select a role:
• Administrator
• Device Manager
• Viewer
For more information, see Role-based OpenManage Enterprise user privileges.
By default, the Enabled check box is selected to indicate that the user privileges currently being set up are enabled for a user.
3 Click Finish.
A message is displayed that the user is successfully saved. A job is started to create a new user. After running the job, the new user is created and displayed in the list of users.
Edit OpenManage Enterprise user properties1 On the Application Settings page, under Users, select the check box corresponding to the user.
2 Complete the tasks in Add and edit OpenManage Enterprise users.
The updated data is saved.
NOTE: When you change the role of a user, the privileges available for the new role automatically get applied. For example, if you change a device manager to an administrator, the access rights and privileges provided for an administrator will be automatically enabled for the device manager.
Import AD and LDAP groupsNOTE: The users without Administrator rights cannot enable or disable the Active Directory (AD) and Lightweight Directory Access Protocol (LDAP) users.
NOTE: Before importing AD groups in OpenManage Enterprise, you must include the user groups in a UNIVERSAL GROUP while configuring the AD.
1 Click Import Directory Group.
2 In the Import Active Directory dialog box:
a From the Directory Source drop-down menu, select an AD or LDAP source that must be imported for adding groups. For adding directories, see Add or edit Active Directory groups to be used with Directory Services.
b Click Input Credentials.c In the dialog box, type the username and password of the domain where the directory is saved. Use tool tips to enter the correct
syntax.d Click Finish.
3 In the Available Groups section:
a In the Find a Group box, enter the initial few letters of the group name available in the tested directory. All the groups names that begin with the entered text are listed under GROUP NAME.
b Select the check boxes corresponding to the groups be imported, and then click the >> or << buttons to add or remove the groups.
4 In the Groups to be Imported section:
a Select the check boxes of the groups, and then select a role from the Assign Group Role drop-down menu. For more information about the role-based access, see Role-based OpenManage Enterprise user privileges.
b Click Assign.
The users in the group under the selected directory service are assigned with the selected user roles.
5 Repeat steps 3 and 4, if necessary.
6 Click Import.
The directory groups are imported and displayed in the Users list. However, all users in those groups will log in to OpenManage Enterprise by using their domain username and credentials.
Managing OpenManage Enterprise appliance settings 125

It is possible for a domain user, for example john_smith, to be a member of multiple directory groups, and also for those groups to be assigned different roles. In this case, the user will receive the highest level role for all the directory groups the user is a member of.
• Example 1: The user is a member of three groups with admin, DM, and viewer roles. In this case, user becomes an administrator.
• Example 2: The user is a member of three DM groups and a viewer group. In this case, the user will become a DM with access to the union of device groups across the three DM roles.
Directory services integration in OpenManage EnterpriseDirectory Services enables you to import directory groups from AD or LDAP for use on the console.
NOTE: If the OpenManage Enterprise is hosted on an IPv6 network, the SSL authentication against domain controller using FQDN would fail if IPv4 is set as preferred address in DNS. To avoid this failure, do one of the following:
• DNS should be set to return IPv6 as preferred address when queried with FQDN.
• DC certificate needs to have IPv6 in SAN field.
To use Directory Services:
• Add a directory connection. See Add or edit Active Directory groups to be used with Directory Services.
• Import directory groups and map all users in the group to a specific role. See Import AD and LDAP groups.
• For DM users, edit the directory group to add the groups the DM can manage. See Add and edit OpenManage Enterprise users.
Add or edit Active Directory groups to be used with Directory Services
1 Click Application Settings > Users > Directory Services, and then click Add.
2 In the Connect to Directory Service dialog box, by default, AD is selected to indicate that directory type is Active Directory (AD):
NOTE: To create an LDAP user group by using Directory Services, see Add or edit Lightweight Directory Access Protocol groups to be used with Directory Services.
a Enter a desired name for the AD directory.b Select the Domain Controller Lookup method:
• DNS: In the Method box, enter the domain name to query DNS for the domain controllers.
• Manual: In the Method box, enter the FQDN or the IP address of the domain controller. For multiple servers, a maximum of three servers are supported, use a comma-separated list.
c In the Group Domain box, enter the group domain as suggested in the tool tip syntax.
3 In the Advanced Options section:
a By default, Global Catalog Address port number 3269 is populated. For the Domain Controller Access, enter 636 as the port number.
NOTE: Only LDAPS ports are supported.
b Enter the network timeout and search timeout duration in seconds. The maximum timeout duration supported is 300 seconds.c To upload an SSL certificate, select Certificate Validation and click Select a file. The certificate should be a Root CA Certificate
encoded in Base64 format.
The Test connection tab is displayed.
4 Click Test connection.
5 In the dialog box, enter the username and password of the domain to be connected to.
126 Managing OpenManage Enterprise appliance settings

NOTE: The username must be entered in either the UPN (username@domain) or in the NetBIOS (domain\username) format.
6 Click Test connection.
In the Directory Service Information dialog box, a message is displayed to indicate successful connection.
7 Click Ok.
8 Click Finish.
A job is created and run to add the requested directory in the Directory Services list.
Editing Active Directory (AD) groups to be used with Directory Services
1 In the DIRECTORY NAME column, select the directory. The Directory Service properties are displayed in the right pane.
2 Click Edit.
3 In the Connect to Directory Service dialog box, edit the data and click Finish. The data is updated and saved.
Add or edit Lightweight Directory Access Protocol groups to be used with Directory Services
1 Click Application Settings > Users > Directory Services, and then click Add.
2 In the Connect to Directory Service dialog box, select LDAP as the directory type.
NOTE: To create an AD user group by using Directory Services, see Add or edit Active Directory groups to be used with Directory Services.
a Enter a desired name for the LDAP directory.b Select the Domain Controller Lookup method:
• DNS: In the Method box, enter the domain name to query DNS for the domain controllers.
• Manual: In the Method box, enter the FQDN or the IP address of the domain controller. For multiple servers, a maximum of three servers are supported, use a comma-separated list.
c Enter the LDAP Bind Distinguished Name (DN) and password.
NOTE: Anonymous bind is not supported for AD LDS.
3 In the Advanced Options section:
a By default, LDAP port number of 636 is populated. To change, enter a port number.
NOTE: Only LDAPS ports are supported.
b To match the LDAP configuration on the server, enter the group base DN to search for.c Enter the User attributes already configured in the LDAP system. It is recommended that this is unique within the selected Base
DN. Else, configure a search filter to ensure that it is unique. If the user DN cannot be uniquely identified by the search combination of attribute and search filter, the login operation fails.
NOTE: The user attributes should be configured in the LDAP system used to query before integrating on the directory services.
NOTE: You need to enter the user attributes as cn or sAMAccountName for AD LDS configuration and UID for LDAP configuration
d In the Attribute of Group Membership box, enter the attribute that stores the groups and member information in the directory.e Enter the network timeout and search timeout duration in seconds. The maximum timeout duration supported is 300 seconds.f To upload an SSL certificate, select Certificate Validation and click Select a file. The certificate should be a Root CA Certificate
encoded in Base64 format.
The Test connection button is enabled.
4 Click Test connection, and then enter the bind user credentials of the domain to be connected to.
Managing OpenManage Enterprise appliance settings 127

NOTE: While testing the connection, ensure that the Test username is the value of the Attribute of User Login entered previously.
5 Click Test connection.
In the Directory Service Information dialog box, a message is displayed to indicate successful connection.
6 Click Ok.
7 Click Finish.
A job is created and run to add the requested directory in the Directory Services list.
Editing LDAP groups to be used with Directory Services
1 In the DIRECTORY NAME column, select the directory. The Directory Service properties are displayed in the right pane.
2 Click Edit.
3 In the Connect to Directory Service dialog box, edit the data and click Finish. The data is updated and saved.
Set the login security propertiesNOTE: To perform any tasks on OpenManage Enterprise, you must have necessary user privileges. See Role-based OpenManage Enterprise user privileges.
NOTE: AD and LDAP directory users can be imported and assigned one of the OpenManage Enterprise roles (Admin, DeviceManager, or Viewer).
By clicking OpenManage Enterprise > Application Settings > Security, you can secure your OpenManage Enterprise either by specifying the Restrict Allowed IP Range or the Login Lockout Policy.
• Expand Restrict Allowed IP Range:
a To specify the IP address range that must be allowed to access OpenManage Enterprise, select the Enable IP Range check box.
b In the IP Range Address (CIDR) box, enter the range of IP addresses separated by a comma in CIDR notation.
c Click Apply. To reset to default properties, click Discard.
• Expand Login Lockout Policy :
a Select the By User Name check box to prevent a specific user name from logging in to OpenManage Enterprise.
b Select the By IP address check box to prevent a specific IP address from logging in to OpenManage Enterprise.
c In the Lockout Fail Count box, enter the number of unsuccessful attempts after which OpenManage Enterprise must prevent the user from further logging in. By default, 3 attempts.
d In the Lockout Fail Window box, enter the duration for which OpenManage Enterprise must display information about a failed attempt.
e In the Lockout Penalty Time box, enter the duration for which the user is prevented from making any login attempt after multiple unsuccessful attempts.
f Click Apply. To reset the settings to default attributes, click Discard.
Related linkSecurity Certificates
Security CertificatesBy clicking Application Settings > Security > Certifciates, you can view information about the currently available SSL certificate for the device.
NOTE: To perform any tasks on OpenManage Enterprise, you must have necessary user privileges. See Role-based OpenManage Enterprise user privileges.
To generate a Certificate Signing Request (CSR), see Generate and download the certificate signing request.
Related linkSet the login security properties
128 Managing OpenManage Enterprise appliance settings

Generate and download the certificate signing requestTo generate a Certificate Signing Request (CSR) for your device, and then apply for an SSL:
NOTE: You must generate the CSR from within the OpenManage Enterprise appliance only.
1 Click Generate Certificate Signing Request.
2 In the Generate Certificate Signing Request dialog box, enter information in the fields.
3 Click Generate.
A CSR is created and displayed in the Certificate Signing Request dialog box. A copy of the CSR is also sent to the email address you provided in your request.
4 In the Certificate Signing Request dialog box, copy the CSR data and submit it to the Certificate Authority (CA) while applying for an SSL certificate.
• To download the CSR, click Download Certificate Signing Request.
• Click Finish.
Manage Console preferencesNOTE: To perform any tasks on OpenManage Enterprise, you must have necessary user privileges. See Role-based OpenManage Enterprise user privileges.
By clicking OpenManage Enterprise > Application Settings > Console Preferences, you can set the default properties of the OpenManage Enterprise GUI. For example, default time after which a device health is automatically checked and updated on the dashboard, and preferred settings used for discovering a device.
• To set the maximum number of rows (reports) that you can view on OpenManage Enterprise:
a Expand Report Settings.
b Enter a number in the Reports row limit box. Maximum rows permitted=1000.
c Click Apply. A job is run and the setting is applied.
• To set the time after which the health of devices must be automatically monitored and updated on the OpenManage Enterprise Dashboard:
a Expand Device Health.
b Enter the frequency at which the device health must be recorded and data stored.
c Select:
– Last Known: Display the latest recorded device health when the power connection was lost.
– Unknown: Display the latest recorded device health when the device status moved to 'unknown'. A device becomes unknown to OpenManage Enterprise when the connection with iDRAC is lost and the device is not anymore monitored by OpenManage Enterprise.
d Click Apply to save the changes to the settings or click Discard to reset the settings to default attributes.
• Expand Discovery Setting to set the device naming used by the OpenManage enterprise to identify the discovered iDRACs and other devices using the Server Device Naming and the General Device Naming settings.
NOTE: The device naming choices in the General Device Naming and the Server Device Naming are independent of each other and they do not affect each other.
a General Device Naming applies to all the discovered devices other than the iDRACs. Select from one of the following naming modes:
– DNS to use the DNS name.
– Instrumentation (NetBIOS) to use the NetBIOS name.
NOTE: The default setting for General Device Naming is DNS.
Managing OpenManage Enterprise appliance settings 129

NOTE: If any of the discovered devices do not have the DNS name or the NetBIOS name to satisfy the setting, then the appliance identifies such devices with their IP addresses.
b Server Device Naming applies to iDRACs only. Select from one of the following naming modes for the discovered iDRACs :
– iDRAC Hostname to use the iDRAC hostname.
– System Hostname to use the system hostname.
NOTE: The default naming preference for iDRAC devices is the System Hostname .
NOTE: If any of the iDRACs do not have the iDRAC hostname or the System hostname to satisfy the setting, then the appliance identifies such iDRACs using their IP addresses.
c To specify the invalid device hostnames and the common MAC addresses expand the Advance Settings:
– Enter one or more invalid hostnames separated by a comma in Invalid Device Hostname. By default, a list of invalid device hostname is populated.
– Enter the common MAC addresses separated by a comma in Common MAC Addresses. By default, a list of common MAC addresses is populated.
d Click Apply to save the changes to the settings or click Discard to reset the settings to the default attributes, .
• Set the devices that must be displayed in the All Devices view.
a Expand All devices View Setting.
b From the Show unknown devices drop-down menu, select:
– False: On the Dashboard page, do not display the unknown devices in the list of all devices and device groups.
– True: Display the unknown devices in the list.
c Click Apply.
d To reset the settings to default attributes, click Discard.
• In the SMB Setting section, select the Server Message Block (SMB) version that must be used for network communication. The default selection is Disable V1 (meaning, SMBv1 is disabled). Select Enable V1 to enable SMBv1.
NOTE: Ensure to enable SMBv1 in the SMB Settings before you begin any firmware tasks which need communication with any chassis or the PowerEdge 12G and 13G servers that have iDRAC version 2.50.50.50 and earlier. See Manage Console preferences
• To set the address of the user who is sending an email message:
a Expand Email Sender Settings.
b Enter a email address and click Apply.
• To set the trap forwarding format:
a Expand Trap Forwarding Format.
b To retain the trap data as-is, select Original Format. To normalize, select Normalized.
c Click Apply.
Customize the alert display1 Click OpenManage Enterprise > Application Settings>Alerts and expand the Alert Display Settings.
2 Select one of the following:
a All — to enable the display of both acknowledged and unacknowledged alerts.b Unacknowledged — to enable the display of only the unacknowledged alerts.
NOTE: By default, the Alert Display Settings is set as Unacknowledged.
c Acknowledged — to enable the display of only the acknowledged alerts.
3 Click Apply.
Changes to the Alert Display Settings would be impact the following OpenManage Enterprise pages:
• The upper-right corner of all the OpenManage Enterprise pages. See OpenManage Enterprise Graphical User Interface overview.
• The Dashboard page. See Monitor devices by using the OpenManage Enterprise dashboard.
• The Devices page. See Donut chart.
130 Managing OpenManage Enterprise appliance settings
• The Alert Log table under the Alerts page. See View the alert logs.
Manage incoming alertsNOTE: To perform any tasks on OpenManage Enterprise, you must have necessary user privileges. See Role-based OpenManage Enterprise user privileges.
By clicking OpenManage Enterprise > Application Settings > Incoming Alerts, you can define the properties of the user who receives incoming alerts by using SNMPv3 protocol. You can also set the TrapForward properties.
• To set the SNMP credentials for incoming alerts:
1 Select the SNMPV3 Enable check box.
2 Click Credentials.
3 In the SNMP Credentials dialog box:
a In the User Name box, enter the login ID of the user who manages the OpenManage Enterprise settings.b From the Authentication Type drop-down menu, select either the SHA or MD_5 algorithm as the authentication type.c In the Authentication Passphrase box, enter the passphrase pertaining to SHA or MD_5 based on your selection.d From the Privacy Type drop-down menu, select either DES or AES_128 as your encryption standard.e In the Privacy Passphrase box, enter the passphrase based on your privacy type.f Click Save.
4 In the Community box, enter the community string to receive the SNMP traps.
5 By default, the SNMP port number for the incoming traps is 161. Edit to change the port number.
6 Click Apply.
The SNMP credentials and settings are saved.
7 To reset the settings to default attributes, click Discard.
NOTE: If SNMPv3 alert settings are configured before upgrading the appliance, you have to reconfigure the settings by providing the username, authentication passphrase, and privacy passphrase to continue receiving the alerts.
• To apply the TrapForward settings:
a Expand TrapForward Settings.
– To forward the trap, select AS_IS.
– To forward the normalized trap, select Normalized.
b Click Apply.
c To reset the settings to default attributes, click Discard.
Set SNMP Credentials
1 Click Credentials.
2 In the SNMP Credentials dialog box:
a In the User Name box, enter the login ID of the user managing the OpenManage Enterprise settings.b From the Authentication Type drop-down menu, select either the SHA or MD_5 algorithm as the authentication type.c In the Authentication Passphrase box, enter the passphrase pertaining to SHA or MD_5 based on your selection.d From the Privacy Type drop-down menu, select either DES or AES_128 as your encryption standard.e In the Privacy Passphrase box, enter the passphrase based on your privacy type.
3 Click Save.
Managing OpenManage Enterprise appliance settings 131

Manage warranty settingsWarranty settings determine the display of warranty statistics by the OpenManage Enterprise on the home page Alert widget, scoreboard across all pages, the Warranty page, and the reports.
To change the warranty settings:
1 Click OpenManage Enterprise > Application Settings > Warranty
2 Click Warranty Settings to activate the dialog box.
3 In the Show warning if warranties are expiring in the next box, enter the number of days. You can enter a value 0–1000(both
included). The default value is set as 90 days. The warranties expiring based on this setting are represented as in the report and the widget.
4 The Show expired warranties checkbox, which is checked by default, can be cleared. When cleared, OpenManage Enterprise stops reporting the expired warranties on all the places where warranty-related statistics are displayed.
5 Click Apply or Discard to either save the warranty settings or to discard the changes and retain the old settings.
Check and update the version of the OpenManage Enterprise and the available extensionsTo go to the Console and Extensions page, click Application Settings > Console and Extensions. On the Console and Extensions page you can do the following:
1 View the current version of your OpenManage Enterprise, check if updates are available, and then upgrade to a newer version. You can click the Update Settings button to:
a Check for the updates Automatically or Manually.b Choose from the Online or Offline modes of updating the appliance.
For more information see Updating the OpenManage Enterprise version
2 Download and install more extensions (plug-ins) such as the Power Manager extension to enhance the functionality of the appliance. For more information about the installation of extensions, see Install an Extension
NOTE: The OpenManage Enterprise Advanced license is required for the extensions to be fully functional after installation. For more in-depth information about the extensions, refer the respective documentation available on the Dell Support site.
NOTE: Installing an extension on OpenManage Enterprise restarts the appliance services.
3 With the already-installed extensions you can do the following:
• Click More Actions drop-down menu to learn more about the extension, disable, uninstall, enable, or to change the settings of the extension. For more information, see Disable an extension, Uninstall an extension, Enable Extension
• You can click on Update Available as and when new versions of the extensions are available.
Related linksUpdate from Dell.comUpdate from an internal network share
Updating the OpenManage Enterprise versionThe user is automatically alerted about the availability of a new update package or warranty information on the Home portal. Before updating to the latest version, ensure that you:
• Take a VM snapshot of the console as a backup in case something unexpected occurs. (Allocate more downtime for this, if necessary).
• Allocate at least an hour for the update process. Allocate more time if the update must be downloaded by using a slower network connection.
132 Managing OpenManage Enterprise appliance settings
• Ensure that no device configuration tasks or deployment tasks are running or are scheduled to run during the planned downtime.
• Notify other console users of the impending scheduled update.
NOTE: Only OpenManage Enterprise versions starting 3.0 and above (3.1 and 3.2) can be updated to version 3.2.1 by the Automatic > Online method. However, to update from OpenManage Enterprise—Tech Release (version 1.0), you must use the Manual> Offline method after downloading the appliance to a local share.
NOTE: If an updated version of OpenManage Enterprise is available, a message is displayed on the Dashboard. Users with all privileges (Administrator, Device Manager, and Viewer) can view the message, but only an administrator can choose to get a reminder later or dismiss the message.
NOTE: When you update OpenManage Enterprise with more than 5500 discovered devices to OpenManage Enterprise version 3.2.1, the update task completes in two to three hours. During this time, the services might become unresponsive. It is then recommended to gracefully reboot the appliance. After the reboot, normal functionality of the appliance is restored.
NOTE: You can login immediately after the appliance is updated and don't have to wait till the entire inventory is discovered. Post update, the discovery task will run in the background and you can see the progress occasionally.
Table 22. The role-based access privileges for updating the OpenManage Enterprise version
User with this role... Can...
Administrator View the current OpenManage Enterprise version and update the version
Device Manager and Viewer Only view the current OpenManage Enterprise version
NOTE: For more information about updating OpenManage Enterprise to the latest version, see the Upgrade the Dell EMC OpenManage Enterprise appliance version technical white paper on the support site.
Update from Dell.comYou must ensure that the OpenManage Enterprise appliance can access Dell.com and the expected update.
NOTE: Before you begin the update, ensure to take a VM snapshot of the console as a backup in case something unexpected occurs. (Allocate more downtime for this, if necessary).
1 Select one of the following options to display information about an available update:
• Automatic and Online: Updates are automatically checked after every week. This frequency cannot be changed.
• Manual and Online: Updates are checked when you manually initiate the request.
2 Click Check Now.
The available update version with a brief description of the new features are displayed.
3 Click Update Now, and perform an update.
Log in after the update and confirm that the product works as expected. Check the audit log for any warnings or errors that are related to the update. If any errors, export the audit log and save for tech support.
NOTE: After the appliance is updated:
1 Clear the browser cache. Not clearing the browser cache, may cause failing of new tasks post update.
2 It is highly recommended that you re-configure or import the Active Directory groups for enhanced performance.
3 You can login immediately after the appliance is updated and don't have to wait till the entire inventory is discovered. Post update, the discovery task will run in the background and you can see the progress occasionally.
4 Currently, the status of the associated jobs on the Job Details page is displayed as completed.
5 Currently, an audit log is not created to indicate if the appliance update process was successful or not.
Related link
Check and update the version of the OpenManage Enterprise and the available extensions
Managing OpenManage Enterprise appliance settings 133

Update from an internal network shareYou must set up a local share and manually download the update package when you are not automatically connected to Dell.com. An audit log is created after every manual attempt to find an update.
NOTE:
1 Before you begin the update, ensure to take a VM snapshot of the console as a backup in case something unexpected occurs. (Allocate more downtime for this, if necessary).
2 A direct update from the OpenManage Enterprise—Tech Release version to the 3.2.1 version is not supported. TechRelease versions should be first upgraded to OpenManage Enterprise version 3.0 or above.
3 Updating a previous OpenManage Enterprise version 3.0 to 3.2 through a shared Network File Share (NFS) is not supported. However, you can upgrade the appliance from the 3.1 version to 3.2 version through the shared NFS.
You can update by selecting the Automatic and Online options, or by using HTTP and HTTPS methods. You must ensure that the security certificates are signed by a trusted third-party certificate authority when using the HTTPS method of update.
To update the OpenManage Enterprise:
1 Download the applicable files from https://downloads.dell.com and save on a network share preserving the same folder structure that can be accessed by the console.
2 Select Manual and Offline.
3 Enter the local path information where the downloaded files are saved, and then click Check Now. Example paths: nfs://<IP Address>/<Folder_Name>, http://<IP Address>/<Folder_Name>, https://<IP Address>/<Folder_Name>.
The available update version with a brief description of the new features are displayed.
4 To validate a connection to the catalog click Test now. If the connection to the catalog is established, a Connection Successful message is displayed. If connection to the share address or the catalog file path is not established, Connection to path failed error message is displayed. This step is an optional.
5 Click Update Now, and perform an update.
Log in after the update and confirm that the product works as expected. Check the audit log for any warnings or errors that are related to the update. If any errors, export the audit log and save for tech support.
NOTE: After the appliance is updated:
1 Clear the browser cache. Not clearing the browser cache, may cause failing of new tasks post update.
2 It is highly recommended that you re-configure or import the Active Directory groups for enhanced performance.
3 You can login immediately after the appliance is updated and don't have to wait till the entire inventory is discovered. Post update, the discovery task will run in the background and you can see the progress occasionally.
4 Currently, the status of the associated jobs on the Job Details page is displayed as completed.
5 Currently, an audit log is not created to indicate if the appliance update process was successful or not.
Related link
Check and update the version of the OpenManage Enterprise and the available extensions
Install an ExtensionInstall an extension based on your requirement to enhance the functionality of OpenManage Enterprise.
• Ensure that the connectivity to repository is successful.
– For online, download.dell.com portal.
– For offline, server is configured with the required extension catalog and extension installation files.
NOTE: Installing an extension on OpenManage Enterprise restarts the appliance services.
134 Managing OpenManage Enterprise appliance settings
To install an extension perform the following steps:
1 Click Application Settings > Console and Extensions
The Console and Extensions page is displayed
2 In Extensions section, against the extension you like to install, click More Actions > Install
The Install Extension window is displayed.
3 Review and ensure that you meet the list of prerequisites that are mentioned under the Prerequisite section.
NOTE: The lists of prerequisites change as you select the version of extension that you want to install.
4 In Install Details, select the required version of the extension from the Version(s) drop-down menu, and then click Install Extension.
The details of the number of users logged in to OpenManage Enterprise, tasks in progress, and schedule jobs are displayed in the confirmation window.
To confirm the installation, select I agree that I have captured the snapshot of the OM Enterprise appliance prior to the upgrade option, and then click Confirm Install.
The status of installation is displayed.
Disable an extensionDisables all the functionality of the extension on OpenManage Enterprise.
NOTE: Disabling an extension on OpenManage Enterprise restarts the appliance services.
1 Click Application Settings > Console and Extension
The Console and Extensions page is displayed.
2 In the Extensions section, click More Actions > Disable
The Disable Extension window is displayed
3 Click Disable Extension, and in the confirmation window, select I agree that I have captured the snapshot of the OM Enterprise appliance prior to the upgrade option, and then click Disable Extension.
NOTE: After disabling the Extension, you cannot see any information or pages related to the Extension on OpenManage Enterprise.
Uninstall an extensionUninstalls and deletes all the data that is collected by the extension.
1 Click Application Settings > Console and Extensions
The Console and Extensions page is displayed.
2 In the Extensions section, click More Settings > Uninstall
The Uninstall Extension window is displayed.
3 Click Uninstall Extension, and in the Confirmation window, select I agree that I have captured the snapshot of the OM Enterprise appliance prior to the upgrade option, and then click Uninstall Extension.
Enable ExtensionAll the pages of the Extension on OpenManage Enterprise are displayed and the functionality of the Extension is enabled on OpenManage Enterprise.
Managing OpenManage Enterprise appliance settings 135

NOTE: Enabling an extension on OpenManage Enterprise restarts the appliance services.
1 Click Application Settings > Console and Extensions
The Console and Extensions page is displayed.
2 In the Extensions section click More Actions > Enable
The Enable window is displayed.
3 Click Enable Extension, and in the Confirmation window, select I agree that I have captured the snapshot of the OM Enterprise appliance prior to the upgrade option, and then click Enable Extension.
Execute remote commands and scriptsWhen you get an SNMP trap, you can run a script on OpenManage Enterprise. This sets up a policy that opens a ticket on your third party ticketing system for alert management. You can create and store only up to four remote commands.
1 Click Application Settings > Script Execution.
2 In the Remote Command Setting section, do the following:
a To add a remote command, click Create.b In the Command Name box, enter the command name.c Select any one of the following command type:
1 Script
2 RACADM
3 IPMI Toold If you select Script, do the following:
1 In the IP Address box, enter the IP address.
2 Select the authentication method: Password or SSH Key.
3 Enter the user name and password or the SSH Key.
4 In the Command box, type the commands.
• Up to 100 commands can be typed with each command required to be on a new line.
• Token substitution in scripts is possible. See Token substitution in remote scripts and alert policy
5 Click Finish. e If you select RACADM, do the following:
1 In the Command Name box, enter the command name.
2 In the Command box, type the commands. Up to 100 commands can be typed with each command required to be on a new line.
3 Click Finishf If you select IPMI Tool, do the following:
1 In the Command Name box, enter the command name.
2 In the Command box, type the commands. Up to 100 commands can be typed with each command required to be on a new line.
3 Click Finish
3 To edit a remote command setting, select the command, and then click Edit.
4 To delete a remote command setting, select the command, and then click Delete.
OpenManage Mobile settingsOpenManage Mobile (OMM) is a systems management application that allows you to securely perform a subset of data center monitoring and remediation tasks on one or more OpenManage Enterprise consoles and/or integrated Dell Remote Access Controllers (iDRACs) by using your Android or iOS device. Using OMM you can:
• Receive alert notifications from OpenManage Enterprise.
136 Managing OpenManage Enterprise appliance settings
• View the group, device, alert, and log information.
• Turn on, turn off, or restart a server.
By default, the push notifications are enabled for all alerts and critical alerts. This chapter provides information about the OMM settings that you can configure by using OpenManage Enterprise. It also provides information required to troubleshoot OMM.
NOTE: For information about installing and using OMM, see the OpenManage Mobile User’s Guide at Dell.com/OpenManageManuals.
Related links
Enable or disable alert notifications for OpenManage Mobile
Enable or disable OpenManage Mobile subscribers
Delete an OpenManage Mobile subscriber
View the alert notification service status
Troubleshooting OpenManage Mobile
Enable or disable alert notifications for OpenManage Mobile
Enable or disable OpenManage Mobile subscribers
Troubleshooting OpenManage Mobile
Enable or disable alert notifications for OpenManage MobileBy default, OpenManage Enterprise is configured to send alert notifications to the OpenManage Mobile application. However, alert notifications are sent from OpenManage Enterprise only when a OpenManage Mobile user adds OpenManage Enterprise to the OpenManage Mobile application.
NOTE: The administrator rights are required for enabling or disabling alert notifications for OpenManage Mobile.
NOTE: For OpenManage Enterprise to send alert notifications to OpenManage Mobile, ensure that the OpenManage Enterprise server has outbound (HTTPS) Internet access.
To enable or disable alert notifications from OpenManage Enterprise to OpenManage Mobile:
1 Click OpenManage Enterprise > Application Settings > Mobile.
2 Select the Enable push notifications check box.
3 Click Apply.
Related links
OpenManage Mobile settings
OpenManage Mobile settings
Delete an OpenManage Mobile subscriber
Enable or disable OpenManage Mobile subscribersThe check boxes in the Enabled column in the Mobile Subscribers list allow you to enable or disable transmission of alert notifications to the OpenManage Mobile subscribers.
NOTE: The administrator rights are required for enabling or disabling OpenManage Mobile subscribers.
NOTE: OpenManage Mobile subscribers may be automatically disabled by OpenManage Enterprise if their mobile service provider push notification service indicates that the device is permanently unreachable.
NOTE: Even if an OpenManage Mobile subscriber is enabled in the Mobile Subscribers list, they can disable receiving alert notifications in their OpenManage Mobile application settings.
Managing OpenManage Enterprise appliance settings 137

To enable or disable alert notifications to the OpenManage Mobile subscribers:
1 Click OpenManage Enterprise > Application Settings > Mobile.
2 To enable, select the corresponding check box and click Enable. To disable, select the check box and click Disable.
You can select more than one subscriber at a time.
Related links
OpenManage Mobile settings
OpenManage Mobile settings
Delete an OpenManage Mobile subscriber
Delete an OpenManage Mobile subscriberDeleting an OpenManage Mobile subscriber removes the user from the subscribers list, preventing the user from receiving alert notifications from OpenManage Enterprise. However, the OpenManage Mobile user can re-subscribe to alert notifications from the OpenManage Mobile application at a later time.
NOTE: The administrator rights are required for deleting an OpenManage Mobile subscriber.
To delete an OpenManage Mobile subscriber:
1 Click OpenManage Enterprise > Application Settings > Mobile.
2 Select the check box corresponding to the subscriber name and click Delete.
3 When prompted, click Yes.
Related links
OpenManage Mobile settings
Delete an OpenManage Mobile subscriber
Enable or disable alert notifications for OpenManage Mobile
Enable or disable OpenManage Mobile subscribers
Delete an OpenManage Mobile subscriber
View the alert notification service status
View the alert notification service statusOpenManage Enterprise forwards alert notifications to OpenManage Mobile subscribers through their respective device platform alert notification service. If the OpenManage Mobile subscriber has failed to receive alert notifications, you can check the Notification Service Status to troubleshoot alert notification delivery.
To view the status of the alert notification service, click Application Settings > Mobile.
Related links
OpenManage Mobile settings
Delete an OpenManage Mobile subscriber
View the alert notification service status
View the alert notification service status
Notification service statusThe following table provides information about the Notification Service Status displayed on the Application Settings > Mobile page.
138 Managing OpenManage Enterprise appliance settings

Table 23. Notification service status
Status Icon Status Description
The service is running and operating normally.
NOTE: This service status only reflects successful communication with the platform notification service. If the device of the subscriber is not connected to the Internet or a cellular data service, notifications will not be delivered until the connection is restored.
The service experienced an error delivering a message which may be of a temporary nature. If the issue persists, follow troubleshooting procedures or contact technical support.
The service experienced an error delivering a message. Follow troubleshooting procedures or contact technical support as necessary.
View information about OpenManage Mobile subscribersAfter an OpenManage Mobile user successfully adds OpenManage Enterprise, the user is added to the Mobile Subscribers table in OpenManage Enterprise. To view information about the mobile subscribers, in OpenManage Enterprise, click Application Settings > Mobile.
You can also export the information about mobile subscribers to a .CSV file by using the Export drop-down list.
OpenManage Mobile subscriber informationThe following table provides information about the Mobile Subscribers table displayed on the Application Settings > Mobile page.
Table 24. OpenManage Mobile subscriber information
Field Description
ENABLED Select or clear the check box, and then click Enable or Disable respectively to enable or disable the alert notifications to an OpenManage Mobile subscriber.
STATUS Displays the status of the subscriber, indicating whether or not OpenManage Enterprise is able to send alert notifications successfully to the Alert Forwarding Service.
STATUS MESSAGE Status description of the status message.
USER NAME Name of the OpenManage Mobile user.
DEVICE ID Unique identifier of the mobile device.
DESCRIPTION Description about the mobile device.
FILTER Filters are policies that the subscriber has configured for alert notifications.
LAST ERROR The date and time the last error occurred when sending an alert notification to the OpenManage Mobile user.
Managing OpenManage Enterprise appliance settings 139

Field Description
LAST PUSH The date and time the last alert notification was sent successfully from OpenManage Enterprise to the Alert Forwarding Service.
LAST CONNECTION The date and time the user last accessed OpenManage Enterprise through OpenManage Mobile.
REGISTRATION The date and time the user added OpenManage Enterprise in OpenManage Mobile.
Troubleshooting OpenManage MobileIf OpenManage Enterprise is unable to register with the Message Forwarding Service or successfully forward notifications, the following resolutions are available:
Table 25. Troubleshooting OpenManage Mobile
Problem Reason Resolution
OpenManage Enterprise is unable to connect to the Dell Message Forwarding Service. [Code 1001/1002]
Outbound Internet (HTTPS) connectivity is lost.
By using a web browser, check if outbound Internet connectivity is available.
If connection is unavailable, complete the following network troubleshooting tasks:
• Verify if the network cables are connected.
• Verify the IP address and DNS server settings.
• Verify if the firewall is configured to allow outbound traffic.
• Verify if the ISP network is operating normally.
Proxy settings are incorrect. Set proxy host, port, username, and password as required.
Message Forwarding Service is temporarily unavailable.
Wait for the service to become available.
The Message Forwarding Service is unable to connect to a device platform notification service. [Code 100-105, 200-202, 211-212]
The platform provider service is temporarily unavailable to the Message Forwarding Service.
Wait for the service to become available.
The device communication token is no longer registered with the platform provider service. [Code 203]
The OpenManage Mobile application has been updated, restored, uninstalled, or the device operating system has been upgraded or restored.
Reinstall OpenManage Mobile on the device or follow the OpenManage Mobile troubleshooting procedures specified in the OpenManage Mobile User’s Guide and reconnect the device to OpenManage Enterprise.
If the device is no longer connected to OpenManage Enterprise, remove the subscriber.
The OpenManage Enterprise registration is being rejected by the Message Forwarding Service. [Code 154]
An obsolete version of OpenManage Enterprise is being used.
Upgrade to a newer version of OpenManage Enterprise.
140 Managing OpenManage Enterprise appliance settings

Related links
OpenManage Mobile settings
OpenManage Mobile settings
Managing OpenManage Enterprise appliance settings 141

Other references and field descriptionsDefinitions about some of the commonly displayed fields on the OpenManage Enterprise Graphical User Interface (GUI) are listed and defined in this chapter. Also, other information that is useful for further reference is described here.
Topics:
• Schedule Reference
• Firmware baseline field definitions
• Schedule job field definitions
• Token substitution in remote scripts and alert policy
• Field service debug workflow
• Unblock the FSD capability
• Install or grant a signed FSD DAT.ini file
• Invoke FSD
• Disable FSD
• Catalog Management field definitions
Schedule Reference
• Update Now: The firmware version is updated and matched to the version available in the associated catalog. To make the update become effective during the next device restart, select the Stage for next server reboot check box.
• Schedule Later: Select to specify a date and time when the firmware version must be updated.
Firmware baseline field definitions
• COMPLIANCE: The health status of the firmware baseline. Even if one device associated with a firmware baseline is in critical health status, the baseline health itself is declared as critical. This is called the rollup health status, which is equal to the status of the baseline that has high severity. For more information about Rollup Health status, see the MANAGING THE ROLLUP HEALTH STATUS BY USING IDRAC ON THE DELL EMC 14TH GENERATION AND LATER POWEREDGE SERVERS white paper on the Dell TechCenter.
• NAME: The firmware baseline name. Click to view the baseline compliance report on the Compliance Report page. For more information about creating a firmware baseline, see Create a firmware baseline.
• CATALOG: The firmware catalog to which the firmware baseline belongs to. See Manage firmware Catalogs.
• LAST RUN TIME: The time when the baseline compliance report is last run. See Check the compliance of a device firmware against its baseline.
Schedule job field definitions
• Run now to start the job immediately.
• Run Later to specify a later date and time.
• Run On Schedule to run repeatedly based on a selected frequency. Select Daily, and then select the frequency appropriately.
20
142 Other references and field descriptions

NOTE: By default, the job scheduler clock is reset at 12:00 A.M. everyday. The cron format does not consider the job creation time while calculating the job frequency. For example, if a job is started at 10:00 A.M. to run after every 10 hours, the next time the job runs is at 08:00 P.M. However, the subsequent time is not 06:00 A.M. next day but 12:00 A.M. This is because the scheduler clock is reset at 12:00 A.M. everyday.
Token substitution in remote scripts and alert policyOpenManage Enterprise supports use of tokens to enhance remote scripting and creation of the alert policies.
Table 26. Tokens supported in OpenManage Enterprise
Tokens Description
$IP Device IP Address
$MSG Message
$DATE Date
$TIME Time
$SEVERITY Severity
$SERVICETAG Service tag
$RESOLUTION Recommended Resolution
$CATEGORY Alert Category Name
$ASSETTAG Asset tag
$MODEL Model Name
Field service debug workflowIn OpenManage Enterprise, you can authorize console debugging by using the Field Service Debug (FSD) option.By using FSD, you can perform the following tasks:
• Allow enabling and copying of debug logs
• Allow copying of real-time logs
• Allow backing up or restoring of database to VM.
The topics referenced in each task provide detailed instructions. To enable FSD, perform the following tasks:
1 Unblock FSD capability. See Unblock the FSD capability.
2 Install or grant signed FSD DAT.ini file. See Install or grant a signed FSD DAT.ini file.
3 Invoke FSD. See Invoke FSD.
4 Disable FSD. See Disable FSD.
Unblock the FSD capabilityYou can unblock the FSD capability through the TUI screen.
1 Navigate to the TUI main menu.
2 On the TUI screen, to use the FSD option, select Enable Field Service Debug (FSD) Mode.
3 To generate a new FSD unblock request, on the FSD Functions screen, select Unblock FSD Capabilities
4 To determine the duration of the debug capabilities being requested, select a start and end date.
5 On the Choose Requested Debug Capabilities screen, select a debug capability from a list of debug capabilities unique to the console. In the lower-right corner, select Generate.
Other references and field descriptions 143

NOTE: The debug capability that is current supported is, RootShell.
6 On the Download DAT file screen, view the signing instructions and the URL address of the share where the DAT.ini file exists.
7 Use an external client to extract the DAT.ini file from the URL address of the share mentioned in step 6.
NOTE: The download share directory has read-only privileges and supports only one DAT.ini file at a time.
8 Perform either of the following tasks depending on whether you are an external user or an internal Dell EMC user:
• Send the DAT.ini file to a Dell EMC contact for signing if you are an external user.
• Upload the DAT.ini file to appropriate Dell Field Service Debug Authentication Facility (FSDAF) and submit.
9 Wait for a Dell EMC signed and approved DAT.ini file to be returned.
Install or grant a signed FSD DAT.ini fileEnsure that you have received the DAT.ini file, which is signed and approved by Dell EMC.
NOTE: After Dell EMC approves the DAT.ini file, you must upload the file to the console appliance that generated the original unblock command.
1 To upload a signed DAT.ini file, on the FSD Functions screen, select Install/Grant Signed FSD DAT File.
NOTE: The upload share directory has write-only privileges and supports only one DAT.ini file at a time. The DAT.ini file size limit is 4 KB.
2 On the Upload signed DAT file screen, follow the instructions about uploading the DAT.ini file to a given file share URL.
3 Use an external client to upload the DAT.ini file to a share location.
4 On the Upload signed DAT file screen, select I have uploaded the FSD DAT file.
If there are no errors during DAT.ini file upload, a message confirming the successful installation of the certificate is displayed. To continue, click OK.
The DAT.ini file upload can fail because of any of the following reasons:
• The upload share directory has insufficient disk space.
• The uploaded DAT.ini file does not correspond to the previous debug capability request.
• The signature provided by Dell EMC for the DAT.ini file is not valid.
Invoke FSDEnsure that the DAT.ini file is signed, returned by Dell EMC, and uploaded to OpenManage Enterprise.
1 To invoke a debug capability, on the FSD Functions screen, select Invoke FSD Capabilities.
2 On the Invoke Requested Debug Capabilities screen, select a debug capability from a list of debug capabilities that is approved in the Dell EMC signed DAT.ini file. In the lower-right corner, click Invoke.
NOTE: The debug capability that is currently supported is, RootShell.
While the invoke command is run, OpenManage Enterprise can start an SSH daemon. The external SSH client can attach with OpenManage Enterprise for debugging purposes.
Disable FSDAfter you invoke a debug capability on a console, it continues to operate until the console is restarted, or the debug capability is stopped. Else, the duration determined from the start and end date exceeds.
1 To stop the debug capabilities, on the FSD Functions screen, select Disable Debug Capabilities.
2 On the Disable Invoked Debug Capabilities screen, select a debug capability or capabilities from a list of currently invoked debug capabilities. From the lower right corner of the screen, select Disable.
144 Other references and field descriptions

Ensure that you stop any SSH daemon or SSH sessions that are currently using the debug capability.
Catalog Management field definitionsCATALOG NAME: Name of the catalog. Built-in catalogs cannot be edited.
DOWNLOAD: Indicates the download status of catalogs from its repository folder. Statuses are: Completed, Running, and Failed.
REPOSITORY: Repository types such as Dell.com, CIFS, and NFS.
REPOSITORY LOCATION: Location where the catalogs are saved. Examples are Dell.com, CIFS, and NFS. Also, indicates the completion status of a job running on the catalog.
CATALOG FILE: Type of catalog file.
RELEASE DATE: Date when the catalog file is released for use.
Other references and field descriptions 145