Developing Predictive Equations for Water Capturing ... - MDPI
Upload
khangminh22Category
view
1download
0
LENOVO THINKSTATION
CAPTURING RAID 1 DEGRADATION USING MICROSOFT EVENT MANAGER
Contents
OVERVIEW
SECTION 1 – CHECKING THE RAID1 STATUS MANUALLY
SECTION 2 – PREPARATION
SECTION 3 – CREATING THE RAID TASK
SECTION 4 – DOCUMENT REVISION HISTORY
Overview
Whenever a RAID configuration is setup, it is important to make sure that the RAID
functionality is enabled, and the RAID is fully functional. For an instance, if you have
RAID1 configuration it is best practice to check that the RAID1 is functional and not in a
“degraded” mode.
This document provides a step by step guide to capture a status change of an Intel RST
RAID1 configuration from normal operation to a degraded condition. For compatibility
reasons, only standard Microsoft Windows 10 tools are used to realize this functionality.
This document was created and tested using:
Lenovo ThinkStation P330 Gen1
Microsoft Windows 10 Pro (1903)
Intel RAID/AHCI Driver version: 17.5.0.1017
Section 1 – Checking the RAID status manually
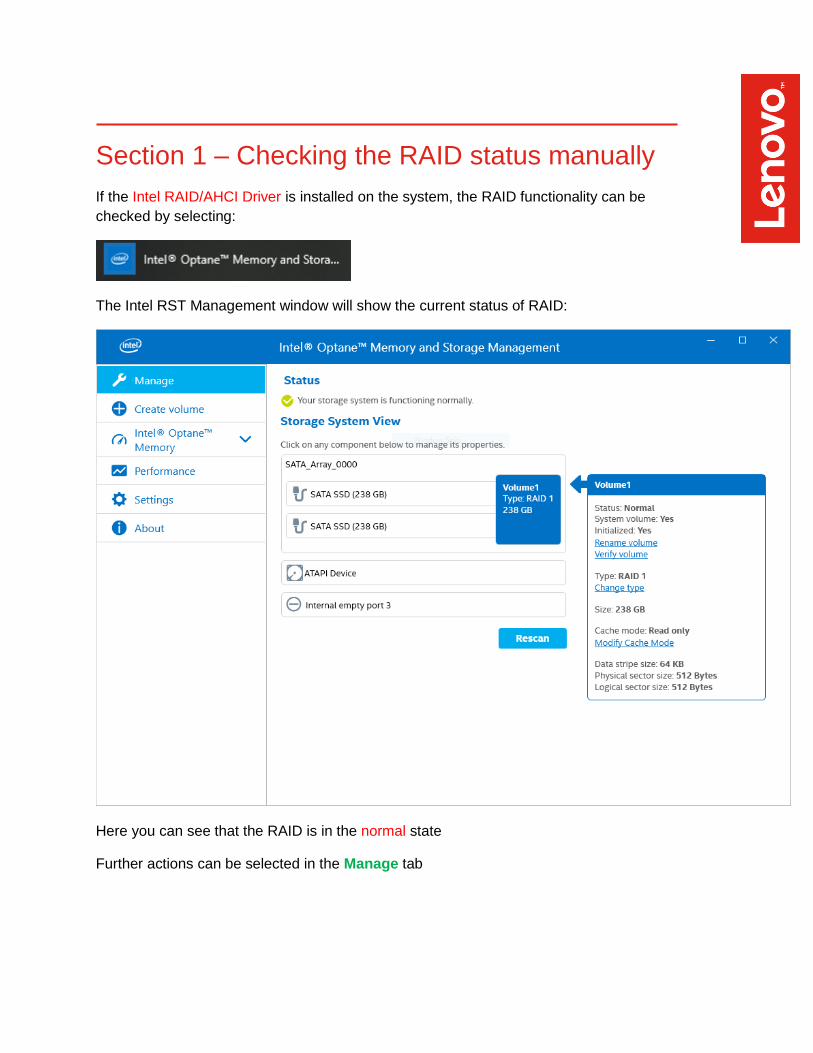
If the Intel RAID/AHCI Driver is installed on the system, the RAID functionality can be
checked by selecting:
The Intel RST Management window will show the current status of RAID:
Here you can see that the RAID is in the normal state
Further actions can be selected in the Manage tab

Section 2 – Preparation
Using the event notification, we need a small script that will push a message popup to the
screen. Use your choice of text editor and create a file with a similar content
Save this file as yourname.bat in a directory and execute it once to see the popup
message
Section 3 – Creating the RAID task
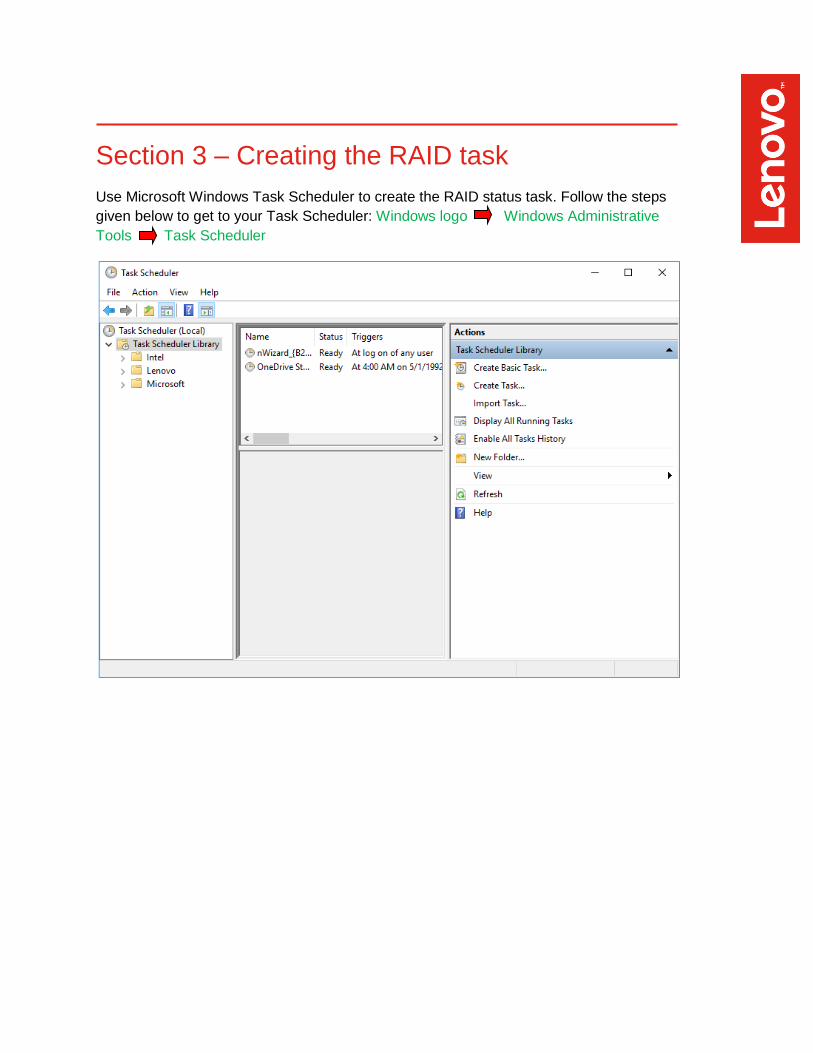
Use Microsoft Windows Task Scheduler to create the RAID status task. Follow the steps
given below to get to your Task Scheduler: Windows logo Windows Administrative
Tools Task Scheduler

Select Create Task to create a new task
- Assign a name to the task
- Write a short description to define the functionality of the task
- Select Run whether user is logged on or not and Do not store password
- Select Windows 10 in the Configure for option
Note: Do not hit OK yet as the task definition is currently not complete!
Select the Triggers tab as next

In the Trigger window select New
- Select On an event under Begin the task field
- Select System under Log field
- Select iaStorAC under Source field
- Type in the event id: 129
- Hit OK

Select the Actions tab as next
In the Action window select New
- Select Start a program in the Action field
- Browse to the file location of your previously created script
- Hit OK
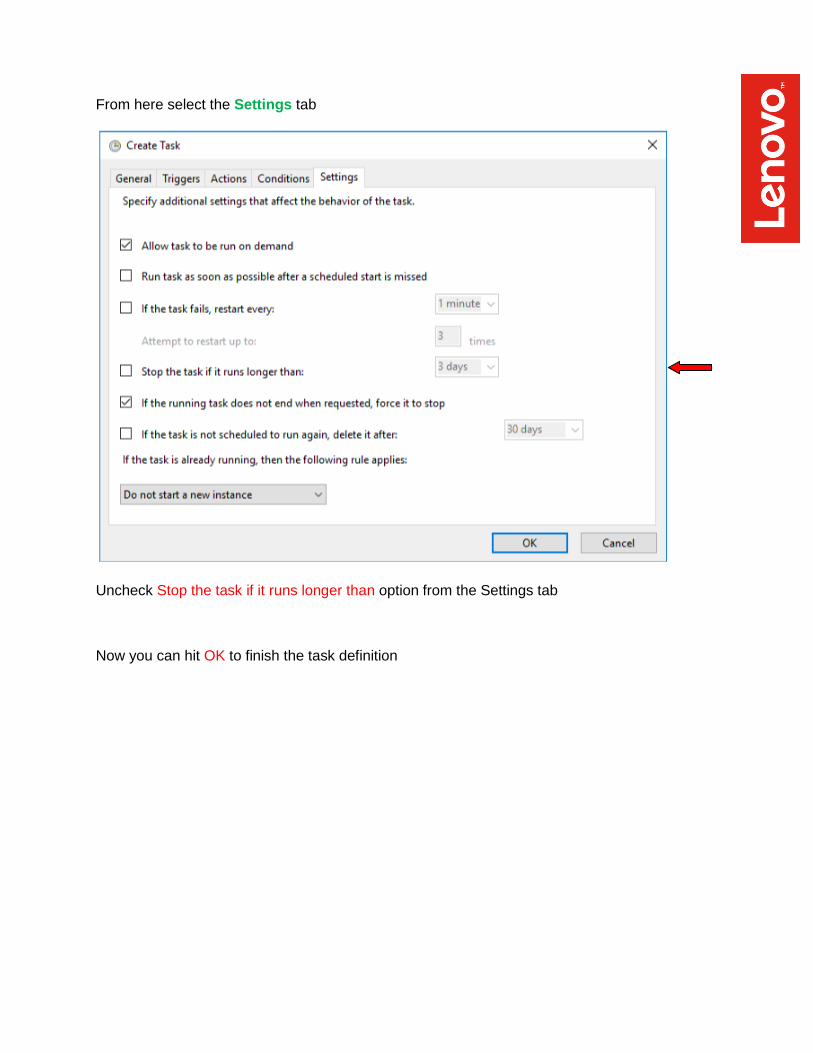
From here select the Settings tab
Uncheck Stop the task if it runs longer than option from the Settings tab
Now you can hit OK to finish the task definition
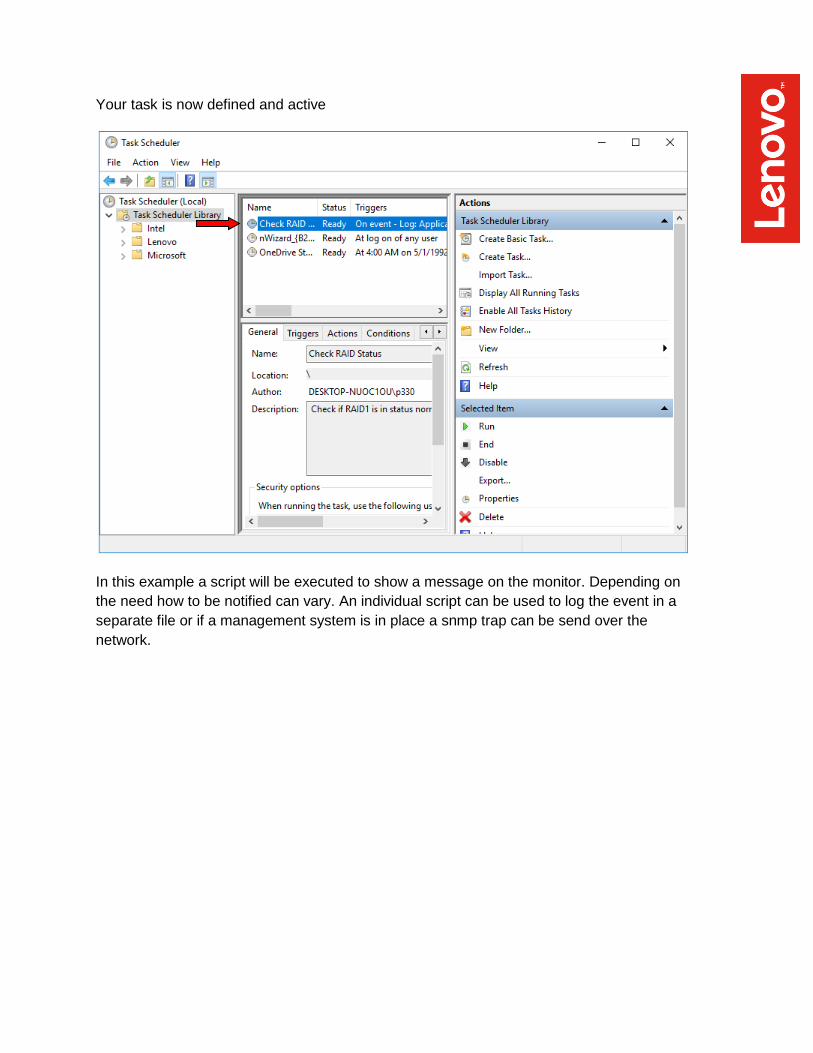
Your task is now defined and active
In this example a script will be executed to show a message on the monitor. Depending on
the need how to be notified can vary. An individual script can be used to log the event in a
separate file or if a management system is in place a snmp trap can be send over the
network.

Section 4 – Document Revision History
Version Date Author Changes/Updates
1.0 11/27/2019 Gregor Linzmeier Initial launch release
Copyright © 2022 FDOKUMEN