
Application Help for SAP Predictive Maintenance and Service ...
410
PUBLIC Document Version: 1.00 – 2019-07-10 Application Help for SAP Predictive Maintenance and Service, cloud edition © 2019 SAP SE or an SAP affiliate company. All rights reserved. THE BEST RUN
-
Upload
khangminh22 -
Category
Documents
-
view
1 -
download
0
Transcript of Application Help for SAP Predictive Maintenance and Service ...

PUBLICDocument Version: 1.00 – 2019-07-10
Application Help for SAP Predictive Maintenance and Service, cloud edition
© 2
019
SAP
SE o
r an
SAP affi
liate
com
pany
. All
right
s re
serv
ed.
THE BEST RUN

Content
1 SAP Predictive Maintenance and Service, cloud edition 1906. . . . . . . . . . . . . . . . . . . . . . . . . . .61.1 Accessing Applications and Functions . . . . . . . . . . . . . . . . . . . . . . . . . . . . . . . . . . . . . . . . . . . . . . 71.2 Terminology. . . . . . . . . . . . . . . . . . . . . . . . . . . . . . . . . . . . . . . . . . . . . . . . . . . . . . . . . . . . . . . . .8
2 SAP Fiori Launchpad with SAP Predictive Maintenance and Service, cloud edition. . . . . . . . . . .9
3 Analytics. . . . . . . . . . . . . . . . . . . . . . . . . . . . . . . . . . . . . . . . . . . . . . . . . . . . . . . . . . . . . . . . . .123.1 Explorer. . . . . . . . . . . . . . . . . . . . . . . . . . . . . . . . . . . . . . . . . . . . . . . . . . . . . . . . . . . . . . . . . . . 12
Analysis Tools. . . . . . . . . . . . . . . . . . . . . . . . . . . . . . . . . . . . . . . . . . . . . . . . . . . . . . . . . . . . 14Explorer Global Filter. . . . . . . . . . . . . . . . . . . . . . . . . . . . . . . . . . . . . . . . . . . . . . . . . . . . . . . 35
3.2 Features in Indicator Chart. . . . . . . . . . . . . . . . . . . . . . . . . . . . . . . . . . . . . . . . . . . . . . . . . . . . . 383.3 Equipment Page. . . . . . . . . . . . . . . . . . . . . . . . . . . . . . . . . . . . . . . . . . . . . . . . . . . . . . . . . . . . . 453.4 Failure Mode Analytics. . . . . . . . . . . . . . . . . . . . . . . . . . . . . . . . . . . . . . . . . . . . . . . . . . . . . . . . 46
Using Failure Mode Analytics. . . . . . . . . . . . . . . . . . . . . . . . . . . . . . . . . . . . . . . . . . . . . . . . . .473.5 Personal Dashboard. . . . . . . . . . . . . . . . . . . . . . . . . . . . . . . . . . . . . . . . . . . . . . . . . . . . . . . . . . 553.6 Analytics Dashboards. . . . . . . . . . . . . . . . . . . . . . . . . . . . . . . . . . . . . . . . . . . . . . . . . . . . . . . . . 55
Viewing Analytics Dashboards in the Application. . . . . . . . . . . . . . . . . . . . . . . . . . . . . . . . . . . .57Viewing Analytics Dashboards on Object Pages. . . . . . . . . . . . . . . . . . . . . . . . . . . . . . . . . . . . 58
3.7 Emerging Issue Detection (EID). . . . . . . . . . . . . . . . . . . . . . . . . . . . . . . . . . . . . . . . . . . . . . . . . . 59
4 Processes. . . . . . . . . . . . . . . . . . . . . . . . . . . . . . . . . . . . . . . . . . . . . . . . . . . . . . . . . . . . . . . . .604.1 Performance Improvement. . . . . . . . . . . . . . . . . . . . . . . . . . . . . . . . . . . . . . . . . . . . . . . . . . . . . 60
Creating an Improvement Request. . . . . . . . . . . . . . . . . . . . . . . . . . . . . . . . . . . . . . . . . . . . . 62Reviewing an Improvement Request. . . . . . . . . . . . . . . . . . . . . . . . . . . . . . . . . . . . . . . . . . . . 63Completing an Improvement Request. . . . . . . . . . . . . . . . . . . . . . . . . . . . . . . . . . . . . . . . . . . 64Resubmitting an Improvement Request. . . . . . . . . . . . . . . . . . . . . . . . . . . . . . . . . . . . . . . . . . 64Confirming an Improvement Request. . . . . . . . . . . . . . . . . . . . . . . . . . . . . . . . . . . . . . . . . . . 65Viewing the List of Improvement Requests. . . . . . . . . . . . . . . . . . . . . . . . . . . . . . . . . . . . . . . . 66Deleting an Improvement Request. . . . . . . . . . . . . . . . . . . . . . . . . . . . . . . . . . . . . . . . . . . . . .66
4.2 Obsolescence Management. . . . . . . . . . . . . . . . . . . . . . . . . . . . . . . . . . . . . . . . . . . . . . . . . . . . . 67Viewing the Obsolescence Management. . . . . . . . . . . . . . . . . . . . . . . . . . . . . . . . . . . . . . . . . 67
4.3 Lookup. . . . . . . . . . . . . . . . . . . . . . . . . . . . . . . . . . . . . . . . . . . . . . . . . . . . . . . . . . . . . . . . . . . 68Managing Lookup. . . . . . . . . . . . . . . . . . . . . . . . . . . . . . . . . . . . . . . . . . . . . . . . . . . . . . . . . 69
4.4 Smart Matcher. . . . . . . . . . . . . . . . . . . . . . . . . . . . . . . . . . . . . . . . . . . . . . . . . . . . . . . . . . . . . . 70Performing a Smart Match. . . . . . . . . . . . . . . . . . . . . . . . . . . . . . . . . . . . . . . . . . . . . . . . . . . 70
5 Master Data. . . . . . . . . . . . . . . . . . . . . . . . . . . . . . . . . . . . . . . . . . . . . . . . . . . . . . . . . . . . . . . 715.1 Equipment. . . . . . . . . . . . . . . . . . . . . . . . . . . . . . . . . . . . . . . . . . . . . . . . . . . . . . . . . . . . . . . . . 72
2 P U B L I CApplication Help for SAP Predictive Maintenance and Service, cloud edition
Content

Managing Equipment. . . . . . . . . . . . . . . . . . . . . . . . . . . . . . . . . . . . . . . . . . . . . . . . . . . . . . . 725.2 Models. . . . . . . . . . . . . . . . . . . . . . . . . . . . . . . . . . . . . . . . . . . . . . . . . . . . . . . . . . . . . . . . . . .103
Managing Models. . . . . . . . . . . . . . . . . . . . . . . . . . . . . . . . . . . . . . . . . . . . . . . . . . . . . . . . .1045.3 Locations. . . . . . . . . . . . . . . . . . . . . . . . . . . . . . . . . . . . . . . . . . . . . . . . . . . . . . . . . . . . . . . . . 119
Creating a Location. . . . . . . . . . . . . . . . . . . . . . . . . . . . . . . . . . . . . . . . . . . . . . . . . . . . . . . 120Updating a Location. . . . . . . . . . . . . . . . . . . . . . . . . . . . . . . . . . . . . . . . . . . . . . . . . . . . . . . 123Deleting a Location. . . . . . . . . . . . . . . . . . . . . . . . . . . . . . . . . . . . . . . . . . . . . . . . . . . . . . . . 124Viewing Work Orders of a Location. . . . . . . . . . . . . . . . . . . . . . . . . . . . . . . . . . . . . . . . . . . . . 125Viewing Notifications of Location. . . . . . . . . . . . . . . . . . . . . . . . . . . . . . . . . . . . . . . . . . . . . . 126
5.4 Functions. . . . . . . . . . . . . . . . . . . . . . . . . . . . . . . . . . . . . . . . . . . . . . . . . . . . . . . . . . . . . . . . . 127Creating and Editing Functions. . . . . . . . . . . . . . . . . . . . . . . . . . . . . . . . . . . . . . . . . . . . . . . .127Deleting Functions. . . . . . . . . . . . . . . . . . . . . . . . . . . . . . . . . . . . . . . . . . . . . . . . . . . . . . . . 128
5.5 Failure Modes. . . . . . . . . . . . . . . . . . . . . . . . . . . . . . . . . . . . . . . . . . . . . . . . . . . . . . . . . . . . . . 128Managing Failure Modes. . . . . . . . . . . . . . . . . . . . . . . . . . . . . . . . . . . . . . . . . . . . . . . . . . . . 129
5.6 Fingerprints. . . . . . . . . . . . . . . . . . . . . . . . . . . . . . . . . . . . . . . . . . . . . . . . . . . . . . . . . . . . . . . 137Creating a Fingerprint. . . . . . . . . . . . . . . . . . . . . . . . . . . . . . . . . . . . . . . . . . . . . . . . . . . . . . 137Viewing a Fingerprint. . . . . . . . . . . . . . . . . . . . . . . . . . . . . . . . . . . . . . . . . . . . . . . . . . . . . . 138Editing a Fingerprint. . . . . . . . . . . . . . . . . . . . . . . . . . . . . . . . . . . . . . . . . . . . . . . . . . . . . . . 139Deleting a Fingerprint. . . . . . . . . . . . . . . . . . . . . . . . . . . . . . . . . . . . . . . . . . . . . . . . . . . . . . 140
5.7 Spare Parts. . . . . . . . . . . . . . . . . . . . . . . . . . . . . . . . . . . . . . . . . . . . . . . . . . . . . . . . . . . . . . . . 141Managing Spare Parts. . . . . . . . . . . . . . . . . . . . . . . . . . . . . . . . . . . . . . . . . . . . . . . . . . . . . . 141
5.8 Groups. . . . . . . . . . . . . . . . . . . . . . . . . . . . . . . . . . . . . . . . . . . . . . . . . . . . . . . . . . . . . . . . . . . 151Managing Groups. . . . . . . . . . . . . . . . . . . . . . . . . . . . . . . . . . . . . . . . . . . . . . . . . . . . . . . . . 152
5.9 Systems. . . . . . . . . . . . . . . . . . . . . . . . . . . . . . . . . . . . . . . . . . . . . . . . . . . . . . . . . . . . . . . . . . 158Managing Systems. . . . . . . . . . . . . . . . . . . . . . . . . . . . . . . . . . . . . . . . . . . . . . . . . . . . . . . . 159
5.10 Documents. . . . . . . . . . . . . . . . . . . . . . . . . . . . . . . . . . . . . . . . . . . . . . . . . . . . . . . . . . . . . . . . 167Uploading a Document. . . . . . . . . . . . . . . . . . . . . . . . . . . . . . . . . . . . . . . . . . . . . . . . . . . . . 168Maintaining Different Language Versions of a Document. . . . . . . . . . . . . . . . . . . . . . . . . . . . . .172Editing Document Attributes. . . . . . . . . . . . . . . . . . . . . . . . . . . . . . . . . . . . . . . . . . . . . . . . . 173Updating a Document. . . . . . . . . . . . . . . . . . . . . . . . . . . . . . . . . . . . . . . . . . . . . . . . . . . . . . 173Assigning Documents to Business Objects. . . . . . . . . . . . . . . . . . . . . . . . . . . . . . . . . . . . . . . 176Deleting a Document. . . . . . . . . . . . . . . . . . . . . . . . . . . . . . . . . . . . . . . . . . . . . . . . . . . . . . 177Creating Hotspots. . . . . . . . . . . . . . . . . . . . . . . . . . . . . . . . . . . . . . . . . . . . . . . . . . . . . . . . 178Guided Procedures. . . . . . . . . . . . . . . . . . . . . . . . . . . . . . . . . . . . . . . . . . . . . . . . . . . . . . . . 179
5.11 Announcements. . . . . . . . . . . . . . . . . . . . . . . . . . . . . . . . . . . . . . . . . . . . . . . . . . . . . . . . . . . . 191Managing Announcements. . . . . . . . . . . . . . . . . . . . . . . . . . . . . . . . . . . . . . . . . . . . . . . . . . 192
5.12 Instructions. . . . . . . . . . . . . . . . . . . . . . . . . . . . . . . . . . . . . . . . . . . . . . . . . . . . . . . . . . . . . . . 198Managing Instructions. . . . . . . . . . . . . . . . . . . . . . . . . . . . . . . . . . . . . . . . . . . . . . . . . . . . . 199
5.13 Templates. . . . . . . . . . . . . . . . . . . . . . . . . . . . . . . . . . . . . . . . . . . . . . . . . . . . . . . . . . . . . . . . 209Managing Templates. . . . . . . . . . . . . . . . . . . . . . . . . . . . . . . . . . . . . . . . . . . . . . . . . . . . . . . 211
5.14 Rules. . . . . . . . . . . . . . . . . . . . . . . . . . . . . . . . . . . . . . . . . . . . . . . . . . . . . . . . . . . . . . . . . . . . 244
Application Help for SAP Predictive Maintenance and Service, cloud editionContent P U B L I C 3

Creating Rules. . . . . . . . . . . . . . . . . . . . . . . . . . . . . . . . . . . . . . . . . . . . . . . . . . . . . . . . . . . 245Rule Management . . . . . . . . . . . . . . . . . . . . . . . . . . . . . . . . . . . . . . . . . . . . . . . . . . . . . . . . 247
5.15 State Transitions. . . . . . . . . . . . . . . . . . . . . . . . . . . . . . . . . . . . . . . . . . . . . . . . . . . . . . . . . . . .2495.16 Creating Revisions and Switching Between Revisions and Published State. . . . . . . . . . . . . . . . . . . 2495.17 Export to Excel. . . . . . . . . . . . . . . . . . . . . . . . . . . . . . . . . . . . . . . . . . . . . . . . . . . . . . . . . . . . . 250
6 Machine Learning Engine. . . . . . . . . . . . . . . . . . . . . . . . . . . . . . . . . . . . . . . . . . . . . . . . . . . . 2516.1 Configuring Data Sets for Equipment Health Indicators. . . . . . . . . . . . . . . . . . . . . . . . . . . . . . . . . 251
Entries to Configure a Data Set. . . . . . . . . . . . . . . . . . . . . . . . . . . . . . . . . . . . . . . . . . . . . . . 254Calculation of Features. . . . . . . . . . . . . . . . . . . . . . . . . . . . . . . . . . . . . . . . . . . . . . . . . . . . . 256
6.2 Managing Models for Equipment Health Indicators. . . . . . . . . . . . . . . . . . . . . . . . . . . . . . . . . . . .257Configuring a Model. . . . . . . . . . . . . . . . . . . . . . . . . . . . . . . . . . . . . . . . . . . . . . . . . . . . . . . 258Training a Model. . . . . . . . . . . . . . . . . . . . . . . . . . . . . . . . . . . . . . . . . . . . . . . . . . . . . . . . . 303Scoring a Model. . . . . . . . . . . . . . . . . . . . . . . . . . . . . . . . . . . . . . . . . . . . . . . . . . . . . . . . . 309
6.3 Managing Models for Failure Mode Analytics. . . . . . . . . . . . . . . . . . . . . . . . . . . . . . . . . . . . . . . . 312Configuring a Model. . . . . . . . . . . . . . . . . . . . . . . . . . . . . . . . . . . . . . . . . . . . . . . . . . . . . . . 314Training a Model. . . . . . . . . . . . . . . . . . . . . . . . . . . . . . . . . . . . . . . . . . . . . . . . . . . . . . . . . 322Scoring a Model. . . . . . . . . . . . . . . . . . . . . . . . . . . . . . . . . . . . . . . . . . . . . . . . . . . . . . . . . .326
6.4 Validating Failure Mode Analytics. . . . . . . . . . . . . . . . . . . . . . . . . . . . . . . . . . . . . . . . . . . . . . . . 3286.5 Managing Models for Leading Indicators. . . . . . . . . . . . . . . . . . . . . . . . . . . . . . . . . . . . . . . . . . . 330
Configuring a Model. . . . . . . . . . . . . . . . . . . . . . . . . . . . . . . . . . . . . . . . . . . . . . . . . . . . . . . 331Training a Model. . . . . . . . . . . . . . . . . . . . . . . . . . . . . . . . . . . . . . . . . . . . . . . . . . . . . . . . . 335
7 Administration. . . . . . . . . . . . . . . . . . . . . . . . . . . . . . . . . . . . . . . . . . . . . . . . . . . . . . . . . . . . 3387.1 Managing Company Profile. . . . . . . . . . . . . . . . . . . . . . . . . . . . . . . . . . . . . . . . . . . . . . . . . . . . 338
Adding Location Details of your Organization. . . . . . . . . . . . . . . . . . . . . . . . . . . . . . . . . . . . . 339Updating Location Details of your Organization. . . . . . . . . . . . . . . . . . . . . . . . . . . . . . . . . . . .340Deleting Location Details of your Organization. . . . . . . . . . . . . . . . . . . . . . . . . . . . . . . . . . . . .341Creating Subsidiary Details. . . . . . . . . . . . . . . . . . . . . . . . . . . . . . . . . . . . . . . . . . . . . . . . . . 341Viewing Company Profile. . . . . . . . . . . . . . . . . . . . . . . . . . . . . . . . . . . . . . . . . . . . . . . . . . . 344Recording Industry ID Information. . . . . . . . . . . . . . . . . . . . . . . . . . . . . . . . . . . . . . . . . . . . .344Editing Company Profile. . . . . . . . . . . . . . . . . . . . . . . . . . . . . . . . . . . . . . . . . . . . . . . . . . . . 345
7.2 Configuring the Document Category. . . . . . . . . . . . . . . . . . . . . . . . . . . . . . . . . . . . . . . . . . . . . .3477.3 Application Settings. . . . . . . . . . . . . . . . . . . . . . . . . . . . . . . . . . . . . . . . . . . . . . . . . . . . . . . . . 348
Configuration Tasks. . . . . . . . . . . . . . . . . . . . . . . . . . . . . . . . . . . . . . . . . . . . . . . . . . . . . . . 3497.4 User Authorizations. . . . . . . . . . . . . . . . . . . . . . . . . . . . . . . . . . . . . . . . . . . . . . . . . . . . . . . . . 359
Tasks in SAP Leonardo IoT. . . . . . . . . . . . . . . . . . . . . . . . . . . . . . . . . . . . . . . . . . . . . . . . . . 363Creating Organizational Hierarchy. . . . . . . . . . . . . . . . . . . . . . . . . . . . . . . . . . . . . . . . . . . . . 365Assigning Business Objects . . . . . . . . . . . . . . . . . . . . . . . . . . . . . . . . . . . . . . . . . . . . . . . . . 366Assigning Groups. . . . . . . . . . . . . . . . . . . . . . . . . . . . . . . . . . . . . . . . . . . . . . . . . . . . . . . . .367Deleting an Organizational Unit. . . . . . . . . . . . . . . . . . . . . . . . . . . . . . . . . . . . . . . . . . . . . . . 368Assigning Role Collections . . . . . . . . . . . . . . . . . . . . . . . . . . . . . . . . . . . . . . . . . . . . . . . . . . 368
4 P U B L I CApplication Help for SAP Predictive Maintenance and Service, cloud edition
Content

7.5 Data Protection and Privacy (DPP). . . . . . . . . . . . . . . . . . . . . . . . . . . . . . . . . . . . . . . . . . . . . . . 369Information Report . . . . . . . . . . . . . . . . . . . . . . . . . . . . . . . . . . . . . . . . . . . . . . . . . . . . . . . 369
8 Configuring SAP Predictive Maintenance and Service, cloud edition. . . . . . . . . . . . . . . . . . . . 3718.1 Accessing Applications and Functions . . . . . . . . . . . . . . . . . . . . . . . . . . . . . . . . . . . . . . . . . . . . .3718.2 Equipment Modelling. . . . . . . . . . . . . . . . . . . . . . . . . . . . . . . . . . . . . . . . . . . . . . . . . . . . . . . . .3728.3 Creating Equipment. . . . . . . . . . . . . . . . . . . . . . . . . . . . . . . . . . . . . . . . . . . . . . . . . . . . . . . . . 3738.4 Equipment Alarms. . . . . . . . . . . . . . . . . . . . . . . . . . . . . . . . . . . . . . . . . . . . . . . . . . . . . . . . . . 3738.5 Creating Alerts. . . . . . . . . . . . . . . . . . . . . . . . . . . . . . . . . . . . . . . . . . . . . . . . . . . . . . . . . . . . . 3748.6 Configuring SAP Analytics Cloud and Analytics Dashboards. . . . . . . . . . . . . . . . . . . . . . . . . . . . . 378
Creating a Destination for SAP Analytics Cloud. . . . . . . . . . . . . . . . . . . . . . . . . . . . . . . . . . . .380Configuring Analytics Dashboard Types. . . . . . . . . . . . . . . . . . . . . . . . . . . . . . . . . . . . . . . . . 382
8.7 Explorer and Analysis Tools Configuration. . . . . . . . . . . . . . . . . . . . . . . . . . . . . . . . . . . . . . . . . . 386Preconfigured Variants. . . . . . . . . . . . . . . . . . . . . . . . . . . . . . . . . . . . . . . . . . . . . . . . . . . . .388Entries to Configure Alerts. . . . . . . . . . . . . . . . . . . . . . . . . . . . . . . . . . . . . . . . . . . . . . . . . . 389Entries to Configure Equipment Indicators . . . . . . . . . . . . . . . . . . . . . . . . . . . . . . . . . . . . . . . 391Entries to Configure the Explorer. . . . . . . . . . . . . . . . . . . . . . . . . . . . . . . . . . . . . . . . . . . . . . 392Entries to Configure the Explorer Global Filter. . . . . . . . . . . . . . . . . . . . . . . . . . . . . . . . . . . . .393Entries to Configure the Indicator Chart. . . . . . . . . . . . . . . . . . . . . . . . . . . . . . . . . . . . . . . . . 394Entries to Configure the Map. . . . . . . . . . . . . . . . . . . . . . . . . . . . . . . . . . . . . . . . . . . . . . . . 396Entries to Configure Notifications. . . . . . . . . . . . . . . . . . . . . . . . . . . . . . . . . . . . . . . . . . . . . 402Entries to Configure Work Orders. . . . . . . . . . . . . . . . . . . . . . . . . . . . . . . . . . . . . . . . . . . . . 403Entries to Configure Equipment Scores (Obsolete). . . . . . . . . . . . . . . . . . . . . . . . . . . . . . . . . 405
Application Help for SAP Predictive Maintenance and Service, cloud editionContent P U B L I C 5

1 SAP Predictive Maintenance and Service, cloud edition 1906
SAP Predictive Maintenance and Service, cloud edition is an Internet of Things (IoT) application. You can reach all the functions from the SAP Fiori launchpad.
The business benefits include:
● Avoidance of costly disruptions by predicting equipment malfunctions before they happen by processing huge volumes of information technology (IT) and operational technology (OT) data using sophisticated machine learning algorithms.
● Use insights from sensor data to improve product quality, reliability, and customer satisfaction● Manage complex asset (equipment) structures● Build an asset network collaboration for better service and maintenance processes
The functions are organised in the following categories:
● Processes [page 60]● Master Data [page 71]● Administration [page 338]● Machine Learning Engine [page 251]● Analytics [page 12]
Supported UI Languages
The following UI languages are supported:
● English (default UI language)● German● Italian● Simplified Chinese (locale: zh-CN)● Japanese● French● Russian● Spanish● Czech Republic (locale: cs-CZ)● Korean (locale: ko-KR)● Hungarian (locale: hu-HU)● Polish (pl)● Portuguese (pt-BR)
The language in which the UI is displayed depends on the language you have set in your browser settings. If you have set a language that is not one of the supported languages, the UI of SAP Predictive Maintenance and Service, cloud edition is displayed in the default language.
6 P U B L I CApplication Help for SAP Predictive Maintenance and Service, cloud edition
SAP Predictive Maintenance and Service, cloud edition 1906

1.1 Accessing Applications and Functions
Here is an overview of how to reach the various applications and functions for SAP Predictive Maintenance and Service, cloud edition
Access URLs
You can access the SAP Fiori launchpad URLs by choosing Go to Application on the subscription applications in SAP Cloud Platform Cockpit. For more information, see Setting up Account.
The SAP Fiori launchpad URLs give you access to all the available applications. There are two types of SAP Fiori launchpad available. The individual SAP Fiori launchpad for SAP Predictive Maintenance and Service, cloud edition and the SAP Intelligent Asset Management Fiori launchpad that includes the applications from the SAP Intelligent Asset Management relevant products on a single SAP Fiori launchpad based on your subscriptions.
The following table provides you with an overview of all URLs depending on your licenses:
Access To URL
SAP Predictive Maintenance and Service Fiori launchpad for a standard license
https://<subaccount>.pdms-sap.cfapps.eu10.hana.ondemand.com
SAP Predictive Maintenance and Service Fiori launchpad for a test and demo license
https://<subaccount>.pdms-sap-pr.cfapps.eu10.hana.ondemand.com
SAP Intelligent Asset Management Fiori launchpad for a standard license
https://<subaccount>.iam.cfapps.eu10.hana.ondemand.com
SAP Intelligent Asset Management Fiori launchpad for a test and demo license
https://<subaccount>.iam-pr.cfapps.eu10.hana.ondemand.com
Please contact your Identity Management Administrator if you cannot see the applications you require. They will ensure the appropriate role collection is assigned to your user.
Application Help for SAP Predictive Maintenance and Service, cloud editionSAP Predictive Maintenance and Service, cloud edition 1906 P U B L I C 7

1.2 Terminology
Here we describe the meanings of some fundamental terms in SAP Predictive Maintenance and Service, cloud edition.
Term Definition
Asset A resource with economic value that a company owns or controls with the expectation that it will increase the value of a firm or benefit the firm's operations. An asset can be thought of as something that will generate income, reduce expenses, improve production, and so on. The asset is managed and modeled holistically, comprising, for example, systems, locations, model, and parts.
Equipment Technical entity, for example, a pump that is maintained as an autonomous unit.
NoteThe term equipment is a noncount noun. Hence:
● A piece of equipment (singular) = one piece of equipment
● Equipment (plural) = two or more pieces of equipment
Top Equipment Equipment that is at the top level of an equipment hierarchy.
Component Subequipment of a piece of equipment
Machine Thing that turns electrical energy into work.
Tool Thing that that turns physical energy into work.
8 P U B L I CApplication Help for SAP Predictive Maintenance and Service, cloud edition
SAP Predictive Maintenance and Service, cloud edition 1906

2 SAP Fiori Launchpad with SAP Predictive Maintenance and Service, cloud edition
You access SAP Predictive Maintenance and Service, cloud edition using the SAP Fiori launchpad. We provide several roles that allow the display of groups that logically group related applications. You can customize the launchpad to show and hide applications as you require.
There are two types of SAP Fiori launchpad available. The individual SAP Fiori launchpad for SAP Predictive Maintenance and Service, cloud edition and the SAP Intelligent Asset Management Fiori launchpad that includes the applications from the SAP Intelligent Asset Management relevant products on a single SAP Fiori launchpad based on your subscriptions.
Supported Features
The launchpad supports the following SAP Fiori launchpad features:
● Anchor navigation● Search● Me area
○ App Finder○ Settings - including changing the appearance of the launchpad, specifying a unit of measure, and
selecting an automatic data refresh interval○ Edit Home Page - contains changing the visibility and placement of groups and applications
Application Help for SAP Predictive Maintenance and Service, cloud editionSAP Fiori Launchpad with SAP Predictive Maintenance and Service, cloud edition P U B L I C 9

Groups
The applications are organized into the following groups:
Group Functions
Analytics Provides abilities to view, filter, and analyze data across all your equipment and perform follow-up tasks, as well as get an overview of applications in the personal dashboard and view analytics dashboards.
NoteThe Explorer [page 12] is the place where most of the activities for SAP Predictive Maintenance and Service occur, bringing together sensor and business data to analyze the health of your equipment and help you decide how to proceed.
Processes Find the important business processes for SAP Predictive Maintenance and Service.
Master Data If you are a business user you can browse all kinds of related information about your equipment. Additionally create and edit master data.
Machine Learning Engine Find tools for your data science tasks:
Data scientists can use the algorithms of the machine learning engine for health indicators to calculate the health status and predict failures for their equipment. In that process, they define data sets, configure, train, and score models.
For failure mode analytics, they can use the algorithms of the machine learning engine to analyze the notifications and failure modes for their equipment in order to get insights about the last occurring failures. In that process, they configure, train, and score models, and also perform validation tasks.
For leading indicators, they can use an algorithm to determine the leading indicators that have the highest influence on failures for their equipment. In this process, they configure and train models.
Administration Access applications for user management and configuration of the Explorer and its analysis tools
10 P U B L I CApplication Help for SAP Predictive Maintenance and Service, cloud edition
SAP Fiori Launchpad with SAP Predictive Maintenance and Service, cloud edition

Roles
The role collections assigned to your user determine which groups and applications are visible. For an overview of the roles that need to be assigned to see and use the applications, see the Roles section in the Security Information for SAP Predictive Maintenance and Service, cloud edition.
Application Help for SAP Predictive Maintenance and Service, cloud editionSAP Fiori Launchpad with SAP Predictive Maintenance and Service, cloud edition P U B L I C 11
3 Analytics
The tiles under Analytics on the SAP Fiori launchpad provide you the abilities to view, filter, and analyze data across equipment, perform follow-up tasks, as well as overview the dashboards.
Overview of Analytics
Tile Use
Explorer [page 12] Use analysis tools in the Explorer to analyze data for all your equipment, and then decide on follow-up actions. The Explorer brings together sensor and business data and from here you can navigate to the Equipment page to get an overview of all the data associated with a selected piece of equipment.
Failure Mode Analytics [page 46] Failure mode analytics uses machine learning to turn the human knowledge contained within the texts of notifications into insights about the nature of failures. This provides you with insights and analytics about your equipment and models with the last occurring failures.
Personal Dashboard [page 55] This app is personalized to be a one-stop point to navigate to the applications, your frequently viewed items of equipment, favorites and unread announcements.
Analytics Dashboards [page 55] Analyze your data coming from SAP Analytics Cloud stories in SAP Predictive Maintenance and Service, cloud edition by using analytics dashboards.
3.1 Explorer
The Explorer is an application that contains analysis tools to analyze data for all your equipment.
NoteIf you are using the application with a touch-enabled device, not all features work using the touch feature.
Features
Working with Analysis ToolsYou can use analysis tools to analyze the health of your equipment, for example, by analyzing sensor data or displaying alerts.
12 P U B L I CApplication Help for SAP Predictive Maintenance and Service, cloud edition
Analytics

For more information about the analysis tools, see Analysis Tools [page 14].
Using Filter Functions for Analysis Tools
To focus your analysis, you can use different filter functions. The following functions are available:
● Filtering in one analysis tool in the Explorer by choosing (Filter).● Filtering across all analysis tools in the Explorer.
NoteThe filter functions across all analysis tools filter based on top equipment.
To filter across all analysis tools, you can use the following options:○ Choose an analysis tool, select, for example, one or more work orders, alerts, notifications, or
equipment. All of these belong to certain top equipment. By choosing Apply as Filter, all analysis tools are filtered and only show data for the same top equipment.
○ Use the Explorer global filter and apply multiple filters to all analysis tools in the Explorer in one go.
You can combine the different filter functions. For example, when you filter in an analysis tool and use the global filter, the analysis tool displays data filtered by both criteria.
For more information about the different filter functions, see Analysis Tools [page 14] and Explorer Global Filter [page 35].
Using Refresh Functions for Analysis Tools
To refresh data across all your analysis tools, you can use different refresh functions. The following functions are available:
● Manually refreshing data on all analysis tools in the Explorer by choosing Refresh.● Automatically refreshing data on all analysis tools in the Explorer by activating an automatic data refresh
with a refresh interval in the Settings of the SAP Fiori launchpad.
You can combine the data refresh functions. For more information about the data refresh functions, see Analysis Tools [page 14].
Saving a Set of Analysis Tools in the Explorer as a Tile
NoteIf you have saved a tile in the last release, the tile is not carried over to this release and you need to save the tile again.
You can save a current set of analysis tools with their selected variants in the Explorer as a new tile by choosing
(Save as Tile). This allows you to save different sets of analysis tools and analysis tool variants, for example, a set of analysis tool variants that focuses on a specific piece of equipment. The new tile is then added to your selected group on the SAP Fiori launchpad. Any applied filter functions or other settings of the analysis tools are not carried over to the new tile.
To update the set in the new tile, you can select different analysis tool variants, add or remove analysis tools, and use all features of the Explorer and the analysis tools. Once you exit the tile, your updates are saved. Other settings are not saved.
Application Help for SAP Predictive Maintenance and Service, cloud editionAnalytics P U B L I C 13

To manage the tile, for example, to rename or move the tile, you can go to the Me area on the SAP Fiori launchpad and choose Edit Home Page.
Navigating to Pages from the Explorer
To go into a detailed analysis for a single piece of equipment, you can reach the Equipment page by clicking an equipment link in the analysis tools. It is also possible to navigate to the details page of alerts, notifications, and work orders from the respective analysis tools.
For more information about the Equipment page, see Equipment Page [page 45].
3.1.1 Analysis Tools
An analysis tool is a self-contained part of the application with its own user interface and functionality that provides an insight into one or more pieces of equipment.
Analysis Tools Variants
For every analysis tool, variants can be configured by an administrator. The analysis tool variants contain different settings and can be adjusted by the business user to work with the Explorer according to the personal business scenario. For more information about the configuration, see Explorer and Analysis Tools Configuration [page 386].
NoteIn addition to the variants configured by an administrator, we also deliver preconfigured variants titled <analysis tool> - SAP Default. If your administrator has deleted some of the preconfigured variants, they are not available to you. For more information about the settings for the available preconfigured variants, contact your administrator.
Analysis Tools Catalog
You can add analysis tools from the Analysis Tools Catalog to the Explorer and then select a specific variant for each analysis tool. In the Analysis Tools Catalog, you can also remove added analysis tools. For more information, see Adding Analysis Tools to the Explorer [page 18] and Removing Analysis Tools from the Explorer [page 19].
NoteIn addition to the available analysis tools, you can also create your own analysis tools with analysis tool variants. For more information, see SAP Help Portal→ Development → SAP Predictive Maintenance and Service, SDK for 1906.
14 P U B L I CApplication Help for SAP Predictive Maintenance and Service, cloud edition
Analytics

Here is an overview of the available analysis tools:
Overview of Available Analysis Tools in the Analysis Tools Catalog
Analysis Tool Description
Alerts [page 20] Provides a list of current alerts based on rules defined for sensor data, key figures, and health scores. Provides data visualization so that you can see when alerts have occurred.
Indicator Chart [page 20] Provides data visualization across one or more measurements.
NoteBesides adding the indicator chart from the Analysis Tool Catalog, you can also reach the indicator chart from the alerts analysis tool.
Work Orders [page 34] Provides a list of current work orders and their details.
Notifications [page 32] Provides a list of notifications and their details
Equipment Indicators [page 27] Provides a list of master data, attributes, and indicators for equipment. These indicators indicate if the behavior of equipment is normal or not.
Map [page 28] Provides a geographic map with the locations of top equipment and allows you to select indicators and apply their colors to the map markers. It also allows spatial selection.
Equipment Scores (Obsolete) [page 35] Provides a list of equipment with their scores.
Features
Functionality and behavior can differ from one analysis tool to another, depending on its purpose. However, some features are the same in most analysis tools:
Full Screen Mode (Relevant for all analysis tools)
If you want to focus your analysis on one specific area, for example, if you only want to look at the map where your equipment are located, you can open an analysis tool in full screen mode and hide the other analysis tools
by choosing (Enter Full Screen).
Settings (Relevant for all analysis tools except for Map)
For all analysis tools containing a list, you can define the sorting and filtering behavior for the list, and what list
columns you want to see on the UI by choosing (Settings).
Application Help for SAP Predictive Maintenance and Service, cloud editionAnalytics P U B L I C 15

NoteSearch and filter options in analysis tools are case-sensitive.
Filter in One Analysis Tool (Relevant for all analysis tools except for Map and Indicator Chart)
For all analysis tools containing a list, you can filter your analysis tool. Choose (Filter), select the filters, enter the values and choose Go to apply this selection to your current analysis tool. This function does not affect filters in other analysis tools.
Filter Across Analysis Tools (Relevant for all analysis tools)
NoteThis filter function filters based on top equipment.
In the Explorer, you can filter across all analysis tools. Select, for example, one or more work orders, alerts, notifications, or equipment. All of these belong to certain top equipment. By choosing Apply as Filter, all analysis tools are filtered and only show data for the same top equipment. If you add a new analysis tool to the Explorer after you have selected a certain set of equipment, the newly added analysis tool automatically
displays data based on your existing selection. If you want to reset the filters in all analysis tools, choose (Reset Global Filter).
Besides applying filters to all analysis tools by using the Apply as Filter function in an analysis tool, you can also use the global filter in the Explorer. For more information, see Explorer Global Filter [page 35].
Navigation and Editing (Relevant for all analysis tools)
You choose the selected analysis tools using anchor navigation (tabs).
NoteThe tabs are only displayed when you have added at least two analysis tools to the Explorer.
Emerging Issue Detection (EID) (Only relevant for Indicator Chart, Alerts, Notifications, and Work Orders)
EID enables you to identify, monitor, and manage an equipment issue early. To analyze an issue, you need to gather information or 'evidence'. This evidence is collected in improvement requests. You can add an improvement request or edit an existing improvement request by choosing Add Evidence in the analysis tools, Indicator Chart, Alerts, and Notifications.
Unit of Measure (UoM) Conversion (Only relevant for Indicator Chart and Equipment Scores)
In the SAP Fiori launchpad, you can define if the unit of measure system for the application is metric (default) or imperial. You do this in the Settings under Unit of Measure
UoM conversion deals with conversion of values across units within a dimension, and a source unit is converted to a target unit. For example, if the unit system is metric and dimension is length, any source unit (miles) must be converted to target unit (kilometers).
16 P U B L I CApplication Help for SAP Predictive Maintenance and Service, cloud edition
Analytics

State Preservation (Relevant for all analysis tools)
When you navigate from the Explorer back to the SAP Fiori launchpad or to another application, any ad-hoc table settings, filter settings, and the selected variant of an analysis tool are preserved.
Automatic Data Refresh (Relevant for all analysis tools)
You can activate an automatic data refresh across all analysis tools in the Explorer. With this automatic data refresh, the data of the analysis tools is reloaded in a regular interval, so that you can view the latest data. By default, the automatic data refresh is not active.
To activate the automatic data refresh and define the refresh interval, go to the Settings of the SAP Fiori launchpad and choose Automatic Data Refresh. Once you have activated and defined the automatic data refresh, the Explorer initiates the data refresh on the analysis tools based on the defined refresh interval. The last refreshed date and time is then displayed at the top of the Explorer. If you add or delete any analysis tool, the closest refresh cycle is reset, and the refresh interval starts again.
For the analysis tools, Indicator Chart and Alerts, the automatic data refresh is also applied in the Equipment application. For more information about viewing Indicator Chart and Alerts, see Viewing Time Series Data (Indicator Chart) of an Equipment [page 95] and Viewing Alerts of an Equipment [page 94].
The manual and automatic data refresh features result in refresh of all analysis tool with its data from the database. Depending on the analysis tool, its variant settings, the number of records the analysis tool need to fetch, and overall system load, the time to complete the refresh may differ. If for a scenario, the time to refresh all the analysis tools take 3 seconds, and the refresh rate is set to that interval or shorter, for instance, 1 second, a continuously refreshing analysis tools will be visible
And, during the refresh, a major area of an analysis tool will not be functioning.
To trigger an automatic refresh, set a higher refresh rate, for instance a minute. Observe the time it takes to refresh the data. This will also indicate the lowest refresh rate you should use. For example, if the refresh takes 3 seconds, you can trigger an automatic refresh rate not lesser than 5 seconds.
Manual Data Refresh (Relevant for all analysis tools)
You can also manually refresh data across all analysis tools in the Explorer by choosing Refresh. The manually refreshed date and time is then displayed at the top of the Explorer. The manual data refresh has no effect on the automatic data refresh. That means if you have activated the automatic data refresh and you manually refresh data, the refresh interval of the automatic data refresh is not reset and continues. Once the automatic data refresh is completed, the displayed date and time of the manual refresh is overwritten by the date and time of the automatic refresh.
For the analysis tools, Indicator Chart and Alerts, the manual refresh is also possible in the Equipment application. For more information about viewing Indicator Chart and Alerts, see Viewing Time Series Data (Indicator Chart) of an Equipment [page 95] and Viewing Alerts of an Equipment [page 94]
Health Score Explanation (Only relevant for Equipment Indicators)
The Health Score Explanation gives additional information about an indicator. It shows, for example, the defined thresholds and uses color coding to show whether the value is in the value range or not. If the value is aggregated from different applications, it also shows the used aggregation concept.
You can display the health score information by clicking on an indicator value link in the Equipment Indicator analysis tool.
Application Help for SAP Predictive Maintenance and Service, cloud editionAnalytics P U B L I C 17

Languages
For information on the supported user interface (UI) languages, refer SAP Predictive Maintenance and Service, cloud edition 1906 [page 6].
3.1.1.1 Adding Analysis Tools to the Explorer
This topic describes how to add analysis tools to the Explorer.
Prerequisites
At least one analysis tool variant has been configured by an administrator. For more information about the configuration, see Explorer and Analysis Tools Configuration [page 386].
Context
To analyze data of your equipment, you need to add analysis tools to the Explorer.
Procedure
1. On the SAP Fiori launchpad, go to the Analytics group and open the Explorer application.2. At the top of the Explorer, choose Manage Tools.
The Analysis Tools Catalog is displayed.3. In the Analysis Tools Catalog, select the analysis tools that you want to use to analyze equipment.4. Choose OK.
The analysis tools are added to the Explorer and the first configured variant for each analysis tool is displayed.
5. To select a different variant, expand the variant dropdown list next to the analysis tool title.6. From the My Views dropdown list, select the desired analysis tool variant. You can choose from all
configured variants.7. If required, repeat step 5 and 6 for all your added analysis tools.
Results
The analysis tools are added to the Explorer.
18 P U B L I CApplication Help for SAP Predictive Maintenance and Service, cloud edition
Analytics

You can navigate between the analysis tools by using the anchor navigation (tabs).
NoteThe tabs are only displayed when you add at least two analysis tools to the Explorer.
Related Information
Analysis Tools [page 14]Removing Analysis Tools from the Explorer [page 19]
3.1.1.2 Removing Analysis Tools from the Explorer
This topic describes how to remove analysis tools from the Explorer.
Context
At least one analysis tool has been added to the Explorer. For more information, see Adding Analysis Tools to the Explorer [page 18].
Procedure
1. On the SAP Fiori launchpad, go to the Analytics group and open the Explorer application.2. At the top of the Explorer, choose Manage Tools.
The Analysis Tools Catalog with the selected analysis tools is displayed.3. In the Analysis Tools Catalog, deselect the analysis tools that you want to remove from the Explorer.
Results
The analysis tools are removed from the Explorer.
You can later add the removed analysis tools to the Explorer again.
Application Help for SAP Predictive Maintenance and Service, cloud editionAnalytics P U B L I C 19

Related Information
Analysis Tools [page 14]
3.1.1.3 Indicator Chart
This analysis tool enables you to visualize data across one or more indicators with the same unit of measure across multiple hierarchies. You can also view thresholds related to an equipment.
By default, the chart is empty on navigating to this page. You can use the Apply as Filter option to filter the top equipment in a diferent analysis tool. Use the Select Indicators option to select or deselect the indicators.
Note● Alerts, notifications, and work orders are not displayed in the indicator chart in Explorer● Legends display equipment name in Explorer
For more information on features within the indicator chart, refer Features in Indicator Chart [page 38]
Related Information
Explorer [page 12]Analysis Tools [page 14]Entries to Configure the Indicator Chart [page 394]
3.1.1.4 Alerts
This analysis tool displays a list of the current alerts that are triggered by equipment events or rules defined for sensor data and health scores.
Alerts calculated from sensor data or health scores give you information about the issues your top equipment/equipment is experiencing. Within the alert analysis tool, you can display an alert page that contains the alert details and additional information. The information provided helps you to decide on prescriptive maintenance and helps to identify potential actions to be taken for the incoming alerts.
20 P U B L I CApplication Help for SAP Predictive Maintenance and Service, cloud edition
Analytics

Working with the Alert Analysis Tool
Action Further Information
Display list of alerts You can display the alert list in one of the following ways:
● From the Explorer, by choosing/adding an analysis tool variant for alerts. For more information, see Adding Analysis Tools to the Explorer [page 18].
● From the equipment page, by choosing Monitoring → Alerts.
Display Alert Page with additional alert information Click an alert in the alert list to navigate to the Alert Page [page 24].
View related top equipment/equipment Click the Top Equipment Name or Equipment Name link to view details of the top equipment or equipment for which the alerts were created. Details are available on the Equipment page.
For more information, see Equipment Page [page 45] and Equipment [page 72].
Information on alert occurrence The following alert occurrence information is available in the alert list:
● Column Created On: When did the alert occur for the first time?
● Column Last Updated On: For reoccurring alerts: When did the alert last occur?
NoteOnce the deduplication period is completed or the existing alert with the specific alert type for this piece of equipment is set to Completed, a new alert instance is generated. This definition is not valid for alerts that existed before the deduplication period was defined for this alert type. For more information, see Alert Deduplication [page 23].
Sort and filter alerts Sort and filter the alerts and columns you want to display. You can also use the Settings option to search for attributes for the alerts.
Filter Use the Filters option to enable filter settings, view default settings defined in the configuration screen, add and edit filters, and define whether these filters are shown in the filter bar. Click Go to apply the specified filters. You can also use the Show Filter Bar option to edit the filter and filter conditions.
Application Help for SAP Predictive Maintenance and Service, cloud editionAnalytics P U B L I C 21

Action Further Information
Overview of available features Some features (for example refreshing data automatically or manually, filtering or default variants) are relevant for the explorer in general or relevant for all analysis tools. For more information, see Explorer [page 12]and Analysis Tools [page 14].
Prerequisites
To be able to perform the activites described below for alerts, you need the following roles:
● Role AlertProcessorAdmin: Users can change the alert status, create notifications and set/change the processor.
● Role AlertProcessor : Users can change the alert status, create notifications, but cannot assign an alert to processors.
Button Contents
Add Evidence Create a new improvement request or edit an existing improvement request by choosing Add Evidence. You navigate to the Improvement Request page.
For more information, see Creating an Improvement Request [page 62] and Emerging Issue Detection (EID) [page 59].
Set in Process
Set to Completed
Change alert status to in process or completed using the respective buttons.
When you set an alert to in process, you are automatically assigned as the processor.
The status sequence is New → In Process → Completed or New to Completed. The changes to the alert status do not change already assigned processors.
NoteIf you select more than 10 alerts at one time, the Set in Process and Set to Completed buttons will be disabled.
Set Processor Use the Set Processor button to change the alert processor.
NoteIf you select more than 10 alerts at one time, then the Set Processor button will be disabled.
22 P U B L I CApplication Help for SAP Predictive Maintenance and Service, cloud edition
Analytics

Button Contents
Create Notification Create a new notification for the selected alerts. The new notification added is visible as link in the alert list and on the alert page. Click the Notification link to view more details about the notification.
NoteYou can create notifications for multiple alerts, only if the alerts belong to the same equipment. If not, the Create Notification button will be disabled.
Note● Timestamp changed to Created Timestamp on the user interface● Business Timestamp changed to Last Updated On on the user interface● New Timestamp changed to Created Timestamp in the database and Entered in System on the user
interface
Related Information
Entries to Configure Alerts [page 389]Entries to Configure the Indicator Chart [page 394]Features in Indicator Chart [page 38]Adding Alert Types [page 227]
3.1.1.4.1 Alert Deduplication
Deduplication option allows the user not to create duplicate alerts for an existing alert type and equipment ID. New alerts can be generated once the deduplication period is over or the status of existing alert of that particular alert type is set to Completed.
Procedure
1. Define deduplication in alert type - Define alert deduplication at the alert type level using the Templates application. For more information, refer Adding Alert Types [page 227]
2. Assign alert type to model - Alert type must be grouped as alert type group and assigned to model. For more information, refer Assigning Alert Type Groups to a Model [page 113]
3. Create alerts - Create alerts for the alert types. For more information, refer Creating Alerts [page 374]4. View alerts - View alerts for a list of equipment in the Equipment application or Explorer. For more
information, refer Viewing Alerts of an Equipment [page 94] and Alerts [page 20]
Application Help for SAP Predictive Maintenance and Service, cloud editionAnalytics P U B L I C 23

3.1.1.4.2 Alert Page
You use the alert page to see an overview of data associated with a selected alert.
You can access the alert page with its holistic view of different information by clicking an alert in the alert list.
For more information about prerequisites and available functions for alerts (for example changing the status of alerts, setting processors), see Alerts [page 20].
Information Available on the Alert Page
Section Contents
Information Shows information about the alert (such as alert type, processor, origin of the alert, alert occurrence and last alert occurrence), and information about the related piece of equipment and notifications. If a notification has been created for the alert, you can click the notification to display details.
An occurrence count is shown to indicate how often an alert reoccurred since the deduplication mode for the particular alert was switched on. For more information, see Alert Deduplication [page 23].
Indicator Values The indicator chart helps you visualize the alert in a time-based line chart, together with contributing indicators.
In the indicator chart, you can see the overlapping indicators as a default:
● Indicators assigned to an alert type that is assigned to the alert.
● Indicators assigned to a piece of equipment that is assigned to the alert.
You can manually add all indicators assigned to the piece of equipment that is assigned to the alert.
NoteDepending on your configuration settings, additional alert attributes are displayed in one or more tabs next to the indicator chart.
24 P U B L I CApplication Help for SAP Predictive Maintenance and Service, cloud edition
Analytics

Section Contents
Failure Modes and Causes This section shows failure modes and causes, alert types and instructions related to the piece of equipment (asset). The information helps you to understand which failure modes occurred for the particular alert and helps you to decide how to proceed with an alert.
● The Recommended Actions column shows the number of instructions assigned to a failure mode.
● Click a row to navigate to details about the failure mode and to display the instructions.
The data displayed is analyzed using Failure Mode Analytics and every piece of equipment, all alert types, the model for the selected alert and indicators mentioned in related notifications are observed here.
Which failure modes are displayed? All overlapping failure modes for the previous year are displayed:
● Failure modes coming from the pieces of equipment (asset) and the model that are assigned to the selected alert.
● Failure modes assigned to an alert type that is assigned to the selected alert.
ExampleYou display the alert page with detailed information about an alert. In this example the highlighted failure mode (failure mode 1) is displayed.
The following failure modes have been assigned to the related piece of equipment (asset), model or alert type:
Piece of equipment (asset) and model:
● Failure Mode 1● Failure mode 3● Failure mode 4● Failure mode 6 (older than one year, based on the
timestamp created for the alert)
Alert type assigned to the alert:
● Failure Mode 1● Failure mode 2● Failure mode 5● Failure mode 6 (older than one year, based on the
timestamp created for the alert)
Application Help for SAP Predictive Maintenance and Service, cloud editionAnalytics P U B L I C 25

Section Contents
Equipment Maintenance History The maintenance history for the piece of equipment shows an overview of what maintenance has taken place for the piece of equipment up to now. The notifications/work orders of the most recent top 3 alerts assigned to the related piece of equipment are shown and ordered by creation date. The most recent one is shown first. You can navigate to the notifications and work orders and display them to see details.
Which top 3 alerts are relevant? All alerts for the related piece of equipment for the last 365 days until now are taken into account. All alerts for which a notification has been created, and to which the same alert type has also been assigned, are relevant for display. The notifications/work orders of the 3 most recent alerts are then displayed in the Equipment Maintenance History section.
If a notification has been created for the currently displayed alert, the notification is be shown under section Information.
ExampleYou display the alert page with detailed information about an alert. Alert type ABC is assigned. In this example the highlighted notifications and work orders are shown as top 3.
The following alerts have been created for the related piece of equipment:
● Alert 2 (Alert type ABC) - Has no notification.● Alert 3 (Alert type DEF) - Has no notification.● Alert 4 (Alert type ABC) - Notification 1 - Work or
der 1● Alert 5 (Alert type DEF) - Notification 2● Alert 6 (Alert type ABC) - Notification 3● Alert 7 (Alert type ABC) - Notification 4 - Work or
der 2● Alert 8 (Alert type ABC) - Notification 5 - Work Or
der 3
Related Information
Adding Alert Types [page 227]Indicator Chart [page 20]Failure Modes [page 128]Failure Mode Analytics [page 46]
26 P U B L I CApplication Help for SAP Predictive Maintenance and Service, cloud edition
Analytics

Instructions [page 198]Notifications [page 32]Work Orders [page 34]
3.1.1.5 Equipment Indicators This analysis tool provides a list of equipment with their indicators, attributes, and master data. You can also assess the equipment status.
It is also possible to view equipment, their heirarchy, attributes, and indicator by navigating to the Equipment Details page. The Apply as Filter option also provides the flexibility to filter all analysis tools in the Explorer.
NoteThe indicator value is not in real time. A job, which is scheduled every five minutes, pulls the data from the timeseries store that is displayed in the Equipment Indicator analysis tool.
The Equipment Indicators provide you the following options:
● Select columns for the equipment● Identify health status of an equipment● Sort and filter● Apply filter● Search
Equipment Columns
The columns marked as default while configuring a variant by the administrator display in this analysis tool. Choose the Settings option and either select or deselect the required columns from the available list. Use the move up and down option to change the column position. You can restore the previous position of columns.
On clicking an indicator, additional information of that particular indicator displays. For more information, refer Analysis Tools [page 14]
Sort and Filter
You can sort the equipment in an ascending or descending order. Possible to filter equipment according to all selected filters. By default, the list of equipment and their columns in this analysis tool are sorted and filtered according to sort and filter defined in the configuration variant
Apply Filter
The Apply as Filter option provides the flexibility to filter all the analysis tools in the analysis tool catalog according to the selection in the Equipment Indicators
Select the Reset Global Filter option to reset your filtered selection in the analysis tool
Search Equipment
Using this analysis tool, you can search for equipment, their master data, attributes, and indicators.
Unit of Measure (UoM) Conversion
The numeric values displayed in the equipment indicators complies with the unit system configured in the SAP Fiori launchpad. Choose Unit of Measure Variant in the Settings option of the SAP Fiori launchpad to personalize. For more information on UoM, see Analysis Tools [page 14]
Application Help for SAP Predictive Maintenance and Service, cloud editionAnalytics P U B L I C 27

Auto Refresh
Possible to refresh data automatically. For more information, refer Analysis Tools [page 14]
Indicator Threshold
Using this analysis tool, it is possible to visualize the indicator threshold range where in the indicator value lies. These thresholds are visible as colored icons on the page. The indicator thresholds are configured in the Indicators application. For more information, refer Adding Indicator Groups and Indicators [page 220]
Related Information
Entries to Configure Equipment Indicators [page 391]Adding Analysis Tools to the Explorer [page 18]
3.1.1.6 Map
This analysis tool provides a geographic map with the locations of equipment and allows you to select indicators and apply their colors to the map markers. It also allows spatial selection.
You can use the map to display where equipment are located and analyze equipment on a map.
NoteConsider the following:
● The map only shows top equipment.● Only a maximum number of 10,000 top equipment can be displayed on the map at the same time.
Markers
When you hover over a marker on the map, the following information represented by that marker is displayed:
28 P U B L I CApplication Help for SAP Predictive Maintenance and Service, cloud edition
Analytics

● Equipment ID● Equipment description● Model description
If you want to get more information about the piece of equipment, you can choose the marker to view additional details that include links to the Equipment, Model or Indicator detail pages.
Markers can be visualized by different indicators that you create in Indicators section of the Templates application, for example, Bearing Temperature. In general, all markers on the map are displayed in blue. When you select an indicator, only the relevant top equipment for this indicator is displayed on the map and the color of the marker changes to visualize the indicator value of the equipment according to the thresholds configuration of the indicator, for example:
● Yellow: Warning● Red: Critical● Grey: Unknown
If the selected indicator has no value, the marker remains blue.
Additional details about the indicator can be seen by choosing a marker. The details include, for example,the indicator value, color, threshold, a link to view indicator details, and more. If you have questions about indicators for your business scenario, ask your administrator.
Map Views
You can switch between different map views by choosing . By choosing this icon, the related models are also displayed, and you can focus your analysis by selecting or deselecting models.
You can choose from multiple map views if these are configured accordingly by your administrator. If you have questions about the map views for your business scenario, ask your administrator. The following list shows some sample map views that can be configured:
● Open Street Maps
● Satellite
Application Help for SAP Predictive Maintenance and Service, cloud editionAnalytics P U B L I C 29

● Streets
● National Geographic
● Simple
30 P U B L I CApplication Help for SAP Predictive Maintenance and Service, cloud edition
Analytics

Layers
On the map, you can use different layers to display specific types of equipment. The following example displays three different layers in one map as follows:
● Pipelines are displayed as lines.● Top equipment is displayed as markers.● Mines are displayed as polygons.
Features
Zoom In and Zoom Out
Depending on which area you want to focus, you can zoom in and zoom out by:
Application Help for SAP Predictive Maintenance and Service, cloud editionAnalytics P U B L I C 31

● Using the corresponding buttons● Using the mouse wheel
Spatial Selection Note
If you are using a touch-enabled device, you cannot use the touch feature to draw geofences.If you are using Internet Explorer 11, you also need to ensure that the touch feature is switched off, so that you can use the mouse to draw geofences.
You can select specific top equipment by drawing one or more geofences around them, as follows:
● Choose (Draw Polygon) to activate the drawing cursor.● To draw the geofence, use single mouse clicks to set points that form the polygon rather
than drawing by dragging the mouse.● To close the geofence, either double-click at the area on the map where you want the last
point to be or single-click on the first point. You can draw several polygons.
● To cancel the geofence, choose (Clear All).● After selecting top equipment on the map in this way, you can choose Apply As Filter to
filter all analysis tools by that selection. Thus, you can narrow down your equipment analysis and focus only on the top equipment you want to analyze in more detail.
Indicator Selection
You can select indicators by using the Select Indicator dropdown list to view markers by different colors and values that you created in the Indicators section of the Templates application.
Panning the Map
You can pan the map by dragging and dropping it. If you zoomed out to the lowest level, the world maps repeat horizontally. Once you drag the map to the next map, the equipment on the map is also moved.
Data Refresh You can refresh data automatically or manually. For more information, see Analysis Tools [page 14].
Related Information
Explorer [page 12]Adding Analysis Tools to the Explorer [page 18]
3.1.1.7 Notifications
We use the term notification to describe an object created in a back end system (for example, Enterprise Asset Management) that has been replicated into SAP Predictive Maintenance and Service and is visible in the Notifications analysis tool. You use this analysis tool to view notifications for all equipment.
Using this analysis tool, you can perform the following:
32 P U B L I CApplication Help for SAP Predictive Maintenance and Service, cloud edition
Analytics

● Click a notification in the notification list to view details. You can view details such as failure modes and causes
● Click the Equipment, Top Equipment, Equipment Description, and Top Equipment Description links to view details of the top equipment and equipment for which the notifications are created. Details are available in the Equipment page. For more information, refer Viewing and Creating Notifications of Equipment [page 96]
● View the progress of notifications, defined as Planned, Pending, and Completed○ Planned: All notifications with the basis start date greater than the current date○ Pending: All notifications with the basic complete date greater than the current date or all notifications
with the basic start date lesser than the current date○ Completed: All notifications with the status Completed or Closed
● Create a new improvement request or edit an existing improvement request using the Add Evidence button. You navigate to the Improvement Request page. For more information, refer Creating an Improvement Request [page 62] and Emerging Issue Detection (EID) [page 59]
● Create a new notification and assign it to a top equipment. You can provide additional information such as type, priority, and description. The newly added notification displays as Notification among the attributes. Click the Notification to view more details about the notification.
● Use the Filters option to enable filter settings, view default settings defined in the configuration screen, add and edit filters, and define whether these filters are shown in the filter bar. Click Go to apply the specified filter(s). In addition, you can also use the Show Filter Bar option to edit the filter and filter conditions
● Using the Settings option, sort and filter notifications. In addition, search the attributes for a notification● Automatic or manual refresh of data. For more information, see Analysis Tools [page 14]
Related Information
Entries to Configure Notifications [page 402]Equipment [page 72]Analysis Tools [page 14]
3.1.1.7.1 Locations to Add Notifications
You can create notifications from the following locations:
● In the Alerts analysis tool, select one or multiple alerts and create a notification. The notification ID is updated and you can navigate to view further details of the notification
● In the Notifications analysis tool, create new notification for a piece of equipment. The newly created notification appears in the analysis tool and you can navigate to view more details
● On the Equipment page, navigate to the alerts view on the Monitoring tab. Select one or multiple alerts and create a notification. The notification ID is updated in the alerts view with the status. You can navigate to view more details
● On the Equipment page, navigate to the notifications view on the Maintenance and Services tab. In this view choose Manage Notification to create a new notification for a piece of equipment. The newly created notification is displayed in the notification view. You can navigate to view more details
Application Help for SAP Predictive Maintenance and Service, cloud editionAnalytics P U B L I C 33

NoteThe notifications are saved in SAP Predictive Maintenance and Service (PdMS). They can be pushed to the back end system using the integration possibilities.
Related Information
Notifications [page 32]
3.1.1.8 Work Orders
We use the term work order to describe an object created in a back end system that has been replicated into SAP Predictive Maintenance and Service, cloud edition and is visible in the Work Orders analysis tool.
Using this analysis tool, you can perform the following functions:
● Get an overview of all existing work orders, or just those for a particular top equipment by selecting it and choosing Apply as Filter. Alternatively you can view the work orders for just one piece of equipment when using this analysis tool on the Equipment List page.
● Get more information about the work order, for example, view details such as associated documents and spare part details. Your administrator can configure tabs and organize the information you would like to see, for example, the service organization or group of subject matter experts to which the work order is assigned (planner group).
● On clicking the Equipment, Top Equipment, Equipment Description and Top Equipment Description link, the details of the equipment for which the work order is created displays in the Equipment page. For more information, refer Viewing Work Orders of an Equipment [page 98] and Equipment Page [page 45].
● View progress of work orders, that is, Planned, Pending, and Completed.○ Planned: All work orders with the basic start date greater than the current data○ Pending: All work orders with the basic end date greater than the current date or all work orders that
have start date lesser than the current date○ Completed: All work orders with the status Completed or Closed
● Start date and end date of work orders display the dates that signify the progress of work orders, which is as follows:○ If the work order progress is Planned or Pending, the basic start and end dates display○ For Completed work order, the actual start and end dates display
● Create an improvement request or edit an existing improvement request using the Add Evidence button. You navigate to the Improvement Request page. For more information, see Emerging Issue Detection (EID) [page 59] and Creating an Improvement Request [page 62]
● Use the Filters option to enable filter settings, view default settings defined in the configuration screen, add and edit filters, and define whether these filters are shown in the filter bar. Click Go to apply the specified filters(s). In addition, you can also use the Show Filter Bar option edit the filter and filter conditions.
● Using the Settings option, sort and filter the work orders. In addition, search the attributes for a work order.● Automatic or manual refresh of data. For more information, see Analysis Tools [page 14]
34 P U B L I CApplication Help for SAP Predictive Maintenance and Service, cloud edition
Analytics

Related Information
Explorer [page 12]
3.1.1.9 Equipment Scores (Obsolete)
This analysis tool provides a sortable list of equipment and components (with their score(s)).
From the Equipment Scores analysis tool in the Explorer, you can navigate to the Equipment page by clicking the equipment name or description.
In the Equipment Scores configuration you define which score or scores are displayed. The scores are calculated using the provided algorithms.
ExampleThe pieces of equipment are scored from 1-100, 100 indicating a very healthy piece of equipment. You sort the list by ascending score so the equipment with the lowest scores are displayed first. These are the equipment that most urgently need attention.
In the configuration you can determine further equipment attributes to sort and filter by, for example, manufacturer or maintenance plant.
ExampleYou sort the list by maintenance plant and you can compare the performance of all the equipment within this maintenance plant by checking the equipment scores.
Related Information
Entries to Configure Equipment Scores (Obsolete) [page 405]
3.1.2 Explorer Global Filter
The Explorer global filter is a filter function in the Explorer that enables you to filter all your analysis tools in the Explorer based on several attributes, for example, class or location in one go.
NoteThe Explorer global filter filters based on top equipment.
The Explorer global filter is displayed at the top of the Explorer. The following graphic shows an example of the Explorer global filter with all available filters:
Application Help for SAP Predictive Maintenance and Service, cloud editionAnalytics P U B L I C 35

Using the Explorer Global Filter
You can use the Explorer global filter in the following ways:
● By using configured variants with defined filters. For more information, see Using the Explorer Global Filter with Variants [page 36].
● By using a combination of filters from scratch. For more information, see Using the Explorer Global Filter with Filters [page 37].
Related Information
Explorer [page 12]Analysis Tools [page 14]
3.1.2.1 Using the Explorer Global Filter with Variants
This topic describes how to use variants to filter all analysis tools in the Explorer.
Prerequisites
● At least one analysis tool has been added to the Explorer. For more information, see Adding Analysis Tools to the Explorer [page 18].
● At least one variant for the Explorer global filter has been configured by an administrator. For more information about the configuration, see Explorer and Analysis Tools Configuration [page 386].
NoteIn addition to the variants configured by an administrator, we also deliver a preconfigured variant titled Explorer Global Filter - SAP Default. If your administator has deleted this preconfigured variant, it is not available to you. For more information about the settings for the preconfigured variant, contact your administrator.
36 P U B L I CApplication Help for SAP Predictive Maintenance and Service, cloud edition
Analytics

Procedure
1. On the SAP Fiori launchpad, go to the Analytics group and open the Explorer application.
The Explorer global filter with the first configured variant is displayed.2. To select a different variant, expand the variant dropdown list next to the title of the Explorer global filter
variant.3. From the My Views dropdown list, select the desired Explorer global filter variant. You can choose from all
configured variants.
NoteYou can change the filter variant by selecting additional filters or deselecting filters. To do so, choose Adapt Filters. These changes are only temporary and will not be adapted to the configured variant.
4. Choose Go.
Results
The selection is applied to all analysis tools in the Explorer.
You can collapse the filters by choosing below the Explorer global filter. You can later also reset the applied
filters in the analysis tools by choosing (Reset Global Filter).
Related Information
Using the Explorer Global Filter with Filters [page 37]Explorer Global Filter [page 35]
3.1.2.2 Using the Explorer Global Filter with Filters
This topic describes how to select a combination of filters from scratch to filter all analysis tools in the Explorer.
Prerequisites
At least one analysis tool has been added to the Explorer. For more information, see Adding Analysis Tools to the Explorer [page 18].
Application Help for SAP Predictive Maintenance and Service, cloud editionAnalytics P U B L I C 37

Procedure
1. On the SAP Fiori launchpad, go to the Analytics group and open the Explorer application.2. At the top of the Explorer, select the filters and the values for the filters.3. Choose Go.
Results
The selection is applied to all analysis tools in the Explorer.
You can collapse the filters by choosing below the Explorer global filter. You can later also reset the applied
filters in the analysis tools by choosing (Reset Global Filter) in the action bar at the top of the Explorer.
Related Information
Using the Explorer Global Filter with Variants [page 36]Explorer Global Filter [page 35]
3.2 Features in Indicator Chart
This analysis tool enables you to visualize data across one or more indicators. You can also view the alerts, notifications, work orders, and threshold related to an equipment.
Variants
You can select variants created using the configuration screen. Depending on the selected variant, the default time range and number of points on the chart varies. For more information, see Entries to Configure the Indicator Chart [page 394]
Duration
You can choose the time interval for your analysis as follows:
● By selecting an analysis tool variant with the required time interval
38 P U B L I CApplication Help for SAP Predictive Maintenance and Service, cloud edition
Analytics

● By picking a specific start and end date from the calendar by clicking the Custom Data option
NoteBy selecting dates accordingly, it is possible to visualize work orders and notifications that are yet to be created/added.
Add Evidence
You can create an improvement request or edit an improvement request. The selected date range in the indicator chart and selected indicators are available within the Description tab of an improvement request. For more information, see Emerging Issue Detection (EID) [page 59] and Creating an Improvement Request [page 62]
Select Indicators
You select, group, and sort indicators using the Select Indicators dialog box (maximum of 30 indicators). By default, indicators set as Favorite displays.
Depending on the indicator color selected in the Templates application, the indicator chart displays in the same color.
NoteThis feature is not enabled for the indicator chart from the Explorer.
Legend
You have the following options:
● Hide and display legend. Remove indicators via legends.● Icons in the legend represent different indicator types. On clicking the indicator, the respective indicator
types display (highlighted) on the chart:○ Circle represents flow○ Triangle represents level○ Square denotes the indicator type discrete
Reset
You can reset time selections you made for the indicator chart to their initial state by choosing Reset Selection
Application Help for SAP Predictive Maintenance and Service, cloud editionAnalytics P U B L I C 39

Settings
You can decide the settings required on the chart. The following options are available:
● Indicators: Select the option to decide whether indicators must display as points or lines or as both on the chart
● Threshold: On selecting, the primary thresholds selected in the Indicator's application displays in the indicator. The number of thresholds defned as primary in the Indicator's application displays.
● Forecast: On selecting a duration, the forecast data for the highlighted indicator displays on the chart. The duration starts from the day you select the duration.
● Values: Select to view a maximum or minimum value or both value of the displayed indicator points on the chart
● Events: Select to view alerts, work orders, and notifications, if any on the chart
Autoscaling
You can scale the Y axis of the indicator chart automatically or manually. Click any of the Y axis labels to view the Y-Axis Setting popup. Automatic scaling is activated by default. If you deselect the Default Values checkbox, you can enter minimum and maximum values to manually scale the Y axis.
Time Selector
Using the time line selector available at the bottom of a chart, you can select a particular time period within the time interval to narrow down your analysis and zoom into the indicator chart. The shorter the time period, the higher the granularity of the indicator chart. You can also select a time period directly in the indicator chart. To do so, place your cursor directly in the chart at the starting point of the time period. Then click and drag the cursor to the end point of the time period. When you release the mouse button, the indicator chart is focused on the selected time period.
Indicators
There are three categories of indicator in the indicator charts, that is, flow, level, and discrete. Depending on the indicator chosen, the corresponding graph is displayed
NoteOnly numeric indicators are supported.
.
● Flow: These variables are visible as continuous variations on the chart.● Level: These variables remain unchanged until a new value exists, that is, level variables are not
interpolated linearly between indicators, but a step function is used (the last value is repeated until a new value exists). An example of a level variable is stock inventory.
40 P U B L I CApplication Help for SAP Predictive Maintenance and Service, cloud edition
Analytics

● Discrete: Three statuses are considered for discrete, that is, 0, 1 and 2.
Value Status Color
0 Off Nil
1 On Dark shade
2 Idle Light shade
NoteAny other value apart from 0, 1 and 2 represents a null status and will be hatched
The mouseover for a value displays the value as a string. The strings are hard coded, but language dependent. You can find more information on SAP Help Portal under Templates in the API Tutorial
Let's take the pump as an example. From the Select Indicators option, choose pressure (flow), waterlevel (level), and the blower status (discrete) as the indicator.
● Flow variable: Pressure displays the line graph for values that are available within the selected range● Level variable: Waterlevel displays the step graph for values that are available within the selected range.● Discrete variable: Blower status displays the active (On, Off) or inactive (Idle) status of the indicator in
colors.The legend is displayed at the side of the chart.
Indicator Forecasting
The indicator chart supports the forecasting of indicator values of an equipment of an equipment model. You can select the duration for which the forecast needs to be displayed. The supported duration is one day, one week, one month, and 3 months. The duration starts from the day you select the duration.
The indicator that is forecasted displays as a dotted line. The blue area displays the confidence interval with the upper and lower boundry. The confidence interval also indicates how reliable the forecasting is. A small confidence interval indicates a reliable forecasting. If no data is available for a particular time in the time range of historical time series data, no lines displays within the indicator chart.
Application Help for SAP Predictive Maintenance and Service, cloud editionAnalytics P U B L I C 41

Prerequisite: You should configure forecasting for the indicator in the Models application. For more information, refer Configuring Indicator Forecasting for a Model [page 117]
NoteThis feature is available only within the Indicator chart in the Equipment page.
Alerts
The indicator chart visualizes alerts for the selected indicators and selected equipment hierarchy. Same type of alerts for a top equipment or equipment aggregate within small intervals and are visible on the chart. By default, alerts that are related to an equipment and not linked to an indicator displays in the indicator chart. On adding the indicators, the alerts linked to the selected indicator also displays in the chart
You can control the visibility of alerts using the Settings option.
Work Orders
The indicator chart visualizes work orders for the selected equipment or component hierarchy. Same type of work orders for a top equipment or equipment aggregate and are visible on the chart as a line. Click the corresponding icon to view the work order details.
42 P U B L I CApplication Help for SAP Predictive Maintenance and Service, cloud edition
Analytics

Notifications
The indicator Chart visualizes notifications for the selected equipment or component hierarchy. Same type of notifications for a top equipment or equipment aggregate and are visible on the chart as a line. Click the corresponding icon to view the notification details.
Threshold
You can view the thresholds for the highlighted indicators in the indicator chart. The primary thresholds selected in the Indicator's application displays on the chart. The number of thresholds defined as primary in the Indicators application displays.
NoteThresholds are only displayed for the indicator category, Flow and Level.
Unit of Measure (UoM) Conversion
Global UoM Settings
The values displayed in the indicator chart complies with the unit system configured in the SAP Fiori launchpad. Choose Unit of Measure in the Settings option of the SAP Fiori launchpad to personalize. For more information on UoM, see Analysis Tools [page 14]
Indicator Chart Specific UoM Conversion
The indicator chart support conversion of indicator values from one UoM to another. Click the Y axis to display the UoM conversion popover. Once the conversion is performed for a UoM, all indicators of that particular UoM will be converted.
When you switch from regular chart to multi chart, the unit of measure conversion also reflects accordingly. You cannot perform the new UoM conversion in the multi chart.
NoteAfter the conversion, the target unit of measure will be displayed in the Y axis and tooltip. The select indicator popup will display the previous unit of measure.
Multi Chart
Multi chart provides capability to display multiple charts and segregate indicators according to unit of measure (UoM). Click the Multi Chart option in the indicator chart to perform this action.
When switching from regular chart to multi chart, the indicators within the indicator chart is segregarated into multiple charts according to unit of measure. You can add or delete chart of unit of measure using the new
Application Help for SAP Predictive Maintenance and Service, cloud editionAnalytics P U B L I C 43

select indicators option. A maximum of 5 charts is supported with 6 indicators per chart. If any of the conditions are not met, a corresponding indicator selection popup with warning message displays.
NoteYou cannot view events, threshold, and values.
NoteAny changes with respect to multi chart persists when navigating from the indicator chart to multi chart and back only if there are no changes to the indicators.
AutoRefresh
Possible to refresh data automatically or manually. For more information, refer Analysis Tools [page 14]
Related Information
Indicator Chart [page 20]Explorer [page 12]Adding Analysis Tools to the Explorer [page 18]Entries to Configure the Indicator Chart [page 394]
44 P U B L I CApplication Help for SAP Predictive Maintenance and Service, cloud edition
Analytics

3.3 Equipment Page
You use the Equipment page to get an overview of all the data associated with a selected piece of equipment.
You can access the Equipment page in the following ways:
● From the Explorer by choosing an equipment link in the Alerts, Indicator Chart, Work Orders, Notifications, Equipment Scores (obsolete), Equipment Indicator, or Map analysis tools.
● From the Equipment List via the Equipment application under Master Data on the SAP Fiori launchpad.
Overview of Information Available on the Equipment Page
Tab Contents
Information ● Highlights● Data Sheet● Model Information● Equipment Information● Business Partner● Sales Organization Data● Installation Location● Life Cycle Information● Systems● Groups
Structure and Parts ● Highlights● Structure● Spare Parts● Visual Parts
Documentation ● Highlights● Documents● Instructions● Failure Modes● Alert Types● Announcements● Improvement Requests● Fingerprints
Monitoring ● Alerts [page 20]● Indicators● Component Indicators● Indicator Chart [page 95]
Application Help for SAP Predictive Maintenance and Service, cloud editionAnalytics P U B L I C 45

Tab Contents
Maintenance & Services ● Highlights● Notifications [page 96]● Work Orders [page 98]● Baseline
Analytics ● Analytics Dashboard [page 55]● Failure Mode Analytics [page 46]● Leading Indicators [page 100]
Timeline All updates of the equipment are recorded here.
Related Information
Explorer [page 12]
3.4 Failure Mode Analytics
Failure mode analytics uses machine learning to turn the human knowledge contained within the texts of notifications into insights about the nature of failures. This provides you with insights and analytics about your equipment and models with the last occurring failures.
Background Information
● Failure mode analytics uses unsupervised and supervised machine learning to extract topics with top words from notification texts that are assigned to standard failure modes and equipment models.
● The system uses various metrics and visualizations to provide you with insights and analytics about your equipment and models with the last occurring failures.
● On the Equipment and Model pages, the failure mode cards show how often the failure modes appeared in notifications for the equipment model. On the failure mode cards, you can also view details that include KPIs for MTTR (Mean Time To Repair), MTTF (Mean Time to Failure), MTBF (Mean Time Between Failure), and the top bad actors.
● In the Failure Modes and Failure Mode Analytics applications, you can find the top words found within the notifications for the chosen failure mode and equipment model by relevancy in a bar graph and a list of all related notifications.
ExampleRose, a reliability engineer, spots a problematic asset, Pump-00554, which pumps crude through a pipeline. She reviews its alerts in the Explorer. The alerts point towards a bearing problem, so Rose checks on two influencing factors: the oil lubrication level, and the temperature of the inflow. She suspects that the
46 P U B L I CApplication Help for SAP Predictive Maintenance and Service, cloud edition
Analytics

inflow temperature is an issue and that the root cause could be a crack in the pump casing. To confirm her assumption, she uses failure mode analytics to get more information. The failure mode OHE (Overheating) has the most occurrences and the MTBF (Mean-Time-Between-Failure) is 1515 hours. She views the detailed analysis for OHE (Overheating) and the top words from the notification text data are Oil level and Temperature High. She looks at the notification that is ranked as most relevant and sees that it was created 1440 hours ago, which means that the next failure is predicted to occur soon because the MTBF is 1515 hours. She also looks up the related work order to see how it was fixed.
Using Failure Mode Analytics
You can access and use the failure mode analytics functions from different access points. For more information, see Using Failure Mode Analytics [page 47].
Validating Failure Mode Analytics
To improve the accuracy of the text analysis that maps topics with top words from notification texts to the most appropriate failure modes, we recommend you perform validation tasks. For more information, see Validating Failure Mode Analytics [page 328].
Related Information
Failure Modes [page 128]Managing Models for Failure Mode Analytics [page 312]
3.4.1 Using Failure Mode Analytics
How to access and use failure mode analytics functions for SAP Predictive Maintenance and Service, cloud edition.
Prerequisites
To appear as failure mode cards, the equipment and failure modes must be assigned to a model. Otherwise, they are hidden.
Application Help for SAP Predictive Maintenance and Service, cloud editionAnalytics P U B L I C 47

Context
You can access and use the failure mode analytics functions as follows:
● From the Equipment or Model pages via the Explorer or the SAP Fiori launchpad. For more information, see Using Failure Mode Analytics from Equipment or Model [page 48].
● From the Failure Modes application via the SAP Fiori launchpad. For more information, see Using Failure Mode Analytics from Failure Modes [page 53].
● From the Failure Mode Analytics application directly via the SAP Fiori launchpad. For more information, see Using the Failure Mode Analytics Application [page 54].
3.4.1.1 Using Failure Mode Analytics from Equipment or Model
This topic describes how to use failure mode analytics from the Equipment or Model pages.
Procedure
1. On the SAP Fiori launchpad, choose between the following options:
○ Go to the Analytics group and open the Explorer application.○ Go to the Master Data group and open the Equipment or Models application.
2. Choose the piece of equipment or model that you want to analyze.
3. Choose ANALYTICS Failure Mode Analytics .The top 5 failure modes for the equipment model within the last 365 days are displayed in cards.
NoteYou can also select a different time range and choose the Go button to apply your selection. If you select the time period from January 8 to January 9, this is a 48 hour time span, not 24 hours.
The failure modes are ranked by the number of occurrences, depending on how often specific words related to the failure mode occurred in notifications for this piece of equipment. The cards show KPIs, including:
1. The number of times this failure mode was identified in notifications created during the time range.2. To what extent this figure compares against all notifications analyzed for the equipment model.3. The MTTR (Mean Time To Repair), MTTF (Mean Time to Failure), and MTBF (Mean Time Between Failure =
The sum of MTTR + MTTF) at the equipment level for each failure mode. For more information about the calculation of these KPIs, see Calculation of Mean Time KPIs [page 49].
4. The top bad actors at the model level for each failure mode.4. To view detailed information about a failure mode, choose the failure mode description on the failure mode
card.5. To display all the failure modes assigned to the model of your selected equipment, choose All Failure
Modes.
48 P U B L I CApplication Help for SAP Predictive Maintenance and Service, cloud edition
Analytics

6. To navigate to the Failure Mode Analytics application, choose View Analytics on a failure mode card.
The analysis shows the top words of the chosen failure mode and equipment model ranked by relevance score.
7. In the Top Notifications table, you can view the related notifications that are ranked by relevance and likelihood of belonging to the failure mode. You can view details of a notification by clicking the notification link.
NoteThe notification ranking by relevance scores contains values from 1 as the highest ranked to 0 as the lowest ranked. The colors for the ranking are provided in three groups:○ Green scores = 0.670 to 1○ Yellow scores = 0.340 to 0.669○ Red scores = 0 to 0.339
8. Under Related Order in the Top Notifications table, you find the work orders for the notifications, from which you can derive the actions taken for other equipment of the same equipment model. You can view details of a work order by clicking the work order link.
3.4.1.1.1 Calculation of Mean Time KPIsOn the failure mode cards, you can view KPIs for Mean Time to Repair (MTTR), Mean Time to Failure (MTTF), and Mean Time Between Failures (MTBF) for each failure mode at equipment level and model level. This topic provides you with an overview of how these KPIs are calculated including examples.
Overview
During the failure mode analysis, notifications for all equipment of a model are collected within the time range. Based on these collected notifications, the downtimes caused by failures and the subsequent uptimes when a failure has been rectified, can be identified. Failures are notifications with a breakdown. That means these notifications have the breakdown attribute set to True or the notificationTypeDescription attribute set to Breakdown. For more information about viewing the notificationTypeDescription attribute, see Viewing and Creating Notifications of Equipment [page 96]. For more information about viewing the breakdown attribute, see SAP Help Portal → Configuration → API Tutorial → Equipment → Viewing Notifications.
These failures and corresponding downtimes as well as uptimes are the basis for the calculation of the KPIs for MTTR, MTTF, and MTBF. The following graphic illustrates these dependencies:
Application Help for SAP Predictive Maintenance and Service, cloud editionAnalytics P U B L I C 49

Mean Time to Repair (MTTR)
The mean time to repair is the expected average time period that it takes to repair a piece of equipment or model that is down because of a failure or planned maintenance. It is the downtime of a piece of equipment or model. The KPI for this mean time is calculated as follows:
Mean Time to Repair = (The total time period when the piece of equipment or model is down for a repair during the time range) / (the number of repairs during the time range)
The total time period when the piece of equipment or model is down for a repair during the time range is the time period between the malfunction start date and the malfunction end date of a notification. The number of repairs during the time range is the total number of collected notifications for which the time to repair (downtime) is known.
ExampleYou have selected 1 month as a time range for your failure mode analysis. Within this period, 1 notification was collected. This notification has a malfunction start date at 4:30 a.m. January 1, 2019 and a malfunction end date at 4:30 p.m. January 1, 2019.
This means that the total time period when the piece of equipment or model is down for a repair is 12 hours and the number of repairs for which the time to repair (downtime) is known is 1. The resulting mean time to repair is 12 hours (12/1).
ExampleYou have selected 2 months as a time range for your failure mode analysis. Within this period, 3 notifications were collected. For all these 3 notifications, the time to repair (downtime) is known:
● The first notification has a malfunction start date at 3:00 a.m. January 1, 2019 and a malfunction end date at 3:00 p.m. January 1, 2019.
● The second notification has a malfunction start date at 3:00 a.m. January 2, 2019 and a malfunction end date at 3:00 p.m. January 2, 2019.
● The third notification has a malfunction start date at 3:00 a.m. January 3, 2019 and a malfunction end date at 9:00 a.m. January 3, 2019.
50 P U B L I CApplication Help for SAP Predictive Maintenance and Service, cloud edition
Analytics

This means that the total time period when the piece of equipment or model is down for a repair is 30 hours (12+12+6) and the number of repairs for which the time to repair (downtime) is known is 3. The resulting mean time to repair is 10 hours (30/3).
Mean Time to Failure (MTTF)
The mean time to failure is the expected average time period between an ended failure and the next expected failure. It is the uptime of a piece of equipment or model and a basic measure of how reliable an ideally non-repairable system is. Furthermore, the mean time to failure is a statistical value and is meant to be the mean over a long period of time and a large number of units. The KPI for this mean time is calculated as follows:
Mean Time to Failure = (The total time period when the piece of equipment or model is up before a failure during the time range) / (the number of failures during the time range)
The total time period when the piece of equipment or model is up before a failure during the time range is the time period between the malfunction end date of a notification and the malfunction start date of the next notification with a breakdown. The number of failures during the time range is the total number of collected notifications that have a breakdown and for which the uptime before a failure is known.
ExampleYou have selected 1 month as a time range for your failure mode analysis. Within this period, 2 notifications with a breakdown were collected. For the second notification, the uptime before a failure is known. For the first notification, the uptime before the first failure is not known:
● The first notification with a breakdown has a malfunction start date at 2:00 a.m. January 1, 2019 and a malfunction end date at 2:00 p.m. January 1, 2019.
● The second notification with a breakdown has a malfunction start date at 8:00 p.m. January 1, 2019 and a malfunction end date at 2:00 a.m. January 2, 2019.
This means that the total time period when the piece of equipment or model is up before a failure is 6 hours and the number of failures for which the uptime before a failure is known is 1. The resulting mean time to failure is 6 hours (6/1).
ExampleYou have selected 2 months as a time range for your failure mode analysis. Within this period, 3 notifications with a breakdown were collected. For 2 of these notifications, the uptimes before a failure are known. For the first notification, the uptime before the first failure is not known:
● The first notification with a breakdown has a malfunction start date at 2:00 a.m. January 1, 2019 and a malfunction end date at 2:00 p.m. January 1, 2019.
● The second notification with a breakdown has a malfunction start date at 8:00 p.m. January 1, 2019 and a malfunction end date at 2:00 a.m. January 2, 2019.
Application Help for SAP Predictive Maintenance and Service, cloud editionAnalytics P U B L I C 51

● The third notification with a breakdown has as malfunction start date at 10:00 a.m. January 2, 2019 and a malfunction end date at 1:00 p.m. January 2, 2019.
This means that the total time period when the piece of equipment or model is up before a failure is 14 hours (6+8) and the number of failures for which the uptime before a failure is known is 2. The resulting mean time to failure is 7 hours (14/2).
Mean Time Between Failures (MTBF)
The mean time between failures is the expected average time period between the last failure and the next upcoming failure. It is a measure of how reliable a system is. The KPI for this mean time is calculated as follows:
Mean Time Between Failures = (The total time period between two subsequent failures during the time range) / (the number of failures during the time range)
The total time period between two subsequent failures during the time range is time period between the malfunction start date of a previous notification with a breakdown and the malfunction start date of the next notification with a breakdown. The number of failures during the time range is the total number of collected notifications that have a breakdown and for which the time period between two subsequent failures is known.
ExampleYou have selected 1 month as a time range for your failure mode analysis. Within this period, 2 notifications with a breakdown were collected. For the first notification, the time period between the subsequent failures is known. For the second notification, the time period between the subsequent failures is not known as the next failure has not yet started:
● The first notification with a breakdown has a malfunction start date at 8:00 a.m. January 1, 2019 and a malfunction end date at 1:00 p.m. January 1, 2019.
● The second notification with a breakdown has a malfunction start date at 5:00 p.m. January 1, 2019 a malfunction end date at 2:00 a.m. January 2, 2019.
This means that the total time period between subsequent failures is 9 hours and the number of failures for which the time period between the subsequent failures is known is 1. The resulting mean time between failures is 9 hours (9/1).
52 P U B L I CApplication Help for SAP Predictive Maintenance and Service, cloud edition
Analytics

ExampleYou have selected 2 months as a time range for your failure mode analysis. Within this period, 3 notifications with a breakdown were collected. For 2 of these notifications, the time period between the subsequent failures is known. For the third notification, the time period between the subsequent failures is not known as the next failure has not yet started:
● The first notification with a breakdown has a malfunction start date at 8:00 a.m. January 1, 2019 and a malfunction end date at 1:00 p.m. January 1, 2019.
● The second notification with a breakdown has a malfunction start date at 5:00 p.m. January 1, 2019 a malfunction end date at 2:00 a.m. January 2, 2019.
● The third notification with a breakdown has as malfunction start date at 10:00 a.m. January 2, 2019 and a malfunction end date at 2:00 p.m. January 2, 2019.
This means that the total time period between subsequent failures is 26 hours (9+17) and the number of failures for which the time period between the subsequent failures is known is 2. The resulting mean time between failures is 13 hours (26/2).
3.4.1.2 Using Failure Mode Analytics from Failure Modes
This topic describes how to use failure mode analytics from the Failure Modes application.
Procedure
1. On the SAP Fiori launchpad, go to the Master Data group and open the Failure Modes application.2. In the Failure Mode List window, select a failure mode.3. Choose the ANALYTICS tab.4. Select an equipment model.5. Choose Go.
The analysis shows a bar graph with the top words of the chosen failure mode and equipment model ranked by relevance score.
6. In the Top Notifications table, you can view the related notifications that are ranked by relevance and likelihood of belonging to the failure mode. You can view details of a notification by clicking the notification link.
NoteThe notification ranking by relevance scores contains values from 1 as the highest ranked to 0 as the lowest ranked. The colors for the ranking are provided in three groups:
Application Help for SAP Predictive Maintenance and Service, cloud editionAnalytics P U B L I C 53

○ Green scores = 0.670 to 1○ Yellow scores = 0.340 to 0.669○ Red scores = 0 to 0.339
7. Under Related Order in the Top Notifications table, you find the work orders for the notifications, from which you can derive the actions taken for other equipment of the same equipment model. You can view details of a work order by clicking the work order link.
3.4.1.3 Using the Failure Mode Analytics Application
This topic describes how to use the Failure Mode Analytics application directly.
Procedure
1. On the SAP Fiori launchpad, go to the Analytics group and open the Failure Mode Analytics application.2. Select an equipment model.3. Select a failure mode.4. Choose Go.
The analysis shows a bar graph with the top words of the chosen failure mode and equipment model ranked by relevance score.
ExampleYou select the equipment model of a faulty piece of equipment and a failure mode that describes the equipment's problem. The failure mode analysis has been run and one of the top words found in the notifications related to this equipment model is “high temperature”. Since “high temperature” is a top word, you further investigate the notification texts that are related to this failure mode and feature this top word.
5. In the Top Notifications table, you can view the related notifications that are ranked by relevance and likelihood of belonging to the failure mode. You can view details of a notification by clicking the notification link.
NoteThe notification ranking by relevance scores contains values from 1 as the highest ranked to 0 as the lowest ranked. The colors for the ranking are provided in three groups:
○ Green scores = 0.670 to 1○ Yellow scores = 0.340 to 0.669○ Red scores = 0 to 0.339
6. Under Related Order in the Top Notifications table, you find the work orders for the notifications, from which you can derive the actions taken for other equipment of the same equipment model. You can view details of a work order by clicking the work order link.
54 P U B L I CApplication Help for SAP Predictive Maintenance and Service, cloud edition
Analytics

3.5 Personal Dashboard
This app is personalized to be a one-stop point to navigate to the applications, your frequently viewed items of equipment, favorites and unread announcements.
Personal Dashboard has the following sections:
● Overview: Contains a search bar to find objects from applications such as Equipment, Models, Templates and Instructions.
● Applications: Allows you to navigate directly to applications from this section.● Frequently Viewed: Displays your frequently viewed items of equipment as thumbnails. You can navigate to
an item of equipment through these thumbnails.● My Favorites: Shows up to 20 items of equipment that you have marked as favorites on the Equipment
object page.● Suggested Tasks: Displays unread announcements.
3.6 Analytics Dashboards
Analytics dashboards visualize data, for example, by using interactive charts or tables. This provides you with insights and allows you to analyze and explore your data.
SAP Analytics Cloud
The source of the analytics dashboards is SAP Analytics Cloud. In SAP Analytics Cloud, an administrator can create stories (dashboards) based on different data and then configure analytics dashboards in order to display these stories in SAP Predictive Maintenance and Service, cloud edition.
For more information about stories in SAP Analytics Cloud, see Stories.
Analytics Dashboard Types
Your administrator can configure different types of analytics dashboards for you:
● Analytics dashboards for the Analytics Dashboards applicationThese dashboards are displayed in the application itself. With this type of dashboard, you can run analytics on any data coming from the story, for example, for all equipment or models with their related data like work orders.
● Analytics dashboards for object pagesThese dashboards are displayed on certain object pages. With this type of dashboard, you can run analytics on data coming from the story that is related to a single business object, for example, one piece of equipment or one model. One analytics dashboard is displayed per business object. The business objects for which dashboards can be configured include:
Application Help for SAP Predictive Maintenance and Service, cloud editionAnalytics P U B L I C 55

○ Equipment○ Models○ Locations○ Spare Parts
For more information about the configuration, see Configuring SAP Analytics Cloud and Analytics Dashboards [page 378].
Features
To analyze and explore your data, you can perform different actions in the dashboards depending on what features you have configured when creating your story in SAP Analytics Cloud. Possible features are, for example:
FilteringYou can focus on a specific set of data on a chart or in a table by filtering table cells or chart data points or excluding non-relevant cells / data points. To apply filters to multiple charts, you can also group filters. Filtering also allows you to rank data and focus on a specified number of data points with the highest or lowest values, or on a specified number of the lowest or highest ranked members. You can later also reset all filters.
SortingOn a table or a chart, you can sort data using different sort directions, for example, sorting dimensions alphabetically.
Adding ThresholdsTo quickly get insights into which areas are doing well and which areas may need improvements, you can create thresholds, for example, for charts.
Entering Full Screen ModeTo focus on data for example, for only one chart, you can open the chart in full screen mode.
For more information about all available features for stories in SAP Analytics Cloud, see SAP Analytics Cloud Help.
Viewing Analytics Dashboards
For more information about viewing analytics dashboards, see Viewing Analytics Dashboards in the Application [page 57] and Viewing Analytics Dashboards on Object Pages [page 58].
Related Information
SAP Analytics Cloud
56 P U B L I CApplication Help for SAP Predictive Maintenance and Service, cloud edition
Analytics

3.6.1 Viewing Analytics Dashboards in the Application
This topic describes how to view analytics dashboards in the Analytics Dashboards application.
Prerequisites
● At least one dashboard for the application has been configured by an administrator. For more information, see Configuring SAP Analytics Cloud and Analytics Dashboards [page 378] and Configuring Analytics Dashboard Types [page 382].
● The following role is assigned to your user:○ For SAP Predictive Maintenance and Service Fiori launchpad: <pdms_AssetCoreReader>○ For SAP Intelligent Asset Management Fiori launchpad: <AC_ORG_DATA_READ>
Procedure
1. On the SAP Fiori launchpad, go to the Analytics group and open the Analytics Dashboards application.
The Analytics Dashboards table is displayed with all configured dashboards. The titles are sorted alphabetically.
2. To view a dashboard, click the respective dashboard title link.
Results
The dashboard is displayed and you can view the data.
You can later close the analytics dashboard and go back to the table by choosing the back button on the SAP Fiori launchpad.
Related Information
Analytics Dashboards [page 55]
Application Help for SAP Predictive Maintenance and Service, cloud editionAnalytics P U B L I C 57

3.6.2 Viewing Analytics Dashboards on Object Pages
This topic describes how to view analytics dashboards on object pages.
Prerequisites
● A dashboard for one of the business objects has been configured by an administrator. For more information, see Configuring SAP Analytics Cloud and Analytics Dashboards [page 378] and Configuring Analytics Dashboard Types [page 382].
● The following role is assigned to your user:○ For SAP Predictive Maintenance and Service Fiori launchpad: <pdms_AssetCoreReader>○ For SAP Intelligent Asset Management Fiori launchpad: <AC_ORG_DATA_READ>
Procedure
1. On the SAP Fiori launchpad, go to the Master Data group and open the respective business object application for which you want to view the analytics dashboard. Depending on the configured dashboards, you can choose between the following applications:
○ Equipment application○ Models application○ Locations application○ Spare Parts application
TipYou can also navigate to the equipment page from the Explorer. For more information, see Explorer [page 12].
2. Choose the business object that you want to analyze, for example, the piece of equipment or model.
The object page is displayed.3. Display the analytics dashboard for the business object. Choose between the following options:
○ On the equipment and models page, choose ANALYTICS Analytics Dashboard .○ On the locations and spare parts page, choose ANALYTICS DASHBOARD.
Results
The dashboard for the business object is displayed and you can view the data.
58 P U B L I CApplication Help for SAP Predictive Maintenance and Service, cloud edition
Analytics

Related Information
Analytics Dashboards [page 55]
3.7 Emerging Issue Detection (EID)
Emerging Issue Detection (EID) enables you to identify, monitor, and manage an equipment issue early. As part of this process, you gather information such as issue history, relevant documents, and investigation details that will help to make a more detailed analysis of the issue.
The evidence is collected in an improvement request [page 62], using the Add Evidence button.
During your evidence collection, you can create a new improvement request or edit an existing improvement request. You can manually collect the evidence related to an issue and attach it to an improvement request using the following analysis tools:
● Features in Indicator Chart [page 38]● Alerts [page 20]● Notifications [page 32]● Work Orders [page 34]
Related Information
Creating an Improvement Request [page 62]
Application Help for SAP Predictive Maintenance and Service, cloud editionAnalytics P U B L I C 59

4 Processes
The tiles under Processes on the SAP Fiori launchpad give you access to the various business processes offered by SAP Predictive Maintenance and Service, cloud edition.
Overview of Processes
Tile Use
Performance Improvement [page 60] Get suggestions or a solution for an equipment issue by creating an improvement request.
Obsolescence Management [page 67] A report that graphically illustrates deadlines for manufacturer support for a model or a piece of equipment.
Lookup [page 68] Search for error codes and look up related information for an equipment or a model.
Smart Matcher [page 70] Use this application to assign models to a lean (equipment with no model assignment to it) equipment.
4.1 Performance Improvement
While using an equipment, you could face issues with regard to its process or maintenance. To get suggestions or a solution, you can create an improvement request. By creating this request, you involve the relevant stakeholders who can collaborate and provide you with a suggestion or even a solution.
If stakeholders within your organization can resolve your request, create an internal improvement request. If you want to involve stakeholders outside your organization, create an external improvement request.
The parties involved in this workflow are:
● Requester: The user who requests for a suggestion or a solution by creating an improvement request.● Reviewer: The user who reviews the improvement request sent by the improvement requester.● Provider: The user who suggests a solution for the improvement request sent by the requester.
NoteThe user who is currently processing the improvement request is referred to as the Processor. The processor can be the requester, reviewer or the provider.
Using the Performance Improvement application, you can perform the following tasks:
● Create, Review and submit an improvement requestCreating an Improvement Request [page 62]Reviewing an Improvement Request [page 63]
● Complete or reject an improvement requestCompleting an Improvement Request [page 64]
60 P U B L I CApplication Help for SAP Predictive Maintenance and Service, cloud edition
Processes

● Resubmit an improvement requestResubmitting an Improvement Request [page 64]
● Confirm an improvement requestConfirming an Improvement Request [page 65]
● Reopen a confirmed improvement requestReopening a Confirmed Improvement Request [page 65]
The following table describes the statuses of an improvement request:
Status Description
Draft The requester has created an improvement request.
In Review The requester has created an improvement request and sent it to the reviewer for review.
Submitted The requester has submitted the improvement request to the provider;
OR
The reviewer has submitted the improvement request (created by the requester) to the provider.
In Process The improvement request is being processed by the provider.
Author Action The provider sends the improvement request to the reviewer or requester for more details.
Rejected The provider has rejected the case as invalid.
Completed The provider has provided a suggestion or a solution.
Confirmed The reviewer has closed the case after it was processed by the provider.
Application Help for SAP Predictive Maintenance and Service, cloud editionProcesses P U B L I C 61

The following figure illustrates the process flow of an improvement request between an requester, reviewer and the provider:
4.1.1 Creating an Improvement Request
You create an improvement request when you want suggestions or solutions about a piece of equipment, its process, or maintenance.
Procedure
1. Open the Performance Improvement application.
2. To create an internal improvement request, choose New Internal .
The system displays the Improvement Request window.3. To define a case, enter the following details in the New Improvement Request dialog box:
a. Enter a request descriptionb. Choose a reference object type (Model, Equipment, Location)c. Choose a reference object ID, based on reference object type chosen.d. Select an improvement category
62 P U B L I CApplication Help for SAP Predictive Maintenance and Service, cloud edition
Processes

e. Choose a priorityf. Select a reviewer to review your improvement request.g. Select a provider who can provide a resolution to your improvement request.h. Choose OK.
4. To add one or more items of equipment, choose Edit→ Affected Equipment and perform the following tasks:a. Choose Addb. Select one or more items of equipmentc. Choose Assign
5. To add additional information to the case, choose Request Description and provide the necessary description of the case in the Description text box.
6. To assign instructions to the case, choose Request Instructions and perform the following tasks:a. Choose the Assign Instructions dropdown.b. Select one or more instructions from the Select Instructions popup.c. Choose Assign.
7. To add additional information to the case using documents, choose Request Documents and perform the following tasks:
a. Choose Add Assign .b. Select the relevant document.c. Choose Assign.
8. Choose Save.9. Choose Send for Review to submit the case to the reviewer.
○ Choose Submit to submit the request directly to the provider.
4.1.2 Reviewing an Improvement Request
As an reviewer, you perform this procedure to review an improvement request created by an requester.
Context
You have a case assigned to you for review by an requester.
Procedure
1. Open the Performance Improvement application.
The system displays the Improvement Requests window with a list of existing cases.2. Choose a request from the improvement requests list, or search for a request that you want to review.3. You can modify information in the request as necessary and add comments in the comments section to
enhance the information required for the processing the request.
Application Help for SAP Predictive Maintenance and Service, cloud editionProcesses P U B L I C 63

4. To submit the request to a provider, choose Submit.
○ To request additional information from the requester, choose Send to Requester for Update.
4.1.3 Completing an Improvement Request
You perform this task to provide a suggestion or a solution to an improvement request created by a requester, or submitted by a reviewer.
Context
As a provider, you have a request assigned to you that requires resolution either by the reviewer or by the requester.
Procedure
1. Open the Performance Improvement application. The system displays the improvement requests window with a list of existing requests.
2. Choose a request from the improvement requests list, or search for a request that you want to resolve.3. To process the improvement request, choose In Process.4. To provide a solution for the request, add comments or documents, as required, in the Recommendation
section.5. Choose Completed.
○ To request additional information from the requester, choose Author Action.○ To reject the request as an invalid request, choose Reject Improvement Request.
4.1.4 Resubmitting an Improvement Request
As an requester or a reviewer, you can resubmit an improvement request to the provider for further processing.
You can resubmit an improvement request in the following scenarios:
● When the provider sends the improvement request for Author Action asking for additional details from the requester or reviewer.
● When the provider has already provided the recommendation for the improvement request.● When the provider has rejected the improvement request.
64 P U B L I CApplication Help for SAP Predictive Maintenance and Service, cloud edition
Processes

4.1.5 Confirming an Improvement Request
As an reviewer, you can confirm a request after the provider has provided a recommendation or rejected the improvement request.
Context
You have received an improvement request that either has a recommendation from a provider, or has been rejected by the provider.
Procedure
1. Open the Performance Improvement application.
The system displays the Improvement Cases window with a list of existing cases in statuses Recommendation Provided or Rejected.
2. To add any additional comments, choose Edit.3. For an improvement request in status Recommendation Provided, choose Confirm to close the request.
○ For a rejected improvement request, you can perform either of the following:○ Choose Confirm Rejection to close the rejected request.○ Choose Resubmit to Provider to resubmit the request.
4.1.5.1 Reopening a Confirmed Improvement Request
You perform this activity if you need more information about an improvement request after a recommendation has been provided or the case has been rejected by the provider.
Prerequisites
● You are either the requester or the reviewer.● You have an improvement request in the status Confirmed in your Improvement Cases window. For more
details about statuses of improvement cases, refer to the table in Performance Improvement [page 60].
Procedure
1. Open the Performance Improvement application.
Application Help for SAP Predictive Maintenance and Service, cloud editionProcesses P U B L I C 65

2. Choose the improvement request in the status Confirmed.3. Choose Reopen Request.4. Choose Yes.5. Add comments and edit the improvement request as necessary.6. Click the More icon and choose Resubmit to Provider.7. Add a comment and choose OK.
The reopened improvement request is sent to the provider.
4.1.6 Viewing the List of Improvement Requests
As a reviewer, provider or requester you might want to see the improvement requests based on certain filters.
Context
The user has an easier way to see the requests based on different statuses and roles.
Procedure
1. Open the Performance Improvement App and view the list of the requests. Now, you want to see the requests that you need to process as a requester.
2. Choose For Processing in the drop down next to the table.3. Choose <My Processing Role> from the filter bar. Automatically, the request list will be filtered out
based on the statuses set on the filter bar.
4.1.7 Deleting an Improvement Request
You can delete an improvement request that you no longer want to have on the network.
Prerequisites
Your user ID either belongs to the group AIN_ORG_ADMIN or AIN_ORG_DATA_EXPERT, or has the roles IMPROVEMENT_DELETE assigned.
For more information, see Additional Roles for Master Data, Processes and Administration [page 350].
66 P U B L I CApplication Help for SAP Predictive Maintenance and Service, cloud edition
Processes

Procedure
1. Open the Performance Improvement app.2. Select the Improvement Request which is one of the following status: Draft, Rejected, Completed, In
Review or Author Action and go to the details screen.3. Select Delete Request.
You get a confirmation message. Choose OK to delete the request.
Results
You can view the improvement request in the list screen with status as Deleted.
NoteYou can still submit the deleted requesst to external providers.
4.2 Obsolescence Management
A report that graphically illustrates deadlines for manufacturer support for a model or a piece of equipment. These deadlines pertain to:
● Support for repair● Accepting model or equipment orders● Calibration services● Availability of spare parts
This application allows timely tracking of the model or equipment lifecycle.
For more information, refer to Viewing the Obsolescence Management [page 67].
4.2.1 Viewing the Obsolescence Management
You use this application to visualize models that will be obsolete in the next 3 years and affected equipment.
Procedure
1. Launch the Obsolescence Management application.2. In the Obsolescence Management details page, you can set the following filters:
Application Help for SAP Predictive Maintenance and Service, cloud editionProcesses P U B L I C 67

a. In the Expiry Date dropdowns, choose the option for which you want to view the items due for expiry.
NoteThe report displays information for every month in the time period that you have selected.
b. Choose the manufacturer.c. Choose the relevant expiry date.d. Choose Class and Subclass from the filters as necessary.
Results
You see a graphical representation of the number of models and items of equipment that are due for expiry for your given time period.
NoteThe tabular view below the graphical representation displays information about the Model Count and Equipment Count that are clickable links. Clicking on the Equipment Count, you can navigate to the equipment list. You can select equipment from the list to view the details page.
You have an option in the chart tool bar to view this data in the following views:
● Chart and Tabular View● Chart View● Tabular View
For chart view, you can use Select Chart Type to visualize the data in different chart types, for example, line chart, bar chart, and so on.
By default, the chart view displays data based on month/year dimension. You can also add additional dimensions to drill down the data using the View By option on the chart tool bar.
You can select a segment from the interactive chart and use the Details option on the chart tool bar to view details of the selected option. You can personalize the data in the chart using the Settings option from the chart tool bar.
You can opt to view all the details in the tabular view or details of only the selected segment from the interactive chart by using the options from the table tool bar. You can personalize the data in the table using the Settings option from the table tool bar.
4.3 Lookup
You use this app to search the error code and look-up related information for an equipment or a model.
Lookup application also allows you to find troubleshooting information for an equipment or a model. You can use the Scan Bar Code option to find the equipment and its details.
68 P U B L I CApplication Help for SAP Predictive Maintenance and Service, cloud edition
Processes

Due to the common pattern across manufacturer, field technicians and engineers in the field can look up error codes much faster using this app. Regardless of the manufacturer, operating, and service providing, companies will always find error codes and solutions to it in the same place.
You can use the look-up option to search for a model or a piece of equipment. Manufacturers can maintain error codes on the model level:
● Error code descriptions and failure modes for a particular error code can be provided● Breakdown instructions assigned to the respective model and failure mode are automatically displayed for
each model
For more information, refer to Managing Lookup [page 69].
In devices that support RFID, in addition to scanning of QR/barcodes you can also scan NFC tags to identify equipment (SAP Fiori client needed). Set up the bar code configurations under General Application Settings
Bar Code Configurations , you have to define the <Prefix> and <Suffix> in order to use this feature.
4.3.1 Managing Lookup
You can perform various operations on lookup such as lookup and error code-related information for an equipment or a model.
Context
You can use this app to search for <Error Code> and <Lookup>. You can perform the following operations using the lookup application:
● Lookup a model using it’s <ShortDescription> or <Model ID> or <PrimaryExternalID> or <ExternalID>
● Lookup an equipment using its <ShortDescription> or <Equipment ID> or <PrimaryExternalID> or <ExternalID> or <SerialNumber>
● Search for specific:○ Lookup of equipment○ Error code of equipment○ Lookup of Model○ Error code of model
● Scan bar code on devices for equipment● Publish equipment details● Search by both Equipment ID and Model ID irrespective of whether the equipment has been assigned to a
model● Display Alert Types of type error code for the selected equipment or model.● NFC enabled for devices that support RFID.
Application Help for SAP Predictive Maintenance and Service, cloud editionProcesses P U B L I C 69

4.4 Smart Matcher
Operator can use this information during their maintenance processes.
Manufacturer provides the information on the model level. The operator in turn synchronizes installed base information from SAP Plant Maintenance (SAP PM) to SAP Predictive Maintenance and Service, cloud edition. With this, operator owns a significant amount of equipment from SAP PM in SAP Predictive Maintenance and Service, cloud edition. If the data quality of the equipment is sufficient enough, the smart matcher can help you link a lean equipment (equipment with no model assignment to it) to the respective model it belongs to.
The above is based on an algorithm that involves fuzzy search. In case of poor or incomplete data on equipment level, the smart matcher application provides a card view in which you can match recommended models to equipment. The recommendation is again based on the same algorithm. The output of the algorithm is a match factor between 0.6 (60%) and 1 (100%).
For more information, refer to Performing a Smart Match [page 70].
4.4.1 Performing a Smart Match
You can perform various operations on smart matcher such as matching an equipment to model or updating the model details in model app and checkin Smart Matcher application.
Context
You use the Smart Matcher application to assign models to a lean (equipment with no model assignment to it) equipment. You can perform the following operations using the Announcements application:
● Assign model to a lean equipmentAll equipment that have an active model request associated with it will not be visible in the equipment list. Equipment in <Sold> and <Retired> are not displayed.
● Identify lean equipment without a fitting model to create model requests● Update the equipment details using the Equipment application and check this using Smart Matcher● Search for a model in the Equipment application and check the equipment for a given matching factor● View the count on the smart matcher tile. This depicts the probable matches for lean equipment● Remove visibility of equipment for a particular model by choosing the NO MATCH button● Display equipment both in list and grid view● Match equipment to a model by choosing the Match button on the equipment file● Remove the visibility of equipment for a particular model by selecting No Match button● You can Matchor No Match model assignments for multiple equipment.
70 P U B L I CApplication Help for SAP Predictive Maintenance and Service, cloud edition
Processes

5 Master Data
The tiles under Master Data on the SAP Fiori launchpad enable you, as a business user, to browse all kinds of related information about your equipment. If you are an administrator you can additionally create and edit master data.
Overview of Master Data
Tile Use
Equipment [page 72] Create/display equipment. An item of an equipment is a physical instance of a model. An operator maintains additional information specific to an item of an equipment such as installation information, installation location, documents.
Models [page 103] Create/display models. A model is an abstract representation from the manufacturer that defines all maintenance and specification information related to a new or existing product. A physical equipment is an instance of a model.
Locations [page 119] Create/display a location is a virtual record of the location where an equipment is installed.
Functions [page 127] Defines how the assigned objects are intended to operate. For example, you can assign functions to equipment, models etc.
Failure Modes [page 128] Create/display failure modes. A failure mode is a probable failure that could occur to piece of equipment.
Fingerprints [page 137] Defined as a collection of snapshot of the indicator chart derived from a set of indicators and meta data (type, data and time, description, equipment state) for a specific time period. It describes the reference state of a single equipment that can be used for further process steps, for example, equipment documentation, trending, failure analytics.
Spare Parts [page 141] Create/display spare parts. Spare parts are components that are kept in your inventory as spare. Typically, these components are not fitted into your equipment, but can be fitted into a piece of equipment when needed.
Groups [page 151] Create/display groups. You can group together different business objects for multiple purposes.
Systems [page 158] Define systems based on a system model and assign system template to it.
Documents [page 167] Create/assign/download/display documents for your equipment.
Announcements [page 191] Create/display announcements. An announcement is information communicated to equipment owners or operators, for example, to inform that an instruction has been updated.
Instructions [page 198] Create/display instructions. An instruction is a set of steps that help the user to carry out a specific task, for example, maintenance of a specific piece of equipment
Templates [page 209] Create/display templates. A template is a format created by the manufacturer to maintain metadata related to a model, piece of equipment or a location.
Rules [page 244] Create and manage rules and associated actions.
Application Help for SAP Predictive Maintenance and Service, cloud editionMaster Data P U B L I C 71

5.1 Equipment
A piece of equipment is a physical instance of a model. An operator maintains additional information specific to an item of an equipment such as the following:
● Installation information:An operator maintains installation information related to an equipment such as serial number of the equipment, tag number of the equipment, installation date of the equipment, and build date of the equipment.
● Installation location:An operator maintains geographical coordinates of the item of an equipment to locate the location of an item of an equipment.
● Documents:An operator maintains some best practices information while using the item of an equipment using unstructured documents.
An equipment can be in any of the following states:
● Unpublished● In Revision● Published
For more information, see State Transitions [page 249].
5.1.1 Managing Equipment
You can create, view, update, and delete a piece of equipment.
Context
Features More Information
Create a piece of equipment and assign additional information such as installation information, location information, and attach documents.
Add and remove equipment components. For more information, see Adding Equipment Components [page 86].
View details of an existing equipment and update an existing equipment.
For more information, see Viewing and Updating a Piece of Equipment [page 88].
72 P U B L I CApplication Help for SAP Predictive Maintenance and Service, cloud edition
Master Data

Features More Information
Delete a piece of equipment. For more information, see Deleting a Piece of Equipment [page 92].
NoteIn addition, you can use the Lookup application to scan the bar code, or the QR code of an item of equipment to view the details related to an item of equipment and perform actions such as update equipment phase, or edit header information for an item of equipment.
View work orders for a piece of equipment Viewing Work Orders of an Equipment [page 98]
View notifications for a piece of equipment Viewing and Creating Notifications of Equipment [page 96]
View and edit indicators Viewing and Editing Indicators [page 99]
View and analyze leading indicators for a piece of equipment.
Viewing and Analyzing Leading Indicators for Equipment
View an analytics dashboard for a piece of equipment. Viewing Analytics Dashboards on Object Pages [page 58]
5.1.1.1 Creating a Piece of Equipment
You create a piece of equipment based on an existing model, and add additional information such as operator, equipment installation information, equipment location information, and assign documents relevant to the equipment.
Prerequisites
● You have created an operator .● You have identified your organization's profile on the SAP Predictive Maintenance and Service, cloud
edition.● Your user ID either belongs to the group ORG_ADMIN or ORG_DATA_EXPERT, or has the roles
EQUIPMENT_DELETE or EQUIPMENT_EDIT assigned.For more information, see Additional Roles for Master Data, Processes and Administration [page 350].
Context
You use the Equipment application to:
● Create a piece of equipment for your own operations purposes● Create a piece of equipment for another customer
For simplicity purpose, we describe the procedure to create a piece of equipment for your own operations.
Application Help for SAP Predictive Maintenance and Service, cloud editionMaster Data P U B L I C 73

Step # DescriptionAdditional Information
1 Open the Equipment application.
2 Choose New.
3 In the New Equipment dialog box:
1. You can optionally assign a model template for the equipment. Select the model template in the Model ID.In the Model ID dropdown, select an existing model from which you want to inherit the properties for the item of the equipment.If SAP Predictive Maintenance and Service is available, once the model template is selected the <IoT Sync> field is enabled. This field enables you to replicate the selected object in SAP Cloud Platform Internet of Things for the Cloud Foundry Environment and SAP IoT Application Enablement and maintain connection between these systems. You can choose a <Yes> or <No>. By default, the sync is always set to <Yes>.
NoteFor more information, see https://help.sap.com/viewer/067e3d8253654398996ec49271b7441a/latest/en-US/ac5129f13f6c43eb99025ebdd079f83b.html.
2. In the Equipment ID field, enter a unique name for an item of equipment.3. In the Short Description field, enter a short description for an item of equipment.4. In the Equipment Template dropdown, choose the equipment template you have
created and want to assign to the equipment.For more information about creating an equipment template, see Creating an Equipment Template [page 235].
5. In the Long Description field, enter a long description for an item of equipment.6. In the Operator field, enter an operator for the equipment. Your company is se
lected as default value.7. In the Phase, select:
○ Fully Operational or Partially Operational status if a piece of physical equipment exists.
○ Planned if a piece of physical equipment does not exist, or you have chosen to update the physical equipment details later.
○ Not Operational8. Choose Save to create a single piece of equipment. Enable the Create
Components switch to create equipment hierarchy from the model template. In the Set Components tab, you can define the individual subequipment. Create Components creates the individual items of equipment, use Save to finalize the activity.
NoteComponent hierarchy is added to the equipment when a model is assigned to it.
74 P U B L I CApplication Help for SAP Predictive Maintenance and Service, cloud edition
Master Data

Step # DescriptionAdditional Information
4 Add values/infomation to the attributes of the underlying templates in the data sheet section, model information, equipment information, business partner information, installation location, lifecycle information, system, or groups
Adding Data in the Information Section [page 78]
5 Add structure components, spare parts or visaul parts information Adding Structure & Parts [page 82]
6 Add equipment component Adding Equipment Components [page 86]
7 Add documents, instructions, failure modes, alert types announcements or create improvement request for the equipment
Adding Information in the Documentation Section [page 83]
8 Configure indicator or component indicator Adding Information in the Maintenance & Service Section [page 87]
10 View changes made on the equipment data Timeline [page 91]
11 To publish an item of equipment, choose Publish
Once equipment is published, it is synchronized with IoT Application Enablement and IoT Services.
System publishes the item of the equipment and creates a first revision of the item of the equipment in .
Publishing Multiple Equipment [page 92]
12 To create revisions of an item of an equipment and to switch between the published and revision states, see the steps provided in the procedure Creating Revisions and Switching Between Revisions and Published State [page 249].
Application Help for SAP Predictive Maintenance and Service, cloud editionMaster Data P U B L I C 75

5.1.1.2 Editing Header Information
The object page of the equipment displays the header information that includes information like Phase/System Status, External IDs, Status (of the equipment), Languages and so on.
Context
You can view or edit the following in the header information:
Procedure
1. Phase/System Status
You can view the phase of the equipment using the icon next to the equipment name in the header. The icon displays the following symbols for the relevant phases:
Icon Phase
Planned
Partial or Fully Operational
Not Operational
Dispose, Retired, Sold
You can also view the system status, the date when the record was created and also navigate to the Manage Phase feature.
You can document the different life cycle phases of the equipment using Manage Phase. Equipment can be in one of the following phases:○ Current phase: It has three subsections:
○ Planned○ Actual○ Phased out
These main phases are followed by a subsequent status schema, for example, Fully Operational.○ Fully Operational
○ Planned => (Not <=> Partially <=>Fully) Operational○ Operational <=> Dispose => Retire
○ Retire => Sold
NoteLegends:
76 P U B L I CApplication Help for SAP Predictive Maintenance and Service, cloud edition
Master Data

○ => one time step, not reversible○ <=> back and forth
Dependencies:○ Dismantle the equipment assigned to location, otherwise they can't reach the state of Dispose,
Retire, and Sell.○ The Sold phase needs a Published status and an assigned model to the equipment.○ Sold means a Transfer of Ownership. Equipment in that stage is not furthermore editable for the
old Owner, but listed in their repository with the app. Date of ownership transfer.Equipment exposed as a System can have an additional(optional) status (ISO 14224):○ Redundant or Passive Standby:
Redundancy wherein parts of the system for performing a required function are operational, while the remaining parts of the system are inoperative until needed.
○ Standby or Active Standby:Redundancy wherein all the parts of the system for performing a required function are intended to operate simultaneously.
○ Next PhaseWith the next phase, you can document or plan the upcoming, multiple phase changes.○ This planned phase change does not have a mandatory phase change as consequence.○ This selectable phase here, do not follow a status schema or dependency.
○ Current and planned phase will be exposed in the Manage Phase dialog and on the related highlight card. In addition, all current phase changes are notified in the Timeline of the Equipment with information of status change, timestamp, and changes done by internal person or business partner.
Equipment can be in one of the following phases:
You can document the different life cycle phases of the equipment.
2. External IDs: You can view the Object ID of the equipment and also view the IDs used for the equipment in the external systems. You can also use Add button to add external IDs.
3. Status: You can view the status of the equipment.4. Languages: You can view the languages supported.5. Manage:
You can perform the following actions using the Manage button in the published equipment:○ New Revision: This option is available only if the equipment is already in Published state.○ View Last Published/View Last Revision: This option is available only if the equipment is in In Revision
state.○ Update Model: You can update the model associated with the equipment. This option is available only if
the equipment is already in Unpublished or In Revision state.○ Remove Model: You can remove the model associated with the equipment. This option is available only
if the equipment is already in Published or In Revision state.○ View Lifecycle Changes○ Delete○ Edit Header: You can edit the equipment information like equipment ID, description, and image. This
option is available only if the equipment is already in Unpublished or In Revision state.○ Request Model: This option is available only if the equipment is already in Published state.
Application Help for SAP Predictive Maintenance and Service, cloud editionMaster Data P U B L I C 77

○ Sync with IoT Services:
NoteNote: This option is available only if the equipment is in Published state, the <IoT Sync Flag> is set to Yes and IoT Services 4.0 system is configured.
○ New Notification: Create a notification.
5.1.1.3 Adding Data in the Information Section
Context
You can add data in the Information section.
Procedure
1. Highlights: You can view the highlight cards and also set their visibility using the Settings button.
2. To add values to the attributes of the underlying templates, choose INFORMATION Data Sheet and perform the following steps:a. Choose Edit and enter values for the attributes as defined by the underlying templates.b. You can reorder the attribute groups using Reorder Groups.c. If you have not assigned any equipment template while creating the equipment, you can add it later
using Add Template. You can add or remove multiple equipment templates.d. You can display the alternate unit of measure using Show Alternate UoM.
You can set the default unit of measurement system in the Unit of Measure Variant under User Account(icon on the left corner of the launchpad) Settings Unit of Measure .
e. Choose Save.
3. To view the model-related information, select INFORMATION Model Information
4. To add installation information, select the INFORMATION Equipment Information tab and perform the following tasks:a. Choose Edit and enter the fields as described in the table:
78 P U B L I CApplication Help for SAP Predictive Maintenance and Service, cloud edition
Master Data

Field Description
Serial Number Update the serial number issued by the manufacturer.
NoteSerial number is not mandatory for equipment with model assigned to them. Serial numbers can be added at a later lifecycle phase of the equipment.
Equipment Tag Number Specify the tag number issued by your organization when the manufacturer has not specified any serial number or batch number.
Batch Number Specify the batch number issued by the manufacturer, if applicable.
Technical Identification Number Enter the Technical Identification Number for the equipment
Operator Equipment ID Enter an alternative key for stakeholder equipment identification.
Procurement Number Enter Purchase Order Number to reference purchasing process or Order Code.
Long Description Enter a description for the piece of equipment.
Manufacturer Part Number Enter manufacturer part number.
Model ID Enter a model ID.
Subclass Select a subclass.
Build Date Specify the date of manufacture issued by the manufacturer.
b. To assign the equipment location, proceed as follows:
1. Choose Assign/Unassign Location .2. In the Assign/Unassign popup, enter the location if you have created from the Locations
application.
Note○ When a location is assigned or unassigned to a piece of equipment, the location is
adjusted based on parent equipment.○ You can now inherit the address from the location to the equipment.
c. Choose Save.
○ To assign a tag, choose Assign/Unassign Tag and type in your tag.
Application Help for SAP Predictive Maintenance and Service, cloud editionMaster Data P U B L I C 79

You can use tags to help you logically categorize activities, information, or reminders about your equipment. You can now inherit the address from the location to the equipment.
5. To add business partner information, select the INFORMATION Business Partners tab and perform the following tasks:a. Choose Edit and enter the fields as described in the table:
Field Description
Source Business Partner Role Update the source business partner role, if necessary.
Manufacturer Select the manufacturer.
Service Providers Select the name of the service provider for the piece of equipment.
Regulators/Authority Select the official who certifies if the equipment is installed or assembled correctly.
Insurers Select the name of the insurer for the piece of equipment.
Suppliers/Dealers Select the name of the dealer for the piece of equipment.
Sold-to Party Select the name of the party to which the equipment is sold.
Ship-to Party Select the name of the party to which the equipment is shipped to.
Bill-to Party Select the name of the party to which the equipment is billed.
6. To add Sales Organization Data, select INFORMATION Sales Organization Data tab and perform the following tasks:a. Choose Edit and select inputs for the fields as described in the table:
Field Description
Sales Organization Enter an address at which the equipment is installed and any additional information.
Distribution Channel Enter the contact person details for the location.
80 P U B L I CApplication Help for SAP Predictive Maintenance and Service, cloud edition
Master Data

Field Description
Division Specify the latitude, longitude coordinates of the installed location.
NoteOptionally you can specify the geo coordinates using the visual map.
Sales Office
Sales Group
b. Choose Save.
7. To add installation location information, select INFORMATION Installation Location tab and perform the following tasks:a. Choose Edit and enter the fields as described in the table:
Field Description
Object Address Enter an address at which the equipment is installed and any additional information.
Contact Person Enter the contact person details for the location.
Geospatial Data Specify the latitude, longitude coordinates of the installed location.
NoteOptionally you can specify the geo coordinates using the visual map.
b. Choose Save.
8. You can view the successor to the current model information under INFORMATION Life Cycle Information .
9. You can view the list of systems to which the equipment is assigned under INFORMATION Systems .○ All parent systems are displayed.○ A piece of equipment can be part of one or more systems. The equipment page now displays the
associated system information.For example, a compressor can be a part of the compressed air system in a plant.
10. To add the equipment to a group, go to INFORMATION→ GROUPS → Add.
You can view the list of groups to which the equipment is added.
Application Help for SAP Predictive Maintenance and Service, cloud editionMaster Data P U B L I C 81

5.1.1.4 Adding Structure & Parts
Context
You can add, view, edit, or delete equipment components, spare parts, and visual parts to a piece of equipment.
You can also view the equipment hierarchy using the button.
● Adding and removing location to equipment.When location is added or removed, equipment structure is adjusted based on the location.
● You can change the order of equipment subcomponents in the structure.● You can link equipment to an existing location hierarchy. You can do this by selecting a location and
equipment relationship. The status of the assignment to a location is saved with a future or past date. This is used for calculating the due date status.
Procedure
1. Highlights: You can view the highlight cards and also set their visibility using the Settings button.
2. To add equipment components, navigate to STRUCTURE AND PARTS Structure Edit and perform the following tasks:
a. To add equipment, choose Assign Equipmentb. From the Select Component dialog box, select the appropriate component.c. Choose Add.
d. To add systems, choose Assign Systemse. From the Select Systems dialog box, select the appropriate system.f. Choose Assign.g. Choose Save.
NoteYou can now inherit the address from the locationYou can publish a component directly from the Structure section. Select the component and use the Publish button.
3. To add equipment spare parts, navigate to STRUCTURE AND PARTS Spare Parts Assign and perform the following tasks:a. From the Assign Spare Parts dialog box, select the appropriate spare parts.b. Choose Provide Quantity to specify the quantity of each spare part. You can also enter a comment if
necessary.c. Choose Assign.
Assign new spare parts or maintain existing spare parts for an equipment using the Edit and Remove buttons. Similarly, you can view the associated documents when a spare part is being shared.
82 P U B L I CApplication Help for SAP Predictive Maintenance and Service, cloud edition
Master Data

NoteIf you have integration with SAP Hybris Commerce, then you can also view the Add to Cart button for each spare part. Currently, you can only add one spare part for each order request.
4. To view Visual Parts for an item of equipment, upload a relevant 3D visual file in the DOCUMENTATIONDOCUMENTS section and view them under STRUCTURE AND PARTS Visual Parts .
Shopping cart enabled on VE file for mapped visual parts.
The viewer search is extended to search for part name, description, manufacturer part number, and EAM number. You can select search result and display it in the viewer window.
5.1.1.5 Adding Information in the Documentation Section
Context
Procedure
1. Highlights: You can view the highlight cards and also set their visibility using the Settings button.
2. To work with documents relevant to a piece of equipment, select DOCUMENTATION DOCUMENTSand perform the following tasks:
a. To add a document, choose Add New and perform the following tasks:1. In the Add Document dialog box, browse for a file or provide a link.2. Select a Category.3. Select a Phase.4. Select the type of data in Data Sensitivity.5. Select your Language.6. Enter a Description.7. Choose the Confidentiality of the document8. Choose Upload to upload a document without a duplicate check.
NoteWhen uploading a new document, you can run a duplicate check and if no duplicates, only then upload a document using the Check and Upload button.
b. To add an existing document, choose Add Assign and perform the following tasks:1. In the Select Documents dialog box, search for a document using the filters - Phase, Source, or
Category.
Application Help for SAP Predictive Maintenance and Service, cloud editionMaster Data P U B L I C 83

2. Select a document from the search results.3. Choose Assign.
c. To edit the properties of an assigned document, perform the following tasks:1. Select a document from the Documents section, and choose Edit.2. In the Edit Document popup, change the relevant fields - Phase, Category, or Description.3. Choose OK.
3. To add instructions to the equipment, go to DOCUMENTATION INSTRUCTIONS and perform the following tasks:a. Choose Assign.b. From the Select Instructions dialog box, select the appropriate instruction.c. Choose Assign.
4. To assign failure modes to the equipment, go to DOCUMENTATION Failure Modes and perform the following tasks:a. Choose Assign.b. Select a failure mode.c. Choose Assign.
If you have write access to the equipment even though you do not have write access to the failure mode, you can still edit the failure mode instance page of the equipment.
When you copy a failure mode and Save & Publish it:○ A new failure mode is created with the same causes and instructions from the source failure mode○ The newly created failure mode is directly assigned to the object○ The new failure mode is in published state○ You navigate to the new failure mode instance page that includes all the copied failure mode instances:
effects, causes, instructions, and detection method○ The new failure mode appears in the failure mode section list
You can view the failure mode instance which is inherited and directly assigned (at the same time), you can now view different object icons in the <From> field of the failure mode section if the failure mode is inherited or assigned directly to the equipment.
You can now flag inherited failure modes to not relevant using the Not Relevant button. This excludes the failure modes from any assessments relevant to the equipment.
5. You can view the alert types associated with the equipment under DOCUMENTATION Alert Types
You can also view the list of rules or create rules using the Manage Rule.
6. To view announcements assigned to the equipment, choose DOCUMENTATION Announcements7. To create an improvement request for the equipment, perform the following tasks:
1. Choose DOCUMENTATION New Improvement Request .2. Enter the relevant details in the New Improvement Request dialog box.3. Choose OK.
8. You can also view the list of fingerprints assigned to the equipment under DOCUMENTATIONFingerprints .
You can create a fingerprint using the New button.
You can also directly access fingerprints using the Fingerprints [page 137] app.
84 P U B L I CApplication Help for SAP Predictive Maintenance and Service, cloud edition
Master Data

NoteFor more information you can refer to the following topics:○ Creating a Fingerprint [page 137]○ Viewing a Fingerprint [page 138]○ Editing a Fingerprint [page 139]○ Deleting a Fingerprint [page 140]
5.1.1.6 Adding Information in the Monitoring Section
Context
Procedure
1. You can view and configure the list of indicators inherited from the model or equipment templates assigned to the equipment under Monitoring.
You can add/remove an indicator to the favorites list using the star icon in the <My Favorites>.
For numeric and numeric flexible datatypes, <Reset>, <Normal>, <Max>, and <Min> fields are available while definition the threshold. You can also define threshold value range for these datatypes (only threshold value not range is available for other data types). The Reset button is functional only for these two datatypes and will delete all the existing values and insert the reset value wherever applicable.
Note○ In the case of indicators of data type Boolean, the maximum number of thresholds selected must
be 2 with values True and False. By default, its set to 0. Anything else can lead to inconsistency.○ You can personalize the indicator filters and columns in the Indicator section. When you login again
the same filters and columns are displayed.
If the same indicator is assigned to the model and also to the equipment, you can define different threshold values for the indicator at the model level and at the equipment level. If the values are defined both at the equipment and model level, the values defined at the equipment level will be considered. If not, the values defined at the model level are considered.
To map the indicators of your item of equipment with an external system, follow the procedure in Mapping Indicators with an External System [page 93].
2. You can also view Alerts and Indicator Chart under Monitoring.
Application Help for SAP Predictive Maintenance and Service, cloud editionMaster Data P U B L I C 85

5.1.1.7 Adding Equipment Components
You perform this activity when you need to alter equipment components to suit your equipment needs.
Prerequisites
● You have already created an item of equipment in SAP Predictive Maintenance and Service, cloud edition.● The item of equipment is in status Unpublished or In Revision.● Ensure that the component you want to add already is created in the network as equipment.
Procedure
1. Launch the Equipment application.2. Open your item of equipment.3. From the Equipment object page, choose New Revision.4. Choose the Structure section.5. Choose Assign.6. In the Select Component dialog box, select the component you want to add.7. Choose Add.8. Choose Save.
Results
The equipment components have been added.
● To remove component, proceed as follows:○ From the Structure section, choose Edit.○ Select the components from the list, choose Remove.○ Choose Save.
● To publish a component directly from the Structure section, select the component from the list that is in Unpublished or In Revision state and choose Publish.
● To replace a component, proceed as follows:○ From the Structure section, choose Edit.○ Select the components from the list, choose Replace.○ Select a component from the dialog box and choose Replace.○ Choose Save.
86 P U B L I CApplication Help for SAP Predictive Maintenance and Service, cloud edition
Master Data

5.1.1.8 Adding Information in the Maintenance & Service Section
Context
In the Maintenance & Service section, you can:
Procedure
1. Highlights: You can view the highlight cards and also set their visibility using the Settings button.2. View Notifications
Use Add Evidence to assign/add improvement requests.
NoteYou can also create notifications using the New button. You can also create new notifications using
Manage New Notifications .
3. View the Work Orders assigned to the equipment.
You can view a list of completed, planned and pending work orders for the equipment.4. View and create baselines
Baselines are snapshot that is used as a reference point. Multiple snapshots can be created over a period of period to view and monitor the full extent of the data change over time. Baselines provide you the ability to travel back in time to see how the equipment data was, and where & when data has changed.
You can create a baseline:○ Using the New button in the Baseline section.
○ Using the Create Baseline option in the Phase Manage Phase .
NoteYou need to have the BASELINE_EDIT role to view and create baselines, and BASELINE_READ role to view baselines.
Application Help for SAP Predictive Maintenance and Service, cloud editionMaster Data P U B L I C 87

5.1.1.9 Viewing and Updating a Piece of Equipment
You can update information such as installation information, installation location, and documents that relate to an existing item of equipment.
Prerequisites
● To view an item of equipment, your user ID either belongs to the group ORG_DATA_READ, or has the roles EQUIPMENT_READ assigned.
● To update an item of equipment, your user ID either belongs to the group ORG_ADMIN or ORG_DATA_EXPERT, or has the roles EQUIPMENT_DELETE or EQUIPMENT_EDIT assigned.For more information, see Additional Roles for Master Data, Processes and Administration [page 350].
Procedure
1. Open the Equipment app.2. You can perform the following tasks by selecting one or more items of equipment from the list:
○ Request Model○ Publish○ Group○ Assess○ Delete
3. Search for an item of equipment that you want to update using the search filters.4. Select the item of equipment from the search results.5. You can perform the following actions using the Manage button in the published equipment:
○ New Revision○ View Lifecycle Changes○ Delete○ Request Model○ Sync with IoT Services:
NoteNote: This option is available only if the equipment is in Published state, the <IoT Sync Flag> is set to Yes and IoT Services 4.0 system is configured.
6. If you choose an item of equipment that is in a published state, choose Manage New Revision from the Equipment screen.
7. View and navigate to the open model request for the equipment from the icon in the <Model ID> under INFORMATION Model Information
88 P U B L I CApplication Help for SAP Predictive Maintenance and Service, cloud edition
Master Data

○ You can view only the icon in <Model ID> for a piece of equipment if it not assigned to any model.○ If the equipment is assigned to a model or if you have entered a free text, you can view the icon
together with the model ID or free text.
NoteYou can only assign model request for items of equipment that are published at least once.
8. To update additional attributes related to an item of equipment, select tab INFORMATION Data Sheet and perform these substeps.a. Choose Edit.b. You can reorder the attribute groups using Reorder Groups.c. You can assign equipment templates using Add Template after the equipment is created.d. You can select templates from the list and choose Remove Template to remove the template.e. You can display the alternate unit of measure using Show Alternate UoM.
You can set the default unit of measurement system in the Unit of Measure Variant under User Account(icon on the left corner of the launchpad) Settings Unit of Measure .
f. Choose Save.
9. To update attributes such as installation information, select tab INFORMATION Equipment Information and perform the following tasks:a. Choose Edit in the Equipment Information section.b. Choose Save.
10. To view the parent systems associated with the equipment, select tab INFORMATION Systems .11. To assign Documents, Instructions, and Announcements, choose the DOCUMENTATION tab.
a. To add documents related to the item of the equipment, choose the tab DOCUMENTATIONDOCUMENTS and perform the following tasks:
1. Choose Add New to add a document to the equipment.
2. Choose Add Assign to assign an existing document to the equipment.3. Choose Edit to edit the properties of the document.4. To remove a document, select the document or documents from the list and choose Remove.
b. To assign existing planned maintenance instructions, or troubleshooting and breakdown instructions to the equipment; or to unassign the instructions related to the equipment, choose the
DOCUMENTATION INSTRUCTIONS tab and perform the following tasks:
NoteYou must have instructions created .
1. Choose Edit in the Instructions section.2. To assign an instruction, choose Assign.
NoteIf you are unable to see the Assign button, change your browser zoom and retry.
3. To remove an instruction, choose Remove.
Application Help for SAP Predictive Maintenance and Service, cloud editionMaster Data P U B L I C 89

c. To view announcements assigned to the equipment, choose DOCUMENTATION Announcementsd. View the list of failure modes assigned to the equipment. You can also assign failure modes by
choosing Failure Modes Assign .
You can view the causes and effects of the failure modes assigned to the equipment in this section.
If you have write access to the equipment even though you do not have write access to the failure mode, you can edit the failure mode instance page of equipment.
When you copy a failure mode and Save & Publish it:○ A new failure mode is created with the same causes and instructions from the source failure mode○ The newly created failure mode is directly assigned to the object○ The new failure mode is in published state○ You navigate to the new failure mode instance page that includes all the copied failure mode
instances: effects, causes, instructions, and detection method○ The new failure mode appears in the failure mode section list
You can view the failure mode instance which is inherited and directly assigned (at the same time), you can now view different object icons in the <From> field of the failure mode section if the failure mode is inherited or assigned directly to the equipment.
You can now flag inherited failure modes to not relevant using the Not Relevant button. This excludes the failure modes from any assessments relevant to the equipment.
e. View the improvement requests assigned to the equipment.
To create an improvement request for the equipment, perform the following tasks:
1. Choose New Improvement Request.2. Enter the relevant details in the New Improvement Request dialog box.3. Choose OK.
f. You can view the alert types associated with the equipment under DOCUMENTATION Alert Types
12. You can perform the following activities in the MONITORING tab:a. View the indicators related to the equipment in the Indicators section.
To define, model, and edit additional properties of the indicators and their thresholds, select an indicator and choose Configure.
You can also view the aggregated indicator value and trend for the indicators in this section.b. View indicators related to the equipment components in the Component Indicators section.
13. You can perform the following activities in the MAINTENANCE & SERVICE tab:a. View notifications related to the equipment in the Notifications section.
Use Add Evidence to assign/add improvement requests. You can also create notifications using the New button.
b. View work orders related to the equipment in the Work Orders section.c. View the list of fingerprints assigned to the equipment under Fingerprints.
You can create a fingerprint using the New button.14. View the modifications made on the equipment data in the Timeline tab.
You can view the update statistics based on:
90 P U B L I CApplication Help for SAP Predictive Maintenance and Service, cloud edition
Master Data

○ Updates By Type○ Time Range○ Updates by Partner○ Updates on model or equipment data
You can click the equipment time range to perform the following the Filter By dialog box:○ Show Timeline Events for: Select if you want to view the changes only on the equipment or the model
associated with the equipment or all the changes made on the equipment data.○ Time Range: Select a time range to view only the changes during that timeframe.
NoteYou can track addition and removal of component and parent equipment. Sharing activities are also tracked in the timeline.
15. Choose Publish to publish the updated equipment.
5.1.1.10 Timeline
Context
Procedure
To view changes on the performance improvement cases, attributes, components, documents, announcements, functional locations, status, equipment header, and firmware for the selected equipment, choose the Timeline tab.○ Maintain comments or tags for a timeline event.
If a comment is owned by your organization, you can delete it. You can also see the person's name if the user belongs to your organization, otherwise the company name is displayed as the creator of the comment.
○ Old and new images are shown on the <Timeline> if image relevant fields have been updated in the Model and the Equipment.
○ Field names are displayed in the logon language with English as default language in the <Timeline>.
Note
Application Help for SAP Predictive Maintenance and Service, cloud editionMaster Data P U B L I C 91

5.1.1.11 Publishing Multiple Equipment
When you have more items of Equipment created using public APIs provided by SAP Predictive Maintenance and Service, cloud edition, you can view these items of equipment using the Equipment application and perform a mass publish of such items of equipment.
Prerequisites
● Your user ID either belongs to the group ORG_ADMIN or ORG_DATA_EXPERT, or has the roles EQUIPMENT_DELETE or EQUIPMENT_EDIT assigned.For more information, see Additional Roles for Master Data, Processes and Administration [page 350].
● You have created an item of equipment and the item of equipment is in any of the following states:○ Unpublished○ Published○ In Revision
Procedure
1. Open the Equipment application.2. Search for items of equipment that are either in unpublished, or in revision state.3. Select one or more items of equipment from the search results.4. Choose Publish.
5.1.1.12 Deleting a Piece of Equipment
You can delete an item of equipment that you do not want to have on the network.
Prerequisites
● Your user ID either belongs to the group ORG_ADMIN or ORG_DATA_EXPERT, or has the role EQUIPMENT_DELETE assigned.For more information, see Additional Roles for Master Data, Processes and Administration [page 350].
● You have created an item of equipment and the item of equipment is in any of the following states:○ Unpublished○ Published○ In Revision
92 P U B L I CApplication Help for SAP Predictive Maintenance and Service, cloud edition
Master Data

Procedure
1. Open the Equipment application.2. Search for an item of equipment.3. Select an item of equipment from the search results.4. Choose Delete.
5.1.1.13 Mapping Indicators with an External System
You perform this activity to retrieve the indicator values of your equipment from an external system of type SAP Cloud Platform Internet of Things for the Cloud Foundry Environment or SAP Cloud Platform Internet of Things for the Neo Environment. When you have equipment data or machine data existing in an external system, you can retrieve that data by mapping your equipment with the external system.
Prerequisites
● The external system in question is already configured with SAP PdMS. For more information, see https://help.sap.com/viewer/067e3d8253654398996ec49271b7441a/1906/en-US/697e20cec0af47d798ea3b76e637c893.html.
● Make sure that the IoT Sync Flag is set to "No".
Note
If this flag is set to "Yes", refer to the help portal under SAP Predictive Maintenance and Service, cloud edition - Based on SAP Cloud Platform Getting Started Information Automatic Deviceonboarding - IoT Application Enablement and SAP Cloud Platform Internet ofThings .
● Your user ID either belongs to the group ORG_ADMIN or ORG_DATA_EXPERT, or has the roles EQUIPMENT_DELETE or EQUIPMENT_EDIT assigned.For more information, see Additional Roles for Master Data, Processes and Administration [page 350]
● You have created an item of equipment. Equipment must be in Fully Operational or Partially Operational phase. For more information, see Creating a Piece of Equipment [page 73]
● You have created indicators from the Templates app, and the equipment in question has inherited this template. For more information, see Adding Indicator Groups and Indicators [page 220].
Context
In this procedure, you map indicators of equipment between an external system and SAP system.
Application Help for SAP Predictive Maintenance and Service, cloud editionMaster Data P U B L I C 93

Procedure
1. Launch the Equipment application.2. Open the item of equipment in question.3. In the Monitoring tab, go to Indicators section.4. Select the relevant indicator and click Map Indicators.
5. In the Map Indicators window, enter the following:
Field Description
System Name Choose the name of the external system. For example: PdMS
Equipment The corresponding equipment name in the external system.
6. Under the Indicators section, select an indicator and choose the corresponding indicator from the listed equipment indicators (external system) by choosing Map.
7. Choose Save.
You see that the new indicator values appear on the Equipment object page.
Note
In order to unmap an indicator go to, Monitoring Indicators Map Indicators select the indicator form the indicator list, and choose the corresponding delete/close icon.
5.1.1.14 Viewing Alerts of an Equipment
Visualize all the alerts related to the top equipment and the relevant equipment.
Prerequisites
● View only alerts for the equipment for which you are authorized.● You need to have Edit authorization to perform action on alerts.
Context
Using this option, it is also possible to sort and filter the alerts and columns that should display on the screen. Click the respective icons to perform these actions. Click an alert to view the same on the indicator chart. This chart displays the alert in a time-based line chart together with contributing sensor or score values.
94 P U B L I CApplication Help for SAP Predictive Maintenance and Service, cloud edition
Master Data

You can view the following alert details: alert (identified by the correlation ID in the URL), status, status description, type, severity, severity description, code, code description, source, measured property, and description.
NoteBy default, the default variant displays. It is possible to override the default variant. On navigating from this page or relogging, the user selected variant persists.
It is also possible to create notification for an alert. Select the alerts for which you want to create notifications and click the Create Notification button. The newly created notification displays as <Notification ID> within the Alerts details. For more details of the newly created notification, click the Notification ID hyperlink.
And, click the Alert Type link to view more details about the alert type.
Using the Add Evidence button, it is possible to create a new improvement request or edit an existing improvement request.
Click the Set to In Process and Set to Completed button to change the status of alerts. The change in status do not result in change in processor. To change the processor, click the Set Processor button. The sequence of status is from New --> In Process --> Completed and from New → Completed. The change in alert status do not change the processor. And, click Set Processor to change the processor.
NoteOnly users with the role, AlertProcessor can change the alert status.
The role AlertProcessorAdmin can set/change the processor and change the alert status.
Use the Manage Rules button to navigate to the Rules page. You can view all the rules related to the model. For more information, refer Rule Management [page 247].
Related Information
Performance Improvement [page 60]
5.1.1.15 Viewing Time Series Data (Indicator Chart) of an Equipment
This analysis tool enables you to visualize data across one or more indicators for one hierarchy. By default, the indicators selected as favorite for a user displays on the chart.
Prerequisites
The scope pdms.AppAccess is required.
Application Help for SAP Predictive Maintenance and Service, cloud editionMaster Data P U B L I C 95

Context
The analysis tool, indicator chart enables you to visualize time series data across one or more indicators for an equipment hierarchy. You can also view the alerts, notifications, work orders, and threshold related to a particular equipment.
By default, the first variant displays. You can override the existing variant by selecting from the dropdown. On navigating from this page or relogging, the user selected variant persists.
NoteFor more information about indicator chart, refer to Features in Indicator Chart [page 38].
Procedure
1. Open the Equipment application2. From the Equipment List screen, use the search filters to select equipment.3. In the Monitoring tab, select Indicator Chart to view the chart.
5.1.1.16 Viewing and Creating Notifications of Equipment
You can view all the notifications associated with a piece of equipment and also create a notification.
Prerequisites
You must have the role EQUIPMENT_READ assigned to your user ID in the SAP Cloud Platform account.
Context
Using this option, it is also possible to sort, filter, group notifications, and create notifications. Click the respective icons to perform these actions. Depending on the action performed on these notifications, the progress statuses - completed, planned, and pending displays against each notification. It is also possible to create an improvement request or edit an improvement request using the Add Evidence button. Also, create a notification using the <New> option.
Click a notification ID to view more details of the same in the object page. A indicator chart displays with the notification details. You can view the start and end date of notifications. If these dates are not available, the current date of notification is plotted on the chart, with the measurement point time series data.
96 P U B L I CApplication Help for SAP Predictive Maintenance and Service, cloud edition
Master Data

NoteIn case of notifications that do not have an assigned equipment, then the indicator chart will not work.
For more information about indicator chart, refer Viewing Time Series Data (Indicator Chart) of an Equipment [page 95].
To view the details of notification, click the respective notification ID. The progress of notifications is as below:
● Completed - All notifications with status Completed or Closed.● Planned - All notifications that have start date equal or greater than the current date.● Pending - All notifications that have end date greater than current date or all notifications that have the
start date lesser than the current date.
Procedure
Viewing Notifications1. Open the Equipment application.2. From the Equipment list screen, select the equipment for which you want to view notifications.3. In the MAINTENANCE & SERVICE tab, select Notifications.
You can view a list of notifications associated with the piece of equipment.Creating a New Notification4. Choose New.
You are navigated to the New Notification dialog box. Enter the following details:
Fields Description
Type (*) Select the type of notification:○ Breakdown○ Maintenance Request
Priority (*) Select the priority of the notification:○ Emergency○ Very High○ High○ Medium○ Low
Description (*) Enter a description.
Long Description Enter the detailed description for the notification.
Required Start Date Select the start date.
Required End Date Select the end date.
Malfunction Start Date Select the start date when the malfunction occurred.
Application Help for SAP Predictive Maintenance and Service, cloud editionMaster Data P U B L I C 97

Fields Description
User Proposed Failure Mode Select a failure mode. If no relevant failure mode is available, you can select No appropriate failure mode available.
Instruction Select an instruction.
NoteAll the mandatory fields are marked as (*).
5. Choose Create.
The notification is displayed in the notification section. Choose the notification to view details.
Related Information
Performance Improvement [page 60]
5.1.1.17 Viewing Work Orders of an Equipment
You can use this procedure to view a list of work orders related to an equipment.
Prerequisites
To view a piece of equipment, your user ID belongs to the group ORG_DATA_READ, or it has the roles EQUIPMENT_READ assigned to it.
Context
You can view the following work orders details: work order ID, order short description, order status, order type, order priority, order long description, start date, end date, actual duration, or planned duration.
Click a work order ID to view more details of the same in the object page. A indicator chart displays with the work order details. You can view the start and end date of work orders. If these dates are not available, the current date of work order is plotted on the chart, with the measurement point time series data.
NoteIn case of work orders that do not have an assigned equipment, then the indicator chart will not work.
For more information about indicator chart, refer Viewing Time Series Data (Indicator Chart) of an Equipment [page 95].
98 P U B L I CApplication Help for SAP Predictive Maintenance and Service, cloud edition
Master Data

You can perform the following actions:
● Sort the work orders by - Ascending, Descending, Type, Priority, Start Date, or End Date.● Group work orders by- Ascending, Descending, Type, or Priority.● Filter work orders by - Type or Priority.
You can have more than one service provider for a piece of equipment. Multiple business partners can have the same role.
NoteIf the order status is <TECO> or closed, then the actual duration is displayed, otherwise the planned duration is displayed.
Procedure
1. Open the Equipment application.2. From the Equipment screen, select an equipment for which you want to view work orders.3. To view information related to work orders, go to MAINTENANCE & SERVICE→ Work Orders section.
You can view the list of work orders associated with the equipment. Select and open a work order to view more details of work order.
5.1.1.18 Viewing and Editing Indicators
You can view and edit the indicators associated with a piece of equipment and its relevant components and add additional properties to it.
Context
NoteComponent indicators section displays all the indicators associated with the equipment components (components of the equipment in the Structure section of the equipment object page) and cannot be edited.
Procedure
1. Open the Equipment application.
Application Help for SAP Predictive Maintenance and Service, cloud editionMaster Data P U B L I C 99

2. From the Equipment list screen, select a piece of equipment for which you want to view the indicators.3. In the Monitoring tab, select Indicators.4. To add additional properties to the indicator, select an indicator and choose Edit.
You can maintain the following properties for an indicator:○ Unit of Measurement (UoM)○ Threshold Range○ Indicator Category
The following values are valid:○ Continuous○ Discrete○ Level
○ Indicator type: Following values are valid:○ Calculated○ Measured○ Assessed
You can maintain values for the indicators for which you have defined the properties by using New Manual Indicator.
5. To view indicators associated with the equipment component, go to Component Indicatorssection.
NoteComponent Indicators are displayed only if any indicators are assigned to the equipment component and cannot be edited.
5.1.1.19 Viewing and Analyzing Leading Indicators for Equipment
Use this procedure to view and analyze the leading indicators for a piece of equipment.
Prerequisites
● You have trained a model in the Leading Indicators Model Management application. For more information, see Managing Models for Leading Indicators [page 330].
● The following role is assigned to your user:○ For SAP Predictive Maintenance and Service Fiori launchpad: <pdms_AssetCoreExpert>○ For SAP Intelligent Asset Management Fiori launchpad: <AC_ORG_DATA_EXPERT>
100 P U B L I CApplication Help for SAP Predictive Maintenance and Service, cloud edition
Master Data

Context
To monitor and predict the performance of your equipment, you can view and analyze leading indicators for a piece of equipment of an equipment model.
Leading indicators are the indicators whose conditions are most related to failures of the piece of equipment. The leading indicators are automatically determined by a machine learning algorithm using historical sensor data and notification data as input. Identifying these leading indicators and their conditions helps you to prevent upcoming failures by proactively maintaining the piece of equipment and creating effective condition-based maintenance (CBM) rules to monitor the performance and predict upcoming failures.
ExampleRose, a reliability engineer, suspects potential failures for her Pump-0054 due to overheating. She reviews the leading indicators for the failure mode OHE (Overheating) of her pump. From the top indicators table, she sees that the temperature has the highest influence on failures. To get a better understanding, she reviews the most related conditions and sees that a temperature higher than 70 degrees has the highest influence. To prevent failures from occurring, she creates a rule for the condition to get notified when the pump is about to fail because of the condition and she can proactively maintain the pump.
Procedure
1. Open the Equipment application.2. From the Equipment screen, select the piece of equipment for which you want to view and analyze the
leading indicators.
The equipment page is displayed.
3. To view and analyze the leading indicators, choose ANALYTICS Leading Indicators .
The leading indicators for the piece of equipment are displayed as follows:○ For the piece of equipment regardless of any failure mode: By default, the leading indicators are
displayed for the piece of equipment regardless of any failure mode. In this case, all failures that occurred in the past are included.
○ For a failure mode related to the piece of equipment: If there are one or more failure modes available for the piece of equipment, you can also display the leading indicators for a specific failure mode by selecting the failure mode. You can choose from all failure modes that are assigned to the piece of equipment.
The indicators are ranked by their strength indicating which indicators have the highest influence on failures. You can view details about the strength threshold values by clicking on the strength link.
4. To view and analyze the conditions for the leading indicators, choose Conditions.
The top conditions for the selected indicator are displayed. The conditions are ranked by their strength indicating which conditions have the highest influence on failures. You can view details about the strength threshold values by clicking on the strength link.
Application Help for SAP Predictive Maintenance and Service, cloud editionMaster Data P U B L I C 101

NoteOnly conditions whose strength is above 50% are displayed. Conditions below this strength are considered as having no influence on failures and the piece of equipment is operating under normal conditions.
5. To create a new rule for one condition, select the condition and choose Create Rule. For more information about rules and how to create rules, see Rules [page 244].
Results
You have viewed and analyzed the leading indicators for your piece of equipment.
Related Information
Viewing and Analyzing Leading Indicators for a Model [page 115]
5.1.1.20 Viewing Alert Type Groups of Model Assigned to Equipment
You can view the alert type assigned to a model of an equipment.
Prerequisites
Your user ID either belongs to the role name AssetCoreReader or has the role EQUIPMENT_READ assigned.
Context
NoteIt is not possible to assign or unassign alert type groups to an equipment template or an equipment.
102 P U B L I CApplication Help for SAP Predictive Maintenance and Service, cloud edition
Master Data

Procedure
1. Open the Equipment application.2. Select an equipment for which you want to view the assigned alert type group.3. Click Alert Types from the Documentation tab.
List of assigned alert types display.
Related Information
Rules [page 244]Adding Alert Types [page 227]Adding Alert Type Groups [page 230]Assigning Alert Type Groups to a Model [page 113]
5.2 Models
A model is an abstract representation from the manufacturer that defines all maintenance and specification information related to a new or existing product. A physical equipment is an instance of a model.
A model is based on a template and allows users to add values to the definitions used in the underlying template.
A model maintains maintenance information using the following business entities:
● Instruction:An instruction is a collection of steps from the manufacturer that make up a procedure on how to carry out a service by an operator. An instruction consists of information that help the operator to maintain the equipment better. There are five types of instructions: Planned Maintenance Instruction, Troubleshooting and Breakdown Instruction, Installation instructions, Operations instruction, Disposal instruction.
● Announcement:An announcement is a way of communicating structured information from a manufacturer to an operator, or a set of operators.. For example: change in instruction
● PartsA part is a single piece of an equipment. A manufacturer provides a list of parts used in the model along with the visual representation of each one of them. An operator can select a specific part of the model from the list to view the manufacturer details, spare part number, and the quantity of the part used in the model and use these details for procurement purposes.
● DocumentA document is a material of reference provided by the manufacturer and contains information relevant to a specific phase in the life cycle of the model.
● HotspotA hotspot is an area on the visual image that is of more interest. A hotspot allows you to view detailed information of a model component in a pictorial way. You can assign additional information to a hotspot such as model, equipment, and instruction to which users can navigate to.
Application Help for SAP Predictive Maintenance and Service, cloud editionMaster Data P U B L I C 103

A model can be in any of the following states:
● Unpublished● In Revision● Published
For more information, see State Transitions [page 249].
5.2.1 Managing Models
You use the Models app to work with a model. You can perform the following operations using the Models app:
Context
Features More Information
● Create a model and assign business entities such as instructions, documents, announcements, parts information of the model.
● Update successor model information.● Add hotspots to the images of a model.● Old and new images are shown on the timeline if image-
relevant fields are updated on model and equipment level.
● Create a model request to contact another business partner when you do not find respective models for equipment in the network. The newly-created model request is saved with the status <Draft>. While in Draft status, the model request is not visible to the provider. You can edit the model request and save the changes. Changes or updates saved are logged in the timeline.
Creating a Model [page 105]
Add and remove model components. Adding Model Components [page 111]
View details of an existing model and update an existing model.
Updating a Model [page 111]
Delete a model to clean up the data that is not required to be on the network.
Deleting a Model [page 113]
Reuse the created models within your organization.
View and analyze leading indicators for a model. Viewing and Analyzing Leading Indicators for a Model
View an analytics dashboard for a model. Viewing Analytics Dashboards on Object Pages [page 58]
Configure indicator forecasting to forecast indicator values for your equipment of an equipment model.
Configuring Indicator Forecasting for a Model
104 P U B L I CApplication Help for SAP Predictive Maintenance and Service, cloud edition
Master Data

Features More Information
Create models relevant for systems.
You can create a system using Manage Create System option. You can also create multiple systems from a model as components.
You can view all the indicators associated with a model using the Indicators section under Monitoring. You can define, model, and edit additional properties of the indicators and their thresholds using the Edit option in the Indicators section.
5.2.1.1 Creating a Model
You use this procedure to: create a model and add business entities to it such as instructions, documents, announcements, parts information, hotspots to the images uploaded as documents for a model.
Prerequisites
● Your user ID has the roles MODEL_DELETE or MODEL_EDIT assigned.For more information, see Additional Roles for Master Data, Processes and Administration [page 350].
● To create a model, you must have a subclass or a model template to inherit from.● You have identified a manufacturer profile to assign to a model.
Procedure
1. Launch the Models app.2. Choose New.3. In the New Model dialog box, enter the following details:
a. In the Type field, select if the model is relevant for equipment or system.b. In the Model ID field, enter the ID for the model.
NoteProvide a unique model ID, as ID is unique for a specific manufacturer.
c. In the Short Description field, enter a short description for the model.d. In the Long Description field, enter a long description for the model.e. In the Tracking drop-down, select the type of tracking you want to assign to an item of equipment that
is based on the model.The following list helps you to select an appropriate value:○ Serial number tracking at model level: As a manufacturer, you want to track an item of
equipment within a model using unique serial number. An operator uses the unique serial number while creating an item of equipment.
Application Help for SAP Predictive Maintenance and Service, cloud editionMaster Data P U B L I C 105

○ Serial number tracking at manufacturer levelAs a manufacturer, you want to track all items of equipment using unique serial number. An operator uses the unique serial number while creating an item of equipment.
○ Batch number tracking at batch levelAs a manufacturer, you want to track all items of equipment within a batch using a batch number. An operator uses the batch number while creating an item of equipment.
f. In the Parent Subclass/Model Template field, select a subclass or model templates.
If you select more than one template, then the Primary Template field is displayed where you need to select one of the templates as the primary template.
You can assign one or more parent subclasses or model templates to a model. If you enter more than one parent subclass/model template, you must additionally select a primary template in the dropdown of field <Primary Template>. This primary template will be used for class/subclass/template display in the breadcrumb as well as in the model list. The assignment of the primary template can later be changed in the Data Sheet section of the model.
NoteAll assigned templates and subclasses (as well as associated classes) are available in the Model Information section. If there are more than one class/subclass/template, count values are displayed in the respective fields. When clicking on one of the count values you will be able to view the complete template hierarchy for your model.
g. In the Manufacturer field, select the manufacturer name.h. Choose OK.
4. To add values to the attributes of the underlying templates choose INFORMATION Data Sheet and perform the following steps:a. Choose Edit and enter values for the attributes as defined by the underlying templates.b. You can reorder the attribute groups using Reorder Groups.c. You can display the alternate unit of measure using Show Alternate UoM.
You can set the default unit of measurement system in the Unit of Measure Variant under User Account(icon on the left corner of the launchpad) Settings Unit of Measure .
d. You can add additional Templates or Subclasses using Add Template.
If there are multiple templates assigned, you will get filtering options on the data sheet:○ All = displays all attribute groups and attributes○ <Industry Standard> = displays all attribute groups and attributes that have the respective
industry standard maintained○ <Custom> = displays all attribute groups and attributes that are coming from customer-created
model templatese. If there are multiple Subclasses and Templates assigned, you can change the Primary Template using
Update Primary Template.f. If there are multiple Subclasses and Templates assigned, you can remove assigned objects using
Remove Template.
NoteIt is mandatory to have at least one parent object assigned, i.e. it is not possible to remove all assigned objects.
106 P U B L I CApplication Help for SAP Predictive Maintenance and Service, cloud edition
Master Data

g. Choose Save.
5. To add modelspecific information, choose INFORMATION Model Information and perform the following steps:a. Choose EditAs a manufacturer, you want and enter the following fields:
Field Description
Tracking Update the tracking mechanism, if necessary.
Safety Risk Select a recommended safety risk for the model during its operating condition.
Generation Specify a number that indicates the version of the model.
Model Release Date Enter a date by which the model will be released.
Description Enter a model description.
Firmware Support Specify if the model supports firmware.
b. To assign a tag, choose Add/Remove Tags.c. In the Add/Remove Tags dialog box, assign a tag.d. Choose OK.
You can assign such tags that logically categorize model information, maintenance, and other model-relevant data.
e. Choose Save.
6. In the Model Usage section, you can view the extent of model's usage.
If consumer or operator is sharing equipment based on the model relation, the usage is linked to the related equipment and operators.
NoteWhen the model is published, you can also create an equipment using this model from the Create Equipment button.
7. To update a model as the successor to the current model, choose INFORMATION Life Cycle Information and perform the following steps:a. Choose Assign in the Successor Model section.b. In the Assign Successors popup, select the model you want to assign as successor.c. Choose Assign.
NoteThe successor model you want to assign must have the same subclass as the current model.
8. To add the model to a group, go to INFORMATION → Groups→ Add.
You can view the list of groups to which the model is added.
Application Help for SAP Predictive Maintenance and Service, cloud editionMaster Data P U B L I C 107

9. To add model components, perform the following:
a. Choose STRUCTURE AND PARTS Structure → Edit.a. Choose Assign. From the Select Component dialog box, select the model component.b. Choose Add.c. You can define if an assigned structure component is mandatory or optional for a model.d. You can adjust the quantity and the item description for the structure components. You can change the
Quantity to a quantity range using the Define Quantity Range.e. You can select an enum attribute to define default list of description to be assigned to the components
using Select Description Attribute.f. Choose Save.
10. To assign spare parts to a model, perform the following:
a. Choose STRUCTURE AND PARTS Spare Parts Assign.a. From the Assign Spare Parts dialog box, select the spare part, and choose Provide Quantity.b. In the Provide Quantity dialog box, enter values for Default Delivered Quantity, Advised Stock Quantity,
and BoM Quantity. You can also enter a comment if necessary.c. Choose Assign.
11. To assign a visual part to a model, perform the following steps:
a. Go to Documentation Documents section.b. Choose Add. You can assign an existing or a new document.c. To assign a visual part, you must add a document of type .vds.
d. Choose Assign. You can now view the visual parts under Structure & Parts Visual Parts .
The viewer search is extended to search for part name, description, manufacturer part number, and EAM number. You can select search result and display it in the viewer window.
12. To add an instruction to the model, choose the Documentation Instructions tab and perform the following tasks:a. In the Instructions section, choose Assign to perform the following steps:b. In the Assign Instructions to a Model dialog box, search for an appropriate instruction.c. From the Instructions search results list, select an instruction.
NoteYou can assign instructions that are in a published state only to a model.
d. Choose Assign.
You can view the different instruction types in the following tabs: Planned Maintenance, Breakdown, Installation, Operations, and Disposal.
13. To add, or assign, or edit an existing document to the model, choose the Documentation Documentstab, and perform the following tasks:a. In the Documents section, from the Add menu, choose New to upload a new document, and perform
the following steps.b. In the Add Document dialog box, browse for a file name or provide a link in the File text box.c. In the Phase field, select the phase in the life cycle of the model where the document is relevant for
use.d. In the Category field, select the category relevant to a phase.
108 P U B L I CApplication Help for SAP Predictive Maintenance and Service, cloud edition
Master Data

e. In the Language dropdown box, choose your language.f. In the Data Sensitivity dropdown, choose if the document contains any sensitive or personal
information for document security purpose such as Personal Data, Sensitive Personal Data, or No Sensitive Information.
g. In the Description field, enter a description for a document.h. Choose Upload.
When uploading a new document, you can upload the document directly without checking for duplicate documents in the system.
You can use Check and Upload to check if there are any duplicates that exist in the system. If duplicate files exist, you will then view the files in the Similar Files Detected dialog box. You then can Continue Uploading the New File or you can select a file from the duplicate file list and Use Selected File option to upload it.
14. In the Documents section, from the Add menu choose Assign to upload an existing document and perform the following steps:a. In the Select Documents dialog box, search for an appropriate file.b. From the Documents search results list, select a document.c. Choose Assign.
You can also use Remove and Download to remove or download any of the documents assigned to the model.
15. To assign a failure mode, choose Documentation Failure Modes perform the following steps:a. Choose Assign.b. In the Select Failure Modes dialog box, select the failure modes that you want to assign to the model.c. Choose Assign.
You can create a copy of the failure mode using Copy.
NoteWhen you copy a failure mode and Save & Publish it:
○ A new failure mode is created with the same causes and instructions from the source failure mode
○ The newly created failure mode is directly assigned to the object○ The new failure mode is in published state○ You navigate to the new failure mode instance page that includes all the copied failure mode
instances: effects, causes, instructions, and detection method○ The new failure mode appears in the failure mode section list
You can navigate to the instance page of a failure by double-clicking on it in the failure mode list. In the failure mode instance page, you can:○ View the failure mode information.○ Add or remove effects from the failure mode.○ Add or remove causes from the failure mode.○ View the maintenance strategy for the failure mode.○ Assign or remove instructions for the failure and manage cause for the instructions.
If you have write access to the model even though you do not have write access to the failure mode, you can edit the failure mode instance page of the model.
Application Help for SAP Predictive Maintenance and Service, cloud editionMaster Data P U B L I C 109

16. In the Documentation Alert Types section, you can, Assign or Remove alert type group.
17. To add an announcement to the model, choose the Documentation ANNOUNCEMENTS tab and perform the following steps:a. In the Announcements section, choose Assign to assign an existing announcement and perform the
following steps.b. In the Assign Announcements to a Model dialog box, search for an appropriate announcement using
the filters – Announcement Type, or Priority, or Status.c. From the Announcements search results list, select an announcement.d. Choose Assign.
18. You can create an improvement request for the model using Documentation Improvement RequestsNew Improvement Requests .
You can enter the details in the New Improvement Request dialog box. Choose OK.
You are navigated to the new improvement request object page where you can further edit the request and save it.
19. In the Indicators section, you can view the list of indicators associated with the model. You can select an indicator from the list and use Configure to define the Threshold values for the indicator.
For Numeric and Numeric Flexible datatypes, you can also define the <Reset>, <Min>, <Max>, and <Normal> values. You can also define threshold range for these datatypes.Reset button is functional only for these two datatypes and will delete all the existing values and insert the reset value wherever applicable.
Note○ In the case of indicators of data type Boolean, the maximum number of thresholds selected must
be 2 with values True and False. Anything else can lead to inconsistency.○ You can personalize the indicator filters and columns in the Indicator section. When you login again
the same filters and columns are displayed.
20.To publish model, choose Publish.System publishes the model and creates a first revision of the model in SAP Predictive Maintenance and Service, cloud edition. Users of your organization can view the published model. If you navigate away from the Models application without saving the model, the model remains in the unpublished state and is not visible to any users in the organization until you publish the model.
21. You can view the changes made on the model data in the Timeline section.
You can click the model date range to open the Filter By dialog box. You can select to show the event for a particular object and define the time range during which you want to see the changes.
For each change entry, you can view changes made in other languages on the timelines using the Show Details button.
110 P U B L I CApplication Help for SAP Predictive Maintenance and Service, cloud edition
Master Data

5.2.1.1.1 Adding Model Components
You perform this activity when you need to alter the model components to customize to your requirement.
Prerequisites
● You have already created a model in SAP Predictive Maintenance and Service, cloud edition. For information about creating a model, see Creating a Model [page 105].
● The model is in status Unpublished or In Revision.● Ensure that the component you want to add already is created in the network as a model.
Procedure
1. Launch the Models application.2. Open the relevant model.3. From the Model object page, choose New Revision.4. Choose the Model Component icon.5. Choose Add Component.6. In the Select Component pop-up box, select the component you want to add.7. Choose Add.
○ To remove component, proceed as follows:○ From the Model Component page, select the model and choose Remove Component.○ From the Select Component page, select the component you want to remove.○ Choose Remove.
5.2.1.2 Updating a Model
You use this procedure to update an existing model that has either incorrect or missing information.
Prerequisites
● You have created a model that is either in an unpublished state, or in the in revision state.● Your user ID has the roles MODEL_DELETE or MODEL_EDIT assigned. For more information, see Additional
Roles for Master Data, Processes and Administration [page 350].
Application Help for SAP Predictive Maintenance and Service, cloud editionMaster Data P U B L I C 111

Procedure
1. Open the Models application.2. Search for a model that you want to update using the search filters.3. Select the model from the search results.4. If you choose a model that is in a published state, choose New Revision from the Model screen and perform
the following tasks:a. To update attributes such as manufacturer’s name, or model name, or any of the model related
attributes select INFORMATION Model Information tab and perform the following tasks:b. Choose Edit in the Model Information section and update the relevant fields. For more information on
the field descriptions, see Creating a Model [page 105].c. Choose Save.
5. To update additional attributes related to the model, select INFORMATION Attributes tab and perform the following tasks:a. Choose Edit in the Attributes section and update the relevant fields. For more information on the field
descriptions, see Creating a Model [page 105].b. Choose Save.
6. To assign existing planned maintenance instructions, or troubleshooting and breakdown instructions to the model; or to unassign the instructions related to the model, choose the INSTRUCTIONS tab and perform the following tasks:
NoteYou must have instructions created in the SAP Predictive Maintenance and Service, cloud edition.
a. Choose Edit in the Instructions section.b. To assign an instruction, choose Assign.
If you are unable to see the Assign button, change your browser zoom and re-try.c. To unassign an instruction, choose UnAssign.
7. Choose Publish to publish the updated model.
5.2.1.3 Publishing a Model
When you have more models created using public APIs provided by SAP Predictive Maintenance and Service, cloud edition, you can view these models using the Models application and perform a mass publish of such models.
Prerequisites
Your user ID has the roles MODEL_DELETE or MODEL_EDIT assigned.
For more information, see Additional Roles for Master Data, Processes and Administration [page 350].
112 P U B L I CApplication Help for SAP Predictive Maintenance and Service, cloud edition
Master Data

Procedure
1. Open the Models application.2. Search for models that are either in unpublished, or in the in revision state.3. Select one or more models from the search results.4. Choose Publish.
5.2.1.4 Deleting a Model
You can delete a model that you do not want to have on the network.
Prerequisites
● Your user ID has the role MODEL_DELETE assigned.For more information, see Additional Roles for Master Data, Processes and Administration [page 350].
● You have created a model and the model is in any of the following states:○ Unpublished○ Published○ In Revision
Procedure
1. Open the Models app.2. Search for a model.3. Select a model from the search results.4. Choose Delete.
5.2.1.5 Assigning Alert Type Groups to a Model
You can assign alert type groups to a model of an equipment.
Prerequisites
● You have created a model that is in the revision state.
Application Help for SAP Predictive Maintenance and Service, cloud editionMaster Data P U B L I C 113

● Your user ID has the scopes MODEL_DELETE or MODEL_EDIT assigned.For more information, see Additional Roles for Master Data, Processes and Administration [page 350].
Context
On assigning an alert type group, the alert types are automatically assigned to a model.
NoteYou cannot assign alert type group to a model template.
Procedure
1. Open the Models application.2. Search for a model or models that you want to assign an alert type group.
NoteYou can assign the same alert type group to more than one model.
3. Click Alert Types from the Documentation tab.
List of alert types assigned to a particular alert type group displays.4. Click Assign Alert Type Group to assign.
You can view details of the alert type such as category, severity, alert type group, indicator, origin, and failure modes.○ If rules are maintained for the alert type, the message Rules Maintained display against the alert type.
This is visible within the Documentation section in the model and equipment page.The message Rules not maintained displays if rules are not maintained for the alert type. You can navigate to the Rules page and view the list of rules related to a model using the Manage Rules option. For more information, refer Rule Management [page 247].
○ It is not possible to unassign an alert type group from a model, if its alert types are used in the rules.
Note○ Make sure that you add only the alert groups having alert types that have indicators matching with
the indicators of the model. In case this criteria is not met, the rules created using these alert types will not be functional.For example, indicator I1 and I2 are assigned to alert types A1 and A2, respectively. These alert types are grouped within an alert type group, AG1. This alert type group (AG1) can be assigned to a model only if the indicators I1 and I2 are already part of the model.This is not applicable to failure modes.
○ Do not delete indicators that are assigned to a model and used in an alert type. Considering the above example, I1 or 12 should not be deleted as these indicators are used in the alert type groups, as well.
○ Alert types without indicators can be assigned to models with or without indicators.
114 P U B L I CApplication Help for SAP Predictive Maintenance and Service, cloud edition
Master Data

Related Information
Rules [page 244]Adding Alert Types [page 227]Adding Alert Type Groups [page 230]
5.2.1.6 Viewing and Analyzing Leading Indicators for a Model
Use this procedure to view and analyze the leading indicators for a model.
Prerequisites
● You have trained a model in the Leading Indicators Model Management application. For more information, see Managing Models for Leading Indicators [page 330].
● The following role is assigned to your user:○ For SAP Predictive Maintenance and Service Fiori launchpad: <pdms_AssetCoreExpert>○ For SAP Intelligent Asset Management Fiori launchpad: <AC_ORG_DATA_EXPERT>
Context
To monitor and predict the performance of your equipment, you can view and analyze leading indicators for all your equipment of an equipment model.
Leading indicators are the indicators whose conditions are most related to failures of the equipment. The leading indicators are automatically determined by a machine learning algorithm using historical sensor data and notification data as input. Identifying these leading indicators and their conditions helps you to prevent upcoming failures by proactively maintaining the equipment and creating effective condition-based maintenance (CBM) rules to monitor the performance and predict upcoming failures.
ExampleRose, a reliability engineer, is interested in activating data-driven condition-based maintenance (CBM) for all her equipment of a specific equipment model to prevent failures. She reviews the leading indicators for her equipment model EM202 and sees that output voltage has the highest influence on failures. To get a better understanding, she reviews the most related conditions and sees that an output voltage less than 600 volt has the highest influence. To prevent failures from occurring and activate condition-based maintenance (CBM), she creates a rule for the condition to get notified when any of her equipment of the equipment model is about to fail because of the condition so she can proactively maintain all equipment of the equipment model.
Application Help for SAP Predictive Maintenance and Service, cloud editionMaster Data P U B L I C 115

Procedure
1. Open the Models application.2. From the Models screen, select the model for which you want to view and analyze the leading indicators.
The model page is displayed.
3. To view and analyze the leading indicators, choose ANALYTICS Leading Indicators .
The leading indicators for the model are displayed as follows:○ For the model regardless of any failure mode: By default, the leading indicators are displayed for the
model regardless of any failure mode. In this case, all failures that occurred in the past are included.○ For a failure mode related to the model: If there are one or more failure modes available for the
model, you can also display the leading indicators for a specific failure mode by selecting the failure mode. You can choose from all failure modes that are assigned to the model.
The indicators are ranked by their strength indicating which indicators have the highest influence on failures. You can view details about the strength threshold values by clicking on the strength link.
4. To view and analyze the conditions for the leading indicators, choose Conditions.
The top conditions for the selected indicator are displayed. The conditions are ranked by their strength indicating which conditions have the highest influence on failures. You can view details about the strength threshold values by clicking on the strength link.
NoteOnly conditions whose strength is above 50% are displayed. Conditions below this strength are considered as having no influence on failures and the equipment of the equipment model are operating under normal conditions.
5. To create a new rule for one condition, select the condition and choose Create Rule. For more information about rules and how to create rules, see Rules [page 244].
Results
You have viewed and analyzed the leading indicators for your model.
Related Information
Viewing and Analyzing Leading Indicators for Equipment [page 100]
116 P U B L I CApplication Help for SAP Predictive Maintenance and Service, cloud edition
Master Data

5.2.1.7 Configuring Indicator Forecasting for a Model
Use this procedure to configure indicator forecasting to forecast indicator values for your equipment of an equipment model.
Prerequisites
● The role <pdms_ConfigUser> is assigned to your user.● Indicators are assigned to your equipment model. For more information, see Adding Indicator Groups and
Indicators [page 220].● The equipment model is published. For more information, see Publishing a Model [page 112].● At least one piece of equipment is synchronized with SAP IoT Application Enablement Services. For more
information, see Creating a Piece of Equipment [page 73].
Context
To get insights about the expected behavior of your equipment of an equipment model in the future, you can forecast indicator values for a certain time period in the future by configuring indicator forecasting. This helps you to recognize any potential issues with your equipment early, for example, breakdowns and proactively maintaining your equipment.
NoteConsider the following:
● You can only configure indicator forecasting for indicators, which have the Continuous category.● Once you have configured indicator forecasting, the configuration cannot be deleted, you can only
deactivate it. This is also the case if the indicators are not assigned to equipment any more or the equipment model and indicators are deleted.
● When you create new indicator forecasting configurations, the current configuration is overwritten by the new configuration.
The indicator values are forecasted based on historical indicator time series data within a defined time range. This data is aggregated within the time range in a certain aggregate interval. The aggregate interval is determined automatically. The aggregated data is then used to calculate averages. Each average is calculated based on the aggregated data within the time interval, for example, 2 minutes and then divided by this time interval. The collection of these averages is then used as input for a linear regression algorithm to calculate the indicator values. For more information about the linear regression algorithm, see Simple Linear Regression . The forecasted indicator values are then displayed in the indicator chart.
ExampleRose, a maintenance planner, wants to get insights about the operating hours of her equipment and wants to see the futuristic behavior of the operating hours. She forecasts the indicator values. In the indicator chart, she views the forecasted operating hours values for the next two weeks and she sees that the operating hours will decrease and may reach a threshold in the next days, which can lead to a potential
Application Help for SAP Predictive Maintenance and Service, cloud editionMaster Data P U B L I C 117

breakdown. To prevent the breakdown from occurring, she can then perform follow-up tasks based on her analysis.
Procedure
1. Open the Models application.2. From the Models screen, select the model for which you want to forecast indicators.3. Choose INDICATORS.
The list with all configured indicators for the model is displayed.4. From the list, select the indicator for which you want to forecast indicator values.5. Choose Configure.
NoteIf the button is not enabled, create a new revision of the model by choosing Manage and then New Revision. For more information about creating revisions, see Updating a Model [page 111].
The dialog box for the indicator is displayed.6. In the dialog box, choose Forecasting.7. Fill in the following entries:
Activate Indicator Forecasting Activate this checkbox to forecast indicator values. You can later also deactivate already created configuration.
Data from within the last Define the time range of the historical time series data that you want to use for forecasting.
Reset on Notifications Activate this checkbox to include failure modes of notifications in the calculation.
If you activate this checkbox, your time range is shortened based on notifications that are assigned to a failure mode. This means that once a notification with a malfunction end date was collected within the time range, only the data after the end date is used for the calculation.
ExampleYou have defined 10 days as a time range for the indicator forecasting. On the 8th day, a notification was collected indicating an end of failure. This means that only the data from the last 2 days is used for the forecasting because only within this time the equipment is up and the 8 days before the equipment was down due to a breakdown and this data is useless.
118 P U B L I CApplication Help for SAP Predictive Maintenance and Service, cloud edition
Master Data

Failure Mode Select the failure mode for which the assigned notifications should be included in the calculation.
8. Choose Confirm.
Results
The indicator forecasting is configured, and the indicator values are forecasted.
Next Steps
You can now view the forecasted indicator values for a specific piece of equipment of the equipment model in the indicator chart. For more information, see Features in Indicator Chart [page 38].
5.3 Locations
A location in SAP Predictive Maintenance and Service, cloud edition corresponds to a virtual record of the location where an equipment is installed.
Using the Locations application, you can create a location and assign it to your item of equipment. This assignment is made based on the functionality of the items of equipment.
A location is based on a template and allows users to add values to the definitions used in the underlying template.
A location can be in any of the following states:
● Unpublished● In Revision● Published
For more information, see State Transitions [page 249]
You can perform the following operations using the Locations app:
● Create a Location and add location information and location attributes.For more information, see Creating a Location [page 120].
● View details of an existing location and update an existing location.For more information, see Updating a Location [page 123].
● Delete a location to clean up the data that is not required to be on the network.For more information, see Deleting a Location [page 124].
● View the <Completeness> status. This is calculated based on values in header,< Location Information>, and <Installation Location> section
● Create <Extensions> for a location.
Application Help for SAP Predictive Maintenance and Service, cloud editionMaster Data P U B L I C 119

A new tab <Extensions> is displayed. This provides the custom specific information that you created
● View the list of child locations under STRUCTURE Locations
NoteYou can remove a child location from a parent location and assign it to a different location.
Assign child locations to existing locations from the Structure section.● Add or remove inherited address.● RFID is enabled in Lookup application for devices that support RFID.
If the <Prefix> and <Suffix> are defined in the Bar Code Configurations under Application SettingsGeneral Application Settings , then RFID feature can be used to scan the RFID tag.
● View an analytics dashboard for a location. For more information see Viewing Analytics Dashboards on Object Pages [page 58].
5.3.1 Creating a Location
You use this procedure to create a location where an item of equipment is installed, and add locationspecific attributes to the location.
Prerequisites
● Your user ID either belongs to the group ORG_ADMIN or ORG_DATA_EXPERT.For more information, see Additional Roles for Master Data, Processes and Administration [page 350].
● You have already created a location template from the Templates application.For more information, see Creating a Location Template [page 237]
Procedure
1. Launch the Locations application.2. From the Locations landing page, choose New.3. In the Create New Location dialog box, enter the location ID, address, description, template, and parent
details.
Note<Parent> And address is optional.
120 P U B L I CApplication Help for SAP Predictive Maintenance and Service, cloud edition
Master Data
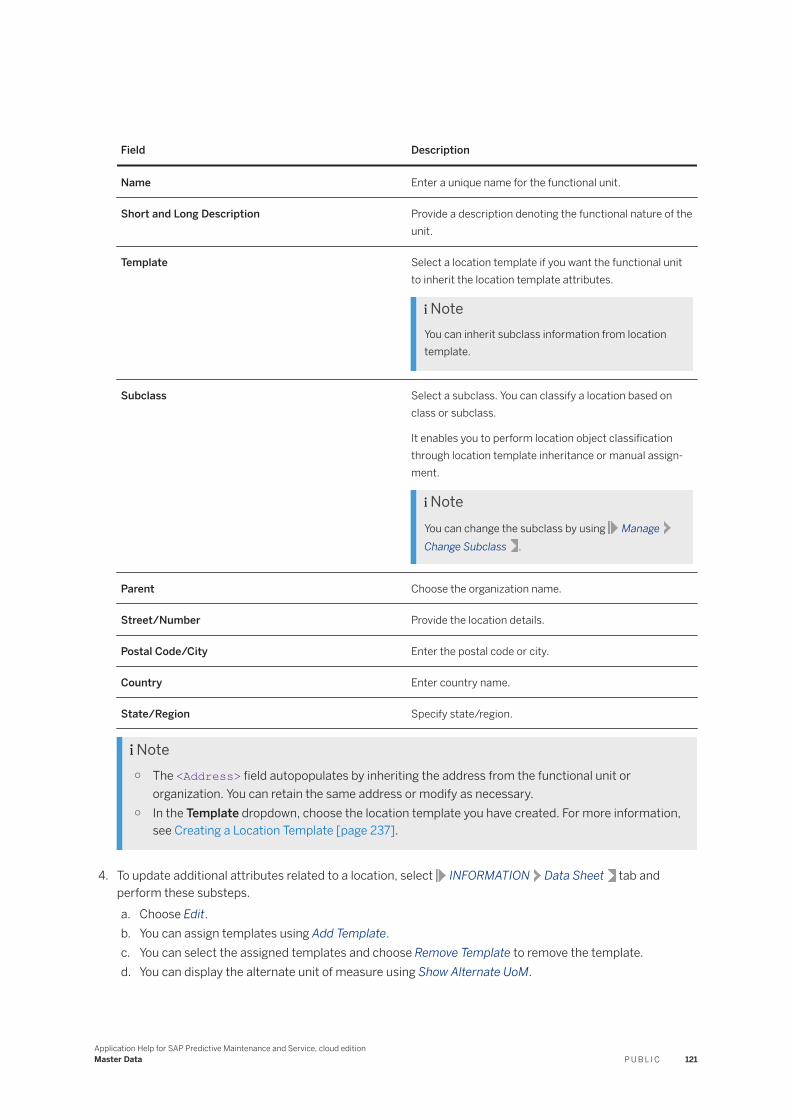
Field Description
Name Enter a unique name for the functional unit.
Short and Long Description Provide a description denoting the functional nature of the unit.
Template Select a location template if you want the functional unit to inherit the location template attributes.
NoteYou can inherit subclass information from location template.
Subclass Select a subclass. You can classify a location based on class or subclass.
It enables you to perform location object classification through location template inheritance or manual assignment.
NoteYou can change the subclass by using ManageChange Subclass .
Parent Choose the organization name.
Street/Number Provide the location details.
Postal Code/City Enter the postal code or city.
Country Enter country name.
State/Region Specify state/region.
Note○ The <Address> field autopopulates by inheriting the address from the functional unit or
organization. You can retain the same address or modify as necessary.○ In the Template dropdown, choose the location template you have created. For more information,
see Creating a Location Template [page 237].
4. To update additional attributes related to a location, select INFORMATION Data Sheet tab and perform these substeps.a. Choose Edit.b. You can assign templates using Add Template.c. You can select the assigned templates and choose Remove Template to remove the template.d. You can display the alternate unit of measure using Show Alternate UoM.
Application Help for SAP Predictive Maintenance and Service, cloud editionMaster Data P U B L I C 121

You can set the default unit of measurement system in the Unit of Measure Variant under User Account(icon on the left corner of the launchpad) Settings Unit of Measure .
e. Choose Save.
5. In the Locations object page, navigate to INFORMATION Location Information and choose Edit.a. In the Location Information field autopopulates by inheriting the address from the section, enter details
as necessary.
In the <Designed Operating State> dropdown, specify the operational state of the location.
You can also specify the <Criticality> and <Safety Risk> for the location.b. Choose Save.
6. To update the installation information about the location, choose INFORMATION INSTALLATION LOCATION and choose Edit.a. In the Installation Location section, enter details as necessary.
You can enter the relevant <Object Address>, <Contact Person>, and <Geospatial Data>.
In the Geospatial Data section, specify the latitude and longitude coordinates of the location.b. Choose Save.
7. To add the location to a group, go to INFORMATION GROUPS Add .
You can view the list of groups to which the location is added.
8. To assign a piece of equipment to the functional location, choose STRUCTURE Equipment Assign .a. From the Select Equipment dialog box, select the equipment. You can also inherit the address of the
location to the equipment. Choose Assign.
9. To assign a location to the functional location, choose STRUCTURE Locations Assign .a. From the Select Locations dialog box, select the location. Choose Assign.
10. To add a new document, choose Documentation Documents Add New and perform the following tasks:
1. In the Add Document dialog box, browse for a file or provide a link.2. Select a Category.3. Select a Phase.4. Select the type of data in Data Sensitivity.5. Select your Language.6. Enter a Description.7. Choose the Confidentiality of the document8. Choose Upload to upload a document without a duplicate check.
NoteWhen uploading a new document, you can run a duplicate check and if no duplicates, only then upload a document using the Check and Upload button.
11. To assign existing documents to the location, choose DOCUMENTATION Documents Add Assignand perform the following tasks:a. In the Select Documents dialog box, select the relevant document.b. Choose Assign.
122 P U B L I CApplication Help for SAP Predictive Maintenance and Service, cloud edition
Master Data

12. To add instructions to the location, choose DOCUMENTATION Instructions Assign and perform the following tasks:a. From the Select Instructions dialog box, select the appropriate instruction.b. Choose Assign.
13. To add Failure Modes to the location, choose DOCUMENTATION Failure Modes Assign and perform the following tasks:a. From the Select Failure Modes dialog box, select the appropriate failure modes.b. Choose Assign.
If you have write access to the location even though you do not have write access to the failure mode, you can edit the failure mode instance page of the location.
When you copy a failure mode and Save & Publish it:○ A new failure mode is created with the same causes and instructions from the source failure mode○ The newly created failure mode is directly assigned to the object○ The new failure mode is in published state○ You navigate to the new failure mode instance page that includes all the copied failure mode instances:
effects, causes, instructions, and detection method○ The new failure mode appears in the failure mode section list
You can now flag inherited failure modes to not relevant using the Not Relevant button. This excludes the failure modes from any assessments relevant to the location.
14. To publish the location, choose Publish.
Results
You have created a location and published it.
● You can view the list of child locations under Structure Locations● You can view notifications and work orders, which are associated with the location under Maintenance and
Service. Notifications and work orders can be uploaded from an external system using available public APIs.
5.3.2 Updating a Location
You use this procedure to update information such as location information, installation location, and documents that relate to an existing location.
Prerequisites
Your user ID either belongs to the group ORG_ADMIN or ORG_DATA_EXPERT.
For more information, see Additional Roles for Master Data, Processes and Administration [page 350].
Application Help for SAP Predictive Maintenance and Service, cloud editionMaster Data P U B L I C 123

Procedure
1. Launch the Locations application.2. Search the location you want to update using search filters.3. Select the location from the search results.
4. If you choose a location that is in status Published, choose Manage New Revision from the Locations object page.
5. Edit the Location Information section, Installation Location section and the Documents section as necessary.For more information about field descriptions in each section, see Creating a Location [page 120].
6. Choose Save.7. Choose Publish.
5.3.3 Deleting a Location
You use this procedure to delete a location that you do not want to have on the network.
Prerequisites
● Your user ID either belongs to the group ORG_ADMIN or ORG_DATA_EXPERT.For more information, see Additional Roles for Master Data, Processes and Administration [page 350].
● You have created a location and the location is in any of the following states:○ Unpublished○ Published○ In Revision
Procedure
1. Launch the Locations application.2. Using search filters, search for the location you want to delete.3. Select the relevant location.4. Choose Delete.
124 P U B L I CApplication Help for SAP Predictive Maintenance and Service, cloud edition
Master Data

5.3.4 Viewing Work Orders of a Location
You can use this procedure to view a list of work orders related to a location.
Prerequisites
To view a location, your user ID belongs to the group ORG_DATA_READ, or it has the roles FUNCTIONAL_LOCATION_READ assigned to it.
Context
You can view the following work orders details: work order ID, order short description, order status, order type, order priority, order long description, start date, end date, actual duration, or planned duration.
Click a notification ID to view more details of the same in the object page. An indicator chart displays with the notification details. You can view the start and end date of notifications. If these dates are not available, the current date of notification is plotted on the chart, with the measurement point time series data.
NoteIn case of work orders that do not have an assigned equipment, then the indicator chart will not work.
For more information about indicator chart, refer Viewing Time Series Data (Indicator Chart) of an Equipment [page 95].
You can perform the following actions:
● Sort the work orders by - Ascending, Descending, Type, Priority, Start Date, or End Date.● Group work orders by- Ascending, Descending, Type, or Priority.● Filter work orders by - Type or Priority.
You can have more than one service provider for a location. Multiple business partners can have the same role.
NoteIf the order status is <TECO> or closed, then the actual duration is displayed, otherwise the planned duration is displayed.
Procedure
1. Open the Locations application.2. From the Location screen, select a location for which you want to view work orders.3. To view information related to work orders, go to MAINTENANCE & SERVICE→ Work Orders section.
Application Help for SAP Predictive Maintenance and Service, cloud editionMaster Data P U B L I C 125

You can view the list of work orders associated with the location. Select and open a work order to view more details of work order.
5.3.5 Viewing Notifications of Location
You use this procedure to visualize all the notifications associated with alocation.
Prerequisites
You must have the roles FUNCTIONAL_LOCATION_READ assigned to your user ID in the SAP Cloud Platform account.
Context
Using this option, it is also possible to sort, filter, group notifications, and create new notifications. Click the respective icons to perform these actions. Depending on the action performed on these notifications, the progress statuses - completed, planned, and pending displays against each notification. It is also possible to create an improvement request or edit an improvement request using the Add Evidence button. Also, create a notification using the <New> option.
Click a work order ID to view more details of the same in the object page. A indicator chart displays with the work order details. You can view the start and end date of work orders. If these dates are not available, the current date of work order is plotted on the chart, with the measurement point time series data.
NoteIn case of work orders that do not have an assigned equipment, then the indicator chart will not work.
For more information about indicator chart, refer Viewing Time Series Data (Indicator Chart) of an Equipment [page 95].
To view the details of notification, click the respective notification ID. The progress of notifications is as below:
● Completed - All notifications with status Completed or Closed.● Planned - All notifications that have start date equal or greater than the current date.● Pending - All notifications that have end date greater than current date or all notifications that have the
start date lesser than the current date.
Procedure
1. Open the Locations application.
126 P U B L I CApplication Help for SAP Predictive Maintenance and Service, cloud edition
Master Data

2. From the Location list screen, select a location for which you want to view notifications.3. In the MAINTENANCE & SERVICE tab, select Notifications.
Results
You can view all the notifications related to the location.
5.4 Functions
Functions are used to define how the assigned objects are intended to operate. You can assign functions to equipment, models, locations and systems.
You can currently use this feature in the Reliability Centered Maintenance (RCM) assessment.
Generally, in asset central foundation, it takes you to the list page. .
Note● Functions once saved are published.
5.4.1 Creating and Editing Functions
You can use this procedure to create a function.
Context
Procedure
1. Open the Functions app.2. Choose New.3. Enter the following details in the New Function dialog box:
Field Description
Short Description (*) Enter a short description for the function.
Application Help for SAP Predictive Maintenance and Service, cloud editionMaster Data P U B L I C 127

Field Description
Long Description Enter a long description for the function, if necessary.
Type (*) Select the type for the function from the list.
These are the categories that the functions have an impact on.
Type Description Enter a collective description for the type, if necessary.
4. Choose Save.5. Once saved, the function is listed in the list page.
There is no status for functions, once saved the function is directly published.6. Choose the function from the list, the Basic Information section lists all the details that you have entered
while creating a function.
You can choose to edit the information using Edit.7. In the Documents section, you can use Add to add any relevant document.
You can use Remove to remove any existing document and download the documents using Download.8. In the Assignments section, you can assign equipment, models, locations, or systems to the function.
5.4.2 Deleting Functions
You can use this procedure to delete a function.
Procedure
1. Open the Functions app.2. Select the functions to be deleted from the list.3. Choose Delete.
5.5 Failure Modes
A failure mode is a probable failure that could occur to piece of equipment. In case SAP Asset Intelligence Network is available, the manufacturer shares the failure modes with the operator; else the operator has to upload or enter the failure modes on their own. The failure mode keeps the operator informed about possible failures and helps them to handle the failure modes efficiently.
A failure mode is always associated with a subclass and may have more than one category.
The following types of failure modes can occur to any of the following business objects associated with a piece of equipment (equipment, models, spare parts, locations, groups):
128 P U B L I CApplication Help for SAP Predictive Maintenance and Service, cloud edition
Master Data

● Design function is not obtained● Specified function lost or outside accepted operational limit● Non-Critical failures
You can now view the Reliability, Availability, Maintainability, and Safety (RAMS) figures for the failure modes.
5.5.1 Managing Failure Modes
You can perform various operations; such as creating a failure mode, viewing a failure mode, updating a failure mode, deleting a failure mode, and assigning models, pieces of equipment, spare parts, groups, and locations to a failure mode.
Context
You use the Failure Modes application to perform the following operations:
● Creating a Failure Mode [page 130]● Viewing and Publishing a Failure Mode [page 133]● Updating a Failure Mode [page 134]● Deleting a Failure Mode [page 135]● Copying a Failure Mode [page 135]● Assigning Failure Modes to Business Objects [page 136]● View the causes associated with a failure mode
You can change the following assignments in failure modes:
● Model assigned to the failure mode● Equipment assigned to the failure mode● Location assigned to the failure mode● Spare part assigned to the failure mode● Group assigned to the failure mode
NoteA failure mode can be in any status when you assign a business object to it.
Application Help for SAP Predictive Maintenance and Service, cloud editionMaster Data P U B L I C 129

5.5.1.1 Creating a Failure Mode
You use this procedure to create a failure mode and assign business objects such as models, items of equipment, spare parts, groups, and locations to the failure mode.
Prerequisites
Your user ID has the roles FAILURE_MODE_DELETE or FAILURE_MODE_EDIT assigned to it.
For more information, see Additional Roles for Master Data, Processes and Administration [page 350].
Procedure
1. Open the Failure Modes app.2. From the Failure Mode List window, choose New.3. In the Failure Modes dialog box, perform the following tasks:
a. Enter the following details as described in the table :
Field Description
Description (*) Enter a short description for the failure mode.
Long description Enter a short description for the failure mode.
Subclass Select a subclass for the failure mode.
Category (*) Select one or more categories relevant for the failure mode.
Type (*) Select the type of failure mode. The following list provides the descriptions for each type of failure mode:○ 1 - Designed function is not obtained○ 2 - Specified function lost or outside accepted op
erational limit○ 3 - Non critical failures
130 P U B L I CApplication Help for SAP Predictive Maintenance and Service, cloud edition
Master Data

Field Description
Detection Method Select a detection method to support detectability. You can select from thr following list:○ Periodic maintenance○ Functional testing○ Inspection○ Periodic condition monitoring○ Continuous condition monitoring○ Production interference○ Casual observation○ Corrective maintenance○ On demand○ Other
NoteAll the mandatory fields are marked as (*) in the table.
4. Choose Save to create the failure mode.5. To add the RAMS figures, follow these steps:
a. In the RAMS Figures section, choose Edit.b. Select a Failure Pattern.c. Enter the KPI values for mean time to failure, mean time to repair, and mean time between failures.d. Save your entries.
6. To assign a model, follow these steps:
a. In the ASSIGNMENTS Models section, choose Assign.b. From the Select Model dialog box, select the relevant equipment.c. Choose Assign.
7. To assign a piece of equipment, follow these steps:
a. In the ASSIGNMENTS Equipment section, choose Assign.b. From the Select Equipment dialog box, select the relevant equipment.c. Choose Assign.
8. To assign a location, follow these steps:
a. In the ASSIGNMENTS Locations section, choose Assign.b. From the Select Location dialog box, select the relevant location.c. Choose Assign.
NoteYou can only assign a maximum of 50 locations to a failure mode.
9. To assign a spare part, follow these steps:
a. In the ASSIGNMENTS Spare Parts section, choose Assign.
Application Help for SAP Predictive Maintenance and Service, cloud editionMaster Data P U B L I C 131

b. From the Select Spare Parts dialog box, select the relevant spare part.c. Choose Assign.
10. To assign a group, follow these steps:
a. In the ASSIGNMENTS Groups section, choose Assign.b. From the Select Group dialog box, select the relevant group.c. Choose Assign.
11. To assign a system, follow these steps:
a. In the ASSIGNMENTS Systems section, choose Assign.b. From the Select System dialog box, select the relevant system.c. Choose Assign.
12. To add causes, follow these steps:a. In the CAUSES section, choose Add.
You can choose New to add new causes or Assign to add existing causes.b. From the Select Causes dialog box, select the relevant cause or create a new cause using the Create
Cause dialog box.c. Choose Assign.
13. To add instructions, follow these steps:a. In the INSTRUCTIONSAssign.
You can choose New section, choose to add new causes or Assign to add existing causes.b. From the Select Causes dialog box, select the relevant cause or create a new cause using the Create
Cause dialog box.c. Choose Assign.
14. To publish the failure mode, choose Publish.15. To create a revision of a failure mode or to work with the last published failure mode, or last revision of
failure mode, see section, choose Creating Revisions and Switching Between Revisions and Published State [page 249].
Results
The failure mode is published.
When you copy a failure mode and Save & Publish it:
● A new failure mode is created with the same causes and instructions from the source failure mode● The newly created failure mode is directly assigned to the object● The new failure mode is in published state● You navigate to the new failure mode instance page that includes all the copied failure mode instances:
effects, causes, instructions, and detection method● The new failure mode appears in the failure mode list
132 P U B L I CApplication Help for SAP Predictive Maintenance and Service, cloud edition
Master Data

5.5.1.2 Viewing and Publishing a Failure Mode
You can view a failure mode to verify whether the information contained in a failure mode is appropriate.
Prerequisites
● To publish a failure mode, your user ID belongs to the group ORG_ADMIN or ORG_DATA_EXPERT, or it has the roles FAILURE_MODE_DELETE or FAILURE_MODE_EDIT assigned to it.
● To view a failure mode, your user ID belongs to the group ORG_DATA_READ, or it has the role FAILURE_MODE_READ assigned to it.
For more information, see Additional Roles for Master Data, Processes and Administration [page 350].
Context
If you have assigned a business object to a failure mode, you can navigate to the business object details and work on the business object.
Procedure
1. Open the Failure Modes application.2. In the Failure Mode List window, use the filters to search for an appropriate failure mode.3. Choose a failure mode from the search list and double-click to view details.4. On the Failure Mode screen, choose the Assignments tab to view the details of all the business objects
assigned to the failure mode. On the Assignments tab:a. Choose Models to view the models assigned to the failure mode.
For more information about working with models, see Models [page 103].b. Choose Equipment to view the pieces of equipment assigned to the failure mode.
For more information about working with equipment, see Equipment [page 72].c. Choose Locations to view the locations assigned to the failure mode.
For more information about working with locations, see Locations [page 119].d. Choose Spare Parts to view the spare parts assigned to the failure mode.
For more information about working with spare parts, see Spare Parts [page 141].e. Choose Groups to view the group assigned to the failure mode.
For more information about working with groups, see Groups [page 151].5. On the Failure Mode screen, choose the Causes tab to view all the possible causes related to the failure
mode.
Choose Add to add a new cause to the failure mode.
Application Help for SAP Predictive Maintenance and Service, cloud editionMaster Data P U B L I C 133

6. Choose Publish to publish the failure mode.
If you want to view details of the relevant business object, double-click it.
5.5.1.3 Updating a Failure Mode
You can delete or update existing information within a failure mode or add missing information to a failure mode.
Prerequisites
● You have identified the failure mode that you want to update.● To update a failure mode, your user ID belongs to the group ORG_ADMIN or ORG_DATA_EXPERT or it has the
roles FAILURE_MODE_DELETE or FAILURE_MODE_EDIT assigned to it.For more information, see Additional Roles for Master Data, Processes and Administration [page 350]
Context
You can add possible causes or create new causes for a failure mode.
Procedure
1. Open the Failure Modes app.2. In the Failure Modes app, search for an appropriate failure mode using the filters.3. From the search results list in the Failure Modes section, select an appropriate failure mode.4. Double-click the failure mode to view details.5. If you have opened a failure mode that has been published, choose Manage->New Revision.6. To update all the relevant business objects assigned to a failure mode, select the different sections on the
ASSIGNMENTS tab.
For more information, see Creating a Failure Mode [page 130].7. To add a new cause, select the CAUSES tab.
For more information, see Creating a Failure Mode [page 130].8. To publish the failure mode, choose Publish.
134 P U B L I CApplication Help for SAP Predictive Maintenance and Service, cloud edition
Master Data

5.5.1.4 Deleting a Failure Mode
You can delete a failure mode that you no longer want to have on the network.
Prerequisites
To delete a failure mode, your user ID belongs either to the group ORG_ADMIN or ORG_DATA_EXPERT, or has the role FAILURE_MODE_DELETE assigned to it.
For more information, see Additional Roles for Master Data, Processes and Administration [page 350].
Procedure
1. Open the Failure Modes application.2. In the Failure Mode List screen, search for a failure mode.3. Choose a failure mode from the search list.
You can select more than one failure mode for deletion.4. On the Failure Mode List screen, choose Delete.
5.5.1.5 Copying a Failure Mode
You can copy a failure mode to create a new failure mode similar to the existing failure mode.
Prerequisites
To copy a failure mode, your user ID belongs to the group ORG_ADMIN or ORG_DATA_EXPERT, or it has the role FAILURE_MODE_DELETE and FAILURE_MODE_EDIT assigned to it.
For more information, see Additional Roles for Master Data, Processes and Administration [page 350].
Procedure
1. Open the Failure Modes application.2. In the Failure Mode List screen, search for a failure mode.3. Choose a failure mode from the search list.
Application Help for SAP Predictive Maintenance and Service, cloud editionMaster Data P U B L I C 135

4. In the Failure Mode List screen, choose Copy.
5.5.1.6 Assigning Failure Modes to Business Objects
You can use this procedure to assign a business object to a failure mode.
Prerequisites
● You have identified the business object that you want to assign.● Your user ID belongs to the group ORG_ADMIN or ORG_DATA_EXPERT.
For more information, see Additional Roles for Master Data, Processes and Administration [page 350].
Context
You can assign a failure mode to the following objects:
● Models● Announcements● Equipment● Instructions● Locations● Improvement Cases● Spare Parts
Note● You can only assign a maximum of 50 locations to a failure mode.● All the equipment belonging to a group or model will also inherit the failure modes assigned to that
model or group.● All the locations belonging to a group will also inherit the failure modes from that group.
For simplicity's sake, we will describe the procedure for assigning a failure mode to a model.
Procedure
1. Open the Failure Modes application.2. In the Failure Mode List screen, use the filters to search for an appropriate failure mode.3. In the Failure Mode screen, go to ASSIGNMENTS-> Models section.4. Choose Assign.
136 P U B L I CApplication Help for SAP Predictive Maintenance and Service, cloud edition
Master Data

You can select one or more models from the list and choose Assign.
5.6 Fingerprints
Fingerprint is defined as a collection of snapshot of indicator chart derived from a set of indicators and metadata (type, data & time, description, equipment state, documents) for a specific time period. It describes the reference state of a single piece of equipment that can be used for further process steps, for example, equipment documentation.
Fingerprints help operators and manufacturers to define normal, reference, or failure states for equipment. They can use these states at a later point in time to detect deviations/distances/trends from the normal behavior and plan actions to get the equipment back to the normal state.
5.6.1 Creating a Fingerprint
You can use this procedure to create a fingerprint.
Prerequisites
You must have the authorized role FINGERPRINT_DELETE or FINGERPRINT_EDIT.
Procedure
1. From the equipment app:a. On the launchpad, choose Equipment application.b. Choose equipment from the list.
c. Go to Documentation Fingerprints .d. Choose New.
Enter the <Fingerprint Name> and <Short Description> in the Create New Fingerprint dialog box.
e. Go to SNAPSHOTS.f. Click New.g. Go to Select Indicators. Select the indicators that you want to record the fingerprint for.h. Choose Capture.
You can adjust the capture screen to select a specific period in the indicator chart.i. Choose OK and provide the snapshot description.
Application Help for SAP Predictive Maintenance and Service, cloud editionMaster Data P U B L I C 137

j. Choose Save.k. You can also provide any relevant comments in the Comments section.
2. From Fingerprints app:a. On the launchpad, choose Fingerprints application.b. Choose fingerprint from the list.c. Go to SNAPSHOTS.d. Click New.e. Go to Select Indicators. Select the indicators that you want to record the fingerprint for.f. Choose Capture.
You can adjust the capture screen to select a specific period in the indicator chart.g. Choose OK and provide the snapshot description.h. Choose Save.i. You can also provide any relevant comments in the Comments section.
Results
You have created a fingerprint for a piece of equipment.
Note● You can capture multiple snapshots with different indicator set and time-periods in a fingerprint.● Once you have created a snapshot, you cannot edit them.
5.6.2 Viewing a Fingerprint
You can use this procedure to view a fingerprint.
Prerequisites
You must have the authorized role FINGERPRINT_READ, FINGERPRINT_DELETE, or FINGERPRINT_EDIT.
Procedure
1. From the equipment app:a. On the launchpad, choose Equipment application.b. Choose equipment from the list.
c. Go to Documentation Fingerprints .
138 P U B L I CApplication Help for SAP Predictive Maintenance and Service, cloud edition
Master Data

d. Click on a fingerprint from the list.2. From Fingerprints app:
a. On the launchpad, choose Fingerprints application.b. Click on a fingerprint from the list.
Results
You can view the snapshot and perform basic functions like sort, filter on the snapshot. Any changes on the fingerprint will be recorded in the Timeline section.
5.6.3 Editing a Fingerprint
You can use this procedure to edit a fingerprint.
Prerequisites
You must have the authorized role FINGERPRINT_DELETE or FINGERPRINT_EDIT.
Procedure
1. From the equipment app:a. On the launchpad, choose Equipment application.b. Choose equipment from the list.
c. Go to Documentation Fingerprints .d. Click on a fingerprint from the list.e. Choose Edit.f. You can change the status of a fingerprint from Created to Approved.g. You can also post any relevant comments in the Comments section.h. You can create a new snapshot or delete an existing one from the list.i. Choose Save.
2. From Fingerprints app:a. On the launchpad, choose Fingerprints application.b. Choose fingerprint from the list.c. Choose Edit.d. You can change the status of a fingerprint from Created to Approved.e. You can also post any relevant comments in the Comments section.f. You can create a new snapshot or delete an existing one from the list.
Application Help for SAP Predictive Maintenance and Service, cloud editionMaster Data P U B L I C 139

g. Choose Save.
Results
NoteOnce the status is set to Approved, you can no longer edit the fingerprint. However, you can still post relevant comments.
You can use the Edit Header to edit the header information.
5.6.4 Deleting a Fingerprint
You can use this procedure to delete a fingerprint.
Prerequisites
You must have the authorized role FINGERPRINT_DELETE.
Procedure
1. From the equipment app:a. On the launchpad, choose Equipment application.b. Choose equipment from the list.
c. Go to Documentation Fingerprints .d. Click on a fingerprint from the list.e. Choose Delete.
A confirmation message is displayed.f. Choose OK.
2. From Fingerprints app:a. On the launchpad, choose Fingerprints application.b. Choose fingerprint from the list.c. Choose Delete.
A confirmation message is displayed.d. Choose OK.
140 P U B L I CApplication Help for SAP Predictive Maintenance and Service, cloud edition
Master Data

5.7 Spare PartsSpare parts are components that are kept in your inventory as spare. Typically, these components are not fitted into your item of equipment, but can be fitted into the item of equipment when needed.
With SAP Predictive Maintenance and Service, cloud edition, you can create and maintain a record of these spare parts. Also, if these spare parts are fitted into the physical item of equipment, you can assign these spart parts to the corresponding model on the network.
In SAP Predictive Maintenance and Service, cloud edition, you can record the spare part's manufacturing information, dimensions, quantity, shelf life, to name a few. A spare part inherits attributes from a subclass. You can assign a spare part to a model.
NoteAfter the spare part is assigned to a model, we refer to the spare part as "Part".
Using the Spare Parts application, you can:
● Create spare parts (see Creating Spare Parts [page 142])● Delete spare parts (see Deleting Spare Parts [page 144])
5.7.1 Managing Spare PartsYou can perform various operations on a spare part such as creating spare parts, viewing spare parts, and deleting spare parts
Context
You can use the Spare Parts application to perform the following operations:
● Creating Spare Parts [page 142]● Deleting Spare Parts [page 144]● Assign new spare parts or maintain existing spare parts for an equipment using the Edit and Remove
buttons.● Assign more than one spare part template to a spare part. You can also remove the templates that have
already been assigned and assign more templates.● View and maintain the attributes and values for a spare part.● Assign or remove documents for a spare part.● Dispalys the break down instructions details such as <Expected Duration>, <Number of Steps>,
<Criticality>, <Activity>, <Primary Document>, and <Long Description>.● View an analytics dashboard for a spare part. For more information see Viewing Analytics Dashboards on
Object Pages [page 58].
NoteSpare parts can only be optionally assigned to one sub-class.
Application Help for SAP Predictive Maintenance and Service, cloud editionMaster Data P U B L I C 141

5.7.1.1 Creating Spare Parts
You perform this procedure to maintain manufacturing information, technical data, and assignment information pertaining to spare parts.
Prerequisites
● Your user ID either belongs to the group ORG_ADMIN or ORG_DATA_EXPERT, or has the roles PART_DELETE or PART_EDIT assigned.For more information, see Additional Roles for Master Data, Processes and Administration [page 350].
● You have identified the subclass for creating the spare part.
Procedure
1. Launch the Spare Parts application.
2. To create a single spare part, navigate to New Single Spare Part . To create spare parts by mass upload, follow these substeps:
a. Navigate to New Mass Upload of Spare Parts .b. From the Mass Upload of Spare Parts dialog box, download the template.c. Fill in the necessary details and upload the template.
3. In the New dialog box, enter the following details:
Field Description
Spare Part ID (*) Provide a unique name
Subclass Choose the appropriate subclass from the dropdown
Template Select a spare part template
Short (*) and Long Description Provide a description for the spare part
Unit of Measure (*) Choose the appropriate unit of measure
Phase Choose if the spare part is in Planned or Released phase
Manufacturer (*) Choose the name of the manufacturer of the spare part
Manufacturer Part Number (*) Provide the manufacturer part number
4. Choose Save.5. In the Spare Parts details screen, to add the unit of measure and long description perform the following
steps:a. Go to the INFORMATION section and choose Edit.b. Select the unit of measure from Unit of Measure.c. Choose Save.
6. In the Spare Parts details screen, to update manufacturer information perform the following steps:
142 P U B L I CApplication Help for SAP Predictive Maintenance and Service, cloud edition
Master Data

a. Go to the INFORMATION Part Number section and choose Edit.b. Enter the details.c. Choose Save.
7. In the Spare Parts details screen, to update availability and procurement information perform the following steps:
a. Go to the INFORMATION Availability and Procurement section and choose Edit.b. Enter the required details like delivery time, manufacturer stock level, shelf life, quality, contract, and
standard. You can also specify if the spare part is hazardous or is 3D printable.You can view the date when the manufacturer stock level information was last updated.
c. Choose Save.8. In the Spare Parts Details screen, to maintain information about dimensions of the spare part, perform the
following steps:a. Go to the DIMENSIONS AND WEIGHT DATA section and choose Edit.b. Provide the appropriate dimensions for size, length, width, height, and weight.a. Choose Save.
9. In the Spare Parts Details screen, to maintain attributes pertaining to the spare part, perform the following steps:
a. Go to the INFORMATION Data Sheet section and choose Edit.b. Choose Add Templates. The attributes are derived from the selected templates. You can also edit or
remove templates.c. You can select a template and choose Remove Template to remove the template.d. You can display the alternate unit of measure using Show Alternate UoM.
You can set the default unit of measurement system in the Unit of Measure Variant under User Account(icon on the left corner of the launchpad) Settings Unit of Measure .
e. Choose Save.In the ASSIGNMENTS section, you can view the details of models, equipment, locations, or instructions that are assigned to the spare part.○ By assigning models to the spare part, the model owner can provide specific information about Default
Delivery Quantity and Advised Stock Quantityof the spare part.○ Instructions are for the operator about the spare part use.
10. In the Spare Parts Details screen, to add the spare part to a group perform the following steps:a. Go to INFORMATION section.b. Choose Add and select if you want to add a spare part to a new group or to an existing group. Similarly,
you can remove a spare part from a group by using Remove.c. Choose Save.
11. In the Spare Parts Details screen, to view or assign spare part successor information about, perform the following steps:
a. Go to the INFORMATION Life Cycle Information Successor Spare Part section and choose Assign.
b. Select one or more spare parts in the Assign Successor dialog box.c. Choose Assign.d. You can edit the spare part successor information by choosing Edit on the selected spare part in the
Successor Spare Partsection.
Application Help for SAP Predictive Maintenance and Service, cloud editionMaster Data P U B L I C 143

e. Enter the date until when the spare part can be ordered in the <Valid From> of the Edit Successor Information dialog box.
f. Choose Save.12. In the DOCUMENTS section, you can view the list of documents assigned to the spare part. You can also
add, remove, or download a document from the list.
When uploading a new document, you can:○ Upload a document without a duplicate check using the Upload button.○ Run a duplicate check and if no duplicates, only then upload a document using the Check and Upload
button.13. In the ASSIGNMENTS section, you can view all the business objects to which the spare part is assigned.14. In the FAILURE MODES section, you see details of failure modes assigned to the spare part. You can also
assign a failure mode to the spare part using Assign.
If you have write access to the spare part even though you do not have write access to the failure mode, you can edit the failure mode instance page of the spare part.
When you copy a failure mode and Save & Publish it:○ A new failure mode is created with the same causes and instructions from the source failure mode○ The newly created failure mode is directly assigned to the object○ The new failure mode is in published state○ You navigate to the new failure mode instance page that includes all the copied failure mode instances:
effects, causes, instructions, and detection method○ The new failure mode appears in the failure mode section list
Results
You have created a spare part.
If you have integration with SAP Hybris Commerce, then you can also view the Add to Cart icon on the page.
5.7.1.2 Deleting Spare Parts
You perform this activity when you want to remove a spare part from the network.
Prerequisites
Your user ID either belongs to the group ORG_ADMIN or ORG_DATA_EXPERT, or has the role PART_DELETE assigned.
For more information, see Additional Roles for Master Data, Processes and Administration [page 350].
144 P U B L I CApplication Help for SAP Predictive Maintenance and Service, cloud edition
Master Data

Procedure
1. Open the Spare Parts application.2. Search for the spare part you want to delete.3. Select the spare part from the search results.4. Choose Delete.
5.7.1.3 Uploading of Spare parts from Visual Design Stream Document
Context
To get familiar with SAP 3D Visual Enterprise Author tool. Please refer https://help.sap.com/viewer/8e4c65bb3a6c4ef6b56dc27d1d95cde6/9.0.0.4/en-US
To maintain spare part metadata according to the relevant product standards, please go through following steps:
Procedure
1. Open SAP 3D Visual Enterprise Author.2. Open Metadata panel, refer to https://help.sap.com/viewer/67c291fba1bd10148bea8dce7b0caa3e/
9.0.0.4/enUS/a46817d5f0874720bff566b9c7e68990.html
Application Help for SAP Predictive Maintenance and Service, cloud editionMaster Data P U B L I C 145

3. Export the current metadata of VDS Viewer to maintain spare parts metadata according to product standards. Refer to https://help.sap.com/viewer/67c291fba1bd10148bea8dce7b0caa3e/9.0.0.4/en-US/0fd8ec37c0574419bb7a7487f5f47741.html
NoteBefore exporting select all the spare parts of the VDS to see all the metadata with respect to each node by moving to Display panel and pressing CTRL+A .
4. Open excel and try to open the file, which you have just exported as .txt file.
146 P U B L I CApplication Help for SAP Predictive Maintenance and Service, cloud edition
Master Data

On opening .txt file in excel following should be marked:
a. Choose the Delimited file type that best describes your data and click Next.
Application Help for SAP Predictive Maintenance and Service, cloud editionMaster Data P U B L I C 147

b. Set the Tab as the delimiters your data contains.
148 P U B L I CApplication Help for SAP Predictive Maintenance and Service, cloud edition
Master Data

c. Set the data format of each column to Text.
5. Please add following columns in the excel:
Column Name Description
0 These are the unique Locator ID for each spare part of the VDS. This is already provided as part of the VE document.
VE Name This is the Name of the spare part and is already provided as part of the VE document.
AIN / Manufacturer It describes the manufacturer of the spare part and will also play vital role in mapping these spare part to any AIN object.
AIN / ManufacturerDescription This describes any additional description about the Manufacturer of the spare part.
AIN / ManufacturerPartID It describe the Part ID given by the manufacturer to the spare part. This will also play a vital role in mapping these to any AIN object.
Application Help for SAP Predictive Maintenance and Service, cloud editionMaster Data P U B L I C 149

Column Name Description
AIN / EANNumber It describes the standard bar code symbology and numbering system used in global trade to identify a specific spare part in VDS.
AIN / PartName It describes any other part name given to the spare part
AIN / Quantity It describes how many of these spare parts are used in a certain VDS.
AIN / UOM It describes what will be the unit of measure for this spare part.
AIN / ShortDescription_XX It describes the short description for spare parts. Here XX can be any valid language code.
Example: en, de
AIN / LongDescription_XX It describes the long description for spare parts. Here XX can be any valid language code.
Example: en, de
6. Import the excel created with SAP Predictive Maintenance and Service, cloud edition specific data to the same VDS. Refer to https://help.sap.com/viewer/67c291fba1bd10148bea8dce7b0caa3e/9.0.0.4/en-US/3569c3003f0f443da3f702a2c25268ee.html
150 P U B L I CApplication Help for SAP Predictive Maintenance and Service, cloud edition
Master Data

To validate if your metadata is successfully added to the VDS, click Select Metadata Keys To Show on Metadata menu panel and select the new columns and click OK.
5.8 Groups
You can group together different business objects for multiple purposes.
A group in SAP Predictive Maintenance and Service, cloud edition can be any of the following types:
● FleetAllowed object types: Equipment
● TrainingAllowed object types: Equipment, Models, Instructions, Locations, Spare Parts, Templates, Documents, Announcements
● FMEA (Failure Mode Effect Analysis)Allowed object types: Equipment, Locations
● OrganizationAllowed object types: Equipment, Locations
● VariantAllowed object types: Models, Spare Parts
● Handover and CommissioningAllowed object types: Equipment, Models, Instructions, Locations, Spare Parts, Templates, Documents, Announcements
● ProjectAllowed object types: Equipment, Models, Instructions, Locations, Spare Parts, Templates, Documents, Announcements
● Criticality AssessmentAllowed object types: Equipment, Locations
● Spare Parts KitAllowed object types:Spare Parts
A group moves from one state to another during its process of creation and maintenance. The different states that a group goes through are listed here:
Application Help for SAP Predictive Maintenance and Service, cloud editionMaster Data P U B L I C 151

● Unpublished● Published● In Revision
5.8.1 Managing Groups
You can perform various operations on a group such as creating, viewing, updating, and deleting a group. You can also assign equipment, models, instructions, locations, spare parts, templates, documents, and announcements to a group.
Context
The following group types are available:
● Risk and Criticality● Fleet● FMEA● Training● Handover and Commissioning● Maintenance Planner● Organization● Project● Spare Parts Kit● Variant● Work Center
You can perform the following operations using the Groups application:
● Creating a Group [page 153]● Viewing and Publishing a Group [page 154]● Updating a Group [page 155]● Deleting a Group [page 156]● Copying a Group [page 157]● Assigning Business Objects to a Group [page 157]
152 P U B L I CApplication Help for SAP Predictive Maintenance and Service, cloud edition
Master Data

5.8.1.1 Creating a Group
You use this procedure to create a group and assign business objects such as equipment, models, instructions, locations, spare parts, templates, documents, and announcements to the groups.
Prerequisites
Your user ID has the roles GROUP_DELETE or GROUP_EDIT assigned.
For more information, see Additional Roles for Master Data, Processes and Administration [page 350].
Procedure
1. Open the Groups app.2. From the type of group from the card view, choose New.3. In the Create Group dialog box, perform the following tasks:
a. Enter the following details as described in the table:
Field Description
Short description(*) Enter a short description for the group.
Long description Enter a long description for the group.
Allowed Member Types(*) Lists the type of business objects that can be assigned to the group type.
NoteMandatory fields are marked as (*) in the table.
4. Choose Ok to create the group.5. To assign a model, follow these steps:
a. In the Members Models section, choose Assign.b. From the Select Models dialog box, select the relevant model.c. Choose Assign.
6. To assign a piece of equipment, follow these steps:
a. In the Members Equipment section, choose Assign.b. From the Select Equipment dialog box, select the relevant equipment.c. Choose Assign.
7. To assign a location, follow these steps:
Application Help for SAP Predictive Maintenance and Service, cloud editionMaster Data P U B L I C 153

a. In the Members Locations section, choose Assign.b. From the Select Locations dialog box, select the relevant location.c. Choose Assign.
8. To assign a spare part, follow these steps:
a. In the Members Spare Parts section, choose Assign.b. From the Select Spare Parts dialog box, select the relevant spare part.c. Choose Assign.
9. To assign a template, follow these steps:
a. In the Members Templates section, choose Assign.b. From the Select Templates dialog box, select the relevant templates.c. Choose Assign.
10. To assign an instruction, follow these steps:
a. In the Members Instructions section, choose Assign.b. From the Select Instructions dialog box, select the relevant instructions.c. Choose Assign.
11. To assign documents, follow these steps:
a. In the Members Documents section, choose Assign.b. From the Select Documents dialog box, select the relevant documents.c. Choose Assign.
12. To assign announcements, follow these steps:
a. In the Members Announcements section, choose Assign.b. From the Select Announcements dialog box, select the relevant announcements.c. Choose Assign.
13. To assign failure modes to a group, follow these steps:a. In the Failure Modes section, choose Assign.b. From the Select Failure Modes dialog box, select the relevant failure modes.c. Choose Assign.
14. To publish the group, choose Publish.
To create a revision of a group or to work with the last published group, or last revision of group, see Creating Revisions and Switching Between Revisions and Published State [page 249].
5.8.1.2 Viewing and Publishing a Group
You can view a group to verify whether the information contained in a group is appropriate.
Prerequisites
● To publish a group, your user ID belongs to the group ORG_ADMIN or ORG_DATA_EXPERT, or has the roles GROUP_DELETE or GROUP_EDIT assigned.
154 P U B L I CApplication Help for SAP Predictive Maintenance and Service, cloud edition
Master Data

● To view a group, your user ID belongs to the group ORG_DATA_READ, or has the role GROUP_READ assigned.
For more information, see Additional Roles for Master Data, Processes and Administration [page 350].
Context
If you have assigned a business object to a group, you can navigate to the business object details and work on the business object.
Procedure
1. Open the Groups application.2. In the Groups window, use the filters to search for an appropriate group.
To publish one or more unpublished groups, select the groups from the list and choose Publish.3. Choose a group from the search list and double-click to view details.4. In the Group screen, choose the Group Information tab to view the details that are specific to the group.5. In the Group screen, choose the Members tab to view the business objects assigned to the group.6. In the Group screen, choose the Analytics tab to view the graphical representation of equipment assigned
to the group based on population and age.7. View the failure modes assigned to a group under Failure Modes.
NoteRelevant for Risk and Criticality and FMEA group types.
8. In the Group screen, choose the Timeline tab to view the relevant changes made on the group.
5.8.1.3 Updating a Group
You can correct the information within a group, or add any missing information to a group.
Prerequisites
● You have identified the group that you want to update.● To update a group, your user ID belongs to the group ORG_ADMIN or ORG_DATA_EXPERT, or has the roles
GROUP_DELETE or GROUP_EDIT assigned.
For more information, see Additional Roles for Master Data, Processes and Administration [page 350].
Application Help for SAP Predictive Maintenance and Service, cloud editionMaster Data P U B L I C 155

Context
You can update a group to change any of the following:
● Properties of a group such as – group type, group ID, created by, or allowed object types.● Business objects assigned to the group.
Procedure
1. Open the Groups app.2. In the Groups app, search for an appropriate group using the filters.3. From the search results list in the Groups section, select an appropriate group.4. Double-click the selected group to view details.5. If you have opened the group that has been published, in the Group window, choose Manage->New
Revision.6. To update all relevant details to a group, select the GROUP INFORMATION section.
For more information, see Creating a Group [page 153].7. To update business objects assigned to a group, select the OBJECT section.
For more information, see Creating a Group [page 153].8. To save the group, choose Save.9. To publish the group, choose Publish.
5.8.1.4 Deleting a Group
You can delete a group that you no longer want to have on the network.
Prerequisites
To delete a group, your user ID belongs to the group ORG_ADMIN or ORG_DATA_EXPERT, or has the role GROUP_DELETE assigned.
For more information, see Additional Roles for Master Data, Processes and Administration [page 350].
Procedure
1. Open the Groups application.2. In the Groups List screen, search for a group.
156 P U B L I CApplication Help for SAP Predictive Maintenance and Service, cloud edition
Master Data

3. Choose a group from the search list.
You can select more than one group for deletion.4. In the Group screen, choose Delete.
5.8.1.5 Copying a Group
You can copy a group to create a new group similar to an existing group.
Prerequisites
To copy a group, your user ID belongs to the group ORG_ADMIN or ORG_DATA_EXPERT, or it has the role GROUP_DELETE and GROUP_EDIT assigned to it.
For more information, see Additional Roles for Master Data, Processes and Administration [page 350].
Procedure
1. Open the Groups application.2. In the Groups List screen, search for a group.3. Choose a group from the search list.4. In the Groups List screen, choose Copy.
5.8.1.6 Assigning Business Objects to a Group
You can use this procedure to assign business objects, such as equipment, models, instructions, locations, spare parts, templates, documents, and announcements to a group.
Prerequisites
● You have created a group to which you want to assign a business object.● You have created a business object that you want to assign to the group.● To copy a group, your user ID belongs either to the group ORG_ADMIN or ORG_DATA_EXPERT, or it has the
role GROUP_DELETE and GROUP_EDIT assigned.
For more information, see Additional Roles for Master Data, Processes and Administration [page 350].
Application Help for SAP Predictive Maintenance and Service, cloud editionMaster Data P U B L I C 157

Context
You can assign failure modes to different business objects.
NoteYou can only assign a maximum of 50 items of each business object type to a group. The different business object type includes announcements, templates, instructions, and documents.
Procedure
1. Open the Groups application.2. In the Groups List screen, use the filters to search for an appropriate group.3. Select a group and in the Group screen, go to Members section, depending on the business object that you
want to assign, choose Assign in the relevant section.4. In the selection window, use the search filters to find an appropriate business object.5. Select the appropriate business objects and choose Assign.
5.9 Systems
A system is defined as a set of interrelated equipment or subsystems that regularly interact or are interdependent. In a defined context, they are considered whole and separated from their environment serving a common purpose. For example, control system, transmission system, brake system, and so on.
You can define a system based on a system model and assign system template to it.
● InformationYou can view the following information in this section:○ Data Sheet○ Model Information○ Installation Information○ Installation Location○ Lifecycle Information
● StructureYou can view a list of subsystems and equipment associated with the system.
● DocumentationYou can view the documents and instructions assigned to a system.
158 P U B L I CApplication Help for SAP Predictive Maintenance and Service, cloud edition
Master Data

5.9.1 Managing Systems
You can create, view, update, and delete a system. You can share a system using the Authorizations app.
Context
You can perform the following operations using the Systems app:
● Create a system and assign additional information such as installation information, location information, and attach documents and instructions to it.
● Assign or remove equipment or subsystems.● Add and remove documents or instructions.● Publish a system.● Delete a system.
5.9.1.1 Creating a System
You use this procedure to create a system based on an existing system model, and add additional information such as system installation information, and related equipment and subsystems to the system. You can also assign documents and instructions relevant to the system.
Prerequisites
Your user ID either belongs to the group ORG_ADMIN or ORG_DATA_EXPERT, or has the roles SYSTEM_DELETE or SYSTEM_EDIT assigned.
For more information, see Additional Roles for Master Data, Processes and Administration [page 350].
Context
You use the Systems application to:
● Create a system for your own operations purposes.● Create a system for another customer.
For simplicity purpose, we describe the procedure to create a system for your own operations.
Application Help for SAP Predictive Maintenance and Service, cloud editionMaster Data P U B L I C 159

Procedure
1. Open the Systems application.2. Choose New.3. In the New System dialog box, enter the following details:
a. In the <Model ID> dropdown, select an existing system model from which you want to inherit the properties for the system.
You can now create a system without assigning a model to it. You can also remove a model assigned to a system by using Manage Remove Model .
b. In the <System ID> field, enter a unique name for a system.c. In the <Short Description> field, enter a short description for the system.d. In the <System Templates> dropdown, choose the system template you have created.
For more information about creating an equipment template, see Creating a System Template [page 240].
e. In the <Long Description> field, enter a long description for the system.f. In the <Operator> field, select an operator for the equipment. Your company is selected as default
value.g. In the <Phase> field, select:
○ An Operation status if a physical system exists.○ Planned if a physical system does not exist, or you have chosen to update the physical system
details later.h. Choose Save to create a single system.
4. To update additional attributes related to a system, select INFORMATION Data Sheet tab and perform these substeps.a. Choose Edit.b. You can add a template using Add Template.c. You can select a template and choose Remove Template to remove the template.d. You can display the alternate unit of measure using Show Alternate UoM.
You can set the default unit of measurement system in the Unit of Measure Variant under User Account(icon on the left corner of the launchpad) Settings Unit of Measure .
e. Choose Save.
5. To add installation information, select the INFORMATION Installation Information tab and perform the following tasks:a. Choose Edit and enter the fields as described in the table:
Field Description
Source Business Partner Role Update the source business partner role, if required.
Build Date Specify the date of manufacture issued by the manufacturer.
160 P U B L I CApplication Help for SAP Predictive Maintenance and Service, cloud edition
Master Data

Field Description
Dealer Select the name of the dealer for the system.
Service Provider Select the name of the service provider for the system.
Regulators/Authority Select the official who certifies if the system is installed or assembled correctly.
Insurers Select the name of the insurer for the system.
Long Description Enter a description for the system.
To assign a tag, choose Add/Remove Tags and enter your tags. You can use tags to help you logically categorize activities, information, or reminders about your system.
6. To add system components, navigate to STRUCTURE Structure tab and perform the following tasks:a. To add systems:
1. Go to Systems tab.
2. Choose Assign Systems .3. Select the systems in the Select Systems dialog box.4. Choose Assign.
b. To add equipment:1. Go to Equipment tab.
2. Choose Assign Equipment .3. Select the equipment in the Select Equipment dialog box.4. Choose Assign.
You can reorder the system components by using the ordering buttons on the structure in the edit mode.1. In the Structure section, choose Edit.2. Select a system or equipment from the list.3. Choose Move to Top, Move Up, Move Down, or Move to Bottom to reorder.
7. To add instructions to the system, go to DOCUMENTATION Instructions and perform the following tasks:a. Choose Assign.b. From the Select Instructions dialog box, select the appropriate instruction.c. Choose Assign.
8. To assign documents relevant to the system, select DOCUMENTATION Documents :
a. To add a document, choose Add New and perform the following tasks:1. In the Add Document dialog box, browse for a file.
○ Select a Phase.○ Select a Category.○ Select your Language.○ Enter a Short Description.○ Set the confidentiality for the document, if required.
Application Help for SAP Predictive Maintenance and Service, cloud editionMaster Data P U B L I C 161

○ Choose Upload.
NoteWhen uploading a new document, you can run a duplicate check and if no duplicates, only then upload a document using the Check and Upload button.
2. Enter a document link in the Add Document dialog box.
b. To add an existing document, choose Add Assign and perform the following tasks:1. In the Select Documents, search for a document using the filters - Phase, Category, or Source.2. Select a document from the search results.3. Choose Assign.
9. You can assign, copy, or remove failure modes relevant to the system in the DOCUMENTATION Failure Modes section.a. To assign failure modes:
1. Choose Assign.2. Select the failure modes from the Select Failure Modes dialog box.3. Choose Assign.
b. To copy a failure mode, select the failure mode from the list and choose Copy.
A confirmation message is displayed. Choose Copy.c. To remove failure modes that are assigned to the system, select the failure modes and choose Remove.
A confirmation message is displayed. Choose OK.
If you have write access to the system even though you do not have write access to the failure mode, you can edit the failure mode instance page of the system.
When you copy a failure mode and Save & Publish it:○ A new failure mode is created with the same causes and instructions from the source failure mode○ The newly created failure mode is directly assigned to the object○ The new failure mode is in published state○ You navigate to the new failure mode instance page that includes all the copied failure mode instances:
effects, causes, instructions, and detection method○ The new failure mode appears in the failure mode section list
You can view the failure mode instance which is inherited and directly assigned (at the same time), you can now view different object icons in the <From> field of the failure mode section if the failure mode is inherited or assigned directly to the system.
10. To publish a system, choose Publish.
The system is published and a first revision of the system is created.11. To create revisions of a system and to switch between the published and revision states, see the steps
provided in the procedure Creating Revisions and Switching Between Revisions and Published State [page 249].
162 P U B L I CApplication Help for SAP Predictive Maintenance and Service, cloud edition
Master Data

5.9.1.2 Viewing and Updating a System
You use this procedure to view and update information such as installation information, instructions, and documents that are related to a system.
Prerequisites
● To view a system, your user ID has the roles SYSTEM_READ assigned.● To update a system, your user ID either belongs to the group ORG_ADMIN or ORG_DATA_EXPERT, or has the
roles SYSTEM_DELETE or SYSTEM_EDIT assigned. For more information, see Additional Roles for Master Data, Processes and Administration [page 350].
Procedure
1. Open the Systems application.2. Search for a system that you want to update using the search filters.3. Select the system from the search results.
4. If you choose a system that is in a published state, choose Manage New Revision from the System object page.
5. To update attributes such as installation information, select INFORMATION Installation Informationtab and perform the following tasks:a. Choose Edit in the Installation Information section.b. Enter the required details.c. Choose Save.
6. To add or remove systems (subsystems) or equipment to a system, go to Structure tab.7. To assign documents and instructions, choose the DOCUMENTATION tab.
a. To add a document, choose DOCUMENTATION Documents and perform the following tasks:
1. Choose Add New to add a new document to the system.
2. Choose Add Assign to assign an existing document to the equipment.3. To remove a document, select the document or documents from the list and choose Remove.
b. To assign existing planned maintenance instructions, or troubleshooting and breakdown instructions to the system, or to remove the instructions related to the system, choose DOCUMENTATIONInstructions tab and perform the following tasks:1. To assign an instruction, choose Assign.2. To remove an instruction, choose Remove.
8. View the modifications made on the system data in the Timeline tab.
You can view the update statistics based on:○ Updates By Type
Application Help for SAP Predictive Maintenance and Service, cloud editionMaster Data P U B L I C 163

○ Time Range○ Updates by Partner○ Updates on model or system data
You can view any changes in the sharing activities in the timeline section. You can also selecta time period to view only the changes during that timeframe using the Filter By dialog box.
You can also choose to view all the changes or only changes made on the associated model or system data using the Filter By dialog box. By default, it shows changes on system data only in the timeline.
9. View the system toplogy under the Topology section. You can also save a topology for future reference.10. Choose Publish to publish the updated system.
5.9.1.3 Publishing a system
Prerequisites
● To update a system, your user ID either belongs to the group ORG_ADMIN or ORG_DATA_EXPERT, or has the roles SYSTEM_DELETE or SYSTEM_EDIT assigned. For more information, see Additional Roles for Master Data, Processes and Administration [page 350].
● You have created systems in any of the following states:○ Unpublished○ Published○ In Revision
Context
You can view the list of systems using the Systems app and perform a mass publish when you have to publish many systems.
Procedure
1. Open the Systems application.2. Search for systems that are either in unpublished, or in revision state.3. Select one or more systems from the search results.4. Choose Publish.
164 P U B L I CApplication Help for SAP Predictive Maintenance and Service, cloud edition
Master Data

5.9.1.4 Deleting a System
You can delete a system that you do not want to have on the network.
Prerequisites
● To update a system, your user ID either belongs to the group ORG_ADMIN or ORG_DATA_EXPERT, or has the roles SYSTEM_DELETE or SYSTEM_EDIT assigned. For more information, see Additional Roles for Master Data, Processes and Administration [page 350].
● You have created systems in any of the following states:○ Unpublished○ Published○ In Revision
Procedure
1. Open the Systems application.2. Search for systems.3. Select one or more systems from the search results.4. Choose Delete.
5.9.1.5 Viewing System Topology
The system topology displays the network of equipment and subsystems, and how these are connected within this specific system.
Example:
EQ1 to EQ10 are part of a system called Bottling Machine and are displayed in the topology according to their connections.
Application Help for SAP Predictive Maintenance and Service, cloud editionMaster Data P U B L I C 165

The topology feature allows you to:
● View how your digital assets are connected.● Drilldown to individual equipment or subssytem to get detailed information on the equipment or
susbsystem itself as well as how interfaces and ports are connected.● Visually identify newly added equipment, removed equipment and – in general – equipment where there
was a discrepancy when comparing the reference structure and the actual structure.
Prerequisites:
● You have created a system.
NoteTo display the Topology tab, the system must have a model assigned which is based on a model template which inherits from subclass INDUSTRIAL_COMMUNICATION_SYSTEM.
● You must have the SYSTEM_EDIT or SYSTEM_DELETE roles assigned to configure and manage the topology.
● You must have – at least – the SYSTEM_READ role assigned to view the topology, and – at least – the EQUIPMENT_READ role assigned to view the Equipment Details, the Connection Details as well as to navigate to the Equipment object page.
Procedure
1. Use the delivered System APIs (/systems(systemId)/topologyConfiguration, and /systems(systemId)/topologyConnections to initially post data to the topology of a system.For more details, see the Systems API under API Tutorial for SAP Asset Intelligence Network documentation .1. First use the /systems(systemId)/topologyConfiguration API to load the interface and port
information for your pieces of equipment.2. Then use the /systems(systemId)/topologyConnections API to create the connections between the
configured interfaces and ports of your loaded pieces of equipment.
Note○ Ports communicated in the configuration API call are considered active, any ports that were
defined in a previous configuration API call, but have removed ports in a subsequent configuration API call are considered inactive.Example:configuration API call 1 communicates: Interface 1 – Port 1 and Port 2 (i.e. Port 1 and Port 2 are considered active);configuration API call 2 communicates: Interface 1 – Port 1 (i.e. Port 1 is considered active, and Port 2 is now considered inactive)
○ You cannot assign a piece of equipment to 2 different industrial communication systems.
2. Go to the Systems app and open the system into which you loaded the topology data.3. Select the Topology tab to view the topology after initial load.
1. View the Connection Details by clicking on a connection line between 2 pieces of equipment.This will show you:○ the Equipment ID and Equipment Short Description○ the interface and port information for each of the connected pieces of equipment for the selected
connection
166 P U B L I CApplication Help for SAP Predictive Maintenance and Service, cloud edition
Master Data

2. Open the detailed information in the side panel by clicking on an equipment in the topology.This will show you:○ the Equipment ID and Equipment Short Description○ Equipment Status○ Manufacturer○ Path information of parent objects of the Equipment○ List of all interfaces and all (that is, connected as well as disconnected) ports for each interface for
the selected equipment.
NoteBy clicking on the Equipment links in the side panel you open the Equipment Details quick view where you can get additional information for the selected equipment.
You can also navigate to the Equipment object page from quick view (via Display Equipment Details).
4. Save Initial Reference Structure.Click Save as Reference to save the actual loaded structure as reference structure, that is, this saved topology structure will be considered as planned structure until you save a new reference structure.
5. Comparison of Reference Structure with Actual Structure.The next time you upload the actual data via the /topologyConfiguration and actual /topologyConnection APIs, this actual structure will be compared to the reference (= planned) structure and changes will be visualized in the topology display.As general information, you will see either Actual is same as planned (if there was no change to the network since the last upload) or Actual is different from planned (if there was a change to the network since the last upload).For the latter, you will get additional information on the changes directly in the topology visualization:○ All new equipment (= equipment that is not in the planned/reference topology, but in the actual
topology) and their connections are displayed in green.○ All removed equipment (= equipment that is in the planned/reference topology, but not in the actual
topology) are displayed in red.6. Save new Reference Structure.
Click Save as Reference to save the actual structure as new reference structure.
You can save a planned topology for future reference using the Save as Reference button. The API always refer to the actual topology. The APIs always compare an actual topology with a planned/reference topology that was saved as reference and display the differences between the two topologies. The following legends are used to depict the differences:
● All the new equipment and their networks are displayed in green.● All the equipment in the planned/reference topology that are removed in the actual are displayed in red.
5.10 Documents
You use the Documents application to perform the following operations:
● View all the documents that are used by your organization in SAP Predictive Maintenance and Service, cloud edition.
Application Help for SAP Predictive Maintenance and Service, cloud editionMaster Data P U B L I C 167

● Upload new documents and assign the document to business objects such as models, items of equipment, announcements, requests, locations, spare parts, and instructions (see Uploading a Document [page 168] and Assigning Documents to Business Objects [page 176])
● Update a document centrally so that the changes apply to all associated business objects (see Updating a Document [page 173])
● Edit attributes of multiple documents centrally so that the changes apply to all associated business objects (see Editing Document Attributes [page 173])
● Delete documents that are not required on the network (see Deleting a Document [page 177])● Upload a link as document and assign the document to business objects such as models, items of
equipment, announcements, requests, locations, spare parts, and instructions.Documents with links allow reference to documents in external DMS and other document systems.
● Add the documents to different groups.
To view the list of document formats you can upload, see Updating a Document [page 173].
NoteYou must have configured a prefix for the object ID of your organization to perform above operations on the documents. For more information, refer to Configuring the Prefix for the Object ID of your Organization [page 356].
Updating Language Files
● Overwrite any language file of a document record for business partner with write permission.● Delete any language files even if uploaded by another business partner, except for the last remaining
language file of the document record. The last remaining language file for a document record can only be deleted by the owner of the overall document record.
Supported Document Size
You can upload a document up to 25 MB. To upload a document of a higher size, configure using the Application Settings app. For more details, see Configuring Document Upload Size [page 357]
5.10.1 Uploading a Document
Prerequisites
● Your user ID either belongs to the group ORG_ADMIN or ORG_DATA_EXPERT, or has the roles DOCUMENT_DELETE or DOCUMENT_EDIT assigned.
168 P U B L I CApplication Help for SAP Predictive Maintenance and Service, cloud edition
Master Data

For more information, see Additional Roles for Master Data, Processes and Administration [page 350].
● The document you want to upload is among the supported document formats and the configured file size. For more details see Documents [page 167]
Procedure
1. Open the Documents application.2. Choose Add.3. Choose New.4. In the Add Document popup browse for a file or provide a URL link to the document along with a <Display
Name>.
NoteYou cannot upload private domains such as .corp as links.
5. Assign a Category to classify the document.You can also assign aPhase if required.
6. Select the type of sensitive data available in the document from the Data Sensitivity list.7. Select the language from the dropdown that corresponds to the documents.8. Enter a description.9. Select the confidentiality of the document .
10. Choose Upload.
You can also run a duplicate check and if no duplicates, only then upload a document using the Check and Upload button.
The following table lists the MIME types and the MIME groups.
MIME Groups
File Extension MIME Type MIME Group
.txt text/plain Text Document
.jpg image/jpeg Image
.jpeg image/jpeg Image
.jpe image/jpeg Image
.jfif image/jpeg Image
.jpg image/jpeg Image
.doc application/msword Word Document
Application Help for SAP Predictive Maintenance and Service, cloud editionMaster Data P U B L I C 169

File Extension MIME Type MIME Group
.pdf application/pdf PDF
.png image/png Image
.bmp image/bmp Image
.dib image/bmp Image
.bmp image/x-windows-bmp Image
.gif image/gif GIF
.tif image/tiff Image
.tiff image/tiff Image
.bmp image/x-ms-bmp Image
.ppt application/mspowerpoint PowerPoint
.ppt application/powerpoint PowerPoint
.docx application/vnd.openxmlformatsofficedocument.wordprocessingml.document
Word Document
.docm application/vnd.ms-word.document.macroenabled.12
Word Document
.dotx application/vnd.openxmlformatsofficedocument.wordprocessingml.template
Word Document
.odt application/vnd.oasis.opendocument.text
Open Document
.rtf application/msword Word Document
.xps application/vnd.ms-xpsdocument XPS
.pptx application/vnd.openxmlformatsofficedocument.presentationml.presentation
PowerPoint
.vds application/octet-stream VDS
.dif application/octet-stream DIF
.prn application/octet-stream PRN
170 P U B L I CApplication Help for SAP Predictive Maintenance and Service, cloud edition
Master Data

File Extension MIME Type MIME Group
.bag application/octet-stream Augmented Reality
.hdf5 application/octet-stream Augmented Reality
.fbx application/octet-stream Augmented Reality
.dib application/octet-stream Image
.csv application/vnd.ms-excel SpreadSheet
.slk application/vnd.ms-excel SpreadSheet
.xlsb application/vnd.ms-excel.sheet.binary.macroenabled.12
SpreadSheet
.xlsm application/vnd.ms-excel.sheet.macroenabled.12
SpreadSheet
.xltx application/vnd.openxmlformatsofficedocument.spreadsheetml.template
SpreadSheet
.ods application/vnd.oasis.opendocument.spreadsheet
SpreadSheet
.xls application/excel SpreadSheet
.xlsx application/vnd.openxmlformatsofficedocument.spreadsheetml.sheet
SpreadSheet
.html text/html HTML
.htm text/html HTML
.avi video/avi Video
.mp4 video/mp4 Video
.dif video/dv DIF
.dif video/x-dv DIF
.wav audio/wav Audio
.mp3 audio/mpeg3 Audio
.mp3 audio/mp3 Audio
.xml text/xml XML
.deb
.tar
Application Help for SAP Predictive Maintenance and Service, cloud editionMaster Data P U B L I C 171

File Extension MIME Type MIME Group
.tgz
.msz
5.10.2 Maintaining Different Language Versions of a Document
Prerequisites
● Your user ID either belongs to the group ORG_ADMIN or ORG_DATA_EXPERT, or has the roles DOCUMENT_DELETE or DOCUMENT_EDIT assigned.For more information, see Additional Roles for Master Data, Processes and Administration [page 350].
● The document you want to upload is among the supported document formats and the configured file size. For more details see Documents [page 167]
Procedure
1. Open the Documents application.2. Select the desired document for which you want to maintain a different language version.
3. Choose Add New Language Version .4. Choose Add.5. In the New Document pop-up, browse for a file.6. Select the language from the dropdown that corresponds to the document.7. Enter a description.8. Choose Upload.
172 P U B L I CApplication Help for SAP Predictive Maintenance and Service, cloud edition
Master Data

5.10.3 Editing Document Attributes
Prerequisites
Your user ID either belongs to the group ORG_ADMIN or ORG_DATA_EXPERT, or has the roles DOCUMENT_DELETE or DOCUMENT_EDIT assigned.
For more information, see Additional Roles for Master Data, Processes and Administration [page 350].
Procedure
1. Open the Documents application.2. Search for the document that you want to assign to a business object.3. Select one or more documents from the search results.4. Choose Edit.5. In the Edit Documents pop-up, add or update the phase and category attributes for a document.6. Choose Save.
5.10.4 Updating a Document
Prerequisites
Your user ID either belongs to the group ORG_ADMIN or ORG_DATA_EXPERT, or has the roles DOCUMENT_DELETE or DOCUMENT_EDIT assigned.
For more information, see Additional Roles for Master Data, Processes and Administration [page 350].
Procedure
1. Open the Documents application.2. Search for a document that you want to assign to a business object.3. Select the document from the search results.4. To replace an existing file upload a new file in the File section.
Application Help for SAP Predictive Maintenance and Service, cloud editionMaster Data P U B L I C 173

5. To update the attributes, update the phase and category attributes in the File Information section6. Choose Save.
The following table lists the MIME types and the MIME groups.
MIME Groups
File Extension MIME Type MIME Group
.txt text/plain Text Document
.jpg image/jpeg Image
.jpeg image/jpeg Image
.jpe image/jpeg Image
.jfif image/jpeg Image
.jpg image/jpeg Image
.doc application/msword Word Document
.pdf application/pdf PDF
.png image/png Image
.bmp image/bmp Image
.dib image/bmp Image
.bmp image/x-windows-bmp Image
.gif image/gif GIF
.tif image/tiff Image
.tiff image/tiff Image
.bmp image/x-ms-bmp Image
.ppt application/mspowerpoint PowerPoint
.ppt application/powerpoint PowerPoint
.docx application/vnd.openxmlformatsofficedocument.wordprocessingml.document
Word Document
.docm application/vnd.ms-word.document.macroenabled.12
Word Document
174 P U B L I CApplication Help for SAP Predictive Maintenance and Service, cloud edition
Master Data

File Extension MIME Type MIME Group
.dotx application/vnd.openxmlformatsofficedocument.wordprocessingml.template
Word Document
.odt application/vnd.oasis.opendocument.text
Open Document
.rtf application/msword Word Document
.xps application/vnd.ms-xpsdocument XPS
.pptx application/vnd.openxmlformatsofficedocument.presentationml.presentation
PowerPoint
.vds application/octet-stream VDS
.dif application/octet-stream DIF
.prn application/octet-stream PRN
.bag application/octet-stream Augmented Reality
.hdf5 application/octet-stream Augmented Reality
.fbx application/octet-stream Augmented Reality
.dib application/octet-stream Image
.csv application/vnd.ms-excel SpreadSheet
.slk application/vnd.ms-excel SpreadSheet
.xlsb application/vnd.ms-excel.sheet.binary.macroenabled.12
SpreadSheet
.xlsm application/vnd.ms-excel.sheet.macroenabled.12
SpreadSheet
.xltx application/vnd.openxmlformatsofficedocument.spreadsheetml.template
SpreadSheet
.ods application/vnd.oasis.opendocument.spreadsheet
SpreadSheet
.xls application/excel SpreadSheet
.xlsx application/vnd.openxmlformatsofficedocument.spreadsheetml.sheet
SpreadSheet
Application Help for SAP Predictive Maintenance and Service, cloud editionMaster Data P U B L I C 175

File Extension MIME Type MIME Group
.html text/html HTML
.htm text/html HTML
.avi video/avi Video
.mp4 video/mp4 Video
.dif video/dv DIF
.dif video/x-dv DIF
.wav audio/wav Audio
.mp3 audio/mpeg3 Audio
.mp3 audio/mp3 Audio
.xml text/xml XML
.deb
.tar
.tgz
.msz
5.10.5 Assigning Documents to Business Objects
Prerequisites
● You have the identified the business object that you want to assign to and the business object is in either an Unpublished state, or in In Revision state.
● Your user ID either belongs to the group ORG_ADMIN or ORG_DATA_EXPERT, or has the roles DOCUMENT_DELETE or DOCUMENT_EDIT assigned.For more information, see Additional Roles for Master Data, Processes and Administration [page 350].
Context
You can assign a document to the following objects:
● Models
176 P U B L I CApplication Help for SAP Predictive Maintenance and Service, cloud edition
Master Data

● Announcements● Equipment● Instruction steps● Locations● Improvement cases● Spare Parts● Systems
NoteYou can assign multiple documents to a spare part using this application. The where used list of a document displays the assigned spare part.
Procedure
1. Open the Documents application.2. Search for a document that you want to assign to a business object.
For this activity, we are assigning the document to Models.3. Select one or more documents from the search results.
4. To assign the document to a model, choose Assign Models .5. In the Assign Models pop-up, select one or more models.6. Choose Assign.
5.10.6 Deleting a Document
Prerequisites
Your user ID either belongs to the group ORG_ADMIN or ORG_DATA_EXPERT, or has the role DOCUMENT_DELETE assigned.
For more information, see Additional Roles for Master Data, Processes and Administration [page 350].
Procedure
1. Open the Documents application.2. Search for a document that you want to delete.
Application Help for SAP Predictive Maintenance and Service, cloud editionMaster Data P U B L I C 177

3. Select one or more documents from the search results.4. Choose Delete.
Note○ When you choose to delete a document, the system deletes the document from the SAP Predictive
Maintenance and Service, cloud edition permanently.○ When you choose to delete a document that is assigned to an improvement case, the document
gets deleted from the improvement case without a warning.
5.10.7 Creating Hotspots
A hotspot is an area on the visual image that is of more interest. A hotspot allows you to view detailed information of a model component in a pictorial way. You can assign additional information to a hotspot such as model, equipment, and instruction to which users can navigate to. A published object can be tagged to a hotspot, allowing you to tag supported objects without the need to create a new revision for the object. You can assign hotspots to models, equipment, instruction steps, documents, locations, spare parts, and szstems and include relevant specifications.
Prerequisites
Your user ID belongs to the group ORG_ADMIN or ORG_DATA_EXPERT, or has the roles DOCUMENT_DELETE, or DOCUMENT_EDIT assigned.
For more information, see Additional Roles for Master Data, Processes and Administration [page 350].
Procedure
1. Open the image.
System opens the file in the image viewer.
NoteYou can also select multiple images while editing. All the images you have selected queue up in the image viewer for editing.
2. Choose Manage Hotspot.3. Choose Create from the toolbar.4. Click on the area of the image where you want to create a hotspot, drag and drop the pointer to a next point
in the image. Continue to drag and drop the previous pointers until you have covered a hotspot area on the image. Finally, end the hotspot area with a double click.
5. In the Maintain Hotspot pop-up, fill in:
178 P U B L I CApplication Help for SAP Predictive Maintenance and Service, cloud edition
Master Data

a. Name, description and color under Basic infob. Assign the model, equipment, step or document under Assignment Info as necessary.
6. Choose Save.
System adds the image file that has the hotspots to the Document section of the above mentioned objects.
NoteIf you want to unassign the image files that has the hotspots from the Document section of these objects, you must remove the hotspot attributes.
5.10.8 Guided Procedures
5.10.8.1 Adding a New Document
Procedure
1. Choose the Documents application to commence the process.
2. Choose Add New to add a new document.
NoteThe document you are about to add might already exist in your organization’s library. Use the search to sweep for similar documents first.
Application Help for SAP Predictive Maintenance and Service, cloud editionMaster Data P U B L I C 179

3. Two different sources for adding a new document are provided. You can either browse for a file or provide a URL link to the document along with a display name.
Note○ The name of the uploaded file will be displayed as the file name in Asset central.○ You cannot upload private domains such as .corp as links.
180 P U B L I CApplication Help for SAP Predictive Maintenance and Service, cloud edition
Master Data

4. Provide additional information to specify the added document.
5. Assign one of the VDI 2770 categories that your document corresponds to the best, to classify the
document.
Application Help for SAP Predictive Maintenance and Service, cloud editionMaster Data P U B L I C 181

6. You can assign a phase if desired. Assigning a phase specifies the document and helps other users to find
relevant documents.7. If you want the document to be confidential, you can tick the checkbox. With classifying the document as
confidential, the document will stay within your application and will not be shared with other business partners at any time.
Note○ If you are a premium account holder, all the private documents uploaded by your invitees can be
accessed by you. Your invitees cannot have private documents without your knowledge.○ Confidentiality set by your invitee for a particular document applies to the you as well.
8. Select a language from the dropdown that corresponds to the document. Your browser language is set as default.
NoteTo add a new language version, you need to navigate back to the document list.
182 P U B L I CApplication Help for SAP Predictive Maintenance and Service, cloud edition
Master Data

9. Enter a description (compulsory) and a long description if desired.
10. Choose upload.
Application Help for SAP Predictive Maintenance and Service, cloud editionMaster Data P U B L I C 183

5.10.8.2 Assigning Documents to Business Objects
Context
We will take you through the process of assigning documents to business objects. You can assign documents to the following objects:
● Models● Announcements● Equipment● Instruction steps● Locations● Improvement cases● Spare Parts● Systems
In this tour we will assign documents to equipments.
Procedure
1. Choose the Documents application to commence the process.
184 P U B L I CApplication Help for SAP Predictive Maintenance and Service, cloud edition
Master Data

2. Search for one or more documents you want to assign to an equipment.
3. Select one or more desired documents from the search result you want to assign by ticking the check boxes.
4. To assign the selected documents to an Equipment, choose <Assign> and <Equipment> from the list of all business objects.
Application Help for SAP Predictive Maintenance and Service, cloud editionMaster Data P U B L I C 185

5. In the Select Equipment pop-up, select one or more Equipments you want to assign the documents to by ticking the appropriate check boxes.
6. Choose <Assign> to complete the process.
186 P U B L I CApplication Help for SAP Predictive Maintenance and Service, cloud edition
Master Data

5.10.8.3 Maintaining Different Language Versions of a Document
Context
We will take you through the process of maintaining different language versions of an already existing document.
Procedure
1. Choose the Documents application to commence the process.
2. Select the desired document you want to maintain a different language version for by ticking the check
box.
Application Help for SAP Predictive Maintenance and Service, cloud editionMaster Data P U B L I C 187

3. Choose Add New Language Version .
4. In the pop-up a list of all existing language versions is displayed. Choose <Add> to add a new language file.
188 P U B L I CApplication Help for SAP Predictive Maintenance and Service, cloud edition
Master Data

5. In the New Document pop-up, browse for the desired file.
6. Select the language from the dropdown that corresponds to the document.
Application Help for SAP Predictive Maintenance and Service, cloud editionMaster Data P U B L I C 189

7. Enter a description (mandatory) and a long description if desired.
8. Choose Upload.
190 P U B L I CApplication Help for SAP Predictive Maintenance and Service, cloud edition
Master Data

5.11 Announcements
An announcement is the information that a manufacturer communicates to all his equipment owners or operators. For example: an existing instruction has been updated, or spare parts of an item of an equipment has been updated.
An announcement in SAP Predictive Maintenance and Service, cloud edition can be any of the following types:
● Availability: An announcement to communicate about the availability or non-availability of an item of equipment or location.
● Instruction Change: An announcement from the manufacturer to communicate that an instruction has changed.
● Service Bulletin: An announcement from the manufacturer to communicate information when unanticipated problems occur with a model.
● Recall: An announcement from the manufacturer to request the operator to return equipment related to certain models due to the discovery of safety issues to prevent the risk of legal action.
● New Policy: An announcement from the manufacturer to the operator to communicate the new policy of usage for certain models.
● New Model: An announcement from the manufacturer to the operator on the news of a new model.● Document Change: An announcement from the manufacturer when the document related to a model has
changed.● Spare Parts Change: An announcement from the manufacturer to the operator when the spare parts have
changed.● Model Information Change: An announcement from the manufacturer to the operator when the
information related to the model specification or maintenance has changed.● New Firmware: An announcement from the manufacturer to the operator to communicate that a new
firmware version is available for a model.
An announcement moves from one state to another during its process of creation and maintenance. The different states that an announcement goes through are listed below:
● Unpublished● Published● In Revision
For more information, see State Transitions [page 249] .
Application Help for SAP Predictive Maintenance and Service, cloud editionMaster Data P U B L I C 191

5.11.1 Managing Announcements
You can perform various operations on an announcement such as creating an announcement, viewing an announcement, updating an announcement, deleting an announcement, and assigning documents, models, items of equipment and locations (of type Availability) to an announcement.
Context
You use the Announcements application to work with an announcement. You can perform the following operations using the Announcements application:
● Create an announcement (see, Creating an Announcement [page 192])● View and publish an announcement (see, Viewing and Publishing an Announcement [page 195])● Update an announcement (see, Updating an Announcement [page 196])● Delete an announcement (see, Deleting an Announcement [page 197])● Assign business objects to an announcement (see, Assigning a Model to an Announcement [page 198])● Display report cards on the header and view the count of <Equipment Impacted> and <Customers
Impacted>.● Maintain serial number ranges and build date ranges for announcement types <Service Bulletin> and
<Recall>. You can add serialization ranges on the service bulletin or recall by:○ Enabling <Serialization Ranges> (in announcement header)○ Maintaining the serialization ranges (serial numbers, batch date) and also comments in the<
Serialization Ranges> section on announcement● Add announcement to a group.
5.11.1.1 Creating an Announcement
You use this procedure to create an announcement and assign entities such as documents, instructions, and models to an announcement.
Prerequisites
● If you want to assign a new or an existing document, you have identified the file that you want to attach.● Your user ID either belongs to thegroup ORG_ADMIN or ORG_DATA_EXPERT, or has the roles
ANNOUNCEMENT_DELETE or ANNOUNCEMENT_EDIT assigned.For more information, see Additional Roles for Master Data, Processes and Administration [page 350].
192 P U B L I CApplication Help for SAP Predictive Maintenance and Service, cloud edition
Master Data

Procedure
1. Open the Announcements app.2. From the Announcements window, choose New.3. In the New Announcement pop-up, perform the following tasks:
a. In the Information section, enter details as described in the table below:
Field Description
Name Enter a unique name for the announcement.
Type Select an announcement type. The following list provides the descriptions for each of the types of announcements:○ Availability○ Instruction Change○ Service Bulletin○ Recall○ New Policy○ New Firmware○ New Model○ Document Change○ Spare Parts Change○ Model Information Change
Priority Select a priority of the announcement
Description Enter a description for the announcement
4. For an announcement of type Availability, you must assign an equipment or location. To assign an item of equipment, follow these steps:a. In the Equipment section, choose Assign.b. From the Select Equipment pop-up, select the relevant equipment.c. Choose Assign.
NoteYou now have the Fully Available for the announcement type Availability. You can now announce if a piece of equipment is available or not available.
5. To assign a location, follow these steps:a. In the Locations section, choose Assign.b. From the Select Location pop-up, select the relevant location.c. Choose Assign.
6. For an announcement of type Instruction Change you must assign an instruction. To assign an instruction follow the tasks:
Application Help for SAP Predictive Maintenance and Service, cloud editionMaster Data P U B L I C 193

a. In the Assign Instructions pop-up, search for an appropriate instruction using the filters Instruction Type and Activity.
b. From the Instructions search list, select an instruction.c. Choose OK.
NoteTo unassign an instruction that is assigned to the announcement, select an appropriate instruction from the instructions list in the New Announcement screen, and choose Unassign.
7. In the Documents section, you can add a new document or assign an existing document. To add a new document, choose Add New and perform the following tasks:a. In the Add Document pop-up, enter values for the fields as described in the table below:
Field Description
File Name Browse for a file name that you want to upload.
Phase/Category Select a phase and category corresponding to the phase that the document is relevant to in the lifecycle of an item of equipment. Category is mandatory, whereas Phase is optional.
Language Select the language of the document you want to add.
Description Enter an announcement description
b. Choose Upload.
NoteTo unassign a document, select an appropriate document from list choose Remove.
8. In the Documents section, if you want assign an existing document, choose Add Assign and perform the following tasks:a. In the Assign Documentspop-up, search for an appropriate document using the filters Phase, or
Category.b. From the search results list, select an appropriate document.c. Choose OK.
9. To add a hotspot to image file, see Creating Hotspots [page 178].10. In the Models section, to assign a model to the announcement choose Assign and perform the following
tasks:a. In the Assign Models pop-up, search for an announcement using the filters Class Name, Subclass
Name, Manufacturer, or Source.b. From the search results list, select a model.c. Choose OK.
11. To save the announcement, choose Save.12. To publish the announcement, choose Save and Publish.
194 P U B L I CApplication Help for SAP Predictive Maintenance and Service, cloud edition
Master Data

13. To create a revisions of an announcement, or to work with the last published or last revision announcement, see Creating Revisions and Switching Between Revisions and Published State [page 249].
5.11.1.2 Viewing and Publishing an Announcement
You can view an announcement to verify if the information contained in an announcement is appropriate or not.
Prerequisites
● To publish an announcement, your user ID either belongs to thegroup ORG_ADMIN or ORG_DATA_EXPERT, or has the roles ANNOUNCEMENT_DELETE or ANNOUNCEMENT_EDIT assigned.
● To view an announcement, your user ID either belongs to the group AIN_ORG_DATA_READ, or has the role ANNOUNCEMENT_READ assigned.
For more information, see Additional Roles for Master Data, Processes and Administration [page 350].
Context
When you create many announcements using public APIs provided by SAP AIN, you can view these announcements using the Announcements app and perform a mass publish of such announcements. In addition, if you have assigned a model to an announcement, or an instruction to an announcement, you can navigate to the model details or the instruction details and work with a model or an instruction.
The following procedure applies to all types of announcements (Instruction change, Service Bulletin, RecallNew Policy, New Model, Document Change, Spare Parts Change, Model Information Change, New Firmware, Availability). For simplicity, we only describe the Instruction Change procedure.
Procedure
1. Open the Announcements application.2. In the Announcements window, search for an appropriate announcement using the filters - Announcement
Type, Status, Read Status, Change On Date and Priority.
NoteTo publish one or more unpublished announcements that are created either using APIs, or using the Announcements application, select the announcements from the list and choose Publish.
3. Choose an announcement from the search list and select View Details.4. In the Announcement screen, choose the Information tab to view the details that are specific to the
announcement. These details can include Name, Type, Priority, and Description.
Application Help for SAP Predictive Maintenance and Service, cloud editionMaster Data P U B L I C 195

5. In the Announcement screen, choose the Instructions tab to view the instructions assigned to the announcement.
For more information on working with instructions, see Instructions [page 198].6. In the Announcement screen, choose the Documents tab to view the relevant documentation available for
an announcement.
You can also view the confidentiality of the assigned documents.7. In the Announcement screen, choose the Assignments tab to view the models to which the
announcements are relevant.
If you want to view details of a model, select the model and choose View Details.
For more information on working with models, see Models [page 103].
5.11.1.3 Updating an Announcement
You update an announcement to correct the information within an announcement, or add any missing information.
Prerequisites
● You have identified the announcement that you want to update.● To update an announcement, your user ID either belongs to the group ORG_ADMIN or ORG_DATA_EXPERT,
or has the roles ANNOUNCEMENT_DELETE, or ANNOUNCEMENT_EDIT assigned.For more information, see Additional Roles for Master Data, Processes and Administration [page 350]
Context
You can update an announcement to change any of the following:
● Properties of an announcement such as - type of an announcement, name of an announcement, or priority of an announcement.
● Model assigned to an announcement● Instruction assigned to an announcement● Document assigned to an announcement● Add the numbers of affected models and related serial number ranges or build date ranges to certain
announcement type
196 P U B L I CApplication Help for SAP Predictive Maintenance and Service, cloud edition
Master Data

Procedure
1. Open the Announcements app.2. In the Announcements app, search for an appropriate announcement using the filters – Announcement
Type, Priority, Statusor statuses, as such, Read Status, and Changed On and Source.3. From the search results list in the Announcements section, select an appropriate announcement.4. Choose View Details.5. If you have opened the announcement that is published, in the Announcement window, choose New
Revision.6. To update all relevant details to an announcement, select the INFORMATION section.
For more information, see Creating an Announcement [page 192] .7. To update an instruction assigned to an announcement, select the INSTRUCTIONS section.
For more information, see Creating an Announcement [page 192].8. To add a new document, select DOCUMENTS section.
For more information, see Creating an Announcement [page 192].9. To update any models assigned to the announcement, select the ASSIGNMENTS section.
For more information, see Creating an Announcement [page 192].10. To save the announcement, choose Save.11. To publish the announcement, choose Save and Publish.
5.11.1.4 Deleting an Announcement
You can delete an announcement that you no longer want to have on the network. For simplicity, we only describe the procedure to delete an instruction change announcement.
Prerequisites
To delete an announcement, your user ID either belongs to the group ORG_ADMIN or ORG_DATA_EXPERT, or has the role ANNOUNCEMENT_DELETE assigned.
For more information, see Additional Roles for Master Data, Processes and Administration [page 350].
Procedure
1. Open the Announcements application.2. In the Announcements screen, search for an announcement.3. Choose an announcement from the search list and select View Details.
Application Help for SAP Predictive Maintenance and Service, cloud editionMaster Data P U B L I C 197

4. In the Announcement screen, choose Delete.
5.11.1.5 Assigning a Model to an Announcement
You use this procedure to assign a model to an announcement.
Prerequisites
● You must have created an announcement, to which you want to assign a model. (see Creating an Announcement [page 192].)
● You must have created a model that you want to assign to the announcement. (see Creating a Model [page 105])
● Your user ID either belongs to the group ORG_ADMIN or ORG_DATA_EXPERT, or has the roles ANNOUNCEMENT_DELETE or ANNOUNCEMENT_EDIT assigned.For more information, see Additional Roles for Master Data, Processes and Administration [page 350].
Procedure
1. Open the Announcements application.2. In the Announcements screen, search for an appropriate announcement using the filters – Announcement
Type, Priority, or Status.3. In the Announcements screen, select a model using the check box and choose Assign Models.4. In the Assign Models, search for an appropriate model using the search filters – Class Name, Subclass
Name, Source and Manufacturer.5. From the search list, select an appropriate model using the check box and choose Assign.
5.12 Instructions
An instruction is a set of steps that help the user to carry out a specific task. In SAP Predictive Maintenance and Service, cloud edition, the manufacturer shares the instructions with the operator. The instructions help the operator to maintain the equipment better. SAP Predictive Maintenance and Service, cloud edition has the following instruction types:
● Planned maintenance instruction: An instruction that has information about a task that the operator has to perform at regular intervals. However, these are not mandatory instructions and the operator can choose to apply them based on local conditions such as climatic conditions.
● Breakdown instruction: An instruction that has information about a task that the operator has to perform when dealing with unplanned situations such as an item of equipment fails to open on demand, or an item of equipment fails to operate due to an internal leak.
198 P U B L I CApplication Help for SAP Predictive Maintenance and Service, cloud edition
Master Data

● Installation instruction: An instruction that provides information while installing an equipment.● Operations instruction: An instruction that provides information on how to use an equipment.● Disposal instruction: An instruction that provides information on how to dispose an equipment.
In addition, you can use the following key information to define an instruction:
● Activity type: Defines the primary context where the instruction is applicable.● Failure mode: Defines the effect by which a failure is observed on a failed item.● Frequency: Defines the interval at which you must execute the instruction.● Document: Unstructured document attached to an instruction that is relevant to a specific phase of an
item of equipment.● Safety rule: Specifies the recommended guidance from the manufacturer for executing the instructions
safely.● Model: Specifies an abstract representation from the manufacturer that defines all maintenance
information related to a new or existing product.● Precondition: Specifies an activity that needs to be completed before executing the instruction.● Step: Specifies a single instruction.● Post check: Specifies an activity that needs to be completed after executing the instruction.
An instruction moves from one state to another during its process of creation and maintenance. The different states that an instruction goes through are listed below:
● Unpublished● Published● In Revision
For more information, see State Transitions [page 249].
5.12.1 Managing Instructions
You can perform various operations on an instruction such as creating an instruction, viewing an instruction, updating an instruction, deleting an instruction, and assigning models to an instruction.
Context
You use the Instructions app to work with an instruction.You can perform the following tasks:
Procedure
1. Create an instruction (see Creating an Instruction [page 200]).2. Create an instruction by reusing an existing instruction (see Creating an Instruction by Reusing an Existing
Instruction [page 205]).3. Update an existing instruction (see Updating and Publishing an Instruction [page 207])
Application Help for SAP Predictive Maintenance and Service, cloud editionMaster Data P U B L I C 199

4. Viewing an instruction (see Viewing an Instruction [page 206])5. Deleting an instruction (see Deleting an Instruction [page 208])6. Assign models to an instruction (see Assigning a Model to an Instruction [page 209])
5.12.1.1 Creating an Instruction
Using the Instructions application you can create five types of instructions - planned maintenance, breakdown, installation, operations, and disposal. You can also specify useful key information such as activity type, failure mode, frequency, document, safety rule, preconditions, steps, and post checks for an instruction.
Prerequisites
● Your user ID has the roles INSTRUCTION_DELETE or INSTRUCTION _EDIT assigned.For more information, see Additional Roles for Master Data, Processes and Administration [page 350].
● You have identified the subclass that you want to use for your instruction.
NoteYou must use the same subclass as the model uses to which you assign the instruction.
● If you want to assign a model to an instruction, you must ensure that models already exist in SAP Predictive Maintenance and Service, cloud edition.
Context
For simplicity, we only describe the planned maintenance instruction and a breakdown instruction procedure. In addition, you can assign a model to the instruction so that the operator using the model can use the instruction information for equipment maintenance.
Procedure
1. Open the Instructions app.2. On the Instructions screen, choose New.3. In the New Instruction pop-up, perform the following tasks:
a. In the Instruction Type field, choosePlanned Maintenance to create a planned maintenance instruction, a Breakdown instruction to create an unplanned instruction, a Disposal, an Installation, or an Operations intrsution type.
b. In the Subclass field, enter a subclass to which you want to assign an instruction. This is an optional field.
200 P U B L I CApplication Help for SAP Predictive Maintenance and Service, cloud edition
Master Data

NoteUse the same subclass as the model uses to which you assign the instruction.
c. Choose OK.4. In the Planned Maintenance Instruction screen, perform the following tasks:
a. In the Header section, enter the following information:
Field Description
Short Description Enter the short description for the instruction.
Expected Duration Enter the total time required to execute the instruction and also the unit of time.
Criticality Specify the importance of the instruction.
b. In the Information section, enter the following information:
Field Description
Activity(*) Select an activity type.
Failure Mode Category(*) For a breakdown instruction, select an appropriate value from the drop down. The list below describes what each failure mode means
○ Fail to function: equipment does not function.○ Fail to open: equipment does not open.○ Fail to close: equipment does not close,○ Operation delay: equipment operation is delayed..○ Output is high: output of the equipment is high.○ Output is low: output of the equipment is low.
Long Description(*) Enter a description for the instruction.
Frequency For a planned maintenance instruction, enter the recurring time interval at which the instruction must be executed. In the adjacent drop-down, specify the unit of time
Application Help for SAP Predictive Maintenance and Service, cloud editionMaster Data P U B L I C 201

Field Description
Primary Document An unstructured document that provides more information about the instruction.
To add a new document, follow the steps below:1. Choose New.2. In the Add Document dialog box, browse for a file
name.3. In the Phase drop down, specify a phase.4. In the Category drop down, choose a category that
corresponds to a phase.5. In the Description field, enter a description.6. Choose Upload.
To assign an existing document, follow the steps below:1. In the Assign Documents to Instruction window,
search for a document using the filters Phase, or Category.
2. Select a document from the search results list.3. Choose Assign.
To view the list of supported MIME types, see the Supported MIME Types table under the Documents documentation.
3D Visual Add either a new 3D visual file, or assign an existing 3D visual file. You can refer to the steps mentioned for the Primary Document to upload a new 3D visual file, or to assign an existing 3D visual file.
NoteSystem captures a snapshot of the 3D visual file to use it as a preview image for the instruction.
Relevant to Warranty Specify if the instruction is relevant for warranty.
NoteMandatory fields are marked as (*) in the table.
5. On the Safety Rules screen area, choose Add to add a new safety rule and perform the following tasks:a. In the Safety Rules dialog box, select a safety rule and choose OK.
For example, if you want the user to wear safety boots while performing the step in the instruction, choose Safety boots must be worn.
6. In the Models screen area, choose Assign to assign an existing model to the instruction and perform the following tasks:
202 P U B L I CApplication Help for SAP Predictive Maintenance and Service, cloud edition
Master Data

a. In the Select Models dialog box, search for an appropriate model using the search filters Class or Manufacturer.
b. From the Models search list, select an appropriate model.c. Choose Assign.
NoteTo unassign a model to the instruction, select the model in the Models section and choose Unassign.
7. In the Equipment screen area, to assign an equipment, choose Assign and perform the following tasks:a. In the Select Equipment, select the appropriate equipment.b. Choose Assign.
8. In the Preconditions screen area, choose Add to add an activity that must be performed before executing the instruction.
9. In the Steps screen area, to add individual instructions to the overall instruction, choose Add.10. In the Post Checks screen area, to add an activity that needs to be performed after the instruction
execution, choose Add and enter values in the Post Checks field.11. Save the instruction, or Save and Publish the instruction.12. To add the instruction to a group, go to the instruction detail page and navigate to GROUPS → Add.13. To create a new revision, and to switch between published and revision states, see Creating Revisions and
Switching Between Revisions and Published State [page 249].
5.12.1.2 Adding Steps to an Instruction
You use this procedure to add a set of steps to an instruction. Each steps consists of information such as documents, 3D visual file, or spare parts that help the operator during the maintenance of an item of equipment.
Prerequisites
● If you want to add spare parts information to an instruction, you must have uploaded 3D visual files into SAP Predictive Maintenance and Service, cloud edition for a model, a piece of equipment, an instruction, or an announcement.
● Your user ID either belongs to the group ORG_ADMIN or ORG_DATA_EXPERT, or has the roles INSTRUCTION_DELETE or INSTRUCTION _EDIT assigned.For more information, see Additional Roles for Master Data, Processes and Administration [page 350]
● You have created an instruction. For more details see Creating an Instruction [page 200]
Application Help for SAP Predictive Maintenance and Service, cloud editionMaster Data P U B L I C 203

Procedure
1. Launch the Instructions application.2. From the Instructions list page, open the instruction in question.3. In the Instructions object page, scroll down to the Step section and perform the following tasks:
a. In the Step header section, enter the following details:
Field Description
Step Name Enter a step name.
Step Description Enter a step description.
3D Visual / Image Upload either an image file, or a 3D visual.
b. In the Information section, enter the following details:
Field Description
People Required Enter the number of people required to completed the step.
Expected Work Enter the total time required to complete the step.
Tools Enter the list of tools required to execute the step.
NoteYou must press the enter button after you enter a tool.
Roles Specify a role.
Risk Category Specify the risk category
Risk Description Enter a risk description.
c. In the Parts section, to add new parts choose Add and perform the following tasks:1. Choose the drop-down for Material.2. In the Select Parts pop-up, select an appropriate spare part that is relevant to the instruction and
choose OK.3. In the Quantity field, enter the quantity for the spare part.
d. In the Documents section, to add a new document choose Add and perform the following tasks:1. In the Add Document screen, browse for a file name in the File Name field.2. In the Phase drop down, choose a phase in the lifecycle of the item of equipment.3. In the Category drop down, choose a category that corresponds to a phase.4. In the Description field, enter a description for the document.5. Choose Upload.
204 P U B L I CApplication Help for SAP Predictive Maintenance and Service, cloud edition
Master Data

e. In the Documents screen area, to assign an existing document choose Assign and perform the following tasks:1. In the Assign Documents to Step screen, search for an appropriate document using the filters.2. Select an appropriate document from the search results list.3. Choose Assign.
NoteTo remove a document that is assigned to a step, select the assigned document from the list in the Documents screen area, and choose Remove.
4. Choose Save.5. Choose Save and Publish to publish the updated instruction.
5.12.1.3 Creating an Instruction by Reusing an Existing Instruction
You use this procedure to create an instruction by reusing an existing instruction. For simplicity the procedure below describes the planned maintenance instruction.
Prerequisites
Your user ID either belongs to thegroup ORG_ADMIN or ORG_DATA_EXPERT, or has the roles INSTRUCTION_DELETE or INSTRUCTION _EDIT assigned.
For more information, see Additional Roles for Master Data, Processes and Administration [page 350]
Procedure
1. Open the Instructions app.2. In the Instructions screen, search for an appropriate instruction using the filters Instruction Type, Activity,
Status, or Model Name.3. Select an instruction from the search results list.4. Select Copy.
System creates a new instruction reusing the characteristics of the underlying instruction.5. In the Header section, you must update name of the instruction as instruction names must be unique.
You must update other fields as appropriate.6. To add additional information to the newly created instruction, see Creating an Instruction [page 200].7. To save the instruction, choose Save.
Application Help for SAP Predictive Maintenance and Service, cloud editionMaster Data P U B L I C 205

8. To publish the instruction, choose Save and Publish.
The app displays a dialog box to check if you want to create an announcement for the instruction. In the Create Announcement pop-up, choose yes and then OK.
For more information, see Creating an Announcement [page 192].
5.12.1.4 Viewing an Instruction
You can view an instruction to verify if the information contained in an instruction is appropriate or not.
Prerequisites
● To publish an instruction, your user ID either belongs to the group ORG_ADMIN or ORG_DATA_EXPERT, or has the roles INSTRUCTION_DELETE or INSTRUCTION _EDIT assigned.
● To view an instruction, your user ID either belongs to the group ORG_DATA_READ, or has the roles INSTRUCTION_READ assigned.For more information, see Additional Roles for Master Data, Processes and Administration [page 350].
Context
When you have more instructions created using public APIs provided by SAP Predictive Maintenance and Service, cloud edition, you can view these instructions using the Instructions app and perform a mass publish of such instructions.
In addition, if you have assigned a model to an instruction, or an announcement to an instruction you can navigate to the model details, or the announcement details and work with a model or an announcement.
The following procedure applies to all types of instructions (Planned Maintenance, Breakdown, Installation, Operations, or Disposal). For simplicity, we only describe the planned instruction procedure.
Procedure
1. Open the Instructions app.2. In the Instructions screen, search for an instruction using the filters – Instruction Type, Activity, Status, or
Model Name.
NoteTo publish one or more unpublished instructions created either using APIs, or using the Instructions app, select multiple instructions from the list and choose Publish.
206 P U B L I CApplication Help for SAP Predictive Maintenance and Service, cloud edition
Master Data

3. Choose an instruction from the search list and select View Details.4. In the Planned Maintenance Instruction screen, choose the Information tab to view the details that are
specific to the instruction. These details can include activity type, failure mode, frequency, documents, preconditions, steps, and post checks.
5. Choose the Safety Rules tab for any information about safety measures to follow.6. Choose the Tools and Spare Parts tab for information pertaining to spare parts during maintenance.7. Choose the Roles tab for information regarding number of people, expected duration and the person's
roles while carrying out the activity.8. Choose the Models tab to view the models assigned to the instruction. If you want to view details of a
model, double-click on the selected the model.9. Choose the Equipment tab to view the models assigned to the instruction. If you want to view details of a
equipment, double-click on the selected the equipment.10. Choose the Announcements tab to view the announcements assigned to the instruction. If you want to
view details of an announcement, double-click on the selected the announcement.11. Choose Groups tab to view the list of groups to which the instruction is assigned.12. Choose Failure Modes tab to view the list of failure modes to which the instruction is assigned.13. Choose the Preconditions tab to view the recommended guidance to be followed before executing an
instruction.14. Choose the Steps tab to view the instruction steps.15. Choose the Post Checks tab to view the recommended guidance to be followed after executing an
instruction.
5.12.1.5 Updating and Publishing an Instruction
You can update a planned maintenance instruction or a troubleshooting and breakdown instruction.
Prerequisites
Your user ID either belongs to the group ORG_ADMIN or ORG_DATA_EXPERT, or has the roles INSTRUCTION_DELETE or INSTRUCTION _EDIT assigned.
For more information, see Additional Roles for Master Data, Processes and Administration [page 350].
.
Context
The following procedure applies to all types of instructions. For simplicity, we only describe the planned instruction procedure.
Application Help for SAP Predictive Maintenance and Service, cloud editionMaster Data P U B L I C 207

Procedure
1. Open the Instructions app.2. In the Instructions screen, search for an appropriate instruction.3. Choose an instruction from the search list and select View Details.4. If the instruction is already published, choose New Revision in the Planned Maintenance Instruction window.5. To update any of the sections of an instruction, see Creating an Instruction [page 200]6. Choose Save.7. To publish the instruction, choose Save and Publish.
The app displays a pop-up to check if you want to create an announcement for the instruction. In the Create Announcement pop-up, choose Yes and then OK.
NoteFor more information about creating a revision for an instruction and switching between a revision and a published version, see Creating Revisions and Switching Between Revisions and Published State [page 249]
5.12.1.6 Deleting an Instruction
You can delete an instruction that you no longer want to have on the network. For simplicity, we only describe the procedure to delete planned instruction.
Prerequisites
Your user ID either belongs to the group ORG_ADMIN or ORG_DATA_EXPERT, or has the roles INSTRUCTION_DELETE assigned.
For more information, see Additional Roles for Master Data, Processes and Administration [page 350].
Procedure
1. Open the Instructions app.2. In the Instructions screen, search for an instruction.3. Choose an instruction from the search list and select View Details.4. 4. In the <Instruction Type> Instruction screen, choose Delete.
208 P U B L I CApplication Help for SAP Predictive Maintenance and Service, cloud edition
Master Data

5.12.1.7 Assigning a Model to an Instruction
You can assign a model to an instruction so that the operator can use the instruction information for the items of equipment that are based on the model.
Prerequisites
● Your user ID either belongs to the group ORG_ADMIN or ORG_DATA_EXPERT, or has the roles INSTRUCTION_DELETE or INSTRUCTION _EDIT assigned.For more information, see Additional Roles for Master Data, Processes and Administration [page 350].
● You have identified the instruction to which you want to assign a model (see Creating an Instruction [page 200])
● You have ensured that the instruction in question is in Unpublished or In Revision states.● You have identified a model that you want to assign to the instruction (see Creating a Model [page 105]).
Context
The following procedure applies to all types of instructions. For simplicity, we only describe the planned instruction procedure.
Procedure
1. Open the Instructions app.2. In the Instructions screen, search for an instruction using the filters –Instruction Type, Activity, Status, or
Model Name.3. In the Instructions screen, select a model and choose Assign Models.4. In the Assign Models to Instruction pop-up, search for a model using the search filters Class, or
Manufacturer.5. From the search results list, select a model using the check box and choose Assign.
5.13 Templates
A template is a format created by SAP Predictive Maintenance and Service, cloud edition organization (for example, manufacturer, operator, or service provider) to maintain metadata, that is, attributes and attribute groups, related to a model, equipment, location, system, or spare part. A template inherits metadata from its parent objects, for example, parent subclass templates or other parent templates, and can have additional attribute groups and attributes.
Application Help for SAP Predictive Maintenance and Service, cloud editionMaster Data P U B L I C 209

Example:
A model template inherits the structure from a parent model template, a parent subclass template, other related parent subclasses, and the parent class.
NoteClasses and subclasses are provided by SAP Predictive Maintenance and Service, cloud edition. The classification structure as well as assigned attributes and attribute groups are based on a classification industry standard. Classes and Subclasses can be reused, but not edited.
NoteYou can create hierarchies of template from an existing template.
A template in SAP Predictive Maintenance and Service, cloud edition is identified by a unique name and comprises of attribute groups and attributes. An attribute group is a logical grouping of related attributes of the equipment, model and location, and an attribute is a qualifier to define the equipment.
Example for a classification structure and the relationship to model and equipment
The following example explains how classification objects delivered by SAP Predictive Maintenance and Service, cloud edition, classification objects that can be created by customers, and type and instance information also created by customers relate.
1. The class level – delivered by SAP Predictive Maintenance and Service, cloud edition based on an industry standard – can be considered the top-node of the classification used in SAP Predictive Maintenance and Service, cloud edition.A class does not have a parent object, but can have multiple subclasses as child objects.
2. Subclasses – also delivered by SAP Predictive Maintenance and Service, cloud edition based on an industry standard – are the child objects of a class. It is possible to model multiple subclasses under the top-level subclass. Each child subclass will inherit attributes or attribute groups from its parent objects, that is, class and subclasses.In the example:
210 P U B L I CApplication Help for SAP Predictive Maintenance and Service, cloud edition
Master Data

○ • Subclass 1 (Power transformer) would inherit from Class (Transformer)○ Subclass 2 (Dry-type transformer) would inherit from Subclass 1 (Power transformer) and Class
(Transformer)3. Model Templates – created by manufacturers – can be child objects of a subclass, or be used without a
parent object. It is possible to have multiple model templates under the top-level model template. Each child model template will inherit attribute or attribute groups from its parent objects, that is, class and subclasses and model templates.When creating a model, you do this with reference to a model template.In the example:○ Model Template 1 (SDT) would inherit from Subclass 2 (Dry-type transformer), Subclass 1 (Power
transformer), and Class (Transformer)○ Model Template 2 (SDT-100x) would inherit from Model Template 1 (SDT), Subclass 2 (Dry-type
transformer), Subclass 1 (Power transformer), and Class (Transformer)○ Model would be created with reference to Model Template 2 (SDT-100x), and therefore the Model
would have all attributes or attribute groups coming from the model template itself as well as the ones inherited.
4. Equipment Templates – created by operators – are used to provide equipmentspecific attributes or attribute groups. You can use equipment templates as only reference for an equipment or in combination with the templates coming via a model.
NoteSimilar to the model template it is possible to have multiple equipment templates under the top-level equipment template. Each child equipment template will inherit attribute or attribute groups from its parent object, that is, equipment templates.
In the example:○ Equipment was created in reference to Model, and therefore this equipment would have all
attributes /attribute groups associated with the model, that is, inherit from Model Template 2 (SDT-100x), Model Template 1 (SDT), Subclass 2 (Dry-type transformer), Subclass 1 (Power transformer), and Class (Transformer)
○ Since Equipment was also created in reference to Equipment Template, this equipment would additionally have all attributes or attribute groups associated with the equipment template.
5.13.1 Managing Templates
You use the Templates app to work with a template. The templates are grouped as cards by <Template> types, <Attribute Groups>, and <Attributes>. This provides easier visualization of the template hierarchy. You can drill down the template hierarchy using the navigation on the cards.
You can perform the following operations using the Templates app:
● Create a model template to define the attributes and attribute groups related to a model. For more information, see Creating a Model Template [page 232].
● Create an equipment template to include equipmentspecific attributes and attribute groups.For more information, see Creating an Equipment Template [page 235].
● Create a system template to include systemspecific attributes and attribute groups. For more information, see Creating a System Template [page 240].
Application Help for SAP Predictive Maintenance and Service, cloud editionMaster Data P U B L I C 211

● Create a spare part template to include spare partspecific attributes and attribute groups. For more information, see Creating a Spare Part Template [page 239]
● View details of a template and update the existing template with new information, or update the incorrect information. For more information, see Viewing and Updating a Template [page 242].
● View <External IDs> for attribute groups, attributes, and causes.● If more than one language is maintained for a template, <Available Language> field is displayed in all
the templates.
5.13.1.1 Adding, Updating, and Deleting Code Lists
You can create code lists to be used in string, numeric, and date data types.
Context
You can create, update, or delete code lists using the following procedure.
Procedure
1. Select Code Lists.2. Choose New Code List to create a new code list. Perform the following tasks:
a. In the New Code List Code List Details window, enter the values for the fields as described in the table:
Field Description
ID(*) Enter an ID for the code list.
Note○ There are no spaces allowed in the ID.○ You cannot change the ID of the code list once
it has been created.
Description(*) Enter an appropriate short description that describes the code list.
Long Description Enter an appropriate long description that describes the code list.
212 P U B L I CApplication Help for SAP Predictive Maintenance and Service, cloud edition
Master Data

Field Description
Data Type (*) Select the data type from the list:○ Date○ String○ Numeric○ Numeric Flexible
Values (*) Enter the values for the code list using +.
NoteAll the mandatory fields are marked as (*) in the table.
b. You can add industry standards by choosing Add Industry Standard under New Code List Industry Standards .
c. Choose OK.
3. To edit a code list, select the code list from the Code List Details page. Choose Edit from the code list object page.
4. You can delete a code list by:
○ selecting the code lists from the Code List Details page and choosing Delete.○ choosing Delete form the code list object page.
5.13.1.2 Adding Attribute Groups and Attributes
You perform this procedure to add attributes and attribute groups either directly on a template object or from the Attribute Groups tab or Attributes card.
Context
Using this procedure, you can add attribute groups/attributes directly on a template object.
NoteYou can use this approach for the creation of attribute groups or attributes on a template object.
SAP Operations can now deliver attribute groups & attributes that can be commonly re-used:
● Global attribute groups & attributes are displayed in the attribute group/attribute lists with Source = SAP● Global attribute groups & attributes can be re-used, but not edited
Application Help for SAP Predictive Maintenance and Service, cloud editionMaster Data P U B L I C 213

Procedure
1. Select a template and choose Add Attribute Groups . In the Add Attribute Groups window, to add new attribute group, select New and perform the following tasks:a. In the New Attribute Group window, enter the values for the fields as described in the table below:
Field Description
ID(*) Enter an ID for the attribute group.
Note○ There are no spaces allowed in the ID.○ You cannot change the ID of the attribute
group once it has been created.
Short Description(*) Enter an appropriate short description that describes the attribute group.
Long Description Enter an appropriate long description that describes the attribute group.
Industry Standards Add the relevant industry standards.
NoteAll the mandatory fields are marked as (*) in the table.
b. Choose OK.c. You can add the attributes and also the industry standards by selecting the attribute group and
choosing the Edit button.
2. In the Add Attribute Groups window, to edit an existing attribute group, search for an existing attribute group and perform the following tasks:a. From the search results, select an appropriate attribute group.b. Choose OK.
3. To save the attribute group, choose Save in the <Name of the Attribute Group> section.
NoteEach time you save the attribute group of a template, system updates the template automatically. You do not have to save the template explicitly.
4. To remove the attribute group, choose Remove in the <Name of the Attribute Group> section.
NoteEach time you remove an attribute group from a template, system updates the template automatically.
5. To add attributes to the attribute group, perform the following tasks:
214 P U B L I CApplication Help for SAP Predictive Maintenance and Service, cloud edition
Master Data

a. In the <Name of the Attribute Group> section, choose Edit to add attributes to the attribute group.
b. To add a new attribute, in the <Name of the Attribute Group> Attributes Add perform the following tasks:
1. In the Add Attributes pop-up, to add new attribute, select New.2. In the New Attribute window, enter values for the fields as described in the table below:
Field Description
ID(*) Enter a name for the attribute.
Note○ There are no spaces allowed in the ID.○ You cannot change the ID of the attribute
group once it has been created.
Short Description(*) Enter a short description.
Long Description Enter a long description.
Application Help for SAP Predictive Maintenance and Service, cloud editionMaster Data P U B L I C 215

Field Description
Data Type(*) Select any of the following options:
○ boolean: select boolean if you want the data type to support boolean values such as true or false.
○ string: select string if you want the data type to support alpha numeric values. You can now also define string data type as hyperlink.
NoteIf you want the string data type to be language-dependent, under the Attribute Conditions section, choose Yes from the Language Dependency radio button.
NoteYou can create code lists for Numeric Flexible data type and assign the code list to attributes based on data type, scale, and precision match.
○ date: select date if you want the data type to support a date value. If you select a value list for the data type, then you can also maintain the attribute condition Allow Additional Values to allow additional texts to be maintained with the code for the codelist values.
NoteYou can create code lists for Numeric Flexible data type and assign the code list to attributes based on data type, scale, and precision match.
○ numeric: select numeric if you want the data type to support a numeric value. You can now also have numeric as relational operators.
NoteYou can create code lists for Numeric data type and assign the code list to attributes based on data type, scale, and precision match.
216 P U B L I CApplication Help for SAP Predictive Maintenance and Service, cloud edition
Master Data

Field Description
For a numeric data type you can define additional properties. To do so, in the Attribute Conditions section, enter values for the fields as described in the table below:
○ Dimension: Select an appropriate dimension from the drop-down.
○ Threshold: If the dimension has a suitable threshold which you want to use when entering attribute values, select an appropriate value from the drop-down.
○ Dependent Dimension: If you want to use an additional dimension dependent on the dimension you selected before, choose yes for the Create Dependent Dimension and select the dependent dimension from the drop-down for Entry field At.
NoteNumeric attributes can also be created without dimension and without an associated unit of measure.
○ Relational Operator: Check this setting if you want to be able to maintain values with relational operators (for example, <, <=, >=, >). For example, Number of gears: <= 5.
○ enum: select enum if you want the data type to support constant values.
Note○ Enter the values that you want the
enum data type to support in the Values text box under the Attribute Conditions section. Also, if you want the user to select a single enum value, select the Single Select radio button and if you want the user to select multiple enum values, select the Multi Select radio button.
Application Help for SAP Predictive Maintenance and Service, cloud editionMaster Data P U B L I C 217

Field Description
○ We now support multi-language enumerations. User has to enter enum value against one or more languages.
Noteenum data type is deprecated and will not be available from the next release.
○ picture: select picture if you want to maintain images with an attribute.
○ Currency: select currency if you want to maintain currency values
○ numeric flexible: select numeric flexible if you want the data type to support decimal value.
NoteYou can create code lists for Numeric Flexible data type and assign the code list to attributes based on data type, scale, and precision match.
For a numeric flexible data type you can define additional properties. To do so, in the Attribute Conditions section, enter values for the fields as described in the table below:
○ Dimension: Select an appropriate dimension from the drop-down.
○ Threshold: If the dimension has a suitable threshold which you want to use when entering attribute values, select an appropriate value from the drop-down.
○ Dependent Dimension: If you want to use an additional dimension dependent on the dimension you selected before, choose yes for the Create Dependent Dimension and select the dependent dimension from the drop-down for Entry field At.
○ Total Length of the Number: Enter the total length of the number including decimals.
218 P U B L I CApplication Help for SAP Predictive Maintenance and Service, cloud edition
Master Data

Field Description
NoteTotal length of the number should be greater than zero.
○ Decimal Places Allowed: Enter the number of decimal places allowed for the number.
Note○ The allowed number of deci
mal places cannot be greater than the total length of the number.
○ Decimal places cannot be less than zero.
Note○ To accommodate attributes that are al
ready shared, the difference between new and old value of decimal places must not be greater than difference between new and old value of total length of the number.
○ Data type Integer is covered by the newly introduced data type Numeric Flexible if the Decimal Places Allowed is equal to 0.
Priority(*) Specify if using the new attribute is Recommended, Mandatory or Optional.
3. To add an industry standard, choose Add Industry Standard.4. From the Industry Standards dropdown, choose your relevant industry standard.5. Specify a standard ID.6. Choose OK.
c. To assign an existing attribute, choose <Name of the Attribute Group> Attributes Add . In the Add Attributes pop-up, to use an existing attribute from SAP Predictive Maintenance and Service, cloud edition, search for an existing attribute using the Search text box and perform the following tasks:
a. From the search results list, select an appropriate attribute.b. Choose OK.
Application Help for SAP Predictive Maintenance and Service, cloud editionMaster Data P U B L I C 219

5.13.1.3 Adding Indicator Groups and Indicators
You perform this procedure to add indicators and indicator groups either directly on a template object or from the Indicator Groups or Indicators card.
Context
Using this procedure, you can add indicator groups or indicators directly on a template object.
NoteYou can use this approach for the creation of indicator groups or indicators on a template object.
SAP Operations can now deliver indicator groups and indicators that can be commonly reused:
● Global indicator groups & indicators are displayed in the indicator group or indicator lists with Source = SAP
● Global indicator groups & indicators can be reused, but not edited.
Procedure
1. Select the template and choose Add Indicator Groups . In the Add Indicator Groups window, to add new Indicator group, select New and perform the following tasks:a. In the New Indicator Group window, enter the values for the fields as described in the table:
Field Description
ID(*) Enter an ID for the indicator group.
Note○ There are no spaces allowed in the ID.○ You cannot change the ID of the indicator
group once it has been created.
Short Description(*) Enter an appropriate short description that describes the indicator group.
Long Description Enter an appropriate long description that describes the indicator group.
NoteAll the mandatory fields are marked as (*) in the table.
220 P U B L I CApplication Help for SAP Predictive Maintenance and Service, cloud edition
Master Data

b. Choose OK.c. You can add the attributes by selecting the attribute group and choosing the Edit button.
2. In the Add Indicator Group option from the template object window, to use an existing indicator group, search for an existingindicator group, and perform the following tasks:a. From the search results, select an appropriate indicator group.b. Choose OK.
3. To save the indicator group, choose Save in the relevant indicator group section.
NoteEach time you save the indicator group of a template, system updates the template automatically. You do not have to save the template explicitly.
4. To remove the indicator group, choose Remove in the relevant indicator group section.
NoteEach time you remove an indicator group from a template, system updates the template automatically.
5. To add indicators to the indicator group, perform the following tasks:a. In the selected indicator group section, choose Edit to add indicators to the indicator group.b. In the indicator group window, go to Indicators tab and choose Add and perform the following tasks:
1. In the Add Indicators dialog box, to add new indicator, select New.2. In the New Indicator window, enter values for the fields as described in the table:
Field Description
ID(*) Enter a name for the indicator.
Note○ There are no spaces allowed in the ID.○ You cannot change the ID of the indicator
group once it has been created.
Description(*) Enter a short description.
Long Description Enter a long description.
Application Help for SAP Predictive Maintenance and Service, cloud editionMaster Data P U B L I C 221

Field Description
Data Type(*) Select any of the following options:
○ Date: select date if you want the data type to support a date value.
Note○ For a date data type the Aggregation
Concept is always set to Last Available Value.
○ Code List: Assign code list for the indicator.
○ Boolean: select boolean if you want the data type to support boolean values.
NoteFor a boolean data type the Aggregation Concept is always set to Last Available Value.
○ String: select string if you want the data type to support alpha numeric values.
Note○ For a string data type the Aggregation
Concept is always set to Last Available Value.
○ Code List: Assign code list for the indicator.
○ Numeric: select numeric if you want the data type to support a numeric value. You can now also have numeric as relational operators.
Note○ Dimension: Select an appropriate di
mension from the dropdown.○ Expected Behaviour(*): Specify if the
expected behaviour of the new indicator is Increasing, Decreasing, Unknown, or None.
○ Color: You can specify if you want a specific color for the indicator. You can select a color value from the palette.
222 P U B L I CApplication Help for SAP Predictive Maintenance and Service, cloud edition
Master Data

Field Description
○ Indicator Category: Define the indicator category:○ Continuous○ Level○ Discrete
○ Aggregation Concept: Specify the aggregation concept of the new indicator. The following values can be assigned○ Minimum○ Maximum○ Average○ Sum○ Last Available Value
○ Code List: Assign code list for the indicator.
○ Numeric Flexible: select numeric flexible if you want the data type to support decimal value.
NoteFor a numeric flexible data type you can define additional properties.
○ Dimension: Select an appropriate dimension from the dropdown.
○ Expected Behaviour(*): Specify if the expected behaviour of the new indicator is Increasing, Decreasing, Unknown, or None.
○ Color: You can specify if you want a specific color for the indicator. You can select a color value from the palette.
○ Indicator Category: Define the indicator category:○ Continuous○ Level○ Discrete
○ Total Length of the Number: Enter the total length of the number including decimals.
Application Help for SAP Predictive Maintenance and Service, cloud editionMaster Data P U B L I C 223

Field Description
NoteTotal length of the number should be greater than zero.
○ Decimal Places Allowed: Enter the number of decimal places allowed for the number.
Note○ The allowed number of deci
mal places cannot be greater than the total length of the number.
○ Decimal places cannot be less than zero.
○ Aggregation Concept: Specify the aggregation concept of the new indicator. The following values can be assigned○ Minimum○ Maximum○ Average○ Sum○ Last Available Value
○ Code List: Assign code list for the indicator.
Note○ To accommodate attributes that are al
ready shared, the difference between new and old value of decimal places must not be greater than difference between new and old value of total length of the number.
○ Data type Integer is covered by the newly introduced data type Numeric Flexible if the Decimal Places Allowed is equal to 0.
224 P U B L I CApplication Help for SAP Predictive Maintenance and Service, cloud edition
Master Data

Field Description
Indicator Type Define if the indicator is of type:○ Measured
Quantitative indicators that help you to monitor whether you are doing what you planned (outputs) but do not give us an idea of the effect that is brought about by these outputs.
○ CalculatedIndicators derived using algorithms or some kind of calculation.
○ AssessedIndicators that can be used in assessments.
Note○ Aggregation Concept: Aggregation concept is only applicable if the values for the
indicators are derived from multiple applications or the same application through different methods.○ Minimum: Minimum of the values is displayed○ Maximum: Maximum of the values is displayed○ Average: Average of the values is displayed○ Sum: Sum of the values is displayed○ Last Available Value: latest value is displayed
○ Expected Behaviour: Is only relevant for suggesting the color codes for threshold values.For the number of thresholds available for the indicator, the relevant color codes are defined by default. You can also customize the color codes for the thresholds.For suggested colors in case of <Expected Behaviour> as Increasing, refer to the below diagram:
For suggested colors in case of <Expected Behaviour> as Decreasing, refer to the above diagram by reversing the colors
Application Help for SAP Predictive Maintenance and Service, cloud editionMaster Data P U B L I C 225

For suggested colors in case of <Expected Behaviour> as None or Unknown:
○ Code Lists: You can specify a list of predefined values for the attribute or indicator datatype. You can create codelists using the Codelist feature, see Adding, Updating, and Deleting Code Lists [page 212].
○ Color: This color is used in the indicator chart (SAP Predictive Maintenance and Services specific feature). You can define a color for each indicator and the relevant lines in the indicator chart will be of that color.
○ Indicator Category: This is used in the indicator chart (SAP Predictive Maintenance and Services specific feature). According to the category selected the way the indicator values are plotted in indicator chart differs.○ Flow: These variables are visible as continuous variations on the chart. Flow is line
graph, the indicator values in the indicator chart are connected by line.○ Level: These variables remain unchanged until a new value exists, that is, level
variables are not interpolated linearly between indicators, but a step function is used (the last value is repeated until a new value exists). An example of a level variable is stock inventory. It is displayed similar to a step chart.
○ Discrete: Displays the state of the equipment as a horizontal bar on top of the chart.
3. Choose OK.
6. In the Add Indicators dialog box, to use an existing indicator from SAP Predictive Maintenance and Service, cloud edition, search for an existing indicator using the Search text box and perform the following tasks:a. From the search results list, select an appropriate indicator.b. Choose OK.
Results
1. Go to the relevant app Equipment or Models. You have created the indicators. To instantiate the indicators:2. Select a piece of equipment or a model from the list.3. Choose Indicators under the Monitoring tab.
226 P U B L I CApplication Help for SAP Predictive Maintenance and Service, cloud edition
Master Data

4. Select the indicator that you want to instantiate and choose Configure.You can define the indicator type, unit of measure, indicator category, indicator space, and threshold values for the indicator.
5. Choose Confirm.
5.13.1.4 Adding Alert Types
You perform the following procedure to add alert types directly on a template object page. The alert type definition allows you to define the alerts that are based on equipment error codes or based on certain computation on the data for example by applying Rules on the data. The definition can also define associations with an indicator and possible failure modes. The association with failure mode data allows you to identify associations like instructions.
Prerequisites
● To update a template, your user ID must have the scopes TEMPLATE_DELETE or TEMPLATE_EDIT assigned.
● To view a template, your user ID has the scope TEMPLATE_READ assigned.● You have identified the template that you want to update.
Context
In the Template Explorer window, to add new alert type, select the New button and perform the following tasks:
Procedure
1. In the Template Explorer window, enter the values for the fields as described in the following table:
Field Description
Alert Type ID Define a unique alphanumeric ID for the alert type.
Note1. No spaces allowed in the ID.2. Only the following characters are supported:
○ Uppercase and lowercase alphabets a through z and A through Z.
Application Help for SAP Predictive Maintenance and Service, cloud editionMaster Data P U B L I C 227

Field Description
○ Numeric digits 0 through 9○ Punctuation marks underscore (_), hyphen
(-), colon (:), and full-stop (.)○ Maximum number of characters allowed is
29
You cannot change the ID of the alert type once created.
Category Select an alert category from the dropdown list:○ Environment○ Health○ Equipment○ Operation○ Process○ Safety○ Other
Description Enter an appropriate description that describes the alert type.
NoteMaximum number of characters allowed is 255.
Severity Select the severity of the alert type:○ Information (1)○ Warning (2)○ Error (3)
Indicator Assign indicator to the alert type by selecting from the list.
Origin This allows you to differentiate between the alert type that is defined for the alert arising from an equipment or rule.
Select from the dropdown:○ Equipment: On selecting, you can enter an error code
(this is optional)○ Rule: Value should be used for the alert type defined
for rules.
Error Code Enter an error code. This field is available only if you select Equipment as origin.
228 P U B L I CApplication Help for SAP Predictive Maintenance and Service, cloud edition
Master Data

Field Description
NoteMaximum number of characters allowed is 32.
Failure Modes Assign failure modes to the alert type by selecting from the list.
NoteMultiple failure codes can be assigned to an alert type.
2. Choose Save.
NoteYou cannot create same alert type with the same ID.
If corresponding external ID is not populated, IoT Application Enablement replication of alert type has failed. In such a scenario, edit and save the alert type that will trigger the IoT replication.
Results
In the Alert Type window, the newly created alert type displays. You can search and sort, group by alert types, filter, and export details in an excel.
Editing Alert TypeUsing the Edit option, you can edit an existing alert type or newly creating alert type. For this, click the alert type you want to edit. You can also reassign failure modes to the alert types. To view the instructions assigned with the failure mode, click the number visible within the <Instructions> column.
Note● Alert type cannot be deleted if assigned to an alert type group. Unassign from alert type group to delete
an alert type.● Shared alert types will also be displayed in the list page. Shared alert types are read-only, you cannot
edit/delete them.● You cannot assign shared alert types to an alert type group.● Alert types are implicitly shared with the relevant model, but the failure modes associated with the
shared alert types must be explicitly shared.
Related Information
Application Help for SAP Predictive Maintenance and Service, cloud editionMaster Data P U B L I C 229

Failure Modes [page 128]Viewing and Editing Indicators [page 99]
5.13.1.4.1 Deduplication
Deduplication option allows the user not to create duplicate alerts for an existing alert type and equipment ID. Duplicate alerts are created or generated once the stipulated deduplication period is over or the status of existing alert of that alert type is marked as completed.
During the deduplication period, in a scenario where a new alert instance of an existing not completed alert is generated, the count will increase, and a new alert is not generated. The timestamp of last occurrence of alert is visible.
When creating a new alert type, the deduplication switch is on with the default period of 30 days. If you create an alert with this alert type and same equipment ID, first alert is generated. If you create a second alert within 30 days, a new alert will not be generated. Only the count of first alert increases.
For more information, refer Alerts [page 20]
5.13.1.5 Adding Alert Type Groups
You perform the following procedure to add alert type groups directly on a template object page. Alert type group is a grouping of alert types and can be assigned to a model.
Prerequisites
● To update a template, your user ID either belongs to the group ORG_ADMIN or ORG_DATA_EXPERT or has the scope TEMPLATE_DELETE or TEMPLATE_EDIT assigned.
● To view a template, your user ID either belongs to the group ORG_DATA_READ role template AssetCoreReader; or has the scope TEMPLATE_READ assigned.
230 P U B L I CApplication Help for SAP Predictive Maintenance and Service, cloud edition
Master Data

Context
In the Template Explorer window, to add new alert type group select the New Alert Type Group button and perform the following tasks:
Procedure
1. In the Template Explorer window, enter the values for the fields as described in the following table:
Field Description
ID Enter an ID for the alert type group.
Note○ No spaces allowed in the ID.○ Only the following characters are supported:
○ Uppercase and lowercase alphabets a through z and A through Z.
○ Numeric digits 0 through 9.○ Punctuation marks underscore (_), hyphen
(-), colon (:), and full-stop (.).○ Maximum number of characters allowed is
32.
You cannot change the ID of the alert type once created.
Description Enter an appropriate description that describes the alert type group.
NoteMaximum number of characters allowed is 255.
Long Description Enter a details description, if any, for the alert type group.
NoteThe maximum number of characters allowed is 5,000.
2. Choose Save.
NoteYou cannot create the same alert type group with the same ID.
Application Help for SAP Predictive Maintenance and Service, cloud editionMaster Data P U B L I C 231

Results
In the Alert Type Group window, the newly created alert type group displays. You can search and sort, group by alert type group, filter, and export details in an excel.
Editing Alert Type Group
Click the respective alert type group to edit details. You can also assign new alert types to the selected alert type group using the Assign option in the Edit mode. You can also edit the details of assigned alert type. For this, select the alert type within the Alert Types list and click Edit.
It is also possible to create alert type from the Assign Alert Type dialog box.
Note● You cannot delete alert type group if assigned to a model.● You cannot assign shared alert types to an alert type group.
Related Information
Failure Modes [page 128]Instructions [page 198]
5.13.1.6 Creating a Model Template
You use this procedure to create a model template that helps you to define the attributes and attribute groups related to a model.
Prerequisites
● You have identified the subclass template provided by SAP Predictive Maintenance and Service, cloud edition, or a model template created within your organization or shared by a different organization, from which you can create the template.
NoteA model template can also be created without a parent object (subclass/another model template), in this case the model template acts as a top node.
● Your user ID either belongs to the group ORG_ADMIN or ORG_DATA_EXPERT, or has the roles TEMPLATE_DELETE or TEMPLATE_EDIT assigned.For more information, see Additional Roles for Master Data, Processes and Administration [page 350].
232 P U B L I CApplication Help for SAP Predictive Maintenance and Service, cloud edition
Master Data

Procedure
1. Launch the Templates app.2. On the Templates window, navigate into Model Templates card and choose New and perform the following
substeps:a. In the New Model Template popup, enter values for the fields as described in the following table:
Field Description
Template ID(*) Enter a unique ID for the model template.
Note○ There are no spaces allowed in the Template
ID.○ You cannot change the ID of the template once
it has been created.
Short Description(*) Enter a short description.
Long Description Enter a long description
Parent Subclass/Model Template Select a subclass template, or another model template as parent template.
NoteYou can create a model template without a parent template.
Industry Standards Add an industry standard.
Note○ This field is scopespecific.○ Template objects can have only one industry
standard assigned to them. They can also have no industry standards assignments.
○ If an industry standard is assigned to a template object, you can change or delete it.
NoteAll the mandatory fields are marked as (*) in the table.
b. Choose OK.
System creates a model template.
Application Help for SAP Predictive Maintenance and Service, cloud editionMaster Data P U B L I C 233

3. To edit the description of the template, choose Edit Description in the template header and perform the following tasks:a. In the Edit <Name of the Model Template> popup, enter suitable description in the Description text
box.b. Choose Save.
4. To add attribute groups and attributes to a template, choose Add Attribute Groups from the template header.
For more information, see Adding Attribute Groups and Attributes [page 213].
NoteEach time you save the attribute group of a template, system updates the template automatically. You do not have to save the template explicitly.
5. To add indicator groups and indicators to a template, choose Add indicator Groups from the template header.
For more information, see Adding Indicator Groups and Indicators [page 220].
NoteEach time you save the indicator group of a template, system updates the template automatically. You do not have to save the template explicitly.
6. To add an industry standard to the template, perform the following tasks:a. Go to the Industry Standard section on the template and choose Add Industry Standard.b. In the Industry Standard popup, select the industry standard you want to assign to the template object.
NoteOptionally, you can enter a standard ID or code as defined in an industry standard. You can only assign one industry standard for an object.
You can also directly add an industry standard to an attribute.
Note○ Template objects can have only one industry standard assigned to them. They can also have
no industry standards assignments.○ If an industry standard is assigned to a template object, you can change or delete it.
a. To add to an existing attribute, select the attribute and choose Edit Attribute.
b. In the Edit Attribute popup, choose Industry Standards Add Industry Standard .
c. To add to a new attribute, choose Add Attribute New Attribute and enter all attribute-relevant information.
d. In the Industry Standards section, and Add Industry Standard .e. In the Industry Standards popup, select an industry standard and enter an industry Standard ID.f. Choose OK.
234 P U B L I CApplication Help for SAP Predictive Maintenance and Service, cloud edition
Master Data

Next Steps
● You can update the model template with new attribute groups and attributes.For more information, see Viewing and Updating a Template [page 242].
● You can create a model using the model template.For more information, see Creating a Model [page 105].
● You can add the template to a group using the Group button. For more information, see Groups [page 151].● You can reorder the attribute groups using the Reorder button on the details screen.
5.13.1.7 Creating an Equipment Template
You use this procedure to create an equipment template that helps you to define the equipmentspecific attributes and attribute groups related to an item of equipment. This template allows you to create new attributes and attribute groups that need not be inherited from a class, subclass or a model template.
Prerequisites
Your user ID either belongs to the group ORG_ADMIN or ORG_DATA_EXPERT; or has the roles TEMPLATE_DELETE or TEMPLATE_EDIT assigned.
For more information, see Additional Roles for Master Data, Processes and Administration [page 350].
Procedure
1. Launch the Templates application.
2. On the Templates object page, choose New Equipment Template and proceed as follows:a. In the New Equipment Template pop-up, enter values for the fields as described in the table below:
Field Description
ID(*) Enter a unique ID for the equipment template.
Note○ There are no spaces allowed in the ID.○ You cannot change the ID of the template once
it has been created.
Short(*) and Long Description Enter a template description.
Application Help for SAP Predictive Maintenance and Service, cloud editionMaster Data P U B L I C 235

Field Description
Subclass/Equipment Template Select a subclass template, or another equipment template as parent template.
NoteYou can also create an equipment template without a parent template.
Industry Standards Add an industry standard.
Note○ This field is scopespecific.○ Template objects can have only one industry
standard assigned to them. They can also have no industry standards assignments.
○ If an industry standard is assigned to a template object, you can change or delete it.
NoteAll the mandatory fields are marked as (*) in the table.
b. Choose OK.
The system creates an equipment template.
3. To edit the description of the template, choose Edit Description in the template header and proceed as follows:a. In the Edit pop-up, enter a suitable description in the Description text box.b. Choose Save.
4. To add attribute groups and attributes to a template, choose Add Attribute Group from the template header.
For more information, see Adding Attribute Groups and Attributes [page 213].
Note○ Each time you save the attribute group of a template, system updates the template automatically.
You do not have to save the template explicitly.○ Multi-level inheritance is supported, that is:
○ you can create equipment templates under another equipment template○ you can create an equipment template with reference to a subclass
5. To add indicator groups and indicators to a template, choose Add indicator Groups from the template header.
For more information, see Adding Indicator Groups and Indicators [page 220].
236 P U B L I CApplication Help for SAP Predictive Maintenance and Service, cloud edition
Master Data

NoteEach time you save the indicator group of a template, system updates the template automatically. You do not have to save the template explicitly.
5.13.1.8 Creating a Location Template
You use this procedure to create a location template that helps you to define the locationspecific attributes and attribute groups related to a location.
Prerequisites
Your user ID either belongs to the group ORG_ADMIN or ORG_DATA_EXPERT; or has the roles TEMPLATE_DELETE or TEMPLATE_EDIT assigned.
For more information, see Additional Roles for Master Data, Processes and Administration [page 350].
Procedure
1. Launch the Templates application.
2. On the Templates object page, choose New Location Template and proceed as follows:a. In the New Location Template pop-up, enter values for the fields as described in the table below:
Field Description
Template ID(*) Enter a unique ID for the location template.
Note○ There are no spaces allowed in the ID.○ You cannot change the ID of the template once
it has been created.
Short(*) and Long Description Enter a template description.
Application Help for SAP Predictive Maintenance and Service, cloud editionMaster Data P U B L I C 237

Field Description
Parent Subclass/Location Template Select a subclass template, or another location template as parent template.
NoteYou can also create a location template without a parent template.
Industry Standards Add an industry standard.
Note○ This field is scopespecific.○ Template objects can have only one industry
standard assigned to them. They can also have no industry standards assignments.
○ If an industry standard is assigned to a template object, you can change or delete it.
b. Choose OK.
The system creates a location template.
3. To edit the description of the template, choose Edit Description in the template header and proceed as follows:a. In the Edit pop-up, enter a suitable description in the Description text box.b. Choose Save.
4. To add attribute groups and attributes to a template, choose Add Attribute Group from the template header.
For more information, see Adding Attribute Groups and Attributes [page 213].
Note○ Multi-level inheritance is supported, that is:
○ you can create location templates under another location template○ you can create a location template with reference to a subclass
○ Each time you save the attribute group of a template, system updates the template automatically. You do not have to save the template explicitly.
Next Steps
You use the location template while creating a location from the Locations application.
238 P U B L I CApplication Help for SAP Predictive Maintenance and Service, cloud edition
Master Data

5.13.1.9 Creating a Spare Part Template
You use this procedure to create a spare part template that helps you to maintain manufacturing information, technical data, and assignment information pertaining to spare parts.
Prerequisites
Your user ID either belongs to the group ORG_ADMIN or ORG_DATA_EXPERT; or has the roles TEMPLATE_DELETE or TEMPLATE_EDIT assigned.
For more information, see Additional Roles for Master Data, Processes and Administration [page 350].
Procedure
1. Launch the Templates application.
2. On the Templates object page, choose New Spare Part Template and proceed as follows:a. In the New Spare Part Template dialog box, enter values for the fields as described in the table below:
Field Description
Template ID(*) Enter the template ID.
Note○ There are no spaces allowed in the ID.○ You cannot change the ID of the template once
it has been created.
Short Description(*) Enter a short description.
Long Description Enter a long description.
Parent Subclass/Spare Part Template Select a subclass template, or another spare part template as parent template.
NoteYou can also create a spare part template without a parent template.
Application Help for SAP Predictive Maintenance and Service, cloud editionMaster Data P U B L I C 239

Field Description
Industry Standards Add an industry standard.
Note○ This field is scopespecific.○ Template objects can have only one industry
standard assigned to them. They can also have no industry standards assignments.
○ If an industry standard is assigned to a template object, you can change or delete it.
b. Choose OK.
The system creates a spare part template.
NoteMultilevel inheritance is supported, that is:○ you can create a spare part template under another spare part template○ you can create a spare part template with reference to a subclass
3. To edit the description of the template, choose Edit Description in the template header and proceed as follows:a. In the Edit dialog box, enter a suitable description in the Description text box.b. Choose Save.
4. To add attribute groups and attributes to a template, choose Add Attribute Group from the template header.
For more information, see Adding Attribute Groups and Attributes [page 213]
5.13.1.10 Creating a System Template
You use this procedure to create a system template that helps you to maintain system information, attribute groups, industry standards, and groups assignment information pertaining to system.
Prerequisites
Your user ID either belongs to the group ORG_ADMIN or ORG_DATA_EXPERT; or has the roles TEMPLATE_DELETE or TEMPLATE_EDIT assigned.
For more information, see Additional Roles for Master Data, Processes and Administration [page 350].
240 P U B L I CApplication Help for SAP Predictive Maintenance and Service, cloud edition
Master Data

Procedure
1. Launch the Templates application.
2. Choose System Templates New System Template and proceed as follows:a. In the New System Template dialog box, enter values for the fields as described in the table below:
Field Description
Template ID(*) Enter the template ID.
Note○ There are no spaces allowed in the ID.○ You cannot change the ID of the template once
it has been created.
Short Description(*) Enter a short description.
Long Description Enter a long description.
Parent Subclass/System Template Select a subclass or another system template as the parent template.
NoteYou can also create a system template without a parent template.
Industry Standards Add an industry standard.
Note○ This field is scopespecific.○ Template objects can have only one industry
standard assigned to them. They can also have no industry standards assignments.
○ If an industry standard is assigned to a template object, you can change or delete it.
b. Choose OK.
The system creates a system template.
NoteMulti-level inheritance is supported, that is:○ you can create a system template under another system template○ you can create a system template with reference to a subclass
Application Help for SAP Predictive Maintenance and Service, cloud editionMaster Data P U B L I C 241

3. To edit the description of the template, choose Edit Description in the selected template header and proceed as follows:a. In the Edit dialog box, enter a suitable description in the Description text box.b. Choose Save.
4. To add attributes to the system template, choose Add Attribute Groups in the object page header and proceed as follows:a. In the Add Attribute Groups dialog box, select existing attribute groups from the list or add new
attribute group using New Attribute Group.b. Choose OK.
5.13.1.11 Viewing and Updating a Template
Prerequisites
● To update a template, your user ID either belongs to thegroup ORG_ADMIN or ORG_DATA_EXPERT or has the roles TEMPLATE_DELETE or TEMPLATE_EDIT assigned.
● To view a template, your user ID either belongs to the group ORG_DATA_READrole template AssetCoreReader; or has the role TEMPLATE_READ assigned.
● You have identified the template that you want to update.
Procedure
1. Open the Templates app.2. Search for a template that already exists using the search filter.3. Select the template from the search results.
NoteThe search result displays the number of templates by the template types.
4. Choose a template type to view more details of the templates displayed in the search results.5. Choose a template.
The template details are displayed in a flexible column layout and as a side-by-side view of the selected template in the list view or card view, and the template details in the template object page.
NoteThe quick view (small and medium detailed view) only provides limited editing options. In the full screen view you have the full editing functionalities.
System displays the attribute groups, and attributes of the template.
242 P U B L I CApplication Help for SAP Predictive Maintenance and Service, cloud edition
Master Data

6. Choose Edit Description to update the short and long description of the template.7. To update the description of the attribute group, choose Edit in the <Name of the Attribute Group> section
and perform the following tasks:a. Under the <Name of the attribute group> section, in the Short Description and Long Descriptionfield,
update the descriptions of the attribute group.b. Choose Save.
8. To update the attributes of the attribute group, in the <Name of the attribute group> section, choose Edit Attribute and perform the following tasks:a. In the <Name of the attribute> pop up, update the fields of Attribute Details section.
For more information, see Adding Attribute Groups and Attributes [page 213]
Note○ You cannot update the attributes that have been inherited from a class, subclass, or another
model template.○ You cannot update the attributes that have been used in creating any child objects such as
models, items of equipment or locations.
b. Choose OK.9. To remove the attributes of the attribute group, in the <Name of the attribute group> section, choose
Remove Attribute and perform the following tasks:a. In the Warning pop-up, choose OK if you are sure that you want to remove the attribute to the attribute
group.b. Choose Save.
Note○ You cannot remove attribute groups and attribute that have been inherited either from a class
template, subclass, template, or a model template.
10. To add new attribute groups and attributes to the template, choose Add Attribute Group from the template header.
More information, see Adding Attribute Groups and Attributes [page 213].
NoteEach time you save the attribute group of a template, system updates the template automatically.
Results
You have created a template that you can update with additional attribute groups or attributes.
.
Application Help for SAP Predictive Maintenance and Service, cloud editionMaster Data P U B L I C 243

5.14 Rules
Use
You use the Rules application to manage and create rules so that the service technician is notified about possible alerts. You can set up rules for a model or equipment with this application. These rules, based on the scheduled timestamp and triggered events, will evaluate the conditions and trigger alerts of the selected alert type.
You can perform additional actions such as sending emails with rule execution status to the selected users.
It is also possible to view a list of existing and newly created rules. In addition, edit and delete a rule and view rules for models and equipment.
Procedure
1. Define alert type. Navigate to Templates Alert Types New . The origin should be Rules.
NoteYou can also define the deduplication configuration to reduce the duplication of similar alerts. For more information, refer Adding Alert Types [page 227].
2. Define alert type groups for an alert type created. For more information, refer Adding Alert Type Groups [page 230].
3. Assign the alert type group to the model that will assign all the alert types to the model. These are available for equipment derived from model. For more information on assigning, refer Assigning Alert Type Groups to a Model [page 113].
4. Create a rule for model or equipment by defining rule. You can create scheduled based rules or trigger-based rules using the Rules list page. The scheduled rules are triggered at defined frequency and trigger-based rules are executed based on the trigger created by the equipment alarms. For more information, refer Creating Rules [page 245].
5. You can view the rules defined for the model or equipment using the Rules list page. In case of equipment, you can also view the rules defined at model level and inherited to equipment. For more information, refer Rule Management [page 247].
6. You can also navigate to the Rules list page to view all the rules created against a model or equipment.
Related Information
Rule Management [page 247]Adding Indicator Groups and Indicators [page 220]
244 P U B L I CApplication Help for SAP Predictive Maintenance and Service, cloud edition
Master Data

5.14.1 Creating Rules
Use the New button to add a new rule.
Prerequisites
You must have the authorized role RULES_READ, RULES_DELETE, and RULES_EDIT.
Context
When a specified event occurs, for example, engine temperature exceeding a threshold, and the rule's conditions are met, an alert is triggered. Also possible to send emails (optional).
Procedure
1. On the launchpad, click the Rules application.2. Click New.3. Enter a rule name and a long description (optional) for the rule.4. Select a model or equipment.
Note○ All the published equipment and equipment in revision status with associated model are available
in the list.○ Rules will only run for equipment from the same organization. Shared equipment/shared model of
equipment are not supported.
5. Choose Save6. You are navigated to the rules object page. You can edit the long description, if neccessary.
Rule Details7. Within When, if the user wants to schedule events, use Schedule Event within the Event Type option to set
up an event to check for the rule conditions at a specified time interval.
NoteThe rule will be executed based on Central European Time zone and not based on users time zone.
8. Within When, if the user wants to configure machine generated alerts, use the Triggered Event within the Event Type option to create a rule. The rule is configured for a triggered event based on the selected alert type and is executed when a machine generated alert of the selected alert type occurs for the selected model.
Application Help for SAP Predictive Maintenance and Service, cloud editionMaster Data P U B L I C 245

Note○ Only alert type with origin as Equipment are listed for the triggered events. The same alert type is
automatically populated as a default alert type in the Then option. You can change the alert type in the Then option, if required.
○ In a scenario where trigger-based rule exists for the alert type that is valid for an equipment, the rule is triggered instead of an alert creation. The condition in this rule is evaluated to create an alert.
Set up Rule Conditions9. Within If, use the Add Condition option to choose values to represent the conditions that will trigger an alert
or you can directly enter the conditions into input field.
Optionally choose an aggregator, indicator or attribute for the rule:○ If you choose aggregator, first create an aggregator by defining the values for aggregator function,
indicator, and timeframe. The newly created aggregator defines an aggregated value for the selected indicator within a timeframe. On selecting the newly created aggregator, you can either specify a constant value or select a threshold from the predefined range of thresholds assigned to the indicator within the aggregator.The supported aggregators are count, first, last, minimum, maximum, some, average, and standard deviation.For more information on indicators, refer Adding Indicator Groups and Indicators [page 220].
○ If you choose indicator, you can either specify a constant value or select a threshold from the predefined range of thresholds assigned to the indicator.
NoteConstant value will be numeric.
○ If you choose attribute, you can specify a constant value.
Note○ Add aggregators, indicators, and attributes as required, modifying the operators (AND, OR)
between them to define the condition.○ Rules will run for numeric and string type indicator only. For a condition <Indicator> equal
<constant> constant value should be in quotes (‘’).○ Threshold comparisons for aggregates is not supported in conditions.
Add Action10. Choose an alert type. When the rule execution status is success, an alert of the selected alert type is
created.11. Within Then, perform the following optional steps:
○ Send e-mail to the selected users. For this, click Send Email within the Add Action option. Multiple users can be selected at the same time.The listed users are business users defined using the Application Settings application. For more information, refer Application Settings [page 348]
○ When creating a rule, you can use Add Action Notification to create a corresponding notification and also define the type of notification and priority of the notification.
12. Select Status to activate or deactivate the rule.
246 P U B L I CApplication Help for SAP Predictive Maintenance and Service, cloud edition
Master Data

13. Choose Save. The rule is added to the rule table.
NoteThe rules assigned at the model will not be activated for the equipment initially. To activate, you can use the Rules page by clicking data within the <Total Pieces of Equipment> column. From the popup, select and activate rule for equipment created from the model.
Results
Viewing Rules for Equipment or Model
You can view the list of the rules created for model or equipment using the Rules application. The following details are visible in the Rules page.
● List of rules created for model or equipment (in case of equipment, it is only rules created against them)
Note○ View rules for an equipment (created for an equipment or inherited from model) within the
Equipment tab. Select the equipment to view all the rules defined for an equipment.○ Rules are grouped according to equipment.○ Change the status of only rules created for an equipment.○ Activate or deactivate rules inherited from model.
● Search option● Sort, filter and group rules using Settings option● Number of activated equipment.
Last execution time and status of rules. Statuses are Not executed, Execution Failed, Executed (for All), and Executed (for Few).
● Execution logs for failed rules.
NoteIf the rule execution is successful, execution details are not available.
Editing or Deleting Rule for Model
You can edit and delete the existing rule by clicking the Rule name on the Rules List page.
NoteChanges made within this page will be visible after saving or deleting the details.
5.14.2 Rule Management
● Enabling and Disabling Rules for Model
Application Help for SAP Predictive Maintenance and Service, cloud editionMaster Data P U B L I C 247

You decide the status of a rule for a model while creating a rule. The status can be activate or deactivate. In a rule list page, you can change the rule status corresponding to a model by activating or deactivating it.
NoteBy default, all the rules created against a model are executed automatically as rules are deactivated for the equipment. You must activate the rules for the equipment to execute it.
● Activating or Deactivating Rule for EquipmentIn the rule list page, you can change the status of the rule corresponding to equipment by clicking on the link within the <Number of Activated Equipment> column.
NoteBy default, all the rules created at the model level are in inactivated state (deactivated) at the equipment level.
Using the Activate Rules Dialog dialog box, it is possible to activate or deactivate rule status corresponding to the equipment.
● Execution LogsIn the rule list page, you can click the Last executed Status to view the rule execution logs. in the Execution Logs dialog box, enter the date range for which you want to display the logs. Click Go.All the failure logs are displayed in the table with the following details:○ Time Stamp○ Execution Status○ Message
Message for Execution logs can be of following type:○ Rule for Equipment: If the rule fails for the equipment, execution log for that equipment ID is displayed.○ Rule for Model:
○ If it fails at rule level: The log displays the reason for rule failure.○ If it fails at individual equipment level: The log displays the reason for individual equipment.
248 P U B L I CApplication Help for SAP Predictive Maintenance and Service, cloud edition
Master Data

5.15 State Transitions
A business object such as a model, or an equipment undergoes state transitions during its creation and maintenance in SAP Predictive Maintenance and Service, cloud edition.
The following diagram illustrates these state transitions:
Business objects such as models and items of equipment move to an unpublished state as soon as you create either a new model or a new item of equipment. You do not have to save these business objects explicitly. However, business entities such as instructions and announcements move to unpublished state on explicit save. When you further publish these business objects or business entities they move to a published state.
When the business object or entity is in its published state, and you select new revision the business object or business entity moves from published state to the in revision state. You can toggle between published state and the in revision states by choosing the View Last Published option, and View Last Revision on the UI.
You can create further versions of the business object or a business entity from the in revision state by choosing to publish the business object.
5.16 Creating Revisions and Switching Between Revisions and Published State
You can create revisions of a business object such as a model, or an item of equipment. Additionally, you can create revisions for business entities such as an instruction, or an announcement.
Procedure
1. To create a new revision of the business object or the business entity, open the business object or the business entity in the published state and choose the link New Revision.
Application Help for SAP Predictive Maintenance and Service, cloud editionMaster Data P U B L I C 249

System creates the next higher revision than the published state of the business object or the business entity.
2. To switch from in revision to the last published state of the business object or the business entity, open the business object or the business entity in the revision state and choose the link View Last Published.
3. If multiple revisions for the business object or the business entity exists and you want to switch from last published to the last in revision state of the business object or the business entity, open the business object or the business entity in its published state, choose View Last Revision.
Irrespective of the number of published models and the number of revisions that exist for a business object or a business entity, SAP Predictive Maintenance and Service, cloud edition allows you to switch between the last published state or the last revision of the business object or the business entity.
5.17 Export to Excel
This feature enables you to export the data to an excel for offline reference.
This feature is available on the all the object list pages.
For easier understanding, the document refers to the exporting equipment data to an excel.
1. Choose the Equipment app.You can view the equipment list page.
2. Choose Export to ExcelThere is a predefined set of columns that will be exported to the excel.
Result
The data is exported to an excel as .xls file.
250 P U B L I CApplication Help for SAP Predictive Maintenance and Service, cloud edition
Master Data

6 Machine Learning Engine
You can manage the machine learning engine of SAP Predictive Maintenance and Service, cloud edition by doing the following:
Tile Use
Health Indicator Data Set Configuration [page 251] Configure data sets that you can use as input data when training and scoring models for equipment health indicators.
Health Indicator Model Management [page 257] Configure models for equipment health indicators, and score, and train them.
Failure Mode Analytics Model Management [page 312] Configure models for failure mode analytics, and score, and train them.
Failure Mode Analytics Validation [page 328] Perform validation tasks to improve failure mode analytics.
Leading Indicators Model Management [page 330] Configure models for leading indicators, and train them.
6.1 Configuring Data Sets for Equipment Health Indicators
This topic describes how to configure data sets for models used for equipment health indicators of SAP Predictive Maintenance and Service, cloud edition.
Prerequisites
The following role or roles are assigned to your user:
● For SAP Predictive Maintenance and Service Fiori launchpad: <pdms_DataScienceUser>● For SAP Intelligent Asset Management Fiori launchpad: <DataScienceUser> or the two roles
<DataScienceRead> and <DataScienceWrite>
NoteIf the required role or roles are not assigned to your user, you cannot see the application on the launchpad. Contact your Identity Management Administrator if the role or roles have not been assigned to your user yet.
Application Help for SAP Predictive Maintenance and Service, cloud editionMachine Learning Engine P U B L I C 251

Context
You need to configure data sets that you can then use as training input and scoring input for your models for equipment health indicators.
NoteOnce you have configured a data set and you use this data set in a model, you cannot delete the data set as long as it is in use.
Procedure
1. On the SAP Fiori launchpad, go to the Machine Learning Engine group and open the Health Indicator Data Set Configuration application.
2. To configure a data set, you can choose between the following options:
○ Configure a new data set based on an existing configuration: Select the base data set and choose Copy. The new data set contains all settings of the base data set.
○ Configure a new data set from scratch: Choose .
The New Data Set Configuration screen is displayed.3. Fill in all required fields. For more information about the entries to fill in, see Entries to Configure a Data Set
[page 254].4. Add features to the data set by choosing Add:
A feature is a combination of a certain indicator group with indicators, an aggregation function, and an aggregation period. Each feature together with a specified range represents a new column in the data set.
NoteThe maximum number of features that you can add to the data set is limited. This limit is determined by the way the features are calculated. For more information, see Calculation of Features [page 256].
a. Select the indicator groups with indicators.
Select the indicator groups with indicators that you want to include in the data set such as pressure, temperature, or humidity.
b. Select the aggregation functions.
Select the aggregation functions that need to be executed on the indicators over the aggregation period, for example, the minimum or maximum value of a certain indicator over a certain aggregation period.
c. Define the aggregation period values:○ For the aggregation period, enter the time frame within which indicator data are aggregated. The
aggregation period is a multiple of the step size.○ For the period offset, define how much the aggregation period is moved in the past from a certain
timestamp.
252 P U B L I CApplication Help for SAP Predictive Maintenance and Service, cloud edition
Machine Learning Engine

ExampleYou set the aggregation period to 2 Days and the period offset to 4 Days. Your timestamp is October 22nd, 2017 at 1:30 p.m. This means that the aggregation of indicator data begins on the 16th of October at 1:30 p.m. and ends on the 18th of October at 1:30 p.m. (4 days before the timestamp and 2 days of aggregation).
If you want to use default values for the aggregation period and period offset, activate the Use Default Values checkbox. The default value of the aggregation period is the value of the step size. The default value of the period offset is 0, which means that the aggregation period is not moved at all.
d. Specify a range.With a range, you can exclude values for the aggregation by selecting a minimum and a maximum value. For all values outside this range, the selected NULL value strategy is applied.
If you want to aggregate all data, activate the No Limits checkbox.e. Choose OK.
NoteIf you choose Apply, your features are added and the dialog box remains open so that you can select further features. Once you have selected further features and you choose Apply, the already added features are ignored and only the new features are added to the feature table.
5. (Only relevant if you decided to include labels in your data set): Configure the label for the data set:a. Define the lead time.
With the lead time, you define a buffer before the prediction window to react to a failure that might occur during the prediction window.
b. Specify the prediction window.
With the prediction window, you define the length of the time frame within which a failure can occur in the future. The prediction window begins when the lead time ends and is a multiple of the step size.
ExampleIf you enter 1 Day with 0 as the lead time, the data of the next 24 hours will be looked at. During this time frame, you can expect a failure.
c. Add notifications or event types to the data set by choosing Add.
○ For notifications, you can choose from all notifications that are related to your equipment. By default, all values are selected. If filter values exist, you can also filter the notifications by selecting a specific status, priority or the header level failure mode (failure mode ID) to which the notification is assigned.
○ For events, you can choose from all event types that were created using SAP IoT Application Enablement Services OData APIs. For more information about event types, see Event Type. This also includes the alert types that are defined in the Templates application. For more information, see Adding Alert Types [page 227].
NoteThe following restrictions apply for event types:○ If you have configured event types using SAP IoT Application Enablement Services REST
APIs instead of SAP IoT Application Enablement Services OData APIs, you need to migrate
Application Help for SAP Predictive Maintenance and Service, cloud editionMachine Learning Engine P U B L I C 253

those event types in order to further use them. If you have questions about the migration, create a support ticket referring to component IOT-PDM.
○ Only use event types that are defined as alert types in the Templates application and that are assigned to the equipment model for which you create the data set. In the upcoming release, you will only be able to select those event types.
6. Save your configuration.
Results
Your data set is configured and added to the Data Set Configurations pane.
If you have configured multiple data sets and you want to get information about a specific data set, select the data set from the Data Set Configurations pane and use the URL of the selected data set to directly link to this data set.
Related Information
Managing Models for Equipment Health Indicators [page 257]
6.1.1 Entries to Configure a Data Set
Entry Field Mandatory Description
Name x The name of the data set configuration
Description - The description of the data set configuration
Equipment Model x The equipment model that you want to use as basis for the data set. You can choose from all available equipment models.
Step Size - The interval within which indicator data are aggregated for the training and the scoring. You can choose among step sizes from 2 Minutes to 1 Year.
254 P U B L I CApplication Help for SAP Predictive Maintenance and Service, cloud edition
Machine Learning Engine

Entry Field Mandatory Description
Null Values Strategy - Define how to handle missing values in the data set. You can choose from the following options:
● Ignore: Ignore NULL values and leave them as NULL values. You can use this option for the algorithms TEC, AFP, and IQR as those algorithms can handle NULL values.
● Replace: Replace NULL values with different values. The default value is 0. You can use this option for all algorithms.
● Remove: Remove rows with NULL values from the data set. You can use this option for all algorithms.
For more information about all algorithms, see Algorithms for Equipment Health Indicators [page 265].
Labels - Define whether you want to include labels in your data set to predict upcoming failures. A label indicates a failure or no failure for each row in the data set. You can choose from the following labeling options:
● None: No labels are included in the data set.
● Events: Include events as failures in the data set.
● Notifications: Include notifications as failures in the data set.
NoteYou need to use labeling for the algorithms TEC, AFP, and LOR of the learner type CLASSIFICATION. For more information about these algorithms, see Algorithms for Equipment Health Indicators [page 265].
Application Help for SAP Predictive Maintenance and Service, cloud editionMachine Learning Engine P U B L I C 255

6.1.2 Calculation of Features
Depending on how many features you want to add to a data set, it is important to know how the maximum number of features is calculated. This topic provides you with an overview of how features are calculated including examples.
Calculation
The maximum number of features is based on the bucket size per added feature. The bucket size is calculated by the aggregation period divided by the step size. For the maximum number of features, all bucket sizes are aggregated over all added features. The allowed maximum sum is 2100.
Overall, the following calculation applies:
Maximum number of features = (Sum of bucket sizes (aggregation period/step size) over all added features) < = 2100
This means, depending on the bucket size, you can add more or less features. If you have a bucket size of 1, you can add 2100 features to the data set. If you have a greater bucket size, you can add less features to the data set. A bucket size of 2100 only allows you to add one feature to the data set.
Examples
The following examples show you some feature calculations based on different bucket sizes:
Bucket Size = 1
ExampleYou have added 200 features with a bucket size of 1 as follows:
Aggregation Period Step Size Bucket Size Added Features
Feature Calculation
Allowed / Not Allowed
2 Minutes 2 Minutes (2/2) = 1 200 (1x200) = 200 Allowed
ExampleYou have added 500 features with a bucket size of 1 as follows:
Aggregation Period Step Size Bucket Size Added Features
Feature Calculation
Allowed / Not Allowed
1 Day 1 Day (1/1) = 1 500 (1x500) = 500 Allowed
256 P U B L I CApplication Help for SAP Predictive Maintenance and Service, cloud edition
Machine Learning Engine

Bucket Size = 1 and > 1
ExampleYou have added 650 features with a bucket size of 1 and greater than 1 as follows:
Aggregation Period Step Size Bucket Size Added Features
Feature Calculation
Allowed / Not Allowed
18 Hours 1 Hour (18/1) = 18 25 (18x25+1x200) = 650
Allowed
1 Hour 1 Hour (1/1)= 1 200
Bucket Size > 1
ExampleYou have added 800 features with a bucket size greater than 1 as follows:
Aggregation Period Step Size Bucket Size Added Features
Feature Calculation
Allowed / Not Allowed
4 Hours 1 Hour (4/1) = 4 200 (4x200) = 800 Allowed
ExampleYou have added 200 features with a bucket size greater than 1 as follows:
Aggregation Period Step Size Bucket Size Added Features
Feature Calculation
Allowed / Not Allowed
4 Hours 1 Hour (4/1) = 4 200 (4x200+200x10) = 2400
Not allowed
200 Hours 1 Hour (200/1) = 200 10
6.2 Managing Models for Equipment Health Indicators
This topic describes how to manage models used for equipment health indicators in SAP Predictive Maintenance and Service, cloud edition.
Prerequisites
The following role or roles are assigned to your user:
● For SAP Predictive Maintenance and Service Fiori launchpad: <pdms_DataScienceUser>● For SAP Intelligent Asset Management Fiori launchpad: <DataScienceUser> or the two roles
<DataScienceRead> and <DataScienceWrite>
Application Help for SAP Predictive Maintenance and Service, cloud editionMachine Learning Engine P U B L I C 257

NoteIf the required role or roles are not assigned to your user, you cannot see the application on the launchpad. Contact your Identity Management Administrator if the role or roles have not been assigned to your user yet.
Context
To calculate the health status and predict failures for your equipment, you need to configure, train, and score models in the Health Indicator Model Management application.
Procedure
1. To train and score a model, you first need to configure a model. For more information, see Configuring a Model [page 258].
2. Once you have configured a model, you can train it. For more information, see Training a Model [page 303].3. Once you have trained a model, you can use the latest trained model to score data. For more information,
see Scoring a Model [page 309].
6.2.1 Configuring a Model
This topic describes how to configure models used for equipment health indicators in SAP Predictive Maintenance and Service, cloud edition.
Prerequisites
At least one data set has been configured in the Health Indicator Data Set Configuration application.
Context
To train and score a model, you first need to configure a model.
258 P U B L I CApplication Help for SAP Predictive Maintenance and Service, cloud edition
Machine Learning Engine

Procedure
1. On the SAP Fiori launchpad, go to the Machine Learning Engine group and open the Health Indicator Model Management application.
2. To configure a model, you can choose between the following options:
○ Configure a new model based on an existing model: Select the base model and choose Copy. The new model contains all settings of the base model.
○ Configure a new model from scratch: Choose .
The New Model screen is displayed.3. Fill in all required fields in the General Information and Algorithm sections. For more information about the
entries to fill in, see Entries to Configure a Model [page 259].4. Save your model.
Results
Your model is configured and added to the Models pane.
If you have configured multiple models and you want to get information about a specific model, select the model from the Models pane and use the URL of the selected model to directly link to this model.
Related Information
Training a Model [page 303]
6.2.1.1 Entries to Configure a Model
General Information
Entry Field Mandatory Description
Name x The name of the model
Description - The description of the model
Application Help for SAP Predictive Maintenance and Service, cloud editionMachine Learning Engine P U B L I C 259

Entry Field Mandatory Description
Tags - The tags that you want to add to the model. You can later use these tags to filter and organize your models.
To add a tag, enter a value for the tag and press ENTER .
NoteYou can use the following characters:
● Uppercase or lowercase letters from a to z
● Numbers● Hyphens● Underscores
Training Input x The data set that you want to use to train the model. You can choose from all configured data sets in the Health Indicator Data Set Configuration application.
To view details about the selected data
set, choose . The data set with its details is then displayed in the Health Indicator Data Set Configuration application in a new tab.
Once you have selected a data set, the equipment model for the data set including all related equipment is displayed. You can also filter the equip
ment by choosing . To delete filters, you can delete each filter individually or delete all filters together by choosing
.
260 P U B L I CApplication Help for SAP Predictive Maintenance and Service, cloud edition
Machine Learning Engine

Entry Field Mandatory Description
Scoring Input x The data set that you want to use to score the model. You can choose from all configured data sets in the Health Indicator Data Set Configuration application.
To view details about the selected data
set, choose . The data set with its details is then displayed in the Health Indicator Data Set Configuration application in a new tab.
Once you have selected a data set, the equipment model for the data set including all related equipment is displayed. You can also filter the equip
ment by choosing . To delete filters, you can delete each filter individually or delete all filters together by choosing
.
Independent Variables x The names of the columns that you want use for the model input. The variables are derived from the selected indicators and aggregation functions of the Health Indicator Data Set Configuration application.
Application Help for SAP Predictive Maintenance and Service, cloud editionMachine Learning Engine P U B L I C 261

Algorithm
Entry Field Mandatory Description
Algorithm x The algorithm that you want to use to train and score the model. You can choose from the following predefined algorithms:
● Earth Mover’s Distance (EMD)Distance-based failure analysis using Earth Mover’s Distance
● Logistic Regression (LOR)Logistic Regression for Failure Prediction
● One Class Support Vector Machine (SVM)One-Class Support Vector Machine for anomaly detection
● Multivariate Autoregression (MAR)Anomaly detection using Multivariate Autoregression
● Principal Component Analysis (PCA)Anomaly detection with Principal Component Analysis
● Tree Ensemble Classifier (TEC)Failure prediction using Tree Ensemble Classifier
● Interquartile Range (IQR)Anomaly detection using Interquartile Range
● Automatic Failure Prediction (AFP)Failure prediction using Automatic Failure Prediction
● Automatic Anomaly Detection (AAD)Anomaly detection using Automatic Anomaly Detection
For more information about the algorithms, see Algorithms for Equipment Health Indicators [page 265].
Namespace x The namespace in which the model is created. The namespace for all predefined algorithms is com.sap.iot.mle.
262 P U B L I CApplication Help for SAP Predictive Maintenance and Service, cloud edition
Machine Learning Engine

Entry Field Mandatory Description
Learner Type x The type of algorithm
Depending on the algorithm you have selected, one of the following learner types is displayed:
● CLASSIFICATIONThis learner type is used to predict a category, for example, to classify between good and defective.Dependent variable: Mandatory
● REGRESSIONThis learner type is used to predict a value, for example, a health score.Dependent variable: Mandatory
● SURVIVALThis learner type is used to predict the expected length of time until a certain event, such as the breakdown of a piece of equipment, will happen.Dependent variable: Mandatory
● RULESThis learner type is used to include rules in the machine learning process.Dependent variable: Not allowed
● UNSUPERVISEDThis learner type is used to organize data or to describe its structure.Dependent variable: Not allowed
● OTHERDependent variable: Optional
Application Help for SAP Predictive Maintenance and Service, cloud editionMachine Learning Engine P U B L I C 263

Entry Field Mandatory Description
Dependent Variable - The variable or attribute that you want to train and score on. The variables are derived from the selected indicators and aggregation functions of the Health Indicator Data Set Configuration application.
NoteDepending on the algorithm you have selected for your model, this field is displayed or hidden.
NoteThe dependent variable must differ from the independent variables.
<Algorithm> Parameters - The parameters with their default values. The parameters differ according to the algorithm. For more information, see AlgorithmSpecific Parameters [page 283].
You can use the predefined parameters or adjust the parameters by deleting parameters, adding own parameters, or overwriting the values of the predefined parameters.
To define a new value for a parameter, enter the value and press ENTER .
264 P U B L I CApplication Help for SAP Predictive Maintenance and Service, cloud edition
Machine Learning Engine

Entry Field Mandatory Description
Output Mappings x The outputs that you want to assign to an indicator within an indicator group. The names and the meaning of the outputs differ according to the algorithm. For more information, see AlgorithmSpecific Outputs [page 299].
NoteThe following restrictions apply:
● At least one output must be assigned to an indicator.
● The indicators and indicator groups must have a matching dimension, unit of measure (if applicable), and datatype. Otherwise the indicators and indicator groups are not available for the assignment.
6.2.1.2 Algorithms for Equipment Health Indicators
Anomaly Detection with Principal Component Analysis
Use CaseBefore you explore the details of anomaly detection with principal component analysis (PCA), you should first know when to use this algorithm. A typical use case would be the following:
ExampleA railway operator uses sensors in locomotives. Four motors each have four temperature sensors. If the motors are working correctly, all 16 sensors send data about a synchronous increase or decrease of temperature. PCA notes when this behavior changes. You would use this algorithm to monitor this behavior and to detect if sensors send temperature data that differ from other sensors, which might indicate that a motor is damaged and needs to be maintained.
For more information, see Anomaly Detection with Principal Component Analysis (PCA) [page 269].
Application Help for SAP Predictive Maintenance and Service, cloud editionMachine Learning Engine P U B L I C 265

Distance-Based Failure Analysis Using Earth Mover’s Distance
Use Case
Before you explore the details of distance-based failure analysis using earth mover’s distance (EMD) as known in computer science,(also known as the Wasserstein metric in mathematics), you should first know when to use this algorithm. A typical use case would be the following:
ExampleAn airplane contains electric devices that have batteries inside. These electric devices are equipped with at least two sensors that send data. Sensor A sends data about measurements of electric current, sensor B sends data about voltage measurements. An electric device could also have a sensor C that sends data about temperature measurements. The data sent by the three sensors not only depends on the electric device itself, but also on other factors that affect the electric device and its batteries. These factors could be the weather conditions at heights of several kilometers, how often the device is used in the cockpit, under which conditions the pilot uses the device, and so on. It is therefore normal that data sent from the three sensors might vary around a certain mean score. The data from each sensor can be visualized in a one-dimensional histogram. For multidimensional visualizations, scatterplots are used. This visualization is like a fingerprint of each battery in the airplane. To compare the sensor data of different batteries without looking at and comparing each visualization, a distance measure for probability distributions is needed. One of these measures is the Wasserstein metric, or EMD. It can be used to measure deviation from a known good reference fingerprint of a battery, or to measure differences between several batteries of the same type, for example.
For more information, see Distance-Based Failure Analysis Using Earth Mover’s Distance (EMD) [page 271].
Anomaly Detection Using Multivariate Autoregression
Use Case
The algorithm for multivariate autoregression (MAR) can detect dependencies between different kinds of sensors even if the influence of one sensor by another one is delayed over time.
ExampleAn example might be the changes in the outflow temperature of a system, which after a while is also reflected in the inflow temperature of a downstream system. MAR can handle different kinds of sensor values, and autonomously ranks their influence on each other. The algorithm can therefore handle noisy or random signals.
MAR produces good results if abnormal behavior is detected for systems with various different kinds of sensors that (partly) depend on and influence each other.
For more information, see Anomaly Detection Using Multivariate Autoregression (MAR) [page 273].
266 P U B L I CApplication Help for SAP Predictive Maintenance and Service, cloud edition
Machine Learning Engine

Failure Prediction Using Tree Ensemble Classifier
Use CaseThe TEC algorithm can be used whenever the following applies:
● The goal is to predict failure of a system under investigation.● Historical sensor data or feature records for the system or a similarly behaving system are available.● Feature records include labels for each record whether or not the record corresponds to a failing system.
ExampleFor a rotating engine, sensors measure vibrations at different positions of the housing. A frequency analysis of these vibrations has been performed and, as a result, an SAP HANA fusion view (only valid for on-premise edition) has been created. This fusion view contains several calculated columns per sensor that express the strength of certain characteristic frequencies of the equipment within the vibrations. From an algorithm point of view, these columns represent the features. In this setting, the TEC algorithm can be used to learn to distinguish unhealthy from healthy vibration patterns from historical labeled data. That is data that includes one additional column specifying whether the system was healthy or not at the time in the past when the vibrations were observed. The model created by TEC can then be applied to detect engine problems early on.
For more information, see Failure Prediction Using Tree Ensemble Classifier (TEC) [page 275].
One Class Support Vector Machine (SVM) for Anomaly Detection
Use CaseBefore you explore the details of SVM, you should first know when to use this algorithm. A typical use case would be the following:
ExampleIn an aircraft, the turbines’ condition is monitored using sensors measuring values such as temperature and air flow. Sensor records from flights where the aircraft’s turbines are known to have worked correctly are used to train One-Class-SVM models for different operating modes such as takeoff, landing, or constant cruise. Using these models, it can be told whether an aircraft turbine of the former type is running properly, needs repair, or maybe even needs to be replaced.
For more information, see One Class Support Vector Machine (SVM) for Anomaly Detection [page 277].
Logistic Regression for Failure Prediction
Use CaseLogistic regression (LOR) for failure prediction can be used whenever the following applies:
● The goal is to predict failure of a system under investigation.
Application Help for SAP Predictive Maintenance and Service, cloud editionMachine Learning Engine P U B L I C 267

● Historical sensor data or feature records for the system or a similarly behaving system are available.● Feature records include labels for each record whether or not the record corresponds to a failing system.
ExampleThe job of an ATS box is to capture and burn off (regenerate) the particulate matter (soot) in the engine’s exhaust gas. When an ATS box is replaced, a primary failed part is identified which may either be the ATS box itself or an upstream component. In this case, the logistic regression can be used to predict if the process is still okay or near to failing, and what the main influencers are, that is if the ATS box or some upstream componentis the problem.
For more information, see Logistic Regression (LOR) for Failure Prediction [page 278].
Anomaly Detection Using Interquartile Range
Use Case
Before you explore the details of anomaly detection using interquartile range (IQR), you should first know when to use this algorithm. A typical use case would be the following:
ExampleYou want to monitor a motor using a sensor measuring its temperature. If the motor is too cold, it is not operating effienctly and an overheating of the motor should also be avoided. The algorithm automatically determines thresholds for the normal range of the sensor and can identify issues based on the sensor being out of range.
For more information, see Anomaly Detection Using Interquartile Range (IQR) [page 280].
Failure Prediction Using Automatic Failure Prediction
Use Case
Failure prediction using automatic failure prediction (AFP) can be used whenever the following applies:
● The goal is to predict failure of a system under investigation.● Historical sensor data or feature records for the system or a similarly behaving system are available.● Feature records include labels for each record whether or not the record corresponds to a failing system.
ExampleYou monitor a pump within a production process by the use of multiple sensors such as pressure, voltage, and temperature. By using automatic failure prediction, you create a model that uses data from the different sensors to predict breakdowns of the pump.
For more information, see Failure Prediction Using Automatic Failure Prediction (AFP) [page 281].
268 P U B L I CApplication Help for SAP Predictive Maintenance and Service, cloud edition
Machine Learning Engine

Anomaly Detection Using Automatic Anomaly Detection
Use Case
Before you explore the details of anomaly detection using automatic anomaly detection (AAD), you should first know when to use this algorithm. A typical use case would be the following:
ExampleYou want to monitor a welding robot using multiple sensors measuring its current, voltage, and resistance. By using the algorithm, an anomaly detection model is created from the sensors. By monitoring the behavior of the sensors, anomalies are detected that can indicate a potential failure.
For more information, see Anomaly Detection Using Automatic Anomaly Detection (AAD) [page 282].
6.2.1.2.1 Anomaly Detection with Principal Component Analysis (PCA)
The principal component analysis (PCA) can be used to detect anomalies in mulitvariate sensor data.
What Does the Algorithm Do?
The algorithm basically transforms data readings from an existing coordinate system into a new coordinate system. This concept is depicted in the following sequence of figures:
1.
2.
Application Help for SAP Predictive Maintenance and Service, cloud editionMachine Learning Engine P U B L I C 269

3.
The closer data readings are to the center of the new coordinate system, the closer these readings are to an optimum value.
Model Configuration
To configure a model for anomaly detection with PCA, use the Health Indicator Model Management application. For more information, see Managing Models for Equipment Health Indicators [page 257].
Data Preparation for Model Training and Scoring
Do not use all observations for model training. Rather, use observations from known equipment with normal behavior for the model training instead of random observations where possible. A small amount of abnormal data normally has no effect on the model performance.
This algorithm cannot handle missing values in a data set. If your data set contains such NULL values, you cannot train and score your model. To train and score your model, you need to remove or replace existing NULL values by using the NULL value strategy. For more information, see Entries to Configure a Data Set [page 254].
Model Training
Model training for PCA means calculating the eigenvectors and eigenvalues of the covariance matrix of the training data.
NoteThe model size depends only on the number of dimensions (that is, the sensors) that go into the model, not on the number of training examples.
270 P U B L I CApplication Help for SAP Predictive Maintenance and Service, cloud edition
Machine Learning Engine

Depending on the individual use case, PCA can be applied to any kind of reading, be it one-second-interval readings of sensors or aggregated sensor readings.
To train a model for anomaly detection with PCA, use the Health Indicator Model Management application. For more information, see Managing Models for Equipment Health Indicators [page 257].
After a training, a model summary of the trained model is displayed in the Trainings table. For more information, see Model Summary [page 307].
Model Scoring
Anomaly ScoreThe anomaly score is calculated using the Mahalanobis distance between a sensor reading and the mean of all readings, which is the center of the transformed coordinate system.
SmoothingIn some cases, anomaly scores can be high but only for a few seconds. This phenomenon is not usually critical, and can represent normal behavior (if a machine is started, for example). Smoothing algorithms added to the anomaly score prevent anomaly alerts caused by sporadic anomalies. The smoothing of algorithms is done using the running median.
To score a model for anomaly detection with PCA, use the Health Indicator Model Management application. For more information, see Managing Models for Equipment Health Indicators [page 257].
6.2.1.2.2 Distance-Based Failure Analysis Using Earth Mover’s Distance (EMD)
What Does the Algorithm Do?
To explain what the algorithm does, we can use a figurative example: The algorithm solves a linear optimization problem, in this case a transportation problem. Suppose you want to transform a sandcastle A into a sandcastle B. Both sandcastles consist of the same amount of sand. EMD measures how much sand you have to transport across which distance. The algorithm compares the locations of both sandcastles: Are they located close to each other, or does the sand have to be transported a long way from sandcastle A to sandcastle B? The algorithm also compares how the two sandcastles are shaped, for example. If they have a similar shape, no or little rebuilding work needs to be done. If their shapes differ significantly, considerable effort is required to rebuild sandcastle A so that it looks like sandcastle B. The conclusion is that the closer and more similar the sandcastles are, the lower the work effort and transport costs are.
Similar to the example, the histogram of a battery A, for example, is compared to the histogram of a well functioning battery B. The lower the score calculated with EMD, the more similar the histograms are (battery A is working like battery B). The higher the score, the more different the histgrams are.
Application Help for SAP Predictive Maintenance and Service, cloud editionMachine Learning Engine P U B L I C 271

Model Configuration
To configure a model for distance-based failure analysis using earth mover's distance, use the Health Indicator Model Management application. For more information, see Managing Models for Equipment Health Indicators [page 257].
Data Preparation for Model Training and Scoring
Before training and scoring, data scientists need to configure a model. In the configuration, they need to specify the names of one or more columns that contain values by which the data need to be grouped. These grouping columns are used for scoring. You can define as many grouping columns as required for your business case. The grouping columns are included in scoring only. In training, the grouping columns are used to exclude these columns from training.
This algorithm cannot handle missing values in a data set. If your data set contains such NULL values, you cannot train and score your model. To train and score your model, you need to remove or replace existing NULL values by using the NULL value strategy. For more information, see Entries to Configure a Data Set [page 254].
To train a model, data scientists also need to specify a number of bins, and can specfiy the expected minimum and maximum values of data columns. The minimum and maximum values are used for binning.
NoteTo define minimum and maximum values, the following syntax needs to be followed:
Example<DATA_COLUMN_NAME>.min
<DATA_COLUMN_NAME>.max
Model Training
To train a model for distance-based failure analysis using earth mover's distance, use the Health Indicator Model Management application. For more information, see Managing Models for Equipment Health Indicators [page 257].
After a training, a model summary of the trained model is displayed in the Trainings table. For more information, see Model Summary [page 307].
272 P U B L I CApplication Help for SAP Predictive Maintenance and Service, cloud edition
Machine Learning Engine

Model Scoring
To score a model for distance-based failure analysis using earth mover's distance, use the Health Indicator Model Management application. For more information, see Managing Models for Equipment Health Indicators [page 257].
6.2.1.2.3 Anomaly Detection Using Multivariate Autoregression (MAR)
A multivariate autoregressive model can be used to detect anomalies in a univariate or multivariate series of sensor data records varying over time.
What Does the Algorithm Do?
Based on the training data, which in this case is a time series of data records, the algorithm trains a model. If trained on regular data (data without anomalies present), the model is capable of learning the regular behavior of a system. Based on a window of recently observed data records, the model can then predict the data record for one time step into the future. Once the actual values for this point in time are available, the model prediction can be compared to the actual observations. An anomaly score is then assigned based on the distance between the prediction and the observation. If large deviations appear, this can indicate abnormal behavior of the underlying system.
The following figure illustrates the predictive model for one input variable:
Application Help for SAP Predictive Maintenance and Service, cloud editionMachine Learning Engine P U B L I C 273

NoteThe implemented algorithm computes one multivariate predictive model per input variable, and aggregates the deviations for the equipment from each model.
Model Configuration
To configure a model for multivariate autoregression, use the Health Indicator Model Management application. For more information, see Managing Models for Equipment Health Indicators [page 257].
Data Preparation for Model Training and Scoring
This algorithm cannot handle missing values in a data set. If your data set contains such NULL values, you cannot train and score your model. To train and score your model, you need to remove or replace existing NULL values by using the NULL value strategy. For more information, see Entries to Configure a Data Set [page 254].
For a correct training and scoring, the number of records in the provided data time series used for training needs to be at least window.size +1 per group (typically per piece of equipment).
TipFor more robust models and, thus, more reliable anomaly scores, we recommend using a training data size at least one or two orders of magnitude larger than the window size.
TipWe generally recommend creating one distinct model per group of input variables for which a tight, time-varying dependency can be assumed, rather than modeling a joint model of all input variables.
ExampleAn example of a tightly coupled group of input variables could be battery voltage and charging current for the system of a rechargeable battery.
TipIf it is clear from the system context that the sensor dependency is directed (the battery voltage is influenced by the charging current, but the charging current is typically not directly influenced by battery voltage), we recommend specifying prediction targets (battery voltage in this example) manually using the corresponding modelspecific parameters.
274 P U B L I CApplication Help for SAP Predictive Maintenance and Service, cloud edition
Machine Learning Engine

Model Training
To train an MAR model, the provided data is used to fit one autoregressive multivariate linear model for each target variable. By default, each provided input variable is also a target variable, but the modelspecific parameter target.columns can be used to select only specific input variables as target variables.
To train a model for multivariate autoregression, use the Health Indicator Model Management application. For more information, see Managing Models for Equipment Health Indicators [page 257].
After a training, a model summary of the trained model is displayed in the Trainings table. For more information, see Model Summary [page 307].
Model Scoring
Scoring is applied to a series of window.size + 1 consecutive records referring to the order of their timestamps. The first n of these records are used as input for the linear models established during training to produce predictions for each target of the record number window.size + 1.
Each prediction is compared to the actual values of the first window.size + 1 record. An anomaly score is derived based on the distance between predictions and observations, and on other influencing factors such as model uncertainty.
To score a model for multivariate autoregression, use the Health Indicator Model Management application. For more information, see Managing Models for Equipment Health Indicators [page 257].
6.2.1.2.4 Failure Prediction Using Tree Ensemble Classifier (TEC)
Based on records of sensor data, a tree ensemble model can learn to predict future system failures from past failures.
What Does the Algorithm Do?
The algorithm trains a boosted decision tree model, which is a series of decision trees, that encodes characteristics of data records with regards to failure. Based on the values of features of a given data record, the model is trained in such a way that each tree can decide which set of record groups the given record belongs to. An appropriate weight is then assigned to each record, indicating evidence for or against the record belonging to a failing system. The model aggregates the evidence weights of all trees and outputs a probability of failure. Thus, the model reflects the certainty that the given data record is an indication of a failing system.
Application Help for SAP Predictive Maintenance and Service, cloud editionMachine Learning Engine P U B L I C 275

The following figure illustrates the tree ensemble model created by the algorithm:
Model Configuration
To configure a model for the tree ensemble classifier, use the Health Indicator Model Management application. For more information, see Managing Models for Equipment Health Indicators [page 257].
Data Preparation for Model Training and Scoring
This algorithm is a supervised learning method. This means that it requires training data records featuring a column that indicates for each record whether a record belongs to a regular or a failing system.
Model Training
Model training for TEC means using the provided historical training data to learn the following:
● A series of decision trees, including decision thresholds● Evidence weights● An appropriate mapping of weights to probabilities of failure that represents the training data well
Together, these make up the model as referred to in the context of this algorithm.
The aim is to find a model that well represents the data set used for training. Internally, this algorithm splits the data into a train and test set, using 90% of the data for the training. After a training, quality metrics calculated
276 P U B L I CApplication Help for SAP Predictive Maintenance and Service, cloud edition
Machine Learning Engine

on the test set are displayed in a model summary in the Trainings table. For more information, see Model Summary [page 307].
The contribution of each feature (independent variable) of a trained model, i.e the feature importance, can be found in the Log Summary in the Trainings table.
To train a model for the tree ensemble classifier, use the Health Indicator Model Management application. For more information, see Managing Models for Equipment Health Indicators [page 257].
Model Scoring
To score a record, the TEC model determines for each decision tree the group that the record belongs to based on the feature values of this record. Next, the assigned evidence weights of each tree are aggregated for this record.
ExampleReferring to the figure above, these weights could be -41.83 (taken from group 1.4 of tree 1), and -99.04 (taken from group 2.2 of tree 2). Which weights of a tree are aggregated depends on the decision result of a tree.
To score a model for the tree ensemble classifier, use the Health Indicator Model Management application. For more information, see Managing Models for Equipment Health Indicators [page 257].
6.2.1.2.5 One Class Support Vector Machine (SVM) for Anomaly Detection
What Does the Algorithm Do?
In order to identify anomalous behaviour of equipment, the current sensor values of this particular piece of equipment are compared with sensor values of a period when the equipment is working correctly. This is done by training a model using sensor data from when the equipment was working correctly, which is then used to classify the current sensor values as normal or anomalous accordingly.
An n-dimensional set of data points, considered as normal by the user, is supplied to the algorithm. The algorithm classifies the data by spatially separating the region containing the set from the rest of the n-dimensional space. This, in most of the cases, is done by finding a hyperplane in a higher dimensional space, which is enclosing the data when projecting back to the initial n dimensions. The hyperplane is characterized by so-called support vectors, lying at the edge of enclosed region of as normal classified data. If a new data point needs to be classified, the distance between the data point and any of the support vectors is computed. From this, it can uniquely be told whether the data point lies within the region of normal data, so is a member of the learned 'normal' class, or is anomalous.
Application Help for SAP Predictive Maintenance and Service, cloud editionMachine Learning Engine P U B L I C 277

Model Configuration
To configure a model for this type of anomaly detection, use the Health Indicator Model Management application. For more information, see Managing Models for Equipment Health Indicators [page 257].
Data Preparation for Model Training and Scoring
This algorithm cannot handle missing values in a data set. If your data set contains such NULL values, you cannot train and score your model. To train and score your model, you need to remove or replace existing NULL values by using the NULL value strategy. For more information, see Entries to Configure a Data Set [page 254].
Model Training
To train a model for this type of anomaly detection, use the Health Indicator Model Management application. For more information, see Managing Models for Equipment Health Indicators [page 257].
NoteThe Support Vector Machine algorithm is sensitive to the number of rows in training data. The run time of the training methods exponentially grows with the number of rows of input data. While for a data set with ten columns and 10k rows training takes about 15 sec, training on a table with ten columns and 100k rows already takes more than half an hour. On the other hand, SVM has performance advantage in case of increased number of features, which is columns.
After a training, a model summary of the trained model is displayed in the Trainings table. For more information, see Model Summary [page 307].
Model Scoring
To score a model for this type of anomaly detection, use the Health Indicator Model Management application. For more information, see Managing Models for Equipment Health Indicators [page 257].
6.2.1.2.6 Logistic Regression (LOR) for Failure Prediction
What Does the Algorithm Do?
This algorithm uses logistic regression to perform supervised binary classification, meaning the algorithm is able to predict either 0 or 1 corresponding to a healthy or unhealthy state. Logistic regression, similar to Tree
278 P U B L I CApplication Help for SAP Predictive Maintenance and Service, cloud edition
Machine Learning Engine

Ensemble Classification can be used to either predict the likeliness of an failure, or the need for maintenance, based on historic sensor data as well as information indicating if there was a maintenance or failure, or not.
The algorithm fits a multi-dimensional logistic function to the input data. For this, a label column, specified as dependent, is required containing only the values 0 and 1. The logistic function gets fitted to these values, using the predictor values as arguments. In scoring, the value of the fitted function obtained during training is computed. This value is interpreted as failure probability. Each data with a score larger than the cutoff is classified as 1, otherwise 0.
Model Configuration
To configure a model using LOR, use the Health Indicator Model Management application. For more information, see Managing Models for Equipment Health Indicators [page 257].
Data Preparation for Model Training and Scoring
This algorithm cannot handle missing values in a data set. If your data set contains such NULL values, you cannot train and score your model. To train and score your model, you need to remove or replace existing NULL values by using the NULL value strategy. For more information, see Entries to Configure a Data Set [page 254].
Model Training
Internally, this algorithm splits the data into a train and test set, using 90% of the data for the training. After a training, quality metrics calculated on the test set are displayed in a model summary in the Trainings table. For more information, see Model Summary [page 307].
To train a model using LOR, use the Health Indicator Model Management application. For more information, see Managing Models for Equipment Health Indicators [page 257].
Model Scoring
To score a model using LOR, use the Health Indicator Model Management application. For more information, see Managing Models for Equipment Health Indicators [page 257].
Application Help for SAP Predictive Maintenance and Service, cloud editionMachine Learning Engine P U B L I C 279

6.2.1.2.7 Anomaly Detection Using Interquartile Range (IQR)
What Does the Algorithm Do?
This algorithm uses the interquartile range test for determining anomalies on univariate timeseries. During the training, the normal range is determined for each piece of equipment by using the interquartile range (upper quartile – lower quartile). The interval between lower quartile – n * inter-quartile range and upper quartile + n * interquartile range is considered as the normal range. All data points in this range receive scores between 0 and 1. All data points outside that range receive scores greater than 1.
Model Configuration
To configure a model for anomaly detection using IQR, use the Health Indicator Model Management application. For more information, see Managing Models for Equipment Health Indicators [page 257].
Data Preparation for Model Training and Scoring
Only one independent variable may be used in this algorithm.
Model Training
To train a model for anomaly detection using IQR, use the Health Indicator Model Management application. For more information, see Managing Models for Equipment Health Indicators [page 257].
After a training, a model summary of the trained model is displayed in the Trainings table. For more information, see Model Summary [page 307].
Model Scoring
To score a model for anomaly detection using IQR, use the Health Indicator Model Management application. For more information, see Managing Models for Equipment Health Indicators [page 257].
NoteIf the trained model is based on a constant value, a deviating value from this constant receives an infinite value in scoring. In this case, the value is set to MAX_FLOAT.
280 P U B L I CApplication Help for SAP Predictive Maintenance and Service, cloud edition
Machine Learning Engine

6.2.1.2.8 Failure Prediction Using Automatic Failure Prediction (AFP)
Based on records of sensor data, a tree ensemble model can learn to predict future system failures from past failures.
What Does the Algorithm Do?
This algorithm uses a black box approach to learn a classification model for failure prediction. The algorithm does not have any hyperparameters that are exposed to the user. The algorithm finds the most suitable hyperparameters for the provided data set.
Model Configuration
To configure a model for failure prediction using AFP, use the Health Indicator Model Management application. For more information, see Managing Models for Equipment Health Indicators [page 257].
Data Preparation for Model Training and Scoring
This algorithm is a supervised learning method. This means that it requires training data records featuring a column that indicates whether each record belongs to a regular or a failing system.
Model Training
Model training for AFP means using the provided historical training data to learn a classification model for failure prediction.
The aim is to find a model that well represents the data set used for training. Internally, this algorithm splits the data into a train and test set, using 90% of the data for the training. After a training, quality metrics calculated on the test set are displayed in a model summary in the Trainings table. The algorithm may also generate additional features (independent variables) internally based on the training data. After the training, these may also appear in the model summary. For more information about the model summary, see Model Summary [page 307].
To train a model for failure prediction using AFP, use the Health Indicator Model Management application. For more information, see Managing Models for Equipment Health Indicators [page 257].
Application Help for SAP Predictive Maintenance and Service, cloud editionMachine Learning Engine P U B L I C 281

Model Scoring
To score a record, the model found in the training is applied to the scoring data.
The result contains information on whether the equipment is likely to fail and the probability of failure.
This algorithm may also generate additional features (independent variables) internally based on the scoring data. After the scoring, these may appear in the log summary.
To score a model for failure prediction using AFP, use the Health Indicator Model Management application. For more information, see Managing Models for Equipment Health Indicators [page 257].
6.2.1.2.9 Anomaly Detection Using Automatic Anomaly Detection (AAD)
What Does the Algorithm Do?
This algorithm trains and scores multiple anomaly detection models and compares their score distribution to find the most appropriate unsupervised anomaly detection model. The model that best separates anomalies from normal behavior is considered the most appropriate unsupervised anomaly detection model.
The algorithm does not have any hyperparameters that are exposed to the user. The algorithm finds the most suitable hyperparameters for the provided data set.
The following figure illustrates the difference between an inappropriate and appropriate anomaly detection model. In the diagram of the inappropriate anomaly detection model, the scores are overlapped and a separation of anomalies from normal scores is not possible. In the diagram of the appropriate anomaly detection model, the scores are split and anomalies can be separated from normal data:
282 P U B L I CApplication Help for SAP Predictive Maintenance and Service, cloud edition
Machine Learning Engine

Model Configuration
To configure a model for anomaly detection using AAD, use the Health Indicator Model Management application. For more information, see Managing Models for Equipment Health Indicators [page 257].
Data Preparation for Model Training and Scoring
For the model training, use training data that includes normal data and anomalies. The percentage of the included anomalies is assumed to be a maximum of 10%.
This algorithm cannot handle missing values in a data set. If your data set contains such NULL values, you cannot train and score your model. To train and score your model, you need to remove or replace existing NULL values by using the NULL value strategy. For more information, see Entries to Configure a Data Set [page 254].
Model Training
To train a model for anomaly detection using AAD, use the Health Indicator Model Management application. For more information, see Managing Models for Equipment Health Indicators [page 257].
After a training, a model summary of the trained model is displayed in the Trainings table. For more information, see Model Summary [page 307].
Model Scoring
To score a model for anomaly detection using AAD, use the Health Indicator Model Management application. For more information, see Managing Models for Equipment Health Indicators [page 257].
6.2.1.3 Algorithm-Specific Parameters
Depending on the algorithm that you have selected, different parameters are displayed. The following sections provide you with an overview of the parameters with their descriptions and default values, sorted by the algorithms:
NoteFor all algorithms that are not included in this topic, there are no hyperparameters defined. These algorithms find the most suitable hyperparameters for the provided data set.
Application Help for SAP Predictive Maintenance and Service, cloud editionMachine Learning Engine P U B L I C 283

Earth Mover’s Distance (EMD)
Parameter Description
number.of.cores Number of cores to use during scoring
Choosing a number higher than 1 to utilize multi-threaded implementation is recommended only if you have large enough data and the performance of your runtime or memory is critical for your use case:
● Multi-threaded implementation pays off with respect to training runtime, for example, for data sets of 10,000 rows and 25 columns, or for data sets of 100,000 rows and 10 columns. Therefore, multi-threaded implementation can make sense only for similarly sized or larger training data sets.
● However, while the training runtime decreases significantly, the parallel implementation causes slightly increased scoring runtimes. For this reason, parallel implementation is recommended only if you consider the performance of training jobs, which are asynchronous tasks, to be performance-critical for your use case, depending also on how ofteperformance of your runtime or memory is not considered critical, the single-threaded implementation is recommended (number.of.cores = 1).
The default value is 1.
bins The number of bins to use in each dimension to generate the histogram. By default, bins are created such that the minimum and maximum reading of each sensor come to lie at the center of the lowest or highest bin respectively, and linearly equi-spaced bins are created in each dimension.
Positive integer for discretization that is not zero. The default value is 20.
group.by Column name of data to be excluded in contingency table computation. It contains the name(s) of the column(s) used for grouping data. This parameter is mandatory.
The default value is Thing.
284 P U B L I CApplication Help for SAP Predictive Maintenance and Service, cloud edition
Machine Learning Engine

Parameter Description
normalizer.type The type of normalizer that should be applied to the scores calculated by the algorithm. The default value is quantile. Allowed values are:
● Quantile (default)Internally calculates an effective threshold value based on the training data. Raw scores and normalized scores are generated.
● ThresholdUses the given value. Raw scores and normalized scores are generated.
● NoneDoes not do any normalization of the values. Only raw scores are generated.
NoteFor more information about the normalization of scores, see Normalization of Scores [page 296].
normalizer.value The value used for the normalization. For quantile, a value between 0 and 1 is valid; for threshold, a value larger than 0.
The default value is 0.99.
alignment.interval The parameter is used by the algorithm to bucket given timestamps into intervals that are then treated as one group of data. The value is given in minutes where -0 (default) means that no alignment is done, and the timestamps are treated as they are. A value of 1 means, that all timestamps are bucketed into 1-minute intervals, meaning timestamps of the same minutes are grouped together. After that, based on the updated timestamps, the distribution of each timestamp group is calculated and compared with the distribution of a normal state of the equipment.
The default value is 0.
NoteTo use this parameter, enter Timestamp as a value in the group.by parameter in addition to a value in the alignment.interval parameter. Otherwise, the scores are not calculated by the alignment.interval parameter.
Application Help for SAP Predictive Maintenance and Service, cloud editionMachine Learning Engine P U B L I C 285

Logistic Regression (LOR)
Parameter Description
cutoff Cutoff for the binary classes. Data with score below is classified 0, above is classified 1.
The default value is 0.5.
One Class Support Vector Machine (SVM)
Parameter Description
nu This parameter is an upper bound on the fraction of margin errors and a lower bound of the fraction of support vectors relative to the total number of training samples. Nu specifies the fraction of training data to be misclassified during training. Therefore, you should choose nu equal to the fraction of data you assume to be anomalous.
The default value is 0.01.
NoteAs nu specifies the fraction of training samples which you assume to be outliers and, for normalizer.type, normalizer.value specifies the fraction of training samples which you assume to be normal, these two values should always add up to one. If you set nu to 0.01, you are advised to set the normalizer.value to 0.99 if you use the normalizer.type quantile.
gamma This parameter controls the influence of individual training samples, which effects the smoothness of the model. A low value improves the smoothness and generalizability of the model. A high value reduces it, but makes the model tighterfitted to the training data.
The default value is 0.1.
286 P U B L I CApplication Help for SAP Predictive Maintenance and Service, cloud edition
Machine Learning Engine

Parameter Description
number.of.cores Number of cores to use during scoring
Choosing a number higher than 1 to utilize multi-threaded implementation is recommended only if you have large enough data and the performance of your runtime or memory is critical for your use case:
● Multi-threaded implementation pays off with respect to training runtime, for example, for data sets of 10,000 rows and 25 columns, or for data sets of 100,000 rows and 10 columns. Therefore, multi-threaded implementation can make sense only for similarly sized or larger training data sets.
● However, while the training runtime decreases significantly, the parallel implementation causes slightly increased scoring runtimes. For this reason, parallel implementation is recommended only if you consider the performance of training jobs, which are asynchronous tasks, to be performance-critical for your use case, depending also on how ofteperformance of your runtime or memory is not considered critical, the single-threaded implementation is recommended (number.of.cores = 1).
The default value is 1.
normalizer.type The type of normalizer that should be applied to the scores calculated by the algorithm. The default value is quantile. Allowed values are:
● Quantile (default)Internally calculates an effective threshold value based on the training data. Raw scores and normalized scores are generated.
● ThresholdUses the given value. Raw scores and normalized scores are generated.
● NoneDoes not do any normalization of the values. Only raw scores are generated.
NoteFor more information about the normalization of scores, see Normalization of Scores [page 296].
Application Help for SAP Predictive Maintenance and Service, cloud editionMachine Learning Engine P U B L I C 287

Parameter Description
normalizer.value The value used for the normalization. For quantile, a value between 0 and 1 is valid; for threshold, a value larger than 0.
The default value is 0.99.
NoteAs nu specifies the fraction of training samples which you assume to be outliers and, for normalizer.type, normalizer.value specifies the fraction of training samples which you assume to be normal, these two values should always add up to one. If you set nu to 0.01, you are advised to set the normalizer.value to 0.99 if you use the normalizer.type quantile.
Multivariate Autoregression (MAR)
Parameter Description
target.columns Contains the columns for which a linear regression should be fitted (default: NULL/empty). Depending on the input data, it is necessary to specify at least one target column if the window_size parameter is 0.
NoteYou need to enter the exact name of the columns because this field is case-sensitive.
window.size Contains the number of former observations that are taken into account to fit a regression. Windowing is only necessary if each row contains only the observations from one particular time.
NoteIf windowing is applied, the algorithm uses the data of the window_size parameter former rows (based on the timestamp). In order to ensure a proper functionality, an equidistance is recommended.
The default value is 10.
288 P U B L I CApplication Help for SAP Predictive Maintenance and Service, cloud edition
Machine Learning Engine

Parameter Description
weight.by.uncertainty If set to TRUE, the deviation between prediction and observation is discounted by the quality of the underlying model for this particular target variable. The underlying idea is to incorperate the predictive power of the trained regressions. If a model for one particular target variable does not produce reliable predictions, the influence of this particular deviation should be less than the deviation produced by a more accurate regression.
The default value is TRUE.
smoothing.window.size Determines how to smooth raw scores calculated by the algorithm. The permitted value range is odd numbers greater than 0.
The default value is 1.
If you enter a number greater than 1, the scores are smoothed using a running median with a window size given by the parameter.
normalizer.type The type of normalizer that should be applied to the scores calculated by the algorithm. The default value is quantile. Allowed values are:
● Quantile (default)Internally calculates an effective threshold value based on the training data
● ThresholdInternally calculates an effective threshold value based on the training data. Raw scores and normalized scores are generated.
● NoneDoes not do any normalization of the values. Only raw scores are generated.
NoteFor more information about the normalization of scores, see Normalization of Scores [page 296].
normalizer.value The value that is used for the normalization. For quantile, a value between 0 and 1 is valid; for threshold, a value larger than 0.
The default value is 0.99.
Application Help for SAP Predictive Maintenance and Service, cloud editionMachine Learning Engine P U B L I C 289

Principal Component Analysis (PCA)
Parameter Description
group.by Name(s) of the column(s) used for grouping data rows. This parameter is mandatory.
The default value is Thing.
sort.by Name(s) of the column(s) used for sorting data rows. This parameter is mandatory.
The default value is Timestamp.
smoothing.window.size Integer specifying the width of the running median window.
NoteThis value must be an odd number.
Use smoothing.window = 3 for minimal robust smoothing so that isolated outliers are eliminated.
The default value is 1.
window.size Contains the number of former observations that are taken into account to fit a regression. Windowing is only necessary if each row contains only the observations from one particular time.
NoteIf windowing is applied, the algorithm uses the data of the window_size parameter former rows (based on the timestamp). In order to ensure a proper functionality, an equidistance is recommended.
The default value is 0.
290 P U B L I CApplication Help for SAP Predictive Maintenance and Service, cloud edition
Machine Learning Engine

Parameter Description
normalizer.type The type of normalizer that should be applied to the scores calculated by the algorithm. The default value is quantile. Allowed values are:
● Quantile (default)Internally calculates an effective threshold value based on the training data. Raw scores and normalized scores are generated.
● ThresholdUses the given value. Raw scores and normalized scores are generated.
● NoneDoes not do any normalization of the values. Only raw scores are generated.
NoteFor more information about the normalization of scores, see Normalization of Scores [page 296].
normalizer.value The value that is used for the normalization. For quantile, a value between 0 and 1 is valid; for threshold, a value larger than 0.
The default value is 0.99.
Tree Ensemble Classifier (TEC)
Parameter Description
number.of.trees Specifies the number of trees in the ensemble model. Increasing the number of trees in the model can yield higher prediction accuracy, but requires higher computational effort, and there is the risk that the model will be adjusted too much to the non-characteristic noise of the specific training data set (known as overfitting). Permitted value range is integer numbers greater than or equal to 1.
The default value is 20.
Application Help for SAP Predictive Maintenance and Service, cloud editionMachine Learning Engine P U B L I C 291

Parameter Description
max.tree.depth Controls the maximum depth of each tree in the ensemble model. Increasing the maximum tree depth allows you to build more complex trees that are capable of capturing more complex relations in the data. On the downside, increasing the maximum tree depth also increases the risk of building models that are heavily tuned to the particularities of the given training data set, including those that are not characteristic of the underlying real-world process. It is generally recommended to increase the amount of training data when increasing the maximum tree depth (where possible). Permitted value range is integer numbers greater than or equal to 1.
The default value is 2.
records.subsampling.ratio Defines the share of records (that is,. rows of the training data) to be used to train each tree of the ensemble model. The number of records corresponding to the specified share is chosen randomly (without replacement) from the training data set. Specifying a value strictly smaller than 1 for this parameter can increase the robustness of the model (that is, it is less likely to overfit) if .number.of.trees is set to a sufficiently large value (problem-dependent) at the same time. On the downside, a smaller value for this parameter may lead to lower overall model accuracy and confidence, and may (indirectly) require higher computational effort due to a need for larger values for .number.of.trees. Also, a relatively large training data set may be required for subsampling to be successful. Permitted value range is numbers greater than 0 and less than or equal to 1. Note that a value of 1 effectively means that no subsampling is performed.
The default value is 1.
292 P U B L I CApplication Help for SAP Predictive Maintenance and Service, cloud edition
Machine Learning Engine

Parameter Description
features.subsampling.ratio Defines the share of features (that is, columns of the training data) to be used to train each tree of the ensemble model. The number of columns corresponding to the specified share is chosen at random (without replacement) from the given training data set. Similarly to .records.subsampling.ratio, specifying a value strictly smaller than 1 can be used to increase the robustness of the model, but may come at thea price: lower accuracy and model confidence, and choosing a smaller value for .features.subsampling.ratio may reduce the ability to capture complex relationships in the data successfully. It can be helpful, however, to tune this parameter if the given data set contains highly correlated features (for example, variants obtained through feature engineering). The permitted value range is numbers greater than 0 and less than or equal to 1. Note that a value of 1 effectively means that no subsampling is performed.
The default value is 1.
max.weight.contrib.per.leaf Defines how much weight each leaf of a tree may contribute maximally to the ensemble model. Within the algorithm, this parameter is used as a threshold to cap xgboost's gradient step in norm (that is, in absolute length). Choosing a smaller value for this parameter may help deal with unbalanced data sets (i.e. data sets where the occurrence of one class is only a fraction of the occurrence of the other class) by preventing "highly confident" leaves dominating "less confident" leaves as a result of sheer sample majority. The permitted value range is numbers greater than or equal to 0. Note that 0 means that no limit is specified on the maximum weight contribution of each leaf, while every strictly positive number specifies a weight threshold.
The default value is 0.
Application Help for SAP Predictive Maintenance and Service, cloud editionMachine Learning Engine P U B L I C 293

Parameter Description
learning.rate Defines the step size of the updates calculated through each tree on the ensemble learning objective function. In this specific algorithm, this parameter can be interpreted as the level of trust the ensemble model gives to each tree before calculating the next tree on the score residuals of the previously calculated trees. Choosing a smaller value will mean that objective functions of subsequently computed trees will look more alike and, as a consequence, the ensemble model tends to feature more trees per problem facade (at the cost of covering fewer facades if the overall number of trees is not increased). It is generally recommended to increase number.of.trees when decreasing learning.rate. Reducing this parameter can be used to increase number.of.trees when decreasing learning.rate. Reducing this parameter can be used to prevent overfitting, but it comes at the price of typically requiring a higher number.of.trees to achieve comparable model accuracy and confidence. The permitted value range is numbers greater than 0 and less than or equal to 1.
The default value is 0.3.
initial.guess.bias Allows you to introduce a bias into the classifier. This parameter serves as the inital guess (score) to which the tree models are iteratively added. Assuming that result scores (of the ensemble model) smaller than 0.5 are interpreted as predicting class '0' and scores greater than or equal to 0.5 are a prediction of class '1', code.initial.guess.bias can be used to require more tree weight to predict one class compared to the other, and thus naturally favor one class. Tuning this parameter may help to find a desirable tradeoff between so-called "false positives" and "false negatives" among incorrectly classified records. Permitted value range is numbers greater than or equal to 0 and less than or equal to 1. A value of 0.5 means no bias in either direction.
The default value is 0.5.
294 P U B L I CApplication Help for SAP Predictive Maintenance and Service, cloud edition
Machine Learning Engine

Parameter Description
evaluation.metric Controls the evaluation metric for validation. The default value is error. Allowed values are:
● error (default)The error rate for the binary classification that is calculated as #(wrong cases)/#(all cases). For the predictions, the evaluation regards the instances with prediction value larger than 0.5 as positive instances, and the others as negative instances.
● error@tA different than 0.5 binary classification threshold value could be specified by providing a numerical value through "t", where t is a decimal between 0 and 1. A possible example is "[email protected]".
● aucArea under the ROC curve.
NoteFor more information about the parameter evaluation.metric and the ROC curve, see
XGBoost Parameters and ROC curve .
scale.pos.weight Controls the balance of positive and negative weights, for instance if it is desired to weight the positive cases more than negative ones. This scenario is useful for unbalanced classes that are typical in predictive maintenance. Any positive real number can be entered by the user.
The default value is 0. For this value, the ratio of number of negative instances to the number of positive instances i.e. #(negative cases) / #(positive cases) will be used implicitly.
NoteIf it is not desired to weight classes differently, the value 1 should be used.
Application Help for SAP Predictive Maintenance and Service, cloud editionMachine Learning Engine P U B L I C 295

Interquartile Range (IQR)
Parameter Description
interquartile.multiplier Factor by which the interquartile range will be multiplied when determining the normal interval.
The default value is 2.
normalizer.type The type of normalizer that should be applied to the scores calculated by the algorithm. The default value is quantile. Allowed values are:
● Quantile (default)Internally calculates an effective threshold value based on the training data
● ThresholdInternally calculates an effective threshold value based on the training data. Raw scores and normalized scores are generated.
● NoneDoes not do any normalization of the values. Only raw scores are generated.
NoteFor more information about the normalization of scores, see Normalization of Scores [page 296].
normalizer.value The value that is used for the normalization. For quantile, a value between 0 and 1 is valid; for threshold, a value larger than 0.
The default value is 0.99.
6.2.1.3.1 Normalization of Scores
Normalizing scores enables you to compare scores computed for different equipment using different anomaly detection algorithms.
Normalization Type: Threshold
You can use the normalization type threshold to score a model if you know the threshold for your data set that distinguishes normal data from abnormal data.
296 P U B L I CApplication Help for SAP Predictive Maintenance and Service, cloud edition
Machine Learning Engine

ExampleYou can compare scores that were computed using different algorithms. The following table provides you with an example of how normalized scores are calculated:
Threshold 1 = 80 Threshold 2 = 450000
Algorithm 1 Algorithm 2
Raw Score Normalized Score
Score Interpretation
Raw Score Normalized Score
Score Interpretation
100 (100/80)*100 = 125
25 % above the threshold = abnormal
10000 (10000/450000)*100 = 2.22
97.78 % below the threshold = normal
90 (90/80)*100 = 112.5
12.5 % above the threshold = abnormal
400012 (400012/450000)*100 = 88.89
11.11 % below the threshold = normal
4 (4/80)*100 = 5 95 % below the threshold = normal
412313 (412313/450000)*100 = 91.63
8.37 % below the threshold = normal
32 (32/80)*100 = 40
60 % below the threshold = normal
477212 (477212/450000)*100 = 106.05
6.05 % above the threshold = abnormal
Without normalizing the raw scores of the algorithms 1 and 2, a comparison of the scores of these two algorithms would hardly be possible. Using the threshold, which represents a percentage of 100, the normalized scores are set in relation to this percentage and can therefore be compared across different anomaly detection algorithms.
Normalization Type: Quantile
You can use the normalization type quantile to train a model if you do not know the threshold for your data set. However, you know the data set itself very well, and you know that a certain percentage of your raw scores are outliers.
ExampleYou do not have a training set of normal data that is below a certain threshold. You cannot therefore train your model against a training data set. However, you know that 90 % of your raw scores are normal and 10 % of your raw scores are abnormal. You also know which scores represent normal values and which values represent abnormal values. What you need to do before you can score your model is to get to a threshold that distinguishes normal from abnormal scores.Without normalizing the raw scores of the algorithms 1 and 2, a comparison of the scores of these two algorithms would hardly be possible. Using the threshold, which represents a percentage of 100, the normalized scores are set in relation to this percentage and can therefore be compared across different anomaly detection algorithms.
Application Help for SAP Predictive Maintenance and Service, cloud editionMachine Learning Engine P U B L I C 297

Outliers = 10 %, which means quantile = 0.9
Raw Score Training Effective Threshold After Training Using Statistic Function to Calculate the Empirical Quantile: 0.9Normal score 0.04
Normal score 0.07
Normal score 0.07
Normal score 0.15
Normal score 0.23
Normal score 0.35
Normal score 0.35
Normal score 0.71
Normal score 0.89
abnormal score 0.95
Afteryour model has been trained with the empirical quantile process, the calculated effective threshold is used to score your model. The scoring process is then executed as described in the section Normalization Type: Threshold:
Effective Threshold = 0.9
Raw Score Normalized Score Score Interpretation
0.4 (0.4/0.9)*100 = 44.44 55.56 % below the threshold = normal
1.1 (1.1/0.9)*100 = 122.22 22.22 % above the threshold = abnormal
0.23 (0.23/0.9)*100 = 25.56 74.44 % below the threshold = normal
0.91 (0.91/0.9)*100 = 101.11 1.11 % above the threshold = abnormal
298 P U B L I CApplication Help for SAP Predictive Maintenance and Service, cloud edition
Machine Learning Engine

6.2.1.4 Algorithm-Specific Outputs
Depending on the algorithm that you have selected, different outputs are displayed. The following sections provide you with an overview of the outputs with their descriptions, data type and dimension, sorted by the algorithms:
Earth Mover’s Distance (EMD)
Output Description Data Type Dimension
Normalized Score Displays the percentage of the score divided by the effective threshold that is selected in the model specific parameter (Score/Effective threshold*100)
Numeric None
Score Displays the anomaly of a data point
With an increasing value, the anomaly of the data point increases too.
Numeric None
Reading Count The number of readings contributing to score
Numeric None
Logistic Regression (LOR)
Output Description Data Type Dimension
Predicted Class For this output, the values 0 or 1 are possible. If the probability of failure is greater than the cutoff value, the data points receive the value 1. Otherwise the data points receive the value 0.
Numeric None
Score Displays the probability of failure
Numeric None
Application Help for SAP Predictive Maintenance and Service, cloud editionMachine Learning Engine P U B L I C 299

One Class Support Vector Machine (SVM)
Output Description Data Type Dimension
Normalized Score Displays the percentage of the score divided by the effective threshold that is selected in the model specific parameter (Score/Effective threshold*100)
Numeric None
Score Displays the anomaly of a data point
With an increasing value, the anomaly of the data point increases too.
Numeric None
Multivariate Autoregression (MAR)
Output Description Data Type Dimension
Normalized Score Displays the percentage of the score divided by the effective threshold that is selected in the model specific parameter (Score/Effective threshold*100)
Numeric None
Score Measures the difference between a data point and a predicted value
A greater values indicates a bigger abnormality.
Numeric None
300 P U B L I CApplication Help for SAP Predictive Maintenance and Service, cloud edition
Machine Learning Engine

Principal Component Analysis (PCA)
Output Description Data Type Dimension
Normalized Score Displays the percentage of the score divided by the effective threshold that is selected in the model specific parameter (Score/Effective threshold*100).
Numeric None
Score Displays the anomaly of a data point
With an increasing value, the anomaly of the data point increases too.
Numeric None
Tree Ensemble Classifier (TEC)
Output Description Data Type Dimension
Predicted Class Displays the predicted class of the record
Numeric None
Score Displays the probability of the corresponding record belonging to the class that is encoded as the predicted class
Numeric None
Interquartile Range (IQR)
Output Description Data Type Dimension
Normalized Score Displays the percentage of the score divided by the effective threshold that is selected in the model specific parameter (Score/Effective threshold*100)
Numeric None
Application Help for SAP Predictive Maintenance and Service, cloud editionMachine Learning Engine P U B L I C 301

Output Description Data Type Dimension
Score Displays the anomaly of a data point
With an increasing value, the anomaly of the data point increases too. The scores are based on the distance to the median and the quartiles.
Numeric None
Automatic Failure Prediction (AFP)
Output Description Data Type Dimension
Predicted Class Displays the predicted class of the record
Numeric None
Score Displays the probability of a data point belonging to the predicted class
Numeric None
Automatic Anomaly Detection (AAD)
Output Description Data Type Dimension
Normalized Score Displays the percentage of the score divided by the effective threshold that is calculated in the model training (Score/Effective threshold*100)
Numeric None
302 P U B L I CApplication Help for SAP Predictive Maintenance and Service, cloud edition
Machine Learning Engine
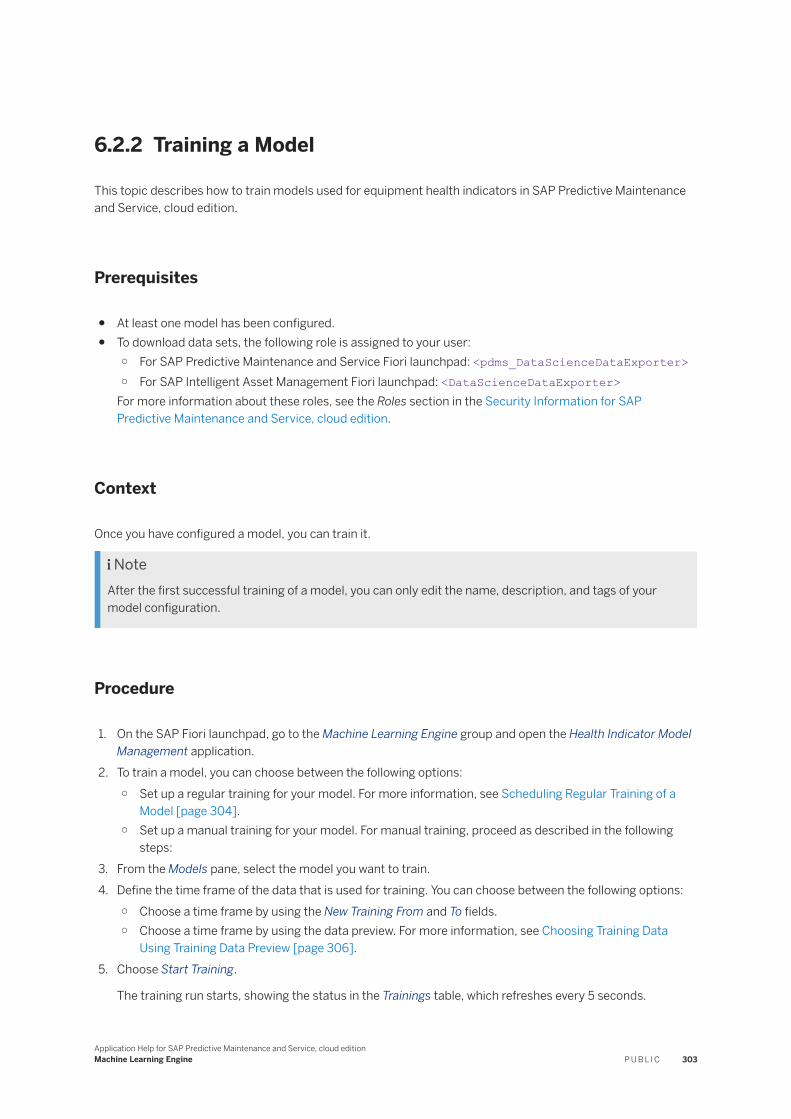
6.2.2 Training a Model
This topic describes how to train models used for equipment health indicators in SAP Predictive Maintenance and Service, cloud edition.
Prerequisites
● At least one model has been configured.● To download data sets, the following role is assigned to your user:
○ For SAP Predictive Maintenance and Service Fiori launchpad: <pdms_DataScienceDataExporter>○ For SAP Intelligent Asset Management Fiori launchpad: <DataScienceDataExporter>
For more information about these roles, see the Roles section in the Security Information for SAP Predictive Maintenance and Service, cloud edition.
Context
Once you have configured a model, you can train it.
NoteAfter the first successful training of a model, you can only edit the name, description, and tags of your model configuration.
Procedure
1. On the SAP Fiori launchpad, go to the Machine Learning Engine group and open the Health Indicator Model Management application.
2. To train a model, you can choose between the following options:○ Set up a regular training for your model. For more information, see Scheduling Regular Training of a
Model [page 304].○ Set up a manual training for your model. For manual training, proceed as described in the following
steps:3. From the Models pane, select the model you want to train.4. Define the time frame of the data that is used for training. You can choose between the following options:
○ Choose a time frame by using the New Training From and To fields.○ Choose a time frame by using the data preview. For more information, see Choosing Training Data
Using Training Data Preview [page 306].5. Choose Start Training.
The training run starts, showing the status in the Trainings table, which refreshes every 5 seconds.
Application Help for SAP Predictive Maintenance and Service, cloud editionMachine Learning Engine P U B L I C 303

Once the training run is completed, you can see detailed information and the training job ID by clicking on the log entries in the Log Summary column. You can also view a model summary with multiple metrics by
choosing . For more information about the model summary and the metrics, see Model Summary [page 307].
NoteIf the role <pdms_DataScienceDataExporter> is assigned to your user, you can download your configured data set for the latest successful training of your model by choosing Download Input Data. The downloaded file includes the independent variables you selected as input for your model within the defined time frame for the training. The file is available for 30 days after the training and is only for information purposes.
Results
Your model is trained.
Related Information
Scoring a Model [page 309]
6.2.2.1 Scheduling Regular Training of a Model
This topic describes how to schedule a regular training of models used for equipment health indicators in SAP Predictive Maintenance and Service, cloud edition.
Prerequisites
At least one model has been configured.
Context
In the Health Indicator Model Management application, you can configure a schedule, update an existing schedule, and activate or deactivate a schedule for the periodical execution of training.
304 P U B L I CApplication Help for SAP Predictive Maintenance and Service, cloud edition
Machine Learning Engine

Procedure
1. On the SAP Fiori Launchpad, go to the Machine Learning Engine group and open the Health Indicator Model Management application.
2. From the Models pane, select the model you want to train.3. To configure the training schedule, choose Set Schedule.
The Set Training Schedule dialog box is displayed.4. Fill in the following entries:
Active Activate or deactive the training schedule for the model.
Start Set start date of the training schedule.
Recurrence Pattern Define whether the training job should run once or frequently at certain intervals.
Data Range Define a limited data set coming in during a certain time period before your training.
End Date Define whether your training schedule should finish on a certain date.
5. Choose OK.
Results
The training schedule is configured.
You can later edit or also deactivate the training schedule if required.
Related Information
Training a Model [page 303]
Application Help for SAP Predictive Maintenance and Service, cloud editionMachine Learning Engine P U B L I C 305

6.2.2.2 Choosing Training Data Using Training Data Preview
This topic describes how to choose training data using the training data preview.
Context
In the Health Indicator Model Management application, you have different options to select a time frame for training models. One option is to select the time frame by using the training data preview. This preview displays the available training data for a certain period of time.
Procedure
1. In the Health Indicator Model Management application, select the model that you want to train from the Models pane.
The training data preview including a data preview histogram and a data preview slider is displayed under Training Data Preview.
If the model is already trained, the data preview histogram and the data preview slider is visible by choosing Show Data Preview and Training Runs.
NoteThe data preview histogram shows an estimated number of all aggregated data of the training input. The actual available data may differ from the displayed number of data in the chart depending, for example, on the null strategy you have chosen or which independent variables you have selected.
2. Select a time frame. You can choose between the following options:○ Click on the data preview slider.○ Drag the frame to any point on the data preview slider.○ Pull the left or right side of the frame to any point on the data preview slider.
NoteOnly data within the past year is displayed in the data preview slider. If you want to select a time frame with an earlier start date, select the time frame by using the New Training From and To fields.
Results
The selected training data is displayed in the data preview histogram in an enlarged view and the New Training From and To fields are filled.
306 P U B L I CApplication Help for SAP Predictive Maintenance and Service, cloud edition
Machine Learning Engine

Related Information
Training a Model [page 303]
6.2.2.3 Model Summary
After each training of a model, you can view a model summary. This model summary contains multiple metrics, which help you to understand the trained model better and evaluate and compare the quality of different trained models.
Background Information
When you train a model, metrics containing multiple numeric measurements and diagrams are calculated automatically. These numeric measurements and diagrams are calculated in different ways:
● Based on all training data. This is typical for for the numeric measurements and diagrams for anomaly detection, such as score distribution.
● Based on dedicated test data. In this case, a test set, representing 10% of the training data is automatically split from the data, and is excluded from the training. The numeric measurements and diagrams are calculated by using the test set to compare the model predictions with the actual outcomes of the test data after the training. This is typical for the numeric measurements and diagrams for failure prediction, such as accuracy.
● Based on the learned model. This is typical for the feature importance for failure prediction.
The Metrics of the Model Summary
Depending on the algorithm that you have selected for the model training, a different combination of numeric measurements and/or diagrams is displayed. The following tables provide you with an overview of the metrics with their descriptions, and show the algorithms to which they apply:
Application Help for SAP Predictive Maintenance and Service, cloud editionMachine Learning Engine P U B L I C 307

Numeric Measurements
Metric Description Algorithm
Accuracy This metric displays the overall fraction of the correctly classified data.
For this metric, values between 0 and 1 are possible. The value 1 refers to a perfect model.
NoteThis metric can be misleading for highly imbalanced data sets.
● Logistic Regression (LOR)● Automatic Failure Prediction (AFP)● Tree Ensemble Classifier (TEC)
Kappa This metric adjusts the accuracy based on the expected accuracy provided by the class distribution.
For this metric, values between -1 and 1 are possible. The value 1 refers to a perfect model.
● Logistic Regression (LOR)● Automatic Failure Prediction (AFP)● Tree Ensemble Classifier (TEC)
Matthews Correlation Coefficient (MCC)
This metric takes class imbalance into account.
For this metric, values between -1 and 1 are possible. The value 0 refers to a random prediction. The value 1 refers to a perfect prediction.
● Logistic Regression (LOR)● Automatic Failure Prediction (AFP)● Tree Ensemble Classifier (TEC)
Sensitivity This metric displays the fraction of correctly classified positive cases.
For this metric, values between 0 and 1 are possible. The value 1 refers to a perfect classification of all positive cases.
● Logistic Regression (LOR)● Automatic Failure Prediction (AFP)● Tree Ensemble Classifier (TEC)
Specificity This metric displays the fraction of correctly classified negative cases.
For this metric, values between 0 and 1 are possible. The value 1 refers to a perfect classification of all negative cases.
● Logistic Regression (LOR)● Automatic Failure Prediction (AFP)● Tree Ensemble Classifier (TEC)
Test set size This metric displays the amount of data that was used to calculate the metrics.
● Logistic Regression (LOR)● Automatic Failure Prediction (AFP)● Tree Ensemble Classifier (TEC)
Estimated Anomaly Fraction This metric displays the fraction of abnormal training data. The abnormal training data are classified by the Automatic Anomaly Detection (AAD) algorithm.
Automatic Anomaly Detection (AAD)
308 P U B L I CApplication Help for SAP Predictive Maintenance and Service, cloud edition
Machine Learning Engine

Diagrams
Metric Description Algorithm
Confusion Matrix This diagram displays the number of correctly and incorrectly classified positive and negative cases in the test set as separate tiles. Large numbers on the green tiles on the diagonal indicate a good classification. Large numbers on the red tiles on the offdiagonal indicate a bad classification.
● Logistic Regression (LOR)● Automatic Failure Prediction (AFP)● Tree Ensemble Classifier (TEC)
Feature Importance This diagram displays the importance of each feature for the model in a bar chart based on the gain provided by the feature. The feature with the highest value is considered to be the most important feature.
NoteThe feature importance is only displayed for the 20 most important features.
● Automatic Failure Prediction (AFP)● Tree Ensemble Classifier (TEC)
Score Distribution This diagram displays the distribution of the training scores in a histogram. The distribution indicates how well you can separate anomalies from normal scores. The scores are separated by different colors. Green indicates normal data and red indicates anomalies.
● Automatic Anomaly Detection (AAD)
● Interquartile Range (IQR)● Support Vector Machines (SVM)● Principal Component Analysis
(PCA)● Multivariate Autoregression (MAR)● Earth Mover’s Distance (EMD)
6.2.3 Scoring a Model
This topic describes how to score models used for equipment health indicators in SAP Predictive Maintenance and Service, cloud edition.
Prerequisites
Your model has been trained successfully at least once.
Application Help for SAP Predictive Maintenance and Service, cloud editionMachine Learning Engine P U B L I C 309

Context
Once you have trained a model, you can score the latest trained model to score data.
NoteThe latest version of a trained model is used for scoring.
Procedure
1. On the SAP Fiori launchpad, go to the Machine Learning Engine group and open the Health Indicator Model Management application.
2. To score a model, you can choose between the following options:○ Set up a regular scoring for your model. For more information, see Scheduling Regular Scoring of a
Model [page 311].○ Set up a manual scoring for your model. For manual scoring, proceed as described in the following
steps:3. From the Models pane, select the model you want to score.4. Define the time frame of the data that is used for scoring by using the Score Data From and To fields.5. Choose Start Scoring.
The scoring run starts, showing the status in the Scorings table, which refreshes every 5 seconds.
Once the scoring run is completed, you can see detailed information and the scoring job ID by clicking on the log entries in the Log Summary column.
Results
Your model is scored.
Next Steps
You can now check the scores in the indicator chart by choosing in the Scorings table. From the equipment list, select a piece of equipment to display the algorithm scores over the scoring time for this piece of equipment. This provides you with insights about the health and performance of your equipment.
ExampleYou have scored a model using the Multivariate Autoregression (MAR) algorithm. From the scores in the indicator chart, you see that the MAR scores for your pump increased in the last week within the scoring time frame. This means that the algorithm has detected a probable anomaly and you can expect a failure.
310 P U B L I CApplication Help for SAP Predictive Maintenance and Service, cloud edition
Machine Learning Engine

NoteThe following restrictions apply:
● The icon for the indicator chart is only displayed when the scoring run was completed successfully.● The scores in the indicator chart are only displayed when data for the equipment was collected during
the scoring run. You can view this information in the log entries of the scoring run.
Related Information
Indicator Chart [page 20]Anomaly Detection Using Multivariate Autoregression (MAR) [page 273]Managing Models for Equipment Health Indicators [page 257]
6.2.3.1 Scheduling Regular Scoring of a Model
This topic describes how to schedule a regular scoring of models used for equipment health indicators in SAP Predictive Maintenance and Service, cloud edition.
Prerequisites
Your model has been trained successfully at least once.
Context
In the Health Indicator Model Management application, you can configure a schedule, update an existing schedule, and activate or deactivate a schedule for the periodical execution of scoring.
Procedure
1. On the SAP Fiori launchpad, go to the Machine Learning Engine group and open the Health Indicator Model Management application.
2. From the Models pane, select the model you want to score.3. To configure the scoring schedule, choose Set Schedule.
The Set Scoring Schedule dialog box is displayed.
Application Help for SAP Predictive Maintenance and Service, cloud editionMachine Learning Engine P U B L I C 311

4. Fill in the following entries:
Active Activate or deactive the scoring schedule for the model.
Start Set start date of the scoring schedule
Recurrence Pattern Define whether the scoring job should run once or frequently at certain intervals.
Data Range Define whether the scoring should run on all data coming in since the last scoring run, or on a limited data set coming in during a certain time period before your scoring.
End Date Define whether your scoring schedule should finish on a certain date.
5. Choose OK.
Results
The scoring schedule is configured.
You can later edit or also deactivate the scoring schedule if required.
Related Information
Scoring a Model [page 309]
6.3 Managing Models for Failure Mode Analytics
This topic describes how to manage models used for failure mode analytics in SAP Predictive Maintenance and Service, cloud edition.
Prerequisites
The following role is assigned to your user:
● For SAP Predictive Maintenance and Service Fiori launchpad: <pdms_DataScienceUser>● For SAP Intelligent Asset Management Fiori launchpad: <FMA_MODEL_MANAGER>
312 P U B L I CApplication Help for SAP Predictive Maintenance and Service, cloud edition
Machine Learning Engine

NoteIf the required role is not assigned to your user, you cannot see the application on the launchpad. Contact your Identity Management Administrator if the role has not been assigned to your user yet.
Context
To get insights about the last occurring failures for your equipment and equipment models, you need to analyze the notifications and failure modes by configuring, training, and scoring models in the Failure Mode Analytics Model Management application.
In this process, you first configure and train an unsupervised model and then configure, train, and score a supervised model. The unsupervised model is the basis for the supervised model. The unsupervised model identifies the characteristics of notification texts and maps the notification texts to the characteristics found in standard failure modes. After the training, it suggests the most appropriate failure mode for each notification.
TipYou can perform validation tasks to validate and improve the suggestion. For more information, see Validating Failure Mode Analytics [page 328].
The supervised model learns from this suggestion by performing text classification. This means, it learns the characteristics of individual failure modes from the mapped notification texts for upcoming notifications during the training. After the scoring, it maps the most appropriate failure modes to upcoming notifications.
Procedure
1. To train an unsupervised model, you first need to configure it. For more information, see Configuring a Model [page 314].
2. Once you have configured the unsupervised model, you can train it. For more information, see Training a Model [page 322].
3. Once you have trained the unsupervised model, you can configure the supervised model. For more information, see Configuring a Model [page 314].
4. Once you have configured the supervised model, you can train it. For more information, see Training a Model [page 322].
5. Once you have trained the supervised model, you can use the latest trained model to score data. For more information, see Scoring a Model [page 326].
Application Help for SAP Predictive Maintenance and Service, cloud editionMachine Learning Engine P U B L I C 313

6.3.1 Configuring a Model
This topic describes how to configure models used for failure mode analytics in SAP Predictive Maintenance and Service, cloud edition.
Context
To train and score a model, you first need to configure a model.
NoteYou start with first configuring a model of unsupervised learner type, and then a model of supervised learner type.
Procedure
1. On the SAP Fiori launchpad, go to the Machine Learning Engine group and open the Failure Mode Analytics Model Management application.
2. To configure a model, you can choose between the following options:
○ Configure a new model based on an existing model: Select the base model and choose Copy. The new model contains all settings of the base model.
○ Configure a new model from scratch: Choose .
The New Model screen is displayed.3. Fill in all required fields in the General Information and Algorithm sections. For more information about the
entries to fill in, see Entries to Configure a Model [page 315].a. To configure an unsupervised model, select the LDA algorithm and select an equipment model.b. To configure a supervised model, select the TextClassEssemble algorithm and select the created
unsupervised model as a basis for the supervised model.4. Save your model.
Results
Your model is configured and added to the Models pane.
Related Information
Training a Model [page 322]
314 P U B L I CApplication Help for SAP Predictive Maintenance and Service, cloud edition
Machine Learning Engine

6.3.1.1 Entries to Configure a Model
General Information
Entry Field Mandatory Description
Name x The name of the model
NoteThe model name must not contain whitespaces.
Description - The description of the model
Algorithm
Entry Field Mandatory Description
Algorithm x The algorithm that you want to use to train and score the model. You can choose from the following algorithms:
● LDAUnsupervised topic modeling using Latent Dirichlet Allocation for failure mode assignment
● TextClassEnsembleFailure mode analytics with supervised TextClassEnsemble
For more information on the algorithms, see Algorithms for Failure Mode Analytics [page 317].
Application Help for SAP Predictive Maintenance and Service, cloud editionMachine Learning Engine P U B L I C 315

Entry Field Mandatory Description
Learner Type x The type of algorithm
Depending on the algorithm you have selected, one of the following learner types is displayed:
● UNSUPERVISEDThis learner type is displayed if you have selected the algorithm name LDA.
● SUPERVISEDThis learner type is displayed if you have selected the algorithm name TextClassEnsemble.
Equipment Model x The equipment model that you want to use as basis for the model
NoteThis field is visible only when you create an unsupervised model.
Unsupervised Model x The unsupervised model that you want to use as basis for the supervised model
NoteThis field is visible only when you create a supervised model.
Parameters - The parameters with their default values. The parameters differ according to the algorithm. For more information, see AlgorithmSpecific Parameters [page 320].
You can use the predefined parameters or adjust the parameters by deleting parameters, adding own parameters, or overwriting the values of the predefined parameters.
To define a new value for a parameter, enter the value and press ENTER .
316 P U B L I CApplication Help for SAP Predictive Maintenance and Service, cloud edition
Machine Learning Engine

6.3.1.2 Algorithms for Failure Mode Analytics
Unsupervised Topic Modeling Using Latent Dirichlet Allocation for Failure Mode Assignment
Use Case
Before you explore the details of this algorithm, you should first know when to use this algorithm. Unsupervised Topic Modeling applies for the following scenarios:
● The goal is to auto-assign labels to locuments, given known behavior of the labels in the form of text.● A text corpus related to the document that needs label assignment is available.● A text corpus related to the labels whose underlying topic needs to be inferred needs to be available,
thereby allowing for-auto assignment of the label to the notification based on the mutual topic assignment.
ExampleAn example use case is notifications that have rich text data, but are missing failure modes. In this case, unsupervised topic modeling can be applied to learn latent topics in the notifications. Scoring is then used on the text corpus related to standard failure modes to infer underlying topics, thereby giving the ability to assign standard failure mode labels to the topics learned.
For more information, see Unsupervised Topic Modeling Using Latent Dirichlet Allocation for Failure Mode Assignment [page 318].
Supervised Text Classification Using Ensemble Techniques
Use Case
Before you explore the details of this algorithm, you should first know when to use this algorithm. Supervised Text Classification applies for the following scenarios:
● The goal is to predict labels/class to text data.● Text records must include labels.● Text data representing similar entities/issues must be available.
ExampleAn example use case would be auto-assigning failure modes to new notifications on the basis of text classification model learned on historical data. If notifications that have rich text data, have been assigned failure modes either using automated techniques using NLP or manually via hand labeling, a text classification model can be learned. New notifications are auto-assigned failure modes based on the text classification models learned.
For more information, see Failure Mode Analytics with Supervised TextClassEnsemble [page 319].
Application Help for SAP Predictive Maintenance and Service, cloud editionMachine Learning Engine P U B L I C 317

6.3.1.2.1 Unsupervised Topic Modeling Using Latent Dirichlet Allocation for Failure Mode Assignment
What Does the Algorithm Do?
This algorithm uses Latent Dirichlet Allocation, which is a generative probabilistic method for modeling a corpus. Corpus here could be text from notifications. Latent Dirichlet Allocation assigns topics to documents and generates topic distributions over words given a collection of texts, thus providing a way of automatically discovering topics those documents contain.
The LDA model is a Bayesian mixture model for discrete data where topics are assumed to be uncorrelated. LDA assumes that each document can be represented as a probabilistic distribution over latent topics, and that topic distribution in all documents share a common Dirichlet prior. Each latent topic in the LDA model is also represented as a probabilistic distribution over words and the word distributions of topics share a common Dirichlet prior as well.
The algorithm fits a topic model to the input text data. For this, text data that makes up the corpus is specified. Training a model extracts the latent topics given a set of documents (notification texts).
Likewise, scoring would essentially be to infer underlying topics that explain a specific document based on the generative process which was used to train the model; basically infer the conditional distribution (posterior) of the hidden variables given the observed variables.
Model Configuration
To configure a model for Failure Mode Analytics, use the Failure Mode Analytics Model Management application. For more information, see Managing Models for Failure Mode Analytics [page 312].
Data Preparation for Model Training and Scoring
The algorithm takes text data as an input. Thus, each row of text must belong to a homogenous set, which might have several latent categories.
ExampleAll failure notification texts that belong to a single equipment model.
318 P U B L I CApplication Help for SAP Predictive Maintenance and Service, cloud edition
Machine Learning Engine

Model Training
Model training for LDA means using the provided historical training text data to learn a topic model for failure mode assignment.
The aim is to find a model that well represents the data set used for training. Internally, this algorithm splits the data into a train and test set, using 90% of the data for the training. After a training, a quality metric calculated on the test set is displayed in the Log Summary in the Trainings table. For more information, see Model Summary [page 324].
To train a model for Failure Mode Analytics, use the Failure Mode Analytics Model Management application. For more information, see Managing Models for Failure Mode Analytics [page 312].
Model Scoring
To score a model for Failure Mode Analytics, use the Failure Mode Analytics Model Management application. For more information, see Managing Models for Failure Mode Analytics [page 312].
6.3.1.2.2 Failure Mode Analytics with Supervised TextClassEnsemble
What Does the Algorithm Do?
This algorithm conducts automatic supervised classification on text data using ensemble agreement between multiple classification algorithms that makes a prediction concerning the label/class given a document. The train function uses an ensemble of three algorithms: random forest, cart, and knn to generate a consensus on assigning categories to documents.
Scoring makes predictions from the fitted ensemble model to predict the class (label) of new documents.
Model Configuration
To configure a model for Failure Mode Analytics, use the Failure Mode Analytics Model Management application. For more information, see Managing Models for Failure Mode Analytics [page 312].
Application Help for SAP Predictive Maintenance and Service, cloud editionMachine Learning Engine P U B L I C 319

Data Preparation for Model Training and Scoring
The algorithm takes text records that are classified as an input. Thus, each row is expected to have text data represented as a document that must have a class or label associated with it.
Model Training
To train a model for Failure Mode Analytics, use the Failure Mode Analytics Model Management application. For more information, see Managing Models for Failure Mode Analytics [page 312].
Model Scoring
To score a model for Failure Mode Analytics, use the Failure Mode Analytics Model Management application. For more information, see Managing Models for Failure Mode Analytics [page 312].
6.3.1.3 Algorithm-Specific Parameters
Depending on the algorithm that you have selected, different parameters are displayed. The following sections provide you with an overview of the parameters with their descriptions and default values, sorted by the algorithms:
320 P U B L I CApplication Help for SAP Predictive Maintenance and Service, cloud edition
Machine Learning Engine

LDA
Parameter Description
stopwords Collection of stopwords that is excluded from the failure mode analysis, for example, a model name or user name.
This parameter already includes a list of default stopwords, which are automatically excluded from the analysis. These stopwords are not visible as default values on the UI. The stopwords are languagespecific, currently standard English stopwords are used. You can find multiple English stopwords lists on the internet.
In addition to the automatically excluded stopwords, you can also add your own stopwords.
NoteTo enter own stopwords, you can use the following characters:
● Uppercase or lowercase letters from a to z● Numbers● Hyphens● Periods● Underscores
alpha Parameter of the Dirichlet distribution for topics across documents
The default value is 0.001.
beta Logarithmized parameter of the word distribution for each topic
The default value is 0.001.
num.top.terms Number of top terms per topic that need to be extracted
The default value is 20.
num.topics Number of topics
The default value is 5.
burnin Number of omitted Gibbs iterations at beginning
The default value is 4000.
iter Number of Gibbs iterations
The default value is 2000.
Application Help for SAP Predictive Maintenance and Service, cloud editionMachine Learning Engine P U B L I C 321

Parameter Description
thin Number of omitted in-between Gibbs iterations
The default value is 500.
best If TRUE, only the model with the maximum (posterior) likelihood is returned
The default value is TRUE.
ngram n-grams used to create Document Term Matrix
The default value is 2.
TextClassEnsemble
Parameter Description
ngram n-grams used to create Document Term Matrix
The default value is 2.
6.3.2 Training a Model
This topic describes how to train models used for failure mode analytics in SAP Predictive Maintenance and Service, cloud edition.
Prerequisites
● At least one failure mode analytics model has been configured.● The notifications for your equipment meet the following three requirements:
○ The breakdown attribute of the notification is set to True or the notificationTypeDescription attribute is set to Breakdown.
○ The notification has a valid malfunction start and end date.○ The notification has a long description.
If these requirements are not met, the notifications are not collected during the training. For more information about all these attributes and how to view and create a notification, see Viewing and Creating Notifications of Equipment [page 96] and SAP Help Portal → Configuration → API Tutorial → Equipment → Creating Notifications.
322 P U B L I CApplication Help for SAP Predictive Maintenance and Service, cloud edition
Machine Learning Engine

NoteNot all attributes are available on the UI when you use the equipment application to create notifications. For those attributes, such as the breakdown attribute, use the API in the API documentation.
Context
Once you have configured a model, you can train it.
NoteYou start with first training a model of unsupervised learner type, and then a model of supervised learner type.
NoteAfter the first successful training of a model, you cannot edit your model configuration any longer or delete your model. You can only copy the model and adjust the copied model.
Procedure
1. On the SAP Fiori launchpad, go to the Machine Learning Engine group and open the Failure Mode Analytics Model Management application.
2. From the Models pane, select the model you want to train.3. Define the time frame of the data that is used for training by using the New Training From and To fields.
NoteFor training a supervised model, select a time range that is a subset of the time range used in the unsupervised model that is referred to in the created supervised model.
4. Choose Start Training.
The training run starts, showing the status in the Trainings table, which can be refreshed by clicking the Refresh button next to the table.
Once the training run is completed, you can see detailed information, a model summary with multiple metrics, and the training job ID by clicking on the log entries in the Log Summary column. For more information about the model summary and the metrics, see Model Summary [page 324].
Results
Your model is trained.
Application Help for SAP Predictive Maintenance and Service, cloud editionMachine Learning Engine P U B L I C 323

Related Information
Configuring a Model [page 314]Scoring a Model [page 326]
6.3.2.1 Model Summary
After each training of a model, you can view a model summary. This model summary contains multiple metrics, which help you to understand the trained model better and evaluate and compare the quality of different trained models.
Background Information
When you train a model, metrics containing multiple numeric measurements are calculated. These metrics are calculated based on dedicated test data. This means, a test set, representing 10% of the training data is automatically split from the data, and is excluded from the training. The numeric measurements are calculated by using the test set to compare the model predictions with the actual outcomes of the test data after the training.
The Metrics of the Model Summary
Depending on the algorithm that you have selected for the model training, different numeric measurements are displayed. The following tables provide you with an overview of the metrics with their descriptions, and show the algorithm to which they apply:
Metric Description Algorithm
Accuracy This metric displays the overall fraction of the correctly classified data.
For this metric, values between 0 and 1 are possible. The value 1 refers to a perfect model.
NoteThis metric can be misleading for highly imbalanced data sets.
Supervised Text Classification Using Ensemble Techniques
324 P U B L I CApplication Help for SAP Predictive Maintenance and Service, cloud edition
Machine Learning Engine

Metric Description Algorithm
Kappa This metric adjusts the accuracy based on the expected accuracy provided by the class distribution.
For this metric, values between -1 and 1 are possible. The value 1 refers to a perfect model.
Supervised Text Classification Using Ensemble Techniques
Matthews Correlation Coefficient (MCC)
This metric takes class imbalance into account.
For this metric, values between -1 and 1 are possible. The value 0 refers to a random prediction. The value 1 refers to a perfect prediction.
Supervised Text Classification Using Ensemble Techniques
Sensitivity This metric displays the fraction of correctly classified positive cases.
For this metric, values between 0 and 1 are possible. The value 1 refers to a perfect classification of all positive cases.
Supervised Text Classification Using Ensemble Techniques
Specificity This metric displays the fraction of correctly classified negative cases.
For this metric, values between 0 and 1 are possible. The value 1 refers to a perfect classification of all negative cases.
Supervised Text Classification Using Ensemble Techniques
Test set size This metric displays the amount of data that was used to calculate the metrics.
Supervised Text Classification Using Ensemble Techniques
Perplexity This metric indicates how well a probability model predicts a sample and is used by the convention in language modeling.
A low perplexity indicates that the probability distribution is good at predicting the sample. The lower the perplexity score, the better the generalization performance.
Unsupervised Topic Modeling Using Latent Dirichlet Allocation
Application Help for SAP Predictive Maintenance and Service, cloud editionMachine Learning Engine P U B L I C 325

6.3.3 Scoring a Model
This topic describes how to score models used for failure mode analytics in SAP Predictive Maintenance and Service, cloud edition.
Prerequisites
Your supervised model has been trained successfully at least once.
Context
Once you have trained a supervised model, you can score the latest trained model to score data.
NoteThe latest version of a model is used for scoring.
Procedure
1. On the SAP Fiori launchpad, go to the Machine Learning Engine group and open the Failure Mode Analytics Model Management application.
2. To score a model, you can choose between the following options:○ Set up a regular scoring for your model. For more information, see Scheduling Regular Scoring of a
Model [page 327].○ Set up a manual scoring for your model. For manual scoring, proceed as described in the following
steps:3. From the Models pane, select the model you want to score.4. Define the time frame of the data that is used for scoring by using the Score Data From and To fields.5. Choose Start Scoring.
The scoring run starts, showing the status in the Scorings table, which can be refreshed by clicking the Refresh button next to the table.
Once the scoring run is completed, you can see detailed information and the scoring job ID by clicking on the log entries in the Log Summary column.
Results
Your supervised model is scored.
326 P U B L I CApplication Help for SAP Predictive Maintenance and Service, cloud edition
Machine Learning Engine

Next Steps
You can now use the failure mode analytics functions to get insights about the last occurring failures of your equipment and equipment models. For more information, see Using Failure Mode Analytics [page 47].
Related Information
Managing Models for Failure Mode Analytics [page 312]
6.3.3.1 Scheduling Regular Scoring of a Model
This topic describes how to schedule a regular scoring of models used for failure mode analytics in SAP Predictive Maintenance and Service, cloud edition.
Prerequisites
Your supervised model has been trained successfully at least once.
Context
In the Failure Mode Analytics Model Management application, you can configure a schedule, update an existing schedule, and activate or deactivate a schedule for the periodical execution of scoring.
Procedure
1. On the SAP Fiori launchpad, go to the Machine Learning Engine group and open the Failure Mode Analytics Model Management application.
2. From the Models pane, select the model you want to score.3. To configure the scoring schedule, choose Set Schedule.
The Set Scoring Schedule dialog box is displayed.4. Fill in the following entries:
Active Activate or deactive the scoring schedule for the model.
Application Help for SAP Predictive Maintenance and Service, cloud editionMachine Learning Engine P U B L I C 327

Start Set start date of the scoring schedule
Recurrence Pattern Define whether the scoring job should run once or frequently at certain intervals.
Data Range Define whether the scoring should run on all data coming in since the last scoring run, or on a limited data set coming in during a certain time period before your scoring.
End Date Define whether your scoring schedule should finish on a certain date.
5. Choose OK.
Results
The scoring schedule is configured.
You can later edit or also deactivate the scoring schedule if required.
Related Information
Scoring a Model [page 326]
6.4 Validating Failure Mode Analytics
This topic describes how to validate failure mode analytics in SAP Predictive Maintenance and Service, cloud edition.
Prerequisites
● Your unsupervised model has been trained successfully once at least.● The following role or roles are assigned to your user:
○ For SAP Predictive Maintenance and Service Fiori launchpad: <pdms_DataScienceUser> or <pdms_AppUser>
○ For SAP Intelligent Asset Management Fiori launchpad: <FMA_VALIDATION_EXPERT>
328 P U B L I CApplication Help for SAP Predictive Maintenance and Service, cloud edition
Machine Learning Engine

NoteIf the required role or roles are not assigned to your user, you cannot see the application on the launchpad. Contact your Identity Management Administrator if the role or roles have not been assigned to your user yet.
Context
To improve the accuracy of the text analysis that maps topics with top words from notification texts to the most appropriate failure modes, we recommend you perform validation tasks. Validation tasks are generated based on a trained unsupervised model and are displayed on the Failure Mode Analytics Validation application. Once you have performed a validation task, you can apply your validation to the next supervised model training and scoring run in the Failure Mode Analytics Model Management application and check the validation results for failure mode analytics.
Procedure
1. On the SAP Fiori launchpad, go to the Machine Learning Engine group and open the Failure Mode Analytics Validation application.
NoteOnly one validation task is generated per trained unsupervised model. The validation is assumed to be a one-time activity for each training run.
2. To begin a validation task, choose Start.
The Topics and Failure Mode Assignments table is displayed. The table lists all topics with the most relevant top words for each failure mode.
3. In the table, check if each topic is assigned to the most appropriate failure mode based on the top words of the topic and your own experience. You see the top words by clicking on a topic.
NoteThe topics are pre-assigned to the most appropriate failure modes during the initial training. When a topic has an equal relevance split between several failure modes, it is assigned to the first mode ID alphabetically.
4. (Relevant only if there is a more appropriate failure mode): Reassign the topic to a different failure mode by using the failure mode selection dialog.
5. To continue the task, choose Save and Next.The Notifications table is displayed. The table lists notifications for each failure mode. It displays a maximum of 10 notifications per failure mode.
6. In the table, check if each notification is assigned to the most appropriate failure mode. You can see details of a notification by clicking the notification link.
7. (Relevant only if there is a more appropriate failure mode): Reassign the notification to a different failure mode by using the failure mode selection dialog.
Application Help for SAP Predictive Maintenance and Service, cloud editionMachine Learning Engine P U B L I C 329

NoteIf you change the failure mode, the relevance score is replaced with N/A and a new training is required to generate a new score.
8. To confirm the task, choose Save and Confirm.9. To complete the task, choose Activate.
NoteIf you choose Start, you can rework the task.
The task is completed and removed from the table containing all validation tasks and is removed from the Failure Mode Analytics Validation application.
A new validated model is displayed on the Failure Mode Analytics Model Management application.10. To apply your validation, go to the Machine Learning Engine group and open the Failure Mode Analytics
Model Management application.11. Configure a supervised model based on the unsupervised model that you validated, train, and score it. For
more information, see Managing Models for Failure Mode Analytics [page 312].
Results
For the chosen equipment model, your validation results are displayed.
Next Steps
You can now check the validation results in the failure mode analytics functions. For more information, see Using Failure Mode Analytics [page 47].
6.5 Managing Models for Leading Indicators
This topic describes how to manage models used for leading indicators in SAP Predictive Maintenance and Service, cloud edition.
Prerequisites
The following role or roles are assigned to your user:
● For SAP Predictive Maintenance and Service Fiori launchpad: <pdms_DataScienceUser>
330 P U B L I CApplication Help for SAP Predictive Maintenance and Service, cloud edition
Machine Learning Engine

● For SAP Intelligent Asset Management Fiori launchpad: <DataScienceUser> or the two roles <DataScienceRead> and <DataScienceWrite>
NoteIf the required role or roles are not assigned to your user, you cannot see the application on the launchpad. Contact your Identity Management Administrator if the role or roles have not been assigned to your user yet.
Context
To view and analyze the leading indicators that have the highest influence on failures for your equipment and equipment models, you need to determine the leading indicators by configuring and training models in the Leading Indicators Model Management application.
In this process, you configure a model based on the equipment model and optionally failure mode for which you later want to view and analyze the leading indicators. You can do this either for a one piece of equipment or all equipment of the equipment model. You then train the model.
Procedure
1. To train a model, you first need to configure a model. For more information, see Configuring a Model [page 331].
2. Once you have configured a model, you can train it. For more information, see Training a Model [page 335].
6.5.1 Configuring a Model
This topic describes how to configure models used for leading indicators in SAP Predictive Maintenance and Service, cloud edition.
Context
To train a model, you first need to configure a model.
NoteOnce you have configured a model, you can only edit the name and the description of the model. If you delete a configured model, the used data set of the model is deleted if the data set is not used in other models.
Application Help for SAP Predictive Maintenance and Service, cloud editionMachine Learning Engine P U B L I C 331

Procedure
1. On the SAP Fiori launchpad, go to the Machine Learning Engine group and open the Leading Indicators Model Management application.
2. To configure a model, you can choose between the following options:
○ Configure a new model based on an existing model: Select the base configuration and choose Copy. The new configuration contains all settings of the copied configuration.
○ Create a new model from scratch: Choose .
The New Model screen is displayed.3. Fill in all required fields in the General Information section. For more information about the entries to fill in,
see Entries to Configure a Model [page 332].4. Save your model.
Results
Your model is configured and added to the Models pane.
Related Information
Training a Model [page 335]
6.5.1.1 Entries to Configure a Model
Entry Field Mandatory Description
Name x The name of the model
Description - The description of the model
332 P U B L I CApplication Help for SAP Predictive Maintenance and Service, cloud edition
Machine Learning Engine

Entry Field Mandatory Description
Data Set - The data set that you want to use to train the model. You can choose between the following options:
● Generate a data set for the training inputSelect this option when you haven't configured a data set yet as a training input.
● Select an existing data set for the training inputSelect this option when you have already configured a data set as training input.
Equipment Model x The equipment model that you want to use as a basis for the data set. You can choose from all equipment models that were created in the Models application.
NoteThis field is visible only when you have selected the option to generate a data set.
NoteIf you want to include a specific failure mode, select a failure mode in the field below. If you don't want to select a specific failure mode and determine the leading indicators for all failures that occurred in the past, choose Generate Data Set to generate the data set. The generated data set is then displayed in the Training Input field.
Application Help for SAP Predictive Maintenance and Service, cloud editionMachine Learning Engine P U B L I C 333

Entry Field Mandatory Description
Failure Mode - The failure mode that you want to use as a basis for the data set. You can choose from all failure modes that are assigned to the selected equipment model.
NoteThis field is visible only when you have selected the option to generate a data set.
NoteOnce you have selected a failure mode, choose Generate Data Set to generate the data set. The generated data set is then displayed in the Training Input field.
Training Input x The training input for the model training
NoteWhen you have selected the option to generate a data set, the data set is displayed in this field. You can review the generated data set by clicking the training input link.
NoteWhen you have selected the option to select a data set, you select here the data set that you want to use to train the model. You can choose from all configured data sets in the Health Indicator Data Set Configuration application.
To view details about the selected
data set, choose . The data set with its details is then displayed in the Health Indicator Data Set Configuration application in a new tab.
334 P U B L I CApplication Help for SAP Predictive Maintenance and Service, cloud edition
Machine Learning Engine

6.5.2 Training a Model
This topic describes how to train models used for leading indicators in SAP Predictive Maintenance and Service, cloud edition.
Prerequisites
At least one model has been configured.
Context
Once you have configured a model, you can train it.
For more information about the algorithm that is used for the model training, see Decision Tree .
NoteOnce you have trained a model and you delete the trained model, the used data set of the model is deleted in case the data set is not used in other models and the leading indicators with their conditions on the models and equipment page are deleted. If you have created a rule for one condition, this rule is not deleted, and you need to delete it manually.
Procedure
1. On the SAP Fiori launchpad, go to the Machine Learning Engine group and open the Leading Indicators Model Management application.
2. From the Models pane, select the model that you want to train.3. Define the time frame of the data that is used for training by using the New Training From and To fields.4. Choose Start Training.
The training run starts, showing the status in the Trainings table, which can be refreshed by clicking the Refresh button next to the table.
Once the training run is completed, you can see detailed information, a model summary with multiple metrics, and the training job ID by clicking on the log entries in the Log Summary column. For more information about the model summary and the metrics, see Model Summary [page 336].
Results
Your model is trained.
Application Help for SAP Predictive Maintenance and Service, cloud editionMachine Learning Engine P U B L I C 335

Next Steps
You can now view and analyze the leading indicators as follows:
● On the equipment page for one piece of the equipment of the equipment model. For more information, see Viewing and Analyzing Leading Indicators for Equipment [page 100].
● On the models page for all your equipment of the equipment model. For more information, see Viewing and Analyzing Leading Indicators for a Model [page 115].
Related Information
Managing Models for Leading Indicators [page 330]
6.5.2.1 Model Summary
After each training of a model, you can view a model summary. This model summary contains multiple metrics, which help you to understand the trained model better and evaluate and compare the quality of different trained models.
Background Information
When you train a model, metrics containing multiple numeric measurements and a JSON are calculated. These metrics are calculated based on dedicated test data. This means, a test set, representing 10% of the training data is automatically split from the data, and is excluded from the training. The numeric measurements and JSON are calculated by using the test set to compare the model predictions with the actual outcomes of the test data after the training.
336 P U B L I CApplication Help for SAP Predictive Maintenance and Service, cloud edition
Machine Learning Engine

The Metrics of the Model Summary
The following tables provide you with an overview of the metrics with their descriptions:
Numeric Measurements
Metric Description
Accuracy This metric displays the overall fraction of the correctly classified data.
For this metric, values between 0 and 1 are possible. The value 1 refers to a perfect model.
NoteThis metric can be misleading for highly imbalanced data sets.
Kappa This metric adjusts the accuracy based on the expected accuracy provided by the class distribution.
For this metric, values between -1 and 1 are possible. The value 1 refers to a perfect model.
Matthews Correlation Coefficient (MCC) This metric takes class imbalance into account.
For this metric, values between -1 and 1 are possible. The value 0 refers to a random prediction. The value 1 refers to a perfect prediction.
Sensitivity This metric displays the fraction of correctly classified positive cases.
For this metric, values between 0 and 1 are possible. The value 1 refers to a perfect classification of all positive cases.
Specificity This metric displays the fraction of correctly classified negative cases.
For this metric, values between 0 and 1 are possible. The value 1 refers to a perfect classification of all negative cases.
Test set size This metric displays the amount of data that was used to calculate the metrics.
JSON
Metric Description
Feature Importance This JSON displays the importance of each feature for the model as a (feature/ importance) key value pair based on the gain provided by the feature. The feature with the highest value is considered to be the most important feature.
Application Help for SAP Predictive Maintenance and Service, cloud editionMachine Learning Engine P U B L I C 337

7 Administration
The tiles under Administration on the SAP Fiori launchpad give you access to the various administration functions.
Overview of Administration Functions
Tile Use
Company Profile [page 338] Create/display a company profile. You can add locations of your organization, subsidiaries and specify industry IDs.
Application Settings [page 348] Execute configuration tasks for roles and users and configure the Explorer and analysis tools.
User Authorizations [page 359] Define a more granular user authorizations to access SAP Predictive Maintenance and Service.
Data Protection and Privacy (DPP) [page 369] View details regarding your personal data like e-mail address, first name, last name, and user ID and the objects that you have created or modified.
7.1 Managing Company Profile
As an organization administrator, you can edit your organization’s company profile, add locations of your organization, add subsidiaries and maintain Industry IDs of your organization in SAP Predictive Maintenance and Service, cloud edition. You can search for organizations using the industry member names. You can also create locations, contact persons and industry ID's for a subsidiary.
Prerequisites
Your organization and the users of your organization are successfully registered with SAP Predictive Maintenance and Service, cloud edition and you have received the necessary information to logon to the SAP Predictive Maintenance and Service, cloud edition and use the applications of SAP Predictive Maintenance and Service, cloud edition .
Context
You use the Company Profile application to work with the company profile of your organization.
338 P U B L I CApplication Help for SAP Predictive Maintenance and Service, cloud edition
Administration

7.1.1 Adding Location Details of your Organization
Prerequisites
Your user ID either belongs to the groups AIN_ORG_ADMIN, or has the role COMPANYPROFILE_DELETE, COMPANYPROFILE_EDIT assigned.
For more information, see Additional Roles for Master Data, Processes and Administration [page 350].
Procedure
1. Open the Company Profile application.2. Choose Locations.3. Choose New Location.4. In the New Location popup, enter the Location Details and Contact Person Details.
1. For Location Details, enter the values for the fields as described in the table below:
Field Description
Location Name (*) Enter the name of your location.
Street/Number Enter the street and house number information for your location.
Postal Code/City Enter the postal code and city information for your location.
Country (*) Enter the country information for your location.
Phone Number Enter the phone number for your location.
2. For Contact Person Details, enter the values for the fields as described in the table below:
NoteIf you want to use the primary contact person details of your base location, select the checkbox Reuse Primary Contact Person Details.
Field Description
Title Enter the title of your contact person
Application Help for SAP Predictive Maintenance and Service, cloud editionAdministration P U B L I C 339

Field Description
First Name (*) Enter the first name of your contact person
Last Name (*) Enter the last name of your contact person
Phone Number Enter the phone number of your contact person
Email Address (*) Enter the Email address of your contact person
NoteThe information you enter for your contact person will be visible for other companies when they are viewing your company profile.
Therefore, make sure that your contact person is aware of this system behavior, and you only enter a contact person whose tasks include to represent your company location to external business partners.
If you change a contact person, the previously entered contact person data gets overwritten with the new contact person information and cannot be restored.
5. Choose Save.
7.1.2 Updating Location Details of your Organization
Prerequisites
● You have at least one location of your organization in SAP Predictive Maintenance and Service, cloud edition.
● Your user ID either belongs to the groups AIN_ORG_ADMIN, or has the role COMPANYPROFILE_DELETE, COMPANYPROFILE_EDIT assigned.For more information, see Additional Roles for Master Data, Processes and Administration [page 350].
Procedure
1. Open the Company Profile application.2. Choose Locations and select the location you want to edit.3. Choose Edit.4. In the Edit Location pop-up, update the Location Details and Contact Person Details.5. Choose Save.
340 P U B L I CApplication Help for SAP Predictive Maintenance and Service, cloud edition
Administration

7.1.3 Deleting Location Details of your Organization
Prerequisites
● You have at least one location of your organization in SAP Predictive Maintenance and Service, cloud edition.
● Your user ID either belongs to the groups AIN_ORG_ADMIN, or has the role COMPANYPROFILE_DELETE assigned.For more information, see Additional Roles for Master Data, Processes and Administration [page 350].
Procedure
1. Open the Company Profile application.2. Choose Locations and select the location you want to delete.3. Choose Delete.
○ To delete multiple locations, perform these steps:1. Choose the List View icon.2. Select all the locations you wish to delete.3. Choose Delete.
4. Choose OK on the warning message.
7.1.4 Creating Subsidiary Details
You perform this procedure to add your subsidiary company details to the network.
Prerequisites
Your user ID either belongs to the groups AIN_ORG_ADMIN, or has the role COMPANYPROFILE_DELETE, COMPANYPROFILE_EDIT and DOCUMENT_EDIT or DOCUMENT_DELETE assigned.
For more information, see Additional Roles for Master Data, Processes and Administration [page 350].
Application Help for SAP Predictive Maintenance and Service, cloud editionAdministration P U B L I C 341

Procedure
1. Open the Company Profile application.2. Choose Subsidiaries.3. Choose New .4. In the New Subsidiary popup, add the following details:
1. For Subsidiary Details enter the values for the fields as described in the table below:
Field Description
Company Name(*) Name of the subsidiary company
Subsidiary Logo Browse the subsidiary logo and upload
Company Short Name Enter a short name for the subsidiary
Roles (*) Choose the roles from the dropdown
Th following roles are available:○ Bill-To Party○ Insurer○ Manufacturer○ Operator○ Regulator/Authority○ Retailer○ Service Provider○ Ship-To Party○ Software Partner/Content Partner○ Sold-To Party○ Supplier / Dealer
Mnemonics Enter informal names (for example, obsolete company names, abbreviations or potential wrong spellings) of the subsidiary company that may be used for search.
Street/Number Enter the street and house number information for the subsidiary
Postal Code Enter the postal code information for the subsidiary
City Enter the city information for the subsidiary
Country (*) Enter the country information for the subsidiary
Phone Number Enter the phone number of the subsidiary
Web Site (*) Enter the URL of the subsidiary Web site
342 P U B L I CApplication Help for SAP Predictive Maintenance and Service, cloud edition
Administration

Field Description
Acquired Subsidiary Specify if your organization has acquired the subsidiary.
NoteYes/No is a toggle button. If Yes, specify the date you acquired the subsidiary company.
Contact Person Details Enter the contact person title, first name, last name, phone number, and e-mail address
2. For Contact Person Details enter the values for the fields as described in the table below:
NoteThe information you enter for subsidiary contact person will be visible for other companies when they are viewing the subsidiary information in your company profile.
Therefore, make sure that your subsidiary organization is aware of this, and you only enter a subsidiary contact person whose tasks include to represent the subsidiary externally.
If you change a subsidiary contact person, the previously entered subsidiary contact person data gets overwritten with the new subsidiary contact person information and cannot be restored.
Field Desccription
Title Enter the title of the subsidiary contact person
First Name (*) Enter the first name of the subsidiary contact person
Last Name (*) Enter the last name of the subsidiary contact person
Phone Number Enter the phone number of the subsidiary contact person
Email Address (*) Enter the Email address of the subsidiary contact person
5. Choose Save.
Results
The subsidiary company, as a separate entity, cannot create or access business objects in the network.
NoteYou can also create locations and industry IDs for subsidiaries. To do so, open the subsidiary and choose Locations or Industry IDs to maintain the respective information.
Application Help for SAP Predictive Maintenance and Service, cloud editionAdministration P U B L I C 343

7.1.5 Viewing Company Profile
Prerequisites
Your user ID either belongs to the groups AIN_ORG_ADMIN, AIN_ORG_DATA_EXPERT or AIN_ORG_DATA_READ, or has the roles COMPANYPROFILE_DELETE, COMPANYPROFILE_READ, or COMPANYPROFILE_EDIT assigned.
For more information, see Additional Roles for Master Data, Processes and Administration [page 350].
Procedure
1. Open the Company Profile application.2. Choose Locations to view the locations of an organization.3. Choose Subsidiaries to view the list of all the subsidiary companies or acquired companies of an
organization.
Choose Industry IDs to view or search for member IDs or member name as SAP Asset Intelligence Network account has in a specific industry group.
7.1.6 Recording Industry ID Information
You perform this activity to maintain the unique reference number (for example, a vendor ID, a manufacturer ID) your company has with a standard organization that issues such unique IDs.
Prerequisites
Your user ID either belongs to the groups AIN_ORG_ADMIN, or has the role COMPANYPROFILE_DELETE, COMPANYPROFILE_EDIT assigned.
For more information, see Additional Roles for Master Data, Processes and Administration [page 350]
Procedure
1. Open the Company Profile application.2. Choose the Industry IDs tab.3. Choose New.
344 P U B L I CApplication Help for SAP Predictive Maintenance and Service, cloud edition
Administration

4. In the New window, under the Industry ID Detail, fill in Industry Group, Member ID and Member Name.5. Choose Save.
7.1.7 Editing Company Profile
Prerequisites
Your user ID either belongs to the groups AIN_ORG_ADMIN, or has the role COMPANYPROFILE_DELETE, COMPANYPROFILE_EDIT assigned.
For more information, see Additional Roles for Master Data, Processes and Administration [page 350]
Procedure
1. Open the Company Profile application.2. Choose Edit to edit your Company Details and your Primary Contact Person Details
a. In the Edit Company Profile Company Details dialog box, enter the values for the fields as described in the table below:
Field Description
Company Name (*) Enter your company name.
Web Site (*) Enter the URL of your company Web site
Company Logo Browse for and upload the logo of your company.
NoteThe logo will be displayed on the Company Profile, on the Company Details, as well as on list views/grid views that show company information.
Background Image Upload a background image for your company.
Application Help for SAP Predictive Maintenance and Service, cloud editionAdministration P U B L I C 345

Field Description
Company Short Name Enter your company short name
NoteThis short name will be displayed in list/grid views (for example, in Business Partner app), and value helps (for example, Manufacturer/Operator/Service Provider value helps) if it is mainatined.
.
Roles (*) Select additional roles for your company from the dropdown.
NoteThe selected roles will indicate to your business partners in which roles you participate in SAP Predictive Maintenance and Service, cloud edition .
The role selection here also adds your company name to the respective value helps.
Mnemonics Enter informal names (e.g. obsolete company names, abbreviations or potential wrong spellings) for your company that other business partners may search for.
Example:
In Company Profile you entered SAP SE as company name. Some of your business partner may still know your company as SAP AG. If you enter SAP AG in the mnemonic field, business partners in SAP Predictive Maintenance and Service, cloud edition who still search by SAP AG will find you under the official company name SAP SE.
Street/Number Enter the street and house number information for your company.
Postal Code/City Enter the postal code and city information for your company
Country (*) Enter the country information for your company
State/Region Enter the state and region information for your company
Phone Number Enter the phone number for your company.
346 P U B L I CApplication Help for SAP Predictive Maintenance and Service, cloud edition
Administration

b. In the Edit Company Profile Primary Contact Person Details dialog box, enter the values for the fields as described in the table below:
NoteThe information you enter for your primary contact person will be visible for other companies when they are viewing your company profile.
Therefore, make sure that your primary contact person is aware of this system behavior, and you only enter a primary contact person whose tasks include to represent your company to external business partners.
If you change a contact person, the previously entered contact person data gets overwritten with the new contact person information and cannot be restored.
Field Description
Title Enter the title of your primary contact person
First Name (*) Enter the first name of your primary contact person
Last Name (*) Enter the last name of your primary contact person
Phone Number Enter the phone number of your primary contact person
Email Address (*) Enter the Email address of your primary contact person
3. Choose Save.
7.2 Configuring the Document Category
To ensure complete documentation for assets such as models, or equipment, an SAP administrator configures the significance of a document category at the subclass level. As an organization admin, you can set the preference of the document category at the subclass level.
Prerequisites
● Your user ID either belongs to the group ORG_ADMIN or ORG_DATA_EXPERT, or has the roles TEMPLATE_DELETE or TEMPLATE_EDIT assigned.For more information, see Additional Roles for Master Data, Processes and Administration [page 350].
● You have identified the subclass for which you want to configure the documents.
Application Help for SAP Predictive Maintenance and Service, cloud editionAdministration P U B L I C 347

Context
The preference set by the organization administrator overrides the preference set by the SAP administrator for the document category.
Procedure
1. Open the Templates application.2. Search for a subclass template.3. Select a subclass template from the search results.4. In the Template screen, select the DOCUMENT CATEGORIES tab.5. In the DOCUMENT CATEGORIES section, choose Edit and update the category configuration for model and
category configuration for equipment as appropriate.6. Choose Save.
7.3 Application Settings
You must be an organization administrator to perform the activities using Application Settings.
You can perform the following tasks with this application:
● Configure the Explorer and analysis tools (see Explorer and Analysis Tools Configuration [page 386])● Create user information (see Creating User Details [page 354])● Update user information (see Updating User Details [page 355])● Delete user information (see Deleting User Details [page 356])● Configure document size limit: Use this functionality to set the maximum document size limit. This setting
determines the allowed maximum upload size of your documents from the Documents application. For more information, see Configuring Document Upload Size [page 357]
● Configure Prefix: Configuring the Prefix for the Object ID of your Organization [page 356].
NoteOnly premium account holders can maintain prefix. The prefix is valid for its invitees as well. Prefix maintenance section is made non-editable for the invitee administrators.
● Maintain Email domains for Automatic User Creation. Premium accounts can maintain one or more Email domains for their organization.
● Maintain customerspecific list of object types. In the reusable dialog to maintain external IDs, you can optionally select the previously maintained object types to create multiple <External IDs for a system>.
● In the section Organizational Configurations you can:○ Enable User Authorization, and Spare Parts Obsolescence.○ Define the Retention Period for the deleted users after which the users will be permanently deleted
from the system.
348 P U B L I CApplication Help for SAP Predictive Maintenance and Service, cloud edition
Administration

○ Define retention period for offboarding objects.○ Define the Default Scope (in case your organization is working with multiple scopes).○ Define a technical user with user name, user ID and e-mail address.
● You can maintain 2 default indicator names in the header information of all the equipment in your organization using the Header Status section.
● Define the automatic email domains for user under General Application Settings Automatic User Creation .As a premium organization administrator, you have to maintain allowed email domains, relevant for premium organization users, if there are one or more invitee organizations on-boarded using Company Profile app.
NoteThis is to avoid any invitee user from getting on-boarded as premium organization user automatically and hence be able to access premium organization data, which is inappropriate from a security perspective.
● Object Types: The object types are used for external systems integration.To support external object ID mapping, you are provided with a capability to add custom object type, in case a relevant object type is missing in the standard list using Application Settings Object typeAdd .You can use it later for corresponding External ID mapping in Company Profile app.
● Under General Application Settings Bar Code Configurations , you can define the <Prefix> and <Suffix>. You can then use the RFID feature in the Lookup application in devices that support RFID reader.
● You can maintain the default configuration settings for the equipment, model, and system object page under Object Page Configurations.
7.3.1 Configuration Tasks
As an organization admin, you perform several configuration tasks.
The following list provides the list of tasks that an administrator performs:
● Assign roles to the users of your organization (see Additional Roles for Master Data, Processes and Administration [page 350]).
● Configure the Application Settings (see Application Settings [page 348]).● Configure documents at subclass level (see Configuring the Document Category [page 347]).
Application Help for SAP Predictive Maintenance and Service, cloud editionAdministration P U B L I C 349

7.3.1.1 Additional Roles for Master Data, Processes and Administration
SAP Predictive Maintenance and Service, cloud edition provides the following standard role collections for controlling access to master data, processes and administration functions:
● pdms_AssetCoreAdmin - for the administration role● pdms_AssetCoreExpert - for reading, editing, and deleting data● pdms_AssetCoreReader - for reading data
pdms_AssetCoreAdmin has the following scopes:
Scope Description
TEMPLATE_DELETE Templates application.
MODEL_DELETE Create, update, view, or delete a model using the Models application.
EQUIPMENT_DELETE Create, update, view, or delete an item of equipment using the Create, update, view, or delete a model template, equipment and location templates using the Equipment application.
INSTRUCTION_DELETE Create, update, view, or delete an instruction using the Instructions application.
ANNOUNCEMENT_DELETE Create, update, view, or delete an announcement using the Announcements application.
DOCUMENT_DELETE Create, update, view, or delete a model template, equipment andCreate, update, view, or delete a document using the Documents application.
COMPANYPROFILE_DELETE Create, update, view, or delete your organization details using the Company Profile application.
IMPROVEMENT_DELETE Create, update, view or delete improvement cases using the Performance Improvement application
FUNCTIONAL_LOCATION_DELETE Create, update, view or delete locations using the Locations application
PART_DELETE Create, update, view or delete locations using the Spare Parts application
CONFIGURATION_DELETE Perform all configuration tasks using the Application Settings application
350 P U B L I CApplication Help for SAP Predictive Maintenance and Service, cloud edition
Administration

Scope Description
FAILURE_MODE_DELETE Create, update, view or delete failure modes using the Failure Modes application
GROUP_DELETE Create, update, view or delete groups using the Groups application
SYSTEM_DELETE Create, update, view or delete systems using the Systems application
INDICATOR_DELETE Create, update, view or delete indicators.
USER_AUTH_DELETE Create, update, view or delete user authorizations using the User Authorization application.
FINGERPRINT_DELETE Create, update, view or delete fingerprints.
FUNCTION_DELETE Create, update, view or delete functions.
RULES_DELETE Create, update, view or delete rules.
pdms_AssetCoreExpert has the following scopes:
Scope
TEMPLATE_DELETE
MODEL_DELETE
EQUIPMENT_DELETE
INSTRUCTION_DELETE
ANNOUNCEMENT_DELETE
DOCUMENT_DELETE
COMPANYPROFILE_DELETE
IMPROVEMENT_DELETE
FUNCTIONAL_LOCATION_DELETE
PART_DELETE
CONFIGURATION_READ
FAILURE_MODE_DELETE
GROUP_DELETE
SYSTEM_DELETE
INDICATOR_DELETE
USER_AUTH_DELETE
FINGERPRINT_DELETE
FUNCTION_DELETE
Application Help for SAP Predictive Maintenance and Service, cloud editionAdministration P U B L I C 351

Scope
RULES_DELETE
pdms_AssetCoreReader has the following scopes:
Scope Description
TEMPLATE_READ View a model template using the Templates application.
MODEL_READ View a model using the Models application.
EQUIPMENT_READ View an item of equipment using the Equipment application
INSTRUCTION_READ View an instruction using the Instructions application.
ANNOUNCEMENT_READ View an announcement using the Announcements application.
DOCUMENT_READ View an document using the Documents application.
COMPANYPROFILE_READ View your organization details using the Company Profile application
IMPROVEMENT_READ View an improvement case using the Performance Improvement application.
FUNCTIONAL_LOCATION_READ View a location using the Locations app
PART_READ View a spare part using the Spare Parts app
CONFIGURATION_READ View all configurationrelated settings using the Application Settings app
FAILURE_MODE_READ View a failure mode using the Failure Modes application
GROUP_READ View a group using the Groups application
SYSTEM_READ View a system using the Systems application
INDICATOR_READ View indicators.
USER_AUTH_READ View user authorizations using the User Authorization application.
FINGERPRINT_READ View fingerprinst.
FUNCTION_READ View functions.
RULES_READ View rules.
SAC_READ View analytics dasboards.
352 P U B L I CApplication Help for SAP Predictive Maintenance and Service, cloud edition
Administration

There are additional roles that do not belong to any of the groups. The following table lists these roles:
Scope Description
ANNOUNCEMENT_EDIT Create, update, or view an announcement using the Announcements application.
COMPANYPROFILE_EDIT Create, update, or view your organization details using the Company Profile application.
DOCUMENT_EDIT Create, update, or view an document using the Documents application.
EQUIPMENT_EDIT Create, update, or view an item of equipment using the Equipment application.
INSTRUCTION_EDIT Create, update, or view an instruction using the Instructions application.
MODEL_EDIT Create, update, or view a model using the Models application.
TEMPLATE_EDIT Create, update, or view a model template using the Templates application.
IMPROVEMENT_EDIT Create, update or view an improvement case using the Performance Improvement application.
FUNCTIONAL_LOCATION_EDIT Create, update or view a location using the Locations application.
PART_EDIT Create, update or view a spare part using the Spare Parts application.
CONFIGURATION_EDIT Perform all configuration tasks using the Application Settingsapp
FAILURE_MODE_EDIT Create, update or view a failure mode using the Failure Modes application
GROUP_EDIT Create, update or view a group using the Groups application
SYSTEM_EDIT Create, update or view a system using the Systems application
INDICATOR_EDIT Create, update, or view indicators
USER_AUTH_EDIT Create, update or view user authorizations using the User Authorization application.
FINGERPRINT_EDIT Create, update, view or delete fingerprints.
FUNCTION_EDIT Create, update, view or delete functions.
Application Help for SAP Predictive Maintenance and Service, cloud editionAdministration P U B L I C 353

Scope Description
RULES_EDIT Create, update, view or delete rules.
DPP_AUTH role is available for data protection and privacy officers to access the Blocked Users and Logs section in the Data Protection and Privacy application.
As an administrator you can also create users and assign any of the above mentioned roles.
7.3.1.2 Creating User Details
As an administrator you can add the details of the users of your organization to SAP Predictive Maintenance and Service, cloud edition.
Prerequisites
● Your user ID either belongs to the groups ORG_ADMIN, or has the role CONFIGURATION_DELETE, CONFIGURATION_EDIT assigned.For more information, see Additional Roles for Master Data, Processes and Administration [page 350].
● The users that you create have been assigned predefined roles of SAP Predictive Maintenance and Service, cloud edition to access and perform appropriate actions using applications of SAP Predictive Maintenance and Service, cloud edition.
Procedure
1. Open the SAP Cloud Platform Cockpit for your account.
2. Choose Security Authorizations Authorization tab.3. Choose the respective role and assign the user ID to the role. For more information about roles, see
Additional Roles for Master Data, Processes and Administration [page 350]
NoteThe user IDs you assign here are the user IDs you obtained when creating or importing your users in SAP Cloud Platform Identity Administration Console (for more details see Administrator’s Guide for SAP Asset Intelligence Network).
4. Log on to SAP Predictive Maintenance and Service, cloud edition.5. Open the Application Settings application.
6. Navigate to Users Add .a. Choose Add Single User to add a single user only.
Enter the user ID, first and last name, email address and organization name.
354 P U B L I CApplication Help for SAP Predictive Maintenance and Service, cloud edition
Administration

NoteThe user IDs you enter here are the user IDs you obtained when creating or importing your users in SAP Cloud Platform Identity Administration Console (for more details see Administrator’s Guide for SAP Asset Intelligence Network), and which you also used to assign the user to the respective role (see step 3 above).
b. Choose Mass Upload Users to add at multiple users.a. Download the CSV template.b. Enter the user ID, first and last name, email address and organization name in the template.
NoteThe user IDs you enter here are the user IDs you obtained when creating or importing your users in SAP Cloud Platform Identity Administration Console (for more details see Administrator’s Guide for SAP Asset Intelligence Network), and which you also used to assign the user to the respective role (see step 3 above).
c. Upload the CSV template with the user information.7. Choose Save.
7.3.1.3 Updating User Details
If your organization possesses a premium account, as an administrator you can update the details of the users of your organization and your supplier organization in SAP Predictive Maintenance and Service, cloud edition.
Prerequisites
● Your user ID either belongs to the group ORG_ADMIN, or has the roles CONFIGURATION_DELETE or CONIFIGURATION_EDIT assigned.For more information, see Additional Roles for Master Data, Processes and Administration [page 350].
● The users that you create have been assigned predefined roles to access and perform appropriate actions using applications .
Procedure
1. Open the Application Settings application.2. Choose Users.3. Choose More on a user tile, and choose Edit.4. In the Edit User pop-up, update the user details.5. Choose Save.
Application Help for SAP Predictive Maintenance and Service, cloud editionAdministration P U B L I C 355

7.3.1.4 Deleting User Details
You perform this procedure to remove the user from SAP Predictive Maintenance and Service, cloud edition.
Prerequisites
Your user ID either belongs to the group ORG_ADMIN, or has the roles CONFIGURATION_DELETE assigned.
For more information, see Additional Roles for Master Data, Processes and Administration [page 350].
Procedure
1. Open the Application Settings application.
2. Choose Users My Users Users.3. Select the user you want to delete.4. Choose Delete.5. Choose OK on the warning message.6. Open your SAP Cloud Platform account.
7. Navigate to the Security Authorizations tab.8. Choose the respective role and unassign the user ID from the role.
7.3.1.5 Configuring the Prefix for the Object ID of your Organization
You perform this activity to configure the Instruction ID, Document ID and Announcement ID for your organization. Setting a prefix from the Application Settings app determines the object ID while you are creating an instruction, document, and announcement from the respective applications for your organization.
Prerequisites
Your user ID is configured to the group ORG_ADMIN or ORG_DATA_EXPERT.
356 P U B L I CApplication Help for SAP Predictive Maintenance and Service, cloud edition
Administration

Procedure
1. Launch the Application Settings application.2. Choose the General Application Settings tab.3. In the Prefix for Objects created field, input a prefix of 4 characters.4. Click Save.
Note○ This is a one-time activity and you cannot modify or delete the prefix at a later point in time.○ Only premium account holders can maintain prefix. The prefix is valid for its invitees as well. Prefix
maintenance section is made non-editable for the invitee administrators.
7.3.1.6 Configuring Document Upload Size
You perform this activity using the Application Settings application to set the document size limit for upload. This setting determines the document upload size in Documents application.
Prerequisites
Your user ID belongs to the group ORG_ADMIN.
Procedure
1. Launch the Application Settings application.2. Choose the General Application Settings tab.3. Choose Edit.4. Enter the upload size of your choice.5. Choose OK.
Application Help for SAP Predictive Maintenance and Service, cloud editionAdministration P U B L I C 357

7.3.1.7 Configuring Default Indicators in the Header Status
You perform this activity to display default indicators in the header status of a piece of equipment. You can maintain 2 default indicator names in the header information of all the equipment in your organization.
Prerequisites
• Your user ID either belongs to the group ORG_ADMIN or has role CONFIGURATION_EDIT assigned.
Context
You can have exceptions for the default header status based on the subclass used by a piece of equipment. You can define a different set of indicators to be displayed for a listed subclass instead of the default using the Class Configurations.
Procedure
1. Launch the Application Settings application.2. Choose the Equipment under Header Status tab.3. Choose Edit.4. Configure the 2 default status by selecting from the dropdown menu.5. As an optional step, you can maintain the statuses to be displayed for different subclass under Class
Configurations.
You can add, edit, or remove the entries.6. Choose Save.
NoteThe indicators are visible in the header information of a piece of equipment only if the indicators are assigned to the equipment and values are defined for the indicators.
358 P U B L I CApplication Help for SAP Predictive Maintenance and Service, cloud edition
Administration

7.4 User Authorizations
For SAP Cloud Platform - Cloud Foundry Environment
You use this feature to define a more granular access to SAP Predictive Maintenance and Service, cloud edition business objects for users within your organization.
You can use the User Authorization app to:
● Create an organizational hierarchy.● Assign the following to a node in the organizational hierarchy:
○ Role Collections○ Business Objects○ Groups
● Edit the organization hierarchy and its assigned objects.● Delete a node from the organizational hierarchy.
Role collections get assigned to one or more nodes in the organization hierarchy. Users who are part of a user group that is mapped to a role collection (which is assigned to a node in the organizational hierarchy) have access to:
● The business objects and groups assigned to the relevant node in the hierarchy.● The business objects and groups assigned to the sub-nodes of a relevant parent node in the organizational
hierarchy.
Note● The administrator of your organization must be assigned to the root node or parent organizational level
in your organizational hierarchy to have access to all the business objects in your organization.● The level of authorization for each user is defined under <Privilege>.● If a role collection is assigned to multiple nodes in the organizational hierarchy, then the privilege
maintained on the highest level is by default inherited to the sub-nodes. If required you can also edit an inherited privilege on a sub-node.
PrerequisitesThe following objects and object relationships have been configured in SAP Cloud Platform Identity and SAP Cloud Platform Cockpit:
● In SAP Cloud Platform Identity:○ User groups created○ Users assigned to user groups
NoteUsers can also be added to user groups at a later point in time.
● In SAP Cloud Platform Cockpit:
Application Help for SAP Predictive Maintenance and Service, cloud editionAdministration P U B L I C 359

○ Role Collections created○ Mapping of User groups to Role Collections done
NoteAll these set-up steps are not specific to User Authorization but should already have been done during the setting up of roles and onboarding of users to your account.
For more details on these steps, refer to https://help.sap.com/ under Security Guide Setting up Roles and Onboarding Users .
Process Overview
● Enable User authorization in Application Settings General Application Settings Organizational Configurations .
● Create an organizational hierarchy for your organization in User Authorization app.
NoteCurrently, you can have only one organizational hierarchy for your organization.
● Assign role collections to the nodes in your organizational hierarchy in User Authorization app.● Assign business objects to the nodes in your organizational hierarchy in User Authorization app. You can
directly assign business objects to the nodes in your organizational hierarchy in User Authorization app, create a group in Groups app and assign business objects to this group, and then assign the group to a node in your organizational hierarchy in User Authorization app.
ExampleCompany B wants to provide a more granular access to business objects for their internal users, so that their users can only access business objects that are assigned to their area of responsibility. In the example:
● Equipment 2 is to be visible for users assigned to Germany● Equipment 3 is to be visible for users assigned to Germany - North● Equipment 3 and 4 are to be visible for users assigned to Germany - South● Equipment 5 is to be visible for users assigned to Switzerland● Equipment 6 are to be visible for users assigned to Switzerland - North● Equipment 7 are to be visible for users assigned to Switzerland - South● Equipment 1 is to be visible for all areas
NoteThe following example is based on a simple country or region structure, but you can flexibly model other structural elements as well according to your needs.
1. Authorized user at Company B enables user authorization in Application Settings General Application Settings Organizational Configurations .
2. Authorized user at Company B creates an organizational hierarchy in User Authorization app:1. Create root node Company B.
2. Create child node Company B Germany .
3. Create 2 child nodes Company B Germany Germany North and Company B GermanyGermany South
360 P U B L I CApplication Help for SAP Predictive Maintenance and Service, cloud edition
Administration

4. Create a second child node under the root node Company B Switzerland .
5. Create 2 child nodes Company B Switzerland Switzerland North and Company BSwitzerland Switzerland South
3. Authorized user at Company B assigns role collections to the respective nodes in the organizational hierarchy:1. Assign an admin role collection (= role collection to which your admin user group is assigned) to the
root node Company B and provide respective privileges, which the user is to have on the business objectsUsers assigned to the user group which is mapped to the role collection that is assigned to the root node can access all of the business objects assigned to the child nodes with the maintained privilege.
NoteIt is recommended to add at least one admin user as well as substitutes to the admin user group assigned to the root node to ensure that there is always at least one user in the organization who has full access to all objects.
2. Assign other role collections to the respective nodes in the organizational structure and provide respective privileges the users in the associated user group are to have on the business objects.Role collections can be assigned to one or more nodes in the organizational structure. If a role collection is assigned to a node, which has further child nodes, the users in the associated user group can access the business objects assigned to the current node as well as all of the child nodes with the maintained privilege.
Result: Authorized user of Company B created their organizational hierarchy and assigned role collections.
Application Help for SAP Predictive Maintenance and Service, cloud editionAdministration P U B L I C 361

4. Authorized user at Company B assigns equipment to the relevant nodes in the organizational hierarchy in User Authorization app.
1. Assign Equipment 1, 2, 5, and 8 to node Company B Germany .
2. Assign Equipment 6 and 7 to node Company B Germany Germany South .
3. Assign Equipment 3, 4, and 8 to node Company B Switzerland .Result:Authorized user of Company B assigned all relevant business objects to the relevant nodes in the organizational hierarchy.
362 P U B L I CApplication Help for SAP Predictive Maintenance and Service, cloud edition
Administration

NoteOnce a business object was assigned to a node in the organizational hierarchy, this business object is only visible to the users assigned to the user groups which are mapped to one or more role collections that are assigned to the respective node in the organizational hierarchy.
Business objects that are not assigned to the organizational hierarchy, are still accessible to everyone in the organization.
Example:Equipment 2 was assigned to hierarchy node Company B Germany, so only users who belong to a user group that is mapped to the role collections assigned to hierarchy node Company B Germany and have either EQUIPMENT_READ or EQUIPMENT_EDIT or EQUIPMENT_DELETE privileges can now view, edit, or delete this equipment.
Equipment 10 was not/neither directly assigned to a node in the authorization hierarchy nor belongs to any group which is assigned to a node in the authorization hierarchy, so all users of Company B with EQUIPMENT_READ or EQUIPMENT_EDIT or EQUIPMENT_DELETE privileges can view, edit, or delete this equipment.
7.4.1 Tasks in SAP Leonardo IoT
System Setup
The steps are required to sync the user authorizations to the SAP Leonardo IoT tenant to access Things and respective related information:
1. Create the root authorization unit using the User Authorization application.Configuration on SAP Leonardo IoT Tenant
Application Help for SAP Predictive Maintenance and Service, cloud editionAdministration P U B L I C 363

2. Create the corresponding object group under the tenant using the organization unit ID created, as above. For more information, refer SAP Leonardo IoT→ End-User Information → Tenant Administration Apps → Object Authorizations Overview → Create an Authorization Group.
3. Create a new collection for the tenant
NoteAssign the tenant only to the tenant root and not to any underlying groups including the group created above. For more information, refer SAP Leonardo IoT→End-User Information →Tenant Administration Apps →Object Authorizations Overview → Create a Collection
.
4. Using Capabilities, create a new capability of type Thing using the collection created, as above, and assign the required actions. Within Conditions, select the following, assigned authorization group and is element of from the dropdown. This is the default privilege for the things that are assigned to the tenant root. For more information, refer SAP Leonardo IoT → End-User Information → Tenant Administration Apps → Object
364 P U B L I CApplication Help for SAP Predictive Maintenance and Service, cloud edition
Administration

Authorizations Overview → Create a Capability.
5. Using the User Groups application, assign the newly created capability to the user group or role collection.
NoteFor new tenants, role collections can be assigned while defining the capabilities using the New Capability Dialog.
For more information, refer SAP Leonardo IoT → Tenant Administration Apps → User Groups: Overview → Create a User Group.
7.4.2 Creating Organizational Hierarchy
You perform this activity to define a new organizational hierarchy for your organization.
Prerequisites
Your user ID either belongs to thegroup ORG_ADMIN or ORG_DATA_EXPERT, or has the roles USER_AUTH_DELETE, or USER_AUTH_EDIT assigned.
For more information, see Additional Roles for Master Data, Processes and Administration [page 350].
Procedure
Creating Single Organizational Unit
Application Help for SAP Predictive Maintenance and Service, cloud editionAdministration P U B L I C 365

1. Open the User Authorization app.
2. Choose New Single Organizational Unit .3. In the New Organizational Unit dialog box, provide the appropriate organizational unit name, short and
long descriptions.4. Choose OK.
Creating Multiple Organizational Units5. Open the User Authorization app.
6. Choose New Multiple Organizational Units .7. In the Multiple Organizational Units dialog box, download the CSV template.8. Enter the organizational unit name, short and long descriptions, and parent organizational unit name in the
template.
Note○ Root organization is an organization that does not have any parent organization unit. It is
mandatory for every organization to have parent organization except for root organizations.○ You can have only one root organization.○ You cannot maintain duplicate organization entries
9. Upload the CSV template with the organizational information.
NoteUpload CSV can only be used if there is no organizational units created or maintained in the organization structure.
10. Choose Upload.
Results
System creates a node or multiple nodes in the organizational hierarchy to which you can add users, business objects, and groups.
7.4.3 Assigning Business Objects
Context
You perform this activity to assign the relevant business objects to the selected node in the organizational hierarchy.
366 P U B L I CApplication Help for SAP Predictive Maintenance and Service, cloud edition
Administration

Procedure
1. Open the User Authorizations app.2. Select a node in the organizational hierarchy.3. Select the relevant business object like model, locations in the Business Objects section in the object page
of the selected node. For example, you have selected Models.
You can share the following business objects:○ Models○ Equipment○ Announcements○ Templates○ Documents○ Instructions○ Locations○ Spare Parts○ Systems○ Failure Modes
You can only assign published failure modes to the selected node in the organizational hierarchy.○ Attributes○ Attribute Groups○ Indicators○ Indicator Groups
4. Choose Assign in the Models section.5. Select the relevant models in the Select Models window.6. Choose Assign to save the changes.
7.4.4 Assigning Groups
You perform this activity to assign the relevant groups to the selected node in the organizational hierarchy.
Prerequisites
You have created one or more groups in the Groups app. You have assigned the business objects that you want to use for user authorization to these groups.
Procedure
1. Open the User Authorizations app.
Application Help for SAP Predictive Maintenance and Service, cloud editionAdministration P U B L I C 367

2. Select a node in the organizational hierarchy.3. Choose Assign in the Groups tab in the object page of the selected node.4. Select the relevant groups in the Select Groups window.5. Choose Assign to save the changes.
7.4.5 Deleting an Organizational Unit
Context
You perform this activity to delete an existing node from the organizational hierarchy.
Procedure
1. Open the User Authorizations app.2. Select the node from the organizational hierarchy that you want to delete.3. Choose Delete in the object page of the selected node4. Choose OK on the confirmation message dialog box.
7.4.6 Assigning Role Collections
Context
You perform this activity to add role collections to the selected node in the organizational hierarchy.
NoteAll the assigned role collections have authorizations to access all the business objects and groups associated with the node in the organizational hierarchy at this level and all the subnodes of this level.
368 P U B L I CApplication Help for SAP Predictive Maintenance and Service, cloud edition
Administration

Procedure
1. Open the User Authorization app.2. Select a node in the organizational hierarchy.3. Select Edit in the Role Collections section of the organizational hierarchy object page.4. Choose Assign.5. Select the relevant role collections in the Select Role Collections window.6. Choose Add.7. Define the level of authorization for each role collections in the Privilege field.
By default, the role collections have read access.8. Choose Save.
7.5 Data Protection and Privacy (DPP)
Data protection is associated with numerous legal requirements and privacy concerns. In addition to compliance with general data privacy regulation, it is necessary to consider compliance with industryspecific legislation in different countries. SAP provides specific features and functions to support compliance with regards to relevant legal requirements, including data protection.
SAP does not give any advice on whether these features and functions are the best method to support company, industry, regional, or countryspecific requirements. Furthermore, this information does not give any advice or recommendation in regards to additional features that would be required in particular IT environments; decisions related to data protection must be made on a case-by-case basis, under consideration of the given system landscape and the applicable legal requirements.
Introduction
The Data Protection and Privacy (DPP) application can be used by data subjects and data admins. As a data subject, you can view your own personal data stored in SAP Predictive Maintenance and Service, on premise edition. A data admin can view and delete one's own personal data and personal data of any other data subject.
Related Information
Information Report [page 369]
7.5.1 Information Report
The DPP application supports you to be compliant with the Information Report section of Data Privacy and Protection.
Application Help for SAP Predictive Maintenance and Service, cloud editionAdministration P U B L I C 369

You can view details regarding your personal data like e-mail address, first name, last name, and user ID and the objects that you have created or modified.
If you have an admin role, then you can view the list of users, their personal data, and the list of objects that each user has created or modified. If the user is a functional location or company profile contact person, then you can view their personal data as well as relevant address details.
In SAP Predictive Maintenance and Service (PdMS), cloud edition, a user can view the personal data whereas a user with the admin role can delete or remove own personal data or personal data of any other data subject.
Related Information
Data Protection and Privacy (DPP) [page 369]
370 P U B L I CApplication Help for SAP Predictive Maintenance and Service, cloud edition
Administration

8 Configuring SAP Predictive Maintenance and Service, cloud edition
Context
To configure SAP Predictive Maintenance and Service, cloud edition, it is recommended to follow the configuration order described in this chapter.
Procedure
1. Configure application settings as described in the chapter Application Settings [page 348]2. Configure equipment modeling capabilities. For more information, see https://help.sap.com/viewer/
067e3d8253654398996ec49271b7441a/1906/en-US/697e20cec0af47d798ea3b76e637c893.html3. Create and publish your required equipment. For more information, see Creating a Piece of Equipment
[page 73] and the topic Important Information When Creating Equipment in SAP Predictive Maintenance and Servie, cloud edition in the Getting Started guide
4. Create alert types for alerts as described in Adding Alert Types [page 227]5. For the alert type created using step 4, the alerts can be created as described in Creating Alerts [page 374]6. Configure the machine learning engine as described in the chapters Machine Learning Engine [page 251].7. Perform all configuration steps for analytics dashboards as described in the chapter Configuring SAP
Analytics Cloud and Analytics Dashboards [page 378].8. Configure the Explorer and analysis tool variants as described in the chapter Explorer and Analysis Tools
Configuration [page 386].
8.1 Accessing Applications and Functions
Here is an overview of how to reach the various applications and functions for SAP Predictive Maintenance and Service, cloud edition
Access URLs
You can access the SAP Fiori launchpad URLs by choosing Go to Application on the subscription applications in SAP Cloud Platform Cockpit. For more information, see Setting up Account.
Application Help for SAP Predictive Maintenance and Service, cloud editionConfiguring SAP Predictive Maintenance and Service, cloud edition P U B L I C 371

The SAP Fiori launchpad URLs give you access to all the available applications. There are two types of SAP Fiori launchpad available. The individual SAP Fiori launchpad for SAP Predictive Maintenance and Service, cloud edition and the SAP Intelligent Asset Management Fiori launchpad that includes the applications from the SAP Intelligent Asset Management relevant products on a single SAP Fiori launchpad based on your subscriptions.
The following table provides you with an overview of all URLs depending on your licenses:
Access To URL
SAP Predictive Maintenance and Service Fiori launchpad for a standard license
https://<subaccount>.pdms-sap.cfapps.eu10.hana.ondemand.com
SAP Predictive Maintenance and Service Fiori launchpad for a test and demo license
https://<subaccount>.pdms-sap-pr.cfapps.eu10.hana.ondemand.com
SAP Intelligent Asset Management Fiori launchpad for a standard license
https://<subaccount>.iam.cfapps.eu10.hana.ondemand.com
SAP Intelligent Asset Management Fiori launchpad for a test and demo license
https://<subaccount>.iam-pr.cfapps.eu10.hana.ondemand.com
Please contact your Identity Management Administrator if you cannot see the applications you require. They will ensure the appropriate role collection is assigned to your user.
8.2 Equipment Modelling
The procedure to model equipment is as follows:
1. Create indicator groups and indicators (Optional)2. Create attribute groups and attributes (Optional)3. Create alert types and Create alert type groups4. Create model template
○ Assign attribute groups to model template○ Assign indicator groups to model template
5. Create model from model template6. Assign alert type group to model (Optional)7. Create a piece of equipment
Note● While creating an equipment, the IoT sync button should be set to Yes,by default.● Once the equipment is published, two external IDs are created.
372 P U B L I CApplication Help for SAP Predictive Maintenance and Service, cloud editionConfiguring SAP Predictive Maintenance and Service, cloud edition

8.3 Creating Equipment
On the SAP Fiori launchpad under Master Data you can find all the functions you need to create equipment and its associated data.
To create equipment, you use a model template to create a model and assign the model to the equipment. These prerequisites are described below. For information about creating equipment, see Creating a Piece of Equipment .
For more general information about equipment, see Managing Equipment.
NoteOnce you have created your equipment do not forget to publish it.
Prerequisites
● Create a model template. A model template is used to define metadata for a model. It inherits a subclass template or other model template and has additional attribute groups and attributes. For information about creating a model template, see Creating a Model Template [page 232]. For more general information about templates, see Managing Templates [page 211].
● Create a model. A model is an abstract representation from the manufacturer that defines all maintenance and specification information related to a new or existing product. A physical equipment is an instance of a model.A model is based on a model template and allows users to add values to the definitions used in the underlying template. For information about creating a model see Creating a Model [page 105]. To add model components, refer to Adding Model Components [page 111]. For more general information, see Managing Models [page 104].
Related Information
Configuring SAP Predictive Maintenance and Service, cloud edition [page 371]
8.4 Equipment Alarms
Alerts can also be created by alarms raised by equipment. The configuration for the equipment alarms mapping details allow the equipment to send alerts. In a scenario where validation is required with alarms to raise an alert, a trigger based rule must be defined
Procedure
Application Help for SAP Predictive Maintenance and Service, cloud editionConfiguring SAP Predictive Maintenance and Service, cloud edition P U B L I C 373

1. Define alert type for error codes: Navigate to Templates → Alert Types → New. The origin should be Equipment. You can also define the deduplication configuration to reduce the duplication of similar alerts. For more information, refer Adding Alert Types [page 227]
2. Define alert type groups for the alert type created. For more information, refer Adding Alert Type Groups [page 230]
3. Assign the alert type group to the model, which in turn will assign all alert types to the model and available for equipment derived from model. For more information, refer Assigning Alert Type Groups to a Model [page 113]
4. Create configuration file for the equipment, that have configured required to setup a specific connector instance.
5. You can also define a rule if any other condition need to be checked during alert generation from the equipment alarm. In such a scenario, you can define a trigger based alarrm using the Rules creation page. Add a condition that will be validated before creating the alert. For more information, refer Creating Rules [page 245]
Related Information
Creating Alerts [page 374]Creating Rules [page 245]
8.5 Creating Alerts
You can create alerts for the alert types using the following service:
Request
● URL: https://<Application_URL>/ain/services/api/v1/alerts
NoteDo not call SAP IoT Application Enablement APIs directly as it will impact deduplication and other processing logic.
Event Object Properties
Property TypeMandatory (For Alerts)
Maximum Length Sample Value
Corresponding Alerts Column Name
Corresponding Alerts Column Description
correlationId numeric No 32 854417525154 Not displayed Unique identifier to group all related events
374 P U B L I CApplication Help for SAP Predictive Maintenance and Service, cloud editionConfiguring SAP Predictive Maintenance and Service, cloud edition

Property TypeMandatory (For Alerts)
Maximum Length Sample Value
Corresponding Alerts Column Name
Corresponding Alerts Column Description
businessTimeStamp
string Yes 24 2018-04-04T10:00:00Z
Created, Last Updated
Business timestamp corresponding to the event that is created. UTC timestamp
type string Yes 71 sap-iotaeexplorer.pdms.events:AlertsPST
Type Type of event. Format is <tenant>.pdms.events:AlertsPST. This is used in 2D chart and the format must be followed.
eventType string Yes 81 sap-iotaeexplorer.pdms.events:E_TemperatureExceeded
Alert Type Name of the alert type. Format is <teanant>.pdms.events:E_<AlertTypeName>
status string Yes 50 New Status Status of event. Only New is allowed.
code string No 32 ErrorCode Code This field corresponds to error code field defined during alert type creation
severity integer Yes 1
Severity types:
● Information (1)
● Warning (2)
● Error (3)
Severity Severity of the event. This value is selected when creating alert type with the options: Information(1), Warning(2), and Error(3).
Application Help for SAP Predictive Maintenance and Service, cloud editionConfiguring SAP Predictive Maintenance and Service, cloud edition P U B L I C 375

Property TypeMandatory (For Alerts)
Maximum Length Sample Value
Corresponding Alerts Column Name
Corresponding Alerts Column Description
thingId String Yes 32 6DAC315F180940CB9AAFDC32EE808BC0
Compnent ID Thing ID corresponding to the event created. You can get this value from the external ID hyperlink provided in the Equipment page. Other columns such as the Equipment ID, Equipment Name,Equipment External ID, Component Name, and Component External ID are derived using this information
thingProperty String Yes 255 sap-iotaeexplorer.com.sap.asset.tt:M_200_Series/IG_Rotating_Equipment_Mea/I_Bearing_Temperature
Measured Property
Thing property corresponding to the event created. Format is <tenant>.com.sap.asset.tt:M_<ModelName>/IG_<Indicator Group Name>/I_<Indicator name>
AlertDescription
String Yes 50 Bearing overheating
Description
376 P U B L I CApplication Help for SAP Predictive Maintenance and Service, cloud editionConfiguring SAP Predictive Maintenance and Service, cloud edition

Property TypeMandatory (For Alerts)
Maximum Length Sample Value
Corresponding Alerts Column Name
Corresponding Alerts Column Description
AlertSource String Yes 50 Machine Source Machine indicates that the alerts are created by machine and not by rules. Rule indicates otherwise.
Created Timestamp
String Yes 24 2018-04-04T10:00:00Z
Sample Code
{ "correlationId": "854417525154", "businessTimeStamp": "2018-04-04T10:00:00Z", "type": "<tenant>.pdms.events:AlertsPST", "eventType": "<tenant>.pdms.events:E_<AlertTypeName>", "status": "New", "severity": 2, "code": "ErrorCode", "thingId": "6DAC315F180940CB9AAFDC32EE808BC0", "thingProperty": "<tenant>.com.sap.asset.tt:M_<Model name>/IG_<Indicator group name>/I_<Indicator name>", "alert_details": { "AlertDescription": "Bearing Overheating", "AlertSource": "Machine" "CreatedTimeStamp":"2018-08-08T10:22:00Z" }}
NoteStatus should be New
Values of created timestamp should be same as business timestamp
Value of severity should be same as mentioned in AlertType
Code value should be same as error code as mentioned while creating AlertType. If no error code is defined, use None
Indicator value should be the same as used while creating the alert type
Event type can be fetched from the AlertType External ID that is available in the Alert Type list view
Thing ID corresponds to equipment IDs external ID and can be fetched from Equipment's pdmsSysThing external ID from the Equipment page under the External ID hyperlink
Application Help for SAP Predictive Maintenance and Service, cloud editionConfiguring SAP Predictive Maintenance and Service, cloud edition P U B L I C 377

Response
Response Status and Error Codes
Code Description
201 An event with correlation ID created
For more information, refer SAP Leonardo IoT
Related Information
Configuring SAP Predictive Maintenance and Service, cloud edition [page 371]
8.6 Configuring SAP Analytics Cloud and Analytics Dashboards
This topic describes how to configure SAP Analytics Cloud and analytics dashboards in SAP Predictive Maintenance and Service, cloud edition to view analytics dashboards.
Context
In order that a business user can view analytics dashboards in SAP Predictive Maintenance and Service, cloud edition, multiple steps are required.
Procedure
Steps related to SAP Analytics Cloud:1. Request a license for SAP Analytics Cloud and activate your account. For more information about SAP
Analytics Cloud, see SAP Analytics Cloud .2. Create a data connection in SAP Analytics Cloud to use data from SAP Predictive Maintenance and
Service, cloud edition. For more information, see Import Data Connection to OData Services.
378 P U B L I CApplication Help for SAP Predictive Maintenance and Service, cloud editionConfiguring SAP Predictive Maintenance and Service, cloud edition

3. Create a model in SAP Analytics Cloud. For more information, see Creating Your First Model and Creating a New Model.
4. Create a story in SAP Analytics Cloud. For more information, see Creating Your First Story and Creating a New Story.
5. Set up a data replication schedule in SAP Analytics Cloud to regularly refresh data from your data source. For more information, see Updating and Scheduling Models.
6. Create a new user in SAP Analytics Cloud for the user from SAP Predictive Maintenance and Service, cloud edition who wants to view analytics dashboards and assign the BI Content Viewer role with read privileges to the user. For more information, see Creating a New User and Assigning Roles to Users.
NoteThe user is identified by the email address. This means that the email address needs to be the identical in both systems so that the user can view analytics dashboards later.
7. Share the story with the created user. For more information, see Sharing Stories.
TipTo easily share a story with multiple users, we recommend to create teams and share stories with teams including different users. For more information about creating teams, see Creating Teams.
Steps related to SAP Predictive Maintenance and Service, cloud edition:8. Create a destination for SAP Analytics Cloud. For more information, see Creating a Destination for SAP
Analytics Cloud [page 380].9. Configure SAP Analytics Cloud as an external system in SAP Predictive Maintenance and Service, cloud
edition. For more information, see Configuring SAP Analytics Cloud in SAP Predictive Maintenance and Service, cloud edition .
10. Configure the analytics dashboards types in SAP Predictive Maintenance and Service, cloud edition. For more information, see Configuring Analytics Dashboard Types [page 382].
Related Information
Analytics Dashboards [page 55]SAP Analytics Cloud
Application Help for SAP Predictive Maintenance and Service, cloud editionConfiguring SAP Predictive Maintenance and Service, cloud edition P U B L I C 379

8.6.1 Creating a Destination for SAP Analytics Cloud
This topic describes how to create a destination for SAP Analytics Cloud using OAuth2SAMLBearerAssertion authorization flow.
Prerequisites
You have performed all steps related to SAP Analytics Cloud. For more information, see Configuring SAP Analytics Cloud and Analytics Dashboards [page 378].
Procedure
1. Go to SAP Cloud Platform Cockpit (https://account.hana.ondemand.com/#/home/welcome).
2. Choose Tenant Connectivity Destinations .3. The Destination Configuration screen is displayed.4. Fill in the following fields:
Name SAC
Type HTTP
Description Enter a description to provide additional information.
URL Copy and paste your home URL when you log on to SAP Analytics Cloud.
Proxy Type Internet
Authentication OAuth2SAMLBearerAssertion
Audience Paste the entity ID from SAP Analytics Cloud (SAC).
To paste the entity ID, open the URL https://<SAC_tenant_subdomain>.authentication.sap.hana.ondemand.com/info. For example, https://acme.authentication.sap.hana.ondemand.com/info. The entity ID is then displayed in the response.
380 P U B L I CApplication Help for SAP Predictive Maintenance and Service, cloud editionConfiguring SAP Predictive Maintenance and Service, cloud edition

Client Key Paste your client secret from SAP Analytics Cloud.
To paste the client secret, open SAP Analytics Cloud and create a new OAuth client for SAP data center with Interactivate Usage as purpose. The client secret is then displayed.
CautionDo not share this client secret with anyone.
For more information about creating OAuth clients, see Managing OAuth Clients.
Token Service URL Paste your token service URL from SAP Analytics Cloud.
To paste the token service URL, open the URL https://<SAC_tenant_subdomain>.authentication.sap.hana.ondemand.com/oauth/token/alias/<SAC_tenant_entity ID>. For example, https://acme.authentication.sap.hana.ondemand.com/oauth/token/alias/acme.live. The token service URL is then displayed in the response.
Token Service URL Type Dedicated
Token Service User Paste your client ID from SAP Analytics Cloud.
The client ID is displayed when you have added a new OAuth client.
Token Service Password Paste your client secret from SAP Analytics Cloud.
The client secret is displayed when you have added a new OAuth client.
System User Leave this field empty.
5. Choose New Property.
The Additional Properties fields are displayed.6. In the left field, enter authnContextClassRef .7. In the right field, enter urn:oasis:names:tc:SAML:2.0.8. Activate the Use default JDK truststore checkbox if it is not activated.9. Choose Save.
Results
The authorization for SAP Analytics Cloud is created.
Application Help for SAP Predictive Maintenance and Service, cloud editionConfiguring SAP Predictive Maintenance and Service, cloud edition P U B L I C 381

Related Information
Configuring SAP Analytics Cloud and Analytics Dashboards [page 378]
8.6.2 Configuring Analytics Dashboard Types
This topic describes how to configure analytics dashboard types in SAP Predictive Maintenance and Service, cloud edition.
Prerequisites
● You have configured SAP Analytics Cloud as an external system in SAP Predictive Maintenance and Service, cloud edition. For more information, see Configuring SAP Analytics Cloud in SAP Predictive Maintenance and Service, cloud edition.
● One of the following roles is assigned to your user:○ CONFIGURATION_EDIT○ CONFIGURATION_DELETE
Procedure
1. On the SAP Fiori launchpad, go to the Administration group and open the Application Settings application.
2. To configure analytics dashboards, choose (Analytics Dashboards).
The Analytics Dashboards configuration screen is displayed.3. To configure analytics dashboard types, choose between the following options:
○ Configure analytics dashboards for the application. For more information, see Configuring Analytics Dashboards for the Application [page 383].
○ Configure analytics dashboards for the object pages. For more information, see Configuring Analytics Dashboards for the Object Pages [page 384].
Results
The analytics dashboard types are configured. Depending on your configuration, the business user can now view the dashboard either in the Analytics Dashboards application or on the respective object pages. For more information, see Viewing Analytics Dashboards in the Application [page 57] and Viewing Analytics Dashboards on Object Pages [page 58].
382 P U B L I CApplication Help for SAP Predictive Maintenance and Service, cloud editionConfiguring SAP Predictive Maintenance and Service, cloud edition

You can later edit configured dashboards by selecting the dashboard and choosing Edit. You can also delete dashboards by either selecting the dashboard and choosing Delete when you have configured a dashboard for the application or choosing Edit and deleting the story URL in the dialog box when you have configured a dashboard for the object pages. Once you have deleted a dashboard, it is no longer available for the business user.
Related Information
Configuring SAP Analytics Cloud and Analytics Dashboards [page 378]
8.6.2.1 Configuring Analytics Dashboards for the Application
This topic describes how to configure analytics dashboards for the Analytics Dashboards application in SAP Predictive Maintenance and Service, cloud edition.
Context
When configuring analytics dashboards, you have different options. One option is to configure analytics dashboards for the application.
Procedure
1. In the Analytics Dashboards configuration screen, choose Add under Analytics Dashboards Application.
The Add Analytics Dashboard dialog box is displayed.2. Fill in the following entries:
Title Enter a name for the dashboard. This name is later displayed in the Analytics Dashboards application.
Application Help for SAP Predictive Maintenance and Service, cloud editionConfiguring SAP Predictive Maintenance and Service, cloud edition P U B L I C 383

Story URL Paste the URL of your story from SAP Analytics Cloud.
To paste the URL, open a story in SAP Analytics Cloud (SAC), copy the URL, replace the <hostname:router> from the story URL with your SAP Predictive Maintenance and Service, cloud edition (PdMS) tenant, and add the parameter ;mode=embed at the end of the URL.
Examplehttps://<hostname:router from PdMS>/sap/fpa/ui/tenants/<SAC_tenant>/app.html#;view_id=story;storyId=<story_id>;mode=embed
3. Choose OK.
Results
The dashboard for the application is configured.
Related Information
Configuring Analytics Dashboard Types [page 382]
8.6.2.2 Configuring Analytics Dashboards for the Object Pages
This topic describes how to configure analytics dashboards for the object pages in SAP Predictive Maintenance and Service, cloud edition.
Context
When configuring analytics dashboards, you have different options. One option is to configure analytics dashboards on the object pages.
384 P U B L I CApplication Help for SAP Predictive Maintenance and Service, cloud editionConfiguring SAP Predictive Maintenance and Service, cloud edition

Procedure
1. In the Analytics Dashboards configuration screen, select the business object for which you want to configure an analytics dashboard under Object Pages.
2. Choose Edit.
The Edit Analytics Dashboard dialog box for the business object is displayed.3. Fill in the following entries:
Story URL Paste the URL of your story from SAP Analytics Cloud.
To paste the URL, open a story in SAP Analytics Cloud (SAC), copy the URL, replace the <hostname:router> from the story URL with your SAP Predictive Maintenance and Service, cloud edition (PdMS) tenant, and add the parameter ;mode=embed at the end of the URL.
ExampleThe following example shows the structure of the URL: https://<hostname:router from PdMS>/sap/fpa/ui/tenants/<SAC_tenant>/app.html#;view_id=story;storyId=<story_id>;mode=embed
Data Model ID Paste the model ID of your story from SAP Analytics Cloud. The model ID filters the story data by a specific business object, for example, a piece of equipment.
To paste the model ID, open a model in SAP Analytics Cloud (SAC) and copy the model ID from the displayed model URL.
ExampleThe following example shows the structure of the URL with the model ID at the end: https://<system URL from SAC>/sap/fpa/ui/app.html#;view_id=model;modelId=<model_id>
Application Help for SAP Predictive Maintenance and Service, cloud editionConfiguring SAP Predictive Maintenance and Service, cloud edition P U B L I C 385

Dimension The dimension of your business object. The dimension filters the story data by a specific business object ID, for example, the ID of a piece of equipment
You can enter the following dimensions:○ <internalId> for equipment, models, and locations
○ <sparepartinternalID> for spare parts.
4. Choose OK.
Results
The dashboard for the business object is configured.
Related Information
Configuring Analytics Dashboard Types [page 382]
8.7 Explorer and Analysis Tools Configuration
Configuration options for analysis tool variants and the Explorer can be found in a dropdown within Application Settings.
Prerequisites
The role collection PDMS_CONFIG is assigned to your user.
Accessing the Configuration Dropdown
Go to the SAP Fiori launchpad under Administration Application Settings Explorer and Analysis Tools Configuration .
386 P U B L I CApplication Help for SAP Predictive Maintenance and Service, cloud editionConfiguring SAP Predictive Maintenance and Service, cloud edition

Preconfigured Variants
In addition to variants that you configure, we also deliver preconfigured variants. For more information, see Preconfigured Variants [page 388].
Overview of Functions in the Configuration Dropdown
Configuration Entry More Information Type of Configuration
Alerts Entries to Configure Alerts [page 389] Analysis tool with variants
Equipment Indicators Entries to Configure Equipment Indicators [page 391]
Analysis tool with variants
Explorer Entries to Configure the Explorer [page 392]
Application
Explorer Global Filter Entries to Configure the Explorer Global Filter [page 393]
Filter with variants
Indicator Chart Entries to Configure the Indicator Chart [page 394]
Analysis tool with variants
Map Entries to Configure the Map [page 396]
Analysis tool with variants
Notifications Entries to Configure Notifications [page 402]
Analysis tool with variants
Work Orders Entries to Configure Work Orders [page 403]
Analysis tool with variants
Equipment Scores (Obsolete) Entries to Configure Equipment Scores (Obsolete) [page 405]
Analysis tool with variants
Overview of Functions in the Explorer and Analysis Tool Configuration Screens
Function Description
Add Add a new configuration variant.
Save Save your configuration.
Cancel While configuring, you can cancel your configuration.
Copy Copy an existing configuration variant and adjust it.
Application Help for SAP Predictive Maintenance and Service, cloud editionConfiguring SAP Predictive Maintenance and Service, cloud edition P U B L I C 387

Function Description
Delete Delete an existing configuration variant.
Restore Default Restore a preconfigured variant in case you deleted it.
NoteIn the Explorer Configuration, the following functions do not exist, as the Explorer has only one variant:
● Add● Copy● Delete● Restore Default
NoteFor information on the supported user interface (UI) languages, refer SAP Predictive Maintenance and Service, cloud edition 1906 [page 6]
Related Information
Configuring SAP Predictive Maintenance and Service, cloud edition [page 371]
8.7.1 Preconfigured Variants
With every release, we deliver preconfigured variants in addition to the variants that you can configure. This allows a business user to immediately start working with the Explorer.
Overview of the Preconfigured Variants
We deliver the following preconfigured variants:
● A preconfigured variant for each analysis tool● A preconfigured variant for the Explorer global filter● A preconfigured variant for the Explorer including all analysis tools with their preconfigured variants
The settings of the preconfigured variants can differ in every release.
388 P U B L I CApplication Help for SAP Predictive Maintenance and Service, cloud editionConfiguring SAP Predictive Maintenance and Service, cloud edition

Working with the Preconfigured Variants
You can work with the preconfigured variants as follows:
Preconfigured Variant for Each Analysis Tool and for the Explorer Global Filter
● You can copy the preconfigured variants for the analysis tools and the preconfigured variants for the Explorer global filter and then edit the copy.
● If one of the preconfigured variants for the analysis tools or the preconfigured variant for Explorer global filter is not required, you can delete it. The deleted preconfigured variant is then not available for the business user in the Explorer.
● If you have deleted one of the preconfigured variants and you need it again, you can restore it.
Preconfigured Variant for the Explorer
You can edit the preconfigured variant for the Explorer by changing the preconfigured settings.
NoteIf you edit the preconfigured variant for the Explorer, we recommend that you note down the preconfigured settings before changing them so that you can later bring them back if required. Also, if you edit the preconfigured variant, the edited variant persists in the upcoming release and is not overwritten by the new delivered preconfigured variant.
Related Information
Explorer and Analysis Tools Configuration [page 386]
8.7.2 Entries to Configure Alerts
You can define variants of this analysis tool. These variants can then be selected by business users from the Explorer.
NoteWe also deliver a preconfigured variant titled Alerts - SAP Default For more information on preconfigured variant, refer Preconfigured Variants [page 388]
Columns
In this section you define which columns business users see by default when they choose this variant of the Alerts analysis tool to add it to the Explorer. You can choose from a predefined list of columns.
Application Help for SAP Predictive Maintenance and Service, cloud editionConfiguring SAP Predictive Maintenance and Service, cloud edition P U B L I C 389

Filters
In this section you define the default filter values that are displayed in the list of alerts for the variant.
Sorting
In this section you define which columns are displayed under Sort in the View Settings of the Alerts analysis tool and whether the column should be sorted in ascending or desending order. The first entry in this list is the default in the alert list.
Table Details
In the Alerts analysis tool when you click on an alert you navigate in-place to the indicator chart. Next to the 2D chart you can define further tabs providing more information. In this section you define the tabs containing this further information and enter an ID for the tab under Tab Title (you later map a label to this ID under Labels and Translations. Each of these tabs can have up to 3 columns and you can define which fields are displayed in each column.
Labels and Translations
Entries to Map Labels
Field Description
Language Select the language in which you want to maintain text values.
Variant Name Enter a name for the variant. The name is visible when you select a variant for the analysis tool in the Explorer.
Variant Description Enter a description to provide more details about the variant. The description is visible in the Variants pane in the configuration screen.
Related Information
Explorer and Analysis Tools Configuration [page 386]Alerts [page 20]
390 P U B L I CApplication Help for SAP Predictive Maintenance and Service, cloud editionConfiguring SAP Predictive Maintenance and Service, cloud edition

8.7.3 Entries to Configure Equipment Indicators
You can define variants of this analysis tool. These variants can then be selected by business users from the Explorer.
NoteWe also deliver a preconfigured variant titled Equipment Indicators - SAP Default. For information about preconfigured variants, refer Preconfigured Variants [page 388]
Column Selection
In this section, you define which columns/fields business users see by default when they choose this variant of the Equipment Indicators analysis tool in the Explorer. You can choose from a predefined list of columns.
NoteThe column Equipment is mandatory. You can navigate to the details page only by clicking the Equipment.
Entries to Define the Columns Displayed in the Equipment Indicators List
Entry Field Description
Column Name of column. Select master data, attribute, attribute group, indicator, and indicator group
Column Width Width defined here will be the default column width in the Equipment Indicators analysis tool. By default, the width is 200 pixels.
Default By default, on selecting this checkbox results in the respective column displaying in the analysis tool.
Filters
In this section, you define the default filter for the columns. The analysis tool display the contents according to these filters. The values are
● Contains● Equal
Sorting
In this section, you define the default sorting of the columns. You can sort the columns in the ascending or desending order.
Labels and Translations
Entries to Map Labels
Field Description
Language Select the language in which you want to maintain text values
Application Help for SAP Predictive Maintenance and Service, cloud editionConfiguring SAP Predictive Maintenance and Service, cloud edition P U B L I C 391

Field Description
Variant Name Enter a name for the variant. The name is visible when you select a variant for the analysis tool in the Explorer.
Variant Description Enter a description to provide more details about the variant. The description is visible in the Variants pane in the configuration screen.
Related Information
Explorer and Analysis Tools Configuration [page 386]Equipment Indicators [page 27]
8.7.4 Entries to Configure the Explorer
Here you configure what your business users will see in the Explorer when they log on for the first time. After the very first logon, SAP Predictive Maintenance and Service preserves the order of analysis tools made by business users in the Explorer and on the Details object page.
NoteWe also deliver a preconfigured variant for the Explorer with a predefined order of the analysis tools. For more information about preconfigured variants, see Preconfigured Variants [page 388].
Content
Entries to Define the Analysis Tools Displayed by Default When Logging On to the Explorer for the First Time
Field Description
Analysis Tool You specify the type of analysis tool, for example, Alerts.
Variant You specify the variant of the specfied analysis tool, for example, Work Orders - Pump Variant.
392 P U B L I CApplication Help for SAP Predictive Maintenance and Service, cloud editionConfiguring SAP Predictive Maintenance and Service, cloud edition

Labels and Translations
Entries to Map Labels
Field Description
Language Select the language in which you want to maintain text values.
Variant Name You can use the variant name to specify, for example, a role suitable for this Explorer variant.
Variant Description You can use the variant description to provide more details about, for example, the role that uses this Explorer variant.
8.7.5 Entries to Configure the Explorer Global Filter
You can define variants including various filters. These variants can then be selected by business users in the Explorer.
NoteWe also deliver a preconfigured variant titled Explorer Global Filter - SAP Default. For more information about preconfigured variants, see Preconfigured Variants [page 388].
Filters
Field Description
Class The underlying class template used while creating the model/piece of equipment. The characteristics of a piece of equipment are defined by the underlying class and subclass template.
Subclass The underlying subclass of a model or a piece of equipment. The characteristics of a piece of equipment are defined by the underlying class and subclass template.
Model The abstract representation of an equipment that holds the specifications defined for that equipment.
Location The location where your equipment is installed.
Phase The phase to which the equipment relates, for example, planned or sold.
Application Help for SAP Predictive Maintenance and Service, cloud editionConfiguring SAP Predictive Maintenance and Service, cloud edition P U B L I C 393

Field Description
Manufacturer The relevant manufacturer linked to the selected model ID. If a model ID is selected when creating equipment data, the relevant manufacturer is linked to the equipment.
Operator The operator who maintains additional information specific to a piece of equipment.
Labels and Translations
Field Description
Language Select the language in which you want to maintain text values.
Variant Name Enter a name for the variant. The name is visible when you select a variant for the Explorer global filter in the Explorer.
Variant Description Enter a description to provide more details about the variant. The description is visible in the Variants pane in the configuration screen.
8.7.6 Entries to Configure the Indicator Chart
When navigating to the Indicator Chart from Alerts, the indicator chart displays the first variant defined in the Indicator Chart configuration.
NoteWe also deliver a preconfigured variant titled Indicator Chart - SAP Default. For more information about preconfigured variants, refer Preconfigured Variants [page 388]
Data Points
In this section, you can define the number of data points per indicators that you want to be displayed in the chart.
NoteA maximum of 600 data points in total can be displayed in the indicator chart. This is entered in the Data Points for Each Indicator on the Chart column. The default number of data points is 240 and can range
394 P U B L I CApplication Help for SAP Predictive Maintenance and Service, cloud editionConfiguring SAP Predictive Maintenance and Service, cloud edition

between 30 and 600. The more the number of data points, the more the accuracy of chart. But, the response time may be affected.
Time Filters
Only five time filters can be added for a variant
Indicator Chart Settings
Entry Field Description
Text Key Key of the time interval
Text Label of the time interval that is displayed on the UI of the indicator chart
Example48 Hours, Today
Value Value of the time interval
Example48 for a time interval of 48 hours
Unit Unit of the time interval
Examplehour for a time interval of 48 hours
You can choose among the following values:
● hour● day● week● month● year
Application Help for SAP Predictive Maintenance and Service, cloud editionConfiguring SAP Predictive Maintenance and Service, cloud edition P U B L I C 395

Labels and Translations
Entries to Map Labels
Field Description
Lang Select the language in which you want to maintain text values.
Key / Text Choose the key of the text. Enter the time filter text you would like to be displayed on the UI.
Variant Name Enter a name for the variant. The name is visible when you select a variant for the analysis tool in the Explorer.
Variant Description Enter a description to provide more details about the variant. This description is visible in the Variants pane in the configuration screen.
Related Information
Explorer and Analysis Tools Configuration [page 386]Features in Indicator Chart [page 38]
8.7.7 Entries to Configure the Map
You can define variants of this analysis tool. These variants can then be selected by business users in the Explorer.
NoteWe also deliver a preconfigured variant titled Map - SAP Default. This preconfigured variant includes a sample base map so that business users can immediately start working with the map. It does not include preconfigured settings related to equipment (models and indicators). These settings are customerspecific and therefore cannot be added to the preconfigured variant.
For more information about preconfigured variants, see Preconfigured Variants [page 388].
396 P U B L I CApplication Help for SAP Predictive Maintenance and Service, cloud editionConfiguring SAP Predictive Maintenance and Service, cloud edition

Map Settings
Map Settings
Entry Field Description
Zoom Level Specifies the initial zoom level when you open this map variant
Latitude Initial focus of latitude of the map
Longitude Initial focus of longitude of the map
Layers
In the map settings you can configure base layer settings and overlay layer settings.
NoteWhen using multiple layers, each layer must have a different layer number.
NoteYou can use the following tile providers:
● OpenStreetMap● Esri
Base LayersBase Layer Settings
Field Description
Layer Name Name of the base layer
NoteThis name should be unique for each layer. The name is displayed later on the UI of the map.
Application Help for SAP Predictive Maintenance and Service, cloud editionConfiguring SAP Predictive Maintenance and Service, cloud edition P U B L I C 397

Field Description
Layer Type Type of the base layer
You can choose between the following types:
● xyzIf you choose this type, make sure you specify a Layer URL.
● esriIf you choose this type, make sure you specify an esri Base Layer Type.
Layer URL URL template of the tile provider for the base layer
NoteWhen using Open Street Maps with 'https', use layerUrl : https://{s}.tile.openstreetmap.org/{z}/{x}/{y}.png
NoteSelect the Mandatory checkbox if you fill in this entry field.
Layer Parameters Specifies the base layer type if the base layer is of type esri.
For more information about esri base layer types, see http://www.esri.com/data/basemaps .
NoteSelect the Mandatory checkbox if you have filled in this entry field.
Attribution A string that defines the copyright of the map provider. You can also include an HTML link that leads to the copyrights of the map provider.
Example© Mapbox
NoteSelect the Mandatory checkbox if you have filled in this entry field.
398 P U B L I CApplication Help for SAP Predictive Maintenance and Service, cloud editionConfiguring SAP Predictive Maintenance and Service, cloud edition

Field Description
Application ID NoteFill in this entry field if you are using Nokia HERE Maps as the tile provider.
App ID used to register with the tile provider.
NoteSelect the Mandatory checkbox if you have filled in this entry field.
Application Code NoteFill in this entry field if you are using Nokia HERE Maps.
App code used to register with the tile provider.
NoteSelect the Mandatory checkbox if you have filled in this entry field.
Subdomains NoteFill in this entry field if your tile provider uses subdomains.
For more information about subdomains and subdomain prefixes, see https://developer.here.com/news/201602172#.V-Fc2U1pDct .
NoteSelect the Mandatory checkbox if you have filled in this entry field.
Application Help for SAP Predictive Maintenance and Service, cloud editionConfiguring SAP Predictive Maintenance and Service, cloud edition P U B L I C 399

Field Description
Map ID Version of the map
NoteFill in this entry field according to the requirements and conventions of your tile provider.
NoteSelect the Mandatory checkbox if you have filled in this entry field.
Base Map type such as panorama, traffic, or base
NoteFill in this entry field according to the requirements and conventions of your tile provider.
NoteSelect the Mandatory checkbox if you have filled in this entry field.
Maximum Zoom Maximum number of levels for zooming into the base layer
NoteThis setting overrules the generic map zoom level.
NoteSelect the Mandatory checkbox if you have filled in this entry field.
Initial Base Layer Value true sets this base layer as the default base layer.
Hide Logo Select this checkbox if the logo of the tile provider should not be visible on the map.
400 P U B L I CApplication Help for SAP Predictive Maintenance and Service, cloud editionConfiguring SAP Predictive Maintenance and Service, cloud edition

Overlay Layers
Overlay Layer Settings
Field Description
Model ID Select a model or multiple models from the list provided in the popup. The ID of the selected models is displayed later in the Map Analysis tool's overlay dropdown menu in the top right hand corner.
Clustering You can choose between the following values:
● Marker: Equipment is displayed on the map individually.● Cluster: Equipment is clustered on the map according to
the zoom level. The further you zoom out of a map, the wider the radius of a cluster.○ If many equipment are too close to each other at
maximum zoom level when the cluster is configured, a spider leg will appear to show all overlapping equipment after clicking the cluster.
○ The spider leg only works with clusters at maximum zoom level.
○ If no cluster is configured, the spider leg does not work.
Remove Cluster at Zoom Level Define at which zoom level clusters are removed.
NoteThe zoom level furthest from Earth is 1.
NoteFor spider legs to work, the configuration capability to limit clustering to a zoom level has to be inactive. To do this make sure you enter a number that is one higher than the maximum zoom levels for the backdrop maps under Remove Cluster at Zoom Level.
Labels and Translations
Entries to Map Labels
Field Description
Language Select the language in which you want to maintain text values.
Application Help for SAP Predictive Maintenance and Service, cloud editionConfiguring SAP Predictive Maintenance and Service, cloud edition P U B L I C 401

Field Description
Variant Name Enter a name for the variant. The name is visible when you select a variant for the analysis tool in the Explorer.
Variant Description Enter a description to provide more details about the variant. The description is visible in the Variants pane in the configuration screen.
Related Information
Explorer and Analysis Tools Configuration [page 386]
8.7.8 Entries to Configure Notifications
You can define variants of this analysis tool. These variants can then be selected by business users from the Explorer.
NoteWe also deliver a preconfigured variant titled Notifications - SAP Default. For more information on preconfigured variant, refer Preconfigured Variants [page 388]
Columns
In this section, you define which columns/fields business users see by default when they choose this variant of the Notifications analysis tool in the Explorer. You can choose from a predefined list of columns.
Filters
In this section, you define the filter field values for the notifications variant.
Sorting
In this section, you define which columns are displayed under Sort in the View Settings of the Notifications analysis tool and whether the column should be sorted in ascending or descending order.
402 P U B L I CApplication Help for SAP Predictive Maintenance and Service, cloud editionConfiguring SAP Predictive Maintenance and Service, cloud edition

Table Details
In this section, you configure the Notifications analysis tool for more information about a particular notification. When you click a notification, you navigate in-place to more information about that notification.
You define the tabs containing this further information and enter an ID for the tab under Tab Title (you later map a label to this ID under Labels and Translations). Each of these tabs can have up to 3 columns and you can define which fields are displayed in each column.
Labels and Translations
Entries to Map labels
Field Description
Language Select the language in which you want to maintain text values.
Variant Name Enter a name for the variant. The name is visible when you select a variant for the analysis tool in the Explorer.
Variant Description Enter a description to provide more details about the variant. The description is visible in the Variants pane in the configuration screen.
Related Information
Explorer and Analysis Tools Configuration [page 386]Work Orders [page 34]
8.7.9 Entries to Configure Work Orders
You can define variants of this analysis tool. These variants can then be selected by business users from the Explorer.
NoteWe also deliver a preconfigured variant titled Work Order - SAP Default. For more information on preconfigured variants, refer Preconfigured Variants [page 388]
Application Help for SAP Predictive Maintenance and Service, cloud editionConfiguring SAP Predictive Maintenance and Service, cloud edition P U B L I C 403

Columns
In this section you define which columns/fields business users see by default when they choose this variant of the Work Orders analysis tool in the Explorer. You can choose from a predefined list of columns.
Filters
In this section you define the filter field values for the work orders variant.
Sorting
In this section you define which columns are displayed under Sort in the View Settings of the Work Orders analysis tool and whether the column should be sorted in ascending or desending order. The first entry in this list is the default in the alert list.
Table Details
In this section you configure the Work Orders analysis tool for more information about a particular work order. When you click on a work order you navigate in-place to more information about that work order.
You define the tabs containing this further information and enter an ID for the tab under Tab Title (you later map a label to this ID under Labels and Translations). Each of these tabs can have up to 3 columns and you can define which fields are displayed in each column.
Labels and Translations
Entries to Map Labels
Field Description
Language Select the language in which you want to maintain text values.
Variant Name Enter a name for the variant. The name is visible when you select a variant for the analysis tool in the Explorer.
Variant Description The variant description you enter here is visible in the analysis tool catalog after you have selected the variant by its name.
404 P U B L I CApplication Help for SAP Predictive Maintenance and Service, cloud editionConfiguring SAP Predictive Maintenance and Service, cloud edition

Related Information
Explorer and Analysis Tools Configuration [page 386]Work Orders [page 34]
8.7.10 Entries to Configure Equipment Scores (Obsolete)
NoteYou can define variants of this analysis tool. These variants can then be selected by business users from the Analysis Tools Catalog.
Application Help for SAP Predictive Maintenance and Service, cloud editionConfiguring SAP Predictive Maintenance and Service, cloud edition P U B L I C 405

Columns
Entries to Define the Columns Displayed in the Equipment Scores List
Entry Field Description
Attribute/Indicator Specifies attributes/indicators to select from your data model (for example, Thing model).
You can configure the following attributes/indicators:
● Equipment/component attributes/indicators
○ AssetID○ AssetExternalID○ AssetName○ AssetDescription○ AssetThingType○ ComponentID○ ComponentExternalID○ ComponentName○ ComponentDescription○ ComponentThingType
○ NoteEnter the attributes/indicators exactly as displayed above taking account of the upper and lower case letters.
If there is an error in any of the configured attributes/indicators (for example, a typo or a not existing field), the tool will display no data at all.
● Master data and time series attributes/indicators: <tenant><PropertySetType>/<PropertySet>/<Property> For example, tenant.com.sap.pdms.assets.pumps:AssetMasterData/masterData/Manufacturer
● Scores: <tenant><PropertySetType>/<algorithm>/<Property>.The following machine learning algorithms can be used to display scores:○ PCA○ EMD○ TEC○ MAR○ PAM
406 P U B L I CApplication Help for SAP Predictive Maintenance and Service, cloud editionConfiguring SAP Predictive Maintenance and Service, cloud edition

Entry Field Description
○ SVMFor example, tenant.com.sap.pdms.datascience.scoring:MAR/MAR/normalised_score
NoteWhen you configure self-created property set types, ensure that all of these property set types are assigned to all thing types that you want to see in the equipment scores table. Equipment that do not have all property set types assigned will otherwise not be displayed in the equipment scores list.
Data Type Data type of the column value
You can select the following values:
● string● float● integer
Label ID Key to which a translatable label is mapped in the section Labels and Translations
NoteThe label mapped to this key becomes the column header description displayed in the Equipment Scores analysis tool.
Visible by Default If you activate this check box, the column is displayed in the Equipment Scores analysis tool by default.
Filters
In this section, you define the default filter for the attributes/indicators. The analysis tool display the contents according to these filters. The values are:
● Contains● Equals to● Starts with● Between● Ends with● Less than● Less than or equal to
Application Help for SAP Predictive Maintenance and Service, cloud editionConfiguring SAP Predictive Maintenance and Service, cloud edition P U B L I C 407

● Greater than● Greater than or equal to
Sorting
In this section, you define the attributes/indicators according to which the columns are sorted.
Labels and Translations
Entries to Map Labels
Field Description
Language Select the language in which you want to maintain text values.
Variant Name The variant name you enter here is visible when you select the variant from the analysis tools catalog.
Variant Description The variant description you enter here is visible in the analysis tool catalog after you have selected the variant by its name.
<Label ID> Give the label ID a text that will be displayed on the user interface.
Related Information
Explorer and Analysis Tools Configuration [page 386]
408 P U B L I CApplication Help for SAP Predictive Maintenance and Service, cloud editionConfiguring SAP Predictive Maintenance and Service, cloud edition

Important Disclaimers and Legal Information
HyperlinksSome links are classified by an icon and/or a mouseover text. These links provide additional information.About the icons:
● Links with the icon : You are entering a Web site that is not hosted by SAP. By using such links, you agree (unless expressly stated otherwise in your agreements with SAP) to this:
● The content of the linked-to site is not SAP documentation. You may not infer any product claims against SAP based on this information.● SAP does not agree or disagree with the content on the linked-to site, nor does SAP warrant the availability and correctness. SAP shall not be liable for any
damages caused by the use of such content unless damages have been caused by SAP's gross negligence or willful misconduct.
● Links with the icon : You are leaving the documentation for that particular SAP product or service and are entering a SAP-hosted Web site. By using such links, you agree that (unless expressly stated otherwise in your agreements with SAP) you may not infer any product claims against SAP based on this information.
Beta and Other Experimental FeaturesExperimental features are not part of the officially delivered scope that SAP guarantees for future releases. This means that experimental features may be changed by SAP at any time for any reason without notice. Experimental features are not for productive use. You may not demonstrate, test, examine, evaluate or otherwise use the experimental features in a live operating environment or with data that has not been sufficiently backed up.The purpose of experimental features is to get feedback early on, allowing customers and partners to influence the future product accordingly. By providing your feedback (e.g. in the SAP Community), you accept that intellectual property rights of the contributions or derivative works shall remain the exclusive property of SAP.
Example CodeAny software coding and/or code snippets are examples. They are not for productive use. The example code is only intended to better explain and visualize the syntax and phrasing rules. SAP does not warrant the correctness and completeness of the example code. SAP shall not be liable for errors or damages caused by the use of example code unless damages have been caused by SAP's gross negligence or willful misconduct.
Gender-Related LanguageWe try not to use genderspecific word forms and formulations. As appropriate for context and readability, SAP may use masculine word forms to refer to all genders.
Application Help for SAP Predictive Maintenance and Service, cloud editionImportant Disclaimers and Legal Information P U B L I C 409

www.sap.com/contactsap
© 2019 SAP SE or an SAP affiliate company. All rights reserved.
No part of this publication may be reproduced or transmitted in any form or for any purpose without the express permission of SAP SE or an SAP affiliate company. The information contained herein may be changed without prior notice.
Some software products marketed by SAP SE and its distributors contain proprietary software components of other software vendors. National product specifications may vary.
These materials are provided by SAP SE or an SAP affiliate company for informational purposes only, without representation or warranty of any kind, and SAP or its affiliated companies shall not be liable for errors or omissions with respect to the materials. The only warranties for SAP or SAP affiliate company products and services are those that are set forth in the express warranty statements accompanying such products and services, if any. Nothing herein should be construed as constituting an additional warranty.
SAP and other SAP products and services mentioned herein as well as their respective logos are trademarks or registered trademarks of SAP SE (or an SAP affiliate company) in Germany and other countries. All other product and service names mentioned are the trademarks of their respective companies.
Please see https://www.sap.com/about/legal/trademark.html for additional trademark information and notices.
THE BEST RUN