Cockpit - SAP Help Portal
306
User Guide | PUBLIC Document Version: 2020.2 – 2021-05-24 Cockpit © 2021 SAP SE or an SAP affiliate company. All rights reserved. THE BEST RUN
-
Upload
khangminh22 -
Category
Documents
-
view
0 -
download
0
Transcript of Cockpit - SAP Help Portal

User Guide | PUBLICDocument Version: 2020.2 – 2021-05-24
Cockpit
© 2
021 S
AP S
E or
an
SAP affi
liate
com
pany
. All r
ight
s re
serv
ed.
THE BEST RUN

Content
1 Cockpit. . . . . . . . . . . . . . . . . . . . . . . . . . . . . . . . . . . . . . . . . . . . . . . . . . . . . . . . . . . . . . . . . . . .31.1 What's New in Cockpit?. . . . . . . . . . . . . . . . . . . . . . . . . . . . . . . . . . . . . . . . . . . . . . . . . . . . . . . . .3
1.2 Getting Started. . . . . . . . . . . . . . . . . . . . . . . . . . . . . . . . . . . . . . . . . . . . . . . . . . . . . . . . . . . . . . 4
Target Audience. . . . . . . . . . . . . . . . . . . . . . . . . . . . . . . . . . . . . . . . . . . . . . . . . . . . . . . . . . . 5
Pricing Specialist's Journey . . . . . . . . . . . . . . . . . . . . . . . . . . . . . . . . . . . . . . . . . . . . . . . . . . . 6
System Administrator's Journey. . . . . . . . . . . . . . . . . . . . . . . . . . . . . . . . . . . . . . . . . . . . . . . . 8
Support Specialist's Journey. . . . . . . . . . . . . . . . . . . . . . . . . . . . . . . . . . . . . . . . . . . . . . . . . . 9
Application Highlights. . . . . . . . . . . . . . . . . . . . . . . . . . . . . . . . . . . . . . . . . . . . . . . . . . . . . . 10
Technical Requirements. . . . . . . . . . . . . . . . . . . . . . . . . . . . . . . . . . . . . . . . . . . . . . . . . . . . . 11
Authorizations. . . . . . . . . . . . . . . . . . . . . . . . . . . . . . . . . . . . . . . . . . . . . . . . . . . . . . . . . . . . 11
Notes on SAP CC Implementation. . . . . . . . . . . . . . . . . . . . . . . . . . . . . . . . . . . . . . . . . . . . . . 12
Explore the Workspace for Convergent Charging Cockpit. . . . . . . . . . . . . . . . . . . . . . . . . . . . . . 13
1.3 Tasks with Cockpit. . . . . . . . . . . . . . . . . . . . . . . . . . . . . . . . . . . . . . . . . . . . . . . . . . . . . . . . . . . 19
Launching Cockpit. . . . . . . . . . . . . . . . . . . . . . . . . . . . . . . . . . . . . . . . . . . . . . . . . . . . . . . . .20
Tasks for Pricing Specialists. . . . . . . . . . . . . . . . . . . . . . . . . . . . . . . . . . . . . . . . . . . . . . . . . . 21
Tasks for System Administrators. . . . . . . . . . . . . . . . . . . . . . . . . . . . . . . . . . . . . . . . . . . . . . . 25
1.4 Cockpit Apps. . . . . . . . . . . . . . . . . . . . . . . . . . . . . . . . . . . . . . . . . . . . . . . . . . . . . . . . . . . . . . . 27
Analyze Item Files. . . . . . . . . . . . . . . . . . . . . . . . . . . . . . . . . . . . . . . . . . . . . . . . . . . . . . . . . 28
Display System Status. . . . . . . . . . . . . . . . . . . . . . . . . . . . . . . . . . . . . . . . . . . . . . . . . . . . . . 36
Display Usage Metrics. . . . . . . . . . . . . . . . . . . . . . . . . . . . . . . . . . . . . . . . . . . . . . . . . . . . . . 48
Display User Operations. . . . . . . . . . . . . . . . . . . . . . . . . . . . . . . . . . . . . . . . . . . . . . . . . . . . . 62
Manage Chargeable Item Classes. . . . . . . . . . . . . . . . . . . . . . . . . . . . . . . . . . . . . . . . . . . . . . 70
Manage Charged Item Classes. . . . . . . . . . . . . . . . . . . . . . . . . . . . . . . . . . . . . . . . . . . . . . . . 79
Manage Mapping Table Classes. . . . . . . . . . . . . . . . . . . . . . . . . . . . . . . . . . . . . . . . . . . . . . . 101
Manage Mapping Tables. . . . . . . . . . . . . . . . . . . . . . . . . . . . . . . . . . . . . . . . . . . . . . . . . . . . 122
Manage Rate Plans. . . . . . . . . . . . . . . . . . . . . . . . . . . . . . . . . . . . . . . . . . . . . . . . . . . . . . . . 135
Manage Range Table Classes. . . . . . . . . . . . . . . . . . . . . . . . . . . . . . . . . . . . . . . . . . . . . . . . .237
Manage Range Tables. . . . . . . . . . . . . . . . . . . . . . . . . . . . . . . . . . . . . . . . . . . . . . . . . . . . . .252
Manage SAP CC System Parameters. . . . . . . . . . . . . . . . . . . . . . . . . . . . . . . . . . . . . . . . . . . 271
Process a Chargeable Item. . . . . . . . . . . . . . . . . . . . . . . . . . . . . . . . . . . . . . . . . . . . . . . . . . 285
1.5 FAQs and Tips About Cockpit. . . . . . . . . . . . . . . . . . . . . . . . . . . . . . . . . . . . . . . . . . . . . . . . . . . 295
1.6 Troubleshooting with Cockpit. . . . . . . . . . . . . . . . . . . . . . . . . . . . . . . . . . . . . . . . . . . . . . . . . . .298
Troubleshooting Problems with SAP CC. . . . . . . . . . . . . . . . . . . . . . . . . . . . . . . . . . . . . . . . . 298
Troubleshooting Problems of the User Interface. . . . . . . . . . . . . . . . . . . . . . . . . . . . . . . . . . . 299
2 PUBLICCockpit
Content

1 Cockpit
Cockpit is an intuitive web application and a central tool that enables the SAP CC administrators and pricing specialists to manage the SAP Convergent Charging 2020 systems and data quickly and efficiently.
What's New in Cockpit? [page 3]
Getting Started [page 4]
Tasks with Cockpit [page 19]
Cockpit Apps [page 27]
FAQs and Tips About Cockpit [page 295]
Troubleshooting with Cockpit [page 298]
1.1 What's New in Cockpit?
This section highlights the main changes in this SAP Product Document and User Assistance Deliverable. They relate both to new or changed features in the SAP Convergent Charging 2020 software and to documentation enhancements for enriching your SAP user experience continuously. Cockpit is a web application that enables the SAP CC administrators and pricing specialists to manage the SAP Convergent Charging systems and data quickly and efficiently.
What's New in SAP CC 2020 FPS 2
As of SAP CC 2020 FPS 2, Convergent Charging Cockpit provides you with some new features:
Domain App in Cockpit Change Details
Pricing Definition Manage Rate Plans What's New? [page 135]
Pricing Administration Process a Chargeable Item What's New? [page 285]
What's New in SAP CC 2020 FPS 1
As of SAP CC 2020 FPS 1, Convergent Charging Cockpit provides you with some new features:
CockpitCockpit PUBLIC 3

Domain App in Cockpit Change Details
Pricing Definition Manage Rate Plans What's New? [page 135]
Manage Mapping Tables What's New? [page 123]
Pricing Data Structures Manage Mapping Table Classes What's New? [page 101]
What's New in SAP CC 2020 (in FPS 0)
As of SAP CC 2020, the primary Help system of Convergent Charging Cockpit is a dedicated document. On SAP Help Portal, you can filter content depending on your target audience (pricing specialist, system administrator, support specialist).
As of FPS 0 for release 2020, Convergent Charging Cockpit provides you with a new app and some features:
Domain App in Cockpit Change Details
Pricing Definition Manage Rate Plans (new app) What's New? [page 135]
What Was New in SAP CC 5.0
Please, see What's New in Cockpit.
Related Information
What's New in Feature Package Stack 2
1.2 Getting Started
Getting Started with the User Interface
If this is your first time using the SAP CC Cockpit user interface, get started by working through this topic to familiarize yourself with the application. Then, you can use the web-based user interface to perform your daily tasks quickly and easily.
Cockpit is the web-based user interface of SAP Convergent Charging 2020. It is a modern Launchpad application that allows you to manage local or remote instances of a running SAP CC Core Server systems and data.
4 PUBLICCockpit
Cockpit

It is a role-based and personalized work center for SAP Convergent Charging for pricing specialists, system administrators, and support specialists.
Cockpit is based on SAP Fiori, the new user experience (UX) for SAP software that applies modern design principles. The Cockpit web application and its apps are built using the SAPUI5 powerful user interface (UX) technology and OData Services. It benefits from easy-to-use interfaces and apps, role-based navigation, and intelligent user guidance. It simplifies and emphasizes your day-to-day work and tasks. You increase your productivity by doing more work in less time.
Target Audience [page 5]
Pricing Specialist's Journey [page 6]
System Administrator's Journey [page 8]
Support Specialist's Journey [page 9]
Application Highlights [page 10]
Technical Requirements [page 11]
Authorizations [page 11]
Notes on SAP CC Implementation [page 12]
Explore the Workspace for Convergent Charging Cockpit [page 13]
1.2.1 Target Audience
Convergent Charging Cockpit is a central tool with role-based apps. It is intended for both business configuration of master data (pricing settings) and some system administration.
The primary target audiences are the pricing specialists and the system administrators for SAP Convergent Charging. Note that the user interface is also available for the support specialists who can view and audit the systems and data:
Business Configuration (Pricing Settings)
System Administration (Monitoring, Configuration, Audit, Technical Operations) Technical Support (Inspection)
● Pricing Specialist● IT Consultant/Implementer● Power User● Project Team Member
(Implementation, Integration)
● IT Administrator● Operations Team Expert
● Support Specialist (SAP SE, Local Support Team)
Get Started [page 6] Get Started [page 8] Get Started [page 9]
TipOn the launchpad, app visibilities and capabilities depend on your granted role and associated authorizations.
CockpitCockpit PUBLIC 5

Related Information
Authorizations [page 11]
1.2.2 Pricing Specialist's Journey
With the Cockpit user interface, pricing specialists quickly and efficiently configure and maintain the pricing configuration for the chargeable services or products commercialized by their company.
Goal Details How
Analysis As of release 2020, the pricing specialists benefit from a simplified and renewed vision and concepts introduced in Convergent Charging Cockpit to analyze how to model and design the implementation depending on the business requirements.
Rate plans specify how to charge end customers for the use of a service or product.
● Study the business needs: in collaboration with the marketing team you take into account the pricing policy for the services or products to monetize.
● Translate the pricing needs (pricing models and offers) to functional and non-functional requirements.
● Map these requirements onto SAP Convergent Charging capabilities and features.
Modeling and Design Based on rate plans and mapping/range tables in pricing catalogs, on provider contracts and subscriber accounts for end customers and subscribers, the pricing specialists model the implementation and translate the pricing policy from the marketing team to pricing configurations in SAP Convergent Charging for their chargeable services or products.
● Create a prototype or demo to....
6 PUBLICCockpit
Cockpit

Goal Details How
Pricing Configuration With Cockpit, the pricing specialists configure, test, and release easy-to-maintain rate plans and mapping/range tables with SAP Convergent Charging to meet new business needs.
Set up the pricing configuration in SAP CC, namely all the data, data structures, plans and logics required for the rating.
Validate
● Test and debug rate plans and data tables.
● Conduct validation tests in a QA environment.
Put into production
● Transport settings and data.● Release the rate plans.
Maintenance and Evolutions The pricing specialists maintain existing rate plans and tables to configure the marketing and pricing policy evolutions or in case of pricing issues in rate plans or tables. They retire obsolete rate plans.
● Investigate and correct pricing issues dues to incorrect rate plans or tables.
● Implement changes from the marketing team.
● Put corrections and changes into production.
As an SAP CC pricing specialist, you complete the following tasks:
Analysis
● Study the business needs: in collaboration with the marketing team you take into account the pricing policy for the services or products to monetize.
● Translate the pricing needs (pricing models and offers) to functional and non-functional requirements.● Map these requirements onto SAP Convergent Charging capabilities and features.
Modeling and Design
● Map business requirements onto SAP CC concepts in detail.● Model and design rate plans in collaboration with an SAP CC pricing manager.● Create a prototype or demo to demonstrate the modeling.● In your business logic, identify the following to find: Variables and constants Branches in the logic (If...
Then... Else...) Reasons to price the same event several times with different logic Any needed non-price calculations How the actual price is determined If data tables are needed
CockpitCockpit PUBLIC 7

Business Configuration
● Cooperate with the application administrator for SAP CC to ask for some system configuration:○ System settings for implemented business features (charging, precision, tax)○ Business and custom data such as currencies, value added taxes (VAT)
● Configure and maintain the pricing logic based on rate plans and pricing data tables.● Test and debug rate plans and pricing data tables.● Notify other stakeholders when rate plans are ready for validation.● Investigate and fix rate plan and table issues.
See Tasks for Pricing Specialists [page 21]
Maintenance and Evolutions
● Investigate and correct pricing issues dues to incorrect rate plans or tables.● Implement changes from the marketing team.● Put corrections and changes into production.
Related Information
Tasks for Pricing Specialists [page 21]SAP CC Pricing Specialists
1.2.3 System Administrator's Journey
With the Cockpit user interface, system administrators ensure that the systems run effectively and efficiently. They configure, monitor, and audit the SAP Convergent Charging systems in their SAP system landscapes (PROD, QA, TST, DEV).
Goal Details What
Installing You initially install and deploy new multihost and multi-instance SAP CC systems in your SAP system landscape.
● Viewing and Inspecting the System Status [page 40]
● Viewing Parameter Values [page 273]
Configuring You configure the necessary technical features and business features for the SAP CC systems.
● Configuring Parameter Values [page 277]
8 PUBLICCockpit
Cockpit

Goal Details What
Maintenance For system maintenance, you put the SAP system instances to down and you resume them.
● Managing the System Maintenance Mode [page 43]
● Putting a System Instance on Standby and Resuming it to the Started Status [page 44]
Monitoring You monitor the key processes (technical/business) of the SAP CC systems.
● Viewing and Analyzing the File Metadata [page 33]
Audit You audit the SAP CC systems. ● Viewing and Inspecting the System Status [page 40]
● Viewing Parameter Values [page 273]
● Viewing and Auditing Some User Operations [page 65]
● Viewing and Analyzing Some Usage Metrics of the System [page 50]
● Verifying System Usage and Licenses [page 58]
● Downloading a License Auditing Report [page 59]
Troubleshooting You troubleshoot the SAP CC systems. Troubleshooting Problems with SAP CC [page 298]
1.2.4 Support Specialist's Journey
Support specialists from SAP Support Team or from your local organization can use the Cockpit user interface to complete their troubleshooting operations (technical support and user guidance, data inspection, system information, audit, system health and performance).
As a L1 support specialist, you use Convergent Charging Cockpit and this primary help documentation to provide some technical support to your SAP users.
● Case #1: You can sign in to the installed Cockpit and perform the expected tasks. See the next table.
RememberRemote Support is the requested role in SAP CC. The list or permitted operations is restricted.
● Case #2: For security reasons, you have no accesses to the systems and you must guide a distant SAP user. See the documentation (tasks, tips, FAQs, troubleshooting) that is available for each app [page 27] to open by the supported individual user.
CockpitCockpit PUBLIC 9

Business Configuration: Pricing
System Configuration: Information
System Administration: Operations
Pricing definition (rate plans and tables)
● Finding [page 211] and Viewing a Rate Plan [page 212]
● Viewing a Mapping Table [page 130]
● Viewing a Range Table [page 256]
Pricing data structures (classes)
● Viewing a Chargeable Item Class [page 74]
● Viewing a Charged Item Class [page 95]
Pricing data structures (table classes)
● Viewing and Reviewing a Mapping Table Class [page 115]
● Viewing and Reviewing a Range Table Class [page 247]
● Viewing and Inspecting the System Status [page 40]
● Viewing Parameter Values [page 273]
Audits (user operations, SAP product usage metrics)
● Viewing and Auditing Some User Operations [page 65]
● Viewing and Analyzing Some Usage Metrics of the System [page 50]
● Verifying System Usage and Licenses [page 58]
1.2.5 Application Highlights
Refer to the regular or exceptional Tasks with Cockpit [page 19] that you can perform with your Cockpit application.
TipAn SAP CC pricing specialist is a typical individual user of SAP Convergent Charging 2020 who is responsible for designing and configuring the end-customer service pricing.
As a pricing specialist, you complete the following tasks:
● Translate the pricing requirements in collaboration with the marketing team● Design rate plans● Cooperate with the application administrator for SAP CC to ask for some system configuration:
○ System settings for implemented business features (charging, precision, tax)○ Business and custom data such as currencies, value added taxes (VAT)1
● Configure and maintain the pricing logic based on rate plans and pricing data tables
1 Value Added Tax
10 PUBLICCockpit
Cockpit

● Test and debug rate plans and tables● Notify other stakeholders when rate plans are ready for validation● Investigate and fix rate plan and table issues
1.2.6 Technical Requirements
Supported Browsers
The front-end application of the Cockpit user interface for SAP Convergent Charging supports the following web browsers:
● Microsoft Edge● Microsoft Internet Explorer 2
● Mozilla Firefox● Google Chrome
RecommendationThis list may change. Always refer to the up-to-date technical release information in the Product Availability Matrix (PAM) for SAP Convergent Charging 2020 at support.sap.com/pam .
See the two pages:
● Supported Web Browsers● Technical Release Information
Note that the PAM also defines the technical requirements for the Cockpit back-end application.
1.2.7 Authorizations
CautionFor security reasons, SAP recommends that you always lock your SAP CC Cockpit application and sign out when you completed your tasks.
Closing the web browser does not end the user session.
In the SAP system landscape, SAP Convergent Charging manages the security and protection for the SAP CC systems and controls the accesses for SAP CC users. To work with the Convergent Charging Cockpit launchpad and its various apps [page 27], you must have:
2 We recommend that you do not use the Microsoft F12 Developer Tools window of IE11 because of potential known issues [page 303].
CockpitCockpit PUBLIC 11

● An unlock individual user ID (or user name) for SAP Convergent Charging● An unexpired password● Some specific roles set in your SAP CC user profile to work with your apps and complete your tasks [page
19]● No pricing catalog restrictions (when the user administrator associates your user ID with a specific and
unique pricing catalog)
NoteApp visibilities and capabilities depend on your user settings (granted roles, pricing catalog restriction).
If an app tile is absent on your launchpad, verify the expected roles for this app by consulting the Security Guide documentation. See the Cockpit Apps topic in the Roles and Authorizations section.
Contact your user administrator to change your SAP CC user profile.
For more information and user assistance about the necessary authorizations and permitted operations, refer to the SAP CC 2020 Security Guide about the following concepts:
● User Administration and Authentication● Authorizations
Related Information
Roles and AuthorizationsTechnical Configuration
1.2.8 Notes on SAP CC Implementation
SAP CC Cockpit is an optional software component. If you want to implement it in your SAP system landscape, consider the following documentation and user assistance:
● Procedures for Installing SAP CC Cockpit: See Installing and Launching Cockpit section in the SAP CC 2020 Installation and Maintenance Guide documentation
● Procedures for Securing an SAP CC System Landscape: Securing a Landscape section in the SAP CC 2020 Installation and Maintenance Guide documentation
● Procedures for Securing Communications with Cockpit and Tomcat Server: Securing Communications with Cockpit and Tomcat Server section in the SAP CC 2020 Installation and Maintenance Guide documentation
12 PUBLICCockpit
Cockpit

1.2.9 Explore the Workspace for Convergent Charging Cockpit
SAP CC Cockpit is a Launchpad application that allows you to open your role-based apps and to start working with SAP Convergent Charging.
Your Convergent Charging Cockpit offers a user centric and role based starting point. To use the intuitive user interface optimally, read this section and consult the user guides for SAP Fiori Launchpad.
App Tile Visibility [page 13]
Date and Time Information [page 13]
Themes [page 15]
Automatic Sign-Out When Inactive [page 15]
Working with Notifications [page 15]
Usability Features in the Launchpad [page 15]
1.2.9.1 App Tile Visibility
App visibility and user capabilities depend on your user settings:
● Granted roles (and corresponding user authorizations and permitted operations)● Pricing catalog restriction
Related Information
Authorizations [page 11]
1.2.9.2 Date and Time Information
Date and Time Information
In the SAP CC 2020 Cockpit user interface, your apps may display some useful date/time information. It relates to the date and time of the SAP CC system instance that registered the information. It is generally the date and time for the operating system (OS) of the host on which this system instance is installed. Its time zone may differ from the time zone of either your web browser or the OS of your computer.
CockpitCockpit PUBLIC 13

In an SAP CC system landscape, all the SAP CC systems use the same time zone definition and its associated offset ahead or behind the Coordinated Universal Time (UTC3). This time offset can change throughout the year because of Daylight Saving Time (DST) adjustments.
In Cockpit and as of FPS 2 for release 2020 , your app:
● Displays dates/times in the format of the unique time zone that is defined for SAP Convergent Charging and its systems.
● Does not indicate the time zone's offset (number of hours or minutes ahead of or behind UTC) such as (UTC+02:00) in the date/time fields.
RememberWhen you work with your app, keep in mind that:
● The SAP CC systems may have a different time zone than you.● The app does not display the offset (number of hours or minutes ahead of or behind UTC).
RecommendationIn an SAP CC system landscape, all the Core Server system instances on the same host have the same date and time. Instances on different SAP CC hosts may have different date and time references when the host clocks are not synchronized.
SAP highly recommends that you synchronize the clocks of the hosts that compose your SAP CC system. You can implement a Network Time Protocol (NTP) server as detailed in the SAP CC 2020 Installation and Maintenance Guide. See Setting Up the System Time Zone.
This date/time information facilitates your technical operations, administrative tasks, or business configuration.
For example, you can easily correlate the date/time information displayed in your app with the date/time information that is stored in the logs and traces for each SAP CC system instance. Business data is released with a validity period based on dates and times.
ExampleWhen a Pricing Specialist sets up an additional information item, the app displays: Enter a time that exists in the time zone for the Web server.
This message warns and instructs the SAP CC user what to do. The entered date/time value is not valid for the time zone used by the intermediate Java Web Server system on which the Cockpit back-end application is installed and deployed on.
When an SAP CC administrator works with an app, the displayed or entered dates/times are defined in the time zone for the SAP CC system landscape. These dates/times correspond to the date/time information recorded in the logs and traces. It facilitates the technical operations.
3 Coordinated Universal Time
14 PUBLICCockpit
Cockpit

1.2.9.3 Themes
Various themes are predefined to assist SAP CC users with various color and vision preferences.
The launchpad offers two high-contrast themes [page 19] to support readability in light sensitive situations.
Usually, you can choose between the following themes for the appearance interface:
● SAP Quartz Light (SAP default theme) - The new quartz theme is lighter and more neutral, to blend more into the background, giving application content the center stage. It is simple and minimalist.
● SAP Belize● SAP Belize Plus● SAP Belize High Contrast Black● SAP Belize High Contrast White (as of support package 6 for release 5.0)
1.2.9.4 Automatic Sign-Out When Inactive
For security reasons, usually a time for automatic sign-out is set. Your IT administrator can define the time, when the sign-out should happen. When you have not been active in the launchpad for this time, you are automatically signed out.
It can be configured that a few minutes before this timeout, a warning is displayed, informing you that you will be signed out soon. You can choose to stay signed in (this resets the timeout) or sign out directly.
1.2.9.5 Working with Notifications
Your Convergent Charging Cockpit launchpad provides a Notifications window that lets you know about important tasks and requests requiring your timely action or knowledge. They allow you to view immediate updates on the latest and most important events that are related to your role.
1.2.9.6 Usability Features in the Launchpad
Your Convergent Charging Cockpit launchpad includes usability features, such as keyboard-only navigation, screen reader support, and high contrast themes to assist you while working in the launchpad. SAP CC users seeking information about accessibility may also find some valuable information here.
Keyboard Navigation [page 16]
Screen Reader Support in the Launchpad [page 18]
High-Contrast Themes [page 19]
CockpitCockpit PUBLIC 15

1.2.9.6.1 Keyboard Navigation
To navigate in the launchpad using the keyboard instead of the mouse, you use a combination of the Tab , F6 , and Shift keys:
● F6 to move the focus on the next group of user interface elements● Tab to move the focus on the next user interface element● Shift + F6 and Shift + F6 to move the focus on the reverse direction
You may need to first press Enter or the Space bar to open or view the selected user interface element.
For more information and user assistance, refer to the user guides for SAP Fiori Launchpad.
TipPower users prefer keyboard navigation because it is faster and more accurate. View the available keyboard shortcuts [page 16].
Keyboard Shortcuts [page 16]Use keyboard shortcuts to navigate between the user interface elements, reach active screen elements, and save you lots of time.
1.2.9.6.1.1 Keyboard Shortcuts
Use keyboard shortcuts to navigate between the user interface elements, reach active screen elements, and save you lots of time.
In Convergent Charging Cockpit, you can use keyboard shortcuts to perform actions in the launchpad and its apps. The following shortcuts are available:
Shortcut (Qwerty Keyboard) Action Example
Tab Select the next user interface element.
In editing mode, navigate within the interactive elements in a cell or move across next editable cells.
Press Tab to move forward until the focus is on the expected user interface element.
Tip: Use F6 to speed up the navigation.
Shift + Tab Select the previous control in the user interface. Move backward.
Space If the element is selectable, toggle the select/deselect.
If the element is not selectable, trigger the corresponding associated action.
Turn on/off a checkbox.
Trigger the action associated with a button.
Enter Trigger the action associated with a button, an item in a list.
Execute buttons or menu items.
16 PUBLICCockpit
Cockpit

Shortcut (Qwerty Keyboard) Action Example
F6 Move the focus to the next group of user interface elements. This key is fundamental.
Press F6 several times to move the focus and activate the user interface element that you want.
Shift + F6 Group navigation – move to the previous control before the current group.
UPArrow Move to the previous item within a control. Traverse the items in a list.
DOWNArrow Move to the next item within a control. Traverse the items in a list such as a value list or a result list.
LEFTArrow Move to the left within a control. Traverse the columns in a row of a table.
Move to the next left tab in a tab bar.
RIGHTArrow Move to the right within a control. Traverse the columns in a row of a table.
Move to the next right tab in a tab bar.
Home Focus on the first item within a control. Traverse the items in a list.
Navigate to the root of a tree.
End Focus on the last item within a control. Traverse the items in a list.
Navigate to the end of a tree.
Ctrl + A If items of a control are selectable, toggle select/deselect of all items.
F2 If the item has a Detail event, trigger the Detail event.
F4 Open a Value Help dialog box.
F5 Refresh the displayed page.
Escape Close down dialog boxes (aka popup windows).
Shortcuts for the Pricing Trees
Shortcut Action Category Special Shortcut
Space Select/unselect (turn on/off) a checkbox for a component in a pricing tree in order to remove the component or add another component.
Tip: Press F6 several times to move the focus and activate the pricing tree in the displayed user interface.
Edition
CockpitCockpit PUBLIC 17

Shortcut Action Category Special Shortcut
Ctrl + Inser Add a pricing component to the pricing tree for a rate plan. See the above note.
Edition This shortcut is specific for the pricing trees in SAP Convergent Charging.
Ctrl + Del Remove a pricing component from the pricing tree. See the above note.
Edition This shortcut is specific for the pricing trees.
Ctrl + Backspace
Remove a pricing component from the pricing tree. See the above note.
Edition This shortcut is specific for the pricing trees.
Ctrl + C Copy one or multiple pricing components from the pricing tree as well as their related subbranches. Multiselection of nodes belonging to the same parent node is possible. See the above note.
Edition
Ctrl + X Cut one or multiple pricing components from the pricing tree as well as their related subbranches. Multiselection of nodes belonging to the same parent node is possible. See the above note.
Edition
Ctrl + V Paste previous cut or copied pricing components after the selected target node in the pricing tree. See the above note.
Edition
Alt + UP Arrow In a pricing tree, move up a selection of operator components that are contiguous. See the above note.
Edition This shortcut is specific for the pricing trees in SAP Convergent Charging.
Alt + DOWN Arrow
In a pricing tree, move down a selection of operator components that are contiguous. See the above note.
Edition This shortcut is specific for the pricing trees in SAP Convergent Charging.
Enter Show/hide the information that relates to a component or subbranch node in the pricing tree.
Navigation
DOWN Arrow
(resp. UP Arrow )
Move to the bellow (resp. above) node in the pricing tree.
Navigation
RIGHT Arrow
(resp. LEFT Arrow )
Expand (resp. collapse) a branch in the pricing tree.
Navigation
1.2.9.6.2 Screen Reader Support in the Launchpad
The screen reader reads out the contents of the user interface to you. Labels, headings, and descriptions help describe the contents and visual elements of an application.
18 PUBLICCockpit
Cockpit

Screen reader support in SAP Fiori launchpad is based on built-in keyboard navigation and roles, and the names and states of functional elements and areas. For example, in the launchpad the screen reader announces:
● Menu options and how many there are● Which tiles and which groups are in focus
1.2.9.6.3 High-Contrast Themes
High-contrast themes help users to see more details.
Various themes [page 15] are predefined to assist SAP CC users with various color and vision preferences. The Convergent Charging Cockpit launchpad offers two high-contrast themes to support readability in light sensitive situations.
In your user preferences, choose the theme SAP Belize High Contrast Black. It is a white-on-black scheme that displays white texts on a black background.
In bright environments, choose the theme SAP Belize High Contrast White. It is a black-on-white scheme that displays black texts on a white background.
1.3 Tasks with Cockpit
Activities and Tasks
You use Convergent Charging Cockpit regularly or exceptionally to inspect, administer, or configure the SAP CC Core Server systems and data.
● If these administrative or configuration tasks are part of your daily activities, take few minutes to discover this new user interface in your web browser. Navigate to the home page and benefit from a modern and efficient user experience.
● If you want to complete an occasional task successfully, get started [page 4] with the user interface concepts and perform one of the following tasks depending on your goals and responsibilities:
Launching Cockpit [page 20]How to start your web interface properly.
Tasks for Pricing Specialists [page 21]As an SAP CC pricing specialist, you use the Convergent Charging Cockpit user interface to configure the pricing for the services or products that you want to monetize.
Tasks for System Administrators [page 25]As an SAP CC system administrator, you regularly or exceptionally use Convergent Charging Cockpit to inspect or configure the SAP CC Core Server system.
CockpitCockpit PUBLIC 19

1.3.1 Launching Cockpit
How to start your web interface properly.
Executing the User Interface
To start your Convergent Charging Cockpit:
● Open a web browser.● Just enter the URL4 that corresponds to your favorite SAP CC Cockpit application and distant Core Server
system.
TipURL Syntax
Use the following syntax:
http://<IP_OR_DNS_ADDRESS>:<PORT_NB>/<WEB_APP_NAME>/
or in a secure environment:
https://<IP_OR_DNS_ADDRESS>:<PORT_NB>/<WEB_APP_NAME>/
Where:
● <IP_OR_DNS_ADDRESS> corresponds to the IP address or DNS name of the Tomcat Server host● <PORT_NB> corresponds to the dedicated communication port● <WEB_APP_NAME> corresponds to the technical short name of the SAP CC Cockpit application
(default: cccockpit)
It is the path to the web application in the Tomcat Server or the Tomcat Context Path of the Cockpit application. Contact your IT administrator for more information and support.
NoteThis URL depends on the installation in your SAP system landscape and data center. When deploying the web applications, the IT administrator has communicated about these URLs.
● A sign-in page appears in the browser.● As an SAP CC administrator or a support specialist, log on to the user interface to access the
administration tools. Cockpit transmits your operation requests to the target Core Server system.
4 Uniform Resource Locator
20 PUBLICCockpit
Cockpit

Connecting and Logging On
The back-end component of SAP CC Cockpit communicates directly with the dispatcher instances of the target SAP CC Core Server system via the HTTP Communication Interface (HCI). The messages are always redirected in the background to the primary dispatcher instance of the Core Server system.
Working with the User Interface
Once authenticated, you can start working with SAP CC Cockpit. Cockpit includes several Cockpit Apps [page 27]. Click the tile that corresponds to your app.
Refer to the regular or exceptional tasks [page 19] that you can perform.
NoteBe familiar with the SAP UI5 concepts which this user interface is based on navigation, filters, trees, input fields.
1.3.2 Tasks for Pricing Specialists
As an SAP CC pricing specialist, you use the Convergent Charging Cockpit user interface to configure the pricing for the services or products that you want to monetize.
Business Configuration
1. Create a catalog [page 94].2. Set up the data structures for the input chargeable items and output charged items:
○ In case of usage-based pricing, create the necessary chargeable item classes [page 75] for describing the metered input data for usage charges.
○ Create the necessary charged item classes [page 88] for the output data.3. Set up the data structures for the tables that you want to use in your rate plans:
○ Create your mapping table classes [page 111], when necessary.○ Create your range table classes [page 243], when necessary.
4. Set up the mapping tables by manually entering data or by importing data.○ Create mapping tables [page 126].○ Create range tables [page 260].
5. Configure your rate plan [page 180] and its charges.6. Release the rate plans [page 209].7. Transport [page 230] and validate the pricing configuration in test and QA system landscapes.8. Put the master data into production by transporting [page 230] the pricing configurations to the productive
system.
CockpitCockpit PUBLIC 21

Maintenance and Evolutions
● In a development SAP system landscape, investigate and correct pricing issues due to incorrect rate plans or data in tables in the production system landscape.
● Implement changes from the marketing team:○ Change data tables.○ Maintain existing rate plans [page 210] or configure new ones.○ Retire a rate plan [page 210].
● Put the corrections or changes into production by transporting [page 230] the relevant pricing configurations.
Task Index
As a pricing specialist, you regularly or exceptionally use Convergent Charging Cockpit to configure the pricing for the subscription- and usage-based services of the service provider company that you represent.
Activity Tasks App
Use the launchpad Launching Cockpit [page 20] Cockpit [page 3]
Configure the chargeable item classes (for input data)
● Creating a Chargeable Item Class [page 75]
● Listing and Searching For Chargeable Item Classes [page 72]
● Viewing a Chargeable Item Class [page 74]
● Editing a Chargeable Item Class [page 76]
● Deleting a Chargeable Item Class [page 77]
● Transporting a chargeable item class: see Transporting a Rate Plan and Its Related Pricing Elements [page 230]
Manage Chargeable Item Classes [page 70]
22 PUBLICCockpit
Cockpit

Activity Tasks App
Configure the charged item classes (for output data)
● Creating or Copying Your Charged Item Classes [page 88]
● Creating a Charged Item Class from a Billable Item Class [page 91]
● Creating a Pricing Catalog [page 94]
● Listing or Searching For Charged Item Classes [page 94]
● Viewing a Charged Item Class [page 95]
● Refreshing the Billable Item Mapping [page 96]
● Associating a Charged Item Class with a Billable Item Class [page 97]
● Editing a Charged Item Class [page 98]
● Deleting a Charged Item Class [page 98]
● Transporting a charged item class: see Transporting a Rate Plan and Its Related Pricing Elements [page 230]
Manage Charged Item Classes [page 79]
Configure the pricing data tables ● Creating or Copying a Mapping Table Class [page 111]
● Creating a Pricing Catalog [page 113]
● Listing and Searching For Mapping Table Classes [page 114]
● Viewing and Reviewing a Mapping Table Class [page 115]
● Editing a Mapping Table Class [page 115]
● Deleting a Mapping Table Class [page 117]
● Transporting a mapping table class: see Transporting a Rate Plan and Its Related Pricing Elements [page 230]
Manage Mapping Table Classes [page 101]
CockpitCockpit PUBLIC 23

Activity Tasks App
● Creating a Mapping Table [page 126]
● Listing and Searching For Mapping Tables [page 129]
● Viewing a Mapping Table [page 130]
● Editing a Mapping Table and its Rows [page 132]
● Importing Rows in a Mapping Table [page 128]
● Exporting Mapping Table Rows to a File [page 128]
● Deleting a Mapping Table [page 132]
● Transporting a mapping table: see Transporting a Rate Plan and Its Related Pricing Elements [page 230]
Manage Mapping Tables [page 122]
● Creating or Copying a Range Table Class [page 243]
● Creating a Pricing Catalog [page 246]
● Listing and Searching For Range Table Classes [page 247]
● Viewing and Reviewing a Range Table Class [page 247]
● Editing a Range Table Class [page 248]
● Deleting a Range Table Class [page 250]
● Transporting a range table class: see Transporting a Rate Plan and Its Related Pricing Elements [page 230]
Manage Range Table Classes [page 237]
● Creating a Range Table [page 260]● Listing and Searching For Range
Tables [page 254]● Viewing a Range Table [page 256]● Editing a Range Table [page 264]● Importing a Range Table [page
267]● Exporting a Range Table [page
267]● Deleting a Range Table [page 268]● Transporting a range table: see
Transporting a Rate Plan and Its Related Pricing Elements [page 230]
Manage Range Tables [page 252]
24 PUBLICCockpit
Cockpit

Activity Tasks App
Implement pricing models ● Configuring a New Rate Plan [page 180]○ Creating a Rate Plan [page
180]○ Configuring the Pricing Tree of
a Charge [page 187]● Managing the Rate Plan Lifecycle
[page 209]● Maintaining Existing Rate Plans
[page 210]● Transporting a Rate Plan and Its
Related Pricing Elements [page 230]○ Exporting a Rate Plan and Its
Related Pricing Elements [page 230]
○ Importing a Rate Plan and Its Related Pricing Elements [page 231]
Manage Rate Plans [page 135]
Run or simulate triggering of usage charges
● Editing and Processing a Chargeable Item [page 289]
● Analyzing the Processing Result [page 291]
● Saving a Chargeable Item to a File [page 293]
● Loading a Chargeable Item from a File [page 293]
Process a Chargeable Item [page 285]
Related Information
Pricing Specialist's Journey [page 6]Core ToolManaging the Transport Requests
1.3.3 Tasks for System Administrators
As an SAP CC system administrator, you regularly or exceptionally use Convergent Charging Cockpit to inspect or configure the SAP CC Core Server system.
This section shows your tasks.
CockpitCockpit PUBLIC 25

System Information and Maintenance
● Viewing and Inspecting the System Status [page 40]● Managing the System Maintenance Mode [page 43]● Putting a System Instance on Standby and Resuming it to the Started Status [page 44]
System Configuration (Technical Features and Business Features)
● Viewing Parameter Values [page 273]● Filtering Parameter Values [page 275]● Configuring Parameter Values [page 277]● Exporting Values to a File [page 278]● Preparing Custom Files [page 279]● Importing Values from a File [page 281]
Technical Monitoring
● Filtering the Item Files [page 30]● Viewing and Analyzing the File Metadata [page 33]● Exporting some File Metadata to a Spreadsheet File [page 33]
Audit
● Viewing and Inspecting the System Status [page 40]● Viewing Parameter Values [page 273]
● Filtering User Operations [page 64]● Viewing and Auditing Some User Operations [page 65]● Exporting User Operations and Objects Values [page 67]
● Viewing and Analyzing Some Usage Metrics of the System [page 50]○ Working with the Metric Chart [page 53]○ Working with the Metric Table [page 54]○ Filtering Usage Metrics [page 55]○ Using Variants [page 56]
● Exporting Usage Metrics to a Spreadsheet File [page 57]
● Verifying System Usage and Licenses [page 58]● Downloading a License Auditing Report [page 59]
26 PUBLICCockpit
Cockpit

Additional Information
In case of an issue with your user interface, see the Troubleshooting with Cockpit [page 298] section in this primary help.
TipTo enrich your user experience, view the FAQs and Tips About Cockpit [page 295].
1.4 Cockpit Apps
With the Cockpit user interface, you quickly and efficiently perform your administrative or business configuration tasks. On the launchpad, click the corresponding tile to open an app. Which tiles are displayed depends on the user’s granted role.
Pricing Data Structures
● Manage Chargeable Item Classes [page 70]● Manage Charged Item Classes [page 79]● Manage Mapping Table Classes [page 101]● Manage Range Table Classes [page 237]
Pricing Definition
● Manage Rate Plans [page 135]● Manage Mapping Tables [page 122]● Manage Range Tables [page 252]
Pricing Administration
● Process a Chargeable Item [page 285]
CockpitCockpit PUBLIC 27

System Information
● Analyze Item Files [page 28]● Display System Status [page 36]● Display Usage Metrics [page 48]● Display User Operations [page 62]
System Configuration
● Manage SAP CC System Parameters [page 271]
1.4.1 Analyze Item Files
With the app Analyze Item Files, you can visualize and analyze the high-volume item files that are generated by the SAP CC Core Server system. To facilitate your technical operations, you quickly and efficiently inspect the selected item files.
What's New? [page 28]
About This App [page 29]
Important Concepts [page 29]
Tasks [page 30]
FAQs and Tips [page 34]
Troubleshooting [page 36]
1.4.1.1 What's New?
This section highlights the main changes in the app Analyze Item Files that relate to new or changed features.
What Was New in SAP CC 5.0
Please, see https://help.sap.com/viewer/c7120011d1c244168dc1f945a06f1350/5.0.latest/en-US/b28a1fdd7ce2414fbd25b0d8b8c5b819.html.
28 PUBLICCockpit
Cockpit

1.4.1.2 About This App
Target Audience
The app Analyze Item Files is intended for the following audiences:
● IT Administrator (system, application, business)● Operations Team Expert● Support Specialist (SAP SE, Local Support Team)
App Summary
The app Analyze Item Files provides you with the following capabilities to monitor and operate with the connected Core Server system:
● Filter [page 30] the list of item files generated by the rater and bulkloader instances during the processing execution of the Chargeable Items Charging and Data Files Bulk Loading operations.
● View [page 33] the metadata related to the filtered item files, for monitoring purpose.● Export [page 33] the displayed metadata to spreadsheet files.
See the Important Concepts [page 29] topic for more information about the business processes.
1.4.1.3 Important Concepts
As an SAP CC administrator or operations team expert, you are aware of the following concepts to use the app Analyze Item Files in your SAP system landscape:
● The technical operations to administer the Core Server systems that are running in your SAP system landscapes.
● The item files that result from the business operations (rating, refilling, activation) and that are generated by the connected Core Server system.
● The following business processes of SAP Convergent Charging:○ Chargeable Items Rating Process○ Data Files Bulk Loading Process
● The corresponding system configuration settings:○ The notification policy, CIF5 configuration, and the RIF6 configuration of your Core Server system○ The JCo7 destination definitions - in an integrated SAP Solution with SAP Convergent Invoicing in SAP
S/4HANA or SAP Business Suite
5 Charging output Integration Framework6 Rerating Integration Framework7 Java Connector
CockpitCockpit PUBLIC 29
For more information and user assistance, refer to the Processes and Functions section in the SAP CC 2020 Application Help.
NoteYour app displays some date/time information about the management and processing of these item files.
● It corresponds to the date and time of the SAP CC system instance that registered the information. It relates to neither the date/time of your computer nor your local time zone.
● It does not correspond to the date/time properties for the item files in the file system that is used as storage.
In Cockpit, your app does not display the time zone information of the SAP CC system instances. This time zone may differ from your time zone.
1.4.1.4 Tasks
With the app Analyze Item Files, you complete the following administrative tasks:
● Filtering the Item Files [page 30]● Viewing and Analyzing the File Metadata [page 33]● Exporting some File Metadata to a Spreadsheet File [page 33]
1.4.1.4.1 Filtering the Item Files
The Analyze Item Files app contains a filter bar located on the upper part of the screen. This filter bar gives the possibility to filter the file metadata that are stored within the SAP CC Core Database, using either:
● Visual filters [page 30], which represent a pre-defined graphical representation of filters● Compact filters [page 31], which represent a textual version of filters
Whatever the combined criteria are, the filtering scope determines a subset of item files whose metadata have been recorded within the Core Database.
TipYou can save your filtering criteria for a future use by creating a new variant (or modifying an existing one). For further information and concrete examples of possible dashboards you can create, refer to the Monitoring the File Metadata section of the SAP CC 2020 Tuning Guide documentation.
Visual Filters
To build your filtering condition, you can use the following visual filters:
30 PUBLICCockpit
Cockpit

● Items By Status, that gives the possibility to filter the items files according to their status● Unprocessed Items by Creation Event, that gives the possibility to define a filter related to the unprocessed
items according to the event that lead to the creation of the item file● Written Items (Rater) by Creation Date, that gives the possibility to set a filter related to the items written by
a rater instance, according to the creation date of the item file. This visual filter can be modified by clicking the Measure By button in order to change the type of concerned items
● Written Items (Rater) by Class Name, an adapted visual filter that gives the possibility to set a filter related to the items written by a rater instance, according to the name of the concerned item class. This visual filter:○ Is available in the Additional Filters of the Adapt Filters dialog window○ Can be modified by clicking the Measure By button in order to change the type of concerned item
Compact Filters
In case the visual filters do not fit your needs, you can use the following compact filters:
● Written Items (Rater), that corresponds to the number of items written by the rater instance in the data file● Written Items (Bulkloader), that corresponds to the number of items written by the bulkloader instance in
the data file● Unprocessed Items, that corresponds to the number of items which have not been processed yet● Successful Items, that corresponds to the number of items which were successfully processed● Lost Items, that corresponds to the number of items which could not be processed from the data file,
because:○ The items could not be read during cleaning○ The items were written by the rater but not found by the bulkloader○ The items statuses could not be determined after a bulkloader restart when resuming the processing
of the data file● Erroneous Items, that corresponds to the number of items which could not be sent to SAP CI while
processing the data file and were written to error data files● Pending Erroneous Items, that corresponds to the number of items which still need to be sent to SAP CI by
processing the related error data files● Creation Event, that corresponds to the type of event which triggered the creation of the data file, which
can be:○ A data file created to store items generated during the process○ A data file created to store items which could not be sent to SAP CI because they were invalid○ A data file created to store items which could not be sent to SAP CI because of a communication error○ A date file created for another unknown reason
● Creation Date, that corresponds to the date and time when the data file was created by an SAP CC system instance
● Class Name, an adapted compact filter that corresponds to the name of the item class related to the items contained in the data file
● Name, an adapted compact filter that corresponds to the name of the data file● Root Name, an adapted compact filter that corresponds to the name of the root data file (without any
extension), which can be:○ The name of the data file itself for data files generated during the rating process
CockpitCockpit PUBLIC 31

○ The name of the data file initially containing the items for data files related to erroneous items● Parent Name, an adapted compact filter that corresponds to the name of the parent data file (without any
extension), which can be:○ Empty for data files generated during the rating process○ The name of the produced data file for data files related to erroneous items
● Producer, an adapted compact filter that corresponds to the identifier of the instance which produced the data file, or "unknown" if the producer cannot be determined
● Consumer, an adapted compact filter that corresponds to the identifier of the instance which consumed the data file
● Writing End Date, an adapted compact filter that corresponds to the date and time when the writing of the data file ended
● Processing Start Date, an adapted compact filter that corresponds to the date and time when the processing of the data file started
● Processing End Date, an adapted compact filter that corresponds to the date and time when the processing of the data file ended
● Path Producer, an adapted compact filter that corresponds to the file system path where the data file was located when it was produced
● Path Consumer, an adapted compact filter that corresponds to the file system path where the data file was located when it was consumed
● Destination, an adapted compact filter that corresponds to the JCo or WS destination associated to the items contained in the data file
● Status, an adapted compact filter that corresponds to the current status of the data file, which can inform that:○ The data file was created○ The file is being written○ The file was archived and is ready for being processed by a bulkloader○ The file is being cleaned○ The file is being read and processed by a bulkloader○ The file was entirely processed by a bulkloader and renamed○ The file was entirely processed by a bulkloader and deleted○ The file could not be entirely read by a bulkloader
● Item Type, an adapted compact filter that corresponds to the type of items contained in the data file, which can be:○ Postpaid charged items○ Prepaid charged items○ Refill records○ Charged chargeable items○ Acquired chargeable items○ Notifications○ Rerating notifications○ Unknown items
● Checksum Status, an adapted compact filter that corresponds to the status of the computation and verification of the checksum of the data file
32 PUBLICCockpit
Cockpit

1.4.1.4.2 Viewing and Analyzing the File Metadata
The lower part of the Analyze Item Files app gives the possibility to visualize the metadata related to the set of item files previously filtered. According to your needs, you can visualize and analyze this metadata using a smart chart and/or a table that you can both configure to build your own dashboard.
Smart Charts
As far as the smart chart is concerned, you can:
● Modify the chart type, by clicking the Selected Chart Type button● Modify the structure of the chart (axis, data series), by clicking the Settings button● Investigate within the displayed data, by clicking the Drill Down button● Display textual values of a set of selected data (or a whole data series), by clicking the Details button● Modify the display of the chart legend, by clicking the Toggle Legend Visibility button● Modify the chart display mode (zoom in/out, full screen mode, display with table)
Tables
As far as the table is concerned, you can:
● Modify the type of displayed content, by clicking:○ The Show all Items button to display the whole set of filtered item files○ The Only Show Items Selected on the Chart button to only display the data selected in the smart chart
● Modify the structure of the table (displayed columns, sorting and grouping conditions), by clicking the Settings button
● Modify the table display mode (full screen mode, display with smart chart)● Modify the display scope, by clicking the Display Related Records button that is only available when an
element is selected in the table. When this button is clicked, only linked item files are displayed (i.e. items files concerned by the root or parent hierarchy).
● Export the content of the table in a spreadsheet file, by clicking the Export to Spreadsheet button
1.4.1.4.3 Exporting some File Metadata to a Spreadsheet File
NoteExport operation is only executed by the system when the number of filtered item files does not exceed the value of the query.limit.fetchSize parameter that is set in the configuration file of the deployed SAP CC Cockpit application. If the filtered content exceeds this number (10,000 by default), no data is exported.
CockpitCockpit PUBLIC 33

When such a situation occurs, adapt your filters [page 30] to decrease this number of item files and request the export again.
Procedure
To export some file metadata to a file:
1. Open the Analyze Item Files app2. Filter [page 30] some item files whose metadata you want to export3. Click Export to Spreadsheet and select the folder you want to save your spreadsheet file in4. Specify a name for the export spreadsheet5. Click Save
The app starts exporting and storing the information available in the table within your export spreadsheet.
1.4.1.5 FAQs and Tips
Based on SAP user feedbacks, we deliver Frequently Asked Questions (FAQs) about all aspects of working with the Cockpit application and its apps efficiently. In addition, we complete these solutions with some best time-saving and task-completion tips and tricks.
RememberPlease share your SAP user experience to enrich these sections in the SAP user assistance and product documentation for SAP Convergent Charging 2020.
Frequently Asked Questions (FAQs) [page 34]
Tips and Tricks [page 35]
1.4.1.5.1 Frequently Asked Questions (FAQs)
Why do filtered metadata not correspond to my filtering set?
Filters can be defined either using visual filters [page 30] or compact filters [page 31]. Verify that you did not set filtering criteria without displaying them on the filter bar. For further information, refer to the Filtering the Item Files [page 30] section.
Where are my variants?
The location of the variants depends on the configuration of Cockpit. It depends whether Cockpit uses a local storage or an embedded database. In case of a local storage, you might not be able to reuse a variant if you used another browser or another computer.
34 PUBLICCockpit
Cockpit

1.4.1.5.2 Tips and Tricks
Monitoring the unprocessed items
● Filtering the items:To create the relevant filter, execute the following operations:1. Click the Unprocessed Items element of the Items By Status visual filter, that corresponds to item files
containing unprocessed items (whatever their creation reason is)2. Click the Communication error element of the Unprocessed Items By Creation Event visual filter to deter
mine a subset of all the unprocessed items3. Click the Measure By button and select the Unprocessed Items element to modify the behavior of the third
visual filter and thus display the daily repartition of the unprocessed items created because of a communication error
4. Click the Adapt Filters button and browse the list of additional filters using the More Filter button5. Select the Written Items (Rater) by Class Name element, that appears in the Additional Filters section6. Click the Measure By button and select the Unprocessed Items element to modify the behavior of this ad
ditional visual filter used to display the repartition of the unprocessed items according to the name of the associated item class
7. Select the Show on Filter Bar option8. Click the Go button to update the filter bar that now contains four visual filters dedicated to the unpro
cessed items● Modifying the smart chart:
To display a more suitable smart chart, execute the following operations:1. Click the Selected Chart Type button and select the Pie Chart element2. Click the Settings button and only select the Unprocessed Items and Class Name elements to modify the
content of the smart chart and thus build a pie chart displaying the repartition of the unprocessed items according to the name of the associated item class
3. Click the OK button● Modifying the table:
To display a more suitable smart chart, execute the following operations:1. Click the header of the Unprocessed Items column, and click the Sort Descending element2. Click the header of the Class Name column, and click the Group element3. Click the Settings button and only select the Name, Status, Class Name, Unprocessed Items, Progress and
Creation Date elements to modify the content of the table and display the relevant information4. Click the OK button
● Creating a variant:To create a variant that will be available for future connections to the Analyze Item Files application, execute the following operations:1. Click the Select Variant button to open the window dedicated to the management of variants2. Click the Save As button3. Fill the Name field with a relevant name for your dashboard, such as Unprocessed items per item class4. In case you want this dashboard to be loaded on startup, select the Set as Default option5. Click the OK button to create this dashboard
CockpitCockpit PUBLIC 35

Use variants to save your environment.
In the Analyze Item Files app, you can save your filtering criteria and display settings by creating a new variant in your working environment.
1.4.1.6 Troubleshooting
As part of the technical operations, you may have to troubleshoot some problems when using this app or working with your SAP CC environment (systems, data, users) in your SAP system landscape. Please find afterwards a list of possible symptoms and related solutions that you can try to implement by yourself.
I experience slowdowns when working with the app.
This situation may be due to the number of metadata stored in the Core Database, that can become too important. SAP SE recommends that you contact your system administrator. It might be necessary to execute purge operations in order to decrease the number of stored metadata.
NoteFor security reasons, SAP SE recommends that you create a service user dedicated to connections between SAP CC Cockpit and the Core Database. This user shall be granted a read access to database views pointing on the OBJECT_CHANGE_LOG, FILE_METADATA and FILE_METADATA_PATH tables.
RecommendationSAP SE recommends to activate the recording of file metadata, to monitor the generation of data files. Refer to the Enabling the Recording of File Metadata chapter of the SAP CC 2020 Tuning Guide documentation for more information.
1.4.2 Display System Status
With the app Display System Status, you have a clear overview of the status and availability of an SAP CC Core Server system in your SAP Convergent Charging landscape. You quickly and efficiently visualize and analyze the instances that compose your connected system.
What's New? [page 37]
About This App [page 37]
Important Concepts [page 38]
Tasks [page 40]
FAQs and Tips [page 46]
Troubleshooting [page 47]
36 PUBLICCockpit
Cockpit
1.4.2.1 What's New?
This section highlights the main changes in the app Display System Status that relate to new or changed features.
What Was New in SAP CC 5.0
Please, see https://help.sap.com/viewer/c7120011d1c244168dc1f945a06f1350/5.0.latest/en-US/b28a1fdd7ce2414fbd25b0d8b8c5b819.html.
1.4.2.2 About This App
Target Audience
The app Display System Status is intended for the following audiences:
● IT Administrator (system, application, business)● Operations Team Expert● IT Consultant/Implementer● Support Specialist (SAP SE, Local Support Team)
App Summary
The app Display System Status provides you with the following capabilities:
● Viewing and Inspecting [page 40] information such as:○ The availability of all the instances that compose your SAP CC Core Server system, that gives you the
possibility to briefly observe the restart of your system after a maintenance operation (such as shutdown or startup sequences)
○ The important Information that facilitate your technical operations (such as software version, partitions distribution and reallocation)
● Managing variants, to define custom views that facilitate your administrative tasks● Managing the System Maintenance Mode [page 43], to enable or disable the maintenance mode for your
SAP CC Core Server system● Putting a System Instance on Standby and Resuming it to the Started Status [page 44], to switch a rater
or guider to the standby mode, or resume it
CockpitCockpit PUBLIC 37

NoteTo monitor the performance and health of your SAP CC systems in real time, you can also configure your SAP CC Core Server system in order to communicate with CA Application Performance Management (APM). For further information, refer to the SAP CC 2020 Installation and Maintenance Guide documentation.
1.4.2.3 Important Concepts
As an IT Administrator or Operations Team Expert, you are aware of the following concepts to use the app Display System Status in your SAP system landscape.
SAP CC multi-hosts and multi-instances landscapes
For high availability and scalability purposes, you can extend your landscape by installing additional instances that can be deployed on different physical hosts. For further information about such landscapes, refer to the following documentations:
● Architecture section of the SAP CC 2020 Application Help documentation.● Installing a Multi-Hosts Landscape section of the SAP CC 2020 Installation and Maintenance Guide
documentation.
Communication channels used within SAP CC landscapes
The communications between client applications/systems and instances in your SAP Convergent Charging landscape rely on different communication protocols:
● HTTP8, used to transport:○ SOAP9 messages (Web Services technical interface)○ Proprietary XML10 messages (HTTP Communication Interface, HCI)○ JSON messages between the SAP Fiori user interfaces and the Cockpit element
● TCP/IP11, used to transport proprietary TCP Packets, either internally between server instances or externally between the deployed components
● UDP12, used to transport messages dedicated to network discovery purposes● JDBC13, used to communicate with running RDBMS14
8 HyperText Transfer Protocol9 Simple Object Access Protocol
10 eXtended Markup Language11 Transmission Control Protocol / Internet Protocol12 User Datagram Protocol13 Java Database Connectivity14 Relational Database Management System
38 PUBLICCockpit
Cockpit
For further information, refer to the SAP CC 2020 Security Guide documentation.
Note● The communication between the deployed components of SAP CC can be secured in order to fit the
security policy of your landscape. For further information, refer to the Securing a Landscape section of the SAP CC 2020 Installation and Maintenance Guide documentation.
● Secured connections and encrypted communications are based on the Secure Socket Layer/Transport Layer Security (SSL/TLS) protocols. To check the protocols that are declared in your deployed Core Server system, you can use the Manage SAP CC System Parameters [page 271] app to check the value of the TLS_PROTOCOLS system parameter
Instance possible statuses
In your SAP CC Core Server system, each instance has some particular statuses that are orchestrated by the primary dispatcher instance. These possible instance statuses are:
● Starting, which means that the instance is executing its startup sequence● Waiting, which represents an intermediate status only used for updater instances to inform that it is
registering on the dispatcher instance and is thus waiting for the permission to continue the starting sequence of its services
● Started, which means that the instance services are started and ready for processing operation requests● Stopping, which means that the instance started its shutdown sequence● Stopped, which means that the instance is completely stopped and cannot process any operation● Going into Standby, which represents a status only used for rater and guider instances to inform that the
instance is still performing charging operations, while its handled partitions are being transferred to the other started raters or guiders
● Standby, which represents a status only used for rater and guider instances to inform that the instance is excluded from the scope of the charging operations, and that its handled partitions have been transferred to the other started raters or guiders
NoteFor each instance of the Core Server system, the starting and shutdown sequences depend on the instance type, special conditions (processes) and some particular roles (primary dispatcher instance, active updater instance).
Partitions warm-up and distribution
SAP Convergent Charging data have been partitioned within the databases in order to isolate them and ensure performances and stability towards concurrent accesses. Most of the instances of the SAP CC Core Server system handle this partitioned data within structures that are:
● Stored in the memory of the concerned instances● Managed by instances as cached structures
CockpitCockpit PUBLIC 39

● Related to a given isolated partition
For optimization purpose, SAP CC uses a warm-up mechanism for the cached structures that must be loaded by raters and guiders. This mechanism consists in:
● Retrieving the necessary partitioned data either from database or from another instance, according to the configuration
● Loading this data into the memory of the concerned instance
When a rater or guider is added or removed from the list of running instances, the primary dispatcher must reorganize the Partition Map and reallocate the list of partitions to the running instances in order to re-distribute the overall data. When such a situation occurs, the content of every transferred partition must be warmed-up by the destination instance, a situation which can impact the overall performance of the system. For further information, refer to the Partitioning Routing section of the SAP CC 2020 Application Help documentation
1.4.2.4 Tasks
With the app Display System Status, you complete the following administrative tasks:
● Viewing and Inspecting the System Status [page 40]● Managing the System Maintenance Mode [page 43]● Putting a System Instance on Standby and Resuming it to the Started Status [page 44]
NoteInherited from SAP CC Cockpit, you can also manage variants to define custom views that facilitate your administrative tasks. By default, a "Standard" variant is available and displays basic information about the SAP CC system instances (instance statuses, instance IDs, Java process IDs, instance start dates/times, instance versions). You cannot customize this variant, but you can create additional ones such as:
● A "CC maintenance operations" variant, to display information such as the instance version, identifier and status, and the subset of partitions handled by the instance
● A "CC communications" variant, to display the configured URLs and secured modes
1.4.2.4.1 Viewing and Inspecting the System Status
The workspace of the Display System Status app is made up with two main areas:
● An upper area, that provides you with a global system status rendered as:○ A donut chart summarizing the available instances○ The detailed list of available instances, grouped by instance types and statuses
● A lower area, that contains a table whose content can be customized to fit specific needs. To modify the content of the table, execute the following procedure:
1. Click the button2. Select the columns you want to display. For further information about the available information, refer
afterwards
40 PUBLICCockpit
Cockpit

3. Define the column sequence using the up and the down buttons4. Click the Sort tab to configure your sorting policy5. Click the Filter tab to specify some filtering conditions based on information inclusion or exclusion6. Click the "OK" button to apply your changes
Note○ If necessary, you can create a new variant to store this presentation and quickly retrieve this
information in the future○ To track in real time the evolution of the displayed information, you can refresh the table manually
or automatically, using the dedicated buttons
Available information
The following table contains the list of available information that can be displayed:
Element Description
Instance information
Status The operational status of the instance, as described in the Important Concepts [page 38] section.
Started On The date and time information when the instance was started. The reference is the current date/time for the operating system of the machine that hosts this instance.
Instance Date/Time
This information represents the current date/time for the operating system of the SAP CC host on which the instance is installed. The app does not display the time zone of this operating system. SAP SE recommends that you synchronize the clocks of the hosts that compose your SAP Convergent Charging landscape.
Instance Type The type of the instance in the Core Server system: updater, dispatcher, guider, rater, taxer or bulkloader.
Host The name or IP address (IPv4 or IPv6) of the host where the instance is deployed. For further information, refer to the description of the HOSTNAME indicator available in the SAP CC 2020 System Parameter Reference documentation.
Memory information
Free Memory The size of the memory remaining in a running instance. The runtime value in bytes is rounded to two decimal places by using the best unit (TB, GB, MB, or KB for example). This information relates to the remaining space in the heap of the Java Virtual Machine (JVM) that executes the instance. For further information, refer to the description of the FREE_MEMORY indicator available in the SAP CC 2020 System Parameter Reference documentation.
Total Memory The total size of the host memory where the instance is deployed. The runtime value in bytes is rounded to two decimal places by using the best unit (TB, GB, MB, or KB for example). This information represents the total amount of memory in the heap of the Java Virtual Machine (JVM) that executes the instance. For further information, refer to the description of the TOTAL_MEMORY indicator available in the SAP CC 2020 System Parameter Reference documentation.
Application information
Partitions The list of handled partitions, that are displayed as multiple ranges. If necessary, you can focus on a given data partition by defining a relevant filter.
CockpitCockpit PUBLIC 41

Element Description
Version The technical version number of the instance, that corresponds to the deployed binaries. For further information, refer to the description of the VERSION indicator available in the SAP CC 2020 System Parameter Reference documentation.
Identification information
Instance ID The unique identifier of the instance in the Core Server system. In your app, this information element is enriched with the current primary dispatcher and active updater instances. For further information, refer to the description of the INSTANCE_ID indicator available in the SAP CC 2020 System Parameter Reference documentation.
SAP Instance Number
The SAP Instance Number to know when working with SAP Management Console (SAP MC) or SAP Microsoft Management Console (SAP MMC) to start or stop the instance. This technical number (00-97) depends on the host on which this instance is deployed. For further information, refer to the description of the SAP_INSTANCE_NUMBER indicator available in the SAP CC 2020 System Parameter Reference documentation.
SAP Instance Name
The SAP Instance Name to know when managing a given instance with the startup framework. This information is based on a three-letter prefix dedicated to SAP Convergent Charging, combined with the two digits of the SAP Instance Number. For further information, refer to the description of the SAP_INSTANCE_NAME indicator available in the SAP CC 2020 System Parameter Reference documentation.
Process The identifier of the operating system Java process (aka PID) that executes the instance. For further information, refer to the description of the PROCESS_IDENTIFIER indicator available in the SAP CC 2020 System Parameter Reference documentation.
Communication information
Message TCP - URL
The main address of the Message TCP technical interface provided by the Core Server system, that includes:
● The schema name (tcp or tcps)● A hostname or IP address (IPv4 or IPv6)● The dedicated communication port number
Message TCP - Server Authentication
The authentication method that is currently configured for encrypted communications via the Message TCP technical interface of SAP CC.
WS - URL The main address of the Web Services (WS) technical interface provided by the Core Server, that includes:
● The schema name (http or https)● A hostname or IP address (IPv4 or IPv6)● The dedicated communication port number
WS - Server Authentication
The authentication method that is currently configured for encrypted communications via the Web Services technical interface of SAP CC.
HCI - URL The main address of the HTTP Communication Interface (HCI) technical interface provided by the Core Server, that includes:
● The schema name (http or https)● A hostname or IP address (IPv4 or IPv6)● The dedicated communication port number
HCI - Server Authentication
The authentication method that is currently configured for encrypted communications via the HCI technical interface of SAP CC.
42 PUBLICCockpit
Cockpit

Element Description
Internal - URL The main address for all the interinstance communications based on TCP, that includes:
● The schema name (tcp or tcps)● A hostname or IP address (IPv4 or IPv6)● The dedicated communication port number
Internal - Server Authentication
The authentication method that is currently configured for the interinstance communications orchestrated by the primary dispatcher.
TipTo display the value of a given indicator, you can either use Admin+ or the Manage SAP CC System Parameters [page 271] app.
1.4.2.4.2 Managing the System Maintenance Mode
To optimize the partitions distribution operations that are performed by the primary dispatcher instance during raters and guiders restarting operations, SAP Convergent Charging provides you with a feature named "System Maintenance Mode". This important feature gives the possibility to put your SAP CC Core Server system to a specific running mode within which raters and guiders can be switched to a standby mode, that you can use during maintenance operations such as upgrades and/or updates in order to:
● Optimize the usage of the available network resources by decreasing:○ The number of transferred partitions○ The solicitation of the databases
Which both decrease the probability of latency peaks.● Decrease the duration of warm-up operations of the cached structures handled by these instances in case
of partitions redistribution.
TipTo activate or deactivate the system maintenance mode, you can also use the Admin+ user interface. For further information, refer to the description of the maintenance command of the Admin+ user interface available in the SAP CC 2020 Primary Help for Admin+ documentation.
Activating the System Maintenance Mode [page 44]
Deactivating the System Maintenance Mode [page 44]
CockpitCockpit PUBLIC 43

1.4.2.4.2.1 Activating the System Maintenance Mode
Activate the System Maintenance Mode
To activate the system maintenance mode using the Convergent Charging Cockpit user interface, execute the following procedure as a system administrator:
1. Click the Switch to Maintenance Mode button available in the upper area of the workspace.2. Read the warning message and confirm the action if you agree with the terms and conditions.
Once in maintenance mode, you can select rater and/or guider instances and put them on standby. See Putting a System Instance on Standby [page 45].
Related Information
Putting a System Instance on Standby and Resuming it to the Started Status [page 44]
1.4.2.4.2.2 Deactivating the System Maintenance Mode
Deactivate the System Maintenance Mode
To deactivate the system maintenance mode using the Convergent Charging Cockpit user interface, perform the following procedure as a system administrator:
1. Click the Exit Maintenance Mode button.2. Confirm the action to deactivate the system maintenance mode and return to the standard running mode
for the Core Server system.
1.4.2.4.3 Putting a System Instance on Standby and Resuming it to the Started Status
When the system maintenance mode [page 43] is activated for your SAP CC Core Server system, it is possible to switch raters and/or guiders to a standby mode, taking into consideration the fact that:
● Every running rater or guider can be switched to a standby mode
44 PUBLICCockpit
Cockpit

● Every starting rater or guider starts in a standby mode● Every standby rater or guider instance:
○ Is alive but does not perform any business operation○ Does not handle any partition but is available for receiving partitions from the primary dispatcher○ Can be manually resumed by the administrator○ Is automatically resumed when the Core Server system exits the maintenance mode○ Is automatically resumed when another instance stops (and receives the partitions previously handled
by this stopped instance)○ Is not automatically resumed in case of another instance failure (which means that the remaining
started instances will handle the partitions previously handled by the crashed instance)● Every stopping rater or guider preferably transfers its partitions to a standby instance, which is
automatically resumed (except when the number of stopped instances exceeds the number of available standby instances, in which case the regular smart warmup mechanism applies)
TipTo put on standby or resume rater and guider instances, you can also use the Admin+ user interface.
For further information, refer to the description of the standby command of the Admin+ user interface available in the SAP CC 2020 Primary Help for Admin+ documentation.
Putting a System Instance on Standby [page 45]
Resuming a Standby Instance [page 46]
Related Information
Managing the System Maintenance Mode [page 43]
1.4.2.4.3.1 Putting a System Instance on Standby
Put a rater or guider Instance on Standby
To put rater and guider instances on standby using the Convergent Charging Cockpit user interface, perform the following procedure as a system administrator:
1. In the table, select the rater and guider instances that you want to put on standby2. Click the Put on Standby button available in the toolbar above the table.3. Read the warning message and confirm the action by clicking the Stand By button. You can verify the
evolution of the instance status, from Going into Standby to Standby.
CockpitCockpit PUBLIC 45

1.4.2.4.3.2 Resuming a Standby Instance
Resume a Standby rater or guider Instance
To resume raters and guiders using the Convergent Charging Cockpit user interface, perform the following procedure as a system administrator:
1. In the table, select the raters and/or guiders you want to resume.2. Click the Resume button available in the toolbar above the table.3. Read the warning message and confirm the action by clicking the Resume button. You can verify the
evolution of the instance status, that is set to "Started".
1.4.2.5 FAQs and Tips
Based on SAP user feedbacks, we deliver Frequently Asked Questions (FAQs) about all aspects of working with the Cockpit application and its apps efficiently. In addition, we complete these solutions with some best time-saving and task-completion tips and tricks.
RememberPlease share your SAP user experience to enrich these sections in the SAP user assistance and product documentation for SAP Convergent Charging 2020.
Frequently Asked Questions (FAQs) [page 46]
Tips and Tricks [page 47]
1.4.2.5.1 Frequently Asked Questions (FAQs)
Why may the displayed information differ from my SAP CC system?
The information may be cached, so it might be necessary to refresh the Display System Status app, either by reloading the web browser, or by refreshing (manually or using the auto-refresh button) the content of the table.
NoteWhen you adjust the visualization table settings or use another personalized variant, the app does not automatically refresh the data in the table.
46 PUBLICCockpit
Cockpit
Where are my variants?
The location of the variants depends on the configuration of Cockpit. It depends whether Cockpit uses a local storage or an embedded database. In case of a local storage, you might not be able to reuse a variant if you used another browser or another computer.
1.4.2.5.2 Tips and Tricks
How to observe a partition?
You can focus on a given data partition that is assigned to an instance sequentially. With the Display System Status app, you see the partition allocation and reallocation easily. Adjust the visualization table by filtering the Partitions column:
1. Click the button2. Click the Filter tab3. Define a filter by using the contains filter operator, and entering a unique numeric value that represents the
partition ID4. Click the OK button to apply your changes5. Refresh the table
Use variants to save your environment.
In the Display System Status app, you can save your filtering criteria and display settings by creating a new variant in your working environment.
1.4.2.6 Troubleshooting
As part of the technical operations, you may have to troubleshoot some problems when using this app or working with your SAP CC environment (systems, data, users) in your SAP system landscape. Please find afterwards a list of possible symptoms and related solutions that you can try to implement by yourself.
Unable to switch a rater or guider to standby mode
To switch a rater or guider to standby mode, you need to ensure that:
● The system is currently switched to maintenance mode. For further information, refer to the Managing the System Maintenance Mode [page 43] section
● You did not create any filter that excludes raters and guiders from the list of displayed (and thus selectable) instances. In case no filter exists, ensure that raters and guider instances have been deployed for your Core Server system
CockpitCockpit PUBLIC 47

1.4.3 Display Usage Metrics
With the app Display Usage Metrics, you quickly visualize and analyze the system usage measurement of your SAP CC Core Server system. You audit the daily business traffic and the master data growth by comparing the recorded usage metrics. You verify the metrics that are incorporated in the SAP license reporting and auditing programs and you prepare your license auditing reports yearly.
What's New? [page 48]
About This App [page 48]
Important Concepts [page 49]
Tasks [page 50]
FAQs and Tips [page 60]
Troubleshooting [page 61]
1.4.3.1 What's New?
This section highlights the main changes in the app Display Usage Metrics that relate to new or changed features.
What Was New in SAP CC 5.0
Please, see https://help.sap.com/viewer/c7120011d1c244168dc1f945a06f1350/5.0.latest/en-US/b28a1fdd7ce2414fbd25b0d8b8c5b819.html.
1.4.3.2 About This App
Target Audience
The app Display Usage Metrics is mainly intended for the following audiences:
● IT Administrator (application, system)● Operations Team Expert● Support Specialist (SAP SE, Local Support Team)
48 PUBLICCockpit
Cockpit

App Summary
The app Display Usage Metrics provides you with the following capabilities:
● Viewing and Analyzing Some Usage Metrics of the System [page 50]● Exporting Usage Metrics to a Spreadsheet File [page 57]● Verifying System Usage and Licenses [page 58]● Downloading a License Auditing Report [page 59]
App Workspace
The workspace of the app Display Usage Metrics is made up with two main areas:
● An upper area provides you with a table containing a list of recorded usage metrics whose content can be customized to fit specific needs. For further information about the available information and the customizing capabilities, refer to the Viewing and Analyzing Some Usage Metrics of the System [page 50] task
● A lower area provides you with the detailed information related to a given recorded usage metrics. This area is only visible when a usage metrics is selected in the upper area. For further information about this area, refer to the Viewing and Analyzing Some Usage Metrics of the System [page 50] task.
1.4.3.3 Important Concepts
As an application administrator or a system administrator for SAP Convergent Charging, you are aware of the following important concepts to use the app Display Usage Metrics in your SAP system landscape.
Usage Metrics
You know:
● The usage metrics that are recorded by your Core Server system on a daily basis: Viewing and Analyzing Some Usage Metrics of the System [page 50]
● The technical operations to administer the Core Server systems that are running in your SAP system landscapes
● The item files that result from the mass processing of the requested business operations (charging, refilling, activation) and that are generated by a Core Server system
● The System and Data Auditing features and functions of SAP Convergent Charging● The SAP License Management features of SAP Convergent Charging
For more information and user assistance, refer to the Features section in the SAP CC 2020 Application Help.
CockpitCockpit PUBLIC 49

Related Information
License ManagementSystem and Data Auditing
1.4.3.4 Tasks
With the app Display Usage Metrics, you administer your Core Server system efficiently and you perform your technical operations quickly.
You successfully complete the following occasional administrative tasks:
Usage Measurement License Auditing
● Viewing and Analyzing Some Usage Metrics of the System [page 50]○ Working with the Metric Chart [page 53]○ Working with the Metric Table [page 54]○ Filtering Usage Metrics [page 55]○ Using Variants [page 56]
● Exporting Usage Metrics to a Spreadsheet File [page 57]
● Verifying System Usage and Licenses [page 58]● Downloading a License Auditing Report [page 59]
TipTo enrich your SAP user experience, view and share our FAQs, tips, and tricks about Cockpit and your app. See FAQs and Tips [page 60].
1.4.3.4.1 Viewing and Analyzing Some Usage Metrics of the System
View and analyze your usage metrics to get an overview of the global usage for your SAP CC system and SAP CC software product.
1. Launch the Web application in your browser. (Launching Cockpit [page 20])2. In Cockpit, open the app Display Usage Metrics by clicking the tile.
The app displays all the recorded usage metrics that are available for your measured Core Server system. This data set represents the usage measurement of your system. It includes statistics about business traffic loads (daily numbers of items generated for accounting operations with back-end systems) and daily total numbers of subscriber accounts in master data.
3. According to your needs, you can:○ Visualize and analyze this information by working with a chart (Working with the Metric Chart [page
53]) or with a data table (Working with the Metric Table [page 54]) that you can both configure to build your own personalized views.
50 PUBLICCockpit
Cockpit

○ Manipulate the metric chart or the metric table to focus on particular information or view the data history. You compare the system usage with its current sizing, the regular data volume growth, and the business traffic increase.You can verify the adequacy of your system usage with respect to your license.
○ Filter some useless information. (Filtering Usage Metrics [page 55])○ Refresh your browser to display the latest values in real time.○ Export some measured data to a file (Exporting Usage Metrics to a Spreadsheet File [page 57]) or
download a license auditing report.
NoteThe possible information is:
DATE AND STATUS TRAFFIC LOAD MEASUREMENTMASTER DATA VOLUME MEASUREMENT
● Date● Year● Month● Status
● Total Items● Postpaid Items● Prepaid Items● Total Items (Max.)● Postpaid Items (Max.)● Prepaid Items (Max.)
● Subscriber Accounts (Max.)
See here:
● Working with the Metric Chart [page 53]● Working with the Metric Table [page 54]● Exporting Usage Metrics to a Spreadsheet File [page 57]● Verifying System Usage and Licenses [page 58]● Downloading a License Auditing Report [page 59]
Recorded Usage Metrics
Your app works with all the usage metrics that have been recorded by the system. It completes the information by calculating useful sums of item numbers and by identifying the maximum values observed for different periods.
Few peak values are incorporated in the SAP license reporting and auditing programs (Verifying System Usage and Licenses [page 58]).
The alphabetical list of possible information elements is:
ELEMENT USAGE METRIC FOR THE LICENSING DESCRIPTION
Date N/A The date when the SAP CC system recorded the corresponding usage metric.
CockpitCockpit PUBLIC 51

ELEMENT USAGE METRIC FOR THE LICENSING DESCRIPTION
Month N/A The recording month for a set of metric values when the SAP CC system measured its usage.
Postpaid Items No The cumulated number of postpaid items (such as postpaid charged items). The app calculates this value depending on the observed period.
Postpaid Items (Max.) Yes The maximum number of postpaid items (such as postpaid charged items) that was registered for a day.
Prepaid Items No The cumulated number of prepaid items (such as prepaid charged items or refill records). The app calculates this value depending on the observed period.
Prepaid Items (Max.) Yes The maximum number of postpaid items (such as prepaid charged items or refill records) that was registered for a day. The app displays the value that relates to the observed period (year, month, day). It represents a load peak of business operations (rating, refilling, activation) processed by SAP Convergent Charging.
Status No The processing status (complete or partial) of the usage metric recording. When enabled, the daily recording of usage metrics may fail when no updater instance is available or when some rater instances are not available in the SAP CC system (see System Parameter Reference).
Subscriber Accounts (Max.) Yes:
Use the history of the recorded values to verify your license adequacy and future usage.
The maximum number of existing subscribed accounts that was observed during the considered period. The app displays the value that relates to the observed period (year, month, day). It represents a volume peak of master data managed by SAP Convergent Charging.
Total Items No The cumulated number of items generated by the SAP CC system when executing the rating processes. The app calculates this value depending on the observed period.
Total Items (Max.) Yes:
Use the history of the recorded values to verify your license adequacy and future usage.
The maximum number of generated items that was registered for a day (continued 24 hours). The app displays the value that relates to the observed period (year, month, day).
52 PUBLICCockpit
Cockpit

ELEMENT USAGE METRIC FOR THE LICENSING DESCRIPTION
Year No The calendar year when the SAP CC system recorded the corresponding usage metric.
NoteThe usage metric recording may be partial when the system failed to collect the complete statistical data. When viewing and analyzing the recorded data, pay attention to the recording status values that are available in your usage metrics.
When there is no available updater instance at the time of the daily recording, the recorded usage metrics are also set to the Partial status. Verify the value of the METRIC_RECORDING_SCHEDULER_LAST_TRIGGER indicator in your running system (System Parameter Reference).
1.4.3.4.1.1 Working with the Metric Chart
Working with the Metric Chart
The most up-to-date measurement is at the left of the chart. Organize your chart and create variants (Using Variants [page 56]) to save your dashboards.
CautionFirst identify the type of the chart that you want to work with.
Then configure it and manipulate it.
By default, the app uses a chart type that shows all the most important metrics.
Actions
Use the interactive chart to view and analyze the recorded usage metrics graphically:
FOR... JUST DO...
Changing the chart type.Click the Selected Chart Type button and select the most relevant type such as:
● stacked column chart with two Y-axes (default in this app)
● column chart● column chart with two Y-axes
CockpitCockpit PUBLIC 53

FOR... JUST DO...
Changing the structure of the chart (axis, data series).Click the Settings button and set up your options. Make sure that your chart definition is compliant with its type. Do not select a 2 Y-axes chart if you want to display a chart with a single axis.
Displaying values and recording dates of a data subset. In the chart or in the legend, select a data bar, a dot, or a data series and click the Details button.
Observing the daily, monthly, or yearly details. Click the Drill Down button and add all items (such as Date or Month) repeatedly.
Changing the chart display modes. Click the relevant button:
● to maximize (full screen)
● to zoom in
● to zoom out
● to display both the chart and the table
● to display the chart
Hiding the chart legend.Click the Toggle Legend Visibility button.
Saving a personalized variant as new dashboard.Click the Select Variant button or click the Settings button in the chart bar.
Complete the corresponding task successfully (Using Variants [page 56]).
TipIn the chart bar, click the Drill Down button and select the Date item to show the daily values of the usage metrics.
1.4.3.4.1.2 Working with the Metric Table
Working with the Data Table
The most up-to-date measurement is at the top of the table.
Organize your data table and create variants to save your dashboards.
54 PUBLICCockpit
Cockpit
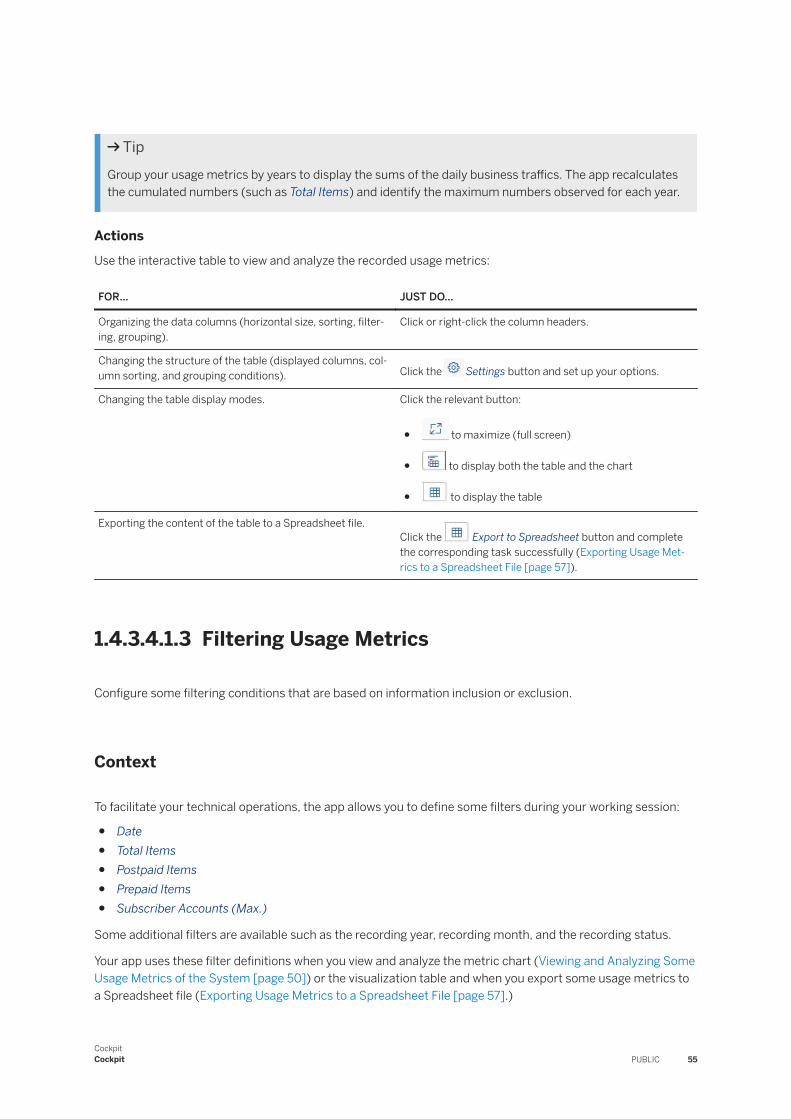
TipGroup your usage metrics by years to display the sums of the daily business traffics. The app recalculates the cumulated numbers (such as Total Items) and identify the maximum numbers observed for each year.
ActionsUse the interactive table to view and analyze the recorded usage metrics:
FOR... JUST DO...
Organizing the data columns (horizontal size, sorting, filter-ing, grouping).
Click or right-click the column headers.
Changing the structure of the table (displayed columns, column sorting, and grouping conditions). Click the Settings button and set up your options.
Changing the table display modes. Click the relevant button:
● to maximize (full screen)
● to display both the table and the chart
● to display the table
Exporting the content of the table to a Spreadsheet file.Click the Export to Spreadsheet button and complete the corresponding task successfully (Exporting Usage Metrics to a Spreadsheet File [page 57]).
1.4.3.4.1.3 Filtering Usage Metrics
Configure some filtering conditions that are based on information inclusion or exclusion.
Context
To facilitate your technical operations, the app allows you to define some filters during your working session:
● Date● Total Items● Postpaid Items● Prepaid Items● Subscriber Accounts (Max.)
Some additional filters are available such as the recording year, recording month, and the recording status.
Your app uses these filter definitions when you view and analyze the metric chart (Viewing and Analyzing Some Usage Metrics of the System [page 50]) or the visualization table and when you export some usage metrics to a Spreadsheet file (Exporting Usage Metrics to a Spreadsheet File [page 57].)
CockpitCockpit PUBLIC 55

By default, there is no filtering.
Procedure
You adapt your filters:
● In the SAP UI5 user interface, enter a filter condition in the input fields directly.
● Click or to define some filtering items or conditions carefully.● Some user guidance is available, such as calendar, predefined value list, and auto-completion.
TipEnrich your user experience by learning how the app defines tokens when you set up filter conditions.
Look at the tokens in the filter fields.
● The app applies the filtering immediately.● Click Adapt Filters to:
○ select the filters to show on the filter bar○ save the filtering settings to a variant (Using Variants [page 56])○ define new filtering conditions○ restore the filtering settings
● If you quit the app, the filter definitions are lost.
1.4.3.4.1.4 Using Variants
Create and manage some useful variants to personalize your SAP user experience by defining your own working views (charts, tables).
Context
Variants provide a means to use the same selection criteria repeatedly. When you define a variant, you can save it using a variant name and there is no need to reenter the same selection criteria each time you open this app in Cockpit.
As an SAP CC administrator, you define your useful variants and select the default one.
Arrange your user interface and create a variant in your working environment.
Procedures
In your app, you perform the following procedures to create, load, and manage your personalized variants.
56 PUBLICCockpit
Cockpit

NoteVariants depend on the web browser and the computer you work with. They are stored locally for later use.
To create a variant:1. Arrange your user interface to display the expected level of information.
2. Click the Select Variant button to open the window dedicated to the management of variants.3. The new window appears. Click the Save As button.4. Type the variant name that is relevant for you and your activity or task.5. When you want that this personalized view to be loaded on startup, select the Set as Default option.6. Click the OK button to create this variant.
To use a variant:
1. Click the Select Variant button to open the window dedicated to the management of variants.2. The new window appears. Click the row that relates to your variant.3. Click the Refresh button to update your displayed information.
To manage your variants:
1. Click the Select Variant button to open the window dedicated to the management of variants.2. Click the Manage button.3. Depending on your needs, configure the existing variants.4. Click the OK button to save your changes.
1.4.3.4.2 Exporting Usage Metrics to a Spreadsheet File
Export a subset of usage metrics to a Spreadsheet file that you can use as a report of a system measurement, an archive, or a new document for further investigations.
Prerequisites
The data table must contain some usage metrics recorded by your Core Server system.
Context
For your administrative tasks, you want to retrieve some usage metrics of SAP CC for reporting or archiving a system measurement. You may want to rework the report before storing it or sharing it.
With the app, you can export the system measures to a Spreadsheet file easily. In your Spreadsheet application, you can edit or consolidate the data (master data growth, daily business traffic).
CockpitCockpit PUBLIC 57

Procedure
In the app Display Usage Metrics:
● View the usage metrics recorded by your system (Viewing and Analyzing Some Usage Metrics of the System [page 50].)
● Filter some useless values Filtering Usage Metrics [page 55]).
● Click to display the data table when necessary.
● Click to export the data to a Spreadsheet file.
The app starts exporting and storing the information to a new file.
Depending on your local environment (Web browser, user settings, and operating system) the new file is in the Download folder for example
● Store the file in another location or open your Spreadsheet application to edit the report.● Define your own charts and data tables.● Save the new file.
.
1.4.3.4.3 Verifying System Usage and Licenses
Compare your SAP system usage measurement with your licenses and plan some extension.
Prerequisites
The usage metric recording is enabled in your system (METRIC_RECORDING_SCHEDULER_ENABLED in System Parameter Reference).
Context
SAP CC system measurement is based on usage metrics that are recorded daily. Only the yearly peak values are incorporated in the licensing:
● Daily business traffic: maximum numbers of charged items generated per day● Master Data volume: maximum number of subscriber accounts stored in the system
Note that the measurement does not count neither the incoming traffic nor the SAP CC users.
Each productive SAP CC system counts the generated items in prepaid and postpaid payment environments. The output items reflect the business accounting operations that are received by a back-end billing system.
58 PUBLICCockpit
Cockpit

Procedure
In the app Display Usage Metrics:
● View the usage metrics recorded by your Core Server system Viewing and Analyzing Some Usage Metrics of the System [page 50]).
● Click View License Auditing Reports.● View the current and past years in the preview.● For each year, note the peak values and the event dates that are incorporated in the licensing.● Verify that the measured values are compliant with the system sizing and the estimated data growth and
traffic load increase.● Ensure that you have adequate licensing for your installation and plan some extension.● Complete your internal audit by viewing and analyzing the usage metrics more precisely (Viewing and
Analyzing Some Usage Metrics of the System [page 50]).You can inspect the:○ history of the total numbers of subscriber accounts available in master data at the end of the day.○ evolution of the maximum numbers of output items (such as Postpaid Items (Max.)).
You can observe the numbers for different periods and time divisions.Use a chart type of Vertical Columns to show the information.
1.4.3.4.4 Downloading a License Auditing Report
Download a license auditing file as a yearly report that you can declare or share with the SAP Global License Auditing Services (GLAS).
Prerequisites
Your measured system runs with a permanent SAP license.
Context
License auditing of SAP Convergent Charging is based on a yearly report for each productive Core Server system. You declare the results or send the reports to your SAP license auditor.
The XML files are in the format of the Global License Auditing Services (GLAS) reports. They include short statistics about peak numbers of business accounting operations and of subscriber accounts in master data.
A report includes information about your license and production system:
● SAP Installation Number (INSTALLATION_NO indicator in System Parameter Reference) and SAP System Number (SYSTEM_NO indicator in System Parameter Reference) that were received with the permanent license)
CockpitCockpit PUBLIC 59

● SAP System ID (SID) (SYSTEM_ID parameter in System Parameter Reference) set at the time of the initial installation
● hardware keys of the hosts that compose your system (HARDWARE_KEY indicator in System Parameter Reference)
● peak values tracked in usage metrics (Verifying System Usage and Licenses [page 58])
Procedure
In the app Display Usage Metrics:
● View the usage metrics recorded by your Core Server system (Viewing and Analyzing Some Usage Metrics of the System [page 50]).
● Click View License Auditing Reports.● Choose the reference year of the license audit report.● Verify the usage metrics that are tracked in the report.
● Click to download the report as an XML file.The app starts exporting and storing the information to a new file. By default, the file name contains the SID of the Core Server system and the calendar year of the license audit report. Depending on your local environment (Web browser, user settings, and operating system) the new XML file is available in the Download folder for example.
● When you are ready to share the auditing results, send the report file to your SAP license auditor or consider the self-declaration on SAP Support Portal.
NoteFor more information about performing an SAP system measurement or uploading the GLAS report to the SAP Global Auditing License Services team, see:
SAP System Measurement .
To determine and share the usage of your SAP CC systems, SAP Convergent Charging is part of the SAP Self-Declaration Product Measurement program.
1.4.3.5 FAQs and Tips
Based on SAP user feedbacks, we deliver Frequently Asked Questions (FAQs) about all aspects of working with the Cockpit application and its apps efficiently. In addition, we complete these solutions with some best time-saving and task-completion tips and tricks.
RememberPlease share your SAP user experience to enrich these sections in the SAP user assistance and product documentation for SAP Convergent Charging 2020.
Frequently Asked Questions (FAQs) [page 61]
60 PUBLICCockpit
Cockpit

Tips and Tricks [page 61]
1.4.3.5.1 Frequently Asked Questions (FAQs)
What does partial status mean?
The recording of usage metrics may fail when the active updater instance or a rater instance is down in the Core Server system.
1.4.3.5.2 Tips and Tricks
How to view the usage metrics for a given day?
In the Display Usage Metrics app, you can filter [page 55] the system measurements by recording date. Just use the Date filter and set up the relevant condition to include the expected day.
Use variants to save your environment.
In the Display Usage Metrics app, you can save your filtering criteria and display settings by creating a new variant in your working environment.
1.4.3.6 Troubleshooting
As part of the technical operations, you may have to troubleshoot some problems when using this app or working with your SAP CC environment (systems, data, users) in your SAP system landscape. Please find afterwards a list of possible symptoms and related solutions that you can try to implement by yourself.
Error message: 'Sorry, the app can't load the license auditing reports. Please try again later. If this happens again, check the status of the updater and dispatcher instances in the Core Server system and contact the IT administrator of the intermediate Java Web Server system.'
CockpitCockpit PUBLIC 61

This error message means that the Display Usage Metrics app cannot receive any reports from the Cockpit back-end or from the target Core Server system. SAP SE suggests you to:
● Wait for few seconds, refresh the page, and view the reports again● As an SAP CC administrator, ensure that the primary dispatcher is neither down nor overloaded, using the sys
tem logs or a monitoring system (such as CA Introscope or SAP Solution Manager)● As the active updater is in charge of processing the license auditing reports, ensure that this instance is nei
ther down nor overloaded● Verify the performance and health of the communication networks between your browser, the Java Web
Server, and the Core Server system● Verify the logs and traces of the Core Server system● Verify the logs and traces of the Java Web Server where Cockpit is deployed on. Search for some entries re
corded by the Cockpit back-end application.
NoteFor security reasons, SAP SE recommends that you create a service user dedicated to connections between SAP CC Cockpit and the Core Database. This user shall be granted a read access to database views pointing on the METRIC_RECORD, FILE_METADATA and FILE_METADATA_PATH tables.
1.4.4 Display User Operations
With the app Display User Operations, you view and inspect the audited operations and continue your investigations. You can also view the related object change log when the audited operation modified the data object (creation, modification, deletion). Only an SAP CC user granted the “Administration” or “Remote Support” role can view this information.
What's New? [page 62]
About This App [page 63]
Important Concepts [page 63]
Tasks [page 64]
FAQs and Tips [page 68]
Troubleshooting [page 69]
1.4.4.1 What's New?
This section highlights the main changes in the app Display User Operations that relate to new or changed features.
62 PUBLICCockpit
Cockpit
What Was New in SAP CC 5.0
Please, see https://help.sap.com/viewer/c7120011d1c244168dc1f945a06f1350/5.0.latest/en-US/b28a1fdd7ce2414fbd25b0d8b8c5b819.html.
1.4.4.2 About This App
Target Audience
The app Display User Operations is mainly intended for the IT Administrator, Operations Team Expert and Support Specialist (SAP SE, Local Support Team).
App Summary
The app Display User Operations provides you with the following capabilities:
● Filtering User Operations [page 64]● Viewing and Auditing Some User Operations [page 65]● Exporting User Operations and Objects Values [page 67]
App Layout
The layout of the app Display User Operations is split into two areas:
● The Header area provides you with different fields whose content can be customized to fit specific needs. For further information about this area, refer to the Filtering User Operations [page 64] task.
● The Operations area provides you with the list of all the recorded user operations. For further information about this view, refer to the Viewing and Auditing Some User Operations [page 65] topics.
1.4.4.3 Important Concepts
As an SAP CC administrator, you are aware of the following important concepts to use the app Display User Operations in your SAP system landscape.
CockpitCockpit PUBLIC 63

User Operations
SAP Convergent Charging gives the possibility to track the user operations requested by the SAP CC users (individual users and service users), whatever the used user interface or technical interface (Web Services, Message or HCI15) is.
The SAP CC Core Server system audits all the requested operations by recording their execution and result (success, failure) automatically within the Core Database system.
The SAP CC Display User Operations user interface gives the possibility to view and inspect the audited operations and to continue your investigations. You can also view the related object change log when the audited operation modified the data object (creation, modification, deletion). Only an SAP CC user granted the “Administration” or “Remote Support” role can view this information.
You can audit:
● The successful operations that modified the persistent configuration data in the Core Database● The successful operations that modified state of the SAP CC Core Server system● All the failed operations
For security reason, you can audit the successful search operations that retrieve lists of audited user operations.
For more information, refer to the Recording of User Operations section of the SAP CC 2020 Application Help documentation.
1.4.4.4 Tasks
With the app Display User Operations, you complete the following administrative tasks:
● Filtering User Operations [page 64]● Viewing and Auditing Some User Operations [page 65]● Exporting User Operations and Objects Values [page 67]
TipTo enrich your SAP user experience, view and share our FAQs, tips, and tricks about Cockpit and your app. See FAQs and Tips [page 68].
1.4.4.4.1 Filtering User Operations
To Filter user operations
In the app Display User Operations:
15 Http Communication Interface
64 PUBLICCockpit
Cockpit

● Select a variant● Adapt filters● Click Go
VariantsYou can manage variants to:
● Search for variants● Add or remove variants● Select a variant as the default variant
You can create variants or change existing variants to save filters that meet specific needs.
To create a variant or change an existing variant, adapt filters, and then save your changes to a new or existing variant.
TipYou can start a search of user operations by just selecting a variant without clicking Go if you have set up the variant accordingly (Execute on Select).
Adapt FiltersTo adapt filters, you can:
● Search for filters● Add or remove filter criteria● Restore criteria that you have just changed● Define the conditions of each filter by including or excluding criteria values
NoteFilter criteria are described in the Viewing and Auditing Some User Operations [page 65] section.
1.4.4.4.2 Viewing and Auditing Some User Operations
To view user operationsin the app Display User Operations:
● Filter user operations (Filtering User Operations [page 64])● Click Go
NoteA user operation that is highlighted in red means that an error has occurred when the user operation has been executed. You can consult the error in the Error Message Column.
SettingsYou can set up the display of user operations by clicking Settings to:
CockpitCockpit PUBLIC 65

● Add or remove columns● Sort any column in ascending or descending order● Group one or more columns to display user operations according to the order of the chosen columns
NoteWhen grouping columns, make sure that the chosen columns are part of the table.
The following table describes the columns that display audited user operations and information details:
COLUMN DESCRIPTION COMMENT
Date/Time The date and time of the operation execution.
Object ID The identifier of the object changed by the operation.
Operation The name of the executed operation. For example, import, user deletion, or creation of a subscriber mapping table.
User The name of the SAP CC user who has initiated the audited operation.
Object Snapshot Before Modification This column contains a checkmark if an object snapshot was created before the operation execution time.
Object Snapshot After Modification This column contains a checkmark if an object snapshot was created after the operation execution time.
Status The result of the operation (Successful or Failed).
Action The type of the operation such as creation, modification, or deletion.
Date The date of the operation execution.
Error Message The displayed message when the operation has failed.
Messages are displayed only if the Status column is Failed.
Instance ID The identifier of the SAP CC system instance that has executed the operation.
Object ID Part 2 An additional identifier of an object.
Object ID Part 3 An additional identifier of an object.
Object Reference The internal identifier of the object.
Object Type The type of an object. For example, a mapping table, a rate plan, or a user.
Operand The arguments of the operation. For example, an object identifier.
Operation Reference The internal identifier of the operation execution.
Success The column contains Yes if the operation was successful; otherwise, No.
66 PUBLICCockpit
Cockpit

1.4.4.4.3 Exporting User Operations and Objects Values
To export user operationsIn the app Display User Operations:
● Filter [page 64] user operations● Click Export to Spreadsheet
NoteMicrosoft Excel files of user operations are saved according to the download settings of your browser.
The export of user operations is only executed if the number of user operations does not exceed the value of the query.limit.fetchSize parameter that is defined in the configuration file of the deployed SAP CC Cockpit.
If the number of user operations exceeds the default value of 10,000, no data is exported. Adapt your filters to adjust the number of user operations to export.
To export object valuesIn the app Display User Operations:
● Filter [page 64] user operations● Select the objects to export the values from
● Click the button Before Modification (or After Modification) to export the values of mapping tables or range tables16 snapshots in a ZIP file named: export_cc_objects_<current date>.zip where <current date> is the date when the download has been effective in the time zone of the user and comply with the following format: yyyyMMddHHmmss (the file name is not customizable). This ZIP archive contains:○ a CSV file containing the values of the mapping tables or range table○ an XML file containing data from the mapping table or range table header (as such as its name, class,
and so on...)
Note○ If the class of the mapping table or the range table has been modified so that it is no longer
compatible with the mapping table or the range table to be exported, the values of the mapping table or the range table snapshot will be exported in XML
○ For mapping tables, a row of the CSV file will have the following format: <row id>, <input values>, <version start date>, <version end date>, <output values> where:○ <row id> is the identifier of the row○ <input values> are all the values for the input columns○ <version start date> is the effective date of the version complying with the default date
format○ <version end date> is the expiration date of the version complying with the default date
format
16 or subscriber mapping tables or subscriber range tables
CockpitCockpit PUBLIC 67
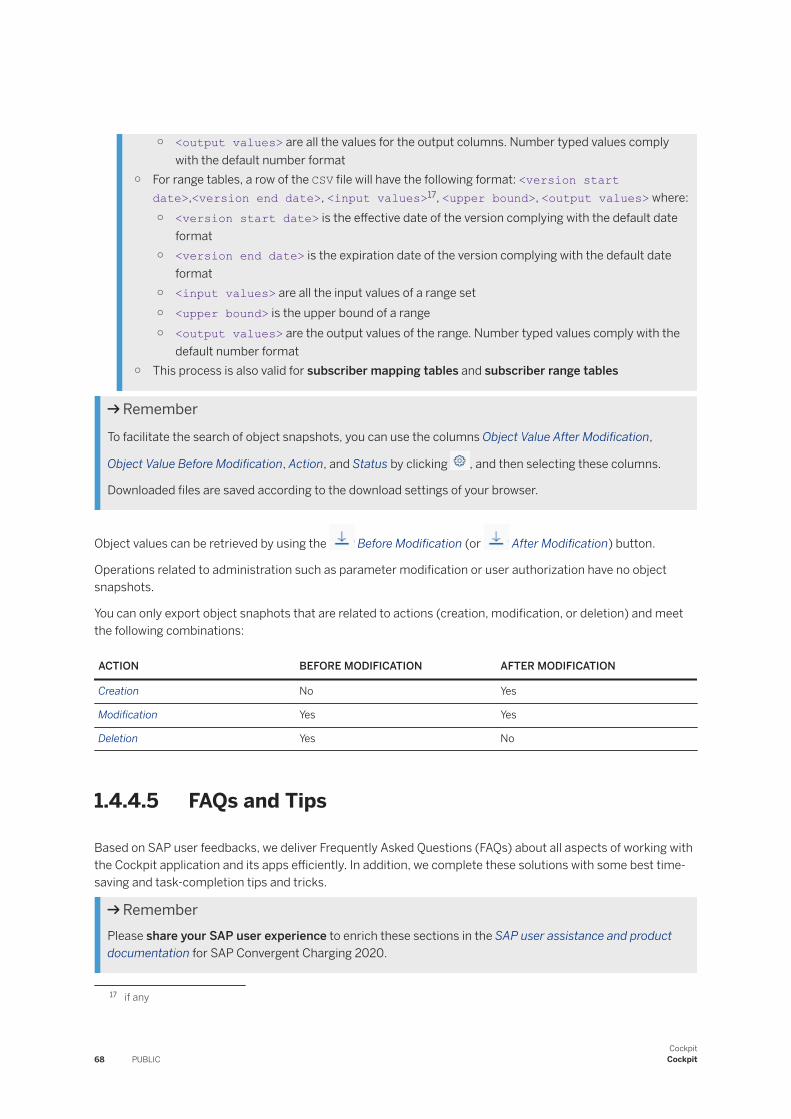
○ <output values> are all the values for the output columns. Number typed values comply with the default number format
○ For range tables, a row of the CSV file will have the following format: <version start date>,<version end date>, <input values>17, <upper bound>, <output values> where:○ <version start date> is the effective date of the version complying with the default date
format○ <version end date> is the expiration date of the version complying with the default date
format○ <input values> are all the input values of a range set○ <upper bound> is the upper bound of a range○ <output values> are the output values of the range. Number typed values comply with the
default number format○ This process is also valid for subscriber mapping tables and subscriber range tables
RememberTo facilitate the search of object snapshots, you can use the columns Object Value After Modification,
Object Value Before Modification, Action, and Status by clicking , and then selecting these columns.
Downloaded files are saved according to the download settings of your browser.
Object values can be retrieved by using the Before Modification (or After Modification) button.
Operations related to administration such as parameter modification or user authorization have no object snapshots.
You can only export object snaphots that are related to actions (creation, modification, or deletion) and meet the following combinations:
ACTION BEFORE MODIFICATION AFTER MODIFICATION
Creation No Yes
Modification Yes Yes
Deletion Yes No
1.4.4.5 FAQs and Tips
Based on SAP user feedbacks, we deliver Frequently Asked Questions (FAQs) about all aspects of working with the Cockpit application and its apps efficiently. In addition, we complete these solutions with some best time-saving and task-completion tips and tricks.
RememberPlease share your SAP user experience to enrich these sections in the SAP user assistance and product documentation for SAP Convergent Charging 2020.
17 if any
68 PUBLICCockpit
Cockpit

Frequently Asked Questions (FAQs) [page 69]
Tips and Tricks [page 69]
1.4.4.5.1 Frequently Asked Questions (FAQs)
Where are my variants?
The location of the variants depends on the configuration of Cockpit. It depends whether Cockpit uses a local storage or an embedded database. In case of a local storage, you might not be able to reuse a variant if you used another browser or another computer.
1.4.4.5.2 Tips and Tricks
Use variants to save your environment.
In the Display User Operations app, you can save your filtering criteria and display settings by creating a new variant in your working environment.
1.4.4.6 Troubleshooting
As part of the technical operations, you may have to troubleshoot some problems when using this app or working with your SAP CC environment (systems, data, users) in your SAP system landscape. Please find afterwards a list of possible symptoms and related solutions that you can try to implement by yourself.
I cannot export my filtered user operations.
The number of user operations to export is limited and cannot exceed the value defined in the configuration file of Cockpit. This value is set by default to 10,000. SAP SE recommends that you contact your SAP CC administrator to decide whether it can be pertinent to modify this value, or not. In case this value cannot be modified, SAP SE recommends that you adapt your filters in order to decrease the number of user operations to export.
NoteFor security reasons, SAP SE recommends that you create a service user dedicated to connections between SAP CC Cockpit and the Core Database. This user shall be granted a read access to database views pointing on the OBJECT_CHANGE_LOG, USER_OPERATION, FILE_METADATA and FILE_METADATA_PATH tables.
CockpitCockpit PUBLIC 69

1.4.5 Manage Chargeable Item Classes
In SAP Convergent Charging, chargeable item classes represent the description of the chargeable items that have the same data structure. A chargeable item class contains a list of properties that characterize each usage event used inside price plans or charging plans for charging purposes. With the app Manage Chargeable Item Classes, you create, search for, view, and maintain these objects.
These properties can be:
● Default properties, used to provide basic information about the consumption (aka usage) of the service to monetize, and whose definition cannot be modified
● User-defined properties, created and modified by SAP CC users according to their business or technical needs
What's New? [page 70]
About This App [page 70]
Important Concepts [page 71]
Tasks [page 72]
FAQs and Tips [page 77]
Troubleshooting [page 78]
1.4.5.1 What's New?
This section highlights the main changes in the app Manage Chargeable Item Classes that both relate to new or changed features.
What Was New in SAP CC 5.0
Please, see https://help.sap.com/viewer/c7120011d1c244168dc1f945a06f1350/5.0.latest/en-US/b28a1fdd7ce2414fbd25b0d8b8c5b819.html.
1.4.5.2 About This App
Target Audience
The app Manage Chargeable Item Classes is mainly intended for the Pricing Specialist.
70 PUBLICCockpit
Cockpit

App Summary
The app Manage Chargeable Item Classes provides you with the following capabilities:
● Easier configuration of your chargeable item classes, by creating [page 75] new ones or copying [page 75] existing chargeable item classes
● Searching for [page 72] chargeable item classes within the list of existing ones and organize (sort, filter, and group) the result list according to your needs
● Viewing or reviewing [page 74] a given chargeable item class● Maintaining your master data by editing [page 76] a released chargeable item class or deleting [page 77]
it in case it is no longer needed
App Workspace
The workspace of the app Manage Chargeable Item Classes is made up with two main areas:
● A left area provides you with a result table containing a list of chargeable item classes whose content can be personalized to fit specific user needs. See Listing and Searching For Chargeable Item Classes [page 72].
● A right area provides you with the detailed information related to a given chargeable item class. This area is only visible when a chargeable item class is selected in the left area, or during the creation of a new chargeable item class. See Viewing a Chargeable Item Class [page 74] and Creating a Chargeable Item Class [page 75].
1.4.5.3 Important Concepts
As an Pricing Specialist, you are aware of the following concepts to use the app Manage Chargeable Item Classes.
Chargeable Item
In SAP Convergent Charging 2020, a chargeable item is the technical result of an external action or usage (such as a mobile phone, telephone call or Internet service) that the consumer carries out in the framework of marketable services. Massively sent to SAP CC by external mediation systems for charging purposes, this technical transactional data record contains the properties and their associated values required by the different charging operations.
CockpitCockpit PUBLIC 71
Chargeable Item Class
In SAP Convergent Charging 2020, a chargeable item class is a custom data which defines a common structure (input and output value sets) that can be used for several chargeable items.
For further information about Chargeable Item Classes, refer to the dedicated section of the SAP CC 2020 Application Help documentation.
1.4.5.4 Tasks
With the app Manage Chargeable Item Classes, you complete the following business configuration tasks to configure and maintain some master data quickly:
● Creating a Chargeable Item Class [page 75]● Listing and Searching For Chargeable Item Classes [page 72]● Viewing a Chargeable Item Class [page 74]● Editing a Chargeable Item Class [page 76]● Deleting a Chargeable Item Class [page 77]● Transporting a chargeable item class: see Transporting a Rate Plan and Its Related Pricing Elements [page
230]
NoteAs a prerequisite, a pricing catalog must exist for the marketable service or service bundle for which you design and set up the pricing configuration.
Tip● In addition, you can use the Core Tool user interface to:
○ Save a chargeable item class to an XML file for troubleshooting purpose.● To enrich your SAP user experience, you can also:
○ Browse the list of FAQs and tips.○ Consult the Troubleshooting [page 78] section in case you encounter issues or difficulties when
using the app.
1.4.5.4.1 Listing and Searching For Chargeable Item Classes
To list or search for some chargeable item classes, you use the left area of the Manage Chargeable Item Classes app. This area is the area of the workspace that is available when entering the app, and contains the following parts:
● An upper part, that contains:
72 PUBLICCockpit
Cockpit

○ A search field, that you can use to enter search criteria○ A Create button that you can use to create a new chargeable item class. For further information, refer
to the Creating a Chargeable Item Class [page 75] task.○ Three buttons that you use to tune and organize the content of the result list and fit your specific
needs:○ Sort ○ Filter ○ Group
● A table, that is located on the lower part of this area and that contains a list of chargeable item classes whose scope can be customized to fit specific needs using the following criteria:○ The name of the chargeable item class○ The name of the pricing catalogs you are assigned to○ The description of the chargeable item class, if any
CautionIf you are assigned to a single pricing catalog, some restrictions apply to you and you can only work with the chargeable item classes that belong to this catalog. Verify with your user administrator if a catalog restriction is set in your SAP CC user profile. For further information, refer to the Setting Up a User section available in the Core Tool documentation.
Available Information
The following table contains the list of displayed information:
Element Description
Name The name of the chargeable item class. If a description exists, it is displayed just beneath the name of the chargeable item class.
Catalog The name of the pricing catalog containing the chargeable item class.
Search For Chargeable Item Classes
To search for some chargeable item classes, enter your search criteria in the search field, and click the button. The content of the table is then updated according to the retrieved content.
NoteOrganize the content of the result table by:
● Sorting the results by class names or pricing catalogs● Filtering the results by pricing catalogs● Grouping the results by pricing catalogs
CockpitCockpit PUBLIC 73

TipYou can use the button to reset your search criteria.
1.4.5.4.2 Viewing a Chargeable Item Class
The screen used to display a given chargeable item class contains the following parts:
● A title bar● A header● A main content
Title Bar
The title bar displays the name of the chargeable item class and contains the different buttons related to the actions you can perform on this chargeable item class according to your profile:
● Edit, that you can use to modify the chargeable item class. For further information, refer to the Editing a Chargeable Item Class [page 76] task.
● Delete, that you can use to delete the chargeable item class from the target system and its back-end database. For further information, refer to the Deleting a Chargeable Item Class [page 77] task.
● Copy, that gives the possibility to create a new chargeable item class by duplicating the currently displayed chargeable item class.
NoteIn addition to the action buttons, you also have the following buttons to improve your user experience:
● , that you can use to hide the left area of the screen and focus on the chargeable item class itself● , that you can use to quit the display of the chargeable item class and return to the search result list
Header
The header, that can be collapsed or expanded according to your needs, contains the following high-level information related to the chargeable item class:
● The name of the pricing catalog that the chargeable item class belongs to● The optional description of the chargeable item class
Main Content
The main content part is split in two different tabs:
74 PUBLICCockpit
Cockpit

● Default Properties, that contains the list of the three mandatory default properties:○ Consumption Date: This property describes the date and time when the service is consumed by the
end customer○ User Identifier: This property describes the identifier of the end customer consuming the service○ Service Identifier: This property describes the identifier of the service consumed by the end customer
● User Properties, that contains the list of the custom properties you may need to add to configure your price plan.
1.4.5.4.3 Creating a Chargeable Item Class
As an Pricing Specialist, you configure a new chargeable item class:
● By copying an existing chargeable item class, using the Copy button● From scratch, using the Create button
When clicking the Copy button on a displayed chargeable item class, a draft version of this copied chargeable item class is created, containing the same information and rows. Only the name of this new chargeable item class differs, for unicity purpose.
When clicking the Create button, an empty chargeable item class is created, and you can use the recommendations afterwards to fill the different information. The newly created chargeable item class is recorded as a draft. This draft remains valid until you click the Save button, that definitively creates the chargeable item class in the target system and its back-end database.
TipFor readability and productivity purposes, SAP recommends that you click the button when editing the chargeable item class, in order to hide the left area of the screen and focus on the chargeable item class itself.
Header Tab
The following table contains the list of information you need to fill in the Header tab:
Element Description and Recommendations Type
Name The name of the chargeable item class, that must be unique among the list of existing chargeable item classes
M
Catalog The name of the pricing catalog this chargeable item class must belong to
M
Description
A description of the role of this chargeable item class (2,000 characters maximum)
O
Legend: M: Mandatory, O: Optional
CockpitCockpit PUBLIC 75

Definition Tab
The Definition tab contains two tables representing respectively the:
● Default Properties which describe each usage event for rating purposes (not alterable)● User Properties you set up in order to design your price plan:
○ Click the Add button to add a new user property and fill the different fields:○ Name: Provide a significant name for the property○ Type: Select Date/Time, String or Number according to your needs○ Description: define the property shortly (optional)
○ Click the Copy button to copy a selection of properties.○ Click the Remove button to delete a selection of properties.
○ Click the or the button to move a selected property down or up.
Once you finish your edition, click:
● Save to save your chargeable item class in the database.● Cancel to ignore this new chargeable item class. In this case, you are requested to confirm your choice and
then, all your changes are lost.
1.4.5.4.4 Editing a Chargeable Item Class
When a chargeable item class is selected, you can click the Edit button to switch to the editing mode. The Definition tab is displayed in edit mode. In this tab, you can:
● Modify the user properties descriptions● Add new user properties● Clone a user property
To change the description of the chargeable item class, click on the Header tab and modify the Description field.
For further informations about the editing mode, refer to the Creating a Chargeable Item Class [page 75] section in this documentation.
The modified chargeable item class is recorded as a draft. This draft remains valid until you click the Save button, that definitively modifies the chargeable item class in the target final system and its back-end database.
NoteIf the chargeable item class is valid, it is saved and automatically released as unique version when clicking the Save. Otherwise, a validation window is displayed to inform you what and where the errors are. Once the corrections are done, the validation window hides and you can save the chargeable item class.
76 PUBLICCockpit
Cockpit

1.4.5.4.5 Deleting a Chargeable Item Class
When a chargeable item class is selected in the search result list, you can click the Delete button located in the title bar to definitively remove this chargeable item class from the back-end database.
By clicking the Delete button, you are requested to confirm your choice in a confirmation window.
1.4.5.5 FAQs and Tips
Based on SAP user feedbacks, we deliver Frequently Asked Questions (FAQs) about all aspects of working with the Cockpit application and its apps efficiently. In addition, we complete these solutions with some best time-saving and task-completion tips and tricks.
RememberPlease share your SAP user experience to enrich these sections in the SAP user assistance and product documentation for SAP Convergent Charging 2020.
Frequently Asked Questions (FAQs) [page 77]
Tips and Tricks [page 78]
1.4.5.5.1 Frequently Asked Questions (FAQs)
What corresponds to the number displayed in the app tile?
The tile for your Manage Chargeable Item Classes app indicates the total number of chargeable item classes that are currently released in SAP Convergent Charging 2020. If your user profile is assigned to a single pricing catalog (catalog restriction), this number counts the released chargeable item classes for this catalog.
NoteThis number does not take drafts into consideration.
Searching for chargeable item classes does not return the expected results list.
For a better user experience, the search mechanism is case-insensitive, which may return more elements that expected. In case less results than expected are returned, please note that a synchronization mechanism exists between the Cockpit application and the Core Server system. In case a user created a chargeable item class in parallel (for example using the Core Tool user interface), it might be necessary to click the button to refresh the list and get these elements.
CockpitCockpit PUBLIC 77
Can someone view my draft chargeable item classes?
No. Only you can access and display your drafts, until they are unlocked. These interim versions are personal and available with your user session.
NoteIf you open multiple user sessions on different web browsers or computers, the drafts differ.
Why can’t I copy a draft chargeable item class?
The copy mechanism is only possible for released chargeable item classes.
1.4.5.5.2 Tips and Tricks
How to access a chargeable item class quickly?
Just use the browser bookmarks to access a given chargeable item class directly. You can copy and share a bookmark, taking into account the associated privileges that may be required to access this chargeable item class.
1.4.5.6 Troubleshooting
As part of the technical operations, you may have to troubleshoot some problems when using this app or working with your SAP CC environment (systems, data, users) in your SAP system landscape. Please find afterwards a list of possible symptoms and related solutions that you can try to implement by yourself.
Error message: 'No matching chargeable item classes to display'
This error message means that the Manage Chargeable Item Classes app cannot display the requested chargeable item class. This situation may be due to:
● A parallel deletion of this chargeable item class by another individual user or service user (CRM18 application, provisioning system). Try to click the button to refresh the list of chargeable item class and check whether it still exists, or not. In case your chargeable item class is still present, ask your system administrator to audit the user operations.
● Insufficient privileges associated to your user profile, or a catalog restriction. Contact your user administrator to verify your user profile (credentials, lock status, password expiration, assigned roles, pricing catalog restriction).
● An incorrect bookmark or link. Try to use the search mechanism to retrieve your chargeable item class. In case you find your chargeable item class, update your bookmark and share the changes with your team members.
● Other technical issues. Contact your local support team or your SAP Support Team.
18 Customer Relationship Management
78 PUBLICCockpit
Cockpit

1.4.6 Manage Charged Item Classes
With the app Manage Charged Item Classes, you configure and maintain the charged item classes and the associated billable item mapping that are necessary for the pricing configuration of your subscription- and usage-based services.
In SAP Convergent Charging, charged item classes define structures of output data named charged items and generated by the SAP CC system out of the charging operations for billing, invoicing, or revenue recognition purposes.
In an integrated SAP Solution, the system uses these settings to convert charged items into billable items before transferring them to SAP Convergent Invoicing in SAP ERP, SAP S/4HANA, or SAP S/4HANA Cloud.
What's New? [page 79]
About This App [page 79]
Important Concepts [page 80]
Tasks [page 88]
FAQs and Tips [page 99]
Troubleshooting [page 100]
1.4.6.1 What's New?
This section highlights the main changes in the app Manage Charged Item Classes that relate to new or changed features.
What Was New in SAP CC 5.0
Please, see https://help.sap.com/viewer/c7120011d1c244168dc1f945a06f1350/5.0.latest/en-US/b28a1fdd7ce2414fbd25b0d8b8c5b819.html.
1.4.6.2 About This App
Target Audience
The app Manage Charged Item Classes is intended for the SAP CC pricing specialists.
CockpitCockpit PUBLIC 79

App Summary
The app Manage Charged Item Classes provides you with the following capabilities for you charged item classes [page 81]:
● Easier configuration of your charged item classes, by creating [page 88] new ones or copying existing charged item classes (and their associated billable item mapping)
● Guided configuration [page 91] of the charged item class and its billable item mapping based on billable item classes managed in SAP Convergent Invoicing
● Searching for [page 94] charged item classes and organizing (sort, filter, and group) the result list according to your needs
● Viewing and reviewing [page 95] a given charged item class● Maintaining your master data by editing [page 98] a released charged item class or deleting [page 98] it
in case it is no longer needed● Refreshing [page 96] the billable item mapping to synchronize a charged item class and its billable item
class again
App Workspace
The workspace of the app Manage Charged Item Classes is made up with two main areas:
● A left area provides you with a result table containing a list of charged item classes whose content can be personalized to fit specific user needs. See Listing or Searching For Charged Item Classes [page 94].
● A right area provides you with the detailed information related to a given charged item class and its associated billable item mapping. This area is only visible when a charged item class is selected in the left area, or during the creation of a new charged item class. See:○ Creating or Copying Your Charged Item Classes [page 88]○ Creating a Charged Item Class from a Billable Item Class [page 91]○ Viewing a Charged Item Class [page 95]
1.4.6.3 Important Concepts
As a pricing specialist for SAP CC, you are aware of the following concepts before using the app Manage Charged Item Classes.
See here:
Charged Items and Classes [page 81]
Billable Items, Classes, and Billable Item Mapping [page 86]
80 PUBLICCockpit
Cockpit

1.4.6.3.1 Charged Items and Classes
As an SAP CC pricing specialist, you are aware of the following concepts to use the app Manage Charged Item Classes.
Charged Items
In SAP Convergent Charging 2020, a charged item is a transactional data for billing, invoicing, or revenue recognition operations. The SAP CC system generates a high volume of this output data as results of the charging operations. This outgoing data contains multiple custom data fields filled in by the system and depending on the pricing configuration for the consumed service. In an integrated SAP Solution, SAP CC massively sends these charged items in the form of billable items [page 86] to SAP Convergent Invoicing.
The SAP CC pricing specialist designs and configures the generation of charged items by setting up a charged item class first, and a rate plan second.
Note that you can use this charged item class in Core Tool when configuring a charge plan or an allowance plan.
Charged Item Class
In SAP Convergent Charging 2020, a charged item class is a master data for the service pricing configuration. This class typically defines both a common data structure based on output fields and initial settings for filling values of these fields in by the system (constant values, values set by the system at runtime, redefinitions in rate plans or allowance plans). In rate plans and allowance plans, the generation of charged items is customized by the pricing specialist for each chargeable service to monetize.
See: Creating or Copying Your Charged Item Classes [page 88]
In an integrated SAP Solution, the pricing specialist maps fields in a charged item class onto fields in a billable item class.
See: Creating a Charged Item Class from a Billable Item Class [page 91]
See Also
Editing the Charged Item Definition [page 226]
Related Information
For more information and user assistance about the concepts, refer to the Application Help documentation for SAP Convergent Charging and see:
CockpitCockpit PUBLIC 81

Charged Item Class (for Output Data)
1.4.6.3.1.1 Default Properties
When configuring a charged item class in Cockpit, you can use one of the following default properties. If you use this charged item class with the Core Tool user interface, the table includes all the predefined properties.
Search for the property that you need:
Name Type
Produced by an Allowance Boolean
Chargeable Items Are Exported Boolean
Subscriber Consumes Service (Client) Boolean
Charged Amount is a Credit Boolean
Charged Amount is a Debit Boolean
Subscriber Provides Service (Partner) Boolean
Account Type is Prepaid Boolean
Charged Transaction is a Prepaid Refill Boolean
Charged Transaction is a Prepaid Debit Boolean
Rated Amount is Prorated Boolean
Rated Amount is Refunded Boolean
Tax is Included in Total Amount Boolean
VAT Business Entity Boolean
VAT Transaction Gross Price Flag Boolean
Account Event Date Date/Time
Rating Activation Date Date/Time
Allowance Validity End Date Date/Time
Allowance Validity Start Date Date/Time
Charge Activation Cancellation Date Date/Time
Charge Activation Effective Date Date/Time
Rating Consumption Date Date/Time
Charge Date Date/Time
Event Date Date/Time
Event Processing Date Date/Time
Excluding Last Day of the Rating Recurring Period Date/Time
Including Last Day of the Rating Recurring Period Date/Time
Start of Rating Recurring Period Date/Time
82 PUBLICCockpit
Cockpit
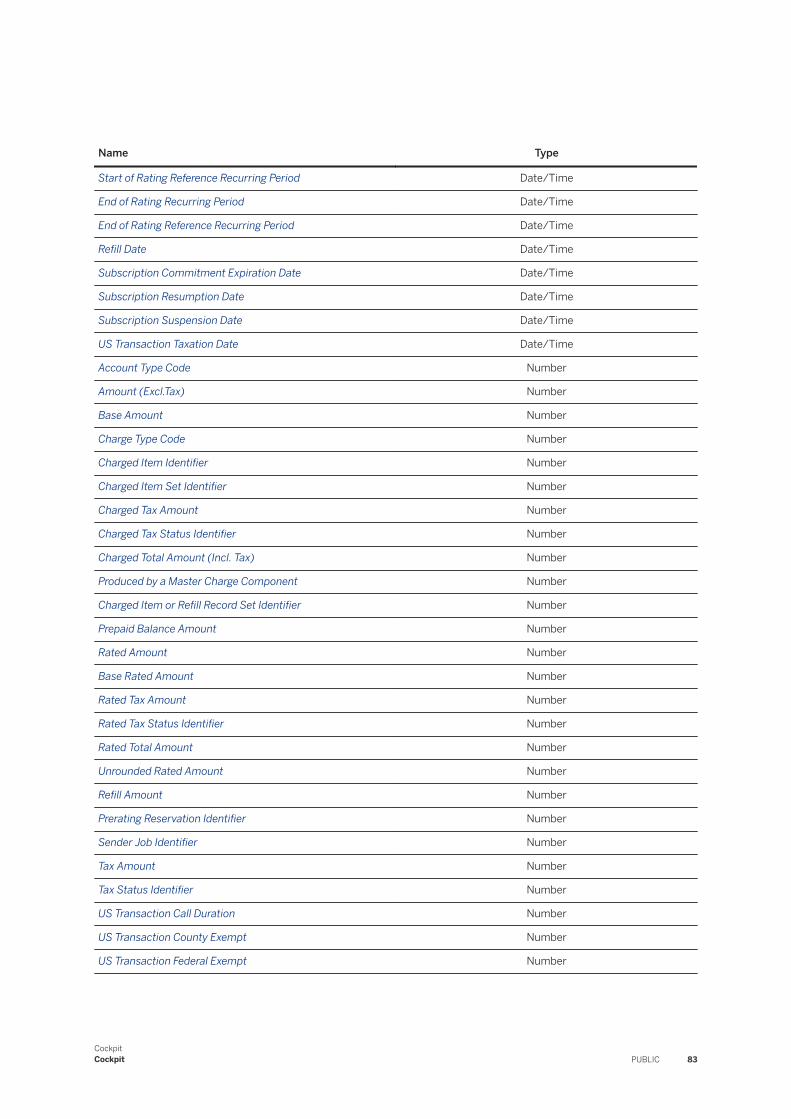
Name Type
Start of Rating Reference Recurring Period Date/Time
End of Rating Recurring Period Date/Time
End of Rating Reference Recurring Period Date/Time
Refill Date Date/Time
Subscription Commitment Expiration Date Date/Time
Subscription Resumption Date Date/Time
Subscription Suspension Date Date/Time
US Transaction Taxation Date Date/Time
Account Type Code Number
Amount (Excl.Tax) Number
Base Amount Number
Charge Type Code Number
Charged Item Identifier Number
Charged Item Set Identifier Number
Charged Tax Amount Number
Charged Tax Status Identifier Number
Charged Total Amount (Incl. Tax) Number
Produced by a Master Charge Component Number
Charged Item or Refill Record Set Identifier Number
Prepaid Balance Amount Number
Rated Amount Number
Base Rated Amount Number
Rated Tax Amount Number
Rated Tax Status Identifier Number
Rated Total Amount Number
Unrounded Rated Amount Number
Refill Amount Number
Prerating Reservation Identifier Number
Sender Job Identifier Number
Tax Amount Number
Tax Status Identifier Number
US Transaction Call Duration Number
US Transaction County Exempt Number
US Transaction Federal Exempt Number
CockpitCockpit PUBLIC 83

Name Type
US Transaction Lifeline Flag Number
US Transaction Line Count Number
US Transaction County Exempt Number
US Transaction Location Count Number
US Transaction State Exempt Number
VAT Transaction Raw Rate Number
Threshold Amount Number
Total Amount (Incl. Tax) Number
Account Code String
Account Type Name String
Allowance Context String
Allowance Event Class Name String
Allowance Share Identifier String
Allowance Unique Identifier String
Charge Activation Code String
Charge Reference String
Charge Reference Name String
Charge Type Name String
Chargeable Item Class Name String
Chargeable Item Unique Identifier String
Chargeable Item Unique Identifier Type String
Chargeable Item Package Code String
Charged Item Identifier String
Charged Item Set identifier String
Charged Item Set Identifier Type String
Charged Tax Code String
Charged Tax Status Code String
Charging Component Name String
Contract Identifier String
Contract Item External Identifier String
Contract Item Identifier String
Contract Type String
Currency String
First Dispatch Code String
84 PUBLICCockpit
Cockpit

Name Type
Second Dispatch Code String
Third Dispatch Code String
External Account Code String
External Account Name String
External System Code String
ISO Currency String
Charged Item or Refill Record Set identifier String
Charged Item or Refill Record Set Identifier Type String
Offer Code String
Rating Event Origin String
Overrun From String
Overrun To String
Prepaid Account Name String
Price Plan Name String
Name of Rate Component Used String
Rated Tax Code String
Rated Tax Status Code String
Refill Currency String
Refill ISO Currency String
Service Identifier String
Service Provider Name String
Session Rating reservation Identifier String
Subscriber Account Code String
Subscriber Account Reference String
Subscription Code String
Tax Code String
Tax Determination Type String
Tax Status Code String
US Transaction Business Class String
US Transaction customer Type String
US Transaction Facilities-Based Flag String
US Transaction Franchise Flag String
US Transaction Incorporated Code String
US Transaction Origin String
CockpitCockpit PUBLIC 85

Name Type
US Transaction Origin Flag String
US Transaction Regulated Flag String
US Transaction Resale Flag String
US Transaction Service Address String
US Transaction Service Address Flag String
US Transaction Service Class String
US Transaction Service Type String
US Transaction Tax Data String
US Transaction Telecom Type String
US Transaction Termination String
US Transaction Termination Flag String
US Transaction Type String
VAT Transaction Rate Code String
VAT Transaction Raw Rate ID String
Service Provider Country Code String
VAT Place of Taxation String
Triggering Contract Identifier String
Triggering Contract Item External Identifier String
User Service Identifier String
Related Information
Definition (Tab) [page 89]
1.4.6.3.2 Billable Items, Classes, and Billable Item Mapping
RememberThis topic is relevant only if you use SAP Convergent Charging 2020 in an integrated SAP Solution scenario with SAP Convergent Invoicing. For more information and user assistance, see the integration guides at help.sap.com/brim.
As an SAP CC pricing specialist, you are aware of the following concepts to use the app Manage Charged Item Classes.
86 PUBLICCockpit
Cockpit

Billable Items
In an integrated SAP Solution scenario, SAP Convergent Charging 2020 automatically converts charged items into billable items and bulkloads the data items to SAP Convergent Invoicing in SAP ERP, SAP S/4HANA) or SAP S/4HANA Cloud.
A billable item is a transactional data to be billed in SAP Convergent Invoicing. A billable item class defines a common data structure for billable items.
The SAP CC pricing specialist designs and configures the conversion of charged items into billable items by mapping the related charged item class onto the corresponding billable item class.
Billable Item Class
A billable item class defines a common data structure for corresponding billable items. The configuration of a billable item class specifies the technical characteristics (control rules) and properties (data fields) of billable items based on the class.
This class suits the business needs and requirements. It defines the necessary custom fields.
Billable Item Mapping
In SAP Convergent Charging 2020, the billable item mapping is a master data for the service pricing configuration. It is a field-to-field mapping between the data fields of a charged item class (source) and target fields of a corresponding billable item class.
The SAP CC pricing specialist designs and configures the generation of billable items by setting up a charged item class and its associated billable item mapping. The specialist maps each source field onto a target field.
See:
● Creating a Charged Item Class from a Billable Item Class [page 91]● Refreshing the Billable Item Mapping [page 96]
Related Information
For more information and user assistance about the concepts, refer to the Application Help documentation for SAP Convergent Charging and see: Billable Item Mapping
CockpitCockpit PUBLIC 87

1.4.6.4 Tasks
With the app Manage Charged Item Classes, you complete the following business configuration tasks to configure and maintain some master data quickly:
● Creating or Copying Your Charged Item Classes [page 88]● Creating a Charged Item Class from a Billable Item Class [page 91]● Creating a Pricing Catalog [page 94]● Listing or Searching For Charged Item Classes [page 94]● Viewing a Charged Item Class [page 95]● Refreshing the Billable Item Mapping [page 96]● Associating a Charged Item Class with a Billable Item Class [page 97]● Editing a Charged Item Class [page 98]● Deleting a Charged Item Class [page 98]● Transporting a charged item class: see Transporting a Rate Plan and Its Related Pricing Elements [page
230]
NoteAs a prerequisite, a pricing catalog must exist for the marketable service or service bundle for which you design and set up the pricing configuration.
1.4.6.4.1 Creating or Copying Your Charged Item Classes
Configure a new charged item class or copy an existing one to be able to define some pricing logic in your rate plans or allowance plans.
As an SAP CC pricing specialist, you design and configure the data fields that must be generated in charged items as output data. In an integrated SAP Solution, you also set up the billable item mapping that configures the conversion of charged items into billable items at runtime. See Creating a Charged Item Class from a Billable Item Class [page 91].
You configure a new charged item class:
● By copying an existing charged item class, using the Copy button in the right area● From scratch, using the Create button in the left area
Create a Charged Item Class
When clicking Copy on a displayed charged item class, a draft version of this copied class is created, containing the same information and content. Only the name of this new charged item class differs, for unicity purpose.
When clicking Create, an empty charged item class is created, and you can use the recommendations afterwards to fill in the different information. The newly created charged item class is recorded as a draft. This draft remains available until you click the Save button, which definitively creates the charged item class in the target SAP CC system (and its back-end database system) as the released version.
88 PUBLICCockpit
Cockpit
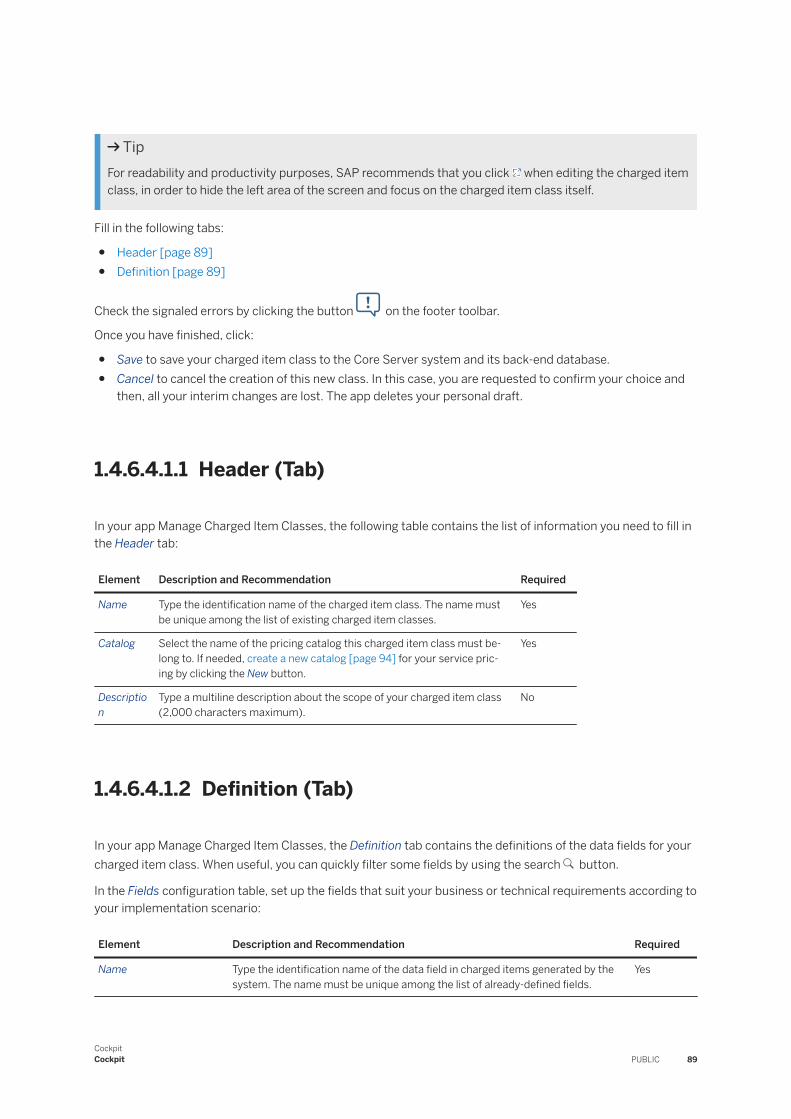
TipFor readability and productivity purposes, SAP recommends that you click when editing the charged item class, in order to hide the left area of the screen and focus on the charged item class itself.
Fill in the following tabs:
● Header [page 89]● Definition [page 89]
Check the signaled errors by clicking the button on the footer toolbar.
Once you have finished, click:
● Save to save your charged item class to the Core Server system and its back-end database.● Cancel to cancel the creation of this new class. In this case, you are requested to confirm your choice and
then, all your interim changes are lost. The app deletes your personal draft.
1.4.6.4.1.1 Header (Tab)
In your app Manage Charged Item Classes, the following table contains the list of information you need to fill in the Header tab:
Element Description and Recommendation Required
Name Type the identification name of the charged item class. The name must be unique among the list of existing charged item classes.
Yes
Catalog Select the name of the pricing catalog this charged item class must belong to. If needed, create a new catalog [page 94] for your service pricing by clicking the New button.
Yes
Description
Type a multiline description about the scope of your charged item class (2,000 characters maximum).
No
1.4.6.4.1.2 Definition (Tab)
In your app Manage Charged Item Classes, the Definition tab contains the definitions of the data fields for your charged item class. When useful, you can quickly filter some fields by using the search button.
In the Fields configuration table, set up the fields that suit your business or technical requirements according to your implementation scenario:
Element Description and Recommendation Required
Name Type the identification name of the data field in charged items generated by the system. The name must be unique among the list of already-defined fields.
Yes
CockpitCockpit PUBLIC 89

Element Description and Recommendation Required
Type Select the relevant type of values:
● String● Number● Date/Time● Boolean
Yes
Value Choose the appropriate option to define how the system generates the corresponding charged items at runtime:
● Undefined: Use this option if you do not want to define a default value for this data field in charged items. Then you will have to define a value for this data field when configuring a rate plan [page 180] with Convergent Charging Cockpit. If you want to use this charged item class in Core Tool, the final defi-nition is available when configuring a rate plan or an allowance plan. By default, the data field will have no value in charged items generated by the system.
● Property: Select (Empty) or choose a value from the rating, charging, or allowance contexts.○ If you select (Empty), the data field will have no value in charged items
generated by the system.
As the pricing specialist, you can force the redefinition when configuring a charge in a rate plan.
If you want to use this charged item class in Core Tool, the final redefini-tion is available when configuring a charge in a rate plan or the allowance logic in an allowance plan.
○ If you type or select an item in the list, the value of the data field in charged items will be determined at runtime based on the property selected. These are default properties. If you want to use a custom property from your customized pricing logic, you must redefine the charged item generation in the rate plans.
If you want to use this charged item class in Core Tool, the final redefini-tion is available when configuring rate plans or allowance plans.
TipIn the app, start typing the property name or a word. The app automatically filters properties that include the name or word you typed. For example, type acc, allow, or cur. See the default properties [page 82].
● Constant: Type or select any constant value for the data field in charged items generated by the system.
TipA value is required. If you want to define an empty field, choose the Property option and select (Empty) in the list.
Yes
90 PUBLICCockpit
Cockpit

Element Description and Recommendation Required
Description Type a short description of the function for this data field. This information is visible when the pricing specialist configures the pricing logic in rate plans (or charge plans and allowance plans if you want to use this charged item class with Core Tool).
No
TipTo work with the data fields more efficiently, use the search field and the button, at the top of the Fields table.
The app searches for your criterion from:
● Field names● Field values (incl. names of default properties from rating, charging, and allowance contexts)● Field descriptions
For example, type allowance, account, or external.
1.4.6.4.2 Creating a Charged Item Class from a Billable Item Class
Based on an existing billable item class, configure a new charged item class and its associated billable item mapping.
RememberThis topic is relevant only if you use SAP Convergent Charging 2020 in an integrated SAP Solution scenario with SAP Convergent Invoicing. For more information and user assistance, see the integration guides at help.sap.com/brim.
As an SAP CC pricing specialist, you design and configure the data fields that the system generates in charged items as output data. In an integrated SAP Solution, you also set up the billable item mapping that configures the conversion of charged items into billable items at runtime.
You configure a new charged item class and its billable item mapping:
● By copying an existing charged item class and associated billable item mapping, using the Copy button in the right area
● From an existing billable item class, using the Create button in the left area● From scratch
Depending on your business requirements, you may need to configure a charged item class with no billable item mapping. See Creating or Copying Your Charged Item Classes [page 88].
CockpitCockpit PUBLIC 91

Create a Charged Item Class from a Billable Item Class
When clicking Copy on a displayed charged item class, a draft version of this copied class is created, containing the same information and content. The billable item mapping is also copied. Only the name of this new charged item class differs, for unicity purpose.
When clicking Create, the app asks you to choose between a guided creation from an existing billable item class (default) and a basic creation.
● Select the Create a charged item class from a billable item class option Select the billable item class that suits your business need. Based on the selected billable item class, the app creates a prefilled charged item class and the associated billable item mapping. To facilitate your understanding, field names are the same in the new charged item class and in the existing billable item class. For example: SRCTATYPE, SRCTAID, SUBPROCESS, BITTYPE, or VKONT.
● Otherwise, select the Create an empty charged item class option. Note that you can define the billable item mapping as a second step. See Associating a Charged Item Class with a Billable Item Class [page 97].
The newly created charged item class and its billable item mapping are recorded as a draft. This draft remains available until you click the Save button, which definitively creates the charged item class and the mapping in the target SAP CC system (and its back-end database system) as the released version.
TipFor readability and productivity purposes, SAP recommends that you click when editing the charged item class, in order to hide the left area of the screen and focus on the charged item class itself.
Fill in the following tabs:
● If necessary, set up the class name, the pricing catalog, and a legible class description by filling the Header [page 89] tab.
● In the Billable Item Mapping [page 93] tab, quickly verify the suggested field mapping (fields in charged item class onto fields in billable item class).
● Change a few field settings for the new charged item class in the Definition [page 89] tab. As an example, you may configure default values for the SUBPROCESS and BITTYPE fields.
TipYou may also set up a charged item class first and associate [page 97] it to a billable item class (through configuration of the billable item mapping) as a second step.
Check the signaled errors by clicking the button on the footer toolbar.
Once you have finished, click:
● Save to save your charged item class and its associated billable item mapping to the Core Server system and its back-end database.
● Cancel to cancel the creation of this new class and mapping. In this case, you are requested to confirm your choice and then, all your interim changes are lost. The app deletes your personal draft.
92 PUBLICCockpit
Cockpit
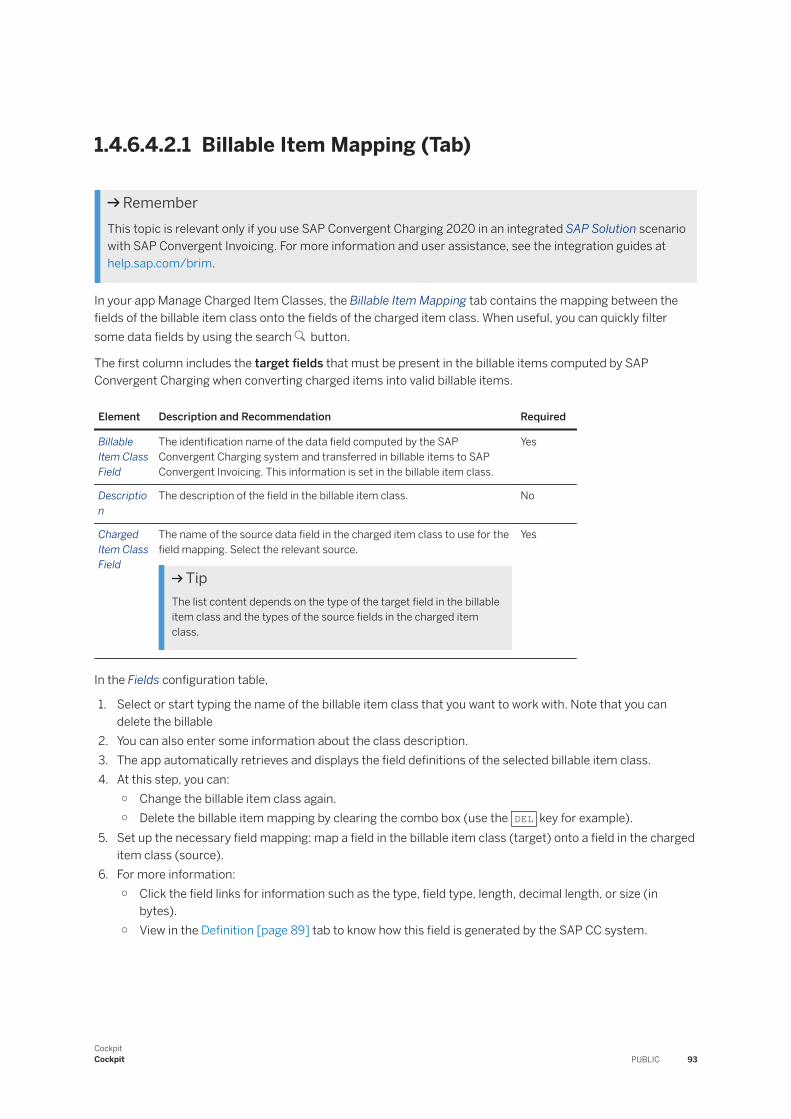
1.4.6.4.2.1 Billable Item Mapping (Tab)
RememberThis topic is relevant only if you use SAP Convergent Charging 2020 in an integrated SAP Solution scenario with SAP Convergent Invoicing. For more information and user assistance, see the integration guides at help.sap.com/brim.
In your app Manage Charged Item Classes, the Billable Item Mapping tab contains the mapping between the fields of the billable item class onto the fields of the charged item class. When useful, you can quickly filter some data fields by using the search button.
The first column includes the target fields that must be present in the billable items computed by SAP Convergent Charging when converting charged items into valid billable items.
Element Description and Recommendation Required
Billable Item Class Field
The identification name of the data field computed by the SAP Convergent Charging system and transferred in billable items to SAP Convergent Invoicing. This information is set in the billable item class.
Yes
Description
The description of the field in the billable item class. No
Charged Item Class Field
The name of the source data field in the charged item class to use for the field mapping. Select the relevant source.
TipThe list content depends on the type of the target field in the billable item class and the types of the source fields in the charged item class.
Yes
In the Fields configuration table,
1. Select or start typing the name of the billable item class that you want to work with. Note that you can delete the billable
2. You can also enter some information about the class description.3. The app automatically retrieves and displays the field definitions of the selected billable item class.4. At this step, you can:
○ Change the billable item class again.○ Delete the billable item mapping by clearing the combo box (use the DEL key for example).
5. Set up the necessary field mapping: map a field in the billable item class (target) onto a field in the charged item class (source).
6. For more information:○ Click the field links for information such as the type, field type, length, decimal length, or size (in
bytes).○ View in the Definition [page 89] tab to know how this field is generated by the SAP CC system.
CockpitCockpit PUBLIC 93

1.4.6.4.3 Creating a Pricing Catalog
While creating a charged item class, configure a new catalog to group the pricing elements for your subscription- and usage-based services to monetize.
Create a Pricing Catalog
As an SAP CC pricing specialist, you want to create a mandatory pricing catalog quickly when configuring some other master data for the pricing configuration of your chargeable service.
NoteAs a prerequisite, you are not assigned to a unique pricing catalog by your user administrator.
1. While creating your catalog element, click the New button to the right of the Catalog input field.2. The app displays the Create Catalog window.3. Type the name for the pricing catalog. The catalog name depends on your pricing modeling and design.
It can be:○ The company name of the contracting service provider that brings value-added services to the market
and wants to monetize the service use○ The service name for these subscription- and usage-based services○ The name for the bundle of services that you monetize by configuring and sharing some
pricing logic in a single catalogYou can use commercial names, technical names, abbreviations, or a combination of different information items.It must be legible in your environment.
4. Click Create to request the immediate creation of this pricing catalog.5. Continue the creation of the catalog element and save it.
Related Information
Creating or Copying Your Charged Item Classes [page 88]
1.4.6.4.4 Listing or Searching For Charged Item Classes
To review or modify a charged item class, search for draft and released charged item classes by different criteria.
RememberIf you are assigned to a unique pricing catalog, some restrictions apply to you and you can only work with the charged item classes that belong to this catalog. Verify your SAP CC user settings with your user administrator. See Setting Up a User.
94 PUBLICCockpit
Cockpit
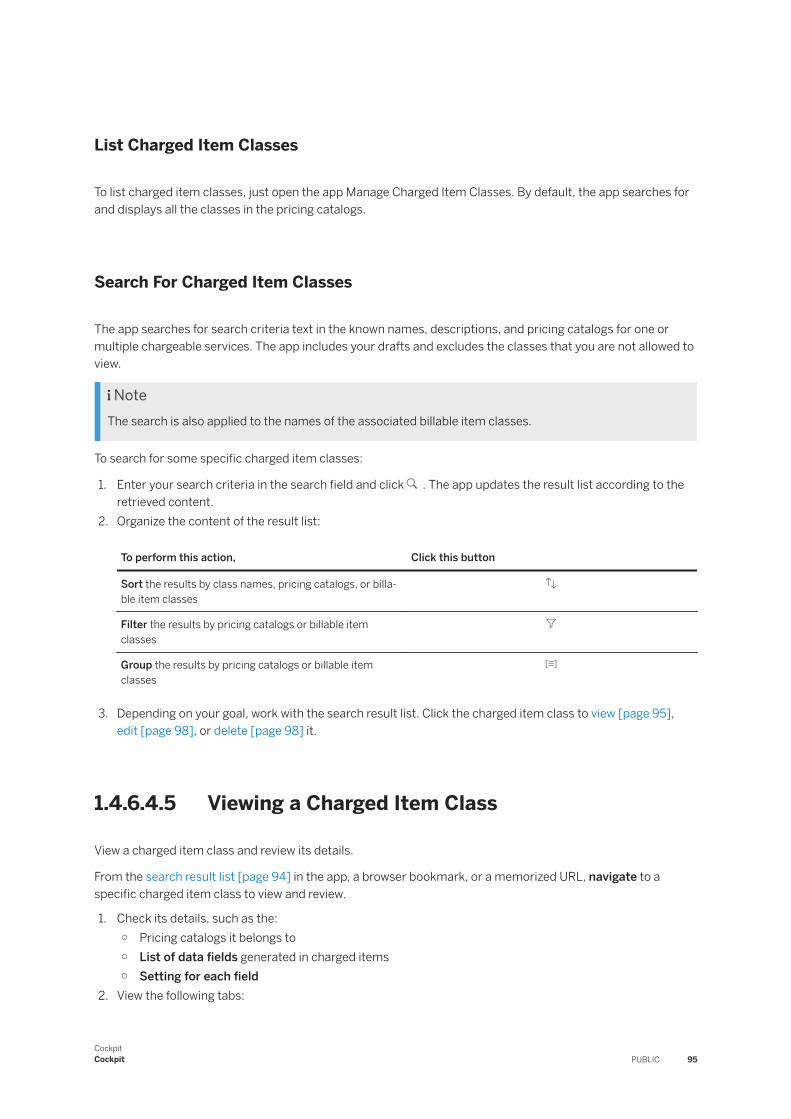
List Charged Item Classes
To list charged item classes, just open the app Manage Charged Item Classes. By default, the app searches for and displays all the classes in the pricing catalogs.
Search For Charged Item Classes
The app searches for search criteria text in the known names, descriptions, and pricing catalogs for one or multiple chargeable services. The app includes your drafts and excludes the classes that you are not allowed to view.
NoteThe search is also applied to the names of the associated billable item classes.
To search for some specific charged item classes:
1. Enter your search criteria in the search field and click . The app updates the result list according to the retrieved content.
2. Organize the content of the result list:
To perform this action, Click this button
Sort the results by class names, pricing catalogs, or billable item classes
Filter the results by pricing catalogs or billable item classes
Group the results by pricing catalogs or billable item classes
3. Depending on your goal, work with the search result list. Click the charged item class to view [page 95], edit [page 98], or delete [page 98] it.
1.4.6.4.5 Viewing a Charged Item Class
View a charged item class and review its details.
From the search result list [page 94] in the app, a browser bookmark, or a memorized URL, navigate to a specific charged item class to view and review.
1. Check its details, such as the:○ Pricing catalogs it belongs to○ List of data fields generated in charged items○ Setting for each field
2. View the following tabs:
CockpitCockpit PUBLIC 95

○ Header [page 89]○ Definition [page 89]○ Billable Item Mapping [page 93]
Tip
To facilitate the inspection of your charged item class, arrange your user interface by clicking the or
button to extend the visualization area or click to maximize the displayed window.
Related Information
Refreshing the Billable Item Mapping [page 96]Editing a Charged Item Class [page 98]
1.4.6.4.6 Refreshing the Billable Item Mapping
Maintain the charged item class and associated billable item mapping to resynchronize these business configurations with a modified billable item class.
RememberThis topic is relevant only if you use SAP Convergent Charging 2020 in an integrated SAP Solution scenario with SAP Convergent Invoicing. For more information and user assistance, see the integration guides at help.sap.com/brim.
NoteIn an integrated SAP Solution with SAP S/4HANA Cloud, refreshing the billing item mapping is not available.
When a billable item class is changed in SAP Convergent Invoicing, you manually change some settings in SAP Convergent Charging to enable the SAP CC system to generate and bulkload the appropriate output data.
As an SAP CC pricing specialist, you maintain the charged item class or its associated billable item mapping first, and maintain the charge and allowance plans second. You perform the following actions:
1. Search for the charged item class that maps onto the recently changed billable item class.2. Click the charged item class to update. The app displays the selected class.3. View the Billable Item Mapping tab and click Refresh to start the resynchronization.4. The app gets the modified billable item class and its field modifications.5. In your billable item mapping, the app automatically:
○ Adds new fields at the bottom of the table.○ Detects some typical fields and sets up some suggested definitions.○ Removes fields removed from the billable item class.
96 PUBLICCockpit
Cockpit

6. Finalize your business configuration operation:1. Eventually map a new field onto an already-existing field in the charged item class.2. You may need to create a new field in the charged item class.3. Check all the undefined fields and determine if you must change their configurations with a constant
value or property.7. Save your recent changes.8. If you want to configure the generation of a new field that is based on some new logic, you must adapt the
relating rate plans and allowance plans.
Maintain your rate plans and allowance plans that use this modified charged item class by redefining the generation of this new field and based on some new pricing logic.
NoteFor backward compatibility between systems, you cannot remove any obsolete fields in the charged item class.
1.4.6.4.7 Associating a Charged Item Class with a Billable Item Class
Based on an existing billable item class, change an existing charged item class and create the billable item mapping to associate them together.
RememberThis topic is relevant only if you use SAP Convergent Charging 2020 in an integrated SAP Solution scenario with SAP Convergent Invoicing. For more information and user assistance, see the integration guides at help.sap.com/brim.
As an SAP CC pricing specialist, you created a charged item class and you want to configure the field mapping onto an existing billable item class.
TipIf possible in your charged item class, use the same field names as in the billable item class so the app can automatically map these fields together.
● View this existing charged item class.● Click Edit.● In the Billable Item Mapping tab, select a billable item class.● The app gets the field details for this billable item class.● Manually map each field onto a field from the charged item class.
CockpitCockpit PUBLIC 97

1.4.6.4.8 Editing a Charged Item Class
Maintain your charged item class to define some new data fields or change some configurations.
When a charged item class is selected, click Edit to switch to the editing mode and make your changes. You can:
● Define new fields [page 89]● Set up another value (constant, property, undefined) for an existing field● Modify field descriptions● Change the description for the class [page 89]● Configure the billable item mapping [page 93]● Refresh the billable item mapping [page 96]
Check the signaled errors by clicking the button on the footer toolbar.
TipYou cannot change neither the name of the charged item class nor its pricing catalog. You cannot change neither the field names nor their types. Therefore, we recommend that you make a copy of an existing charged item class if necessary.
The modified charged item class is recorded as a draft. This draft remains valid until you click Save, which definitively modifies the charged item class in the target SAP CC system and its back-end database. This final system automatically releases this newer unique version.
NoteIf the charged item class is valid, it is saved and released in the Core Server system when clicking the Save button. Otherwise, a validation window is displayed to inform you what and where the errors are. Once the corrections are done, the validation window disappears and you can save the charged item class.
1.4.6.4.9 Deleting a Charged Item Class
Delete a charged item class and its associated billable item mapping.
Delete a Charged Item Class and Its Billable Item Mapping
From the search result list [page 94] in the app, a browser bookmark, or a memorized URL, navigate to the class to delete from a pricing catalog.
The app displays the charged item class and its associated billable item mapping that you want to delete.
As an SAP CC pricing specialist, click Delete to request the target SAP CC system to remove the master data from the back-end database definitively.
98 PUBLICCockpit
Cockpit

By clicking the Delete button, you are requested to confirm your choice in a confirmation window. The Core Server system verifies that no references exist. Otherwise, first delete all the pricing elements in the catalog that refer to your charged item class.
1.4.6.5 FAQs and Tips
Based on SAP user feedbacks, we deliver Frequently Asked Questions (FAQs) about all aspects of working with the Cockpit application and its apps efficiently. In addition, we complete these solutions with some best time-saving and task-completion tips and tricks.
RememberPlease share your SAP user experience to enrich these sections in the SAP user assistance and product documentation for SAP Convergent Charging 2020.
Frequently Asked Questions (FAQs) [page 99]
Tips and Tricks [page 100]
1.4.6.5.1 Frequently Asked Questions (FAQs)
Why can’t I copy a charged item class?
The copy action is only possible for released classes. You cannot copy a draft.
Why can’t I see the Refresh button?
The refresh action is only possible in an integrated SAP Solution scenario with the SAP ERP system or the SAP S/4HANA system. The Refresh button is not available when you are connected to SAP S/4HANA Cloud. This button is only available for the Marketing role in your SAP CC user profile.
Searching for charged item classes does not return the expected result list.
For a better user experience, the search is case insensitive, which may return more elements that expected. In case less results than expected are returned, please note that a synchronization mechanism exists between the Cockpit back-end application and the Core Server system. In case a user created a charged item class in parallel (for example using the Core Tool user interface), it might be necessary to click the button to refresh the list and get these elements.
Can someone view my draft charged item classes?
CockpitCockpit PUBLIC 99

No. Only you can access and display your drafts, until they are unlocked. These interim versions are personal and available with your user session.
NoteIf you open multiple user sessions on different web browsers or computers, the drafts differ.
1.4.6.5.2 Tips and Tricks
How to access a charged item class quickly?
Just use the browser bookmarks to access a given charged item class directly. You can copy and share a bookmark, taking into account the associated privileges that may be required to access this charged item class.
How to search for a specific field in a class quickly?
At the top of the Fields tables, enter a partial text to search for in the field names, values and descriptions, and click . The app filters the table and keeps the fields that match your criterion.
For example, type PR, BIL, or SRC.
The search is case insensitive.
1.4.6.6 Troubleshooting
As part of the technical operations, you may have to troubleshoot some problems when using this app or working with your SAP CC environment (systems, data, users) in your SAP system landscape. Please find afterwards a list of possible symptoms and related solutions that you can try to implement by yourself.
Error message: 'No matching charged item classes to display'
This error message means that the app Manage Charged Item Classes cannot display the requested charged item class. This situation may be due to:
● A parallel deletion of this charged item class by another individual user with the Core Tool user interface Try to click to refresh the list of charged item classes and check whether it still exists, or not. In case your charged item class is still present, ask your system administrator to audit the user operations for SAP Convergent Charging
● Insufficient privileges associated to your user profile, or a catalog restriction. Contact your user administrator to verify your user profile (credentials, lock status, password expiration, assigned roles, pricing catalog restriction).
● An incorrect browser bookmark or link. Try to use the search mechanism to retrieve your charged item class. In case you find your charged item class, update your bookmark and share the changes with your team members.
● Other technical issues. Contact your local support team or your SAP Support Team.
100 PUBLICCockpit
Cockpit

1.4.7 Manage Mapping Table Classes
With the app Manage Mapping Table Classes, you configure, list, review, and maintain some mapping table classes, which enable you to define all the mapping tables that are necessary for the pricing configuration of your marketable end-customer services.
In SAP Convergent Charging, mapping tables are intended for multicurrency and multidimensional pricing. They are used to configure your price lists, pricing data, or any kind of data values to map to result values. Mapping table classes are some useful templates that define a common multicolumn structure for a subset of mapping tables in your pricing catalog or for a subset of subscriber mapping tables for your subscriber accounts or provider contracts.
What's New? [page 101]
About This App [page 102]
Important Concepts [page 102]
Tasks [page 110]
FAQs and Tips [page 117]
Troubleshooting [page 119]
1.4.7.1 What's New?
This section highlights the main changes in the app Manage Mapping Table Classes that relate to new or changed features.
What's New in SAP CC 2020 FPS 1
As of SAP CC 2020 FPS 1:
● As a pricing specialist, the app Manage Mapping Table Classes allows you to configure mapping table classes that define the data structures for mapping tables and subscriber mapping tables that contain up to 40 input columns.
What Was New in SAP CC 5.0
Please, see https://help.sap.com/viewer/c7120011d1c244168dc1f945a06f1350/5.0.latest/en-US/b28a1fdd7ce2414fbd25b0d8b8c5b819.html.
CockpitCockpit PUBLIC 101

1.4.7.2 About This App
Target Audience
The app Manage Mapping Table Classes is mainly intended for the pricing specialists for SAP Convergent Charging [page 6].
App Summary
The app Manage Mapping Table Classes provides you with the following capabilities:
● Easier configuration of your mapping table classes, by creating new ones or copying existing ones.● Searching for mapping table classes in the list of existing ones and organizing (sort, filter, and group) the
result list according to your needs.● Displaying a given mapping table class to view or review.● Maintaining your master data by editing a given mapping table class or deleting it in case it is no more
needed and referenced.
App Workspace
The workspace of the app Manage Mapping Table Classes is made up with two main areas:
● A left area provides you with tools to search for, filter, and sort mapping table classes in pricing catalogs. The area displays a result list containing the released mapping table classes and your drafts. See Listing and Searching For Mapping Table Classes [page 114].
● A right area provides you with the detailed information related to a specific mapping table class. This area is only visible when a mapping table class is selected in the left area or during the configuration of a new mapping table class. See:○ Viewing and Reviewing a Mapping Table Class [page 115]○ Creating or Copying a Mapping Table Class [page 111]
1.4.7.3 Important Concepts
As an SAP CC pricing specialist, you are aware of the following important concepts. You know:
● The pricing catalog for the pricing configuration of some marketable end-customer services that a service provider company wants to monetize with the SAP Convergent Charging software product
● The product and pricing modeling in SAP CC
102 PUBLICCockpit
Cockpit

● The pricing catalog design in SAP CC● The pricing configuration in SAP CC user interfaces and systems● The concepts for convergent charging (charging, refilling, activation)
See here:
Service Pricing Configuration with Mapping Tables [page 103]
Mapping Tables and Classes [page 103]
Currencies and Custom Currencies [page 107]
Additional Information [page 109]
1.4.7.3.1 Service Pricing Configuration with Mapping Tables
Service Pricing Configuration with Mapping Tables
To facilitate and improve the pricing configuration for your chargeable services or products, SAP Convergent Charging can manage some advanced price lists or tables. SAP CC looks up these data tables for specific value subsets to determine the correct prices and some other custom information.
Tables that include such pricing data or other business data are named mapping tables in SAP CC.
1.4.7.3.2 Mapping Tables and Classes
RecommendationFor optimal performance, do not exceed the recommended maximum sizes explained in SAP Note 2478958 . Refer to the provided guidance.
Mapping Table Classes
With your app, you configure and maintain [page 110] some mapping table classes when you need to configure some pricing logic that is based on mapping tables (in the pricing catalog) or subscriber mapping tables (in customer master data).
Mapping table classes in SAP Convergent Charging are master data that define the common characteristics and the multicolumn structures (input and output columns) for different sets of mapping tables:
● Mapping tables in a pricing catalog (in master data)
CockpitCockpit PUBLIC 103

● Subscriber mapping tables for a subscriber account and its associated provider contracts (in customer master data)
A mapping table class is part of a pricing catalog. It defines the columns for the corresponding mapping tables:
● One to 40 input columns with the comparative data values● One to 30 output columns with result values
A mapping table class is viewable in SAP CRM (integrated SAP Solutions) or another interfaced CRM application or provisioning system (refer to Catalog Management section in the Web Services Documentation).
NoteIn an integrated SAP Solution with SAP Business Suite, a price table is a specific mapping table class that is used to managed periodic fees (recurring rates) in SAP CRM. It enables synchronizing SAP CC Recurring Rates with SAP CRM prices. This dedicated mapping table class defines two input columns (price key, currency) and one output column (price amount).
The SAP CC pricing specialist designs and configures the pricing configuration for the end-customer services to monetize.
More info here:
● Using SAP CRM Prices in Recurring Charges● Application Help● Importing a Price Table
Mapping Tables
In SAP Convergent Charging, a mapping table is a multicolumn price list composed of a set of data rows. Each row defines a mapping between a subset of input values with some output values. You use a mapping table to configure some multidimensional and multicurrency pricing for the end-customer services to monetize.
SAP CC uses a mapping table to determine prices dynamically. At runtime, it compares row by row, the values defined in the input columns of a mapping table with a particular set of values. The dynamic price results from this personalizable comparison and supplementary calculation.
104 PUBLICCockpit
Cockpit

A subset of data values from the input columns maps to a value subset in the output columns.
The format is:
COLUMN RANGE SCOPE COLUMN COUNT COLUMN TYPESTYPICAL USE OR EXAMPLE
Default columns (predefined)
Row identifiers 1 String The first column includes unique technical IDs for the row defi-nitions to facilitate the data table maintenance for a given row and for a given period
Validity periods 2 Date/Time Two columns include the definition period for each row in a mapping table:
● Start dates and times
● End dates and times
Input columns with the comparative data values
Pricing data or custom data
Max. 40 ● String● Currency (only
one input column)
● Currencies● Comparison or
segmentation keys
● Tariff identifiers● Metadata
Output columns Pricing data or custom data
Max. 30 ● String● Number
● Fees, prices, tariffs per minute or distance, unit prices, credits, and other amounts
● References, labels● Any resulting in
formation (pricing or technical)
See also:
● About Subscriber Mapping Tables● Primary Help of Core Tool
CockpitCockpit PUBLIC 105

1.4.7.3.2.1 Examples for Mapping Table Classes
Industry Examples
Depending on your SAP Industry and your business needs (marketing and pricing policy for the end-customer services to monetize) you can design the following mapping tables and corresponding class:
MAPPING TABLES AND CLASSES INPUT COLUMNS OUTPUT COLUMNS INDUSTRY CASES
Prices per minute based on a call destination prefix or ID
● Destination prefixes (or IDs)
● Currency IDs
● Prices per minute ● Telecommunications
Prices based on a destination zone prefix or ID (advanced zoning determination based on longest prefix match (LPM) algorithm)
● Zone prefixes or IDs
● Currency IDs
● Prices ● Telecommunications
● Logistics and Postal Services
Price amounts based on pricing levels and options
● Pricing levels● End-customers
service options● Currency IDs
● Unit prices ● High-tech● Media
Your mapping tables may include different family of data: pricing data, business data, or technical data as input values for comparisons or as output values.
For example, you can design and configure a mapping table that is based on:
● Two input columns (Pricing Level, Pricing Option)● Two output columns (Unit Price, Supplementary Fee)
106 PUBLICCockpit
Cockpit

At runtime, SAP CC compares some key values from the rating context with data values in the input columns of this mapping table:
RATING CONTEXT COMPARISON
A couple of data values as reference list The SAP CC system first preselects the rows whose data values in the input columns match the reference data list.
A reference date/time The SAP CC system selects the row:
● Whose time period includes the reference date/time● Whose start date/time is closest to the reference date/
time● Whose validity period is the shortest
In this example, the reference data list includes two values because the mapping table has two input columns.
1.4.7.3.3 Currencies and Custom Currencies
Currencies and Custom Currencies
SAP Convergent Charging 2020 manages ISO and non-ISO based currency definitions. SAP CC 2020 assigns a currency to each computed amount (dynamic price) with a personalized precision level. You can process prices with up to six decimal places. Currencies are part of the business data configured in the complete SAP CC system.
SAP CC handles a proprietary definition for country or custom currencies.
An application administrator manages this business data in close cooperation with the SAP CC pricing specialists. The data maintenance depends on various reasons.
Note● In an integrated SAP Solution (with SAP S/4HANA or SAP Business Suite), the currency definitions are
configured in the SAP S/4HANA or SAP ERP reference system first. The reference system replicates the currency definitions with their number of decimal places to SAP Convergent Charging when requested by an SAP CC user.
● If your deployment scenario is not based on this SAP Solution, each SAP currency must be configured and maintained in the SAP CC system.
● The SAP CC Core Server system stores the currency definitions in the CURRENCY database table (please refer to Core Database References).
● In SAP Convergent Charging 2020, you do not configure currencies to manage currency conversion for the pricing configuration.
An SAP Currency is identified by an alphanumeric code (max. five digits).
● This identification code is a three-letter code when you configure an SAP currency that represents an original country currency and that is based on the international ISO 4217 standard.
CockpitCockpit PUBLIC 107

● To manage amounts with more decimal places than an original currency, you define some secondary currencies. Use a four-digit code to configure some secondary currencies that are based on the original one but with some different precision.
● Use a personalized code to configure some non-ISO currencies such as the PNT (Point) currency for example. PNT is defined with no decimal precision.
The currency is defined by:
● The precision, which represents the number of decimal places● A legible name, which is clear enough to be read easily● An ISO 4217 currency code defined by the International Standards Organization (ISO) when the currency
configured in SAP CC relates to an ISO currency.
ExampleYou configure an SAP CC system with the following currencies:
SAP CURRENCY PRECISION LEGIBLE NAME BASED ON ISO CODE
PNT Zero decimal places Point N/A
EUR Two decimal places European Euro EUR (978)
EUR4 Four decimal places European Euro (4 Dec. Places)
EUR6 Six decimal places European Euro (6 Dec. Places)
USD Two decimal places United States Dollar USD (840)
USDN Five decimal places (Internal) United Staes Dollar (5 Dec. Places)
USD6 Six decimal places (Internal) United States Dollar (6 Dec. Places)
Based on these currencies, you can model and design some pricing logic for your marketable end-customer services.
For example, in customer master data, subscriber accounts are associated to a currency; subscriber mapping tables can include some currencies (section About Subscriber Accounts in the Primary Help of Core Tool).
SAP Convergent Charging 2020 manages some definitions for the IS0 4217 currency codes to facilitate the configuration of ISO-based country currencies. In SAP CC, you configure the necessary ISO currency codes (three-letter code, numeric code, minor currency unit, and ratio). The international ISO 4217 standard is the reference from the International Standards Organization (ISO).
An application administrator manages this business data in close cooperation with the SAP CC pricing specialists. The data maintenance depends on various reasons.
NoteThe SAP CC Core Server system stores the ISO currency code definitions in the ISO_4217 database table (see ISO_4217 section in the Core Database References).
108 PUBLICCockpit
Cockpit
1.4.7.3.4 Additional Information
In SAP Convergent Charging, additional information is a custom data that characterizes a catalog element or that is required by an interfaced system or application for further processing. SAP CC does not reuse this data. For example, the pricing specialist can set up a particular reference, code, or attribute. You set up some additional information to:
● Define custom information that is relevant for your business requirements.● Facilitate the search operations (in Core Tool, in SAP CRM, or in another interfaced system).● Conform to your integration scenario that requires this typical data for further processing.
There are three types of data: string, number, and date/time. The configured names must be legible and unique.
Note● The additional information data is conditionally visible and reusable in a Customer Relationship
Management (CRM) application, a provisioning system, a billing system, or another external system that is integrated with SAP Convergent Charging 2020. In this context, the systems know how to reuse the configured additional information.
● Depending on your integration scenario and your business needs, some of these custom attributes may be mandatory.
RememberYou cannot configure the service pricing by reusing this additional information data. The SAP CC system does not reuse any additional information when executing its business processes (charging, refilling, activation, master data configuration). Design and set up the pricing logic by using some other features such as parameters or properties.
In the Additional Information tab, add some additional information items to define all the necessary custom characteristics or references.
See:
● Creating or Copying a Mapping Table Class [page 111]● Viewing and Reviewing a Mapping Table Class [page 115]
Related Information
Creating or Copying a Mapping Table Class [page 111]
CockpitCockpit PUBLIC 109

1.4.7.4 Tasks
Note
In your app, click to refresh the visible data when your SAP system landscape includes a Core Tool user interface, a CRM application, or a provisioning system that creates or modifies some master data.
With the app Manage Mapping Table Classes, you complete the following business configuration tasks:
● Creating or Copying a Mapping Table Class [page 111]● Creating a Pricing Catalog [page 113]● Listing and Searching For Mapping Table Classes [page 114]● Viewing and Reviewing a Mapping Table Class [page 115]● Editing a Mapping Table Class [page 115]● Deleting a Mapping Table Class [page 117]● Transporting a mapping table class: see Transporting a Rate Plan and Its Related Pricing Elements [page
230]
TipTo enrich your SAP user experience, view and share our FAQs, tips, and tricks about Cockpit and your app. See FAQs and Tips [page 117].
Prerequisites
A pricing catalog must exist in the system for the marketable end-customer service or service bundle for which you design and set up the pricing configuration. Create a catalog with Cockpit [page 113] or with Core Tool.
Complementary Tasks
Use the Core Tool user interface to complete the following tasks:
● Transporting a mapping table class from a source SAP CC system to a remote system by using the:○ Transport functionality preparing a change list○ Export to and import from an XML file
● Saving a mapping table class to an XML file for troubleshooting purpose● Importing a Price Table as a Mapping Table Class
Related Information
Manage Mapping Tables [page 122]
110 PUBLICCockpit
Cockpit

1.4.7.4.1 Creating or Copying a Mapping Table Class
Configure a new mapping table class or copy an existing one to define the data structure for multiple mapping tables based on this class.
Prerequisites
● A pricing catalog is mandatory.● You know the implementation recommendations from SAP. See Working with Notifications [page 15].● You have modeled and designed the pricing configuration for your subscription- and usage-based services
to monetize.
Context
As an SAP CC pricing specialist, you want to create a mapping table class [page 103] for an existing or a new pricing catalog.
Procedure
To create or copy your mapping table classes for a specific pricing catalog:
1. Launch [page 20] the web application in your browser depending on your local environment. 2. In Cockpit, open the app Manage Mapping Table Classes by clicking the tile.3. As an SAP CC pricing specialist, click Create to configure a new mapping table class. Otherwise, select a
released class and click Copy.4. Fill in the mandatory information that is highlighted.
○ The legible name for the mapping table class must be unique. It complies with your naming conventions.
○ Type or select the pricing catalog that your new mapping table class must belong to.
TipIf the catalog you are looking for is not in the list, then click New to create [page 113] a pricing catalog immediately.
○ In the Description fields, enter multiple lines manually or copy/paste some information.5. Declare the columns that define the data structure for the mapping tables based on this new class.
○ The column names must be unique.
○ To change the column name ordering, choose your line, select (turn on) its checkbox, and click or
to move down or up the definition of a column name.
CockpitCockpit PUBLIC 111

TipRemember the format of a mapping table that corresponds to your new class:
6. Add additional information [page 109] items to define all the necessary custom characteristics or references.
7. The app manages different drafts as interim revisions transparently. Drafts are saved automatically to the Cockpit back-end application whenever you add or change information within the mapping table class while in editing mode (auto-save). As long as you work on a draft mapping table class, other SAP CC users cannot access it.
Note○ Cockpit keeps your drafts until you sign out (aka log off) from the web application or are signed out
automatically because your user session has expired. Make sure that you save and release the necessary drafts beforehand.When you close the web browser, your user session remains active thanks to the cookies technology. If you open a new browser, you do not need to sign in (aka log on) again.
○ You cannot copy a draft mapping table class.
8. Click Save to create your mapping table class finally. The target SAP CC system releases the master data automatically. Other SAP CC users can view [page 115] it depending on their privileges.
RecommendationWhen working with this app in your SAP CC 2020 Cockpit launchpad, make sure that you are aware of this recommendation if you use multiple tabs in your web browser.
● If you duplicate a tab in your browser, or if you accidentally open the same tab twice in the browser, data changes made in each browser tab may affect some data in the other tab.
● When switching between tabs, first refresh the app by clicking the Refresh button that is top of the search result list [page 114].
112 PUBLICCockpit
Cockpit

Results
Now the configuration of the necessary mapping tables is possible:
● Manually create [page 126] your data tables with your cockpit.● Let a provisioning system or a CRM application configure some new mapping tables.
Related Links
● Importing a Price Table● Primary Help of Core Tool
Related Information
Examples for Mapping Table Classes [page 106]Mapping Tables and Classes [page 103]Creating a Mapping Table [page 126]
1.4.7.4.2 Creating a Pricing Catalog
While creating a mapping table class, configure a new catalog to group the pricing elements for your subscription- and usage-based services to monetize.
Create a Pricing Catalog
As an SAP CC pricing specialist, you want to create a mandatory pricing catalog quickly when configuring some other master data for the pricing configuration of your chargeable service.
NoteAs a prerequisite, you are not assigned to a unique pricing catalog by your user administrator.
1. While creating your catalog element, click the New button to the right of the Catalog input field.2. The app displays the Create Catalog window.3. Type the name for the pricing catalog. The catalog name depends on your pricing modeling and design.
It can be:○ The company name of the contracting service provider that brings value-added services to the market
and wants to monetize the service use○ The service name for these subscription- and usage-based services
CockpitCockpit PUBLIC 113
○ The name for the bundle of services that you monetize by configuring and sharing some pricing logic in a single catalog
You can use commercial names, technical names, abbreviations, or a combination of different information items.It must be legible in your environment.
4. Click Create to request the immediate creation of this pricing catalog.5. Continue the creation of the catalog element and save it.
Related Information
Creating or Copying a Mapping Table Class [page 111]
1.4.7.4.3 Listing and Searching For Mapping Table Classes
List and search for draft and released mapping table classes by different criteria.
NoteIf you are assigned to a unqiue pricing catalog, some restrictions apply to you and you can only work with the mapping table classes that belong to this catalog.
Verify your SAP CC user settings with your user administrator. See Setting Up a User in the SAP CC 2020 Primary Help for Core Tool.
Search For Table Classes
1. Launch [page 20] the web application in your browser depending on your local environment. 2. In Cockpit, open the app Manage Mapping Table Classes by clicking the tile.3. By default, the app searches for and displays all the classes.4. Search for mapping table classes by entering a value in a search field, and organize (filter, alphabetical
sort, group) the mapping table classes by different criteria.
The app searches for the text in the known names, descriptions, and pricing catalogs for one or multiple end-customer services. It displays a first result list and automatically extends it.
5. Depending on your goal, work with the search result list. Click the mapping table class to view [page 115], edit [page 115], or delete [page 117] it.
Related Information
Viewing and Reviewing a Mapping Table Class [page 115]
114 PUBLICCockpit
Cockpit

1.4.7.4.4 Viewing and Reviewing a Mapping Table Class
View a mapping table class and review its details.
From the search result list [page 114] in the app, a browser bookmark, or a memorized URL, navigate to a specific mapping table class to view and review its details, such as the definitions of the:
● Input columns for comparative data values (string values or currencies [page 107])● Output columns for resulting data values (number or string values)● Additional information [page 109] items
The app displays the three default columns (row identifier, start date/time, and end date/time for the validity period) that make the base structure of a mapping table.
Tip
To facilitate the inspection of your mapping table class, arrange your user interface by clicking the or
button to extend the visualization area or click to maximize the displayed window.
Related Information
Mapping Tables and Classes [page 103]Currencies and Custom Currencies [page 107]Additional Information [page 109]
1.4.7.4.5 Editing a Mapping Table Class
Edit and change the data structure definitions and some additional information items either to finalize the configuration for a mapping table class or to maintain a class regarding to some pricing policy evolutions for your marketable end-customer services.
Context
As an SAP CC pricing specialist, you want to:
● Finalize the configuration for a mapping table class and corresponding tables. You may need to define another input or output column that must be present in mapping tables that will be based on this modified class.
● Maintain the pricing configuration for your marketable end-customer services to translate the evolutions for the pricing policy.
CockpitCockpit PUBLIC 115

RememberFor optimal performance, do not exceed the recommended maximum sizes explained in SAP Note 2478958 . Refer to the provided guidance.
Procedure
To change a mapping table class:
1. From the search result list [page 114] in the app, a browser bookmark, or a memorized URL, navigate to a specific mapping table class to edit and change its configuration.
2. Click Edit to switch to the editing mode and change the mapping table class depending on its use.3. You can:
○ Change the class description.○ Add, change, move, or delete some declarations of input columns or output columns.○ Add, change, move, or delete some additional information items.
NoteOnce the mapping table class is referenced in a mapping table, a pricing macro, or another pricing element from the catalog, you can no longer modify the data structure. Several typical references are possible:
References Pricing Catalogs (in Master Data) Master Data for End Customers
Direct Mapping table Subscriber mapping table
Indirect ○ Pricing macro○ Reusable charge○ Allowance logic○ Refill logic
4. The app regularly saves the modified mapping table class as a draft.5. Click Save to record your modified mapping table class definitively. The final system processes the
operation request and saves the changes in its database permanently.
TipFor some notes, recommendations, and tips, refer to the section Creating or Copying a Mapping Table Class [page 111].
Results
Now you can:
● Create [page 126] or change [page 132] the necessary mapping tables.
116 PUBLICCockpit
Cockpit

● Adapt the pricing logic settings to use some mapping tables based on your recently modified class. Reconfigure the relevant pricing elements in the catalog for your end-customer service or service bundle.
Related Information
Creating a Mapping Table [page 126]Editing a Mapping Table and its Rows [page 132]
1.4.7.4.6 Deleting a Mapping Table Class
Delete a single mapping table class that is no more referenced in the belonging service pricing catalog and in the master data for end customers.
Delete a Single Class
1. From the search result list [page 114] in the app, a browser bookmark, or a memorized URL, navigate to a specific mapping table class to delete from a service pricing catalog.
2. Display the mapping table class that you must delete.3. As an SAP CC pricing specialist, click Delete to request the target SAP CC system to remove the master
data definitively. The target and final system verifies that no references exist. Otherwise, first delete all the pricing elements in the catalog that refer to your mapping table class.
1.4.7.5 FAQs and Tips
Based on SAP user feedbacks, we deliver Frequently Asked Questions (FAQs) about all aspects of working with the Cockpit application and its apps efficiently. In addition, we complete these solutions with some best time-saving and task-completion tips and tricks.
RememberPlease share your SAP user experience to enrich these sections in the SAP user assistance and product documentation for SAP Convergent Charging 2020.
Frequently Asked Questions (FAQs) [page 118]
Tips and Tricks [page 118]
CockpitCockpit PUBLIC 117

1.4.7.5.1 Frequently Asked Questions (FAQs)
What corresponds to the number displayed in the app tile?
The tile for your Manage Mapping Table Classes app indicates the total number of mapping table classes that are currently released in SAP Convergent Charging 2020. If your user profile is assigned to a single pricing catalog (catalog restriction), this number counts the released mapping table classes for this catalog.
NoteThis number does not take drafts into consideration.
Searching for mapping table classes does not return the expected results list.
For a better user experience, the search mechanism is case-insensitive, which may return more elements that expected. In case less results than expected are returned, please note that a synchronization mechanism exists between the Cockpit application and the Core Server system. In case a user created a mapping table class in parallel (for example using the Core Tool user interface), it might be necessary to click the button to refresh the list and get these elements.
Can someone view my draft mapping table classes?
No. Only you can access and display your drafts, until they are unlocked. These interim versions are personal and available with your user session.
NoteIf you open multiple user sessions on different web browsers or computers, the drafts differ.
Why can’t I copy a mapping table class?
The copy mechanism is only possible for released mapping table classes.
1.4.7.5.2 Tips and Tricks
How to use the search result list optimally?
Try to display the shortest list of mapping table classes that you want to work with. In the Manage Mapping Table Classes app, just combine the textual search (Listing and Searching For Mapping Table Classes [page 114]) with the filtering and grouping functions to reduce the number of items in the list.
What kind of input columns could I need?
118 PUBLICCockpit
Cockpit

When designing your mapping tables, you can base the service pricing on the following information:
● Any identifier you can base a price on● Destination information, destination prefix, zone ID● Tariff ID● Time ID● Various options that the system can use to match some reference data with data in input columns
What kind of output columns could I need?
You can base the service pricing on the following information:
● Price per minute, per destination, or per distance● Various additional fees such as connection fees or monthly fees● Free items● Any information you need to post treat
How to access a mapping table class quickly?
Just use the browser bookmarks to access a given mapping table class directly. You can copy and share a bookmark, taking into account the associated privileges that may be required to access this mapping table class.
Can I configure a new mapping table class by copying an existing one?
Yes. If you want to create a mapping table class very speedily, just copy [page 111] an existing and released one.
Your Manage Mapping Table Classes app makes a copy of the mapping table class that is currently displayed. Rename the new draft and set up the data. If you want to copy the latest released version, first click the button before performing the copy.
1.4.7.6 Troubleshooting
As part of the technical operations, you may have to troubleshoot some problems when using this app or working with your SAP CC environment (systems, data, users) in your SAP system landscape. Please find afterwards a list of possible symptoms and related solutions that you can try to implement by yourself.
Error message when searching for mapping table classes: 'The sorting and grouping orders you have chosen are incompatible. Please change the view settings. The app uses the sort order that you defined for the grouping. Select the same ascending or descending orders to avoid this message occurring.'
This error message means that the Manage Mapping Table Classes app cannot properly display the result list because you have chosen incompatible sorting and grouping orders. When such a situation occurs, SAP SE recommends that you, as an power user, try the following suggestions:
● Click the button to change the view settings● Select the Sort > Group tabs successively● Verify that the sorting and grouping orders are identical (ascendant or descendant)
CockpitCockpit PUBLIC 119

Error encountered when searching for mapping table classes: In the search result list, you cannot find your expected mapping table class.
Several reasons can explain an incomplete result list. This situation may be due to:
● The currently defined filters. Click the button to change the view and filtering settings● The fact that you are assigned to a unique pricing catalog. Contact your user administrator to verify your user
privileges● Out-of-date data in Cockpit. Click the button to perform a data synchronization operation
Error message when viewing a given mapping table class: 'No matching items to display. Check whether the mapping table class still exists and can be accessed.'
This error message means that the Manage Mapping Table Classes app cannot display the mapping table class that you requested. This situation may be due to:
● A parallel deletion of the expected mapping table class by another individual user or service user (CRM19 application, provisioning system). To check this possible reason:○ Click the button to refresh the list of mapping table class. Your expected class should disappear○ Ask your system administrator to investigate within the audited user operations of SAP CC
● An access restriction to the expected mapping table class (such as a catalog restriction applied to your user profile). To check this possible reason:○ Contact your user administrator to verify your user settings (credentials, lock status, password expiration,
assigned roles, pricing catalog restriction)○ The expected mapping table belongs to a given pricing catalog. Ensure that you are not associated to an
other pricing catalog● A wrong bookmark or URL20 used to access this mapping table class. To check this possible reason:
○ Search [page 114] for your mapping table class again and use the new URL that is displayed in your web browser
○ Update your browser bookmarks○ Share the URL changes with your team
● Other technical issues. To investigate on such situation, SAP SE recommends that you contact your local support team, or the SAP Support Team.
Error message when creating a mapping table class: '(Contains errors)'
This message, displayed in the search result list, means that some of your draft mapping table classes are contain basic errors that may block the auto-save function of your Manage Mapping Table Classes app. For each erroneous draft:
● View [page 115] the erroneous mapping table class. The Manage Mapping Table Classes app highlights the erroneous information (fields, values) and displays an error summary in the bottom bar
● Click the button to display the quick summary● Correct each single error in your mapping table class● Click Save to release the mapping table class and request for additional data controls● In case of new issues, see the troubleshooting information about the creation, copy, and edition
Error message when creating a mapping table class: 'Sorry, your app can't save the mapping table class. View the message details and take an action. View Details...'
19 Customer Relationship Management20 Uniform Resource Locator
120 PUBLICCockpit
Cockpit

A large variety of functional or technical reasons, single or cascading issues, and temporary or permanent problems may explain this message in your Manage Mapping Table Classes app. When creating a mapping table class, several components (browser, intermediate systems, Core Server system, databases) and communication networks are involved in the background. To display some additional information that you can use to troubleshoot your issue, click "View Details...". The following complementary information may appear:
● 'Change your data and continue. The Cockpit back-end application or the Core Server system signaled the following error: {0}'
NoteIn this message, the text {0} includes a specific message or an error stack that provides you with more information and user guidance.
This message informs you that the Core Server system has detected and replied an error that relates to the configuration of your mapping table class. When such a situation occurs, SAP SE recommends that you modify your mapping table class and save it again
● 'Please try again later. If it happens again, check the Core Server system and contact the system administrator of the intermediate Java Web Server system. To find out why the error occurred, look at the log messages and traces of both systems.'
● 'Verify the technical issue and try again later. The Cockpit back-end application signaled the error or exception "{0}"'
NoteIn this message, the text {0} includes a key or code that provides you with more information.
This message informs you that the Cockpit back-end application cannot communicate with the active updater of the Core Server system. Maybe the updater instance is down or overloaded, or there is a network performance decrease. When such a situation occurs, SAP SE recommends that you verify:○ If the active updater instance is down or overloaded○ The performance and health of the communication networks between your web browser, the intermediate
Java Web Server system that hosts the Cockpit back-end application, and the Core Server system○ The log messages and traces of the Core Server system○ The logs and traces of the Java Web Server system within which your Cockpit is deployed
Error message when copying a mapping table class: 'Sorry, your app can't copy this mapping table class. Please try again later. If it happens again, check your browser console and contact the IT administrator of the intermediate Java Web Server system. To find out why the error occurred, look at the log messages and traces for the Cockpit web application.'
CockpitCockpit PUBLIC 121

This error message means that the Cockpit back-end application cannot copy a mapping table class.
NoteWith Cockpit, you can copy a mapping table class that is displayed on your screen even when another user deleted the class. As soon as you refresh the Manage Mapping Table Classes app, the mapping table class disappears from the result list, the app displays an empty page, and you cannot copy the mapping table class anymore.
When such a situation occurs, SAP SE recommends you to ensure that you didn't deleted this mapping table class in another instance of your app but with the same user session. To do such a verification:
● Verify if you have duplicated the browser tab that displays your app or if you have launched Cockpit with another web browser
● Click the button to refresh the list of mapping table classes. If the mapping table class is still visible, try to perform a copy again
● If the mapping table class is still visible, try to perform a copy again● Otherwise, contact the system administrator of SAP CC
Error message when editing a mapping table class: 'Sorry, your app can't edit this mapping table class. Please refresh or try again later. If this happens again, check your browser console and contact the IT administrator of the intermediate Java Web Server system. To find out why the error occurred, look at the log messages and traces for the Cockpit web application.'
This error message depends on the performed action:
● If you clicked the Edit button, this error message means that the Manage Mapping Table Classes app cannot switch to the editing mode. This situation may occur when the mapping table class to modify has been locked or deleted by another SAP CC user
● If you clicked the Save button, this error message means that the Manage Mapping Table Classes app cannot save and release your modified mapping table class. This situation may occur when the mapping table class you want to edit is locked or does not exist anymore.
Whatever the reason is, SAP SE recommends that you, as an power user, try the following suggestions:
● Wait for few seconds and try again● Refresh the web browser or click the button to refresh the list of mapping table classes● Contact the system administrator of SAP CC
1.4.8 Manage Mapping Tables
In SAP Convergent Charging, mapping tables represent master data that are intended for multicurrency and multidimensional pricing. They are used to configure your price lists, pricing data, or any kind of input values that need to be mapped onto output values. They rely on mapping table classes that represent useful templates defining a common multicolumn structure for both mapping tables and subscriber mapping tables.
With the app Manage Mapping Tables, you can list, display, create, and maintain all the mapping tables that are necessary for the pricing configuration of your subscription- and usage-based services to monetize. You quickly import your business, pricing, custom data to a mapping table.
What's New? [page 123]
About This App [page 123]
Important Concepts [page 124]
122 PUBLICCockpit
Cockpit

Tasks [page 125]
FAQs and Tips [page 132]
Troubleshooting [page 134]
1.4.8.1 What's New?
This section highlights the main changes in the app Manage Mapping Tables that relate to new or changed features.
What's New in SAP CC 2020 FPS 1
As of SAP CC 2020 FPS 1:
● As a pricing specialist, the app Manage Mapping Tables allows you to configure and maintain mapping tables that contain up to 40 input columns according to their corresponding mapping table classes.
What Was New in SAP CC 5.0
Please, see https://help.sap.com/viewer/c7120011d1c244168dc1f945a06f1350/5.0.latest/en-US/b28a1fdd7ce2414fbd25b0d8b8c5b819.html.
1.4.8.2 About This App
Target Audience
The Manage Mapping Tables app is mainly intended for the Pricing Specialist.
App Summary
The Manage Mapping Tables app provides you with the following capabilities:
● Searching for mapping tables within the list of existing ones and organize (sort, filter, and group) the result list according to your needs
CockpitCockpit PUBLIC 123
● Displaying a given mapping table (and its data rows), and navigate to the mapping table class that defines its structure
● Easier configuration of your mapping tables, by creating new ones or copying existing mapping tables● Maintaining your master data by editing a given mapping table or deleting it in case it is no more needed● Importing or exporting the rows of a given mapping table (from and to custom CSV21 files) in order to
facilitate the pricing configuration tasks
App Workspace
The workspace of the Manage Mapping Tables app is made up with two main areas:
● A left area, that provides you with a table containing a result list of existing or draft mapping tables whose content can be customized to fit specific needs. For further information about the available information and the customizing capabilities, refer to the Listing and Searching For Mapping Tables [page 129] task.
● A right area, that provides you with the detailed information related to a given mapping table. This area is only visible when a mapping table is selected in the left area, or during the creation of a new mapping table. For further information about this area, refer to the Viewing a Mapping Table [page 130] and Creating a Mapping Table [page 126] tasks.
1.4.8.3 Important Concepts
As an SAP CC pricing specialist, you are aware of the following concepts to use the Manage Mapping Tables app.
Mapping Tables
To facilitate and improve the pricing configuration for your end-customer services, SAP Convergent Charging can manage some advanced price lists as table objects. Used at runtime to determine correct prices or custom information, these tables are named Mapping Tables in SAP CC.
For more information about mapping tables, refer to the "Mapping Tables and Mapping Table Classes" section of the SAP CC 2020 Application Help documentation.
Additional Information
In SAP Convergent Charging, additional information is a custom data (such as a particular reference, code or attribute) that:
● Has a name and a value whose type can be string, number or date/time
21 Comma Separated Value
124 PUBLICCockpit
Cockpit

● Characterizes a catalog element and defines custom information that is relevant for your business requirements
● Facilitates the search operations (in Core Tool, in SAP CRM, or in another interfaced system)● May be required by an interfaced system or application for further processing operations● Is not reused by SAP CC within its own business operations
NoteIn an integrated landscape, additional information is conditionally visible and reusable in the external systems that are integrated with SAP Convergent Charging 2020. In such situations, the external systems know how to reuse the configured additional information.
RememberAs SAP CC does not reuse the defined additional information within its own business operations, you cannot configure the service pricing by reusing this additional information. Design and set up the pricing logic by using some other mechanisms such as parameters or properties.
1.4.8.4 Tasks
With the Manage Mapping Tables app, you complete the following business configuration tasks:
● Creating a Mapping Table [page 126]● Listing and Searching For Mapping Tables [page 129]● Viewing a Mapping Table [page 130]● Editing a Mapping Table and its Rows [page 132]● Importing Rows in a Mapping Table [page 128]● Exporting Mapping Table Rows to a File [page 128]● Deleting a Mapping Table [page 132]● Transporting a mapping table: see Transporting a Rate Plan and Its Related Pricing Elements [page 230]
RememberAs a prerequisite, a pricing catalog must exist for the marketable service or service bundle for which you design and set up the pricing configuration. This catalog must include the expected mapping table classes, otherwise, you must first design and configure the necessary classes.
TipIn addition, you can use the Core Tool user interface to:
● Transport a mapping table between SAP CC landscapes by using either the transport or import/export mechanisms.
● Save a mapping table to an XML file for troubleshooting purpose.
CockpitCockpit PUBLIC 125

1.4.8.4.1 Creating a Mapping Table
RecommendationFor optimal performance, do not exceed the recommended maximum sizes explained in SAP Note 2478958 . Refer to the provided guidance.
As an SAP CC pricing specialist, you configure a new mapping table:
● By copying an existing mapping table, using the Copy button● From scratch, using the Create button
When clicking the Copy button on a displayed mapping table, a draft version of this copied mapping table is created, containing the same information and rows. Only the name of this new mapping table differs, for unicity purpose.
When clicking the Create button, an empty mapping table is created, and you can use the recommendations afterwards to fill the different information. The newly created mapping table is recorded as a draft. This draft remains valid until you click the Save button, that definitively creates the mapping table in the target final system and its back-end database system.
TipFor readability and productivity purposes, SAP recommends that you click the button when editing the mapping table, in order to hide the left area of the screen and focus on the mapping table itself.
Header Tab
The following table contains the list of information you need to fill in the Header tab:
Element Description and recommendations Type
Name The name of the mapping table, that must be unique among the list of existing mapping tables
M
Class The name of the mapping table class whose structure must be used for this mapping table. This selection is mandatory to access the Data tab
M
Catalog The name of the pricing catalog this mapping table must belong to M
Agreement ID The identifier of the master agreement that this mapping table belongs to. When specified, the mapping table is an agreement table that can be shared between several subscriber accounts. This particular table is part of the customer master data.
O
Description A description of the role of this mapping table (2,000 char. maximum) O
M: Mandatory, O: Optional
126 PUBLICCockpit
Cockpit

Data Tab
The Data tab contains the list of rows making up the mapping table. This list is displayed as a table whose list of columns:
● Corresponds to the structure of the selected mapping table class● Includes an Editing StatusEditing Status column that reflects the current status of the mapping table row
(new, modified, not modified, deleted or error)
To add one or multiple mapping table rows, you can:
● Click the Import button to select a file that contains a list of rows to import in the mapping table. For further information, refer to the Importing Rows in a Mapping Table [page 128] task
● Click the Edit All button to manage the rows of the mapping table, and perform the following tasks:○ Click the Add button to manually add a row○ Click the Copy button to copy a selection of rows○ Click the Delete button to delete a selection of rows○ Click the Restore button to restore a selection of deleted rows (that were neither drafts nor new rows)○ Click the Clear Table button to remove all the rows that currently exist in this mapping table
NoteImporting rows or creating new one is not mandatory. You can import rows or create new ones whenever you want after the creation of the mapping table.
Additional Information Tab
The Additional Information tab contains the list of additional information items [page 124] associated to your mapping table. To define some new additional information in your mapping table, click Add and fill the elements according to the following recommendations:
Element Description and recommendations Type
Name The name of the additional information, that must be unique among the list of additional information associated to this mapping table
M
Type Select the relevant type for the additional information M
Value The value that corresponds to this additional information M
Description A description of this additional information M
M: Mandatory, O: Optional
NoteAccording to the integration scenario, adding additional information is not mandatory. However it will not be possible to add any additional information after the creation of the mapping table.
CockpitCockpit PUBLIC 127
1.4.8.4.2 Importing Rows in a Mapping Table
RecommendationFor optimal performance, do not exceed the recommended maximum sizes explained in SAP Note 2478958 . Refer to the provided guidance.
When the editing mode is enabled for a selected mapping table, you can use the import mechanism to replace all or part of the rows that currently exist in this mapping table by a set of rows declared within a data file. To use this import mechanism, click the Import button to open the Import From File dialog window, that contains the following sections:
● File, that gives the possibility to select the file containing the rows to import in the mapping table● Import Mode, that gives the possibility to select one of the following importing strategy:
○ Clear and Replace, that clears all the existing rows of the mapping table and imports the rows available in the file
○ Merge, that merges the existing rows with the rows available in the rows, taking into consideration that any identical row or the rows not found in the file will not be modified. Please note that only the changed rows will be considered when saving your modifications (the other rows will reflect the external changes)
● File Format, that gives the possibility to specify:○ Which separator is used in the file to separate the existing fields○ Which mark is used in the file for comment lines
● Number Format, that gives the possibility to specify which separator are used in the file for decimals and thousands
● Mapping, that gives the possibility to tune the association between:○ The fields of each row of the file that will be imported○ The properties of the mapping table class that is associated to the mapping table
Note○ By default, the mapping table properties are mapped using the order of the fields of each row○ A given field of a row can be mapped onto multiple properties of the mapping table class
Once you configured all the relevant elements, click the Import button to start importing the content of the selected file. At the end of the importing operation, a dialog window will be displayed to inform you about the modifications that have been performed on the set of mapping tables, possibly including:
● The number of new rows that have been added to the mapping table● The number of existing rows whose content has been modified with information coming from the data file● The number of existing rows whose content remains unchanged due to identical information found in the
data file
1.4.8.4.3 Exporting Mapping Table Rows to a File
When a mapping table is selected, you can click the Export button to open the Export to File dialog window. This dialog window contains the following sections:
128 PUBLICCockpit
Cockpit

● File Format, that gives the possibility to specify which separator must be used between each generated field
● Number Format, that gives the possibility to specify which separators must be used for decimals and thousands
Once you configured all the relevant elements:
● Click the Export button to open the Save As dialog window● Specify the name of the file that will be created, and select the relevant destination for this file● Click the Save button to start exporting the content of the mapping table to the specified file
CautionThe export mechanism exports the currently displayed version of the mapping table. If this mapping table contains errors, the exported file will also contain these errors. When such a situation occurs, the exported file will have to be manually corrected before being used for future import purposes.
1.4.8.4.4 Listing and Searching For Mapping Tables
To list or search for some mapping tables, you use the left area of the Manage Mapping Tables app. This area is the area of the workspace that is available when entering the app, and contains the following parts:
● An upper part, that contains:○ A search field that you can use to enter search criteria.○ A Create button that you can use to create a new mapping table. For further information, refer to the
Creating a Mapping Table [page 126] task.○ Three buttons that you use to tune and organize the content of the result list and fit your specific
needs:○ Sort ○ Filter ○ Group
● A table, that is located on the lower part of this area and that contains a list of mapping tables whose scope can be customized to fit specific needs using the following criteria:○ The name of the mapping table○ The name of the mapping table class that is associated to the mapping table○ The name of the pricing catalogs you are assigned to○ The ID of the master agreement (agreement ID) to which the mapping table is linked
CautionIf you are assigned to a single pricing catalog, some restrictions apply to you and you can only work with the mapping table classes that belong to this catalog. Verify with your user administrator if a catalog restriction is set in your SAP CC user profile. For further information, refer to the "Setting up a user" section available in the Core Tool documentation.
CockpitCockpit PUBLIC 129

Available Information
The following table contains the list of displayed information:
Element Description
Name The name of the mapping table
Catalog The name of the pricing catalog containing the mapping table
Class The mapping table class associated to the mapping table
Agreement ID The agreement ID associated to this mapping table
Search For Mapping Tables
To search for some mapping tables, enter you search criteria in the search field, and click the button. The content of the table is then updated according to the retrieved content.
NoteOrganize the content of the result table by:
● Sorting the results by table names, class names, pricing catalogs, or agreement IDs (if any)● Filtering the results by class names, pricing catalogs, or agreement IDs (if any)● Grouping the results by class names, pricing catalogs, or agreement IDs (if any)
TipYou can use the button to reset your search criteria.
1.4.8.4.5 Viewing a Mapping Table
The page used to display a given mapping table contains the following parts:
● A title bar● A header● A main content
Title Bar
The title bar displays the name of the mapping table and contains the different buttons related to the actions you can perform on this mapping table according to your profile:
130 PUBLICCockpit
Cockpit

● Edit, which you can use to modify the mapping table. For further information, refer to the Editing a Mapping Table and its Rows [page 132] task.
● Delete, which you can use to delete the mapping table from the back-end database. For further information, refer to the Deleting a Mapping Table [page 132] task.
● Copy, which gives the possibility to create a new mapping table by duplicating the currently displayed mapping table.
NoteIn addition to the action buttons, you also have the following buttons to improve your user experience. Click:
● to hide the left area of the screen and focus on the mapping table itself.● to quit the display of the mapping table and return to the search result list.
Header
The header, which can be collapsed or expanded according to your needs, contains the following high-level information related to the mapping table:
● The name of the mapping table class that defines the data structure of the mapping table, with a direct link to this mapping table class (opened within the Manage Mapping Table Classes app)
● The name of the pricing catalog containing the mapping table● The agreement ID, which is the identifier of the master agreement that the mapping table belongs to
(optional)● The business description of the mapping table (optional)
Main Content
The main content part is split in two different tabs:
● Additional Information, that contains the list of additional information [page 124] associated to the mapping table.
● Data, that contains the list of rows making up this mapping table. This list is displayed as a table whose list of columns depends on the definition of the associated mapping table class. This tab also contains the different buttons related to the actions you can perform on this list of rows:○ Show All, that you can use to hide the other parts of the app and focus on this Data tab that contains
the entire list of mapping table rows with advanced filtering capabilities.○ Export, that you can use to export the list of mapping table rows in an output file. For further
information, refer to the Exporting Mapping Table Rows to a File [page 128] task.
○ Change View Settings( ), that gives the possibility to organize the content of the table by sorting and/or filtering the list of mapping table rows.
CockpitCockpit PUBLIC 131

1.4.8.4.6 Editing a Mapping Table and its Rows
RememberFor optimal performance, do not exceed the recommended maximum sizes explained in SAP Note 2478958 . Refer to the provided guidance.
When a mapping table is selected, you can click the Edit button located in the title bar to switch to the editing mode. In addition to the already available Export feature, this mode also gives you the possibility to:
● Click Import to import a set of data rows within this mapping table. See Importing Rows in a Mapping Table [page 128].
● Click Edit All to switch the table containing the list of mapping tables to the editing mode. For further information, refer to the "Data Tab [page 127]" section of the Creating a Mapping Table [page 126] task.
● Click Clear to remove all the rows that currently exist in this mapping table.
The modified mapping table is recorded as a draft. This draft remains valid until you click the Save button, that definitively modifies the mapping table in the target system and its back-end database.
1.4.8.4.7 Deleting a Mapping Table
When a mapping table is selected in the search result list, you can click the Delete button located in the title bar to definitively remove this mapping table from the back-end database.
1.4.8.5 FAQs and Tips
Based on SAP user feedbacks, we deliver Frequently Asked Questions (FAQs) about all aspects of working with the Cockpit application and its apps efficiently. In addition, we complete these solutions with some best time-saving and task-completion tips and tricks.
RememberPlease share your SAP user experience to enrich these sections in the SAP user assistance and product documentation for SAP Convergent Charging 2020.
Frequently Asked Questions (FAQs) [page 133]
Tips and Tricks [page 133]
132 PUBLICCockpit
Cockpit

1.4.8.5.1 Frequently Asked Questions (FAQs)
What corresponds to the number displayed in the app tile?
The tile for your Manage Mapping Tables app indicates the total number of mapping tables that are currently released in SAP Convergent Charging 2020. If your user profile is assigned to a single pricing catalog (catalog restriction), this number counts the released mapping tables for this catalog.
NoteThis number does not take drafts into consideration.
Why is the 'Merge' option already selected in the Import From File dialog window?
The first time that the Import From File dialog window is opened during a user session, the "Clear and Replace" option is selected. Next times this dialog window is opened, the option previously selected by the user is automatically positioned.
Searching for mapping tables does not return the expected results.
For a better user experience, the search mechanism is case-insensitive, which may return more elements that expected. In case less results than expected are returned, please note that a synchronization mechanism exists between the Cockpit application and the Core Server system. In case a user created a mapping table in parallel (for example using the Core Tool user interface), it might be necessary to click the button to refresh the list and get these elements.
Can someone view my draft mapping tables?
No. Only you can access and display your drafts, until they are released. These interim versions are personal and available with your user session.
NoteIf you open multiple user sessions on different web browsers or computers, the drafts differ.
Why can’t I copy a draft mapping table?
The copy mechanism is only possible for released mapping tables.
1.4.8.5.2 Tips and Tricks
How to access a mapping table quickly?
Just use the browser bookmarks to access a given mapping table directly. You can copy and share a bookmark, taking into account the associated privileges that may be required to access this mapping table.
CockpitCockpit PUBLIC 133

How to facilitate your tasks?
Just use the rich functions of your app and UI5 technology. Use the copy and the import-data-from-file functions to create a mapping table quickly.
1.4.8.6 Troubleshooting
As part of the technical operations, you may have to troubleshoot some problems when using this app or working with your SAP CC environment (systems, data, users) in your SAP system landscape. Please find afterwards a list of possible symptoms and related solutions that you can try to implement by yourself.
Viewing a mapping table is slow and takes a long time.
In case the loading of a mapping table takes a long time and leads to a slowdown of the Manage Mapping Tables app, you need to check whether the mapping table you are trying to load is a large mapping table, or not. In case this mapping table contains a huge number of rows, this latency may be due to the quantity of modifications that have been performed on these rows, which require Cockpit to reload the entire content of the mapping table.
When such a situation occurs, SAP SE recommends that you contact your SAP CC administrator and ask him to increase the retention period for the deleted rows of the mapping tables by modifying the value of the MAPPING_TABLE_DELETED_ROWS_RETENTION_PERIOD system parameter.
I cannot restore some deleted mapping table rows.
When the editing mode is enabled for a given mapping table, the restore button is only available once at least one row is selected, and the selection does not contain new (including duplicates) rows. As a consequence, you can only restore some deleted rows whose editing status was neither "Draft" nor "New".
Error message: 'No matching mapping tables to display'
This error message means that the Manage Mapping Tables app cannot display the requested mapping table. This situation may be due to:
● A parallel deletion of this mapping table by another individual user or service user (CRM22 application, provisioning system). Try to click the button to refresh the list of mapping table and check whether it still exists, or not. In case your mapping table is still present, ask your system administrator to audit the user operations
● Insufficient privileges associated to your user profile, or a catalog restriction. Contact your user administrator to verify your user profile (credentials, lock status, password expiration, assigned roles, pricing catalog restriction)
● An incorrect bookmark or link. Try to use the search mechanism to retrieve your mapping table. In case you find your mapping table, update your bookmark and share the changes with your team
● Other technical issues. Contact your local support team or the SAP Support Team
22 Customer Relationship Management
134 PUBLICCockpit
Cockpit

1.4.9 Manage Rate Plans
Rate plans are used to implement and run pricing models like subscription- and usage-based pricing. A rate plan specifies how to charge end customers for the use of a service or product.
With the app Manage Rate Plans, you can configure, maintain, and share rate plans stored in your pricing catalog.
What's New? [page 135]
About This App [page 137]
Important Concepts [page 137]
Tasks [page 179]
FAQs and Tips [page 234]
Troubleshooting [page 236]
1.4.9.1 What's New?
This section highlights the main changes in the app Manage Rate Plans that relate to new or changed features.
What's New in FPS 2
As of SAP CC 2020 FPS 2, the Manage Rate Plans app provides you with some new features:
● In an integrated SAP Solution scenario, rate plans include the external parameter SAP_BILL_CYCLE_DATE, which represents the start dates/times of the first billing cycles for the provider contracts managed in SAP Convergent Invoicing. This parameter is then used to synchronize the triggering of recurrent charges with billing cycles managed in SAP Convergent Invoicing.
● Recurrent charges can be configured with a reference date/time that is a default property, the parameter SAP_BILL_CYCLE_DATE, or another custom parameter.
● One-time charges [page 140] are now available in rate plans: as a pricing specialist, you use this type of charge to compute fees based on a contract event.
● New pricing components are available:○ Comparators:
○ Date/Time Comparison [page 156]○ Date Matching [page 157]
○ Operators:○ Date/Time Shift [page 170]○ Time Duration Calculation [page 178]
● You can export a saved rate plan and its related pricing elements [page 230] from a source system to an XML file and import this content from the exported file into a target system.○ Pricing data structures:
○ Chargeable item classes
CockpitCockpit PUBLIC 135

○ Charged item classes○ Mapping table classes○ Range table classes
○ Pricing definitions:○ Mapping tables○ Range tables
What's New in FPS 1
As of SAP CC 2020 FPS 1, the Manage Rate Plans app provides you with some new features:
● Counters are now available in rate plans: As a pricing specialist, you define a counter and use it in the pricing tree. The value of a counter can be changed or read.
● New types or external parameters are available in rate plans (Mapping Table Key, Mapping Table Name, and Range Table Name): As a pricing specialist, you define these parameters so they can be redefined in products or in provider contracts. You set up your pricing components (mapping table lookup, range table lookup, other string-based components) with these new parameters.
● Five new pricing components are available:○ Comparator:
○ Range Table Lookup [page 161]○ Operators:
○ String Concatenation [page 176]○ Counter Update [page 169]○ Property Introduction [page 171]○ Property Type Conversion [page 172]
● In the pricing component Mapping Table Lookup, you can define up to 40 comparison values. The number of allowed values depends on the mapping table class that is selected.
● When viewing or editing the pricing tree in a charge, the interactions and the shortcuts are enhanced. The header is redesigned to provide a direct link to the charged item definition. New Cancel buttons are added in the Charge and Charged Item Definition pages to restore (or reinitialize) the pricing tree and charged item definition from the already-save rate plan.
● You can cut, copy, and paste a selection of pricing components and their subbranches into another pricing tree of a charge in a rate plan.
● It is possible to move operators up and down in pricing trees.
What's New in FPS 0
As of release 2020, Manage Rate Plans is a new app in the Cockpit user interface that enables the SAP CC pricing specialists to create and maintain some rate plans in the pricing catalog for a service/product provider company which wants to monetize its end-customer services. As a pricing specialist, you use rate plans to implement pricing models like subscription- and usage-based pricing.
136 PUBLICCockpit
Cockpit

1.4.9.2 About This App
Target Audience
The app Manage Rate Plans is mainly intended for the pricing specialists of SAP Convergent Charging.
App Summary
The app Manage Rate Plans provides you with the following capabilities:
● Configuring rate plans to charge end customers for the usage of a service or product● Managing rate plans lifecycle to create contracts using them or not● Maintaining existing rate plans to keep them up-to-date● Sharing rate plans with other users
App Layout
The layout of the app Manage Rate Plans is made up with different views:
● The Master View, in the left area of the app screen, that provides you with a result list of existing or draft rate plans whose content can be customized to fit specific needs. For further information about this view, refer mainly to the Maintaining Existing Rate Plans [page 210] task.
● The Detail View, that provides you with the detailed information related to a given rate plan. This view is only visible when a rate plan is selected in the left area, or during the creation of a new rate plan. For further information about this view, refer to the Configuring a New Rate Plan [page 180].
In addition to these areas, a title bar, containing the name of the current rate plan and its status, and a footer toolbar provide buttons related to the different actions you can perform.
1.4.9.3 Important Concepts
As a pricing specialist for SAP Convergent Charging, you are aware of the following concepts to use the app Manage Rate Plans.
Rate Plans
A rate plan allows the implementation of pricing models like subscription- and usage-based pricing.
CockpitCockpit PUBLIC 137

It specifies how to charge an end customer for the use of a product or the consumption of a service.
A set of charges composes a rate plan. These charges can be:
● A one-time charge which computes fees each time contract lifecycle events occur
● A recurring charge which computes regular fees based on a period
● A usage charge which computes fees based on the use of a product or a service consumption by the end customer
Rate plans from pricing catalogs are exposed to the SOM (Subscription Order Management) application or provisioning system in the form of rate plans that the system combines into commercial products and offers. When ordering a product, end customers automatically subscribe to rate plans as part of the contract creation process. Each contract item refers to such a rate plan that is included in the pricing catalog for the service or product.
See also: Charges [page 139]
Rating Process
The rating process triggers the charges of a rate plan subscribed in a provider contract:
● For one-time and recurring charges, the rating process triggers scheduled fees of a provider contract● For usage charges, the rating process considers chargeable items as input data (which represent the use
of a product or a service consumption) and triggers related usage fees
The rating process generates charged items as output data (which can then be loaded into SAP Convergent Invoicing as billable items in an integrated SAP Solution scenario).
See also: Process a Chargeable Item [page 285]
Important Note
CautionRate plans are mapped to charge plans managed by Cockpit: whereas charge plans are configured through a bottom-up approach (i.e. from the individual charge to the charge plan), rate plans are configured through a top-down-approach (i.e. you create a rate plan before adding recurring and usage charges to it).
Considering this difference, you must know that:
● Even if charge plans are visible in Cockpit, they cannot be edited by it. The Cockpit user interface manages exclusively rate plans. Use Core Tool to manage charge plans
● On the contrary, rate plans can be managed by Core Tool: but in such a case, once a rate plan is modified by Core Tool, it becomes a charge plan and cannot be managed by Cockpit any longer
138 PUBLICCockpit
Cockpit

In the rest of this documentation, only rate plans are considered.
1.4.9.3.1 Charges
A charge is an element of a rate plan that defines how to compute fees for the use of a service or product. Configuring a charge enables implementing various pricing models.
Icon Name Triggering Definition Examples
One-Time Charge Event based The one-time charge is an element of a rate plan that defines how the system computes fees each time contract lifecycle events occur. It enables implementing a subscription-based pricing model with revenues based on the provider contracts that subscribe to the rate plan containing the one-time charge.
● Administration fees● Termination fees
Recurring Charge Periodic The recurring charge is an element of a rate plan that defines how the system computes fees on a periodic basis. It enables implementing a subscription-based pricing model with regular revenues.
● Monthly subscription fees● Annual membership fees
Usage Charge Each use of a product or consumption of a service
The usage charge is an element of a rate plan that that defines how the system computes fees based on the metered use of a chargeable service or product. It enables implementing a usage-based pricing model.
● Data services (video download)● Voice services (phone calls)● Transport services● Electric vehicles (car charging,
service unavailability)
One-Time Charge [page 140]
Recurring Charge [page 140]
Usage Charge [page 141]
Related Information
Adding Charges [page 185]Editing Charges [page 223]
CockpitCockpit PUBLIC 139

1.4.9.3.1.1 One-Time Charge
A one-time charge is an element of a rate plan that defines how the system computes fees based on contract lifecycle events. The one-time charge can be triggered by the following contract lifecycle events: activation (aka creation), suspension, or resumption of a contract item in the provider contract. Configuring a one-time charge enables implementing a subscription-based pricing model.
Once subscribed in a provider contract, the contracted charge is triggered automatically by the system according to a specific defined event (creation (aka activation), suspension, resumption of a provider contract item).
ExampleA charging station company provides its end customers with a new network of electric charging points for their electric vehicles. To use a charging point, a badge is necessary.
The business model is based on a mix of subscription-based pricing model, usage-based pricing model and event-based pricing model.
The end customer who is the subscriber pays a unique fee for the supply of the badge at subscription time.
As a pricing specialist for SAP Convergent Charging, you design and configure a rate plan that includes a one-time charge to cover the badge fee.
Configuration
Editing a One-Time Charge [page 223]
1.4.9.3.1.2 Recurring Charge
A recurring charge is an element of a rate plan that defines how the system computes fees on a periodic basis.
Configuring a recurring charge enables implementing a subscription-based pricing model.
Once subscribed, this charge is regularly triggered by the system according to a reference date/time (initial triggering) and a predefined frequency (from daily to yearly).
● It has a periodic recurrence that is based on one of the following frequencies:○ Daily
140 PUBLICCockpit
Cockpit

○ Weekly○ Monthly○ Quarterly○ Biannually○ Annually
● In an integrated SAP Solution scenario, the recurrent triggering can be synchronized with billing cycles managed in SAP Convergent Invoicing. The reference date/time must be set up to the external parameter SAP_BILL_CYCLE_DATE, which represents the start dates/times of the first billing cycles for the provider contracts managed in SAP Convergent Invoicing. This parameter is set in the provider contract items by the system that creates the provider contracts and contract items.
ExampleA charging station company provides its end customers with a new network of electric charging points for their electric vehicles. The business model is based on a mix of a subscription-based pricing model and usage-based pricing model.
The end customer who is the subscriber pays an annual fee for the charging services in the charging stations.
As a pricing specialist for SAP Convergent Charging, you design and configure a rate plan that includes a recurring charge.
Configuration
Editing a Recurring Charge [page 224]
1.4.9.3.1.3 Usage Charge
A usage charge is an element of a rate plan that defines how the system computes fees based on the metered use of a service or product.
Configuring a usage charge enables implementing a usage-based pricing model.
Once subscribed in a provider contract, the contracted charge is triggered when the system receives an input chargeable item that relates to the use of a service or product by an end customer. The system identifies and assigns this use to the corresponding provider contract and subscriber account.
Note● This type of charge requires the configuration of a chargeable item class that defines the structure for
the input data named chargeable items.
CockpitCockpit PUBLIC 141

● The charge configuration specifies a technical identifier of the chargeable service or product. The input chargeable items must include this ID.
ExampleA charging station company provides its end customers with a new network of electric charging points for their electric vehicles. The business model is based on a mix of a subscription-based pricing model and usage-based pricing model.
The end customer is charged a fee for the quantity of electricity that was delivered at the charging station. The unit price depends on the car manufacturer.
As a pricing specialist for SAP Convergent Charging, you design and configure a unique rate plan that defines an external parameter and includes a usage charge. Its pricing tree mostly contains a mapping table lookup component. The parameter - whose the value represents the car manufacturer - allows configuring one single rate plan for all car manufacturers instead of having one rate plan per car manafacturer.
The parameter value is defined at subscription time.
Configuration
Editing a Usage Charge [page 225]
1.4.9.3.2 Pricing Tree
In a charge [page 139], a pricing tree is a structured combination of pricing components that define and compute prices and fees related to the consumption of a service or use of a product. A pricing tree enables flexible and rapid configurations.
A pricing tree is a decision tree that facilitates the implementation of pricing models like subscription- and usage-based pricing. It includes the necessary business logic for your pricing configurations.
The pricing tree is graphically represented by a tree structure in Convergent Charging Cockpit.
NoteFor better readability in the user interface, the names for the nodes and leaves are expressed in a human-understandable language.
At runtime, calculations in a pricing tree are only performed when the charge is triggered by:
● Use of the chargeable service or product: an incoming input chargeable item that relates to a service/product use is assigned to an end customer by determining the appropriate provider contract and subscriber account.
● Provider contract lifecycle change: Activation, suspension, or resumption of a contract item in the provider contract of the end customer.
142 PUBLICCockpit
Cockpit

● A periodic event in the case of a recurring amount such as an annual subscription fee
Graphical Representation
In the user interface, a pricing tree is graphically represented by a tree. Nodes and leaves are the pricing components.
Pricing Tree of a One-Time Charge
CockpitCockpit PUBLIC 143

Pricing Tree of a Recurring Charge
Pricing Tree of a Usage Charge
See also: Interacting with the Pricing Tree [page 205]
144 PUBLICCockpit
Cockpit

Related Information
Configuring the Pricing Tree of a Charge [page 187]Viewing the Pricing Tree [page 217]
1.4.9.3.2.1 Properties
The different categories are:
● Default Property● Chargeable Item Property● Counter● Parameter
1.4.9.3.2.1.1 Default Properties
When configuring the pricing logic in your rate plan, you can use one of the following default properties to set up either the pricing components in the pricing trees of your charges or the charged item definitions.
Search for the property that you need:
Name Type
Produced by an Allowance Boolean
Chargeable Items Are Exported Boolean
Subscriber Consumes Service (Client) Boolean
Charged Amount is a Credit Boolean
Charged Amount is a Debit Boolean
Subscriber Provides Service (Partner) Boolean
Account Type is Prepaid Boolean
Charged Transaction is a Prepaid Refill Boolean
Charged Transaction is a Prepaid Debit Boolean
Rated Amount is Prorated Boolean
Rated Amount is Refunded Boolean
Tax is Included in Total Amount Boolean
VAT Business Entity Boolean
VAT Transaction Gross Price Flag Boolean
Account Event Date Date/Time
CockpitCockpit PUBLIC 145

Name Type
Rating Activation Date Date/Time
Allowance Validity End Date Date/Time
Allowance Validity Start Date Date/Time
Charge Activation Cancellation Date Date/Time
Charge Activation Effective Date Date/Time
Rating Consumption Date Date/Time
Charge Date Date/Time
Event Date Date/Time
Event Processing Date Date/Time
Excluding Last Day of the Rating Recurring Period Date/Time
Including Last Day of the Rating Recurring Period Date/Time
Start of Rating Recurring Period Date/Time
Start of Rating Reference Recurring Period Date/Time
End of Rating Recurring Period Date/Time
End of Rating Reference Recurring Period Date/Time
Refill Date Date/Time
Subscription Commitment Expiration Date Date/Time
Subscription Resumption Date Date/Time
Subscription Suspension Date Date/Time
US Transaction Taxation Date Date/Time
Account Type Code Number
Amount (Excl.Tax) Number
Base Amount Number
Charge Type Code Number
Charged Item Identifier Number
Charged Item Set Identifier Number
Charged Tax Amount Number
Charged Tax Status Identifier Number
Charged Total Amount (Incl. Tax) Number
Produced by a Master Charge Component Number
Charged Item or Refill Record Set Identifier Number
Prepaid Balance Amount Number
Rated Amount Number
Base Rated Amount Number
146 PUBLICCockpit
Cockpit

Name Type
Rated Tax Amount Number
Rated Tax Status Identifier Number
Rated Total Amount Number
Unrounded Rated Amount Number
Refill Amount Number
Prerating Reservation Identifier Number
Sender Job Identifier Number
Tax Amount Number
Tax Status Identifier Number
US Transaction Call Duration Number
US Transaction County Exempt Number
US Transaction Federal Exempt Number
US Transaction Lifeline Flag Number
US Transaction Line Count Number
US Transaction County Exempt Number
US Transaction Location Count Number
US Transaction State Exempt Number
VAT Transaction Raw Rate Number
Threshold Amount Number
Total Amount (Incl. Tax) Number
Account Code String
Account Type Name String
Allowance Context String
Allowance Event Class Name String
Allowance Share Identifier String
Allowance Unique Identifier String
Charge Activation Code String
Charge Reference String
Charge Reference Name String
Charge Type Name String
Chargeable Item Class Name String
Chargeable Item Unique Identifier String
Chargeable Item Unique Identifier Type String
Chargeable Item Package Code String
CockpitCockpit PUBLIC 147
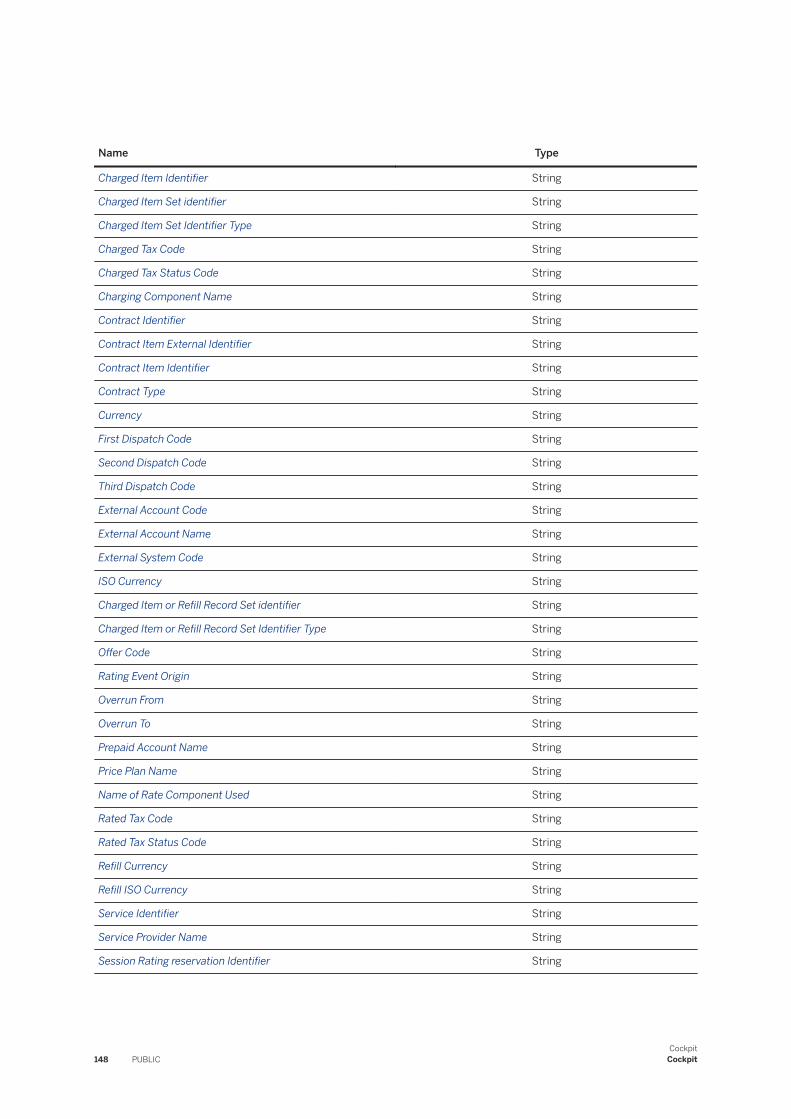
Name Type
Charged Item Identifier String
Charged Item Set identifier String
Charged Item Set Identifier Type String
Charged Tax Code String
Charged Tax Status Code String
Charging Component Name String
Contract Identifier String
Contract Item External Identifier String
Contract Item Identifier String
Contract Type String
Currency String
First Dispatch Code String
Second Dispatch Code String
Third Dispatch Code String
External Account Code String
External Account Name String
External System Code String
ISO Currency String
Charged Item or Refill Record Set identifier String
Charged Item or Refill Record Set Identifier Type String
Offer Code String
Rating Event Origin String
Overrun From String
Overrun To String
Prepaid Account Name String
Price Plan Name String
Name of Rate Component Used String
Rated Tax Code String
Rated Tax Status Code String
Refill Currency String
Refill ISO Currency String
Service Identifier String
Service Provider Name String
Session Rating reservation Identifier String
148 PUBLICCockpit
Cockpit

Name Type
Subscriber Account Code String
Subscriber Account Reference String
Subscription Code String
Tax Code String
Tax Determination Type String
Tax Status Code String
US Transaction Business Class String
US Transaction customer Type String
US Transaction Facilities-Based Flag String
US Transaction Franchise Flag String
US Transaction Incorporated Code String
US Transaction Origin String
US Transaction Origin Flag String
US Transaction Regulated Flag String
US Transaction Resale Flag String
US Transaction Service Address String
US Transaction Service Address Flag String
US Transaction Service Class String
US Transaction Service Type String
US Transaction Tax Data String
US Transaction Telecom Type String
US Transaction Termination String
US Transaction Termination Flag String
US Transaction Type String
VAT Transaction Rate Code String
VAT Transaction Raw Rate ID String
Service Provider Country Code String
VAT Place of Taxation String
Triggering Contract Identifier String
Triggering Contract Item External Identifier String
User Service Identifier String
Related Information
Configuring the Pricing Tree of a Charge [page 187]
CockpitCockpit PUBLIC 149

Editing the Charged Item Definition [page 226]
1.4.9.3.3 Pricing Components
A pricing component is a logic unit for configuring the pricing logic in SAP Convergent Charging based on pricing context properties.
The pricing components provide a wide flexibility with regard to pricing configuration.
It is graphically represented by nodes and subbranches in a tree structure. To ease its configuration, a pricing component is represented by one or more pricing branches in the pricing tree [page 142] of a charge.
Together the components make up a pricing tree or a particular subbranch. The values generated higher up a pricing branch become available to all parts of the branch further toward the ends of the branch. When a property is generated on one pricing branch, it cannot be used on another pricing branch.
The components of a pricing tree are grouped into three families depending on their main scope:
● Fees and Functions [page 151]● Comparators [page 154]● Operators [page 166]
Icon Family Definition
Functions The function component dynamically computes and returns a calculated fee from pricing context's properties, parameters, constant values, or values from data tables. Depending on its nature, the function component defines when the system produces output charged items for interfaced billing, invoicing, or revenue recognition systems.
Comparators The comparator component compares properties or data of the same type and provide the ability to set up some differ-ent logic that depends on the comparison results. The comparator component can compare the properties of chargeable item classes, parameters, or properties computed by another logic component.
Operators The operator component changes the pricing context by adding or modifying context properties.
150 PUBLICCockpit
Cockpit

NoteIn your app, the icon colors depend on your selected theme [page 15] in the user preferences.
Fees and Functions [page 151]
Comparators [page 154]
Operators [page 166]
Related Information
Configuring the Pricing Tree of a Charge [page 187]
1.4.9.3.3.1 Fees and Functions
A function component dynamically computes and returns a calculated fee from pricing context's properties, parameters, constant values, or values from data tables. A function component must end each branch in the pricing tree of a charge in your rate plan. At runtime, the execution of a function component ends the execution of its belonging pricing tree and charge. A final fee and all the computed properties are used by the system to produce the output charged items accordingly to the configured charge.
Icon Name DefinitionGeneration of Charged Items
SAP CC Version Availability
Flat Fee The flat fee component computes and returns a price based on a constant value or an amount from the pricing context properties. An output charged item is produced.
Yes 2020 FPS 0
No Fee The no fee component is a particular function that provides the ability to not compute any fees and to produce no output charged items.
None 2020 FPS 1
CockpitCockpit PUBLIC 151

Icon Name DefinitionGeneration of Charged Items
SAP CC Version Availability
Error The error component is a particular function that provides the ability to not compute any fees and to return a configurable exception at runtime.
None 2020 FPS 0
Flat Fee [page 152]
No Fee [page 153]
Error [page 154]
Related Information
Adding a Function Component [page 189]
1.4.9.3.3.1.1 Flat Fee
A flat fee component computes and returns a price based on a constant value or a numerical property expressed in the currency of the belonging rate plan. An output charged item is produced and can be loaded into the interfaced billing, invoicing, or revenue recognition system.
Use and Best Practices
If you want to set up the pricing for a service that is charged based on a monthly flat fee, then add this flat fee component to the pricing tree of a recurring charge in your rate plan.
To set up a service that is "free of charge", add this flat fee component with a 0 amount to your pricing tree.
Configuration
Set up the component:
152 PUBLICCockpit
Cockpit

● Select a rating context property or enter a constant value. It represents the amount of the computed price expressed in the currency of the rate plan.
Related Information
Adding a Function Component [page 189]
1.4.9.3.3.1.2 No Fee
A no fee component is a particular function that represents a free service or product in the pricing tree. No price is computed. No output charged items are produced.
Use and Best Practices
If you want to set up the pricing for a service that is "free of charge" and you do not need any output charged items, then add the no fee component to your pricing tree.
On the contrary, if you need that the SAP system generates charged items as output data to record into a downstream system, add a flat fee component [page 152] with a 0 amount to your pricing tree.
If you use this component in a pricing tree, the rerating feature is not available anymore.
Configuration
There is nothing to set up.
Related Information
Adding a Function Component [page 189]
CockpitCockpit PUBLIC 153

1.4.9.3.3.1.3 Error
An error component is a particular function that represents an unauthorized use of a chargeable service or product, an invalid access, or an unexpected case when usage events are processed. It does not compute any fee and returns an exception at runtime with a configurable error message and a customizable list of returned properties from the pricing context. No price is computed. No output charged items are produced.
Use and Best Practices
In a pricing tree, add the error component in the Else branch when there is an error with the business logic.
RecommendationWe recommend that you do not use the error component in recurring charges that relate to background processes.
Configuration
Set up the component:
● Enter the message to communicate to the end customer who uses the chargeable service or product.● Select the context properties or parameters to add to the error notifications as complementary
information for the addressed end customer.
Related Information
Adding a Function Component [page 189]
1.4.9.3.3.2 Comparators
154 PUBLICCockpit
Cockpit

A comparator component compares properties or data of the same type. The comparator component can compare the properties of chargeable item classes, parameters, or properties computed by another pricing component.
Name Definition
SAP CC Version Availability
Date/Time Comparison [page 156]
The date/time comparison component is a pricing component that compares a date/time property to a given constant or to a date property of the pricing context.
2020 FPS 2
Date Matching [page 157]
The date matching component is a pricing component that checks if a specific part of a date property matches a given constant or the same specific part of another date property of the pricing context.
2020 FPS 2
Mapping Table Lookup [page 158]
The mapping table lookup component is a pricing component that provides the ability to look up data in mapping tables, compare some data values (in input columns) to pricing context data, and set up some pricing logic based on the comparisons results.
2020 FPS 0
Number Comparison [page 160]
The number comparator is a pricing component that compares a number property to a given constant or another number property of the pricing context.
2020 FPS 0
Range Table Lookup [page 161]
The range table lookup component is a pricing component that provides the ability to look up data in range tables and compare these data values (ranges, input columns) to values of the pricing context.
2020 FPS 1
String Comparison [page 166]
The string comparator is a pricing component that compares a string property to a given constant or another string property of the pricing context.
2020 FPS 0
Date/Time Comparison [page 156]
Date Matching [page 157]
Mapping Table Lookup [page 158]
Number Comparison [page 160]
Range Table Lookup [page 161]
String Comparison [page 166]
CockpitCockpit PUBLIC 155

Related Information
Adding a Comparator [page 190]
1.4.9.3.3.2.1 Date/Time Comparison
At runtime, a date/time comparison compares a date/time property value (from the pricing context) to a given date/time constant value or to the value of another date/time property. Five date/time comparison operators are available:
● Is Equal To● Is After● Is Strictly After● Is Before● Is Strictly Before
Use and Best Practices
If you want to define different prices for separate branches in a pricing tree, you may need to compare a date property with a constant value or another date property or parameter.
Configuration
Set up the component and its two branches (If/Else):
● Date/Time Property: Select a rating context property for the date comparison.● Operator: Select a date comparison operator in the list (Is Equal To, Is After, Is Strictly After, Is Before, or Is
Strictly Before).● Comparison Value: Select the type of the value and set up this value:
○ Select a constant date/time value by clicking the calendar icon for Constant type.○ Select a rating context property in the list for Property type.
156 PUBLICCockpit
Cockpit

Related Information
Adding a Comparator [page 190]
1.4.9.3.3.2.2 Date Matching
At runtime, a date matching checks if the value of a specific part of a date property (from the pricing context) matches a given constant value or the value of the same specific part of another date property. Four matching criteria are available:
● Day of Week● Day of Month● Month● Year
Use and Best Practices
In a rate plan, if you want to apply different prices which vary from one time period to another time period (which can be a day of the week, a day of the month, a month or a year), you may need to compare a part of a date to another one (which can come from another date property of the rate plan or be a constant). To use the date matching comparator inside your rate plan, do the following:
● After you add the component, set up the matching criteria● Configure the pricing of each decision tree branch by using a component
Configuration
Set up the component and its two branches (If/Else):
● Date/Time Property: Select a rating context property for the date comparison.● Matching Property: Select another rating context property to be compared to the first one (if applicable).● Matching Criteria: Select and set up the criteria that are relevant for the matching. For each criterion,
select:○ Ignore if the criterion is not relevant○ Same as Matching Property to compare this criterion of the date/time property to the same one of the
matching property defined above (if applicable). Once this option is selected, a second field appears below the criterion, displaying the name and the type of the property used for the comparison.
CockpitCockpit PUBLIC 157

NoteThis option cannot be selected and is grayed out if no matching property is defined.
○ Constant Value to compare this criterion of the date/time property to a constant value. Once this option is selected, a second field appears below, and a constant value must be selected in the list.
TipThe value can also be entered in the input field.
Related Information
Adding a Comparator [page 190]
1.4.9.3.3.2.3 Mapping Table Lookup
A mapping table lookup component provides the ability to look up data in mapping tables and compare these data values to values of the pricing context. Its execution computes new properties, one property for each output column. The component definition includes two "If/Else" branches to configure some dedicated business logic.
The comparison algorithm is based on a reference date/time that is set by the pricing specialist in the component:
● Only the rows whose validity periods include this reference date/time are used for the comparison.● The row whose start date/time is closest to the reference date/time is first selected.● If two rows have validity periods with the same start date/time, the row with the shortest period is first
selected.
At runtime, SAP Convergent Charging proceeds as follows when executing the pricing component:
1. The system compares row by row the data in the input columns of a selected mapping table with a subset of properties in the rating context.
2. The system first preselects the rows whose data values (in input columns) match the property values. If enabled in the pricing component, the system applies a longest prefix match (LPM) algorithm to select a unique row that has the longest prefix value.
3. Finally, the system selects the row:○ Whose time period includes the reference date/time○ Whose start date/time is closest to the reference date/time
158 PUBLICCockpit
Cockpit

○ Whose validity period is the shortest4. As results, the output columns relating to the input columns are retrieved in computed properties that the
system uses to execute some specific business logic (as configured by the pricing specialist in the component).
5. If no matching row is found, the system executes some specific business logic that is defined in an Else branch in the pricing tree.
Use and Best Practices
If you want to base some pricing or business logic on data stored in a mapping table in the pricing catalog, you need to configure this component.
A basic mapping table is a data table with business, pricing, or technical data values. Each row of the mapping table consists of a subset of values of input columns to which corresponds a subset of values of output columns. For each row, you have to specify the period during which the row is valid.
Data returned from the table during processing is available for downstream logic.
Configuration
Set up the component and configure its two branches (If/Else):
● Mapping Table Class: Select the mapping table class that you want to use with this pricing component. Click View to view or modify the mapping table class in the pricing catalog.
● Mapping Table: Select a given mapping table that corresponds to the selected class or select a parameter or a property that must include the identifier of a mapping table to use in the pricing tree. This mapping table contains some input columns with the comparative data values, and some output columns with the result data values (fees, labels).
● Row Searched: Displays the names of the input columns in the selected mapping table and allows you to select the properties or parameters that you want to use for the comparisons with the data in the input columns of the mapping table.
Define the comparison values by filling in the configuration table:○ Input Column Name: Displays the name of an input column in the selected mapping table.○ Type: Displays the type of the data in the related input column.○ Comparison Value: Select a property or parameter that you want to be compared with the data in the
corresponding input column of the mapping table. The suggested list contains items of the same type.○ Description: Displays the description of the input column in the mapping table to facilitate your
configurations.● Column for Longest Prefix Match: Provides the list of input column names of the selected mapping table.
If you want to implement some zoning and comparisons based on a longest prefix match (LPM) algorithm, select the input column that you define as the input column for containing the prefixes to be compared with the value of the related Comparison Value When comparing the prefixes of this input column with the value of the related Comparison Value, the system finds a row only if the two conditions are true:
CockpitCockpit PUBLIC 159

1. The value of the input column (prefix, zone prefix) that matches the value of the related Comparison Value is the longest prefix match of all rows in the selected mapping table.
2. The values of the other input columns of the mapping table match the values of the related Comparison Value column.
● Reference Date/Time: Select a date/time property (or a parameter) or start typing its name. Each row in the mapping table has a validity period. Therefore, the Reference Date/Time setting enables the system to preselect the row whose validity period includes the reference date/time.
When several rows contain this same reference date/time:1. The SAP CC system selects the row whose start date/time is closest to the reference date/time set
in this pricing component.2. If two validity periods have the same start date/time, the row with the shortest validity period is first
selected.For example, you can set up with the Charge Effective Date/time property that corresponds to the use of the chargeable service or product.
● Computed Properties: Click Configure to set up the properties that are computed by the system at runtime when executing the pricing component. At runtime, when a comparison is true, the system computes new context properties that contain the values of the data subset in output column of the mapping table. These data values are the result of the comparison operations.
Identify the new computed properties:○ Output Column Name: Displays the name of an output column in the selected mapping table.○ Type: Displays the type of the computed property: Number or String.○ Computed Property: Identify the new property that contains the comparison result in the rating context
at runtime.○ Description: Displays the description of the output column in the mapping table to facilitate the
configurations.
Related Information
Adding a Comparator [page 190]
1.4.9.3.3.2.4 Number Comparison
At runtime, a number comparator compares a numerical property value with a given numerical constant value or with the value of another numerical property in the pricing context. Five numerical comparison operators are available:
160 PUBLICCockpit
Cockpit

● Is equal to● Is greater than● Is less than● Is greater than or equal to● Is less than or equal to
Use and Best Practices
If you want to apply different prices to branches in a pricing tree, you may need to compare the value of a property with a constant value or another property value.
Configuration
Set up the component and its two branches (If/Else):
● Number Property: Select a rating context property for the numerical comparison.● Operator: Select a numerical comparison operator in the list (is equal to, is greater than, is less than, is
greater than or equal to, or is less than or equal to).● Comparison Value: Select a rating context property or enter a constant value for the numerical
comparison.
Related Information
Adding a Comparator [page 190]
1.4.9.3.3.2.5 Range Table Lookup
A range table lookup component provides the ability to look up data in range tables (in pricing catalogs or in customer master data), compare these data values to values of the pricing context, and execute some dedicated pricing logic that is based on the comparison results and supplementary calculations. Its execution computes new properties. The component definition includes three or four "If/Else if" branches to configure some dedicated business logic.
At runtime, SAP Convergent Charging proceeds as follows when executing the pricing component:
CockpitCockpit PUBLIC 161

1. The system determines the version of the selected range table by comparing a given date/time value in the pricing context with a reference date/time that is configured in the pricing component. For example, the date/time for the use for the service or product. The system selects the version whose validity period includes this reference date/time.
2. If the selected range table contains one or more input columns, the system searches whether there is a range set key (in the input columns) that matches with given values in the pricing context. When found, the system focuses on the ranges that are associated to this range set key.
If there are no matching range set keys, the system executes some specific business logic (error) that is defined in a dedicated Else if branch in the pricing component.
3. Finally, the system searches whether there is a range that matches a given numerical value in the pricing context.
4. As results, the output column values relating to the reached range are retrieved in computed properties that the system uses to execute some specific business logic. Additional computed properties are available (accumulated amounts, range size).
Depending on the characteristics (bounds, + Infinite upper bound, input columns) of the selected range table, the system executes some specific business logic that is defined in an Else if branch in the pricing component.
5. If no matching ranges are found, the system executes some specific business logic (error) that is defined in an Else if branch in the pricing component.
Range Tables in SAP Convergent Charging
162 PUBLICCockpit
Cockpit

Use and Best Practices
If you want to base some pricing or business logic on data stored in a range table in the pricing catalog (or in customer master data), you need to configure this component. Implementing range tables enables you to design and configure volume, tiered, or block pricing models.
A basic range table is a data table with business, pricing, or technical data values. Each row of the range table consists of a range (numerical interval) to which corresponds a subset of values in output columns. The system can automatically calculate accumulated values based on cumulative and cumulative linear algorithms. Depending on your business requirement, determine if the last range is bounded with a business value or is unbounded (+ Infinite).
A range table with input columns combines multiple range tables in one with a selection method based on comparisons of range set keys (in these input columns) with a subset of data in the pricing context. It enables implementing multidimensional pricing.
Data returned from the table during processing is available for downstream logic.
Configuration
Set up the component and configure its branches (If/Else if):
● Range Table Class: Select the range table class that you want to use with this pricing component. Click View to view or modify the range table class in the pricing catalog.
● Range Table: Select a range table that corresponds to the selected class or select a parameter that must include the name of a range table to use in the pricing tree.
● Reference Date/Time: Select a date/time property . A range table has several versions at different times. Therefore, the Reference Date/Time setting enables the system to select the table version whose validity period includes this reference date/time.
● Range Set Key Searched: Displays the names of the input columns in the selected range table and allows you to select the properties that you want to use for the comparisons with the data in the input columns of the selected range table.
Define the comparison values by filling in the configuration table:○ Input Column Name: Displays the name of an input column in the selected range table.○ Type: Displays the type of the data in the related input column.○ Comparison Value: Select a property that you want to be compared with the data in the corresponding
input column of the range table. The suggested list contains items of the same type.○ Description: Displays the description of the input column in the range table to facilitate your
configurations.● Range Searched: Select a number property that you want to be compared with the ranges (positive
intervals) in the selected range table. The value must be a quantity that the system can use to compare with ranges and determine the position in the reached range.
● Computed Properties: Click the Configure buttons to set up the new properties that are computed by the system at runtime when executing the pricing component.
Configuration tabs let you rename the computed properties:
CockpitCockpit PUBLIC 163

Tab Instructions
Characteristics of Range Give names to the following new computed properties:○ Lower Bound of Range○ Upper Bound of Range○ Range Size○ Prorata in Range○ Value Beyond Lower Bound○ Value Beyond Upper Bound
Values of Range For each output column, configure the new computed properties:○ Name: Displays the name of an output column in the selected range table.○ Type: Displays the type of the computed property: Number or String.○ Computed Property: Name the new property that contains the value of the output
column of the selected range table for the currently reached range.○ Description: Displays the description of the output column in the selected range ta
ble to facilitate the configuration.
Values of Previous Ranges This tab is visible if the output columns of the selected range table include values that must be cumulated by the system to calculate new business values.
For each of these columns, configure the new computed properties:○ Name: Displays the name of an output column in the selected range table. This col
umn contains values that must be cumulated by the system depending on the computation mode.
○ Type: Displays the type of the new computed property: Number.○ Computation Mode: Displays the calculation algorithm that the system performs on
the column values.○ Cumulative: The system calculates the sum of the values in the output column
of the selected range table across all previous ranges, excluding the reached range.
○ Cumulative, Linear: The system calculates the sum of the values in the output column of the selected range table multiplied by the range size across all previous ranges, excluding the reached range.
○ Computed Property: Name the new property that contains the accumulated value. By default, the app suggests names that end with the suffix Accumulated.
○ Description: Displays the description of the output column in the selected range table to facilitate the configuration.
When you insert the range table lookup component in the pricing tree, it creates a main If branch and two or three separate Else if branches. Configure all the branches that apply to you:
● Is found in a range of the range table: Configure this main part of the pricing tree. Depending on your business requirement, combine the expected pricing components to compute the final values. Use the computed properties (range size, lower bound of range, prorata in range, accumulated values) to set up the relevant pricing logic.
● And some of the following Else if branches:○ Is below the first range: It occurs when the value to be searched is less than the lower bound of the first
range. The system executes this branch.
NoteIf this first range does not include zero (]0 , A]), the system also executes this branch when the searched value is zero.
164 PUBLICCockpit
Cockpit

○ Is above the last range: It may occur when all the ranges of the selected range table are defined by user values. The system executes this branch when the specified value to be searched in ranges is above the last range. It is outside the ranges.
○ Is found in the last unbounded range: It may occur when the upper bound of the last range is + Infinite. The system executes this branch when the specified value to be searched in ranges is inside this last unbounded range.
○ The specified range set key is not found in the range table: It may occur when the selected range table contains input columns. The system executes this branch when the specified range set key is not found in the selected range table. No values in the input columns match with the subset of properties in pricing context.
Typical Range Set
Branch to Set Up
] 0 , A ]
] A , B ]
] B , C ]
[ 0 , A [
[ A , B [
[ B , C [
] 0 , A ]
] A , B ]
] B , +Infinite [
[ 0 , A [
[ A , B [
[ B , +Infinite [
Is found in a range of the range table
■ ■ ■ ■
Is below the first range of the range table
■
Note that the searched value is 0 or a negative value.
■
The searched value is negative.
■
Note that the searched value is 0 or a negative value.
■
The searched value is negative.
Is above the last range of the range table
■ ■
Is found in the last unbounded range of the range table
■ ■
The specified range set key is not found in the range table
◘ ◘ ◘ ◘
■ Branch is visible ◘ Branch is visible when the range table contains input columns
Related Information
Adding a Comparator [page 190]
CockpitCockpit PUBLIC 165

1.4.9.3.3.2.6 String Comparison
At runtime, a string comparator compares a string property value (from the pricing context) with a given string constant value or with the value of another string property. Four string comparison operators are available:
● Is equal to● Starts with● Ends with● Contains
Use and Best Practices
If you want to apply different prices to branches in a pricing tree, you may need to compare a string property with a string value or another string property or parameter.
Configuration
Set up the component and its two branches (If/Else):
● String Property: Select a rating context property for the string comparison.● Operator: Select a string comparison operator in the list (is equal to, starts with, ends with, or contains).● Comparison Value: Select a rating context property or enter a constant value for the string comparison.
Related Information
Adding a Comparator [page 190]
1.4.9.3.3.3 Operators
166 PUBLICCockpit
Cockpit

An operator component changes the pricing context by adding or modifying context properties.
Name Definition
SAP CC Version Availability
Arithmetic Computation [page 168]
The arithmetic computation component is an operator that carries out an arithmetical operation between two numerical values or properties and returns the result in a new property.
2020 FPS 0
Counter Update [page 169]
The counter update component is an operator used to update the value of a counter in a pricing tree. 2020 FPS 1
Date/Time Shift [page 170]
The date/time shift component is an operator that shifts a date/time property by adding or subtracting a time value.
2020 FPS 2
Property Introduction [page 171]
The property introduction component is used to create new properties or to modify existing properties of a pricing tree.
2020 FPS 1
Property Type Conversion [page 172]
The property type conversion component is an operator used to convert, transform, or extract data at runtime.
2020 FPS 1
String Concatenation [page 176]
The string concatenation component is used to concatenate two or more string properties or character strings.
2020 FPS 1
Time Duration Calculation [page 178]
The time duration calculation component is an operator that calculates the period of time between two date/time properties.
2020 FPS 2
Related Information
Adding an Operator [page 197]
CockpitCockpit PUBLIC 167

1.4.9.3.3.3.1 Arithmetic Computation
An arithmetic computation component carries out an arithmetical operation between two given numerical values or values of context properties. At runtime, the calculation result is saved in a new property that can be rounded with a configurable scale and rounding mode.
● This operator can carry out the following arithmetical operations:○ Addition (+)○ Subtraction (-)○ Multiplication (x)○ Division (/)○ Modulo (%)○ Power (^)
● For divisions, rounding rules are based on:○ The number of decimal places for the result○ The following rounding modes:
○ Rounding up to the next greater value○ Rounding down to the previous value○ Rounding to the nearest value
Use and Best Practices
You can add several components to chain intermediate computations.
The rounding feature is only available for the division operations.
Configuration
Set up the component:
● Computed Property: Name the new context property that contains the result of the arithmetical operation at runtime.
● First Operand: Select a rating context property or enter a constant value for the first operand of the arithmetical operation.
● Operator: Select the arithmetical operator in the list (+, -, x, /, modulo (%), or power).● Second Operand: Select a rating context property or enter a constant value for the second operand of the
arithmetical operation.
168 PUBLICCockpit
Cockpit

● Rounding: Click Configure to define the expected scale (number of decimal places for the result) and the rounding mode (next greater, previous, or nearest).
Related Information
Adding an Operator [page 197]
1.4.9.3.3.3.2 Counter Update
A counter update is an operator that updates a counter value according to the operation defined. The different operations are:
● Reset to its initial value● Set to value● Increment by value● Decrement by value
Use and Best Practices
You can add several components to chain intermediate computations.
Configuration
Set up the component:
● Counter: Select in the dropdown list the counter to be updated● Operation: Select in the dropdown list the operation executed on the counter at runtime: Reset to its initial
value, Set to, Increment by or Decrement by● Value: Select the type of the value and set this value:
○ Type a constant numerical value for Constant type.○ Select a rating context property in the dropdown list for Property type.
CockpitCockpit PUBLIC 169

Related Information
Adding an Operator [page 197]
1.4.9.3.3.3.3 Date/Time Shift
A date/time shift is an operator that shifts a date/time property by adding or subtracting a time value. At runtime, the calculation result is saved in a new date/time property.
This operator can carry out the following date/time operations:
● Time addition● Time subtraction
The possible units of time for the shift are:
● Seconds● Minutes● Hours● Days● Months● Years
Use and Best Practices
You use this component to change an existing date and time into an earlier or a later date and time.
● If you want to give end customers a time credit of 10 seconds for each service consumption (call, streaming), you use this component to calculate the expected payable period. You subtract 10 seconds from the consumption date/time of the service or product.
● With this date/time shift component, you can easily calculate the local time based on GMT time if you know the GMT offset. You add a numerical property containing the GTM offset (in hours) to the consumption date/time. The result is the local time.
Configuration
Set up the component:
170 PUBLICCockpit
Cockpit

● Computed Property: Name the new date/time property that contains the result of the time operation at runtime.
● Operation: Select the operation (Add to or Subtract from) executed at runtime.● Date/Time Property: Select the date/time property that contains the source value to shift.● Number of Units: Enter a constant value or select the numerical property that is applied to shift the source
value. If the value is a decimal number, only the integer part is added to or subtracted from the source date/time property.
● Unit of Time: Select the unit of time that is used to add (resp., subtract) the number of units to (resp., from) the source property:○ Seconds (default)○ Minutes○ Hours○ Days○ Months○ Years
Related Information
Adding an Operator [page 197]
1.4.9.3.3.3.4 Property Introduction
A property introduction is an operator that creates new properties (or modifies properties computed by other components) needed by a pricing component in the pricing tree.
Use and Best Practices
You can add several components to chain intermediate computations.
Configuration
Set up the component:
CockpitCockpit PUBLIC 171

Computed Properties: For each row of the table, which represents a property to introduce:
● Name: Name the new property created at runtime● Type: Select in the dropdown list the type of the created property: Number, String or Date/Time● Value:
○ Click Property to choose a property from the pricing tree.○ Click Constant to specify a value to the property.
NoteAn empty string can be a constant value.
Note● Two buttons are displayed above the table to manage the properties to create:
○ Add: Add a new row at the end of the table.○ Remove: Remove the selected row(s) (available ony if at least one row is selected).
Related Information
Adding an Operator [page 197]
1.4.9.3.3.3.5 Property Type Conversion
A property type conversion component is an operator that converts, transforms, or extracts a property value into another format or value. The different operations are:
From Source Type To Target Type
String String (substring, case changes)DateNumber
Date/Time StringNumber
Number String
172 PUBLICCockpit
Cockpit

RememberA string type represents a character string. For example, "image", "text", and "price" are strings.
A number type represents a decimal or an integer number. For example, 25.60, 6523, and 4.55 are numbers.
A date/time type represents a combination of the day, the month, the year, and the time. For example, August 12, 2020 12:00:00 AM is a date/time.
A date type represents a combination of the day, the month, and the year. For example, August 12, 2020 is a date.
Use and Best Practices
In the pricing tree, add this component to convert a date/time or number property into a string property that can be used with a mapping table lookup component as a property to compare with values in the input columns of a mapping table.
Configuration
Set up the component:
● Computed Property: Name the new context property that contains the result of the conversion operation at runtime. Its type depends on the selected conversion (Number from, String from, or Date from).
● Source Property: Select a property that you want to convert or start typing its name.● Conversion: Depending on the types of the selected properties and your business need, select the
operation to apply from the list:○ String from String○ String from Number○ String from Date○ Number from String○ Number from Date/Time○ Date from String
● Define the conversion settings depending on the types of the selected properties and the conversion operation.
Click the Configure buttons to set up the expected conversion:
CockpitCockpit PUBLIC 173

Setting For Instructions
Strings ○ Start Position: Define the start position in the string to extract by typing a number value or selecting a number property or the default property (Start of String).
The value can range from 1 to the size of the source string.
○ End Position: Define the end position in the string to extract by typing a number value or selecting a number property or the default property (End of String).
The value can range from 1 to the size of the source string. At runtime, the system includes this end position into the computed property.
○ Transformation: Define a basic transformation:○ None: No transformations apply.○ To Lower Case: The system transforms the con
verted string into lower case letters.○ To Upper Case: The system transforms the con
verted string into upper case letters.
RememberThe value of the end position must be greater than or equal to the value of the start position.
TipIf you set up the pricing component with a property, a counter, or a parameter to define the start and end positions, keep in mind that:○ The runtime values of Start Position and End
Position can range from 1 to the size of the source string.
○ The runtime value of End Position must be equal to or greater than the runtime value of Start Position.
○ At runtime, if End Position is equal to -1 then this value represents the size of the source string.
○ If Start Position is equal to 1 and if End Position is equal to 0, the combination of these values represents an empty string.
174 PUBLICCockpit
Cockpit

Setting For Instructions
○ If Start Position is equal to a value greater than 1 and if End Position is equal to 0, then the system generates an error.
Numbers ○ Decimal Separator: Select one of the following decimal separators:○ Point: For example, 1234567.89○ Comma: For example, 1234567,89
○ Thousand Separator: Select one of the following thousand separators:○ None: For example, 1234567,89○ Space: For example, 1 234 567,89○ Comma: For example, 1,234,567,89○ Quote: For example, 1'234'567,89
RememberThe decimal and thousand separators must be differ-ent.
Dates/Times Field to Extract: Select one of the following parts of the source date/time value to extract and convert into a number:○ Year: Extracts the year from the source date/time.○ Month: Extracts the month number from the source
date/time, ranging from 1 to 12.○ Day of Month: Extracts the day number within the
month from the source date/time, ranging from 1 to 31.
○ Day of Year: Extracts the day number within the year from the source date/time, ranging from 1 to 366.
○ Hour: Extracts the hour of the day from the source date/time, ranging from 0 to 23.
○ Minute: Extracts the minutes from the source date/time, ranging from 0 to 59.
○ Second: Extracts the seconds from the source date/time, ranging from 0 to 59.
○ Milliseconds since January 1, 1970: Converts the source date/time into a timestamp that is equal to the number of elapsed milliseconds since the UNIX epoch time (1/1/1970 at midnight GMT). Source dates/times prior to this epoch time are converted into negative timestamps.
At runtime, the system uses this setting to parse the source values.
CockpitCockpit PUBLIC 175
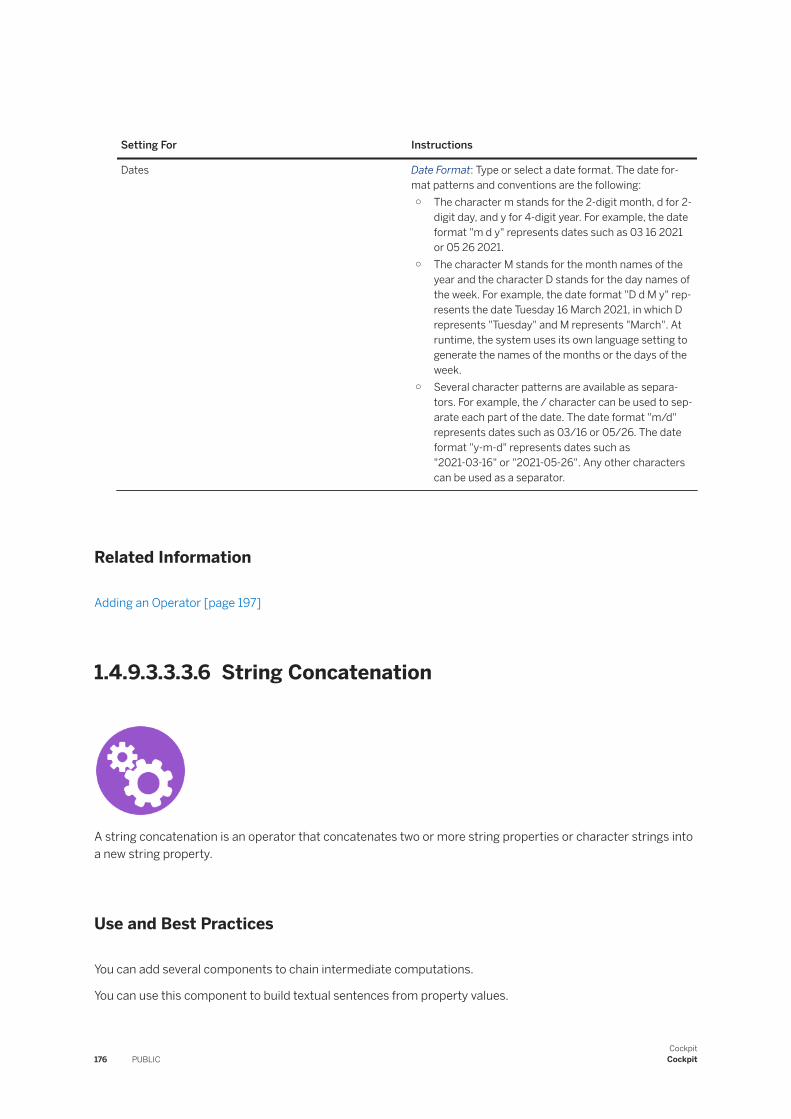
Setting For Instructions
Dates Date Format: Type or select a date format. The date format patterns and conventions are the following:○ The character m stands for the 2-digit month, d for 2-
digit day, and y for 4-digit year. For example, the date format "m d y" represents dates such as 03 16 2021 or 05 26 2021.
○ The character M stands for the month names of the year and the character D stands for the day names of the week. For example, the date format "D d M y" represents the date Tuesday 16 March 2021, in which D represents "Tuesday" and M represents "March". At runtime, the system uses its own language setting to generate the names of the months or the days of the week.
○ Several character patterns are available as separators. For example, the / character can be used to separate each part of the date. The date format "m/d" represents dates such as 03/16 or 05/26. The date format "y-m-d" represents dates such as "2021-03-16" or "2021-05-26". Any other characters can be used as a separator.
Related Information
Adding an Operator [page 197]
1.4.9.3.3.3.6 String Concatenation
A string concatenation is an operator that concatenates two or more string properties or character strings into a new string property.
Use and Best Practices
You can add several components to chain intermediate computations.
You can use this component to build textual sentences from property values.
176 PUBLICCockpit
Cockpit

Configuration
Set up the component:
● Computed Property: Name the new context property that contains the result of the concatenation operation at runtime
● Values to Concatenate: For each row of the table, which represents an element to concatenate:○ Click Property to choose a string property from the rate plan in the dropdown list on the right end of
the row.○ Click Constant to specify a character string in the field on the right end of the row.
NoteAn empty string is a possible value to concatenate as a constant.
Note○ Four buttons are displayed above the table to manage the elements to concatenate:
○ Add: Add a new row at the end of the table.○ Remove: Remove the selected row(s) (available ony if at least one row is selected).
○ : Move the selected row up (available only if one row is selected)
○ : Move the selected row down (available only if one row is selected)
RememberThe string concatenation operator concatenates the values of properties or character strings in the order of the table from the top to the bottom of the table.
○ The table displays two rows by default.
RememberYou cannot concatenate more than 1000 values. The Add button is deactivated when 1000 values are concatenated.
● Separator: Select the type of separator used in the in the concatenation result:○ None: Select this option if you do not want to separate the concatenated strings○ Comma: Select this option if you want a comma as a separator○ Semicolon: Select this option if you want a semicolon as a separator○ Space: Select this option if you want a space as a separator○ Tabulation: Select this option if you want a tabulation as a separator○ Other: Type a character that you want to use as a separator in the field
Related Information
Adding an Operator [page 197]
CockpitCockpit PUBLIC 177

1.4.9.3.3.3.7 Time Duration Calculation
A time duration calculation component is an operator that calculates the period of time between two date/time properties. This duration is expressed with a unit of time in seconds, minutes, hours, or days. At runtime, the calculation result is saved in a new numerical property that can be rounded with a configurable rounding mode, a rounding based on multiples of a step value, and a minimum value.
Rounding rules are based on:
● The following rounding modes:○ Rounding up to the next value○ Rounding down to the previous value○ Rounding to the nearest value
● A rounding step to round up or down the duration to the multiples of a configured step value● A minimum value to return● A unit of time for the rounding
Use and Best Practices
Depending on your industry and business requirements, you use this component to implement time-based pricing.
For example, with this component, you can define a fee that is charged based on a number of minutes of a service usage, with any minute started being charged in full.
Configuration
Set up the component:
● Computed Property: Name the new numerical property that contains the calculated and rounded duration at runtime.
● Start Date/Time Property: Select the date/time property that contains the start date and time of the period to calculate.
● End Date/Time Property: Select the date/time property that contains the end date and time of the period to calculate.
● Unit of Time: Select the unit of time that the system uses to calculate the duration:○ Seconds (default)
178 PUBLICCockpit
Cockpit

○ Minutes○ Hours○ Days
● Rounding: Click Configure to define a rounding that suits your business requirement.○ Rounding Mode: Select the rounding mode from the list:
○ Rounded to the Next Value (default)○ Rounded to the Previous Value○ Rounded to the Nearest Value
○ Unit of Time: Select the unit of time that the system uses to calculate the rounded value:○ Seconds (default)○ Minutes○ Hours○ Days
○ Rounding Step: Select a numerical property or enter a constant value that allows rounding the period of time to a multiple of this step value, up or down depending on the selected rounding mode. For example, 38 seconds rounded to the nearest ten is 40 seconds, 35 rounded to the nearest hundred is 0.
By default, the rounding step is set to 1.○ Minimum Value: Select a numerical property or enter a constant value that defines a minimum value to
apply when rounding. If the number to round is less than this minimum value, then the result is this minimum value.
By default, the minimum value is set to 0.
Related Information
Adding an Operator [page 197]
1.4.9.4 Tasks
RememberAs a prerequisite, a pricing catalog must exist and include the necessary chargeable item classes [page 75] (inputs), charged item classes [page 88] (outputs), and classes for the mapping or range tables that you want to use in the pricing logic for your chargeable service or product.
With the app Manage Rate Plans, you complete the following business configuration tasks:
CockpitCockpit PUBLIC 179

Activities Configure Release/Retire Transport Maintain
Primary Tasks
Configuring a New Rate Plan [page 180]
Managing the Rate Plan Lifecycle [page 209]
Transporting a Rate Plan and Its Related Pricing Elements [page 230]
Maintaining Existing Rate Plans [page 210]
Tasks ● Creating a Rate Plan [page 180]
● Configuring the Pricing Tree of a Charge [page 187]
● Releasing a Rate Plan [page 209]
● Retiring a Rate Plan [page 210]
● Exporting a Rate Plan and Its Related Pricing Elements [page 230]
● Importing a Rate Plan and Its Related Pricing Elements [page 231]
● Listing or Searching For Rate Plans [page 211]
● Viewing a Rate Plan [page 212]
● Editing a Rate Plan [page 218]
● Deleting a Rate Plan [page 229]
Configuring a New Rate Plan [page 180]
Managing the Rate Plan Lifecycle [page 209]
Maintaining Existing Rate Plans [page 210]
Transporting a Rate Plan and Its Related Pricing Elements [page 230]
1.4.9.4.1 Configuring a New Rate Plan
Creating a Rate Plan [page 180]
Configuring the Pricing Tree of a Charge [page 187]
1.4.9.4.1.1 Creating a Rate Plan
As an SAP CC pricing specialist, you configure a new rate plan:
● By copying an existing rate plan, using the Copy button.● By importing an already exported rate plan and its consistent related pricing elements, using the Import
button.● From scratch, using the Create button and a top-down-approach method.
NoteCreating a rate plan from scratch from the result list is also possible by clicking on the Create button.
When clicking the Copy button on a displayed rate plan, a draft version of this copied rate plan is created, as a clone of the original. Only the name of this new rate plan differs, for unicity purpose. When SAP Convergent Charging is interfaced with SAP Convergent Invoicing, the app adds the required external parameter SAP_BILL_CYCLE_DATE that is used to set up the reference date/time in recurring charges and synchronize the recurrent triggering with billing cycles managed in SAP Convergent Invoicing.
180 PUBLICCockpit
Cockpit

When clicking the Import button, an import window helps you create your rate plan. See Importing a Rate Plan and Its Related Pricing Elements [page 231].
When clicking the Create button, an empty rate plan is created, and you can use the recommendations afterwards to fill the different information. The newly created rate plan is recorded as a draft. This draft remains valid until you click the Save button, that definitively creates the rate plan in the back-end database.
CautionIf you log out without saving your draft object, the rate plan is not definitely recorded in the back-end database, but the draft is kept.
TipFor readability and productivity purposes, SAP SE recommends that you click the button when editing the rate plan in order to hide the left area of the screen and focus on the rate plan itself.
A rate plan requires at least the information of the header [page 182] and a valid charge [page 185] (including its pricing tree [page 187]) to be saved. The information of other sections:
● Adding Parameters [page 184]● Adding User Technical Identifiers [page 182]● Adding Counters [page 183]● Adding Additional Information [page 187]
can be needed to calculate the pricing and charging conditions.
NoteWhen creating a rate plan, its status is automatically set to Open.
The modified rate plan is recorded as a draft. This draft remains until you click the Save button, that saves the rate plan to the Core Server system and its back-end database.
RememberOnce saved, a new rate plan is in status Open.
If you click the Cancel button, a popover message appears, inviting you to confirm your choice by clicking the Discard button. In this case, all changes are discarded and the draft of the rate plan is deleted.
Tip
In the footer toolbar, a summary button shows the number of errors to be fixed before saving the rate plan in the system. If you click on this button, you access to the detailed list of these errors.
Related Information
Viewing a Rate Plan [page 212]Editing a Rate Plan [page 218]
CockpitCockpit PUBLIC 181

1.4.9.4.1.1.1 Filling In the Header
The following table contains the list of information you need to fill in in the Header section:
Element Description and recommendations Type
Name The name of the rate plan, that must be unique among the list of existing rate plans
M
Currency The currency that is used in the rate plan M
Catalog The name of the pricing catalog this rate plan belongs to
NoteIf the catalog is not defined yet, use the New button next to the Catalog field to create it.
M
Description A description of the role of this rate plan (2000 char. Maximum) M
M: Mandatory, O: Optional
NoteOnce saved, only the description can be modified but neither the name, nor the currency, nor the catalog.
The created rate plan is recorded as a draft. This draft remains until you click the Save button, that saves the rate plan to the Core Server system and its back-end database.
If you click the Cancel button, a popover message appears, inviting you to confirm your choice by clicking the Discard button. In this case, all changes are discarded and the draft of the rate plan is deleted.
Tip
In the footer toolbar, a summary button shows the number of errors to be fixed before saving the rate plan in the system. If you click on this button, you access to the detailed list of these errors.
Related Information
Viewing a Rate Plan [page 212]Editing the Header [page 219]
1.4.9.4.1.1.2 Adding User Technical Identifiers
The User Technical Identifiers section contains the list of user technical identifiers.
182 PUBLICCockpit
Cockpit

RememberUser technical identifiers need to be defined if a usage charge is declared in the rate plan.
TipIf you click the Add button just above the list of user technical identifiers in reading mode, you switch automatically to the editing mode and add a new empty user technical identifier to the table.
Two buttons are available above the list:
● Add to add a new empty user technical identifier to set up● Remove to remove a selected user technical identifier
NoteRemove works with multiple selection.
Fill in your settings. See Editing User Technical Identifiers [page 221].
The modified rate plan is recorded as a draft. This draft remains until you click the Save button, that saves the rate plan to the Core Server system and its back-end database.
If you click the Cancel button, a popover message appears, inviting you to confirm your choice by clicking the Discard button. In this case, all changes are discarded and the draft of the rate plan is deleted.
Tip
In the footer toolbar, a summary button shows the number of errors to be fixed before saving the rate plan in the system. If you click on this button, you access to the detailed list of these errors.
Related Information
Viewing a Rate Plan [page 212]Editing User Technical Identifiers [page 221]
1.4.9.4.1.1.3 Adding Counters
The Counters section contains the list of counters defined in the rate plan.
Click on the Edit button to manage counters.
TipIf you click the Add button just above the counter table in reading mode, you switch automatically to the editing mode and add a new empty counter to the table.
CockpitCockpit PUBLIC 183

Two buttons are available above the table:
● Add to add a new empty counter to set up● Remove to remove a selected counter
NoteRemove works with multiple selection.
Fill in your settings. See Editing Counters [page 222].
Note● Adding a counter to a rate plan makes it available to all the charges included in the rate plan● Removing a counter from a rate plan removes this counter from all the charges included in the rate plan● The number of counters is displayed next to the table title
The modified rate plan is recorded as a draft. This draft remains until you click the Save button, that saves the rate plan to the Core Server system and its back-end database.
If you click the Cancel button, a popover message appears, inviting you to confirm your choice by clicking the Discard button. In this case, all changes are discarded and the draft of the rate plan is deleted.
Tip
In the footer toolbar, a summary button shows the number of errors to be fixed before saving the rate plan in the system. If you click on this button, you access to the detailed list of these errors.
Related Information
Editing Counters [page 222]
1.4.9.4.1.1.4 Adding Parameters
The Parameters section contains the list of parameters declared in the rate plan. In this list, you manage the parameters that can be modified in this rate plan.
RememberWhen SAP Convergent Charging is interfaced with SAP Convergent Invoicing, the app automatically adds the required external parameter SAP_BILL_CYCLE_DATE that represents the start dates and times of the first billing cycles defined in SAP Convergent Invoicing. This date/time parameter is mandatory in an integrated SAP Solution scenario. It is used to set up the reference date/time of a recurring charge to synchronize the recurrent triggering with billing cycles managed in SAP Convergent Invoicing.
This parameter is noneditable and nonremovable.
184 PUBLICCockpit
Cockpit

Click on the Edit button to manage parameters.
TipIf you click the Add button just above the parameter table in reading mode, you switch automatically to the editing mode and add a new empty parameter to the table.
Two buttons are available above the table:
● Add to add a new empty parameter to set up.● Remove to remove a selected parameter.
TipRemove works with multiple selection.
Fill in your settings. See Editing Parameters [page 220].
Note● Adding a parameter to a rate plan adds a parameter with the same characteristics to all charges
included in the rate plan and maps this parameter at the rate plan level.● Removing a parameter from a rate plan removes this parameter from all charges included in the charge
plan.● The number of parameters is displayed next to the table title.
The modified rate plan is recorded as a draft. This draft remains until you click the Save button, that saves the rate plan to the Core Server system and its back-end database.
If you click the Cancel button, a popover message appears, inviting you to confirm your choice by clicking the Discard button. In this case, all changes are discarded and the draft of the rate plan is deleted.
Tip
In the footer toolbar, a summary button shows the number of errors to be fixed before saving the rate plan in the system. If you click on this button, you access to the detailed list of these errors.
Related Information
Viewing a Rate Plan [page 212]Editing Parameters [page 220]
1.4.9.4.1.1.5 Adding Charges
The Charges section contains the list of the charges defined in the rate plan. The charges are split into three categories, represented by three tables:
CockpitCockpit PUBLIC 185
● One-Time Charges [page 140]● Recurring Charges [page 224]● Usage Charges [page 225]
TipIf you click the Add button just above the charge tables in reading mode, you switch automatically to the editing mode and add a new empty charge to the table
NoteIn editing mode, the tables include an Editing Status column that reflects the current status of the displayed charge (New, Modified, or In error)
Two buttons are available above each configuration table:
● Add to add a new empty charge to set up● Remove to remove a selected charge
NoteRemove works with multiple selection.
Depending on your business needs, define and configure the expected charges. See Editing Charges [page 223].
TipThe number of charges of each type is displayed next to the name of each table.
The modified rate plan is recorded as a draft. This draft remains until you click the Save button, that saves the rate plan to the Core Server system and its back-end database.
If you click the Cancel button, a popover message appears, inviting you to confirm your choice by clicking the Discard button. In this case, all changes are discarded and the draft of the rate plan is deleted.
Tip
In the footer toolbar, a summary button shows the number of errors to be fixed before saving the rate plan in the system. If you click on this button, you access to the detailed list of these errors.
Related Information
Editing Charges [page 223]Editing the Charged Item Definition [page 226]
186 PUBLICCockpit
Cockpit

1.4.9.4.1.1.6 Adding Additional Information
TipIf you click the Add button just above the list of additional information in reading mode, you switch automatically to the editing mode and add a new empty additional information to the table.
Two buttons are available above the list:
● Add to add a new empty additional information to set up● Remove to remove a selected additional information
NoteRemove works with multiple selection.
Fill in your settings. See Editing Additional Information [page 228].
NoteAdding additional information is not mandatory. It is still possible to add any additional information after the creation of the rate plan.
The modified rate plan is recorded as a draft. This draft remains until you click the Save button, that saves the rate plan to the Core Server system and its back-end database.
If you click the Cancel button, a popover message appears, inviting you to confirm your choice by clicking the Discard button. In this case, all changes are discarded and the draft of the rate plan is deleted.
Tip
In the footer toolbar, a summary button shows the number of errors to be fixed before saving the rate plan in the system. If you click on this button, you access to the detailed list of these errors.
Related Information
Viewing a Rate Plan [page 212]Editing Additional Information [page 228]
1.4.9.4.1.2 Configuring the Pricing Tree of a Charge
As an SAP CC pricing specialist, you set up a pricing tree [page 142] for your charge.
CockpitCockpit PUBLIC 187

RememberAs a prerequisite, a pricing catalog must exist and include the necessary chargeable item classes [page 75] (inputs), charged item classes [page 88] (outputs), and classes for the mapping or range tables that you want to use in the pricing logic for your chargeable service or product.
Configure the Pricing Tree
1. Depending on your business needs and implementation design, add and combine the necessary pricing components to configure your pricing tree:○ Adding a Comparator [page 190]○ Adding an Operator [page 197]
Configure your pricing components inline within the pricing tree. The app displays the business logic by using natural language for the nodes and subbranches.
2. End each branch with a function component. See Adding a Function Component [page 189].3. Click the Edit Charged Item Definition link to define the output charged item associated to the charge or
click Apply to validate your changes and navigate back to the rate plan.If you click the Cancel button, a popover message appears, inviting you to confirm your choice by clicking the Discard button. In this case, all interim changes are discarded:○ If the rate plan has already been saved, the pricing tree of the charge and the associated charged item
definition are restored from the already-saved rate plan.○ If the rate plan is new, the pricing tree of the charge and the associated charged item definition are
reinitialized.The app automatically navigates back to the rate plan.The cancellation of a pricing tree implies the cancellation of the charged item definition that is associated.
Tip
In the footer toolbar, a summary button shows the number of errors to be fixed to save the rate plan in the system definitely. Click this button to view the detailed list of these errors.
Related Information
Pricing Tree [page 142]Pricing Components [page 150]
188 PUBLICCockpit
Cockpit

1.4.9.4.1.2.1 Adding a Pricing Component
To define some pricing logic, you can add and combine one or more pricing components [page 150] to the pricing tree according to the business needs for your service or product.
You define each branch of the pricing tree by using several combinations of pricing components. You must end each branch of the pricing tree with a function [page 151] component.
TipTurn on a component checkbox and use the Ctrl + Inser key combination to add a component quickly. See other shortcuts [page 207].
Adding and Setting Up a Pricing Component
1. In the pricing tree, select the checkbox for the pricing component under which you want to add a pricing component.
2. Once the checkbox is selected, click the Add button.3. Select your pricing component or type its name (partial or complete). For example, you can select a
component that belongs to one of these families: Functions, Comparators, or Operators.
4. Set up this component. See:○ Adding a Function Component [page 189]○ Adding a Comparator [page 190]○ Adding an Operator [page 197]
5. The app provides you with some useful user guidance. Fix all the signaled errors.6. Click Apply.
The modified pricing tree is recorded in the draft rate plan. This draft remains until you click the Save button, that definitively saves the rate plan in the system.
Adding a Function Component [page 189]
Adding a Comparator [page 190]
Adding an Operator [page 197]
1.4.9.4.1.2.1.1 Adding a Function Component
At the end of the tree, add and set up one of the following functions by selecting or typing its name:
CockpitCockpit PUBLIC 189

Function or Fee Configure the Component...
Error [page 154]
Set up the component:
● Enter the message to communicate to the end customer who uses the chargeable service or product.● Select the context properties or parameters to add to the error notifications as complementary informa
tion for the addressed end customer.
No Fee [page 153]
There is nothing to set up.
Flat Fee [page 152]
Set up the component:
● Select a rating context property or enter a constant value. It represents the amount of the computed price expressed in the currency of the rate plan.
Related Information
Fees and Functions [page 151]
1.4.9.4.1.2.1.2 Adding a Comparator
Add and set up a comparator and its branches in the pricing tree.
When inserted in the decision tree, the comparator creates two separate branches:
● A branch that is executed by the system when the comparison is true.● A branch that is executed when the comparison is false.
When the component is executed, only one branch is activated depending on the comparison test result. Some components may have more than two branches.
Add and set up one of the following comparators by selecting the component or typing its name:
Comparator Configure the Component...
Date/Time Comparison [page 156]
Set up the component and its two branches (If/Else):
● Date/Time Property: Select a rating context property for the date comparison.● Operator: Select a date comparison operator in the list (Is Equal To, Is After, Is Strictly After, Is Before, or Is
Strictly Before).● Comparison Value: Select the type of the value and set up this value:
○ Select a constant date/time value by clicking the calendar icon for Constant type.○ Select a rating context property in the list for Property type.
190 PUBLICCockpit
Cockpit

Comparator Configure the Component...
Date Matching [page 157]
Set up the component and its two branches (If/Else):
● Date/Time Property: Select a rating context property for the date comparison.● Matching Property: Select another rating context property to be compared to the first one (if applicable).● Matching Criteria: Select and set up the criteria that are relevant for the matching. For each criterion, se
lect:○ Ignore if the criterion is not relevant○ Same as Matching Property to compare this criterion of the date/time property to the same one of
the matching property defined above (if applicable). Once this option is selected, a second field appears below the criterion, displaying the name and the type of the property used for the comparison.
NoteThis option cannot be selected and is grayed out if no matching property is defined.
○ Constant Value to compare this criterion of the date/time property to a constant value. Once this option is selected, a second field appears below, and a constant value must be selected in the list.
TipThe value can also be entered in the input field.
CockpitCockpit PUBLIC 191

Comparator Configure the Component...
Mapping Table Lookup [page 158]
Set up the component and configure its two branches (If/Else):
● Mapping Table Class: Select the mapping table class that you want to use with this pricing component. Click View to view or modify the mapping table class in the pricing catalog.
● Mapping Table: Select a given mapping table that corresponds to the selected class or select a parameter or a property that must include the identifier of a mapping table to use in the pricing tree. This mapping table contains some input columns with the comparative data values, and some output columns with the result data values (fees, labels).
● Row Searched: Displays the names of the input columns in the selected mapping table and allows you to select the properties or parameters that you want to use for the comparisons with the data in the input columns of the mapping table.
Define the comparison values by filling in the configuration table:○ Input Column Name: Displays the name of an input column in the selected mapping table.○ Type: Displays the type of the data in the related input column.○ Comparison Value: Select a property or parameter that you want to be compared with the data in the
corresponding input column of the mapping table. The suggested list contains items of the same type.
○ Description: Displays the description of the input column in the mapping table to facilitate your configurations.
● Column for Longest Prefix Match: Provides the list of input column names of the selected mapping table.
If you want to implement some zoning and comparisons based on a longest prefix match (LPM) algorithm, select the input column that you define as the input column for containing the prefixes to be compared with the value of the related Comparison Value When comparing the prefixes of this input column with the value of the related Comparison Value, the system finds a row only if the two conditions are true:1. The value of the input column (prefix, zone prefix) that matches the value of the related Comparison
Value is the longest prefix match of all rows in the selected mapping table.
192 PUBLICCockpit
Cockpit

Comparator Configure the Component...
2. The values of the other input columns of the mapping table match the values of the related Comparison Value column.
● Reference Date/Time: Select a date/time property (or a parameter) or start typing its name. Each row in the mapping table has a validity period. Therefore, the Reference Date/Time setting enables the system to preselect the row whose validity period includes the reference date/time.
When several rows contain this same reference date/time:1. The SAP CC system selects the row whose start date/time is closest to the reference date/time
set in this pricing component.2. If two validity periods have the same start date/time, the row with the shortest validity period is first
selected.For example, you can set up with the Charge Effective Date/time property that corresponds to the use of the chargeable service or product.
● Computed Properties: Click Configure to set up the properties that are computed by the system at runtime when executing the pricing component. At runtime, when a comparison is true, the system computes new context properties that contain the values of the data subset in output column of the mapping table. These data values are the result of the comparison operations.
Identify the new computed properties:○ Output Column Name: Displays the name of an output column in the selected mapping table.○ Type: Displays the type of the computed property: Number or String.○ Computed Property: Identify the new property that contains the comparison result in the rating con
text at runtime.○ Description: Displays the description of the output column in the mapping table to facilitate the con
figurations.
CockpitCockpit PUBLIC 193

Comparator Configure the Component...
Range Table Lookup [page 161]
Range Tables in SAP Convergent Charging
Set up the component and configure its branches (If/Else if):
● Range Table Class: Select the range table class that you want to use with this pricing component. Click View to view or modify the range table class in the pricing catalog.
● Range Table: Select a range table that corresponds to the selected class or select a parameter that must include the name of a range table to use in the pricing tree.
● Reference Date/Time: Select a date/time property . A range table has several versions at different times. Therefore, the Reference Date/Time setting enables the system to select the table version whose validity period includes this reference date/time.
● Range Set Key Searched: Displays the names of the input columns in the selected range table and allows you to select the properties that you want to use for the comparisons with the data in the input columns of the selected range table.
Define the comparison values by filling in the configuration table:○ Input Column Name: Displays the name of an input column in the selected range table.○ Type: Displays the type of the data in the related input column.○ Comparison Value: Select a property that you want to be compared with the data in the correspond
ing input column of the range table. The suggested list contains items of the same type.○ Description: Displays the description of the input column in the range table to facilitate your configu-
rations.
194 PUBLICCockpit
Cockpit

Comparator Configure the Component...
● Range Searched: Select a number property that you want to be compared with the ranges (positive intervals) in the selected range table. The value must be a quantity that the system can use to compare with ranges and determine the position in the reached range.
● Computed Properties: Click the Configure buttons to set up the new properties that are computed by the system at runtime when executing the pricing component.
Configuration tabs let you rename the computed properties:
Tab Instructions
Characteristics of Range Give names to the following new computed properties:○ Lower Bound of Range○ Upper Bound of Range○ Range Size○ Prorata in Range○ Value Beyond Lower Bound○ Value Beyond Upper Bound
Values of Range For each output column, configure the new computed properties:○ Name: Displays the name of an output column in the selected range ta
ble.○ Type: Displays the type of the computed property: Number or String.○ Computed Property: Name the new property that contains the value of
the output column of the selected range table for the currently reached range.
○ Description: Displays the description of the output column in the selected range table to facilitate the configuration.
Values of Previous Ranges
This tab is visible if the output columns of the selected range table include values that must be cumulated by the system to calculate new business values.
For each of these columns, configure the new computed properties:○ Name: Displays the name of an output column in the selected range ta
ble. This column contains values that must be cumulated by the system depending on the computation mode.
○ Type: Displays the type of the new computed property: Number.○ Computation Mode: Displays the calculation algorithm that the system
performs on the column values.○ Cumulative: The system calculates the sum of the values in the out
put column of the selected range table across all previous ranges, excluding the reached range.
○ Cumulative, Linear: The system calculates the sum of the values in the output column of the selected range table multiplied by the range size across all previous ranges, excluding the reached range.
○ Computed Property: Name the new property that contains the accumulated value. By default, the app suggests names that end with the suffix Accumulated.
CockpitCockpit PUBLIC 195

Comparator Configure the Component...
Tab Instructions
○ Description: Displays the description of the output column in the selected range table to facilitate the configuration.
When you insert the range table lookup component in the pricing tree, it creates a main If branch and two or three separate Else if branches. Configure all the branches that apply to you:
● Is found in a range of the range table: Configure this main part of the pricing tree. Depending on your business requirement, combine the expected pricing components to compute the final values. Use the computed properties (range size, lower bound of range, prorata in range, accumulated values) to set up the relevant pricing logic.
● And some of the following Else if branches:○ Is below the first range: It occurs when the value to be searched is less than the lower bound of the
first range. The system executes this branch.
NoteIf this first range does not include zero (]0 , A]), the system also executes this branch when the searched value is zero.
○ Is above the last range: It may occur when all the ranges of the selected range table are defined by user values. The system executes this branch when the specified value to be searched in ranges is above the last range. It is outside the ranges.
○ Is found in the last unbounded range: It may occur when the upper bound of the last range is + Infinite. The system executes this branch when the specified value to be searched in ranges is inside this last unbounded range.
○ The specified range set key is not found in the range table: It may occur when the selected range table contains input columns. The system executes this branch when the specified range set key is not found in the selected range table. No values in the input columns match with the subset of properties in pricing context.
Typical Range Set
Branch to Set Up
] 0 , A ]
] A , B ]
] B , C ]
[ 0 , A [
[ A , B [
[ B , C [
] 0 , A ]
] A , B ]
] B , +Infinite [
[ 0 , A [
[ A , B [
[ B , +Infinite [
Is found in a range of the range table
■ ■ ■ ■
Is below the first range of the range table
■
Note that the searched value is 0 or a negative value.
■
The searched value is negative.
■
Note that the searched value is 0 or a negative value.
■
The searched value is negative.
196 PUBLICCockpit
Cockpit

Comparator Configure the Component...
Typical Range Set
Branch to Set Up
] 0 , A ]
] A , B ]
] B , C ]
[ 0 , A [
[ A , B [
[ B , C [
] 0 , A ]
] A , B ]
] B , +Infinite [
[ 0 , A [
[ A , B [
[ B , +Infinite [
Is above the last range of the range table
■ ■
Is found in the last unbounded range of the range table
■ ■
The specified range set key is not found in the range table
◘ ◘ ◘ ◘
■ Branch is visible ◘ Branch is visible when the range table contains input columns
Number Comparison [page 160]
Set up the component and its two branches (If/Else):
● Number Property: Select a rating context property for the numerical comparison.● Operator: Select a numerical comparison operator in the list (is equal to, is greater than, is less than, is
greater than or equal to, or is less than or equal to).● Comparison Value: Select a rating context property or enter a constant value for the numerical compari
son.
String Comparison [page 166]
Set up the component and its two branches (If/Else):
● String Property: Select a rating context property for the string comparison.● Operator: Select a string comparison operator in the list (is equal to, starts with, ends with, or contains).● Comparison Value: Select a rating context property or enter a constant value for the string comparison.
Related Information
Comparators [page 154]
1.4.9.4.1.2.1.3 Adding an Operator
Add and set up one of the following operators by selecting the component or typing its name:
CockpitCockpit PUBLIC 197
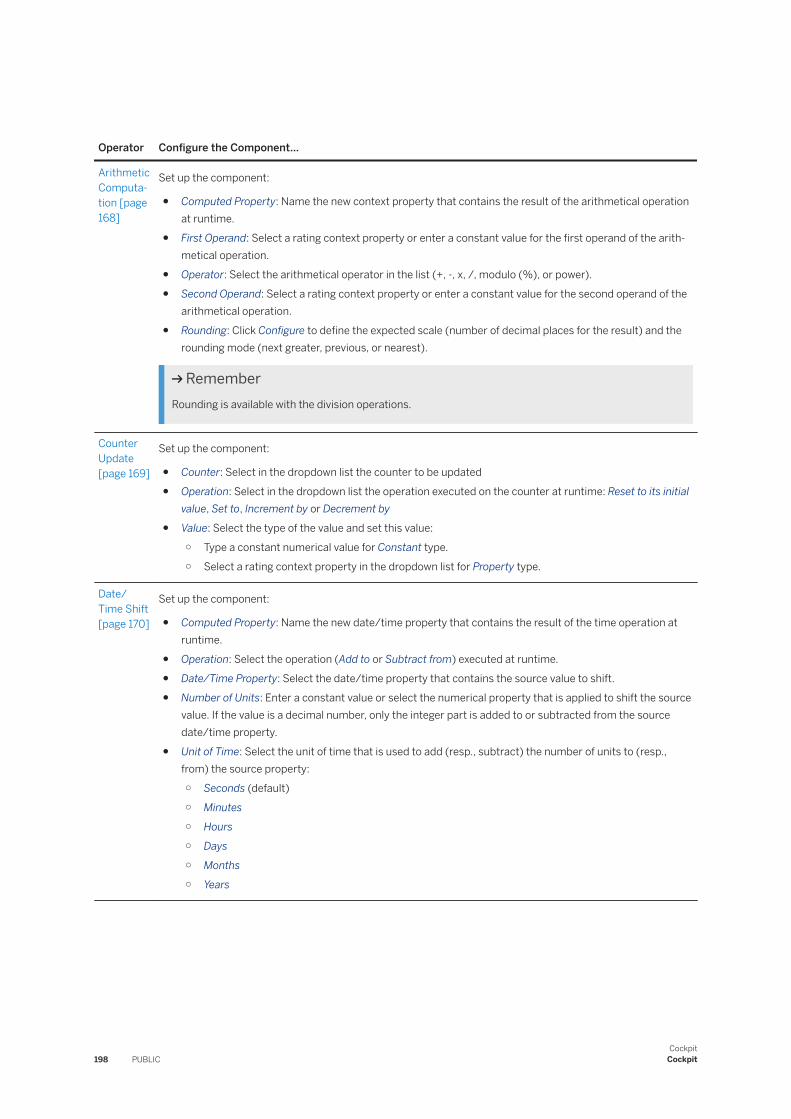
Operator Configure the Component...
Arithmetic Computation [page 168]
Set up the component:
● Computed Property: Name the new context property that contains the result of the arithmetical operation at runtime.
● First Operand: Select a rating context property or enter a constant value for the first operand of the arithmetical operation.
● Operator: Select the arithmetical operator in the list (+, -, x, /, modulo (%), or power).● Second Operand: Select a rating context property or enter a constant value for the second operand of the
arithmetical operation.● Rounding: Click Configure to define the expected scale (number of decimal places for the result) and the
rounding mode (next greater, previous, or nearest).
RememberRounding is available with the division operations.
Counter Update [page 169]
Set up the component:
● Counter: Select in the dropdown list the counter to be updated● Operation: Select in the dropdown list the operation executed on the counter at runtime: Reset to its initial
value, Set to, Increment by or Decrement by● Value: Select the type of the value and set this value:
○ Type a constant numerical value for Constant type.○ Select a rating context property in the dropdown list for Property type.
Date/Time Shift [page 170]
Set up the component:
● Computed Property: Name the new date/time property that contains the result of the time operation at runtime.
● Operation: Select the operation (Add to or Subtract from) executed at runtime.● Date/Time Property: Select the date/time property that contains the source value to shift.● Number of Units: Enter a constant value or select the numerical property that is applied to shift the source
value. If the value is a decimal number, only the integer part is added to or subtracted from the source date/time property.
● Unit of Time: Select the unit of time that is used to add (resp., subtract) the number of units to (resp., from) the source property:○ Seconds (default)○ Minutes○ Hours○ Days○ Months○ Years
198 PUBLICCockpit
Cockpit

Operator Configure the Component...
Property Introduction [page 171]
Set up the component:
Computed Properties: For each row of the table, which represents a property to introduce:
● Name: Name the new property created at runtime● Type: Select in the dropdown list the type of the created property: Number, String or Date/Time● Value:
○ Click Property to choose a property from the pricing tree.○ Click Constant to specify a value to the property.
NoteAn empty string can be a constant value.
Note● Two buttons are displayed above the table to manage the properties to create:
○ Add: Add a new row at the end of the table.○ Remove: Remove the selected row(s) (available ony if at least one row is selected).
NoteThe property introduction operator is valid without properties, that allows you to define them further in the pricing tree if needed.
CockpitCockpit PUBLIC 199

Operator Configure the Component...
Property Type Conversion [page 172]
Set up the component:
● Computed Property: Name the new context property that contains the result of the conversion operation at runtime. Its type depends on the selected conversion (Number from, String from, or Date from).
● Source Property: Select a property that you want to convert or start typing its name.● Conversion: Depending on the types of the selected properties and your business need, select the opera
tion to apply from the list:○ String from String○ String from Number○ String from Date○ Number from String○ Number from Date/Time○ Date from String
● Define the conversion settings depending on the types of the selected properties and the conversion operation.
Click the Configure buttons to set up the expected conversion:
Setting For Instructions
Strings ○ Start Position: Define the start position in the string to extract by typing a number value or selecting a number property or the default property (Start of String).
The value can range from 1 to the size of the source string.
○ End Position: Define the end position in the string to extract by typing a number value or selecting a number property or the default property (End of String).
The value can range from 1 to the size of the source string. At runtime, the system includes this end position into the computed property.
○ Transformation: Define a basic transformation:○ None: No transformations apply.○ To Lower Case: The system transforms
the converted string into lower case letters.
○ To Upper Case: The system transforms the converted string into upper case letters.
200 PUBLICCockpit
Cockpit

Operator Configure the Component...
Setting For Instructions
RememberThe value of the end position must be greater than or equal to the value of the start position.
TipIf you set up the pricing component with a property, a counter, or a parameter to define the start and end positions, keep in mind that:○ The runtime values of Start Position and
End Position can range from 1 to the size of the source string.
○ The runtime value of End Position must be equal to or greater than the runtime value of Start Position.
○ At runtime, if End Position is equal to -1 then this value represents the size of the source string.
○ If Start Position is equal to 1 and if End Position is equal to 0, the combination of these values represents an empty string.
○ If Start Position is equal to a value greater than 1 and if End Position is equal to 0, then the system generates an error.
Numbers ○ Decimal Separator: Select one of the following decimal separators:○ Point: For example, 1234567.89○ Comma: For example, 1234567,89
○ Thousand Separator: Select one of the following thousand separators:○ None: For example, 1234567,89○ Space: For example, 1 234 567,89○ Comma: For example, 1,234,567,89○ Quote: For example, 1'234'567,89
RememberThe decimal and thousand separators must be different.
CockpitCockpit PUBLIC 201

Operator Configure the Component...
Setting For Instructions
Dates/Times Field to Extract: Select one of the following parts of the source date/time value to extract and convert into a number:○ Year: Extracts the year from the source date/
time.○ Month: Extracts the month number from the
source date/time, ranging from 1 to 12.○ Day of Month: Extracts the day number within
the month from the source date/time, ranging from 1 to 31.
○ Day of Year: Extracts the day number within the year from the source date/time, ranging from 1 to 366.
○ Hour: Extracts the hour of the day from the source date/time, ranging from 0 to 23.
○ Minute: Extracts the minutes from the source date/time, ranging from 0 to 59.
○ Second: Extracts the seconds from the source date/time, ranging from 0 to 59.
○ Milliseconds since January 1, 1970: Converts the source date/time into a timestamp that is equal to the number of elapsed milliseconds since the UNIX epoch time (1/1/1970 at midnight GMT). Source dates/times prior to this epoch time are converted into negative timestamps.
At runtime, the system uses this setting to parse the source values.
Dates Date Format: Type or select a date format. The date format patterns and conventions are the following:○ The character m stands for the 2-digit month,
d for 2-digit day, and y for 4-digit year. For example, the date format "m d y" represents dates such as 03 16 2021 or 05 26 2021.
○ The character M stands for the month names of the year and the character D stands for the day names of the week. For example, the date format "D d M y" represents the date Tuesday 16 March 2021, in which D represents "Tuesday" and M represents "March". At runtime, the system uses its own language setting to generate the names of the months or the days of the week.
○ Several character patterns are available as separators. For example, the / character can be used to separate each part of the date. The date format "m/d" represents dates such as 03/16 or 05/26. The date format "y-m-d" rep
202 PUBLICCockpit
Cockpit

Operator Configure the Component...
Setting For Instructions
resents dates such as "2021-03-16" or "2021-05-26". Any other characters can be used as a separator.
String Concatenation [page 176]
Set up the component:
● Computed Property: Name the new context property that contains the result of the concatenation operation at runtime
● Values to Concatenate: For each row of the table, which represents an element to concatenate:○ Click Property to choose a string property from the rate plan in the dropdown list on the right end of
the row.○ Click Constant to specify a character string in the field on the right end of the row.
NoteAn empty string is a possible value to concatenate as a constant.
Note○ Four buttons are displayed above the table to manage the elements to concatenate:
○ Add: Add a new row at the end of the table.○ Remove: Remove the selected row(s) (available ony if at least one row is selected).
○ : Move the selected row up (available only if one row is selected)
○ : Move the selected row down (available only if one row is selected)
RememberThe string concatenation operator concatenates the values of properties or character strings in the order of the table from the top to the bottom of the table.
○ The table displays two rows by default.
RememberYou cannot concatenate more than 1000 values. The Add button is deactivated when 1000 values are concatenated.
● Separator: Select the type of separator used in the in the concatenation result:○ None: Select this option if you do not want to separate the concatenated strings○ Comma: Select this option if you want a comma as a separator○ Semicolon: Select this option if you want a semicolon as a separator○ Space: Select this option if you want a space as a separator○ Tabulation: Select this option if you want a tabulation as a separator○ Other: Type a character that you want to use as a separator in the field
CockpitCockpit PUBLIC 203

Operator Configure the Component...
Date/Time Shift [page 170]
Set up the component:
● Computed Property: Name the new numerical property that contains the calculated and rounded duration at runtime.
● Start Date/Time Property: Select the date/time property that contains the start date and time of the period to calculate.
● End Date/Time Property: Select the date/time property that contains the end date and time of the period to calculate.
● Unit of Time: Select the unit of time that the system uses to calculate the duration:○ Seconds (default)○ Minutes○ Hours○ Days
● Rounding: Click Configure to define a rounding that suits your business requirement.○ Rounding Mode: Select the rounding mode from the list:
○ Rounded to the Next Value (default)○ Rounded to the Previous Value○ Rounded to the Nearest Value
○ Unit of Time: Select the unit of time that the system uses to calculate the rounded value:○ Seconds (default)○ Minutes○ Hours○ Days
○ Rounding Step: Select a numerical property or enter a constant value that allows rounding the period of time to a multiple of this step value, up or down depending on the selected rounding mode. For example, 38 seconds rounded to the nearest ten is 40 seconds, 35 rounded to the nearest hundred is 0.
By default, the rounding step is set to 1.○ Minimum Value: Select a numerical property or enter a constant value that defines a minimum value
to apply when rounding. If the number to round is less than this minimum value, then the result is this minimum value.
By default, the minimum value is set to 0.
Related Information
Operators [page 166]
204 PUBLICCockpit
Cockpit

1.4.9.4.1.2.2 Interacting with the Pricing Tree
Interactions in a pricing tree are based on the following principles:
● Click a component or subbranch node to open/close it and show/hide its settings. Alternatively, type Enter .
● Click (resp. ) to expand (resp. collapse) subbranches.● Turn on/off a checkbox for a component to remove it or to add another component below the selected
component. Alternatively, click the node or type Space .
Tip● To speed up your work, you can use some useful shortcuts for SAP apps and pricing trees. See
Shortcuts for the Pricing Tree [page 207]. Make sure that the pricing tree has the focus and use the arrow keys and Enter to navigate in the tree.
● When you expand or collapse a node, the line numbering remains the same so you can easily identify a sequence in the decision tree.
The app controls where you can perform your actions and automatically enables of disables the corresponding buttons.
Click... To... How
Add Add a pricing component [page 189] Select a node in the pricing tree after which the pricing component will be inserted and click Add.
Remove Remove a pricing component [page 209]
Select a node and click Remove.
Cut some pricing components Select one or multiple nodes that be
long to the same parent node and click
.
The other nodes of multinode pricing components will be automatically be included in the selection as well as their related subbranches.
Cut pricing components and their related subbranches are removed from the pricing tree.
The button is disabled when you cannot cut your selection.
CockpitCockpit PUBLIC 205

Click... To... How
Copy some pricing components Select one or multiple nodes that be
long to the same parent node and click
.
Nodes of the copied pricing components are unselected after the copy action.
The button is disabled when you cannot copy your selection.
Paste some copied or cut components
Select a target node and click .
The target node for inserting cut or copied pricing components is unselected after the paste action.
The button is disabled when you cannot paste your selected components.
Move a selection of operator components up
Select contiguous operators and click
to move the selected operators up in the same branch.
The button is disabled when you cannot move your selected components up.
Move a selection of operator components down
Select contiguous operators and click
to move the selected operators to down.
The selected operators remains selected after being moved up or down in order to be moved again.
The button is disabled when you cannot move your selected components down.
Note● When you select a node of a multinode pricing component, and copy or cut it, the app automatically
selects all its nodes and related subbranches (if, else, else if) for being copied or cut.● You can paste your cut or copied components into the same pricing tree or into another pricing tree of
a charge in a rate plan.● You can paste your selection until the end of your user session in the Cockpit user interface.● If you have two active user sessions in two web browsers with the same user name, you cannot cut/
copy/paste components between the two user sessions.
206 PUBLICCockpit
Cockpit

TipYou can copy or cut pricing components that are not contiguous. When pasting your selection, the app reorders the components.
When you edit a pricing tree, the modified pricing tree and its charged item definition are recorded as draft data. This draft remains until you click the Apply button and then the Save button in the displayed Rate Plan window, which saves the rate plan to the Core Server system and its back-end database.
If you click the Cancel button, a popover message appears, inviting you to confirm your choice by clicking the Discard button. In this case, all changes in the pricing tree and its charged item definition are discarded and the version from the already-saved rate plan is restored.
1.4.9.4.1.2.3 Viewing a Component or Branches
In the pricing tree, click the component node itself to view its configurations or click to expand the branches in the pricing tree.
The app displays detailed configurations to understand or change.
Click again to hide the information.
NoteThe names of the pricing components are buttons that you use to show or hide the configurations of a component. Showing the detailed configurations expands the size of the pricing tree. Click the component name to collapse this part of the screen.
1.4.9.4.1.2.4 Shortcuts for the Pricing Tree
For a better user experience, basic keyboard shortcuts for SAP Fiori apps are available and extended with new useful shortcuts for the pricing trees. Save your time by using these shortcuts.
To work with pricing trees in Convergent Charging Cockpit, the list of available keyboard shortcuts is the following.
NoteThe shortcuts for editing a pricing tree are available when all nodes are collapsed.
CockpitCockpit PUBLIC 207

Shortcut Action Category Special Shortcut
Space Select/unselect (turn on/off) a checkbox for a component in a pricing tree in order to remove the component or add another component.
Tip: Press F6 several times to move the focus and activate the pricing tree in the displayed user interface.
Edition
Ctrl + Inser Add a pricing component to the pricing tree for a rate plan. See the above note.
Edition This shortcut is specific for the pricing trees in SAP Convergent Charging.
Ctrl + Del Remove a pricing component from the pricing tree. See the above note.
Edition This shortcut is specific for the pricing trees.
Ctrl + Backspace
Remove a pricing component from the pricing tree. See the above note.
Edition This shortcut is specific for the pricing trees.
Ctrl + C Copy one or multiple pricing components from the pricing tree as well as their related subbranches. Multiselection of nodes belonging to the same parent node is possible. See the above note.
Edition
Ctrl + X Cut one or multiple pricing components from the pricing tree as well as their related subbranches. Multiselection of nodes belonging to the same parent node is possible. See the above note.
Edition
Ctrl + V Paste previous cut or copied pricing components after the selected target node in the pricing tree. See the above note.
Edition
Alt + UP Arrow In a pricing tree, move up a selection of operator components that are contiguous. See the above note.
Edition This shortcut is specific for the pricing trees in SAP Convergent Charging.
Alt + DOWN Arrow
In a pricing tree, move down a selection of operator components that are contiguous. See the above note.
Edition This shortcut is specific for the pricing trees in SAP Convergent Charging.
Enter Show/hide the information that relates to a component or subbranch node in the pricing tree.
Navigation
DOWN Arrow
(resp. UP Arrow )
Move to the bellow (resp. above) node in the pricing tree.
Navigation
RIGHT Arrow
(resp. LEFT Arrow )
Expand (resp. collapse) a branch in the pricing tree.
Navigation
208 PUBLICCockpit
Cockpit

TipUse Space to select/unselect (turn on/off) a checkbox for a component in a pricing tree in order to remove [page 209] the component or add [page 189] another component.
Use End and Home to navigate to the end of the pricing tree or to the root of the tree.
Related Information
Interacting with the Pricing Tree [page 205]Keyboard Shortcuts [page 16]
1.4.9.4.1.2.5 Removing a Pricing Component
To remove a pricing component in the pricing tree:
● In the pricing tree, select the checkbox for the component to remove.● Click Remove or use the Ctrl + Del key combination.
RememberIf the checkbox is not selected, the removal feature is not available (and the button is dimmed).
1.4.9.4.2 Managing the Rate Plan Lifecycle
A rate plan evolves during its lifetime. A lifecycle management feature based on a status is available for rate plans in order to restrict their use depending on their status.
Releasing a Rate Plan [page 209]
Retiring a Rate Plan [page 210]
1.4.9.4.2.1 Releasing a Rate Plan
When a rate plan is selected, with the status Open, you can click the Release button located in the title bar when the rate plan is ready to be in production. The rate plan can be used by the SAP S/4HANA system, the SAP ERP/FI-CA system, or an external provisioning system. When clicking on Release, a dialog box appears to allow you to confirm your choice. Once the confirmation is done, the status of the rate plan changes to Released.
CockpitCockpit PUBLIC 209

Once released in the pricing catalog, the rate plan can be subscribed to in:
● A new contract item in a new provider contract● A new contract item in an existing provider contract
According to this status, you are only allowed to do the following:
● Add or remove an internal parameter [page 220] and change the description of parameters● Change the charged item class and the charged item definition (Charges [page 223] section)
Note● When you create a rate plan, its status is automatically set to Open. You must save the rate plan once
before changing its status.● You can release a rate plan only if the current status of the rate plan is Open.
1.4.9.4.2.2 Retiring a Rate Plan
When a rate plan is selected, with the status Released, you can click the Retire button located in the title bar when you want to block the capacity of the rate plan to be subscribed to. The rate plan can be used by the SAP S/4HANA system, the SAP ERP/FI-CA system, or an external provisioning system. You are allowed to do the same changes as with the Released status.
Once obsolete, the rate plan can be subscribed in an existing provider contract but cannot be subscribed in a new provider contract.
When clicking on Retire, a dialog box appears to allow you to confirm your choice. Once the confirmation is done, the status of the rate plan changes to Obsolete.
NoteYou can retire a rate plan only if the current status of the rate plan is Released.
1.4.9.4.3 Maintaining Existing Rate Plans
As an SAP CC pricing specialist, you have to update and enrich existing rate plans according to the business needs and pricing policy evolutions. The following sections deal with the activities you can perform to achieve these objectives.
Listing or Searching For Rate Plans [page 211]To review or modify a rate plan and its charges, search for draft and released rate plan by different criteria.
Viewing a Rate Plan [page 212]
Editing a Rate Plan [page 218]
Deleting a Rate Plan [page 229]
210 PUBLICCockpit
Cockpit

1.4.9.4.3.1 Listing or Searching For Rate Plans
To review or modify a rate plan and its charges, search for draft and released rate plan by different criteria.
To list or search for existing rate plans, you use the result list that is available when entering the app.
NoteOnce you click on a rate plan in the result list, the view changes: the displayed list reduces in the left area of the screen, and the detail view appears in the left area of the screen.
The result list contains the following parts:
● An upper part, containing:○ The number of rate plans○ A search field, that you can use to enter a search criteria○ A Create button that you can use to create a new rate plan. For further information, refer to the task
Configuring a New Rate Plan [page 180]○ Three buttons that you use to tune and organize the content of the result list and fit your specific
needs:○ Sort ○ Filter ○ Group
● A result table located on the lower part displaying a list of rate plans whose content can be customized using the following criteria:○ The name of the rate plan○ The name of the pricing catalog containing the rate plan for the pricing configuration of the chargeable
service or product○ The status (open, released, and obsolete) of the rate plan○ The user interface to use in order to manage the plan
NoteHighlights allow you to know if a rate plan is a draft (blue color) or contains errors (red color).
Available Information
The following table contains the list of displayed information:
Element Description
Name The name of the rate plan
Catalog The name of the pricing catalog that contains the rate plan
CockpitCockpit PUBLIC 211

Element Description
Status The current status of the rate plan:
● Open● Released● Obsolete
Managed by The user interface to use in order to manage this plan:
● Cockpit for a rate plan● Core Tool for a charge plan
Search For Rate Plans
To search for some existing rate plans, enter you search criteria in the search field, and click the button. The content of the table is then updated according to the retrieved content.
Note● Use the Sort , Filter and Group to adjust the result list according to your needs● Use the Reset button of the View Settings window to reset your criteria
Related Information
Viewing a Rate Plan [page 212]Editing a Rate Plan [page 218]
1.4.9.4.3.2 Viewing a Rate Plan
To view a rate plan, just open the app and select a plan in the result list. See Listing or Searching For Rate Plans [page 211].
The page used to display a given rate plan contains the following parts:
● A title bar [page 213]● A header [page 213]● A main content [page 213]
212 PUBLICCockpit
Cockpit

Title Bar
The title bar displays the name of the rate plan, its status (Open, Released or Obsolete) and contains the different buttons related to the actions you can perform on this rate plan according to your SAP user settings:
● Edit, which you can use to modify the rate plan. For further information, refer to the Editing a Rate Plan [page 218] task.
● Delete, which you can use to delete the rate plan from the system. For further information, refer to the Deleting a Rate Plan [page 229] task.
● Copy, which gives the possibility to create a new rate plan by duplicating the current rate plan. For further information, refer to the Creating a Rate Plan [page 180] task.
● Export, which you can use to export the rate plan and its related pricing elements. For further information, refer to the Exporting a Rate Plan and Its Related Pricing Elements [page 230] task.
● Release or Retire (according to the current status of the rate plan), which gives you the possibility:○ To use the rate plan in production○ To make the rate plan obsolete
NoteThis button is not available if the selected plan:○ Is a draft○ Is managed by the Core Tool user interface○ Is in status Obsolete
For further information about the different statuses, refer to the Managing the Rate Plan Lifecycle [page 209] task.
NoteIn addition to the action buttons, the following buttons are available to change the layout. Click:
● to hide the left area of the screen and focus on the rate plan itself.● to quit the display of the rate plan and return to the search result list.
Header
The header, which can be collapsed or expanded according to your needs, contains the following information related to the rate plan:
● The name of the pricing catalog that the rate plan belongs to● The currency used in the rate plan● The description of the rate plan
Main Content
The main part is split into five different sections:
CockpitCockpit PUBLIC 213
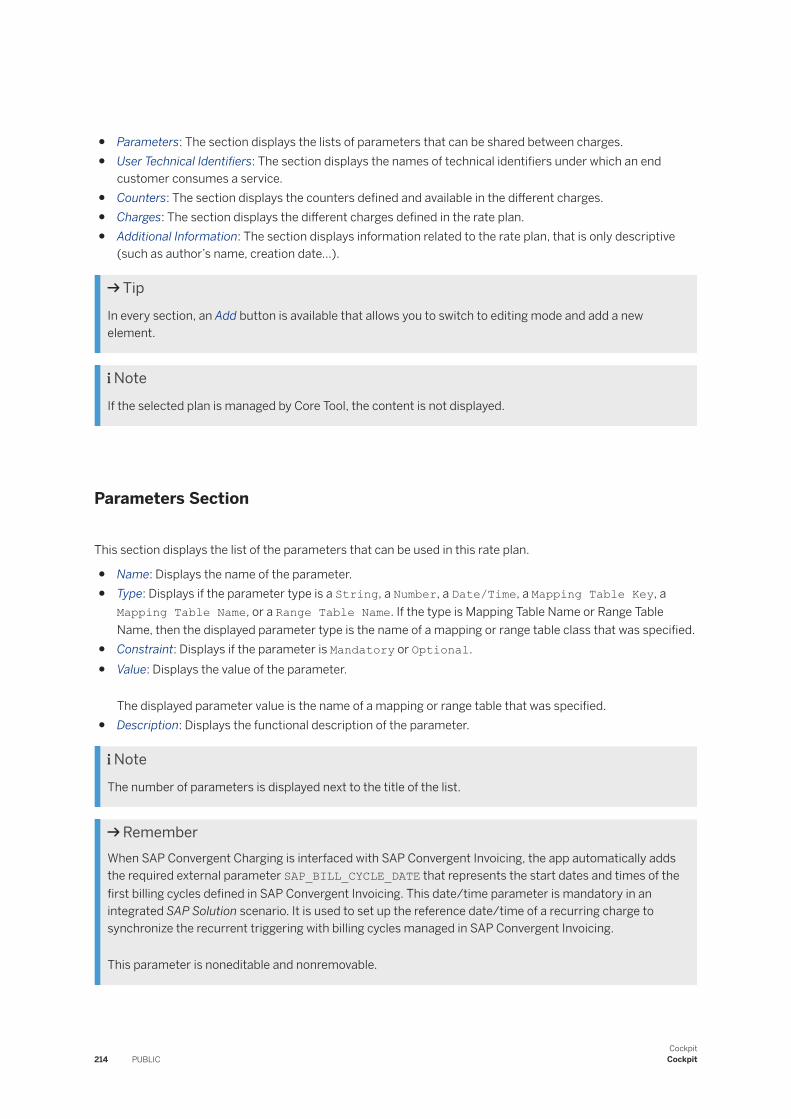
● Parameters: The section displays the lists of parameters that can be shared between charges.● User Technical Identifiers: The section displays the names of technical identifiers under which an end
customer consumes a service.● Counters: The section displays the counters defined and available in the different charges.● Charges: The section displays the different charges defined in the rate plan.● Additional Information: The section displays information related to the rate plan, that is only descriptive
(such as author’s name, creation date...).
TipIn every section, an Add button is available that allows you to switch to editing mode and add a new element.
NoteIf the selected plan is managed by Core Tool, the content is not displayed.
Parameters Section
This section displays the list of the parameters that can be used in this rate plan.
● Name: Displays the name of the parameter.● Type: Displays if the parameter type is a String, a Number, a Date/Time, a Mapping Table Key, a
Mapping Table Name, or a Range Table Name. If the type is Mapping Table Name or Range Table Name, then the displayed parameter type is the name of a mapping or range table class that was specified.
● Constraint: Displays if the parameter is Mandatory or Optional.● Value: Displays the value of the parameter.
The displayed parameter value is the name of a mapping or range table that was specified.● Description: Displays the functional description of the parameter.
NoteThe number of parameters is displayed next to the title of the list.
RememberWhen SAP Convergent Charging is interfaced with SAP Convergent Invoicing, the app automatically adds the required external parameter SAP_BILL_CYCLE_DATE that represents the start dates and times of the first billing cycles defined in SAP Convergent Invoicing. This date/time parameter is mandatory in an integrated SAP Solution scenario. It is used to set up the reference date/time of a recurring charge to synchronize the recurrent triggering with billing cycles managed in SAP Convergent Invoicing.
This parameter is noneditable and nonremovable.
214 PUBLICCockpit
Cockpit

User Technical Identifiers Section
NoteUser technical identifiers are only required when there are usage charges in the rate plan.
This section contains the list of user technical identifiers under which an end customer consumes a service (this identifier can be a phone number, an email address...). This identifier is used by the SAP CC system to rate the usages of this end-customer service. Note that the same identifier can be used for rating the usages of different services that are specified for each charge customized in this rate plan.
● Name: Displays the name of the user technical identifier.● Description: Displays the business description of the user technical identifier.
Counters Section
This section displays the list of the counters that can be used in this rate plan.
● Name: Displays the name of the counter.● Initial Value: Displays the initial value of the counter.● Description: Displays the business description of the counter.
NoteThe number of counters is displayed next to the title of the list.
Charges Section
This section contains the list of charges used to compute the cost of a consumed service by an end customer. These charges are grouped into three tables, according to their type:
● One-Time Charge [page 140]:○ Name: Displays the name of the one-time charge and the name of the output charged item.○ Contract Event: Displays the event on which this one-time charge is triggered.○ Output Charged Item: Displays the name of the output charged item.
Tip○ If you click on the name of the output charged item, a quick view providing information about it
is displayed (name, description, class...).○ In this quick view:
○ Clicking on View Charged Item Class opens this one in the dedicated Manage Charged Item Classes [page 79] app.
○ Clicking on View Charged Item Definition opens the Charged Item Definition [page 226] page.
CockpitCockpit PUBLIC 215

○ Description: Displays the description of the one-time charge.● Recurring Charge [page 140]:
○ Name: Displays the name of the recurring charge and the name of the output charged item.○ Recurrence: Displays the frequency at which this recurring charge is triggered by the system. The initial
triggering is defined by the reference date/time setting.○ Reference Date/Time: Displays the base date and time when the recurring charge is automatically
triggered by the system once the belonging rate plan is subscribed to in a provider contract item. The system bases the recurrent triggering on both this reference date/time and the recurrence setting.
The app displays the name and category (Default Property or Parameter) of the selected property. For example:○ Charge Effective Date (Default Property), which represents the start dates/times of
the contract items in their provider contracts.○ SAP_BILL_CYCLE_DATE (Parameter), which represents the start dates/times of the first billing
cycles for the provider contracts and contract items managed in SAP Convergent Invoicing.○ Output Charged Item: Displays the name of the output charged item.
Tip○ If you click on the name of the output charged item, a quick view providing information about it
is displayed (name, description, class...).○ In this quick view:
○ Clicking on View Charged Item Class opens this one in the dedicated Manage Charged Item Classes [page 79] app.
○ Clicking on View Charged Item Definition opens the Charged Item Definition [page 226] page.
○ Description: Displays the business description of the recurring charge in its rate plan.● Usage Charge [page 141]:
○ Name: Displays the name of the usage charge and the name of the output charged item.
Tip○ If you click on the name of the output charged item, a quick view providing information about it
is displayed (name, description, class...).○ In this quick view:
○ Clicking on View Charged Item Class opens this one in the dedicated Manage Charged Item Classes [page 79] app.
○ Clicking on View Charged Item Definition opens the Charged Item Definition [page 226] page.
○ Input Chargeable Item: Displays the name of the input chargeable item
Tip○ If you click on the name of the input chargeable item, a quick view providing information about
it is displayed (name, description, class...).○ In this quick view, clicking on View Chargeable Item Class opens this one in the dedicated
Manage Chargeable Item Classes [page 70] app.
○ User Technical Identifier: Displays the name of the user technical identifier to charge.
216 PUBLICCockpit
Cockpit

○ Service Identifier: Displays the name of the consumed service.○ Description: Displays the business description of the usage charge.
If you click on the button on the right end of a row, you access the pricing tree [page 187] of the selected charge. See Viewing the Pricing Tree [page 217].
NoteHighlights allow you to know if a charge is a draft (blue color) or contains errors (red color).
Additional Information Section
In SAP Convergent Charging, additional information is a custom data (such as a particular reference, code or attribute) that:
● Has a name and a value whose type can be string, number or date/time● Characterizes a catalog element and defines custom information that is relevant for your business
requirements● Facilitates the search operations (in Core Tool, in SAP CRM, or in another interfaced system)● May be required by an interfaced system or application for further processing operations● Is not reused by SAP CC within its own business operations
NoteIn an integrated landscape, additional information is conditionally visible and reusable in the external systems that are integrated with SAP Convergent Charging 2020. In such situations, the external systems know how to reuse the configured additional information.
RememberAs SAP CC does not reuse the defined additional information within its own business operations, you cannot configure the service pricing by reusing this additional information. Design and set up the pricing logic by using some other mechanisms such as parameters or properties.
Related Information
Viewing the Pricing Tree [page 217]Editing a Rate Plan [page 218]
1.4.9.4.3.2.1 Viewing the Pricing Tree
To view a pricing tree of a charge in your app:
CockpitCockpit PUBLIC 217

1. View the relevant rate plan.2. Navigate to the Charges section.
3. Click the button on the right end of a row to view the pricing tree.4. The app displays an expanded tree. Line numbering simplifies the way of referencing pricing components
in your tree.
Click the buttons to collapse the corresponding components, nodes, and branches.
See also:
● Interacting with the Pricing Tree [page 205]● Shortcuts for the Pricing Tree [page 207]
At the top of the tree, the app displays some useful information depending on the type of charge that contains your pricing tree.
Click Edit to manage changes in this pricing tree.
TipAt the top of the window, a breadcrumb allows you to navigate back to the charge that contains thee displayed pricing tree.
Related Information
Pricing Tree [page 142]
1.4.9.4.3.3 Editing a Rate Plan
When a rate plan is selected, click the Edit button located in the title bar to switch to the editing mode. This mode gives you the possibility to:
● Edit the Header [page 219] of the rate plan● Edit the User Technical Identifiers [page 221] of the rate plan● Edit the Parameters [page 220] of the rate plan● Edit the Charges [page 223] of the rate plan● Edit the Additional Information [page 228] of the rate plan
The modified rate plan is recorded as a draft. This draft remains until you click the Save button, that saves the rate plan to the Core Server system and its back-end database.
If you click the Cancel button, a popover message appears, inviting you to confirm your choice by clicking the Discard button. In this case, all changes are discarded and the draft of the rate plan is deleted.
218 PUBLICCockpit
Cockpit
Tip
In the footer toolbar, a summary button shows the number of errors to be fixed before saving the rate plan in the system. If you click on this button, you access to the detailed list of these errors.
Related Information
Creating a Rate Plan [page 180]Viewing a Rate Plan [page 212]
1.4.9.4.3.3.1 Editing the Header
To edit the header of a rate plan, click the Edit button.
● Description: describe the role of the rate plan
RememberYou cannot edit the header of a rate plan if this one is in status Released or Obsolete
The modified rate plan is recorded as a draft. This draft remains until you click the Save button, that saves the rate plan to the Core Server system and its back-end database.
If you click the Cancel button, a popover message appears, inviting you to confirm your choice by clicking the Discard button. In this case, all changes are discarded and the draft of the rate plan is deleted.
Tip
In the footer toolbar, a summary button shows the number of errors to be fixed before saving the rate plan in the system. If you click on this button, you access to the detailed list of these errors.
Related Information
Filling In the Header [page 182]Viewing a Rate Plan [page 212]
CockpitCockpit PUBLIC 219

1.4.9.4.3.3.2 Editing Parameters
RememberWhen SAP Convergent Charging is interfaced with SAP Convergent Invoicing, the app automatically adds the required external parameter SAP_BILL_CYCLE_DATE that represents the start dates and times of the first billing cycles defined in SAP Convergent Invoicing. This date/time parameter is mandatory in an integrated SAP Solution scenario. It is used to set up the reference date/time of a recurring charge to synchronize the recurrent triggering with billing cycles managed in SAP Convergent Invoicing.
This parameter is noneditable and nonremovable.
To edit the parameters of a rate plan, click the Edit button.
● Name: Type the name of the external parameter.● Type: In the list, choose the type of the external parameter. The possible default parameter types are:
○ String○ Number○ Date/Time○ Mapping Table Key
When your pricing catalog includes some mapping or range table classes, specific external parameter types are also possible:○ Mapping Table Key○ Mapping Table Name○ Range Table Name
The combobox displays two lists with externalm parameter types for the existing mapping table classes and range table classes. Select the external parameter type that suits your business requirement.
TipMapping Table Key, Mapping Table Name, and Range Table Name external parameters are also string properties. They are available in all pricing components that use string properties.
● Constraint: Choose if the external parameter is Mandatory or Optional by clicking the switch button.● Value: Type a numerical value, a string value, or a date/time to initialize the external parameter, depending
on its type.If the external parameter type is Mapping Table Name or Range Table Name, then select a value that corresponds to the mapping table classes and range table classes in the pricing catalog.
RememberThis field is not available if the external parameter is mandatory. Indeed, in this case, the value is provided at provider contract level when customers subscribe to commercial products or offers.
● Description: Describe the function of the external parameter.
RememberIf the rate plan is in status Released or Obsolete:
● You cannot add or remove external parameters.
220 PUBLICCockpit
Cockpit

● You cannot modify the existing external parameters.
The modified rate plan is recorded as a draft. This draft remains until you click the Save button, that saves the rate plan to the Core Server system and its back-end database.
If you click the Cancel button, a popover message appears, inviting you to confirm your choice by clicking the Discard button. In this case, all changes are discarded and the draft of the rate plan is deleted.
Tip
In the footer toolbar, a summary button shows the number of errors to be fixed before saving the rate plan in the system. If you click on this button, you access to the detailed list of these errors.
Related Information
Adding Parameters [page 184]Viewing a Rate Plan [page 212]
1.4.9.4.3.3.3 Editing User Technical Identifiers
To edit the user technical identifiers of a rate plan, click the Edit button.
● Name: type the name of the user technical identifier● Description: describe the function of the technical user identifier
RememberIf the rate plan is in status Released or Obsolete:
● You cannot add or remove user technical identifiers● You cannot modify the existing user technical identifiers
The modified rate plan is recorded as a draft. This draft remains until you click the Save button, that saves the rate plan to the Core Server system and its back-end database.
If you click the Cancel button, a popover message appears, inviting you to confirm your choice by clicking the Discard button. In this case, all changes are discarded and the draft of the rate plan is deleted.
Tip
In the footer toolbar, a summary button shows the number of errors to be fixed before saving the rate plan in the system. If you click on this button, you access to the detailed list of these errors.
CockpitCockpit PUBLIC 221

Related Information
Adding User Technical Identifiers [page 182]Viewing a Rate Plan [page 212]
1.4.9.4.3.3.4 Editing Counters
To edit the counters of a charge plan, click the Edit button.
● Name: type name of the counter that must be unique (mandatory)● Initial Value: type a numerical value that defines the initial value of the counter (mandatory)
NoteIf not defined, the value is set to 0.
● Description: describe the role of the counter (optional)
RememberCounters are editable whatever the status of the rate plan. You can also add or remove counters.
RememberIf the rate plan is in status Released or Obsolete:
● You can add or remove counters● You can modify the existing counters
The modified rate plan is recorded as a draft. This draft remains until you click the Save button, that saves the rate plan to the Core Server system and its back-end database.
If you click the Cancel button, a popover message appears, inviting you to confirm your choice by clicking the Discard button. In this case, all changes are discarded and the draft of the rate plan is deleted.
Tip
In the footer toolbar, a summary button shows the number of errors to be fixed before saving the rate plan in the system. If you click on this button, you access to the detailed list of these errors.
Related Information
Viewing a Rate Plan [page 212]Adding Counters [page 183]
222 PUBLICCockpit
Cockpit

1.4.9.4.3.3.5 Editing Charges
To edit the charges of your rate plan, click the Edit button.
Configure your charges with their charged item definitions and pricing trees. Depending on your charges, see:
● Editing a One-Time Charge [page 223]● Editing a Recurring Charge [page 224]● Editing a Usage Charge [page 225]
See also:
● Editing the Charged Item Definition [page 226]● Configuring the Pricing Tree of a Charge [page 187]
RememberIf the rate plan is in status Released or Obsolete, you cannot add or remove charges.
The modified rate plan is recorded as a draft. This draft remains until you click the Save button, that saves the rate plan to the Core Server system and its back-end database.
If you click the Cancel button, a popover message appears, inviting you to confirm your choice by clicking the Discard button. In this case, all changes are discarded and the draft of the rate plan is deleted.
Tip
In the footer toolbar, a summary button shows the number of errors to be fixed before saving the rate plan in the system. If you click on this button, you access to the detailed list of these errors.
Related Information
Adding Charges [page 185]Configuring the Pricing Tree of a Charge [page 187]Editing the Charged Item Definition [page 226]Viewing a Rate Plan [page 212]
1.4.9.4.3.3.5.1 Editing a One-Time Charge
To edit a one-time charge [page 140] in a rate plan, click the Edit button.
CockpitCockpit PUBLIC 223
Edit a One-Time Charge
● Name: Type the name of the one-time charge to define unique fees for event-based pricing models.● Editing Status: Reflects the status of the charge (New, Modified, or In Error).● Contract Event: Contract events are contract lifecycle events for the provider contract items that subscribe
to the rate plan. Select the event that triggers the execution of the contracted charge:○ Activation ("creation" of the contract item in the subscribed provider contract)○ Suspension○ Resumption
Once subscribed, the system triggers the one-time charge when the selected contract event occurs. The system manages all the provider contracts for the contracting service provider.
● Output Charged Item: Select or type the name of the expected charged item class that defines the output data that the system generates for the billing, invoicing, or revenue recognition systems.
When necessary, configure the charged item definition [page 226] to redefine the generation of output charged items by the SAP CC system.
Tip○ If you click on the View link, a quick view providing information about the output charged item is
displayed (name, description, class...)○ In this quick view:
○ Clicking on View Charged Item Class opens this one in the dedicated Manage Charged Item Classes [page 79] app.
○ Clicking on Edit Charged Item Definition opens the Charged Item Definition [page 226] page in the app.
● Description: Describe the business scope of this one-time charge in your rate plan.
● Pricing Tree: Click the button on the right end of a row to edit the pricing tree of this one-time charge. See Configuring the Pricing Tree of a Charge [page 187].
1.4.9.4.3.3.5.2 Editing a Recurring Charge
To edit a recurring charge [page 140] in a rate plan, click the Edit button.
RememberIf the rate plan is in status Released or Obsolete, you can change neither the recurrence nor the reference date/time settings.
Edit a Recurring Charge
● Name: Type the name of the recurring charge (editable only at creation time) to define some periodic fees for subscription-based pricing models.
224 PUBLICCockpit
Cockpit

● Editing Status: Reflects the current status of the charge (New, Modified, or In Error).● Recurrence: Select the frequency for the triggering of the charge by the system (Daily, Weekly, Monthly,
Quarterly, Biannual, or Annual). The initial triggering is defined by the reference date/time setting.● Reference Date/Time: Select the date and time when the recurring charge is automatically triggered by the
system once the belonging rate plan is subscribed to in a provider contract item. This setting is a reference for the recurrent triggering of the charge by the system.
In the list, choose the date/time property that suits your business requirements. For example:○ Charge Effective Date (default property), which represents the start dates/times of the contract items
in their provider contracts.○ SAP_BILL_CYCLE_DATE (external parameter), which represents the start dates/times of the first
billing cycles for the provider contracts and contract items managed in SAP Convergent Invoicing.
Select this property when you want to synchronize or correlate the recurrent triggering with billing cycles managed in SAP Convergent Invoicing.
RememberIf you select a Monthly recurrence, the recurring charge will be triggered every month on the reference date. However, if you select the 31st of the month as a reference date, the recurring charge will be triggered the last day of the month (the 31st for odd months, the 30th for even months and the 28th or 29th for February).
● Output Charged Item: Select or type the name of the expected charged item class that defines the output data that the system generates for interfaced billing, invoicing, or revenue recognition systems.
When necessary, configure the charged item definition [page 226] to redefine the generation of output charged items by the SAP CC system.
Tip○ If you click on the View link, a quick view providing information about the output charged item is
displayed (name, description, class...)○ In this quick view:
○ Clicking on View Charged Item Class opens this one in the dedicated Manage Charged Item Classes [page 79] app.
○ Clicking on Edit Charged Item Definition opens the Charged Item Definition [page 226] page in the app.
● Description: Describe the business scope of this recurring charge in your rate plan.
● Pricing Tree: Click the button on the right end of a row to edit the pricing tree of this recurring charge. See Configuring the Pricing Tree of a Charge [page 187].
1.4.9.4.3.3.5.3 Editing a Usage Charge
To edit a usage charge [page 141] in a rate plan, click the Edit button.
CockpitCockpit PUBLIC 225

Edit a Usage Charge
● Name: Type the name of the usage charge (editable only at creation time) to define how to charge end customers for the use of a service or product.
● Editing Status: Reflects the current status of the charge (New, Modified, or In error).● Input Chargeable Item: in the dropdown list, choose the relevant input chargeable item of the catalog
Tip○ If you click on the View link, a quick view providing information about the input chargeable item is
displayed (name, description, class...).○ In this quick view, clicking on View Chargeable Item Class opens this one in the dedicated Manage
Chargeable Item Classes [page 70] app.
● User Technical Identifier: in the dropdown list, choose the relevant user technical identifier previously defined in the User Technical Identifiers [page 221] section in the app
● Service Identifier: Type the name of the service identifier, that makes the pair "user technical identifier / service identifier" unique in this rate plan (if several usage charges)
● Output Charged Item: in the dropdown list, choose the relevant output charged item of the catalog.
When necessary, configure the charged item definition [page 226] to redefine the generation of output charged items by the SAP CC system.
Tip○ If you click on the View link, a quick view providing information about the output charged item is
displayed (name, description, class...)○ In this quick view:
○ Clicking on View Charged Item Class opens this one in the dedicated Manage Charged Item Classes [page 79] app.
○ Clicking on Edit Charged Item Definition opens the Charged Item Definition [page 226] page in the app.
● Description: Describe the business scope of this usage charge in your rate plan.
● Pricing Tree: Click the button on the right end of a row to edit the pricing tree of this usage charge. See Configuring the Pricing Tree of a Charge [page 187].
1.4.9.4.3.3.5.4 Editing the Charged Item Definition
In the app, this page allows you to configure the generation of output charged items by the SAP CC system when processing the charging operations, according to the charged item class of the selected charge in your rate plan.
Click the Edit Charged Item Definition links to navigate to this app page.
You can:
● Change the constant values or properties of the fields predefined in the charged item class specified for this charge.
226 PUBLICCockpit
Cockpit

● Assign values to the fields not set in the charged item class.
NoteFor more information about charged item classes, refer to the dedicated section [page 79] of this documentation.
This page contains the following parts:
● A title bar [page 227]● A header [page 227]● A main content area [page 227] to edit [page 228] the fields
Title Bar
The title bar displays:
● A breadcrumb, which allows you to navigate either to the pricing tree page [page 187] or to the rate plan page [page 212]
● The name of the page: Charged Item Definition● An Edit button that you can use to switch to the editing mode and make some changes
Header
The header contains the following information:
● The number of fields defined in the charged item class● The name of the charged item class
Tip○ If you click on the View link next to the name of the charged item class, a quick view providing
information about this charged item class is displayed (name, description,...).○ In this quick view, clicking on View Charged Item Class opens this one in the dedicated Manage
Charged Item Classes [page 79] app.
● A search field
Main Content
The main part consists in a table listing all the fields defined in the charged item class assigned to the output charged item of your charge in the rate plan:
● Name: Displays the name of the field.● Type: Displays if the field is a Boolean, a String, a Number, or a Date/Time.
CockpitCockpit PUBLIC 227

● Status: Displays if the field the one defined by Default in the charged item class or if it is Redefined.● Value: Displays the value of the field. You can edit [page 228] the field to change its value.
Edit the Fields of the Output Charged Items
Set up the fields that suit your business or technical requirements according to your implementation scenario.
To edit the fields of the output charged items generated by the system:
1. Click the Edit button.2. Click the switch button in the Status column of the field that you want to redefine.3. Change the value.
Note○ You can change the charged item class if necessary, by choosing another one in the Charged Item
Class list.○ In editing mode, a fifth column called Default Value appears in which the value initially defined is
displayed.
4. Once all the fields you want to modify are redefined, click the Apply button to validate your changes. If there is an error, correct the error in the fields and click Apply again.If you click the Cancel button, a popover message appears, inviting you to confirm your choice by clicking the Discard button. In this case, all interim changes are discarded and the previous configuration (class name, field definitions) is restored from the already-saved rate plan.
The app automatically navigates back to the pricing tree of the edited charge so you can eventually adapt some pricing logic.
Note● Modifying the fields of the output charged item is not mandatory.● Blue highlights allow you to know which fields have been redefined.
Tip
In the footer toolbar, a summary button shows the number of errors to be fixed before saving the rate plan in the system. If you click on this button, you access to the detailed list of these errors.
1.4.9.4.3.3.6 Editing Additional Information
To edit the counters of a rate plan, click the Edit button. Fill the elements according to the following recommendation:
228 PUBLICCockpit
Cockpit

Element Description and recommendations Type
Name The name of the additional information, that must be unique among the list of additional information associated to this rate plan
M
Type Select the relevant type for the additional information M
Value The value that corresponds to this additional information M (O for a string type)
Description A description of this additional information M
M: Mandatory, O: Optional
NoteAdding additional information is not mandatory. It is still possible to add any additional information after the creation of the rate plan.
RememberIf the rate plan is in status Released or Obsolete:
● You cannot add or remove additional information● You cannot modify the existing additional information
The modified rate plan is recorded as a draft. This draft remains until you click the Save button, that saves the rate plan to the Core Server system and its back-end database.
If you click the Cancel button, a popover message appears, inviting you to confirm your choice by clicking the Discard button. In this case, all changes are discarded and the draft of the rate plan is deleted.
Tip
In the footer toolbar, a summary button shows the number of errors to be fixed before saving the rate plan in the system. If you click on this button, you access to the detailed list of these errors.
Related Information
Adding Additional Information [page 187]Viewing a Rate Plan [page 212]
1.4.9.4.3.4 Deleting a Rate Plan
Before you delete a rate plan, you must first delete all master data objects which reference it.
For example, you can not delete a rate plan that is part of a contract in the back-end database. You must first delete the contract that uses this rate plan, and then you can delete the rate plan.
CockpitCockpit PUBLIC 229

When a rate plan is selected, you can click the Delete button located in the title bar to remove it from the system. When clicking on Delete, a dialog box appears to allow you to confirm your choice.
1.4.9.4.4 Transporting a Rate Plan and Its Related Pricing Elements
As an SAP CC pricing specialist, use this procedure to transport a rate plan and a consistent subset of related pricing elements from a source SAP CC system to target SAP CC systems.
1. In a first web browser, launch [page 230] the Cockpit that is connected to the source SAP CC system and sign in to the user interface with the relevant credentials for this system.
2. Export [page 230] your rate plan with its related pricing elements from the source system to an XML file.3. In another web browser window, open a second Cockpit user interface that is connected to the target SAP
CC system. Sign in to the user interface with the relevant credentials for this system.4. Import [page 231] the rate plan and its related pricing elements from the previously exported XML file into
the target system and its back-end database.
NoteIf you need to use the Catalog Transport feature that is based on change lists, transport requests, SAP Solution Manager or SAP CTS, see:
● Change Lists and Transport Requests● Managing the Transport Requests
Exporting a Rate Plan and Its Related Pricing Elements [page 230]
Importing a Rate Plan and Its Related Pricing Elements [page 231]
1.4.9.4.4.1 Exporting a Rate Plan and Its Related Pricing Elements
In order to transport data or make a file copy, you can export a single rate plan and its related pricing elements from the SAP CC system to an XML file.
The function exports a consistent subset of data that is associated to the selected rate plan. Depending on your configured rate plan, it includes the following saved pricing elements:
● Pricing data structures:○ Chargeable item classes○ Charged item classes○ Mapping table classes○ Range table classes
● Pricing definitions:○ Mapping tables
230 PUBLICCockpit
Cockpit
○ Range tables
The draft versions of these pricing elements are not exportable.
Export a Rate Plan and Its Related Pricing Elements
1. In the list of rate plans, select the rate plan that you want to export from the SAP CC system. You can use the sort and filter buttons to find the expected rate plan.
RememberYou cannot export a draft rate plan.
2. The app displays the selected rate plan. In the title bar, click Export.3. The app retrieves the data from the SAP CC system and starts downloading an XML file to your computer.
By default, the file name contains the name of the exported rate plan and some date and time information without punctuations. For example, myrateplan_20201226234859.xml.
4. Depending on your web browser settings (download location, automatic download), the file is saved on your hard drive, a network directory, or a cloud storage.
5. This technical file includes a pnrObjectSet XML element as root element. You can use this XML file with Cockpit or Core Tool to import its content to the connected system.
6. Use the XML file to report, share, archive, or transport the rate plan and its related pricing elements.
NoteYou cannot export a rate plan that is managed by the Core Tool user interface.
TipIn editing mode, the Export button is not available because the export function is only possible with a rate plan that is saved in the SAP CC system and its back-end database.
1.4.9.4.4.2 Importing a Rate Plan and Its Related Pricing Elements
To configure a system quickly, you can import a single rate plan and its related pricing elements. You upload an XML file and then the Cockpit user interface validates the file and saves its content into the connected SAP CC system and its back-end database system.
The file to import was previously exported by using Cockpit. It must include a unique rate plan and its related pricing elements.
NoteYou cannot import a rate plan that is managed by Core Tool.
In Cockpit, the possible pricing elements that relate to a rate plan are:
● Pricing data structures:
CockpitCockpit PUBLIC 231

○ Chargeable item classes○ Charged item classes○ Mapping table classes○ Range table classes
● Pricing definitions:○ Mapping tables○ Range tables
You can import a rate plan, whether it is already saved in the system or not.
NoteThe import of a rate plan can change the status of an existing rate plan forward (from Open to Released or from Released to Obsolete), but not backward.
RememberYou cannot import a rate plan from a file if you are assigned to a pricing catalog that differs from the one of this rate plan.
Import a Rate Plan and Its Related Pricing Elements
CautionThe import will replace existing data.
1. Click Import to open the import window. The window contains two sections to use successively: File [page 232] and Content [page 232].○ File: Click Browse... to select the XML file to upload and import into the target SAP CC system and its
back-end database system.
The app loads and checks the content of the XML file. In case of errors, see Correct the XML File to Import [page 233].
Otherwise, the app displays the content of the file in the Content section. View and select the elements to import.
○ Content: This section previews the content of the file, compares with the already-saved data, and displays the customizable selection of related pricing elements that can or must be imported.○ Rate Plan
○ Name: Displays the name of the rate plan to import.○ Catalog: Displays the name of the pricing catalog that contains the rate plan to import.○ Currency: Displays the currency of the rate plan to import.○ Description: Displays the business description of the rate plan to import.
TipIf the description is long, click Show More to view the complete description.
232 PUBLICCockpit
Cockpit
○ Status: Displays the status (Open, Released, or Obsolete) of the rate plan to import.○ Already in System: Displays the information if a rate plan is already saved in the system and its
back-end database:○ Yes: A rate plan with the same name already exists in the target system. If you continue
your import, it will replace this rate plan. You may cancel the import and verify the existing rate plan.
○ No: The rate plan found in the XML file does not exist in the target system. Check if related pricing elements already exist. See the Related Pricing Elements subsection.
○ Related Pricing Elements○ Name: Displays the name of the related pricing element that is found in the XML file.○ Type: Displays the type of the related pricing element to import○ Already in System: Displays the information if the related pricing element is already saved in
the system and its back-end database or not:○ Yes: A pricing element with the same name already exists in the system. Decide if you
want to import the one from the XML file. You may need to verify this pricing element before the import.
○ No: The pricing element does not exist in the system. Therefore, its import is required.○ Selected for Import:
○ Yes (Required): The related pricing element does not exist in the system and must be imported to ensure data consistency.
○ Yes or No: When a related pricing element already exists in the system, you decide if you want to import the one from the XML file or not.
Switch on all the pricing elements that you want to import.2. When your selection is done, click the Import button to start importing the content of the selected file.3. The target system validates the pricing configurations.
If there are no errors, the rate plan and the selected related pricing elements are imported and existing data is replaced if it already exists in the system.
4. Click View to view [page 212] the imported rate plan or click Close to continue your tasks or review the other imported pricing elements.
5. In case of errors, the app displays detailed messages that help you correct the XML file. See Correct the XML File to Import [page 233].
Correct the XML File to Import
In case of errors, the app displays detailed messages that relate to the XML file and its content. You must be knowledgeable about this technical file.
Open the XML file with a text or XML editor and compare the error information with the file content.
Use the XML element names and the signaled positions. Correct errors in the file and save it.
Try again to import the rate plan. Redo these actions until the import is successful.
CockpitCockpit PUBLIC 233

TipWhen the pricing catalog does not exist in the target SAP Convergent Charging system, a new pricing catalog is automatically created if you are not already assigned to another pricing catalog.
1.4.9.5 FAQs and Tips
Based on SAP user feedbacks, we deliver Frequently Asked Questions (FAQs) about all aspects of working with the Cockpit application and its apps efficiently. In addition, we complete these solutions with some best time-saving and task-completion tips and tricks.
RememberPlease share your SAP user experience to enrich these sections in the SAP user assistance and product documentation for SAP Convergent Charging 2020.
Frequently Asked Questions (FAQs) [page 234]
Tips and Tricks [page 236]
1.4.9.5.1 Frequently Asked Questions (FAQs)
What corresponds to the number displayed in the app tile?
The tile for your Manage Rate Plans app indicates the total number of rate plans that are currently stored in SAP Convergent Charging 2020. If your user profile is assigned to a single pricing catalog (catalog restriction), this number counts the stored rate plans for this catalog.
NoteThis number does not take drafts into consideration.
Searching for rate plans does not return the expected results.
For a better user experience, the search mechanism is case-insensitive, which may return more elements that expected. In case less results than expected are returned, please note that a synchronization mechanism exists between the Cockpit application and the Core Server system. In case a user created a rate plan in parallel (for example using the Core Tool user interface), it might be necessary to click the button to refresh the list and get these elements.
Can someone view my draft rate plans?
234 PUBLICCockpit
Cockpit

No. Only you can access and display your drafts, until they are released. These interim versions are personal and available with your user session.
NoteIf you open multiple user sessions on different web browsers or computers, the drafts differ.
Why can’t I copy a draft rate plan?
The copy is only possible for stored and valid rate plans.
Can I export a draft rate plan?
No. The export is only possible for a single, stored, and valid rate plan. The answer is the same regarding to its related pricing elements.
Is it mandatory to click on the Edit button in each section to edit or create a rate plan?
No. Once enabled, the editing mode is available for each section until you click on the Save or the Cancel button.
Why can’t I view or edit a charge in my rate plan?
In the app, the Charges area contains the button on the right end of a row. If there are errors, the button is not visible.
Can I share a charge between two rate plans?
No. If you want to use reusable and shareable charges, you need to base your design on charge plans that you can configure with the Core Tool user interface.
Where are the Flat, No Access, and Free components for the plans?
A new business-oriented terminology is available with SAP CC 2020 and the Cockpit user interface.
In Core Tool In Cockpit
Flat Function Flat Fee [page 152]
Free Function No Fee [page 153]
No Access Function Error [page 154]
Why can't I move a function component in my pricing tree?
A function must end each branch in the pricing tree. Therefor you cannot move it up. If you select a few operators and a fee, the move buttons are disabled.
CockpitCockpit PUBLIC 235
Why can't I add a parameter named SAP_BILL_CYCLE_DATE in my rate plan?
When the SAP CC system is interfaced with SAP Convergent Invoicing in an SAP ERP system or an SAP S/4HANA system, the external parameter SAP_BILL_CYCLE_DATE is mandatory and its name is a reserved parameter name. However, it is not the case with an SAP S/4HANA Cloud system.
1.4.9.5.2 Tips and Tricks
How to share a rate plan?
Just copy the URL of the rate plan in Cockpit and send it to your contacts. Depending on their privileges (SAP CC user settings), they view the rate plan, using the same Cockpit user interface if several interfaces are installed and deployed on the same SAP CC system.
How to access a rate plan quickly?
Just use the browser bookmarks to access a given rate plan directly. You can copy and share a bookmark, taking into account the associated privileges that may be required to access this rate plan.
How to release a rate plan?
You must save the rate plan once before changing its status.
How to add/remove pricing components quickly?
Just use the shortcuts. See Shortcuts for the Pricing Tree [page 207]. Do not forget to turn on the checkbox that is above the component.
1.4.9.6 Troubleshooting
As part of the technical operations, you may have to troubleshoot some problems when using this app or working with your SAP CC environment (systems, data, users) in your SAP system landscape. Please find afterwards a list of possible symptoms and related solutions that you can try to implement by yourself.
I cannot save my rate plan.
To save a rate plan, the following criteria must be fulfilled:
● This rate plan must be associated to a catalog● This rate plan must have a name● This rate plan must have a currency● This rate plan must have a description
If all these criteria are verified and the rate plan still cannot be saved, check out if the summary button displays errors.
236 PUBLICCockpit
Cockpit

"Error message: 'No matching rate plan to display'."
This error message means that the Manage Rate Plans app cannot display the requested rate plan. This situation may be due to:
● A parallel deletion of this rate plan by another individual user or service user (CRM23 application, provisioning system). Try to click the button to refresh the list of rate plan and check whether it still exists, or not. In case your rate plan is still present, ask your system administrator to audit the user operations
● Insufficient privileges associated to your user profile, or a catalog restriction. Contact your user administrator to verify your user profile (credentials, lock status, password expiration, assigned roles, pricing catalog restriction)
● An incorrect bookmark or link. Try to use the search mechanism to retrieve your rate plan. In case you find your rate plan, update your bookmark and share the changes with your team
● Other technical issues. Contact your local support team or the SAP Support Team
"Error message: 'Sorry, your app cannot save the rate plan. View the message details and take a relevant course of action.'
'If this happens again, contact the IT administrator for your systems.'"
This error message means that the Manage Rate Plans app cannot save the current rate plan in the database. This situation may be due to an incorrect value of the managedByCockpit attribute which may have been modified manually. Try to save the rate plan by using Core Tool.
RememberIn doing so, the rate plan is no longer manageable by Cockpit
1.4.10 Manage Range Table ClassesWith the app Manage Range Table Classes, you create, list, review, and maintain some range table classes, which enable you to define all the range tables that are necessary for the pricing configuration of your subscription- and usage-based services.
In SAP Convergent Charging, range tables are multicolumn data tables intended for tiered pricing, volume pricing, or block pricing. When extended with input columns, range tables enable multidimensional pricing. Range tables are used to configure the pricing logic that must compare a quantity of service (or another unit) with ranges (numerical intervals) and that computes correct unit/total prices and custom information.
Range table classes are some useful templates that define a common multicolumn structure for a subset of range tables in your service pricing catalog or for subscriber range tables when the prices are end-customer-specific. Each range table is based on a given range table class.
What's New? [page 238]
About This App [page 238]
Important Concepts [page 239]
Tasks [page 242]
23 Customer Relationship Management
CockpitCockpit PUBLIC 237

FAQs and Tips [page 250]
Troubleshooting [page 251]
1.4.10.1 What's New?
This section highlights the main changes in the app Manage Range Table Classes that relate to new or changed features.
What Was New in SAP CC 5.0
Please, see https://help.sap.com/viewer/c7120011d1c244168dc1f945a06f1350/5.0.latest/en-US/b28a1fdd7ce2414fbd25b0d8b8c5b819.html.
1.4.10.2 About This App
Target Audience
The app Manage Range Table Classes is mainly intended for the Pricing Specialist.
App Summary
The app Manage Range Table Classes provides you with the following capabilities:
● Easier configuration of your range table classes by creating new ones or copying existing ones.● Searching for range table classes in the list of existing ones and organizing (sort, filter, and group) the
result list according to your needs.● Displaying a given range table class to view or review.● Maintaining your master data by editing a given range table class or deleting it in case it is no more needed
and referenced.
App Workspace
The workspace of the app Manage Range Table Classes is made up with two main areas:
238 PUBLICCockpit
Cockpit

● A left area provides you with tools to search for, filter, and sort range table classes in pricing catalogs. The area displays a result list containing the released range table classes and your drafts. See Listing and Searching For Range Table Classes [page 247].
● A right area provides you with the detailed information related to a specific range table class. This area is only visible when a range table class is selected in the left area or during the configuration of a new range table class. See the tasks:○ Viewing and Reviewing a Range Table Class [page 247]○ Creating or Copying a Range Table Class [page 243]
1.4.10.3 Important Concepts
As an SAP CC pricing specialist, you are aware of the following concepts to use the app Manage Range Table Classes.
Related Information
Service Pricing Configuration with Range Tables [page 239]Range Tables and Classes [page 241]Additional Information [page 241]Core ToolWorking with Logic ComponentsRange Table Introducer (Comparator)
1.4.10.3.1 Service Pricing Configuration with Range Tables
Service Pricing Configuration with Range Tables
To facilitate and improve the pricing configuration for your services, SAP Convergent Charging can manage some advanced price tables that define graduated prices per ranges (numerical intervals) for a service usage or for another measurable quantity. SAP CC looks up data in such a table, compares a consumed service quantity (or another measured unit) with its table ranges to determine the correct prices and some other custom information from the output columns of the selected table. Additionally, SAP CC can compare a set of keys with data in the input columns of the selected table to preselect some ranges in order to enable multidimensional pricing.
● Usage-based pricing is a pricing model in which the amount that an end customer pays depends on the usage level (quantity) for the consumed service. When you want to offer your end customers gradually
CockpitCockpit PUBLIC 239

reducing pricing (or increasing discounting), you can implement different pricing submodels with SAP CC and range tables such as:○ Volume pricing○ Tiered pricing○ Block pricing
● You can use range tables to implement recurring pricing models.
You can test or bring to the market your pricing models:
Pricing/Discounting Model Description Range Tables
Volume Pricing Volume pricing defines graduated prices per ranges of service quantity (or another measured quantity).
For a service usage, a ranked range is determined this consumption level. Volume pricing calculates the applicable price by using the total consumed service quantity multiplied by the price that corresponds to the ranked range.
Volume pricing offers a discount when the service consumption level increases. As soon as a service usage hits a particular consumption level, all units will cost the lower price.
Computation mode: none
Tiered Pricing Tiered pricing defines graduated prices per ranges of service quantity (or another measured quantity). Each range is a usage tier. The end customer pays for each consumed tier.
For a service usage, tiered pricing calculates the applicable price by cumulating subprices corresponding to the consumed tiers. The applicable price is the sum of these subprices.
Each usage tier corresponds a different commercial offer or package.
Computation mode: cumulative, linear
Block Pricing Block pricing defines graduated prices per ranges of service quantity units (or another measured quantity). Each range is a usage block. In a block, the price does not change whatever the consumption level.
For a service usage, block pricing calculates the applicable price by splitting the consumed service quantity into usage blocks of consumptions and sums the interim prices.
For example, a first block of 1,000 service units is free of charge, the next blocks have a flat rate.
Computation mode: none
As the SAP CC pricing specialist, you translate the marketing and pricing policy and contribute to the pricing strategy for your company by using pricing to achieve its strategic goals.
240 PUBLICCockpit
Cockpit

1.4.10.3.2 Range Tables and Classes
For more information and examples about range tables and classes, refer to the section Range Tables and Range Table Classes in the SAP CC 2020 Application Help.
1.4.10.3.3 Additional Information
In SAP Convergent Charging, additional information is a custom data that characterizes a catalog element or that is required by an interfaced system or application for further processing. SAP CC does not reuse this data. For example, the pricing specialist can set up a particular reference, code, or attribute. You set up some additional information to:
● Define custom information that is relevant for your business requirements.● Facilitate the search operations (in Core Tool, in SAP CRM, or in another interfaced system).● Conform to your integration scenario that requires this typical data for further processing.
There are three types of data: string, number, and date/time. The configured names must be legible and unique.
Note● The additional information data is conditionally visible and reusable in a Customer Relationship
Management (CRM) application, a provisioning system, a billing system, or another external system that is integrated with SAP Convergent Charging 2020. In this context, the systems know how to reuse the configured additional information.
● Depending on your integration scenario and your business needs, some of these custom attributes may be mandatory.
RememberYou cannot configure the service pricing by reusing this additional information data. The SAP CC system does not reuse any additional information when executing its business processes (charging, refilling, activation, master data configuration). Design and set up the pricing logic by using some other features such as parameters or properties.
In the Additional Information tab, add some additional information items to define all the necessary custom characteristics or references.
See: Additional Information (Tab) [page 245]
Related Information
Creating or Copying a Range Table Class [page 243]Viewing and Reviewing a Range Table Class [page 247]Editing a Range Table Class [page 248]
CockpitCockpit PUBLIC 241

1.4.10.4 Tasks
With the app Manage Range Table Classes, you complete the following business configuration tasks to configure and maintain some master data quickly:
● Creating or Copying a Range Table Class [page 243]● Creating a Pricing Catalog [page 246]● Listing and Searching For Range Table Classes [page 247]● Viewing and Reviewing a Range Table Class [page 247]● Editing a Range Table Class [page 248]● Deleting a Range Table Class [page 250]● Transporting a range table class: see Transporting a Rate Plan and Its Related Pricing Elements [page 230]
TipTo enrich your SAP user experience, view and share our FAQs, tips, and tricks about Cockpit and your app. See FAQs and Tips [page 250].
Prerequisites
A pricing catalog must exist in the system for the marketable end-customer service or service bundle for which you design and set up the pricing configuration. Create a catalog with Cockpit [page 246] or with Core Tool.
Complementary Tasks
Use the Core Tool user interface to complete the following tasks:
● Transporting a range table class from a source SAP CC system to a target system by using the:○ Configure a transport request after preparing a change list.○ Export to and import from an XML file.
● Saving a range table class to an XML file for troubleshooting purpose
Related Information
Manage Range Tables [page 252]
242 PUBLICCockpit
Cockpit

1.4.10.4.1 Creating or Copying a Range Table Class
Configure a new range table class or copy an existing one to define the data structure for multiple range tables based on this class.
As an SAP CC pricing specialist, you configure a new range table class:
● By copying an existing range table class, using the Copy button in the right area● From scratch, using the Create button in the left area
Create a Range Table Class
When clicking Copy on a displayed range table class, a draft version of this copied class is created, containing the same information and content. Only the name of this new range table class differs, for unicity purpose.
When clicking Create, an empty range table class is created, and you can use the recommendations afterwards to fill the different information. The newly created range table class is recorded as a draft. This draft remains valid until you click the Save button, which definitively creates the range table class in the final SAP CC system and its back-end database.
TipFor readability and productivity purposes, SAP recommends that you click the button when editing the range table class, in order to hide the left area of the screen and focus on the range table class itself.
Fill in the following tabs:
● Header [page 244]● Definition [page 244]● Additional Information [page 245]
Once you have finished, click:
● Save to save your range table class to the Core Server system and its back-end database.● Cancel to cancel the creation of this new class. In this case, you are requested to confirm your choice and
then, all your interim changes are lost.
Related Information
Persistent CountersWorking with CockpitCreating a Range Table [page 260]
CockpitCockpit PUBLIC 243

1.4.10.4.1.1 Header (Tab)
The following table contains the list of information you need to fill in the Header tab:
Element Description and Recommendation Required
Name Type the name of the range table class. The name must be unique among the list of existing range table classes.
M
Catalog Select the name of the pricing catalog this range table class must belong to. If needed, create a new catalog [page 246] by clicking the New button.
M
Description
Type a multiline description of the function for this range table class (2,000 characters maximum).
M
M: Mandatory, O: Optional
1.4.10.4.1.2 Definition (Tab)
The Definition tab contains the definitions of the characteristics and data structure for the range tables that are based on your new class.
ElementSubelement Description and Recommendation Required
Bounds Configure bounds of the ranges (positive intervals) for the range tables that are based on this class. To do that, you just have to set up some characteristics for the upper bounds.
M
Upper Bounds
Define if the upper bounds must be inclusive or exclusive for all the ranges in the corresponding range tables.
● Include● Exclude
Automatically, the lower bounds and the upper bounds are the inverse.
M
Upper Bound of Last Range
Depending on your business requirements, define if the upper bound of the very last range is +∞ or a user value. Select the appropriate option:
● User Value● +Infinite
M
Input Columns
Define up to 5 input columns for the corresponding range tables and subscriber range tables. The type for values in input columns is string.
O
Name Type a column name that must be unique in the range table class. M
Description
Enter a multiline description for the function of this input column in the corresponding range tables.
M
Output Columns
Define 1 to 15 output columns for the corresponding range tables and subscriber range tables.
M
244 PUBLICCockpit
Cockpit

ElementSubelement Description and Recommendation Required
Name Type a column name that must be unique in the range table class. M
Type Select the relevant type of values for each output column:
● String● Number
M
Computation Mode
For numerical output columns, select the computation mode that the system processes when looking up data in the corresponding range tables:
● None: There is no additional processing.● Cumulative: The system calculates the applicable price (or
another unit) by summing the values in an output column of the selected range table. It starts with the first range and ends with the range that corresponds to the compared service quantity (or another unit).
● Cumulative, Linear: The system calculates the applicable price (or another unit) by using an advanced formula based on sums and linear computations. In an output column of the selected range table, it multiplies each value by the range size and cumulates these interim sums. This option is useful when you want to design tiered pricing for a service usage.
M
Description
Enter a multiline description for the function of this output column.
M
M: Mandatory, O: Optional
TipThe app provides you with some guidance: it displays a preview of the ranges. See these numerical intervals and defined bounds.
1.4.10.4.1.3 Additional Information (Tab)
The Additional Information tab contains the list of additional information [page 241] associated to your range table class. Define all the necessary custom characteristics or references by adding your information items according to the following recommendations:
Element Description and Recommendation Required
Name Type the name of the additional information item. It must be unique among the list of additional information items associated to this range table class.
M
CockpitCockpit PUBLIC 245

Element Description and Recommendation Required
Type Select the relevant format type for the additional information:
● String● Number● Date/Time
M
Value Enter the value that corresponds to this additional information. M
Description
Enter a multiline description for the function of this additional information.
M
M: Mandatory, O: Optional
Related Information
Additional Information [page 241]
1.4.10.4.2 Creating a Pricing Catalog
While creating a range table class, configure a new catalog to group the pricing elements for your subscription- and usage-based services to monetize.
Create a Pricing Catalog
As an SAP CC pricing specialist, you want to create a mandatory pricing catalog quickly when configuring some other master data for the pricing configuration of your chargeable service.
NoteAs a prerequisite, you are not assigned to a unique pricing catalog by your user administrator.
1. While creating your catalog element, click the New button to the right of the Catalog input field.2. The app displays the Create Catalog window.3. Type the name for the pricing catalog. The catalog name depends on your pricing modeling and design.
It can be:○ The company name of the contracting service provider that brings value-added services to the market
and wants to monetize the service use○ The service name for these subscription- and usage-based services○ The name for the bundle of services that you monetize by configuring and sharing some
pricing logic in a single catalogYou can use commercial names, technical names, abbreviations, or a combination of different information items.It must be legible in your environment.
246 PUBLICCockpit
Cockpit

4. Click Create to request the immediate creation of this pricing catalog.5. Continue the creation of the catalog element and save it.
Related Information
Creating or Copying a Range Table Class [page 243]
1.4.10.4.3 Listing and Searching For Range Table Classes
To review or modify a range table class, list and search for draft and released range table classes by different criteria.
RememberIf you are assigned to a unique pricing catalog, some restrictions apply to you and you can only work with the range table classes that belong to this catalog.
Verify your SAP CC user settings with your user administrator. See Setting Up a User in the SAP CC 2020 Primary Help for Core Tool.
Search For Table Classes
To search for some range table classes, open the app Manage Range Table Classes. By default, the app searches for and displays all the classes in the service pricing catalogs.
Search for range table classes by entering a value in a search field, and organize (filter, alphabetical sort, group) the range table classes by different criteria.
The app searches for the text in the known names, descriptions, and pricing catalogs for one or multiple services. It displays a first result list and automatically extends it.
Depending on your goal, work with the search result list. Click the range table class to view [page 247], edit [page 248], or delete [page 250] it.
1.4.10.4.4 Viewing and Reviewing a Range Table Class
View a range table class and review its details.
From the search result list [page 247] in the app, a browser bookmark, or a memorized URL, navigate to a specific range table class to view and review its details, such as the definitions of the:
● Ranges
CockpitCockpit PUBLIC 247

● Input columns for comparative data values (string values)● Output columns for resulting data values (number or string values)● Additional information [page 109] items
Review the following tabs:
● Header [page 244]● Definition [page 244]● Additional Information [page 245]
Tip
To facilitate the inspection of your range table class, arrange your user interface by clicking the or
button to extend the visualization area or click to maximize the displayed window.
1.4.10.4.5 Editing a Range Table Class
Edit and change the data structure definitions and some additional information items either to finalize the configuration for a range table class or to maintain a class regarding to some pricing policy evolutions for your services.
Context
As an SAP CC pricing specialist, you want to:
● Finalize the configuration for a range table class and corresponding tables. You may need to define another input or output column that must be present in range tables that will be based on this modified class.
● Maintain the pricing configuration for your usage-based services to translate the evolutions for the pricing policy.
Edit a Range Table Class
From the search result list [page 247] in the app, a browser bookmark, or a memorized URL, navigate to a specific range table class to edit and change its configuration.
Click Edit to switch to the editing mode and change the range table class depending on its use.
You can:
● Change the class description. See Header (Tab) [page 244].● Change the range settings for the bounds. See Definition (Tab) [page 244].● Add, change, move, or delete some declarations of input columns or output columns.● Add, change, move, or delete some additional information items. See Additional Information (Tab) [page
245].
248 PUBLICCockpit
Cockpit

NoteOnce the range table class is referenced in a range table, a pricing macro, or another pricing element from the catalog, you can no longer modify the data structure. Several typical references are possible:
References Pricing Catalogs (in Master Data) Master Data for End Customers
Direct Range table Subscriber range table
Indirect ● Pricing macro● Reusable charge● Allowance logic● Refill logic
The app regularly saves the modified range table class as a draft.
Once you finish, click:
● Save to record your modified range table class definitively. The final system processes the operation request and permanently saves the changes in its back-end database.
● Cancel to cancel the interim modifications of this new class. In this case, you are requested to confirm your choice and then, all your changes are lost. The systems keep the previously released class.
TipFor some notes, recommendations, and tips, refer to the section Creating or Copying a Range Table Class [page 243].
Results
Now you can:
● Create [page 260] or change [page 264] the necessary range tables.● Adapt the pricing logic settings to use some range tables based on your recently modified class.
Reconfigure the relevant pricing elements in the catalog for your end-customer service or service bundle.
Related Information
Creating a Range Table [page 260]Editing a Range Table [page 264]
CockpitCockpit PUBLIC 249

1.4.10.4.6 Deleting a Range Table Class
Delete a single range table class that is no more referenced in the belonging service pricing catalog and in the master data for end customers.
Delete a Single Class
From the search result list [page 247] in the app, a browser bookmark, or a memorized URL, navigate to a specific range table class to delete from a service pricing catalog.
The app displays the range table class that you want to delete.
As an SAP CC pricing specialist, click Delete to request the target SAP CC system to remove the master data definitively. The system verifies that no references exist. Otherwise, first delete all the pricing elements in the catalog that refer to your range table class.
1.4.10.5 FAQs and Tips
Based on SAP user feedbacks, we deliver Frequently Asked Questions (FAQs) about all aspects of working with the Cockpit application and its apps efficiently. In addition, we complete these solutions with some best time-saving and task-completion tips and tricks.
RememberPlease share your SAP user experience to enrich these sections in the SAP user assistance and product documentation for SAP Convergent Charging 2020.
Frequently Asked Questions (FAQs) [page 250]
Tips and Tricks [page 251]
1.4.10.5.1 Frequently Asked Questions (FAQs)
What corresponds to the number displayed in the app tile?
The tile for your Manage Range Table Classes app indicates the total number of range table classes that are currently released in SAP Convergent Charging 2020. If your user profile is assigned to a single pricing catalog (catalog restriction), this number counts the released range table classes for this catalog.
NoteThis number does not take drafts into consideration.
250 PUBLICCockpit
Cockpit
Searching for range table classes does not return the expected result list.
For a better user experience, the search is case insensitive, which may return more elements that expected. In case less results than expected are returned, please note that a synchronization mechanism exists between the Cockpit back-end application and the Core Server system. In case a user created a range table class in parallel (for example using the Core Tool user interface), it might be necessary to click the button to refresh the list and get these elements.
Can someone view my draft range table classes?
No. Only you can access and display your drafts, until they are unlocked. These interim versions are personal and available with your user session.
NoteIf you open multiple user sessions on different web browsers or computers, the drafts differ.
Why can’t I copy a range table class?
The copy function is only possible for released range table classes.
1.4.10.5.2 Tips and Tricks
How to use the search result list optimally?
Try to display the shortest list of range table classes that you want to work with. In the Manage Range Table Classes app, just combine the textual search with the filtering and grouping functions to reduce the number of items in the list.
How to access a range table class quickly?
Just use the browser bookmarks to access a given range table class directly. You can copy and share a bookmark, taking into account the associated privileges that may be required to access this range table class.
Can I configure a new range table class by copying an existing one?
Yes. If you want to create a range table class very speedily, just copy [page 243] an existing and released one.
Your Manage Range Table Classes app makes a copy of the range table class that is currently displayed. Rename the new draft and set up the data. If you want to copy the latest released version, first click the button before performing the copy.
1.4.10.6 Troubleshooting
As part of the technical operations, you may have to troubleshoot some problems when using this app or working with your SAP CC environment (systems, data, users) in your SAP system landscape. Please find afterwards a list of possible symptoms and related solutions that you can try to implement by yourself.
CockpitCockpit PUBLIC 251
Error message: 'No matching items to display'
This error message means that the Manage Range Table Classes app cannot display the requested range table class. This situation may be due to:
● A parallel deletion of this range table class by another individual user or service user (CRM24 application, provisioning system). Try to click to refresh the list of range table class and check whether it still exists, or not. In case your range table class is still present, ask your system administrator to audit the user operations for SAP Convergent Charging
● Insufficient privileges associated to your user profile, or a catalog restriction. Contact your user administrator to verify your user profile (credentials, lock status, password expiration, assigned roles, pricing catalog restriction).
● An incorrect browser bookmark or link. Try to use the search mechanism to retrieve your range table class. In case you find your range table class, update your bookmark and share the changes with your team members.
● Other technical issues. Contact your local support team or your SAP Support Team.
1.4.11 Manage Range Tables
In SAP Convergent Charging, range tables are used to implement tier pricing, volume pricing, or block pricing. In addition, a range table allows to define different prices for the same product or service that apply at different times. With the app Manage Range Tables, you can search, display, create, and maintain range tables stored in the pricing catalog.
A range table includes one or several versions, managed in a chronological way. Only one version applies at a given time. It allows to define different prices for the same product or service that apply at different times. Version has a validity period and range sets. A range set consists of a key defined as input values and all the corresponding ranges and output values. The table structure is based on a range table class [page 237] defining the name, the type and the description of input and output columns.
RememberA range table consists of 0 to 5 input columns and 1 to 15 ouput columns.
What's New? [page 252]
About This App [page 253]
Important Concepts [page 254]
Tasks [page 254]
FAQs and Tips [page 268]
Troubleshooting [page 270]
1.4.11.1 What's New?
This section highlights the main changes in the app Manage Range Tables that relate to new or changed features.
24 Customer Relationship Management
252 PUBLICCockpit
Cockpit

What Was New in SAP CC 5.0
Please, see https://help.sap.com/viewer/c7120011d1c244168dc1f945a06f1350/5.0.latest/en-US/b28a1fdd7ce2414fbd25b0d8b8c5b819.html.
1.4.11.2 About This App
Target Audience
The app Manage Range Tables is mainly intended for the Pricing Specialist.
App Summary
The Manage Range Tables app provides you with the following capabilities:
● Searching for range tables within the list of existing ones and organize (sort, filter, and group) the result list according to your needs
● Displaying a given range table (and its versions, range set keys and ranges), and navigate to the range table class that defines its structure
● Creating, copying, maintaining, or deleting range tables● Importing or exporting a range table in a CSV25 format
App Layout
The layout of the Manage Range Tables app is made up with different views:
● The Master View, that provides you with a result list of existing or draft range tables whose content can be customized to fit specific needs. For further information about this view, refer to the Listing and Searching For Range Tables [page 254] task
● The Version View, that provides you with the detailed information related to a given range table. This view is only visible when a range table is selected in the left area, or during the creation of a new range table. For further information about this view, refer to the Master and Version View [page 256] and Creating a Range Table [page 260] topics
● The Range Set Key View, that provides you with the list of input columns related to a given range table. For further information about this view, refer to the Range Set Key View [page 258] topic
● The Range View, that provides you with the list of ranges and output columns related to a given range table. For further information about this view, refer to the Range View [page 259] topic
25 Comma Separated Value
CockpitCockpit PUBLIC 253

1.4.11.3 Important Concepts
As a Pricing Specialist, you are aware of the following concepts to use the Manage Range Tables app.
Range Tables Classes
A range table is necessarily associated to a range table class which defines the structure of this table (input an output value sets).
For further information about range tables, refer to the Range Tables and Range Table Classes section of the SAP CC 2020 Application Help documentation.
1.4.11.4 Tasks
With the app Manage Range Tables, you complete the following business configuration tasks:
● Creating a Range Table [page 260]● Listing and Searching For Range Tables [page 254]● Viewing a Range Table [page 256]● Editing a Range Table [page 264]● Importing a Range Table [page 267]● Exporting a Range Table [page 267]● Deleting a Range Table [page 268]● Transporting a range table: see Transporting a Rate Plan and Its Related Pricing Elements [page 230]
RememberAs a prerequisite, a pricing catalog must exist to store the range tables. This catalog must include the expected range table classes, otherwise, you must define them first.
1.4.11.4.1 Listing and Searching For Range Tables
To list or search for some existing range tables, you use the result list that is available when entering the app.
The result list contains the following parts:
● An upper part, containing:○ A search field to enter search criteria○ A Create button to configure a new range table. For further information, refer to the Creating a Range
Table [page 260] task.○ Three buttons that you use to tune and organize the content of the result list and fit your specific
needs:
254 PUBLICCockpit
Cockpit

○ Sort ○ Filter ○ Group
● A result table located on the lower part displaying a list of range tables whose content can be customized using the following criteria:○ The name of the range table○ The name of the pricing catalogs you are assigned to○ The name of the range table class associated to the range table
Tip○ If you click on the name of the range table class, a quick view providing all the information
about the class is displayed (name, catalog, bounds...).○ In this quick view, clicking on the name of the range table class opens this one in the dedicated
Manage Range Table Classes [page 237] app.
○ The ID of the master agreement (agreement ID) to which the range table is linked○ Highlights allow you to know if a range table is a draft (blue color) and contains errors (red color)
CautionIf you are assigned to a single pricing catalog, some restrictions apply to you and you can only work with the range tables that belong to this catalog. Check with your user administrator if a catalog restriction is set in your SAP CC user profile. For further information, refer to the Setting Up a User section available in the Core Tool documentation.
Available Information
The following table contains the list of displayed information:
Element Description
Name The name of the range table
Catalog The name of the pricing catalog containing the range table
Class The range table class associated to the range table
Agreement ID The ID of the master agreement associated to this range table
Searching For Range Tables
To search for some range tables, enter you search criteria in the search field, and click the button. The content of the list is then updated accordingly.
CockpitCockpit PUBLIC 255
Note
● You can use the button to organize the content of the result table by:○ Sorting by range table names, class names, pricing catalogs, or agreement IDs (if any)○ Filtering by class names, pricing catalogs, or agreement IDs (if any)○ Grouping by class names, pricing catalogs, or agreement IDs (if any)
TipYou can use the button to reset your search criteria.
1.4.11.4.2 Viewing a Range Table
Data of a range table (versions, range set keys and ranges) are shown in three different views.
Master and Version View [page 256]
Range Set Key View [page 258]
Range View [page 259]
1.4.11.4.2.1 Master and Version View
The page used to display a given range table contains the following parts:
● A title bar● A header● A main content
Title Bar
The title bar displays the name of the range table and contains the different buttons related to the actions you can perform on this range table according to your profile:
● Edit, which you can use to modify the range table. For further information, refer to the Editing a Range Table [page 264] task.
● Delete, which you can use to delete the range table from the system. For further information, refer to the Deleting a Range Table [page 268] task.
● Copy, which gives the possibility to create a new range table by duplicating the current range table.
NoteIn addition to the action buttons, you also have the following buttons to change the layout. Click:
256 PUBLICCockpit
Cockpit

● to hide the left area of the screen and focus on the range table itself.● to quit the display of the range table and return to the search result list.
Header
The header, that can be collapsed or expanded according to your needs, contains the following information related to the range table:
● The name of the range table class that defines the data structure of the range table
Tip○ If you click on the name of the range table class, a quick view providing all the information about
the class is displayed (name, catalog, bounds...).○ In this quick view, clicking the name of the range table class opens this one in the dedicated
Manage Range Table Classes [page 237] app, in display mode.
● The name of the pricing catalog that contains the range table● The agreement ID, which is the identifier of the master agreement that the range table belongs to
(optional)● The business description of the range table (optional)
Main Content
The main part is split into two different tabs:
● Versions: The tab contains the list of versions for which the validity period is shown. An access to the
corresponding range sets is available thanks to the button.
Note○ No gap is possible between two periods (the system adjusts automatically the periods for this
purpose)○ The oldest period does not need a start date○ The newest period does not need an end date
In this tab, you can also use the Export button to export the range table including all its versions in an output CSV file. For further information, refer to the Exporting a Range Table [page 267] task.
By clicking on the button on the right end of a version, you access the next view concerning this version:○ Range Set Key view [page 258] if input columns have been declared in the class [page 237] of the range
table○ Range view [page 259] otherwise
● Additional Information, that contains the list of additional information associated to the range table.
CockpitCockpit PUBLIC 257

Additional Information Tab
In SAP Convergent Charging, additional information is a custom data (such as a particular reference, code or attribute) that:
● Has a name and a value whose type can be string, number or date/time● Characterizes a catalog element and defines custom information that is relevant for your business
requirements● Facilitates the search operations (in Core Tool, in SAP CRM, or in another interfaced system)● May be required by an interfaced system or application for further processing operations● Is not reused by SAP CC within its own business operations
NoteIn an integrated landscape, additional information is conditionally visible and reusable in the external systems that are integrated with SAP Convergent Charging 2020. In such situations, the external systems know how to reuse the configured additional information.
RememberAs SAP CC does not reuse the defined additional information within its own business operations, you cannot configure the service pricing by reusing this additional information. Design and set up the pricing logic by using some other mechanisms such as parameters or properties.
1.4.11.4.2.2 Range Set Key View
The screen is used to display the range set keys for a given version of a range table. It contains the following parts:
● A header● A filter bar● A main content
A range set key is a multivalue key that is composed of a value in each input column of your range table. This key is not unique as many lines in your range table can include this key.
By the way, this key uniquely identifies a subset of ranges [page 259] in your range table.
Header
The header displays:
● The breadcrumb of the range table version:○ It gives the possibility to navigate back to the Master and Version View [page 256] page.○ It provides the name of the version in which the range set keys are displayed as a title, in bold
characters.
258 PUBLICCockpit
Cockpit

● The class of the range table
Tip○ If you click on the name of the range table class, a quick view providing all the information about
the class is displayed (name, catalog, bounds, and so on...).○ In this quick view, clicking on the name of the range table class opens this one in the dedicated
Manage Range Table Classes [page 237] app, in display mode.
Filter Bar
The filter bar, that can be collapsed or expanded according to your needs, contains:
● A field for each input column declared in the class [page 237] of the range table, in which you can search
for a specific value from existing values in the range table. A button is available at the right end of each field to define conditions of filtering more precisely.
● An Adapt Filters button to manage the display of the filters● A Go button to trigger the filters
Main Content
The main content part is displayed as a configuration table whose column names are the names of the input columns already declared in the class [page 237] of the range table.
An Edit button is available to add input values for a range set key, modify existing ones and perform most of the actions related to the edition [page 260] of a range table.
1.4.11.4.2.3 Range View
The screen is used to display all the ranges of a range set key and contains the following parts:
● A header● A header content● A main content
Header
The header displays the breadcrumb of the ranges and gives the possibility to navigate back to the previous views.
CockpitCockpit PUBLIC 259

Header Content
The header content displays:
● The range table class
Tip○ If you click on the name of the range table class, a quick view providing all the information about
the class is displayed (name, catalog, bounds, and so on...)○ In this quick view, clicking on the name of the range table class opens this one in the dedicated
Manage Range Table Classes [page 237] app, in display mode
● The range set key whose ranges are displayed in the main content part.
Main Content
The main content part is displayed as a table where:
● The first column represents the ranges● The subsequent columns represent the output values for each range
An Edit button provides the possibility to add ranges, modify existing ones and most of the actions related to the edition [page 260] of a range table.
1.4.11.4.3 Creating a Range Table
RecommendationFor optimal performance, do not exceed the recommended maximum sizes explained in SAP Note 2478958 . Refer to the provided guidance.
From the master and version view of the app, Pricing Specialist can configure a new range table:
● By copying an existing range table, using the Copy button● From scratch, using the Create button
When clicking Copy on a displayed range table, a draft version of this copied range table is created, as a clone of the original. Only the name of this new range table differs, for uniqueness purpose.
When clicking Create, an empty range table is created, and you can use the recommendations below to fill the table. The newly created range table is recorded as a draft. This draft remains until you click the Save button, that definitively creates the range table in the system.
CautionIf you log out without saving your draft, the range table is not recorded in the system, but the draft is kept.
260 PUBLICCockpit
Cockpit

TipYou can click the button when editing the range table, in order to hide the left area of the screen and focus on the range table itself.
Header Tab
The following table contains the list of information you need to fill in in the Header tab:
Element Description and recommendations Type
Name The name of the range table, that must be unique among the list of existing range tables
M
Class The name of the range table class whose structure is used for this range table. This selection is mandatory to access the Versions tab.
M
Catalog The name of the pricing catalog this range table belongs to M
Agreement ID
The agreement ID this range table is associated to O
Description
A description of the purpose of this range table (2000 char. Maximum) O
M: Mandatory, O: Optional
Version Tab
For more information about the creation of the versions of a range table, refer to the dedicated topic [page 262].
Additional Information Tab
The Additional Information tab contains the list of additional information items associated to the range table. To define some new additional information in your range table, click the Add button and fill the elements according to the following recommendations:
Element Description and recommendations Type
Name The name of the additional information, that must be unique among the list of additional information associated to this range table
M
Type Select the relevant type for the additional information M
Value The value that corresponds to this additional information O
CockpitCockpit PUBLIC 261

Element Description and recommendations Type
Description
A description of this additional information M
M: Mandatory, O: Optional
NoteAdding additional information is not mandatory. It is still possible to add any additional information after the creation of the range table.
The modified range table is recorded as a draft. This draft remains until you click the Save button, that saves the range table in the system.
If you click the Cancel button, a popover message appears, inviting you to confirm your choice by clicking the Discard button. In this case, all changes in each view are discarded and the range table remains in its initial state.
1.4.11.4.3.1 Creating the Versions of a Range Table
The Versions tab contains the list of versions:
● In case of a single version, the name that appears in the Period column is "Unlimited". Otherwise, the date and time from which the period is valid is shown in the period column.
NoteNo gap is possible between two versions. The system prevents from this situation.
● The table includes an Editing Status column that reflects the current status of the version (New, Modified or In error)
● Each row of the table begins with a radio button to select a version
Five action buttons are available to manage the versions of a range table:
● Click the Import button to select a file that contains a range table with all its versions to be imported. For further information, refer to the Importing a Range Table [page 267] task.
● Click the Export button to export the current range table including all its versions in a CSV file. For further information, refer to the Exporting a Range Table [page 267] task.
● Click the Edit Period button to edit the period a selected version.● Click the Copy button to copy a selected version
RememberUsing the copy function also copies all the data of the version, including range set keys and ranges.
● Click the Add button to add an empty new version.
Once the versions you need are created, you access the next creation step by clicking the button on the right end of a version:
262 PUBLICCockpit
Cockpit

● Creating the Range Set Keys of a Range Table [page 263] if input columns have been declared in the class [page 237] of the range table
● Or Creating the Ranges of a Range Table [page 264] view [page 259] otherwise
1.4.11.4.3.2 Creating the Range Set Keys of a Range Table
The screen used to display range set keys of a given version of a range table. The screen contains the following parts:
● A header● A filter bar● A main content
Note● For further information about the header and the filter parts, refer to the relevant section [page 258].● In editing mode, the filter area is enhanced with an Editing Status field to refine the search.
Range Set Keys
The main content part is displayed as a table whose input columns are declared in the class [page 237] of the range table.
Click on the Edit button to manage range set keys.
NoteThe table includes an Editing Status column that reflects the current status of the range set keys (New, Modified or In error)
Three buttons, are available:
● Add to add a new empty range set key to set up.● Remove to remove a selected range set key.
NoteRemove works with multiple selection.
● Copy to copy a selected range set key.
NoteCopy is not available with multiple selection.
RememberUsing the copy function also copies all the data of the range set key, including the ranges.
CockpitCockpit PUBLIC 263
Once the range set keys are created, click on the button on the right end of a row to access the next creation step: Creating the Ranges of a Range Table [page 264].
1.4.11.4.3.3 Creating the Ranges of a Range Table
The screen is used to display the ranges of a given range set key. The screen contains the following parts:
● A header● A header content● A main content
NoteFor further information about the header and the header content parts, refer to the relevant section [page 259].
Ranges
The main content part is displayed as a table where:
● The first column represents the ranges● The subsequent columns represent the output values for each range
Click on the Edit button to manage ranges.
Three buttons are available:
● Copy to copy a selected range.
NoteCopy is not available with multiple selection
● Remove to remove a selected range.
NoteRemove works with multiple selection.
● Add to add a new empty range.
1.4.11.4.4 Editing a Range Table
When a range table is selected, click the Edit button located in the title bar to switch to the editing mode. This mode gives you the possibility to:
264 PUBLICCockpit
Cockpit

● Use the Import button to import a range table, with all its versions from a CSV file. For further information, refer to the Importing a Range Table [page 267] task.
● Use the Export button to export the selected range table, with all its versions in a CSV file. For further information, refer to the Exporting a Range Table [page 267] task.
● Edit the versions [page 265] of the range table.● Edit the additional information [page 265] of the range table.
Version Tab
For more information about the edition of the versions of a range table, refer to the dedicated topic [page 265].
Additional Information Tab
In editing mode, two buttons are available to manage additional information:
● Add to set up some new additional information● Remove to remove an additional information item
For further information about this tab, refer to the dedicated section [page 261].
The modified range table is recorded as a draft. This draft remains until you click the Save button, that saves the range table in the system.
If you click the Cancel button, a popover message appears, inviting you to confirm your choice by clicking the Discard button. In this case, all changes in each view are discarded and the range table remains in its initial state.
1.4.11.4.4.1 Editing the Versions of a Range Table
To edit the period of a version, select a version and click the Edit Period button. A dialog box appears:
● Start Date left area: select the radio-button:○ Date: to define a start date and time by clicking on the calendar icon○ Unlimited: if there is no start date○ Previously Defined: to select a previous entered date by choosing it in the dropdown list
● End Date right area: select the radio-button:○ Date: to define a end date and time by clicking on the calendar icon○ Unlimited: if there is no end date○ Previously Defined: to select a previous entered date by choosing it in the dropdown list
Click Apply to validate your choices or Cancel.
NoteFor a new version, the Apply button is replaced by the Add button
CockpitCockpit PUBLIC 265
The modified range table is recorded as a draft. This draft remains until you click the Save button, that saves the range table in the system.
RememberThe end date of a version is never included in the period. If an event occurs at this date, the following version will apply.
1.4.11.4.4.2 Editing the Range Set Keys of a Range Table
In editing mode, use the available buttons to manage the range set keys as described in the dedicated section [page 263].
The main task consists in filling in each field properly.
Once done, you can either:
● Click Apply to validate your changes and be redirected to the master and version view● Or click Cancel to ignore your changes. A popover message appears, inviting you to confirm your choice by
clicking the Discard button. In this case, all changes in all views are discarded and the range table remains in its initial state. You are redirected to the master and version view
● Or click at the right end of the row to edit the ranges of the selected range set key
RememberThe modified range table is recorded as a draft. This draft remains until you click the Save button in the master and version view, that saves the range table in the system.
1.4.11.4.4.3 Editing the Ranges of a Range Table
In editing mode, use the available buttons to manage the ranges as described in the dedicated section [page 264].
To edit ranges:
● Fill in the upper bound of each range.
Note○ Similarly to versions, no gap is possible between two ranges.○ The upper bound of the last range of an unbounded range table is not editable. It is always +∞.
● Fill in the ouput value fields, according to the type defined in the corresponding class of the range table (string or number).
Once done you can either:
266 PUBLICCockpit
Cockpit

● Click the Apply button to validate your changes and come back to the previous view● Or click Cancel to ignore your changes. A popover message appears, inviting you to confirm your choice by
clicking the Discard button. In this case, all changes in all views are discarded and the range table remains in its initial state. You are redirected to the master and version view.
RememberThe modified range table is recorded as a draft. This draft remains until you click the Save button in the master and version view, that saves the range table in the system.
1.4.11.4.5 Exporting a Range Table
In editing mode, click the Export button to open the Export to File dialog box.
This dialog box contains the following sections:
● File Format: you specify which separator to be used between each generated value● Date Format: you specify the format of a date● Number Format: you specify which separators to be used for decimals and thousands
Once you have configured all the relevant elements, click the Save button to start exporting the content of the range table.
The file will be downloaded according to your browser configuration and will be named:
<sanitized_name_of_the_range_table>_<now_date_time>.csv
Where:
● <sanitized_name_of_the_range_table> is the name of the range table (in which the invalid filename characters are removed)
● <now_date_time> is the date when you export the range table with the following format: YYYYMMddHHmmss
CautionThe export feature exports the current range table. If this range table contains errors, the generated file will also contain these errors. When such a situation occurs, the file will have to be manually fixed before being used for import purposes.
1.4.11.4.6 Importing a Range Table
In editing mode, you can use the import function to replace the content of a range table. To use it, click the Import button to open the Import From File dialog box, which contains the following sections:
● File, that gives the possibility to select the file containing the range table versions in CSV● File Format, that gives the possibility to specify:
CockpitCockpit PUBLIC 267

○ which separator is used in the file to separate the existing fields○ which mark is used in the field comment lines
● Number Format, that gives the possibility to specify which separator are used in the file for decimals and thousands
● Mapping, that gives the possibility to customize the association between the range table version column names and the column index
Once you have configured all the relevant elements, click the Import button to start importing the content of the selected file. The new versions replace the existing versions of the range table. If the import is successful, a draft version of the range table is displayed. The user can then save the draft or cancel it. In that last case, the range table is restored to in its initial state.
Note● One row of the file will be mapped to one and only one range table version range.● Optionally, one row can be interpreted as comment line if a comment line character is specified in the
import request and if the row starts with this character. Comment lines will be ignored.● The row must contain following values:
○ the version start date (this value is required but can be empty to define that the version is always effective. Otherwise the date must be formatted with the following ISO 8601 date format: YYYY-MM-ddThh:mm:ss)
○ each input field defined in the class [page 237] of the range table (these values can be empty if the class does not define any input fields)
○ the upper bound of the range (this value is required but can be empty for an unbounded range)○ each output field defined in the class of the range table (string or number values)
● String values can have up to 256 characters.● Number values can have up to 28 digits including 6 decimal places. The decimal separator can be dot ‘.’
or coma ‘.’. The integer part of the number can contain separators for thousand. In that case digits must be grouped by 3.
● The order of the values is free. You can define the right mapping in the "mapping" section.
1.4.11.4.7 Deleting a Range Table
When a range table is selected, you can click the Delete button located in the title bar to remove it from the system.
When clicking on Delete, a dialog box appears to allow you to confirm your choice.
1.4.11.5 FAQs and Tips
Based on SAP user feedbacks, we deliver Frequently Asked Questions (FAQs) about all aspects of working with the Cockpit application and its apps efficiently. In addition, we complete these solutions with some best time-saving and task-completion tips and tricks.
268 PUBLICCockpit
Cockpit

RememberPlease share your SAP user experience to enrich these sections in the SAP user assistance and product documentation for SAP Convergent Charging 2020.
Frequently Asked Questions (FAQs) [page 269]
Tips and Tricks [page 270]
1.4.11.5.1 Frequently Asked Questions (FAQs)
What corresponds to the number displayed in the app tile?
The tile for your Manage Range Tables app indicates the total number of range tables that are currently released in SAP Convergent Charging 2020. If your user profile is assigned to a single pricing catalog (catalog restriction), this number counts the released range tables for this catalog.
NoteThis number does not take drafts into consideration.
Searching for range tables does not return the expected results.
For a better user experience, the search mechanism is case-insensitive, which may return more elements that expected. In case less results than expected are returned, please note that a synchronization mechanism exists between the Cockpit application and the Core Server system. In case a user created a range table in parallel (for example using the Core Tool user interface), it might be necessary to click the button to refresh the list and get these elements.
Can someone view my draft range tables?
No. Only you can access and display your drafts, until they are released. These interim versions are personal and available with your user session.
NoteIf you open multiple user sessions on different web browsers or computers, the drafts differ.
Why can’t I copy a draft range table?
The copy mechanism is only possible for released range tables.
Is it mandatory to click on the Edit button in each view to edit or create a range table?
No. Once enabled, the editing mode is available for each view until you click on the Save or the Cancel button in the Master and Version View.
CockpitCockpit PUBLIC 269

1.4.11.5.2 Tips and Tricks
How to access a range table quickly?
Just use the browser bookmarks to access a given range table directly. You can copy and share a bookmark, taking into account the associated privileges that may be required to access this range table.
How to delete a version?
Just create a new version whose period can overwrite the existing one.
CautionIf the period overwrites all the available versions, this new edited version will be the only existing one.
How to facilitate your tasks?
Just use the rich functions of your app and UI5 technology. Use the copy and the import-data-from-file functions to create a range table quickly.
1.4.11.6 Troubleshooting
As part of the technical operations, you may have to troubleshoot some problems when using this app or working with your SAP CC environment (systems, data, users) in your SAP system landscape. Please find afterwards a list of possible symptoms and related solutions that you can try to implement by yourself.
I can not save my range table.
To save a range table, the following criteria must be fulfilled:
● This range table must be associated to a catalog● This range table must have a name● A range table class must be associated to this range table, and according to this class:
○ An upper bound must exist if the class is bounded○ Input values must be entered if the class has input columns
● Output values must be specified
"Error message: 'No matching range tables to display'."
270 PUBLICCockpit
Cockpit

This error message means that the Manage Range Tables app cannot display the requested range table. This situation may be due to:
● A parallel deletion of this range table by another individual user or service user (CRM26 application, provisioning system). Try to click the button to refresh the list of range table and check whether it still exists, or not. In case your range table is still present, ask your system administrator to audit the user operations
● Insufficient privileges associated to your user profile, or a catalog restriction. Contact your user administrator to verify your user profile (credentials, lock status, password expiration, assigned roles, pricing catalog restriction)
● An incorrect bookmark or link. Try to use the search mechanism to retrieve your range table. In case you find your range table, update your bookmark and share the changes with your team
● Other technical issues. Contact your local support team or the SAP Support Team
1.4.12 Manage SAP CC System Parameters
With the app Manage SAP CC System Parameters, you can search for and view some system parameter values that are defined in a running SAP CC Core Server system. You quickly and efficiently inspect and change the persistent values and the runtime values.
What's New? [page 271]
About This App [page 272]
Important Concepts [page 272]
Tasks [page 273]
FAQs and Tips [page 282]
Troubleshooting [page 283]
1.4.12.1 What's New?
This section highlights the main changes in the Manage SAP CC System Parameters app that both relate to new or changed features.
What Was New in SAP CC 5.0
Please, see https://help.sap.com/viewer/c7120011d1c244168dc1f945a06f1350/5.0.latest/en-US/b28a1fdd7ce2414fbd25b0d8b8c5b819.html.
26 Customer Relationship Management
CockpitCockpit PUBLIC 271

1.4.12.2 About This App
Target Audience
The Manage SAP CC System Parameters app is intended for the following audiences:
● Application and System Administrators● Operations Team Expert● IT Consultant/Implementer● Project Team Member (Implementation, Integration)● Support Specialist (SAP SE, Local Support Team)
App Summary
The Manage SAP CC System Parameters app provides you with the following capabilities:
● Display and inspect [page 273] all the system parameters with their current values (runtime, persistent, initial) in the connected Core Server system
● Filter or search [page 275] for some particular parameters, system instances, and other criteria● Change [page 277] some system parameter values quickly and efficiently● Change multiple parameter values at the same time● Export [page 278] parameter values to files● Prepare [page 279] and import [page 281] custom files (CSV27, XML28)
1.4.12.3 Important Concepts
As an SAP CC administrator, you are aware of the following concepts to use the app Manage SAP CC System Parameters in your SAP system landscape:
● The technical operations to administer the Core Server systems that are running in your SAP system landscapes
● The architecture of the multihost and multiinstance systems of Manage SAP CC System Parameters● The system configuration settings based on system parameters and based on advanced configuration
structures such as the CIF29 configuration
27 Comma Separated Value28 eXtended Markup Language29 Charging output Integration Framework
272 PUBLICCockpit
Cockpit

Files and Formats
The Manage SAP CC System Parameters app handles two file formats: CSV and XML, both using the UTF-8 encoding to support many languages (Exporting Values to a File [page 278]).
XML FormatThe app supports the XML files of Config Tool. Refer to the XML Files of Config Tool section in the primary help of Config Tool.
CSV FormatThe file format is CSV (comma separated values), that respects the following rules.
● This file contains the parameter definitions.● Each line corresponds to a record.● The file has a table-structured format:
○ The first uncommented line defines this structure.○ The next uncommented lines define the values of each system parameter. Some of these lines contain
the persistent values of a parameter, other lines contain the runtime and initial values for each instance of the Core Server system.
1.4.12.4 Tasks
With the app Manage SAP CC System Parameters, you can complete the following administrative tasks:
● Viewing Parameter Values [page 273]● Filtering Parameter Values [page 275]● Configuring Parameter Values [page 277]● Exporting Values to a File [page 278]● Preparing Custom Files [page 279]● Importing Values from a File [page 281]
1.4.12.4.1 Viewing Parameter Values
Viewing
1. Launch [page 20] the web application in your browser depending on your local environment. 2. In Cockpit, open the app Manage SAP CC System Parameters by clicking the tile.3. Wait a few seconds. By default, the app displays all the system parameter values defined in the running
Core Server system.
CockpitCockpit PUBLIC 273

4. Filter [page 275] the displayed results to focus on particular parameter values.5. View or inspect the system parameters.
NoteYou can export [page 278] some parameter values to a CSV or XML file. The file is either a report when auditing the system or the basis for a custom file to import later [page 281].
6. Refresh your browser to display the latest values in real time.7. When you need to configure your system manually, change the values (persistent or runtime) of the
system parameters (see System Parameter Reference).8. If the app cannot display some parameter values, see the section Troubleshooting [page 283].
Workspace
On your screen, the main area of the app is a parameter table that includes all the known parameter values (persistent, runtime, initial).
The graphical view is a 3-level tree:
● The first level represents a parameter.● The second level represents information available for a particular type of system instances.● The last level represents information available for a specific instance in the Core Server system.
TipTop of the table, you can use the action buttons (Parameters, Instance Types, and Instance IDs) to collapse
or expand the parameter information tree. Click to select the columns displayed in the parameter table.
In SAP Convergent Charging, the system parameters (System Parameter Reference->All System Parameters) have multiple values:
VALUES OF SYSTEM PARAMETERS DEFINITION
Persistent Value A persistent value is the value of a system parameter that is used by each system instance when it restarts.
The persistent value of a system parameter is recorded in the back-end database. A single value is defined for all the instances of the same type in the Core Server system.
Runtime Value A runtime value is the current value of a system parameter in a running instance of the Core Server system.
The runtime value may differ from the persistent value.
Initial Value An initial value is the parameter value used at startup time by an instance in the Core Server system.
274 PUBLICCockpit
Cockpit

1.4.12.4.2 Filtering Parameter Values
To facilitate your operations, the app allows you to set up some filters during your working session:
● Parameter names or key words (tokens)● Types of system instances● Instance IDs● Names of parameter groups or key words● Editing status of each parameter value
Your app Manage SAP CC System Parameters uses these filter definitions when you view, configure, or export some system parameters.
Procedure
To filter some parameter values:
In the user interface, you define your custom filters and click GO to apply the filtering. The app completes your inputs automatically. If you defined inconsistent filters, the parameter table is empty.
FILTER USE
Parameters To filter numerous parameter values:
● Enter a parameter name or a token in the multi-input field. The app suggests some parameter names.
● Or use the graphical component to define your custom filter.
Click to define some filtering items or conditions carefully. Enrich your user experience by learning how the app defines tokens when you set up filter conditions.
Example:
ENTER... TO...
the token *enabled display the system parameters that end with the key word 'enabled'.
the token *enabled* display the system parameters that contain the key word 'enabled'.
In the Select from List tab, enter your key words. The user interface takes into account the parameter definitions to enhance your research capabilities.
CockpitCockpit PUBLIC 275

FILTER USE
Instance types Select the types of the system instances you want to show the parameter values (persistent, runtime, initial):
● bulkloader● dispatcher● guider● rater● taxer● updater
Your type list depends on the current configuration of the running Core Server system.
Instance identifiers Select some particular instances in the Core Server system directly.
The list depends on the current configuration of the system. For example, you can select dispacther#1 and dispatcher#2.
Groups In the multi-input field:
● Enter a group name, the beginning of a group name, or a token.
● Click to define some filtering items carefully. Enrich your user experience by learning how the app defines tokens when you set up filter conditions.Example:
ENTER... TO...
the token *security* display only the system parameters that relate to the security management in SAP CC
the two tokens *security* and *log*
display only the system parameters that relate to the following configura-tion settings:○ security manage
ment○ logging and tracing
functions
See also: the parameter groups (System Parameter Reference) defined in SAP Convergent Charging 2020.
Editing status Select or type the Modified status if you want to highlight the parameter changes before to save.
TipClick GO to apply the filters to the displayed parameter table.
276 PUBLICCockpit
Cockpit

If you quit the app, the filter definitions are lost.
1.4.12.4.3 Configuring Parameter Values
To configure your system, you can:
● Change few parameter values manually.● Import a configuration from a custom file.
Procedure
To change values manually:
In the app Manage SAP CC System Parameters:
● Click Edit to activate the edition mode to change the values (persistent, runtime) of the available system parameters (System Parameter Reference->All System Parameters).
● Filter some parameter values to focus on the relevant parameters.● Use the interface to change the parameter values:
○ Persistent values: a persistent value is defined for all the system instances of same type (such as rater instances or dispatcher instances).
○ Runtime values: a runtime value is the current value of a system parameter in a particular running instance in the Core Server system. The runtime value may differ from the persistent value. You can change immediately and temporarily a predefined subset of system parameters (System Parameter Reference->Immediate Changes) because the Core Server system does not support this feature.
● Finally, click Save to request the Core Server system to take the parameter changes into account:○ All modified persistent values○ All modified runtime values
The app summarizes the changes before it sends your relating operation requests to the Core Server system. In case of errors signaled by the Core Server system, an error message explains the issue and how to solve it. See the Troubleshooting [page 283] section.
NoteIt can result in partially saved parameters and thus incoherent system state. Finalize your administrative operation by fixing the signaled errors manually and save the changes again.
As the app saves the values sequentially to the Core Server system, the save action could lead to invalid constraint errors, which are no more accurate because the related parameter may already have been modified.
In this case you may directly retry to save the remaining parameters to complete your task.
See also : System Parameter Reference
CockpitCockpit PUBLIC 277

1.4.12.4.4 Exporting Values to a File
For security reason, the app does not export any password such as SLD_PASSWORD.
Procedure
To export some parameter values to a file:
In the app Manage SAP CC System Parameters:
● Filter [page 275] some parameter values to focus on the parameters that you want to export and download.
● Click Save to File and select your file format and its content:○ Persistent values of all parameters (CSV file)○ All values (CSV file)○ XML file for Config Tool (sublist of persistent values)
Your app manages two types of text files. The character encoding is UTF-8 to support many languages.
Depending on your needs, you determine the appropriate file type and format by verifying the following detailed information about the file content, file use, and detailed file formats:
FILE TYPE FILE FORMAT CONTENT USE COMPATIBILITY
CSV (Comma Separated Values)
CSV File Format (System Parameter Values)
● All parameter values (persistent, runtime, and initial)
● Or only persistent values
The file includes parameter values that relate to CIF and RIF configuration settings such as the POSTPAID_CIT_WRITER_CHANNEL_COUNT parameter.
Use your file to:
● Create a report that you can final-ize with spreadsheet applications
● prepare a custom file [page 279] to import later
● Any text editors● Any spreadsheet
applications
278 PUBLICCockpit
Cockpit

FILE TYPE FILE FORMAT CONTENT USE COMPATIBILITY
XML (Extensible Markup Language)
Refer to the XML Files section in the primary help of Config Tool
● Limited list of persistent values
To be consistent with Config Tool, the app does not export the following parameter values to an XML file. They are incompatible parameters such as:
● SYSTEM_ID● HTTP_SERVER_H
OST● POST
PAID_CIT_WRITER_CHANNEL_COUNT
They correspond to parameters that:
● Are not modifiable by an SAP CC system administrator
● Or relate to CIF and RIF configura-tion settings
Use your file to prepare a custom file to import with the SAP CC Config Tool user interface when the Core Server system is not started.
Do not use this file as a report because it does not include all the parameter values.
● SAP CC Config Tool user interface
● Any XML editors
● Click Download.The app starts exporting and storing the information to a new file. By default, the file name contains the SID of the Core Server system and the export date and time (YYYYMMDDHHMMSS).Depending on your local environment (web browser, user settings, and operating system) the CSV or XML file is in the download folder for example.
● Complete your task:○ Use this file as a report when inspecting or auditing the Core Server system○ Or prepare some custom files [page 279] to import by changing some parameter values and deleting
some entries that are not relevant for your administrative operations.● Store or send the file.
1.4.12.4.5 Preparing Custom Files
To configure a system quickly, you can create a custom file that includes the persistent values of some SAP CC system parameters that are relevant for your administrative operation.
ExampleExample 1
CockpitCockpit PUBLIC 279

You create two custom files to switch your Core Server system to a debug mode or to a normal mode.
Example 2
You create two custom files to fine-tune the SQLHELPER_CONNECTION_COUNT (see System Parameter Reference) system parameter and associated parameters that have the same constraint. The first file contains the values before your technical operations. You can use the first file as a backup file. You create a second file that contains a set of values that you want to apply to the runnning system to test the performance and processing. You modify the file regularly during the tuning activity.
Procedure
To prepare a custom file:
1. Initiate the file by exporting [page 278] some expected persistent values to a CSV or XML file. The file structure is correct.
2. Customize your text file by editing it to change some values, remove some entries, and adapt the file content to your needs.You edit the custom file in a text editor, XML editor, or another application.
NoteThe spreadsheet applications may change the format of your CSV file. We recommend that you use a text editor to avoid such potential modifications.
When you edit a CSV file in your spreadsheet application:○ First launch your application. Then open the file from the File menu. In the text import assistant,
select the options "Delimited" and "Unicode (UTF-8)". Set up the delimiter to Comma uniquely.○ Always save your file as Unicode UTF-8.
Consult the product documentation to know the best procedures to work with CSV files.
3. When editing a CSV file:○ You write multiple lines to redefine a system parameter and its persistent values. A line corresponds to
a parameter persistent value for a particular type of system instance.○ You clean your custom file by deleting all the lines that correspond to parameter values about the CIF
and RIF configuration settings such as the POSTPAID_CIT_WRITER_CHANNEL_COUNT parameter (see System Parameter Reference). Otherwise, if your try to import your file, the app signals an error and ignores each parameter value.
4. Save and close your file.5. Test your custom file by importing the system parameters.6. Depending on your needs, store or send the file.
Now, an SAP CC administrator can import the persistent values [page 281] to configure the SAP CC system parameters of a running Core Server system.
NoteThe export contains only the parameter values available in your app. not all the parameters available in the related Core Server system. If you have setup a Bulk Loader or a Taxer but this instance is not actually
280 PUBLICCockpit
Cockpit

started then the Cockpit and thus the export may not contains such instances. If you need to export the full Core Server parameters then please start these instances or consider using the Config Tool application.
1.4.12.4.6 Importing Values from a File
To configure a system quickly, you can import the persistent values of some system parameters. You upload a custom file, review the parameter modifications, and save them to the Core Server system.
With this app, you cannot load parameters that are defined in system configuration structures (XML) such as the notification policy, the CIF, or the RIF. Modify these parameters later in your app or use the SAP CC Setup Tool user interface.
Procedure
To import some parameter values from a file:
NoteSome parameter values shall not be changed in a productive system. For example, a tuning parameter that depends on a particular host memory.
Before importing parameters from another system, you must carefully validate the parameter subset and their values before importing and propagating their values. Refer to the SAP CC 2020 System Parameter Reference to know if the parameter value could be modified safely.
1. Prepare [page 279] the CSV or XML file to import.2. Launch [page 20] the web application in your browser.3. In Cockpit, open the app Manage SAP CC System Parameters. Wait a few seconds.4. By default, the app displays all the parameter values that are defined in the running Core Server system.
1. 1. In the app, click Load from File.2. Select the expected file in your environment. By default, the file names start with the SID of your Core
ServerCore Server system.3. The app can propagate some modified persistent values in order to redefine the corresponding
runtime values. Select this option when you need that your app detects valid changes of persistent values and changes the runtime values when they differ from automatically.View the candidate parameters in the Immediate Changes section of SAP CC 2020 System Parameter Reference.
4. Click Load.The app verifies the file content. It may warn you about some issues and ask you to continue or cancel the action.Note that the app ignores:○ The unknown parameters or wrongly named○ The invalid parameters
The app does not load the corresponding parameter values that are defined in your custom file. Make sure that you agree with this behavior or contact the file owner.
CockpitCockpit PUBLIC 281

5. Confirm the ignored parameter redefinitions.6. If the app cannot load your file, see the section Troubleshooting [page 283].7. The user interface activates the edition mode and displays the loaded parameter values.
2. 1. Review the system parameters and decide if you are ready to apply the changes. You can set up your filters [page 275] to display the modified values only.
2. Change the values [page 277] manually when needed.3. Finally, click Save to request the Core Server system to consider the parameter changes:
○ All modified persistent values○ All modified runtime values
The app summarizes the changes before it sends your relating operation requests to the Core Server system. In case of errors signaled by the Core Server system, an error message explains the issue and how to solve it. See the Troubleshooting [page 283] section.
NoteIt can result in partially saved parameters and thus incoherent system state. Finalize your administrative operation by fixing the signaled errors manually and save the changes again.
As the app saves the values sequentially to the Core Server system, the save action could lead to invalid constraint errors, which are no more accurate because the related parameter may already have been modified.
In this case you may directly retry to save the remaining parameters to complete your task.
1.4.12.5 FAQs and Tips
Based on SAP user feedbacks, we deliver Frequently Asked Questions (FAQs) about all aspects of working with the Cockpit application and its apps efficiently. In addition, we complete these solutions with some best time-saving and task-completion tips and tricks.
RememberPlease share your SAP user experience to enrich these sections in the SAP user assistance and product documentation for SAP Convergent Charging 2020.
Frequently Asked Questions (FAQs) [page 283]
Tips and Tricks [page 283]
282 PUBLICCockpit
Cockpit
1.4.12.5.1 Frequently Asked Questions (FAQs)
What corresponds to the number displayed in the app tile?
The tile for your Manage SAP CC System Parameters app indicates the total number of parameter values (persistent, runtime) that are displayed in the parameter table. This number depends on the filters currently defined by the power user.
Can I keep my filters between two working sessions?
No. The Manage SAP CC System Parameters app does not remember your filter settings.
1.4.12.5.2 Tips and Tricks
How to enter tokens to define custom filters?
You can enrich your user experience by learning how the Manage SAP CC System Parameters app defines tokens
when you set up some filter conditions. When you defined a token, just click the button to view and change it with the assistant.
How to view a subset of parameters quickly?
If you have a defined list of parameters to work with, you can execute the following procedure:
● Put this multi-line list in your text editor● Keep the expected parameter names● Remove empty lines (when exists)● Copy this selection in the clipboard● Paste [page 275] this content in the input field in order to define the parameter filter● Press Enter
1.4.12.6 Troubleshooting
As part of the technical operations, you may have to troubleshoot some problems when using this app or working with your SAP CC environment (systems, data, users) in your SAP system landscape. Please find afterwards a list of possible symptoms and related solutions that you can try to implement by yourself.
The Manage SAP CC System Parameters app does not display any information about your bulkloader and taxer instances in the Core Server system that you operate with.
This rare situation only occurs when you never started one of these instances of the SAP CC system. When such a situation occurs, SAP SE recommends that you try to start an instance of each type in order to solve the problem. Refresh the browser and ensure that you have some new rows in the parameters table.
CockpitCockpit PUBLIC 283

Error message when loading persistent values from an XML file: 'Sorry, your file is empty or contains useless data. Please verify your file or select another one.'
This error message means that the Manage SAP CC System Parameters app considers that the custom file is empty or contains parameter configurations that cannot be understood. When such a situation occurs, SAP SE recommends that you, as a system administrator, verify in this custom XML file that the clusterConfig element is present and has a correct syntax.
Error message when loading persistent values from an XML file: 'To load this XML, it must be valid. Verify the XML elements and attributes in the file and retry.'
This error message means that the Manage SAP CC System Parameters app considers that the custom file does not comply with XML standards. When such a situation occurs, SAP SE recommends that you, as a system administrator, try the following suggestions:
● Verify that two clusterConfig elements are present in the XML file, at the beginning and at the end of the file
● Use an XML editor in order to verify why the file is not considered as a valid XML file
Error message when loading persistent values from an XML file: 'Set up a name of an existing parameter.'
This error message means that the Manage SAP CC System Parameters app does not know the name of the system parameter. When such a situation occurs, SAP SE recommends that you, as a system administrator, try the following suggestions:
● Verify the parameter name● Verify the spelling● Verify that the versions of the Cockpit user interface and Core Server systems have the same version exactly.
Different versions may introduce or remove a system parameter.
NoteFrom the top-right menu in Cockpit, select the About submenu to display the versions of both Cockpit and the Core Server system. To know the version of your Core Server system, you can use Admin+ to get the value of the VERSION indicator.
Error message when loading persistent values from an XML file: 'Set up a valid instance type that is a technical key.'
This error message means that the Manage SAP CC System Parameters app does not know the name of the instance type. It expects a technical name such as rater or bulkLoader.
NoteRater ('R' uppercase) or bulkloader ('l' lowercase) values are not correct.
When such a situation occurs, SAP SE recommends that you, as a system administrator, try the following suggestions:
● Verify the instance type, specified as:○ A column in a CSV file○ An attribute of the instanceConfiguration elements in an XML file
● Verify the spelling
284 PUBLICCockpit
Cockpit

Error message when loading persistent values from an XML file: 'You can't load a value for an undetected instance type.'
This error message means that you tried to load and import some persistent values that are defined for a particular instance type of the running Core Server system, but your Manage SAP CC System Parameters app did never detect such running instances. When such a situation occurs, SAP SE recommends that you, as a system administrator, try the following suggestions:
● Verify within the instance map that the Core Server system contains the mentioned instance type● Verify the reason why your Manage SAP CC System Parameters app cannot detect the mentioned instances
(instance not started, communication issues, and so on)● Verify if the custom file is correct and does not include any parameter modification for this mentioned type of
instance
1.4.13 Process a Chargeable Item
With transactional app Process a Chargeable Item you manually process a chargeable item with the system. As a pricing specialist, you can also simulate the processing to check the correctness of the chargeable item data and therefore validate the complete pricing configuration for your service or product.
In SAP Convergent Charging, a chargeable item is the input data for the rating process of consumption events to be charged. Usually, it represents a consumption of a service by an end customer like a phone call for instance.
The structure of a chargeable item is based on a chargeable item class [page 70] which contains a list of properties required for rating purposes.
What's New? [page 285]
About This App [page 286]
Important Concepts [page 287]
Tasks [page 288]
FAQs and Tips [page 293]
Troubleshooting [page 294]
1.4.13.1 What's New?
This section highlights the main changes in the app Process a Chargeable Item that relate to new or changed features.
What's New in SAP CC 2021
As of SAP CC 2021, the app Process a Chargeable Item provides you with the following new features:
CockpitCockpit PUBLIC 285

What's New in SAP CC 2020 FPS 2
As of SAP CC 2020 FPS 2, the app Process a Chargeable Item provides you with the following new features:
● Automatic synchronization of the pricing catalogs in all the rater and bulkloader instances in the connected SAP CC system when rating a chargeable item of simulating the operation
● Ability to load billable items and their corresponding consumption items immediately when rating a chargeable item
What Was New in SAP CC 5.0
Please, see https://help.sap.com/viewer/c7120011d1c244168dc1f945a06f1350/5.0.latest/en-US/b28a1fdd7ce2414fbd25b0d8b8c5b819.html.
1.4.13.2 About This App
Target Audience
The app Process a Chargeable Item is intended for the pricing specialists of SAP Convergent Charging.
App Summary
The app Process a Chargeable Item provides you with the following capabilities:
● Editing and processing a chargeable item and navigate to the chargeable item class that defines its structure
● Analyzing the result of the processing of a chargeable item● Saving or loading a chargeable item to or from a file
App Layout
The layout of the app Process a Chargeable Item is made up with two main areas:
● An upper area, which allows you to edit the necessary input data for the processing of the chargeable item. For further details about the available information, refer to the Editing and Processing a Chargeable Item [page 289] task.
● A lower area, which provides you with the result of the processing of the chargeable item. For further information about this area, refer to the Analyzing the Processing Result [page 291] task.
286 PUBLICCockpit
Cockpit

In addition to these areas, a header, containing the name of the system the app is connected to, and a footer toolbar provide different buttons related to the actions you can perform:
● For further information about the header buttons, refer to the Loading a Chargeable Item from a File [page 293] and Saving a Chargeable Item to a File [page 293] tasks.
● For further information about the footer toolbar buttons, refer to the Editing and Processing a Chargeable Item [page 289] and Analyzing the Processing Result [page 291] tasks.
1.4.13.3 Important Concepts
As a pricing specialist for SAP Convergent Charging, you are aware of the following concepts to use the Process a Chargeable Item app.
Rating Process
The rating process triggers the charges of a rate plan subscribed in a provider contract:
● For one-time and recurring charges, the rating process triggers scheduled fees of a provider contract● For usage charges, the rating process considers chargeable items as input data (which represent the use
of a product or a service consumption) and triggers related usage fees
The rating process generates charged items as output data (which can then be loaded into SAP Convergent Invoicing as billable items in an integrated SAP Solution scenario).
Rate Plans
A rate plan allows the implementation of pricing models like subscription- and usage-based pricing.
It specifies how to charge an end customer for the use of a product or the consumption of a service.
A set of charges composes a rate plan. These charges can be:
● A one-time charge which computes fees each time contract lifecycle events occur
● A recurring charge which computes regular fees based on a period
● A usage charge which computes fees based on the use of a product or a service consumption by the end customer
Rate plans from pricing catalogs are exposed to the SOM (Subscription Order Management) application or provisioning system in the form of rate plans that the system combines into commercial products and offers.
CockpitCockpit PUBLIC 287

When ordering a product, end customers automatically subscribe to rate plans as part of the contract creation process. Each contract item refers to such a rate plan that is included in the pricing catalog for the service or product.
Chargeable Items and Classes
A chargeable item is associated to a chargeable item class that defines the characteristics (i.e. properties) of each consumption event used by rate plans.
See Manage Chargeable Item Classes [page 70].
For further information about chargeable items, refer to the Chargeable Item section of the SAP CC 2020 Application Help documentation.
Charged Items and Classes
A charged item is associated to a charged item class that defines the characteristics (i.e. properties) of data generated by the system as resulting outputs.
See Manage Charged Item Classes [page 79].
For further information about charged items, refer to the Charged Item section of the SAP CC 2020 Application Help documentation.
1.4.13.4 Tasks
With the app Process a Chargeable Item, you complete the following tasks:
● Editing and Processing a Chargeable Item [page 289]● Analyzing the Processing Result [page 291]● Saving a Chargeable Item to a File [page 293]● Loading a Chargeable Item from a File [page 293]
NoteAs a prerequisite, a pricing catalog must exist to run a rating process. This catalog must include the expected chargeable item classes, otherwise, you must define them first.
See also: Viewing a Chargeable Item Class [page 74]
288 PUBLICCockpit
Cockpit

1.4.13.4.1 Editing and Processing a Chargeable Item
Context
As an SAP CC pricing specialist, you want to:
● Charge an end customer (and belonging provider contract) manually (in a production system) for the use/consumption of a service or product.
● Test and validate the behavior of a rate plan (during the implementation phase or during the maintenance phase) by charging a dummy end customer.
● Demonstrate the capabilities of SAP Convergent Charging by charging a dummy end customer for a dummy service/product use.
Edit a Chargeable Item
Before processing a chargeable item, you must edit it in the upper main area.
In the header, the name of the current system is displayed and two action buttons Load from File [page 293] and Save to File [page 293] are available.
NoteIf a previous chargeable item has been saved to a file, you can use the Load from a File button in the header instead of editing a new one.
For more information about this action, refer to the Loading a Chargeable Item from a File [page 293] task.
This section is divided into two subsections: Default Properties and Custom Properties.
Default PropertiesProvide common information of chargeable items used for rating purposes. All chargeable item classes contain the same default properties:
● Service ID: Define the identifier of the chargeable service (or product) consumed by the end customer. Type the identifier of the related service.
● User ID: Define the technical identifier of the end customer consuming the service (or using a product). Type the identifier of the related end customer.
● Consumption Date: Define the date and time when the service is consumed by the end customer. Select the related date and time in the dialog box by clicking the calendar icon.
Custom PropertiesProvide additional information usually specific to the consumed service.
● Chargeable Item Class: Select the related chargeable item class in the dropdown list by clicking the button at the right end of the field.
CockpitCockpit PUBLIC 289

NoteOnce the chargeable item class is provided, a clickable link appears under its field. This link allows you to open a quick view displaying information about this chargeable item class, and a shortcut to open it in its dedicated application [page 70], in display mode.
● Catalog: Select the related pricing catalog in the list by clicking the button at the right end of the field.
Remember○ If the chargeable item class is already provided, this field is automatically filled in.○ If you are assigned to only one pricing catalog, this field is automatically filled in.
● Properties: This table shows the custom properties declared in the chargeable item class. Fill in the Value fields properly.
NoteThe string type properties are limited to 2,000 characters maximum.
Process a Chargeable Item
Once all the necessary information provided, click one of the two buttons on the right end of the footer toolbar:
● Simulate: Executes the rating process in simulated mode to make an estimate and check the correctness of the chargeable item data. All the changes are canceled at the end of process (like counter updates for example) and no charged items are generated.
● Execute: Executes the rating process in real mode.
TipIf you change your mind after clicking the Execute button, click anywhere else from the confirmation popover message to cancel the execution.
In an integrated SAP Solution scenario, the manual rating can be combined with an immediate loading into SAP Convergent Invoicing for immediate billing purpose. This feature must be implemented in your SAP system landscape. Refer to the integration guides. See Enabling the Billable Items Immediate Loading Feature in the App Process a Chargeable Item.
In order to make sure that catalog data used for the rating process is up-to-date in rating instances of SAP Convergent Charging, the app forces the synchronization of pricing catalogs. Your administrator can disable this default behavior when needed.
The result of the processing displays in the lower main area of the app. For further information about how to analyze the result of the processing, refer to the Analyzing the Processing Result [page 291] task.
RememberLogs for these charging operations are not auditable.
290 PUBLICCockpit
Cockpit

1.4.13.4.2 Analyzing the Processing Result
Processing Result
This section is divided into 3 subsections: Provider Contract, Charged Items and Notifications.
Provider ContractThis subsection provides general information about the provider contract involved in the processing:
● Subscriber Account ID: displays the ID of the subscriber account associated to the impacted provider contract
● Provider Contract ID: displays the ID of the provider contract retrieved from the Service ID and User ID data● Provider Contract Item External ID: displays the ID of the provider contract item used for integration
purposes
Charged ItemsIn this subsection, a table provides a summary of the charged items generated during the processing. The number of charged items depends on the rate plan.
● Key: displays the index of the charged item in the result list● Class: displays the name of the class of the generated charged item● Account ID: displays the name of the external or prepaid account determined by the rate plan● Operation Type: displays the type of operation applied to the account (debit or credit)● Amount: displays the amount calculated by the rate plan
By clicking at the right end of the row, you access the detailed charged item page [page 292].
NotificationsIn this subsection, a table provides a summary of the notifications generated during the processing (User Alert or a No Access). The number of notifications depends on the rate plan.
● Key: displays the index of the notification in the result list● Type: displays if the notification is a User Alert or a No Access● Name: displays the name of the notification in the rate plan● Message: displays the text message of the notification
By clicking at the right end of the row, you access the detailed notification page [page 292].
Note
● In the footer toolbar, a summary button shows the number of executions of the rating process. If you click on this button, you access to the list of executions whether they are simulation or real ones. Each execution failure is clickable to see the details.
● The number of displayed properties is limited to 100 by default. If the number of generated properties exceeds this limit, click on the More button.
CockpitCockpit PUBLIC 291

● The number of displayed charged items and notifications is limited to 20 by default. If the number of generated charged items exceeds this limit, click on the More button.
Charged Item Page
The header displays:
● the name of the current charged item● the summary of the current charged item as shown in the table on the main page (Class, Account,
Operation Type and Amount)
Tip○ If you click on the name of the charged item class, a quick view providing all the information about
the class displays (name, catalog...)○ In this quick view, clicking on the name of the charged item class opens it in the dedicated Manage
Charged Item Classes [page 79] app, in display mode
This page is divided into 3 sections: Properties, Related Charged Items and Notifications.
● Properties: displays the table of the properties generated by the rate plan, according to the class of the charged item
● Related Charged Items: displays○ the name of the Parent charged item, if applicable ((empty) if the current charged item has no parent)
TipIf you click on the name of the parent charged item, you are automatically redirected to its page.
○ the list of the Children charged items● Notification: displays the notifications related to this charged item
Notification Page
The header displays the name and the text message of the current notification. This page contains:
● A table named Properties which summarizes the list of the properties generated by the rate plan according to the class of the charged item
● The name of the Related Charged Item concerned by this notification.
TipIf you click on it, you are redirected to the page [page 292] of this charged item.
Tip
From any page, use the button in the header bar to navigate back to the previous page.
292 PUBLICCockpit
Cockpit

1.4.13.4.3 Saving a Chargeable Item to a File
You can save a chargeable item to an XML file. Use the Save to File button in the header.
To save a chargeable item:
1. Click on the Save to File button2. Depending on your web browser settings:
○ Your web browser does not ask for download location: the file is downloaded in the default folder and is named process_chargeable_item_<YYYY_MM_DD>T<HHMMSS>.xml where:○ <YYYY_MM_DD> is the date of the download○ <HHMMSS> is the time of the download
○ Your web browser asks for download location:○ Browse the directory in which the file will be saved○ Name the file at your convenience (by default, it is named
process_chargeable_item_<YYYY_MM_DD>T<HHMMSS>.xml)○ Click OK
NoteThe saved file includes both the chargeable item and the processing result.
1.4.13.4.4 Loading a Chargeable Item from a File
If a previous chargeable item has been saved to a file, you can use the Load from File button in the header.
To load a chargeable item:
1. Click on the Load from File button2. In the file selection window of the browser, browse the directory in which the chargeable item has been
saved3. Select the relevant XML file4. Click Open
CautionIf the catalog in the file is not allowed for the user, the loading fails.
1.4.13.5 FAQs and Tips
Based on SAP user feedbacks, we deliver Frequently Asked Questions (FAQs) about all aspects of working with the Cockpit application and its apps efficiently. In addition, we complete these solutions with some best time-saving and task-completion tips and tricks.
CockpitCockpit PUBLIC 293

RememberPlease share your SAP user experience to enrich these sections in the SAP user assistance and product documentation for SAP Convergent Charging 2020.
Frequently Asked Questions (FAQs) [page 294]
Tips and Tricks [page 294]
1.4.13.5.1 Frequently Asked Questions (FAQs)
Can I use the app in two different tabs of my browser?
SAP SE highly recommends not to display the app in two different tabs of a single browser as it may cause inconsistencies.
Do I lose my data if I switch to another app?
Not necessary. An empty form occurs only when:
● you use the app just after a log on to the Cockpit● you come back to the home page of the Cockpit and re-launch the app
1.4.13.5.2 Tips and Tricks
How to navigate easily through the app?
Have you noticed the header bar? It provides you some smart buttons to ease your navigation.
On the left side of this bar, you can click on:
● the button to navigate back to the previous page● the SAP icon button to navigate back to the home page● the name of the page to display a dropdown list to choose where you want to navigate
1.4.13.6 Troubleshooting
As part of the technical operations, you may have to troubleshoot some problems when using this app or working with your SAP CC environment (systems, data, users) in your SAP system landscape. Please find afterwards a list of possible symptoms and related solutions that you can try to implement by yourself.
294 PUBLICCockpit
Cockpit

I can't see the Process a Chargeable Item [page 285] app tile in the Cockpit launchpad.
Ensure your SAP user settings are granted with the Marketing role. Contact your SAP CC user administrator.
The Process a Chargeable Item [page 285] app tile in the Cockpit is grayed out with the message "Charging is not available".
This means that the Process a Chargeable Item app is unavailable.
If you click the tile, a message appears.
This message provides with you the reason of the dysfunction (which may be temporary).
Ensure the Cockpit configuration file is correct, regarding the requirements provided in the Configuring Cockpit section of the SAP CC 2020 Tuning Guide documentation.
The app freezes when I click the Execute or Simulate button.
As of SAP CC 2020 FPS 2, the app forces the pricing catalog synchronization in the rater and bulkloader instances of the connected SAP CC system.
The data cache refreshment and additional communications can slow down the processing.
Ask your SAP CC system administrator to reconfigure the Cockpit back-end application by disabling the feature of the app Process a Chargeable Item. The setting charging.catalog.sync.enabled must be set to false.
The app displays the error "The user ID for the specified service ID does not correspond to an existing contract on the specified consumption date." when simulating a chargeable item.
SAP CC cannot identify any provider contract that As of SAP CC 2020 FPS 2, the app forces the pricing catalog synchronization in the rater and bulkloader instances of the connected SAP CC system.
Check if there is a typo in the user ID or service ID that you typed. Check if the selected date/time is correct.
Otherwise, verify the provider contract that relates to your simulation. Check if there are several versions. Check the user IDs and service IDs that are set in the contract items.
1.5 FAQs and Tips About Cockpit
Based on SAP user feedbacks, we deliver Frequently Asked Questions (FAQs) about all aspects of working with the Cockpit application and its apps efficiently. We complete these solutions with our best time-saving and task-completion tips and tricks.
RememberPlease share your SAP user experience to enrich these sections in the SAP user assistance and product documentation for SAP Convergent Charging 2020.
See here:
CockpitCockpit PUBLIC 295

● Frequently Asked Questions (FAQs) [page 296]● Tips [page 297]
Frequently Asked Questions (FAQs)
Review this section Frequently Asked Questions (FAQs) to find useful answers about SAP Convergent Charging 2020 Cockpit and its apps.
"How to install Cockpit?"
Refer to the sections:
● Installing and Launching Cockpit in SAP CC 2020 Installation and Maintenance Guide● Configuring Cockpit in SAP CC 2020 Tuning Guide
"How to launch Cockpit?"
Refer to the section Launching Cockpit [page 20] in this primary help.
"Why will Cockpit not start?"
Maybe Cockpit is running on an Apache Tomcat Server 6 or a former release. Your web application does not support this release and requires servlet 3.0. See SAP Note 2492244 for more information and user assistance.
"Can Cockpit work without a running dispatcher instance?"
No, Cockpit regularly connects to the primary dispatcher instance in the SAP CC Core Server system. When implementing the web application in your SAP system landscape, you define the SID and the URLs of a particular system. The primary dispatcher instance can change.
"How do I sign out?"
As of SP 3 for release 5.0, you can log off by displaying your user preferences in the Cockpit user interface.
1. Just click at the top left corner of the screen. It is visible in the shell header of the launchpad.
2. Click Sign Out to log off and close your user session.
"What happens when I sign out?"
You end your user session. All your catalog draft objects are unlocked. If another web browser of the same technology was previously launched, you must log on again with the sign-in page. You will recover your draft items on your next log on. In the meantime, other users will be able to see that there are unsaved changes on the active documents you were modifying. They could not access the draft object modification but they could delete it or start a new edition.
If another web browser for another supported technology is launched with a running SAP CC Cockpit, the user session is different whatever the user name you used to log on to the user interface.
296 PUBLICCockpit
Cockpit

"Can I create a catalog with Cockpit?"
Yes. As of SP 4 for release 5.0, you can quickly configure a new pricing catalog while configuring a new mapping table class. Just start creating [page 111] a mapping table class and click the New button to the right of the Catalog input field.
"Can another user view my drafts?"
No. Drafts are personal. By the way, other users can see that there are unsaved changes by the person who modifies a draft for an already-released data. Locked by <USER_ID> indicates that a user is currently editing a data object. Unsaved Changes by <USER_ID> that a user has started editing a data object but this person has signed out.
Tips
Share your tips and tricks with SAP CC users and experts. Our user assistance reflects this rich experience.
"How to search for more information about Cockpit?"
Search for cockpit from Searching for 'cockpit' in SAP Notes and Knowledge Base Articles (KBAs) - Please refresh your web browser and then filter the results by setting up the component filter to: IS-CC.
"What is an SAP CC pricing specialist for beginners?"
Typical Persona Main Goals Responsabilities
Pricing Specialist (Convergent Charging)
Business Role Description:
● Responsible for designing price plans – which include pricing algorithms for one-time, recurring, and usage-based fees – with SAP Convergent Charging (SAP CC) to meet the business needs.
● Tasks include configuring, maintaining, testing, and debugging price plans and tables, and investigating price plan and table issues.
● Common job titles for the role are: "Price Plan Expert" and "Product Developer".
● Analyze how to design pricing algorithms with SAP Convergent Charging, given that there are typically several ways for implementing a given requirement, based on price plans and tables.
● Regularly configure new and easy-to-maintain price plans and tables with SAP Convergent Charging to meet new business needs.
● Maintain existing price plans and tables e.g. for enriching existing pricing algorithms or in case of issues.
● Configure and maintain price plans and tables.
● Test and debug price plans and tables.
● Notify other stakeholders when price plans are ready for validation.
● Investigate and fix price plan and table issues.
"How to delete a draft?"
To delete a draft, just open the corresponding app, select the draft in the list, and click the Cancel button in the footer toolbar.
CockpitCockpit PUBLIC 297

Related Links
Your app is part of the Cockpit user interface. We recommend that you see the FAQs and tips sections in this primary help or visit the SAP sites for all your questions and answers:
● Searching for 'cockpit' in SAP Notes and Knowledge Base Articles (KBAs)● SAP Questions and Answers (answers.sap.com) for SAP Convergent Charging● Troubleshooting with Cockpit [page 298]
TipIn SAP ONE Support Launchpad, use the app My SAP Notes & KBAs to manage your key efficiently:
● Favorites● New
1.6 Troubleshooting with Cockpit
Troubleshooting Problems
As part of the technical operations, you may have to troubleshoot some problems with your user interface or with your SAP CC environment (systems, data, users) in the SAP system landscape.
Troubleshooting Problems with SAP CC [page 298]
Troubleshooting Problems of the User Interface [page 299]
1.6.1 Troubleshooting Problems with SAP CC
SAP Convergent Charging is part of a complex system landscape with multiple systems, applications, and components that are interfaced together.
You can use Cockpit and its apps to troubleshoot some technical or business problems that may occur in the communication chains between individual users and heterogeneous cascaded systems.
As part of a specific investigation and troubleshooting procedure, you use this user interface to troubleshoot some problems by:
● Retrieving some information and analyze symptoms.● Performing some important actions (immediate corrections, preventive actions).● Determining the root causes.● Resolving an issue.
298 PUBLICCockpit
Cockpit

RecommendationConsult the SAP Convergent Charging Administration Guide for more troubleshooting information and tasks. See the main chapter Troubleshooting of SAP CC.
ExampleFor example, as an SAP CC administrator, you may use this user interface to configure a system by enabling the log and trace functions or changing some system parameter values.
As an SAP CC pricing specialist, you may correct some pricing configuration settings because of some erroneous computed prices.
1.6.2 Troubleshooting Problems of the User Interface
You may have to troubleshoot some user interface issues. Various symptoms are possible:
● Error messages● Slow performances● Unexpected behavior or experience
You troubleshoot some problems when:
● Launching the Cockpit user interface, signing in to the launchpad, locking/unlocking, or signing out● Using the Cockpit launchpad and its features● Working with your apps● Operating the target SAP CC system with an app
To troubleshoot problems that relate to the SAP CC Cockpit user interface, you can:
1. First use the error messages displayed by the user interface. They are helpful and provide you with the best experience and support to continue your investigations.
CockpitCockpit PUBLIC 299

WHEN CONNECTING AT ANY TIME
WHEN WORKING WITH THE COCKPIT
WHEN WORKING WITH AN APP WHEN LEAVING
When logging on to the user interface
See:○ Issues When Launching
the User Interface [page 302]
○ Issues When Logging On to the User Interface with the Sign-In Window [page 303]
Once connected and authenticated you can encounter:○ Communication fail
ures○ Issues with your SAP
CC user account○ Issues with your user
session that can be locked or expired
When using the Cockpit launchpad, you can encounter:○ Work
space Issues [page 303]
○ Navigation Issues [page 303]
When using your app in Cockpit, issues may appear. The app provides you with error information to solve the issue quickly. In this primary help, refer to the Troubleshooting sections of each app [page 27]:○ Issues
with Analyze Item Files [page 36]
○ Issues with Display System Status [page 47]
○ Issues with Display Usage Metrics [page 61]
○ Issues with Display User Operations [page 69]
○ Issues with Manage
When leaving the launchpad application or an app page.
See Log-Off Issues [page 303].
300 PUBLICCockpit
Cockpit

WHEN CONNECTING AT ANY TIME
WHEN WORKING WITH THE COCKPIT
WHEN WORKING WITH AN APP WHEN LEAVING
Chargeable Item Classes [page 78]
○ Issues with Manage Charged Item Classes [page 100]
○ Issues with Manage Mapping Table Classes [page 119]
○ Issues with Manage Mapping Tables [page 134]
○ Issues with Manage Rate Plans [page 236]
○ Issues with Manage Range Table Classes [page 251]
○ Issues with Manage Range Tables [page 270]
CockpitCockpit PUBLIC 301

WHEN CONNECTING AT ANY TIME
WHEN WORKING WITH THE COCKPIT
WHEN WORKING WITH AN APP WHEN LEAVING
○ Issues with Manage SAP CC System Parameters [page 283]
○ Issues with Process a Chargeable Item [page 294]
Remember that your browser communicates with a Java Web Server (Apache Tomcat Server) system that communicates with the target SAP CC 2020 Core Server system and its back-end database system. This complex communication chain may lead to various issues.
2. As an IT administrator, use the logs of the Java Web Server system (such as Apache Tomcat Server).3. Search for cockpit from Searching for 'cockpit' in SAP Notes and Knowledge Base Articles (KBAs) -
Please refresh your web browser and then filter the results by setting up the component filter to: IS-CC.4. Use the traces generated by your web application. This supportability tool can help your support specialist
to locate the issue. Contact the IT administrator of the Java Web Server system about these recorded traces. Consult the SAP Convergent Charging 2020 Administration Guide for more information.
Issues When Launching the User Interface
Error message: 'Sorry, an unexpected error happened in Convergent Charging Cockpit.'
When launching the user interface in your web browser, various issues may occur and the Cockpit back-end application and the Cockpit front-end application handle most of the situations. This error message means that an unexpected situation occurred.
Please contact the IT administrator of the Java web server (Apache Tomcat Server) that hosts your web application. The log may include the entry: java.lang.NoSuchMethodError:javax.servlet.http.HttpServletRequest.getServletContext() as described in SAP Note 2492244 .
For example, this error message is displayed when the version of the Apache Tomcat Server system is not supported by SAP CC 2020 Cockpit. See the possible versions list in the Product Availibility Matrix - PAM .
302 PUBLICCockpit
Cockpit
Issues When Logging On to the User Interface with the Sign-In Window
Error message: "Check your user name and password combination."
For security reasons and to prevent attacks, the message is not detailed. Several issues with credentials are possible. This situation may be due to:
● Entered user ID is wrong or the SAP CC user does not exist.● Entered password is wrong or has expired and must be changed first.● User is locked in SAP CC.
Try again carefully. Otherwise, contact your user administrator for SAP Convergent Charging.
Issues at any Time
Error message repetitively displayed: "Sorry, your access to this application has been restricted or your session no longer exists."
You can observe this unexpected message while using the Microsoft Internet Explorer browser with its Microsoft F12 Developer Tools window.
Close the Microsoft F12 Developer Tools window and reload the page, or use another web browser. See Technical Requirements [page 11].
Workspace Issues
I can't see the tile for my app.
In the Convergent Charging Cockpit launchpad, if a tile is not visible, verify your user settings about roles currently assigned to your user profile in SAP Convergent Charging.
Navigation Issues
See also: Keyboard Navigation [page 16]
Log-Off Issues
Even I previously locked my user session, I've been signed out by the Cockpit launchpad.
It is the normal behavior. See Automatic Sign-Out When Inactive [page 15].
CockpitCockpit PUBLIC 303

Important Disclaimers and Legal Information
HyperlinksSome links are classified by an icon and/or a mouseover text. These links provide additional information.About the icons:
● Links with the icon : You are entering a Web site that is not hosted by SAP. By using such links, you agree (unless expressly stated otherwise in your agreements with SAP) to this:
● The content of the linked-to site is not SAP documentation. You may not infer any product claims against SAP based on this information.● SAP does not agree or disagree with the content on the linked-to site, nor does SAP warrant the availability and correctness. SAP shall not be liable for any
damages caused by the use of such content unless damages have been caused by SAP's gross negligence or willful misconduct.
● Links with the icon : You are leaving the documentation for that particular SAP product or service and are entering a SAP-hosted Web site. By using such links, you agree that (unless expressly stated otherwise in your agreements with SAP) you may not infer any product claims against SAP based on this information.
Videos Hosted on External PlatformsSome videos may point to third-party video hosting platforms. SAP cannot guarantee the future availability of videos stored on these platforms. Furthermore, any advertisements or other content hosted on these platforms (for example, suggested videos or by navigating to other videos hosted on the same site), are not within the control or responsibility of SAP.
Beta and Other Experimental FeaturesExperimental features are not part of the officially delivered scope that SAP guarantees for future releases. This means that experimental features may be changed by SAP at any time for any reason without notice. Experimental features are not for productive use. You may not demonstrate, test, examine, evaluate or otherwise use the experimental features in a live operating environment or with data that has not been sufficiently backed up.The purpose of experimental features is to get feedback early on, allowing customers and partners to influence the future product accordingly. By providing your feedback (e.g. in the SAP Community), you accept that intellectual property rights of the contributions or derivative works shall remain the exclusive property of SAP.
Example CodeAny software coding and/or code snippets are examples. They are not for productive use. The example code is only intended to better explain and visualize the syntax and phrasing rules. SAP does not warrant the correctness and completeness of the example code. SAP shall not be liable for errors or damages caused by the use of example code unless damages have been caused by SAP's gross negligence or willful misconduct.
Bias-Free LanguageSAP supports a culture of diversity and inclusion. Whenever possible, we use unbiased language in our documentation to refer to people of all cultures, ethnicities, genders, and abilities.
304 PUBLICCockpit
Important Disclaimers and Legal Information

CockpitImportant Disclaimers and Legal Information PUBLIC 305

www.sap.com/contactsap
© 2021 SAP SE or an SAP affiliate company. All rights reserved.
No part of this publication may be reproduced or transmitted in any form or for any purpose without the express permission of SAP SE or an SAP affiliate company. The information contained herein may be changed without prior notice.
Some software products marketed by SAP SE and its distributors contain proprietary software components of other software vendors. National product specifications may vary.
These materials are provided by SAP SE or an SAP affiliate company for informational purposes only, without representation or warranty of any kind, and SAP or its affiliated companies shall not be liable for errors or omissions with respect to the materials. The only warranties for SAP or SAP affiliate company products and services are those that are set forth in the express warranty statements accompanying such products and services, if any. Nothing herein should be construed as constituting an additional warranty.
SAP and other SAP products and services mentioned herein as well as their respective logos are trademarks or registered trademarks of SAP SE (or an SAP affiliate company) in Germany and other countries. All other product and service names mentioned are the trademarks of their respective companies.
Please see https://www.sap.com/about/legal/trademark.html for additional trademark information and notices.
THE BEST RUN