A DIY Greenhouse - Texas Master Gardener Association
34
A DIY Greenhouse By Dave Posh Bastrop County Master Gardener Presented at Lunch & Learn - Sept 7, 2019
-
Upload
khangminh22 -
Category
Documents
-
view
3 -
download
0
Transcript of A DIY Greenhouse - Texas Master Gardener Association

A DIY GreenhouseBy Dave Posh
Bastrop County Master Gardener
Presented at Lunch & Learn - Sept 7, 2019

My 2017 first attempt, with ½” PVC and old plastic, did not
stand up to the February 2018 winds. I needed to do a lot
of researching to find a better DIY Greenhouse.

After watching many YouTube
videos, decided to start with
the ideas in this TexasPrepper2
video (youtu.be/c1BBX4OxW4U).
His greenhouse is made with
two 16ft x 50in cattle panels
and a base of 2x4s.
Modifications I decided on
were:
3 cattle panels
Base 8’ wide, 12’6” deep
Base made from 2x6s
Instead of door in front and
window in back – doors in front
and back, each with a venting
window.
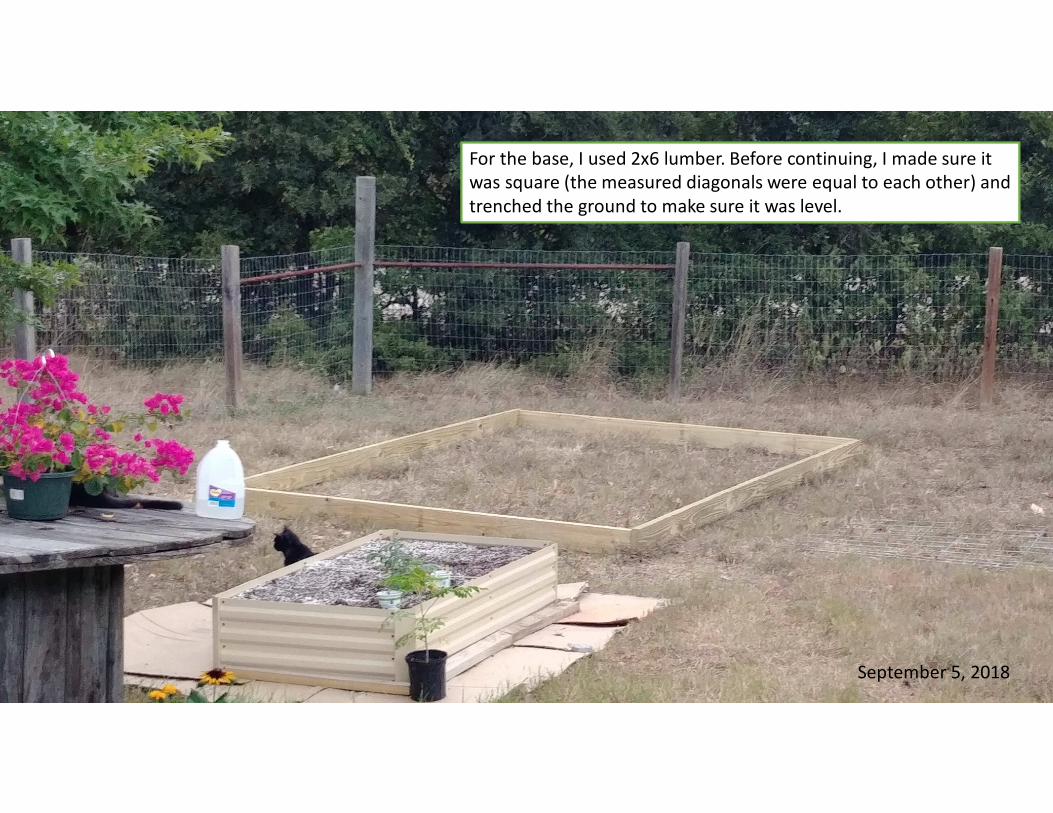
For the base, I used 2x6 lumber. Before continuing, I made sure it
was square (the measured diagonals were equal to each other) and
trenched the ground to make sure it was level.
September 5, 2018

The trenching has been done to level
the base. Added flat corner braces to
each corner. Used 2x4s when fence
stapling the cattle panel, to keep edge
of panel in middle of 2x6. First (rear)
panel already stapled to base with
fencing staples.
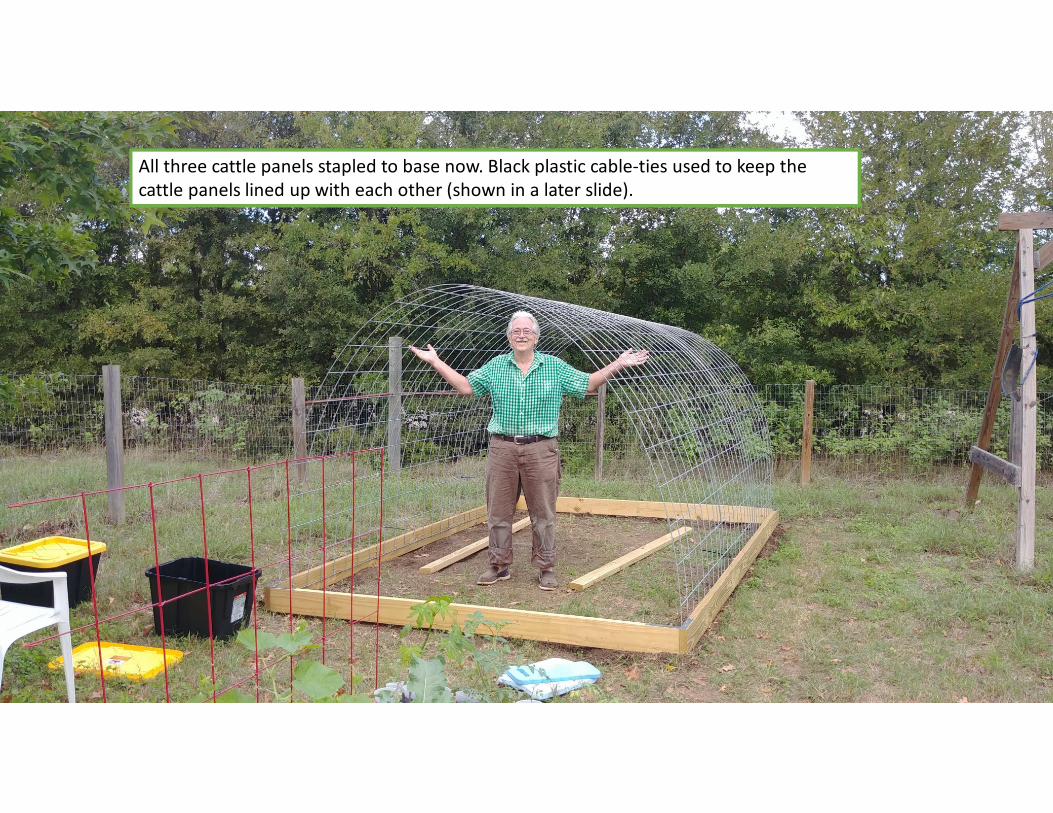
All three cattle panels stapled to base now. Black plastic cable-ties used to keep the
cattle panels lined up with each other (shown in a later slide).

2x4s for the door have been clamped together, in order to
mark for the angle cut needed at the top so the cattle panel
can be stapled to the top of the door frame uprights.

Door frame uprights cut to size
and door frame top and
bottom attached. Cattle panel
stapled to door frame
uprights.

Front and rear door frames finished
along with cross braces.
All door frame material = 2x4s

After the door frames
were completed, I took
measurements of the
door openings so the
doors wouldn’t be too
tight or too loose.

Dimensions for making the doors and windows.

Front door assembled and tested
for fit in frame. Door made from
2x2s ripped from 2x4s. Cross brace
is 2x4.
September 30, 2018

Venting window assembled
and hinged at top. Doors are
hinged so they open
outward.
Window made from 2x2s
ripped from 2x4s.

View of the front door open. Automatic
vent opener attached.
From Amazon: Univent Automatic Vent
Opener Standard - Lifts 15 Lbs.

Both front and back doors
and windows completed.
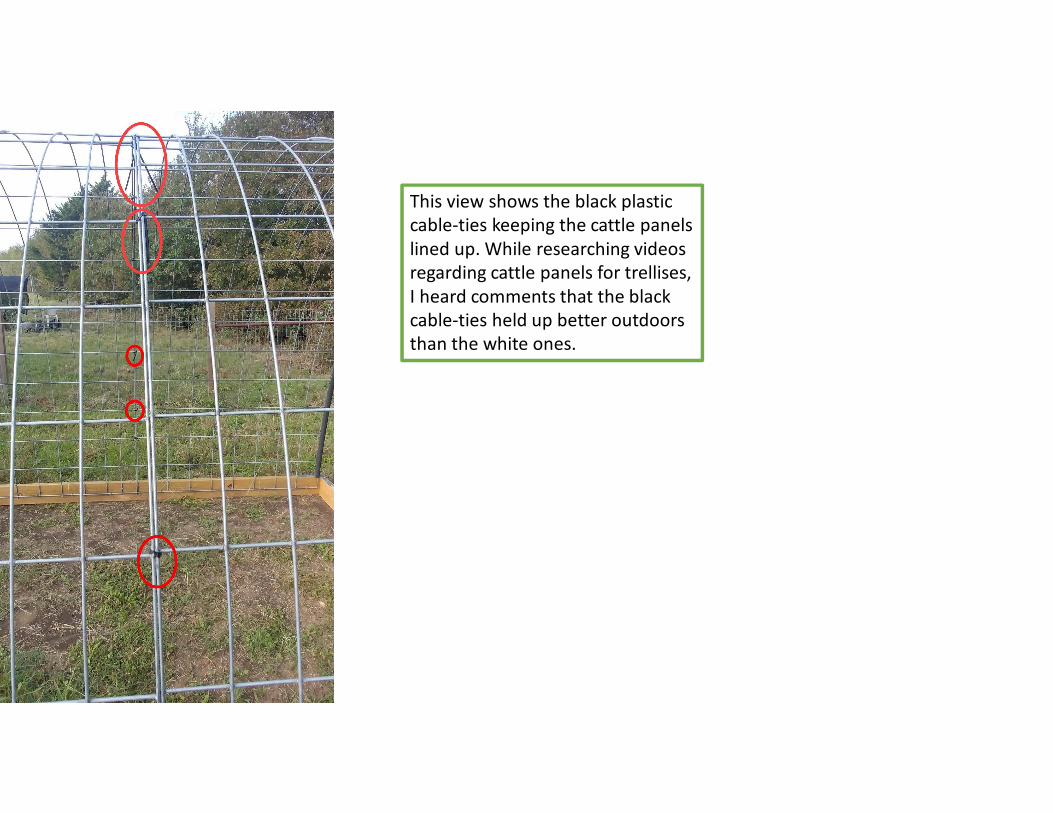
This view shows the black plastic
cable-ties keeping the cattle panels
lined up. While researching videos
regarding cattle panels for trellises,
I heard comments that the black
cable-ties held up better outdoors
than the white ones.

Added foam pipe
insulation at front
and back to protect
the greenhouse
plastic covering
from sharp edges
on the end of the
cattle panels.

See the black plastic I put down for weed
control? It was a mistake.
Fire ants loved it under there. Before
continuing, I pulled back the plastic and
treated with Orthene. The fire ants were
all gone in a couple days.
Also, the black plastic held puddles when
watering plants in the greenhouse.
This year, I will pull up the black plastic,
and replace it with cardboard
underneath decomposed crushed
granite.

Calculating the amount of "Greenhouse Clear Plastic Film" and how to cut pieces to cover greenhouse, doors, and windows.
Ordered from Amazon: Greenhouse Clear Plastic Film Polyethylene Covering Gt4 Year 6 Mil 20ft. X 25ft. By Grower's Solution

Greenhouse plastic placed
over greenhouse.
October 26, 2018

Greenhouse plastic pleated
and stapled at front.
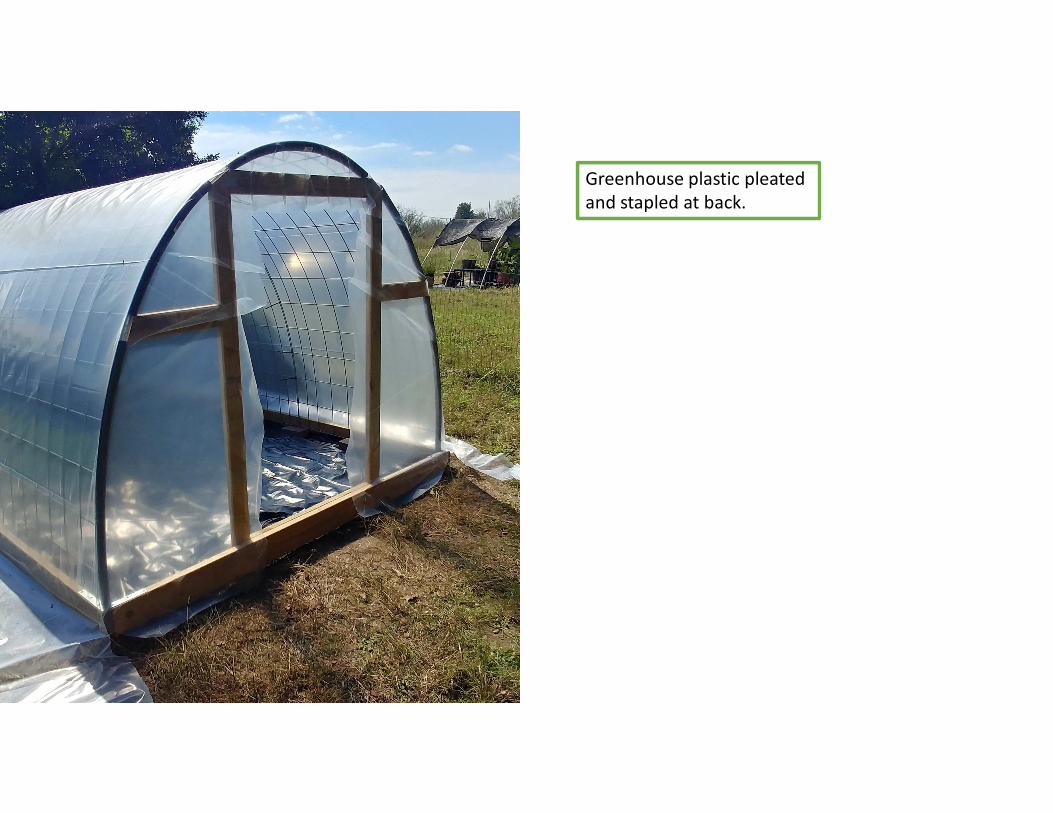
Greenhouse plastic pleated
and stapled at back.

Furring strips nailed on so
Greenhouse plastic won't rip
through staples.

Back view showing
furring strips.

Furring strips also nailed on to
base.

View from inside shows cable ties holding
cattle panel edges together.

Plastic added to doors and
windows and doors
reattached to greenhouse.
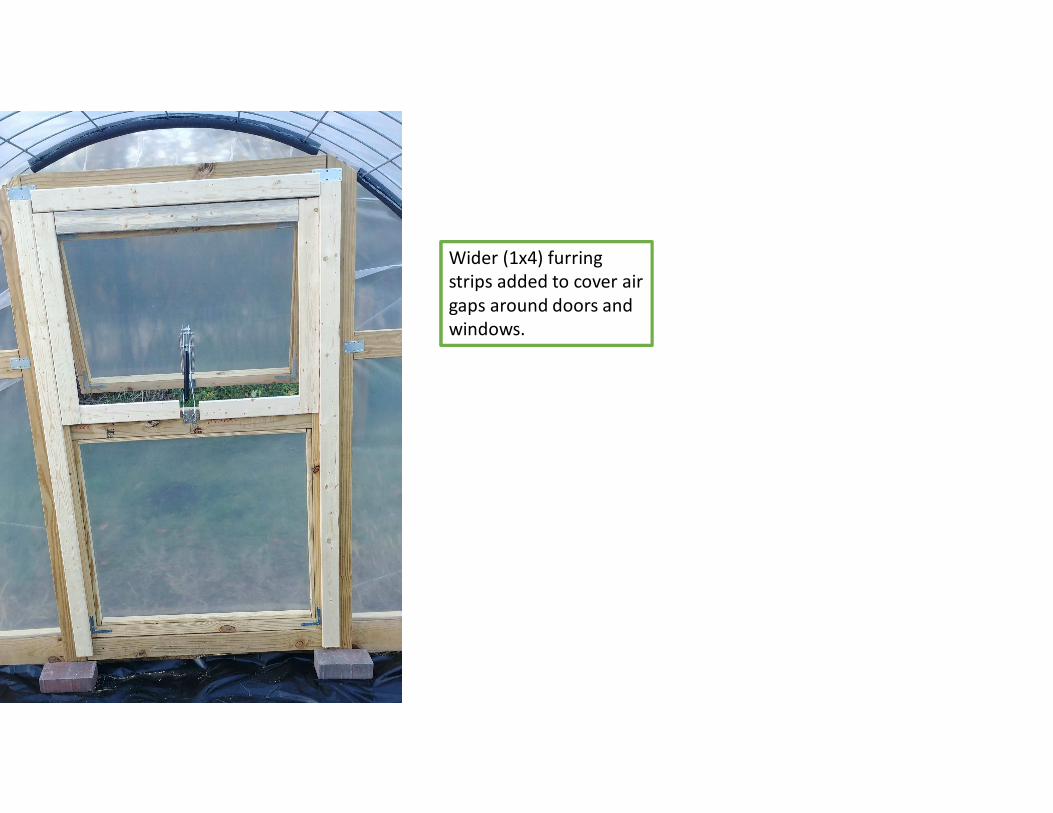
Wider (1x4) furring
strips added to cover air
gaps around doors and
windows.

A happy gardener
with her plants in
the greenhouse
November 10, 2018

Another view inside
the greenhouse

When I don't want the
automatic vent opening the
window, I can pop the arms out
of the pins on the door
crossmember.
However, the arms could hang
down and poke the plastic in the
lower section of the door.
By adding a piece of pressboard
to the inside of the door, that
won’t happen.

Rebar
1/2in PVC
String
When it got warmer in the spring, I
wanted to have the doors held open. A
piece of 1/2in PCV attached to the
inside of the door allows a piece of
rebar to drop down to the ground to
hold the door in place. A piece of string
attached to the rebar holds it up when
not needed.

An inexpensive handle and a
latch & screw-eye were the
last things added to the doors.

If you are interested, this complete presentation is available as a PDF on the website of the Bastrop County Master Gardener Association at: https://txmg.org/bastropcounty/files/2019/08/DIY-Greenhouse.pdf