
09281 03050 8 0 5 ® - Nxtbook Media
76
VOL. TWENTY SEVEN NUMBER EIGHT MAY 2014 USA $5.99 CANADA $5.99 ® MAY 2014
-
Upload
khangminh22 -
Category
Documents
-
view
3 -
download
0
Transcript of 09281 03050 8 0 5 ® - Nxtbook Media

0 09281 03050 8
0 5
$5.99US $5.99CAN
VOL. TWENTY SEVENNUMBER EIGHT
MAY 2014USA $5.99 CANADA $5.99
®
MA
Y 2
01
4


It’s all about the micsIf a picture is worth a thousand words, here’s a 3-page editorial for you:
This hopefully will also give folks a partial understanding of why I consider Paul VnukJr. the hardest-working mic reviewer around. These three shots turned up on my iPhone(usually around midnight) over the last few weeks, snapped by Paul in the studio as heset up mics in “star” arrays—a fast and easy way to find the best mic for a given ses-sion. The first picture’s all ribbon mics, the second all solid-state condensers, and thethird all tube condensers... a mixture of mics reviewed in this issue, stalwarts from Paul’smic closet, and a couple of yet-to-comes.A mic in Paul’s studio will be put through this and many other trials during sessions
with clients, put to work on as many different sources in as many different genres as hecan manage. Anyone can throw a mic onto a stand, sing and play into it for an after-noon, and write about it... but when you read one of Paul’s pieces, you’re getting thebenefit of weeks of hard work on real sessions with real musicians recording realalbums.In this special issue on mics and miking techniques, Paul’s done a stellar job. He’s got
reports on eleven different mics from $119 up to $2999, written with attention to soundquality, build quality, flexibility, and appropriateness for your budget. Even afterdecades of studio work, Paul can differentiate between a mic that’s a great value at$200 vs. a mic that’s a great value at $2000, and we’re thrilled to have you share inhis expertise.Speaking of expertise, you’ll get a lot out of our features on mic choice and place-
ment. Sven-Erik Seaholm talks us through a complete album project from start to finish,with an eye toward miking setups and getting results appropriate for the songs. EleanorGoldfield shares her love of getting great sounds from miked guitar cabinets, startingwith the reliable methods everyone knows and branching out into multi-mic setups,placement tricks, and weird and wonderful mic choices. And Michael Schulze teachesa simple set of questions and answers to narrow down the right mic for your next track-ing session before you even play a note.If you’re curious about how a high-end pro studio approaches work with a new client
(and would like a glimpse of, among other things, how their engineer mikes a drum kit),check out Lorenz Rychner’s interview with Jesse Wright of California Sound Studios.There’s a lot to be learned here, and the wonderful thing about mics and miking is
that the more you learn, the more you realize how much there is still out there to belearned. Our mic-locker specials are always among our most popular issues, and welove bringing them to you.Enjoy the issue!
PUBLISHER: Thomas Hawley ASSOCIATE PUBLISHER: Brent Heintz
EDITORIALEDITOR: Mike Metlay
SENIOR EDITOR: Lorenz RychnerTECHNICAL CONSULTANT: Paul Vnuk Jr.
EDITOR AT LARGE: Beto HaleMÚSICO PRO EDITOR: Fernando Curiel
CONTRIBUTORSSven-Erik Seaholm, Paul Vnuk Jr.,Eleanor Goldfield, Michael Schulze,
Marty Peters, Peter Bolland
SOCIAL MEDIABrent Heintz, Paul Vnuk Jr.
ART & PRODUCTIONART DIRECTOR: Scott Simmonds
PRODUCTION MANAGER: Colin CourtneyWEB GOALIE: Colin Courtney
PLAYBACK PLATINUM SERIESEDITOR/PRODUCER: Lorenz Rychner
CIRCULATIONCIRCULATION MANAGER: Tiffany Sepe
ADVERTISING SALES AND MARKETINGDIRECTOR: Brent Heintz
CLASSIFIEDS MANAGER: Colin Courtney
ADMINISTRATIONACCOUNTS RECEIVABLE: Thomas Hawley
EXECUTIVE OFFICERSPRESIDENT: Thomas HawleyVICE PRESIDENT: Brent Heintz
SUBSCRIPTIONS/ADDRESS CHANGES: 1-954-653-3927
ADVERTISING/CLASSIFIEDS/MAIN OFFICE:(303) 516-9118
RECORDING MAGAZINE (ISSN 1078-8352; USPS 002-298) is publishedmonthly, 12 times per year, by Music MakerPublications, Inc., 5408 Idylwild Trail, Boulder,
CO 80301-3523. Tel: (303) 516-9118 Fax: (303) 516-9119
email: [email protected]
Los Angeles Editorial Office: [email protected]
Periodicals Postage is paid at Boulder, CO and at addi-tional mailing offices. POSTMASTER: Send address changes toRECORDING, Subscriber Services, P.O. Box 5024, Fort.Lauderdale, FL, 33310. Tel: 1-954-653-3927, Fax: 1-954-772-3393. Subscription rate: $23.97 per year. Distributed to themusic trade by Hal Leonard Corporation. All material is subjectto worldwide copyright protection, and reproduction or imita-tion in whole or in part is ex pressly forbidden without writtenconsent from the publishers. All reasonable care is taken toensure accuracy in the preparation of the magazine, but MusicMaker Publications, Inc. cannot be held legally responsible forits contents. The publishers cannot assume responsibility for thereturn of unsolicited manuscripts, photographs or materials. Alltrademarked names, whether indicated as such or not, areowned by their respective companies.
Canada Post: Publications Mail Agreement #41491032.Canada Returns to be sent to Bleuchip International, P.O. Box25542, London, ON N6C 6B2
© Copyright 2014 Music MakerPublications, Inc.
PRINTED IN THE U.S.A.
RECORDING May 20144


Follow us on Twitter atwww.twitter.com/recordingmag
Become a fan ofrecordingmag on Facebook
RECORDING MAGAZINE MAY
reVIeWs24 ADK Custom Shop Z-MOD Z-67 and
T-FET Hamburg 67-T.The latest from the Custom Shop: a magnificently silky tube mic and a flexible, source-friendly solid-state design.REVIEWS BY PAUL VNUK JR.
32 Audix VX10 and VX5 Professional Vocal Microphones.More than a great alternative to a dynamic mic on stage, these handheld condensers can be a singer/songwriter’s secret weapons.REVIEWS BY PAUL VNUK JR.
34 Coles 4038 and 4030L Ribbon Microphones.A classic design that still sounds great after over 50 yearson the market, and a brand-new ribbon that’s within reach of any studio.REVIEWS BY PAUL VNUK JR.
38 RØDE NT1 and M5 Condenser Microphones.A redesign and reimagining of this Australian maker’s first microphone for a modern audience, and affordable excellencein a stereo-paired pencil condenser.REVIEWS BY PAUL VNUK JR.
40 Neumann TLM 107 Condenser Microphone.State-of-the-art digital control over polar pattern, pad, and highpass filtering lends power to this modern design from the classic mic maker.REVIEW BY PAUL VNUK JR.
42 Reviewed & Revisited: Apogee MiC 96k.This high-end USB microphone now handles 24/96 audio with ease.REVIEW BY MIKE METLAY
44 Equator Audio Research D8 Studio Monitors.A coaxial design lends power and precision at a very affordable price.REVIEW BY LORENZ RYCHNER
46 sE Electronics Magneto.The quality bar for an entry-level multipurpose condenser mic has just been raised by a considerable amount...REVIEW BY PAUL VNUK JR.
58 Audio-Technica ATH-M20x, ATH-M30x, and ATH-M40x Headphones.We recently ran a scoop review on the new ATH-M50x phones; now we’re delighted to bring you its three new siblings, offering great quality at unheard-of prices.REVIEWS BY MIKE METLAY
60 Reviewed & Revisited: Telefunken Elektroakustik AR-51 and its New Capsule.When you change the very heart of a microphone, is the new version still the same mic? And is the new sound better than what has become a modern classic?REVIEW BY PAUL VNUK JR.
62 Sony PCM-D100 Portable Recorder.An intensified commitment to high-end audio brings us Sony’s latest digital recorder, which can record audio up to 24/96, and also DSD.REVIEW BY LORENZ RYCHNER
Features12 Miking The Magic: The Sound Of Two Pines.
A singer/songwriter and producer/engineer team up to record an album, and we walk you through the entire project from concepts to miking to final mix.BY SVEN-ERIK SEAHOLM
26 Capturing The Cab.Guitar amps are so much fun to mike! There are dozens of options for getting great tone, from tried and true classicsto really wacky sounds... we show you how.BY ELEANOR GOLDFIELD
48 Choose Your Weapon.Picking a mic for a project doesn’t have to be trial and error. Here’s a straightforward way to make decisions and quickly zero in on the right mic for the job.BY MICHAEL SCHULZE
INterVIeWs20 Doing It Wright: Jesse Wright of
California Sound Studios.A versatile engineer spells out how your project will progress when you take it to a professional environment with the expertise and tools your music deserves.INTERVIEW BY LORENZ RYCHNER
regulars4 Fade In.
8 Talkback.
10 Fast Forward.
64 Readers’ Tapes.BY MARTY PETERS
72 Fade Out.Musings On The Value Of A Truly Good Producer.GUEST EDITORIAL BY PETER BOLLAND
65 Advertiser Index.
12
20
44
58
62
40
38
24 34


8 RECORDING May 2014
Note to faithful writers: When sending your letters by email, please remember to include your name and where you hail from.
This article really resonated with readersHi Bruce: I just finished reading your 2-parter about Helmholtz
resonators (December 2013 and March 2014). Thanks for themost helpful article I’ve read in years.I have two questions about the article, though. First, you men-
tion performing a room analysis. What should I use to figure outwhat frequency needs to be tuned? And my other question is,does it matter where the port is located? Thanks!
RL AlexanderNew Jersey
Bruce Black replies:Hi RL! The easiest and least expensive way to find your room
resonances requires an SPL (Sound Pressure Level) meter, andthe ability to play a sine wave through a speaker and manuallysweep its frequency. You can get an SPL meter at Radio Shackor online (try Amazon.com). If your DAW doesn’t have an oscil-lator/tone generator, you can find one online.You’re going to be tracking the relative SPL as you sweep through
a low-frequency sine wave. However, the low-frequency response ofthe cheaper SPL meters can get dicey due to the cheaper and small-er capacitors used in them. Get the best you can afford.Send a sine wave to one of your speakers and sweep it
between roughly 30 Hz and 200 Hz while watching the levelon your SPL meter, which should be set up with its mic at yourprimary listening position. Zero in on the peaks by sweepingback and forth across them, and write down the frequency andSPL at the highest readings. Move to the left and right a few feetand repeat this process at each position. Move back from yourlistening position and repeat the entire process. You can alsomove all around your room and repeat the process if you like.Be sure to use only one speaker. Using two speakers intro-
duces uncertainties and unnecessary complexities. If you reallywant to get into it, take a bunch of readings with one speaker,and then repeat the process with the other speaker. This pro-vides more data points, which gives you better accuracy.At this point you should have a series of numbers for each
position. Some of the numbers will repeat in multiple positions,closely if not exactly the same. These are the numbers youshould use for the tuning of the resonator.Also, if you have any particularly large peaks exclusively at
your listening position, you should consider making a resonatorat that frequency, as the listening position is where your creativedecision-making takes place.Since you may have space limitations, use the levels you
wrote down to prioritize which frequencies you will build res-onators for. Since the Q (bandwidth) of the resonators is ratherbroad, even with no absorbent inside, you can chose the portsize on the drawing in the article that is closest to your frequen-cy of interest. This also means that there’s no need to build a sep-arate resonator for two close frequencies.I like to place the port on the resonator in a panel position that
allows the resonator to be placed as close as possible to a tri-corner where three room surfaces meet. This positions the port
to influence resonances on all three room dimensions. Abicorner (two room surfaces) will work too, but it only influencesresonances from two dimensions. So a port as near as possibleto the corner of the resonator allows it to be placed as close aspossible to a tri- or bi-corner. I hope this helps out!—BB
Getting schooledDear Eric Alexandrakis: I enjoyed your December 2013 arti-
cle, “Remixing Depeche Mode’s ‘Should Be Higher’”. I also ama Depeche Mode fan, especially “Strangelove”. In the late1980s I was a small-time engineer/producer in a studioequipped with an SSL 6000 board, Lexicon 224XL, Otari 24-track reel recorder, Studer Revox 1" Stereo Master recorder, andJBL monitors with 18" woofers, silk dome tweeters, and loadedhorns with QSC amplifiers. I’ve never heard anything like it. Sobeautiful.Please help me with your advice—I have been away from the
industry for a long time and am just trying to get back into itagain with all the new technology, and I am pondering my edu-cation options. What DAW certifications and schooling do Ineed? Respectfully,
Ken Boglevia email
Eric Alexandrakis replies:Hey Ken, sounds like you had a really nice setup!Education options? I suppose it really depends on what you’re
trying to do. I find that if you already have a background insound engineering, the new tech can be learned via manuals,experimentation and taking a night class or two. Unless you’relooking to get some sort of Bachelor’s, school can teach you thetools of the trade... but in the end, for this trade (especially if youalready have a degree), networking and unique output is what’sgoing to grab people’s attention.If you’re not set up to attend a school, I’d enroll in a program
online to go at your own pace earning your degree, while learn-ing new tech/skills, and interning at studios/recording your ownmaterial to pull attention towards your craft. Mix local artists forfree if necessary, get into the game in your town so that youhave something to show.DAW certification isn’t as important as knowing your DAW
inside and out. Avid Pro Tools is the standard, but I love Logicbecause I’m Apple-obsessed since 1982, and it fits my workflowand is fun for me. It’s also more affordable than Pro Tools, if ofcourse you already have the Mac to run it.All of my engineering skills I learned on my own, without
courses or degrees in that field. Just manuals and experimenta-tion can get you what you need, but some kind of degree makesone more acceptable in order to get into a more professional set-ting. All in all, focus on recording/mixing a great band/artist,work hard, and hopefully everything will fall into place. Best ofluck.—EA
Write to us at: Talkback, Recording Magazine, 5408 Idylwild Trail, Boulder, CO 80301
Or save stamps and send email to [email protected]


RECORDING May 201410
Toontrack Announces EZdrummer 2—Launches May 6Toontrack has announced EZdrummer 2, a completely new version of the
popular EZdrummer drum performance plug-in that is scheduled to ship onMay 6. Our Nick Rothwell attended a preview of the new version at MarkKnopfler’s studio in London in February, where a remarkable A/B compar-ison took place—between a drummer in the studio playing tracks, and the
software playing back from a DAW, the audience found it difficult if not impossible to tell which was whichwhen listening back on the monitors.The list of improvements in EZdrummer 2 is too long to mention in full. The new program sports an entirely
revamped and much improved audio engine, a brand-new mixer with built-in effects chains to make drum treat-ment easy, an intuitive user interface, two all-new sound libraries and a selection of percussion instruments.
Along with the launch of EZdrummer 2, all of Toontracks’ EZX audio and MIDI expan-sion packs for the original version—20 titles to date—will be modernized with newgraphics and effects chains for compatibility with the new version. The original contentof EZdrummer itself will also be made available as an EZX expansion, so users of theoriginal won’t lose the sounds they’ve come to rely upon in their existing projects.EZdrummer 2 will be available as a free upgrade to anyone who purchases and
registers the current version of EZdrummer between now and the official productlaunch on May 6. Look for a full review of the new version very soon.
Price: $179; upgrade from EZdrummer, $99More from: Toontrack, www.toontrack.com
Focal Professional Launches New Line Of Affordable MonitorsThe Alpha line is a new series of professional studio monitors from Focal Professional. These monitors
feature an all-new design with 1" aluminum inverted dome tweeters for very low directivity (for fatigue-free highs with improved imaging), Polyglass cone woofers (microscopic glass spheres coating a cellu-lose pulp cone for a combination of low distortion and improved damping), internally reinforced MDF cabinets,Class AB biamplification, dual mixable audio inputs, adjustable bass and treble filters, and more.There are three models in the Alpha line: The Alpha 50 with a 5" woofer and 20W/35W amplifica-
tion, the Alpha 65 with a 6.5" woofer and 35W/70W amplification, and the Alpha 80 with an 8"woofer and 40W/100W amplification. All three models are rated up to 22 kHz ±3 dB, with low end(±3 dB) at 45 Hz for the Alpha 50, 40 Hz for the Alpha 65, and 35 Hz for the Alpha 80. Units willship in the late spring; look for a review soon.
Prices (street): Alpha 50, $299; Alpha 65, $399; Alpha 80, $549 (each)More from: Focal Professional, www.focal.com
Positive Grid Brings Full-Featured MasteringTools To The iPadThe latest iPad-based audio app from Positive Grid is Final
Touch, a complete mastering system for iOS. The app com-bines seven mastering tools into an integrated system foraudio processing on any iPad running iOS 7.The modules include Pre and Post linear phase EQ mod-
ules with up to eight independent bands, each with achoice of high and low shelving, highpass and lowpassfiltering, and peak EQ; a Dynamics module with astereo/Mid-Side multiband compressor/limiter; a StereoImaging module for channel balancing, width adjustment,and mono compatibility checking; a Reverb module withtweakable room, hall, and plate reverbs; a Maximizermodule with peak limiting; and Dither with noise-shapingfor producing completed tracks from high-bit-rate audio.Other tools include an accurate metering suite, independent bypass controls for each module and for
individual EQ bands, independent solo and bypass for Left, Right, Mid, and Side channels, 100 facto-ry presets plus unlimited user presets, module ordering in the signal path via drag and drop, and easysharing of completed work via email, FTP, iTunes, Dropbox, or SoundCloud. Audio can even be routedinto the app via Audiobus and Inter-App Audio if desired.
Price: $19.99 • More from: Positive Grid, www.positivegrid.com


RECORDING May 201412
Miking The Magic: The Sound of Two Pines
This was not our first rodeo. Americanaartist Peter Bolland and I have spent a greatdeal of time together in the studio over theyears. I produced and recorded two albums forhis former band The Coyote Problem, and he’soften in the studio as a session guitarist. Fromtime to time, he will come in with his acousticguitar and demo 15–20 songs in a single two-hour session. Over the last seven years he’sdone this four times.One day, Peter called me to say he was
ready to make a solo album. He described themusical parameters and working method hewished to pursue. Most notably Peter wanted todo all of the singing and playing himself, exceptfor bass and drums. He wanted to cut theacoustic guitar and lead vocals first, which hereferred to as “building a sturdy frame to hangeverything on”.
Due to all of the musical history Peter and Ihave shared together, this project differs frommost others I’ve worked on. Our personal andprofessional relationship has brought us to apoint where are of one mind, essentially. Wewatch each others’ backs, end each others’ sen-tences, and what very little we disagree on isquickly solved and moved on from. All of this isto say that his album Two Pines turned out to bethe record we both had hoped to make.Here is how we captured it all, with explana-
tions of the mics and techniques we used. See ifyou can use as inspiration some of the things wedid, some of the rules we broke, some of thehappy accidents we came to celebrate.
Multi-miking for a unified “Frame”Over the years I have been experimenting with an endless variety of mic
setups with regard to all instruments, but particularly the acoustic guitar.That tinkering evolved into discovering a mic setup that is not only beauti-
fully unique and unorthodox, but probably completely wrong, as well.When I think of all of the songwriters who have played a song for me at my
kitchen table, I picture them sitting down with their guitar, relaxed and com-pletely immersed in the song they’re performing; not craning their neck towardsthe mic or maintaining any particular posture. I wanted to be able to allow anartist to sing and play in this near-fetal position of comfort and still get the bestperformance and recording possible.It was with this in mind that I placed an MXL Genesis tube microphone—a
side-address mic—in a nearly horizontal position, facing up towards where thevocalist’s mouth would be if they were singing slightly bent over their guitar. Thismic location not only allows for intimate close-miking, but its upward orientationalso frees the vocalist from having to sing squarely into it. The Genesis has acardioid pattern, which helps to reject the sound of the guitar in this position,as well as a built-in windscreen, which helps facilitate this tight placement. Sincethe mic’s shock mount wasn’t really intended for less than vertical orientation, I
placed a small piece of thick foam rubber where the weight of the mic causedit to make contact with the shockmount.I placed an MXL R77L ribbon mic, also side-address, in front of Peter’s Taylor
510 Dreadnought acoustic guitar at the upper bout. This mic was turned 90degrees to the right, but facing the guitar’s soundboard, about a foot away. The‘L’ stands for Lundahl, an iron-wound output transformer that imparts a deep,warm and rich quality that is still quite detailed and open. The mic’s figure-8pattern brings the sound of the room into the sonic picture as well.The top of the R77 almost touches the mic placed next to it, a Shure KSM27 side-
address cardioid condenser, with no low rolloff engaged. This a very bright mic,with very forward and aggressive upper mids. This mic is set up 45 degrees off axis,looking across the sound hole (not at it), at an angle. This picks up the guitarist’s left-hand action and just enough ‘bleed’ from the other miked areas to help to keep theimaging focused and unified, once the guitar mics are subsequently panned intostereo. See pages 17 and 19 for pictures of this mic array from different angles.
By Sven-Erik Seaholm


RECORDING May 201414
three mics, particularly the room tone in the ribbon and the ceil-ing reflections in the tube mic. This became notable becausePeter and I decided we didn’t want to be married to the livevocals. That meant he would record just the guitar part first, to aclick. After we got the take and feel we wanted, Peter simply laiddown a scratch vocal from the chair he was already seated in.We moved through all of the songs in three sections: Finger-picked
songs first, then all of the more rhythmically muted “chunk” numbers,and finally the openly strummed tunes. We reset levels at the end ofeach of these sections due to their varying volumes. In that way, wewere able to remain sonically and dynamically consistent, creatingthat sturdy “frame” that Peter had previously described.
Keeper vocalsWe then tracked ‘keeper’ vocals for all the songs over the next
few days. I selected the side-address Studio Projects T3 tubemicrophone, with a pencil attached perpendicularly across thecapsule to minimize sibilance (I describe this technique in myarticle “Getting Great Vocals At Home” in the May 2013Recording). We chose the mic because of its deep bottom, bur-nished mids and open top end, which suited Peter’s vocal deliv-ery and all of its sonorous textures. The Avalon Vt-737sp lent amodest 2 dB of compression at a 3:1 ratio, and a gentle 1.5 dBhigh-shelf boost at 15 kHz gave the vocal a little shimmer.
After four days, we had definitive acoustic guitar and vocalperformances for 18 songs. There were very few edits neededfor the acoustic guitar tracks and each vocal was comped fromthree takes immediately after recording each one. We made192 kbps MP3 files for 14 of them and sent them to the drum-mer and bassist, along with all of the chord charts that Peter hadput together.
The bass—the anchorA few days later, the rhythm section of drummer Bob Sale and
bassist Jim Reeves arrived at the studio to record the rhythmtracks. To avoid the bass bleeding into the drums, Reeves’Fender Precision and Jazz basses were taken direct, via a DIbox run into the UA 6176 with a low-shelf boost of 3 dB at 200Hz, and a high-shelf 1.5 dB boost at 4.5 kHz. The 6176’s tubestages can really add some grit and heft, imparting a very amp-like quality to the bass tone. I compressed it generously, 3–6 dBat a ratio of 8:1, with a fast attack and a slow release. This gavethe bass a giant, everpresent and long-sustaining sound thatwould prove to be both powerful and supportive within oursparse arrangements.Had we opted to mike Jim’s Gallien-Krueger GK800RB amp
and Hartke 4x10 cabinet, I would have reached for an Electro-Voice RE20 large-diaphragm dynamic microphone. I’d ask him toplay a bit as I carefully listened to each of the four speakers, witha finger in my other ear. Once I found the sweetest-sounding one,
The R77L was run into an Avalon Design Vt-737sp pre-amp/compressor/EQ, which offers plenty of good clean head-room to amplify the ribbon mic’s typically low output level.Compression with a moderately fast attack and release time wasapplied at a 3:1 ratio with the threshold set to allow a maximumof 3 dB of gain reduction during louder musical passages.Because of the large amount of low-frequency energy provid-
ed by this combination of the guitar and the Lundhal trans-former’s “booty”, the highpass filter was set to roll off at 80 Hz.Additionally, a low-shelf EQ set to 80 Hz was attenuated by 3dB. Using a Pultec-style EQ trick, I then boosted the low mids by5 dB at 80 Hz with the Avalon’s Hi-Q engaged. This gives youa tighter, more focused and controllable bottom end, reminiscentof the ’70s-era singer-songwriter records from artists like JamesTaylor and Joni Mitchell. I increased the upper mids slightly by2 dB at 1.5 kHz, but added a whopping 8 dB at 20 kHz.
The KSM27 was sent into a Universal Audio 6176 vintagechannel strip. I drove the preamp’s tube stage pretty hard, in aneffort to bolster the attitude a little and thicken the sound. The EQwas +3 dB at 10 kHz and +1.5 dB at 200 Hz. I applied about3 dB of compression at an 8:1 ratio, with a slow attack and a fastrelease. I believe the slight disparities between the two differentcompressors’ settings help to glue things together a little.The Genesis vocal mic was taken straight into a PreSonus
StudioLive 16.0.2 Mixer, via one of its onboard XMAX pre-amps, with no further processing applied. The mic’s tube impartsa bit of compression of its own, and adds a bit of excitement tothe upper harmonics as well.The three channels were then balanced level-wise as Peter
played and sang, all panned to center for a fully mono per-spective. Once the levels were all looking pretty even, I checkedall phases, and once the EQ was good and we had the vocalat the level that we liked, I panned the ribbon hard left and thecenter mic hard right, leaving the vocal mic in its center position.The result sounds like the artist isn’t just in front of you, but is active-
ly hugging you with the music. The soundstage is extremely wide, yetcenter-focused at the same time, imbuing it with an almost three-dimensional sense of depth. This technique can be heard in all itsglory on Jason Yamaoka’s album According To The Doctor, a live-in-the-studio acoustic guitar and vocal recording I recently produced.Peter was in a small, fairly deadened room, but there was still
plenty of ambience and harmonic excitement picked up by all


I would set the mic about 4 inches away and directed at the pointwhere the dust dome at the speaker’s center meets the cone—sim-ilar to placing an SM57 in front of a guitar amp.The RE20 was originally intended as a broadcast mic and you
have no doubt seen them in pictures, featured prominently in frontof radio personalities and their on-air guests. It has very little of theproximity effect that can muddy the lower mid response, so itsounds smooth throughout the mic’s frequency range, with a tightand controlled low end. This also makes it an ideal choice for kickdrums and toms, too, as discussed by Paul J. Stamler in the April2014 article “From The Outside In”, and later in this issue you canread what Eleanor Goldfield has to say about putting it in front ofa guitar amp. It’s a very versatile mic!
Drums—as one multi-miked instrumentMiking a drum kit can be a mysterious process, fraught with
frustration and unsatisfying results for a lot of us. Many attemptto capture its sound with an army of mics from top to bottom,often resulting in a mess of EQ and phasing issues that can suckall of the life and personality out of the drums. This can also leadto overprocessing as a result of trying to use gates, compressionand excessive EQ in an effort to fix these problems. The solutioncan be found in adopting a “less-is-more” approach.Bob’s kit consisted of 10" and 14" Pearl maple shell toms and a
matching 22" bass drum. The snares were a DW 13" maple drum
and a Pork Pie 14" brass model. Heads were Remo CoatedAmbassadors on the toms and CS Coated Black Dots on the snares.His cymbals were an 18" Zildjian K Custom Session Ride, and a 16"Zildjian Custom Session Crash. His hi-hat was a Zildjian New Beat.Bob set up his kit and I placed two Shure KSM44 side-address
large-diaphragm multi-pattern condenser microphones in aspaced pair 3 feet in front of the kit at its outer edges, with thecapsules pointed at a slight downward angle. These were alsotilted inward a little toward the snare, to avoid the “hole-in-the-

RECORDING May 2014 17
middle effect” that can sometimes occurwhen miking drums with spaced pairs inparticular. I placed the mics at a heightbarely above the tops of the cymbals, sothat when the crashes were hit hard, youcould actually hear them moving up anddown, adding excitement. Their patternwas set to figure-8, which brought a lot ofgreat room reflections into the signal.
The kick drum was miked with an AKGD112 large-diaphragm dynamic about 8inches away, on axis but slightly off center,into the Avalon Vt-737sp with a 3 dB cut at30 Hz and a 4 dB boost at 80 Hz. A 3 dBhigh-shelf boost at 15 kHz helped pick upsome additional sense of space. 3–5 dB ofcompression at a 4:1 ratio was alsoapplied, with an attack just slow enough toallow the punch of the drum to comethrough, and a fast release, keeping this cru-cial element stable and focused in the mix.A Shure Beta 57A was used on the snare,
an inch above the rim, hanging over aboutan inch into the head, at a “10 o’clock”angle to minimize bleed from the hi-hat.More room excitement was captured by
an Avantone CR-14 ribbon mic (also figure-8), placed over the center of the kit at a heightof about 6 feet, which picked up the rack tomas well as the snare reflections from the vault-ed ceiling above it. This went a long waytowards unifying the stereo image as well.The RE20 was used on the floor tom at
its outer edge at about 4 o’clock, 2 inchesoff the head and tilted about 30 degreestowards the drum’s center. This went into aJoemeek VC1Q Channel Strip, with a 3 dBboost at 100 Hz and about 6 dB of com-pression, with a similar attack and releaseto those used for the bass drum.The overheads, snare and ribbon were
all taken straight in, with no compressionor EQ, and only a small amount of ducttape was applied to the tom heads. We letthe snare ‘ring’, sans damping.
A drum kit is a collective sound—one instrument, if you will. The interaction of allthe mics is critical. I tend to monitor them in mono during setup, as this will more read-ily reveal any phase issues in the form of comb filtering and EQ inconsistencies.Isolating individual tracks should be avoided, unless you’re trying to track downwhich mic is being plagued by these audio gremlins.Once the mics were moved and polarities flipped where needed, I then panned the
overhead mics hard left and right, from an audience perspective. The floor tom waspanned about 10 o’clock, the center ribbon was at about 1:00, kick and snare werecentered.We moved through the songs in a particular order for a very specific reason. I have
always felt that if one can tune the drums to each song’s key, you will find that theybloom and support in a very beautiful way. We started with the tunes in D, then in Eb,E, F, F# and G, tightening up the drums as we went. (The songs in A were satisfacto-rily covered by the E tuning.) This really didn’t add all that much time to our sessionsand the results were definitely worth it! To their credit, the rhythm section of Reeves andSales performed all 14 songs wonderfully... They tracked them all in a single seven-hour session and I made three small edits in total.

Plugging inThe next phase was recording the electric guitars, including
lap steel and solos. Peter arrived with his 1976 Gibson Les PaulCustom, a 1983 Fender Stratocaster and a 1953 Fender Champlap steel guitar, along with a 1966 Fender Deluxe Reverb ampli-fier. There were a number of tones, textures and stylistic touch-stones that we had discussed going in, and we thought we wouldbe moving the mics around quite a bit. As things turned out, how-ever, we ended up using the exact same mic setup throughout.We just changed the tones underneath them!This was accomplished by changing volumes, pickups and
EQ on the guitar and/or amp, sometimes in combination with acouple of effects pedals: A BOSS SD-2 Dual Overdrive for solosand crunch, and a Voodoo Lab Sparkle Drive, a distortion effectfeaturing the unique ability to adjust the level of your ‘clean’sound at the same time, providing an endless array of tonaloptions. Aside from the lap steel’s volume pedal, these were ouronly guitar effects.The amp was placed in the same wood-floored living room
where the rhythm tracks were cut. The MXL R77L ribbon mic wasplaced about 2–3 feet from the speaker, tilted slightly downward,to capture some of the reflections from the floor, in addition to thebit of room sound from the mic’s back. This went into the UA6176, with slight 1.5 dB boosts at 100 Hz and 7 kHz. Also sub-tle was the 2 dB of compression that just grazed the loudest peaks.
I used the Studio Projects T3 tube mic as a room mic, posi-tioned about 8 feet back from the amp and six feet high, inomnidirectional mode. I like to mix these with the amp micpanned slightly to one side, with the room mic hard panned tothe other at a lower volume. This imparts a 3D-like depth of fieldthat allows you to almost see around the instrument.
Sprinkling the sugarAlong the way, Peter performed several acoustic instrument
overdubs, all played and recorded by my side in the controlroom. A Cascade Fat Head II ribbon mic captured Peter’s RegalBlack Lightning resonator guitar (also called a “Dobro” after the

most famous brand of resonator guitars). Peter plays with metal fin-ger picks, so this mic’s roomy sound and gentle rolloff at the top endhelped to sweeten the attack. I put a small strip of duct tape at thepoint where his picks were hitting the metal resonator, to furtherattenuate extraneous noises. I ran this into the Joemeek channel witha generous 6 dB of compression. I disengaged the EQ, but used avery small dose of the VC1Q’s “enhancer” circuit, which excited thehigher harmonics.
The other acoustic string instruments—my beloved no-nameJapanese nylon-string acoustic guitar, a Burke Banjuke, and a beauti-ful Taylor 12-string we’d borrowed—were all recorded in a similarfashion, except that they were miked with an Earthworks SR20 omni-directional condenser mic, three feet away. We did this to help adda bit of space, depth, and distance, allowing them to glue themselvesinto the mix more naturally, and it worked well. Fiddle player MelissaBarrison was added to one song at the eleventh hour, through theMXL Genesis tube mic, about a foot away, over the scroll.Two Pines took a total of 122 hours to record, edit, mix, and mas-
ter. All but nine of those were solely Peter and myself collaboratingon every note and edit. The result is a record that I feel not only per-sonifies great songwriting, dynamic musicianship and a veritableclinic on country singing, but a definitive portrait of Peter’s artistry. Itwas an honor and a privilege to be involved in bringing this won-derful music to your ears.Two Pines will be released in late May, 2014. Look for it on iTunes
and CD Baby.
Sven-Erik Seaholm ([email protected]) is an award-win-ning independent record producer, singer and songwriter. His lat-est release of his own music, not counting the many projects he
records for other artists, is Seaholm Mackintosh’s Monarchs. Checkout his website at www.kaspro.com. Photos by Sven-Erik Seaholm,
Peter Bolland, and Gabriela Aparicio.

RECORDING May 201420
Doing It WrightInterview by Lorenz Rychner
We wanted to know what a recording musi-cian can expect when taking a project to a pro-fessional studio. We’ve long been acquaintedwith the Wright family and their Lake Forest stu-dio in Orange County, and have seen over theyears how musicians from the Southland andbeyond approach the Wrights to get their music tothe next level. Jesse Wright, son of studio founderFrank D. Wright, helms most of the sessions thesedays and took time to field our questions.—LzR
First approach
What are some of the concerns people havethat make them look to someone like you totake on their projects for completion?
Jesse Wright: I can think of many reasons, ofcourse, but one of them seems to be the sound ofthe rooms. My Dad has built and soundproofed allthe rooms here, they sound really good, and thatcan make a big difference compared to an imper-fect home studio.
Are there any issues with the way an unfin-ished project comes to you?It doesn’t matter too much what DAW the project
comes from. I work with Pro Tools HDX, it’s easy toconvert formats these days. It can come as an emailattachment, or—with really big files—sometimes Iget an actual hard drive sent to me. Even the flashdrives are getting so big that an entire album pro-ject can fit on one, like the 64 GB thumb drives.What matters more is the sample rate and bit
rate. I usually start with 48 kHz / 24 bit. I don’tlike to start higher, because at the end of the daywe have to come down to 44.1 / 16, and whileyou can track at a higher rate, the conversion isthen so drastic that you can lose a lot in transla-tion. If I get something in 44.1 / 16, that’s fine too,I can mix in that just fine. The only thing I try to stayaway from is working with MP3s. Sometimes that’sall I have to work with and I make it work, I caneven convert them back up, but if anything anMP3 should be at least at 192 kbps.
What’s the first thing you do?Usually I will spend an hour or so mixing, so
that when they come in and do vocals over theirtracks it’s a mix that’s already sounding prettygood. For the drums I have a lot of modern sam-ples, I can use a program called Sound Replacer[from Avid, makers of Pro Tools], I can go in andput a really nice kick drum on there...
...from what you hear you can get an idea about what they are after,but maybe their sounds aren’t the best?Right, or their sounds might be a bit outdated, so I can give them some-
thing modern. If it was a live drummer, Sound Replacer will keep all thedynamics. If there were any timing issues, we’ll look at that also.So typically I will start by mixing and doing any necessary edits before track-
ing vocals. Sometimes everything is already tracked and ready for mixing, butthat’s rare—ideally you get vocals in a great room with the best mic pre andvocal mics, through the new HDX system which gives us a great sound.
Adding vocals
How do you go about matching the right mic to a voice for somebodywho has never been here?Right now we work with three vocal mics, and one or the other of those will
do it: An AKG C414 which is really good for hip hop, it will capture a malerapper’s voice very well; the Neumann U87 which is really great for any-thing—it’s really difficult to not get a good sound on this microphone; and theAvantone CV-12, it’s a multi-pattern large-capsule tube condenser (www.avantonepro.com). It’s brand new and my favorite, came highly recommend-ed—for example Taylor Swift just used it on her latest album. I’ve used it forvocals, as a room mic for guitars—I’ve always gotten a great sound out of it.
Do you track with compression, without, or both ways at the same time?I always track with compression, but that’s the great thing about the new Pro
Tools, it’s non-destructive, if I add compression here on my pre I’m not stuckwith that compression. Being a commercial engineer you want to keep youroptions open—in case there’s anything the artist wants to change. Doing it inPro Tools I can later either take it off altogether, or continually adjust it as we’re
Jesse Wright of California Sound Studios


RECORDING May 201422
mixing down. After all, it’s all about the artist andwhat is it they want in the end.I only take a little bit of low end off when I do my
levels here through the Universal Audio, the 6176Vintage Channel Strip, a tube preamp. We alsohave the Avalon 737, but right now the combinationof Avantone and UA is my favorite.
Background vocals
Do you do much with backing vocals, for peoplewho come in to do that?Oh yeah, one of the funnest experiences I had doing
vocals was actually with Jeff Timmons, the founder andone of the members of [Grammy-nominated pop group]98 Degrees. I remember doing his album and he wouldhave probably up to 96 vocals on certain parts of thesong, stacked and layered...
...of his own?...all of his own, doing different harmonies and
different things, that was really quite amazing. Thenthere was another band right after that, they hadabout 12 vocal tracks, and I remember them saying“Yeah, when you get the song, don’t be suprised,there are a lot of vocal tracks on it”, and I askedhow many, and they said “About twelve”, so I said“That’s nothing, going from 96 down to twelve...”.That was a wonderful experience I had with Jeffdoing all that...
Do you get people to come in here and standhere (at the mic) and sing like they do on stage?Yeah, I had a group in the other night and we
had about four members standing all around themicrophone at once and do a chant. Typically,though, if we’re doing harmonies we do it separateso it’s nice and clean, so I can do things like useVocALign [www.synchroarts.com] on all theirtakes, because I usually like to get at least four lay-ers of any particular key or harmony. Eight is myfavorite, but depending on the artist, if they getexhausted or whatever, we can settle on four oreven two.
Now I do any edits as needed, stretches, fades, autotunes, then useVocALign so they come in and exit together. I hard-pan them so you hearfour from the left and four from the right, for a really big sound. Then a lit-tle bit of reverb, slap delay if you want to, although typically with some-thing smooth like aahs and oohs, just reverb will do the trick just fine.
Drums in a dead roomWe talked about a dead room earlier—that’s really what I go for, I go
for really direct miking, especially for drums, because if they want real dryup-front drums, I can give that to them. If they want a room with a littlereverb or anything accented later, I can give it to them also.
Do you track with distant room mics that you can blend in later—or not?No, not unless it’s requested. For years I did overhead mics for drums, but
now I mike every element of those drums individually. I just had a group in herecalled Fused By Defiance (www.fusedbydefiance.com), I miked up their China,their Ride, the three Crashes, all individually, each of their three toms, their kick,snare above and below, and their hi-hat, which gave me a total of 12 mics.
What genre?Heavy rock—they have a really good label now [laughs—it’s the
Wrights’ own label www.wrightrecords.com, affiliated with Sony], and agreat following, too, they came in as Number One in the Tap House Battleof the Bands for the Warped Tour.
Here’s another new act, Raff Caballero [Nathan plays back the track “StopThis Train”, which readers can hear on Spotify] where I miked the drums asfollows: For the toms we used Sennheiser MD421, for the overheads we usedAudix ADX51 or AKG C414, Shure KSM 109 for hi-hat, Audix D6 for thekick, Shure SM57 for snare top and bottom, Oktava MK-012-01 for the Rideand AKG C414 for the China and Audix ADX51 for the Crash cymbals.
In this track I hear a pronounced click on the kick—did you eq that in?Let me look that up [scrolls through Pro Tools screens]. I used not just the
Audix D6 on the kick, but I added a sample—and I eq’d the sample, Iadded 4.8 dB at around 100 Hz and 5.7 dB around 200 Hz. Here theyare [plays back miked kick, raw sample, eq’d sample, then final combi-nation]. The click you heard is a part of the kick sample.Lots of people bring tracks that sound okay, or they bring in their own
kick drum that only cost maybe five hundred bucks, so they can’t expecttoo much. I have samples that are not only better but also more modern inthe way they sound, in my library of samples of DWs, Ludwigs, Pearls—five-thousand-dollar kick drums, and miked as good as it gets.
Building the mix
Do you normally proceed with the mix, or does it happen that some-body comes here to do some tracking, then takes the tracks and goessomewhere else to mix?

Only very rarely, really only if it’s a project through Warren G. [arapper / hip hop producer who leases a permanent productionroom at California Sound Studios] and he has a guy in mind downthe road for the mixing and mastering. I really do it normally. Thereare five different tiers for an engineer. First you have a miking andprep engineer, then you have the tracking engineer, then you havean editing engineer, then you have a mixing engineer, then you havea mastering engineer. I do all those things here on a given project.
There is a misconception out there about mastering, that ithas to be so complex. If you have a really great mix, then mas-tering becomes easy. The way I look at it—90 percent of yourproduct is in the mixing.
That’s also because you have all ten or whatever tracks comingfrom right here, so it’s not like a mastering engineer who hasto match up ten tracks coming from ten different sources...
Exactly, we get much better results with mastering if we werein control of the mixes.
My Dad taught me how to start with a mix, there’s a process I doevery time, with every genre, starting with the low end of the song.For example with a rock group, I always start with the kick drum, I getthat to sound exactly how I want it, then I mix the snare to the kick.
Not the bass?Not yet, then I mix the hi-hat and snare to the kick; then I mix
the toms to the hi-hat, snare, and kick; then I mix any kind ofcymbals to the toms and the hi-hat, snare, and kick, then I mixthe bass guitar to the drums.
Then I mix any rhythm to the bass guitar and to the drums. SoI’m constantly building, but I’m still keeping those drums soundingbig and live. Then any kind of lead guitar or other instrument that’splaying more of a lead, I’ll mix those in typically with the vocalsat the same time, so the vocals are the last to get mixed in.
I like to overcompress my vocals, but—maybe surprisingly—I don’t use compression on anything else. I’ll eq the vocals, adda little reverb and a little slap delay on those vocals.
Do you EQ before or after compression?After the compression, I’ll EQ out anything from the low end
that might be too muddy for the vocal. Sometimes the vocalsounds fine, because I already take some low end out here [dur-ing tracking] so the voice sounds fine when blended with thesong, then I won’t really EQ it too much [during the mix stage],maybe not at all. We’ve released a couple of records where wedidn’t really EQ the vocals at all. Then we need a little reverband slap delay to make it sound like a live performance, and onto mastering.
Creative inputWith pop, where everything is expected to be highly
processed, you can go a little crazy with the vocals, creatively.That’s my favorite. With hip hop you can only get kinda crazy,depending on the song, on how the chorus is, depending onwhat the beat’s doing, but typically with everything else you gottastay pretty consistent. Maybe an effect here, an effect there.
On the whole, you don’t wanna saturate a song with all thesecrazy effects when you’re supposed to capture how that bandsounds live. You don’t want to change their sound, so peoplewho only know them live don’t get put off by the album, andpeople who only have the album don’t get disappointed whenthey go to a live show. That gap should be relatively small.
More about the work of Jesse Wright and his family enter-prise can be seen at www.casoundstudios.com and atwww.wrightrecords.com.

RECORDING May 201424
Cremona 251Au microphones, solid-statemics voiced to evoke the tones found in clas-sic microphones of similar enumeration.
Originally ADK got its start using Chinese-sourced parts and manufacturing. Since then,the company’s Custom Shop has gone trulyglobal, with capsules designed in the USA,Belgium, and Australia, USA- and Belgian-designed and built circuit boards, high-endtransformers from Sweden, the USA andEngland, Asian metalwork, and more. Eachmic is then re-manufactured/upgraded withsaid components by Kevin Dale in ADK’sTacoma, Washington headquarters.
This month we return to ADK’s CustomShop, as we look at a pair of new offer-ings that are inspired by the 1960s soundof the coveted Neumann U67: The solid-state Hamburg 67-T and the brand newtube-based Z-67, one of ADK’s new Z-MOD line of tube mics.
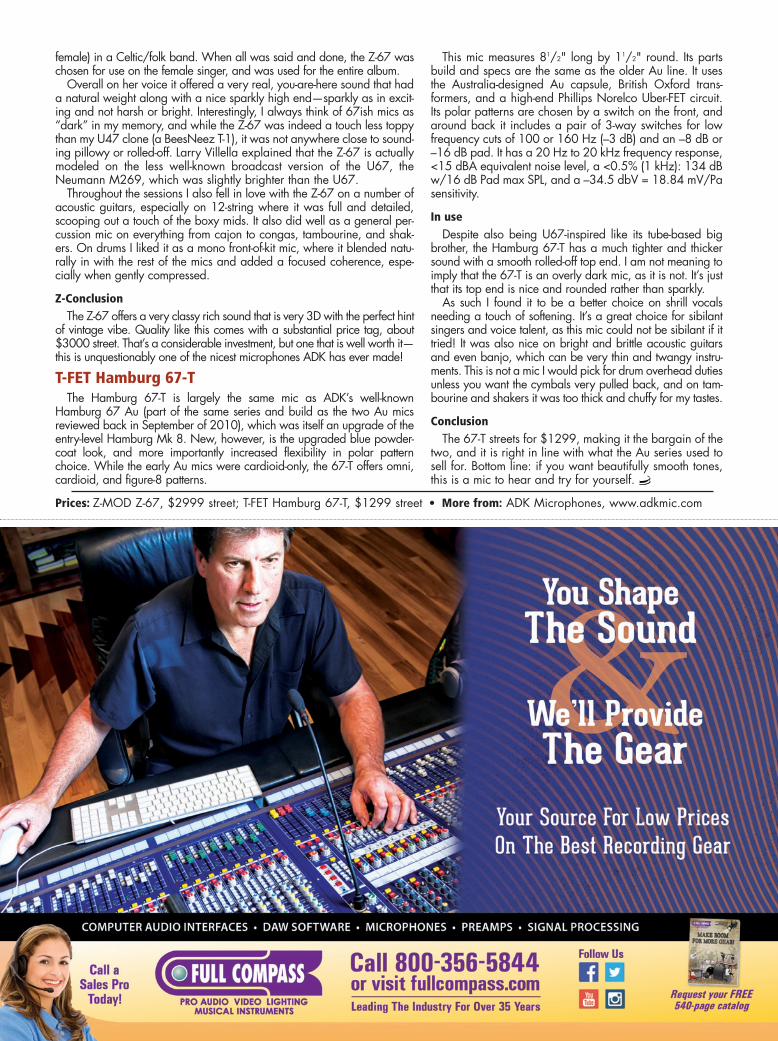
A beautiful new lookIn the past Larry Villella was well-known
for having a “sound before bling” philoso-phy. Most of ADK’s mics shared the same sil-ver bodies and head baskets, with onlyproduct numbers differing from mic to mic.This all changed with the introduction of thenew T-FET and Z-MOD Series models,which include new powder-coated finishesin one of five vintage flavored colors. Both67 models I received for review came sport-ing a classy powder-blue finish. The Z-67also has a new chrome head while the 67-T retains its brushed nickel head basket.
While I agree with Larry that soundabsolutely needs to come first, there is alsoa lot of truth in the fact that many customersand studio clients “listen” with their eyes.The idea is that if it looks cool and expen-sive, then it must be good. Fortunately foranyone using these mics, they have thesound to back up the beauty!
Z-MOD Z-67 “Blue Suede”The new Z-MOD line represents ADK’s
top shelf microphones—the most customcustomizations in the Custom Shop! Thecomponents in the Z-MODs have beenavailable for years as upgrade options for
ADK’s Audiophile Series TT TubeMicrophones, but here you get all of theupgrades in one package, plus the greatnew colors and some extras as well.
The Z-67 is a large-diaphragm multi-pat-tern tube condenser mic. It is built upon thebody of the Area-51 TT and measures 2.1"in diameter by 8.9" in length and weighs justover 11/2 lbs. This body includes a 15/8"thread mount, larger than on most mics. Itlooks and feels more solid and robust andmakes mounting the mic a lot easier.
The capsule is an Australian-designed GK-67D dual-diaphragm capsule. It features anupgraded custom designed Belgian PCboard and uses Wima caps as well as $6-per-unit resistors. The one I was sent (serialnumber 0003) came with a 12AX7/ECC83Mullard Tube and a Lundahl transformer onthe output stage. Regarding tubes and trans-formers, apparently in any of the Z-MODmics you can choose a different transformerif you wish—a Lundahl, Sowter, or Jensen.Each mic also comes with a jewel box witha choice of 3 tubes that include Mullard,Tungsol, and JJ Audio or Electro-Harmonix,depending on availability.
All Z-MOD mics come in a standard alu-minum briefcase and include a metal meshpop shield, a shock mount, a standard ringmount, a foam windscreen, a Custom Shoppower supply, and Premium XLR and 7-PinAccusound silver mic cables. There is also awooden felt-lined box for the mic itself.
The Z-67 offers 9 polar patterns switchableon the power supply with omni, cardioid, fig-ure-8, and six intermediate positions. The michas a 20 Hz to 20 kHz frequency response,a sensitivity of 14mV/Pa = –37 dBV (0 dBV= 1v/Pa), a <250 ohm impedance, a maxSPL of 125 dB, a 17 dBA noise level, and asignal-to-noise ratio of 1Pa: 76 dB.
Sound and useThe words that instantly come to mind with
the Z-67 are rich, weighted and dimension-al. My very first use of the Z-67 was to put itup with seven other microphones in a quickcomparison to determine which micro-phones sounded the best on each memberof a group of three singers (2 male and 1
R E V I E W S B Y P A U L V N U K J R .
ADK Custom Shop Z-MOD Z-67 and T-FET Hamburg 67-T
Solid-state sound or classic tube design? Take your pick
ADK is an American microphonecompany that has been in the microphonebusiness since 1997. Helmed by micro-phone connoisseur Larry Villella, ADK firstmade a splash with the Area-51, whichwas among the first wave of affordableand good-sounding large-diaphragm con-densers back in the early days of thehome and project studio movement.
Since that time ADK has grown its entry-level offerings to include microphones suchas the $399 Thor (reviewed in ourNovember 2012 issue), which offers threecompletely different microphone voicings atthe flick of a switch. At the other end of theprice spectrum, a few years back ADK alsolaunched a Custom Shop for its upper-endfare. We looked at a pair of Custom Shopmodels back in 2010—the Berlin 47Au and
female) in a Celtic/folk band. When all was said and done, the Z-67 waschosen for use on the female singer, and was used for the entire album.Overall on her voice it offered a very real, you-are-here sound that had
a natural weight along with a nice sparkly high end—sparkly as in excit-ing and not harsh or bright. Interestingly, I always think of 67ish mics as“dark” in my memory, and while the Z-67 was indeed a touch less toppythan my U47 clone (a BeesNeez T-1), it was not anywhere close to sound-ing pillowy or rolled-off. Larry Villella explained that the Z-67 is actuallymodeled on the less well-known broadcast version of the U67, theNeumann M269, which was slightly brighter than the U67.Throughout the sessions I also fell in love with the Z-67 on a number of
acoustic guitars, especially on 12-string where it was full and detailed,scooping out a touch of the boxy mids. It also did well as a general per-cussion mic on everything from cajon to congas, tambourine, and shak-ers. On drums I liked it as a mono front-of-kit mic, where it blended natu-rally in with the rest of the mics and added a focused coherence, espe-cially when gently compressed.
Z-ConclusionThe Z-67 offers a very classy rich sound that is very 3D with the perfect hint
of vintage vibe. Quality like this comes with a substantial price tag, about$3000 street. That’s a considerable investment, but one that is well worth it—this is unquestionably one of the nicest microphones ADK has ever made!
T-FET Hamburg 67-TThe Hamburg 67-T is largely the same mic as ADK’s well-known
Hamburg 67 Au (part of the same series and build as the two Au micsreviewed back in September of 2010), which was itself an upgrade of theentry-level Hamburg Mk 8. New, however, is the upgraded blue powder-coat look, and more importantly increased flexibility in polar patternchoice. While the early Au mics were cardioid-only, the 67-T offers omni,cardioid, and figure-8 patterns.
This mic measures 81/2" long by 11/2" round. Its partsbuild and specs are the same as the older Au line. It usesthe Australia-designed Au capsule, British Oxford trans-formers, and a high-end Phillips Norelco Uber-FET circuit.Its polar patterns are chosen by a switch on the front, andaround back it includes a pair of 3-way switches for lowfrequency cuts of 100 or 160 Hz (–3 dB) and an –8 dB or–16 dB pad. It has a 20 Hz to 20 kHz frequency response,<15 dBA equivalent noise level, a <0.5% (1 kHz): 134 dBw/16 dB Pad max SPL, and a –34.5 dbV = 18.84 mV/Pasensitivity.
In useDespite also being U67-inspired like its tube-based big
brother, the Hamburg 67-T has a much tighter and thickersound with a smooth rolled-off top end. I am not meaning toimply that the 67-T is an overly dark mic, as it is not. It’s justthat its top end is nice and rounded rather than sparkly.As such I found it to be a better choice on shrill vocals
needing a touch of softening. It’s a great choice for sibilantsingers and voice talent, as this mic could not be sibilant if ittried! It was also nice on bright and brittle acoustic guitarsand even banjo, which can be very thin and twangy instru-ments. This is not a mic I would pick for drum overhead dutiesunless you want the cymbals very pulled back, and on tam-bourine and shakers it was too thick and chuffy for my tastes.
ConclusionThe 67-T streets for $1299, making it the bargain of the
two, and it is right in line with what the Au series used tosell for. Bottom line: if you want beautifully smooth tones,this is a mic to hear and try for yourself.
Prices: Z-MOD Z-67, $2999 street; T-FET Hamburg 67-T, $1299 street • More from: ADK Microphones, www.adkmic.com

RECORDING May 201426
Capturing the Cab By Eleanor Goldfield
“It’s never wrong if it sounds right.” Thatwas one of the first things I learned when itcame to recording. It just so happens that whenBarry Conley (Zakk Wylde, Black Label Society, Red Elvises,Bullet Boys, etc.) said this, he was placing two mics in front of aguitar cabinet at what seemed, to me, to be very awkwardangles. In the end, however, it sounded amazing. There arecountless ways to mic a guitar cabinet... and really, none arewrong unless they sound wrong.There are some tried and true ways of miking guitar cabinets
that I have seen, and more importantly, heard. Years after Barryshowed me that miking trick, I used it on a session at the VillageStudios, blending the formerly bizarre with a customary classic.This article will focus on both sides of that spectrum, and the
in-between, giving you a solid foundation on which to build asyou experiment.
What follows—the planFirst, I’ll start with mics. Although any mic can be put in front
of a guitar cabinet, here I will focus on those that pop up timeand again, and a little bit on why they never get old.Next, I’ll get into the third dimension of cabinet miking: angles
and distances. This is where creativity and technical knowl-edge/prowess lock step. Simply moving a mic a half of an inch,turning the diaphragm out or in, pushing it backwards or forwards,can be the difference between awesome tone and awful tone.Blends will be the third section, dishing on ways to create the
ultimate soundscape with the various mics and placementsyou’ve set up.And lastly, for all you adventurers out there, I haven’t forgot-
ten about you: the wild cards. Learn the rules so you can breakthem, as the saying goes, and here I will give you a little insightinto some oddities and rare encounters that might just shift a par-adigm or two. But don’t cheat—eat your veggies first...
Mic check—dynamicsStarting with dynamic mics, the most obvious and frequently
used guitar cab mic is the Shure SM57. Actually, in the spectrumof all kinds of mics—dynamics, condenser and ribbon—theSM57 is the poster child for guitar cabs, for good reason: notonly is it almost impossible to break an SM57, it has an idealfrequency response curve for most guitar cabinets.The SM57 has a steady rolloff from 200 Hz down, allowing
for on-the-grille miking without battling proximity effect or flabbyfrequencies from the cab itself. This rolloff also leaves moreroom for the bass and/or kick drum. A dip between 300–500Hz sucks out some more muddy frequencies. The steady grow-ing peak from 2–6 kHz highlights the bite and punch of electricguitars, pulling back slightly in the high shimmery ranges of8–10 kHz to allow for sparkle without the harsh hiss.The Sennheiser MD421 is likely the second most popular gui-
tar cabinet mic. Nicknamed “the fish” for its shape and awk-wardly slippery quick clip, this large-diaphragm dynamic was
built for vocals and broadcasting, and it has a rotary bass roll-off selector (near the mic-cord socket) for five different frequen-cy responses, from S (Speech—with a bass roll-off below 400Hz) to M (Music—a flat, steady response from 90 Hz–1 kHz).There is a smooth emphasis between 3 kHz and 8 kHz, beforedropping off at around 15k. Start miking a cabinet with the Mposition—don’t forget to check! If the tone you get is too bass-heavy, first increase the distance from mic to speaker, ratherthan engaging the rolloff too soon.
The Electro-Voice RE20 is another dynamic mic with bass rolloffcapabilities that’s regularly shoved in front of guitar cabinets. Alsobuilt as a broadcast mic, the RE20 has a pretty steady and flatresponse from 70 Hz–1.5 kHz, with a boost around 3k and sub-tle shimmer between 8–10k before gradually sloping down. Withthe bass rolloff, there’s a steep incline from 40 Hz–400 Hz, some-thing to be aware of for both the good and the bad effects. These are the three main dynamics that I’ve seen set up in
front of guitar cabinets. This is a good place to start, but thereare certainly others out there, such as the Shure SM7B andmany others. Dynamic mics tend to have high thresholds for SPL,unlike most condensers and ribbons, which is where we’reheaded next.
An in-depth look at one of our favorite things to mike—the guitar amp

RECORDING May 2014 27
Mic check—condensersAlthough condensers distort more read-
ily than dynamics, some of the tones theycan capture are certainly worth experi-menting with. Many condensers do havepad switches; don’t be afraid to use them.You’ll still get all the rich goodness con-densers can offer—typically a moreexpanded frequency response, particu-larly in the lows, with less bitey highs androunded mid-upper mids, overall a moresmooth and silky sound than dynamics. First up, the AKG C414 is a classic
large-diaphragm condenser that has abeautifully flat response from 30 Hz–1kHz, a slight dip around 1.5 kHz and abroad, smooth bell peak around 5 or 6kHz, sloping off after 15 kHz. Now, to beexact, I am referring to the C414 B-XL II.There have been many versions of the414 since the ’60s so there will be somevariation depending on which exactmodel you have. The B-XL series is the lat-est and easiest to find. The other 414 inthis series is the B-XLS, which has a verysimilar response curve, with slightly flatterhighs.In the world of condensers, one cannot
escape the power of Neumann. The threesisters—U47, U67, and U87—are beauti-ful mics that offer broad-spectrum captureand that “it” factor some producers andengineers can’t describe and can’t livewithout.Again, Neumann and AKG don’t own
the condenser-for-cabinet market, they’rejust the most popular ones. For example,I’ve also successfully used Audio-Technicaon a few cabs; the AT4060 and theAT4047, the former of which can handle131dB SPL (more than average for a con-denser).For me however, the beauty of con-
densers comes not at close range andhighest SPL, but at arms’ length and thensome, which we’ll get into in a moment.Before that, however, let’s talk ribbons.
Mic check—ribbonsHistorically, one has had to be careful
with ribbon mics due to their delicate con-struction—quite literally an aluminum rib-bon only a few microns thick. If you’re notsure how thick a micron is, one inch isequal to 25,400 microns. So, it’s a prettythin little sliver of a ribbon in there. Thatribbon is what gets blasted with SPL andconducts the electronics of the mic.Nowadays there are ribbons that can
take a beating, and when they do, theydeliver a warm honey feel to the lows,and a rich and smooth creaminess to themids. Ribbons are not generally knownfor their airy or crisp highs, which canmake them a good pairing for, say, anSM57. Think warm caramel sauce asopposed to icy dibs.The Royer R-121 is perhaps the most
famous of these examples. With the ability
to handle up to 135 dB SPL, it sits happi-ly in front of any guitar cab, capturingcreamy and rich textures that havebecome well known and loved in the stu-dio world. The Beyerdynamic M160 ribbon is
another popular choice, giving you a lit-tle bit more in the highs than the 121 witha comparable SPL rating of 129 dB.The Coles 4038, made by BBC as a
broadcast mic back in the 1950s (andrevisited in this very issue by Paul Vnuk Jr.in his review of Coles’ new 4030L—readall about it!), has a fairly flat frequencyresponse curve. It breaks up more readilythan the aforementioned two ribbons andis known for its delicacy, but delivers softhighs and almost goosebump-inducingsmooth and cozy lows and mids. So, with a nice smorgasbord of mic
options, let’s dive right into where to putthem.
Location, location, locationWhen it comes to cabinet miking, there
are a few basic generalizations to keepin mind when you’re starting off. First, the further you are from the cabi-
net, the more room tone you’ll get. Thedirect sound of the cabinet will be lessbassy and have softer highs. The closeryou are, the more direct cabinet soundyou’ll get, with added proximity effectdown low plus piercing highs.Second, the closer you are to the cen-
ter of the speaker cone, the brighter andmore direct the sound will be. As youmove towards the edge of the cone, thesound will get darker.Third—on-axis vs. off-axis. This com-
parison refers to the angle at which themic is placed in relation to the soundsource. So, let’s say you have that SM57placed at a 45 degree angle against thegrille of the cab. That is 45 degrees off-axis. If you place it pointing straighttowards the cab, that’s on-axis. Not sur-prisingly, on-axis gives your more trebleand more punch. Off-axis gives a bassier,darker and warmer tone.Let’s start with close miking, which to
me is anything up to 6 inches away fromthe cabinet. Most engineers and produc-ers have their own preference; somewanting to literally shove the mic into thegrille while others prefer an inch or moreof distance. In most cases, I like to see thesmallest sliver of light between the grilleand the diaphragm of the mic.I say “most cases” because there is
always variation. Something I recom-mend is to have someone out with thecabinet moving the microphone back andforth from the amp, 6 inches to right upfront, while someone plays through theamp and you listen on headphones in thecontrol room. This will allow you to hearthe spectrum of close miking, solidifyingyour sweet spot.

RECORDING May 201428
First, however, grab yourself a flashlight and hold it up to thegrille, revealing the placement and size of the speaker. Someengineers will just feel around for the edges of the speaker conebut I prefer the accompanying visual. Alternatively, you can sim-ply remove the grille.
If your cabinet has multiple speakers, it’s not a bad idea to takethe time in finding the best sounding one... or the best ones, if youplan on using multiples. This will require that you either move a micin front of each speaker and record a sample of each, listeningback in the control room, or that you stick your head close to thecabinet. If choosing the latter, make sure to check the volume onthe amp first. I’ve learned this the hard way—no fun.
Once you have a good idea of which speaker(s) to go for,and of their size, you can go about placing mics! Not all theaforementioned mics work on all cabs. I’m giving some generalplacement ideas and options. But as with anything else inrecording, there are no rules until it starts sounding bad. Use thisas a starting point and don’t be afraid to get creative!
In 90% of the sessions that I’ve done where the engineer/pro-ducer didn’t have a specific reason for avoiding the SM57, that’sthe mic that we started with. Because of its tonal characteristics, Ilike it on-axis, almost touching the grille, at the center of the cone.
If the cabinet is really bright, like a Fender Tweed or somethingsimilar, I may turn the SM57 to a slight off-axis angle, or move it outfrom the direct center of the cone, but not too much. Don’t try to turnone mic into several, or into a mic it’s not. Grab several and mix.
When I use the MD421 and/or the RE20, I’ll typically placethem halfway between the edge of the cone and the center, on-axis, about a half inch to an inch away from the grille.
I really like adding a ribbon to the mix here. For me, that’sbeen the Royer R-121, but as I mentioned, ribbons tend to havesimilar characteristics across the board.
This one I will also place about halfway between the centerand the edge of the speaker, perhaps more cheated towards theedge so as to accentuate the smooth, warm lows and creamymids that the dynamics don’t highlight.
Some other quick close-miking ideas:~ Place a mic at center and angle it out towards the edge of
the cone, about 1 inch from the grille.~ Place a mic at the edge of a second speaker and angle it
towards the center of the first.~ Grab two of the same mic (I use SM57s for this one) and
place one straight on and one at 45 degrees.For close-miking I prefer the warm transparency of a ribbon
and the edginess of dynamics at closer range. I don’t typicallylike a condenser for close miking, although I know several engi-neers who do. Why not condensers? The condensers are veryclean and pure. I don’t like that kind of purity up close. I want itto blend with the cacophony of tones happening in the roomand serve it up with a nice shimmery bow.
But for far or remote miking, a.k.a room miking, I’ll use a con-denser. I’ll throw one up about 4–5 feet or more away from thecabinet, depending on the room.
I once miked a cabinet in a room that was about a half-clickaway from echo chamber. There, I found it distracting to havethe room mic anymore than 12 inches away from the cab. Thesituation will dictate the placement.
Blend bigI say “blend big” not because I’m assuming you want the “wall of
sound,” but because in most cases, you’ll want to blend additively. In
other words, check your phase! Any time you have more than onemicrophone on a single sound source, you run into the possibility ofphase issues. If you start blending those lovely mics that you’veplaced and the sound becomes smaller, you have a phase issue.
Another way of checking this is to simply look at the com-pression and rarefaction of the sound waves inside your DAW.Does one go up when the other goes down? That’s a phaseissue. You can fix this simply by nudging one of the regions toline up with the other track.
Yet another way that I’ve seen engineers tackle phase prob-lems is by placing the diaphragms of two mics at exactly 90degrees to one another.
A cool and old school way of dealing with phase, is this littletrick: Turn the amp up loud, with the volume of the guitar all theway down, making the amp hiss. In front of your chosen speak-er, wearing headphones, move the first mic around until youfind the spot where the hiss sounds the most broad across the

spectrum. Grab your second mic and invert the phase, sweep-ing it across the speaker until the hiss is at its lowest. Do thesame with any additional mics. You won’t be able to com-pletely cancel the phase like you can inside the DAW by mov-ing regions, but it will be really close. Once your phase is inorder, you can blend your mics together.There are also simple phase-shifting devices that you can put
inline between one of the two mics and your recorder; you turnthe dial until the blend sounds best. The best known of these arethe Little Labs IBP (In Between Phase) and the RadialEngineering Phazer, but I’ve never worked with either.In terms of the blend of mics you have up, I will typically choose
an ‘alpha mic’ and at this point, I’ve become rather predictable: inmost cases it will be the SM57. More often than not, I’ll use this asmy alpha mic and blend the others in relation to it. The other dynam-ics fill out the sound, particularly in the punchy mids. The ribbon willadd depth and warmth and the condenser will add room tone.I’d like to briefly suggest recording a DI track if you have the
space in your DAW’s track count. This isn’t because it’ll soundgood now, but it may come in handy later to try some reamp-ing (sending the recorded DI signal back out to an amp).Now, before you print your guitars and call it a day, read
this last little section about the fascinating oddities you maywant to try when recording guitar cabinets (insert evil chucklehere).

RECORDING May 2014 31
Wild cardsWell, let’s start at the beginning: mics.
I mentioned the staples, the cool kids inthe class. I, however, appreciate the the-ater kids and geeks, so I like throwing upa wild-card mic every now and then, justto see what it gives me.One such wild card is the Placid Audio
Copperphone. It’s a band-passed micro-phone that highlights the frequencyresponse of a telephone or AM radio,and it sounds pretty awesome on a guitarcab. It will unlikely be your alpha but itcan add a nice sprinkling of distorted fizzand slice to your tone.Next, mixing the extremes: Try a blend of
expensive and cheap or dark and bright.For the former, take an SM57 and put itnext to a Neumann U67, then blend. Thejuxtaposed characteristics will give you areally interesting capture of the cabinet. Justmake sure you watch out for the SPL on the67! For the latter, take a mic like the AKGD112 or an Audix D6 kick mic and blendit with the Copperphone, or an AKG C418or the Superlux PRA-288A (originally engi-neered for trumpet). Or take a Shure Beta52 kick-drum mic and blend it with anMD421 in the “S” position.These will essentially give you a highpass
and lowpass snapshot of the amp, offeringinteresting blending options. To make for athree-band EQ snapshot, add in a mid-punch mic like the SM57, all pointed to thecenter of the cone, or in a straight line asclose to one another as possible. I’ve alsoseen this idea done with a Sennheiser 409for the lows, SM57 for the mids and aC12A or C414 for the highs.If you want to try something a little dif-
ferent in terms of placement, try behindthe cab or off to the side. On one track, Iplaced a mic behind an open-backedcombo, so that the mic sat underneath thespring reverb. At one point, the ampcrackled so the guitarist walked up to theamp and hit the top of it. The mic pickedup the shaking of the spring reverb andwe ended up using it for a really cool-sounding effect!Back in front of the cab, try turning that
room condenser mic away from the soundsource. In figure-8 pattern, face it towardsthe walls so that it rejects the sound comingfrom the cabinet. Hello, room tone! If you want to throw a wild card into the
control room, try some phase EQ. Thistechnique calls for three mics, two of whichare close mics, one of which is a roommic—let’s say two dynamics close and onecondenser far. Position them so that theyform a triangle, with the two close mics atan angle against the grille, off-axis. Bringup one mic at a time to an ideal level onyour board or DAW, making sure thatthey’re in phase with each other.Then start to raise and lower each
fader, creating a unique EQ-ing effect. Toget real crazy, try flipping the phase on
one of the mics. It will act like a filter andreally throw some interesting mojo intothe mix.
Now you tryWith everything from the straightfor-
ward on-axis to the crazy wild cardbehind the cabinet, you have a solidrange of cabinet-miking options. Takeyour time in experimenting. Don’t figureyou’ll fix it later. Really dive into micchoices, placements and blends. Evenwhen you find something you like, whynot make a note, shift the placement andsee if you like that even better?Friendly tip: know when to experiment,
i.e. not on a big session that you’re assist-ing on. And even if it’s all about you and
your miking adventures, once you getpast two hours of play time, you maywant to offer the guitarist a drink or somefood. Happy miking!
Eleanor Goldfield ([email protected]) is a Los Angeles-based writer,musician and freelance tech and studioconsultant. She is lead singer in the hardrock band, Rooftop Revolutionaries, andworks with several studios and pro audioprofessionals in management and con-sulting capacities. For more info, checkout eleanor-swede.com. The photos weretaken by Eleanor at The Mouse HouseStudios in Altadena, owned and run byRich Mouser. You’ll learn more at www.themousehousestudio.com.

RECORDING May 201432
Based in Wilsonville, OR, AudixMicrophones has a history that datesback to the mid-1980s, with a reputa-tion for manufacturing quality micro-phones for the studio, stage and evencorporate use. My own Audix historydates back to 1998, when a pair ofCX111s became one of the first pairsof large-diaphragm condenser micsin my then-brand-new studio!Since then I have acquired and/or
regularly use a full set of D Series drummics, Micro Series mics for choir work,and back when I regularly sang in bands,the other singers and I all swore by AudixOM5 and OM7 dynamic vocal mics. So atthis year’s NAMM show, when Audix’s VP ofSales Cliff Castle asked me if I wanted to takehis VX10 and VX5 vocal condenser mics for aspin, I enthusiastically accepted. Handheld con-denser mics for live use, bringing studio qualityto the stage, are available from a number ofmakers, and the VX mics were among the veryfirst in the field; we’re long overdue in introduc-ing these mics to our readers.The bulk of this review is on the VX10,
which is Audix’s flagship handheld vocal con-denser mic; see the sidebar for a quick look atthe more affordable VX5 handheld electretcondenser mic.
Meet the VX10Visually and stylistically the VX10 shares a
strong resemblance to Audix’s OM series ofdynamic handheld mics, with its matte blackfinish and tapered body. It is a very classylooking mic and is very comfortable in thehand. Under its brass grille (which features amulti-layered pop filter) lives a standard car-dioid capsule—the SCX1C capsule that canalso be found as the heart of the Audix SCX1pencil condenser mic. Said capsule is a 21mm medium-diaphragm true condenser ele-ment, internally shockmounted to reduce han-dling noise.It has a frequency response of 40 Hz–20
kHz, a 250 ohm impedance, a maximum SPL of 138dB, and a sensitivity of 24 mV/Pa at 1 kHz. Both themaximum SPL and sensitivity are impressive for ahandheld vocal mic. Tonally it has a flat mid sectionwith a wide low-end bump from 200 Hz down, aswell as a high-end peak of about 3 dB from 5 to 12kHz before rolling off.
In useNormally this is the part of a review where I mention all ofthe sources I tried a microphone on, and how they fared.Seeing as this is handheld vocal mic, you might think I lim-ited its use to vocals. And you’d be wrong! But let’s not getahead of ourselves.Starting with vocals, this mic delivers a clean, classy
sound with a glassy smooth top end and a nice amountof low-end richness. Like any good studio mic, this is amicrophone that a singer can play to, and it capturesvocal nuance well—be it male or female, crooner to rock-er. I originally feared this mic might be a tad too prissy fora good Cookie Monster screamer, but since it handles 138dB, that’s not much of a problem either.While most of us don’t typically reach for handhelds in the
studio, recently I was recording a group of singers who sim-ply could not get their parts to come together when trackingeach voice separately. First I suggested everyone gatheraround a large-diaphragm mic in a figure-8 pattern and tracktogether. This was problematic, as it gave up too much controlfor adjusting the levels of each vocalist in the mix later on.The final and best solution was to give each of the three vocal-
ists a handheld mic and still have them track the vocal parts togeth-er live. I gave the male lead vocalist the VX10, another vocalist theAudix VX5 (see the sidebar), and used a common dynamic hand-held on the third singer. Not only did this work like a charm, butthe quality of the track from the vocalist on the VX10 was not muchdifferent than the tracks we were getting earlier with the large-diaphragm mic—except that they were tighter, with less roomsound. Nicely, handling noise and plosives were never an issue.Since I am a percussionist, I spent much of the rest of my time
with the VX10 using it on the front of a cajon, for shakers, congas,and even snare drum. In every instance, with the exception ofsnare, I was quite pleased by the results. Again it was a clearsound with a nice touch of low-end heft, a nice forward and tightsound. On snare, however, it lacked the aggressive punch I preferfrom an SM57 or Audix’s own i5 dynamic mic.My last test was on acoustic guitar, where the highs cut through
nicely for string definition, and the low bump helped add weightto the sound. Very cool!
ConclusionsReally there is only one concern with the VX10, and that is that
it costs quite a bit more than most typical dynamic handheld mics.But it’s more affordable than practically all the handheld condensercompetition, and with its tonal quality it is well worth considering if
it fits your needs.What needs are those? If you are a professional singer who tours, you
really should have your own mic rather than what the venue offers, andthe VX10 is a great choice. If you do any home recording or songwritingdemos, this is a mic that will not only handle your vocal duties (and let youmaximize your live mic-working technique), but is equally adept atacoustic guitar and percussion as well. I can’t stress enough how tailor-
R E V I E W S B Y P A U L V N U K J R .
Audix VX10 and VX5 Professional Vocal MicrophonesCondenser quality within your grasp—literally

RECORDING May 2014 33
made the VX10 is for this situation; it canreally be a singer/songwriter’s One MicTo Rule Them All.
Whether you choose this mic or themore affordable VX5, Audix has put animpressive pair of well-built and greatsounding vocal options in your hands.
Prices: VX10, $590; VX5, $290
More from: Audix, www.audixusa.com
Vocal condenser quality for less: the VX5If the VX10 is outside of your price
range at $590, another Audix mic to con-sider is its baby brother, the VX5. TheVX5 is a $290 electret condenser with a40 Hz–16.5 kHz frequency response, a5.0 mV sensitivity, and 140 dB maximumSPL.
Its high-end bump is tighter and cen-tered closer to 10 kHz, and it lacks thelow boost of the VX10, but it has theadvantages of a hypercardioid pattern,which is great on stage for rejecting otherinstruments that may be close, as well asfeedback from stage monitors. At homethat tight pattern can be used to ignoremiscellaneous noises like the neighbor’sbarking dog, the refrigerator, and streetnoise. Plus it offers a few things the VX10does not: a 150 Hz rolloff switch and a–10 dB pad.
Tonally the VX5, while not as rich-sounding as the VX10, still offers a greatclarity not found in most dynamic hand-helds. It helped save the day for my vocalsession as described in the VX10 review,and I found it clear and solid on acousticguitar and percussion as well. It’s a finealternative for the singer/songwriter orstudio on a tight budget that can benefitfrom a handheld condenser option.—PV

RECORDING May 201434
Coles Electroacoustics Ltd. is a Britishmicrophone company started in the 1960sby two gentlemen with the first names ofColin and Les, which condensed nicely toColes. At one time both men worked atanother British company named STC, shortfor Standard Telephones and Cables Ltd.,which had a prestigious microphone divi-sion. Over time Coles took over the manu-facture of many STC models, and eventual-ly in the 1970s acquired the intellectualproperty and rights to continue the manu-facture of those microphones on its own.Coles is best known for classic ribbon
mics like the 4038, originally an STCdesign that is still in production today, aswell as more modern ribbon designs likethe 4040 (reviewed April 2004) and thestereo 4050 (reviewed February 2011).Today we will take a look and listen to
the historic 4038 as a prelude to tryingout the newest Coles ribbon, the 4030L.
The Coles 4038The original STC 4038 was designed for
the BBC and dates back to 1953. The current
R E V I E W S B Y P A U L V N U K J R .
Coles 4030L and 4038 Ribbon MicrophonesA classic ribbon mic serves as introduction to a remarkable newcomer
4038 (shown on the facing page) is not a reproduction or reissue—it is one of the old-est microphone models still being made today. This is evidenced by the fact that
it is still constructed with a long-outdated 3-prong Western Electric input jackand needs an XLR adaptor (thankfully included) to be used with modernmic preamps and consoles.
The 4038 measures 71/4" x 31/4" x 23/8" and weighs a healthy 2lb. 6 oz., and as you can see from the photo has a unique headdesign somewhat like an old-fashioned flatiron. It is finished in a tex-tured black enamel, and its head assembly is made of perforatedbrass with an internal mesh fabric protecting the ribbon and motor.
The head assembly is attached to the body on a swivel mountand can pivot a full 180 degrees front to back to aid in mic posi-tioning. Another design holdover from the 1950s is a rotatingring on the body with three eyelets, whereby you could attachcords to suspend the mic above its source. For modern-day use itcomes with a threaded mic stand adaptor that attaches to two of
the eyelets with Allen screws.
SpecsThe 4038 uses a pressure-gradient low-mass damped ribbon which is
only 0.6 microns thick, 1" long and just under 1/4" wide. It is one of the thinnestribbons on the market. As such it is quite delicate and the 4038 needs, like most olderribbon designs, to be handled with care.It has a 30 Hz to 15 kHz frequency response, an impedance of 300 ohms, and a sen-
sitivity of –65 dB re: 1 V/Pa. It is fairly flat across the frequency spectrum, with its mostsignificant variances being a roughly 2 dB rise around 200–300 Hz and 1.5–6 kHz.
It comes in a hard plastic case and my review model came complete with the 4069XLR adaptor, mic stand mount, and a purple velvet mic bag, which should be placedon the mic when not in use. The bag is vital to protect it from both air blasts, as wellas microscopic metal particulates that can literally clog up the ribbon assembly.
Set up, stand upThe 4038 requires a robust mic stand, as it is both heavy and a tad awkward in shape
and balance. I repeat, when I say “robust mic stand,” I mean a good counterweighted standfrom someone like Latch Lake, Atlas, or Ultimate Support, and not the cheap $20 variety.This is especially true if you wish to use one or a pair of 4038s on drum overheads...
and trust me, you will! Also give yourself some setup time, as some assembly with ascrewdriver is involved with both the XLR adaptor and the mic stand mount.
In useThe 4038 is one of those microphones that, when you plug it in and place it on a
source, makes your brain say, “Aha! I get it!” It is instantly apparent why this mic hasbeen so highly revered throughout recording history. Like most ribbon mics it has a richbottom end and a smooth rolled-off top, but it also has a nice pronounced mid pres-ence that many other ribbons do not.Despite its figure-8 pattern, I found the 4038 less subject to the sound of the room than
what I am used to from other ribbon mics by firms like AEA. To explain, when I use a miclike an AEA R84 I am very aware of the source sitting naturally in its space in a very 3Dway. With the 4038 the source and the room are tighter, more focused and gelled togeth-er with a natural compression that is hard to describe until you hear it.The 4038 has one of the smoothest yet most pronounced proximity effects I have heard
in a ribbon mic. It’s thick and full even at 2–3 feet away, making it very deceptive when

RECORDING May 2014 35
it comes to distance miking. In multipleinstances I miked up various instrumentsand singers with my usual large- and small-diaphragm condensers, and then decidedto put up the 4038 a few feet back, think-ing I would get some nice space and roomsounds... only to find out that often the4038 competed sonically with the closemics for presence and fullness, giving theillusion of being much closer to the sourcethan it was!The 4038 is amazing on a drum kit—a
fabulous blend of full, focused, and punchyyet natural sound. The 4038 makes anamazing drum overhead, even if you onlyhave a single mic to use in mono.On electric guitar amp, about 3–4’
back and coupled with a modern ribbonmic or standard dynamic, it adds a huge,focused depth that again gels the ampand the room together nicely. On acousticguitars, a foot or two back coupled with asmall-diaphragm condenser for brightnessand detail, the result is similarly gorgeous.It even did well to tame an Irish pennywhistle on a Celtic session, which makessense due to its solid reputation as a brassand wind instrument mic.On spoken voice it does have a very
radio-announcer sound, and unlike mostribbons, you won’t need to get right up onit for a little chest resonance—in fact the4038 would prefer that you keep your dis-tance. Sung vocals are a similar experi-ence of smooth yet bold sound, but use agood pop shield and stand back a bit.The 4038’s sound is classically lovely
and rarely requires any tweaking in thesignal chain, but on vocals and the occa-sional acoustic instrument I did findmyself adding a few dB of 10 kHz andabove to give it a more modern edge.And speaking of modern, now that we’vegotten to know this amazing mic, let’smeet the new baby in the Coles family.
The 4030LThe 4030L (shown at left) is the antithe-
sis of the 4038 in almost every way, withthe exception of build and sonic quality,both of which are exceptional. In the sizeand weight category the 4030L measuresjust shy of 5" x 23/4" x 11/4" and weighsin at just over half a pound. Its includedcustom mic clip weighs more than it does!The 4030L is a lollipop-style mic, with
a large nickel double mesh grille andblack body. While it does bear an initialresemblance to many low-priced over-seas-sourced ribbon mics, be assured thatwhen you hold it in your hand you instant-ly see that it’s made with high-qualityBritish tooling and easily deserving of theColes name.Internally the 4030L uses the same
newer ribbon assembly found in the com-pany’s 4040 mic. It has a 50 Hz to 20kHz frequency response, a 300 ohmimpedance and a sensitivity of 0.56
mV/Pa. Those are all the specs I have—the 4030L is so new that even the Coleswebsite has no tech data at all.It ships in a foam-lined plastic case with
a robust mic clip that is custom-made forthe mic and once attached allows foreasy 360 degree swiveling. I wish all micclips were this nice!
Modern ribbon soundWhile the 4030L and the 4038 share a
nice even response and similar focused midweighting, the 4030L is much more mod-ern, with a nice extended top end and lesslow-end fullness.Compared to the 4038, it has a much
more constrained proximity effect—you’llneed to get right up on its grille if youwant chesty radio voice tones. Yes, I saidright up on it! The 4030L can go placeswhere I would never dream of using a4038 and is quite happy up close on asource, and thanks to its small size, lightweight, and swiveling mic clip, it is quiteeasy to place just about anywhere.It’s a great kick drum and tom mic. Just
inches from the head, the 4030L captureshuge punchy tones. It also sounded bigand full about 6 inches outside the soundhole of a cajon (with a pop filter in placeto protect it from the cajon’s air blast, ofcourse).
If you are a person who thinks most rib-bons are too dark for drum overheads, the4030L may be a better choice, thanks to itsmore rolled-off low end and slightly extend-ed highs. On vocals, the 4030L is great forvelvety crooner tones. It’s still a nice pillowyribbon tone, but one where you won’t haveto boost in the 10–12 kHz range near asmuch as you might be used to for an olderribbon design.Like most modern ribbon mics, the
4030L works great right up in the grille ofa screaming guitar amp, where it issmooth, forward and open. A few inchesoff of the 12th fret position on acoustic gui-tar, it offers a great balance of strings andbody. Similarly this is a great microphoneon mandolin, banjo and fiddle. It’s a clas-sic sound with just the right amount of highend rolloff and control to keep said instru-ments from being too thin and jangly.I don’t want to give the impression that
this is a bright mic—it is not, it’s justbrighter than many older ribbons. Youcould say that I’m talking “ribbon bright”rather than “condenser bright”.
ConclusionsWhile the 4038 is an undisputed clas-
sic mic that rose to fame with the Beatlesand has been appearing on hit recordsever since (and it’s easy to hear why!), the4030L is a bit more versatile and may bea better choice if you are thinking ofadding a good all-around ribbon mic toyour locker—primarily since it is lighter,easier to set up and place, and a lot lessfragile when dealing with blasts of air.Actually, many of my sessions includedusing the two in tandem: 4038 on over-head and 4030L on kick drum, 4030L upin an amp grille with 4038 at a dis-tance... you get the point.Coles is billing the 4030L as its entry-
level mic; at $1099 list price, it’s certainlythe most affordable Coles ever. The 4038isn’t that much more costly at $1589 list,but as I said above, it’s finicky about treat-ment and placement and isn’t as well suit-ed as the 4030L for modern music record-ing techniques.The 4030L modernizes the great Coles
sound and brings it to an audience thatloves ribbon tone but doesn’t want tomess with ribbon fussiness. It’s still hard tofind in the USA—very few places carrythem—but I hope it will make a realimpact as it becomes better known. Inclosing, I’d like to thank IndependentAudio for loaning me these mics as away of getting the word out about Coles’brilliant designs... old and new.
Prices: 4038, $1589; 4030L, $1099
More from: Coles Electroacoustics Ltd.,www.coleselectroacoustics.com;dist. by Independent Audio,www.independentaudio.com


SoundThe NT1 is indeed quiet. I mean
it’s really, really quiet... which makesit great not only with high-end micpreamps but also with many of thepres in entry-level computer inter-faces that make your mic work a littleharder.Sonically, this mic is clean on the
top, with a full and even low endand mids. The most impressive partof the NT1 is its top end, which isnice and clear but with zero harsh-ness or bite. Overall the NT1reminds me a slight bit of classicmics from the past—not that it’s try-ing to be “vintage”, but rather that itlacks the high-end profile of manymics that we have come to equatewith the “modern condenser sound.”My first use of the NT1 was on an
acoustic guitar and vocal demo ses-sion in my office. This was right after Itook the mic out of its box and pluggedit into my MOTU 4pre (reviewedDecember 2012)... I immediately had
one of those “This mic costs howmuch?” moments. In the next fewweeks I took it into the studio and usedit on more acoustic guitars, percussion,mono overhead/front-of-kit (I only hadone), and male and female vocals. Inevery instance I was impressed. It doesnot have a sound per se—it just cap-tures a source with a great blend ofdetail and richness.
Final thoughts on the NT1So how much is the NT1? For the full
kit version it has a street price of $269.I know, I couldn’t believe it either!I don’t say this lightly, but I expect-
ed the NT1 to cost closer to $500and even then it would still beimpressive. This is a great starter mic,a great workhorse-utility mic that youshouldn’t outgrow for quite a while, ifever. Nice job, RØDE!
RØDE is an Australian microphone company that has beenproducing microphones for the studio, stage and video produc-tion since the early 1990s. Today we are looking at therelaunch/redesign of the mic that started it all, the NT1, and abrand-new pencil condenser mic, the M5.
The NT1: the past as prologueRØDE got its start modifying Asian import mics, but soon shift-
ed its entire production line in-house. Today all RØDE mics aredesigned and made Down Under, in Sydney. The first mic wasoriginally dubbed the Rodent-1, eventually shortened to RØDENT1. When production shifted in-house, the company launchedthe NT2 and eventually in 2003 the NT1 evolved into one of thecompany’s most popular microphones of all time, the NT1-A.Geno Porfido gave us our first look at the NT1-A in our July
2003 issue; he found it “well made... and it sounds good on justabout everything.” Now, just over a decade later, it gives megreat pleasure to introduce you to the RØDE NT1. Rather thanjust an upgrade, the new NT1 is a complete redesign. Accordingto RØDE, the only thing it shares with the NT1-A is its mesh headassembly. So what’s new? Apparently everything!
From the top downThe NT1 is built around the company’s new 1" HF6 cardioid
condenser capsule, which rests upon an internal Rycote Lyreshockmounting system. I had to take the top off and see for
myself; it truly is one of the most unique capsule shockmounts Ihave seen. The mic is a transformerless J-FET design and usessurface mount technology to achieve the NT1’s next claim tofame—a low 4.5 dB of self noise.The outer body, which does pay homage to its predecessor,
is finished in a special ceramic-coated and baked matte blackfinish with a laser etched logo, model and serial number. Themic is rounded out by gold-plated output connectors.The NT1 has a 20 Hz to 20 kHz frequency response that is
flat from 25 Hz up to 1.3 kHz. This is followed by a smooth 2dB bump up to about 11 kHz, which then rolls off smoothly.Other notable specs include a –29 dB sensitivity, 128 dBdynamic range, and a 132 dB maximum SPL.The NT1 comes in a kit with a cloth dust bag, and a special-
ized shock mount called the SMR which also makes use of theRycote Lyre system, which also has a removable metal popscreen. On the downside, it is a bit bulky; fitting it into tightspaces will be a concern. It’s best suited for vocals or sourcemiking at a few inches’ distance. For use on snare or up closeto a source, the mic is available with a simple RM2 ring mount.The NT1 seems to be sold with either one or the other, which Ifind odd, as you will probably want both for versatility.
RECORDING May 201438
R E V I E W S B Y P A U L V N U K J R .
RØDE NT1 and M5 Condenser Microphones
A new twist on an established workhorse and an affordable new design

The M5: something entirely newWe aren’t done with RØDE yet! About three
weeks before the NT1 arrived at my door, I alsoreceived a pair of RØDE’s new M5 pencil con-denser microphones.The M5 is a 1/2" pressure-gradient electret con-
denser with a cardioid pattern. The transformerlessM5 uses a J-FET impedance converter with a bipo-lar output buffer. It is a compact mic, measuringonly 33/4" in length by 3/4" in diameter. Like theNT1, it is finished in RØDE’s ceramic coated bakedmatte-black finish and is highly scratch resistant.The M5 is only available in pairs and comes with
a set of foam wind screens for outdoor use, and twoof the nicest pencil condenser mic clips I have seen.Beside being made of high-quality tough plastic,each one features a button-locking, spring-loadedthumb screw.The M5 has a 20 Hz to 20 kHz frequency
response, an output impedance of 200 ohm,equivalent noise of 19 dBA, sensitivity of –34 dB,a dynamic range of 121 dB, and a 140 dB maxi-mum SPL. If you are running to compare thesespecs to RØDE’s well known NT5 pencil con-denser, the nutshell version is that the M5 has ahigher noise floor and is a tad less sensitive... butit’s also half the price of the NT5, and in my testsneither of these slightly lower specs was an issue.
In useMy first use of the M5 was as a pair of spaced
overheads on a live drum kit; they worked won-derfully, the sound was full and tight. Again
RØDE has done a great job of creating a budget condenser mic that does nothave a harsh piercing high end!Next up I used the pair to mic the top and bottom of a Leslie speaker cabi-
net connected to a Hammond B3 organ. I initially feared that being a small-diaphragm budget condenser, the M5 might not manage the low end as itshould. But I can attest that the pedal tones rumbled the subs quite well for anevening of live gospel music!Moving the pair into the studio, I put them to work everywhere I normally use pen-
cil condensers: acoustic guitar, hi-hat, snare drum, drum overheads, shakers, tam-bourine... and even a few places I normally don’t, like vocals, kick drum and cajon.The M5 is full and evenly weighted with a clear tight top end. It did lack a
bit of the air, depth, and weight of my vintage Neumann KM 84 mics, my usualsmall-diaphragm mic of choice, but that’s hardly a fair comparison, and theydid share a similar midrange presence and feel.The M5 was nice and focused. Its sound was solid overall, but not too for-
ward or imposing, and it worked well on every source I tried—surprisinglyeven vocals and kick! Speaking of vocals, these make a nice set of stereo choirmics, not only because of their sound, but also thanks to their size. The twomics I had were perfectly matched for stereo use.One last note: speaking of stereo, RØDE has just released a high-quality
adjustable stereo bar for said applications. I didn’t get to review it, but it shouldbe available by the time this issue goes to print.
Final thoughts on the M5The price of the M5 is a scant $199 per pair street, and they really do hang
comfortably with mics twice their price! The M5 is a great, durable pencil con-denser for live use as well as the studio.If you grab a pair of these and the new NT1, for less than $500 you can have a
killer starter kit for the home hobbyist, project studio, and singer/songwriter alike.
Prices: NT1, $269 street; M5, $199/pair street
More from: RØDE Microphones, www.rodemic.com

RECORDING May 201440
I can’t think of a better place than in this mega-microphone issue to introduce our readers to thelatest mic from Neumann, the TLM 107.With a history of creating some of the most
legendary microphones of all time, Neumanncontinues to this day creating mics, such as theU87AI, that are benchmarks against whichother microphones are judged. The downsideis that most Neumann models come with fairlysubstantial price tags. Until recently, that is!A few years ago Neumann created the com-
pany’s first large-diaphragm condenser micro-phone to fall well below the $1000 mark: thecardioid TLM 102. At an average street priceof $699, this was a neutral-flavored Neumannaimed squarely at the growing market of homeand project studios. As we saw in PaulStamler’s review of it in our April 2010 issue, itis an impressive mic—not “for the price,” it’s
just impressive! And that trend continues with the new TLM 107; it’s the compa-ny’s first multipattern condenser mic to fall below $2000.Like the TLM 102, the TLM 107 has no illusions of trying to sound like any of
the Neumann greats of yesteryear. Instead this microphone focuses on clarity anduncolored tonality, thanks to its modern capsule design as well as innovative cir-cuit design and controls. Readers should be aware that while the TLM 107 doesshare a similar design philosophy and even some sonic characteristics heard inthe TLM 102, the TLM 107 is not simply a TLM 102 that offers multiple polar pat-terns; as we’ll see and hear, it has a very appealing character all its own.
The newest number 7Romantically I like to think that Neumann reserves the number 7 for microphones
that are destined to be cornerstones in their line. I shouldn’t give away the endingof my review so early, but I do think the TLM 107 is destined to be just that.Starting with the physical: the TLM 107, like all Neumann mics, is handmade
in Germany. It measures roughly 53/4" tall by 21/2" across and weighs just shyof a pound. It is available in either black or nickel with a matching double meshgrille. While its size and shape nods toward many of Neumann’s past TLM mod-els like the TLM 103, it’s much more sculpted and modern-looking.It comes in a simple package with a wooden, foam rubber-lined box and a
standard mic mount. Neumann have created a brand new shock mount design,the EA-4, which fits not only the TLM 107, but the TLM 102 and 103 as well; it’savailable as an option.
InsideThe pressure gradient transducer/capsule in the TLM 107 is a completely new
design made for this mic. Its does however draw heavily on the capsule foundin Neumann’s all digital D 01 (Solution-D) mic, which is likewise known for itstransparent fidelity. It is a dual-diaphragm, edge-terminated design with bothdiaphragms set to ground voltage. This helps make the capsule less sensitive toboth humidity and dust particles. As any Neumann user will know, the TLM des-ignation means the electronics are transformerless.
The TLM 107 features five selectable polar patterns: Omni, Wide Cardioid,Cardioid, Hypercardioid, and Figure-8. It also features two levels of signal atten-uation, –6 dB and –12 dB, and lastly it has not one but two available highpassfilters, with corner frequencies set at 40 Hz and 100 Hz.On its own this is a pretty healthy feature set, but it is how the settings are
accessed and controlled that really puts the TLM 107 over the top. All of the func-tions and settings on the TLM 107 are digitally controlled. This is not a new ideaand we have seen it before in mics from AKG and Lewitt, but the way Neumannchose to implement it is unique and appealing.
One Joystick to rule them allMuch like the touch wheel on pre-touchscreen generation iPods, where one
dial controlled a host of functions, the TLM 107 uses a tiny silver pushbutton/joy-stick to scroll through and select your settings.Using the joystick is simple. Once the microphone is hooked up to phantom
power, simply push the joystick in. This illuminates the current settings on the micwith very bright white LED backlighting and activates the navigation controls.To the left of the joystick are the mic’s attenuation settings, to the right are the
highpass filter choices, and under the joystick are illuminated symbols for each
B Y P A U L V N U K J R .
Neumann TLM 107Condenser Microphone
Modern touches to classic tone create a modern legend

RECORDING May 2014 41
polar pattern. Pushing the navigation but-ton to the left or right scrolls through eachside’s settings in a round-robin fashion. Tochange polar patterns, simply move thejoystick up or down to scroll back andforth through the patterns.
The TLM 107 stores its last settings uponpower-down, and once you have madeyour selections the lighted controls willturn off after 15 seconds. At first I did notrealize this and when I saw that the lightshad gone out, I feared my mic had lostphantom power! This is also a good placeto note that switching between settings,including polar patterns, is completelysilent and produces no pops orthumps, an issue heard onmany competing microphones.
SpecsLike most modern mics the
TLM 107 has a 20 Hz to 20kHz frequency response.Regardless of polar pattern theTLM 107 is ruler flat from 200Hz up to 3 kHz. Below that it isflat all the way down to 40 Hzin Omni, Wide Cardioid, andCardioid. In Hypercardioid andFigure-8, the low end slopesgently down from 200 Hz.
On the upper end there is aslight 2 dB dip at both 4 kHzand 8 kHz that gently smoothsout as you move from Omni downto Figure-8. Lastly there is aroughly 5 dB bump at 12 kHz,which also smooths down signif-icantly as you move again fromOmni to Figure-8, averaging outin Cardioid mode at 2 dB. So thereis a bit of 12 kHz ‘air’, but it is noteven close to the high-end push ofmany modern microphones, includingsome past Neumann models.
When listening to the mic and switch-ing patterns I was impressed by the over-all tonal constancy from pattern to pat-tern. Using my ears rather than thegraphs, I found the variations betweenpatterns are even smoother and moreminute than the frequency graphs imply.
Further specs include: sensitivity of 11mV/Pa (1 kHz, into 1 kilohm); impedanceof 50 ohms with 1 kilohm load impedance;Equivalent noise level of 10 dBA and sig-nal/noise ration of 84 dBA, with 141 dBmaximum SPL unpadded and up to 153 dBSPL with the 12 dB pad in place.
In useI saw and first heard this microphone at
AES last year, and I couldn’t wait to put itthrough its paces. I was sent a pair inblack, and I put them to work instantly ondrum overheads, both as a spaced pair
and later in a minimal Glyn Johns setupwith one mic over the snare and the otheron the side by the low tom and ride. Inboth instances I was impressed by theclarity, realism and depth that the TLM107 provided. The top end of the TLM107, despite its 10-12 kHz bump, is anopen and natural sounding mic, but it isvery slightly silky rather than bright.
Next up I had a ton of vocal sessions allin the same week, so rather than audition-ing different mics on each singer, I put upone TLM 107 and let it fly. Trusting one micsight unseen (or in this case soundunheard) may have been a gamble, but it
was one that paid off nicely. And honestly,how much of a gamble could it be... Imean, Neumann?
The first session of the week was achoir demonstration CD, where one per-son sings the various parts for choir sec-tions to learn. This gave me a chance tohear a male bass and tenor and femalealto and soprano parts. In each instancethe mic was clean and clear and stayedout of the way, and never once did I havethe urge to change it out for something
more vibey or singer-specific. The samething happened later in the week whentracking a three-piece Celtic folk groupwith two males and a female singer. Evenon a cappella tracks, the mic was just nat-ural, open, and frankly stunning.
A quick word about the highpass filtersin the TLM 107: they are very well-imple-mented and largely unobtrusive. Some micssound like something is missing when high-passed at the mic, and I usually leave themics at full and use the highpass on my EQduring mixdown. Not so on the TLM 107!The 40 Hz setting was great on the drumkit, while 100 Hz worked well on most of
the voices—except for the lonebaritone singer, where I wentback to 40 Hz just to be safe.
I also used the TLM 107 onsome beautiful folky Martinacoustic guitar tracks; it cap-tured a great balance of smoothcontrolled body tone along withcontrolled yet detailed pickingand strumming sound.
Really there was no sourcewhere I would not use the TLM107. This is a fantastic all-aroundworkhorse and one of the mostneutral microphones Neumannhas made, this side of the D 01.
Overall this mic is natural, hon-est, and largely unobtrusive withjust the perfect hint of silky sweet-
ness on the top end to keep it from beinglabeled as clinical or sterile. Warning,though, this mic has no thickness and novibe—in fact even its proximity effect issubdued, even, and minimal throughout all
the patterns, with the exception ofOmni mode, where there is essen-
tially zero proximity effect. To getthat extra shot of low push, you’llneed to be up on the mic, nomore than an inch or two away.
ConclusionIt’s nice to see Neumann looking boldly
forward with a new sound and directionthat can sit proudly along side its legacymics of the past, rather than trying to recap-ture a vintage vibe. This mic, along with theTLM 102, is the start of a range of greatnew high-quality mics for the future.
OK, I will admit that $1699 street is notnecessarily entry-level. But this is a micthat, if you save up for it, would do wellas your one and only large-diaphragmcondenser. Even if your mic locker ishuge, the TLM 107 offers a clean, silkytone you simply must hear!
Price: $1699; EA-4 shockmount, $130
More from: Neumann USA, www.neumannusa.com

We first reviewed Apogee’s MiC in our July 2012issue, and enjoyed its combination of great soundquality and single-cable convenience for Mac or iOSuse. It was designed for the songwriter, solo musi-cian, podcaster, voiceover artist, or anyone elserequiring high-quality miking with a minimum of fussand outboard gear.Apogee recently decided to take the performance
of the MiC to the next level. The new MiC 96kimproves on the performance of the original MiC(which remains in Apogee’s product line) by provid-ing 24-bit/96 kHz audio in apps that support it.(Apogee has also upgraded the A/D in its JAM gui-tar input device; look for a review of the new JAM96k in a future issue.)The MiC 96k was first announced at the 2014
Winter NAMM Show; we received a review unit justin time for this special issue on mics and miking, andI was able to quickly put it through its paces over afew days of informal recording sessions.
Out of the boxMeasuring about 4.5" long and 1.4" wide, the
MiC 96k features a roughly 3/4" diaphragm behindthe grille. A medium-diaphragm microphone of thistype is actually a nice compromise for general-pur-pose recording applications; it doesn’t have the char-acter of a large-diaphragm mic, but on the other handit also doesn’t have a large-diaphragm mic’s weird off-axis response at treble frequencies.The only control on the MiC 96k is a side-mounted
Gain thumbwheel for the internal preamp. A user-fac-ing LED glows faint blue for Power On and turns faintgreen when attached to software that recognizes it.The LED also serves as a quick and dirty level meter: itglows brighter green when it hears audio, and turnsyellow, then red, when levels climb toward clipping.A threaded mounting hole on the back of the body
attaches to either of two mounting options included withthe MiC 96k: a small folding tripod for tabletop use, and an adaptermount for use with a standard mic stand. The MiC 96k comes withthree cables, for use with Macs via USB or old and new iOS devicesvia 30-pin or Lightning connectors. The cables are short (0.5 or 1meter long), but Apogee offers 3-meter cables as an option (alongwith a carrying case). Note that these aren’t off-the-shelf cables; theyconnect to the bottom of the MiC 96k via an unconventional lockingconnector.
Giving it a trySetup on the MiC 96k was a cinch on my test Mac (running OS
X 10.8.5) and my 30-pin and Lightning iPads (running iOS 7.0.6and 6.1.3 respectively). It was instantly recognized, and in the case
of recording apps that allow the user to select audio quali-ty, like RØDE Rec, sample rates up to 96 kHz were auto-matically offered as a selectable option.The Gain thumbwheel is easy to use, but the user will need
to get used to adjusting it pretty much every time he or shesets up the MiC 96k. At higher settings, it overloads and clipsvery easily. Once you dial in the right gain setting, the soundis exceptionally clear; as this is a 24-bit device, you can safe-ly leave yourself some headroom and not have to worry
about wasting resolution in your recordings.An informal test of the MiC 96k’s polar pat-
tern and off-axis response was very revealing.The published polar pattern for the MiC 96k isa wide cardioid with fair but not perfect rejec-tion at 180º and relatively little differencebetween on-axis and 90º off axis. In tests withvoice and musical material, the MiC 96k hada fairly wide “sweet spot” before tone began tobe adversely affected; while this would be lessthan ideal for, say, a spot mic on a drum kit, it’sperfect for applications like solo singer/gui-tarist or voiceover talent in a relatively quietroom. The performer doesn’t have to worryabout being right on axis and can movearound a bit without compromising tone.And speaking of tone, the MiC 96k was
a delight. In my recordings with male voice,winds, and acoustic string instruments, I foundthe MiC 96k to capture what it was being fedwith clear but not harsh highs, nice high-midclarity and very controlled bottom end.As a relatively wide cardioid mic, the MiC 96khas a very limited—really almost nonexistent—proximity effect; I couldn’t get any real extra boomfrom my voice until I got so close to the capsulethat the internal preamp overloaded. At the otherend of the frequency response, the highest highs(via the trusty key-jingle test) were clear and well-defined with very little of the undifferentiated hashi-ness that one gets from a cheap condenser mic.Aside from getting used to the very sensitive
Gain adjustment, my only other issue with theMiC is that it doesn’t have D/A conversion or aheadphone jack built in. The user is forced tomonitor at 16-bit/44.1 kHz conversion via theiOS device’s headphone jack (although alterna-tive outputs can be available on a Mac). Thiswould have increased its cost significantly, though;
Apogee’s ONE mic/interface, reviewed December 2013, pro-vides this extra feature if you need it, and other extras as well.Over all, this is a USB/iOS mic that will do great service
in tight spaces, recording high-resolution audio to any Mac,iPod, iPad, or iPhone. I see it as a better-than-the-usual wayto capture song ideas, demos, interviews, podcast vocals,and more. Yes, there are more affordable USB microphonesout there, but it’s a great feeling to have Apogee sound qual-ity close at hand for your next recording project.
Price: $229
More from: Apogee Electronics, www.apogeedigital.com
RECORDING May 201442
&...where we bring you follow-up articleswith application hints and upgrade newsabout gear already reviewed in Recording
Apogee MiC 96kA high-class USB/iOS mic goes hi-def as well
Review by Mike Metlay


RECORDING May 201444
Equator makes two distinct monitorseries, the mid-field/far-field Q series (todate consisting of models Q10 andQ12), and the near-field/mid-field Dseries—models D5 and D8. We reviewedthe smaller D5 in the December 2011issue, when its introductory price per pairwas $299.99, available direct fromequator.com. Now a pair of D5 monitorscosts $399.99—still a great deal.A good two years later we’ve now had
a chance to evaluate the newer and larg-er D8—a pair costs $749, also fromequator.com. At almost double the priceof the D5, is it a worthwhile deal? Let’sinvestigate.
D8 design principlesEquator states that “the D8 was
designed specifically to deliver a muchbigger sound while maintaining theextreme level of detail that the D5 hasbeen proven to provide.”The Equator D8 is a bass-reflex design,
with the 2.5" porthole sitting low in front.That front location of the porthole meansthat the user can expect less boominessfrom walls or corners behind the cabinetthan could be the case with a rear-firingport. The wood cabinet, with its grey fin-ish and black front baffle, measures 14"x 10" x 12" and weighs 22 lbs.
What catches the eye immediately is thefact that there is not a woofer and a sepa-rate tweeter; instead the 1" silk tweeter ismounted in the center of the 8" polypropy-lene woofer. Let’s spend a moment on thistopic of “coaxial”, shall we?Coaxial speaker design aims at deliver-
ing the entire sound output of the speakersin a time-aligned manner, meaning that ourears receive the full range of frequenciesemitted at any time by both speaker ele-ments at once and from the identical pin-point source. Manufacturers of such coaxi-al speaker designs have long stated that theresult for the listener is increased accuracy.Phase shifts and cancellations that mayarise from a tweeter and woofer that eachhave their own location on a cabinet arelargely omitted when the tweeter speaksfrom the center of the woofer.
But it’s not quite that simple, so there are DSP-aided group delay filters inside the D8for phase-accurate response, expecially in the critical midrange—hence the technicalverbiage from Equator, “Zero-Point Reference™ custom designed coaxial Digitally-Controlled Transducers™ along with internal DSP...”. Equator states that a furtherdesign principle was “unobstructed clarity in that complex 900 Hz–3 kHz range,something that was already noticeable in the D5.”
More specsThe D8 is bi-amped, with a total of 100 W (60W LF / 40W HF), and it is listed with
a frequency response of 44 Hz–20 kHz (±3 dB) and an SPL of 106 dB.Inputs (around back) are balanced XLR and balanced/unbalanced 1/4". A
“Sensitivity” knob acts as a volume control of sorts, to better match input signals—it isnot designed to attenuate down to silence but has a much more restricted range.A three-position “Boundary” switch allows for some response correction depending
on speaker location. As on the D5, setting 2 is the flat setting, used for positioning neara rear wall. Setting 1 has less bass—a rolloff that starts at 1 kHz and is 2.5 dB downby 44 Hz, for very bass-heavy positioning such as in the corner of a room.However, Boundary Setting 3 is quite different than the D5’s “freestanding” curve (1
dB boost from 1 kHz–15 kHz and 2 dB shelf boost below 1 kHz). As Ted Keffalo ofEquator Audio Research explains it, “We did the final tweaking [of the D8 voicing] at
B Y L O R E N Z R Y C H N E R
Equator Audio Research D8 Studio MonitorsCoaxial precision in a powerful, affordable near field monitor

RECORDING May 2014 45
Grundman Mastering with Chris Bellman,and we ended up with something that wereally liked... but it wasn’t flat. It has aslight rise from 6 kHz up and an interest-ing bell curve dip centered at 150 Hz.What essentially happened is that Chrismoved the low-frequency fundamentals toa point where the low-frequency over-tones got out of the way of the midrangefundamentals. It ended up with amazingmidrange detail, especially in BernieGrundman’s room, so we left it asBoundary position 3.”There is a mysterious connector port
that users are warned to stay away from,it is for factory calibration purposes only.The 3-prong A/C connector for thedetachable power cord and the on/offtoggle switch complete the rear of the D8.The cabinet appears to be solidly bracedand baffled internally—the knuckle testreveals no suspicious hollow resonances.
SonicsThis can’t be a direct one-to-one com-
parison with the D5—too much time haselapsed and too many speakers havecome and gone for review in the interim.So let me describe my impressions of theD8 on its own merits.I was listening mostly with the
Boundary switch at 2. I didn’t want toadd a bass or treble boost or dip, eventhough the speakers were freestanding,at least five feet from the nearest wall inall directions, and with no desk or con-sole between the stands and my ears. Iknow that this setup is slightly unrealistic,but why would you want to hear what myfurniture does to the reflected soundsfrom a speaker under evaluation, whenit’s the speaker’s direct sound that mat-ters? ‘Nuff said.First impressions: Fullness, heft, and
midrange detail. The D8 is not a smallspeaker—you saw the measurements—and you’d expect a bi-amped 8” modelof that size to have a certain bignessabout its sound when you turn it up. Whatstruck me, though, was how the D8retains the big-speaker sound even at lowvolume.The low end is not just full and present,
but it reveals fine detail when reproduc-ing music that contains such detail, with-out ever sounding boomy unless theboom is in the tracks. The highs arerevealing; string sections only sound silkyif mixed that way, but if the instrumentshave been attacked with vigor, and close-miked, you can just smell the rosin.
The upper midrange of the D8, wherethe intelligibility and direct appeal of voic-es and the raw expressiveness of windinstruments lies, has uncanny forwardnessand honesty. Not shrill, but shining aunapologetic spotlight on the sonicdetails, just what you need when mixing.Case in point: The D8 revealed a telling
detail in a piece I had listened to hundredsof times, Rachmaninoff’s SymphonicDances (a great tool for evaluating speak-ers!). When a new CD of the same workarrived, this one by the BBC Wales orches-tra, starting in measure 16 I heard analarming sustained sound that made megrab my orchestral score. It sounded likesomeone was twirling one of those ratchetsthat go something like “brrrrrrrrrr”. Butthere’s nothing like it in the score...It turns out that it has to be the contra-
bassoon: it’s the only new instrument enter-ing and sustaining at that point, playing its
low C (about 33 Hz). I then rememberedthat the contrabassoon produces the low-est notes of any orchestral instrument, andone of its idiosyncrasies is that it makesthat buzzing, clattering sound, especiallywhen played loud. That noise would behard to specify in Hz but it is certainly inthe higher midrange. I’d never heard it soclearly before, and in the D8, there it was!That the mixing and mastering engi-
neers of this release let that buzz remainso prominent is one thing, but for the D8to highlight it as strongly as it did speaksvolumes for the success of Equator’s stat-ed design philosophy. If I could hear thisexample, imagine how you’ll be hearingtelling details that can make or break thesuccess of a critical project!
All in allThe D8 continues where the D5 began,
delivering uncompromising sound forthose who want their audio precise andclinical rather than just “pretty”. While theD5 can be had with a carry case to goanywhere, the D8 is a bit large for that.But it is not too large for even the smallest
project studio—I had the most fun with itwhen I sat real close, absorbing the fine detailit provides from up close and at modest vol-ume levels! If there is room in your workspaceand in your budget for the Equator D8, yourears and your clients will thank you.
Price: $749/pair
More from: Equator Audio Research,www.equator.com
Coaxial speaker design aims at deliveringthe entire sound output of the speaker
in a time-aligned manner.

RECORDING May 201446
Almost none of the components in sEmicrophones are purchased OEM(Original Equipment Manufacturer) fromany other company, and sE doesn’t OEMfor anyone else. This allows sE to haveironclad control over both costs and qual-ity. (See Mike Metlay’s Fade Out ofOctober 2010 to read a bit about the fac-tory, which he visited that year.)
We have looked at many of sE’s micro-phones in the past, and I have to mentionthat company’s Voodoo VR-1 passive rib-bon microphone, which I reviewed back inour May 2011 issue and which remainsone of my absolute favorite ribbon mics forsaxophone and drum overhead work. Thismonth, we move to the entry-level side ofsE as a prelude to a look at the company’svery affordable X Series.
In future issues, we’ll bring you reviewsof the new X1R entry-level ribbon mic andthe X1 USB mic, but this time we’re start-ing at the beginning, or perhaps I shouldsay with beginners. The newly-releasedMagneto begins what we’re told will be anew entry-level sE range. It’s sE’s mostaffordable mic ever, with an averagestreet price of only $119.
MagnetoThe Magneto is a large-
diaphragm condenser micro-phone that uses a back-electretfixed cardioid capsule. It fea-tures a 20 Hz–20 kHz frequen-cy response, a 200 ohm imped-ance, a 16 dBA equivalentnoise level and a 140 dB maxi-mum SPL. In plain English, thismeans it is clear, quiet, and canhandle extreme instrument andvocal volume levels with ease.Functionally the Magneto ispretty straight ahead; it featuresno highpass filters nor pad con-trols on the mic itself.
In the build and looks depart-ment Magneto measures 61/4"from stem to stern and is 21/8"round at its widest point. Bodywise it issimilar in style to sE’s X Series mics, onlyshorter with a slightly retooled grille.
B Y P A U L V N U K J R .
sE Electronics MagnetoIt is currently available in two colors,
either sE’s standard black or in limited-edition purplish-pink. For this review I wassent a pair of the limited-edition models,
and the color reminds me of the accentcolors on the costume of the MarvelComics villain of the same name. Hmmm,coincidence? Regardless of color, theMagneto features a double mesh nickel-colored grille, along with what looks tobe internal foam lining, most likely to helpaid in the reduction of plosives.
Like all sE microphones, it is well builtand should easily withstand the rigors ofstudio and stage. In the case somethingdoes go wrong, sE offers one of the bestwarranties in the business, with what theycall the “3 Year Zero Downtime FreeReplacement Warranty.” You can checktheir website for details.
Magneto comes packaged pretty sim-ply in a foam lined cardboard box with astandard mic clip, although it can be usedwith sE’s optional Isolation Pack (whichincludes a custom shockmount and remov-able pop filter) and/or Reflexion Filters.
In useI took my pair of Magnetos into my stu-
dio and to the venues where I routinely dolive sound and recording, and put themthrough their paces much as I would anyother condenser mic. Or maybe I should
say, “As I would every other con-denser mic.” I believe that as anentry-level mic, the Magnetoneeds to be sonically neutral so asto cover a lot of bases for thebeginning recordist whose miccloset probably consists of one ortwo Magnetos and nothing else.
I was pleased at what I foundout. The Magneto has a verycrisp open top end, an evenmidrange, and a solid yetunimposing low end. Over amonth’s time I put the pair Iwas sent to work on drum over-heads, acoustic and electricguitar, cajon, shakers, tam-bourine, vocals and podcastingduties, and quickly noted the
mic’s distinct tonality.There’s no question, the Magneto is
definitely one of the toppiest mics I haveused in a while! This very detailed high
A new standard for entry-level condenser mics
sE Electronics is a UK-based micro-phone manufacturer that has been releas-ing microphones and the like since theyear 2000. The sE product line spans therange from the affordable X Series all theway up to high-end pieces like theGemini line and the Rupert Neve-designed RNR1 ribbon microphone. sE isalso largely responsible for the “portablevocal booth” craze thanks to the originalReflexion Filter (reviewed March 2007).
While the mics are built in China, it isworth noting that sE actually owns its ownfactory and all of the firm’s products areproduced in-house from start to finish.

RECORDING May 2014 47
end is common on condensers, but I wasrelieved to hear that it’s not a harsh or splat-ty sound like many overseas budget micscan give. This was highlighted when I wasdoing tambourine and shaker overdubs ona song from about 3 feet back. Many mics,even more expensive ones, will produce a“chuffy,” almost distorted sound on saidsources, while the Magneto did not.On the other side of the sonic spectrum
the mic’s low end is fairly subtle andequally weighted with the mids. TheMagneto has little to no proximity effectuntil you get right up on the mic, about aninch away. Fortunately, it’s perfectly OKto get right up close to the mic for singingand voiceover duties; thanks to its internalfoam windscreen the Magneto doesindeed handle plosives well.All in all, the Magneto was adept at most
of the sources I threw at it. On drum kit duty,it did well at capturing the cymbals, hightoms and snare in a nice detailed way. Onjangly acoustic guitar it was nice and even,and captured the tone and strums well.About the only thing that I did not like it onat all was heavy electric guitar, where I pre-fer more mid and low-end oomph. TheMagneto’s tonal balance was just not wellsuited to the task. Oh, well.
Bottom lineIf you are waiting for the reviewerly
wrap-up where I say, “This mic bests micscosting twice the price”, I’m sorry to dis-appoint you, but not this time. After all, sEhas provided me with a perfect coun-terexample to that very statement in theoriginal X1 mic, which is roughly twicethe price of the Magneto and has a rich-er and fuller sound; you can look forwardto my review of that mic in a comingissue, as well as the X1R ribbon, whichoffers its own advantages for the price.But what I can say is that across the
board, entry-level microphones continueto get better and better, as well as moreaffordable. I can think of more than a few$200–$300 mics that were “unbeliev-able for the money” over the last decadethat do not sound as good as what theMagneto now offers in 2014 for $119.With the Magneto, sE has definitely hit
the mark in both quality and price point, cre-ating a large-diaphragm condenser that isperfect for the budding engineer, thesinger/songwriter working on home demos,podcasters, and even amateur video editorswho need a decent affordable option to gettheir feet wet, as well as being a nice stepup from many dynamic mics. If you’ve want-ed to maximize every dollar in your first con-denser mic purchase, the Magneto bearsserious consideration... even in pink.
Price: $119 street
More from: sE Electronics,www.seelectronics.com

RECORDING May 201448
When I teach my students about how tochoose mics, I try to make the decisionprocess as clear and simple as possible. Forthis issue of Recording, I will communicate theessentials of this process to our readers.Figure 1 shows a flow chart of how to make
decisions on which mics to use in a given situa-tion. If you’ve never seen a flow chart before,don’t worry too much about it; all you need toknow is that it’s a sort of a “map” to find yourway to the right decision. As you get to eachdecision point along the path, we’ll ask a ques-tion, e.g. “does the source have a lot of highs ormids?”, and then you’ll choose your route basedon how the question is answered: go this wayfor yes, that way for no.I’ll now explain each step in the flow chart
with some basic acoustics background, so youcan understand why we make these choices.We’ll start by covering the left side of the chart...
Less than 12" from very loud source? Go for a dynamic microphone.Dynamic mics are capable of withstanding very high
sound pressure levels without distorting because they arepassive devices, containing only the dynamic capsule and atransformer. In contrast, condenser mics have internal pream-plifiers that can easily be overloaded to the point of distortion.Ribbon mics are also dynamic mics, although we usually
treat them as a separate beast. In this case, though, we canthink of them along with more traditional moving-coil dynam-ic designs. Ribbons, thin as they are, still have higher massthan condenser diaphragms, and they are designed to movewith greater excursion (displacement from their position atrest). When placing a microphone very close to a very loudsound source (instrument amplifiers, drums, trumpet, etc.) the
Choose Your Weapon By Michael Schulze
12a
Strategies for matching the right microphone to your recording situation

choice of a moving-coil or rib-bon dynamic microphone canprevent distortion at the micro-phone output. (Just be sure, ifyou choose a ribbon, that it’sdesigned to handle high SPL;a modern design like a Royerwill be more robust in theseapplications than a vintageRCA mic.)Note that the higher mass of
a dynamic mic capsule alsoresults in a high-frequency
response that starts to attenuate at a lowerfrequency than a typical condenser. Take alook at the frequency response chart for anAudix i5 dynamic (Figure 2a) compared toa Neumann KM184 condenser (Figure 2b).You can clearly see the more extended high-frequency response of the KM184.Both of these microphones were
designed with an intentional high-frequen-cy boost, and you can see that this boost is“bumpier” in the dynamic. This is due to
the inherent “ringing” reso-nance of the heavy dynamicdiaphragm and coil com-pared to the extremely low-mass condenser diaphragm.This is neither a good nor abad thing; it’s just a differentsound from a differentdesign. The KM184 was
designed with a smootherand more subtle high fre-quency boost, giving it a dif-ferent character than adynamic mic like the i5 or theShure SM57.
Less than 12" from a very loud source,but does it have an abundance of high-mid to high frequencies? If so, pick amic with a flatter response; if not, gofor a brighter response.Instruments that have robust energy in
the high-mid to high frequencies (3–20kHz) may sound too bright when record-ed with microphones that boost these fre-quencies. Conversely, instruments thathave less high-mid to high-frequency ener-gy may sound too dark and dull whenrecorded with microphones that have aflatter response in this frequency range.These darker instruments may becomehard to hear in the mix because thehuman ear is more sensitive to high-midfrequencies than lower frequencies.
So it’s important to choose a mic whosefrequency response balances what theinstrument is giving off. For example, avery bright and loud trumpet might soundbest through a flatter response ribbonmic, or even one that slightly attenuates
2b
3a

RECORDING May 201450
the high-mids and highs, such as theRoyer R-101 (Figure 3a).Similarly, instruments that have an
abundance of low frequencies mightsound too boomy or muddy when recordedwith microphones that have a pronounced
proximity effect or a significant bump in thelow-frequency response. A darker source like abass guitar amplifier might sound more presentin the mix when recorded with a mic that hasa high-mid boost and a bit of low-frequencyrolloff, such as the Sennheiser MD421 (Figure3b). The MD421 is famous for its 5-way rolloffswitch, which produces the curves seen in thefrequency plot.Note that every once in a while, you’ll
want to pair up a bassy source with aboomy mic for maximum impact; the classicexample of that is the kick drum mic (AKGD12 and D112, Shure Beta 52, Audix D4and D6, Lewitt DTP 640 REX, etc.).
Now we move to the right side of the flowchart...
Not less than 12" from a very loud source? Start with a con-denser microphone.As I said above, when a condenser microphone is placed too
close to a very loud source, it is possible to overload its internal pre-amplifier, which produces distortion at the mic output. But if you can
back off from your source, you then enter the realm of the condenser mic.Condenser microphone diaphragms are
very sensitive due to their very low mass.This high sensitivity gives them an extendedhigh-frequency response and good signal-to-noise ratio. They are therefore a goodchoice when recording sources that pro-duce desirable high frequencies. (They’realso great for quieter sound sources.)Condenser mics are widely used for
voice, drum overheads (drum sets are loudbut the overheads are a few feet away fromthe source), brass, woodwinds, acoustic
instruments (acoustic guitar, cello, piano, etc.), and acoustic ensembles.They are by far the best choice when very far from the source, as whenone records a classical ensemble or a thunderstorm.
Distance from sound source, far or near? Choose a condenser micwith a single capsule for distant placement vs. a dual capsule forclose placement.The AKG C451B is a single-capsule condenser microphone. It has a
fixed cardioid polar pattern. The AKG C414XLS is a dual-capsule con-denser microphone with two cardioid capsules mounted back to back;the five possible polar patterns are selected by a switch on the micwhich combines the two cardioid signals, altering the amplitude andpolarity of the rear capsule.For example, adding the front and rear cardioid patterns creates an
omnidirectional pattern. Inverting the polarityof the rear capsule and adding it to the frontcapsule creates a figure-8 polar pattern.Doing this while attenuating the rear capsule
It’s important to choose a mic whose frequency responsebalances what the instrument is giving off.
4a 4b
3b

creates the hypercardioid pattern, and turning off therear capsule entirely results in a cardioid pattern (asyou get from the single-diaphragm cardioid mic).Dual-capsule condenser microphones tend to become
more omnidirectional at lower frequencies, and you cansee this in the two polar pattern diagrams shown inFigure 4. Notice that in the C451B’s polar plot (Figure4a) the 125 Hz curve (in blue, on the left) isn’t all thatdifferent from the red curve that shows polar response at250 Hz and above. But for the C414XLS, the curve upto 250 Hz (the green line on the left in Figure 4b) ismuch more omnidirectional than the red line that repre-sents polar response above 500 Hz.When your dual-diaphragm mic is close to the sound
source, this is not a problem because the source is somuch closer to the mic than the sound arriving frombehind the mic (wall reflections or other instruments). Thesource is much louder at the mic position than the reflect-ed sound, so you won’t hear much of the low frequencyomnidirectionality of the mic. However, when the mic isfar from the source, the direct and reflected sound willbe closer to the same amplitude, so you may tend tohear a muddiness in the sound as the low frequencyomnidirectionality becomes more audible.When single-diaphragm mics are far from the source
they do not exhibit this increased low frequency omni-directionality. However, they do start to pick up excesslow frequencies when they get close to the source dueto proximity effect, which tends to be more pronouncedon single-diaphragm mics than dual-diaphragm.(Shure’s Guy Torio and Jeff Segota published a paperon this topic that’s available on aes.org if you want toread more.)
Put this all together, and you will have more accurate low-frequencyresponse if you choose dual-diaphragm mics for close placement andsingle-diaphragm mics for distant placement.
Is the source wide or narrow? Use a large-diaphragm condensermic for a narrow source vs. a medium- or small-diaphragm mic fora wide source.Some sound sources are narrow, like a singer’s mouth or a speaker
in a guitar amplifier. It is easy to place a mic for these sources; all youhave to do is point the mic at the source and you can be relatively con-fident that you are picking up all the sound. With wide sound sources—a grand piano, a marimba, a choir, or an orchestra—it is important toselect a mic (or mics) that will pick up good sound from off to the sidesas well as from directly in front of the mic. This is called off-axis responseand it is strongly controlled by the size of the mic diaphragm.We refer to condenser mics with diaphragms with a diameter of approx-
imately 1 inch or larger as large-diaphragm mics. The Neumann M147 isan example of a large-diaphragm condenser microphone. Microphonediaphragms closer to 1/2" (or less, like the 1/4" diaphragms in Earthworksmics) are called small-diaphragm mics. The diaphragm in an AKG C451has a diameter close to 1/2". Microphones such as the Neumann KM184and the Sennheiser MKH 40 have diaphragm diameters closer to 3/4";
5

RECORDING May 201452
they are often referred to as “small-diaphragm” mics,although some would call them medium-diaphragm mics.Consider a high-frequency sound that arrives at a 1"
diaphragm capsule from 90 degrees off axis (hitting theedge of the diaphragm). If the frequency of the sound is 14kHz then its wavelength is approximately 1 inch, the same as thediameter of the capsule. Therefore the compressions and rarefac-tions of the sound are affecting the diaphragm at the same time,with the compressions pushing the diaphragm while the rarefac-tions are pulling... so at 14 kHz the 1" capsule will not producean output signal at all! See Figure 5.
This attenuation lessens as the angle of the sound source getscloser to 0 degrees (on axis), or as the frequency gets lower. Butnotice: if the diaphragm has a diameter of 1/2" then the attenua-tion happens one octave higher (28 kHz), so it is much less notice-able. So if your sound source is wide, or any time you need goodhigh-frequency response from off-axis, then a smaller diaphragmis better.Note that if you need to place one mic each on 4 singers who
are standing shoulder to shoulder, then large-diaphragm mics willhelp attenuate high-frequency leakage between the singers.Consider them as four narrow sources, not one wide one.
Does the source have an abundance of high-mid to high frequen-cies? Again, choose a flatter or brighter response as needed.This discussion basically parallels what I said above about dynamic
mics. You will want to choose a microphone that doesn’t over-accentuateemphasis in a frequency range where the source is already very strong; ifthere’s a lot of high-mids and highs, watch out for a mic with a strong high-frequency bump because it will take things a bit too far.An ensemble of trumpets and trombones can be very bright and may
sound best recorded with a mic (or mics) that have a perfectly flat fre-quency response. A famous example is the Earthworks QTC50; anoth-er is the Sennheiser MKH40, which only deviates from flat response upto 20 kHz when its rolloff filter is switched on, as shown in Figure 6.
An acoustic bass has an abundance of low fre-quencies and a relative lack of high frequencies,so a condenser mic that rolls off some lows andboosts higher frequencies might be best for aneven overall response. As an example, Figure 7shows the frequency response of the NeumannM147, which can work well in these circum-stances; compare it to the dynamic SennheiserMD421 we discussed for loud sources up close.Finally, I have included the ribbon mic as a pos-
sible alternative to condensers for narrow soundsources both far and near. Most ribbon mics havea figure-8 (or bidirectional) polar pattern, which isnot the best for off-axis pickup. They also tend tohave a rather low output amplitude, so they mightnot work very well for quieter instruments at a dis-tance. However, they do tend to have smootherand more extended high frequency response thanmoving-coil dynamic mics, so they are worth a tryunder these circumstances.
ConclusionWith all the sound sources out there and all the dif-
ferent mics available to capture them, it can be con-fusing to find the best mic for the job by sheer trialand error. Answering the questions in this flow chartin a careful way can help put you in the ballpark forthe right sort of mic for each application; the rest isup to your ears and preference. Have fun!
Michael Schulze ([email protected])directs the award-winning Bachelor of Music
Recording and Production program at the LamontSchool of Music, University of Denver. Learn
more at www.du.edu/lamont/audio
6
7
When a condenser mic is placed too close to a very loud source, it is possibleto overload its internal preamplifier. But if you can back off from your source,
you then enter the realm of the condenser mic.

the rules and regulations at EMI at that time, youdidn’t go back and go over tape. You kept every-thing. Everything had to be recorded on virgintape.
Was that for technical reasons? Or because EMIwanted to sell more tape?They said you can’t do it, that it was going to be adetriment to the recording. That was the direc-tive. You have to record on virgin tape.
I think I started in the industry about a dozen or soyears after you, and we had some rules when Iworked at Criteria Studios in Miami. I just can’t evenimagine having all those internal regulations. Itseems like it would have been so incredibly inhibit-ing to the creative process.Well, the problem for me to begin with wasbecause of my age. When I first walked into EMIStudios, they showed me the different jobs Imight be doing, you know.When you’re 35 or 40
53
Legendary producer/engineer Geoff Emerickwas just 15-years-old when he worked on the his-torical, first EMI sessions recording the Beatles.At age 19, Geoff became the “first engineer” onRevolver, and subsequently engineered Sgt. Pep-per’s Lonely Hearts Club Band, The Beatles (WhiteAlbum), and Abbey Road. He’s also engineeredthree of Paul McCartney’s classic solo albums,and engineered or produced artists like ElvisCostello, Badfinger, Art Garfunkel, America,Supertramp, Cheap Trick, and many, many moreduring his incredible, decades-long career. Emer-ick has received four Grammy Awards, and is theco-author of the incredible book,Here, There andEverywhere – My Life Recording the Music of theBeatles. We were thrilled to honor Mr. Emerickwith TAXI’s Lifetime Achievement Award and do alive, keynote interview with a gentleman who hasliterally been an integral part in musical historyon a global basis.
It’s also noteworthy that this final part of theinterview with Geoff will be published shortlyafter the 50th anniversary of the Beatles hittingAmerican shores, and their first performance onthe Ed Sullivan Show. For many of us old enoughto have watched it as it happened, it shaped thefuture of our lives. TAXI would not exist, and wewould have never heard Geoff speak at the RoadRally if not for the Beatles. We hope you enjoythis final part of the interview!
The first question in Part Three is a carry overfrom Part Two, for context and continuity.—Michael Laskow
There is a lot to be said for capturing unbridledenthusiasm, I think.It’s just something that’s overlooked now.Whatused to happen in the creation of the Beatlesrecords, because they didn’t come into the studiowith things “finished.” They might have the lyricfinished, and the instrumentation was thoughtabout, but it hadn’t been set. So when we wouldbe doing the basic backing track for any of theirrecords, we might spend like six hours doing it
and realize it’s not working. Why is it not work-ing? So there’s a discussion. Well, let’s change theinstrumentation. And sometimes then the ideaswould come out. You’ve got them en masse, soyou’ve got ideas floating around. And often,someone would make a mistake and it would bean error. But if you thought about the error, itwas really good and different, so we used to putoverdubs on top of the error. That’s why theirsongs are the way they are, with lots of changes inthe songs, and the mistakes becoming part of thearrangement. It was just great working like that. Imean, people don’t work like that now, you know.
They didn’t fight to go back and get another take?They just rolled with it? When they made a mistake,they didn’t…?No, no. We’d go back to the basic recordingagain. We’d be doing basic rhythm track, andobviously it’s been recorded, and then there was amistake there. But we would just play it back andlisten to it, and they would sort of work on themistake. That’s what used to happen. And with Continued on page 54
M A Y 2 0 1 4
TAXI Road Rally 2013
Geoff Emerick Interview, Part ThreeInterview by Michael Laskow
TAXI’s Michael Laskow (right) beams while presenting Geoff Emerick with his Lifetime Achievement Award at the Road Rally.(Photo by James DiModica)

54
do you mean you can’t?” The players responded,“We can, but obviously, we’ve never done thatbefore. There’s a way of reading notes on manu-scripts.” Anyway, a couple of the players in theorchestra—like Alan Civil, who played the Frenchhorn on “For No One,” and DavidMason, whoplayed the piccolo on “Penny Lane”—they sort oftalked their fellows around. So gradually, whatwas happening was the pop people were breakingdown that barrier between the classical people.That was the beginning of the breakdown of thatbarrier. Anyway, to keep a long story short again,
we had done that orchestral thing on that [“A Dayin the Life”], and then the piano chord on the endcame a few weeks later. We tried anOm sort ofsound, but that didn’t work.
Actually, that was the first time we had run twofour-tracks in lock [synced together]. The basicrecord was on four tracks. The rhythm track andvocals were on three tracks. There was one track,the fourth track, was for the orchestral overdub.But what we did for the first time…We thought,“How could we link two four-track machines?” Sowe paused each motor, because they weren’t crys-tal-lock motors with the same 50-cycle pulse, andput a grease mark on the tape on the secondmachine, and went for another take of theorchestra so they were running together. We didthe same thing on the second and the third part,because we’d already locked in the first orchestraltrack on the proper four-track. So we then wentfor the third part of the orchestra on track two ofthe second four-track by just lining up the greasepencil and going into record.
But how often did that actually work?Wewere only going to know when we came tothe mix.
And the players had all gone home?Yeah, that was fine. We had gotten our basic takeon track four with, obviously, some timing errors.The timing was going with the orchestra, so I wasducking a track and lifting up another track tocover it and smooth it out. But the mono mix ofthat is almost perfect, whereas, on the stereo mixon that orchestral part, you can actually hear a
years old, you might be a recording engineer, andsuddenly it all changed. I had to be very careful,because there was one engineer who didn’t likewhat I was doing. They had been using the guythat used to do Cliff Richard and stuff. He used tojust come in, do this, do that and press a button,and away he’d go. Everything was always set upthe same.
In [studio] Number Two, once I was doing a ses-sion. The rhythm section always used to go up inthe dead end of the studio, and the strings andthe brass were all down in the live end. So Idecided to put all the strings and brass on thedead end, and bring all the rhythm down on tothe live end. It was a pretty good session, andsomeone had gone and snitched on me!
I had changed the process. The other engineerswere like 35, 45 years old and they didn’t wantsome young guy coming in trying to teach themtheir job. They didn’t want the hassle of changingthe process of how they recorded. They weren’tprepared to experiment.
I was shocked when you said at dinner the othernight in somany words that EMI/Abbey Road Stu-dios is really not all that it’s believed to be. It’s kindof enshrined in our mind as being hallowedground— certainly because the Beatles recordedthere. Tell the audience what it was actually like, Imean physically. Youmentioned paint was peelingoff the walls.It was very regimented. I mean, it was like work-ing in a hospital. There was light green paint halfthe way up the wall, and the rest of it was cream.There were the maintenance people, or the tech-nicians with their white lab coats on, and thejanitorial staff wears the brown coats. I willalways remember the manager when I firststarted, Mr. Fowler. The only time you used to seeMr. Fowler was lunchtime. He was a recordingengineer himself. I guess once you get too old tobe a recording engineer yourself, you’re the man-ager of EMI Studios. Mr. Fowler used to comearound at lunchtime, and he used to turn the
lights off. Then he’d come around an hour laterand turn the lights back on. That was his job.
Tell us about the period when Johnmet Yoko, andshe was ever present during the sessions.Obviously, she was a stranger. John brought herin and she went into the studio. I don’t think shewas really introduced; she just sat there.Obviously, they didn’t like it. A feeling developed.
In fact, Yoko used to follow John everywhere. IfJohn went to the bathroom, she’d sit on the corri-dor floor outside the door. She would never lethim out of her sight.
Then, when we did the Abbey Road album, justbefore we were due to start it, they had been in aroad accident together, so we canceled thesessions for the first two weeks. Then, when wedid start the session, they wheeled a big bed intothe studio from Harrods, which is a store in Lon-don. So they roll in this bed, and the premise wasthat Yoko was going to lie in bed while werecorded the Abbey Road album. And she did.
So Yoko actually had a bed in the studio…andwould take visitors whowould come and see her.That’s right. So she laid in bed. But as far as I wasconcerned, she was just like part of the furniture,so I didn’t think any more of it. But, of course, itwas bad for the other guys. I mean, you can imag-ine how they must have felt? Nothing was reallysaid, but you could tell by their looks.
I can’t imagine that nothing was said, and I can’timagine that George Martin didn’t say, “What thehell is going on here?”I mean, control had been lost. They were control-ling their own session.
Do you have a favorite Beatles song?There are a lot, really. “A Day in the Life,” I guess,obviously. And “Tomorrow Never Knows,”because it was the first one. I mean, they’ve all gottheir memories. The night we finished “A Day inthe Life” and put that orchestra on it, it was like aparty-type thing. You’ve got to remember whatwas available at that time to listen to, and whatthings sounded like. There were a lot of people—Mick Jagger was there. There was a huge host ofpeople; it was like a party going on in NumberOne studio.
And they asked them to wear costumes?While we were doing the orchestra, yeah. So Johnsaid, “Let’s dress everyone up.” The orchestralpeople had to wear tuxedos, andMal Evans, whowas one of the roadies, went out and bought a lotof funny noses and glasses and plastic mustaches,and asked the orchestra, who were mainly classi-cal players—in fact, all classical players—to putthese things on. So, obviously, there was a hugeuproar, but George Martin and Paul sort ofcalmed them all down. The other thing was, onthe score for “A Day in the Life,” the directive wasthat it just go from one note to the next note over24 bars, I think it was. And what you did, youwent from that note in your own time, not listen-ing to the person next to you. And they said, “Wecan’t do that.” So Paul’s out there asking, “What
Continued from page 53
Continued on page 57
“The artist side is still the mostimportant side. It’s got nothing to dowith technology, you know!”
“If you thought about the error, itwas really good and different, so weused to put overdubs on top of theerror. That’s why their songs are theway they are, with lots of changes inthe songs, and the mistakes becom-ing part of the arrangement.”


56

57
part that’s slightly out of time. So the only thingon that second four-track is just four orchestraltracks.
And did all four of themmake it on to the stereomix?Oh yeah. Yeah, yeah, yeah, that’s part of thathuge orchestral sound.
I bet it’s hard—certainly for the younger peoplehere today—to even conceive of what Geoff is talk-ing about. I mean, to have two four-trackmachinesthat were never intended to run synchronouslytogether, and putting a 50-Hertz hum on there.Basically, you knowwhen you get a ground humthrough your guitar amp? That’s what he’s talkingabout, using the peaks and valleys of that waveformto synchronize twomachines. There was no digitalback then. For those of you who have only grown upwith Pro Tools, you have no idea how complex it wasto do what Geoff is describing.But again, it was a challenge.We would try theimpossible. Also, a lot of people have commentedsometimes that the single runs a bit fast or a bitslow. None of the machines at EMI in those dayswere crystal-lock motors, obviously. So if thepower… If it was really out, you’d say there’s some-thing wrong with the machine. But there was likea tolerance level, plus or minus, whatever. [Thestudio] didn’t have its own generator, so if thelocal power fluctuated, the machines would startrunning slightly slower or faster depending onwhat the outside voltage was. So that’s how some-times someone would do a copy tape fromanother tape, which had probably been sped upjust a fraction. Then there would be another copyfrom that which probably got sped up a bit. Theywere never on perfect pitch, some of these things.
What do you think is your greatest accomplishment?Well, over the years, it’s not really a work thing, Ithink it’s the realization of what we all achievedthen. We developed people’s careers [as they are]now from what we were doing then. And I reallyget emotional over that, realizing that what we’vedone has made everyone—especially, I’m sure, alot of people here, I would think—because ofwhat we [did back then] is why they work [atwhat they’re doing now].
You are literally part of world-changing history,Geoff. All from just a 15-year-old kid that wanted toget a job in a studio.Well, it’s a mindset, isn’t it? Of course, with theway technology moves now, it changes frommonth-to-month. I mean, from the period of1975 through probably 1981, on a lot of theMcCartney stuff—especially on Tug of War—wewere recording four 24s in lock. And then Iremember the prototype of the first Sony digital
maybewe should all worry more about the perfor-mance—capturing that lightening in a bottle.I mean, Auto-Tune is the most devastating thingthat has ever happened. What’s the point, youknow?Whereas, before you’d be directing anartist, and it would be great for them to learn tosing in tune, because if they go out live they cansing in tune, and they become better performersfor it…and much better singers. But now theydon’t have to… You know what the system is now,it’s just laughable.
Andwith that, all I can say is, Geoff, you deserve this[Lifetime Achievement Award] somuch. Thank youfor all that you’ve given us. You are a very, very, veryspecial man. Ladies and gentlemen, Mr. GeoffEmerick! [applause]
machine coming in. And it was only a prototypethen, because the power supply was bigger thanthe tape machine, and they were working on thepower supply. And then, with the advent of CDs.Things have moved so fast. We were locked into asystem for like five or six years which didn’tchange, and that was the way we worked. Butnow, it’s different frommonth-to-month. Sothere’s no sort of focus in on this, it’s just chang-ing so fast. And the artist side is still the mostimportant side. It’s got nothing to do with tech-nology, you know! [applause]
You spent somuch time at dinner last week talkingabout that. That wasmy big take-away from ourtime together. I thought about it all the way home.You’re right. Technology can be very frustrating, and
Continued from page 54

RECORDING May 201458
In our March 2014 issue, I reviewed theAudio-Technica ATH-M50x, a redesign ofthe well-loved ATH-M50 headphone. As Iexplained in that review, I feel that Audio-Technica chose the best possible way toimprove upon a headphone that everyoneadored already: they didn’t mess with itssound at all, they simply made it more pro-friendly. Keeping the uncompromisingsound, fatigue-free comfort, and excep-tional isolation of the original design, theATH-M50x added redesigned andreplaceable earpads and a quick-releasecable attachment with a selection ofcables to suit the user’s tastes... a greatheadphone simply made a bit better.
In this review, I’ll tell you about the threenew headphones that have been releasedto fill out the M-Series under the ATH-M50xat different price points and for differentintended uses. Come along and meet theATH-M20x, ATH-M30x, and ATH-M40x!
Look before you listenStarting at the top and just to refresh your
memory from our review in March, the ATH-M50x is a closed-back dynamic head-phone with a 45 mm driver, neodymium
R E V I E W S B Y M I K E M E T L A Y
Audio-TechnicaThe ATH-M40x is closest in feature set to
the ATH-M50x, offering the same fold-ing/turning earcup design, carry pouch,and detachable cables (it comes with two,the long straight and straight/coiled cablesmentioned above). It has a 15 Hz to 24kHz frequency response, 1600 mW @ 1kHz maximum input power, 98 dB sensi-tivity, and 35 ohm impedance, and weighsabout 8.5 ounces.
The ATH-M30x simplifies things a bit,offering a headband design that folds fortransport but without swiveling earcups(there’s a little bit of play to fit the user’shead nicely, but they don’t turn complete-ly off-ear) and with a 10' (3m) straightcable with miniplug and screw-on 1/4"adapter that’s permanently attached tothe left earcup with solid strain relief. Itcomes with a carrying pouch. Its specsare as follows: 15 Hz to 22 kHz frequen-cy response, 1300 mW @ 1 kHz maxi-mum input power, 96 dB sensitivity, 47ohm impedance, and 7.8 ounce weight.
The ATH-M20x delivers a stripped-downand no-frills affordable headphone. Its head-band has minimal swivel for comfort pur-poses but doesn’t fold; it has no carry pouch,
magnets, and copper-clad aluminum wire inthe voice coils. It offers a frequencyresponse of 15 Hz to 28 kHz, a maximuminput power of 1600 mW at 1 kHz, a sen-sitivity of 99 dB (presumably per mW), animpedance of 38 ohms, and a weight ofabout 10 ounces. The headphone isdesigned to fold compactly, and its earcupscan swivel by 90º for off-ear use. It comeswith a protective carrying pouch and threedifferent detachable cables: a straight/coiled cord (1.2–3 meters, roughly 4' to10') and a 10' (3 m) straight cord that sharea screw-on 1/4" adapter for their TRS mini-plugs, plus a 4' (1.2 m) straight cable withminiplug for use with mobile devices.
The ATH-M20x, ATH-M30x, and ATH-M40x are all closed-back dynamic head-phones like their big brother; they also fea-ture neodymium magnets and copper-cladaluminum wire voice coils, but their driversare 40 mm in diameter. They share a sim-ilar earcup shape and padded headband,with slight differences in construction. I willnote up front that all three phones offer fan-tastic isolation in the studio; I wouldn’t hes-itate to recommend any of them for use ina tracking room with nearby live mics.
RECORDING May 2014 59
and its 1/4" adapter for the miniplug at theend of the 10' (3m) permanently attachedstraight cable is snap-on rather than screw-on. Its specs include a 15 Hz to 20 kHz fre-quency range, 700 mW @ 1 kHz max inputpower, 96 dB sensitivity, 47 ohm imped-ance, and feather-light 6.7 ounce weight.
Listen as you lookThe changes in feature set aren’t all that’s
going on here. The three new headphonesare also voiced differently from one anoth-er, to best suit different applications.These differences are often subtle, but
they’re there. I lived with all three modelsfor several weeks and compared them toone another and to the ATH-M50x, andI’ll do my best to communicate what Iheard as the fundamentals in the listeningexperience for each headphone.
The ATH-M20xAudio-Technica markets the ATH-M20x
as an M-Series headphone that anyonecan afford, and designed it to fit that role:it takes the core sonic essence that madethe ATH-M50x such a beloved headphoneand strips away everything around it,leaving a headphone that is simultaneous-ly a bare-bones experience and a real joy.The ATH-M20x has a very flat response
that’s believable and clear from the deepbass up to the high end; if it doesn’t have theextreme airiness in the high treble that onehears in some of the other M-Series head-phones, it’s not an absence that equates to
muddiness. There’s no real emphasis on anyparticular part of the frequency range... per-haps a tiny dip in the low mids but not some-thing I would call a “smiley face” curve. Icould easily learn to mix on these phones,and they were my cans of choice for com-posing sessions leading up to a live sologig; they sounded beautiful through myEcho AudioFire2 interface (as well as everyother quality interface I tried).The ATH-M20x is one of those products
that comes along every once in a whileand resets our expectations for everyother product in its class. It is a fifty-dollarheadphone that frankly beats out severalof the far more expensive models we’vereviewed in recent months. One stafferwith decades of experience in the field,after auditioning it, estimated its streetprice as triple what it actually costs!There are bad headphones, mediocre
headphones, good headphones, great head-phones, and phenomenal headphones—andunfortunately the bad ones can come withany price tag. The ATH-M20x is a good-to-great headphone for a price that’s basically
pizza money; there is no reason not to havea pair in your studio. In fact, there’s no rea-son to not to have several pairs, fitting outyour entire tracking room with reliable, con-sistent phones for your talent and keeping apair for yourself in the control room!
The ATH-M30xThe ATH-M30x isn’t so much a step up
from the ATH-M20x as a step sideways. Yes,it feels a bit more hefty, and the screw-onadapter, folding design, and carry pouch areall nice touches, but the sound of the ATH-M30x is a significant departure from the ATH-M20x and deserves a detailed discussion.While the ATH-M30x does have more
high end, a noticeable sense of space andclarity in the soundstage that isn’t quite asimpressive in the ATH-M20x, you onlynotice that once you’ve gotten used tohow the ATH-M30x handles the mids andmid-highs. It’s a distinctly mid-forwardheadphone, designed by Audio-Technicato bring out fine details in vocals and gui-tars. This distinction, between mids for-ward and a very flat response with per-haps a perceived dip in the mids, hasbeen around for decades in both monitorspeakers and headphones, and there’s noreal “right answer.” With the ATH-M30x,you have a chance to choose the former ifthat’s what helps you mix best, while theother models lean toward the latter.This is a remarkably exacting headphone
in that critical frequency range—just as oneexample, I picked up a slight sibilance in the
lead vocal in the song “Margaret Vs.Pauline” from Neko Case’s Fox ConfessorBrings The Flood. That sibilance is very mild,and a number of good headphones don’tpick up on it... but on the ATH-M30x it wasinstantly and annoyingly noticeable,enough so that if it was me tracking or mix-ing that song, I’d make a decision on thespot to do something about it. And that saysall you need to know right there: this head-phone will help you hear and fix problemsin your tracks and mixes.
The ATH-M40xOkay, so what if you have a bit more to
spend and you’d like to combine the upper-end clarity of the ATH-M30x with the flatterfrequency response of the ATH-M20x, andadd a few perks like a detachable cable andearpads that can go off-ear when needed?That’s when you step up to the ATH-M40x.Thanks to my March review of the ATH-
M50x (and my trusty pair of ATH-M50sAnniversary Edition phones), I “got” thesound of this headphone the most quickly ofall; it has a similar voicing to the ATH-M50x,
flat and workmanlike and uncompromisingacross the frequency spectrum. It shares thesolid, believable, tight bass that’s heard inevery one of the other M-Series phones, andadds a bit more “on a clear day you cansee forever” to the air band and above, ifnot to the extent of the ATH-M50x. It alsooffers a flat and uncolored midrange that atfirst listen might seem a bit restrained in com-parison to the mid-forward ATH-M30x, butthere’s no sense of lacking detail or com-promised balance, just a smooth and uni-versal trustworthiness—especially when lis-tening to acoustic music, from Americanaand folk to classical.The folding/swiveling design is a love-
ly touch that one doesn’t miss until onegets it back, and the detachable cableswill make people in pro studios veryhappy. This is a new and exciting bench-mark for a $100 phone, much as theATH-M20x is for a $50 phone.
No wrong choicesIf the ATH-M50x and everything it offers
is appealing but just a tad too rich for yourblood, you should give the ATH-M40x atry. If you’ve been interested in getting intoa mid-forward and highly detailed head-phone for tracking and for mixing/editingdecisions, the ATH-M30x brings that capa-bility into the hands of pretty much every-one. And the ATH-M20x? When a head-phone that does what this headphone cando becomes available for a price this low...it really makes you stop and think.
The entry point for a really great, reliableprofessional headphone vs. a merely goodheadphone has been dropping steadily foryears now, but even so, Audio-Technica’snew M-Series offerings are a shot across thebows of every firm offering a “good solidphone” for a hundred dollars. You can nowget a great phone for that much, and amore-than-good phone for half that.This is affordable quality, and by “quali-
ty” I don’t mean glitz, hype, sheen, boom,or bling—I mean audio that lets you trackand mix with confidence, audio that a pro-fessional wants in a headphone. Audio-Technica’s designers deserve to take a bowfor this entire headphone line; they’regoing to be turning a lot of heads.
Prices: ATH-M50x, $239 ($169 street);ATH-M40x, $139 ($99 street); ATH-M30x, $99 ($69 street); ATH-M20x,$69 ($49 street)
More from: Audio-Technica,www.audio-technica.com/monitorheadphones
ATH-M20x, ATH-M30x, and ATH-M40x HeadphonesMeet the rest of the family

Back in our November 2010 issue we took a look at a new micro-phone in Telefunken Elektroakustik’s R-F-T series of microphones, theAR-51. Since 2009, the USA-based Telefunken Elektroakustik hasbeen keeping the Telefunken legacy alive by offering USA handbuiltspot-on recreations of classic Telefunken microphones, most notablythe ELA M 250 and 251 models.
Of course, when you see the words “recreation”, “clas-sic”, and “handbuilt in the USA,” the next word to followwill usually be “expensive”! For this reason the compa-ny launched the R-F-T line, which takes its design princi-ples and expertise and uses overseas parts and manu-facturing to offer Telefunken models in the $1800 rangevs. the $5000–$7000 range of the USA-made products.The R-F-T line makes use of a hybrid approach whereoverseas parts are commingled with domestic parts andassembled here in the USA.
Since its launch the R-F-T line has offered six differentmodels. The original AK-47 (U47ish) and M-16 (C12ish)have been discontinued. The current line includes theAK-47 MkII (reviewed October 2011), the CU-29Copperhead (reviewed June 2011) which is a purelymodern Telefunken design, and the AR-51 which isbased on the ELA M 251E and the AKG C12. There isalso a stereo AR-51 called the AR-70.
The reason for this Reviewed & Revisited column isthat the AR-51 has recently undergone a capsulechange. The original model had a center-terminat-ed TK67D capsule. The new upgraded capsule,the TK51D, is a 34 mm dual-membrane,edge-terminated capsule that Telefunkenfeels is closer in sound and design tothe CK12-style capsules used in origi-nal ELA M microphones.
As of this review all AR-51 mics comewith this new capsule, and if you ownan older AR-51 you can send yours in andget yours swapped for $199. But the ques-tion is, should you?
Questions and answersAfter my original review I was so enamored of the
AR-51 that I purchased a pair; they are among myfavorite drum overhead mics ever. So in talking with theguys at Telefunken, I had two questions: “Why did youchange it?”, and more practically, “I already know Ilove the sound of the original capsule... but will I like thenew one?”
The first question was answered by Telefunken DesignEngineer Ryan Loftus. His answer: “Since the AR-51 circuit isdesigned after the C12/ELA M 251E, we wanted to introduce
an edge-terminated style capsule in the AR-51 tobring it closer to the sonic characteristics and con-struction of the CK12 used in those microphones.”
He also took time to explain the benefits of the newcapsule. “The membrane of the TK51D has a largerfree-moving surface area than the center-terminatedTK67D. This inherently slows the transient response,resulting in a smoother, open high end. This construc-tion also provides an extended low-frequencyresponse that complements the amplifier perfectly.”
Of course my last question still lingered: “Will Ilike it?” Thankfully for myself and for our readers,Telefunken shipped me out a TK51D-equipped AR-51 so I could do some side-by-side comparisons ofthe new mic with my original designs.
An AR-51 refresherIf you don’t have the November 2010 issue handy,
let me quickly bring you back up to speed. The AR-51is a tube microphone with 9 selectable polar patterns.
Internally it couples a NOS ECC81 twin triodetube to an Austrian-designed amplifier circuit, a
USA-made PC board and a custom Germanoutput transformer. It is housed in the
same C-12 steel body as the rest of theR-F-T line, with a gray powder coatfinish and a smoky chrome coveredbrass head basket.
It has an 86 dB signal-to-noiseratio, 8 dBA equivalent noise, sensi-
tivity of 13mV/Pa ±0.5 dB, 250 ohmnominal impedance, 128 dB Max SPL,and a 20 Hz to 20 kHz frequencyresponse.
Sound of the oldI found the original AR-51 exhibited a clear sound
with an airy width and depth. Its midrange exhibitsa lovely clarity and detail without being punchy orforceful, and its low end is controlled yet smooth.
While I loved it on drums, it also became a primemic for bass cabinet and electric guitar cabinets.
However, I found the original mic rather source-specificon most singers; I honestly never pulled it out much forvocal duties.
RECORDING May 201460
&...where we bring you follow-up articleswith application hints and upgrade newsabout gear already reviewed in Recording
Telefunken ElektroakustikAR-51 and its New CapsuleA new heart and a new sound
for a well-loved condenser micby Paul Vnuk Jr.

RECORDING May 2014 61
Sound of the newMy first use of the new-capsule-
equipped AR-51 was on a three pieceCeltic/folk group. Elsewhere in this issue Imention a mic (ADK’s new Z-67) that wassingled out for the female vocalist of thegroup; well, to my surprise, for the tenor ofthe group the winner and go-to vocal micfor the project was the new AR-51!Over the course of recording the album,
as well as a few indie-rock sessions, I cameto realize that the tone of the new capsuleretained the depth and midrange presenceof the original, but the TK51D capsule hasa richer top end. It’s still feathery, but atouch smoother and more full. The TK51Dalso now offers a slightly broader low end.This is still not a low-end-heavy mic; it’s justthat the AR-51 seems a bit more even nowacross the spectrum.
It is instantly an improvement to my earson acoustic instruments and vocals. Ondrums, I did have to adjust my ears to it, buthaving done so, now I like it just as much asthe original. Really the only area where I stillthink the original capsule beats the new oneis on electric guitar amps. All I can say is thatthe original sat better in a mix, especiallywhen blended with an SM57 or 442.
Bottom lineWhile the AR-51 with its original capsule
excelled on a few sources like no other mic,it had other sources where it didn’t reallyshine. With this new capsule upgrade, theAR-51 has just made the jump to being abetter all-rounder and, dare I say it, muchmore of a workhorse mic. And if you’rewondering... yes, I’m putting my moneywhere my mouth is. I will be getting theupgrade for both of my mics.
Price: $1895 street; upgrade to existingAR-51, $199
More from: Telefunken Elektroakustik,www.telefunken-elektroakustik.com

RECORDING May 201462
The PCM-D100 represents the fourthgeneration in Sony’s PCM Series of hand-held digital recorders with built-in mics. Ofthe D100’s predecessors—D1, D50,M10—only the M10 is still available newfrom Sony. These products, and especiallythe latest, the PCM-D100 with its DSDcapability, are not just fine portable audiodevices, but Sony sees them as beingmeaningful in a wider context.Last year, after much organizational
restructuring, the company embarked onan initiative to promote high-resolutionaudio. This is an excerpt from Sony CEOKazuo Hirai’s keynote address at therecent CES tradeshow: “...Listening to high-resolution audio
using Sony’s end-to-end, high-resolutionrecording delivery and playback systems.An entire generation—we all know this—an entire generation missed the visceralemotion of listening to uncompressedaudio. The precision and clarity of every
B Y L O R E N Z R Y C H N E R
note. The moment when a singer takes hisor her breath before the chorus. Gettinggoose bumps as a song reaches a crescen-do. High-res audio allows the completedynamic range of what the artist originallyintended when they were in the recordingstudios creating their music...”And, to further bring the high-resolution
experience to a wider audience, in a pushto promote high-res audio in “master quali-ty” as an alternative to MP3, Sony promot-ed the following products recently to the fes-tival audience at SXSW in Austin, TX:• UDA-1 USB DAC System for PC Audio• HAP-S1 High Resolution Music System• HAP-Z1ES High Resolution Music Player• PHA-2 Portable High ResolutionDAC/Amplifier• PCM-D100 High Resolution PortableStereo RecorderThat’s quite a lineup to get the high-res
message across. So let’s see what makesthe PCM-D100 worthy of fitting in withthis illustrious company.
From the lineage...After setting trends in portable audio
for the last 30-plus years, first as the orig-inator of the Walkman (cassette), then atthe forefront of DAT (Digital Audio Tape)and MiniDisc formats, Sony brought us
high-end portable digital recording withthe all-in-one PCM-D1 (reviewed April2006). It had protruding mics (andaccepted external mics), USB, internaland stick memory, recorded up to 24/96quality (but not MP3), and cost aroundtwo thousand dollars.The PCM-D50 (reviewed April 2008)
had adjustable mics that could be toed infor X/Y (90 degrees) or out for wide stereo(120 degrees), also accepted external
mics, didn’t record MP3 but could playback MP3 if imported over USB, and costaround $600.The PCM-M10 (reviewed March
2010) was no longer coat-pocket largebut now shirt-pocket small, with fixedmics built into the top corners (at 45degrees, barely protruding), recordedand played back MP3 (and PCM up to24/96), had a record buffer for 5 sec-onds before you go from Record-Pause toRecord mode, and can still be had newfor around $250 (street).
...to the PCM-D100The PCM-D100 comes in a substantial
box, with a printed manual of 98 pages,with a CD of SoundForge AudioStudio LE(alas for Windows only, Mac users missout), a wireless remote (transport functionsonly, no control over record level) with itsreceiver unit that plugs into the PCM-D100, a fuzzy windscreen, a USB cord,and a carrying case. There is no ACpower adaptor included.At about 31/2" wide and 6" tall and
11/4" thick, weighing 14 oz., this unit sitscomfortably in your hand but not in a shirtpocket. It feels accident-proof, from thesturdy guard around the mics to the lid forthe battery compartment that now has a
sliding release switch, to the circular guardaround the record-level knob—the guardcan be flipped away from the knob toallow easier access for those with thick fin-gers. All very robust and well thought out!The built-in electret condenser mics have
been redesigned for maximum perfor-mance with this ambitious new recorder,to do justice to the variety of formats thatthe PCM-D100 provides: MP3 from 32 to320 kbps and 16 to 48 kHz, Linear PCM
Sony PCM-D100 Portable RecorderHigh-resolution audio—including DSD—on the go

(.WAV) and FLAC at 22.05 kHz/16 bit,Linear PCM (.WAV) and FLAC from 44.1to 192 kHz at 16/24 bit, and DSD 1-bit/ 2.8224 MHz. See Figure 1 (courtesy ofSony) for the mics’ frequency response asa function of angle off axis.The mics can be toed in for X/Y (90
degrees) or toed out for wide stereo (120degrees), or set to point straight ahead ifthat happens to give you the sound youwant. Right below each mic you see agreen LED that lights up when the inputsignal reaches –12 dB and a red LED toindicate overs.The onboard limiter has a special feature
worth mentioning: Each input channel hastwo preamps and two A/D converters—theprimary ones carrying the “regular” signaland the secondary operating 12 dB lower.When an over is detected in the primarysignal, that portion of the data is automati-cally replaced with the undistorted datafrom the secondary. While that is neither aguarantee for a panacea nor an excuse forsloppy gainstaging, it can nevertheless bea lifesaver with critical sessions. The limiterrecovery time can be adjusted from 150ms to 1 second to 1 minute—some experi-mentation is recommended.The PCM-D100’s internal memory
capacity is substantial at 32 GB, allowingfor more than six hours of stereo recordingat 24/192, and much more at lower bit
and sample rates, all the way to 477 hoursof MP3 at 128 kpbs (assuming you buy anA/C adapter and incur no power outagesduring those almost three weeks of contin-uous recording...). Add a 128 GB SD-XCmemory card and make use of the PCM-D100’s cross-memory recording capability(seamless switching over of memory on thefly) and these recording times quintuple!Many more features (for which we don’t
have the space to get specific) make lifeeasy for the operator of the PCM-D100,things like a switch for –20 dB attenuationof input for exeedingly noisy environments,dual recording of PCM and MP3 simulta-neously, dedicated button for T-Mark inser-tion (also on the remote!), low-cut filter,recording optical line signals with sync, twomodes of Peak-Hold display, 5-second pre-recording (while in Record-Pause mode),file move/divide/copy/fade, playbackspeed and pitch controls, search and loop,playback EQ choices, a dedicated input forexternal mic and dedicated input and out-put for line signals, two custom-assignablefunction buttons, and much more.
Stellar soundHaving used all its predecessors, we
expected no less than stellar sound from thePCM-D100, and it didn’t let us down.While the windscreen was no match for 40MPH Colorado winds during outdoor
nature recording, in all other respects thePCM-D100 shone. I must thank DonnaWickham, head of the Vocal Jazz programat the Lamont School of Music at theUniversity of Denver, for letting me record alive event where I used the various mic andrecorder settings, all with stellar results.In the wide (120 degrees) position the
PCM-D100 never produced a hollow cen-ter while reaching far out to the sides, evenfrom a few feet in front of a wide bandstage. A visit to a large hall with an orches-tra performing, and many combinations ofrecording and playback variations done inmy study further confirmed the viability ofthe PCM-D100’s many features.
SummaryThe PCM-D100 is positioned as a flag-
ship product in Sony’s push for the resur-gence of high-res audio, and it is pricedin the flagship class. As such, an ACpower adaptor could have been throwninto the deal, and a tiny speaker elementfor quick confidence monitoring wouldhave been welcome. Aside from that, thePCM-D100 delivers on all counts and istruly a cut above.
Price $999.99 (around $800 street)
More from: Sony Electronics,sony.com/proaudio

RECORDING May 201464
By submitting a Readers’ Tapes entry you automatically grant per-mission to Music Maker Publications to feature your submission here,on our website, and in our SPOTLIGHT e-newsletter. We might need toshorten entries for editorial reasons. By listing your name with the sub-mitted work, MMP does not imply any assignment of rights to the sub-mitted work. We can neither guarantee publication of a review norengage in correspondence about individual submissions.
Media can be submitted physically (as in an actual recordingthrough the mail) or online at our website. For online submissions,please go to www.recordingmag.com and click on Readers’ Tapes,then select “Submit Your Recording” and fill in the requested informa-tion. We accept MP3 and AAC files of up to 5 MB size. File bitrate isup to you but we strongly recommend a minimum of 128 kbps; notethat the higher the bitrate, the shorter the song that will fit in the 5 MBlimit. You’re free to submit an excerpt of a longer song if that helps!
Send physical submissions to: Readers’ Tapes c/o RecordingMagazine, 5408 Idylwild Trail, Boulder, CO 80301. Please be sure toinclude: a) a CD, CD-R, cassette, DAT, or MiniDisc with only onesong preferably no longer than 3:30 in length (or tell us which trackyou want reviewed); b) a credit list (who did what); c) a list ofequipment used. Remember that CD-Rs with unevenly appliedpaper labels, smudges, or scratches won’t play back reliably.
PLEASE state which part of your contact info we can publish(address, phone, and/or email)—if you don’t tell us precisely, wewon’t print anything at all.
Suggestions: While we are unsure of just how the trackstraveled back and forth between countries, the results areimpressive. Joey has got a good thing going here and weencourage him to keep on rockin’!
Summary: No jet lag in sight!
Contact: Joey Cabusas, [email protected]
Kris McDaniel
Equipment: Apple iMac running Apple Logic Pro 8 and iZotopeOzone 5 mastering software; Audio-Technica AT2020 mic, ShureSM57 and SM58 mics, AKG K240 MkII headphones. Sonic Realityvirtual drum kit samples played by (and with) Roland TD-6 elec-tronic drums. Yamaha FH110 acoustic guitar, Crafter mandolin,cheap ukes, and miscellaneous hand percussion.
Music: “Ukeo” is a male vocal folk song, one-man-bandedat Kris’ home studio. As Kris put it in his submission, “I dideverything. Hopefully not too poorly.”
Recording: Kris has delivered quite an exotic and ambi-tious track here, full of possibilities but needing a bit of pol-ishing. Starting from the ground up, we found the drum pro-gramming and playing to be rather inconsistent, with sever-al timing issues throughout the length of the song leadingthe aggressive bass guitar to be out of sync with the drumsin a few areas.The remaining sound sources were a mixed bag. We dug
the flute sound in the intro of the track (presumably fromthe EXS24 sample player inside Logic Pro 8, although wecan’t be sure). We also felt that Kris did a nice job present-ing his lead vocal, up front and free of artifact. On the downside, the mandolin had a very “bitey” sound through bothour monitors and our Grado Labs headphones. Kris’ AKGK240 MkII phones are fine old monitor cans, but they needa good headphone amplifier to speak with clarity, and wedon’t see anything of that nature in his equipment list (hedidn’t list what he was using for an interface to Logic), nordo we see any studio monitors here. So maybe he wasn’thearing what he needed to...?
Suggestions: We often search for a “template,” an existingsong or album that we can offer folks to provide a clear pathto not only fixing the trouble areas of their submissions, butalso as a guide towards their future recordings. Though it israre to find one that custom-fits, in Kris’ case we stronglyurge him to find/download a copy of Seals and Crofts’ mag-nificent 1971 release Year of Sunday. Prior to the duo becom-ing soft rock icons, they released a record that is incrediblyclose in nature to what Kris is doing here.In the meantime, we suggest that Kris spend some quali-
ty time working with his drums and a click track. It is quitecommon for non-drummers to struggle when attemptingcomplicated arrangements, and we feel that simplifying theparts here would allow for more focus on the timing issues.As for the mandolin, they are tricky instruments indeed,
although the AT2020 should provide good results. As withall sound sources, mic placement/distance is critical. Also,remember that the mando definitely demands correct man-agement of the mids and upper midrange frequencies,either during tracking or mixdown... and preferably both!
Summary: Grab that record and study!
Contact: Kris McDaniel, [email protected]
Joey Cabusas
Equipment: Custom PC (Intel Core i7 4770) with TASCAMFireOne interface running Cakewalk SONAR 8.5 with audiorouted via JACK through Harrison MixBus plug-in. YamahaHS50M studio monitors, Yamaha SY77 keyboard workstation.
Music: “Love is All I Need” is a male vocal rock song.Dennis Alejandria wrote the song, Eddie Planes sang thevocals, Kenya Marshal performed the rap, the electricguitar solo was courtesy of Jaime Diaz, and Joey was thearranger/MIDI programmer and mix engineer.
Recording: A tale of two countries! Joey tells us thatthe guitar solos, vocals and rap were done in the USA,while the programming and mix were done in thePhilippines. So how did this multiple-time-zone effortturn out? Pretty darn good, thank you!Starting with the rhythm section, the drum program-
ming and the individual drum tones are as tight and real-istic as we’ve heard, and the bass supports the drumsthroughout. The electric guitar sounds are edgy and thesolos, while showing signs of distortion (as in tracking,not fuzzbox), are both articulate and emotive. We alsoloved the ’70s-era string patch that gives flight to thearrangement (The Sound Of Philadelphia indeed!).Joey has also done a nice job integrating the rap into
the mix here; it is beautifully recorded (we wish weknew what mics he used), free of artifact, and adds nodiscernible loss of flow to the proceedings. Lastly, weapplaud Joey for the way he handled his effects. Theroom ambience on the kick drum gave it a great sense ofspace, and the multi-tap delay on both the lead vocalsand electric guitars were carefully executed throughoutthe track.

COMPANY PAGE PHONE WEB ADDRESS
ADAM Professional Audio 23 www.adam-audio.com
ADK 31 www.ADKMIC.com
AEA 45 626-795-9128 www.RibbonMics.com
API Audio 11 www.APIaudio.com
Apogee OBC www.apogeedigital.com
Audix Corporation IBC www.audixusa.com
B&H Audio 43 800-947-9918 www.bandh.com
Blue Microphones 5 www.bluemic.com
Bock Audio/TransAudio Group 61 www.transaudiogroup.com
ClearSonic 61 800-888-6360 www.clearsonic.com
Cloud Microphones 16 www.cloudmicrophones.com
Conservatory of Recording Arts & Sciences 39 888-604-4075 www.cras.edu
Ear Trumpet Labs 63 www.EarTrumpetLabs.com
Five Towns College 47 631-656-2110 www.ftc.edu
Focal Professional/Audio Plus Services 15 800-663-9352 www.audioplusservices.com
Full Compass 25 www.fullcompass.com
Genelec 21 www.genelec.com/music-creation
Grace Design 17 www.gracedesign.com
Great River Electronics 30 651-455-1846 www.GreatRiverElectronics.com
IsoAcoustics 51 www.isoacoustics.com
KIQ Productions 55, 57 800-600-1543 www.kiqproductions.com
Millennia Music & Media Systems 49 www.mil-media.com
Pearlman Microphones 47 www.pearlmanmicrophones.com
Radial Engineering/Primacoustic 18-19, 33 604-942-1001 www.radialeng.com
RealTraps 63 866-732-5872 www.realtraps.com
RØDE Microphones IFC www.rodemic.com/nt1
Samson 1 www.samsontech.com
sE Electronics 9 www.seelectronics.com
Shure 7 www.shure.com/americas
Sweetwater 2-3 800-222-4700 www.sweetwater.com
Sweetwater/MOTU 70-71 800-222-4700 www.sweetwater.com
TAXI A&R Insider 53-57 800-458-2111 www.taxi.com
Telefunken 27 860-882-5919 www.t-funk.com
Toontrack 13 www.toontrack.com
Vintage King Audio 29, 36-37 888-653-1184 www.vintageking.com

RECORDING MAY 201466
CLA
SSIF
IED
S/
MA
RK
ETPL
AC
E
RECORDING MAY 2014 67
CLA
SSIFIEDS
/M
AR
KETPLA
CEVisit www.recordingmag.com • Visit www.recordingmag.com

RECORDING MAY 201468
CLA
SSIF
IED
S/
MA
RK
ETPL
AC
E

RECORDING MAY 2014 69
Country Singer/SongwriterWalterWeyburnAvailable onYoutube or join his growingfanbase on facebook.www.walterweyburn.webs.com
Eric Bolvin; composer, horn arranger, pro-ducer and teacher. Lots of free music,charts and videos. www.BolvinMusic.com
Songwriter with“WOWMATERIAL” suit-able forMichael Bublé,TonyOrlando andMarie Osmond looking for agent with con-tacts. “GREATFINDERSFEE”.Call Phil609-588-0282
CHARLTONMETCALF, SONGWRITERfor all genres.An original song just foryou. myspace.com/charltontmetcalf,|[email protected]
Please Recycle your CDs and DVDsDoes your studio generate much CD andDVD waste?We recycle your discs forfree. Please Go Green!Learn how at www.cdrecyclingcenter.org
This is Improv at it’s best.Singer/Songwriter/Bandleader looking forserious manager/agent.www.myspace.com/andycliftonandcompanyhas material and [email protected]
John Shaughnessy writes and recordssongs that cross genres, with hooks aimedat the part of your brain where unforget-table songs get stuck. Listen atwww.johnshaughnessy.com
We are looking for rappers & singers andsongwriters and producers please sendyour song to myspace.com/mikecaponecontact:[email protected]
Singer Singwriter and Producer with di-verse style of music available for sound-track work. Project management capable.www.myspace.com/trigSongs and Bio posted.Contact: [email protected]
MUSICIANS Seeking Expert Key-boardist, Guitarist, Singers, etc. for NEWBAND. ORIGINAL MUSIC: Jazz/Pop.Some Covers. Serious.Arranging and Im-provising a Plus. Great Opportunity.(480) [email protected].
FREE NOTICESIf truth is the most powerful mind-alter-ing substance then new home recordingReality Series Joe Fresh Out Da Peniten-tiary delivers a lethal dose. Like Joe onFB @ Fans of Joe Fresh and subscribeYouTube @ JoeFreshOutDaPen andhttp://www.joefreshout.com
My sound? BOBDYLANmeetsTOMPETTY,ERICANDERSEN,andWEIRDAL-- in CHURCH.http://www.lexzaleta.com/
Listen to free samples from our new release“Pocket Full of Change”atwwwwww..eexxppeennsseerroocckkss..ccoomm
We at long beach city college would like tooffer free music videos to artists in the longbeach, ca area. Write [email protected] for more info or facebook.com/lbccmvp
Family band, “The Fulcos”, are now seek-ing a successful management/productionteam. Music style Beatlesque/Queenish.www.meetingthefulcos.com
Please visit www.johnlewitt.com to down-load this Canadian singer/songwriters lat-est collection for FREE.
17 year old singer/songwriting KerryD’Azevedo! Available on iTunes or joinher growing fan base on Facebook.
Hear Chris Williams music for film, tv, andadvertising. Great music for any media proj-ects that you may have. I own 100% of allrights so it is a one stop shop to me for all li-censing requests. Visithttps://www.box.com/shared/ig1p71sxci todownload and listen or www.cwiz.info
The Center for Hearing & Dizziness is aImprovised (Impoprivised) Band we Improvise new sounds to old movies. Seevideos at www.youtube.com/user/cfhd orwww.youtube.com/user/pjcdrummer.
Grooving Live Drum TracksPop, Hiphop, Soul, Reggae beats playedto your tracks by pro Drummer/Engineer. Web: www.Ive09.comEmail: [email protected]
Great sounding professional drum tracks, custom designed for your music, delivered quickly, affordable rates!www.rodneyballard.com
MIXYOURSONGS.COM Broadcast quality mixes of your songsby professional engineers.
REALDRUMSTUDIO.COMMaster Quality Drum Tracks by pro-fessional studio drummer and audioengineer. Great sounding room! Call Pat Bautz 888-755-6957
wwwwww..ssaaxxttrraacckkssoonnlliinnee..ccoommProfessional Saxophone Tracks Andy 818-378-8007
drumoverdubs.comCustom drum tracks recorded live toyour songs by professional studio drummer Brian McRae.
Killer Real Drum Tracksfrom Chet McCracken. Send or bringme your songs. All formats and afford-able! For credits, rates, equipment andinfo call Chet: 818-888-6687 Email: [email protected]: www.chetmccracken.com
Only Free Notices ads are free—use this space to further your career, make contacts, announceyour demo, website (non-commer-cial) etc. Free Notices ads (25words or less—we reserve theright to shorten longer entries)are restricted to items where nomoney changes hands.
No phone calls please for FreeNotices ads. Fax 303-516-9119or email: [email protected]
For sales and services, use thepaid categories:
• Commercial Web Sites• Duplication• For Sale• Miscellaneous• Services• Wanted
For details call 303-516-9118or email:
SERVICES
CLA
SSIFIEDS /
MA
RK
ETPLAC
E


RECORDING May 201472
Making an album is not for the timid.It’s going to cost you some sleep, andmore than a little money. It’s going tooccupy your every waking moment formonths. It’ll damage your health, yourserenity, and your relationships. Somedays you’ll be gripped with self-loathingand the compulsion to throw in the towel.Other days you’ll secretly entertain thethought that you might be a genius andyour record a masterpiece. Then yoursanity returns and you get back to work.
A journey this treacherous should neverbe taken alone. You’re going to need agreat producer.A producer is many things. A friend, a
technician, a guide, a strategist, an orga-nizer, a cheerleader, a shaman, a mom,a barista, a host, a roadie, a therapist, aconfidant, a diplomat, a savant, a makerof sandwiches—but more than anythingelse, a producer is a trusted collaboratorwhose decisions at a thousand forks inthe road could mean the life or death ofyour record. Sure mic placement matters.EQ, preamps, signal paths, and com-pression settings are all important. But thesingle most important element in any suc-cessful recording project is the relation-ship between the artist and the producer.If you don’t trust, rely on, respect, andadmire your producer, you’re doomed.I hadn’t made an album in seven years.
Life got in the way. My day job as a phi-losophy professor and the demands of my
expanding work as a writer and speakerpushed music off of center stage. I’d evenfired myself from my own band TheCoyote Problem. It was just all too much.But the songs kept coming. Seven years isa lot of songs. I had to do something. Itwas time to make an album.As the song list came together I real-
ized I needed a title song, one last pieceto tie all the themes of the record togeth-er. I tuned my Taylor to a double drop Dand wrote “Two Pines.”I decided to call Sven-Erik Seaholm, the
producer of The Coyote Problem’s twoalbums, Wire in 2005 and California in2007. We’d worked well together, wehad exceptional rapport, and most impor-tantly we got great results. The two tro-phies for Best Americana Album from theSan Diego Music Awards didn’t hurt. Artcontests are weird but hey, I’ll take it.At our first meeting we talked about
what kind of record we wanted to make.Like Stephen Covey says, begin with theend in mind. I wanted a raw, warm, open
sound. I wanted three things front and cen-ter—the holy trinity of acoustic guitar, bass,and drums. We talked about Neil Young’s“Out on a Weekend.” We talked aboutTom Petty’s “You Don’t Know How it Feels.”We talked about Nashville vs. Austin, hi-fivs. lo-fi, and Steve Earle. We talked aboutthe nearly impossible goal of getting arecorded acoustic guitar to sound like anacoustic guitar. Sven listened carefully,took it all in, and found a way.As our first scheduled session grew
near I upped my practice schedule. Iwanted to be ready. I searched deep andlong for the soul of this album. In anyartistic project or process, the most impor-tant question is always the same. What toleave in and what to leave out? The pres-sure began to build.I wasn’t nervous in front of the mic. I know
how to play my songs. In fact, recording isreally fun. It’s the editing that’ll get you.Especially when it came to guitar overdubs...
I’d do nine takes of Dobro on a song,and then Sven and I would start editing.It’s agonizing—which licks of which takesto put where. Thankfully, Sven has theuncanny ability to remember all of themoods and feels of all of them, and deft-ly moves through the song mousing andclicking and splicing and blending andbringing the best of the best together intoone seamless performance. I’m alwaystorn by indecision and haunted by thetakes not used—what if there’s a gem inthere we’re leaving out? Watching yourproducer edit is like handing him ascalpel and closing your eyes. This is whytrust is so important.I came to rely on Sven to do the right
thing, and nine times out of ten weagreed. When we didn’t, he’d listen andeither change his mind or gently make hiscase. It often felt like we were one person,one man with two heads and four hands,and we were making music together.People who don’t make records have noidea how deeply embedded a producer
is. I was there for every edit, but there isn’tone note on this album that Sven hasn’ttouched, nurtured, birthed, and brought tolife. Sure, I sang it and played it. But in avery real sense, so did he.In the end, that’s the greatest gift a pro-
ducer gives an artist—a safe place to bewho they really are. It’s the little things.Having the coffee ready. Knowing whenyou need another take and when youdon’t. Supporting you through a thousanddecisions, sometimes leading, sometimesfollowing, until you don’t know who’s incharge. You just know that somethinggood is happening, and you’re thrilled tobe a part of it.
Musings On The Value Of A Truly Good Producer
Guest editorial by Peter Bolland
Peter Bolland is an Americana artist,writer, and educator who lives and
records in the San Diego area. Keep aneye on peterbolland.com for informationabout the upcoming release of his new
album Two Pines.
I’m always torn by indecision and haunted by the takes not used—
what if there’s a gem in there we’re leaving out?
Watching your producer edit is like handing him a scalpel and closing your eyes.
This is why trust is so important.