Windows® 7 and USB 3.0 driver installation for 100 Series
6
Windows ® 7 and USB 3.0 driver installation for 100 Series 1 Based on the chipset specification, the 100 series requires USB 3.0 drivers to be preloaded in order to use USB keyboard/mouse during Windows ® 7 installation. This section is a guide on preloading USB 3.0 drivers and installing Windows ® 7. Method 1: Using SATA ODD & USB devices Load USB 3.0 drivers using the ASUS support DVD and install Windows ® 7 using a USB device. 1. Insert the Windows ® 7 installation DVD into a USB ODD, or copy all files on the Windows ® 7 installation DVD to a USB storage device on a working system. 2. Connect the USB ODD or USB storage device to your 100 series platform. 3. Insert the ASUS support DVD into a SATA ODD on your 100 series platform. 4. Power on your system and press F8 during POST (Power-On Self Test) to enter the boot screen. 5. Select the USB ODD or USB storage device as the boot device. Windows ® 7 and USB 3.0 driver installation for 100 Series DE160 First Edition June 2015 Requirement: • 1 x ASUS support DVD • 1 x Windows ® 7 installation source • 1 x SATA ODD • 1 x USB device (ODD or storage) The USB storage device requires 8 GB or more capacity. It is recommended to format the storage device before use.
-
Upload
khangminh22 -
Category
Documents
-
view
5 -
download
0
Transcript of Windows® 7 and USB 3.0 driver installation for 100 Series

Windows® 7 and USB 3.0 driver installation for 100 Series 1
Based on the chipset specification, the 100 series requires USB 3.0 drivers to be preloaded in order to use USB keyboard/mouse during Windows® 7 installation. This section is a guide on preloading USB 3.0 drivers and installing Windows® 7.
Method 1: Using SATA ODD & USB devicesLoad USB 3.0 drivers using the ASUS support DVD and install Windows® 7 using a USB device.
1. Insert the Windows® 7 installation DVD into a USB ODD, or copy all files on the Windows® 7 installation DVD to a USB storage device on a working system.
2. Connect the USB ODD or USB storage device to your 100 series platform.
3. Insert the ASUS support DVD into a SATA ODD on your 100 series platform.
4. Power on your system and press F8 during POST (Power-On Self Test) to enter the boot screen.
5. Select the USB ODD or USB storage device as the boot device.
Windows® 7 and USB 3.0 driver installation for 100 Series
DE160 First Edition
June 2015
Requirement:
• 1 x ASUS support DVD
• 1 x Windows® 7 installation source
• 1 x SATA ODD
• 1 x USB device (ODD or storage)
The USB storage device requires 8 GB or more capacity. It is recommended to format the storage device before use.
Windows® 7 and USB 3.0 driver installation for 100 Series2
Method 2: Using a modified Windows® 7 ISOLoad USB 3.0 drivers and install Windows® 7 using a modified Windows® 7 installation DVD.
Requirement:
• 1 x ASUS support DVD
• 1 x Windows® 7 installation source
• 1 x Working system (PC or notebook)
• 1 x SATA ODD1. On your working system, create an ISO image file of the Windows® 7 installation source using
a third-party ISO software.
2. Copy both “Auto_Unattend.xml” and “Auto_Unattend” folder from the root directory of the ASUS supporting DVD to your system.
3. Edit the ISO file and add both “Auto_Unattend.xml” and “Auto_Unattend” folder into the ISO file.
4. Burn this ISO file onto an empty DVD to create a modified Windows® 7 installation DVD.
5. Insert the modified Windows® 7 installation DVD into an ODD on your 100 series platform.
6. Power on your system and press F8 during POST (Power-On Self Test) to enter the boot screen.
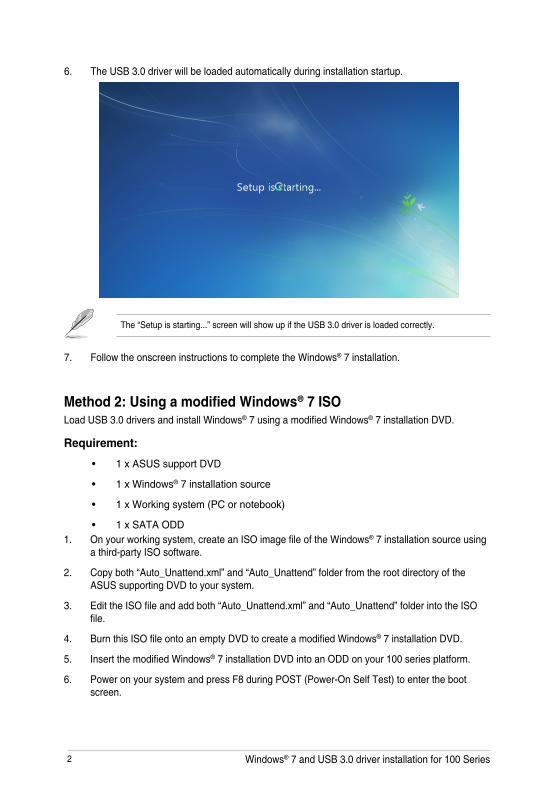
6. The USB 3.0 driver will be loaded automatically during installation startup.
The “Setup is starting...” screen will show up if the USB 3.0 driver is loaded correctly.
7. Follow the onscreen instructions to complete the Windows® 7 installation.

Windows® 7 and USB 3.0 driver installation for 100 Series 3
7. Select the ODD as the boot device.
8. The USB 3.0 driver will be loaded automatically during installation startup.
The “Setup is starting...” screen will show up if the USB 3.0 driver is loaded correctly.
9. Follow the onscreen instructions to complete the Windows® 7 installation.
Method 3: Using ASUS EZ InstallerUse the ASUS EZ Installer to create a modified Windows® 7 installation source
Requirement:
• 1 x ASUS support DVD
• 1 x Windows® 7 installation DVD
• 1 x Working system (PC or notebook)
• 1 x SATA ODD
• 1 x USB storage device (8 GB or more)
1. Insert the Windows® 7 installation DVD.
2. Launch the ASUS EZ Installer located on the ASUS support DVD.
3. Select a method of creating a modified Windows® 7 installation file:
• Windows® 7 OS disk to USB storage device
- Select Windows 7 OS disk to USB storage device then click Next.
Windows® 7 and USB 3.0 driver installation for 100 Series4
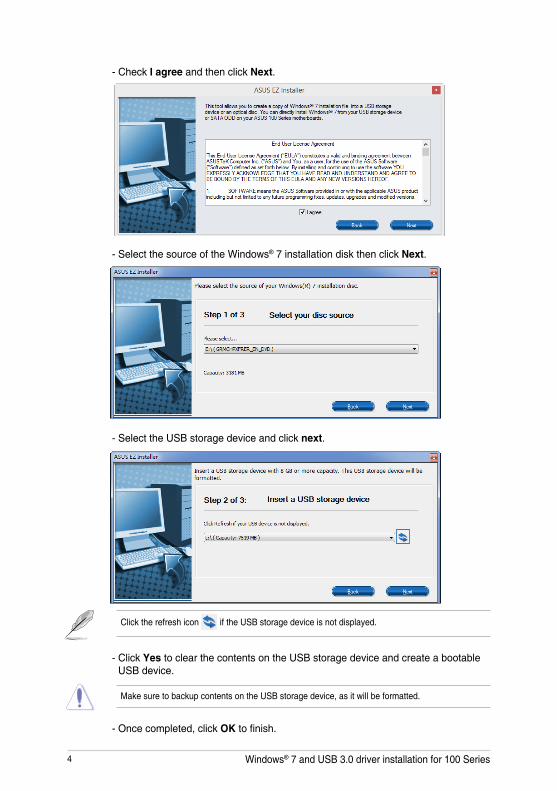
- Select the source of the Windows® 7 installation disk then click Next.
- Select the USB storage device and click next.
Click the refresh icon if the USB storage device is not displayed.
- Click Yes to clear the contents on the USB storage device and create a bootable USB device.
Make sure to backup contents on the USB storage device, as it will be formatted.
- Once completed, click OK to finish.
- Check I agree and then click Next.

Windows® 7 and USB 3.0 driver installation for 100 Series 5
• Windows® 7 OS disk to ISO file
- Select Windows 7 OS disk to ISO file then click Next.
- Select the source of the Windows® 7 installation disk then click Next.
- Check I agree and then click Next.

Windows® 7 and USB 3.0 driver installation for 100 Series6
- Select the folder to save the modified Windows® 7 installation ISO file and click Next.
- Once completed, click OK to finish.
- Burn this ISO file onto an empty DVD to create a modified Windows® 7 installation DVD.
4. Insert the modified Windows® 7 installation DVD into an ODD or connect the USB storage device with modified Windows® 7 installation files onto your 100 series platform.
5. Power on your system and press F8 during POST (Power-On Self Test) to enter the boot screen.
6. Select the ODD or USB storage device as the boot device.
7. The USB 3.0 driver will be loaded automatically during installation startup.
The “Setup is starting...” screen will show up if the USB 3.0 driver is loaded correctly.
8. Follow the onscreen instructions to complete the Windows® 7 installation.