Video Series Transcript Book - Amazon S3
109
1 Video Series Transcript Book
-
Upload
khangminh22 -
Category
Documents
-
view
0 -
download
0
Transcript of Video Series Transcript Book - Amazon S3

1
Video SeriesTranscript Book

2
The Healing Power of Essential Oils Recipes & Home Remedies
by Dr. Eric & Sabrina Ann Zielinski
Copyright © 2017 by Biblical Health Publishing.
All rights reserved. No part of this publication may be reproduced, stored in a retrieval system, or transmitted
by any means – electronic, mechanical, photographic (photocopying), recording, or otherwise – without prior
permission in writing from the author.
The products and statements in this book have not been evaluated by the United States Food and Drug Admin-
istration (FDA) and are not intended to diagnose, treat, cure or prevent disease. All information provided in this
book is for informational purposes only, and is not in-tended as a substitute for advice from your physician or
other health care professional. You should not use the information in this book for diagnosis or treatment of
any health problem.
The recipes featured in this transcript book are part of Dr. Z’s bestseller, The Healing Power of Essential Oils.
Get your copy today! http://HealingPowerOfEssentialoils.com

3
Table of ContentsSERIES INTRODUCTION 04
DILUTION GUIDE 06CARRIER OIL GUIDE 10
ROLLER BOTTLE GUIDE 14FOCUS AND CLARITY INHALER 17
MORNING GET UP AND GO DIFFUSER BLEND 24MATCHA GREEN TEA 28
CANCER-FIGHTING ROLL-ON 34HEALING SKIN SERUM 45
MAMA Z’S OIL BASE 51SWEET SLEEP BODY OIL 58
TOXIC-FREE HAND SANITIZER 62LEMON TEA TREE DISH SOAP 66
PERFORMANCE BOOSTER INHALER 71SUPER QUICK COCO MINT DELIGHT 77NAUSEA-FREE PREGNANCY INHALER 81
GENTLE VAGINAL LUBRICANT 84ARTHRITIS PAIN OINTMENT 88
JOYFUL BODY OIL 92 CANDIDA TAMPON 96
HEALING AFFIRMATIONS 103 SERIES CONCLUSION 108
Scroll down or click on the recipe title below to be taken to that transcript.

4
than 20 videos that are walking you through some of our favorite recipes to help you battle and overcome nausea, fatigue, brain fog, give you mental clarity. For those women, out there that battle vaginal dryness or yeast infections, we got you covered. There’s virtually nothing you can’t use essential oils for. And not only that, but Sabrina’s done a great job giving our house a whole DIY makeover. So, Sabrina, what were some of the favorite recipes that you shared?
Mama Z: Well, definitely, our DIY hand soap and also our hand sanitizer, as well as detoxifying our lotions, and oils, and things that we use with our household and our babies. So all of things together, it’s just very exciting to help, you, do the same.
Dr. Z: Folks, I cannot stress enough, and I harp on this a lot in my articles and in my book, that we need to be careful about the chemicals that we put on our skin. Our skin is virtually a sponge. And we’re finding a direct link to the chemicals in your lo-tions and your potions and all the conventional body care products, and them being connected to cancer, autoimmune disease, heart disease, and a whole number of ailments.
We want to make sure we’re mentally sharp, we’re not battling dementia when we get older. And you know what? The things that you smell has a direct effect to that. So we’re truly, truly committed to helping you and your family experience the abun-dant life. And it really all starts in the home.
So we invite you to check out this entire Video Series and really start at the lowest hanging fruit because we want you to be empowered by doing something that you could start today. We don’t want you to be overwhelmed because that’s one thing that we’ve learned, we’ve been living this way for nearly 15 years. And it’s taken us a long time. So we’re trying to distill this information to you in a way that you could start implementing today. But again, don’t get overwhelmed. Go start at the lowest hanging fruit. Like, what’s the easiest thing?
Series IntroductionDr. Z: Hey, welcome! Dr. Z, here.
Mama Z: And Mama Z.
Dr. Z: And we’re so excited to be introducing you to a brand new Do It Yourself Video Series that in the companion guide for my new book, The Healing Power of Essential Oils. Sabrina and I have worked together to create more

5
Sabrina, what do you think? What’s the easiest thing someone can start off with out of the list of videos that we’ve done that they could do just to get really empowered and get the motor running?
Mama Z: Definitely the skin healing serum is one of our favorites. People ask about it all the time. It’s just really blending raw organic coconut oil and aloe with essential oils, and literally changing some of the common problems with your skin.
Dr. Z: And what’s that good for, by the way?
Mama Z: It’s awesome for sunburns. It’s amazing to use after a detox bath on your body for eczema or other skin-related issues, as well.
Dr. Z: And in our video, to give you a sneak peek, Sabrina actually shows us how she used that to help her father heal of skin cancer. So just a teaser there.
Well, we’re again so excited. And if you haven’t, pick up my book, you can find it on Amazon, Barnes & Noble, Target, Walmart, all the major retailer, The Healing Power of Essential Oils. And these videos are the companion guide to help you really see, and look, and join us, as we make these Do It Yourself concoctions. You’re going to love it.
Well, folks, as always, this is Dr. Eric Zielinski.
Mama Z: And Mama Z.
Dr. Z: And our hope and prayer is that you and your family truly experience the abundant life. And these demo videos are going to help. God bless. Bye, bye.

6
Diluting Essential ils
5 ml roller bottle (1 teaspoon)
Less than 1 drop 1 drop
3 drops
3 drops
4.5 drops
7.5 drops
1.5 drops
6 drops
6 drops
9 drops
12 drops
15 drops
0.5%
1.0%
2.0%
3.0%
4.0%
5.0%
10 ml roller bottle (2 teaspoons)

7
Dr. Zielinski: I’m going to direct your attention to the chart that you get by being part of our club member or when you join any of my courses. This is your go-to dilu-tion chart whenever you make a roller bottle. I also have a chart that you’re going to want to take advantage of. And this is a dilution guide. Depending on what it is that you’re using, if you’re going to be using tablespoons or ounces, this is the key. And this is what you’re going to go towards. Okay.
So do me a favor. Do yourself a favor. Laminate this. Keep it at home and keep it as a resource. If you are a distributor of a network marketing company that sells essen-tial oils, I highly recommend you print these out and give them to your customers, it’s something that it’s just a nice added touch. And your people are going to appreciate you because they need to learn how to use essential oils safely and effectively. And that’s what I want to start off with, very briefly, the importance of dilution.
The reason why we dilute essential oils is, first and foremost, for safety. We need to remember, folks, these precious plant compounds, yes, they’re natural, insofar as the essential oil. The volatile organic compounds are in the plant, but we need to extract them by manmade processes. So it’s not like you’re going to walk through a lavender field and see a beautiful pool of lavender oil, it just doesn’t exist.
And it’s important to remember because these are highly concentrated plant com-pounds that can interact with your skin that could cause an allergic response or what’s known as sensitization. Our bodies were not designed by God to have these oils slathered all over us straight or “neat,” as it’s called. That’s by far, the top five most common questions I get on a regular basis, “Dr. Z, is it safe, can I use essential oils neat, directly on my skin?”
“No, unless it’s an emergency situation like I had when my son and I were out hiking. And he cut his head, literally an open sore. And all I had was lavender in my car. I didn’t have a dilution carrier. That was fine. That was onsite emergency medicine, right.” That’s what they used to do in the World War I, World War II era with thyme and oregano and tea tree. That’s fine. But when it comes down to it, day-to-day use like you and I, we don’t want to ever use oils neat.
So here’s why you want to use them diluted. First again safety. It can prevent what’s
Dilution GuideVIDEO TRANSCRIPT

8
known as sensitization. Those highly concentrated compounds can interact with your body in a way where the body’s then going to respond with a rash, with a burn, with sometimes an oozing sore. It all depends on how your body reacts to it. And the problem with it, people that get sensitized, people that develop the sensitivity to essential oils, they might never be able to use that oil again. And I personally know many people that this has happened to. So first is safety.
Second is effectiveness. We don’t really realize it, but the reason why these oils are called volatile organic compounds is because they evaporate in to the air. That’s what volatility is. So when you apply an essential oil directly on your skin, it immedi-ately starts to evaporate. If you want the biggest bang for your buck, again one or two drops goes a long way.
If you look to get the biggest bang for your buck, you dilute it, which helps the body absorb the essential oil. It prevents evaporation. And research studies have shown when you apply diluted essential oil massage lotions on your skin, within 20 minutes, the full concentration of the essential oil is in your bloodstream, 20 minutes, full con-centration within your bloodstream. So if you want to get a systemic, full-body effect by using essential oils, you’ve got to use a carrier oil. It’s proven.
And third is sustainability. I want to make sure my children and my grandchildren and great-great grandchildren get to enjoy these beautiful plant-base compounds that we all love and adore. And unfortunately, we’re consumerizing many of them to death.
Quite frankly, there are certain species of chamomile, blue tansy, helichrysum, rose, and a number of other oils that we can’t even grow in its indigenous native environ-ment to produce the oils that the world wants because they’re so popular. Millions upon millions of people are using essential oils every day. But unfortunately, we’re using them a little bit too much.
Why? Because a lot of folks are using them undiluted. And they’re not using them wisely and effectively. I, by far, go through so little essential oils compared to what I used to when I first started several years ago because I’ve learned. And guess what? My health is better. I don’t get burns like I used to. I don’t hurt myself. And at the end of the day, it saves me a lot of money, too.
So, folks, I’m going to end with that. And we’re going to talk more. And we have a series of videos here. I’m going to talk more about the type of different carrier oils that you could see we have here. The different ways you could use essential oils like

through dropper bottles, and lotion containers, and roller bottle recipes. There’s so many different ways we could do it, but remember, safety first. And, friends, don’t let friends use essential oils undiluted. All right.
Well, this is Dr. Z signing off. We’ll talk again very soon. And remember, my hope and prayers are that you and your family truly experience the abundant life.
Available everywhere books are sold.
“The essential oils of a plant are the true treasure of nature and Dr. Zielinski has brought this wisdom
forth in a salient and accessible way. This book should be in every house and be used frequently.”
— Pedram Shojai

10
Dr. Z: I put together a really handy-dandy chart for you. Again, please, please, please, please print this out. Laminate it, and share it with your loved ones, especially if you are a multi-level marketing distributor because this is going to help your busi-ness. It’s going to help your customers. It’s going to help them educate them. And it’s really sharp. It’s something you’ll want to keep on hand.
So there’s a variety of different carrier oils that you use. Now, as you know, I’m non-branding. I do not sell essential oils that’s one of the reasons why I do what I do. However, I have found that out of all the different companies out there on Amazon, because I always try to recommend a source that you could get things on Amazon, whether it’s your roller bottles, whether it’s my online store where you can get diffus-ers, and other gifts, whatever it might be, I have found that Plant Therapy has, by far, the widest selection and the most cost-effective selection of carrier oils on the market.
And you know what? I really, really like this handy-dandy spout. It makes putting oils in a roller bottle super, super easy and clean. Now, again, I’m not promoting Plant Therapy essential oils. You choose the oil brand that you like and that you love. How-ever, when it comes to carrier oil, they got it down pat.
Dilution GuideVIDEO TRANSCRIPT

11
There’s a variety of different carrier oils that you could use. And what I want to do is I want to draw your attention to that chart that I created because you’re going to learn first, how to use them, specifically, but for what situations. Okay. So let’s go to that chart.
When it comes to essential oils, I recommend people using a carrier oil always for safety and effectiveness. Well, where do you start? Well, you start in your kitchen. And the best place to start is olive oil and coconut oil because chances are if you’re a natural health nut, you have these in your home. It’s very easy to use olive oil and coconut oil. And they’re especially good for enhancing skin healing because they’re thicker. They’re more of like an emollient. You could use them in drink or culinary preparations, as well.
These are not oils that you would use in a roller bottle and other DIY applications. And I’ll give you the ones that you do. Why? Because they could possibly gum up. Coconut oil will actually harden in room temperature. And that’s not what you want to do. You want something that will always remain liquid.
Now, the nut in seed oils, almond and jojoba, chances are you don’t have those in your kitchen, but they’re pretty easy to get. Again, your local health food store or you can go online and click on the link that I’ll be sharing with you. You can get these on Amazon. The nice thing about jojoba and almond is they’re very easy to work with.
They’re very rich in nutrients like vitamin A, vitamin E, and other minerals. And I find that they’re exceptionally effective for dry and inflamed skin. And they’re extreme-ly versatile. So whatever it is that you’re doing, whether it’s a lotion, whether it’s a cream, a roller bottle, you really can’t go wrong with almond or jojoba.
However, I’ve heard that some people are allergic to nut oils. So again, you want to stay away from jojoba. You want to find something else like maybe avocado oil or even grapeseed, which we’ll go in next.
And these are the fruit oils. They’re easy to remember because again, thanks to kitch-en staples. These come from seeds. Apricot, avocado, grapeseed, these are great for creating massage oils. And the next thing is they’re especially effective for deep hy-dration and creating DIY products like chapsticks and balms.
Now, the essential fatty oils, the borage and the evening primrose, this is the com-mon carrier oils that I typically recommend. And you’ll see in a lot of aromatherapy books on women’s health, they’re exceptionally, exceptionally dense in essential fatty acids, and they’re great at resolving topical inflammation, and helping with hormone

12
imbalance, believe it or not, especially borage and evening primrose for women that are post-menopausal, a lot of research out there about that.
So when it comes to roller bottles specifically, I want to recommend fractionated co-conut oil for a couple of reasons. One, fractionated means the long-chain fatty acids are taken out of it. Those are the fatty acids that cause the hardening. So this isn’t going to harden, it’s liquid forever. So it’s just medium-chain fatty acids. Okay. The nice thing is, and research has shown this, is it prevents oxidation.
So here’s the problem that we have as essential oil users, they don’t last forever. Don’t believe it, folks. Don’t believe it. Oxygen will cause what’s known as oxidation or even sometimes heat or sometimes sunlight, but oxygen is not our friend. As we know, oxygen corrodes metal into rust and a number of other [materials]. Oxygen, again is more of a destructive process. And what it’ll do is it’ll break down the chem-icals in the oil. Well, we have seen because of its high antioxidant property, we want to be against oxidation, right. Antioxidant is key for fractionated coconut oil. It could prevent oxidation and prolong your shelf life.
So on average, an essential oil will last two to three years-ish if you’re using it. And here every time I open it up, it introduces oxygen in to this, especially if you’re not using a dropper lid. If you don’t have that, it’s going to really add more oxygen, which is going to cause the oils to erode or not be as therapeutic because you don’t know what’s going to happen once the oxygen hits over a course of years, but that’s where fractionated coconut comes.
And we don’t even know. Chemists are looking at possibly 5, 10, 15 years that this could extend the life of an essential oil. We still need to do more testing. But at the end of the day, this is what you want to do, especially if you make a roller bottle blend and you don’t use a lot, then you don’t have to worry about it oxidizing, espe-cially if you use a carrier oil like fractionated coconut oil. It’s the go-to essential oil. Okay.
So, folks, this is the importance of using the right essential oil. Again, I’m going to draw your attention to this handy-dandy chart. Laminate it, share it with your friends and family members. Share it with your downline. Share it with your customers. They’re going to want to learn. And I have a whole article that goes more in-depth about which carriers to use for even specific conditions.
So, folks, this is Dr. Eric Zielinski. As always, my hope and prayer is that you and your family truly experience the abundant life. And remember, proper use of essential oils can certainly help.

4 Categories of CARRIER OILS to Know
The best place to start is at the beginning, and for DIY aromatic and herbal preparations, that’s right in your own kitchen.
Olive Oil Coconut Oil
Choose these when: Quick dilutions with what you have on hand; enhancing skin healing; use in a drink or culinary preparation.
Probably not in your kitchen for cooking, but these oils are still very commonly purchased, easy to work with, and rich sources of skin-health nutrients.
Almond Oil Jojoba Oil
Choose these when: Skin is dry or inflamed; nutrients are lacking; versatility and ease of use are desired.
Easy to remember thanks to kitchen staples, these oils typically come from the seeds of their respective fruits, as is the case with the other carrier oils.
Apricot Oil Avocado Oil Grape Seed Oil
Choose these when: Creating a massage oil; looking for deep hydration; creating chapsticks and balms.
While most of the carrier oils we’ve talked about and what is on the market are decent sources of essential fatty acids, some oils are considered good sources of these vital nutrients.
Borage Oil Evening Primrose Oil
Choose these when: Resolving topical inflammation; essential fatty acid deficiency/imbalance is a problem.
EssentialOilsClub.infofacebook.com/groups/
DrZEOClub/
Beginner Oils: Olive and Coconut
Nut & Seed Oils: Almond and Jojoba
1
Fruit Oils: Apricot, Avocado, and Grapeseed
Essential Fatty Acid Oils: Borage and Evening Primrose
2
3
4

Roller Bottle Guide
5 ml roller bottle (1 teaspoon)
Less than 1 drop 1 drop
3 drops
3 drops
4.5 drops
7.5 drops
15 drops
1.5 drops
6 drops
6 drops
9 drops
12 drops
15 drops
30 drops
0.5%
1.0%
2.0%
3.0%
4.0%
5.0%
10.0%
10 ml roller bottle (2 teaspoons)

15
Dr. Z: I want to draw your attention to a free gift I’m giving everyone. It’s a download that I’m inviting you to please, please print out and laminate because it takes all the guesswork out. We could truly use essential oils cradle to grave, whether it’s infants, whether it’s geriatric patients, or whether it’s folks in between like you and I.
So I’m asking you to please print this out. Laminate it. If you are a network marketing distributor or if you have any downline or you sell these products, please take ad-vantage of it. Print them out. Share them with your customers. Share them with your downline because you’re going to add value to them. And they’re going to really ap-preciate that. You’re taking out the guesswork okay. So I invite you to share this with everyone because it’s that important, we always want to use essential oils safely and effectively.
And I have found that curating a little roller bottle, something easy peasy like this on-the-go therapeutic effects all the time, the key is the ratios. And so that’s what this is all about. And, quite frankly, I don’t even have them memorized because I don’t need to have them memorized because I always go back to my chart. So one thing I do have memorized — and this is important — when it comes down to it, I try to take out some of the guesswork. I try to take out some of the guesswork when it comes to when, and where, and how.
So specifically, 2% dilution is the standard aromatherapy dilution for adults, whether it’s a massage body oil or whatever it might be. When you’re working with children or possible sensitive skin like genitalia, the underarms, the face, then 1% or lower is what we want to do. Now, if you’re battling a tumor, let’s say you’re trying to affect a specific area with a burn or whatever it might be, you could go higher, up to 5%, 10%, 15%, 25%. I want to caution people, the 1 to 1, 50:50 ratio, that’s a lot of essential oils. And that’s, quite frankly, probably too much than your body can handle. Always dilute properly.
So here’s how you use an essential oil roller bottle. I go to my chart. And I try to fig-ure out, “Okay, what am I looking for? What am I trying to do?” Let’s say right now we’re trying to create a blend that’s going to promote joy, and happiness, and mood boosting. And it’s nothing that we’re going to concern ourselves over young children. And it’s something for me. And I don’t need to worry about sensitive skin.
Let’s say I put it on my wrist, the back of my neck, we’re good to go. I’m going to go to 2%, that’s where I’m going to go. I’m going to go 2%, possibly 3%, depending on the strength that I want. And this roller bottle right here is a 10-milliliter roller bottle. So all I do is I go, “Two percent? That means I need 6 drops of essential oil for my

16
2-milliliter roller bottle.” So what you do is you get your essential oils. And here I have a collection of the citrus oils. This is actually my citrus heaven blend that I like to cre-ate. It’s lemon, bergamot, neroli, and sweet orange. I like this. I really, really like that combination. Sometimes, I’ll add key lime, which is another favorite of mine.
So I just have a pre-made blend of essential oils. And again, going to 2% dilution, we’re going to do six drops. And you want to put the oils in first. And afterwards, you add your carrier oil. My carrier oil of choice for a roller bottle is fractionated coconut for a number of reasons. Primarily, it helps prevent oxidation. It extends the shelf life. And it works just extremely well because it’s very thin. And it’s not going to harden up like regular coconut oil. And you simply fill it up.
Now, I like this brand specifically of carrier oils because they’re extremely cost effec-tive, and this spout. I’m telling you, you get a little funnel, and you get another bottle without that spout, it gets messy. So I really like this. So you could check it out. I’m going to have a link before. Or you could go to Amazon. Just go to Plant Therapy and get it. I really, really like their carrier oils. And that’s it.
You put the roller bottle on top. And here, folks, is your Roller Bottle 101. The nice thing is, this will last you several years if you don’t use it all at the same time or if you don’t use it all really quick.
A couple of different ways you can apply it, all depends on what you’re trying to do. Like, for me, this is actually my cologne. I gave away all my Armani, all my smelly stuff. I don’t do any of that stuff anymore. So I like to apply it on my wrist. Go like this [demonstrates applying oil on wrist]. I like to go in the back by my mastoid bone right there in the back of neck. You could put these on the backs of your legs, on the bot-toms of your feet. But that’s it. It’s that simple. This is pre-diluted. It works wonder-fully. And you get the safe benefits of essential oils on the go in the bottle. That’s it, easy peasy.
Well, folks, this is Dr. Eric Zielinski. I hope and pray that you truly enjoy the abundant life. And remember using essential oils, especially with roller bottles and other solu-tions, is a great way.

17
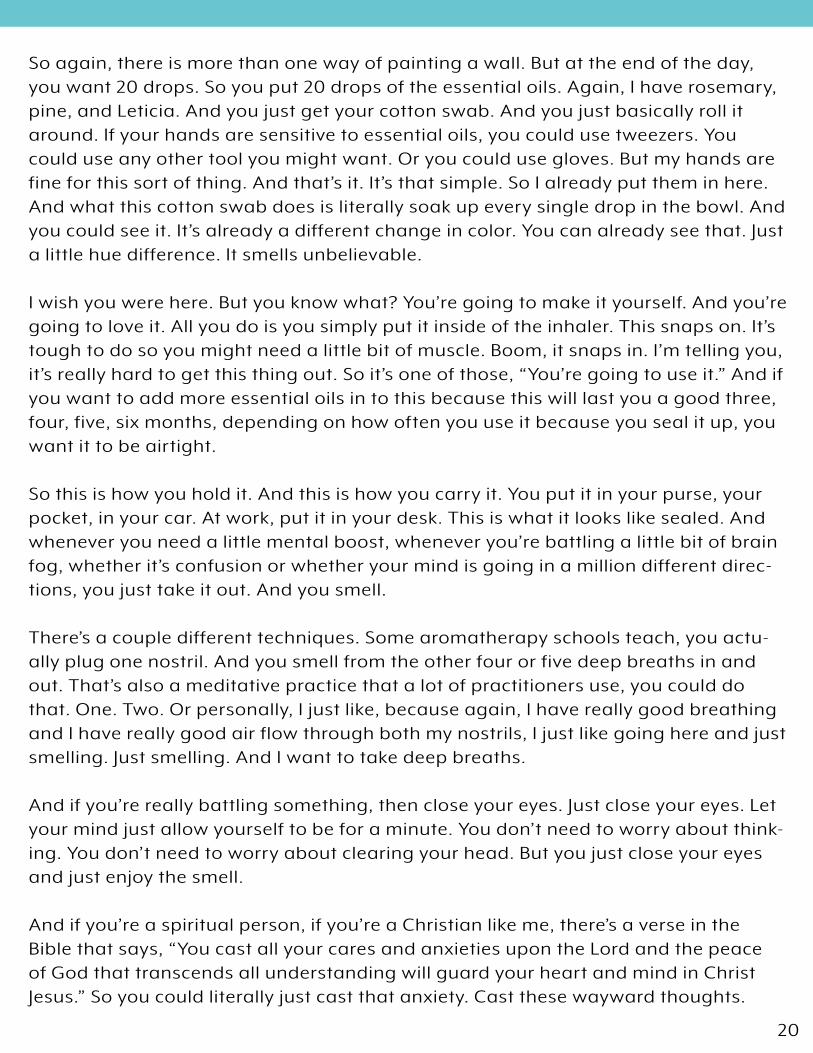
Recipe DirectionsIngredients
Recipe Notes
10 drops rosemary essential
5 drops pine essential oil
5 drops Litsea cubeba (also known
as may chang) essential oil
1. Place a cotton pad in the inhaler tube.2. Drop the essential oils directly onto the cotton pad in the tube. Alternatively, you can drop the essential oils into a glass bowl, roll the cotton pad in the oils to absorb them, and then insert it into the inhaler tube using tweezers.3. Open the inhaler and take a few deep breaths through your nose with your eyes closed. Repeat as often as needed when-ever you need a quick boost of mental clarity.
Though they are not as common to most people’s medicine cabinets and are new to our discussion, I have found that pine and Litsea cubeba (aka may chang) essential oils—traditionally known for their uplifting, grounding properties—create a nice blend with rosemary to promote focus and clarity. Alternatively, if you don’t have these on hand, you can replace them with any oils that can help reduce cloud-ed thinking, such as eucalyptus, peppermint, and spearmint.
Precut organic cotton padAromatherapy inhaler
Supplies

18
Dr. Z: Hello, everyone, Dr. Eric Zielinski here. And I’m going to show you how to make my focus and clarity inhaler to help you banish brain fog, once and for all.
Now, here’s the tip, when it comes to essential oils, when it comes to brain fog, there are a variety of reasons why we do have just that mental hang-up. Sometimes it’s due to stress. Sometimes it’s because of a high-inflammatory diet. Sometimes it’s because our minds are just too filled with things like if you’re studying for a big test or if you’re getting ready for just something like planning for a wedding, whatever it might be, we can only handle so much.
And what I found is using essential oils can really put you in that frame of mind like [snaps fingers] immediately. And it’s an unbelievably profound thing that essential oils can do because they literally work at the limbic system, the primal brain, your memory, your emotions. And it can trigger things in your brain to help calm wayward thoughts.
There’s actually been studies done on children battling ADHD and how vetiver has improved their memory, their cognitive performance, help them perform better at school, and also reduce the symptoms related to ADHD just by inhaling vetiver.
So what I’ve done today is put together what I do as I create an inhaler. And just to walk you through a couple of different options because we have sprays here, we have droppers, we have roller bottles because there is more than one way of painting a wall. So again, we’re looking at how to create an inhaler, but you could do other things, as well. So we’ll talk about that in just a minute.
So the supplies that you’ll need to create an aromatherapy inhaler are very simple. You have a cotton swab that literally fits into a tube that you place inside the inhaler and you use, as needed. It’s that simple.
Now, I also like these. These are a little more stylish, but they’re in glass casings. I re-ally like these inhalers, as well. They’re a couple of dollars more. Like, this is the more cost-effective type. It can be challenging to reuse these because once that little cap clips on, it’s hard to get off. Where this is a very replaceable, you could change the
Focus and Clarity InhalerVIDEO TRANSCRIPT

19
cotton swab, or you could wash the glass tube in a dishwasher. And you can keep on using this over, and over, and over again.
So again, it all depends on your budget. You could find this stuff on Amazon. It’s real-ly easy to find this stuff. Again, just type up aromatherapy inhaler. So we have a cou-ple of different options.
So the easiest way of making this aromatherapy inhaler is you put your essential oils in a glass bowl. And what I’ve already done is I’ve already put them in here. And what you’re looking at here, it’s not very much, but it goes a long way. I have nine drops of rosemary. Rosemary is the herb of remembrance. I have six drops of pine and six drops of Leticia cabeza. What is pine and what is Leticia? And why am I in-cluding it?
I’ll tell you. I went to a spa just a few months ago. Actually, writing the manuscript for my book and getting ready, getting in the mindset, I went to have an aromatherapy massage. And there was a variety of different blends that you could choose from. And these are homemade blends at this spa. And so you could one for relaxation. You could do one for muscle rejuvenation with arnica and lavender, just those really soothing oils to help with sore muscles.
And they had one that was on focus and clarity. And I smelled it. And I’ve never smelled this blend before. Like, I’ve never smelled rosemary, pine, and Leticia togeth-er. And it was like, “Boom!” It opened up my sinuses. It opened up my awareness. And I told the massage therapist, “This is what I want.” And I absolutely loved it.
Now, I don’t know and I didn’t get the recipe of what the ratio was. But I went back home to my little Betty Crocker DIY kitchen. And I put together this blend. However, not many people have pine or not many people have Leticia. If that’s you, don’t wor-ry. You could use other essential oils. Rosemary is key. Again, that’s the herb of re-membrance.
We want to use essential oils, again to banish brain fog, to promote focus, to pro-mote clarity. We want to use those essential oils that cause us to be alert, which are typically rosemary, eucalyptus, peppermint, spearmint. And if you really want to go deeper into more meditation, more, again mental clarity, mental focus, frankincense, myrrh, and vetiver, and even sandalwood. You can’t forget sandalwood. And those are great oils to help clear away the thoughts. The Ancients, our ancestors used those oils for meditative practices, as far as we know, from the beginning of recorded history.
20
So again, there is more than one way of painting a wall. But at the end of the day, you want 20 drops. So you put 20 drops of the essential oils. Again, I have rosemary, pine, and Leticia. And you just get your cotton swab. And you just basically roll it around. If your hands are sensitive to essential oils, you could use tweezers. You could use any other tool you might want. Or you could use gloves. But my hands are fine for this sort of thing. And that’s it. It’s that simple. So I already put them in here. And what this cotton swab does is literally soak up every single drop in the bowl. And you could see it. It’s already a different change in color. You can already see that. Just a little hue difference. It smells unbelievable.
I wish you were here. But you know what? You’re going to make it yourself. And you’re going to love it. All you do is you simply put it inside of the inhaler. This snaps on. It’s tough to do so you might need a little bit of muscle. Boom, it snaps in. I’m telling you, it’s really hard to get this thing out. So it’s one of those, “You’re going to use it.” And if you want to add more essential oils in to this because this will last you a good three, four, five, six months, depending on how often you use it because you seal it up, you want it to be airtight.
So this is how you hold it. And this is how you carry it. You put it in your purse, your pocket, in your car. At work, put it in your desk. This is what it looks like sealed. And whenever you need a little mental boost, whenever you’re battling a little bit of brain fog, whether it’s confusion or whether your mind is going in a million different direc-tions, you just take it out. And you smell.
There’s a couple different techniques. Some aromatherapy schools teach, you actu-ally plug one nostril. And you smell from the other four or five deep breaths in and out. That’s also a meditative practice that a lot of practitioners use, you could do that. One. Two. Or personally, I just like, because again, I have really good breathing and I have really good air flow through both my nostrils, I just like going here and just smelling. Just smelling. And I want to take deep breaths.
And if you’re really battling something, then close your eyes. Just close your eyes. Let your mind just allow yourself to be for a minute. You don’t need to worry about think-ing. You don’t need to worry about clearing your head. But you just close your eyes and just enjoy the smell.
And if you’re a spiritual person, if you’re a Christian like me, there’s a verse in the Bible that says, “You cast all your cares and anxieties upon the Lord and the peace of God that transcends all understanding will guard your heart and mind in Christ Jesus.” So you could literally just cast that anxiety. Cast these wayward thoughts.

21
Cast any stress. Cast the things that are clouding up your mind. You can just, in your mind’s eye, just lay it at the altar. Lay it at the foot of the cross. And just smell.
You can thank God. You can thank the Lord for all he’s done for you. You can remem-ber what the Bible says that you have the mind of Christ. And you can just inhale and enjoy. Do that for a couple of minutes. And if you’re like most people, you’ll just have peace. The thoughts will dissipate. And you’ll have much more clarity and focus.
Every time you open up this inhaler, and especially one like this—and again, it’s only airtight when you have it closed—every time you open these up, oxygen interacts with the molecules of the essential oils. And it causes the molecules to erode little by little by little, it’s oxidation. There is no way around it. Don’t worry about it. It’s not going to cause the oils to go rancid, but you will lose effectiveness.
Every single time you use this, every single time you open up your bottle of essential oils, it just affects the chemical constituency just a little bit. And over time, the oxy-gen will literally make this useless within five, six, seven months, a year, I don’t know, because it all depends on how much you use them.
So all you need to do for something like this, you see the hole right there, all you need to do is you could get a dropper. And you just drop 10, 15 drops of this blend. And you’re good to go. And that’s why I have these out here. For those of you who want to use this on a regular basis, instead of getting all your oils and mixing it together, you could totally do that or you could make your own blend.
And I want to encourage you to find the blend that works for you, whether it’s Leticia, whether it’s pine, peppermint, eucalyptus, rosemary, spearmint, whatever it is, try to find that blend that really helps you. Like this is my blend. I love it. And I’m grateful to the spa that I went to up in the Blue Ridge Mountains in Georgia that really turned me on to this because again, this was a really sweet, sweet blend that I’ve never even heard of before. And you want to find something that resonates with you and your spirit to where you’re really at right now in your life. And guess what? It will change because we change.
So what I like to do is I like to actually your focus and clarity blend already ready. You could label it. My wife is a label junkie. I actually don’t have one, I should. She’s a la-bel junkie. Everything we have in the house has labels in it. So what you do is you just create, put equal parts of these oils into this bottle. And then, you start adding differ-ent oils, as adding different amounts of the oils until you find that scent that works for you.

22
That’s how I like to do blending. There’s no science to it. There’s no math. There’s no layering. It doesn’t matter what oils you put in first. It really doesn’t. Medicinally speaking, it has no scientific value whatsoever. So what you’ll do is a little five mil like this, you’ll have anywhere from like 80 to 90, maybe 100 drops.
And I would put 20 drops of pine, 20 drops of rosemary, 20 drops of Leticia. See how that smells. And then, maybe add a couple more drops of rosemary. Do you like that smell? Do you like it being a little more on the rosemary side? Maybe not, put a cou-ple more drops of pine. Basically, it’s like your science experiment. And you create back and forth, back and forth until you find your blend.
And this is your master blend that you’ll use. And this will last you for quite a while. It should last you a year or two if you’re using something like this, because again, 20 drops should last you a solid three months.
Same thing with a dropper, I absolutely love putting my blends in an essential oil dropper because it makes it so easy and so clean to make blends, to make inhalers, and to even put it in your diffuser because you’ve already got it ready because there’s no reason why you can’t use this in your diffuser if you’re studying for a test, if you’re at work, if you’re just under stress and your mind’s going crazy.
And also, you have a spray bottle. You know I love my spritzers. And for every one ounce of water that you have in a spritzer, what you want to do is add a little bit of aloe. You want to add a couple drops of vitamin E to act as a preservative, and up to 5, 6, maybe 10, depending on the essential oil strength that you want, of drops of essential oil.
So again, you have your master blend. Here your mental and focus clarity blend, you just put a couple drops in here. And you mix it all up. And now, you could just spray. Just more than one way of painting a wall, right.
And a roller bottle. Why not? Let’s say you really like this blend. Let’s say you’re re-ally focusing with brain fog and you want more on the go. Something that you can actually have penetrate into your bloodstream, it’s completely safe if you’ve diluted properly. If you haven’t, be sure you check out my video on How to Dilute and How to Make Roller Bottles. I have a three-part video series that walks you through every-thing. You’d want to do maybe two, three, up to a four or five percent dilution of this blend. And use it on a regular basis.
Well, that is how I use essential oils to banish brain fog and to help me maintain

focus and clarity, especially when I’m under a tight deadline like writing a book, or creating courses, or videos like this, I want to make sure I’m sharp.
I want to leave you with this, essential oils are great. And they’re a fantastic adjunct to anyone’s natural therapy regiment. But they’re not an end-all. If you’re eating a McDonald’s lifestyle, a Standard American Diet, and if you’re not exercising, and if you have chronic stress and anxiety into your life, there’s only so much that these things can do, but they’re great. They’re great for symptom-base management. They’re great to help people through a tough time.
But I want to encourage you all the more, especially when it comes to brain fog and clarity, especially if you have ADHD or you have a son or daughter that does, diet, exercise, mind-body balance, really strong, deep spiritual practices are key. I’ve seen people literally transform by taking a holistic lifestyle approach. And this is part of it.
So that’s my challenge to you is to really dive deeper and to look into more research. And you can find a lot of that stuff on my website. However, always remember that there’s more than one piece to the pie. And that when you really incorporate this all-encompassing lifestyle, it can make all the difference in the world.
Thank you again for hanging out and watching me do this aromatherapy inhaler demonstration. And as always, this is Dr. Eric Zielinski. And my hope and prayer is that you and your family truly experience the abundant life. And remember, essential oils can help.
Available everywhere books are sold
“Dr. Eric Zielinski has done the near impossible. Armed with a researcher’s mind, a caring heart, and
an unstoppable faith, he’s taken this beautifully important yet complex topic and made it accessible for everyone.”—Marc David, MA

24
Recipe DirectionsIngredients3 drops orange essential oil
2 drops peppermint essential oil
1 drop rosemary essential oil
1. Fill the diffuser with water as directed.
2. Add the essential oils.
3. Turn on the diffuser immediately upon
rising in the morning to permeate the room
with the aroma as you get ready for the day.
4. Turn off the diffuser when done. You can
keep this mixture in the diffuser and use it
every morning until the diffuser is empty.

25
Dr. Z: Hello, everyone, Dr. Eric Zielinski here. And I’m going to be sharing with you my Get Up and Go Morning diffuser blend. And some good tips on how to enjoy the abundant life in the morning and how to start off your day the right way.
So I don’t know about you, but one of the traps that I tend to fall into is when I wake up in the morning, the first thing I do just because it’s become instinct, is check my phone. Well, oftentimes, when I do that, I’ll see the notifications on my phone, I’ll see settings on my phone, I’ll see, “Oh, I got to update this. I got an email from that. Here’s a text message.” And then, even before I’m even out of bed, I’m in this work mode.
Well, I have to tell you, that is a way of really robbing you of starting off your day the right way because you find yourself not even able to clearly think about and focus of what today’s about. What about prayer? What about meditation? What about devotional reading? It just gets you completely off the mind track. So if you’re part of my generation, if you’re part of the cell phone lives with you every part of your life generation, that is a trap I want to encourage you to just throw on the wayside.
And one of the ways I do it is put my phone in airplane mode so when I do get my phone because again I’m taking my phone with me, I’m putting it in the bathroom, I’m getting it ready, whatever it is, I’m like getting my wallet together, whatever it might be, I pick up the phone. And I don’t see any major notification, or need to even play with it, or do anything with it. Plus, not having the EMF, the electro-magnetic field rob me of any sleep. During the night, you never want to have your phone on next to you. You never want to do that unless it’s on airplane mode be-cause that could really mess with your REM and sleep cycles. So that’s a little tip.
Another tip I really like to start the day off right is using essential oils and having them handy. And a good thing to do is to be proactive because I don’t know about you—again I have teething babies at the house. We have four children—sometimes I’m not waking, oftentimes I’m not waking up after a restful eight-hour sleep be-cause I’m getting up multiple times a night. Bless my wife’s heart, she’s nursing our baby as we speak. She’s like a living, breathing pacifier right because she’s nursing. And so there’s only so much you could do.
So you’re waking up, you might be a little groggy. The last thing in the world you’re going to want to do is go to the restroom, go to your bathroom, fill up your diffus-er with water, drop oils in when you’re just not in that mind space. So why not get it ready? Why not actually have two diffusers by your bed stand. Just think about that. One diffuser by your bed stand with your sleepy time blend that’s helping you promote a better night sleep with your lavenders, and your vetivers, and your
26
chamomiles, and just those oils that will just help you calm because again a good, sound sleep will help you get up and go first thing in the morning.
So why not have your sleepy time blend diffuser running through the night. And then, you have a diffuser like this turned off waiting. All you have to do is press a button. And then, you could actually pre-make a get up and go blend that I like. I’ll give you the recipe in just a second. But just some really nice oils that help you just perk you up. And it’s relative, it really is.
Some people get really energetic from smelling lavender, which you might think is counterintuitive because lavender’s that calming sedative oil. Well, a lot of people get jazzed up with lavender. It’s just their different body’s chemistry reacting differ-ently to the lavender okay. So think about that. There is no one size fits all approach to essential oils. And that’s why I love them because we have to find what works for us.
So a recommendation I have is to really start the day out right, to get up and go, is to have something ready so all you have to do is press the button. And the first you get is just a nice, energetic, aromatic experience. Just nice, energetic, aromatic expe-rience so you could just start to inhale those essential oil vapors that just helps you clear your focus, give you better breathing, increases your oxygen. And it’s really like a shot of expresso. It’s a natural, natural high.
So what I have here is a blend. And this blend is orange, peppermint, and rosemary. Now, it all depends on the ratio that you want. Like, for me, I like three drops of or-ange. It could be wild orange, sweet orange, blood orange, a variety of oranges. I like three drops of orange, two drops of peppermint, and one drop of rosemary. This is just a really nice happy go lucky, joyful, perk you up in the mood kind of blend. And you could actually put something like that in here to have your own get up and go blend. Put a label on it. Organize your own self-homemade blends into your medicine cabinet so they’re always ready, on hand.
So again, what we have here, at night before you go to bed, you fill up the water to the fill line. You put in six drops of your get up and go blend. And that’s it. You put on the lid. You have everything absolutely ready. You make sure it’s plugged because you don’t want to be thinking about anything in the morning because again you might be groggy, you might have teething babies. I don’t know where you’re at, but you want to be able to make it easy.
The first thing you do, you wake up in the morning, you thank God for giving you breath, fresh air. You read your devotional. You put on your scriptures, whatever you’re doing, maybe some music. And you press “On.” And what you’re doing here is

27
you’re now immediately starting your day with a great aromatic experience. Okay.
Now, fantastic approach through diffusers. But what if you like a little bit more? And if you’re like me, you like options. And that’s why I have these here. I absolutely love topical application of essential oils, that’s my go to. It really is because you really get the inhalation benefit. Because the oils actually penetrate into your bloodstream, you get that benefit, as well.
So I like having a blend, my Get Up and Go blend in a roller bottle. And if you hav-en’t, watch the three-part series that I have about how to dilute essential oils, how to make a roller bottle, and I’ll tell you all about carrier oils. I have it all here in your database that’s available to you. And another way, you have this kicking, right [ges-tures to diffuser].
Or let’s say you’re traveling. And you don’t want to or you can’t bring your diffuser, that happens to me a lot. Well, I’ll have something like this already ready to go. And very simply put, you can put it on your wrist. Put it on the back of your neck. Because it’s already diluted, it’s very safe. You can actually roll some on your tummy, it’s a great place to put essential oils. Again, just so you can enjoy, enjoy through inhala-tion. And you can have those chemicals get in to your bloodstream. Again, all this works. More than one way of painting a wall.
Or you can make a spritzer bottle. And we talk a lot about hand sanitizers and spritzers, super easy to do. You’ll want 10 to 12 drops of essential oil blend per ounce of water. And make sure you have some aloe and vitamin E to act as a preservative and an emulsifier. Shake it up. And then, you can spray yourself for instant boom.
Starting your day of right is so key. It really is. And I’ve found that having a regular prayer practice, meditation practice, using essential oils, being sure you’re not falling into technology first thing is the morning is absolutely key to experiencing the abun-dant life throughout the entire day. It really is. It sets the foundation for the entire day.
Well, I hope you’ve enjoyed this short segment about getting up and going, starting off the day in the abundant life mindset. And as always, this is Dr. Eric Zielinski, my hope and prayer is that you and your family truly experience the abundant life. And remember essential oils can help. God bless! Bye-bye.

28
Recipe DirectionsIngredients
Recipe Notes
32 oz. warmed milk
2 tablespoons Matcha green tea powder
2 tablespoons raw organic coconut oil
1 drop essential oil of your choice (optional)*
1 dropperful liquid stevia, or to taste
1 pinch Himalayan sea salt
Pour all ingredients into a Vitamix or other blender and blend until frothy, about 30 seconds.
If you’re adding essential oils to this recipe, mix them in with the coconut oil before adding the coconut oil to the blender. Otherwise, you’ll have droplets of the essential oils suspended in your drink that could burn your mouth.

29
Dr. Z: Do you find yourself stumbling in the morning, grasping for your cup of coffee or pot of coffee just to start out the day? Yeah, I used to be that way until we met Matcha green tea. Dr. Z here with my lovely wife.
Mama Z: Mama Z.
Dr. Z: And we are absolute Matcha tea junkies. There’s a million reasons why. Mat-cha green tea is a superfood. It’s actually a green superfood, high in chlorophyll, one of the highest antioxidant-containing foods on the planet. And you know what? It tastes great, and it’s a great substitute for coffee.
Now, again, coffee’s cool. Coffee’s great. And we love our organic fair-trade lattes once in a while, but daily use of coffee has been shown to disrupt your hormones, reduce libido, cause a number of other health conditions like heart arrhythmias and a lot of other things like addiction while you’re not going to get a lot of that with Mat-cha green tea.
So we’re going to walk you through how we like to make our latte. And Sabrina, be-cause you are a high-performance athlete, what is your technique and how have you been using Matcha?
Mama Z: Well, I love Matcha. I actually use it in my green smoothies, my superfood smoothies in the morning. And I love it in multiple ways actually. I like it hot. I like it on ice. I like it blended, so really, I like it in any fashion that I can have it.
Dr. Z: Now, unlike your normal tea bags where you have an actual cheesecloth type of bag with tea in it, this is the Matcha green tea in whole powdered form. We’re actually going to consume this, so you actually get the fiber and you get the antioxi-dants in a way that you wouldn’t get if you were to steep the tea.
So, baby doll, walk me through how we’re making our latte because we love these. This is our gradual bell curve of energy. We don’t get that spike, a coffee high. We don’t do energy drinks. We don’t do the Monster stuff. And the Matcha gives us a nice, beautiful curve. So what are we making here? What’s in here?
Matcha Green TeaVIDEO TRANSCRIPT
30
Mama Z: Okay. So we’ve got 32 ounces of warmed almond milk, and we use the un-sweetened vanilla. But, of course, you could use unsweetened as well.
Dr. Z: And you can use other milks too, like coconut milk.
Mama Z: Absolutely. Yes.
Dr. Z: Or hemp milk.
Mama Z: Absolutely. And then, we’re going to use two tablespoons of our Matcha green tea powder. And then, we’re going to do two tablespoons of our raw organic coconut oil. And if I usually add cinnamon essential oil, I’m going to add that right to the coconut oil before I pour it in.
Dr. Z: Cool. And on a side note, essential oils in this is great. You could use pepper-mint, cinnamon, a variety, whatever flavor that you want of those oils that are safe for internal use. But before you do, you really want to make sure that you put the essential oil in here first and mix it up because it will dilute it. Otherwise, you’ll have little oil droplets suspended on it, and you can burn your mouth.
So the oil is in here. It’s already mixed. And we’re putting two tablespoons of coconut.
Mama Z: Absolutely.
Dr. Z: And my favorite because I’m a stevia junkie.
Mama Z: Yes.
Dr. Z: We love the Sweet Leaf stevia.
Mama Z: Yeah.
Dr. Z: And we have a little family dispute. I like vanilla.
Mama Z: I like coconut.
Dr. Z: But since this is my video, we’re using vanilla. She’s my guest. Again, I’m a junk-ie. So I’m going to go solid three droppers of this. And it just gives a really nice—if you are not a stevia junkie, then start off with one dropper.

31
Mama Z: Right. Or if you’re transitioning to stevia.
Dr. Z: Junkie. Because we’re junkies. Zero. Why stevia? It’s an herb, and this is an ex-tract. So it also helps emulsify any essential oils, and it’s very healthy for you. It’s zero on the glycemic index. So if you’re a diabetic, this is really diabetic friendly. And also, to help diabetics, we have…
Mama Z: Pumpkin pie spice.
Dr. Z: Yep. So a lot of you out here listening and following our work, you’re not from America. And I didn’t realize this, but evidently, pumpkin pie spice isn’t well known throughout the world. But being American, American apple pie, we use pumpkin pie spice in everything. So for those people who don’t know what pumpkin pie spice is, baby, what is it?
Mama Z: All right. You’re going to have a blend of clove, nutmeg, cinnamon, allspice. You could have mace in there or any kind of blend with those in it. And it’s one of our favorite.
Dr. Z: So it’s a variety like curry. A lot of you are familiar with curry powder. There is no one recipe for curry. Same thing like pumpkin pie spice, but the core always seems to be cinnamon, clove, and nutmeg with a variety of other stuff.
Mama Z: Right.
Dr. Z: And just for a little touch of antioxidant—not antioxidant—for electrolyte. We want to add electrolytes. What we do is add some Himalayan sea salt. That’s it. Just a little bit. Like a little pinch. And we like actually having ground Himalayan sea salt direct. We love this blended, and it makes a really nice latte.
Now, if you’re super fancy, you could have a latte machine. You could heat up and froth your milk and just create Matcha on the side. You could do that, but this is for those of us who actually don’t have a latte machine. And we just put it in our Vitamix or any sort of blender that you have that works at a good high speed. And you start at low and you work your way up.
And just let that blend for just about 20-30 seconds. And essentially what we’re do-ing is we want it to froth on high for just a minute. And that’s it. Love it.
Mama Z: And if you don’t have pumpkin pie spice, you can always use just cinnamon

32
is fine as well.
Dr. Z: Ladies first.
Mama Z: Thank you. This is fabulous.
Dr. Z: Love it. Love it. Nothing better. Folks, this is our secret to maintaining mental and physical performance without hurting ourselves with excess caffeine and excess coffee. This is the superfood solution. And for those of you who are not sure where to buy Matcha green tea, our favorite vendor is Ujido. We absolutely love Ujido. We love what they stand by. We love the fact that they’re nontoxic.
And there is a concern with purchasing Matcha green tea from certain suppliers be-cause of the nuclear radiation meltdown that happened not too long ago. You want to make sure—because, again, Matcha green tea comes from Japan. You want to make sure that the Matcha is grown away from where we had the nuclear meltdown and the spill. So that’s a consideration.
And we’ve made sure and Ujido has made sure that they harvest it far enough so it’s not affected, because that is a concern for a lot of people. We love the product. And, Sabrina, talk a little bit about these… This is what I like. This is my favorite go-to, but Sabrina is just loving these single serves.
Mama Z: I am. I absolutely love these. I absolutely love this. But on the go in the morning, I can have this all set and ready to go. You can use one or two packs of this. I’ll fill it up with hot water, stir it. Sometimes I’ll add some extra unsweetened vanilla coconut or almond milk right to it, and it is absolutely fabulous.
And I’ve tasted other ones like that, and nothing is better. This is sweetened with monk fruit, but it is fabulous.
Dr. Z: Yeah, monk fruit and erythritol. So it’s really low on the glycemic index. And what do you do? How do you make this? Similar to this or do you even need a blender?
Mama Z: You don’t need a blender, but what I do recommend is putting some of the boiled water in first, then putting your packet in, filling it the rest of the way up, stir-ring it in, and then stir the milk in.
Dr. Z: Awesome.

33
Mama Z: That’s it.
Dr. Z: Awesome. If you want to try it out, folks, click on the link that we’re providing under this video because Ujido is giving Dr. Z tribe members a special discount. So we really want to get it into your hands, and you’re going to love it. We actually have it on auto shipment. We get a lot every month. It’s our go-to.
Well, this is just our love and appreciation for just God’s gift to the world through Matcha green tea. And we have found it to be a great enhancement to a lot of what we do to help us experience natural health.
As always, this Dr. Eric Zielinski.
Mama Z: And Mama Z.
Dr. Z: And our hope and prayer is that you and your family truly experience the abun-dant life, and Ujido Matcha green tea can help. Bye-bye.

34
Recipe DirectionsIngredients
Recipe Notes
Supplies
2 drops grapefruit essential oil 2 drops orange essential oil2 drops tangerine essential oil 2 drops oregano essential oil2 drops thyme essential oil1 drop winter savory essential oilCarrier oil of choice*
1. Drop the essential oils into the roller
bottle.
2. Fill the roller bottle with your carrier
oil of choice and shake well.
3. Apply once or twice per day over the
tumor area if isolated, or on the soles of
the feet if the cancer is systemic.
10 ml glass roller bottle
*Jojoba and fractionated coconut oil absorb quickly and work best—as needed.

35
Dr. Zielinski: Hey, everyone, Dr. Eric Zielinski here. And I’m going to be showing you how to make my cancer-fighting roll on. And we’re going to be talking briefly about the truth about essential oils and cancer because there is a lot of misinformation online about this topic. I’m really passionate about this topic because, as you might know from reading my book and just following me on the Internet, I wasn’t really into essential oils.
Really, I’ve had my own little personal story where I hurt myself using essential oils because I typed up, “How to use essential oils to clear up a pimple,” on Dr. Google. And some foolish blogger told me, “Top ranking article to put oregano right on my face undiluted.” It burned. I was like, “I don’t like this stuff. It hurts.” And it caused me to have outbreaks in my skin. And I really didn’t know how to use them, quite frankly.
And it wasn’t until one of my clients commissioned me, because I was a medical writer several years ago, told me and asked me to write a series of public health reports about oils. And one of the oils he asked me to write about was, of course, be my guest, frankincense. And he said, “Specifically, find the research regarding frank-incense and cancer,” because this was before frankincense and cancer became such a hot topic like it is now. It’s almost like a household name.
If you use essential oils, you hear frankincense, you’re thinking cancer, and cancer prevention, cancer-fighting because so many people have gone out and shared, “Frankincense cured me of cancer.” Like, I know people personally, friends of mine, family, that have said that. And I believe them. Who am I, really? At the end of the day, who am I to say that this experience didn’t happen for them because I know these people. They’re truly dear to my heart.
So when I started going through the research, I saw study after study after study talk about cancer, not only frankincense, but other oils. Oils containing a chemical, we’ll talk about d-limonene like orange, lemon, grapefruit, tangerine, and other citrus oils. And oils containing a chemical called carvacrol like winter savory, thyme, oregano. Just again, cancer-fighting chemicals.
And I started going through other different lines of cancer like breast cancer and how lavender and clary sage can really help women with breast cancer. And then,
Cancer-Fighting Roll-onVIDEO TRANSCRIPT

36
colon cancer, prostate cancer and sandalwood came up and myrrh came up, and again all this research. And it really stopped me. And I started to think. And I started to evaluate. And then, I started to interview. And then, I hosted my first telesummit where 165,000 people from around the globe attended this free online event. And I interviewed a cancer survivor who swears that it was applying frankincense over her astrocytoma that helped her, in addition to nutrition, and just healthy mind-body holistic practices helped cure her of brain cancer.
And then, we have a friend who used frankincense, lemongrass, and myrrh to over-come stage 4 non-small cell lung cancer after her oncologist essentially left her for dead, not in a bad way, in a way where she told her, “You know what? Prepare, just prepare because we can’t do anymore for you. I mean, our therapy isn’t working. Chemotherapy isn’t working. Radiation isn’t working. Your white blood cells are so low. We can’t do anymore for you.”
And our friend was told around, it was September, October in 2016 to essentially prepare, prepare herself. She was supposed to be paralyzed by, I believe it was, Hal-loween 2016. She was supposed to be blind by Thanksgiving. And she was supposed to be dead by Christmas. This was like again welcome to holiday season. When you have metastatic cancer, that’s in your brain. That’s in your lungs. That’s throughout your whole body.
Well, she had no choice but to do something. And if you want to hear the whole sto-ry, you can go on my website, DrEricZ.com. And look at Biblical Health Radio. And the episode that I interviewed her, the title is, “Can Essential Oils and Faith Cure Cancer?”
And our dear friend Yvonne who literally had nothing, she wasn’t on drugs. She couldn’t eat. She was actually so nauseous that all she could consume was broth, vegetable broth, and bone broth. She lost 60, 70 pounds. And she was, what? One-hundred and ten pounds soaking wet anyway. She was just a very trim, fit wom-an. And she didn’t have a lot of meat to lose. So she lost a considerable amount of weight.
And she had nothing else to do. But she sought God like never before. She was able to forgive. She was able to love. She got beyond the mental component of, “Why me?” And her and her husband did all that they needed to do. And they started to apply essential oils because that’s all they could do. Again, when you can’t swallow something, when you can’t take a pill, when the doctor said, “No more drugs,” what are you going to do?

37
So she literally started applying mass amounts of frankincense, myrrh, and lemon-grass over her body. And it’s been now, at the time that I’m filming this video, it is cur-rently August of 2017. And, not only is she not dead, her hair is growing back. She can see again. She’s walking again. And she’s thriving. She just went to the oncologist. They can’t find cancer in her brain. The golf-sized tumor on her lymph nodes is gone. And they’re seeing such low levels of cancer, they’re like, “She’s a medical miracle at this point.”
She is now on immunotherapy drugs. Her body can handle that. She’s doing that route. She’s still using essential oils.
And this is a testimony of someone using essential oils when there’s nothing else, but this isn’t a cure-all. This isn’t a story to say, “Hey, this is what everyone has to do.” It worked for our friend. And it worked for countless other people; however, I want to put things into context because the truth about essential oils and cancer is it’s still ex-perimental.
All the research we have, when I was researching, literally dozens and dozens of studies about, not only essential oils, but the specific chemical components within the essential oils—like I’ve already mentioned two, d-limonene and carvacrol, how they interact with cancer cells, how they actually cause apoptosis, which is known as cancer cell death. It’s like programmed suicide. The cells just like, “boom!” They just burst. They lyse.
And then, how essential oils can actually stop angiogenesis, which basically means the blood flow, the veins, the arteries, the arterials that feed cancer tumors, they could stop that. How they are anti-thermogenic. How again, heat and energy feed cancer cells and feed tumors. And how essential oils can stop that. And how they literally can prevent DNA repair. That’s unbelievable because cancer is a smart, living entity that will repair itself. But essential oils have the ability to stop that repair.
So if chemotherapy or radiation is being used, and the DNA of the cancer cell lines are damaged, using essential oils with those therapies have actually been shown to enhance those therapies. So one thing you’re going to learn about me, when it comes to the truth about essential oils and cancer like my friend, Yvonne, whose on immu-notherapy, she just didn’t shun medicine. And that’s a route for some people.
And I applaud. And I praise God, if and how they receive victory from this. But I, also, applaud and I praise God for all the people that take a more integrative approach, which is using both medicine and natural therapies. The truth about essential oils

38
and cancer is this, it’s not an all-or-nothing thing. And I caution people to get out of that mindset because it’s not.
Even though I use medicine very, very little, like rarely ever, but you know what? When I just had some dental work done, I allowed the dentist to give me Novocain. I’m not insane where I’m just going to deal with excruciating pain. However, when the dental hygienist wanted to rinse out my mouth with a chlorohexidine rinse, I said, “No thank you,” because that actually causes cancer. I don’t need that.
So I have a very integrative approach. I don’t do fluoride treatments. We don’t do vaccines. But you know what? When we need to, we will take that antibiotic. But you know what? I can count on one hand how many times my entire family has taken antibiotics in the last five years. A family of six, we use medicine when needed when natural therapies don’t help us.
So the truth about essential oils and cancer is this, be balanced, be wise. Keep your oncologist and your pharmacist and your naturopath in the loop. I encourage you to try to find an oncologist, a naturopath, and your pharmacist who understand essen-tial oils, who understands natural therapies as a whole because you want someone with an open mind. And that’s very, very important. It really is.
The truth about essential oils and cancer is this for a majority, like 99 percent of all cancers you have time. You have time to think. You have time to pray. You have time to do research. Unless there is a cancer literally stopping and blocking the trachea, preventing breathing, or you can’t swallow, or something, which is very rare, you have days, weeks, sometimes months to act. Okay.
So don’t let fear, don’t let a cancer diagnosis draw you to fear in one way or anoth-er. You don’t want to be impulsive. Do some research. Look up things online. Find a trusted resource.
If you got my book, look up the information I share about cancer in my book. Go on my website. I have protocols. I have things that I try to share. I actually have a truth about essential oils and cancer book, right. You could download it in eBook, as well. You want to educate yourself.
Yet, keep in context one thing. Everything we do with essential oils is virtually exper-imental because we have no human trials that have tested how these oils work on human patients for a long period of time. It just doesn’t exist. I have stories like my friend Yvonne, which is an actual case study. That’s anecdotal evidence. That, to me,

39
is valid scientific data. However, just because it worked for Yvonne, doesn’t mean it’s going to work for you.
And the same thing, when you go to PubMed.com, if you’re doing research yourself, if you’re a practitioner, if you’re a researcher, I beg of you, keep things in context be-cause you’re not going to find human trials that are evaluating essential oils on ac-tual live patients. You’re seeing in vitro studies. What are those? Cells in a petri dish. Well, a lot of things kill cancer in a petri dish. Bleach, for example, that doesn’t mean we’re going to drink bleach, right. It’s extreme. But it’s the reality. So we need to keep things into context. It’s still experimental, but it doesn’t mean that it’s not real.
So on the flip side, if you’re a medical doctor, if you’re a conservative, if you’re a phar-macist listening to me, or if you have a pharmacist, an oncologist, or a medical doc-tor that is very conservative, challenge them and say, “Look, even though there isn’t evidence, proof like you see in drug trials, there is reason to believe. And here’s why. Because we see individual chemical components in in vitro studies, in laboratory an-imal rat studies, in chicken studies, in animal studies, right, that show essential oils can literally kill cancer cells. It’s just how it works.
And the interesting thing is unlike chemotherapy, unlike antibiotics, who have a broad-spectrum approach would kill everything, essential oils have what’s known as cell selectivity. It’s unbelievable to see God’s design, how he gave essential oils the ability to target cancerous and malignant cells and leave healthy cells alone. That’s what cell selectivity is.
And, also, I want to repeat, this is really important, it’s not an all-or-nothing thing because there have been clinical trials, again some in petri dish studies that have shown that using essential oils with adjunct therapy is like chemo help chemo thera-py approach be more effective. Let that sink in for a minute. Same thing for digestive enzymes and probiotics. Essential oils are lipid soluble. They go right into the cell, where a lot of chemotherapy drugs can’t. So essential oils act just like a carrier into the cancer cells. Plus, they cross the blood-brain barrier. It’s unbelievable.
So the truth about essential oils and cancer is it can really help. And so I want to caution wisdom. I want to caution safe, effective us. You just don’t drink oils for the sake of drinking oils. The more I learn about essential oils, the less I consume them because I know better ways now. I know smarter ways. I know more strategic ways of getting the chemicals into my bloodstream without having to potentially danger my esophagus, and my mucous membranes, and my mouth, and my tummy. Be wise.

40
So that’s why I put together this roll on. And I want to refer you to the three-part se-ries that I created in this video collection of “How to Dilute Essential Oils,” “How to Make a Roll On” and “Different Carrier Oils.” And again, you’re seeing fractionated coconut oil. And just as a point, I’m not branded. But it’s very important to point out I actually just picked up a bunch of different carrier oils from Plant Therapy.
And the reason why I’m even showing you this is because of the spout. And for those of you who do roller bottles, having this simplicity where you can just put a couple pumps of fractionated coconut oil makes your life a lot easier because a lot of other carrier oils on the market, you have to use a funnel. And it gets messy.
So I personally like Plant Therapy for their carrier oils. The quality is the same of a va-riety of different brands. Okay. So don’t worry about it. Don’t tar and feather me. I’m not promoting Planet Therapy essential oils. But I’m saying, “Look, if you need some carrier oils, they got them all. And they’ve got these great spouts. I love them.”
Again, I want to refer you to that three-part series to learn about dilutions, to learn about how to do roller bottles. But as a whole, I want to focus on this cancer-fighting blend because I mentioned it twice that carvacrol and the d-limonene, some of the most potent chemicals that we see in plant-based medicine that help prevent cancer cell growth. And that can actually kill cancer cells.
So when you’re looking at all the different essential oils, number one is wild orange, sweet orange, whatever orange it is, okay, it could be wild orange, sweet orange, or even blood orange, we see that orange essential oil has some of the highest levels of d-limonene of all the essential oils.
Also, we have lemon, grapefruit, and tangerine, mandarin. These citrus oils are jam packed with d-limonene, which is a cancer-fighting oil. And the nice thing is these oils are relatively cost effective. Frankincense is super expensive for a good reason. So I don’t even include frankincense.
So I’m going to read out…This is a very, very cost-effective roll on. And that’s why I’m offering this. You could again, you could use the frankincense, and myrrh, and san-dalwood, but it’s going to cost you a lot of money so I’m trying to work with you and your budget. And at the end of the day, you have to find what works for you.
And this is trial and error. It’s going back to your oncologist, it’s going back to your naturopath and saying, “Hey, where are my cancer levels at? How am I doing? I’m trying alternative therapies. What do this look like?” You are a living breathing exper-

41
iment if you have cancer because you need to beat this thing. And by God’s grace we can.So I’m going to read off what I’ve done because I have essential oils here. And what I like to do is I like to pre-make a blend. So right here is my cancer-fighting blend. And I have a variety of essential oils in them. Okay. I’ll read them off. I have grapefruit. I have orange, tangerine, oregano, thyme, and winter savory. If you don’t have all these oils, that’s fine. But hopefully, you have at least a few, okay, again grapefruit, orange, tangerine, oregano, thyme, and winter savory.
And what I’ve actually done is I have two drops or I should say two parts of all those oils. But the winter savory, I just have one drop. And again, it doesn’t matter. Really the recipe blows down to putting those essential oils in here in a way that really has a nice experience for you. You don’t want to have 50 drops of oregano and one drop of orange. You want to keep them balanced.
And I would have one-to-one-to-one ratio, really one-to-one-to-one ratio. So in the little five milliliter bottle, you’re looking at maybe 90 drops of essential oil. So I would put 10 drops of each of all those oils in to this. Mix it up a little bit. Now, you have a cancer-fighting blend. So when you’re making a roll on, you could put 12, 15 drops like that. Now, you’re ready.
So to make the roll on, you have your essential oils on the bottom first. And then, you put a couple pumps of your fractioned coconut oil, or almond oil, or jojoba, or grape-seed. Whatever you want. Mix it up. You don’t want to make it…I love it. Again, this is such a clean way of doing this. I’ve used other carrier oils, but it gets so messy. You don’t want that. Again, it mixes it up for you while you pump it in. You put the top on. You’re ready.
So what do you do? How do you use it? Of course, if you have an isolated tumor, like Yvonne, she had non-small cell stage four lung cancer, which was metastatic, so what do you do? Well, she targeted the actual tumor because she had a golf-ball sized tumor on her neck. So they took a blend like this. You could roll it on itself. Again, it’s diluted. You want to dilute this. And for a 10 milliliter, you’re going to want to have 15 to 20 drops of essential oil. You want a range up to 3%, 4%, 5% dilution.
Again, go back to my video on “How to Dilute Essential Oils,” “How to Make Roller Bottles,” and “How to Use Carrier Oils.” I have all those videos lined up. So you want to have up to five percent dilution because it’s still diluted. It’s not concentration be-cause you put these oils on your skin, it might burn them. Okay. So you could roll it right over the tumor if you have a tumor there. Or if you’re battling systemic cancer like metastatic cancer, the abdomen is the go to.

42
Let me point this out, putting oils on the bottoms of your feed medicinally, is a waste of your money. It’s actually been proven the bottoms of your feet is the least perme-able part of your body, which means the oils are not getting into your bloodstream. One of the highest, most permeability areas of your body of the skin are the obvious places, the sensitive places, the genitalia, the underarms, the back of the neck. So I’m not encouraging you to put this on your genitalia or your underarms, back of the neck can work. It’s very absorbent.
But I’ve found that the abdomen is the key. Putting the oils over the abdomen, espe-cially because the organs of life are over the abdomen, these oils can penetrate into the bloodstream within minutes. And that’s how you get, within 20 minutes, the en-tire body will start benefitting from the chemicals of these essential oils. This is your carvacrol, d-limonene rich blend.
It smells nice. I’m not really going for the smell, right. Do we use essential oils to live? Or do we live to use essential oils? This is not the blend you’re going to use before you go out on a date because it has some very strong odor to it, very strong cellular rejuvenation oils in it.
So put it over your tummy for metastatic cancer. You can put it over where the actual cancer is, whether it’s a tumor isolated over the breast, whatever. You want to make sure that it’s so diluted where it’s not going to hurt you.
If you don’t have these oils, there are a number of oils. There’s clary sage. There’s myrrh. There’s sandalwood. There is a variety of essential oils that could help that are calm. That are soothing. That are not so caustic like oregano. Like, if your body really reacts to oregano, then that’s fine, use geranium.
Like there are a lot of cancer-fighting oils out there. For an exhaustive list, go to my website. You can just type up, “Essential oils, essential oils cancer protocol.” And you’ll look up. And you’ll see I have a whole list of all the oils that I’ve seen through the research showing how they kill cancer cells. And I go into a little more detail.
So I have the roller bottle on-the-go cancer fighting. Brain tumors, applying it on the back of the skull. I’m telling you, these oils cross the blood-brain barrier. I actually like going right in the brain stem. Right here where the occiput meets the atlas. Of course, with my chiropractor friends, right at the top two bones of the spine meeting the skull. Applying these oils right there in the brain stem is a fantastic way again to facilitate these oils to penetrate through the blood-brain barrier. Can’t promise it, but I know enough people. And research suggests it can help.

43
It really helps, especially now when you’re incorporating oils like frankincense, which are high in sesquiterpenes that are literally have been shown to penetrate the blood-brain barrier because again most drugs can’t, chemotherapy included. That’s why so many brain tumors are deadly because there’s no way of really targeting them.
So you have this roll on. And a good rule of thumb is to use this two to three times a day. And you want to spread out four or five hours between each application. And then, I usually like to see people using this for two, three, four weeks max because you do not want to do the same thing over, and over, and over again. Really, your body regenerates itself within a monthly cycle. You actually get a new layer of skin every 28 days. It’s just how our body just responds to life. And how our body contin-ues to grow and be healthy.
So I find a good month’s cycle. So try a blend off and on every other month. Get an-other blend. Get another cancer-fighting blend with high d-limonene and carvacrol oils. And use them. So we want to switch them up. And there’s other ways, as well. Whether it’s spritzers, whether it’s droppers, whether it’s roller bottles, there are a variety of ways.
You can actually put this in to your diffuser so you get the inhalation benefit, as well. These aromatic compounds can reach your nose and literally affect the brain in a way where your brain can now trigger apoptosis, and fighting cancer, prevent can-cer. A lot of things we don’t even truly understand yet because science haven’t prov-en it. But we see people using this stuff.
So anyway, I want to let you know there are a variety of ways that you could use this blend. I will caution you not to consume this blend. And be very, very careful when you’re consuming essential oils for cancer because, quite frankly, I don’t see it help-ing people as much as I do the topical application. I don’t.
And there’s a variety of reasons why, okay, because at the end of the day when you’re consuming essential oils, the gastric acid just annihilates and just decomposes all the chemicals. It doesn’t really get into your bloodstream. Like that doesn’t help you. So you really want to be smart. You can even put oils into a capsule. But it still won’t guarantee it gets into your bloodstream.
If you want to guarantee oils get into your bloodstream, which means that every cell in your body would be affected, a topical application is the way to go. And I like to add the inhalation benefit, too, through a diffuser.
So that is a lot of information. I know that. That’s why I wanted to do this video be-cause it’s a great adjunct to my section in my book and all the things I write on my website. Watch this video two or three times. Really, really consider this stuff that I’m sharing with you knowing that safe, effective use of essential oils could be an abso-lute game changer.
And I really hope and pray that you, if you’re listening right now, and if you have a story, that you’re battling cancer right now, that you get to experience what Yvonne did. That you get to experience remission. That you do find natural therapies can be what you’re looking for. All right. Don’t shun medical therapies. Don’t shun your med-ical doctor. Don’t do that yet until at least you’re educated enough to do something very pinpoint, and very focused, and having support. There’s a lot of support out there.
And I would encourage you to find a good medical practitioner who understands a lot of different things, not just drugs. Okay, that’s very key. You want someone that will not judge you. Someone that can help educate you and support you on this pro-cess.
I’ll end with this because cancer is not a death sentence. God has given your body the remarkable ability to heal itself under the right conditions. Okay. And as always, this is Dr. Eric Zielinski. My hope and prayer is that you and your family truly experi-ence the abundant life. And remember, essential oils can help. Bye-bye.
Available wherever books are sold.
“Our ancestors’ earliest medicines were all made from the plants in their immediate environment. The Healing Power of Essential Oils blends ancient traditions with cutting-edge science to present
a powerful new approach that can help you safely reverse the effects of modern scourges including depression, chronic
stress and mood disorders.” —Alan Christianson, NMD
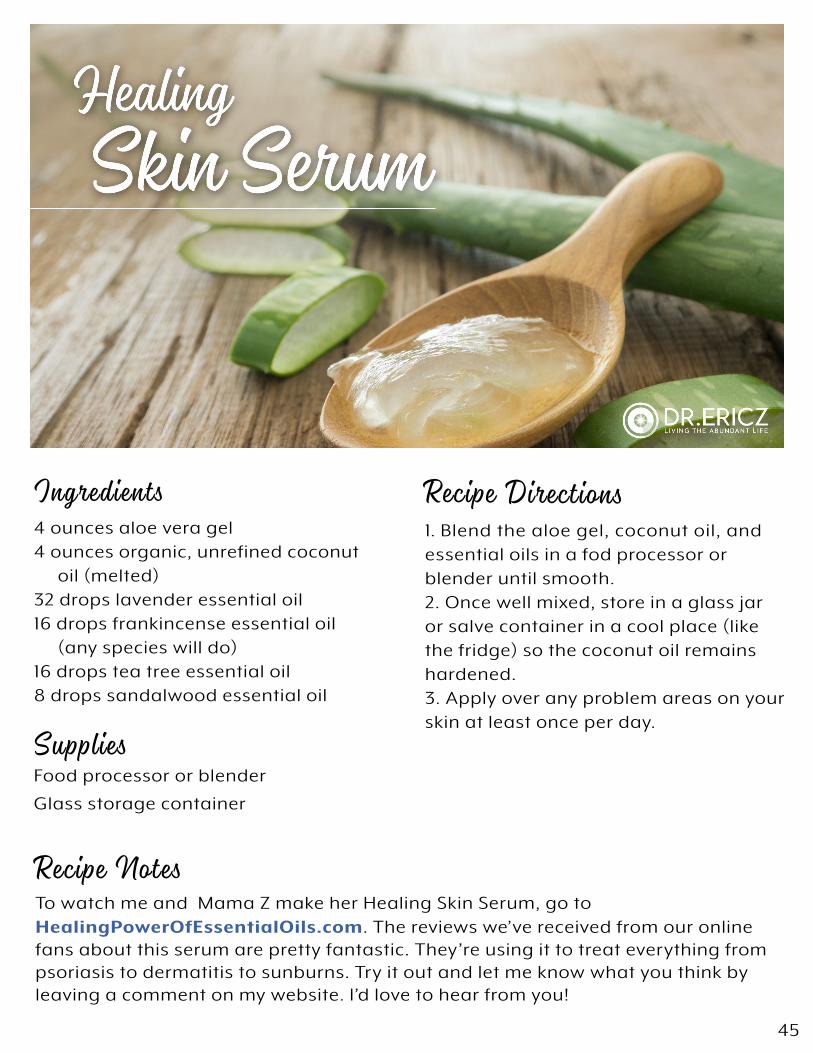
45
Recipe DirectionsIngredients
Recipe Notes
Supplies
4 ounces aloe vera gel4 ounces organic, unrefined coconut oil (melted)32 drops lavender essential oil16 drops frankincense essential oil (any species will do)16 drops tea tree essential oil8 drops sandalwood essential oil
1. Blend the aloe gel, coconut oil, and essential oils in a fod processor or blender until smooth.2. Once well mixed, store in a glass jar or salve container in a cool place (like the fridge) so the coconut oil remains hardened. 3. Apply over any problem areas on your skin at least once per day.
Food processor or blender
Glass storage container
To watch me and Mama Z make her Healing Skin Serum, go to HealingPowerOfEssentialOils.com. The reviews we’ve received from our online fans about this serum are pretty fantastic. They’re using it to treat everything from psoriasis to dermatitis to sunburns. Try it out and let me know what you think by leaving a comment on my website. I’d love to hear from you!

46
Dr. Z: Sabrina, what inspired you to come up with this healing skin serum to begin with?
Mama Z: Sure. Well, I was on vacation. And I got a serious burn, sunburn. And so I went, of course, into Whole Foods to see what they had. And it didn’t really have exactly what I wanted, but what they did have was very expensive. And so we were on a budget. So basically, what I got out of it was to utilize apple cider vinegar first. It helps the pH of the skin and to exfoliate the layers.
Dr. Z: That doesn’t burn with a sunburn?
Mama Z: No, it actually feels like for the first couple of seconds, it’s definitely some-thing to get used to. But then, it feels really nice. It actually feels soothing. So then, they had mentioned aloe. And I had researched lavender essential oil. But I wanted to blend it with coconut oil because of the healing properties, and the antibacterial, and the antifungal properties, of the coconut oil.
Dr. Z: Awesome! And then so you used this to help soothe and heal your sunburn.
Mama Z: Yes.
Dr. Z: And fast forward a little bit because a couple of years ago, your dad had a skin cancer scare. Tell us about your dad. Why he had so much skin cancer. And how you helped heal it.
Mama Z: Sure. Sure. Well, he had lived out in the sun in California. And, of course, his forearms, he had marks everywhere. He came to our house. And he said, “Okay, here’s the project.” And he had got this cream out. And he was putting all this cream on. But I read the container. And it said a side effect was that it caused cancer.
Dr. Z: The side effect of the cancer cream cause cancer.
Mama Z: Yes. So--
Dr. Z: You get that? I’m just, I’m just…
Mama Z: It was so crazy. And so I said to him, “Uhm, do you want to be healed?”
Dr. Z: You did. You did say, “Do you want to be healed?” And he’s like, “Ah!”
Healing Skin SerumVIDEO TRANSCRIPT

47
Mama Z: “Ah, yeah.”
Dr. Z: “Of course, you can heal me?”
Mama Z: Yeah. So I got out my concoction. And, of course, when I first put the Bragg’s apple cider vinegar on his arm, he said, “Oh, I—
Dr. Z: You exfoliated it. You cleansed it. Yeah.
Mama Z: Yeah. He says, “Oh, I don’t want to smell like a salad.” And I said, “Oh, wait, wait, wait, just wait. I’m not done yet.” And then, that’s when I put this mixture on.
Dr. Z: And this is the healing skin serum. I’m going to show you how to make it.
Mama Z: Yes.
Dr. Z: This is the end product here. And so okay, walk me through. What we have here is…What is this?
Mama Z: This is aloe.
Dr. Z: Right, aloe gel.
Mama Z: Yep, aloe gel.
Dr. Z: Like four ounces of aloe gel. Four ounces of melted coconut oil.
Mama Z: Raw organic coconut oil, yes.
Dr. Z: And what’s the best, quickest, easiest way of melting because again, the co-conut oil will solidify in ambient room temperature for most people, unless you’re in Georgia and the room temperature’s 100. It is here. So how do you get it soft?
Mama Z: I have smaller containers. I put all of my containers, about 16 ounces of coconut oil. So it’s a very small amount. I pop it in a warm sink of water.
Dr. Z: That’s it. That’s cool.
Mama Z: That’s it.
Dr. Z: Walk me through it. So what do you do? What’s the first thing?
Mama Z: Okay, you’re going to go ahead and put your coconut oil in.
Dr. Z: Oh, coconut oil first, okay.

48
Mama Z: Yep.
Dr. Z: And you want to have a handy rubber scraper because we don’t waste any-thing.Mama Z: Absolutely. Absolutely not.
Dr. Z: So we’ve got coconut oil. You could use a Ninja or whatever they call it. You could use a Vitamix.
Mama Z: Absolutely.
Dr. Z: We love Magic Bullets because it’s super easy and effective.
Mama Z: And it’s really easier in these smaller containers to do it this way.
Dr. Z: The little ones.
Mama Z: Yes.
Dr. Z: Or this one?
Mama Z: Or this one.
Dr. Z: Because, yeah, they do have the big one, too.
Mama Z: Yeah.
Dr. Z: So coconut oil and aloe.
Mama Z: Yep, aloe.
Dr. Z: Okay, aloe. This is aloe gel. You can get this good organic aloe gel. You can get it on Amazon. And check out any recipe we have on what we share on the website, the membership site. We always give links to where to find this stuff, really easy. So I want to make sure I get all of it.
Mama Z: Absolutely.
Dr. Z: And then, we have a different essential oil blend, right? So walk us through how you…
Mama Z: Yes.
Dr. Z: So what do you do? We use the oils yet? Or do we mix it? Or how do we do this?

49
Mama Z: So first of all, we blend this first. And I don’t add the essential oils until right before I’m going to use it. So let’s say you stored that in a glass container.
Dr. Z: So I’m going to blend this now?
Mama Z: Yes. Yep.
Dr. Z: Okay. Without oils, no oils?
Mama Z: I don’t do any oils until right before I’m going to use it. So if you had this all blended up and you had it stored in a glass container, and you needed to use it at a later time, then I would again, warm it up in the sink. And blend it again just like this.
Dr. Z: Okay, so we’re just going to blend this in the Magic Bullet. [blends for about 7 seconds]
Mama Z: That’s probably long enough.
Dr. Z: Okay, that’s it. So we have this.
Mama Z: Yep.
Dr. Z: And we’ve come up with a more healing version than just lavender.
Mama Z: Yes.
Dr. Z: And we have found that…So what do you have here because this is like the super strong healing serum?
Mama Z: Sure. So the first time when my dad did it, within two days, a lot of the mi-nor spots were gone. And then, all of the major spots were gone within two weeks. And then, he had some spots that were exfoliating and flaky. So that’s when we came up with this more intense version, which worked very well.
Dr. Z: So a good idea, folks, is to start with the lavender-only healing skin serum and work your way up to the one that we add frankincense and tea tree. So we have this recipe if you want to make the advanced. The more just healing, super healing one would be 32 drops of lavender--
Mama Z: Yes.
Dr. Z: And then, 16 drops of tea tree, and 16 drops of frankincense. So a good idea is just to get this alone with just 32 drops of lavender. And then, use that until it’s

50
done. And then, make it again where you’re using the same proportions where you then use 32 drops of lavender, 16 drops each of tea tree, and frankincense.
Mama Z: Yes.
Dr. Z: So you want, again one thing that we do, especially in aromatherapy is work your way into something. You just don’t start with the highest concentration.
Mama Z: Right.
Dr. Z: So we’re slowly working our way. And it’s still, because it’s eight ounces, it’s still a very highly diluted blend. So it’s safe for the entire skin.
Mama Z: Absolutely. And it actually feels wonderful. And I have some of my friends that ask me to make the regular and the intense, depending on their vacation.
Dr. Z: And how do you store it?
Mama Z: I like to store it in glass bottles. And again, I don’t add the essential oils un-til right before I’m going to use it. Then you want to go ahead and melt it in the sink again and rewhip it with your Magic Bullet or your blender. And then, go ahead and add the oils at the time. And mix it right in together in your final container.
Dr. Z: Awesome. And, folks, to extend the shelf life, especially if you make a larger container, you can put it in the refrigerator. It works great.
Mama Z: Absolutely.
Dr. Z: Well, folks, that is the healing skin serum. It’s going to help you and your family survive the summer. And just enjoy it because it works wonders. Again, this is Dr. Z.
Mama Z: And Mama Z.
Dr. Z: And our hope and prayer is that you and your family truly experience the abundant life. And remember, doing it yourself and essential oils can help.

51
Recipe DirectionsIngredients
Supplies
54 ounces raw organic, unrefined coconut oil (melted)16 ounces sweet almond oil8 ounces jojoba oil4 ounces vitamin E
1. If you’re in a colder climate and need to liquefy your coconut oil, be sure to preserve the nutrition content by using indirect heat to warm it up instead of heating it on the stove. We have placed a glass measuring cup with coconut oil in it on a space heater or the top of our gas stove while we’re baking something in the oven to slowly melt the oil. You can also immerse a jar of coconut oil in a bowl or saucepan of warm (not boiling) for a few minutes until the oil lique es.
2. Combine all of the ingredients in a large cooking pot and mix using a wire whisk or a blender to reach a smoother, “whipped” consistency if desired.
3. Pour into quart or pint mason jars or other glass containers. Store in a cool, dark place, where it will last for 1 to 2 years.
Quart or pint wide-mouth
mason jars

52
Recipe NotesOnce your base oil is ready, you can make your own blends; use 6 to 12 drops of es-sential oils for every 1 ounce of the base.
This recipe makes a lot—it really is that versatile and can be used to make multiple healing salves and balms (that also make great gifts). Be sure to store any oil base that you aren’t using right away out of sunlight—the saturated fats in coconut milk won’t spoil, but the almond oil could get stale. You can also easily divide the recipe by a quarter to make a smaller batch.
Depending on the temperature in your house, the base may go back to a solid or semisolid state (as coconut oil has a low melting point of 76 degrees). If it hardens, you can either liquefy some by rubbing it in your hands, placing it near a heat- ing vent, or putting it near the oven when you’re cooking dinner.

53
Dr. Z: Sabrina, tell everyone why did you do this Mama Z’s Oil Base to begin with.
Mama Z: Well, I was looking for an oil base when I was pregnant with my first. And I didn’t find anything in the store that really didn’t have extra fillers or other things in it. And everything that I did find that was acceptable was really expensive. And knowing that we were going to have more people in our family than just the three of us, I knew we had to come up with a better option.
Dr. Z: It’s pricey. Stuff gets really pricey. And that’s one thing I really appreciate what you’ve done. Not only is our stuff safe, it’s effective. But it’s very cost effective, too. So walk us through. And walk us through your thought process because we have a vari-ety of different oils here. So first, what are all these?
Mama Z: Okay, this is coconut oil, raw organic coconut oil, 54 ounces. This is sweet almond oil. It’s 16 ounces. We’ve got eight ounces of jojoba oil. And then, we’ve got four ounces of vitamin E.
Dr. Z: So the coconut oil is antifungal. It’s very nourishing, high of antioxidants, a lot of good benefit of coconut oil. We have the sweet almond. Sweet almond’s really good, too. It’s high in vitamins.
Mama Z: It’s my favorites.
Dr. Z: Yeah, very nice, just very moisturizing. It’s good for a variety of skin types. Jojo-ba, that’s really just a standard aromatherapy essential oil, again very nutritious, very good for a variety of skin types. And they make a nice mix. They have a nice blend to-gether and, of course, the vitamin E. And what’s your special thing about the vitamin E? That’s a lot of vitamin E.
Mama Z: It is. Well, I had an instance where my face reacted with regular chemical products. And it ate the layers of my skin off. And one of the things that I had—
Dr. Z: She had a chemical burn. Yeah, it was a bad chemical burn.
Mama Z: It was a very bad chemical burn. And vitamin E was one of my staples really to help heal my skin. So that’s one of the things that I love to use.
Mama Z’s Oil BaseVIDEO TRANSCRIPT

54
Dr. Z: Awesome.
Mama Z: And now, you can find it in a form like this versus squeezing out all the little capsules, which at one point, I had to do. So.
Dr. Z: We had to like bite the capsule.
Mama Z: Yeah, it was horrible. It was horrible.
Dr. Z: So I’m practical. And Sabrina didn’t do this because of that. But practically speaking, vitamin E is a natural preservative. It’s exceptionally high in antioxidants. And the reason why is at the end of the day, yeah this is very good. These oils are very effective when you add essential oils, especially. But they’re not going to last forever.
And oxygen is our enemy. And we have to fight the oxidation process. So if you want to have your oils, especially your bases and your essential oil blends last long, you need a good preservative. And we’re not in to the chemical stuff. So that’s why vi-tamin E is key. And you could see, here’s our storage. We’ll have this stuff lasting for months on end. And it works very well.
So walk us through. So here we go. We’re going to make this Mama Z’s Oil Base, which you could use as your number one carrier for basically every lotion, and po-tion, and DIY project that you want to make. And we’re going to talk briefly in just a moment about allergies. Don’t let me forget that because some people are allergic to this, certain products. So we have alternatives, too.
So here we go. We have unrefined coconut oil. So what do you do? You just go in order?
Mama Z: Yes.
Dr. Z: Okay.
Mama Z: So you’re just going to go ahead and put our 16 ounces of sweet almond oil in there.
Dr. Z: Okay, in a big glass bowl. Folks, we just like glass. I know this isn’t essential oils here. But glass is just a great practice to get into. Plastic is Bad News Bears for a vari-ety of reasons. Good rubber scraper.
Mama Z: All right, now we’re on to our jojoba.
55
Dr. Z: And if you don’t have one of these, if you guys can see this, this is a fantastic cup. I love these glasses where it gives you grams, and millimeters, and teaspoons, and ounces, and tablespoons. This is like the one go-to measuring cup.
Mama Z: It’s my favorite. I have three of them.
Dr. Z: Yeah, we love the measuring cup. So get all your jojoba, and then vitamin E.
Mama Z: Yes.
Dr. Z: Okay. And so if you could see, folks, in it a little bit, it’s cloudy. Talk us a little bit, Sabrina, because we use melted coconut oil. Coconut oil will harden at most room ambient temperatures. Okay. So with that, remember don’t be tossing this in your drain pipes. It will clog your drains after time. So you want to make sure, especially if you’re doing oil pulling or other things, spit it in the garbage and other things. Just be careful because you don’t want to put a lot of this in your sink. So how did you soften the coconut oil?
Mama Z: Well, one of my favorite ways is just put a sink full of extra warm water, any-where between 80˚ and 100˚ is really going to melt it. And you could also use a space heater in a room. But, again, we don’t want to get it too hot so that it kills the proper-ties of it being raw organic.
Dr. Z: Yeah, we’re not cooking it.
Mama Z: Correct.
Dr. Z: No double broiler.
Mama Z: No, no.
Dr. Z: But your your solution.
Mama Z: Yes.
Dr. Z: And you could get a big jug at a variety of health food stores. We get ours from Costco. But yeah, you want to make sure it’s melted or softened. You don’t want hard because hard won’t work.
Mama Z: Right.
Dr. Z: So I’m just mixing it.

56
Mama Z: Just mix it.
Dr. Z: Okay. And you can see, folks, when you’re mixing it, it’s a little bit cloudy be-cause the coconut oil needs to mix well with the other oils.
Mama Z: But it doesn’t take long to get this to be homogenous. And then, right from there, I go ahead and put them in my glass storage. So you can use a mason jar. That’s one of our old honey jars that we repurposed.
Dr. Z: It’s not cloudy anymore. Like, you could tell it was a little bit cloudy. And now, it’s now it’s clean, clear.
Mama Z: Yep, perfect, it’s ready to go.
Dr. Z: Cool. And, folks, in my defense, I don’t really do this. Sabrina does this. This is actually like the first times I’ve done this is with her. I take you for granted because you do all this stuff. And I really just appreciate it. I’m just in my office doing my oil research. And you could actually see it. It’s starting to--
Mama Z: Harden.
Dr. Z: Harden and separating. You see the coconut oil, the more how it’s separated. It’s interesting how it’s separated. So when you thaw it out, you want to mix a little bit, right?
Mama Z: Right. So again, when you’re going to use it, that’s why I put them in these smaller containers, well, I’m going to go ahead and put those in the sink. And then, of course, in the summertime we don’t need to do that because it already is liquefied. But I am going to shake it before I use it. But use it in the proportions that you prob-ably would want to use the in. And for us, refilling, these are really what I like to use. You could always use a smaller mason jar, as well.
Dr. Z: This is our recipe. And we store it. This is an old honey container we got at the health food store. Good ole glass jars that we love, mason jars. Again, this is enough to last you hopefully a few months. Now, we have a family of six. We use body oil every day on all of us. We anoint ourselves with all kinds of different aromatherapy blends. How long will this last us as a family?Mama Z: It might last us a month.
Dr. Z: Okay. Again, we have six people in our family.
Mama Z: But we go through a lot of oil. And we’re making a lot of different products

57
with it. So if you were just going to use it for the oil, this is going to last you a lot lon-ger. But we’re making deodorant. We’re making lotion bars and other things that we use every day. So for someone who doesn’t--
Dr. Z: Everything from diaper cream to regular ole body lotion and stuff. Again, it’s ev-erything. So a single person, one person, maybe a small family, four or five, six, seven months, a year. So this will last you. Good to have on hand. And if that’s the case, if you have a smaller family or if you’re single, you might want to consider putting it in smaller jars instead of a big one. Again, we’ll go through this in a month kind of thing easy. So you might want to do smaller ones.
So before I forget, allergies is really important because I’ve gotten this a lot from people, whether it’s my Facebook community or on my website, “Hey, Dr. Z, I’m al-lergic to coconut. Or I’m allergic to almond oil. What do I use?” So we’re all about allergy-friendly solutions. So by far the most common allergy I’ve heard is coconut oil. What can someone do? This is big. This is 54 ounces of coconut. So what would someone do if they were allergic to coconut here?
Mama Z: They could either do olive oil or grapeseed oil for the largest component. Then, of course, you’ve got your apricot seed oil. You’ve got your Shae nut oil. Some of the other ones that are my favorite to substitute in and out.
Dr. Z: Okay. Easy. Allergy friendly. Done. Well, hey, thanks so much for doing all that you do because it’s a lot. And, folks, if you go to our home, you’ll see Sabrina has nat-ural lotions and soaps at every different counter of every different sink we have. So I love you, honey. I really appreciate it. And, folks, it’s not hard. And this is that easy. And we’re going to talk a lot more about a lot of different ways you can use this base for a variety of your healthcare solutions.
So with that, this is Dr. Z signing off.
Mama Z: Mama Z.
Dr. Z: And our hope and prayer is that you and your family truly experience the abun-dant life.

58
Recipe DirectionsIngredients
Supplies
4 drops lavender essential oil
4 drops Roman chamomile essential oil
4 drops vetiver essential oil
4 drops ylang ylang essential oil
2 ounces carrier oil or Mama Z’s Oil base
1. Drop the essential oils into the bowl.2. Add a carrier oil and mix3. Use to massage your feet and as a body oil before bedtime for added mois-ture and supersweet sleep.4. Store the excess in a lotion dispenser or glass jar.
Medium glass bowl
Lotion dispenser or glass jar

59
Dr. Z: Sabrina, tell us a little bit about why you created this.
Mama Z: Well, as I found out, being a mom, it’s very important to get good quality sleep when you can get sleep.
Dr. Z: Yes, and a dad.
Mama Z: And so when I heard about that prior to having my first baby, then I figured I’d better do a little bit of research to try to help have “sweet sleep,” as they promise in the Bible.
Dr. Z: Well, this is awesome because this is sweet sleep in a bottle. And what we do, we have our Sweet Sleep blend that you could make yourself, which is essentially equal parts, let me get this right, equal parts of lavender, Roman chamomile, vetiver, and ylang ylang, so equal parts. So you want to have your essential oil blend. And then, you can put this into a diffuser, which we like to do with topical application. That’s like guaranteed sweet sleep. So walk us through how to make the oil. So we have the essential oil blend. Again, equal parts of lavender, Roman chamomile, veti-ver, and ylang ylang.
Mama Z: Perfect. So then, what we’re going to do is we’re going to put 16 drops in our favorite measuring cup.
Dr. Z: Talk to us about the cup.
Mama Z: Yes, this is one of my favorite tools in the kitchen because it has grams, milliliters, teaspoons, tablespoons, cups, ounces, the works. So--
Dr. Z: I love it. Look at that.
Mama Z: we use it for cooking projects with the kids that we do every week and ev-erything else. And it makes it so easy to follow along with your recipes.
Dr. Z: Well, we got the essential oils in here. And then—
Mama Z: Perfect. And then, we’re going to put two ounces of our Mama Z’s oil base in there.
Sweet Sleep Body OilVIDEO TRANSCRIPT

60
Dr. Z: We use Mama Z’s oil base for virtually everything. You could find how to. Watch that in another video. We walk you through step-by-step. So just about two ounces. Folks, this is a very safe 1% dilution. So we want to go in the aromatherapy commu-nity and the aromatherapy standards. We want to do 1% when it comes to the face, when we apply oils for children, ourselves, sensitive areas. It’s just a really nice, very diluted blend. So we have 16 drops of essential oil, per two ounces. So then, you mix up.
Mama Z: I mix it up.
Dr. Z: Okay.
Mama Z: And then—
Dr. Z: That’s it.
Mama Z: It is. One of the things that I love to do, and my kids are so cute, at the end of the night, my daughter calls it, “the royal touch,” when I give them each their little massage before they go to bed, I do the bottom of their feet, the spine, back of the night. And it’s just a pleasure for them. But this, also, ensures a good night sleep, which we all need as parents, of course.
Dr. Z: And it smells heavenly.
Mama Z: It does!
Dr. Z: You’re going to love it. And there’s a couple good ways you could store it. You could put it in a lotion dispenser. We always prefer glass. Glass is best, if not high-grade plastic, which is another good way. Or you could put it in something like this with a dropper or a spray bottle. But get your funnel. Make it really easy. Pour it in. So it’s not going to be messy for you. Just like this. Your funnel’s going to be your best friend in your kitchen.
And that’s it, folks. This is your sweet sleep blend. Use it every night. I recommend switching things on and off. You want your body to guess. So use this for a week. And then, use another blend. Maybe take out your ylang ylang. And put in frankincense. Or maybe take out lavender. And try geranium. Whatever it might be. There’s a va-riety of different ways. More than one way of painting a wall. And you can definitely paint a wall that creates great sweet sleep.
Well, with that, folks, this is Dr. Z.

61
Mama Z: And Mama Z.
Dr. Z: And our hope and prayer is that you and your family truly experience the abundant life. And remember, essential oils and doing it yourself will help.
Available everywhere books are sold.
“No-fluff, cutting-edge and evidence-based, The Healing Power of Essential Oils systematically debunks common
myths and fanciful claims that take the internet by storm. The indispensable truths presented in this book makes it
a must-read for every essential oil user.”—Sylla Sheppard-Hanger, CMT

62
Recipe DirectionsIngredients
Supplies
Witch hazelPurified water15 drops Immunity Boosting Blend or other oil(s) you prefer2 or 3 drops vitamin E (optional)2 or 3 drops aloe (optional)
1. Fill a quarter of the bottle with witch
hazel and the rest with water.
2. Choose the essential oils to add that
meet your desired result—for example,
if you want a soothing sanitizer, use
lavender; if you want an uplifting blend,
use sweet or wild orange.
3. If you want a moisturizing spray, add
some vitamin E and aloe.
4. Shake to blend.
5. Spray on your hands and rub them
together as you would with a conven-
tional hand sanitizer.
1-ounce glass spray bottle

63
Dr. Z: In 2016, September, the FDA, the Food and Drug Administration, finally out-lawed triclosan, triclocarbans, and 17 other chemicals that are found in virtually every antibacterial product on the market. Now, they only banned them from hand-wash and bodywash.
Why? Because triclosan has been shown to be a thyroid hormone disrupter, to cause cancer, and even neurocognitive disorders like Alzheimer’s and dementia. But, un-fortunately, triclosan is still in shampoos, toothpaste, lipstick, and hand sanitizer. It’s Bad News Bears, folks. It’s been a registered pesticide since 1969.
And I’m telling you something. You do not need to use that stuff at the store. And, for me, when someone always asks me, “Hey, where do I start? And what do I do?” I always say, “If you want to get started with essential oils, start with the lowest hang-ing fruit, which is, in my opinion, hand sanitizer because it’s so easy to do. It’s super cheap. And most people use hand sanitizers. So, Sabrina, walk us through your rec-ipe for hand sanitizer because we have it around the house. And it is very aromatic. And we love it.
Mama Z: Yes, so I love to use essential oils. A lot of times, people ask me what essen-tial oils to even use. We are going to use a citrus essential oil today. We’re going to do 10 drops of essential oils. Ten drops of the witch hazel. And then, five of vitamin E, and five of the aloe. And then, fill the rest up with water, with purified water.
Dr. Z: And so why citrus? What are we doing citrus for? Why do you like it?
Mama Z: Okay, well I like anything with citrus. And I like it because it’s very cleans-ing, very clean. I like this. This is the one that I have in my dispenser in the kitchen.
Dr. Z: And we have a blend. Like what blend of citrus because you could use a vari-ety of different citrus.
Mama Z: Yes. Yes. So this blend just happens to be orange and vanilla. I like using either lemon, orange, peppermint, lavender. And any of those actually are amazing when you add a drop of vanilla, as well.
Toxic-Free Hand SanitizerVIDEO TRANSCRIPT

64
Dr. Z: Awesome. And so, folks, the importance of witch hazel, when you’re making this, is you want to use an emulsifier. Oil and water do not mix. So when you use essential oils and water compounds, you want to make sure you have an emulsifier that basically allows the oil and the water to mix together so they’re equally distrib-uting.
The vitamin E is super key because it acts as a preservative in addition to a moistur-izer because water has a tendency to contract pathogens like bacteria, and viruses, and fungus. Even though the essential oils are antimicrobial, they still can have bac-terial overgrowth because of all the water. Vitamin E will help with that. And aloe is just great just for a straight up moisturization.
So basically, folks, whatever you want to produce in your life, if you want joy, mood boost, enhancement, citrus oils. If you want to relax, that’s with the lavenders, and the chamomile, and the vetivers. If you want to perk yourself up and get a little bit of energy, eucalyptus, peppermint, rosemary, they all work great.
So we just fill up water. Oh, actually, you have this here. And what I do is I just shake it up just a little bit because you want to mix up that mixture. We’re mixing everything up first. And then, we’re putting the water in. Get a little funnel. And then, we put the water in just to about the top. And then, you put the top on. Shake it.
Now, here’s a little secret I’m going to give you, especially for a scent that I like. And you could see, you could actually start to see the bubbles start to separate. It’s emul-sifying. You’re not going to see all the bubbles aggregating on top. That’s why you just don’t put water in your oils because the bubbles are just going to go on top, the oil bubbles. And you spray.
Mama Z: And especially in one of your dispensers at the sink, if you use that, the emulsifier is key because you’re not going to be able to shake that bottle before you use it. You’re just going to be pumping it right on your hands. So that’s our recipe. And we enjoy using it in our kitchen all the time. And, boy, do we go through it.
Dr. Z: And I have some in my car. And, folks, I’ll tell you, I don’t use my Armani any-more. I used to have fancy dancy colognes and what not. And what I’ll do is I’ll just spray this. This is very safe. Only a little bit. A little bit of a spritzer. And don’t worry the aloe and the witch hazel is not going to stain your clothes. But we use it for a va-riety of different ways. It cleans your hand in a pinch. It gives you a nice perk. You can use it as a mister, as well. That’s one other thing I like to do, as well. So enjoy the DIY empowerment of making your own hand sanitizer.

65
And, folks, please, please, I implore you, prayerfully consider about what you’re go-ing to buy next at the store. Stay away from all antibacterial products because even though the FDA banned these products, manufacturers have one year to get them off the market. So right now, people are still poisoning themselves ignorantly, inadver-tently, not knowing putting these products on their babies and on their bodies. And we still got to watch out for the other things, too, because we still can’t trust that the replacement for triclosan’s going to be any better than the triclosan itself. So anyway, the safest way of doing it is doing it yourself.
Well, with that, this is Dr. Z signing off.
Mama Z: And Mama Z.
Dr. Z: And our hope and prayer is that you and your family truly experience the abundant life. And remember, essential oils and doing it yourself will help.

66
Recipe DirectionsIngredients
Supplies
1⁄2 cup Dr. Bronner’s liquid castile soap
2 teaspoons vegetable glycerin (avail-
able at many household goods
stores and online at Amazon.com)
6 drops lemon essential oil
4 drops tea tree essential oil
4 drops lemon eucalyptus or lemon
myrtle essential oil (or 2 drops each)
1. Pour the liquid castile soap and vegeta-
ble glycerin into the glass bottle.
2. Add the essential oils.
3. Fill the bottle with water, allowing
enough room for the pump. Replace the
pump.
4. Shake well and use like you would tradi-
tional dish soap.
16- ounce glass bottle with
pump or glass foaming
soap dispenser

67
Dr. Z: So today, we’re going to walk you through how to make our lemon tea tree dish soap. And so, Sabrina, walk everyone through why you came up and how you even came up with the recipe because we went through the ringer when it comes to using different dish soap. And it was hard to find one that really worked.
Mama Z: Well, just like you said, every time that we went to try a new natural dish soap, it was either too expensive, it still had toxic ingredients, or it plain ole didn’t work. I remember one time I brought one home. And we tried it. And—
Dr. Z: It was bad.
Mama Z: Dr. Z, said, “If we never use this again, that would be great,” because it was like greasy. And it didn’t do anything that we expected a dish soap to do.
Dr. Z: “The all-natural one.”
Mama Z: Yeah.
Dr. Z: It was like water. It was so expensive, too.
Mama Z: It was like watery oil. Like, it left a residue and everything.
Dr. Z: Yuck.
Mama Z: So that’s why we came up with this one. And I’m sure you’ll love it.
Dr. Z: Now, this is only for washing dishes in your sink. This is definitely not to use in your washer. I made that mistake once.
Mama Z: So did I.
Dr. Z: And I will tell you, you could eat off of our floor for weeks because we had to clean this floor and the basement because everything had leaked down through. So anyway, this is for handwashing. I’m an old hand washer. My mom’s Sicilian. And she made me hand wash dishes. And Sabrina’s the one who actually started forcing me to use the dishwasher. So with that in mind, Sabrina, walk me through how to make
Lemon Tea Tree Dish SoapVIDEO TRANSCRIPT

68
this. And then, we’ll talk a little bit about why we chose the ingredients that we did, and specifically the oils.
Mama Z: Okay. Great. Well, we’re going to start out with one-half cup of Dr. Bron-ner’s liquid castile soap.
Dr. Z: Okay. And that’s what this is.
Mama Z: Yep.
Dr. Z: And we have a bottle. It could be any glass bottle. You could get these on Am-azon or your local Hobby Lobbies or any of these stores, right.
Mama Z: Mmm hmm.
Dr. Z: Okay. You want a good 16-ounce glass bottle. You want Dr. Bronner’s liquid castile. Now, why Dr. Bronner’s out of all the other options?
Mama Z: I really like it because of the consistency. And it doesn’t get too gummy. And I really like that because it’s going to wash clean. And then, two teaspoons of vegetable glycerin.
Dr. Z: Vegetable glycerin, again this is a great emulsifier. And it is easy to get this on Amazon, as well. It really helps us bring things together because that’s one thing, you always have to remember, folks, is oils and water don’t mix. So you need to have some good filler ingredients. And vegetable glycerin’s really a good one for that.
Mama Z: Awesome. Okay, now we’re on to the oils. And the blend that we like is six drops of lemon, four drops of tea tree, and four drops of lemon eucalyptus.
Dr. Z: Or lemon myrtle.
Mama Z: Or lemon myrtle.
Dr. Z: Yep, or lemon myrtle. And so what I like to do, and this the theme of this entire DIY Series, is instead of having all these oils, and where you’re mixing like a witch’s cauldron brew, why not just pre-mix something. And I found this is really easy. So for us, we’ll have this, our dish soap blend, and we’ll have like “dish soap blend.”
Dr. Z: You didn’t label this. She’s like the label queen. You are. We probably forgot to

69
label it. But what we did is we can pre-mix it. So you could even put equal parts. You can have a 5 milliliter, a 10, a 15-milliliter empty bottle. And just put equal parts of lemon, tea tree, and then lemon eucalyptus, and/or lemon myrtle. Just a great smell. And so we’re going to put 14 drops of our blend.
Mama Z: Perfect. And sometimes, I’ll even use lavender in amongst the blend or a citrus, other citruses.
Dr. Z: We love this blend because lemon is just the epitome of clean, of fresh. And tea tree is great. It has a lot of antifungal, antibacterial properties. And I just found that when you mix them all together with the lemon myrtle and the lemon eucalyptus, it just curates this really nice aroma that it has a synergistic ability to even, in my opin-ion, clean better. And so we, also, like to use that blend in our carpet dusting powder, in our homemade aerosol sprays, and in other DIY products, as well.
Mama Z: Absolutely.
Dr. Z: And so anyway, put, oh--
Mama Z: We’re going to put water.
Dr. Z: We forgot water.
Mama Z: Yeah.
Dr. Z: So you can fill this up until about what way?
Mama Z: I would fill it to about right there so there’s enough room for the top.
Dr. Z: Okay.
Mama Z: Perfect.
Dr. Z: And you could use a foaming, a non-forming. They all work, right?
Mama Z: Absolutely. It depends on what you’re going to use it for. If you’re going to use it on your wand before to presoak before it goes in the dishwasher, then I like the foaming one instead. But this one is absolutely. And then, you’re just going to go ahead and spray it right into your sink.

70
Dr. Z: That’s it. So you just pump right in. And this one is our foaming one. I like foam-ing. And I find it just helps to make everything just nice and clean. I love that.
Mama Z: It smells good.
Dr. Z: It’s just gentle. It’s very pleasant. Folks, cleaning your dishes doesn’t have to be a big deal. It could be pleasant. It could be enjoyable using something like this, if you even want. If you find you get dishpan hands, you could even add some aloe to that, some vitamin E. There is no limit. This is just a good base recipe. And I hope that you enjoy and have some fun with it. Like Sabrina says, “Use different kind of oils, depending on the season,” because the smell and the aroma really enhances your experience in the abundant life.
So any other thoughts or questions to help everyone clean dishes?
Mama Z: No, just have fun. Start out with this recipe. And make your own. And if you have any that you really like or any blends that you really like and wanted to share with us, please do that, too.
Dr. Z: Yeah, I love that. We always love sharing ideas. And we thank you so much for being so involved. Folks, this is Dr. Z.
Mama Z: And Mama Z.
Dr. Z: And our hope and prayer is that you and your family truly experience the abun-dant life. And remember, DIY will help.

71
Recipe DirectionsIngredients
Supplies
10 drops peppermint essential oil5 drops sweet or wild orange essential oil5 drops spearmint essential oil
1. Place a cotton pad in the inhaler tube.
2. Drop the essential oils directly onto the
cotton pad inside the tube. Alternatively,
you can drop the essential oils into a glass
bowl, roll the cotton pad in the oils to
absorb them, and then insert it into the
inhaler tube using tweezers.
3. Open the inhaler and take five deep
breaths before your workout or between sets.
4. Keep on hand for those long runs and
extended workouts!
Precut organic cotton pad
Aromatherapy inhaler

72
Dr. Z: Hey, today, we’re going to walk you through how to make our performance booster inhaler. And I have found the research is absolutely conclusive, peppermint oil and other oils enhance athletic performance better than Red Bull. It’s absolute-ly great. And Sabrina’s an athlete. And I brought her on just to talk a little bit about what she’s using this for.
But before I do, I got to geek out a little bit about the research because we don’t have too many actual human trials when it comes to essential oils. We have a number of in vitro. Those cells in the petri dish studies. And we have a number of animal stud-ies. But when it comes to actually using oils on people, it’s limited.
But we do have a few studies from Iran testing the internal use of peppermint. And how just simply ingesting a drop of peppermint in water or straight into the mouth, actually enhanced athletic performance for college athletes.
And here’s the cool thing, when you breathe something like peppermint, spearmint, even wild orange, sweet orange, what you find is that your lung capacity increases. You could breathe deeper. You could breathe better. It actually affects blood pres-sure. It lowers stress. And it helps your body perform grip strength, muscle strength, and so many other measures.
So I have found that there’s a number of ways you could do this. And for people that have a sensitive esophagus, or mouth, or they get reflux by ingesting oils, then I have found that using an inhaler is a great way to get the same benefits because you’re inhaling them.
So before we walk you through how to use the inhaler, Sabrina, because you’ve been doing a lot lately, and this is one of your go-to recipe, so—
Mama Z: Absolutely.
Dr. Z: tell us everything.
Mama Z: Well, of course, with our fourth, our teething baby, there’s times at night where we don’t get much sleep. And so one of the things I like to do is work out early
Performance Booster InhalerVIDEO TRANSCRIPT

73
in the morning. And one of these booster inhalers on the way to a 5 a.m. workout is the difference between being able to function in a work out and actually do a good job. And it really wakes you up. And it’s very invigorating. But the other thing is I do a mountain challenge. And as we go up, I hear other people hacking, and coughing, and things like that. And a lot of times, I run over to them. And I let them smell my little inhaler because it really makes that much of a difference, especially as you’re running up a road. They might think I’m a little bit weird.
Dr. Z: Like, “What is that?” “Try my drugs. No, it’s like [laughter].” We’re that crazy, people. But you know what?
Mama Z: But it really helps.
Dr. Z: Yeah.
Mama Z: So essential oils can help.
Dr. Z: I love it.
Mama Z: And especially in this kind of blend, it makes all the difference in the world.
Dr. Z: It opens up the airwaves because you’re not drinking coffee first in the morn-ing.
Mama Z: No, you’re not.
Dr. Z: You’re waking up. You’re training. You’re getting ready for your next upcoming pageant. And Sabrina’s doing like crazy Orangetheory high-intensity interval train-ing. So it’s not like a walk in the park. So here’s how we do it. And for those of you who are new to aromatherapy inhalers, we’re big fans of them. They are on the go.
Like you could get a nice fancy one like this on Amazon. Or you could get one of these. I call them throwaways because they’re really, really hard to use again. They’re great for one-time usage. But these things last a good five, six, seven months. But something like this, they’re actually nicer. They’re very fashionable. For guys, you can put them in your pocket. Ladies can put them in their purses. Great to have in your car, in your desk drawer at your office.
But the nice thing is for something like this, it costs a couple extra dollars, but you could see it’s glass. And in glass, it encases a cotton swab or a cotton tube, which

74
all you have to do is you open it up. You can actually take that out with tweezers. You can clean that a variety of ways. Put it in your dishwasher. Or you can clean it by hand. And then, you could just use this over, and over, and over again. So this all that you need.
And we’ve already put 20 or so drops in a glass bowl. And our recipe is 10 drops of peppermint, 5 drops of orange, and 5 drops of spearmint. Now, regarding the or-ange, it could be blood orange, wild orange, sweet orange. You could even use nero-li. But anything in the orange family, we found just works very, very effectively. So you have 20 drops in total. And all you do is you get your cotton tube, your cotton. And you just roll it around. And I’m telling you this stuff can absorb a lot of essential oils.
If you have sensitive hands, you could use gloves, you can use tweezers. But that’s it. And you could see because it is orange, it’s just beautiful. Smell that.
Mama Z: It smells awesome.
Dr. Z: Isn’t that nice?
Mama Z: Mmm hmm.
Dr. Z: And when you’re using the inhaler, all you do is you put this in the inhaler. Just like that. And you seal it. Now, for this one, once you seal it, it’s really hard to unseal it. Like, getting that out is virtually impossible. Again, but something like this cost a little more. But you just screw it on. And you screw if off. It’s really easy. So that’s the inhaler.
Mama Z: And the nice thing, too, about the glass is that you can clean it out and pop it in the dishwasher. And change your cotton swab. And change your recipe in there. And use it literally forever, as long as you keep cleaning it out.
Dr. Z: So this is airtight. It’s sealed. And right before you work out or if you’re want-ing to get a nice boost because you’re driving at 5 o’clock in the morning. So walk us through how you use it, right.
Mama Z: Yeah. So when I get in the car, I’m literally taking my shoes out to the car. I get in the car. Pull this out. And then, I am inhaling it. As I’m going down the road, I’m [inhales fragrance]. And then, sometimes, [inhales fragrance]. It just, it’s such a good smell. And it really opens you up and wakes you up. And the orange is very happy. So I might be the peppiest person there at 5 o’clock in the morning. But it does make the
75
workout more pleasurable. And I do feel awake by the time I’m getting there.
Dr. Z: Another technique that people use is actually, not while you’re driving, but right before you work out, you could plug one nostril. And you can breathe in two or three times. [Inhales while holding one nostril] So it’s isolated on one nostril. And then, you switch. That’s another technique.
Mama Z: And I’ve used that technique with lemon, lavender, peppermint or lemon, lavender, peppermint, melaleuca around the allergy-type of season, that kind of thing. And it’s more concentrated. It really helps to open up the airwaves, as well.
Dr. Z: I want you to become fanatical about keeping this closed because like ask your rusty tools outside, oxygen is our enemy when it comes to essential oils. You don’t want these to oxidize. So the more that oils are exposed to oxygen, the less ef-fective they get. The actual chemicals that bring that healing, the energy, the boost-ed performance will decrease, will actually start to oxidize. That’s what the term is. So oxygen and heat are known components to speed up oxidation.
Your essential oils last a good two, three, four years max, if you’re using them. Don’t believe the lie out there. There’s a myth that says essential oils last for thousands and thousands of years. Maybe if they’re sealed in an airtight vacuumed container. I don’t know. We don’t have any proof of that. We really, really don’t. So every time you open this up, you’ll know that just enjoy it. And close it up. You really should get three, four, five, six months out of this.
And for something like this, you could see, there’s a hole. And what you could do, if you get a pipette, which is really easy to do, you could get your blend. And we like to pre-mix blends. Make it really easy. So right here, you could put peppermint, orange, and spearmint. Have it ready. Call it your booster, your performance booster blend. Put a label on it. Why not? What you could do is actually get a dropper. Get a pipette. And put 15 or so drops into that hole every few months. That is a good way of main-taining this. And this could last you quite a long time.
So I want to end with this. That’s the aromatherapy inhaler. However, this perfor-mance booster blend can be used every which way. So whether you want to use a roll on, whether it’s a spritzer, or you can even have like a massage oil. And I love putting massage oils in something like, again with a nice dropper because it’s a nice clean way of using essential oils.
We’re not going to go into the dilutions in this video because I have a video on how

76
to create roller bottles. How to dilute your essential oils properly. Download your guide. You get that for free. Your dilution guide, your roller bottle guide, which will walk you through it.
I would recommend, for something like this, about 3%, 4% max dilution. This is strong for a lot of people. But you only need a couple of drops. And a couple of drops, you can put it over your chest. Again, of the diluted massage oil, put it over your chest or have your roller bottle on the back of your neck. And that will get you through a great workout. Throw the Red Bull away. You’re never going to want to use that stuff. It’s so bad for your health. This is not at all bad for your health. And it’ll only enhance.
Babe, you have anything else you want to share?
Mama Z: Well, also on the roller bottles, that’s an excellent way, and that’s another way that I utilize these same kinds of blends. And even if you’re going to go out and do a long run, and you know you are, and you use the roller bottles, you can inhale them right off of your wrist while you’re running, too. So that’s another way that I use it.
Dr. Z: All right, that’s it. Using essential oils to enhance your athletic performance. Well, folks, this is Dr. Z.
Available wherever books are sold.
“If you’re confused by conflicting claims about essential oils, pick up this book now and get the unbiased, evidence-based information you’re seeking. The Healing Power of Essential Oils
will become your favorite go-to guide if you’re serious about using these health-boosting oils safely, smartly, and effectively.”
—Kellyann Petrucci, MS, ND

77
Recipe DirectionsIngredients
Supplies
1 tablespoon unrefined coconut oil
2 teaspoons raw cacao powder
10 drops vanilla-flavored liquid stevia
extract
1 drop peppermint essential oil
1. Mix all the ingredients in a glass bowl
until smooth.
2. Pour the mixture into a cupcake liner,
muffin tin, or silicone candy mold and
refrigerate until hard (about 30 minutes).
Enjoy!
Small glass bowl for mixing
Cupcake liner, muffin tin, or silicone candy mold

78
Dr. Z: We’re going to show you how to make the super quick cocoa mint delight, which is my favorite on-the-go chocolate fix. And I invited Mama Z here because she’s going to tell you a little bit about how she likes to use it. And this is in the con-text of premenstrual syndrome. So I have little, to no experience, thank God, with PMS. But my wife does because she’s a woman.
And so one thing that I have found, through my studies and through working with women is just cravings, food cravings and a bunch of other symptoms that happen during that time of the month. So we could use essential oils. And Sabrina will show you just briefly how you can use essential oils to really combat a lot of those symp-toms.
But when it comes down to it, and if you get that sweet tooth, you know what? Why not satisfy it with a really nice, healthy version of chocolate versus going to get something junky at the store. So, Sabrina, share with everyone a little bit about what happened with you when you were a young woman because you had a pretty rough time when it came to your monthly cycle.
Mama Z: Yes, I was diagnosed with dysmenorrhea, so excessive irregular periods. And nobody had asked me about it. So I just suffered with it for years and years and years. Then, finally when they did, basically they only gave me one option. And that was to go on birth control to regulate my period, which I do not recommend for any-body to do that. So that did help to control some of it. But at what cost? So that’s it.
Dr. Z: So you went through a variety of natural therapies. And you prayed and you fasted.
Mama Z: Yes.
Dr. Z: And you really were just freed from a lot of what you dealt with. But still, you still get a hankering for some things. Right now, you don’t struggle. You’re not overly moody. You don’t have dysmenorrhea. Your cycle is normalized.
Mama Z: It’s 28 days right on. And even, right after pregnancy and delivery, after my cycle resumes, it’s again 28 days right on. And that definitely has to do with natural therapies.
Super Quick Coco Mint DelightVIDEO TRANSCRIPT

79
Dr. Z: And you use essential oils like clary sage, geranium. You use lavender and ylang ylang to help.
Mama Z: Yes.
Dr. Z: And, folks, you could find those recipes. We have those online. We have the roll-ons, all that stuff. But we’re going to talk about our super quick cocoa mint de-light because again, if you want a quick chocolate fix, I love chocolate and so does Sabrina, this is how you do it. So, Sabrina, you’re going to make this. I want to walk you through because this is one of my brain children. Every once in a while, she lets me have permission to go into the kitchen. And so I could play around sometimes. And I’m pretty creative, too, even though she is the queen of the castle.
So okay, what I’ve done is I just love cacao. Raw cacao is such a superfood. It actual-ly is a superfood. It gives you a lot of great energy. It’s real chocolate. You don’t ever have to get cocoa. We’re talking raw cacao powder. We’re going to get raw cacao.
Liquid Stevia is my virtual favorite for virtually everything. I don’t use any sugar. I love it. If you don’t have it, you can use honey. But then again, it’s going to spike up your glucose levels. This is a zero-glycemic index food. Stevia is an herb. And this extract, which is alcohol based, also acts as an emulsifier and a solubilizer for your essential oil. What that means? Super safe, so you’re not going to hurt yourself by putting a drop or two of essential oil.
I also like, as the base, coconut oil, antifungal, antibacterial, super tasty. If you don’t like coconut oil, then you could use olive oil, grapeseed oil. You could use a number of different things, but we love coconut oil. So, Sabrina, you’re going to start with a tablespoon of unrefined coconut oil. And then, I just put two teaspoons of raw cacao right in there. And I like to mix it up first just a little bit just because it can get a little messy.
I like the coconut oil softened, not hardened, and not melted. If it’s melted, it has a tendency to get a little messy. And think, this is super quick. You want this on the fly. So hopefully, it’s room temperature. It’s softened, not hardened. But it could work either way.
So now that you pre-mix it, I put about a whole dropper’s worth or 10 to 15 drops of liquid Stevia. Do it to your taste. I love Stevia. I could do a lot of it. And so does Sabri-na. And then, one drop of peppermint essential oil.

80
Now, the reason we use peppermint is a couple of reasons. One, it tastes great with chocolate. Two, it’s been shown to help curve hunger cravings, unhealthy hungry cravings. And help you lose weight. And you just mix it up nice and smooth.
So a lot of ladies, especially during their cycles, they get those cravings for chips and bad foods like fatty, high-fried stuff. Well, you don’t want any of that stuff. And you also don’t want to contribute to weight gain. So we have found that, especially peppermint and other essential oils, can help with that, but super good cravings. So that’s it. You mix it up. And then, you just take a bite. “Am I allowed to have some?”
Mama Z: It’s so good.
Dr. Z: “Give me another one.” That’s it.
Mama Z: One of the things you can do is if you are somebody that does get a crav-ing, and needs that satisfied right away, you can take small muffin papers and actu-ally make this in a larger batch and pre-freeze them in your freezer or your refrigera-tor so that they’re right and ready to go as soon as you have one of those cravings.
Dr. Z: We have one that’s a little heart. So it’s so cute. So we always have something in the freezer if we need a quick chocolate on the go. So yeah, make this. Time it by 10. Make a times 10 recipe. Put it in your freezer. It’s great. Folks, this is a safe, effec-tive way of using essential oils. Consuming them. And you’re not going to burn your-self. And you’ll get all the aromatic benefits, as well. So this is the best of both worlds.
Well, with that, this is our super quick coco mint delight. And next time, you have a hankering for some chocolate, especially during your period, try it out. And this is Dr. Z.
Mama Z: And Mama Z.
Dr. Z: And our hope and prayer is that you and your family truly experience the abundant life.

81
Recipe DirectionsIngredients
Supplies
15 to 20 drops lemon essential oil 1. Place a cotton pad in the inhaler tube.
2. Drop the essential oils directly onto the
cotton pad inside the tube. Alternatively,
you can drop the essential oils into a glass
bowl, roll the cotton pad in the oils to ab-
sorb them, and then insert it into the inhaler
tube using tweezers.
3. When you feel nauseous or like you may
vomit, open the inhaler and take a few deep
breaths.
Precut organic cotton pad
Aromatherapy inhaler

82
Dr. Z: So, Sabrina, bless your heart, four babies, four pregnancies, all very much filled with morning sickness and nausea. How did you beat it? What did you do?
Mama Z: Well, lemon essential oil was a key for me. And I remember one time on the way to work. And I was fumbling in my car. I remembered that lemon essential oil would work. I would grab it. I could barely get the lid off. I couldn’t even get it in the diffuser. I put it up to my nose. And just inhaled. And it worked wonders. And so many times with nausea, especially during pregnancy, it’s been a life saver.
Dr. Z: Folks, research has shown that lemon essential oil, simply smelling it like Sa-brina did, helps women, clinical trials, alleviate nausea. And we see in the Ayurvedic model, ancient Indian medicine has been using lemon for thousands of years. So if you’ve got lemon on hand, chances are you do, it’s so easy to do.
And our recommendation is to use an aromatherapy inhaler. And there’s a couple of different kinds that you could get. There’s the more expensive kind. And there’s like the cheaper, cost-effective kind. It all depends on the grade of plastic and how fash-ionable you want to get. But how very easy it is to put lemon essential oil on a cotton swab that you put into a glass container. And then, you just smell. Very easy.
So what I want to do is I want to show you how to do one of the cost-effective ones that we have used that work very good. Now, the thing about this is you can’t reuse this. This you can. You could actually take out, with tweezers, you could take it out. And you could clean the glass. And you can reuse this over, and over, and over again. And that’s why they’re a little more expensive. But these are throwaways after you use them.
So I’m going to show you how to do it. There’s a couple of different approaches. It all depends on how messy you want to get. But for us, we use the easy, simple, peasy way. So I like to actually put the cotton swab right in a glass bowl. And for something like that, an aromatherapy inhaler, 15 to 20 drops of essential oils. So you have lem-on. And all you do is you pour it right on top. You’ve got 15 to 20 drops.
And then, you could use tweezers. You could use a spoon, whatever it is you want to do. You roll it around. And you want to make sure that it absorbs it. And it absorbs
Nausea-Free Pregnancy InhalerVIDEO TRANSCRIPT

83
a lot of oil. And easy peasy, you put it in your inhaler. You’ve got the lid. You want to make sure it snaps on tight because you don’t want this thing opening up on you. And I’m telling you, once you snap it in, you can’t snap it out.
But the nice thing is there’s a hole so you could put more drops of oil on it once the aroma goes away. And you put it in. You tighten it up. And you have your nausea aromatherapy inhaler ready to go whenever you want. So all you do is you open it up. And you take a smell. And that’s it.
But not just for nausea and not just for lemon, there’s a lot of different blends. And you’re going to find that in our book, on our website, and everywhere else you see any kind of blend that will help you, aromatherapy inhalers are the way to go. That’s it. Simple.
Well, folks, this is Dr. Z.
Mama Z: Mama Z.
Dr. Z: And our hope and prayer is that you and your family truly experience the abundant life.

84
Recipe DirectionsIngredients
Supplies
3 drops geranium essential oil
3 drops lavender essential oil
3 drops Roman chamomile essential oil
3 drops ylang ylang essential oil
2 ounces Mama Z’s Oil Base or
straight jojoba oil—avoid coconut
and fractionated coconut because
they absorb too quickly
1. Drop the essential oils into the bowl.
2. Add Mama Z’s Oil Base and mix well.
Store in a lotion dispenser or glass jar.
3. Massage into the labia before and after
sexual intercourse and as needed. You
may also find it helpful to lubricate your
vagina after swimming and showering.
Medium glass bowl
Lotion dispenser or glass jar

85
Dr. Z: So I’ve got my wife here, Sabrina, Mama Z, who’s going to give us a little bit of background because, thank God, I’ve never dealt with this situation. And I’ve seen you go through now four births.
Mama Z: Yes.
Dr. Z: And again, we have ladies in our family that are post-menopausal, and vag-inal dryness is actually one of the more popular questions I’ve been getting, espe-cially in my essewntial oils club. What essential oils can help? So talk to us a little bit about vaginal dryness and how you’ve overcome and how you battled it.
Mama Z: Sure. When my midwife said, like literally, in our postpartum talk when I had my third, she said, “Now, this is when the hormones shift and change, especially after your third birth. And vaginal dryness is one of the most common complaints.” And so she said, “Make sure that you use a good, healthy lubricant regularly, and of course for marital relations as well.”
Dr. Z: Now, the vagina produces a natural lubricant during intercourse that’s directly related to estrogen. And so, when women are postmenopausal or when they’re post-partum, their hormone levels are just out of whack. So there’s something to consider when we’re using essential oils, particularly the carrier oil that we would want to use. Something that we recommend would be Mama Z’s oil base. You can also use eve-ning primrose oil.
If you don’t have Mama Z’s oil base, check out another video. We’ve done a video on that. You can also check the article in the database that we have online as well. So it’s very important that I’ve seen not only to use this before intercourse but also especially for ladies out there who just have a general feeling of friction and pain throughout their day to use a small amount of this just as a normal lubricant, normal lotion throughout the day.
And so, what we have here is a premixture blend of essential oils, and this is gerani-um, lavender, Roman chamomile, and ylang-ylang. Again, equal parts of geranium, lavender, Roman chamomile, and ylang-ylang. All very safe, very healing, and very medicinal for the vagina.
Gentle Vaginal LubricantVIDEO TRANSCRIPT

86
And so, what you’ll have is you’ll put your oils, your carrier oil, two ounces of your Mama Z’s oil base or you could use evening primrose.
Mama Z: Or a combination as well.
Dr. Z: Yeah. And then you add your—what we have here is a total of 12 drops. So we already have our premixed blend, because we’re going to have a nice 1% dilution. Remember, you don’t want to use too many. So you’re going to do 12 drops of your blend, your essential oil, and then you mix it up. And you store it.
Now, I’d like you to talk briefly about storage because I know we have dispensers throughout the house. I do want to recommend a couple things because you could use, very easy so you don’t waste anything, a dropper and you have this little lotion dispenser as well, right?
Mama Z: Yes. And both are great. I prefer something like this because it comes right out in your hand. It’s really easy to use. And this recipe really was basically what we also used prior to our birth to stretch that area as well.
Dr. Z: So if you’re pregnant or have a loved one who is, there is a technique called the perineum massage that you could use this exact blend, this exact ratio. And then, you just massage the perineum. Essentially you’re stretching the perineum about, what, three weeks before when you start?
Mama Z: When you get to 36 weeks, 35-36 weeks. And it’s so interesting because people have said to me, “Well, does that just stretch you out?” And I say, “Actually, it’s not. It’s more like a muscle because…” And it is. But it really helps to tighten and tone the muscle structure in there so that it’s able to expand during birth. And I have never had to have stitches on any of my births, and one of them was 9 pounds, 8 ounces.
Dr. Z: With big heads.
Mama Z: Big heads.
Dr. Z: Isaiah, what, 98th percentile?
Mama Z: It was 95th percentile for his entire life.
Dr. Z: He’s got the biggest brain. He’s not the biggest guy, but he’s got a big head.

87
Mama Z: He stretched out all the onesies, and we had to unbutton all the shirts.
Dr. Z: No major tearing, thank God.
Mama Z: This is such a good method. And I remember after our midwife said that, I immediately thought of the perineum mixture because it was so helpful during that time.
Dr. Z: And not only effective for before birth, but also postpartum, having a perineum massage. Talk to your spouse. And it’s just a very nice way of easing into having in-tercourse again.
Well, folks, vaginal dryness, vaginal thinning is becoming more of an epidemic be-cause we’re going to have more women that are going to be postmenopausal soon than ever before. We have a very aging population. So this is great for your mothers, your grandmothers, your aunts, your loved ones. Share this recipe with them and let them know that they could truly not have to suffer in any way.
Well, this is Dr. Z.
Mama Z: And Mama Z.
Dr. Z: And our hope and prayer is that you and your family truly experience the abun-dant life. And remember, essential oils can help.

88
Recipe DirectionsIngredients
Supplies
14 drops eucalyptus essential oil
14 drops marjoram essential oil
7 drops lavender essential oil
7 drops peppermint essential oil
7 drops rosemary essential oil
2 ounces almond oil
2 ounces apricot oil
1 tablespoon jojoba oil
1. Drop the essential oils into a bowl.
2. Add the almond, apricot, and jojoba oils
and mix well.
3. Rub over sore, arthritic joints daily or as
needed.
4. Store in a lotion dispenser or glass jar.
Medium glass bowl
Lotion dispenser or glass jar

89
Dr. Z: In 2005, Korean researchers took a variety of oils at a specific ratio with very key carrier oils, and they tested them on arthritis patients at a one-and-a-half dilu-tion which is pretty diluted. They found that applying this essential oil mixture over arthritis patients helped not only decrease their pain but their depression.
The power behind essential oils is multifold. One, we do know that they literally pen-etrate into the cellular level of the body. They have an anti-inflammatory effect, and they can help stop pain in its tracks. But also, there is an aromatic benefit. So you really get a two-for-one deal when you apply oils safely on the body.
So not only do you get the benefit in the actual area that you’re applying the oil to, but you get the smell benefit. That is the key aromatherapy that we all love and we all enjoy. So I’m going to walk you through how to make this recipe. It’s very simple, and it’s very effective.
So what we have here is we have two ounces of almond oil, two ounces of apricot oil, and a half ounce of jojoba. And the essential oils that we have—we have eucalyptus, marjoram, lavender, peppermint, and rosemary.
So what you do, very easily, is you take your two ounces of almond oil. And I like to get a rubber scraper because I’m going to get every last drop. Your two ounces of apricot. And why these researchers chose this particular blend, they didn’t mention in the study. However, we do know that this is a very nice blend to create, in a sense, a nice, smooth ointment that absorbs into the skin well, doesn’t leave too much of an oily residue. But it has its own nutrition because these oils are high in vitamin E and in vitamin A.
And last of all, a half ounce of jojoba. These are your standard aromatherapy oils. Now, if you’re allergic to nut oils—for example, some people are allergic to apricot or almond—then a good solution might be grapeseed oil, olive oil, and there’s a number of other ones. Fractionated coconut for some people. There’s a variety of different oils that you can use.
Now, for the sake of me saving my oils, because we’re all about sustainability here, I’m going to walk you through which of the essential oils to use and how much. What
Arthritis Pain OintmentVIDEO TRANSCRIPT

90
you’re going to want to do is put 14 drops of eucalyptus, 14 drops of marjoram, sev-en drops of lavender, seven drops of peppermint, and seven drops of rosemary. And what you do, you mix it up.
And you could store this in a mason jar, a lotion container. And one thing you don’t have to worry too much about, because there’s no water added to this, you don’t have to worry about a preservative per se. Unless you feel that this is going to last you a very long time, then you may want to consider adding some vitamin E which is high in antioxidant. It will help preserve your essential oils from bacterial overgrowth. But this should last you a good month, maybe two, depending on where you’re ap-plying it.
My recommendation is to apply this over those sore joints in your body, especially those arthritic hands and knees that get oftentimes—especially when the weather gets cold or when it gets rainy, just apply it twice a day. Now my recommendation, these are very potent essential oils. Still it’s a one-and-a-half dilution. They’re pretty diluted, so you’re not getting a full concentration of the essential oils. So you don’t have to worry about burning yourself.
If you experience any irritation or anything, discontinue use. You always want to be sure that you’re using that good wisdom that we have, because there’s no such thing as a detoxifying effect. Just remember that. When you put these oils on your skin, you shouldn’t break out in hives. That’s never ever a good sign.
So take the oils, and, as always, I recommend a skin patch. So what you do is you just get the mixture, and you apply just some right here on your hand. This is a skin patch test. So what I want to see is how my body responds to that. Am I breaking out in a hive? Does it get red? Does it burn? Who knows what will happen? Hopefully, like most people, it’ll be fine. And you can just rub that in there and you just enjoy that.Just like how you test the carpet before you use a carpet cleaner in the corner of the room. Use that inconspicuous part before you potentially stain the whole carpet.
That’s what a skin patch test is. I like to do it on the back of my hand. You could also do it on the bottoms of your feet, a place where it often gets sun or might be a little more calloused. You could even put it on right here if you have a callus, just any area to see if you’re going to have a reaction.
Whenever you use a new oil or a new blend, always remember, try a skin patch test first. Give it a few minutes. See how well you respond. And if you respond well, which you should, then you could apply it over your body on a regular basis. This blend is

91
designed to be used for two to three weeks at a time. This isn’t something that you’re going to want to do forever. You want to switch it up. You really do.
You want to give your body a break, and you want to maybe choose another blend that you could find as well. So, folks, this is a proven evidence-based anti-pain oint-ment that will be sure to help arthritic patients. And my hope and prayer is that you experience great relief from this because the anti-inflammatory properties are pro-found.
And as always, this is Dr. Eric Zielinski. My hope and prayer is that you and your fam-ily truly experience the abundant life. And remember, essential oils and doing it your-self can help.
Available wherever books are sold.
“Dr. Z delivers a priceless collection of DIY recipes that will help you detoxify your
home, make over your medicine cabinet and transform your body care to help you
enjoy optimal health!” —Amy Myers, MD

92
Recipe DirectionsIngredients
Supplies
Recipe Notes
1 ounce carrier oil (we use Mama Z’s
Oil Base)
6 drops sweet or wild orange essential oil
6 drops vanilla extract (can be vanilla
absolute)
1. Mix the ingredients in a glass bowl, making
sure the essential oils blend into the carrier
thoroughly.
2. Use as a body moisturizer or rub on your
belly, wrists, and temples as needed for an
overall emotional pick-me-up.
3. Store in a glass container.
Small glass bowl
2-ounce glass bottle or glass salve jar
This simple blend has worked well for us, but there is an unlimited number of
blends that you can come up with.

93
Dr. Z: So, Sabrina, let us know a little about why you came up with this recipe be-cause it truly is joy in a bottle.
Mama Z: Sure. When I was pregnant, I wanted to come up with something really to help counteract postpartum depression because my mom had had that with her three children. And it progressively got worse. So when I did my research, I found that orange and vanilla together were awesome to help counteract depression and, of course, postpartum depression.
So I wanted to get the aromatherapy benefit of putting it on the baby but then also use it on myself as well.
Dr. Z: All right. Well, show me how to make it.
Mama Z: Great. I have preblended a 1:1 drop of vanilla and orange already in the bottle.
Dr. Z: So 1:1 ratio. So for every drop of vanilla, you’re going to have a drop of orange essential oil. So you’re going to get vanilla absolute and orange oil.
Mama Z: Correct.
Dr. Z: So how many drops?
Mama Z: If you have them separate, it would be eight drops of each. So we’re going to go 16.
Dr. Z: Okay. Cool. So we have 16 drops of Mama Z’s oil blend. That’s the joyful essen-tial oil blend. Okay.
Mama Z: And then, we’re going to do two ounces.
Dr. Z: So two ounces. And, folks, if you don’t have a cup like this, you really want to get one. It’s so easy. It’s a measuring cup that measures tablespoons, teaspoons, ounces, and every other thing that you could imagine that you need, especially good for DIY solution.
Joyful Body OilVIDEO TRANSCRIPT

94
So we’re going to put two ounces in addition to what we already have here. And this essentially is about a 1% dilution. So here’s the rule of thumb: for every ounce, you have 600 drops. So if you want to make a 1% essential oil dilution, you’re going to have one ounce of carrier oil per 6-7, 8 drops or so of essential oils. That’s about a 1% dilution.
That’s very diluted and very safe for the entire family, something that we use on our children as young as infant. You could use that dilution on your face, on your under-arms, a variety of areas that are sensitive to other things that might be touched.
So anyway, 1% dilution is very safe and that’s where we start here. It’s for the whole family. So we have basically the solution, and then you mix it up.
Mama Z: And then go ahead and mix it up.
Dr. Z: So just a quick little stir, something easy. You just want to make sure it’s ho-mogenous. And we have a very, very good—this is Mama Z’s oil base. So you want to take a good carrier oil. You have a variety of carrier oils that you could use.
We love this because it’s a combination of your coconut, jojoba, almond, vitamin E. If you don’t know how to make this, we have a video on that as well. This is our staple carrier. If you don’t have this, you could use anything else, like fractionated coconut oil. You could use straight-up almond oil, whatever it might be. But we like our mix-ture of carrier oil.
So this is it, right?
Mama Z: It is. And then you could go ahead and store it in glass.
Dr. Z: Smells so nice.
Mama Z: It is. It’s heavenly. It really is. And then, if you want to use a funnel so that you don’t get it everywhere, because the first couple of times I did get it everywhere.
Dr. Z: And this is just a regular old dropper bottle. You could do it with this or you could put it in…
Mama Z: In a spray bottle.
Dr. Z: Yeah, a glass spray bottle. Or we actually put this in lotion dispensers too.

95
Mama Z: Yeah.
Dr. Z: So whatever way you do it, you just want to make it easy and clean. Well, folks, this is joy in a bottle. The research has shown that orange essential oil has the abili-ty to really affect your mind, to affect your emotions. It’s your mood-boosting oil. It’s also high in a chemical called d-limonene which has been shown to fight cancer and has a variety of therapeutic effects.
So this is more than just boost a mood. This is true healing in a bottle, and this is safe for the entire family. I really hope that you take advantage of this recipe and make it.Well, Sabrina, thanks so much for sharing this. Any last thoughts for everyone?
Mama Z: Yeah, I wanted to let you know I never had had postpartum depression, and I really believe that this helped with so much of that. And even to this day, my kids love to put their joyful body oil on every morning.
Dr. Z: Yeah, it’s our morning routine. Well, folks, this is Mama Z’s joyful body oil. Use it. Be joyful. Experience the abundant life. And as always, this is Dr. Eric Zielinski.
Mama Z: And Mama Z.
Dr. Z: And our hope and prayer is that you and your family truly experience the abun-dant life.

96
Recipe DirectionsIngredients
Supplies
Recipe Notes
2 drops lavender essential oil
2 drops tea tree essential oil
1⁄2 teaspoon raw honey
2 teaspoons unrefined coconut oil
or evening primrose oil
1 teaspoon organic plain yogurt
(no flavoring, no sugar added)
1. Mix the essential oils, honey, coconut oil,
and yogurt in a glass bowl.
2. Place the tampon in the mixture for sev-
eral minutes to absorb the contents. Insert
into the vagina before going to bed.
3. Wear a pad or panty liner to absorb the
discharge.
4. Remove the tampon first thing in the
morning and clean the vagina with plain,
unscented soap and water in the shower.
5. Repeat every night for one week.Medium glass bowl
Cotton tampon (unbleached and
organic if possible)
Continence pad or panty liner
Small glass jar for storage
Between uses, store the mixture in a small glass jar in your refrigerator. Soften it by
immersing the jar in a bowl or pot lled with enough warm water to melt the contents.

97
Dr. Z: Seventy-five percent of every woman watching this video and around the world will get a vaginal infection at least once in their life. Fifty percent of those women will have a recurrence. And let me tell you something, a lot of this does not need to happen. We’re going to talk a little bit about that, and Sabrina’s going to share you a story. And we’re going to show to you a proven solution, according to the research, of what can help you.
So, Sabrina, thankfully, I’ve never dealt with this situation and, by God’s grace, I never will. And I understand it’s just horrible. As I guy, I battle with jock itch. That’s a little bit uncomfortable as well, and you can use a lot of these same solutions, men, as well, if you do battle with jock itch. But for vaginal infection specifically, tell us your story.
Mama Z: Yeah, so in our family, we’re more prone to urinary tract infections just be-cause of the placement of our bodies and whatnot.
Dr. Z: Meaning the body parts.
Mama Z: The body parts.
Dr. Z: The relation to the anus, to the vagina. Some women, that area is shorter in distance. Then, that woman particularly has a tendency to have a UTI. So if you get UTIs a lot, you might want to question that and then talk to your doctor about maybe natural solutions.
Mama Z: And I remember my mom sharing with me that in our family we were much more prone to that. And the very first one that I had was in 10th grade, and I had accidentally sprayed like a really toxic perfume spray. And it must’ve got on my un-derwear. And I remember this just horrible pain and that I had to go to the bathroom every five minutes, but I wasn’t going to the bathroom. And I actually started bleed-ing.
And I had no idea whatsoever. Well, thank the Lord, the next door from the high school was the Ready Med department and they said that I had had a UTI. And my mom came, and then, of course, I took antibiotics, like I did back then. And unfortu-nately, my mom had said, “Now, you do have to watch out because you could get a yeast infection, because it’s going to kill all the bacteria.”
Candida TamponVIDEO TRANSCRIPT

98
And I remember calling my mom on a pay phone from the ice arena and I said, “You said I might have a yeast infection. What does that feel like?” And she says, “That you just want to go up there and scratch everything.” And that’s exactly what it felt like. So I knew that that was what I had had. And I wish I would’ve had something like this at the time. Doing research and stuff, you kind of come up with your own meth-ods. But really, this proven method is a great way to go.
Dr. Z: And that cycle can continue from UTI to vaginal infection, UTI to vaginal infec-tion. Folks, the causes of a vaginal infection vary. A variety of reasons: having a high acidic diet, eating a lot of sugar, because Candida feeds on sugar. Stress. Uncon-trolled diabetes. Vaginal dryness. Vaginal tightness, especially during intercourse. That’s actually a contributing factor. So make sure you use a proper lubricant. We’re going to talk about that in another video. A good, healthy, safe vaginal lubricant. And antibiotics.
Antibiotics are by far one of the top causes of vaginal infections because we need healthy bacteria. We need to remember: we are micro-organism-based people. You’re looking at 10 bacterial cells to every one human cell. So when you annihilate all those bacterial cells, using a broad-spectrum antibiotic, you’re going to be more susceptible. And oftentimes, Candida will overgrow in that environment.
So this is a recipe that we came up with. It’s rooted in proven clinical aromatherapy textbooks. Plus, what we have found is a very, very highly-proven solution of yogurt and raw honey, which has been shown, again, clinically speaking to help. So this is a tampon. And I have…
Sabrina, I have never used a tampon before. So what I’m going to do is I’m going to walk you through how to make this. Just so you know, ladies, essential oils can be used safely and effectively, but you want to make sure this is highly diluted. This is a 1% dilution. You can even go—if you have an especially sensitive vaginal wall, you might even want to go less than 1%. So we only have four drops of essential oil here.
So, Sabrina, I’m going to walk you through this. We use a couple different products with just organic, non-flavored, non-sweetened yogurt. We use coconut yogurt. We don’t do dairy in our home. If you can get your hands on some good organic coconut, good organic dairy, you can if you want, as long as it has the healthy bacteria as well as raw honey. And you have a tampon. You have lavender and tea tree and a Poise pad to protect.
So what we do is you’ll get—in this bowl, we have one-half teaspoon of raw honey

99
and one teaspoon of organic plain yogurt. Then, you’re going to take your two table-spoons of unrefined coconut oil. And we’ve already added the essential oils in here which is two drops of lavender and two drops of tea tree. Lavender and tea tree ac-tually have—and you mix that up. Lavender and tea tree actually have a synergistic effect.
Tea tree, by far, is the number-one, safest, most effective anti-fungal oil period. Now, we’ve also found that lavender works very well too. Very soothing, very healing. So you can also alternatively use evening primrose oil if you don’t want to use coconut oil.
Okay, now this is where my expertise ends. Okay. This is the formula. Now, walk me through… I mean, really, I don’t know. So walk me through… This is Dr. Z’s first live tutorial on how to use a tampon. So, good. So you’re putting it in a cup.
Mama Z: Yeah. And I’m just putting it back in the other one because it’s going to be easier to saturate the tampon with.
Dr. Z: So this is a solution that has multiple applications. So how many applications do you think we’ll get out of this?
Mama Z: Hmm. Maybe two, three, four. Depends all on that tampon and how many grams that it is able to hold.
Dr. Z: Again, it depends on the tampon, depending on the fibers. You want organic, unbleached cotton fibers.
Mama Z: Sure.
Dr. Z: And so, how long are we going to keep that in there for?
Mama Z: I would say probably about 10-15 minutes.
Dr. Z: Okay. So you’re letting it absorb. Now, here’s the key. The key is this is for mul-tiple applications, so you don’t want to leave this around, out and about, to get bac-teria overgrowth. And you don’t want to have the yogurt spoil. So what you’re going to do is you’re going to put this in the refrigerator. But, if you use coconut oil—now, here’s the key.
Coconut oil is by far the most anti-fungal oil that we have as a carrier. It works won-

100
derfully. It’s one reason why we included it. However, it can harden. Especially, it will harden in the refrigerator. So how are we going to soften it up that we can use it again?
Mama Z: I would just use something like this, filled with warm water and set the cup in there. You don’t want to go too hot so that you kill the good bacteria as well.
Dr. Z: Good point. This is not low maintenance. This is not quick and easy. But neither is a yeast infection.
Mama Z: No.
Dr. Z: Quite frankly, this is a more involved DIY recipe, which is one reason why I wanted to do this video. Because, yeah, I could share you my recipe on paper, but like, okay, how do we do this? We’ve got to explain some of the things.
Okay. So this is absorbing. Then you insert, and we have a Poise pad to protect.
Mama Z: And a Poise pad is different—if you’ve never used a Poise pad before. If you’ve had children, you probably have used a Poise pad before because…
Dr. Z: Again, I don’t know. Hallelujah. No, really.
Mama Z: Because unlike a regular menstruation pad that’s for that purpose, this is more for leakage, bladder leakage. So it’s going to be able to hold any of the other liquid that the mixture kind of makes inside of your body.
This is going to be your better option for it. The Poise pad is what I like the best for those types of things.
Dr. Z: So we’ll put this in at night. So right before you go to bed, and then you protect your sheets. You protect your underwear.
Mama Z: Yes.
Dr. Z: Protect your clothing and you let this sit all night. First thing in the morning, you take the tampon out and you go in the shower and have a nice, thorough wash, us-ing soap and water, preferably none of the crazy Bath and Body Works smelly stuff. If you do have a homemade body wash, that’s what you’re going to want to use, espe-cially if you have an infection. You do not want to use that smelly stuff. Chemicals are

101
not going to help you at this point.
Mama Z: Now, one of the things to remember too is when you do a do-it-yourself type of thing, you need to look at your body and recognize what your signs are for Candida overgrowth or for a UTI because using the natural methods are a great way. But you really do have to do that earlier on so that it hasn’t gone past a point where it’s really harder to do the maintenance on your own.
Dr. Z: And you’re loading up on your probiotics. You want to be consuming probiot-ics, as much as the dosage allows of the particular product that you’re using. You’re really going to want to bring healing to your body.
You’ve mentioned before liquid silver, colloidal silver.
Mama Z: Yes.
Dr. Z: Okay. How would you use that?
Mama Z: On the bottle, it gives you proper recommendations which I would follow, and then I always double my probiotics.
Dr. Z: Yeah.
Mama Z: But one of the things to remember is that if you’re going to take the liquid silver, you want to wait a few hours before you take the probiotics so they don’t can-cel each other out. So if you’re taking it every six hours, then you want to do the pro-biotics every three hours, just to alternate those so that you’re not taking both and like zeroing them both out and you’re doing nothing for your body.
Dr. Z: Any last questions? Any last thoughts? Words of hope? Because I know you battled with these several times. What parting advice would you like to give ladies out there?
Mama Z: Really, give it a little bit more time than you would a traditional method. It’s going to be a lot more beneficial for your body, and it is going to carry you a lot longer. And the healing is going to carry you a lot longer. In a clinical setting, if they were to give you a pill, it might take a day or less. This might take longer than a day, but you will feel some relief.
Definitely, hang in there and continue trying the method because it is worth it to do it
102
in a nontraditional way like this.
Dr. Z: I’m glad you shared that. Folks, we actually have clinical research that has shown that lavender essential oil as a body wash or as an oil compared to the drug, within the first 24 hours the drug outperforms the lavender. But after two days, they’re equal, equal performance.
So, again, like Sabrina shared, like Dr. Jane Buckle shares, give it at least three days and then go. And make sure you’re working with your natural healthcare provider to make sure…
Mama Z: Absolutely.
Dr. Z: And if you experience any aggravation, any irritation, or anything, discontinue use. Contact your medical doctor immediately because we want to make sure we’re knocking this thing out the right way. Okay.
Well, wow. This was a big one. This was a long one. I’m getting outside my comfort zone a little bit, but I appreciate it. I really appreciate, Sabrina, you taking the time.
And, folks, please, please, please remember, our hope and prayer is that you and your family truly experience the abundant life. And remember, essential oils can help.

103
To help you along your healing journey, here are some affirmations that I recommend you write out and tape on your bathroom mirror immediately.
Read them every day until they take firm root into your spirit, and make them part of your daily meditation!
It is God’s will for me to be healed and whole! (3 John 1:2)
I speak life, even when I don’t feel like it. My words are like honeycomb: sweet tothe soul and healing to the body. (Proverbs 16:24)
I serve an awesome God who proclaims that He is my healer! (Exodus 15:26)I serve a faithful God who promises to never leave me nor forsake me!(Deuteronomy 31:6)
Your DailyHEALING AFFIRMATIONS

104
I serve an unconditionally loving God who says He sees what I do and will heal me anyway! (Isaiah 57:18)
I serve a merciful God who commits to taking sickness from among me!(Exodus 23:25)
I serve a gracious God who promises to restore me to health and to heal my wounds! (Jeremiah 30:17)
I am made in God’s image and He has given my body the ability to heal itself!(Genesis 1:27)
I have not been given a spirit of fear, but of power, of love and a sound mind!(2 Timothy 1:7)
I know that God will perfect that which concerns me to the end! (Psalm 138:8)
I hear God’s voice and obey His word. Therefore He promises to be my Healer and to keep deadly pestilences from me! (Exodus 15:26)

105
Dr. Z: Hey, everyone, Dr. Eric Zielinski here. And I want to walk you through some healing affirmations that I like to speak just to help me along my health and healing journey.
This is such a key aspect of the abundant life where we sometimes forget that the Bible says, “Life and death are in the power of the tongue.” And so, we have the abil-ity—just think of it just a moment—we have the ability, like God, to create life and to kill life with our words, with our thoughts, and with our actions.
We’re created in God’s image, and he spoke the world into existence. And like Jesus says, “If you have faith to say to this mountain, ‘Be lifted up and go into the sea,’ it shall be done for you.” So we need to operate faith and activate our faith for good, because faith could be used to do harm. If you believe you’re going to be sick, you will. If you believe you’re going to die of cancer, you will. If you believe you’re going to have a divorce, you will. If you believe, if you believe, if you believe.
That’s actually called—as science refers to it—the nocebo effect. I’m sure you all have heard of the placebo effect, where people have a sugar pill and then they miracu-lously get cured of a disease. Well, because they think this pill is going to do some-thing for them. Well, the opposite could happen, and it’s very real.
And so, what I want to do is caution all of you from personalizing any disease. You don’t have diabetes. It’s not my cancer. It’s not my autoimmunity. You’re believing it. You’re internalizing it. You’re owning it. Instead, you want to do your best to speak life and to speak health and to speak something positive.
And so to help you, I’ve put together a list of affirmations that we get directly from the Scriptures, promises of God that I want to ask you, I encourage you, to print this out. Have a copy for on-hand, whether it’s in the car, at work, because you don’t know when you’re going to have a weak moment. Tape it onto the mirror of your bathroom, wherever it might be, so you remember to say these things daily, especial-ly if you’re battling a disease, especially if you’ve been given a death by a doctor who says you have six months to live or 12 months or fill in the blank.
I cannot discount and I cannot stress enough the power of positive thinking, of
Healing AffirmationsVIDEO TRANSCRIPT

106
prayer, and truly manifesting the life that you want by meditating on and speaking God’s word. It’s what true practicing faith is like. So what I like to do, especially when I’m battling something, is to go out in nature. I really connect with God in a very spe-cial way outside. If that’s not you, if you don’t have that tendency towards nature, then find your place, find your “prayer closet.” This is my prayer closet. I love coming out. I love walking. I love going out to a place where I can just let my mind just calm down, let nature soothe me, hearing the birds and the crickets. And just nature’s noises really just resonate with my spirit.
And I like to do that. I like to come out and just read God’s Word, speak God’s Word, and remind myself of who I am in Christ. And so, I have a list of nearly 20 affirma-tions that I put together for you, especially if you’re in the throes of sickness right now, because by God’s grace we’re going to believe that He’s going to help you get through it. And it doesn’t matter what it is.
I’m telling you, I’ve seen it, and I’ve experienced God’s healing power and the body’s ability to recoup and the body’s ability to heal itself under the right conditions. And it starts in the mind and in the heart. Amen.
So here’s how I do it. It is God’s will for me to be healed and whole. I speak life even when I don’t feel it. My words are like honeycombs, sweet to the soul and healing to the body. I serve an awesome God who proclaims that He is my healer. I serve a faithful God who promises to never leave me nor forsake me. I serve an uncondition-ally loving God who says He sees me and will heal me anyway.
I serve a merciful God who commits to taking sickness from among me, and I serve a gracious God who promises to restore me to health and heal my wounds. I am made in God’s image, and He has given my body the ability to heal itself. I have not been given a spirit of fear but of power, love, and sound mind. I know that God’s will is per-fect, and He will perfect that which concerns me to the end.
I hear God’s voice, and I obey His Word. Therefore, He promises to be my healer and to keep deadly pestilences from me. I worship the only true God, and He promises to take sickness from my midst. I am called by God’s name. I humble myself before Him. I pray and I seek His face. I turn from my sin. Therefore, I am confident that He hears from heaven, that He will forgive my sin, and He will heal my land.
The Lord protects the helpless, so I am confident He will restore me to health. As a be-liever in Christ, all of God’s benefits are mine. He forgives my sin. He heals all my diseas-es, and He satisfies my desires with good things and renews my youth like the eagles.

107
My God sends His Word and He heals me. He delivers me from all destruction. My God promises to heal the broken-hearted and bind up my wounds. I have a joyful heart. It is good medicine. And my God will bring he health and healing. He will heal me and reveal to me abundance of prosperity and security.
Now, my challenge to you—that took, what, two minutes. Maybe? My challenge to you is to print out this list. I have it for you available. You can just download it. Print it out. Laminate it. Keep it around in multiple places and make sure—make it part of your natural healing regimen to allow these biblical affirmations, because every one of these comes directly from the Scripture. Speak this at least three times a day: morning, noon, and night. And more. Go for it.
And I challenge you to do this for 30 days. Write me an email. You can email me at [email protected] and let me know what happens. Believe God. Have faith in Him. Trust that He will see you through this. Have hope. Have love. And share. Because what you’re going to experience is a gift, a gift that you could give to other people.
Don’t let any of these experiences go to waste because your testimony is what can be used to heal someone else and to give them encouragement and to give them health. Our Lord has brought me through so many things. He’s helped me overcome addiction to drugs, alcohol, caffeine, pornography, a lot of different sin, a lot of dif-ferent things. Our Lord has helped me get through gut issues, cystic acne, depres-sion, suicide ideation, chronic pain, and he can help you too.
So manifest love, manifest light, manifest life, and manifest your healing by speaking God’s word, because he promises that it will not return void.
Folks, this is Dr. Eric Zielinski. And, as always, my hope and prayer is that you and your family truly experience the abundant life. And speaking healing affirmations will help. God bless.

108
Series ConclusionMEET THE Z’s
Dr. Z & Mama Z have pioneered natural living and biblical health education since 2003. Knowing what it’s like to be sick from a young age and having recovered from several chronic diseases in their early 20s, they have been on a mission to sharing the evidence-based approach to natural living that allowed them to regain control of their health with the world.
Trained as a aromatherapist, public health researcher and chiropractor, Dr. Z started his online ministry in 2014 along side of Mama Z with DrEricZ.com to help people learn how to use natural remedies like essential oils safely and effectively. Now visited by more than four million natural health seekers every year, it has rapidly become the #1 source for Biblical Health and non-branded essential oils education online.
An accomplished researcher with several publications and conference proceedings, Dr. Z currently sits as a peer-reviewer for multiple journals. The Z’s live in Atlanta with their four children.

109
Video SeriesTranscript Book