TU2-IDSA Quick Installation Guide - TRENDnet
10
TU2-IDSA Quick Installation Guide
-
Upload
khangminh22 -
Category
Documents
-
view
2 -
download
0
Transcript of TU2-IDSA Quick Installation Guide - TRENDnet

TU2-IDSA
Quick Installation Guide

Table of Contents Table of Contents
Version 06.05.2006
Español .....................................................................................................
Troubleshooting ........................................................................................
12
1
5
1. Antes de iniciar ..................................................................................2. Cómo se instala .................................................................................

1
Aplicación
Requisitos del sistema
1. Antes de iniciar
TU2-IDSA
Guía de instalación rápida
Convertidor IDE de 2.5” a 3.5”
Adaptador de alimentación AC
Cable de Serial SATA
Cable de alimentación del Disco Duro
PC con un puerto USB 1.1 ó 2.0 disponibleCPU: 300 MHz o superiorMemoria: 128MB o másWindows 98SE/ME/2000/XP/2003 Server/MAC OS XDispositivo IDE o SATA 1.0a
Contenidos del paquete
Español
IDE Hard DriveSATA Hard Drive
CD/DVD ROM
Notebook
USB 2.0 to SATA/IDE Converter Adapter(TU2-IDSA)

Español
2
2. Cómo se instala
Nota: Se le recomienda formatear primero el disco duro nuevo. Por favor refiérase a la pregunta 2 en la guía de resolución de problemas para más información.
Nota: Si su disco duro SATA viene con un conector de alimentación de 4-pin preexistente, use el conector de alimentación de 4-pin en su lugar. Conecte tanto el disco duro IDE como el disco duro SATA con un conector de alimentación preexistente de 4-pin, necesita un cable de alimentación tipo Y de 4-pin para convertir un conector de alimentación de 4-pin individual en un conector de alimentación de 4-pin dual.
1. Conecte el cable SATA suministrado al receptáculo SATA de su disco duro SATA y del adaptador.
2. Utilice el cable de alimentación HDD incluido, conecte el extremo mini de 4-pin al conector DC del adaptador y el otro extremo del conector de alimentación hembra SATA de 15-pin al conector de alimentación de 15-pin del disco duro. Luego vaya al paso 5.
Cómo conectar el Disco SATA

Español
3
3. Conecte su dispositivo IDE al conector IDE del adaptador. Para conectar un disco duro IDE de 3.5” ó un disco CD/DVD de 5.25”, conecte primero el convertidor de 2.5" a 3.5".
Cómo conectar el Disco IDE
4. Si un dispositivo IDE de 3.5” ó 5.25” está conectado, utilice el cable de alimentación suministrado, conecte el extremo mini de 4-pin al conector DC del adaptador y el extremo hembra de 4-pin grande al conector de alimentación en el disco IDE.

Español
4
Nota: El disco duro conectado al TU2-IDSA debe ser formateado en FAT-16 o FAT-32 para que Windows 98SE o Windows ME pueda reconocerlo.
Nota: Para los usuarios de Windows 98SE, por favor consulte la pregunta 1 en la sección de resolución de problemas. Para los usuarios de XP/2000/ME vaya al paso 6.
5. Conecte el conector de entrada DC individual del adaptador de alimentación al jack DC IN en el adaptador. Después, conecte el cable de alimentación al adaptador de alimentación y el otro extremo a una toma de corriente AC.
6. Conecte el conector USB a un puerto USB disponible en el PC. Los controladores se instalarán de manera automática.
7. Haga doble clic en el icono My Computer (Mi PC).
8. El disco duro externo (s) debería mostrarse. Si su disco duro es nuevo, por favor vaya a la pregunta 3 en la sección de resolución de problemas.

5
CertificationsThis equipment has been tested and found to comply with FCC and CE Rules. Operation is subject to the following two conditions:(1) This device may not cause harmful interference.(2) This device must accept any interference received. Including interference that may cause undesired operation.
NOTE: THE MANUFACTURER IS NOT RESPONSIBLE FOR ANY RADIO OR TV INTERFERENCE CAUSED BY UNAUTHORIZED MODIFICATIONS TO THIS EQUIPMENT. SUCH MODIFICATIONS COULD VOID THE USER’S AUTHORITY TO OPERATE THE EQUIPMENT.
Troubleshooting
Waste electrical and electronic products must not be disposed of with household waste. Please recycle where facilities exist. Check with you Local Authority or Retailer for recycling advice.
Q1:A1:
Q2: A2:
Q3: A3:
Q4:A4:
Q5:A5:
How do I install the TU2-IDSA on my Windows 98SE machine?First, download the Windows 98SE drivers from . Second, uncompress the drivers.
If you do not have a compression program such as WinZip, you need to download and install this program first. Third, double-click on the Setup icon. Click OK when the Setup successful! Window appears. Fourth, continue on to step 6 in Section 2.
My computer does not recognize the TU2-IDSA. What should I do?First, verify that the computer meets the minimum requirements as listed in section 1. Second, make
sure that you have plugged in the power into the unit and the power cord into an outlet. Third, try plugging the device into a different USB slot on your computer.
How do I format my brand new hard drive?For Windows 2000/XP, go to Start -> Settings -> Control Panel -> Administrative Tools ->
Computer Management -> Disk Management. If the Initialize and Convert Disk Wizard appears, click Cancel. Right click the Unknown drive, click Initialize and then click OK. Right click on the unallocated region of the hard drive and select New Partition. Follow the New Partition Wizard instructions then click Finish. The hard drive will automatically start the formatting process.For Windows 98SE/ME, right click on My Computer, and then click Device Manager. Double-click on Disk drives, and then double-click on your hard drive. When the hard drive properties window appears, click on the Settings tab. Check Removable in the options section, select an available drive letter for Start drive letter and then click OK. Click Close. Click Yes to restart the computer. Double click on My Computer, double-click on the hard drive and click Yes to format it.
My computer does not recognize my hard drive(s)? What should I do?First, verify that the device is installed properly. Right click on My Computer Properties. Click on
Hardware, then Device Manager. Double click on Universal Serial Bus Controllers. Make sure that USB Mass Storage Device is listed and there is no yellow question mark or exclamation point. Second, if you are attaching a brand new hard drive, format the drive. Please refer to question 2 for more information. Third, the hard drive that is connected to the TU2-IDSA must be formatted in FAT-16 or FAT-32 in order for Windows 98SE or ME to recognize it
Can I connect a SATA drive and an IDE drive simultaneously?Yes. To connect to both IDE hard drive and SATA hard drive with legacy 4-pin power connector, you
need a 4-pin Y type power cable to convert a single 4-pin power connector into a double 4-pin power connector.If you still encounter problems or have any questions regarding the TU2-IDSA, please contact TRENDnet's Technical Support Department.
www.trendnet.com

Limited Warranty
- 2-Year Warranty
TRENDnet warrants its products against defects in material and workmanship, under normal use and service, for the following lengths of time from the date of purchase.
TU2-IDSA
If a product does not operate as warranted above during the applicable warranty period, TRENDnet shall, at its option and expense, repair the defective product or deliver to customer an equivalent product to replace the defective item. All products that are replaced will become the property of TRENDnet. Replacement products may be new or reconditioned.
TRENDnet shall not be responsible for any software, firmware, information, or memory data of customer contained in, stored on, or integrated with any products returned to TRENDnet pursuant to any warranty.
There are no user serviceable parts inside the product. Do not remove or attempt to service the product through any unauthorized service center. This warranty is voided if (i) the product has been modified or repaired by any unauthorized service center, (ii) the product was subject to accident, abuse, or improper use (iii) the product was subject to conditions more severe than those specified in the manual.
Warranty service may be obtained by contacting TRENDnet office within the applicable warranty period for a Return Material Authorization (RMA) number, accompanied by a copy of the dated proof of the purchase. Products returned to TRENDnet must be pre-authorized by TRENDnet with RMA number marked on the outside of the package, and sent prepaid, insured and packaged appropriately for safe shipment.
6
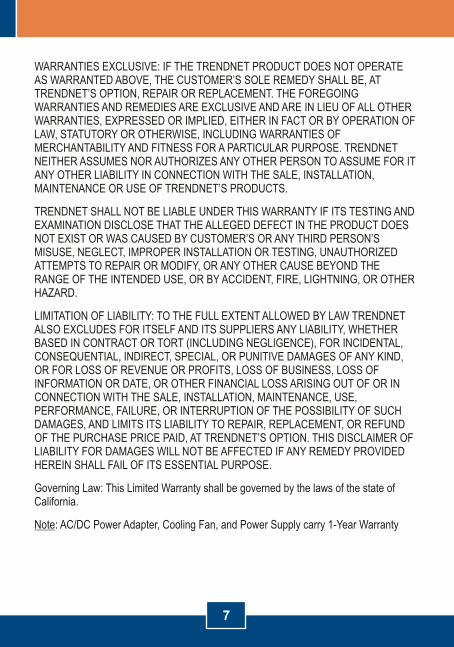
WARRANTIES EXCLUSIVE: IF THE TRENDNET PRODUCT DOES NOT OPERATE AS WARRANTED ABOVE, THE CUSTOMER’S SOLE REMEDY SHALL BE, AT TRENDNET’S OPTION, REPAIR OR REPLACEMENT. THE FOREGOING WARRANTIES AND REMEDIES ARE EXCLUSIVE AND ARE IN LIEU OF ALL OTHER WARRANTIES, EXPRESSED OR IMPLIED, EITHER IN FACT OR BY OPERATION OF LAW, STATUTORY OR OTHERWISE, INCLUDING WARRANTIES OF MERCHANTABILITY AND FITNESS FOR A PARTICULAR PURPOSE. TRENDNET NEITHER ASSUMES NOR AUTHORIZES ANY OTHER PERSON TO ASSUME FOR IT ANY OTHER LIABILITY IN CONNECTION WITH THE SALE, INSTALLATION, MAINTENANCE OR USE OF TRENDNET’S PRODUCTS.
TRENDNET SHALL NOT BE LIABLE UNDER THIS WARRANTY IF ITS TESTING AND EXAMINATION DISCLOSE THAT THE ALLEGED DEFECT IN THE PRODUCT DOES NOT EXIST OR WAS CAUSED BY CUSTOMER’S OR ANY THIRD PERSON’S MISUSE, NEGLECT, IMPROPER INSTALLATION OR TESTING, UNAUTHORIZED ATTEMPTS TO REPAIR OR MODIFY, OR ANY OTHER CAUSE BEYOND THE RANGE OF THE INTENDED USE, OR BY ACCIDENT, FIRE, LIGHTNING, OR OTHER HAZARD.
LIMITATION OF LIABILITY: TO THE FULL EXTENT ALLOWED BY LAW TRENDNET ALSO EXCLUDES FOR ITSELF AND ITS SUPPLIERS ANY LIABILITY, WHETHER BASED IN CONTRACT OR TORT (INCLUDING NEGLIGENCE), FOR INCIDENTAL, CONSEQUENTIAL, INDIRECT, SPECIAL, OR PUNITIVE DAMAGES OF ANY KIND, OR FOR LOSS OF REVENUE OR PROFITS, LOSS OF BUSINESS, LOSS OF INFORMATION OR DATE, OR OTHER FINANCIAL LOSS ARISING OUT OF OR IN CONNECTION WITH THE SALE, INSTALLATION, MAINTENANCE, USE, PERFORMANCE, FAILURE, OR INTERRUPTION OF THE POSSIBILITY OF SUCH DAMAGES, AND LIMITS ITS LIABILITY TO REPAIR, REPLACEMENT, OR REFUND OF THE PURCHASE PRICE PAID, AT TRENDNET’S OPTION. THIS DISCLAIMER OF LIABILITY FOR DAMAGES WILL NOT BE AFFECTED IF ANY REMEDY PROVIDED HEREIN SHALL FAIL OF ITS ESSENTIAL PURPOSE.
Governing Law: This Limited Warranty shall be governed by the laws of the state of California.
Note: AC/DC Power Adapter, Cooling Fan, and Power Supply carry 1-Year Warranty
7

Copyright ©2006. All Rights Reserved. TRENDnet.
3135 Kashiwa StreetTorrance, CA 90505USA
TRENDnet Technical Support
Product Warranty RegistrationPlease take a moment to register your product online. Go to TRENDnet’s website at http://www.trendnet.com
US Canada
24/7 Tech Support
Toll Free Telephone: 1(866) 845-3673
Europe (Germany France Italy Spain Switzerland UK)
English/Espanol - 24/7Francais/Deutsch - 11am-8pm, Monday - Friday MET
English/Espanol - 24/7Francais/Deutsch - 11am-8pm, Monday - Friday MET
Worldwide
Telephone: +(31) (0) 20 504 05 35
Toll Free Telephone: +00800 60 76 76 67
.
. . . . .