Stationery Management - NetSuite login
25
Stationery Management Mimecast Training Student Workbook V 1.2
-
Upload
khangminh22 -
Category
Documents
-
view
3 -
download
0
Transcript of Stationery Management - NetSuite login

Stationery Management
Mimecast Training
Student Workbook
V 1.2
www.mimecast.com 2
Information in this document is subject to change without notice.
No part of this document may be reproduced or transmitted in any form or by any means, electronic or
mechanical, for any purpose, without the express prior written permission of Mimecast Limited.
A reference to Mimecast shall be deemed to include Mimecast Limited, Mimecast Services Limited, Mimecast
South Africa (Pty) Limited, Mimecast Offshore Limited, Mimecast North America Inc. and Mimecast Middle
East.
Copyright © 2012 Mimecast Limited. All rights reserved.
Mimecast® is a registered trademark.
Unified Email Management, Secure Messaging Gateway, Message Archive, Stor5, Mimecast Storage Grid,
Enhanced Stationery, ARMed SMTP, Always On, UEM Express, UEM Enterprise, UEM Advanced, Mimecast
Email Protect, Mimecast Multi, Mimecast 180, Mimecast Small Business Edition, Mimecast Services for
Outlook, Mimecast Services for Exchange, Mimecast Services for BlackBerry®, Unified Email Management for
Domino, Unified Email Management for Groupwise, Mimecast Services for SharePoint, Mimecast Personal
Portal, ZHARA and Where business banks its data are trademarks of Mimecast Limited. All other names are
trademarks or registered trademarks of their respective owners. Any omission or misuse (of any kind) of
service marks or trademarks should not be regarded as intent to infringe on the property of others.
Mimecast disclaims all warranties, either expressed or implied, including, but not limited to, implied warranties
of merchantability and fitness for particular purpose, with respect to the instructions contained within this
guide.
In no event shall Mimecast be liable for any damages whatsoever (including, without limitation, damages for
loss of business profits, business interruption, loss of business information, or other pecuniary loss), even if
Mimecast has been advised of the possibility of such damages. As some US states do not allow the exclusion
or limitation of liability for consequential damages, the above limitation may not apply to you.
Requests, amendments and suggestions to [email protected]
www.mimecast.com 3
Table of Contents
CHAPTER 1: MIMECAST INFRASTRUCTURE -------------------------------------------------------------------------------- 5
WHAT IS MIMECAST? ----------------------------------------------------------------------------------------------------------- 5
SOFTWARE-AS-A-SERVICE (SAAS) ---------------------------------------------------------------------------------------------- 5
MIMECAST SERVICES ------------------------------------------------------------------------------------------------------------ 6
MIMECAST STATIONERY --------------------------------------------------------------------------------------------------------- 6
CHAPTER 2: NAVIGATION ------------------------------------------------------------------------------------------------------ 7
LOGGING IN --------------------------------------------------------------------------------------------------------------------- 7
GENERAL NAVIGATION ---------------------------------------------------------------------------------------------------------- 8
ICONS AND BUTTONS------------------------------------------------------------------------------------------------------------ 8
FOLDER CONTROL -------------------------------------------------------------------------------------------------------------- 8
GROUPS ------------------------------------------------------------------------------------------------------------------------ 9
BUILDING GROUPS ------------------------------------------------------------------------------------------------------------ 10
AD GROUPS ------------------------------------------------------------------------------------------------------------------ 10
EXERCISE: STATIONERY NAVIGATION ------------------------------------------------------------------------------------------ 10
CHAPTER 3: PLANNING STATIONERY -------------------------------------------------------------------------------------- 11
STATIONERY BRIEF ------------------------------------------------------------------------------------------------------------ 11
CREATING A BRIEF ------------------------------------------------------------------------------------------------------------ 11
EXERCISE: STATIONERY BRIEF ------------------------------------------------------------------------------------------------- 12
CHAPTER 4: IMAGES --------------------------------------------------------------------------------------------------------- 13
WORKING WITH IMAGES ------------------------------------------------------------------------------------------------------- 13
EXERCISE: STATIONERY IMAGES ----------------------------------------------------------------------------------------------- 14
CHAPTER 5: CLICK ACTIONS------------------------------------------------------------------------------------------------ 15
CLICKABLE HTML COMPONENTS --------------------------------------------------------------------------------------------- 15
WORKING WITH CLICK ACTIONS ----------------------------------------------------------------------------------------------- 15
EXERCISE: CLICK ACTIONS ---------------------------------------------------------------------------------------------------- 15
CHAPTER 6: MICRO SITES --------------------------------------------------------------------------------------------------- 16
MICRO SITES ------------------------------------------------------------------------------------------------------------------ 16
EXERCISE: STATIONERY MICRO SITES ----------------------------------------------------------------------------------------- 17
CHAPTER 7: LAYOUTS ------------------------------------------------------------------------------------------------------- 18
STATIONERY LAYOUTS -------------------------------------------------------------------------------------------------------- 18
RESOURCE REQUIREMENTS --------------------------------------------------------------------------------------------------- 18
CREATE STATIONERY LAYOUT ------------------------------------------------------------------------------------------------- 18
TESTING LAYOUTS ------------------------------------------------------------------------------------------------------------ 20
SIGNATURES ------------------------------------------------------------------------------------------------------------------ 20
EXERCISE: STATIONERY LAYOUTS --------------------------------------------------------------------------------------------- 20
CHAPTER 8: POLICIES ------------------------------------------------------------------------------------------------------- 21
POLICY LISTS ----------------------------------------------------------------------------------------------------------------- 21
POLICY EDITOR --------------------------------------------------------------------------------------------------------------- 21
SPECIFICITY ------------------------------------------------------------------------------------------------------------------- 22
VALIDITY ---------------------------------------------------------------------------------------------------------------------- 22
POLICY ORDER ---------------------------------------------------------------------------------------------------------------- 22
EXERCISE: STATIONERY POLICIES --------------------------------------------------------------------------------------------- 23
CHAPTER 9: REPORTS ------------------------------------------------------------------------------------------------------- 24
STATIONERY REPORTS -------------------------------------------------------------------------------------------------------- 24
EXERCISE: STATIONERY REPORTS -------------------------------------------------------------------------------------------- 24
www.mimecast.com 4
APPENDIX: KNOWLEDGE BASE AND RESOURCES ----------------------------------------------------------------------- 25
KNOWLEDGE BASE ------------------------------------------------------------------------------------------------------------ 25
TRAINING COURSES ----------------------------------------------------------------------------------------------------------- 25
OTHER USEFUL LINKS --------------------------------------------------------------------------------------------------------- 25

www.mimecast.com 5
Chapter 1: Mimecast Infrastructure
What is Mimecast?
Mimecast delivers cloud-based email management services, including Security, Archiving and Continuity.
By unifying disparate and fragmented email environments into one holistic solution that is always
available from the cloud, Mimecast minimizes risk and reduces cost and complexity, while providing total
end-to-end control of email. Founded in the United Kingdom in 2003, Mimecast serves thousands of
customers worldwide and has offices in Europe, North America, Africa, and the Channel Islands.
Software-as-a-Service (SaaS)
Mimecast provides email services from the internet, also referred to as the cloud, delivered through a
SaaS model. In simple terms, this means that Mimecast will handle your email data in a secure way,
and deliver it to your existing infrastructure. The benefit of this SaaS model is that it is always accessible,
100% of the time, and all you need is an internet connection to access your emails.
The SaaS solution is made available through two physically separate data centers. In the event of
infrastructure outage, emails will continue to flow to the alternative data center. This event is completely
seamless, and ensures 100% email Continuity.
KBID10140
www.mimecast.com 6
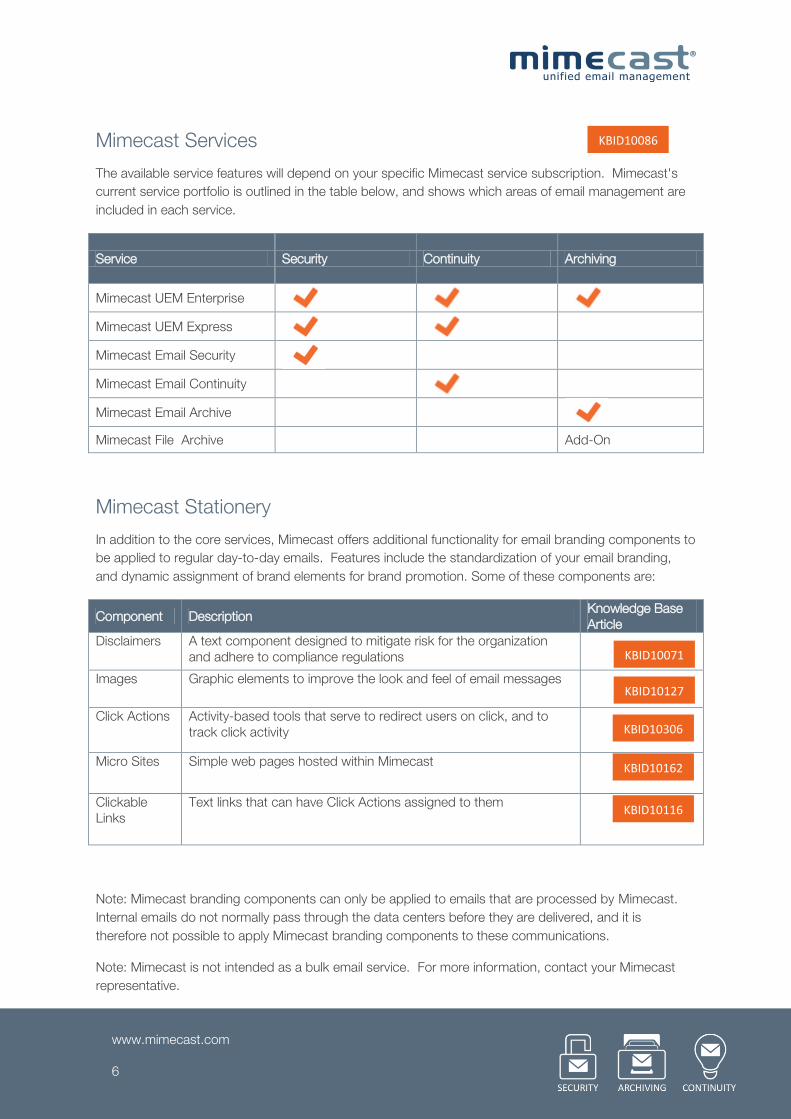
Mimecast Services
The available service features will depend on your specific Mimecast service subscription. Mimecast's
current service portfolio is outlined in the table below, and shows which areas of email management are
included in each service.
Service Security Continuity Archiving
Mimecast UEM Enterprise
Mimecast UEM Express
Mimecast Email Security
Mimecast Email Continuity
Mimecast Email Archive
Mimecast File Archive Add-On
Mimecast Stationery
In addition to the core services, Mimecast offers additional functionality for email branding components to
be applied to regular day-to-day emails. Features include the standardization of your email branding,
and dynamic assignment of brand elements for brand promotion. Some of these components are:
Component Description Knowledge Base Article
Disclaimers A text component designed to mitigate risk for the organization and adhere to compliance regulations
Images Graphic elements to improve the look and feel of email messages
Click Actions Activity-based tools that serve to redirect users on click, and to track click activity
Micro Sites Simple web pages hosted within Mimecast
Clickable Links
Text links that can have Click Actions assigned to them
Note: Mimecast branding components can only be applied to emails that are processed by Mimecast.
Internal emails do not normally pass through the data centers before they are delivered, and it is
therefore not possible to apply Mimecast branding components to these communications.
Note: Mimecast is not intended as a bulk email service. For more information, contact your Mimecast
representative.
KBID10086
KBID10071
KBID10127
KBID10306
KBID10162
KBID10116

www.mimecast.com 7
Chapter 2: Navigation
Logging In
To access the Mimecast Administrator Console, visit our website: http://www.mimecast.com. Click on
the Log In link on the top right side of the screen.
The Log In dialogue box is displayed. Select the Mimecast Administrator Console from the list, then
enter your email address in the available field. Click the Continue link.
The Administrator Console login page is displayed. Complete your password, and click the Log In
button.
Note: Your password could be your network password (this is dependent on Directory Sync
configuration), or it could be your local Mimecast password.
KBID10150
www.mimecast.com 8
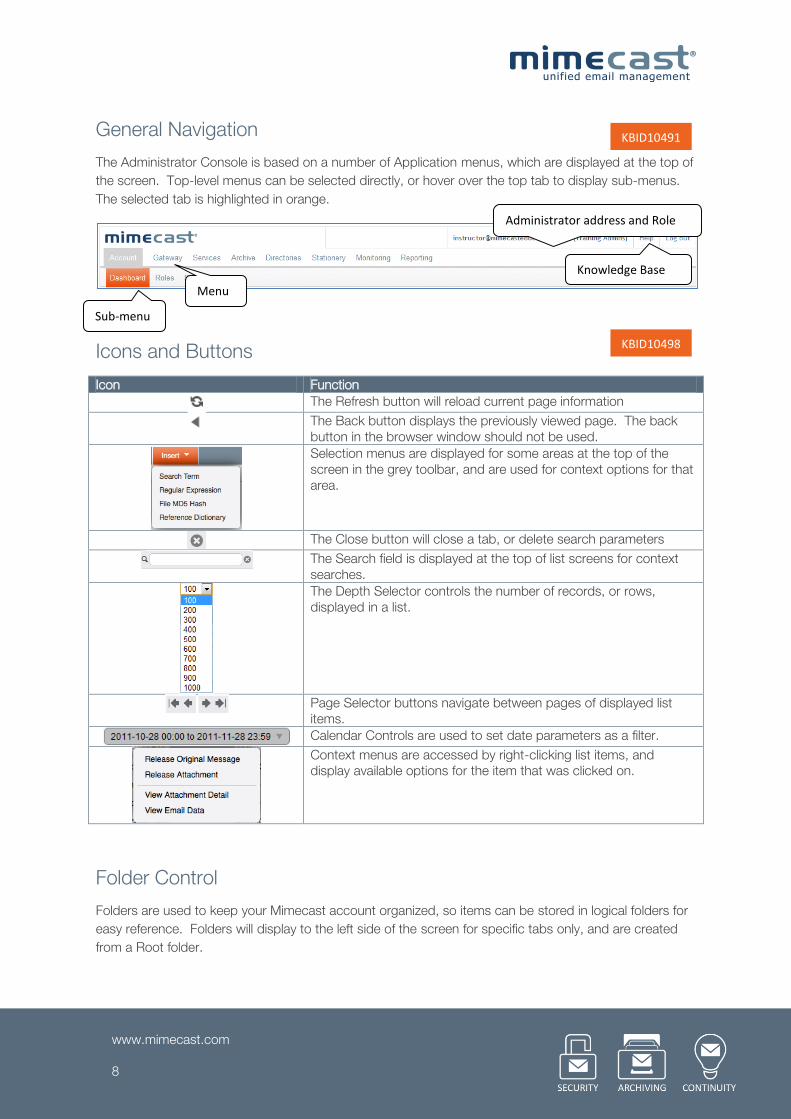
General Navigation
The Administrator Console is based on a number of Application menus, which are displayed at the top of
the screen. Top-level menus can be selected directly, or hover over the top tab to display sub-menus.
The selected tab is highlighted in orange.
Icons and Buttons
Icon Function
The Refresh button will reload current page information
The Back button displays the previously viewed page. The back button in the browser window should not be used.
Selection menus are displayed for some areas at the top of the screen in the grey toolbar, and are used for context options for that area.
The Close button will close a tab, or delete search parameters
The Search field is displayed at the top of list screens for context searches.
The Depth Selector controls the number of records, or rows, displayed in a list.
Page Selector buttons navigate between pages of displayed list items.
Calendar Controls are used to set date parameters as a filter.
Context menus are accessed by right-clicking list items, and display available options for the item that was clicked on.
Folder Control
Folders are used to keep your Mimecast account organized, so items can be stored in logical folders for
easy reference. Folders will display to the left side of the screen for specific tabs only, and are created
from a Root folder.
Administrator address and Role
Knowledge Base
Sub-menu
Menu
KBID10491
KBID10498
www.mimecast.com 9
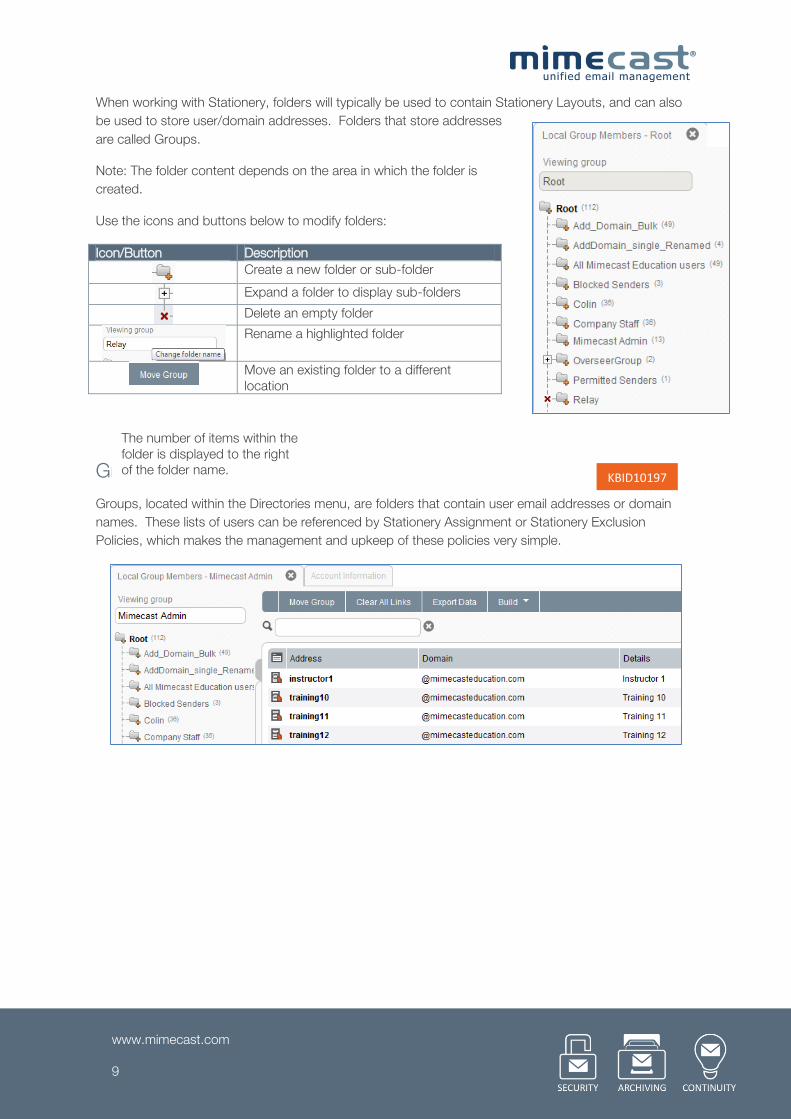
When working with Stationery, folders will typically be used to contain Stationery Layouts, and can also
be used to store user/domain addresses. Folders that store addresses
are called Groups.
Note: The folder content depends on the area in which the folder is
created.
Use the icons and buttons below to modify folders:
Groups
Groups, located within the Directories menu, are folders that contain user email addresses or domain
names. These lists of users can be referenced by Stationery Assignment or Stationery Exclusion
Policies, which makes the management and upkeep of these policies very simple.
Icon/Button Description
Create a new folder or sub-folder
Expand a folder to display sub-folders
Delete an empty folder
Rename a highlighted folder
Move an existing folder to a different location
KBID10197
The number of items within the folder is displayed to the right of the folder name.
www.mimecast.com 10
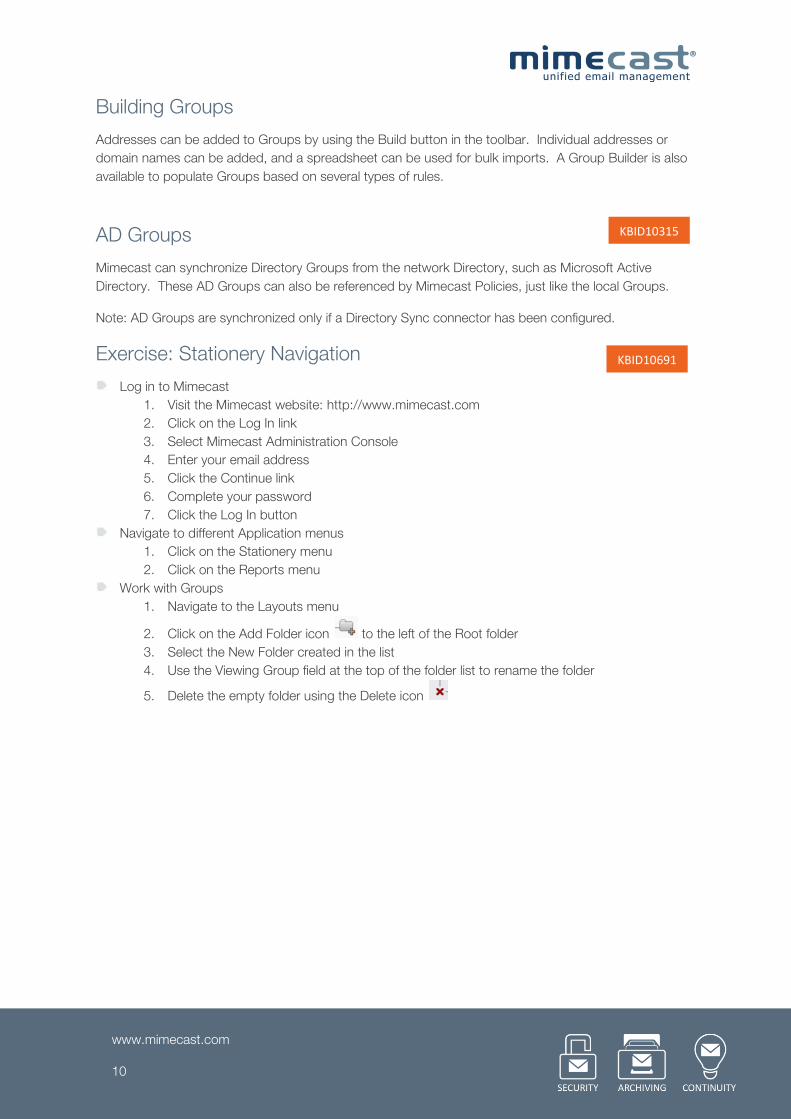
Building Groups
Addresses can be added to Groups by using the Build button in the toolbar. Individual addresses or
domain names can be added, and a spreadsheet can be used for bulk imports. A Group Builder is also
available to populate Groups based on several types of rules.
AD Groups
Mimecast can synchronize Directory Groups from the network Directory, such as Microsoft Active
Directory. These AD Groups can also be referenced by Mimecast Policies, just like the local Groups.
Note: AD Groups are synchronized only if a Directory Sync connector has been configured.
Exercise: Stationery Navigation
Log in to Mimecast
1. Visit the Mimecast website: http://www.mimecast.com
2. Click on the Log In link
3. Select Mimecast Administration Console
4. Enter your email address
5. Click the Continue link
6. Complete your password
7. Click the Log In button
Navigate to different Application menus
1. Click on the Stationery menu
2. Click on the Reports menu
Work with Groups
1. Navigate to the Layouts menu
2. Click on the Add Folder icon to the left of the Root folder
3. Select the New Folder created in the list
4. Use the Viewing Group field at the top of the folder list to rename the folder
5. Delete the empty folder using the Delete icon
KBID10509 KBID10315
KBID10691

www.mimecast.com 11
Chapter 3: Planning Stationery Stationery Brief
Before a Stationery Layout is created, it is important to plan:
1) The structure of the Stationery Layout
2) The resources required to prepare the Layout
The Brief will help identify and map the required resources that need to be in place before creating the
Stationery Layout, and reduces the build time to produce a successful Layout.
Creating a Brief
The components to be used in the Layout have to be planned in two formats: HTML and Plain Text. It is
a requirement to create both formats when building a Stationery Layout, as some mail servers do not
accept HTML content. A Policy is used to apply Stationery Layouts to emails and should also be
scoped.
Note: The table below contains some suggestions for a Layout. It is important to keep in mind that the
design of your Layout is completely dependent on what the organization wants to achieve.
HTML Brief Resources
HTML Design Example 1:
Message Body: o Tag: <MC Type=’body’> o Text format
Logo: o Tag: <MC Type=’clickimage’
code=’name’> o Image: JPG, JPEG, PNG AND GIF format o Click Action:
o Redirect to Website URL o Collect email address when clicked
Signature: o Tag: <MC Type=’variable’ source=’from’
attribute=’attributename’> o Attributes: Signature elements to include
Vertical/Horizontal Banner: o Tag: <MC Type=’clickimage’
code=’name’> o Image: JPG, JPEG, PNG AND GIF format o Click Action:
o Redirect to Micro Site o Micro Site HTML o Direct link to Micro Site
o Don’t record email address Disclaimer:
o Text content o Text Format
HTML Design Example 2:
KBID10147
Message Body (1)
Logo (2) Signature (3)
Vertical
Banner (4)
Disclaimer (5)
Message Body (1)
Logo (2) Signature (3)
Horizontal Banner (4)
Disclaimer (5)
www.mimecast.com 12
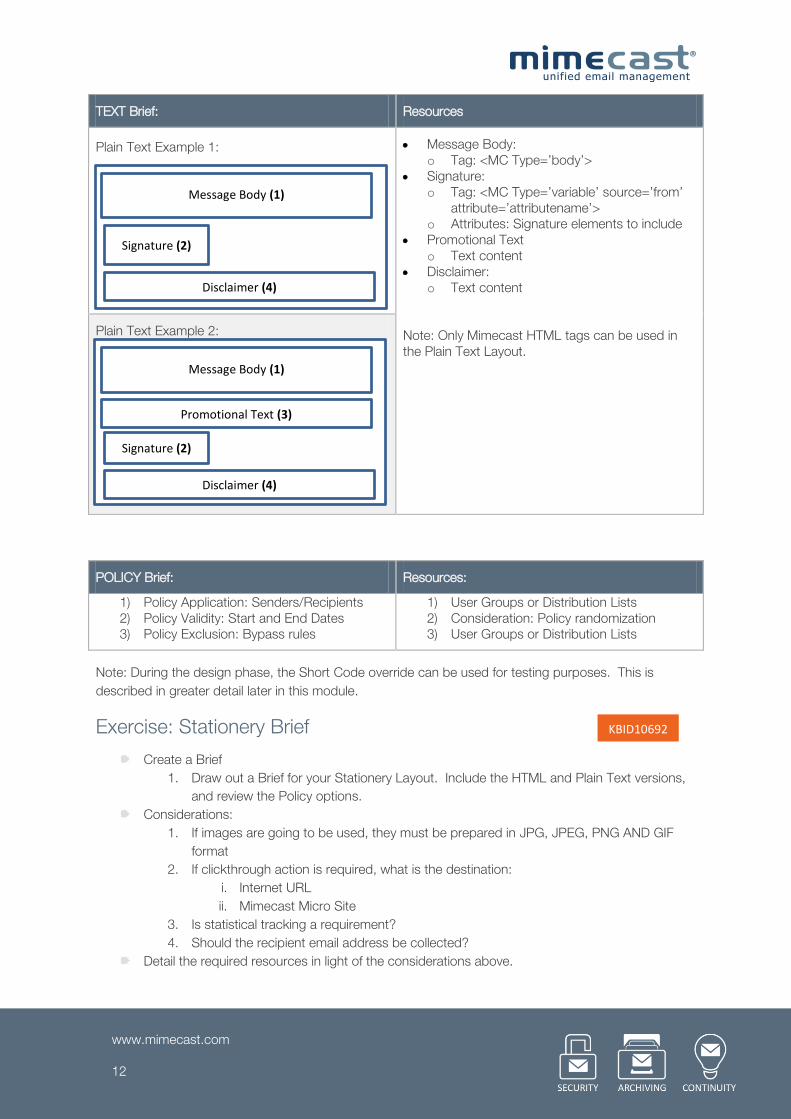
TEXT Brief: Resources
Plain Text Example 1:
Message Body: o Tag: <MC Type=’body’>
Signature: o Tag: <MC Type=’variable’ source=’from’
attribute=’attributename’> o Attributes: Signature elements to include
Promotional Text o Text content
Disclaimer: o Text content
Note: Only Mimecast HTML tags can be used in the Plain Text Layout.
Plain Text Example 2:
POLICY Brief: Resources:
1) Policy Application: Senders/Recipients 2) Policy Validity: Start and End Dates 3) Policy Exclusion: Bypass rules
1) User Groups or Distribution Lists 2) Consideration: Policy randomization 3) User Groups or Distribution Lists
Note: During the design phase, the Short Code override can be used for testing purposes. This is
described in greater detail later in this module.
Exercise: Stationery Brief
Create a Brief
1. Draw out a Brief for your Stationery Layout. Include the HTML and Plain Text versions,
and review the Policy options.
Considerations:
1. If images are going to be used, they must be prepared in JPG, JPEG, PNG AND GIF
format
2. If clickthrough action is required, what is the destination:
i. Internet URL
ii. Mimecast Micro Site
3. Is statistical tracking a requirement?
4. Should the recipient email address be collected?
Detail the required resources in light of the considerations above.
Message Body (1)
Signature (2)
Disclaimer (4)
Signature (2)
Promotional Text (3)
Disclaimer (4)
Message Body (1)
KBID10692
www.mimecast.com 13
Chapter 4: Images
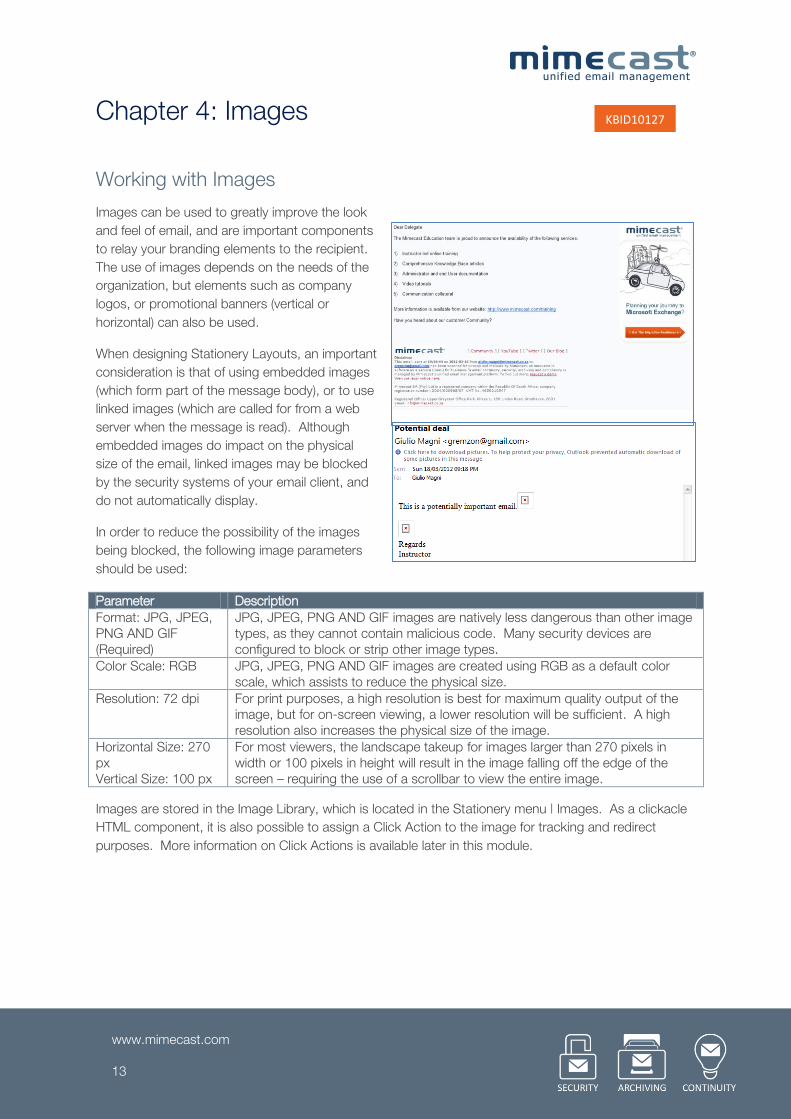
Working with Images
Images can be used to greatly improve the look
and feel of email, and are important components
to relay your branding elements to the recipient.
The use of images depends on the needs of the
organization, but elements such as company
logos, or promotional banners (vertical or
horizontal) can also be used.
When designing Stationery Layouts, an important
consideration is that of using embedded images
(which form part of the message body), or to use
linked images (which are called for from a web
server when the message is read). Although
embedded images do impact on the physical
size of the email, linked images may be blocked
by the security systems of your email client, and
do not automatically display.
In order to reduce the possibility of the images
being blocked, the following image parameters
should be used:
Parameter Description
Format: JPG, JPEG, PNG AND GIF (Required)
JPG, JPEG, PNG AND GIF images are natively less dangerous than other image types, as they cannot contain malicious code. Many security devices are configured to block or strip other image types.
Color Scale: RGB JPG, JPEG, PNG AND GIF images are created using RGB as a default color scale, which assists to reduce the physical size.
Resolution: 72 dpi For print purposes, a high resolution is best for maximum quality output of the image, but for on-screen viewing, a lower resolution will be sufficient. A high resolution also increases the physical size of the image.
Horizontal Size: 270 px Vertical Size: 100 px
For most viewers, the landscape takeup for images larger than 270 pixels in width or 100 pixels in height will result in the image falling off the edge of the screen – requiring the use of a scrollbar to view the entire image.
Images are stored in the Image Library, which is located in the Stationery menu | Images. As a clickacle
HTML component, it is also possible to assign a Click Action to the image for tracking and redirect
purposes. More information on Click Actions is available later in this module.
KBID10127
www.mimecast.com 14
Exercise: Stationery Images
Prepare an image that can be imported to the image library, using the following parameters: o JPG, JPEG, PNG AND GIF format o 72 dpi
Upload an image o Navigate to the Stationery menu o Select the Images menu o Create a new folder to save the image, e.g. Training Folder
Note: If a folder is not created, the image is stored in the root folder
o Click on the New Stationery Image button o Click on the Browse button o Select the image to be imported o Click on the Upload Image and Preview button
Note: The physical landscape size is displayed at this point
o Click on the Save button o A thumbnail of the image is displayed
Note: Distortions of the image may occur – this only affects the thumbnail
o Repeat this process for any additional images that are required
KBID10693
www.mimecast.com 15
Chapter 5: Click Actions
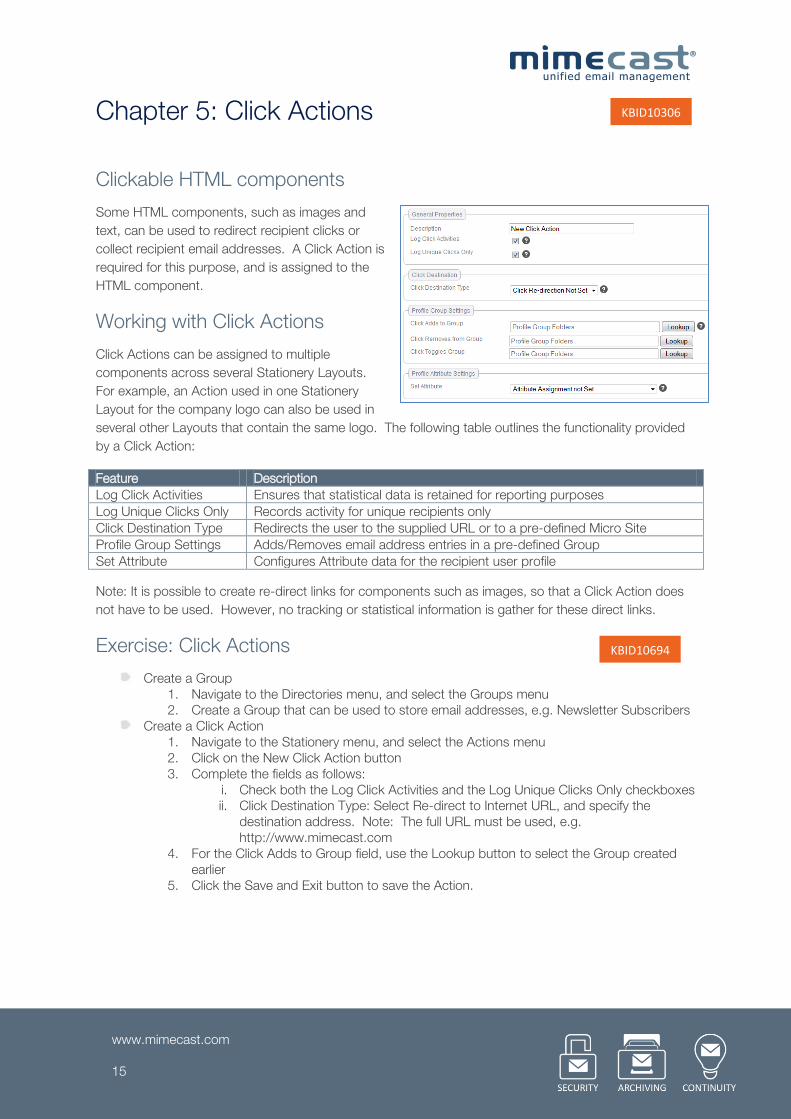
Clickable HTML components
Some HTML components, such as images and
text, can be used to redirect recipient clicks or
collect recipient email addresses. A Click Action is
required for this purpose, and is assigned to the
HTML component.
Working with Click Actions
Click Actions can be assigned to multiple
components across several Stationery Layouts.
For example, an Action used in one Stationery
Layout for the company logo can also be used in
several other Layouts that contain the same logo. The following table outlines the functionality provided
by a Click Action:
Feature Description
Log Click Activities Ensures that statistical data is retained for reporting purposes
Log Unique Clicks Only Records activity for unique recipients only
Click Destination Type Redirects the user to the supplied URL or to a pre-defined Micro Site
Profile Group Settings Adds/Removes email address entries in a pre-defined Group
Set Attribute Configures Attribute data for the recipient user profile
Note: It is possible to create re-direct links for components such as images, so that a Click Action does
not have to be used. However, no tracking or statistical information is gather for these direct links.
Exercise: Click Actions
Create a Group 1. Navigate to the Directories menu, and select the Groups menu 2. Create a Group that can be used to store email addresses, e.g. Newsletter Subscribers
Create a Click Action 1. Navigate to the Stationery menu, and select the Actions menu 2. Click on the New Click Action button 3. Complete the fields as follows:
i. Check both the Log Click Activities and the Log Unique Clicks Only checkboxes ii. Click Destination Type: Select Re-direct to Internet URL, and specify the
destination address. Note: The full URL must be used, e.g. http://www.mimecast.com
4. For the Click Adds to Group field, use the Lookup button to select the Group created earlier
5. Click the Save and Exit button to save the Action.
KBID10306
KBID10694
www.mimecast.com 16
Chapter 6: Micro Sites
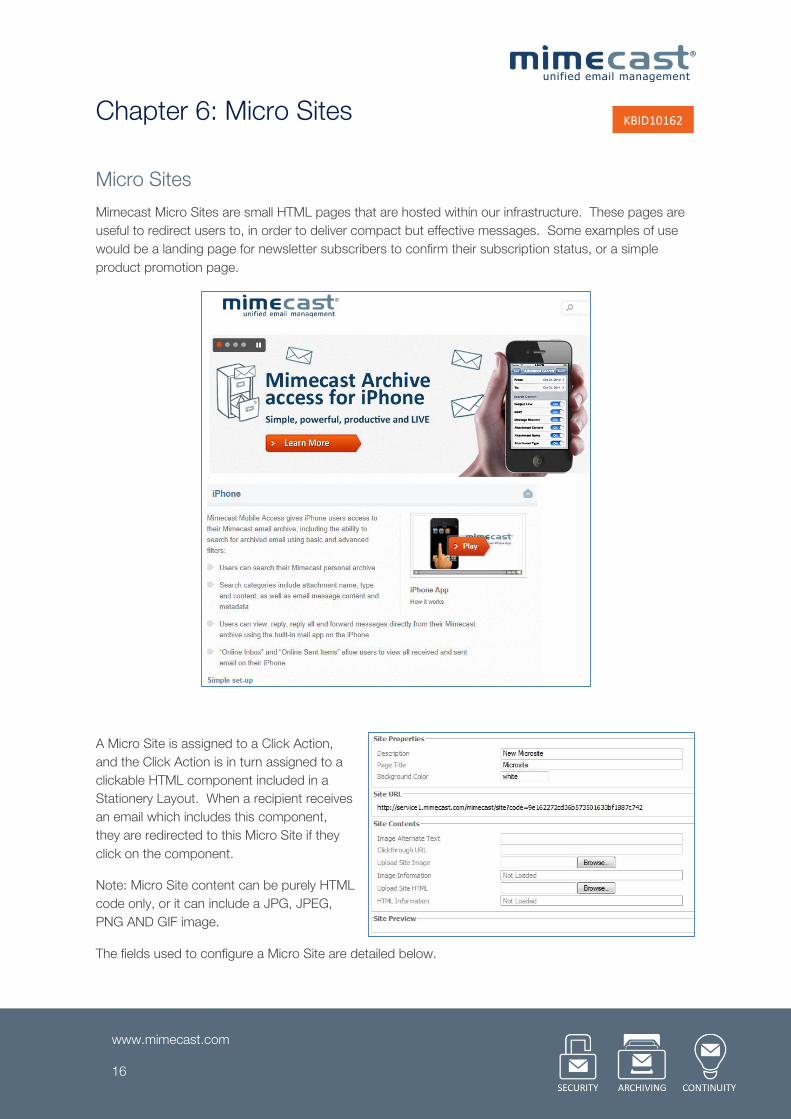
Micro Sites
Mimecast Micro Sites are small HTML pages that are hosted within our infrastructure. These pages are
useful to redirect users to, in order to deliver compact but effective messages. Some examples of use
would be a landing page for newsletter subscribers to confirm their subscription status, or a simple
product promotion page.
A Micro Site is assigned to a Click Action,
and the Click Action is in turn assigned to a
clickable HTML component included in a
Stationery Layout. When a recipient receives
an email which includes this component,
they are redirected to this Micro Site if they
click on the component.
Note: Micro Site content can be purely HTML
code only, or it can include a JPG, JPEG,
PNG AND GIF image.
The fields used to configure a Micro Site are detailed below.
KBID10162
www.mimecast.com 17
Field Name Description
Description The Micro Site name
Page Title The title of the web page displayed at the top of the web browser when the page is viewed
Background Color
The Site background colour (this field supports HTML Hex codes)
Site URL This automatically generated URL is the internet link used to access the Site
Image Alternate Text
The tooltip displayed when the mouse pointer is hovered over the Micro Site image
Clickthrough URL
The URL that is redirected to when the Micro Site image is clicked
Upload Site Image
The image, in JPG, JPEG, PNG AND GIF format, that is uploaded to display above the Micro Site
Upload Site HTML
The HTML or HTM document to be used as the contents of the site
Exercise: Stationery Micro Sites
Create a Micro Site
1. Create an HTML document
Upload the Micro Site
1. Navigate to the Stationery menu | select the Micro Sites menu
2. Click on the New Micro Site button
3. Add a Description for the new Site
4. Add the Page Title to be used
5. Use the Browse button for the Upload Site HTML field to select your HTML document
6. Click the Site Preview button to upload the Site content and preview the output
7. Click on the Save and Exit button to save the Micro Site.
KBID10695
www.mimecast.com 18
Chapter 7: Layouts
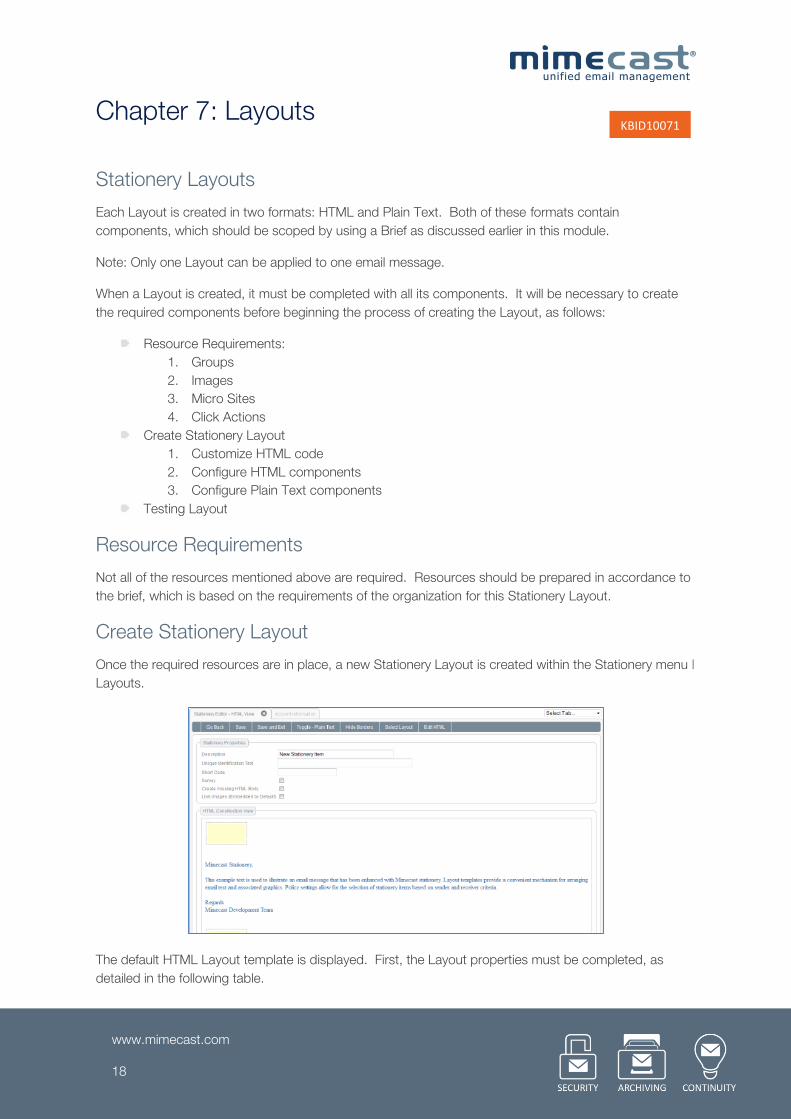
Stationery Layouts
Each Layout is created in two formats: HTML and Plain Text. Both of these formats contain
components, which should be scoped by using a Brief as discussed earlier in this module.
Note: Only one Layout can be applied to one email message.
When a Layout is created, it must be completed with all its components. It will be necessary to create
the required components before beginning the process of creating the Layout, as follows:
Resource Requirements:
1. Groups
2. Images
3. Micro Sites
4. Click Actions
Create Stationery Layout
1. Customize HTML code
2. Configure HTML components
3. Configure Plain Text components
Testing Layout
Resource Requirements
Not all of the resources mentioned above are required. Resources should be prepared in accordance to
the brief, which is based on the requirements of the organization for this Stationery Layout.
Create Stationery Layout
Once the required resources are in place, a new Stationery Layout is created within the Stationery menu |
Layouts.
The default HTML Layout template is displayed. First, the Layout properties must be completed, as
detailed in the following table.
KBID10071
www.mimecast.com 19
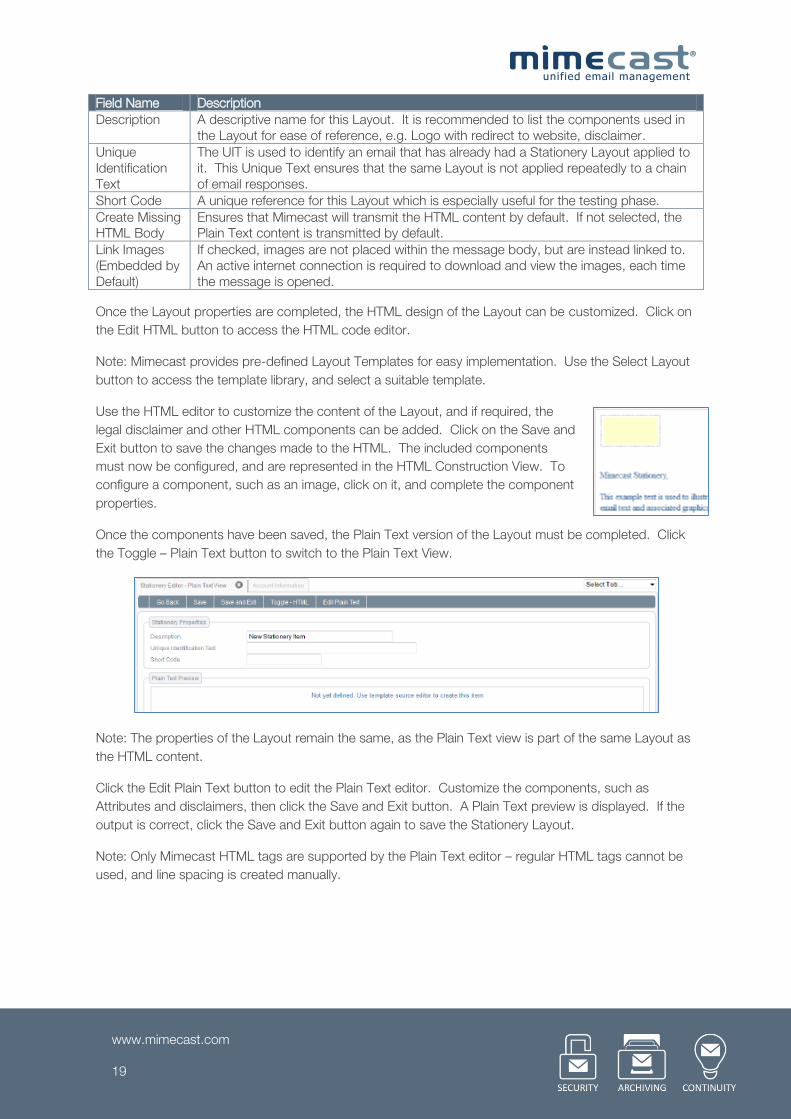
Field Name Description
Description A descriptive name for this Layout. It is recommended to list the components used in the Layout for ease of reference, e.g. Logo with redirect to website, disclaimer.
Unique Identification Text
The UIT is used to identify an email that has already had a Stationery Layout applied to it. This Unique Text ensures that the same Layout is not applied repeatedly to a chain of email responses.
Short Code A unique reference for this Layout which is especially useful for the testing phase.
Create Missing HTML Body
Ensures that Mimecast will transmit the HTML content by default. If not selected, the Plain Text content is transmitted by default.
Link Images (Embedded by Default)
If checked, images are not placed within the message body, but are instead linked to. An active internet connection is required to download and view the images, each time the message is opened.
Once the Layout properties are completed, the HTML design of the Layout can be customized. Click on
the Edit HTML button to access the HTML code editor.
Note: Mimecast provides pre-defined Layout Templates for easy implementation. Use the Select Layout
button to access the template library, and select a suitable template.
Use the HTML editor to customize the content of the Layout, and if required, the
legal disclaimer and other HTML components can be added. Click on the Save and
Exit button to save the changes made to the HTML. The included components
must now be configured, and are represented in the HTML Construction View. To
configure a component, such as an image, click on it, and complete the component
properties.
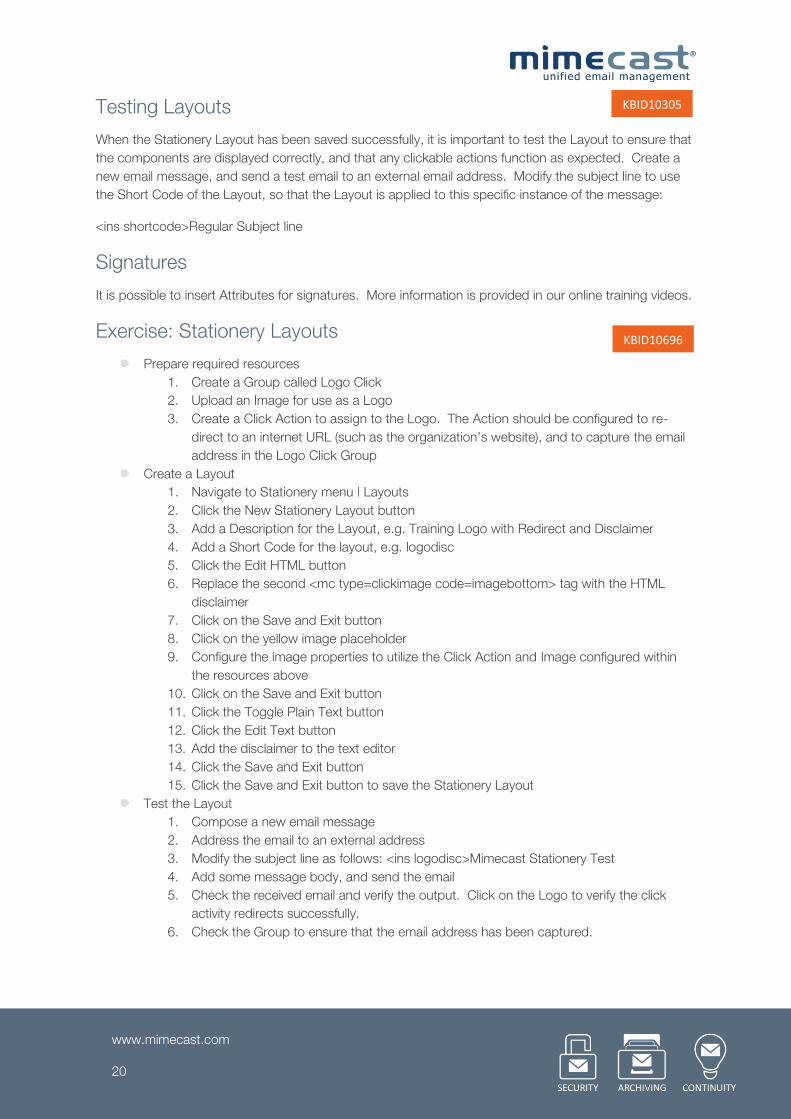
Once the components have been saved, the Plain Text version of the Layout must be completed. Click
the Toggle – Plain Text button to switch to the Plain Text View.
Note: The properties of the Layout remain the same, as the Plain Text view is part of the same Layout as
the HTML content.
Click the Edit Plain Text button to edit the Plain Text editor. Customize the components, such as
Attributes and disclaimers, then click the Save and Exit button. A Plain Text preview is displayed. If the
output is correct, click the Save and Exit button again to save the Stationery Layout.
Note: Only Mimecast HTML tags are supported by the Plain Text editor – regular HTML tags cannot be
used, and line spacing is created manually.
www.mimecast.com 20
Testing Layouts
When the Stationery Layout has been saved successfully, it is important to test the Layout to ensure that
the components are displayed correctly, and that any clickable actions function as expected. Create a
new email message, and send a test email to an external email address. Modify the subject line to use
the Short Code of the Layout, so that the Layout is applied to this specific instance of the message:
<ins shortcode>Regular Subject line
Signatures
It is possible to insert Attributes for signatures. More information is provided in our online training videos.
Exercise: Stationery Layouts
Prepare required resources
1. Create a Group called Logo Click
2. Upload an Image for use as a Logo
3. Create a Click Action to assign to the Logo. The Action should be configured to re-
direct to an internet URL (such as the organization’s website), and to capture the email
address in the Logo Click Group
Create a Layout
1. Navigate to Stationery menu | Layouts
2. Click the New Stationery Layout button
3. Add a Description for the Layout, e.g. Training Logo with Redirect and Disclaimer
4. Add a Short Code for the layout, e.g. logodisc
5. Click the Edit HTML button
6. Replace the second <mc type=clickimage code=imagebottom> tag with the HTML
disclaimer
7. Click on the Save and Exit button
8. Click on the yellow image placeholder
9. Configure the image properties to utilize the Click Action and Image configured within
the resources above
10. Click on the Save and Exit button
11. Click the Toggle Plain Text button
12. Click the Edit Text button
13. Add the disclaimer to the text editor
14. Click the Save and Exit button
15. Click the Save and Exit button to save the Stationery Layout
Test the Layout
1. Compose a new email message
2. Address the email to an external address
3. Modify the subject line as follows: <ins logodisc>Mimecast Stationery Test
4. Add some message body, and send the email
5. Check the received email and verify the output. Click on the Logo to verify the click
activity redirects successfully.
6. Check the Group to ensure that the email address has been captured.
KBID10305
KBID10696
www.mimecast.com 21
Chapter 8: Policies
Policy Lists
Mimecast Policies are a set of rules that affect the flow of email traffic, and are applied to either Inbound
or Outbound messages. The available Policies allow an Administrator to apply granular control to the flow
of email messages as they are processed by Mimecast.
Policies can be set to affect emails in many ways - email flow can be halted (Hold for Review, or Block
Policies), data leaks can be prevented (Content Examination, or Document Conversion Policies), and
Attachment Handling and Spam Policies can also be applied.
All available Policies are consolidated in a dedicated Gateway Policy Editor within the Gateway menu. By
selecting any of the Policy types, an Administrator is able to create new policies, and amend or remove
existing policies. The Policy Editor should also be used to configure Policy definitions which are used to
apply even more granular control to certain policies.
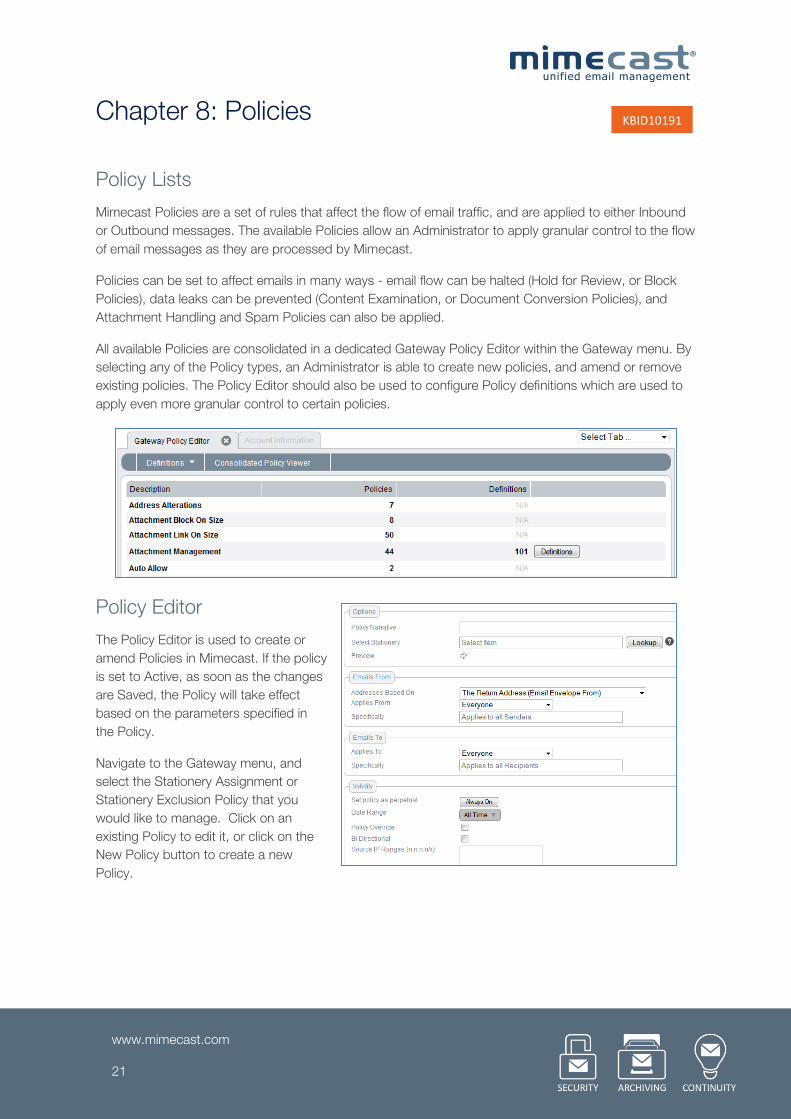
Policy Editor
The Policy Editor is used to create or
amend Policies in Mimecast. If the policy
is set to Active, as soon as the changes
are Saved, the Policy will take effect
based on the parameters specified in
the Policy.
Navigate to the Gateway menu, and
select the Stationery Assignment or
Stationery Exclusion Policy that you
would like to manage. Click on an
existing Policy to edit it, or click on the
New Policy button to create a new
Policy.
KBID10191
www.mimecast.com 22
Specificity
Specificity relates to the order in which Mimecast applies Policies to emails. The more specific a Policy is,
the higher the priority. For example, a Policy specifying a single individual email address is very specific
and will be applied first, in contrast to a Policy applied to Everyone which is the least specific of all, and
will therefore be applied last.
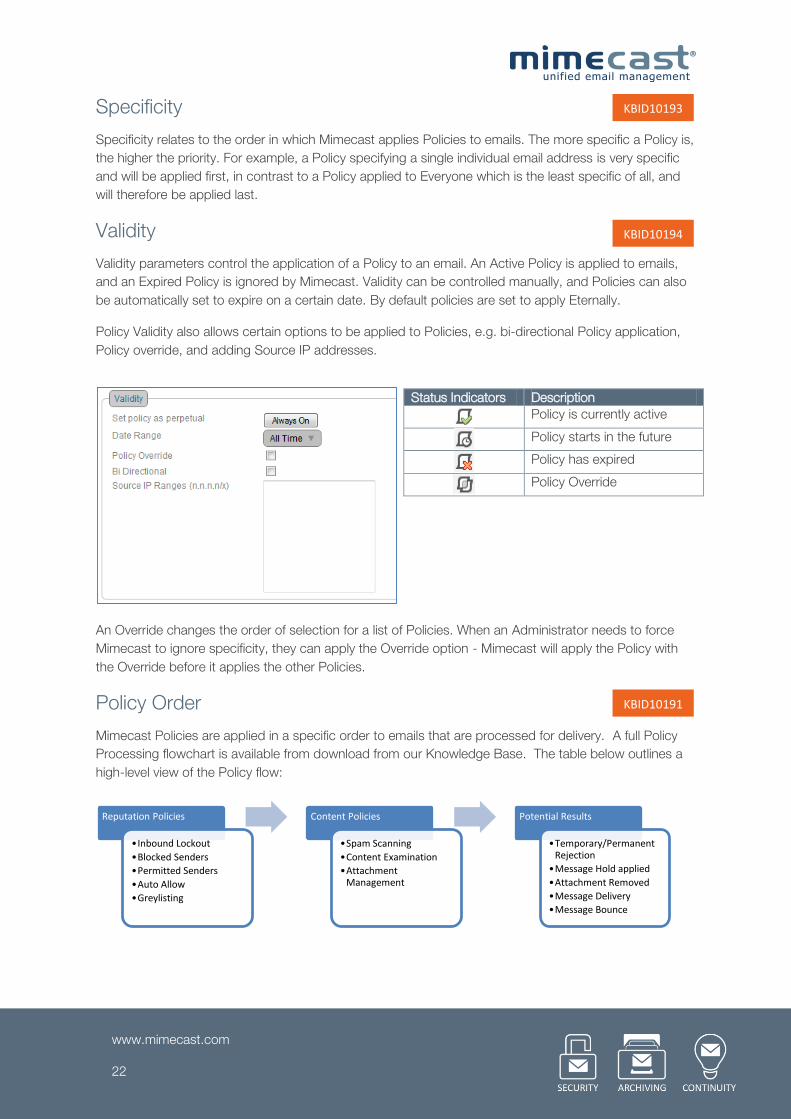
Validity
Validity parameters control the application of a Policy to an email. An Active Policy is applied to emails,
and an Expired Policy is ignored by Mimecast. Validity can be controlled manually, and Policies can also
be automatically set to expire on a certain date. By default policies are set to apply Eternally.
Policy Validity also allows certain options to be applied to Policies, e.g. bi-directional Policy application,
Policy override, and adding Source IP addresses.
An Override changes the order of selection for a list of Policies. When an Administrator needs to force
Mimecast to ignore specificity, they can apply the Override option - Mimecast will apply the Policy with
the Override before it applies the other Policies.
Policy Order
Mimecast Policies are applied in a specific order to emails that are processed for delivery. A full Policy
Processing flowchart is available from download from our Knowledge Base. The table below outlines a
high-level view of the Policy flow:
Reputation Policies
•Inbound Lockout
•Blocked Senders
•Permitted Senders
•Auto Allow
•Greylisting
Content Policies
•Spam Scanning
•Content Examination
•Attachment Management
Potential Results
•Temporary/Permanent Rejection
•Message Hold applied
•Attachment Removed
•Message Delivery
•Message Bounce
Status Indicators Description
Policy is currently active
Policy starts in the future
Policy has expired
Policy Override
KBID10193
KBID10194
KBID10191

www.mimecast.com 23
Exercise: Stationery Policies
Use a Policy to assign a Stationery Layout for your outbound email
1. Navigate to the Gateway menu, and select the Policies menu
2. Select the Stationery Assignment Policy, and click on the New Policy button
3. Add a description in the Narrative field: Test Stationery Layout
4. Use the Policy Options field to select the required Layout
5. Within the Emails From section, change the Applies From field from the Everyone option
to Individual Email Address. The page refreshes to display the Specifically field
6. Enter your internal email address within this field (i.e. the email address from where you
will send the test email message)
7. Within the Emails To section, change the Applies To field from the Everyone option to
Individual Email Address. The page refreshes to display the Specifically field
8. Enter your external email address within this field (i.e. the email address to which you will
send the test email message)
9. Use the Date Range calendar control to adjust the Policy Validity so that the Policy
applies for today’s date only
10. Click the Save and Exit button to save the Policy
11. Using the email address specified in the Emails From section, send a test email to the
address specified in the Emails To section. The email should be delivered including your
Layout
12. Return to the Policy in the Mimecast Administration console, and right-click it to remove
it.
Create a Stationery Exclusion Policy
1. Navigate to the Gateway menu, and select the Policies menu
2. Select the Stationery Exclusion Policy, and click on the New Policy button
3. Add a description in the Narrative field: Test Stationery Layout
4. Use the Select Option field to Exclude Stationery from Email
5. Within the Emails From section, change the Applies From field from the Everyone option
to Individual Email Address. The page refreshes to display the Specifically field
6. Enter your internal email address within this field (i.e. the email address from where you
will send the test email message)
7. Within the Emails To section, change the Applies To field from the Everyone option to
Individual Email Address. The page refreshes to display the Specifically field
8. Enter your external email address within this field (i.e. the email address to which you will
send the test email message)
9. Use the Date Range calendar control to adjust the Policy Validity so that the Policy
applies for today’s date only
10. Click the Save and Exit button to save the Policy
11. Using the email address specified in the Emails From section, send a test email to the
address specified in the Emails To section. The email should be delivered excluding
your Layout
12. Return to the Policy in the Mimecast Administration console, and right-click it to remove
it.
KBID10697
www.mimecast.com 24
Chapter 9: Reports
Stationery Reports
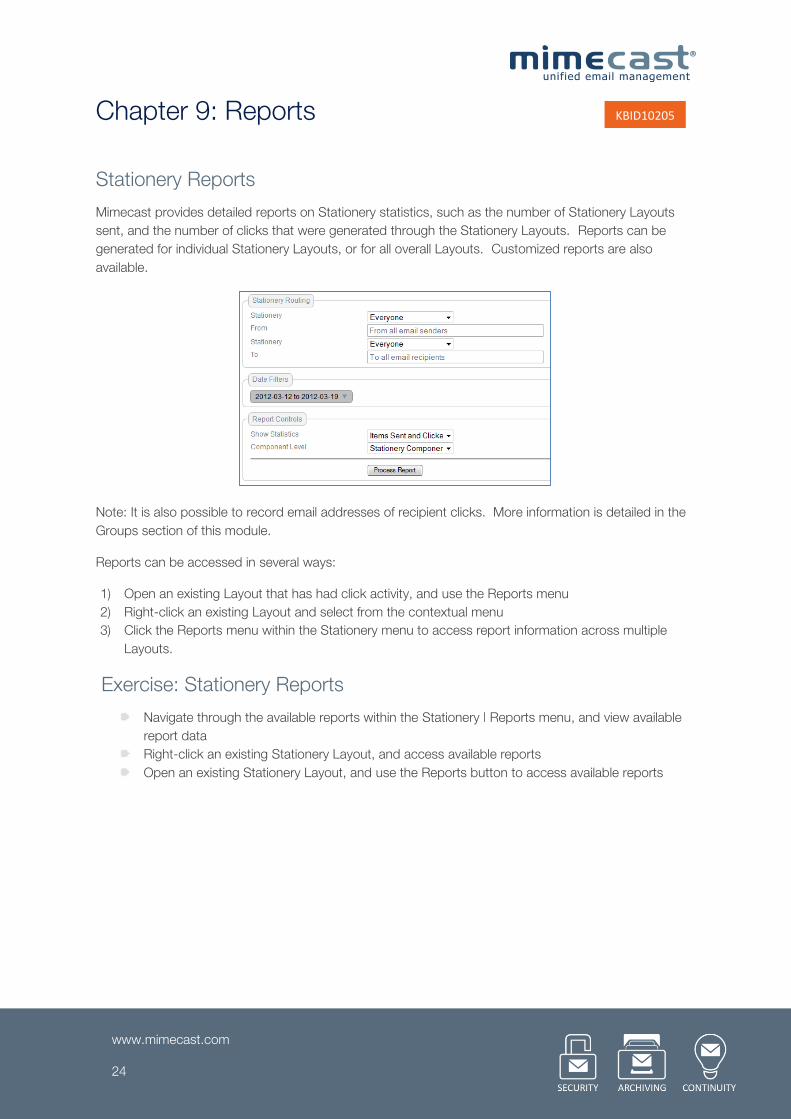
Mimecast provides detailed reports on Stationery statistics, such as the number of Stationery Layouts
sent, and the number of clicks that were generated through the Stationery Layouts. Reports can be
generated for individual Stationery Layouts, or for all overall Layouts. Customized reports are also
available.
Note: It is also possible to record email addresses of recipient clicks. More information is detailed in the
Groups section of this module.
Reports can be accessed in several ways:
1) Open an existing Layout that has had click activity, and use the Reports menu
2) Right-click an existing Layout and select from the contextual menu
3) Click the Reports menu within the Stationery menu to access report information across multiple
Layouts.
Exercise: Stationery Reports
Navigate through the available reports within the Stationery | Reports menu, and view available
report data
Right-click an existing Stationery Layout, and access available reports
Open an existing Stationery Layout, and use the Reports button to access available reports
KBID10205
KBID10698
www.mimecast.com 25
Appendix: Knowledge Base and Resources
Knowledge Base
This manual refers to several Knowledge Base (KB) articles which can be directly accessed by replacing the relevant ID number in the URL: http://www.mimecast.com/knowledgebase/MimecastKB.htm#KBIDxxxxx.htm
• Where xxxxx represents the ID of the article.
To access the Knowledge Base, use the direct link: http://www.mimecast.com/knowledgebase
Training Courses
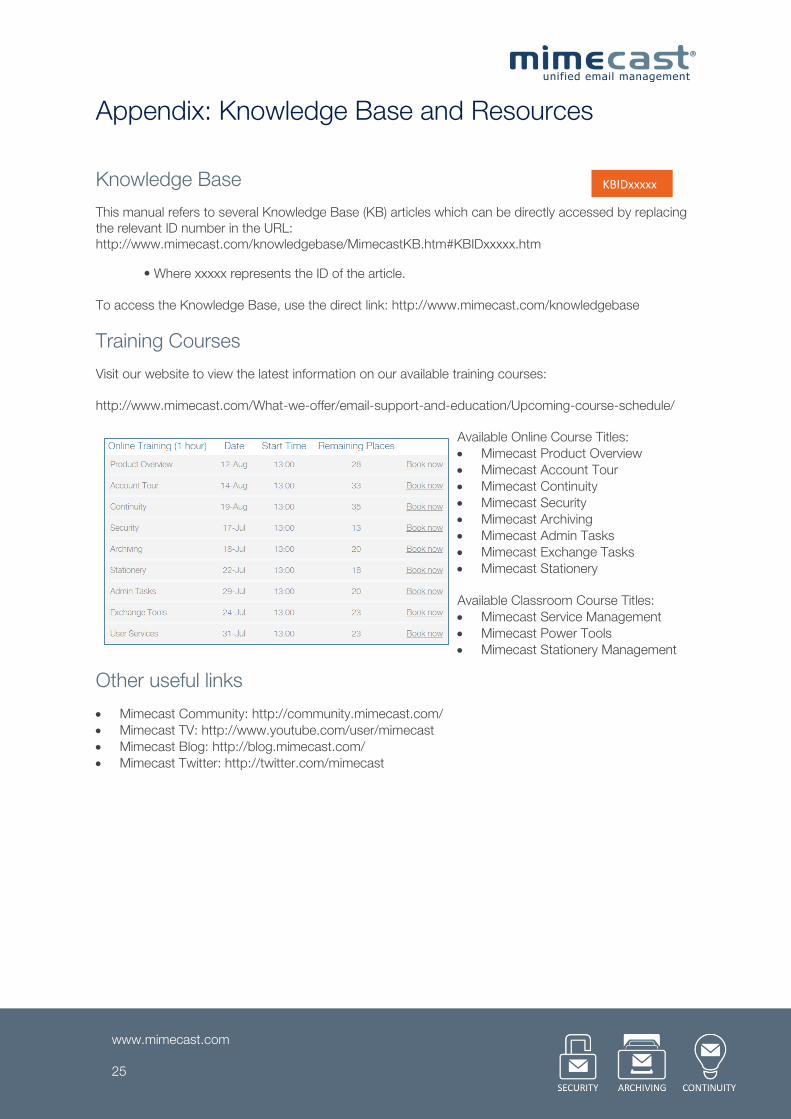
Visit our website to view the latest information on our available training courses:
http://www.mimecast.com/What-we-offer/email-support-and-education/Upcoming-course-schedule/
Available Online Course Titles: Mimecast Product Overview Mimecast Account Tour Mimecast Continuity Mimecast Security Mimecast Archiving Mimecast Admin Tasks Mimecast Exchange Tasks Mimecast Stationery Available Classroom Course Titles: Mimecast Service Management Mimecast Power Tools Mimecast Stationery Management
Other useful links
Mimecast Community: http://community.mimecast.com/ Mimecast TV: http://www.youtube.com/user/mimecast Mimecast Blog: http://blog.mimecast.com/ Mimecast Twitter: http://twitter.com/mimecast
KBIDxxxxx