
Software Installation User's Guide - Balibago.org
196
EXPERION PKS RELEASE 501 Software Installation User's Guide EPDOC-X136-en-501A February 2018
-
Upload
khangminh22 -
Category
Documents
-
view
3 -
download
0
Transcript of Software Installation User's Guide - Balibago.org

EXPERION PKSRELEASE 501
Software Installation User's GuideEPDOC-X136-en-501A
February 2018

DisclaimerThis document contains Honeywell proprietary information. Information contained herein is to beused solely for the purpose submitted, and no part of this document or its contents shall bereproduced, published, or disclosed to a third party without the express permission of HoneywellInternational Sàrl.
While this information is presented in good faith and believed to be accurate, Honeywell disclaimsthe implied warranties of merchantability and fitness for a purpose and makes no expresswarranties except as may be stated in its written agreement with and for its customer.
In no event is Honeywell liable to anyone for any direct, special, or consequential damages. Theinformation and specifications in this document are subject to change without notice.
Copyright 2018 - Honeywell International Sàrl
- 2 -

Contents 3
Chapter 1 - About this guide 8
Chapter 2 - Introduction to Experion installation 92.1 Experion installation methods 9
2.2 Overview of Experion Software Installation Server (ESIS) 11
2.3 Overview of Experion PKS System Initialization media 11
2.4 Overview of Experion Process Control Network (PCN) 14
2.5 Simplified and seamless Experion installation process usingESM 16
2.6 Experion End User License Agreement (EULA) 16
Chapter 3 - Preparing for an Experion installation 173.1 Installation terms and definitions 17
3.2 Installing additional hardware 19
3.2.1 Installing NIC 19
3.2.2 Installing ControlNet PCIC 20
3.2.3 Installing LCNP4E/E2 and slot assignment 21
3.3 Disabling the antivirus services and applications 22
3.4 Preparing FTE networks 22
3.5 Preparing non-FTE networks 24
3.6 Setting up an ESIS repository 24
3.7 Custom installation path 27
3.8 Experion installation space requirements 32
3.9 Getting oriented with Status Display 33
3.10 Configuring software protection devices 34
3.11 Configuring pre-installed Microsoft SQL Server 2014 35
Chapter 4 - Installing Experion on Honeywell-qualified platforms 374.1 Installing Experion using ESIS 37
4.2 Proceeding with Experion installation using ESIS 40
Chapter 5 - Post-installation tasks 485.1 Verifying completeness of Experion installation 48
5.2 Configuring the computer for use within a Windows domain 49
5.3 Configuring the Domain or Workgroup 49
- 3 -

5.3.1 Domain Controller security policies and optional component (ESIS/DVD)installation 49
5.4 Configuring FTE Device Index if Experion is running with FTE 54
5.5 Installing TPS personality module for T-nodes 55
5.6 Checking for updates on Honeywell Process Solutionswebsite 57
5.7 Applying the latest patches 57
5.8 Installing the latest antivirus software 58
5.9 Defragmenting the hard disk 59
5.10 Installing RSLinx Classic 61
5.11 Upgrading the firmware in hardware components 62
5.12 Setting up time synchronization 62
5.13 Installing Microsoft Excel 62
5.14 Installing remote desktop services 62
5.15 Installing a serial adapter, printer, or modem 62
5.16 Installing the web server (IIS) role on the Experion server 62
5.17 Backing up your system 62
5.18 Configurations for eServer Premium Access clients 63
5.19 Enabling comments in Programs and Features window 63
5.20 Configuring secure communication settings 63
Chapter 6 - Getting oriented with Product Version file 64
Chapter 7 - Enabling Remote Desktop Services on Flex nodes 67
Chapter 8 - Optional features 698.1 Licensed and non-licensed optional features for Experion 69
8.2 Installing optional features 73
Chapter 9 - Maintaining an ESIS repository 769.1 Upgrading an existing ESIS repository 76
9.2 Restarting a failed ESIS repository creation 77
9.3 Removing an existing ESIS repository 78
Chapter 10 - Removing Experion applications 7910.1 About maintenance tool 79
10.2 Removing all Experion applications 80
- 4 -

10.3 Removing individual Experion feature packages 82
10.4 Removing Experion Support and Maintenance server 82
10.5 Removing Experion patches 82
Chapter 11 - Reinstalling Experion applications 8411.1 Reinstalling Experion installed with default paths 84
11.2 Reinstalling Experion installed with custom installationpaths 84
Chapter 12 - Alternate scenarios for installing Experion on Honeywell-qualified platforms 87
12.1 Installing Experion with operating system using ESIS 87
12.1.2 Installing Experion with operating system reinstall 87
12.1.3 Installing Experion on a node on which operating system does not exist(bare metal) 90
12.2 Installing Experion using DVD 91
12.2.1 Installing Experion on a system where an operating system is alreadyinstalled 92
12.2.2 Installing Experion on node without operating system (bare metal) 99
12.2.3 Installing Experion with operating system reinstall using DVD media 106
12.2.4 Proceeding with Experion installation using DVD media 107
Chapter 13 - Installing Experion on other Honeywell platforms 10913.1 Introduction 109
13.2 Preparing for an Experion installation 109
13.2.1 Prerequisites 109
13.2.2 Verifying the time and time zone settings 110
13.2.3 Setting up screen resolution and color quality 110
13.2.4 Setting up NIC adapter 110
13.2.5 Changing the network firewall settings 111
13.2.6 Setting up a user account 111
13.3 Installing Experion on other Honeywell platforms 112
13.4 Post-installation tasks 121
13.4.1 Adding a node to a Windows domain or workgroup 121
13.4.2 Configuring the computer for use within a Windows domain 122
13.4.3 Configuring the Domain or Workgroup 122
13.4.4 Configuring FTE Device Index post-installation if Experion is running withFTE 122
13.4.5 Setting up host files 123
13.4.6 Installing the Microsoft security updates 126
- 5 -

13.4.7 Installing the Experion software updates 128
13.4.8 Installing the latest antivirus software 129
13.4.9 Defragmenting the hard disk 130
13.4.10 Setting up time synchronization 131
13.4.11 Installing Microsoft Excel 132
13.4.12 Installing remote desktop services 132
13.4.13 Re-connecting the modem and entering user settings 133
13.4.14 Backing up your system 133
Chapter 14 - Installing/Configuring operating system on Honeywell-qualified platforms using Experion PKS System Initialization media 134
14.1 Prerequisites 134
14.2 Preparing a platform with supported operating system 135
14.3 Preparing a platform which has unsupported operatingsystem 142
14.4 Preparing a platform without operating system (baremetal) 145
Chapter 15 - Planning to deploy VMware virtual machines 150
Chapter 16 - Creating new Experion virtual machines 15216.1 Preparing the ESIS virtual hard disk 153
16.1.1 Creating the ESIS virtual hard disk 153
16.1.2 Installing ESIS on the ESIS virtual hard disk 154
16.1.3 Creating the master ESIS virtual hard disk 155
16.2 Preparing the Utility virtual hard disk 156
16.2.1 Creating the Utility virtual hard disk 156
16.2.2 Creating the Experion System Initialization media configuration files forExperion installations 158
16.2.3 Preparing the Utility virtual hard disk to include third-party applications 160
16.2.4 Creating the master Utility virtual hard disk 161
16.3 Renaming the master ESIS and/or Utility virtual hard disks 161
16.4 Preparing partition replacement virtual hard disks 164
16.4.1 Creating the partition virtual hard disk 164
16.4.2 Creating the master partition virtual hard disk 165
16.5 Creating an Experion node virtual machine 166
16.5.1 Creating a virtual machine 166
16.5.2 Connecting a virtual machine to networks 168
16.5.3 Connecting a USB device 168
- 6 -

16.5.4 Starting an Experion installation using the Experion System Initializationmedia 170
16.5.5 Installing VMware Tools for an Experion node 171
16.5.6 Installing the Wyse TCX Suite for an Experion node 172
16.5.7 Completing the Experion node installation 173
16.5.8 Preparing virtual machines for thin clients 176
16.6 Create virtual machine templates manually 178
16.6.1 Creating an Experion-installed virtual machine template manually 178
16.6.2 Creating an operating system-installed virtual machine template manually 179
Chapter 17 - Creating virtual machines from templates or physicalcomputers 182
17.1 Deploying new operating system virtual machines fromtemplates 182
17.2 Deploying Experion virtual machines from templates 183
17.3 Deploying Experion virtual machines on servers fromtemplates 185
Chapter 18 - Upgrading Virtual Hardware and VMware tools versions 187
Chapter 19 - Installing PDF Collection 18919.1 About PDF Collection 189
19.2 Installing Experion PDF collection 189
Chapter 20 - Troubleshooting Experion Installation 19120.1 Troubleshooting Experion for installation failure 191
20.2 Running 32-bit Snap-ins in 64-bit Windows operatingsystem 193
Chapter 21 - Special Considerations 19421.1 Installation of Experion on Different Partition (other than Cdrive) Along With OS Reinstallation using ESIS on USB 194
- 7 -

ABOUT THIS GUIDE
This guide describes how to install Experion, and the different methods to install Experion.
1.1 Intended Audience
This guide is for people who are installing Experion.
1.2 Prerequisite skills
You should have knowledge about Experion system, and know the Experion components that youhave licensed and need to install and configure. You should also know how to complete systemadministration tasks in the Windows operating system.
1.3 Related documents
For more information about installing Experion, refer to the:
l Getting Started with Experion Software Guide
l Experion migration guides
1.4 Revision history
Version Date Description
A February 2018 Initial release of the document.
- 8 -
CHAPTER
1

INTRODUCTION TO EXPERION INSTALLATION
l Experion installation methods
l Overview of Experion Software Installation Server (ESIS)
l Overview of Experion PKS System Initialization media
l Overview of Experion Process Control Network (PCN)
l Simplified and seamless Experion installation process using ESM
l Experion End User License Agreement (EULA)
2.1 Experion installation methods
You can install Experion using one of the following methods.
l Installation using Experion Software Installation Server (ESIS)
l Installation using DVD
ESIS can be setup on a network share, USB drive, or a removable hard drive.
- 9 -
CHAPTER
2
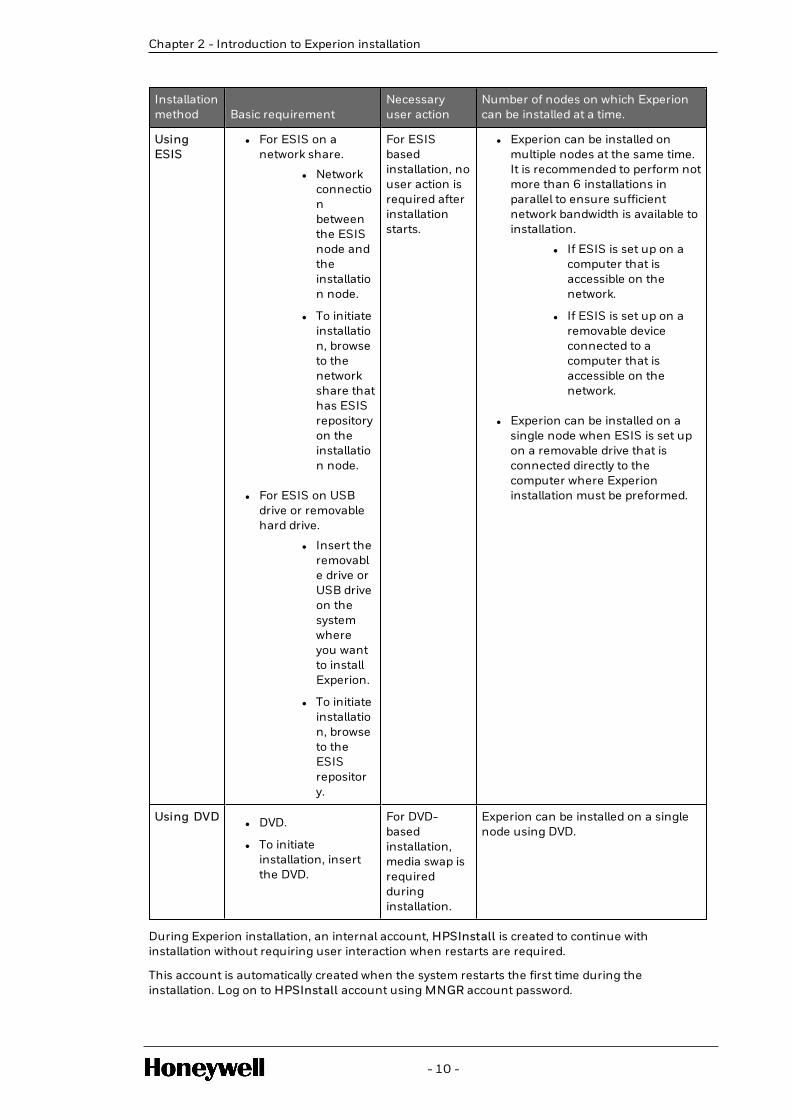
Installationmethod Basic requirement
Necessaryuser action
Number of nodes on which Experioncan be installed at a time.
UsingESIS
l For ESIS on anetwork share.
l Networkconnectionbetweenthe ESISnode andtheinstallation node.
l To initiateinstallation, browseto thenetworkshare thathas ESISrepositoryon theinstallation node.
l For ESIS on USBdrive or removablehard drive.
l Insert theremovable drive orUSB driveon thesystemwhereyou wantto installExperion.
l To initiateinstallation, browseto theESISrepository.
For ESISbasedinstallation, nouser action isrequired afterinstallationstarts.
l Experion can be installed onmultiple nodes at the same time.It is recommended to perform notmore than 6 installations inparallel to ensure sufficientnetwork bandwidth is available toinstallation.
l If ESIS is set up on acomputer that isaccessible on thenetwork.
l If ESIS is set up on aremovable deviceconnected to acomputer that isaccessible on thenetwork.
l Experion can be installed on asingle node when ESIS is set upon a removable drive that isconnected directly to thecomputer where Experioninstallation must be preformed.
Using DVDl DVD.
l To initiateinstallation, insertthe DVD.
For DVD-basedinstallation,media swap isrequiredduringinstallation.
Experion can be installed on a singlenode using DVD.
During Experion installation, an internal account, HPSInstall is created to continue withinstallation without requiring user interaction when restarts are required.
This account is automatically created when the system restarts the first time during theinstallation. Log on to HPSInstall account using MNGR account password.
- 10 -
Chapter 2 - Introduction to Experion installation
Chapter 2 - Introduction to Experion installation
CAUTIONThe HPSInstall account is reserved for automatic login after every restart during theExperion installation. Do not create this account manually for the purpose of anAdministrator account.
ATTENTIONl If the installation fails or is interrupted before completion, the system must be
restarted. Log on to HPSInstall account using MNGR account password. Afterlogging in successfully, run the setup.exe from the ESIS location or the ExperionPKS Installation media 1, depending upon the mode of installation.
l For PCUS node, HPSInstall password must be in the following format.o Computer name in upper case, followed by space, and $1p$1g. For
example, IE11FRT6SERW1 $1p$1g.
l The HPSInstall account is only created when restarts are required to complete theinstallation.
l The HPSInstall account is disabled automatically after the installation is complete.
l To ensure that the security descriptor for the account is not lost, the account mustnot be deleted.
l If you install only optional feature(s) on a clean operating system, and theinstallation of the optional feature(s) requires a reboot, the HPSInstall account iscreated automatically when the system reboots the first time during installation.
2.2 Overview of Experion Software Installation Server (ESIS)
Experion Software Installation Server (ESIS) can be set up only on a local hard drive, a portableUSB hard drive, or a removable USB drive. Setting up ESIS includes installing all the Experionsoftware on a shared folder (the shared folder is created on local hard drive or USB drive) whichcan be accessed over a network to perform Experion installation and migration on one or moresystems.
ESISprovides a single repository for all Experion software and can be used for installing andmigratingExperion software on multiple systems simultaneously. ESIS can be updated for anymedia updates or new media releases.
ATTENTIONIt is recommended to perform not more than 6 installations in parallel to ensure sufficientnetwork bandwidth is available to installation.
2.3 Overview of Experion PKS System Initialization media
Use Experion PKS System Initialization media to set up the hardware settings and device driverson Honeywell-qualified platforms. Experion PKS System Initialization media also installs operatingsystem components.
The advantages of using Experion PKS System Initialization media are.
l Prepares the system for Experion installation without mandatory operating system reload, ifoperating system and hardware platforms are compatible (Embedded Microsoft Windows 10Enterprise 2016 LTSB (x64) or Embedded Microsoft Windows Server 2016 Standard).
l Helps install qualified operating system, if necessary.
- 11 -

l Installs Experion software.
l Creates configuration files for operating system and Experion. These configuration files arecreated and saved on the node being initialized or on external media such as USB drive.
l Stores configuration files for different nodes in different folders on the external media.
Use Experion PKS System Initialization media on Honeywell-qualified platforms for the followingpurposes.
l Installs operating system before installing Experion, if the operating system is not EmbeddedMicrosoft Windows 10 Enterprise 2016 LTSB (x64) or Embedded Microsoft Windows Server2016 Standard.
l Reinstalls Embedded Microsoft Windows 10 Enterprise 2016 LTSB (x64) or EmbeddedMicrosoft Windows Server 2016 Standard operating system.
TIPl Refer to the Experion PKS System Initialization media Software Change Notice for
details about Experion installation using Experion PKS System Initialization media.
l It is not mandatory to prepare the system for Experion installation using ExperionPKS System Initialization media. You can configure the operating system first andthen use the Experion PKS Installation media 1, or choose to install the productusing ESIS.
2.3.1 Honeywell OEM-embedded operating systems
With Experion PKS System Initialization media, Honeywell supports the following OriginalEquipment Manufacturer (OEM)-embedded operating systems.
l Embedded Microsoft Windows 10 Enterprise 2016 LTSB (x64)
l Embedded Microsoft Windows Server 2016 Standard
2.3.2 Usage rights
The operating system supplied with Experion PKS System Initialization mediais licensed throughHoneywell under Microsoft Embedded program. The embedded licensing states that the computermust be used in conjunction with Honeywell control software. It must not be used as a general-purpose computing device (such as a personal PC) or as a multi-function server.
2.3.3 Additional licensing requirements and/or usage rights
l Specific use: Honeywell has designed this software for a specific use. The software must beused for that purpose only.
l Other software: You may use other programs with the software as long as the other programsadhere to the following rules.
o Directly support the manufacturer’s specific use for the media.
o Provides system utilities, resource management, and antivirus or similar protection.
- 12 -
Chapter 2 - Introduction to Experion installation
Chapter 2 - Introduction to Experion installation
ATTENTIONl Do not run software that offers consumer services, business tasks or processes on
systems where Experion PKS System Initialization media is used. This includeselectronic mail (e-mail), word processor, spreadsheet, database, scheduling, andpersonal finance software. However, you can access such software from a serverusing the terminal service protocol.
l Before using the software, read and accept the End User License Agreement (EULA)present on the Experion PKS System Initialization media at the following location.
o <root of the DVD>\PEtools\ALP_WINPREINSTALLENVIRON_
X64.rtf.
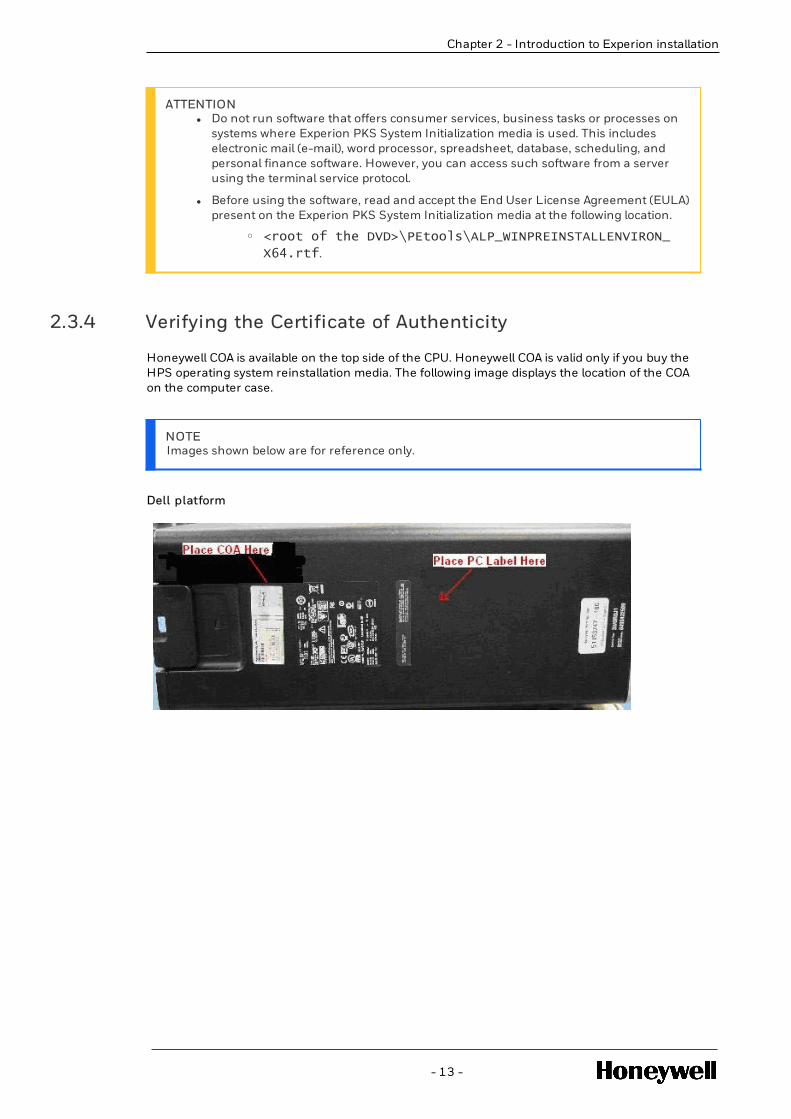
2.3.4 Verifying the Certificate of Authenticity
Honeywell COA is available on the top side of the CPU. Honeywell COA is valid only if you buy theHPS operating system reinstallation media. The following image displays the location of the COAon the computer case.
NOTEImages shown below are for reference only.
Dell platform
- 13 -

HP platform
2.3.5 Setting the BIOS boot order
To set the BIOS boot order for both server and workstation platforms, perform the following steps.
1. Restart the system and press F2 to access the System menu.
2. Expand the System menu, select the Boot sequence, and press ENTER.
3. Press the UP/DOWN ARROW keys on your keyboard to select Onboard or USB CD-ROM driveand bring it to the top.
4. Ensure that the Boot sequence is set as follows:
a. CD/DVD
b. Hard drive
2.4 Overview of Experion Process Control Network (PCN)
Process Control Network (PCN) is a communications network used for transmitting instructionsand data between the following:
l Control and measurement units.
l Supervisory Control and Data Acquisition (SCADA) equipment.
There are three levels of networks available on an Experion system.
- 14 -
Chapter 2 - Introduction to Experion installation

Chapter 2 - Introduction to Experion installation
Networktype Network details
ExperionProcessNetwork(EPN)
Network communication for Level 1 controllers.
l FTE – A single FTE network that supports Level 1 and Level 2 communications.In this topology, Level 1 and Level 2 networks are one physical network, butare logically separate by TCP/IP Subnet masks. If FTE is selected at the EPNlevel, it is automatically selected at the supervisory level.
l ControlNet (PCIC) – A network used by C200 controllers using a PCIC cardinstalled on a node with an RSLinx driver.
l ControlNet (Ethernet) – A network used by C200 controllers using standardEthernet and RSLinx driver.
l Ethernet – It enables a simulated EPN type setup over Ethernet for usage ofsimulation environments without connecting to real controllers.
l No communication required for real controller – This is applicable only for ACE,PCUS, and Simulation environments. This is useful when ACE does notcommunicate with other controllers and is used for integrating with controldata using other means such as OPC. Use this option if there is no interactionof the simulated controllers with real controllers.
Supervisorynetwork(supervisory)
Network communication for Level 2 Experion nodes.
l FTE-S – It is an FTE network used only for Level 2 communication. (Example:Experion Server to Experion Flex stations). It is a single redundant Ethernetnetwork topology used as an alternative for deploying multiple Ethernetnetworks. (Previously, deploying multiple Ethernet networks required thecoordination of more complicated station connection files and server aliasnames).
l Ethernet - Provides support to the Level 2 communications if FTE is notselected.
Auxiliarynetworks(optional)
The extra network configurations used for integrating legacy hardware withExperion such as RSLinx, DHEB, and so on. RSLinx option is available only forserver node and DHEB is available only on EHG node. DHEB is selected by defaultand you cannot clear this selection.
l SLinx - Provides connection to other supported interfaces/controllers such asPLC (Control Logix 5500) and so on.
l K4LCN - K4LCN-ETNI processor boards connects both Physical and VirtualETNs (Enhanced T-Nodes) through the FTE for communicating with LCN/TPSnetwork.
l For Physical ETN, a physical server/workstation will be connected tothe K4LCN-ETNI processor boards through the FTE.
l For Virtual ETN, a virtual machine on a server will be connected tothe K4LCN-ETNI processor boards through the FTE.
l LCNP4 - Provides connection to Classic T-Nodes for communicating withLCN/TPS network.
l ELCN - Provides connection to the following nodes through FTE based ELCNfor communicating with LCN/TPS network:
l ACE-T and E-APP physical Windows based platform
l ACE-T and E-APP virtual Experion node
l ES-T and ESC-T, PC-based user interface and server
l ES-T and ESC-T virtual Experion user interface node and serverrespectively
- 15 -

2.5 Simplified and seamless Experion installation processusing ESM
The Installation Builder tool, part the of the ESM Tool Set, allows the user to configure nodesoffline and automate large scale deployments for both physical and virtual platforms. Theadvantage to using this method is offsite preparation capabilities, reduced individualinstall/configuration times, and centralized management of the entire system configuration.
ESM Configurations require a network based ESIS and a Virtual Support Environment (ifdeploying Virtual systems).
You can install Experion using the following options in the Installation Builder.
l Install Experion using ESIS (operating system pre-installed)
l Create Experion-installed virtual machines using the following options.o Create Experion virtual machine using ESIS from an operating system-installed
virtual machine template
o Create virtual machine from an Experion-installed template
o Install Optional Features on an Experion template deployed machine from ESM
For more information, refer to the Installation Builder User’s Guide.
2.6 Experion End User License Agreement (EULA)
The HoneywellExperion End User License Agreement (EULA) contains important terms andconditions for installation and use of the software.
A copy of the license is installed on all Experion nodes.
2.6.1 To view the Experion End User License Agreement
1. In Windows Explorer, go to <Experion Software path>\Honeywell\Experion PKS\EULA\.Where <Experion Software path> is the location where Experion is installed.
2. Open the Honeywell license agreement.
- 16 -
Chapter 2 - Introduction to Experion installation

PREPARING FOR AN EXPERION INSTALLATION
l Installation terms and definitions
l Installing additional hardware
l Disabling the antivirus services and applications
l Preparing FTE networks
l Preparing non-FTE networks
l Setting up an ESIS repository
l Custom installation path
l Experion installation space requirements
l Getting oriented with Status Display
l Configuring software protection devices
l Configuring pre-installed Microsoft SQL Server 2014
3.1 Installation terms and definitions
The following terms and definitions are used during Experion installation.
Term Definition
Cleanoperatingsystem
A clean Windows operating system installed using Windows operating systemmedia without any software, driver, or configuration. Clean Windows operatingsystem can be manually installed using Windows operating system media.
Supportedoperatingsystem
The operating systems qualified for Experion.
l Embedded Microsoft Windows 10 Enterprise 2016 LTSB (x64)
l Embedded Microsoft Windows Server 2016 Standard
Unsupportedoperatingsystem
Any other operating system other than the qualified operating system.
Platformpreparation
Platform preparation includes operating system configuration, network settingsand installation of device driver, computer-specific software, operating systemcomponents, BIOS, and firmware.
Operatingsystemreinstallation
Installation/reinstallation of supported operating system.
Configurationfiles
Files used for configuring Experion system with or without operating systeminstallation.
Bare metal A computer without any operating system installed.
ESIS Experion Software Installation Server (ESIS) is the repository of the requiredmedia contents to perform a complete unattended installation.
- 17 -
CHAPTER
3

You may require the following Experion media to install Experion.
Medianame
Mediatype
Contents
Experion®PKSInstallationMedia 1
DVD This media contains all of the Experion software.
Experion®PKSInstallationMedia 2
DVD This media contains all of the Experion software.
Experion®PKS UpdatesMedia
DVD Updates for the Experion installation. The latest point release The latestpoint release Experion Support Software is available as an ISO imageon Honeywell Process Solutions website(https://www.honeywellprocess.com/support). Use the ISO imagecontent to create a DVD/media for installing the latest Experion pointrelease. For extracting contents to a media, use ISO extractionsoftware. For example, you can use Virtual Clone Drive software forextracting the contents to a media.
Microsoft®VisualStudio® 2012Professionalfor CABDevelopersMedia 1
DVD Media contains Microsoft Visual Studio software
Microsoft®VisualStudio® 2012Professionalfor CABDevelopersMedia 2
DVD Media contains Microsoft Visual Studio software
Experion®PKS SystemInitializationMedia
DVDl Required drivers for system hardware component and different
software packages
l System performance tools
Experion®PKS SystemInitializationUpdatesMedia
DVD Windows operating system updates
Experion®Support andMaintenance(ESM) Media(R240.1)
DVD Experion support and maintenance
Microsoft®SQL Server®2014 SP2x64 Media
DVD Media contains SQL Server software
- 18 -
Chapter 3 - Preparing for an Experion installation

Chapter 3 - Preparing for an Experion installation
3.2 Installing additional hardware
Install the following hardware before Experion installation.
l Network Interface card (NIC)
l ControlNet PCIC card
l LCNP4E/E2 card
l Installing NIC
l Installing ControlNet PCIC
l Installing LCNP4E/E2 and slot assignment
3.2.1 Installing NIC
Considerations
l The qualified NIC drivers are automatically detected and configured during the operatingsystem installation. Honeywell supports the Broadcom 5720 Dual NIC Adapter cards.
l The onboard Dual NICs that are part of the Honeywell qualified platforms are alsoautomatically detected and drivers installed with the Experion installation.
l It is important to get all NIC drivers from the Experion PKS System Initialization media becauseHoneywell has special versions of these drivers to specially support Experion FTE operations.
l Install the NIC in accordance with the platform Planning, Installation, and Service guide.
l The Planning, Installation, and Service Guides are located on Honeywell Process Solutionswebsitehttp://www.honeywellprocess.com
CAUTIONESD HAZARD: Ensure proper grounding when installing any hardware in a computer. It isrecommended that you use an antistatic wrist strap. Alternatively, touch metal parts on thecomputer frequently to prevent the buildup of static electricity.
- 19 -

ATTENTIONl Use NIC1 and NIC2 for setting up FTE.
l You must use NIC3 for EHG node installation without disabling the NIC ports in theBIOS.
l If you receive a configured computer from the factory, the qualified NIC is alreadyinstalled. For a list of qualified switches and other network equipment, refer to thelatest Experion Platform Fault Tolerant Ethernet (FTE) Specification and TechnicalData.
l There is no additional NIC support for the following platforms.o Dell PowerEdge T330 server
o Dell PowerEdge R320 server
o Dell PowerEdge T320 server
o Dell PowerEdge R330 server
o Dell PowerEdge T130 server
o Dell PowerEdge T330 server
o Dell Precision T3600XL workstation
o HP ProLiant DL360p Gen8 server
TIPFor more information, refer to Fault Tolerant Ethernet Installation and Service Guide.
3.2.2 Installing ControlNet PCIC
ATTENTIONDo not install PCIC and LCNP4E/E2 cards on the same computer. This combination is notsupported.
Prerequisites
l Necessary computer documentation.
l Knowledge of installing computer hardware.
l Operating system installation and configuration of the required options.
l Grounding wrist strap to wear before you handle the card.
l Phillips-head and flat-head screwdriver.
Accessing the expansion slots and installing the card
To access the PCI local bus expansion slots in your computer, refer to the Planning Installationand Service Guides (PISG).
- 20 -
Chapter 3 - Preparing for an Experion installation
Chapter 3 - Preparing for an Experion installation
ATTENTIONl To interface PCIC interface card on Dell PowerEdge T320, R320, R330, T330, R430,
and T130,HP DL360p servers, you must use the PCIe to PCI expansion chassis.
l For more information, refer to Magma PCI Expansion and Chassis InstallationInstructions (PE4DR-HNWL or PE3R) Guide.
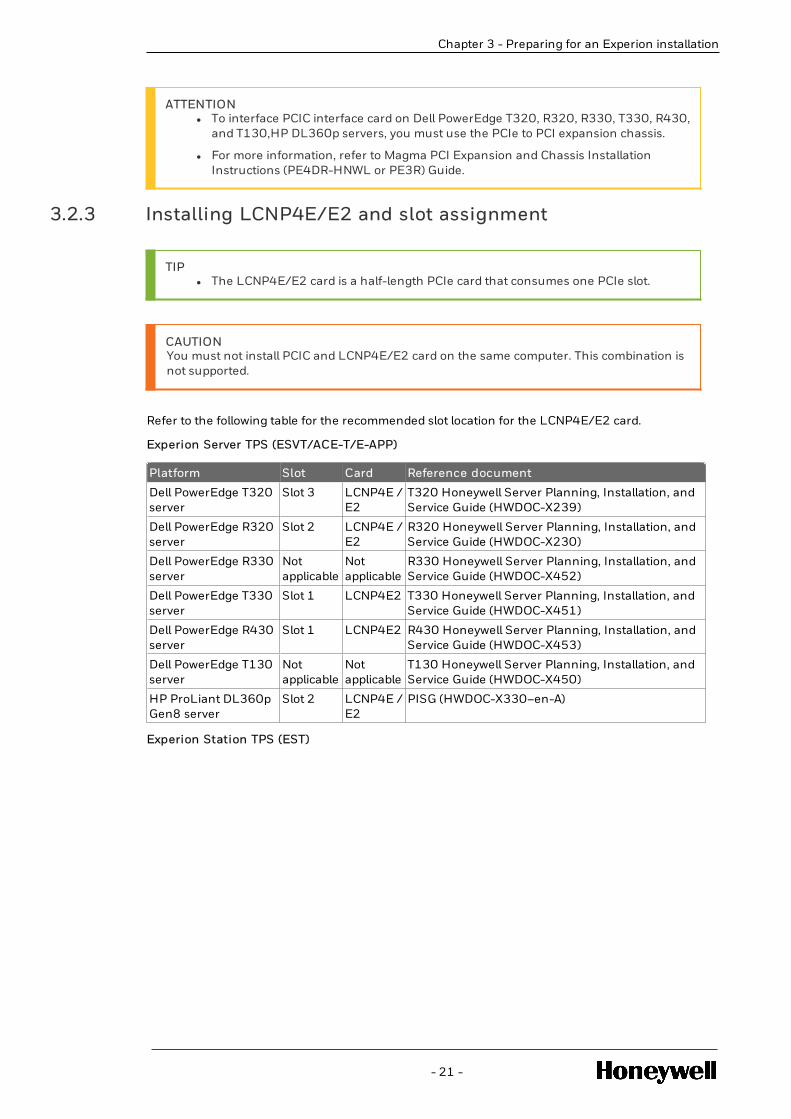
3.2.3 Installing LCNP4E/E2 and slot assignment
TIPl The LCNP4E/E2 card is a half-length PCIe card that consumes one PCIe slot.
CAUTIONYou must not install PCIC and LCNP4E/E2 card on the same computer. This combination isnot supported.
Refer to the following table for the recommended slot location for the LCNP4E/E2 card.
Experion Server TPS (ESVT/ACE-T/E-APP)
Platform Slot Card Reference document
Dell PowerEdge T320server
Slot 3 LCNP4E /E2
T320 Honeywell Server Planning, Installation, andService Guide (HWDOC-X239)
Dell PowerEdge R320server
Slot 2 LCNP4E /E2
R320 Honeywell Server Planning, Installation, andService Guide (HWDOC-X230)
Dell PowerEdge R330server
Notapplicable
Notapplicable
R330 Honeywell Server Planning, Installation, andService Guide (HWDOC-X452)
Dell PowerEdge T330server
Slot 1 LCNP4E2 T330 Honeywell Server Planning, Installation, andService Guide (HWDOC-X451)
Dell PowerEdge R430server
Slot 1 LCNP4E2 R430 Honeywell Server Planning, Installation, andService Guide (HWDOC-X453)
Dell PowerEdge T130server
Notapplicable
Notapplicable
T130 Honeywell Server Planning, Installation, andService Guide (HWDOC-X450)
HP ProLiant DL360pGen8 server
Slot 2 LCNP4E /E2
PISG (HWDOC-X330–en-A)
Experion Station TPS (EST)
- 21 -

Platform Slot Card Reference document
Dell R5500 (ES-T)workstation
PCIe x 16Slot 2
LCNP4E/ E2
Planning, Installing, and Service for R5500 (EP-DPCX25) .
Dell T3600XL
workstation
Slot 1 LCNP4E/ E2
T3600XL Honeywell Planning, Installation and ServiceGuide (HWDOC-X230)
Dell T5810XLworkstation
Slot 1 LCNP4E/E2
T5810XL Honeywell Planning, Installation and ServiceGuide (HWDOC-X398)
R7910XLworkstation
Slot 5 LCNP4E/ E2
R7910XL Honeywell Planning, Installation and ServiceGuide (HWDOC-X369)
HP Z440workstation
Slot 4 LCNP4E/ E2
HPZ440 Honeywell Planning, Installation and ServiceGuide (HWDOC-X368)
HP Z620workstation
Slot 1 LCNP4E/ E2
HPZ620 Planning Installation and Service Guide(HWDOC - X223)
R7610 workstation Slot-2 LCNP4E/E2
R7610 Honeywell Workstation Planning InstallationService Guide (HWDOC-X273)
PCUS
For information about PCUS related platforms, refer to US Board Set to Computer Based UpgradeKit Instructions.
3.3 Disabling the antivirus services and applications
To ensure proper installation of the software, before you begin with Experion installation, disablethe antivirus services, if antivirus is already installed on the system.
ATTENTIONl You must disable your antivirus only if you are installing Experion on a pre-installed
operating system.
l Ensure that your network connections do not have internet access or othercommunications outside of your internal network.
Perform the following steps if you are not installing a new operating system and you already haveantivirus software running on your target node.
3.3.1 To disable the antivirus services and applications
1. Click Start > Windows System > Run and type msconfig.
2. If the User Account Control dialog box appears, click Continue.
The System configuration Utility dialog box is displayed.
3. In the Services tab, turn off all antivirus services and applications.
4. Enable and restart these services and applications after the installation is complete.
3.4 Preparing FTE networks
This section is applicable only if the operating system was manually installed without usingExperion PKS System Initialization media.
- 22 -
Chapter 3 - Preparing for an Experion installation

Chapter 3 - Preparing for an Experion installation
3.4.1 Prerequisites
l Perform the following procedure only if you are manually installing the operating system.
l For more information about configuring FTE networks, refer to the following documents.o Fault Tolerant Ethernet Overview and Implementation Guide
o Fault Tolerant Ethernet Installation and Service Guide
3.4.2 Changing network properties to support Fault TolerantEthernet
1. Log on as a user with local administrator rights.
2. Perform the following steps to verify the network connections for the system you areconfiguring.
Click Start > Windows System > Control panel > Network and Internet > Network andSharing Center > Change adapter settings.
The Network Connections window appears.
3. Enable network connections. Ensure that both network connections (Local Area or Yellow,Green) are enabled and network cables are connected to the corresponding adapters for themachine.
4. Select the Local Area Connection. (First adapter in FTE Array - it is called Yellow connection ifusing Experion PKS System Initialization media). Right-click the adapter and chooseProperties.
5. Click Continue to the User Account Control prompt if it appears.
6. Go to Local Area Connection -> Properties window.
7. Select Internet Protocol Version 4 (TCP/IPv4) and change the network configurationsettings for your test configuration. Specify only the IP Address, Subnet Mask, Defaultgateway, and DNS Servers. You do not have to set up any of the advanced settings.
8. Click OK. Select the Local Area Connection (First adapter in FTE Array- It is called Yellow ifusing Experion PKS System Initialization media) again. Right-click the adapter and selectProperties.
9. Click Continue to the User Account Control prompt.
10. Click Configure. Select the Link Speed or Advanced tab to change the speed and duplex ofyour adapter type to 100 mbps/ Full Duplex from AUTO.
11. In the Advanced tab.
l Set the IPv4 Large Send Offload, IPv6 Large Send Offload, and Receive Side Scalingto Disable for the adapters (Receive Side Scaling may not be present for Intel NICs).
l Verify that Jumbo MTU is set to 1500 on Broadcom adapters.
l Verify that Jumbo packet is disabled on Intel adapters.
12. Click OK. Select the Local Area Connection 2 (Second adapter in FTE Array- it is called Greenif using Experion PKS System Initialization media) again. Right-click the adapter and selectProperties.
13. Click Continue to the User Account Control prompt.
- 23 -

14. Click Configure.
l Change the speed and duplex of your adapter to 100 mbps /Full Duplex from AUTO.
l Set the IPv4 Large Send Offload and Receive Side Scaling to Disable. (Receive SideScaling may not be present for Intel NICs).
l Verify that Jumbo MTU is set to 1500 on Broadcom adapters.
l Verify that Jumbo packet is disabled on Intel adapters.
15. Click OK.
3.4.3 To verify IP address of FTE
n It is important that the FTE Yellow (NIC1) adapter be configured correctly before FTE installationoccurs. Ensure to setup the IP address of NIC1 with the IP address of the FTE MUX to ensure anyfuture updates are operational. For more information, refer to the Configure FTE networkconnections section in FTE Installation and Service Guide.
3.5 Preparing non-FTE networks
ATTENTIONPerform this procedure only if you are running Experion without FTE. This section isapplicable only if you are not using Experion PKS System Initialization media.
1. Click Start > Windows System > Control panel > Network and Internet > Network andSharing Center > Change adapter settings.
The Network Connections window appears.
2. In the Network Connections window, right-click the second (traditionally Green) NIC adaptericon and select Disable.
3. If the controllers are in a separate subnet, perform the following to add a static route toservers, consoles, and ACEs.
a. Start up the command prompt with administrator privileges.
b. Type the following command: route add a.b.c.d mask m.m.m.m <yellow IP>—p
l Where a.b.c.d and m.m.m.m match the entry in the embedded FTE parameter pagein Control Builder and <yellow IP> is the IP address of the computer where the staticroute is being added.
l For example, if the server with IP address 10.0.1.20 is being configured and thecontroller base address is 10.0.0.0 and subnet mask is 255.255.252.0, then thecommand line must be: route add 10.0.0.0 mask 255.255.252.0 10.0.1.20-p
l This ensures that the route is persistent through the reboots.
3.6 Setting up an ESIS repository
The ESIS is a file server/file share. It is an accessible Windows node with account security, capableof hosting a share that has available disk space to host the Experion installation media. You canset up an ESIS to host the Experion software. The ESIS can be accessed over the network or aremovable drive for installation/migration of system software on Experion system nodes. If youuse ESIS, you do not have to insert the software medias into the Experion node to install thesystem software.
ESIS repository consists of the following additional medias and also modified media:
- 24 -
Chapter 3 - Preparing for an Experion installation

Chapter 3 - Preparing for an Experion installation
l Experion® PKS Installation media 1 (R501.1 DVD 1)
l Experion® PKS Installation media 2 (R501.1 DVD 2)
l Experion® PKS Updates media (R501.1)
l Microsoft® Visual Studio® 2012 Professional for CAB Developers media - 1 (DVD 1)
l Microsoft® Visual Studio® 2012 Professional for CAB Developers media - 2 (DVD 2)
l Experion® PKS System Initialization media
l Experion® PKS System Initialization Updates media
l Experion® Support and Maintenance (ESM) media (DVD R240.1)
l Microsoft® SQL Server® 2014 SP2 x64 media
l HMIWeb Solution Pack Installation Media
l Experion® PKS R501 PDF Collection media
l Microsoft Windows 10 Enterprise 2016 LTSB (x64) HPS Reinstallation media
l Microsoft Windows Server 2016 Standard HPS Reinstallation media
l Experion PKS with PMD Controller media
l Experion TPN Personalities APP CD
l Experion TPN Personalities GUS CD
l Microsoft Updates DVD (SUIT)
ATTENTION
l You can create an ESIS repository on a local hard disk that can be accessed using anetwork share.
l For setting up an ESIS repository, the minimum space required on the ESIS serveris 35 GB.
TIPDepending upon your preferences for ESIS setup, the minimum sizerequired for ESIS setup varies.
l You must have .Net Framework 2.0 or higher version installed on your computer forcreating an ESIS repository.
l You can create the ESIS repository on the following operating systems.o Embedded Microsoft Windows 10 Enterprise 2016 LTSB (x64)
o Embedded Microsoft Windows Server 2016 Standard
o Windows Server 2008 32-bit OS (Service pack 1 or above)
o Windows Server 2008 R2 OS (Service pack 1 or above)
o Windows 7 32-bit OS (Service pack 1 or above)
o Windows 7 64-bit OS (Service pack 1 or above)
l The ESIS and Experion Migration Storage Node (EMSN) can be hosted on the sameserver. When hosted on the same node, while connecting to EMSN or ESIS, ensureto use the same account (with same permission) during migration.
3.6.1 Prerequisites
- 25 -

l On the ESIS node, you must disable On-Access Scan for your virus protection softwarebefore setting up or updating ESIS.
l The network link speed on the node where ESIS is being set up, must match the link speed onthe to which the node is connected (Link speed is 100 Mbps Full Duplex for an FTE-basednetwork).
3.6.2 To set up an ESIS repository
1. Insert Experion PKS Installation media 1.
The Honeywell Experion PKS Installer screen is displayed.
ATTENTION
If auto run is disabled on a system and Honeywell Experion PKS Installer screendoes not appear, perform the following steps.
a. Using the Windows Explorer, browse to the media \Browser\cdbrowse path.
b. Double-click cdbrowse.exe.
2. Click Setup an Experion Software Installation Server.
ATTENTIONl If the ESIS tool fails to start and an error message Net 2.0 or higher needs to
be installed is displayed.o Click OK to exit.o Enable .Net 3.5 through Server manager > Roles and features.
The Welcome to ESIS page is displayed.
The options in the Welcome to ESIS page are as follows:
l Create a new ESIS repository
l Upgrade existing ESIS repository
l Resume a failed ESIS repository creation
l Remove an existing ESIS repository
ATTENTIONWhen the ESIS Preparation Utility is started on the node for the first time,only the option Create a New ESIS Repository, is selected by default and allthe other options are unavailable.
3. Select Create a New ESIS Repository if not already selected and click Next.
The Select a path dialog box is displayed.
- 26 -
Chapter 3 - Preparing for an Experion installation

Chapter 3 - Preparing for an Experion installation
4. Click Browse to select the destination folder for the ESIS repository.
ATTENTIONThe destination folder must be located only on USB drives, removable hard drives,or local system drives.
If you select local system drive, a message prompting to share the destination location isdisplayed. Perform the following steps.
a. Click OK.
b. In the <Folder Name> Properties dialog box, select Sharing.
c. Select Share this folder.
d. Enter the Share name.
e. Click Permissions to assign the share permissions.
f. Click OK.
TIPRead permission is required for ESIS share.
5. Click Next.
The Select media page is displayed.
6. Select the appropriate names of the media for ESIS repository creation and click Start.
The Status Display page is displayed, with the following information.
l The selected media is displayed on the left pane of the Status Display page.
l The Current Step displays the progress of the current media being copied.
l The Overall Progress displays the progress of all the media being copied.
l The Description displays a message related to the current media being copied.
7. After the selected media are successfully copied, the Description is updated as ESISRepository [<Name>] created successfully at <Destination Location>.
8. Click Finish.
ATTENTIONl Ensure that you enable On Access Scan for your antivirus after you have
completed the ESIS setup.
l Ensure to add ESIS folder path to the antivirus scan exclusion list to ensureuninterrupted installation of Experion software.
3.7 Custom installation path
Starting Experion R410, installation is supported on custom installation path. This feature isintroduced to allow control on the path where Experion is installed and the location where theruntime files and SQL logs are stored.
- 27 -

ATTENTIONl Before you choose custom installation paths for Experion, verify that there are no
interoperability issues with any non-Experion applications/packages that depend onthe path where Experion software, runtime files or SQL logs are stored.
l All nodes in the cluster must use the same custom installation path.
You can select the custom installation path for the following components.l Experion software: This consists of deliverable that are part of Experion installer and third-
party software.
l Experion runtime data: This consists of all the files and folders available atC:\ProgramData\Honeywell\ path for the Experion release and the Experion SQLdatabases.
Following files belong to this category.o Runtime data
o Experion created SQL data files
l Experion SQL logs: This consists of SQL database log files generated during installation.
ATTENTIONThe custom installation path is appended to <>Vendor\Product Name<>. Forexample, Honeywell Experion features is <Component> Honeywell\Experion
PKS\(Function-specific path)
where, <Component> is user selected software path/runtime data path/SQL logspath.
The custom installation path option is not supported for the following components. Thesecomponents are installed in the default path.
Component Default path
Shared software across different Honeywellproducts
% CommonProgramFiles %\Honeywell\
Shared software across different vendors % CommonProgramFiles%
The following table describes the default path and custom installation path format for thecomponents that support custom installation paths.
Component Default path Custom installation path
Experion software C:\Program Files
(x86)\Honeywell
%User selected
path%\Honeywell
Experion runtimedata
C:\ProgramData\Honeywell %User selected
path%\Honeywell
Experion SQL logs C:\ProgramData\Honeywell %User selected
path%\Honeywell
- 28 -
Chapter 3 - Preparing for an Experion installation

Chapter 3 - Preparing for an Experion installation
ATTENTIONl You cannot change the drive letter for system or boot volume.
l If there are multiple internal hard disks or partitions on the system, the drive letterspecified is reset automatically during operating system installation. You can changethe drive letter before you select the custom installation path for Experioninstallation by performing the following steps.
1. Install the operating system manually.
2. Change the drive letter name.
a. Right-click on Start and select Computer Management.
The Computer Management window is displayed.
b. In the left pane of the Computer Management window, select ComputerManagement (Local) > Storage > Disk Management.
The disk partitions in the system are displayed in the right pane.
c. Right-click the disk partition of which you want to change the drive letter andselect Change Drive Letter and Paths.
d. In the Change Drive Letter and Paths dialog box, click Change.
e. Select the drive letter from the list and click OK.
3. Select the custom path for installation and continue with installation.
Considerations for custom installation paths
Ensure that you adhere to the following guidelines for choosing the custom installation path.
l All nodes in the cluster must use the same custom installation paths.
l Custom installation paths can not be changed post installation.
l Experion software, Experion runtime data, and Experion SQL logs must have differentdirectory and subdirectory custom installation paths.
l The Experion SQL logs custom path can be a subdirectory of the Experion runtime datacustom path. However, the Experion runtime data custom path cannot be a subdirectory ofthe Experion SQL logs custom path.
l The Experion Software path cannot be a subdirectory of Experion SQL logs path or vice-versa.
l On a 64-bit platform, the custom installation path for Experion software can be“C:\ProgramFiles” or a subdirectory of “C:\ProgramFiles”. However, the software isplaced in the “C:\ProgramFiles(x86)” path.
l The custom installation path must not begin with the following paths.o C:\ProgramData (Experion software)
o C:\Program Files (x86) and C:\Program Files (Experion
runtime data and Experion SQL logs).
o C:\Program
o C:\Windows
o C:\Users
o C:\Documents and Settings
l The folder names within the path supports space ( ), hyphen (-) and underscore (_) specialcharacters.
l While specifying the custom installation paths in the Dialog Manager, any space entered
- 29 -

before or after the custom installation path is automatically removed.
l Only the path C:\Program Files (x86), supports the use of opening and closing braces– ( ). The exact representation of this path along with the space requirements is –C:\Program<space>Files<space>(x86). No variant of this representation (missingspace or a different drive - refer examples) and no other path allow opening and closingbraces.
Following are some examples of paths that do NOT allow braces.o C:\Test (custom install path)
o C:\Test<space> (custom install path)
o C:\Program Files(x86)
o D:\Program Files<space>(x86)
l You must enter only a single letter for the drive/path. For example, “D:”.
l The maximum path length of the custom installation path folder is 50 characters.
l If the specified drive/path does not exist, an appropriate error message appears, and you canmodify the drive name.
l Ensure that the Microsoft Windows Server 2016 operating system is installed on the C: drive.
l Custom installation path is supported on local drives only. It does not support network drivesor removable drives.
l If optional features are already installed on your system, ensure that you provide the samepath for Experion installation.
l Local drive(s) selected for the custom installation path(s) must not be compressed.
ATTENTION
l The Experion files and folders created within the custom and non-custominstallation path folder have Experion specific security permissions assigned tothem. This is to ensure that others users, apart from the System Administrator donot access or modify the content within these folders.
For example, if ““D:\Experion\Programs””, “D:\Experion\Data”, and“D:\Experion\SQLLogs” are the custom installation paths for Experionsoftware, Experion runtime data, and Experion SQL logs respectively, the Experionsecurity is specified on the following directories.
o D:\Experion\Programs\Honeywell
o D:\Experion\Data\Honeywell
o D:\Experion\SQLLogs\Experion PKS\Honeywell
Hence, the Honeywell folder within ““D:\Experion\Programs””,“D:\Experion\Data”, and “D:\Experion\SQLLogs” paths is assignedExperion specific security permissions. Additionally, ensure that you do not haveother data in this path.
l Ensure that you provide required access permissions to the custom installation pathfolders.
o The Experion software custom path must have the access permissions as“Program Files (x86)” folder.
o The Experion runtime and Experion SQL log custom paths must havethe access permission “ProgramData” folder.
- 30 -
Chapter 3 - Preparing for an Experion installation

Chapter 3 - Preparing for an Experion installation
The following table describes the list of Honeywell folders/files that do not support the custominstallation path.
Media/package Installation path Comments
Init Mediafolder
C:\ProgramData\Honeywell\Install\Init Media\ This folder iscreated byExperionPKS SystemInitializationmedia, and isused formaintaininglogs andconfigurationfiles. Thesefiles are onlycreatedduring installtime, notaccessedduringruntime.
SharedSoftware
C:\Program Files(x86)\Common Commonfiles sharedacross thesoftware.
ErrLog1.txt C:\ProgramData\Honeywell\Experion PKS\ErrLog_1.txt Refer to theErrLog(s)maintainedat thecustominstallationpath location.
TraceUI C:\ProgramData\Honeywell\TraceUI\DotNetSysMgmtDsp.txt Log forSystemManagementDisplaytracing tool.
- 31 -

The following list describes the third-party packages that do not support custom installation paths.l Adobe Reader 11.0.12
l Microsoft Silverlight 5.1
l Microsoft SQL Server 2014 SP2 (Note: SQL databases and logs support custom installationpaths)
l Microsoft SQL Server Compact 4.0 SP1 (Note: SQL databases and logs support custominstallation paths)
l Microsoft Visual C++ 2005 SP1 x86 Redistributable
l Microsoft Visual C++ 2008 SP1 x86 Redistributable
l Microsoft Visual C++ 2010 SP1 x86 Redistributable
l Microsoft Visual C++ 2010 SP1 x64 Redistributable
l Microsoft Visual C++ 2012 x86 Redistributable
l Microsoft Visual C++ 2017 x86 Redistributable
l Microsoft Visual C++ 2013 x86 Redistribuatable
l Microsoft Visual C++ 2015 x86 Redistributable
l Microsoft Visual C++ 2013 x64 Redistribuatable
l Microsoft Visual Studio 2012 Professional
l Microsoft Visual Studio 2012 Remote Debugger
l Microsoft Visual Studio 2012 Service Pack 1
l Redhat (Redhat GNU C++ compiler for CAB)
l Sentinel Protection Installer 7.6.7
l SYCON.net Honeywell EPKS
l SQL XML 4.0 SP1
3.8 Experion installation space requirements
The Experion system must have minimum of 60 GB hard disk space in C drive for the ExperionPKS System Initialization media to install the following:
l Operating system
l Operating system updates
l Drivers
Using the following method, calculate the minimum free hard disk space required for theoperating system installation: 100 GB (operating system + base Experion) + GB RAM size x 1.5(page file) + GB RAM size x 1.5 (dump file).
If the calculated value is greater than 60 GB, then calculated value is the minimum free hard diskspace required. For example, in a system with 8 GB RAM, the minimum free hard disk spacerequired for the operating system installation is 124 GB (100 + 8*1.5 + 8*1.5). Hence, 124 GB isthe minimum free hard disk space required for operating system installation.
If the calculated value is lesser than 60 GB, then the calculated value is the minimum free harddisk space required. Hence, 60 GB is the minimum free hard disk space required for operatingsystem installation.
It is recommended to keep additional 30 GB for data migration (20 GB for Runtime Data path and10 GB for SQL Logs path).
- 32 -
Chapter 3 - Preparing for an Experion installation

Chapter 3 - Preparing for an Experion installation
ATTENTIONl If you are installing Experion in custom installation path, refer to Custom
installation path section, for the disk space required for each of the custom installpaths.
l The minimum space required in C drive (60 GB) is independent of default or custominstallation paths.
l The Experion PKS System Initialization media displays a warning if therecommended disk space is not available, and does not allow you to install on C:drive.
Experion installation without using Experion PKS System Initialization media
The hard disk space requirement to install Experion without using Experion PKS SystemInitialization media is as follows:
l Default path: If you are installing/migrating Experion in the default path, each node mustmeet minimum space requirements on C drive as follows:
l Custom installation path: If you are installing/migrating Experion in the custom installationpath, the path you select for each component must meet the minimum free spacerequirements as follows:
Node
C DriveUsage
(in MB)
ExperionSoftware path
(in MB)
Experion RuntimeData path
(in MB)
Experion SQLLogs path
(in MB)
Server 40960 22528 9216 2048
ESC 27648 21504 5120 0
PCUS 11264 4096 2048 0
EAS 33792 19456 6144 2048
EHG 22528 5120 2048 2048
EST 27648 23552 5120 0
ESVT 40960 23552 10240 2048
ESF 30720 19456 2048 0
EAPP 16384 4096 2048 0
eServer 35840 12288 6144 2048
ACE-T 18432 6144 2048 1024
ACE 18432 6144 2048 1024
SCE 18432 6144 2048 1024
ESCE 30720 19456 2048 0
Collab Station 17408 17408 3072 0
ELCN History Module 15360 3072 1024 0
3.9 Getting oriented with Status Display
The Status Display is the page displayed during installation of Experion. The following is anillustration of the Status Display page (image shown below is for reference only).
- 33 -

The Status Display page consists of the following elements.l Task pane: The Task pane displays the list of tasks in the sequence in which they are
performed. The tasks can be classified based on user interaction requirements as following:o Automated tasks - do not require any user intervention.
o Tasks requiring user intervention before the task - indicated with a blue backgroundand an asterisk before the task title. Usually occurs before a media swap step.
o Tasks requiring user intervention after the task - indicated with a blue backgroundand an asterisk after the task title. Usually occurs at the end of the installation or atthe end of Phase 1 of migration to indicate that you must click a button(Yes/No/Cancel) after completing the task.
l Data pane: The Data pane consists of the following sections.o Current step section - displays the time details of the task in-progress.
o Overall progress section - displays the time details of the tasks that have beenperformed.
o Next user interaction section - displays the approximate time when the next userinteraction is required. If you are multitasking, this would help you plan your tasks.
o Message section - displays the details of what action is required for the next userinteraction.
ATTENTIONThe time details displayed, such as, the time remaining for the current taskin progress, the overall installation time remaining, and the time when thenext user interaction is required, are all approximate values. The resultsmay vary.
3.10 Configuring software protection devices
The software license states whether the system configuration requires the use of a softwareprotection key (also known as a dongle device). This must be inserted in the computer before youbegin installation and must remain in place for proper operation of the system.
- 34 -
Chapter 3 - Preparing for an Experion installation

Chapter 3 - Preparing for an Experion installation
ATTENTIONl This task is applicable for Experion server only.
l Ensure that you have the required Experion license to use the dongle on yourcomputer.
l Ensure that the dongle appears in the Device Manager window. It must appear inthe Other Devices section or in the Universal Serial Bus controllers section.
l Ensure that the dongle light is turned on after it is connected to the computer.
l During installation, ensure that dongle is connected throughout the installation.
3.11 Configuring pre-installed Microsoft SQL Server 2014
In R500.1, the pre-installed SQL scenario is supported to install Experion on a system whereMicrosoft SQL Server 2014 Standard Edition Service Pack2 (SP2) is already installed.
ATTENTIONThis software must be installed in a default path. Custom install path is not supported.
Considerations
l Perform the following tasks only if you have pre-installed Microsoft SQL Server 2014Standard Edition Service Pack 2 (SP2).
l The tasks ensures that a compatible Microsoft SQL Server 2014 Standard Editionconfiguration exists prior to initiating Experion installation.
l The pre-installed SQL scenario of Experion installation fails, when the SQL server servicesaccount is configured with Administrator account in Server Configuration menu of SQLinstallation and Experion PKS System Initialization media is used for configuring the system.The Experion PKS System Initialization media disables the Administrator account duringoperating system configuration. The Experion installation at SQL step fails if the log onaccount of the SQL services is disabled. Hence, prior to SQL server configuration, ensure thatyou change the user account to a different Windows account (with or without Administratorprivileges) using the SQL Server Management Studio and SQL Server ConfigurationManager.
l The SQL installation path must be same for redundant servers in a pre-installed SQLscenario.
l Ensure that the following features have been installed along with SQL.o Database engine services
o SQL server replication
o Reporting services-native
o Client tools connectivity
o Documentation components
o Management tool-basic
o Management tools-complete
l Experion only supports the default instance of the SQL Server - MSSQLSERVER
1. Add the user account HPSInstall as a Microsoft Windows User with one of the followingprivileges.
- 35 -

l Administrator privileges for a clean installation.
l Administrator and Product Administrator privileges for reinstalling Experion withoutoperating system reinstallation.
Create HPSInstall account, note down the password provided for the HPSInstall account.The same password must be entered for MNGR account during Experion Installation.
2. Add a database user HPSInstall with the same password as used for the Windows useraccount.
If Microsoft SQL Server 2014 is already installed, use SQL Server Management Studio(SSMS), and add a database user HPSInstall.
Perform the following steps in the left pane of the SSMS Object Explorer.
a. Select Security > Logins > HPSInstall user/account.
b. Right-click HPSInstall, and choose Properties.
c. In the left pane of the Properties page, select Server Roles.
d. In the right pane of the Properties page, select sysadmin.
e. Click OK. Exit SSMS Object Explorer.
3. Log off and log on using HPSInstall account, and start Experion installation.
- 36 -
Chapter 3 - Preparing for an Experion installation

INSTALLING EXPERION ON HONEYWELL-QUALIFIEDPLATFORMS
l Installing Experion using ESIS
l Proceeding with Experion installation using ESIS
4.1 Installing Experion using ESIS
This section describes how to install Experion using ESIS. You can install Experion using ESIS inone of the following ways.
l ESIS from network share
l ESIS from USB drive
4.1.1 Prerequisites
l To view the list of Honeywell-qualified platforms, refer to the Experion PKS SystemInitialization media Software Change Notice available in the HPS support website. In addition,for the qualified Experion PKS System Initialization media version refer to the ExperionGeneral Release Software Change Notice.
l For operating system reinstallation, use the Administrator account for generatingconfiguration files.
l If you are using Administrator account for generating configuration files, Experion PKSSystem Initialization media–Dialog Manager asks you to create a new user account forinstallation.
l
Ensure that a common account does not exist between ESIS and the installation node.l
The HPS Install account is deleted from the ESIS node (if it exists on the ESIS node).
ATTENTIONo The network link speed on the node where installation is being performed
using ESIS on network, must match the link speed on the switch to whichthe node is connected (Link speed is 100 Mbps Full Duplex for an FTE-based network).
o Ensure that you enable Windows firewall before you begin installation.
- 37 -
CHAPTER
4

4.1.2 To connect to ESIS repository using ESIS from USB drive
1. Insert the USB drive or removable hard drive (containing the ESIS repository) into yourmachine.
2. Browse to the ESIS repository location in the USB drive/removable hard drive.
3. Double-click setup.exe at the root of the ESIS repository path.
The Welcome page is displayed.
4.1.3 To connect to the ESIS repository using ESIS from a networkshare
1. Click Start > Windows System > Control Panel > Run.
The Run dialog box is displayed.
2. Type \\<<ESISServer IP>\<ShareName> and press ENTER.
The Windows Security dialog box is displayed.
3. Perform one the following:
a. Type the <Domain Name>\Username and Password if you belong to a domain and ifyou have share permissions.
b. Type the <ESISServer IP>\Username and Password if you belong to a workgroup and ifyou have share permissions.
c. Clear the Remember Password check box.
ATTENTIONIf you enter incorrect credentials, an error occurs after the first reboot of Experioninstallation or migration. Then, you have to enter the correct credentials to connectto the ESIS share.
4. Double-click setup.exeat the root of the \<ShareName>.
If User Account Control dialog box is displayed, click Yes. If you are prompted for theWindows credentials, perform one of the following:
l Type the <Domain Name>\Username and Password if you belong to a domain.
l Type the <ESISServer IP>\Username and Password if you belong to a workgroup.
5. Click OK.
The Welcome page is displayed.
- 38 -
Chapter 4 - Installing Experion on Honeywell-qualified platforms

Chapter 4 - Installing Experion on Honeywell-qualified platforms
4.1.4 Continuing with Experion installation
1. In the Welcome page of the ESIS Install utility, select OS Preparation with/without ProductInstall.
2. When you are prompted for Windows credentials.
a. Type the <Domain Name>\Username and Password if you belong to a domain and if youhave share permissions.
b. Type the <ESISServer IP>\Username and Password if you belong to a workgroup and ifyou have share permissions.
c. Clear the Remember Password check box.
ATTENTIONIf you enter incorrect credentials, an error occurs after the first reboot ofExperion installation or migration. Then, you have to enter the correctcredentials to connect to the ESIS share.
3. Click Next.
The Installation Options page is displayed, which consists of the following options toconfigure the machine/generate configuration files.
l Configure current machine.
l Configure current machine using existing configuration files.
l Generate configuration files.
l Modify existing configuration files.
l Use Config file for migration.
Select one of the following options depending upon your requirements.
Option When to choose this option
Configure current machine You do not have configuration files generated for thetarget machine.
Configure current machineusing existing configurationfiles
You already have configuration files generated for thetarget machine.
Generate configuration files You are configuring/reinstalling your operating system.Hence, you want to generate configuration files.
Modify existing configurationfiles
You already have configuration files generated (forinstallation) for a machine and you want to modify them.
Use configuration files formigration
You want to perform phase 2 migration, and theoperating system is installed manually.
4. Click Next.
The Platform Configuration page is displayed. Perform the following operations.
- 39 -

a. The Product Installation check box is selected automatically.
b. Select the Experion version to install. The operating system is selected automatically.
ATTENTIONDO NOT install the following combination of nodes and operating systems, asthey are not qualified and supported currently.
l Application Server (EAS) on Embedded Microsoft Windows 10 Enterprise2016 LTSB (x64) operating system.
l eServer on a Embedded Microsoft Windows 10 Enterprise 2016 LTSB(x64) operating system.
l Application Control Environment (ACE) node on a Embedded MicrosoftWindows 10 Enterprise 2016 LTSB (x64) operating system.
l Collaboration Station on a Embedded Microsoft Windows Server 2016Standard operating system.
5. Click Next.
The Operating System Configuration page is displayed.
4.1.5 Next steps
Follow the procedure in the section Proceeding with Experion installation using ESIS.
4.2 Proceeding with Experion installation using ESIS
Prerequisites
l You must not use the following user names.o Administrator
o dcscomserver
o expsqlagtsvc
o expsqlagtsvc
o expsqlsvc
o localcomserver
o mngr
o standardaccessadmin
o standardaccessuser
o hpsinstall
o SecureCommsSvc
o Expacctsvclp
l The user account created in the Feature Selection page is Windows Administrator account.This user account must not be used for any Experion application after completing theinstallation.
l If the installation is started using an account (with Administrator rights) other than thestandard Administrator account, type the valid password for the current user account (this isnot for new account creation).
l If the installation is started using a standard Administrator account, type new user name and
- 40 -
Chapter 4 - Installing Experion on Honeywell-qualified platforms

Chapter 4 - Installing Experion on Honeywell-qualified platforms
password for creating new account with Administrator rights.
l Operating system reinstallation is supported only using the HPS operating systemreinstallation media.
l If your system is in a domain, you can enter a dummy workgroup name in the page and set upthe domain after the operating system installation is complete.
4.2.1 Proceeding with Experion installation using ESIS
1. In the Operating System Configuration page, perform the following:
l Select the Local Language and Time Zone.
l Type the Computer Name, Company Name, Customer Name, and Workgroup Name.
l Type the User Account Name and passwords.
l Type the Security Password details.
NOTE
The Security Password shall be used to protect the secured data duringinstallation and will be discarded after completing the installation.
ATTENTION
l Computer Name can have only 0-9, a-z, A-Z, and “-“ as allowed characters. Itmust not contain ONLY numbers, space, and special characters (` ~ ! @ # $ % ^ & * () = + _ {} [] \ | ; : .‘ ” “ , < >, / ?).
l Company Name must not contain the underscore (_) special character.
l Workgroup Name must not contain space, and special characters (* = + [] \ |; : “ “ , < > / ?).
l User Account Name must be a maximum of 20 characters in length.
2. Click Next.
The Network and Input/Output Device Information page is displayed.
- 41 -

TIP
l Select the corresponding NIC tabs, and specify the IP Address, Subnet mask,and default gateway. You can select the Network Link speed (Auto-negotiate/100 mbps Full Duplex) if you select Ethernet as the network type.However, selecting Auto-negotiate may significantly degrade networkperformance on some network hardware platforms. It is recommended to use100MB/full duplex configuration on both NIC and switch port wheneverpossible.
l If you select FTE as the network type, the IP Address, Subnet mask, and defaultgateway settings are not applicable for Green adapter; they are set to DHCP bydefault.
l If you are reinstalling the operating system, select the NIC name to change thenames. FTE Yellow or Primary Supervisory is NIC1, FTE Green or SecondarySupervisory is NIC2.
l For the third NIC (DHEB), DNS server option is disabled.
l The third NIC (DHEB) must be used only for EHG. Otherwise, disable the thirdNIC.
l If Link speed option is displayed for FTE, select Link speed as 100 Mbps FullDuplex.
3. Select the network type (FTE or Ethernet) and, I/O details, and click Next.
The Configuration Summary page is displayed.
4. Click Generate Product Install Config Files.
The Welcome page is displayed.
ATTENTION
l It may take a few seconds to display the Welcome page.
l If a Microsoft User Account Control is displayed, select Allow. The DialogManager starts after setup.exe prepares the installation environment.
5. Read the information, and click Next.
The License Agreement page is displayed.
6. Read the EULA, select I accept the terms in the License agreement option, and click Next.
The Setup type of Node to install page is displayed which lists the Experion nodessupported by the operating system on your computer. The following is a list of Experion nodesthat are listed.
l Server (ESV)
l Server TPN Connected (ESVT)
l eServer
l Application Control Environment (ACE)
l Application Control Environment TPN Connected (ACE-T)
l Simulation Environments
l Console Station (ES-C)
l Console Station TPN Connected (ES-T)
l Console Extension Station (ES-CE)
l Flex Station (ES-F)
- 42 -
Chapter 4 - Installing Experion on Honeywell-qualified platforms

Chapter 4 - Installing Experion on Honeywell-qualified platforms
l Collaboration Station
l Experion Hiway Gateway (EHG)
l APP Node (E-APP)
l Application Server (EAS)
l PC Universal Station (PCUS)
l Optional Features
l ELCN History Module
ATTENTION
The Optional features is also displayed in the node selection page. However, it isnot a node type, but is used to add additional features to an existing node type.
TIPIf installing a Flex Server choose the Server (ESV) option. A Flex Server is anExperion server running on Windows 10.
7. Choose the Experion product node type to install, and click Next.
The User and License Information page is displayed.
Type the Customer Name and Company Name, and specify the following details dependingon the node type selected during installation.
Node type Option
ESV, ESVT, EAS,eServer
Click Browse to navigate to and select the license file.
ESVT, E-App, EST, ES-CE, ESF, ACE-T, ELCNHistory Module andOptional Features
To install licensed TPS components, click Yes and type the TPSComponents License details.
Station node Select Install Custom Algorithm Block (CAB) Developer(Visual Studio) OR PMD features ? only to develop CAB blocksfrom scratch using Control Builder and Visual Studio software,since this might increase the installation time.
ACE, ACE-T, and SCEnode
a. Select Do you want to install licensed features ? if youare performing any of the following:
l Installing CAB Developer on a station.
l Debugging the CAB blocks that you are developingon the ACE using Visual Studio debug.
If you are not creating CAB blocks from the beginningand you are only importing existing CAB blocks, you donot require the CAB remote debug feature.
b. Click Browse to navigate to and select the license file.
- 43 -

ATTENTION
This step is applicable only for Server (ESV) and Server TPN Connected (ESVT)nodes.
A message containing the redundancy information of the node being installed isdisplayed. This redundancy information is based on the machine name.
l Click Yes to proceed with the current redundancy type .
l Click No to change the redundancy type. Change the redundancy type bychanging the machine name. Refer to the Supplementary Installation TasksGuide (SITG) to change the machine name.
If you are providing dongle-based license, ensure that dongle is connectedthroughout the installation.
NOTEA Flex Server is an Experion server running on Windows 10.
8. Click Next.
The Installation Path Selection page is displayed, which contains the path for Experioninstallation.
l If you plan to use the default paths for Experion installation, do not change the path thatis set by default.
l If you plan to use custom installation paths, refer to the section Custom installation path.
ATTENTIONo The Experion PKS SQL Logs path is not applicable for Console (ES-C),
Console station TPN connected (ES-T), Console Extension station(ESC-E), Flex station (ES-F), Collaboration Station nodes, ACE, SCE,and ACET.
o The Experion PKS Software, Experion PKS Runtime Data, andExperion PKS SQL logs can be placed on any hard drive in the system.However, the default path for Experion PKS Software and ExperionPKS Runtime Data is <Custom Install Path selected
drive>\<Custom Install Path selected folder
(s)\Honeywell. The path for Experion PKS SQL logs is\Honeywell\Experion PKS and you cannot change this path.
9. Click Change to define the paths.
The Experion Network Selection page is displayed.
Select the appropriate EPN, supervisory and auxiliary network. Three levels of networks areavailable on an Experion system. for more information, refer to the section, Overview ofExperion Process Control Network (PCN).
RSLinx option is applicable only if PCIC card is available on your system. RSLinx must beinstalled manually after completion of Experion installation. For more information, refer to theInstalling RSLinx Classic.
For ESVT, ES-T, EAPP ACE-T, PCUS, and ELCN History Module nodes, you can either selectLCNP4, K4LCN (with ETNI) or ELCN card in the auxiliary network, even if EPN or supervisorynetwork is selected.
- 44 -
Chapter 4 - Installing Experion on Honeywell-qualified platforms

Chapter 4 - Installing Experion on Honeywell-qualified platforms
10. Click Next.
Depending upon the node type and network selection, the appropriate page listed in thefollowing table is displayed.
Node type and network Display page
l FTE is selected as EPN on Server (ESV)
l Server TPN connected (ESVT) nodes
FTE Bootp and NTP IP AddressConfiguration page
l Ethernet is selected as EPN on Server(ESV)
l Server TPN connected (ESVT) nodes
EthNet_Sim and NTP IP AddressConfiguration page
FTE or Ethernet EPN is user-selected orchosen by default
IP config page
ATTENTIONThe IP addresses listed in the IP config page are used for Level 1 to Level 2controller communication. You can modify this information by performing thefollowing steps after the installation is complete.
a. In Control Builder, click System Preferences.
b. Enter the appropriate information in the Base IP Address, Subnet Mask,Default Gateway fields.
c. Enter the appropriate information in the NTP First IP Address and NTPSecond IP Address fields. The first IP address is set as Server A’s IP addressand the second IP address is set as Server B’s IP address by default. They areused as the time synchronization nodes for the controllers.
11. Click Next.
The Feature and Options Selection page is displayed. Select the method of Experioninstallation.
l Select Typical to install the default features installed for a node.
l Select Custom to add Add-on or Licensed features in addition to the Typical install.
NOTEBeginning from Experion 501, TPN is available as embedded component withExperion. To install TPN, you can select TPN Personality (US) option inCustom tab. Based on the node type, appropriate TPN Personality isautomatically installed. On ESVT, EAPP and ACET, TPN Personality- AxM isinstalled. On EST node, TPN Personality- UxS is installed.
TIPIf you are installing Flex node on a system with Microsoft Windows Server 2016operating system, and want to install a Remote Engineering Station Server(RESS) node, select Enable Terminal ServicesEnable Terminal Services (alsoknown as Remote Desktop Services). For more information, refer to EnablingRemote Desktop Services on Flex nodes.
- 45 -

12. Click Next.
The Remote Server Dialog page is displayed. This page is displayed only if you are installingCollaboration Station node. Enter the eServer name on which the Collaboration Station nodemust be installed.
13. Click Next.
The Experion Accounts Password Entry page is displayed. Type password for all the accountscreated during installation.
Password for the accounts must adhere to the following rules.
l Passwords cannot contain the user’s account name or parts of the user’s full name thatexceed two consecutive characters.
l Passwords must be minimum six characters and maximum 32 characters.
l Passwords must contain characters from three of the following four categories.o English uppercase characters (A through Z).o English lowercase characters (a through z).o Base 10 digits (0 through 9).o Non-alphabetical characters (-@#$%^&+='~!*()_+={}\\|:;\<>,.?/)
l Type the password for each applicable account.
l Type the confirmation password for each applicable account.
l For eServer, passwords for Standard access user and Standard access administratoraccounts must not contain any spaces.
l Passwords of local accounts must be configured to be the same on all nodes in theExperion cluster.
ATTENTIONThe Experion Server Name page is displayed for the ES-C., EST, ACE, ACE-T, EHG,and SCE nodes.
Perform the following steps in the Experion Server Name page.
a. In the Server Name field, specify the name of the server.
b. If you have redundant servers, select the Server is Redundant check box.
14. Click Next.
Honeywell Experion PKS - DialogManager page appears.
15. Click Next.
Honeywell Experion PKS System Initialization R200.1 - DialogManager page appears withconfiguration summary.
16. Check for the conditions to get this new dialog box. This Dialogbox appears only if init mediaoption is used during installation.
The Experion PKS Software Installation Settings page is displayed.
Perform the following steps, depending upon your requirement.
l Save the generated configuration files in a separate folder at the root of the C: drive, orUSB drive.
l Click OK when the confirmation message is displayed.
- 46 -
Chapter 4 - Installing Experion on Honeywell-qualified platforms

Chapter 4 - Installing Experion on Honeywell-qualified platforms
ATTENTIONl Configuration files for different nodes can be stored in different folders on the
external media.
l If you go back and make changes in Experion PKS System Initialization options,you are prompted to reenter product details.
17. Review the summary of the settings you selected, and click Install/Continue.
CAUTIONInstalling any software from untrusted sources can cause security vulnerability.Experion Installers are signed to protect from tampering. However, if the MSI istampered to inject malicious content it can be a security risk. If the tampered orunsigned MSI installers is invoked, then a warning is displayed during theinstallation.
18. The status of the Experion installation is displayed in the Status Display page.
The Support software installation continues.
19. On completing the Experion Support Software R500.1 media installation, click Yes to reboot.
ATTENTIONEnsure that you click Yes or No to complete the Experion installation. If you clickNo, you have to reboot manually.
4.2.2 Next steps
After you complete this task, refer the section Post-installation tasks.
- 47 -

POST-INSTALLATION TASKS
l Verifying completeness of Experion installation
l Configuring the computer for use within a Windows domain
l Configuring the Domain or Workgroup
l Configuring FTE Device Index if Experion is running with FTE
l Installing TPS personality module for T-nodes
NOTEOnly applicable for Experion version below 501. From Expreion 501, TPNPersonality is available as embedded component with Experion. During installation,select TPN Personality option in Custom tab of Feature and Options Selectionpage.
l Checking for updates on Honeywell Process Solutions website
l Applying the latest patches
l Installing the latest antivirus software
l Defragmenting the hard disk
l Installing RSLinx Classic
l Upgrading the firmware in hardware components
l Setting up time synchronization
l Installing Microsoft Excel
l Installing remote desktop services
l Installing a serial adapter, printer, or modem
l Installing the web server (IIS) role on the Experion server
l Backing up your system
l Configurations for eServer Premium Access clients
l Enabling comments in Programs and Features window
l Configuring secure communication settings
5.1 Verifying completeness of Experion installation
5.1.1 To verify completeness of Experion installation
- 48 -
CHAPTER
5

1. Using Notepad, open the ProductVersion.txt file located in the following path.
C:\Program Files(X86)\Honeywell\Experion PKS OR <%Experion
Software Path%>\Honeywell\Experion PKS.
2. Verify the ProductVersion.txt for the following:
+Experion PKS R500.x <Node Name> install completed on MM/DD/YYYY HH:MM:SSAM/PM.
If the above line is present, it indicates that the installation is successful.
Do not realign the drive letter after Experion installation. Otherwise, future patch installation may fail.
5.2 Configuring the computer for use within a Windows domain
Refer to the Network and Security Planning Guide for detailed information on the following topics.
l Selecting to use domains or workgroups.
l Understanding security in Experion users.
ATTENTIONl User accounts created during installation DO NOT have permission to be users of
the Experion software. User accounts must be created and assigned Experionprivileges.
l To use Experion, you must create at least one account for each Experion role usedat the site. It is recommended to create one account per user of Experion and assigneach account the specific role or roles that the users must have.
l DO NOT create an account with both Experion roles and Windows SystemAdministrator Role.
5.3 Configuring the Domain or Workgroup
Refer to the Windows Domain/Workgroup Implementation Guide for detailed information on thefollowing topics.
l Installing a domain controller and implementing Experion domain security.
l Adding a computer to a domain including the required step to link Experion security to thedomain (Link Domain Groups command).
l Creating user accounts and assigning Experion permissions.
l Domain Controller security policies and optional component (ESIS/DVD) installation
5.3.1 Domain Controller security policies and optional component(ESIS/DVD) installation
Considerations
l This package updates domain security policies ONLY. NO OTHER software is installed.
l If the computer is a Read-Only Domain Controller (RODC), refer to Windows Domain andWorkgroup Implementation Guide. For planning information, refer to Windows Domain andWorkgroup Planning Guide. For operation system migration information, refer the appropriateoperating system-specific implementation guide Windows Domain Implementation Guide forWindows Server 2008 R2/Windows Domain Implementation Guide for Windows Server 2012and Windows Domain Implementation Guide for Embedded Microsoft Windows Server 2016
- 49 -
Chapter 5 - Post-installation tasks

Chapter 5 - Post-installation tasks
Standard.
l Before you configure a system with Windows Server 2012 operating system as a domaincontroller, ensure that Microsoft .NET 3.5 is installed manually.
Prerequisites
l Ensure that a common account does not exist between ESIS and the installation node.
To start ESIS-based installation
1. In the Welcome to ESIS page, select OS Preparation with/without Product Install.
When prompted for the Windows credentials for the share.
l Type the <Domain Name>\Username and Password if you belong to a domain and if youhave share permissions.
l Type the <ESISServer IP>\Username and Password if you belong to a workgroup and ifyou have share permissions.
2. Select Product Install Only option.
ATTENTIONTo install Domain Controller packages, you must select the Product Install Onlyoption. Selecting the other options does not allow you to install the DomainController packages.
When prompted for the Windows credentials for the share.
l Type the <Domain Name>\Username and Password if you belong to a domain and if youhave share permissions.
l Type the <ESISServer IP>\Username and Password if you belong to a workgroup and ifyou have share permissions.
3. Click Next.
ATTENTIONAfter clicking Next, if an error message Multiple users cannot be connected tothe same network share appears, refer to the section “Troubleshooting Experionfor installation failure” in the Experion Software Installation User's Guide for thesolution.
4. To continue with the installation go to To continue with installation section.
To start DVD-based installation
1. Log on to the Domain Controller using an account that is a member of the “Domain Admins”group.
2. Insert the Experion PKS Installation media 1 into the DVD drive.
3. If the Honeywell Experion PKS Installer screen does not appear, using Windows Explorer, goto the browser folder on the Experion PKS Installation media 1, and double-click setup.exe.
The installer is automatically detected if it is executed on a Domain Controller.
4. To continue with the installation go to To continue with installation section.
- 50 -

To continue with installation
1. The Setup dialog box is displayed with the message, Do you want to install the ExperionPKS domain policies on this domain controller (Installing domain policies will install noother software on this machine)? NOTE: It may not be necessary to install these policieson more than one domain controller in a domain, or on the domain controller(s) for achild domain of a domain, where these policies are installed.
l Select No to go to the section Installing optional Experion components on the DomainController. This bypasses installation of the domain policies and proceeds to optionalcomponent installation.
l Select Yes to install the Honeywell Domain Controller group policies , user accounts, andgroups (this step also creates the DCSComServer account). Selecting Yes does not installany additional software on this domain controller.
The Honeywell Security Model - Domain Controller InstallShield Wizard is displayed.
2. Click Next to begin installation.
The License Agreement dialog box is displayed.
3. If you accept the license agreement, select I accept the terms in the license agreementand click Next.
If you do not accept the license agreement, click Cancel, and proceed to the section Installingoptional Experion components on the Domain Controller.
4. If the DcsComServer domain account does not exist in this domain, the DcsComServerPassword dialog box is displayed. Enter a strong password for this account in both fields, andclick Next.
The following page is displayed, depending upon the number of organizational units (OUs) ina domain.
If then...
the domain contains one or moreorganizational units (OUs)
Link Policies to the Domain or anOrganizational Unit page is displayed
the domain does not containorganizational units (OUs)
Ready to Install the Program page is displayed
5. If the Link Policies to the Domain or an Organizational Unit page is displayed, select oneof the following options, depending upon your preferences.
If then select the option...
you are not aware of the impact and side effects of linkingdomain policies to an OU
Install policies at Domainlevel
you want the Honeywell security domain policies to beapplied to the entire domain
Install policies at Domainlevel
you want to associate the Honeywell security domainpolicies with a single organizational unit
Link policies to anOrganizational Unit (OU)
Select the appropriate OU, and click Next.
The Ready to Install the Program page is displayed.
6. In the Ready to Install the Program dialog box, click Install to begin the domain controllersecurity package installation.
The Installing Honeywell Security Model–Domain Controller dialog box is displayed.
7. Once the installation is complete, the InstallShield Wizard Completed page is displayed.Click Finish to proceed.
8. Proceed with section Installing optional Experion components on the Domain Controller.
- 51 -
Chapter 5 - Post-installation tasks

Chapter 5 - Post-installation tasks
Installing optional Experion components on the Domain Controller
1. After the completion of the Honeywell security domain policies, the Setup dialog box isdisplayed with the message, Do you want to install optional Experion PKS components onthis domain controller? WARNING: if you answer “Yes” to this question, .NET 3.5 andinstaller-related software will be installed on this domain controller (if not alreadypresent), as it is required for the optional components that can be installed on thismachine.
l Click Yes to continue installing optional components.
l Click No to end the installation with no software installed on this domain controller.
ATTENTIONl Clicking Yes installs Microsoft .NET 3.5 SP1 on this domain controller if it is not
installed, even if no optional packages are installed during the procedure.
l If Microsoft .NET 3.5 SP1 is installed during this step, the system prompts for areboot.
l After the reboot, perform the following steps, depending upon your mode ofinstallation.
If you areinstallingfrom then...
ESIS a. Log on to the Domain Controller using an account that is amember of the “Domain Admins” group.
b. Double-click setup.exe at the root of the ESIS repositorypath.
The Welcome to ESIS Tool screen is displayed.
c. Select Product Install Only, and click Next.
The Welcome to the Honeywell Experion PKS InstallationSetup screen is displayed.
DVD a. Log on to the Domain Controller using an account that is amember of the “Domain Admins” group.
b. The Welcome to the Honeywell Experion PKS InstallationSetup screen is displayed.
If the Welcome to the Honeywell Experion PKSInstallation Setup screen does not appear, using WindowsExplorer, go to the browser folder on the Experion PKSInstallation media 1, and double-click setup.exe .
2. If a Microsoft User Account Control dialog box is displayed, click Yes.
The Setup type of Node to install dialog box is displayed.
3. Select Optional Features, and click Next.
The User and License Information dialog box is displayed.
4. Specify the customer name and company name in the Name and Company Name fieldsrespectively.
Click Next.
The Feature and Options Selection dialog box is displayed.
5. Select the Add-on Features check box.
Depending upon the Domain Controller type, select the required options from the list ofoptions displayed.
- 52 -

Domain Controller type Option
Read-Only Domain Controller(RODC)
Select the following options.
l System Management Runtime
l Fault Tolerant Ethernet (FTE)
l USB Storage Enable Disable
l Multifactor Authentication Domain PolicyTemplates
Writable Domain Controller Select the following options.
l System Management
l Fault Tolerant Ethernet (FTE)
l TPS Domain Console Configuration
l USB Storage Enable Disable
l Multifactor Authentication Domain PolicyTemplates
ATTENTIONSystem Management Runtime feature is not applicable for Windows Server 2008(32-bit) operating system.
Click Next.
The Summary dialog box is displayed.
6. Review the summary of the settings selected, and click Install.
The Experion PKS Status Display dialog box is displayed, indicating the feature beinginstalled/run.
7. If the System Management or FTE optional components were installed, perform the followingprocedure.
a. Select Start > Windows System > Control Panel > Run.
b. Type dcomcnfg, and click OK.
c. In the left pane of the Component Services window, select Component Services >Computers > My Computer.
d. Right-click on This PC > Properties > Change Settings.
The System Properties dialog box appears.
e. In the System Properties dialog box, click the COM Security tab.
f. Click Edit Default for Access Permissions.
g. In the Access Permission dialog box, click Add.
h. In the Enter the object names to select dialog box, type LOCAL SERVICE, and clickOK.
i. In the Access Permission dialog box, select LOCAL SERVICE and ensure that onlyLocal Access Allow is selected.
j. Click OK.
k. Click Edit Default for Launch and Activation Permissions.
l. In the Launch and Activate Permission dialog box, click Add.
m. In the Enter the object names to select dialog box, type LOCAL SERVICE
n. In the Launch and Activate Permission dialog box, select LOCAL SERVICE and ensurethe only permission check boxes that are checked are Local Launch Allow and Local
- 53 -
Chapter 5 - Post-installation tasks

Chapter 5 - Post-installation tasks
Activation Allow.
o. Click OK.
p. In the System Properties dialog box, click OK.
q. Close the Component Services window.
8. When all packages have been successfully installed, the Install Complete message isdisplayed. Click Yes to complete the installation.
The system restarts automatically. After restart, log on to the system.
5.4 Configuring FTE Device Index if Experion is running withFTE
ATTENTIONUse this section only if you are NOT using Experion PKS System Initialization media.
5.4.1 Setting up the FTE Device Index after Experion installation
1. Click Start > Windows System > Control panel > Network and Internet > Network andSharing Center > Change adapter settings.
The Network Connections window appears.
2. In the Network Connections window, right-click one of the FTE network connections (Yellowor Green) and choose Properties.
3. Click Continue to the User Account Control Prompt.
4. Select Honeywell FTE Mux-IM Protocol Driver, and choose Properties.
5. Verify the FTE MUX-IM Protocol Driver Properties dialog and select the Configure tab.
6. Select the Honeywell FTE Adapter in the left pane.
l Set the values for the following:o Device Index Value for the machine-Change the value to a unique number
from 1-511.
l Verify the values for the following:o The IPMC Destination Address (this is the multicast address assigned to the
FTE Community default as 234.5.6.7)o UDP Destination Port— Default is 51966o UDP Source Ports Port— Default is 47837
ATTENTIONYou can modify the IPMC address and the UDP source and destination ports,but it is recommended to retain the default settings.
7. From the Network Connections window, select the Honeywell FTE Adapter, right-click theadapter, and choose Properties.
8. Click Continue to the User Account Control Prompt if it appears.
- 54 -

9. Verify the Honeywell FTE Adapter Properties: Select Internet Protocol Version 4(TCP/IPV4) and choose Properties.
10. Verify IP Address and other IPV4 Settings. Correct any values that are incorrect or missing andthen click OK.
11. Restart your computer.
12. Log on as local administrator.
13. Wait until the machine has completed all the process starts and network connections andthen verify Network Settings using IPConfig/all command from the command prompt. If FTEMux Driver is working correctly, it is displayed in the command prompt as Honeywell FTEMUX-IM Virtual Miniport Driver.
5.5 Installing TPS personality module for T-nodes
Beginning from Experion 501, TPN is available as embedded component with Experion. To installTPN, you can select TPN Personality (US) option in Custom tab during Experion installation. Youcan skip this step if using Experion version 501 or higher.
ATTENTIONl This post-installation task is NOT applicable for Console station (ES-C), Console
Extension station (ES-CE), RESS node,Collaboration station, and Flex station (ES-F).
l The LCNP personality software is necessary for the node to operate as a TPN/LCNnode.
l Install the appropriate personality version, depending on your TPN/LCN version(R641.2 or greater).
l If you need to check the version of an installed and loaded AxM personality, see“Verifying TPN/LCN Installation and Version” section in the Integrated Experion-TPS User's Guide.
l If the package type is SETUP.exe, follow instruction from To install TPS personalityfor versions older than TPN R685 release section and if the package is<filename>.msi follow the instructions from To install TPS personality for TPNR685 and later releases section.
5.5.1 To install TPS personality for versions older than TPN R685release
1. To install the LCNP Personality software on the local drive.
l For ES-T node, insert the GUS-TPN Software CD.
l For ESVT node, insert the Application Module Software CD.
l For ACE-T node, insert the Application Module Software CD.
l For E-APP node, insert the Application Module Software CD.
2. Double-click the setup.exe file.
The Welcome dialog box is displayed.
3. Click Next.
The License Agreement dialog box is displayed.
- 55 -
Chapter 5 - Post-installation tasks

Chapter 5 - Post-installation tasks
4. Select Yes, and click Next.
The User Information dialog box is displayed. Perform the following:
l Enter the name and Company name in the Name and Company fields respectively.
l Enter 1 as the serial number in the Serial field.
5. Click Next.
The Enter Information dialog box is displayed.
6. Enter C: as the drive letter and click Next.
The Setup Type dialog box is displayed.
7. Select the Typical option and click Next.
The Start Copying Files dialog box is displayed.
8. Click Next.
The installation begins.
9. Click Finish.
10. Close the Windows Explorer and remove the CD.
5.5.2 To install TPS personality for TPN R685 and later releases
1. To install the LCNP Personality software on the local drive.
l For ES-T node, insert the GUS-TPN Software CD.
l For ESVT node, insert the Application Module Software CD.
l For ACE-T node, insert the Application Module Software CD.
l For E-APP node, insert the Application Module Software CD.
2. Double-click the .msi file depending upon the node type.
l For ES-T node, double-click tps-unpw.msi.
l For ESVT, ACET, E-APP nodes, double-click tps-amw personality (am).msi.
The Welcome dialog box is displayed.
3. Click Next.
The License Agreement dialog box is displayed.
4. Read the software license agreement, select I accept the terms in the license agreement,and click Next.
The Customer Information dialog box is displayed. Perform the following:
l Enter the User Name and Organization.
l Select Anyone who uses this computer (all users).
5. Click Next.
The Setup Type dialog box is displayed. Select the setup type as Complete.
6. Click Next.
The Ready to Install the Program dialog box is displayed.
7. Click Install.
The installation begins.
8. Click Finish.
9. Close the Windows Explorer and remove the CD.
- 56 -

5.6 Checking for updates on Honeywell Process Solutionswebsite
Download Honeywell software updates, documentation, and recommended antivirus updates fromthe Honeywell Process Solutions website(http://www.honeywellprocess.com).
ATTENTIONl You must access the Honeywell Process Solutions website from a secured
computer, rather than from a node within your Experion system.
l To access zip file, save the file in the local drive and then open.
5.6.1 To access the Honeywell Process Solutions website1. In a web browser, type the following URL.
https://www.honeywellprocess.com/support
The SUPPORT page appears, and the Search Knowledge Base tab is selected by default.
2. Select Click Here to Login in the top-right corner of the page.
The home page appears.
3. If you are a new user, register at this website. Click Register, and follow the on-screeninstructions.
4. If you are already registered, type your Account Login user name and password, and clickLogin.
Your account name appears in the top-right of the page.
5.7 Applying the latest patches
The list of supported antivirus applications, and their recommended configuration, is maintainedon the Honeywell Process Solutions website. If you are a new user, you must register for access atthis site.
Review the antivirus recommendations and folder exclusions. Refer to the antivirusrecommendations and folder exclusions details at, https://www.honeywellprocess.com/en-us/support/pages/search-results.aspx?k=Anti%2Dvirus
ATTENTIONl You must access the Honeywell Process Solutions website from a secured
computer, rather than from a node within your Experion system.
l To access zip file, save the file in the local drive and then open.
5.7.1 To access the Honeywell Process Solutions website
- 57 -
Chapter 5 - Post-installation tasks

Chapter 5 - Post-installation tasks
1. In a web browser, type the following URL.
https://www.honeywellprocess.com/support
The SUPPORT page appears, and the Search Knowledge Base tab is selected by default.
2. Select Click Here to Login in the top-right corner of the page.
The home page appears.
3. If you are a new user, register at this website. Click Register, and follow the on-screeninstructions.
4. If you are already registered, type your Account Login user name and password, and clickLogin.
Your account name appears in the top-right of the page.
5.7.2 To download and install hotfix
1. Open the Product Support page.
2. In Search Support Documentation, type hotfix.
The hotfixes and other non-security updates are displayed. These are the latest hotfixes fromMicrosoft that are approved for use in Experion.
ATTENTIONTo download the latest Experion patches, refer to the spreadsheet available at thefollowing link http://www.honeywellprocess.com/library/support/software-downloads/Experion/experion-update-matrix.zip.
5.8 Installing the latest antivirus software
ATTENTIONThis post-installation task is applicable for all the nodes.
Verify that the latest antivirus software is installed and patched to the proper version for youroperating system. You can find the latest antivirus solution information at.
http://www.honeywellprocess.com
ATTENTIONl You must access the Honeywell Process Solutions website from a secured
computer, rather than from a node within your Experion system.
l To access zip file, save the file in the local drive and then open.
To access the Honeywell Process Solutions website
1. In the web browser, type the following URL.
https://www.honeywellprocess.com/support
The Product Support page appears.
2. If you are a new user, register for access at this site. Click Register, and follow the instructions
- 58 -

on the screen.
3. If you are already registered, type your username and password, and then click Login.
Your account login name appears in the top-right of the page.
To apply the latest antivirus notification
1. Open the Product Support page.
2. To view and download the latest antivirus notifications, click Latest Notifications.
Or
In addition, you can search for the latest notification using the search modes available in theProduct Support page. The following table describes the search options. Choose any one ofthe following option and then perform the corresponding steps.
Option Description
Search Support Documentation
To use this option you must have anactive support contract.
a. Click Advanced.
The Advanced Support Document Searchpage is displayed.
b. Type all the details about the document oruse wildcards to search for the notification.Click Search.
For example, if you are searching for Anti-virus Software Guidelines, type theinformation and click Search. The documentis displayed.
Search by Product and Subscribeto Notifications
This provides the completeinformation about a specificproduct. In addition you can alsosubscribe to this page for alertswhere a notification is sent to youabout the published document.
a. Type the name of the product.
The related products are displayed.
b. Click the required product with the release.
The Documentation, Notifications, SoftwareDownloads and Security Updates for theparticular product are displayed.
For example, type Experion R500.1, andselect Experion R500.1 in the list of productsdisplayed. The page displays theDocumentation, Notifications, SoftwareDownloads and Security Updates tabs thatlist all the support documents related toExperion R500.1.
3. Locate the required notification.
4. Once you locate the required notification, click Download.
The required notification is downloaded on your computer.
5.9 Defragmenting the hard disk
5.9.1 Prerequisites
l Ensure that other applications (Experion Server, SQL Server, and so on.) are not running onyour computer because, this may require restarting the computer.
Considerations
- 59 -
Chapter 5 - Post-installation tasks

Chapter 5 - Post-installation tasks
l It is recommended that you add this task to your system's maintenance schedule, so that it isperformed during control shutdowns.
l You can upgrade the default fragmentation utility included with Windows to the full version.Executive Software's Diskeeper includes a scheduler, and can defragment folders andpagefiles when a computer restarts. Defragmentation tasks affect the control system if theyare set to run automatically with the scheduler. Care must be taken when schedulingdefragmentation tasks. For more details, choose Start > Windows Administrative Tools >Defragment and Optimize Drives, to refer to the Windows Help for Disk Defragmenter usingthe path.
5.9.2 To stop the services on servers and Console stations
1. Launch the Experion PKS Server.
The Experion PKS Server dialog box is displayed.
2. To stop the services of the Experion server, in Full mode of the Start-Stop Experion PKSServer window, select Database Unloaded.
3. Close all windows.
4. To stop the Experion PKS Control Data Access server services and RSLinx, perform thefollowing steps.
a. Select Start > Windows System > right-click This PC and select Manage.
The Server Manager window is displayed.
b. Expand Configuration> Services in the left pane.
c. Click Services.
A list of services is displayed in the right-pane.
d. Right-click Experion PKS Control Data Access server services, and choose Stop.
The Stop Other Services confirmation dialog box is displayed.
e. Click Yes to stop other dependency services.
5. For systems using ControlNet, perform the following procedures.
a. Right-click RSLinx Classic and choose Stop.
b. Right-click Harmony and choose Stop.
c. Close the Server Manager window.
5.9.3 To defragment the hard disk
1. Select Start > Windows System > Change Settings.
The System Properties dialog box appears..
2. Right-click the hard disk to defragment and choose Properties.
3. Click the Tools tab.
4. Click Defragment now.
The Disk Defragmentor dialog box is displayed.
5. Select the disk and then click Analyze disk.
This analyzes the fragmentation level of the drive. The defragmented disk is displayed in Date,Time, Percentage of fragmented disk format.
- 60 -

6. After the analysis is complete, click Defragment Disk to start defragmenting the hard disk.
Depending on the level of fragmentation and usage, the task may take time to complete.
7. When the defragmentation is complete, close the Disk Defragmentor application.
8. Close the Local Disk Properties window.
9. Restart the system.
5.10 Installing RSLinx Classic
Starting with Experion R410, Allen-Bradley RSLinx software is not included with the Experion PKSInstallation media.
The RSLinx Classic v3.9 software is available from Rockwell or their distributors. The RSLinxClassic v3.9 software with Embedded Microsoft Windows 10 Enterprise 2016 LTSB (x64) andEmbedded Microsoft Windows Server 2016 Standard is qualified for Experion R500. The RSLinxClassic v3.9 software can be installed using the RSLinx installation guide provided by Rockwell.
The RSLinx software is required for systems connecting to following:
l Rockwell Automation networks and devices
l Ethernet supervisory network including C200/C200E controllers
l ControlNet supervisory network including C200/C200E controllers
Perform the following steps if you have installed Experion Server (ESV) on a Controlnet (Ethernet)supervisory network.
There are four EPN and supervisory combination network where RSLinx must be installed. Formore information, refer to Overview of Experion Process Control Network (PCN).
1. Choose Start > Windows System > Control Panel > Run.
The Run dialog box is displayed.
2. Type services.msc.
The Services dialog box is displayed.
3. Right-click Experion PKS Control Data Access Server service and select Properties.
The Experion PKS Control Data Access Server Properties dialog box is displayed.
4. If the Experion PKS Control Data Access Server service is enabled, perform the followingsteps.
a. Set the Startup type as Disabled.
The Experion PKS Control Data Access Server service is disabled.
b. Restart the node.
c. Log on to the system with administrator privileges.
d. Install Install the qualified version of RSLinx Classic manually.
e. Enable the Experion PKS Control Data Access services.
5. If the Experion PKS Control Data Access Server service is disabled, perform the followingsteps.
a. Install the qualified version of RSLinx Classic manually.
b. Enable the Experion PKS Control Data Access services.
- 61 -
Chapter 5 - Post-installation tasks

Chapter 5 - Post-installation tasks
ATTENTIONHoneywell recommends the following sequence for installing RSLinx, to ensurethat Experion PKS Control Data Access Server works as intended.
a. Install Experion.
b. Manually install RSLinx.
c. Install Experion patches.
5.11 Upgrading the firmware in hardware components
If you installed Experion for use with process points, you must upgrade the firmware in hardwarecomponents.
ATTENTIONThis post-installation task is applicable only for Experion server.
Depending on the firmware that you want to upgrade, refer to the Control Builder set ofdocuments (as appropriate) available in the PDF collection.
5.12 Setting up time synchronization
For more information about how to set up time synchronization, see the SupplementaryInstallation Tasks Guide.
5.13 Installing Microsoft Excel
For more information about installing Microsoft Excel, see the Supplementary Installation TasksGuide.
5.14 Installing remote desktop services
For more information about installing a remote desktop services (previously known as terminalservices), see the Supplementary Installation Tasks Guide.
5.15 Installing a serial adapter, printer, or modem
For more information about installing a serial adapter, printer, printer drivers, modem, see theSupplementary Installation Tasks Guide.
5.16 Installing the web server (IIS) role on the Experion server
If you plan to use alarm paging for email, you must install the Web Server (IIS) role on theExperion server.
For more information about installing the Web server role, see the Supplementary InstallationTasks Guide.
5.17 Backing up your system
Back up your computer after installing Experion. You can use the backup facility provided withinthe operating system or the purchased backup software.
- 62 -

5.18 Configurations for eServer Premium Access clients
On eServer Premium Access clients, you must add the eServer server name and IP address tothe Trusted Sites zone to avoid Internet Explorer giving warnings when accessing pages on theeServer.
1. On the eServer Premium Access client node, open Internet Explorer.
2. Choose Tools > Internet Options.
3. Click the Security tab.
4. Select Trusted Sites and click Sites.
5. Uncheck Require server verification(https:) for all sites in this zone
6. Type the server name of the eServer node. Example: http://[Server Name]. Click Add.
7. Type the IP address of the eServer node. Example: http://[IP Address]. Click Add.
8. Click Close.
On eServer Premium Access clients, you must add the eServer server name and IP address toCompatibility view to access the Premium Access functionality.
1. On the eServer Premium Access client node, open Internet Explorer.
2. Choose Tools > Compatibility View settings.
3. Type the server name of the eServer node. Example: http://[Server Name]. Click Add.
4. Type the IP address of the eServer node. Example: http://[IP Address]. Click Add.
5. Click Close.
5.19 Enabling comments in Programs and Features window
Starting R400, during the installation of Experion and embedded third party software of Experion,a comment indicating that software was installed as a part of the Experion installation, is displayedin the Programs and Features window. This provides details about the application(s) installed as apart of Experion installation.
Perform the following steps to enable the Comments column in the Programs and Featureswindow.
1. Choose Start > Windows System > Control Panel > Programs and Features.
The Programs and Features window is displayed.
2. Right-click on the heading and choose More.
A dialog box is displayed containing the items that can be displayed as headings in thePrograms and Features window.
3. Select the Comments option.
The Choose Details dialog box is displayed.
4. Select Comments, and click OK.
The Comments column is now displayed Programs and Features window. It lists details of theapplications installed on the system.
5.20 Configuring secure communication settings
If you plan to use Secure Communications on the Experion nodes, you must perform cleaninstallation of the Experion nodes. Secure Communication is not supported on Experion nodescreated using an EBR image or a Virtual Machine template. For information about configuringSecure Communication settings, refer to the Secure Communications User’s Guide.
- 63 -
Chapter 5 - Post-installation tasks

GETTING ORIENTED WITH PRODUCT VERSION FILE
The ProductVersion file records the Experion packages and updates installed or removed on asystem, in the order as they were executed. The ProductVersion.txt file is located in the followingpath.
<Experion PKS Software Path>\Honeywell\ExperionPKS\
The file format is as follows:
ATTENTIONThe "+" sign indicates installation and the “-” sign indicates removal.
Examples:
1. +Experion PKS R432.1.06.0 Support Media Install started on 4/1/2016 7:25:29 AM
l Experion PKS R432.1 Server (ESV) install completed on 4/1/2016 7:38:27 AM
l Experion PKS R432.1 Server (ESV) install completed on 4/1/2016 7:38:27 AM
++ IE11Prerequisites:KB2533623;KB2670838;KB2729094;KB2731771;KB2786081;KB2834140
++ Internet Explorer Verification:IE 11 or Later verified
++ Windows Hotfixes:KB3033929
++ Silverlight Verification:Version 5.1 or later verified.
++ .NET Framework Verification:Version 4.5.2 or later verified
++ Honeywell Security Model - Workstation:043.021.00400
++ Microsoft SQL Server 2012:Microsoft SQL Server 2012
++ SQL Client Components:Microsoft SQL Server 2012 - 11.1.3000.0
++ Microsoft SQL Server Compact 4.0 SP1 x64 ENU:Version 4.0 SP1 or later verified
++ Microsoft SQLXML 4.0 SP1:SQL XML 4.0
++ Microsoft Access Database Engine 2010:Version 14.0.4763.1000 or later verified.
++ Microsoft Visual C++ 2005 Redistributable:8.0.61001
++ Microsoft Visual C++ 2008 Redistributable - x86 9.0.30729.6161:9.0.30729.6161
++ Microsoft Visual C++ 2010 x86 Redistributable - 10.0.40219:10.0.40219
++ Honeywell_HCI_Runtime:043.021.00400
++ Sentinel Protection Installer 7.6.5:7.6.5
++ Crystal Reports 8.5 Royalty-free Runtime Files:43.21.7900
++ SAP Crystal Reports runtime engine for .NET Framework 4 (32-bit):13.0.1.220
++ Diagnostic Framework:43.21.7900
++ Configuration Studio:043.201.0102
- 64 -
CHAPTER
6

++ HMIWeb Station and Display Builder:043.201.158
++ Display Builder 320.4:320.4.0050
++ Honeywell Logger Service:43.21.7900
++ Experion Server System Displays:43.21.7900
++ Experion PKS Server:43.21.7900
++ Quick Builder:043.201.0790
++ odbc_client:43.21.7900
++ Experion PKS Server Support:43.21.7900
++ Batch Application Services Client Component:43.21.7900
++ IEC 61850:043.020.00100
++ IEC870:043.020.0100
++ Honeywell MLServer:043.020.0100
++ Honeywell_EngineeringTools_Infrastructure:043.021.00400
++ Honeywell_EngineeringTools_Application:043.021.00400
++ Honeywell_Controller_Firmware:043.021.00400
++ Honeywell_Process_Detail_Display:043.021.00400
++ SYCON.net Honeywell EPKS:1.310.140617.12614
++ Honeywell_EngineeringTools_ProcSeqTkt:043.021.00400
++ Honeywell_SecureComm_Configuration:043.021.00400
++ Honeywell_SecureComm_Agent:043.021.00400
++ Honeywell_SecureComm_Manager:043.021.00400
++ Honeywell_EngineeringTools_Support:043.021.00400
++ Honeywell_Safeview:043.021.00400
++ Honeywell System Management Runtime:043.021.00400
++ Honeywell Computers and Network Equipment Provider:043.021.00400
++ Honeywell CANE Detail Displays:043.021.00400
++ Honeywell FTE Switch Configuration Tool:043.021.00100
++ Honeywell_Redirection_Manager:043.021.00400
++ Honeywell_IKB_Service:043.021.00400
++ Honeywell Signon Manager:043.021.00400
++ Honeywell Signon Manager ACR120USB plugin:043.021.00400
++ Honeywell USB Storage Disable:043.021.00400
++ Honeywell Profit Loop Assistant:043.001.04000
++ Honeywell Installation Builder:043.021.00400
++ Honeywell Experion Support and Maintenance Server:043.021.00400
++ Experion_TPS_System_Displays:043.021.00400
++ Honeywell_INF_Support:043.021.00400
++ Experion PKS - CAB Developer:Visual Studio 2012
++ Experion PKS - CAB:043.021.00400
++ Honeywell_CAB_Support:043.021.00100
++ Honeywell FTE MUX Driver:043.013.00101
++ Support Media:Refer to Support Media Entries
2. +<release number> Support Media Install started on 2/3/2012 9:13:38 AM
- 65 -
Chapter 6 - Getting oriented with Product Version file

Chapter 6 - Getting oriented with Product Version file
++ Patch Experion PKS <release number> Configuration Studio Patch 1 installed on 2/3/20129:23:32
++ Patch ExperionPKS.<release number>.Server.PatchB32003C.Build32 Installed on 2-3-2012 09:33:04
+<release number> Support Media Install aborted on 2/3/2012 9:38:16 AM
+<release number> Support Media Install resumed on 2/3/2012 9:41:03 AM
++ Patch Experion PKS <release number> Engineering Tools Patch2C Installed on 2-3-201209:46:39
+<release number> Support Media Install completed on 2/3/2012 9:47:50 AM
3. --<release number> ET Patch2 Uninstalled on 9-27-2009 11:00:00 PM
ATTENTIONl When Experion Support Software R501.1 is used during Experion installation,
entries in the ProductVersion.txt file are not in chronological order. ExperionSupport Software R501.1 entries come first followed by the Experion PKSInstallation media 1 entries.
l For the third party packages, ProductVersion.txt does not list the actual versionpresent in the system. Instead, it describes as minimum version or latest version ofthe package is verified in the system.
- 66 -

ENABLING REMOTE DESKTOP SERVICES ON FLEXNODES
A Remote Engineering and Station Server (RESS) node is a Flex node installed on a serveroperating system, where Terminal Services (also known as Remote Desktop Services) areenabled.
Starting R400.3, Terminal Services are not enabled by default for a Flex node installed on asystem with operating system. To install a RESS node during Experion installation, ensure thatyou select Enable Terminal Services option in the Feature and Options selection page.
However, if the Enable Terminal Services option is not selected for a Flex node during theExperion installation, it can also be enabled manually. Perform the following steps, to enable theRDS manually.
1. Logon to the system as a user with administrator privileges.
2. Click Start > Server Manager.
The Server Manager window appears.
3. In the Server Manager window, click Add Roles and features.
The Add Roles and features Wizard window appears.
4. Click Next.
The Installation Type tab appears.
5. Under Installation Type tab, select Role-baser or feature-based installation option.
6. Click Next.
The Sever Selection tab appears.
7. In Sever Selection tab, Select a server from the server pool option, and then selectrequired machine in the machine(s) list.
8. Click Next.
The Server Roles tab appears.
9. Under Server Roles tab, select Remote Desktop Services option.
10. Click Next.
The Features tab appears.
11. Click Next.
The Remote Desktop Services tab appears.
12. Under Remote Desktop Services tab select Role Services, and then select Remote DesktopSession Host option.
13. Click Next.
The Add Roles and Features Wizard window appears.
14. In Add Roles and Features Wizard window click Add Features button.
- 67 -
CHAPTER
7

15. Click Next.
The Conformation tab appears.
16. In the Conformation tab, click Install button.
The Results tab appears.
17. If a manual restart request appears in the Results tab, restart the system to complete theinstallation procedure.
- 68 -
Chapter 7 - Enabling Remote Desktop Services on Flex nodes

OPTIONAL FEATURES
l Licensed and non-licensed optional features for Experion
l Installing optional features
8.1 Licensed and non-licensed optional features for Experion
The following table lists the optional features that are available after Experion installation.
ATTENTIONWhile installing optional features on a Collaboration Station node, you may see manyfeatures that are not applicable for this node. The following features are applicable for thisnode.
l USB Storage Enable Disable
l IEC 60870
Licensed and non-licensed optional features table
- 69 -
CHAPTER
8

Feature Licensed? Supported operating system Supported nodes
CAB RemoteDebug
Y Unrestricted ACE, ACE-T, SCE
CAB Developer Y Unrestricted ESC, EST, ES-CE,ES-F
APP SolutionPack
Y Embedded Microsoft Windows Server 2016Standard
E-APP
CL Server Y Embedded Microsoft Windows Server 2016Standard
E-APP
GUS DisplayBuilder
Y Windows 7, Windows 2008 R2, EmbeddedMicrosoft Windows 10 Enterprise 2016 LTSB(x64), Embedded Microsoft Windows Server 2016Standard
Any Experion nodewhere GUSdisplays aredeveloped.
File Transfer Y Embedded Microsoft Windows 10 Enterprise2016 LTSB (x64), Embedded Microsoft WindowsServer 2016 Standard
ESV-T, ACE-T, ES-T, E-APP
GUS DisplayRuntime
Y Embedded Microsoft Windows 10 Enterprise2016 LTSB (x64), Embedded Microsoft WindowsServer 2016 Standard
ES-T
GUS MultipleDisplays
Y Embedded Microsoft Windows 10 Enterprise2016 LTSB (x64), Embedded Microsoft WindowsServer 2016 Standard
ES-T, ES-CE
GUS RemoteDisplays
Y Embedded Microsoft Windows 10 Enterprise2016 LTSB (x64), Embedded Microsoft WindowsServer 2016 Standard
ES-CE
Remote NativeWindow
Y Embedded Microsoft Windows 10 Enterprise2016 LTSB (x64), Embedded Microsoft WindowsServer 2016 Standard
ESV-T, eServer,ACE, ACE-T, SCE,ES-C, ES-CE, ES-F,EHG, EAS, EAPP,ESV
ExperionMobile Access
Y Embedded Microsoft Windows 10 Enterprise2016 LTSB (x64), Embedded Microsoft WindowsServer 2016 Standard
eServer
PRP NetworkDriver
Y Embedded Microsoft Windows 10 Enterprise2016 LTSB (x64), Embedded Microsoft WindowsServer 2016 Standard
ESV, ESC, ES-F
HSR NetworkDriver
Y Embedded Microsoft Windows 10 Enterprise2016 LTSB (x64), Embedded Microsoft WindowsServer 2016 Standard
ESV, ESC, ES-F
HMIWebSolution PackAdvanced
Y Embedded Microsoft Windows 10 Enterprise2016 LTSB (x64), Embedded Microsoft WindowsServer 2016 Standard
eServer, ESC, EST,ES-CE, ES-F, EAS,CollaborationStation.
RedirectionManager
N Windows 7, Windows 2008 R2, EmbeddedMicrosoft Windows 10 Enterprise 2016 LTSB(x64), Embedded Microsoft Windows Server 2016Standard
All exceptCollaborationStation.
RedirectionManagerConnectivity
N Windows 7, Windows 2008 R2, EmbeddedMicrosoft Windows 10 Enterprise 2016 LTSB(x64), Embedded Microsoft Windows Server 2016Standard
All exceptCollaborationStation.
PHD PointServer
N Windows 2008, Windows 2008 R2, EmbeddedMicrosoft Windows Server 2016 Standard
Displayed on non-Experion nodes
IEC870 N Embedded Microsoft Windows 10 Enterprise2016 LTSB (x64), Embedded Microsoft WindowsServer 2016 Standard
ESV, ESV-T, ESC,ES-T, ES-CE, ES-F,Collaboration
- 70 -
Chapter 8 - Optional features

Chapter 8 - Optional features
Station.
Profit SuiteEngineeringStudio
N Embedded Microsoft Windows 10 Enterprise2016 LTSB (x64), Embedded Microsoft WindowsServer 2016 Standard
ESC, ES-F
Profit SuiteOperatorStation
N Embedded Microsoft Windows 10 Enterprise2016 LTSB (x64), Embedded Microsoft WindowsServer 2016 Standard
ESC, ES-F
ODBC Client N Windows 7, Windows 2008 R2, EmbeddedMicrosoft Windows 10 Enterprise 2016 LTSB(x64), Embedded Microsoft Windows Server 2016Standard
Displayed on non-Experion nodes
MultifactorAuthenticationLogon Provider
N Windows 7, Windows 2008 R2, EmbeddedMicrosoft Windows 10 Enterprise 2016 LTSB(x64), Embedded Microsoft Windows Server 2016Standard
All exceptCollaborationStation.
SignonManager
N Windows 7, Windows 2008 R2, EmbeddedMicrosoft Windows 10 Enterprise 2016 LTSB(x64), Embedded Microsoft Windows Server 2016Standard
All exceptCollaborationStation.
SignonManager SmartCard Support
N Windows 7, Windows 2008 R2, EmbeddedMicrosoft Windows 10 Enterprise 2016 LTSB(x64), Embedded Microsoft Windows Server 2016Standard
All exceptCollaborationStation.
SignonManagerFingerprintPlugin
N Embedded Microsoft Windows 10 Enterprise2016 LTSB (x64), Embedded Microsoft WindowsServer 2016 Standard
All exceptCollaborationStation.
SignonManagerFingerprintEnrollment
N Windows 7 (32 and 64 bit), Windows 2008 32 bit,Windows 2008 R2, Embedded Microsoft Windows10 Enterprise 2016 LTSB (x64), EmbeddedMicrosoft Windows Server 2016 Standard
All exceptCollaborationStation.
SignonManagerDatabaseServer
N Windows 7(32 and 64 bit), Windows 2008 R2,Embedded Microsoft Windows 10 Enterprise2016 LTSB (x64), Embedded Microsoft WindowsServer 2016 Standard
All exceptCollaborationStation.
Safe View N Windows 7, Windows 2008 R2, EmbeddedMicrosoft Windows 10 Enterprise 2016 LTSB(x64), Embedded Microsoft Windows Server 2016Standard
All exceptCollaborationStation.
File TransferClient
N Embedded Microsoft Windows 10 Enterprise2016 LTSB (x64), Embedded Microsoft WindowsServer 2016 Standard
ES-CE, ES-F
IKB/OEP/OTPKeyboard
N Windows 7, Windows 2008 R2, EmbeddedMicrosoft Windows 10 Enterprise 2016 LTSB(x64), Embedded Microsoft Windows Server 2016Standard
All exceptCollaborationStation
ParallelOperationKeyboard
N Embedded Microsoft Windows 10 Enterprise2016 LTSB (x64), Embedded Microsoft WindowsServer 2016 Standard
ES-C, ES-F
HCI Runtime N Windows 7, Windows 2008 R2, EmbeddedMicrosoft Windows 10 Enterprise 2016 LTSB(x64), Embedded Microsoft Windows Server 2016Standard
All exceptCollaborationStation
SystemManagementRuntime
N Windows 7, Windows 2008 R2, EmbeddedMicrosoft Windows 10 Enterprise 2016 LTSB(x64), Embedded Microsoft Windows Server 2016Standard
All exceptCollaborationStation
- 71 -

For DC node: Windows 2008 R2, Windows 2012,Embedded Microsoft Windows Server 2016Standard
Experion APPTPS Client
N Windows 7, Windows 2008 R2, EmbeddedMicrosoft Windows 10 Enterprise 2016 LTSB(x64), Embedded Microsoft Windows Server 2016Standard
All exceptCollaborationStation
Fault TolerantEthernet
N Windows 7, Windows 2008 R2, EmbeddedMicrosoft Windows 10 Enterprise 2016 LTSB(x64), Embedded Microsoft Windows Server 2016Standard
For DC node: Windows 2008 R2, Windows 2012,Embedded Microsoft Windows Server 2016Standard
All exceptCollaborationStation
Applicationframework
N Embedded Microsoft Windows 10 Enterprise2016 LTSB (x64), Embedded Microsoft WindowsServer 2016 Standard
EAS
ProfibusGatewayModule (PGM)
N Embedded Microsoft Windows 10 Enterprise2016 LTSB (x64), Embedded Microsoft WindowsServer 2016 Standard
ESV, ES-C, ES-T,ES-F, ES-CE
OPC ServerConnect
N Windows 7, Windows 2008 R2, EmbeddedMicrosoft Windows 10 Enterprise 2016 LTSB(x64), Embedded Microsoft Windows Server 2016Standard
Displayed on non-Experion nodes
App Base Y Embedded Microsoft Windows Server 2016Standard
E-APP
BatchApplicationServices
N Embedded Microsoft Windows 10 Enterprise2016 LTSB (x64), Embedded Microsoft WindowsServer 2016 Standard
ESV, EAS, ESV-T,eServer, ESC, ES-T, ESF, ES-E,EHG,ACE, ACET, SCE,EAS
ESM Server N Embedded Microsoft Windows 10 Enterprise2016 LTSB (x64), Embedded Microsoft WindowsServer 2016 Standard
ESV, ESV-T, EAS
DiagnosticStudio
N Embedded Microsoft Windows 10 Enterprise2016 LTSB (x64), Embedded Microsoft WindowsServer 2016 Standard
ESV, ESV-T,eServer, ESC, ES-T, ES-CE, ES-F, E-APP, EAS
TPS DomainConsoleConfiguration
N Windows 2008 32-bit, Windows 2008 R2,Windows 2012, Embedded Microsoft WindowsServer 2016 Standard
WDC Node
USB StorageEnable Disable
N Windows 2008 32-bit, Windows 7, Windows 2008R2, Windows 2012, Embedded MicrosoftWindows 10 Enterprise 2016 LTSB (x64),Embedded Microsoft Windows Server 2016Standard
Unrestricted
MultifactorAuthenticationDomain PolicyTemplates
N Windows 2008 32-bit, Windows 7, Windows 2008R2, Windows 2012, Embedded MicrosoftWindows 10 Enterprise 2016 LTSB (x64),Embedded Microsoft Windows Server 2016Standard
DC Node
Experion PKSSystemDocumentation
N Windows 7 (32 and 64 bit), Windows 2008 32 bit,Windows 2008 R2, Windows 2012, EmbeddedMicrosoft Windows 10 Enterprise 2016 LTSB(x64), Embedded Microsoft Windows Server 2016Standard
Unrestricted
Experion PKS N Windows 7 (32 and 64 bit), Windows 2008 32 bit, Unrestricted
- 72 -
Chapter 8 - Optional features

Chapter 8 - Optional features
SCN,Installation,and Migration
Windows 2008 R2, Windows 2012, EmbeddedMicrosoft Windows 10 Enterprise 2016 LTSB(x64), Embedded Microsoft Windows Server 2016Standard
HMIWebSolution PackRuntime
N Embedded Microsoft Windows 10 Enterprise2016 LTSB (x64), Embedded Microsoft WindowsServer 2016 Standard
ESV, ESV-T,eServer, ESC, ES-T, ES-CE, ES-F,EAS, Collab Stn.
HMIWebSolution PackStandard
N Embedded Microsoft Windows 10 Enterprise2016 LTSB (x64), Embedded Microsoft WindowsServer 2016 Standard
ESV, ESV-T,eServer, ESC, ES-T, ES-CE, ES-F,EAS, Collab Stn
TPN Personality(US)
N Embedded Microsoft Windows 10 Enterprise2016 LTSB (x64), Embedded Microsoft Windows
Server 2016 Standard
ESVT, EAPP, ACE-T, ES-T
TPN Personality(AM)
N Embedded Microsoft Windows 10 Enterprise2016 LTSB (x64), Embedded Microsoft Windows
Server 2016 Standard
ESVT, EAPP, ACE-T
MicrosoftUpdates
N Embedded Microsoft Windows 10 Enterprise2016 LTSB (x64), Embedded Microsoft Windows
Server 2016 Standard
Unrestricted
ATTENTIONThe PMD features can be installed only with the correct PMD option Experion license.
Experion withPMD Controller
Y Embedded Microsoft Windows Server 2016 Standard ESV, ESV-T
PMD HMIExtension
Y Embedded Microsoft Windows 10 Enterprise 2016 LTSB (x64),Embedded Microsoft Windows Server 2016 Standard
ES-C, ES-T,ES-F, CONEXT
8.2 Installing optional features
NOTEOnce the optional features installation is completed successfully, apply the latest availableExperion consolidated patch or support media on the node. This will bring the installedoptional features up to the latest available version.
This section describes how to install optional features on a system where Experion is installed.
8.2.1 Prerequisites
l If optional features are installed on your system, do not configure your system using ExperionPKS System Initialization media.
l If optional features are already installed on your system, ensure that you provide the samepath for Experion installation.
l Before you install optional features on the non-Experion nodes, ensure that you haveinstalled .NET 4.5 on that system.
1. Log on to the computer using an account with administrator rights.
- 73 -

2. Perform the following steps depending upon the mode of installation.
Installationtype Procedure
ESIS from anetwork share
a. Type \\ESISServer IP>\<ShareName> in the Windows Run dialogbox (Start > Run) to connect to the ESIS repository.
b. Press ENTER. If you are prompted for the Windows credentials.
l Type the <Domain Name>\Username and Password if youbelong to a domain and if you have share permissions.
l Type the <ESISServer IP>\Username and Password if youbelong to a workgroup and if you have share permissions.
l Clear the Remember Password check box.
c. Double-click setup.exe at the root of the \<ShareName>. Ifprompted for user account control, click Allow. If you areprompted for the Windows credentials.
l Type the <Domain Name>\Username and Password if youbelong to a domain and if you have share permissions.
l Type the <ESISServer IP>\Username and Password if youbelong to a workgroup and if you have share permissions.
l Clear the Remember Password check box.
d. In the ESIS Install Utility, select Product Install.
e. Enter the ESIS credentials in the ESIS information section.
ESIS from aUSB drive
a. Insert the USB drive or removable hard drive (containing theESIS repository) into your machine.
b. Browse to the ESIS repository location in the USBdrive/removable hard drive and double-click setup.exe at the rootof the ESIS repository path.
c. In the ESIS Install Utility, select Product Install.
Experion PKSInstallationmedia 1
a. Insert the Experion PKS Installation media 1. Double-clicksetup.exe at the root of the media.
b. Select Yes if a Microsoft User Account Control dialog box isdisplayed.
c. The Dialog Manager starts after setup.exe prepares theinstallation environment.
The Welcome page is displayed.
3. Click Next.
If you are prompted for Windows credentials.
l Type the <Domain Name>\Username and Password if you belong to a domain and if youhave share permissions.
l Type the <ESISServer IP>\Username and Password if you belong to a workgroup and ifyou have share permissions.
4. Click Next.
The License Agreement page is displayed.
5. Select I accept the terms in the License agreement after reading the EULA and click Next.
The User and License Information page is displayed.
- 74 -
Chapter 8 - Optional features

Chapter 8 - Optional features
6. The User and License Information page is displayed. Type the Customer Name andCompany Name.
ATTENTIONl Do not enter ampersand (&) in the Company Name and Customer Name
fields.
l For ESV, EHG, EAS, eServer, and T-Node types, perform the following:
a. Select Yes for Are there Licensed TPS Components to install? if you wantto install TPS components such as GUS displays, file transfer, App node base,App solution pack and/or CL Server.
b. Specify the TPS license number and Authorization.
7. Click Next.
The Feature and Options Selection page is displayed. By default, selected features areinstalled for a node. You can select additional optional features. Select the Custom option andselect the appropriate options to install the Add-on and licensed components.
ATTENTIONYou must select Profibus Gateway Module to install Sycon.net.
8. Click Next.
The Experion Accounts Password Entry page is displayed. Type the passwords for allaccounts that are created during installation. Password for the accounts must adhere to thefollowing rules.l
Must not contain the user’s account name or parts of the user’s full name that exceed twoconsecutive characters.
l
Must be minimum 6 characters and maximum 32 characters in length.l
Must contain characters from three of the following four categories.o English uppercase characters (A through Z).o English lowercase characters (a through z).o Base 10 digits (0 through 9).o Non-alphabetical characters (- @ # $ % ^ & + = ' ~ ! * ( ) _ + = { }\\ | : ; \ < >, . ? /).
Space is also a non-alphabetical character.
ATTENTIONThe Experion Accounts Password Entry page is displayed based on the featuresselected in the Features and Options Selection page.
9. Click Next.
The Experion PKS Software Installation Settings page is displayed.
10. Review the summary of the settings you have selected in the installation page and clickInstall.
The Experion PKS Status Display page is displayed, indicating the feature beinginstalled/run.
11. After the installation is complete, the Install Complete message is displayed. Click Yes torestart the system.
- 75 -

MAINTAINING AN ESIS REPOSITORY
l Upgrading an existing ESIS repository
l Restarting a failed ESIS repository creation
l Removing an existing ESIS repository
9.1 Upgrading an existing ESIS repository
9.1.1 Prerequisites
You must disable On Access Scan for your antivirus program before upgrading ESIS.
1. Launch R500.x > ESISPrepUtil.
The Welcome to ESIS dialog box is displayed. Select Upgrade an Existing ESIS Repository
2. Click Next.
The ESIS Repository Selection dialog box is displayed. Perform the following stepsdepending upon the location of your ESIS repository. Select the name of the ESIS repositoryyou want to upgrade.
ESIS repository location Procedure
To select an ESIS repository in your localsystem.
a. Select the name of the ESISrepository you want to upgrade.
b. Click Next.
To browse to an ESIS repository residing onan external USB drive
a. Click Select.
b. Click Browse to select the locationof the ESIS repository.
c. Click Next.
ATTENTIONThe destination folder must be USB drives, removable hard drives, or local systemdrives only.
3. Click Next.
The Select Media dialog box is displayed. Select the check boxes next to the names of themedia you want to select for ESIS repository creation
4. Click Start.
The Status Display dialog box is displayed. The upgrade process begins.
- 76 -
CHAPTER
9

The status of the upgrade process is displayed in the Status Display dialog box.
l The selected media is displayed on the left pane of the Status Display dialog box.
l The Current Step displays the progress of the current media being copied.
l The Overall Progress displays the progress of all the media being copied.
l The Description displays a message related to the current media being copied.
5. After the upgrade is complete, the Description is updated to ESIS Repository [<Name>]created successfully at <Destination Location>.
6. Click Finish.
ATTENTIONEnsure that you enable On-Access Scan for your virus protection software afterupgrading ESIS.
9.2 Restarting a failed ESIS repository creation
You can restart a failed ESIS repository using one of the following methods.
9.2.1 Restarting using ESISPrepUtil
1. Launch R500.x > ESISPrepUtil.
The Welcome to ESIS dialog box is displayed. Select the Resume a Failed ESIS RepositoryCreation option.
2. Click Next.
The ESIS Repository Selection dialog box is displayed. Select the name of the ESIS repositoryyou want to restart/resume.
3. Perform the steps specified in Proceeding with ESIS repository restoration.
9.2.2 Retsarting using Experion PKS Installation media
1. Insert Experion PKS Installation media.
The Honeywell Experion PKS Installer screen is displayed.
2. Click Setup an Experion Software Installation Server.
The Welcome to ESIS page is displayed.
The options in the Welcome to ESIS page are as follows:
l Create a new ESIS repository
l Upgrade existing ESIS repository
l Resume a failed ESIS repository creation
l Remove an existing ESIS repository
3. Select Resume a failed ESIS repository creation.
4. Perform the steps specified in Proceeding with ESIS repository restoration.
- 77 -
Chapter 9 - Maintaining an ESIS repository
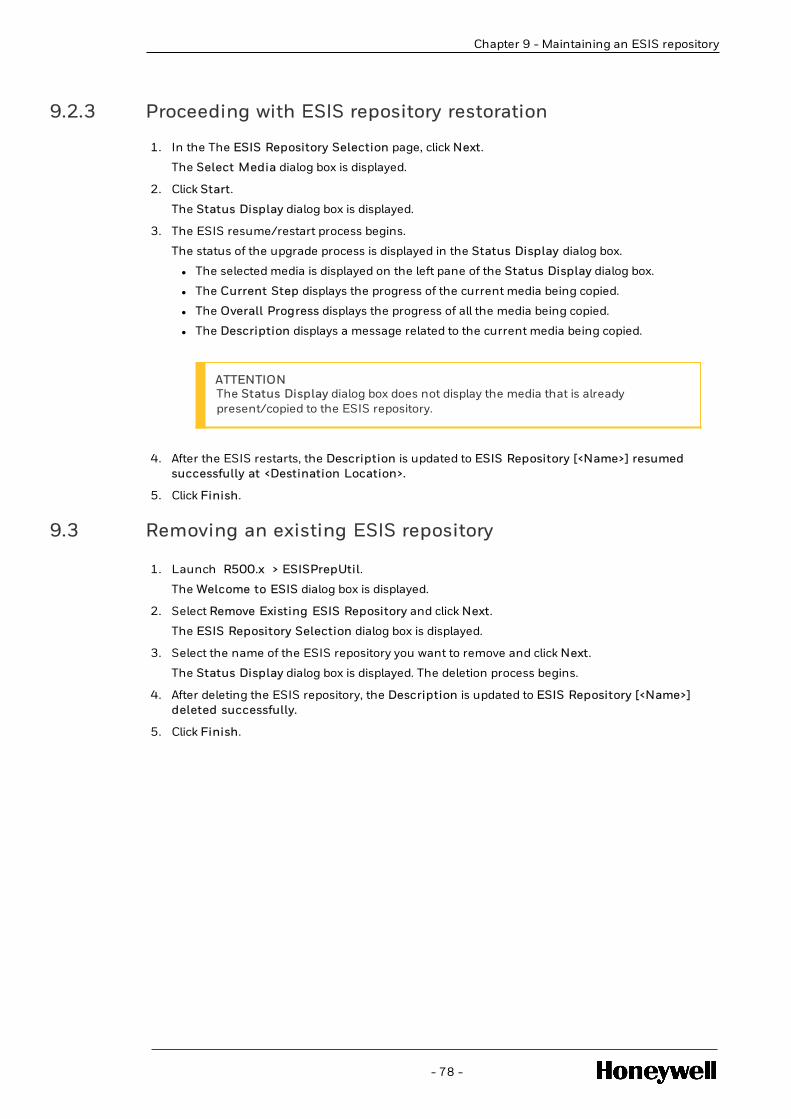
Chapter 9 - Maintaining an ESIS repository
9.2.3 Proceeding with ESIS repository restoration
1. In the The ESIS Repository Selection page, click Next.
The Select Media dialog box is displayed.
2. Click Start.
The Status Display dialog box is displayed.
3. The ESIS resume/restart process begins.
The status of the upgrade process is displayed in the Status Display dialog box.
l The selected media is displayed on the left pane of the Status Display dialog box.
l The Current Step displays the progress of the current media being copied.
l The Overall Progress displays the progress of all the media being copied.
l The Description displays a message related to the current media being copied.
ATTENTIONThe Status Display dialog box does not display the media that is alreadypresent/copied to the ESIS repository.
4. After the ESIS restarts, the Description is updated to ESIS Repository [<Name>] resumedsuccessfully at <Destination Location>.
5. Click Finish.
9.3 Removing an existing ESIS repository
1. Launch R500.x > ESISPrepUtil.
The Welcome to ESIS dialog box is displayed.
2. Select Remove Existing ESIS Repository and click Next.
The ESIS Repository Selection dialog box is displayed.
3. Select the name of the ESIS repository you want to remove and click Next.
The Status Display dialog box is displayed. The deletion process begins.
4. After deleting the ESIS repository, the Description is updated to ESIS Repository [<Name>]deleted successfully.
5. Click Finish.
- 78 -

REMOVING EXPERION APPLICATIONS
l About maintenance tool
l Removing all Experion applications
l Removing individual Experion feature packages
l Removing Experion Support and Maintenance server
l Removing Experion patches
10.1 About maintenance tool
NOTEOnce the optional features installation is completed successfully, apply the latest availableExperion consolidated patch or support media on the node. This will bring the installedoptional features up to the latest available version.
Experion Maintenance Tool provides information about the Experion features, programs, andpatches installed on your system, as part of the Experion product. It also provides you the optionto remove an Experion feature, program, or patch without using the Microsoft Windowscomponents (Programs and Features).
You can perform the following operations using the Maintenance Tool.
l View Installation Options: This option displays the selections made during Experioninstallation such as installation paths, features, and so on.
l View/Modify Experion product: This option displays the individual packages installed and tomodify configuration made during Experion installation. The View/Modify Experion productconsists of the following options.
o Click Add Optional Experion Features to view the optional feature(s) that can beinstalled. Select the feature(s) you want to add, and continue with installing optionalfeatures.
o Click View/Remove Optional Experion Features to view or remove optional featuresinstalled as part of Experion product. Select the feature(s) you want to remove andclick Uninstall.
o Click View/Uninstall Experion updates to view or remove patches installed onExperion. To remove a patch, select the patch and click Uninstall.
l View Experion Feature Packages/Uninstall Experion Product: This option displaysinformation about the packages installed as a part of Experion product.
o Click View Experion Feature Packages/Uninstall Experion Product to view theindividual packages installed and/or, to remove the entire Experion product.
o Click Uninstall All to remove all Experion packages.
Maintenance Tool can be launched in the following methods.
- 79 -
CHAPTER
10

l Launch the Maintenance Tool.o When the Maintenance Tool is launched by clicking on the above options, it is
launched only in View mode. You cannot remove any Experion features, programs, orpatches installed on your system You must be a member of at least one of theExperion created Windows groups.
o When the Maintenance Tool by clicking on the above options, and right-clickingMaintenance Tool, and choosing Run as administrator, a User Account Controldialog box is displayed. The application is now launched with privileges where bothview and remove operations can be performed. To perform this operation, you mustbe part of Administrators and Product Administrators group.
l From the Control Panel.o Choose Start > Windows System > Control Panel > Programs > Programs and
Features.
o In the Uninstall or change a program screen, select Honeywell Experion PKSR500.1.
o The application is now launched with privileges where both view and removeoperations can be performed. To navigate to the Maintenance Tool as above, youmust be a part of Administrators and Product Administrators group.
ATTENTIONl Maintenance Tool is not available on non-Experion nodes where optional features
are installed.
l Performing uninstallation of Optional Features by launching Maintenance Toolfrom Program and Features might result in loss of windows explorer process.
10.2 Removing all Experion applications
Use the Maintenance Tool to remove all the installed applications.
- 80 -
Chapter 10 - Removing Experion applications

Chapter 10 - Removing Experion applications
ATTENTIONl Removing Experion does not remove third-party software that was originally
installed. Remove the third-party software manually one at a time using theProgram and Features option.
l Before starting the removal, you must stop the SNMP services. Use the ExperionPKS Start-Stop Services Control Panel tool to stop all services manually beforeremoving all packages.
l If PMD is installed on your system, remove PMD manually before removingExperion.
l If ESM, is installed on your system, remove them manually after removing Experion.
TIPo To remove ESM, refer to the section, Removing Experion
Support and Maintenance server.
o To remove PMD, refer to the PMD Software Installation User’sGuide.
l Performing uninstallation of Optional Features by launching Maintenance Toolfrom Program and Features might result in loss of windows explorer process.
1. Log on to your computer using Windows account which is a part of Administrators andProduct Administrators group.
2. Launch the Maintenance Tool.
The Maintenance Tool dialog box is displayed.
The Maintenance Tool displays the components and versions installed on your computer.Select one of the following options to remove Experion applications.
l Click View Installation Options, the InstallationSummary.txt file is displayed whichcontains the settings specified during Experion installation such as paths, features, andso on.
l Click View/Modify Experion Product to view the individual packages installed and/or, tomodify/configure Experion product..
l Click View Experion Feature Packages/Uninstall Experion Product to to view andremove the latest patch installed on Experion. Select the patch you want to remove, andclick Uninstall.
3. Click on View Experion Feature Packages/Uninstall Experion Product link to view theindividual packages installed and/or remove the entire Experion product. Click Uninstall All toremove ALL Experion packages.
4. As the removal proceeds, check the lower-left corner of the dialog for status messages oneach package and the progress bar. During the removal process, the dialog is refreshed andremoved packages are no longer visible.
5. If you want to cancel the removal at any time, click Exit. Before exiting, the package currentlybeing removed is completed.
A log file is created in the Install folder, located in the path,<Install drive>\<Install
path>\Honeywell\ Experion PKS\, for any actions taken during use of the tool.
6. Select This program installed correctly if the Program Compatibility Assistant dialog box isdisplayed.
- 81 -

7. The removal operation is complete when the message area in the lower-left area of the dialogdisplays either Uninstall Completed or the number of package failures (if any). Anyremaining packages that failed are visible in the dialog. Click Exit.
8. Reboot your computer to finish the removal of the packages.
10.3 Removing individual Experion feature packages
ATTENTIONl Refer this section only if Honeywell recommends its usage. Removing individual
Experion feature packages without help from Honeywell is not advisable due todependencies.
l Installing Experion, by default, hides all the Honeywell Experion PKS packages inPrograms and Features.
l The following optional features cannot be removed using the Maintenance Tool.o PMD controller
o PMD HMI Extension
o EMDB Server
o ESM Server
o CAB Remote Debug
o CAB Developer
o Redirection Manager Connectivity
o TPN Personality (AM)
o TPN Personality (US)
o Microsoft Updates
10.4 Removing Experion Support and Maintenance server
For information about removing ESM, refer to the section "Removing ESM" in the ExperionSupport and Maintenance Installation Guide.
10.5 Removing Experion patches
Perform the following steps to remove Experion patches installed on your system.
ATTENTIONBefore starting the removal, you must stop the SNMP services. If PMD is installed, use PDSServer tool from Start > PMD > Start Or Stop PDS Server and stop the PMD services. Usethe Experion PKS Start-Stop Services Control Panel tool to stop all services manuallybefore removing all packages.
1. Log on to the computer using a Windows account part of Administrators and ProductAdministrators group.
2. Launch the Maintenance Tool.
The Maintenance Tool dialog box is displayed.
- 82 -
Chapter 10 - Removing Experion applications

Chapter 10 - Removing Experion applications
3. The Maintenance Tool displays the components and versions installed on your computer. ClickView/Remove Experion updates to remove the latest patch installed on Experion.
The list of Experion patches installed on the system are displayed.
4. Select the patch to be removed, and click Remove.
The selected patch is removed.
ATTENTIONl Some patches cannot be removed. For these patches, Uninstall option is
disabled. Refer to the SCN of the corresponding patch for details.
l Maintenance Tool is not available on non-Experion nodes where optionalfeatures and patches for optional features are installed. Patches must beremoved manually, one after the other, through Programs and Features.
- 83 -

REINSTALLING EXPERION APPLICATIONS
l Reinstalling Experion installed with default paths
l Reinstalling Experion installed with custom installation paths
11.1 Reinstalling Experion installed with default paths
Perform the following steps to reinstall Experion installed on default paths.
ATTENTIONIf you are reinstalling Experion without operating system reinstallation, refer to the sectionConfiguring pre-installed Microsoft SQL Server 2014 SP2 before proceeding with Experioninstallation.
1. Remove Experion. Refer to the section Removing Experion applications for removingExperion.
ATTENTIONDo not perform this step if operating system is being reinstalled.
2. Take a backup of user data, and delete these folders.
3. Reinstall Experion (with or without operating system reinstallation).
11.2 Reinstalling Experion installed with custom installationpaths
Perform the following steps if you are reinstalling Experion installed with custom installationpaths.
l If you are reinstalling Experion by reinstalling operating system on a system where Experionis installed on custom installation path, refer to the section, Experion reinstallation withoperating system reinstallation.
l If you are reinstalling Experion without reinstalling operating system on a system whereExperion is installed on custom installation path, refer to the section, Experion reinstallationwithout operating system reinstallation.
- 84 -
CHAPTER
11

11.2.1 Experion reinstallation with operating system reinstallation
1. Take a backup of the user data present in the custom installation paths.
2. Reinstall the operating system manually.
3. After reinstalling the operating system, delete destination folders used for custom installationpaths in previous installations.
TIPl If you are using Experion PKS System Initialization media to configure the
operating system and then install Experion, refer to the section InstallingExperion using ESIS.
l If you are installing Experion using Experion PKS Installation media 1, refer tothe section , Installing Experion.
11.2.2 Experion reinstallation without operating systemreinstallation
1. If PMD is installed on your system, remove PMD manually before removing Experion.
2. If ESM, is installed on your system, remove them manually before removing Experion.
3. Remove Experion. Refer to section Removing Experion applications for removing Experion. IfCAB is installed on systems with Console or Flex nodes, manually remove Microsoft VisualC++ 2012 x86 Runtime - 10.0.40219 after removing Experion.
TIPl To remove ESM, refer to the section, Removing Experion Support and
Maintenance server.
l To remove PMD, refer to the PMD Software Installation User’s Guide.
l For Console and Flex nodes where CAB is installed, you must manually removeMicrosoft Visual C++ 2012 x86 Runtime 10.0.40219 after removingExperion.
4. Take a backup of the user data present in the custom installation paths.
5. Delete the Client folder located in the <Experion PKS Runtime
Data>\Honeywell\Experion PKS path. Perform the following steps to delete the Clientfolder.
a. Click Start > Windows System > Control Panel > Run.
b. Type Services.msc
The Services window appears.
c. Right-click SQL Server (MSSQLSERVER) and then choose Stop to stop the SQL Server(MSSQLSERVER).
d. Delete the Client folder located in the <Experion PKS Runtime
Data>\Honeywell\Experion PKS path.
- 85 -
Chapter 11 - Reinstalling Experion applications

Chapter 11 - Reinstalling Experion applications
e. Right-click SQL Server (MSSQLSERVER) and then choose Start to start the SQL Server(MSSQLSERVER).
f. Right-click SQL Server Agent (MSSQLSERVER) and then choose Start to start the SQLServer Agent (MSSQLSERVER).
6. Create HPSInstall user account if it is not present and add it to Administrators, and ProductAdministrators groups.
7. Reinstall Experion. Refer to the section Configuring pre-installed Microsoft SQL Server 2014SP2 before proceeding with Experion installation.
ATTENTIONDO NOT use Experion PKS System Initialization media for configuring the operatingsystem.
- 86 -

ALTERNATE SCENARIOS FOR INSTALLING EXPERIONON HONEYWELL-QUALIFIED PLATFORMS
l Installing Experion with operating system using ESIS
l Installing Experion using DVD
12.1 Installing Experion with operating system using ESIS
12.1.1 Prerequisites
l To see the list of Honeywell-qualified platforms, refer to the latest Experion PKS SystemInitialization media Software Change Notice.
l Disable Administrator account if it exists on the installation node.
l If the logged-on account on the installation node has access to ESIS share, the sameaccount credentials must be provided for connecting to the ESIS share when promptedduring the installation.
l If HPSInstall account exists on the ESIS node, delete it from the ESIS node.
ATTENTIONo Ensure that you enable Windows firewall before you begin installation.
l Installing Experion with operating system reinstall
l Installing Experion on a node on which operating system does not exist (bare metal)
12.1.2 Installing Experion with operating system reinstall
To connect to ESIS repository using ESIS from USB drive
1. Insert the USB drive or removable hard drive (containing the ESIS repository) into yourmachine.
2. Browse to the ESIS repository location in the USB drive/removable hard drive.
3. Double-click setup.exe at the root of the ESIS repository path.
The Welcome page is displayed.
- 87 -
CHAPTER
12

To connect to the ESIS repository using ESIS from a network share
1. Choose Start > Windows System > Control Panel > Run.
The Windows Run dialog box is displayed.
2. Type \\<<ESISServer IP>\<ShareName> and press ENTER.
The Welcome dialog box is displayed.
3. In the Welcome dialog box of the ESIS Install Utility, if you are prompted for the Windowscredentials, perform the following:
a. Type the <Domain Name>\Username and Password if you belong to a domain and ifyou have share permissions.
b. Type the <ESISServer IP>\Username and Password if you belong to a workgroup and ifyou have share permissions.
c. Clear the Remember Password check box.
ATTENTIONIf you enter incorrect credentials, an error occurs after the first reboot of Experioninstallation or migration. Then, you have to enter the correct credentials to connectto the ESIS share.
4. Double-click setup.exeat the root of the \<ShareName>.
5. If prompted for user account control, click Allow.
6. If you are prompted for the Windows credentials, perform the following:
a. Type the <Domain Name>\Username and Password if you belong to a domain and ifyou have share permissions.
b. Type the <ESISServer IP>\Username and Password if you belong to a workgroup and ifyou have share permissions.
c. Clear the Remember Password check box.
7. Click Next.
The Welcome page is displayed.
To continue with Experion installation
1. In the Welcome to ESIS page, select OS Preparation with/without Product Install.
When prompted for the Windows credentials for the share.
l Type the <Domain Name>\Username and Password if you belong to a domain and if youhave share permissions.
l Type the <ESISServer IP>\Username and Password if you belong to a workgroup and ifyou have share permissions.
2. Click Next.
The Installation Options page is displayed, which consists of the following options toconfigure the machine/generate configuration files.
Select one of the following options depending upon your requirements.
- 88 -
Chapter 12 - Alternate scenarios for installing Experion on Honeywell-qualified platforms

Chapter 12 - Alternate scenarios for installing Experion on Honeywell-qualified platforms
Option When to choose this option
Configure current machine You do not have configuration files generated for thetarget machine.
Configure current machineusing existing configurationfiles
You already have configuration files generated for thetarget machine.
Generate configuration files You are configuring/reinstalling your operating system.Hence, you want to generate configuration files.
Modify existing configurationfiles
You already have configuration files generated for yourmachine and you want to modify them.
Use configuration files formigration
You want to perform phase 2 migration, and theoperating system is installed manually.
ATTENTION
If Experion PKS System Initlialization patches are provided during installation, amessage, InitMedia Patches found is displayed.
3. In this step, either select Configure current machine or Configure current machine usingexisting configuration files only, and click Next.
The subsequent dialogs are displayed with the selections made as per the configuration files.You can modify the selections if required.
4. Click Next.
The Platform Configuration page is displayed. Perform the following operations.
a. Select Reinstall OS and configure system. The hardware platform and operatingsystem are automatically selected.
b. Select the Product Installation check box.
ATTENTIONDO NOT install the following combination of nodes and operating systems, as theyare not qualified and supported currently.
l Application Server (EAS) on Embedded Microsoft Windows 10 Enterprise 2016LTSB (x64) operating system.
l eServer on a Embedded Microsoft Windows 10 Enterprise 2016 LTSB (x64)operating system.
l Application Control Environment (ACE) node on a Embedded MicrosoftWindows 10 Enterprise 2016 LTSB (x64) operating system.
l Collaboration Station on a Embedded Microsoft Windows Server 2016Standard operating system.
5. Click Next.
The Operating System Configuration page is displayed.
Next steps
Follow the procedure in the section Proceeding with Experion installation using ESIS
- 89 -

12.1.3 Installing Experion on a node on which operating systemdoes not exist (bare metal)
Prerequisites
If you want to create configuration files, use a machine other than the target machine to createconfiguration files for the target machine.
To connect to ESIS repository using ESIS from USB drive
1. On the machine other than the target machine, insert the USB drive or removable hard drive(containing the ESIS repository) into the machine.
2. Browse to the ESIS repository location in the USB drive/removable hard drive.
3. Double-click setup.exe at the root of the ESIS repository path.
The Welcome page is displayed.
To connect to the ESIS repository using ESIS from a network share
1. Use a machine other than the target machine, and choose Start > Windows System > ControlPanel > Run.
The Windows Run dialog box is displayed.
2. Type \\<<ESISServer IP>\<ShareName> and press ENTER.
The Welcome dialog box is displayed.
3. In the Welcome dialog box of the ESIS Install Utility, if you are prompted for the Windowscredentials, perform the following:
a. Type the <Domain Name>\Username and Password if you belong to a domain and ifyou have share permissions.
b. Type the <ESISServer IP>\Username and Password if you belong to a workgroup and ifyou have share permissions.
c. Clear the Remember Password check box.
ATTENTIONIf you enter incorrect credentials, an error occurs after the first reboot of Experioninstallation or migration. Then, you have to enter the correct credentials to connectto the ESIS share.
4. Double-click setup.exeat the root of the \<ShareName>.
5. If prompted for user account control, click Allow.
6. If you are prompted for the Windows credentials, perform the following:
a. Type the <Domain Name>\Username and Password if you belong to a domain and ifyou have share permissions.
b. Type the <ESISServer IP>\Username and Password if you belong to a workgroup and ifyou have share permissions.
c. Clear the Remember Password check box.
- 90 -
Chapter 12 - Alternate scenarios for installing Experion on Honeywell-qualified platforms

Chapter 12 - Alternate scenarios for installing Experion on Honeywell-qualified platforms
7. Click Next.
The Welcome to ESIS page is displayed.
8. Follow the procedure in section,To continue with Experion installation.
To continue with Experion installation
1. In the Welcome to ESIS page, select OS Preparation with/without Product Install.
2. When you are prompted for Windows credentials.
a. Type the <Domain Name>\Username and Password if you belong to a domain and if youhave share permissions.
b. Type the <ESISServer IP>\Username and Password if you belong to a workgroup and ifyou have share permissions.
3. Click Next.
The Installation Options page is displayed, which consists of the following options toconfigure the machine/generate configuration files.
Select one of the following options depending upon your requirements.
Option When to choose this option
Configure current machine You do not have configuration files generated for thetarget machine.
Configure current machineusing existing configurationfiles
You already have configuration files generated for thetarget machine.
Generate configuration files You are configuring/reinstalling your operating system.Hence, you want to generate configuration files.
Modify existing configurationfiles
You already have configuration files generated for yourmachine and you want to modify them.
Use configuration files formigration
You want to perform phase 2 migration, and theoperating system is installed manually.
4. Select Generate Configuration Files, and click Next.
The Platform Configuration page is displayed.
5. In the Platform Configuration page, perform the following operations.
a. Select the hardware platform, and operating system is selected by default.
b. Select the Product Installation check box.
ATTENTIONIf you are using ESIS from a USB drive, if you already have configuration filesgenerated for the target machine, select Modify existing configuration files.
6. Click Next.
The Operating System Configuration page is displayed.
Next steps
Follow the procedure in the section Proceeding with Experion installation using ESIS
12.2 Installing Experion using DVD
l Installing Experion on a system where an operating system is already installed
- 91 -

l Installing Experion on node without operating system (bare metal)
l Installing Experion with operating system reinstall using DVD media
l Proceeding with Experion installation using DVD media
12.2.1 Installing Experion on a system where an operating systemis already installed
This section describes how to install Experion using Experion PKS System Initialization media, on asystem where operating system is already installed.
ATTENTIONThe latest point release Experion Support Software is available as an ISO image onHoneywell Process Solutions website (https://www.honeywellprocess.com/support). Usethe ISO image content to create a DVD/media for installing the latest Experion point release.For extracting contents to a media, use ISO extraction software. For example, you can useVirtual Clone Drive software for extracting the contents to a media.. Use this media whenyou are prompted for the Experion PKS Installation media 2.
1. Insert the Experion PKS System Initialization media.
2. Right-click setup.exe at the root of the media and run as Administrator. Or click LaunchSetup on the Autorun screen.
The Installation Options page is displayed, which consists of the following options toconfigure the machine/generate configuration files.
Select one of the following options depending upon your requirements.
Option When to choose this option
Configure current machine You do not have configuration files generated for thetarget machine.
Configure current machineusing existing configurationfiles
You already have configuration files generated for thetarget machine.
Generate configuration files You are configuring/reinstalling your operating system.Hence, you want to generate configuration files.
Modify existing configurationfiles
You already have configuration files generated for yourmachine and you want to modify them.
Use configuration files formigration
You want to perform phase 2 migration, and theoperating system is installed manually.
3. Click Next.
The Platform Configuration page is displayed, which consists of the following options.
- 92 -
Chapter 12 - Alternate scenarios for installing Experion on Honeywell-qualified platforms

Chapter 12 - Alternate scenarios for installing Experion on Honeywell-qualified platforms
Section Option Description
ChooseConfiguration
Platformconfiguration
l Select Configure System option if you are notreinstalling the operating system or if you have a pre-installed operating system.
Select Reinstall OS and configure system if you arereinstalling the operating system using Experion PKSSystem Initialization media.
ChooseConfiguration
Productinstallation
Select the Experion version to be installed.
SelectPlatform
l Select Workstation, if you are installing/configuring aworkstation.
l Select Server, if you are installing/configuring aserver.
Selectoperatingsystem
l Select Client, if you are installing/configuring a clientoperating system.
l Select Server, if you are installing/configuring a serveroperating system.
ATTENTIONDO NOT install the following combination of nodes and operating systems, as theyare not qualified and supported currently.
l Application Server (EAS) on Embedded Microsoft Windows 10 Enterprise 2016LTSB (x64) operating system.
l eServer on a Embedded Microsoft Windows 10 Enterprise 2016 LTSB (x64)operating system.
l Application Control Environment (ACE) node on a Embedded MicrosoftWindows 10 Enterprise 2016 LTSB (x64) operating system.
l Collaboration Station on a Embedded Microsoft Windows Server 2016Standard operating system.
4. Select one of the following options depending upon your requirements, and click Next.
The Operating System Configuration page is displayed. Perform the following:
l Select the Local Language, and Time Zone.
l Type the Computer Name, Company Name, Customer Name, and Workgroup Name.
l Type the user account and password details in the User Account Name, Password andConfirm Password fields.
l Type the Security Password details.
NOTEThe Security Password shall be used to protect the secured data duringinstallation and will be discarded after completing the installation.
- 93 -

ATTENTIONl Computer Name can have only 0-9, a-z, A-Z, and “-“ as allowed characters. It
must not contain ONLY numbers, space, and special characters (` ~ ! @ # $ % ^ & * () = + _ {} [] \ | ; : .‘ ” “ , < >, / ?).
l Company Name must not contain the underscore (_) special character.
l Workgroup Name must not contain space, and special characters (* = + [] \ |; : “ “ , < > / ?).
l User Account Name must be a maximum of 20 characters in length.
5. Click Next.
The Network Input/Output Device Information page is displayed. Select the network type(FTE or Ethernet) and I/O details.
ATTENTIONl For an FTE network, the IP Address, Subnet mask, and default gateway settings
are not applicable for Green adapter; they are set to DHCP by default.
l If you are reinstalling the operating system, select the NIC name to change thenames. NIC1 is the first NIC (FTE Yellow or Primary Supervisory). NIC2 is thesecond NIC (FTE Green or Secondary Supervisory).
l For the third NIC (DHEB), DNS server option is disabled.
l The third NIC (DHEB) must be used only for EHG. Otherwise, disable the thirdNIC.
l If you have Matrox RPS installed on your machine, select the RPS check box.Once you select the check box, the Monitor arrangement and Monitorresolution fields cannot be edited. After completing Experion installation, youcan configure the display using Matrox Power Desk.
l If Link speed option is displayed for FTE, select Link speed as 100 Mbps FullDuplex.
6. Click Next.
The Configuration Summary page is displayed.
7. Verify the configuration summary details, and click Generate configuration files.
8. Remove the Experion PKS System Initialization media and insert the Experion PKSInstallation media 1.
The Honeywell Experion PKS Installer page is displayed.
ATTENTIONIf Honeywell Experion PKS Installer page does not appear, using WindowsExplorer browse to the drive (or folder) and run setup.exe at the root of the mediato start the Installer sequencer.
9. Click Install/Migrate Experion PKS to begin installation.
ATTENTIONClick Yes if a Microsoft User Account Control page is displayed.
- 94 -
Chapter 12 - Alternate scenarios for installing Experion on Honeywell-qualified platforms

Chapter 12 - Alternate scenarios for installing Experion on Honeywell-qualified platforms
The Welcome to the Honeywell Experion PKS Installation Setup Wizard is displayed.
10. Read the information in the page, and click Next.
The License Agreement page is displayed.
11. Read the license terms carefully before accepting the terms in the license agreement andthen select I accept the terms in the License agreement. Click Next.
The Setup type of Node to install page is displayed.
The Experion nodes supported for the operating system on which you are installing are listed.Select the Experion node you want to install.
l Server (ESV)
l Server TPN Connected (ESVT)
l eServer
l Application Control Environment (ACE)
l Application Control Environment TPN Connected (ACE-T)
l Simulation Environments (SCE)
l Console Station (ES-C)
l Console Station TPN Connected (ES-T)
l Console Extension Station (ES-CE)
l Flex Station (ES-F)
l Collaboration Station
l Experion Hiway Gateway (EHG)
l APP Node (E-APP)
l Application Server (EAS)
l PC Universal Station (PCUS)
l Operational Features
l ELCN History Module
TIPThe Optional features is also displayed in the node selection page. However, it isnot a node type, but is used to add additional features to an existing node type.
12. Select the Experion node you want to install and click Next.
The User and License Information dialog box is displayed.
Type the Customer Name and Company Name, and specify the following details dependingon the node type selected for installation.
TIPDo not enter ampersand (&) in the Company Name and Customer Name fields.
- 95 -

Node type Option
ESV, ESVT, EAS,eServer
Click Browse to navigate to and select the license file.
ESVT, E-App, EST, ES-CE, ESF, ACE-T, ELCNHistory Module, andOptional Features
To install licensed TPS components, click Yes and type the TPSComponents License details.
Station node Select Install Custom Algorithm Block (CAB) Developer(Visual Studio) OR PMD features ? only to develop CAB blocksfrom scratch using Control Builder and Visual Studio software,since this might increase the installation time.
ACE, ACE-T, and SCEnode
a. Select Do you want to install licensed features ? if youare performing any of the following:
l Installing CAB Developer on a station.
l Debugging the CAB blocks that you are developing onthe ACE using Visual Studio debug.
If you are not creating CAB blocks from the beginning andyou are only importing existing CAB blocks, you do notrequire the CAB remote debug feature.
b. Click Browse to navigate to and select the license file.
ATTENTIONThis step is applicable only for Server (ESV) and Server TPN Connected (ESVT)nodes.
a. A message containing the redundancy information of the node beinginstalled is displayed. This redundancy information is based on the machinename.
l Click Yes to proceed with the current redundancy type .
l Click No to change the redundancy type. Change the redundancy type bychanging the machine name. Refer to the Supplementary InstallationTasks Guide (SITG) to change the machine name.
b. Click Next.
13. Click Next.
The Installation Path Selection page is displayed.
- 96 -
Chapter 12 - Alternate scenarios for installing Experion on Honeywell-qualified platforms

Chapter 12 - Alternate scenarios for installing Experion on Honeywell-qualified platforms
l If you plan to use the default paths for Experion installation, do not change the path thatis set by default.
l If you plan to use custom installation paths, refer to the section Custom installation path.
ATTENTIONo The Experion PKS SQL Logs path is not applicable for Console (ES-C),
Console station TPN connected (ES-T), Console Extension station(ESC-E), Flex station (ES-F), and Collaboration Station nodes.
o The Experion PKS Software, Experion PKS Runtime Data, andExperion PKS SQL logs can be placed on any drive. However, thedefault path for Experion PKS Software and Experion PKS RuntimeData is <Custom Install Path selected drive>\<Custom
Install Path selected folder(s)\Honeywell. The pathfor Experion PKS SQL logs is \Honeywell\Experion PKS and youcannot change this path.
14. Click Change to define the paths.
The Experion Network Selection page is displayed.
Select the appropriate EPN, supervisory and auxiliary network. Three levels of networks areavailable on an Experion system. for more information, refer to the section, Overview ofExperion Process Control Network (PCN).
RSLinx option is applicable only if PCIC card is available on your system. RSLinx must beinstalled manually after completion of Experion installation. For more information, refer to theInstalling RSLinx Classic.
For ESVT, ES-T, EAPP ACE-T, PCUS, and ELCN History Module nodes, you can either selectLCNP4 or K4LCN (with ETNI) card in the auxiliary network, even if EPN or supervisory networkis selected. For ES-T node, you can additionally select ELCN in the auxiliary network.
15. Click Next.
Depending upon the node type and network selection, the appropriate page listed in thefollowing table is displayed.
Node type and network selection page displayed
l FTE is selected as EPN on Server(ESV)
l Server TPN connected (ESVT)nodes
FTE Bootp and NTP IP Address Configurationpage
l Ethernet is selected as EPN onServer (ESV)
l Server TPN connected (ESVT)nodes
EthNet_Sim and NTP IP AddressConfiguration page
- 97 -

ATTENTIONThe IP addresses listed in the FTE Bootp and NTP IP Address Configurationpage are used for Level 1 to Level 2 controller communication. You can modify thisinformation after the installation in Control Builder > System Preferences.
a. Enter the appropriate information in the displayed fields for Base IP Address,Subnet Mask, and Default Gateway.
b. Enter the appropriate information in the displayed fields for NTP First IPAddress and NTP Second IP Address. By default, the first IP address is setto Server A’s IP address and the second IP adress is set to Server B’s IPaddress. They are then used as the time synchronization nodes for thecontrollers.
16. Click Next.
The Feature and Options Selection page is displayed. Select the method of Experioninstallation.
ATTENTION
l Based on the node selected, the feature and options for that node areavailable.
l By default, selected features are installed for a node. You can select additionaloptional features.
l Select Typical to install the default optional components for a node.
l Select Custom to add Add-on or Licensed features components in addition to theTypical install. Select appropriate options to install the Add-on and Licensed featurescomponents.
NOTEBeginning from Experion 501, TPN is available as embedded component withExperion. To install TPN, you can select TPN Personality (US) option in Customtab. Based on the node type, appropriate TPN Personality is automatically installed.On ESVT, EAPP and ACET, TPN Personality- AxM is installed. On EST node, TPNPersonality- UxS is installed.
TIPIf you are installing Flex node on a system with operating system, and want toinstall a Remote Engineering Station Server (RESS) node, select EnableTerminal Services (also known as Remote Desktop Services). For moreinformation, refer to Enabling Remote Desktop Services on Flex nodes.
17. Click Next.
The Remote Server Dialog page is displayed. This page is displayed only if you are installingCollaboration Station node. Enter the eServer name on which the Collaboration Station nodemust be installed.
18. Click Next.
The Experion Server Name page is displayed for the ES-C, EST, ACE, ACE-T, EHG, and SCEnodes. Perform the following steps in the Experion Server Name page.
- 98 -
Chapter 12 - Alternate scenarios for installing Experion on Honeywell-qualified platforms

Chapter 12 - Alternate scenarios for installing Experion on Honeywell-qualified platforms
a. Enter the name of the server in the Server Name field.
b. Select the Server is Redundant check box if you have redundant servers.
ATTENTIONIf redundant, type the base name without the ‘a’ or ‘b’ suffix.
If you are installing Collaboration Station, enter the name of the eServer in the Server Namefield.
19. Click Next.
The Experion PKS Software Installation Settings page is displayed.
20. Perform the following steps, as necessary.
l If you select Save Configuration Files, browse and select the appropriate location (USB,local hard disk) to save the configuration files to be used on this computer for future use.
l Save the generated configuration files in a separate folder at the root of the C: drive orUSB drive.
l Click OK when the confirmation message is displayed.
ATTENTIONl Configuration files for different nodes can be stored in different folders on the
external media.
l If you go back and make changes in some Experion PKS System Initializationoptions, you are prompted to reenter product details.
21. Review the summary of the settings you selected and click Install/Continue.
A message is displayed to insert Experion PKS System Initialization media.
22. Insert the Experion PKS System Initialization media and click OK.
The system configuration continues.
ATTENTIONIf you are using virtual machine for Experion migration, refer to Creating newExperion virtual machines section in Experion Virtualization Planning andImplementation Guide.
Next steps
Go to section Proceeding with Experion installation using DVD media.
12.2.2 Installing Experion on node without operating system (baremetal)
This section describes steps to install Experion on a node without operating system.
- 99 -

ATTENTIONThe latest point release Experion Support Software is available as an ISO image onHoneywell Process Solutions website (https://www.honeywellprocess.com/support). Usethe ISO image content to create a DVD/media for installing the latest Experion point release.For extracting contents to a media, use ISO extraction software. For example, you can useVirtual Clone Drive software for extracting the contents to a media. Use this media when youare prompted for the Experion PKS Installation media 2.
1. Insert the Experion PKS System Initialization media on the machine other than the targetmachine, to create configuration files.
2. Browse to the CD/DVD drive and double-click Setup.exe at the root of the media
The Installation Options page is displayed, which consists of the following options toconfigure the machine/generate configuration files.
Option When to choose this option
Configure current machine You do not have configuration files generated for thetarget machine.
Configure current machineusing existing configurationfiles
You already have configuration files generated for thetarget machine.
Generate configuration files You are configuring/reinstalling your operating system.Hence, you want to generate configuration files.
Modify existing configurationfiles
You already have configuration files generated for yourmachine and you want to modify them.
Use configuration files formigration
You want to perform phase 2 migration, and theoperating system is installed manually.
3. Select Generate configuration files, and click Next.
The Platform Configuration page is displayed.
4. Select the Product Installation check box and select the Experion release.
By default, the following fields are selected.
l Platform Configuration
l Select Platform
l Select Operating System
5. Click Next.
The Operating System Configuration page is displayed.
6. In the Operating System Configuration page, perform the following:
l Select the Local Language, and Time Zone.
l Type the Computer Name, Company Name, Customer Name, and Workgroup Name.
l Type the user account and password details in the User Account Name, Password andConfirm Password fields.
l Type the Security Password details.
NOTEThe Security Password shall be used to protect the secured data duringinstallation and will be discarded after completing the installation.
- 100 -
Chapter 12 - Alternate scenarios for installing Experion on Honeywell-qualified platforms

Chapter 12 - Alternate scenarios for installing Experion on Honeywell-qualified platforms
ATTENTIONl Computer Name can have only 0-9, a-z, A-Z, and “-“ as allowed characters. It
must not contain ONLY numbers, space, and special characters (` ~ ! @ # $ % ^ & * () = + _ {} [] \ | ; : .‘ ” “ , < >, / ?).
l Company Name must not contain the underscore (_) special character.
l Workgroup Name must not contain space, and special characters (* = + [] \ |; : “ “ , < > / ?).
l User Account Name must be a maximum of 20 characters in length.
7. Click Next.
The Network Input/Output Device Information page is displayed. Select the network type(FTE or Ethernet) and I/O details.
ATTENTIONl In case of FTE, the IP Address, Subnet mask, and default gateway settings are
not applicable for Green adapter; they are set to DHCP by default.
l If you are reinstalling the operating system, select the NIC name to change thenames. NIC1 is the first NIC (FTE Yellow or Primary Supervisory); NIC2 is thesecond NIC (FTE Green or Secondary Supervisory).
l For the third NIC (DHEB), DNS server option is disabled.
l The third NIC (DHEB) must be used only for EHG. Otherwise, disable the thirdNIC.
l If you have Matrox RPS installed on your machine, select the RPS check box.Once you select the check box, the Monitor arrangement and Monitorresolution fields become cannot be edited. After completing Experioninstallation, you can configure the display using Matrox Power Desk.
l If Link speed option is displayed for Ethernet, select Link speed as 100 MbpsFull Duplex.
8. Click Next.
The Configuration Summary page is displayed.
9. Verify the configuration summary details, and click Generate configuration files.
10. When the CD/DVD drive automatically opens and prompts to insert the Experion PKSInstallation media 1, remove the Experion PKS System Initialization media and insert theExperion PKS Installation media 1.
11. Click OK.
The Honeywell Experion PKS Installer page is displayed.
ATTENTIONIf Honeywell Experion PKS Installer page does not appear, using WindowsExplorer browse to the drive (or folder) and run setup.exe at the root of the mediato start the Installer sequencer.
12. Click Generate Product Install Config Files.
The Welcome page is displayed.
- 101 -

ATTENTIONl It may take a few seconds to display the Welcome page.
l If a Microsoft User Account Control is displayed, select Allow. The DialogManager starts after setup.exe prepares the installation environment.
13. Read the information, and click Next.
The License Agreement page is displayed.
14. Read the EULA, select I accept the terms in the License agreement option, and click Next.
The Setup type of Node to install page is displayed which lists the Experion nodessupported by the operating system on your computer. The following is a list of Experion nodesthat are listed.
l Server (ESV)
l Server TPN Connected (ESVT)
l eServer
l Application Control Environment (ACE)
l Application Control Environment TPN Connected (ACE-T)
l Simulation Environments
l Console Station (ES-C)
l Console Station TPN Connected (ES-T)
l Console Extension Station (ES-CE)
l Flex Station (ES-F)
l Collaboration Station
l Experion Hiway Gateway (EHG)
l APP Node (E-APP)
l Application Server (EAS)
l PC Universal Station (PCUS)
l Optional Features
l ELCN History Module
ATTENTIONThe Optional features is also displayed in the node selection page. However, it isnot a node type, but is used to add additional features to an existing node type.
15. Choose the Experion product node type to install, and click Next.
The User and License Information page is displayed.
Type the Customer Name and Company Name, and specify the following details dependingon the node type selected for installation.
- 102 -
Chapter 12 - Alternate scenarios for installing Experion on Honeywell-qualified platforms

Chapter 12 - Alternate scenarios for installing Experion on Honeywell-qualified platforms
Node type Option
ESV, ESVT, EAS, eServer Click Browse to navigate to and select thelicense file.
ESVT, E-App, EST, ES-CE, ESF, ACE-T, ELCNHistory Module, and Optional Features
To install licensed TPS components, clickYes and type the TPS ComponentsLicense details.
Station node Select Install Custom Algorithm Block(CAB) Developer (Visual Studio) ORPMD features ? only to develop CAB blocksfrom scratch using Control Builder andVisual Studio software, since this mightincrease the installation time.
ACE, ACE-T, and SCE node a. Select Do you want to installlicensed features ? if you areperforming any of the following:
l Installing CAB Developer on astation.
l Debugging the CAB blocks thatyou are developing on the ACEusing Visual Studio debug.
If you are not creating CAB blocksfrom the beginning and you are onlyimporting existing CAB blocks, youdo not require the CAB remotedebug feature.
b. Click Browse to navigate to andselect the license file.
ATTENTIONThis step is applicable only for Server (ESV) and Server TPN Connected (ESVT)nodes.
A message containing the redundancy information of the node being installed isdisplayed. This redundancy information is based on the machine name.
l Click Yes to proceed with the current redundancy type .
l Click No to change the redundancy type. Change the redundancy type bychanging the machine name. Refer to the Supplementary Installation TasksGuide (SITG) to change the machine name.
If you are providing dongle-based license, ensure that dongle is connectedthroughout the installation.
16. Click Next.
The Installation Path Selection page is displayed, which contains the path for Experioninstallation.
- 103 -

l If you plan to use the default paths for Experion installation, do not change the path thatis set by default.
l If you plan to use custom installation paths, refer to the section Custom installation path.
ATTENTIONo The Experion PKS SQL Logs path is not applicable for Console (ES-C),
Console station TPN connected (ES-T), Console Extension station(ESC-E), Flex station (ES-F), and Collaboration Station nodes.
o The Experion PKS Software, Experion PKS Runtime Data, andExperion PKS SQL logs can be placed on any hard drive in the system.However, the default path for Experion PKS Software and ExperionPKS Runtime Data is <Custom Install Path selected
drive>\<Custom Install Path selected folder
(s)\Honeywell. The path for Experion PKS SQL logs is\Honeywell\Experion PKS and you cannot change this path.
17. Click Change to define the paths.
The Experion Network Selection page is displayed.
Select the appropriate EPN, supervisory and auxiliary network. Three levels of networks areavailable on an Experion system. for more information, refer to the section, Overview ofExperion Process Control Network (PCN).
RSLinx option is applicable only if PCIC card is available on your system. RSLinx must beinstalled manually after completion of Experion installation. For more information, refer to theInstalling RSLinx Classic.
For ESVT, ES-T, EAPP ACE-T, ES-T, and PCUS nodes, you can either select LCNP4, K4LCN(with ETNI) or ELCN card in the auxiliary network, even if EPN or supervisory network isselected.
18. Click Next.
Depending upon the node type and network selection, the appropriate page listed in thefollowing table is displayed.
Node type and network Display page
l FTE is selected as EPN on Server (ESV)
l Server TPN connected (ESVT) nodes
FTE Bootp and NTP IP AddressConfiguration page
l Ethernet is selected as EPN on Server(ESV)
l Server TPN connected (ESVT) nodes
EthNet_Sim and NTP IP AddressConfiguration page
n FTE or Ethernet EPN is user-selected orchosen by default
IP config page
- 104 -
Chapter 12 - Alternate scenarios for installing Experion on Honeywell-qualified platforms

Chapter 12 - Alternate scenarios for installing Experion on Honeywell-qualified platforms
ATTENTIONThe IP addresses listed in the IP config page are used for Level 1 to Level 2controller communication. You can modify this information by performing thefollowing steps after the installation is complete.
a. In Control Builder, click System Preferences.
b. Enter the appropriate information in the Base IP Address, Subnet Mask,Default Gateway fields.
c. Enter the appropriate information in the NTP First IP Address and NTPSecond IP Address fields. The first IP address is set as Server A’s IP addressand the second IP address is set as Server B’s IP address by default. They areused as the time synchronization nodes for the controllers.
19. Click Next.
The Feature and Options Selection page is displayed. Select the method of Experioninstallation.
l Select Typical to install the default features installed for a node.
l Select Custom to add Add-on or Licensed features in addition to the Typical install.
NOTEBeginning from Experion 501, TPN is available as embedded component withExperion. To install TPN, you can select TPN Personality (US) option inCustom tab. Based on the node type, appropriate TPN Personality isautomatically installed. On ESVT, EAPP and ACET, TPN Personality- AxM isinstalled. On EST node, TPN Personality- UxS is installed.
20. Click Next.
The Remote Server Dialog page is displayed. This page is displayed only if you are installingCollaboration Station node. Enter the eServer name on which the Collaboration Station nodemust be installed.
21. ClickNext.
The Experion Accounts Password Entry page is displayed. Type passwords for all theaccounts created during installation.
Password for the accounts must adhere to the following rules.
l Passwords cannot contain the user’s account name or parts of the user’s full name thatexceed two consecutive characters.
l Passwords must be minimum six characters and maximum 32 characters.
l Passwords must contain characters from three of the following four categories.o English uppercase characters (A through Z).o English lowercase characters (a through z).o Base 10 digits (0 through 9).o Non-alphabetical characters (-@#$%^&+='~!*()_+={}\\|:;\<>,.?/)
l Type the password for each applicable account.
l Type the confirmation password for each applicable account.
l For eServer, passwords for Standard access user and Standard access administratoraccounts must not contain any spaces.
l Passwords of local accounts must be configured to be the same on all nodes in theExperion cluster.
- 105 -

ATTENTION
The Experion Server Name page is displayed for the ES-C., EST, ACE, ACE-T, EHG,and SCE nodes.
Perform the following steps in the Experion Server Name page.a. In the Server Name field, specify the name of the server.
b. If you have redundant servers, select the Server is Redundant check box.
22. Click Next.
The Experion PKS Software Installation Settings page is displayed.
Perform the following steps, depending upon your requirement.
l If you select Save Config Files, browse and select the appropriate location ( USB drive,local hard disk) to save the configuration files on this computer for future use.
l Save the generated configuration files in a separate folder at the root of the C: drive orUSB drive.
l Click OK when the confirmation message is displayed.
ATTENTION
l Configuration files for different nodes can be stored in different folders on theexternal media.
l If you go back and make changes in Experion PKS System Initialization options,you are prompted to reenter product details.
Next steps
Go to section Installing Experion with operating system reinstall using DVD media.
12.2.3 Installing Experion with operating system reinstall usingDVD media
This section describes steps for installing Experion on a system where the operating system isreinstalled.
ATTENTIONThe latest point release Experion Support Software is available as an ISO image onHoneywell Process Solutions website (https://www.honeywellprocess.com/support). Usethe ISO image content to create a DVD/media for installing the latest Experion point release.For extracting contents to a media, use ISO extraction software. For example, you can useVirtual Clone Drive software for extracting the contents to a media. Use this media when youare prompted for the Experion PKS Installation media 2.
Prerequisites
Before you begin installation, ensure that you have saved the configuration file generated for thismachine on removable media and connect it on target machine.
1. In the target machine, insert Experion PKS System Initialization media and boot from theExperion PKS System Initialization media.
- 106 -
Chapter 12 - Alternate scenarios for installing Experion on Honeywell-qualified platforms

Chapter 12 - Alternate scenarios for installing Experion on Honeywell-qualified platforms
ATTENTIONEnsure that the boot sequence in BIOS is set to boot from CD/DVD drive first.
2. Press any key when you see the message Press any key to boot from CD or DVD.
3. Browse to the configuration files and select InitMediaOptions.xml file.
4. Click Next.
The Experion PKS System Initialization Pre-Install Utility screen is displayed when thesystem boots from Experion PKS System Initialization media. Additionally, WinPE is loaded intothe target machine.
5. The Experion PKS System Initialization PreInstall Utility loads the configurationinformation from InitMediaOptions.xml file.
l Experion PKS System Initialization media does not allow you to select the hard diskpartitions (drive path) based on your custom installation path selection.
l Select Use Drive C: option if you want to format only C drive and install operating systemon this drive. In this case, the data on the other partitions are retained. Select this optiononly if the computer has more than one partition and no raw partitions.
l In the Partition Count drop down list, select drive or the number of partitions required.The minimum size for primary partition is . If the disk space is less than , only one partitioncan be created.
l Type the Security Password which is used to generate the Configuration files.
6. Enter configuration details for hard disk in the Disk Configuration section. Select theappropriate media location. It can be any one of the following:
l DVD
l ESIS from network
l ESIS from USB
In this case, select the DVD option and click Next.
7. Select I accept the terms in the License agreement on the License Agreement dialog boxafter reading the EULA.
8. Click Install. Insert the operating system media when prompted.
ATTENTIONDO NOT install the following combination of nodes and operating systems, as theyare not qualified and supported currently.
l Application Server (EAS) on Embedded Microsoft Windows 10 Enterprise 2016LTSB (x64) operating system.
l eServer on a Embedded Microsoft Windows 10 Enterprise 2016 LTSB (x64)operating system.
l Application Control Environment (ACE) node on a Embedded MicrosoftWindows 10 Enterprise 2016 LTSB (x64) operating system.
l Collaboration Station on a Embedded Microsoft Windows Server 2016Standard operating system.
Next steps
Go to section Proceeding with Experion installation using DVD media.
12.2.4 Proceeding with Experion installation using DVD media
- 107 -

l You must not use Administrator or Mngr as user name. The user account created in theFeature Selection dialog box is Windows Administrator account. This user account must notbe used for any Experion application after completing the installation.
l If the installation is started on an account (with Administrator rights) other than the standardAdministrator account, type the valid password for the current user account (this is not fornew account creation).
l If the installation is started on a standard Administrator account, type new user name andpassword for creating new account with Administrator rights.
l If your system is in a domain, you can enter a dummy workgroup name in the dialog box andset up the domain after the operating system installation.
1. After the operating system installation is completed, insert Experion PKS System Initializationmedia again when the Experion PKS System Initialization dialog box is displayed.
l If the Autorun dialog box is displayed, close it. During installation, if Restart Now promptsappear, no action is required. The system reboots automatically.
l During installation, if you see Found New Hardware screens, do not take any action.
l The system restarts several times automatically while using Experion PKS SystemInitialization media.
l If the media is already present in the local machine, installation proceeds withoutprompting Experion PKS System Initialization media.
2. The Experion PKS Installation media 1 status is displayed indicating the feature beinginstalled, approximate remaining time for the feature installation, and overall installation torun and a description/message area that gives information about the installation.
l System restarts automatically.
l If it fails to restart automatically, restart the system manually.
l After restart, it may be necessary to start the services manually. Verify whether theExperion services are running properly in Service Control panel.
3. Follow on screen instruction to insert the respective DVD and complete the installation.
Next steps
After you complete this task, go to the section Post-installation tasks.
- 108 -
Chapter 12 - Alternate scenarios for installing Experion on Honeywell-qualified platforms

INSTALLING EXPERION ON OTHER HONEYWELLPLATFORMS
l Introduction
l Preparing for an Experion installation
l Installing Experion on other Honeywell platforms
l Post-installation tasks
13.1 Introduction
Other Honeywell Platforms are models that do not contain configurations and hardwarecomponents specific to the Honeywell configuration. These computers are purchased directlyfrom Dell/HP or from other manufacturer and may not contain the same qualified hardware.However, they are qualified by Honeywell only for specific Experion nodes. The following Experionnodes are qualified for installation on Other Honeywell Platforms.
l Experion Console (ES-C)
l Experion Flex (ES-F)
l Experion Server (ESV)
13.1.1 Considerations for Other Honeywell Platforms
l Use of an LCNP card is not supported.
l Mounting in Honeywell consoles or cabinets is not supported.
13.2 Preparing for an Experion installation
l Prerequisites
l Verifying the time and time zone settings
l Setting up screen resolution and color quality
l Setting up NIC adapter
l Changing the network firewall settings
l Setting up a user account
13.2.1 Prerequisites
- 109 -
CHAPTER
13

l Ensure that the required hardware drivers are installed on your computer.
l Ensure that Embedded Microsoft Windows 10 Enterprise 2016 LTSB (x64) or EmbeddedMicrosoft Windows Server 2016 Standard operating system is installed before you beginExperion installation.
l Refer to this section only if you are installing Experion using DVD. If you are installing Experionusing ESIS, these operations are performed automatically.
13.2.2 Verifying the time and time zone settings
The system time and time zone settings must remain consistent during installation. Beforestarting installation, ensure that the time and time zone settings are the same on both server andclient nodes (Console stations, Flex stations, and so on).
Support for the latest fixes for Daylight Savings Time are included with the Experion software.However, because of the recent global time zone adjustments, it may be necessary to reset thetime zone settings during some installation scenarios.
To change the time zone
1. Click Start > Settings.
The Settings window appears.
2. On the left pane of the Settings window, click on Date & Time.
3. Select the correct Time zone.
13.2.3 Setting up screen resolution and color quality
To set up screen resolution and color quality for Embedded MicrosoftWindows 10 Enterprise 2016 LTSB (x64) or Embedded MicrosoftWindows Server 2016 Standard operating system
1. Click Start > Windows System > Control Panel.
The Control Panel dialog box is displayed.
2. Click Appearance and Personalization, and in Display, select Adjust Resolution.
3. Select the resolution as 1280x1024 (recommended) from the drop-down list.
Or
Move the slider to the resolution required. Ensure that the resolution is at least 1024x768 orhigher.
4. Click Apply.
5. Click Keep changes to retain the new resolution.
6. Click Advanced Settings and click the Monitor tab.
7. From the Colors drop-down list, select the color as True Color (32 bit).
8. Click OK.
9. Click Yes to confirm the color quality change, and click OK.
10. Close the Display window.
13.2.4 Setting up NIC adapter
Perform the following procedure to update NIC driver for an existing FTE node. This procedure isused for verifying if the network physical adapter properties are configured correctly after a driver
- 110 -
Chapter 13 - Installing Experion on other Honeywell platforms

Chapter 13 - Installing Experion on other Honeywell platforms
update.
TIPFor more information, refer to the Verify/change physical adapters settings section in theFault Tolerant Ethernet Installation and Service Guide.
1. Right-click on Start and then select Network Connections
The Network Connections window is displayed.
2. Right-click one of the FTE network connections (Yellow or Green) and choose Properties.
The User Account Control dialog box is displayed.
3. Click Continue.
Verify the Adapter Yellow/Green Properties window.
4. In the Networking tab, select Configure.
5. In the Advanced tab, perform the following procedure for Broadcom and Intel adapters:
Broadcom adapters:
a. IPv4 Checksum Offload and ensure the value is set to Rx & Tx Enabled.
b. Click IPV4 Large Send Offload v2 and verify/change the value to Disabled.
c. Jumbo Packet and verify/change the value to Disabled.
d. Jumbo MTU and verify/change the value to 1500.
e. Receive Side Scaling and verify/change to Disabled.
f. Link Speed & Duplex and verify/change the value to 100Mb full.
Intel adapters:
a. Jumbo Packet verify/change the value to Disabled.
b. Large Send Offload (IPv4) verify/change the value to Disabled.
c. Large Send Offload (IPv6) verify/change the value to Disabled.
d. Receive Side Scaling verify/change the value to Disabled.
e. Link Speed Tab and verify/change the value to 100Mbps/Full Duplex.
f. Click OK.
g. Click Close from the Adapter Properties window.
h. Repeat the above steps for the second adapter.
13.2.5 Changing the network firewall settings
To change the network settings from public to private network
1. Click Start > Windows System > Control Panel > Network and Internet.
The Network and Sharing Center window is displayed.
2. In the left pane, click Change advanced sharing settings.
The Advanced sharing settings window is displayed.
3. Make the following changes for both Home or Work (private) option and public network.
a. In Network discovery section, select Turn on network discovery option.
b. In File and printer sharing section, select Turn on file and printer sharing option.
c. Click Save Changes.
13.2.6 Setting up a user account
To set up an user account
- 111 -

1. Create a local account using a name of your choice as follows:
TIPThe account must be a member of only the Local Administrators group and not amember of any of the Honeywell groups that are created by the Experion securitypackage.
a. Choose Windows System > This PC.
b. Right-click on This PC > More and select Manage.
The Computer Management window appears.
c. In the left pane, select Local Users and Groups, and click Users folder.
d. In the right pane, from Users click More Actions > New User.
The New User dialog box is displayed.
e. Specify the user name and password and select the Password Never Expires check box.
f. Click Create.
The new user account is created.
2. Disable the standard Windows Administrator account.
3. Assign Administrator privileges to the new user account.
a. Right-click the newly created user, and choose Properties.
b. In the Member of tab, click Add.
The Select Groups dialog box is displayed.
c. Enter the name of the user/group and click OK in the Select Groups dialog box.
d. Click OK in the Member Of tab.
4. Log off and then log on using the created account.
13.3 Installing Experion on other Honeywell platforms
13.3.1 Prerequisites
Ensure that you enable Windows firewall before you begin installation.
13.3.2 To connect to ESIS repository using ESIS from USB drive
1. Insert the USB drive or removable hard drive (containing the ESIS repository) into yourmachine.
2. Browse to the ESIS repository location in the USB drive/removable hard drive.
3. Double-click setup.exe at the root of the ESIS repository path.
The Welcome page is displayed.
4. In the Welcome page of the ESIS Install utility, select OS Preparation with/without ProductInstall.
- 112 -
Chapter 13 - Installing Experion on other Honeywell platforms

Chapter 13 - Installing Experion on other Honeywell platforms
5. When you are prompted for Windows credentials.
a. Type the <Domain Name>\Username and Password if you belong to a domain and if youhave share permissions.
b. Type the <ESISServer IP>\Username and Password if you belong to a workgroup and ifyou have share permissions.
c. Clear the Remember Password check box.
ATTENTIONIf you enter incorrect credentials, an error occurs after the first reboot ofExperion installation or migration. Then, you have to enter the correctcredentials to connect to the ESIS share.
6. Click Next.
The Installation Options page is displayed, which consists of the following options toconfigure the machine/generate configuration files.
l Configure current machine.
l Configure current machine using existing configuration files.
l Generate configuration files.
l Modify existing configuration files.
l Use Config file for migration.
7. Select Configure current machine, and click Next.
The Platform Configuration page is displayed. Perform the following operations.
a. The Product Installation check box is selected automatically.
b. Select the Experion version to install. The operating system is selected automatically.
TIPIf installing a Flex Server choose the Server (ESV) option. A Flex Server is anExperion server running on Windows 10.
8. Click Next.
The Operating System Configuration page is displayed.
9. In the Operating System Configuration page, perform the following:
l Select the Local Language and Time Zone.
l Type the Computer Name, Company Name, Customer Name, and Workgroup Name.
l Type the User Account Name and passwords.
l Type the Security Password details.
NOTEThe Security Password shall be used to protect the secured data duringinstallation and will be discarded after completing the installation.
- 113 -
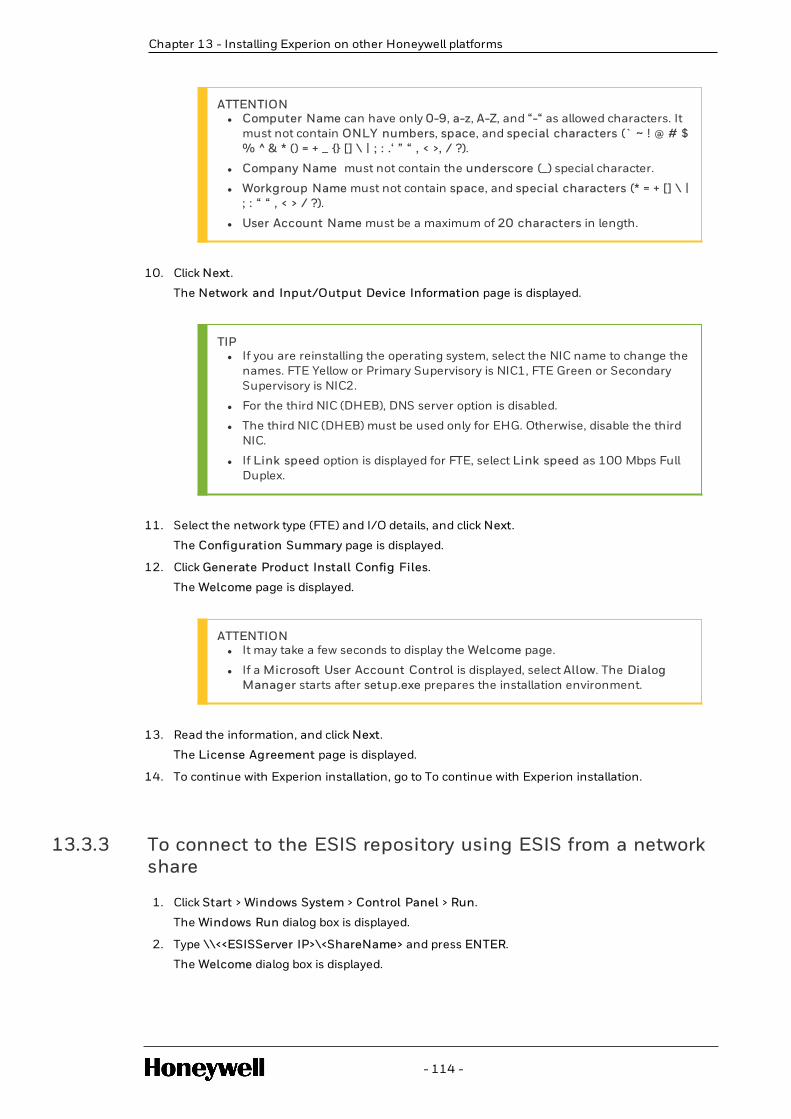
ATTENTIONl Computer Name can have only 0-9, a-z, A-Z, and “-“ as allowed characters. It
must not contain ONLY numbers, space, and special characters (` ~ ! @ # $ % ^ & * () = + _ {} [] \ | ; : .‘ ” “ , < >, / ?).
l Company Name must not contain the underscore (_) special character.
l Workgroup Name must not contain space, and special characters (* = + [] \ |; : “ “ , < > / ?).
l User Account Name must be a maximum of 20 characters in length.
10. Click Next.
The Network and Input/Output Device Information page is displayed.
TIPl If you are reinstalling the operating system, select the NIC name to change the
names. FTE Yellow or Primary Supervisory is NIC1, FTE Green or SecondarySupervisory is NIC2.
l For the third NIC (DHEB), DNS server option is disabled.
l The third NIC (DHEB) must be used only for EHG. Otherwise, disable the thirdNIC.
l If Link speed option is displayed for FTE, select Link speed as 100 Mbps FullDuplex.
11. Select the network type (FTE) and I/O details, and click Next.
The Configuration Summary page is displayed.
12. Click Generate Product Install Config Files.
The Welcome page is displayed.
ATTENTIONl It may take a few seconds to display the Welcome page.
l If a Microsoft User Account Control is displayed, select Allow. The DialogManager starts after setup.exe prepares the installation environment.
13. Read the information, and click Next.
The License Agreement page is displayed.
14. To continue with Experion installation, go to To continue with Experion installation.
13.3.3 To connect to the ESIS repository using ESIS from a networkshare
1. Click Start > Windows System > Control Panel > Run.
The Windows Run dialog box is displayed.
2. Type \\<<ESISServer IP>\<ShareName> and press ENTER.
The Welcome dialog box is displayed.
- 114 -
Chapter 13 - Installing Experion on other Honeywell platforms

Chapter 13 - Installing Experion on other Honeywell platforms
3. In the Welcome dialog box of the ESIS Install Utility, if you are prompted for the Windowscredentials, perform the following:
a. Type the <Domain Name>\Username and Password if you belong to a domain and if youhave share permissions.
b. Type the <ESISServer IP>\Username and Password if you belong to a workgroup and ifyou have share permissions.
c. Clear the Remember Password check box.
ATTENTIONIf you enter incorrect credentials, an error occurs after the first reboot of Experioninstallation or migration. Then, you have to enter the correct credentials to connectto the ESIS share.
4. Double-click setup.exeat the root of the \<ShareName>.
You are prompted for user name and password. Perform one of the following:
l Type the <Domain Name>\Username and Password if you belong to a domain.
l Type the <ESISServer IP>\Username and Password if you belong to a workgroup.
5. If prompted for user account control, click Allow.
6. If you are prompted for the Windows credentials, perform the following:
a. Type the <Domain Name>\Username and Password if you belong to a domain and if youhave share permissions.
b. Type the <ESISServer IP>\Username and Password if you belong to a workgroup and ifyou have share permissions.
c. Clear the Remember Password check box.
7. Click Next.
The Welcome page is displayed.
8. In the Welcome page of the ESIS Install utility, select OS Preparation with/without ProductInstall.
9. When you are prompted for Windows credentials.
a. Type the <Domain Name>\Username and Password if you belong to a domain and if youhave share permissions.
b. Type the <ESISServer IP>\Username and Password if you belong to a workgroup and ifyou have share permissions.
c. Clear the Remember Password check box.
ATTENTIONIf you enter incorrect credentials, an error occurs after the first reboot ofExperion installation or migration. Then, you have to enter the correctcredentials to connect to the ESIS share.
10. Click Next.
The Installation Options page is displayed, which consists of the following options toconfigure the machine/generate configuration files.
- 115 -

l Configure current machine.
l Configure current machine using existing configuration files.
l Generate configuration files.
l Modify existing configuration files.
l Use Config file for migration.
11. Select Configure current machine, and click Next.
The Platform Configuration page is displayed. Perform the following operations.
a. The Product Installation check box is selected automatically.
b. Select the Experion version to install. The operating system is selected automatically.
12. Click Next.
The Operating System Configuration page is displayed.
13. In the Operating System Configuration page, perform the following:
l Select the Local Language and Time Zone.
l Type the Computer Name, Company Name, Customer Name, and Workgroup Name.
l Type the User Account Name and passwords.
l Type the Security Password details.
NOTEThe Security Password shall be used to protect the secured data duringinstallation and will be discarded after completing the installation.
ATTENTIONl Computer Name can have only 0-9, a-z, A-Z, and “-“ as allowed characters. It
must not contain ONLY numbers, space, and special characters (` ~ ! @ # $ % ^ & * () = + _ {} [] \ | ; : .‘ ” “ , < >, / ?).
l Company Name must not contain the underscore (_) special character.
l Workgroup Name must not contain space, and special characters (* = + [] \ |; : “ “ , < > / ?).
l User Account Name must be a maximum of 20 characters in length.
14. Click Next.
The Network and Input/Output Device Information page is displayed.
TIPl If you are reinstalling the operating system, select the NIC name to change the
names. FTE Yellow or Primary Supervisory is NIC1.FTE Green or SecondarySupervisory is NIC2.
l For the third NIC (DHEB), DNS server option is disabled.
l The third NIC (DHEB) must be used only for EHG. Otherwise, disable the thirdNIC.
l The third and fourth NIC must be disabled if the user has a platform.
l If Link speed option is displayed for FTE, select Link speed as 100 Mbps FullDuplex.
- 116 -
Chapter 13 - Installing Experion on other Honeywell platforms

Chapter 13 - Installing Experion on other Honeywell platforms
15. Select the network type (FTE) and I/O details, and click Next.
The Configuration Summary page is displayed.
16. Click Generate Product Install Config Files.
The Welcome page is displayed.
ATTENTIONl It may take a few seconds to display the Welcome page.
l If a Microsoft User Account Control is displayed, select Allow. The DialogManager starts after setup.exe prepares the installation environment.
17. Read the information, and click Next.
The License Agreement page is displayed.
18. To continue with Experion installation, go to To continue with Experion installation.
13.3.4 To install Experion using DVD
1. Insert the Experion PKS Installation media 1.
2. Right-click the CD-ROM drive and select Run Experion Media Browser.
3. On the Honeywell Experion PKS Installer page, click Install/Migrate Experion PKS to begininstallation.
ATTENTION
l Click Yes if a User Account Control page is displayed.
l If Honeywell Experion PKS Installer screen does not appear, using WindowsExplorer browse to the drive (or folder) and run setup.exe at the root of themedia to start the Installer
The Welcome to the Honeywell Experion PKS Installation Setup wizard is displayed.
4. Read the information on the page, and click Next.
The Experion PKS Dialog manager is displayed.
5. The Experion PKSDialog manager has the following options.
l If you are performing a fresh Experion R500.1 installation, select Install Clean.
l If you are migrating from a previous release to Experion R500.1, select ContinueMigration.
ATTENTION
Select the Configure Current Machine with already existing configuration filesoption if you want to configure your system with existing configuration files.
Select Install Clean and click Next.
A migration warning message is displayed.
- 117 -

6. Click Yes to continue installation of Experion.
The License Agreement page is displayed.
7. To continue with Experion installation, go to To continue with Experion installation.
13.3.5 To continue with Experion installation
1. Read the EULA and select I accept the terms in the License agreement. Click Next.
The Setup type of Node to install page is displayed.
Experion product node types supported on Other Honeywell Platforms are.
l Server (ESV)
l Server TPN Connected (ESVT)
l Application Control Environment (ACE)
l Application Control Environment TPN Connected (ACE-T)
l Application Server (EAS) • PC Universal Station (PCUS)
l Simulation Environments (SCE)
l Console Station (ES-C)
l Console Station TPN Connected (ES-T)
l Console Extension Station (ES-CE)
l Flex Station (ES-F)
l Collaboration Station
l Experion Hiway Gateway (EHG)
l Application Server (EAS)
l PC Universal Station (PCUS)
l Optional Features
l eServer
l APP Node (E-APP)
l Collaboration Station
l EHG (Experion Hiway Gateway)
l ELCN History Module
ATTENTIONThe Optional features is also displayed in the node selection page. However, it isnot a node type, but is used to add additional features to an existing node type.
- 118 -
Chapter 13 - Installing Experion on other Honeywell platforms

Chapter 13 - Installing Experion on other Honeywell platforms
ATTENTIONl The third NIC (DHEB) must be used only for EHG. Otherwise, disable the third
NIC.
l Though these nodes are supported on Other Honeywell Platforms, Honeywellqualifies the installation of the following nodes on Other Honeywell Platforms.
o Flex (ES-F)o Console (ES-C)o Server (ESV)
You must select Flex (ES-F) or Console (ES-C), or Server (ESV) nodes whileinstalling Experion on Other Honeywell Platforms.
2. Select the Experion node type you want to install and click Next.
ATTENTIONThis step is applicable only for Server (ESV) node.
A message containing the redundancy information of the node being installed isdisplayed. This redundancy information is based on the machine name. Click Yes toproceed with the current redundancy type or click No to change it. You can changethe redundancy type by changing the machine name. Click Next.
The User and License Information page is displayed. Specify the customer name andcompany name in the Name and Company Name fields respectively.
3. Click Next.
4. Click Change to define the paths, and clickNext.
Select the appropriate EPN, supervisory and/or auxiliary networks.
RSLinx option is applicable only if PCIC card is available on your system. RSLinx must beinstalled manually after completion of Experion installation.
For more information, refer to the Installing RSLinx Classic.
For ESVT, EST, and ACET nodes, you can either select LCNP4 or K4LCN in the auxiliarynetwork, even if EPN or supervisory network is selected. For ES-T node, you can additionallyselect ELCN in the auxiliary network.
TIP
Three levels of networks are available on an Experion system. For moreinformation, refer to the section, Overview of Experion Process Control Network(PCN).
5. Click Next.
The Feature and Options Selection page is displayed. Select the method of Experioninstallation.
- 119 -

ATTENTIONl Based on the node selected, the feature and options for that node are
available.
l By default, selected features are installed for a node. You can select additionaloptional features.
l Select Typical to install the default optional components for a node.
l Select Custom to add Add-on or Licensed features components in addition to theTypical install. Select appropriate options to install the Add-on and Licensed featurescomponents.
NOTEBeginning from Experion 501, TPN is available as embedded component withExperion. To install TPN, you can select TPN Personality (US) option in Customtab.
TIPIf you are installing Flex node on a system with operating system, and want toinstall a Remote Engineering Station Server (RESS) node, select EnableTerminal Services (also known as Remote Desktop Services). For moreinformation, refer to Enabling Remote Desktop Services on Flex nodes.
6. Click Next.
The Remote Server Dialog page is displayed. This page is displayed only if you are installingCollaboration Station node. Enter the eServer name on which the Collaboration Station nodemust be installed.
7. Click Next.
The Experion Accounts Password Entry page is displayed.
ATTENTIONThis step is applicable for Console (ES-C) node (on Other Honeywell platforms)only.
The Experion Server Name dialog box is displayed.
Perform the following steps in the Experion Server Name dialog box.
a. Enter the name of the server in the Server Name field.
b. Select the Server is Redundant check box if you have redundant servers.
ATTENTIONIf redundant, type the base name without the ‘a’ or ‘b’ suffix.
8. Type passwords for all the accounts created during installation.
The Experion PKS Software Installation Settings page is displayed.
Click Next.
The Summary page is displayed.
9. Review the summary of the settings you selected, and click Install.
The Experion PKS Status Display page is displayed.
- 120 -
Chapter 13 - Installing Experion on other Honeywell platforms

Chapter 13 - Installing Experion on other Honeywell platforms
This page indicates the feature being installed/run, approximate time remaining for thefeature installation and a description/message area that gives information of the installation.
l System restarts automatically.
l If it fails to automatically restart, restart the system manually.
l After restart, it may be necessary to start the services manually. Verify whether theExperion services are running properly in Service Control panel.
10. Follow on screen instruction to insert the respective DVD and complete the installation.
13.3.6 Next steps
After successful completion of Experion installation, go to Post-installation tasks .
13.4 Post-installation tasks
l Adding a node to a Windows domain or workgroup
l Configuring the computer for use within a Windows domain
l Configuring the Domain or Workgroup
l Configuring FTE Device Index post-installation if Experion is running with FTE
l Setting up host files
l Installing the Microsoft security updates
l Installing the Experion software updates
l Installing the latest antivirus software
l Defragmenting the hard disk
l Setting up time synchronization
l Installing Microsoft Excel
l Installing remote desktop services
l Re-connecting the modem and entering user settings
l Backing up your system
13.4.1 Adding a node to a Windows domain or workgroup
Prerequisites
l For adding a node to Windows domain.o You must have a Windows domain controller installed and operational.
o You must have an operational DNS server.
o The node being added should have DNS.
- 121 -

To add a node to a Windows domain or workgroup
1. Click Start > Windows System > Control Panel > System and Security > System.
2. Click Change Settings.
The System Properties dialog box is displayed.
3. On the Computer Name tab, click Change.
The Computer Name Changes dialog box is displayed.
4. Select the respective Domain or Workgroup of the system.
5. Click OK to acknowledge the message, and then restart the computer.
6. Log on to the computer using a Windows account with local administrator rights.
13.4.2 Configuring the computer for use within a Windows domain
Refer to the Network and Security Planning Guide for detailed information on the following topics.
l Selecting to use domains or workgroups.
l Understanding security in Experion users.
ATTENTIONl User accounts created during installation DO NOT have permission to be users of
the Experion software. User accounts must be created and assigned Experionprivileges.
l To use Experion, you must create at least one account for each Experion role usedat the site. It is recommended to create one account per user of Experion and assigneach account the specific role or roles that the users must have.
l DO NOT create an account with both Experion roles and Windows SystemAdministrator Role.
13.4.3 Configuring the Domain or Workgroup
Refer to the Windows Domain and Workgroup Implementation Guide. For planning information,refer to Windows Domain and Workgroup Planning Guide. For operation system migrationinformation, refer the appropriate operating system-specific implementation guide WindowsDomain Implementation Guide for Windows Server 2008 R2/Windows Domain ImplementationGuide for Windows Server 2012 and Windows Domain Implementation Guide for EmbeddedMicrosoft Windows Server 2016 Standard. for detailed information on the following topics.
l Installing a domain controller and implementing Experion domain security.
l Adding a computer to a domain including the required step to link Experion security to thedomain (Link Domain Groups command).
l Creating user accounts and assigning Experion permissions.
13.4.4 Configuring FTE Device Index post-installation if Experionis running with FTE
ATTENTIONl Use this section only if you are NOT using Experion PKS System Initialization media.
l For more information about setting up the FTE Device index after Experion
- 122 -
Chapter 13 - Installing Experion on other Honeywell platforms

Chapter 13 - Installing Experion on other Honeywell platforms
installation, refer to the Fault Tolerant Ethernet Installation and Service Guide.
Setting up the FTE Device Index after Experion installation
1. In the Control Panel section, select Network and Sharing Centre
2. Select Change Adapter Settings in the left pane.
3. Right-click one of the FTE network connections (Yellow or Green) and choose Properties.
4. Click Continue to the User Account Control Prompt.
5. Select Honeywell FTE Mux-IM Protocol Driver, and choose Properties.
6. Verify the FTE MUX-IM Protocol Driver Properties dialog box and select the Configure tab.
7. In the left pane, select the Honeywell FTE Adapter #1.
Set the values for the following:
l Device Index Value for the machine - Change the value to a unique number from 1-511.
Verify the values for the following:
l The IPMC Destination Address (this is the multicast address assigned to the FTECommunity default as 234.5.6.7)
l UDP Destination Port, default value is 51966
l UDP Source Port, default value is 47837
ATTENTIONYou can modify the IPMC Destination Address, UDP Source Port, and UDPDestination Port. However, it is recommended to retain the default settings.
8. From the Network Connections window, select the Honeywell FTE Adapter #1, right-clickthe adapter, and choose Properties.
9. Click Continue to the User Account Control Prompt if it appears.
10. Verify the FTE Adapter #1 Properties: Select Internet Protocol Version 4 (TCP/IPV4) andselect Properties.
11. Verify IP Address and other IPV4 Settings. Correct any values that are incorrect or missing andthen click OK.
12. Log out and log in back as local administrator.
13. Wait until the machine has completed all the process starts and network connections andthen verify Network Settings using IPConfig/all command from a command window. If FTEMux Driver is working correctly, Honeywell FTE MUX-IM Virtual Miniport Driver is displayed inthe ipconfig command.
13.4.5 Setting up host files
You must identify the computer name and associated IP address of each Experion server andConsole station in the hosts file. Both server and client computers require a modified hosts file withidentical entries, to edit the hosts file on one computer and then copy it to each computer in theExperion system. The hosts file is located in %SystemRoot%\system32\drivers\etc\ pathwhere %SystemRoot% is usually C:\WINDOWS.
- 123 -

ATTENTIONIn case of redundant server pair, if you are planning to perform a server hardware changeor operating system re-installation of one or both servers, ensure to perform the followingsteps for updating the hosts file. Not performing these steps may lead to Loss of View (LOV)and overwriting of system repository data on the primary server with the data available onthe backup server.
1. On the server where you are performing the hosts file updates, perform thefollowing steps.
a. Launch Experion PKS Server.
The Experion PKS Server (Primary) dialog box appears.
b. In Full mode of the Start-Stop Experion PKS Server window, click DatabaseUnloaded or Database Only.
c. Update the existing hosts file then click Save.
d. Set the server to Database & Daemons.
2. On the other server of the redundant pair (not the one on which hosts file areupdated), open Station and verify the link on Redundancy Status page to be OK(appears in green).
3. Set the server on which the hosts file was updated to System Running.
To edit the hosts file in Notepad.
1. Go to Start > Windows Accessories .
2. Right-click Notepad, and choose Run as Administrator.
The following server naming conventions are used in the host file examples provided.
l Standalone server network name: SERVER
l Redundant primary server network name: SERVER A
l Redundant secondary server network name: SERVER B
l Console station XX network name (where XX = 01 - 10): CSTNXX
l In a system with Backup Control Center (BCC), the preferred primary server network name:SERVERnA, where n is a digit that identifies the server location.
l In a system with Backup Control Center (BCC), the preferred backup server network name:SERVERnB, where n is a digit that identifies the server location.
The following examples show system configurations and the entries that must be included in thehosts file. The examples assume that the system contains two Console stations. Replace networkaddresses and network names with value appropriate for your configuration. Any text following “#”(without quotes) on a single line is a comment and may be omitted from the hosts file.
Example 1: Standalone (non-redundant Cluster Server system) with Single Link (Single LAN/ FTE)
- 124 -
Chapter 13 - Installing Experion on other Honeywell platforms

Chapter 13 - Installing Experion on other Honeywell platforms
Network address Network name Node type
127.0.0.1 localhost
192.168.0.1 SERVER # Server
192.168.0.3 CSTNE # Console Station
192.168.0.5 CSTNF # Console Station
Example 2: Redundant (redundant Cluster Server system) with Single Link (Single LAN /FTE)
Network address Network name Node type
127.0.0.1 localhost
192.168.0.1 SERVERA SERVERA0 # Server A
192.168.0.3 SERVERB SERVERB0 # Server B
192.168.0.5 CSTNE # Console Station
192.168.0.7 CSTNF # Console Station
Example 3: Standalone (non-redundant Cluster Server system) with Dual Links (Dual LAN)
Network address Network name Node type
127.0.0.1 localhost
192.168.0.1 SERVER SERVER0 # Server
12.1.0.1 SERVER1
192.168.0.3 CSTNE CSTNE0 # Console Station 01
12.1.0.3 CSTNE1
192.168.0.4 CSTNF CSTNF0 # Console Station 02
12.1.0.4 CSTNF1
Example 4: Redundant (redundant Cluster Server system) with Dual Link (Dual LAN)
Network address Network name Node type
127.0.0.1 localhost
192.168.0.1 SERVERA SERVERA0 # Server A
12.1.0.1 SERVERA1
192.168.0.2 SERVERB SERVERB0 # Server B
12.1.0.2 SERVERB1
192.168.0.3 CSTNE CSTNE0 # Console Station 01
12.1.0.3 CSTNE1
192.168.0.4 CSTNF CSTNF0 # Console Station 02
12.1.0.4 CSTNF1
Example 5: Backup Control Center (BCC) redundant cluster server system with Single Link(Single LAN / FTE)
Network address Network name Node type
127.0.0.1 localhost
192.168.0.1 SERVER0A0 #SERVER0A
192.168.0.3 SERVER0B0 #SERVER0B
12.1.0.1 SERVER1A0 #SERVER1A
12.1.0.2 SERVER1B0 #SERVER1B
192.168.0.5 FSTNE # Flex Station
192.168.0.7 FSTNF # Flex Station
Example 6: Backup Control Center (BCC) redundant cluster server system with Dual Link(Dual LAN)
- 125 -

Network address Network name Node type
127.0.0.1 localhost
192.168.0.1 SERVER0A SERVER0A0 #SERVER0A - Link 0
192.168.0.2 SERVER0B SERVER0B0 #SERVER0B - Link 0
192.168.1.1 SERVER1A SERVER1A0 #SERVER0A - Link 0
192.168.1.2 SERVER1B SERVER1B0 #SERVER0B - Link 0
192.168.10.1 SERVER0A1 #SERVER0A - Link 1
192.168.10.2 SERVER0B1 #SERVER0B - Link 1
192.168.11.1 SERVER1A1 #SERVER0A - Link 1
192.168.11.2 SERVER1B1 #SERVER0B - Link 1
192.168.0.3 FLEXSTNA FLEXSTNA0 # Flex Station 0A - Link 0
192.168.10.3 FLEXSTNA1 # Flex Station 0A - Link 1
13.4.6 Installing the Microsoft security updates
Install the Microsoft security updates that are applicable to the operating system installed on thissystem. Go to the Honeywell Process Solutions website for more information. If you are a newuser, you can register for access at this site.
ATTENTIONl You must access the Honeywell Process Solutions website from a secured
computer, rather than from a node within your Experion system.
l To access zip file, save the file in the local drive and then open.
To access the Honeywell Process Solutions website1. In a web browser, type the following URL.
https://www.honeywellprocess.com/support
The SUPPORT page appears, and the Search Knowledge Base tab is selected by default.
2. Select Click Here to Login in the top-right corner of the page.
The home page appears.
3. If you are a new user, register at this website. Click Register, and follow the on-screeninstructions.
4. If you are already registered, type your Account Login user name and password, and clickLogin.
Your account name appears in the top-right of the page.
- 126 -
Chapter 13 - Installing Experion on other Honeywell platforms

Chapter 13 - Installing Experion on other Honeywell platforms
To download and install the security updates
1. To locate product-related security information, perform the following:
a. In the LATEST MATRIX UPDATES section, click the required product matrix as shown inthe following image.
The product compatibility matrix spreadsheet enclosed in a zip file is downloaded.
b. In the product compatibility matrix spreadsheet, locate the required security-relatedinformation.
2. To locate the latest security updates, perform the following:
a. In the LATEST SUPPORT FILES section, click Latest Security Updates as shown in thefollowing image.
The All Security Updates page appears as a new page.
- 127 -

b. In the Search box, type the following search phrases to locate security-relatedinformation:
Search for Description
MicrosoftSecurity Hot-fixes HoneywellQualificationMatrix
This matrix provides recommendations for the installation ofMicrosoft security updates for each HPS product.
MicrosoftSecurityUpdates ISO
Monthly releases of an ISO image that contains the HPS UpdateManager application and HPS qualified Microsoft updates. Formore information about the HPS Update Manager, search forHPS Update Manager on the HPS website.
Experion PatchUpdate Matrix
This spreadsheet identifies the updates/patches that need to beinstalled on the system.
3. If the security update cannot be located in the list displayed, you can search using the Searchbox.
4. To search with Advanced link, click the Advanced link in the Search toolbar.
The Advanced Support Document Search page appears.
5. Type the details of the security update.
6. Click Search.
The list of security updates with the required information appears.
7. Locate the required update and click the link to open.
13.4.7 Installing the Experion software updates
You must download and install Experion server, Quick Builder, HMIWeb, Configuration Studio, andExperion TPS integration (if applicable) software updates from the Honeywell Process Solutionswebsite. If you are a new user, you can register for access at this site.
ATTENTIONController and tools updates must not be installed until the migration of the entire system iscomplete.
ATTENTIONl You must access the Honeywell Process Solutions website from a secured
computer, rather than from a node within your Experion system.
l To access zip file, save the file in the local drive and then open.
To access the Honeywell Process Solutions website1. In a web browser, type the following URL.
https://www.honeywellprocess.com/support
The SUPPORT page appears, and the Search Knowledge Base tab is selected by default.
2. Select Click Here to Login in the top-right corner of the page.
The home page appears.
3. If you are a new user, register at this website. Click Register, and follow the on-screen
- 128 -
Chapter 13 - Installing Experion on other Honeywell platforms

Chapter 13 - Installing Experion on other Honeywell platforms
instructions.
4. If you are already registered, type your Account Login user name and password, and clickLogin.
Your account name appears in the top-right of the page.
To download and install hotfix
n In Search Support Documentation, type hotfix.
The hotfixes and other non-security updates are displayed. These are the latest hotfixes fromMicrosoft that are approved for use in Experion.
ATTENTIONTo download the latest Experion patches, refer to the spreadsheet available at thefollowing link http://www.honeywellprocess.com/library/support/software-downloads/Experion/experion-update-matrix.zip.
13.4.8 Installing the latest antivirus software
ATTENTIONThis post-installation task is applicable for all the nodes.
Verify that the latest antivirus software is installed and patched to the proper version for youroperating system. You can find the latest antivirus solution information at.
http://www.honeywellprocess.com
ATTENTIONl You must access the Honeywell Process Solutions website from a secured
computer, rather than from a node within your Experion system.
l To access zip file, save the file in the local drive and then open.
To access the Honeywell Process Solutions website
1. In the web browser, type the following URL.
https://www.honeywellprocess.com/support
The Product Support page appears.
2. If you are a new user, register for access at this site. Click Register, and follow the instructionson the screen.
3. If you are already registered, type your username and password, and then click Login.
Your account login name appears in the top-right of the page.
To apply the latest antivirus notification
- 129 -

1. Open the Product Support page.
2. To view and download the latest antivirus notifications, click Latest Notifications.
Or
In addition, you can search for the latest notification using the search modes available in theProduct Support page. The following table describes the search options. Choose any one ofthe following option and then perform the corresponding steps.
Option Description
Search Support Documentation
To use this option you must have anactive support contract.
a. Click Advanced.
The Advanced Support Document Searchpage is displayed.
b. Type all the details about the document oruse wildcards to search for the notification.Click Search.
For example, if you are searching for Anti-virus Software Guidelines, type theinformation and click Search. The documentis displayed.
Search by Product and Subscribeto Notifications
This provides the completeinformation about a specificproduct. In addition you can alsosubscribe to this page for alertswhere a notification is sent to youabout the published document.
a. Type the name of the product.
The related products are displayed.
b. Click the required product with the release.
The Documentation, Notifications, SoftwareDownloads and Security Updates for theparticular product are displayed.
For example, type Experion R500.1, andselect Experion R500.1 in the list of productsdisplayed. The page displays theDocumentation, Notifications, SoftwareDownloads and Security Updates tabs thatlist all the support documents related toExperion R500.1.
3. Locate the required notification.
4. Once you locate the required notification, click Download.
The required notification is downloaded on your computer.
13.4.9 Defragmenting the hard disk
Prerequisites
l Ensure that other applications (Experion Server, SQL Server, and so on.) are not running onyour computer because, this may require restarting the computer.
Considerations
l It is recommended that you add this task to your system's maintenance schedule, so that it isperformed during control shutdowns.
l You can upgrade the default fragmentation utility included with Windows to the full version.Executive Software's Diskeeper includes a scheduler, and can defragment folders andpagefiles when a computer restarts. Defragmentation tasks affect the control system if theyare set to run automatically with the scheduler. Care must be taken when schedulingdefragmentation tasks. For more details, choose Start > Windows Administrative Tools >Defragment and Optimize Drives, to refer to the Windows Help for Disk Defragmenter usingthe path.
- 130 -
Chapter 13 - Installing Experion on other Honeywell platforms

Chapter 13 - Installing Experion on other Honeywell platforms
To stop the services on servers and Console stations
1. Launch the Experion PKS Server.
The Experion PKS Server dialog box is displayed.
2. To stop the services of the Experion server, in Full mode of the Start-Stop Experion PKSServer window, select Database Unloaded.
3. Close all windows.
4. To stop the Experion PKS Control Data Access server services and RSLinx, perform thefollowing steps.
a. Select Start > Windows System > right-click This PC and select Manage.
The Server Manager window is displayed.
b. Expand Configuration> Services in the left pane.
c. Click Services.
A list of services is displayed in the right-pane.
d. Right-click Experion PKS Control Data Access server services, and choose Stop.
The Stop Other Services confirmation dialog box is displayed.
e. Click Yes to stop other dependency services.
5. For systems using ControlNet, perform the following procedures.
a. Right-click RSLinx Classic and choose Stop.
b. Right-click Harmony and choose Stop.
c. Close the Server Manager window.
To defragment the hard disk
1. Select Start > Windows System > Change Settings.
The System Properties dialog box appears..
2. Right-click the hard disk to defragment and choose Properties.
3. Click the Tools tab.
4. Click Defragment now.
The Disk Defragmentor dialog box is displayed.
5. Select the disk and then click Analyze disk.
This analyzes the fragmentation level of the drive. The defragmented disk is displayed in Date,Time, Percentage of fragmented disk format.
6. After the analysis is complete, click Defragment Disk to start defragmenting the hard disk.
Depending on the level of fragmentation and usage, the task may take time to complete.
7. When the defragmentation is complete, close the Disk Defragmentor application.
8. Close the Local Disk Properties window.
9. Restart the system.
13.4.10 Setting up time synchronization
After completing the migration, you must synchronize the time between the node and the timeserver.
You must log on to the migrated node with Windows System Administrator permission.
- 131 -

To run the NTPConfig utility
1. In Windows Explorer, navigate to C:\Program Files (x86)\Honeywell\Experion
PKS\Utilities\NTPSetup.
For custom installation path, navigate to <User selected
path>\Honeywell\Experion PKS\Utilities\NTPSetup.
2. Right-click NTPConfg.exe and select Run as administrator.
The NTP Configuration dialog box is displayed.
For more information about setting up time synchronization, see the Experion PKSSupplementary Installation Tasks Guide and Experion Server and Client Planning Guide.
3. To restore previous NTP configuration settings, click Yes.
The previous NTP configuration settings are restored.
4. If NTP configuration settings is not restored due to a file mismatch, then the followingmessage is displayed.
5. Click OK.
If the NTP configuration settings are not restored, refer to the Experion SupplementaryInstallation Tasks Guide and Experion Server and Client Planning Guide to reconfigure theNTP settings.
13.4.11 Installing Microsoft Excel
For more information about installing Microsoft Excel, see the Supplementary Installation TasksGuide.
13.4.12 Installing remote desktop services
For more information about installing a remote desktop services (previously known as terminalservices), see the Supplementary Installation Tasks Guide.
- 132 -
Chapter 13 - Installing Experion on other Honeywell platforms

Chapter 13 - Installing Experion on other Honeywell platforms
13.4.13 Re-connecting the modem and entering user settings
The modem must be reconnected to the computer after a product hardware change or anoperating system install or reinstall. For more information, refer to Supplementary InstallationTask Guide.
13.4.14 Backing up your system
Other Honeywell Platforms hardware is supported with EBR R400. You must create a customrecovery media for restoring the backup of Other Honeywell Platforms to the same platform. Formore information, refer to the EBR User’s guide.
ATTENTIONYou can restore Other Honeywell Platforms to another platform of the same type or on thesame platform only. Restoring any Honeywell-qualified platform to Other HoneywellPlatforms is not supported.
- 133 -

INSTALLING/CONFIGURING OPERATING SYSTEM ONHONEYWELL-QUALIFIED PLATFORMS USINGEXPERION PKS SYSTEM INITIALIZATION MEDIA
l Prerequisites
l Preparing a platform with supported operating system
l Preparing a platform which has unsupported operating system
l Preparing a platform without operating system (bare metal)
14.1 Prerequisites
l Before you begin using the Experion PKS System Initialization media, ensure that you havethe following:
o Embedded Microsoft Windows 10 Enterprise 2016 LTSB (x64) or EmbeddedMicrosoft Windows Server 2016 Standard operating system.
l If optional features are installed on your system, do not configure your system usingExperion PKS System Initialization media.
Install the PRO 1000 PT Dual server card into one of the following PCI-e slots of your computer.
Servers:
l Dell PowerEdge T320/R320 servero No add-on on NIC supported for FTE
l Dell PowerEdge T330/R330 servero No add-on on NIC supported for FTE
l Dell PowerEdge R430 servero No add-on on NIC supported for FTE
l Dell PowerEdge T130 servero No add-on on NIC supported for FTE
l HP ProLiant DL360p Gen8 servero No add-on on NIC supported for FTE
- 134 -
CHAPTER
14

ATTENTIONUse HPS operating system reinstallation media (Embedded Microsoft Windows 10Enterprise 2016 LTSB (x64) and Embedded Microsoft Windows Server 2016Standard) (recommended).
Workstation:
l Dell Precision T3600XL workstationo No add-on on NIC supported for FTE
l Dell R7910XL Standard
l Dell R7910XL Performance RAID
l Dell T5810XL Performance RAID
l HPZ440 Performance
l Dell R5500
l Dell R7610
l HP Z620
14.2 Preparing a platform with supported operating system
14.2.1 Configuring the operating system using Experion PKSSystem Initialization media
1. Insert the Experion PKS System Initialization media, right-click setup.exe at the root of themedia and run as Administrator.
ATTENTIONl
Format the drives that are not formatted (raw partitions) before using ExperionPKS System Initialization media.
l Local user account without Administrator rights must not be used to startinstallation using Experion PKS System Initialization media.
The Installation Options page is displayed which contains the following options to configurethe machine/generate configuration files.
l Configure current machine.
l Configure current machine using existing configuration files.
l Generate configuration files.
l Modify existing configuration files.
l Use configuration file for migration.
2. Select Generate Configuration Files and click Next.
The Platform Configuration page is displayed which consists of options to install Experionand/or configure operating system on a selected platform. The following options are present.
- 135 -
Chapter 14 - Installing/Configuring operating system on Honeywell-qualified platforms using

Chapter 14 - Installing/Configuring operating system on Honeywell-qualified platforms using
Section Option Description
ChooseConfiguration
Platformconfiguration
l Select Configure System if the operating system isinstalled manually.
l Select Reinstall OS and configure system ifsupported operating system is not present. Choosethis option and configure the system.
ChooseConfiguration
Productinstallation
Select the Experion version to be installed.
SelectPlatform
Select the type of platform for installing and configuring theoperating system, and Experion (depending upon yourrequirements).
l Select Workstation, if you are installing/configuring aworkstation.
l Select Server, if you are installing/configuring aserver.
Selectoperatingsystem
Depending on the platform type, and product versionselected, the supported operating systems are listed.
l The Client option is selected if you areinstalling/configuring a Workstation platform
l The Server option is selected if you areinstalling/configuring a Server operating system.
ATTENTION
DO NOT install the following combination of nodes and operating systems, as theyare not qualified and supported currently.
l Application Server (EAS) on Embedded Microsoft Windows 10 Enterprise 2016LTSB (x64) operating system.
l eServer on a Embedded Microsoft Windows 10 Enterprise 2016 LTSB (x64)operating system.
l Application Control Environment (ACE) node on a Embedded MicrosoftWindows 10 Enterprise 2016 LTSB (x64) operating system.
l Collaboration Station on a Embedded Microsoft Windows Server 2016Standard operating system.
The following options are available in the Platform Configuration page, depending on yourselection in Platform configuration and Installation Options pages.
- 136 -

Installation option Platform configuration options Options available
Configure CurrentMachine
l Select Configure System.
l Select Product Installationcheck box and choose anExperion version to be installed.
l Select Platformis disabled.
l SelectOperatingSystem isdisabled.
Configure CurrentMachine
l Select Configure System.
l Do not select ProductInstallation.
l Select Platformis disabled.
l SelectOperatingSystem isdisabled.
Configure CurrentMachine
l Select Product Installationcheckbox, and select an Experionversion to be installed.
l Select a 64-bit operating systemin Select Operating System.
l Platform configuration isautomatically set as Reinstall OSand Configure system.
l Select Platformis disabled.
l SelectOperatingSystem isenabled.
Configure CurrentMachine
l Platform configuration isReinstall OS and Configuresystem.
l Select Product installationcheck box, and select an Experionversion to be installed.
l Select Platformis disabled.
l SelectOperatingSystem isenabled.
Generate configurationfiles
l Platform Configuration isReinstall OS and Configuresystem.
l Select Product installation.
l Select Platformis enabled.
l SelectOperatingSystem isenabled.
Generate configurationfiles
l Select Product Installation.
l Select Platform has OtherHoneywell Platform option.
l Platformconfiguration isConfigureSystem.
l SelectOperatingSystem isenabled.
Configure currentmachine using existingconfiguration files
l Select Product installation.
l Select Platform has OtherHoneywell Platform option.
l Platformconfiguration isConfigureSystem.
l SelectOperatingSystem isenabled.
- 137 -
Chapter 14 - Installing/Configuring operating system on Honeywell-qualified platforms using

Chapter 14 - Installing/Configuring operating system on Honeywell-qualified platforms using
TIPl If the target machine is qualified, the hardware platform is automatically
selected. Otherwise, you can only generate or edit the configuration files.
l The Product Installation check box is selected by default. Clear this check box.
3. Select installation type, platform, and operating system, and click Next.
The Operating system Configuration page is displayed, which consists of the fields requiredfor operating system installation. Perform the following operation.
l Select the Local Language and Time Zone.
l Type the Computer Name, Company Name, Customer Name, and Workgroup Name.
l Type the user account name and passwords in the User Account Name, Password andConfirm Password fields.
l Type the Security Password details.
NOTEThe Security Password shall be used to protect the secured data duringinstallation and will be discarded after completing the installation.
ATTENTIONl Computer Name can have only 0-9, a-z, A-Z, and “-“ as allowed characters. It
must not contain ONLY numbers, space, and special characters (` ~ ! @ # $ % ^ & * () = + _ {} [] \ | ; : .‘ ” “ , < >, / ?).
l Company Name must not contain the underscore (_) special character.
l Workgroup Name must not contain space, and special characters (* = + [] \ |; : “ “ , < > / ?).
l User Account Name must be a maximum of 20 characters in length.
4. Click Next.
The Network and Input/Output Device Information page is displayed, which consists of thefollowing options depending upon the Network type selected.
- 138 -

Section Option Description Value
NetworkConfiguration
NetworkType
The different types ofnetwork on which you caninstall Experion.
l Ethernet
l FTE
No. ofAdapters
The number of networkadapters needed forExperion installation.
l Ethernet: 1 (minimum)
l FTE: 2 (minimum)
l If you are installing EHG,you must select 3.
NIC1l The first NIC (FTE
Yellow or PrimarySupervisory).
l Applicable to Ethernetand FTE networktypes.
NIC2l The second NIC (FTE
Green or SecondarySupervisory).
l Applicable to FTEnetwork type.
l Set to DHCP bydefault.
NIC3l The third NIC (DHEB).
l Used only for EHG.
l DNS server option isdisabled.
I/O details RPSAvailable
Select this option to installExtio’s software on yoursystem. If this option is notselected, Extio is notinstalled on your system.
This option is available on thefollowing workstations only.
l Dell Precision R5500workstation
l Dell Precision T3600XLworkstation
l HP Z620 workstation
Monitorarrangement
l Number of monitorsconnected to yoursystem.
l The options aredisplayed dependingupon the video cardinstalled on yoursystem.
Single is selected and theoption is disabled.
Monitorresolution
Minimum resolution to beset for the monitor.
One of the following monitorresolution is set forworkstations, and the option isdisabled.
l 1024*768
l 1280*1024
l 1600*1200
l 1680*1050
l 1920*1200
l 1920*1080
- 139 -
Chapter 14 - Installing/Configuring operating system on Honeywell-qualified platforms using

Chapter 14 - Installing/Configuring operating system on Honeywell-qualified platforms using
ATTENTION
l 1280*1024default whenRPS availableis selected, andthe option isthen disabled.
l 1280*1024(default forEmbeddedMicrosoftWindows 10Enterprise2016 LTSB(x64),EmbeddedMicrosoftWindowsServer 2016Standard)
l 1024*768(default forVMware)
Touchscreentype
Following Touchscreen typeoptions are available forworkstations (Dell PrecisionWorkstation R5500, T3600XL,and HP Workstation Z620).
l None
l SAW USB
l SAW Serial
Network LinkSpeed
(EthernetNetwork typeonly)
The mode of datatransmission over thenetwork.
l Auto negotiate
l 100 mbps full duplex
ATTENTIONYou must select 100mbps full duplex ifyou are using FTEswitch.
FTEConfiguration
(FTENetwork typeonly)
MulticastAddress
The multicast addressassigned to the FTECommunity.
234.5.6.7 (default)
Device Index A unique number between 1and 511
UDP Sourceport
47837 (default)
UDPDestinationPort
51966 (default)
- 140 -

FriendlyName
Alias name for the FTEnetwork.
ATTENTIONl If you select FTE, the IP Address, Subnet mask, and default gateway settings
are not applicable for Green adapter, and they are set to DHCP by default.
l If you are reinstalling the OS, click the NIC name to change the names.o NIC1 is the first NIC (FTE Yellow or Primary Supervisory)o NIC2 is the second NIC (FTE Green or Secondary Supervisory).o NIC3 must be used for EHG only. DNS server option is disabled.
l You cannot change the I/O details settings for Server and VMware.
l If Link speed option is displayed for FTE, select Link speed as 100 Mbps FullDuplex.
5. Select the network type and I/O details and click Next.
The Configuration Summary page is displayed, to confirm the selected options.
The following options are displayed depending on the options you selected.
If you selectThen optiondisplayed is... Perform the following action
Product Installation option inPlatform Configuration page
GenerateProduct InstallConfig Files
a. Click Generate ProductInstall Config Files.
b. Click Install to proceed withExperion installation.
The Experion productinstallation begins.
Reinstall OS and configuresystem option in PlatformConfiguration page
Save config files a. Click Save File.
The Browse for folder pageis displayed.
b. Select the path to save theconfiguration files and clickOK and click Finish.
ATTENTIONl The Experion System Initialization sequencer runs in the background,
sequentially installing selected features and communicating the same to thestatus display. The status display shows the following information:
o Feature being installed.o Approximate time for the feature installation and overall installation
time.o Description that gives information for the features being installed.
l You can abort the installation by clicking Cancel. It can be restarted at a latertime by running setup.exe .
- 141 -
Chapter 14 - Installing/Configuring operating system on Honeywell-qualified platforms using

Chapter 14 - Installing/Configuring operating system on Honeywell-qualified platforms using
6. When the Install complete message is displayed, click OK to finish the installation.
ATTENTIONSystem restarts several times automatically during Experion PKS SystemInitialization installation.
l System restarts automatically.
l If it fails to automatically restart, then restart the system manually.
14.3 Preparing a platform which has unsupported operatingsystem
14.3.1 Installing the operating system using DVD
1. Insert Experion PKS System Initialization media,
2. Right-click setup.exe at the root of the media, and run as Administrator.
The Installation Options page is displayed, which consists of the following options toconfigure the machine / generate configuration files.
l Configure current machine.
l Configure current machine using existing configuration files.
l Generate configuration files.
l Modify existing configuration files.
l Use Config file for migration.
Select one of the following options depending upon your requirements.
Option When to choose this option
Configure current machine You do not have configuration files generated for thetarget machine.
Configure current machineusing existing configurationfiles
You already have configuration files generated for thetarget machine.
Generate configuration files You are configuring/reinstalling your operating system.Hence, you want to generate configuration files.
Modify existing configurationfiles
You already have configuration files generated for yourmachine and you want to modify them.
Use configuration files formigration
You want to perform phase 2 migration, and theoperating system is installed manually.
Select Configure current machine.
3. Click Next.
The Platform Configuration page is displayed.
Since Configure current machine option was selected, Reinstall operating system andconfigure system is selected by default and you cannot change this selection. The hardwareplatform and operating system is automatically selected.
Perform the following operation.
l Clear the Product Installation check box.
l Select the operating system details.
- 142 -

4. Click Next.
The Operating system Configuration page is displayed. Perform the following operation.
l Select the Local Language and Time Zone.
l Type the Computer Name, Company Name, Customer Name, and Workgroup Name.
l Type the user account name and passwords in the User Account Name, Password andConfirm Password fields.
l Type the Security Password details.
NOTEThe Security Password shall be used to protect the secured data duringinstallation and will be discarded after completing the installation.
ATTENTIONl Computer Name can have only 0-9, a-z, A-Z, and “-“ as allowed characters. It
must not contain ONLY numbers, space, and special characters (` ~ ! @ # $ % ^ & * () = + _ {} [] \ | ; : .‘ ” “ , < >, / ?).
l Company Name must not contain the underscore (_) special character.
l Workgroup Name must not contain space, and special characters (* = + [] \ |; : “ “ , < > / ?).
l User Account Name must be a maximum of 20 characters in length.
5. Click Next.
The Network and Input/Output Device Information page is displayed. Select the networktype and I/O details.
ATTENTIONl You can expand the NIC names and double-click IP Address, Subnet mask and
default gateway to type the appropriate IP address or click the TCP/IPProperties button to edit. You can select the Network Link speed (Auto-negotiate/100 mbps Full Duplex) in case you select Network Type asEthernet. However, selecting Auto-negotiate may significantly degradenetwork performance on some network hardware platforms. It isrecommended to use 100MB/full duplex configuration on both NIC and switchport whenever possible.
l In case of FTE, the IP Address, Subnet mask, and default gateway settings arenot applicable for Green adapter, and they are set to DHCP by default.
l If you are reinstalling the operating system, select and click the NIC name tochange the names. NIC1 is the first NIC (FTE Yellow or Primary Supervisory);NIC2 is the second NIC (FTE Green or Secondary Supervisory).
l For third NIC (DHEB), DNS server option is disabled.
l Third NIC (DHEB) should only be used for EHG. Otherwise, disable the thirdNIC.
l If Link speed option is displayed for FTE, select Link speed as 100 Mbps FullDuplex.
6. Click Next.
The Configuration Summary page is displayed.
- 143 -
Chapter 14 - Installing/Configuring operating system on Honeywell-qualified platforms using

Chapter 14 - Installing/Configuring operating system on Honeywell-qualified platforms using
7. Since Product Installation was not selected the Generate Product Install Config Filesoption is not available. Click Finish to proceed with Experion installation using Experion PKSSystem Initialization media.
8. Read the instructions to start operating system installation and click OK to exit the DialogManager.
9. In the target machine, insert Experion PKS System Initialization media and boot from theExperion PKS System Initialization media.
ATTENTIONEnsure that Boot Sequence in BIOS is set to boot from CD/DVD drive first.
10. Press any key when you see the message Press any key to boot from CD or DVD.
11. Browse to the configuration files and select InitMediaOptions.xml file.
12. Click Next.
The Experion PKS System Initialization Pre-Install Utility screen is displayed when thesystem boots from Experion PKS System Initialization media. Additionally, WinPE is loaded intothe target machine.
13. The Experion PKS System Initialization PreInstall Utility loads the configurationinformation from Options files.
l Experion PKS System Initialization media does not allow you to select the hard diskpartitions (drive path) based on your custom installation path selection.
l Select Use Drive C: option if you want to format only C drive and install operating systemon this drive. In this case, the data on the other partitions are retained. Select this optiononly if the computer has more than one partition and no raw partitions.
l Select C: drive or the number of partitions required. The minimum size for primarypartition is . If the disk space is less than , only one partition can be created.
14. Enter configuration details for hard disk in the Disk Configuration section. Select theappropriate media location. It can be any one of the following:
l DVD
l ESIS from network
l ESIS from USB
For ESIS-based installation using USB, browse to the ESIS repository.
15. For ESIS from network.
l Enter the ESIS path <ESIS server IP Address\Username> and Password.
l enter the IP details, Subnet Mask, and Default Gateway in the Network Configurationfor local machine section. Click Next.
16. Select the I accept the terms in the License agreement radio button on the LicenseAgreement page after reading the EULA and click Install.
The Experion PKS Installation media 1 status is displayed indicating the feature beinginstalled/run, approximate time remaining for the feature installation and adescription/message area that gives information of the installation.
l System restarts automatically.
l If it fails to automatically restart, restart the system manually.
l After restart, it may be necessary to start the services manually. Verify whether theExperion services are running properly in Service Control panel.
- 144 -

17. After the operating system installation is completed, insert Experion PKS System Initializationmedia when you see the Experion PKS System Initialization page.
ATTENTIONl If the Autorun dialog is displayed, close it.
l During installation, if you see Restart Now prompt, no action isrequired.System restarts several times automatically during Experion PKSSystem Initialization installation.
l During installation, if you see a Found New Hardware message, do not takeany action.
l If the media is already present in the local machine, installation proceedswithout prompting Experion PKS System Initialization media.
18. The Experion PKS System Initialization sequencer is running in the background sequentiallyrunning install features and communicating to the status. If product installation was selected,a message is displayed prompting for Experion PKS Installation media 1.
19. Insert the Experion PKS Installation media 1 and click OK to begin Experion installation.
ATTENTIONYou can abort the installation by clicking Cancel. It can be restarted at a later timeby running setup.exe .
l System restarts automatically.
l If it fails to automatically restart, restart the system manually.
l After restart, it may be necessary to start the services manually. Verify whether theExperion services are running properly in Service Control panel.
14.4 Preparing a platform without operating system (bare metal)
14.4.1 Prerequisites
Since the target machine does not have any operating system, you must use a machine otherthan the target machine to run Experion PKS System Initialization and create configuration filesfor the target machine.
14.4.2 Installing the operating system using DVD media
1. Insert Experion PKS Installation media 1 in a machine (other than the target machine) anddouble-click setup.exe at the root of the media.
2. Click Configure current machine.
The Installation Options page is displayed, which consists of the options to configure themachine/generate configuration files.
- 145 -
Chapter 14 - Installing/Configuring operating system on Honeywell-qualified platforms using

Chapter 14 - Installing/Configuring operating system on Honeywell-qualified platforms using
l Configure current machine.
l Configure current machine using existing configuration files.
l Generate configuration files.
l Modify existing configuration files.
l Use configuration file for migration.
3. Select Generate Configuration Files and click Next.
The Platform Configuration page is displayed. Select installation type, platform, andoperating system information.
ATTENTIONDO NOT install the following combination of nodes and operating systems, as theyare not qualified and supported currently.
l Application Server (EAS) on Embedded Microsoft Windows 10 Enterprise 2016LTSB (x64) operating system.
l eServer on a Embedded Microsoft Windows 10 Enterprise 2016 LTSB (x64)operating system.
l Application Control Environment (ACE) node on a Embedded MicrosoftWindows 10 Enterprise 2016 LTSB (x64) operating system.
l Collaboration Station on a Embedded Microsoft Windows Server 2016Standard operating system.
4. Click Next.
The Operating system Configuration page is displayed. Perform the following operation.
l Select the Local Language and Time Zone.
l Type the Computer Name, Company Name, Customer Name, and Workgroup Name.
l Type the user account name and passwords in the User Account Name, Password andConfirm Password fields.
l Type the Security Password details.
NOTEThe Security Password shall be used to protect the secured data duringinstallation and will be discarded after completing the installation.
ATTENTIONl Computer Name can have only 0-9, a-z, A-Z, and “-“ as allowed characters. It
must not contain ONLY numbers, space, and special characters (` ~ ! @ # $ % ^ & * () = + _ {} [] \ | ; : .‘ ” “ , < >, / ?).
l Company Name must not contain the underscore (_) special character.
l Workgroup Name must not contain space, and special characters (* = + [] \ |; : “ “ , < > / ?).
l User Account Name must be a maximum of 20 characters in length.
5. Click Next.
The Network and Input/Output Device Information page is displayed. Select the networktype and I/O details
- 146 -

ATTENTIONl You can expand the NIC names and double-click IP Address, Subnet mask and
default gateway to type the appropriate IP address or click the TCP/IPProperties button to edit. You can select the Network Link speed (Auto-negotiate/100 mbps Full Duplex) in case you select Network Type asEthernet. However, selecting Auto-negotiate may significantly degradenetwork performance on some network hardware platforms. It isrecommended to use 100MB/full duplex configuration on both NIC and switchport whenever possible.
l In case of FTE, the IP Address, Subnet mask, and default gateway settings arenot applicable for Green adapter, and they are set to DHCP by default.
l If you are reinstalling the operating system, select the NIC name to change thenames. NIC1 is the first NIC (FTE Yellow or Primary Supervisory); NIC2 is thesecond NIC (FTE Green or Secondary Supervisory).
l For third NIC (DHEB), DNS server option is disabled.
l Third NIC (DHEB) should only be used for EHG. Otherwise, disable the thirdNIC.
l If Link speed option is displayed for FTE, select Link speed as 100 Mbps FullDuplex.
6. Click Next.
The Configuration Summary page is displayed. Since the Product Installation option wasnot selected, the Generate Product Install Config Files button is not available.
7. Click Finish to proceed with installation.
8. Read the instructions carefully to start operating system installation and click OK to exit theDialog Manager.
9. In the target machine, insert Experion PKS System Initialization media and boot from theExperion PKS System Initialization media.
ATTENTIONEnsure that Boot Sequence in BIOS is set to boot from CD/DVD drive first.
10. Press any key when you see the message Press any key to boot from CD or DVD.
11. Browse to the configuration files and select InitMediaOptions.xml file.
12. Click Next.
The Experion PKS System Initialization Pre-Install Utility screen is displayed when thesystem boots from Experion PKS System Initialization media. Additionally, WinPE is loaded intothe target machine.
13. The Experion PKS System Initialization PreInstall Utility loads the configurationinformation from Options files.
l Experion PKS System Initialization media does not allow you to select the hard diskpartitions (drive path) based on your custom installation path selection.
l Select Use Drive C: option if you want to format only C drive and install operating systemon this drive. In this case, the data on the other partitions are retained. Select this optiononly if the computer has more than one partition and no raw partitions.
l Select C: drive or the number of partitions required. The minimum size for primarypartition is . If the disk space is less than , only one partition can be created.
- 147 -
Chapter 14 - Installing/Configuring operating system on Honeywell-qualified platforms using

Chapter 14 - Installing/Configuring operating system on Honeywell-qualified platforms using
14. Enter configuration details for hard disk in the Disk Configuration section. Select theappropriate media location. It can be any one of the following:
l DVD
l ESIS from network
l ESIS from USB
For ESIS - based installation using USB, browse to the ESIS repository folder.
15. For ESIS from network.
l Enter the ESIS path <ESIS server IP Address\Username>and Password.
l enter the IP details, Subnet Mask, and Default Gateway in the Network Configurationfor local machine section. Click Next.
16. Click Next. Select the I accept the terms in the License agreement radio button on theLicense Agreement page after reading the EULA and click Install.
The Experion PKS Installation media 1 status is displayed indicating the feature beinginstalled/run, approximate time remaining for the feature installation and adescription/message area that gives information of the installation.
l System restarts automatically.
l If it fails to automatically restart, restart the system manually.
l After restart, it may be necessary to start the services manually. Verify whether theExperion services are running properly in Service Control panel.
ATTENTIONWhen you install operating system on an external hard disk drive using ExperionPKS Installation media 1, the content in the external hard disk drive is notformatted during operating system installation.
17. After the operating system installation is completed, insert Experion PKS System Initializationmedia when you see the Experion PKS System Initialization page.
ATTENTIONl If the Autorun dialog is displayed, close it.
l During installation, if you see Restart Now prompt, no action is required.System restarts several times automatically during Experion PKS SystemInitialization installation.
l During installation, if you see a Found New Hardware message, do not takeany action.
l If the media is already present in the local machine, installation proceedswithout prompting Experion PKS System Initialization media.
18. The Experion PKS System Initialization sequencer is running in the background sequentiallyrunning install features and communicating to the status. If product installation was selected,a message is displayed prompting for Experion PKS Installation media 1.
19. Insert the Experion PKS Installation media 1 and click OK to begin Experion installation.
ATTENTIONYou can abort the installation by clicking Cancel. It can be restarted at a later timeby running setup.exe .
- 148 -

l System restarts automatically.
l If it fails to automatically restart, restart the system manually.
l After restart, it may be necessary to start the services manually. Verify whether theExperion services are running properly in Service Control panel.
ATTENTIONIf you install the operating system on an additional hard disk drive connected toyour system, the drive letter specified is reset automatically during operatingsystem installation. You can change the drive letter, by performing the followingsteps.
a. Right-click on the Computer icon on the desktop and choose Manage.
The Computer Management window is displayed.
b. In the left pane of the Computer Management window, select ComputerManagement (Local) > Storage >Disk Management. The disk partitions inthe system are displayed in the right pane.
c. Right-click the disk partition of which you want to change the drive letter andselect Change Drive Letter and Paths.
d. In the Change Drive Letter and Paths dialog box, click Change.
e. Select the drive letter from the list and click OK.
- 149 -
Chapter 14 - Installing/Configuring operating system on Honeywell-qualified platforms using

PLANNING TO DEPLOY VMWARE VIRTUAL MACHINES
Identify deployment methods for virtual machines.
ATTENTIONExperion virtual machines should be created and deployed using the procedures describedin this section. See the related topics.
Consideration needs to be given to the location were new virtual machines are created.
l When you are creating virtual machines for the initial installation for a new plant, install theExperion virtual machines directly on the production ESXi hosts, which can be connected tothe Level 2 FTE network, as the system is not online and the effects of the installation will notdegrade the process.
l When you are creating virtual machines for an existing plant on a new production ESXi host,install the Experion virtual machines directly on the production ESXi host that is disconnectedfrom the Level 2 FTE network. Connect the production ESXi host to the production networkwhen you are ready to cut over to the new production ESXi host.
l When you are creating virtual machines for an existing plant on an existing production ESXihost, install the Experion virtual machine on the management ESXi host, which has no directconnection to the production network. Any effect of the installation will not degrade theperformance of any production ESXi hosts. This virtual machine can then be cold migrated tothe required production ESXi host when it is ready to use.
New operating system virtual machines can be deployed from templates. When deploying newvirtual machines that are based on templates, you need appropriate Windows operating systemlicenses for each new virtual machine.
- 150 -
CHAPTER
15
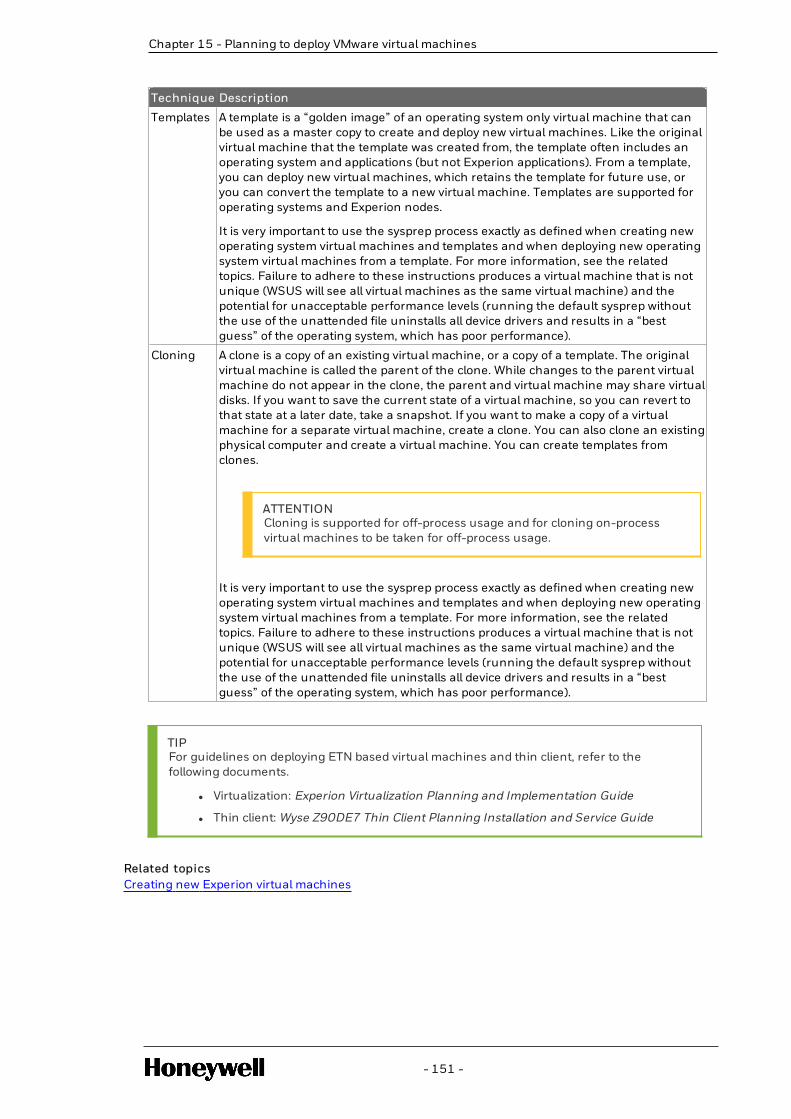
Technique Description
Templates A template is a “golden image” of an operating system only virtual machine that canbe used as a master copy to create and deploy new virtual machines. Like the originalvirtual machine that the template was created from, the template often includes anoperating system and applications (but not Experion applications). From a template,you can deploy new virtual machines, which retains the template for future use, oryou can convert the template to a new virtual machine. Templates are supported foroperating systems and Experion nodes.
It is very important to use the sysprep process exactly as defined when creating newoperating system virtual machines and templates and when deploying new operatingsystem virtual machines from a template. For more information, see the relatedtopics. Failure to adhere to these instructions produces a virtual machine that is notunique (WSUS will see all virtual machines as the same virtual machine) and thepotential for unacceptable performance levels (running the default sysprep withoutthe use of the unattended file uninstalls all device drivers and results in a “bestguess” of the operating system, which has poor performance).
Cloning A clone is a copy of an existing virtual machine, or a copy of a template. The originalvirtual machine is called the parent of the clone. While changes to the parent virtualmachine do not appear in the clone, the parent and virtual machine may share virtualdisks. If you want to save the current state of a virtual machine, so you can revert tothat state at a later date, take a snapshot. If you want to make a copy of a virtualmachine for a separate virtual machine, create a clone. You can also clone an existingphysical computer and create a virtual machine. You can create templates fromclones.
ATTENTIONCloning is supported for off-process usage and for cloning on-processvirtual machines to be taken for off-process usage.
It is very important to use the sysprep process exactly as defined when creating newoperating system virtual machines and templates and when deploying new operatingsystem virtual machines from a template. For more information, see the relatedtopics. Failure to adhere to these instructions produces a virtual machine that is notunique (WSUS will see all virtual machines as the same virtual machine) and thepotential for unacceptable performance levels (running the default sysprep withoutthe use of the unattended file uninstalls all device drivers and results in a “bestguess” of the operating system, which has poor performance).
TIPFor guidelines on deploying ETN based virtual machines and thin client, refer to thefollowing documents.
l Virtualization: Experion Virtualization Planning and Implementation Guide
l Thin client: Wyse Z90DE7 Thin Client Planning Installation and Service Guide
Related topicsCreating new Experion virtual machines
- 151 -
Chapter 15 - Planning to deploy VMware virtual machines
CREATING NEW EXPERION VIRTUAL MACHINES
Creating new Experion virtual machines in the virtual environment is conceptually similar tocreating physical Experion nodes, including the use of the Experion System Initialization media.
However, there are some differences for virtual machines, and these differences are related tothe preparation of an Experion System Installation Server (ESIS) and the need for a Utility virtualhard disk. ESIS is implemented as a virtual hard disk, rather than as a file share or removablemedia. The advantages of virtual hard disks is that they can be copied faster within thevirtualization environment and allow for a more secure installation. In addition, an ESIS virtualhard disk has the following advantages:
l All of the required files for a full Experion node installation are available from a singlelocation, and avoids the complication of accessing physical media and swapping physicalmedia from a virtual machine.
l The fastest Experion node installation time within a virtual environment.
The recommended process for creating Experion virtual machines is described in this section andintroduces the use of an ESIS virtual hard disk and a Utility virtual hard disk.
ATTENTIONIf they are creating virtual machines on a BladeCenter-S, it is important to be aware of theimplications of using the CD/DVD drive on the BladeCenter S to read media. See theExperion Virtualizatoin with BladeCenter-S guide for more information, but at a minimumensure that before connecting the BladeCenter S chassis CD/DVD drive to another Blade inthe chassis, you must first disconnect the CD/DVD drive from the host device in the currentvirtual machine that is using the CD/DVD.
A summary of the process for creating a new Experion virtual machine is:
1. You complete the following once for each release of Experion:
a. Create a VM for the ESIS and Utility virtual hard disks.
b. Mount the virtual hard disks, format them, and create volumes on them for storing theESIS/Utility content.
c. Install the required content on the ESIS and Utility virtual hard disks.
d. Relocate the ESIS and Utility virtual hard disk vmdk files to folders on the managementESXi host’s datastore.
2. When you are creating each Experion virtual machine, you add the ESIS and Utility vmdk tothe virtual machine, so that the contents of the ESIS and Utility virtual hard disks areavailable for the Experion installation process.
- 152 -
CHAPTER
16

TIPDrive letters are assigned to the ESIS and Utility disks during the install process. Thisassignment affects the letters assigned to logical partitions when the primary disk of the VMis configured into more than one partition. If drive letter assignment is important onadditional logical partitions, we recommend replacing logical partitions with virtual harddisks or partitioning replacement virtual hard disks. Partition replacement disks are createdto match the desired partition size, then added to the VM in the desired letter order.
l Preparing the ESIS virtual hard diskThe Experion System Installation Server (ESIS) virtual hard disk contains all of the Experionand operating system media contents required to complete an Experion node installation.
l Preparing the Utility virtual hard disk
l Renaming the master ESIS and/or Utility virtual hard disksIf the master ESIS and Utility virtual hard disks have the same vmdk file name, you can renameeither vmdk file name, or you can rename both. You may also want to rename the vmdk filenames so that they can be easily identified once they are copied to other locations.
l Preparing partition replacement virtual hard disksIf you configure the primary disk of your Experion VM with more than one partition you shouldconsider replacing the additional logical partitions with virtual disks or Partition Replacementvirtual disks.
l Creating an Experion node virtual machine
l Create virtual machine templates manually
Related conceptsPlanning to deploy VMware virtual machinesCreating new operating system virtual machines and templates
16.1 Preparing the ESIS virtual hard disk
The Experion System Installation Server (ESIS) virtual hard disk contains all of the Experion andoperating system media contents required to complete an Experion node installation.
This media represents a single release of Experion and should be labeled to represent thatrelease. Best practice is to create a new ESIS virtual hard disk for each new releases of Experion.
l Creating the ESIS virtual hard disk
l Installing ESIS on the ESIS virtual hard disk
l Creating the master ESIS virtual hard disk
16.1.1 Creating the ESIS virtual hard disk
To create the ESIS virtual hard disk
1. From the vSphere Client, right-click on the ESIS/Utility creation virtual machine andchoose Rename.
Record the current name and then change the name to ESIS-HD. This rename is required sothat the new virtual hard disk .vmdk file is created with this name. You can use a name thatincludes the Experion release in the name (for example, ESIS-HD-EPKSR400-2) if yoursystem could include future releases of Experion.
2. From the vSphere Client, right-click on the ESIS/Utility creation virtual machine and chooseEdit Settings.
The Virtual Machine Properties window appears.
3. Click the Hardware tab.
- 153 -
Chapter 16 - Creating new Experion virtual machines

Chapter 16 - Creating new Experion virtual machines
4. If more than one Hard disk is listed, click Cancel. Browse to the datastore and folder wherethe virtual machine is running and record the names of all the .vmdk files. This is to ensurethat the new hard disks that show as vmdk files are clearly identified after they are created.Right-click on the ESIS/Utility creation virtual machine and choose Edit Settings.
5. Click Add.
The Add Hardware wizard appears.
6. Select Hard Disk and then click Next.
7. Select Create a new virtual disk and then click Next.
8. Change the Disk Size to 35 GB.
9. Select the Allocate and commit space on demand (Thin Provisioning) check box.
10. Ensure that Store with the virtual machine is selected.
11. Click Next.
12. In the Virtual Device Node list, use the default value.
13. Select the Independent check box and then select Persistent.
14. Click Next.
15. Review the summary and then click Finish.
16. Click OK to close the Virtual Machine Properties window.
17. In the Home > Inventory > Datastores view, browse the datastore and locate the folder wherethe ESIS/Utility creation virtual machine files are stored.
You should see a new file called ESIS-HD with the .vmdk extension.
18. From the vSphere Client, right-click on the ESIS/Utility creation virtual machine andchoose Rename.
Change the name back to the original name as seen in vCenter Server.
19. From the vSphere Client, connect to the console of the ESIS/Utility creation virtualmachine and log on as a user with administrator privileges.
20. In the Windows Control Panel, click System and Maintenance, then Administrative Tools.Double click Computer Management.
21. In the left tree, select Disk Management.
The Initialize Disk dialog box appears.
22. Ensure that the new disk and MBR are selected and then click OK.
A new disk appears in the bottom center pane of the window and will have 35 GB ofunallocated space.
23. Right-click on the disk and choose New Simple Volume.
The New simple volume wizard appears.
24. Click Next.
25. Select Assign the following drive letter and assign an appropriate drive letter to the new disk(the default value should be acceptable).
26. Click Next.
27. Ensure that the disk is to be formatted as NTFS with default allocation unit size, change thevolume label to ESIS-HD, select the Perform a Quick Format check box, and then click Next.
28. Review the settings and click Finish.
The new disk will now be visible in Windows Explorer as ESIS-HD.
16.1.2 Installing ESIS on the ESIS virtual hard disk
Prerequisites
- 154 -

l You have created the ESIS virtual hard disk.
l You have the following Experion and Windows operating system installation media:o Experion PKS Installation media
o Experion PKS Support Software media
o Experion PKS System Initialization Updates media
o Experion PKS System Initialization media
o Operating system installation media as appropriate for your Experion release
To install ESIS on the ESIS virtual hard disk
1. On the management host (the ESXi host containing the vSphere Server virtual machine),create a folder named ISO_Media on the datastore. Skip this step if this folder already exists.
2. Convert the contents of the required media files to an ISO file.
There needs to be a single ISO file for each media.
3. Copy the ISO file to the ISO_Media folder that you created on the ESXi host datastore.
4. In the ESIS/Utility creation virtual machine, create the ESIS folder in the root of the ESISvirtual hard disk.
5. In vSphere Client, right-click on the ESIS/Utility creation virtual machine and choose EditSettings.
6. Mount the Experion Application media ISO file in the virtual machine’s DVD drive.
If autorun is enabled, the Honeywell - Experion PKS Installer window appears.
If autorun is not enabled, in Windows Explorer browse to the Browser folder on the ExperionSystem Initialization ISO image and double-click on the CDBROWSE.exe file.
7. Click Setup an Experion Software Installation Server.
8. In the User Access Control dialog box, click Yes.
9. Click the Create a new ESIS Repository option button and then click Next.
10. Browse to the ESIS folder on the ESIS-HD virtual hard disk and then click Next.
The ESISPrepUtil dialog box appears.
11. Click OK.
12. Click Share and enable folder sharing with the default options.
13. Click OK.
14. If the Network discovery and file sharing dialog box appears, click Public networks.
15. Select the EPKS Sys Initialization DVD, Embedded Microsoft Windows 10 Enterprise2016 LTSB (x64) DVD, and Embedded Microsoft Windows Server 2016 Standard DVDcheck boxes.
The VS DVD, MSDN DVD, and Experion Sup and Maint DVD check boxes are only requiredif you intend to use CAB and ESM in your environment.
16. Click Start.
The ESISPrepUtil dialog box appears.
17. Click OK.
18. Edit the virtual machine settings and mount each requested ISO file in the virtual machine'sDVD drive to complete the ESIS creation.
19. When the ESIS process is complete, click the Finish.
16.1.3 Creating the master ESIS virtual hard disk
You need to create a master ESIS virtual hard disk so that a known ESIS repository is available in
- 155 -
Chapter 16 - Creating new Experion virtual machines

Chapter 16 - Creating new Experion virtual machines
the virtual infrastructure, which can then be copied to new Experion virtual machines to form themedia requirements for an Experion node installation.
To create the master ESIS virtual hard disk
1. Remove the ESIS virtual hard disk from the ESIS/Utility creation virtual machine:
a. Shutdown the ESIS/Utility creation virtual machine.
To be able to remove the virtual hard disk, you need to shutdown the virtual machinefirst. If you don’t shutdown the virtual machine, the operating system on the virtualmachine is left in a state that may cause problems with EBR backups.
b. From the vSphere Client, right-click on the ESIS/Utility creation virtual machine andchoose Edit Settings.
The Virtual Machine Properties window appears.
c. Click the Hardware tab.
d. Select the ESIS virtual hard disk (ensure that you select the correct 35 GB disk) and clickRemove.
e. Click the Remove from virtual machine option button and then click OK.
2. In the datastore where you intend to store the master ESIS file (the staging datastore), createa new folder in the root of the datastore and name it ESIS-Master.
This folder is where the ESIS virtual hard disk .vmdk file will be copied to and kept as a masterfor future use. It is from this location that the .vmdk file will be copied from to new Experionvirtual machines.
3. Move the ESIS virtual hard disk to a new folder on the datastore.
a. Locate the 35 GB vmdk file created when the ESIS virtual hard disk was created.
b. Cut and paste this file into the ESIS-Master folder on the datastore.
c. Ensure that the .vmdk file does not appear in the ESIS/Utility creation virtual machine’sdatastore folder where you copied the .vmdk file from.
16.2 Preparing the Utility virtual hard disk
The Utility virtual hard disk is used to supply configuration information and third party installationmedia to the virtual machine during the Experion node creation. It can be used for any Experioninstallation. Where required, use different folders within the Utility virtual hard disk so that it canbe used to store configuration information for operating system only virtual machines.
l Creating the Utility virtual hard disk
l Creating the Experion System Initialization media configuration files for Experioninstallations
l Preparing the Utility virtual hard disk to include third-party applicationsThe Utility virtual hard disk should contain the third party application installation software.Having these installation files available on the Utility virtual hard disk will simplify theinstallation process of Experion nodes.
l Creating the master Utility virtual hard disk
16.2.1 Creating the Utility virtual hard disk
If you have an existing Utility virtual hard disk, you can skip this task.
- 156 -

To create the Utility virtual hard disk
1. From the vSphere Client, right-click on the ESIS/Utility creation virtual machine andchoose Rename.
Record the current name and then change the name to Utility. This rename is required sothat the new virtual hard disk .vmdk file is created with this name. You can use a name thatincludes the Experion release in the name (for example, Utility-EPKSR500-2) if your systemcould include future releases of Experion that require another Utility virtual hard disk.
2. From the vSphere Client, right-click on the ESIS/Utility creation virtual machine and chooseEdit Settings.
The Virtual Machine Properties window appears.
3. Click the Hardware tab.
4. If more than one Hard disk is listed, click Cancel. Browse to the datastore and folder wherethe virtual machine is running and record the names of all the .vmdk files. This is to ensurethat the new hard disks that show as vmdk files are clearly identified after they are created.Right-click on the ESIS/Utility creation virtual machine and choose Edit Settings.
5. Click Add.
The Add Hardware wizard appears.
6. Select Hard Disk and then click Next.
7. Select Create a new virtual disk and then click Next.
8. Change Disk Size to 5 GB.
9. Select the Select Thin Provisioning udder disk provisioning option check box.
10. Ensure that Store with the virtual machine is selected.
11. Click Next.
12. In the Virtual Device Node list, use the default value.
13. Select the Independent check box and then select Persistent.
14. Click Next.
15. Review the summary and then click Finish.
16. Click OK to close the Virtual Machine Properties window.
17. In the Home > Inventory > Datastores views, browse the datastore (right-click on thedatastore and choose Browse) and locate the folder where the ESIS/Utility creation virtualmachine files are stored. You should see a new file with the .vmdk extension. The file shouldhave the ESIS/Utility creation virtual machine name and possibly a numeric suffix. The fileshould indicate 5,242,880KB in provisioned size. Record the current name of this file as it willbe used later.
18. From the vSphere Client, right-click on the ESIS/Utility creation virtual machine andchoose Rename.
Change the name back to the original name as seen in vCenter Server.
19. From the vSphere Client, connect to the console of the ESIS/Utility creation virtual machine,or if you are already connected to the ESIS/Utility creation virtual machine, log on as a userwith administrator privileges.
20. In the Windows Control Panel, click System and Security, then Administrative Tools.Double click Computer Management.
21. In the left tree, select Disk Management.
The Initialize Disk dialog box appears.
22. Ensure that the new disk and MBR are selected and then click OK.
A new disk appears in the bottom center pane of the window and will have 5.00GB ofunallocated space.
- 157 -
Chapter 16 - Creating new Experion virtual machines

Chapter 16 - Creating new Experion virtual machines
23. Right-click on the on the disk and choose New Simple Volume.
The New simple volume wizard appears.
24. Click Next.
25. Click Next.
26. Select Assign the following drive letter and assign an appropriate drive letter to the new disk(the default should be acceptable).
27. Click Next.
28. Ensure that the disk is to be formatted as NTFS with default allocation unit size, change thevolume label to Utility, select the Perform a Quick Format check box, and then click Next.
29. Review the settings and click Finish.
The new disk will now be visible in Computer as Utility.
16.2.2 Creating the Experion System Initialization mediaconfiguration files for Experion installations
There are two methods of creating Experion System Installation Media configuration files thatsupport unattended installations:
1. The Create Installation files option of the Experion Support and Maintenance (ESM)Installation Builder.
This approach is useful for system wide install and validation. Once ESM has been used toinstall a system, it should be used for future node installs as well.
2. The Generate Configuration option provided on the Experion System Initializition media.
This approach is useful when a small number of each node type is to be installed.
Choose one of the following methods to create Installation configuration files.
To create Installation configuration files from Experion Support andMaintenance (ESM) Installation Builder
1. Installation configuration files created by the (ESM) Installation Builder have an added valuein that they are validated against other node definitions. Validation catches many user entryerrors early. ESM configuration files are also used by the (ESM) commissioning task toperform the following post installation actions:
a. Updates local hosts file
b. Configures NTP
c. Joins the node to the domain if defined
d. Links the domain and local security groups
2. More information about the (ESM) Installation Builder can be found in the “About InstallationBuilder” topic in the Installation Builder Users Guide.
3. Installation Builder requires the ESM server to be installed on one Experion server node in thesystem. Installation of the ESM server is a user selectable option during the Experion Serverinstall configuration. References to the Experion Support and Maintenance server are foundin the Experion PKS Software Installation User Guide (SIUG). ESM Server and InstallationBuilder can also be installed on a offline (Non-Experion) node using the ESM media. Theoffline feature allows for the creation of a complete Experion System configuration prior to theinstallation process for the purpose of generating installation configuration files to automatethe install process.
- 158 -

4. For instruction on how to install ESM Server and client on a single offline computer. Find theESM R2XX Installation Instructions guide using the following link.https://www.honeywellprocess.com/library/support/Documents/Experion/esm-installation-guide.pdf
5. The following steps assume that:
a. ESM Installation Builder was used to create the node definitions of all the Experionnodes in the system.
b. Domain Controllers and other 3rd party nodes were included and defined as the "Other"node type to capture their IP addresses for the Hosts file.
c. Installation Builder "Create installation files" option was used to create installation filesfor all Experion nodes to be installed.
6. Copy the ANCIM folder and its entire contents generated by the Installation Builder to the rootof the Utility disk.
7. Skip the following "Generate Configuration Files" topic and continue with the next topic.
To create initialization configuration files from the "GenerateConfiguration files" option on the Experion System Installation media
1. Identify the Experion nodes that you require in your system, and then identify the followinginformation:
l Assign the IP and other IP settings specific for this virtual machine in the Yellow network
l computer name
l FTE ID and FTE multicast address (the FTE UDP source and destination ports must matchthe values of existing systems)
l node type
l Microsoft operating system type
l Microsoft operating system keys
l Honeywell authorization keys
2. In the Utility virtual hard disk, create the EPKS folder at the root of the virtual hard disk.Consideration could be made to the Experion release that is being used and the folder couldinclude the release name for Example EPKS-R400-2.
3. Within the EPKS folder, create a new folder for each Experion node that you identified in step1.
4. Mount the Experion System Initialization ISO image.
If autorun is enabled, the Honeywell Experion PKS System Initialization Media windowappears.
If autorun is not enabled, in Windows Explorer browse to the Browser folder on the ExperionSystem Initialization ISO image and double-click on the CDBROWSE.exe file.
5. Click Launch Setup.
6. In the User Account Access dialog box, click Allow.
The Experion PKS System Initialization wizard appears.
7. Select Generate configuration files and click Next.
8. Select the Product Installation check box.
9. Select the Reinstall OS and Configure System check box.
10. Select the appropriate release check box.
11. Select the required platform type of server or workstation and select VMware virtual platform.
12. Ensure that the operating system is correct.
- 159 -
Chapter 16 - Creating new Experion virtual machines

Chapter 16 - Creating new Experion virtual machines
13. Click Next.
14. Adjust the local language and time zone for your location.
15. Type the machine name.
16. Type the Microsoft operating system key.
17. Leave the User as ExperionAdmin and type a strong password.
18. Click Next.
19. Select FTE as the required network type.
20. Assign the IP address reserved for this virtual machine to the FTE Yellow Ethernet adapter (forlevel 2 FTE networks) or to the single Ethernet adapter (for level 3 networks). Leave the FTEGreen Ethernet adapter with default values.
21. For level 2 FTE networks, adjust any other FTE configurations.
22. Type the required FTE Device ID.
23. Click Next.
The confirmation page of the wizard appears.
24. Click Generate Product Install Config Files.
25. When prompted, mount the Experion Installation media ISO image as a DVD and then clickOK. Cancel autorun for the media.
26. Select the options required for the specific Experion node that you are configuring.
For more information, see the Software Installation User's Guide.
27. When you return to the confirmation pages of the wizard, click Save Config. Files and savethe configuration files to the folder that was created for this Experion node on the Utilityvirtual hard disk.
ATTENTIONSave all the configuration files in a separate folder on the Utility virtual hard disk asfiles will be overwritten if they are saved in the same folder.
28. To create other Experion node configuration files, continue to click the Back button until youreach the Platform configuration page of the wizard, and adjust all the required settings,then continue forward through the wizard.
29. When you have completed creating the required configuration files, click Finish.
30. Click OK.
31. Review that you have created all of the Experion node configuration files.
16.2.3 Preparing the Utility virtual hard disk to include third-partyapplications
The Utility virtual hard disk should contain the third party application installation software. Havingthese installation files available on the Utility virtual hard disk will simplify the installation processof Experion nodes.
- 160 -

To prepare the Utility virtual hard disk to include third-partyapplications
1. At the root of the Utility virtual hard disk, create the APPS folder.
2. Copy any third-party application installer files, such as anti-virus and Microsoft Office to theAPPS folder.
You may also consider downloading the latest Honeywell supplied Microsoft operating systemand Office patches and include these.
3. If any of the Experion nodes are to be connected to an IKB keyboard, copy the Wyse TCXSoftware Suite installation files to the APPS folder.
For more information on how to download the Wyse TCX Software Suite, see the relatedtopics.
Related tasksInstalling the Wyse TCX Suite for an Experion nodeSetting up Backups of Production Virtual Machines
16.2.4 Creating the master Utility virtual hard disk
You need to create a master Utility virtual hard disk so that a known Utility repository is available inthe virtual infrastructure, which can then be copied to new Experion virtual machines to form themedia requirements for an Experion node installation.
To create the master Utility virtual hard disk
1. Remove the Utility virtual hard disk from the ESIS/Utility creation virtual machine:
a. Shutdown the ESIS/Utility creation virtual machine.
To be able to remove the virtual hard disk, you need to shutdown the virtual machinefirst. If you don’t shutdown the virtual machine, the operating system on the virtualmachine is left in a state that may cause problems with EBR backups.
b. From the vSphere Client, right-click on the ESIS/Utility creation virtual machine andchoose Edit Settings.
The Virtual Machine Properties window appears.
c. Click the Hardware tab.
d. Select the Utility virtual hard disk (ensure that you select the correct 5GB disk) and clickRemove.
e. Click the Remove from virtual machine option button and then click OK.
2. In the datastore where you intend to store the master Utility file (the staging datastore), createa new folder in the root of the datastore and name it Utility-Master.
This folder is where the Utility virtual hard disk .vmdk file will be copied to and kept as a masterfor future use. It is from this location that the .vmdk file will be copied from to new Experionvirtual machines.
3. Move the Utility virtual hard disk to a new datastore folder by following these steps:
a. Locate the 5GB vmdk file that was created when the Utility virtual hard disk was created.
b. Cut and paste this file into the Utility-Master folder on the datastore.
c. Ensure that the .vmdk file does not appear in the ESIS/Utility creation virtual machine’sdatastore folder where you copied the .vmdk file from.
16.3 Renaming the master ESIS and/or Utility virtual hard disks
If the master ESIS and Utility virtual hard disks have the same vmdk file name, you can rename
- 161 -
Chapter 16 - Creating new Experion virtual machines

Chapter 16 - Creating new Experion virtual machines
either vmdk file name, or you can rename both. You may also want to rename the vmdk file namesso that they can be easily identified once they are copied to other locations.
For more information about renaming vmdk file names, see VMware KB article 1002491.
16.3.1 Prerequisites
l You have disabled lockdown mode on the ESXi host where the master ESIS and/or Utilityvirtual hard disk are stored.
For more information about disabling lockdown mode, see VMware KB article 1008077.
l You have installed the latest version of the vSphere Command-Line Interface (CLI) on thephysical computer or virtual machine that is connected to the management network, whereyou will perform these tasks.
16.3.2 To rename the master ESIS virtual hard disk
1. Open a Windows Command Prompt window and change folder to the CLI location (that is,C:\Program Files\VMware\VMware vSphere CLI\bin).
For example:
cd C:\Program Files\VMware\VMware vSphere CLI\bin
2. List the files contained within the ESIS-Master folder.
For example:
vifs.pl --server <esxi_host> -D "[<datastore_name>] <folder_name>"
Where:
l <esxi_host> is the name or IP address of the ESXi host.
l <datastore name> is the name of the datastore containing the ESIS-Master folder.
l <folder name> is the path to the ESIS-Master folder.
l the quotation marks (") are required, where indicated.
This command will prompt you for the user name and password to connect to the ESXi host.
3. Rename the virtual hard disk vmdk file name.
For example:
vmkfstools.pl --server <esxi host> -E "[<datastore name>] <foldername>/<vmdk file>" "[<datastore name>] <folder name>/<vmdk file>"
Where:
l <esxi_host> is the name or IP address of the ESXi host.
l <datastore_name> is the name of the datastore containing the ESIS-Master folder.
l <folder_name> is the path to the ESIS-Master folder.
l <vmdk_file> is the file name of the ESIS-Master virtual hard disk.
l the quotation marks (") are required, where indicated.
This command will prompt you for the user name and password to connect to the ESXi host.
4. Validate that the file has been renamed. For example:
vifs.pl --server <esxi_host> -D "[<datastore_name>] <folder_name>"
Where:
- 162 -

l <esxi_host> is the name or IP address of the ESXi host.
l <datastore_name> is the name of the datastore containing the ESIS-Master folder.
l <folder_name> is the path to the ESIS-Master folder.
l the quotation marks (") are required, where indicated.
This command will prompt you for the user name and password to connect to the ESXi host.
5. Enable lockdown mode on the ESXi host where the ESIS-Master virtual hard disk is stored.For more information about enabling lockdown mode, see VMware KB article 1008077.
16.3.3 To rename the master Utility virtual hard disk
1. Open a Windows Command Prompt window and change folder to the CLI location (that is,C:\Program Files\VMware\VMware vSphere CLI\bin).
For example:
cd C:\Program Files\VMware\VMware vSphere CLI\bin
2. List the files contained within the Utility-Master folder.
For example:
vifs.pl --server <esxi_host> -D "[<datastore_name>] <folder_name>"
Where:
l <esxi_host> is the name or IP address of the ESXi host.
l <datastore name> is the name of the datastore containing the Utility-Master folder.
l <folder name> is the path to the Utility-Master folder.
l the quotation marks (") are required, where indicated.
This command will prompt you for the user name and password to connect to the ESXi host.
3. Rename the virtual hard disk vmdk file name.
For example:
vmkfstools.pl --server <esxi host> -E "[<datastore name>] <foldername>/<vmdk file>" "[<datastore name>] <folder name>/<vmdk file>"
Where:
l <esxi_host> is the name or IP address of the ESXi host.
l <datastore_name> is the name of the datastore containing the Utility-Master folder.
l <folder_name> is the path to the Utility-Master folder.
l <vmdk_file> is the file name of the Utility-Master virtual hard disk.
l the quotation marks (") are required, where indicated.
This command will prompt you for the user name and password to connect to the ESXi host.
4. Validate that the file has been renamed. For example:
vifs.pl --server <esxi_host> -D "[<datastore_name>] <folder_name>"
Where:
l <esxi_host> is the name or IP address of the ESXi host.
l <datastore_name> is the name of the datastore containing the Utility-Master folder.
l <folder_name> is the path to the Utility-Master folder.
l the quotation marks (") are required, where indicated.
- 163 -
Chapter 16 - Creating new Experion virtual machines

Chapter 16 - Creating new Experion virtual machines
This command will prompt you for the user name and password to connect to the ESXi host.
5. Enable lockdown mode on the ESXi host where the Utility-Master virtual hard disk is stored.For more information about enabling lockdown mode, see VMware KB article 1008077.
16.4 Preparing partition replacement virtual hard disks
If you configure the primary disk of your Experion VM with more than one partition you shouldconsider replacing the additional logical partitions with virtual disks or Partition Replacementvirtual disks.
Drive letters assigned to logical partitions created during the install of a virtual machine using ESISand Utility disks start with F. Drive letters D and E are assigned to the ESIS and Utility Disks beforethe partition is created, so this leaves F as the first available drive letter. Replacing a logical diskpartition with a "Partition Replacement virtual hard disk" allows you to control the assigned driveletters.
When creating the primary Virtual Hard disk for the Experion VM, remember to size it based on thetotal size identified in the HPS Virtualization Specification minus the total size of the partitionreplacement virtual disks.
For example: C: Primary Disk size = Total disk size - Partition disk size.
Currently, Experion has a 100 GB minimum size requirement for the C: primary drive. Whendividing the recommended disk size into logical chunks, make sure the C: primary disk meetsthe current minimum required size.
As with the ESIS and Utility disks, create a master copy of the Partition replacement disk so it canbe copied to the folder of the VM during the VM creation process.
l Creating the partition virtual hard disk
l Creating the master partition virtual hard disk
16.4.1 Creating the partition virtual hard disk
1. From the vSphere Client, right-click on the ESIS/Utility creation virtual machine and clickRename. Record the current name and then change the name to D-Partition-HD or E-Partition-HD. This rename is required so that the new virtual hard disk .vmdk file is createdwith this name. You can use a name that more accurately represents the use of the partition ifyour system.
2. From the vSphere Client, right-click on the ESIS/Utility creation virtual machine and click EditSettings.
The Virtual Machine Properties dialog box appears.
3. Click the Hardware tab.
4. If more than one hard disk is listed, click Cancel. Browse to the datastore and folder where thevirtual machine is running and record the names of all the .vmdk files. This is to ensure thatthe new hard disks that show as vmdk files are clearly identified after they are created.
5. Right-click on the ESIS/Utility creation virtual machine and click Edit Settings.
6. Click Add.
The Add Hardware window appears.
7. Select Hard Disk and then click Next.
8. Select Create a new virtual disk and then click Next.
9. Change the disk size to the desired size for this partition in GB.
10. Clear the Allocate and commit space on demand (Thin Provisioning) check box.
11. Select the Ensure that Store with the virtual machine check box.
- 164 -

12. Click Next.
13. Select the Independent check box, then select Persistent.
14. Click Next.
15. Review the summary, then click Finish.
16. Click OK.
17. In the Home > Inventory > Datastores view, browse the datastore and locate the folder wherethe ESIS/Utility creation virtual machine files are stored. You should see a new file called D orE-Partition-HD with the .vmdk extension.
18. From the vSphere Client, right-click on the ESIS/Utility creation virtual machine and chooseRename. Change the name back to the original name as seen in vCenter Server.
19. From the vSphere Client, connect to the console of the ESIS/Utility creation virtual machineand log on as a user with administrator privileges.
20. In the Windows Control Panel, click System, then Security , then Administrative Tools.
21. Double–click Computer Management
22. Select Disk Management.
The Initialize Disk dialog box appears.
23. Ensure that the new disk and MBR are selected and then click OK.
A new disk appears in the bottom center pane of the window and will have GB size specifiedearlier of unallocated space.
24. Right-click on the disk and click New Simple Volume.
The New Simple Volume window appears.
25. Click Next.
26. Click Next.
27. Select Assign the following drive letter and assign an appropriate drive letter to the newdisk (the default value should be acceptable).
28. Click Next.
29. Ensure that the disk is to be formatted as NTFS with default allocation unit size, change thevolume label to D or E-Partition-HD, or give it a label.
30. Select the Perform a Quick Format check box, then click Next.
31. Review the settings and click Finish.
The new disk will now be visible in Windows Explorer as the specified Label Name.
16.4.2 Creating the master partition virtual hard disk
The master partition virtual hard disk can be copied to new Experion virtual machines to form themedia requirements for an Experion node installation.
1. Remove the Partition virtual hard disk from the ESIS/Utility creation virtual machine:
a. Shutdown the ESIS/Utility creation virtual machine. To be able to remove the virtualhard disk, you need to shutdown the virtual machine first. If you don't shutdown thevirtual machine, the operating system on the virtual machine is left in a state that maycause problems with EBR backups.
b. From the vSphere Client, right-click on the ESIS/Utility creation virtual machine andclick Edit Settings.
The Virtual Machine Properties window appears.
- 165 -
Chapter 16 - Creating new Experion virtual machines

Chapter 16 - Creating new Experion virtual machines
c. Click the Hardware tab.
d. Select the Partition virtual hard disk (ensure that you select the correct disk) and clickRemove.
e. Click Remove from virtual machine, then click OK.
2. In the datastore where you intend to store the master Partition file (the staging datastore),create a new folder in the root of the datastore and name it Partition-Master.
This folder is where the Partition virtual hard disk .vmdk file will be copied to and kept as amaster for future use. It is from this location that the .vmdk file will be copied from to newExperion virtual machines.
3. Move the Partition virtual hard disk to a new folder on the datastore.
a. Locate the partition .vmdk file created when the Partition virtual hard disk was created.
b. Cut and paste this file into the Partition-Master folder on the datastore.
c. Ensure that the .vmdk file does not appear in the ESIS/Utility creation virtual machine'sdatastore folder.
4. Create additional disk partitions as required. For more information, see the related topics.
16.5 Creating an Experion node virtual machine
l Creating a virtual machineStart the New Virtual Machine Wizard and configure the required virtual machine.
l Connecting a virtual machine to networks
l Connecting a USB device
l Starting an Experion installation using the Experion System Initialization media
l Installing VMware Tools for an Experion nodeVMware Tools enhance the performance of the virtual machine’s guest operating system and
improves the management of the virtual machine.
l Installing the Wyse TCX Suite for an Experion nodeFor virtual machines that need to be accessible from a thin client and need access to a USB
device, you need to install the Wyse TCX Suite. Otherwise, the Wyse TCX Suite is not required.
l Completing the Experion node installation
l Preparing virtual machines for thin clients
16.5.1 Creating a virtual machine
Start the New Virtual Machine Wizard and configure the required virtual machine.
Prerequisites
l HPS Virtualization Specification.
l vSphere Virtual Machine Administration.
To create a virtual machine
n Create a new virtual machine by following the instructions in vSphere Virtual MachineAdministration. Use the following table to identify appropriate values to enter in the New VirtualMachine Wizard.
- 166 -

New VirtualMachineWizard page
Description
Configuration Select Custom.
Name andLocation
Type a unique and recognizable name for the virtual machine. Select alocation, such as a folder, that is consistent with your chosen structure fororganizing VMware inventory objects.
Datastore Select a datastore location, which can be local storage or shared storage (forLevel 3 virtual machines on DCS architecture and SCADA architecture).
If you are creating this virtual machine on the management ESXi host, youshould select the staging datastore. You should not store non-managementworkload virtual machines on the management datastore.
VirtualMachineVersion
l Select Virtual Machine Version 11 for ESXi 6.x systems.
l Select Virtual Machine Version 10 for ESXi 5.5 systems.
GuestOperatingSystem
Select the required Windows operating system for the node type.
CPUs See the HPS Virtualization Specification for the recommended number ofCPUs for the node type.
Note: Apply the recommended number of CPUs for node type to the Numberof Cores per virtual socket value. Leave Number of Virtual Sockets as 1.
Memory See the HPS Virtualization Specification for the recommended memory forthe node type.
Network For FTE networks:
l In the How many NICs do you want to connect list, choose 2.
l In the NIC 1 list, do the following:
l In the Network list, choose the yellow network.
l In the Adaptor list, choose VMXNET3.
l Select the Connect at Power On check box.
l In the NIC 2 list, do the following:
l In the Network list, choose the green network.
l In the Adaptor list, choose VMXNET3.
l Select the Connect at Power On check box.
For non-FTE networks:
l In the How many NICs do you want to connect list, choose 1.
l In the Network list, choose the network.
l In the Adaptor list, choose VMXNET3.
l Select the Connect at Power On check box.
SCSIController
For Windows and Windows Server virtual machines, select LSI Logic SAS.
Select a Disk Select the Create a new virtual disk option button.
Create a Disk See the HPS Virtualization Specification for the recommended disk size forthe node type.
- 167 -
Chapter 16 - Creating new Experion virtual machines

Chapter 16 - Creating new Experion virtual machines
New VirtualMachineWizard page
Description
ATTENTIONRemember to adjust the disk size from the recommended size ifusing Partition virtual disks. For example: C: Disk size = Total size -Partition size.
Ensure that the Allocate and commit space on demand is notselected when creating virtual machines for on-process usage.
AdvancedOptions
Leave the default values.
Ready toComplete
Review the virtual machine settings to ensure that they match the detailsabove.
Add partition virtual hard disks
1. Copy the Partition-HD .vmdk file or files from the Partition-Master folder to the new virtualmachine's folder (this folder will have the same name as the virtual machine name, as shownin vCenter Server)
2. Edit this virtual machine's settings as follows:
a. Add new hardware by selecting the following options:
l Hard disk
l Use an existing virtual disk
b. Browse this virtual machine datastore folder and select one Partition-HD .vmdk file inthe desired drive letter order D then E, and so on.
c. Accept default value for Virtual Device Node
d. Make sure the Mode option of Independent is not checked, then finish adding the harddisk.
e. Repeat this process for each Partition virtual hard disk.
16.5.2 Connecting a virtual machine to networks
When you create a new virtual machine using vSphere Client, the virtual machine’s virtualnetwork adapters connect to one or many virtual machine port groups. These virtual machine portgroups allow the virtual machine to communicate with the virtual switch and all network traffic onthat virtual switch.
Use the Networking display in vSphere Client to check that the new virtual machine is connected tothe correct network.
To ensure the virtual machine is connected to the virtual network, edit the virtual machine settingsand select each network adapter and ensure the Connected and Connect at power on optionsare selected. When a new Experion node is being installed on the management ESXi Host, ensurethe Experion virtual machine is connected to a vSwitch that does not have uplinks configured. Formore information, see “Network configuration for a management host in a DCS architecture”.
To disconnect the virtual machine from the virtual network, edit the virtual machine settings andselect each network adapter and clear the Connected and Connect at power on check boxes.
16.5.3 Connecting a USB device
The process of adding a USB device to a virtual machine, such as an Experion USB securtity key,requires the following:
- 168 -

1. Adding the USB controller to the virtual machine.
2. Inserting the USB device into the ESXi host
3. Waiting at least 5 minutes.
4. Adding the USB device.
Prerequisites
l You have created the virtual machine.
l vSphere Virtual Machine Administration
Adding the USB controller to the virtual machine
1. In vSphere Client, select the virtual machine and right-click and choose Edit Settings.
2. Click Add.
The Add Hardware dialog box appears.
3. In the list of available devices, click USB Controller and then click Next.
4. Click Next.
5. Ensure that the summary states that the hardware type is a USB Contoller and then clickFinish.
6. On the Virtual machine properties dialog box, click OK to finish the process of adding theUSB controller.
The virtual machine will now have a new hardware item shown as USB Controller. This willallow USB device to be added to the virtual machine.
Adding the USB device
1. Ensure that the virtual machine has a USB controller added and that the USB device isinserted into the ESXi host where the virtual machine is running and allowed 5 minutes topass so that the ESXi host has registered the presence of the USB device.
2. In vSphere Client, select the virtual machine and right-click and choose Edit Settings.
3. Click Add.
The Add Hardware dialog box appears.
4. In the list of available devices, click USB Device and then click Next.
5. If you plan to use vMotion with this Experion virtual machine, select the Support vMotionwhile device is connected check box.
For more information about vMotion support for USB devices, see the “Configuring USBDevices for vMotion” topic in vSphere Virtual Machine Administration.
6. Select the required USB Device and ensure that the connection is shown as available.
7. Click Next.
8. Review the summary and then click Finish.
9. On the Virtual machine properties dialog box, click OK to finish the process of adding theUSB device.
The virtual machine will now have a new hardware item shown as USB Controller. This willallow USB device to be added to the virtual machine.
- 169 -
Chapter 16 - Creating new Experion virtual machines

Chapter 16 - Creating new Experion virtual machines
ATTENTIONIf you are using shared storage for your virtual machines, ensure that you selectthe Support vMotion while device is connected check box within this procedure.This will allow the virtual machine to continue to see the USB device if vMotion isused.
16.5.4 Starting an Experion installation using the Experion SystemInitialization media
To start an Experion installation using the Experion System Initializationmedia
1. Mount the Experion System Initialization ISO image and ensure that the Connect at poweron check box is selected.
If this installation is being performed on an ESXi host other than the management ESXi host,you need to copy the ISO file for the media to a local datastore on that ESXi host.
2. Copy the ESIS-HD vmdk file from the ESIS-Master folder and the Utility vmdk file from theUtility-Master folder to the new virtual machine’s folder (this folder will have the samename as the virtual machine name, as shown in vCenter Server).
3. Edit the virtual machine settings, adding a new hard disk to the virtual machine:
a. Browse the virtual machine datastore folder and select the ESIS-HD vmdk file that wascopied specifically for this virtual machine to use.
b. Select the advanced option of Independent and Nonpersisient.
4. Edit the virtual machine settings, adding a second new hard disk to the virtual machine:
a. Browse the virtual machine datastore folder and select the Utility vmdk file that wascopied specifically for this virtual machine to use.
b. Select the advanced option of Independent and Nonpersisient.
5. Power on the virtual machine.
It should start from the Experion System Initialization media ISO file mounted as a DVD.
6. The dialog will request the init media configuration files to continue:
a. Browse to the required node folder in the EPKS folder in the Utility virtual hard disk andselect the InitMediaOptions.xml file for the Experion node that you want to install.
ATTENTIONThe ANCIM folder and UIInfo.xml file are selected if using installation filesfrom ESM's Installation Builder.
b. Click Next.
7. Select ESIS from USB drive option and then browse to the ESIS folder in the ESIS-HD virtualhard disk. The ESIS path should show Q:\ESIS\.
8. Click Next.
9. Accept the license agreement then click Install.
- 170 -

ATTENTIONA dialog box is displayed indicating that multiple hard disks are detected. Ensurethat the disk selected for formatting is the original virtual machine disk not theESIS-HD or Utility virtual hard disks. This can be determined by the size of the disk.
10. In the dialog box, click Yes to continue.
The Windows operating system and Experion applications are installed in an unattendedmode and user interaction is not required until the Experion application installation iscomplete. RSLinx will require acceptance of the Rockwell software drivers.
11. When the Experion installation has completed click OK to close the Experion InstallationStatus Display and complete the Experion Install.
ATTENTIONThe ESM commissioning task is launched now when ESM installation files are usedto perform the install. Repeat the following steps after a reboot to postponecommissioning until instructed to do so in the "Completing the Experion nodeinstallation task".
12. If a commissioning task dialog is displayed to "remove any removable media", click OK.
13. If a commissioning task dialog is displayed with options of Yes, No and Cancel, click No to stopcommissioning task and to continue on next reboot.
14. Continue to the next task.
16.5.5 Installing VMware Tools for an Experion node
VMware Tools enhance the performance of the virtual machine’s guest operating system andimproves the management of the virtual machine.
Prerequisites
l Installing and Configuring VMware Tools provides information for several VMware products toinstall, upgrade, and configure VMware Tools. When using this documentation, follow theinstructions for "vSphere virtual machines".
To install VMware Tools
1. Install VMware Tools by following the instructions in the “Install VMware Tools on a WindowsGuest” topic in chapter 8, “Installing and Upgrading VMware Tools” of the vSphere VirtualMachine Administration Guide.
2. In the vSphere Client, right-click on the virtual machine where you want to install VMwareTools and choose Guest > Install/Upgrade VMware Tools.
3. Select the Interactive Tools Installation option button and then click OK.
4. Open the virtual machine’s console, and log into the Windows operating system.
5. If autorun is enabled, click OK to confirm the autorun to start. If autorun is not enabled,browse to the virtual CD/DVD drive and double-click the setup.exe file (or thesetup64.exe file if running Windows 64-bit).
The VMware Tools installation wizard appears.
6. Click Next.
- 171 -
Chapter 16 - Creating new Experion virtual machines

Chapter 16 - Creating new Experion virtual machines
7. Select the Typical option and then click Next.
8. Click Install.
9. Restart the virtual machine to complete the installation.
DO NOT configure the virtual machine to automatically upgrade VMware Tools when anupdated version is available. This might affect the performance of the system. Hence, youneed to manually upgrade to the newer version. For instructions, see the “Upgrade VMwareTools” topic in Installing and Configuring VMware Tools for manually upgrading the VMwareTools.
ATTENTIONThe ESM commissioning task is launched after a reboot when ESM installation filesare used to perform the install. Perform the following steps after the reboot topostpone commissioning until instructed to do so in the "Completing the Experionnode installation task"
10. If a commissioning task dialog is displayed to "remove any removable media", click OK.
11. If a commissioning task dialog is displayed with options of Yes, No and Cancel, click on No - tostop commissioning task and to continue on next reboot.
12. Continue to the next task.
16.5.6 Installing the Wyse TCX Suite for an Experion node
For virtual machines that need to be accessible from a thin client and need access to a USB device,you need to install the Wyse TCX Suite. Otherwise, the Wyse TCX Suite is not required.
ATTENTIONBefore installing the Wyse TCX Suite software, you need to disable User Account Control(UAC) and then restart the virtual machine. After doing this, you can install the Wyse TCXSuite software. When you have finished installing the Wyse TCX Suite on the virtualmachine, you need to re-enable UAC and restart the virtual machine.
If performing an install using ESM installation files UAC should already be disabled. TheESM commissioning task requires UAC to be disabled. Do not re-enable UAC whenperforming an install with ESM installation files.
To install the Wyse TCX Suite
1. Disable User Account Control (UAC) and then restart the virtual machine.
2. Log onto the virtual machine using a Windows account that has sufficient privileges to installsoftware.
3. Browse to the location where the Wyse TCX installation package was previously copied to theUtility virtual hard drive (or downloaded and stored if you installed the Windows operatingsystem using Microsoft media).
4. Double-clicking on the Wyse TCX Server Suite.msi file.
5. Click Next.
6. Click Accept to accept the EULA.
7. Click Typical installation.
8. Follow the on screen instructions, accepting the default installation options.
- 172 -
9. Restart the virtual machine.
ATTENTIONThe ESM commissioning task is launched after a reboot when ESM installation filesare used to perform the install. Perform the following steps after the reboot topostpone commissioning until instructed to do so in the "Completing the Experionnode installation task"
10. If a commissioning task dialog is displayed to "remove any removable media", click OK
11. If a commissioning task dialog is displayed with options of Yes, No and Cancel, click No to stopcommissioning task and to continue on next reboot.
12. If a commissioning task dialog is not displayed, re-enable the User Account Control (UAC).
To confirm that the installation was successful
1. Click Start > Windows Administrative Tools > Services.
2. Check that the Wyse Technology USB Virtualizer service is listed and that the service isrunning.
To disable TCX warnings
1. Choose Start > All Programs > Wyse TCX Server Suite Configuration.
The TCX Server Suite Configuration Utility window appears.
2. Click the USB Virtualizer tab.
3. Clear the Show Security Warnings check box.
4. Click OK.
To confirm that the Wyse TCX Suite license is valid and to check theWyse TCX Suite software version
1. Choose Start > All Programs > WyseTCX Server Suite Configuration.
The TCX Server Suite Configuration Utility window appears.
2. Click the General tab.
3. Click About.
The About dialog box appears.
4. Confirm that license status is valid.
The TCX Server Suite product versions should match the versions specified in the HPSVirtualization Specification.
16.5.7 Completing the Experion node installation
To complete the Experion node installation
1. Install any third party applications that are required on the virtual machine. For example,install the anti-virus and Microsoft Office software. These application installers should be inthe Apps folder on the Utility virtual hard disk.
2. For virtual machines with the Windows Server 2008 operating system, set the hardwareacceleration of the display adapter to full.
- 173 -
Chapter 16 - Creating new Experion virtual machines

Chapter 16 - Creating new Experion virtual machines
For more information about enabling hardware acceleration, see the related topics.
3. Apply any Microsoft operating system and software updates. Microsoft updates are providedthrough Honeywell Process Solutions web site. You may need to install Microsoft operatingsystem and software updates on Experion virtual machines before connecting them to theprocess network.
4. In the Window operating system, add the ExperionAdmin user to the Product Administratorsgroup.
5. Remove the ESIS and Utility virtual hard disks by:
a. Shutting down the virtual machine. Before removing the virtual hard disk, you need toshutdown the virtual machine. If you don’t shutdown the virtual machine, the operatingsystem on the virtual machine is left in a state that may cause problems with EBRbackups.
b. In the vSphere Client, right click on the virtual machine and choose Edit.
c. Select the last hard disk in the list (this should be the Utility hard disk) and then clickRemove.
d. When prompted, select Remove from virtual machine and delete files from disk.
e. Select the last non-deleted hard disk in the list (this should be the ESIS hard disk) andthen click Remove.
f. When prompted, select Remove from virtual machine and delete files from disk.
6. Click OK to finish the removal process.
7. Connect the virtual machine to the virtual network. To connect the virtual machine to thevirtual network edit the virtual machine settings and select each Network adapter and ensurethat the Connected check box and the Connect at power on check box are selected.
To set CPU and memory resource reservations
1. Resource reservations should now be set on critical Experion nodes. To identify the requiredCPU Mhz values for the following Experion nodes, see the HPS Virtualization Specification.
Experionvirtualnode CPU reservation Memory reservation
ExperionServer
Set the CPU reservation to 60% of the CPU Mhzvalue, as stated in the HPS VirtualizationSpecification.
Set memory reservationto 100% of allocatedmemory.
ExperionConsoleStation
Set the CPU reservation to 60% of the CPU Mhzvalue, as stated in the HPS VirtualizationSpecification.
Set memory reservationto 100% of allocatedmemory.
All otherExperionnodes
Set the CPU reservation to 30% of the CPU Mhzvalue, as stated in the HPS VirtualizationSpecification.
None
To set virtual machine IOP limits
Setting IOP limits for virtual machines helps minimize storage performance impact on virtualmachines on the same storage device during an abnormal circumstance; such as virtual machinestart up, database initialization, or an antivirus exception scan.
To set the virtual machine IOP limits:
- 174 -

1. From the vSphere Client, select the Resource Allocation tab for each host or cluster, thenselect the Storage view to display the virtual machine storage resource items.
2. Refer to the HPS Virtualization Specification to determine the maximum IOPs from theperformance matrix table for each virtual machine within the system been configured.
3. Set the IOP - Limit values per virtual machine taking the following rules into consideration:
a. For each virtual machine with maximum IOPs setting of 400 or less in the HPSVirtualization Specificiation, set the hard drive Limit – IOPs value to 400.
For Console Station virtual machines, set the Limit - IOPs to 800. To ensure that thevirtual infrastructure is monitored for virtual machine disk latency issues, whenevervirtual machine IOP limits are applied it is important to add a virtual machine disk latencyalarm in vSphere. For more information see “Custom Alarms" in this guide.
Console Stations with multiple virtual hard disks will require special consideration.Contact Honeywell Support for more information.
b. For each virtual machine with maximum IOPs setting of greater than 400 in the HPSVirtualization Specificiation, set the hard drive Limit – IOPs to the maximum IOPs valuein the performance matrix table.
c. For virtual machines with 2 or more disks, split the Limit - IOPs between each disk andensure that disk 1 has at least 400 IOPs. After applying the Limit - IOPs value to a virtualmachine with a multiple drives the hard disks should be monitored for storage latency.
Virtual machines with 3rd party applications not covered by the HPS Virtualization Specificationshould also have IOP Limits applied in line with the application vendor recommendations. If norecommendations exist, set Limit – IOPs to 400 and monitor the virtual machine and applicationfor high disk latency or slow application responses and increase IOP limits if required.
Additional tasks
1. If the virtual machine is still shutdown power it back on and login.
2. If ESM installation files were used to install this virtual machine then the ESM commissioningtask will automatically start.
a. Click OK to close the dialog for "removing any removable media".
b. Click Yes to perform commissioning.
c. If prompted, provide a domain account and password used for joining nodes to yourprocess domain. The ESM Commissioning task will automatically perform steps 3, 4, and5 below.
d. Proceed to step 6 below.
3. If the Experion node is part of a Windows domain, add it to the required Windows domain. Formore information, see the “Adding a node to a Windows domain” section of theExperionWindows Domain/Workgroup Implementation Guide.
4. Configure time synchronization. For more information about time synchronization, see therelated topics.
5. Setup the hosts file for the Experion virtual machine. For more information, see the “Settingup hosts files” section of the ExperionSoftware Installation User’s Guide.
6. Continue to engineer the control system. For more information about how to engineer andconfigure the Experion system, see the Experion PDF Collection.
Related conceptsPlanning for time synchronizationAbout system status
Related tasksEnabling hardware acceleration
- 175 -
Chapter 16 - Creating new Experion virtual machines

Chapter 16 - Creating new Experion virtual machines
16.5.8 Preparing virtual machines for thin clients
Complete the following tasks so as to prepare the virtual machine for use with a thin client.
Task Description
EnableRemoteConnectionon the virtualmachines
Ensure that Remote Desktop Access is enabled on the virtual machine and that theappropriate user accounts have been added to the Remote Desktop Users group.
Dual displays Embedded Microsoft Windows 10 Enterprise 2016 LTSB (x64) and EmbeddedMicrosoft Windows Server 2016 Standard Remote Desktop Protocol (RDP)connections support multiple high-resolution displays in a spanned remotesession. Thin clients can be configured to operate in spanned mode with aresolution that matches the monitor resolutions that are connected to it. For avirtual machine, the desktop will appear as a single logical entity.
ConfigureSafeviewWorkspace
If dual screens are required, SafeView must be configured to handle theworkspace management. For more information about SafeView and configuringworkspaces, see the SafeView User's Guide.
ATTENTIONExisting dual screen SafeView workspaces can be reused in virtualmachines that are accessed from thin clients. However, the screenresolutions used in the physical environment must be the same as thescreen resolutions connected to the thin clients. Ensure that theSafeview workspace X and Y axis "0,0" reference points are correctlyimplemented as display spanning may impact the orientation andlayout.
IKB Keyboard When a Honeywell IKB keyboard is connected to a thin client, the IKB Service andStation toolbar files must be configured.
USB deviceaccess
The Wyse TCX Suite enables USB device redirection from a thin client to the virtualmachine that it is connected to. For security and other reasons, you may want todisable the use of USB devices from thin clients. The Wyse TCX Suite can beconfigured to disable USB redirection for specific devices and device types.
To disable USB redirection for specific devices and device types:
1. Log on to Experion virtual machine using a Windows account that has localadministrator privileges.
2. Choose Start > WyseTCX Suite Server Configuration.
3. Click on the USB Virtualizer tab.
4. Clear the check boxes next to the devices that you want to disable.
To disable USB flash drives, clear the Mass Storage Devices check box.
5. Click Apply.
6. Click OK.
ConfigureExperionStationconnection
As with Stations on physical computers, Stations in a virtual environment must beconfigured before use. For more information about configuring Stations, see theServer and Client Configuration Guide.
ConfigureExperionvirtualmachine lock-down
As with Stations on physical computers, it is possible to lock down the Experionvirtual machine so that various operating system functions and behaviors arelimited. For more information, see the “Securing access to the Windows operatingsystem” chapter of the Network and Security Planning Guide.
- 176 -

Operatingsystem clientlicensingrequirementsfor Experionnodes
Ensure appropriate licensing model is implemented for Experion client nodes thatwill be connected to using Thin Clients.
Enable Audioon ServerOperatingSystems
If your virtual machine is running Microsoft Windows Server 2016 Standard andaudible alarms or PC audio is required, you must configure the Operating Systemto enable this feature. The Windows Audio service must be configured for autostartup and RDP must have audio enabled.
1. Use Remote Desktop to connect to the Microsoft Windows Server 2016Standard machine.
2. Click Start > Windows Administrative Tools > Services.
The Services dialog box appears.
3. Right-click on the Windows Audio Service, and click on Properties. .
The Windows Audio Properties dialog box appears
4. If necessary, click Start to start the service. In the Startup type list, clickAutomatic.
5. Click OK.
6. Close the Services dialog box.
7. Select Run from the start menu, type tsconfig.msc and then press Enter.
The Remote Desktop Services Configuration Management Consoleappears.
8. In the Connections list, right-click on RDP-TCP and click Properties.
9. Click the Client Settings tab.
10. Click OK.
11. Click OK to acknowledge the Remote Desktop Services Configurationmessage.
12. Clear the Audio check box.
13. Log off the virtual machine and log on again.
The virtual machine should now be able to play sounds.
Restrictnumber ofRemoteDesktopSessions onServerOperatingSystem
If your virtual machine is running Microsoft Windows Server 2016 Standard and isan Experion Flex Station, Console Station, or Console Extension Station, you mustrestrict the number of Remote Desktop connections to 1. To do this:
1. Select Run from the start menu, type tsconfig.msc and then press Enter.
The Remote Desktop Services Configuration Management Consoleappears
2. In the Connections list, right-click on RDP-TCP and click Properties.
3. Click the Network Adapters tab.
4. Change the maximum connections value to 1.
5. Click OK.
6. Click OK to acknowledge the Remote Desktop Services Configurationmessage.
7. Log off the virtual machine and log on again.
The virtual machine will now only allow 1 RDP session at a time.
Allow users toconnect toMicrosoftWindows
If your virtual machine is running Microsoft Windows Server 2016 Standard, anylocal windows user or domain user that is not a member of the local administratorsgroup needs to added to the Remote Desktop Users group on the virtual machineto be granted remote desktop access using a thin client. To do this:
- 177 -
Chapter 16 - Creating new Experion virtual machines

Chapter 16 - Creating new Experion virtual machines
Server 2016using a thinclient
1. Use Remote Desktop to connect to the Microsoft Windows Server 2016Standard machine. Ensure that you log in as a user with local administrativeprivileges.
2. Click Start > Windows Administrative Tools > Server Manager.
The Server Manager Management Console appears.
3. Expand Configuration, then Local Users and Groups and then clickGroups
4. Double click on the Remote Desktop users group.
5. Click Add to add a local windows user, domain group, or domain user thatrequires access through the thin client.
6. Click OK and then click OK again.
7. Log off the virtual machine and log on again with the new user added to theRemote Desktop Users group.
16.6 Create virtual machine templates manually
ATTENTION
Ensure that the system is offline while preparing systems when you want to deploy node aspart of a cluster.
l Creating an Experion-installed virtual machine template manually
l Creating an operating system-installed virtual machine template manually
16.6.1 Creating an Experion-installed virtual machine templatemanually
Prerequisites
Before creating Experion template, ensure Product Administrator group is member of HPSInstalluser. If Product Administrator group is not part of HPSInstall user, then add Product Administratorgroup to HPSInstall user.
To prepare an Experion virtual machine to create a template1. On the virtual machine, complete the Experion installation.
2. If the VMWARE tool is not installed, do the steps given below:
l Install VMWARE tools in the virtual machine.
l Right-click VM > Guest > Install/Upgrade VMware tools.
3. Log on to the virtual machine with a User ID that has required administrative privileges and ispart of Product Administrator group.
NOTE
If the ESM Server is installed, the User ID should be part of IDBUser group.
- 178 -

4. Use Windows Explorer to browse to the Program files (x86)\Honeywell\Experion
PKS\Utilities\Experion_NCT folder. This path may change for a CustomInstallation Path (CIP) installation.
5. Prepare the system for deployment. Select the check box to deploy node as a cluster (bydefault it is configured as an independent entity).
6. Click OK to continue.
The Experion System Preparation tool dialog box appears. If a CD/DVD is attached to thevirtual machine, use the vSphere client to remove it and then click Yes. The preparevm_template application runs and shuts down the virtual machine.
Converting a virtual machine to a template
1. In the vSphere client (in the Hosts and Clusters view), right-click the virtual machine andselect Template > Convert to template.
The virtual machine disappears from the Hosts and clusters view when the conversion iscomplete.
2. Change to the VMs and templates view.
3. Ensure that the template appears in the view after the conversion.
16.6.2 Creating an operating system-installed virtual machinetemplate manually
NOTE
These are manual steps and ESM is not required for this procedure.
TIP
Antivirus software must be not installed on an operating system installed virtual machine.
To create an OS-installed virtual machine template for EmbeddedMicrosoft Windows Server 2016 Standard and Embedded MicrosoftWindows 10 Enterprise 2016 LTSB (x64)
1. Create a virtual machine with hard disk size less than 60 GB and install Embedded MicrosoftWindows 10 Enterprise 2016 LTSB (x64) or Embedded Microsoft Windows Server 2016Standard operating system.
TIP
For information about creating an OS-installed virtual machine, see the SystemAdministration Guide.
- 179 -
Chapter 16 - Creating new Experion virtual machines

Chapter 16 - Creating new Experion virtual machines
2. Disable the User Account Control.
a. Click Start > Windows System > Control Panel > User Accounts.
b. Click User Accounts > Change User Account Control settings.
c. Move the slider to Never Notify and click OK.
3. On the target node, perform the following steps to enable File and Printer Sharing in WindowsFirewall.
a. Click Start > Control Panel > System and Security > Windows Firewall > AllowProgram and features.
b. Scroll to File and Printer Sharing and select all the check boxes placed with this option.
c. Click Start > Control Panel > System and Security > Windows Firewall > AdvancedSettings > Inbound Rules.
d. Navigate to File and Printer Sharing (Echo Request - ICMPv4-In) for Private profile.
e. Double-click to open the properties and click Scope tab. In Remote IP addresses box,ensure that Any IP Address is selected.
f. Repeat these steps for Public and Domain profiles.
4. Install VMware tools in the virtual machine. Right click the VM > Guest > Install/UpgradeVMware tools.
5. In Embedded Microsoft Windows 10 Enterprise 2016 LTSB (x64) / Embedded MicrosoftWindows Server 2016 Standard operating system, manually enable .Net 3.5.
NOTE
Ensure the OS DVD is available for enabling .NET3.5.
a. Click Start > Windows System > This PC.
b. Right-click on This PC > More and select Manage.
The Computer Management window appears.
c. Click Features>Add Features.
d. Select .NET Framework 3.5.1 below .NET Framework 3.5.1 Features.
e. Click Next. Click Install and click Close.
6. In Microsoft Windows Server 2016 operating system, create an user and add it to theAdministrator group and disable the Administrator user .
a. Click Start > Windows System > This PC.
b. Right-click on This PC > More and select Manage.
The Computer Management window appears.
c. In the User Account Control dialog box, click Continue.
d. Expand Configuration > Local User and Groups and right-click Users.
e. Click New User.
f. In the New User dialog box, type all the details.
g. Click Create and add the new user to Administrators group.
h. To disable the Administrator user, right-click Administrator and in the Properties dialogbox, select Account is disabled.
7. Shut down the virtual machine.
8. Right-click the VM and then click Edit Settings.
The Virtual Machine Properties window appears.
9. In the Hardware tab, select Video Card.
- 180 -

10. On the right pane, ensure that Auto-detect settings is selected.
11. Click OK.
Converting a virtual machine to a template
1. In the vSphere client (in the Hosts and Clusters view), right-click the virtual machine andselect Template > Convert to template.
The virtual machine disappears from the Hosts and clusters view when the conversion iscomplete.
2. Change to the VMs and templates view.
3. Ensure that the template appears in the view after the conversion.
- 181 -
Chapter 16 - Creating new Experion virtual machines

CREATING VIRTUAL MACHINES FROM TEMPLATES ORPHYSICAL COMPUTERS
You can create new operating system virtual machines by deploying from a template or newExperion virtual machines by cloning from a physical computer.
l Deploying new operating system virtual machines from templatesDeploy new virtual machines from an existing operating system virtual machine template.
l Deploying Experion virtual machines from templates
l Deploying Experion virtual machines on servers from templates
17.1 Deploying new operating system virtual machines fromtemplates
Deploy new virtual machines from an existing operating system virtual machine template.
ATTENTIONl Virtual machines deployed from templates require Windows operating system
licenses. For more information about the use of Windows operating system licensesin an Experion virtualization environment, contact Microsoft or your Honeywellrepresentative.
l Honeywell recommends that Experion virtual machines use the installationprocedures outlined within this guide.
l The use of operating system templates can be used for all non Experion nodes.
17.1.1 Prerequisites
l You have created an operating system virtual machine template.
CAUTIONCAUTION: When creating the template for an ELCN EST, ensure to dismount theemulated drives before creating the template. If the emulated drives are mountedin the template, the drives cannot be dismounted in the virtual machine that isdeployed from the template.
- 182 -
CHAPTER
17

17.1.2 To deploy a new Embedded Microsoft Windows Server 2016Standard or Embedded Microsoft Windows 10 Enterprise2016 LTSB (x64) operating system virtual machines from atemplate
1. On the vSphere Client, choose the Home > Inventory > VMs and Templates view.
2. Locate the virtual machine template, right-click on it and choose Deploy Virtual Machinefrom this Template.
This creates a new virtual machine, retaining the virtual machine template.
3. Complete the following wizard steps:
l Name and Location–Name the new virtual machine and select the required inventorylocation.
l Host/Cluster – Select the destination host that the new virtual machine needs to run on.
l Resource Pool – Select the resource pool that the new virtual machine needs to run in.
l Datastore – Identify the datastore for the virtual machine.
l Disk Format – Select the disk format required. On-process usage requires thick format.
l Guest Customization – Select Do not customize.
l Ready to Complete – Click Finish.
4. Once the virtual machine has been created, right-click on it and choose Edit Settings.
5. Select Network adapter 1 and then clear the Connect at power on check box.
6. If Network adapter 2 is present, select it and then clear the Connect at power on check box.
7. Click OK.
8. Right-click on the virtual machine and choose Power > Power On.
9. When prompt, answer the sysprep questions to rename and prepare the virtual machine.
In Embedded Microsoft Windows 10 Enterprise 2016 LTSB (x64), a new user will be createdduring this process. This user should not be used and should be disabled later.
10. Log on as ExperionAdmin, for virtual machine templates where the operating system wasinstalled using the Experion System Initialization media, or an account with Administratorprivileges, for virtual machine templates where the operating system was installed usingMicrosoft media.
11. Update the IP address and other network settings of the virtual machine.
12. Connect the virtual machine to the required virtual network.
17.2 Deploying Experion virtual machines from templates
ATTENTIONVirtual machines deployed from templates require Windows operating system licenses. Formore information about the use of Windows operating system licenses in an Experionvirtualization environment, contact Microsoft or your Honeywell Service representative.
To help speed up deployment of an Experion system, templates can be used for each Experionnode type. Virtual machine templates must be created using the guidance in the "Creating anExperion node virtual machine template" section of this guide.
- 183 -
Chapter 17 - Creating virtual machines from templates or physical computers

Chapter 17 - Creating virtual machines from templates or physical computers
17.2.1 To deploy Experion virtual machines from templates
1. On the vSphere Client, choose the Home > Inventory > VMs and Templates view.
2. Locate the virtual machine template, right-click on it and choose Deploy Virtual Machinefrom this Template.
3. Complete the following wizard steps:
l Name and Location–Name the new virtual machine and select the required inventorylocation.
l Host/Cluster – Select the destination host that the new virtual machine needs to run on.
l Resource Pool – Select the resource pool that the new virtual machine needs to run in.
l Datastore – Identify the datastore for the virtual machine.
l Disk Format – Select the disk format required. On-process usage requires thick ProvisionEager Zeroed format.
l Guest Customization – Select Do not customize.
l Ready to Complete – Click Finish.
4. Right-click on the new virtual machine and click Edit Settings.
5. Select Network adapter 1 and then clear the Connect at power on check box.
6. If Network adapter 2 is present, select it and select the Connect at power on check box.
7. Click OK.
8. Right-click on the virtual machine and choose Power > Power On.
9. Open the virtual machine console.
10. Read and accept the Microsoft EULA and click Start.
a. On Embedded Microsoft Windows 10 Enterprise 2016 LTSB (x64) machines, you mighthave to select the date/time settings. The computer starts configuring Windows settings.The welcome screen appears, followed by the NodeRename Sysprep wizard.
11. Click Next on the Welcome screen.
12. Read and Accept the Honeywell EULA and click Next.
13. Enter the computer name, customer name, company name, passwords and other detailsthat are asked then click Next. If the node is a Console Station you will need to enter theExperion Server details.
14. Click Start to start the node rename operation.
A status bar indicating the progress will be displayed and the system may reboot multiple timesduring the operation.
15. A dialog box stating that the Node Rename has completed successfully appears. Click OK.
16. From the vSphere client, right-click on the virtual machine and click Edit Settings.
17. Select Network adapter 1 and then select the Connect at power on and connected checkbox.
18. If Network adapter 2 is present, select it and then clear the Connect at power on andconnected check box.
19. Click OK.
20. Login to the virtual machine.
21. Adjust the IP address of the virtual machine.
22. From the virtual machine console, join a windows domain if applicable for the system.
- 184 -

23. Restart the virtual machine.
All Experion virtual machines deployed from templates have sysprep run during the renameprocess. This creates a unique and new virtual machine that will require a new Microsoftproduct key and will require activation with Microsoft.
17.3 Deploying Experion virtual machines on servers fromtemplates
ATTENTIONVirtual machines deployed from templates require Windows operating system licenses. Formore information about the use of Windows operating system licenses in an Experionvirtualization environment, contact Microsoft or your Honeywell Service representative.
To help speed up deployment of an Experion system, templates can be used for each Experionnode type. Virtual machine templates must be created using the guidance in the "Creating anExperion node virtual machine template" section of this guide.
17.3.1 To deploy Experion virtual machines on servers
1. Right-click on the Server B virtual machine and choose Power > Power On.
2. Open the virtual machine console.
3. Read and accept the Microsoft EULA and click Start.
a. On Embedded Microsoft Windows 10 Enterprise 2016 LTSB (x64) machines, you mighthave to select the date/time settings. The computer starts configuring Windows settings.The welcome screen appears, followed by the NodeRename Sysprep wizard.
4. Click Next on the Welcome screen.
5. Read and Accept the Honeywell EULA and click Next.
6. Enter the computer name, customer name, company name, passwords and other detailsthat are asked then click Next. If the node is a Console Station, you must enter the ExperionServer details.
7. Click Start to start the node rename operation.
A status bar indicating the progress will be displayed and the system may reboot multiple timesduring the operation.
8. A dialog box stating that the Node Rename has completed successfully appears. Click OK.
9. Repeat the above procedure for Server A.
17.3.2 To deploy Experion virtual machines on other nodes
1. From the vSphere client, right-click on the virtual machine and click Edit Settings.
2. Select Network adapter 1 and then select the Connect at power on and connected checkbox.
3. If Network adapter 2 is present, select it and then clear the Connect at power on andconnected check box.
4. Click OK.
- 185 -
Chapter 17 - Creating virtual machines from templates or physical computers

Chapter 17 - Creating virtual machines from templates or physical computers
5. On the vSphere Client, choose the Home > Inventory > VMs and Templates view.
6. Locate the virtual machine template, right-click on it and choose Deploy Virtual Machinefrom this Template.
7. Complete the following wizard steps:
l Name and Location–Name the new virtual machine and select the required inventorylocation.
l Host/Cluster – Select the destination host that the new virtual machine needs to run on.
l Resource Pool – Select the resource pool that the new virtual machine needs to run in.
l Datastore – Identify the datastore for the virtual machine.
l Disk Format – Select the disk format required. On-process usage requires thick ProvisionEager Zeroed format.
l Guest Customization – Select Do not customize.
l Ready to Complete – Click Finish.
8. Right-click on the new virtual machine and click Edit Settings.
9. Select Network adapter 1 and then clear the Connect at power on check box.
10. If Network adapter 2 is present, select it and select the Connect at power on check box.
11. Click OK.
12. From the vSphere client, right-click on the virtual machine and click Edit Settings.
13. Select Network adapter 1 and then select the Connect at power on and connected checkbox.
14. If Network adapter 2 is present, select it and then clear the Connect at power on andconnected check box.
15. Click OK.
16. Login to the virtual machine.
17. Adjust the IP address of the virtual machine.
18. From the virtual machine console, join a windows domain if applicable for the system.
19. Restart the virtual machine.
All Experion virtual machines deployed from templates have sysprep run during the renameprocess. This creates a unique and new virtual machine that will require a new Microsoftproduct key and will require activation with Microsoft.
- 186 -

UPGRADING VIRTUAL HARDWARE AND VMWARETOOLS VERSIONS
Use the following steps to upgrade virtual machines to use the latest virtual hardware versionand/or VMware Tools with Update Manager. Note that the upgrade requires one or more re-bootsof the virtual machine in order to complete the upgrade.
Use this procedure if
l You are upgrading virtual machines that were created on a vSphere release that is older thanthe current release. This is optional. The current vSphere release will support virtualmachines deployed with older Virtual Hardware or VMware tools versions. Refer to VMwarecompatibility guides to determine which Virtual Hardware or VMware tools versions aresupported with each vSphere release.
l You created new virtual machines on vSphere 5.1 with the vSphere client. In this case, thenew virtual machine wizard limits you to using Virtual Hardware version 8 (VH 8). To deploythe virtual machine with Virtual Hardware version 9 (VH 9), follow these instructions.
ATTENTIONIf you are deploying virtual machines on a single host with different virtual hardwareversions you may experience unpredictable performance behavior.
18.1 To upgrade Virtual Hardware or VMware Tools versions onvirtual machines
1. From the vSphere client that is connected to vCenter Server, select Inventory, and then VMsand Templates Inventory.
2. Power on any virtual machines that are not running by right-clicking on the machine nameand clicking Power.
3. From the navigation pane of the VMs and Templates Inventory view, right-click on yourdatacenter and click New Folder. Name the new folder R430 Upgrades.
4. Drag and drop the virtual machines that are to be upgraded into the new R430 Upgradesfolder.
5. Create baselines for your virtual machines:
a. From the navigation pane of the VMs and Templates Inventory page, select the R430Upgrades folder, and click the Update Manager tab.
b. Click Attach. The Attach Baseline or Group dialog box appears.
c. Select the VMware Tools Upgrade to Match Host (Predefined) and VM Hardware
- 187 -
CHAPTER
18

Upgrade to Match Host (Predefined) check boxes.
d. Click Attach.
e. Check that baselines now exist for all your virtual machines.
6. Scan your virtual machines against the baselines:
a. Click Scan. The Confirm Scan dialog box appears.
b. Select the VM Hardware upgrades and VMware Tools upgrades check boxes.
c. Clear the Virtual appliance upgrades check box, then click Scan.
d. When the scan finishes, check that your virtual machines are either 0% compliant orn% compliant.
7. Upgrade the VMware Tools version in your virtual machines (if only upgrading VirtualHardware, proceed to step 6):
a. From the VMs and Templates Inventory page, select the R430 Upgrades folder, andclick the Update Manager tab.
b. Click Remediate. The Remediate wizard appears.
c. On the Remediation Selection page, select the VMware Tools Upgrade to MatchHost (Predefined) baseline.
d. Check that all the virtual machines are selected and click Next.
e. On the Schedule page, accept the defaults and click Next.
f. On the Rollback Options page, clear the Take a snapshot of the virtual machinesbefore remediation to enable rollback option check box, then click Next.
g. On the Ready to Complete page, review the upgrade information and click Finish.
8. Upgrade VM Hardware to match the host in your virtual machines:
a. From the navigation pane of the VMs and Templates Inventory page, select the R430Upgrades folder, and click the Update Manager tab.
b. Click Remediate. The Remediate wizard appears.
c. On the Remediation Selection page, select VM Hardware Upgrade to Match Host(Predefined).
d. Check that all the virtual machines are selected and click Next.
e. On the Schedule page, accept the defaults and click Next.
f. On the Rollback Options page, clear the Take a snapshot of the virtual machinesbefore remediation to enable rollback check box, then click Next.
g. On the Ready to Complete page, review the upgrade information and click Finish.
9. When remediation finishes, check that all of the virtual machines are compliant with theattached baselines.
10. Select each virtual machine and click the Summary tab. Check that the Virtual Hardwareversion is 9, and that VMware Tools has a value of Current.
- 188 -
Chapter 18 - Upgrading Virtual Hardware and VMware tools versions

INSTALLING PDF COLLECTION
l About PDF Collection
l Installing Experion PDF collection
19.1 About PDF Collection
19.1.1 PDF Collection
Use the PDF Collection to view the Experion platform documentation in PDF format. You cansearch across the documentation set and print pages or entire publication titles.
If AutoPlay is enabled for your optical media drive, the Experion PDF Collection page appearswhen you insert the CD into the drive. If AutoPlay is not enabled, in Windows Explorer browse tothe PDF Collection CD and double-click on the DocumentList.htm file.
To search the PDF collection, in Windows Explorer browse to the PDF Collection CD, double-clickon the search.pdf file, and then follow the on-screen instructions.
From Experion PKS R500 release, the PDF collection can be installed as a part of Experioninstallation process.
19.2 Installing Experion PDF collection
NOTE
Experion PDF collection is an optional feature that can be installed during the Experioninstallation.
You can install Experion PDF Collection, which consists of Experion documentation in PDF format.There are two PDF Collection sets in Experion.
l Experion SCN, Installation, and Migration PDF Collection
l Experion System Documentation PDF Collection
ExperionSCN, Installation, and Migration PDF Collection consists of Experion installation,migration documents, and software changes notices (SCNs).
Experion System Documentation PDF Collection consists of other Experion documents.
1. Insert the Experion PDF Collection media into the media drive.
- 189 -
CHAPTER
19

2. In Windows Explorer, browse to the PDF collection folder on the media and double-click on themsi..
The Welcome dialog box is displayed.
3. Click Next.
The License Agreement dialog box is displayed.
4. Select I accept the terms in the license agreement, and click Next.
The Destination Folder dialog box is displayed.
5. The default path where the PDF Collection is installed, is displayed. Perform the followingsteps to change the default path.
a. Click Change.
b. Specify the path for PDF Collection installation in the Folder Name field.
c. Click OK.
6. Click Next.
The Ready to Install the Program dialog box is displayed.
7. Click Install.
The installation begins. After completion, the InstallShield Wizard Completed dialog box isdisplayed.
8. Click Finish to complete installation.
- 190 -
Chapter 19 - Installing PDF Collection
TROUBLESHOOTING EXPERION INSTALLATION
l Troubleshooting Experion for installation failure
l Running 32-bit Snap-ins in 64-bit Windows operating system
20.1 Troubleshooting Experion for installation failure
ATTENTIONIf you want to log on to Windows manually during Experion installation, you must log onwith HPSInstall account for which the password is the password of MNGR account.
Errorindication
An error occurs when a step in the installation fails to install on any node type (forexample, at the Utility Directory Preparation step).
Cause
Solution 1. Click OK to acknowledge the error.
2. Select Yes to cancel the remaining installation.
3. Fix the issue that leads to the step failure.
4. If the fix requires the user to reboot the computer, then you must log back ontothe computer as HPSInstall account on the current computer.
5. Restart the setup.exe in the root directory of the installation media.
OR
Run HWInstallSequencer.exe from <Install drive:>\<Install
Path>Honeywell\ Experion PKS\Install folder to resumeinstallation.
Errorindication
An error, The Windows Installer service is not responding occurs when a step inthe installation fails to install on any node type
Cause Windows Installer Service is not responding
Solution 1. Click OK to acknowledge the error.
2. Reboot the computer, then you must log back onto the computer as HPSInstallaccount on the current computer.
3. Restart the setup.exe in the root directory of the installation media.
OR
Run HWInstallSequencer.exe from <Install drive:>\<Install
Path>Honeywell\ Experion PKS\Install folder to resumeinstallation.
- 191 -
CHAPTER
20

Errorindication
Multiple users cannot be connected to the same network share.
Cause
Solution 1. Perform one of the following steps.
l If any of the Explorer windows having the ESIS UNC path is open, thenclose all the Explorer windows and click Next.
l Click Start > Windows System > This PC > Right-click > More >Disconnect Network drive.
l In the list, select the ESIS server if present and click OK to disconnect.Click Next.
l Cancel the installation, log off, log on, and start the installation.
2. If the error still appears, perform the following steps.
l Choose Start > Run and type control userpasswords2. Press ENTER .
l Choose Advanced > Manage Passwords. Select the UNC path and selectRemove.
l Reboot your system and start the installation.
Installation errors while using ESIS
The following issue may occur after the first reboot while installing Experion using ESIS.
Errorindication
An error message appears after the first reboot, indicating an error occurred whiletrying to connect to ESIS and prompts for credentials to ESIS path.
Cause
Solution 1. Type Username and Password to connect to the ESIS share.
2. Click OK to proceed with the installation.
Errorindication
You cannot upgrade the USB-based ESIS repository on a system if it is created on adifferent system.
Cause Refer to Error Indication.
Solution Upgrade/Resume the USB-based ESIS repository from the same system where itwas created
Errorindication
Installation of R500.1 Updates step is failing to install with critical error. (PAR# 1-6SB4SXB)
Description While doing system test of R500 T1 TP1 for the Clean Install Scenario on physicalmachine it is observed that there is a critical error displayed on the InstallationScreen during the Updates step and installation is failing at updates step with anerror-pop up as Failed to install update.
Recovery: None
Workaround 1. Click OK on the Installation dialog box, installation will failed with critical issue.
2. Cancel the installation and reboot the system.
3. Log in with HPSInstall account and run the Install sequencer again,installation will proceed successfully.
- 192 -
Chapter 20 - Troubleshooting Experion Installation

Chapter 20 - Troubleshooting Experion Installation
20.2 Running 32-bit Snap-ins in 64-bit Windows operatingsystem
The Microsoft Management Console (MMC) is a component of Windows operating systems thatprovides system administrators and advanced users with a flexible interface through which theymay configure and monitor the system. The management console can display one or moremodules which are Component Object Model components called Snap-ins. Most of Microsoft'sadministration tools included with both Windows operating system, and Windows Server Systemproducts are implemented as MMC "snap-ins". Snap-ins are registered in the [HKEY_CLASSES_ROOT]\{CLSID} and [HKEY_LOCAL_MACHINE\Software\Microsoft\MMC\Snapins] registrykeys.
20.2.1 Diagnostic check
Microsoft 64-bit operating systems can run both 32-bit MMC (MMC32) and 64-bitMMC(MMC 64).By default, when MMC is started, it is the 64-bit version. For example, the Honeywell Node AdminSnap-in is a 32-bit code. Hence, it is not listed in the of available snap-ins.
20.2.2 Solution
To open the a 32-bit Snap-in, perform the following steps:
1. Go to the “C:\WINDOWS\SysWOW64” path on the computer where Experion is installed.
2. Execute the mmc.exe using the command, “mmc –32 mmc.exe”.
- 193 -

SPECIAL CONSIDERATIONS
l Installation of Experion on Different Partition (other than C drive) Along With OSReinstallation using ESIS on USB
21.1 Installation of Experion on Different Partition (other than Cdrive) Along With OS Reinstallation using ESIS on USB
If you are installing Experion on different partition (other than C drive) along with OSreinstallation using ESIS on USB, the drive letter is reset automatically during operating systeminstallation and D letter may get assigned to USB drive. Experion Installation will through an errorsaying The drive is not a fixed drive. To proceed with the installation/migration driveshould be fixed. Please click OK to cancel the installation and change the drive letter by followingbelow steps:
1. Right-click on Start and select Disk Management.
2. On the Disk Management screen, right-click on USB disk and click Change Drive Letterand Paths....
3. On Change Drive Letter and Paths for … screen, click on Change.
4. On Change Drive Letter and Paths screen, select next available free drive letter from thedropdown and press OK.
5. If you see an warning message, click Yes.
6. Right-click on 2nd partition on disk 0 and click Change Drive Letter and Paths….
7. On Change Drive Letter and Paths screen, select D from the dropdown and press OK.
8. If you see an warning message, click Yes.
Once the driver letters are changed, reboot the system and resume the installation by runningsetup.exe from ESIS share in USB.
- 194 -
CHAPTER
21

NoticesTrademarks
Experion®, PlantScape®, SafeBrowse®, TotalPlant®, ControlEdge™, and TDC 3000® are registeredtrademarks of Honeywell International, Inc.
OneWireless™ is a trademark of Honeywell International Sàrl
Other trademarksMicrosoft and SQL Server are either registered trademarks or trademarks of Microsoft Corporationin the United States and/or other countries.
Trademarks that appear in this document are used only to the benefit of the trademark owner,with no intention of trademark infringement.
Third-party licensesThis product may contain or be derived from materials, including software, of third parties. Thethird party materials may be subject to licenses, notices, restrictions and obligations imposed bythe licensor. The licenses, notices, restrictions and obligations, if any, may be found in thematerials accompanying the product, in the documents or files accompanying such third partymaterials, in a file named third_party_licenses on the media containing the product, or athttp://www.honeywell.com/ps/thirdpartylicenses.
Documentation feedbackYou can find the most up-to-date documents on the Honeywell Process Solutions support websiteat:
l http://www.honeywellprocess.com/support
If you have comments about Honeywell Process Solutions documentation, send your feedback to:
Use this email address to provide feedback, or to report errors and omissions in thedocumentation. For immediate help with a technical problem, contact your local HoneywellProcess Solutions Customer Contact Center (CCC) or Honeywell Technical Assistance Center(TAC).
How to report a security vulnerabilityFor the purpose of submission, a security vulnerability is defined as a software defect or weaknessthat can be exploited to reduce the operational or security capabilities of the software.
Honeywell investigates all reports of security vulnerabilities affecting Honeywell products andservices.
To report a potential security vulnerability against any Honeywell product, please follow theinstructions at:
https://honeywell.com/pages/vulnerabilityreporting.aspx
Submit the requested information to Honeywell using one of the following methods:
l Send an email to [email protected].
or
l Contact your local Honeywell Process Solutions Customer Contact Center (CCC) or HoneywellTechnical Assistance Center (TAC) listed in the “Support” section of this document.
- 195 -

SupportFor support, contact your local Honeywell Process Solutions Customer Contact Center (CCC). Tofind your local CCC visit the website, https://www.honeywellprocess.com/en-US/contact-us/customer-support-contacts/Pages/default.aspx.
Training classesHoneywell holds technical training classes about Experion PKS. These classes are taught byexperts in the field of process control systems. For more information about these classes, contactyour Honeywell representative, or see http://www.automationcollege.com.
- 196 -