Recording Zoom Classes and Sharing that Recording
19
1 Recording Zoom Classes and Sharing that Recording Recording and sharing you Zoom class or meeting is a simple process, but it is a process with a number of steps. This document will explain all those steps and the prerequisites for success. U3A Mornington does not allow open access to their Zoom licences, so this document describes recording locally rather than to the Zoom cloud. We limit access to the Zoom licence so that the settings that enable effective sharing for multiple and effective Zoom classes are not altered. Prerequisites for Zoom Class Recording and Sharing The things you need to record and share your Zoom classes are: • 500 Mb of free disc space on your desktop or laptop computer to store a two-hour class (average size 250-300 Mb) • Your own free or paid Cloud drive account. This drive is where you would store your class recordings in a manner that enables you to share the recordings and for your class to access and view them • All the commonly used Cloud drives work in a similar manner. We will describe Dropbox, which is a cloud storage company that provides 2 Gb of storage for free • Other Cloud drives available that can be used for sharing recordings include Google Drive, iCloud (Apple), and OneDrive (Microsoft). If you use one of these already then use that for your recordings • Your Cloud drive needs to be set up with folders for your class or classes and the folders shared to the appropriate classes using the class members email addresses • Average competence in managing files on your computer If you are handling the hosting of Zoom meetings well, you need not worry about managing the recording of them and managing the storage and sharing of those recordings, just keep reading. The Recording Process for Zoom Meetings The process you will follow to record and store your Zoom recordings is: • Start your Zoom meeting and Claim Host as normal • When the class proper commences, push the Record icon on your Zoom menu then select Record on this computer. This starts the recording of your class • During the meeting you may pause, stop and start recording as you wish. The recording does not need to be a continuous recording, you can record just the important parts if you prefer • When the meeting ends, stop recording and Zoom will then convert the recorded file into a format that can be replayed • Zoom will send a message advising where the file is stored on your computer • When you are ready, you rename the recording with date, class code, class title • The next step is to log into your Dropbox account and upload the file of the recording to the folder for that class • You can leave the recording on your computer or, if you have limited free space on your computer drive, you can now delete the file • Now you can email your class advising them that the recording is available on Dropbox In the sections that follow, we will explain the things you have to do in preparation for recording your class by setting up your Dropbox account, how to record, and then how you go about uploading and sharing your recordings Recording Your Zoom Class U3A Mornington licences allow recording of all our Zoom classes. During your class you can start, pause or stop the recording and then restart recording when you want. We recommend using the pause function rather than the stop function, as this keeps the recording in one file, making sharing the recording relatively easy. If you stop the recording, each time you restart recording, Zoom creates a new file, which means you may have several files to share.
-
Upload
khangminh22 -
Category
Documents
-
view
5 -
download
0
Transcript of Recording Zoom Classes and Sharing that Recording

1
Recording Zoom Classes and Sharing that Recording
Recording and sharing you Zoom class or meeting is a simple process, but it is a process with a
number of steps. This document will explain all those steps and the prerequisites for success. U3A Mornington does not allow open access to their Zoom licences, so this document describes
recording locally rather than to the Zoom cloud. We limit access to the Zoom licence so that the
settings that enable effective sharing for multiple and effective Zoom classes are not altered.
Prerequisites for Zoom Class Recording and Sharing
The things you need to record and share your Zoom classes are:
• 500 Mb of free disc space on your desktop or laptop computer to store a two-hour class
(average size 250-300 Mb)
• Your own free or paid Cloud drive account. This drive is where you would store your class
recordings in a manner that enables you to share the recordings and for your class to access
and view them
• All the commonly used Cloud drives work in a similar manner. We will describe Dropbox,
which is a cloud storage company that provides 2 Gb of storage for free
• Other Cloud drives available that can be used for sharing recordings include Google Drive,
iCloud (Apple), and OneDrive (Microsoft). If you use one of these already then use that
for your recordings
• Your Cloud drive needs to be set up with folders for your class or classes and the folders
shared to the appropriate classes using the class members email addresses
• Average competence in managing files on your computer
If you are handling the hosting of Zoom meetings well, you need not worry about managing the
recording of them and managing the storage and sharing of those recordings, just keep reading.
The Recording Process for Zoom Meetings
The process you will follow to record and store your Zoom recordings is:
• Start your Zoom meeting and Claim Host as normal
• When the class proper commences, push the Record icon on your Zoom menu then select
Record on this computer. This starts the recording of your class
• During the meeting you may pause, stop and start recording as you wish. The recording
does not need to be a continuous recording, you can record just the important parts if you
prefer
• When the meeting ends, stop recording and Zoom will then convert the recorded file into a
format that can be replayed
• Zoom will send a message advising where the file is stored on your computer
• When you are ready, you rename the recording with date, class code, class title
• The next step is to log into your Dropbox account and upload the file of the recording to the
folder for that class
• You can leave the recording on your computer or, if you have limited free space on your
computer drive, you can now delete the file
• Now you can email your class advising them that the recording is available on Dropbox
In the sections that follow, we will explain the things you have to do in preparation for recording
your class by setting up your Dropbox account, how to record, and then how you go about
uploading and sharing your recordings
Recording Your Zoom Class
U3A Mornington licences allow recording of all our Zoom classes. During your class you can start,
pause or stop the recording and then restart recording when you want. We recommend using the
pause function rather than the stop function, as this keeps the recording in one file, making sharing the recording relatively easy. If you stop the recording, each time you restart recording,
Zoom creates a new file, which means you may have several files to share.

2
The process for recording you class is relatively simple.
• Start your meeting. When you are ready to start recording click on the Record icon on your
zoom menu bar
• On the menu that opens, click on Record on this computer. Do not click on Record to the cloud as recordings made on the Zoom cloud are NOT available to tutors. Access to
U3A licences is restricted to prevent important Zoom settings being changed inadvertently,
or by choice
• Once you click Record on this computer the recording will start immediately. A recording
menu bar is displayed on your screen as shown in the graphic below. You can pause the
recording whenever you want, just click on the parallel line icon in the recording display
• When the recording is paused, the recording display changes to the graphic shown below.
To resume recording, just click on the sideways facing arrow
• To stop recording, click the solid square box
• If you stop recording during the meeting the message below will be displayed, which also
shows the duration of the recording
• Recording can also be controlled using the Record icon on the Zoom menu bar. Depending on the status of recording (recording or paused), Zoom will display one of the menu icons
shown below. These icons enable you to start, stop or pause the recording
• If you have stopped recording, rather than pausing it, recording can be restarted by clicking
on the Record icon on the Zoom menu bar
• At the end of the meeting, Zoom will display a message as below:

3
• After the file conversion is completed, Zoom will display the file location information detailing
where the file is located, as shown in the graphic below. If the recording is a large file Zoom advises that the file is being converted and that an email will be sent to you when the
conversion is complete. This email will detail the file detail and location.
• Depending on the Zoom settings for the licence that you use, there will be an audio only
recording file, plus a full mp4 recording of vision and sound of the class. If you use your
own licence you can set Zoom to only record the vision and sound recording (mp4). The directories where the file/s is/are located is displayed at the bottom of the file display, with
the recording file being in a folder named Zoom
• It is a good idea to rename your file with the class code, class name, and date so you will know which recording applies to which meeting. This makes finding the correct easier for
you and for others to locate the correct to watch. We suggest using the year/month/date format so that the classes will display in sequential date order. An example of a file name
format:
210217 21CODE Class Name
• To rename a file, double click on the filename and type in the new name, you can also just
hover over the filename, right click, and then click on rename and type in the new name
• After renaming the file, you will be able to upload this file into Dropbox where your class will
be able to access it.
Choosing your Dropbox Application
Once the Zoom class recordings have been made, the next step is to store them in a place that your class can access. The files are much too large to be emailed, so they have to be loaded onto
online storage that your class can access, view and/or download the recordings. The storage place
also needs to have the facility to limit access to people that you select, and preferably it should be
free.
Dropbox is the Internet storage application that we recommend for storing recordings. It is a long-established company that offers 2 Gb of free storage space, enough space to store 6 to 8
recordings of 2 hours duration. However, you will have to manage your Dropbox account to
remove older recordings to make space for new ones so you do not exceed your free storage limit.
4
There are two ways that you can use Dropbox – a web-based application OR an app that you
download onto your computer.
Internet-based Dropbox Application
This application is the traditional way that users have accessed Dropbox, it has excellent functionality but is not as user friendly as the computer-based application. File transfer on the
computer app is much easier as is setting file permissions. However, if you have been using
Dropbox in the past, the Internet based application may be the way to go.
Computer-based Dropbox Application
This app is a newer version of Dropbox that is easier to learn and uses familiar file management
processes to load recordings into Dropbox for other people to access. When you install the
Dropbox computer app a Dropbox folder is installed that is visible in your file Explorer or Finder,
just like your normal files and folders.
This makes transferring recordings into Dropbox as simple as copy and paste as you navigate your way from source folder on your computer to the destination folder in Dropbox, which is also on
your computer. Even though you paste the recording into Dropbox on your computer, Dropbox
automatically loads this file onto the Internet so that it is accessible to your class. You are still able to set permissions for folders or individual files and use links to send to people to access the
recordings.
Our recommendation is to use this app unless you are very familiar with the web-based
application.
We describe both options in this document, so if you want to stay with the Internet based application, click on this link – Setting up Your Web-based Drobox Account or scroll down to
that section.
Setting up Your Computer-based Dropbox App
There is a Dropbox app for desktop and laptop computers both for Mac and Windows machines. You have to be very careful when downloading the app to get the basic free app. Also, when
setting up, you have to make sure you make the right settings. Dropbox can be set up to mirror your devices on Dropbox for backup purposes, which is likely to push your data storage volume
beyond that provided for free, forcing you to buy extra storage.
Protections we describe to keep your folders and files safe need to be made so recordings are only
visible to the permitted people.
Downloading and Setting up Dropbox Computer App
Downloading the Dropbox App
Search “Dropbox free desktop app” in your usual Internet search engine or Click on this link:
https://www.dropbox.com/install
When doing this be very careful to select the free version and not one for which you have to pay.
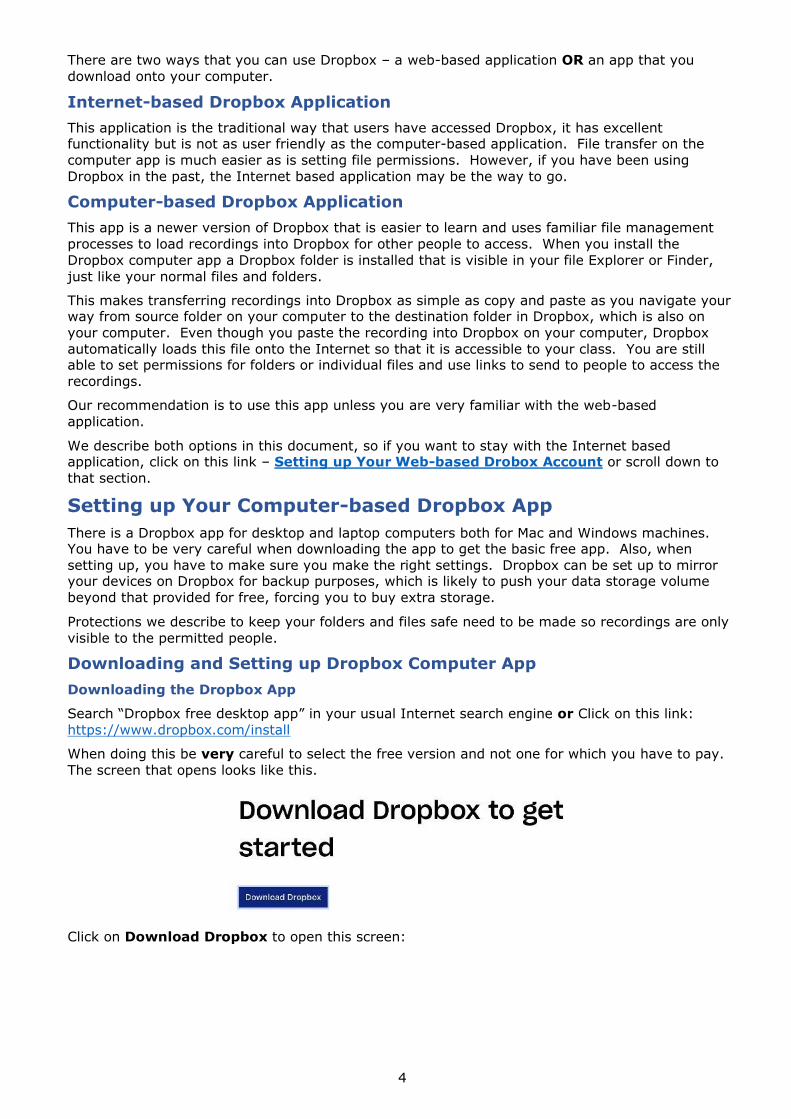
The screen that opens looks like this.
Click on Download Dropbox to open this screen:

5
The file you need to download, that will install Dropbox and is called Dropboxinstaller.dmg, is ready
to be downloaded. You can change the directory (we have changed the directory to Applications), but you could create a Dropbox folder (click New Folder) or just leave it as is and
it will download into the Downloads folder. When you are ready to start downloading, click Save
and the downloading will commence.
This message will be displayed on screen when the file that will manage the installation is
downloaded:
Now double click on the downloaded file (Dropboxinstaller.dmg) to open the file and get this
window:
Double click on the Dropbox icon to start the downloading and installation which will take several
minutes depending on your Internet speed. Progress bars will be displayed during installation:
When installation is complete you will be asked to allow notifications, allow these (you can change
these settings anytime).

6
The installation process will ask if you want to mirror you files to Dropbox and sync these files. We
suggest you do not do this as that may push your storage needs well beyond the free file limit of
your free Dropbox account.
The Dropbox home screen will open when installation is complete.
Preventing Access to your Folders being Shared by Others
As the owner of a shared folder, you can prevent people with access to the folder (members) from
inviting other people to the folder. This will prevent someone other than you, the owner, adding people to have access to your Dropbox folders. The instructions below explain how to protect your
files from unauthorised access.
• Open your Dropbox app to see:
• Hover over the folder you wish to control and click on the person profile
• In the window that opens, click on Link settings

7
• In the window that opens select Only people invited and then click Save
• Now only people that you have invited will have access
Changing or Revoking Access Permission
If someone leaves your class you may want to change or revoke their access permission. This is a
simple process.
• Open the Dropbox app and navigate to the folder (or file) that you want to alter permissions,
hover over the folder (or file)
• Click on the person profile to open the share window
• The share window opens and displays a list of people with access permission

8
• Opposite each person’s name is the access permission that they enjoy, click on this to either
change or revoke the permission
• On the menu that opens you can select either Can view or Can edit or Remove. Click on
the one that you want, the menu closes, then close the main menu by clicking on the red
button in the top left corner (green box)
• The process is now complete
Sharing Your Recordings on Dropbox Computer App
Inviting Class Members
In the free Dropbox account, links to individual folders and files cannot be protected by a
password, only the paid version of Dropbox allows that. However, you can restrict access to files and folders to only those people you have invited. You invite the people who wish to view
recordings and they can use the link to access the recording.
Once you have shared the chosen folder you just upload the recording files each week to that folder and people with folder access permission can access those recordings. Sharing folders saves
you having to issue a separate invitation for each week’s recordings, which you would have to do if
you shared files rather than folders.
Invitation to Class Members to Allow Access to the Recordings Folder
Follow this procedure for the people who wish to be able to access the folder containing your
recordings and view them.
• Hover over the folder that you want to share with your class and click on the person profile:
• In the window that opens, click on can edit – red box

9
• On the window that opens, click on can view – red box
• Now type in the email address of the people you want to access the folder (recordings) and click Share. Tip: If you already have entered your class email addresses in a spreadsheet
you can just paste that block of addresses into the email address field (green box in the
graphic above), just as you do when you are sending emails to your class.
• When you upload recordings to Dropbox the people you have invited will be able to access
those recordings
Invitation to Class Members to Allow Access to Individual Recording Files
The procedure to invite people to be able to view individual recordings (files) is identical to that
described for folders. Except that you first open the folder by double clicking on it. You then
hover over the file and click on the person profile and proceed as above.
Upload Recording Files to your Dropbox Computer App
You will be uploading recordings each week. Once you have installed the Dropbox app, Dropbox
will appear in your normal file explorer or finder program. The graphic below is a picture of my
Finder screen with the Dropbox app installed:

10
• The Dropbox folder is in the green box
• The Zoom directory where files are stored is in the red box. When Zoom sends you a
message at the end of the meeting you will be advised where the file is stored, make a note
of this directory/location
• The parent directory of the Zoom folder is in the white box. Documents is likely where
your recordings will be placed, in the Zoom directory under Documents, the parent directory
• The recorded meeting is in the blue box
• The process to copy or move the recording is very simple.
o Navigate to the Zoom folder and locate the file
o Rename the file something like this – Date – Code – Name , e.g., 210227 21ART16
Art for Engineers
o Now use your normal commands to copy or move this file
o Open the Dropbox folder and open the target folder
o Paste the file in that folder
o The file will now be visible in your Dropbox account and to the people that you have
invited to have access to that folder, see the graphic below:

11
After loading your recording file into Dropbox, you may like to email your class telling them the recording is ready to view or you may just tell the class that you will upload the recording by a
certain time each week
Syncing Your Computer Dropbox to Your Internet Dropbox
After you have copied or moved your recording file into your Dropbox folder on your computer,
Dropbox has to synchronise (sync) your computer folder to the Internet folder where it will be accessible to the people with whom you share. Dropbox does this automatically, but it does
take time, the larger the file the longer it takes, up to hours for very large file, depending on your
Internet speed. The recordings can not be accessed by the people you share with until the
folder/file is synced.
Dropbox shows the status of the syncing process when you open the Dropbox app on your
computer, just click on the Dropbox app icon to open Dropbox to get this display:
• A green circle with a ✓ in it shows that the file is synced
• A blue circle with rotating arrows shows that the file is syncing
• A red circle with an ✕ is not syncing and there is a problem
Given the delay that can happen with syncing, we suggest loading the file into Dropbox on the day
of your class and advising the class to access it the next day.
Setting up Your Web-based Drobox Account
Dropbox have a web-based application and a computer app. The following sections apply to the
web-based application, which has been the traditional way that Dropbox has been used. If you have, or want to use, the new computer-based app, scroll back up to Setting up Your Computer-
based Dropbox App
If you have a Dropbox account and previously shared your folders and/or files just skip the
sections that are not applicable.
Open Google or your usual Internet search engine and search Dropbox free account or click on this link: https://tinyurl.com/1s4oxgo5 A screen opens with a Sign up for free button, click on
this and enter the requested detail. If you already have an account, click Sign in.
After entering the information to create a free account, you will be sent an email to confirm the
request for a Dropbox account. Go to your email account, open the email and click on the link to
confirm your account. If the email is not in the inbox, check in your junk or spam folder.

12
To sign out of your Dropbox account, click on your initials or photo on the top right of screen.
Organising Your Dropbox account
Once you have established your Dropbox account set up your account to enable the recordings that
you upload to be easily located. We suggest creating folders for each class using the course code
as the name of the folder, include the course name if you like.
Create a folder on dropbox.com
• Sign in to Dropbox.com: https://tinyurl.com/1sku2d1x
• On the top right of screen, you will see Create new file
• Click New Folder
• Enter the Folder Name in the box provided
• Click Create to create the new folder
• Repeat this process for all the folders you want to create
Now you have the folders created you are ready to set folder permissions and upload your
recordings.

13
Sharing Folders to Control Access to Your Recordings
This is the preferred way of sharing recordings with your class as you only have to share the folder
once. Any recording loaded into that folder will be available to anyone that you have provided
access by sending them the link; or in Dropbox terminology, invited.
Preventing Access to your Folders being Shared by Others
As the owner of a shared folder, you can prevent people with access to the folder (members) from inviting other people to the folder. This will prevent someone other than you, the owner, adding
people to have access to your Dropbox folders. The instructions below explain how to prevent
people other than you, allowing others to access your folders.
• Sign in to dropbox.com: https://tinyurl.com/1sku2d1x
• Click All Files in the left sidebar
• Hover over the name of the folder and click the share icon (person)
• Click the settings icon (gear symbol) in the window that opens
• Click on the down arrow next to Only the owner (red box) next to Manage access
(green box), then in the dropdown menu that opens click Only the owner (purple box)
• You can now click Save
• Having made that setting only you will be able to add people to be able to access this folder

14
Restricting Access to Invited People Only
You can restrict access to your folders to people that you have invited only, rather than anyone who has a link to the folder. This could arise if people who receive your invitation email forward
the email to another person. The instructions below explain how to prevent uninvited access.
• Sign in to dropbox.com: https://tinyurl.com/1sku2d1x
• Click All Files in the left sidebar
• Hover over the name of the folder on which you wish to change access and click the share
icon (person)
• Click on can edit in the window that opens. In the menu that now opens click on can view.
• Once you have selected can view, the word “settings” is no longer greyed out (it becomes
light blue)
• Click on settings
• On this screen, in the window next to Who has access, click on the down arrow and select
Only people invited
• Click Save
Having made that setting only people you have invited by entering their email address in the
Share this folder box will be able to access this folder

15
Changing or Revoking Access Permission
If someone leaves your class you may want to change or revoke their access permission. This is a
simple process.
• Open the Dropbox web application and navigate to the folder (or file) that you want to alter
permissions, hover over the folder (or file)
• Each folder lists the number of people who have access to that folder (or file). Click on that
for the folder (or file) you wish to change
• The share window opens and displays a list of people with access permission
• Opposite each person’s name is the access permission that they enjoy, click on this to either
change or revoke the permission
• On the menu that opens you can select either Can view or Can edit or Remove. Click on the one that you want, the menu closes, then close the main menu by clicking the X in the
top right corner (green box)
• The process is now complete

16
Sharing Your Recordings on Dropbox Web-based Application
Now that all the necessary settings have been made you are ready to start sharing recordings in
Dropbox.
Inviting Class Members & Uploading Recordings
In the free Dropbox account, links to individual files cannot be protected by a password. That is one reason why we recommend that you share folders rather than files. The other reason is that
sharing folders means that you only have to issue one invitation, rather than a separate invitation
for each week’s recordings.
These folders can be protected by setting Dropbox to only allowing access to people who you have
invited to share the folder. You invite the people who wish to view recordings and they can use the link to access the recording. Once you have shared the folder you just upload the recording files
each week.
Initial Invitation to Class Members to Allow Access to Recordings
Follow this procedure for the people who wish to view your recordings.
• Sign in to dropbox.com: https://tinyurl.com/1sku2d1x
• Click All Files in the left sidebar
• Hover over the name of the folder on which you wish to use and click the share icon
(person)
• In the window that opens click on can edit. On the menu that opens click on can view.
This setting means that people you invite to share the folder that will contain your
recordings, will now only be able to view the recordings, not edit them
• Now enter the email addresses in the box Add an email or name.
Tip: if you already have your class email addresses in an Excel spreadsheet you can copy
them and paste them into Dropbox.

17
• When all the email addresses are entered click Share folder
• Emails will be sent to the email addresses of all the people that you have entered
• A typical email content:
• You will see that, because I clicked on can view before the email address was added, that
only viewing the folder is possible
Ongoing Link for Class Members to Access Recordings
Follow this procedure for the people who wish to view your recordings.
• Sign in to dropbox.com: https://tinyurl.com/1sku2d1x
• Click All Files in the left sidebar
• Hover over the name of the folder on which you wish to use and click the share icon
(person)
• In the window that opens click on can edit. On the menu that opens click on can view.
• Now click on copy link. This copies the link to the folder where you will load the recordings.
You can email this to your class each week and they can click on this to access the
recordings, provided you have invited them in the initial Dropbox settings.

18
Remember that, if new people join the class and wish to access the recordings, you will need to
add their email address to the authorised people. See section Initial Invitation to Class
Members to Allow Access to Recordings for instructions.
Upload Recording Files to a Folder on Dropbox.com
You will be uploading recordings each week.
• Sign in to dropbox.com: https://tinyurl.com/1sku2d1x
• Click All files in the left sidebar
• Hover over and click on the folder to which you are going to add the recording files
• Click Upload. In the menu that opens, click Upload files (in the red box)
• This action opens folders on your computer for you to Navigate to the file you’d like to upload. Navigate around the folders and files to the correct file and click on that file and
then click Open. The file now loads into Dropbox

19
You may like to email your class telling them the recording is ready to view or you may just tell
the class that you will upload the recording by a certain time each week.